article
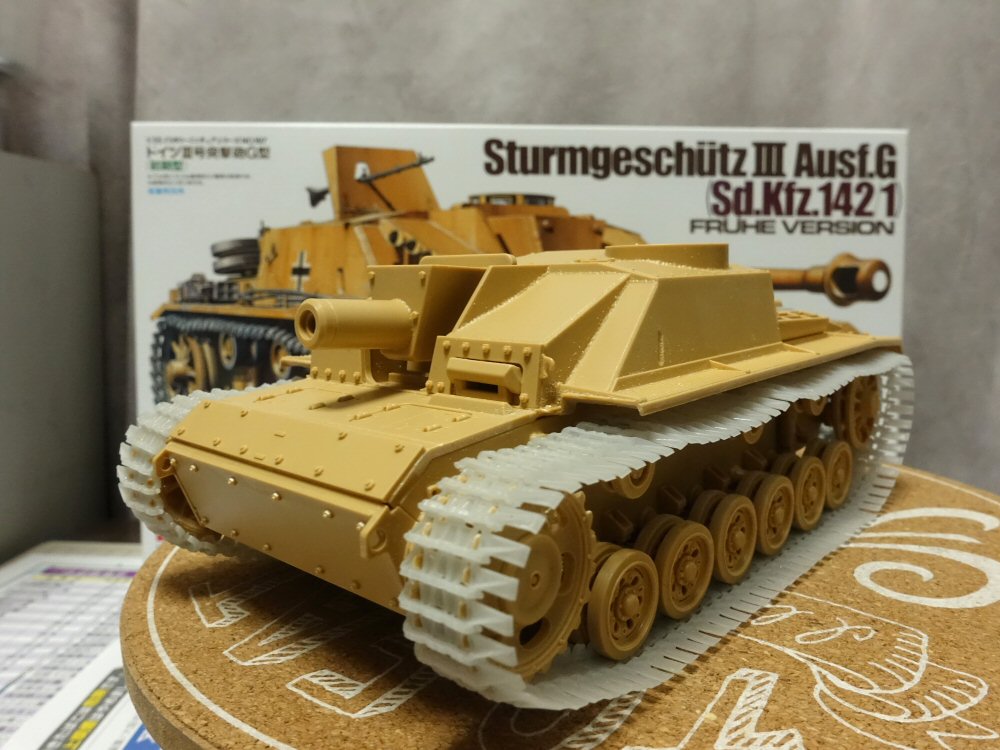
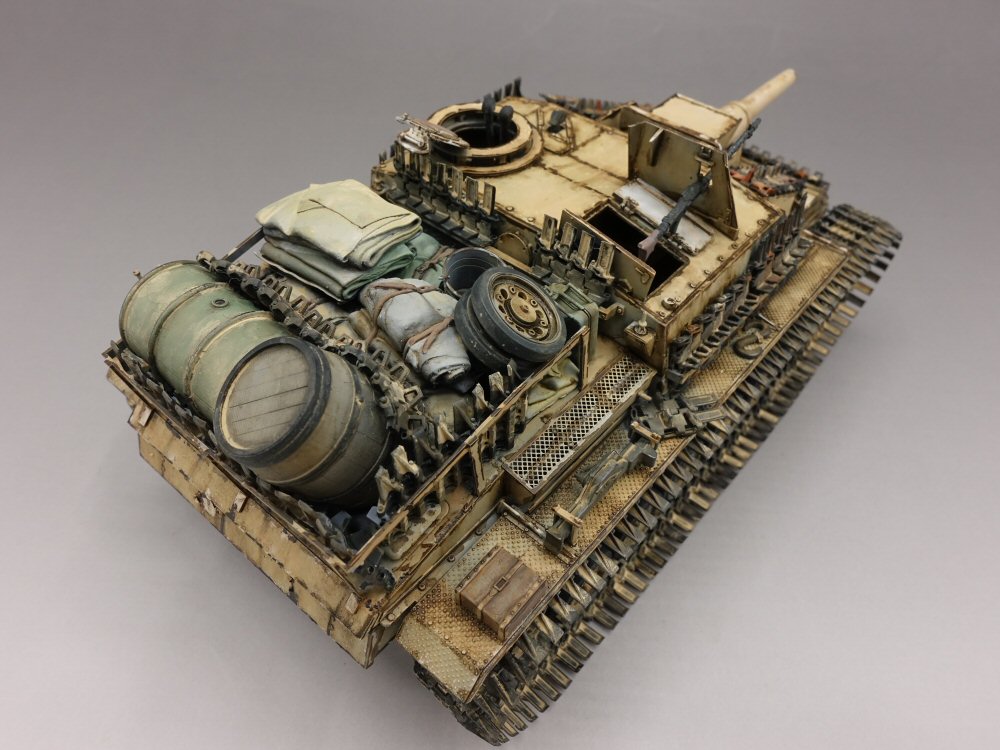
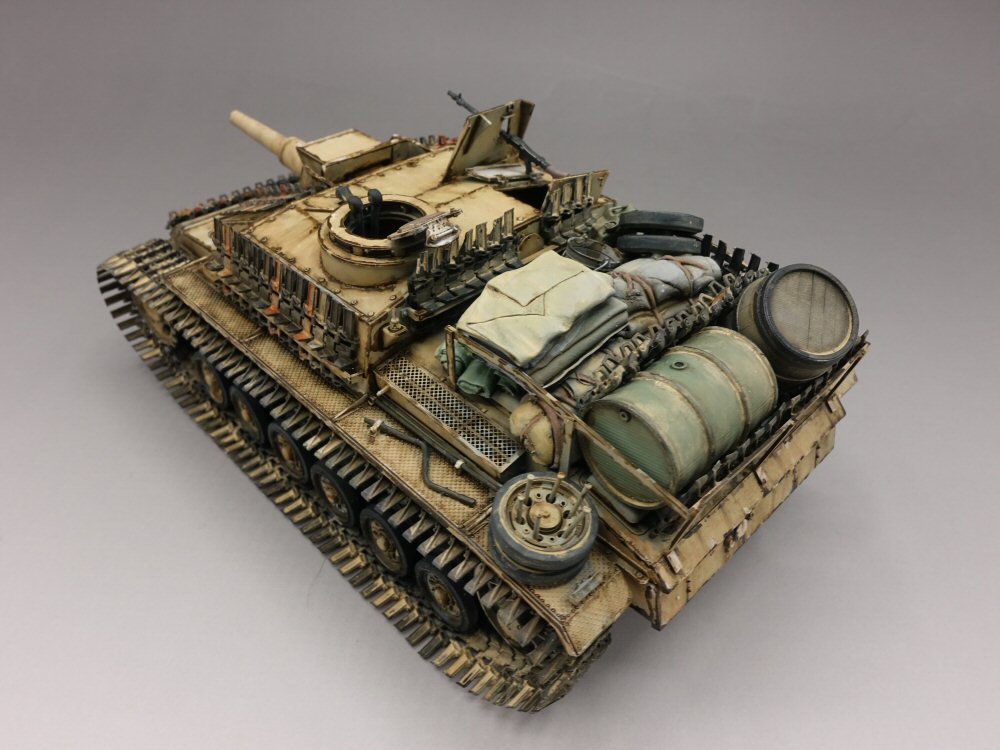
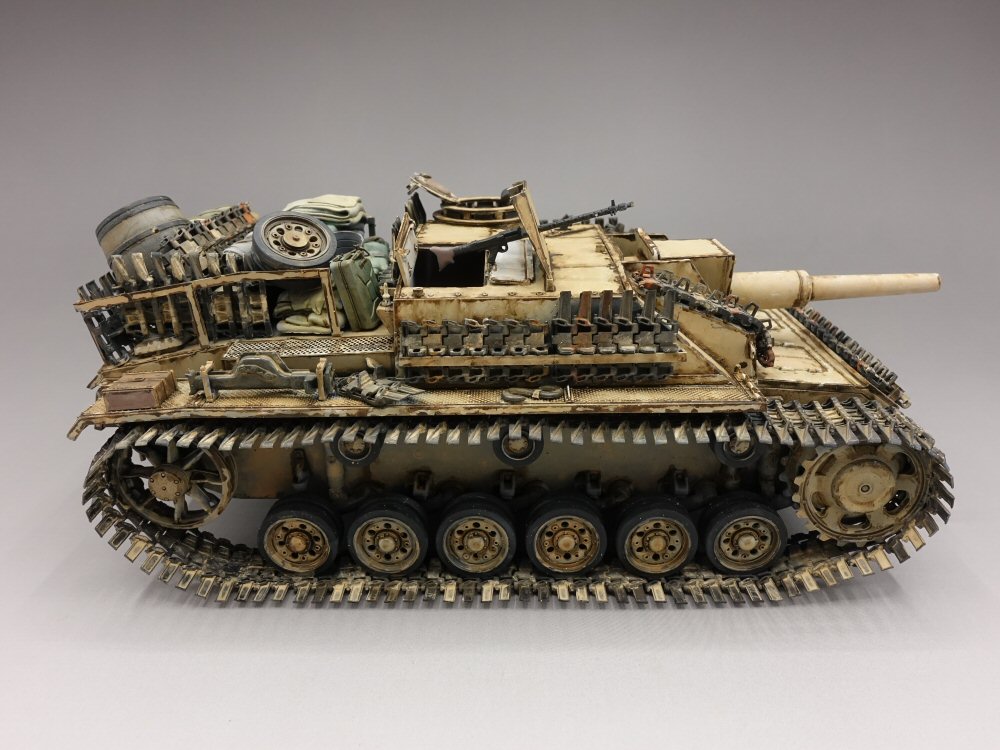
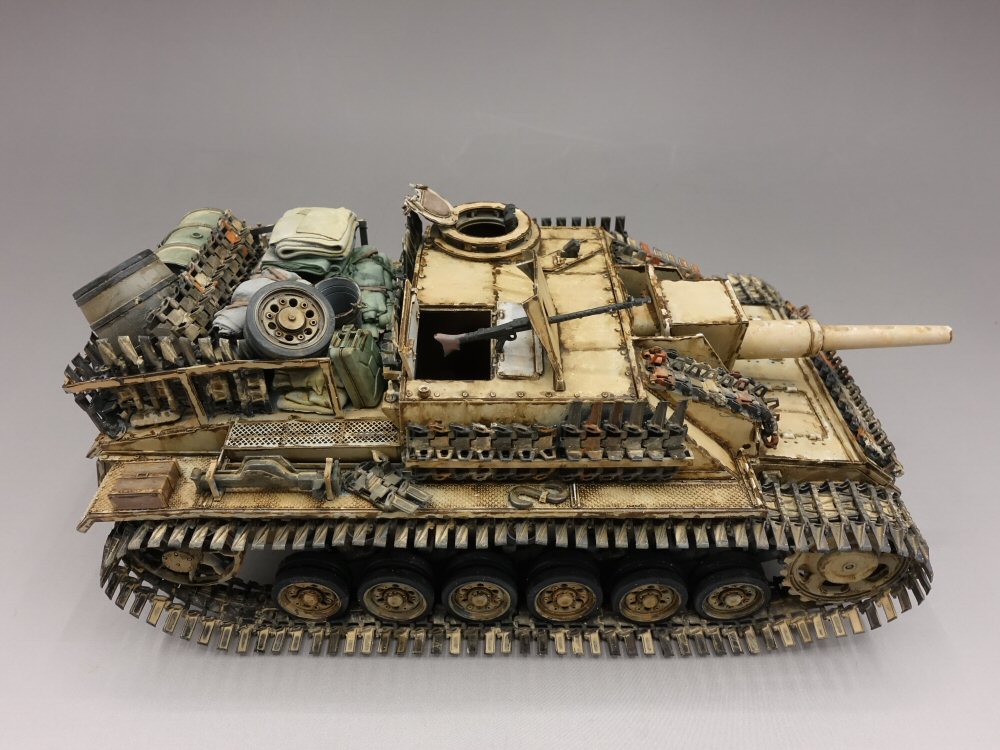
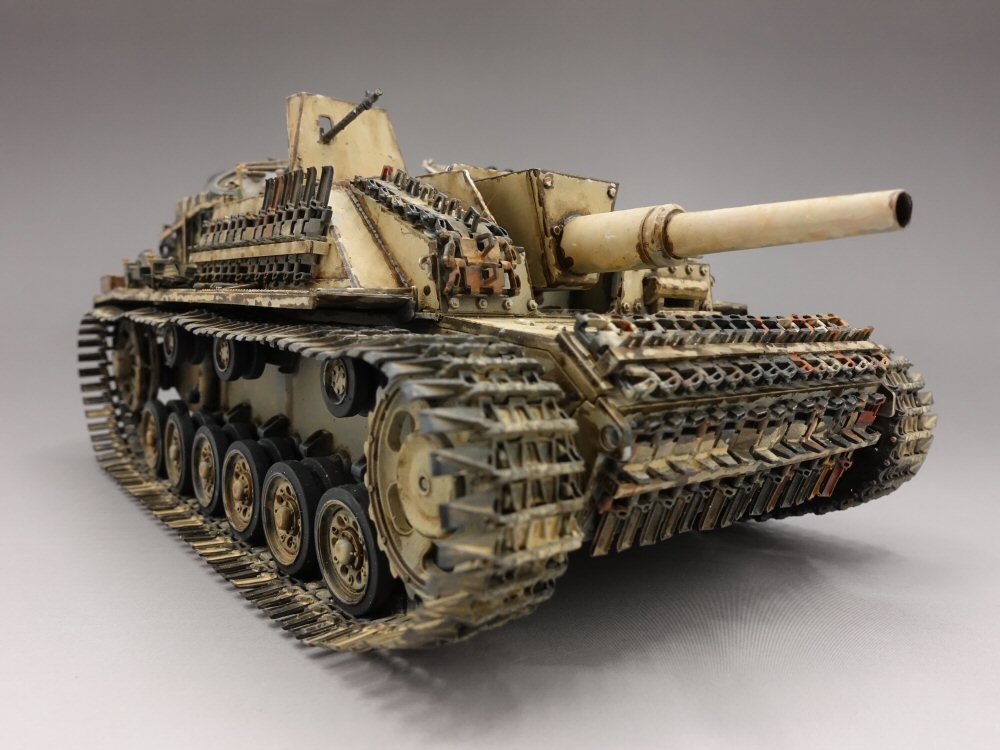
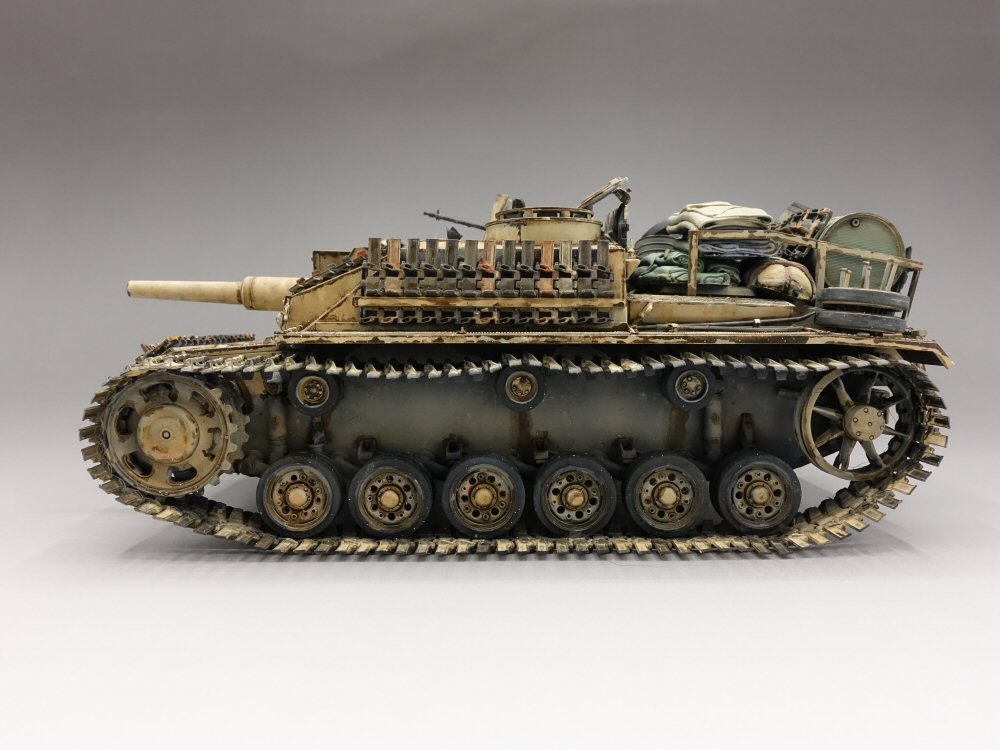
Sturmgeschütz III Ausf.Tamiya 1/35
Panzer III Ausf
This time I made it because I wanted to use my own Winterkette.
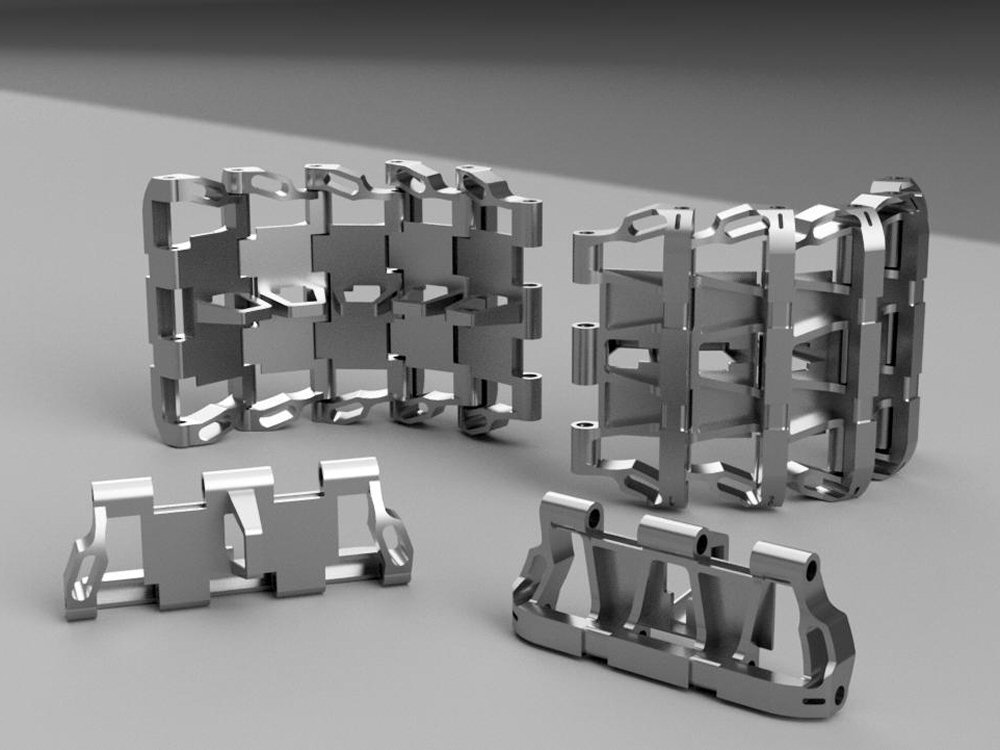
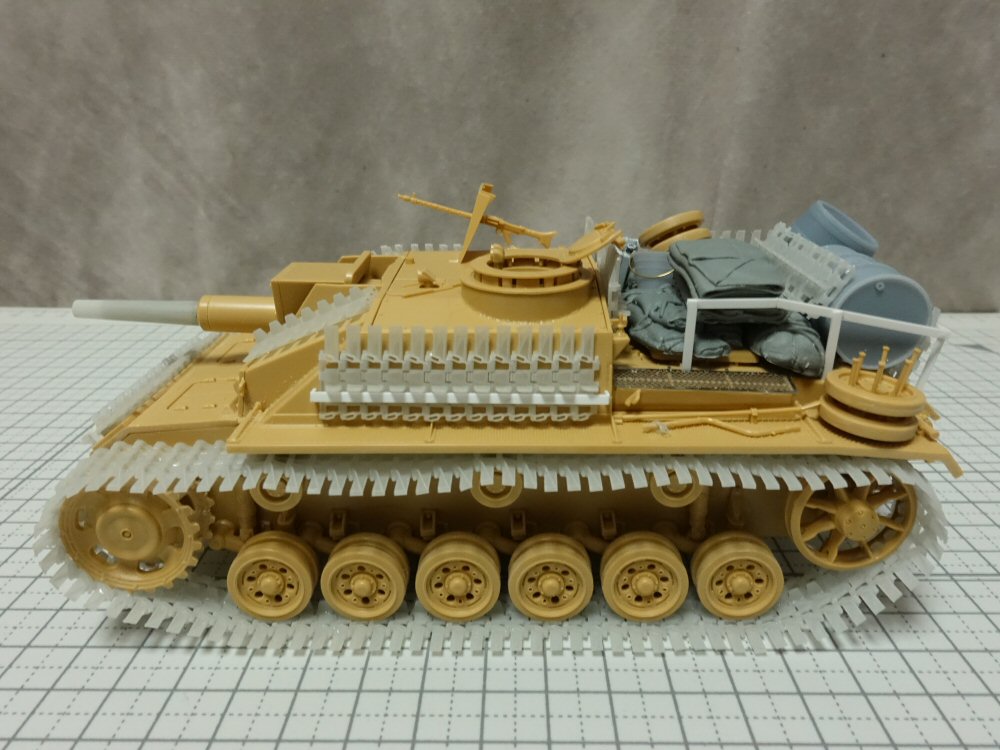
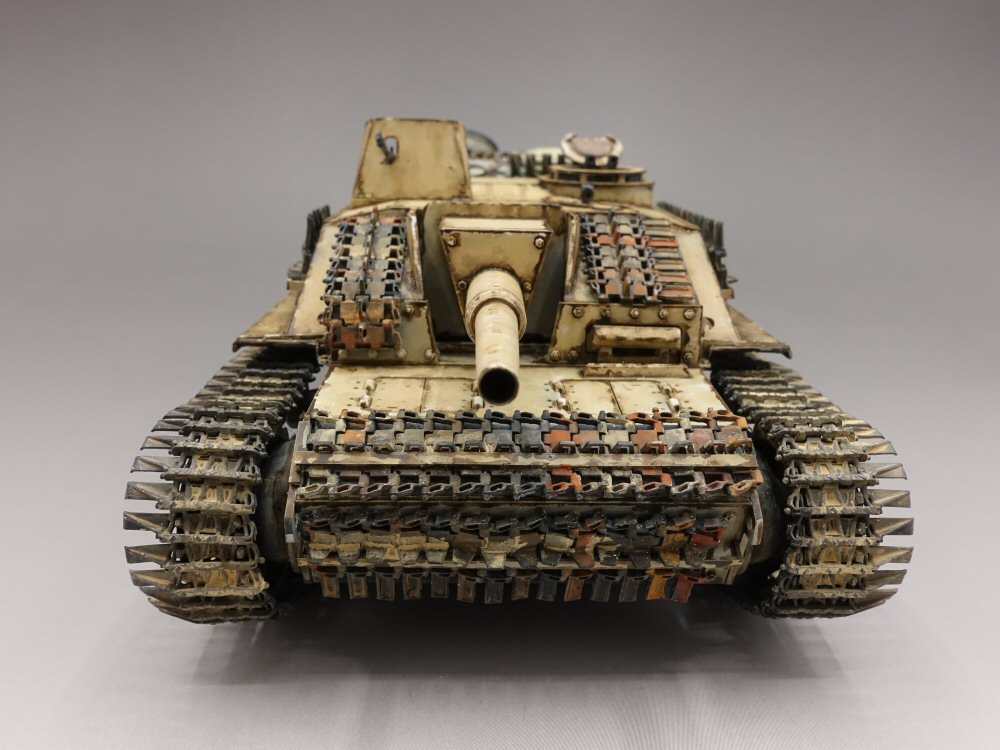
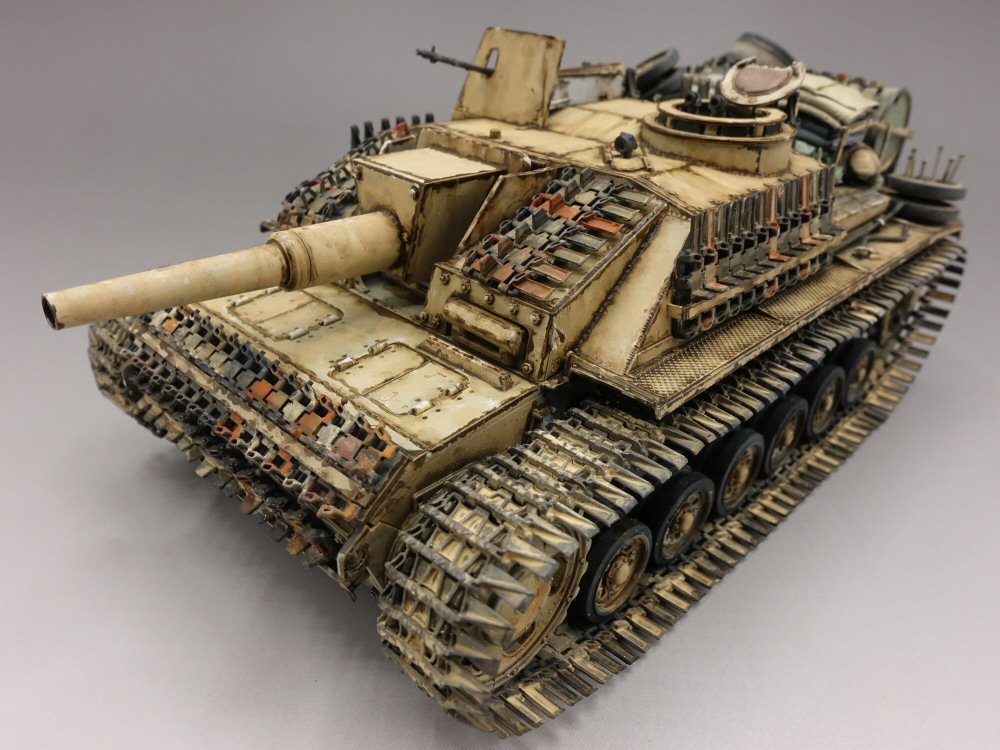
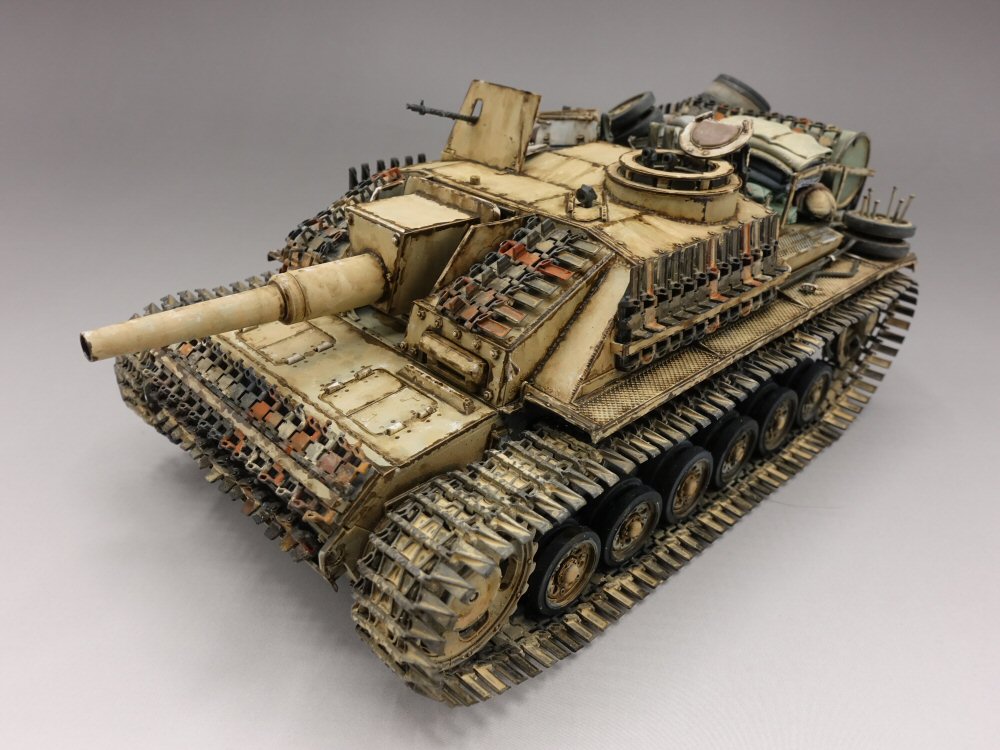
It is also equipped with a large number of caterpillar tracks created through trial and error using a 3D printer.
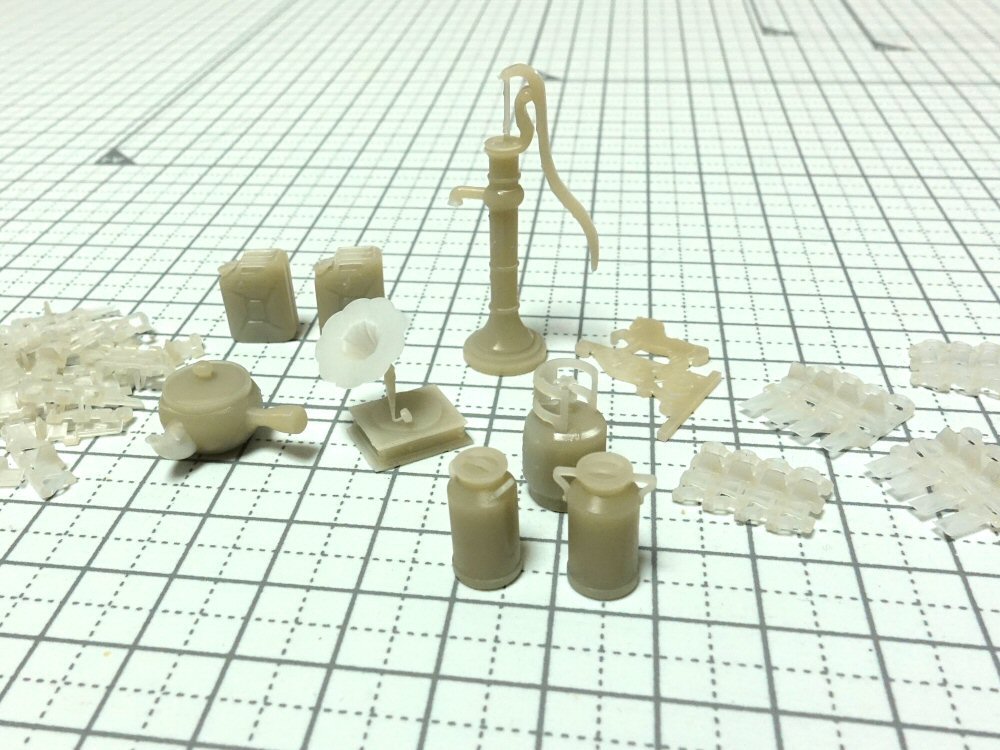
I also used homemade 10.5 cm gun barrels, drums, barrels and equipment clamps.
Also, the painting was done with a Vallejo brush instead of an airbrush, so I feel like the final product has a different feel than usual.
We will create the product based on real photos and dimension drawings.
An expert would probably say that there are a lot of unnecessary lines, but if you keep cutting and gluing, it ends up looking like this.
It takes more than eight hours to make one.
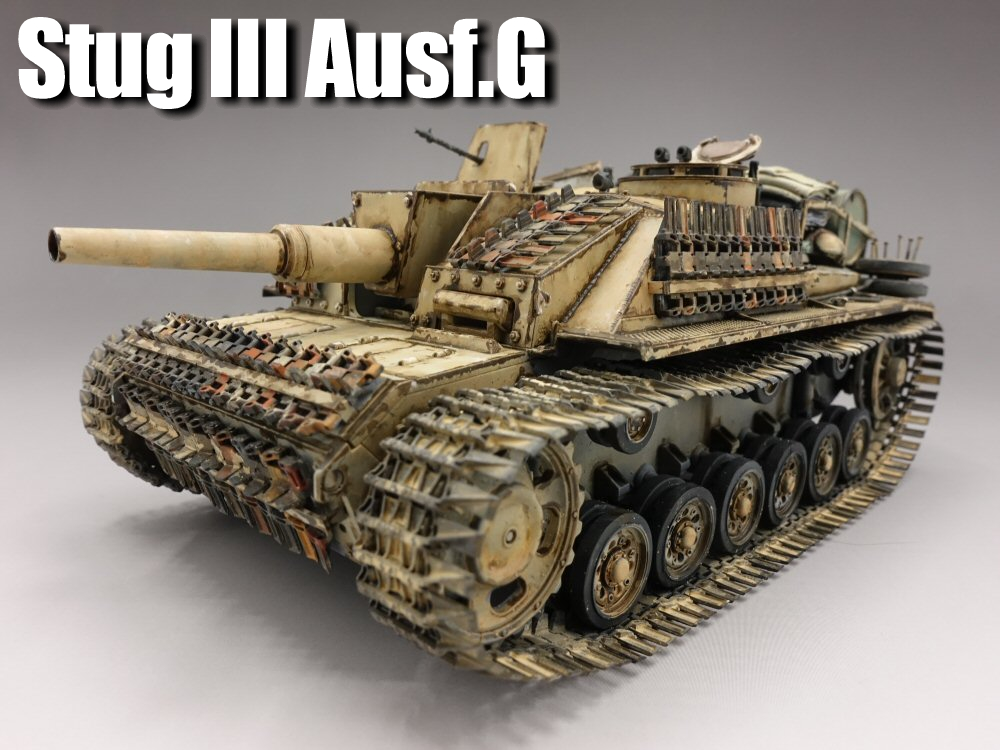
Stug.III Ausf.G construction
I recently got a little dog, but it starts crying whenever I enter the model room, so I can’t make models for a while.
So I do my 3D work in my living room.
I had no experience with 3D CAD, but as I played around with it, I started to have fun and ended up with something like the photo.
(2024.3.9)
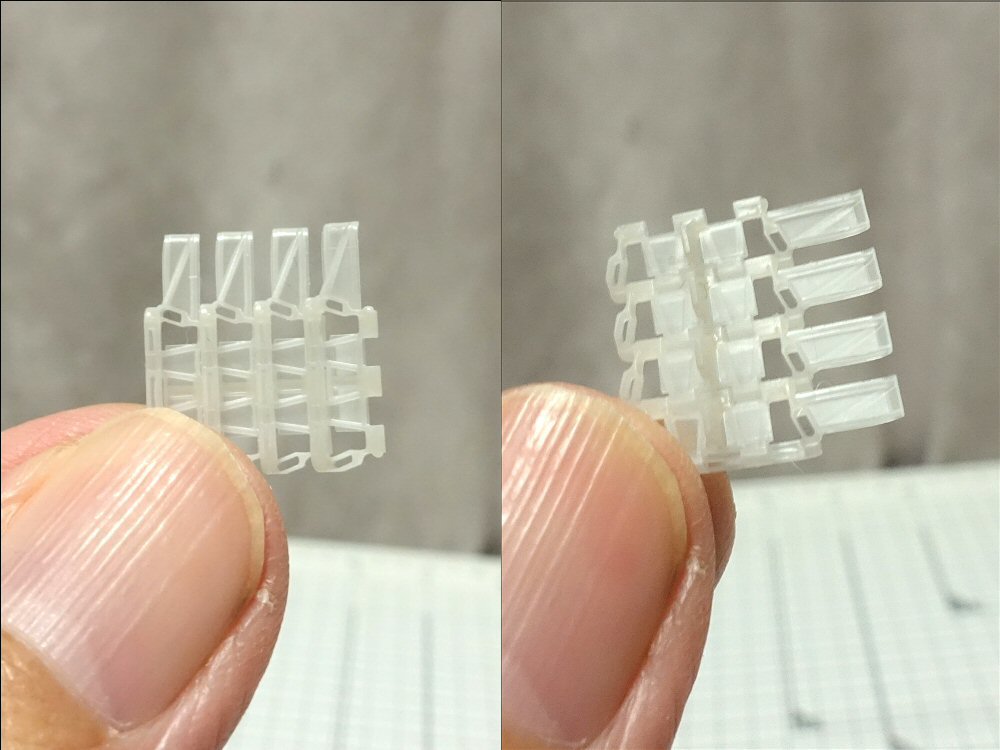
I also tried making Windketten.
I think it came out pretty well, but it’s just 3D data, so I wonder what it will look like when printed…Stug.III Ausf.G construction
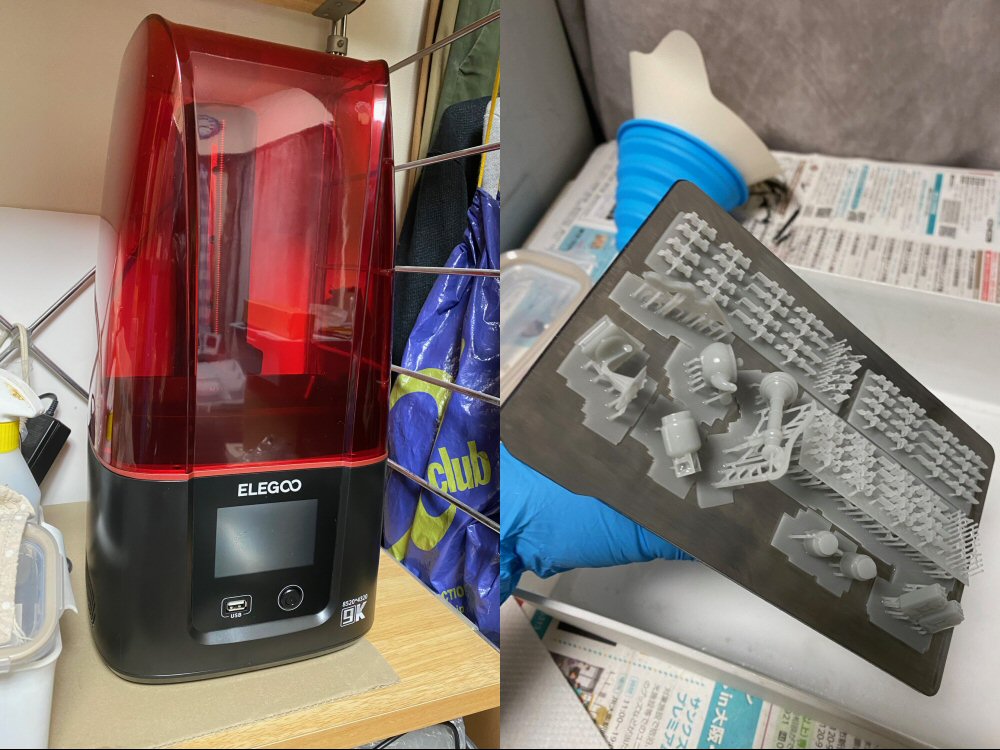
I bought a new 3D printer (ELEGOO MARS 4 9K, price 42,000 yen
I had a 3D printer before, but the prints were unstable and the resolution was low, so I decided to take the plunge and buy a new one).
Since it was difficult to peel off the stickers after printing, we also introduced a magnetic plate.
The durability is questionable but it works perfectly.
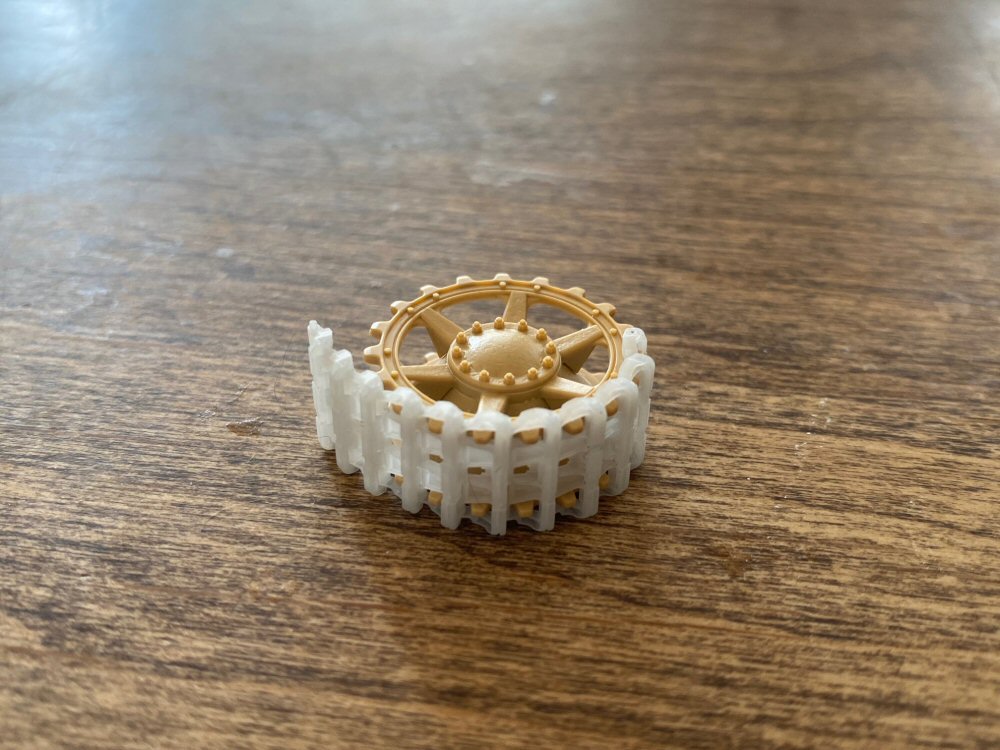
It’s so easy to remove, it’s become a necessity. I tried to mount it on the gear of a Tamiya Type 4 tank.
As I traced the actual design, the claws and width fit perfectly.
No corrections have been made in this area at all.
However, there are still some issues, such as durability and poor casting, so further adjustments are needed. Winterketten completed
Initially, a faulty print was found in about one in ten units, but after repeated tests, the problem was reduced to almost none by increasing and adjusting the supports.
In addition, the strength, which was a concern, has been stabilized by increasing the number of contact areas.Stug.III Ausf.G construction
I tried the winterketten.
However, although it fit perfectly on the gear of the type 4 tank, it did not fit on the type 3 tank… (tears) I had to
adjust it and force it.
This is bad.
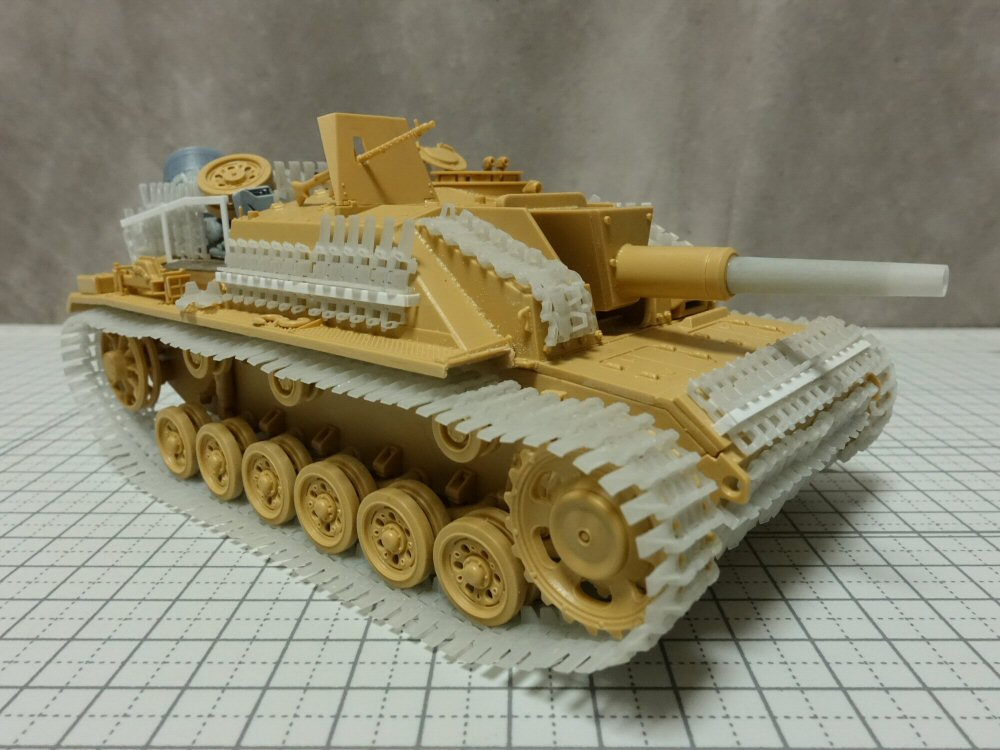
I started assembling the Tamiya Panzer III Ausf.
I cut both wings to emphasize the caterpillar. (Maybe I’m just happy)
I’m the type of person who won’t be satisfied unless everything is fixed, so I made the movable caterpillar with super glue.
I wonder what purpose it serves to move it… (sweat)Assembly complete.
Reusing discarded caterpillars from 3D printing
I took this opportunity to keep everything.Stug.III Ausf.G construction
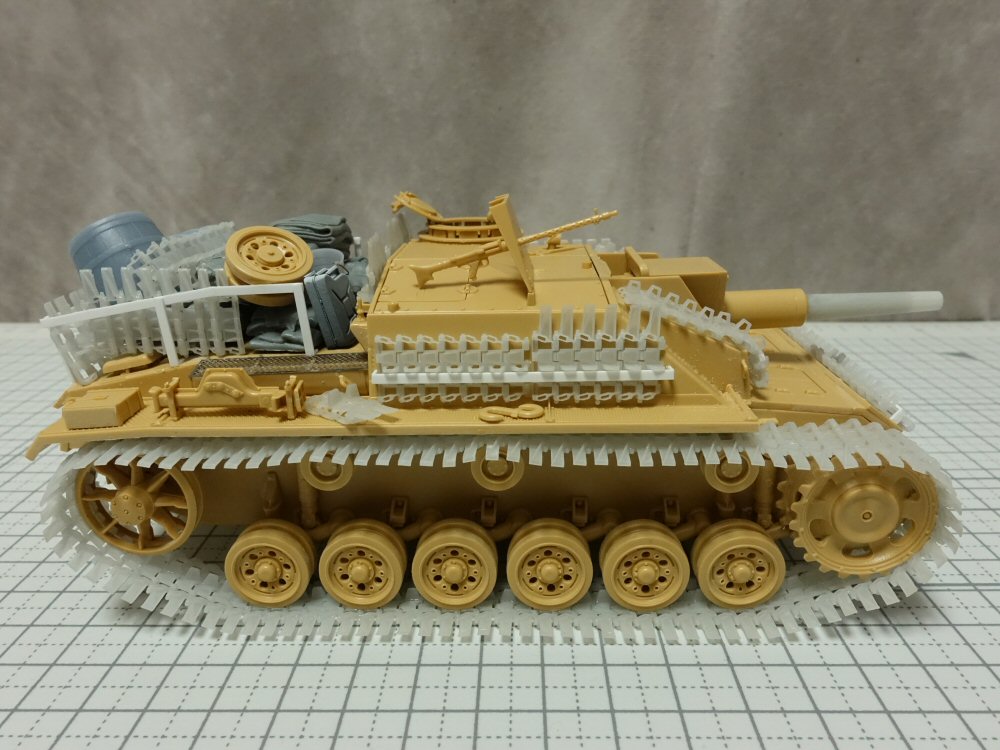
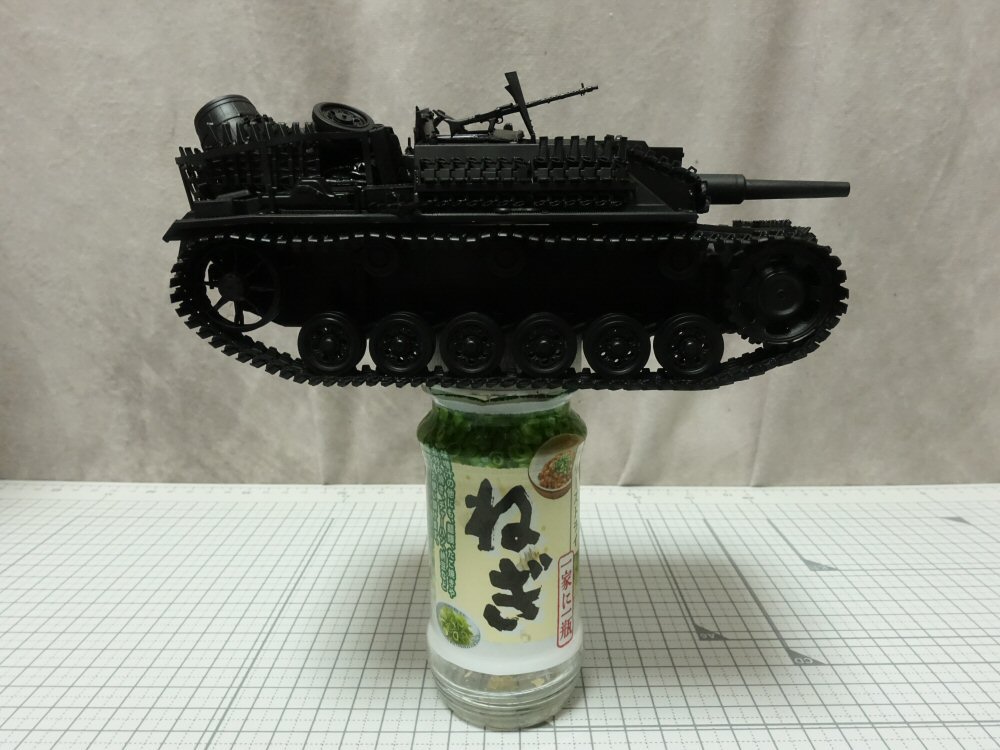
I sprayed Surfacer Evo (black).
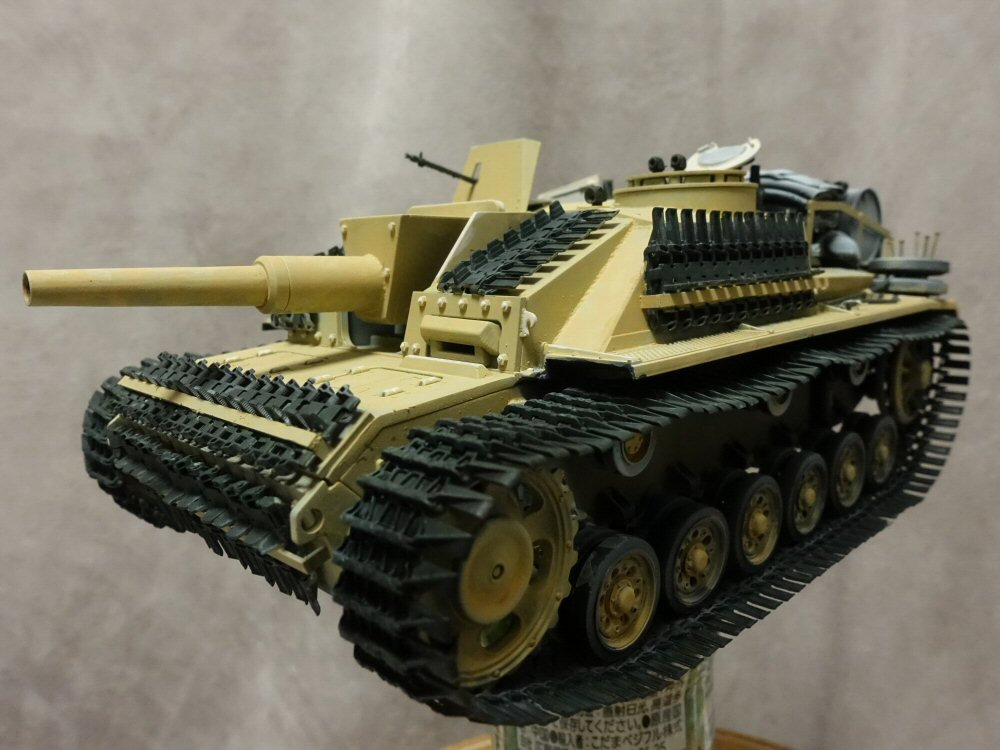
Painting needs a handle! That’s why 100 yen jars of dried onions are so useful.I sprayed Tamiya white acrylic on top.
I usually paint the base colors with an airbrush, but this time I painted everything with a brush.
I mixed several colors of thinned Vallejo and applied them one by one.
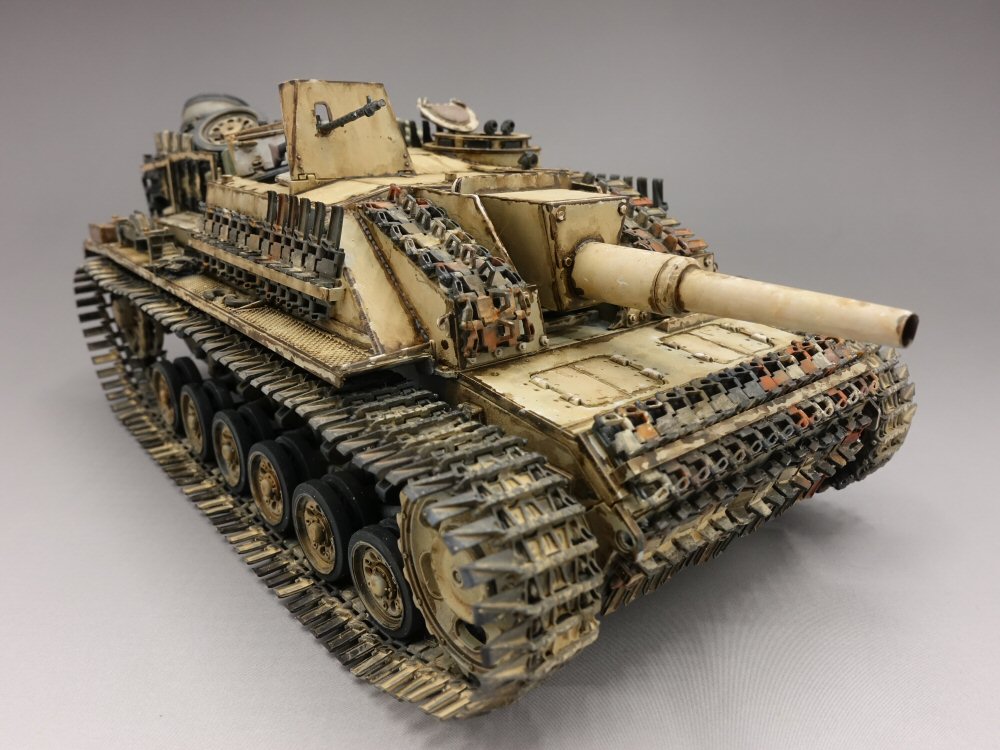
Unlike other acrylic paints, Vallejo and AK paints do not bleed evenly, but have a bright color, resulting in a beautiful painted surface. I tried to make it quite dirty.
Combined with the ridiculous number of caterpillar pieces connected, it looks very messy.
I quickly applied it with oil paint (sepia) to see what it looked like and then I got dirty in one go.
It took about 5 hours of work
https://tank.boy.jp/stug-G-T-s.htm