article
A-4 Skyhawk Access Ladder
Hello..
Finally to finish this “article” that I’m sure you’ll love because it deals with a topic that fascinates ALL of you: the stairs of the A-4.
Finally, an analysis and comparison of the best stairs for climbing a 1/48 Skyhawk, so you can decide which one is best for you, whether you have an A-4 or not. That’s the least.
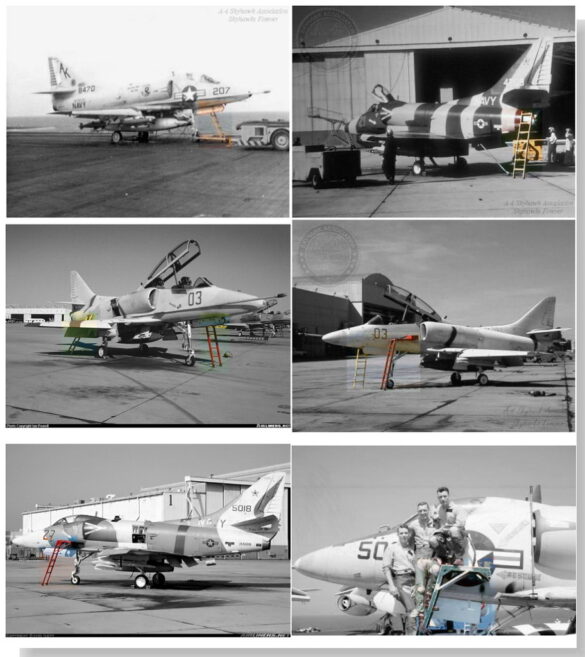
The damn stairs are usually an obstacle in most A-4 photos. The funny thing is that when it comes to documenting them, things are quite complicated.
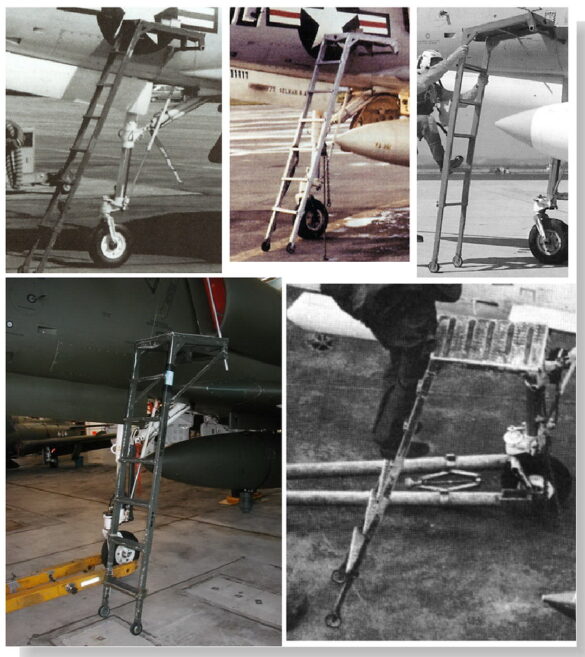
I found a basic design on which many small variations have been made over time, mainly aimed at strengthening it. It’s a peculiar ladder because it is lateral and although simple and light, it provides comfortable access and an external platform to the cabin. It can be moved easily thanks to its wheels and with its unique rotating anchor point, it can be adjusted to the different heights of the A-4’s nose. Come on, as a design it is as brilliant as theA-4 Skyhawk.
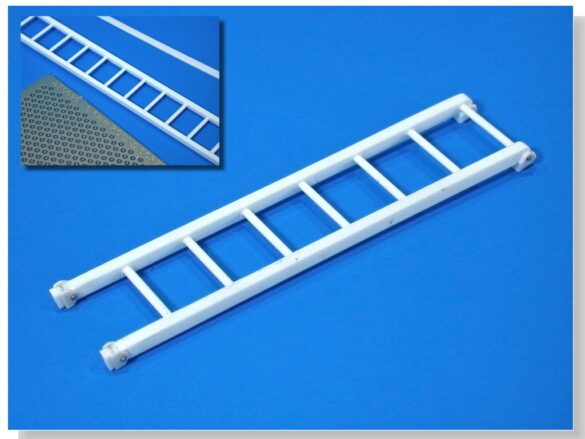
All Hasegawa A-4s have a ladder. It is a peculiar piece due to its location inside its stapler, which is why it is usually bent or broken. In fact, it was its flaws and shortcomings that led me to deal with the subject.
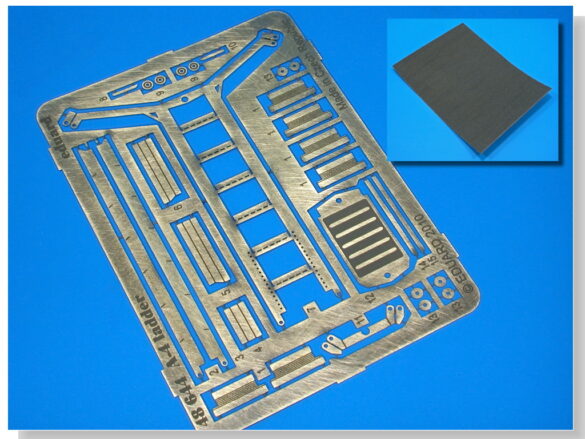
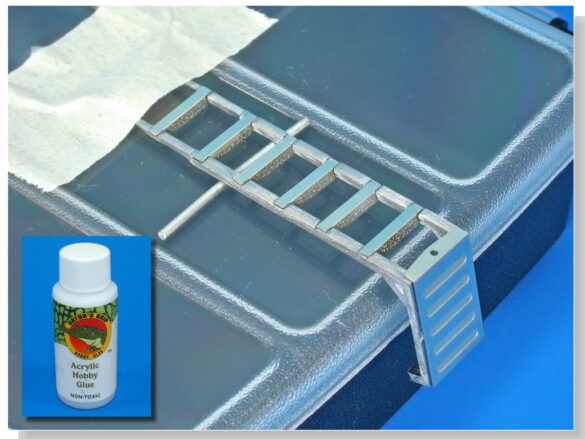
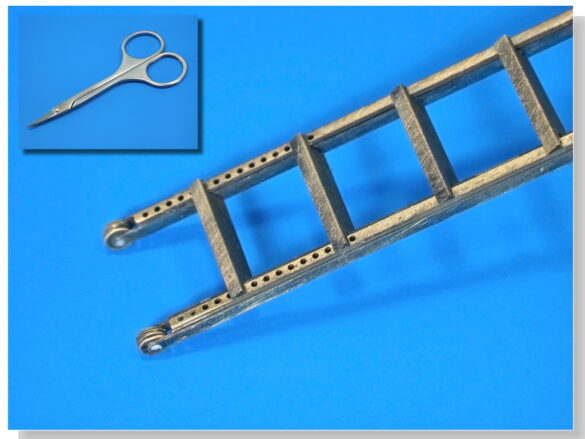
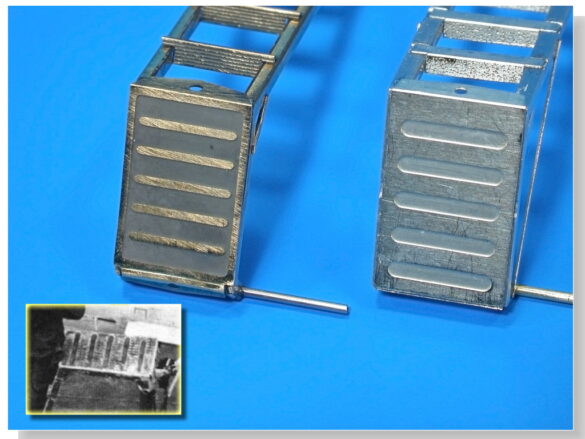
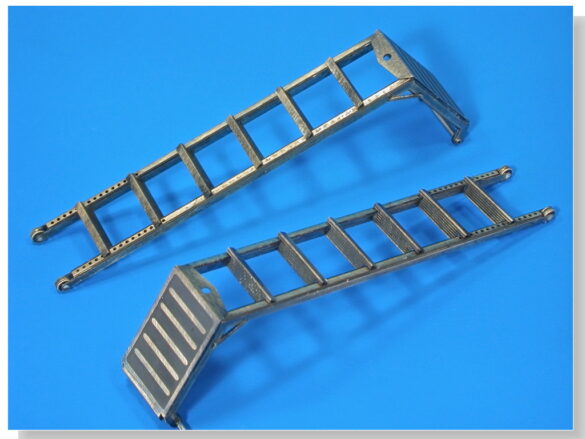
I found two options after the purchase for the Scooter ladder: Flightpath and Eduard.
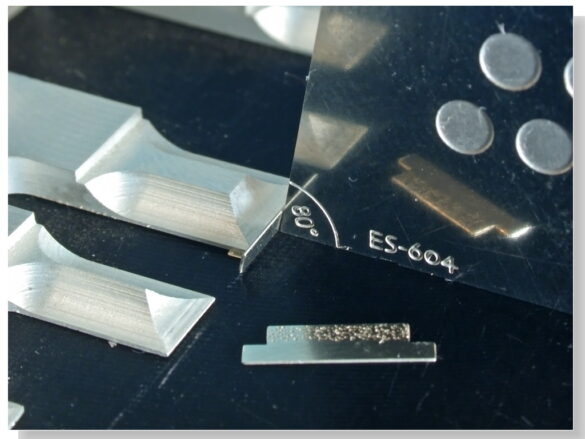
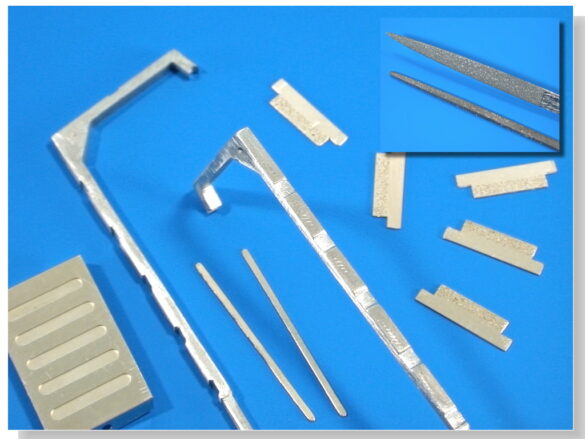
The Eduard kit does not present assembly problems beyond the technical requirements of this type of material. It is robust and the best thing about it is the steps and the small details.
Both kits have a different inclination. 80 degrees on the Flightpath ladder and 70 on the Eduard ladder. My opinion based on the photos is that the actual angle is somewhere in between, closer to Eduard’s.
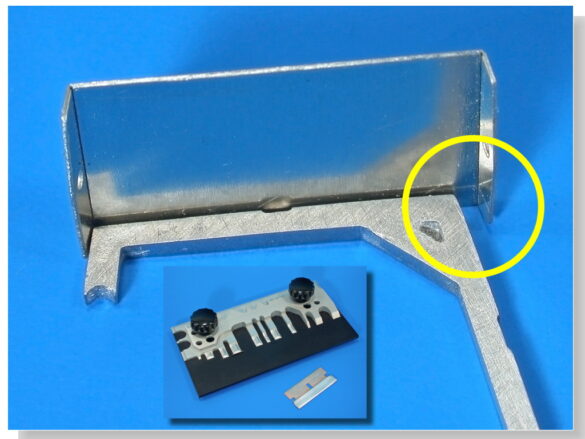
The Flightapath ladder has some optional reinforcements that I really like. Shorter reinforcements were also available.
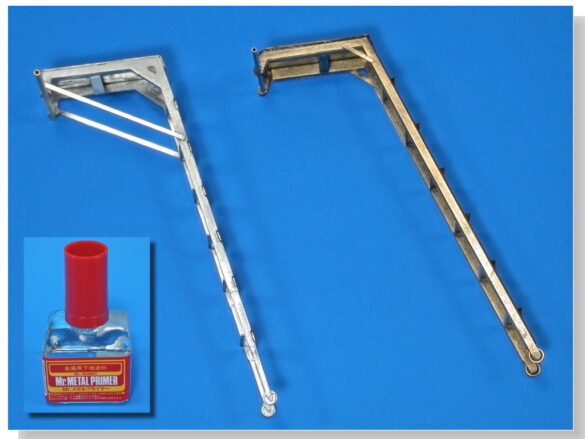
To prepare the paint, I first washed the pieces by soaking them in soapy water, rinsing and drying. Then I used Mr.Metal Primer, Mr.Color’s metal primer for the first time. The most impressive thing about this primer is that it is transparent. It smells like lacquer thinner and cleans up easily with an airbrush without thinning. Luckily, you know you’ve primed the metal because it dries to a satin finish. I have the impression that it’s nothing more than Mr. Color varnish. The truth is that I didn’t have any problems with the paint sticking. But priming is something more, like matching the tones of the base, I say.
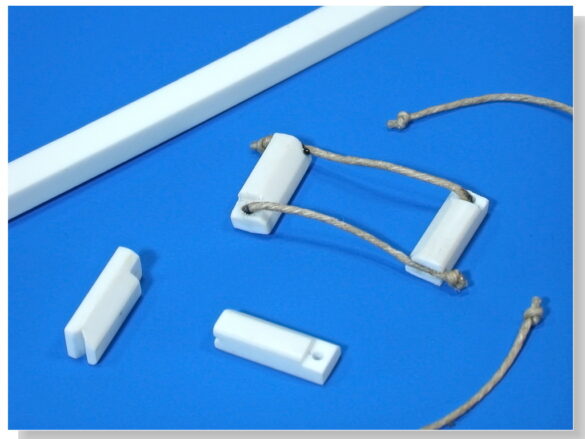
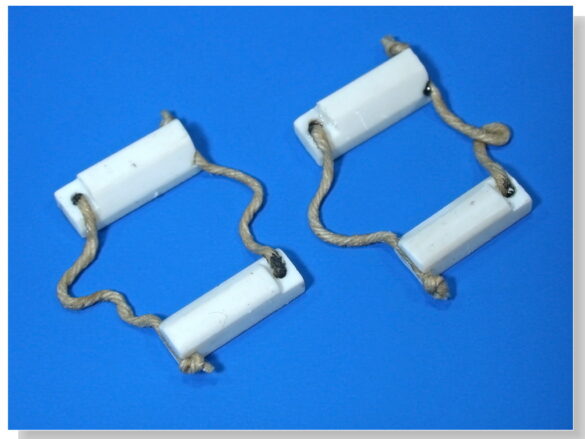
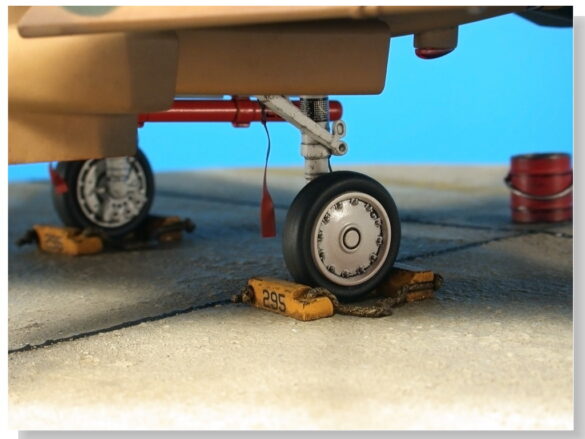
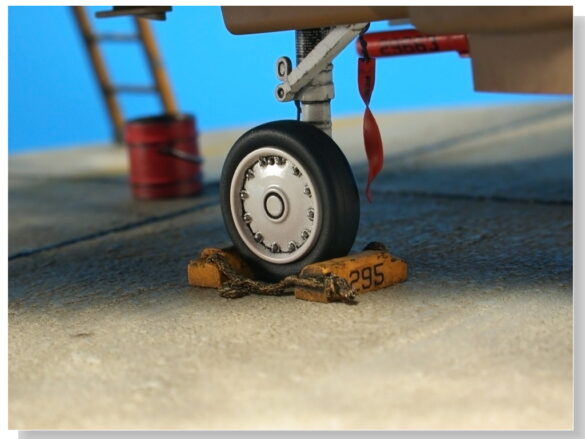
Expanding on the standard accessories for Skyhawks, I made some patterns from Evergreen carved rod and nautical modeling cord. I was inspired by what Eduard includes in the aircraft’s wheel resins.
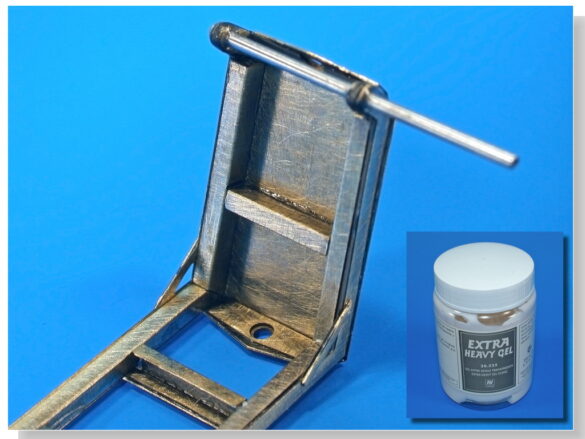
To shape the string I used Future. When it gets wet, it becomes much more pliable and when it dries, the string becomes quite stiff, maintaining the shape we have given it, without losing any textural detail. I have used it with other fibrous materials with excellent results. Another application of the magic product par excellence.
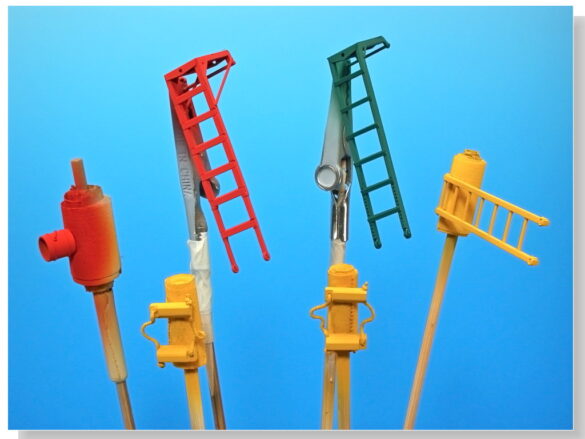
And we come to the fun part. The ladders are painted in bright colors like so many other things around the planes to prevent the engineers from scratching their heads when visibility is poor, to find things quickly and to easily spot garbage where it should not be.
In the case of A-4 ladders, the most common colors are red and yellow. But red is much more abundant in the photos I have consulted. On aircraft carriers I have seen some in gray and dark green.
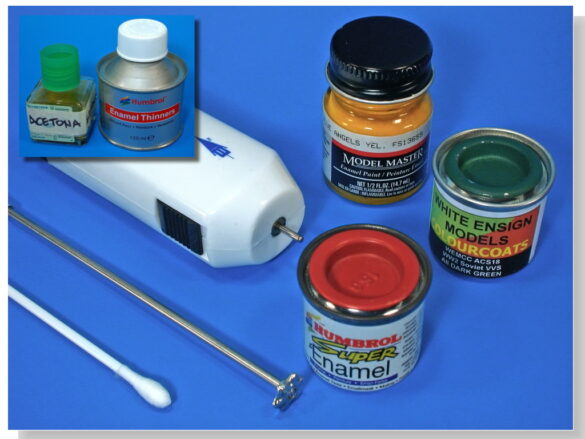
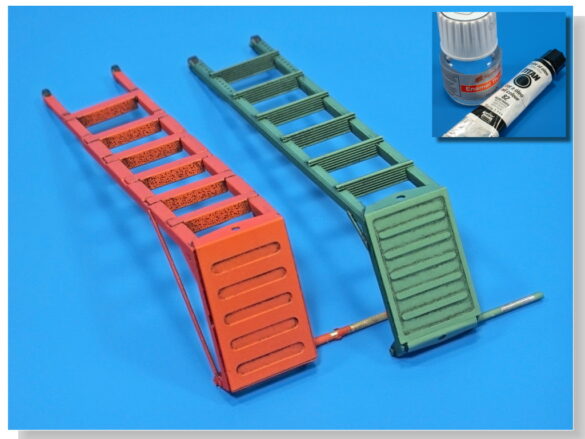
The colours I used need no explanation as they are very basic. But I want to talk about the enamel colour. Lately I have been more comfortable with enamel than ever. Or at least since those long ago days when there was only Humbrol and Airfix.
We have impressive catalogues with very accurate colours from such good brands as Humbrol, WEM and Model Master, the three I have used. And they can all be mixed together and thinned with Humbrol or Molak. The gloss varnishes are really glossy. And they are a very durable, stable and grippy colour.
But I had to learn to be meticulous with the packaging. Clean the lip well before closing, remove any dried paint, making sure it does not drip inside and place the lid on paper to absorb any stuck paint.
And prepare it well before use with the practical battery-operated stirrer, which homogenizes the mixture of pigments, oil and solvent and breaks up lumps.
Enamels are excellent paints for base coats, airbrushing and for work with a clear purpose. What they lack is the flexibility to make mixtures and transparencies.
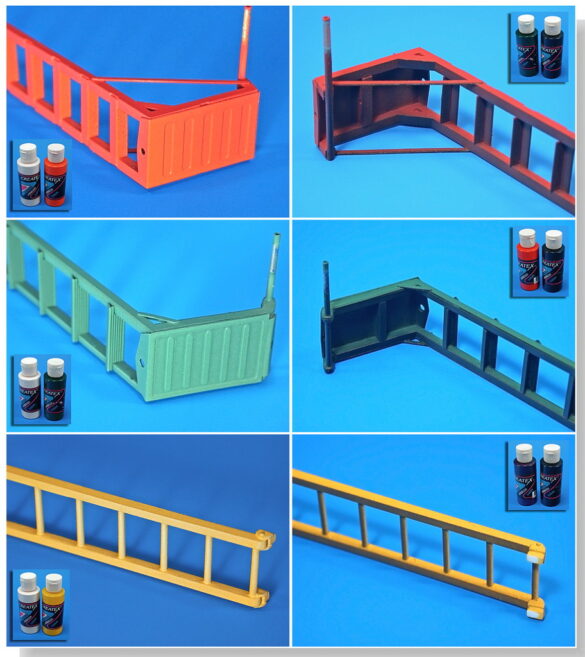
So I painted each element with a different color to test the different effects that go well with these colors.
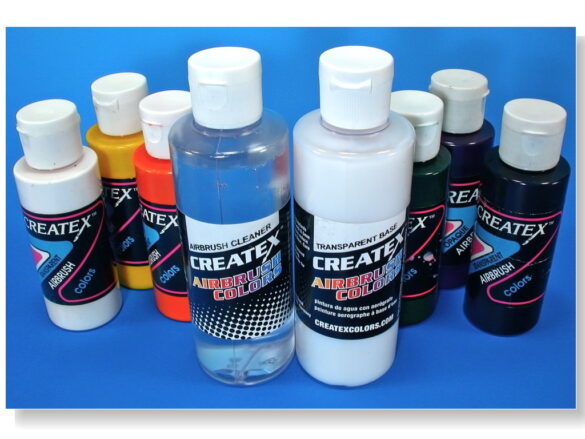
To apply an extreme lighting effect, I chose to work with transparencies. Having already tried Medea acrylics in the previous work, this time it was Createx’s turn. Createx are very vinyl colors. So much so that it is a good idea to have airbrush cleaner to make it easier to clean up any remaining paint. They are also very airbrush-friendly as they accumulate very little on the needle and dry somewhat more slowly than Vallejo.
They are water-thinnable, but I have used their clear base to achieve translucent colors without the paint losing its consistency from excess water.
I got the highlights by mixing the base color with white and a clear base. But for the shadows, I mixed Tinting Black with the complementary color of the base and the clear base. So I darkened the red with a very dark green, the yellow with a dark violet, and the green with a dark red. So in the shadow areas, the color not only darkens but also fades, which is noticeable in these very bright colors.
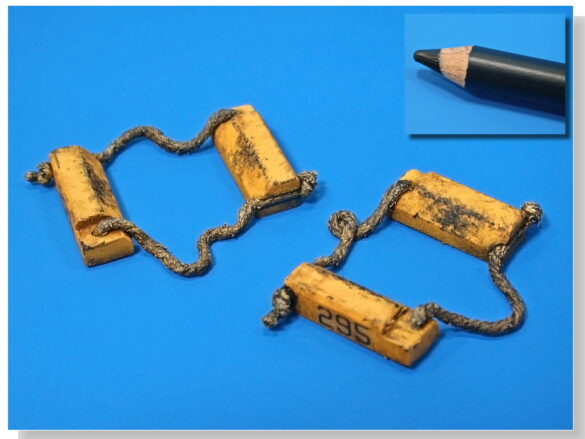
In addition to smearing the wedges with natural fabric oil, I put scratch marks with a black grease pencil. Oil pencil has some interesting properties. Its adhesion to any surface is greater than that of pastel pencil (which is not suitable for glossy surfaces) and much greater than that of watercolor pencil. And like the latter, it can be blurred with turpentine. It has a lot of body, like candles. It reminds me of oil pastels but with the advantage of being able to sharpen with a pencil.
And the usual finishing. Outlined with black oil and solvent to bring out the shapes, followed by Vallejo satin varnish.
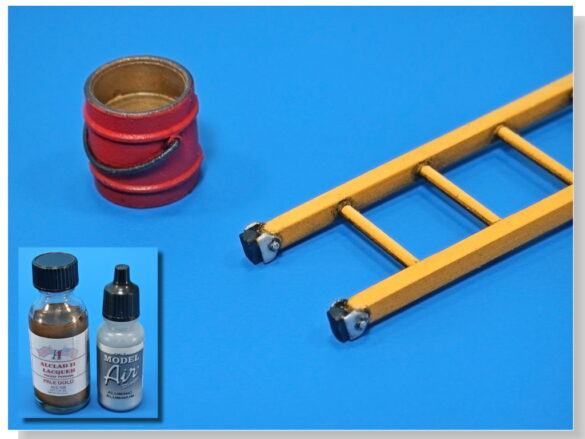
For some small details, exotic metallics can be used.
Despite my deep disdain for acrylic metallics, I admit that there is one that in very small brush applications looks mediocre: Model Air Aluminum Metallic.
Alclad paints are not brush paints, but they can gild an already metallic surface with a thin application. But it must be done with the first brush because it dissolves everything it touches.
I do not recommend these two methods.
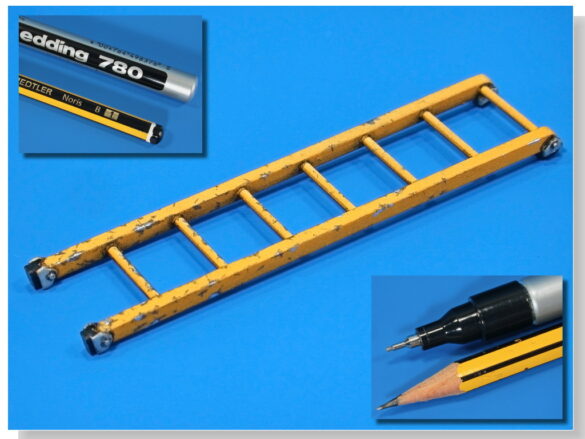
Well, all this is just preparation for what a modeler will find most important when looking at photos of A-4 ladders: the abundant chips and scratches. It looks like these tools have been exposed to the elements for a long time and are subject to heavy use. And they may not have primed the metal with Mr.
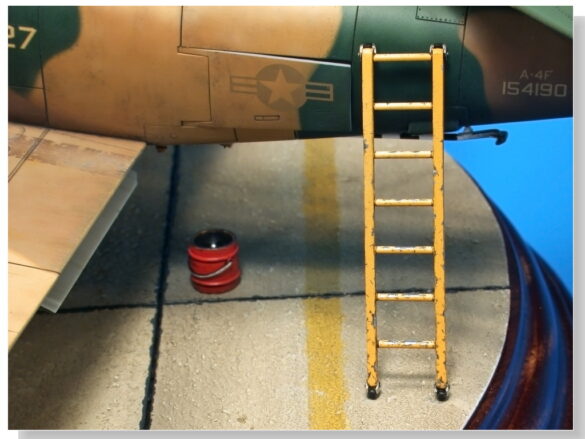
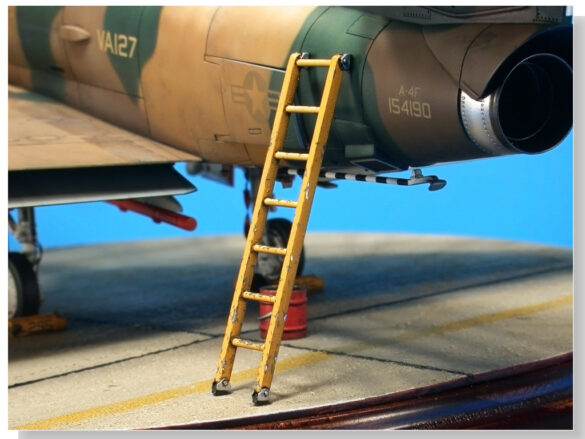
For the yellow I used a soft pencil and a fine tip silver marker. The dark pencil does a great job on light colors (white, gray, yellow), and you can make very fine scratches. The hard tip marker provides a very realistic silver color that contrasts well with the color of the pencil. Its applications are rounded so it is up to the pencil to achieve an irregular outline. The result is classic but elaborate.
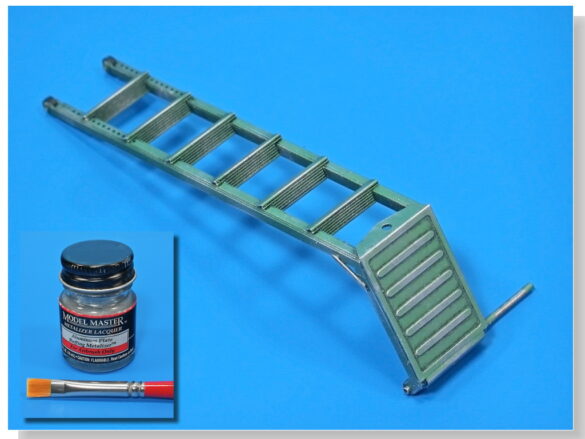
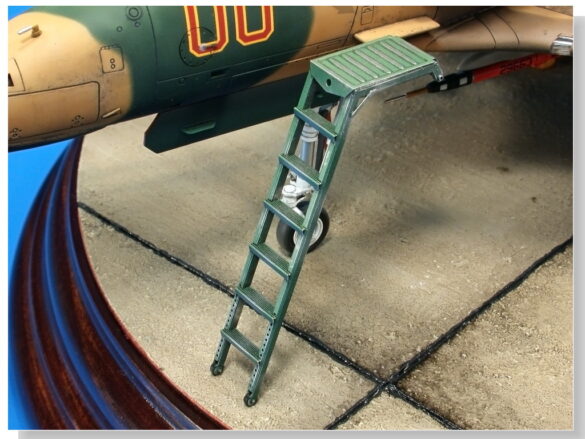
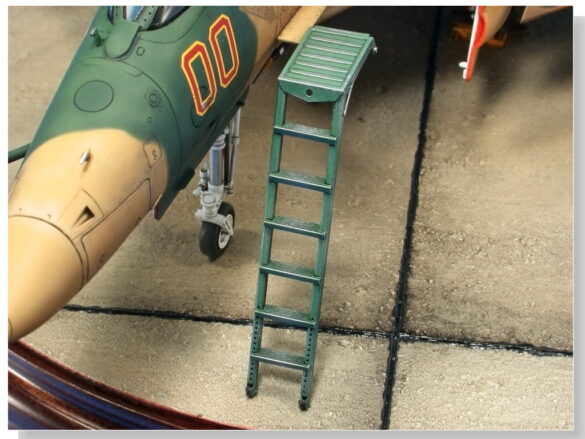
For the green I used a Metalizer series aluminum applied with a dry brush. Nothing gives a better feel of metal subjected to a lot of use and friction than the dry brush Metalizer. On the same level of the same process as graphite. I’ve always liked this effect for certain pieces. It’s a chip that you can’t tell where the edges are.
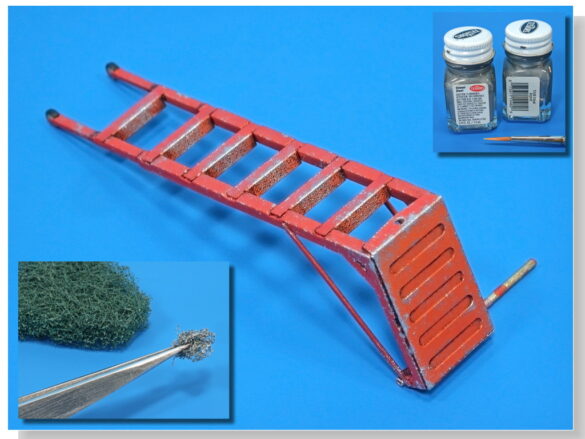
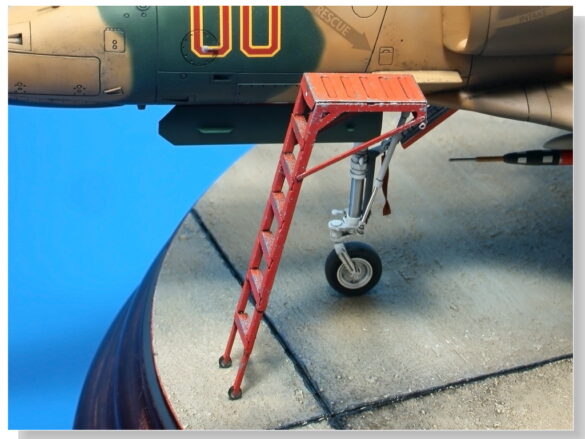
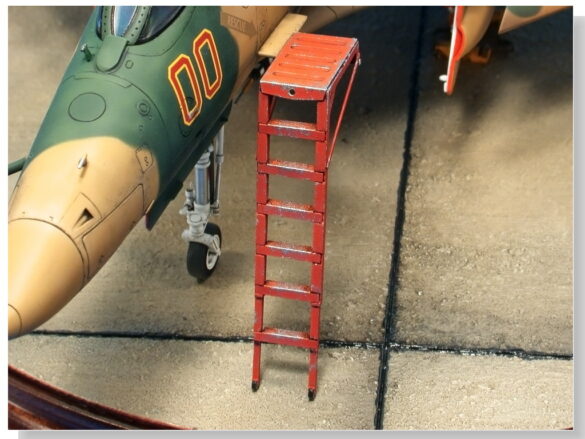
And for the red staircase, the opposite process. Printing with texturing elements, like cleaning pads, produces lots of little chips of various shapes and sizes. I used Testors enamels, my favorite for applying metallics with a brush, being careful not to overload the sponge.
For the edges, I made a few passes with the side of the brush.
In total, there are three methods of painting chipped paint that don’t use the basic system: the tip of a thin brush is moved with skill. Because modeling is also the search to renounce talent.
Let it be known that these are painting methods. The red staircase could really be cut with a knife.
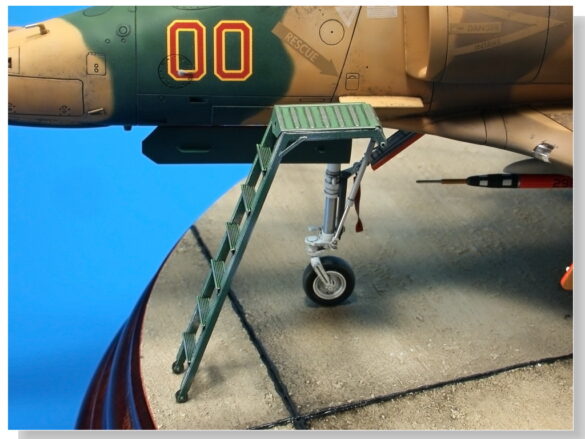
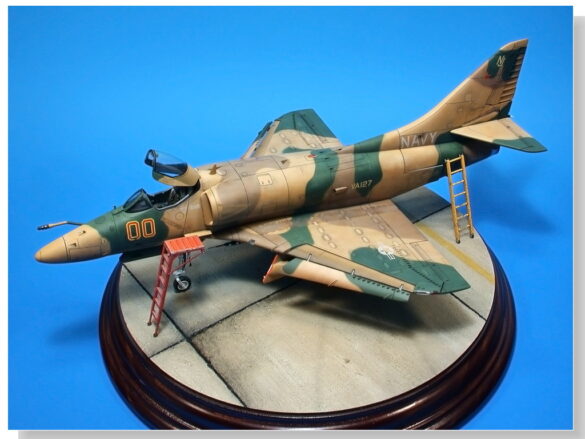
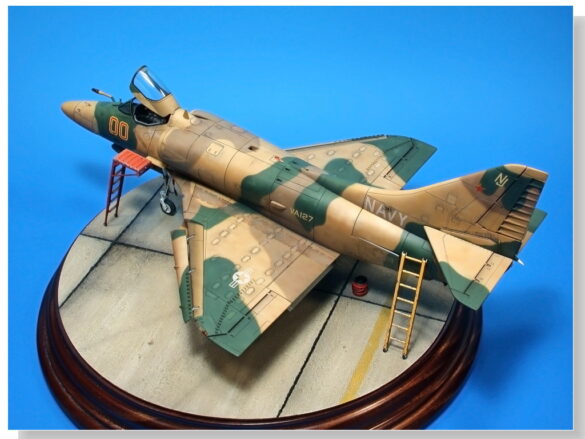
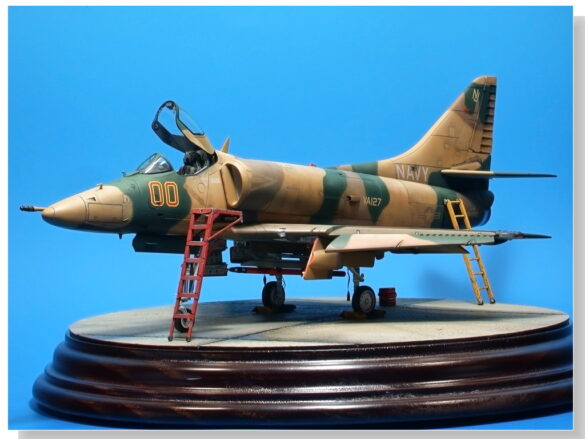
Now let’s see what these toothpicks look like in their natural habitat. If not, it would be a shame to read this far. First the green ladder, which is for another plane.
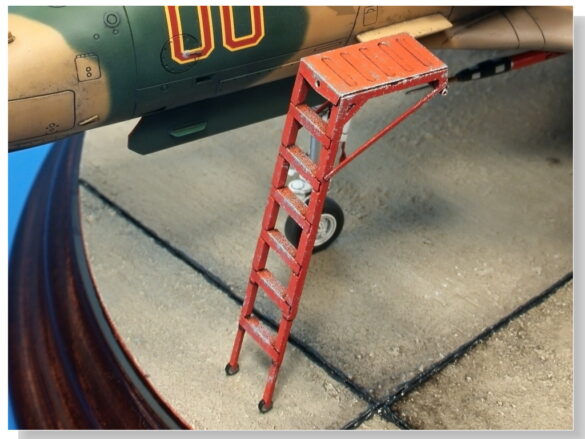
And now the red ladder, which is the last one for this model.
It’s strange that in reality the ladders are almost never perfectly horizontal. This depends on the length of the nose gear shock absorber, which has a lot of travel, which depends on the load of the aircraft. It also depends on the length of the telescopic part of the ladder. So it’s not something you have to take into account when finishing a model.
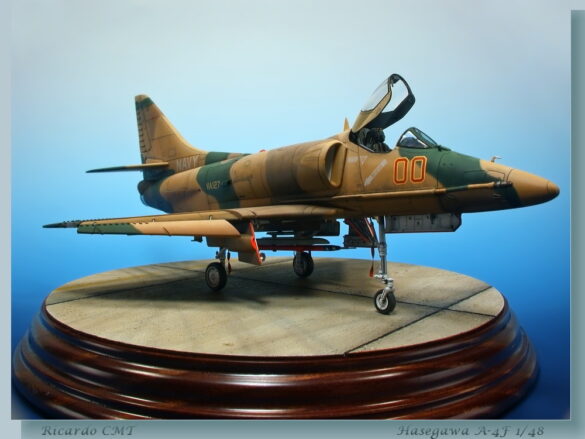
The ultimate reason for this work was to glue this model to the base once and for all. I made it in such a spirit of simplicity that I didn’t even grind the planes on the wheels or make the holes for the usual metal rods that fasten the model to the base. I did it the hard way, with the finished model, fortunately without any accidents. I hope to take it on a trip one day.
The thing is, now I think it’s still missing something. A fire extinguisher or something.
Lately I’ve been doing a lot of things with stairs. Or I’ve put stairs on things that didn’t have any.
Is any psychoanalyst reading this?
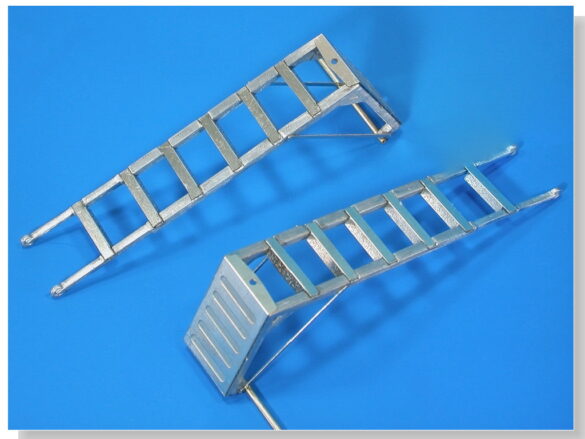
Finally, I’ll say that both stairs are much better than the one with the model. They’re by no means perfect, although combined they could produce something very close to reality.
And also, I didn’t write this to talk about stupid stairs, in case you hadn’t noticed.
My next article will be about stairs.
C-130H HERCULES HAF By:Doxas Yiannis

