article
F-16C Fighting Falcon Aggressor Alaska18th Fighter Interceptor Squadron
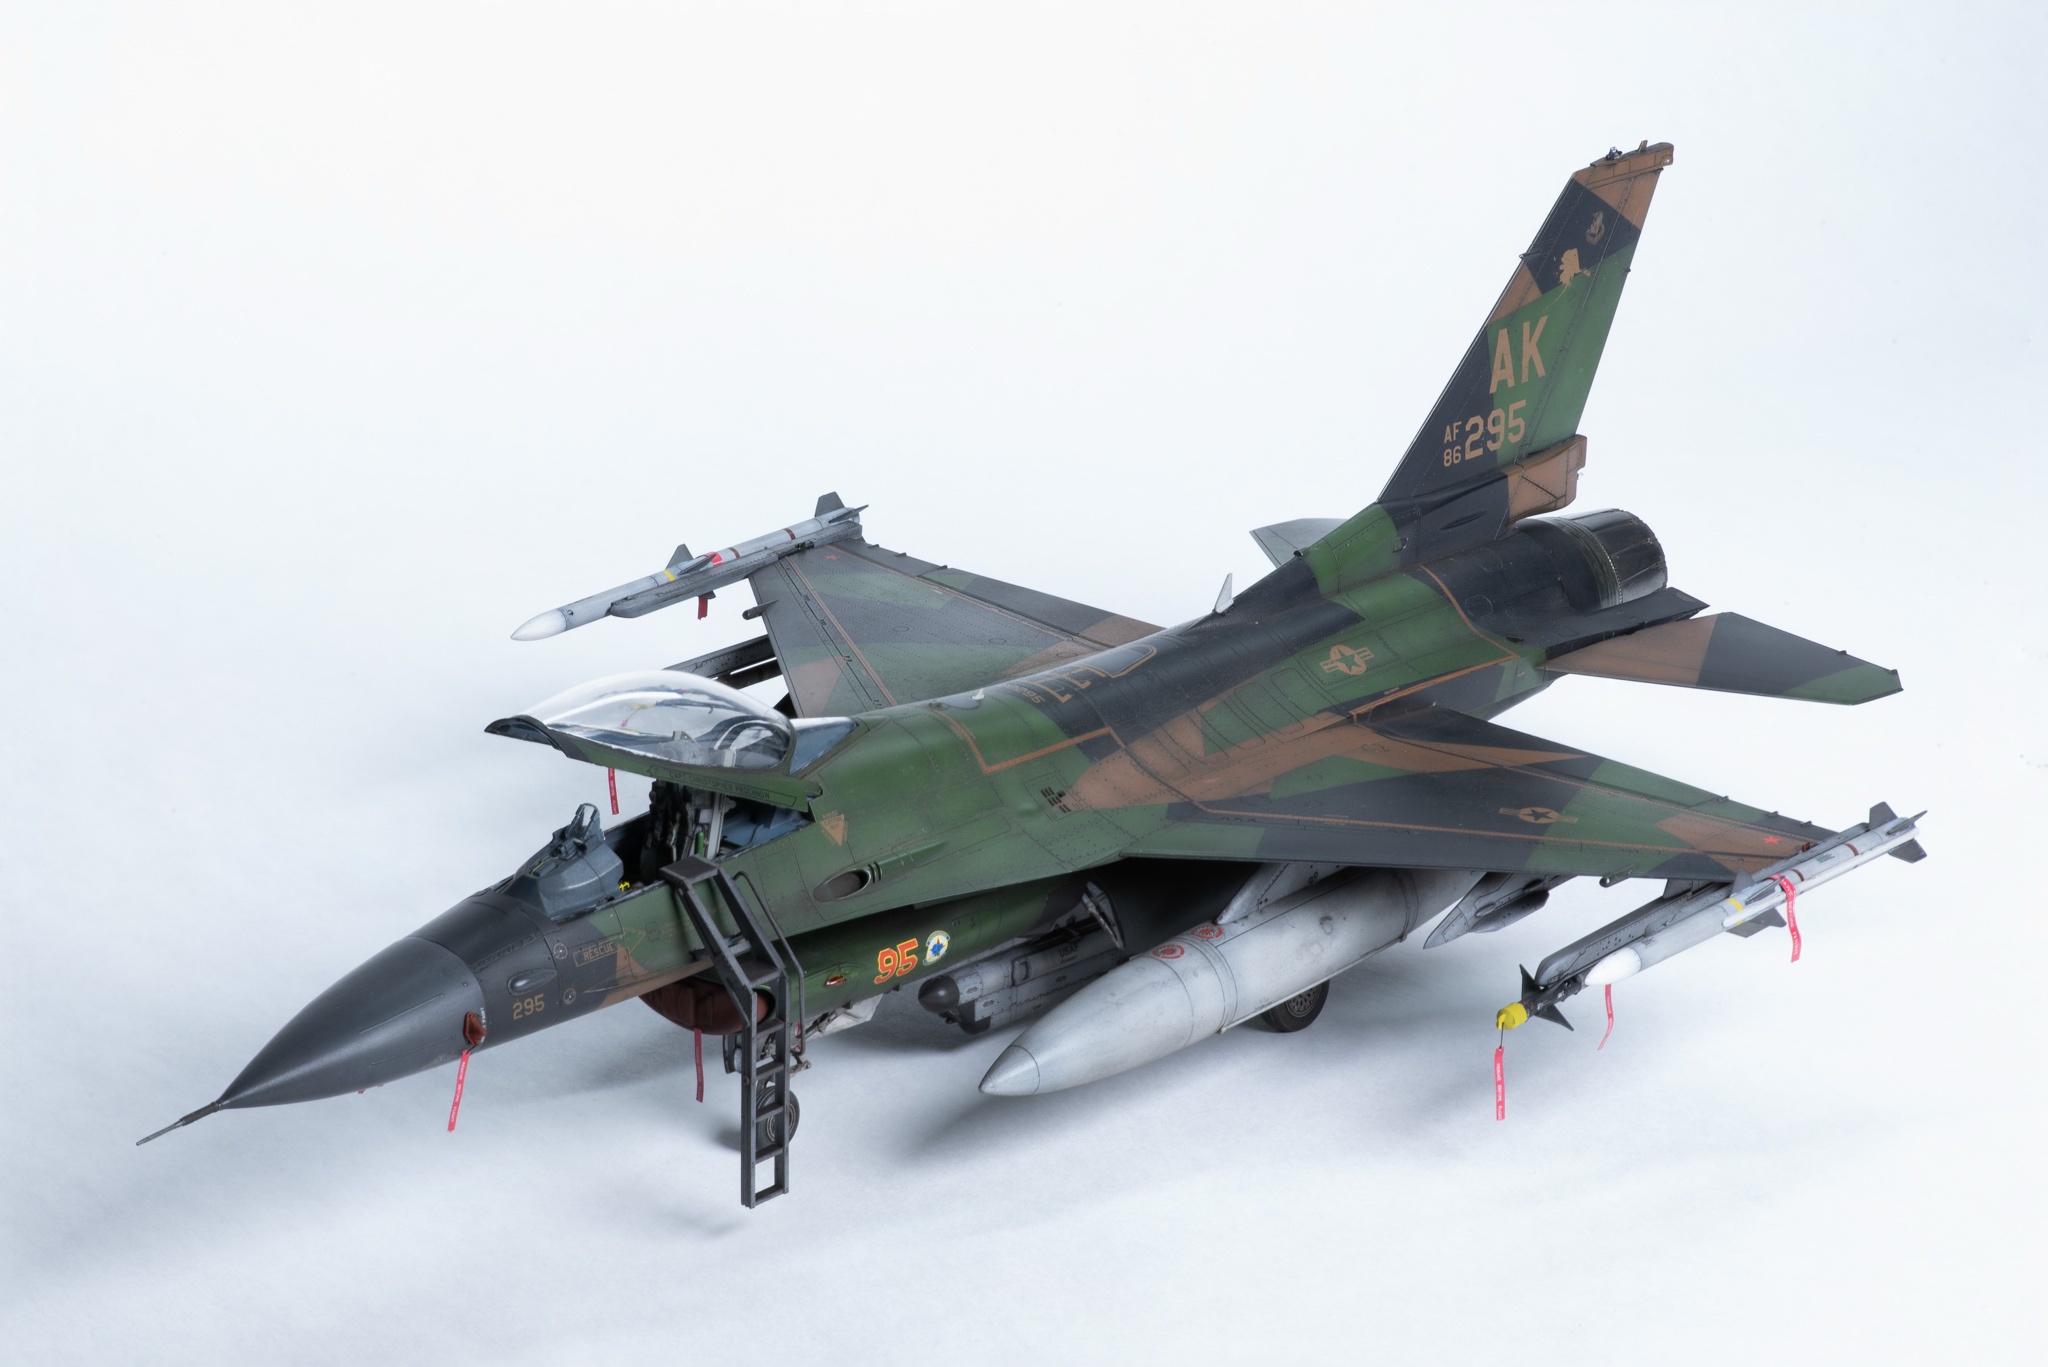
F-16 Block 30 Aggressor in Splinter Green markings of (86-295) operated by the 18th Aggressor Squadron from Eielson AFB, Alaska.
I assembled this 1/48 replica using the Tamiya Block 50 kit.
In addition to the base kit, I also used the following aftermarket products:
•Aggressor decal set from Bullsye. Overall the decals went well without any fuss. I matched the brown paint I used with the brown decal to create a more cohesive finish.
•Exhaust nozzle, shroud, access ladder and remove pre-flight labels from Eduard. The exhaust nozzle was easy to use and a definite upgrade over stock.
•Mini Craft Collections ejection seat. Extremely detailed. Going forward, I plan on getting these great ejection seats for all future builds if they become available.
•Quinta Studios interior 3D decal set. Easy to work with and gives a realistic look.
•Kopecky Scale Models FOD set. There aren’t many FOD sets available for this particular F16, but this one did the trick.
•Landing kit from Detail and Wonder. I can’t say enough great things about this set. Very detailed and easy to work with.
•9M sidewinder target from Reskit. As expected, these were quite detailed and provided a more realistic look than the typical kit ones. While taking pictures, one of the missiles fell off, breaking a wing. I will have to replace the wing.
A few notes on the decisions I made for this build:
Obviously I decided to add live banding to my
missiles. I wanted this build to represent a scenario where the attacker was actually armed for combat, not just for training.
Next, the aftermarket exhaust nozzle is not technically correct for this attacker. It should have been the GE engine, but I went with the Pratt. This was done for 2 reasons. First, I originally had a GE engine from Reskit, but I ended up not liking their choice to include inappropriate detailing on the turkey wings. Second, I personally like the look of the Pratt engine better.
Finally, my wing walk lines don’t extend far enough towards the tail of the aircraft. This was unfortunately a mistake I made looking at the reference image in the decal instructions and not the actual aircraft. You live and learn kind of thing
Finished this amazing F-16 gear set from Detail and Wonder. I chose to add UV resin for the lens covers on the gear lights because it provides a realistic look.
Finished this amazing F-16 gear set from Detail and Wonder. I chose to add UV resin for the lens covers on the gear lights because it provides a realistic look.
It was definitely time consuming to cut and apply all the masking tape. I did each color in layers starting with the black and finishing with the brown. I was a little lazy towards the end and didn’t apply enough mascara, which led to overspray that I had to go back and deal with.
Some notes on the decisions I made for this build:
Obviously I decided to add live banding to my
missiles. I wanted this build to represent a scenario where the attacker was actually armed for combat and not just for training.
Next, the aftermarket exhaust nozzle is not technically correct for this attacker. It should have been the GE motor, but I went with the Pratt. This was done for 2 reasons. First, I originally had a GE motor from Reskit, but I ended up not liking their choice to include inappropriate detailing on the turkey wings. Second, I personally like the look of the Pratt motor better.
Finally, my wing walk lines don’t extend far enough towards the tail of the aircraft. This was unfortunately a mistake I made by looking at the reference image of the decal instructions and not the actual aircraft. You live and learn, sort of.
https://www.britmodeller.com/forums/index.php?/topic/235148173-f-16-aggressor-tamiya-148/
By Green kreationz
Aggressor camouflage F-16 Alaskan Forest Green “Splinter”
Gallery


By Green kreationz 2")
By Green kreationz 3")
By Green kreationz 4")
By Green kreationz 5")
By Green kreationz 6")
By Green kreationz 7")