article
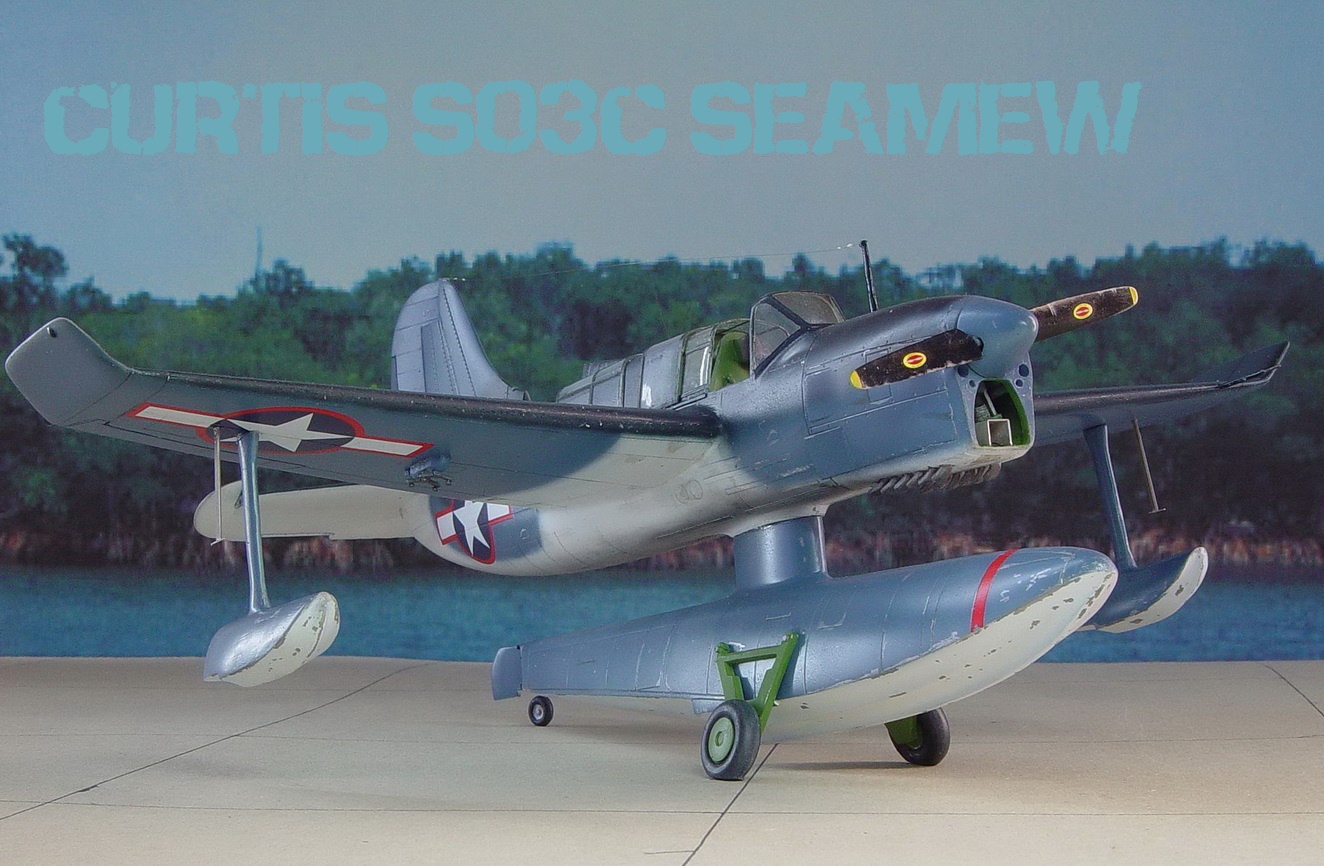
SEA COW
Sometimes when an airplane doesn’t perform as expected, it falls outside the specifications for which it was designed and ends up getting weird or even derogatory nicknames. Seamew also belonged to this category. The official name was given by the British and adopted by the Americans. But he was the first to be called Sea Cow because of his poor performance.
CONSTRUCTION
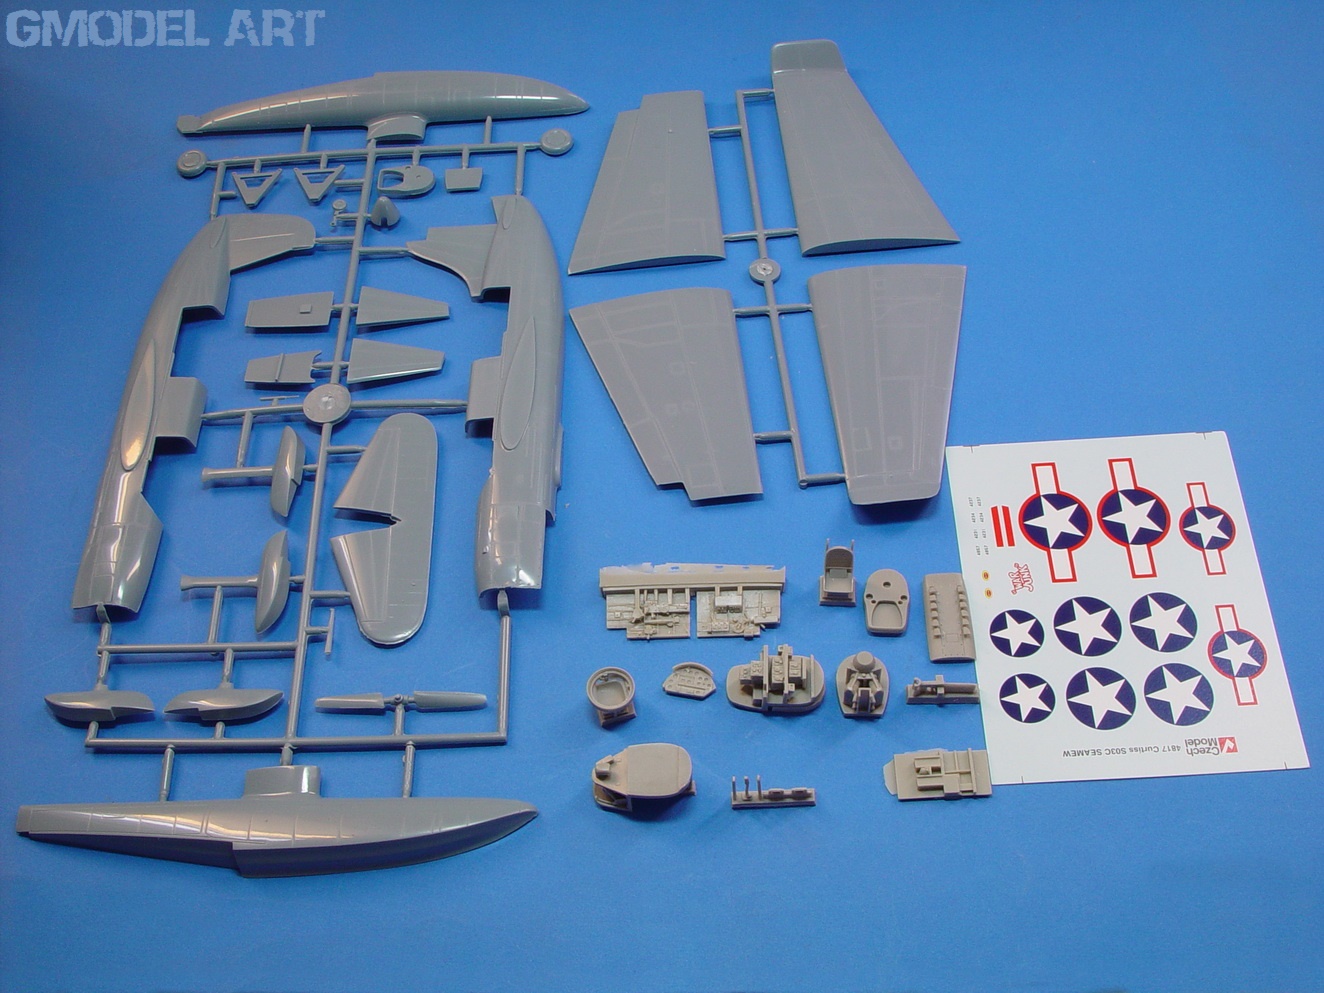
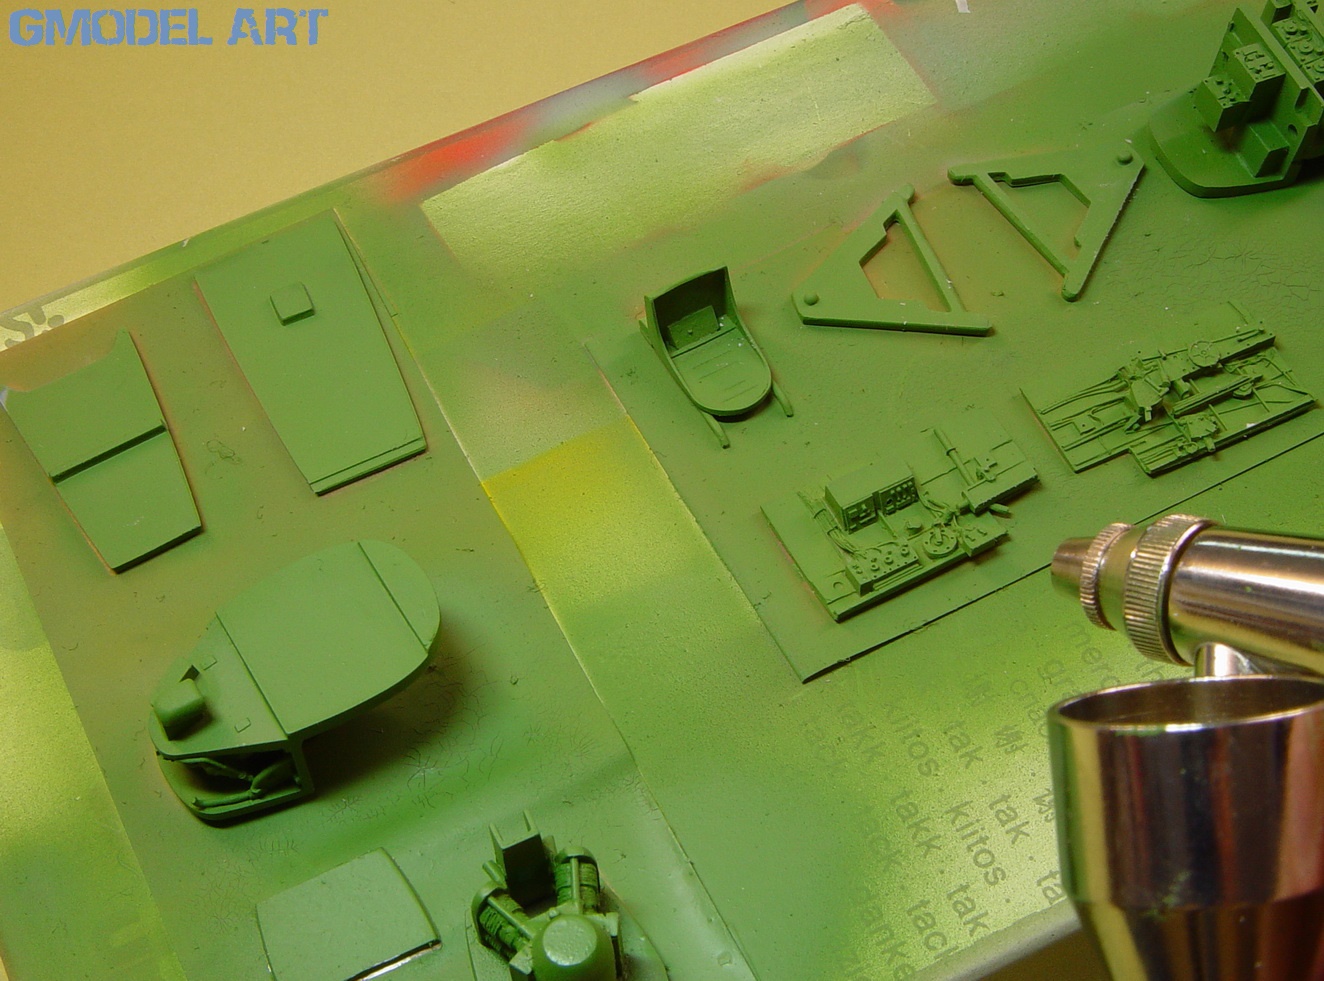
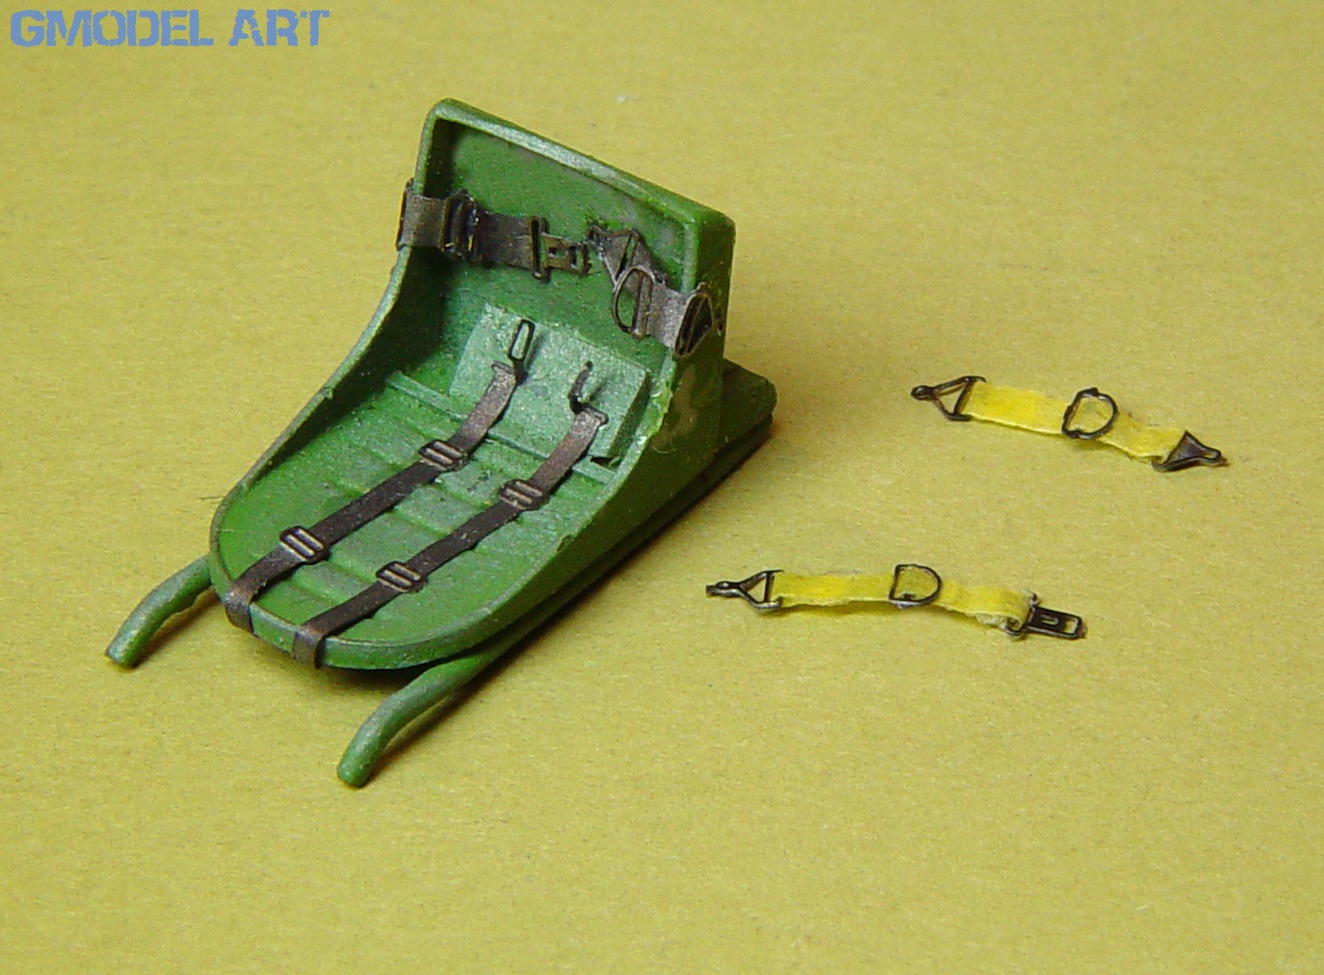
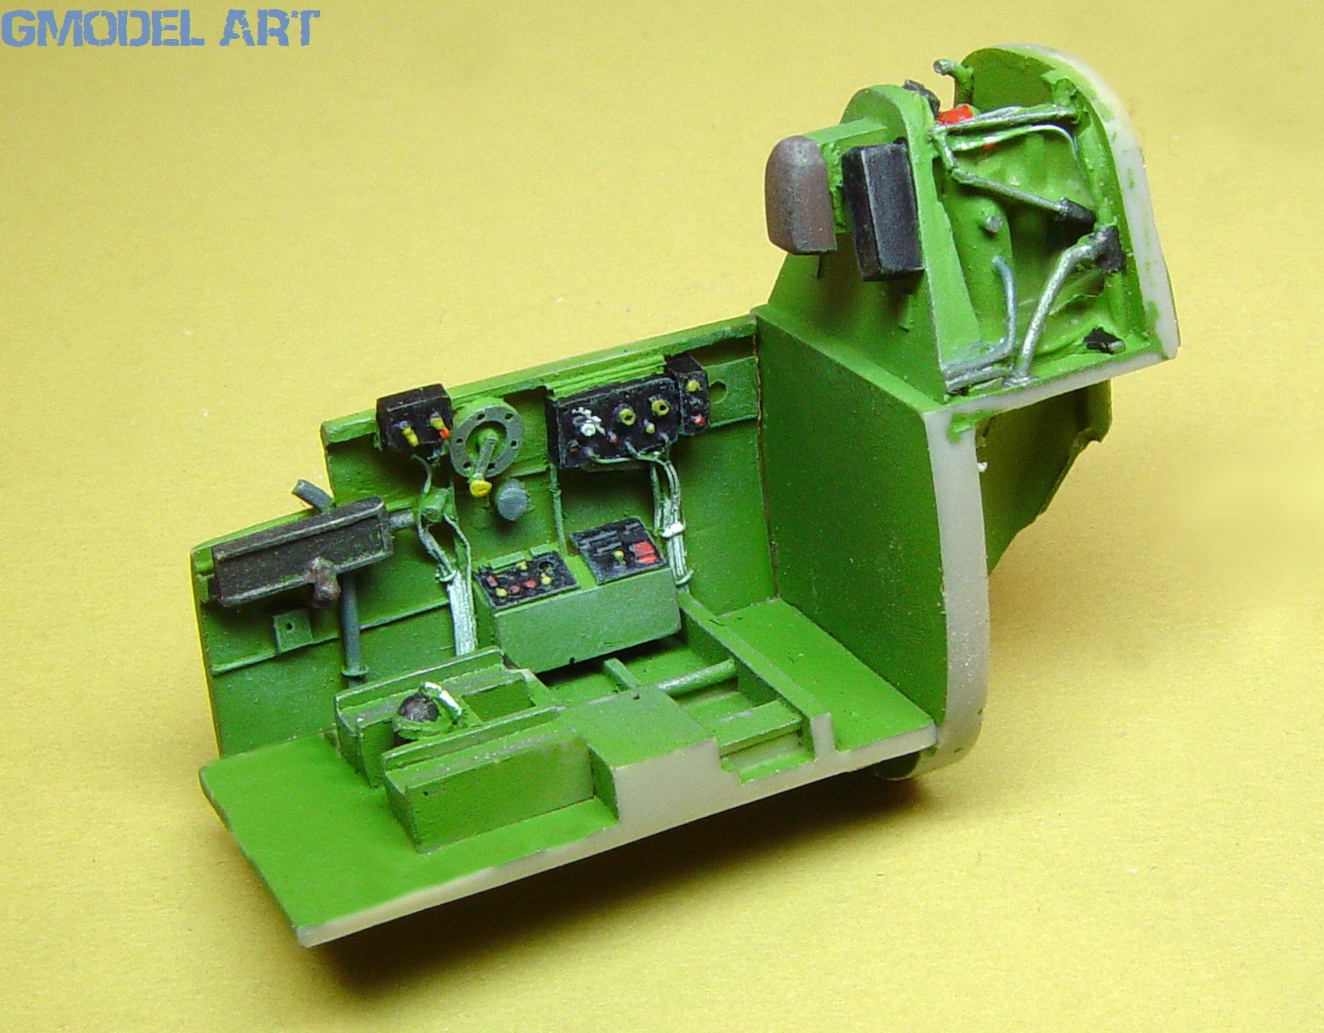
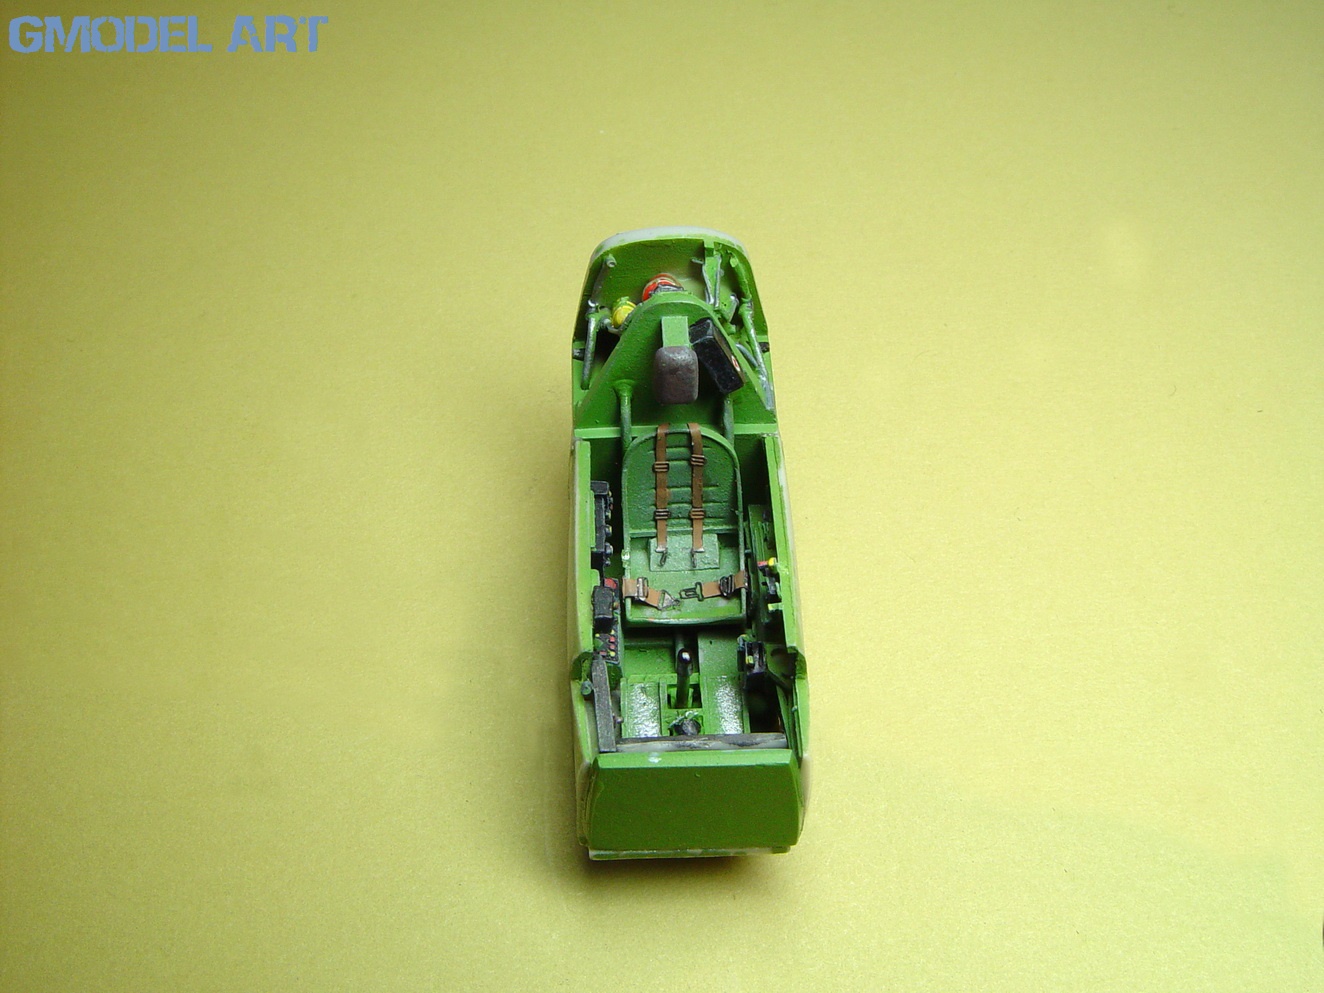
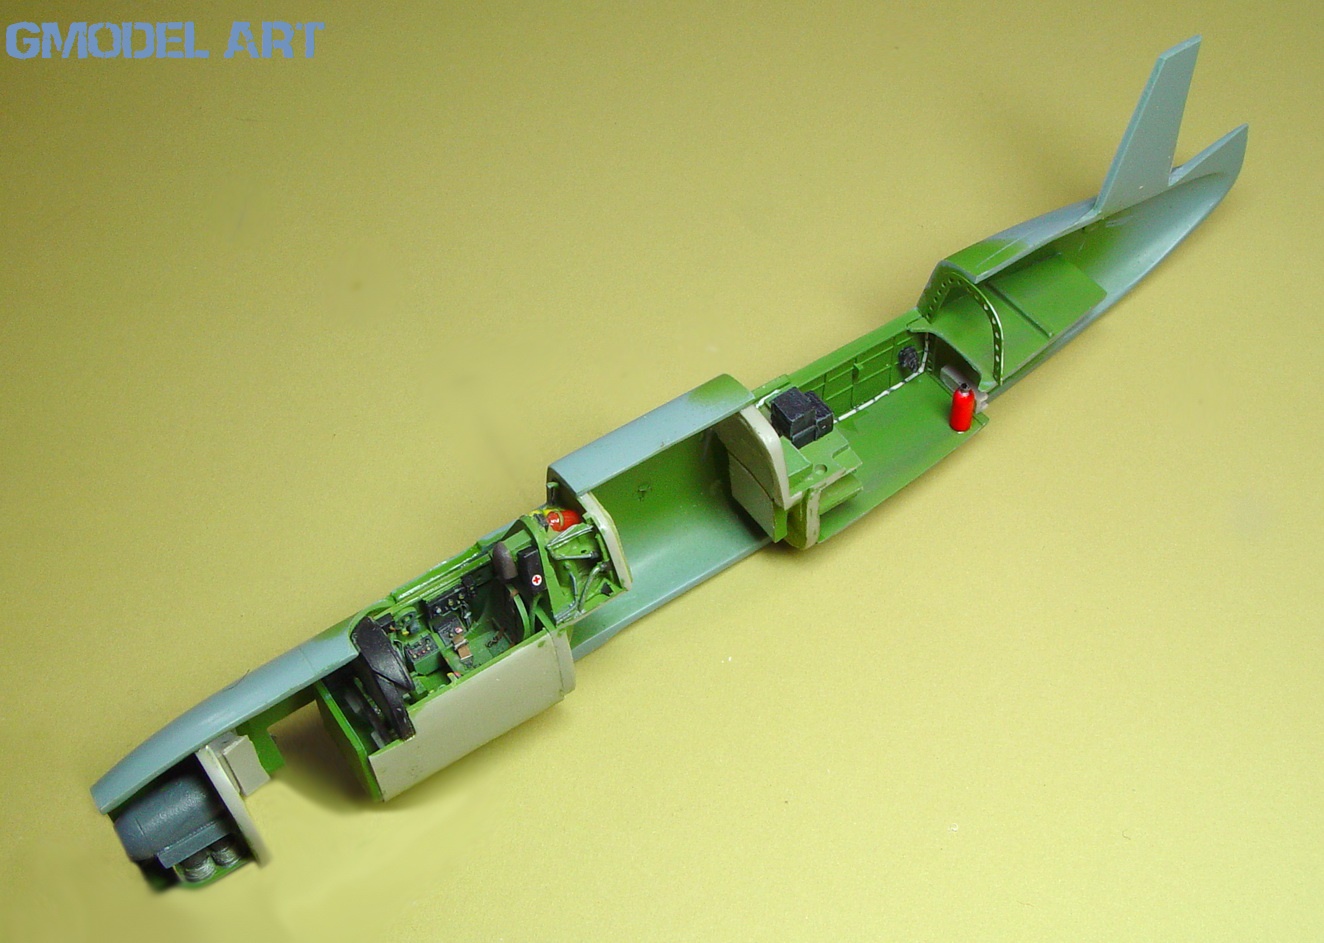
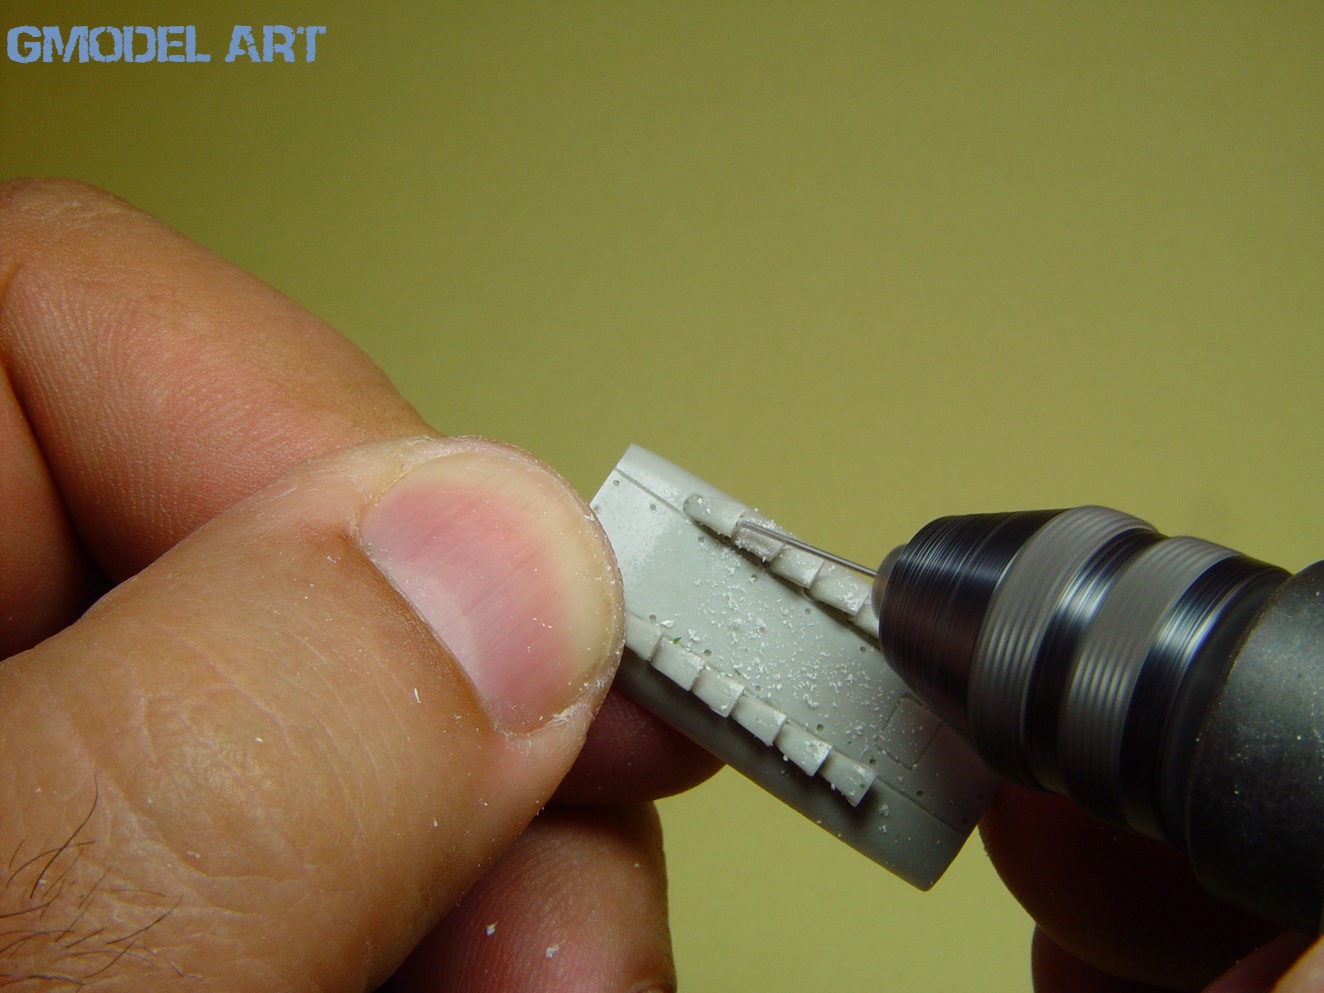
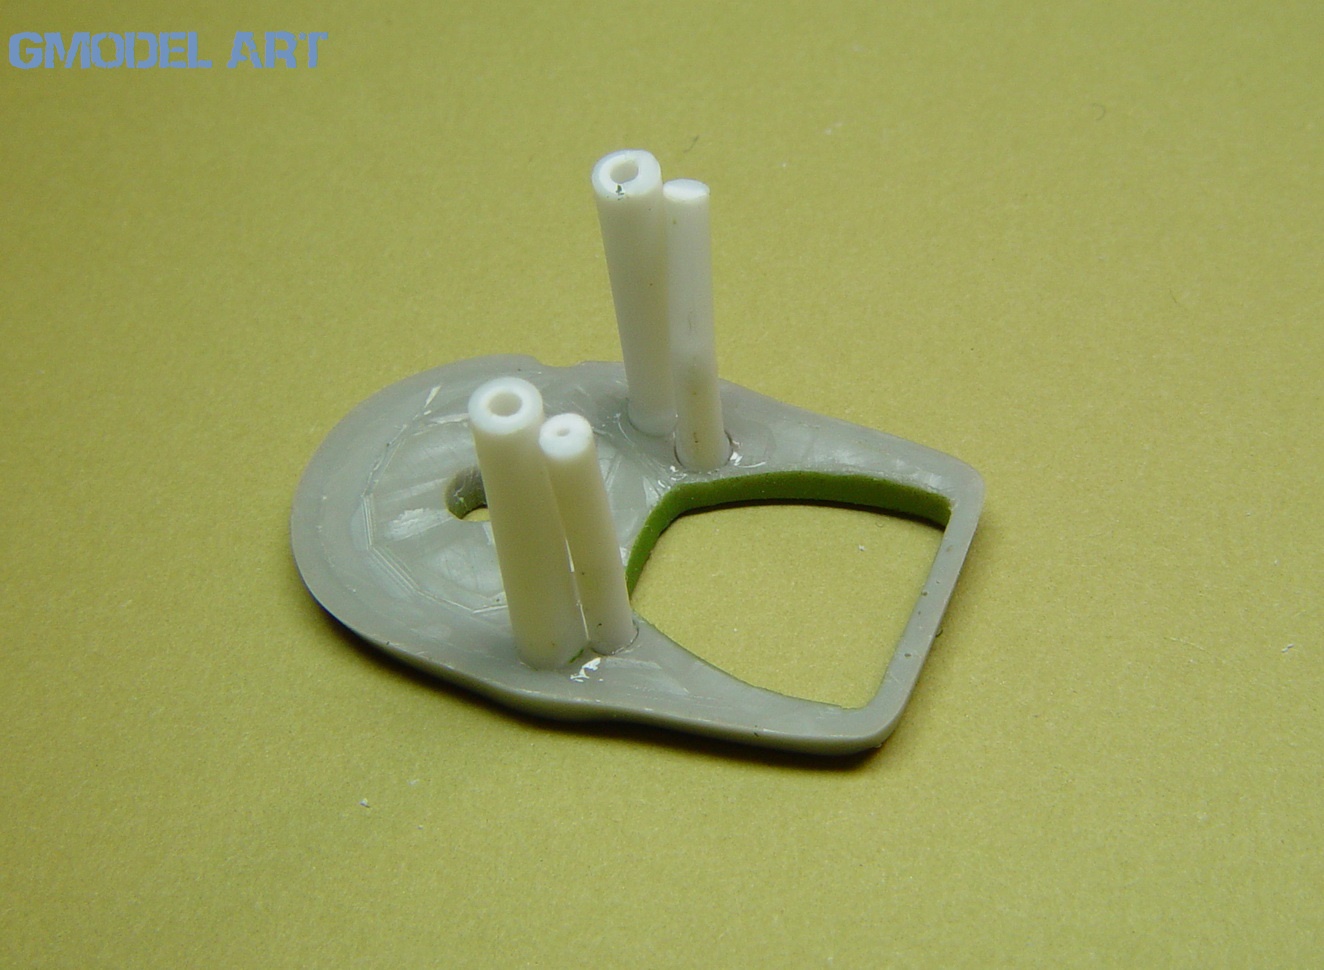
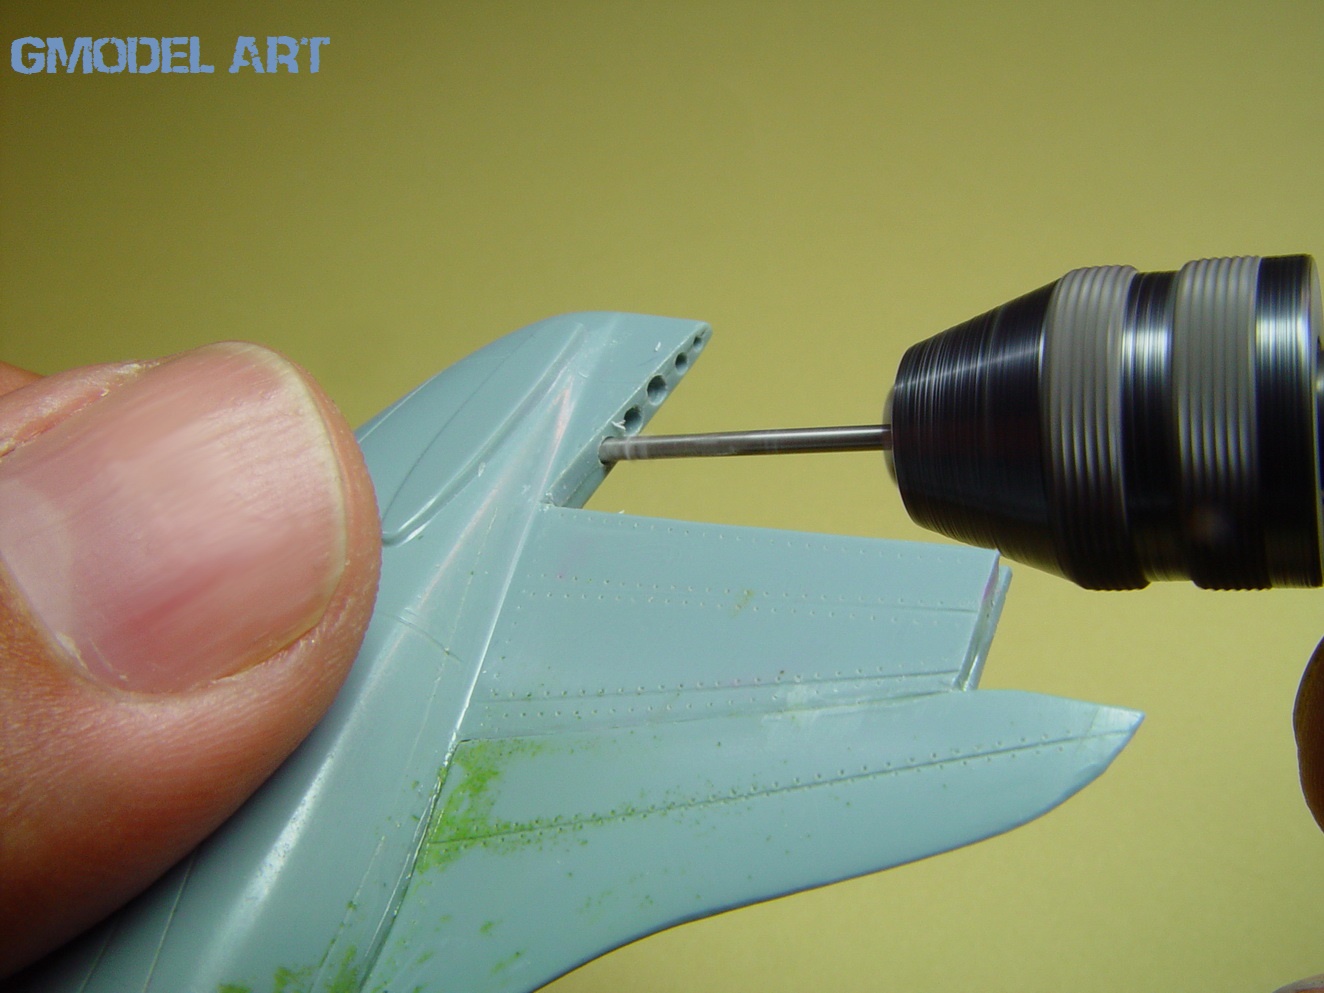
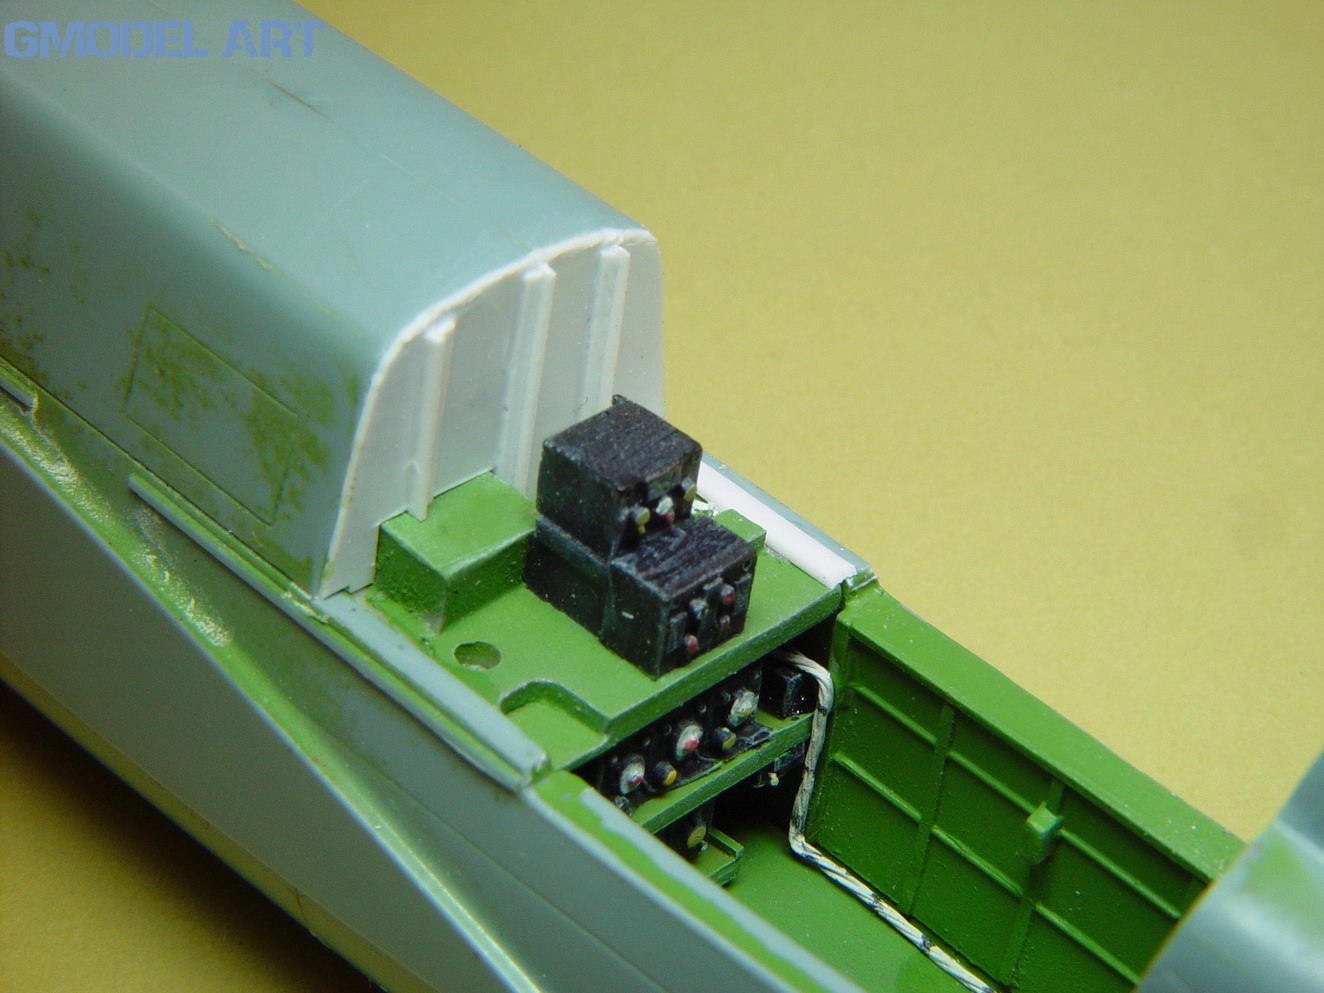
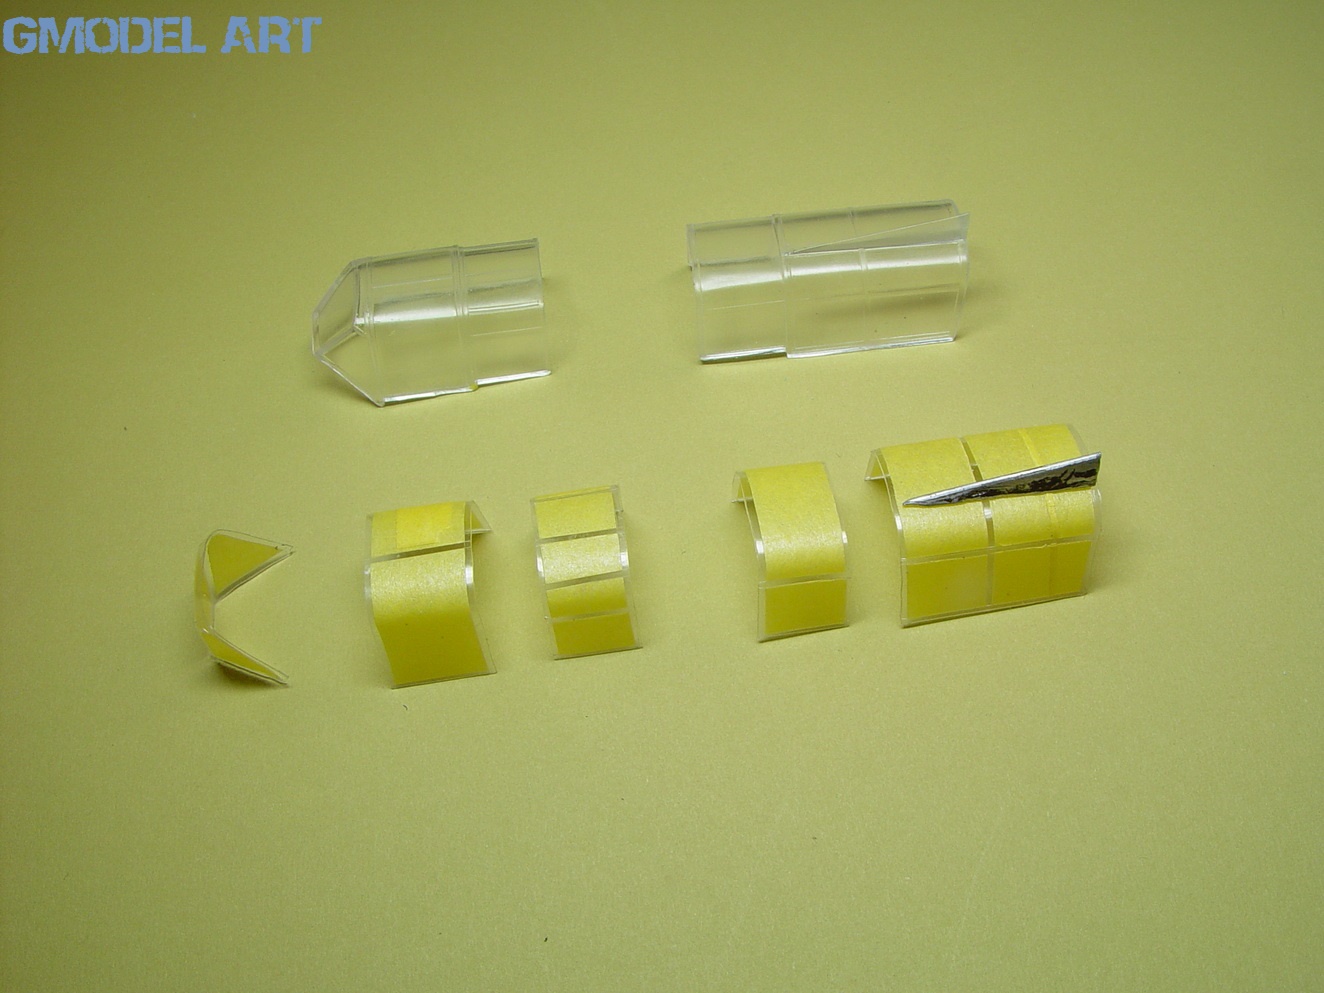
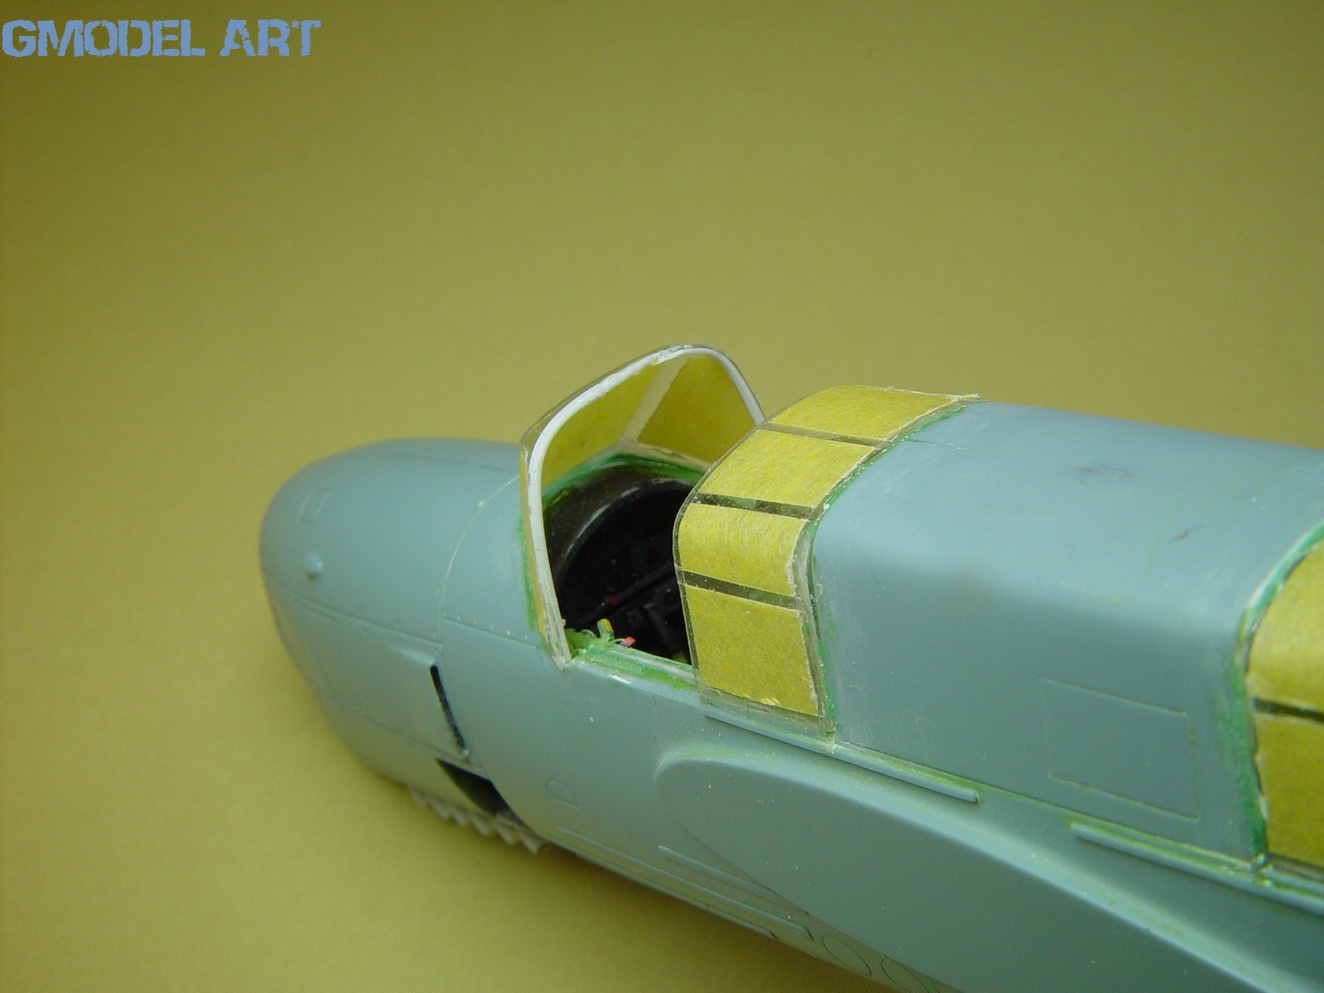
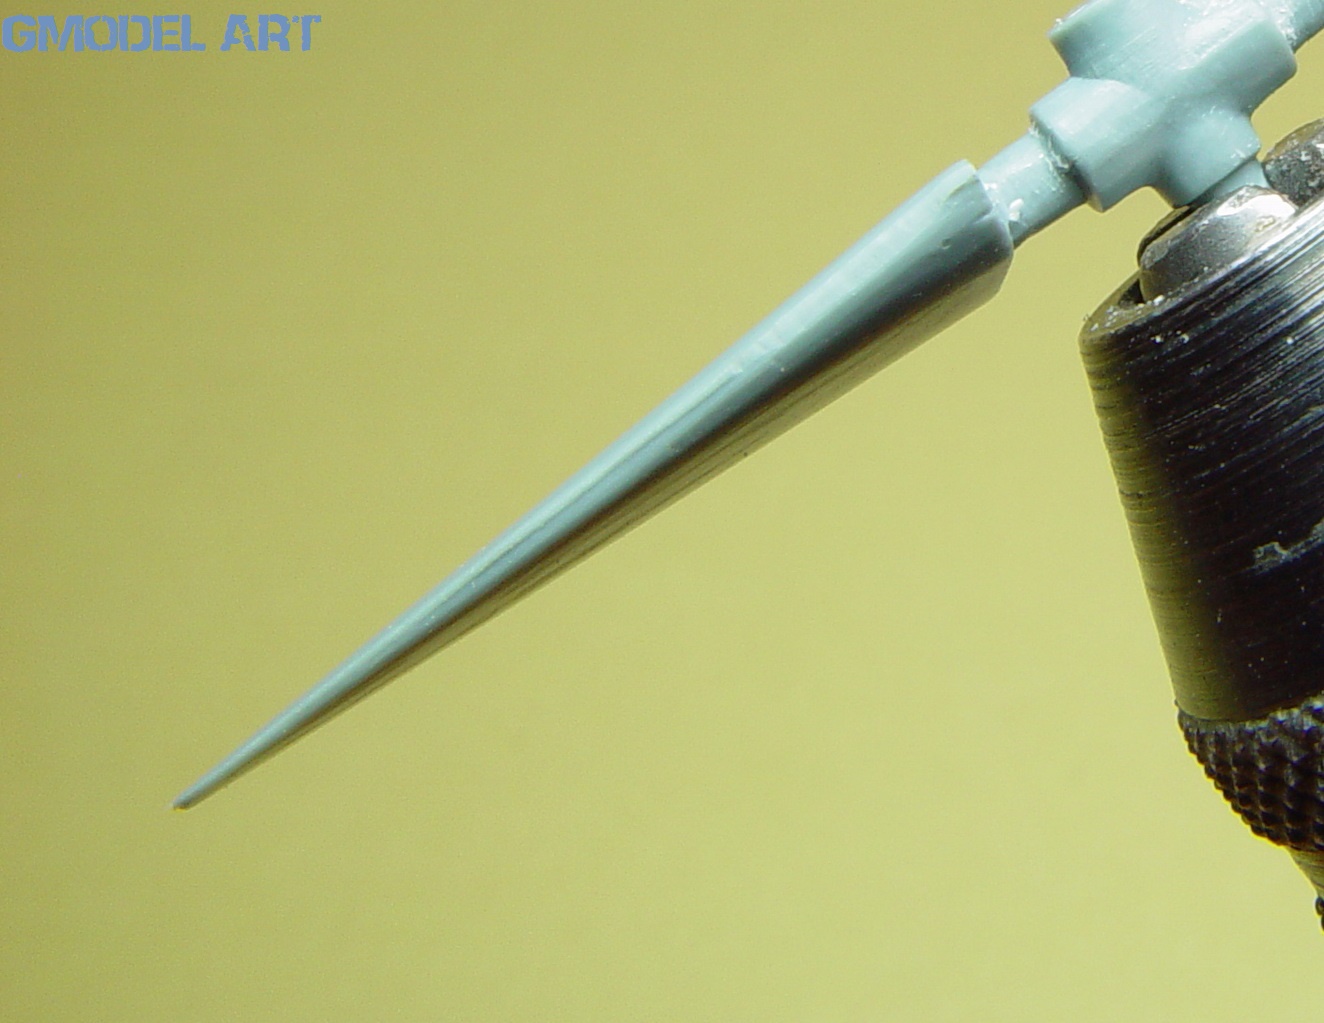
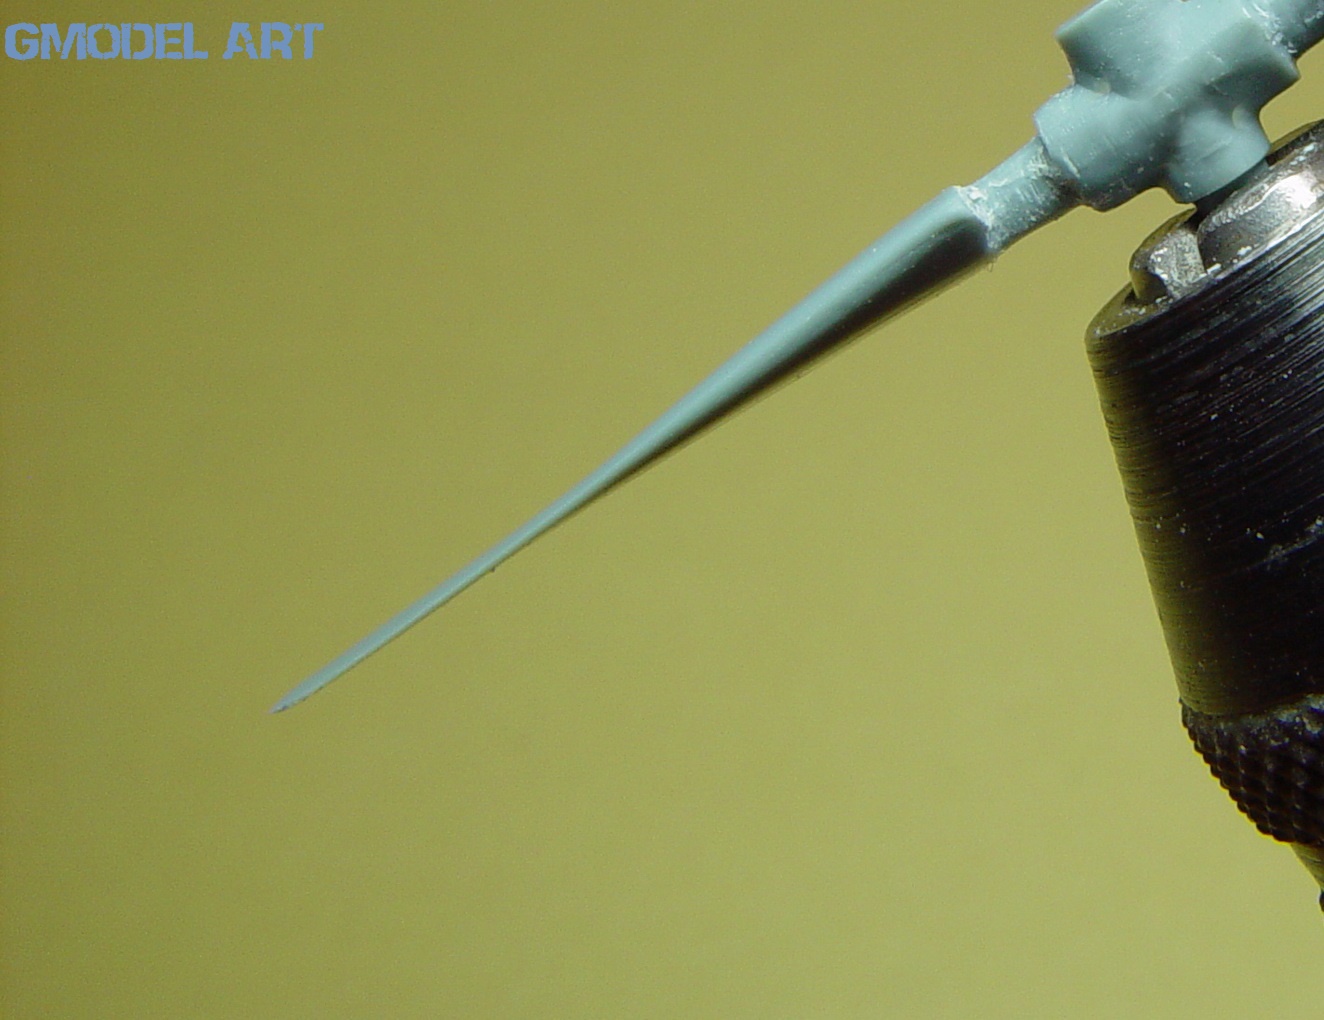
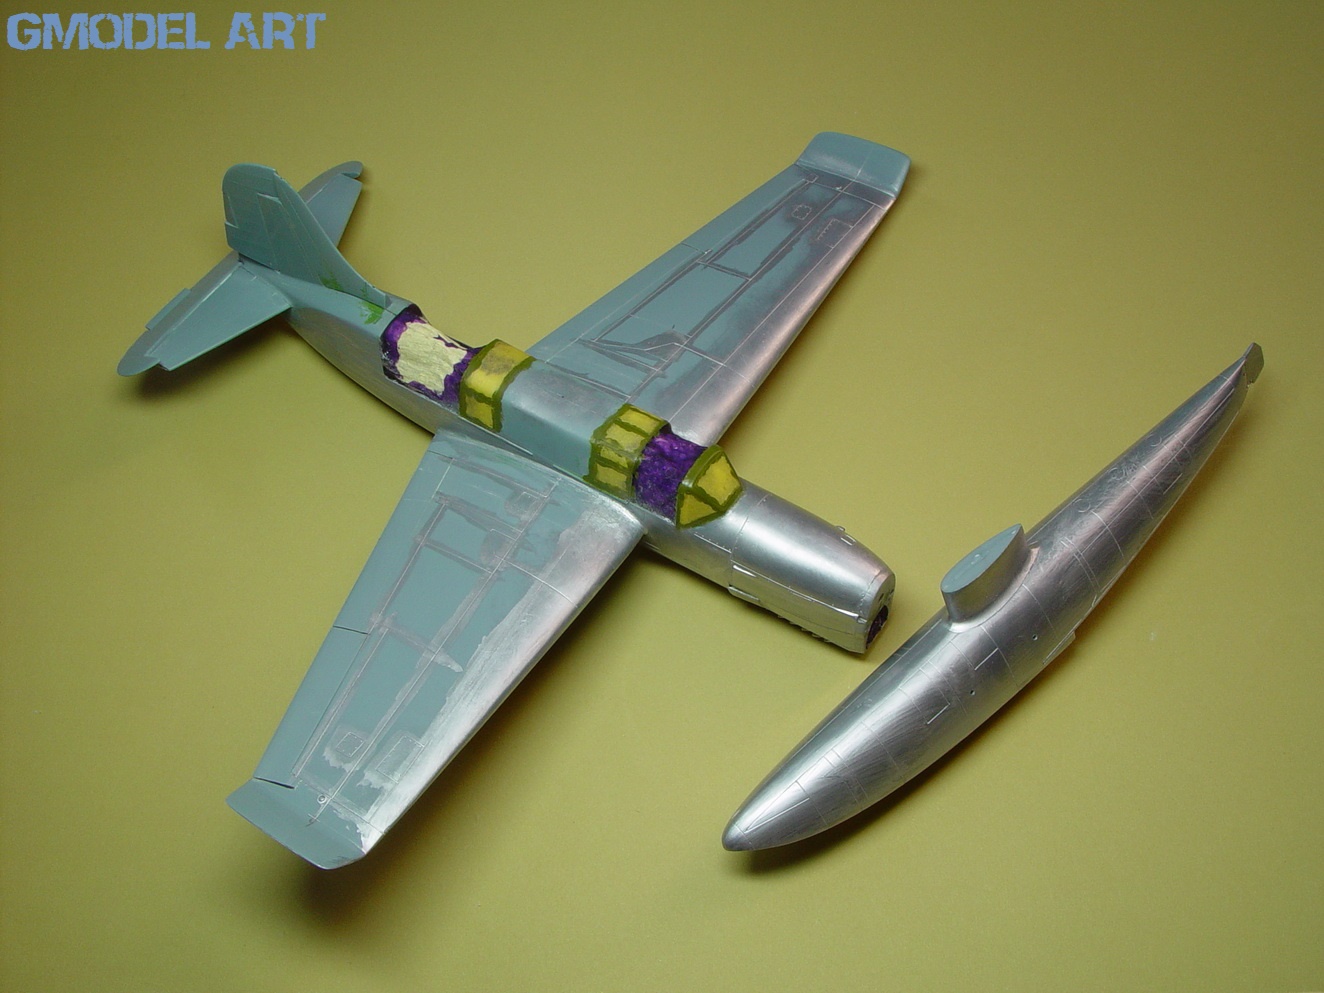
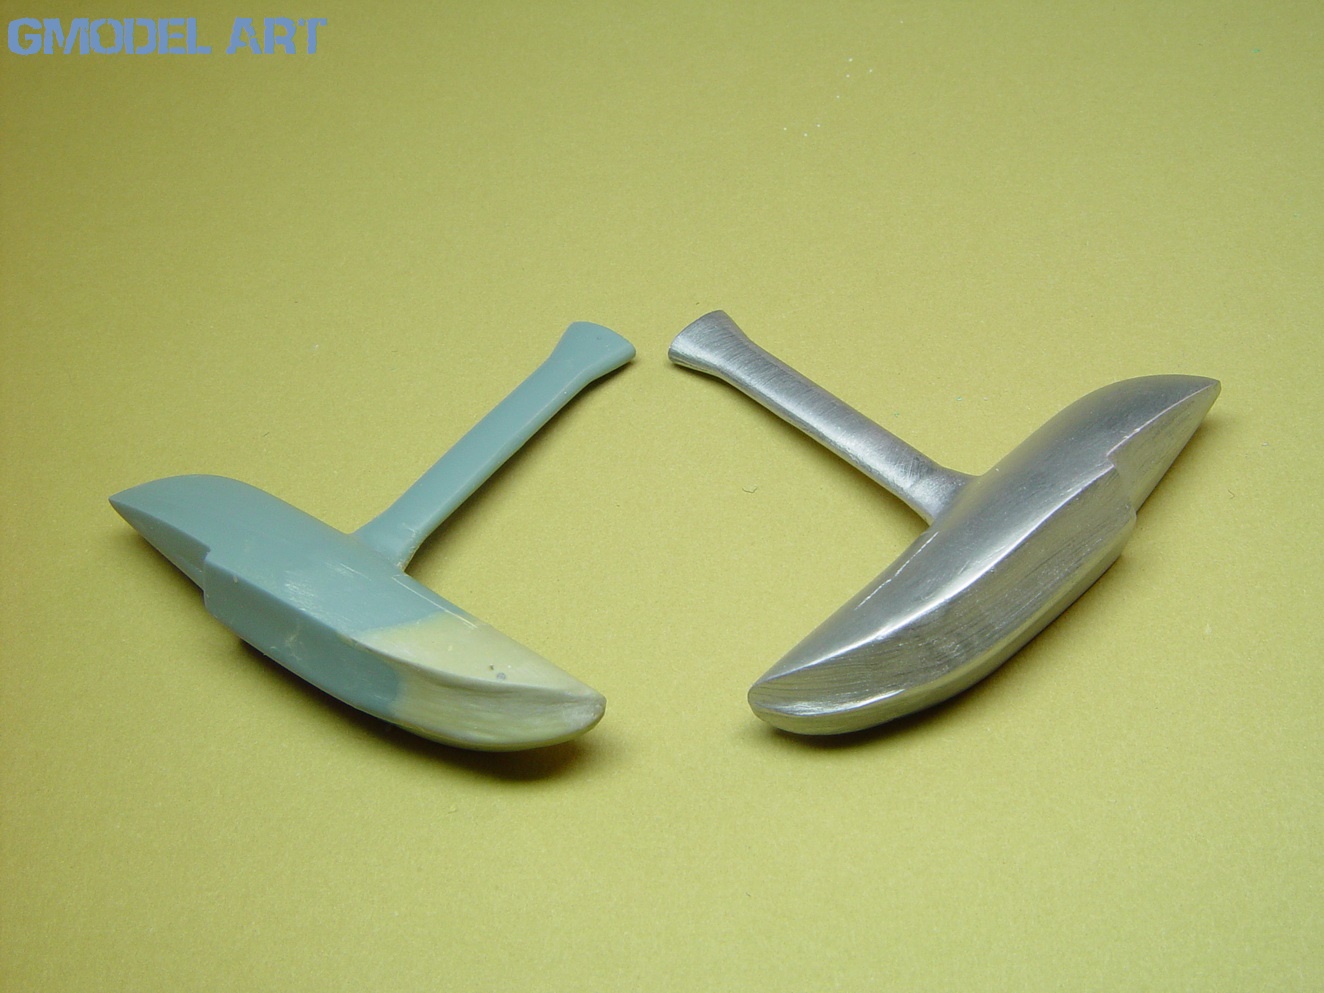
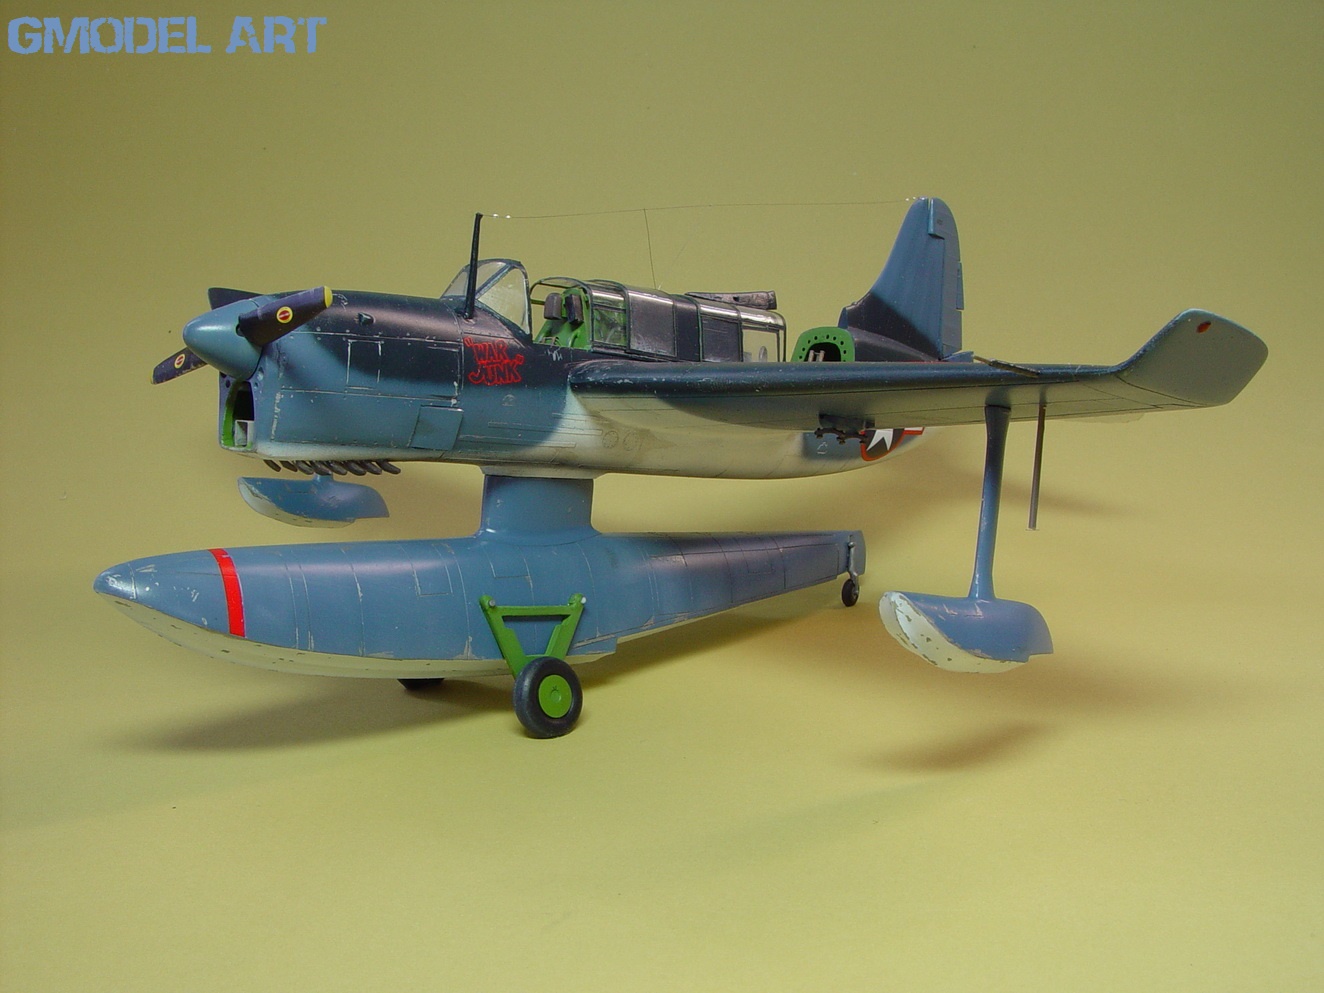
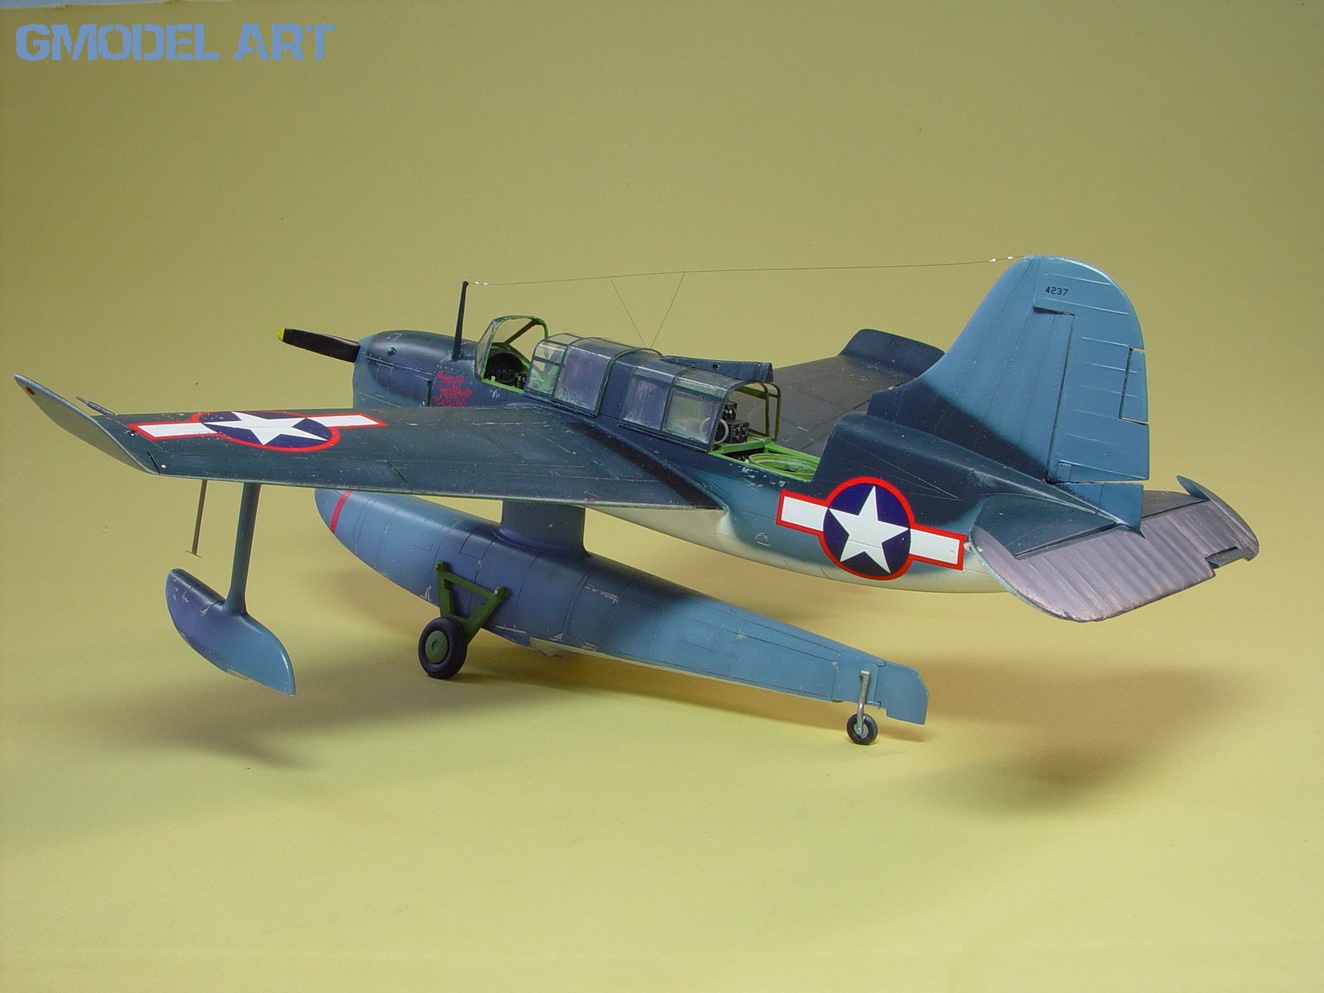
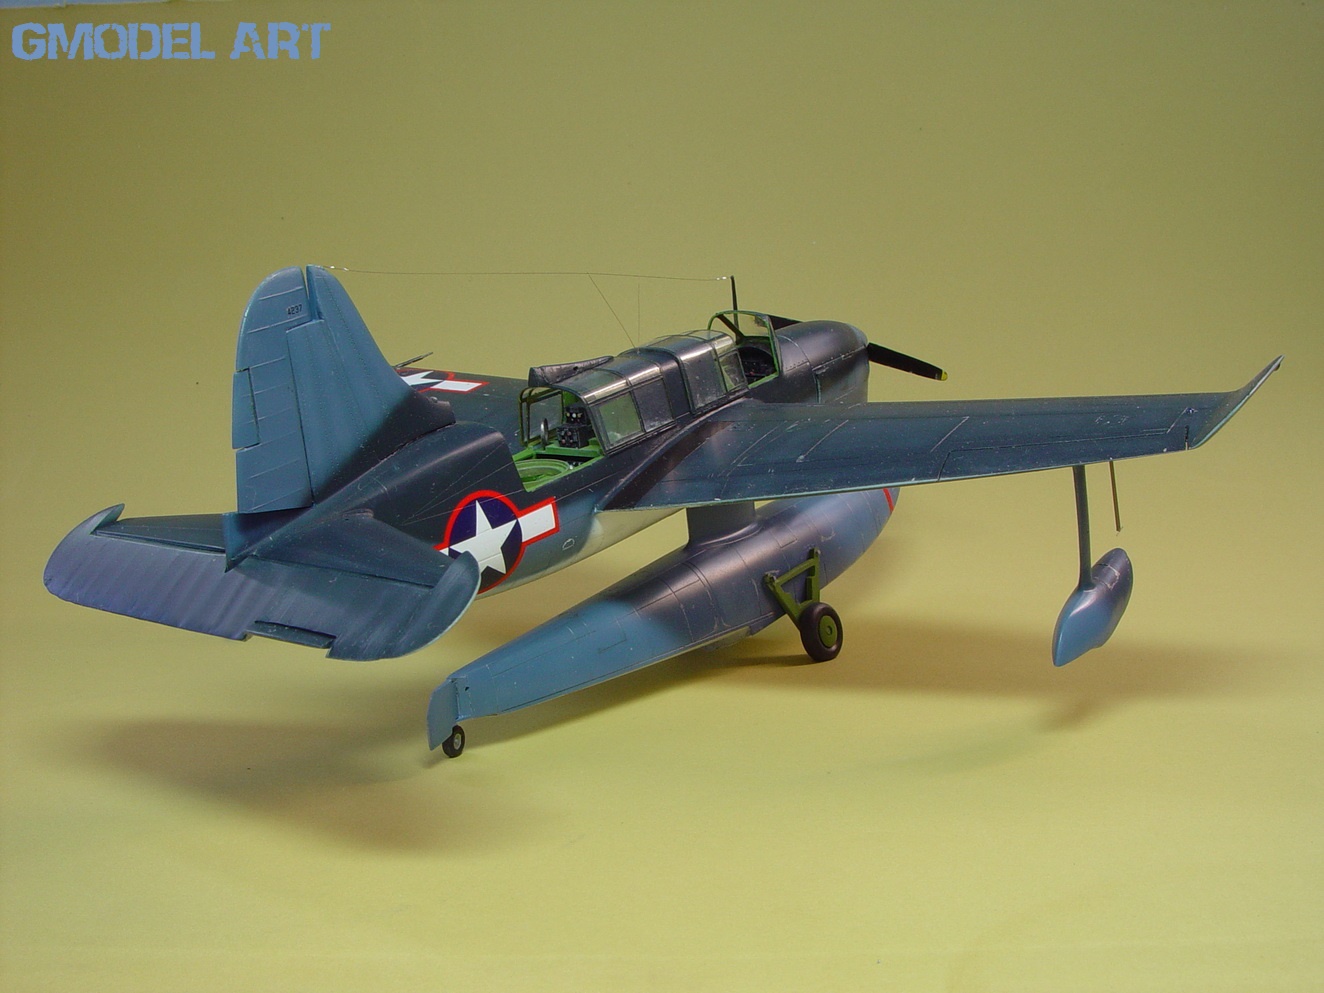
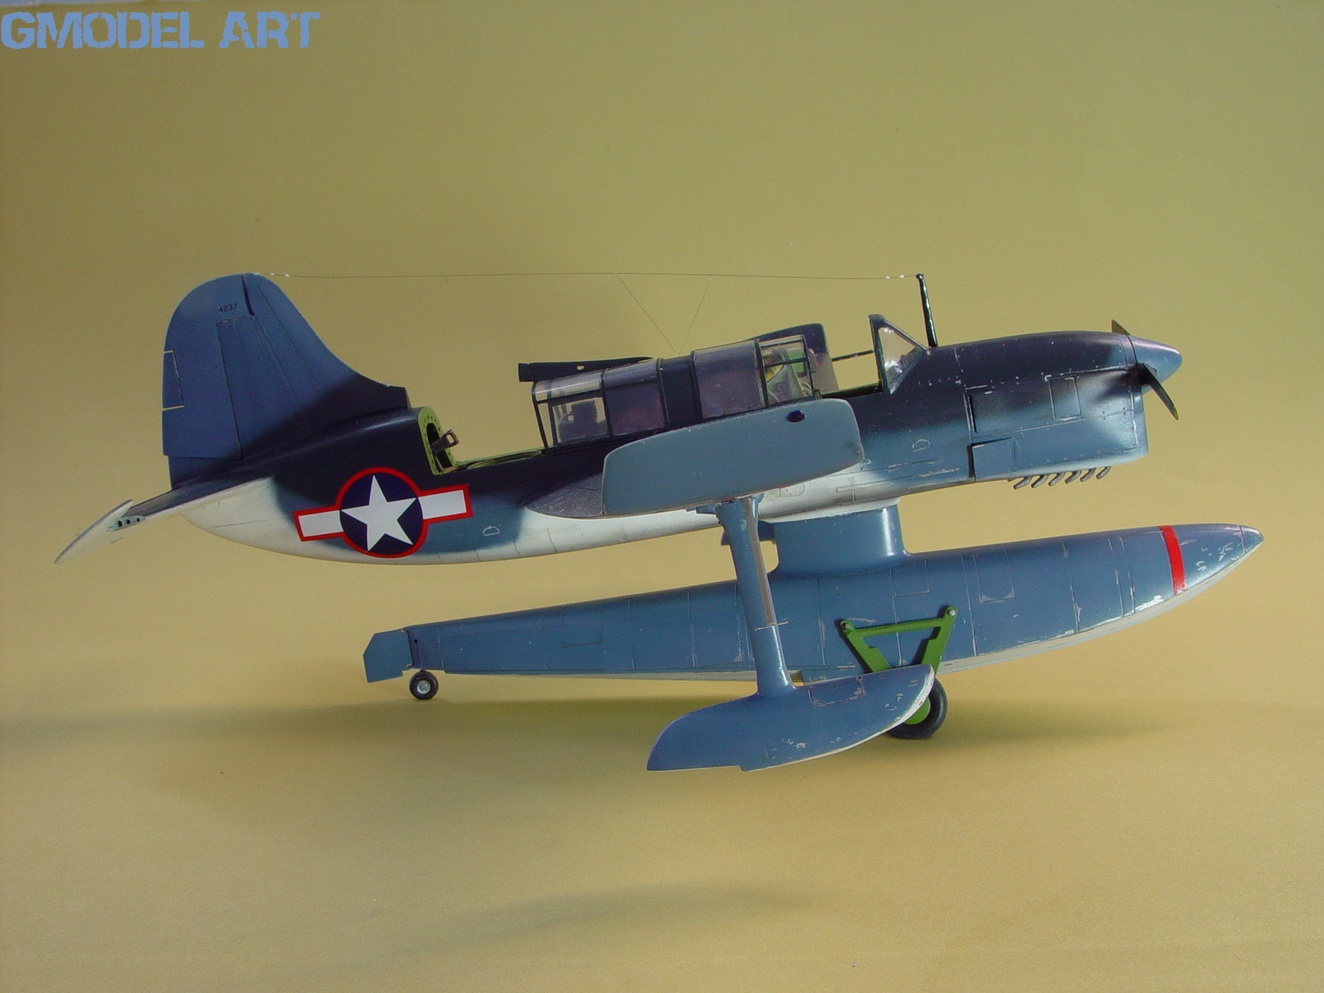
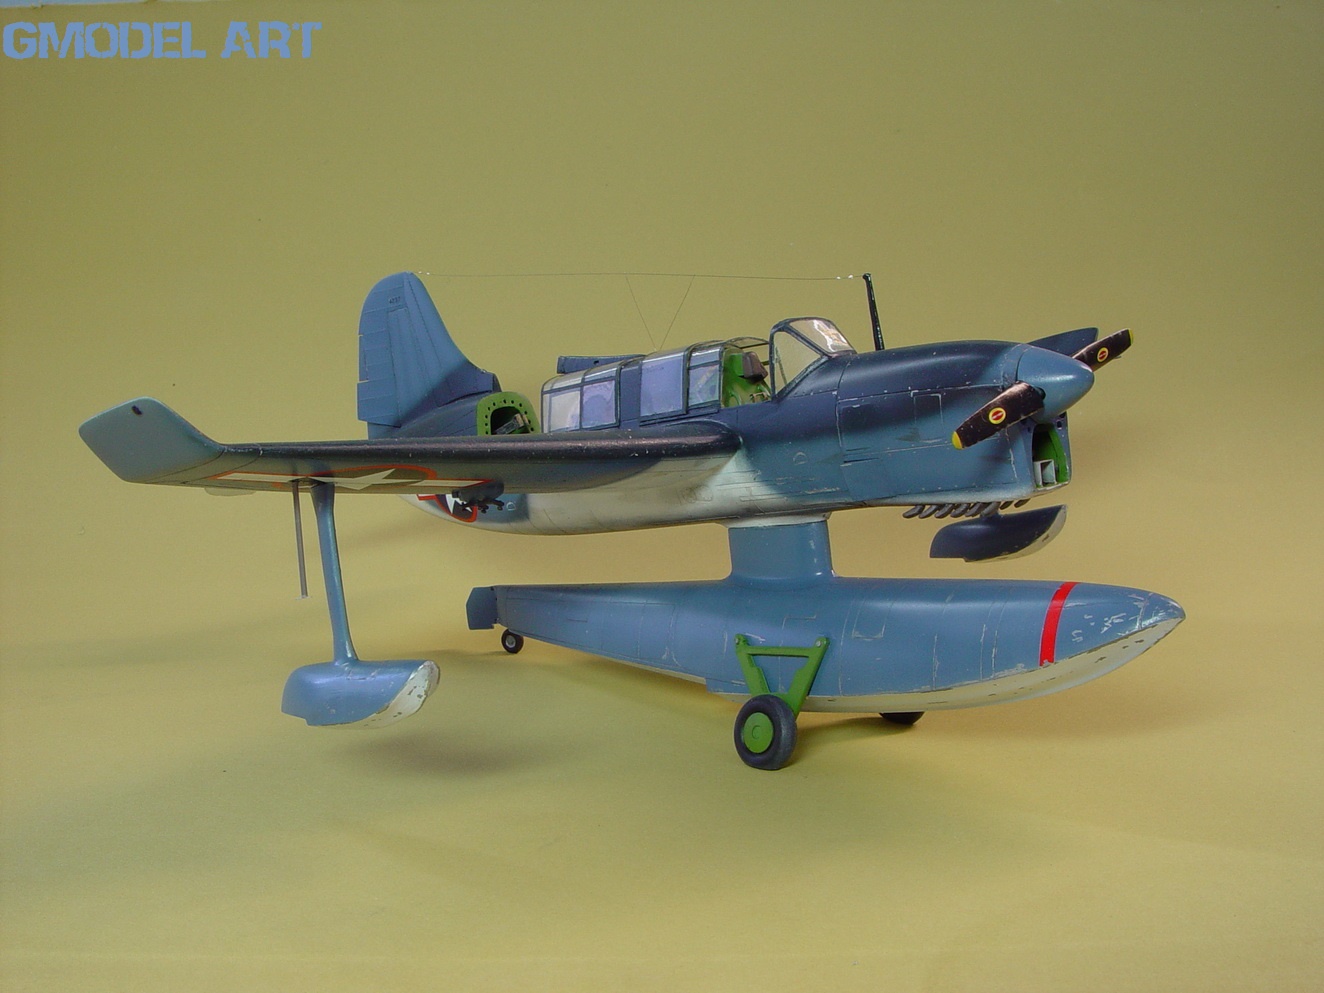
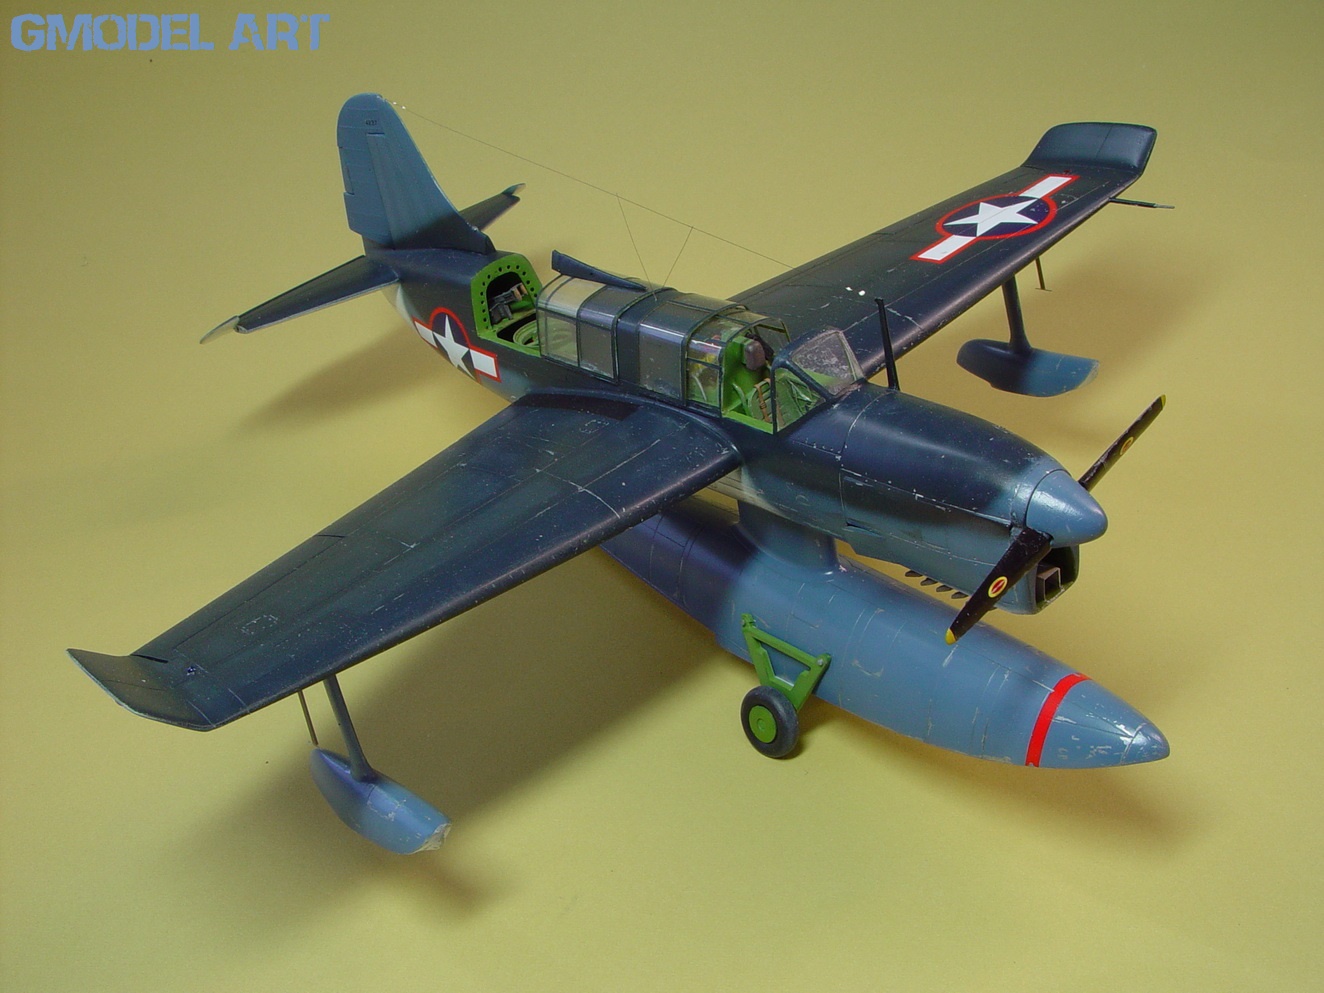
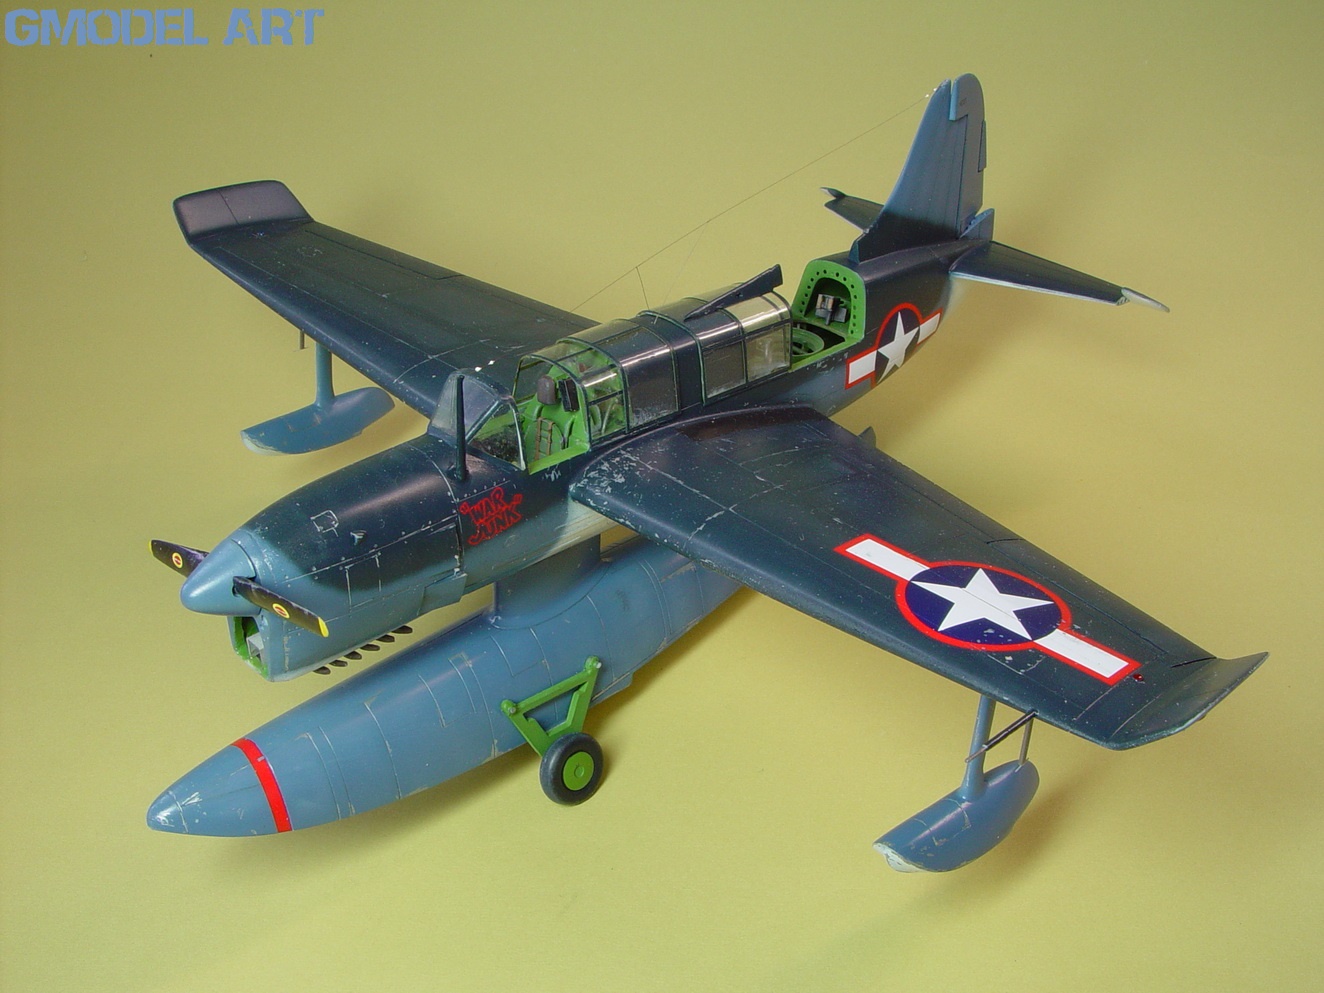
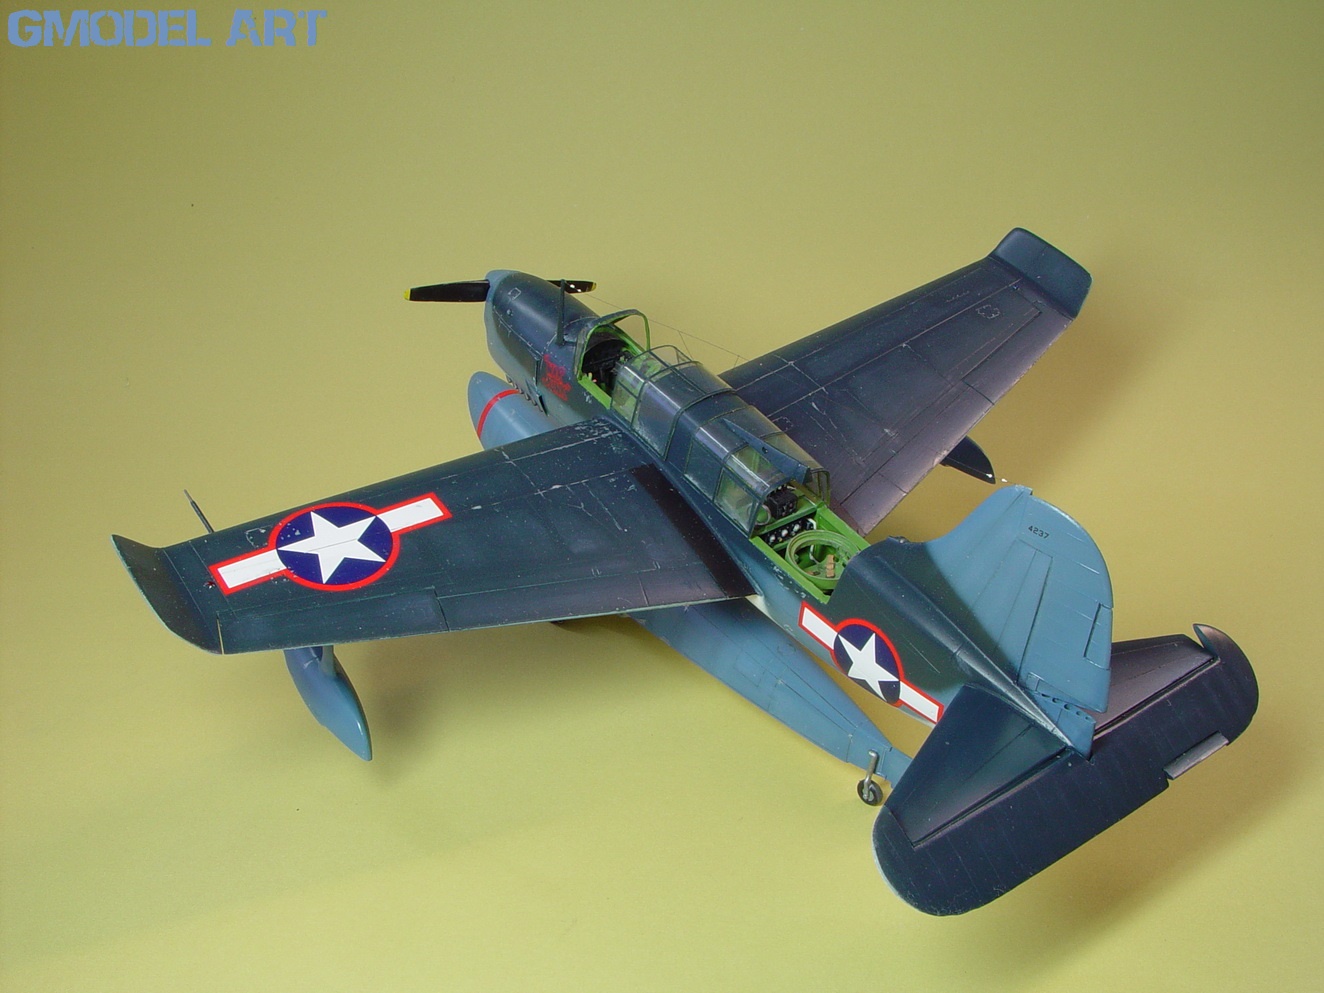
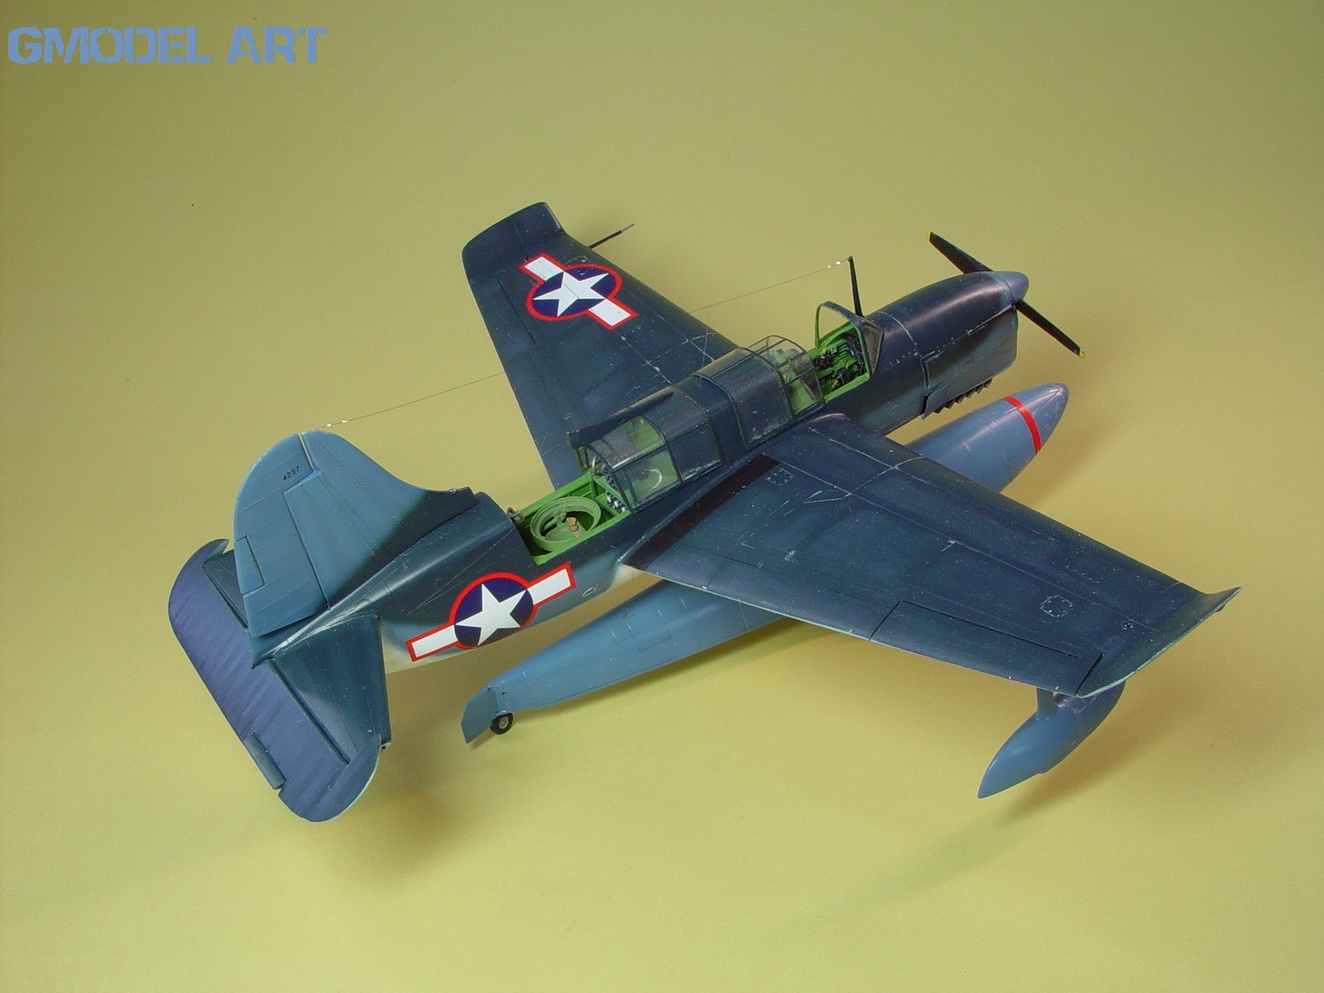
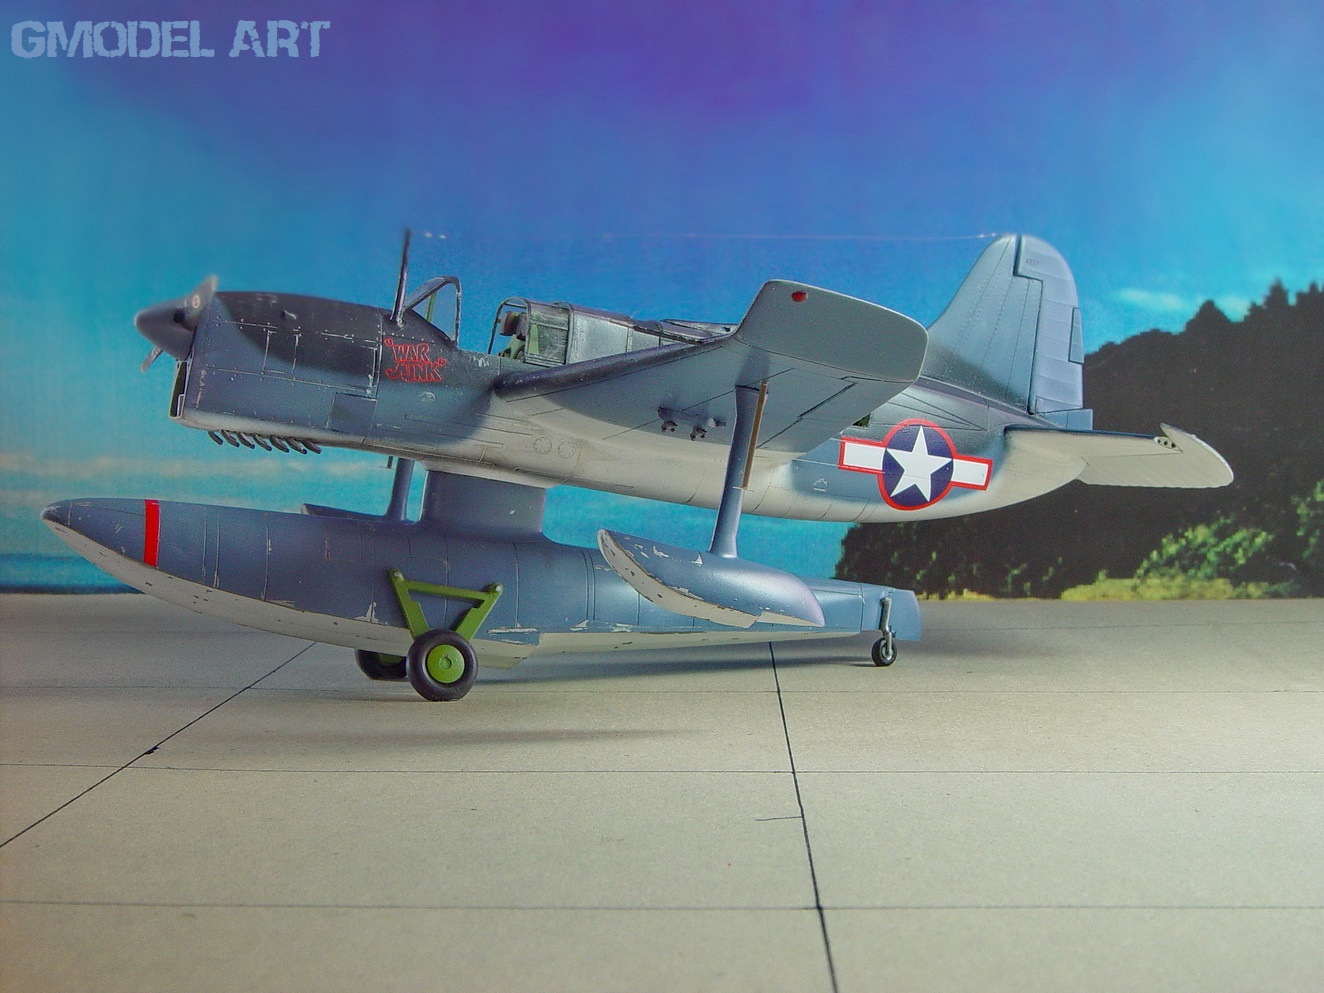
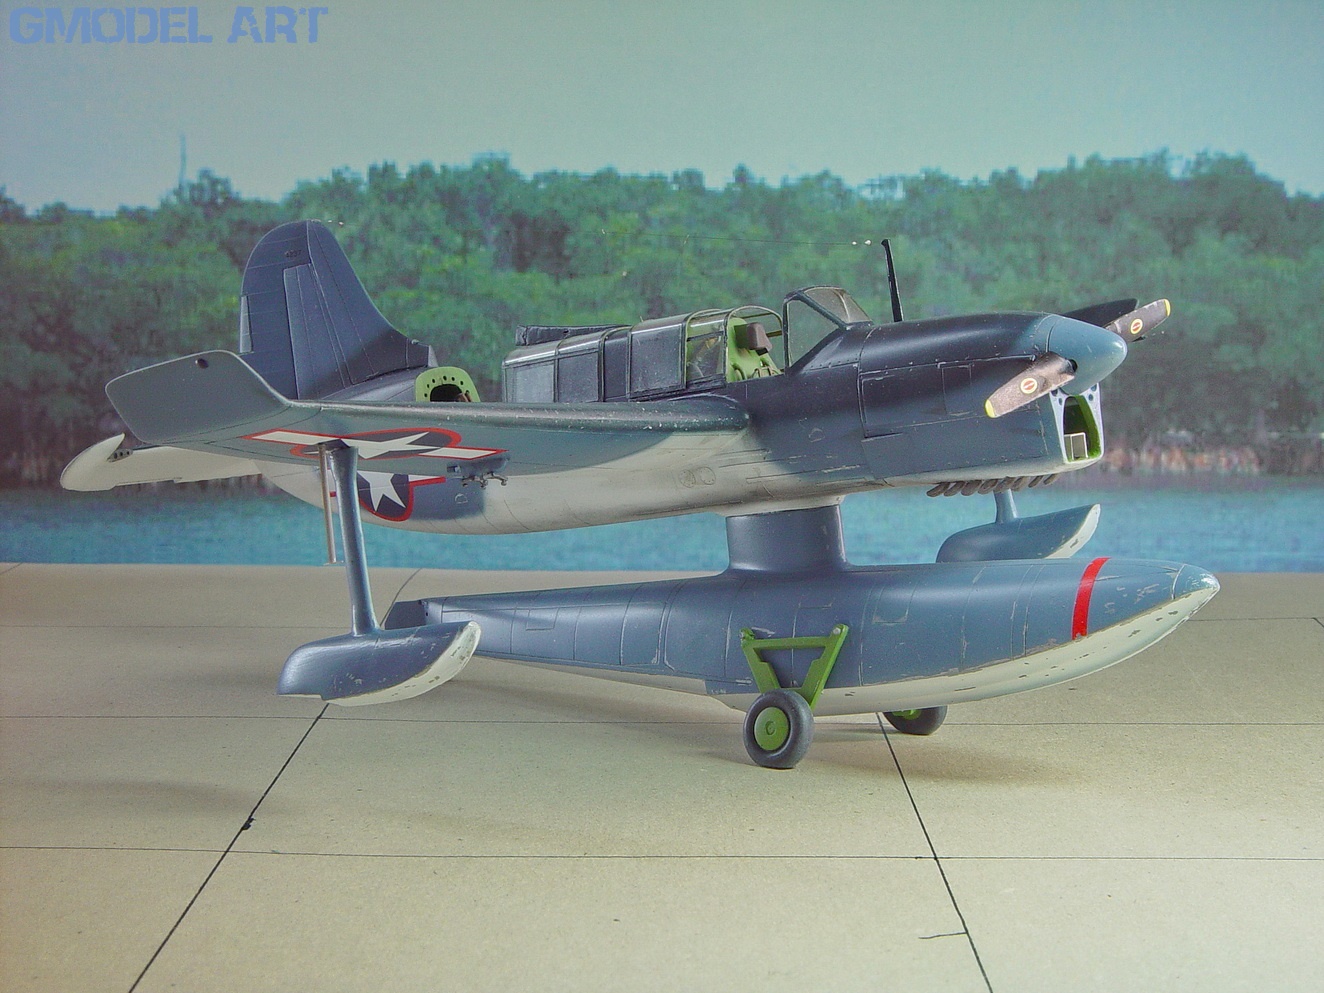
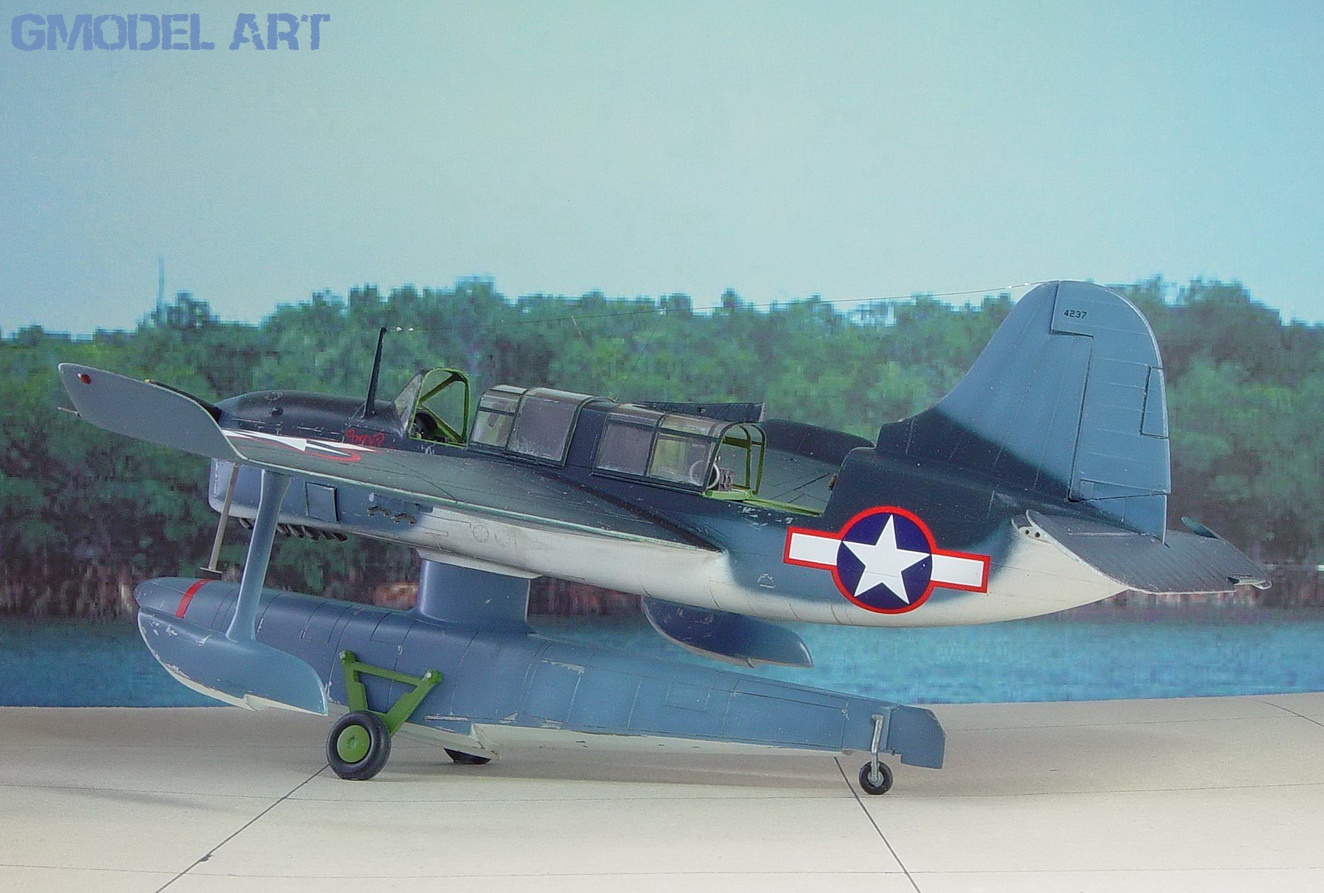
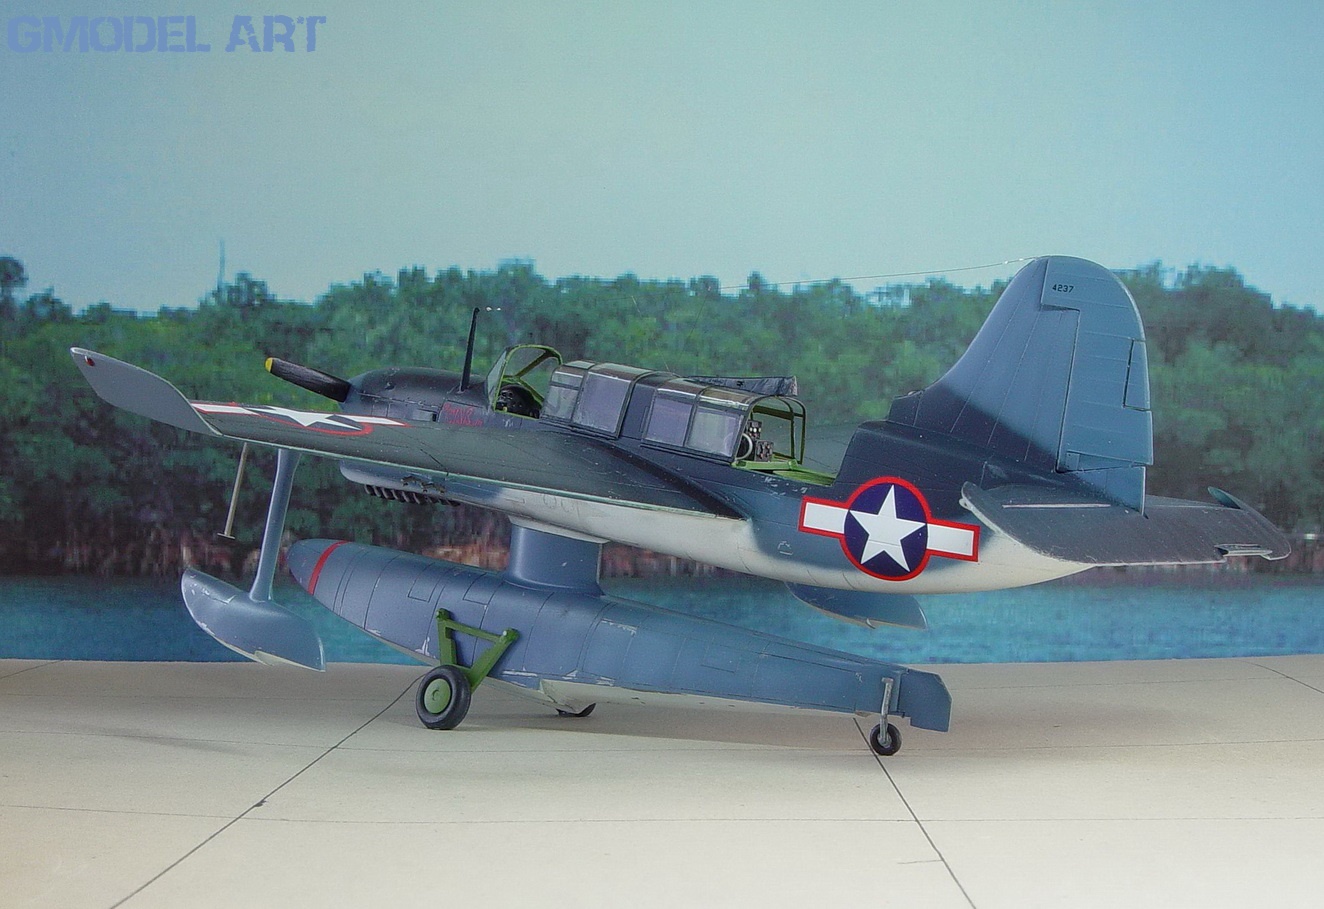
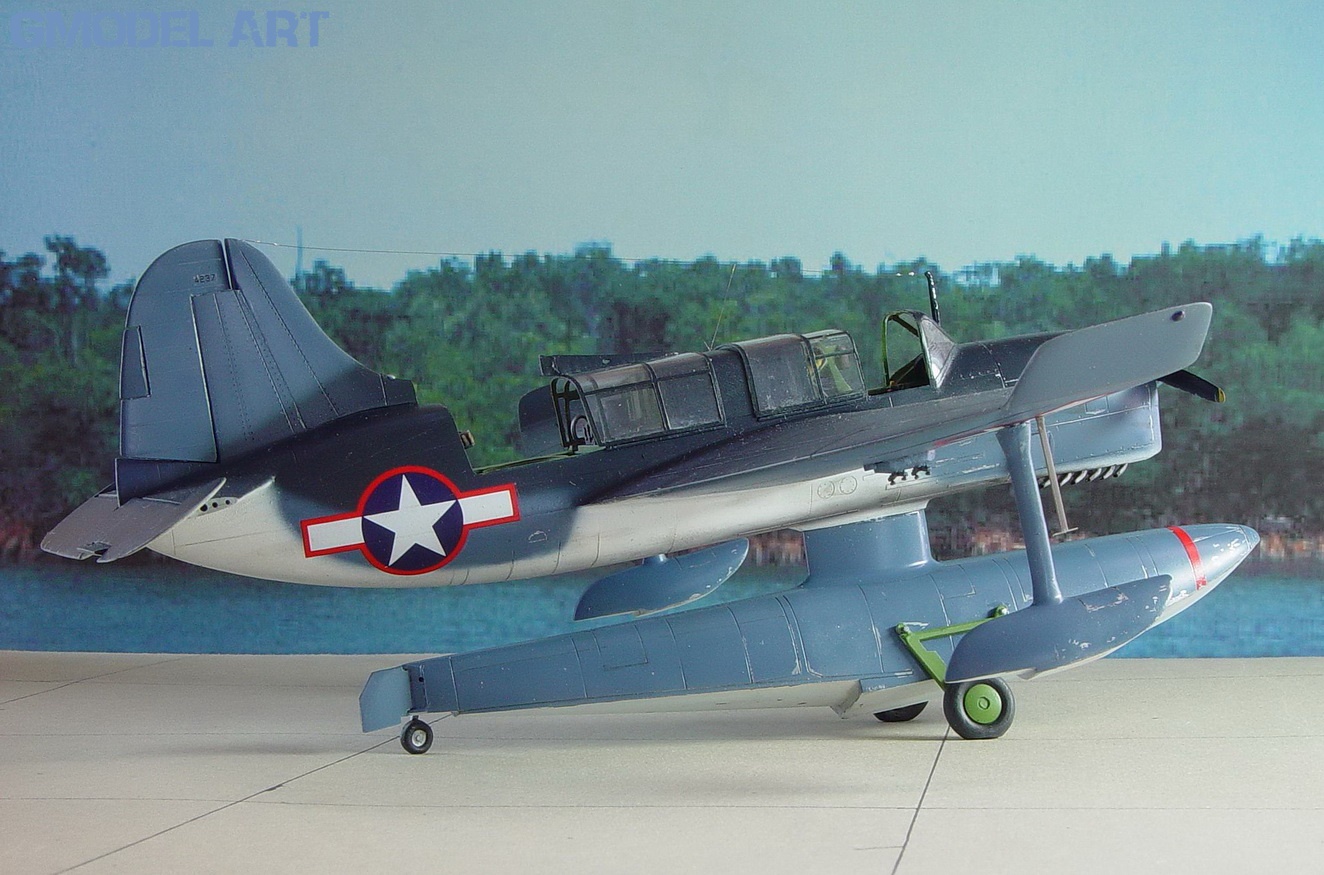
The box that contains the kit has a beautiful artwork of the seaplane, as well as two colored profiles on the back of it, corresponding to the two options we can build. Inside we will find 27 pieces in gray plastic, with a relatively large thickness and fine etched lines, 2 in transparent with excellent transparency and a relatively large thickness and 14 in beige resin, of very good quality with excellent detail. After a careful study of the kit and material found on the internet, it was decided which variant the model would be painted with and which modifications would be made. First the one-piece aileron and rudder were cut to stick in a position other than neutral. This work, despite the great thickness of the plastic, was easy. With a cutter, files and tissue paper, the resin pieces were carefully cleaned of the casting residue. The material is of very good quality, but like all resins they are fragile by nature, so care must be taken when handling them. On each side of the engine covers, an opening cooling hatch was removed and replaced by another made from lithographic tin. All interior surfaces of the operator’s and observer’s cabins were sprayed with interior green, and the former’s instrument panel and the latter’s radio equipment were painted black. The seats got Eduard seat belts. On the side walls of the cockpit, the details were painted with the corresponding colors and went over with a dry brush and a lighter color. In the observer’s area, some additions were made such as a portable fire extinguisher, wiring, ribs, etc. In the corresponding piece of resin the exhausts were drilled with a fine drill. As mentioned above, the covers are supplied in one piece with the fixed parts. Because the plastic is relatively thick it does not allow cutting and gluing them in an open position. So it was decided to make them out of gelatin using as a mold the pieces of the kit, but also the spine of the fuselage. The resulting pieces were cleaned of excess and masked with tape. The constants were glued to the fuselage with minimal instant glue and plastered with putty. The propeller blades went through an extensive slimming program with the cutter and tissue paper, losing quite a bit of their thickness. Three small mistakes concerning the shape of the model should be mentioned here. The fins on the main wings are taller than the pictures of the actual show. Thus, a section of their upper part of approximately 2.5 mm was removed and with fine files and emery papers the thickness and shape of the fins was restored. At the point where the movable part of the rear cowl joins the aerodynamic extension of the vertical stabilizer, a section of the extension was removed from the fuselage and added to the movable part of the cowl. Finally the balancing floats in their front part have the wrong shape, which was restored with epoxy putty. The openings in the fuselage were closed with paper towel and maskall. The main wings need a little attention when gluing, because if they are glued as they are they give a larger positive dihedral angle than they should. To get them glued at the right angle, wedge-like lengths of plastic were placed on the top side of the spoiler, enhancing the strength of the glue at the same time. The model was plastered, sanded with wet sandpaper of various grades and painted in selected places where the damage will be done at a later stage, with aluminum. It was carefully cleaned of the remains of the previous processing and prepared for the paint shop.
PAINTING
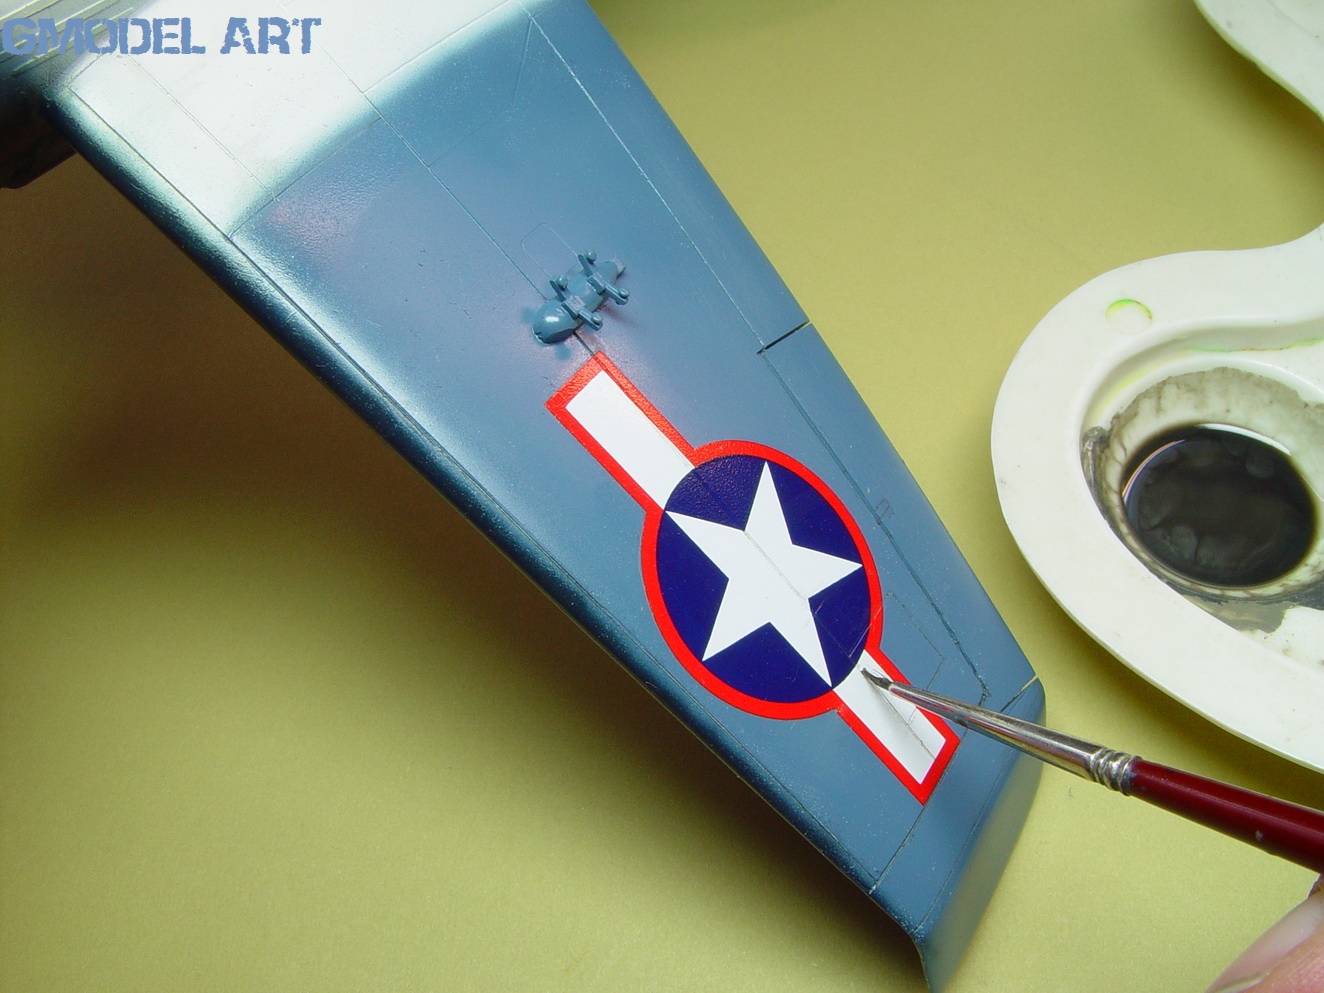
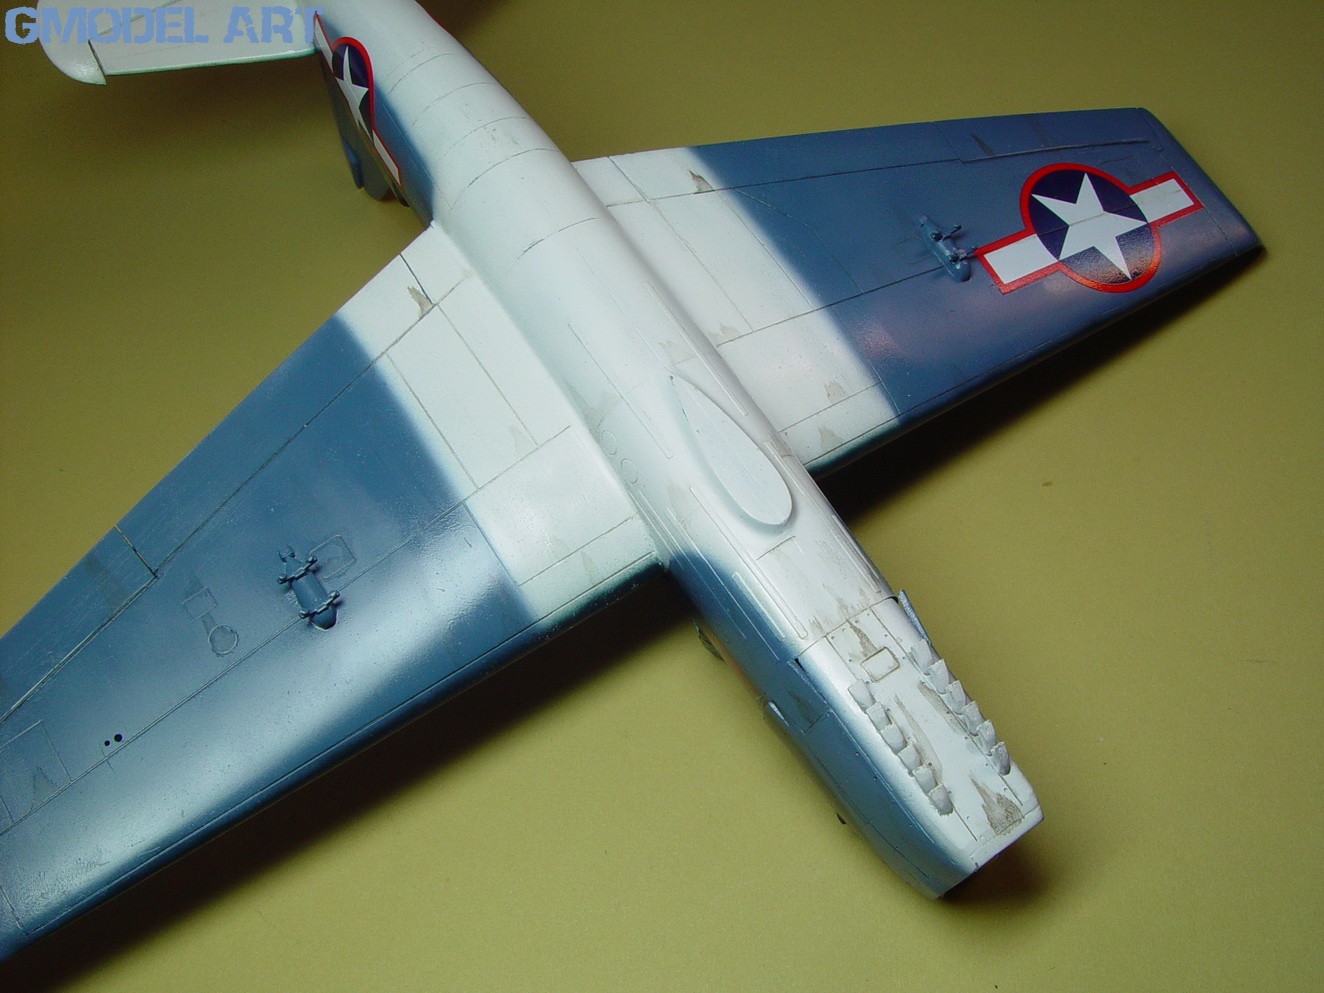
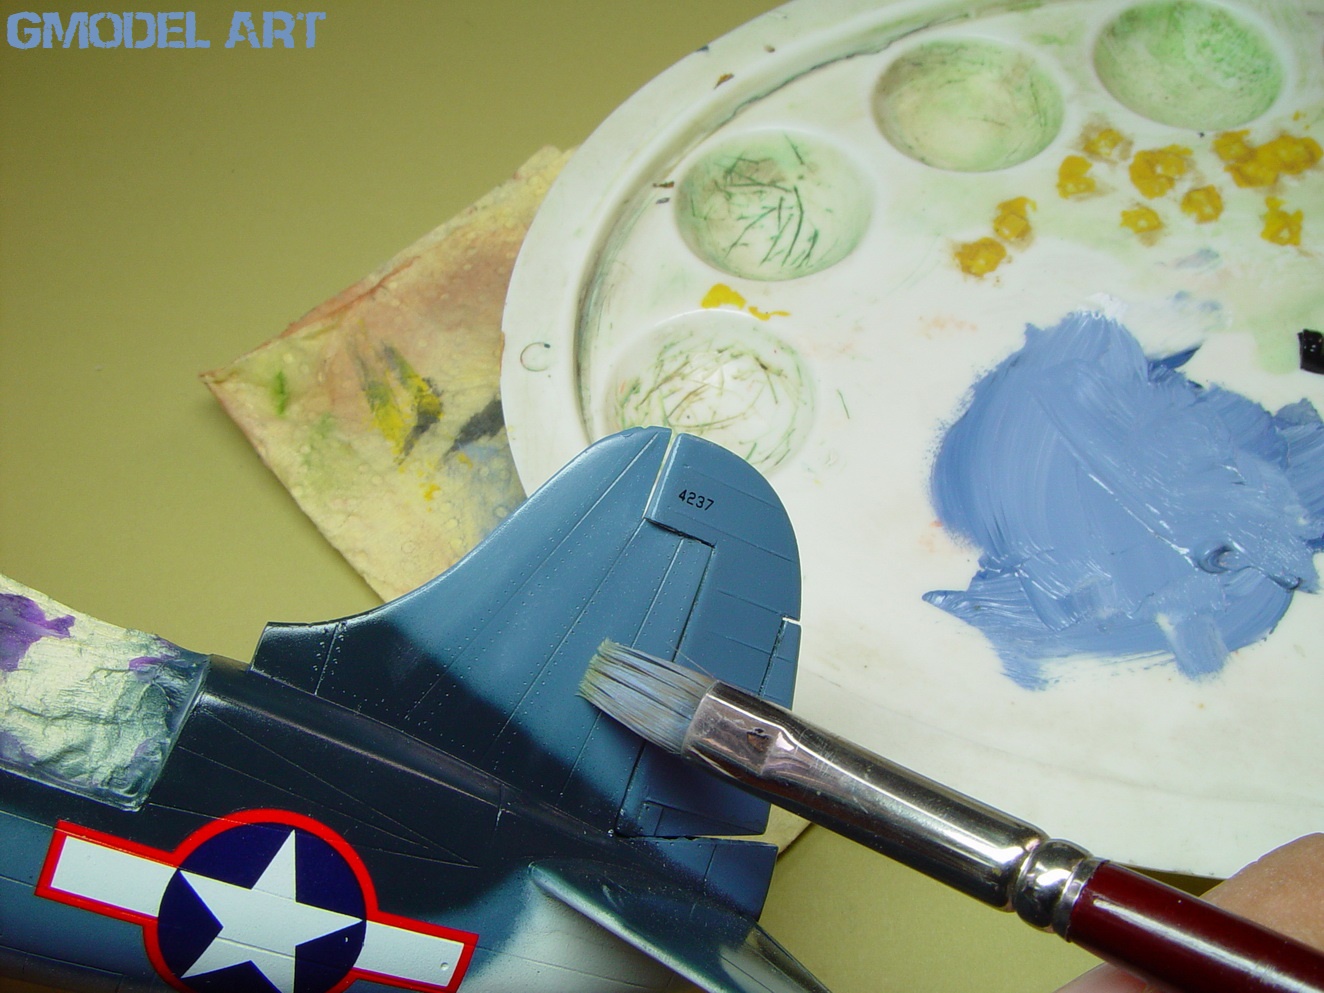
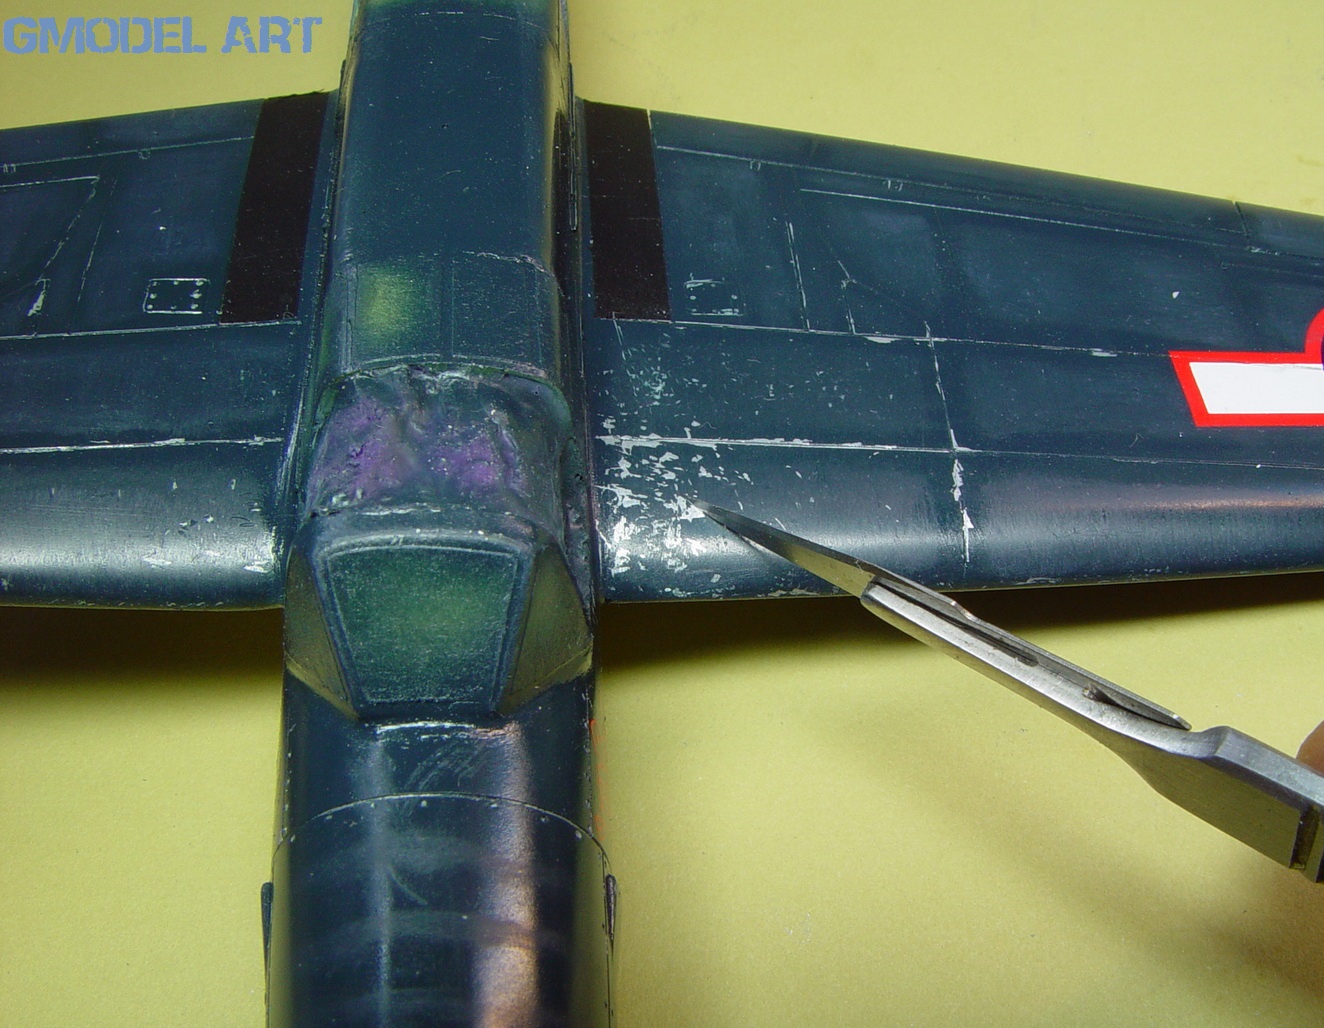
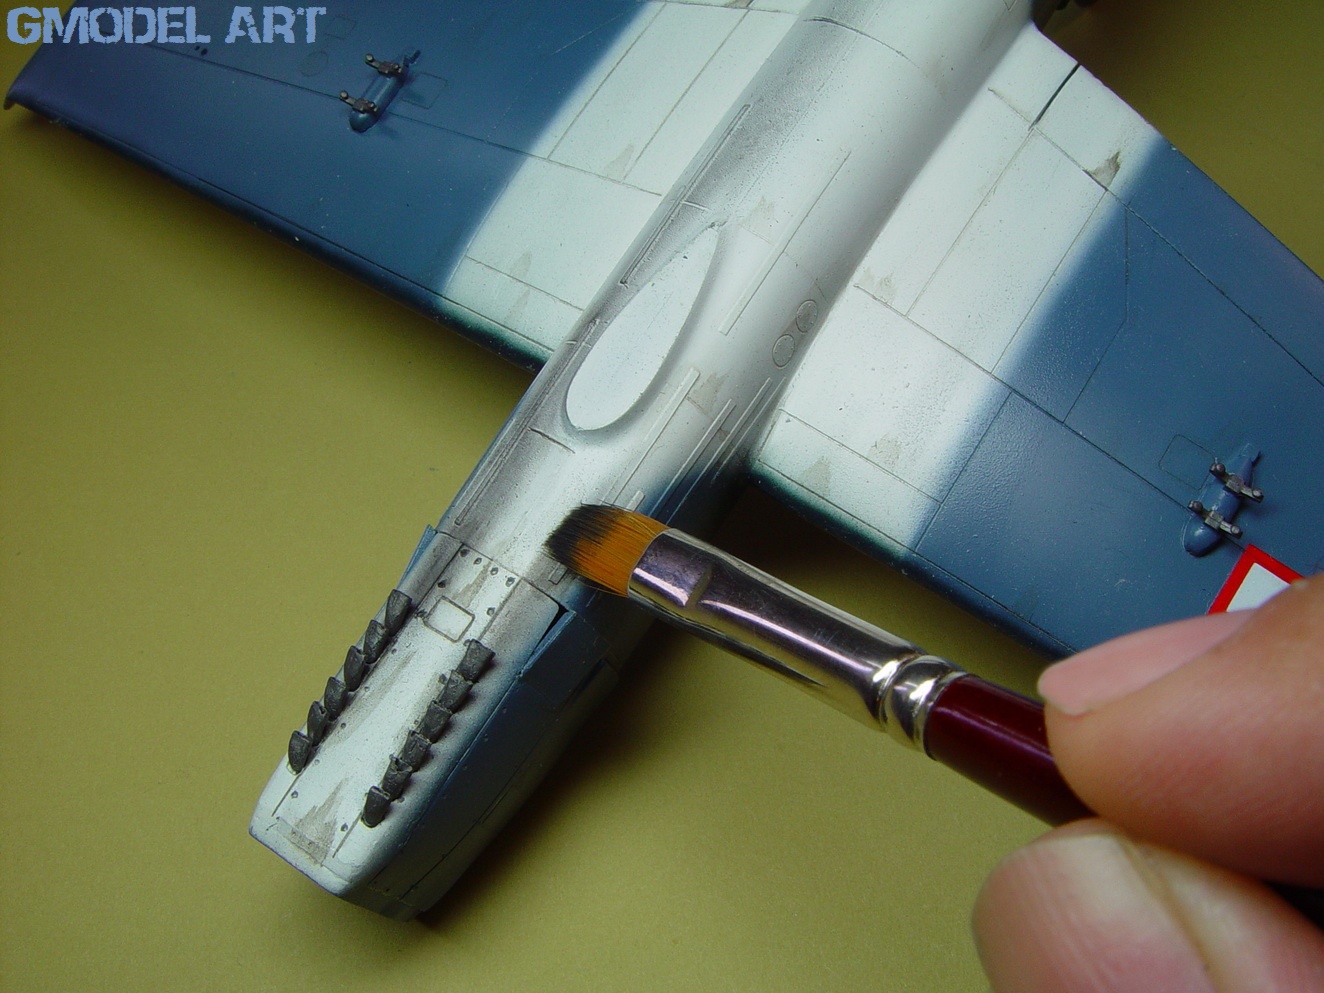
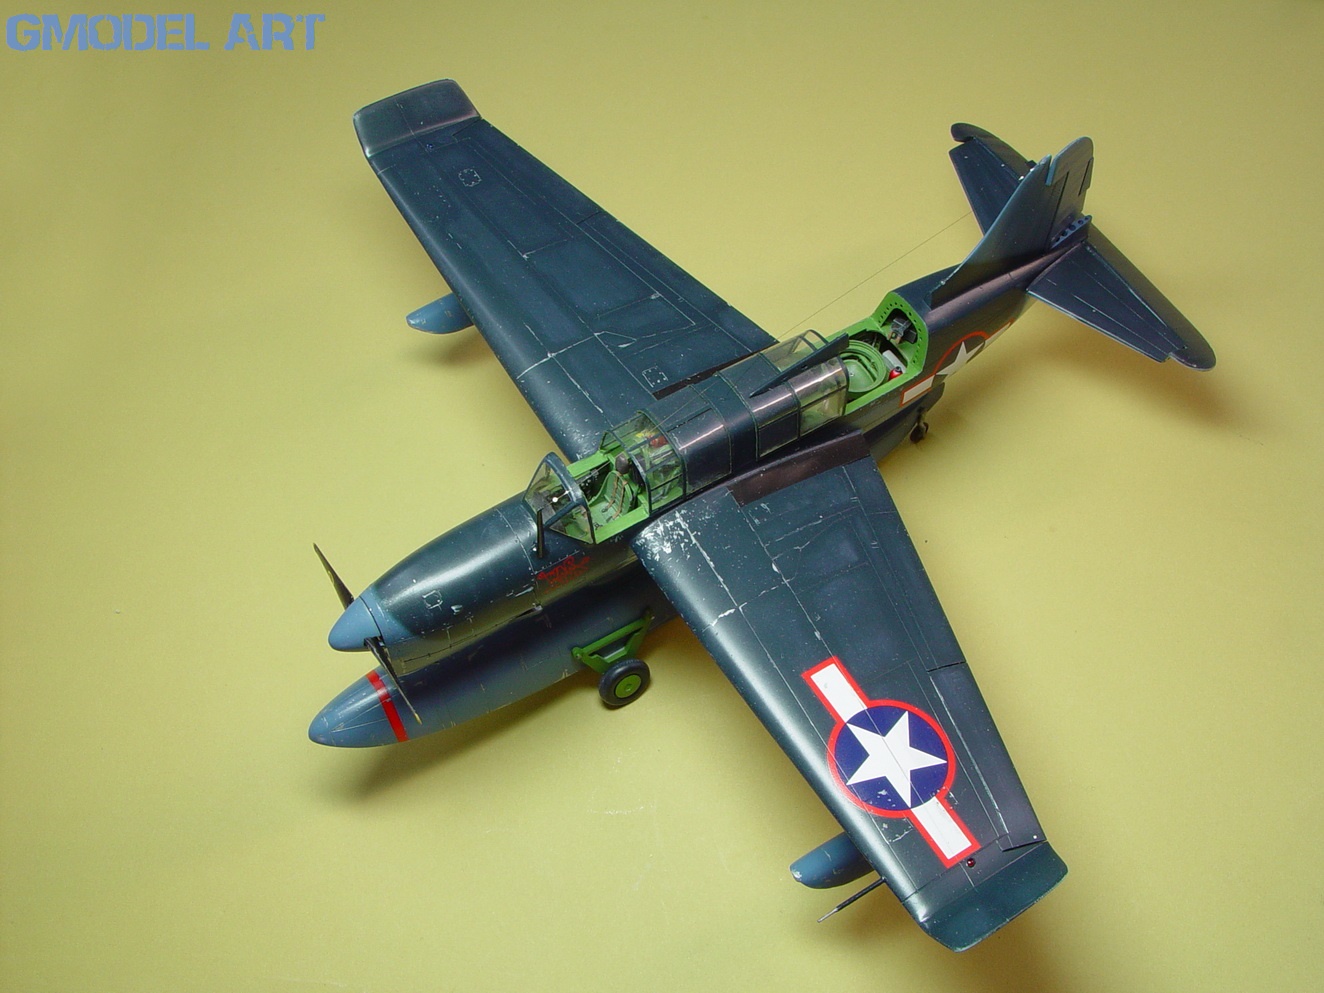
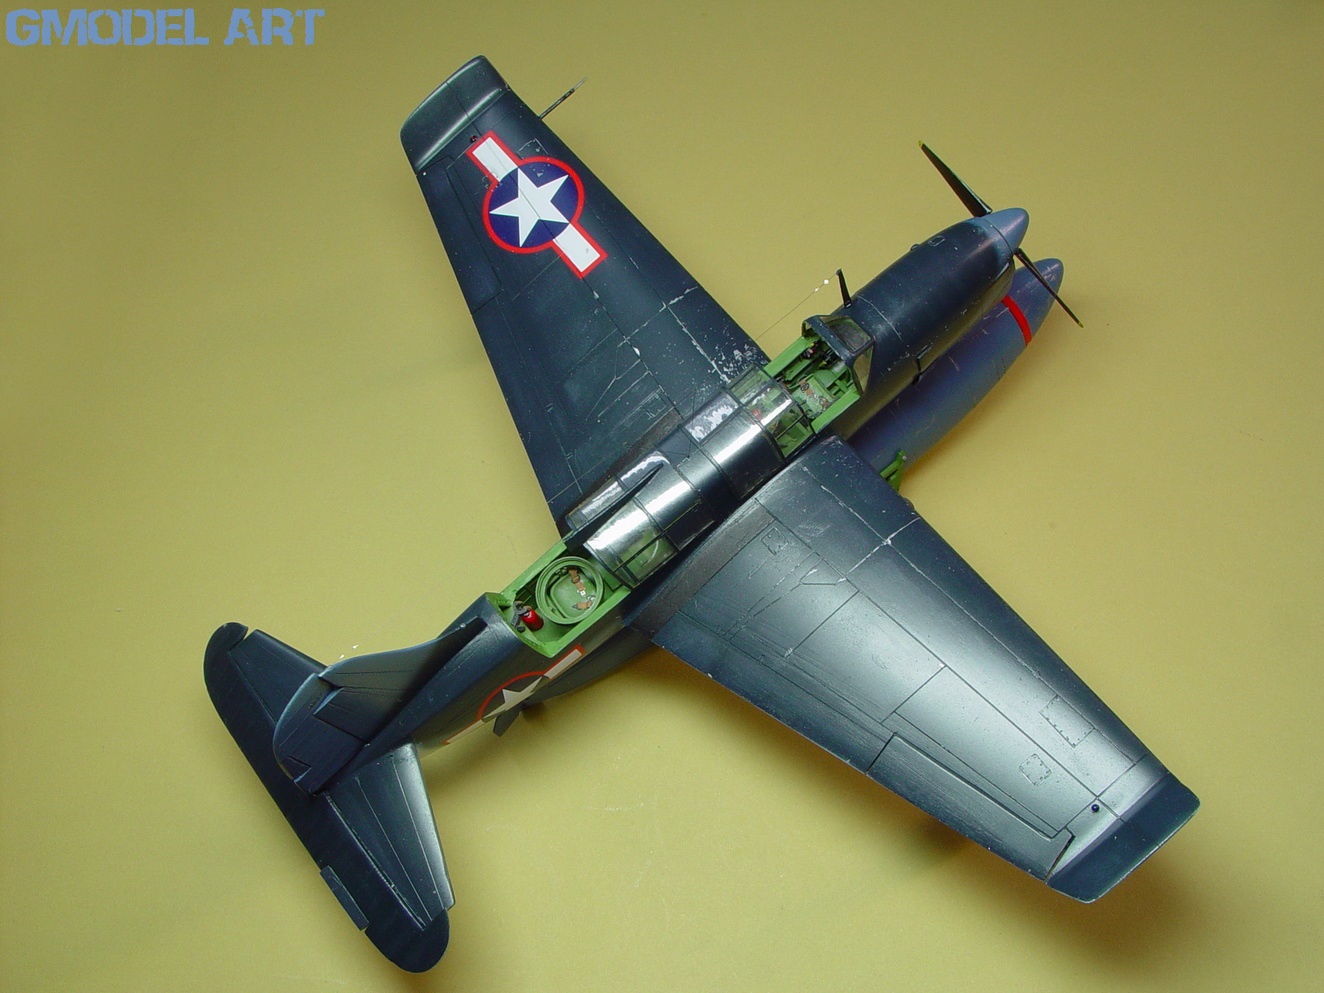
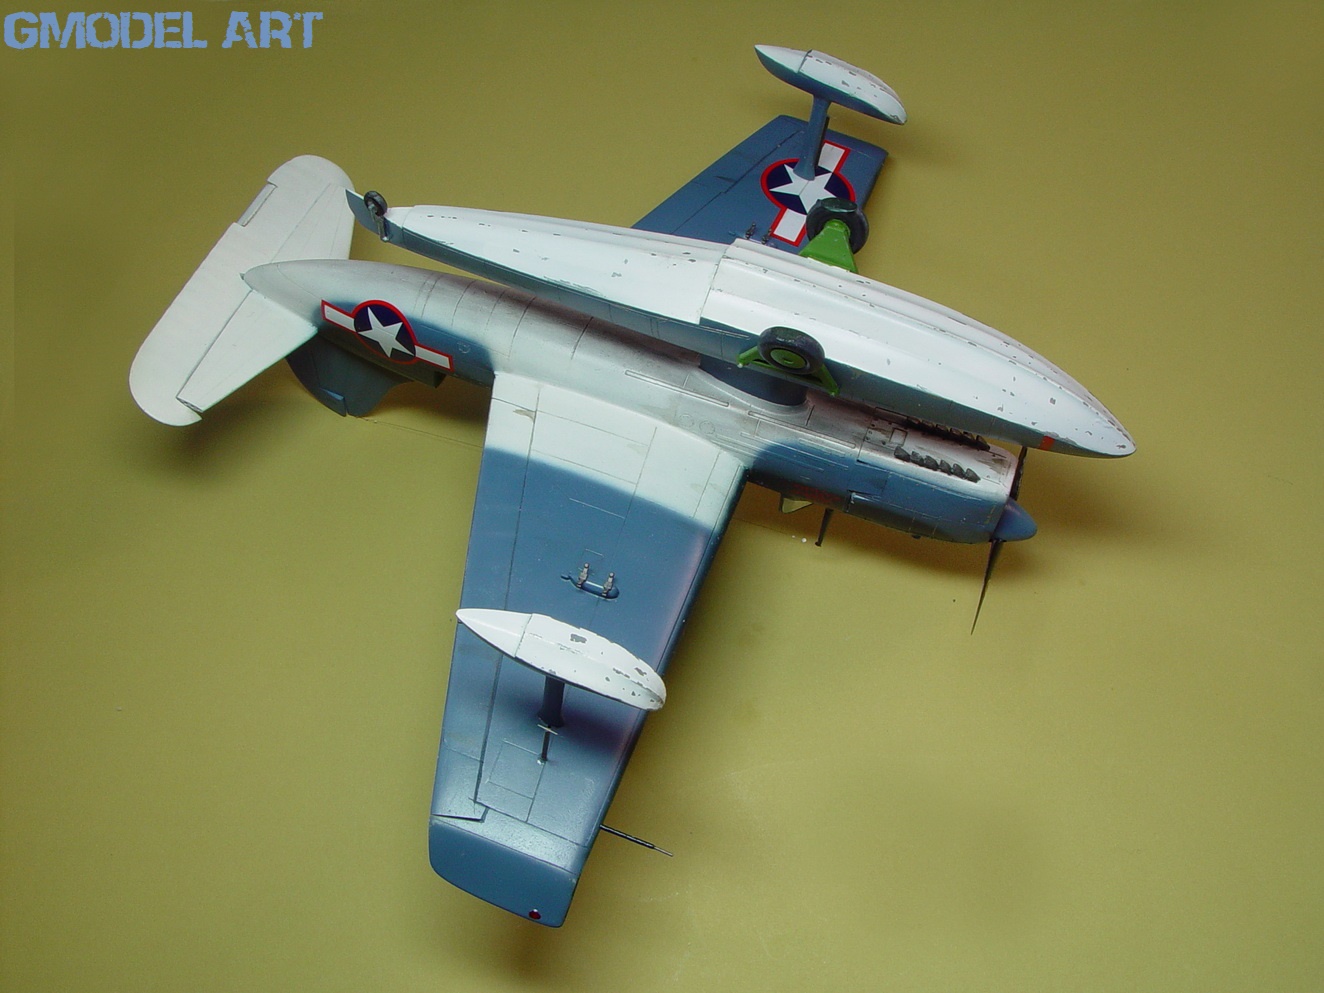
The lower surfaces of the floats, the fuselage, a small part of the wings and the tail, were painted with white gloss. The side sections of the fuselage, the vertical fixed, the rest of the lower surfaces of the wings and floats were sprayed with Gunze Sangyo’s H 42 blue gray. When this color also dried well, the upper surfaces were painted with Humbrol’s 181 glossy sea blue. The decals are of excellent quality with a very thin film and were put in place with the help of a small amount of Gunze Sankyo enhancer and became one with the surfaces of the model. The next day a mixture of medium gray painting oil diluted in white spirit took over to highlight the model’s lines. With the same material in a darker shade of gray, oil leaks were represented in various parts of the model, emphasizing the engine area. With painting oils in slightly lighter tones than the colors of the variant, the panels were “lightened” to represent aging. With the tip of a cutter, the model was scraped in selected places to reveal the aluminum that had been painted at a previous stage. Spraying two thin coats of acrylic satin varnish restored the gloss of the model. The destructive modeling frenzy was completed with pastel dust, further distressing the model’s surfaces, as well as creating the engine exhaust fumes. The construction of the model was completed by gluing the floats, moving parts of the covers and all the fine pieces, as well as painting the navigation lights.
FOR THE END
I have to say that this model was really a pleasure to build. It’s amazing how with so few pieces (only 43 in total) a realistic model is made in this scale, which if I hadn’t built it myself I wouldn’t have believed it, since the additions and improvements, as you can see, are minimal. There were certainly some surprises, such as the application of the wings, which are easily tackled even by modellers with little experience in the type of kit, which, let’s not forget, is a limited production.