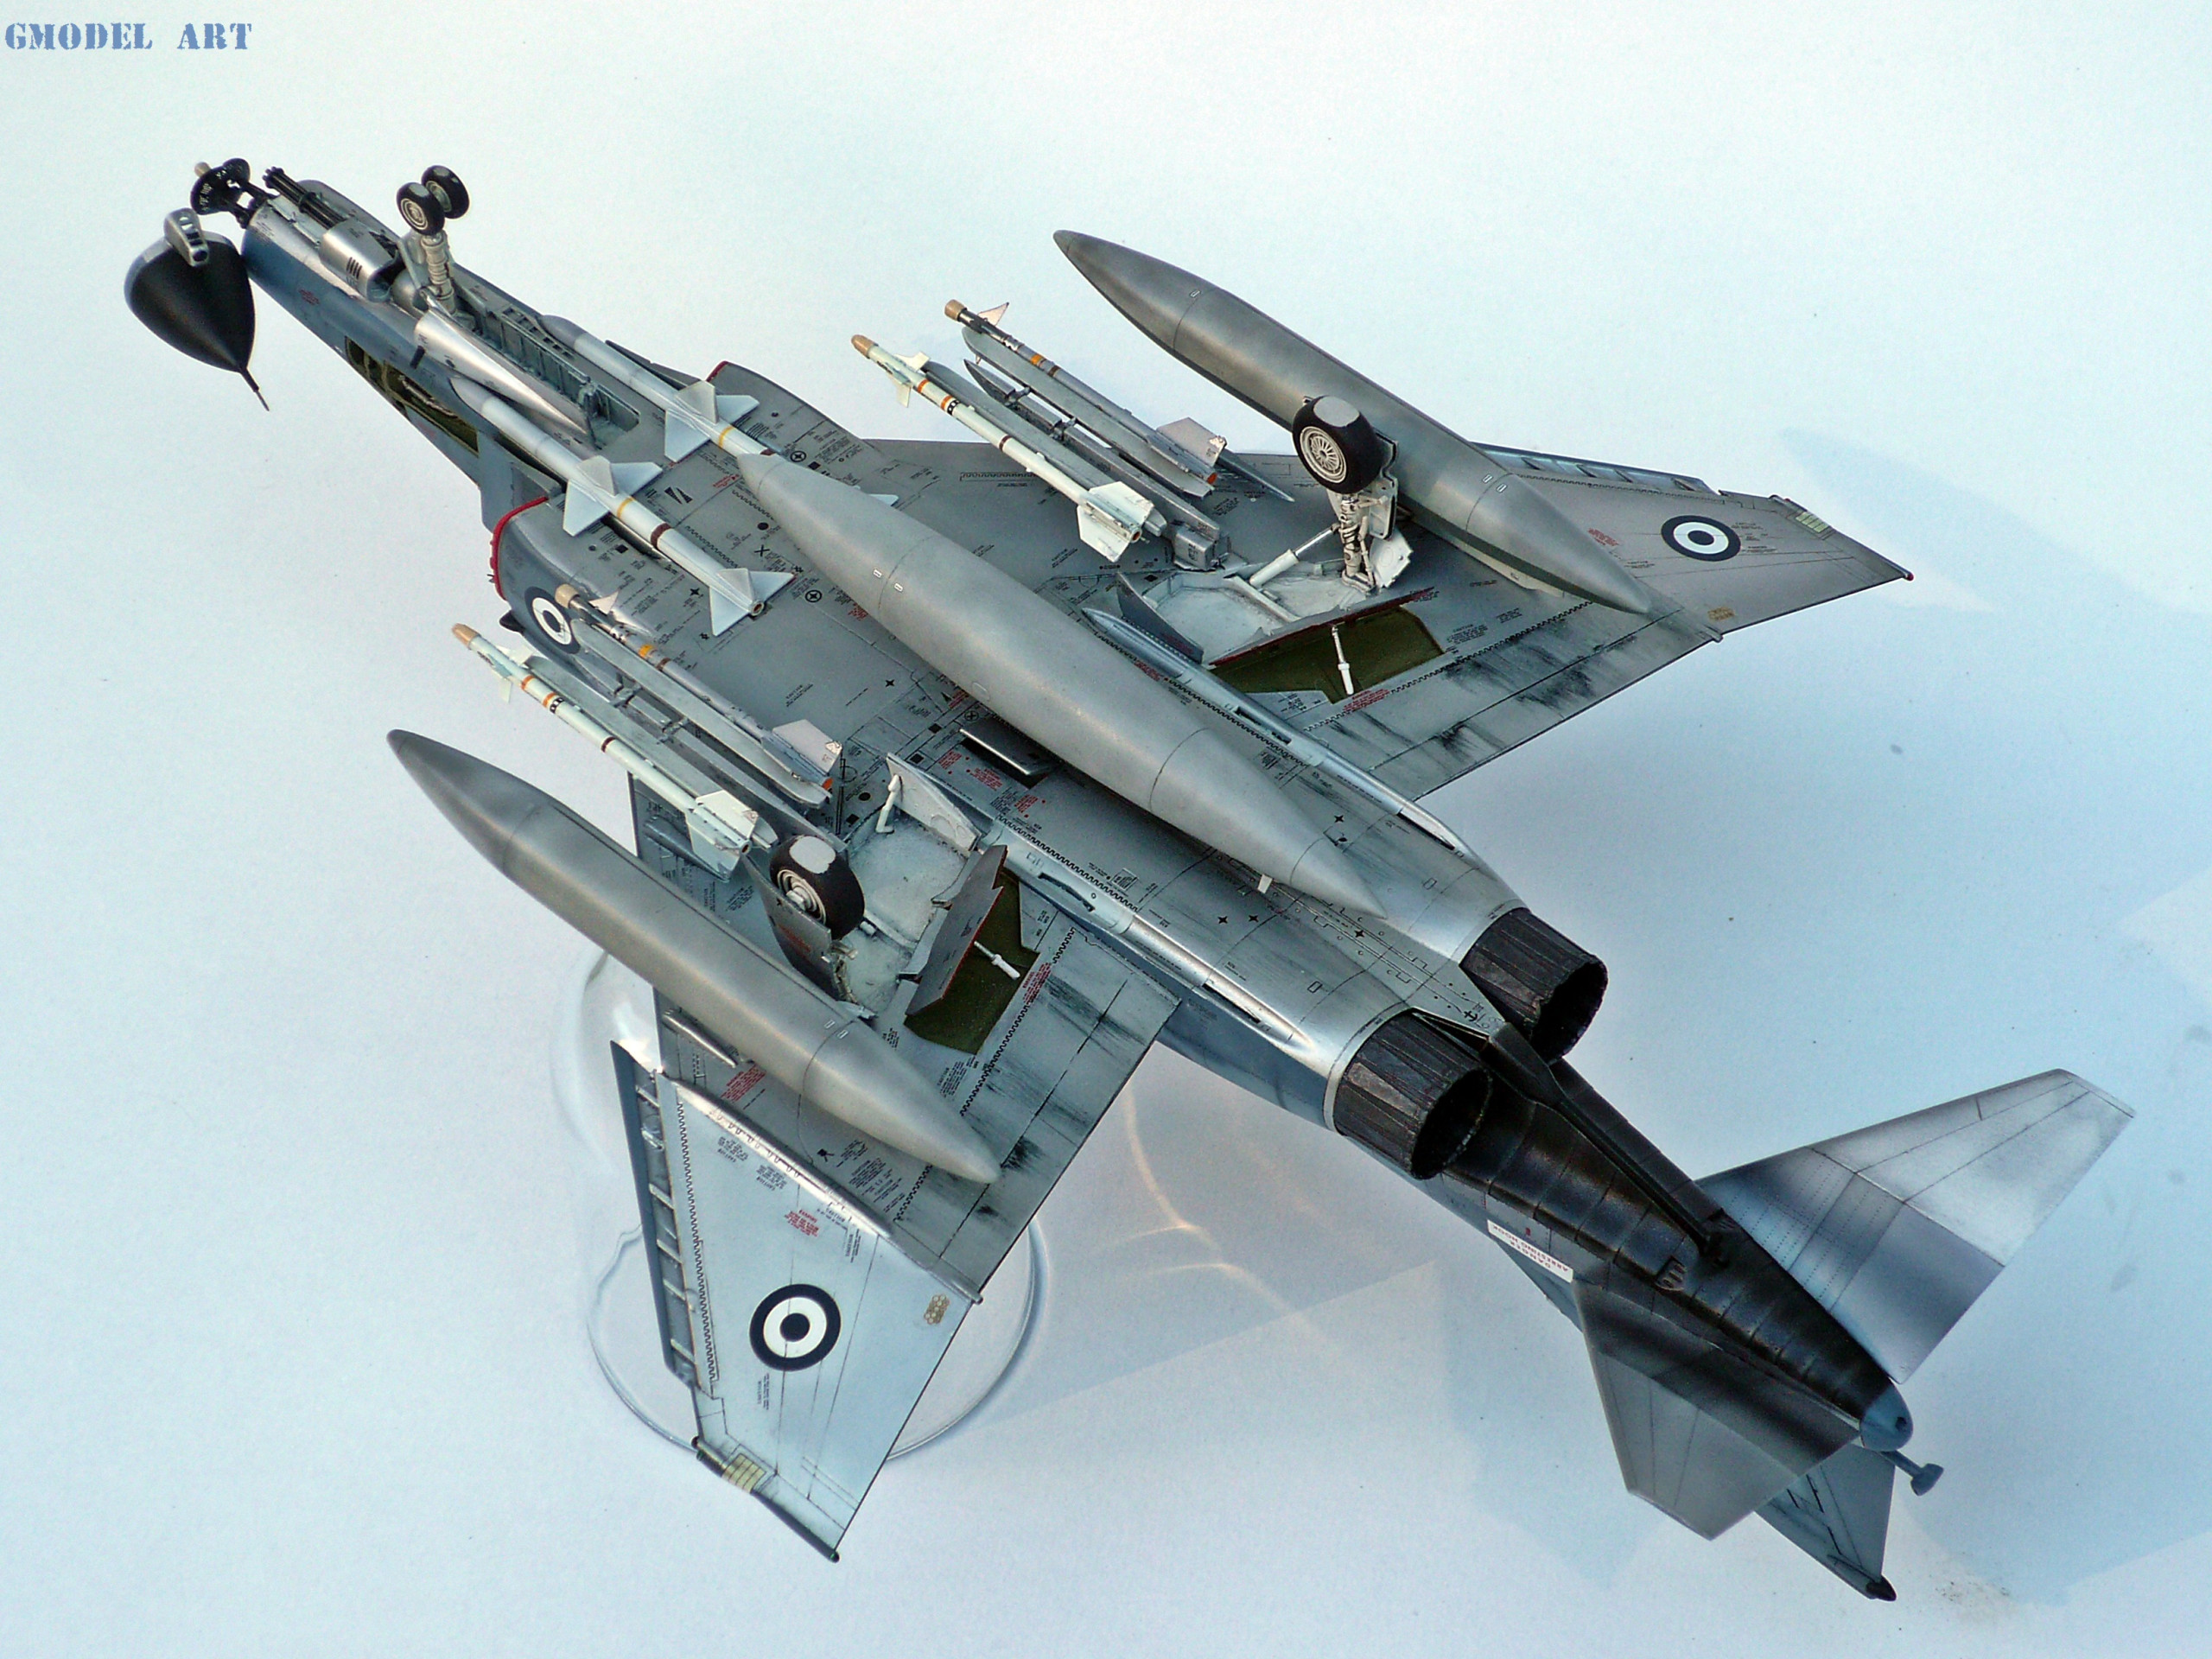
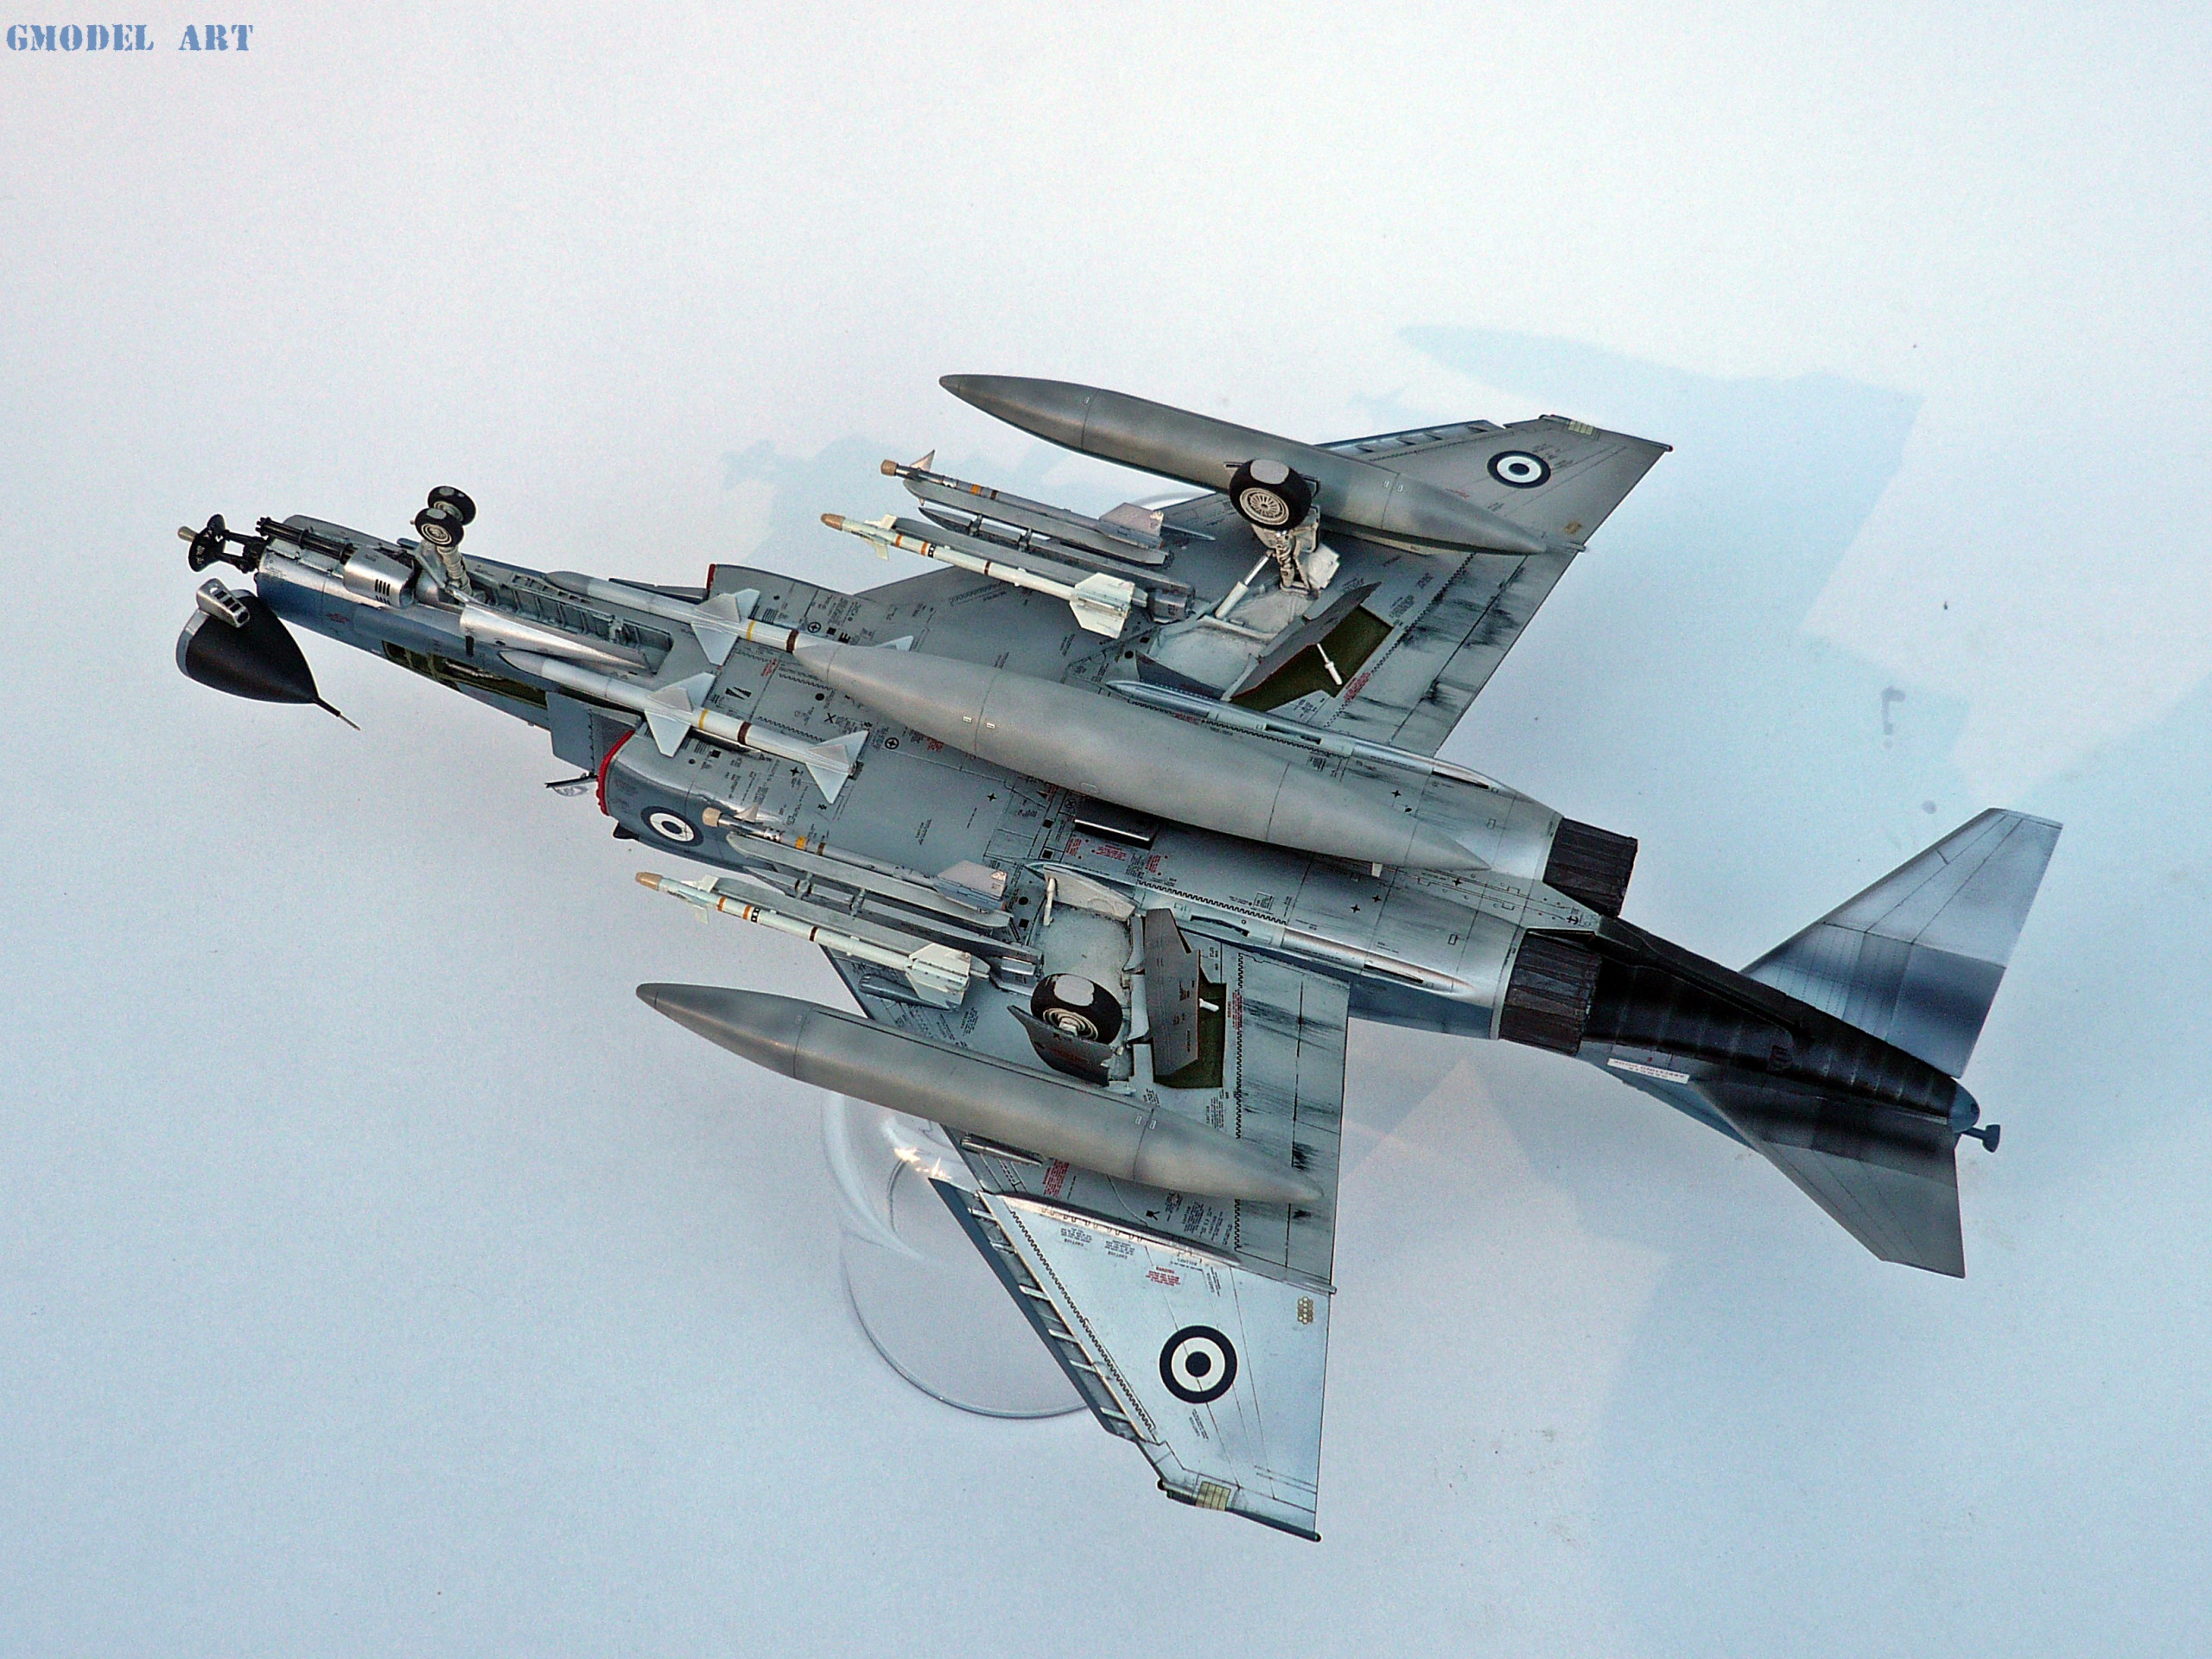
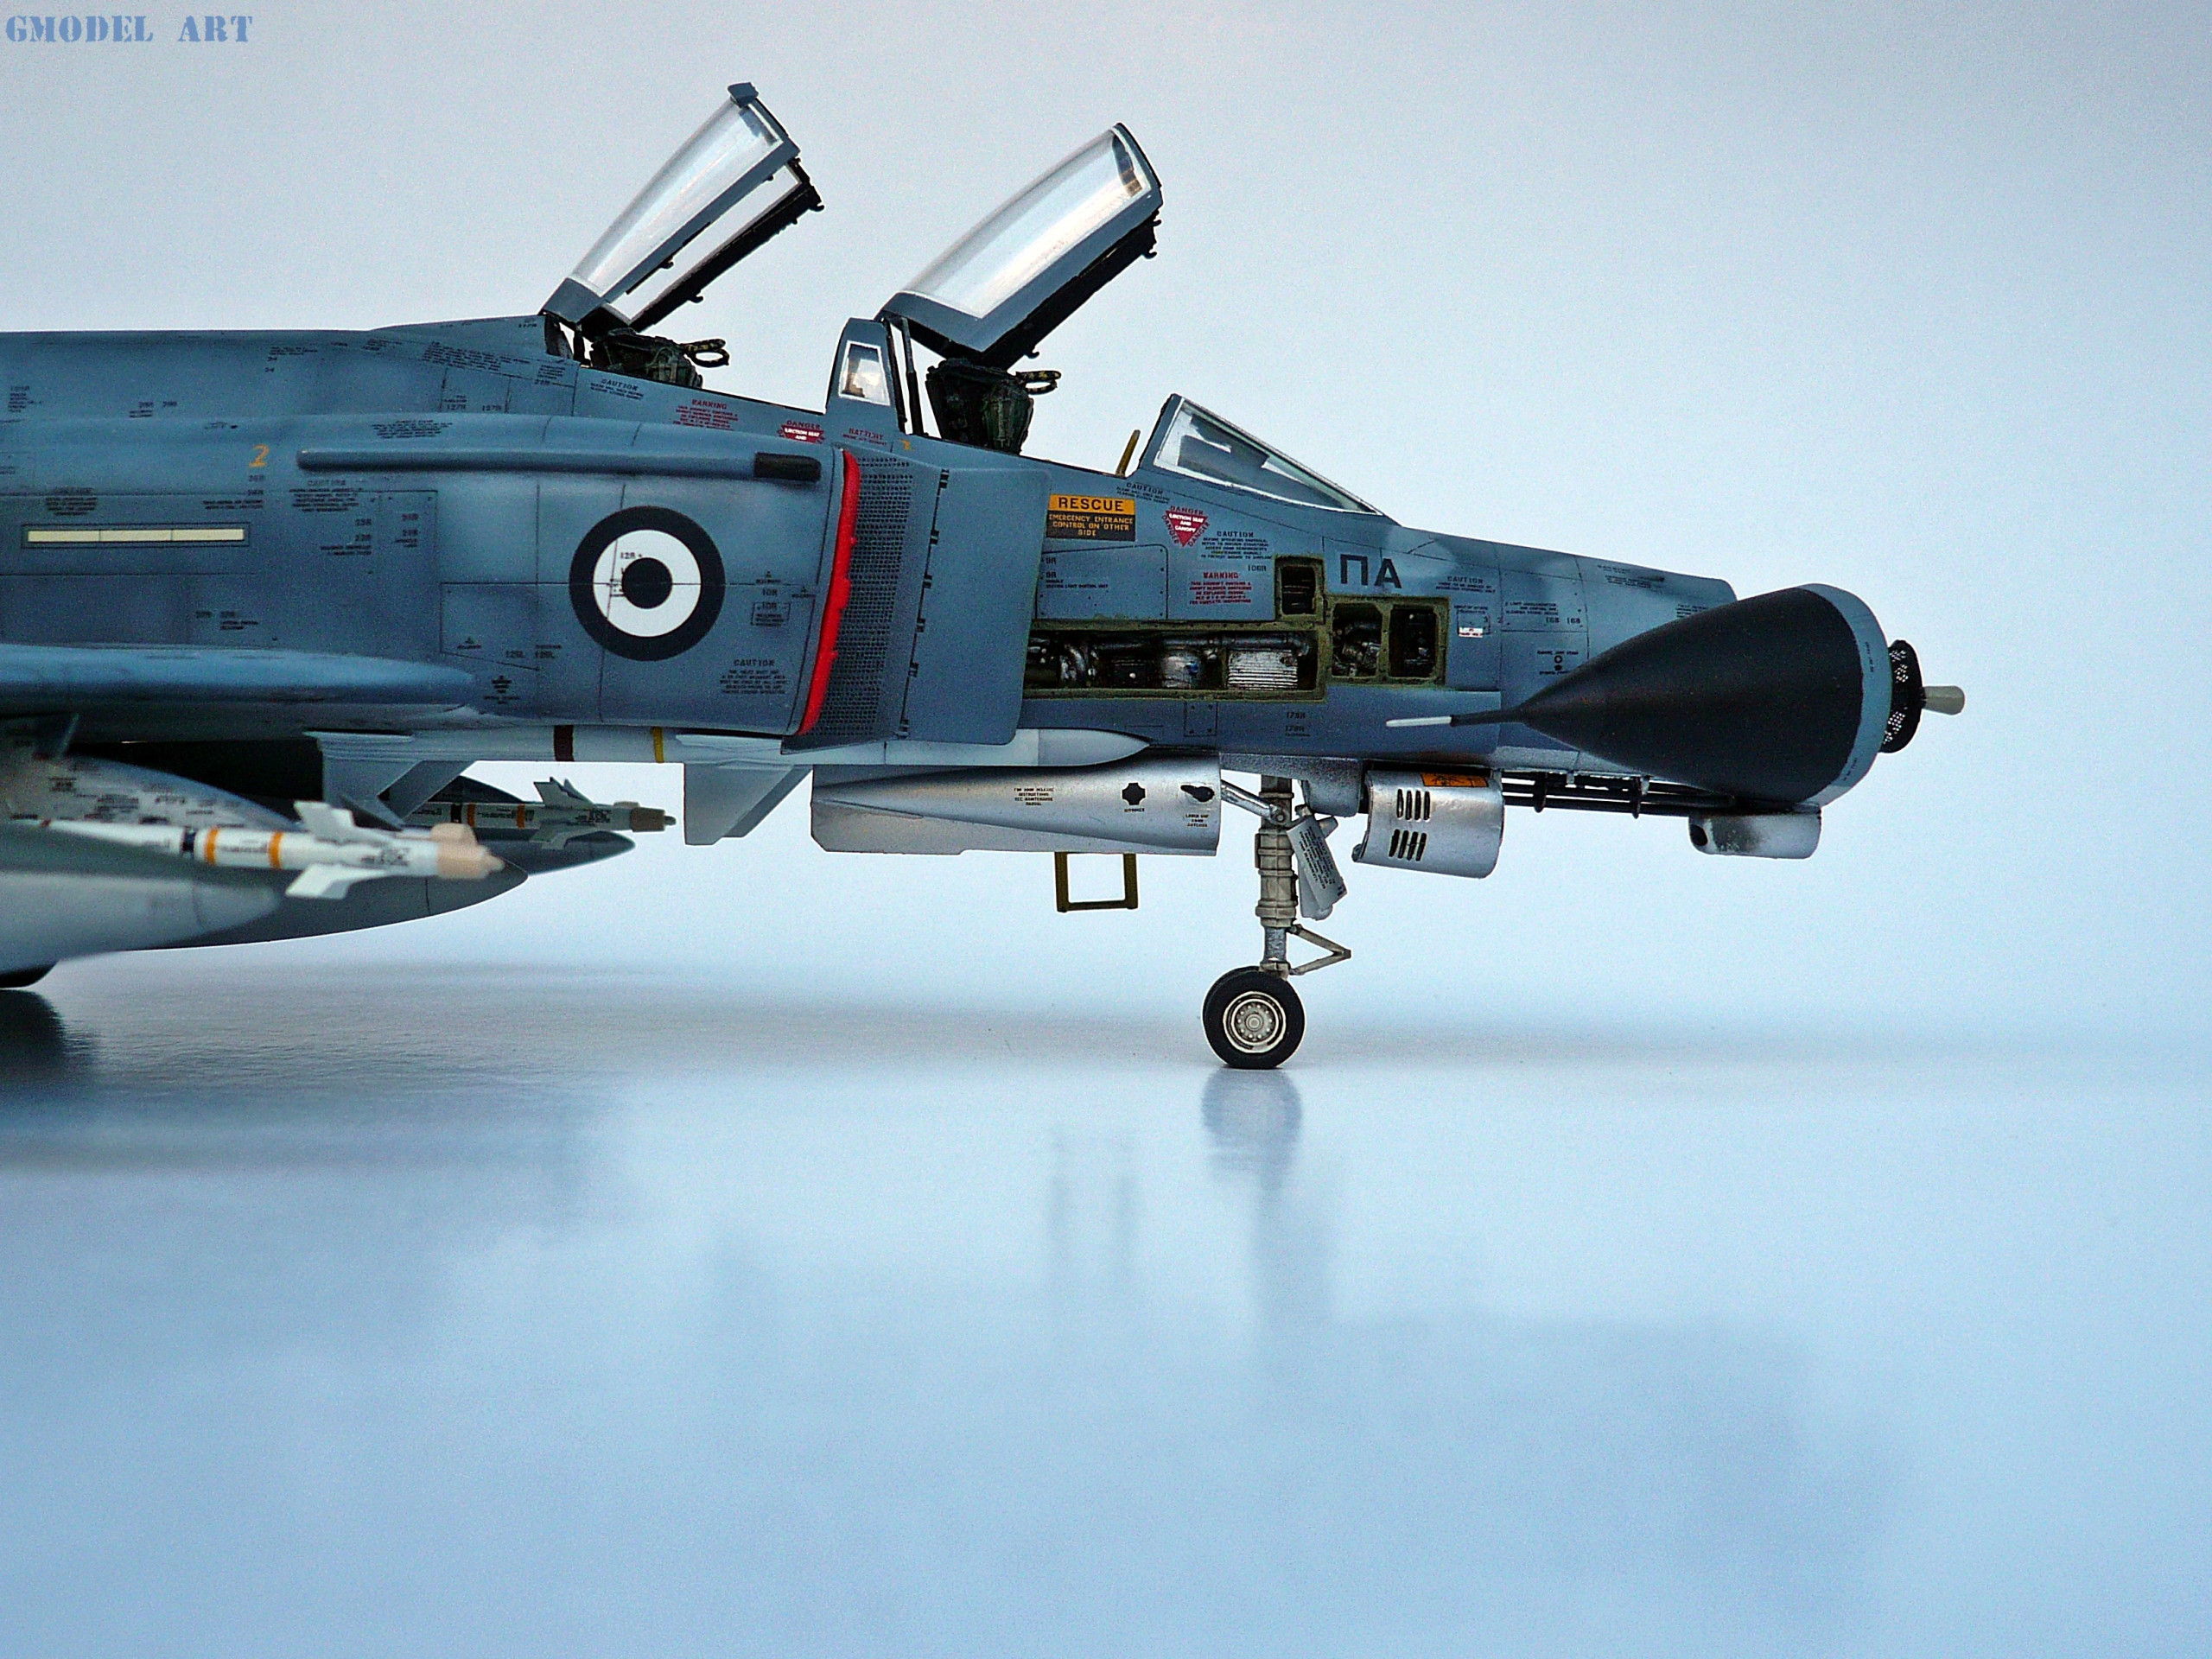
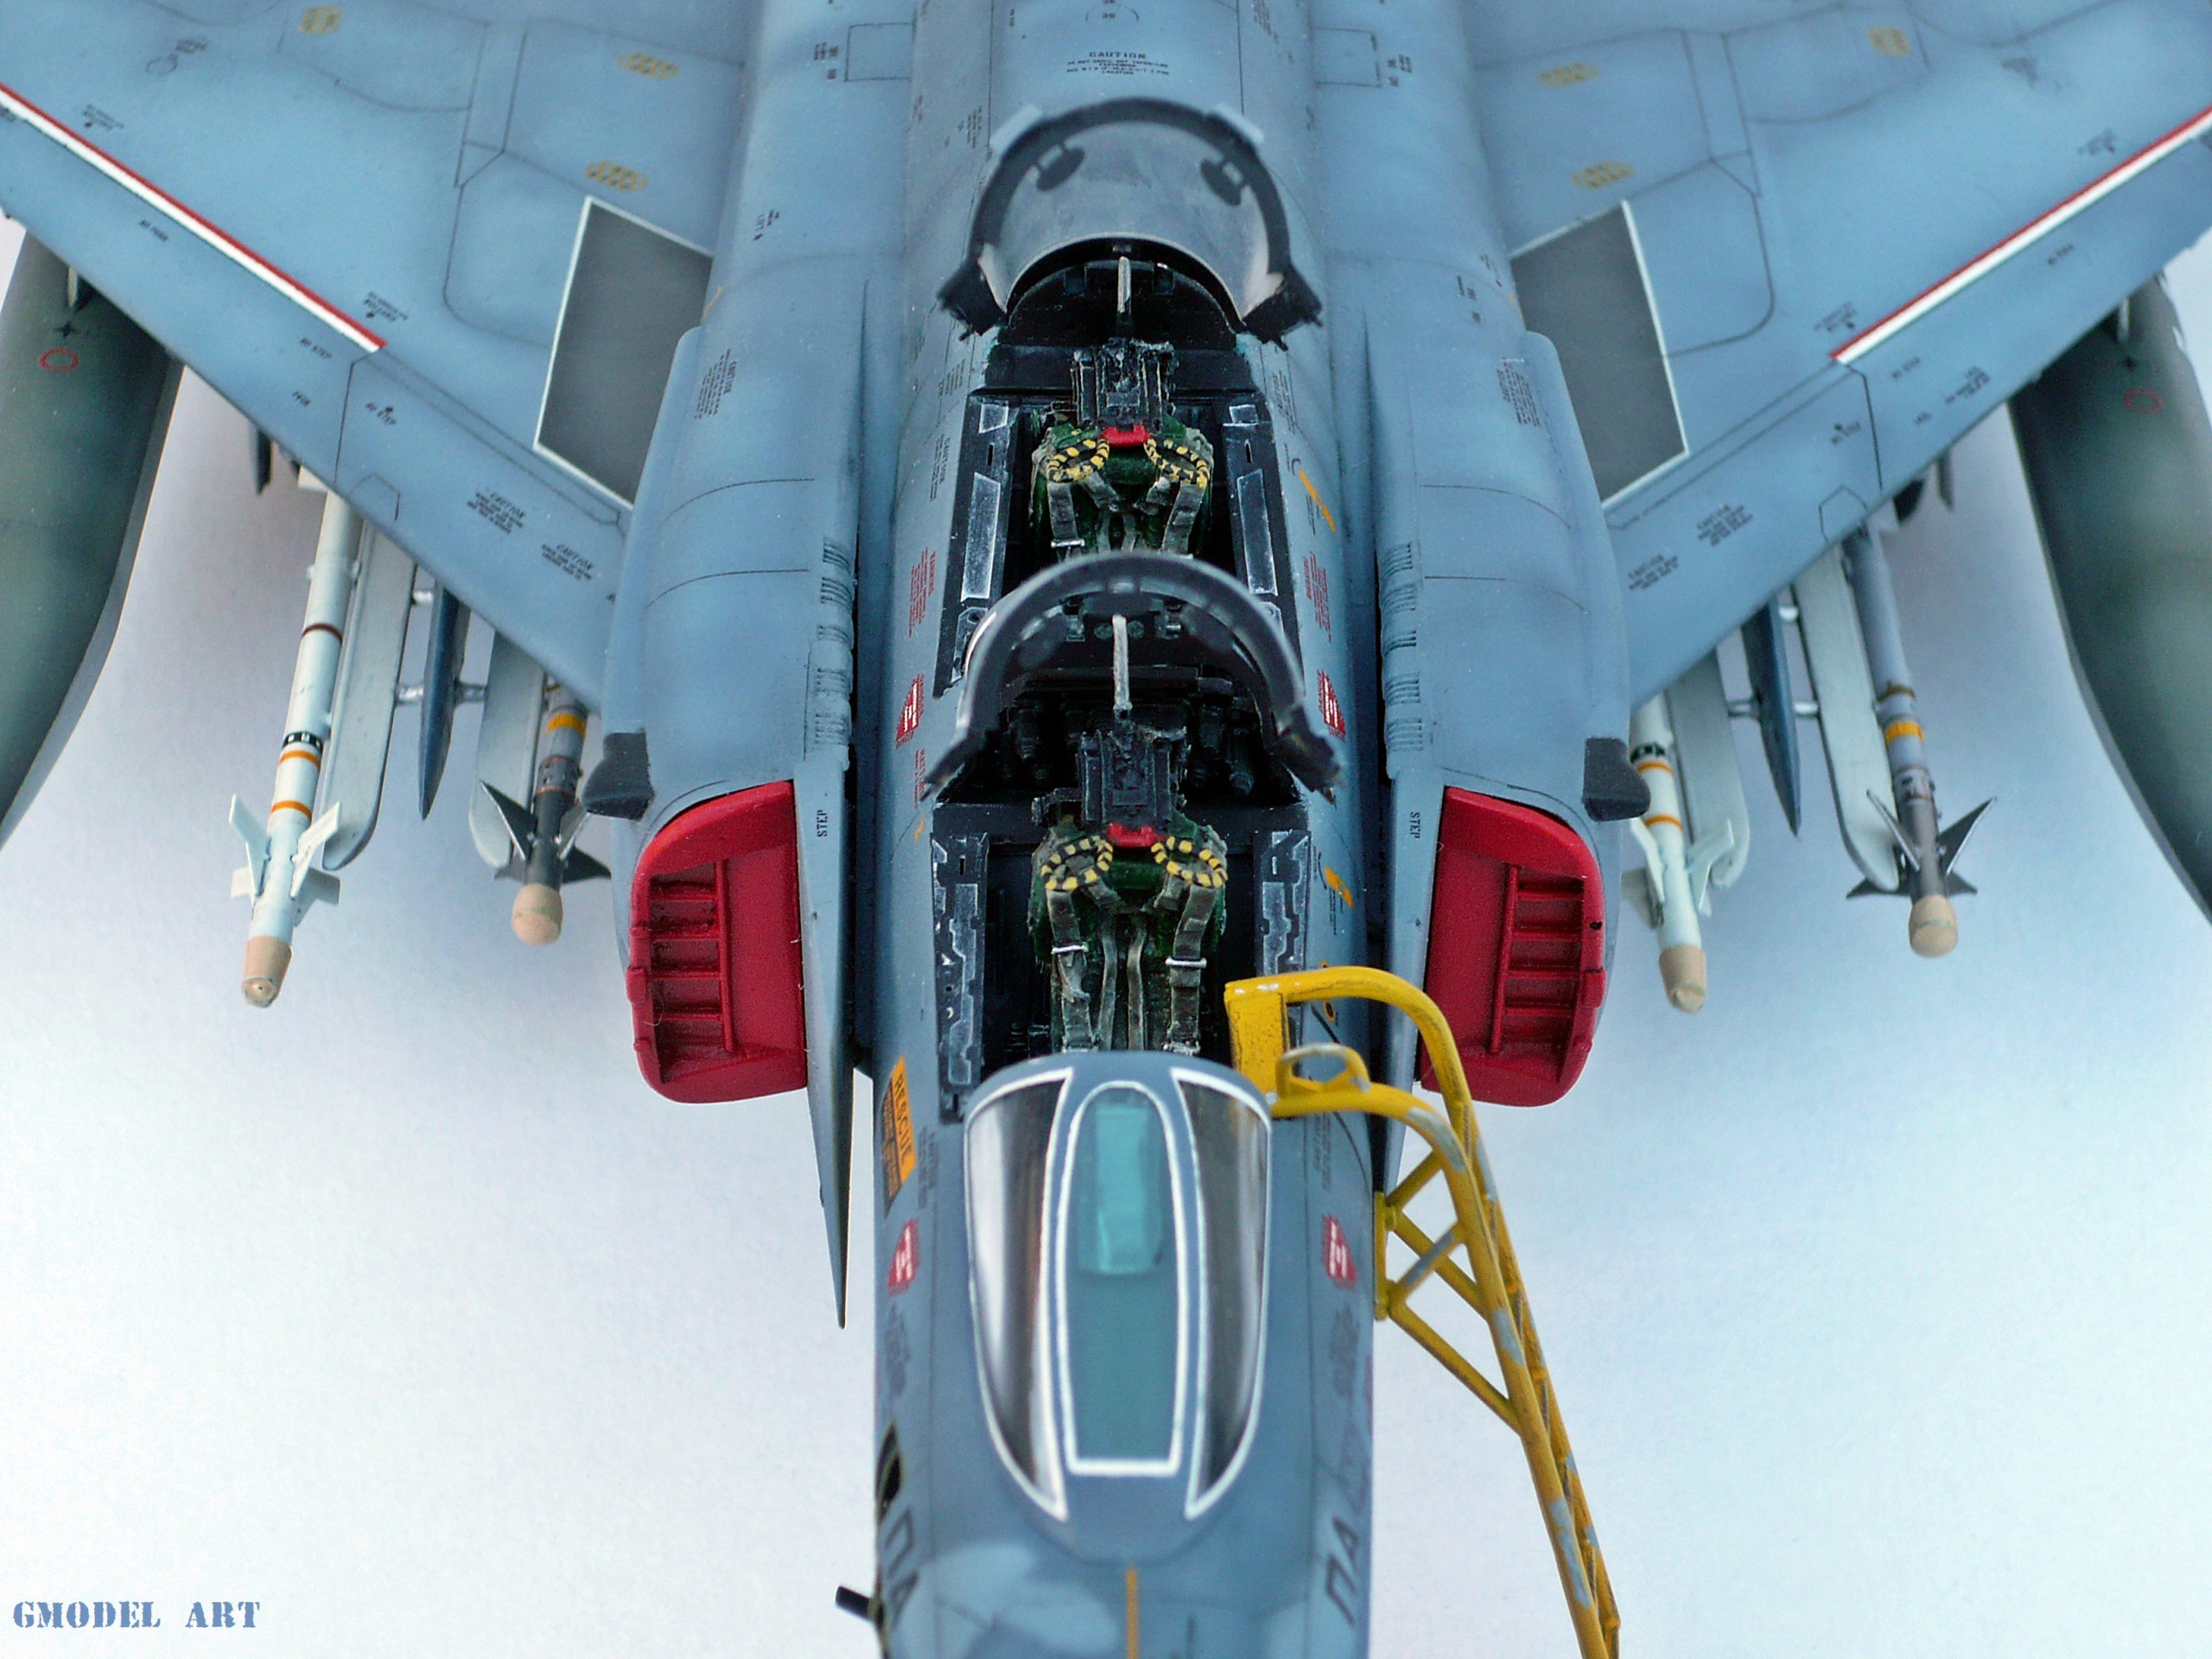
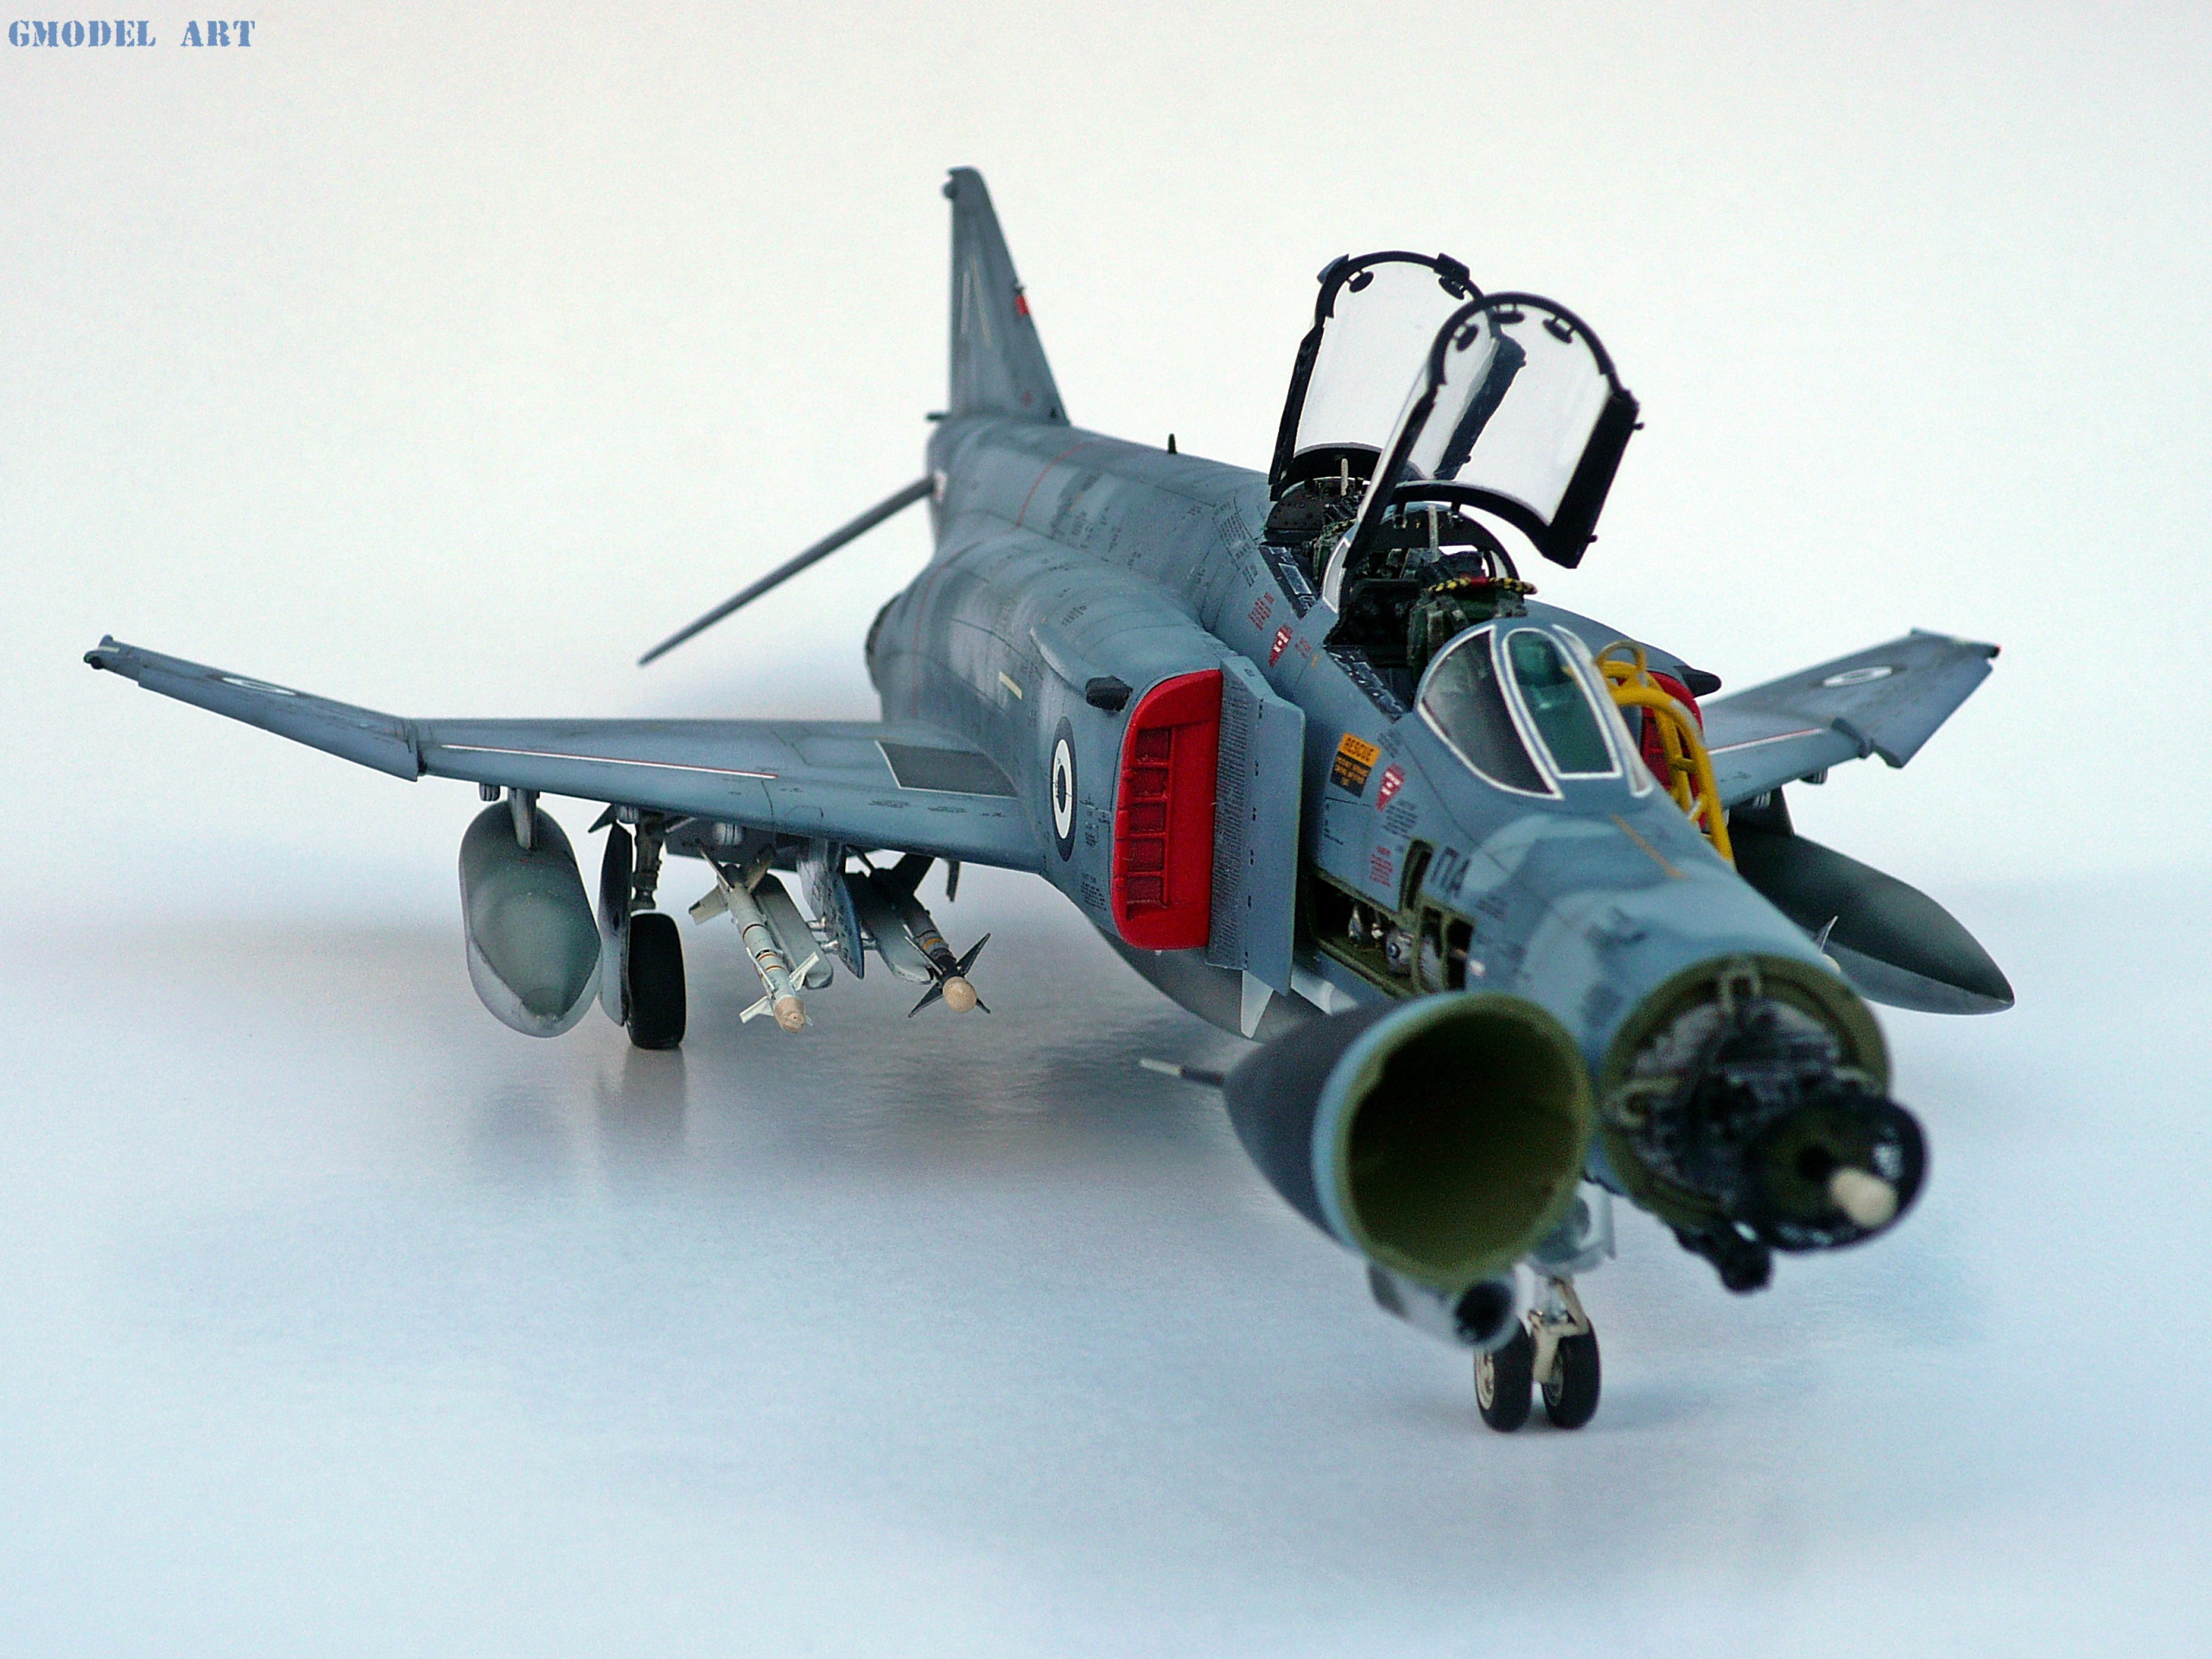
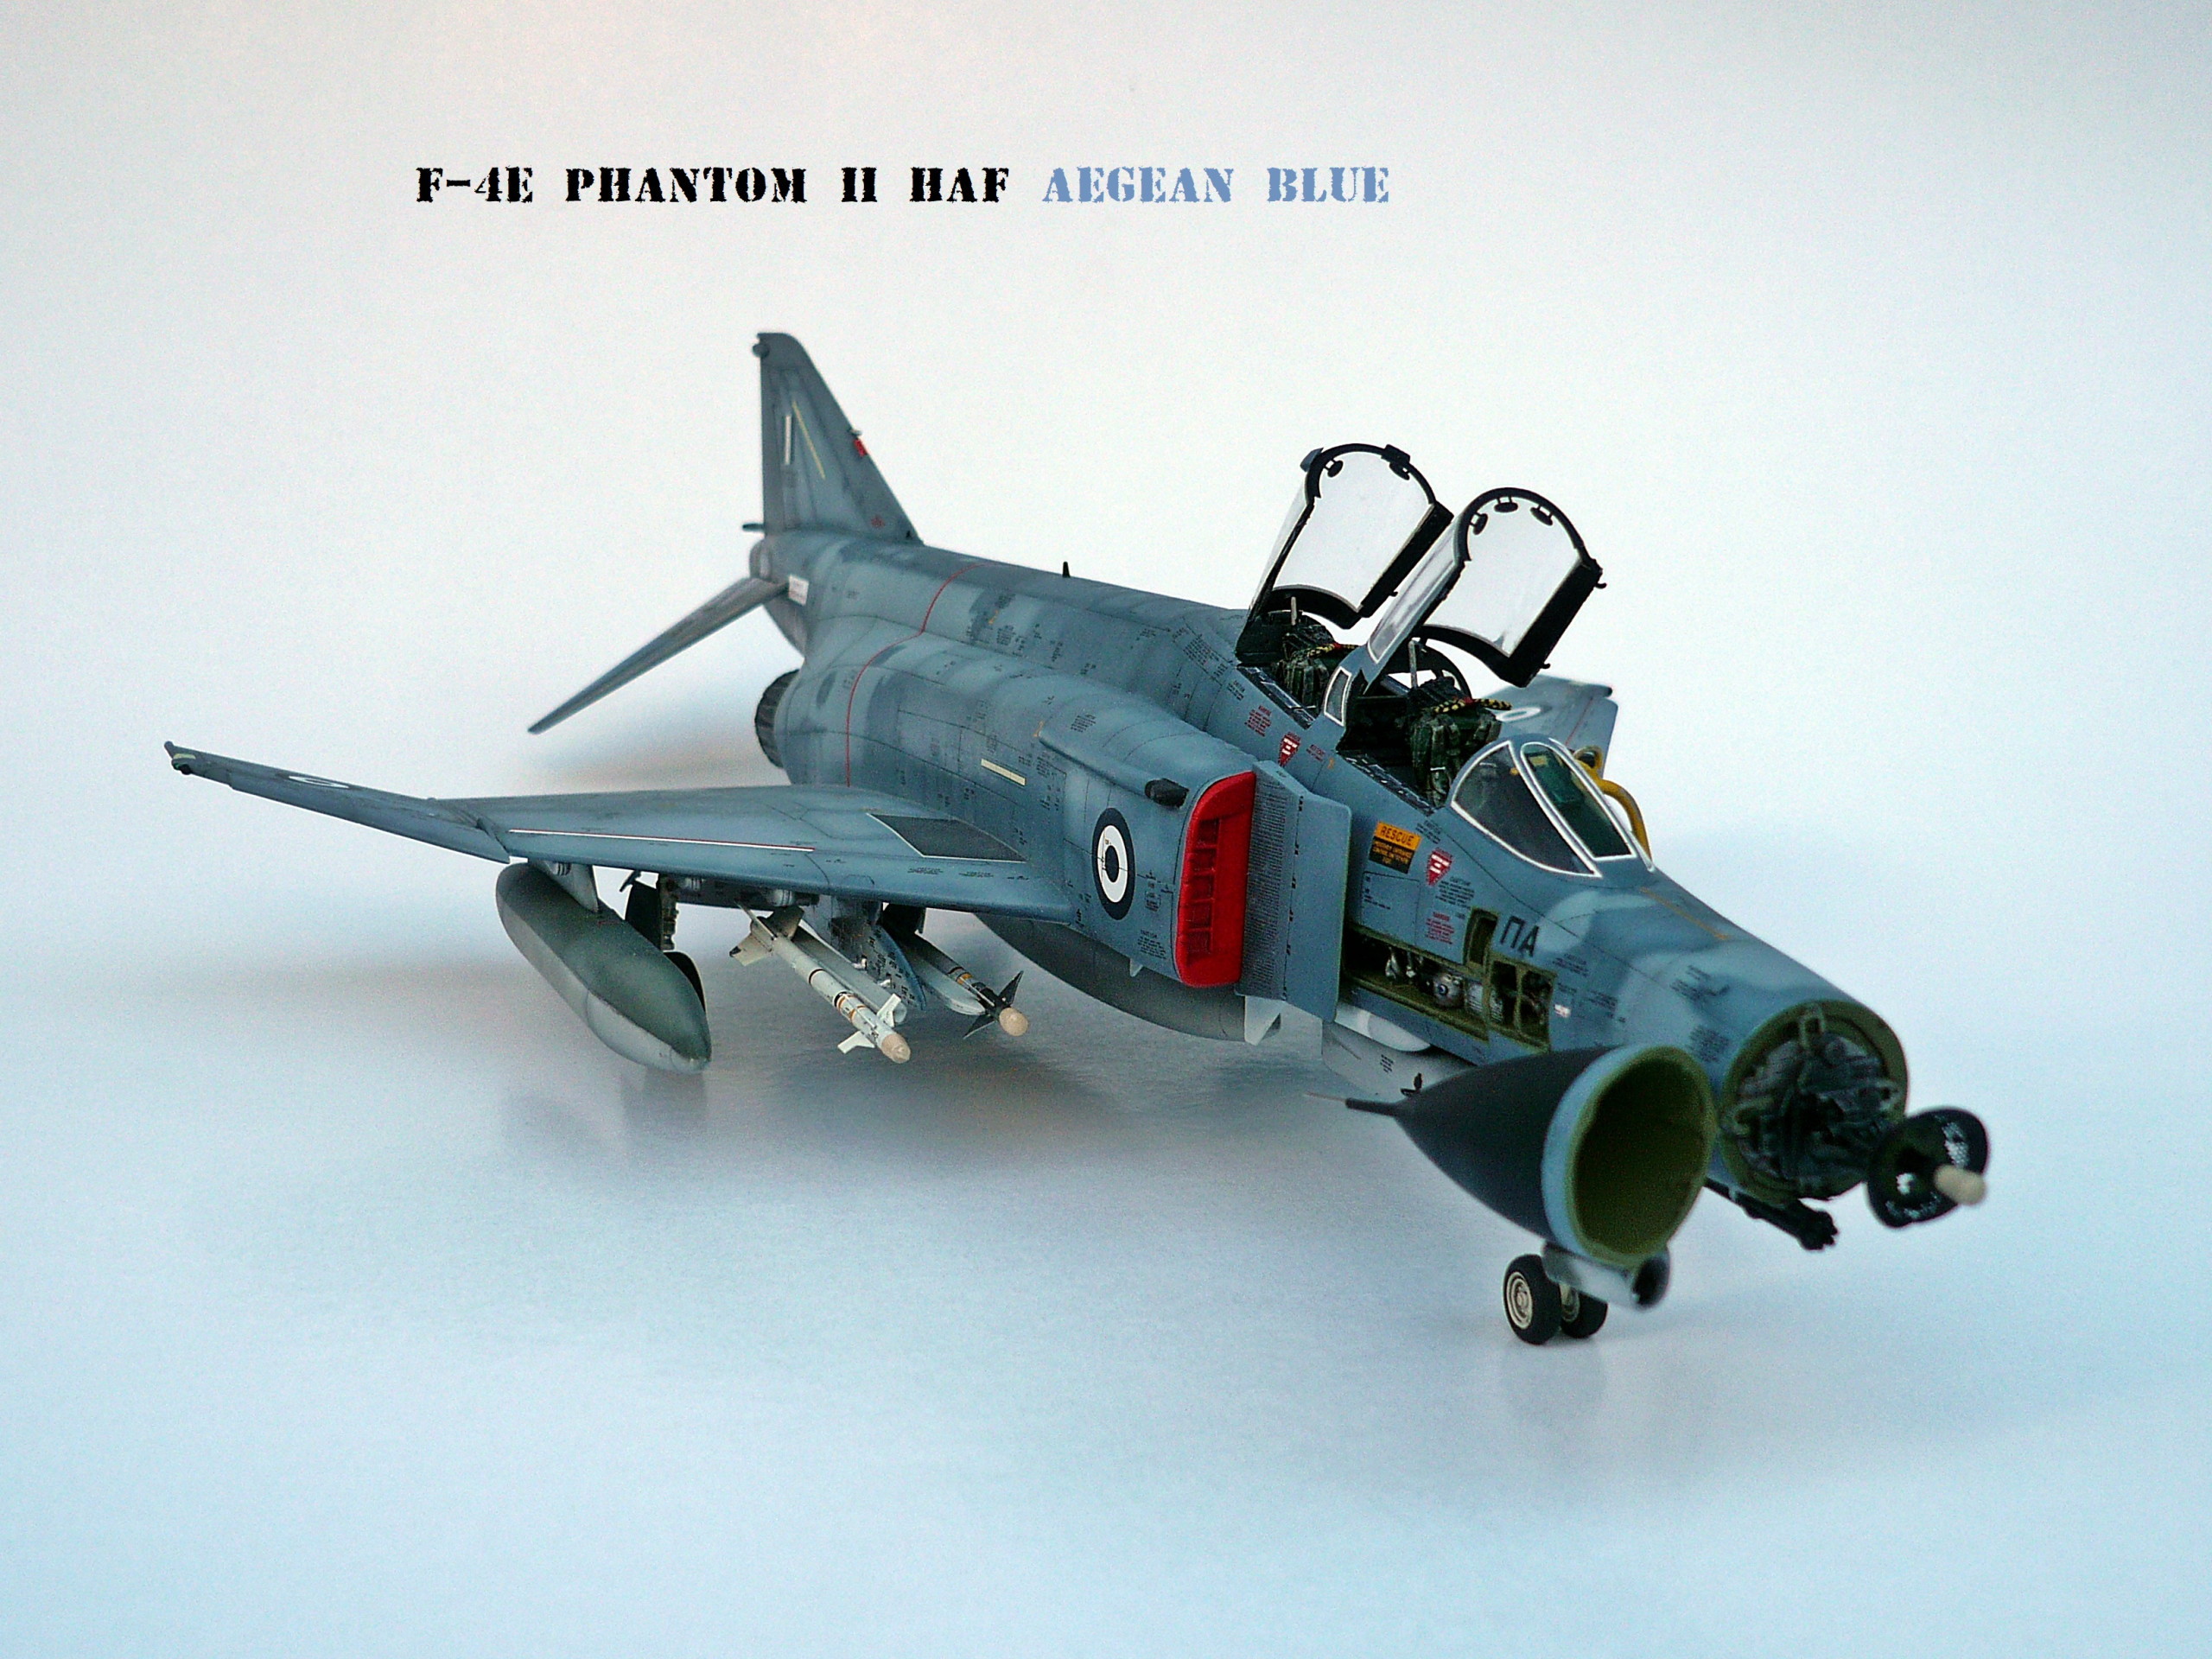
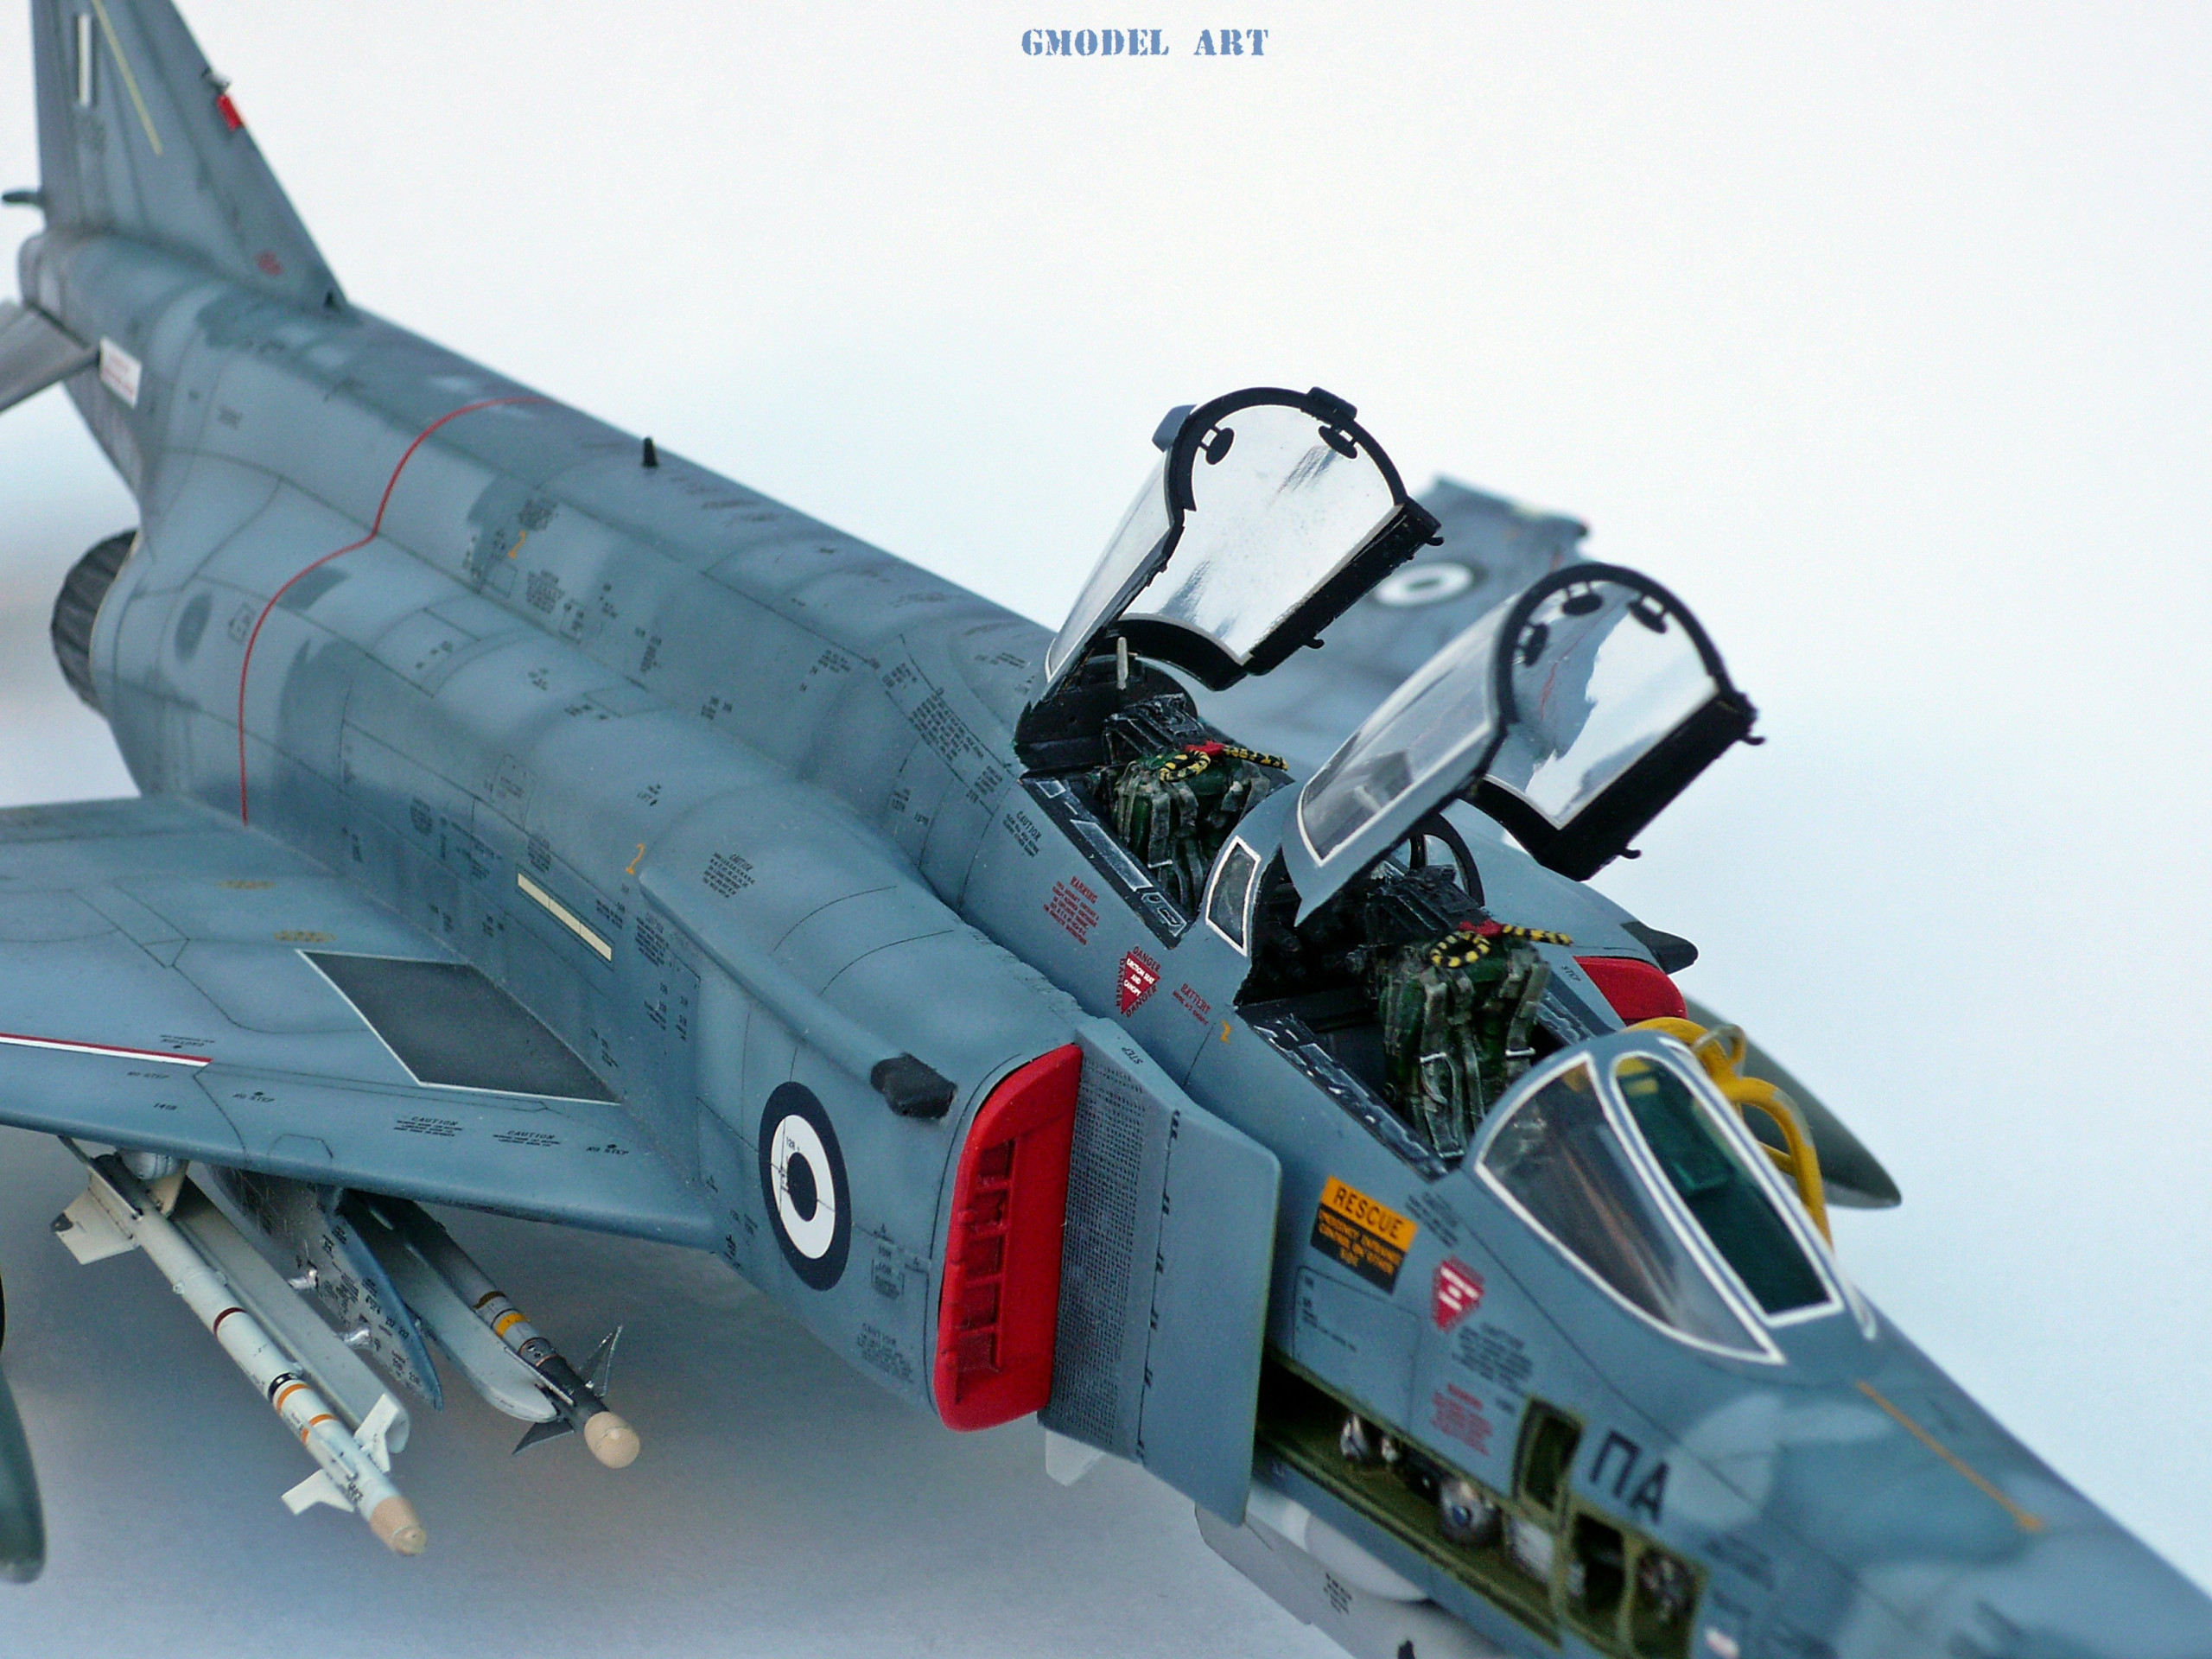
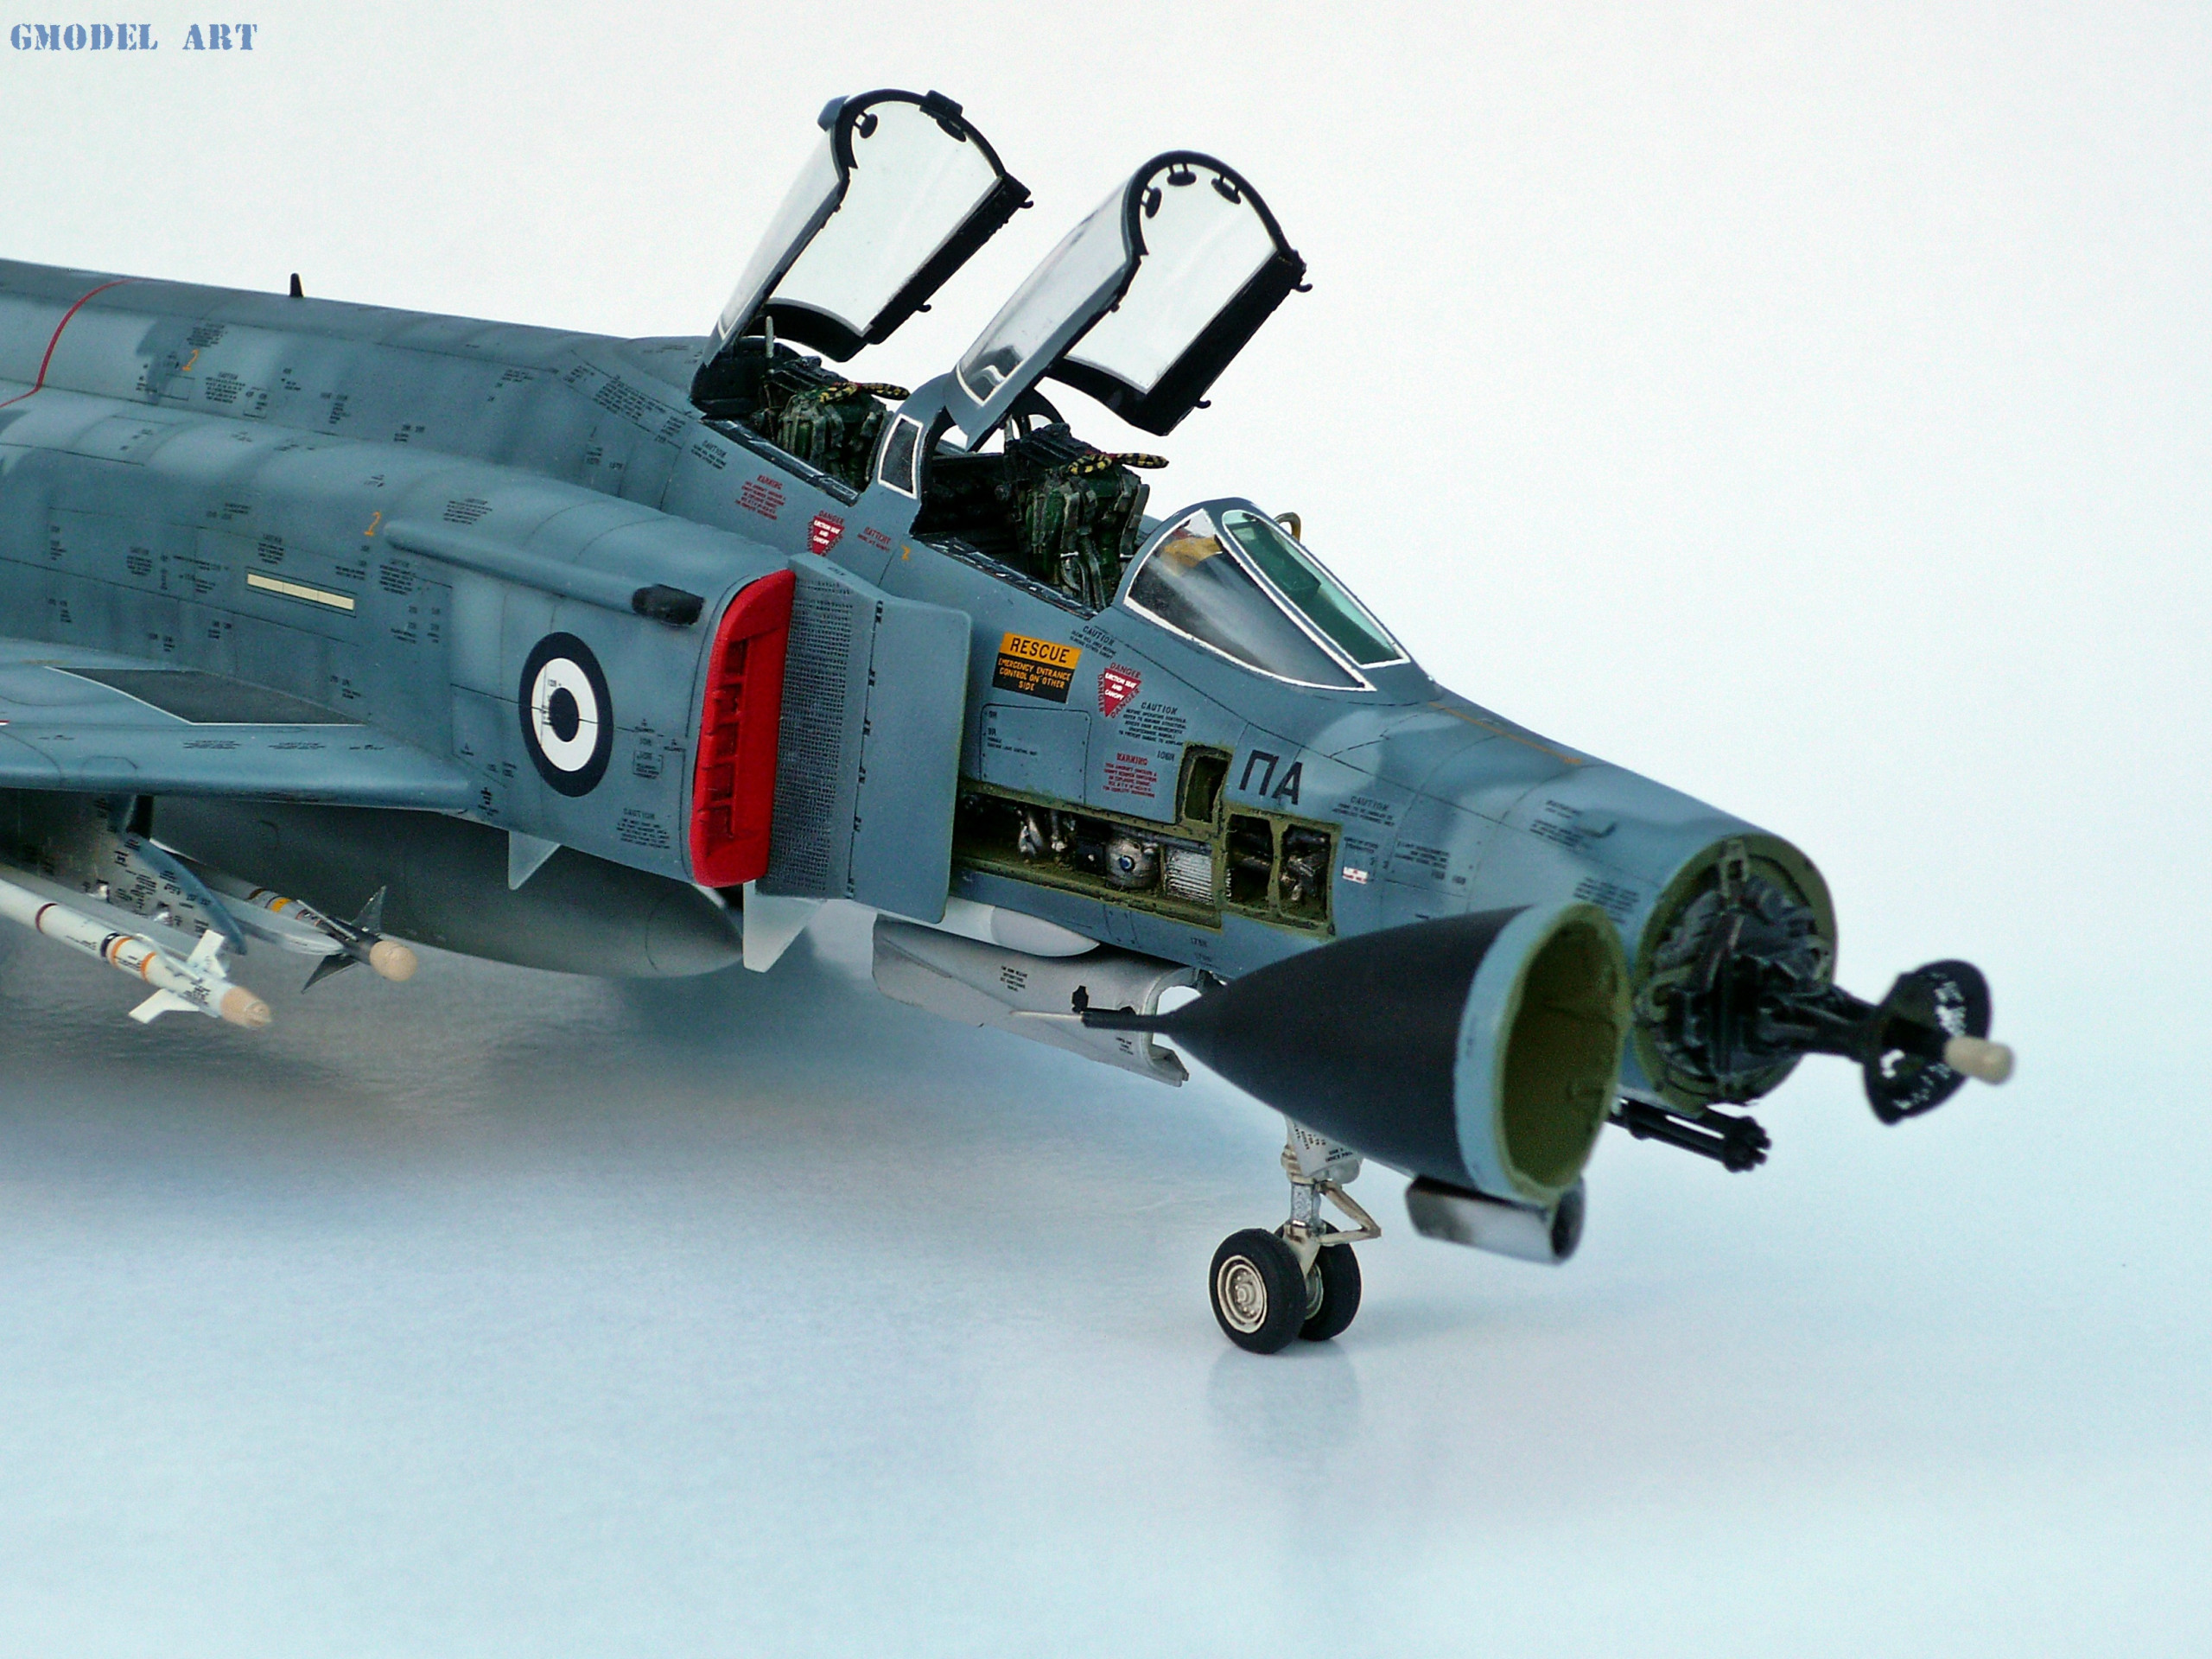
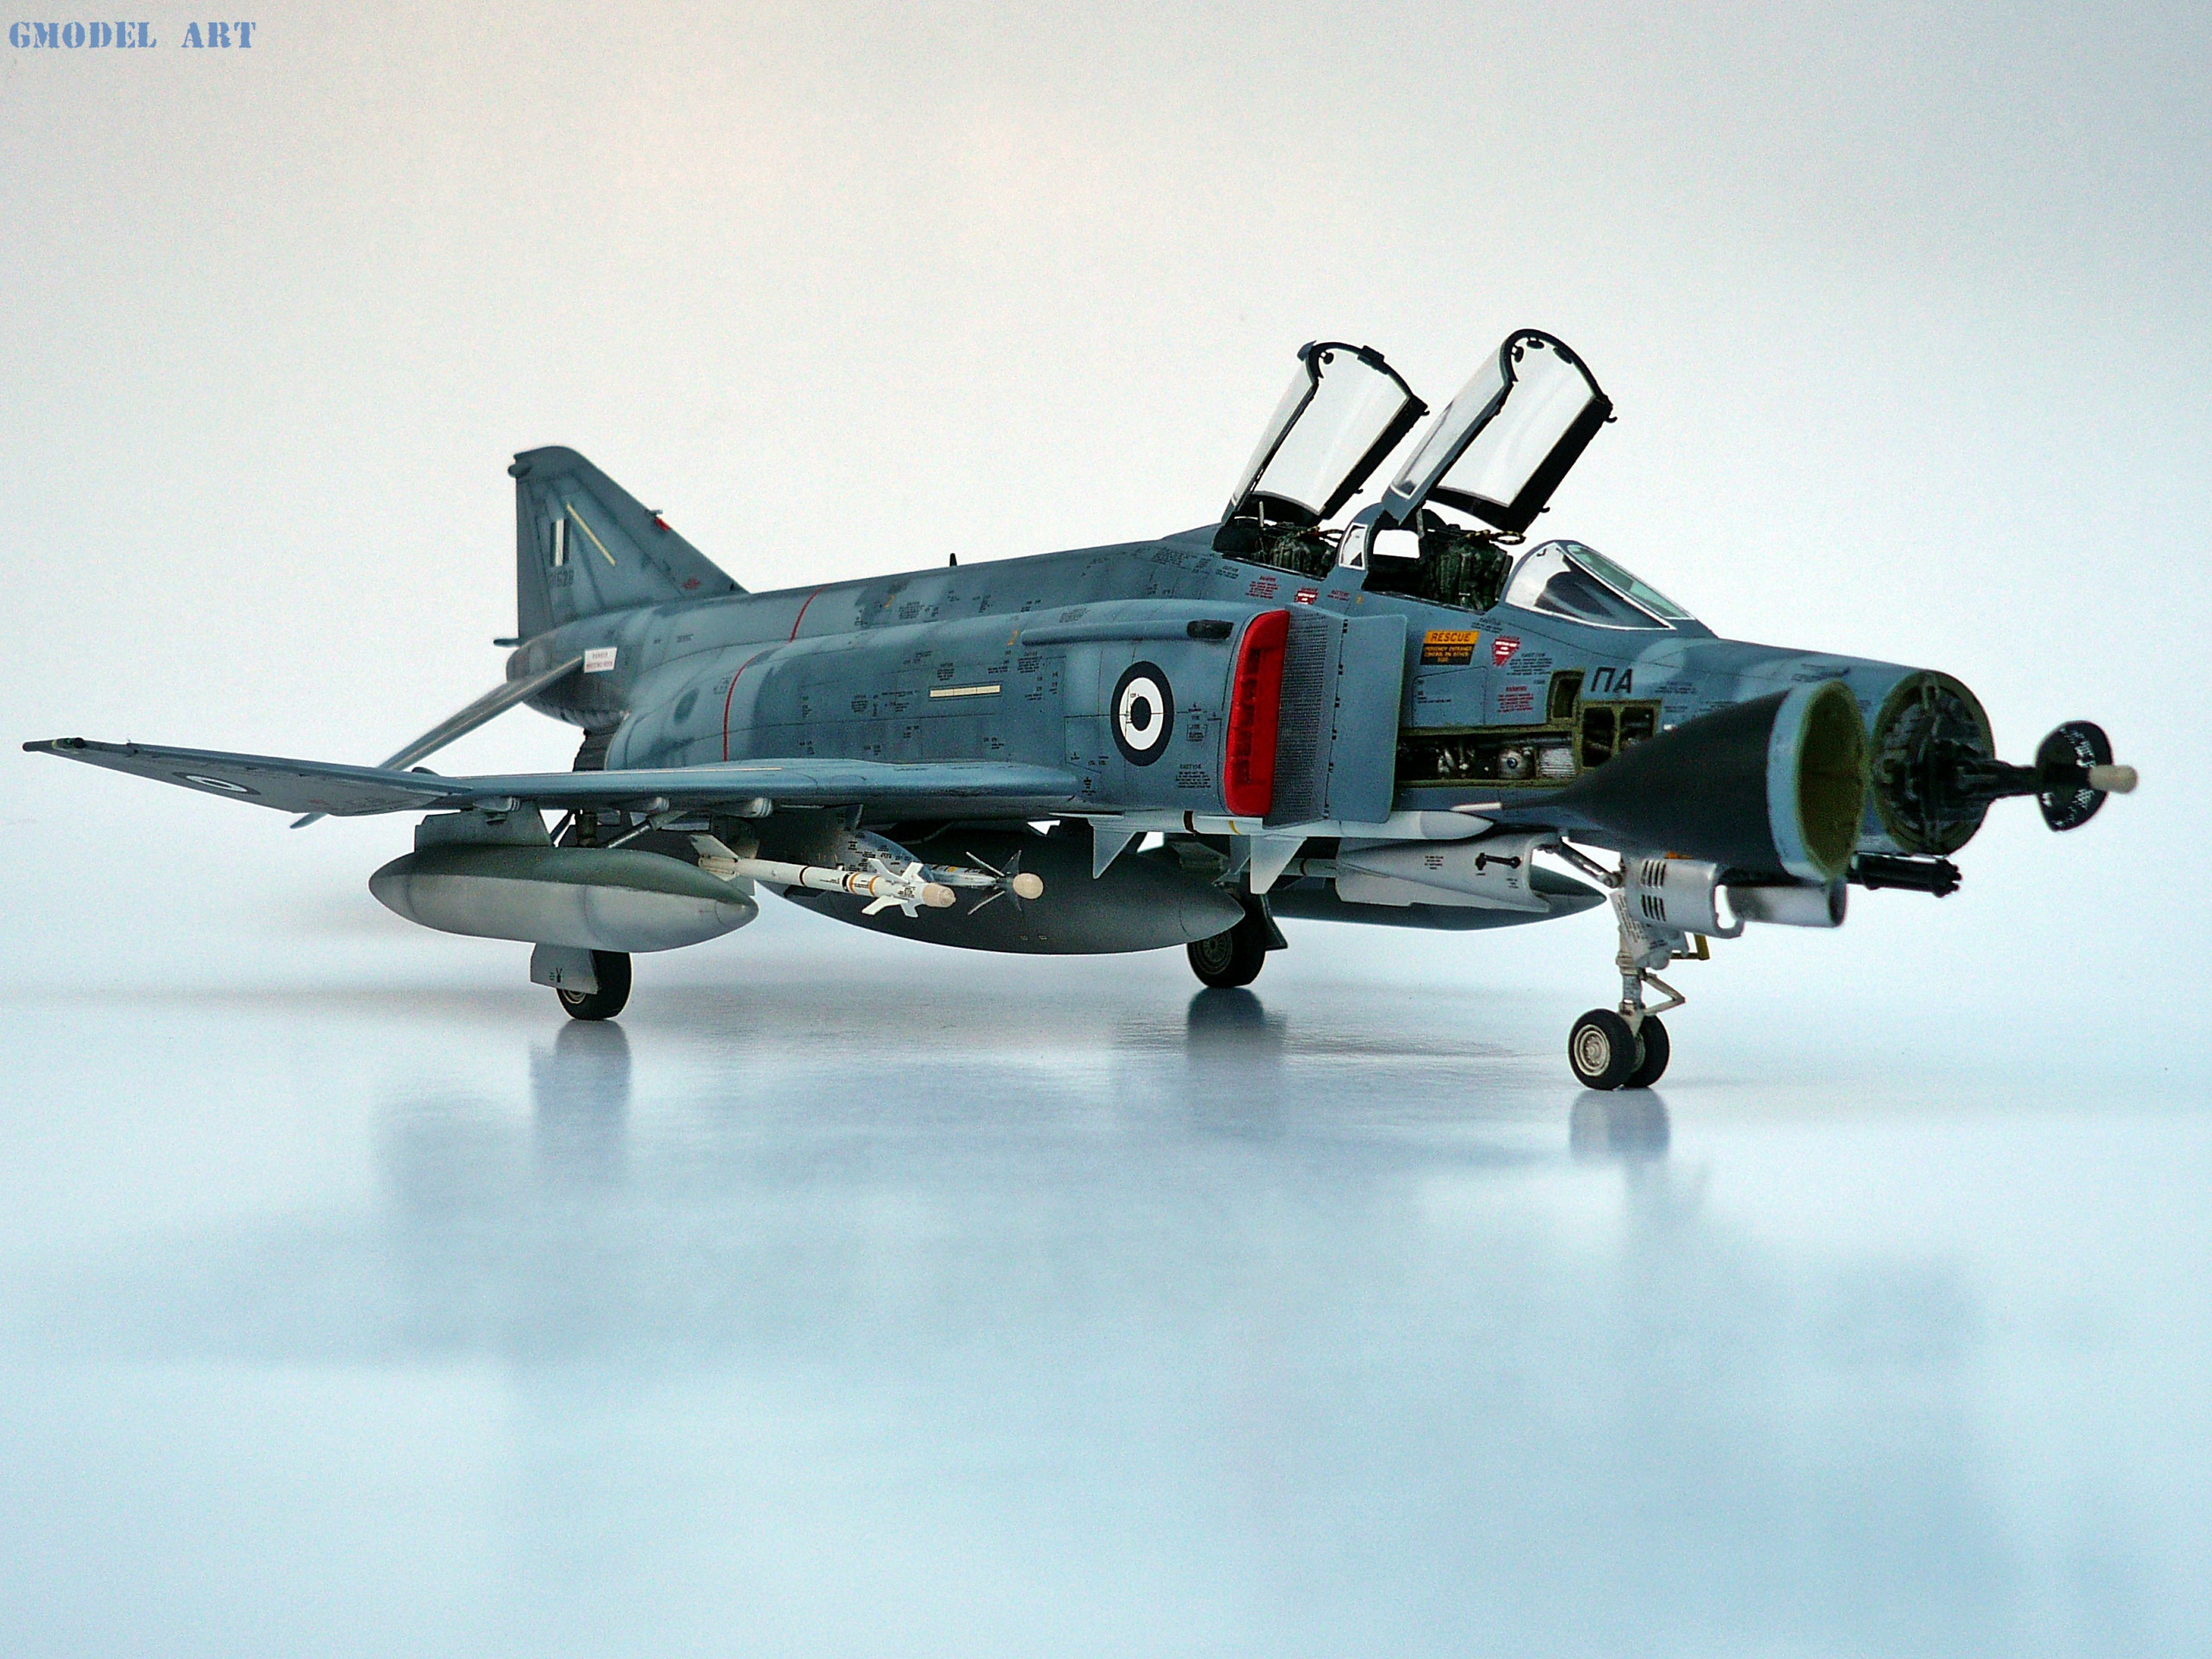
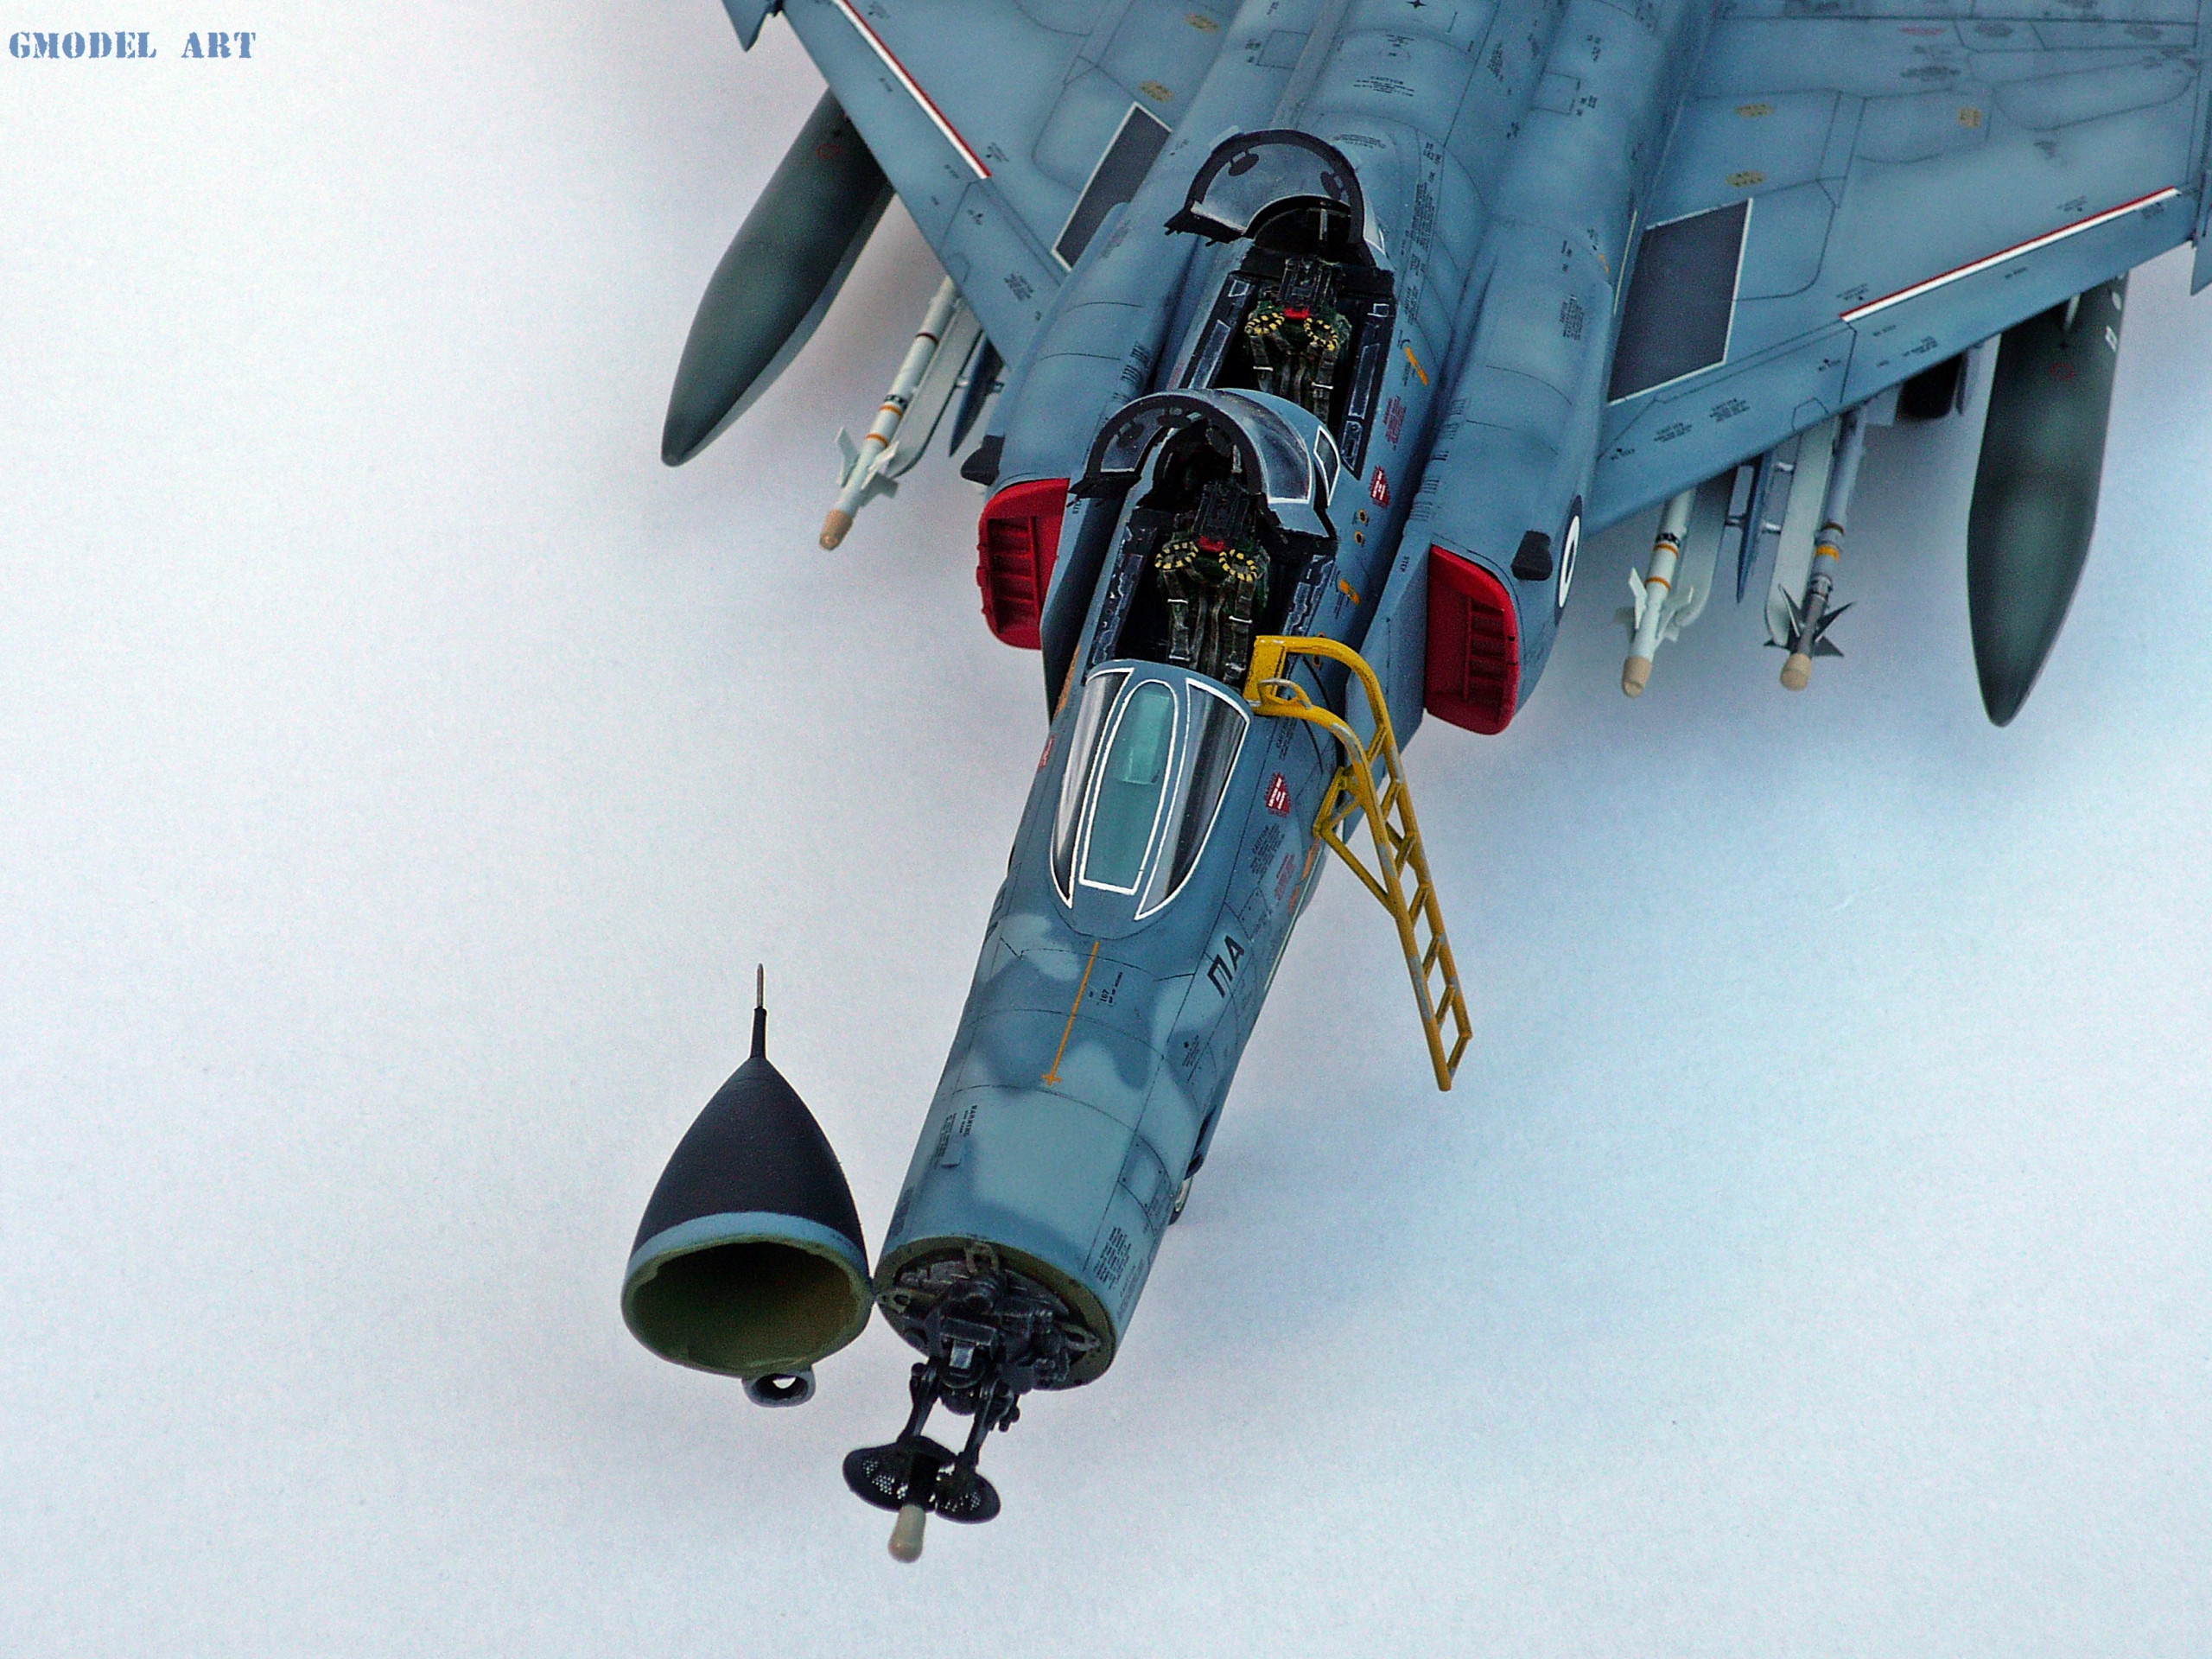
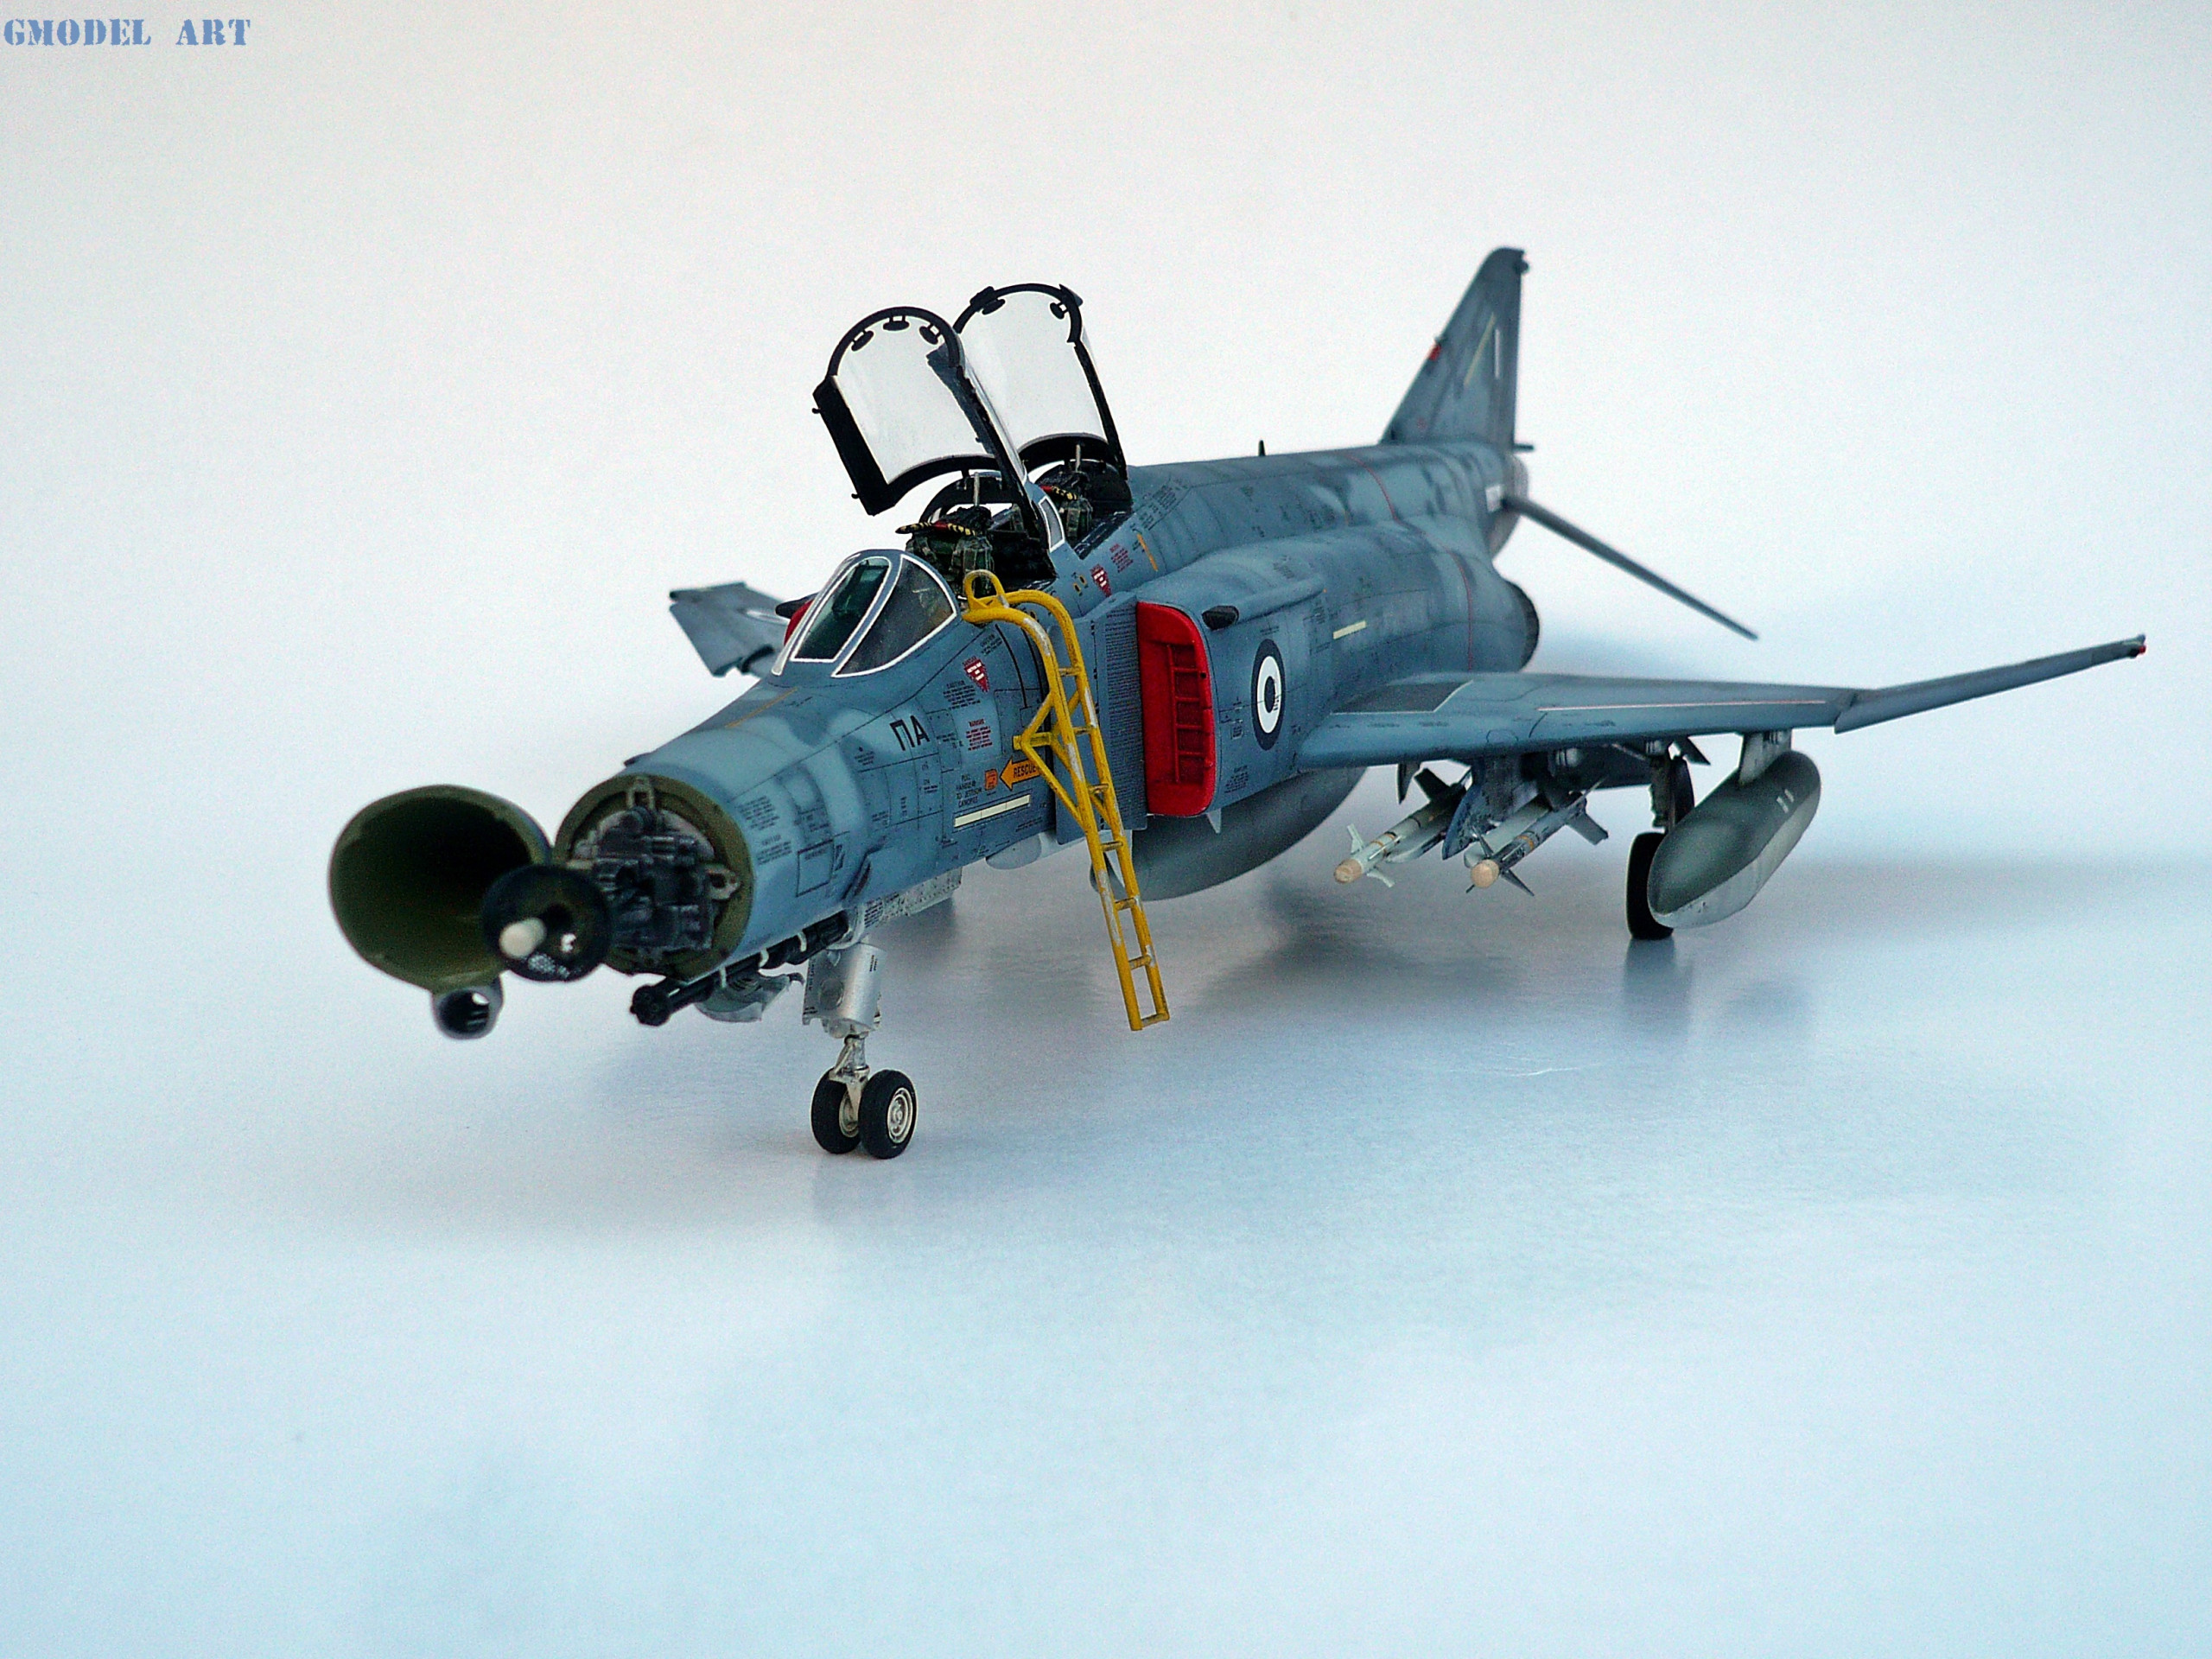
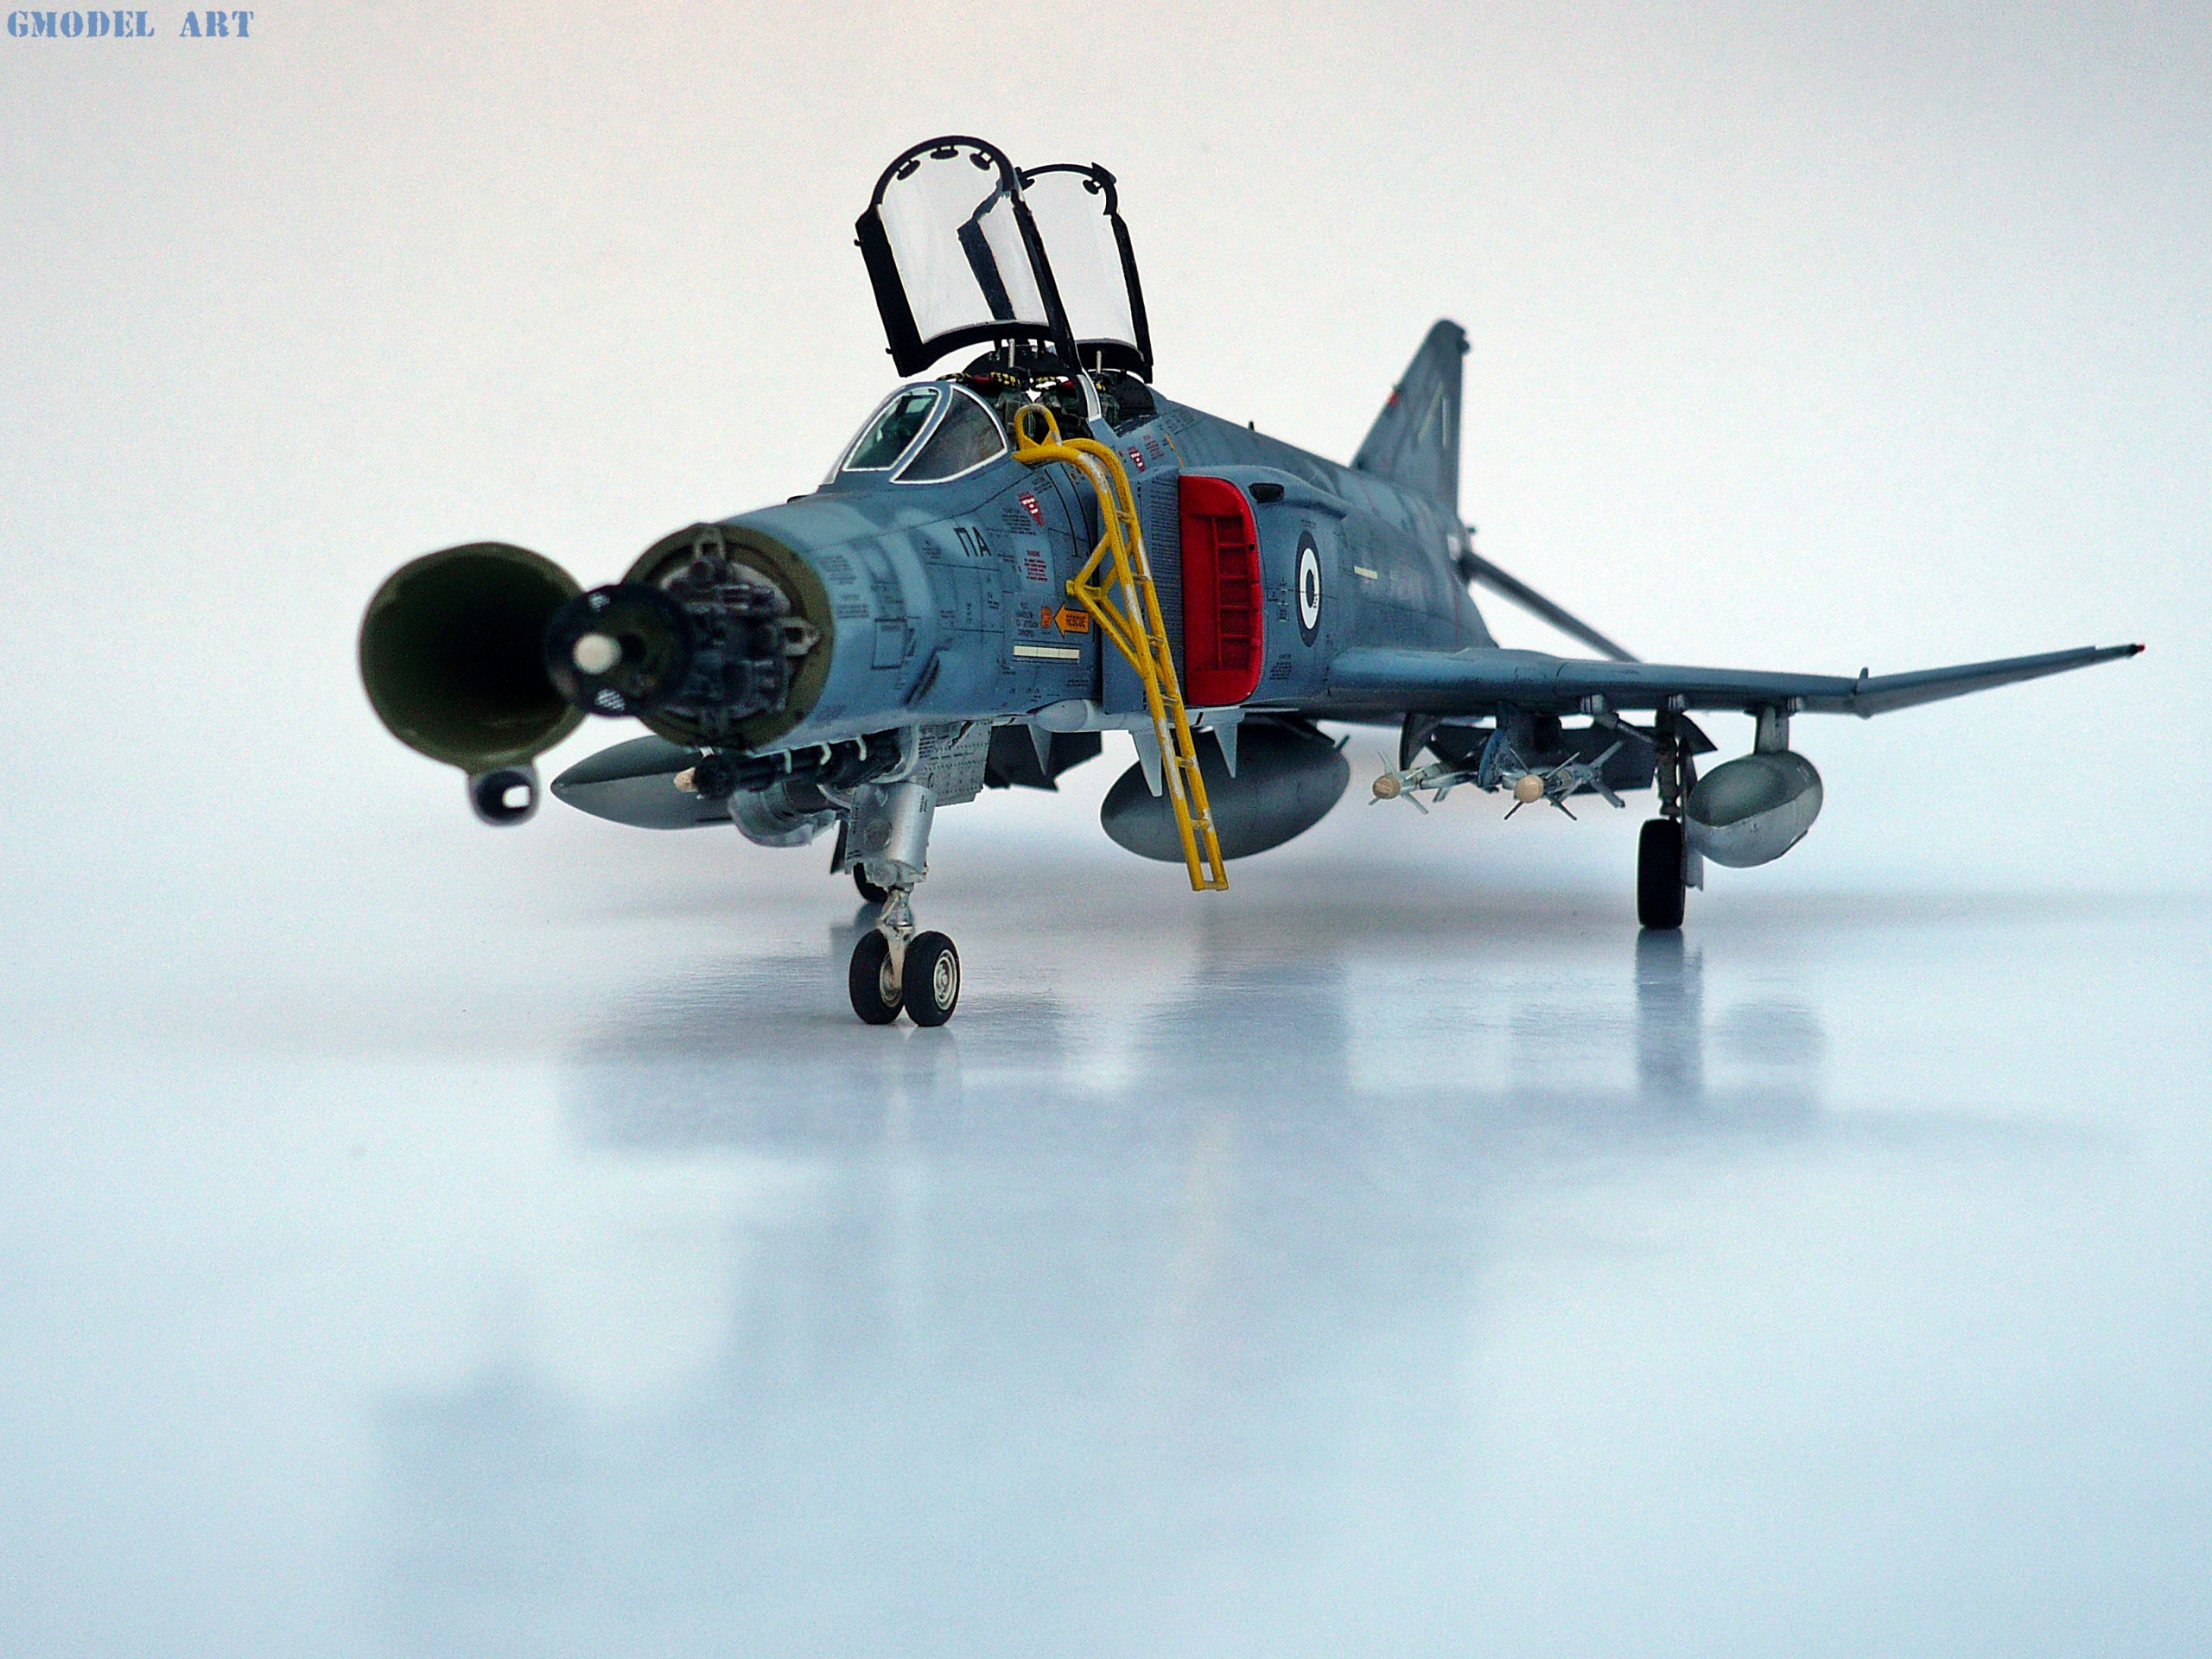
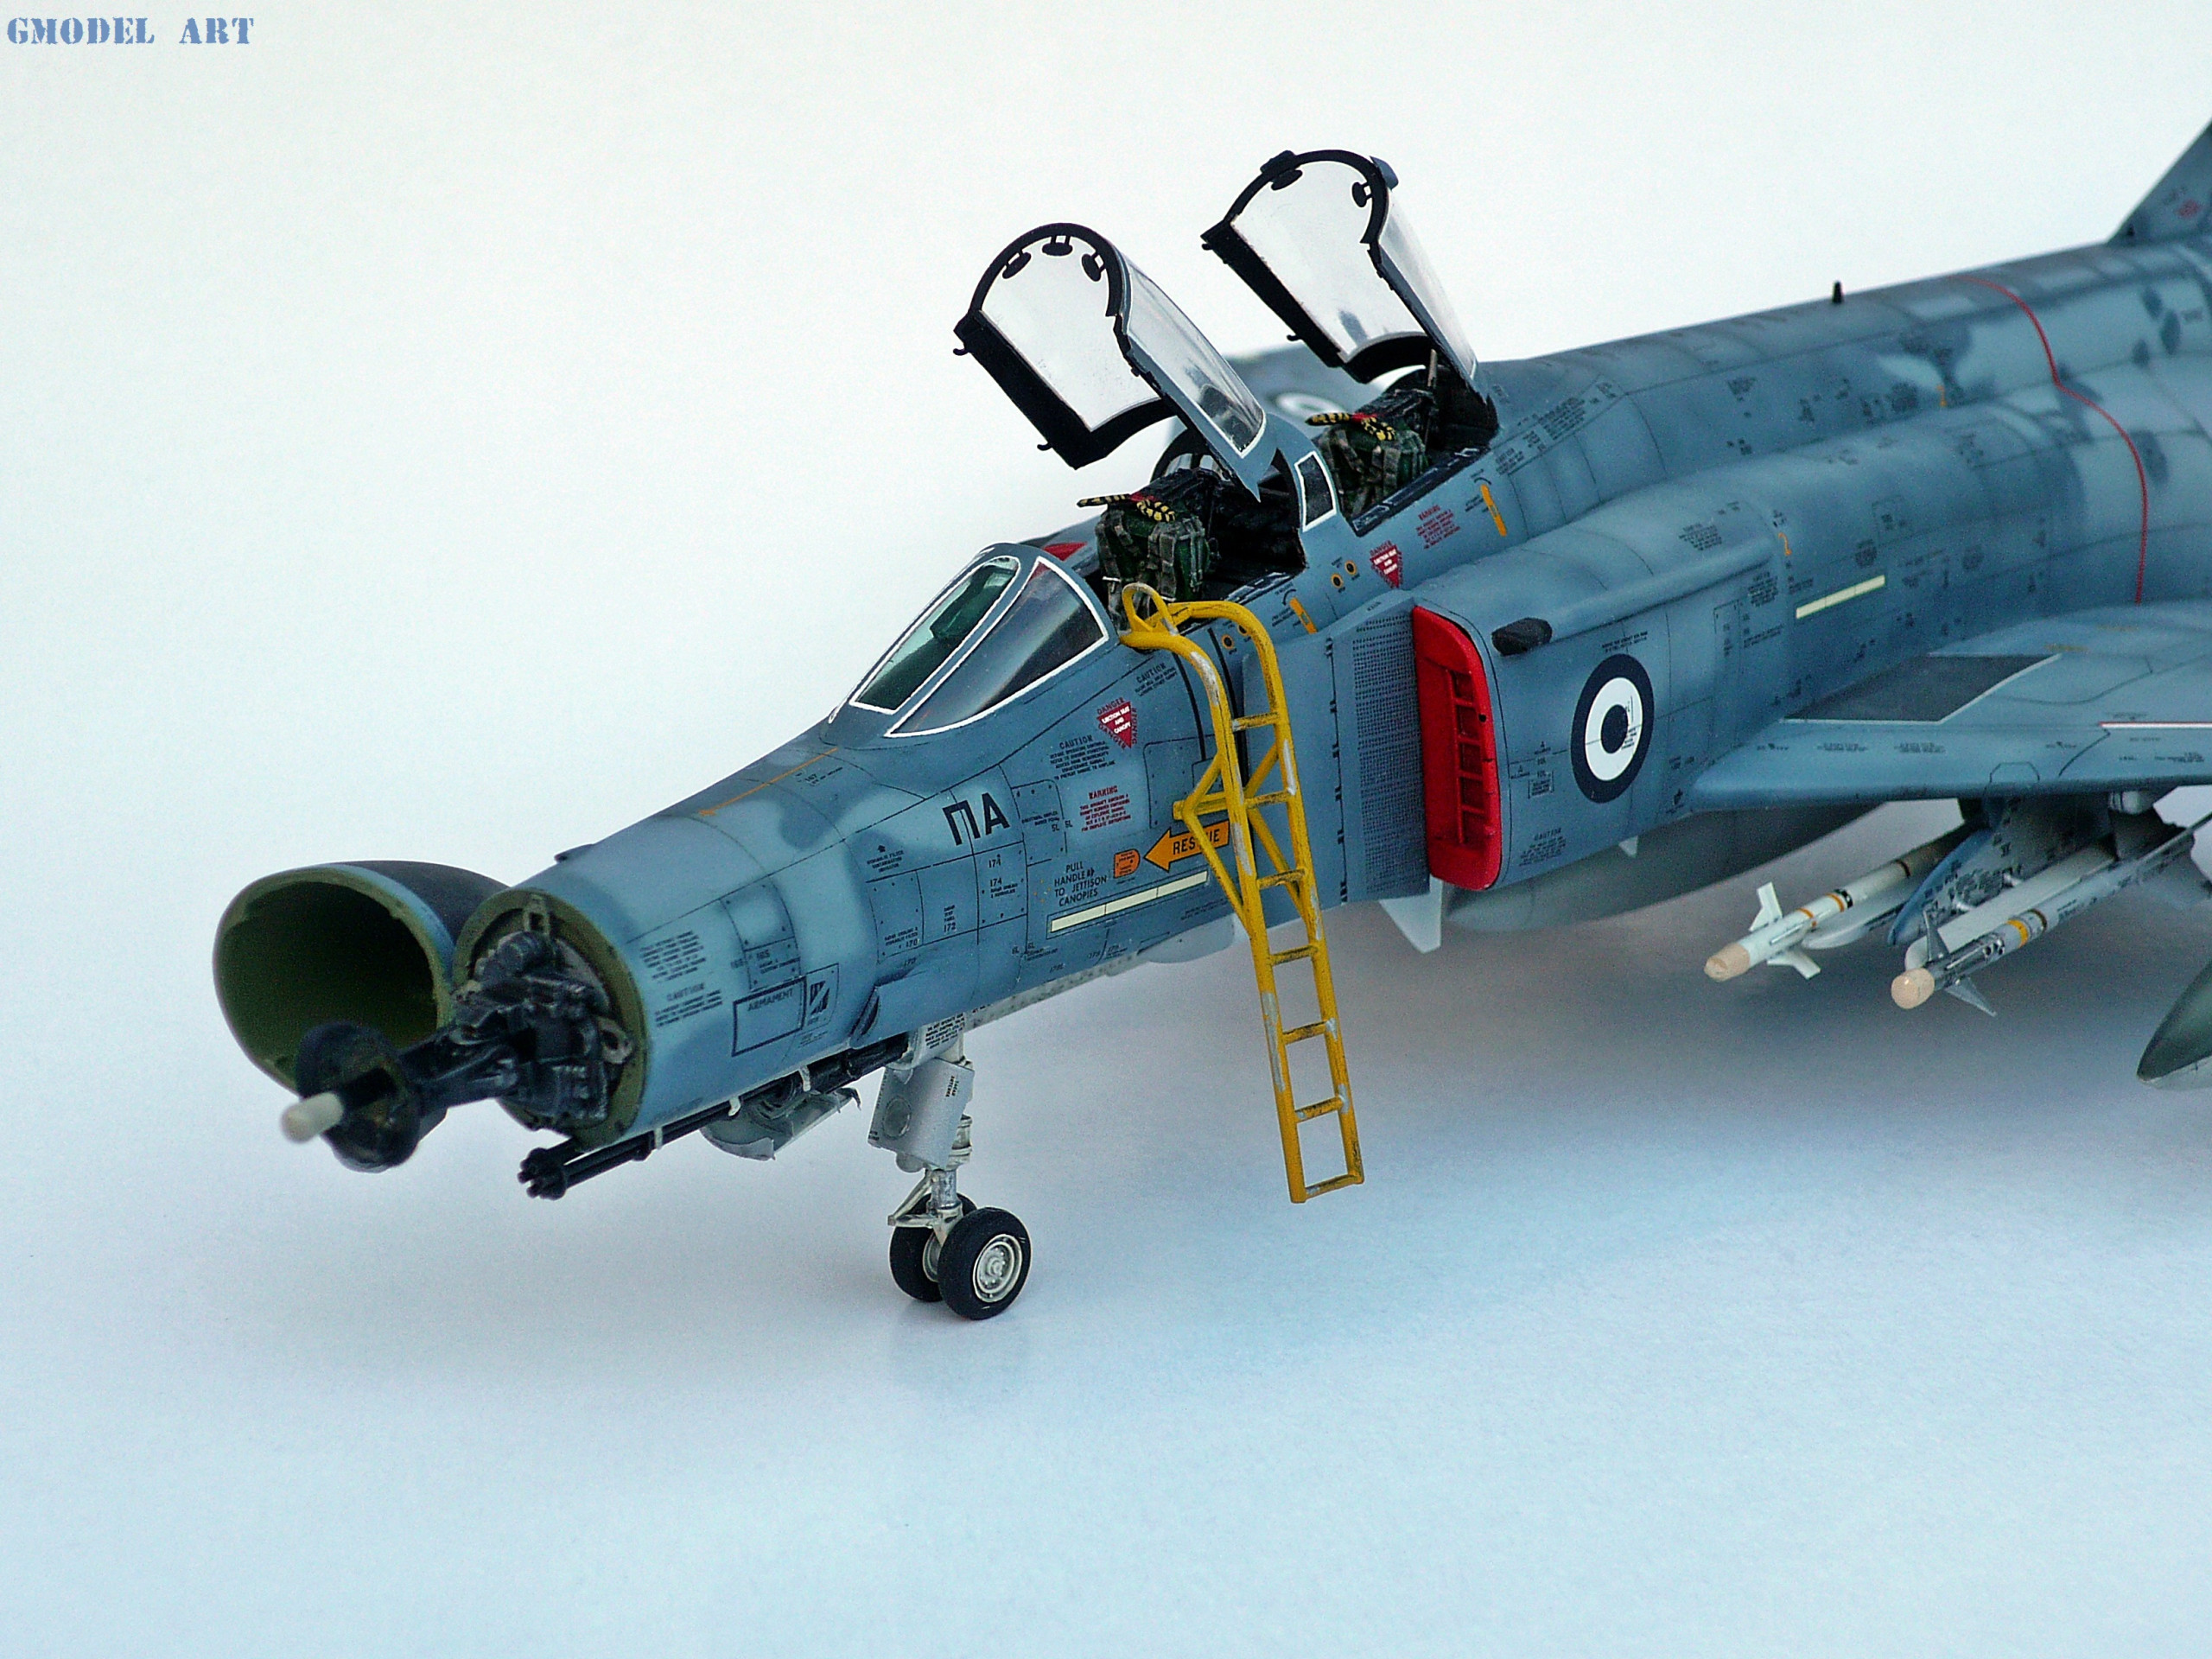
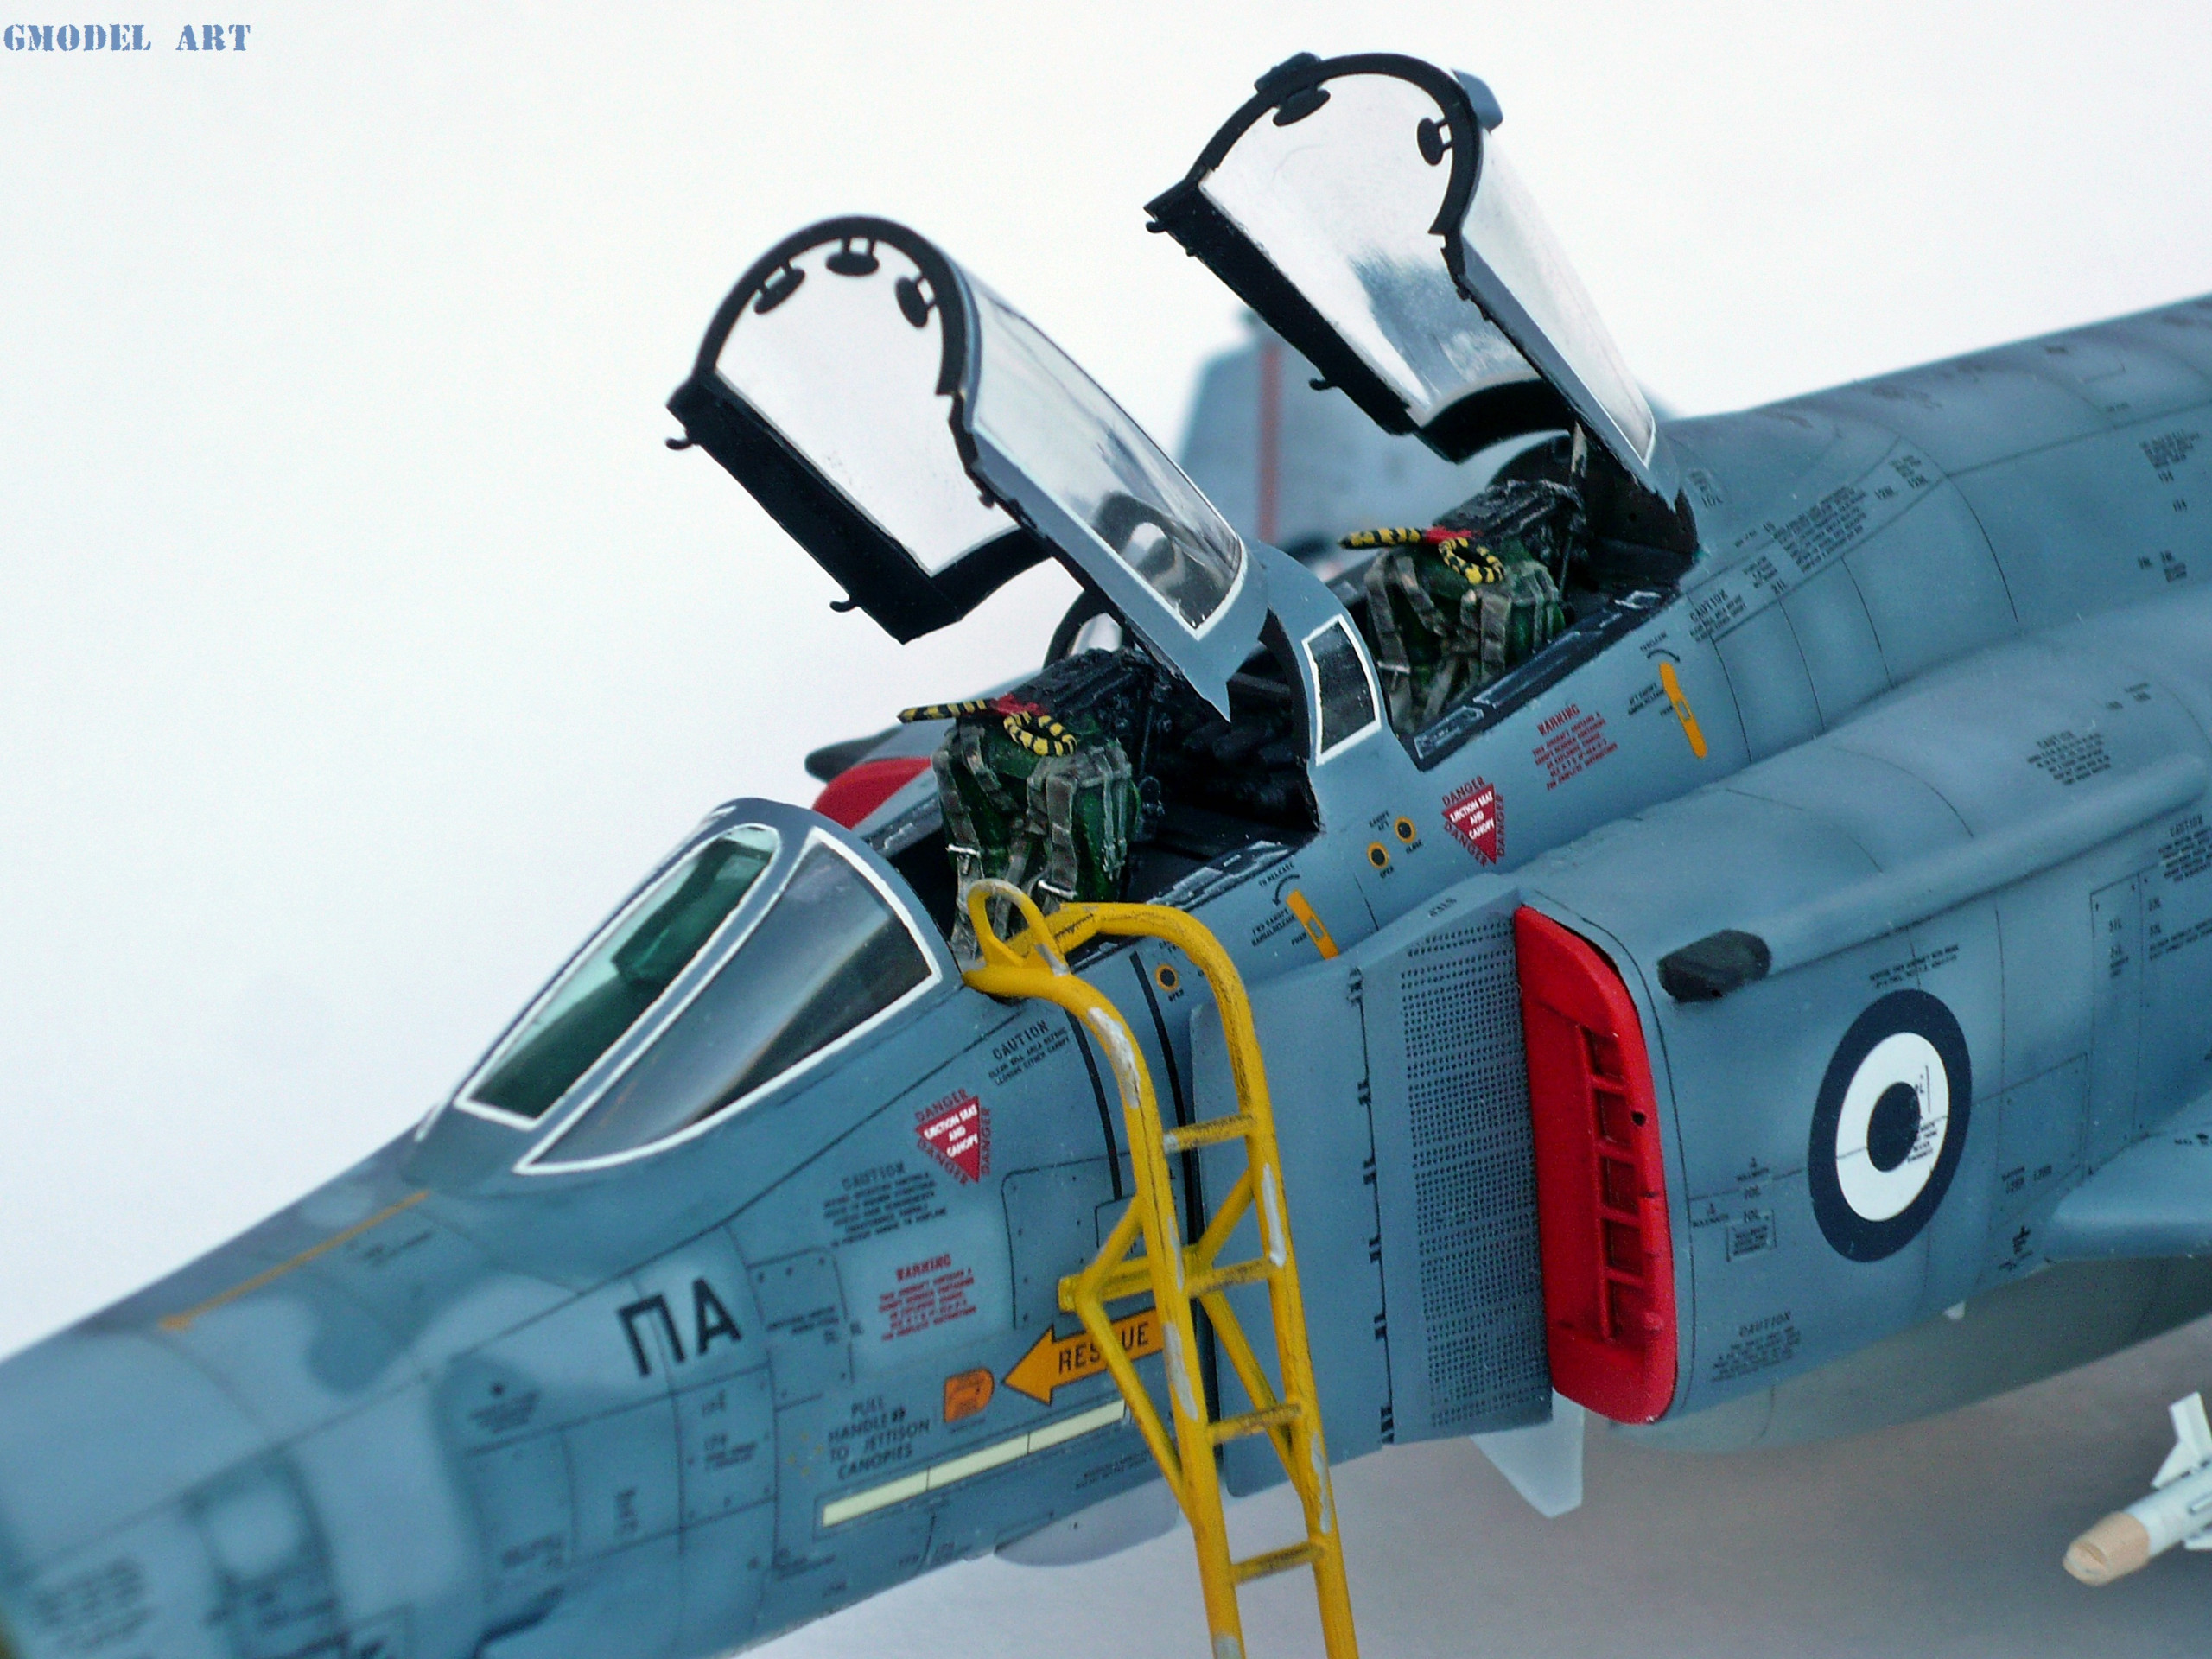
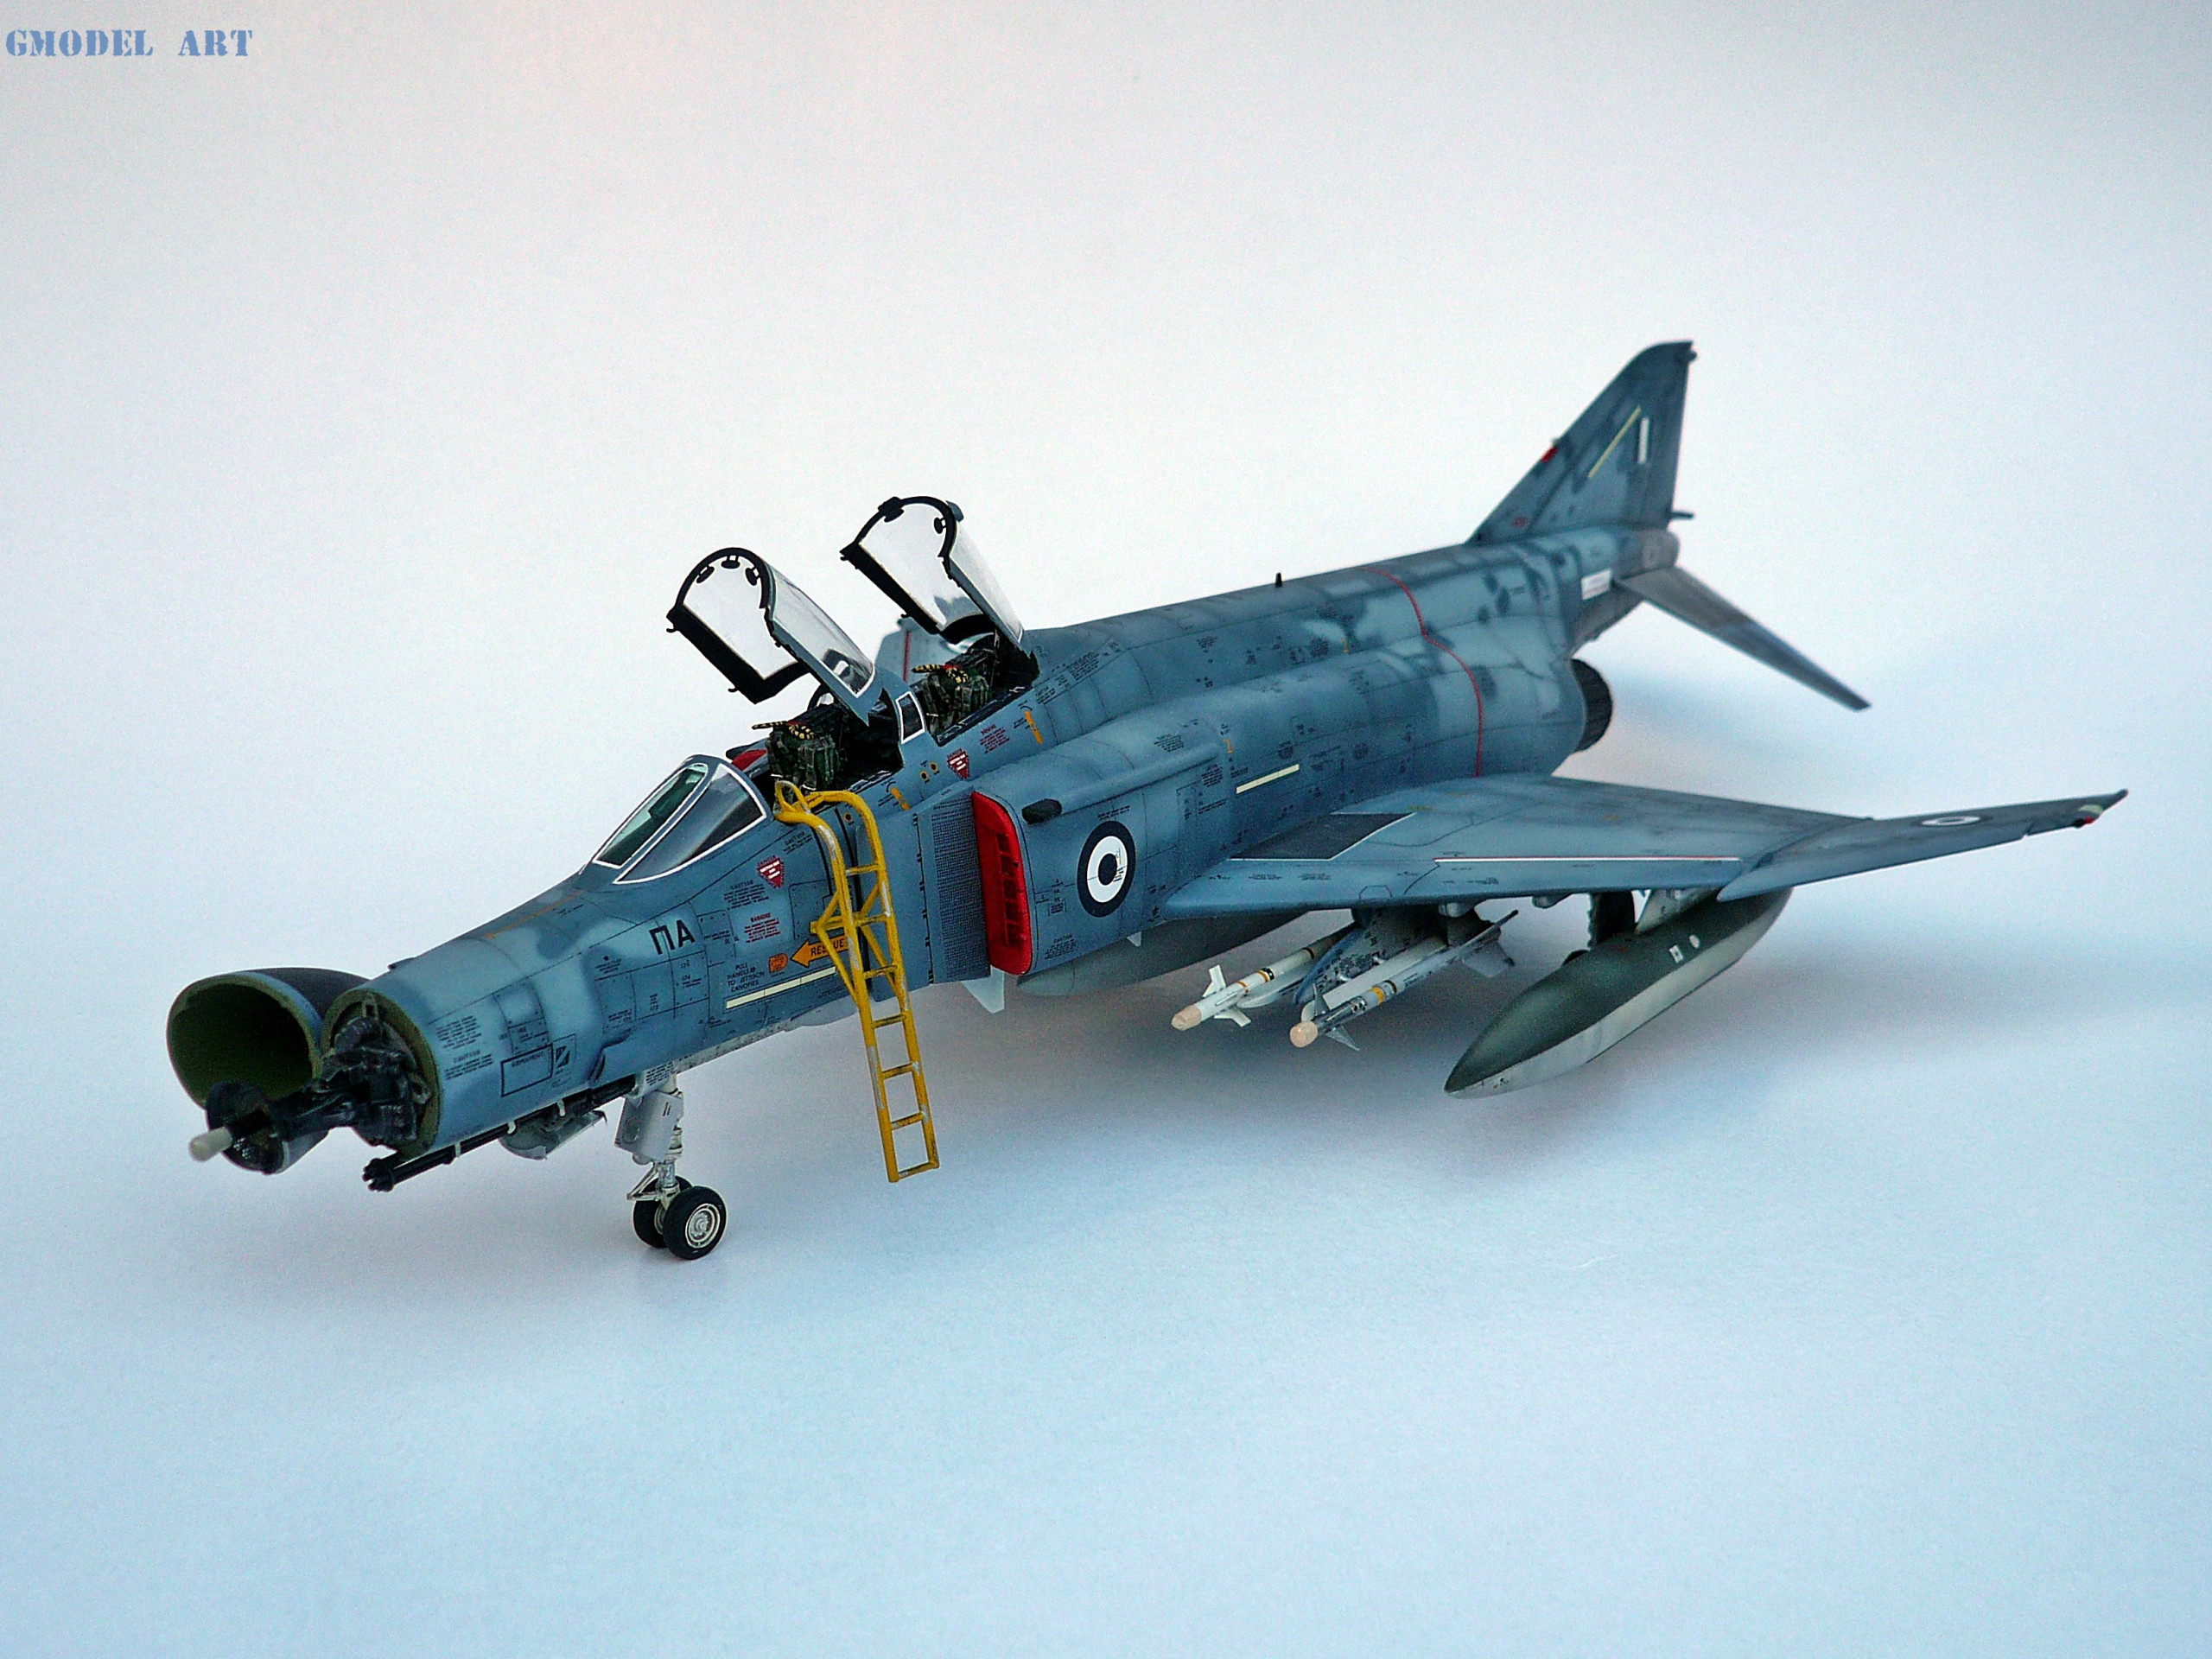
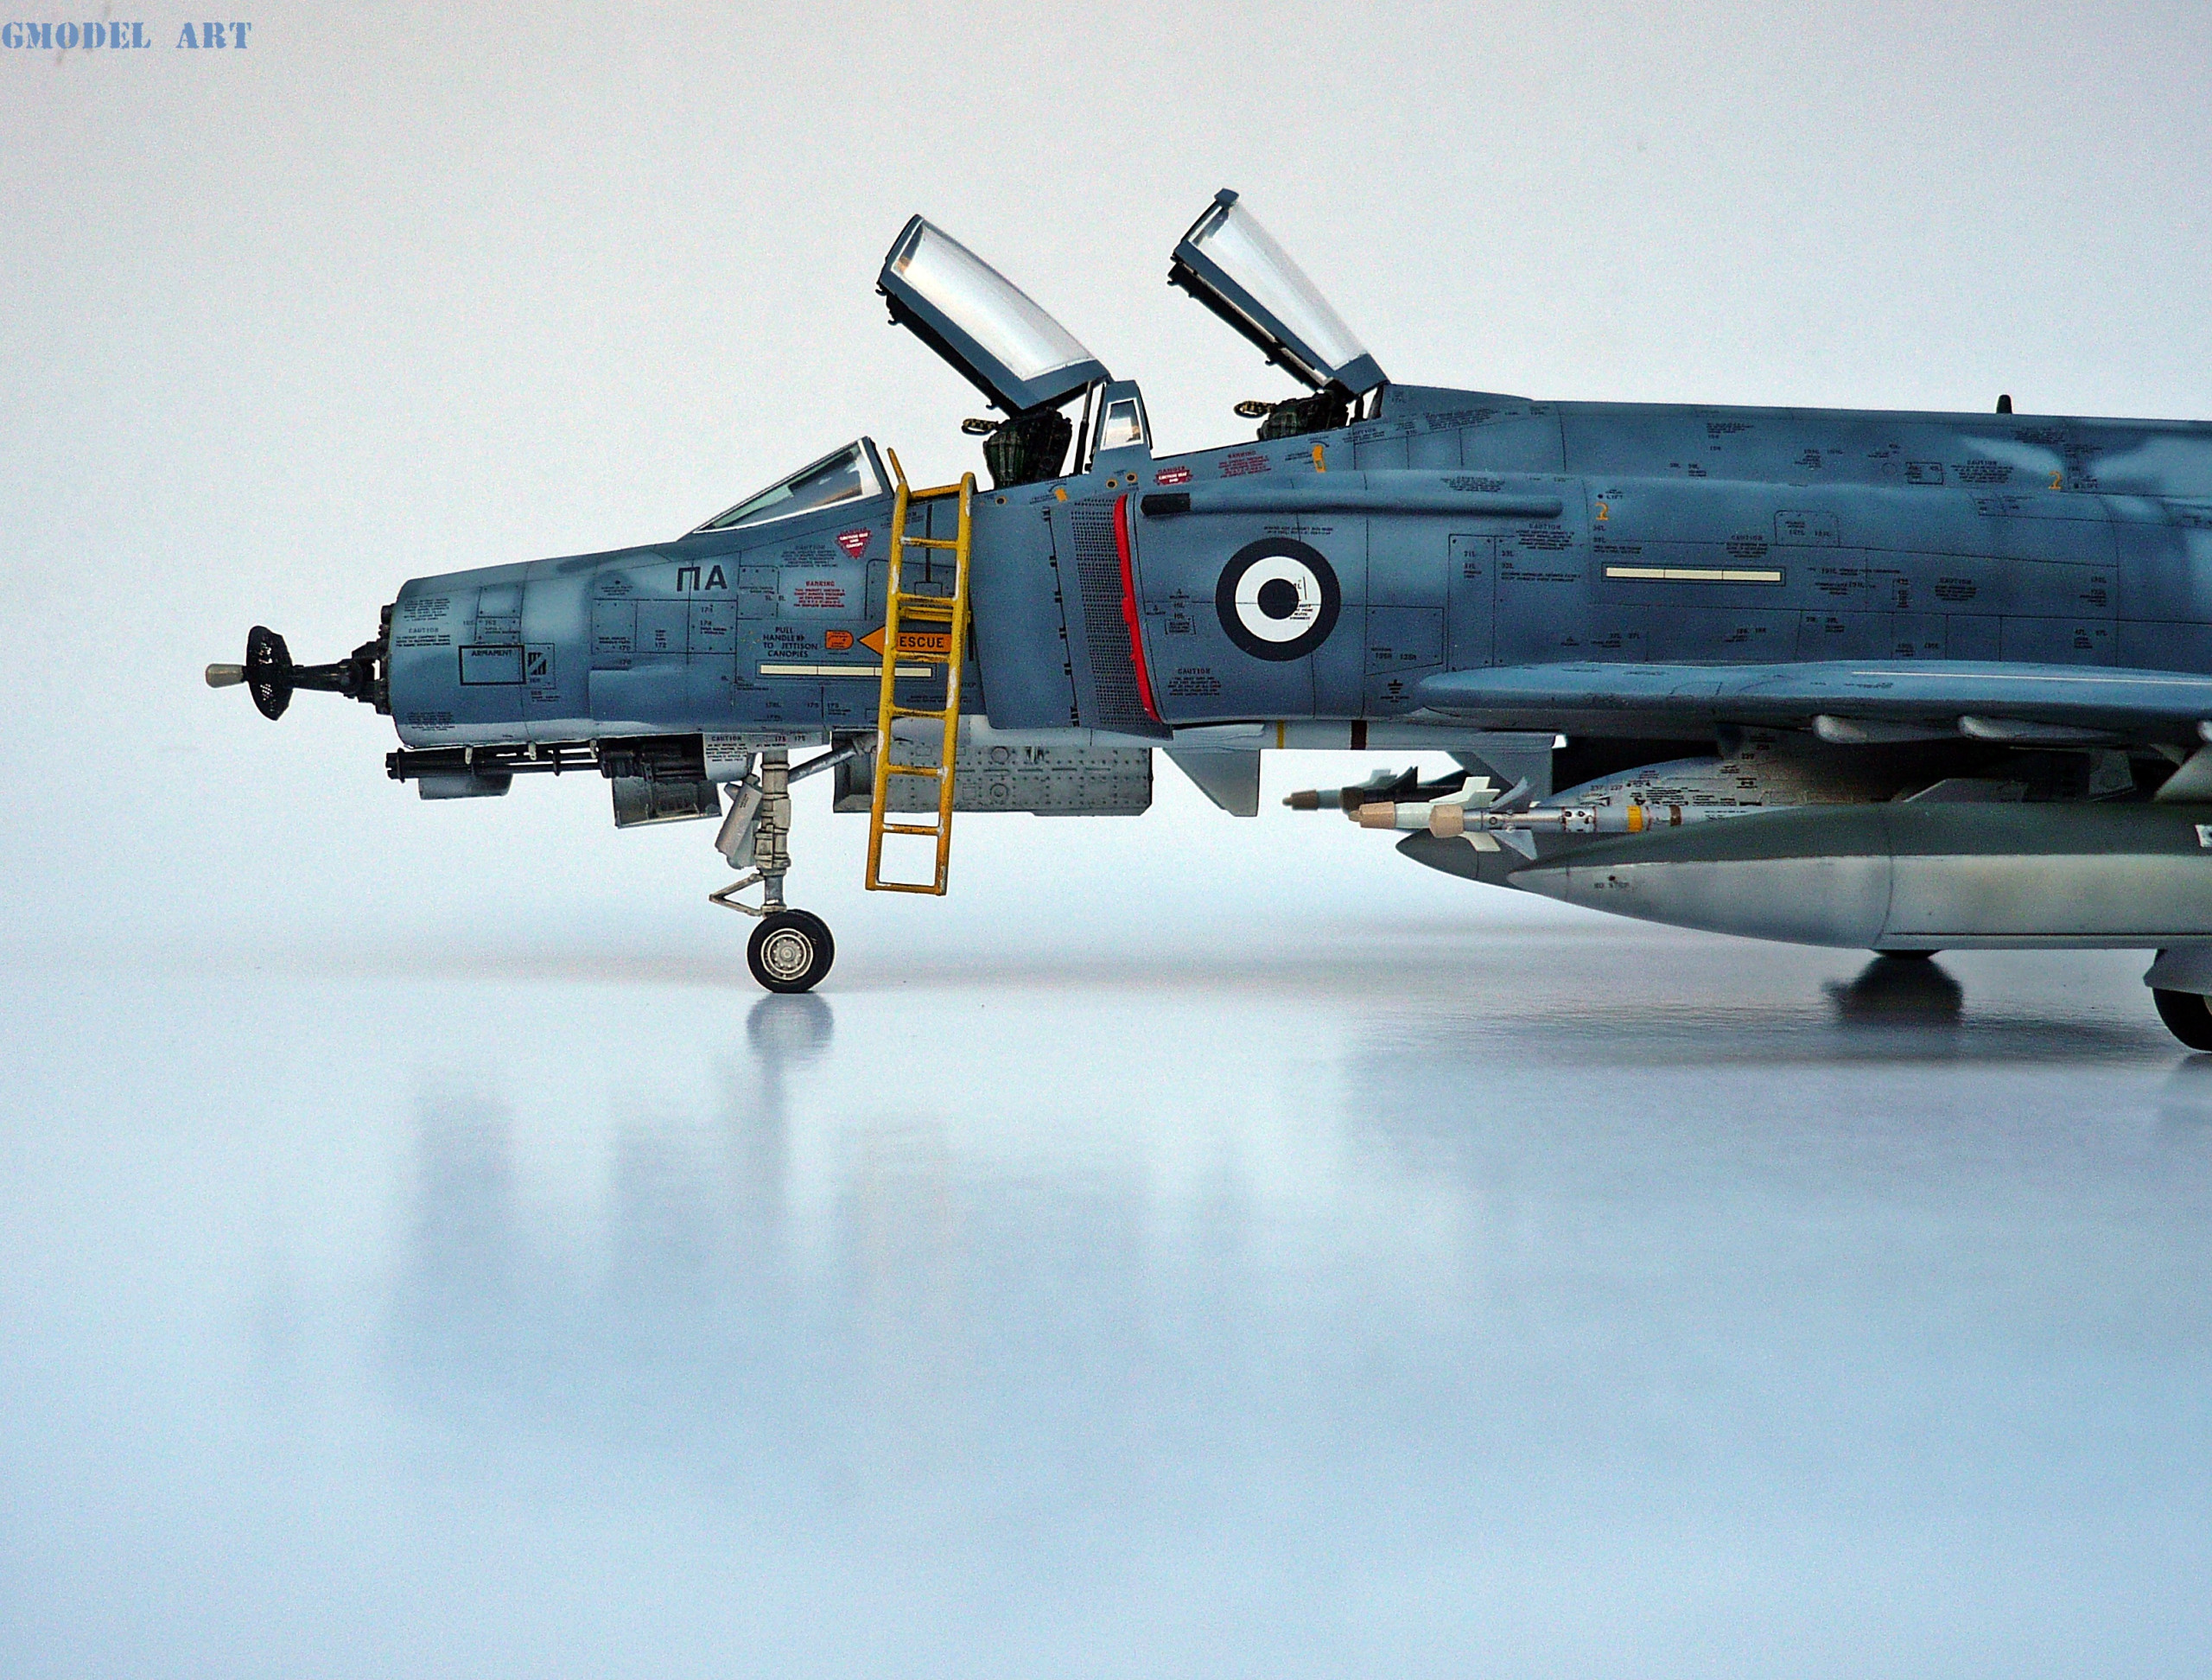
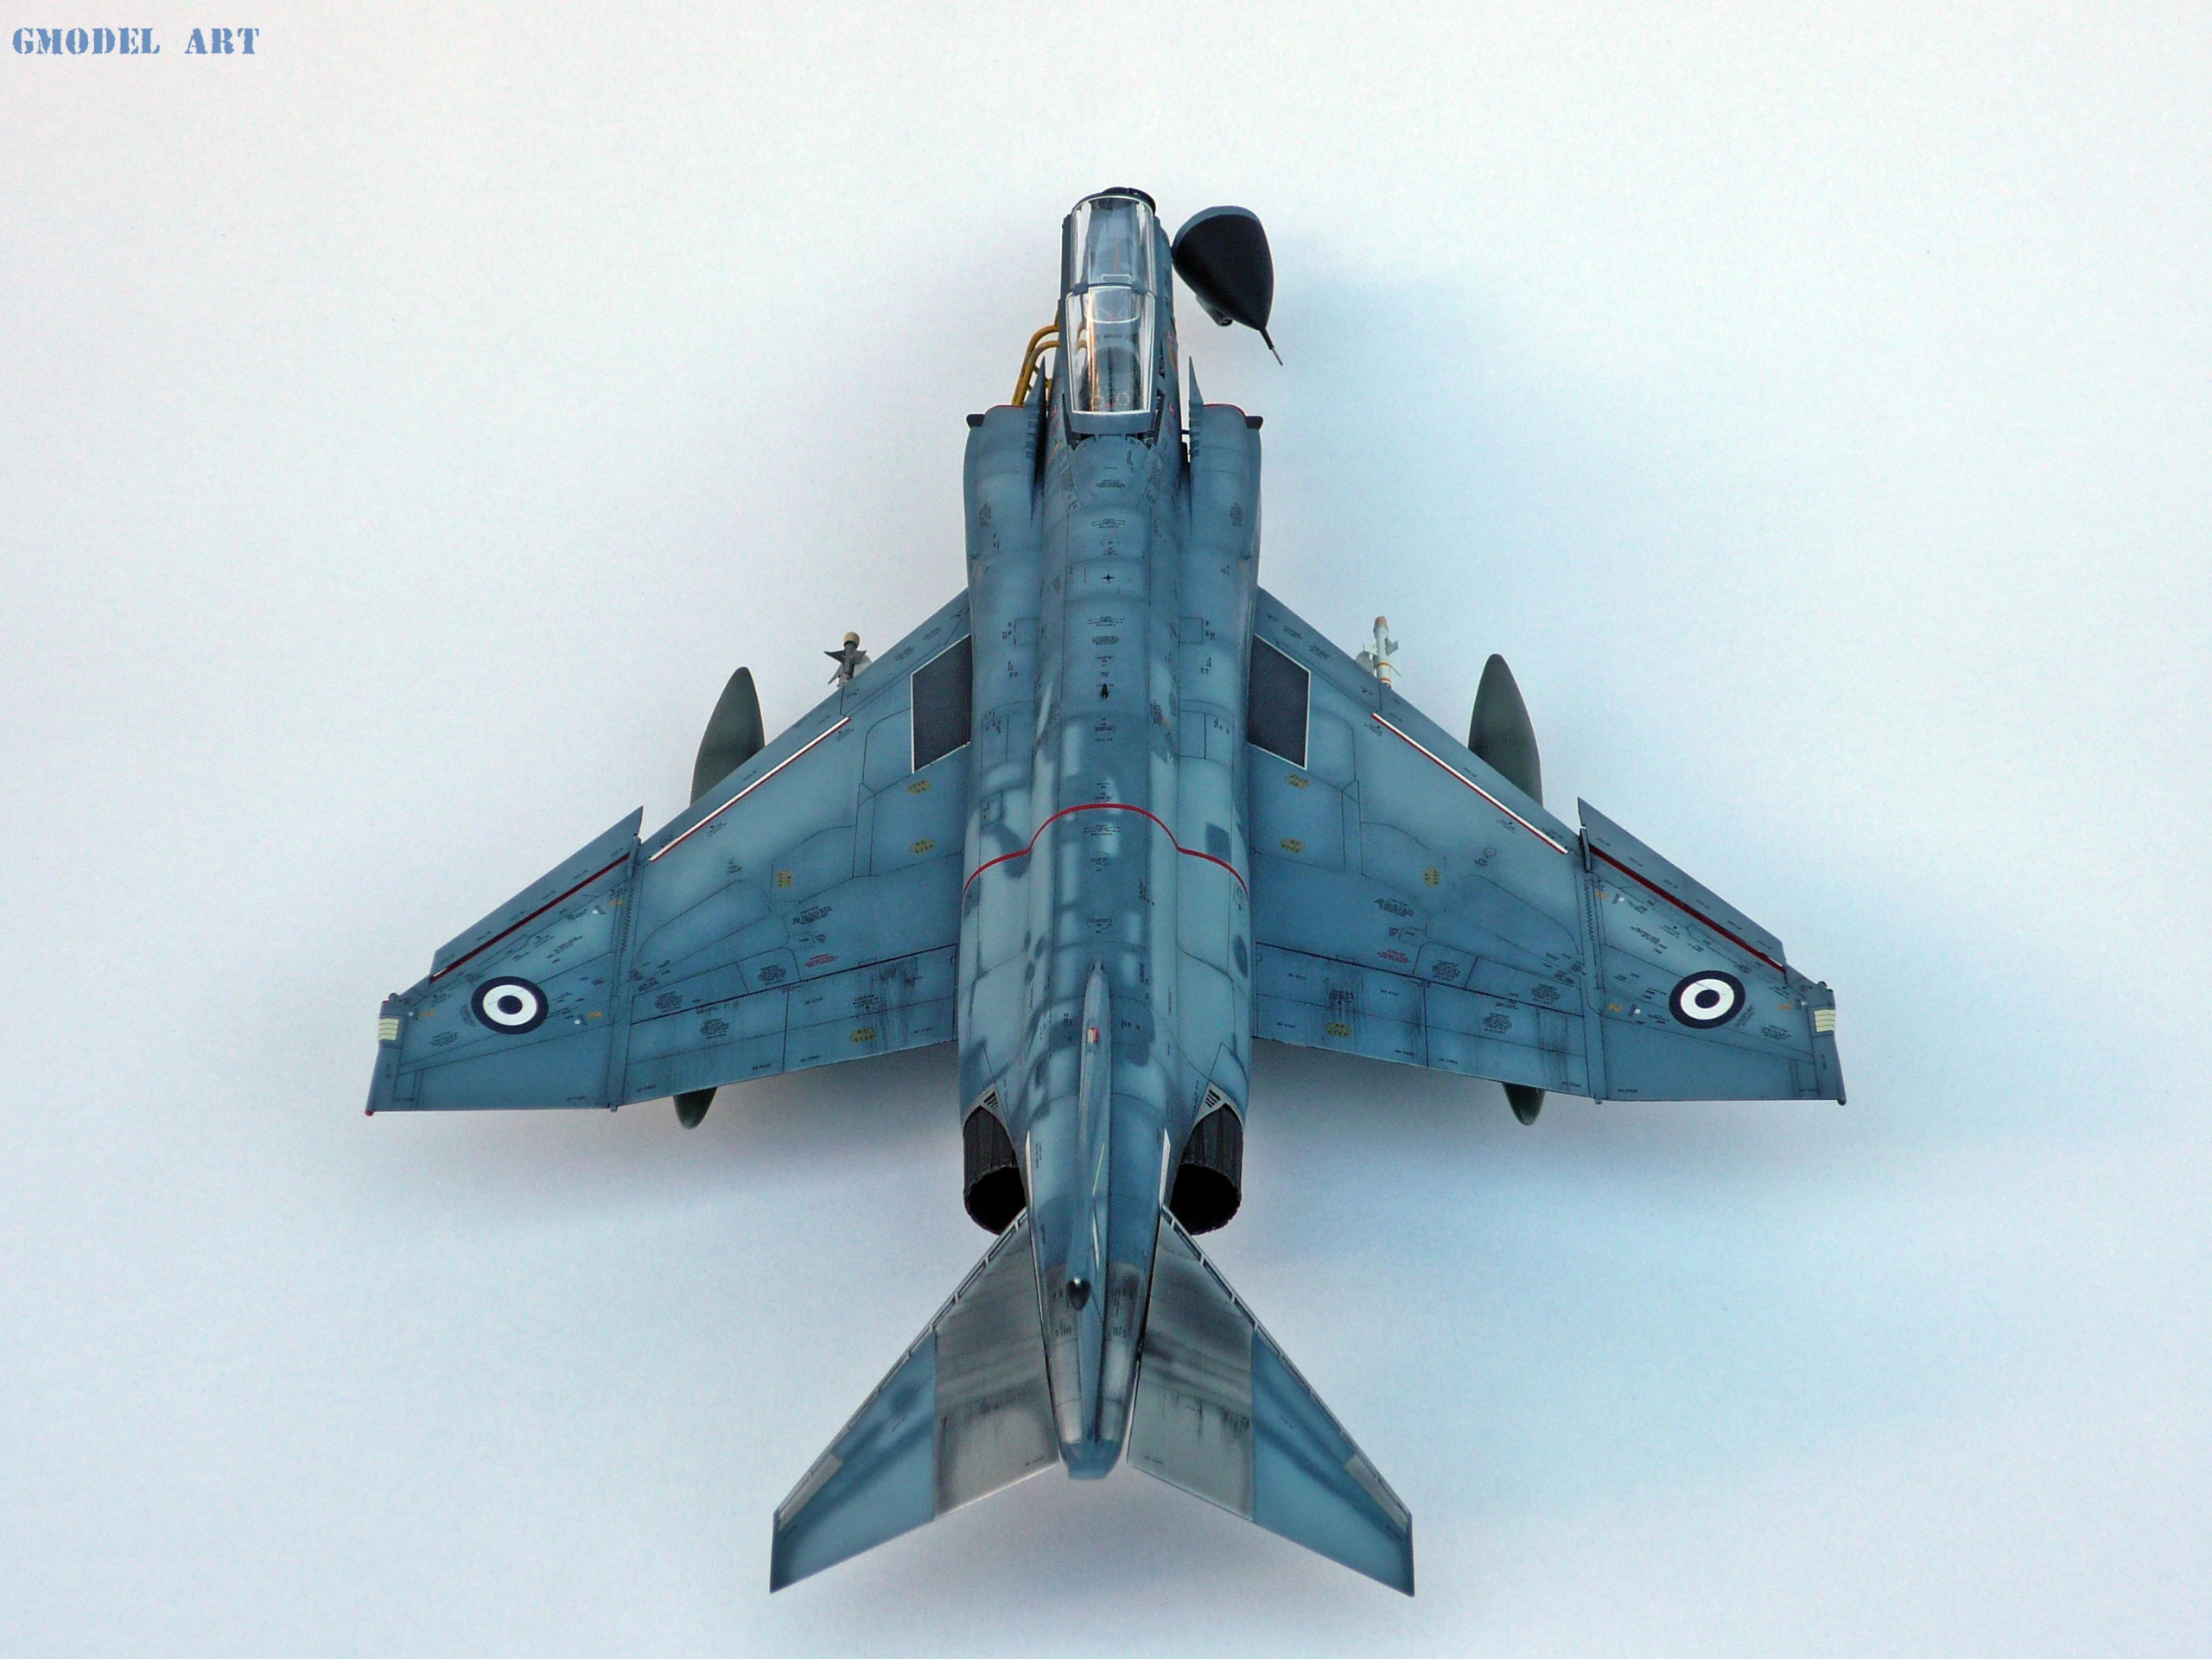
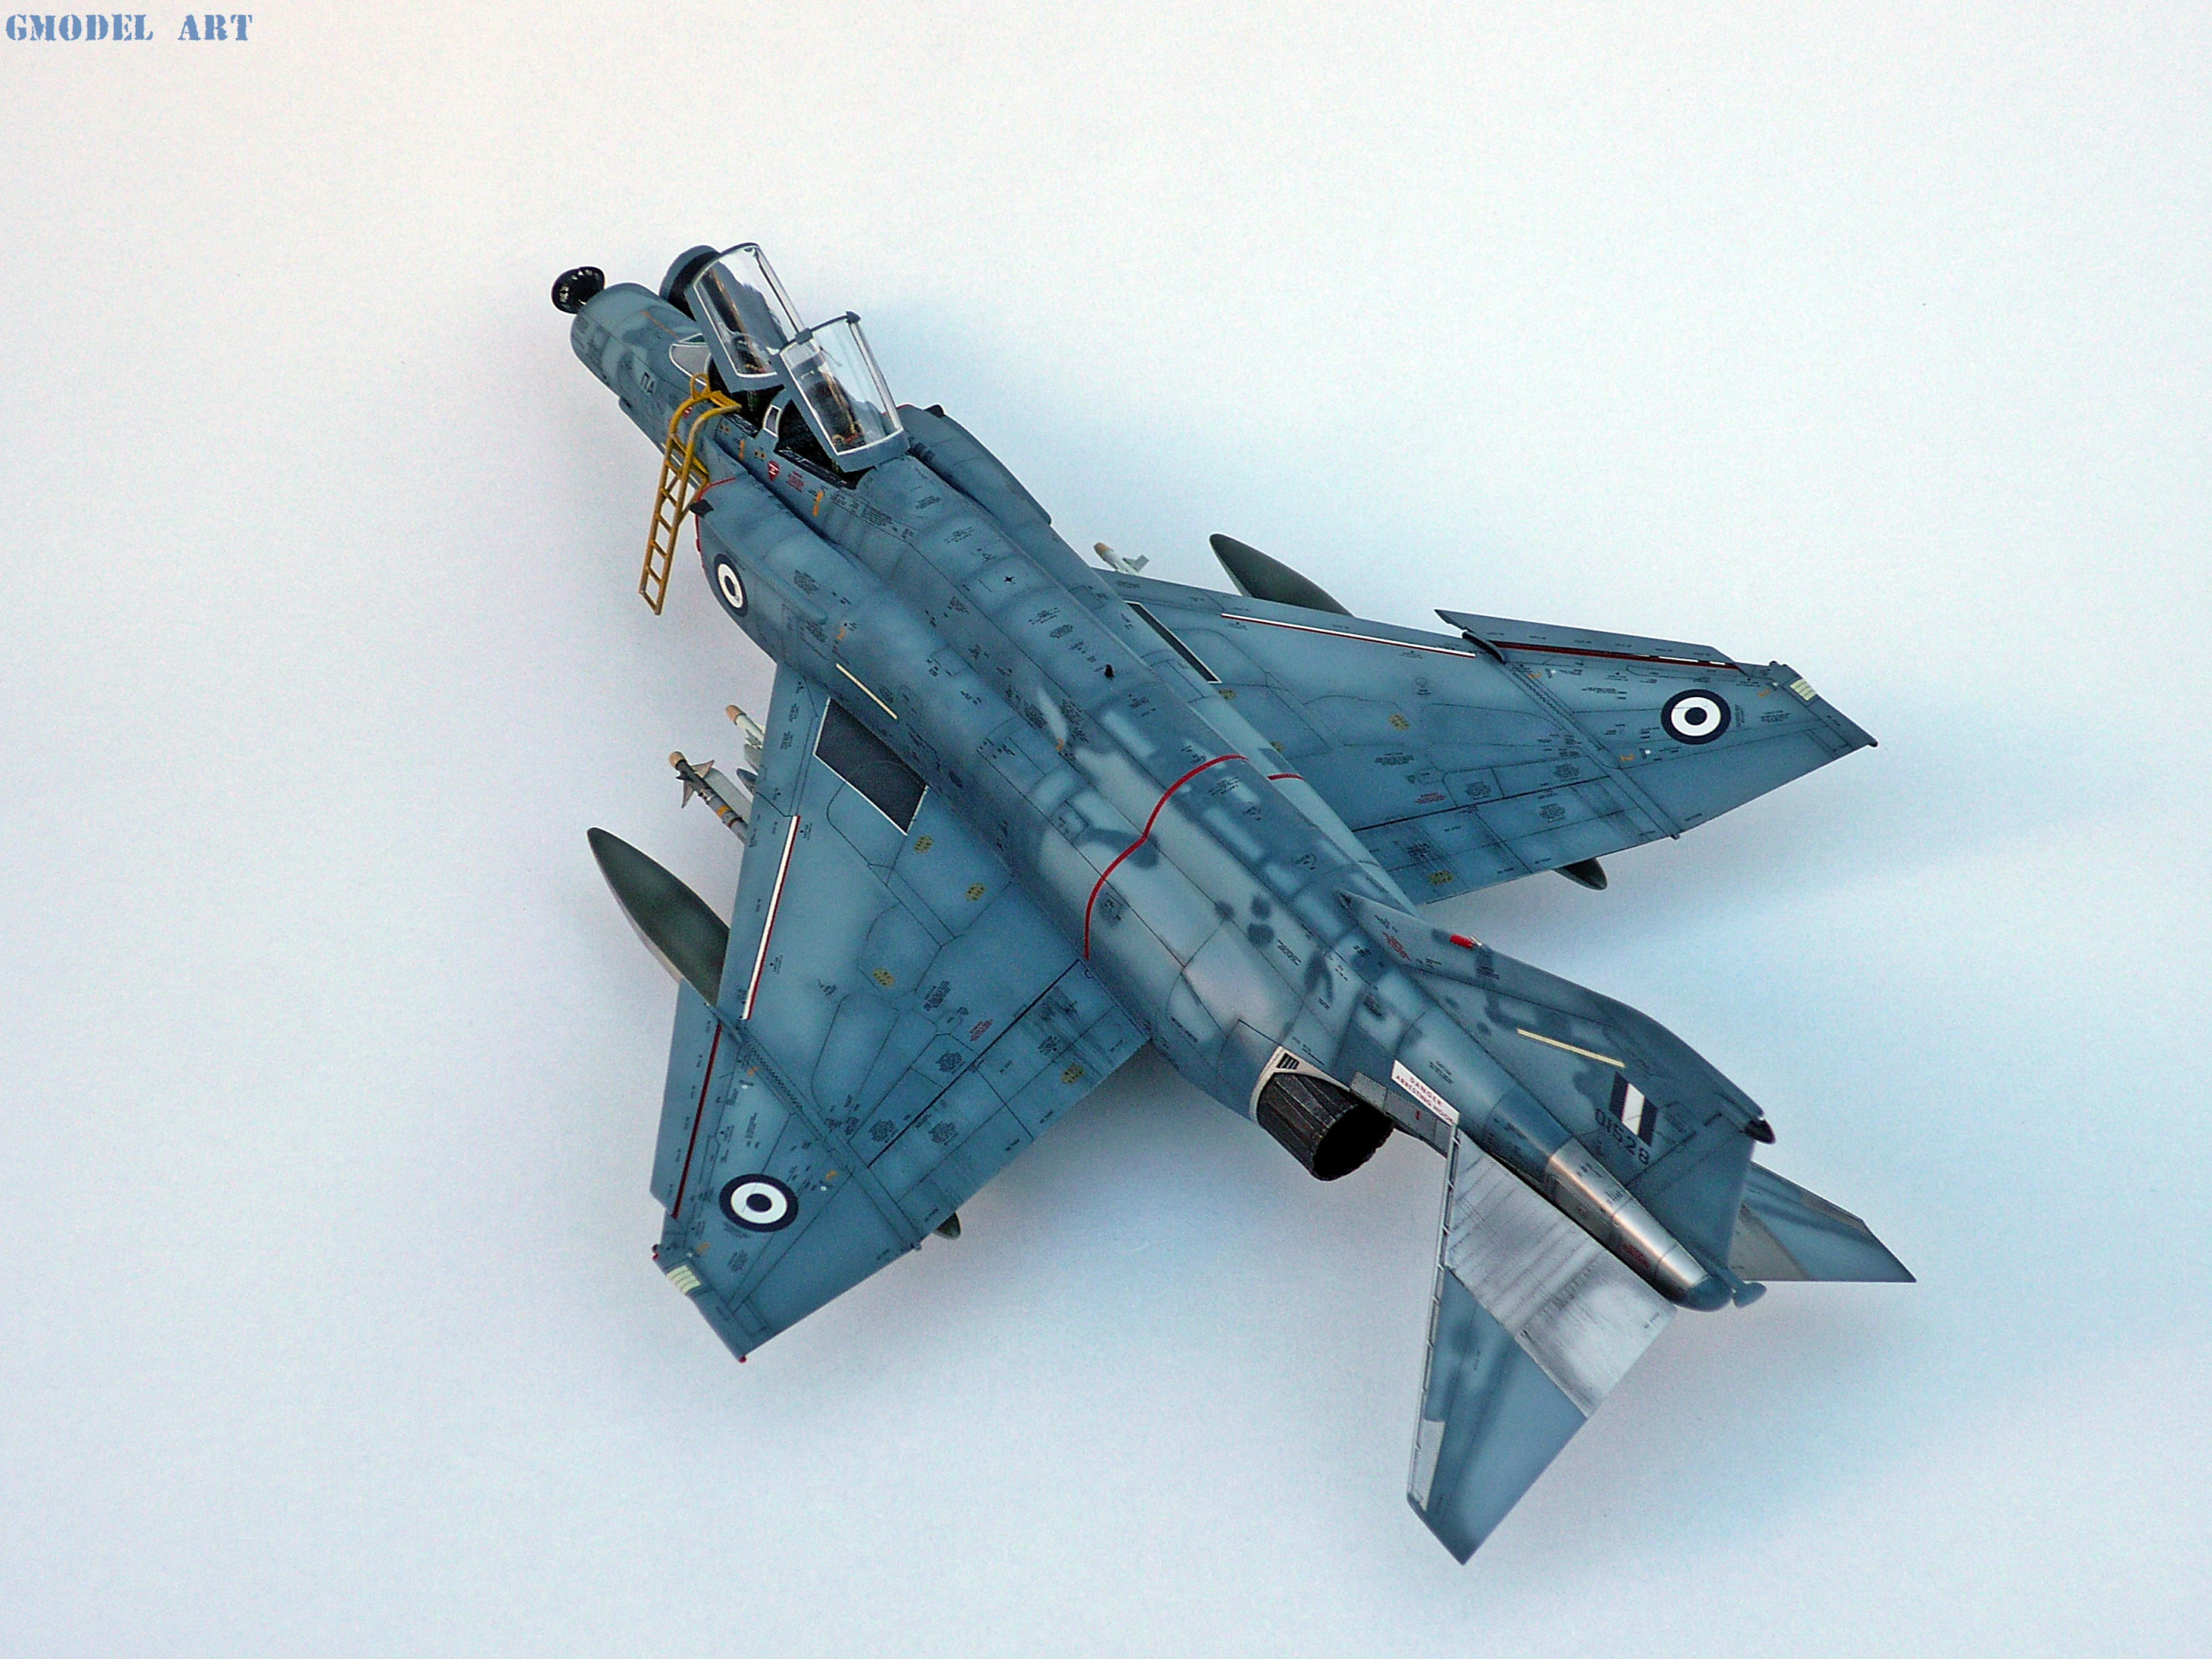
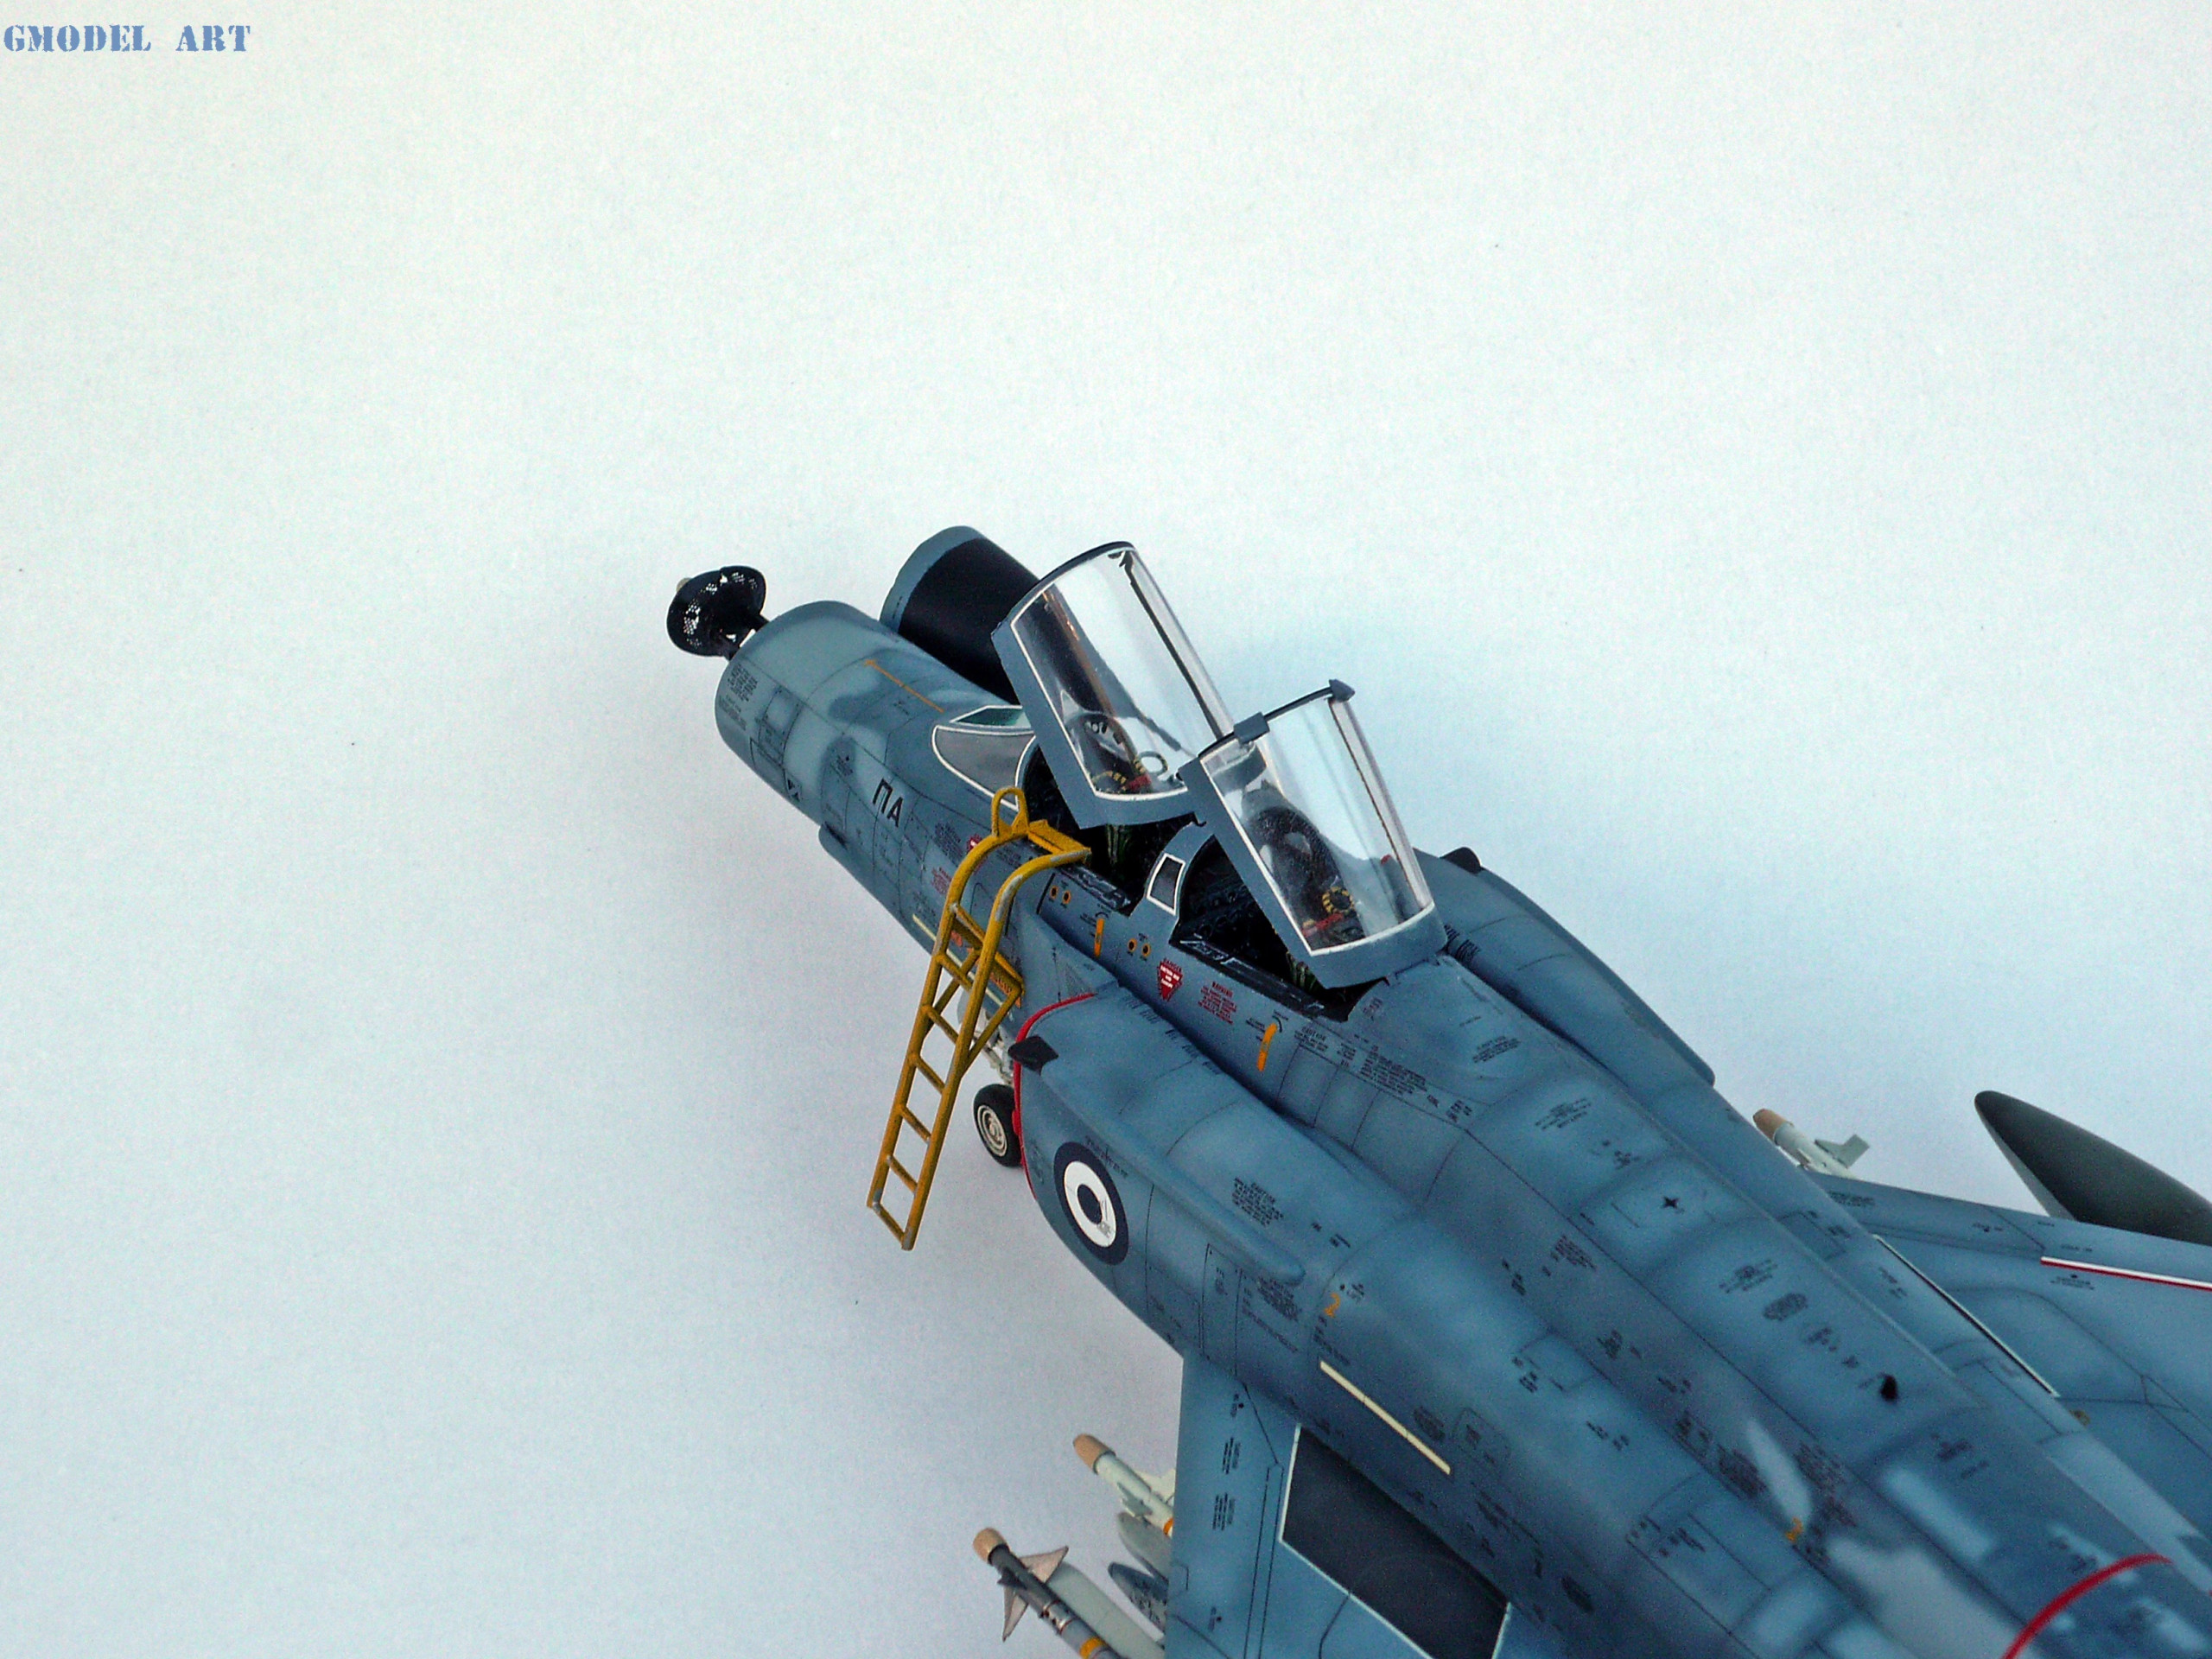
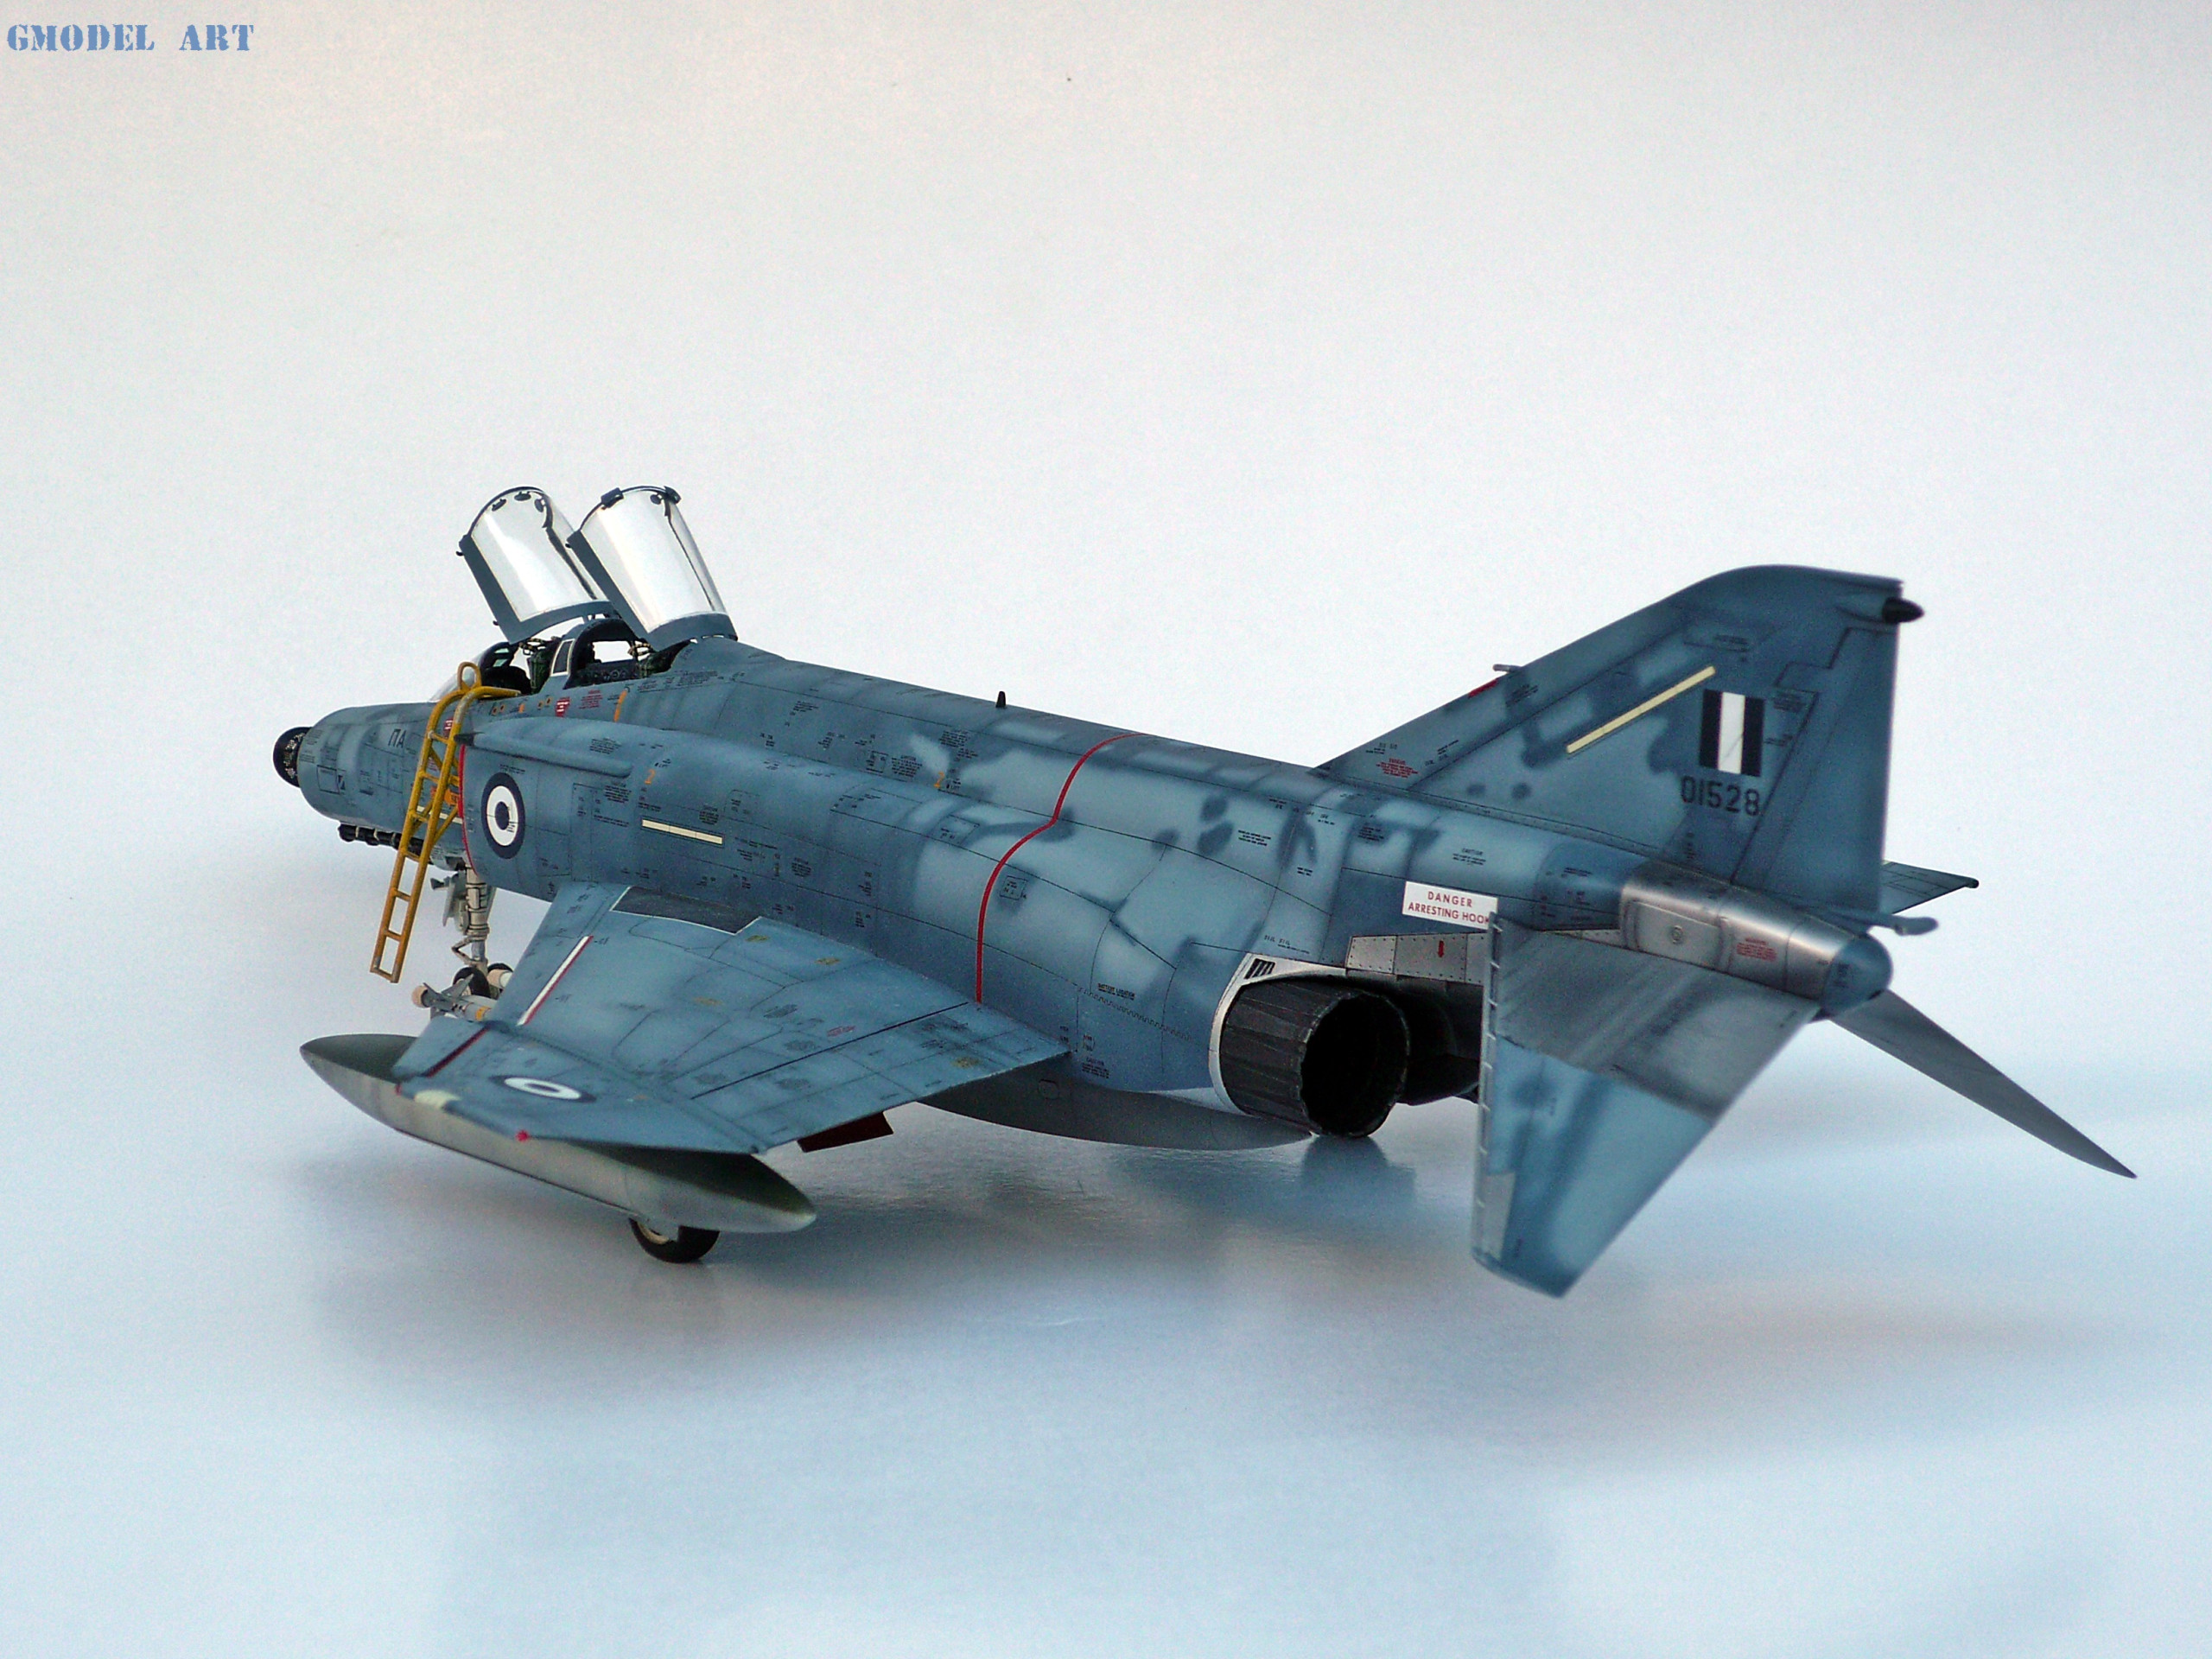
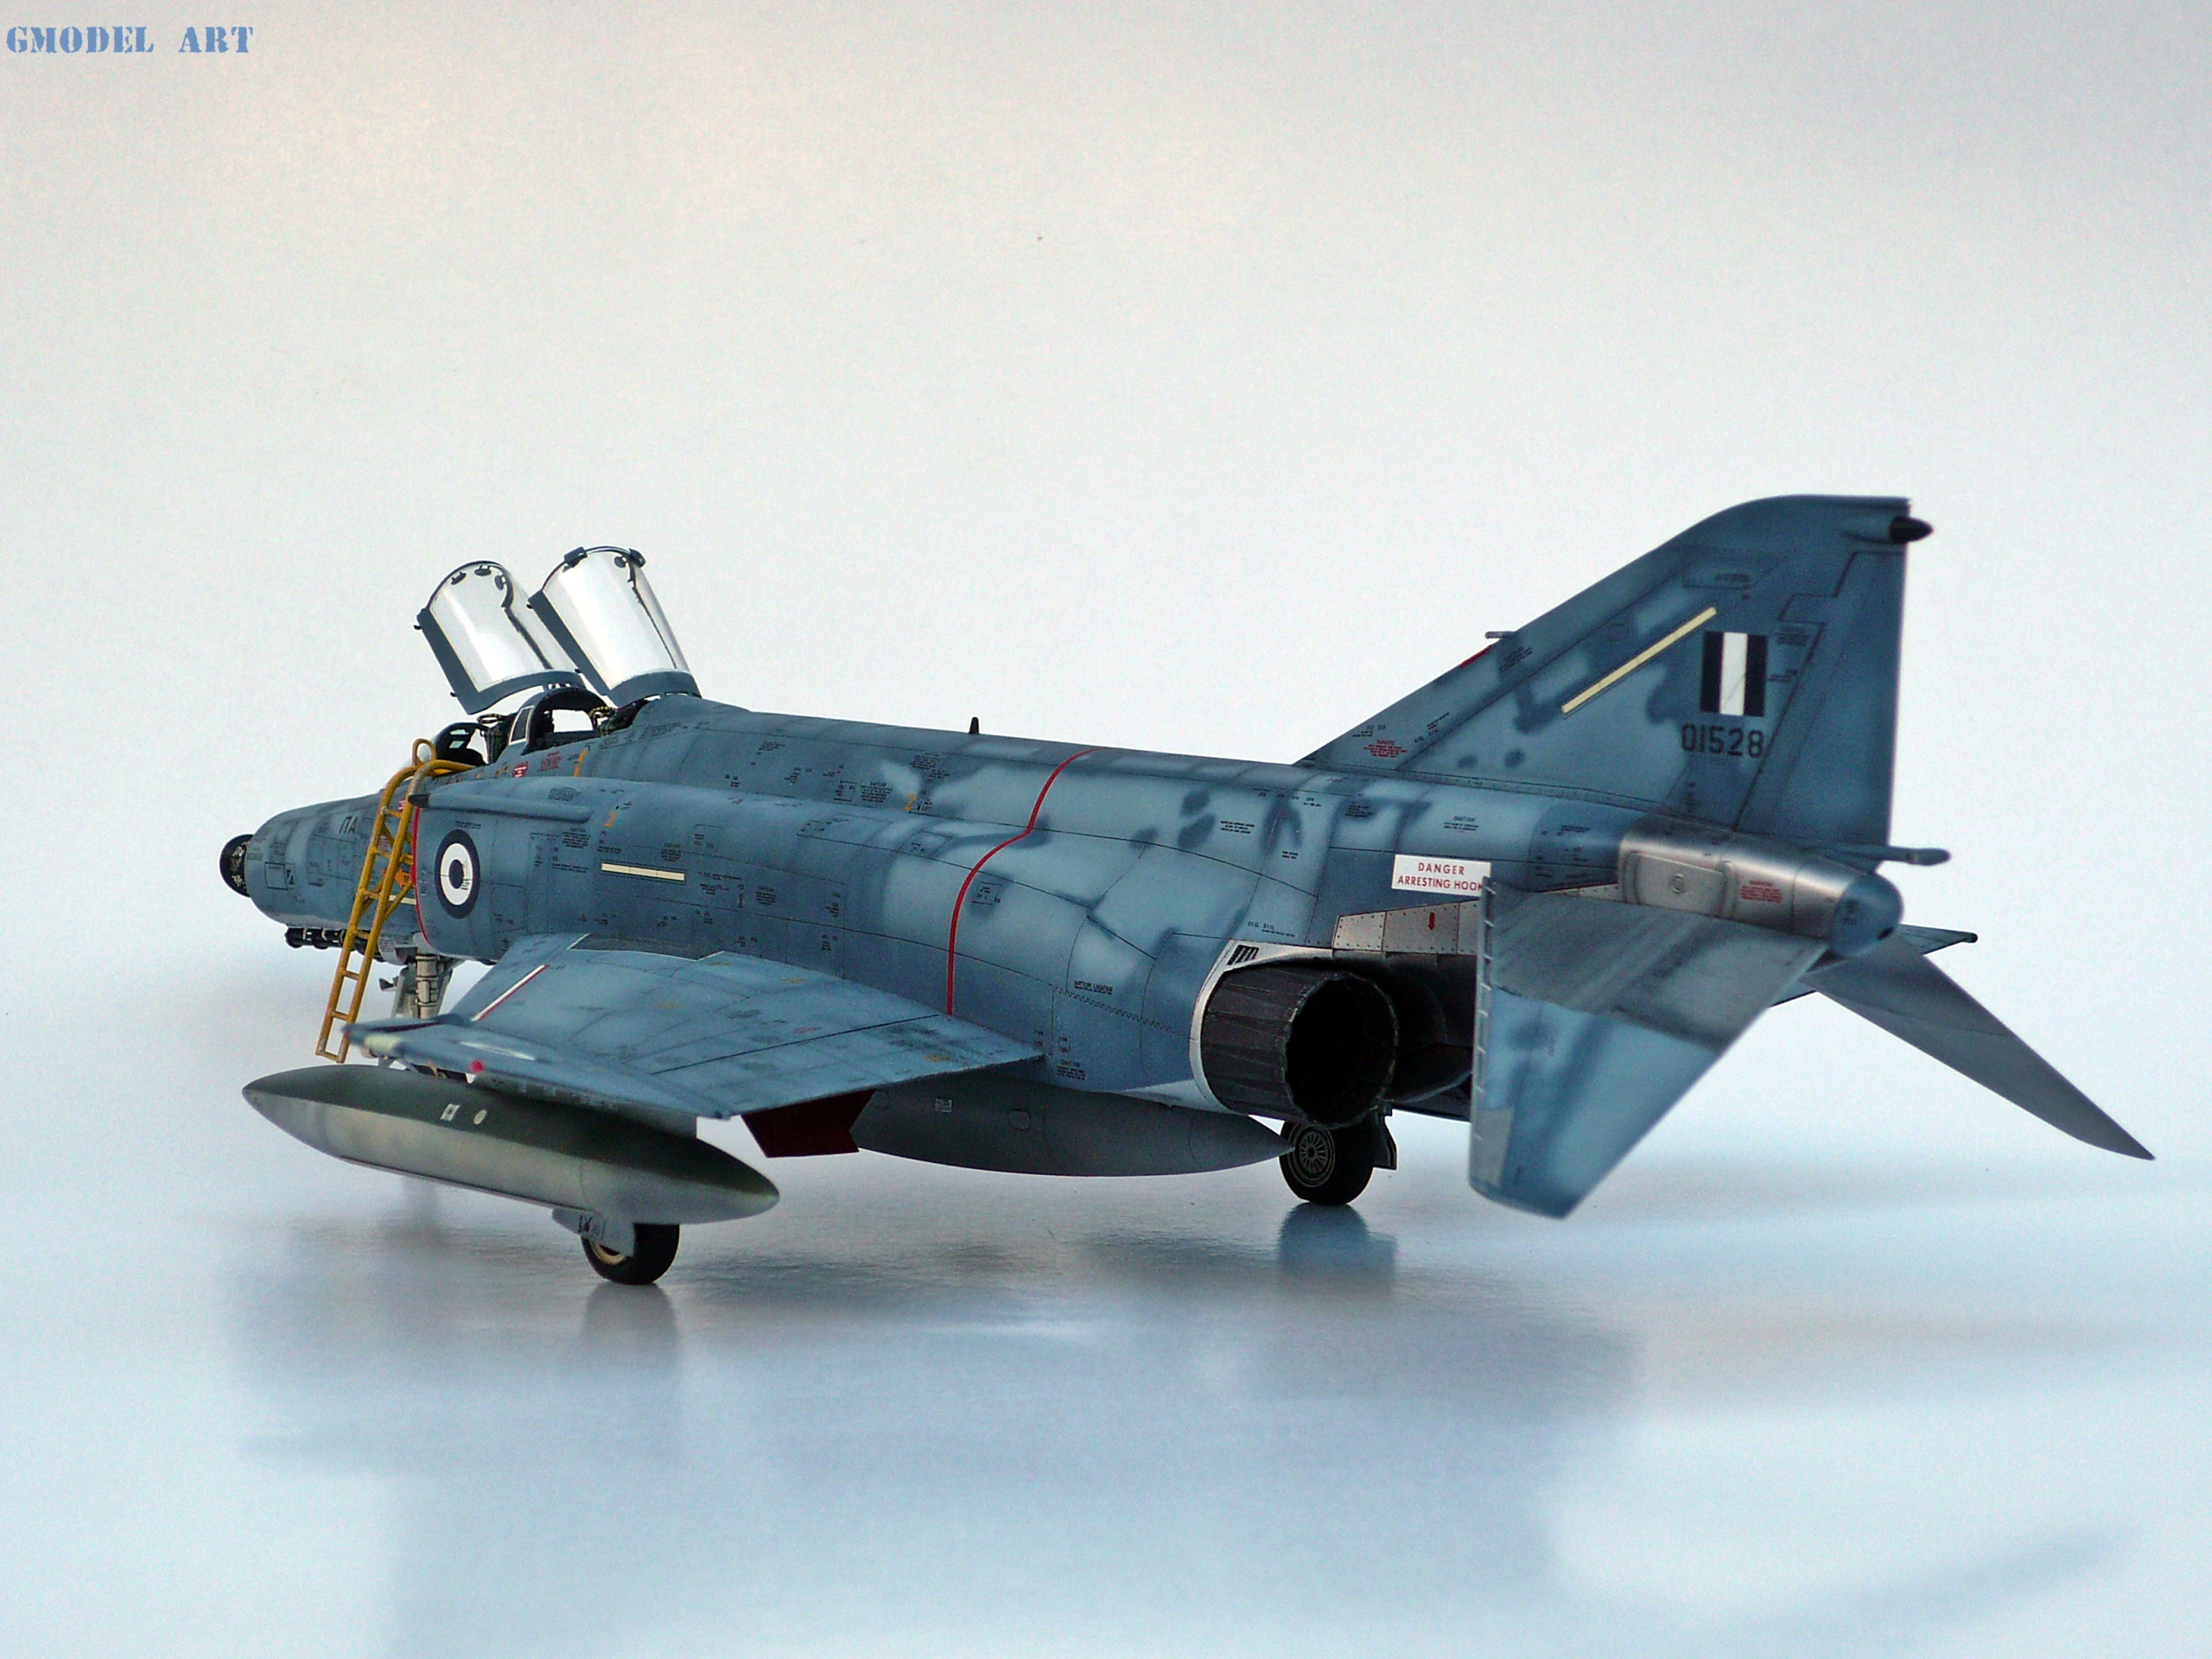
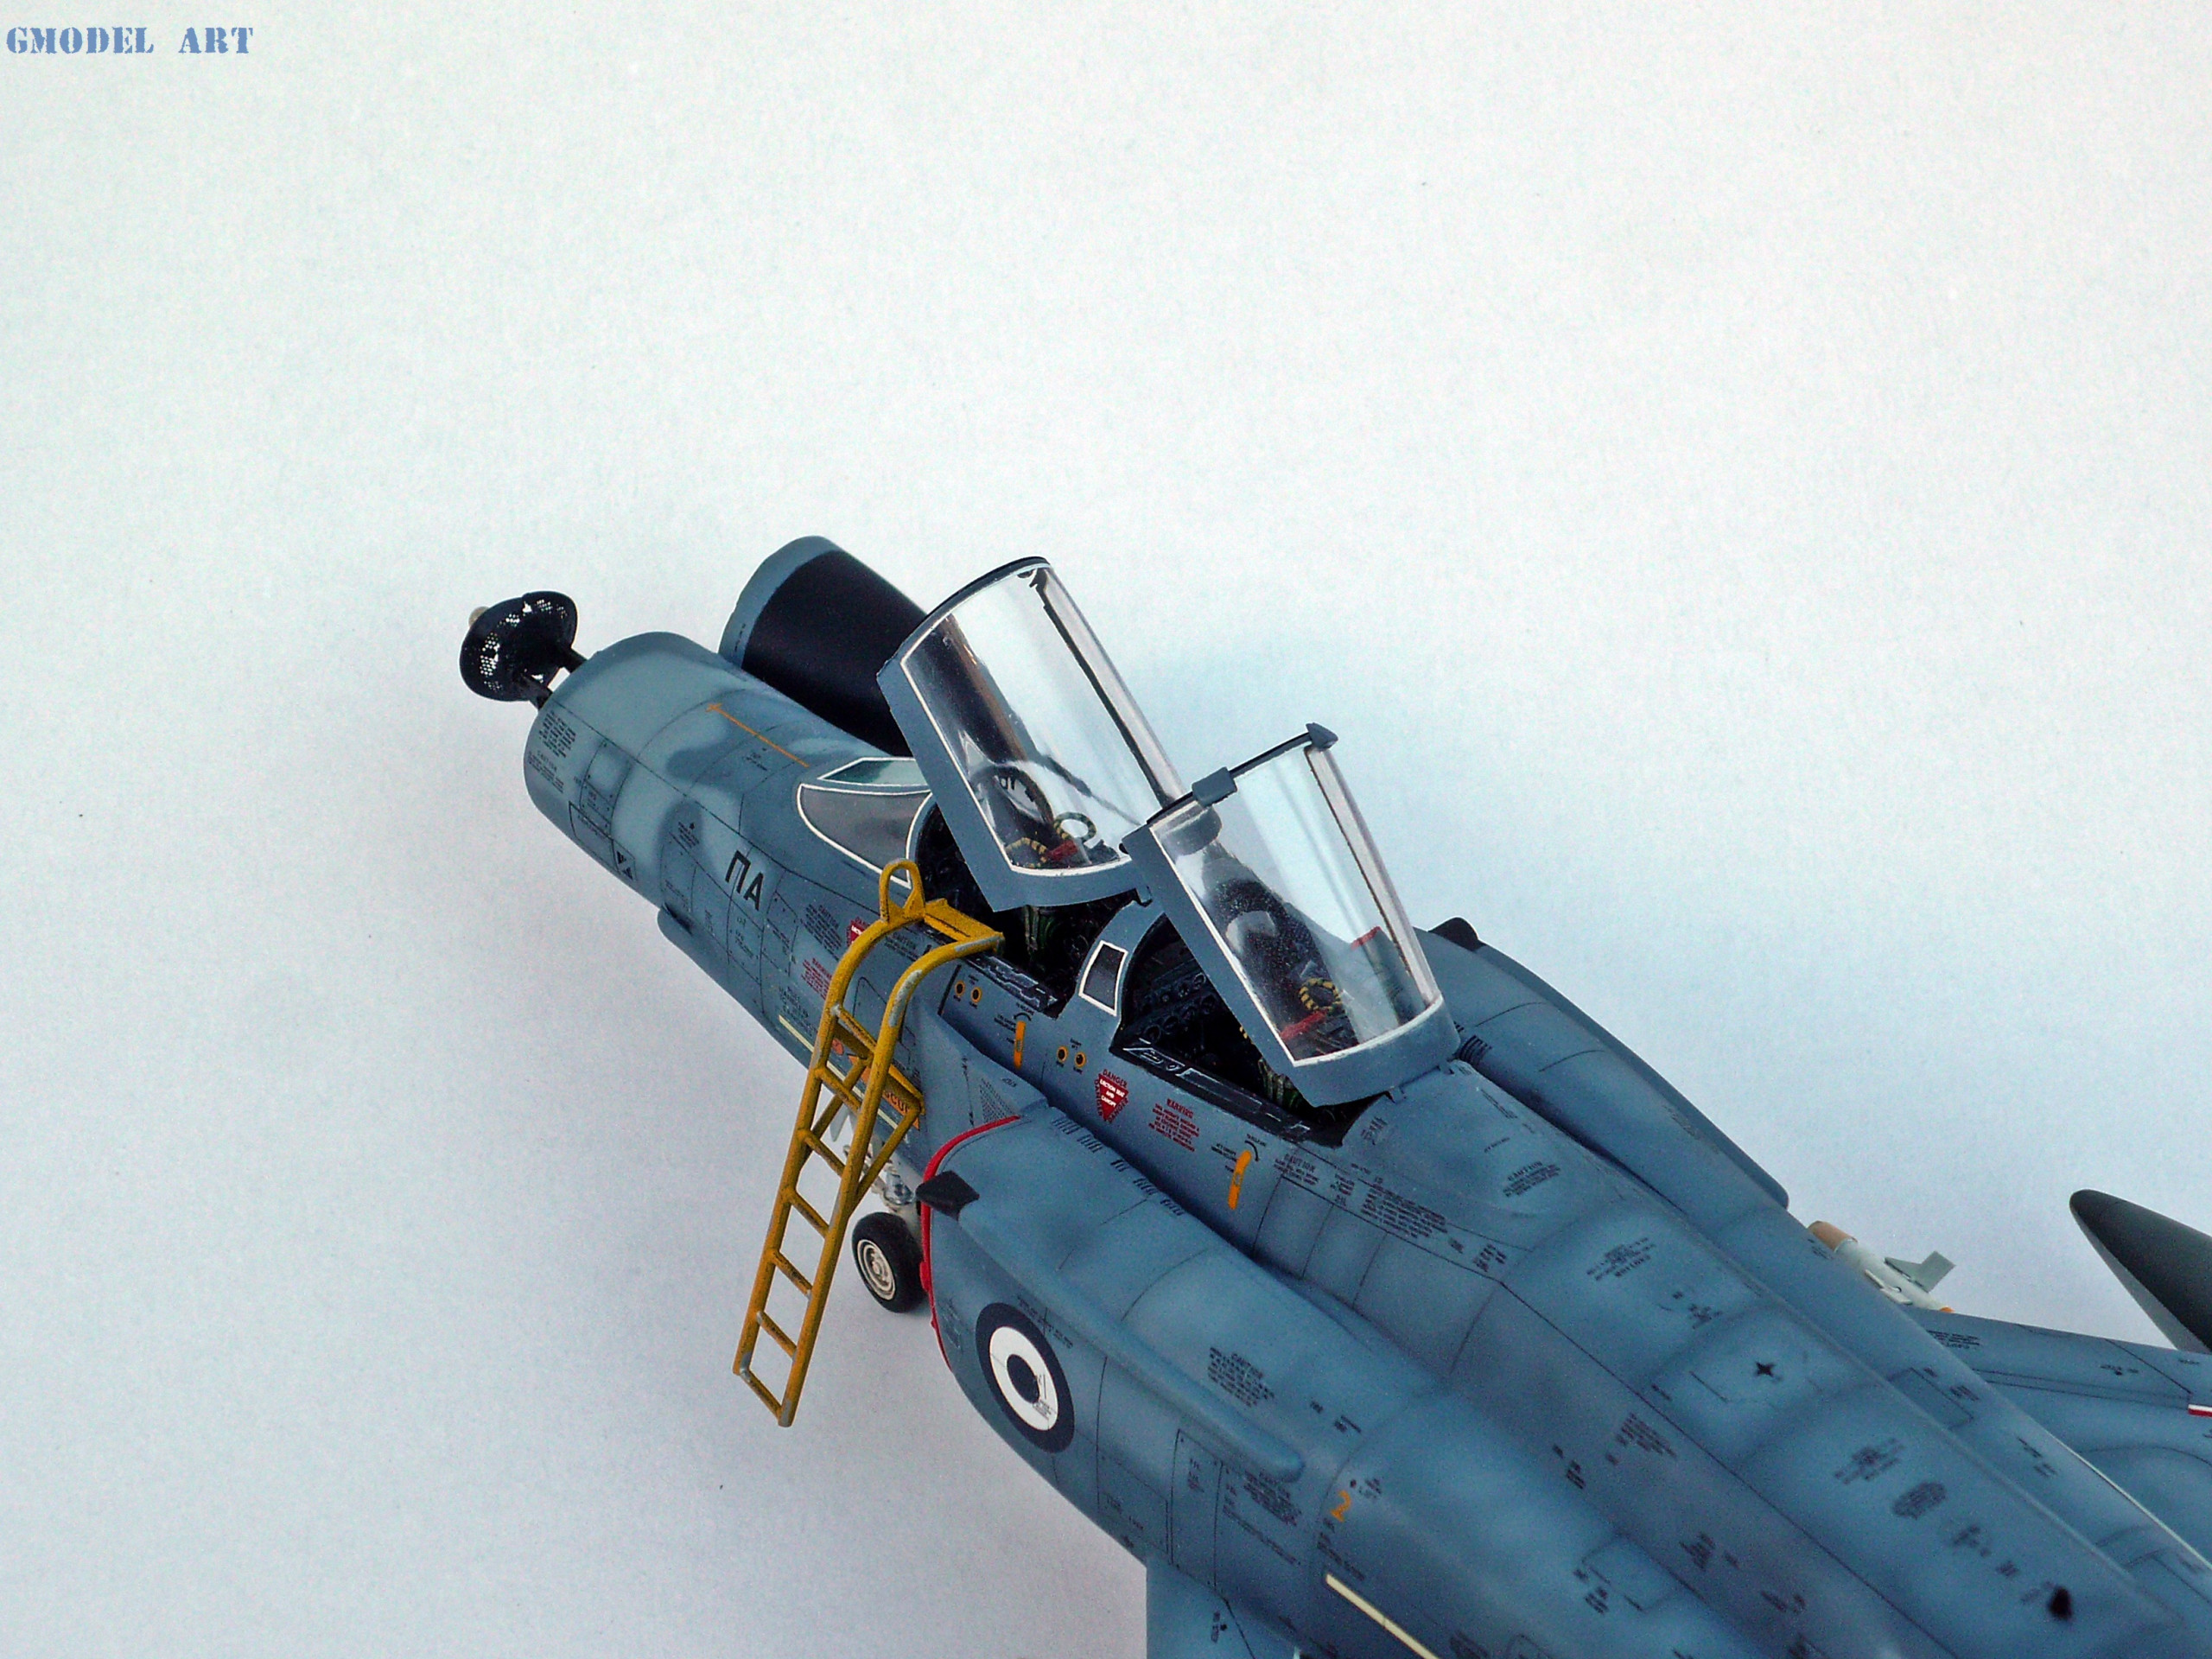
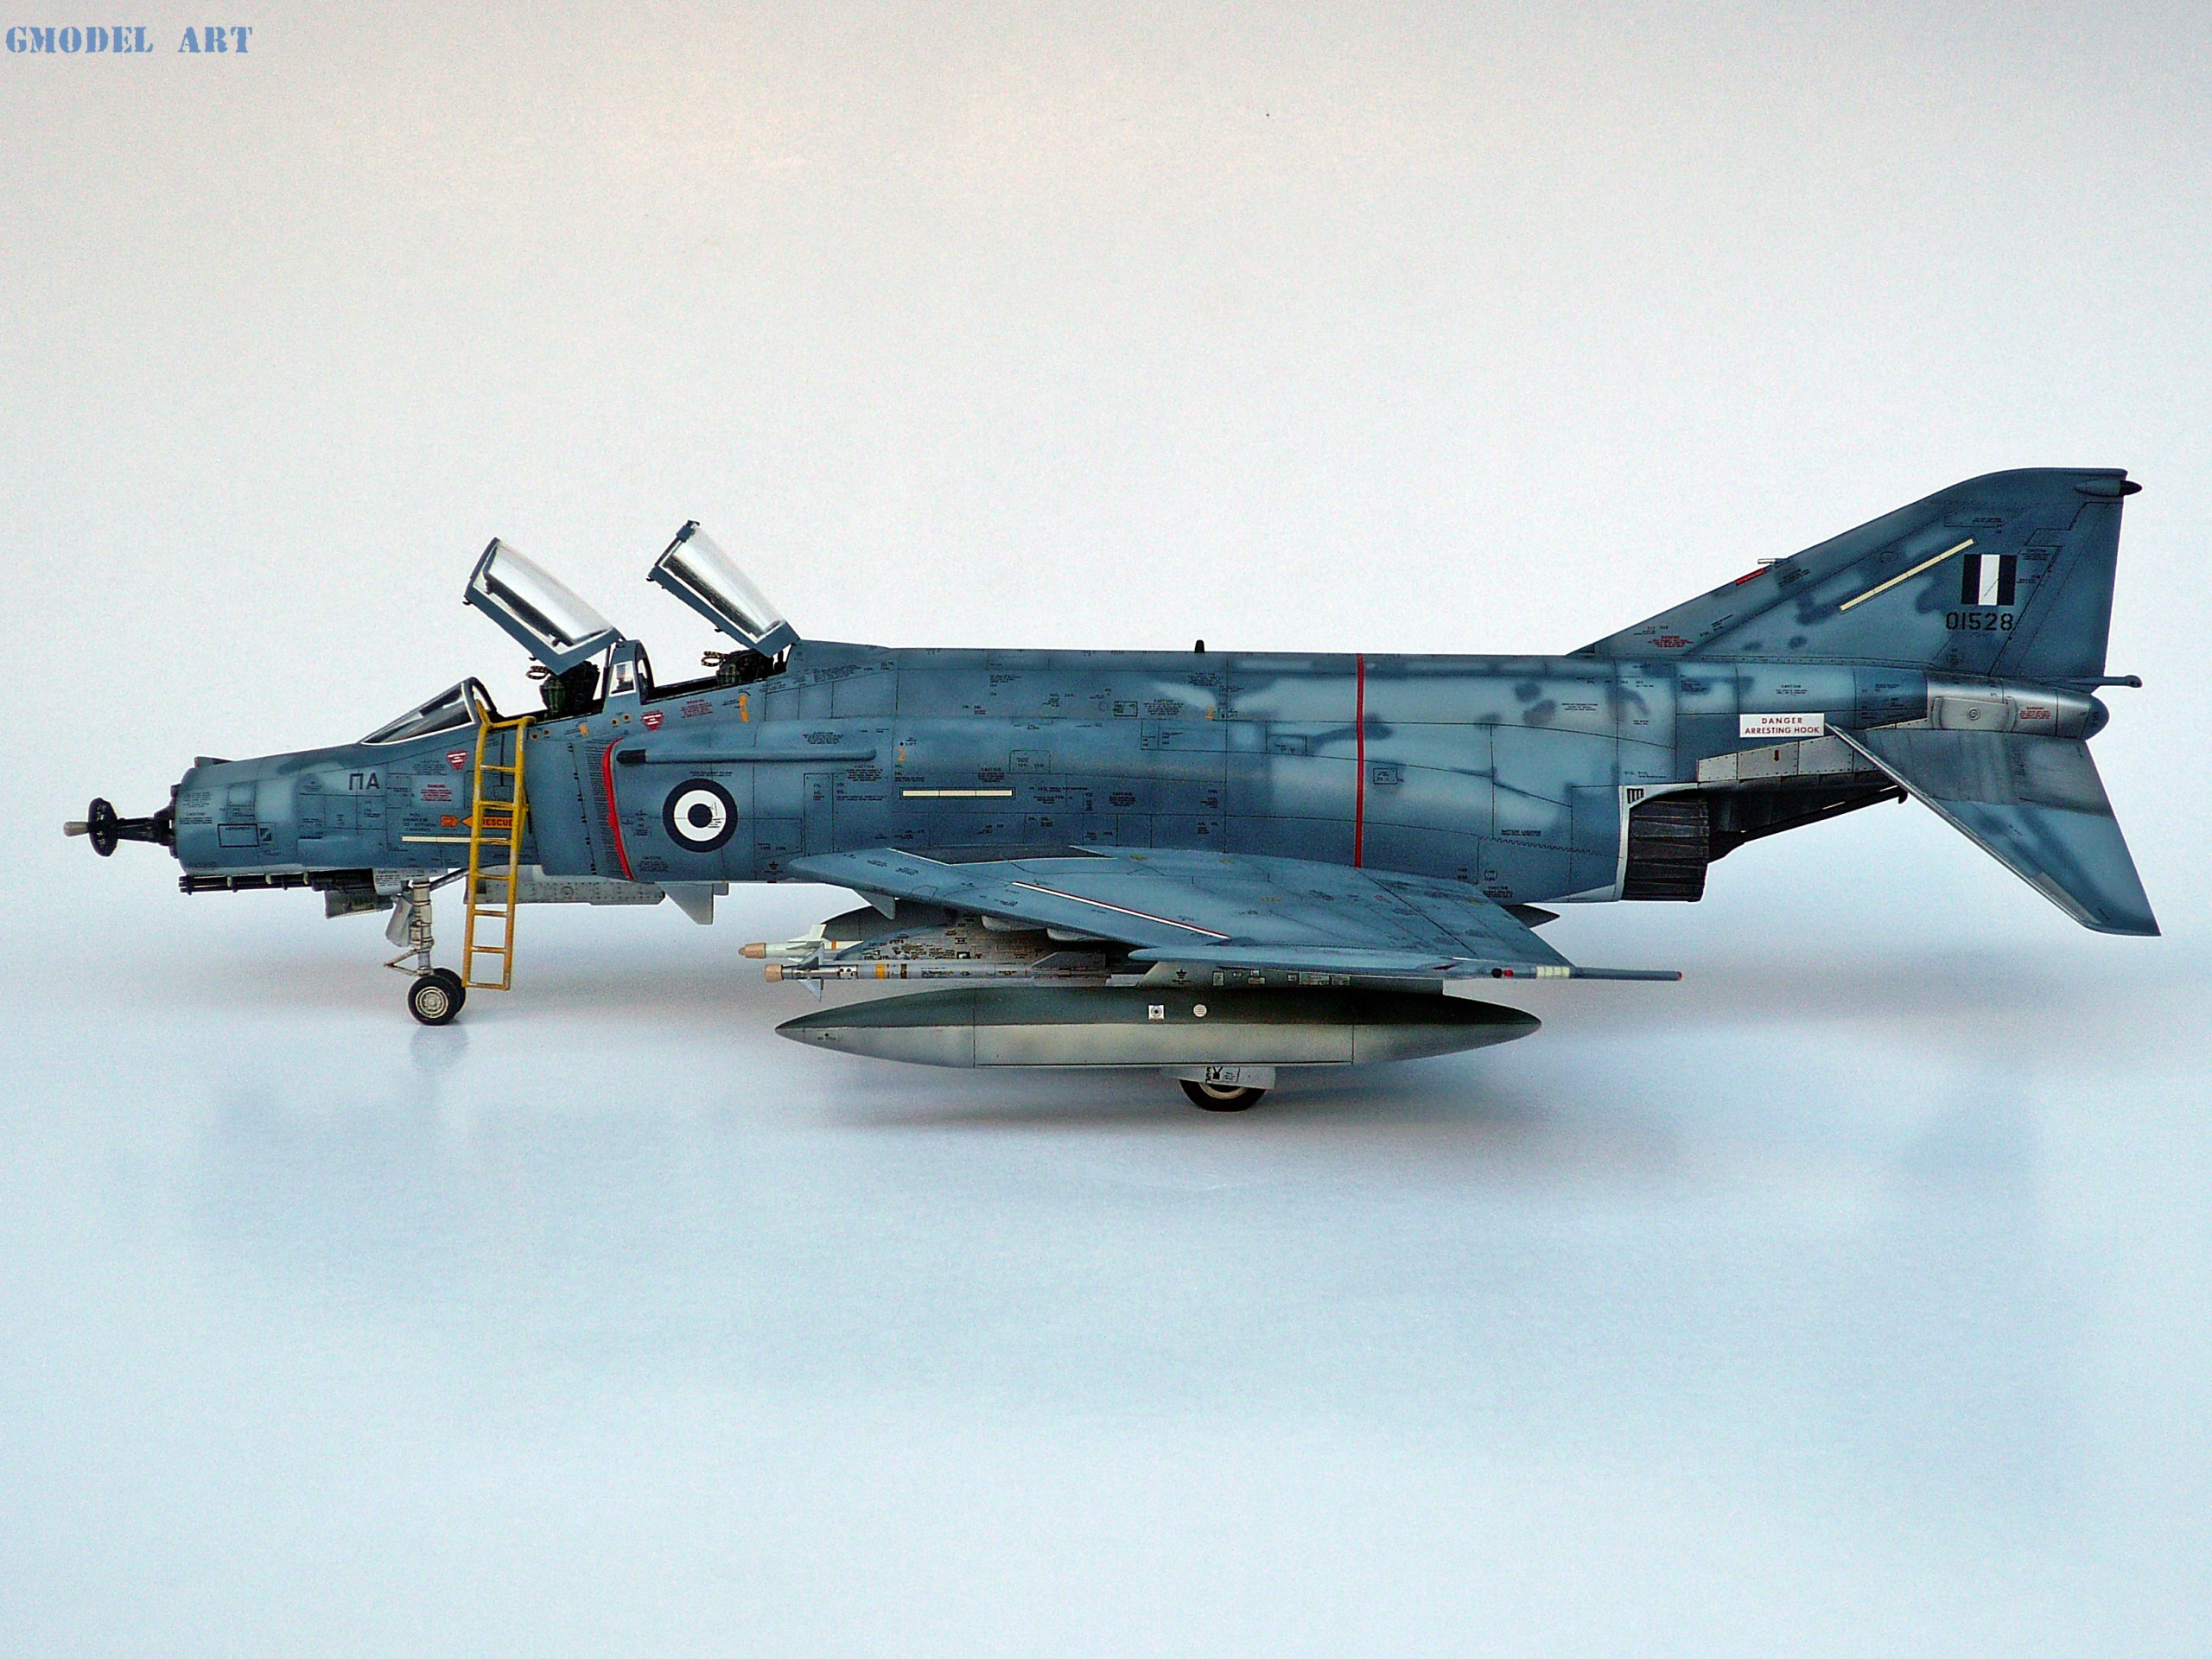
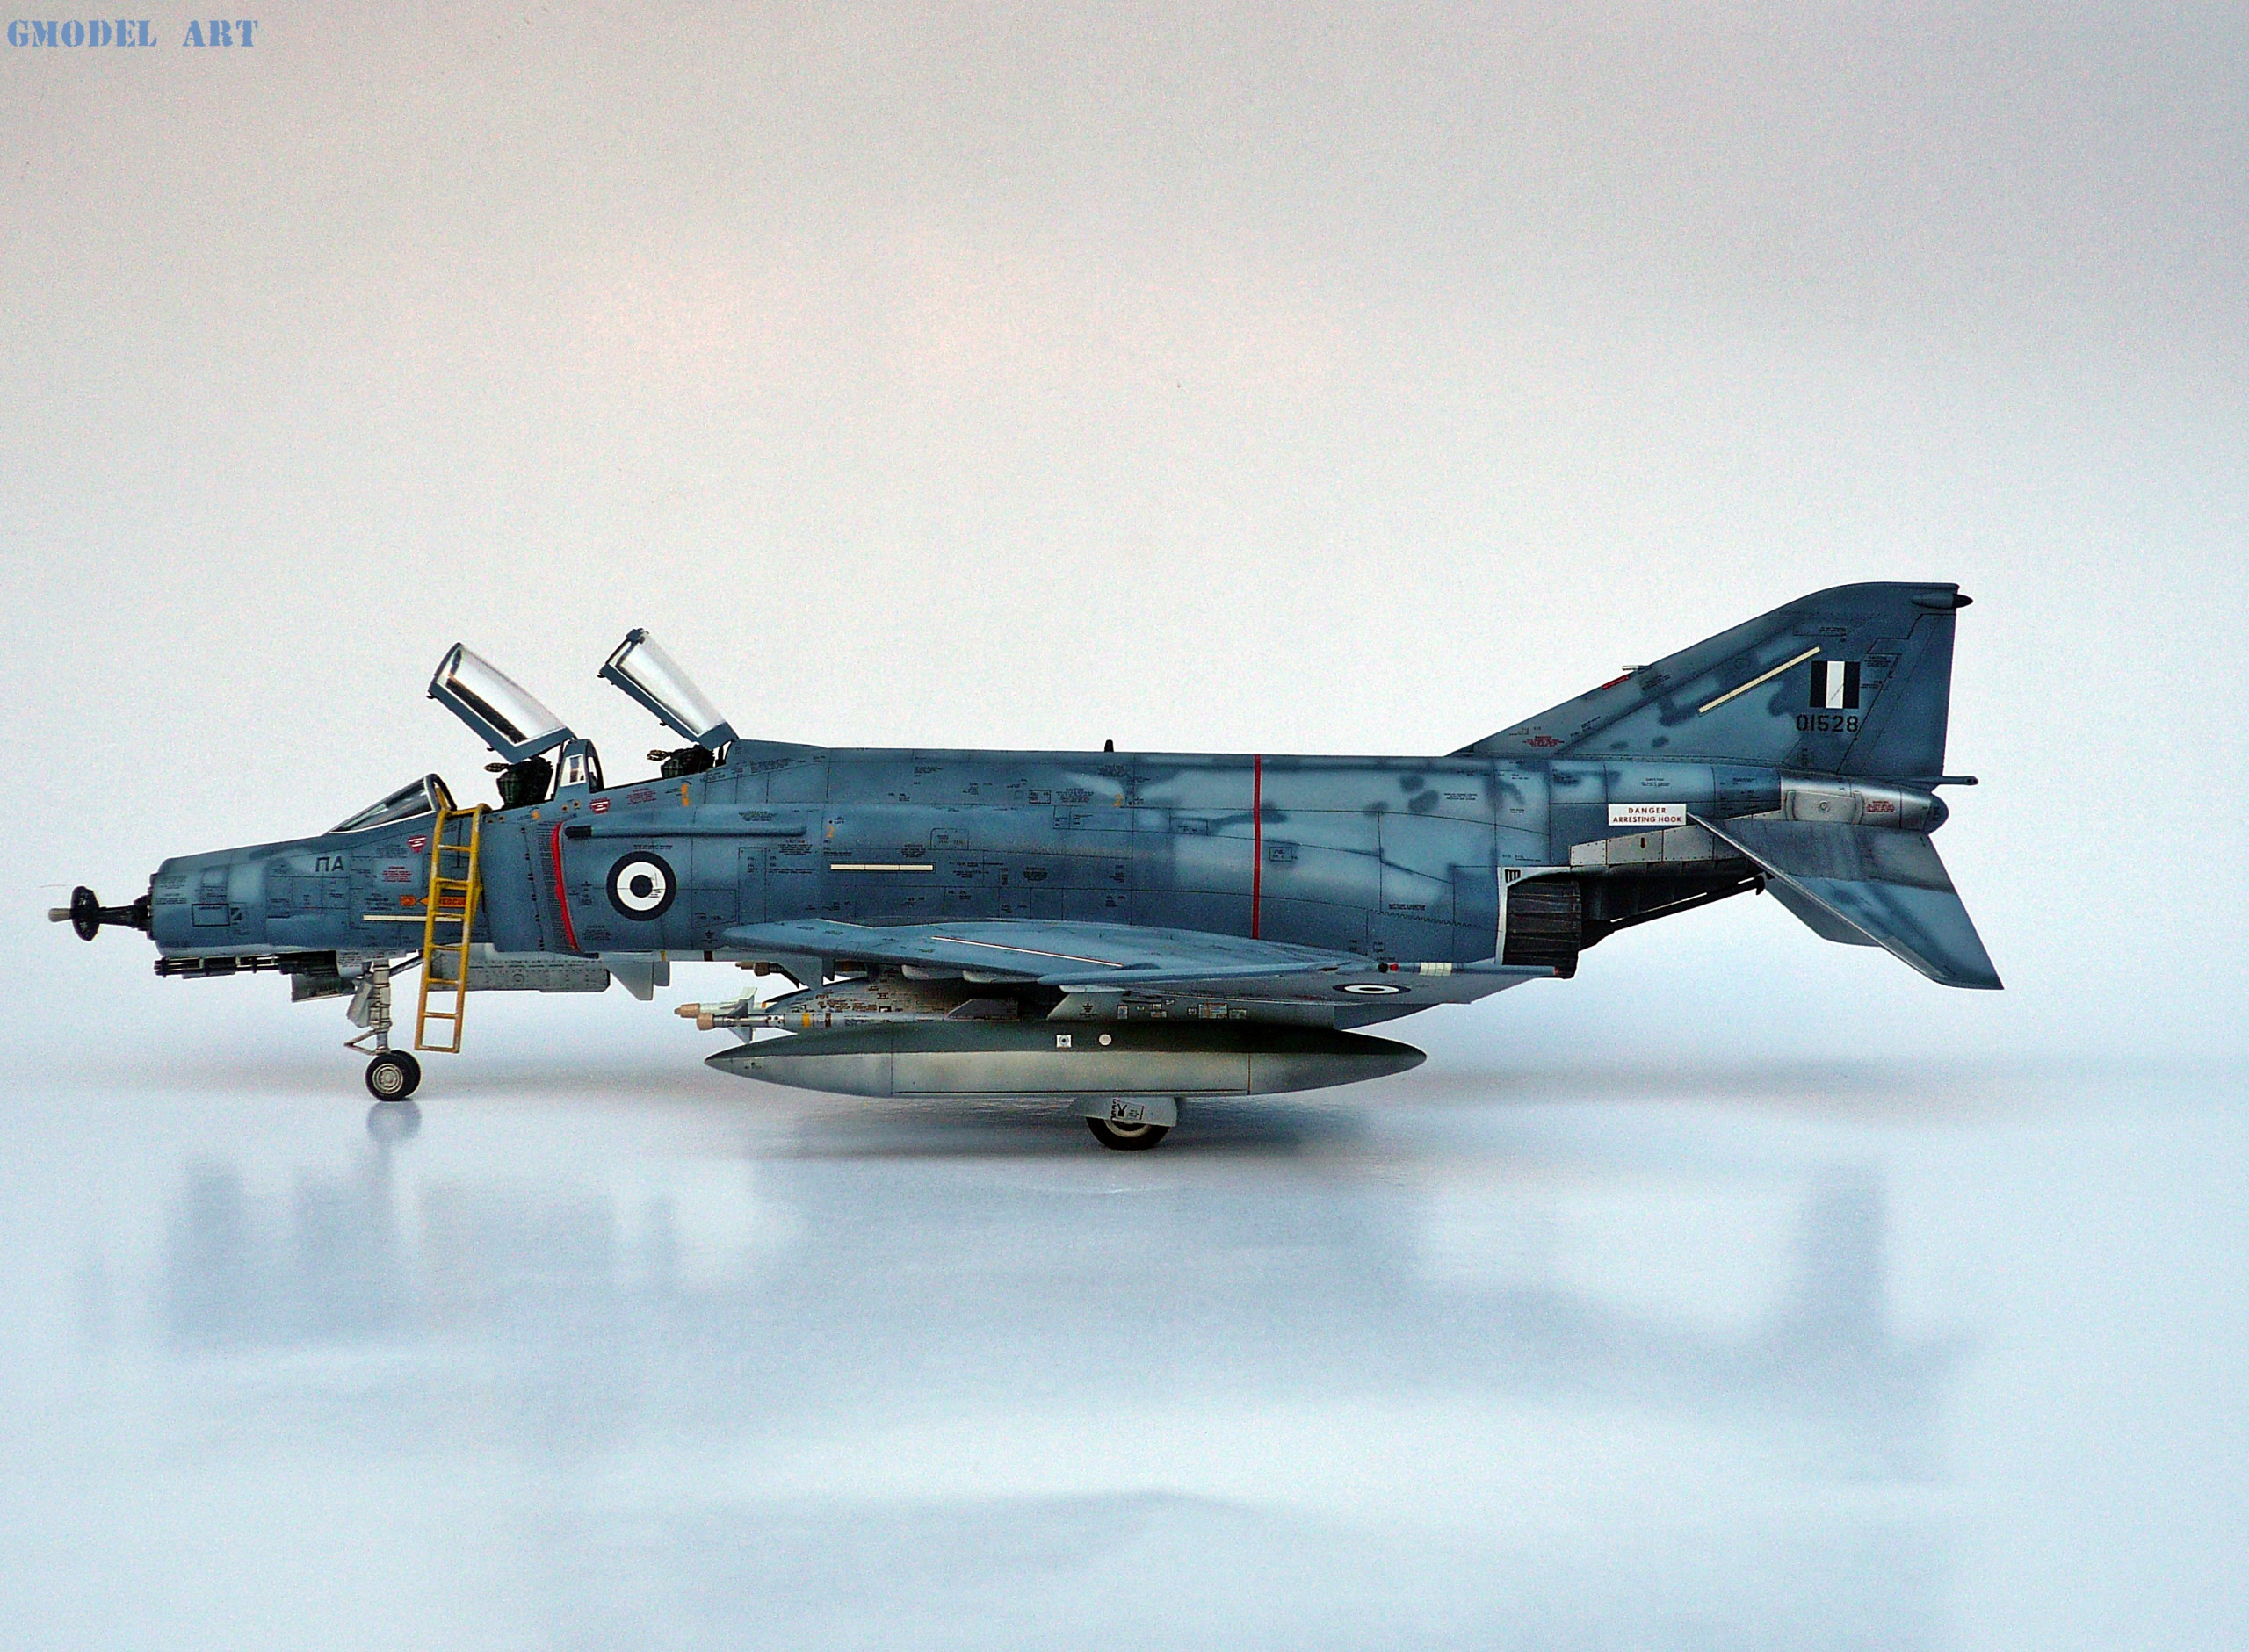
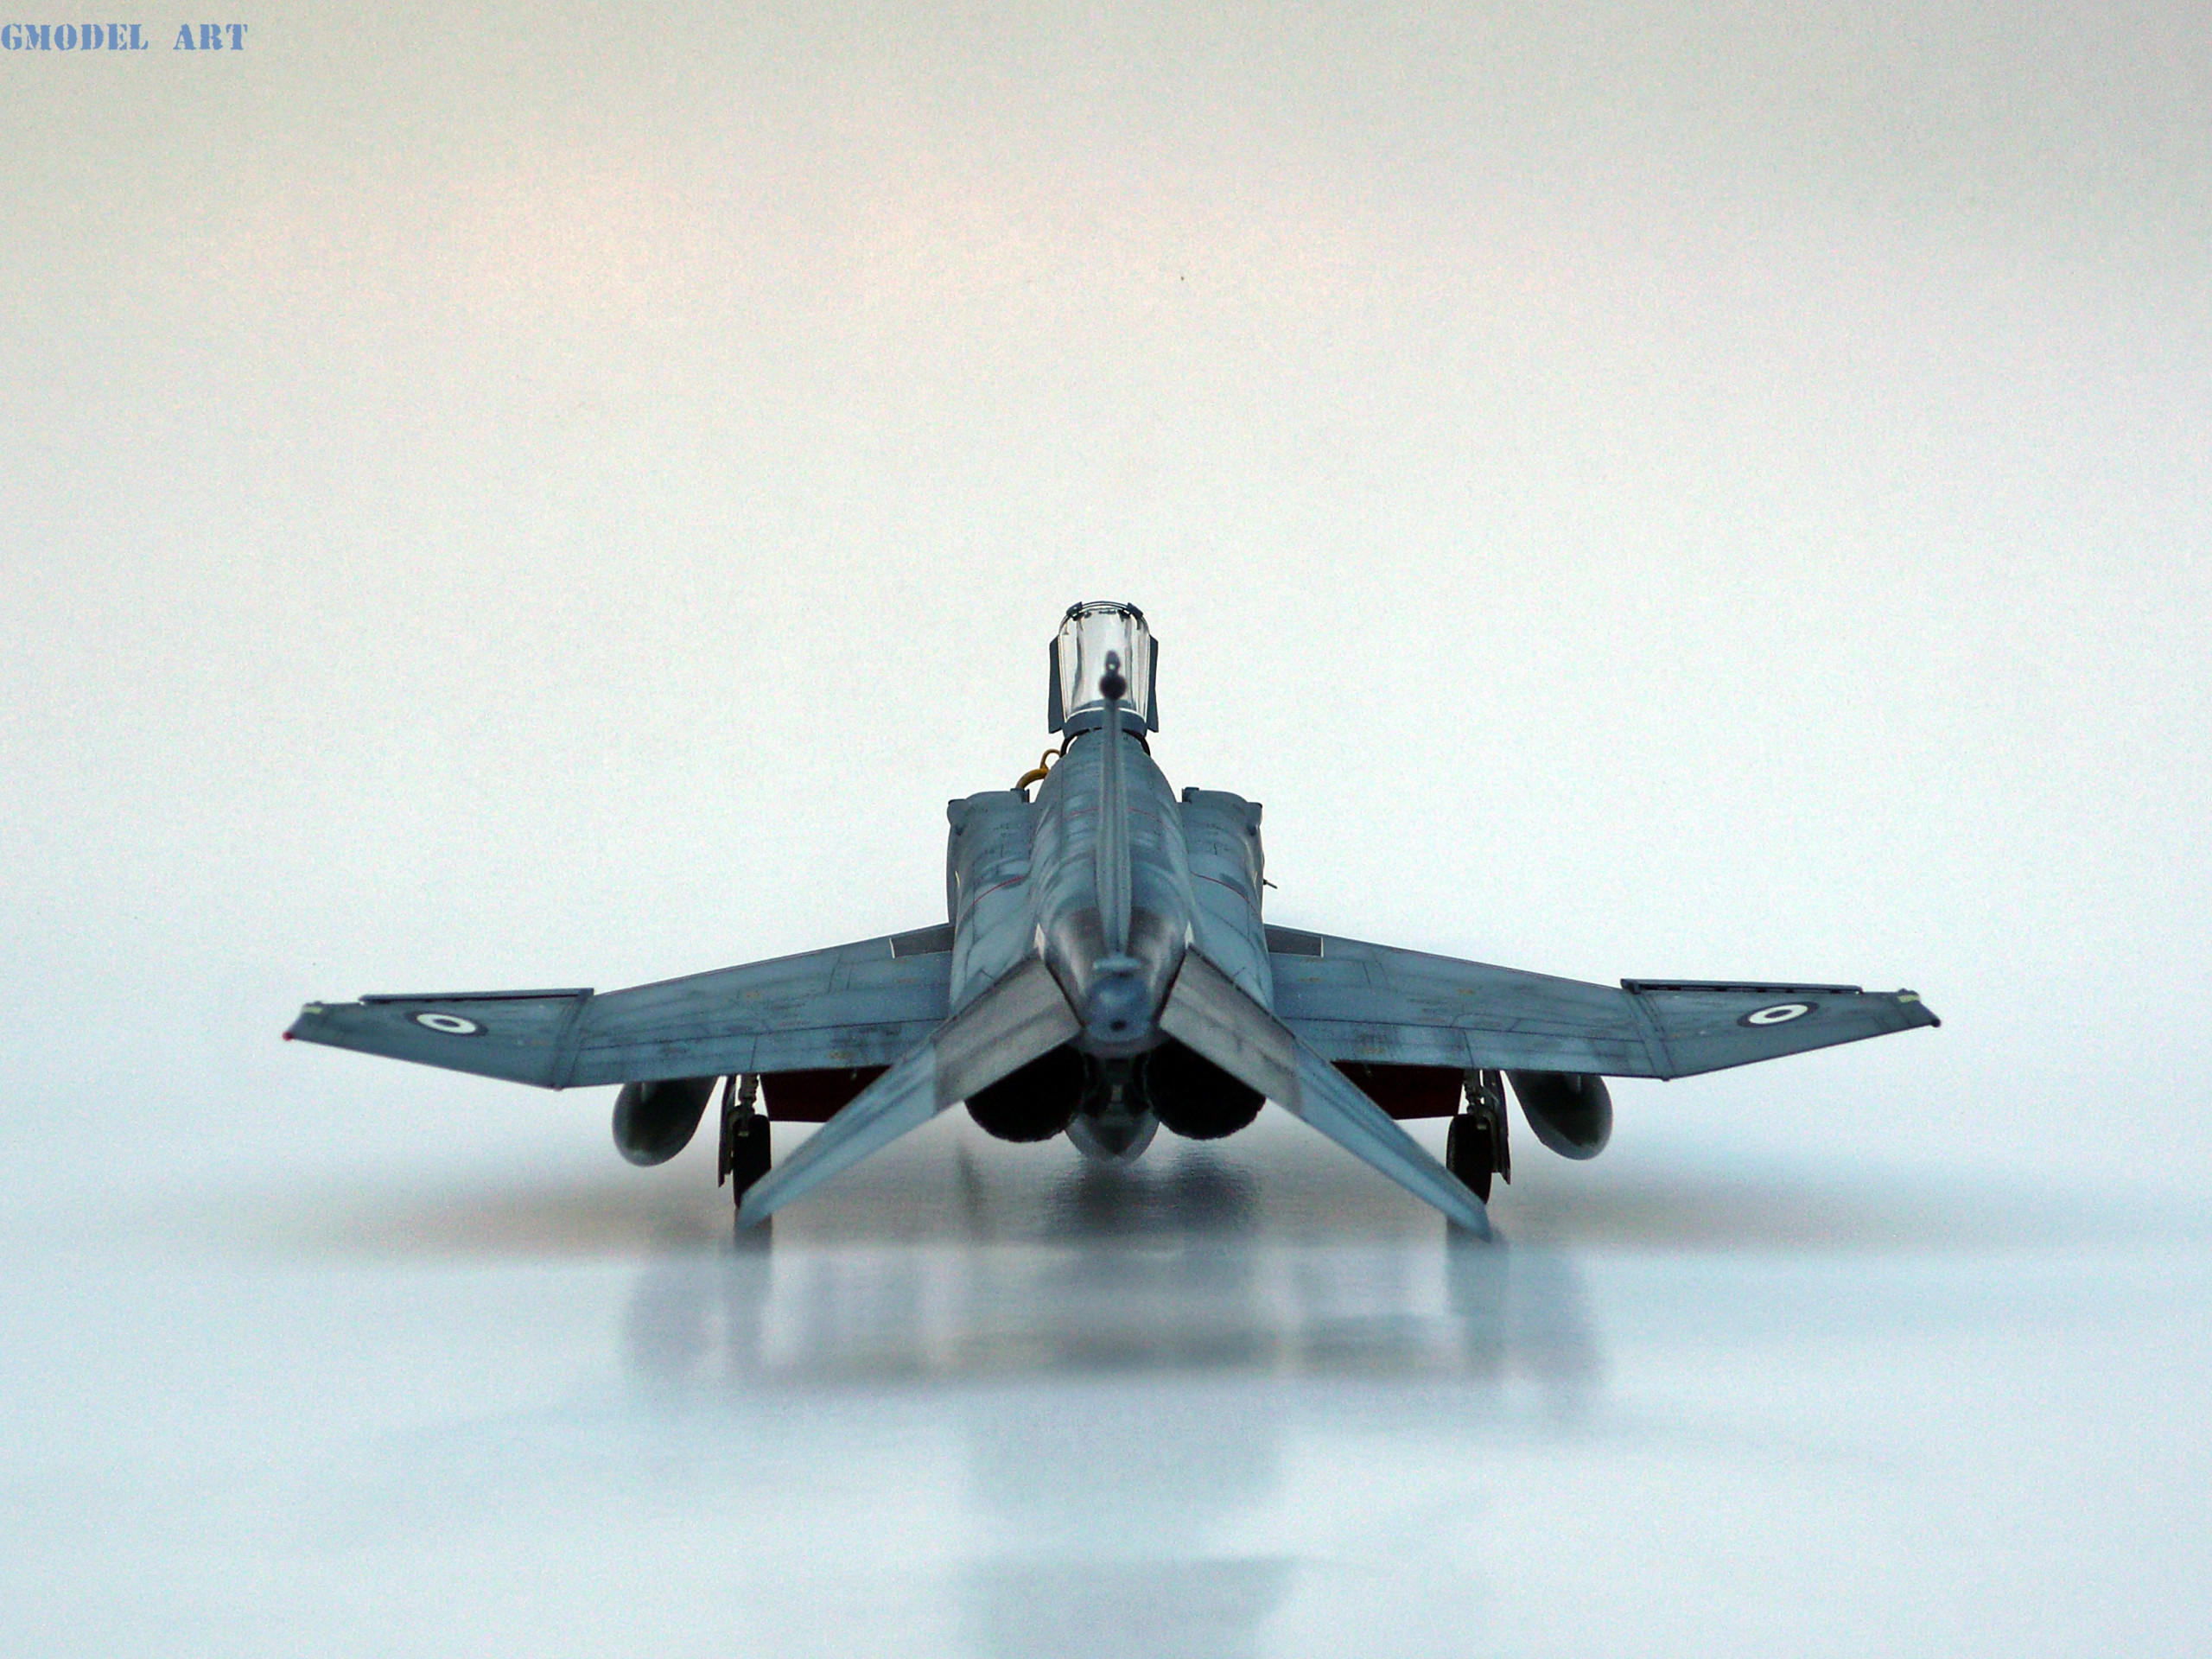
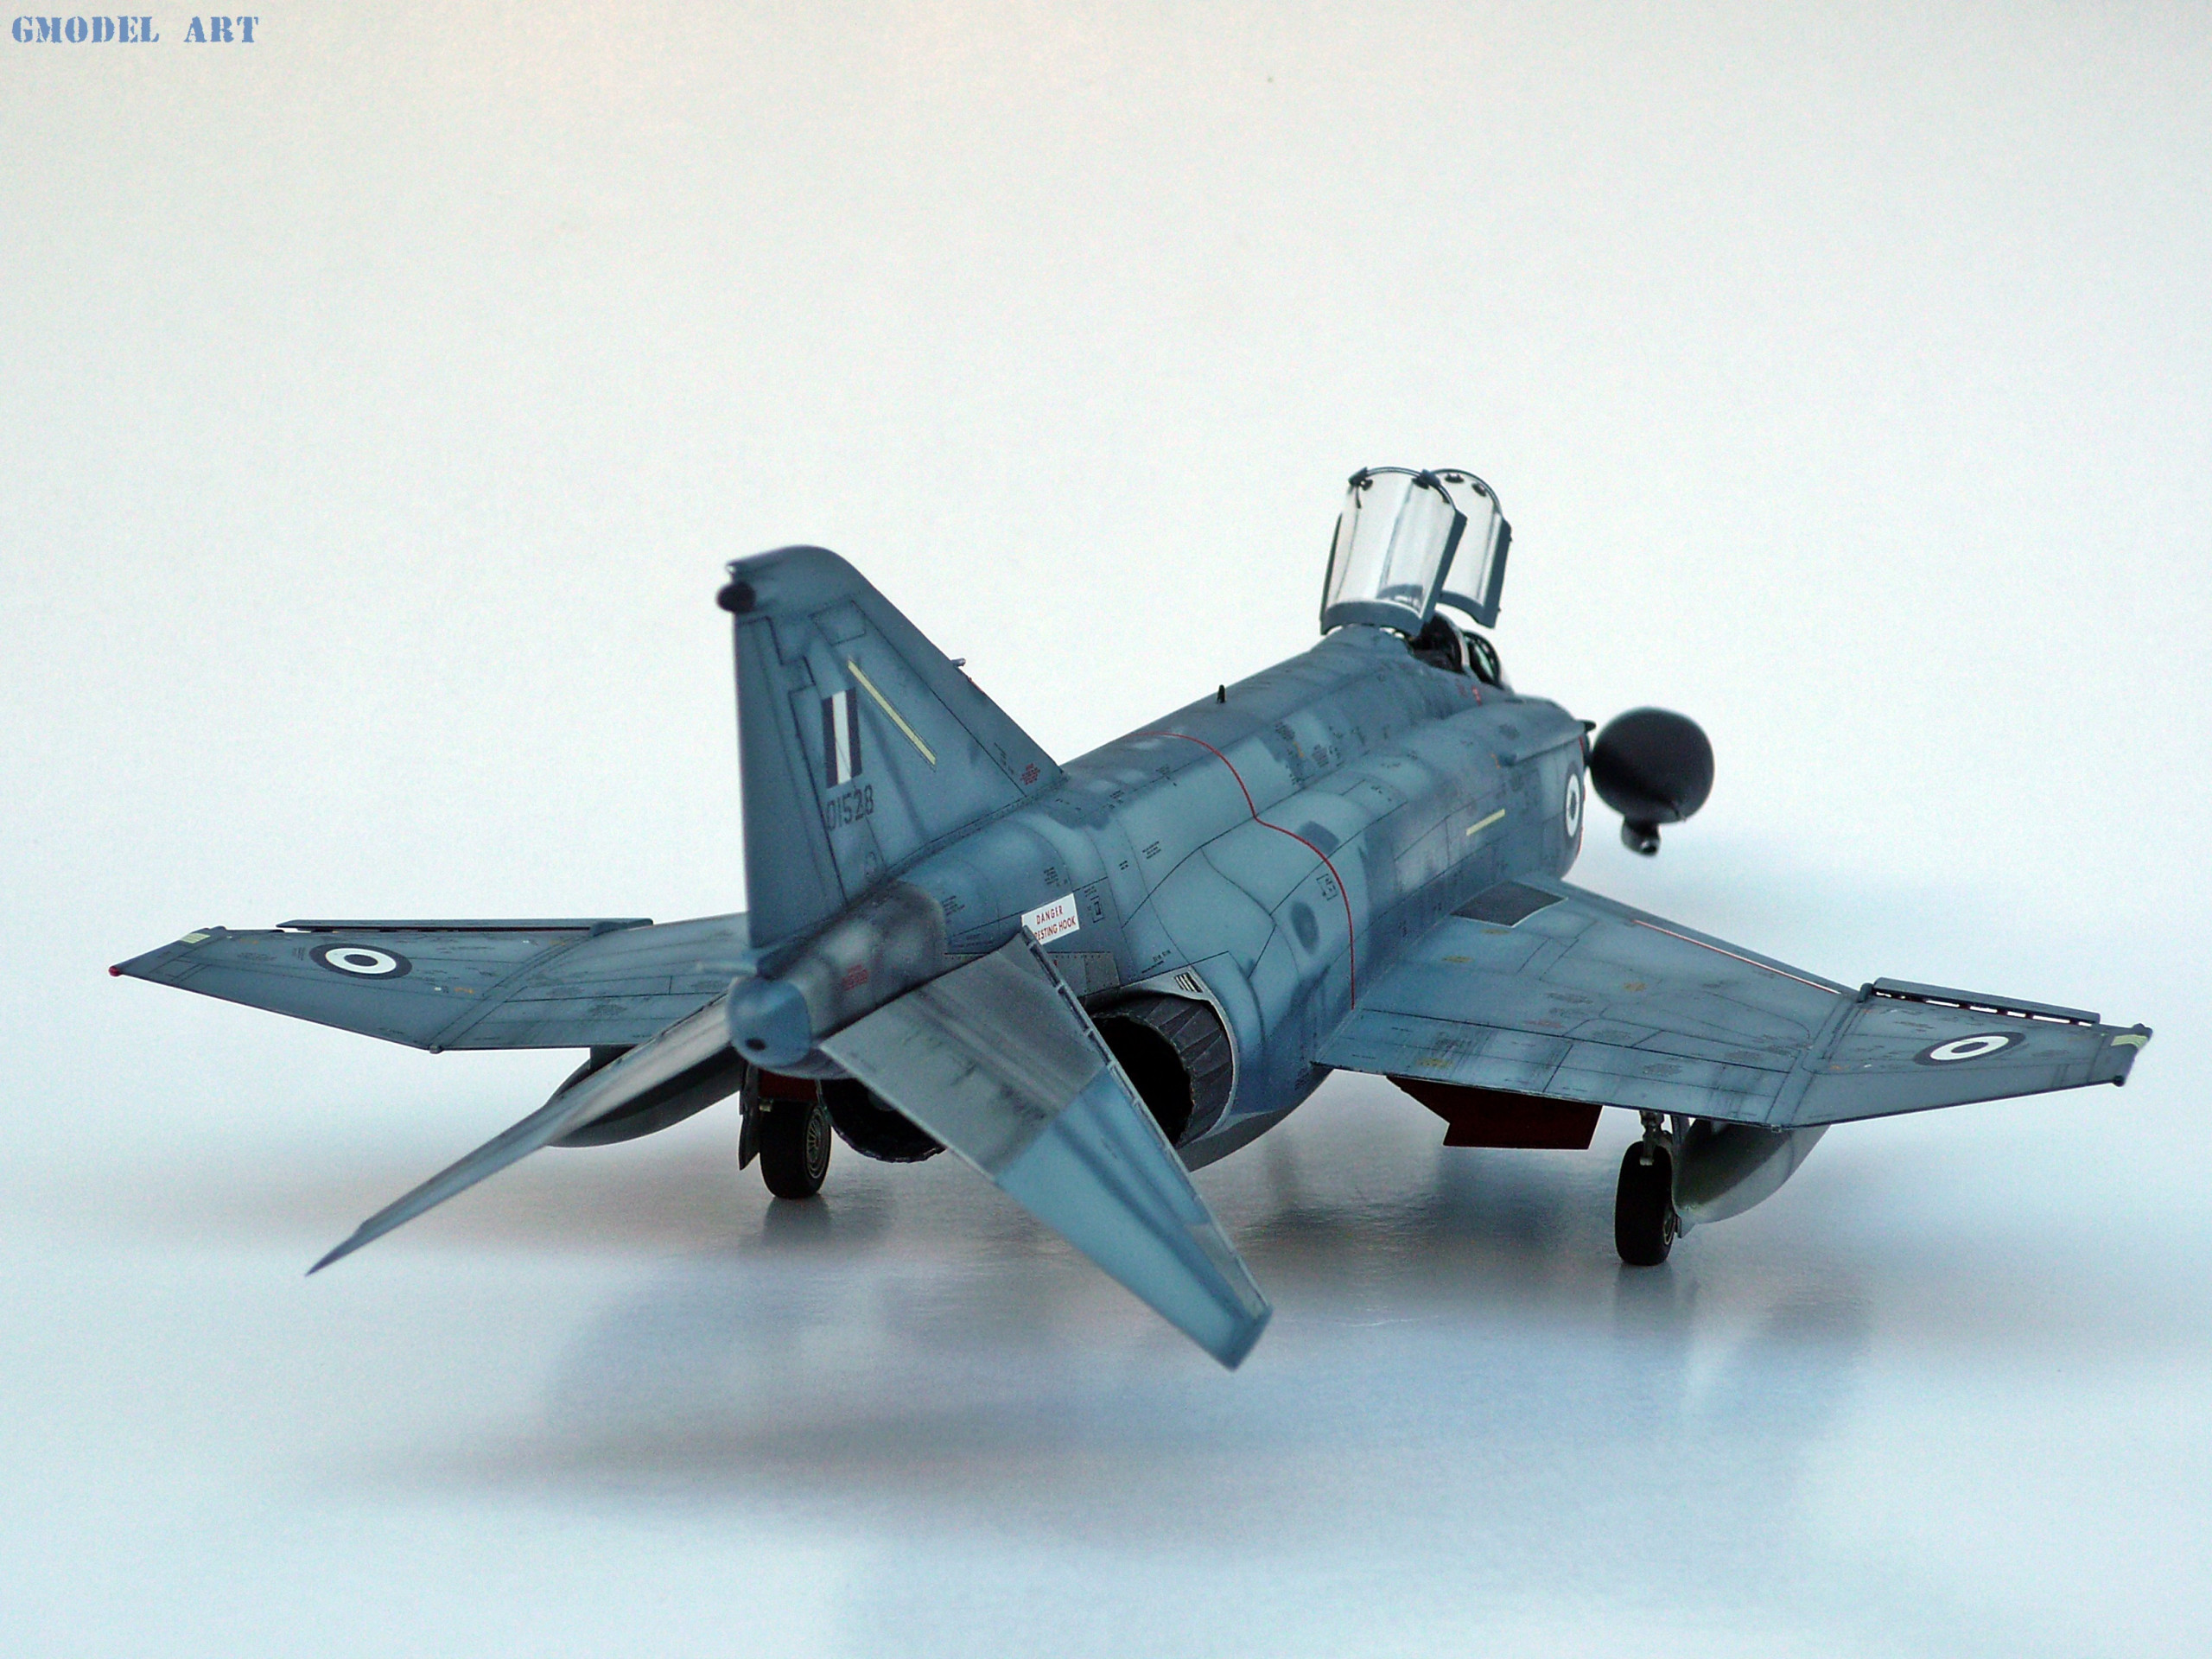
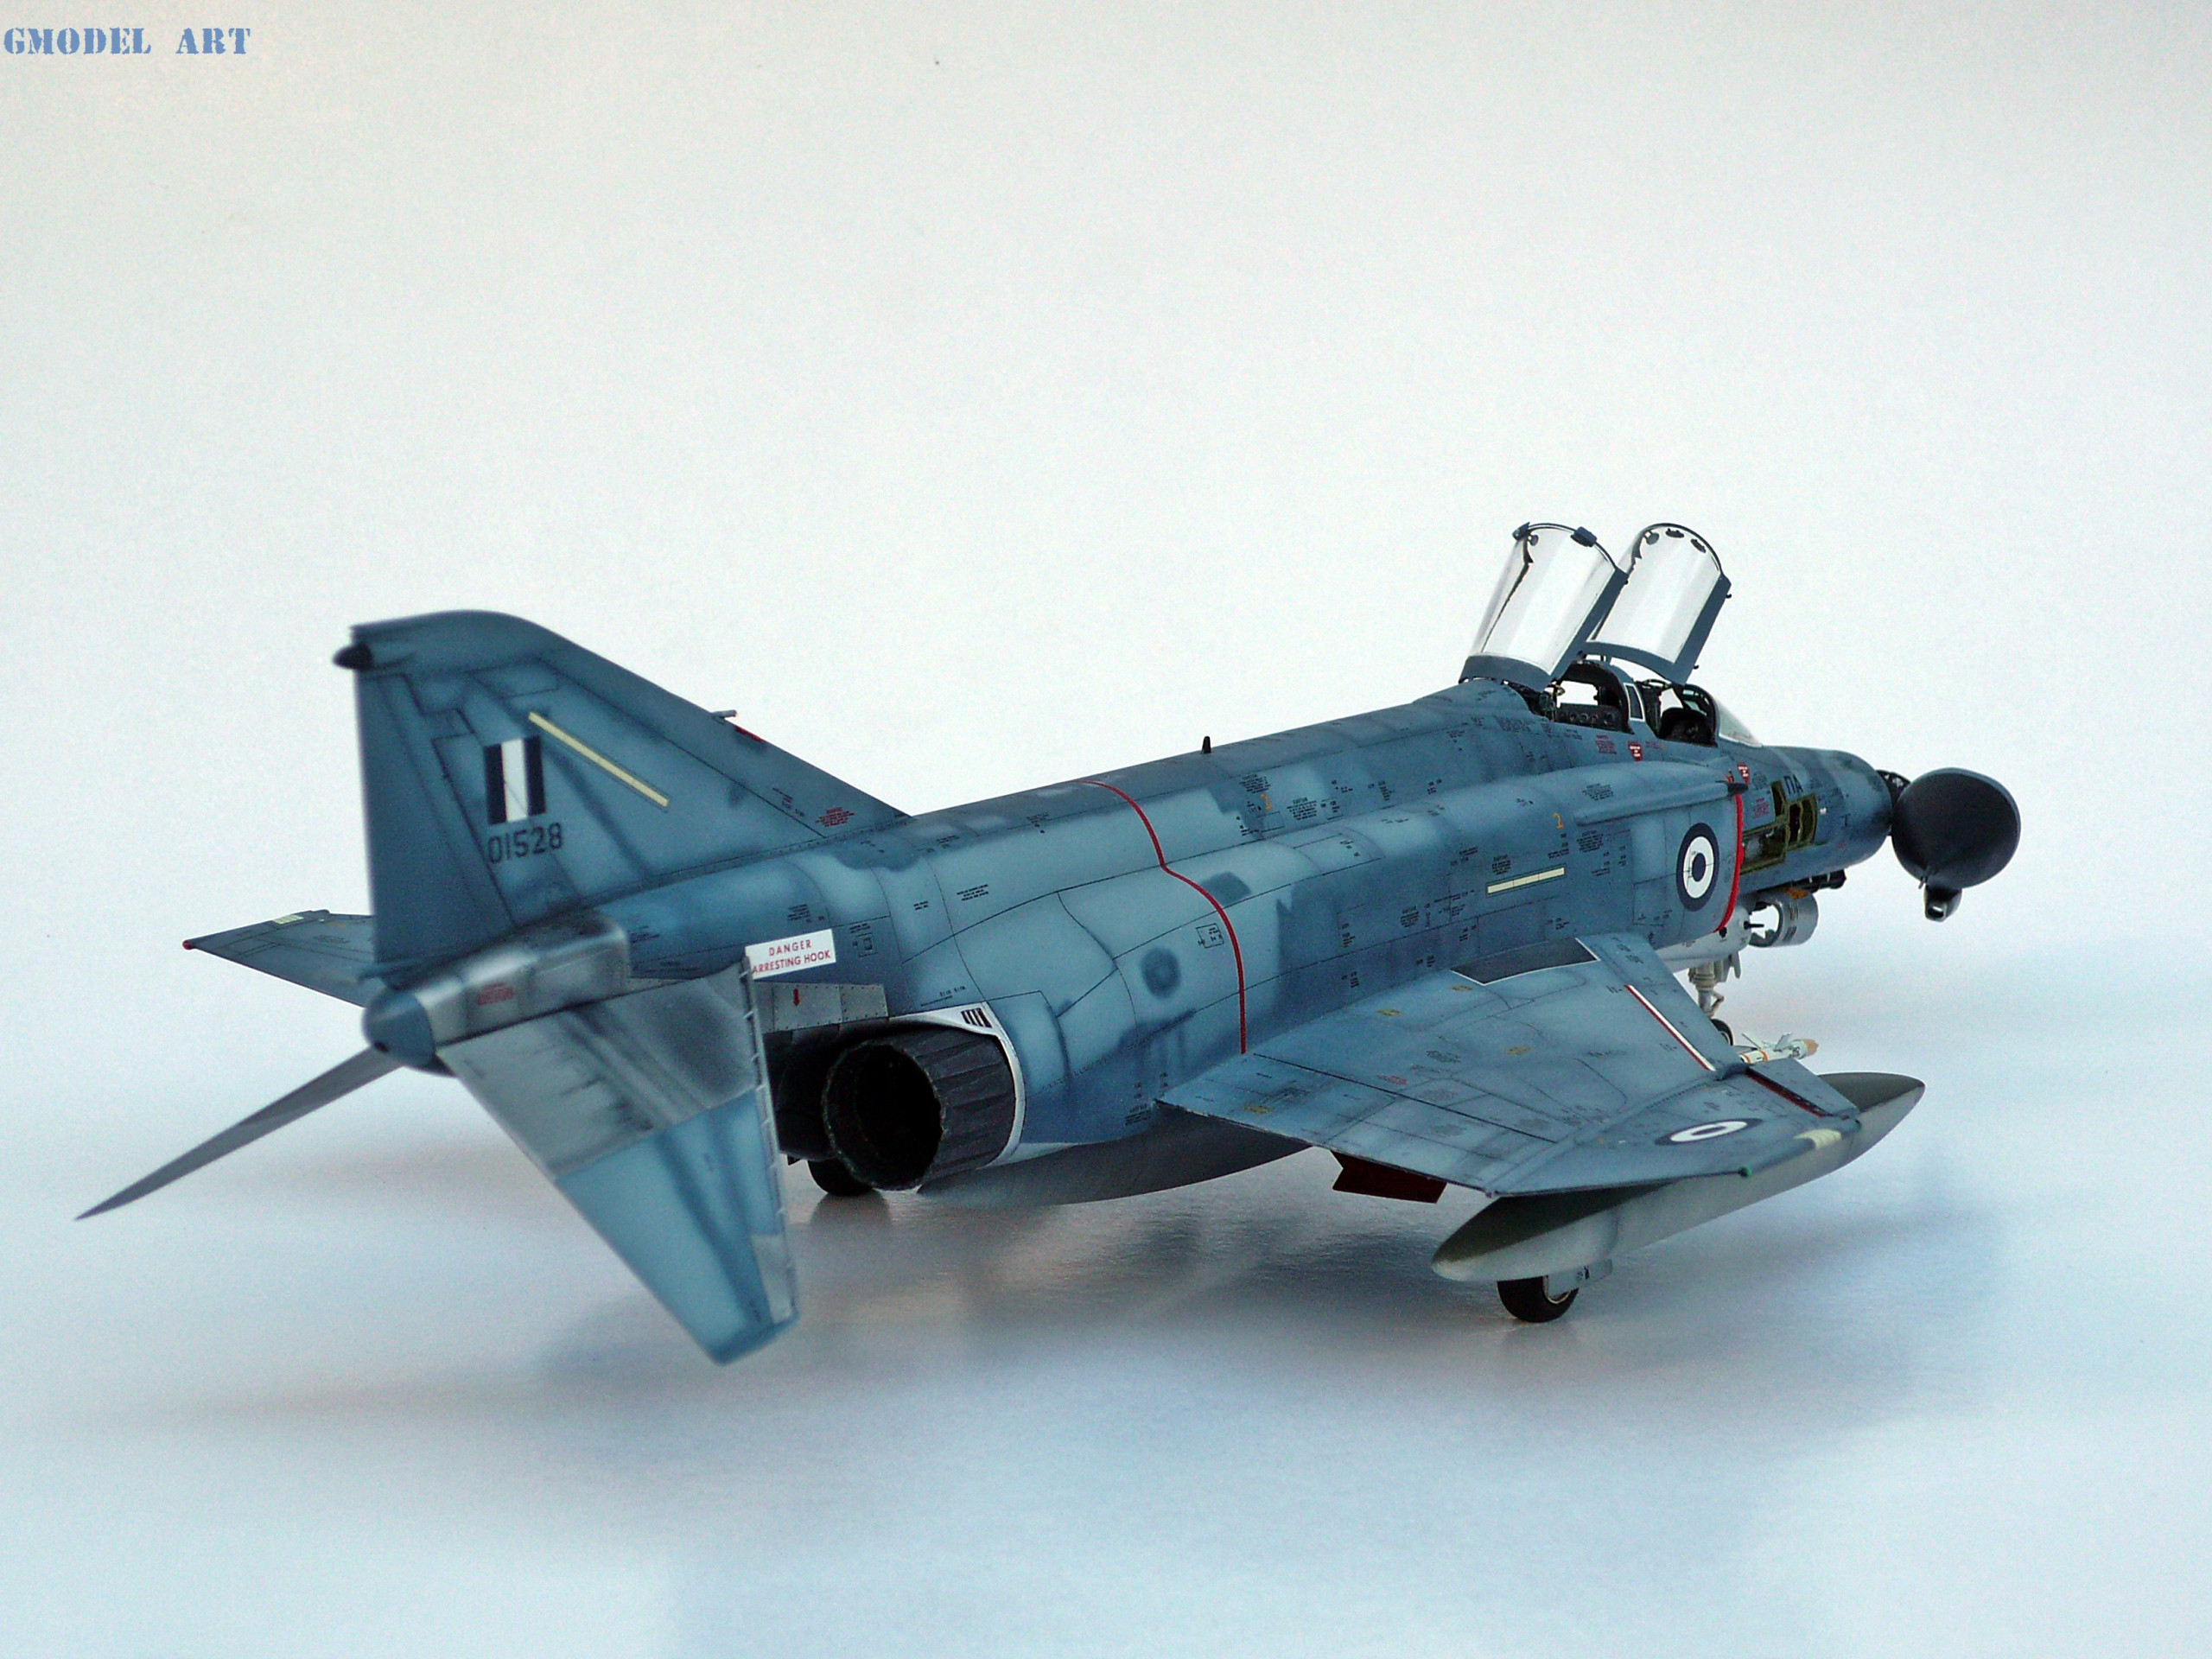
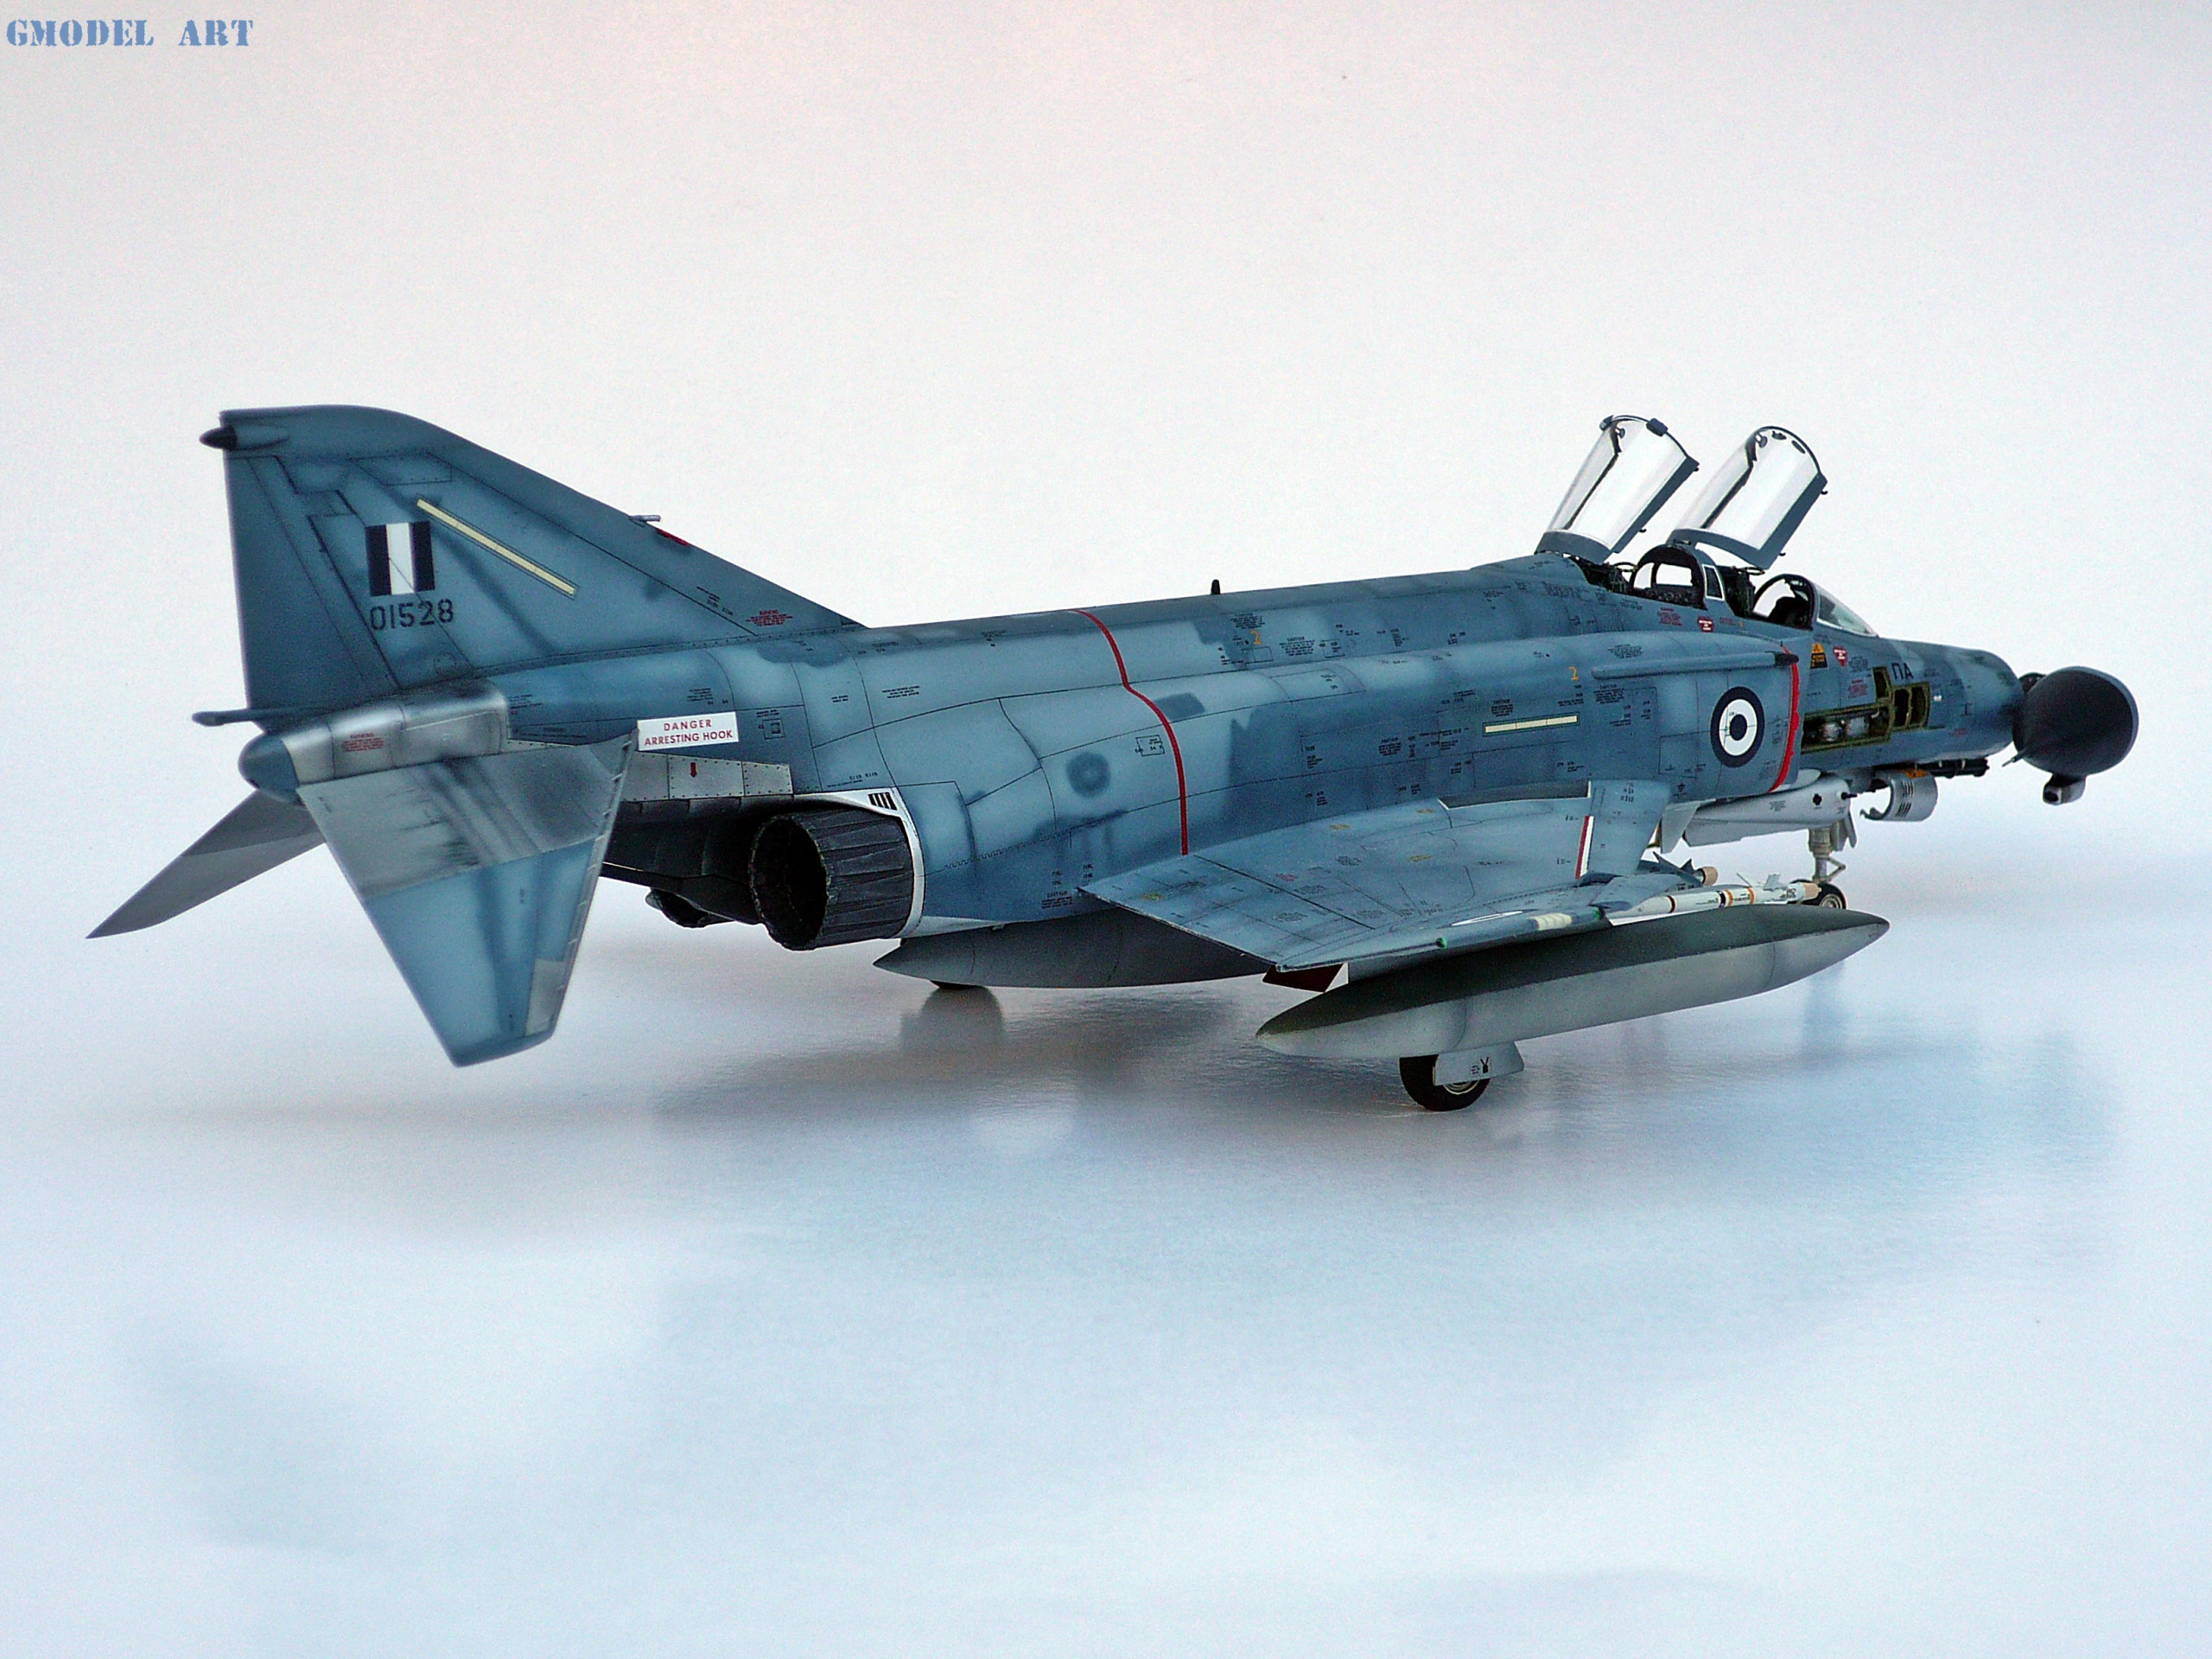
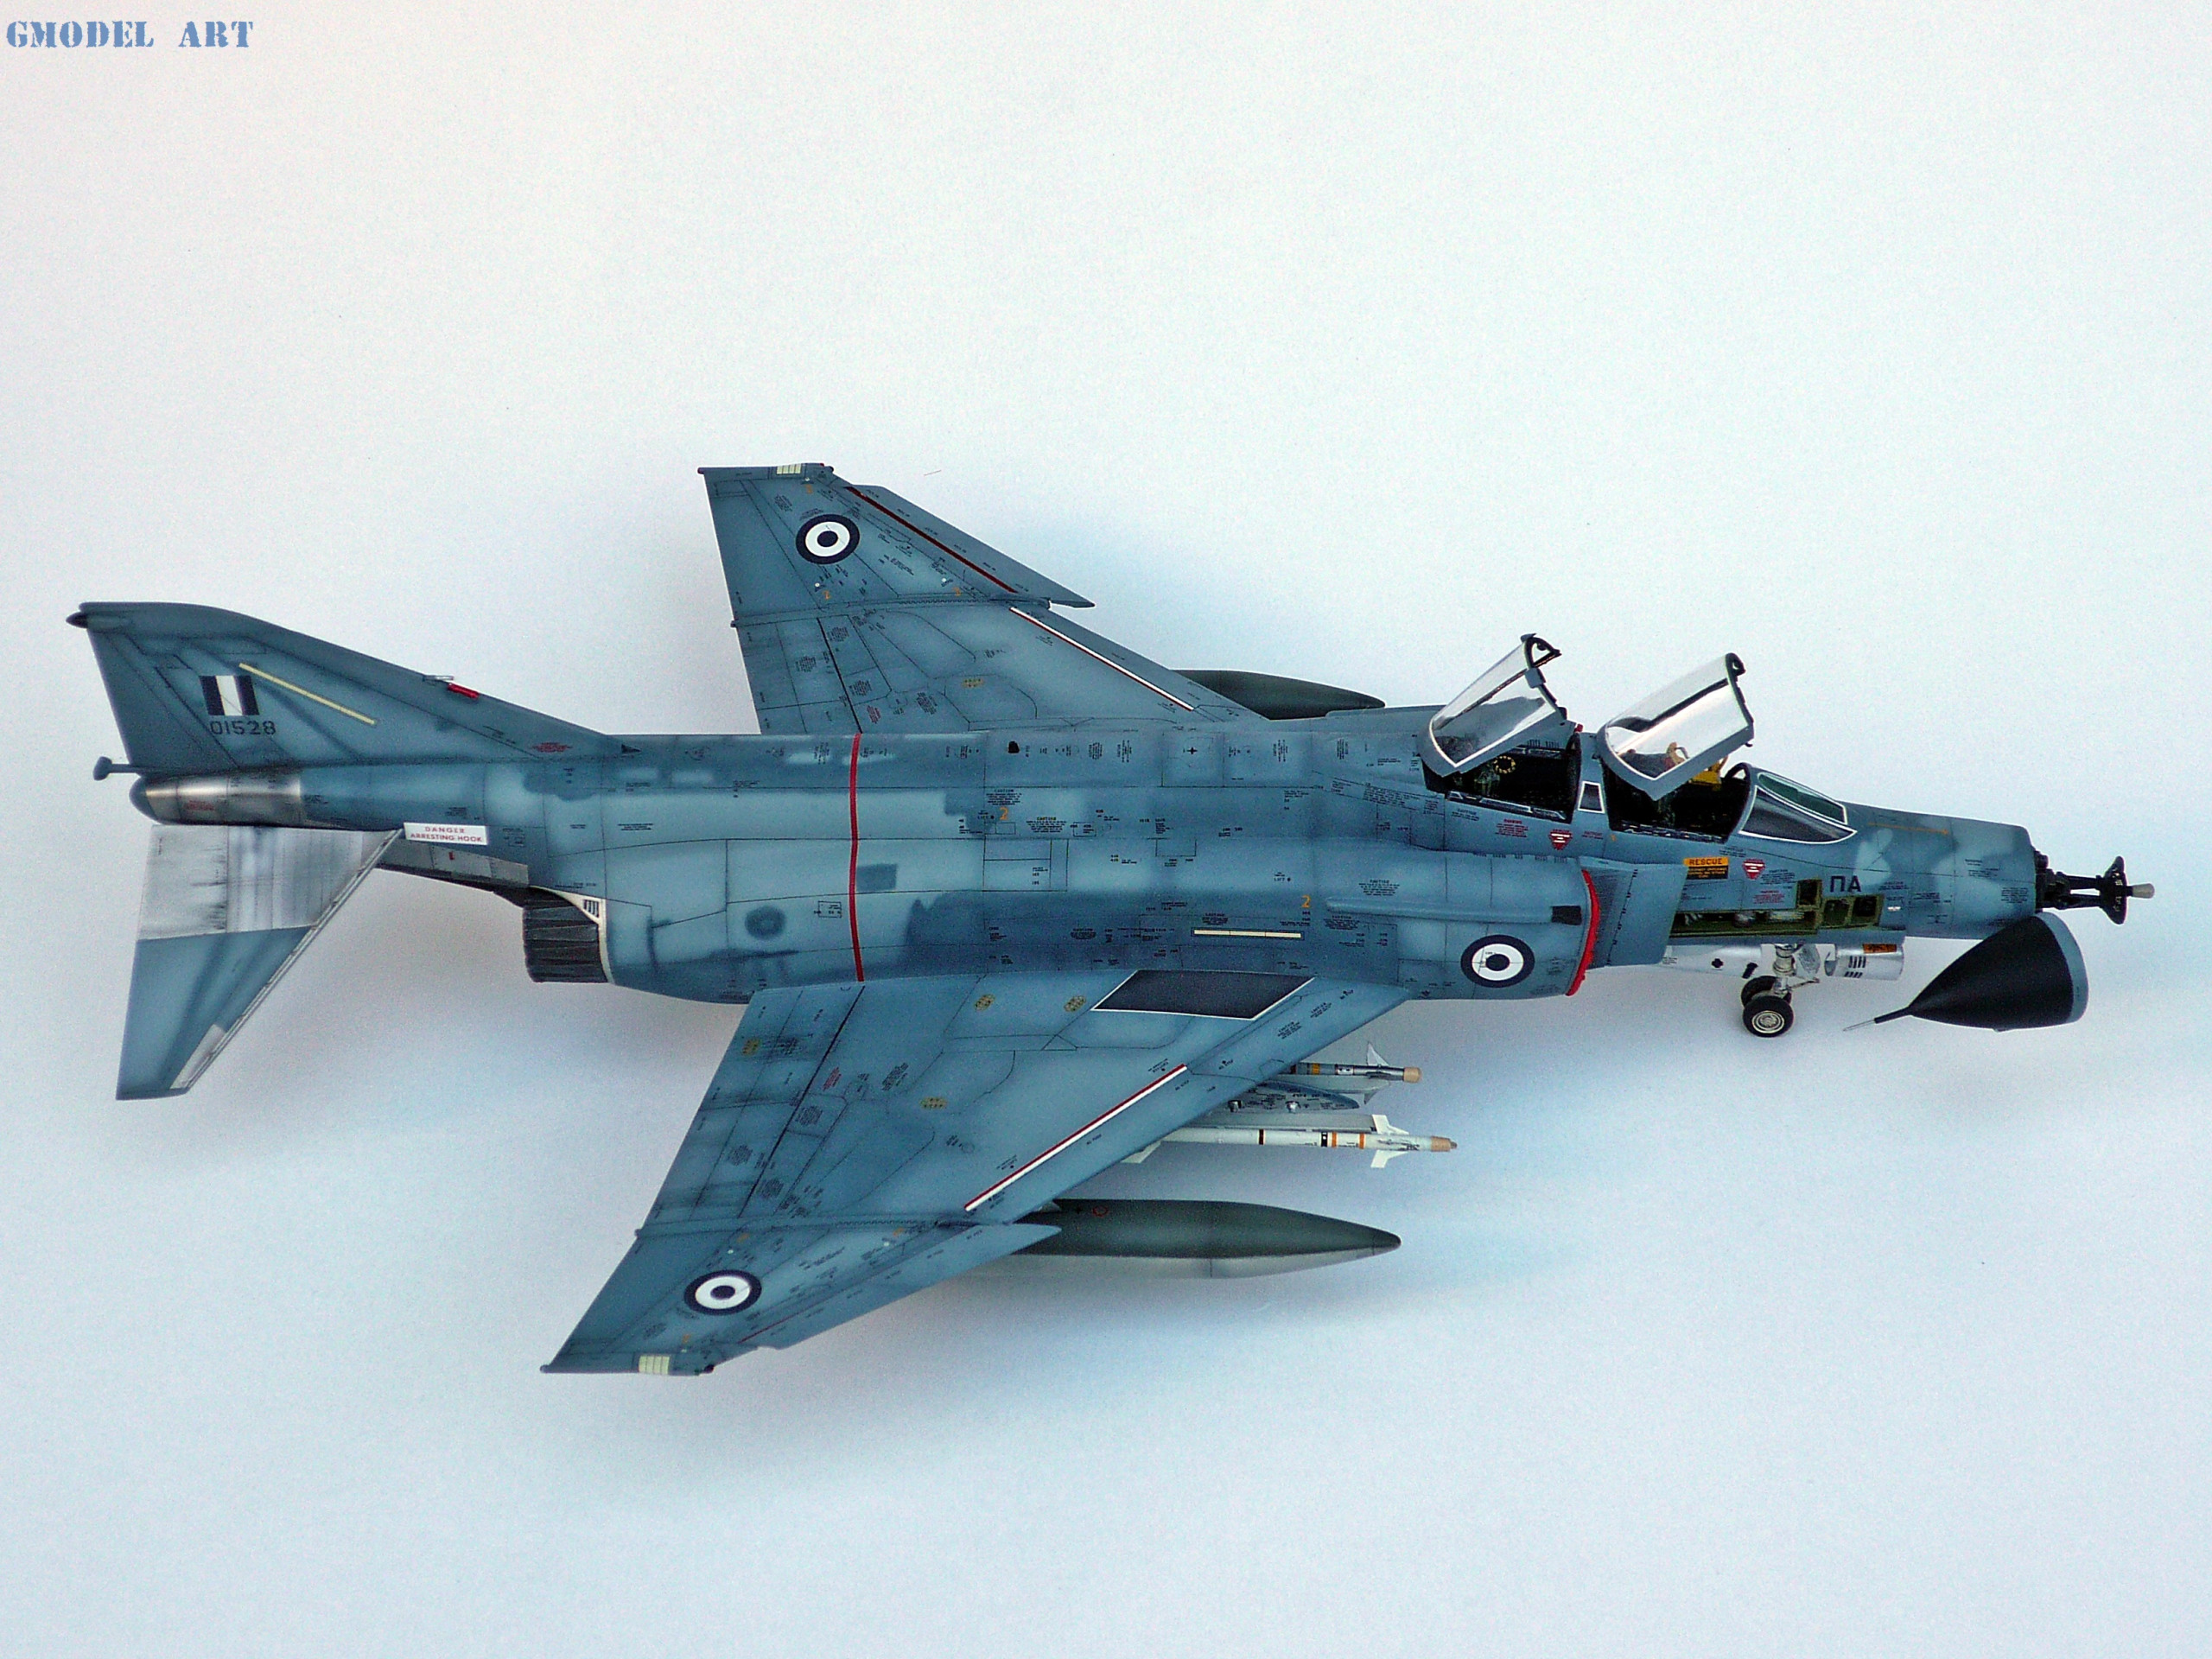
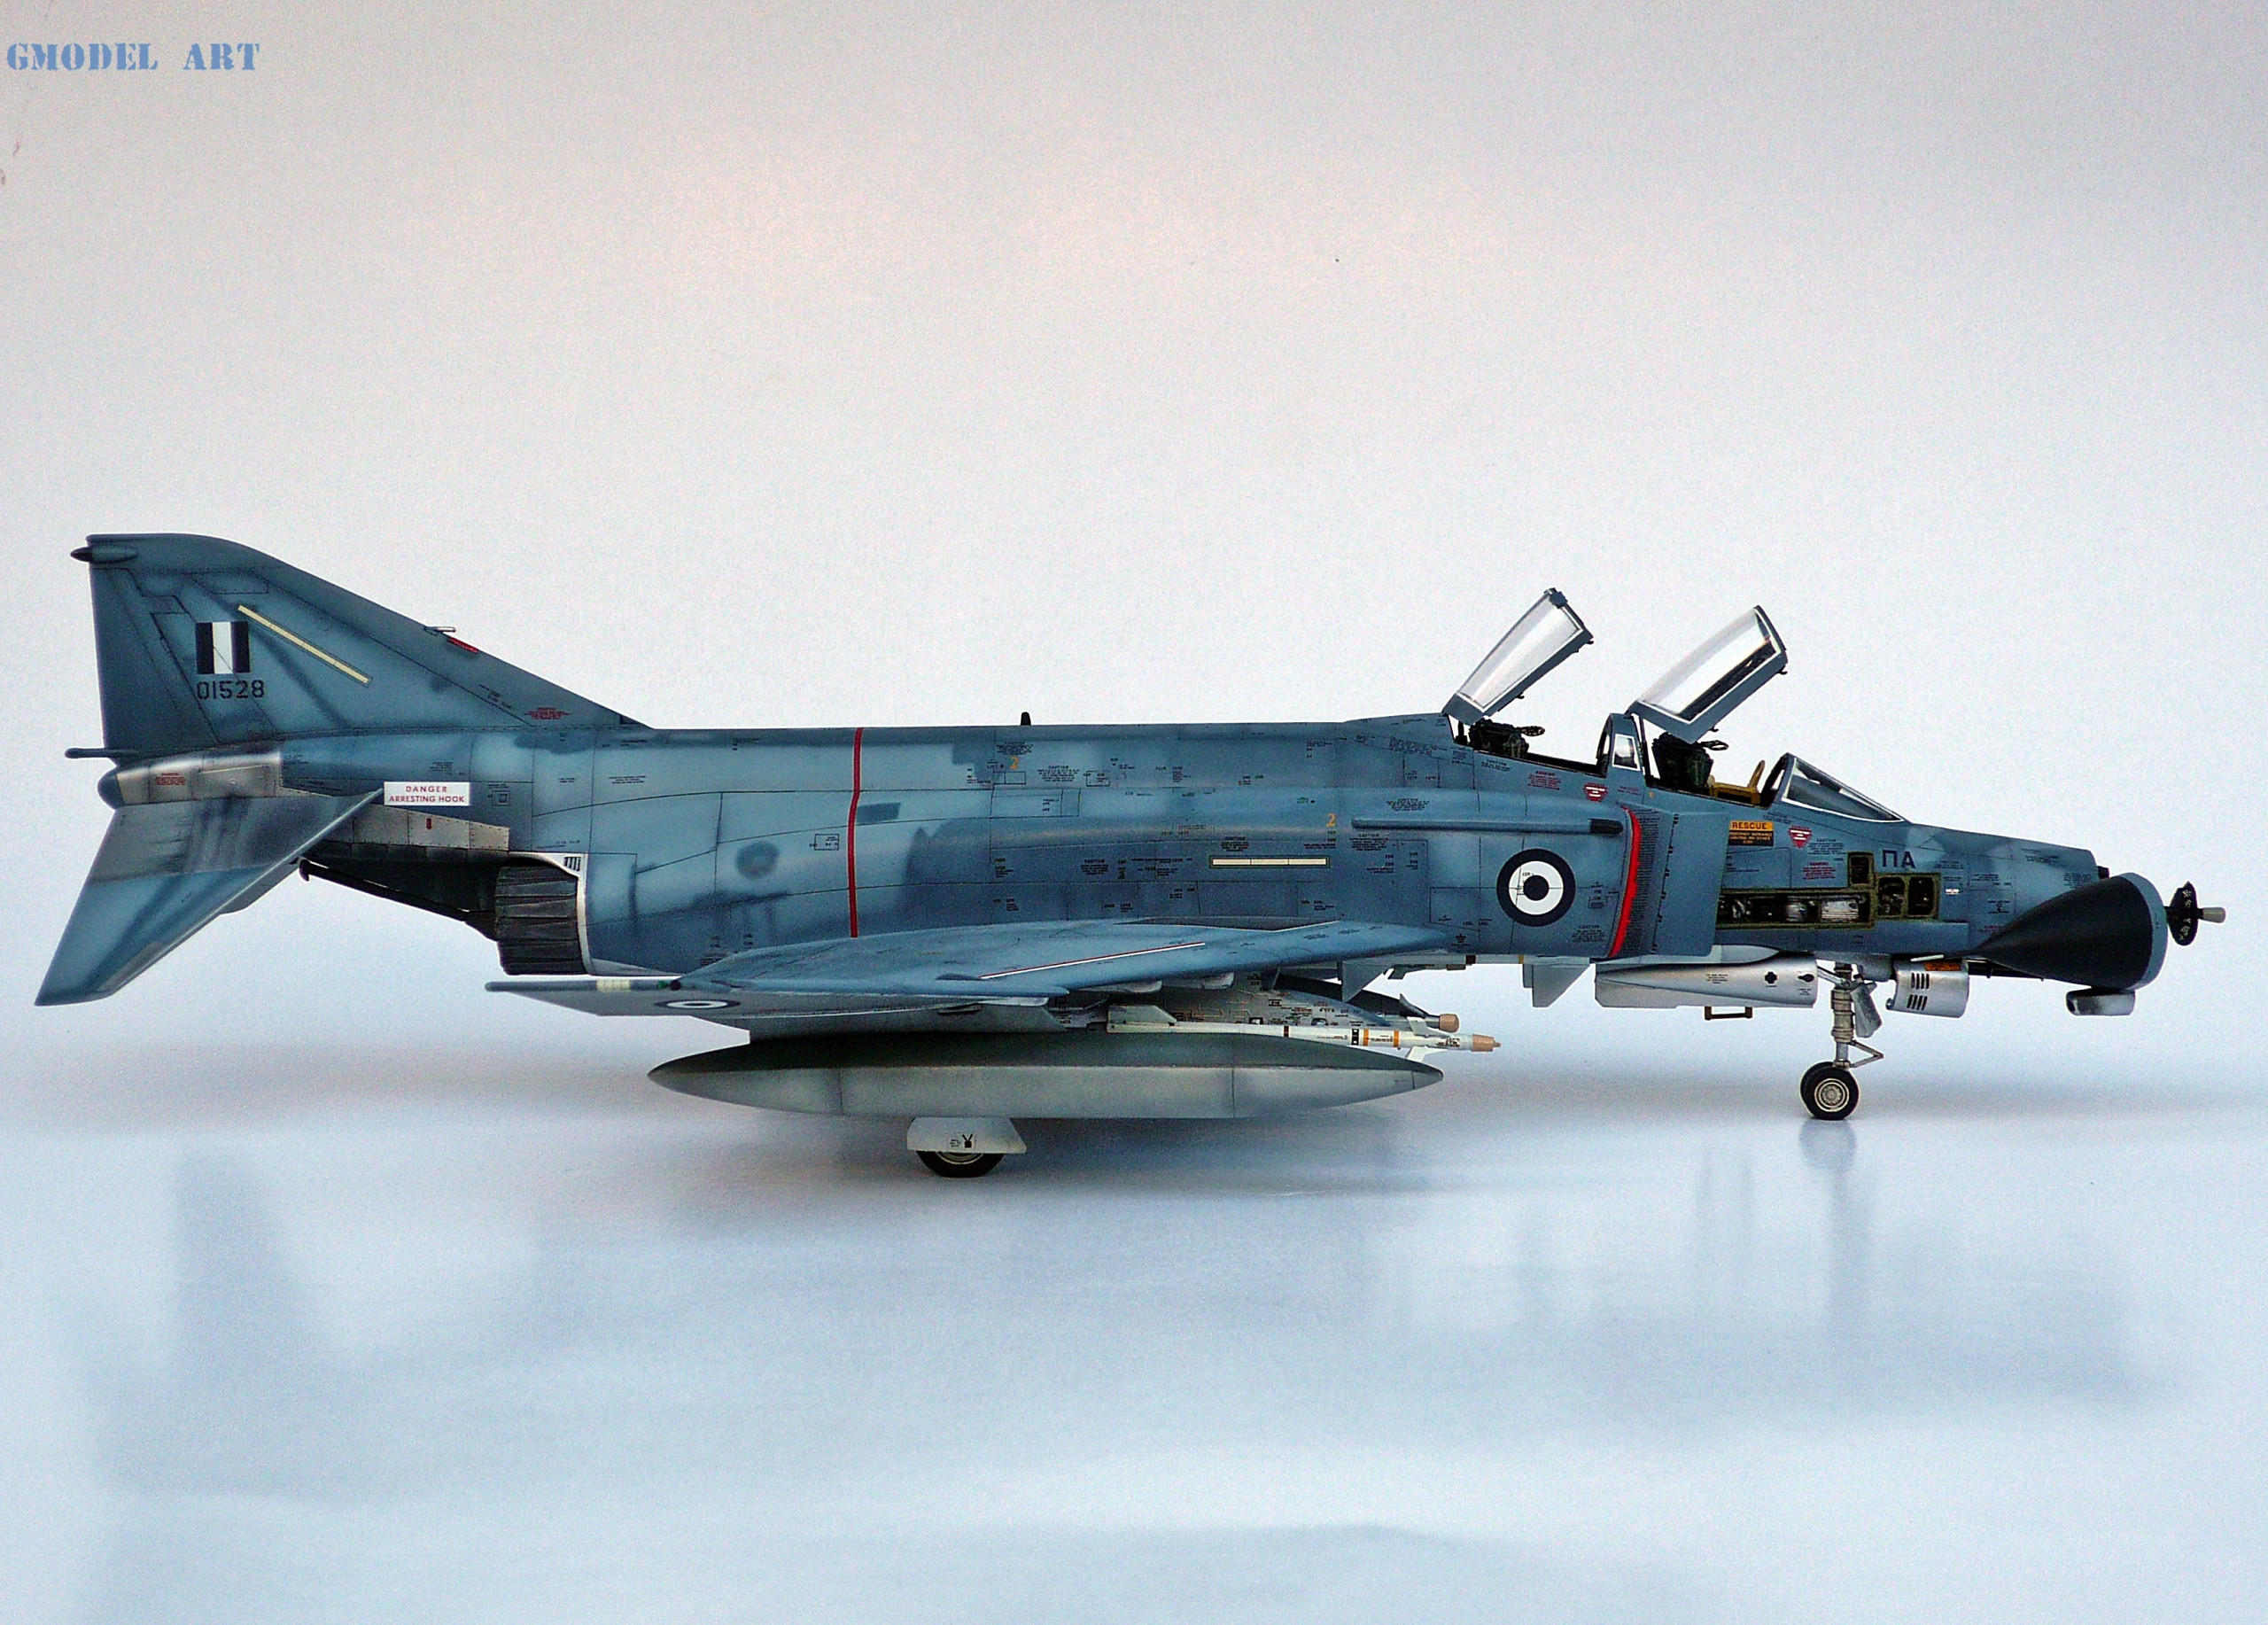
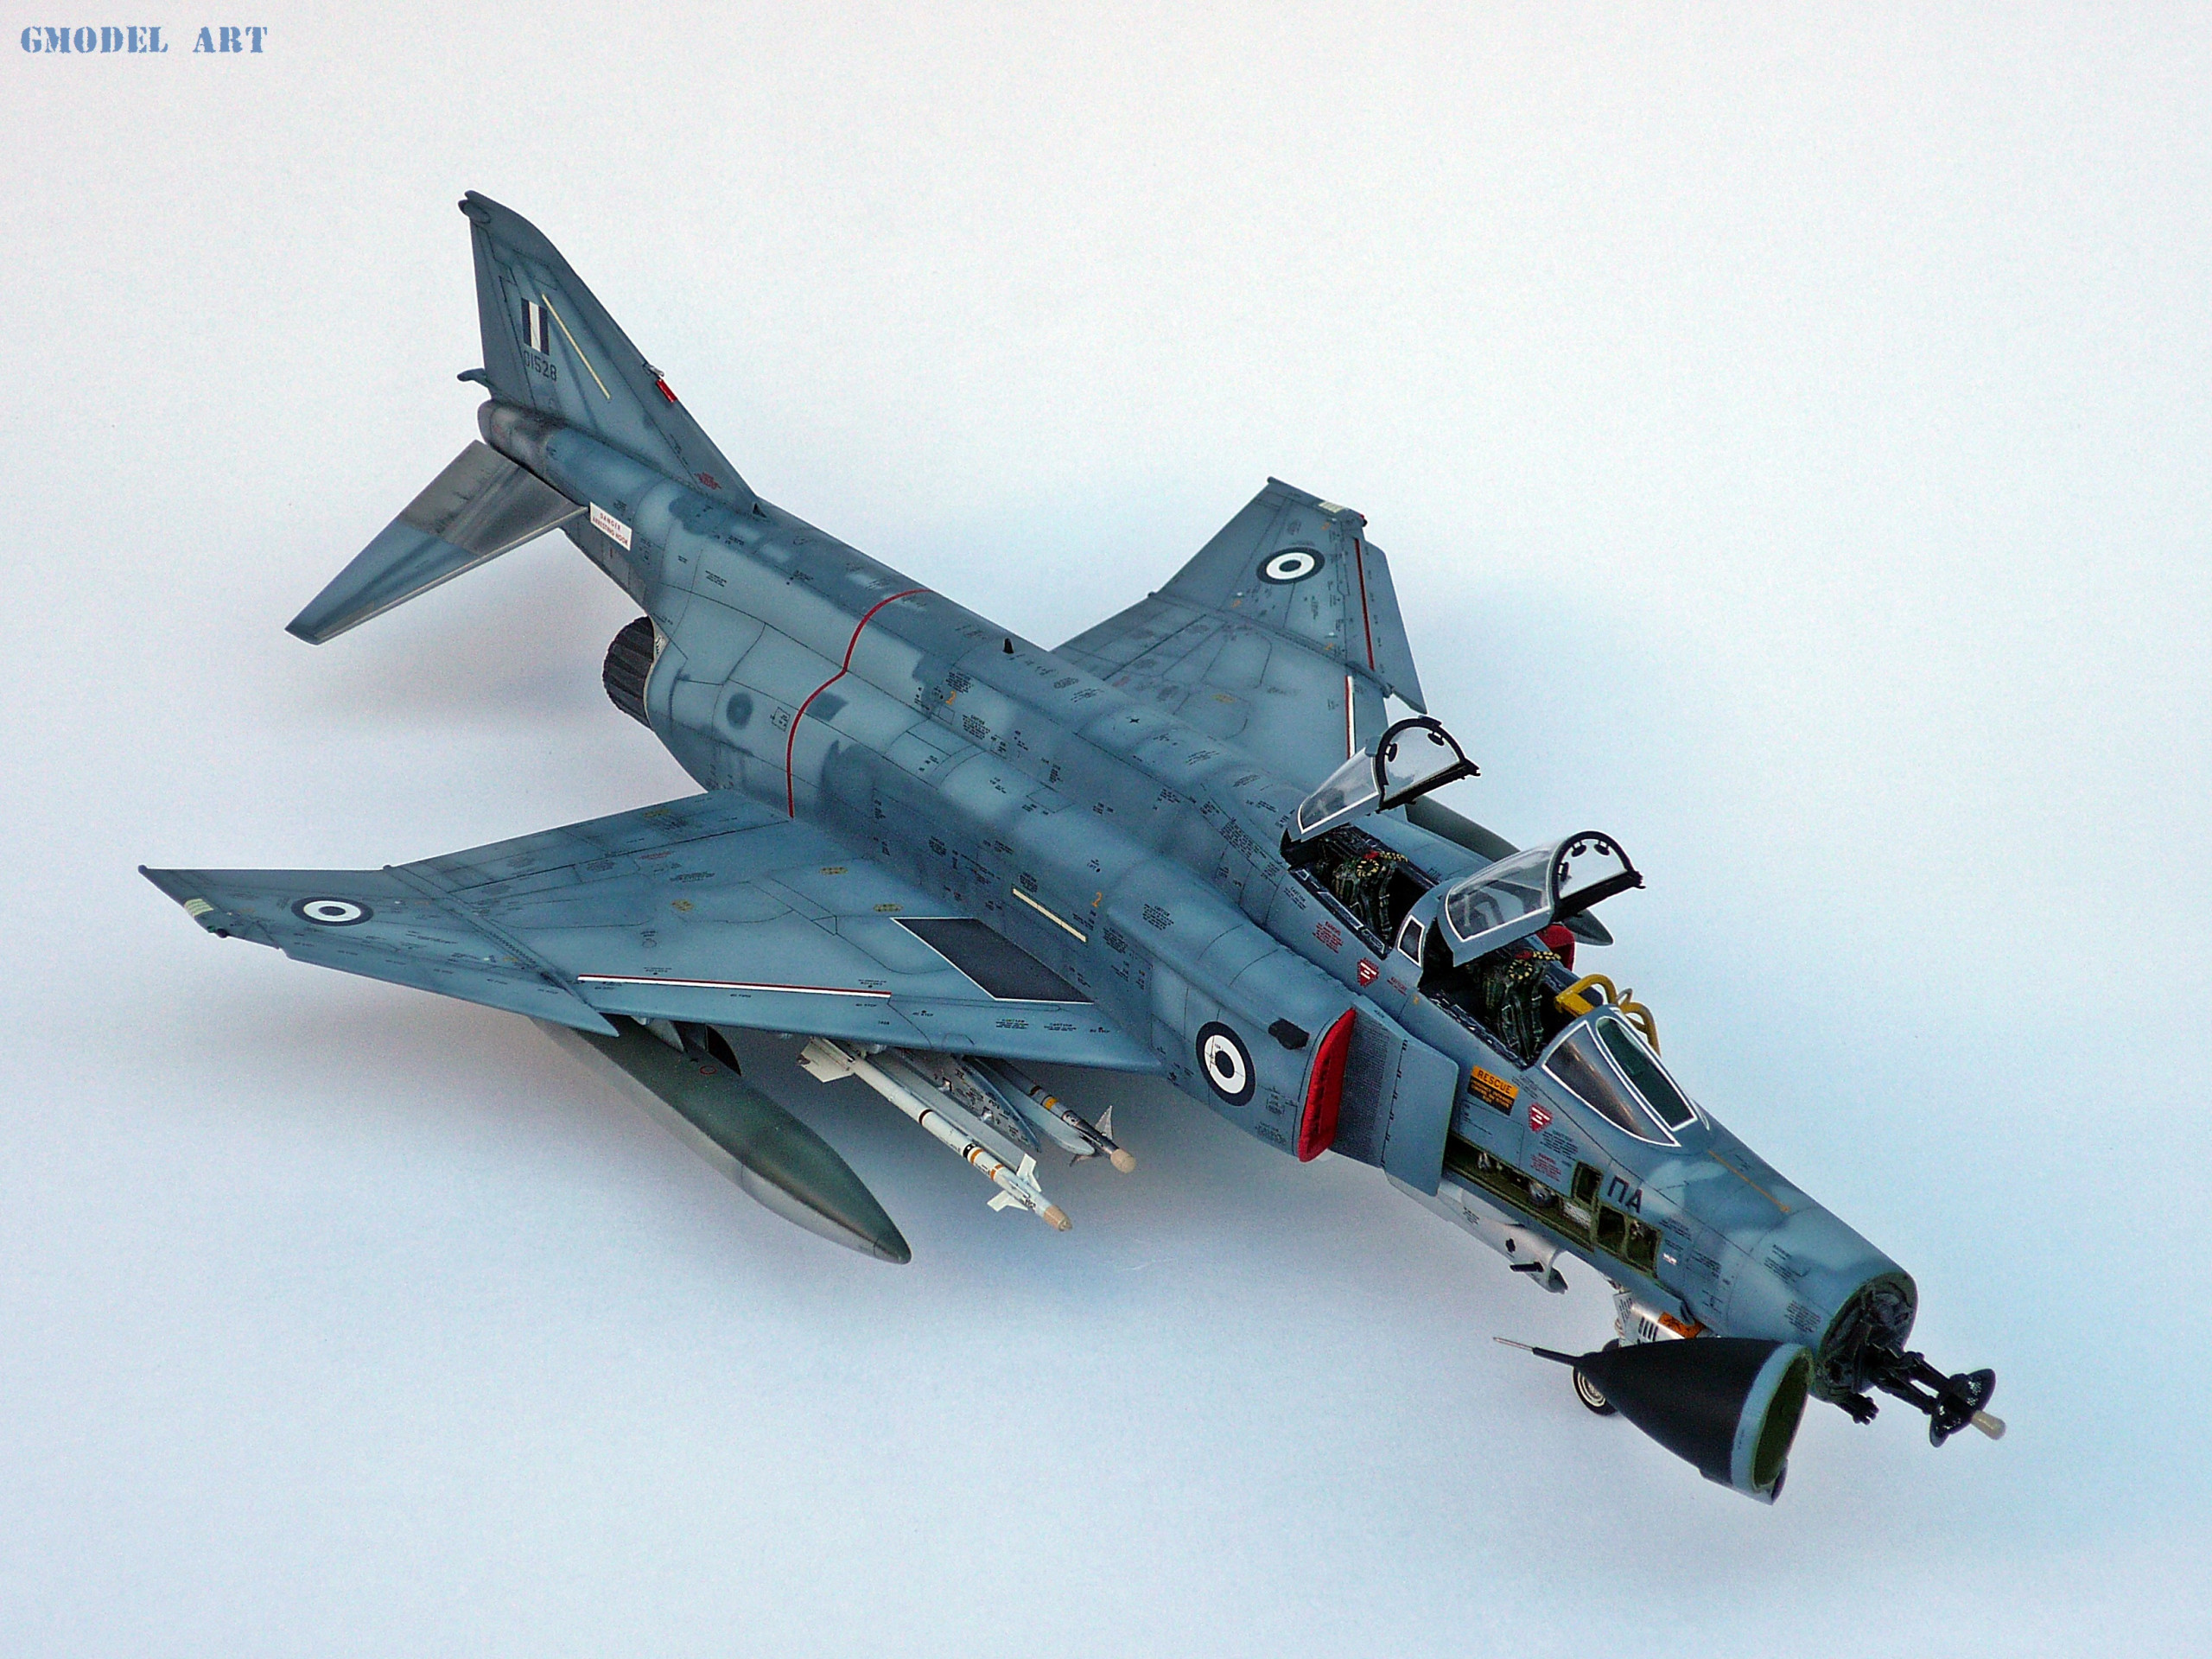
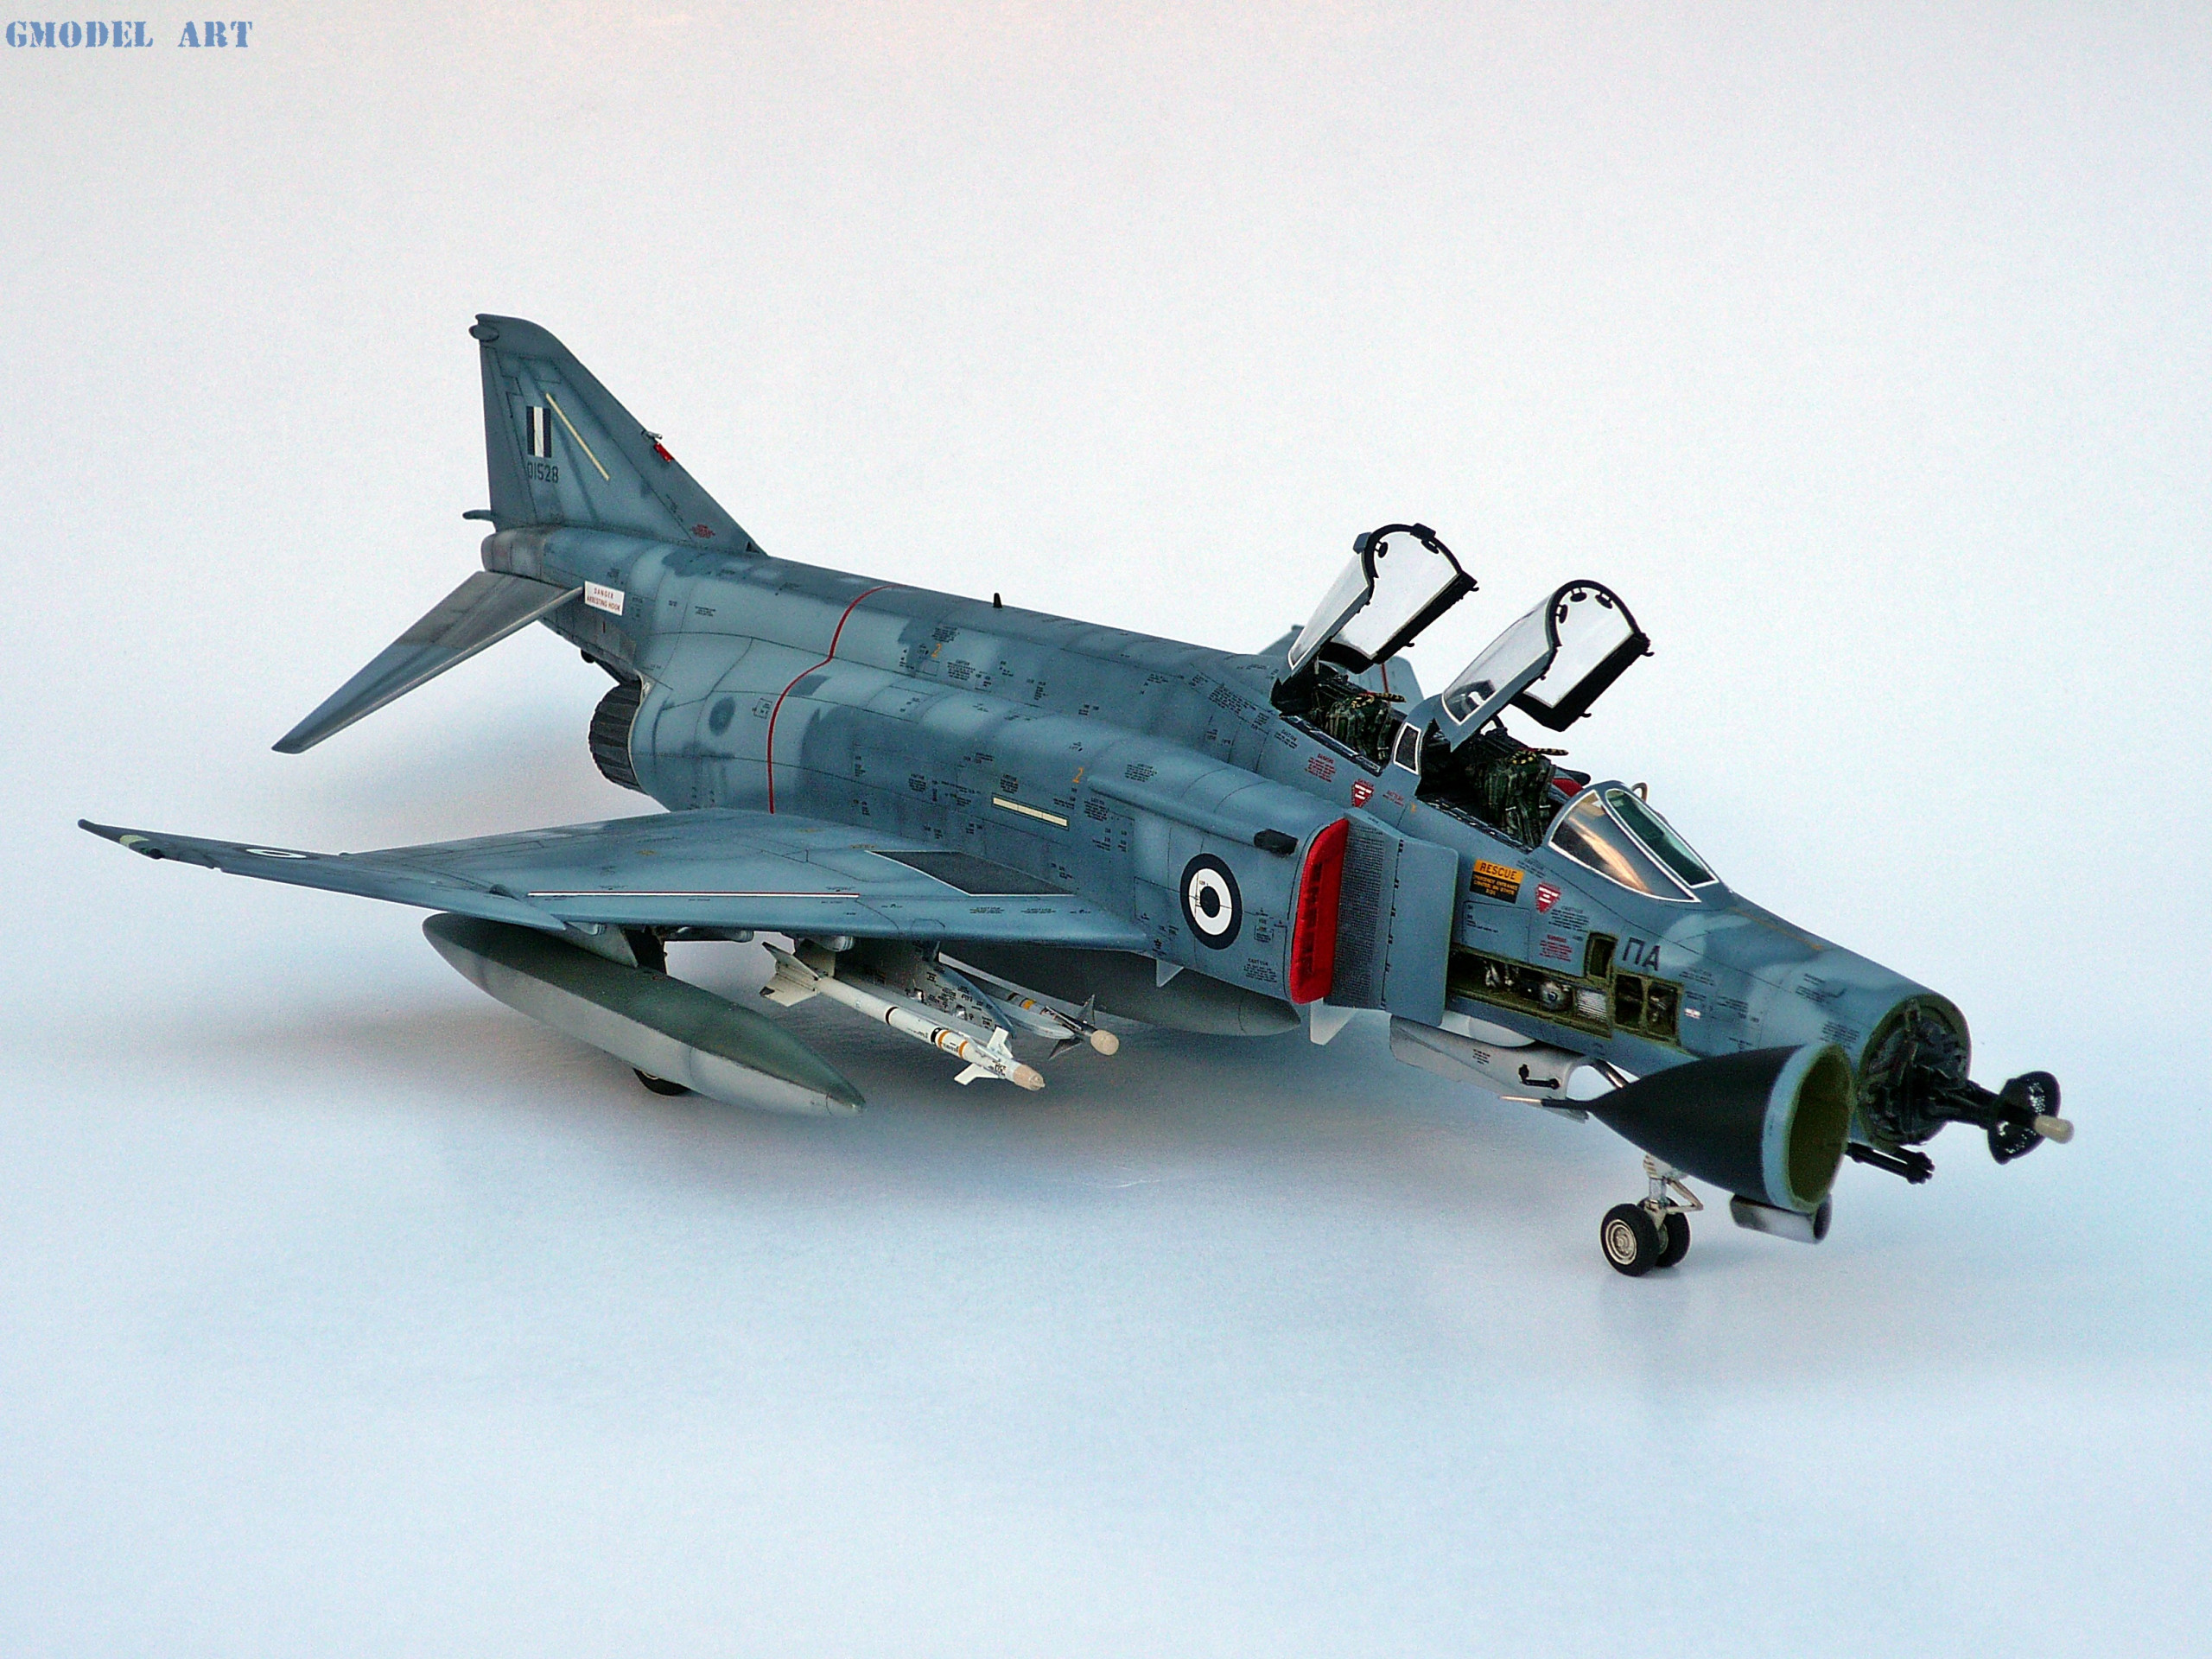
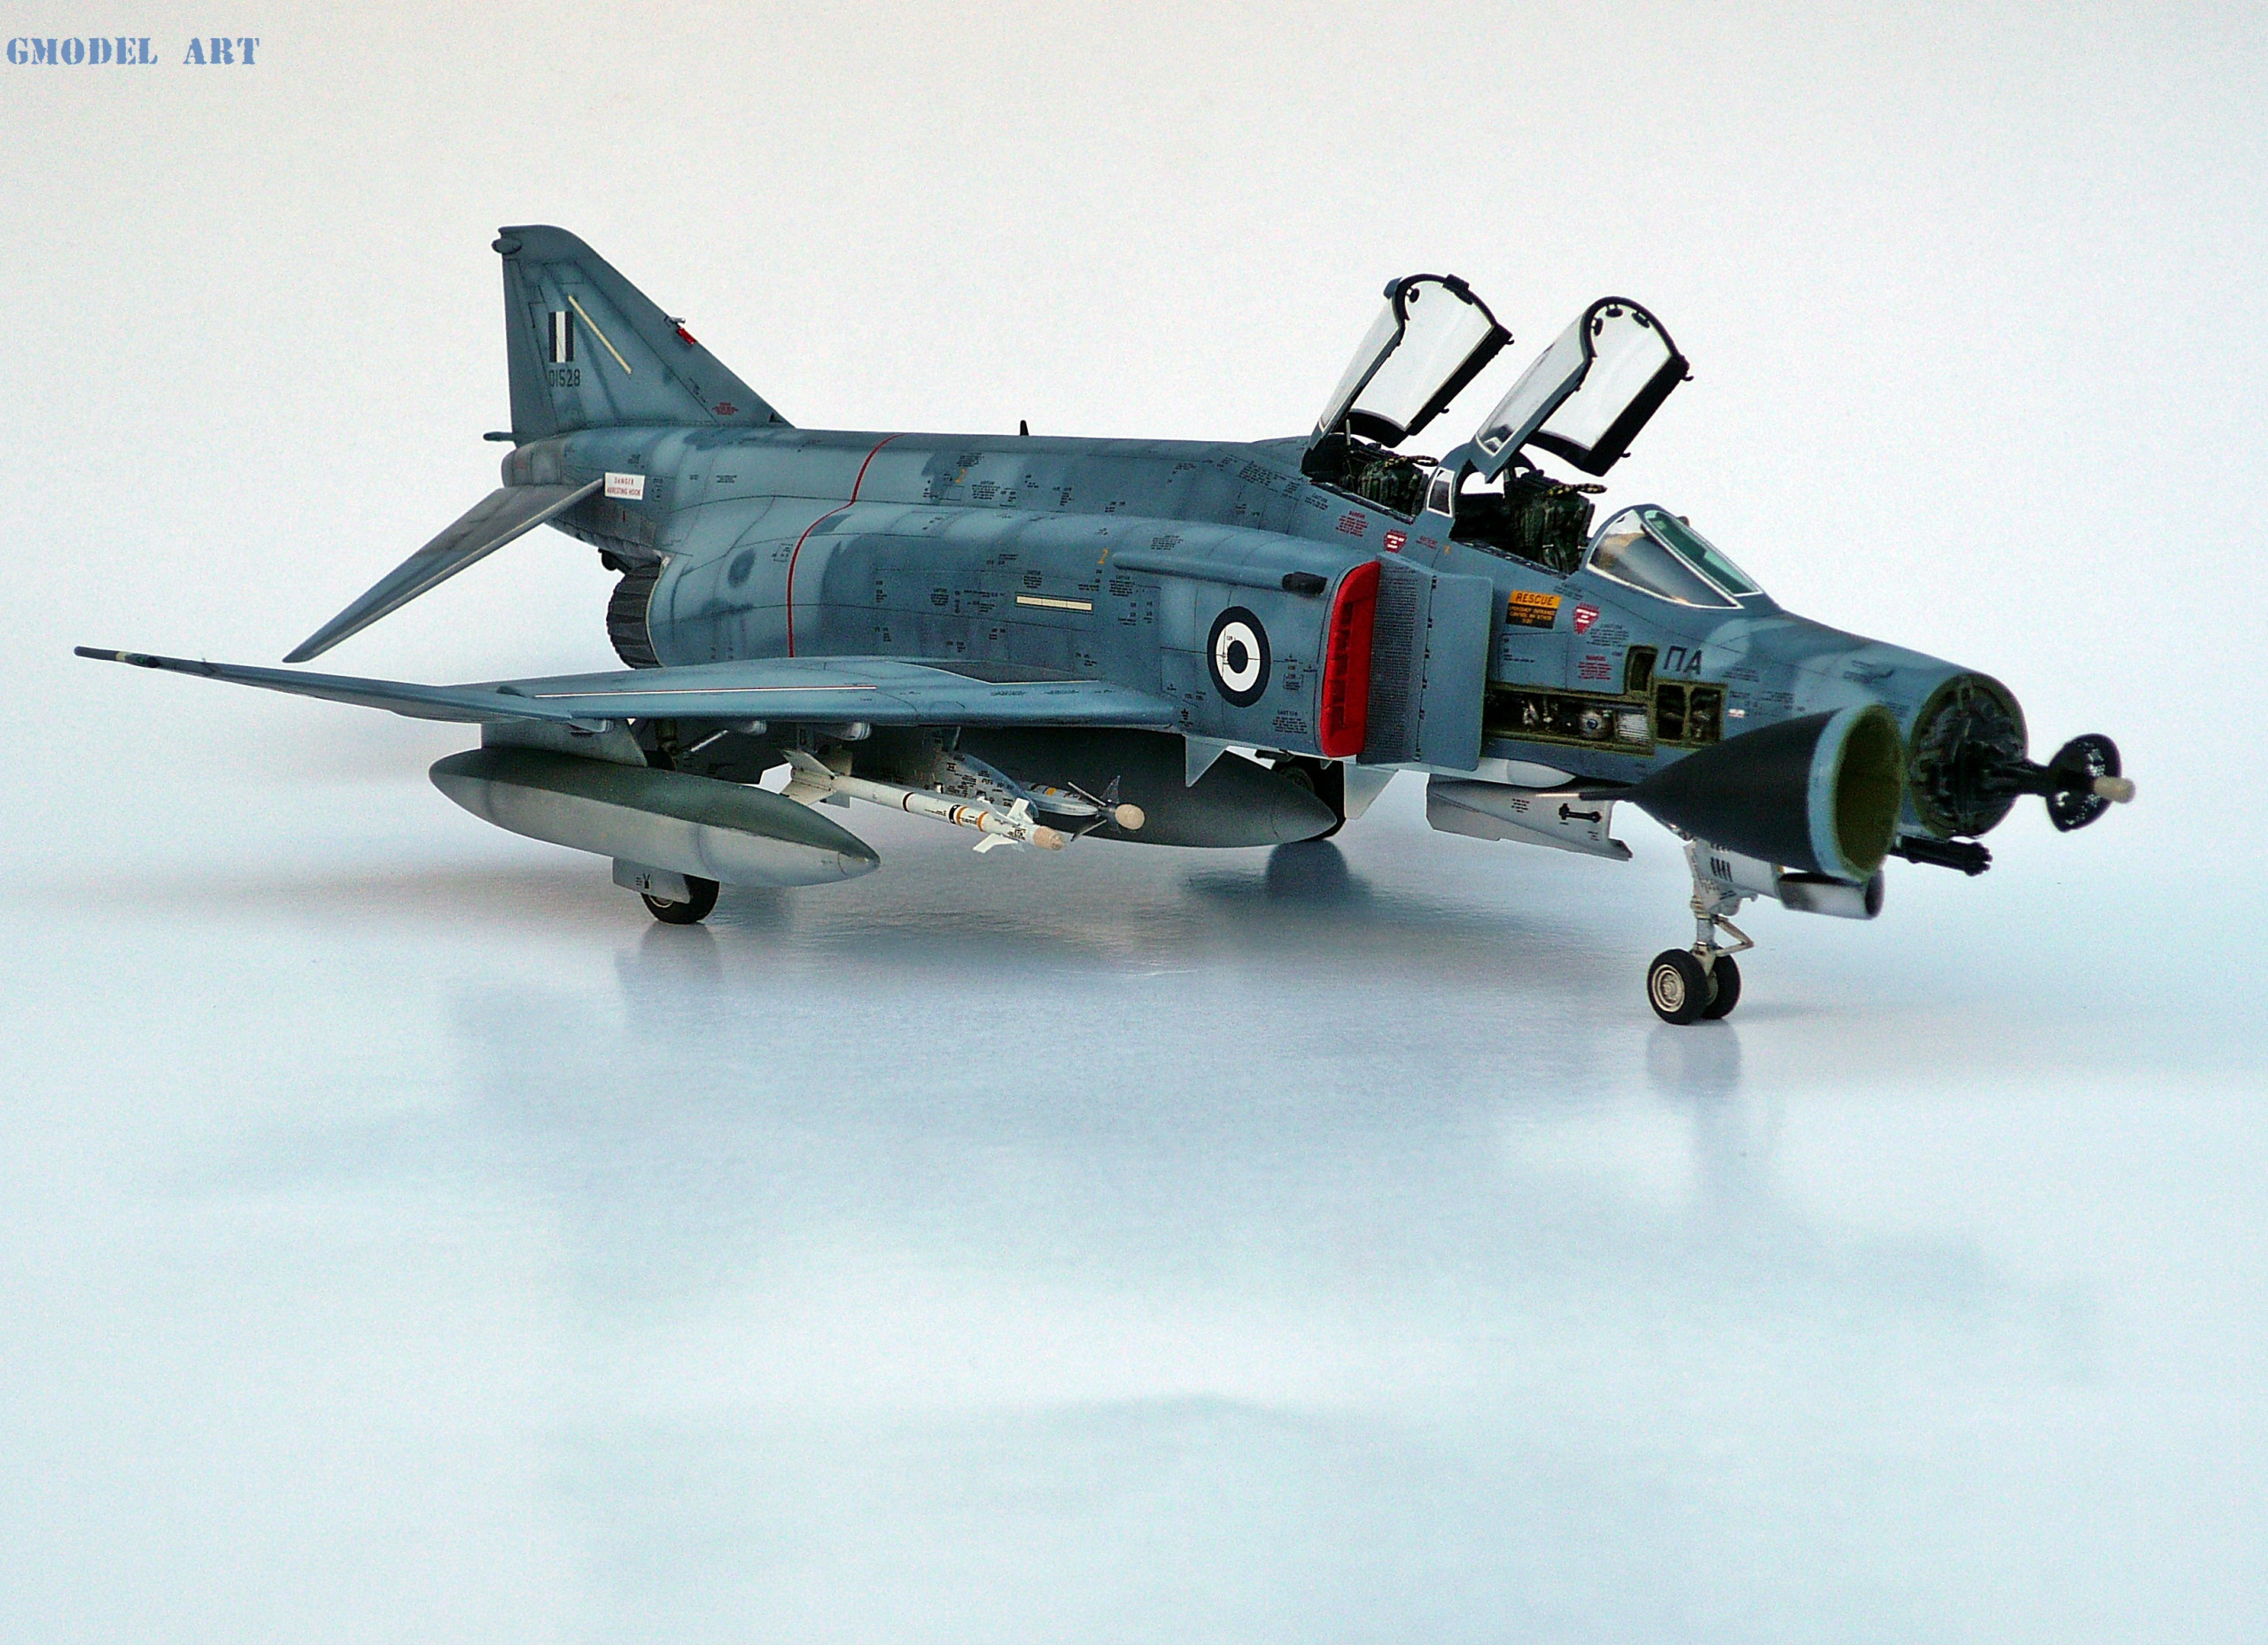
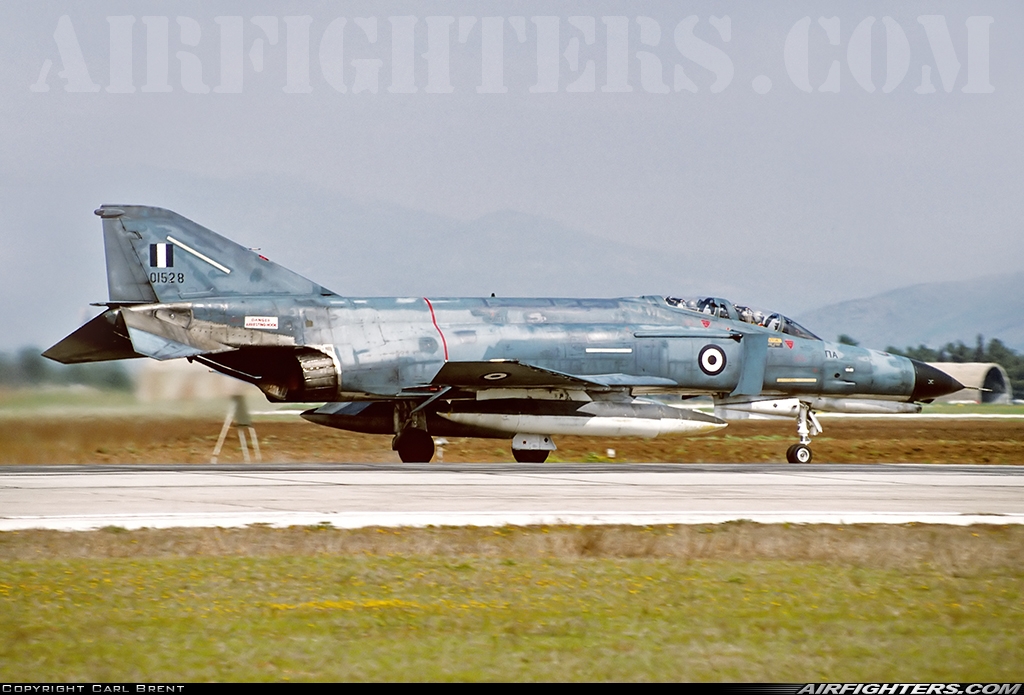
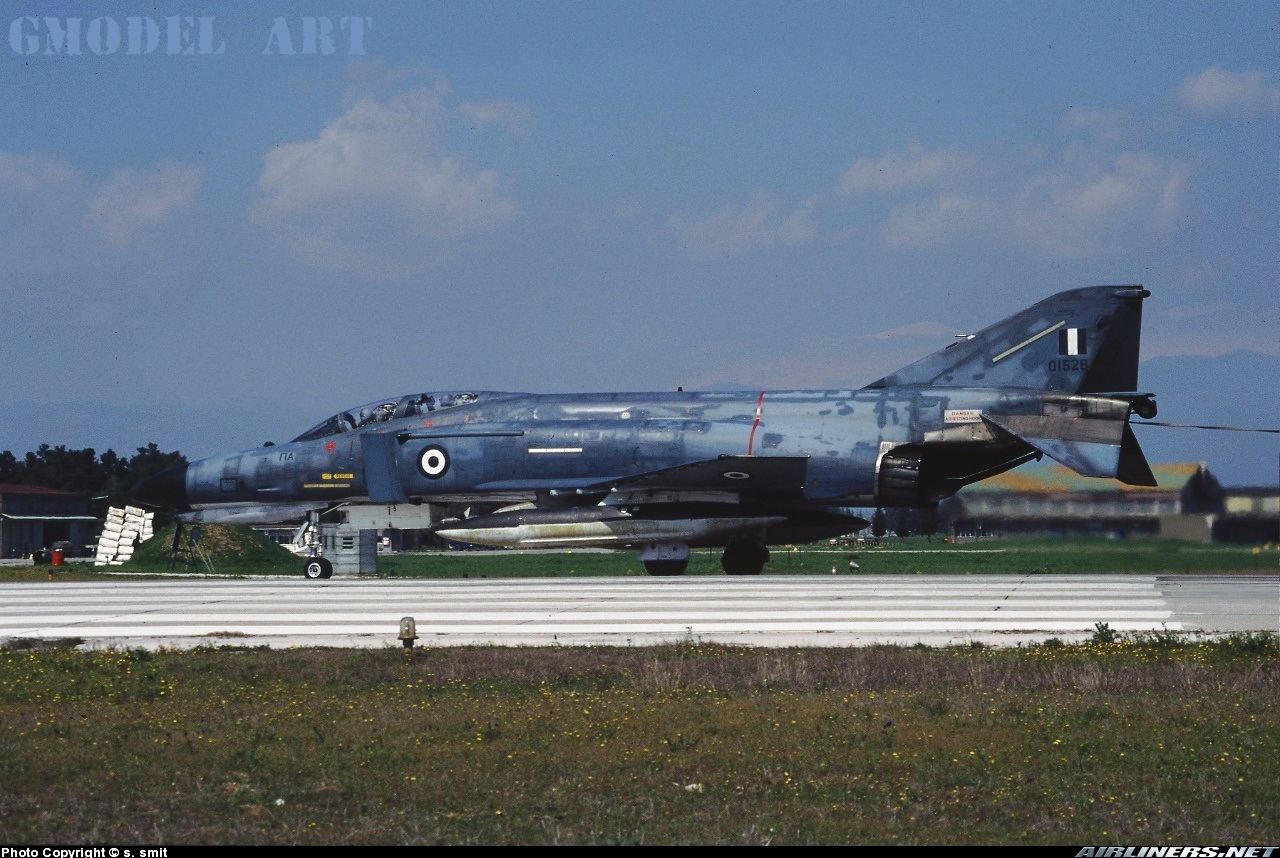
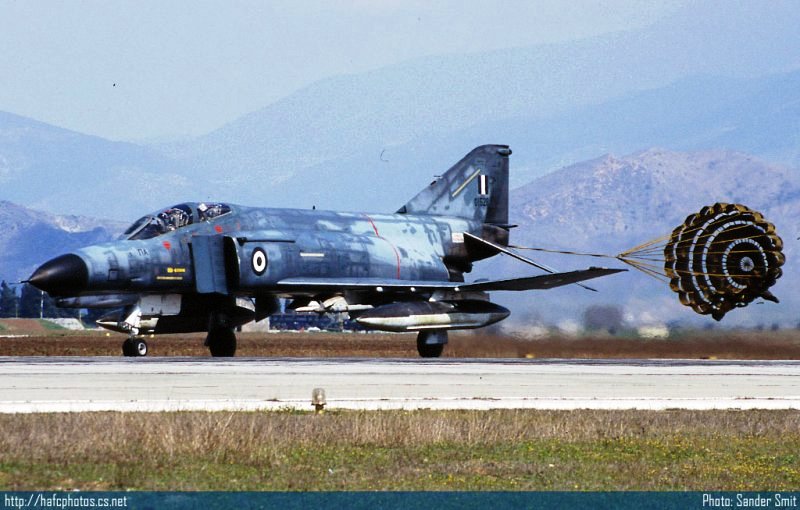
F-4E phantom II 337 squadron 1995
HAF F-4E Project for e-Modelling
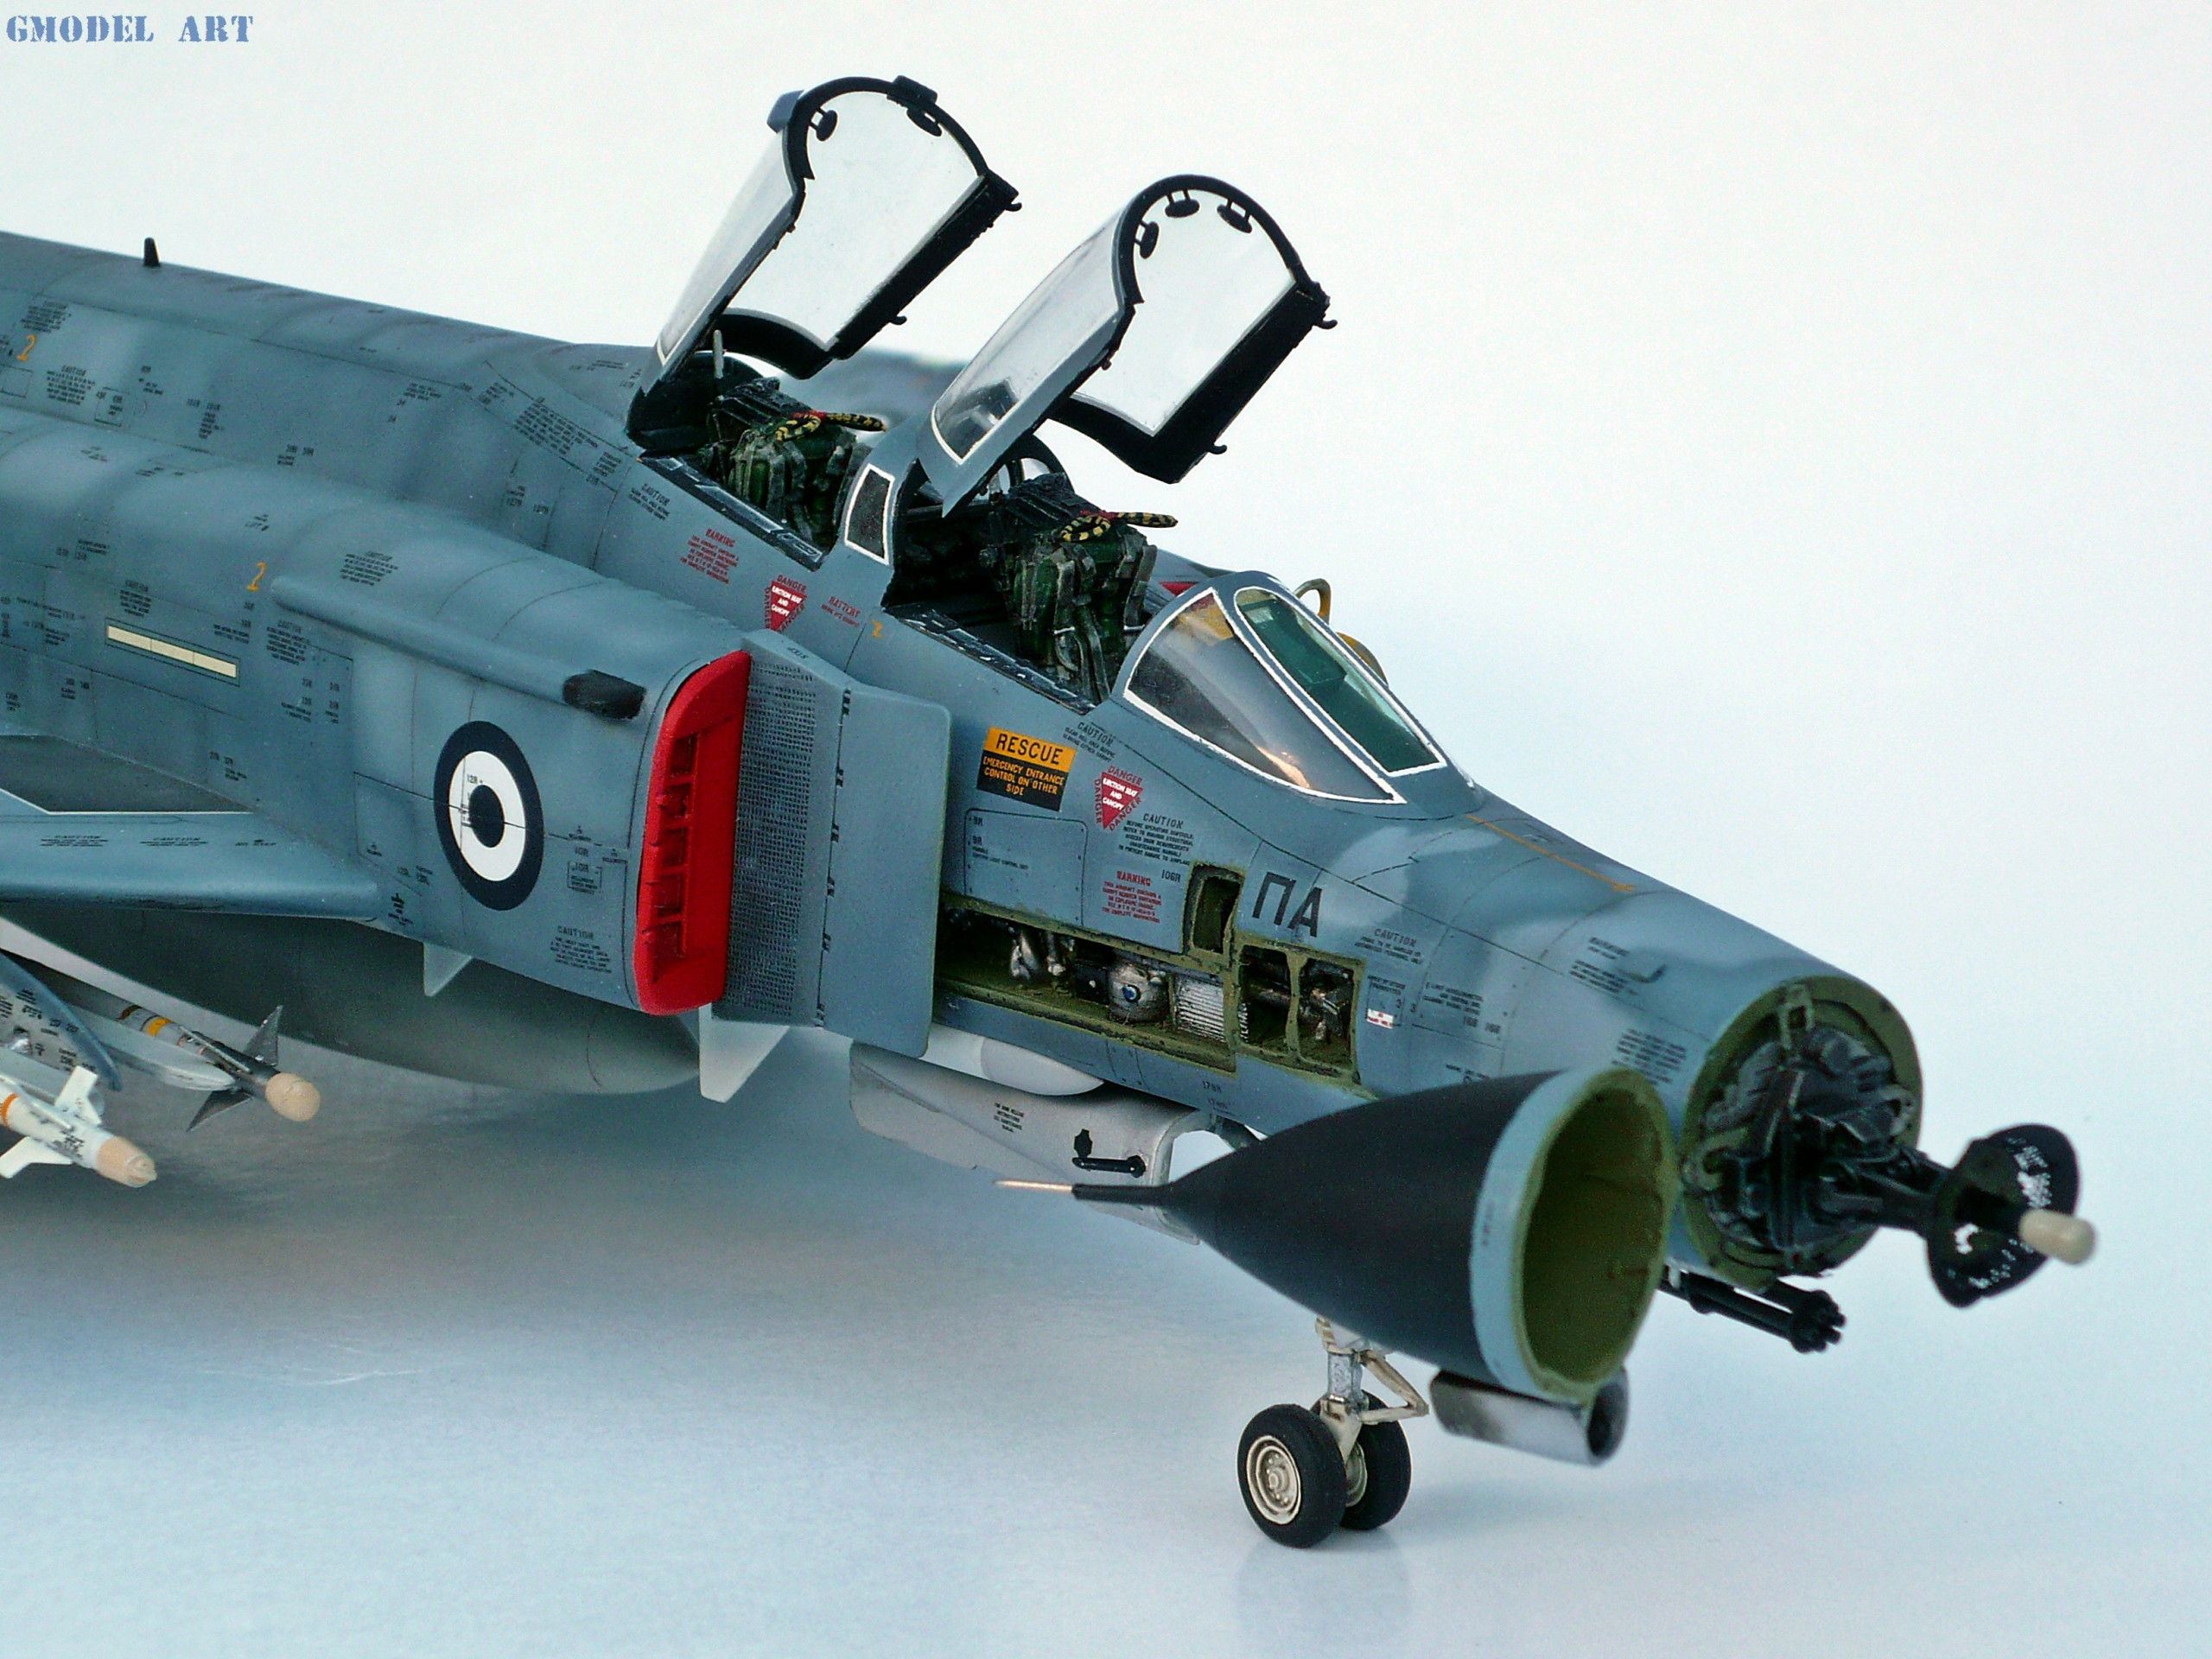
(Hasegawa F-4E Phantom II 1/48 Model kit + Verlinden resin set + Aires exhausts)
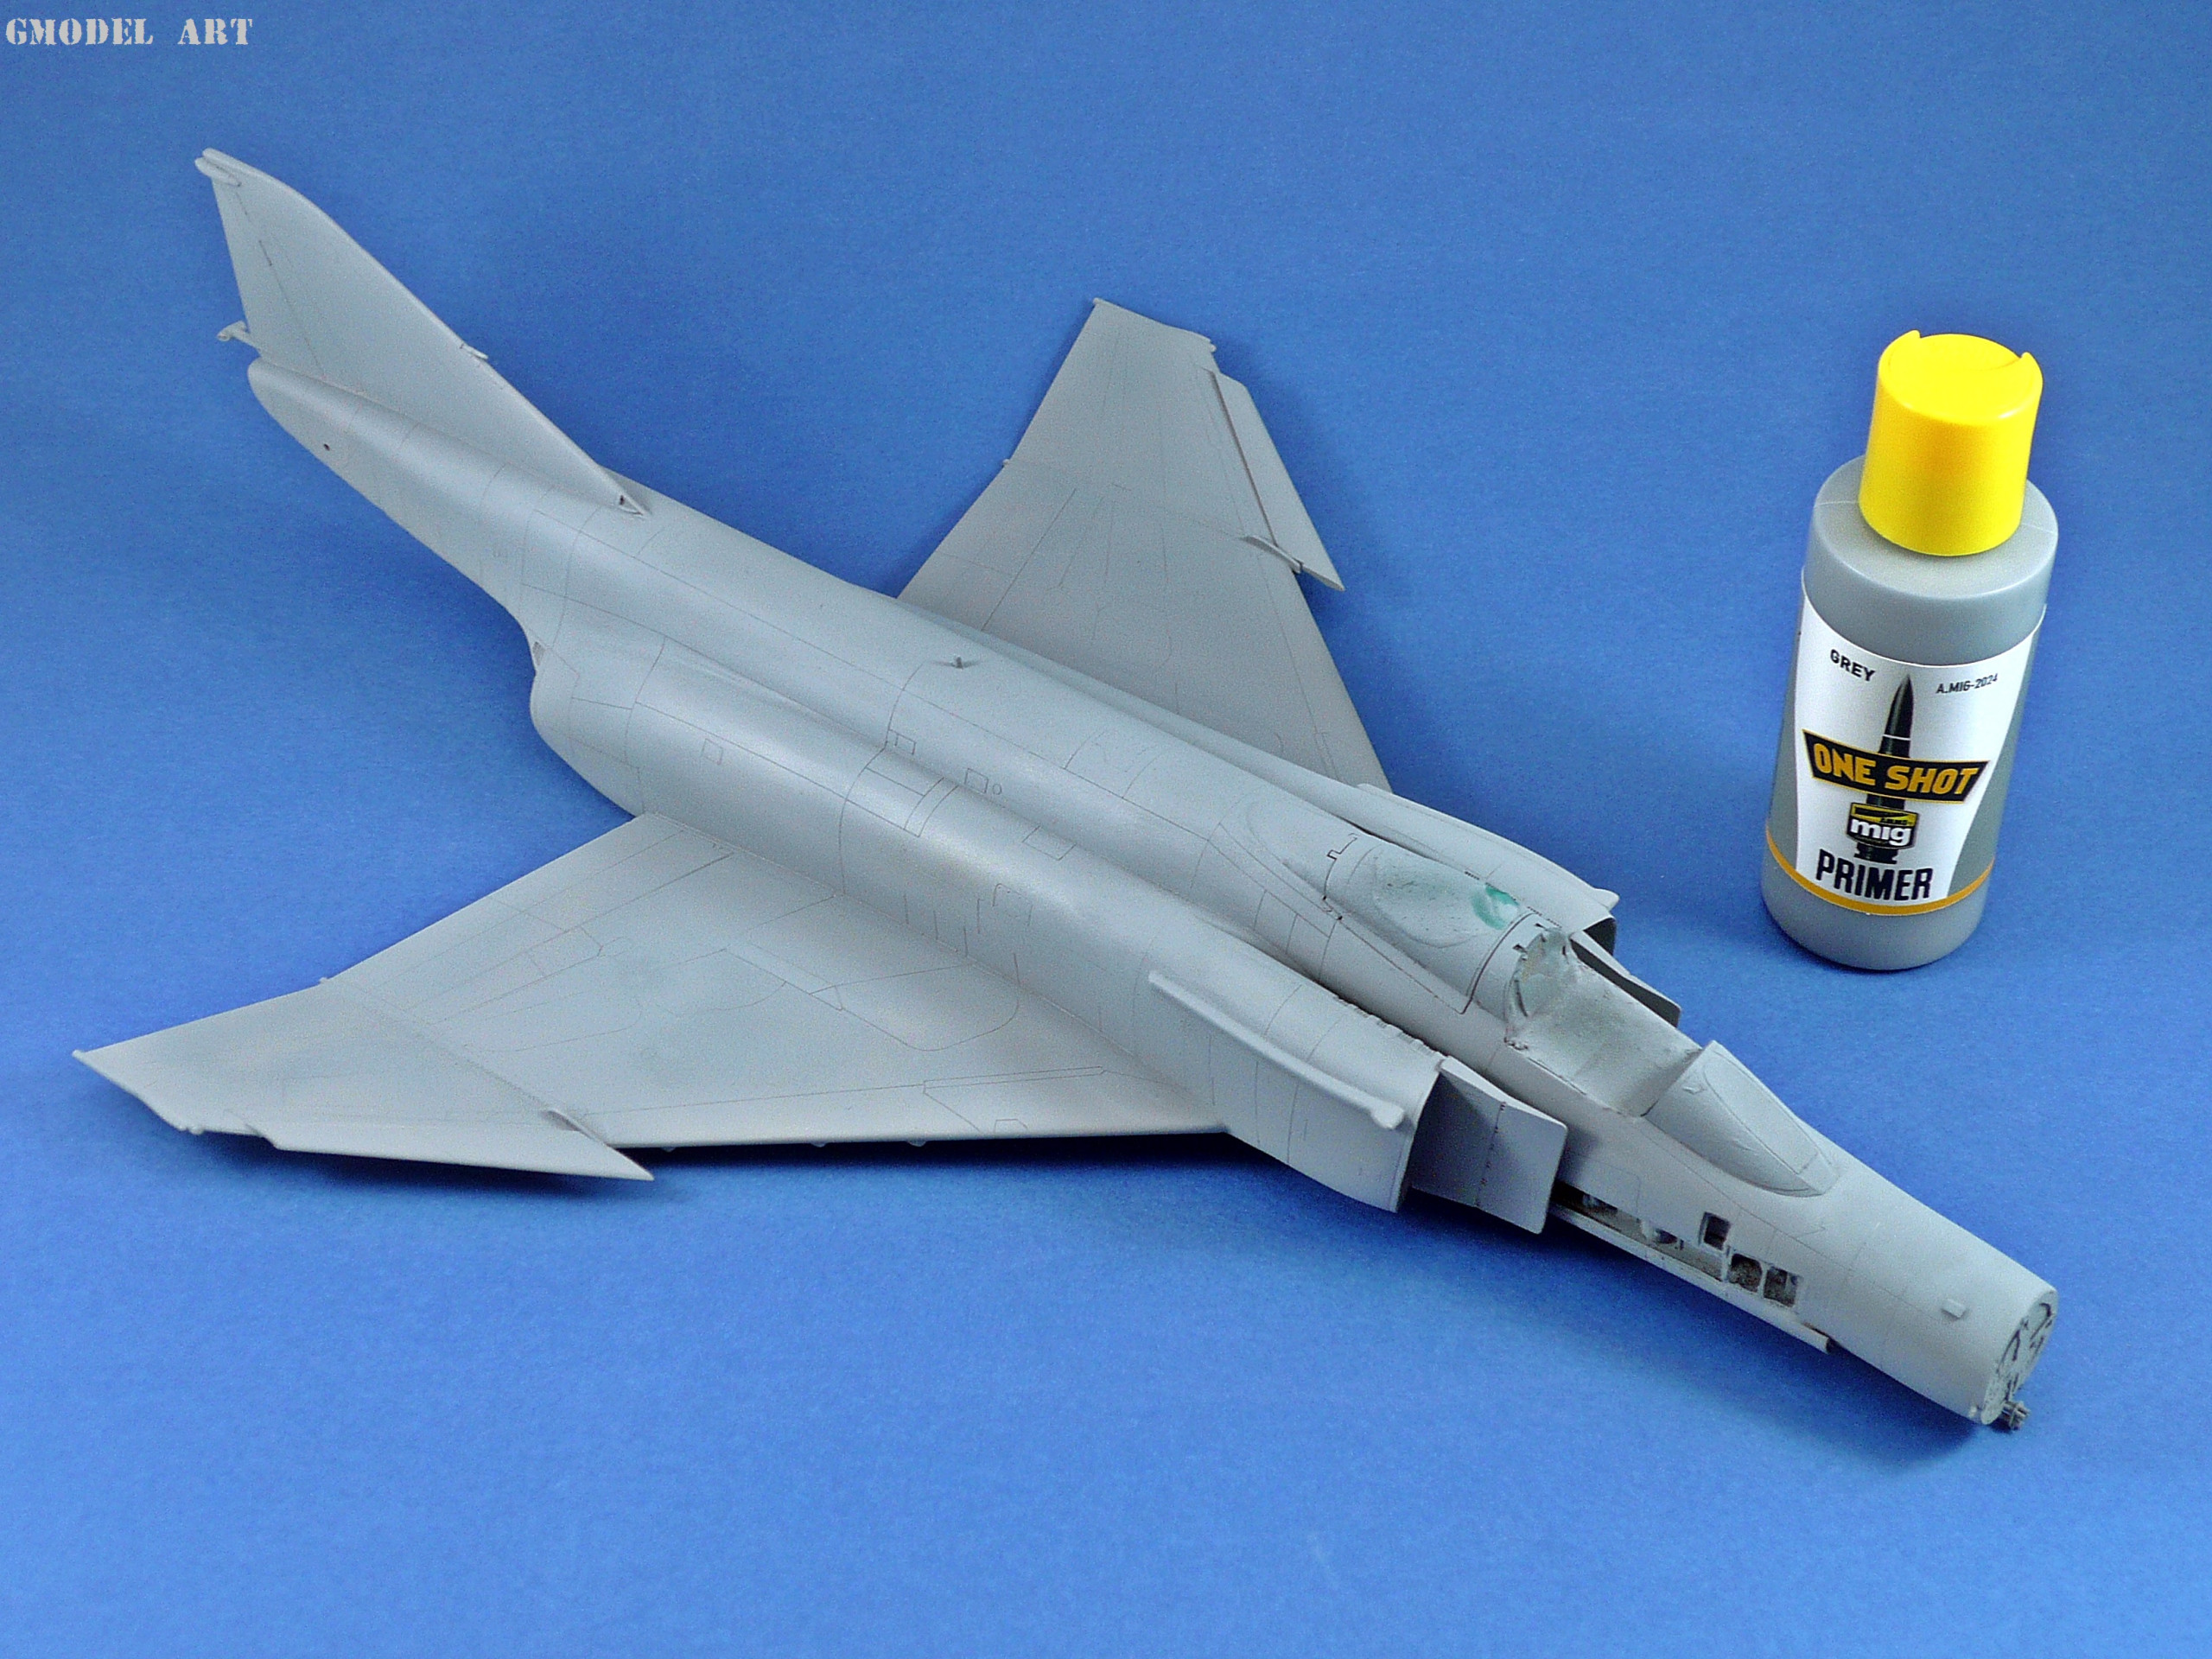
After the basic build finished, I prepared the model for the painting procedure. I washed it with soapy water to remove any grease from my hands and dust remains. The first stage started by spraying the model and fuel tanks and other main pieces with Mig Ammo ”One Shot” primer (pictures 1,2,3,4,5,6).Using primers we can detect any flaws on our models and prepare the surface for the paint.
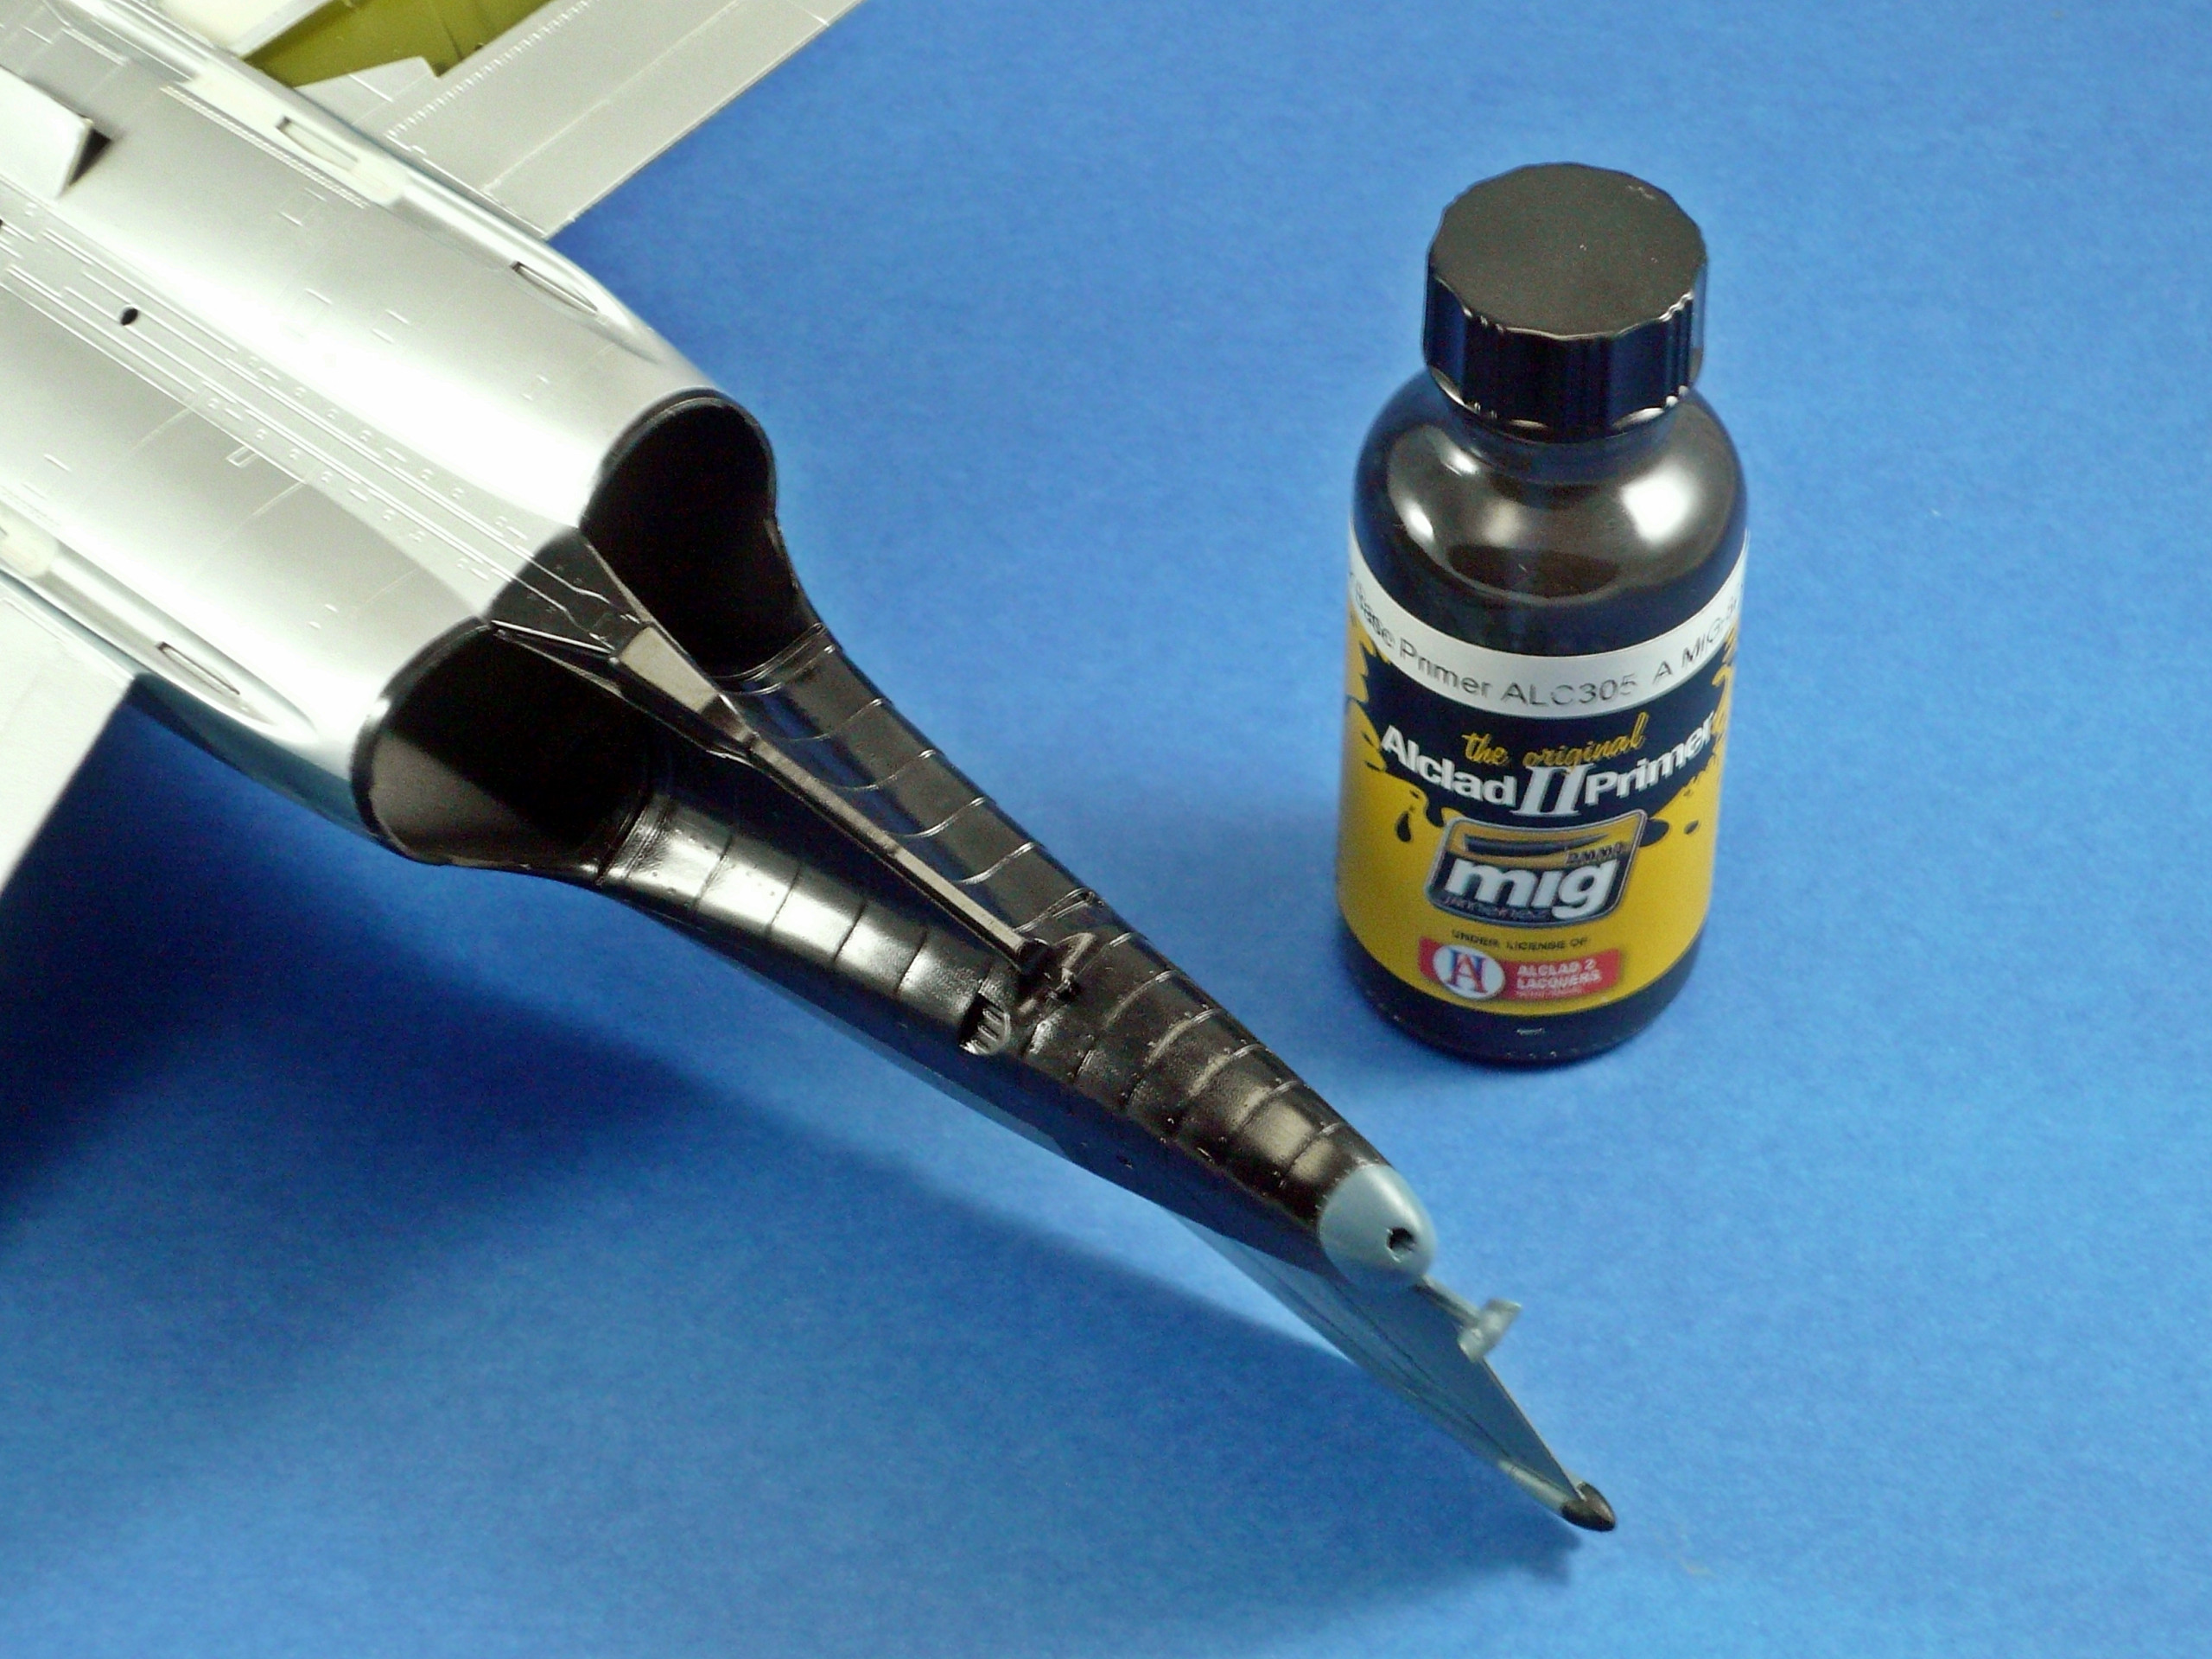
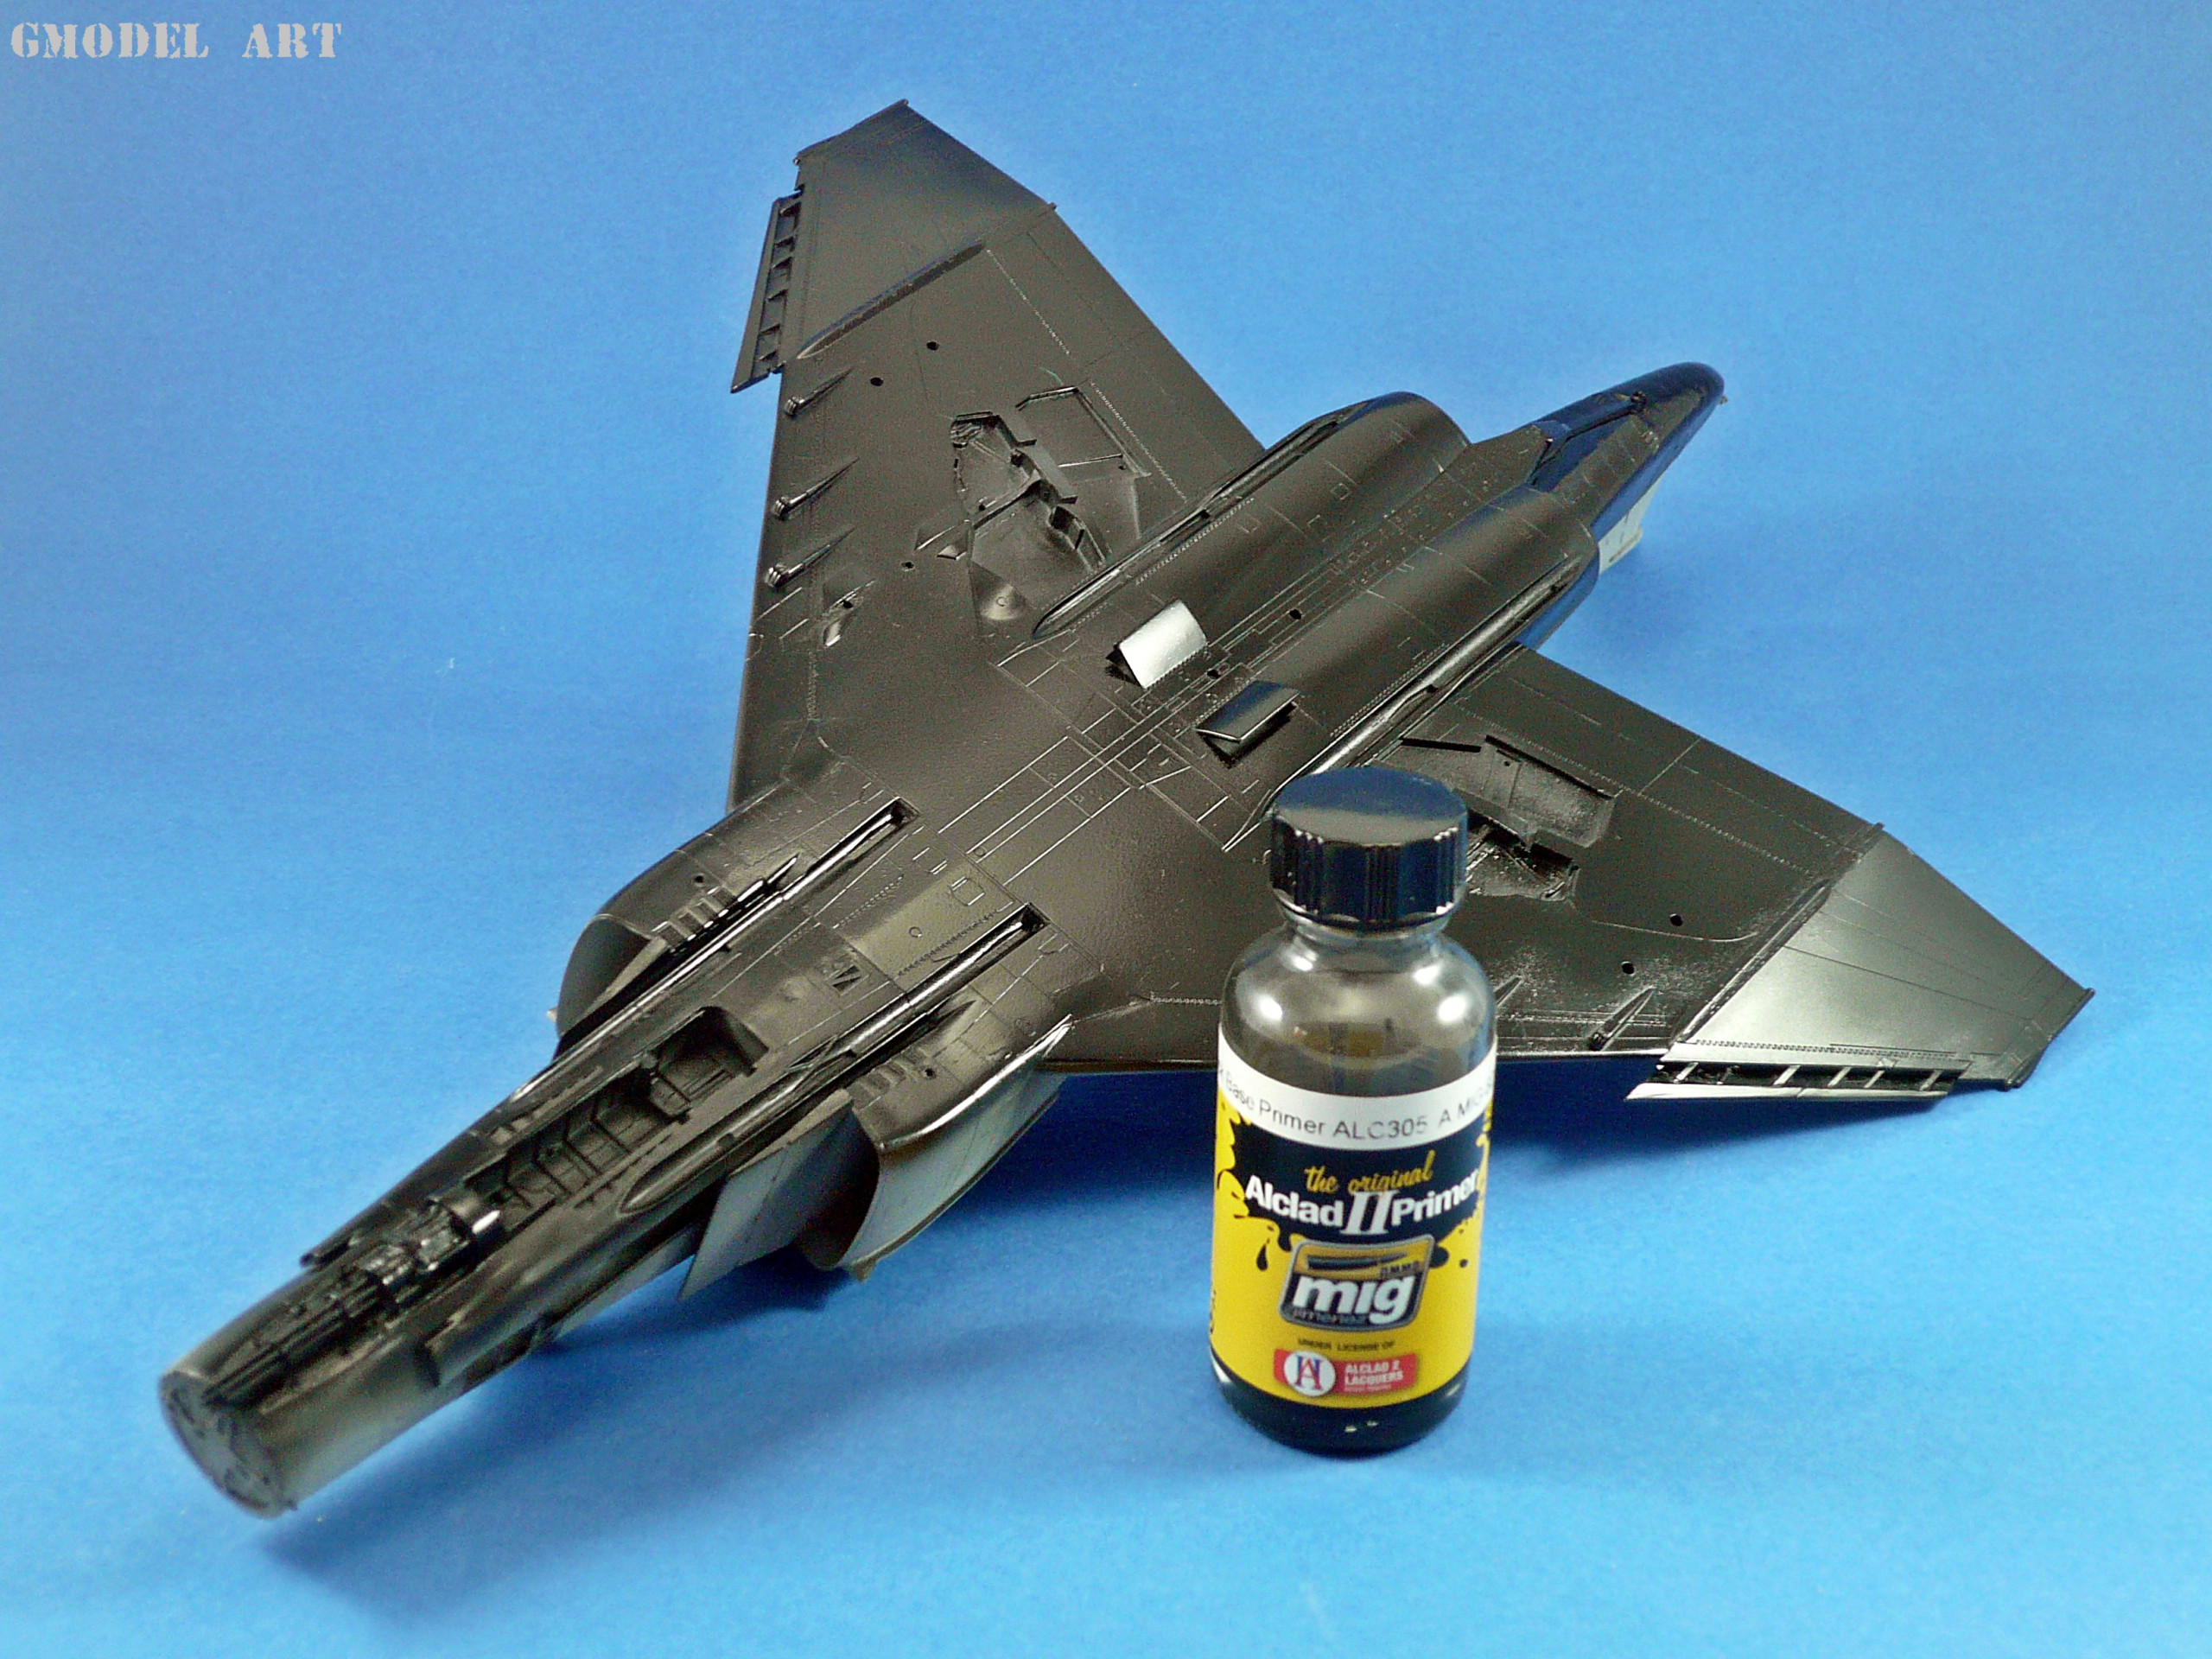
The next step was to spray the underside of the model with Mig Ammo /Alclad Gloss Black Primer (ALC 305) to prepare the surface for the aluminum color that the real aircraft had (pics 7,8,9)
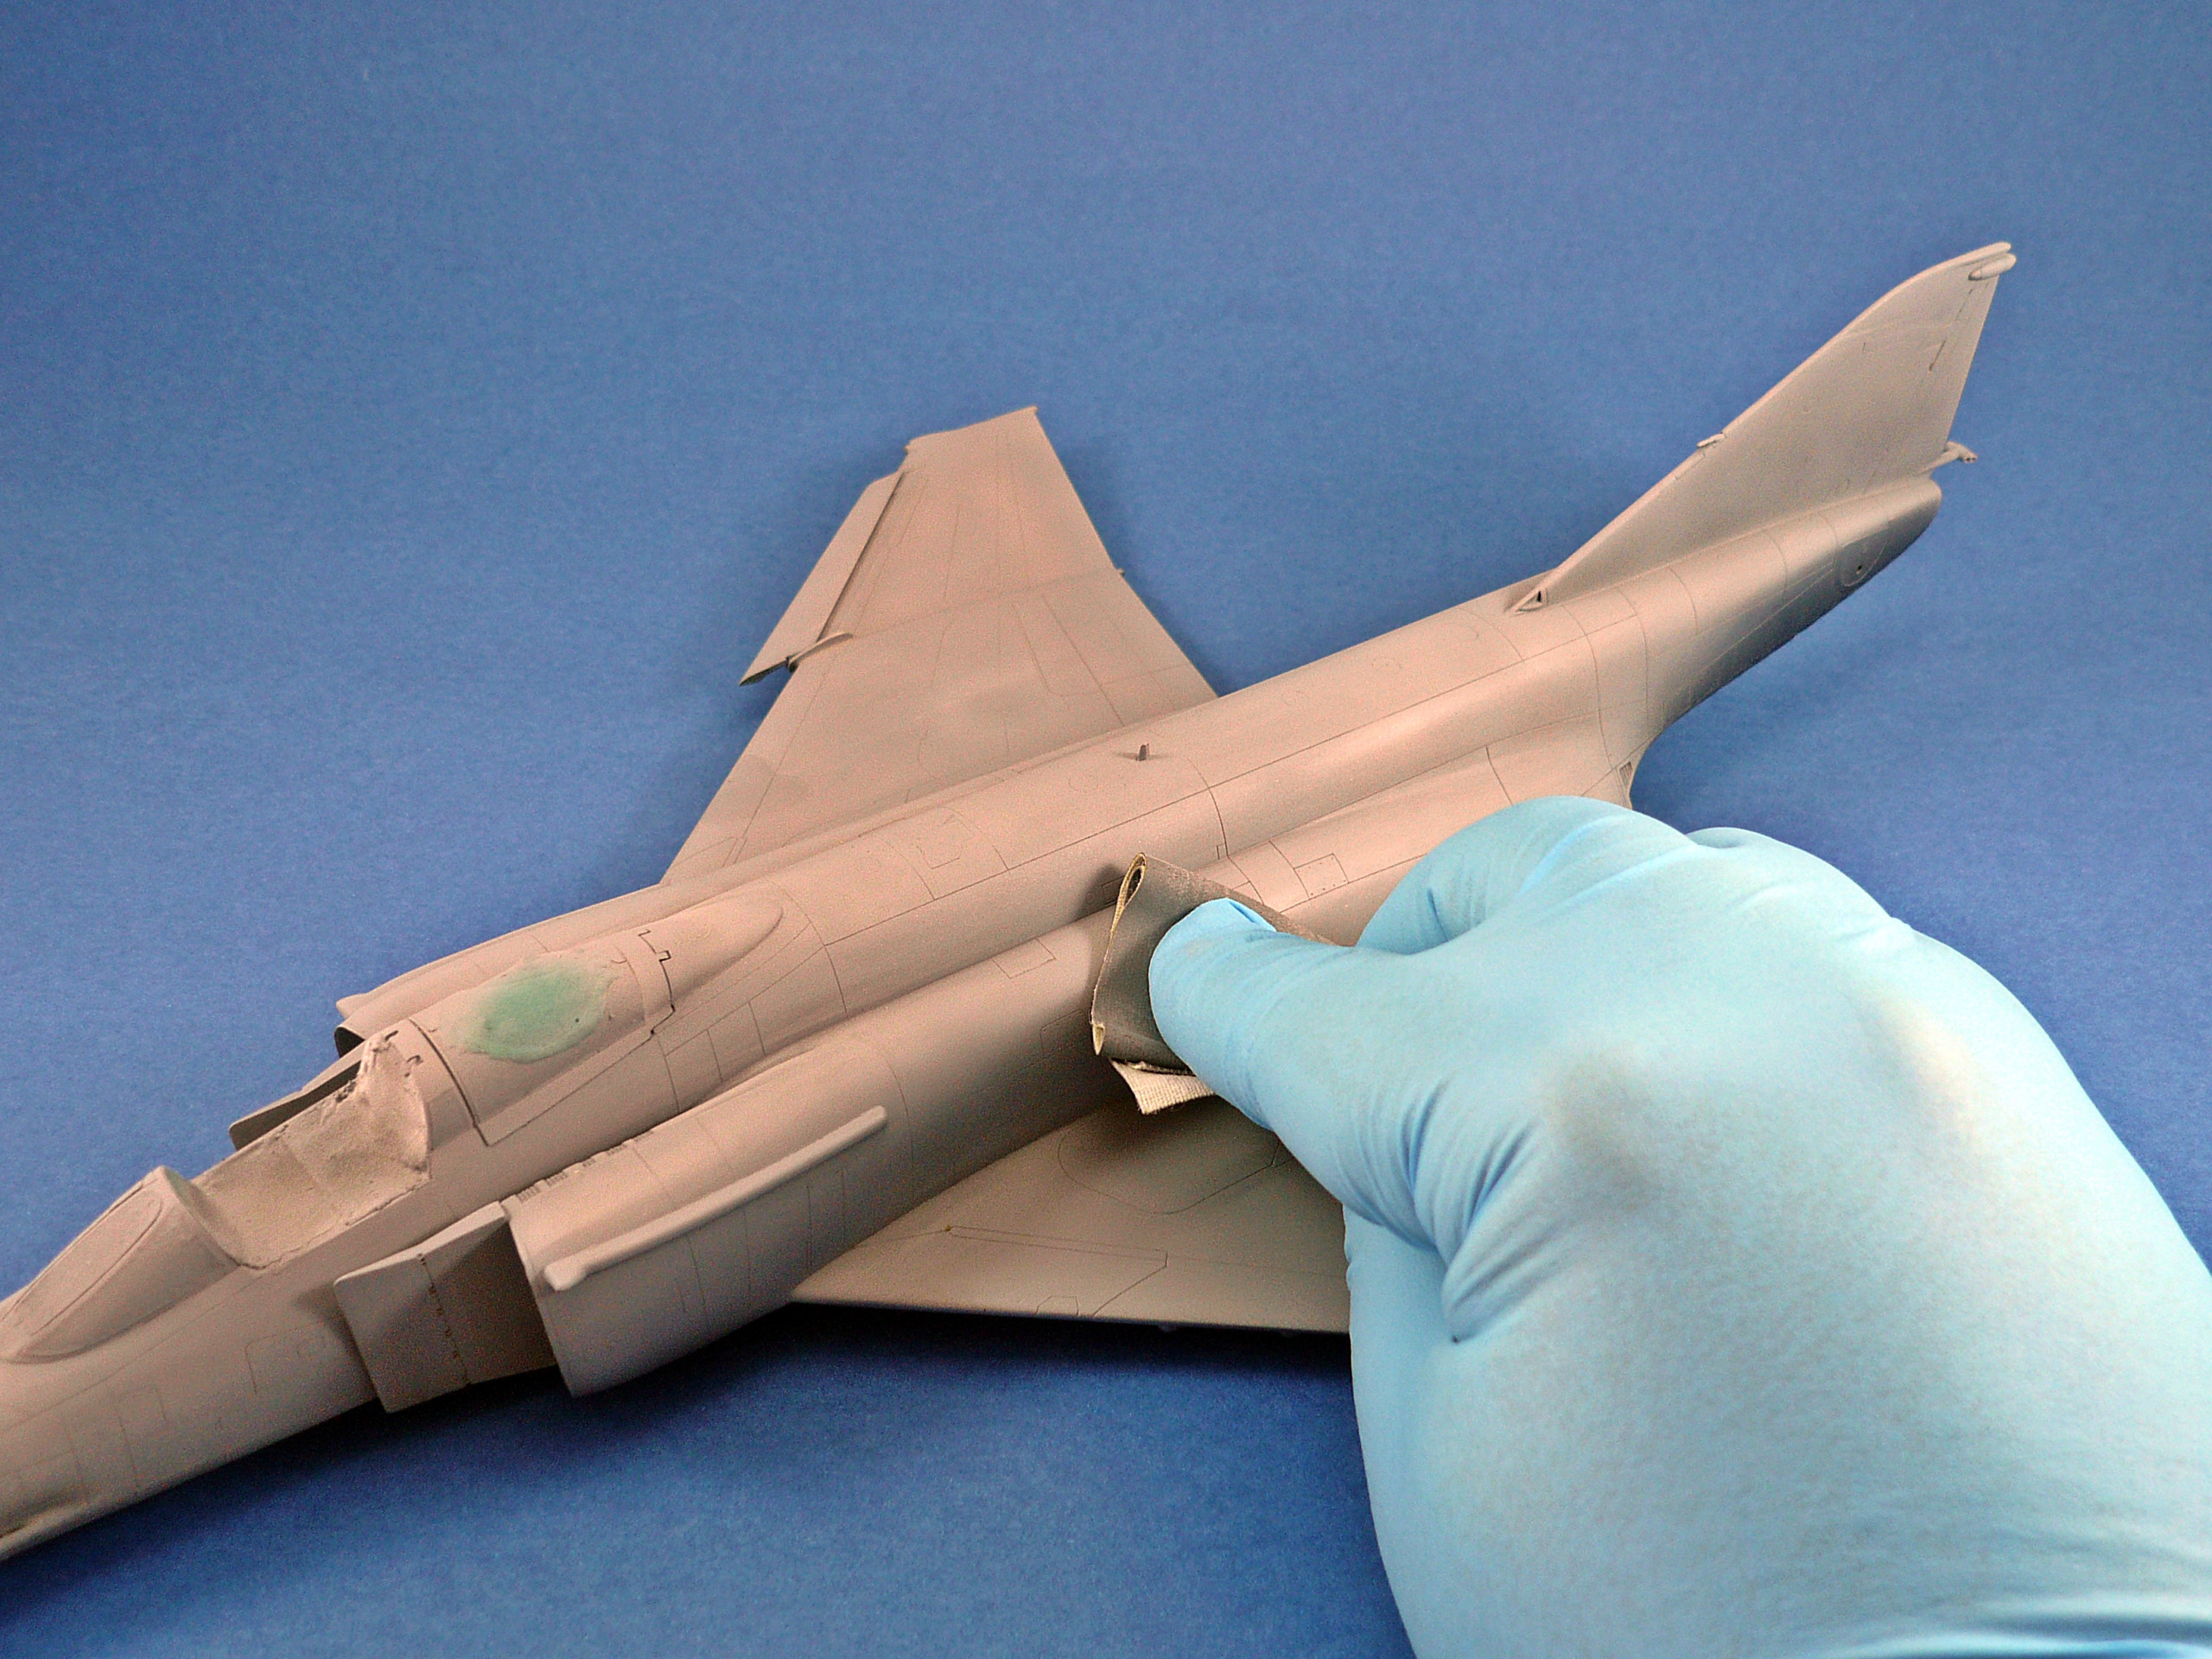
After that I prepared the upper surfaces by sanding them using Micromesh gradually from 3600 grit to 12000 grit to smooth any rough texture (pics 13,14,15)
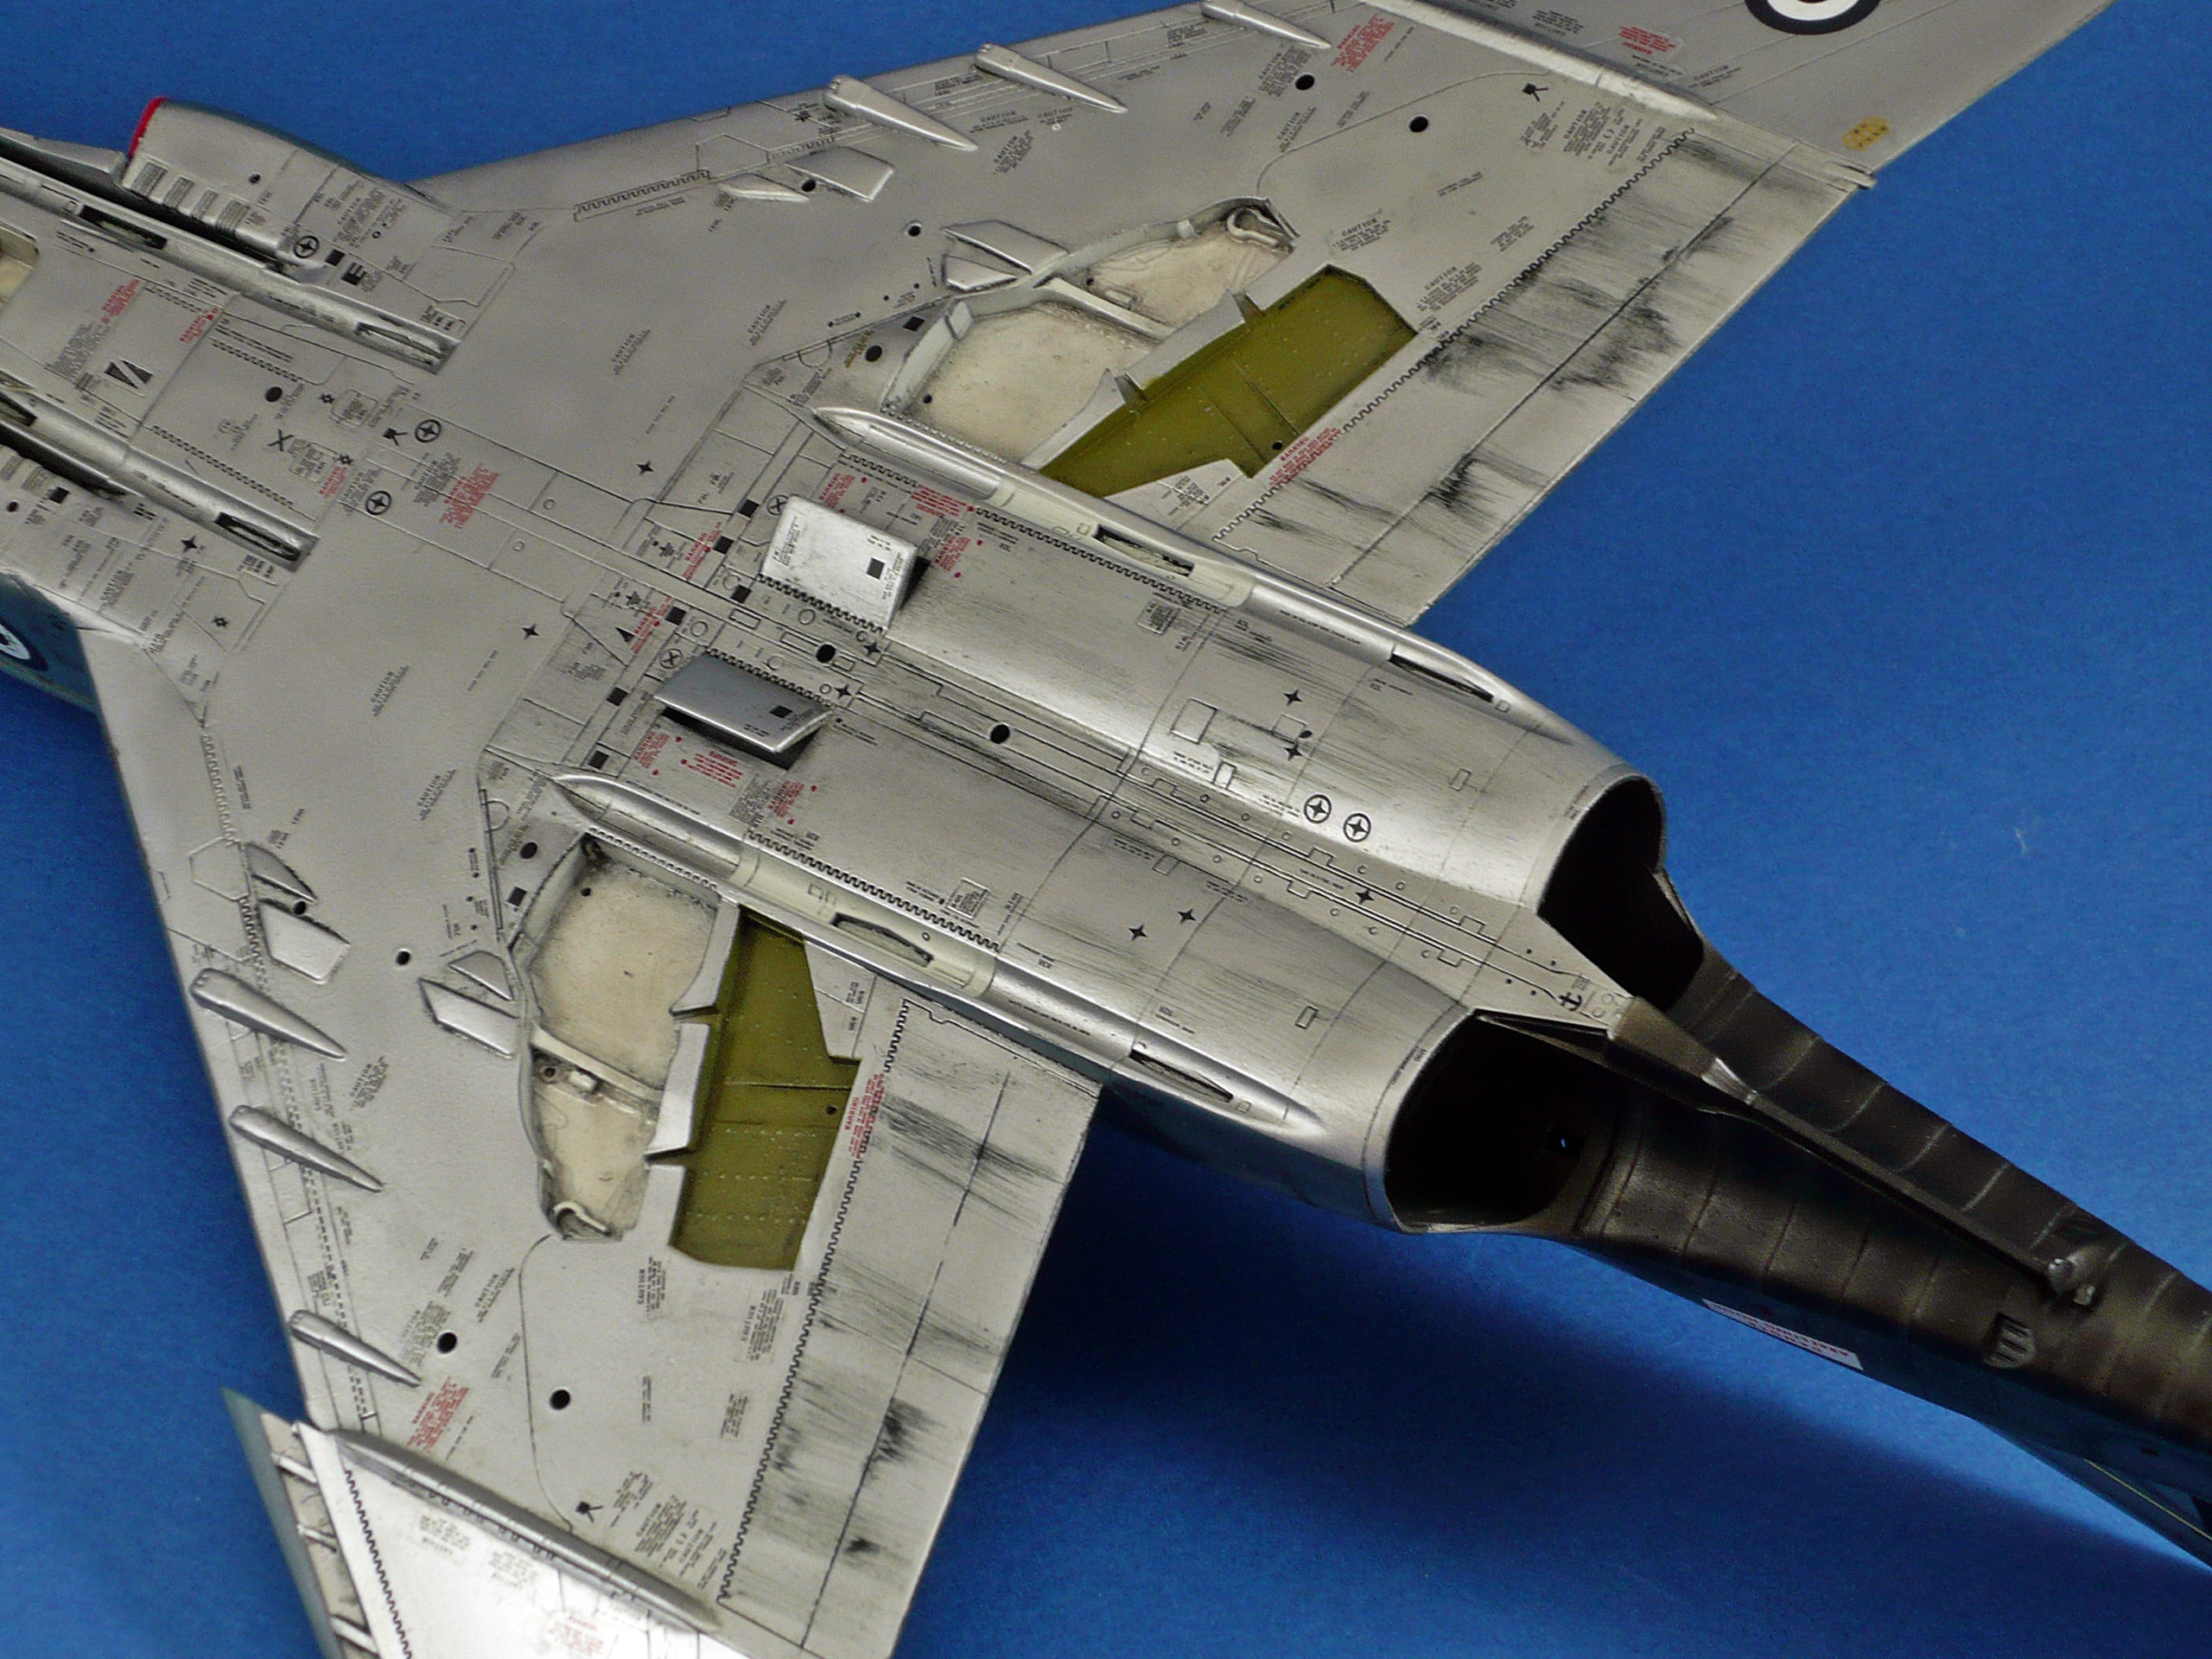
Next step spraying the lower surfaces in several light layers with Mig Ammo / Alclad Aluminum (ALC 101) (pics 27,28,29,30,31)
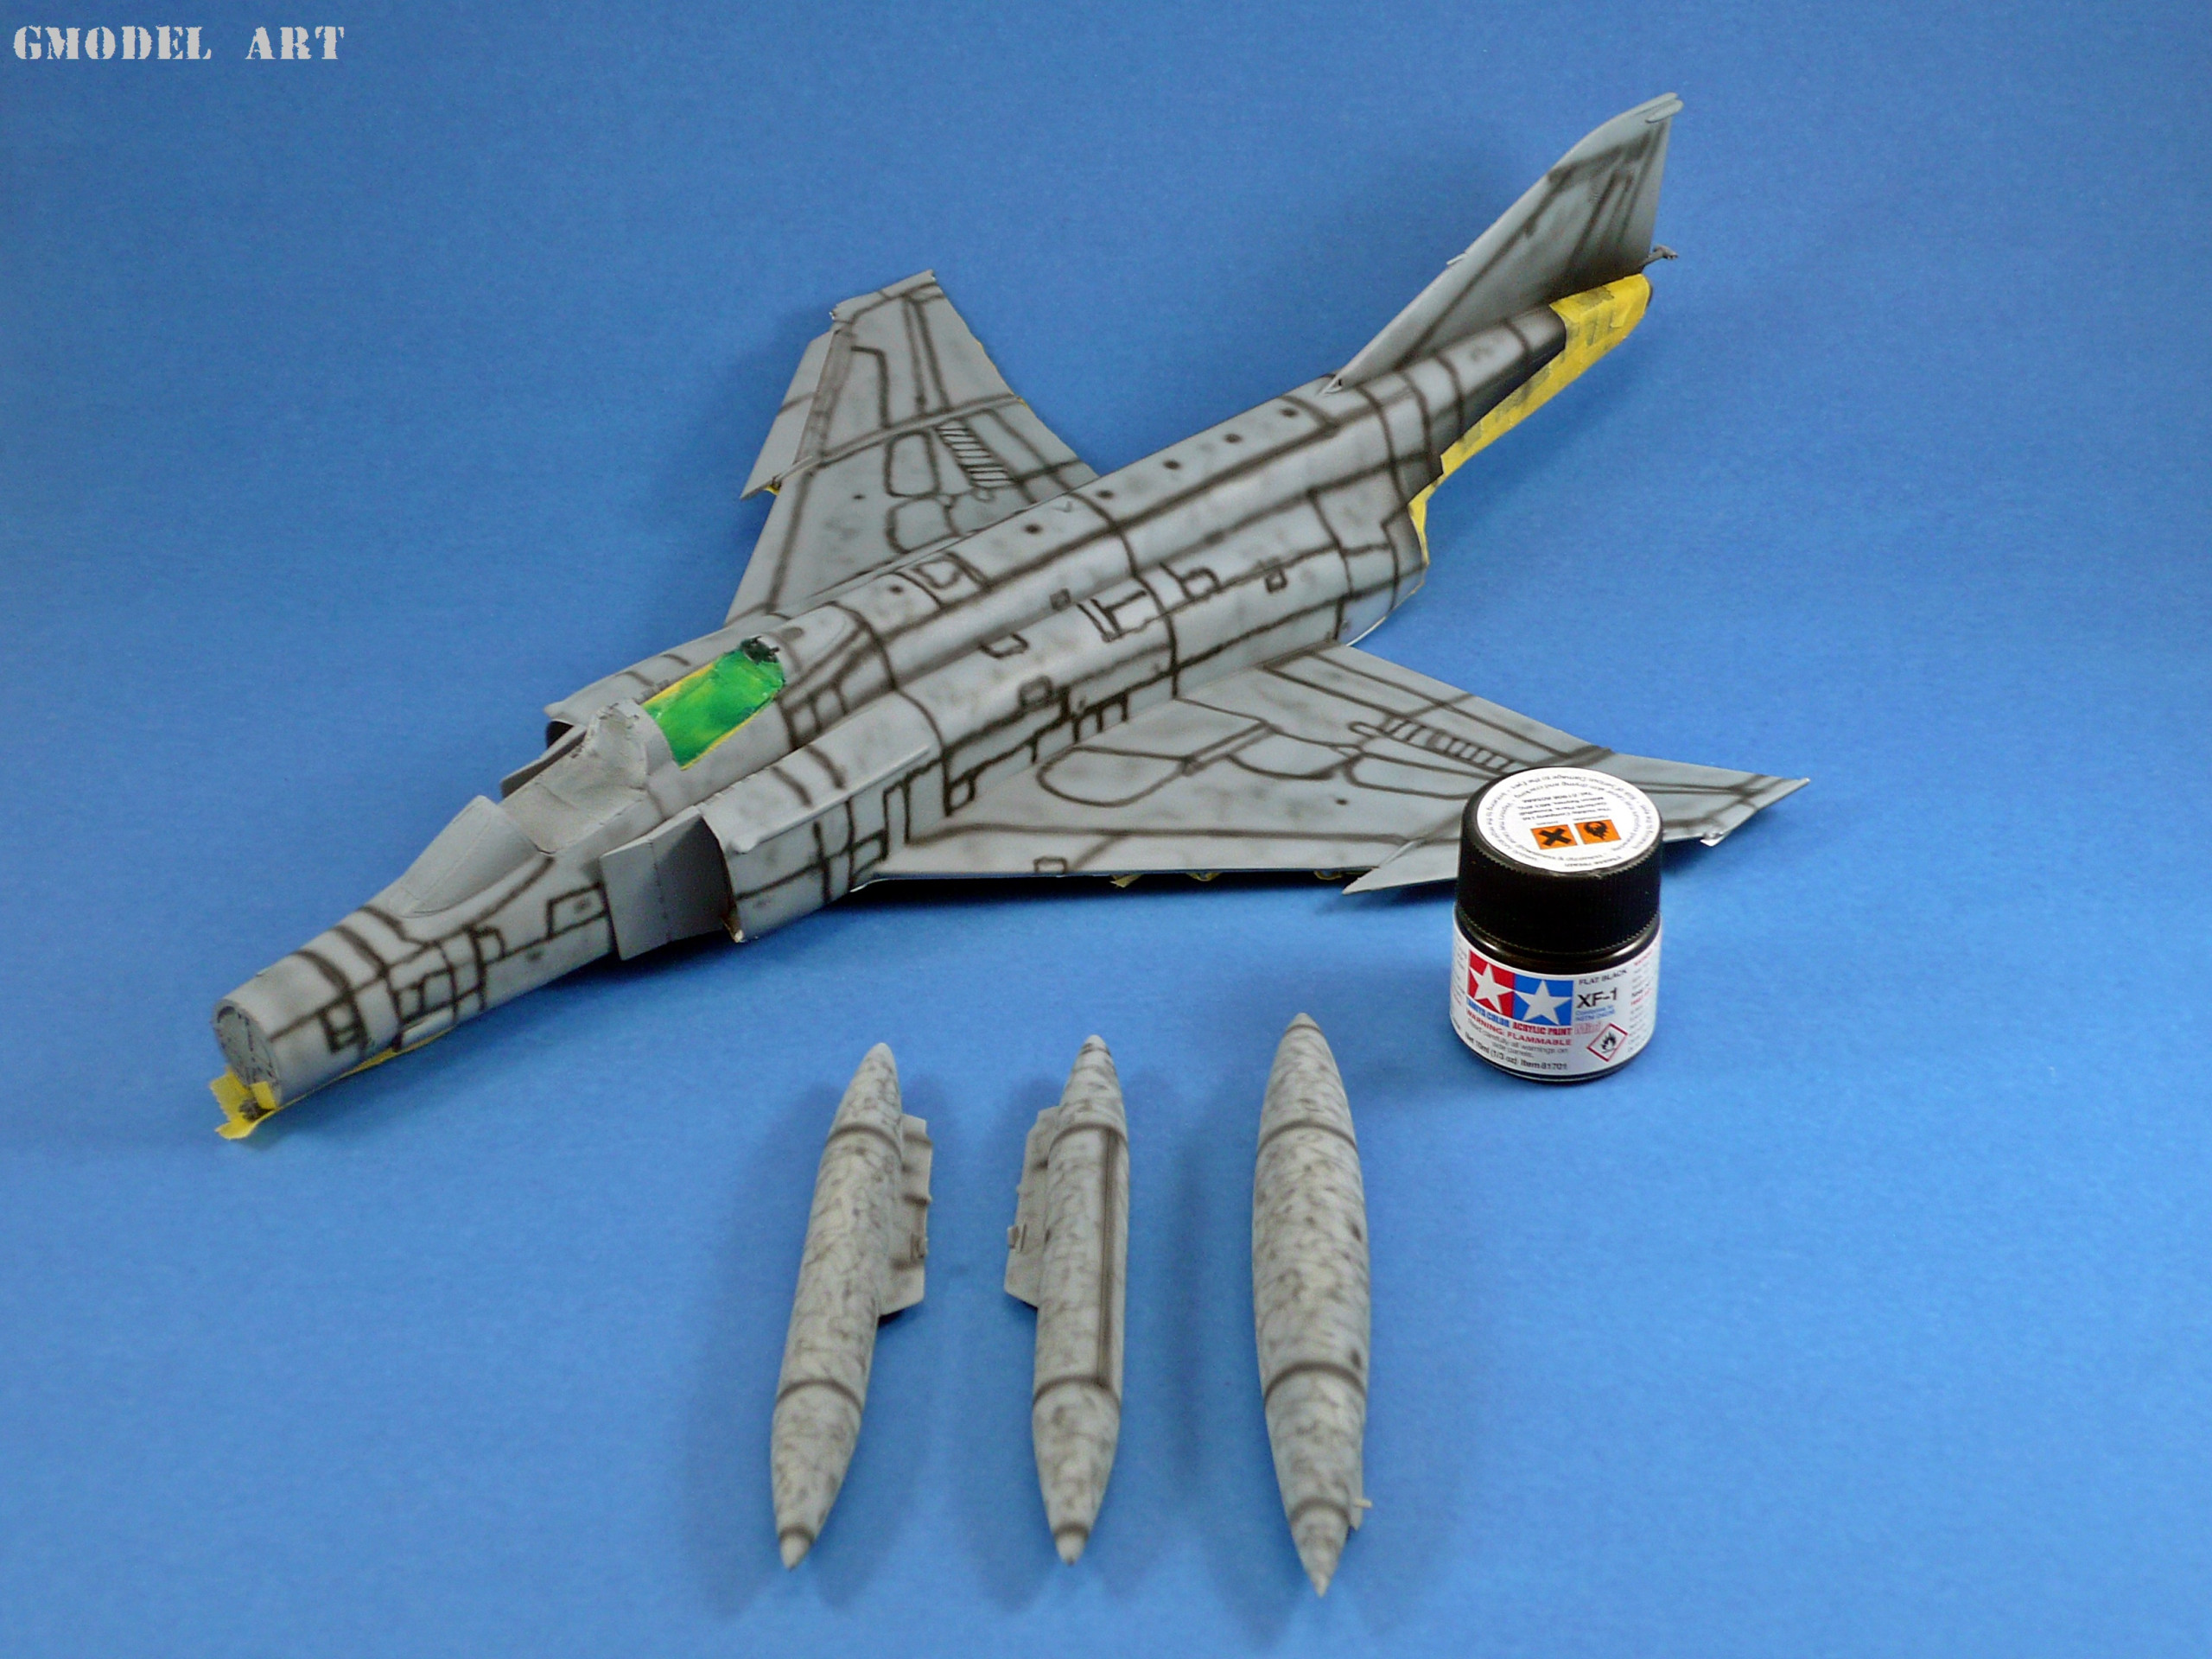
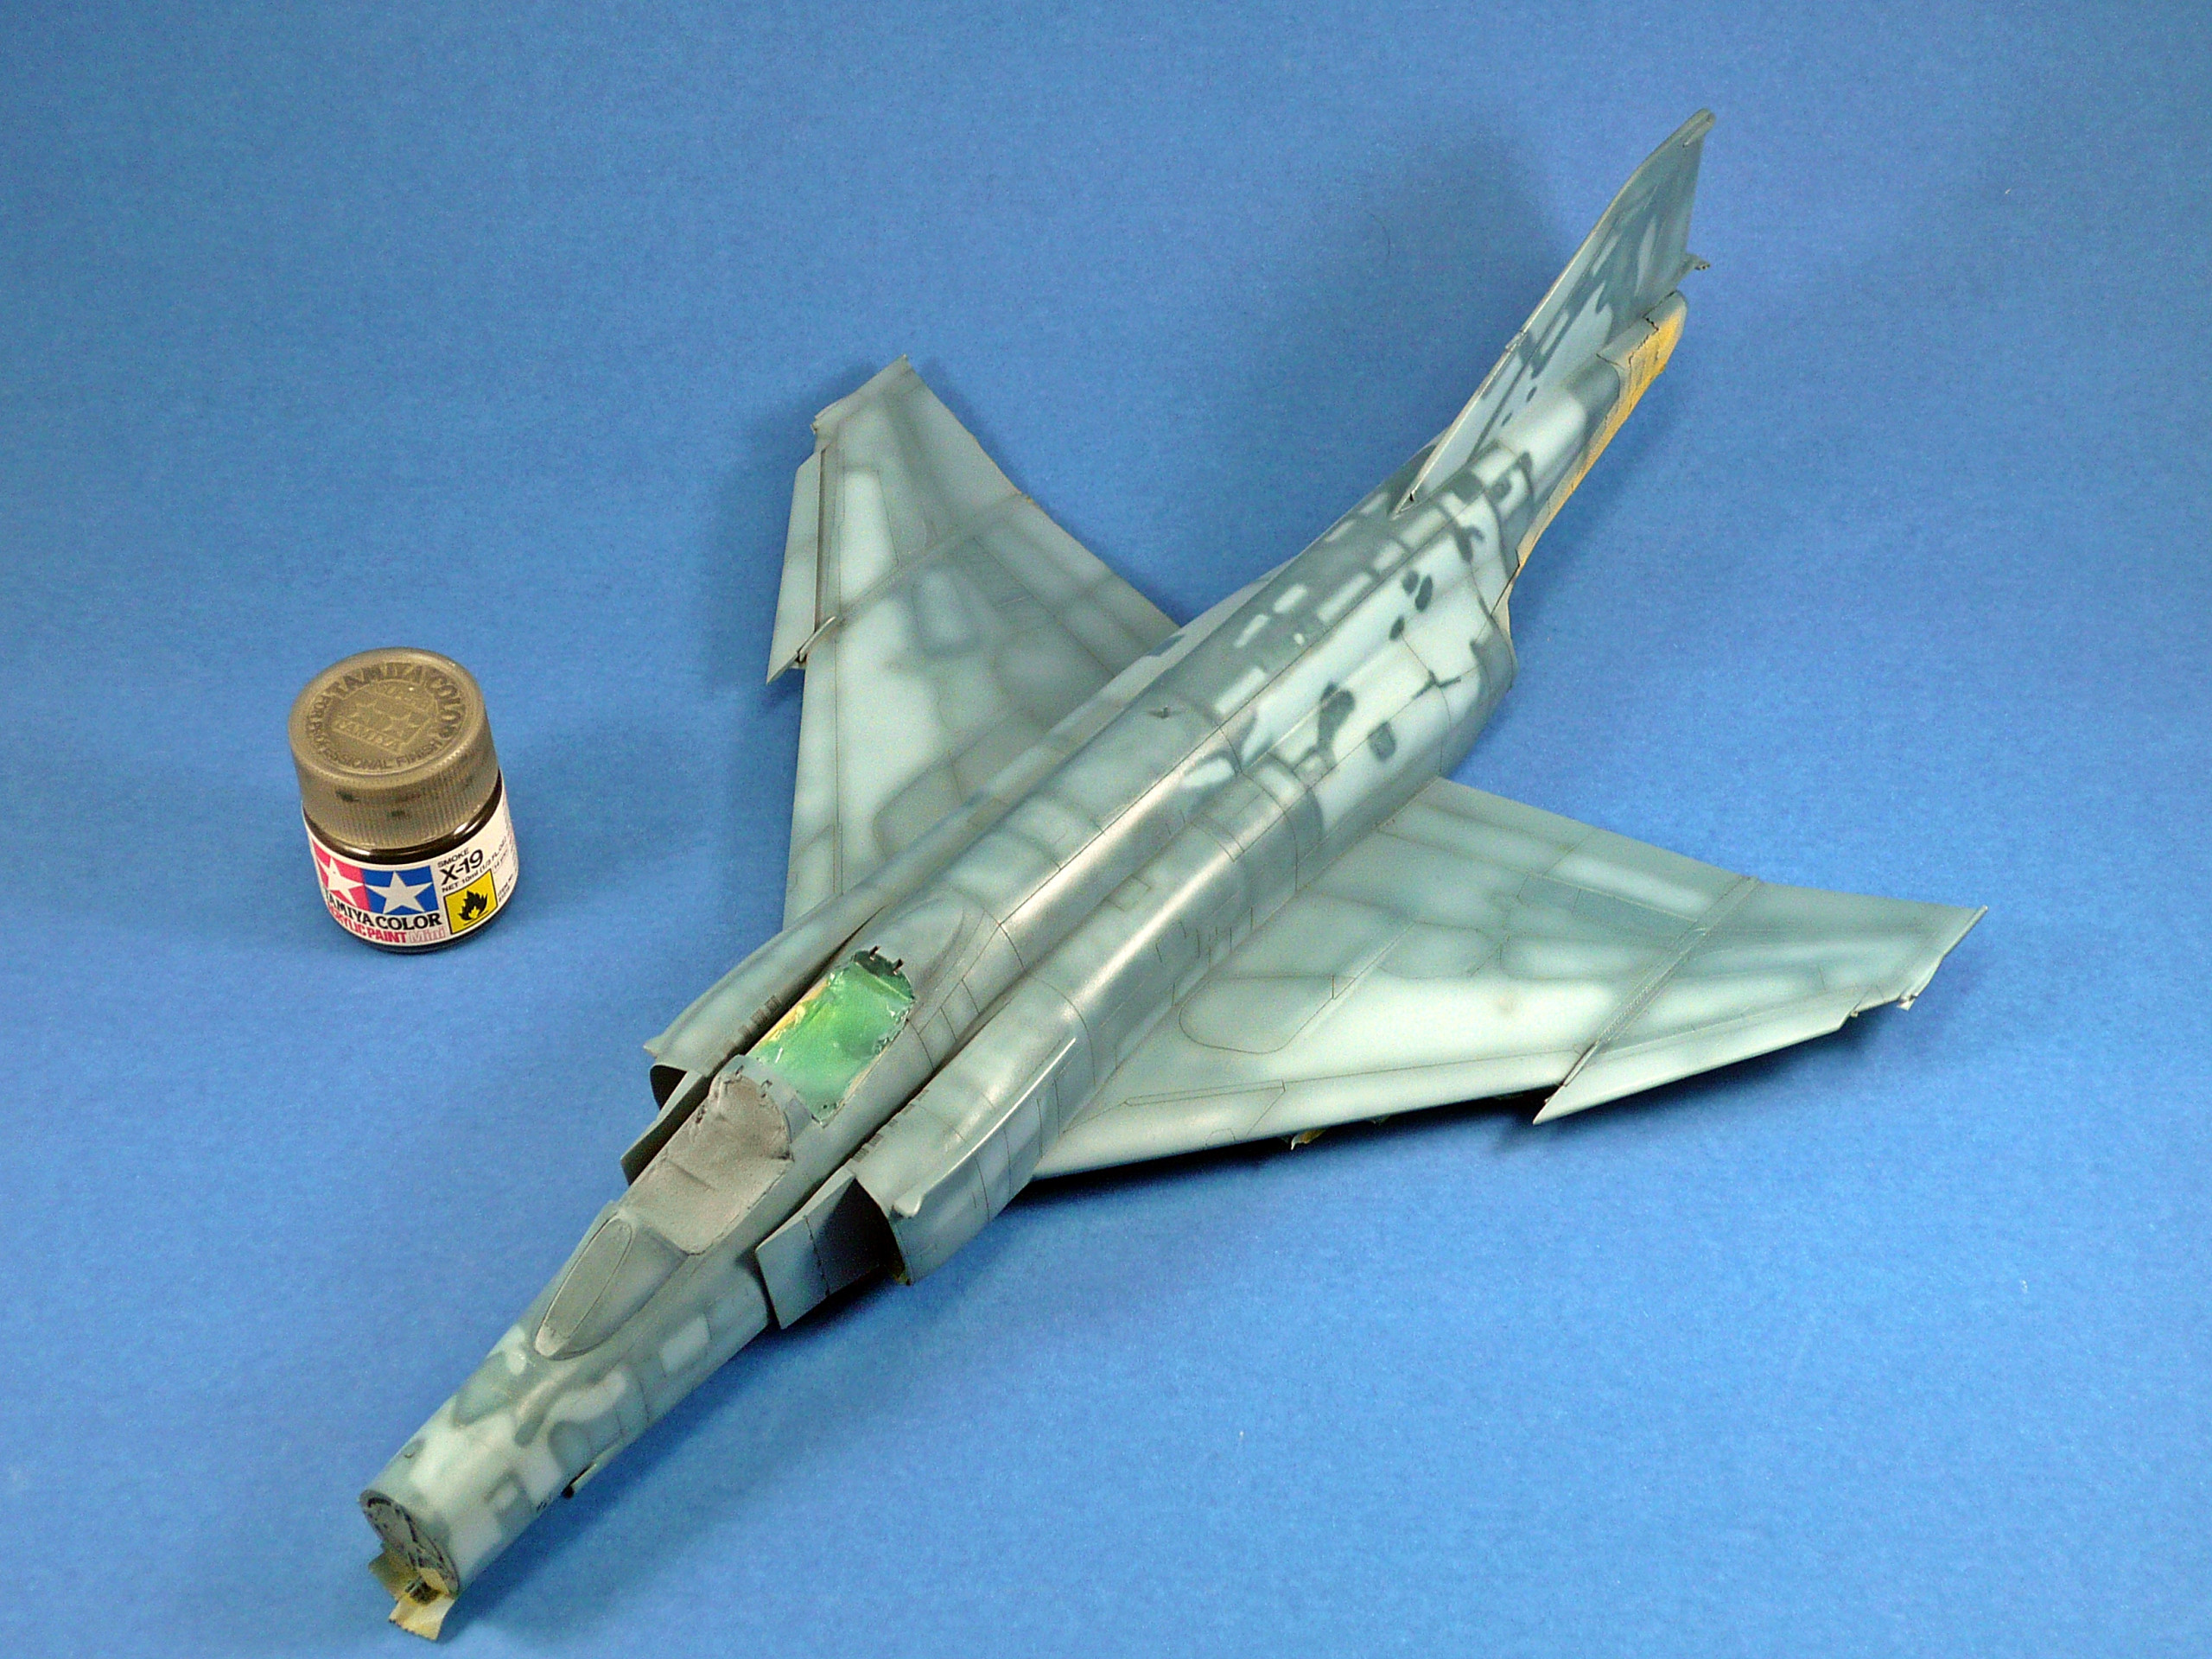
I masked up the painted lower surfaces with masking tape and started the preshading in the upper fuselage, wing surfaces and fuel tanks using flat black (Tamiya) (pics 41,42,43,44)
Then the fun stage began….Painting!
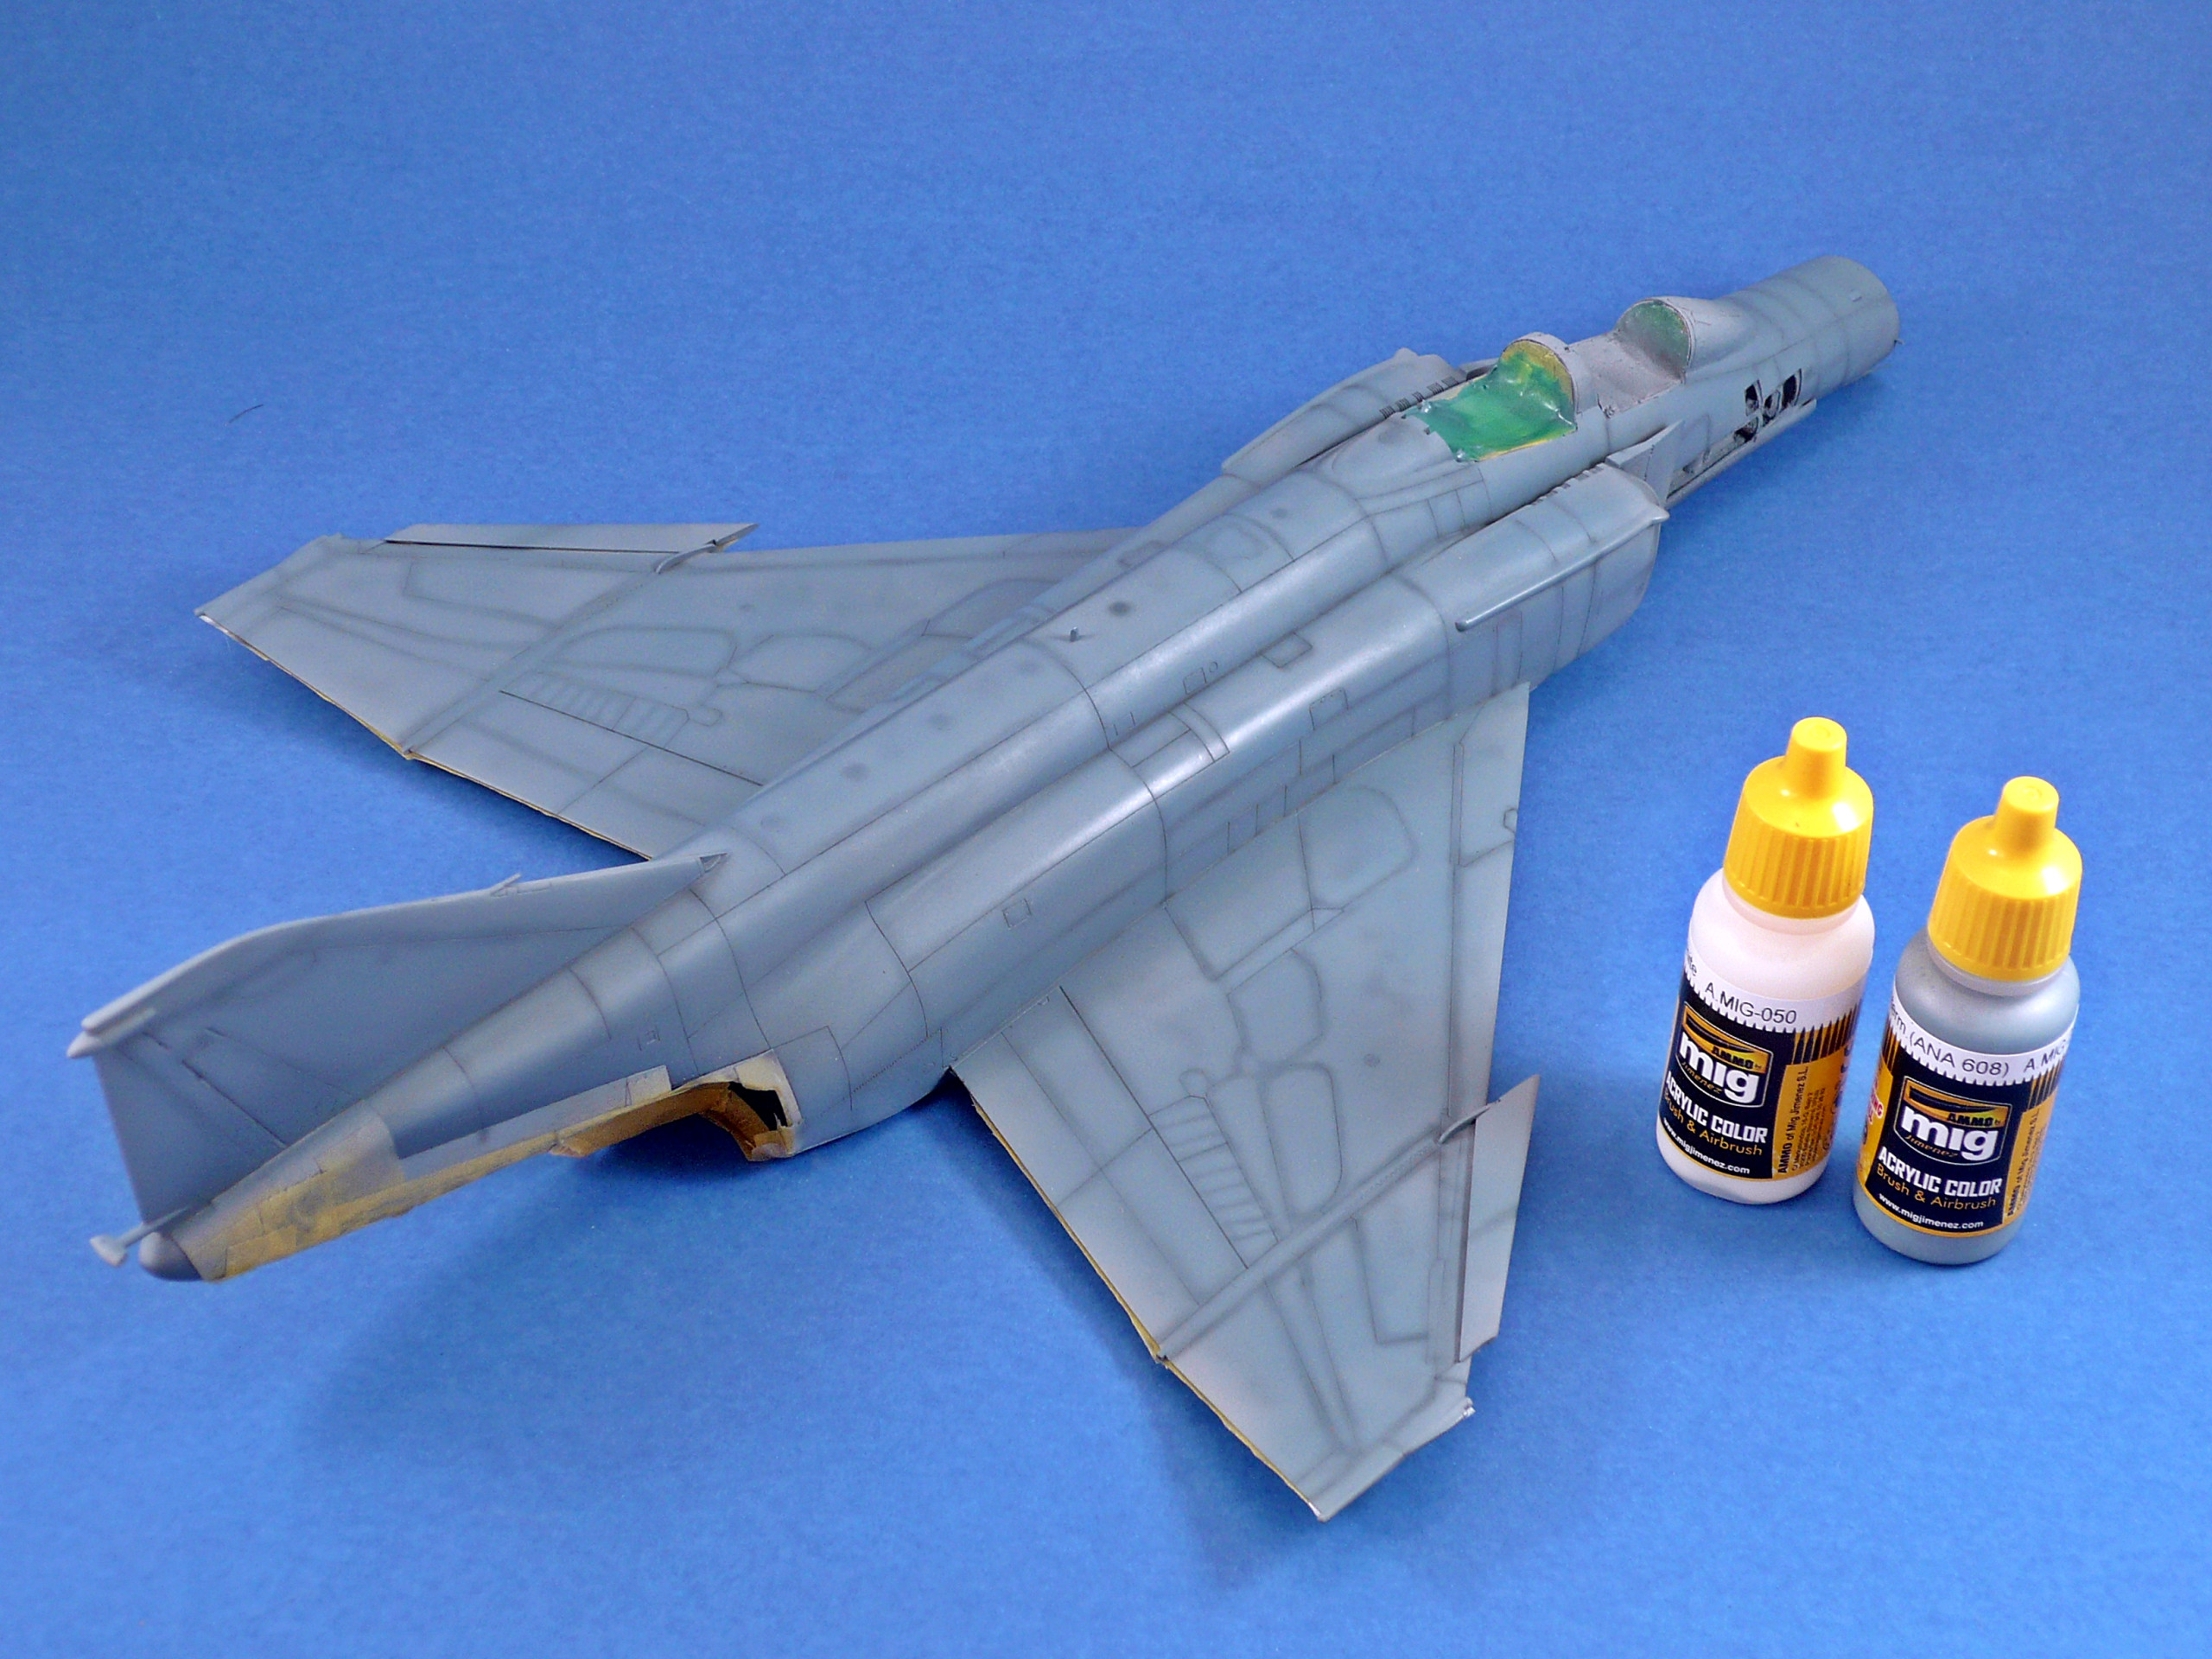
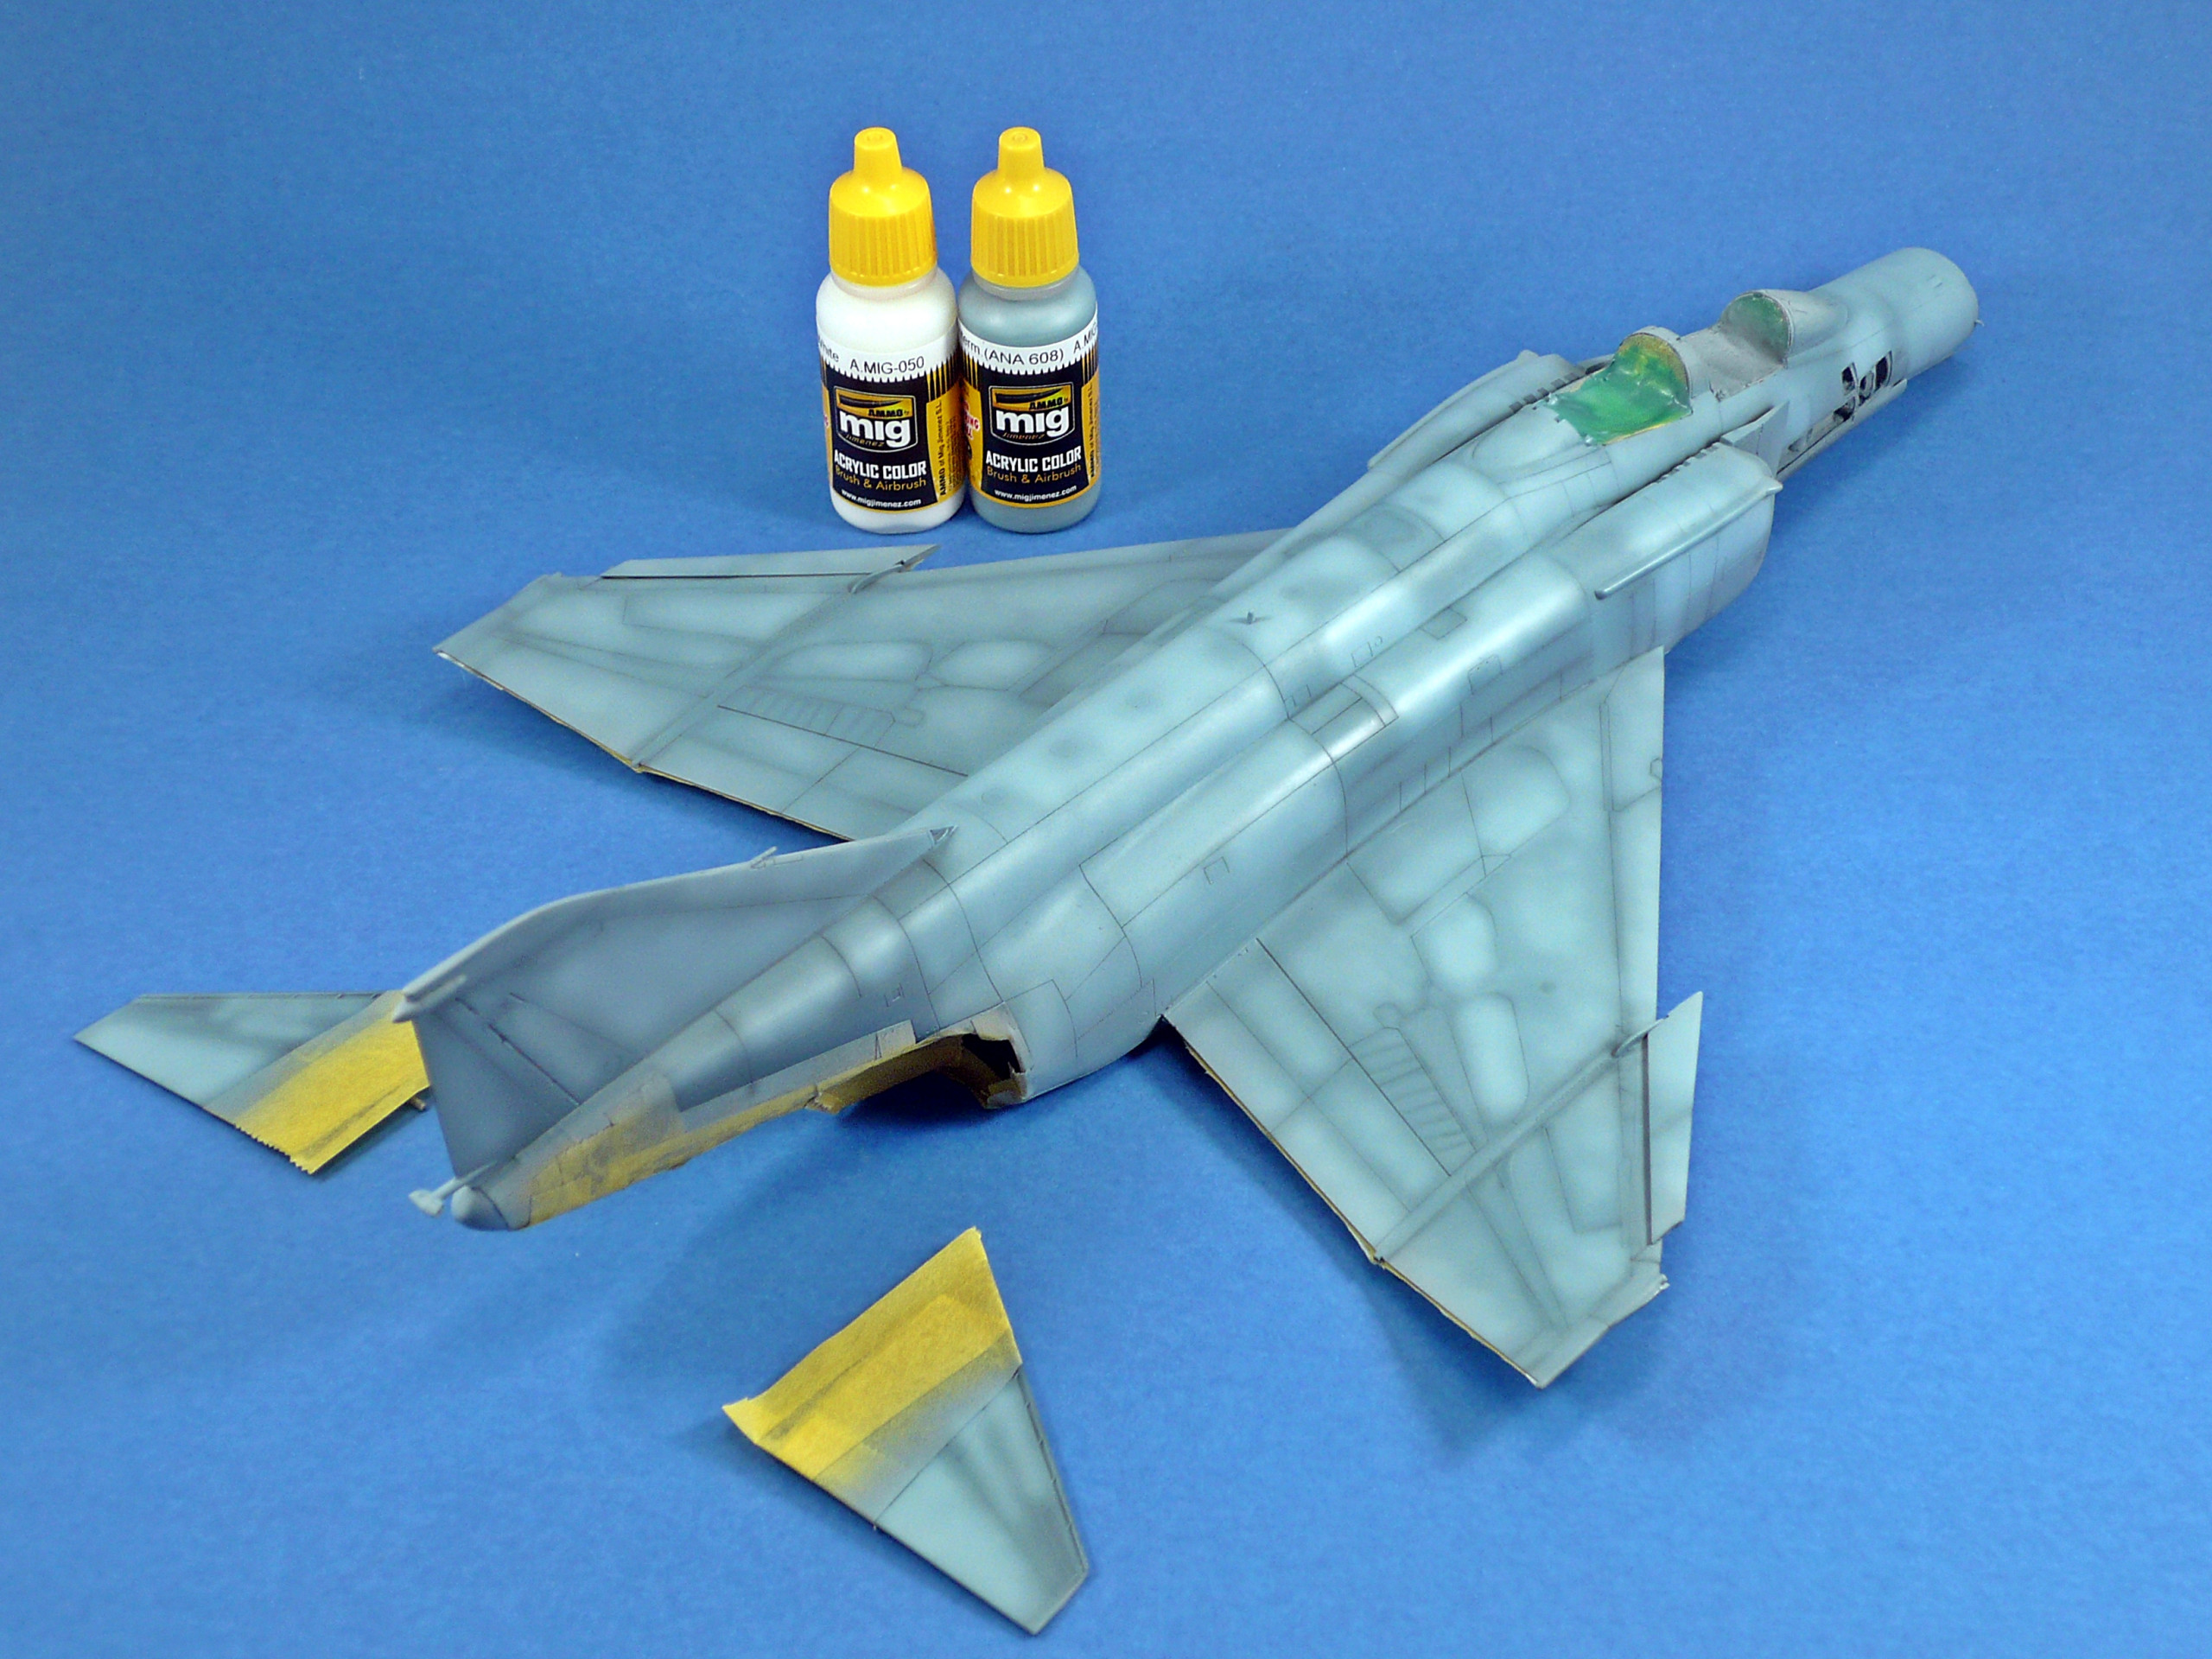
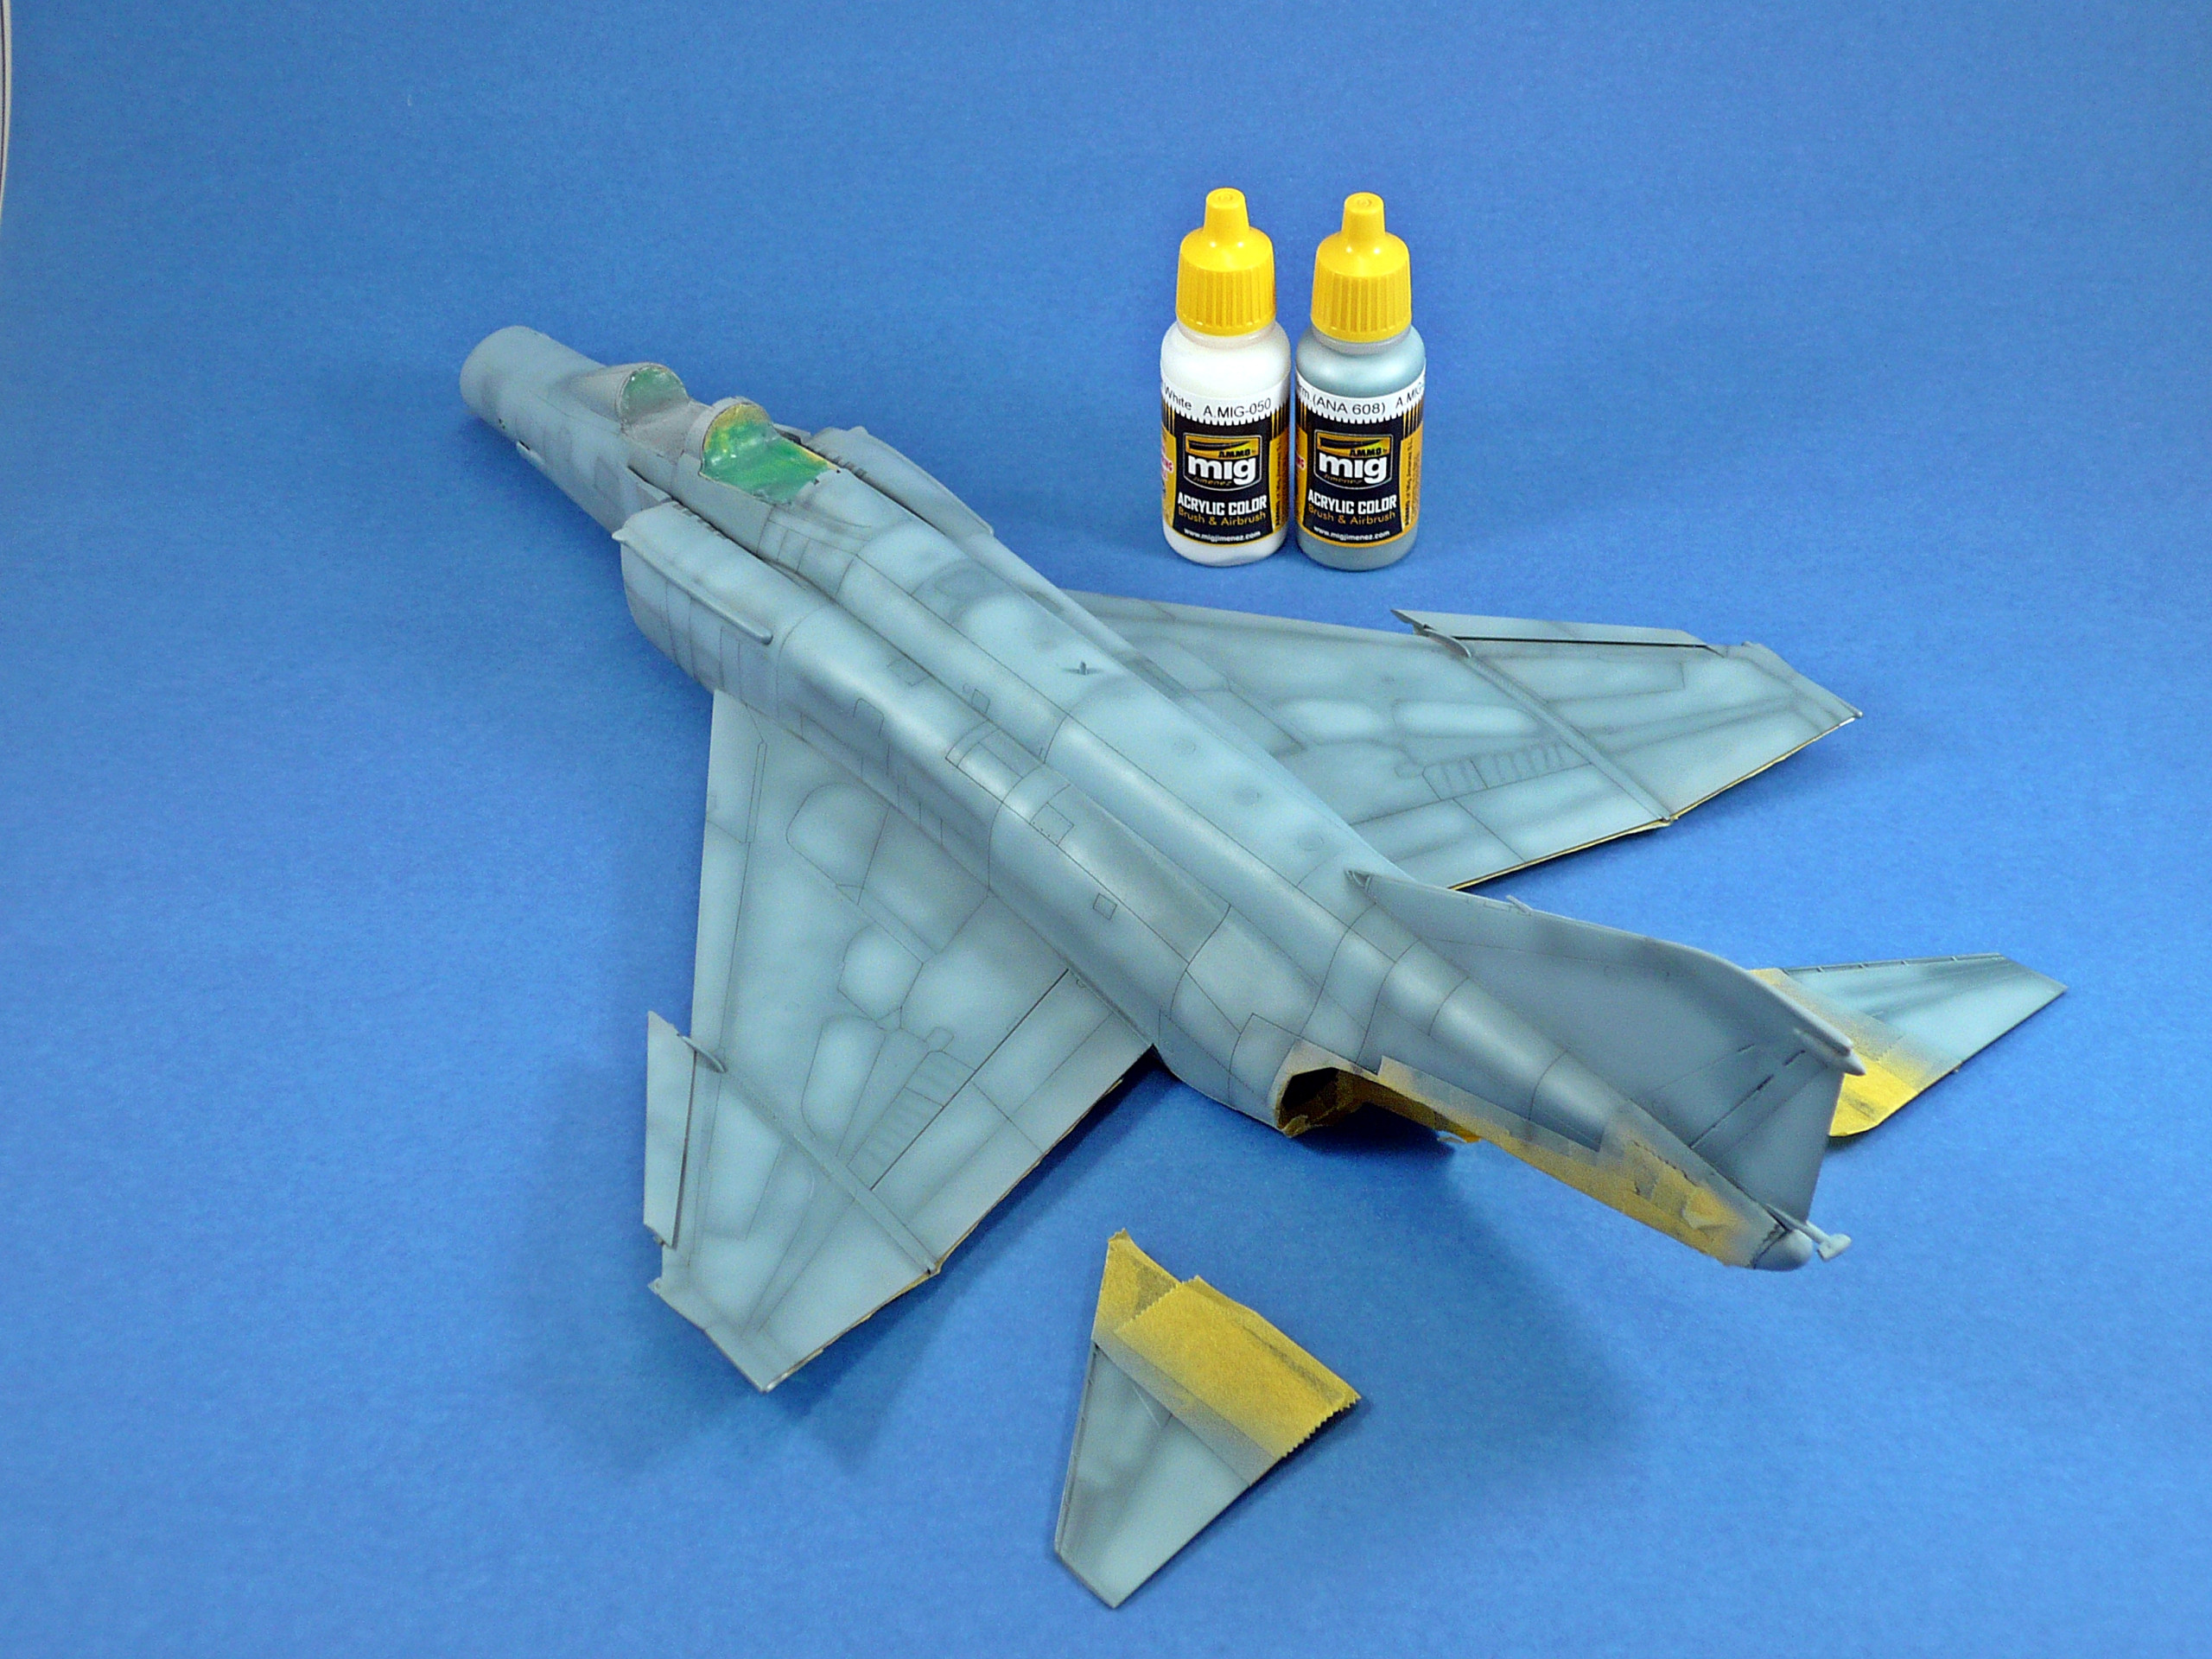
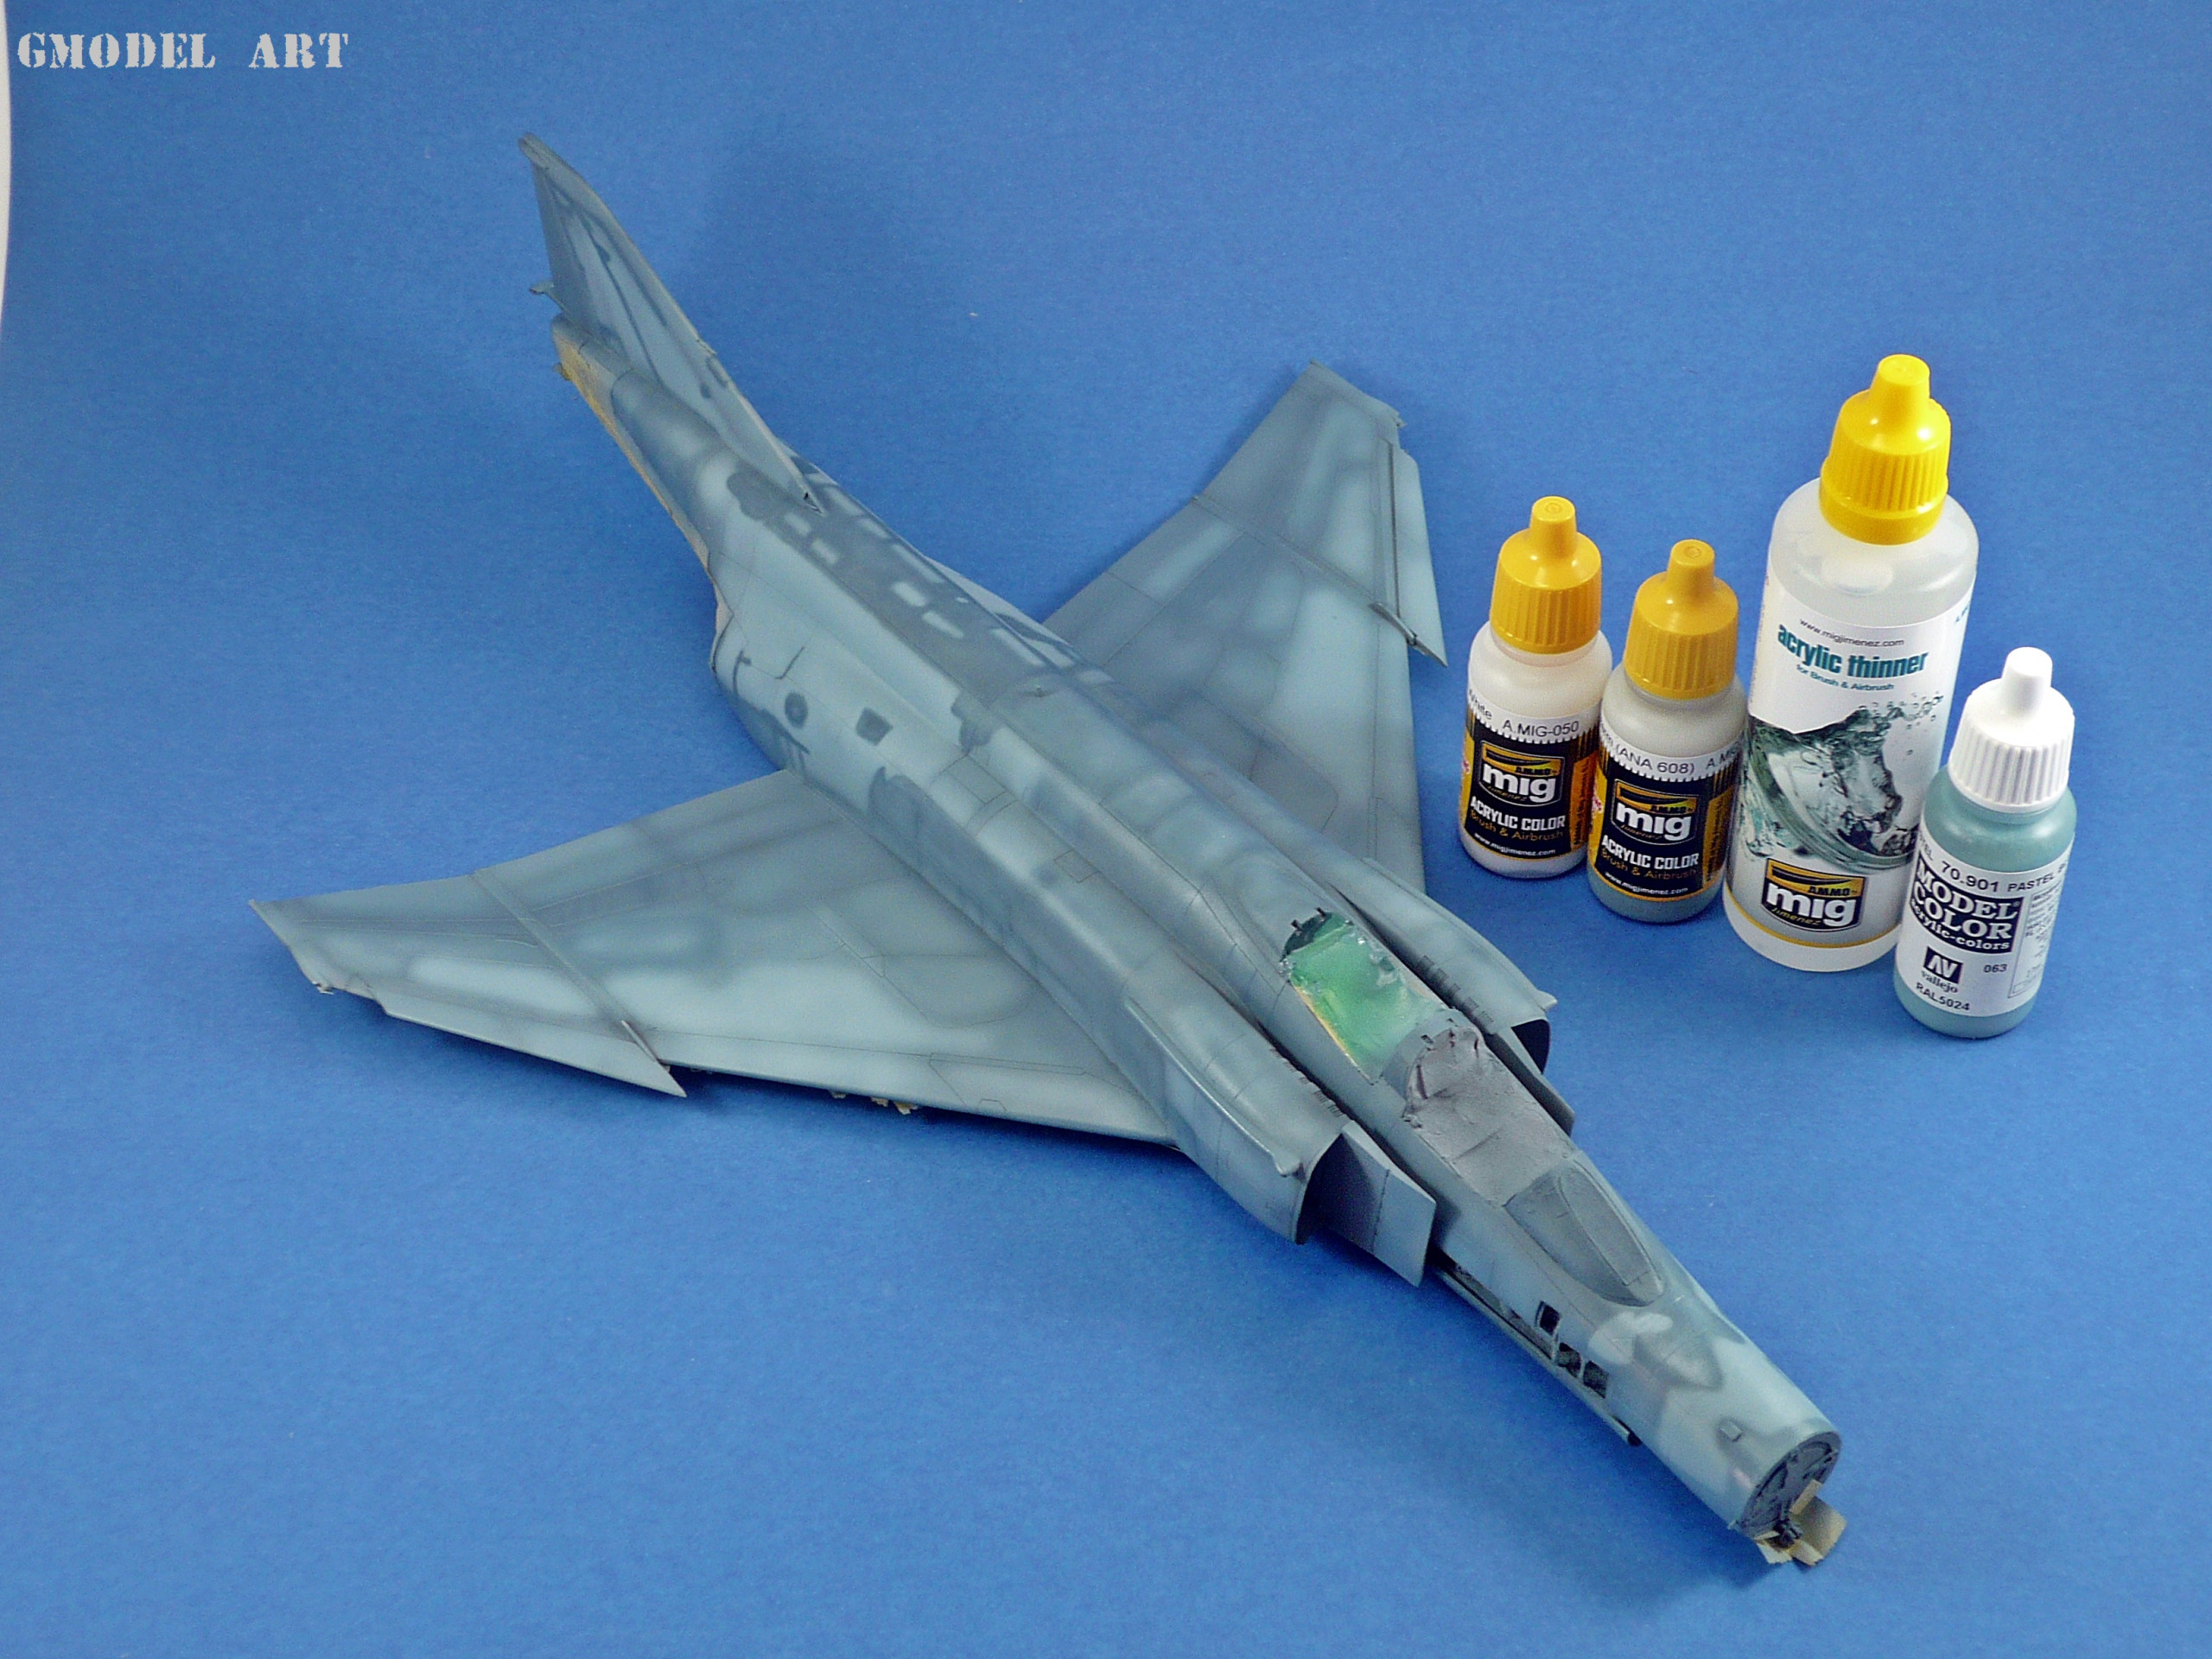
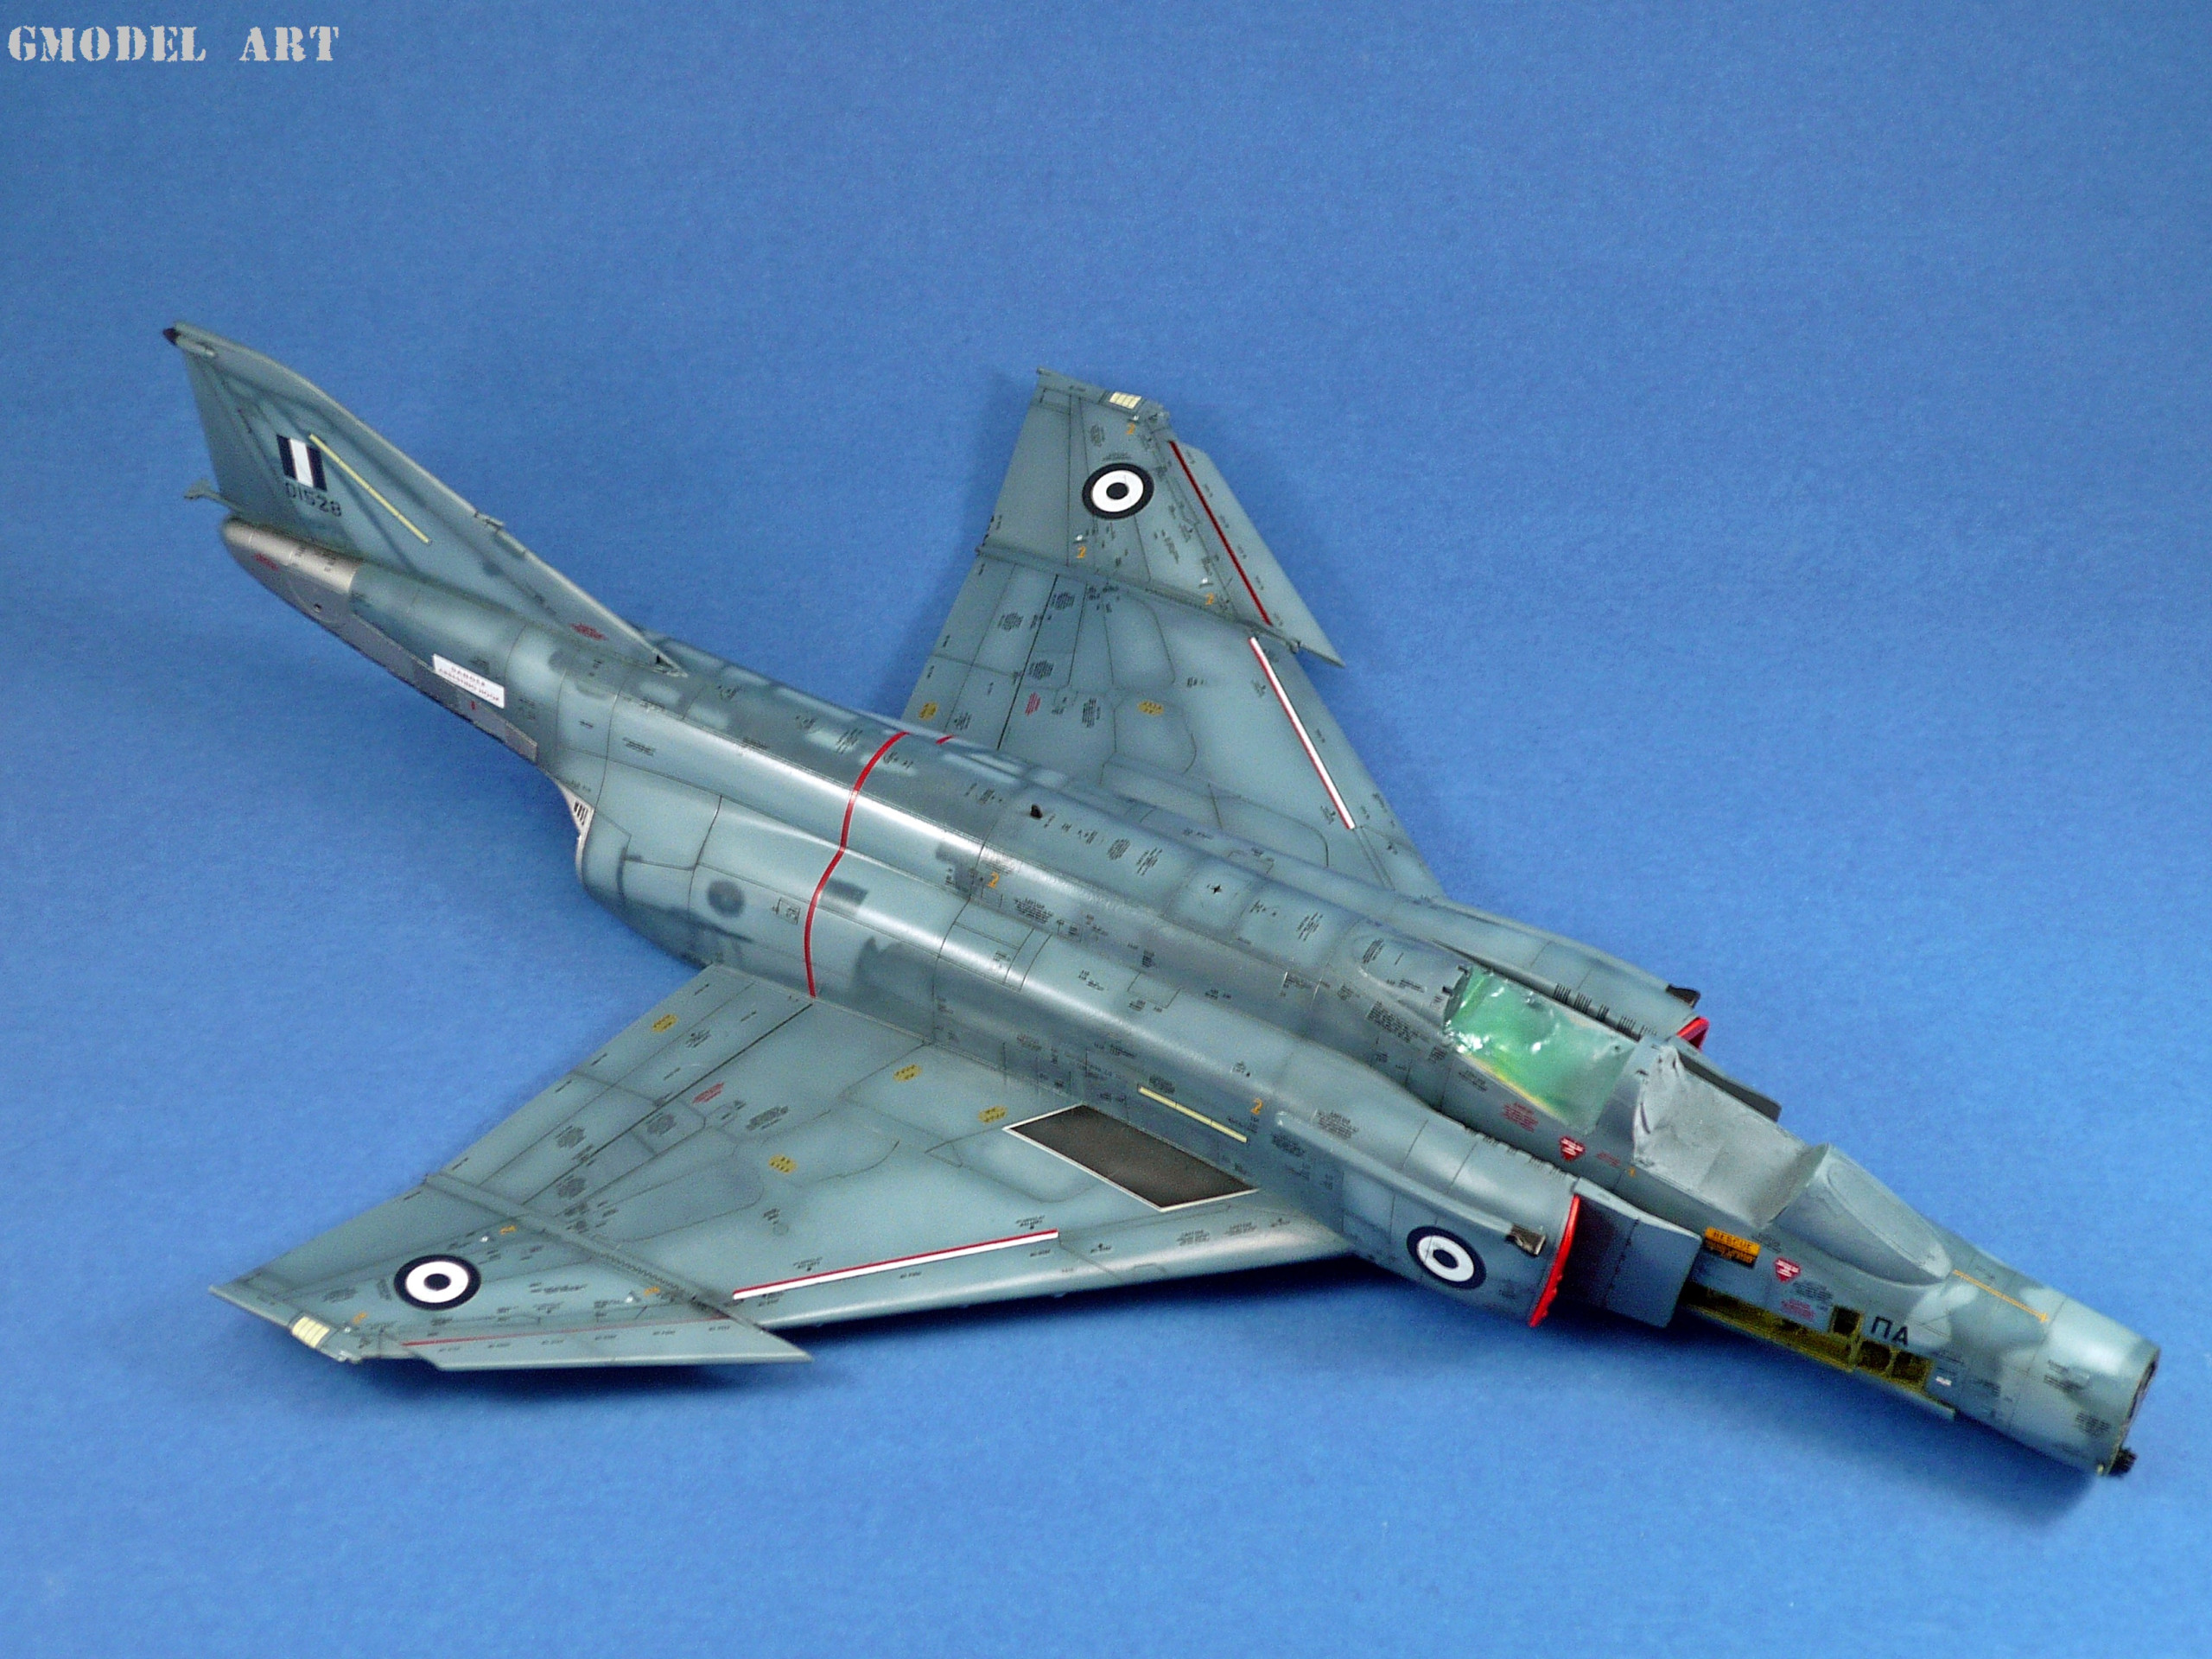
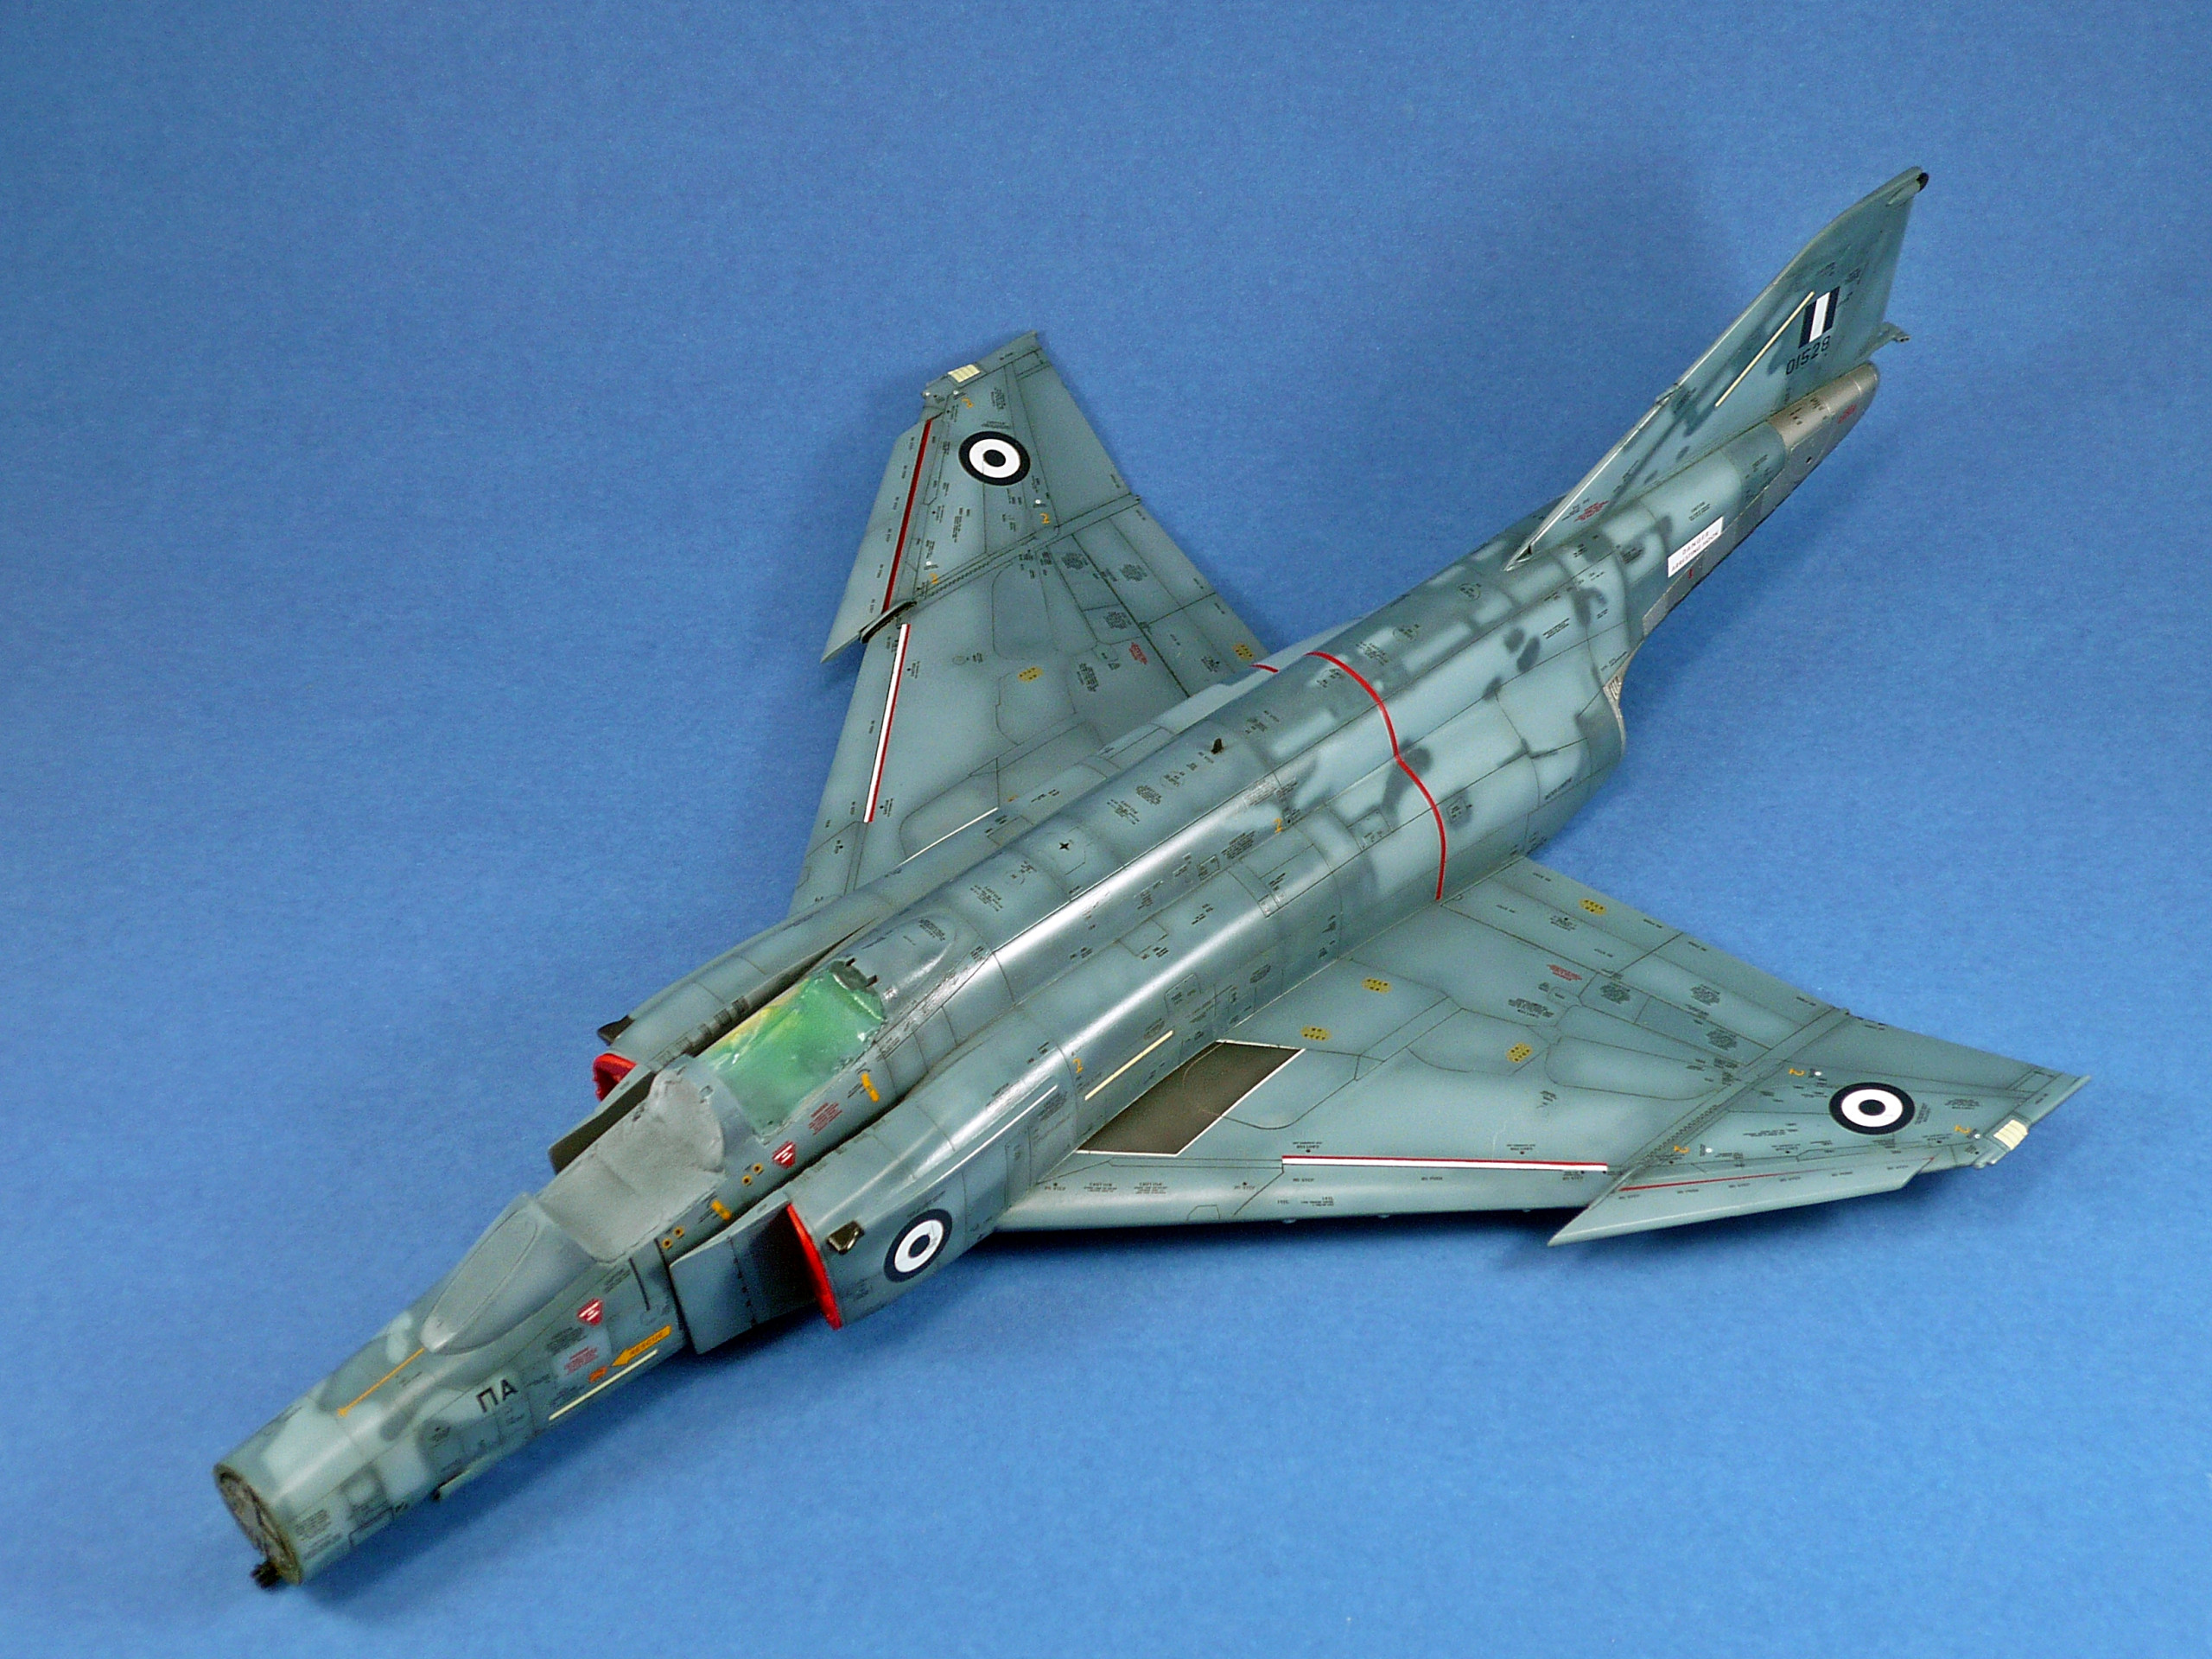
So, I started painting by spraying the basic color of the “Blue Aegean Cammo) which was Mig Ammo ANA 608 Intermediate Blue (FS 35164) (pics 57,58)
Then started to spray various areas with different color ratios using the basic color mixed with flat white (Mig Ammo 050) (Pics 61,62)
Based on the real aircraft reference pics I realized that it had some very faded areas. So I used a mix of colors trying to achieve the best possible result. For that I used the basic color mixed with flat white and some drops (not too much) of Pastel Blue from Vallejo (70901). I believe I came close enough to the real one! (pics 65,66,67,68)
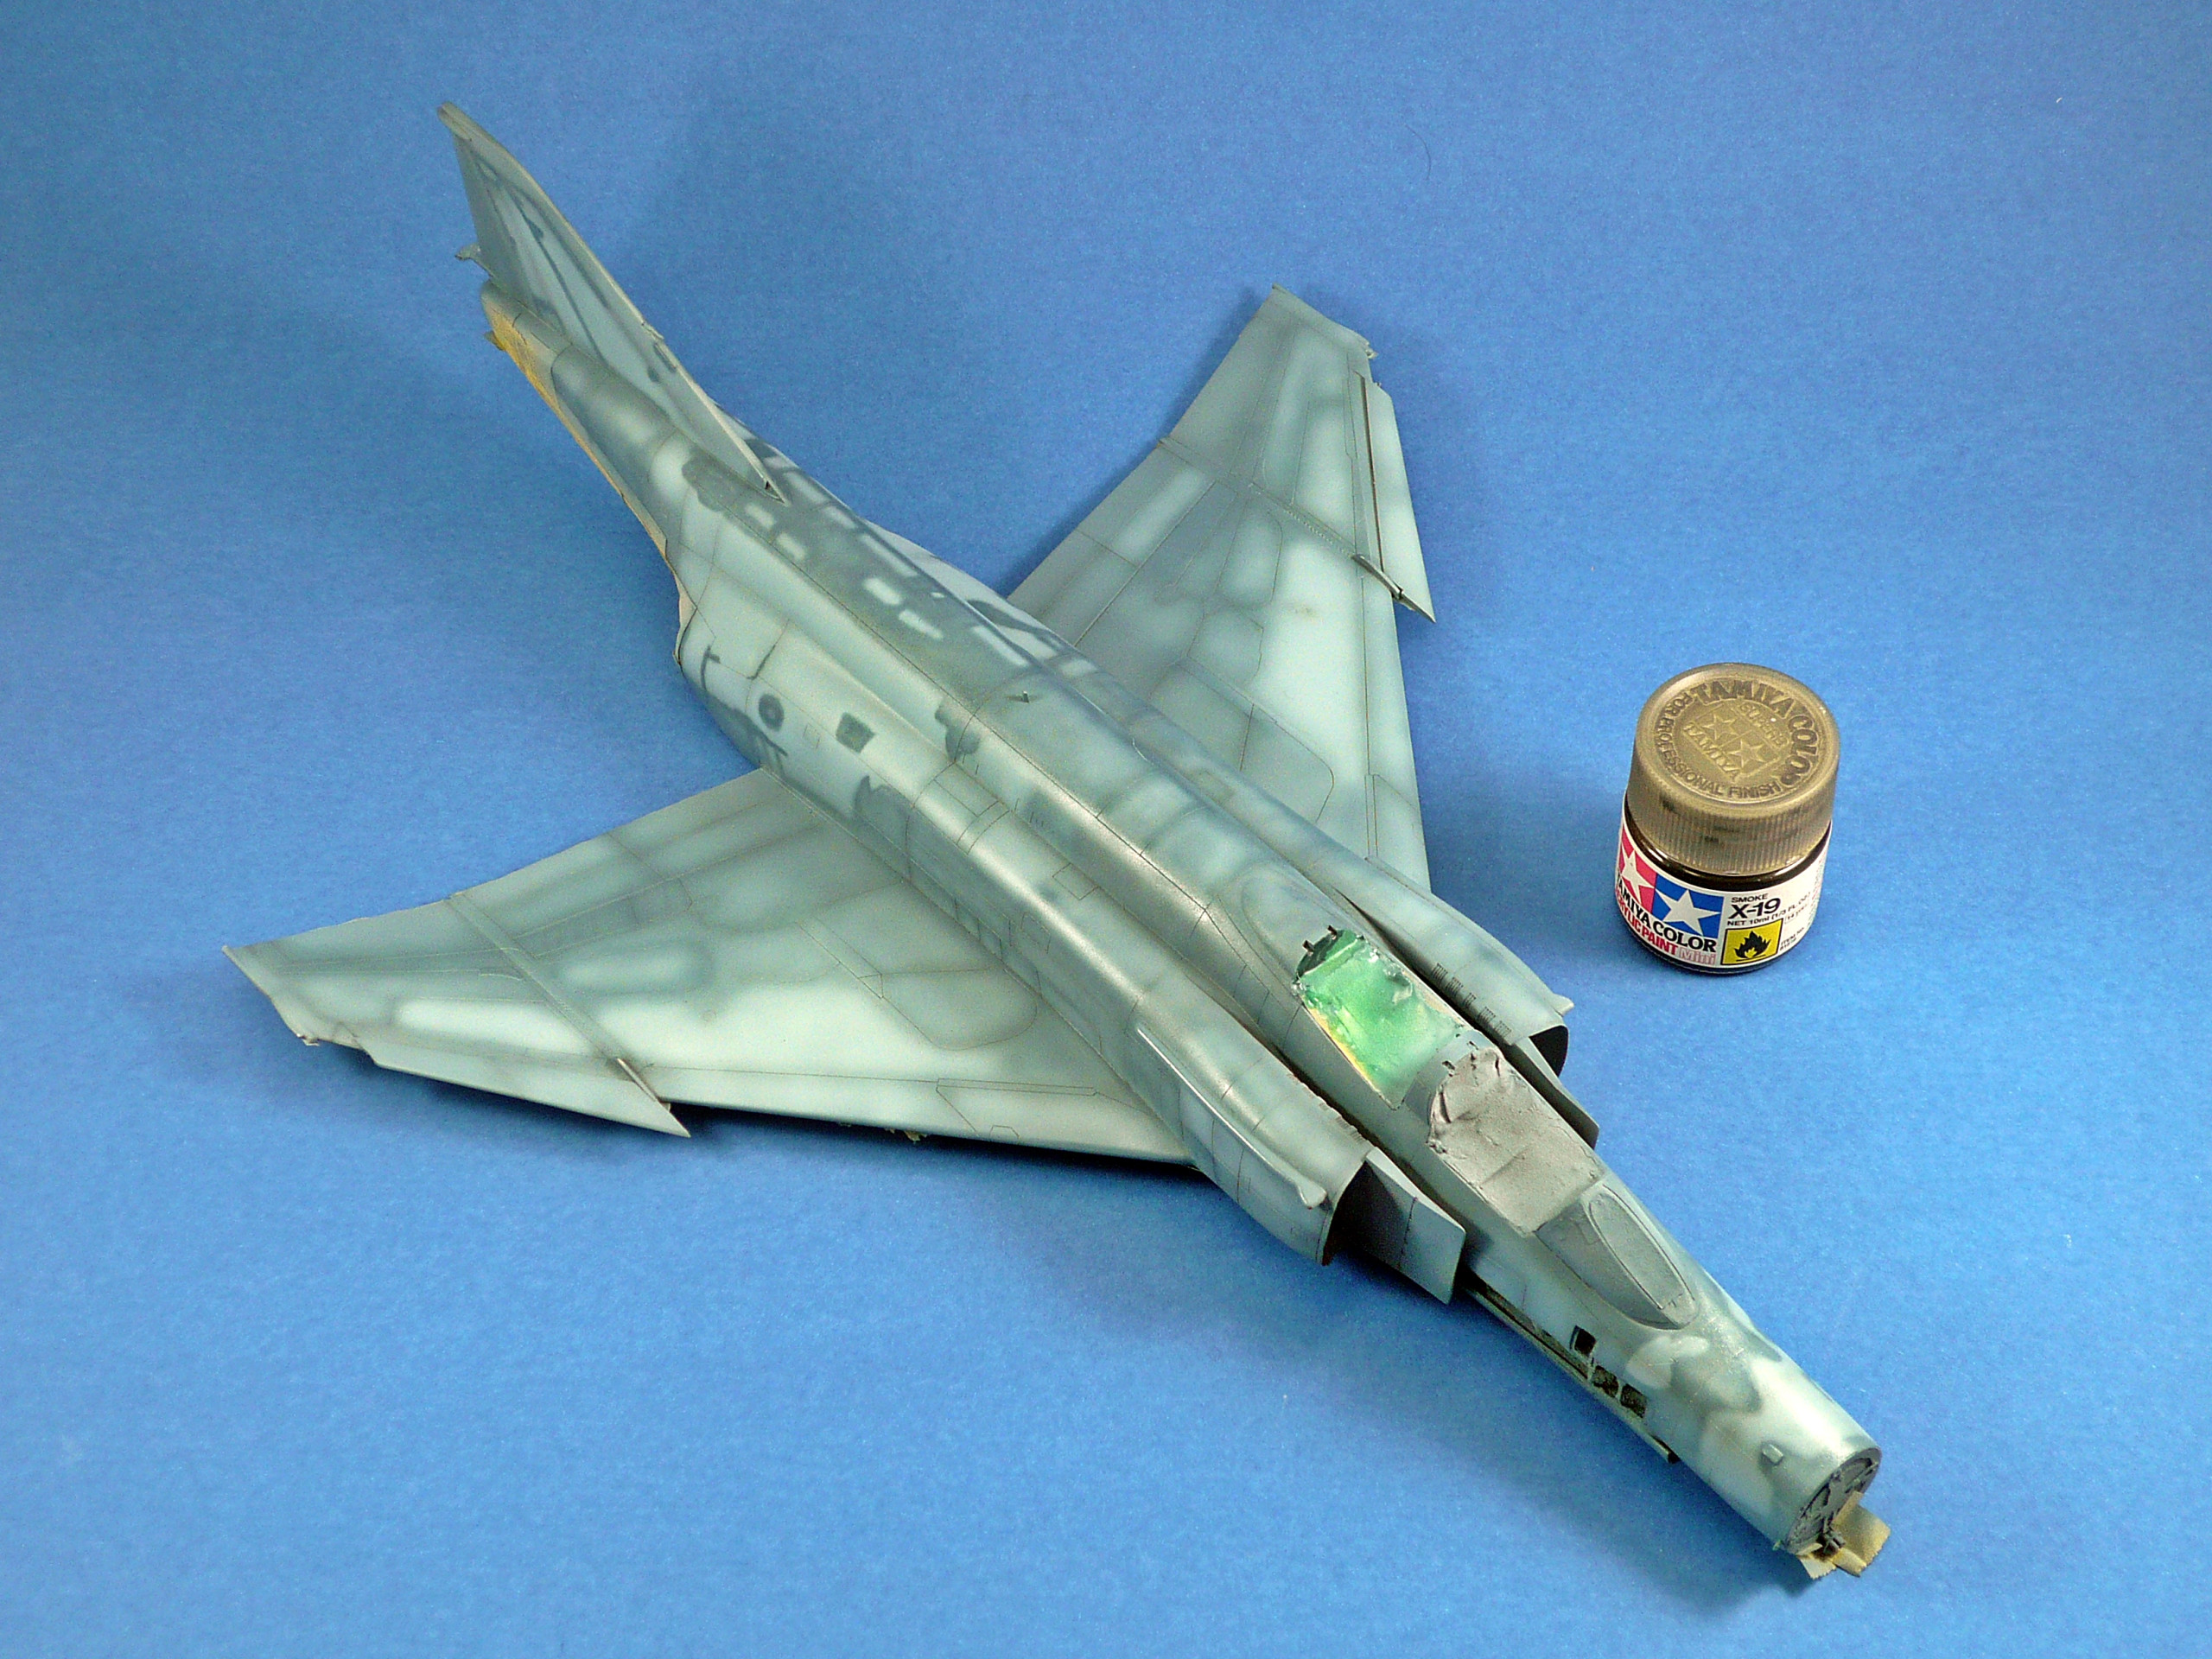
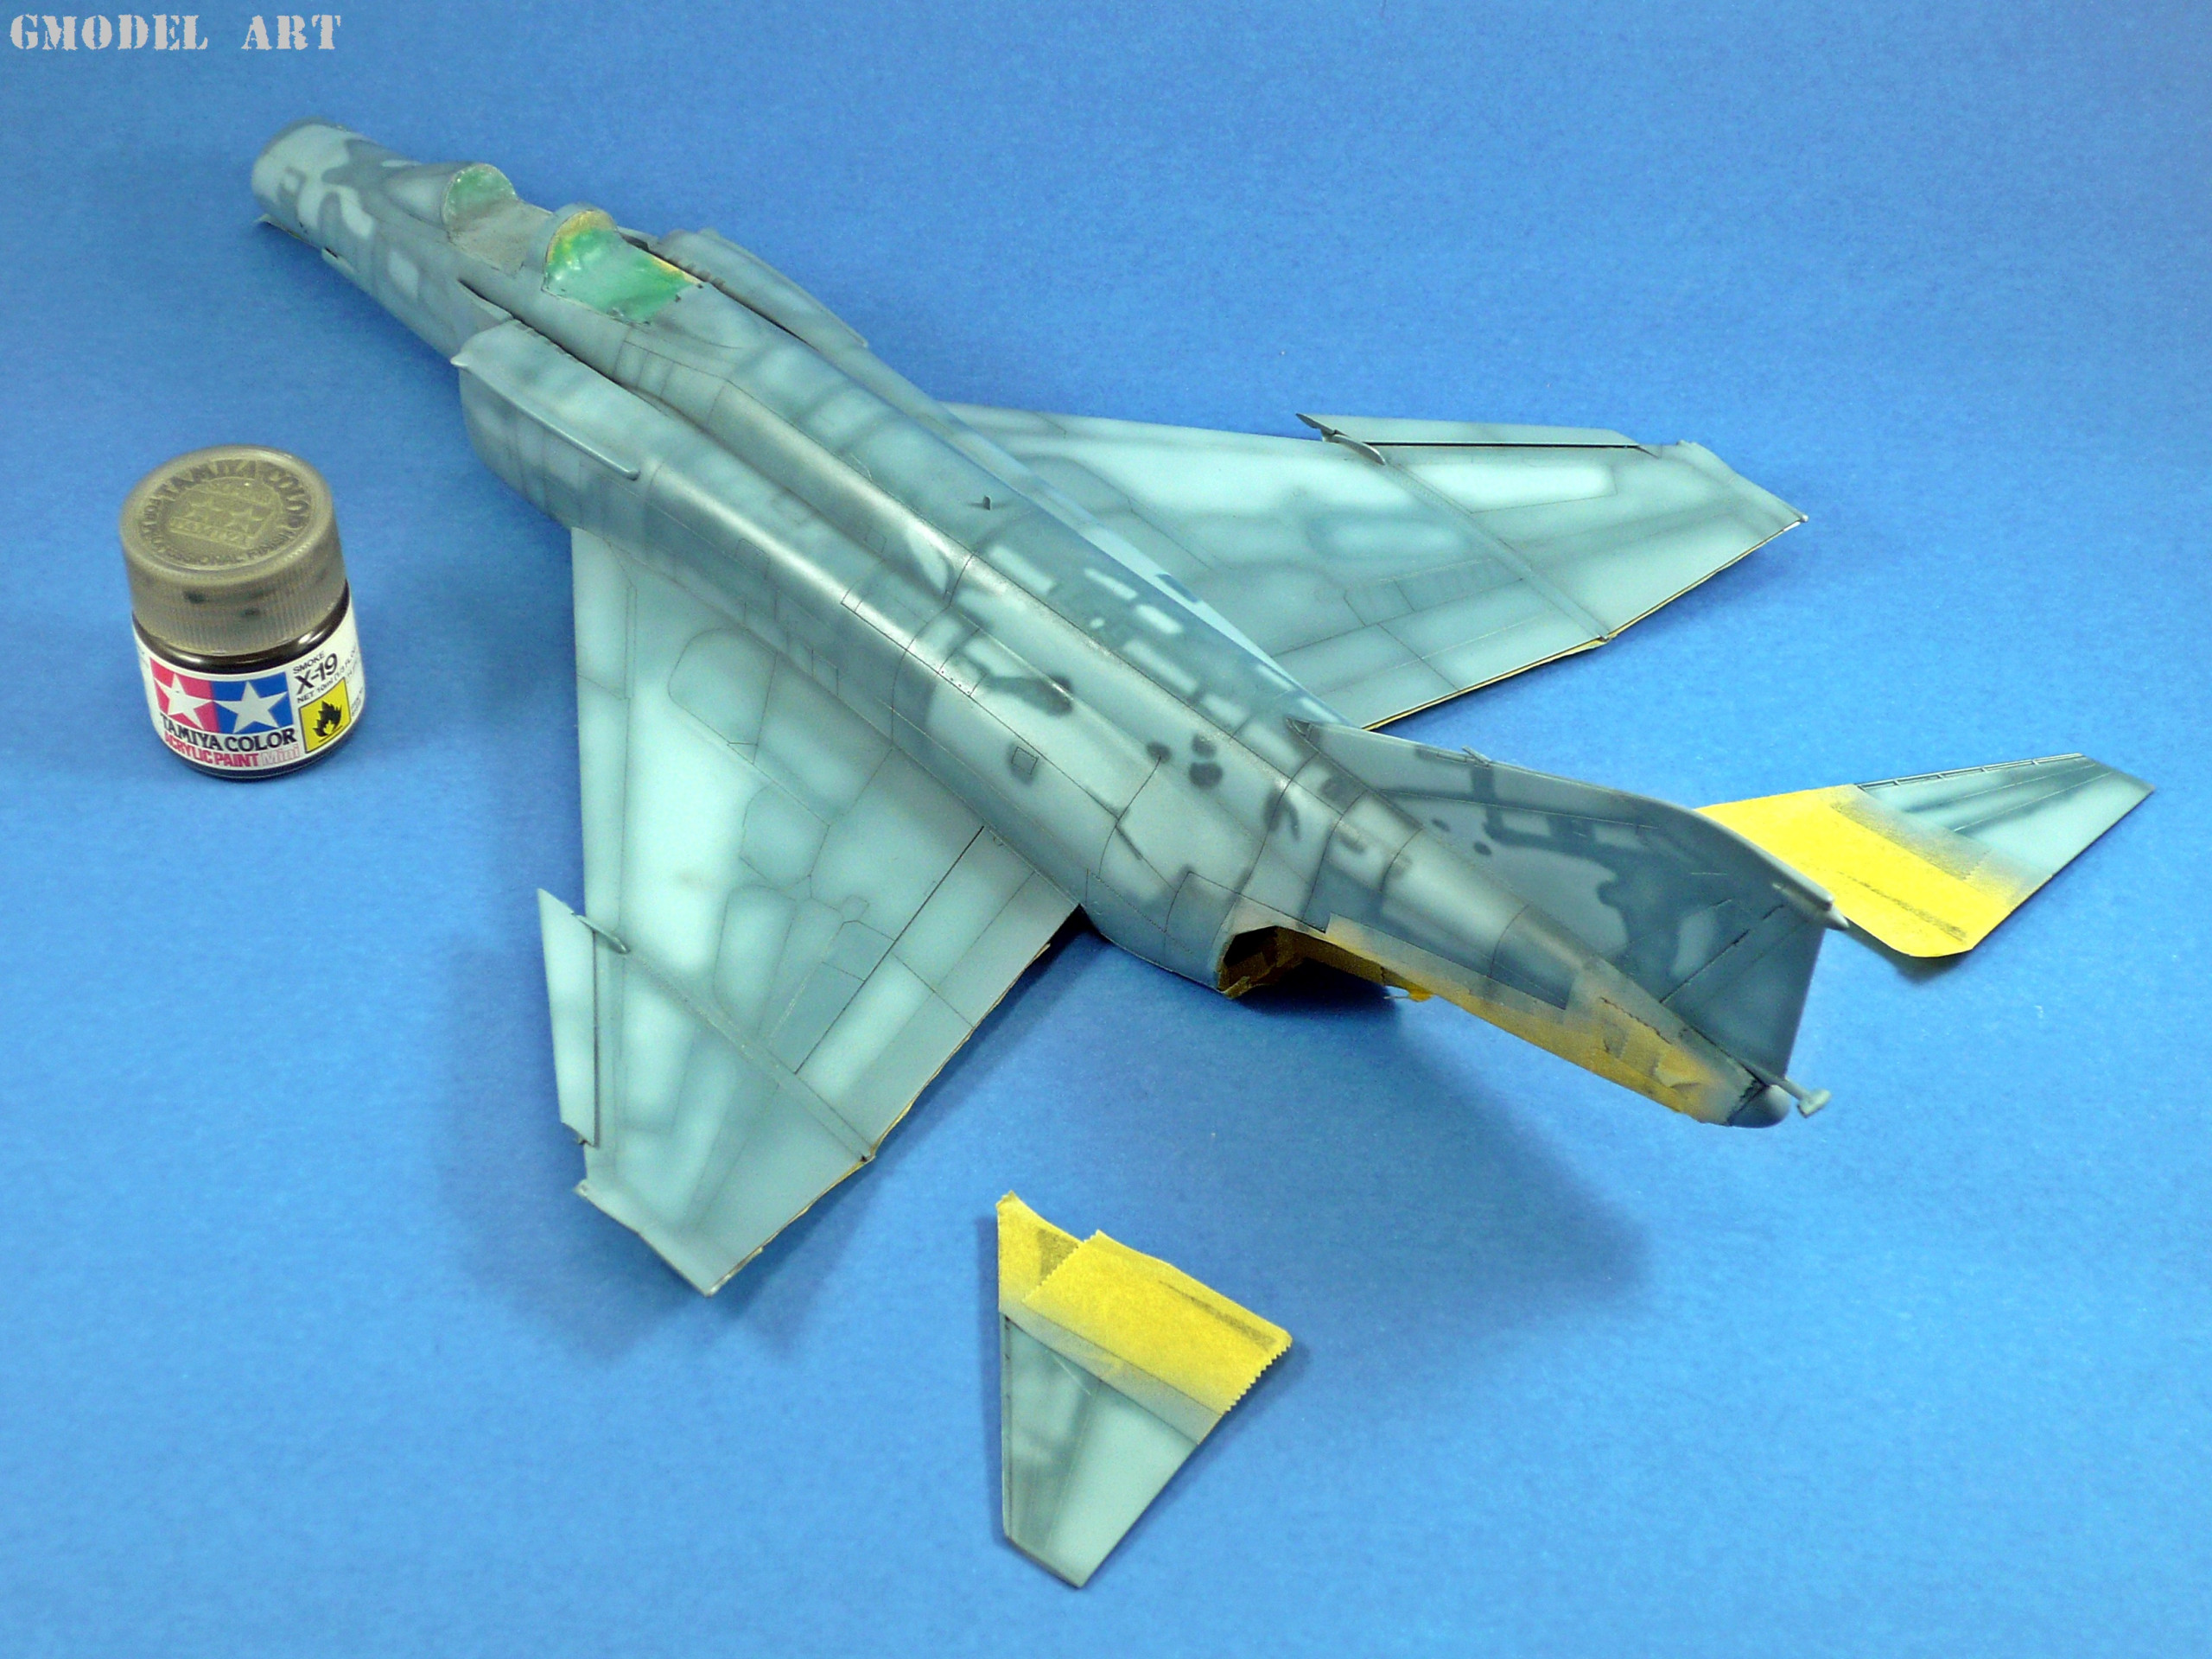
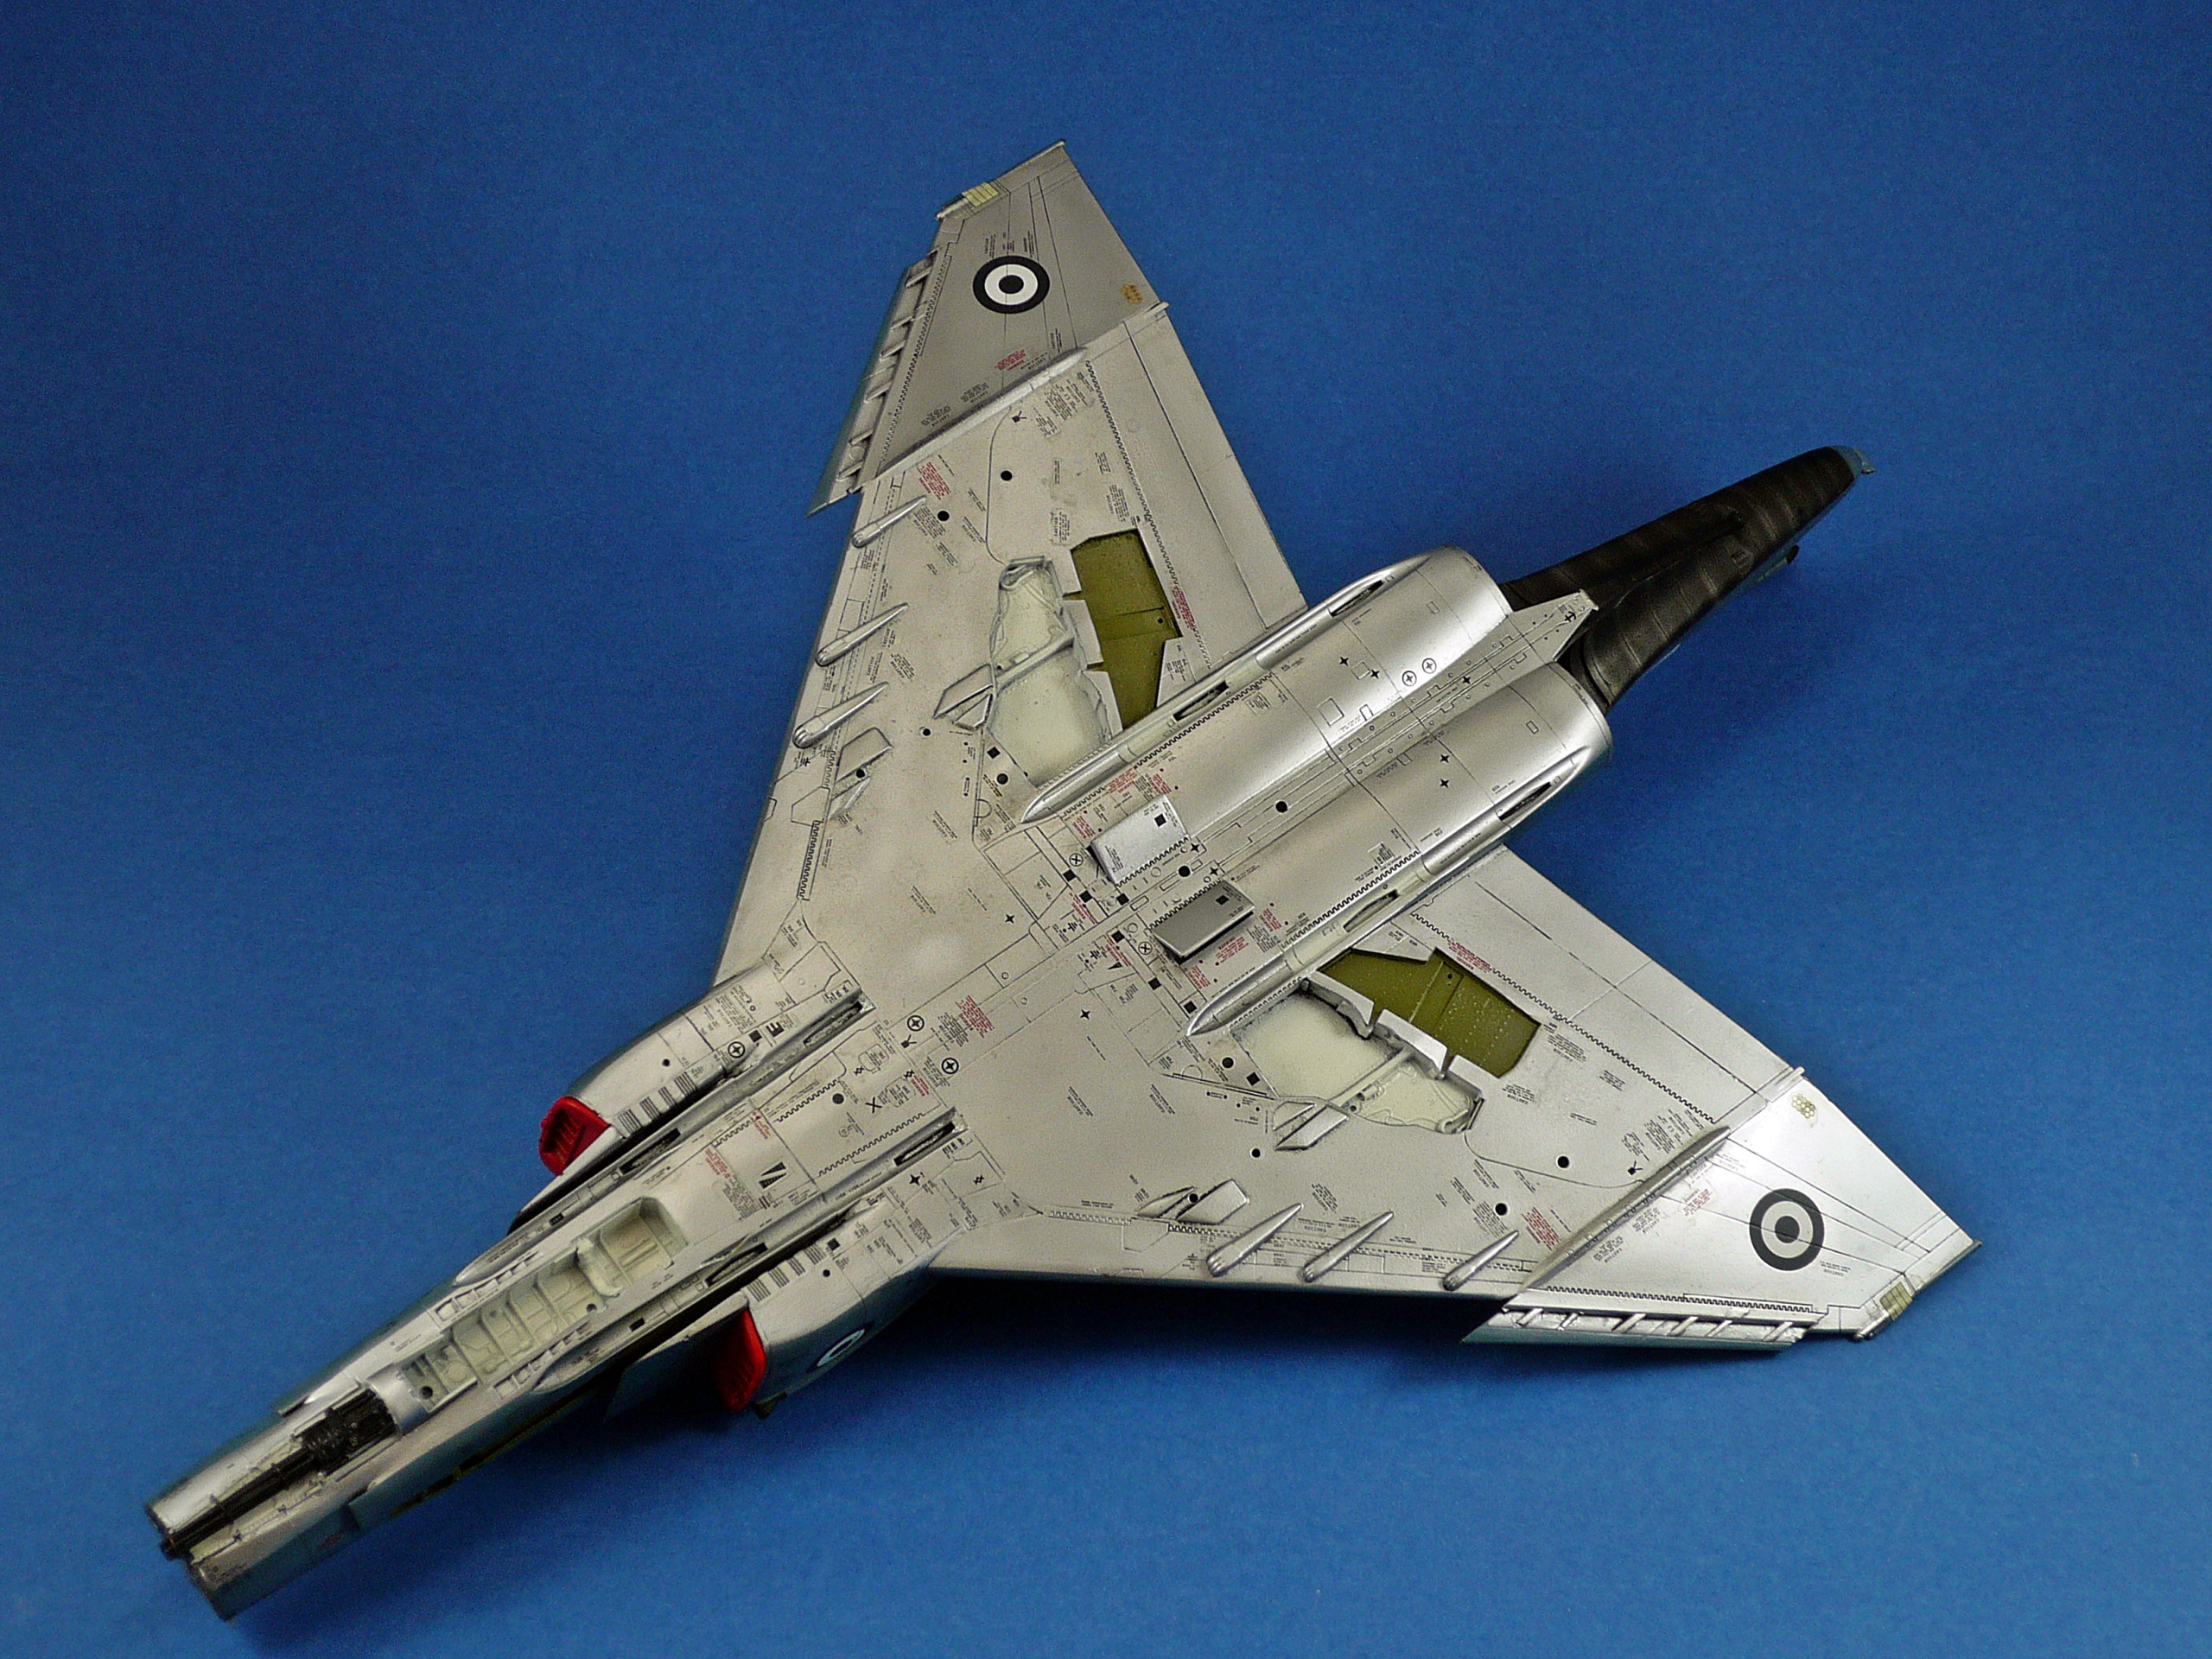
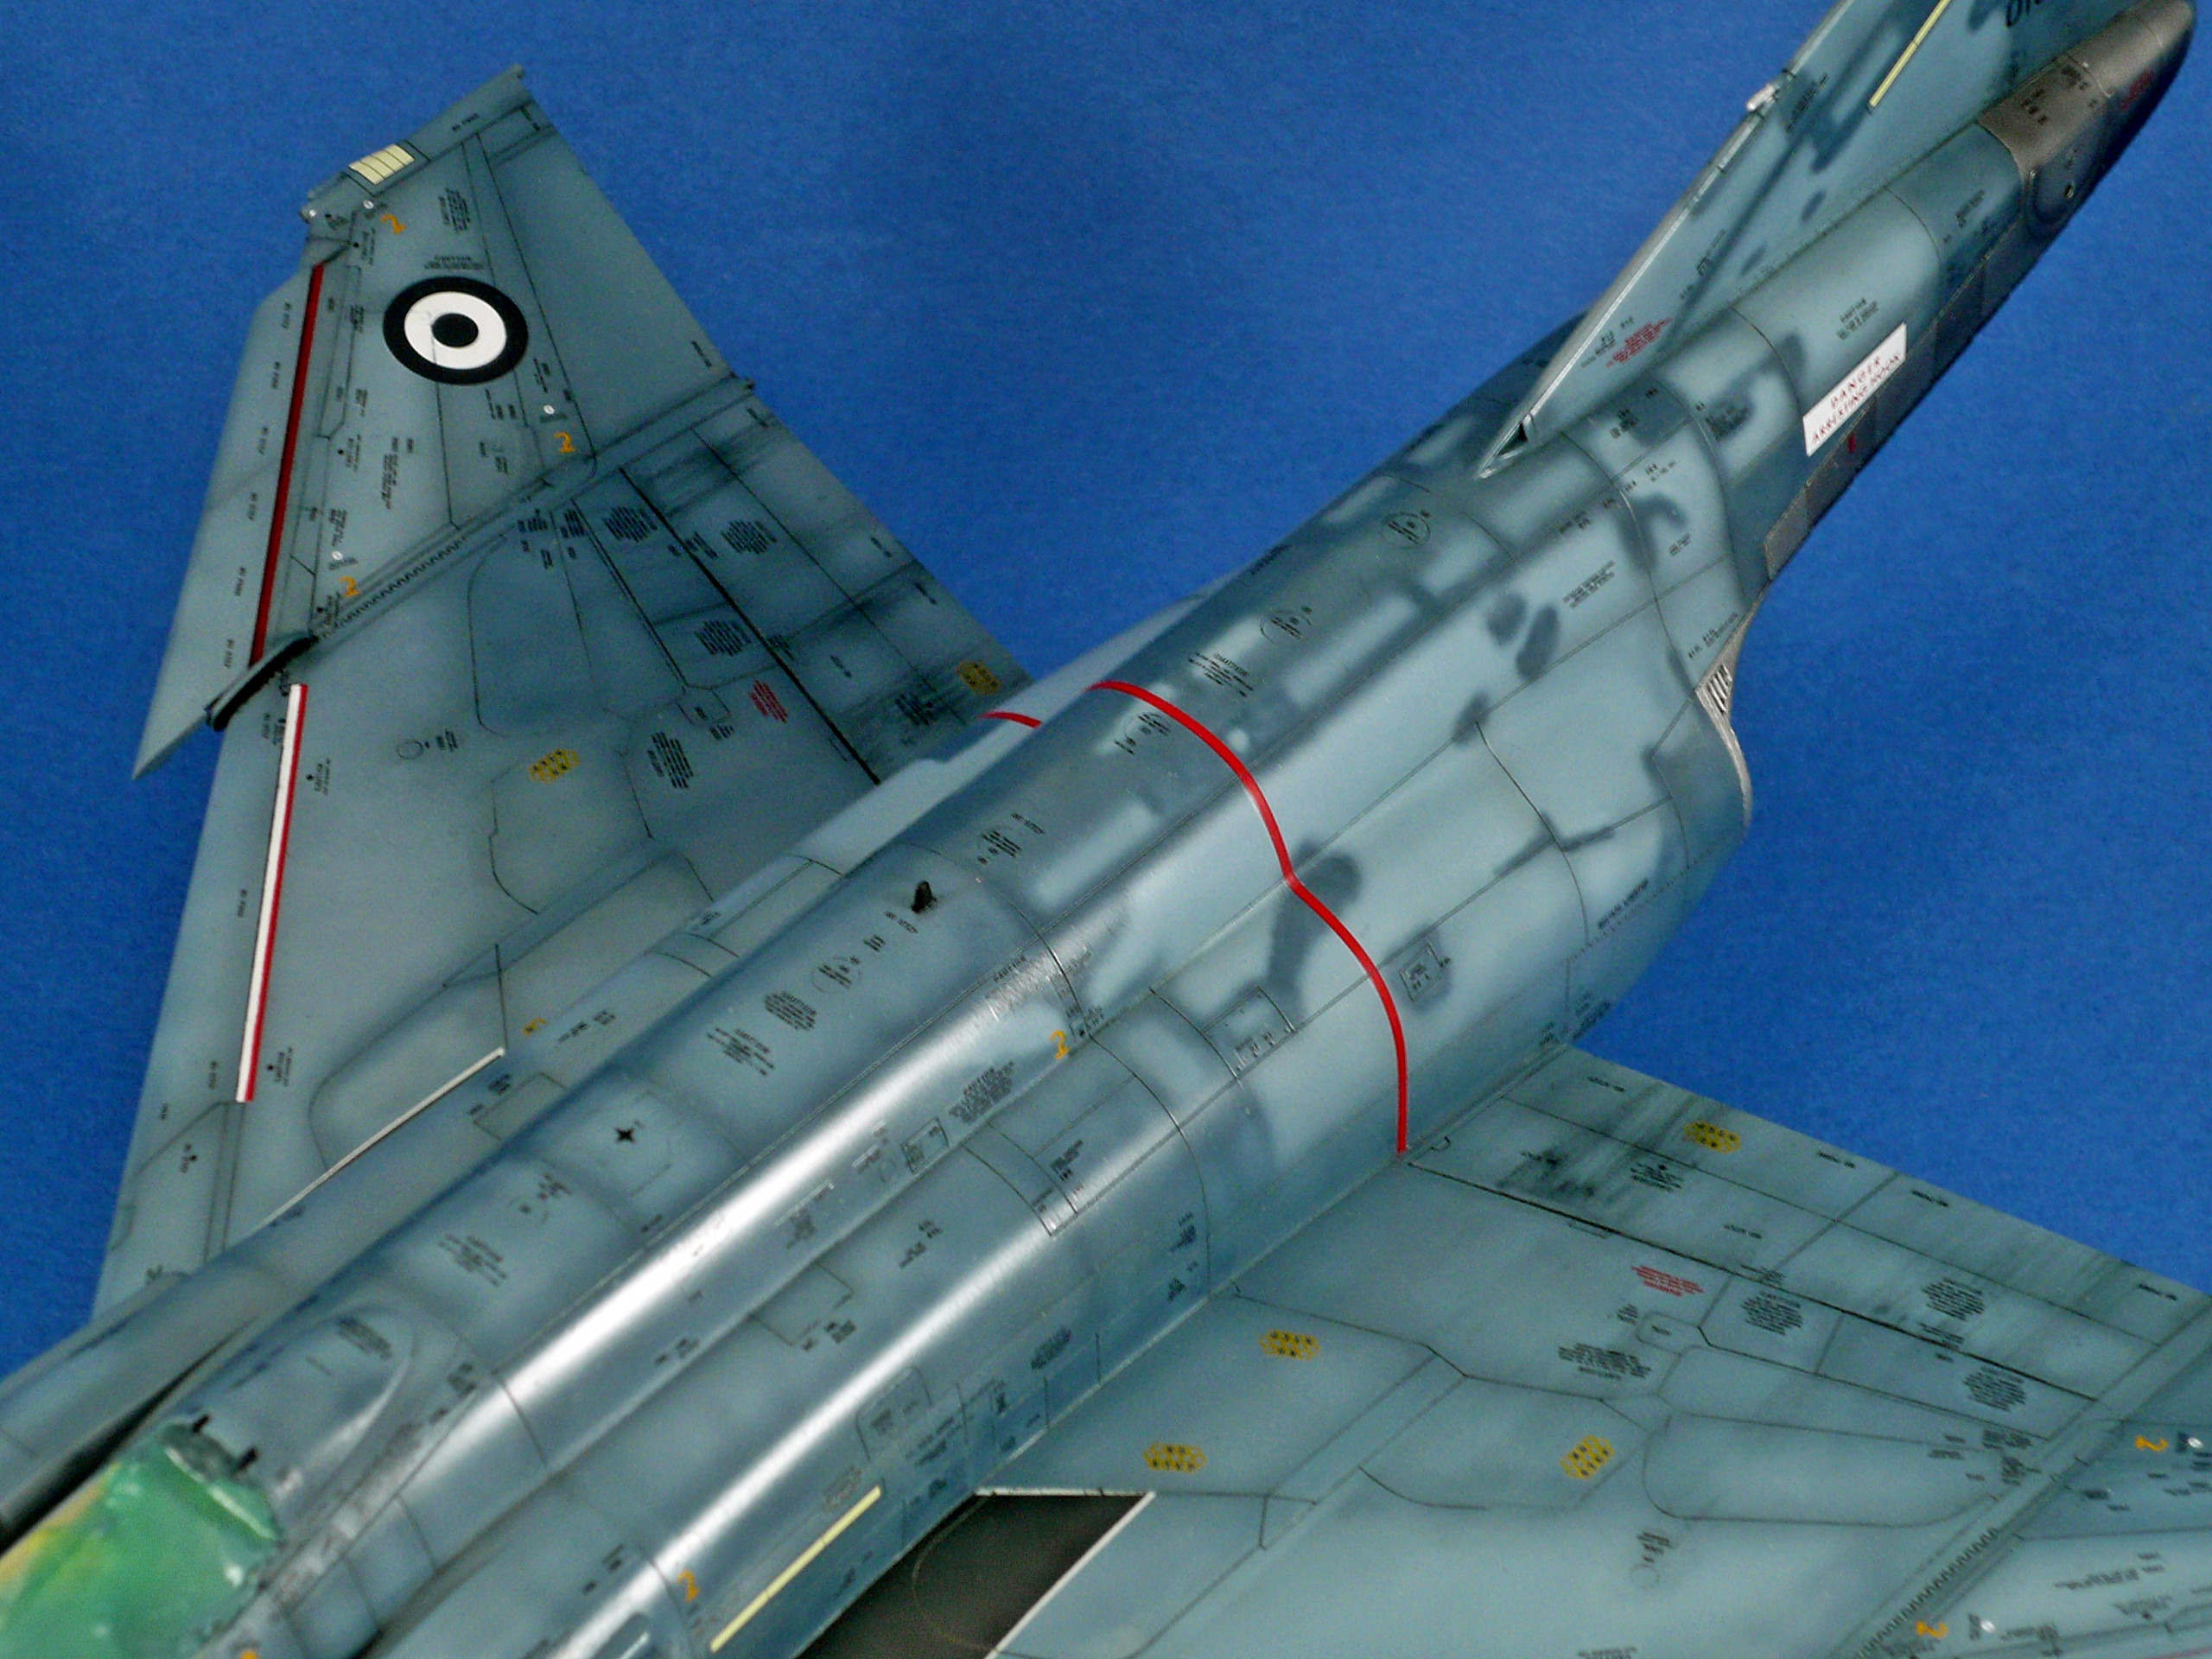
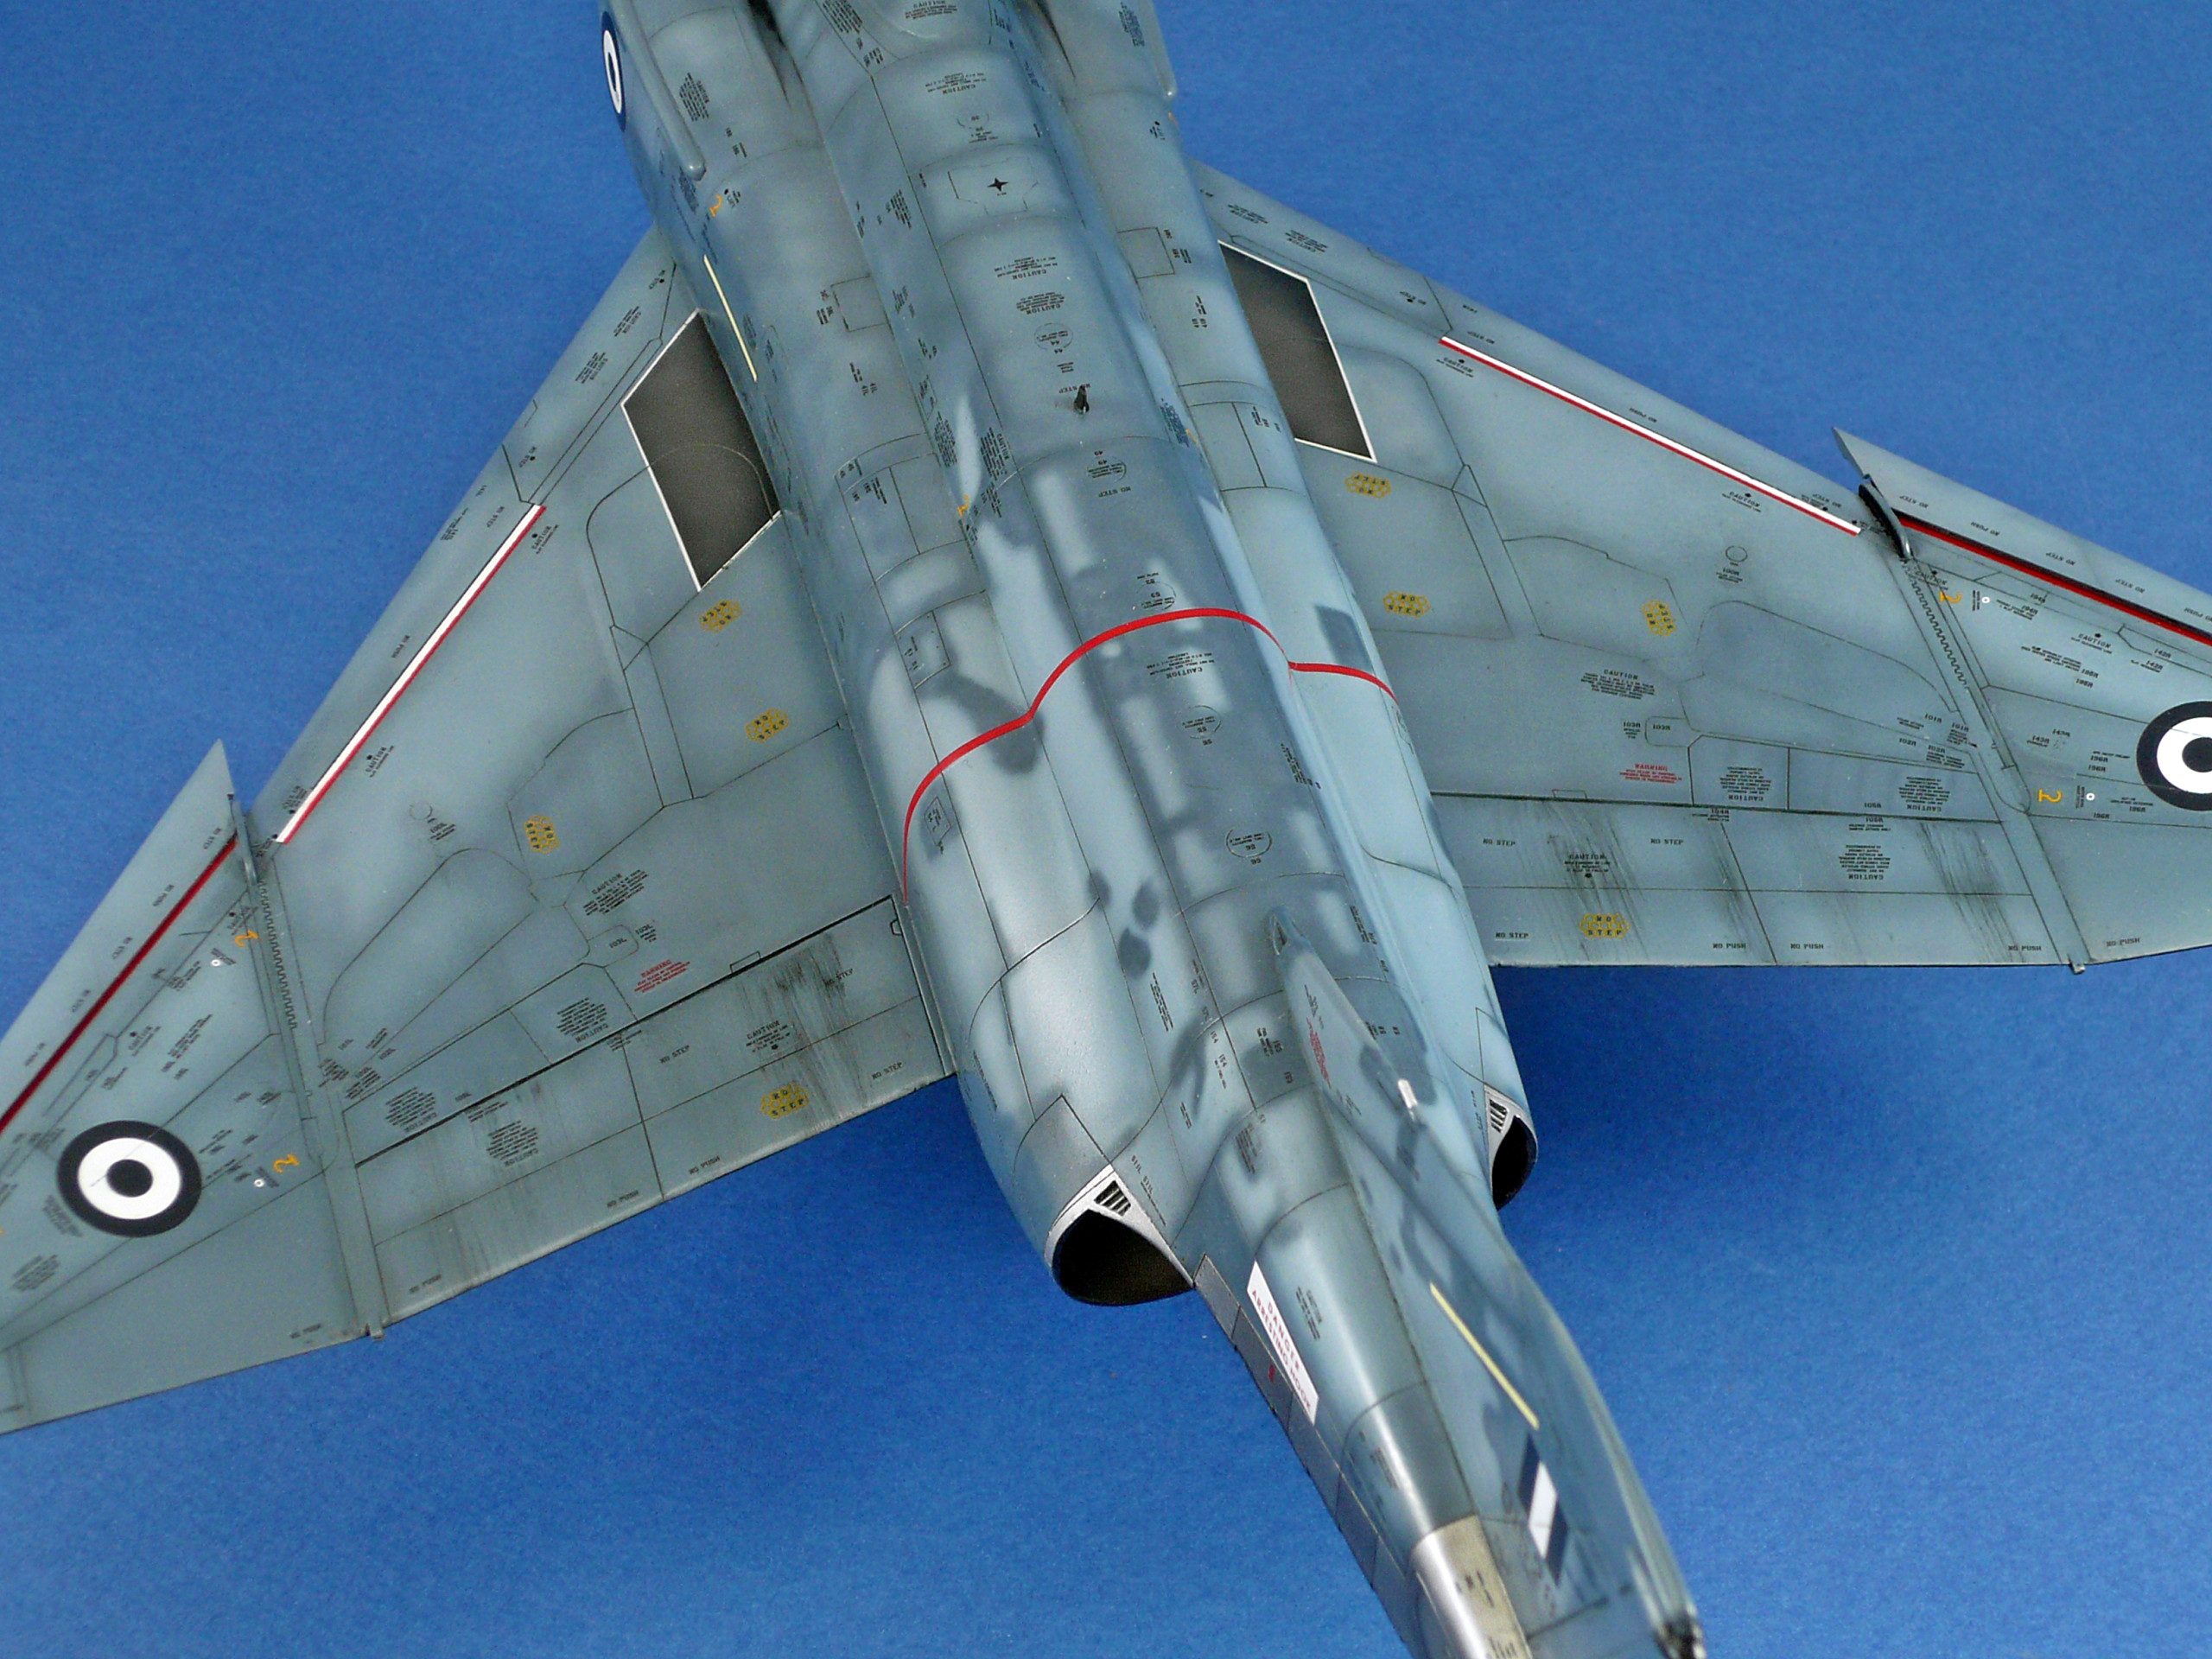
I wanted to give some depth and shadows in my cammo pattern so I sprayed the panel lines and specific panels using Tamiya’s X-19 Smoke (pics 73,74,75,76,77,78,79)
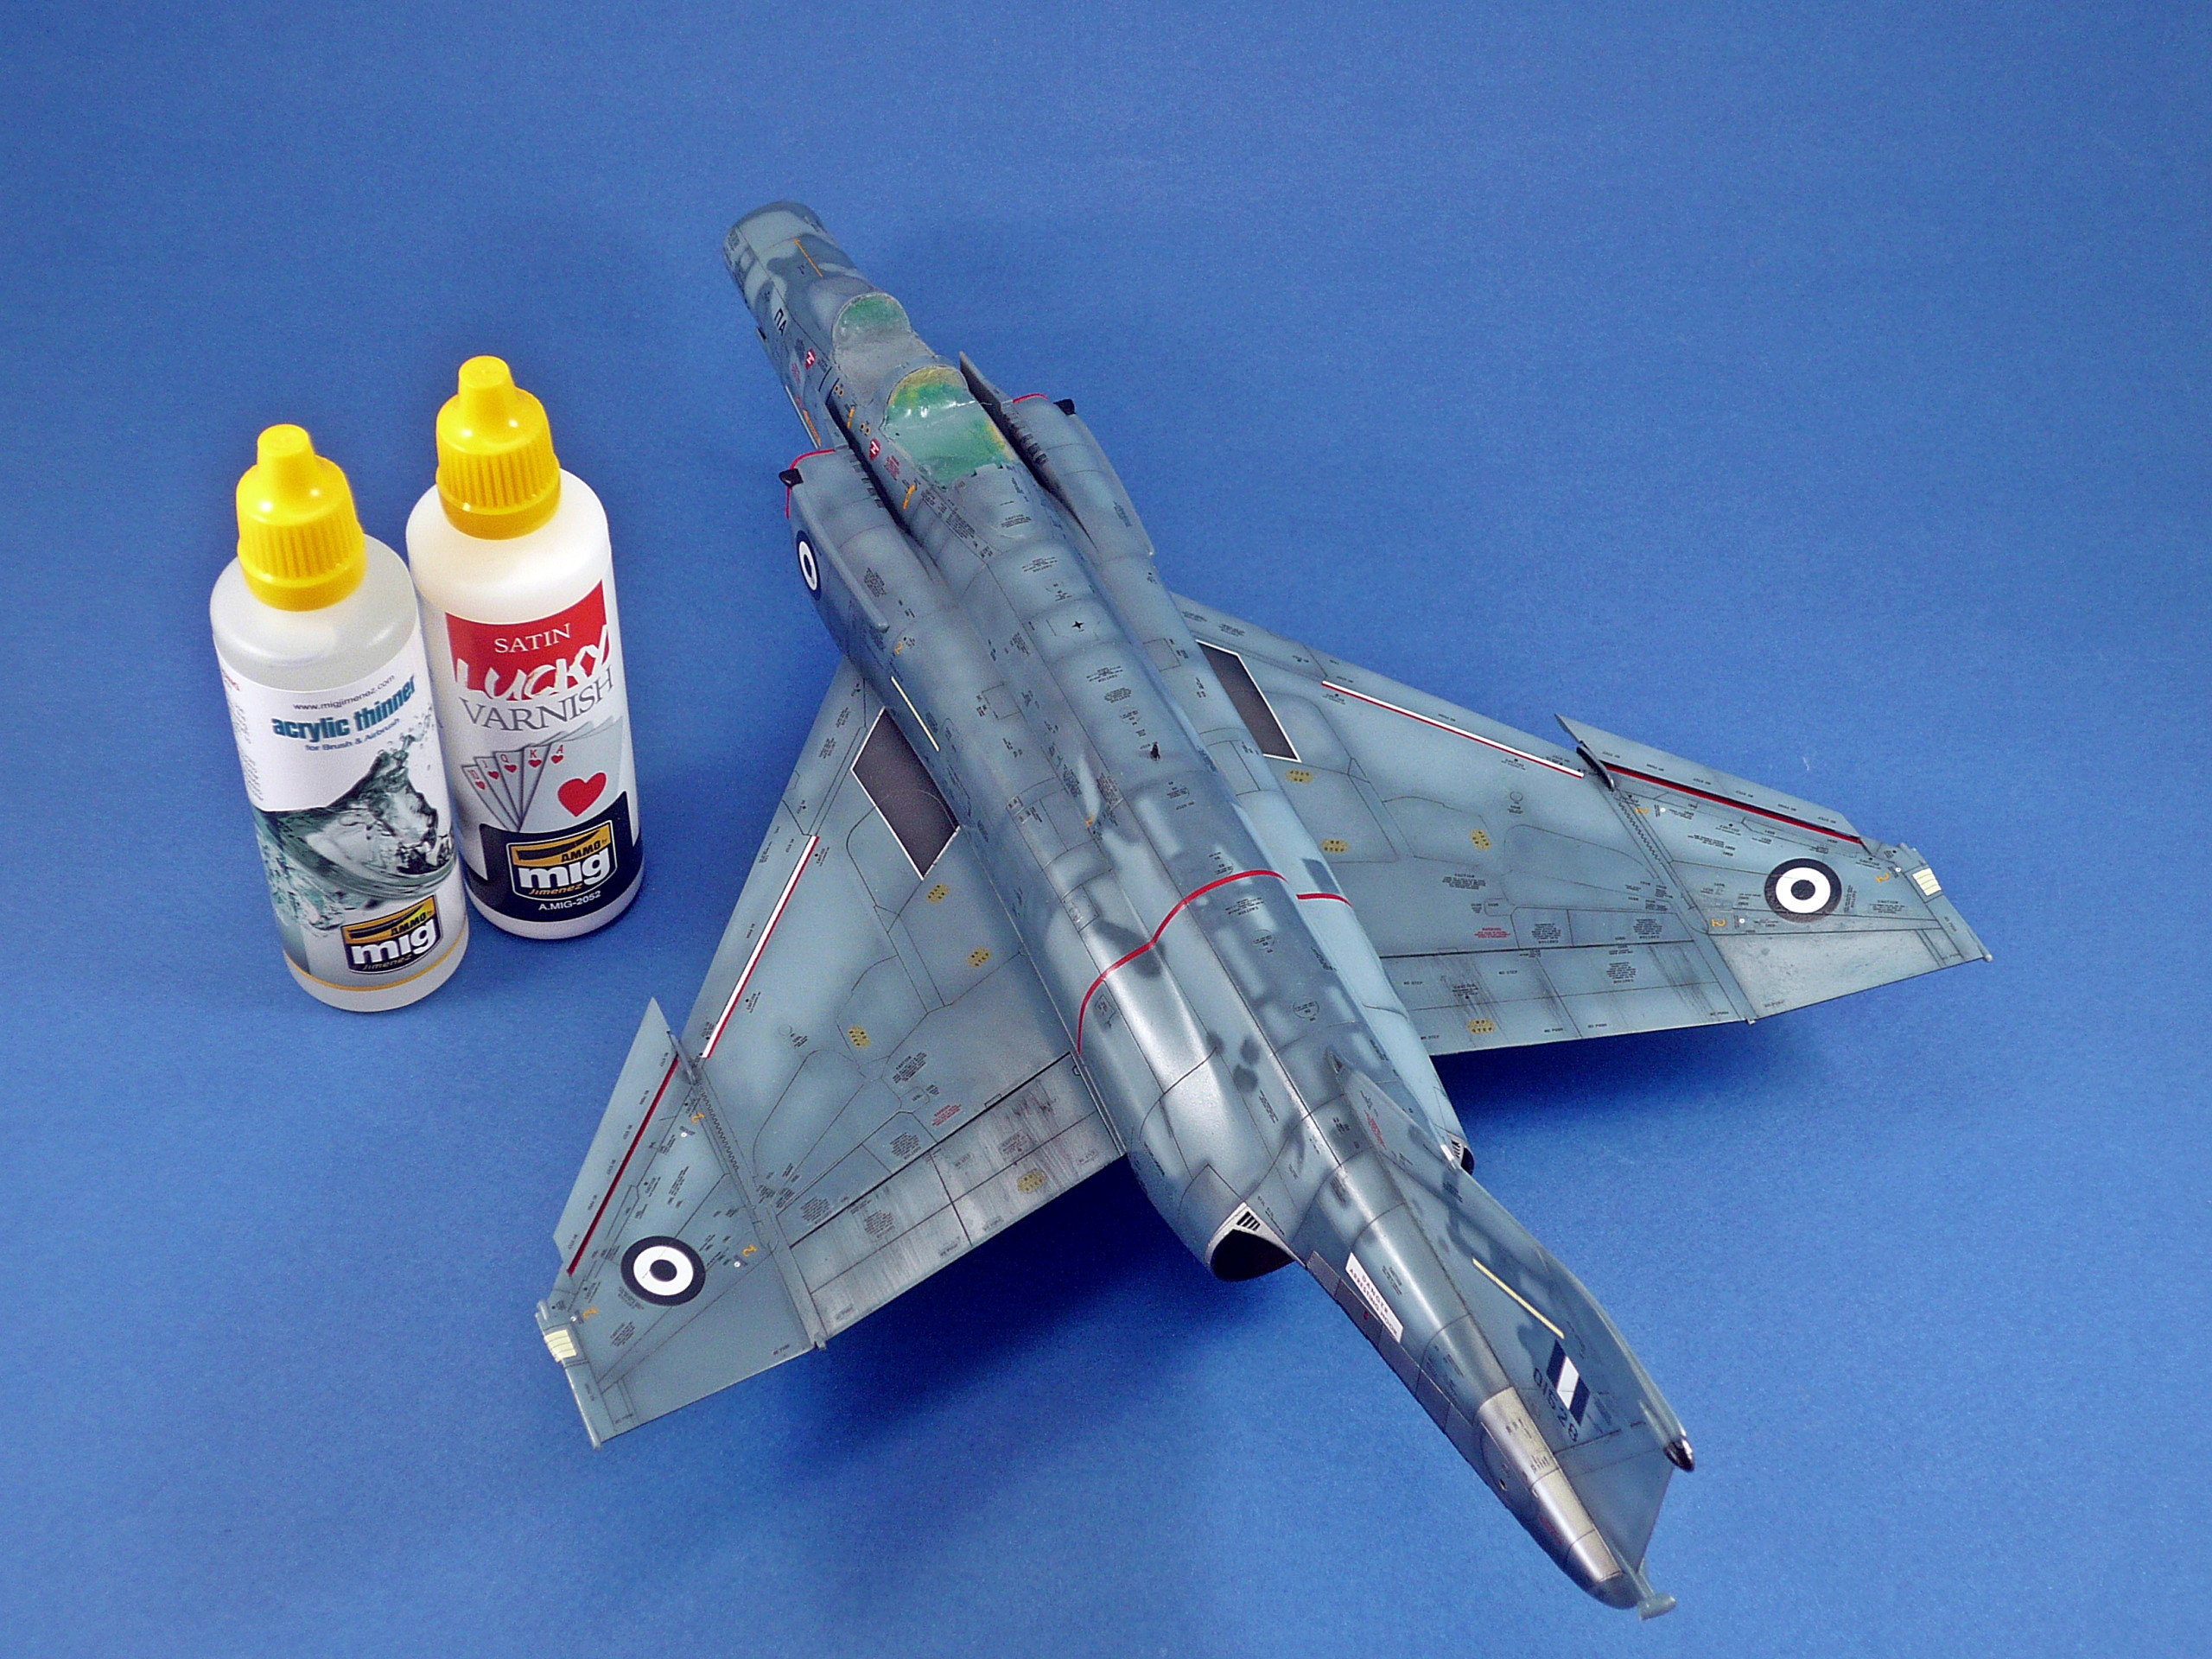
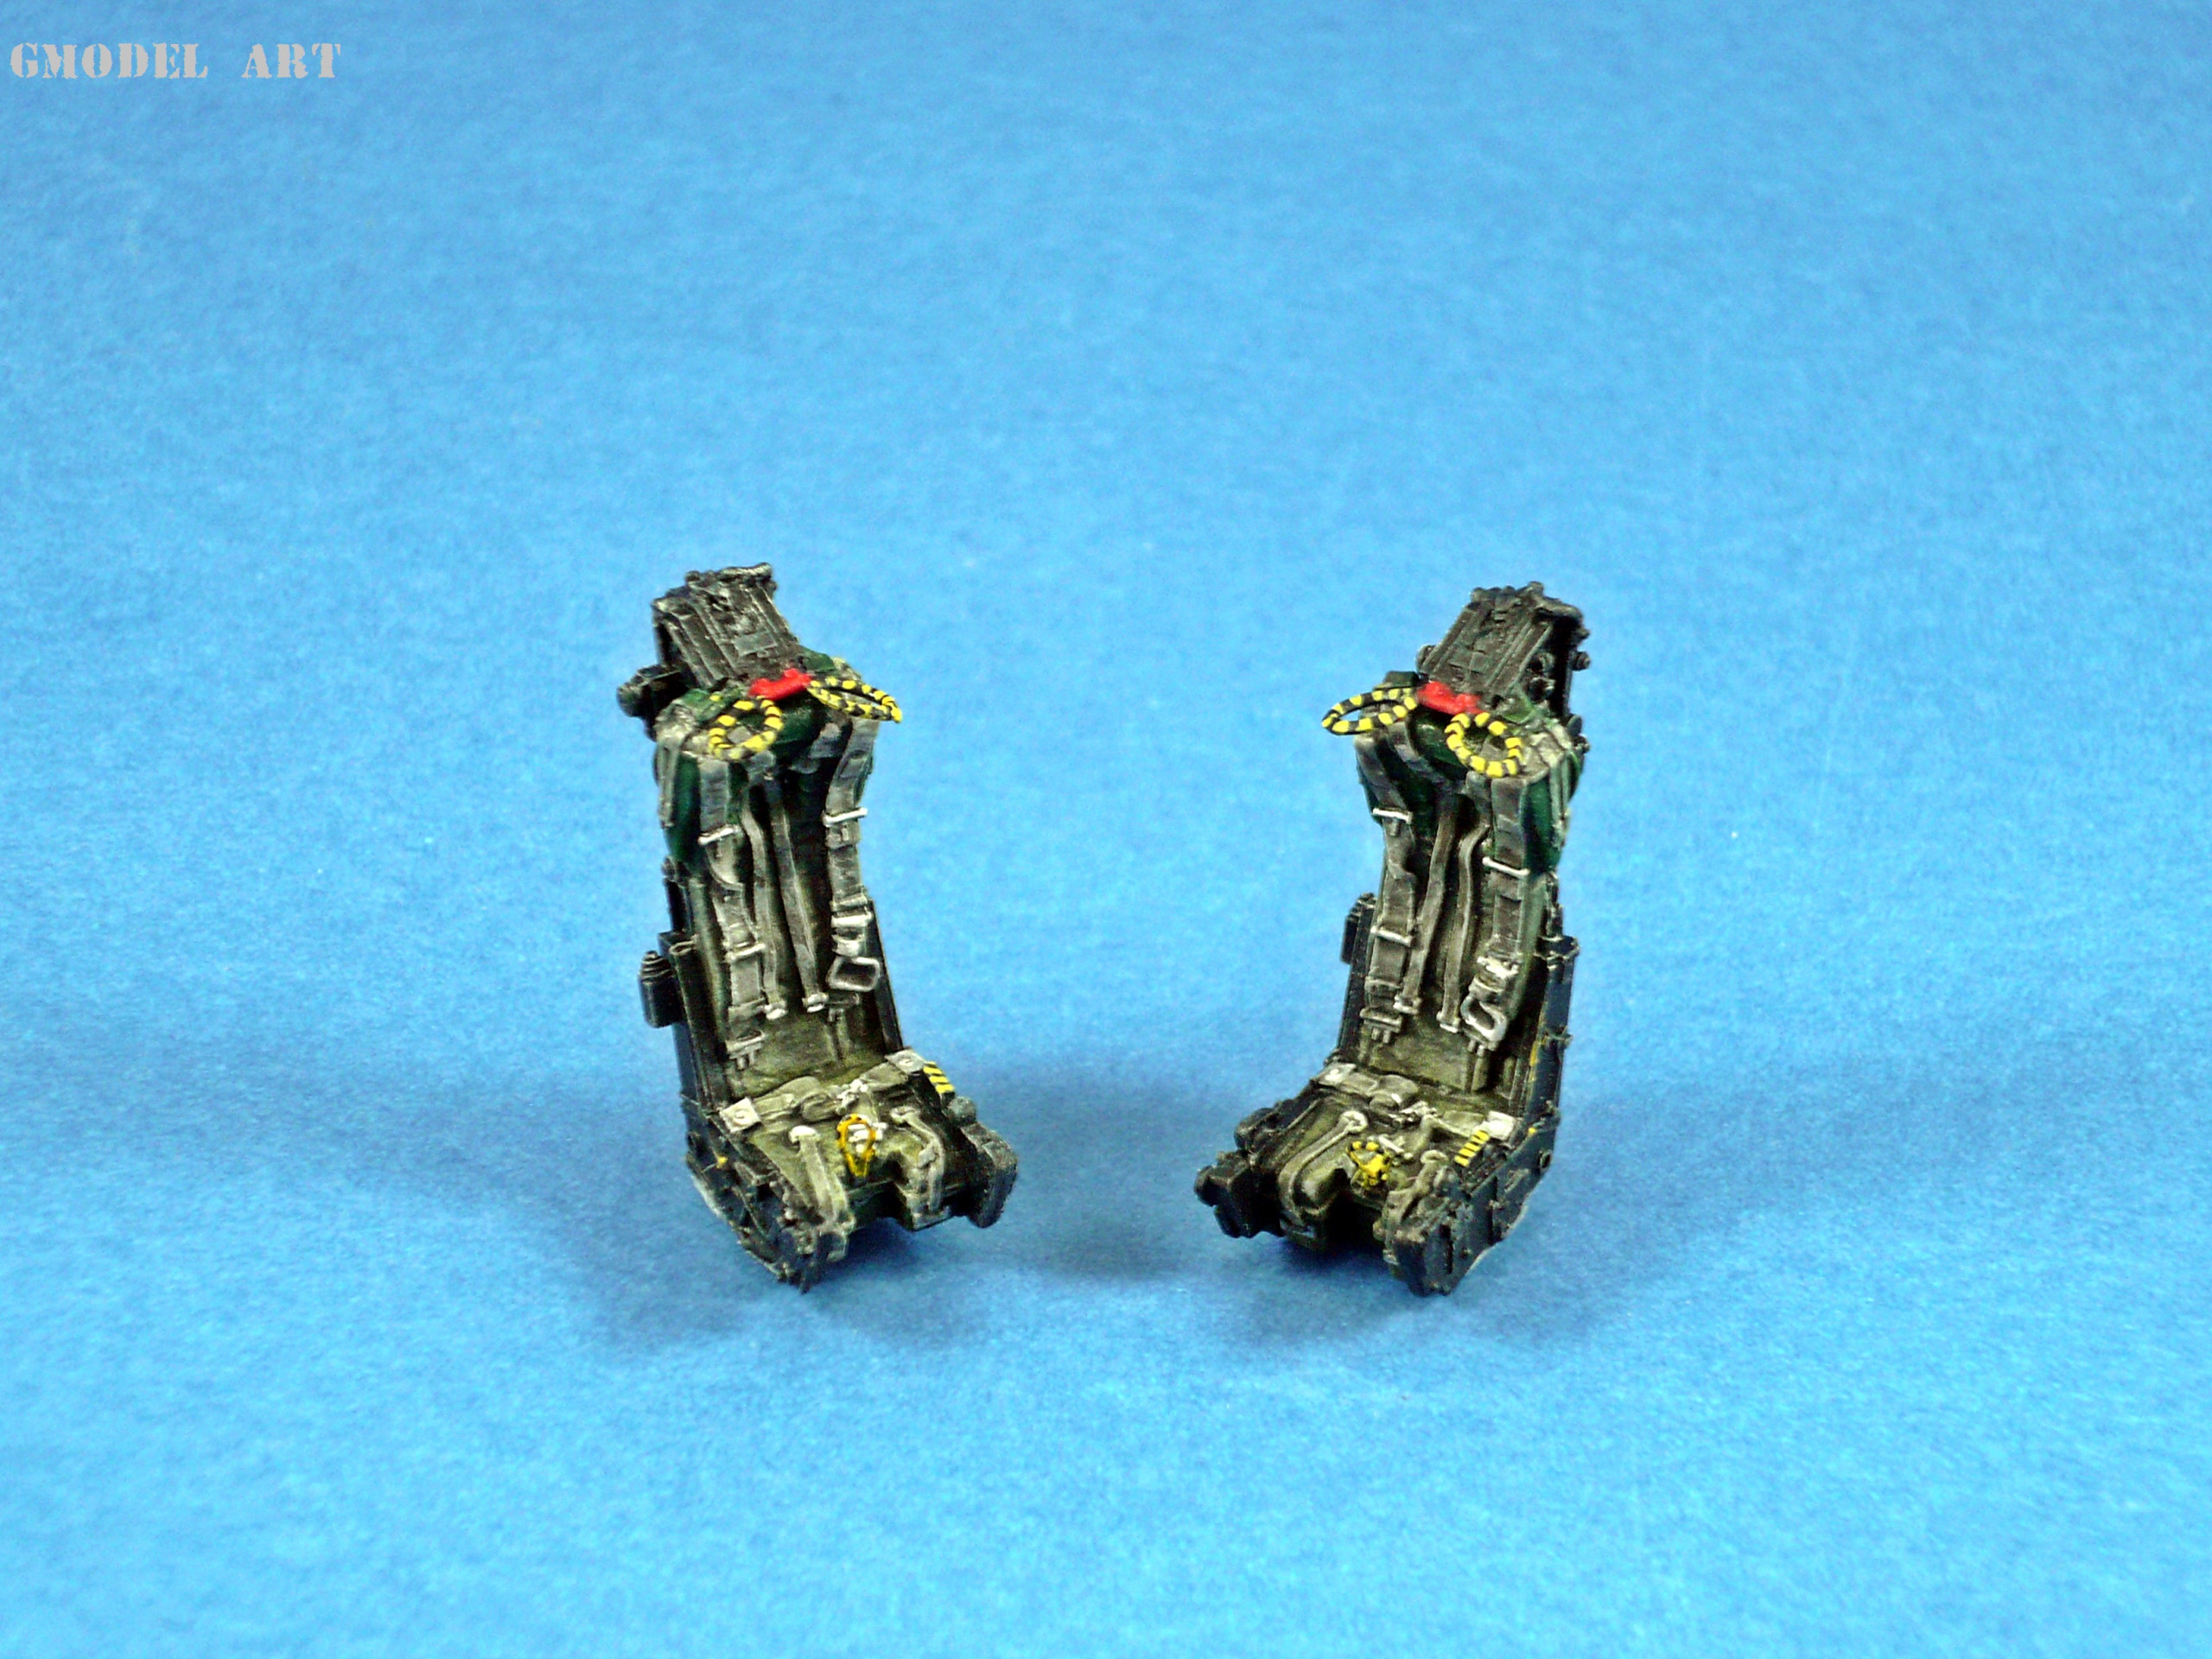
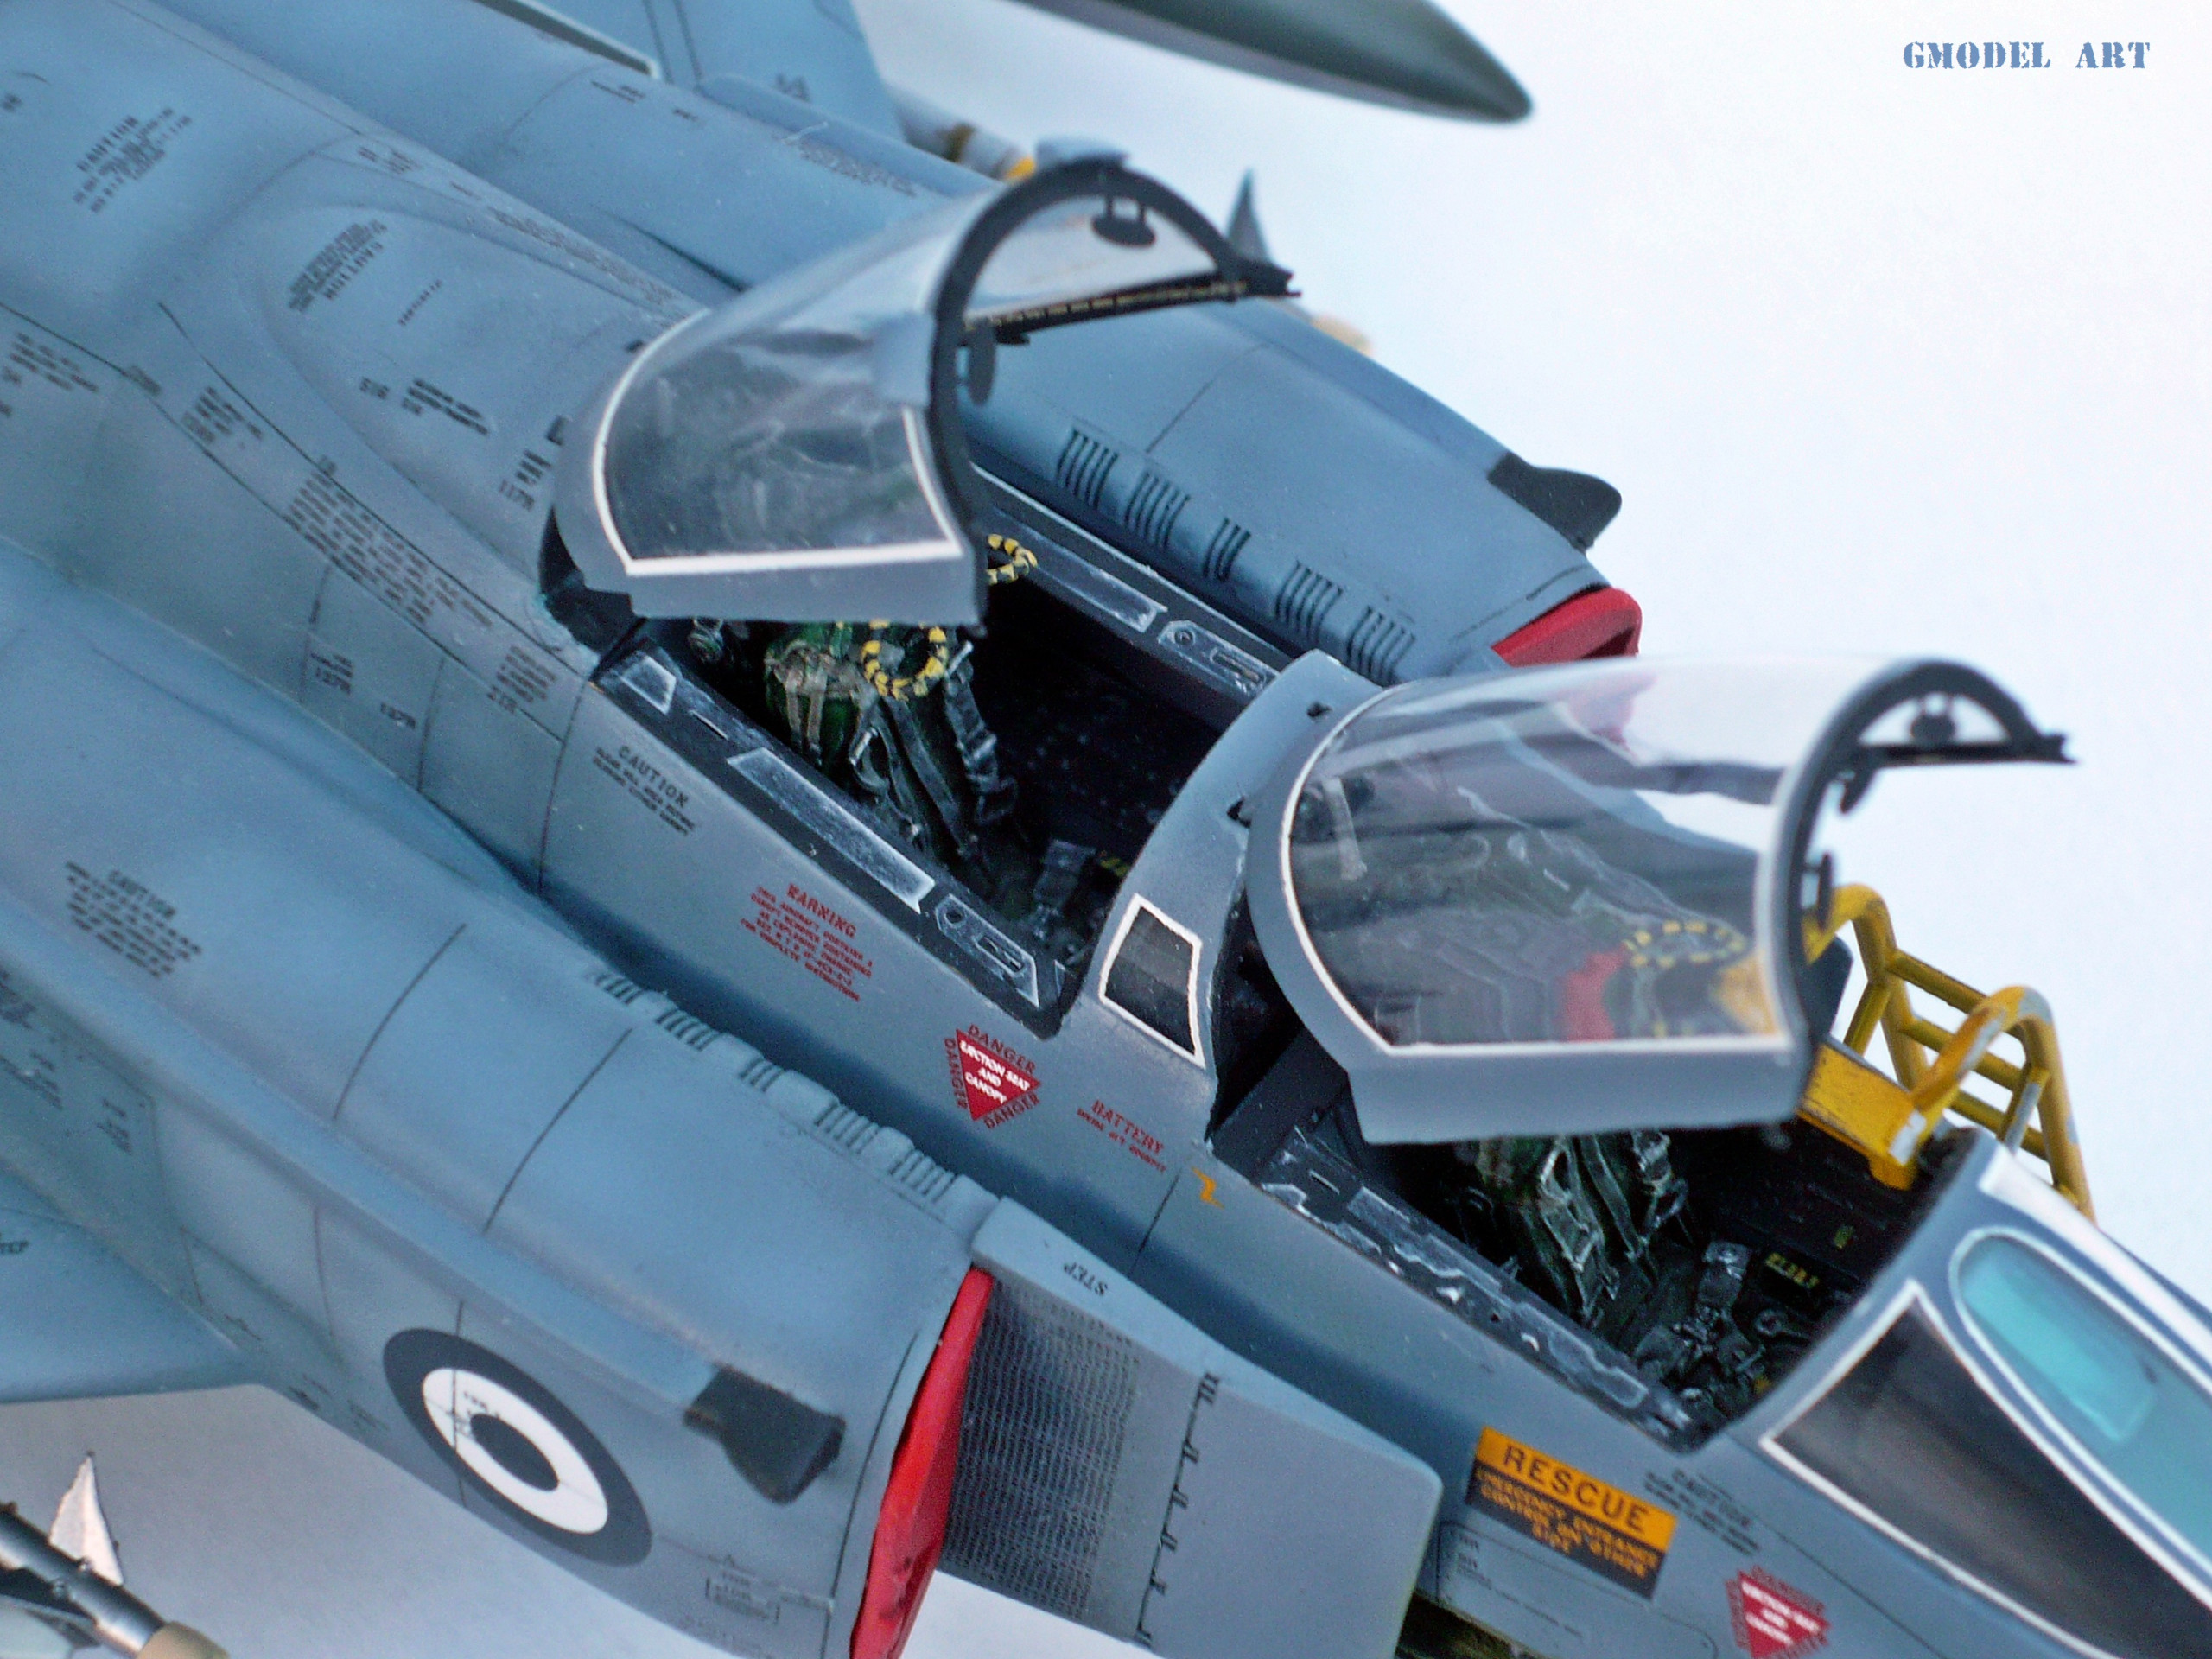
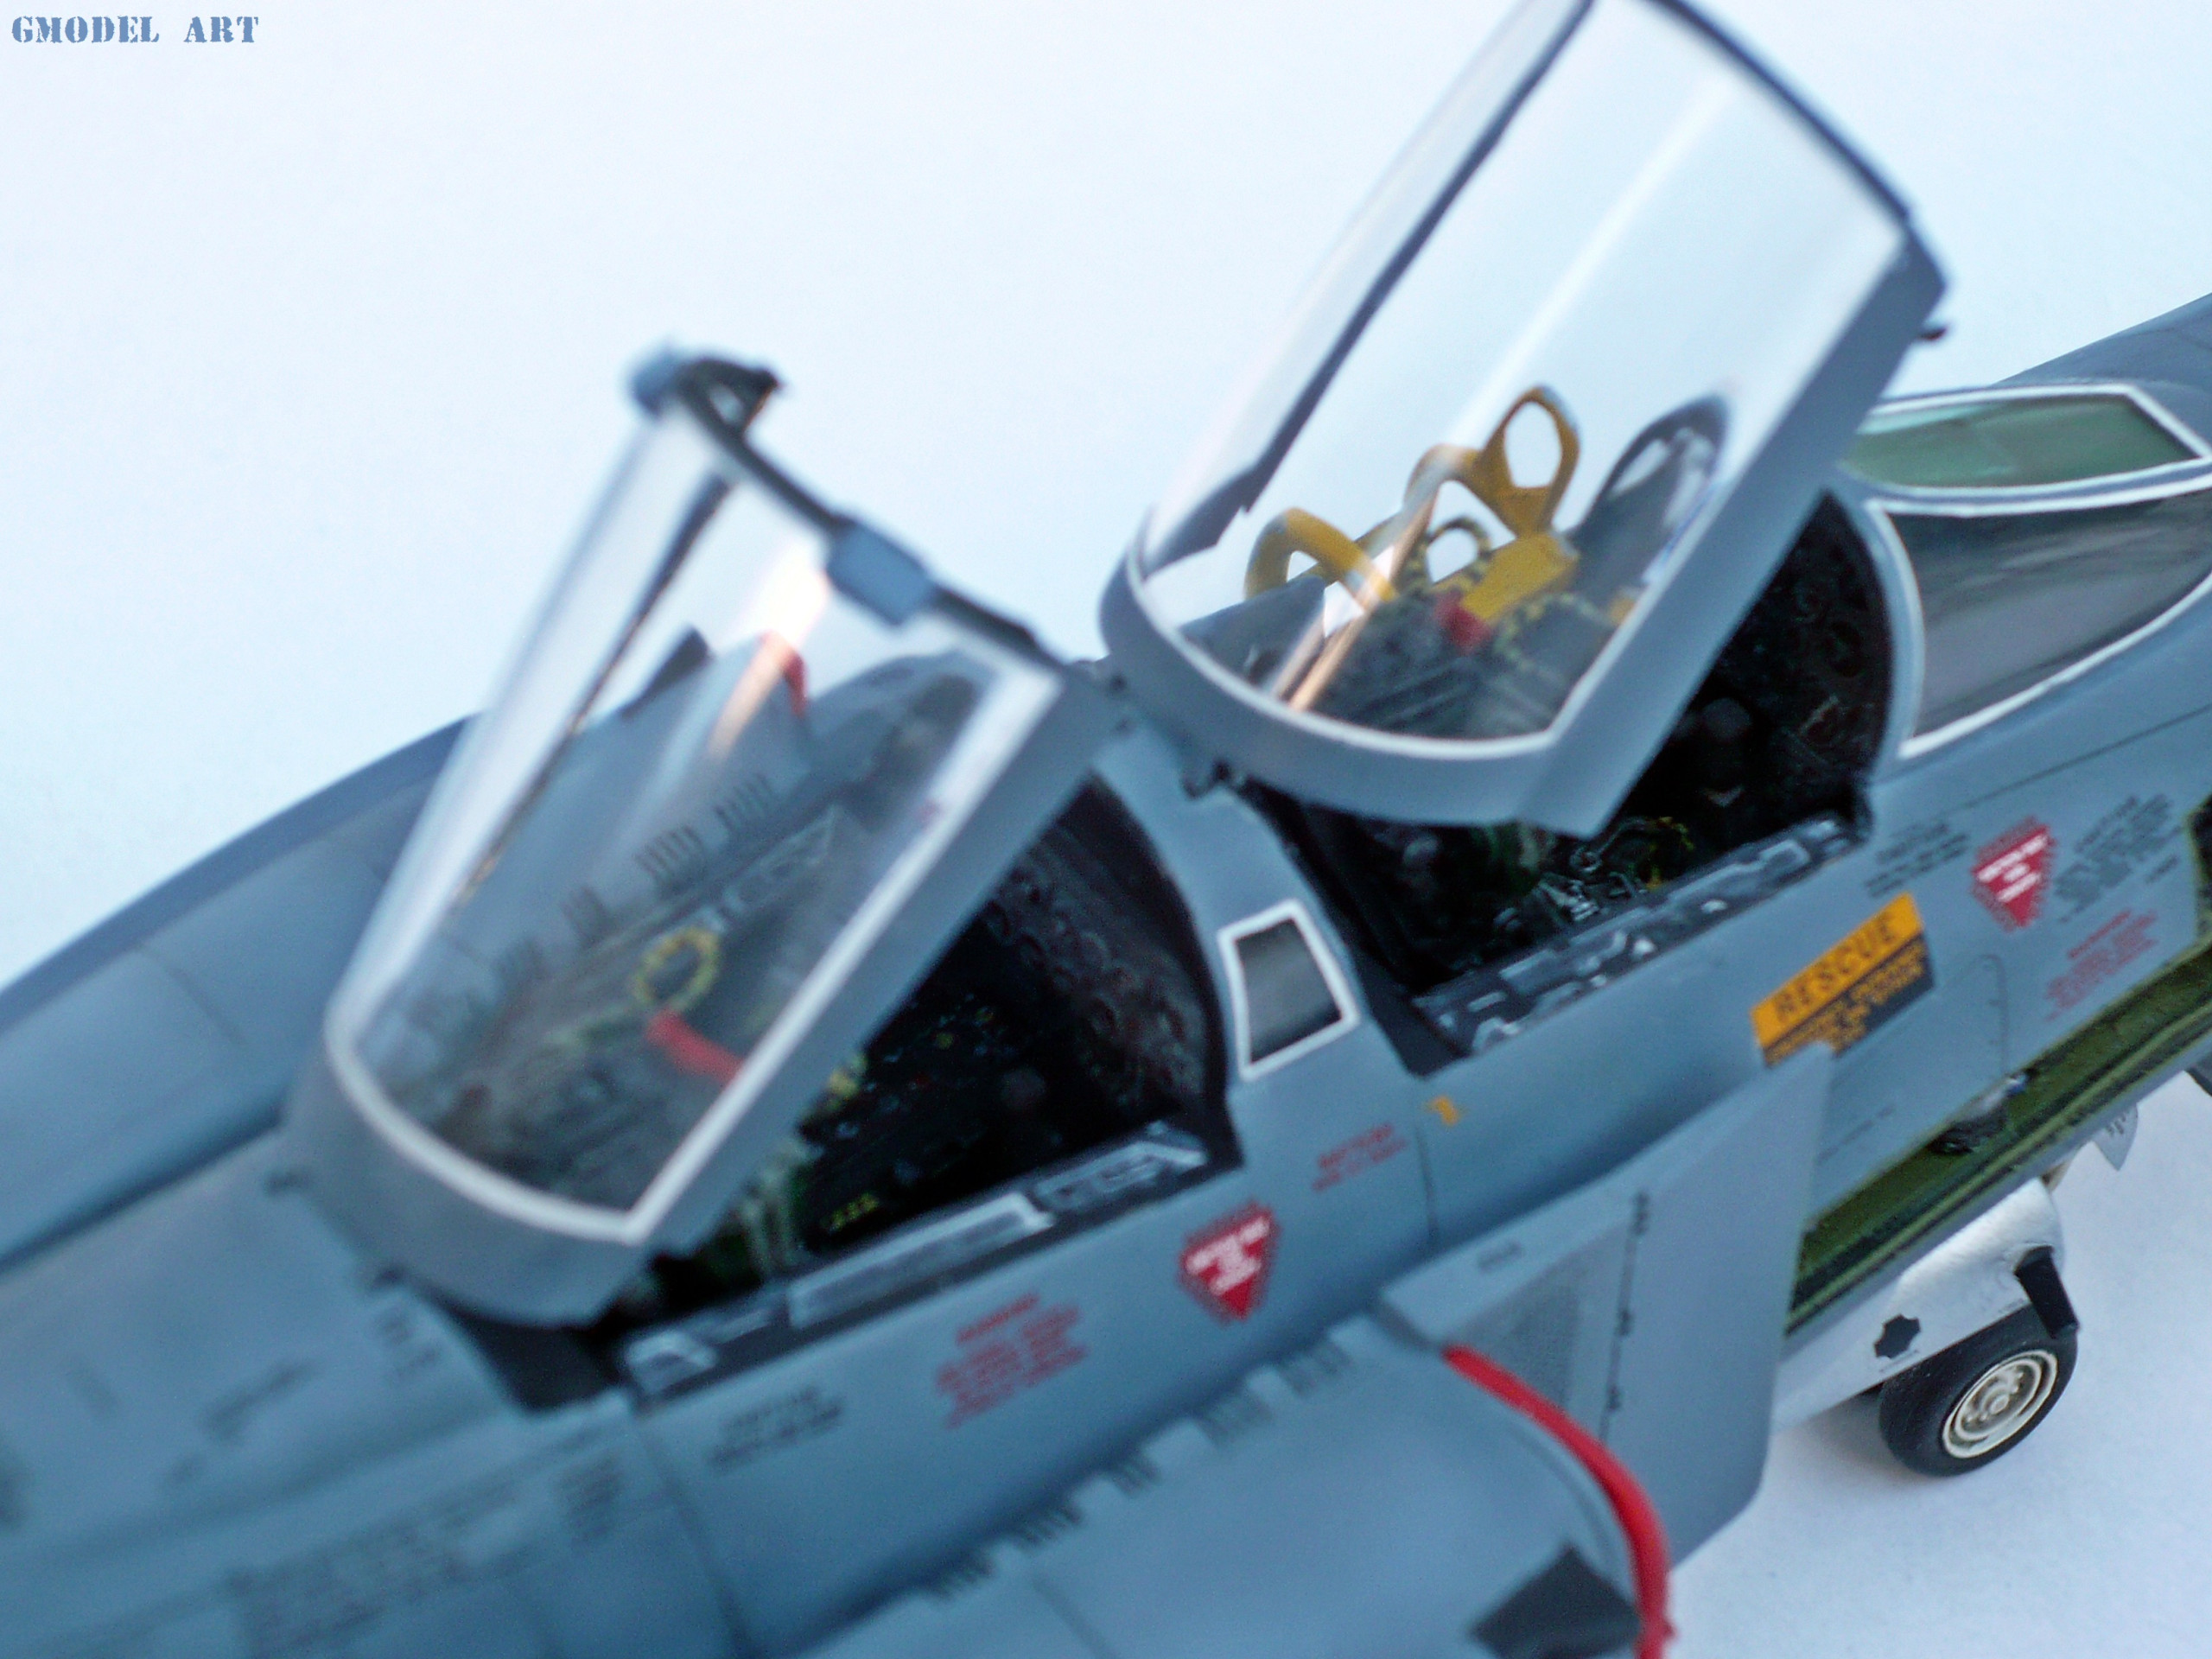
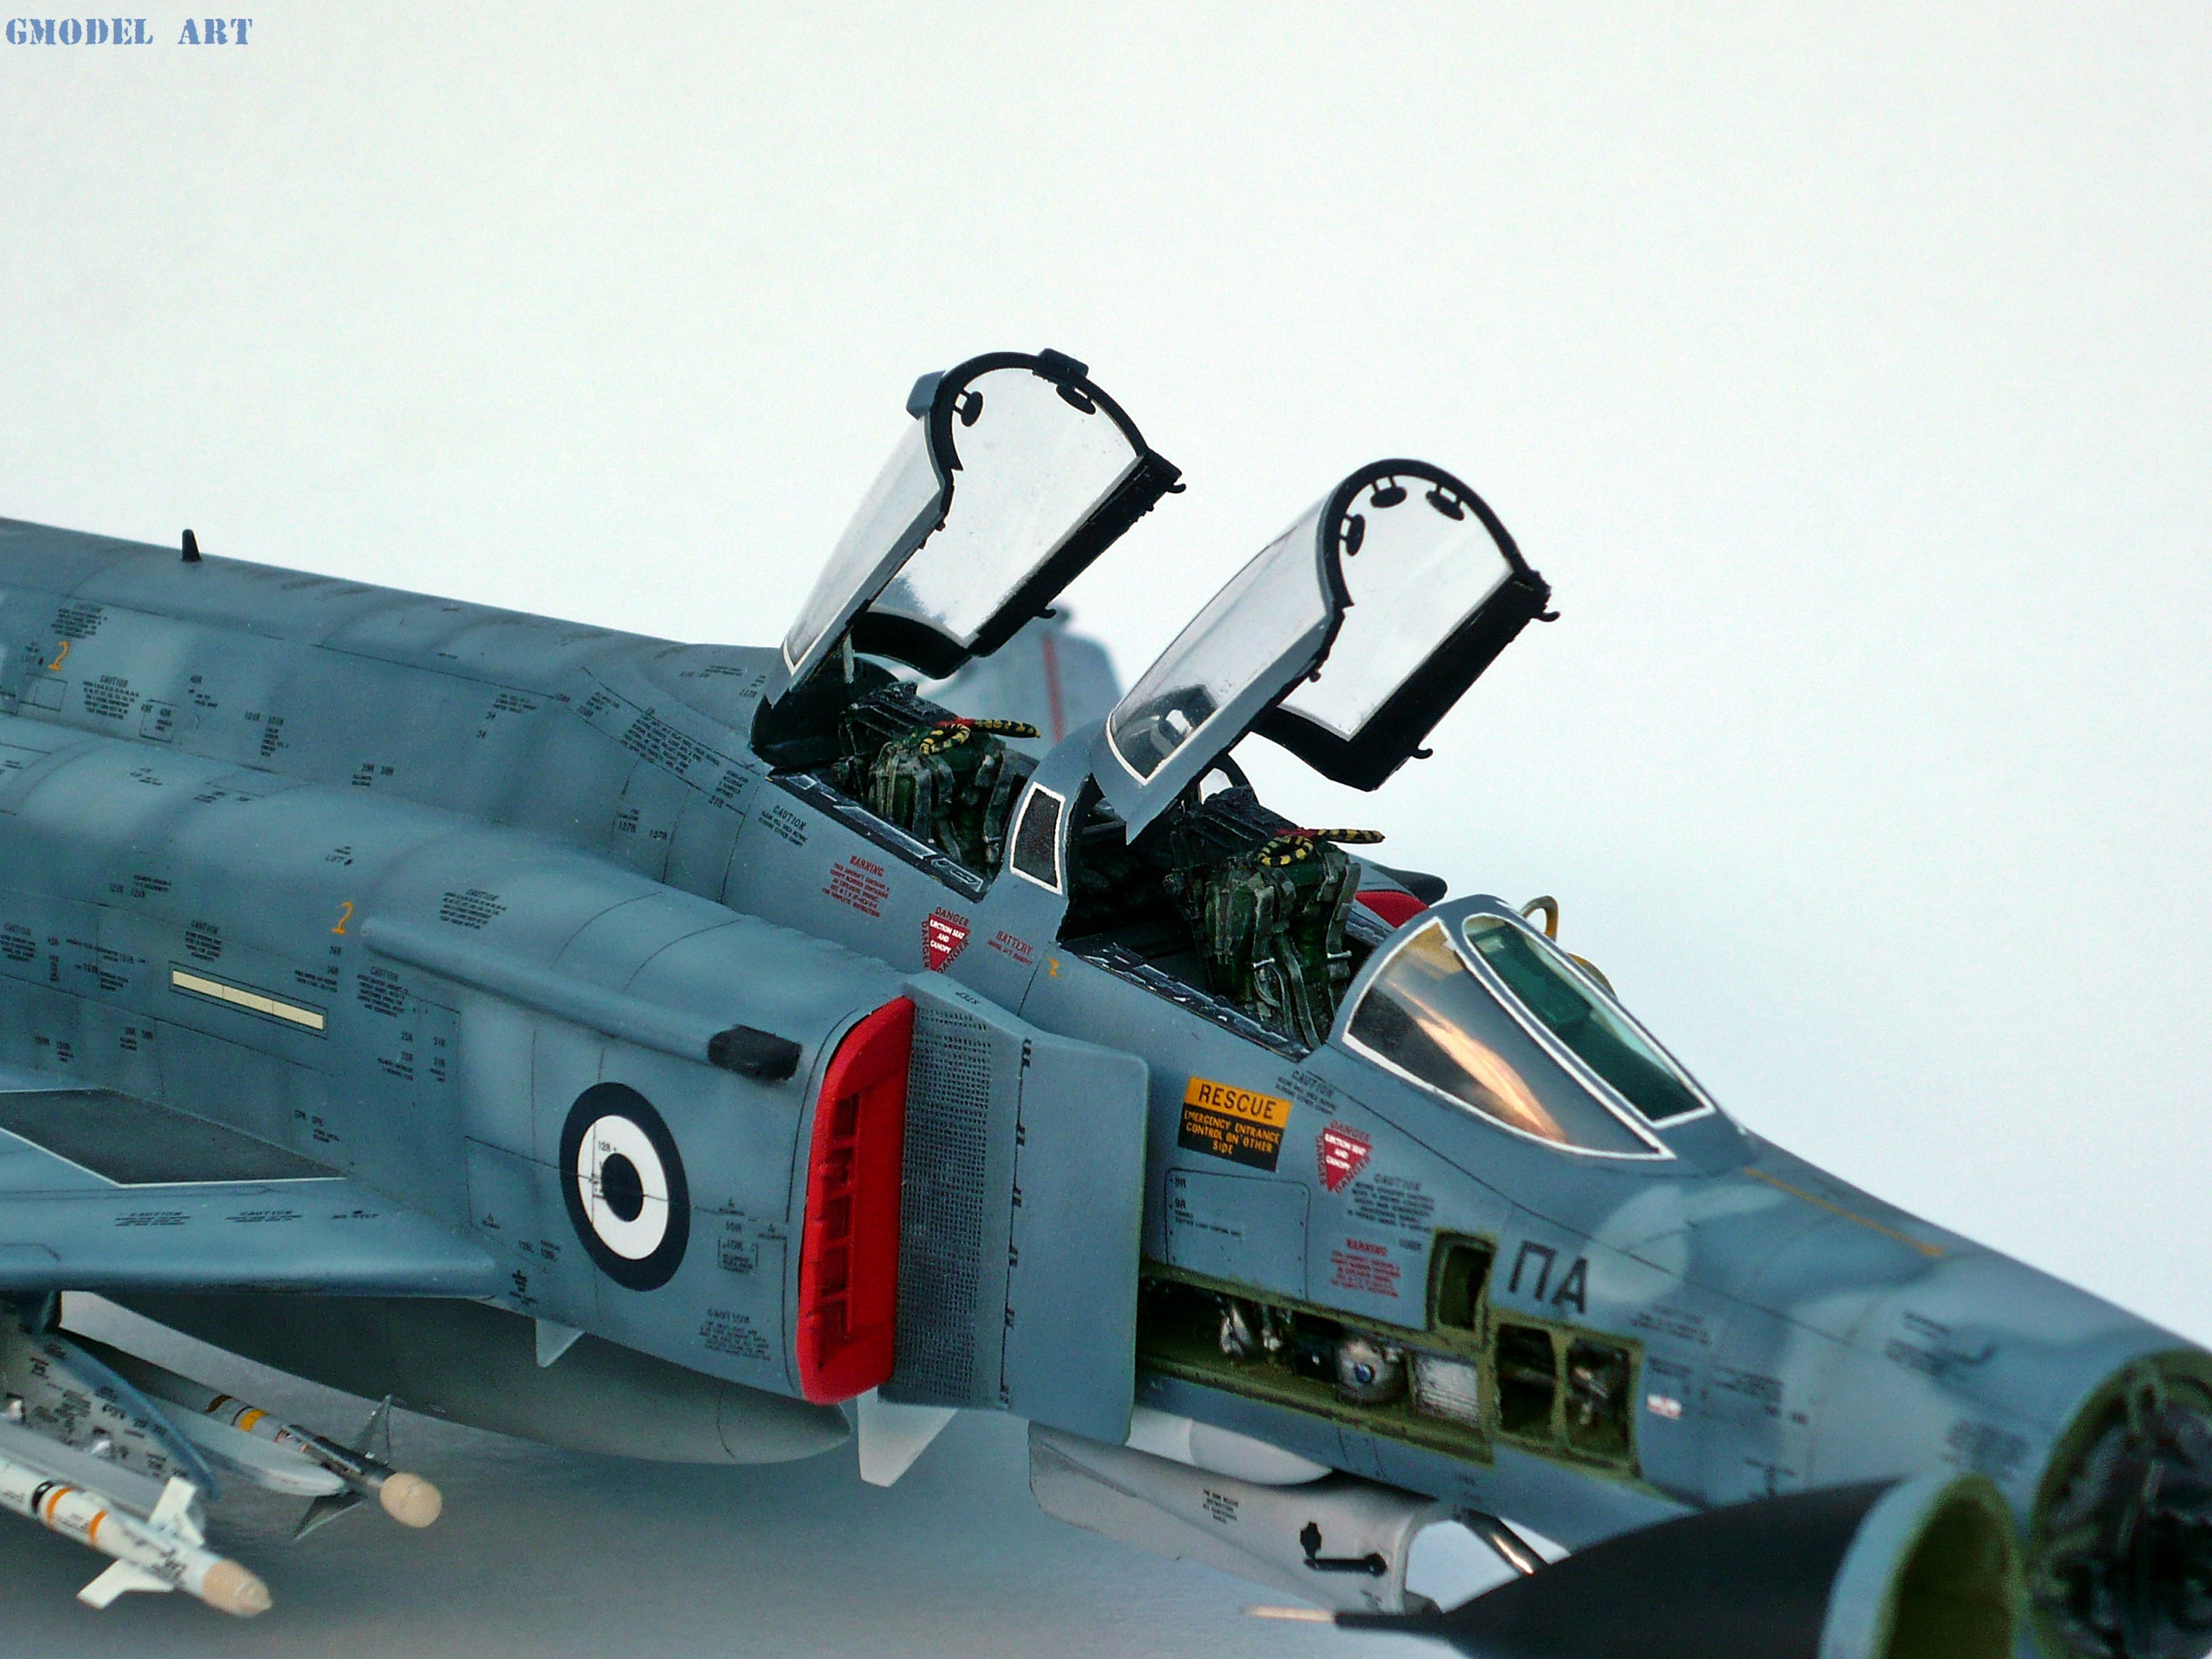
Note: The 2 parallel black areas with white outer perigram in the fuselage/wing root and the inner and outer slats areas painted by me with red and white because no decals given by Hasegawa for those areas!
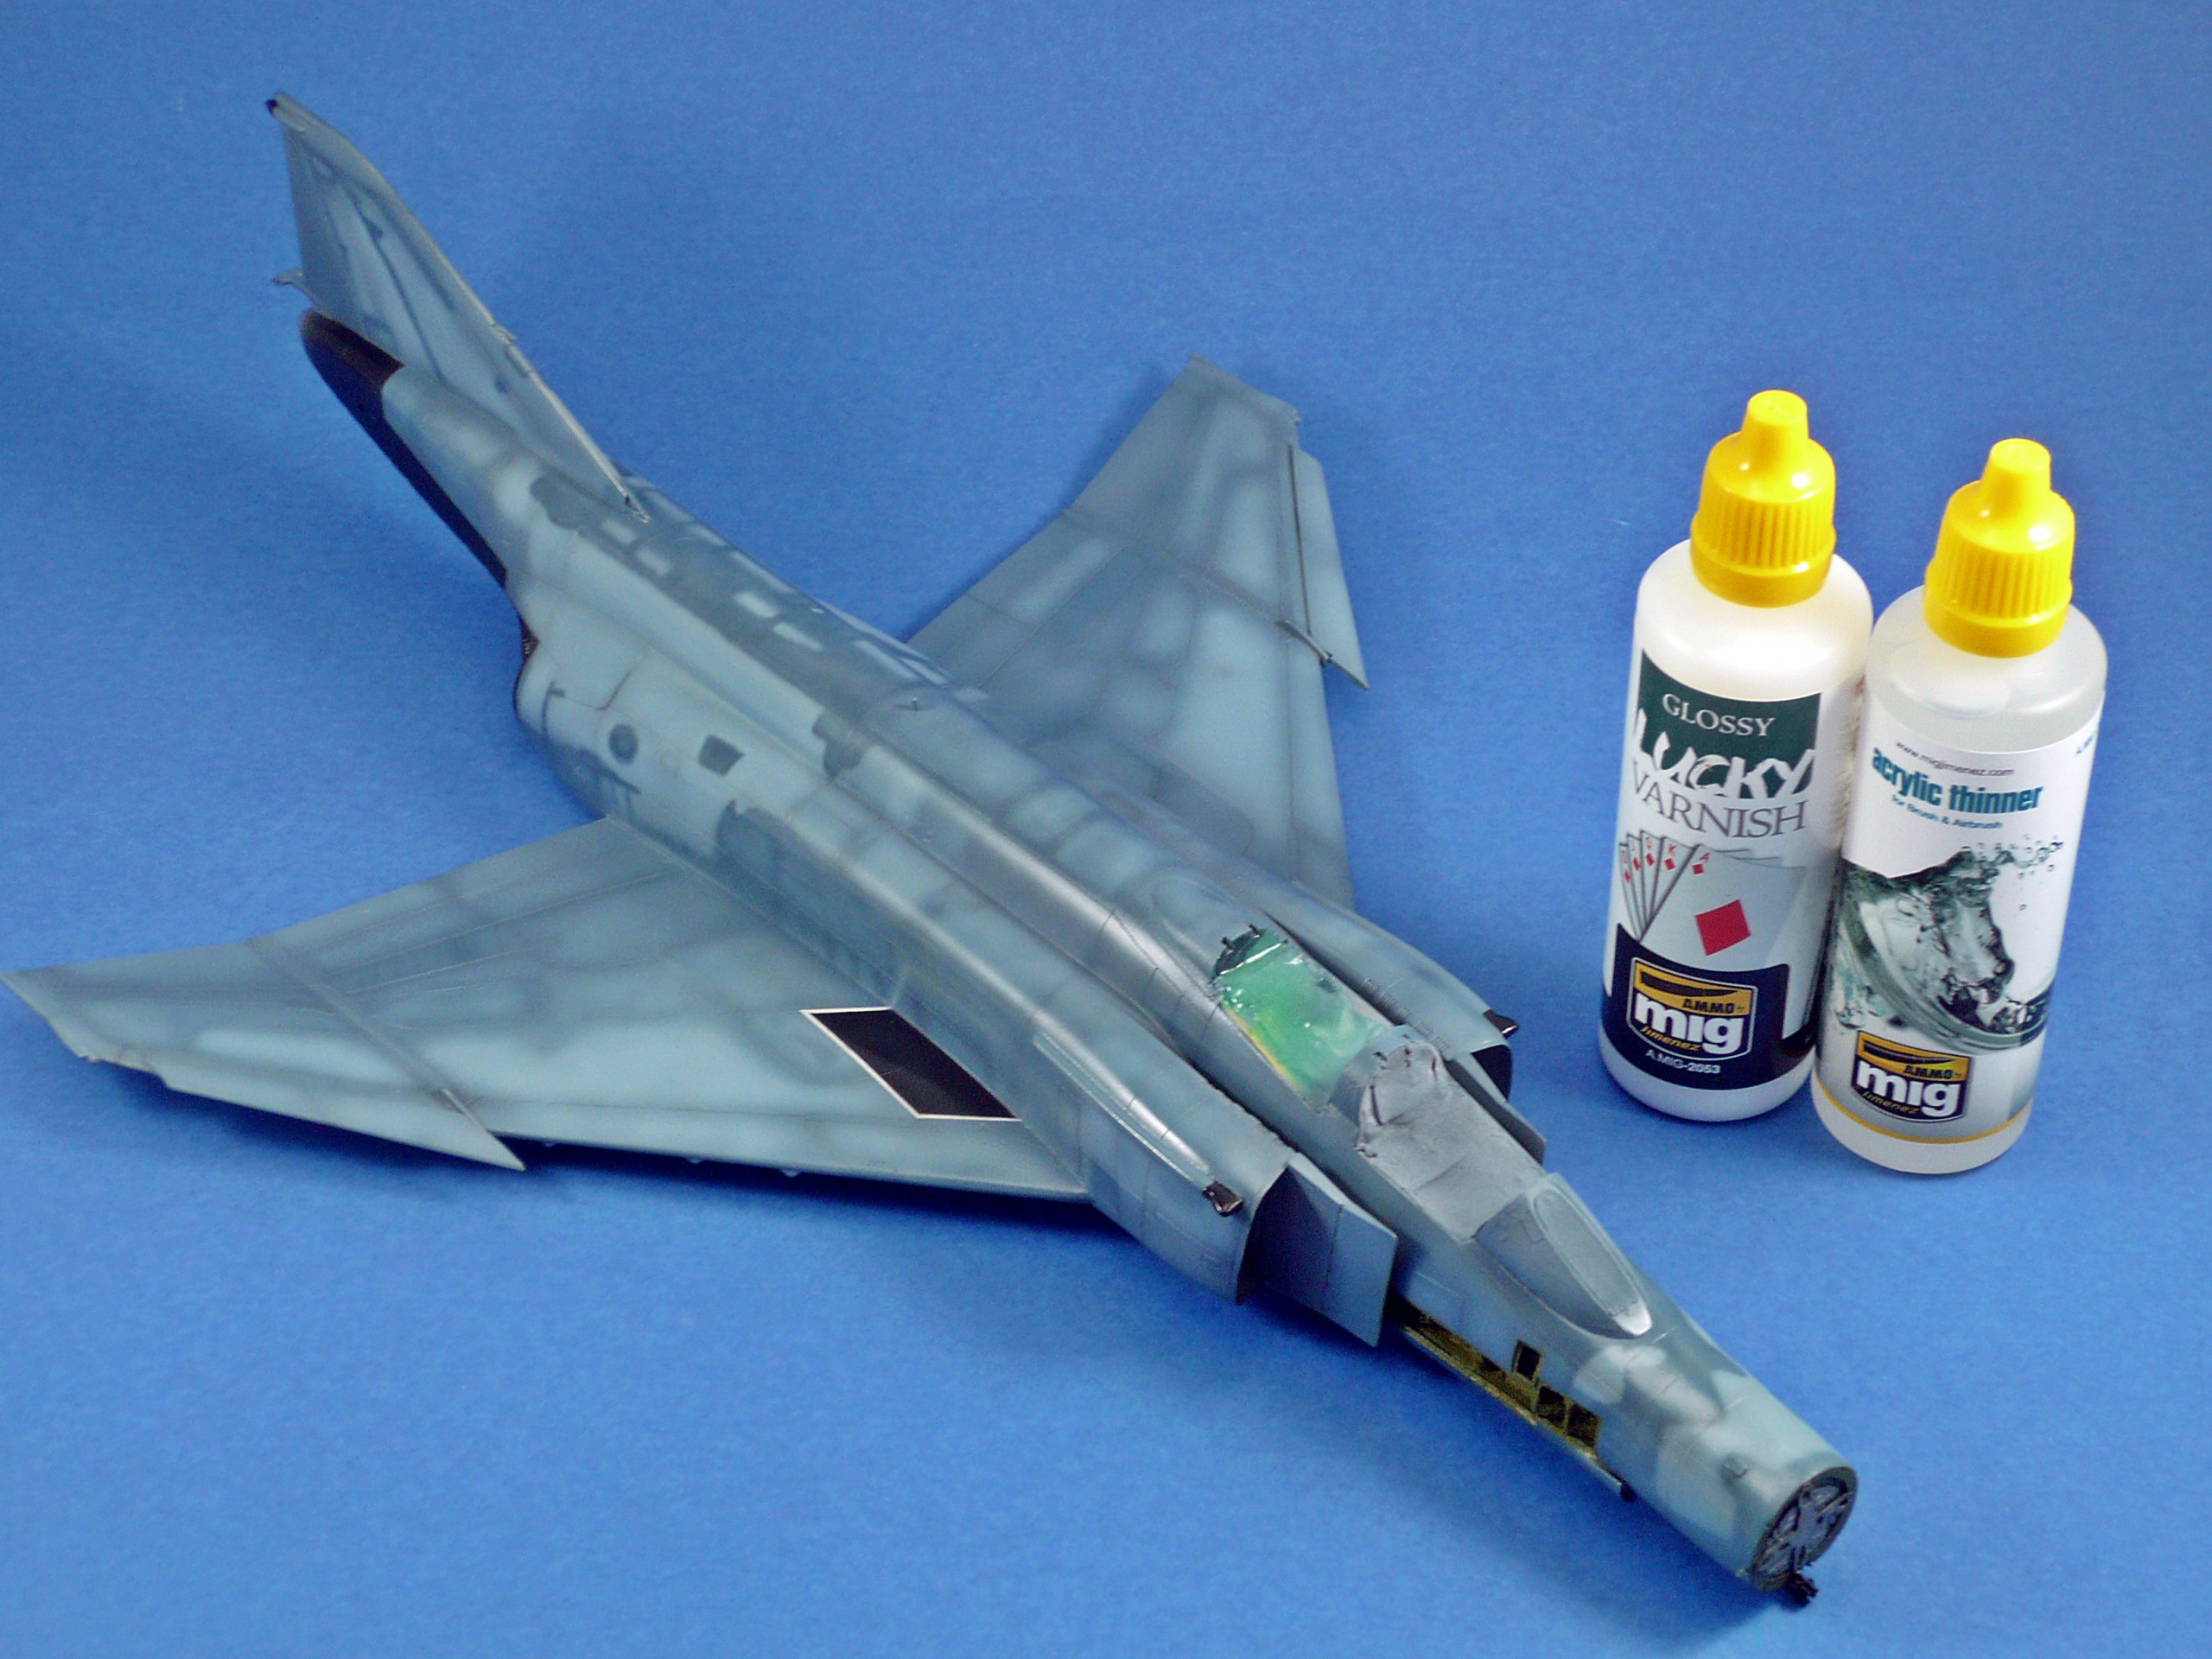
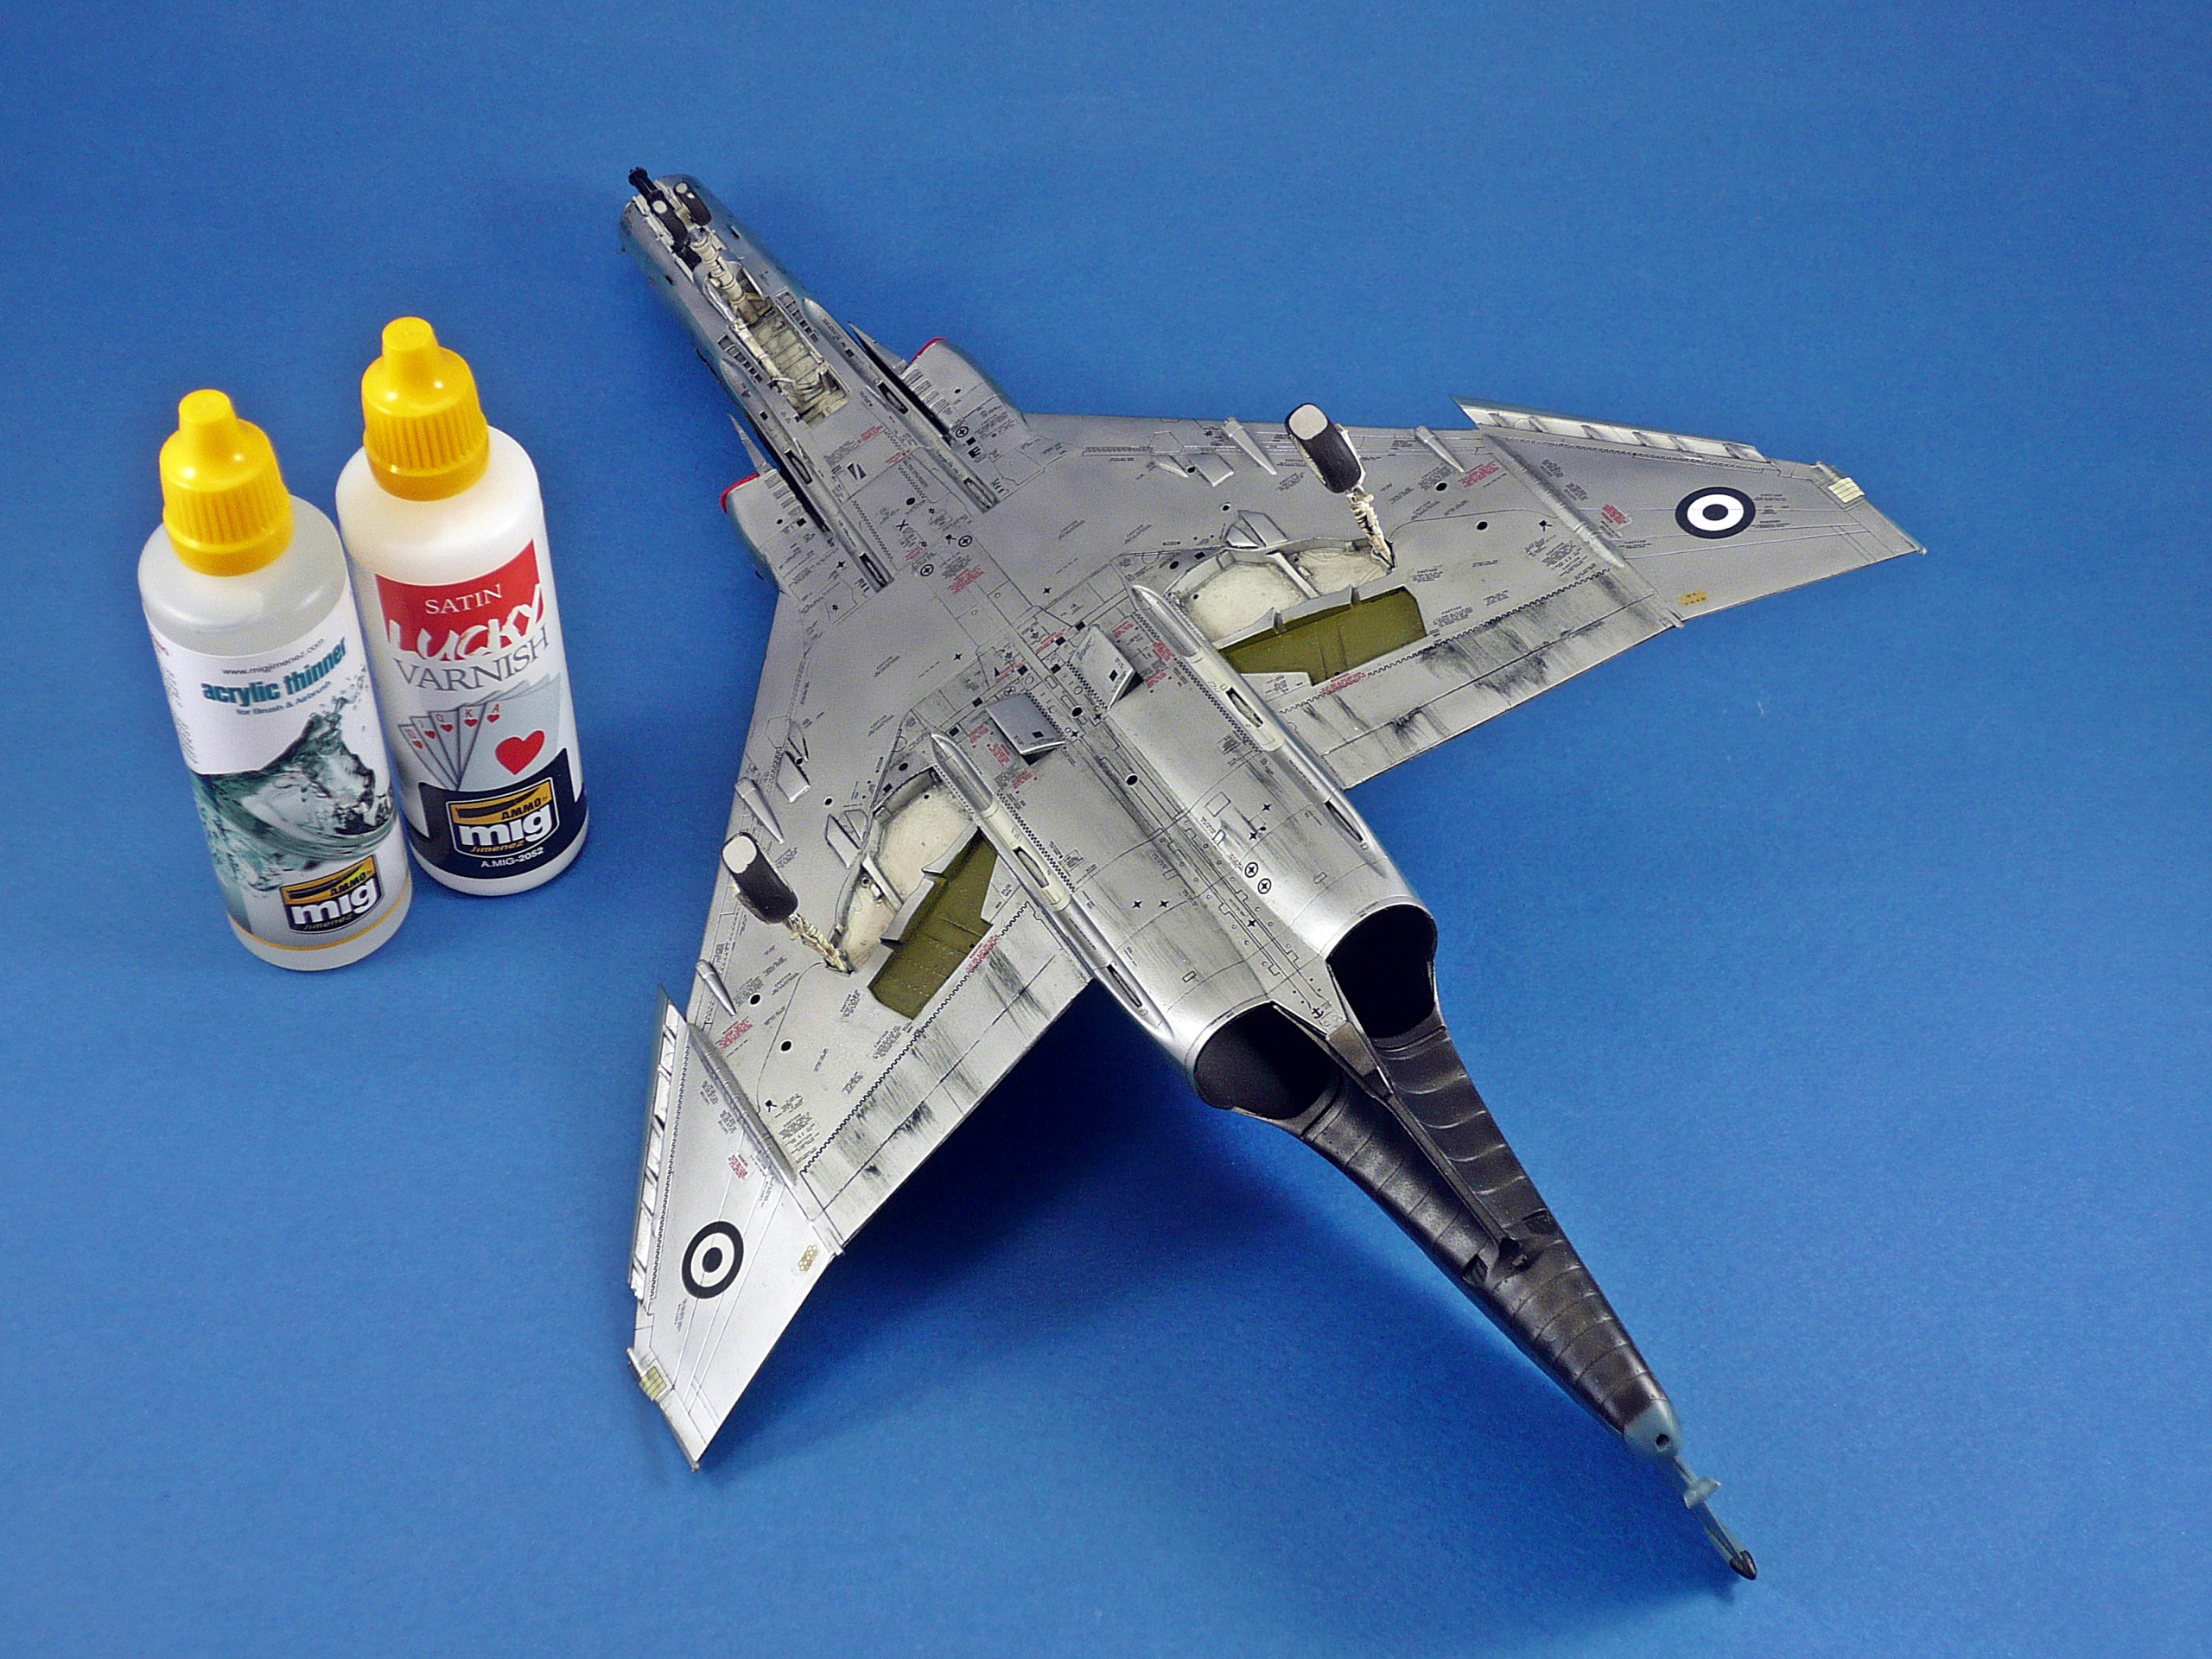
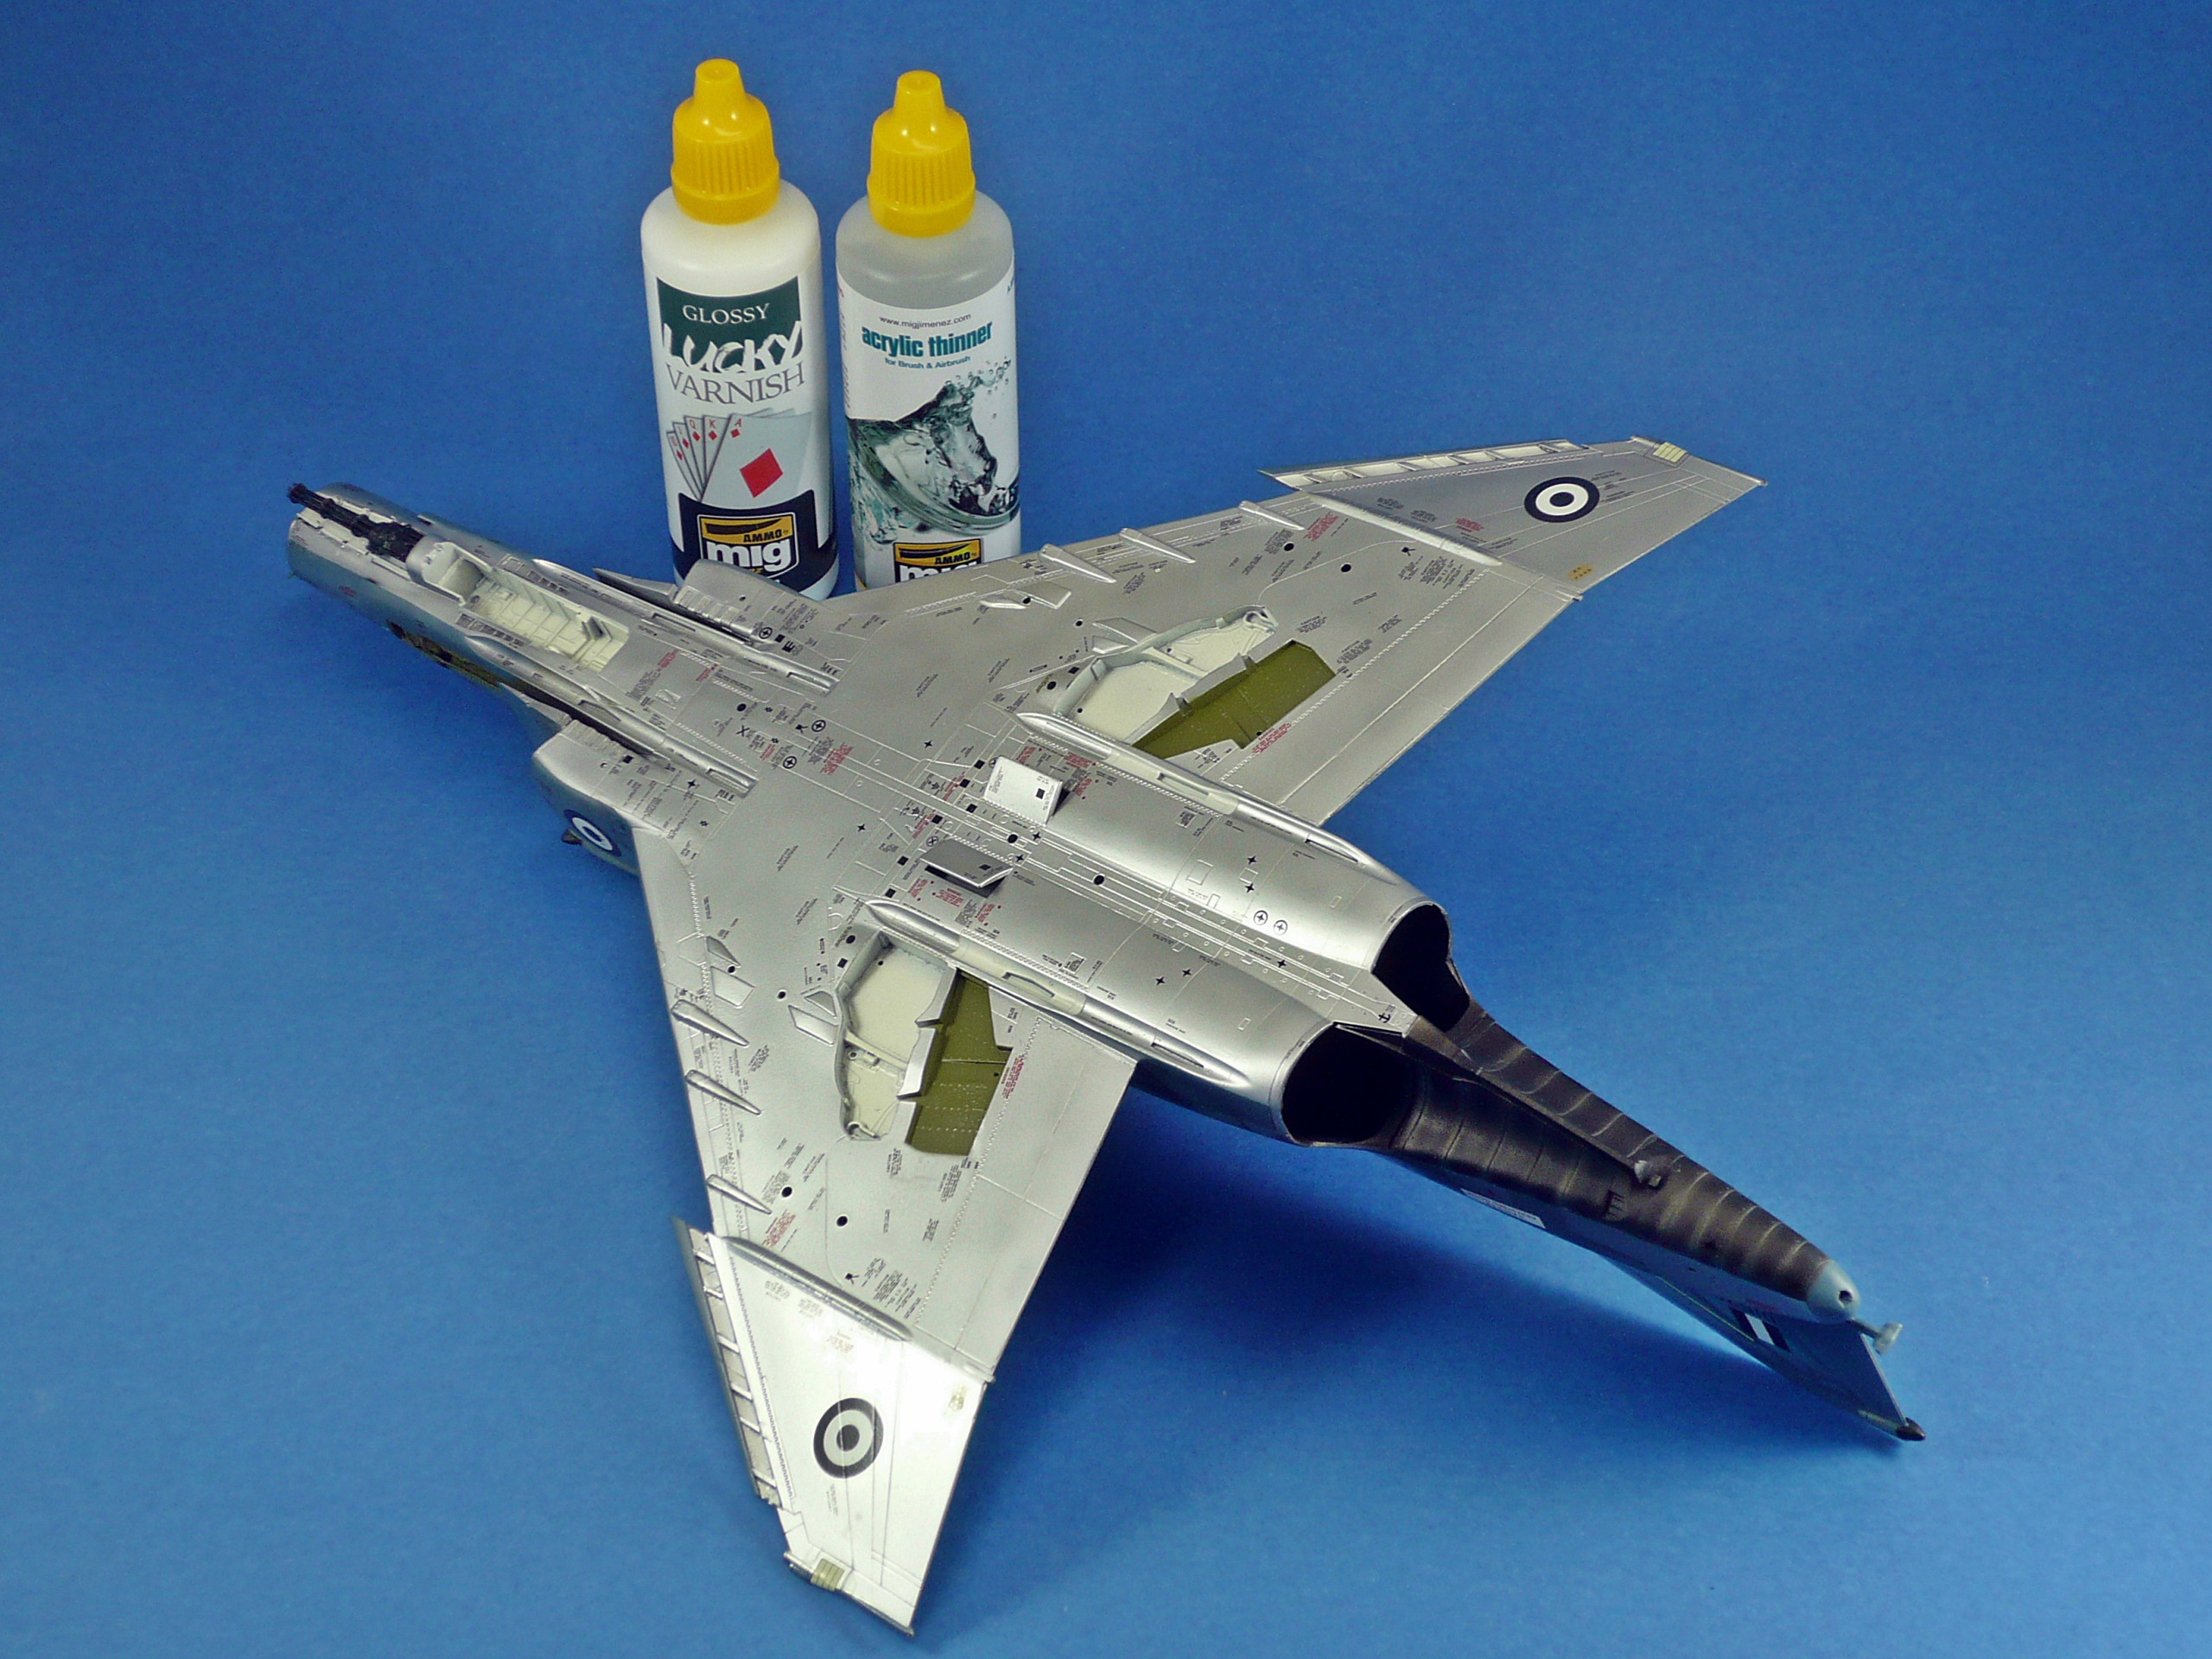
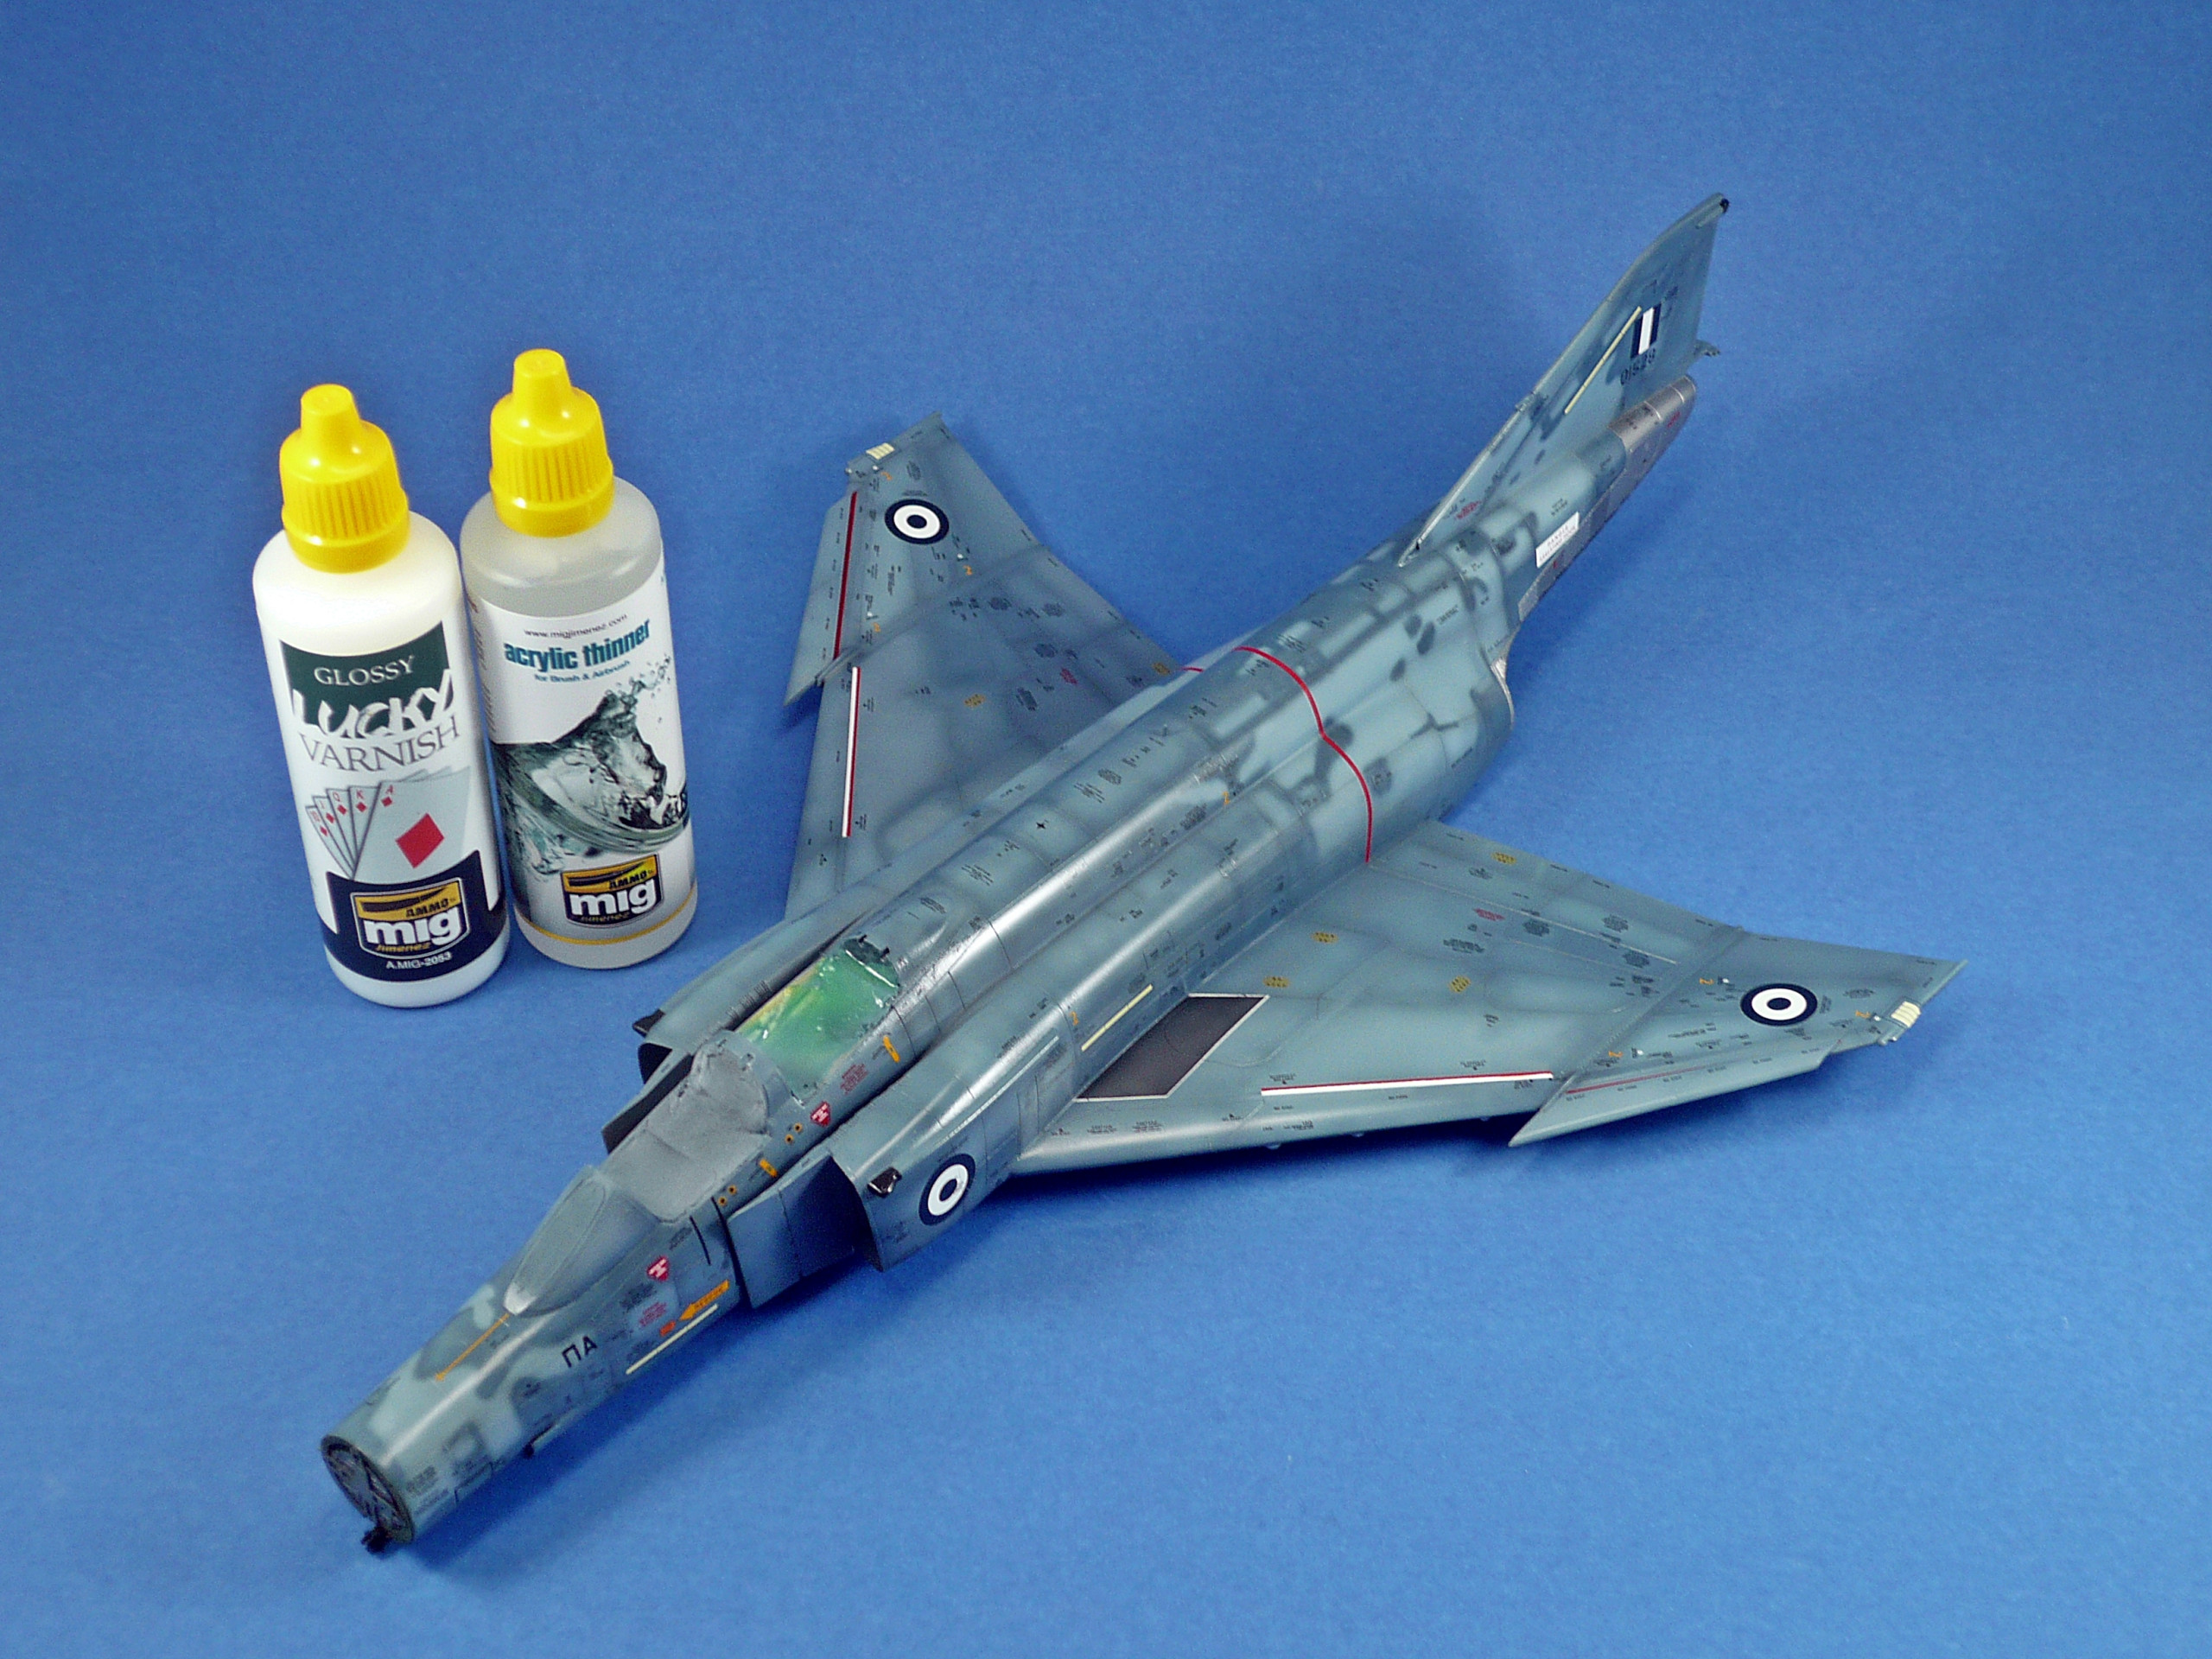
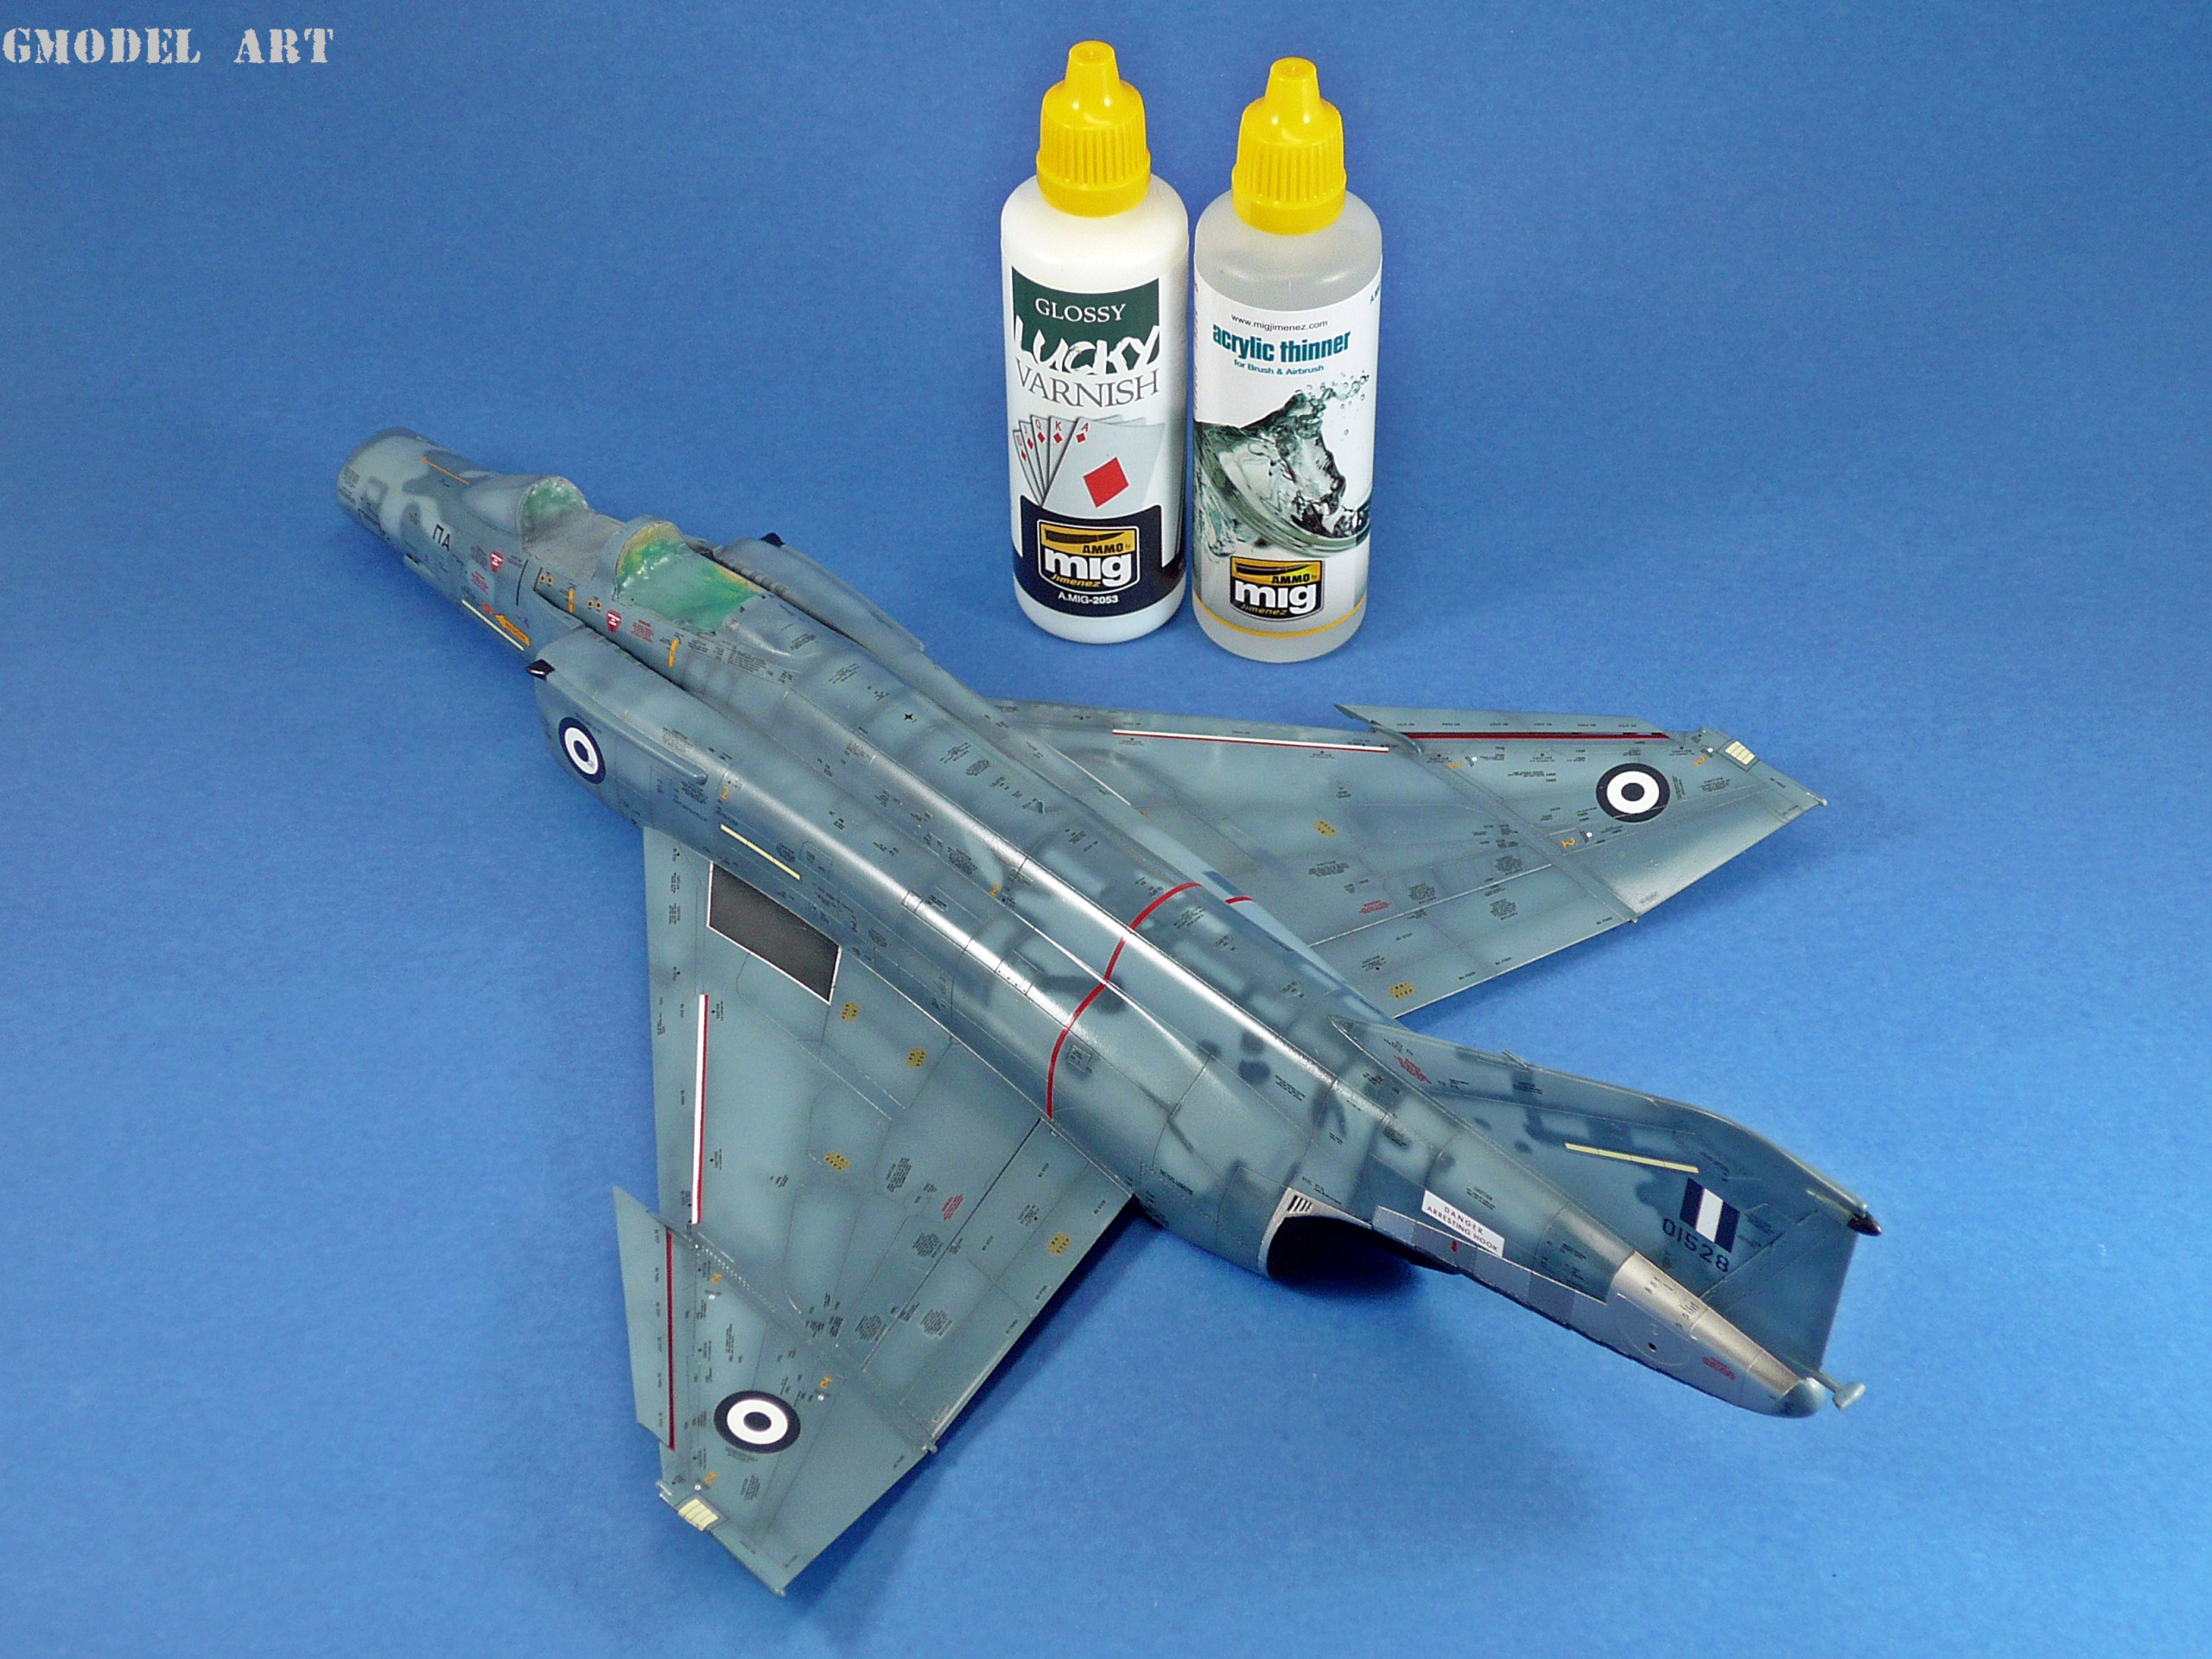
Then it was time to seal the paint and for that I used the excellent new Mig Ammo Gloss Varnish from “Lucky” series (pics 84,85,86,87)
It was time to repaint the exhaust area and for that I used Mig Ammo / Alclad Gloss Black Primer (ALC 305) to prepare the area for the NMF finish (pics 96,97,98,99)
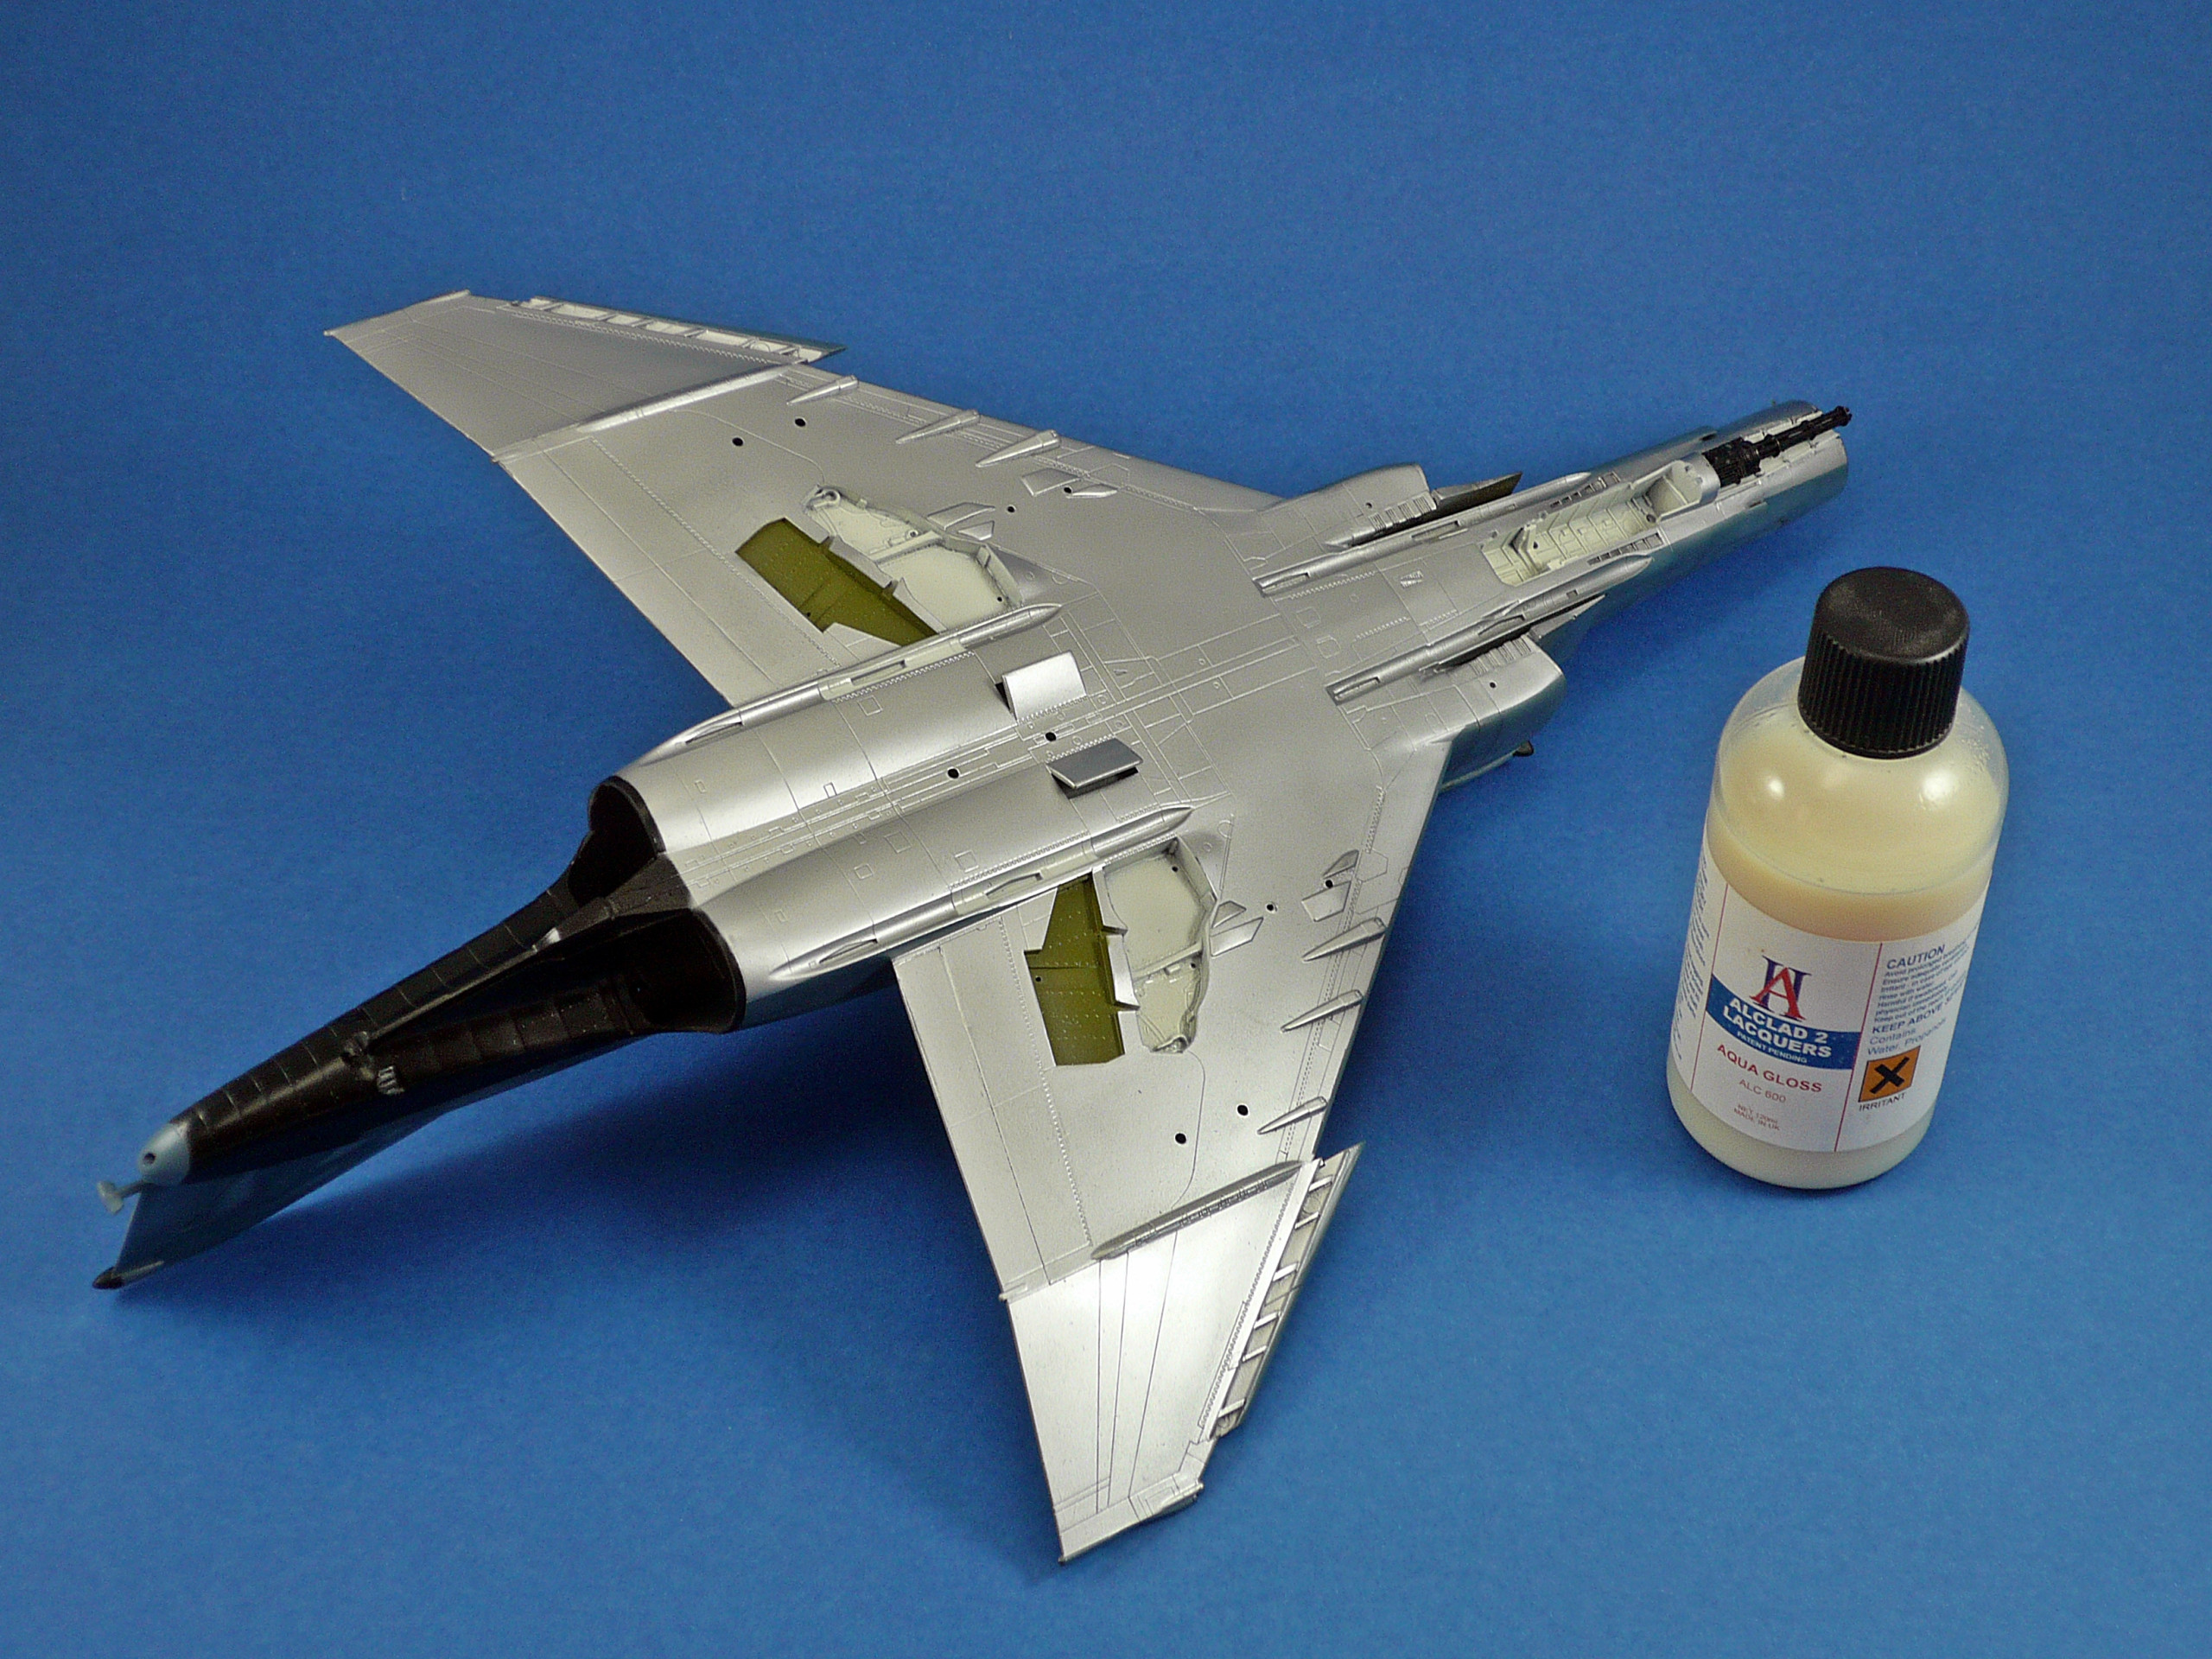
Then I used Alclad’s Gloss Aqua Varnish (ALC 600) to seal the lower surfaces (pic 100)
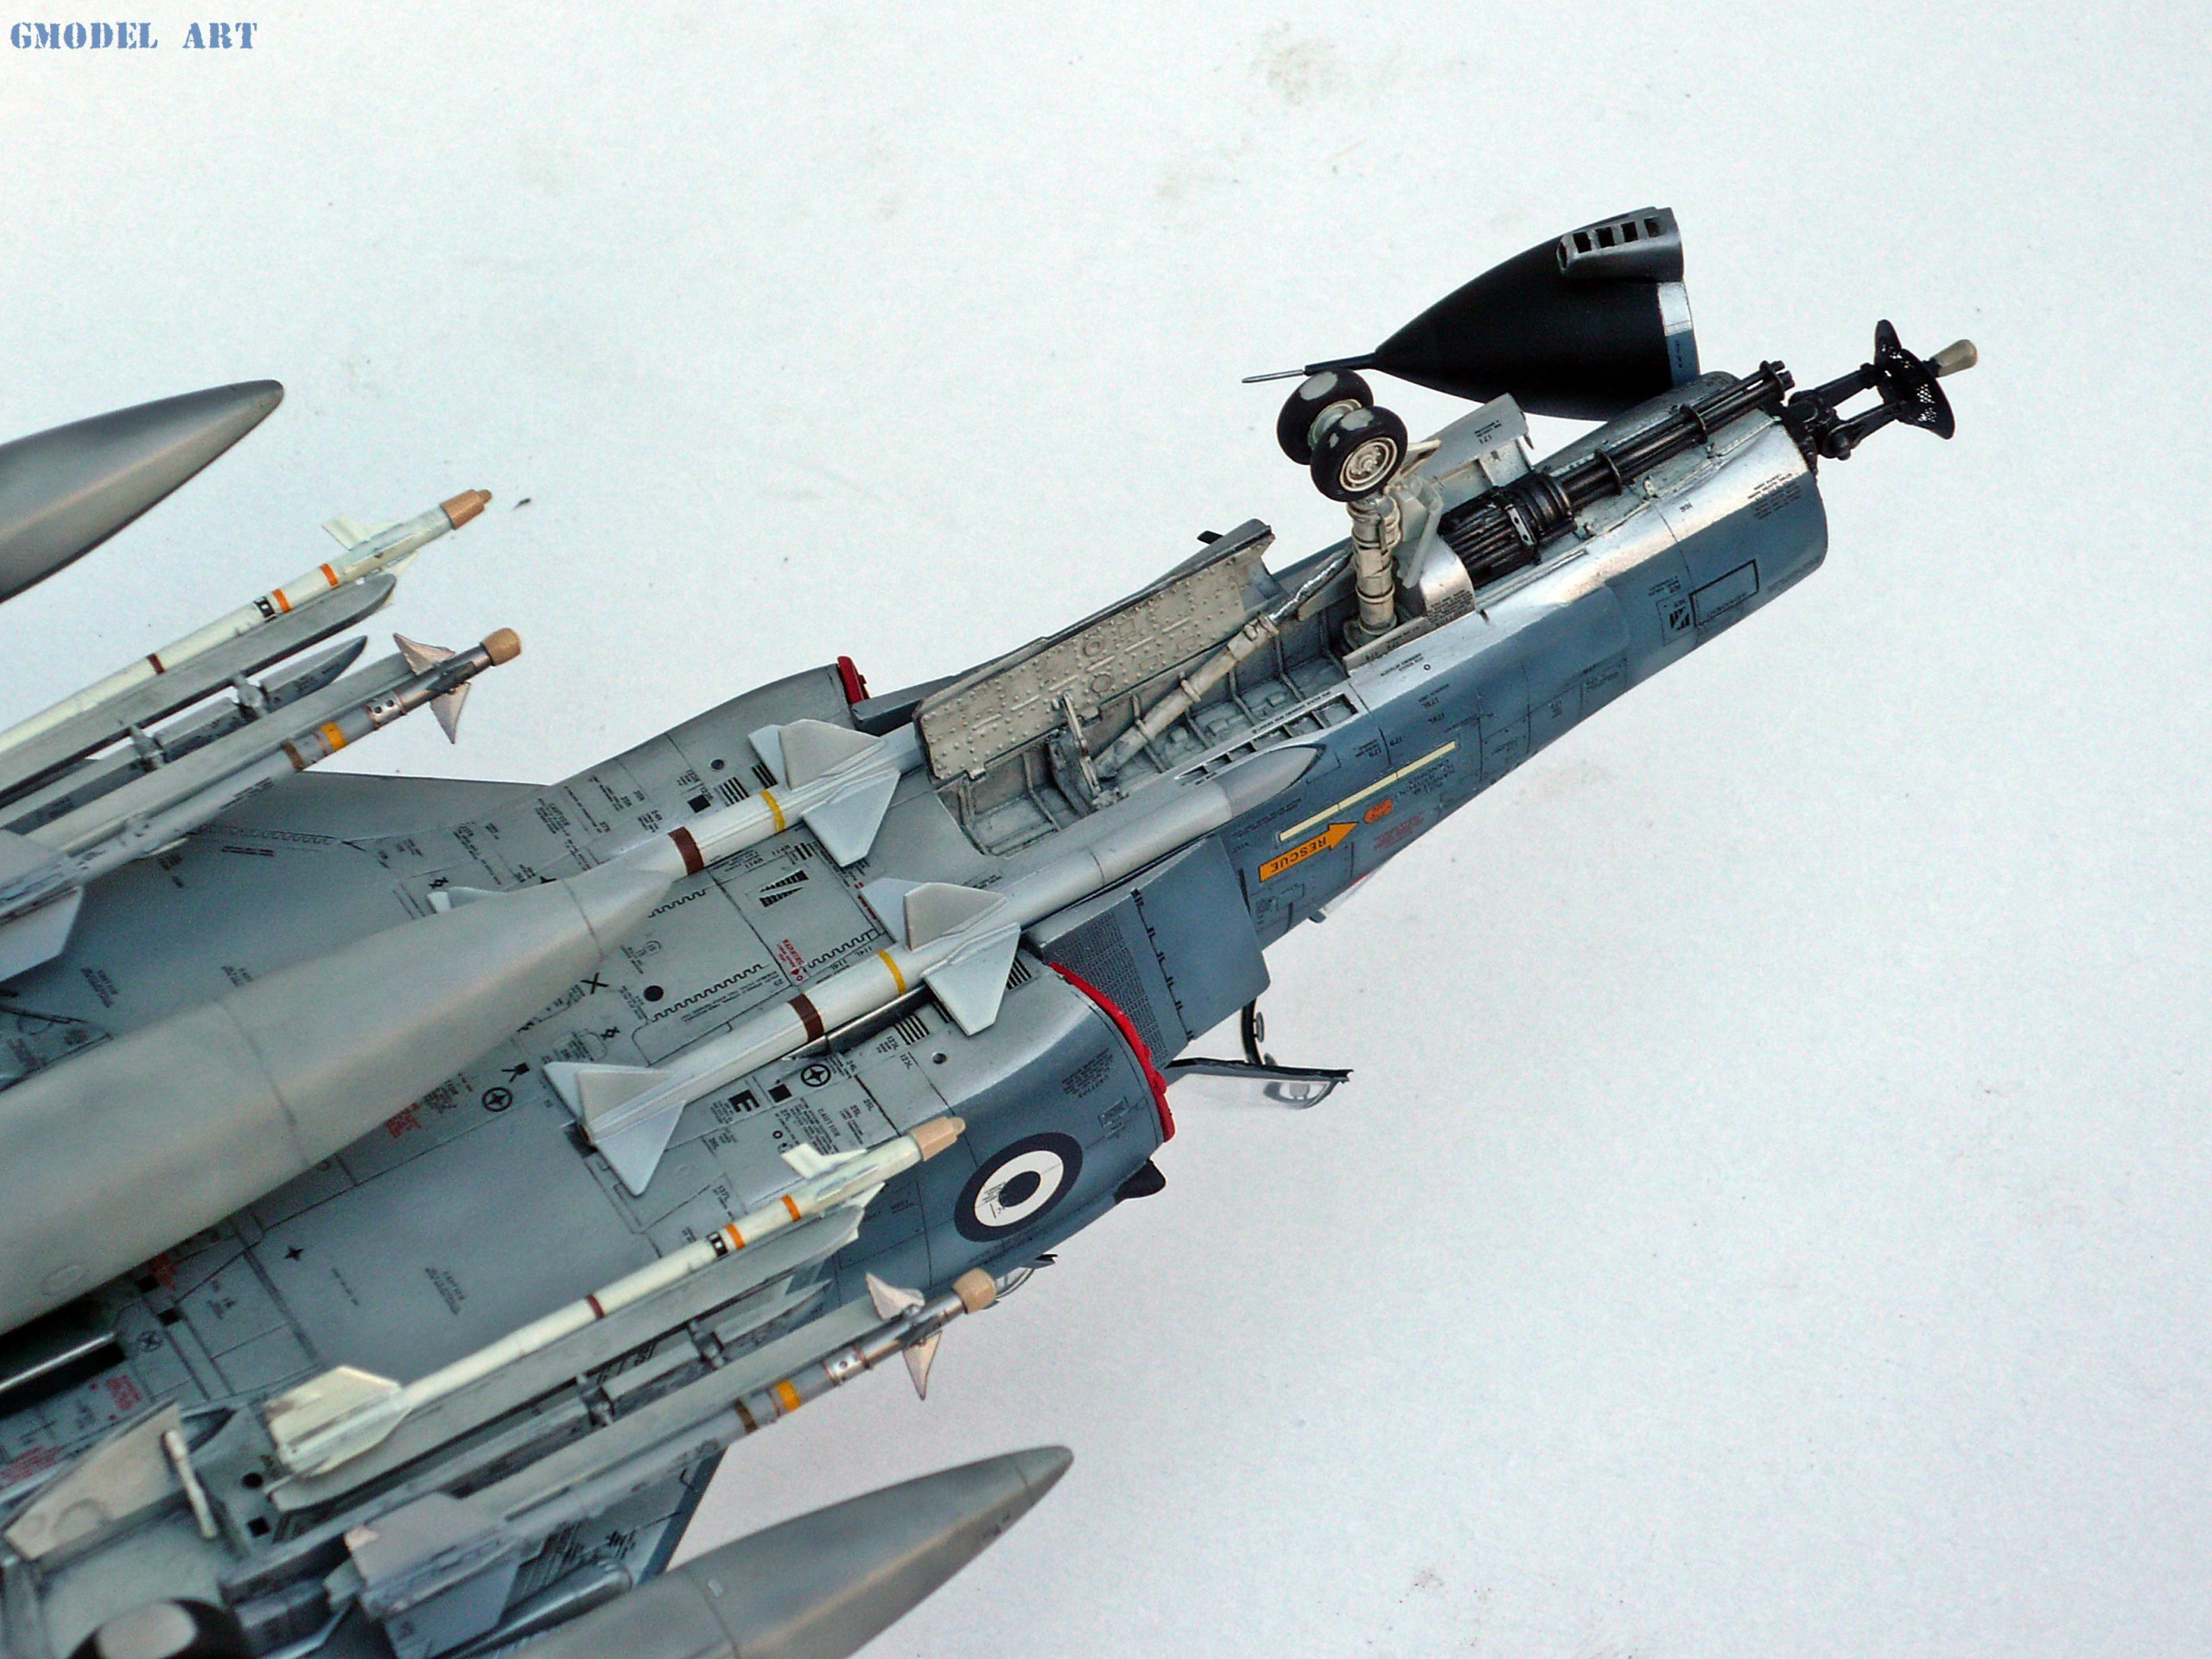
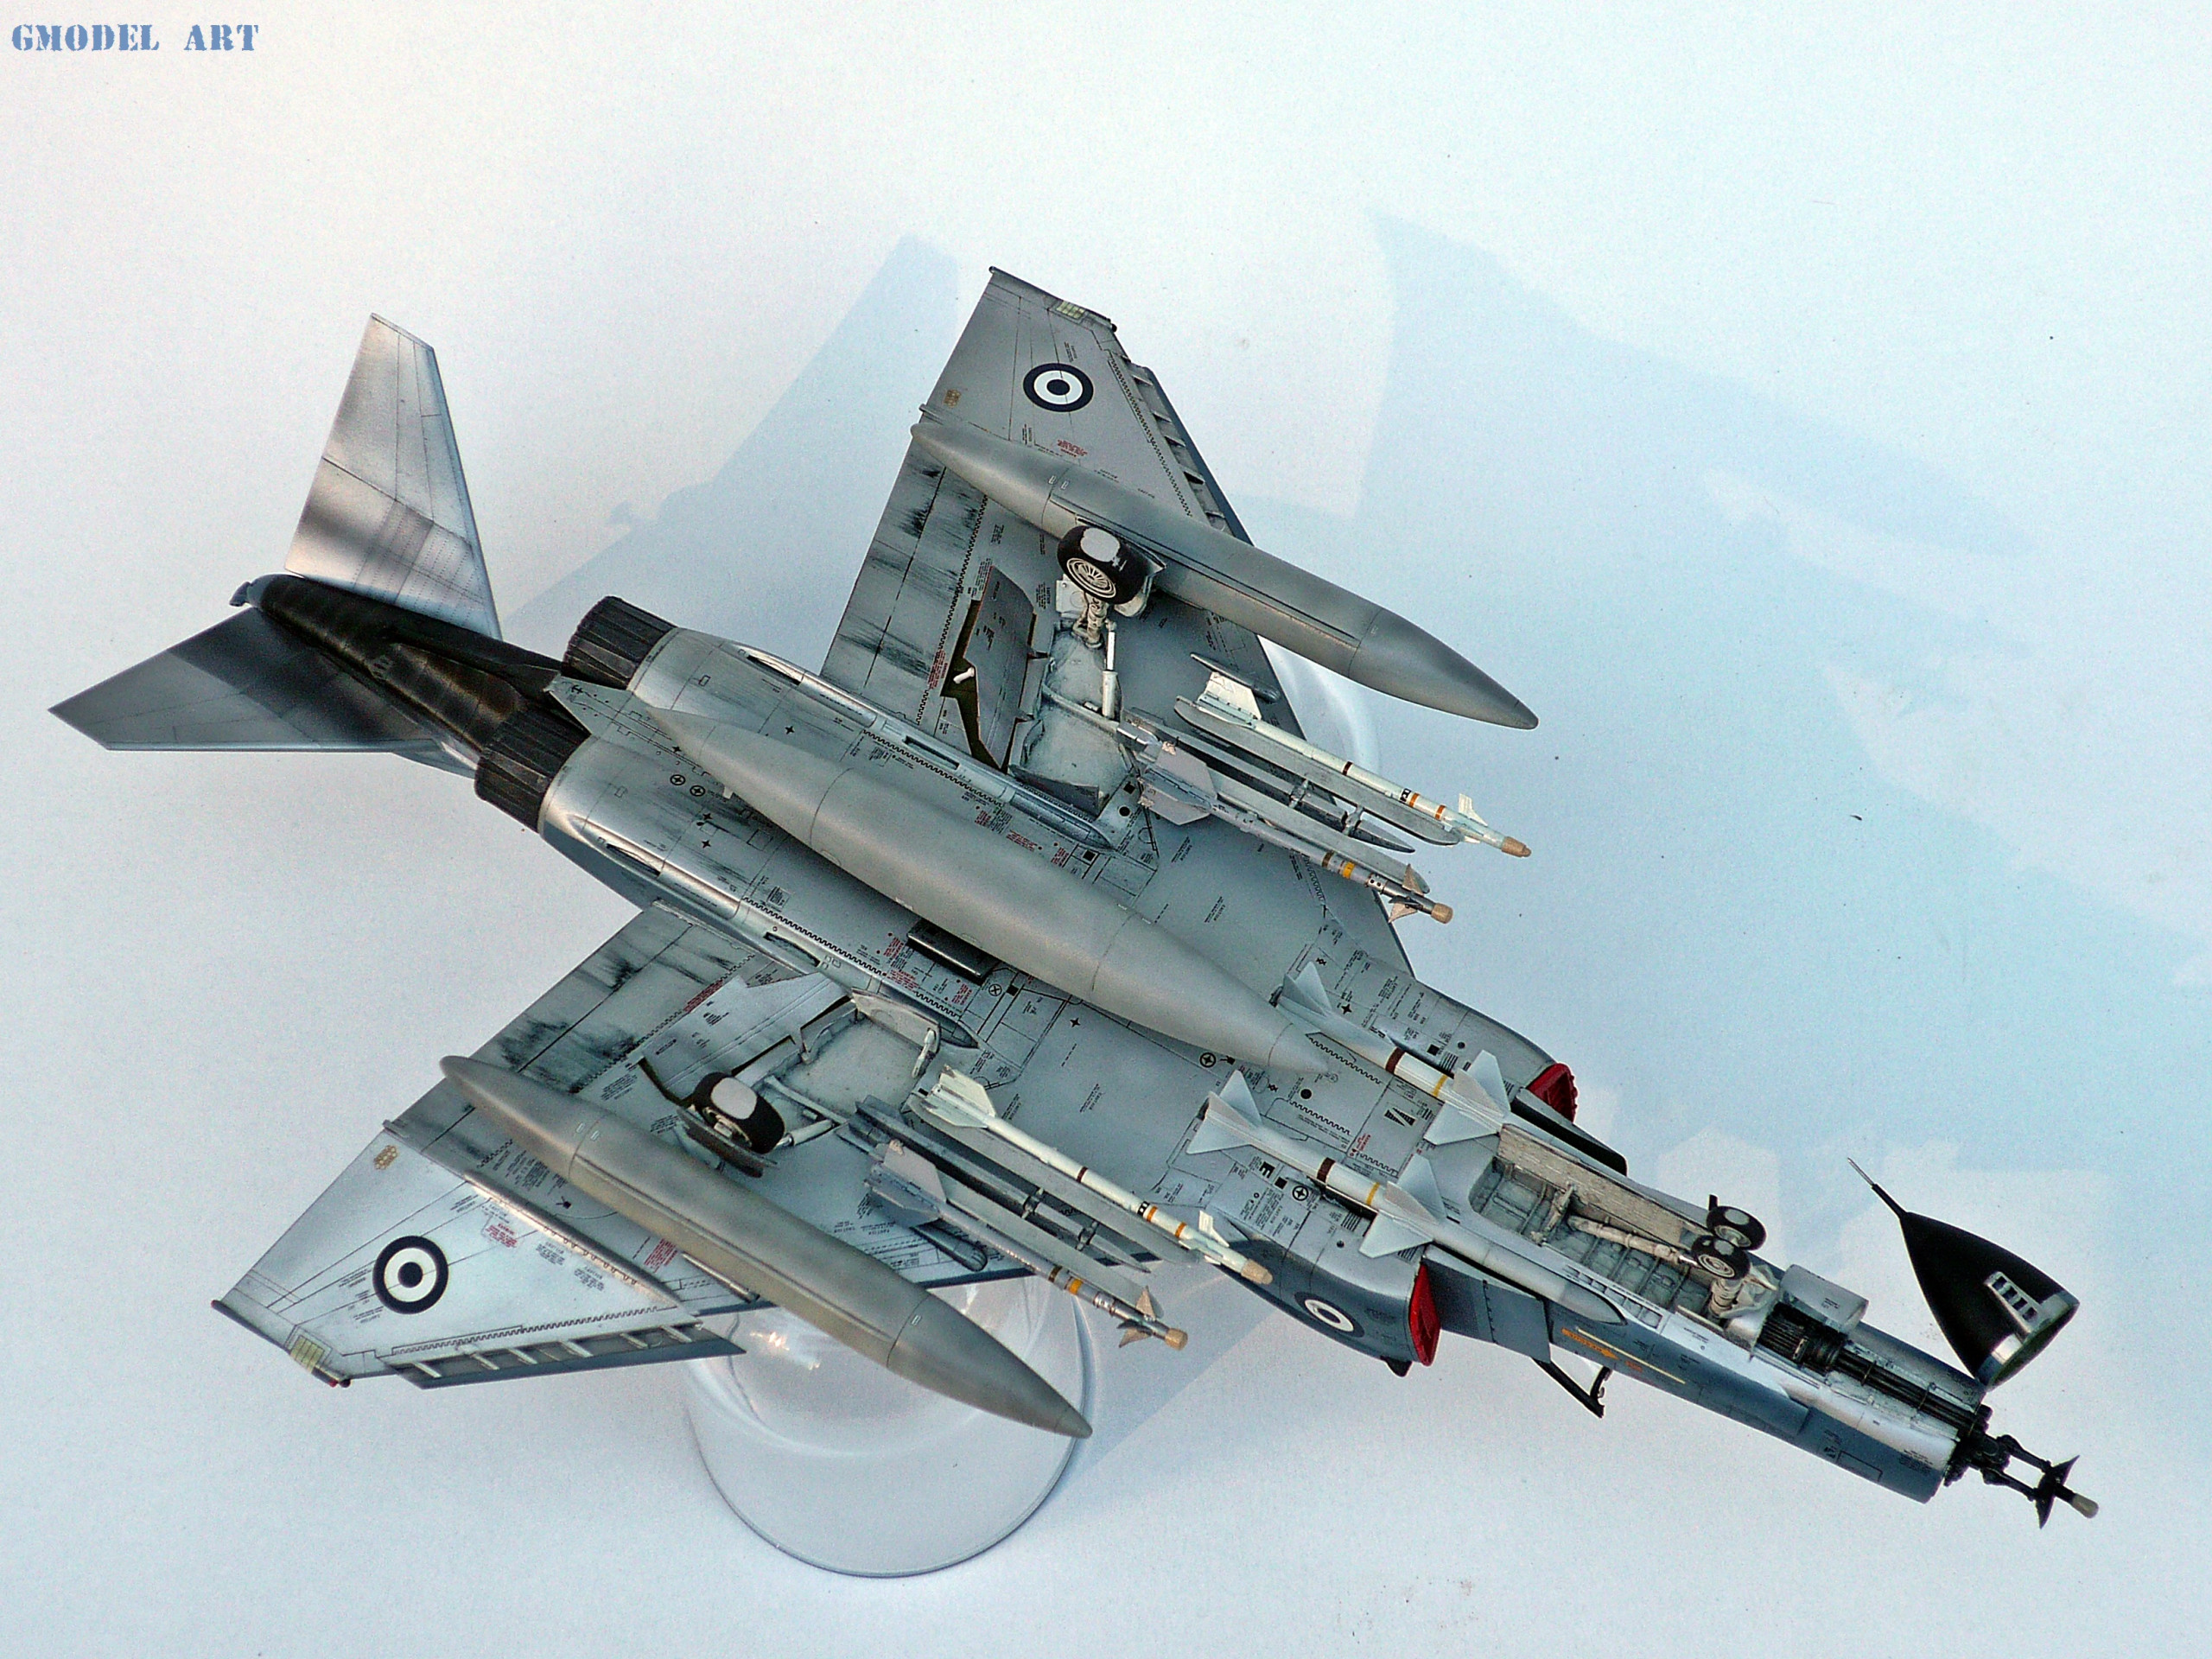
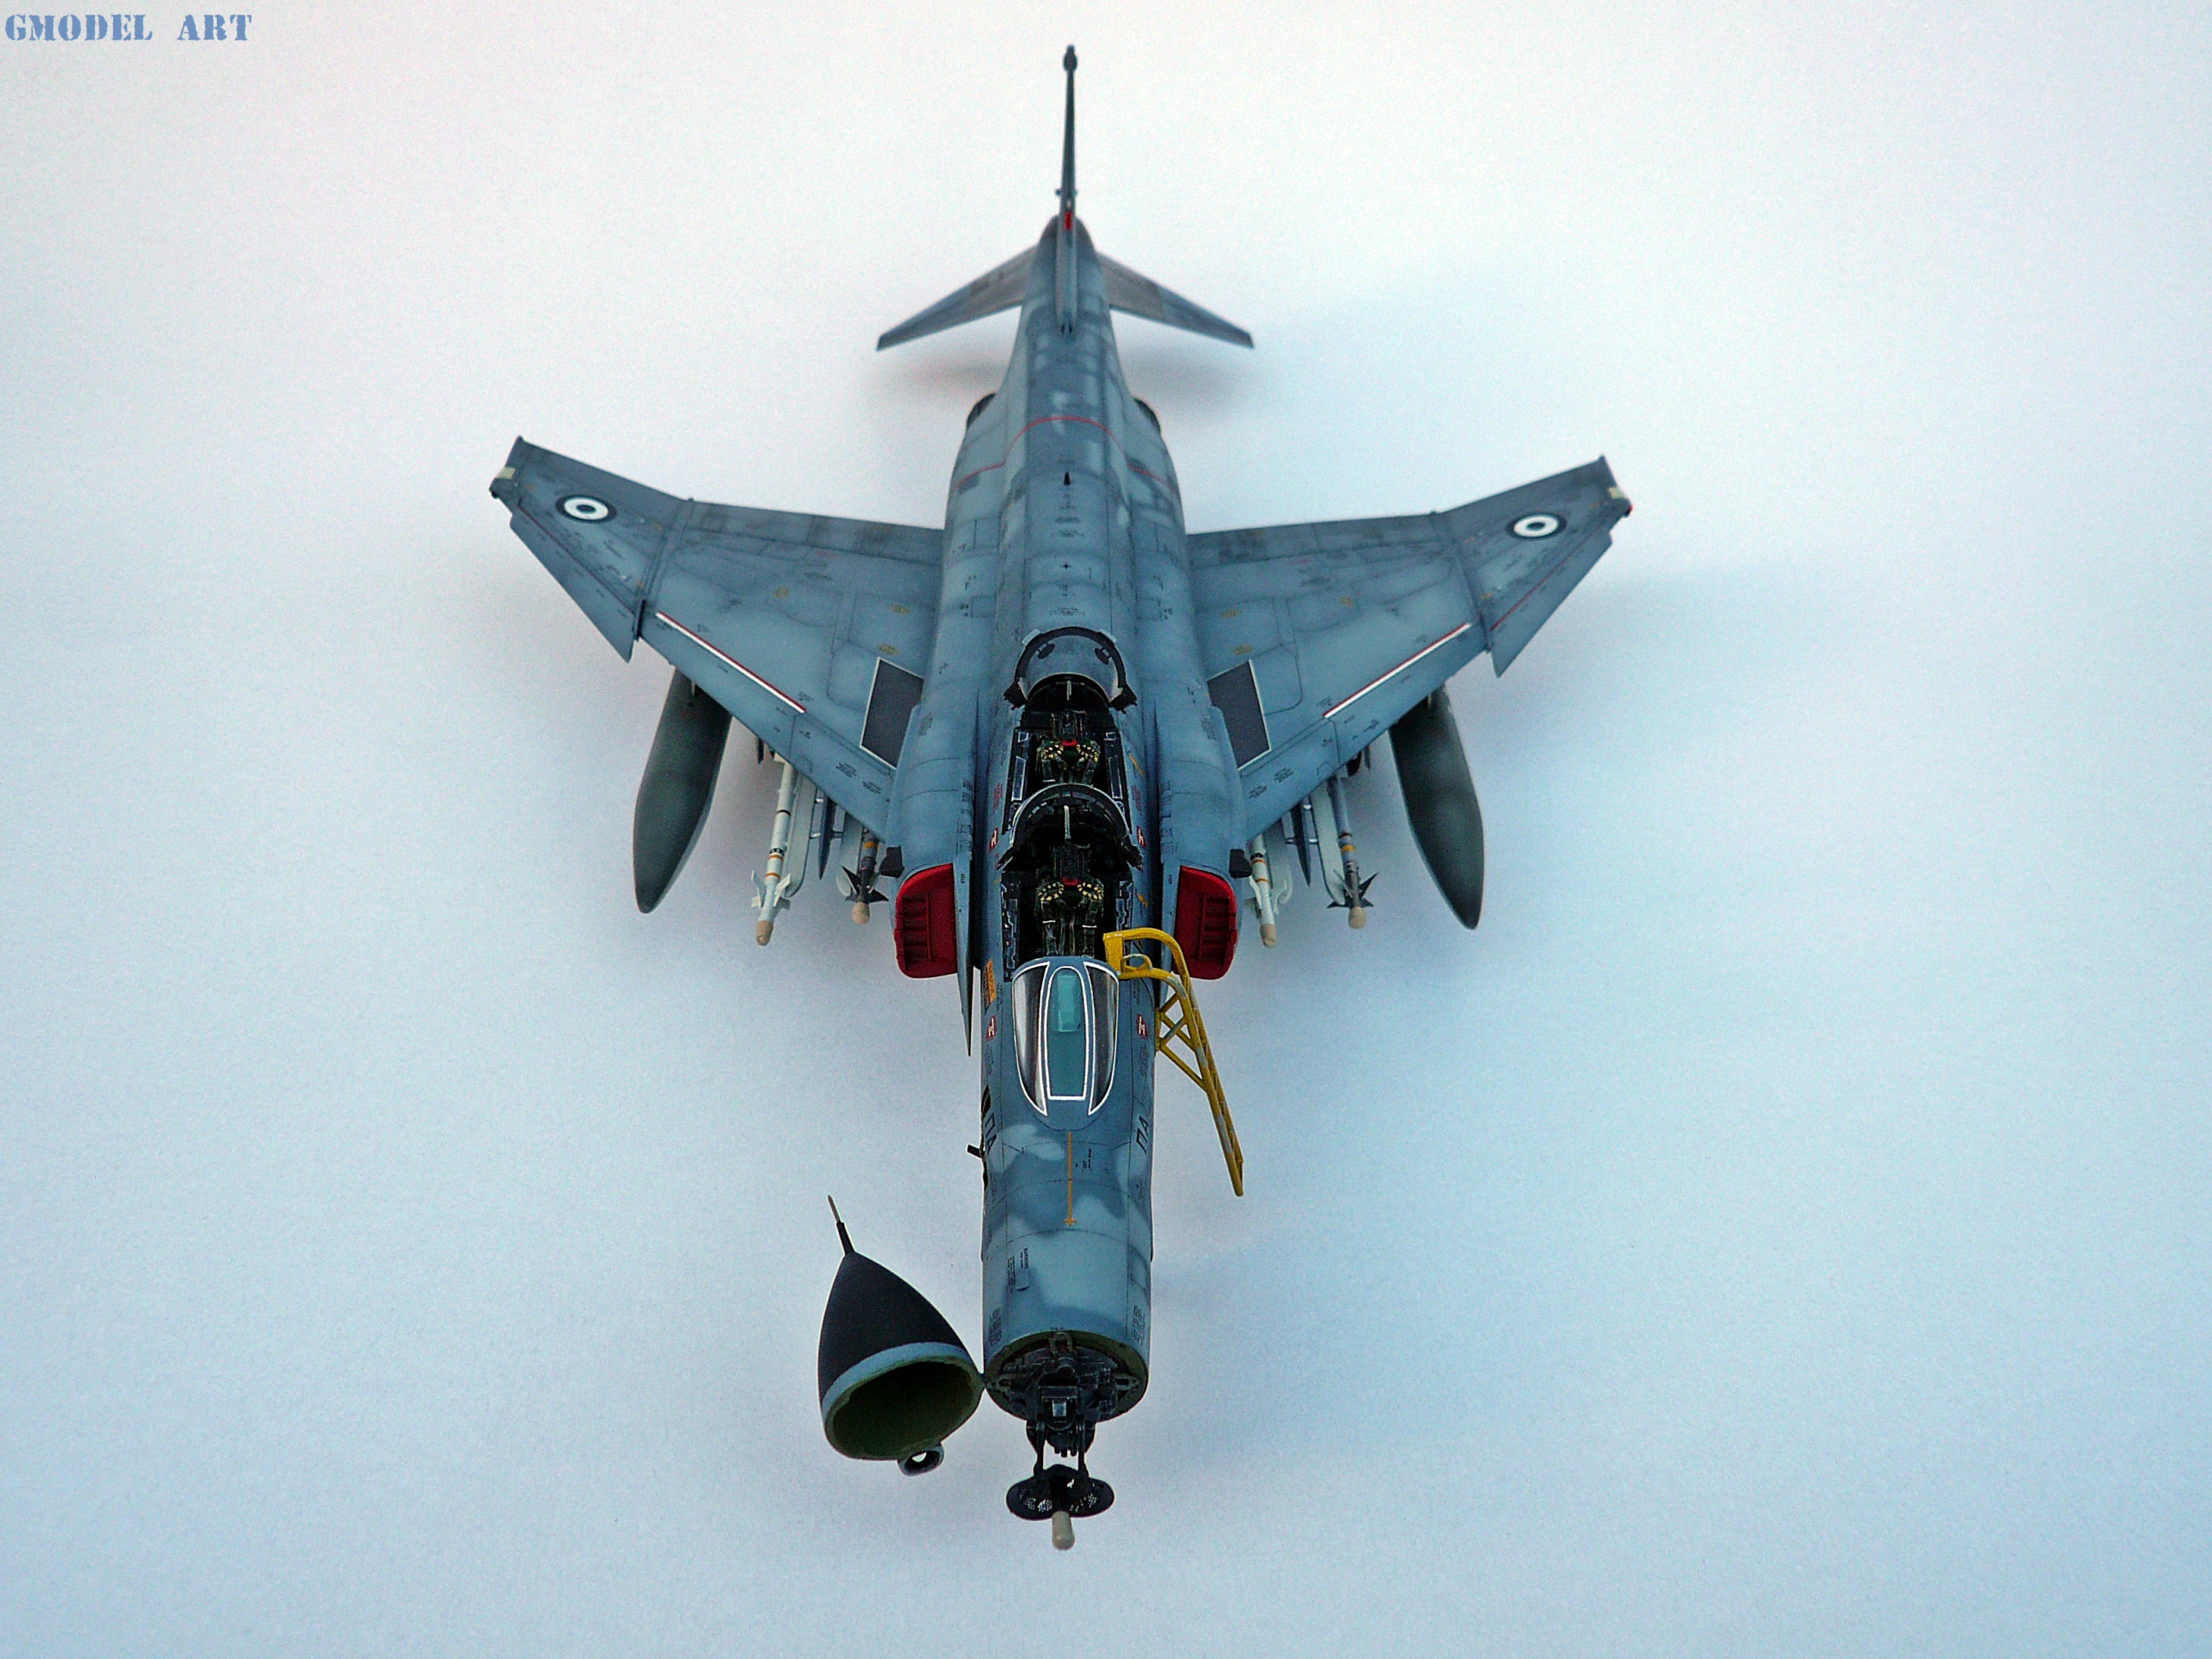
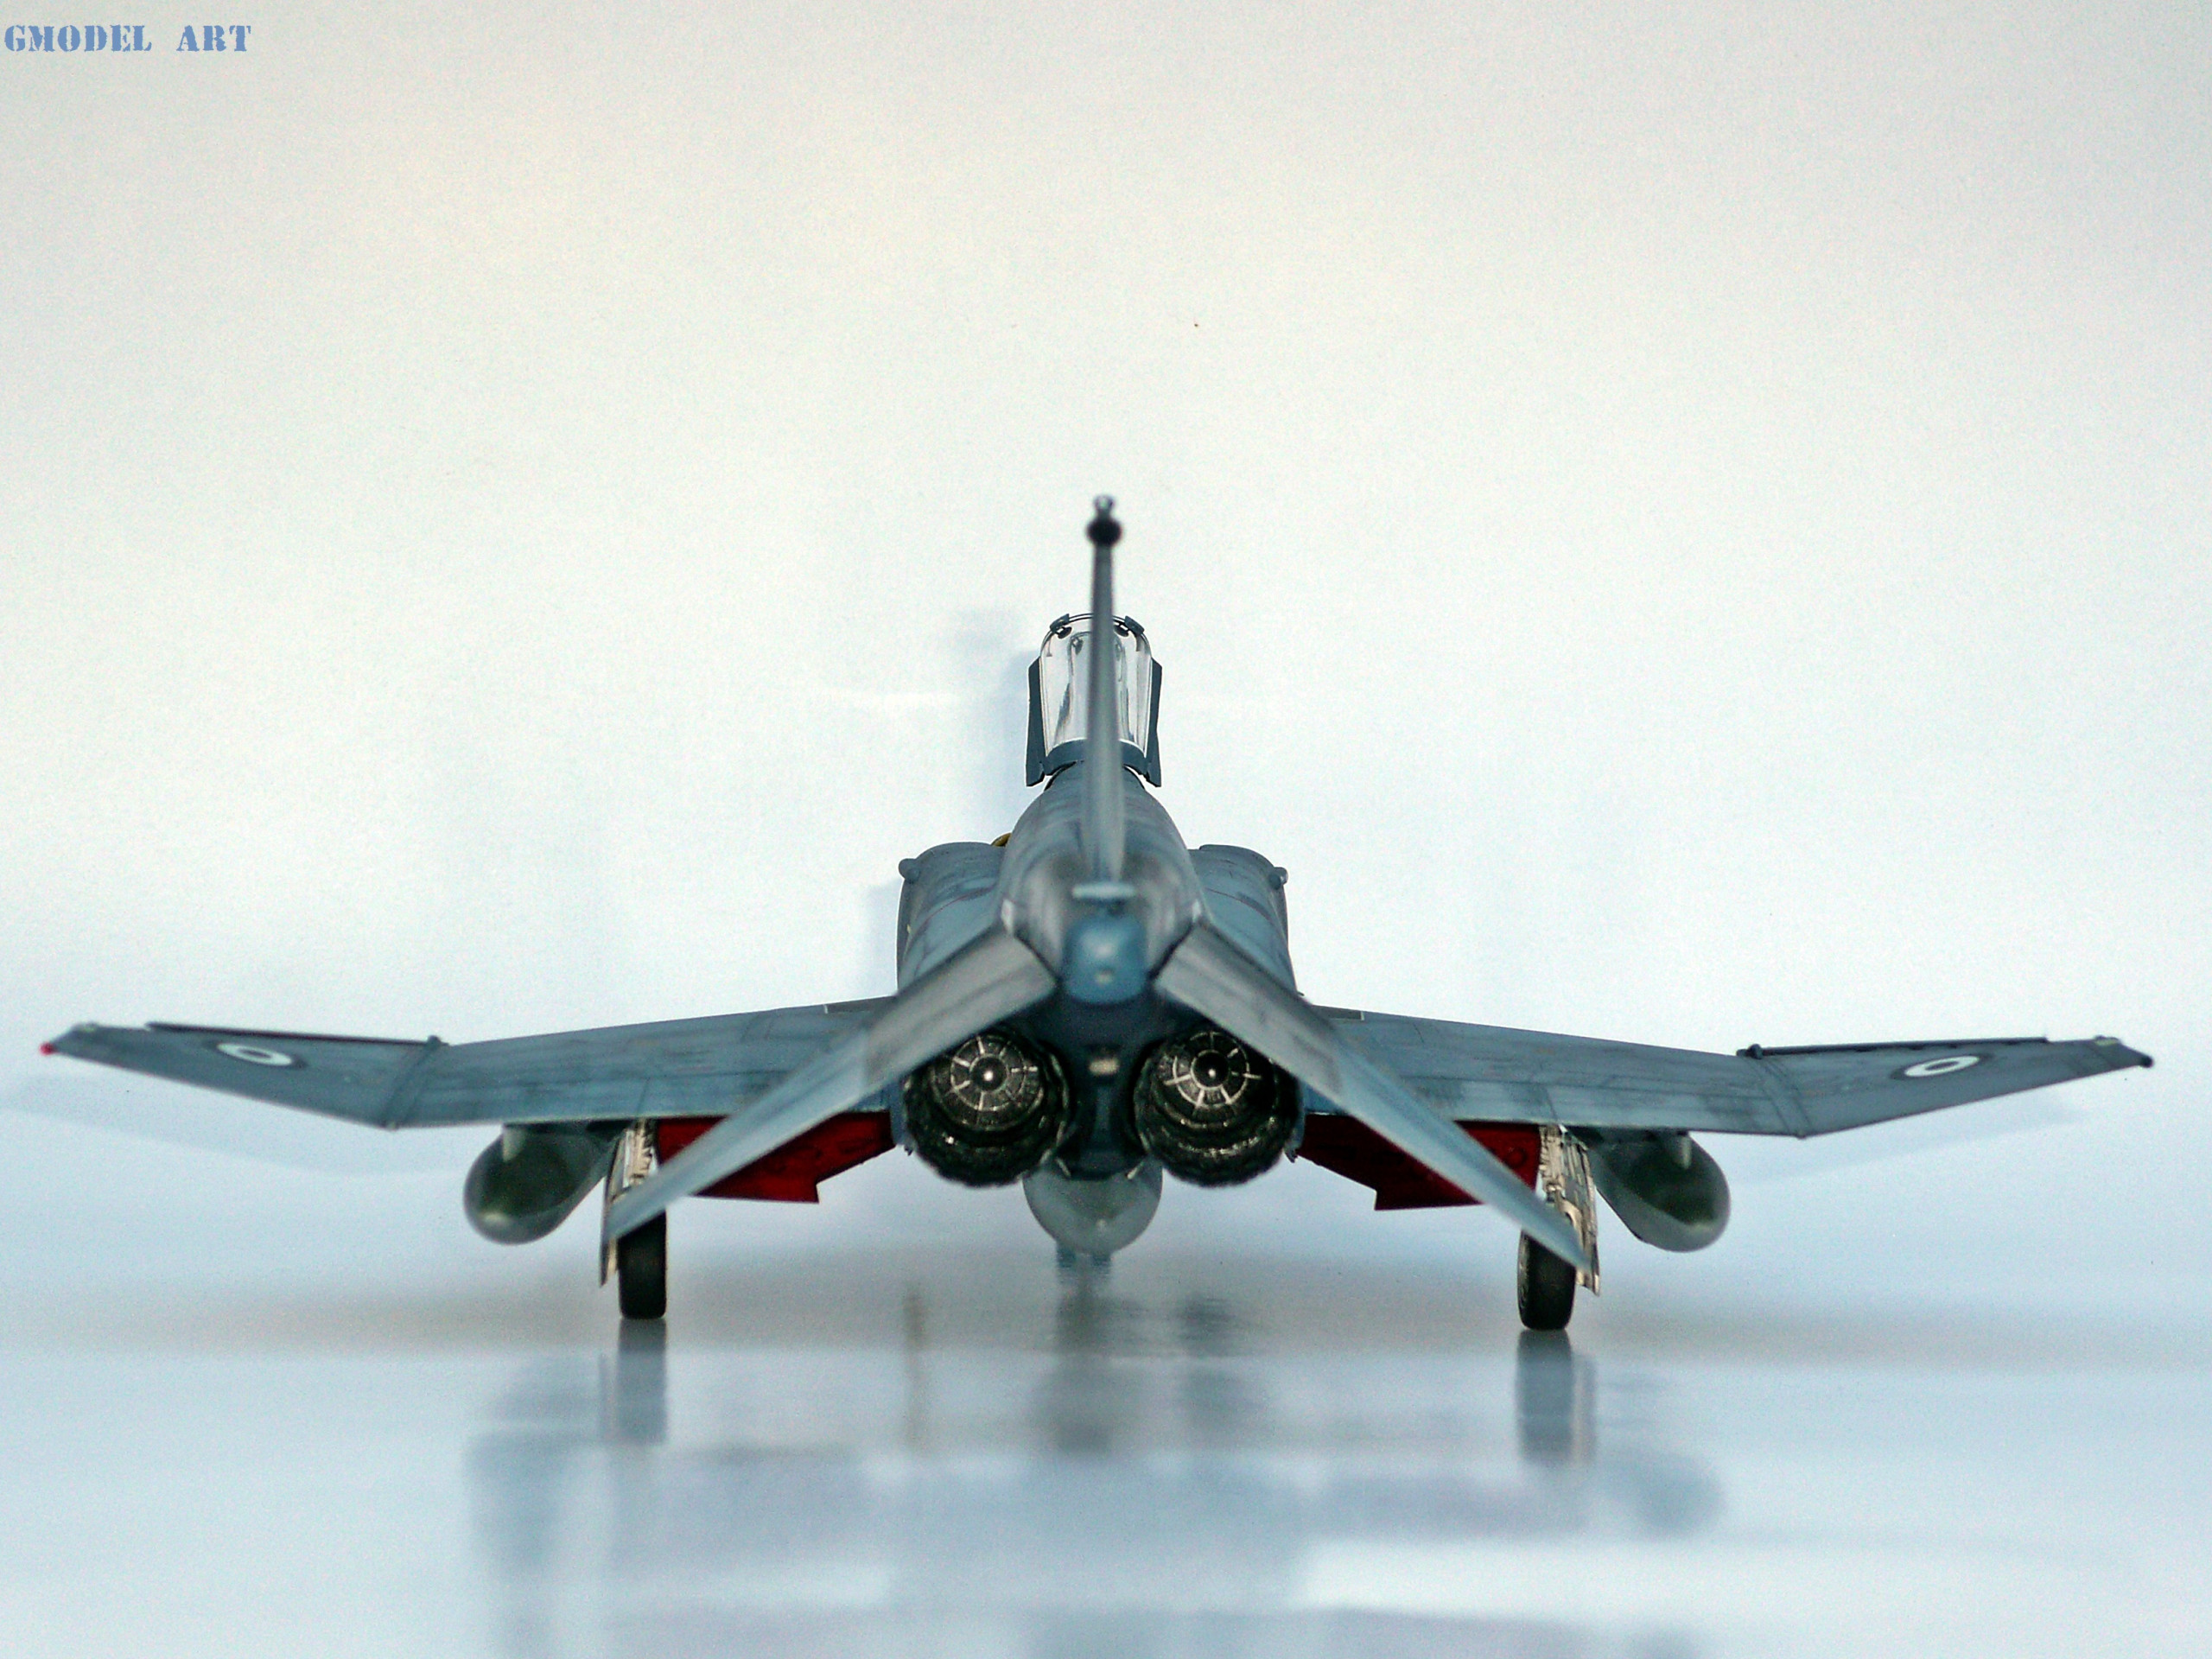
The wheelwells and the airbrake area’s painted off white and interior green based on reference pics.
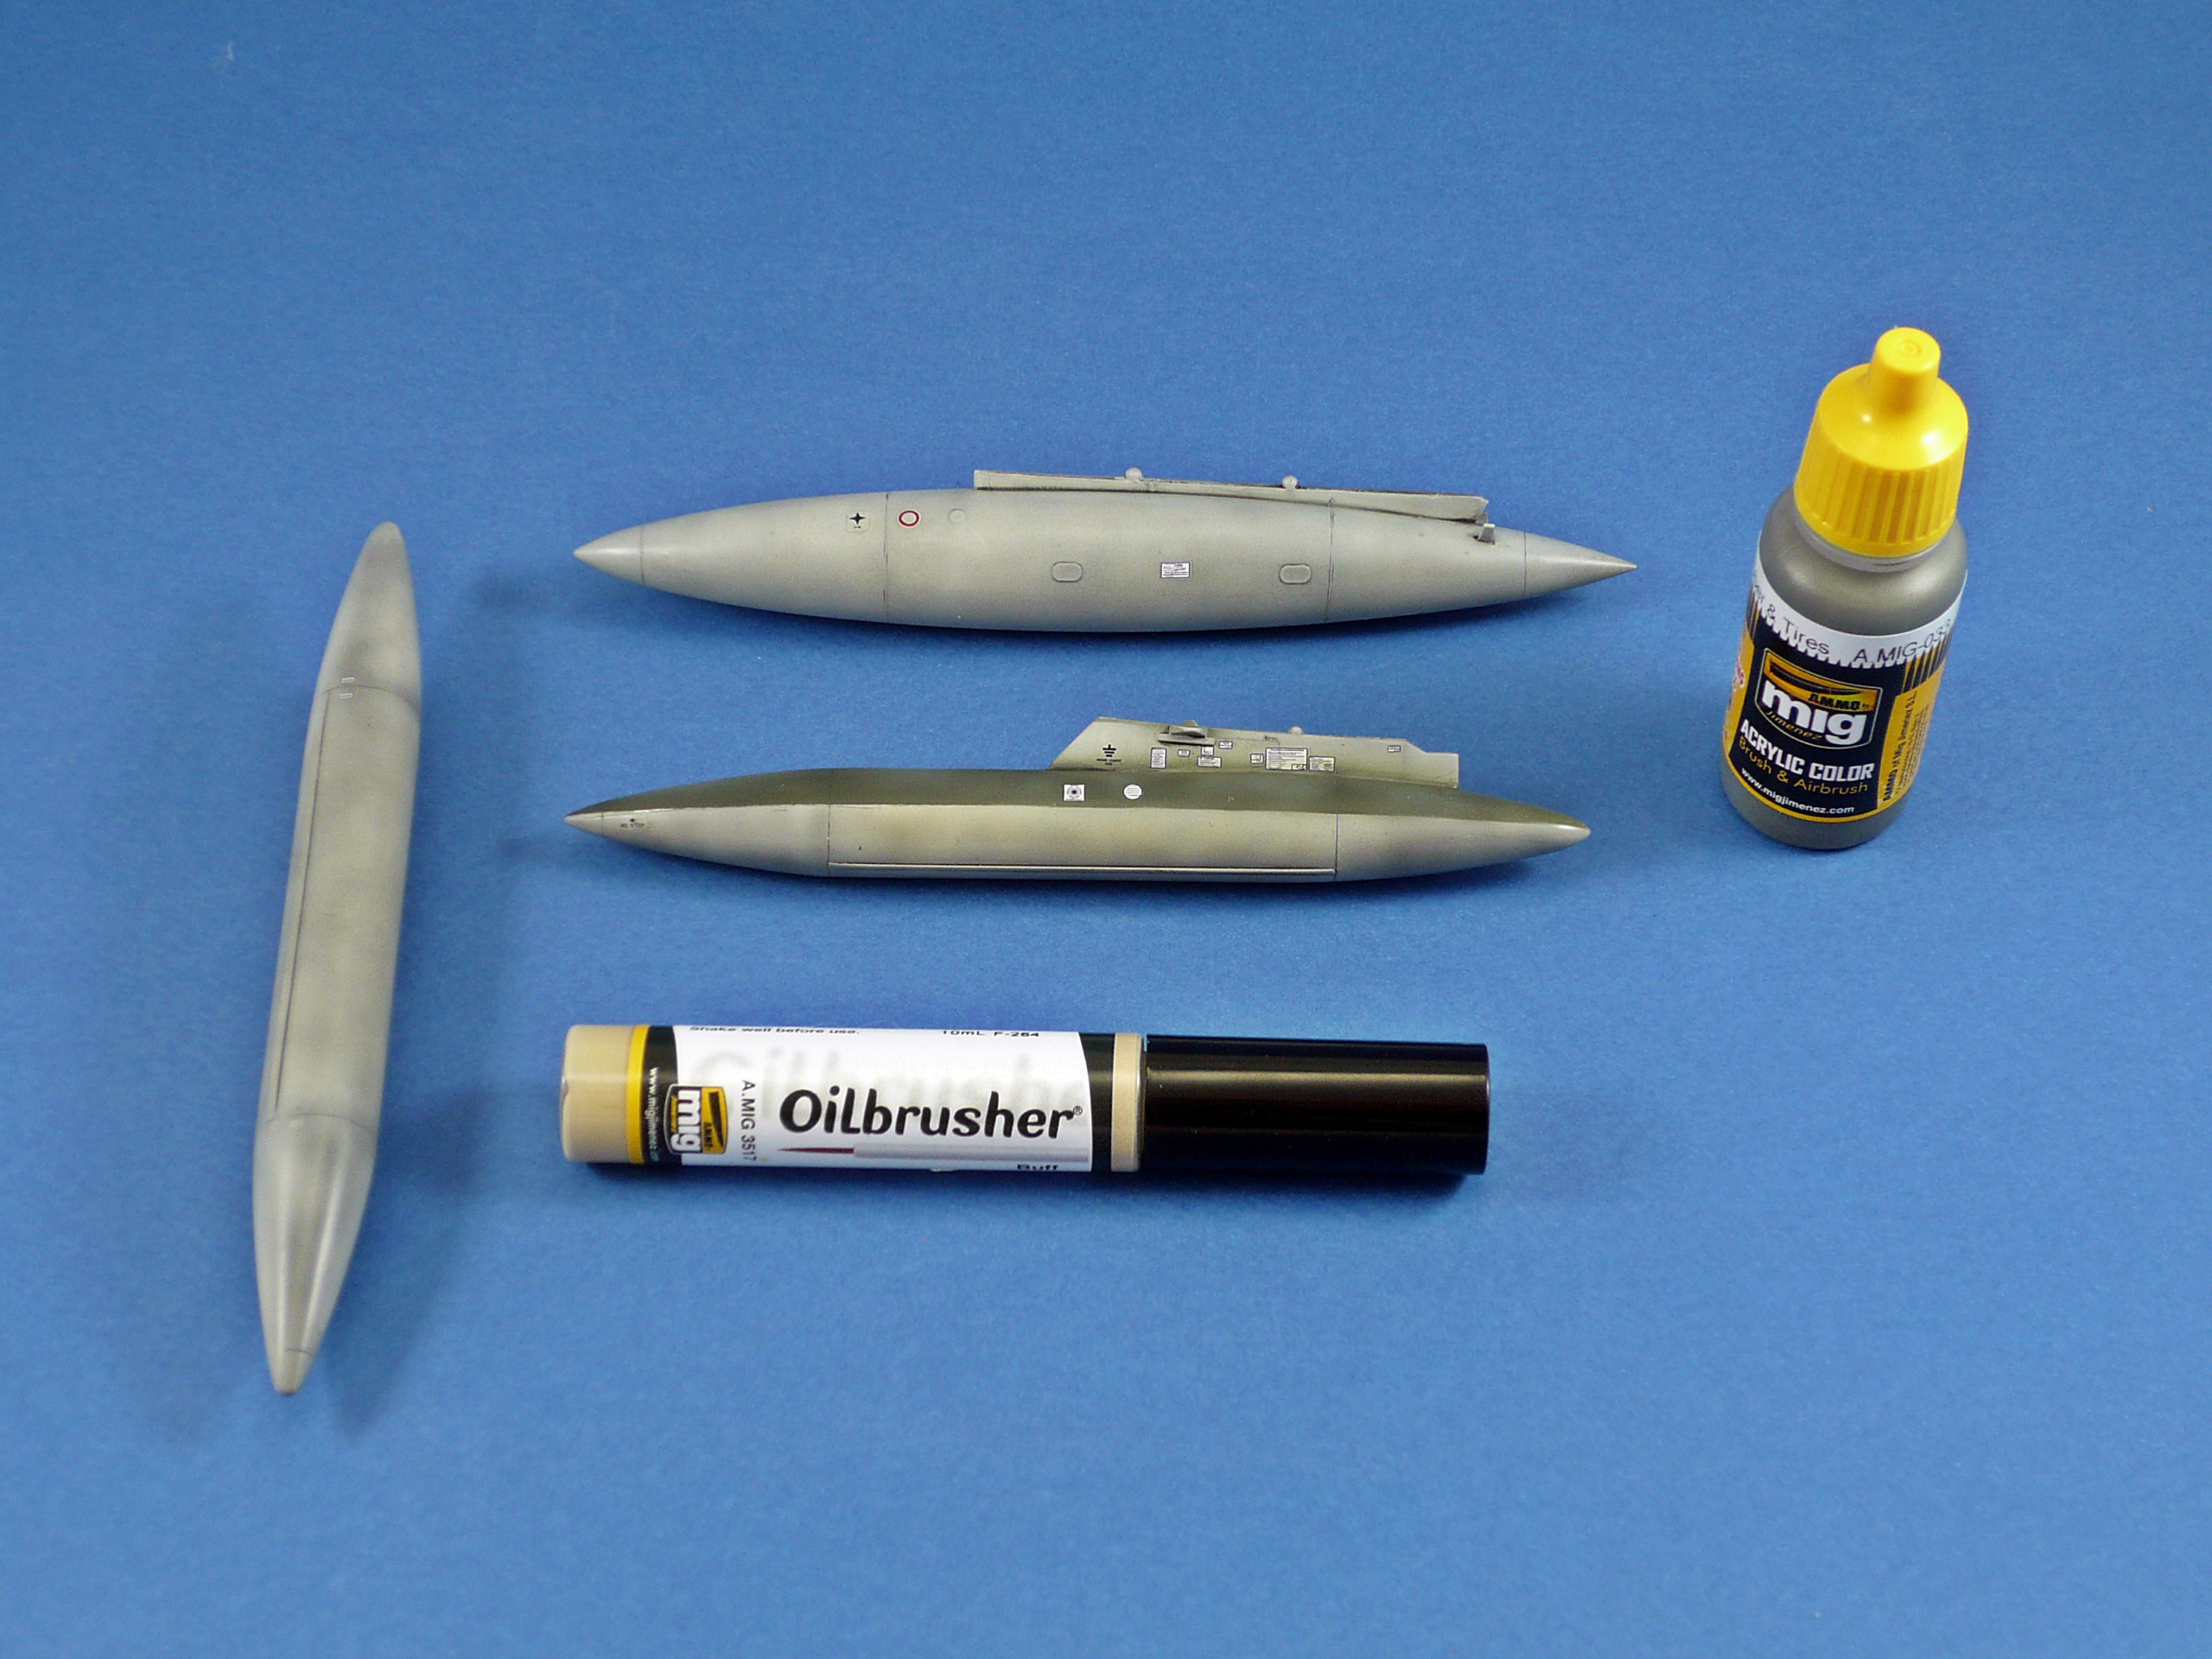
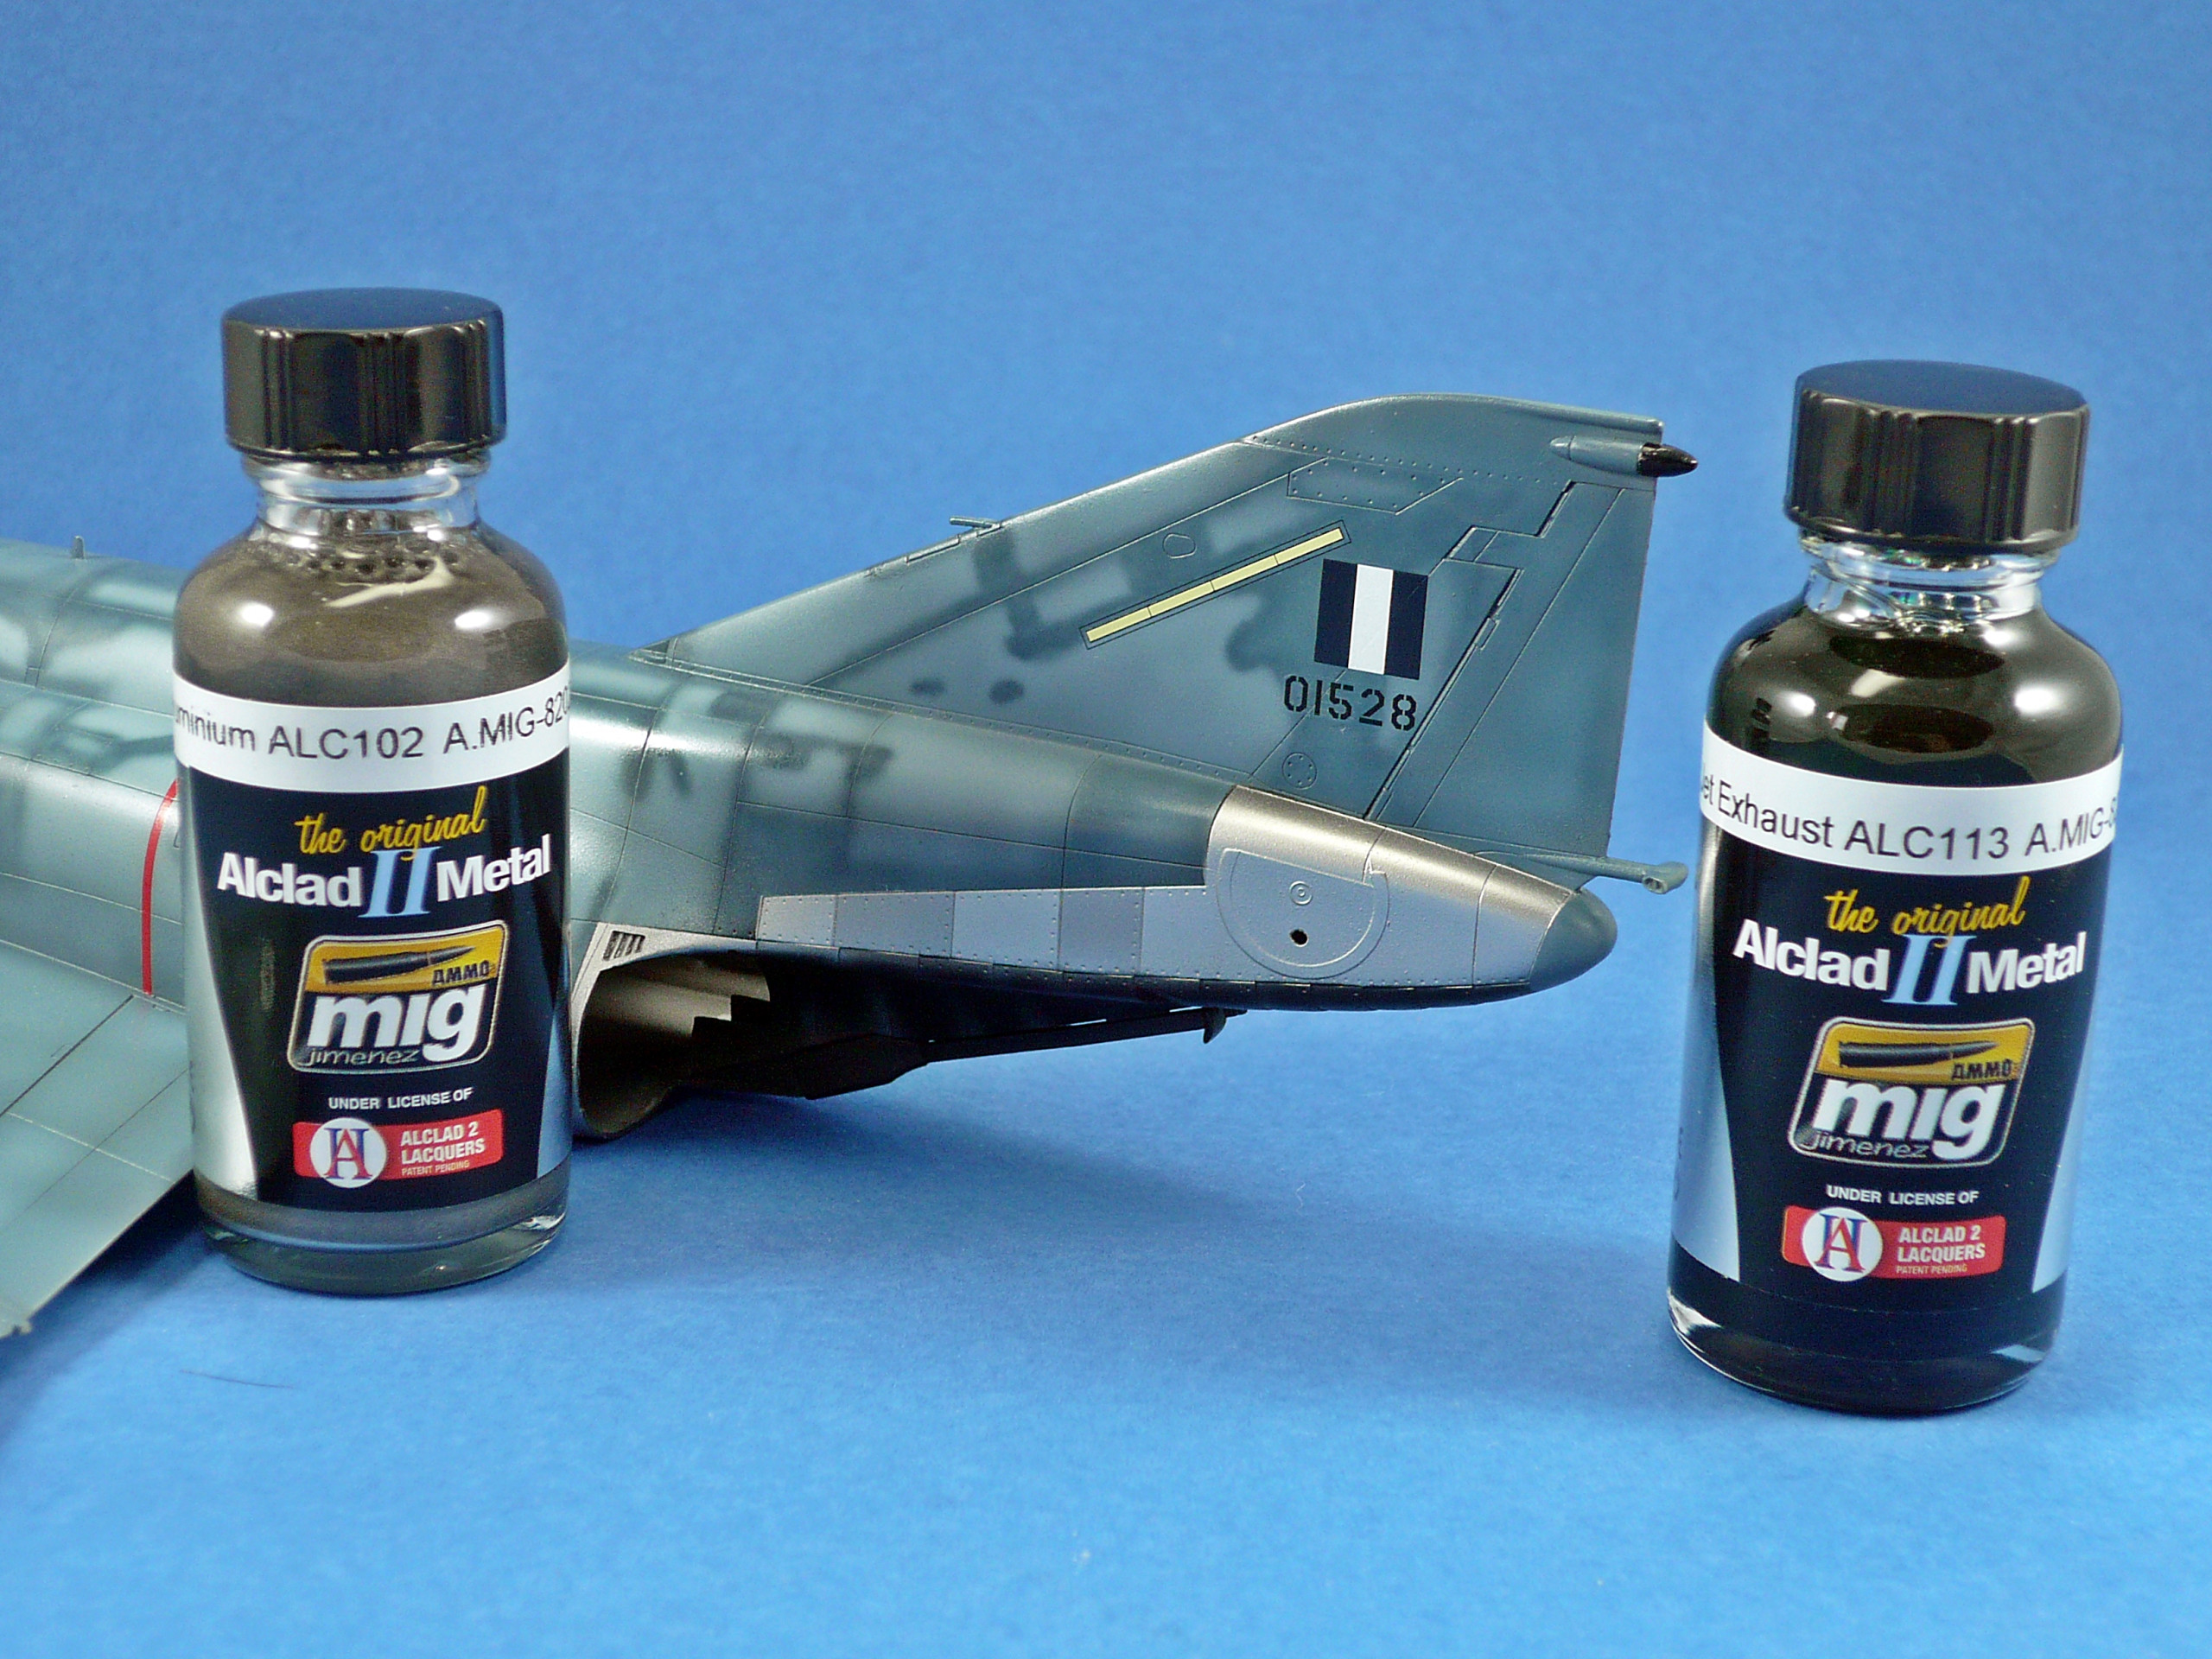
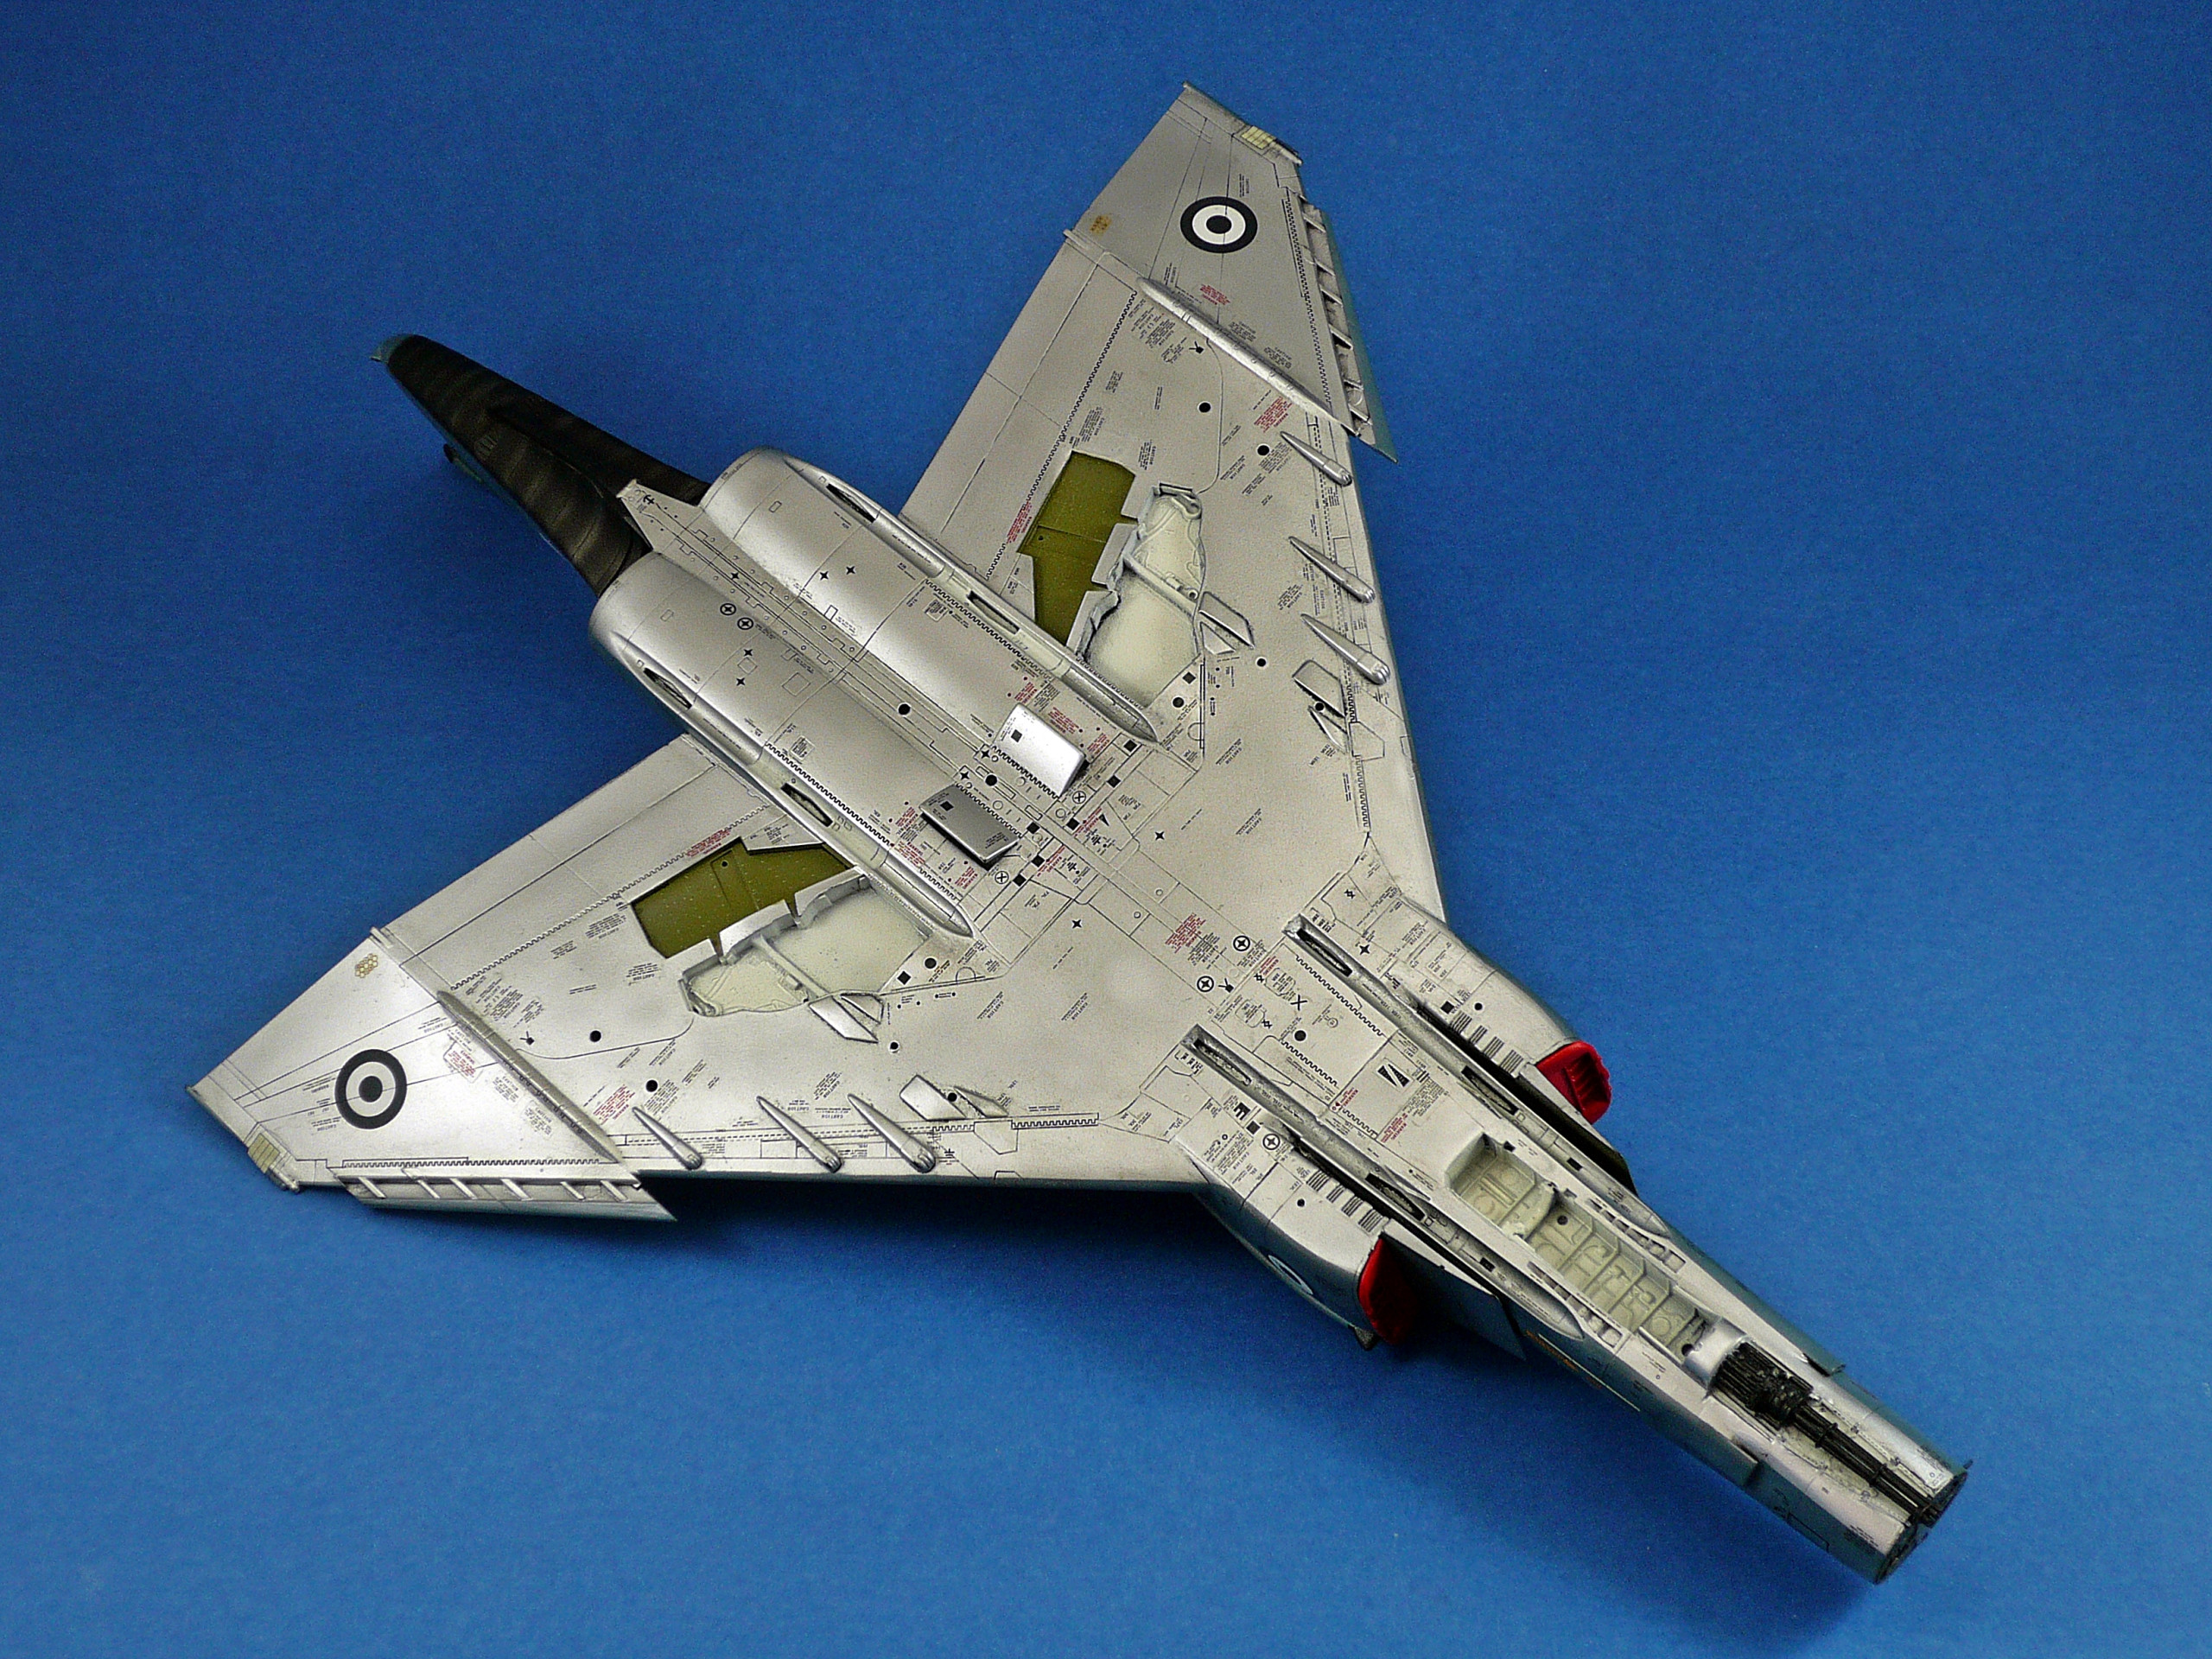
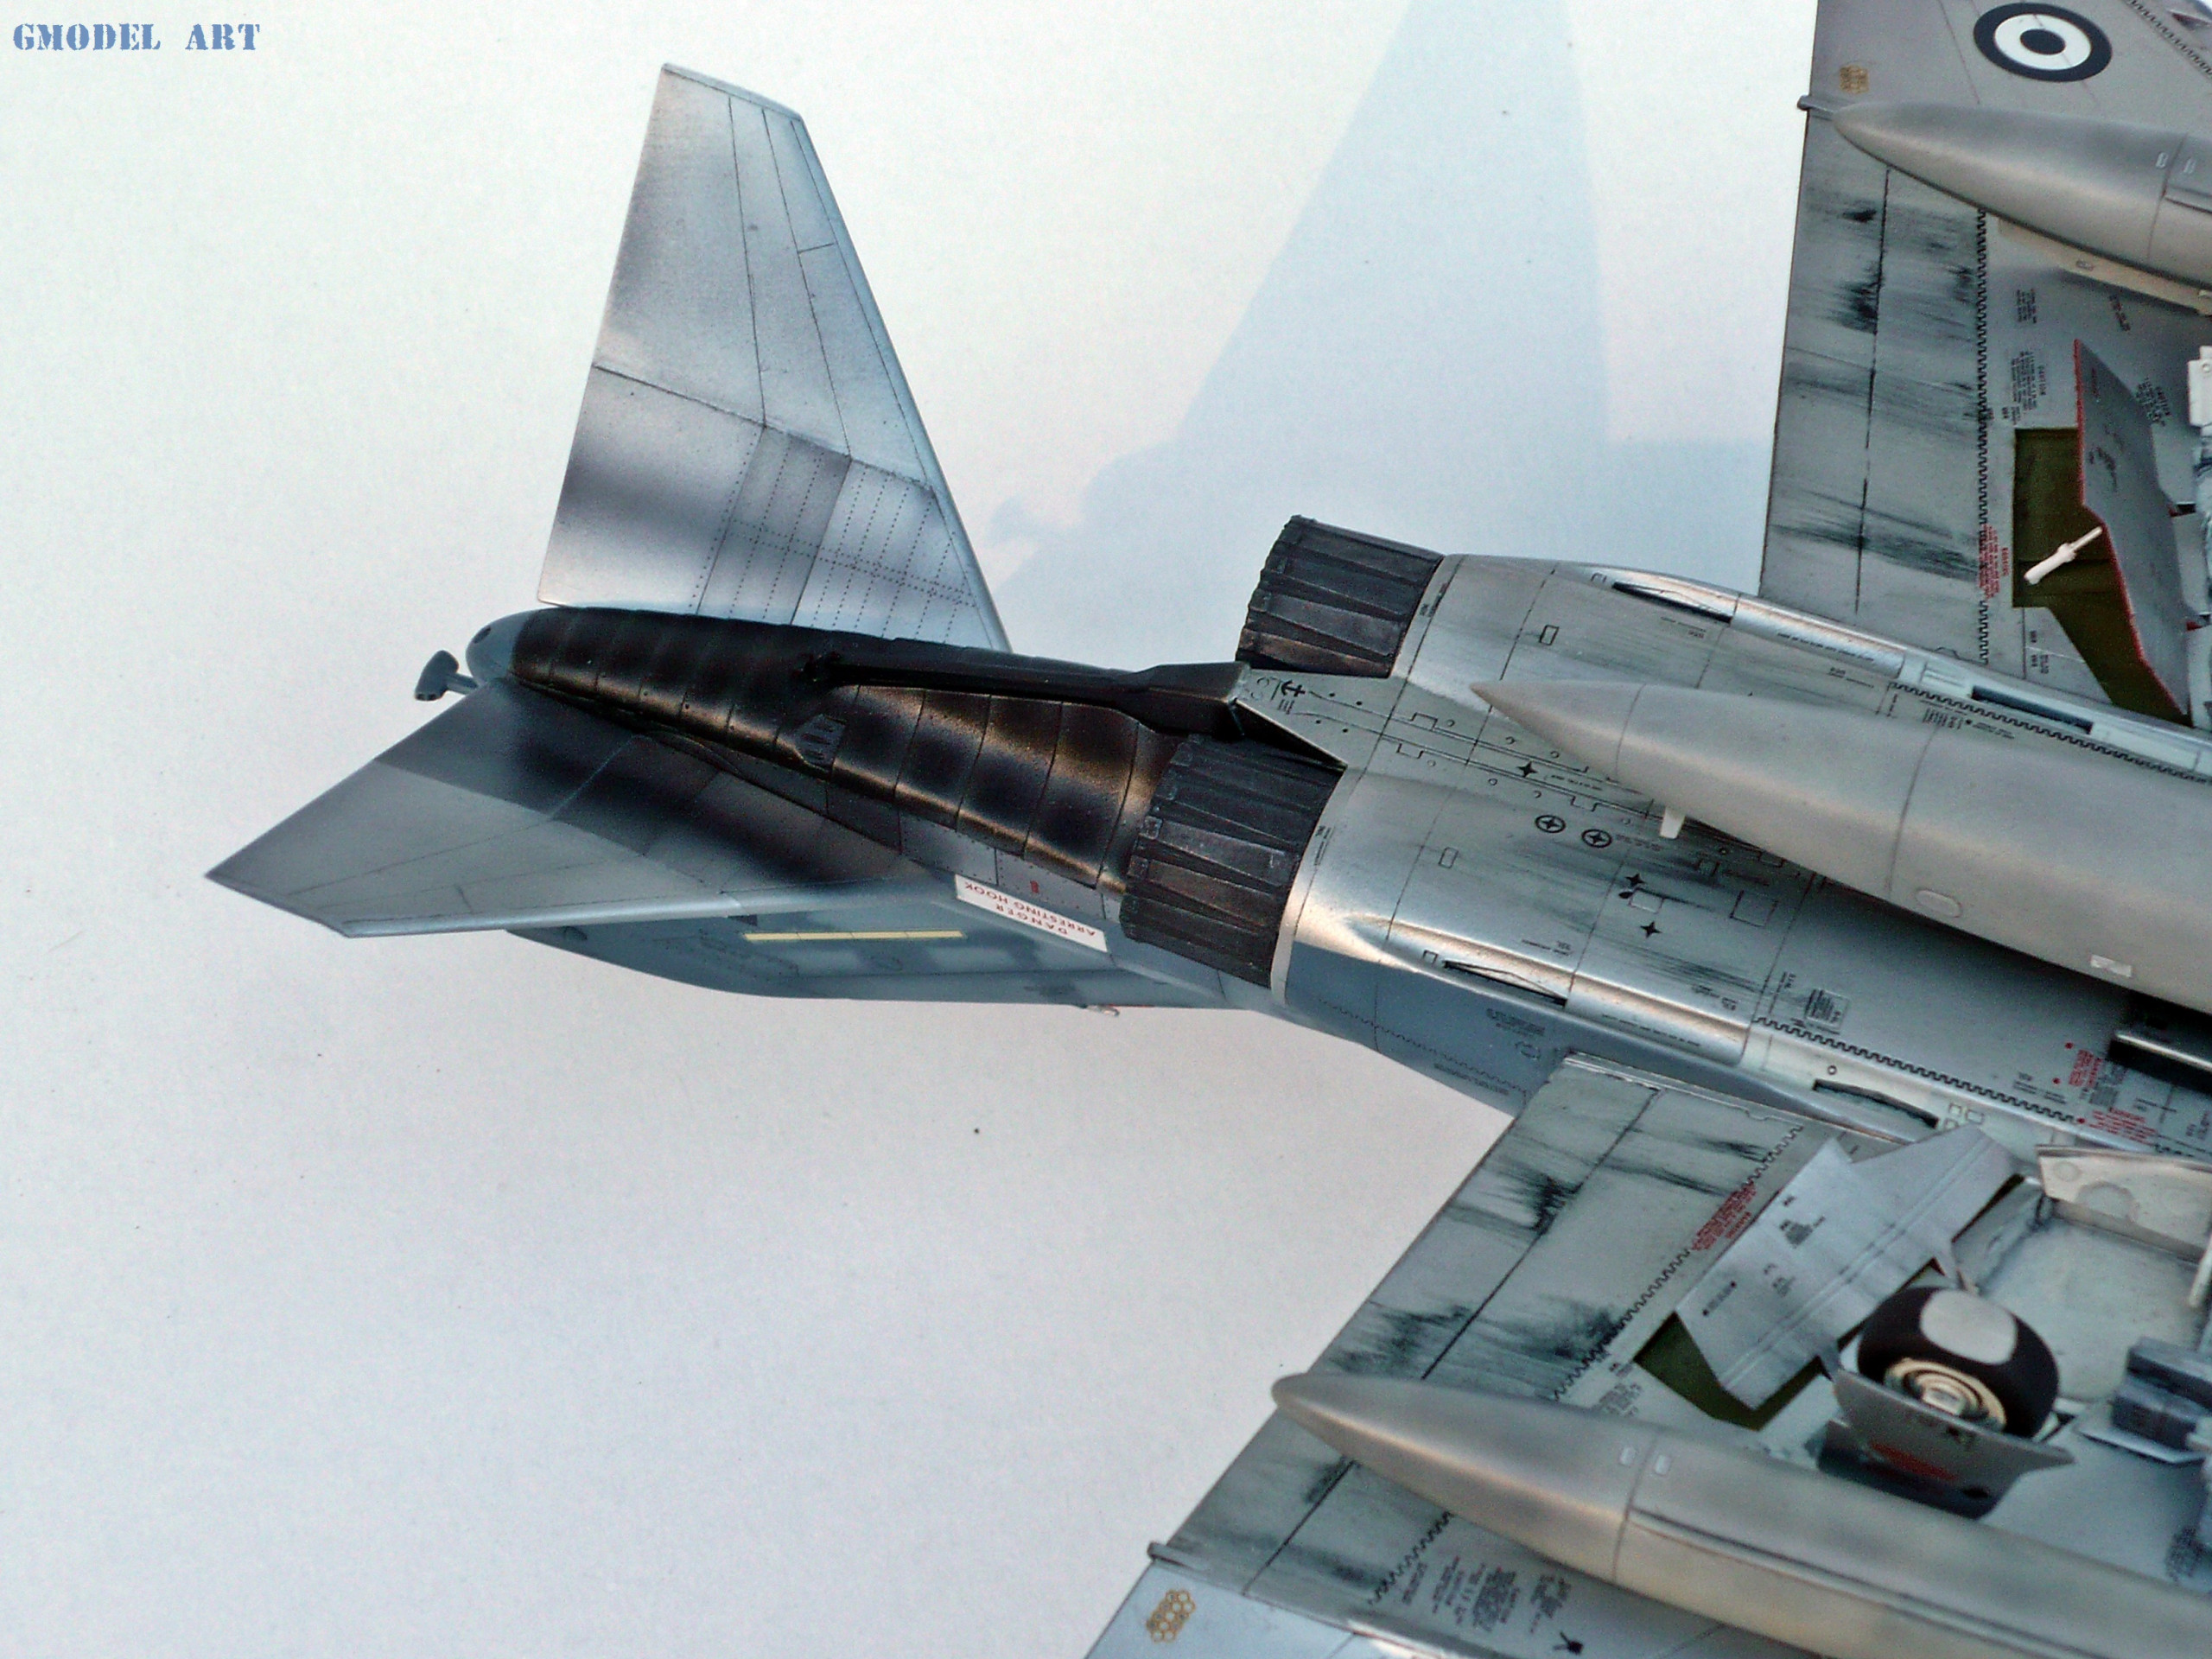
For the upper exhaust area’s NMF finish I used Mig Ammo / Alclad Duraluminium (ALC 102) and a mix of the same color adding 2-3 drops of Jet Exhaust (ALC 113) for the darker panel in the same upper areas (pics 102,103)
For the lower exhaust area’s NMF finish I used Mig Ammo’s Duraluminium (ALC 102), Jet Exhaust (ALC 113), Burnt Iron (ALC 121) and various pigments to highlight some specific spots (pics 104,105)
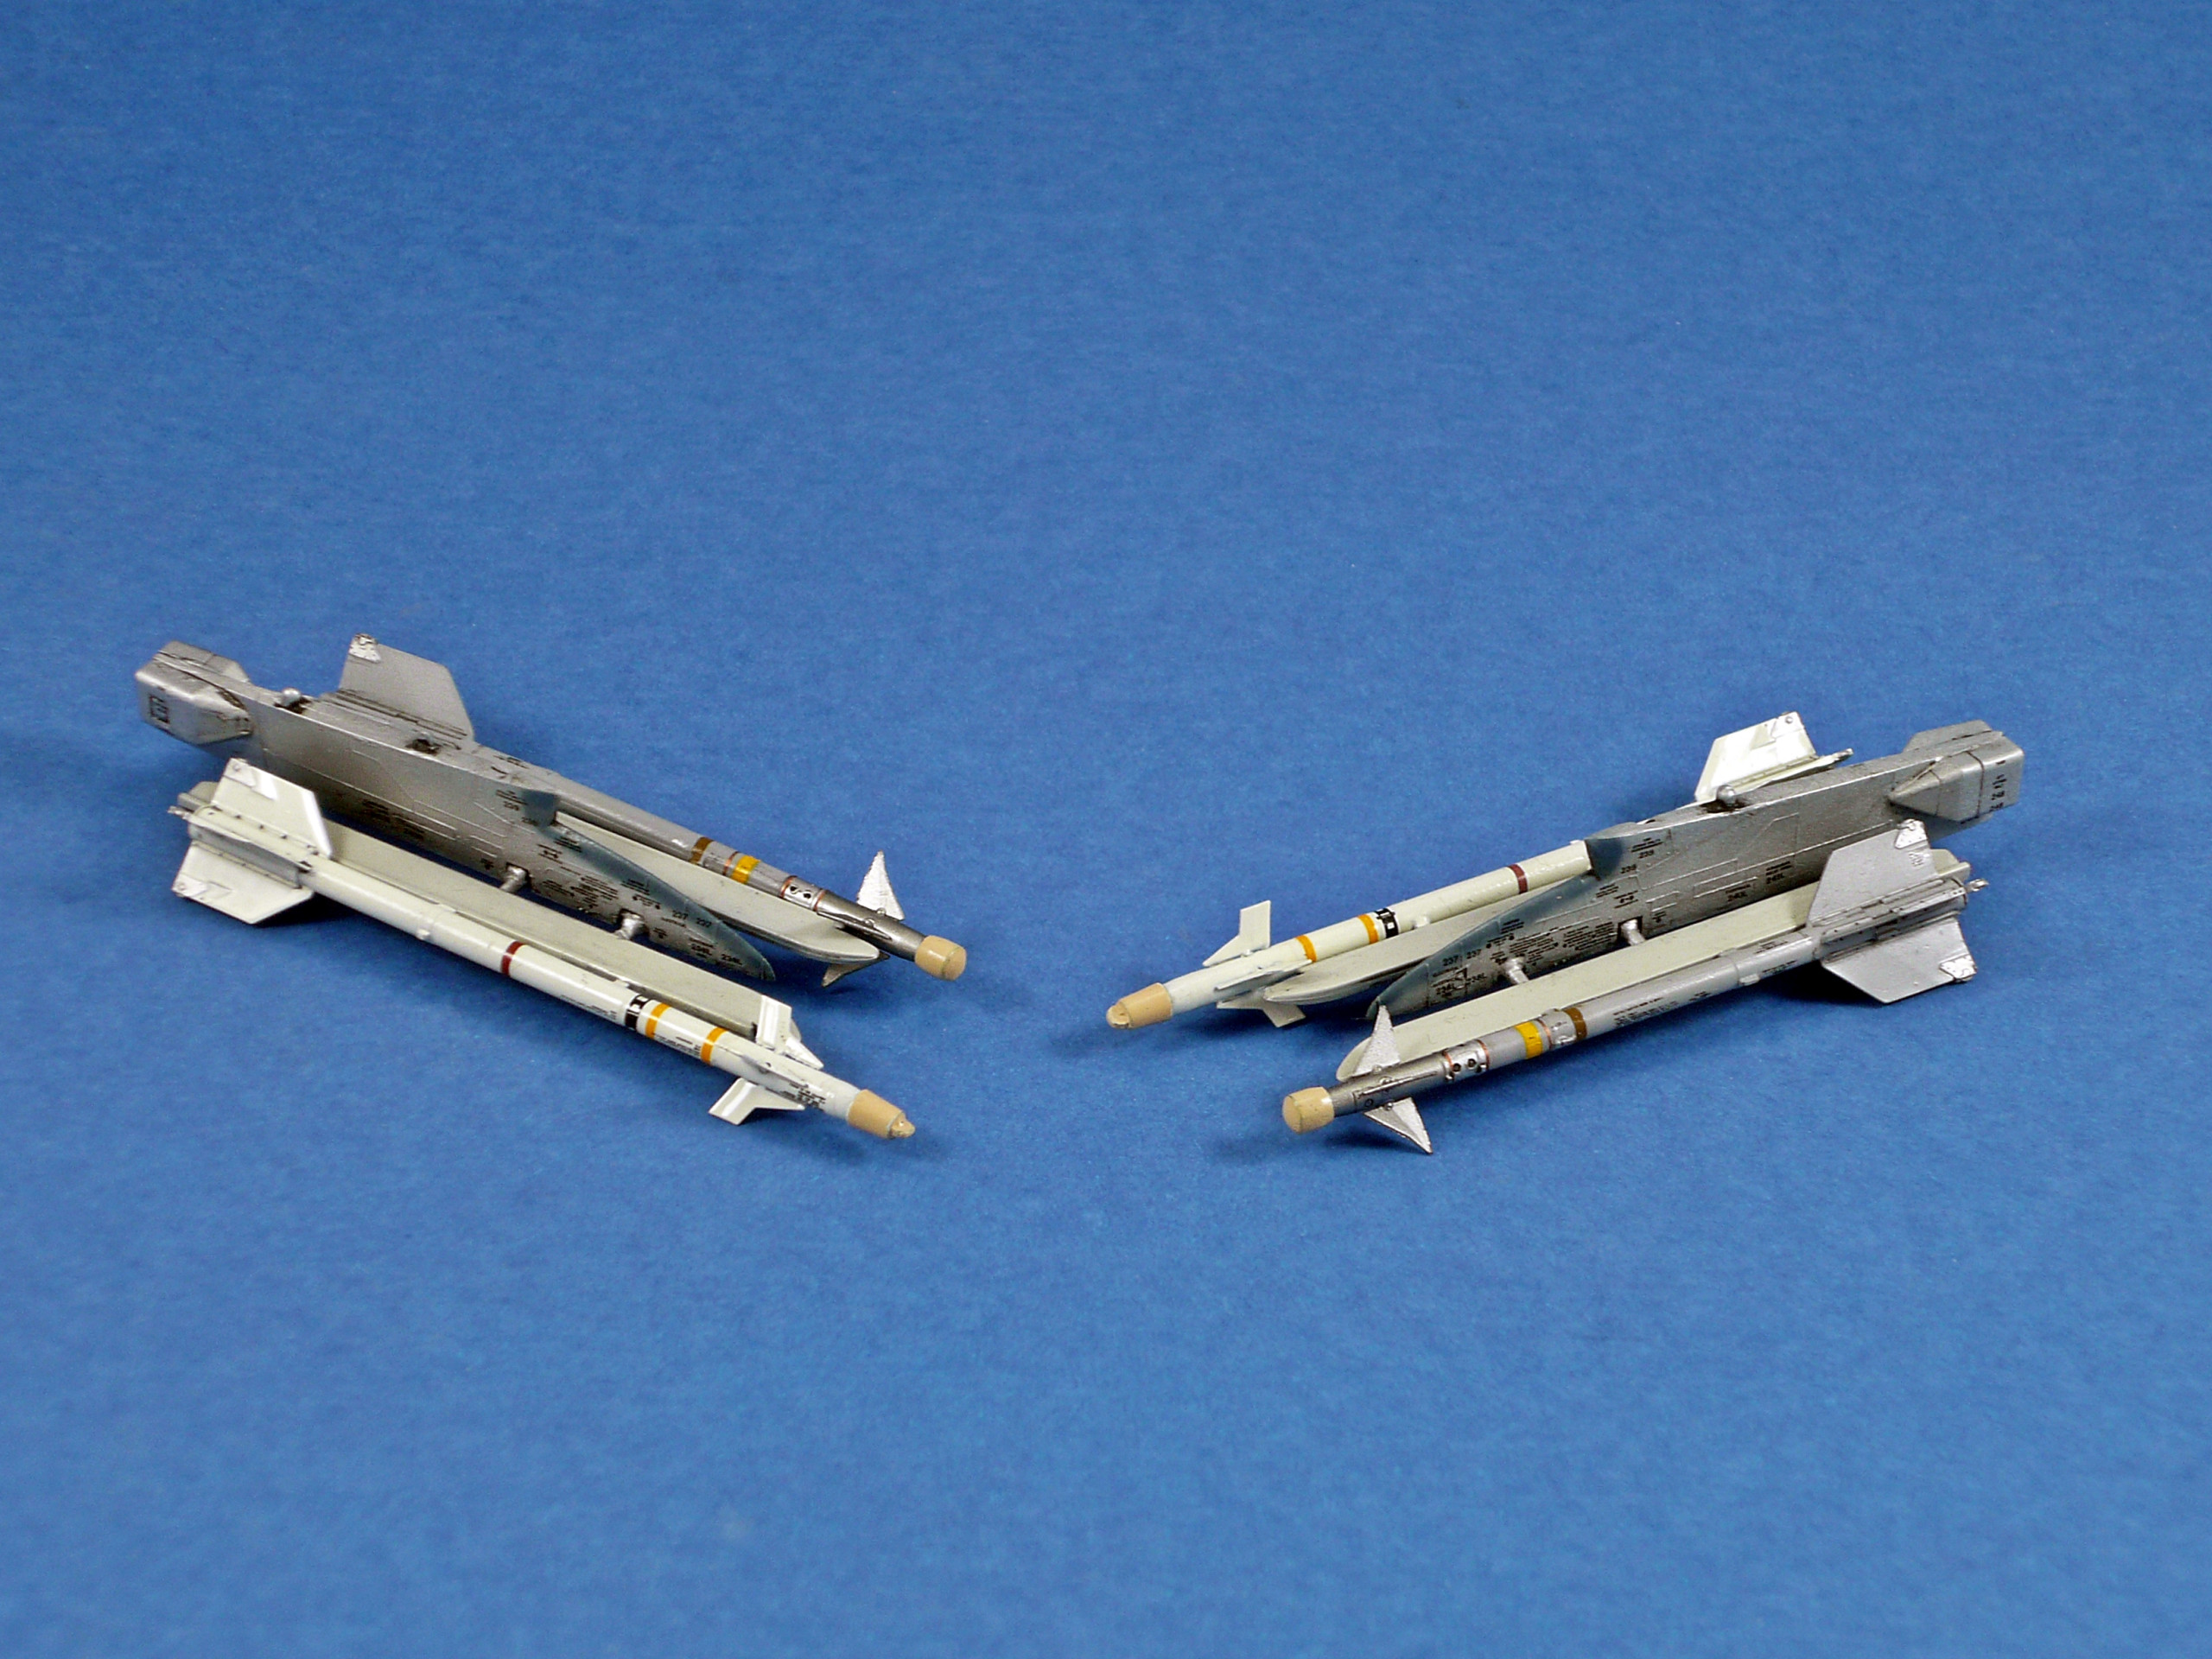
Then decaling procedure started and for the specific project I used “Icarus Decals” decal sheets (48003 & 48004 for stencils). It was a very time consuming stage but it was worth it!!! (pics 110,111)
After the decaling stage finished I used again the “Lucky” series gloss varnish to seal the decals and protect them from the upcoming weathering procedure. I sprayed all the upper surfaces but I tried to avoid the NMF areas (pics 114,115,116,117)
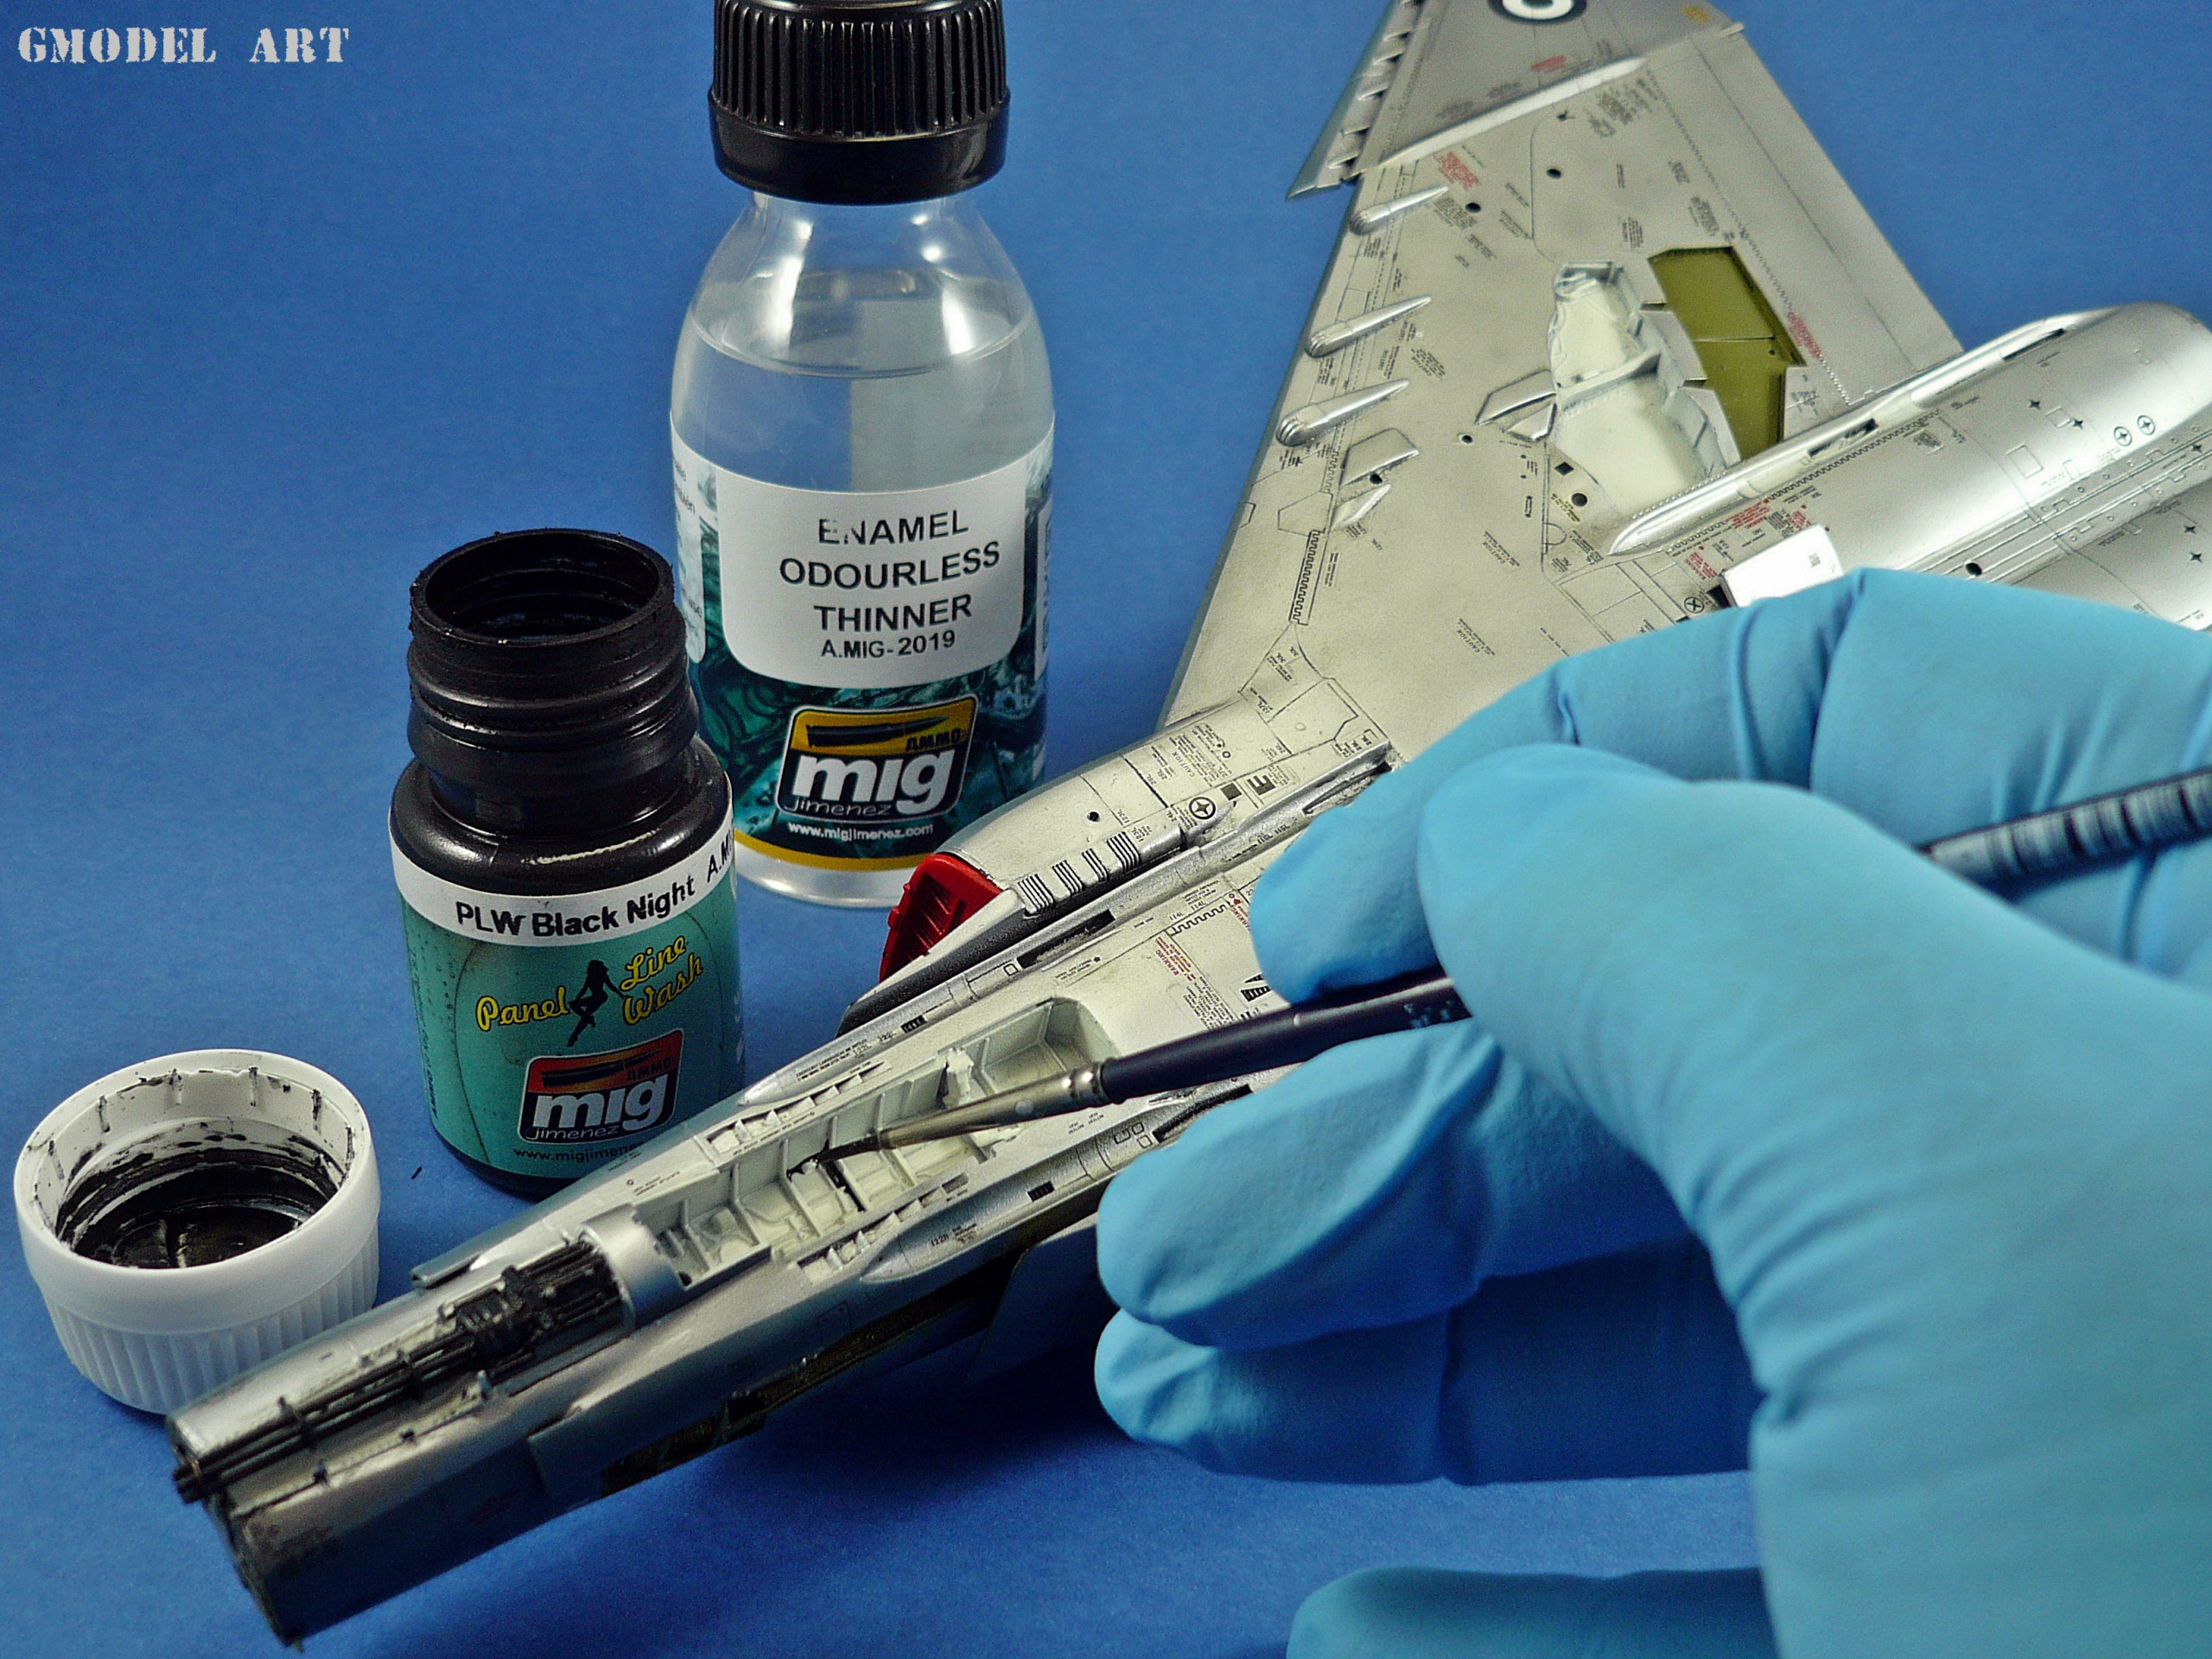
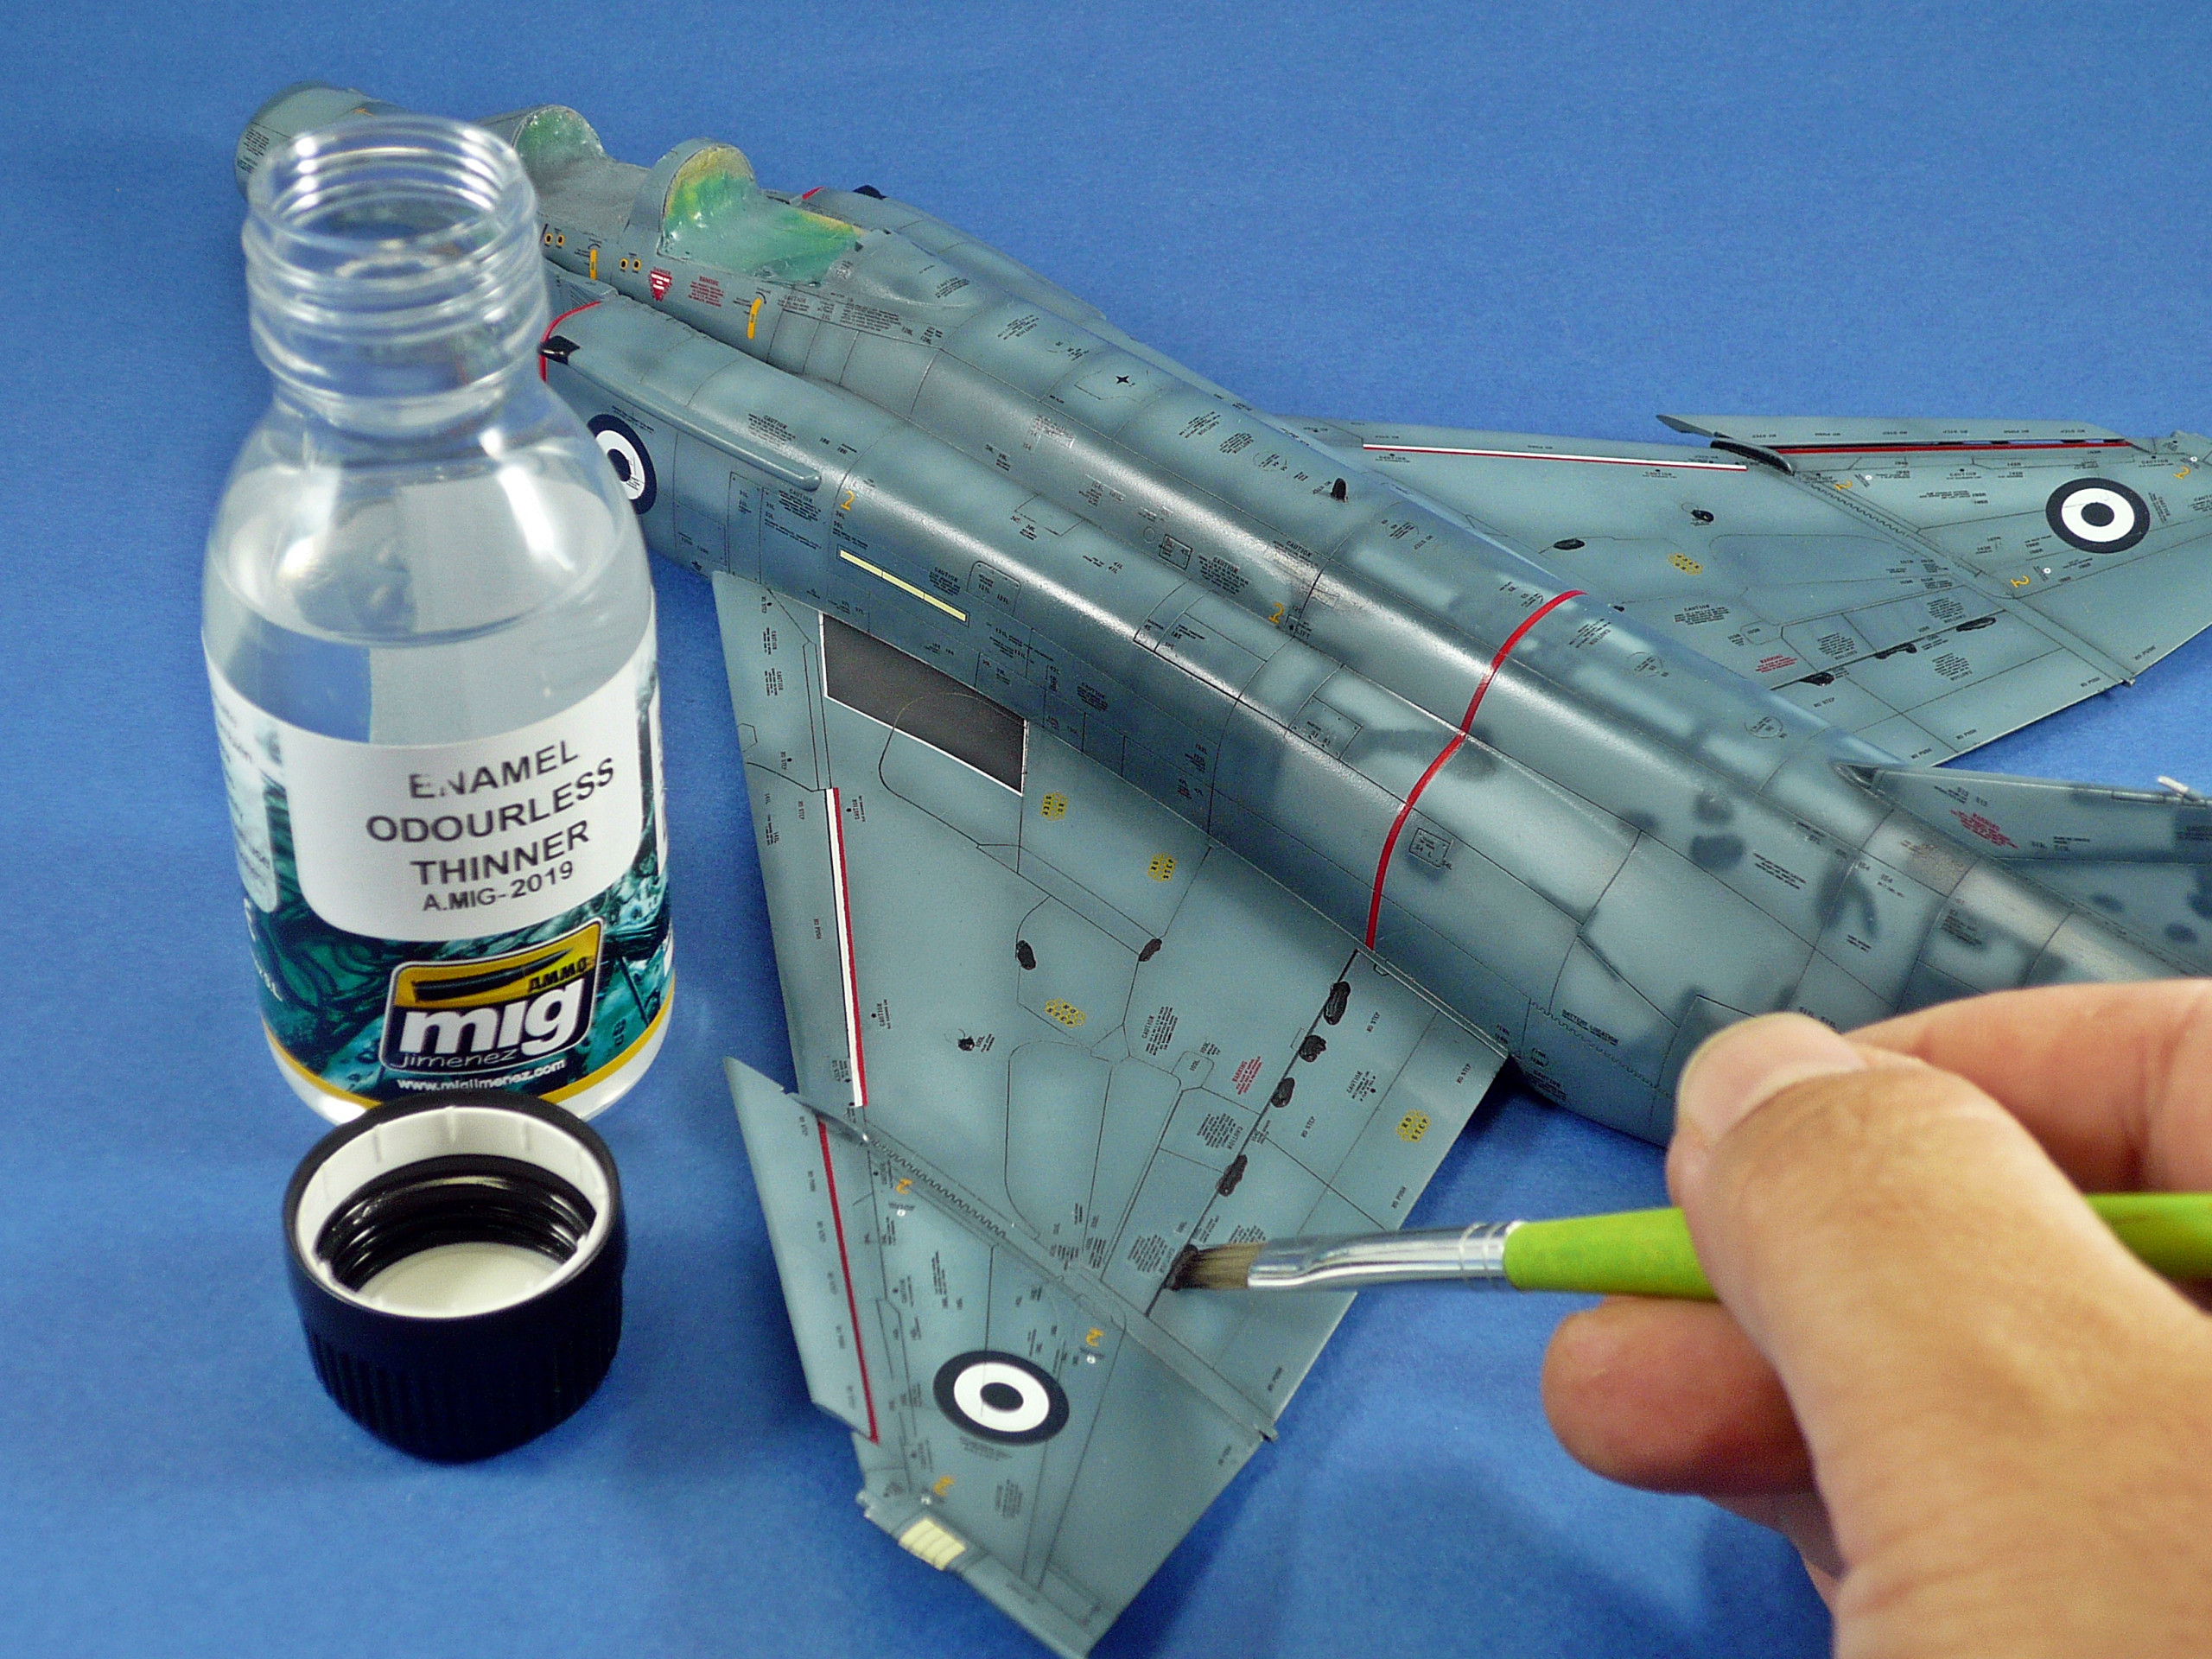
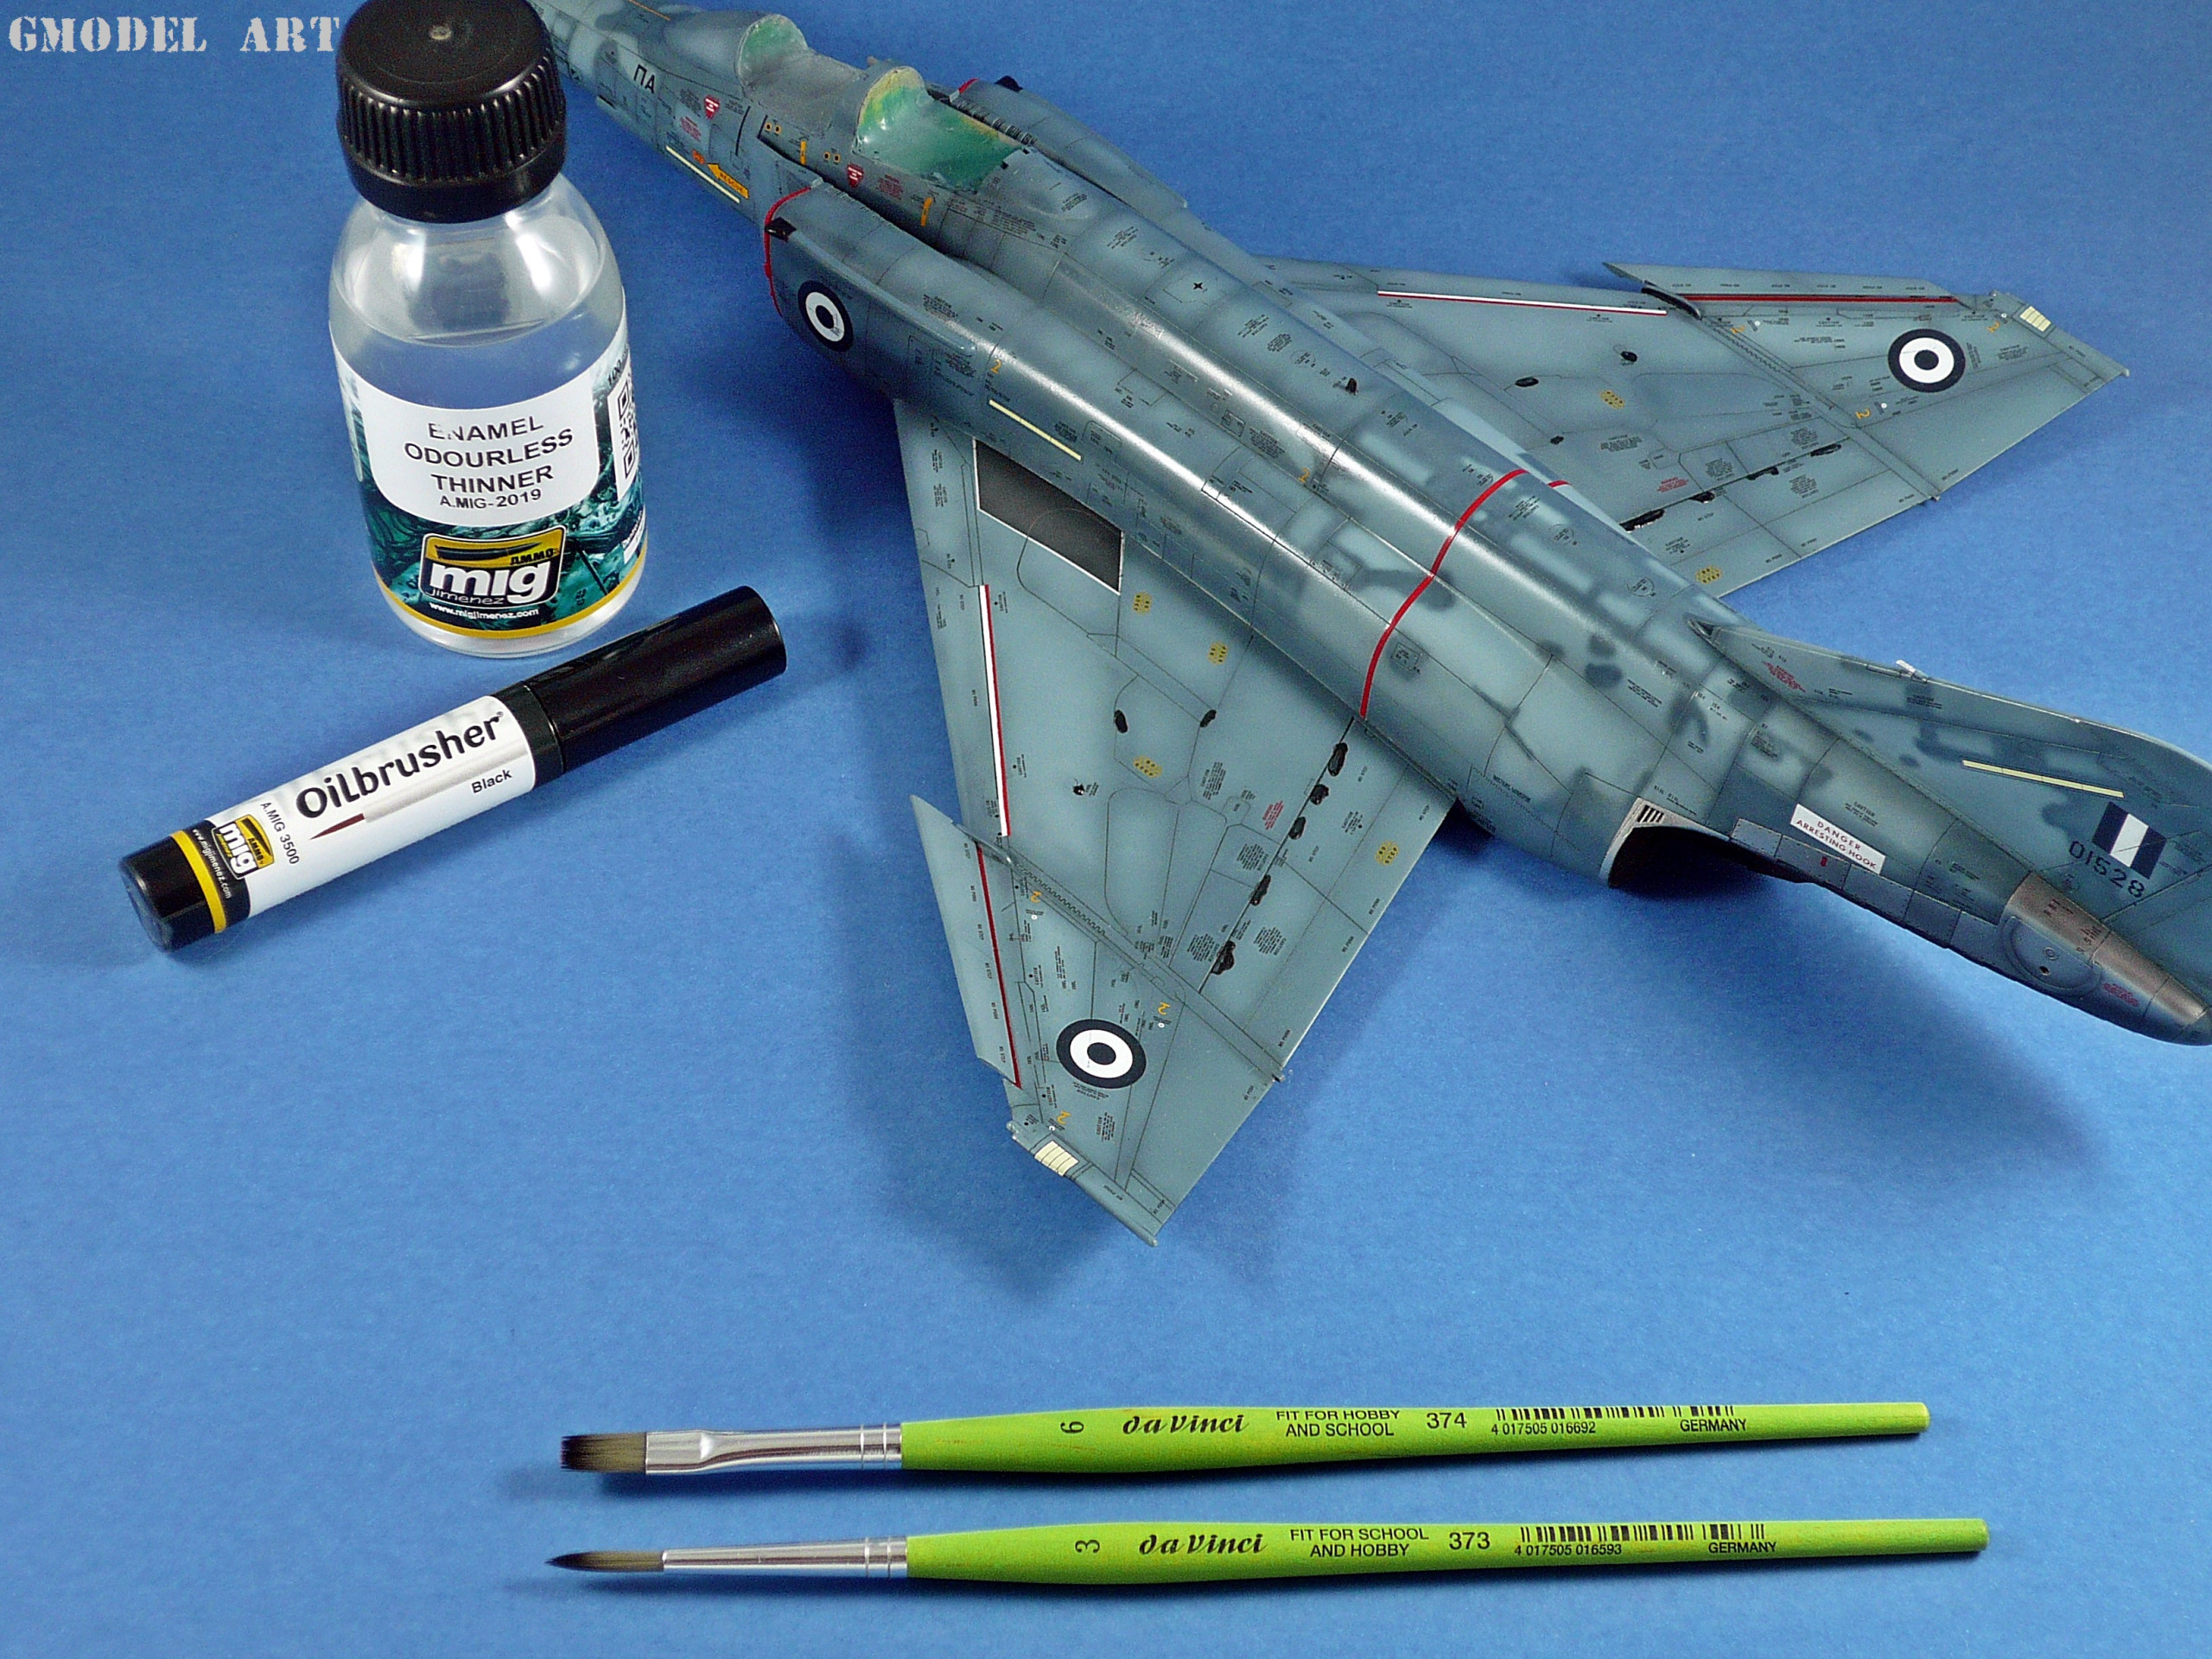
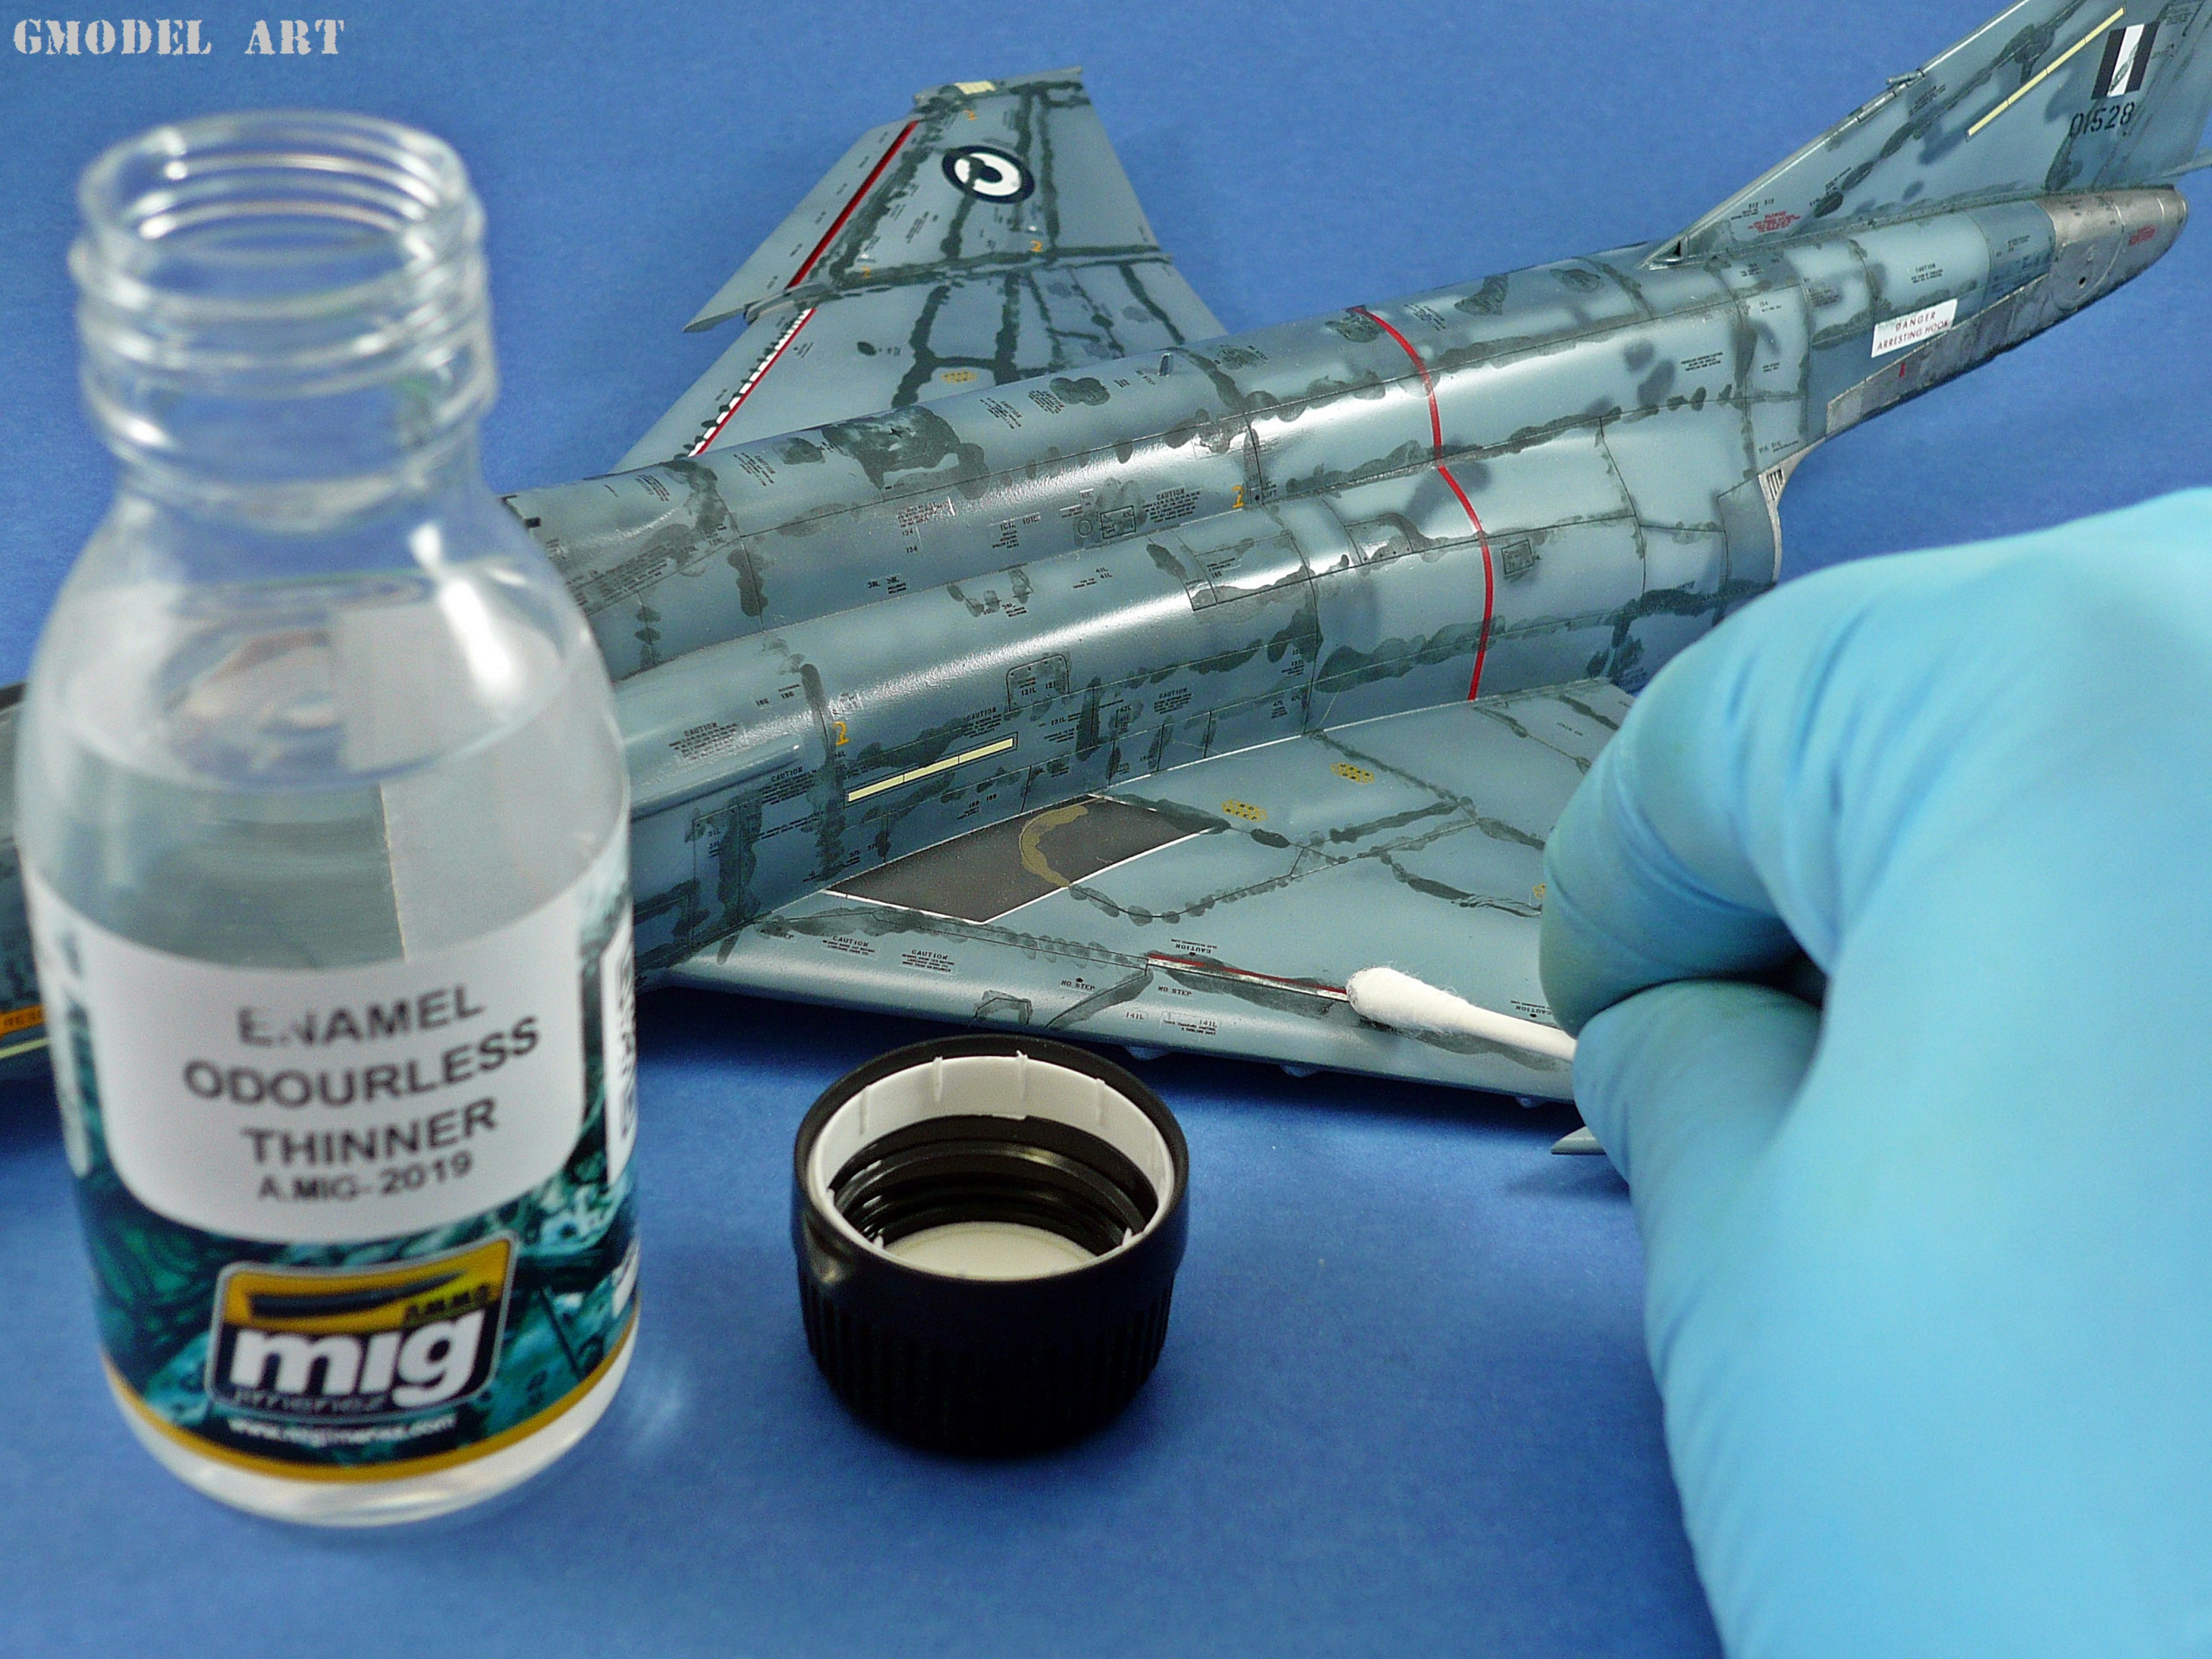
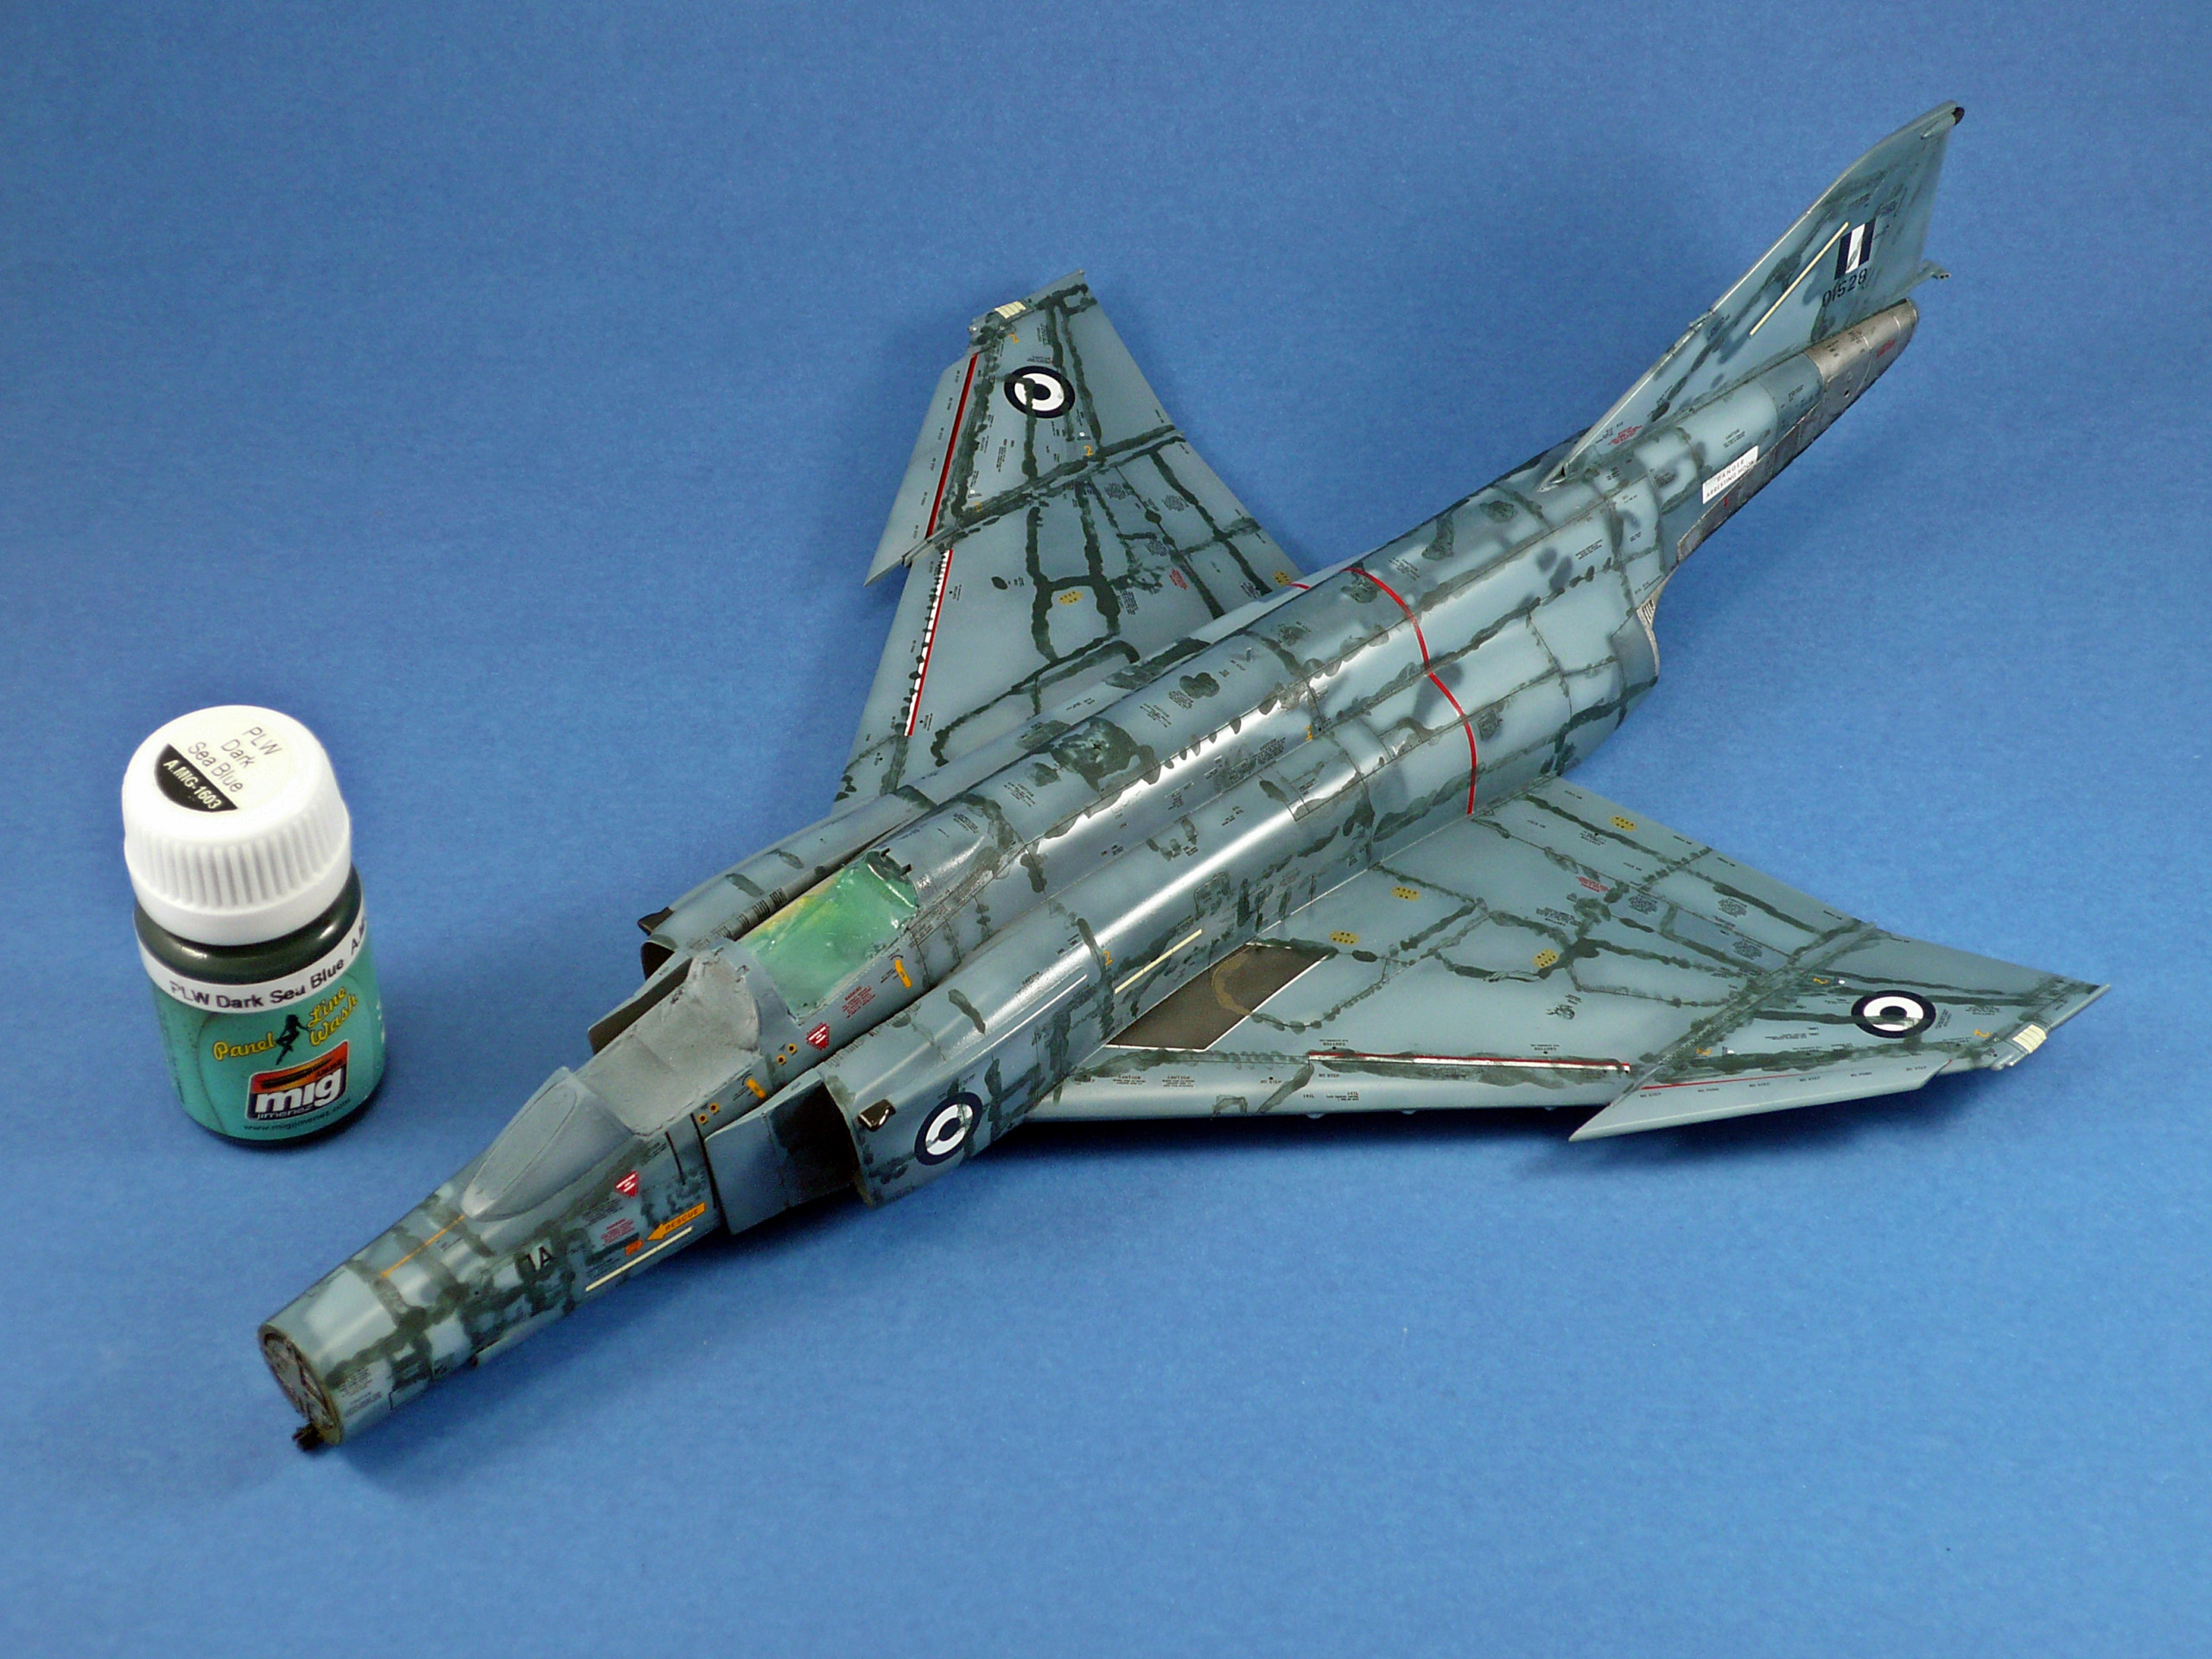
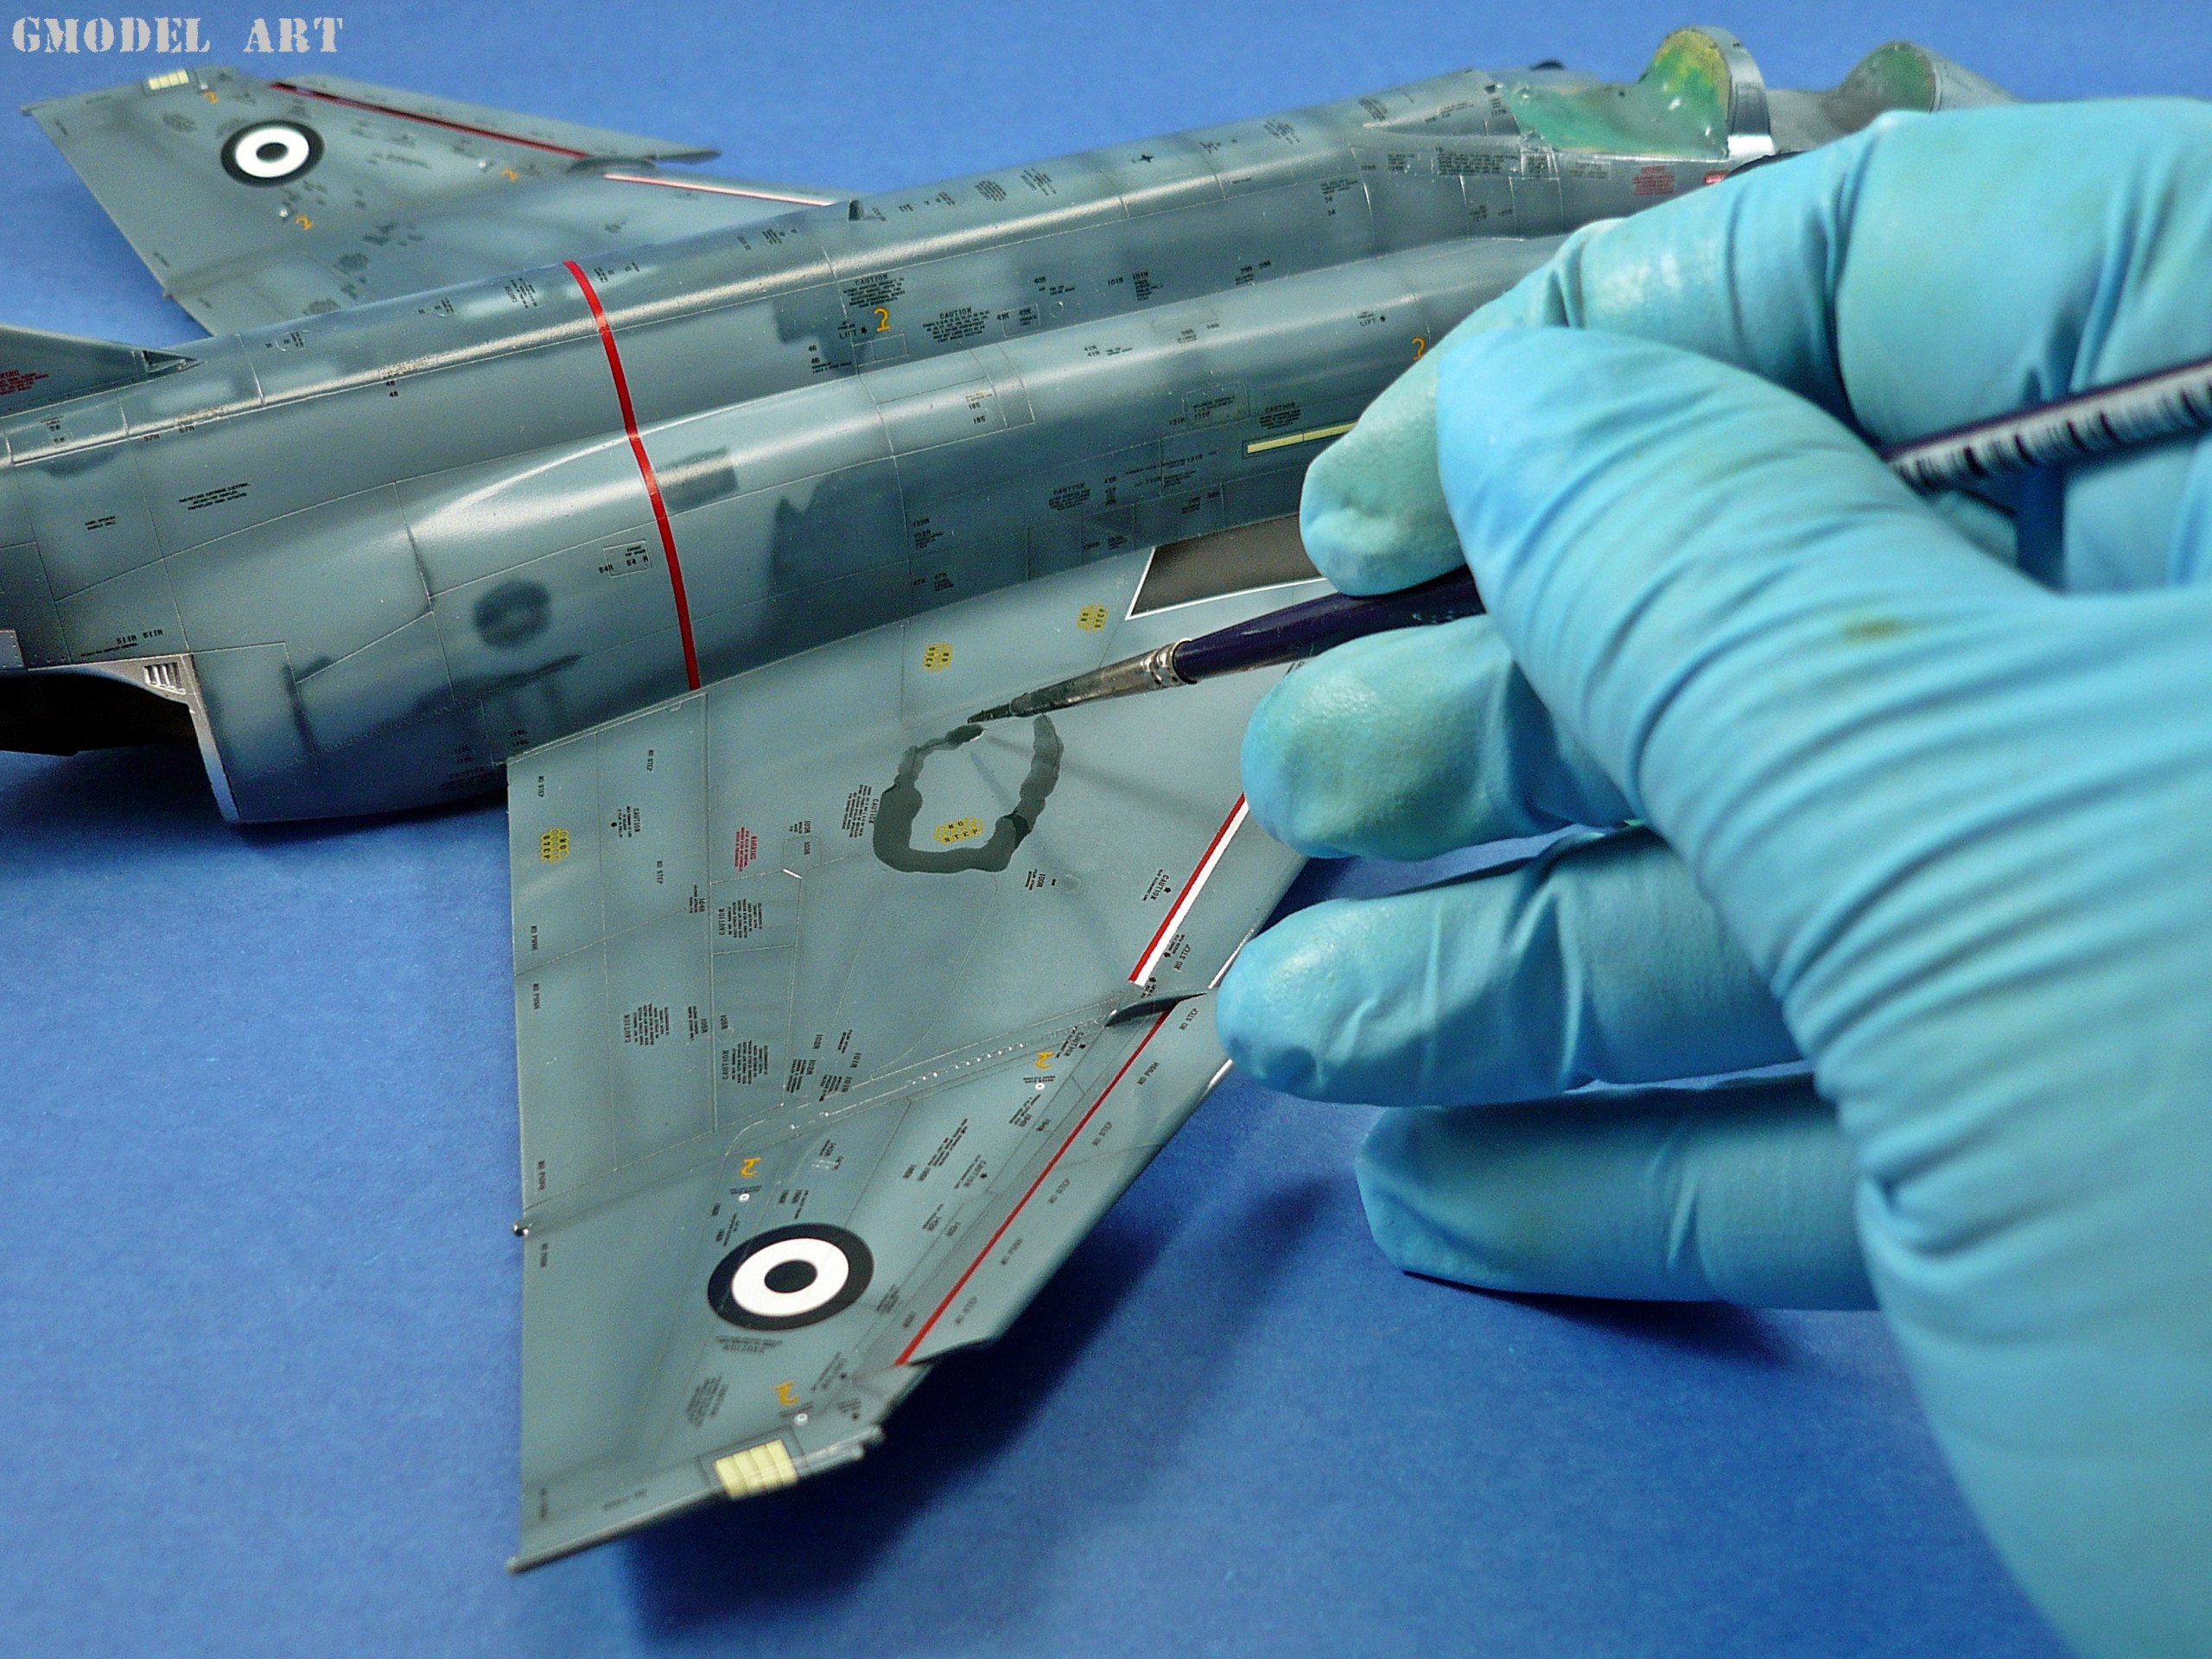
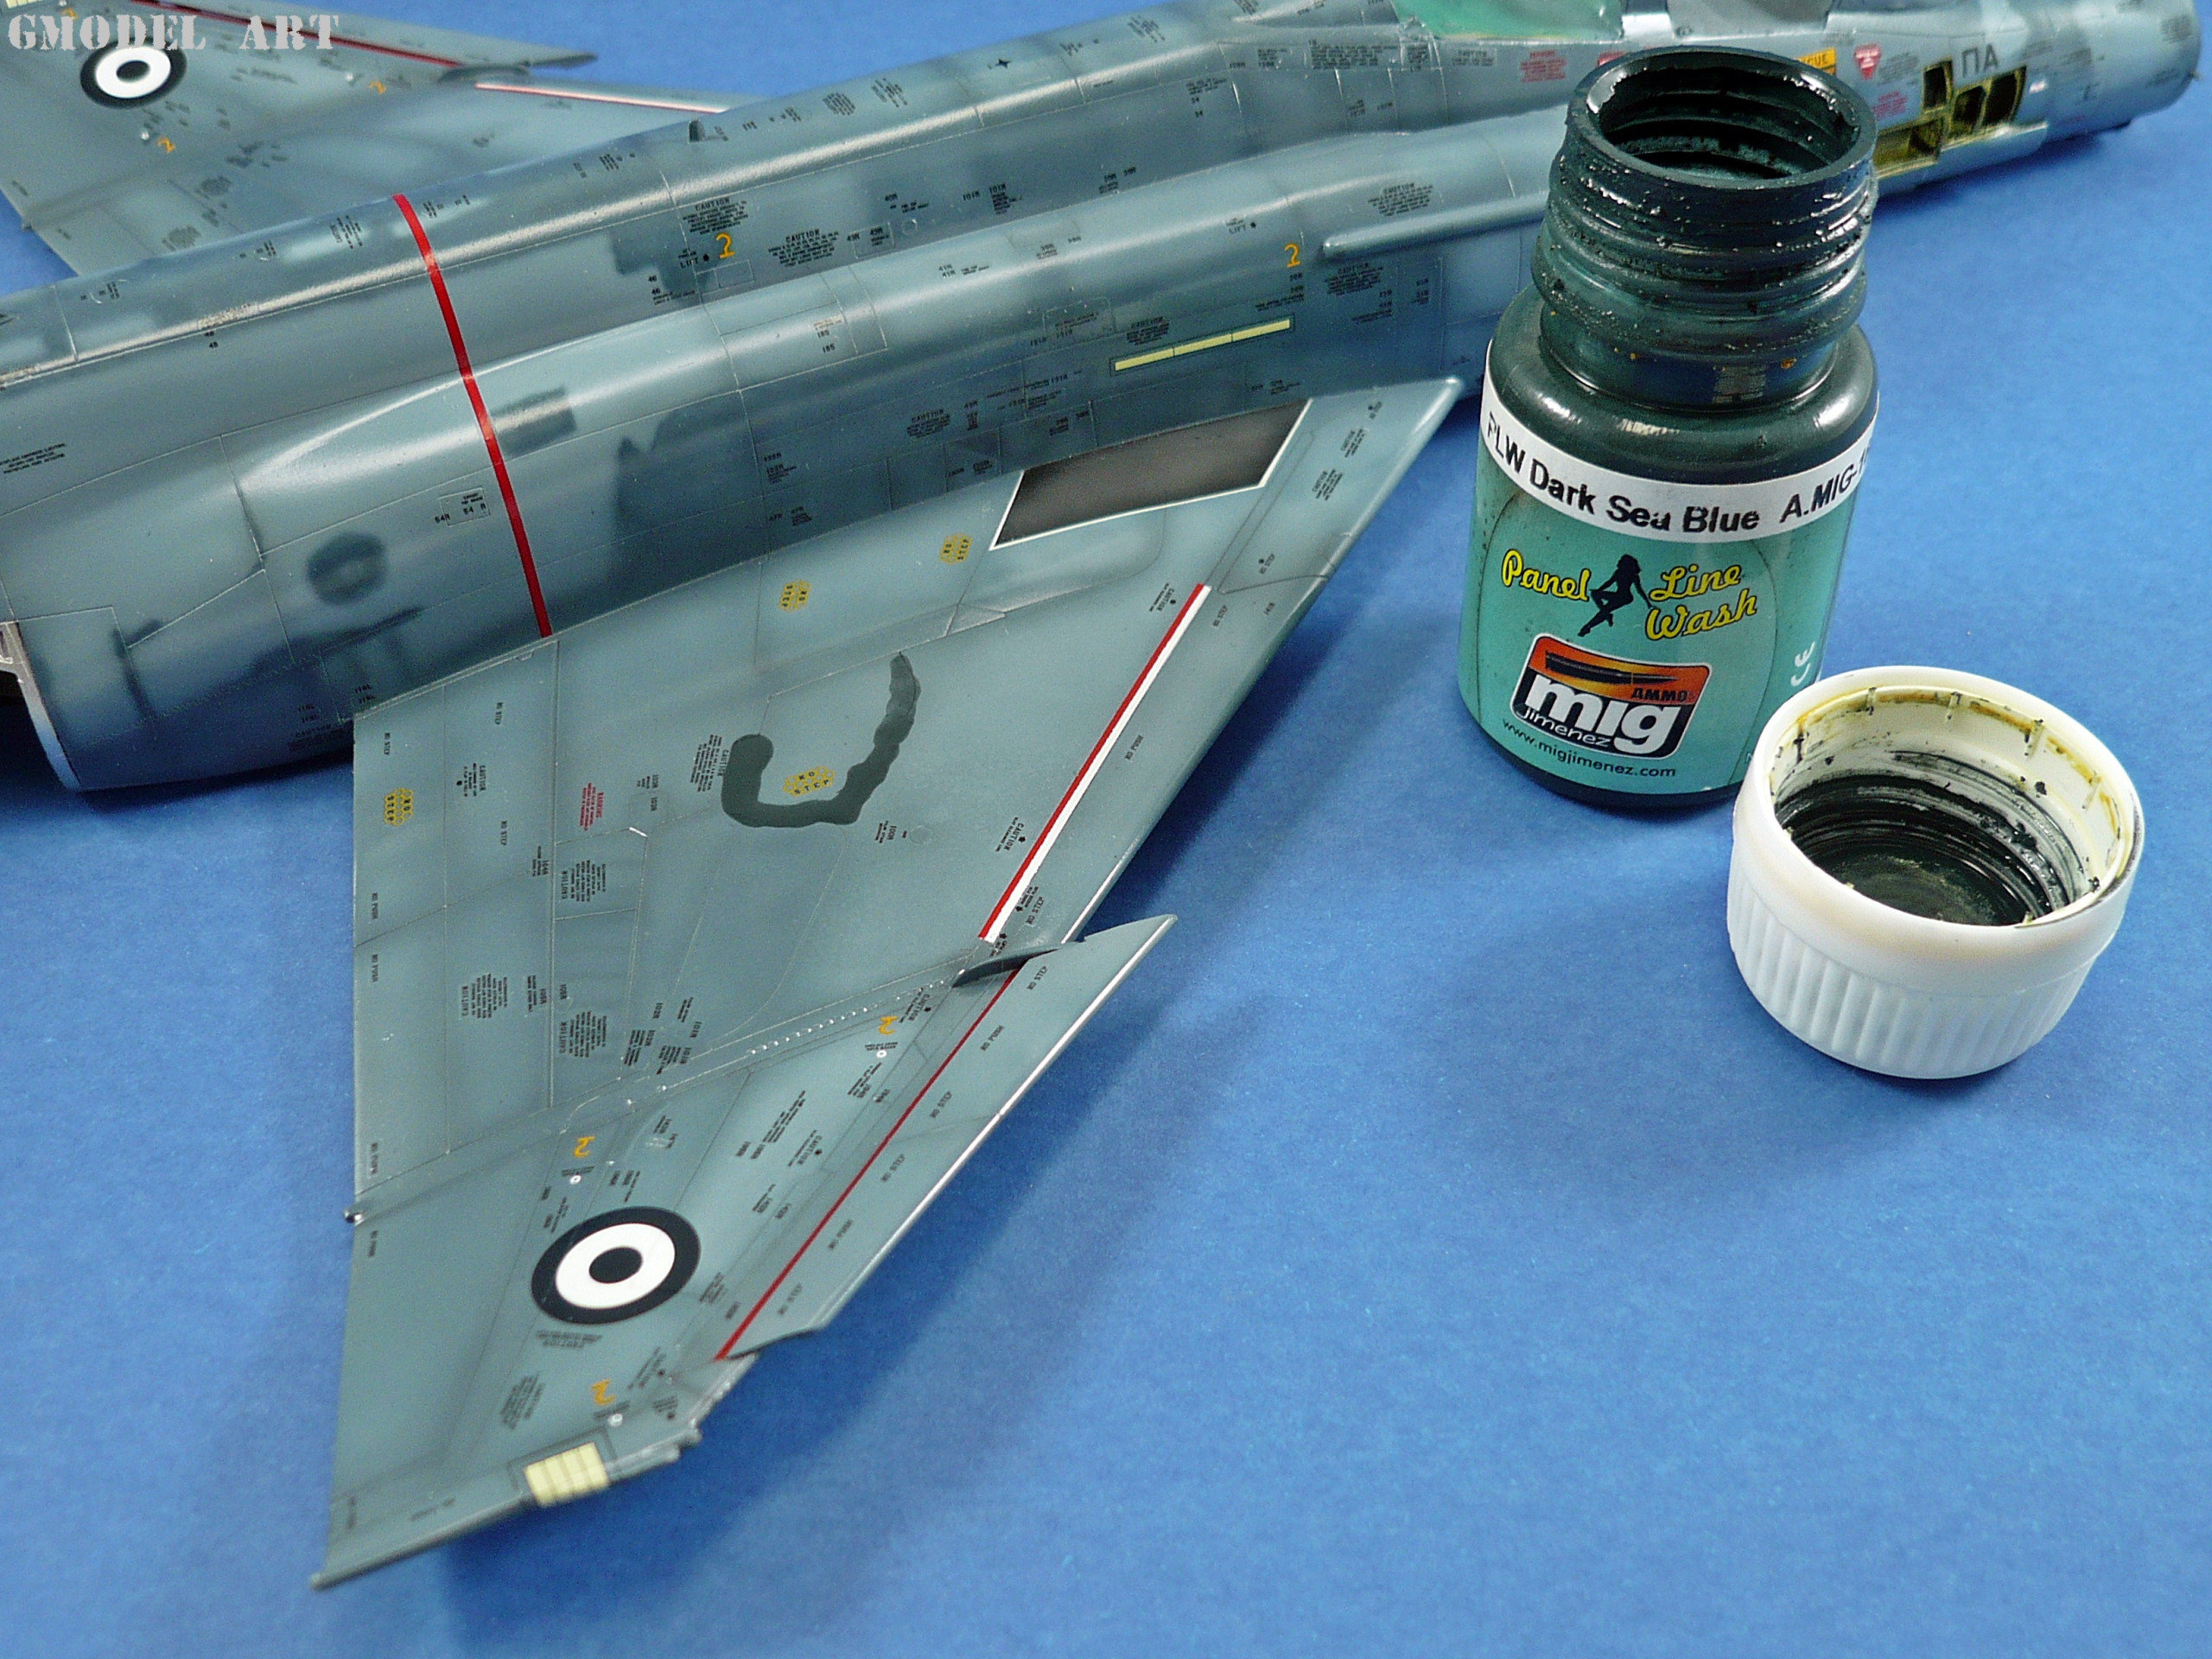
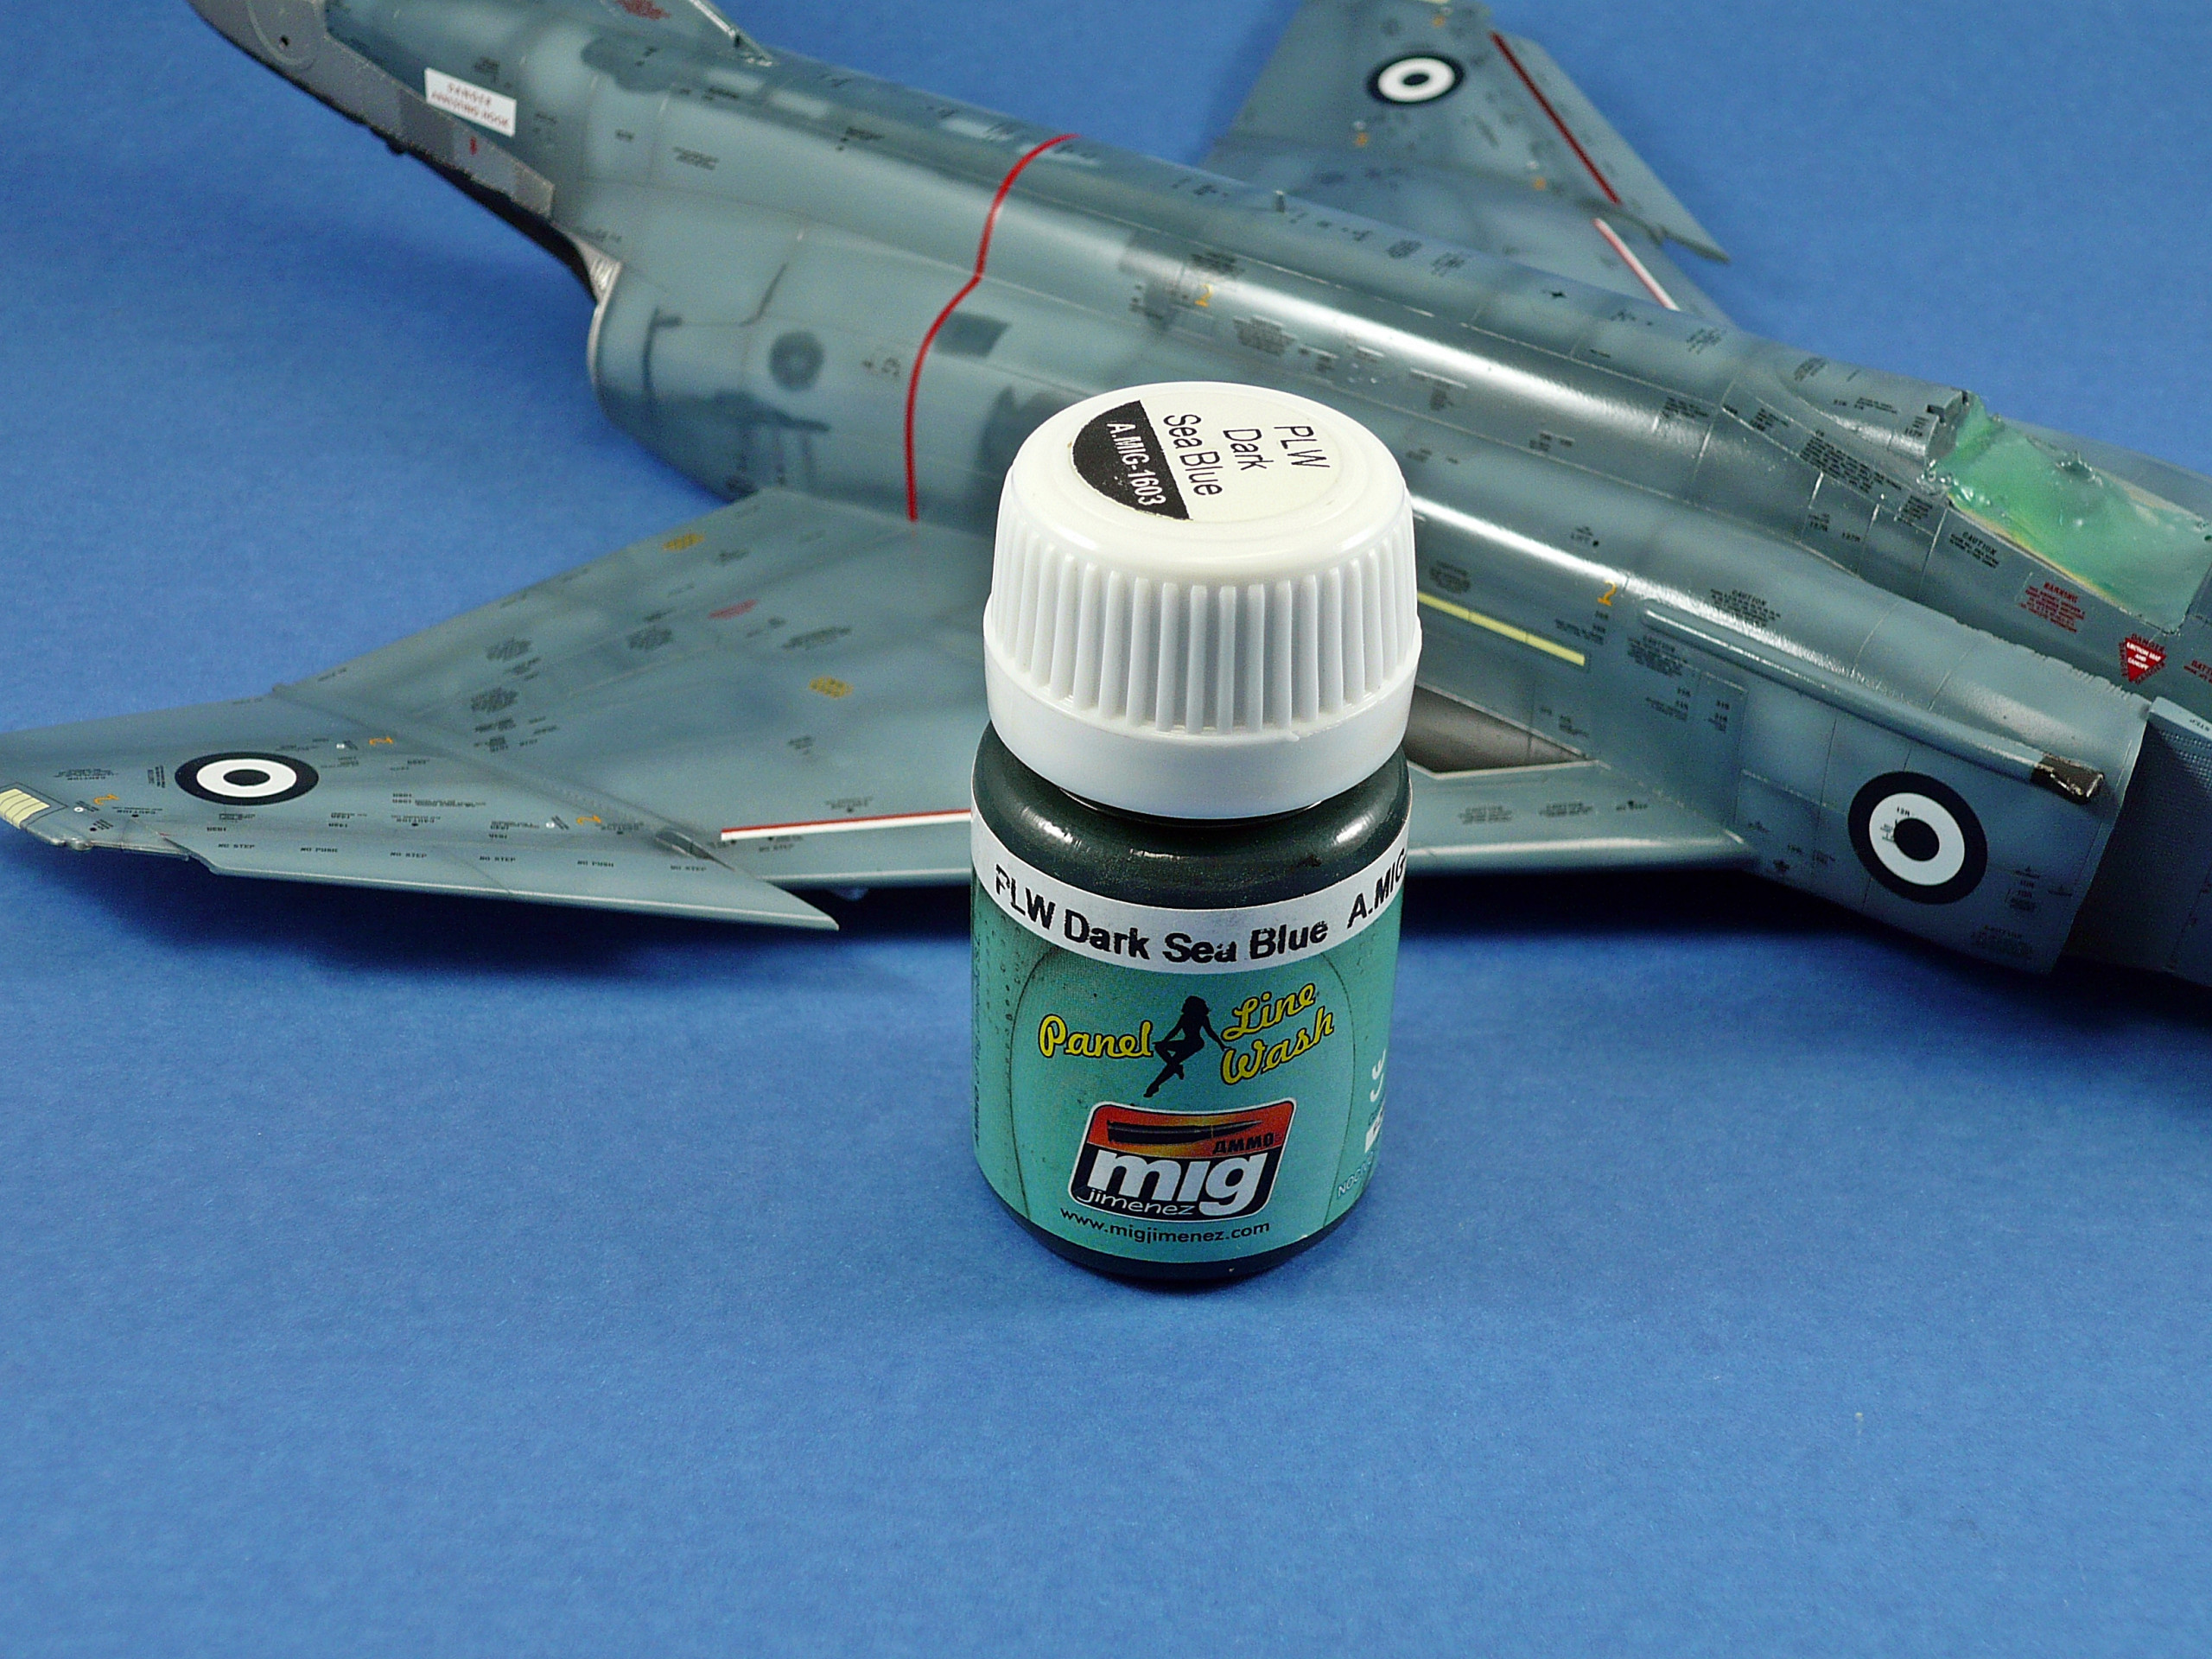
Weathering procedure started in the upper surfaces of the model by using Panel Lines Wash from Mig Ammo PLW range. I chose to use Mig Ammo PLW 1603 Dark Sea Blue. I think it was the best and most suitable color for the project. I applied the wash in the panel lines using a fine tip brush (pics 122,125,126,127)
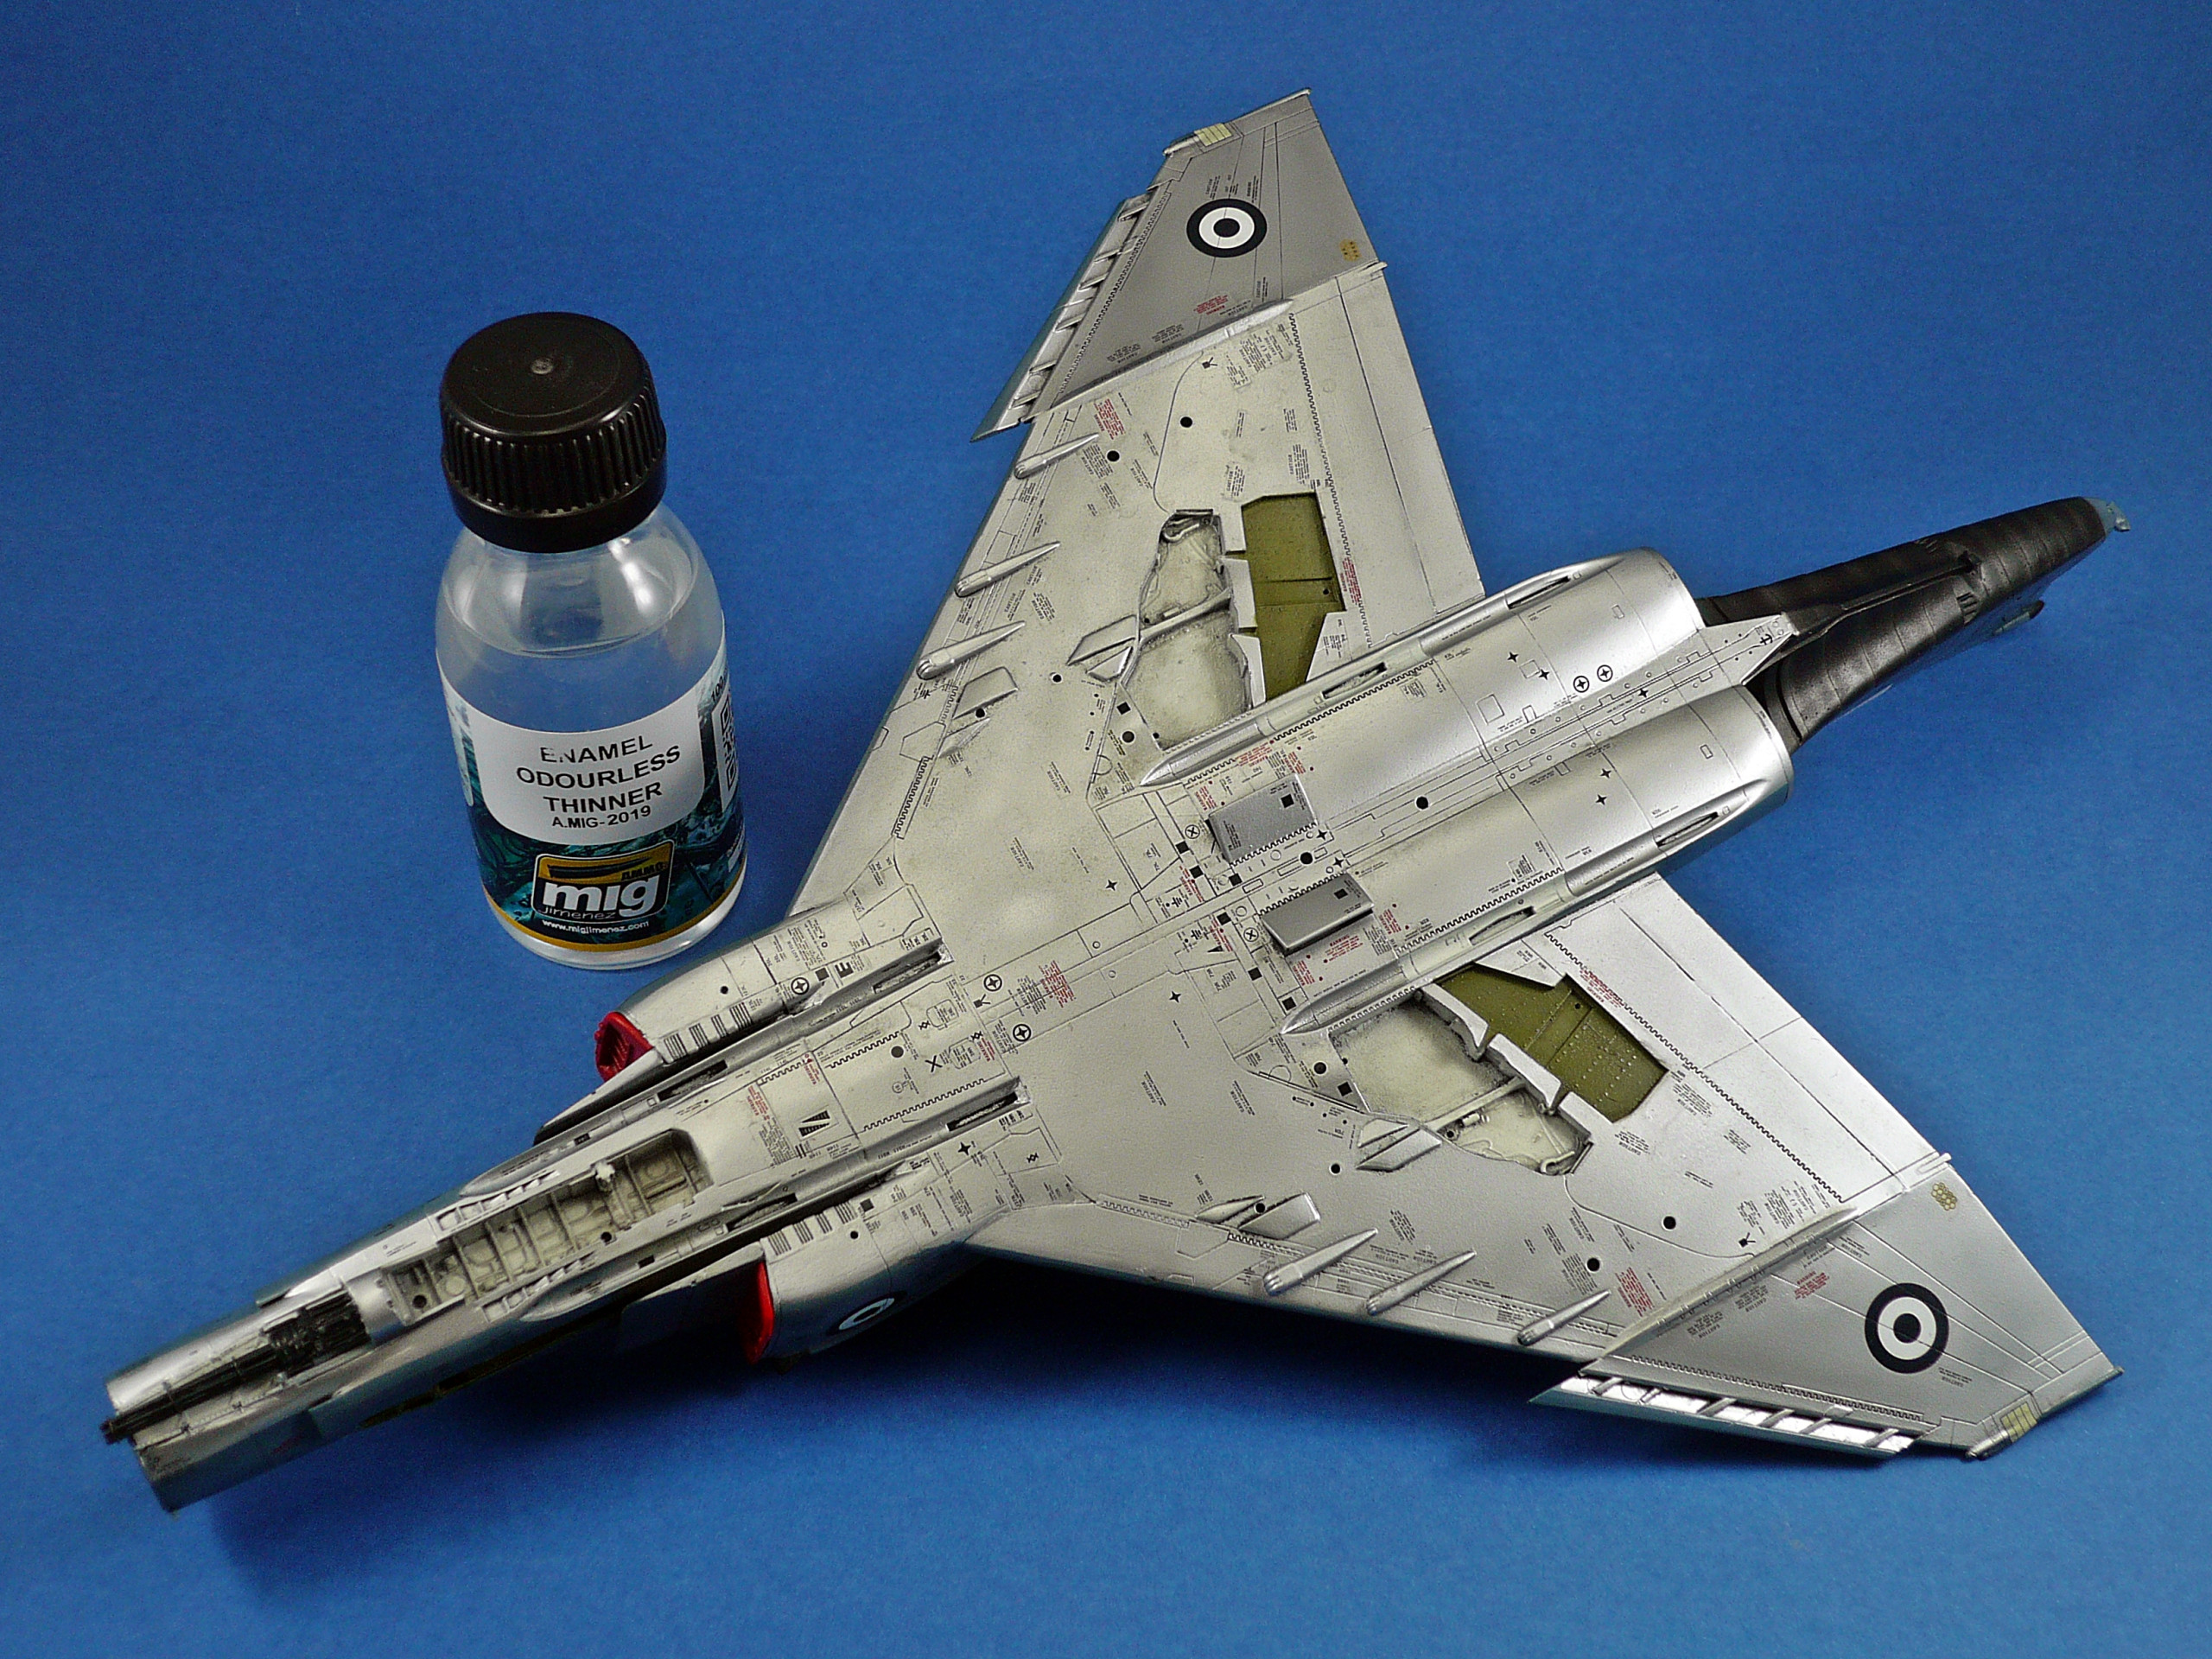
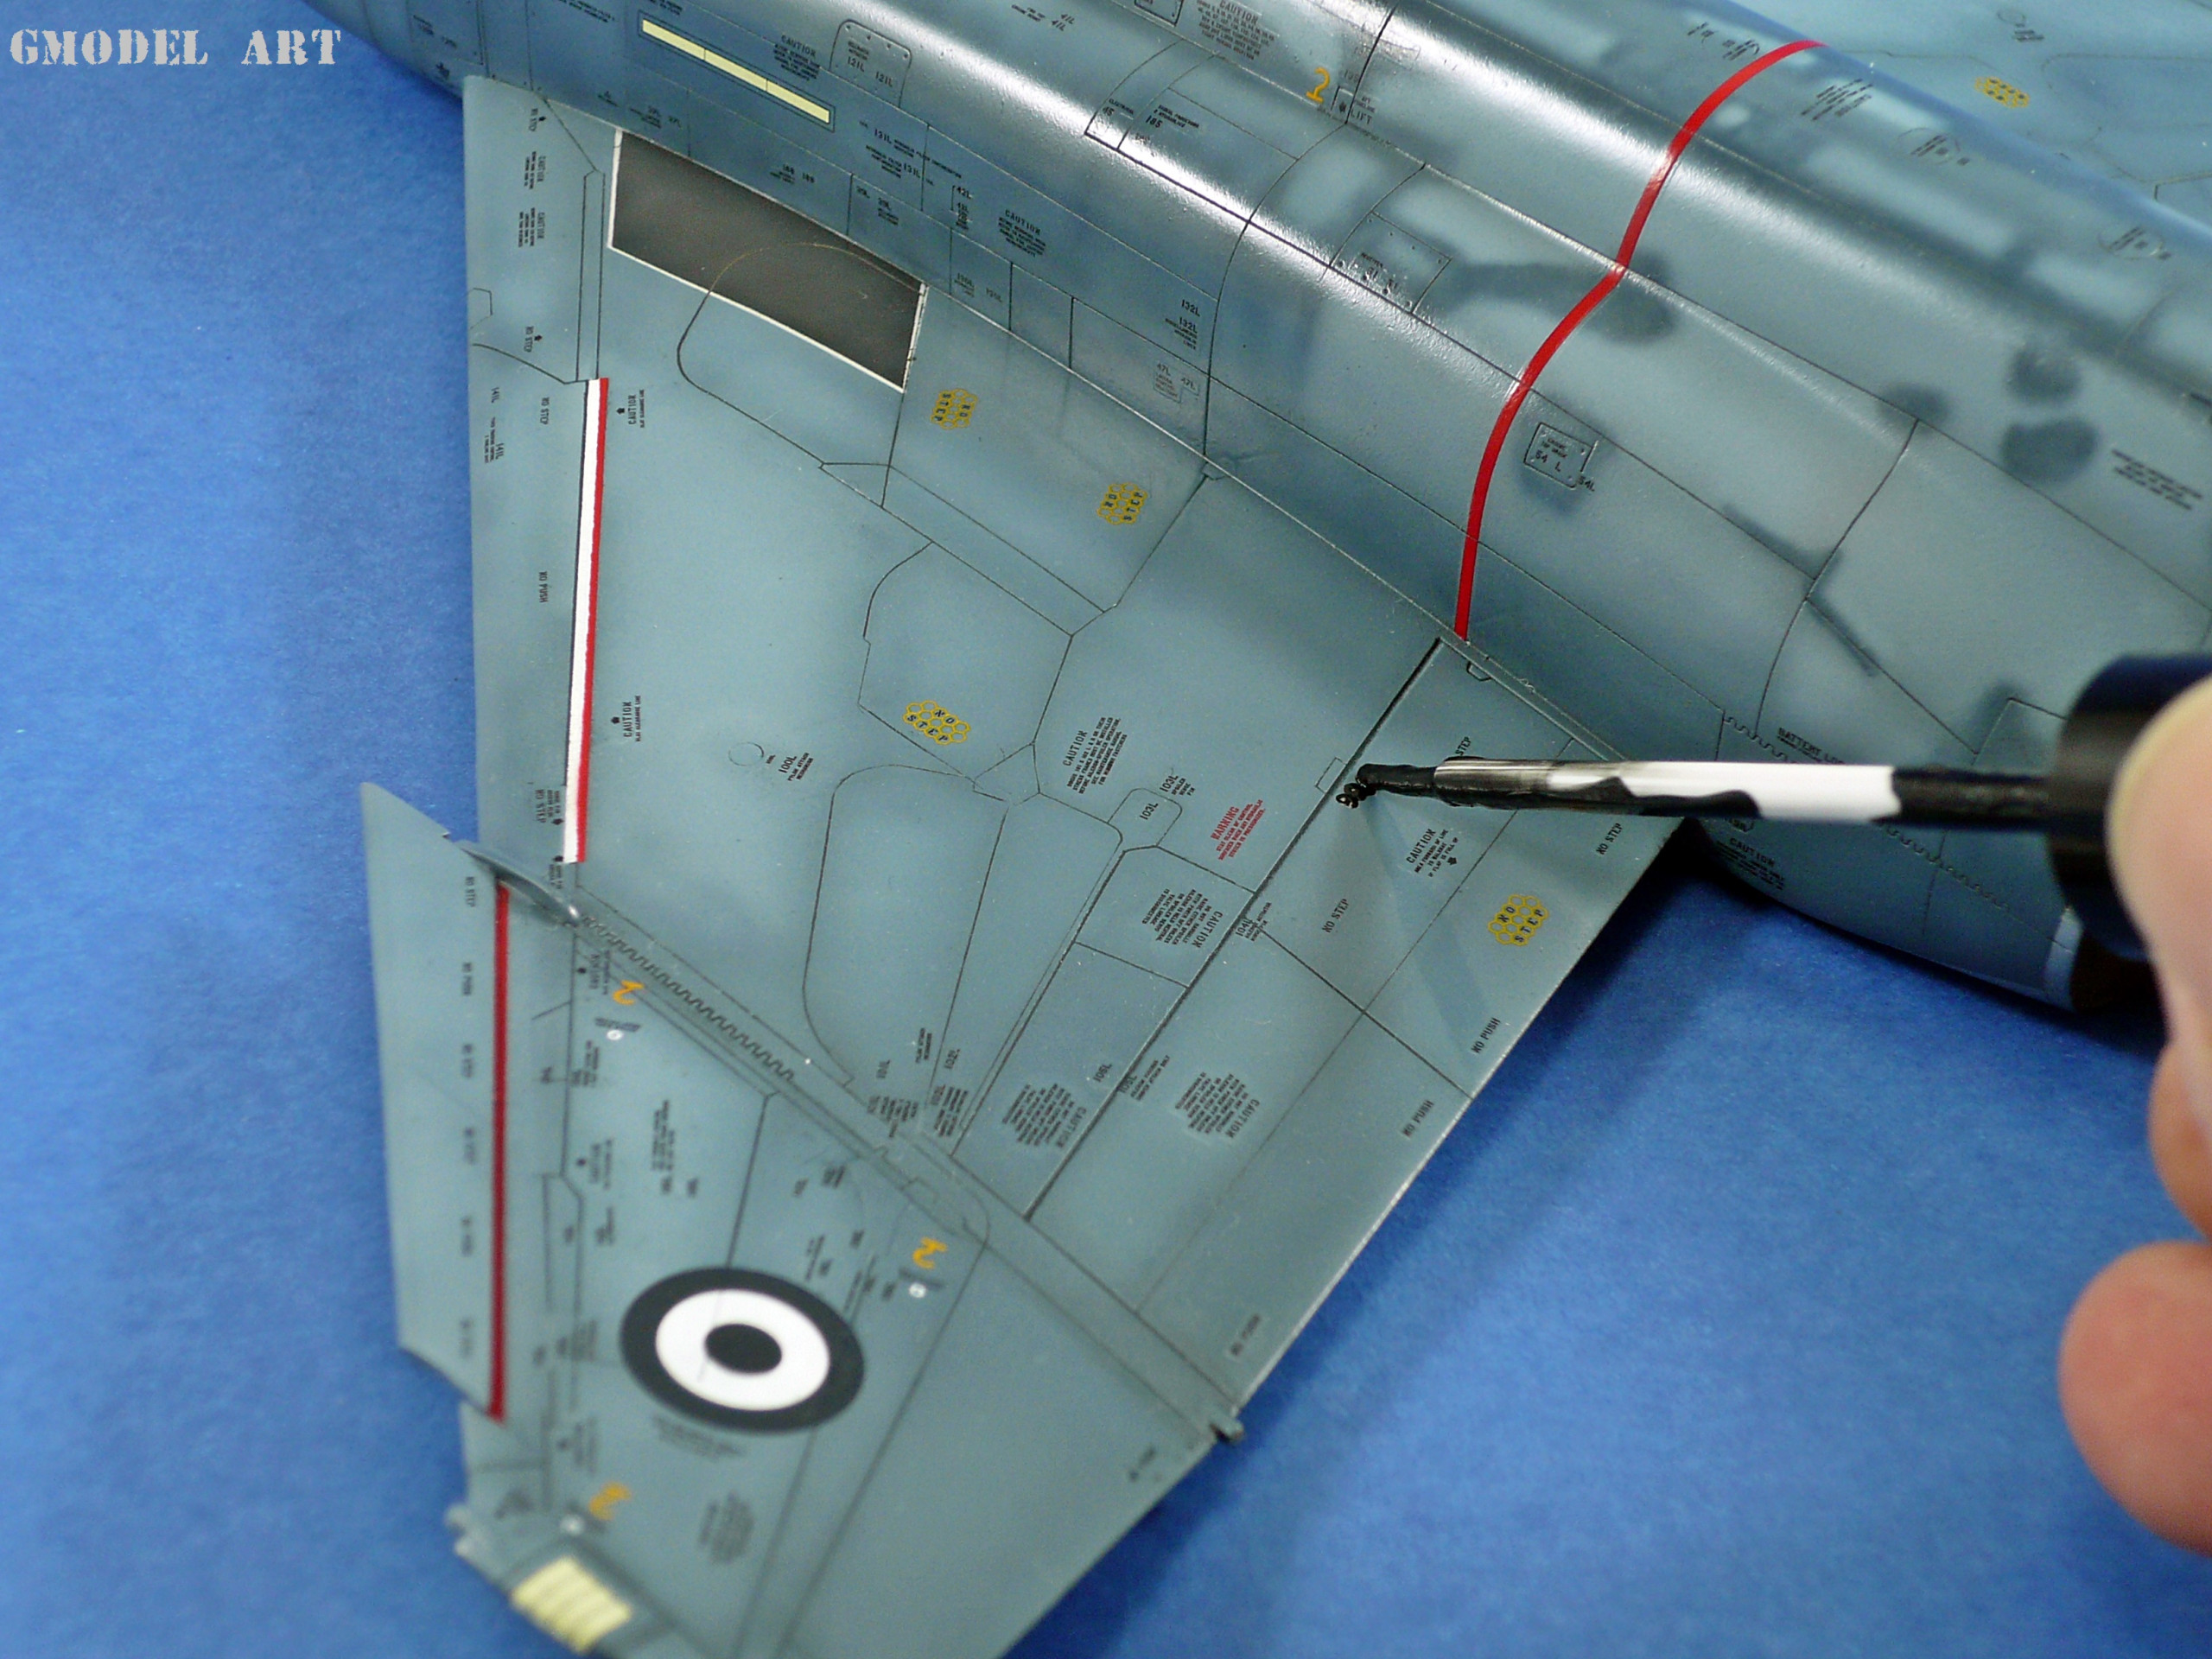
For removing the panel line wash I used a cotton bud with some Mig Ammo odorless enamel thinners (A.Mig 2019) The cotton bud has to have the least amount of thinners. For that dip it to the thinners and swipe it in a kitchen towel to remove the excess (pic 130)
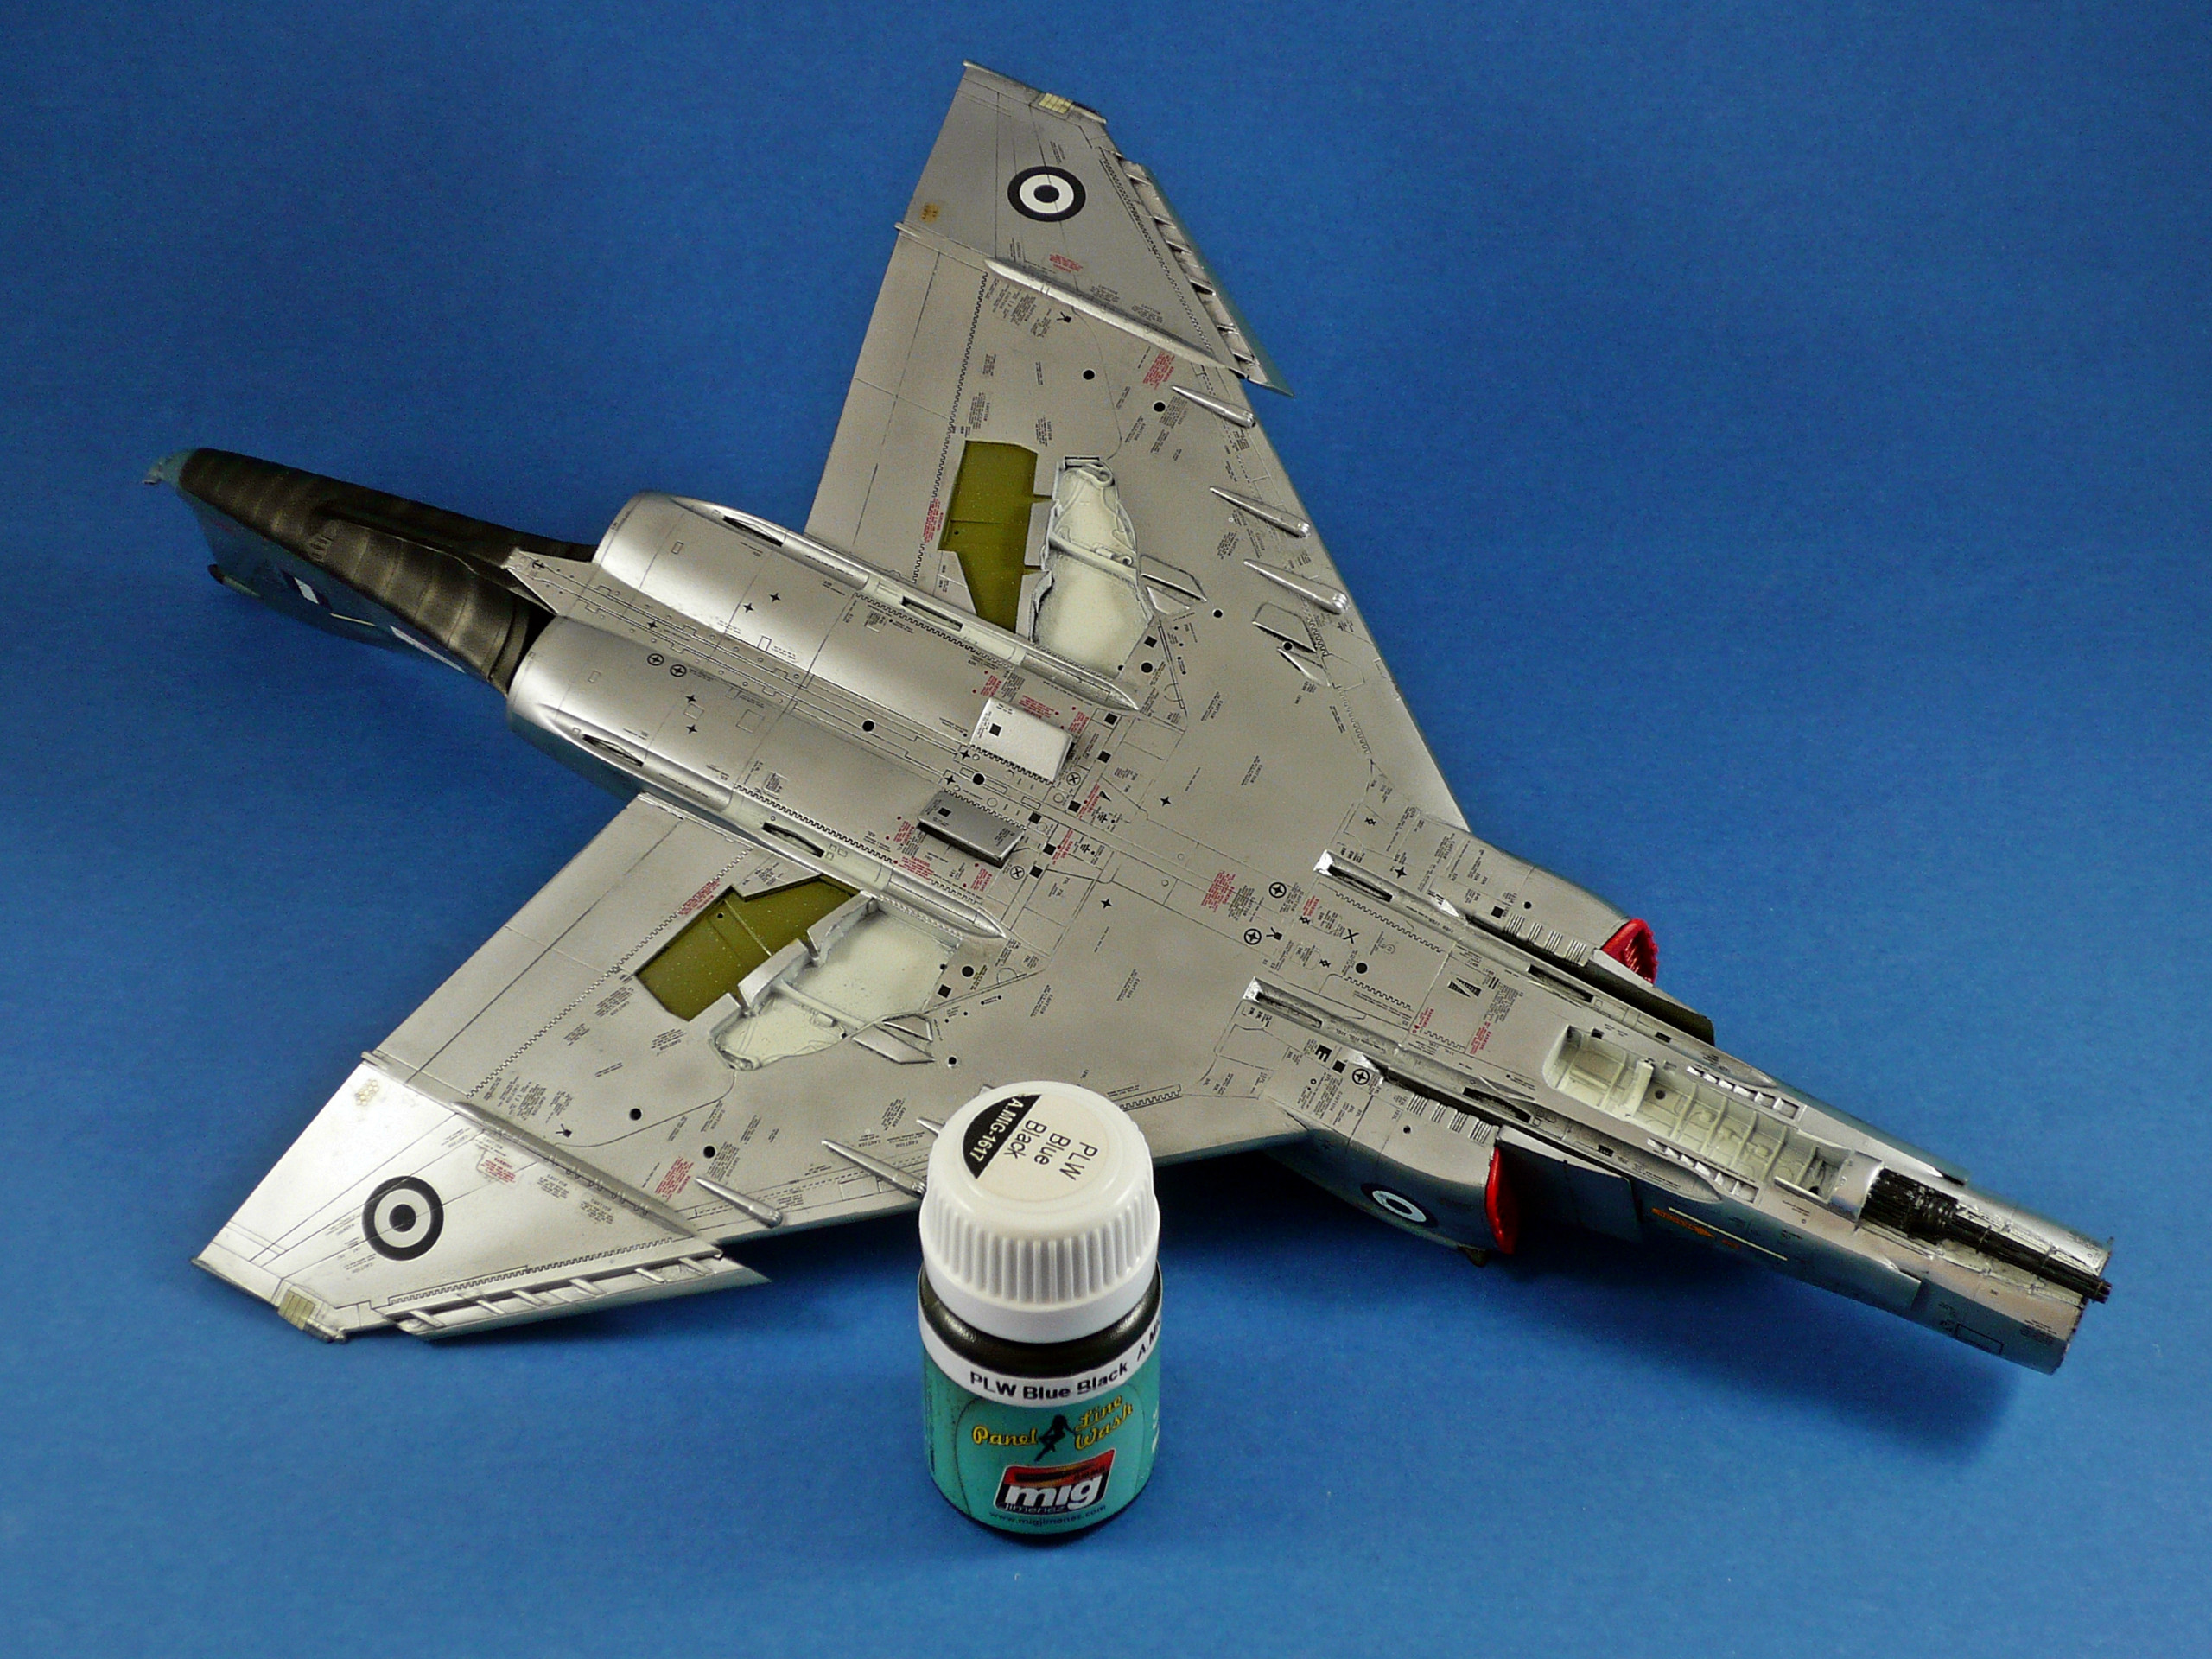
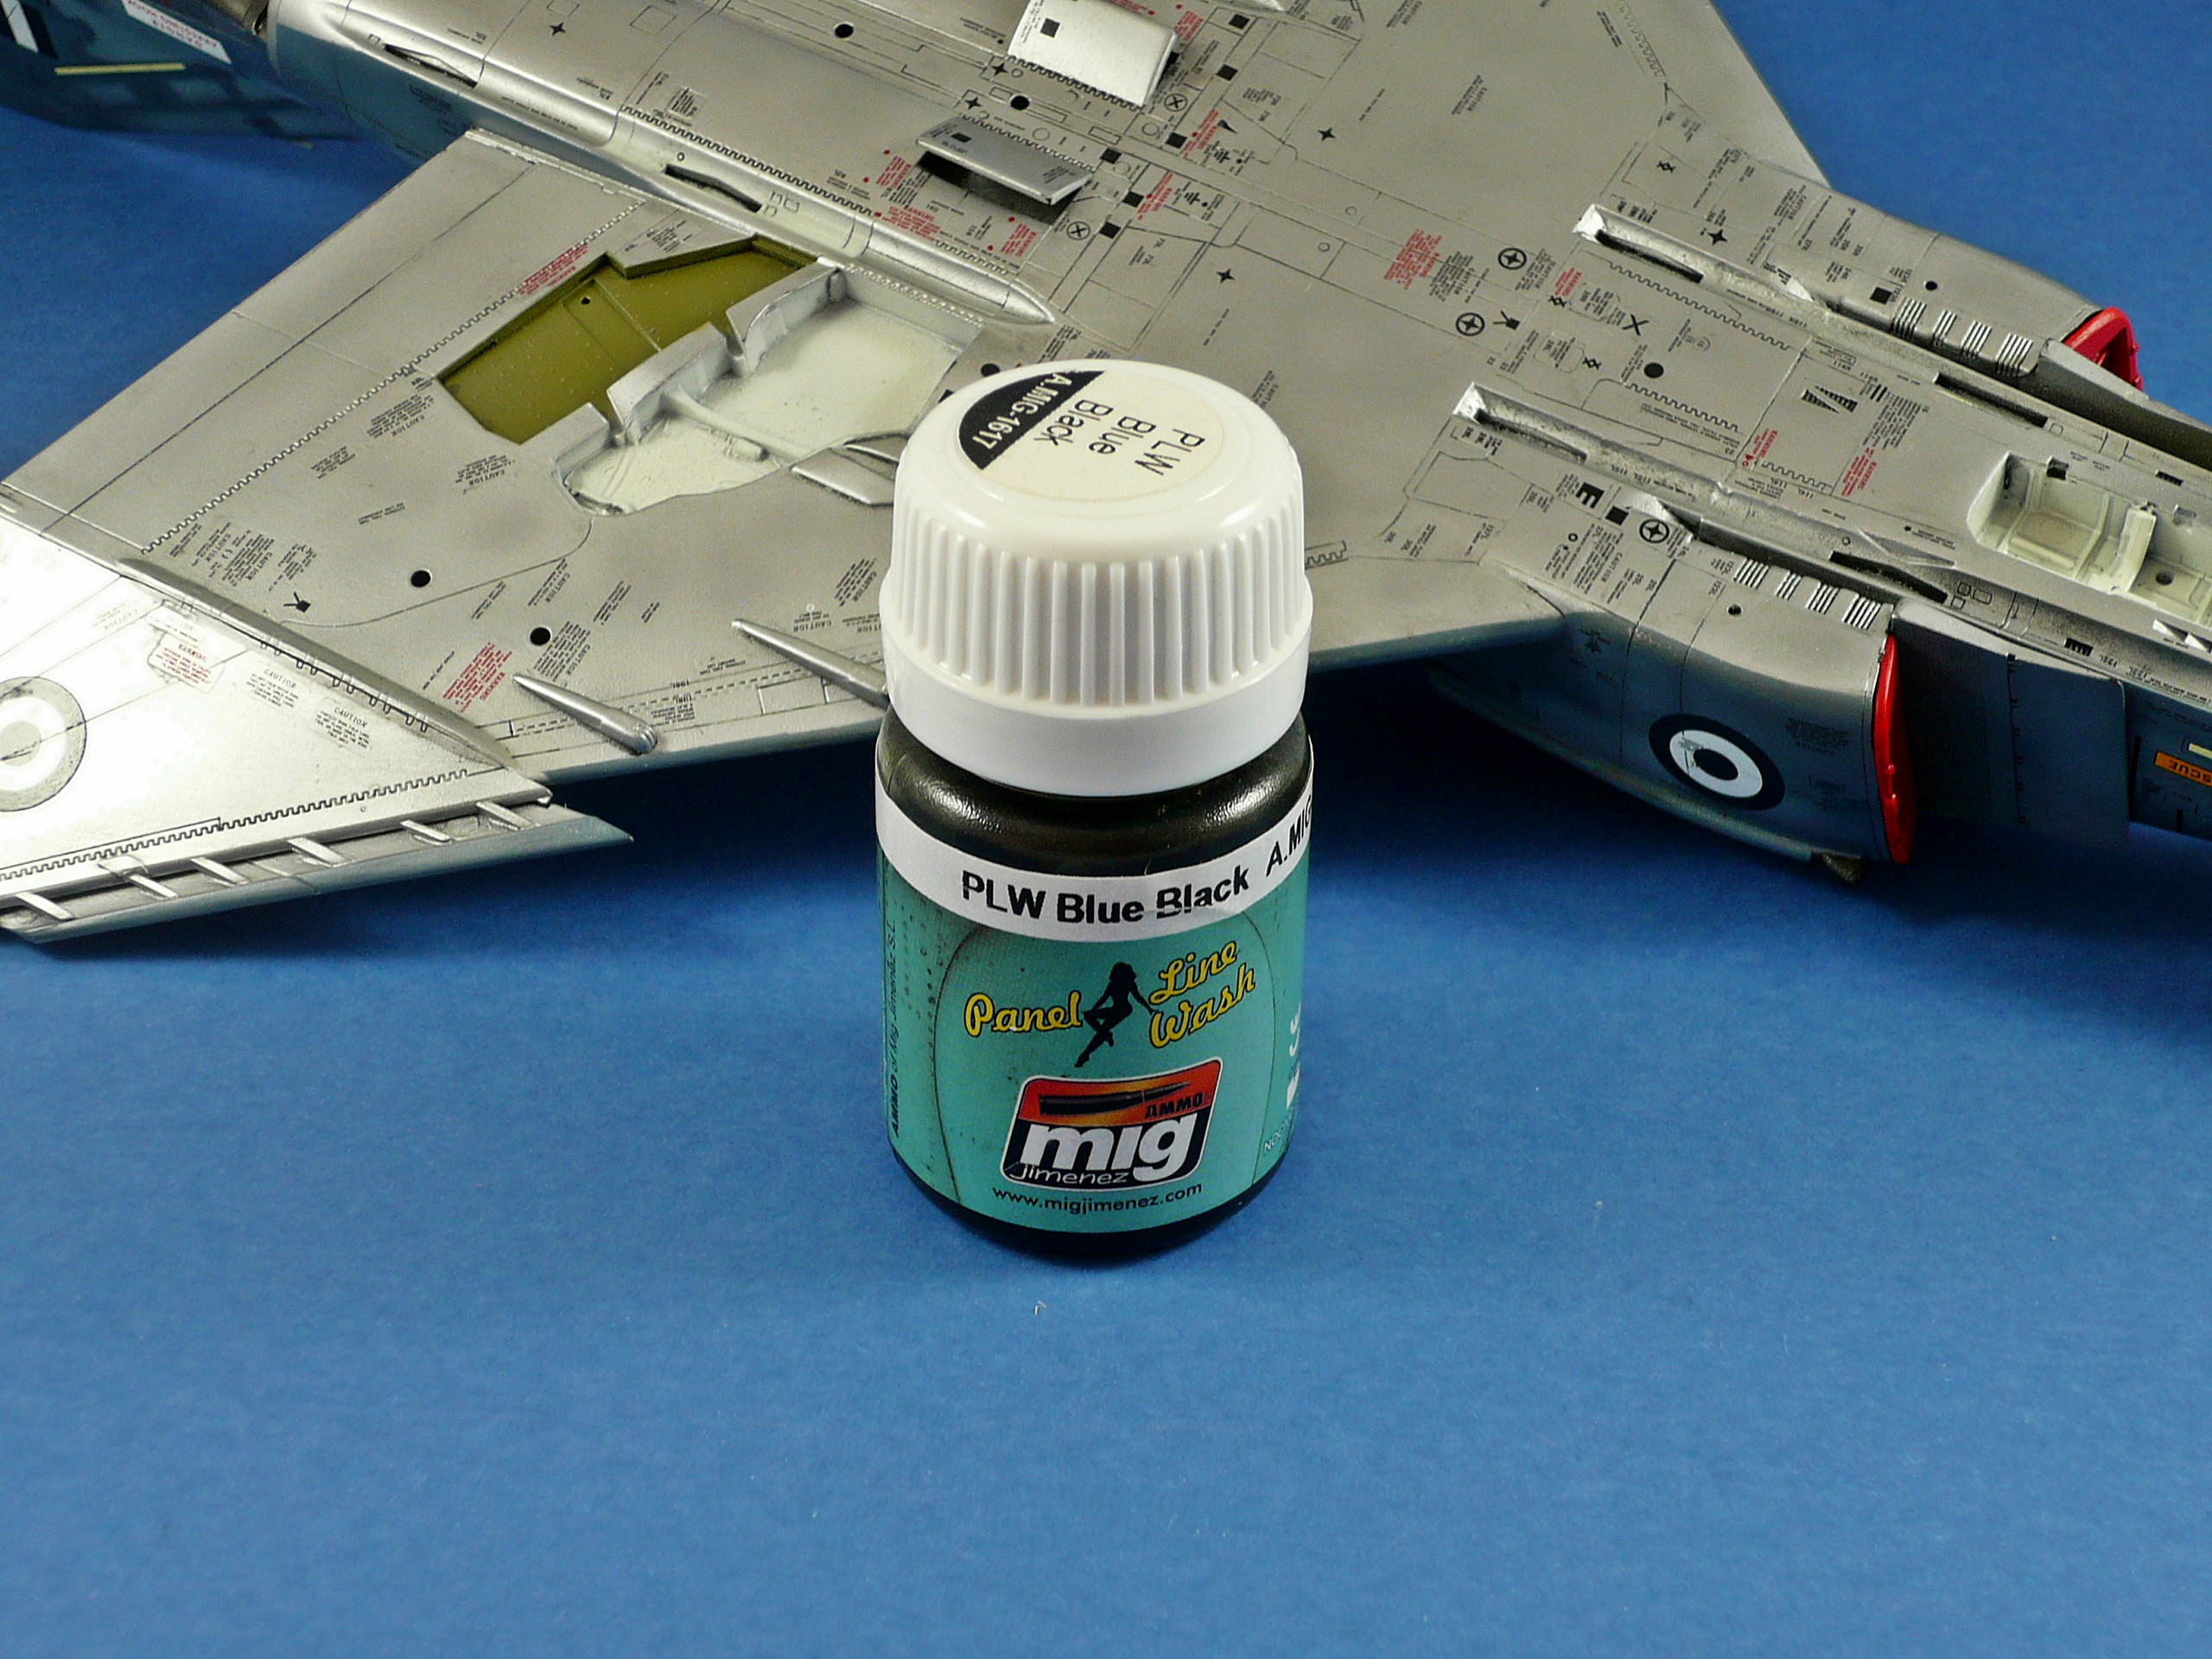
For the lower surfaces I used Mig Ammo PLW 1617 Blue Black. I believe it was the best choice (pics 131,132)
After removing the wash from the upper and lower surfaces the outcome was very nice (pics 137,138,139,140)
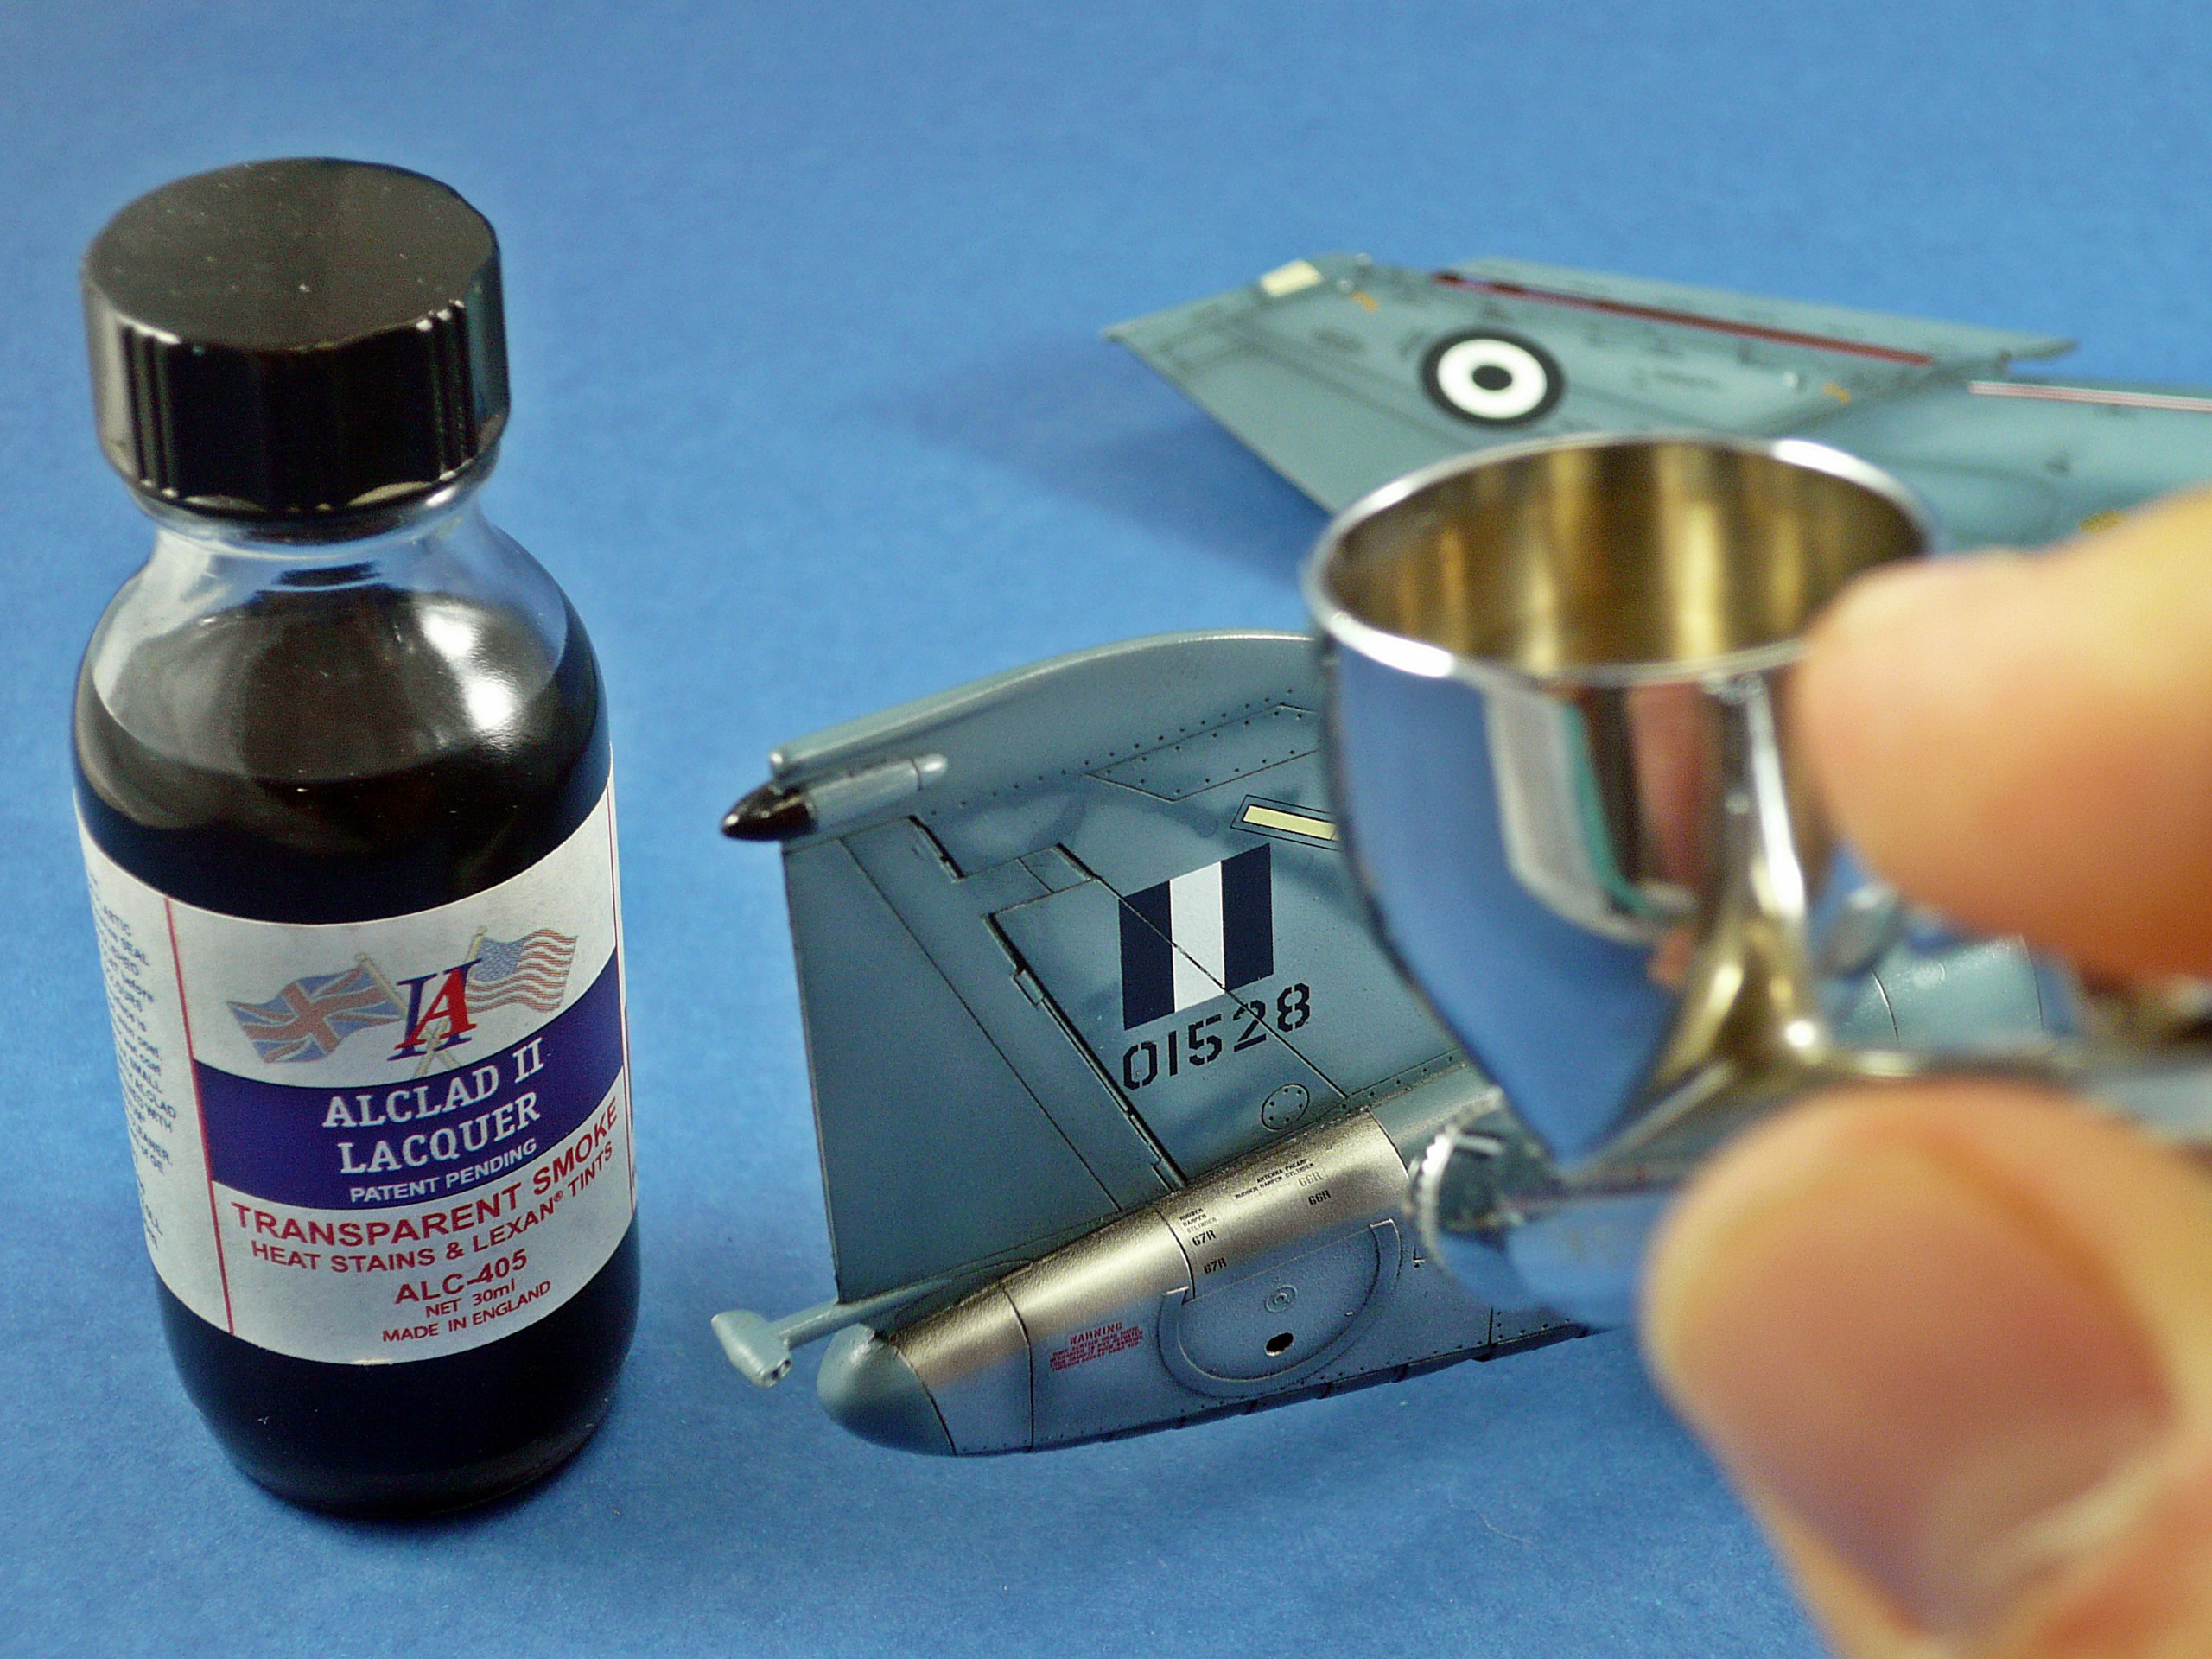
Based again on reference pics of the real aircraft, I saw some heat stains and dirty areas on the upper NMF exhaust areas. So I decided to use some Alclad Transparent Smoke (ALC 405) to represent them (pic 143)
For the weathering of the wheelwells I used Mig Ammo PLW Black Night 1611 and used odorless enamel thinners to clean the excess (pics 145,147)
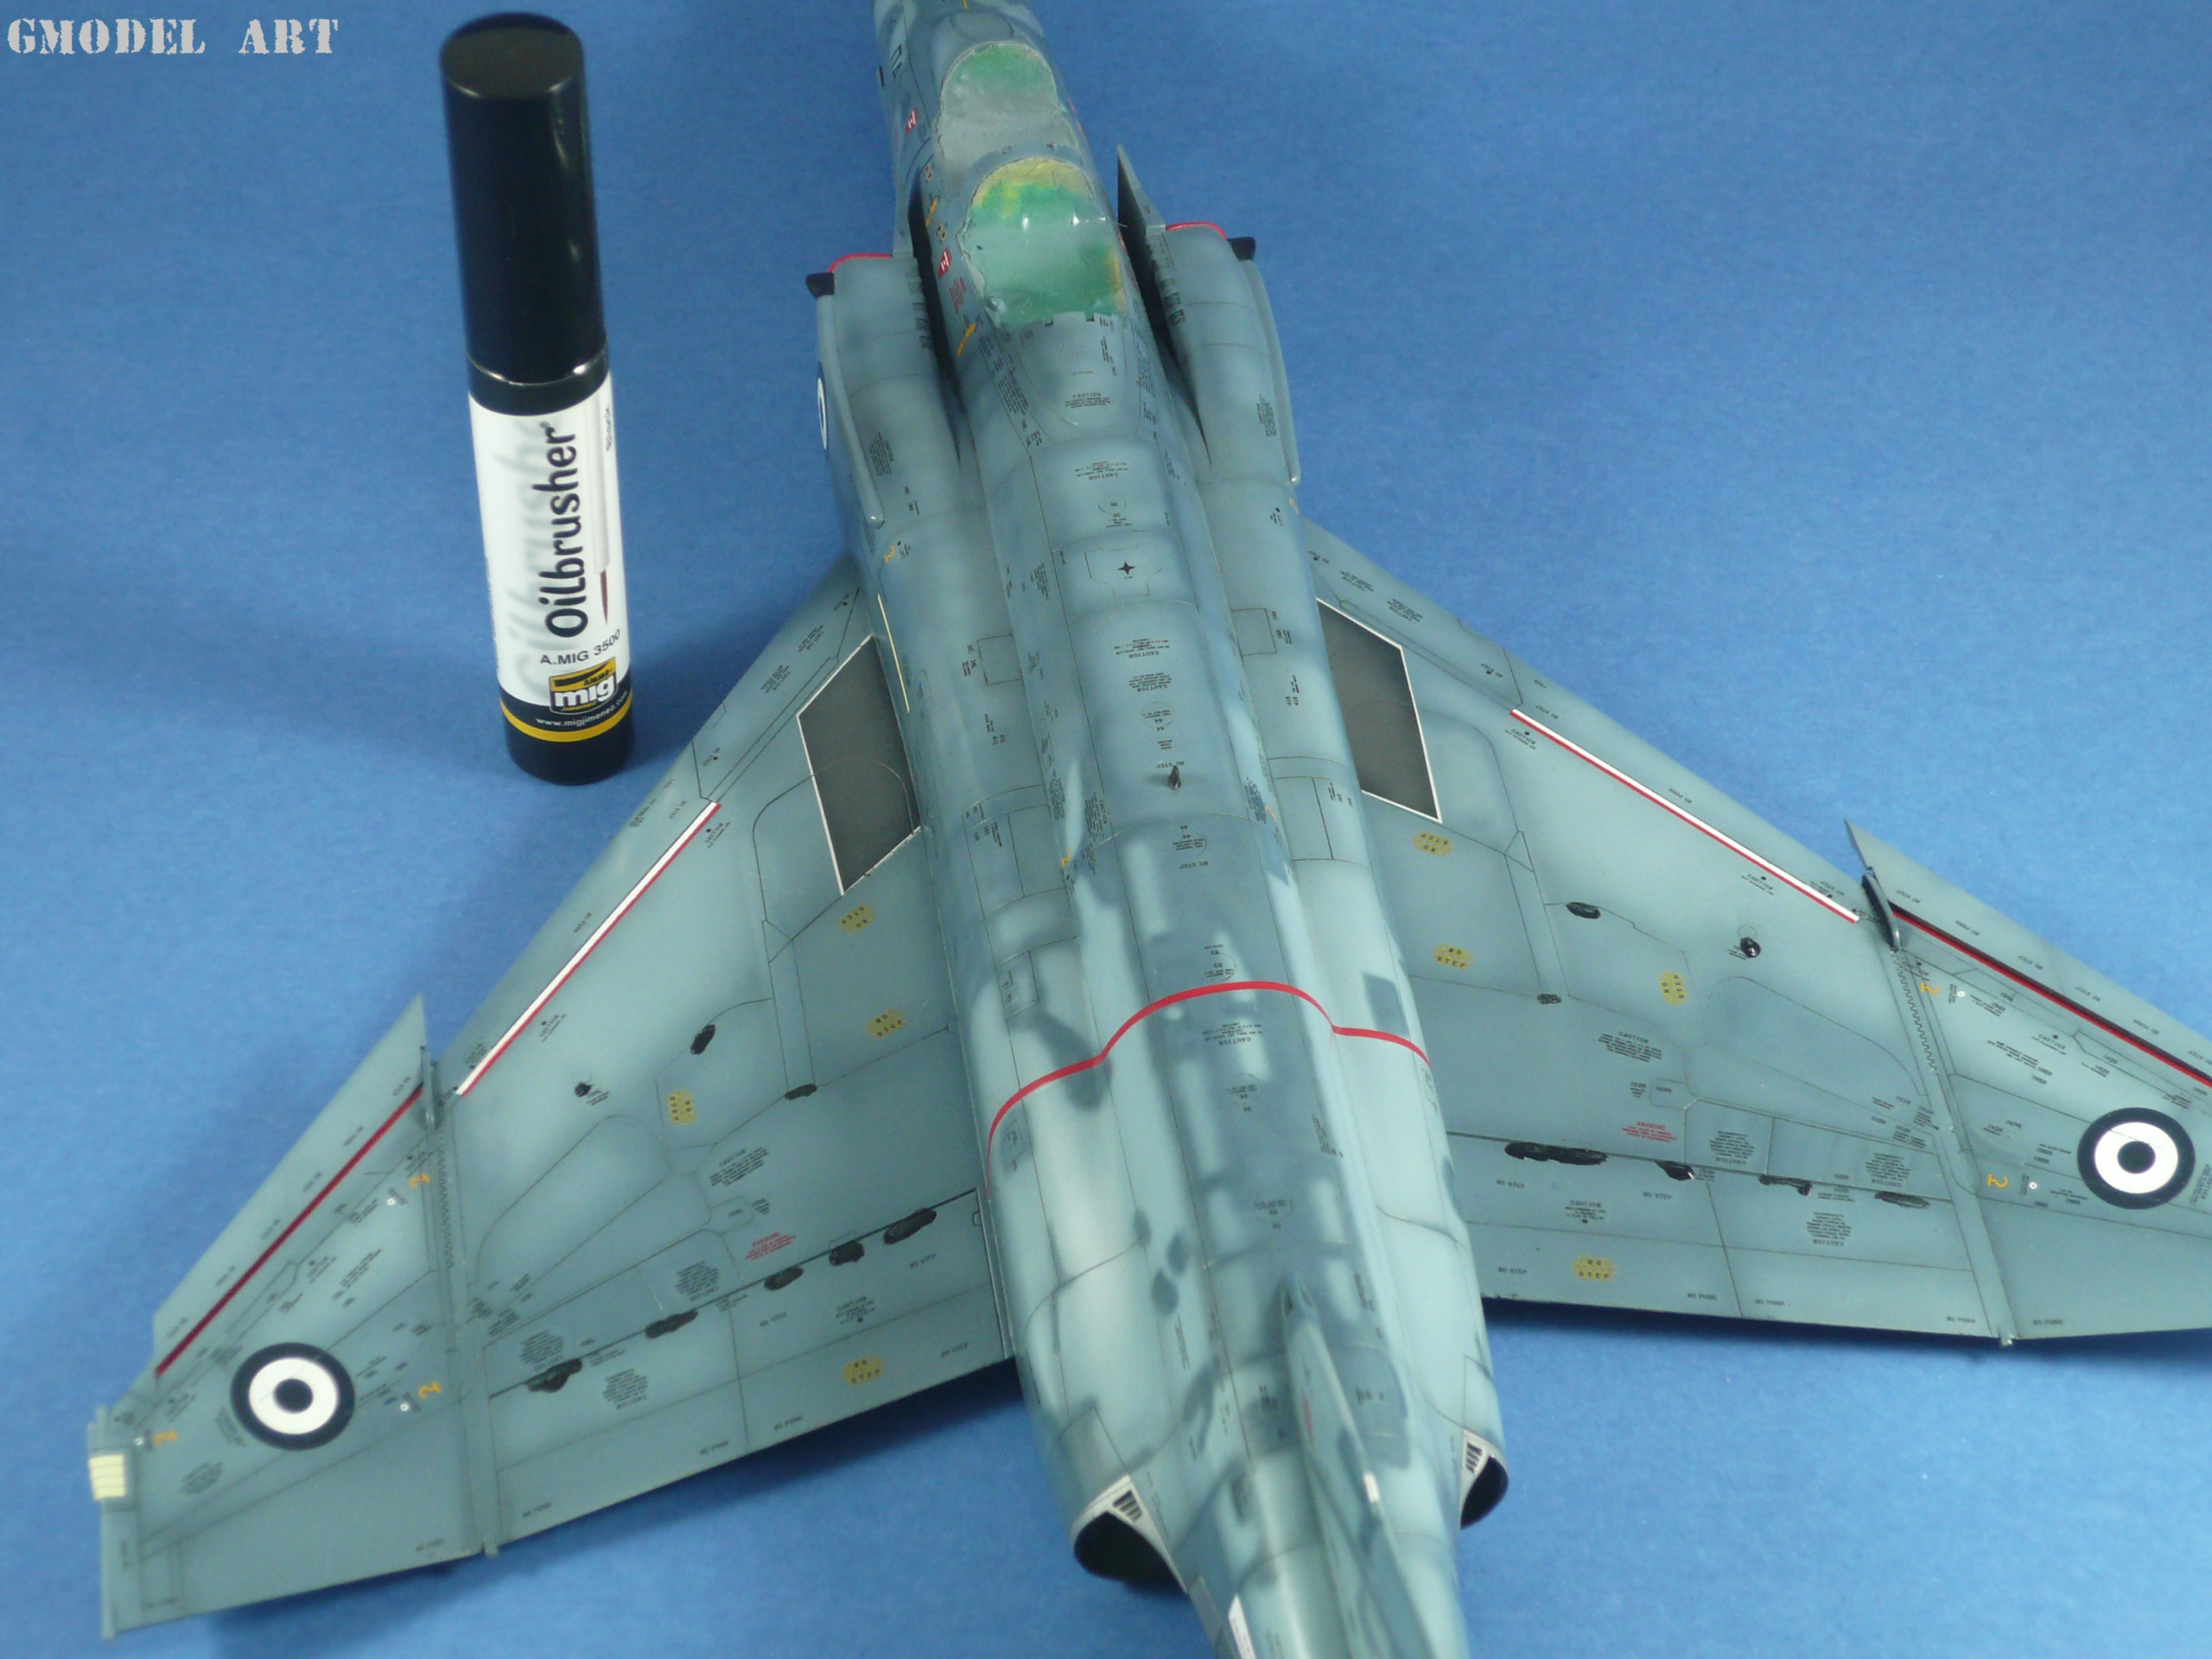
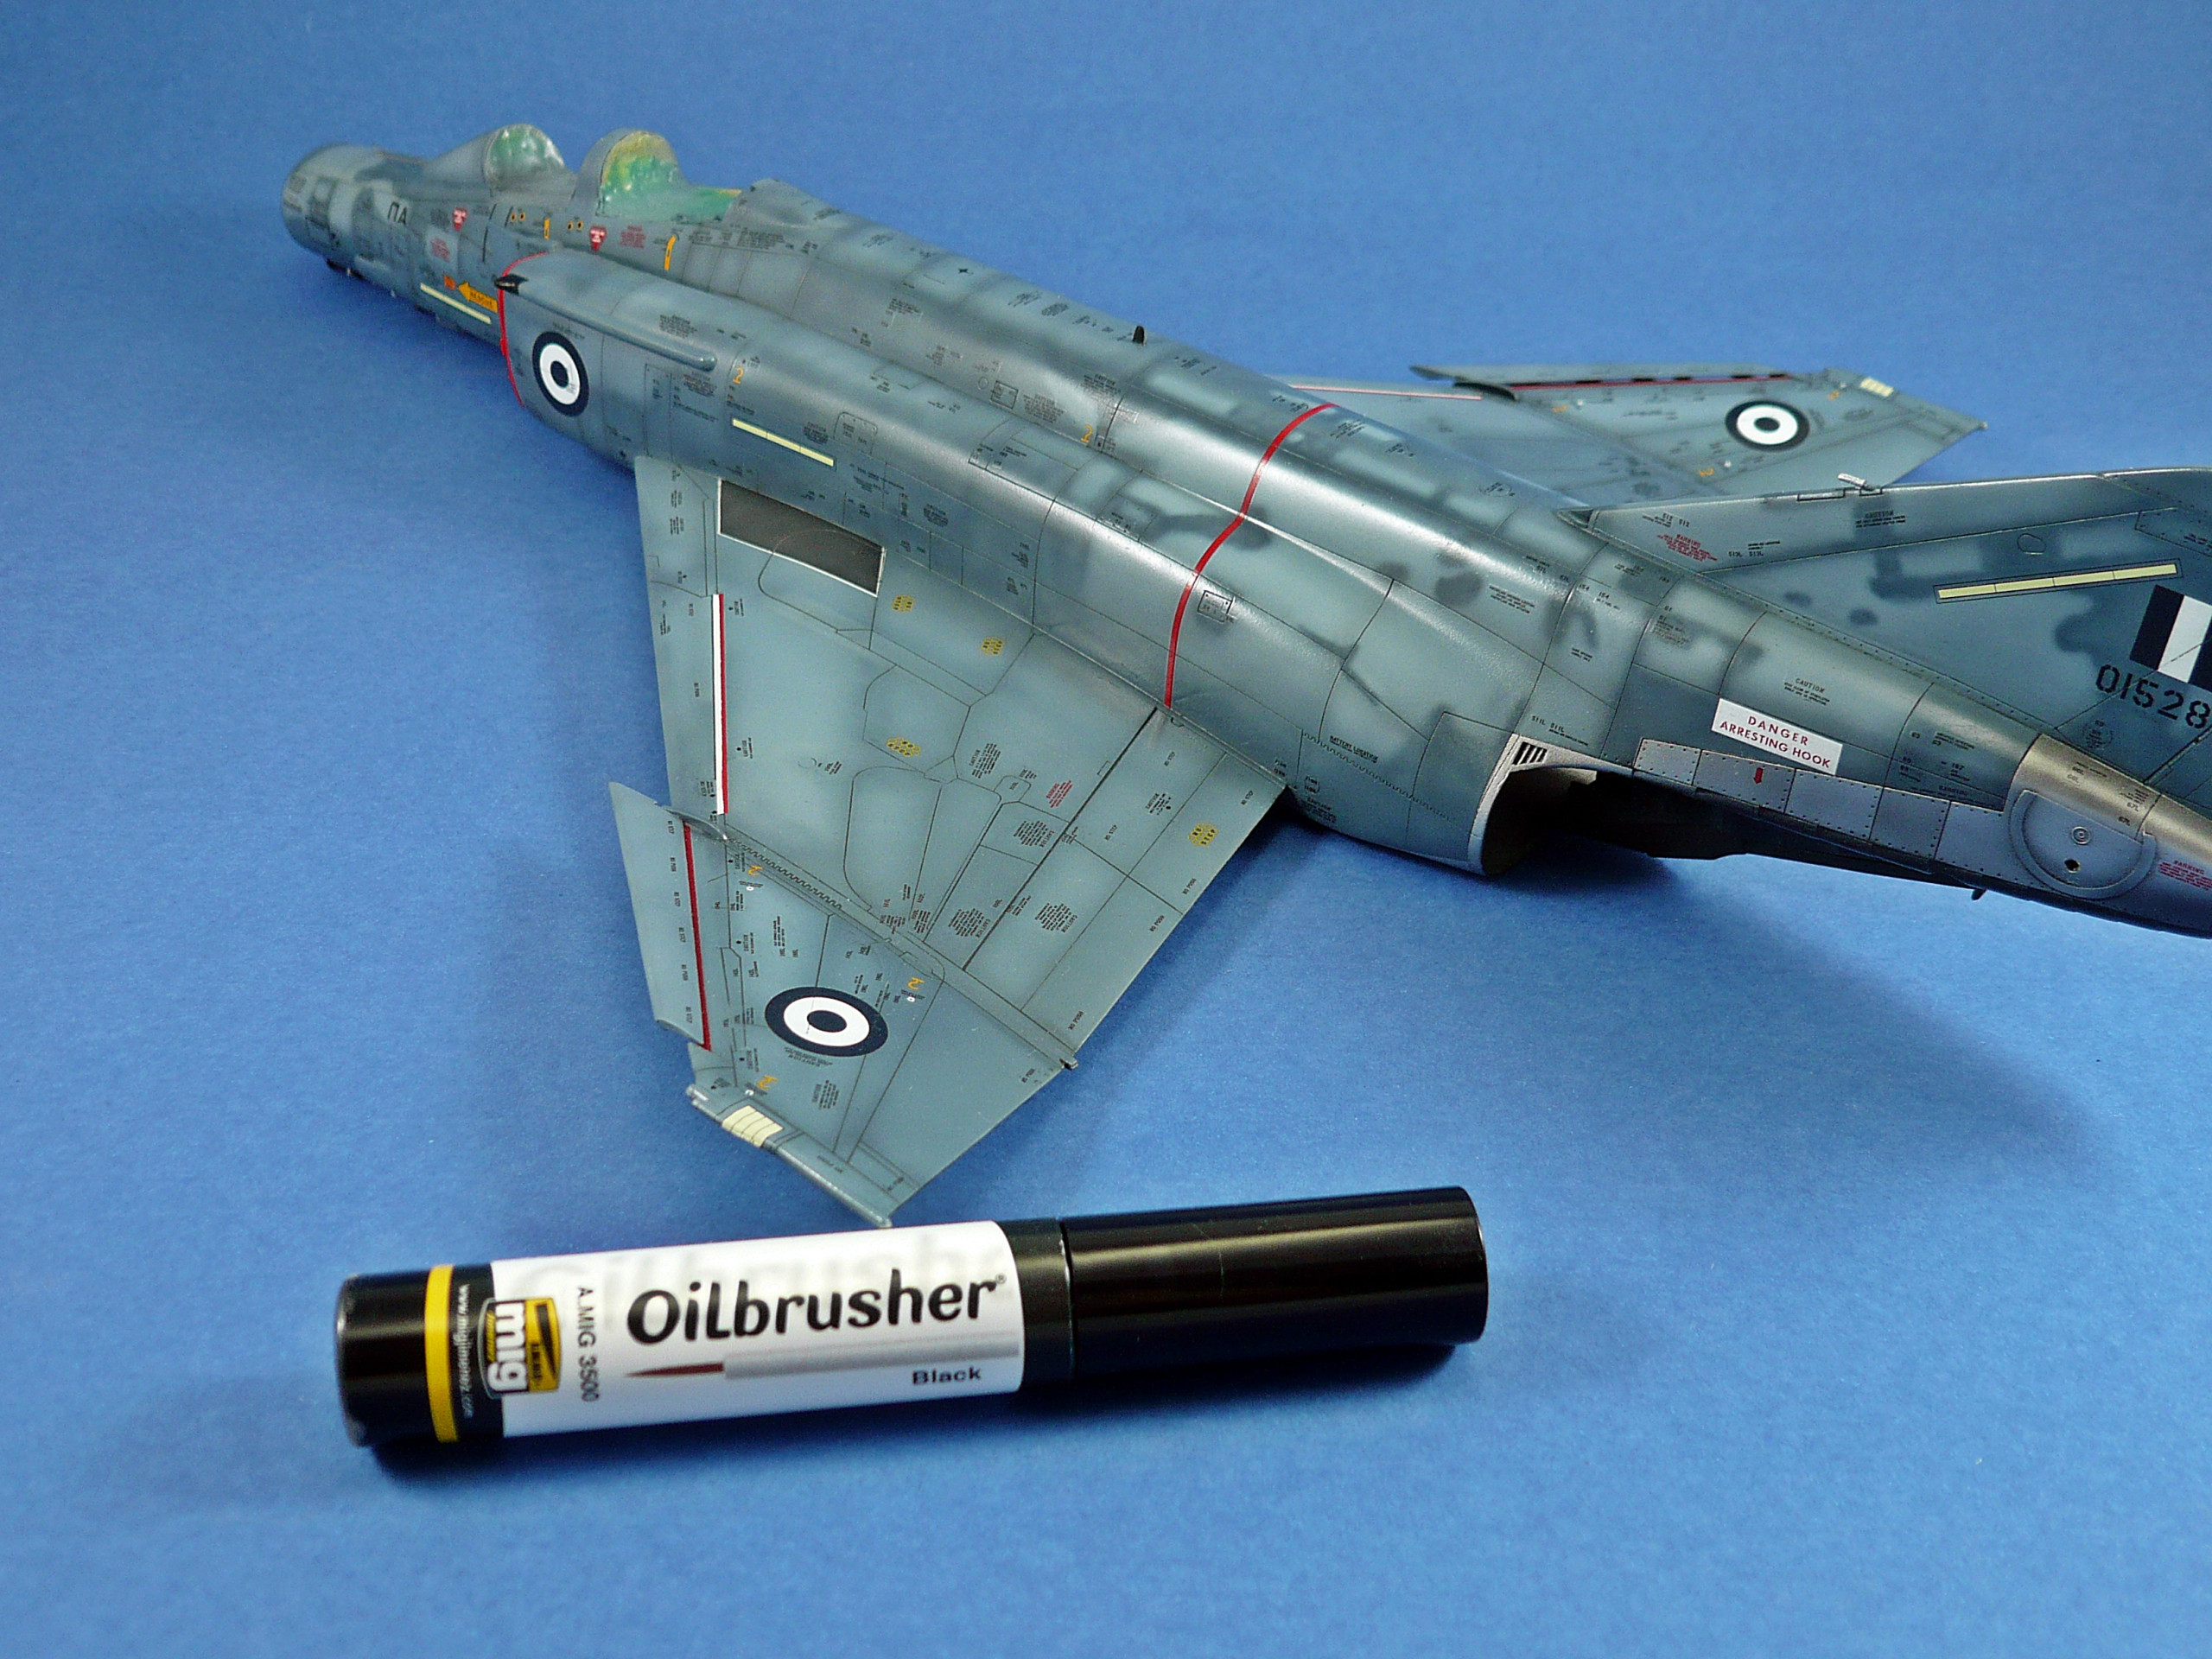
The final weathering touches involved the new Mig Ammo product which is the Oilbrusher. I used the black color to represent the oil leaks and stains in the flaps and the main wing areas but also in the stabilators. I made small color dots, let it dry for 10 minutes and then