article
Harrier FA.2 Project – Building, Painting and Weathering the Royal Navy’s Legendary V/STOL Fighter
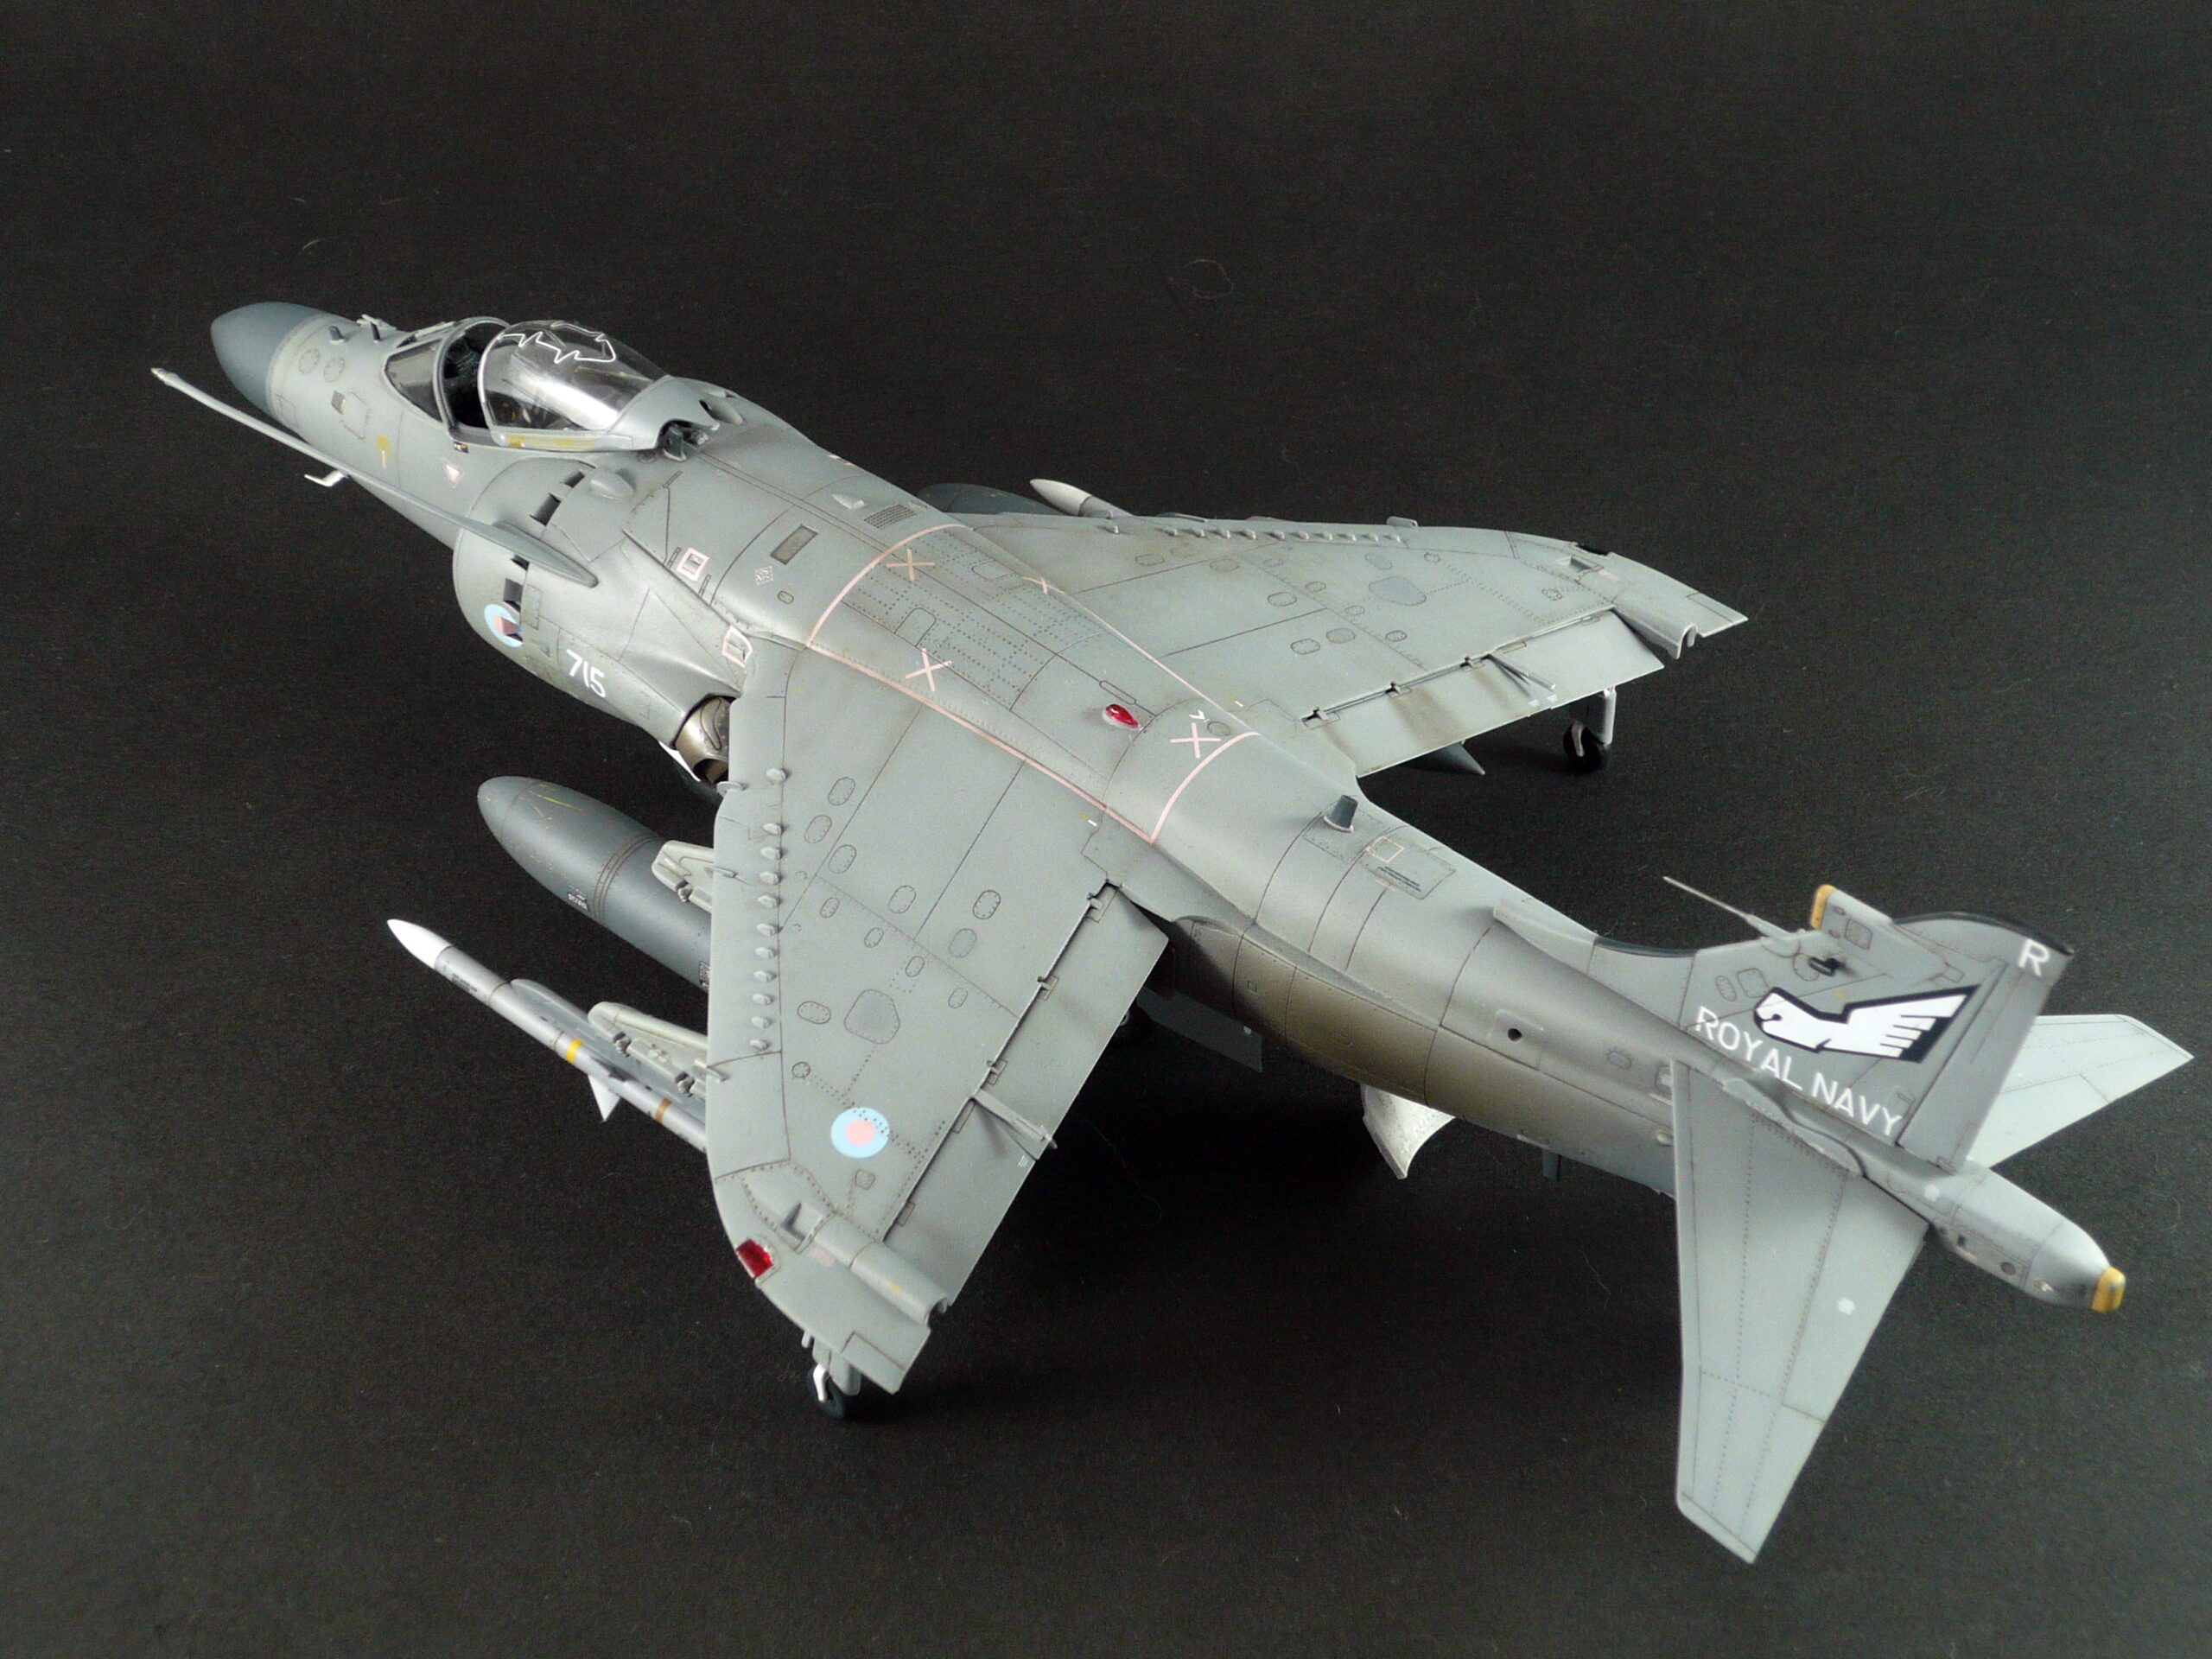
The British Aerospace Harrier FA.2 remains one of the most distinctive fighter aircraft ever to serve with the Royal Navy. Its unique Vertical/Short Take-Off and Landing (V/STOL) capabilities, combined with its advanced Blue Vixen radar and modernized avionics, made it the ultimate evolution of the Sea Harrier family.
In this detailed Harrier FA.2 project, the focus was placed on improving cockpit detail, refining kit fit, enhancing realism through painting and weathering, and recreating the characteristic operational appearance seen on Royal Navy aircraft during their active service years.
The project demonstrates how careful preparation, subtle detailing, and layered weathering techniques can transform a standard kit into a highly realistic scale replica.
Improving the Cockpit and Interior Details
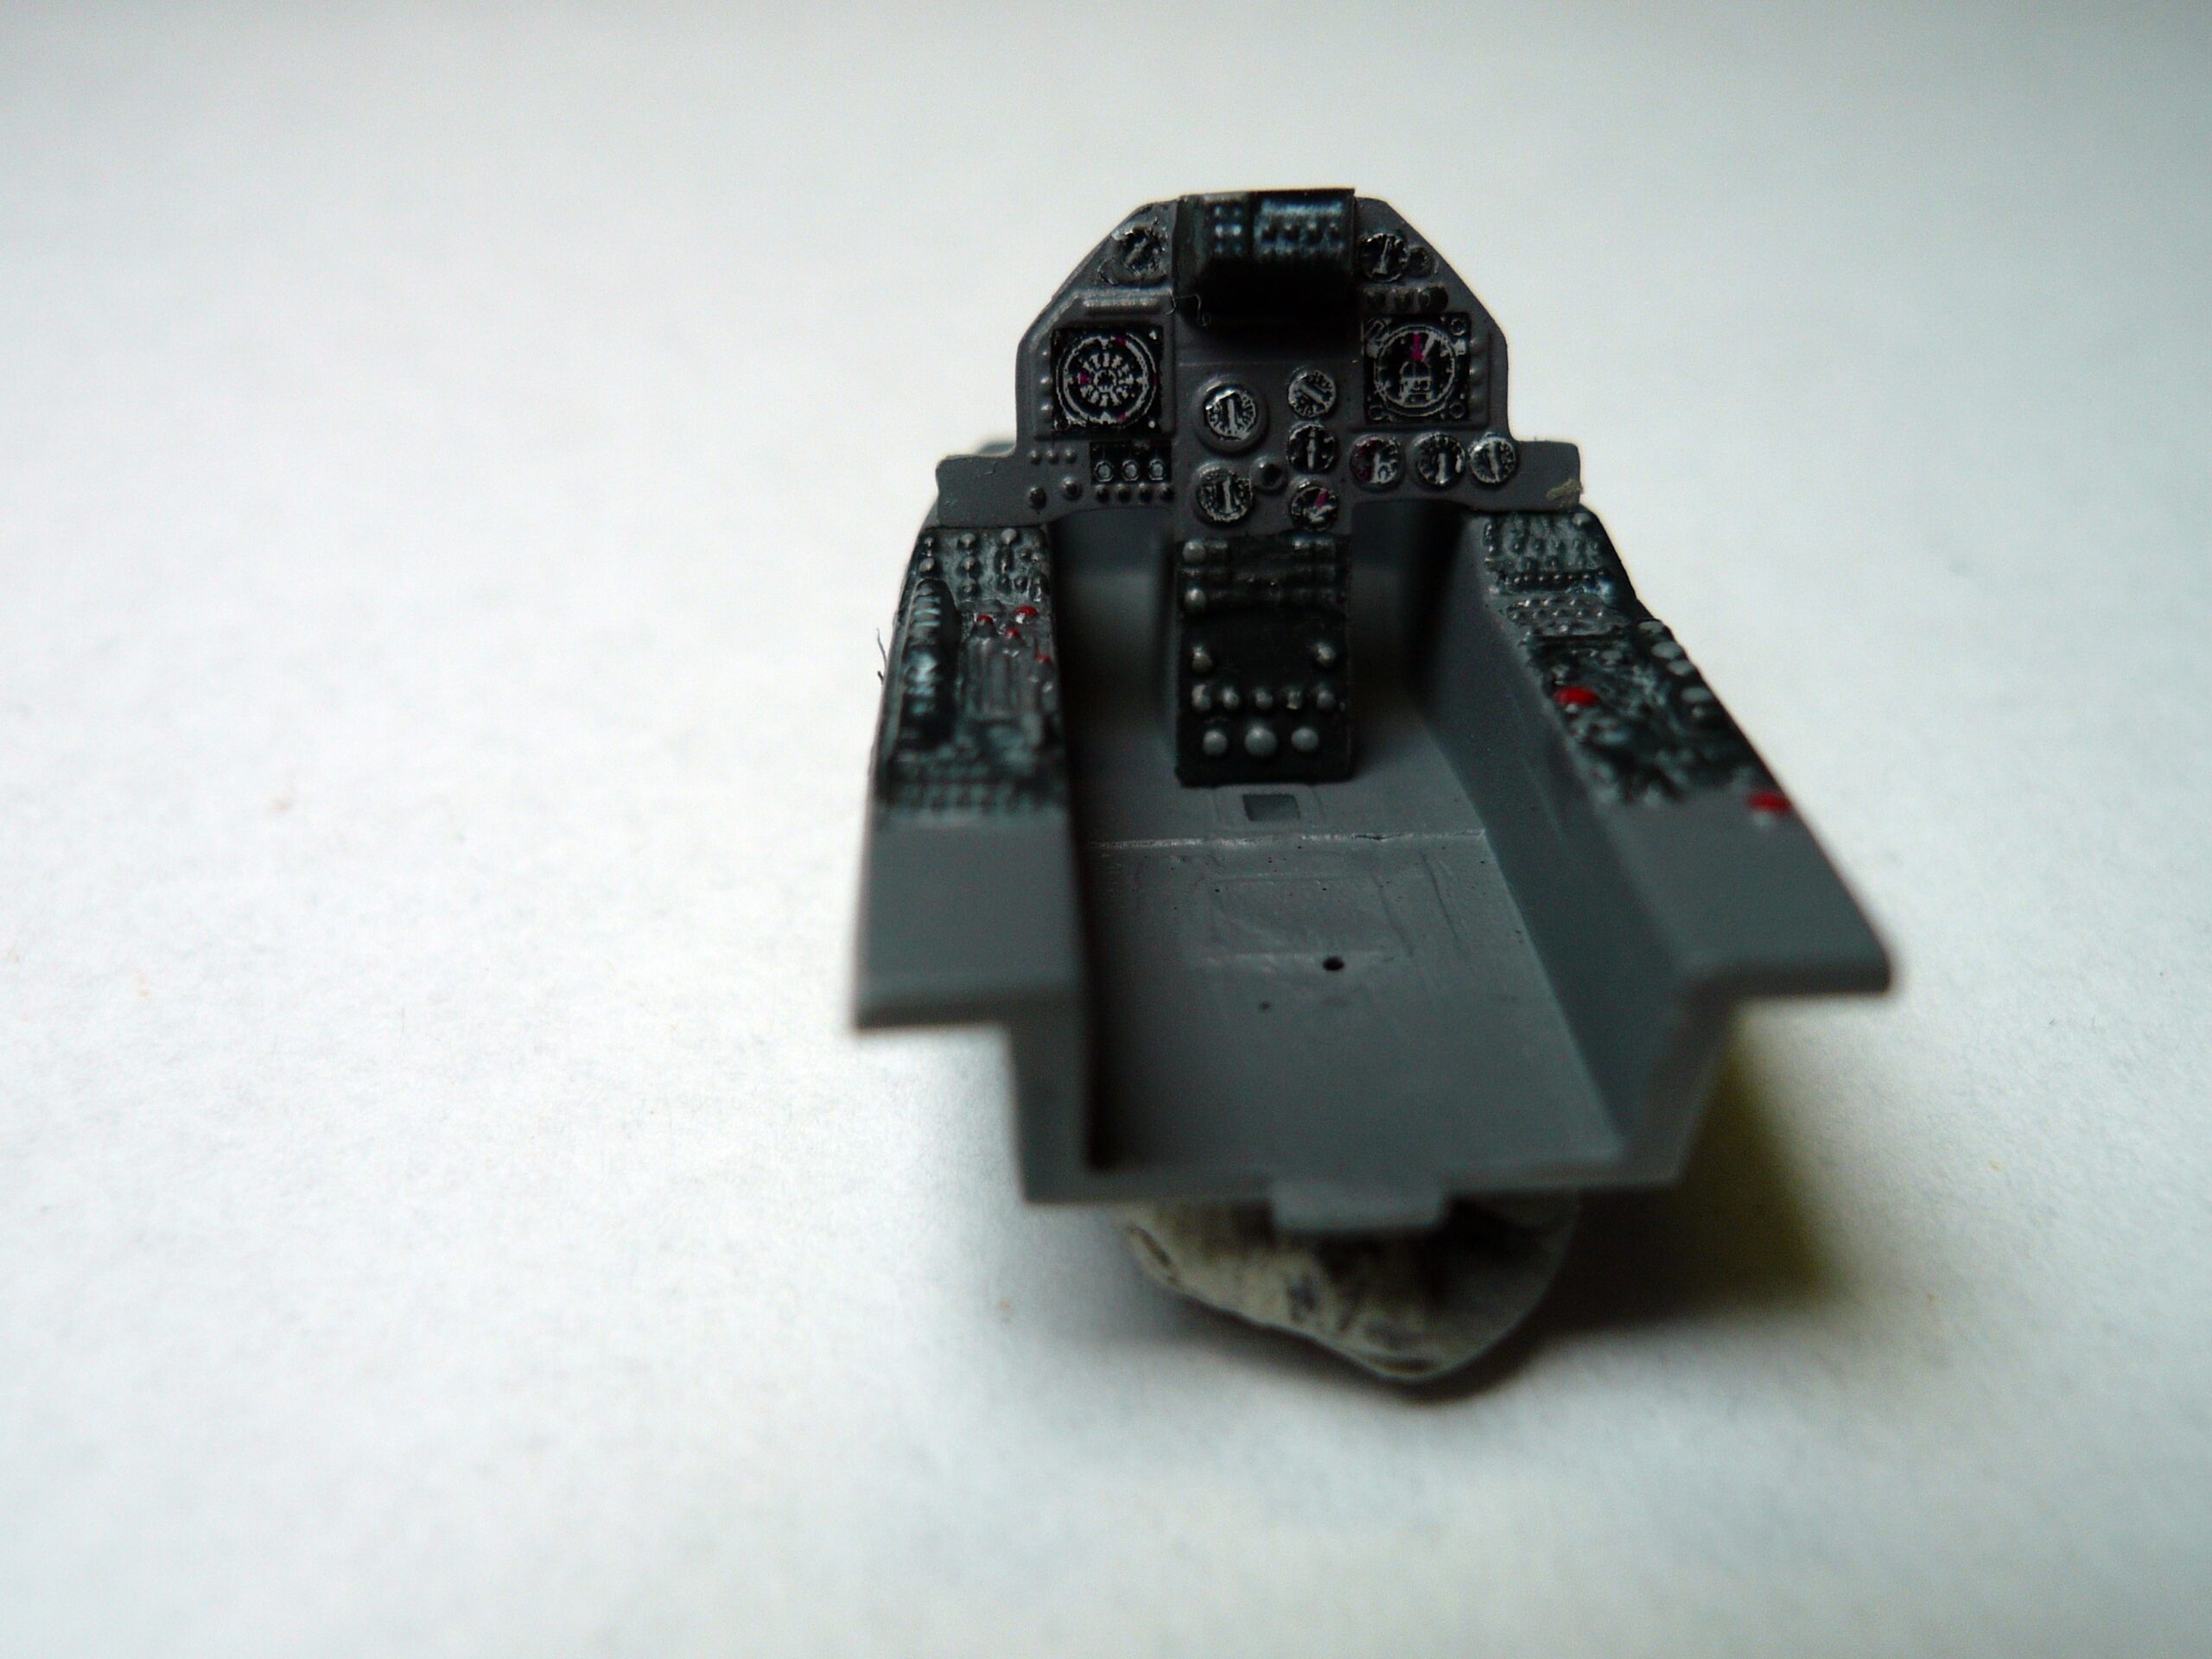
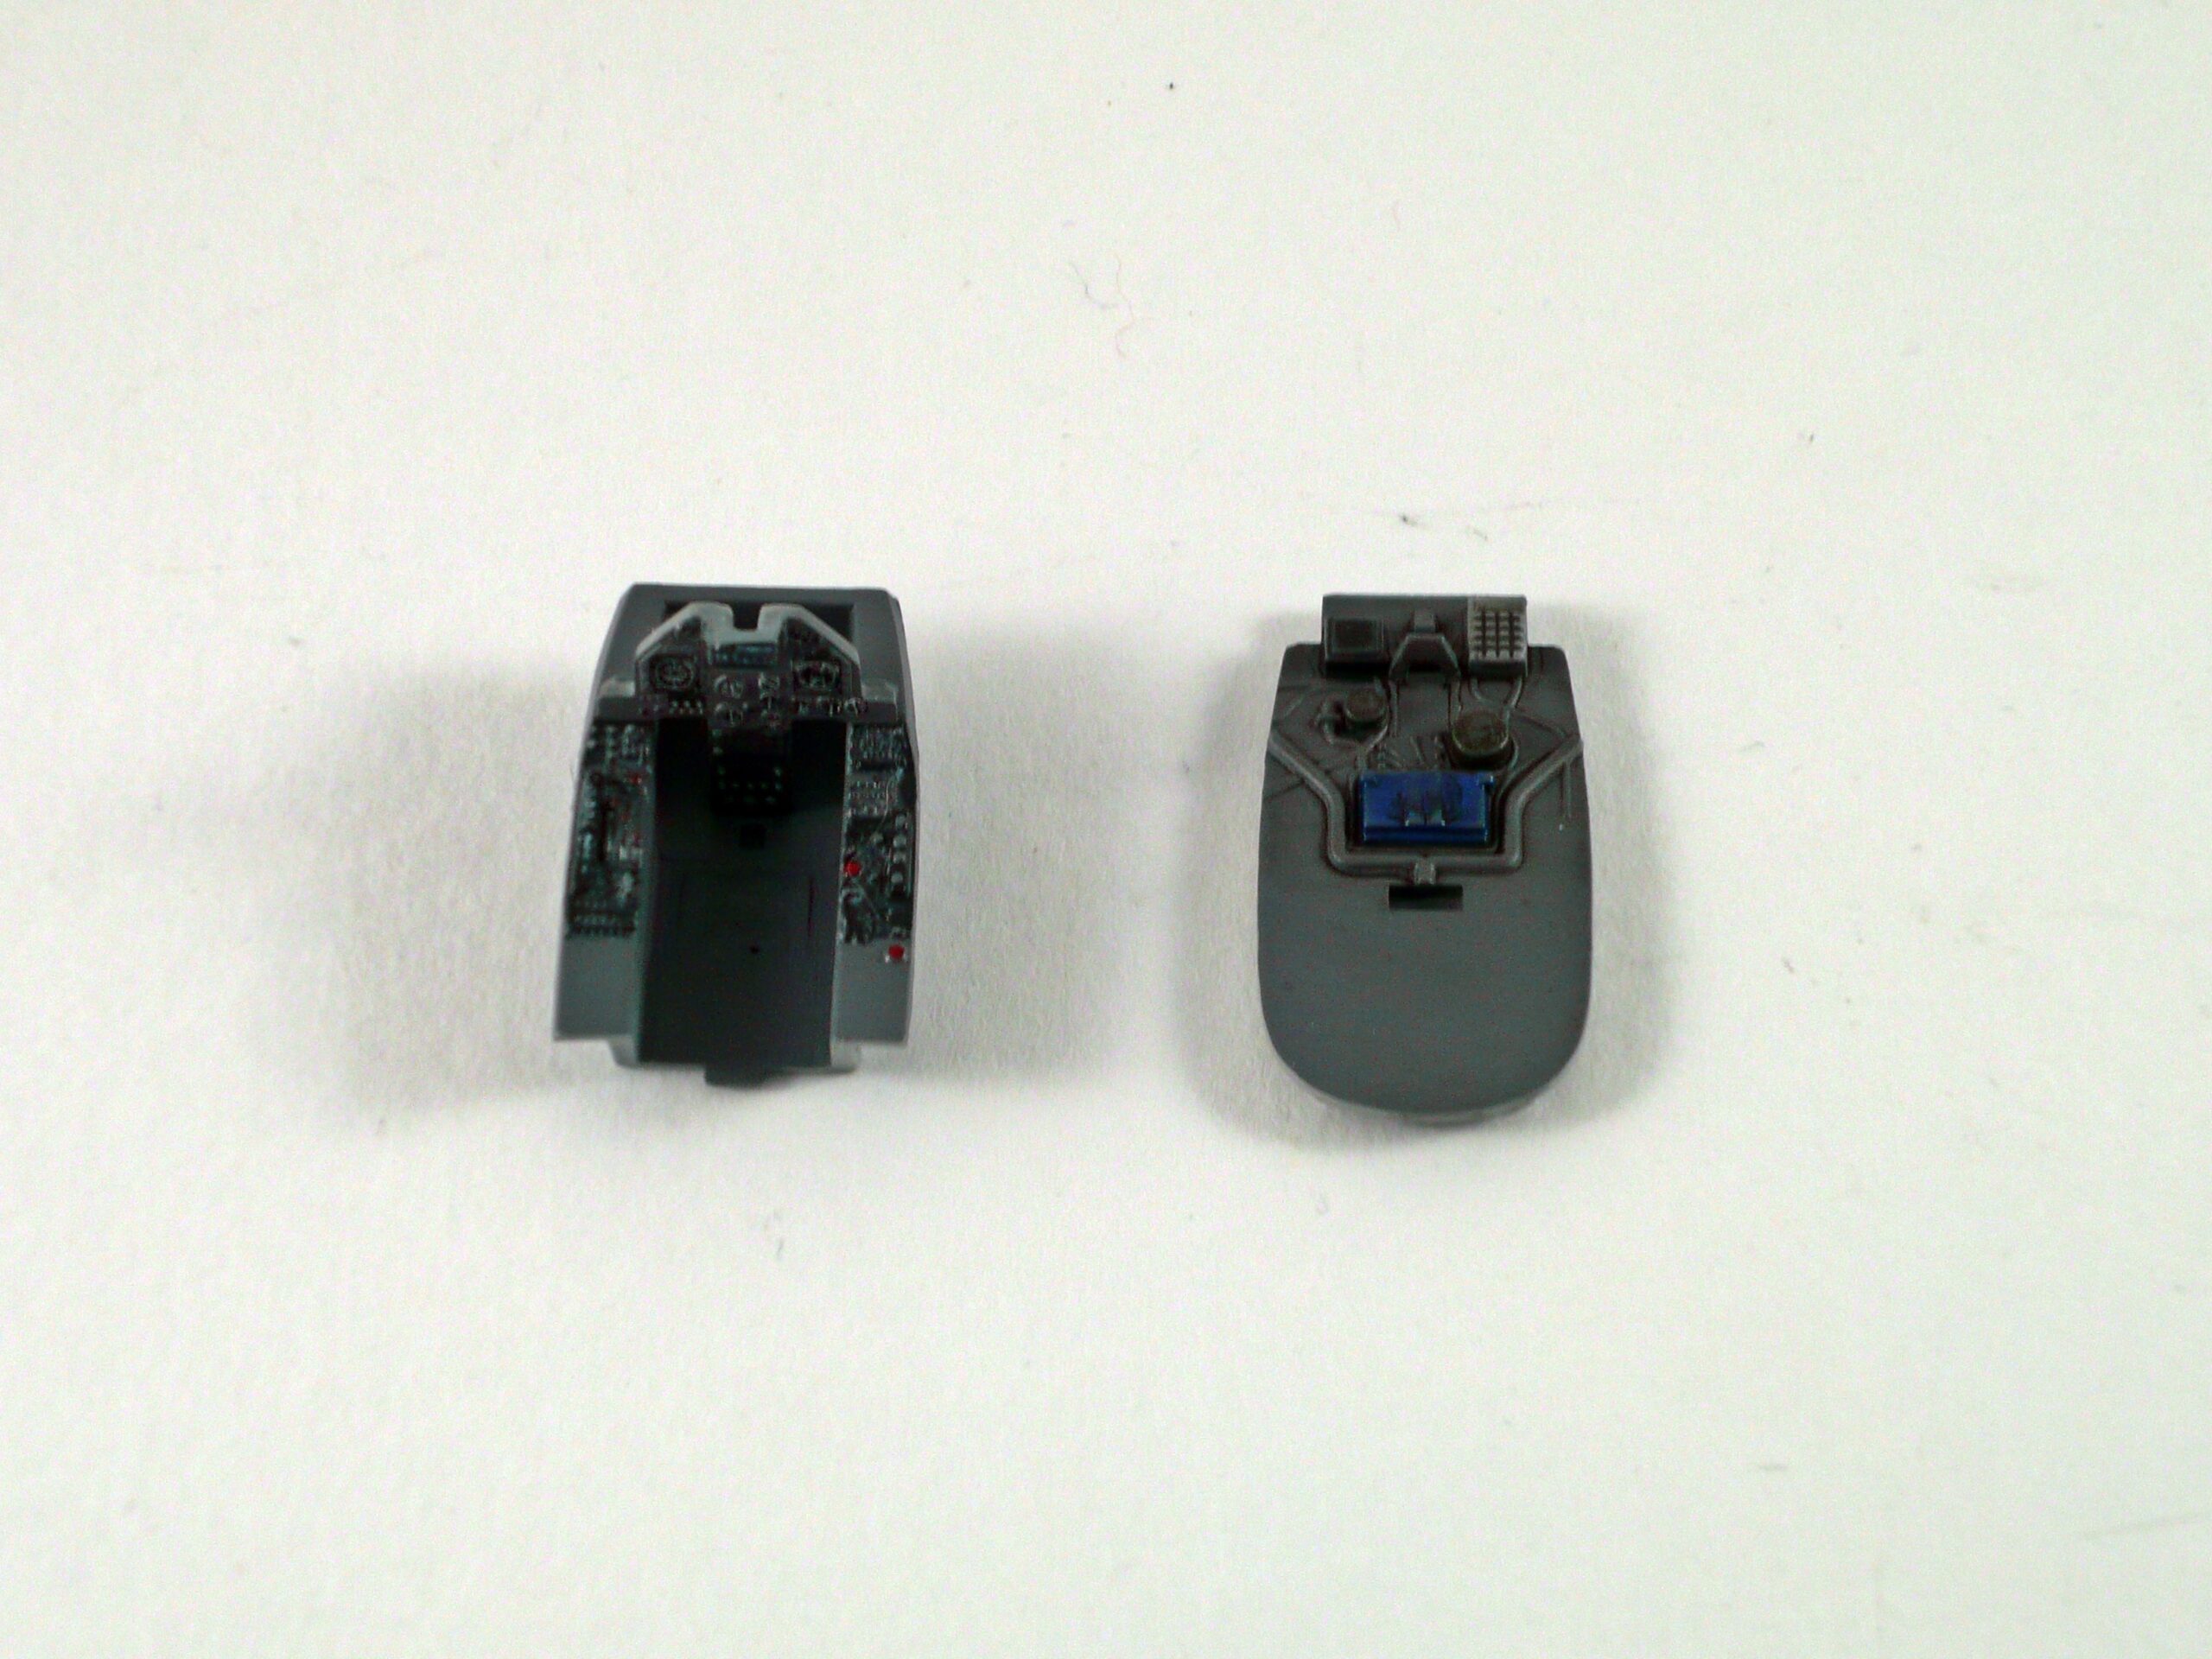
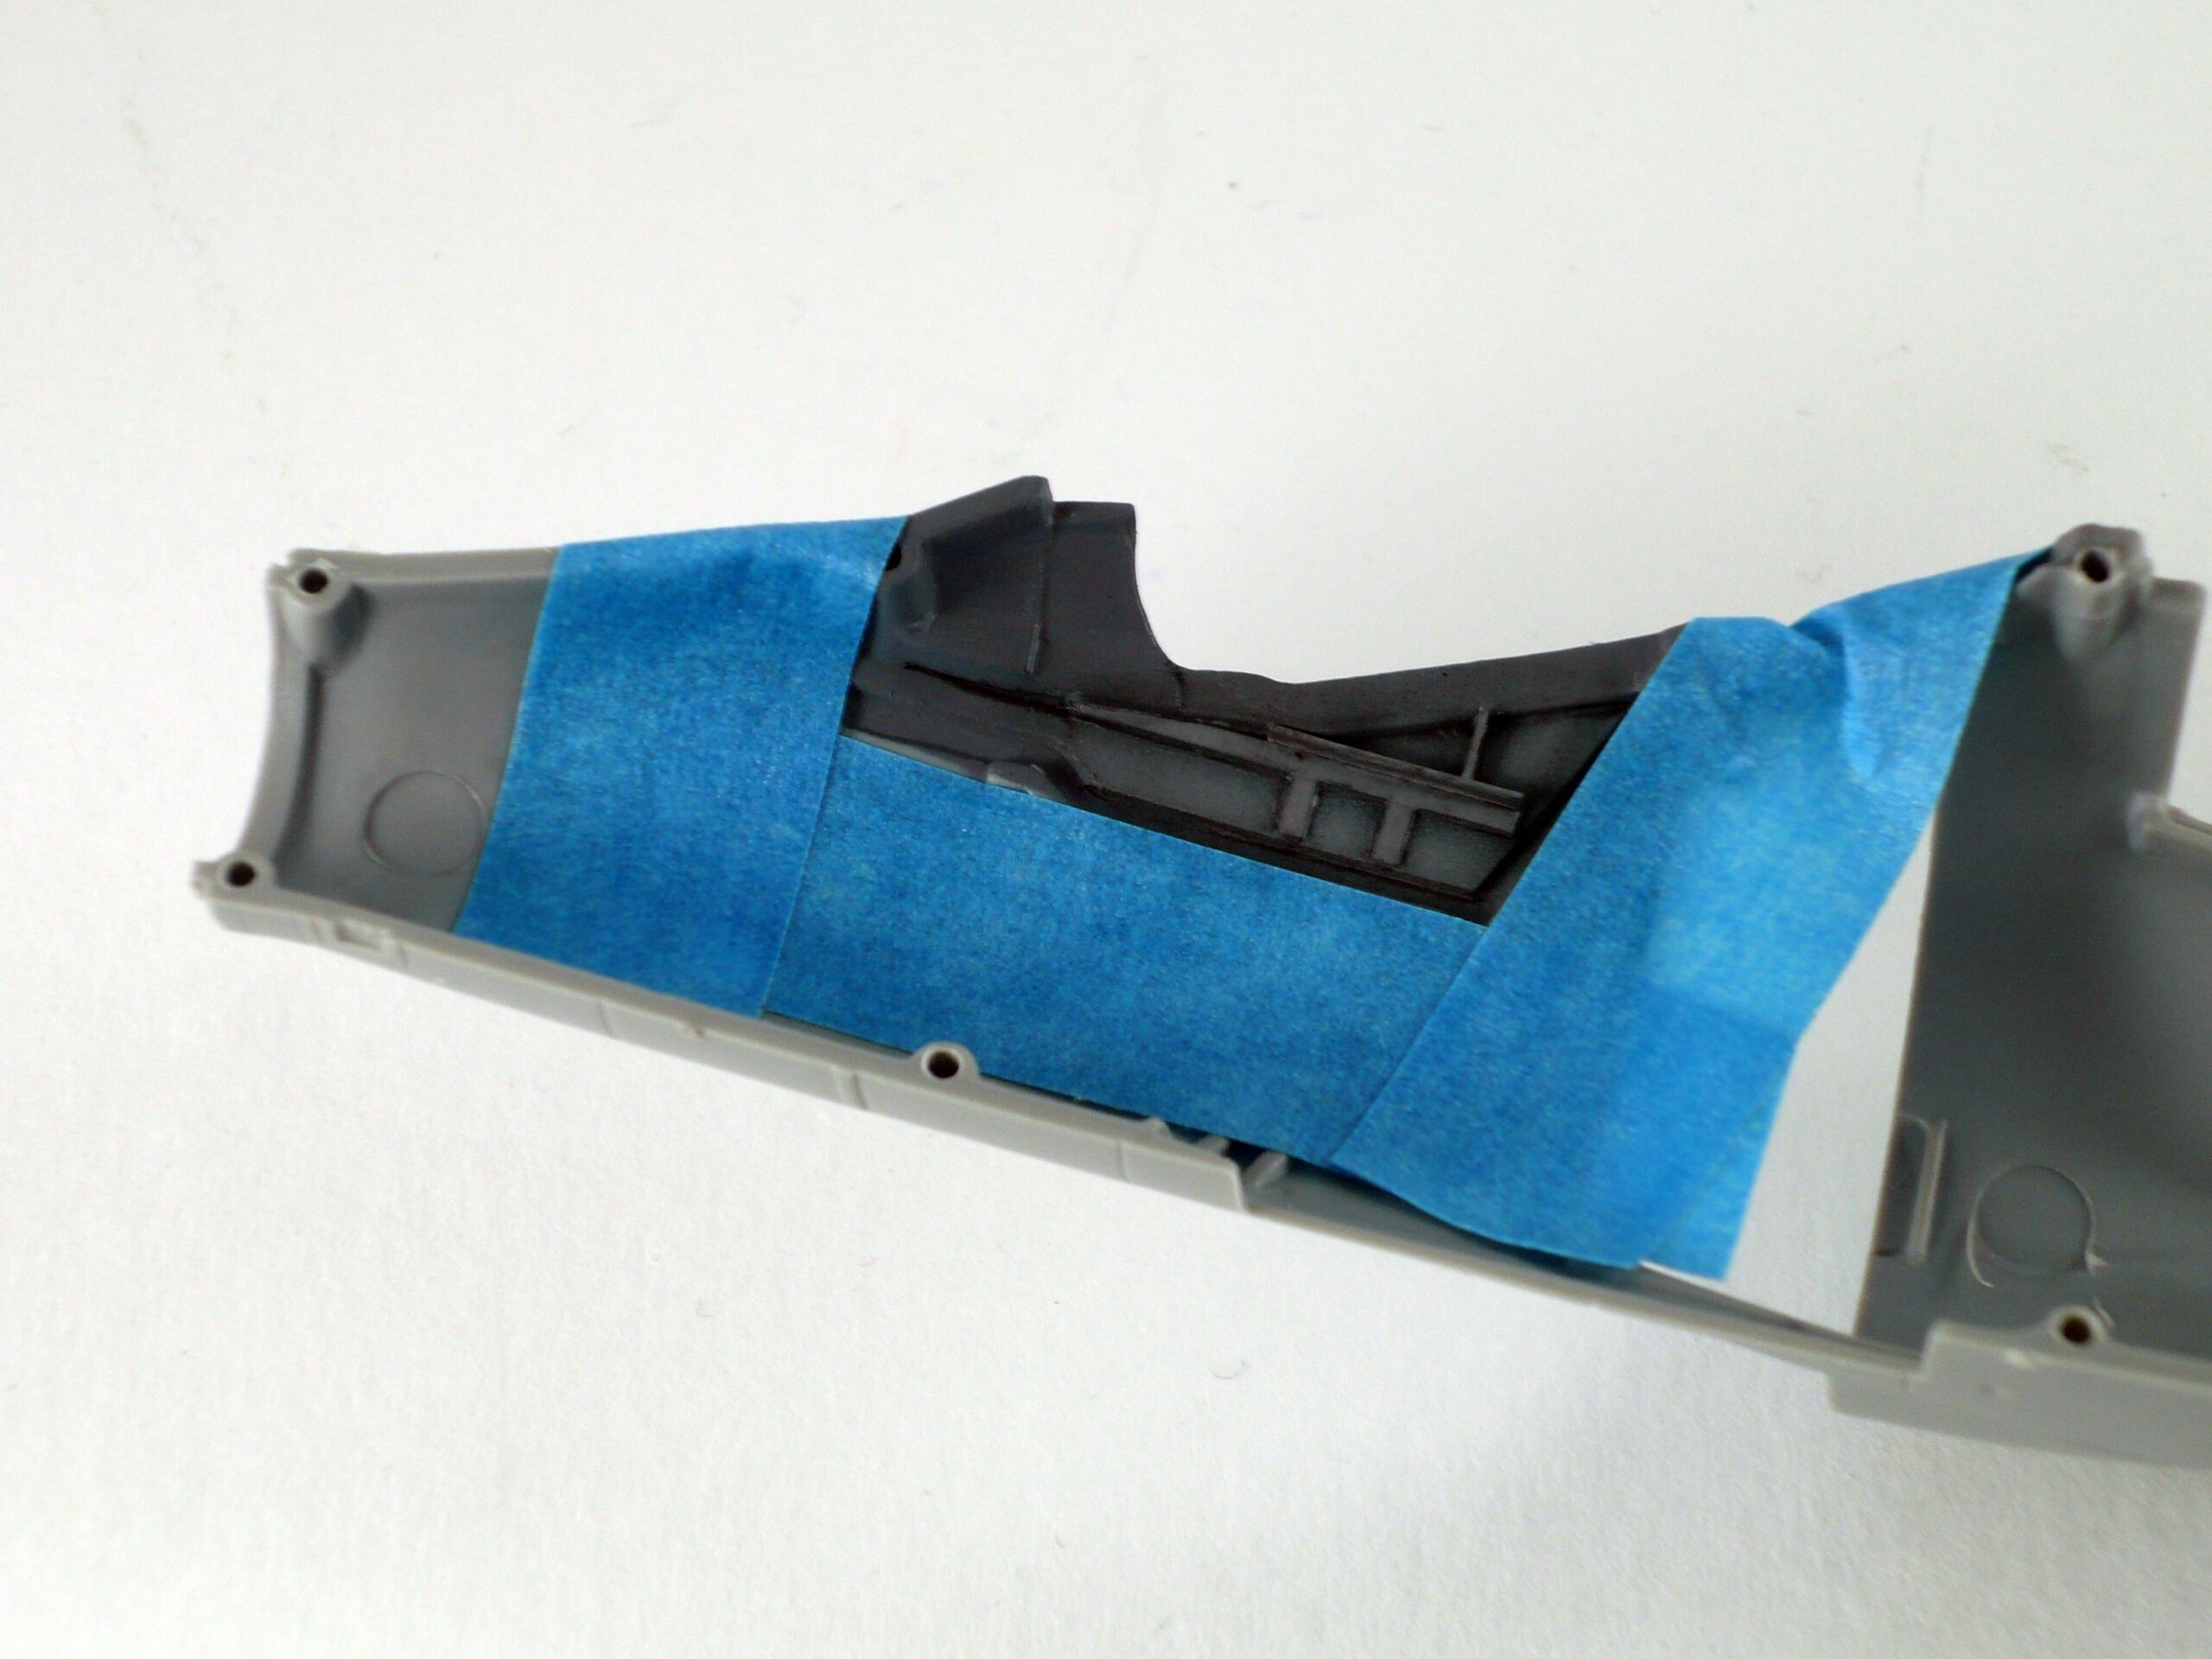
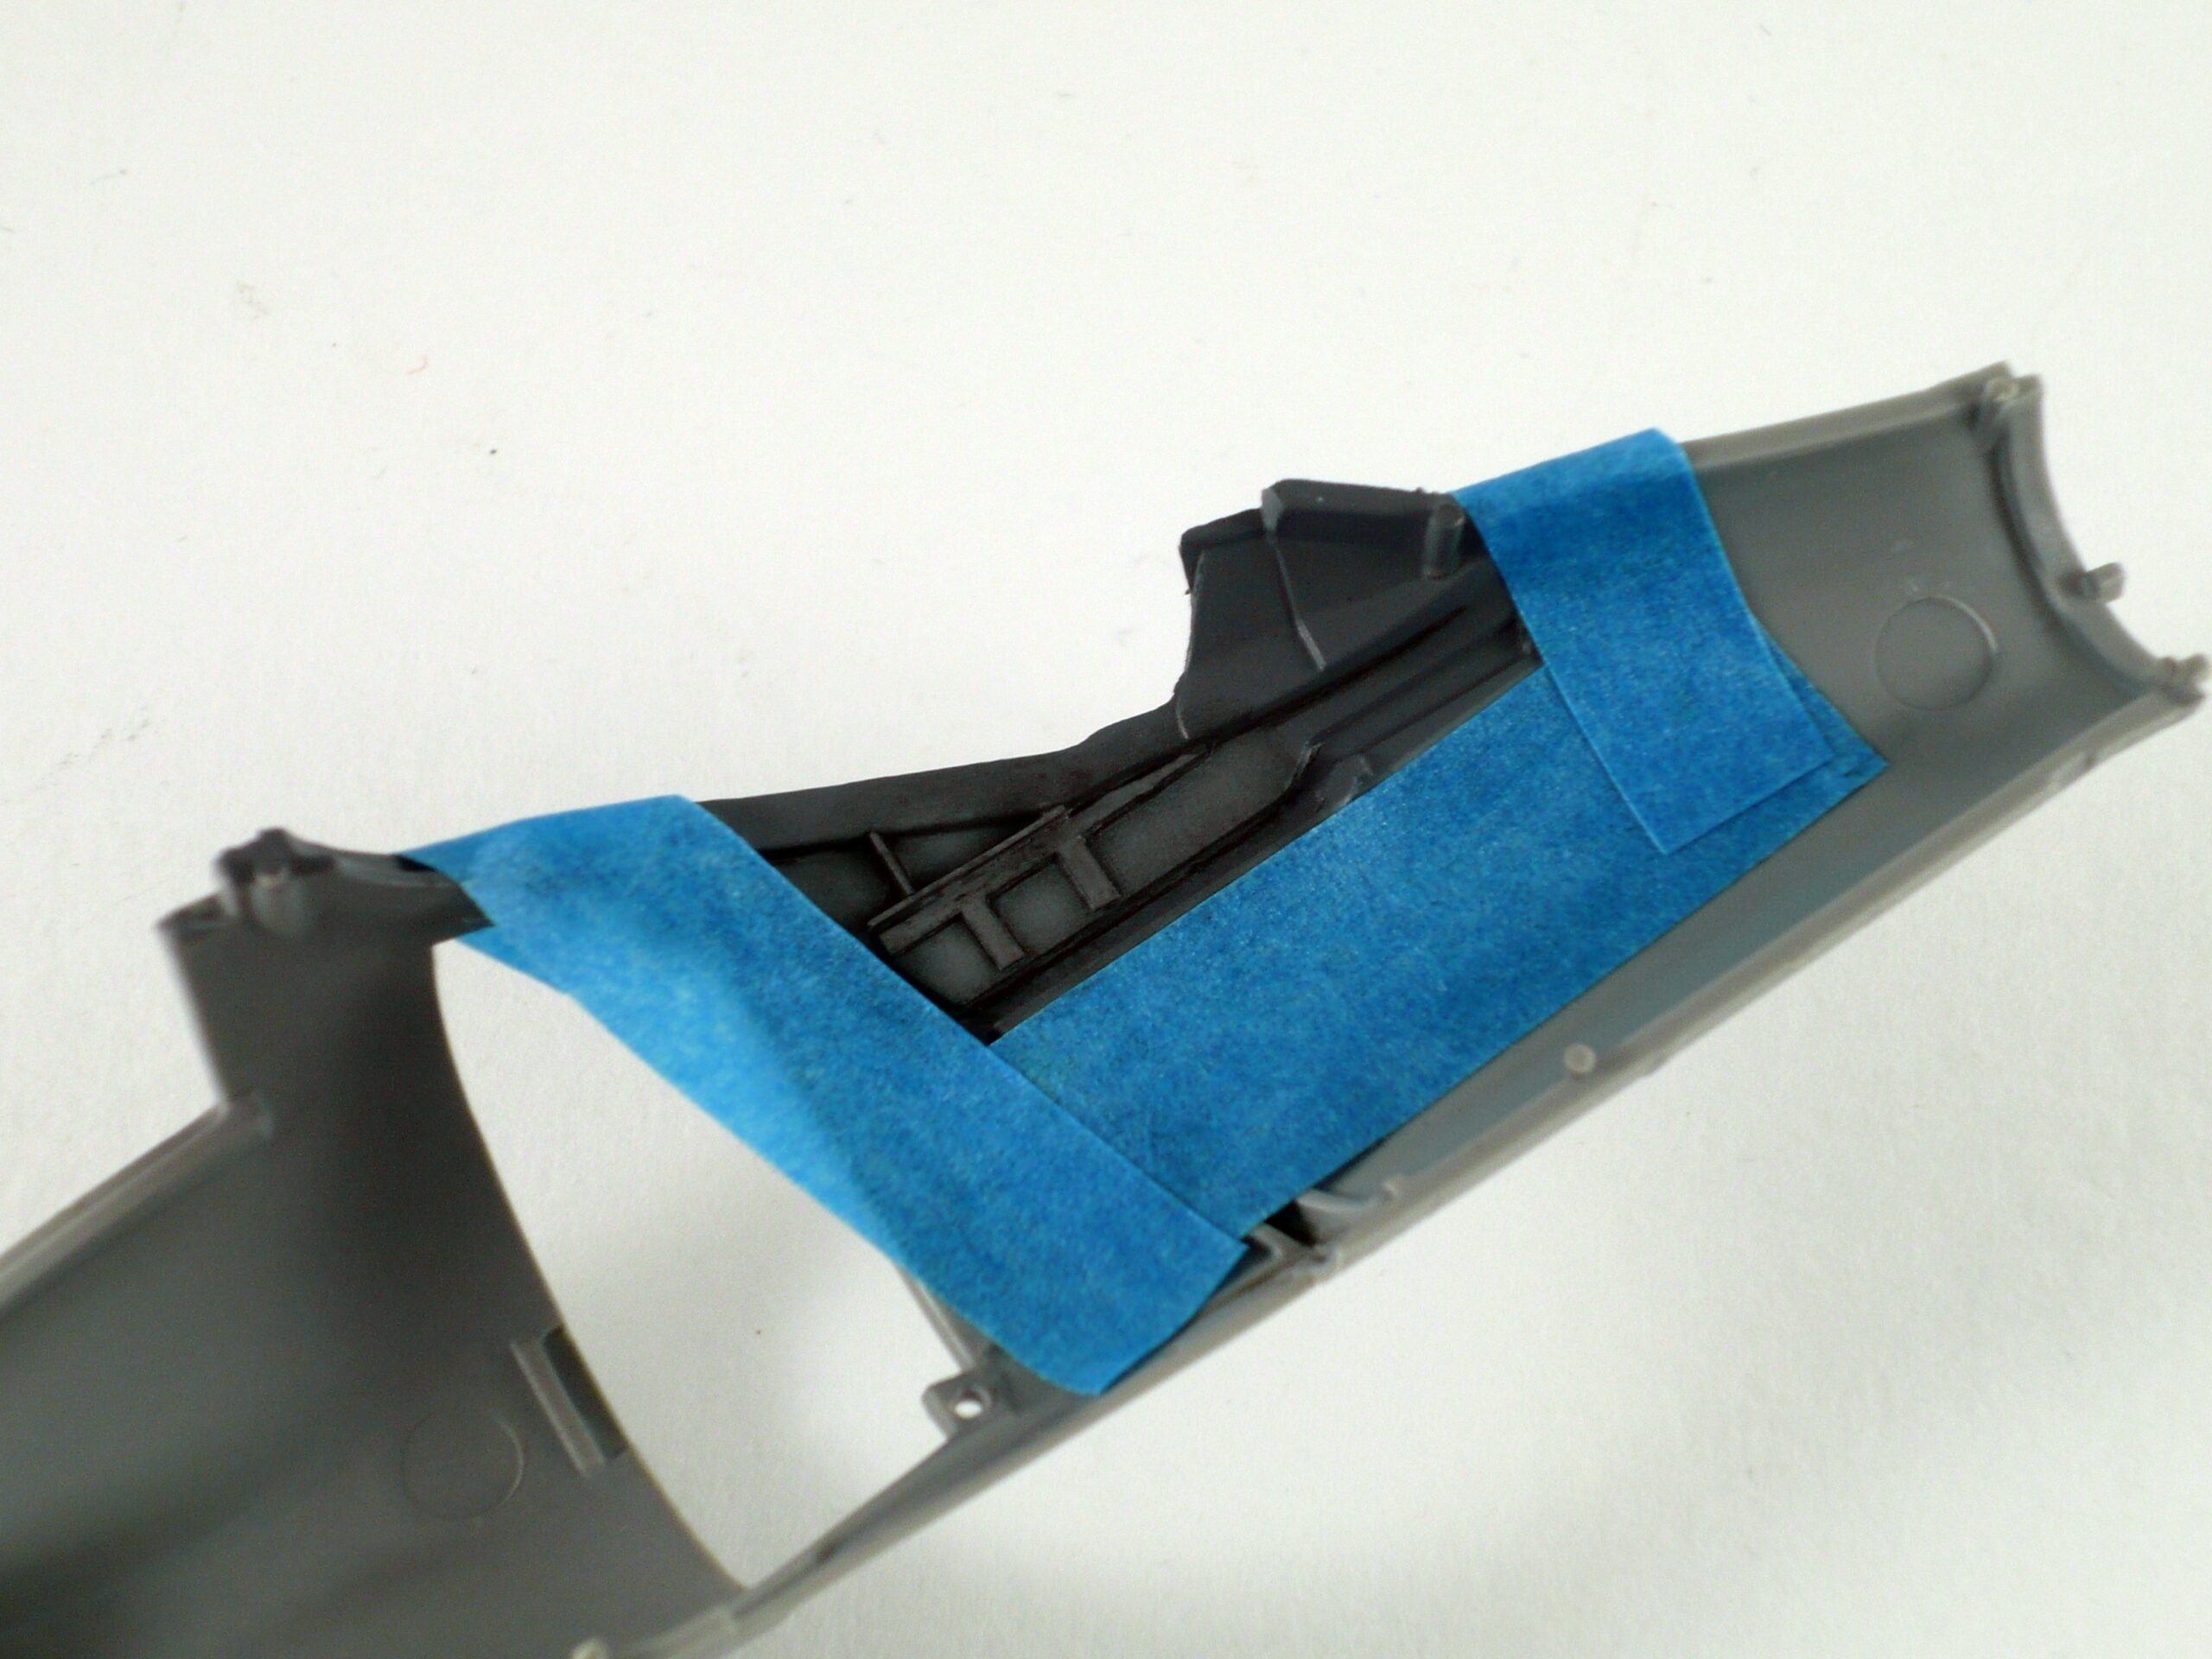
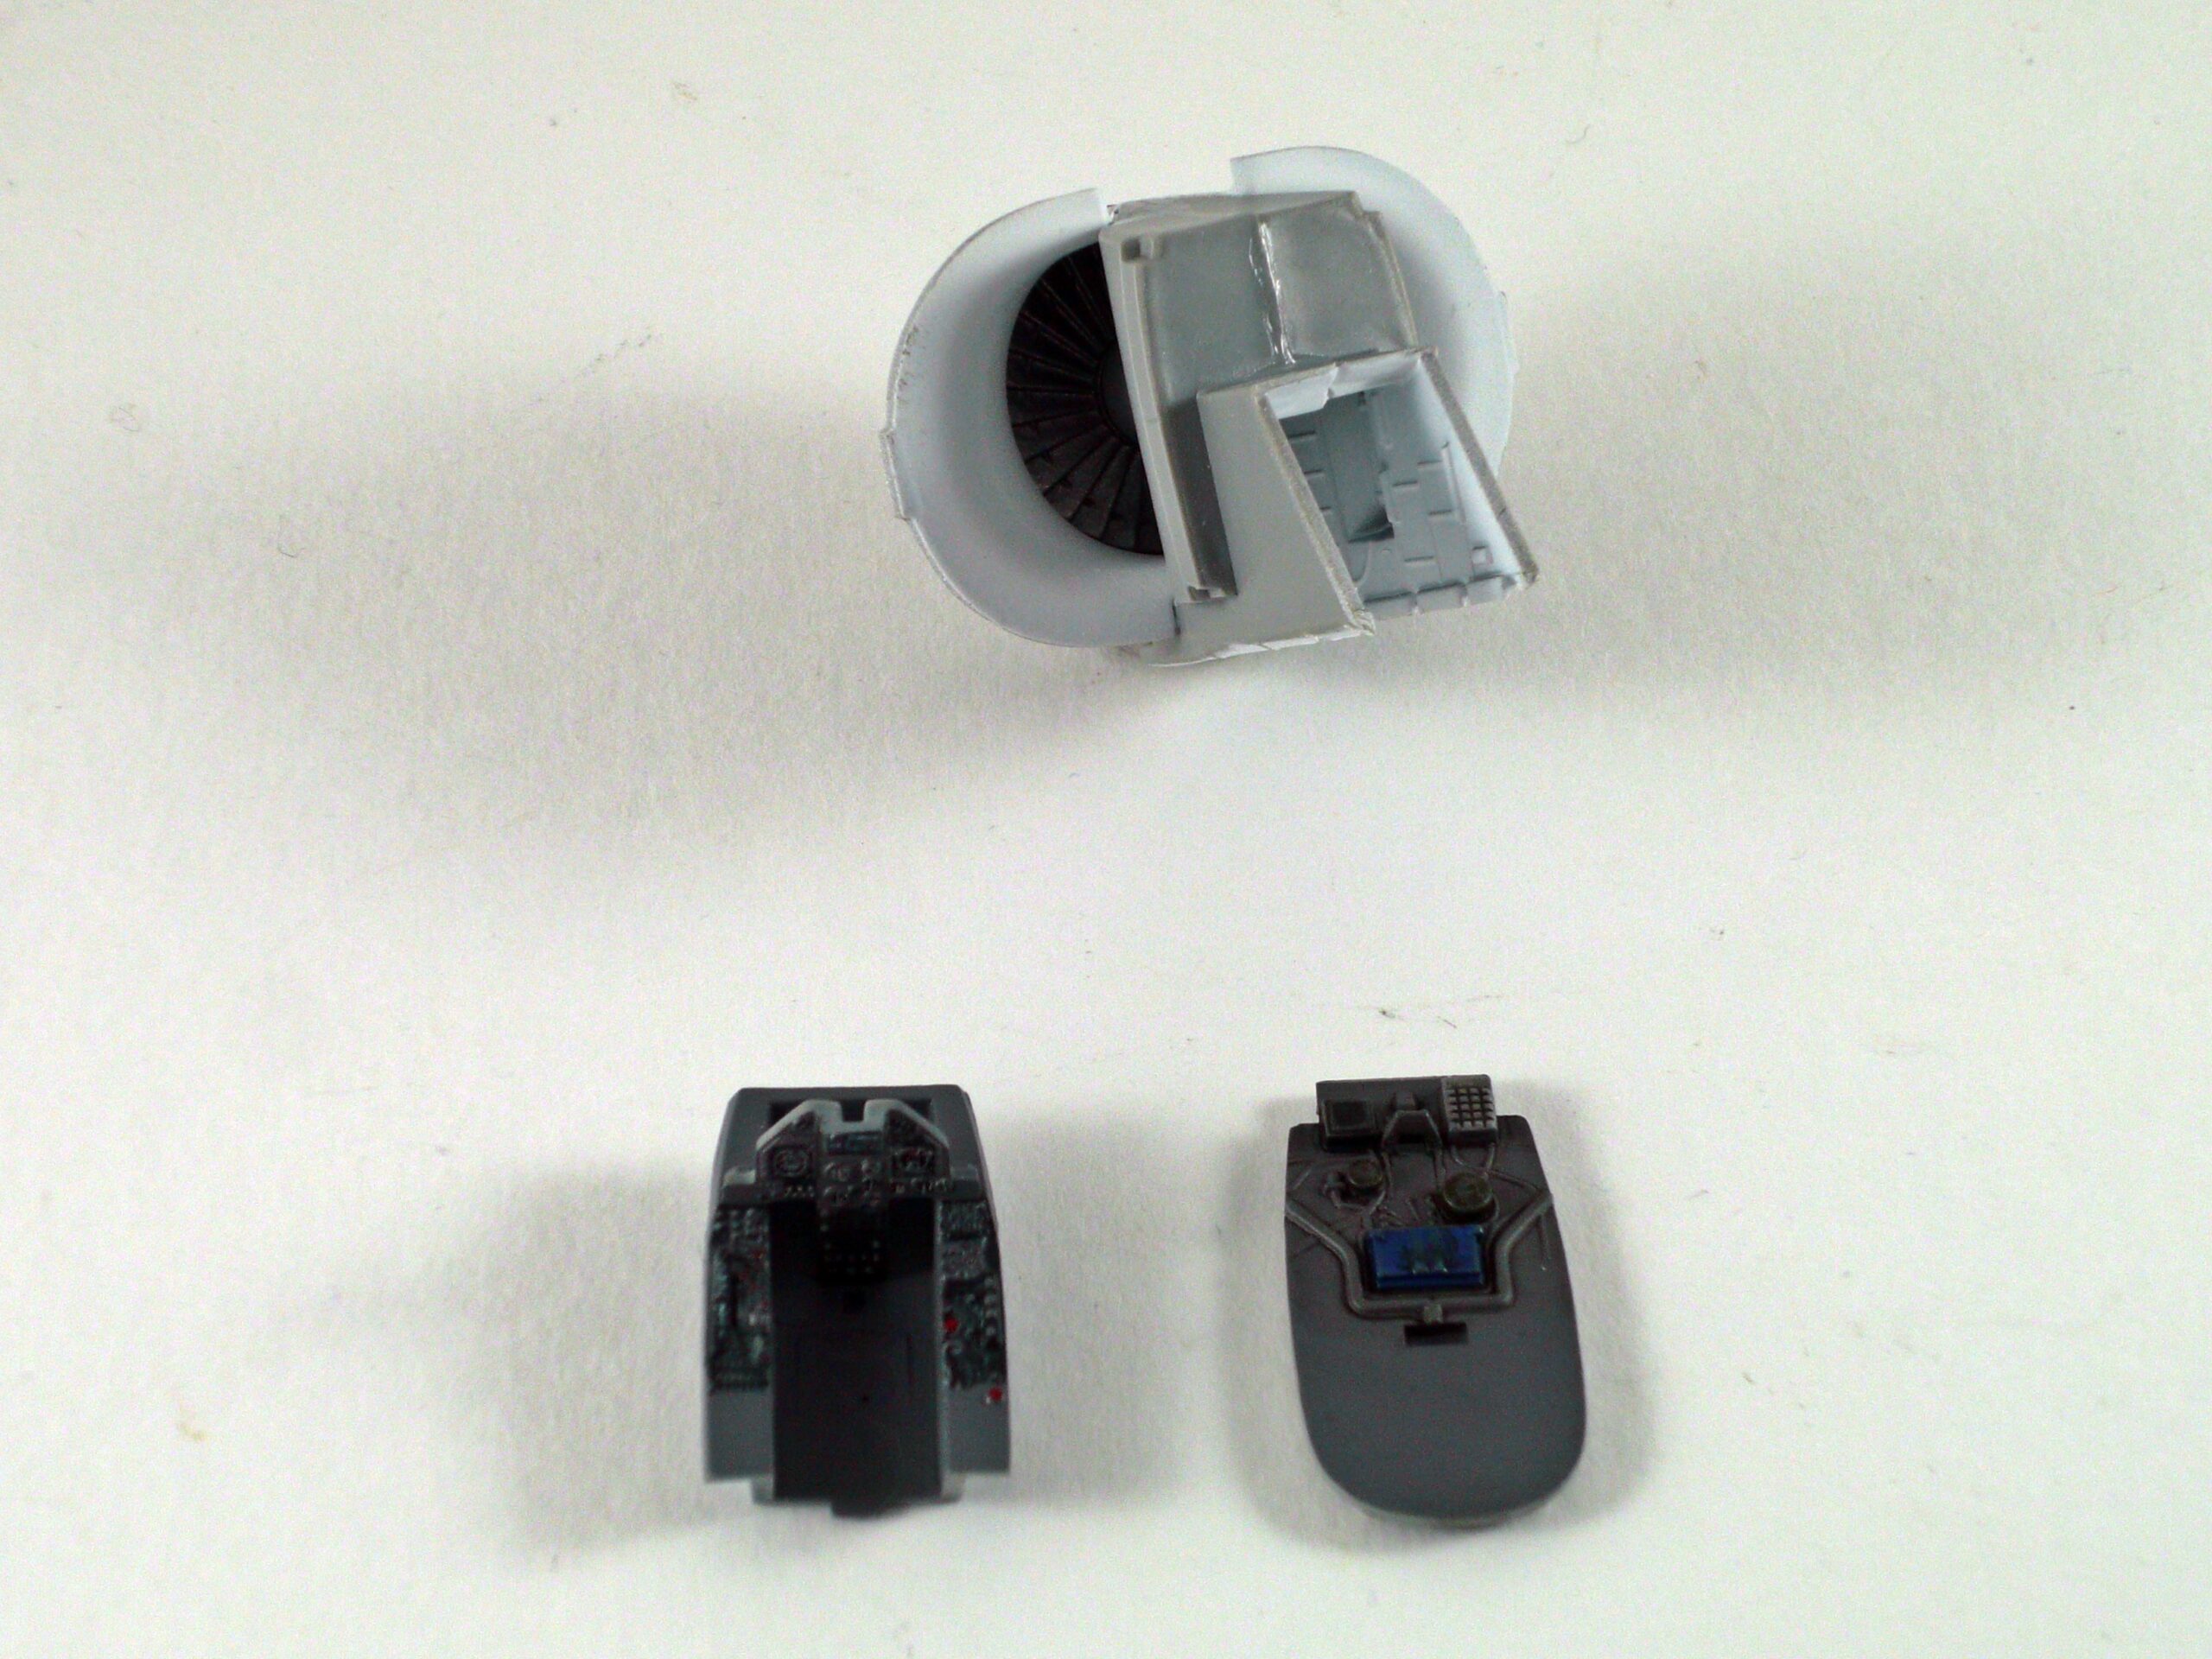
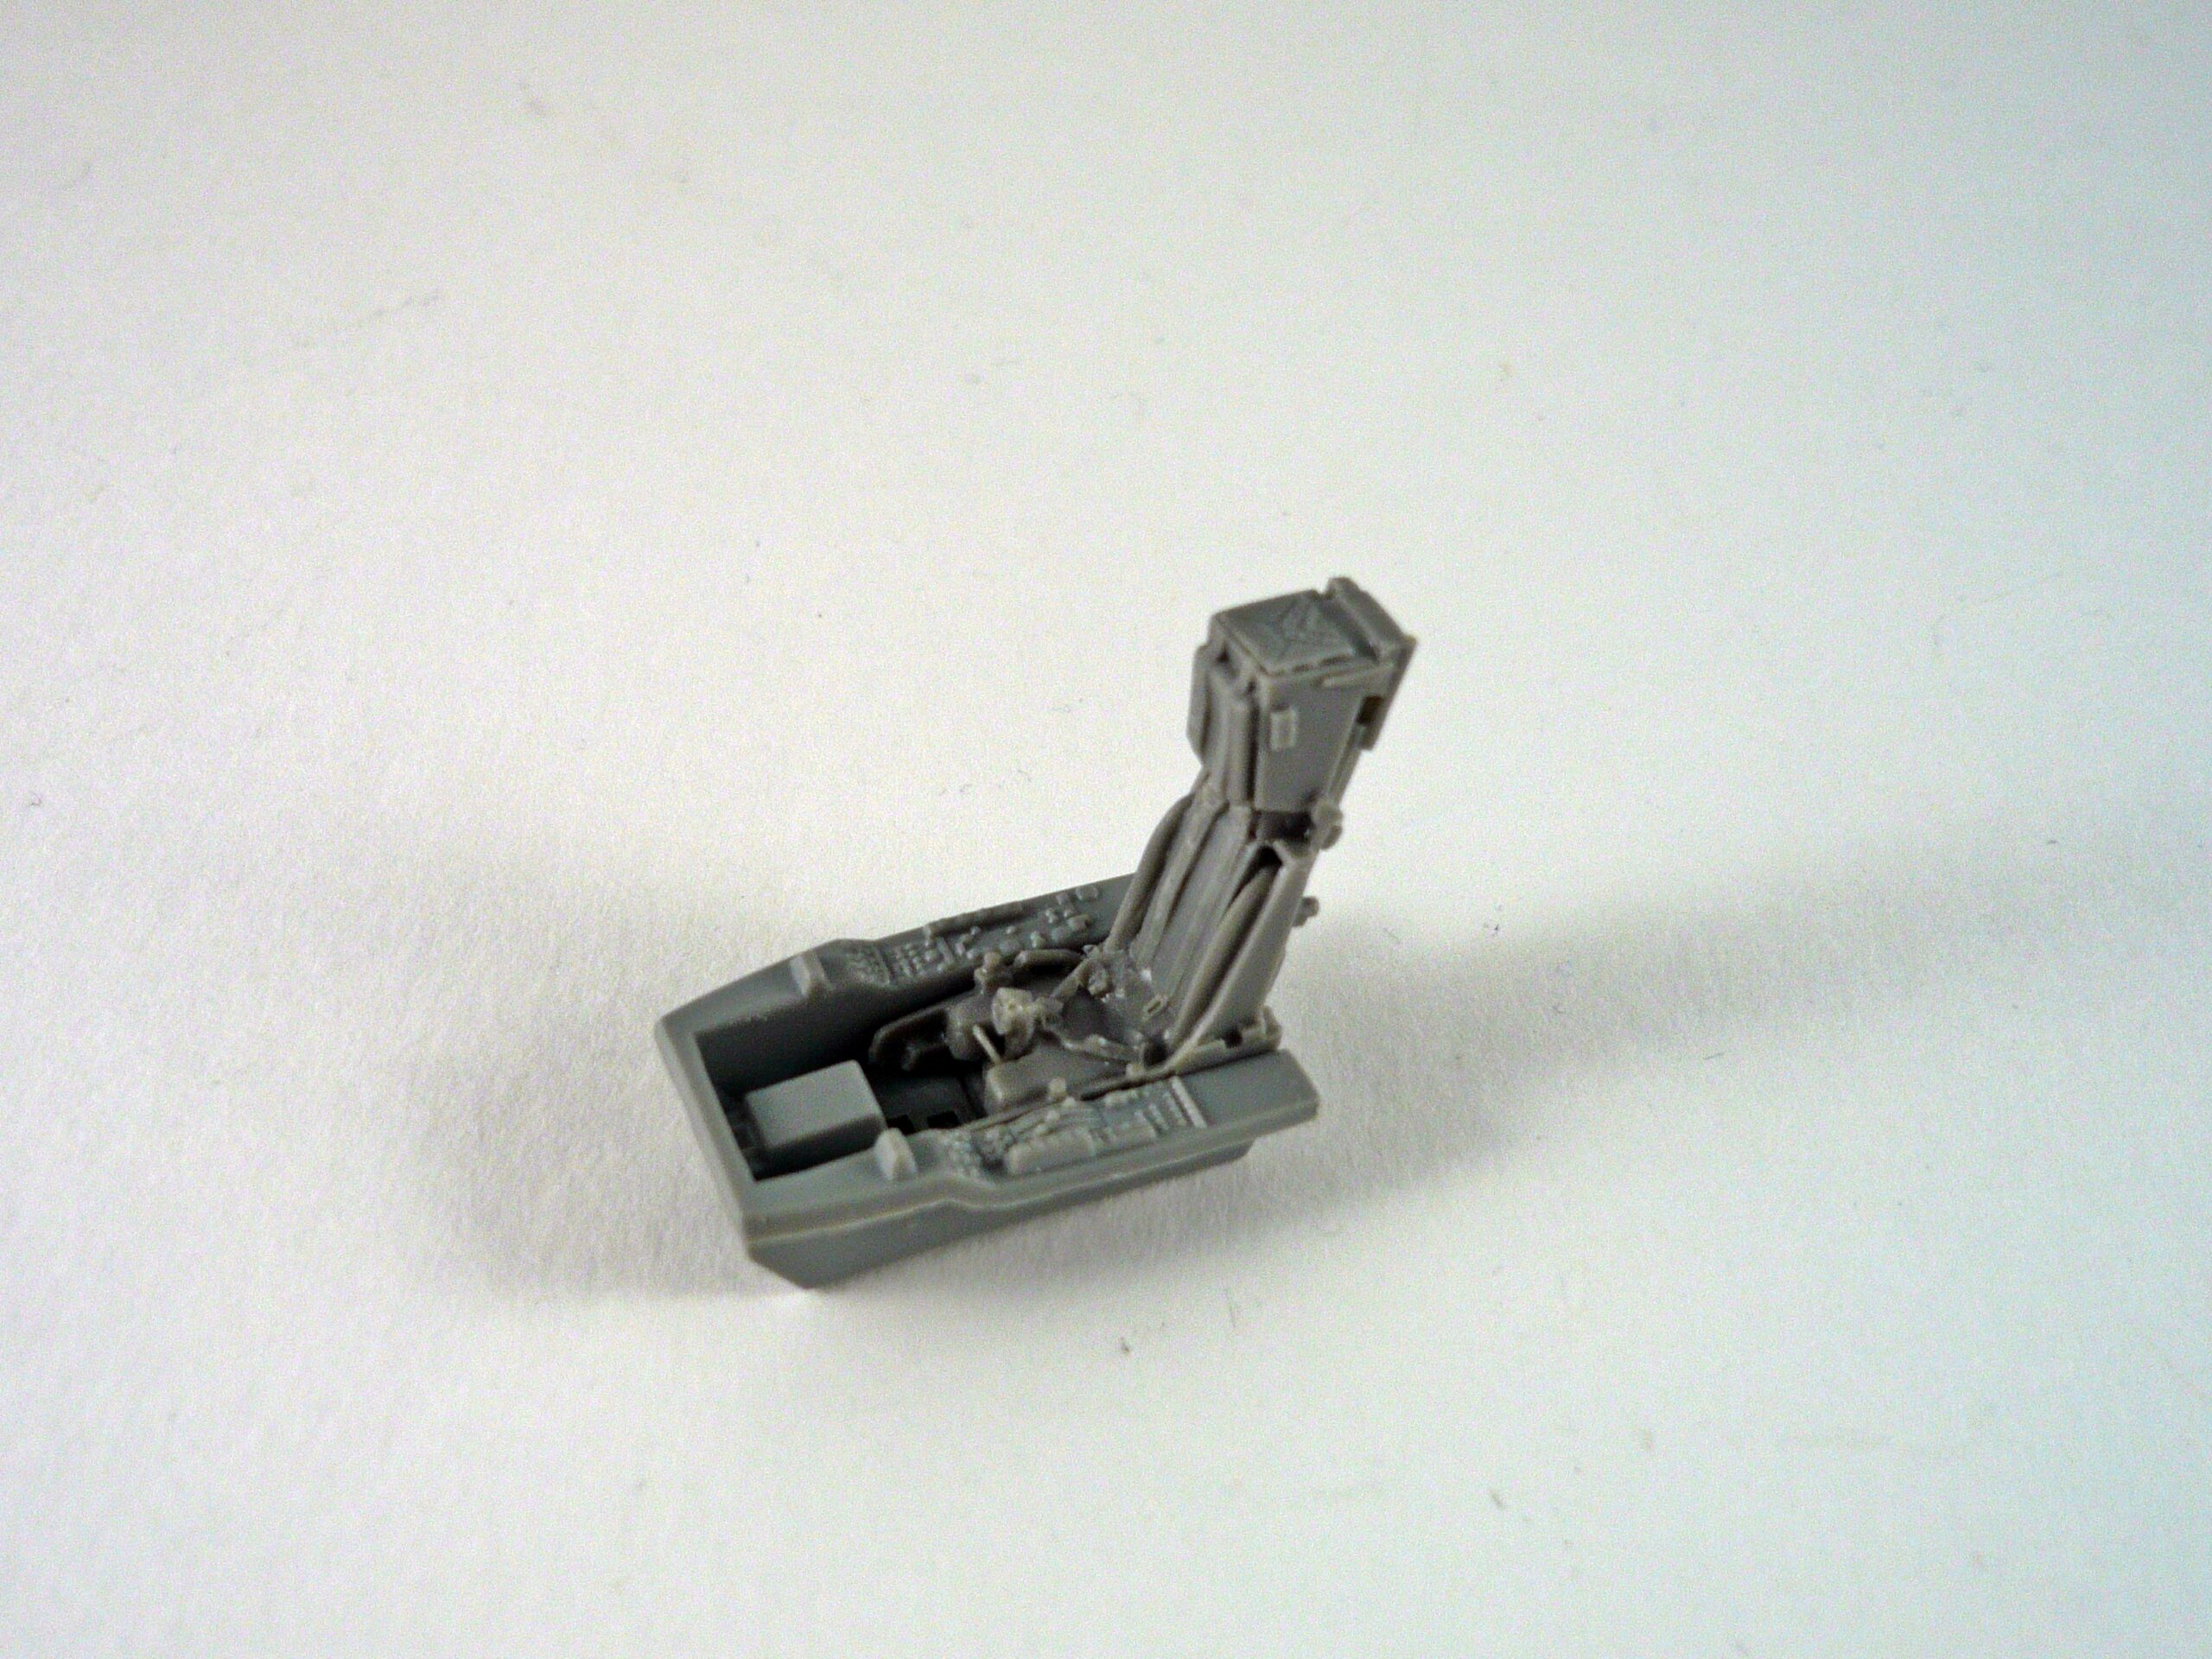
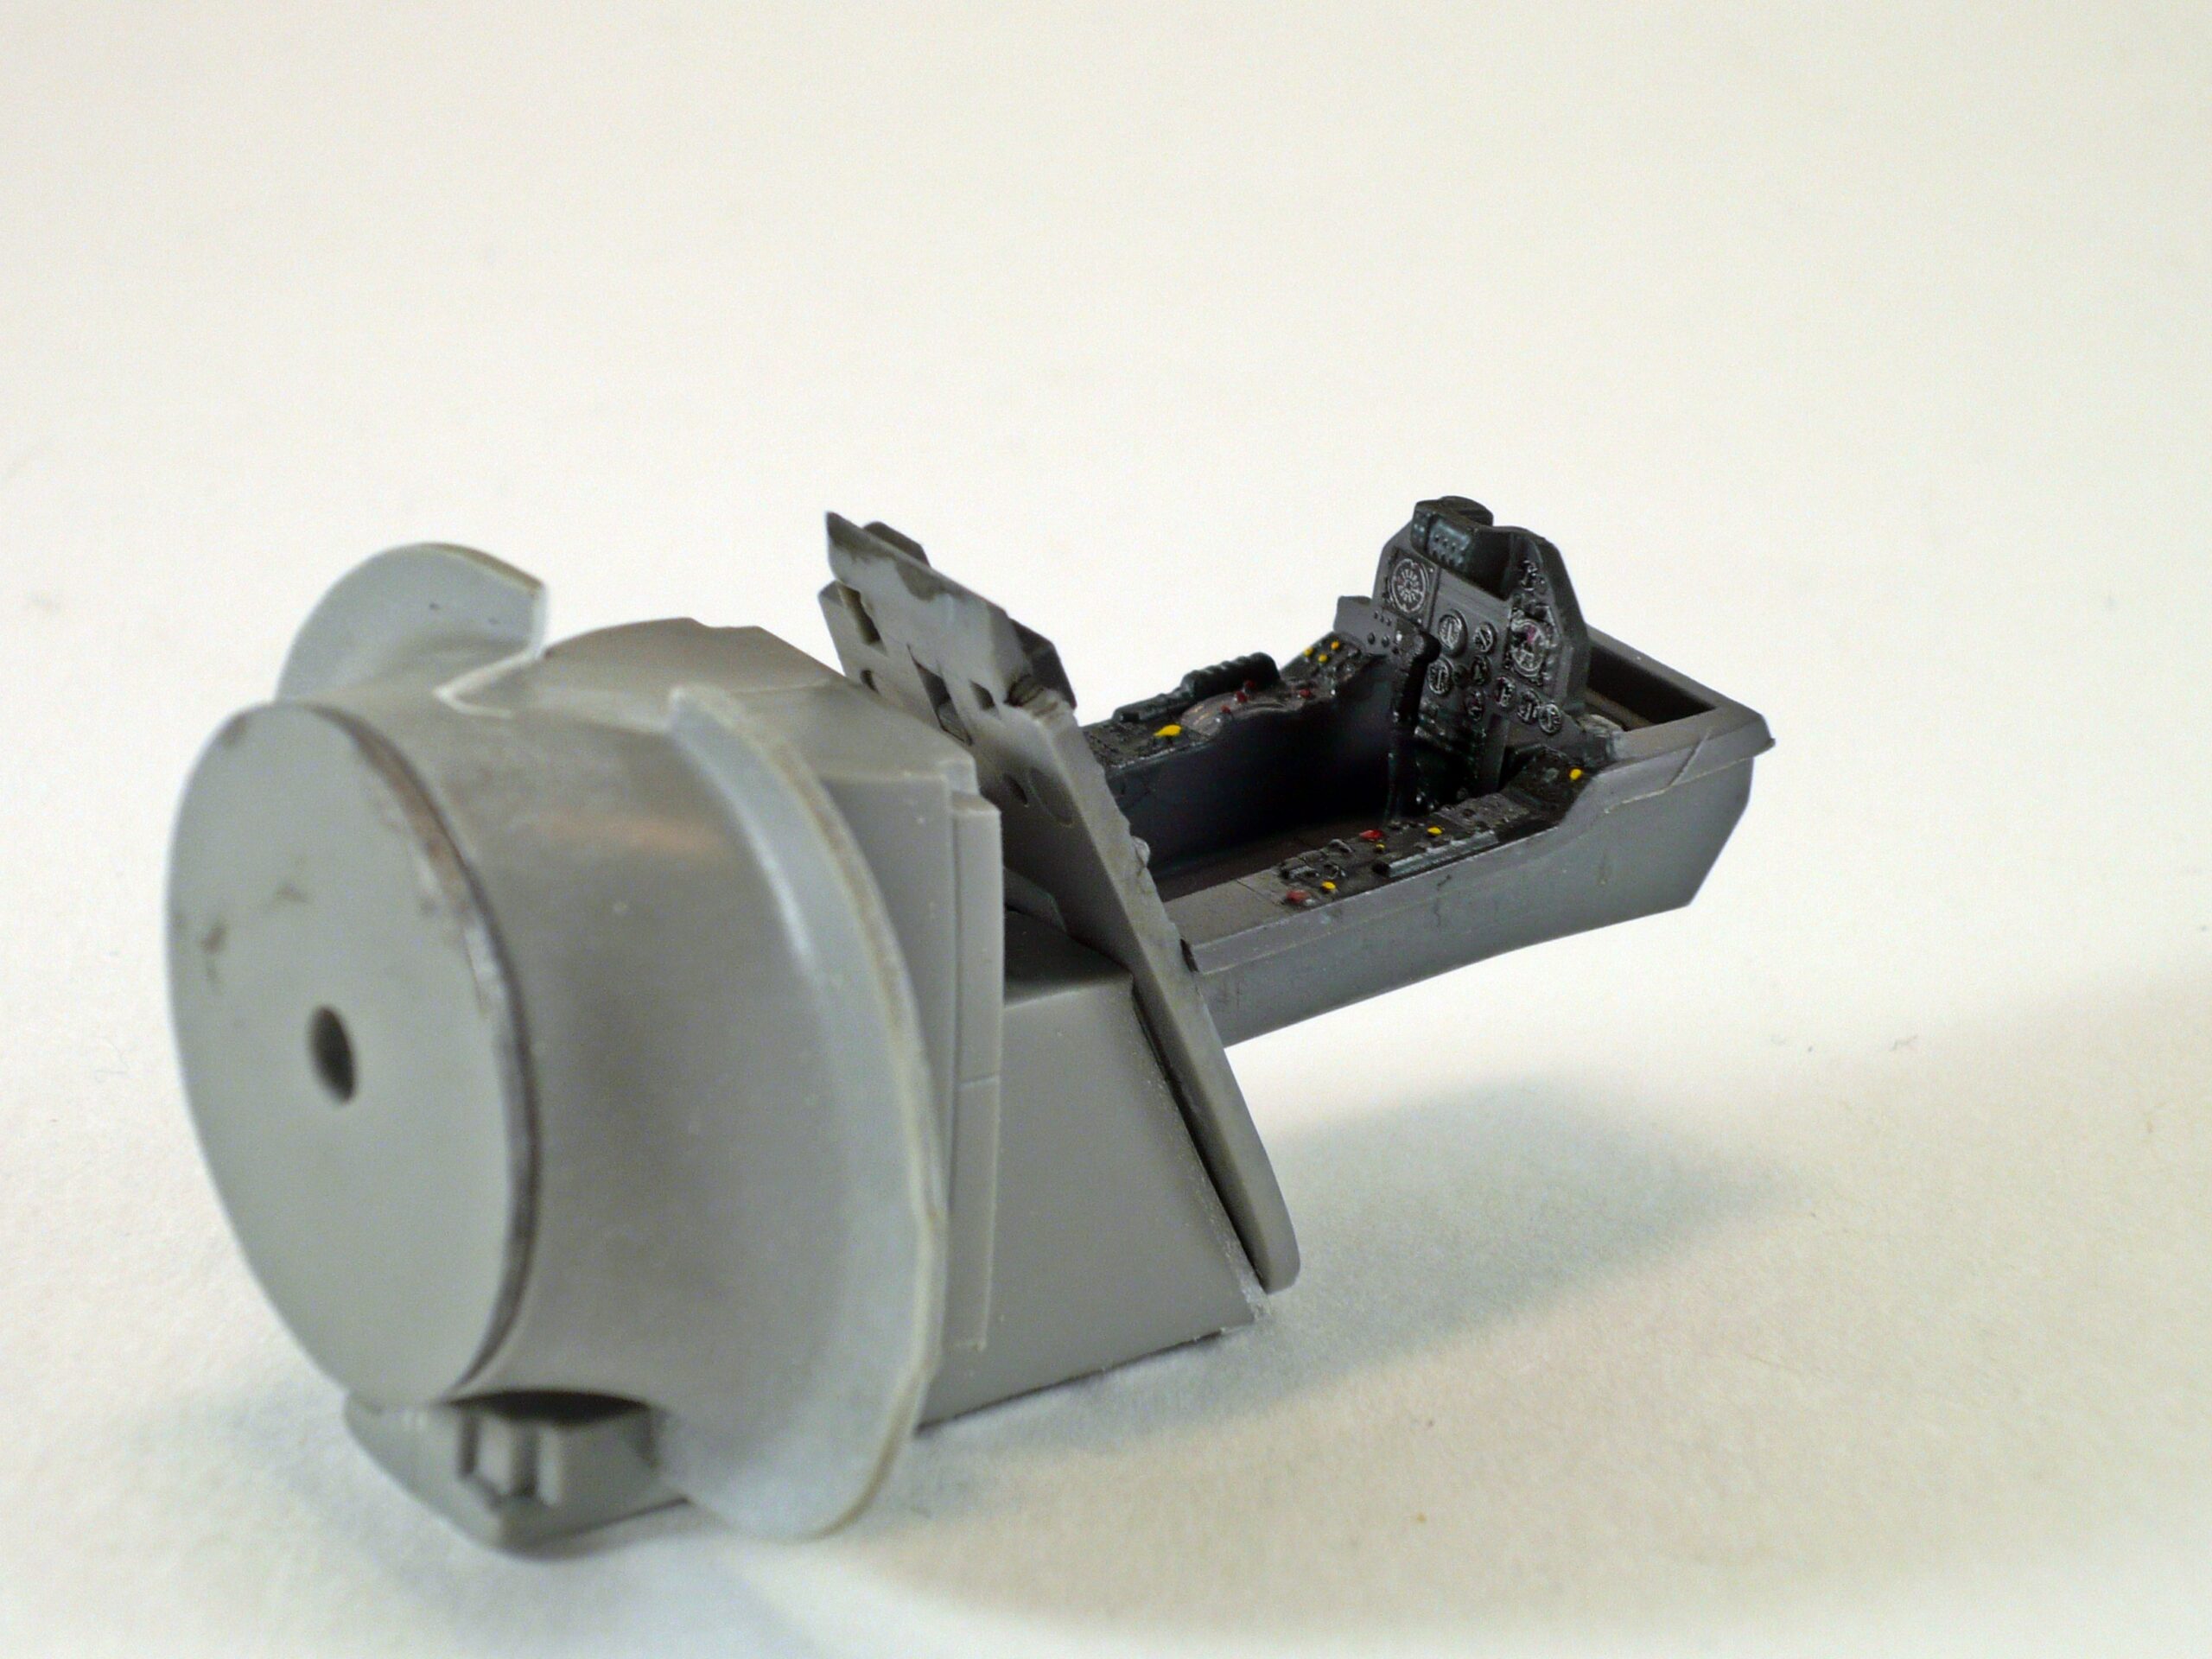
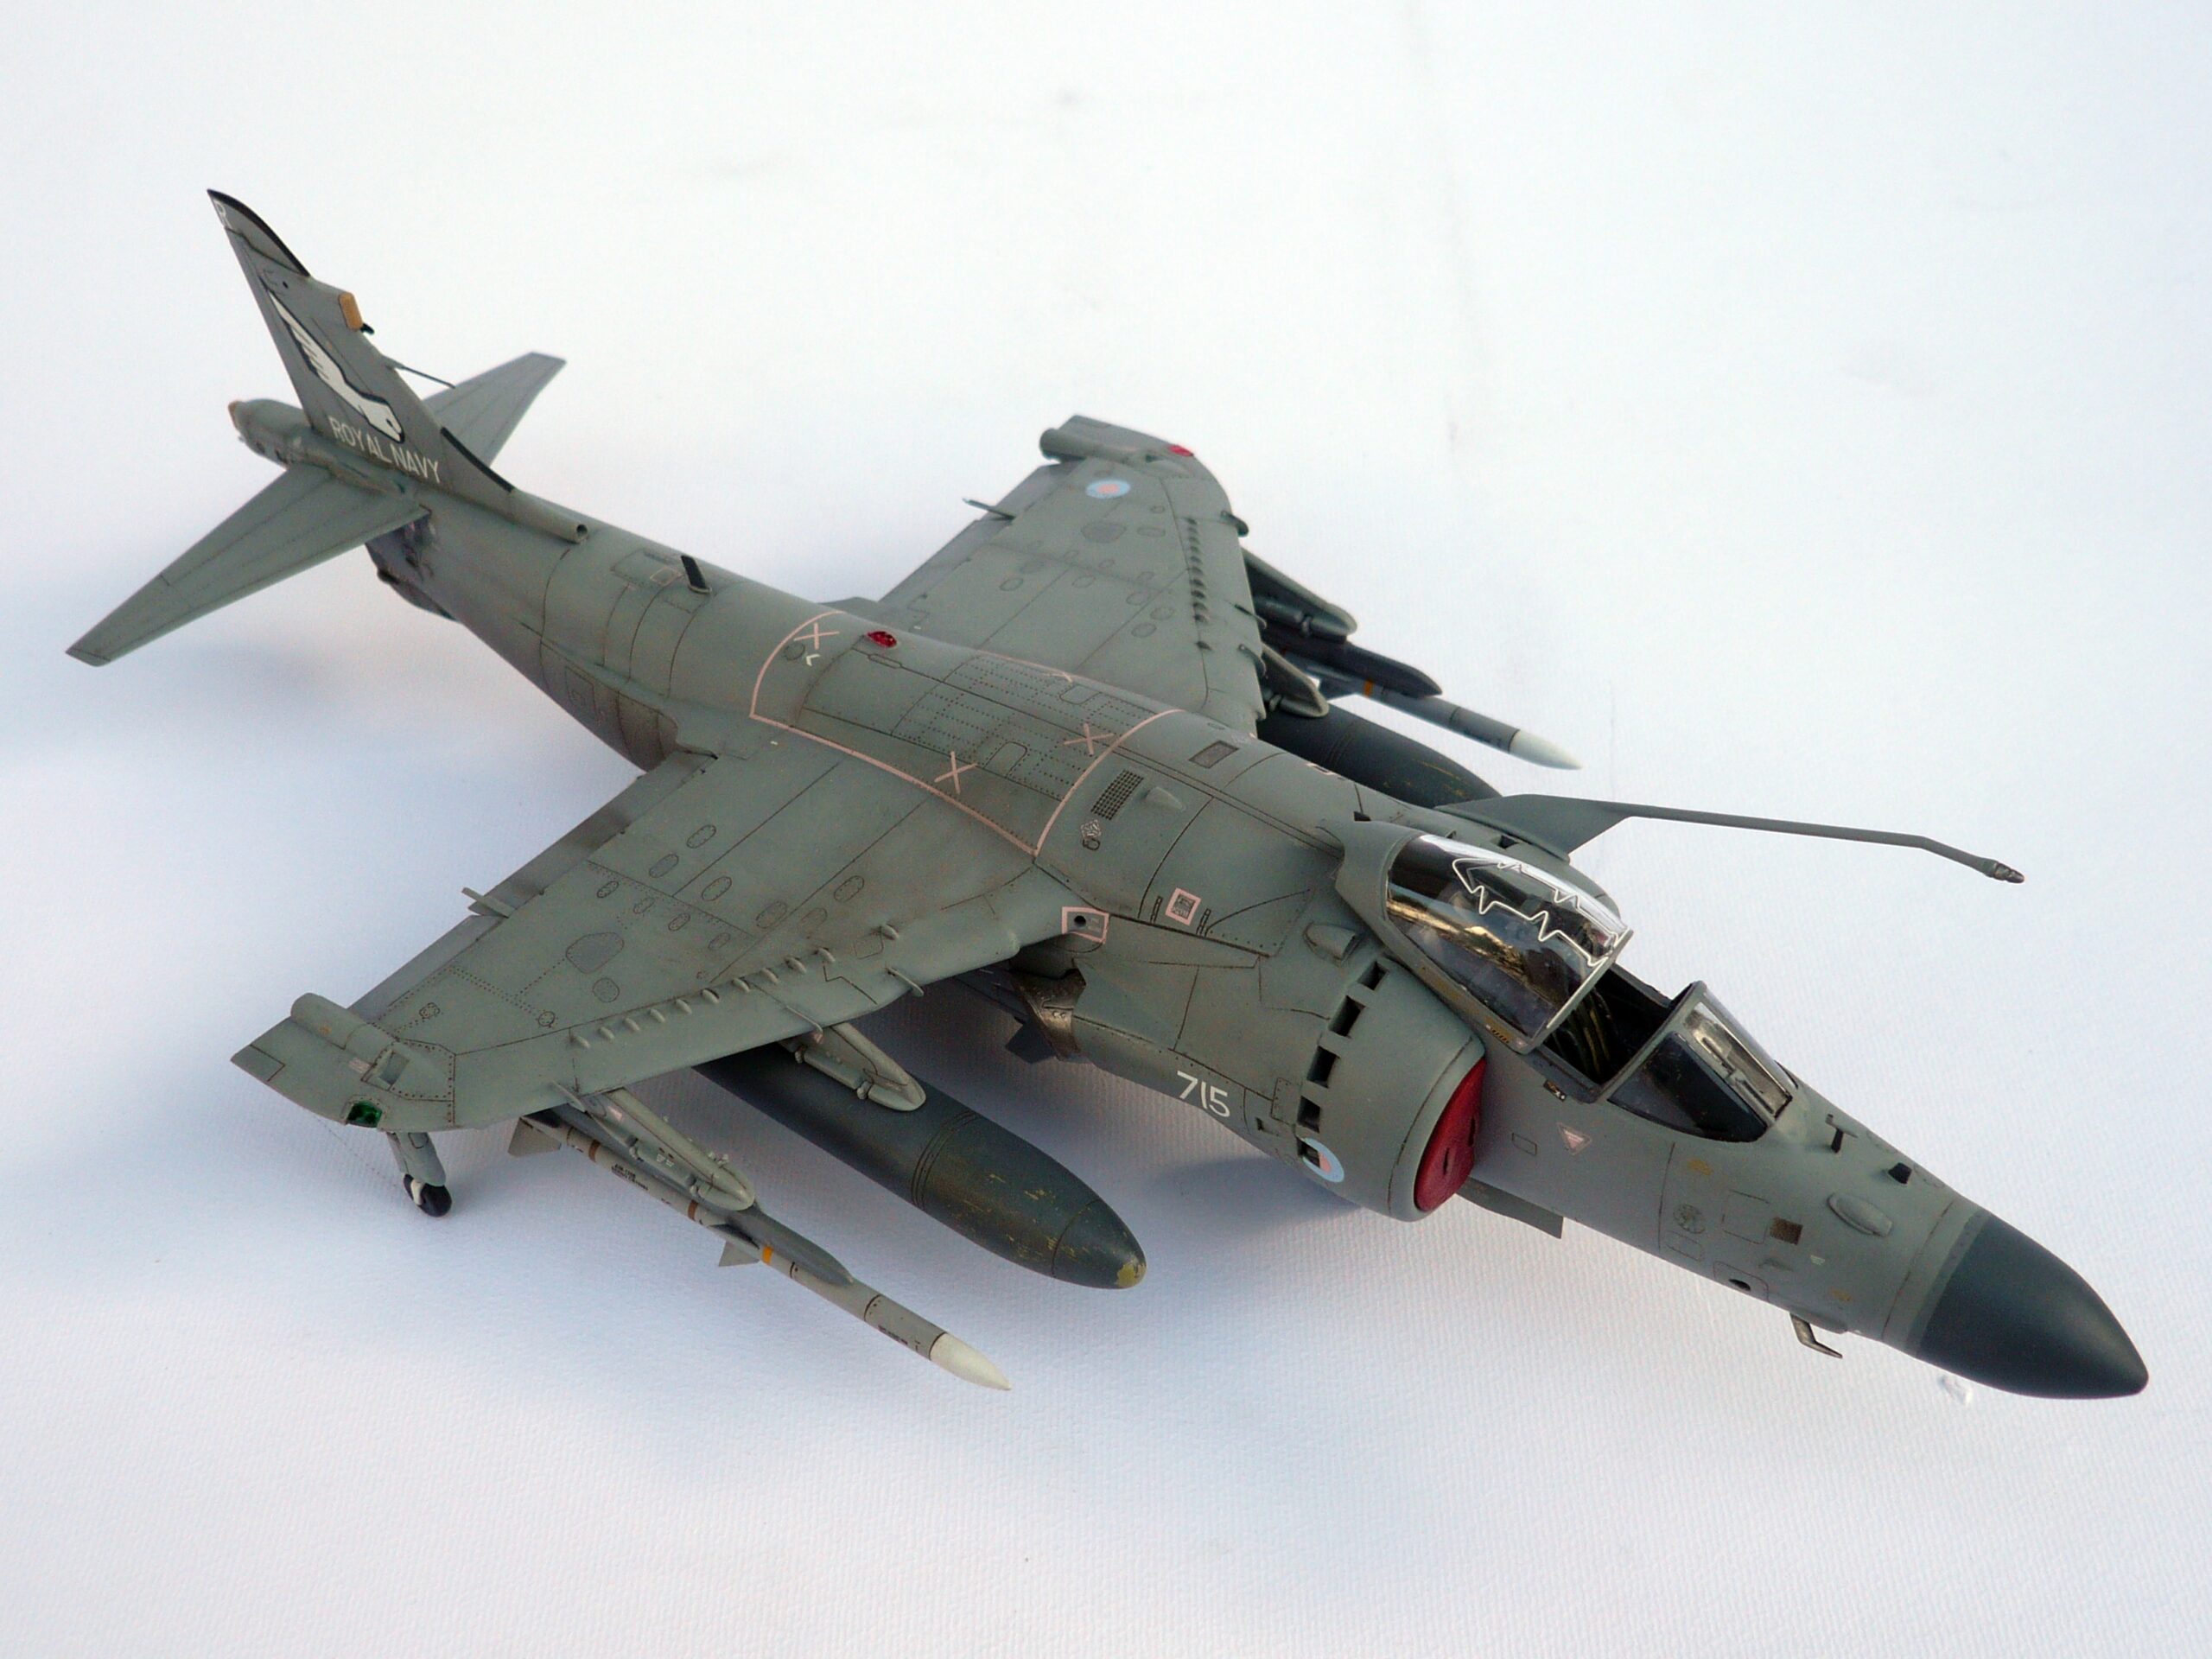
The construction began with enhancements to the cockpit sidewalls. Thin strips of Evergreen plastic strip were added to create extra structural detail and improve the otherwise simplified kit interior.
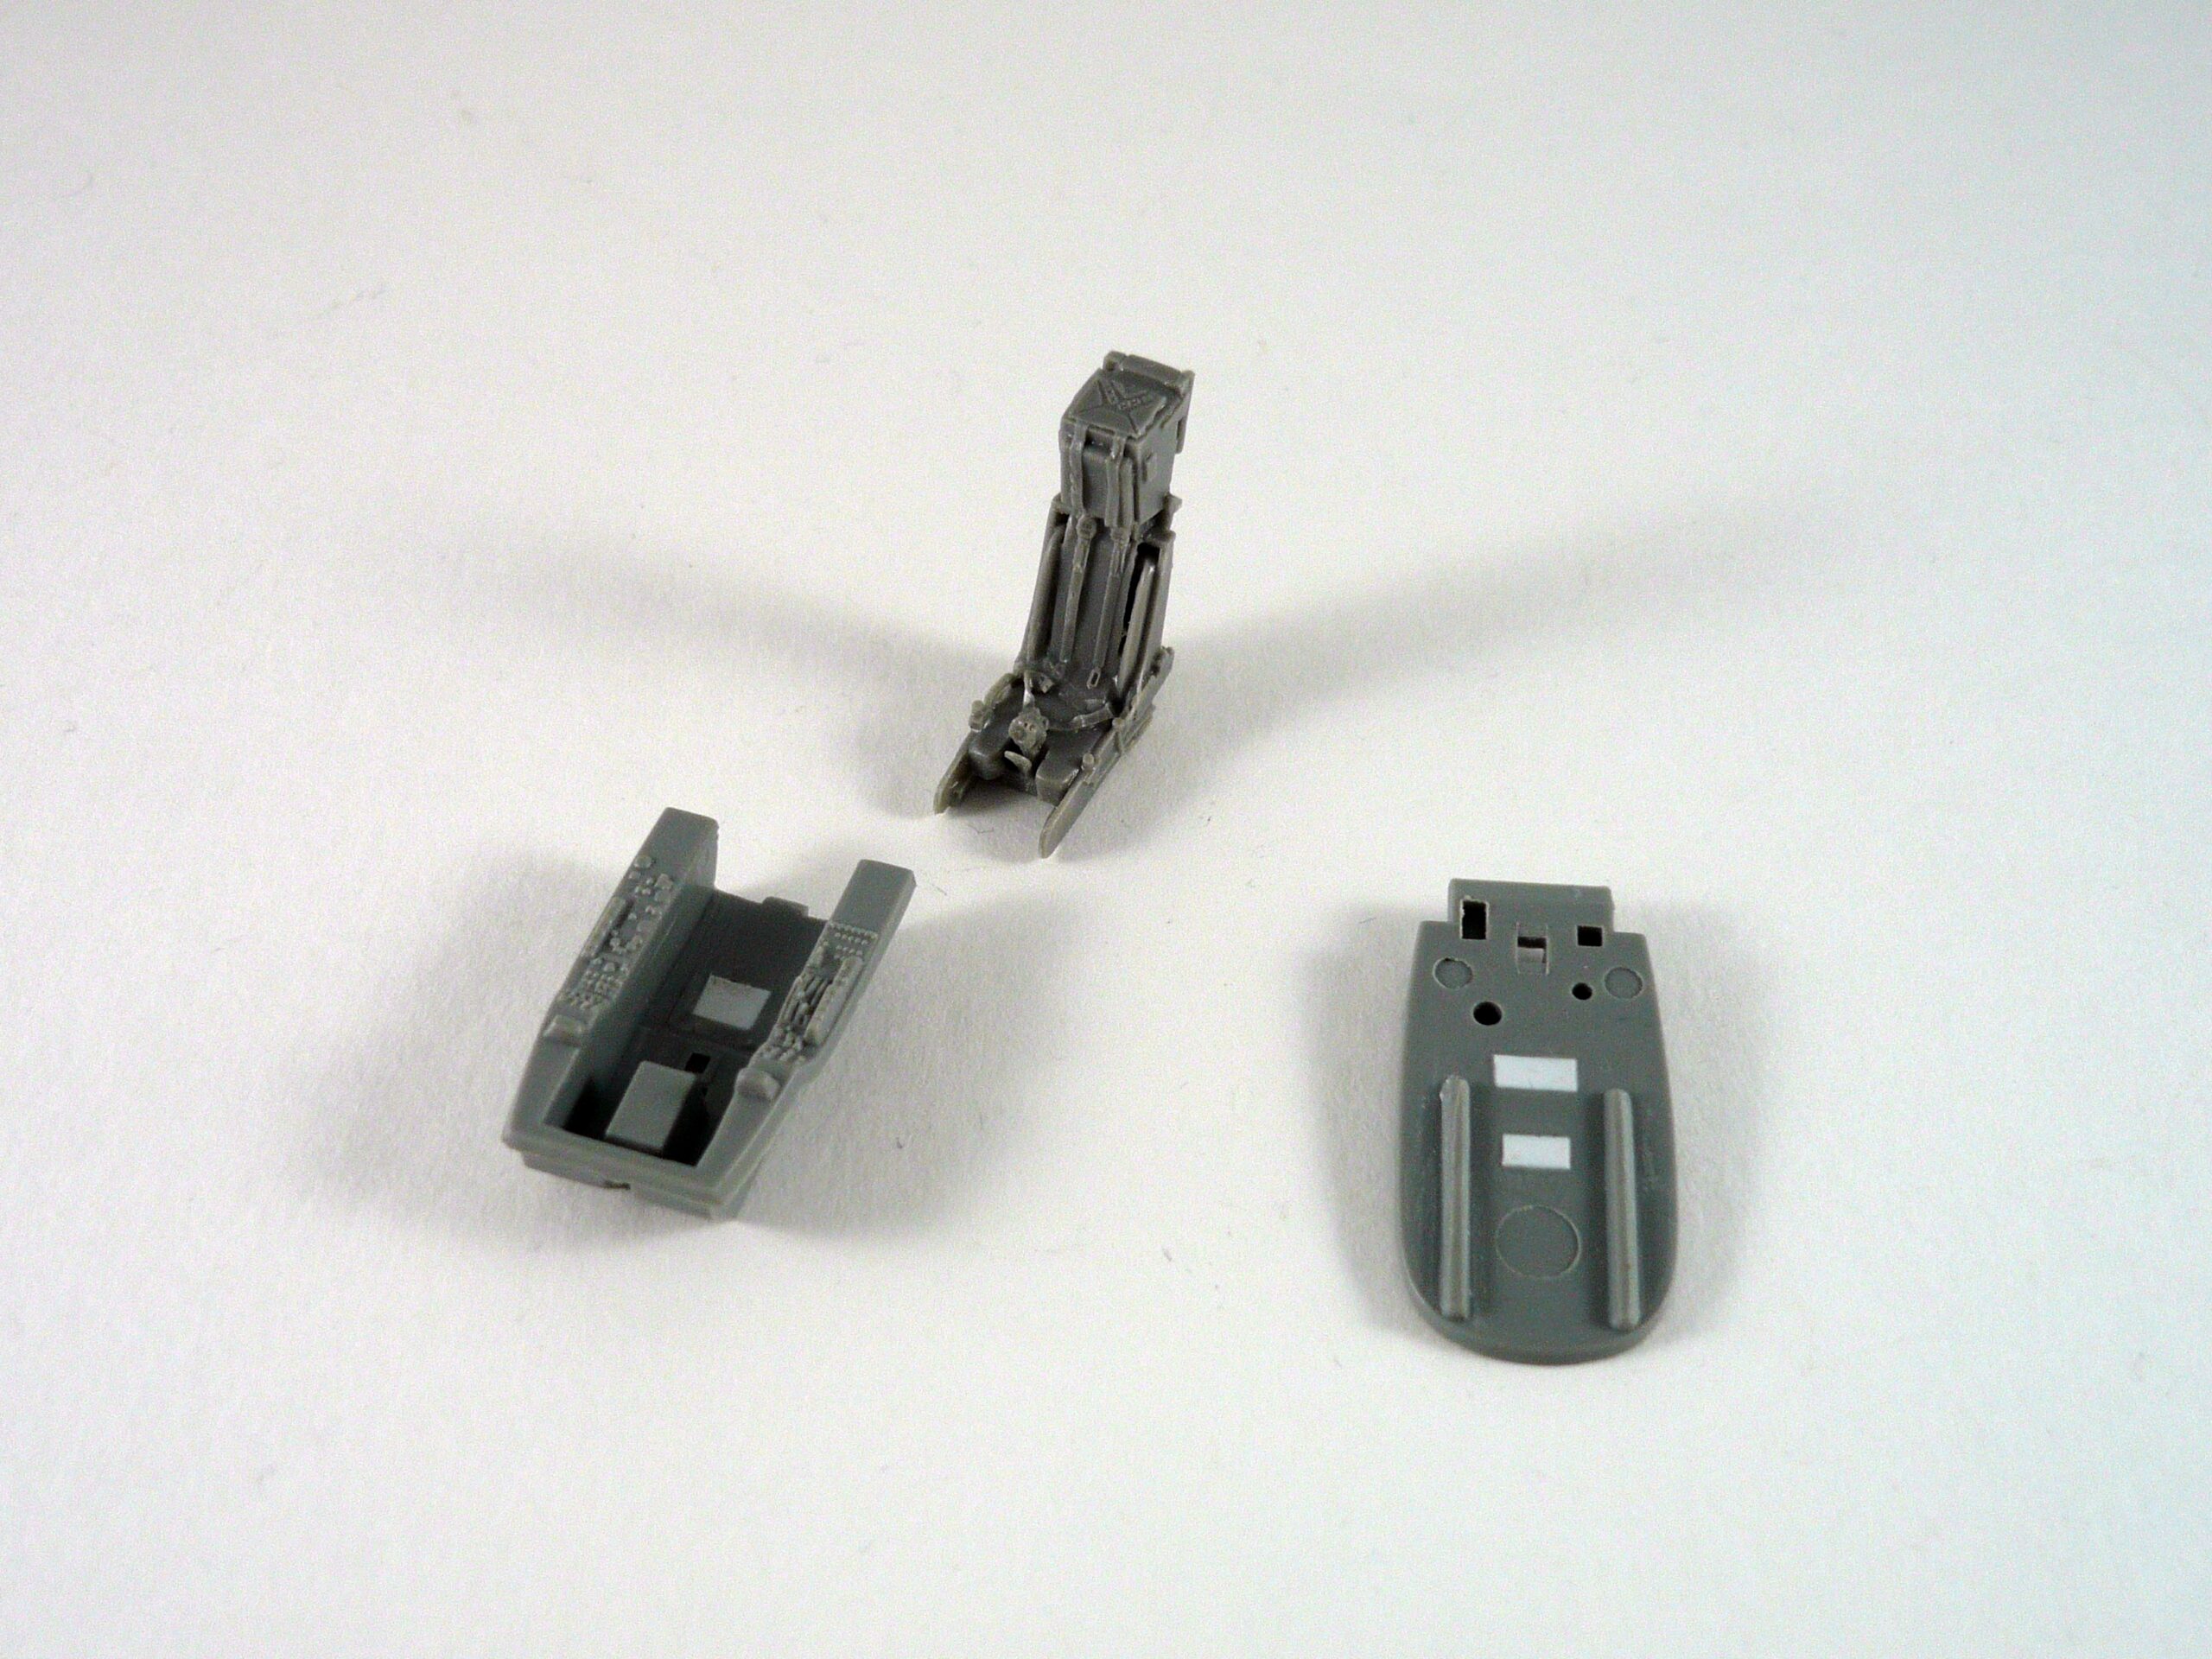
To accommodate a resin ejection seat, the cockpit floor mounting points were removed. The resulting gaps were carefully filled using Evergreen plasticard shaped to fit the cockpit rear bulkhead and floor area. This modification ensured a more accurate and realistic cockpit layout.
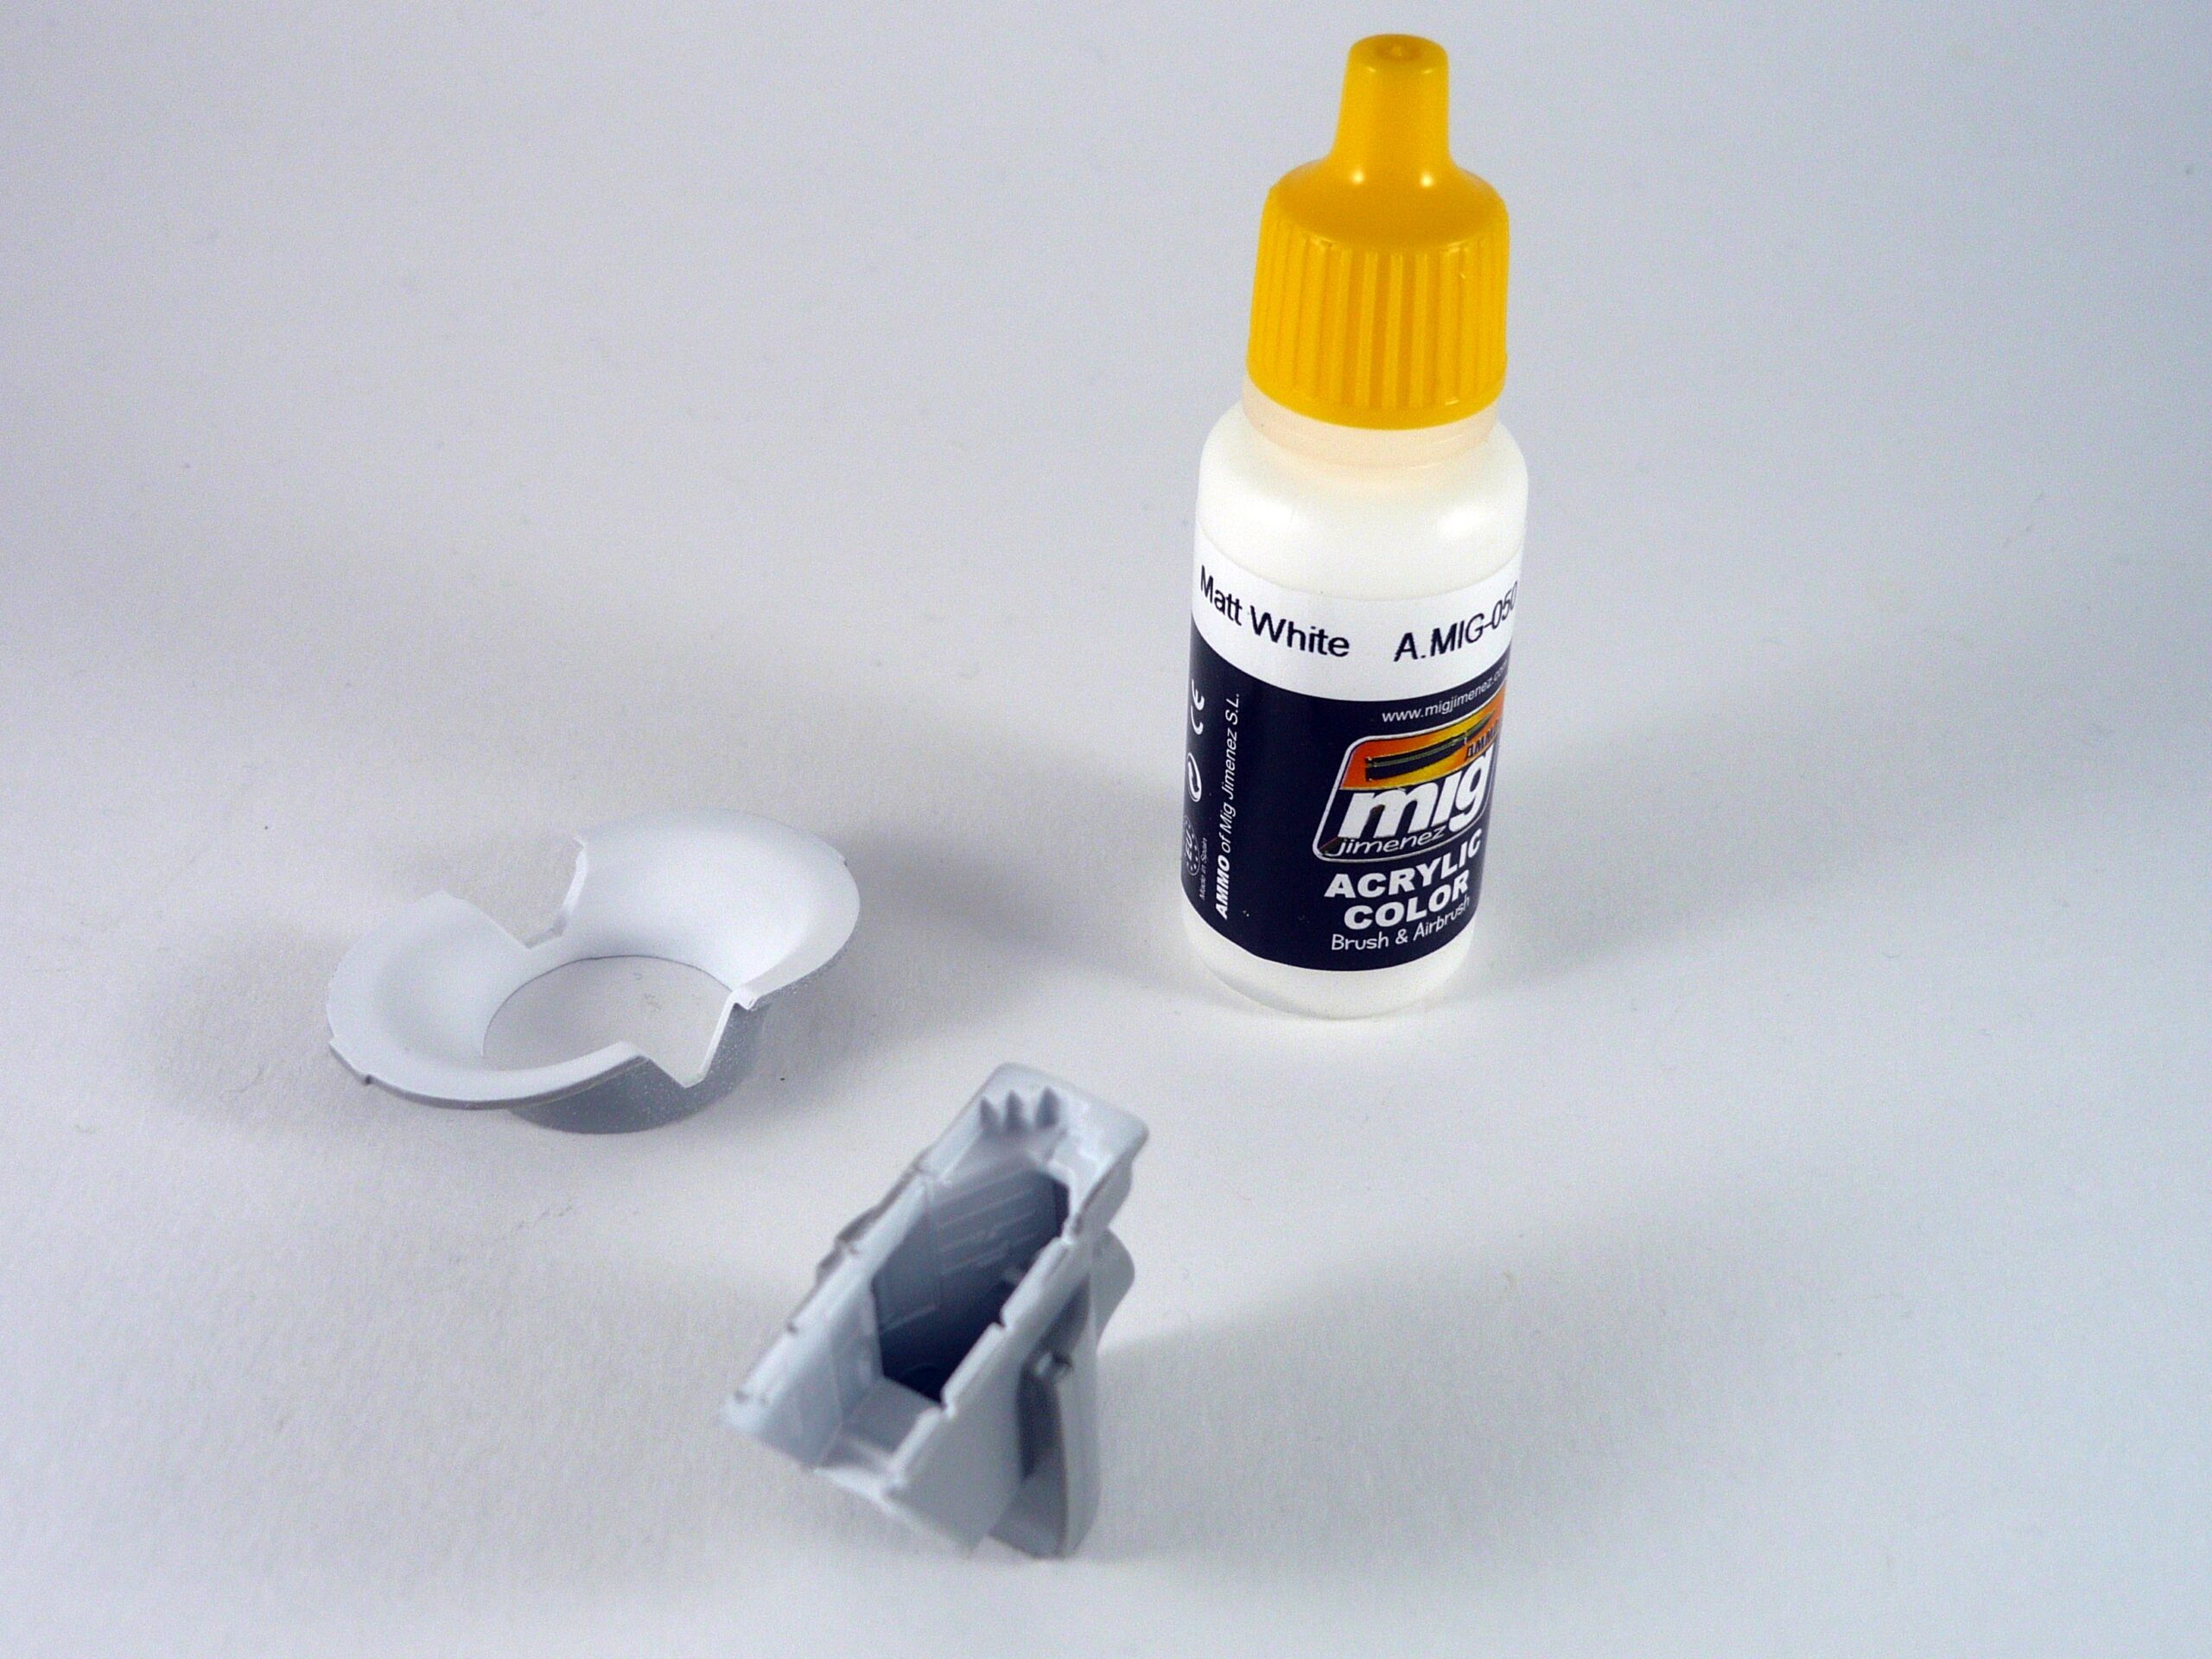
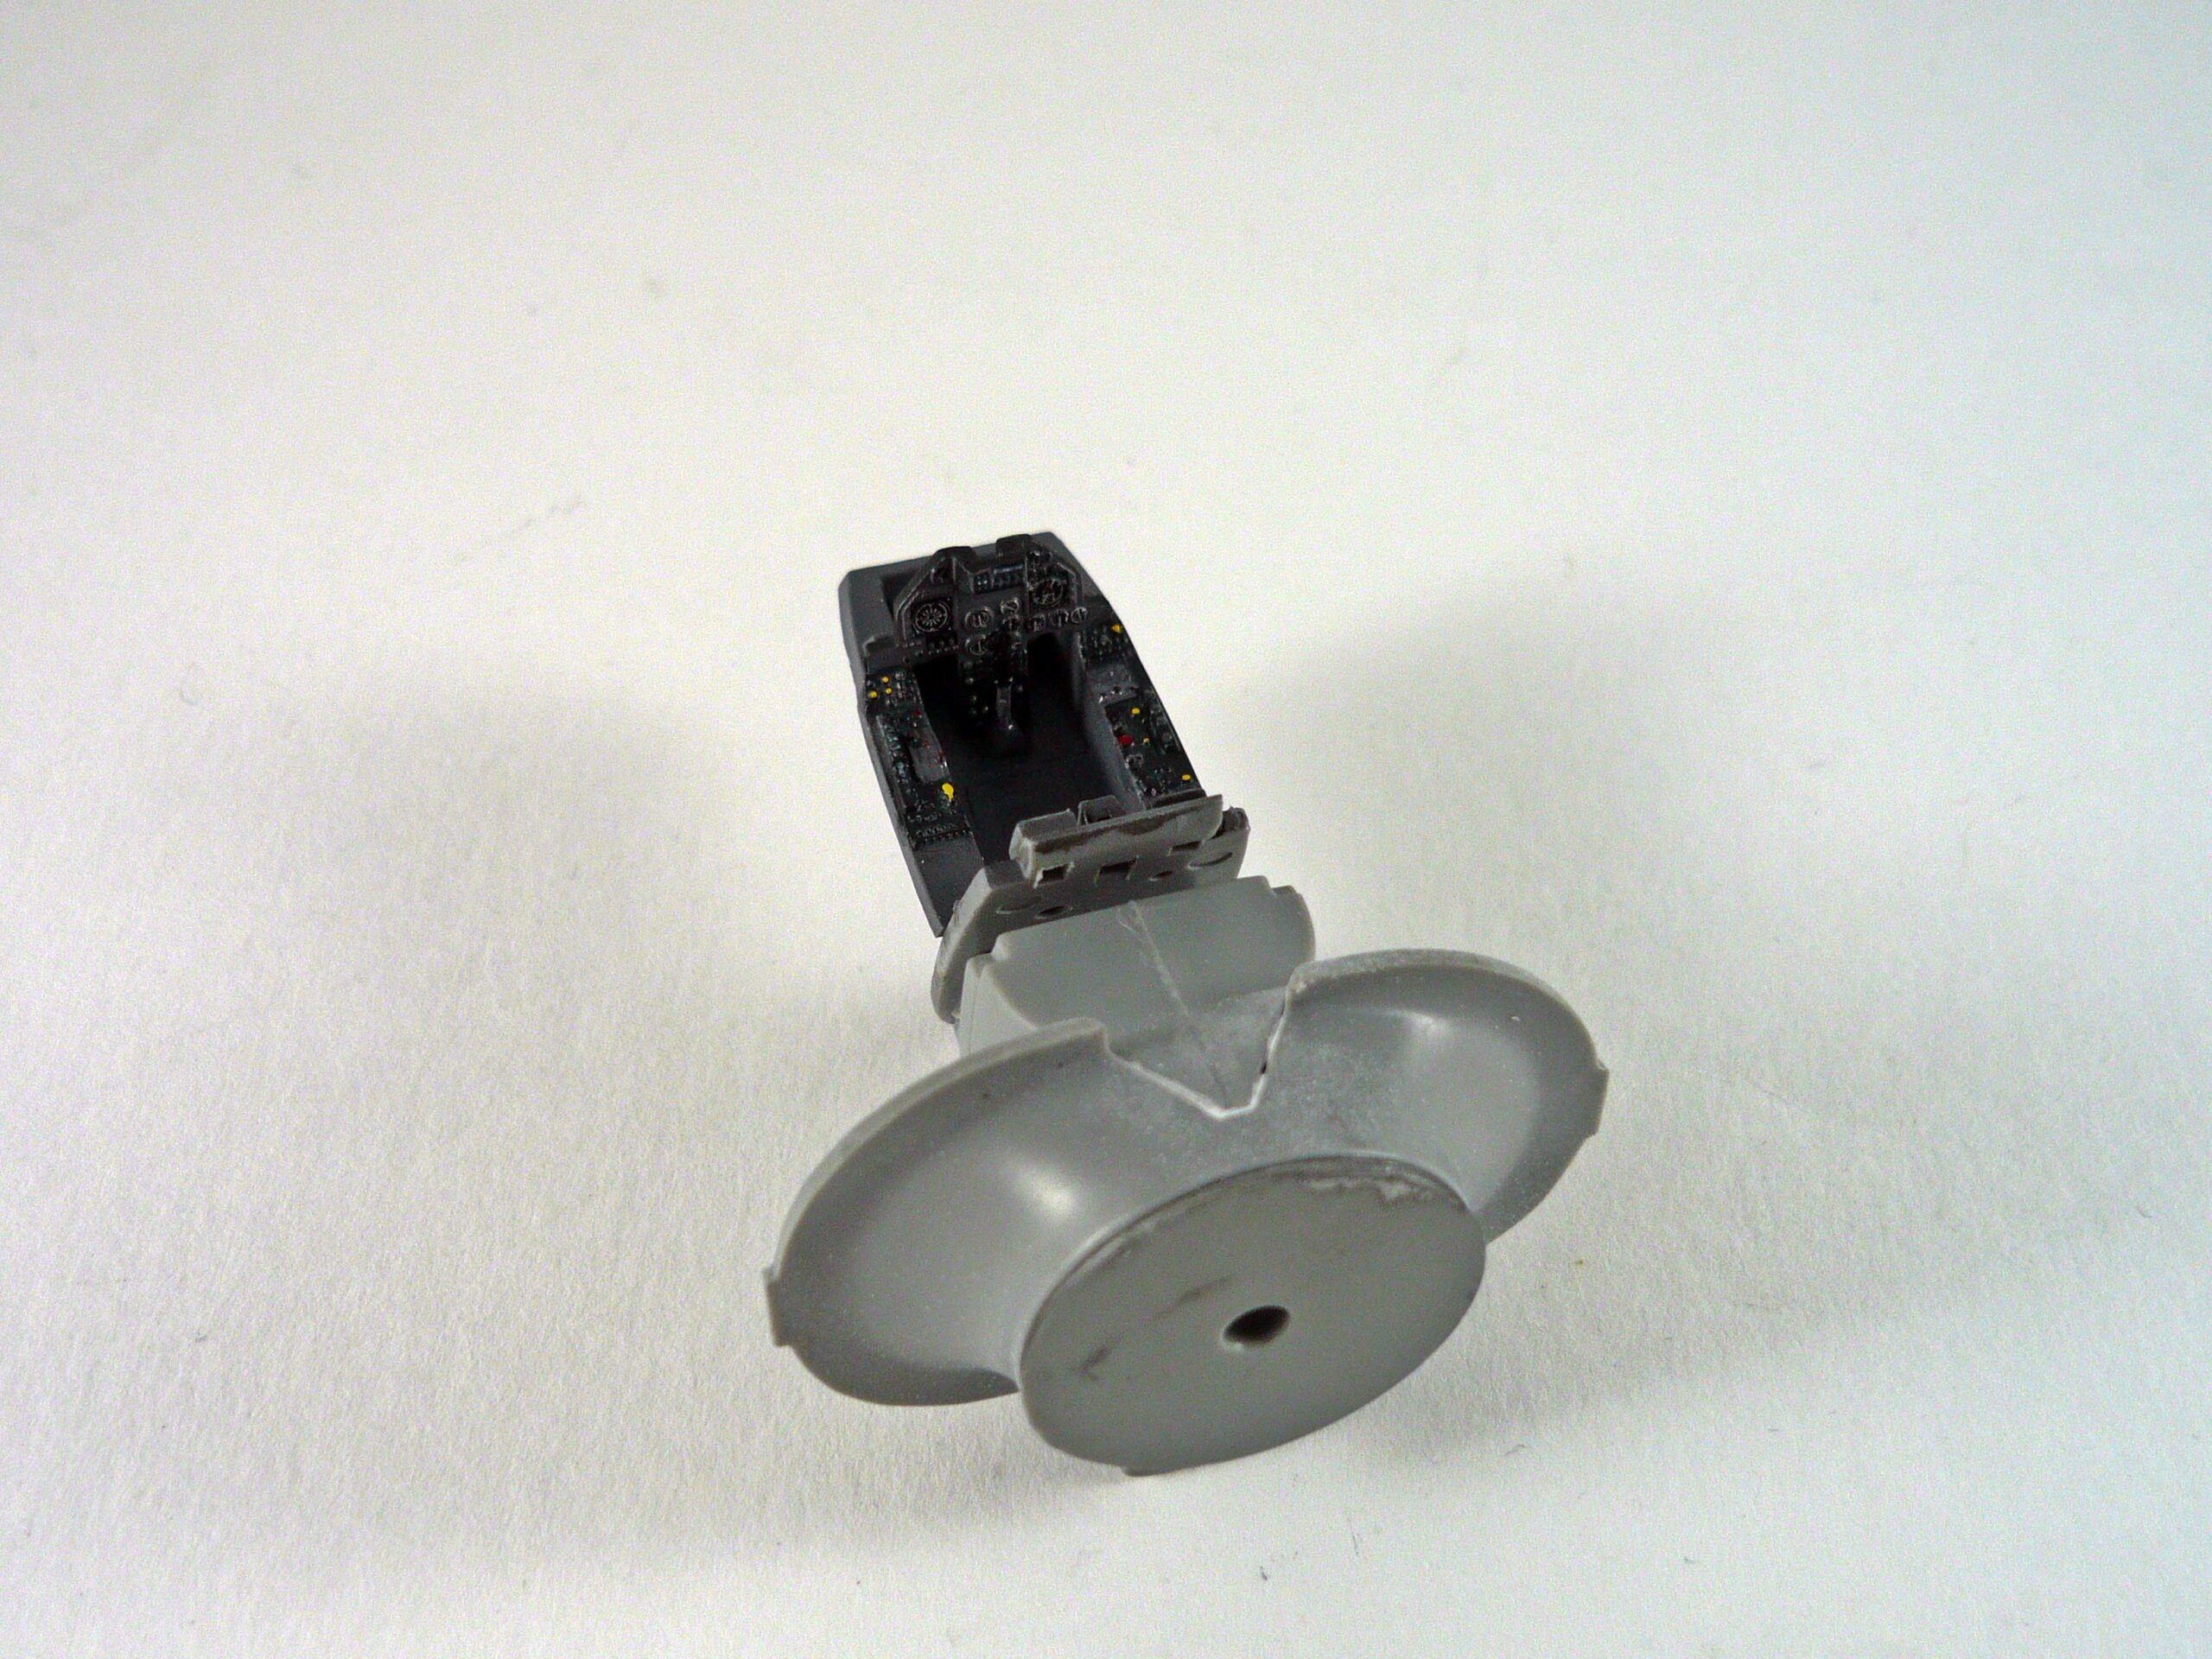
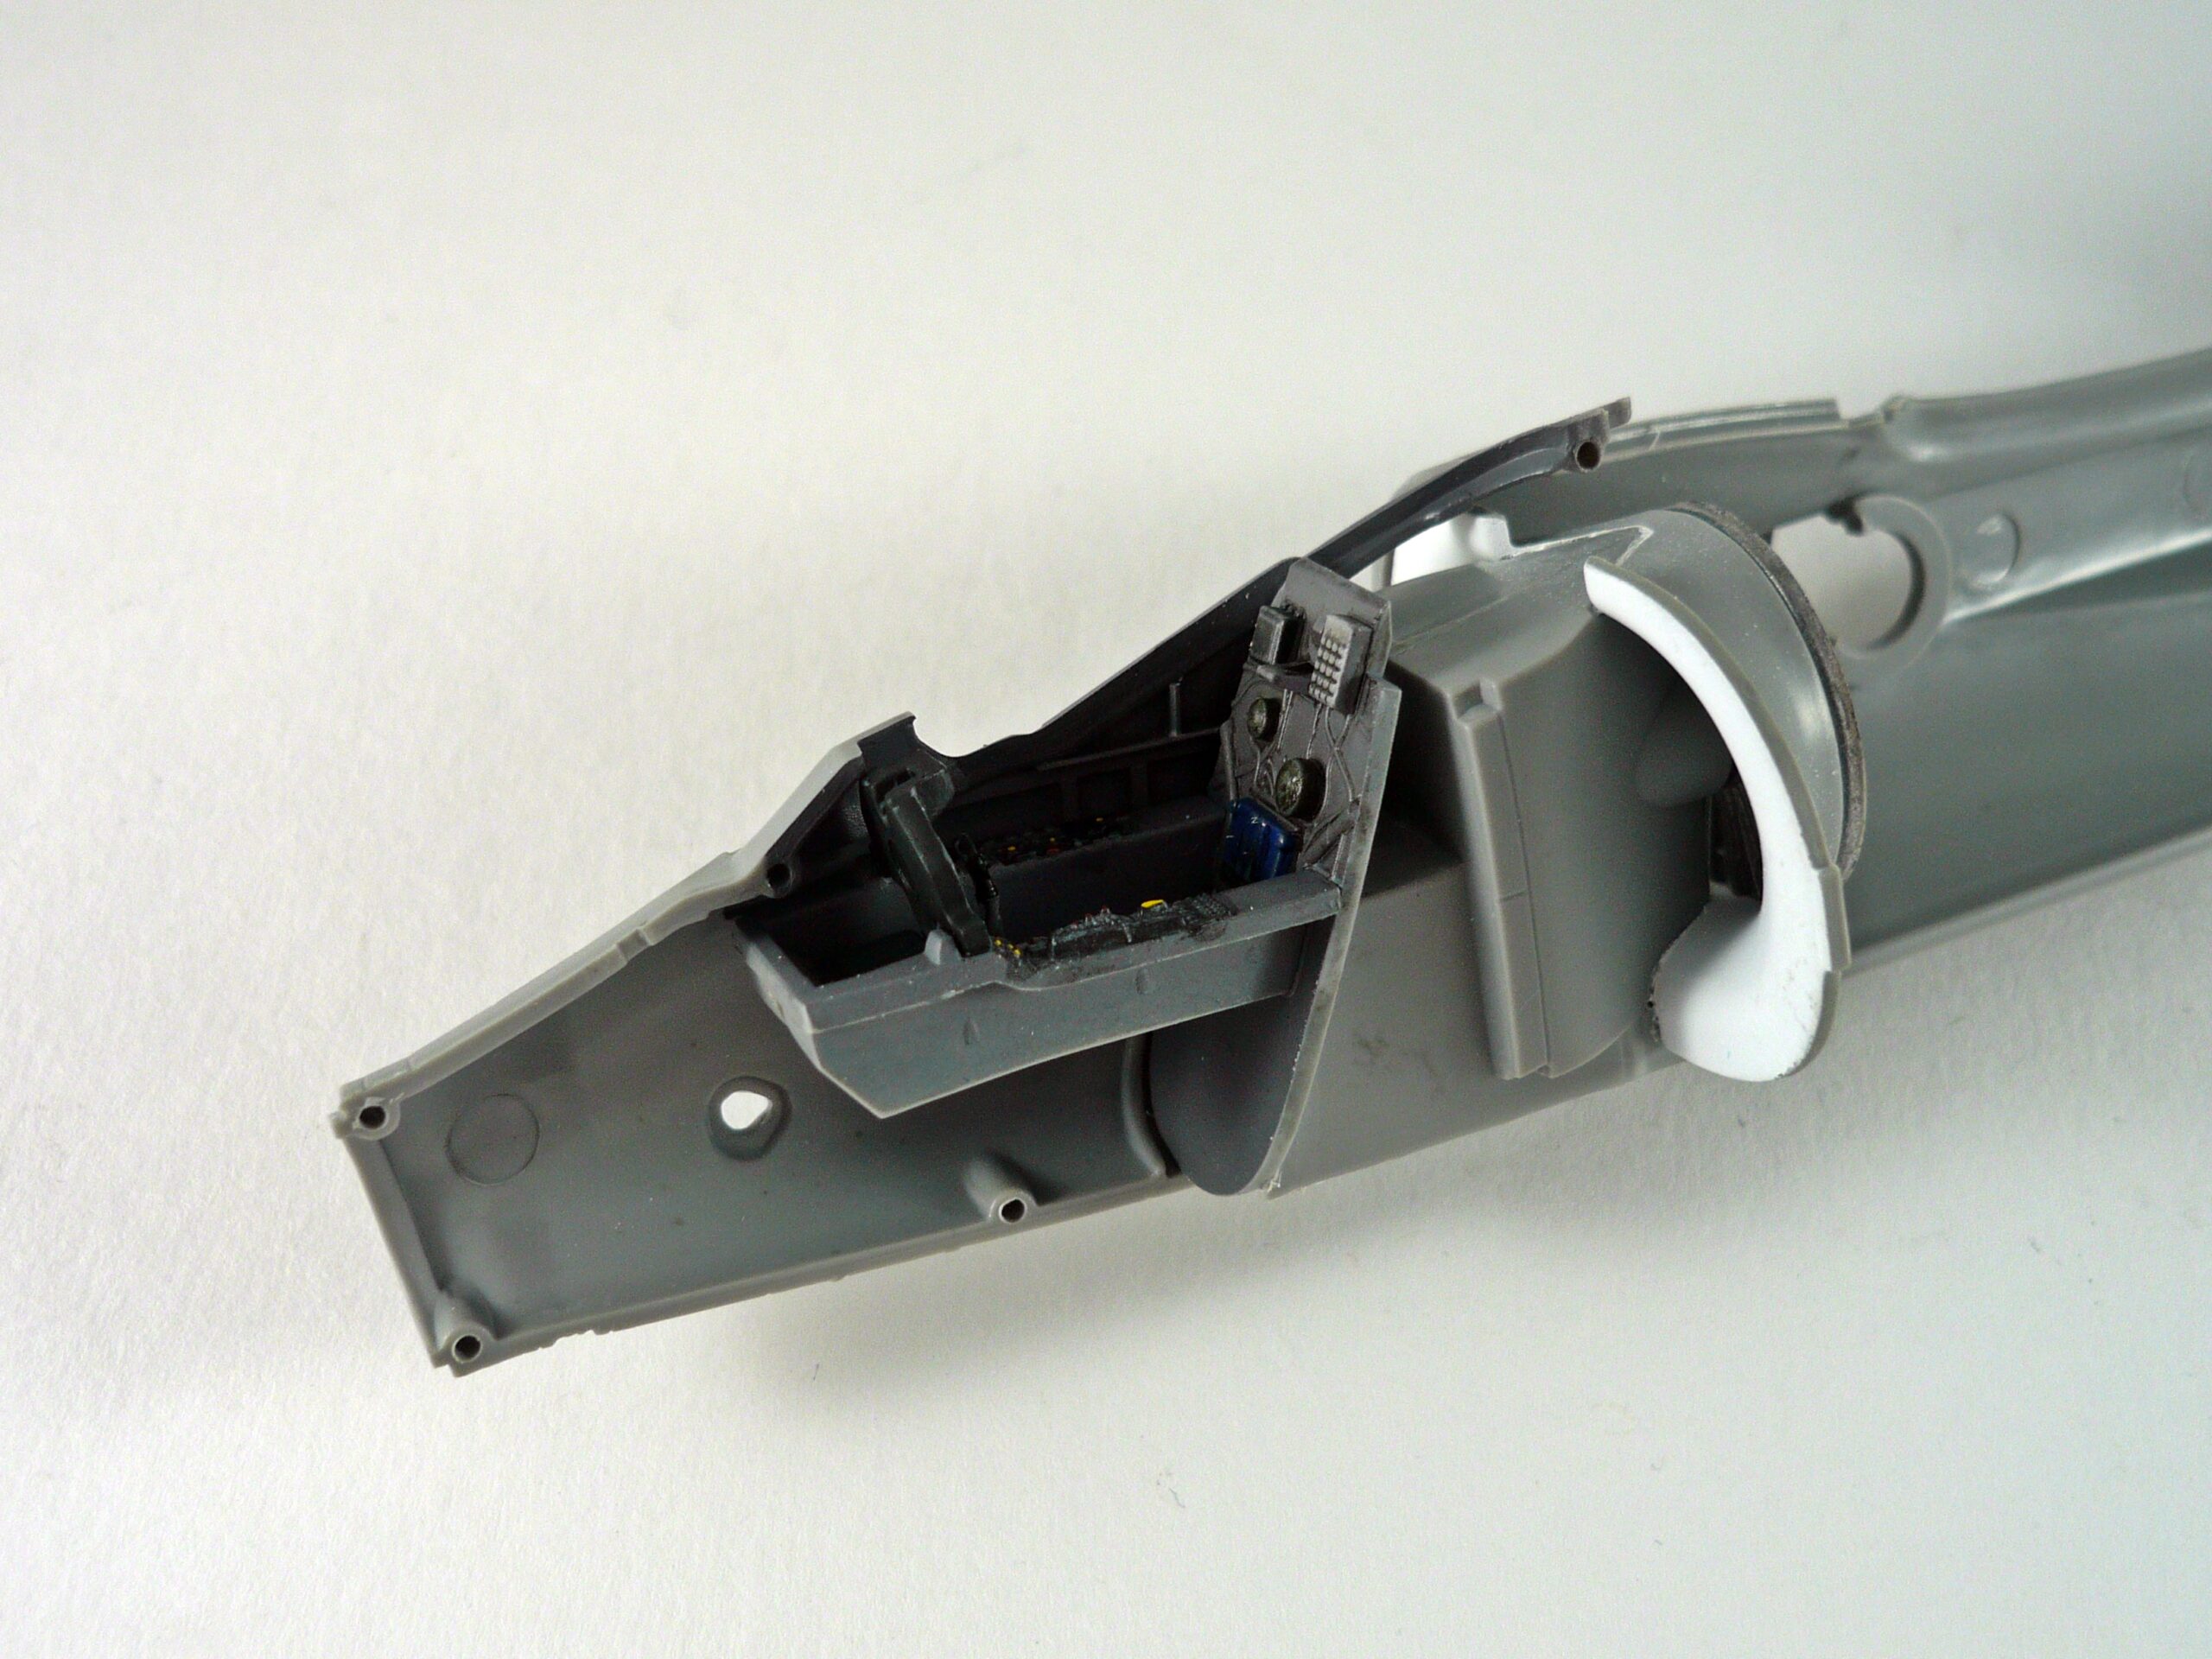
The intake sections and front wheel well were sprayed with matte white paint, creating a clean foundation before assembly. The engine fan received a stainless-steel metallic finish, helping to reproduce the appearance of the Pegasus engine intake assembly.
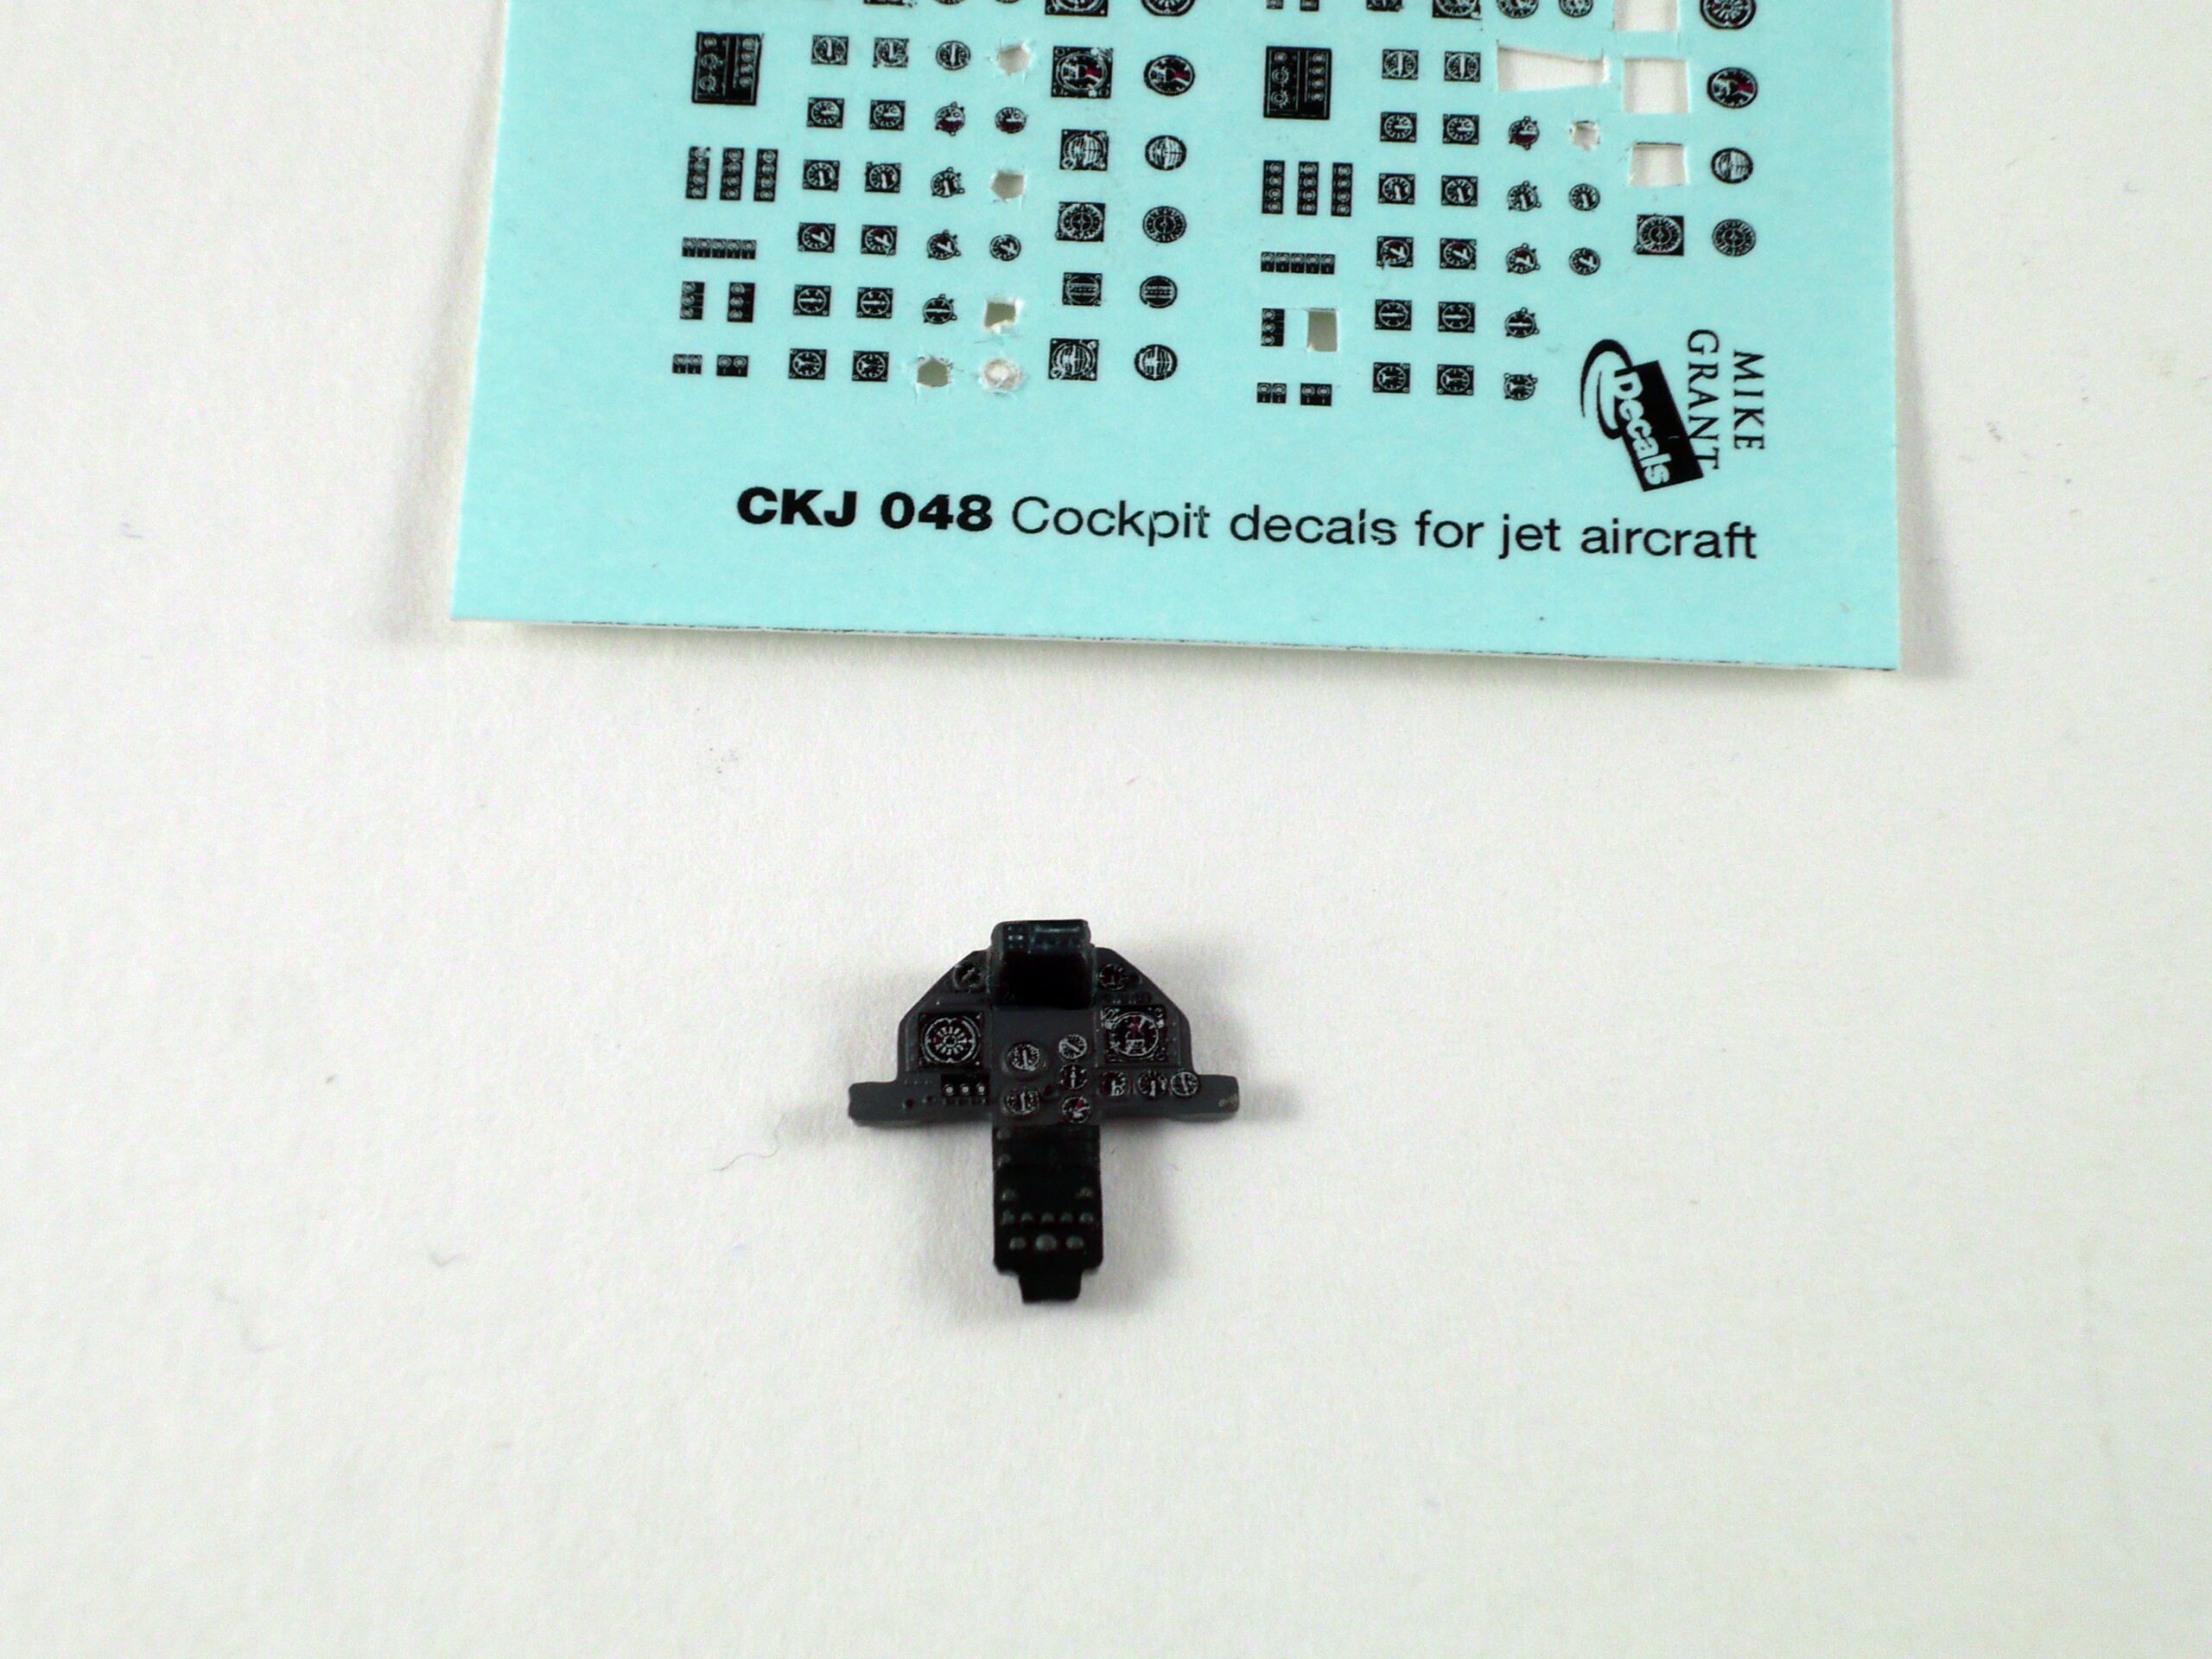
Additional refinement was applied to the instrument panel using aftermarket Mike Grant instrument decals. These provided realistic gauges and LCD displays that significantly enhanced the cockpit appearance. After painting, washes and highlighting techniques were applied to emphasize depth and bring the cockpit details to life.
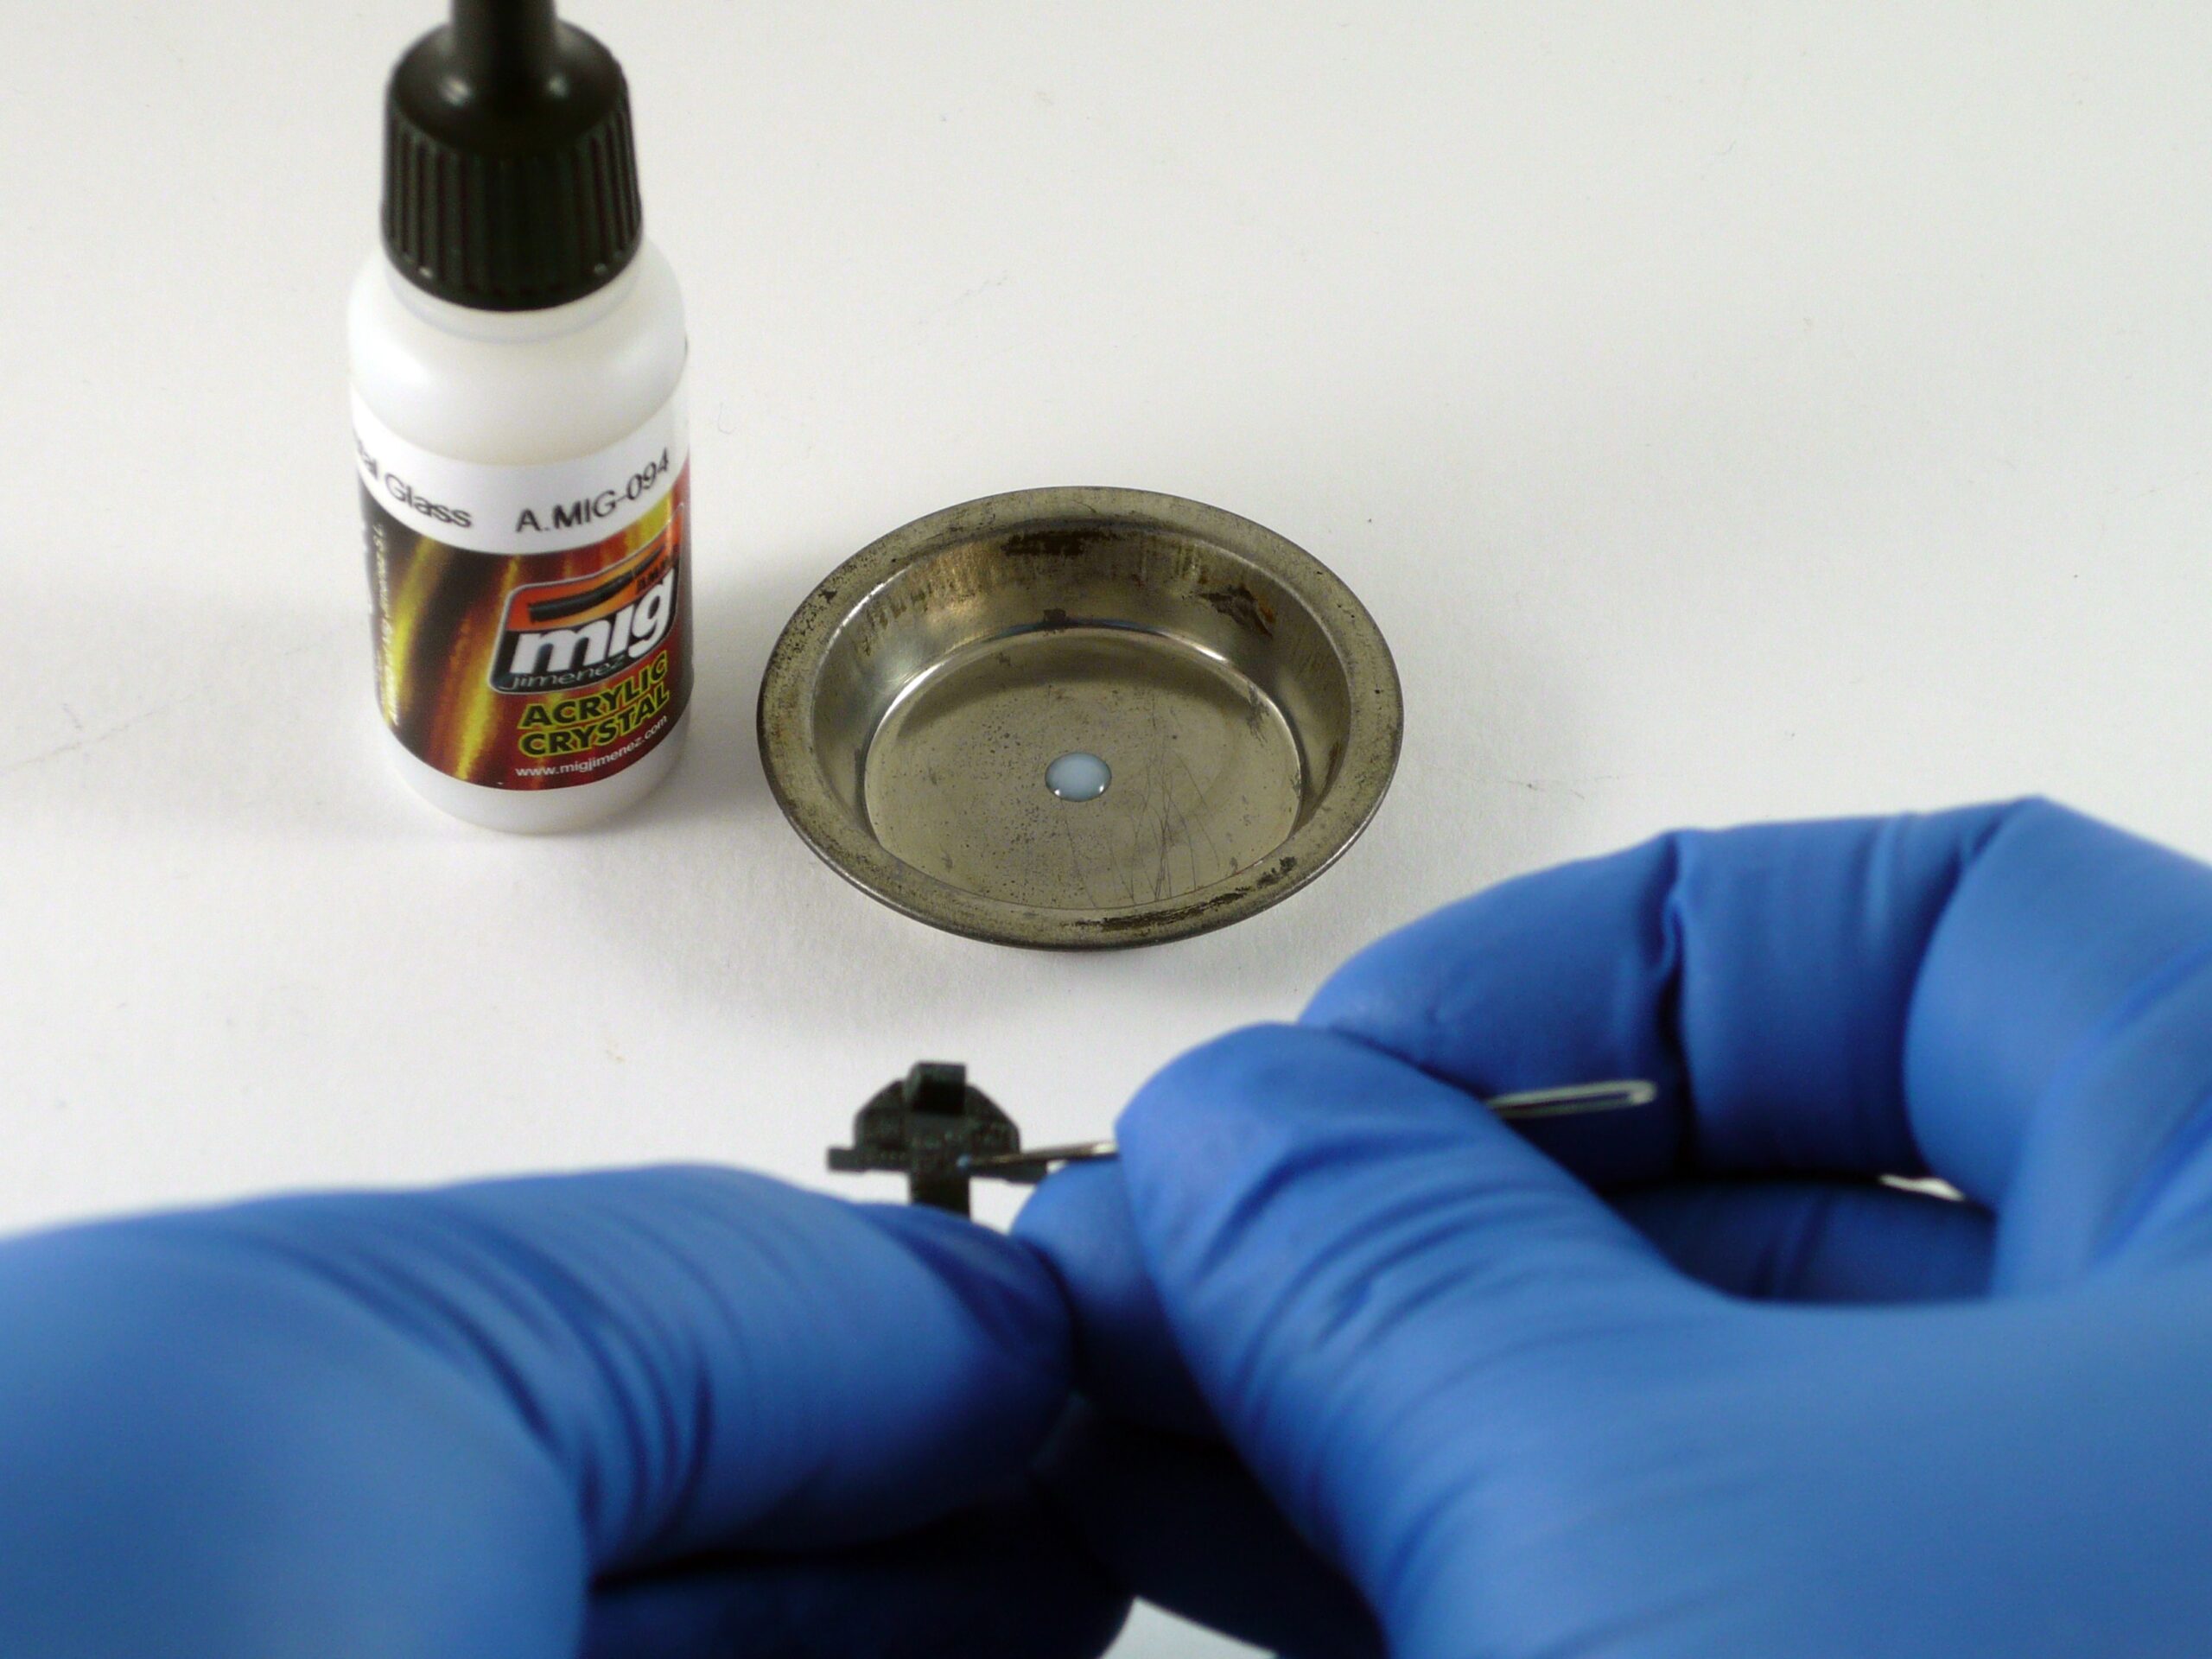
A final application of clear gloss on the instruments created a convincing glass effect, completing the cockpit before installation into the fuselage.
Assembly and Structural Improvements
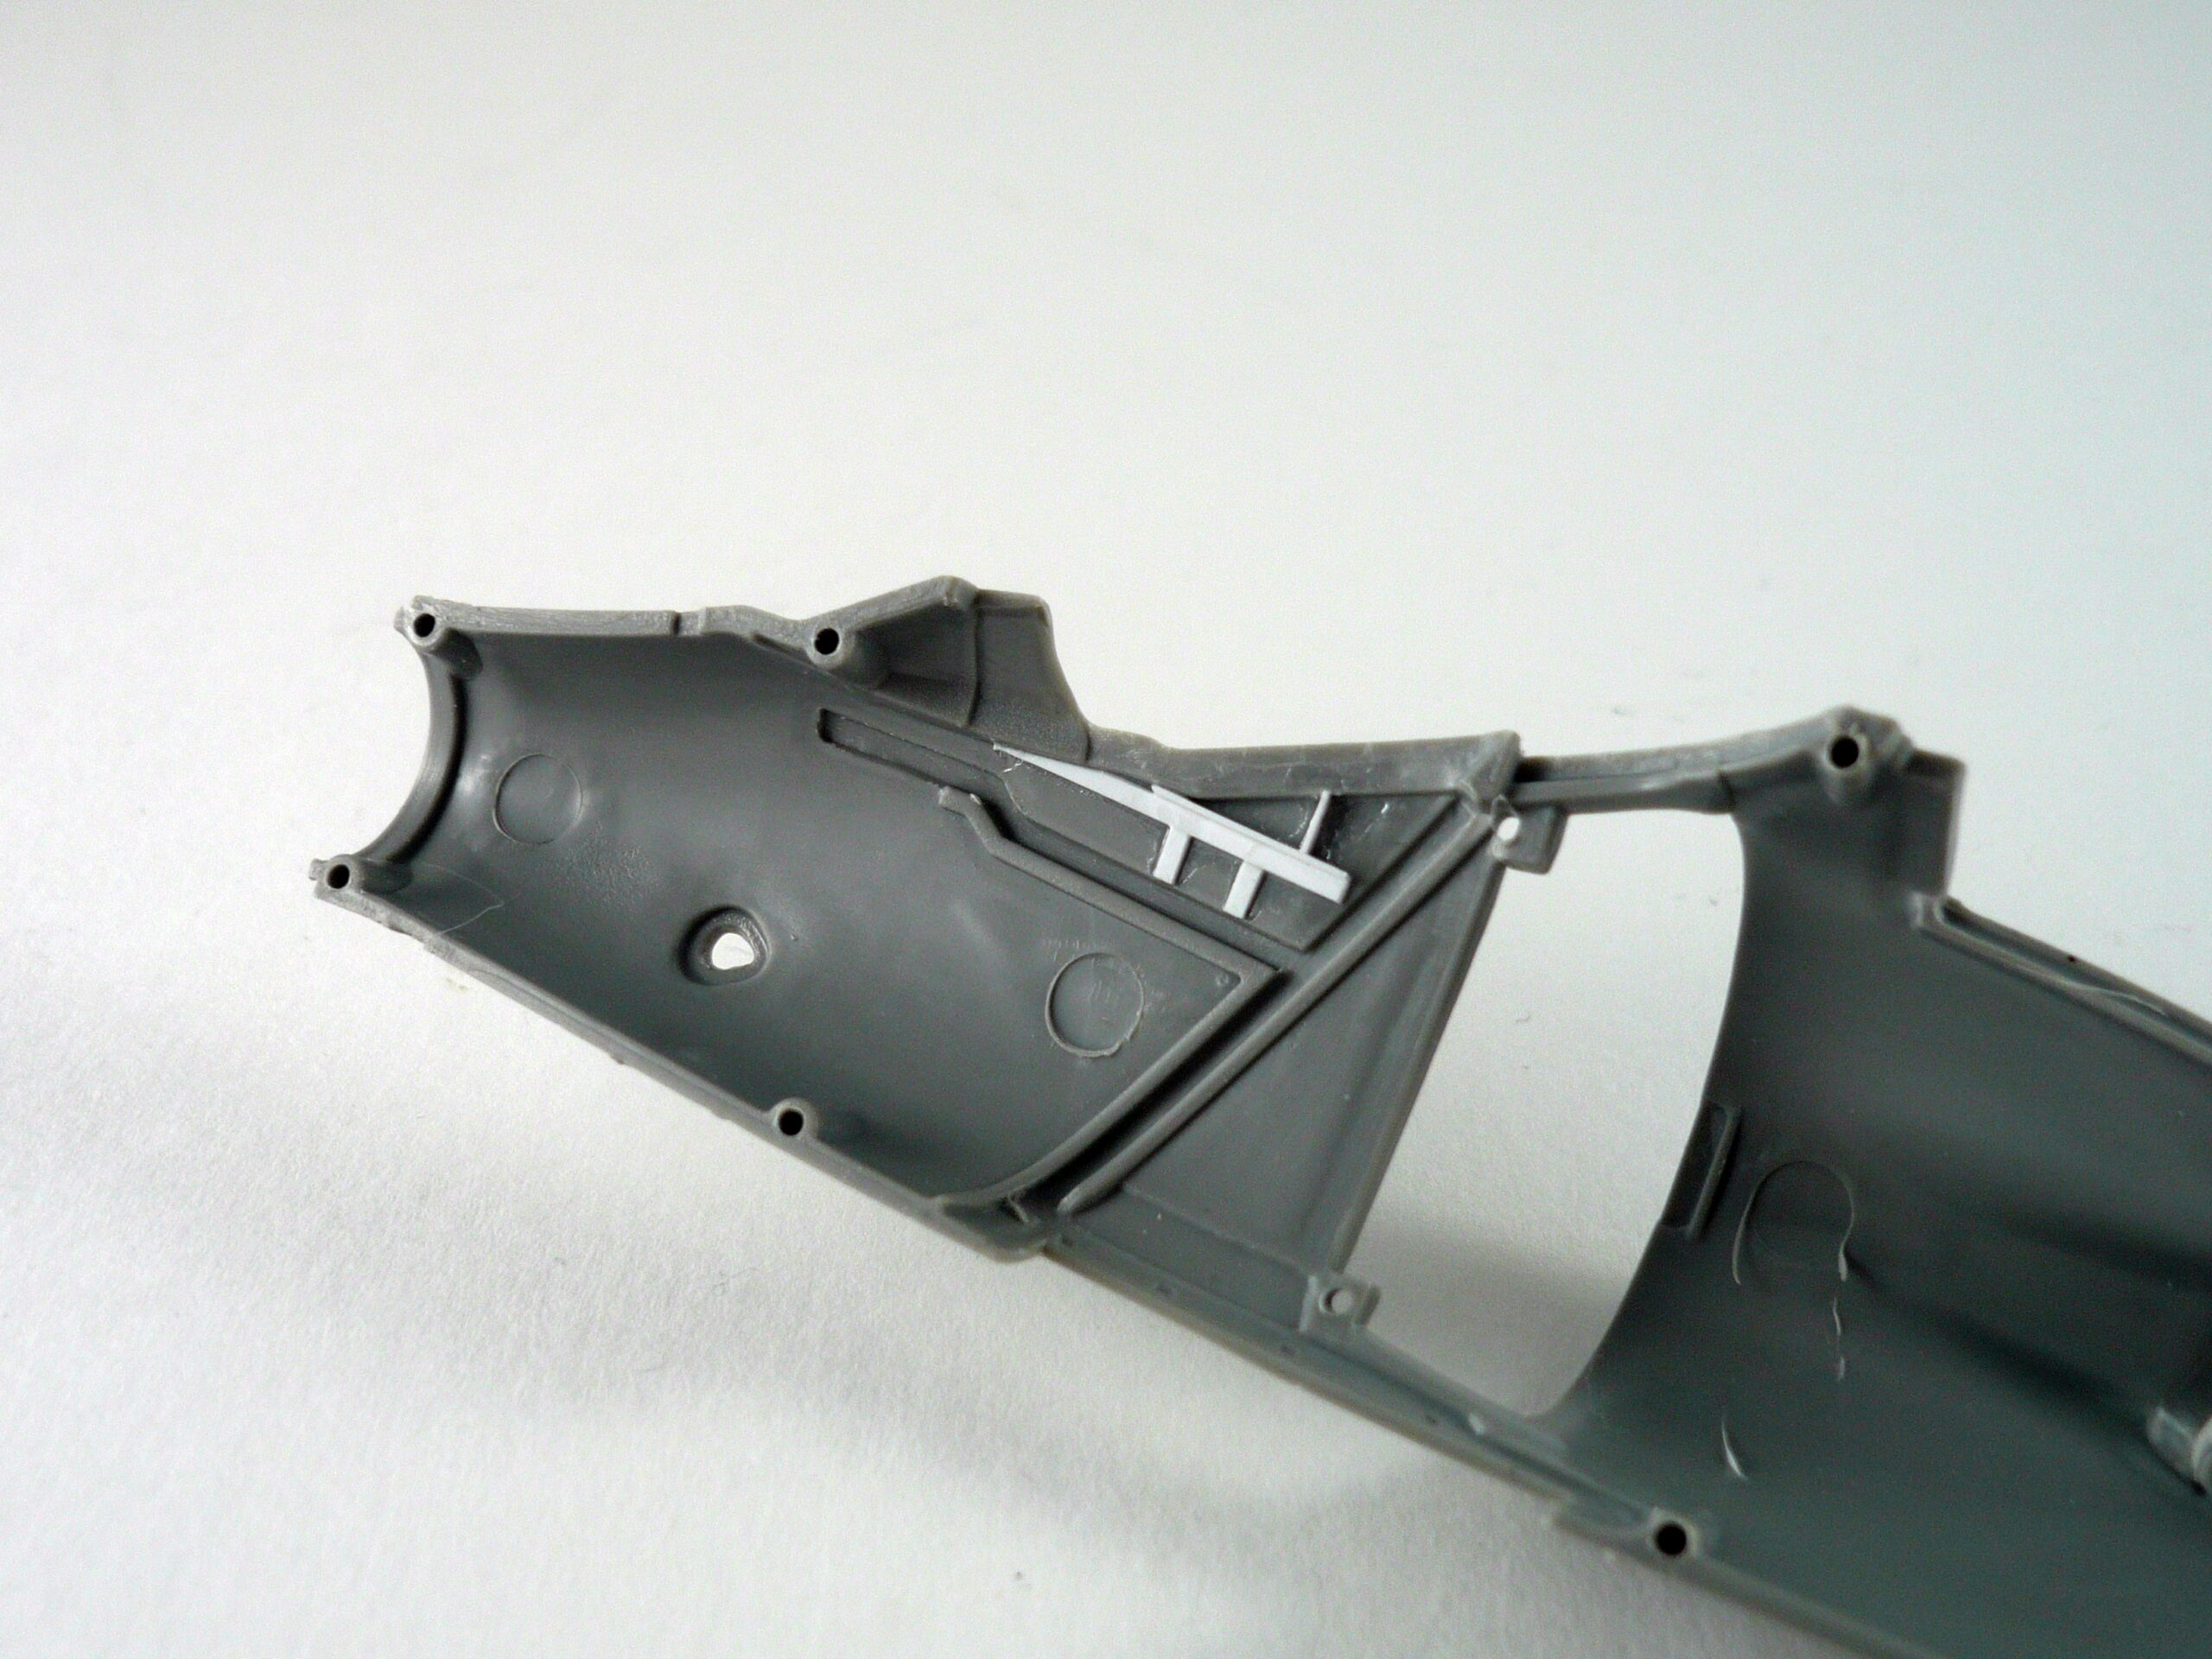
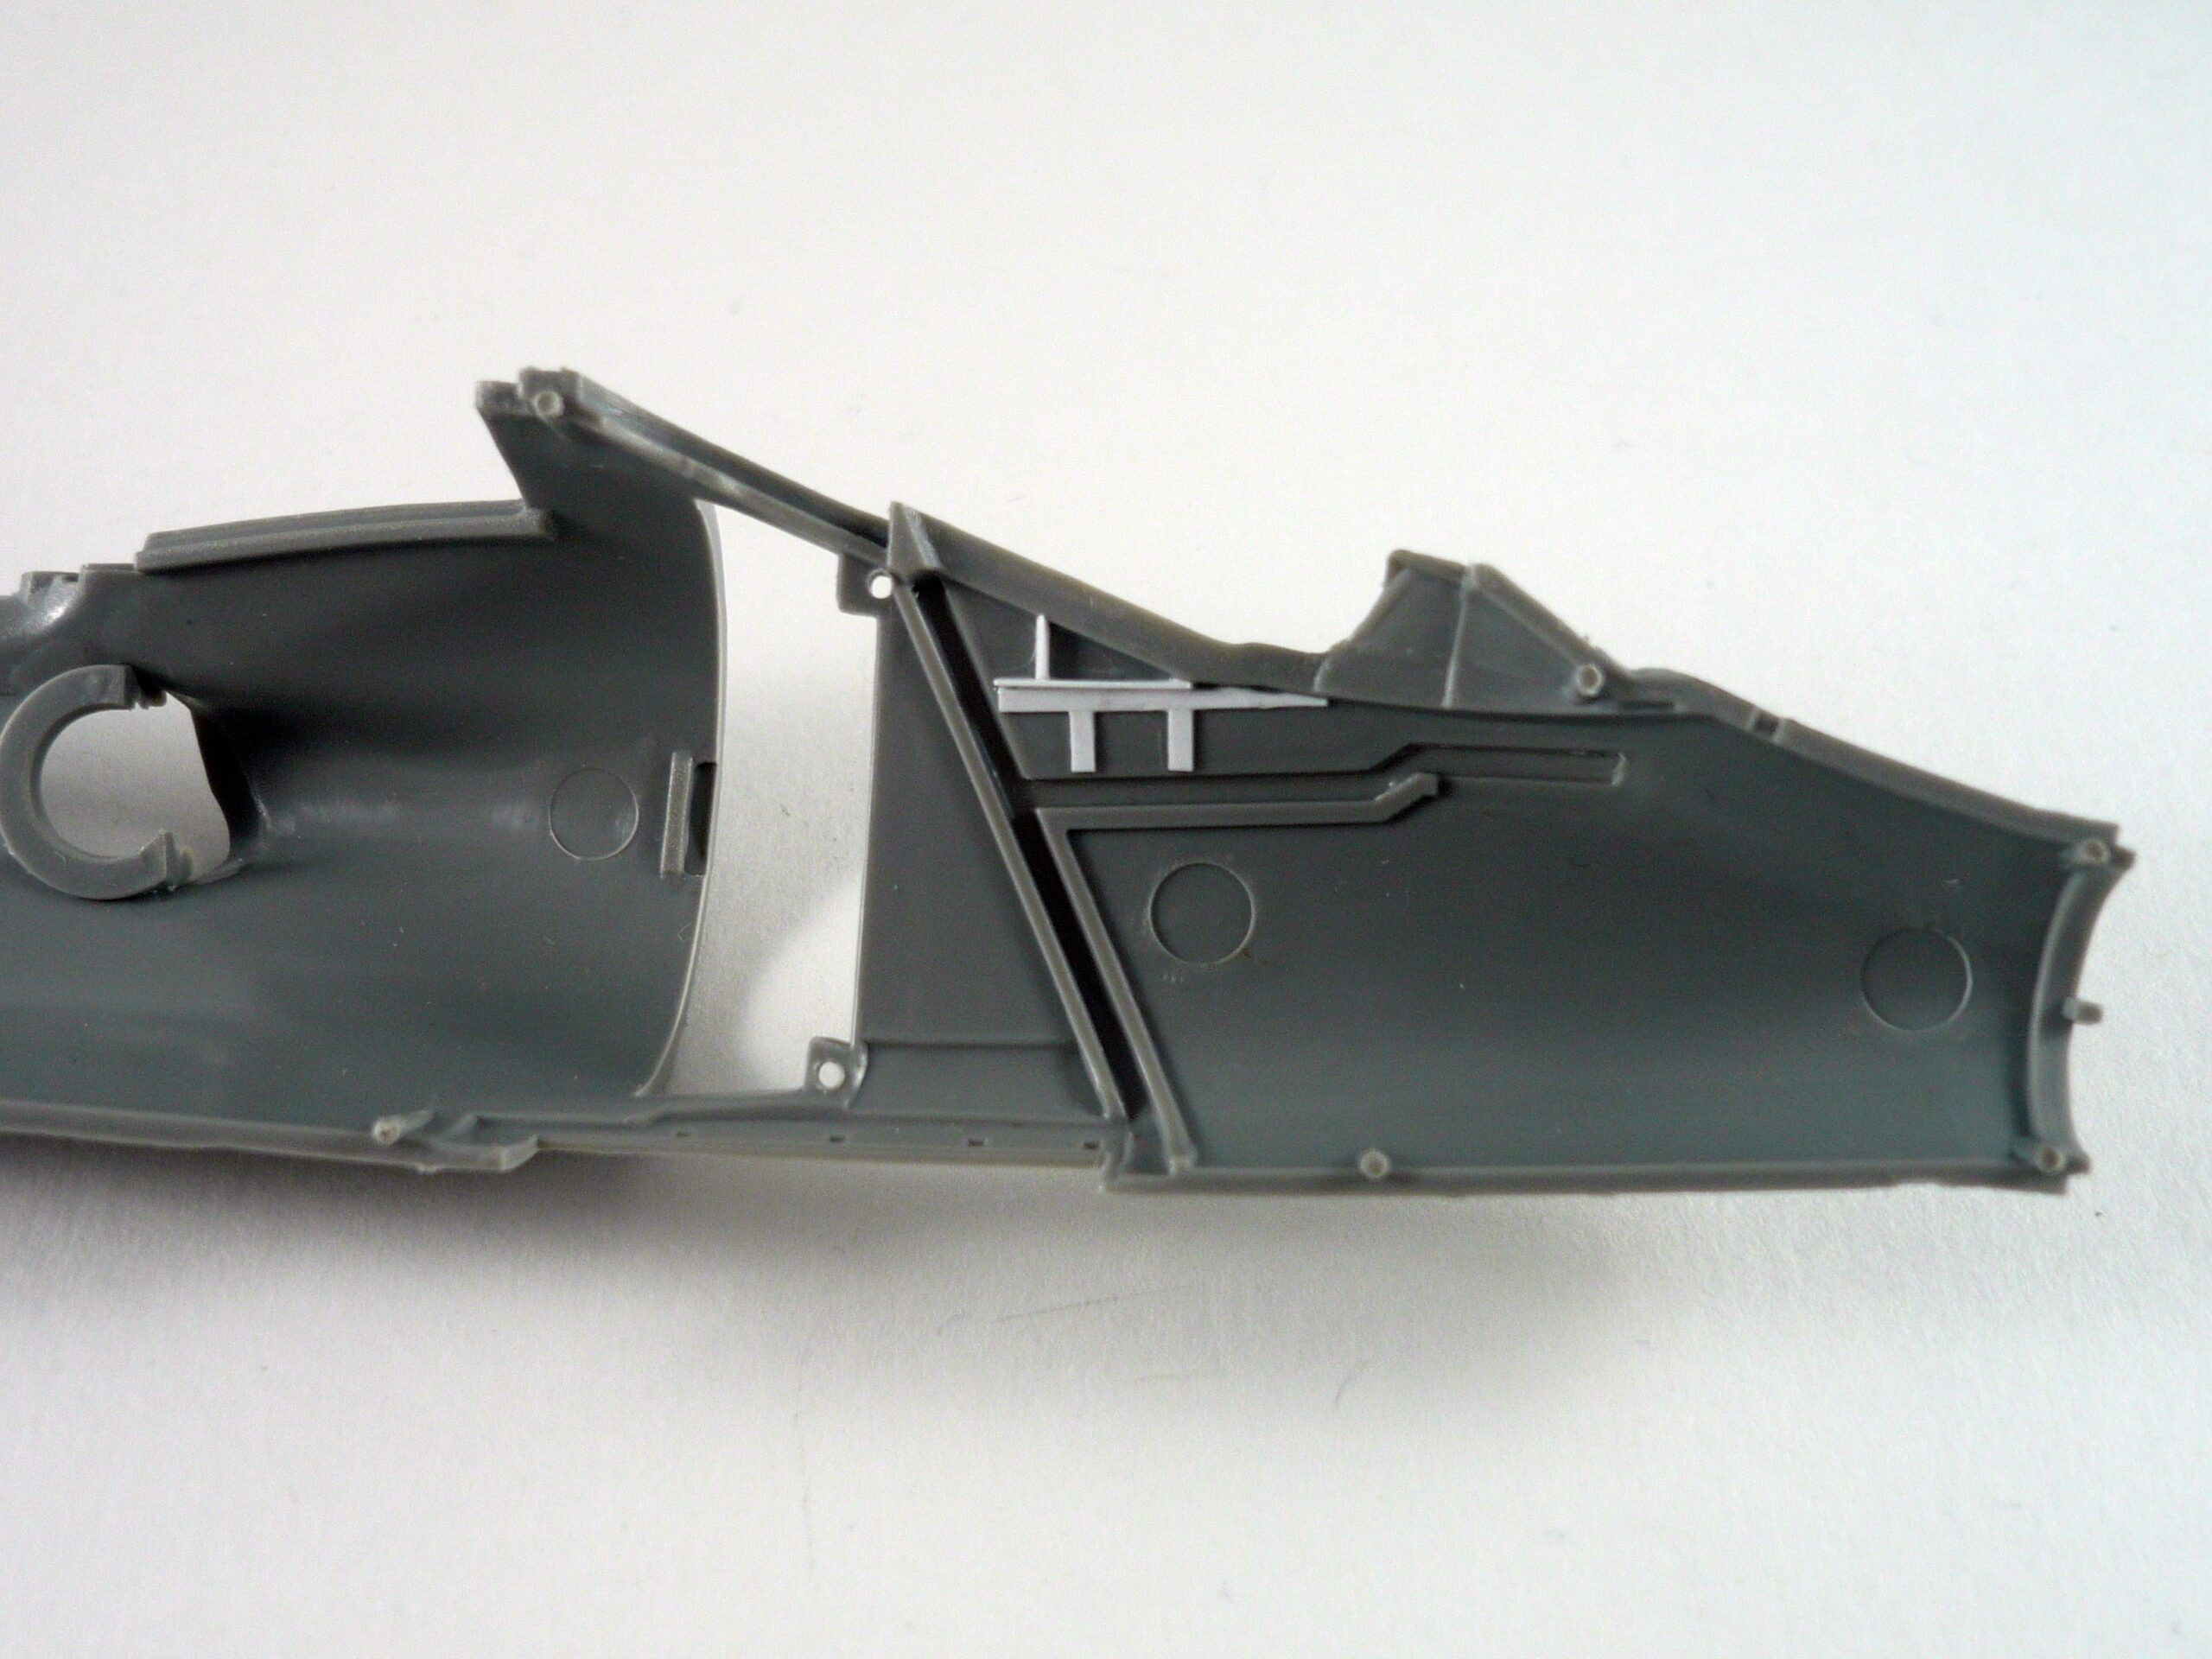
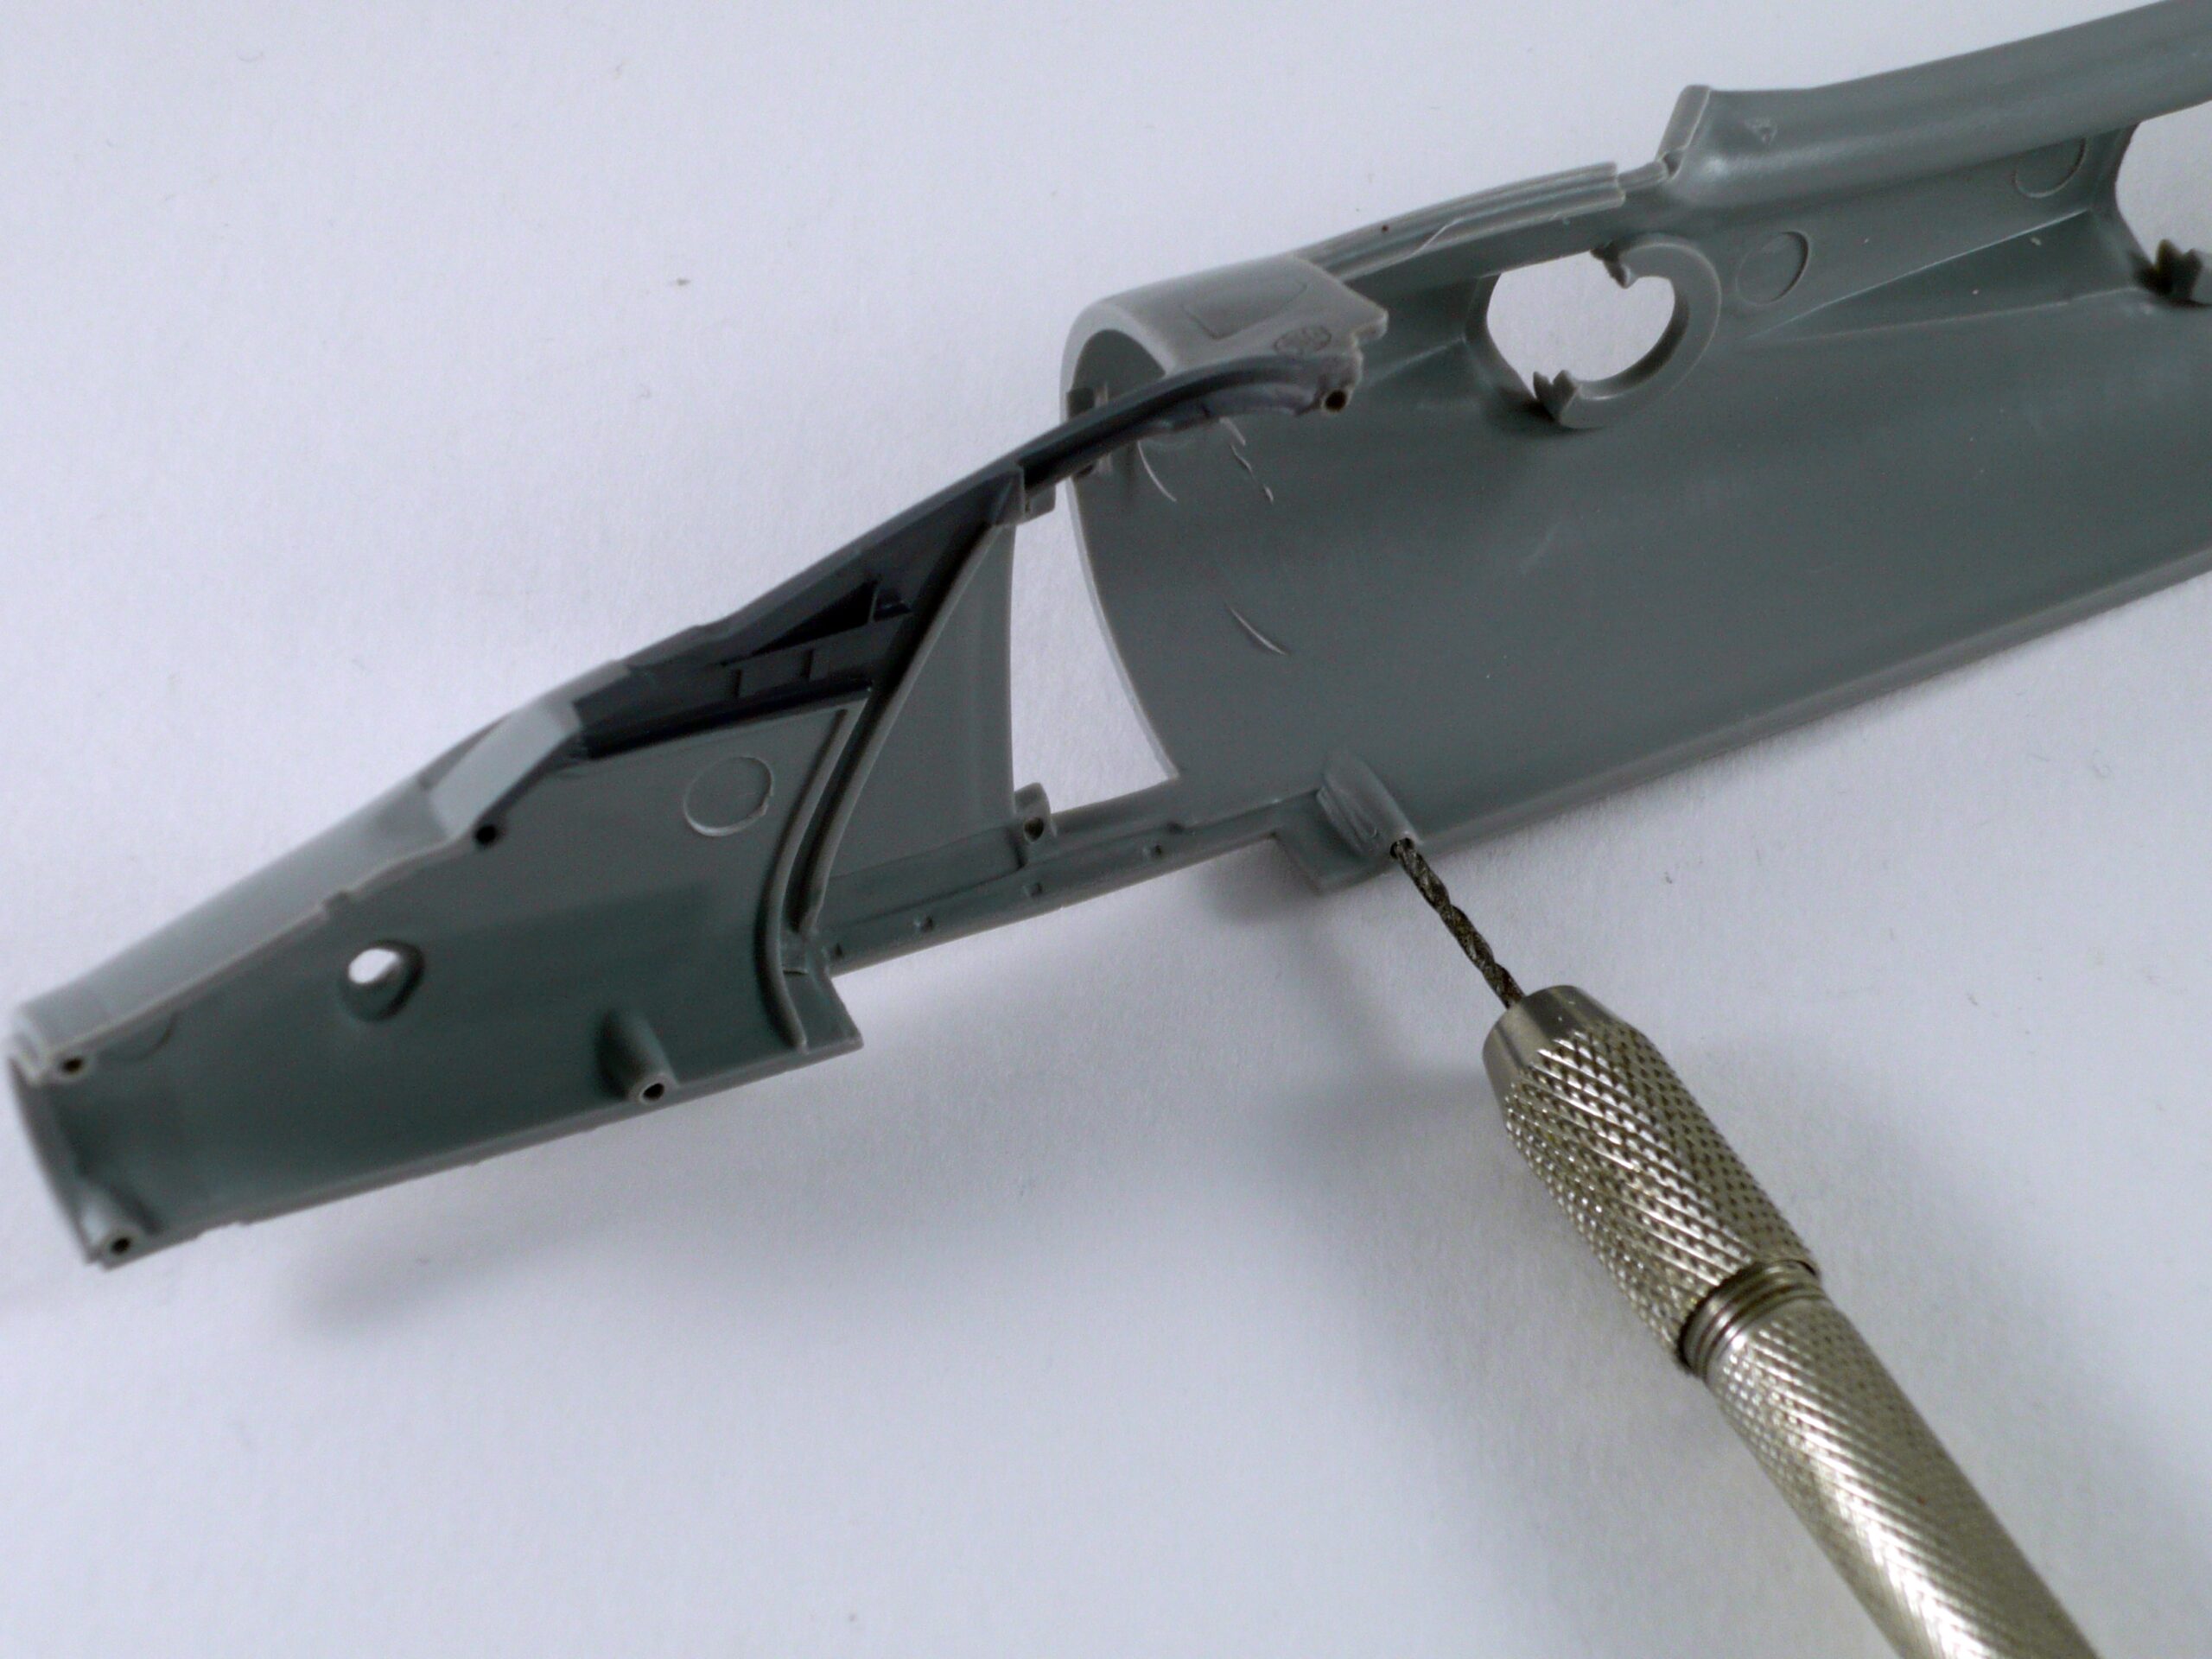
Before joining the fuselage halves, locating holes were enlarged using a twist drill to improve alignment and reduce assembly stress.
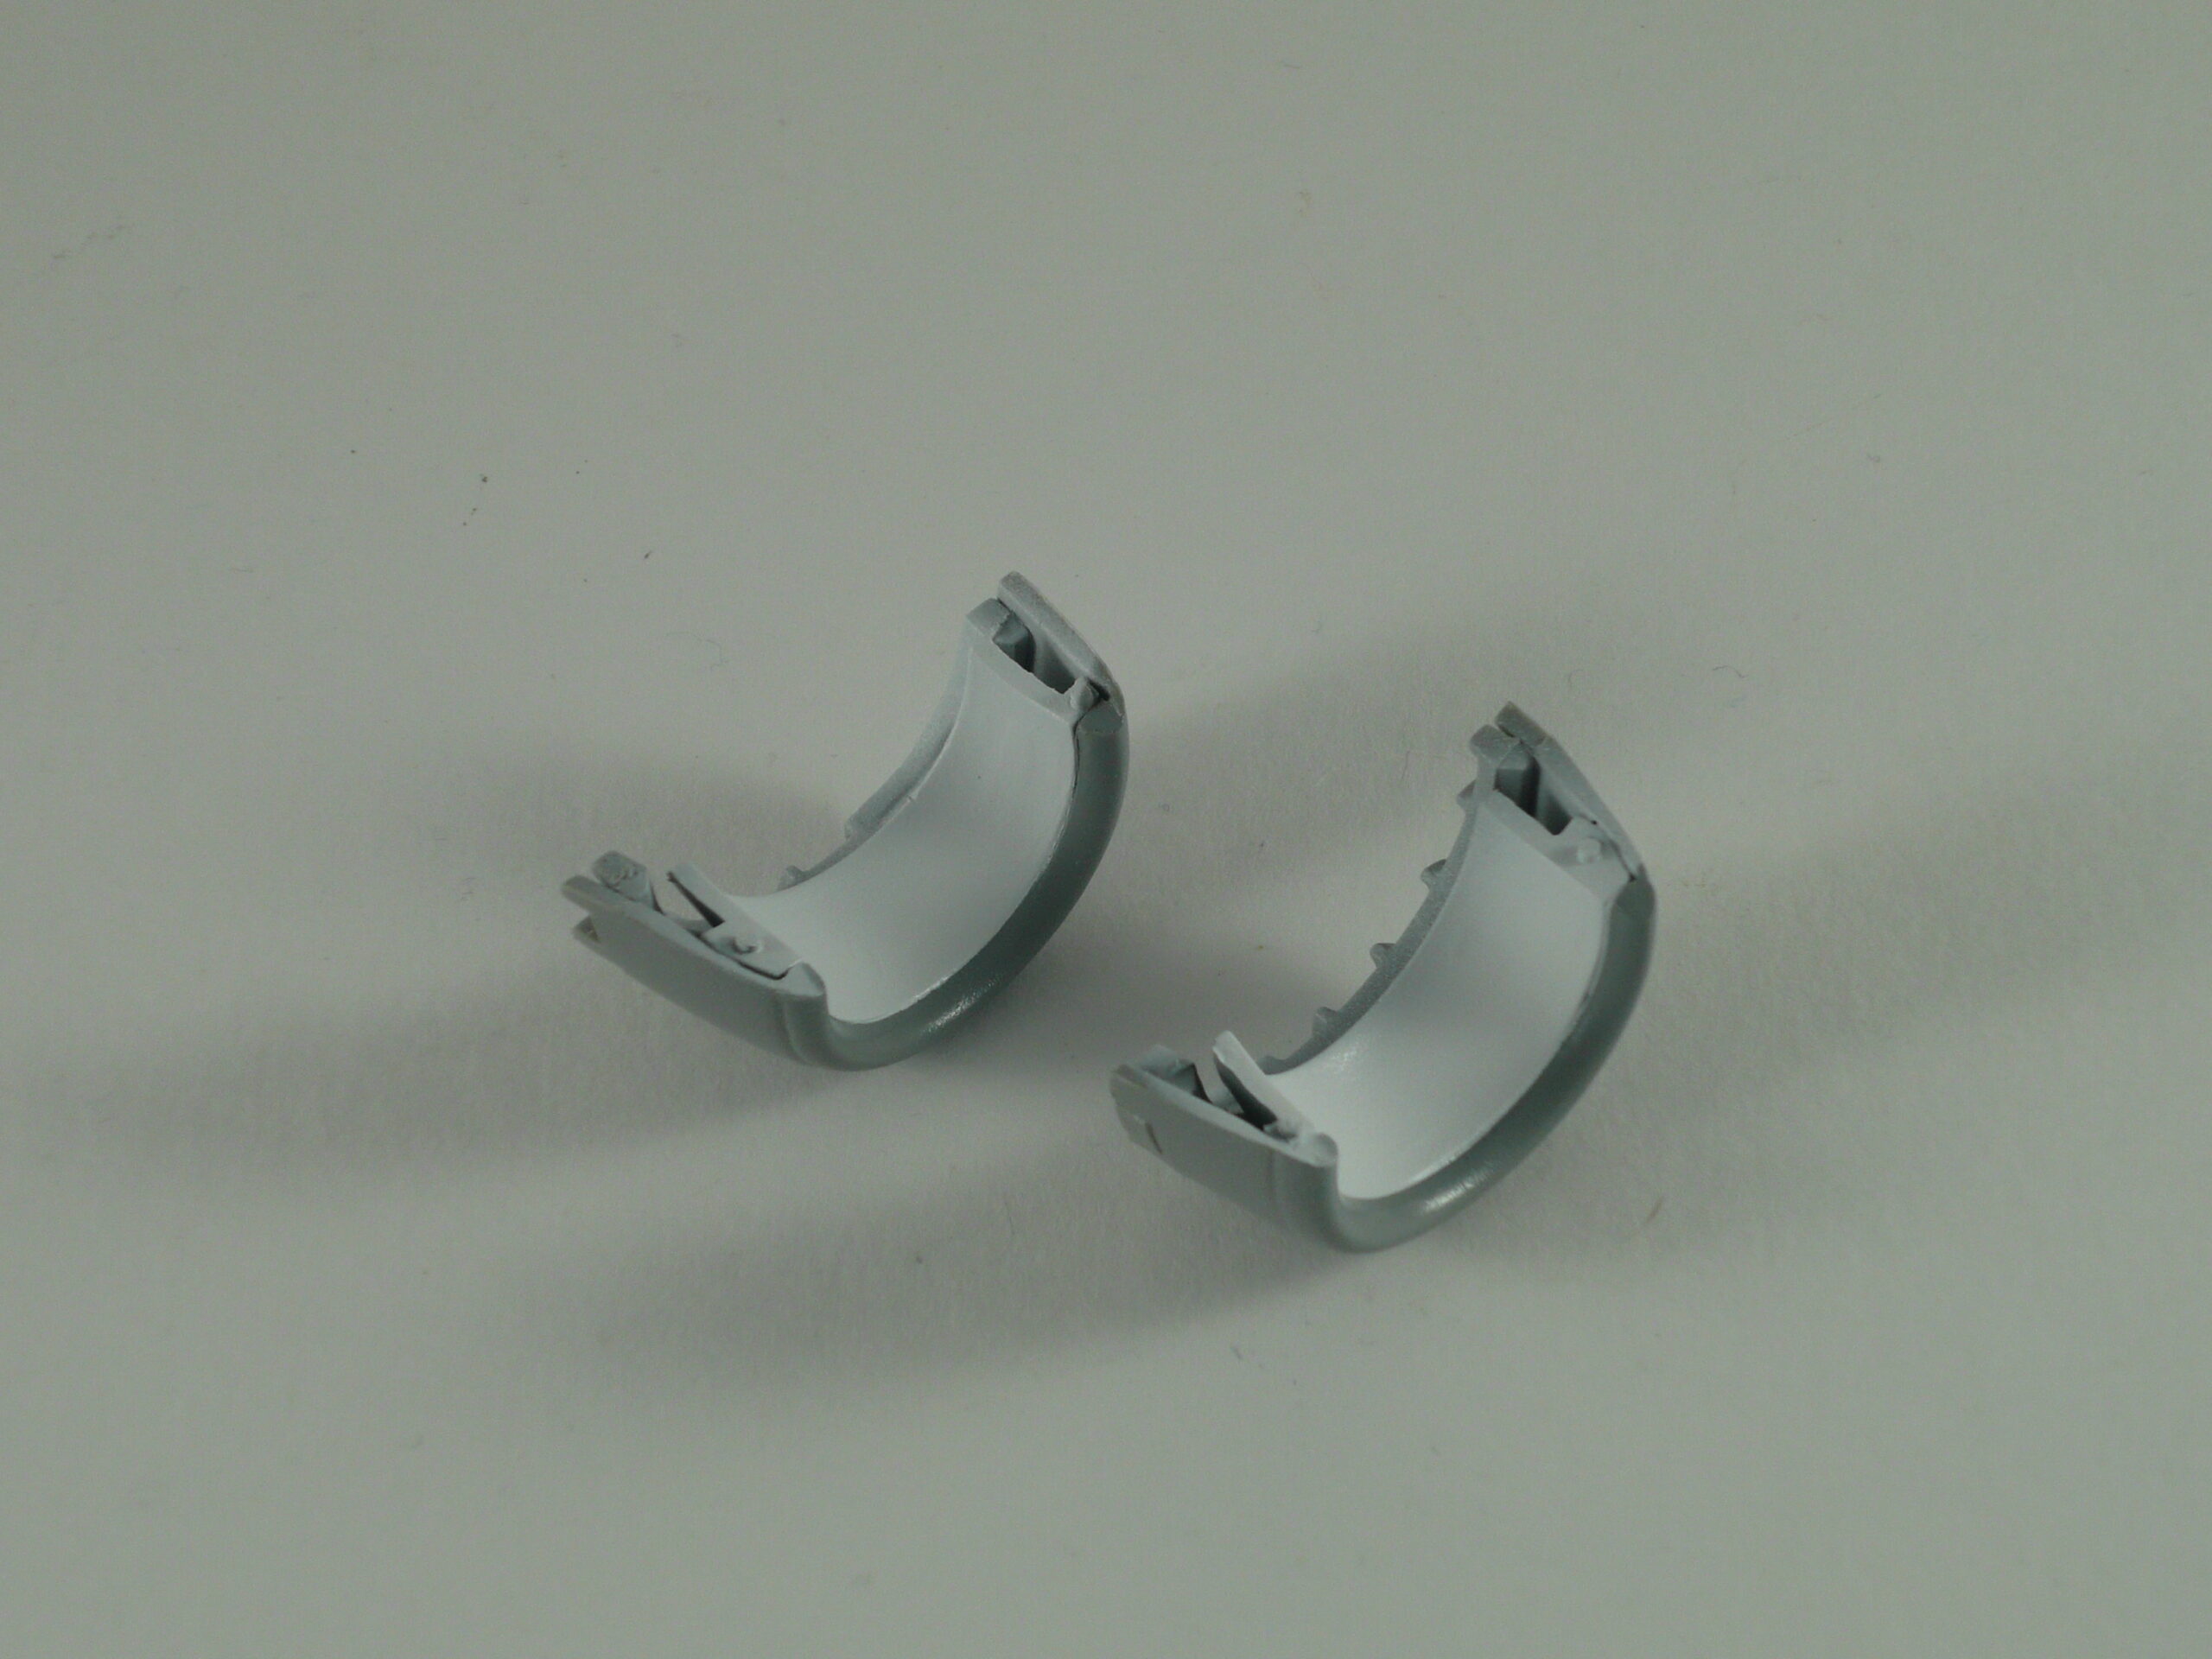
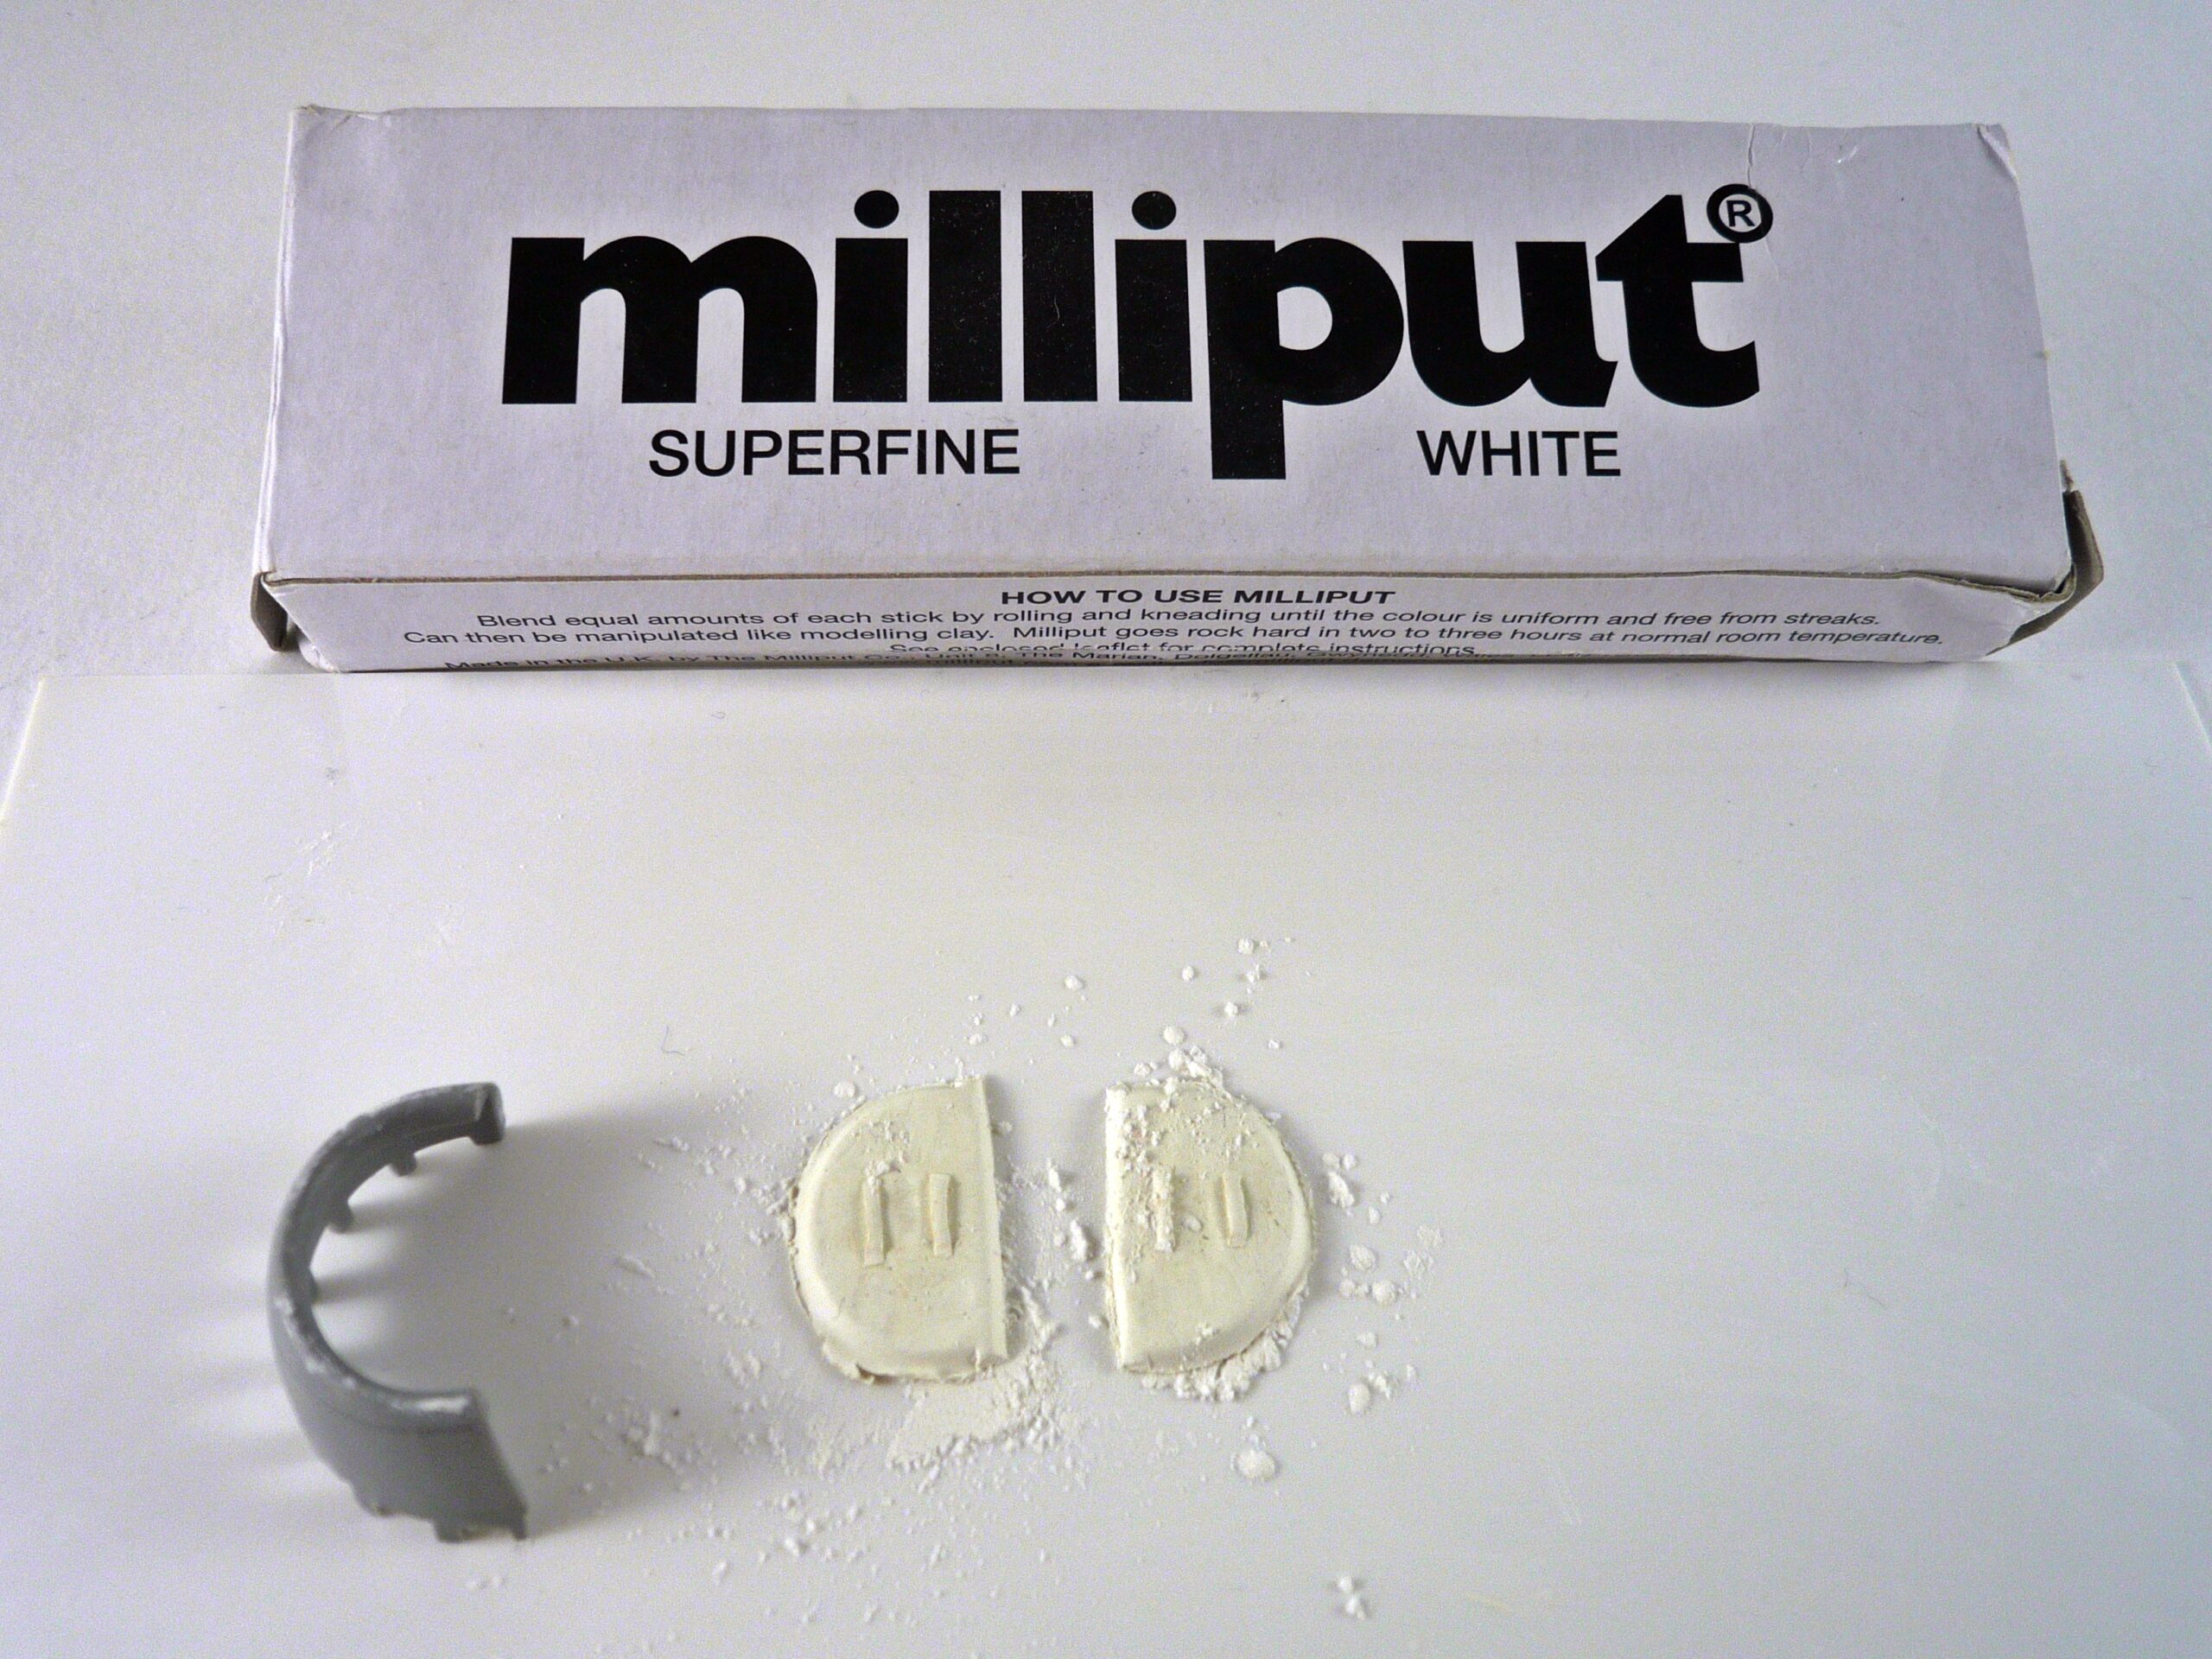
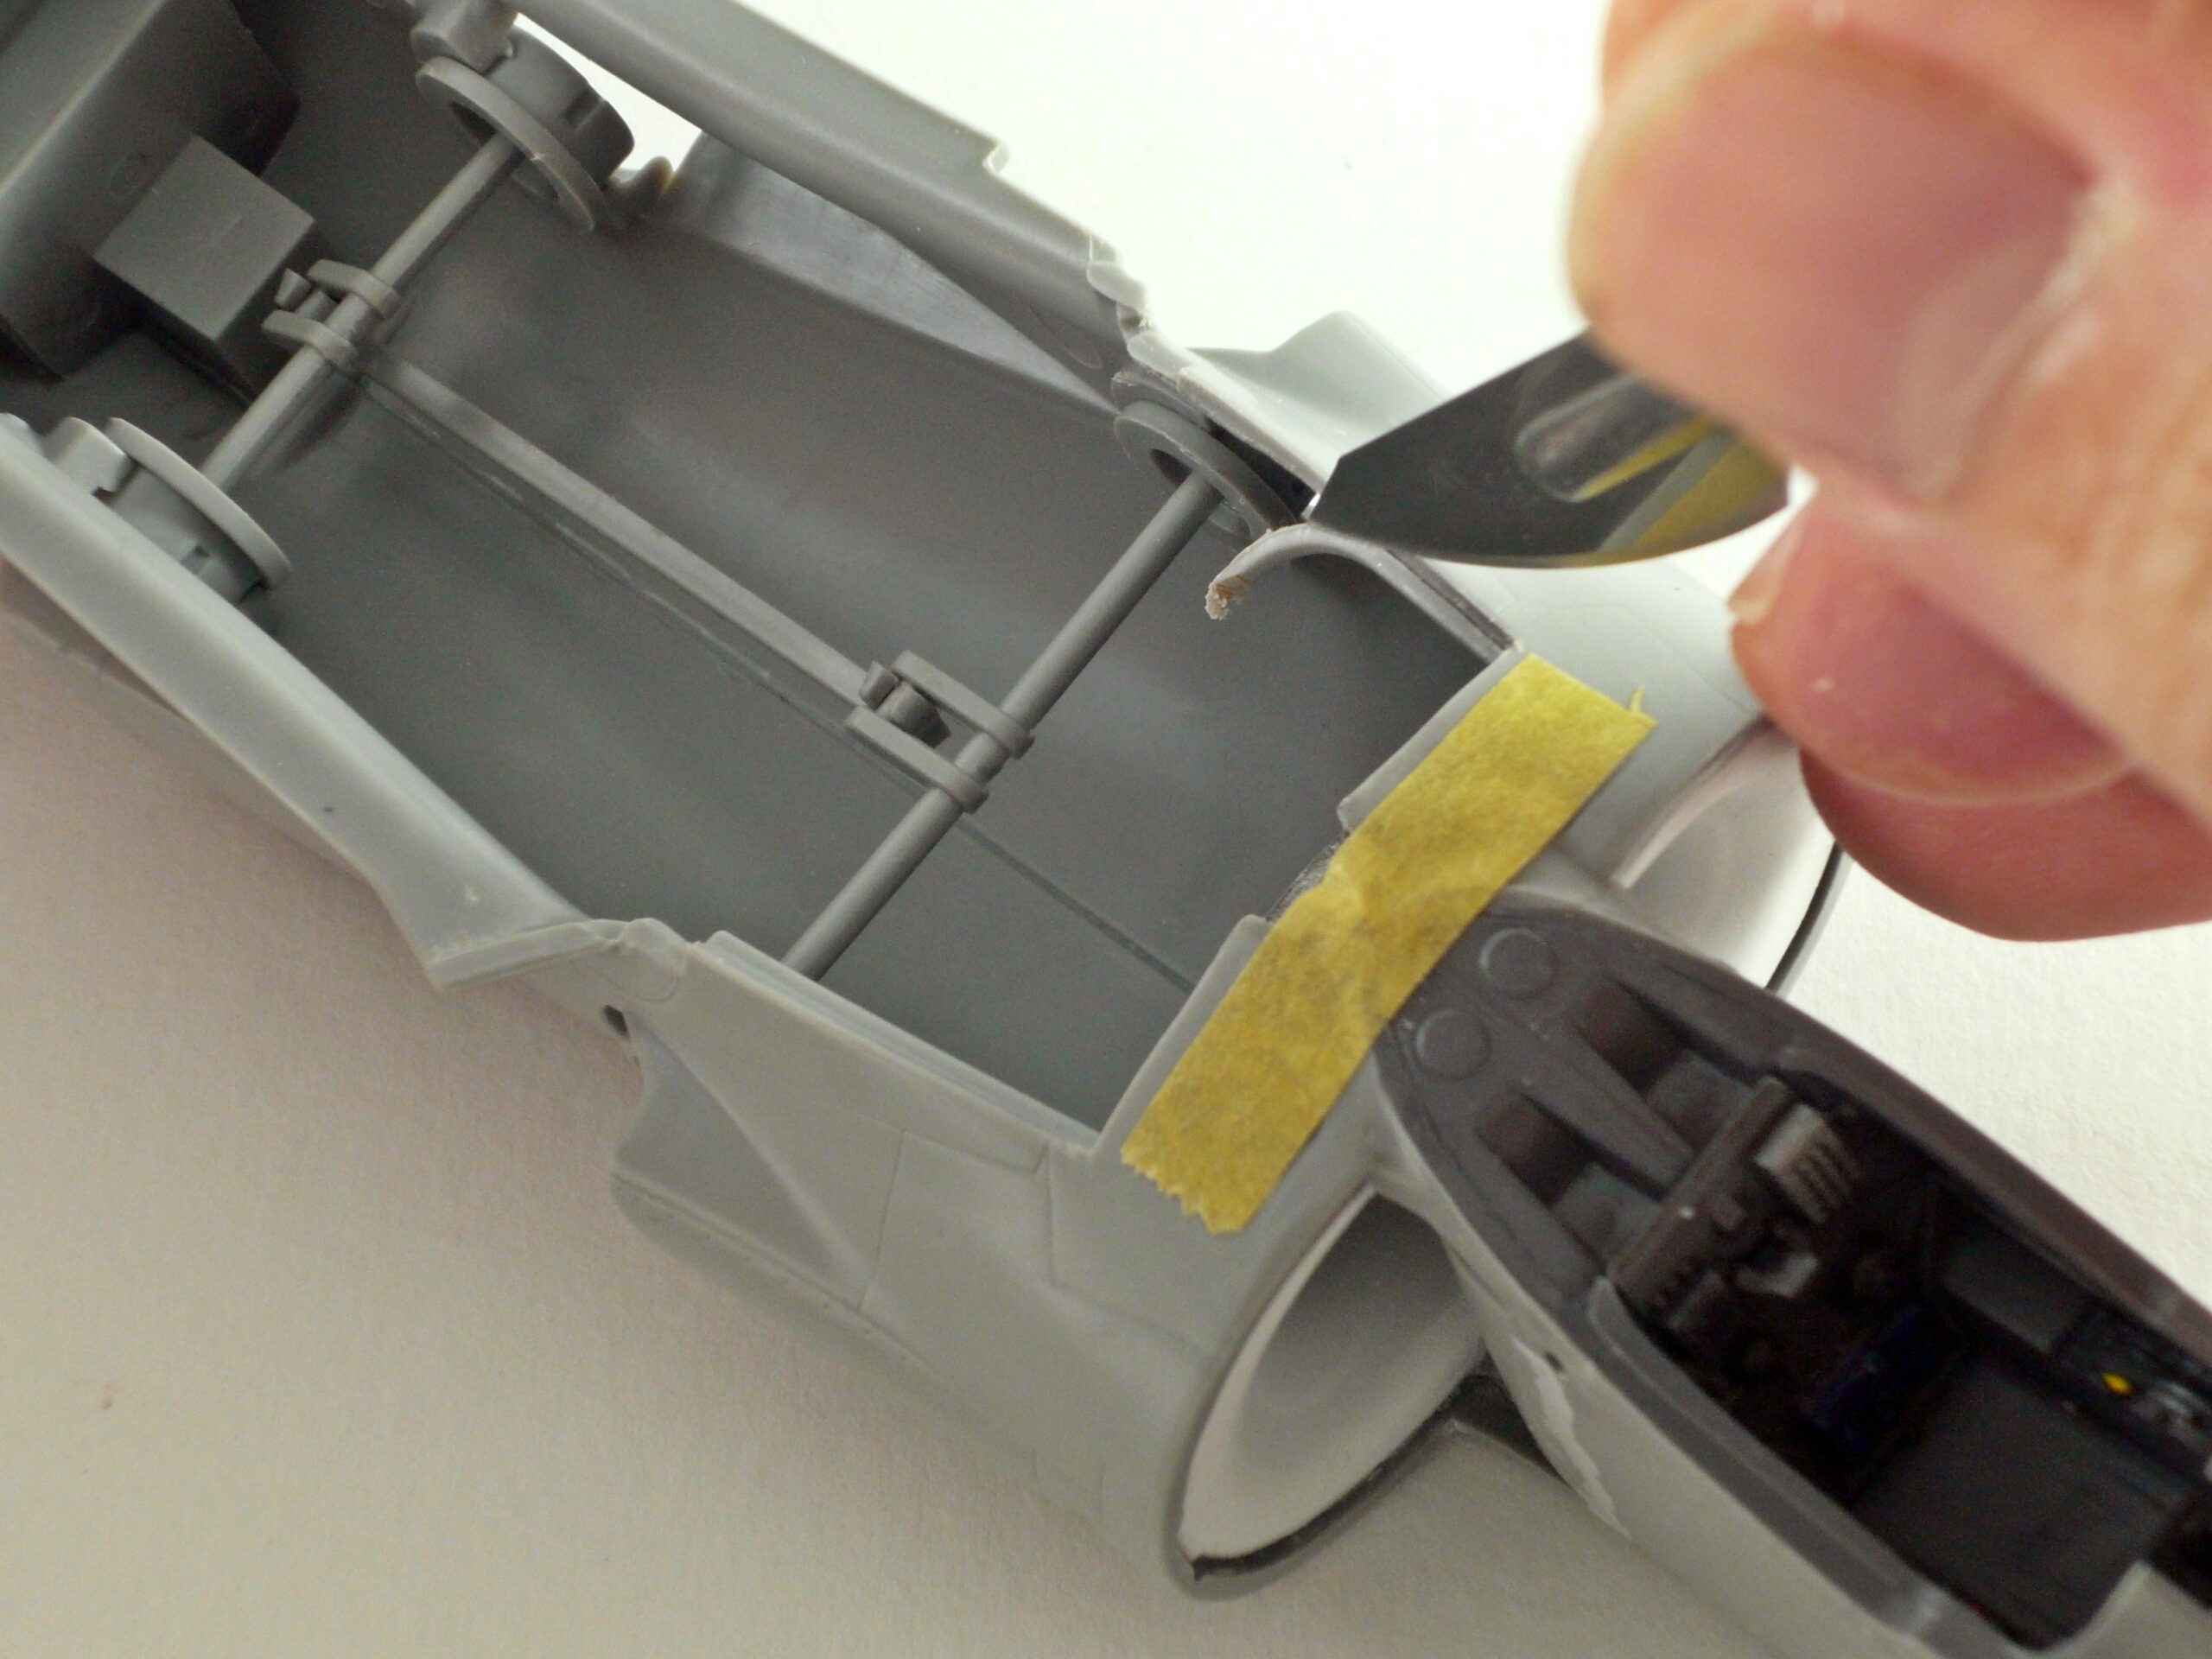
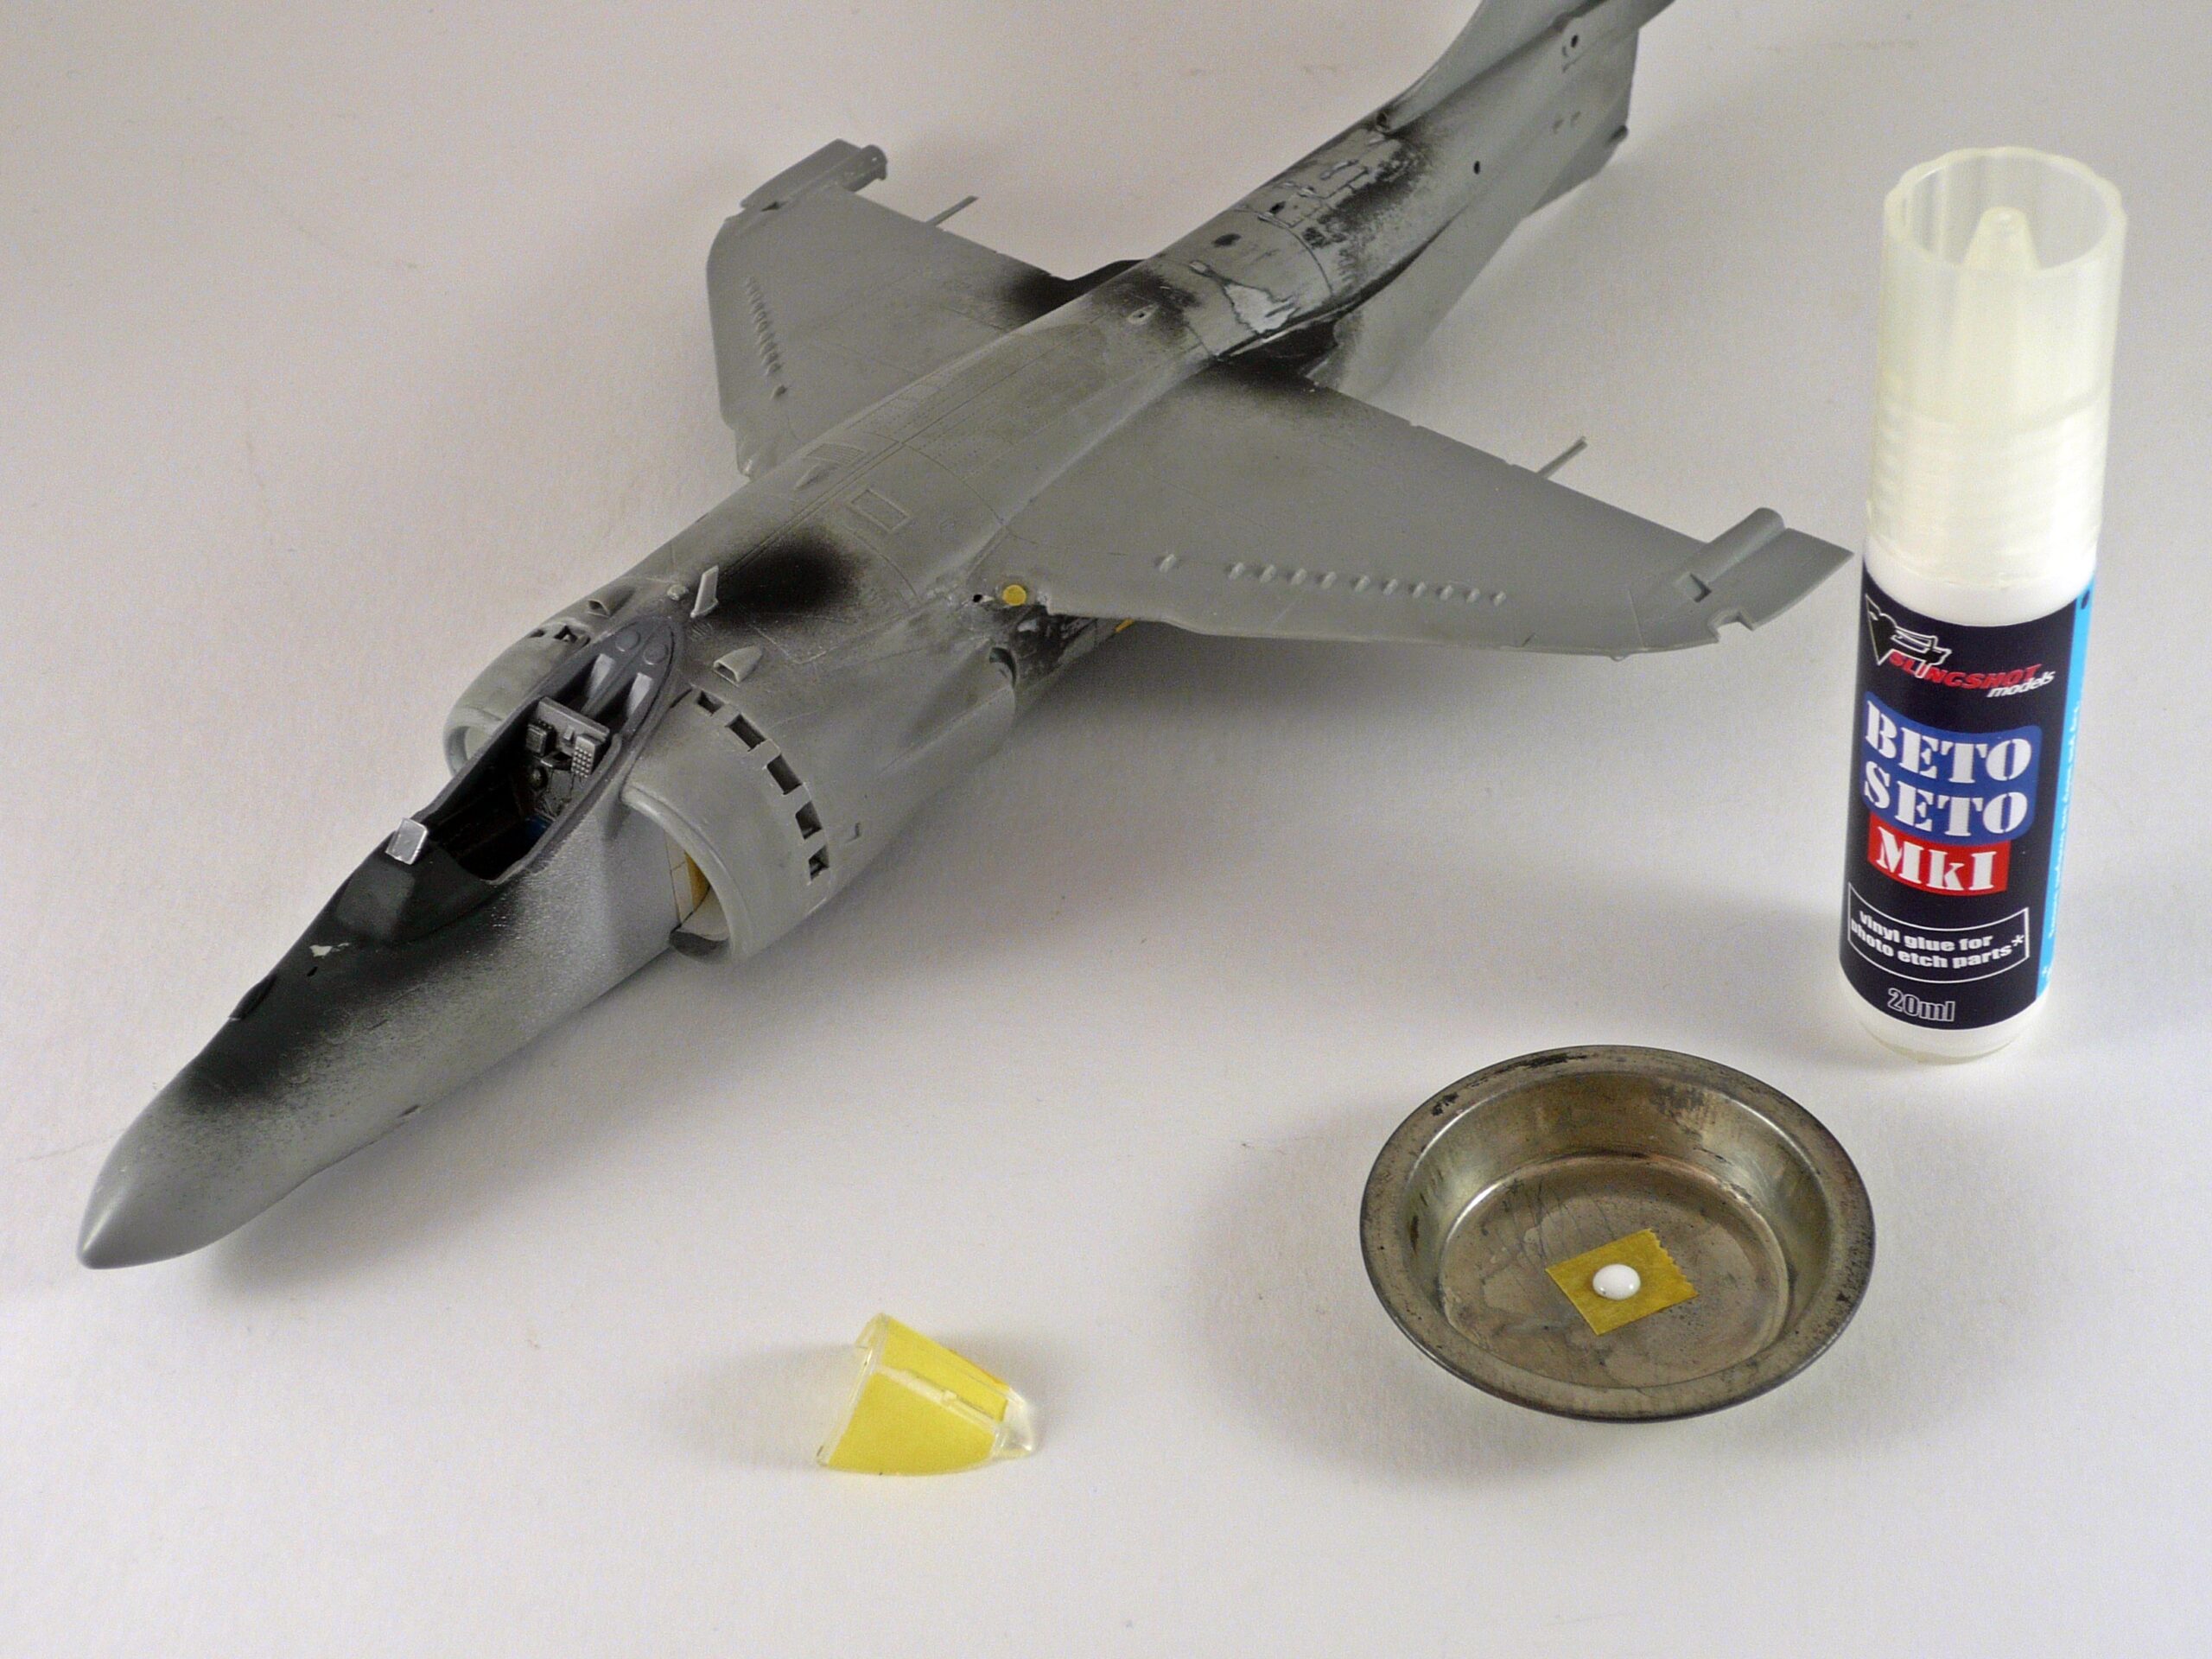
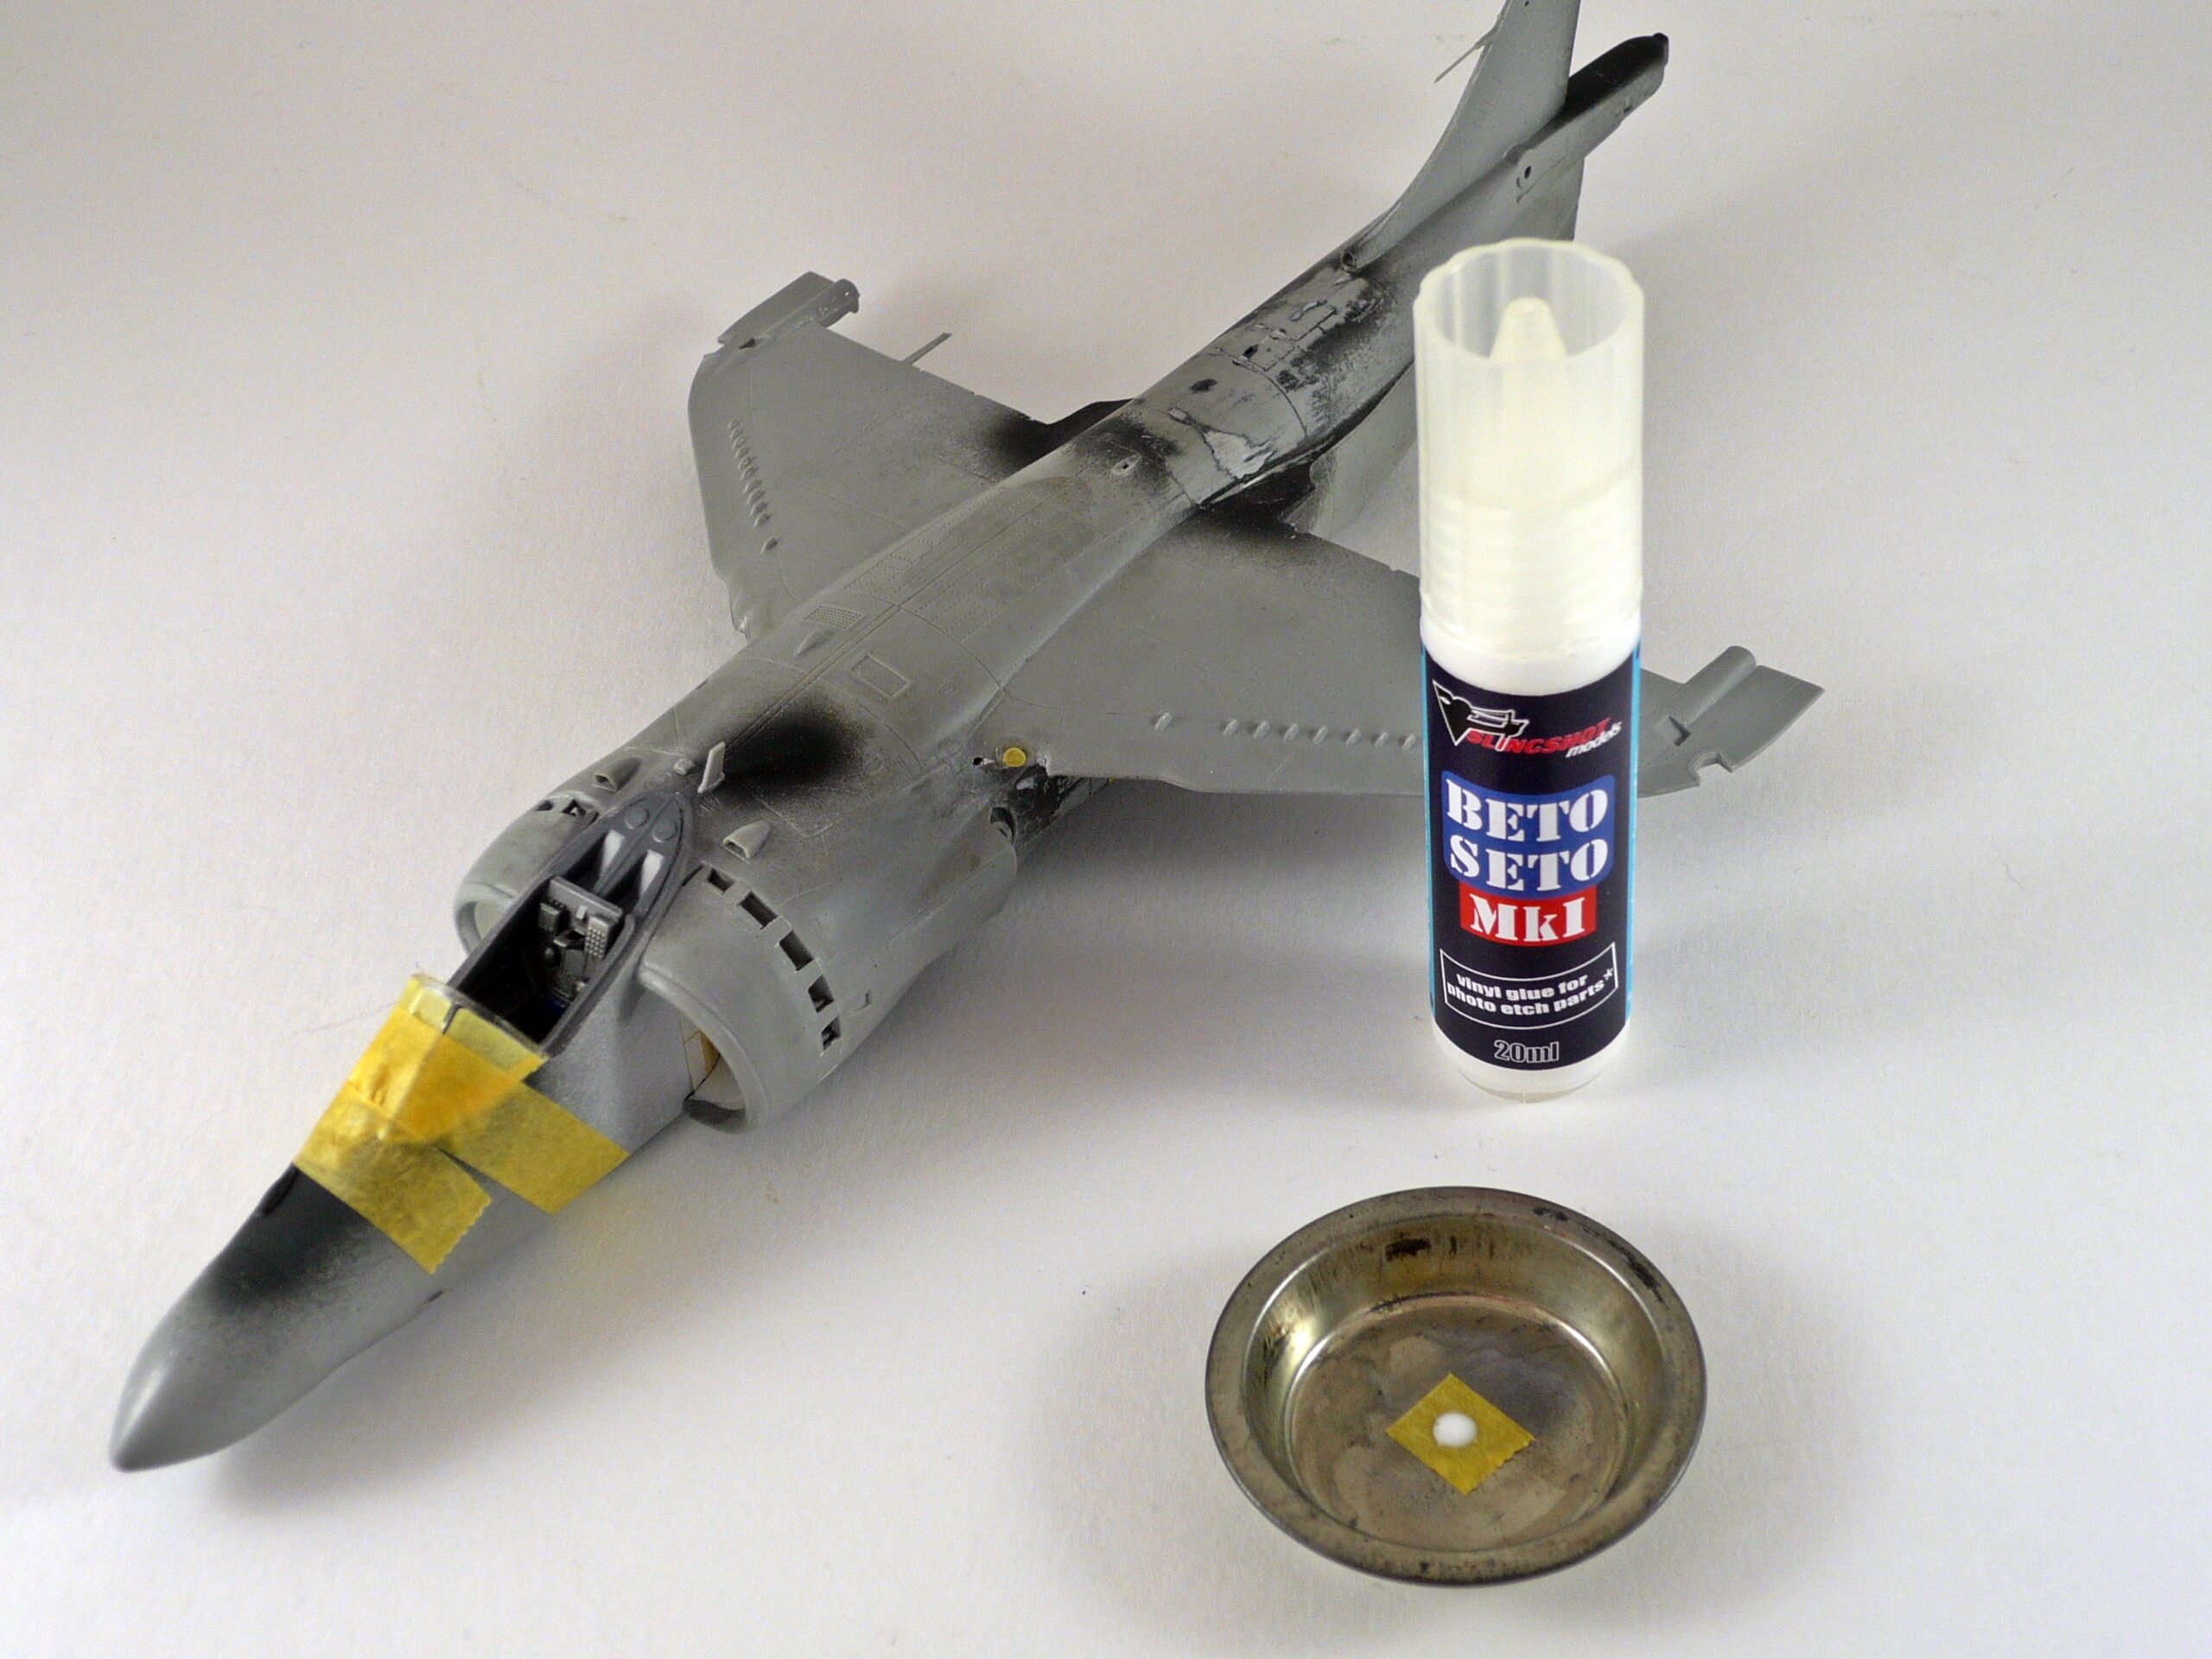
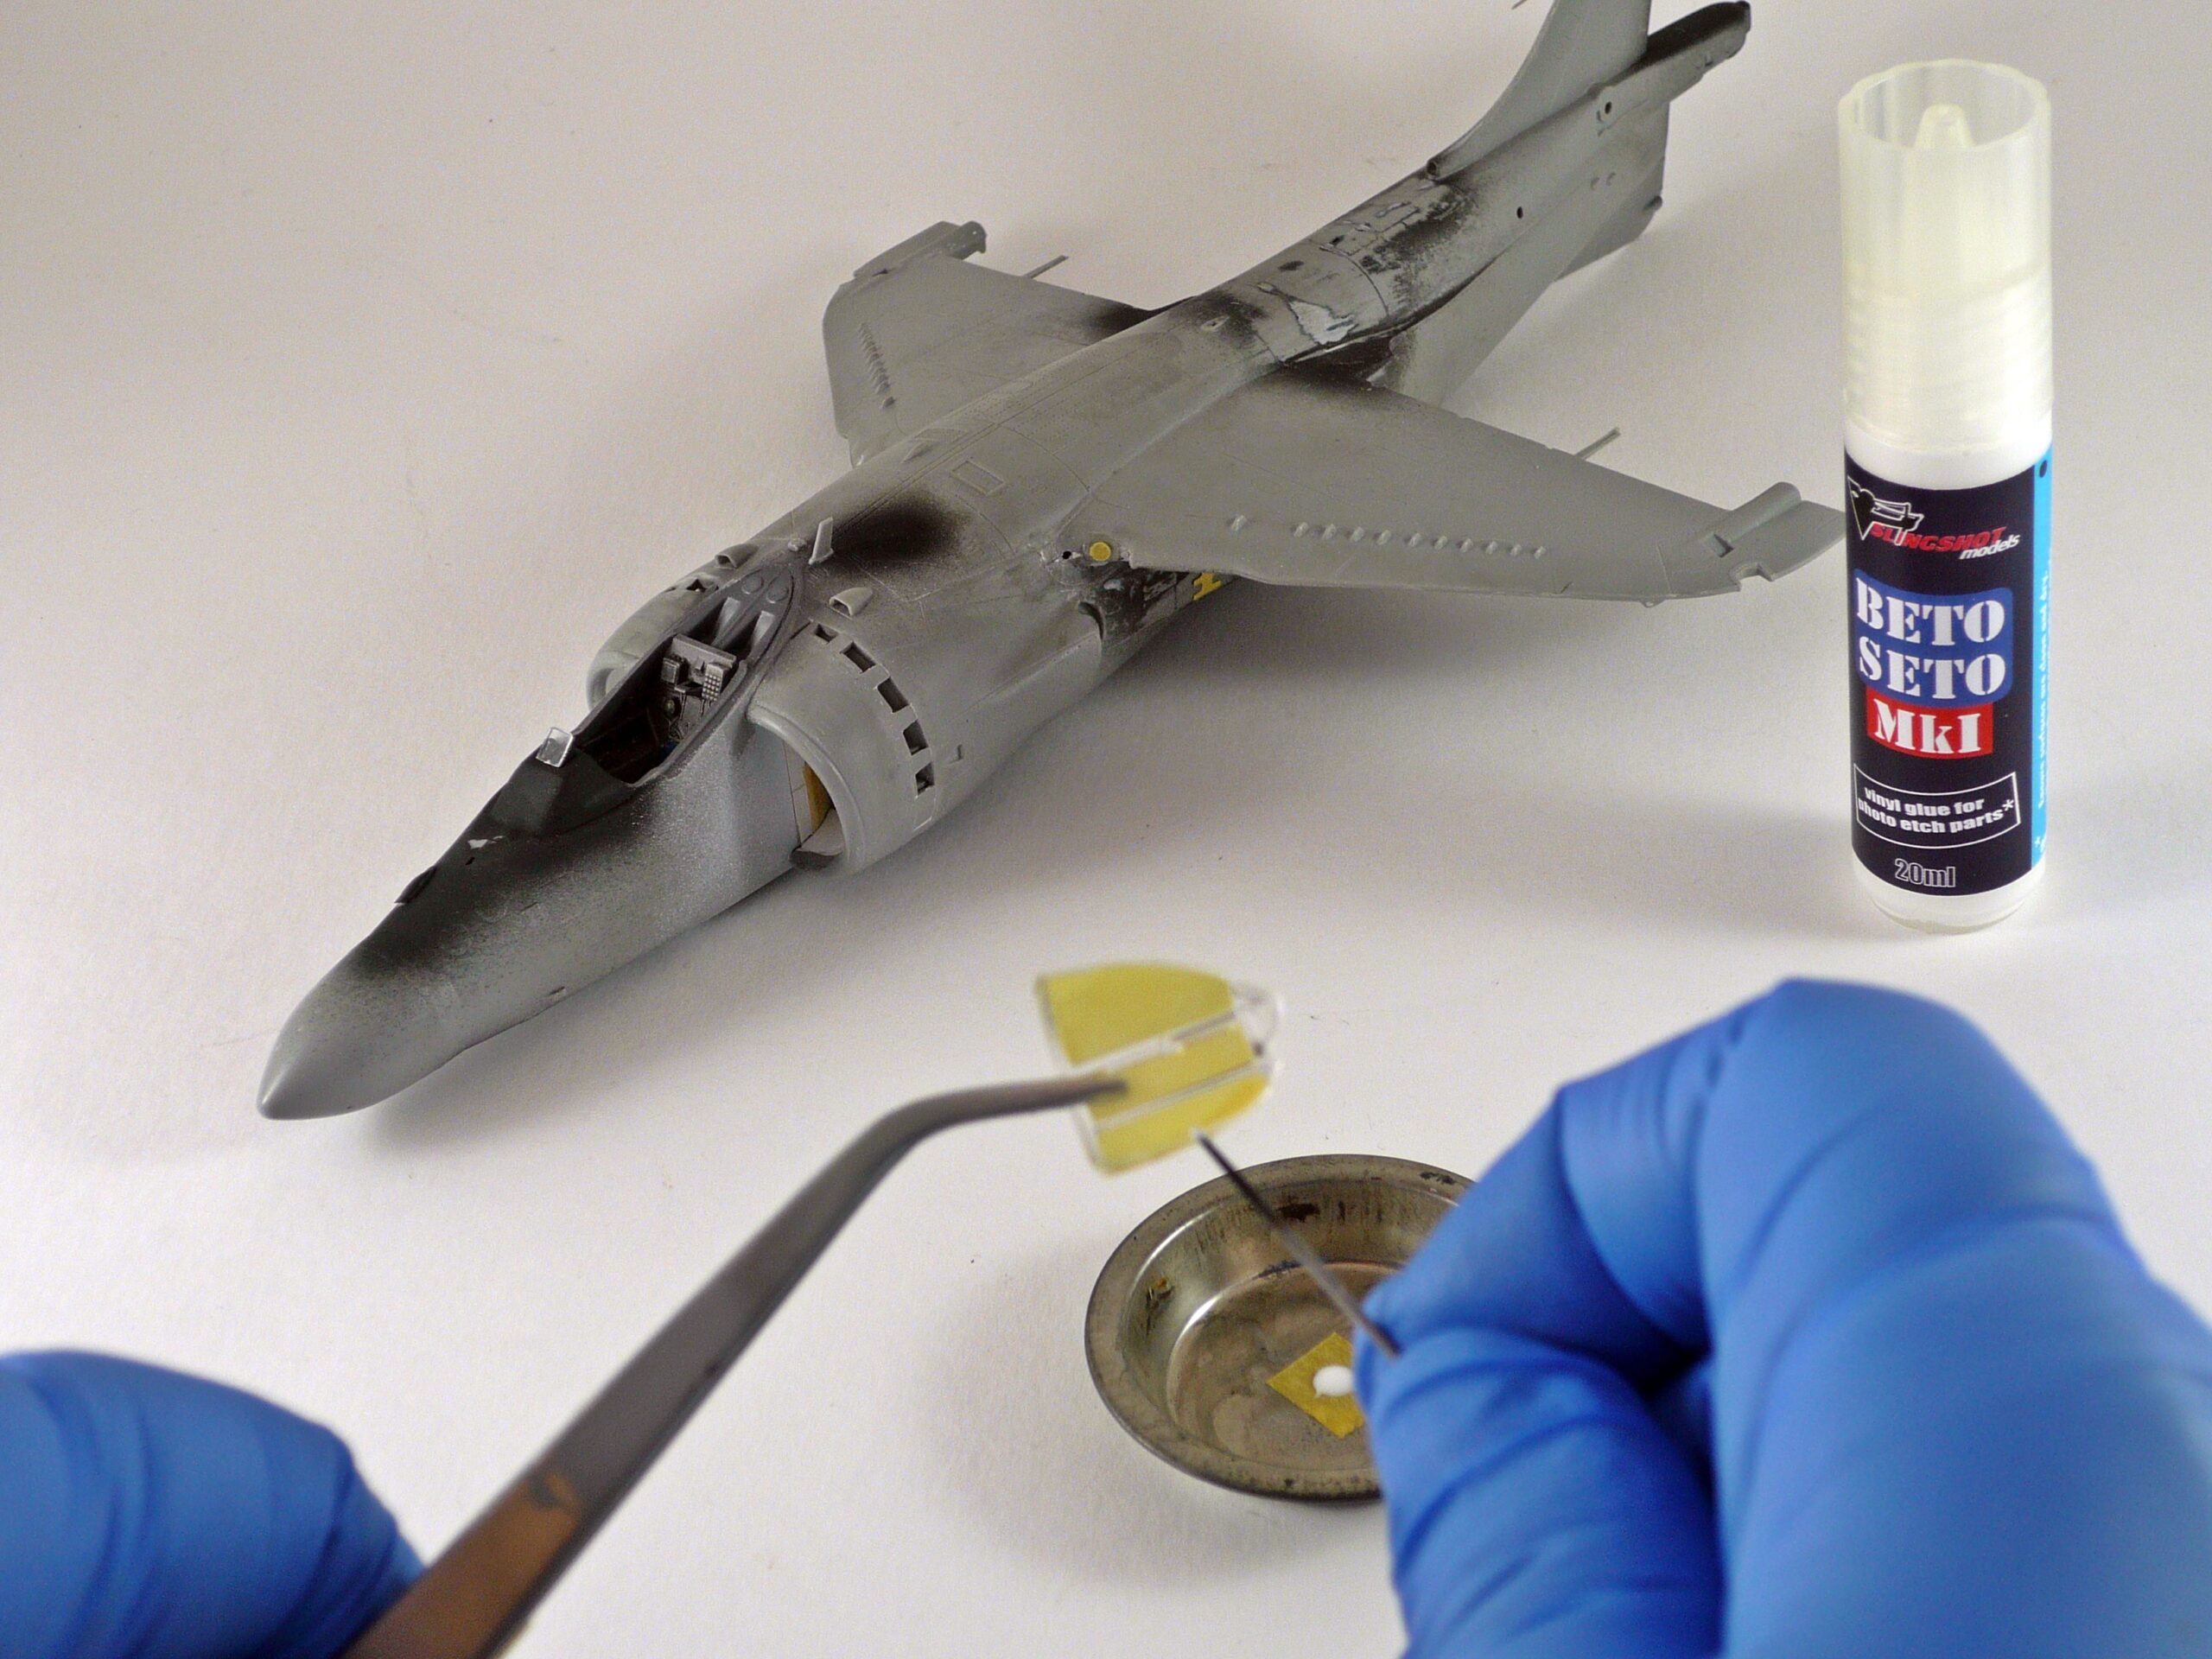
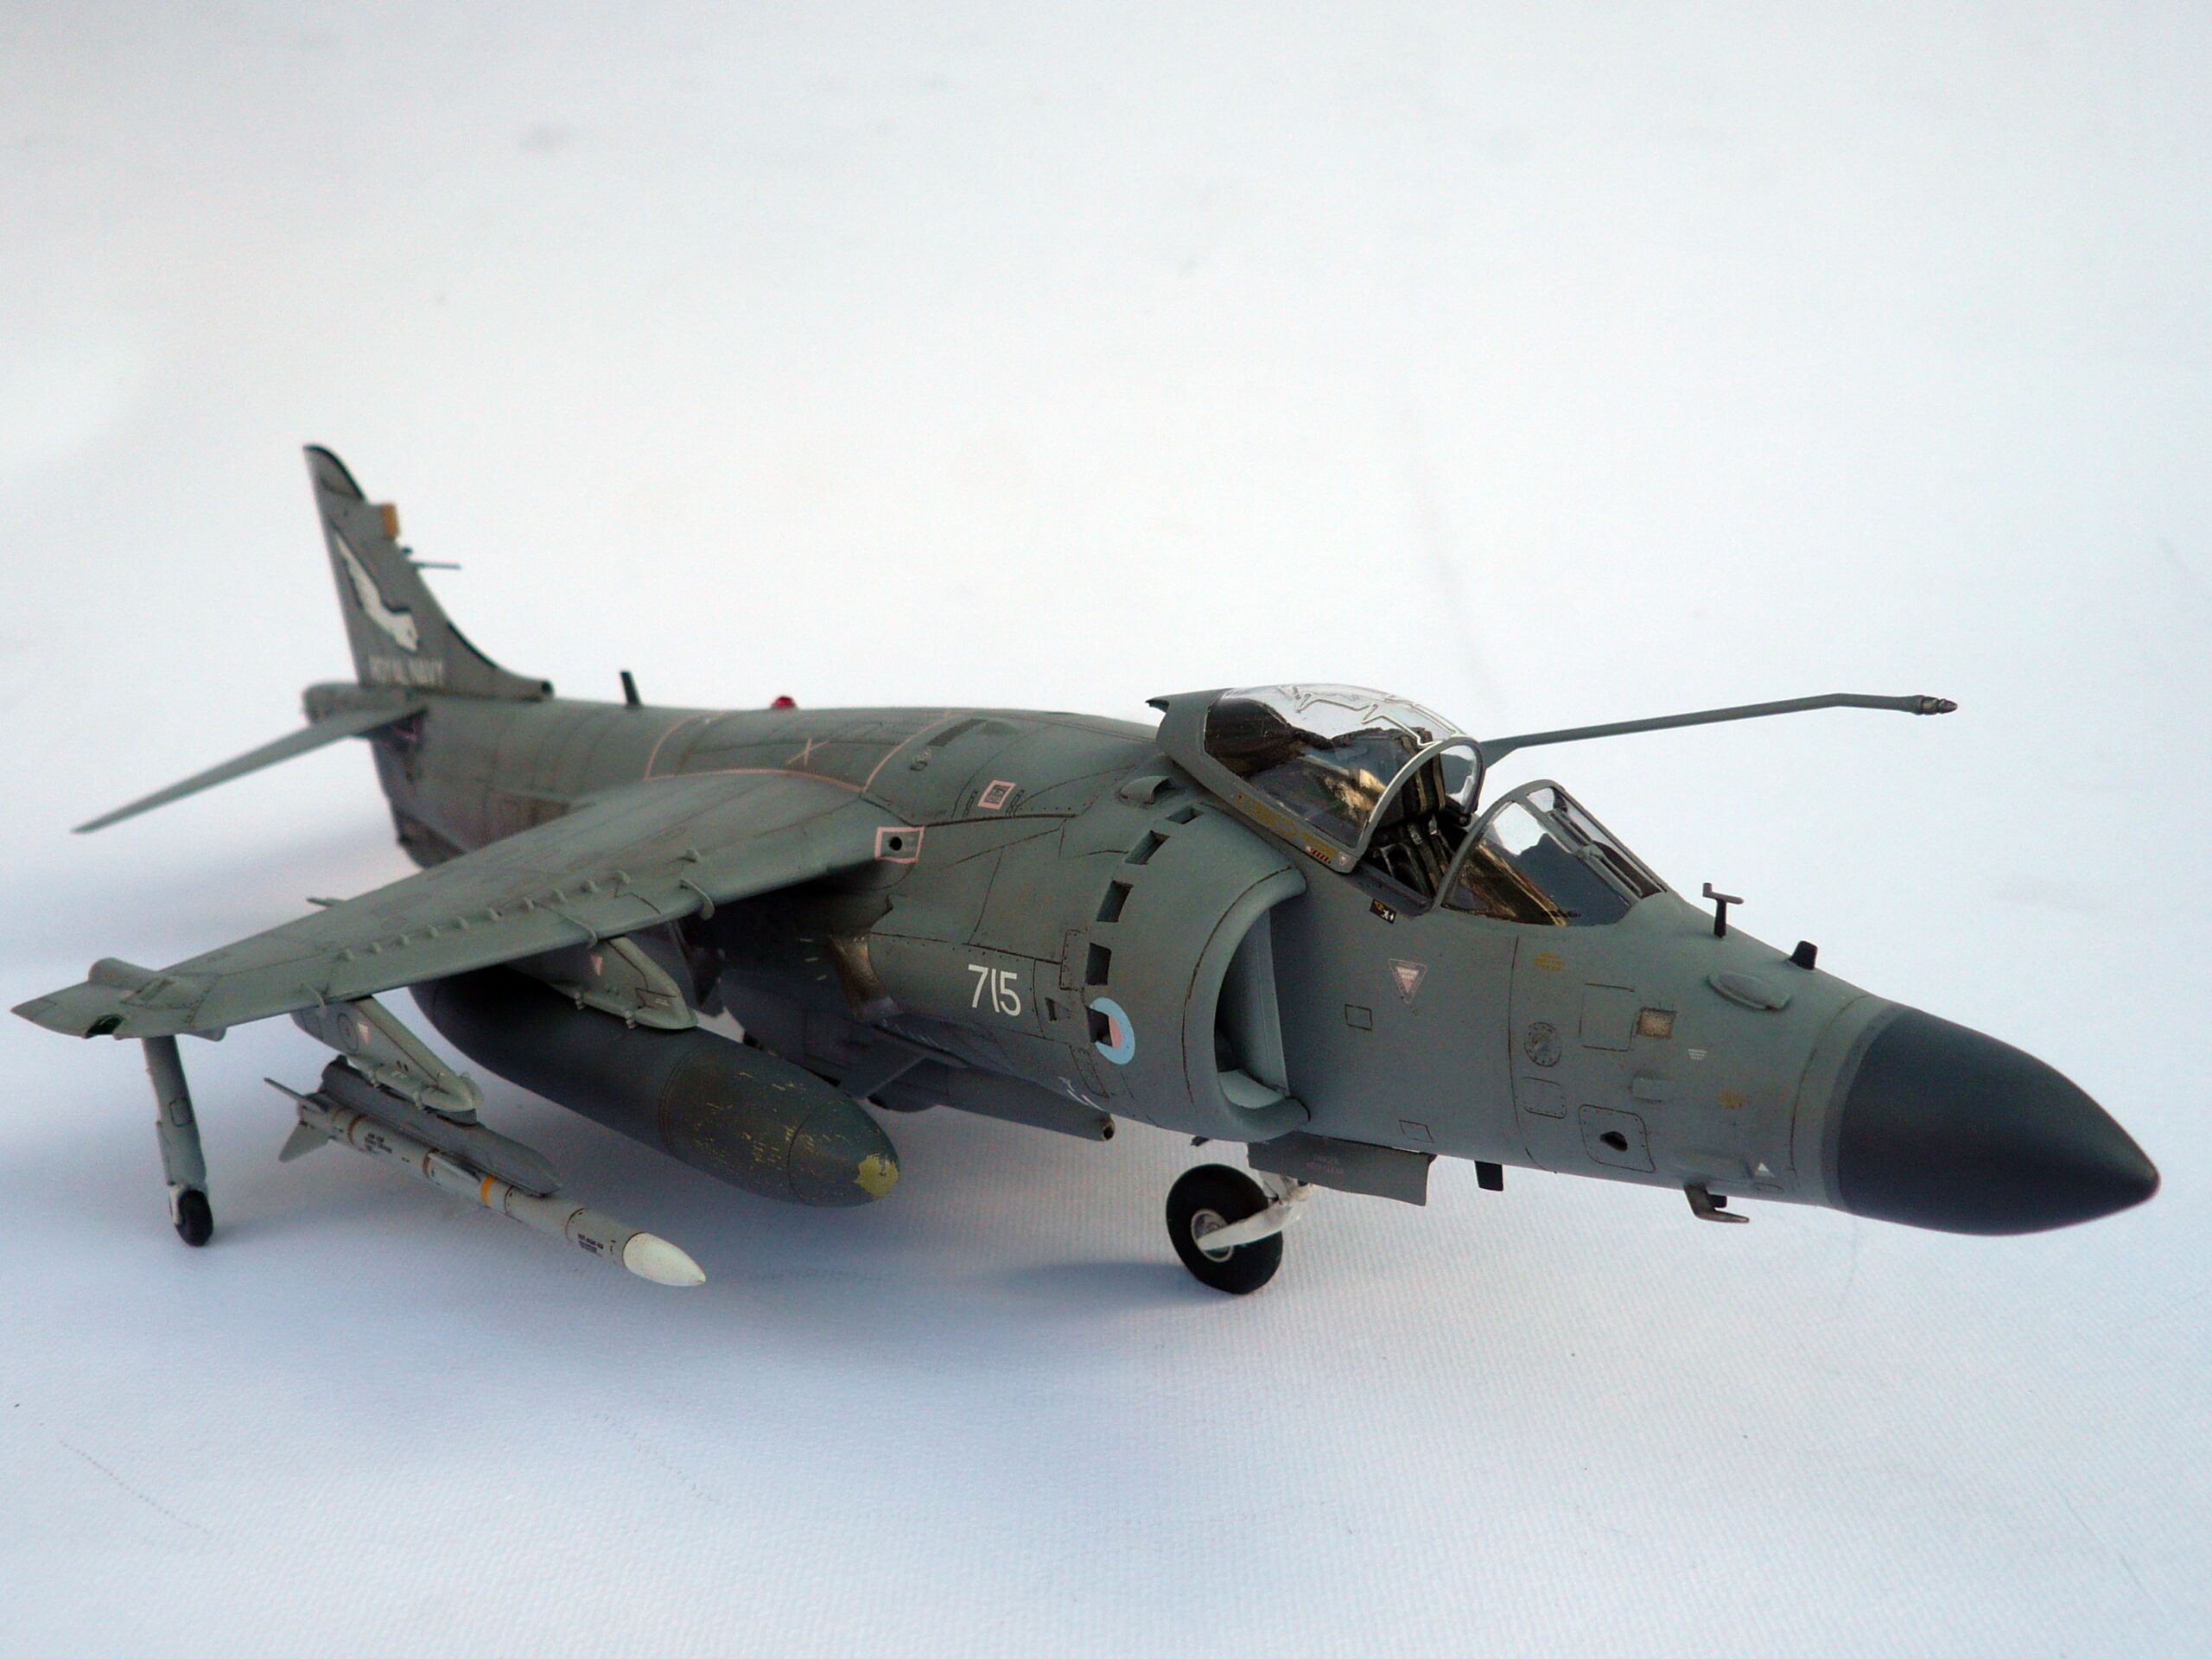
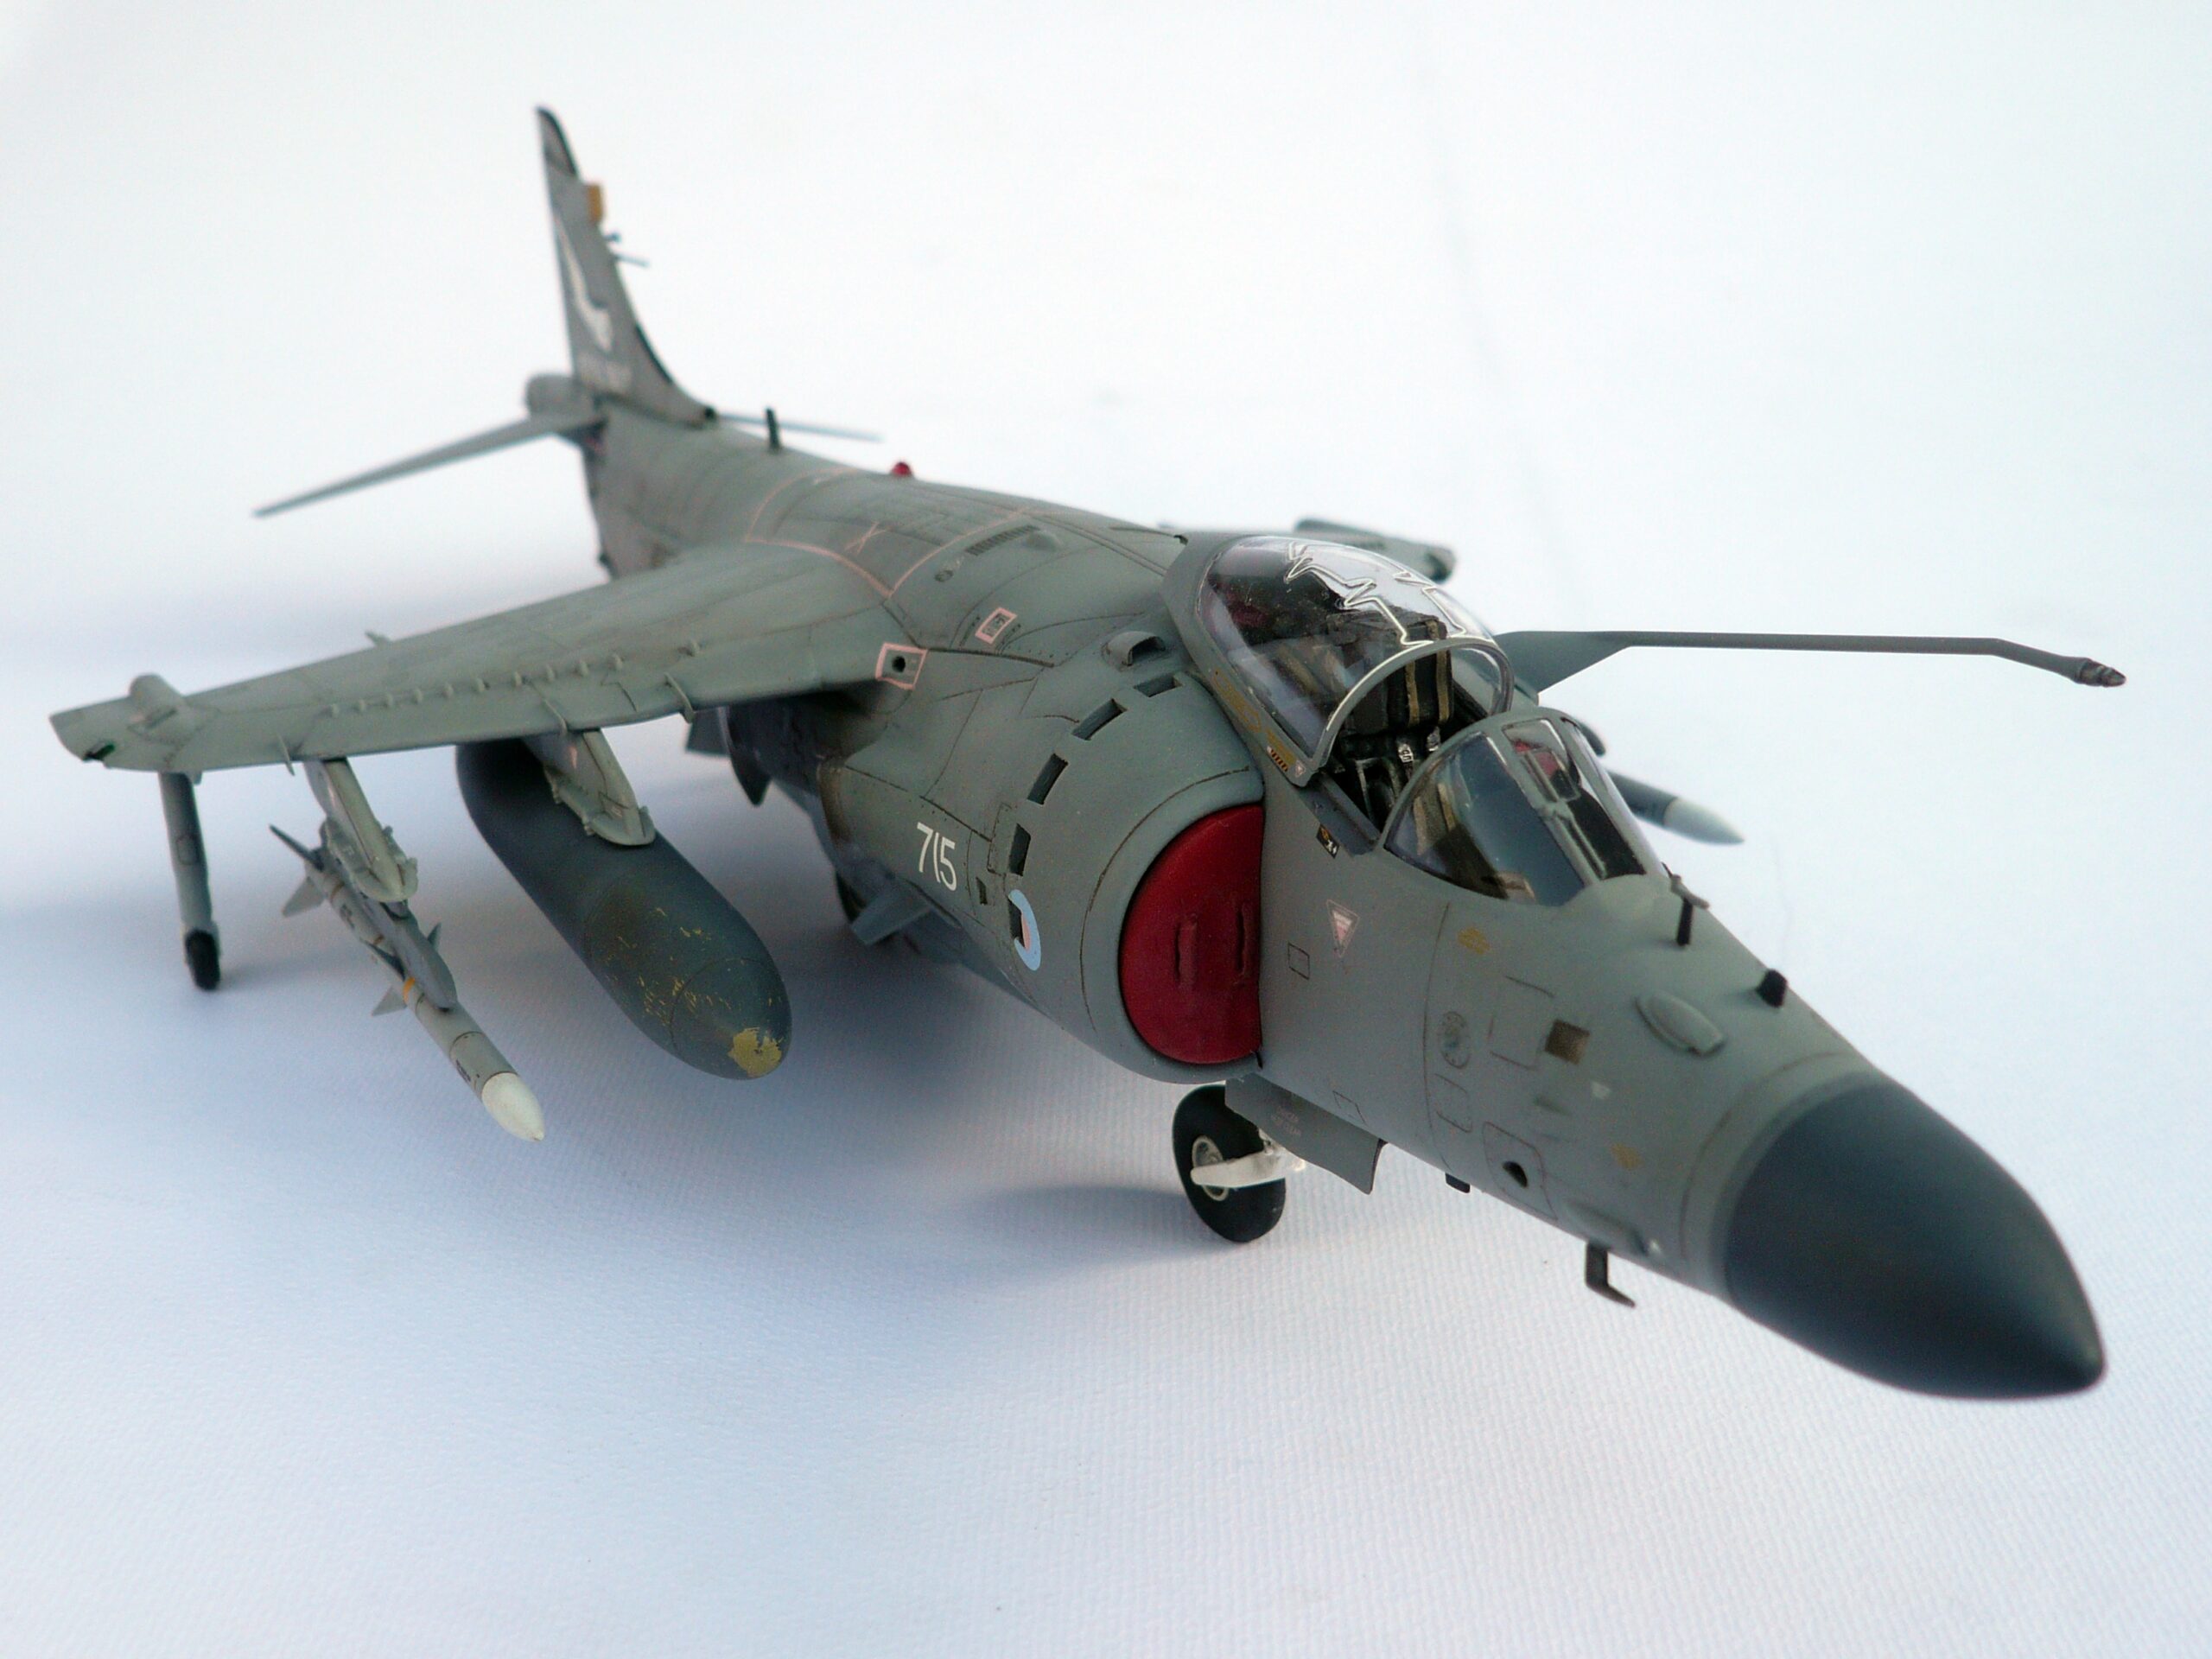
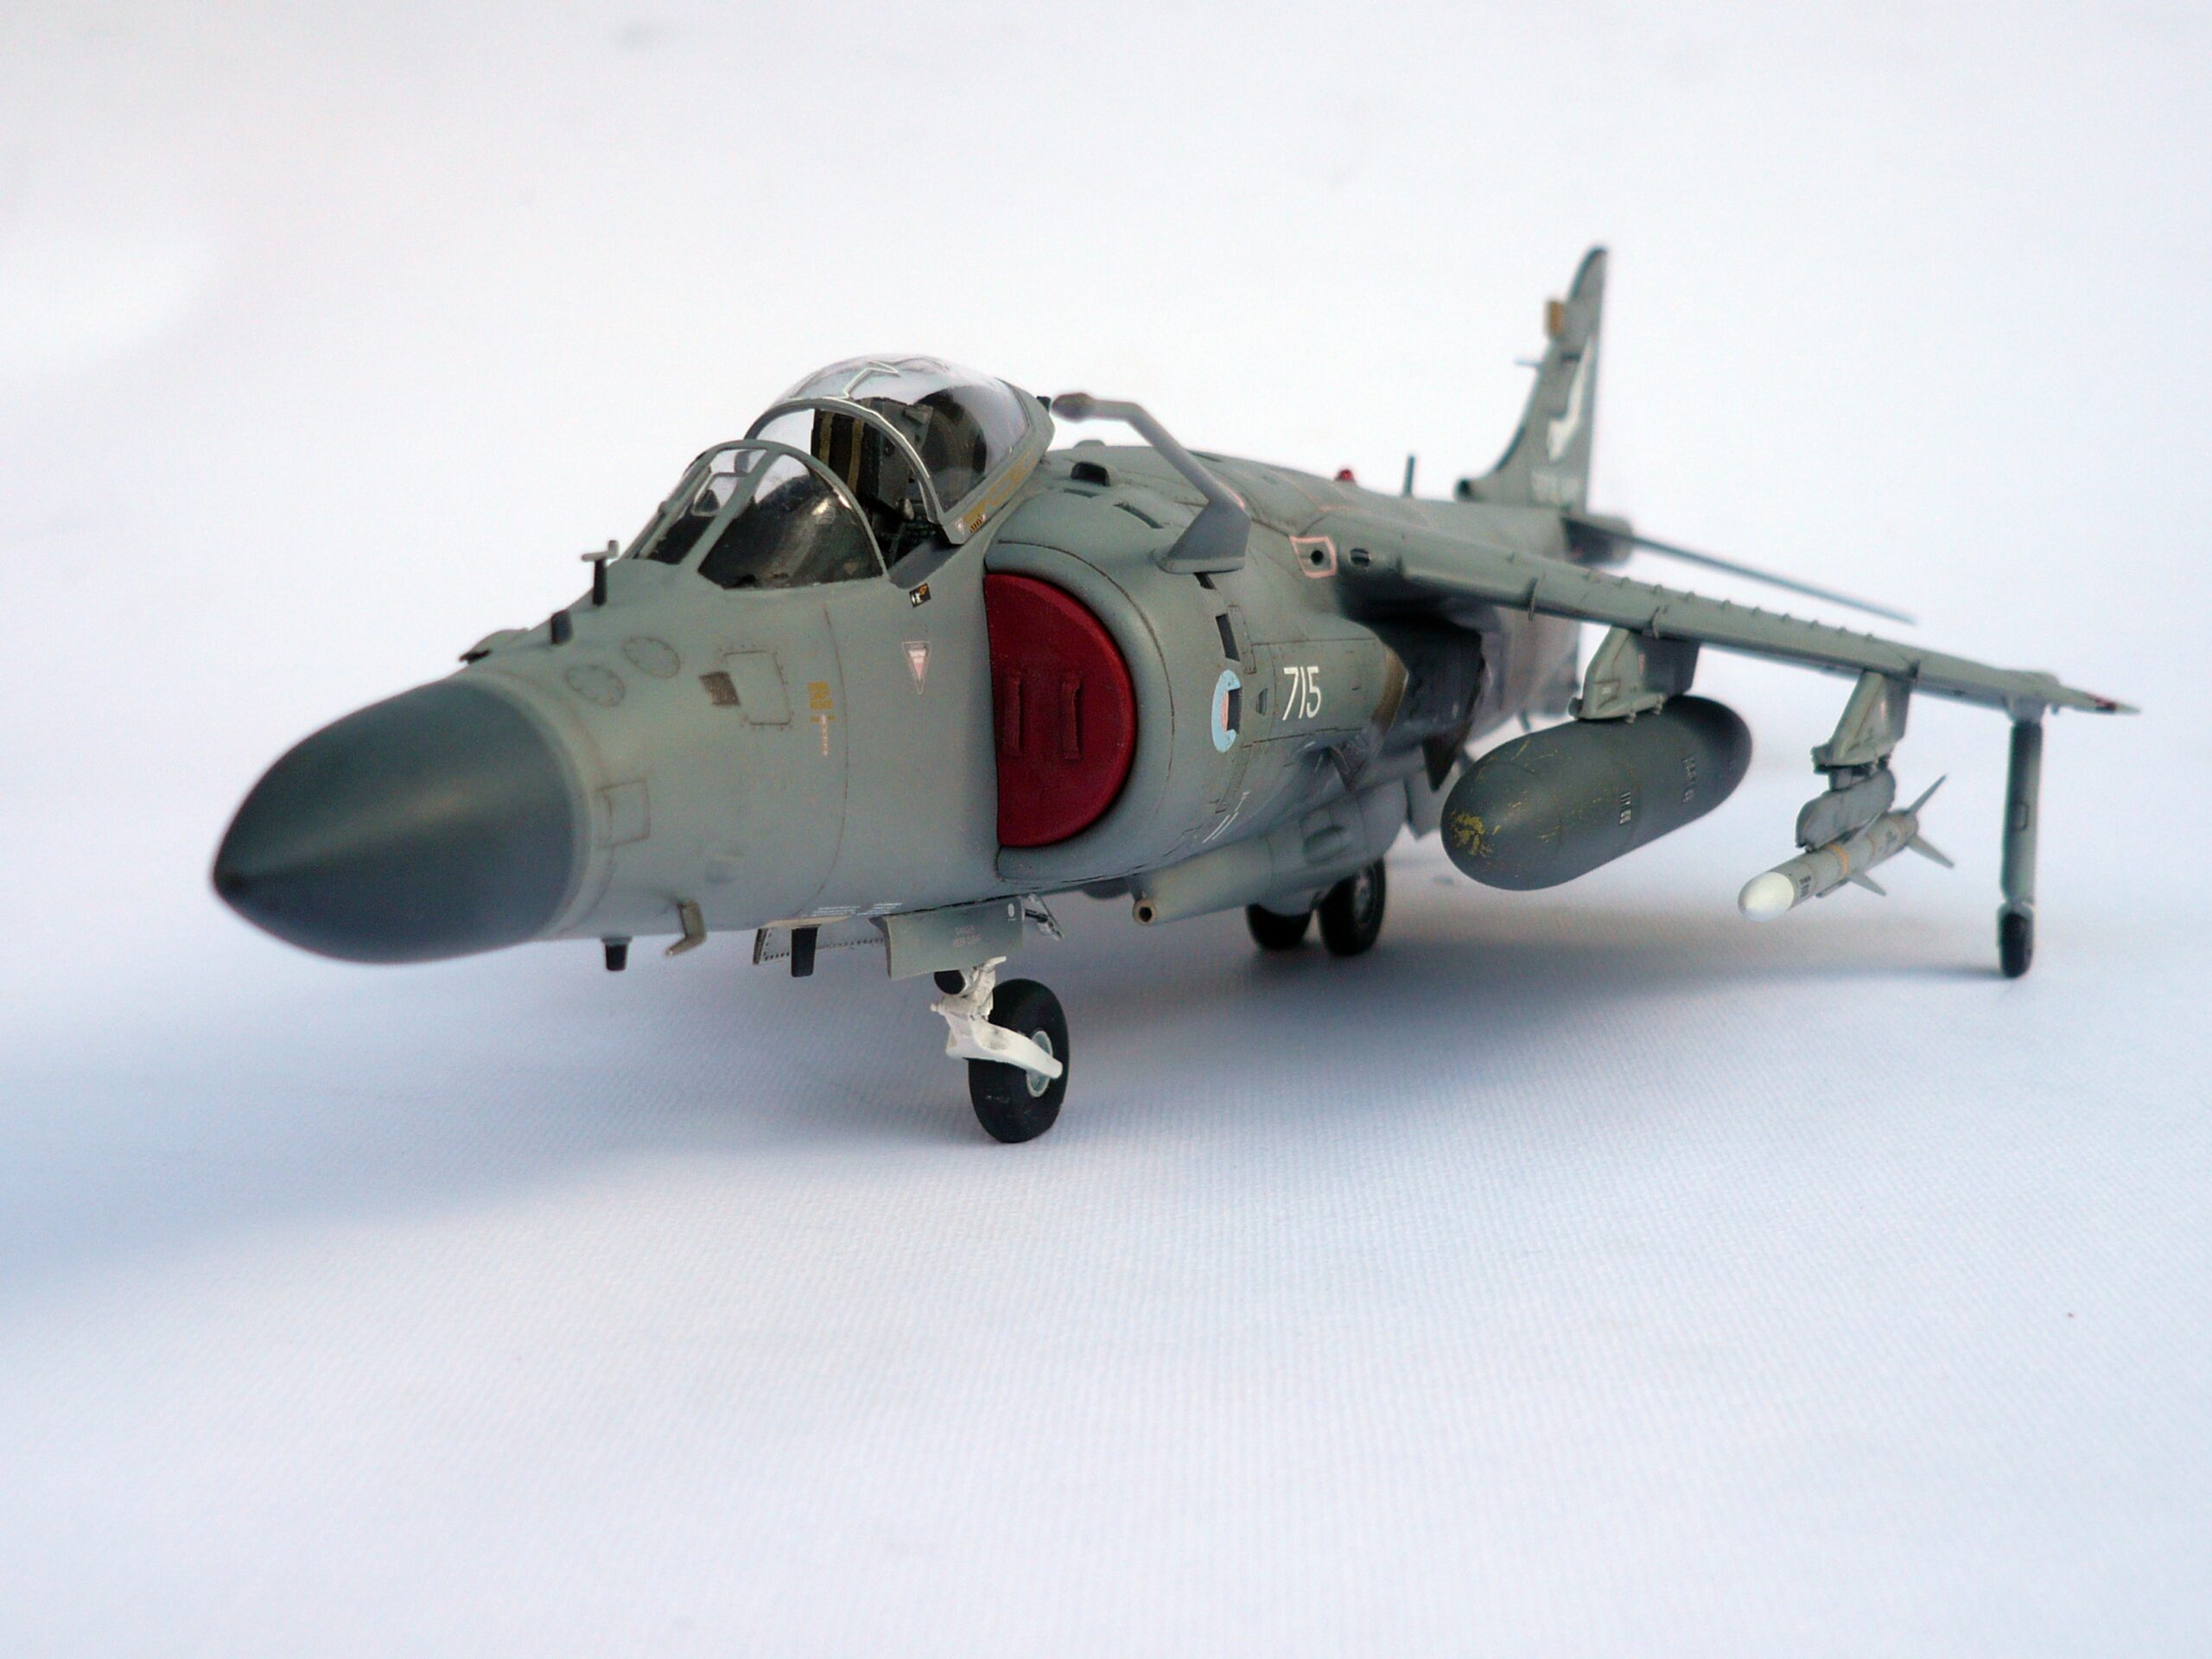
The intake FOD (Foreign Object Damage) covers were scratch-built using Milliput fine epoxy putty and shaped with the kit intake components. This addition not only improved realism but also provided visual interest to the finished model.
To improve wing fit, the moulded locating ridges on the fuselage were carefully removed. This small modification significantly reduced gaps and improved overall assembly quality.
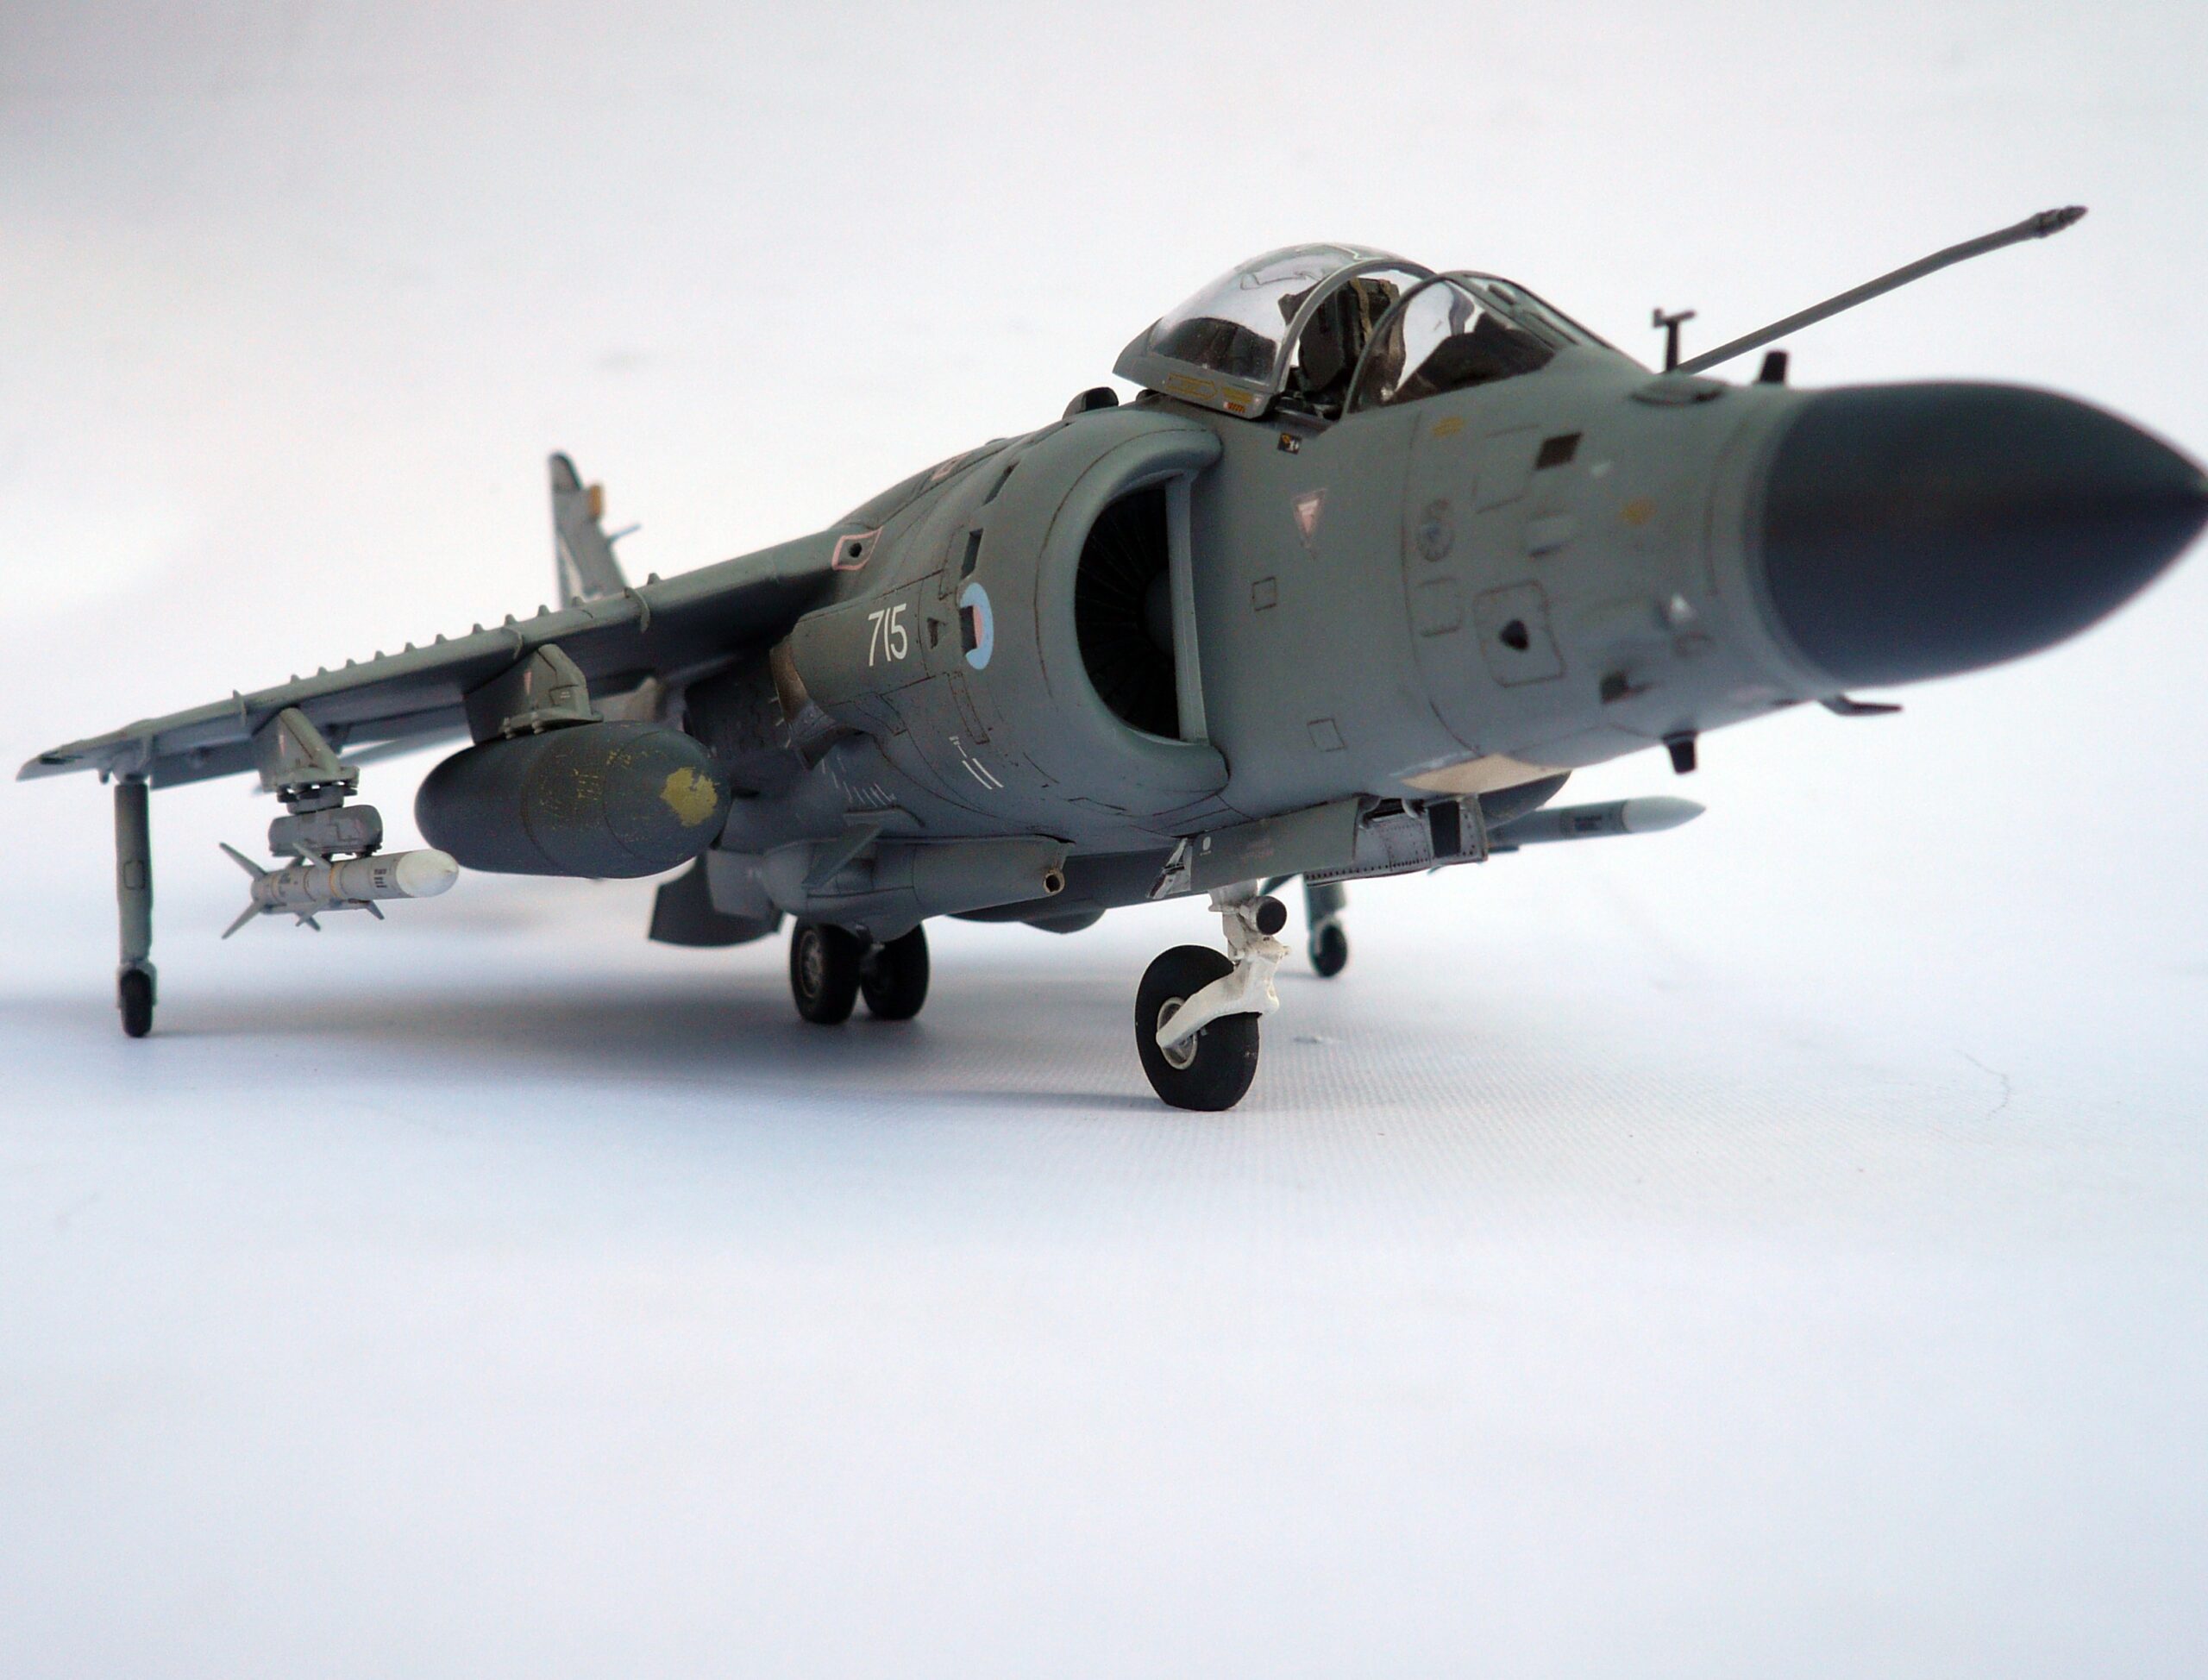
The intakes were finished in gloss white, accurately representing the clean internal surfaces seen on operational Harrier FA.2 aircraft.
The windscreen was masked and installed using white glue, which avoids fogging and allows safer positioning of clear parts. Photo-etched details were also attached during this stage, adding further realism.
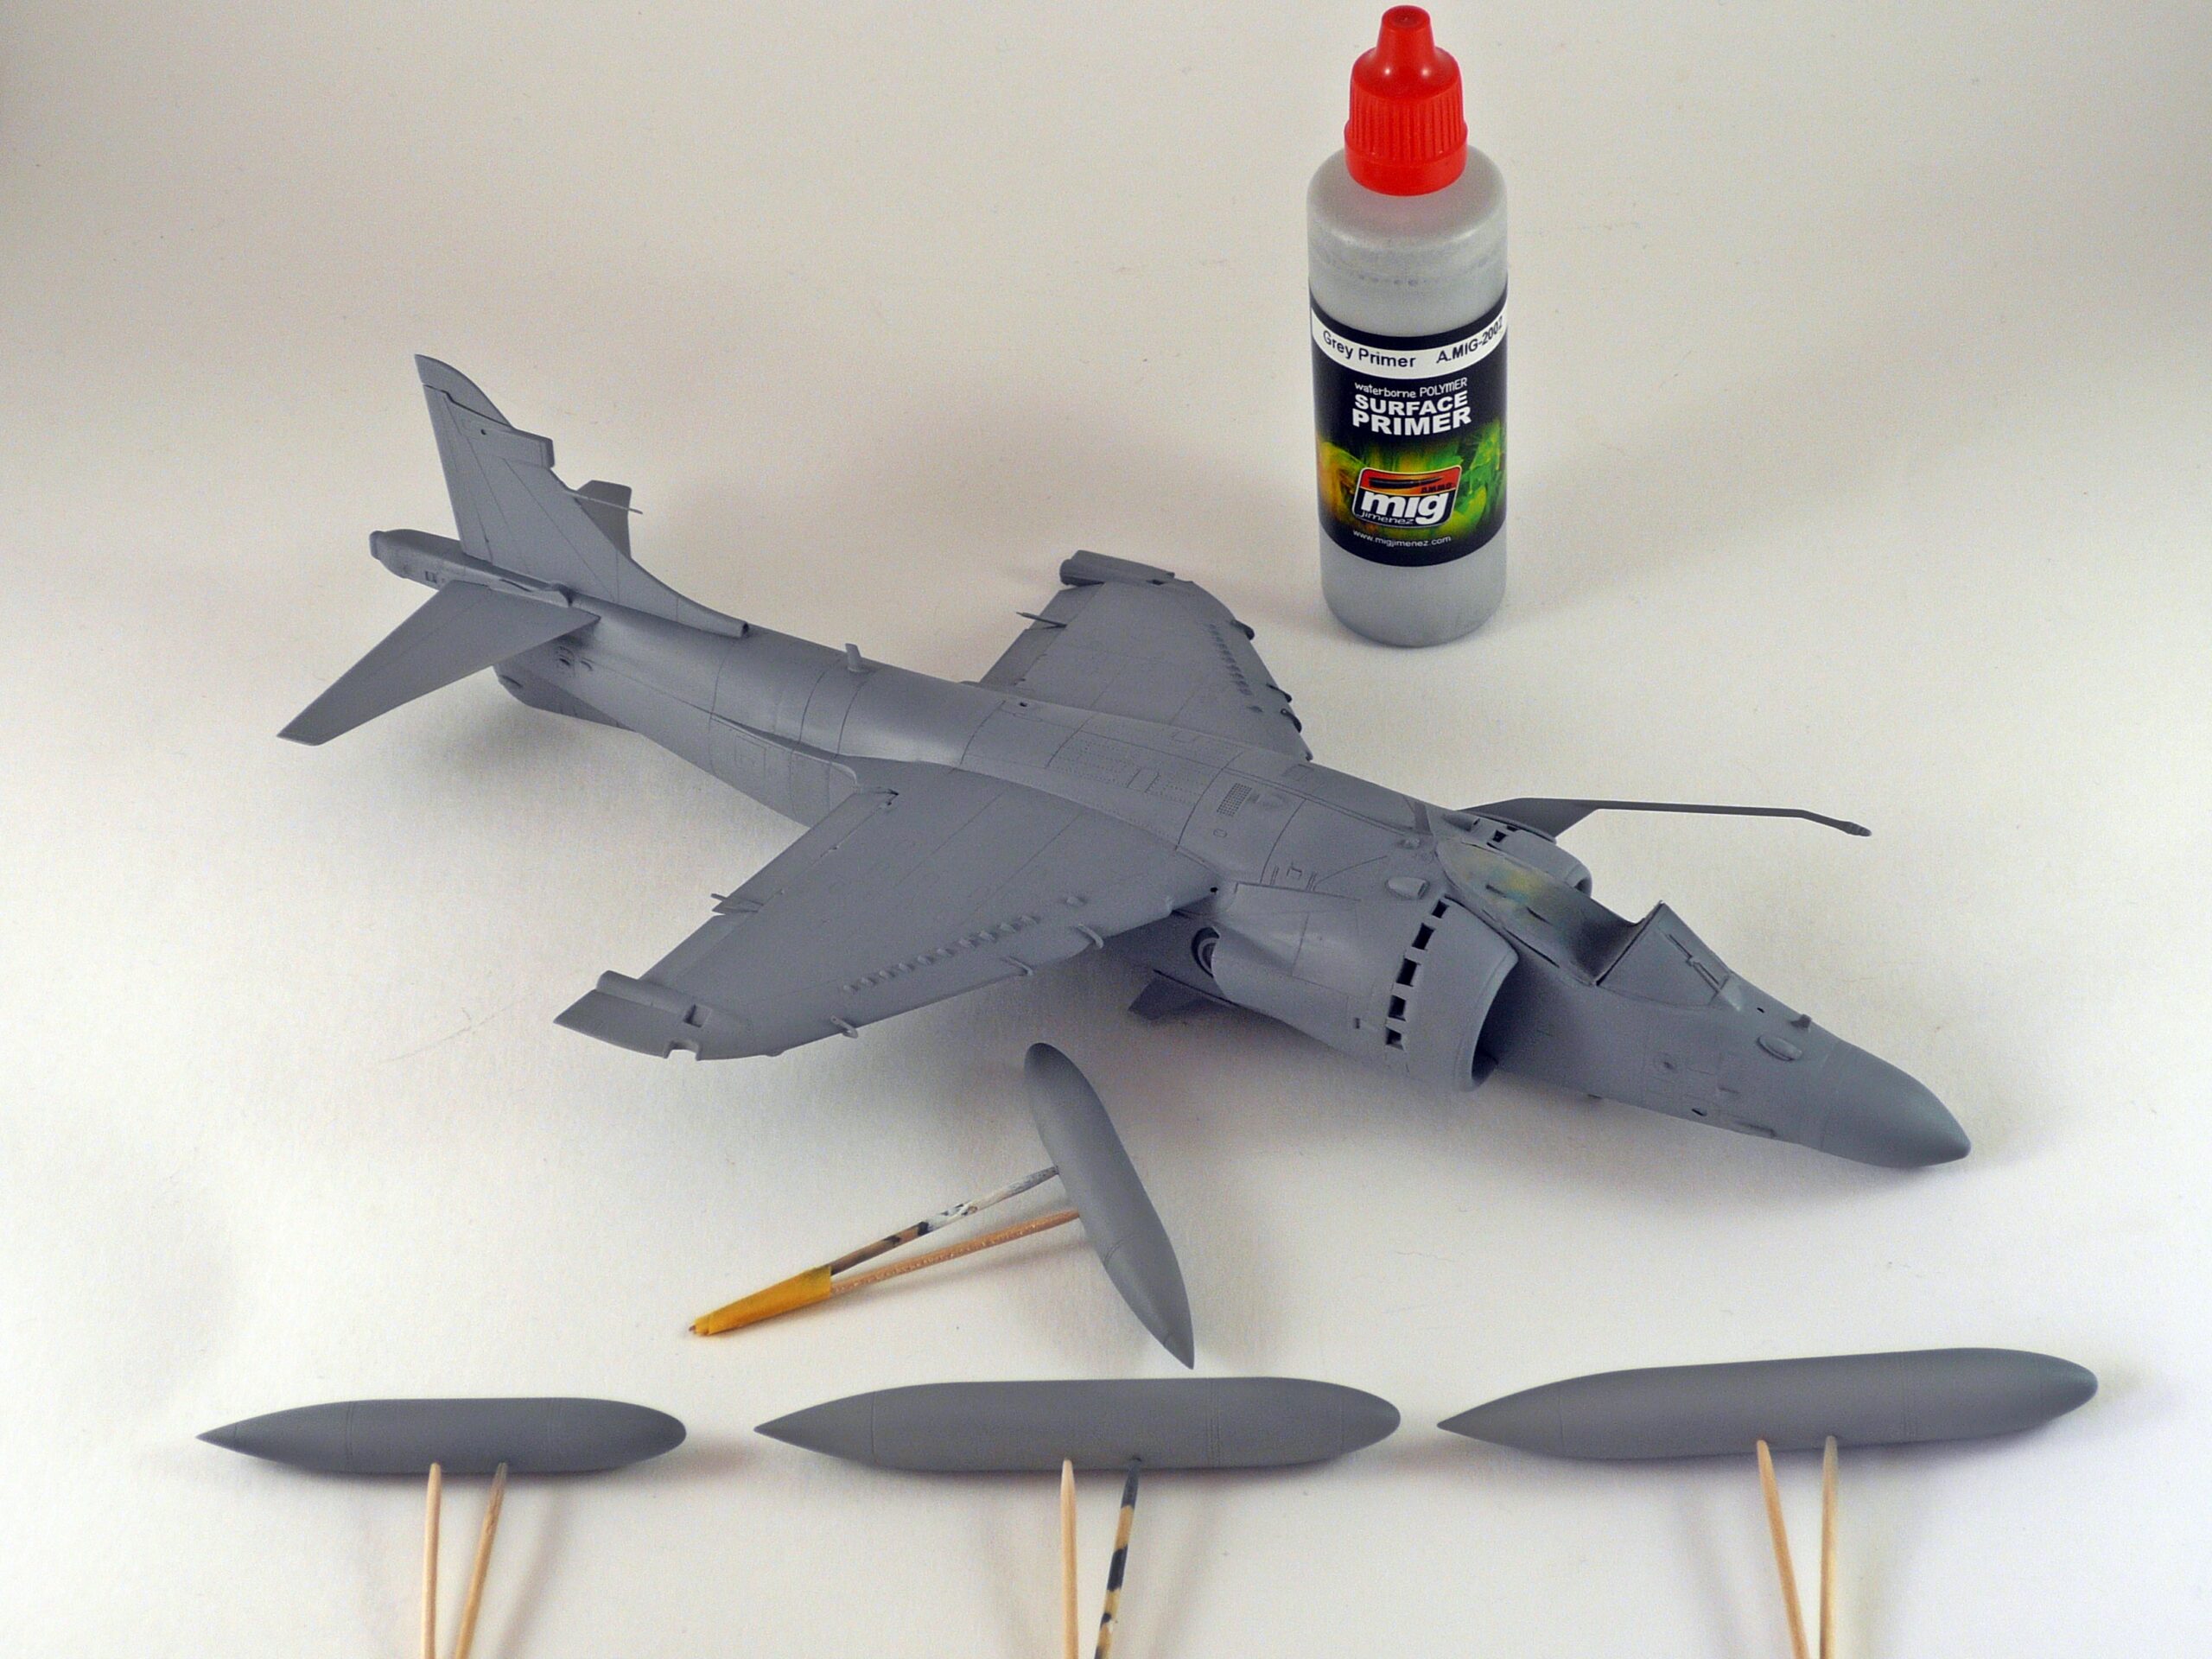
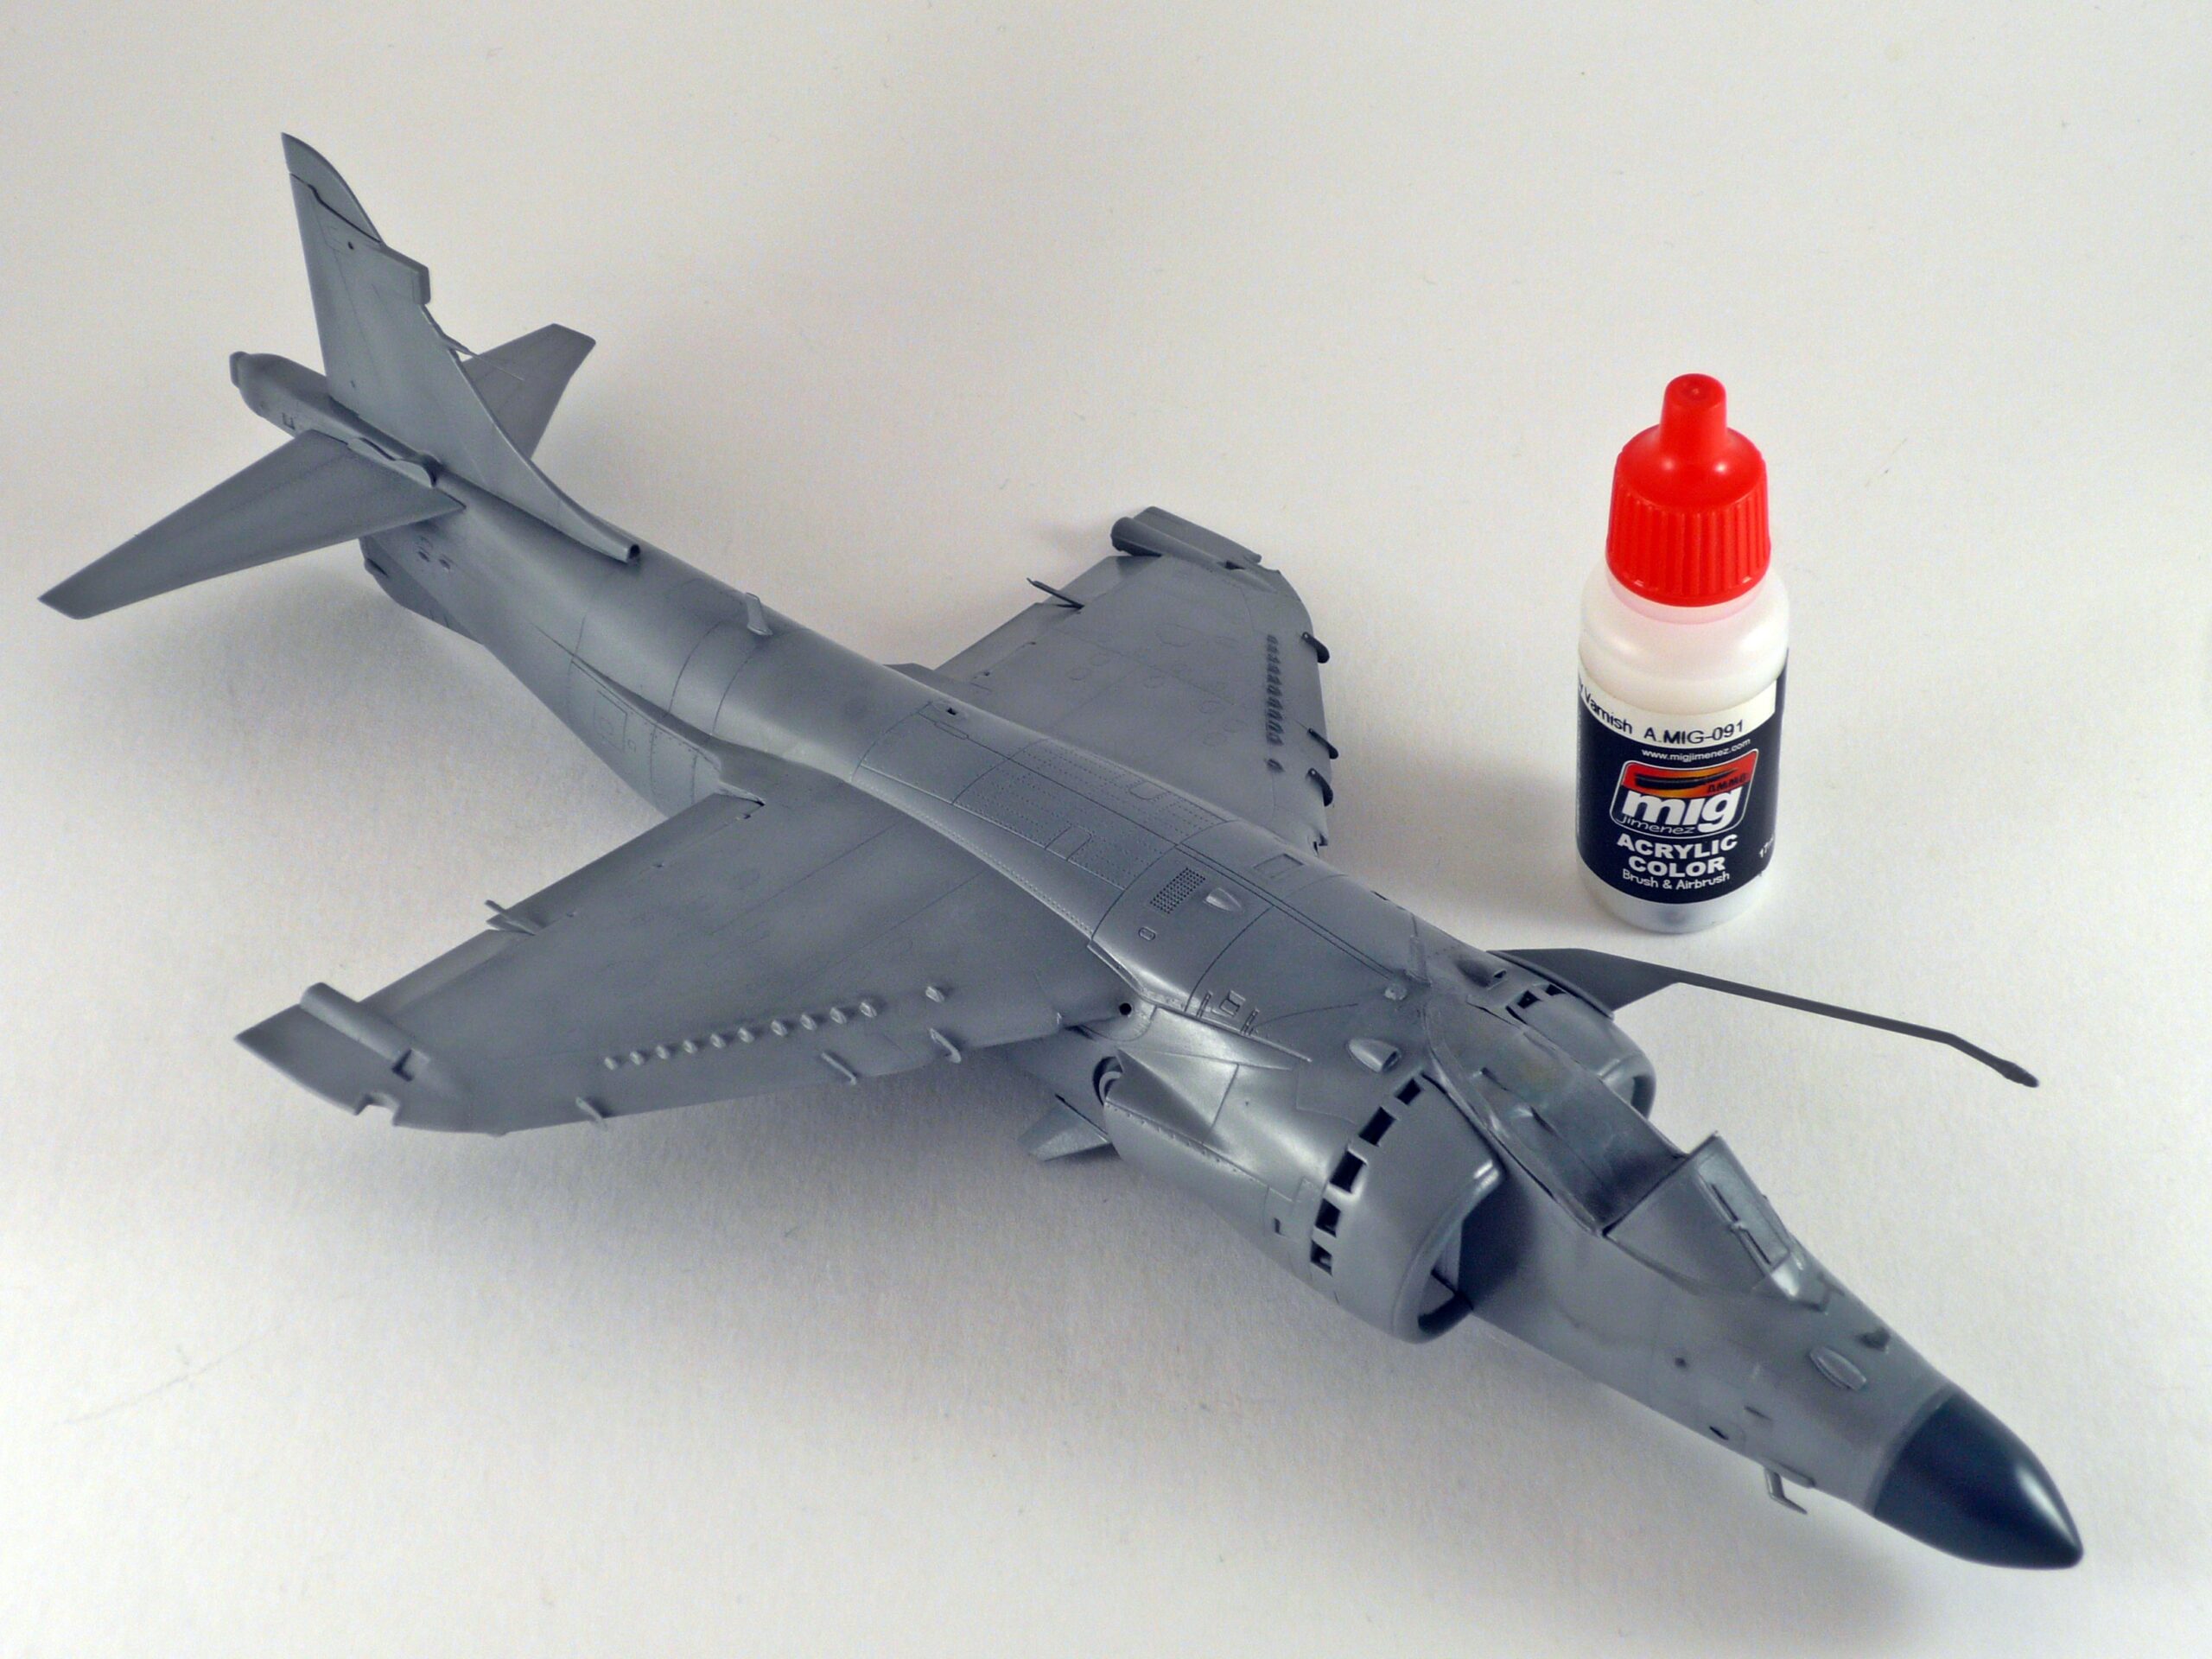
Surface Preparation and Priming
Once assembly was complete, the entire model was thoroughly washed using soap and water to remove dust, oils, and sanding residue.
A full coat of primer was then applied. Priming serves several important purposes:
- Reveals imperfections requiring correction.
- Creates a uniform surface for painting.
- Improves paint adhesion.
- Enhances the effectiveness of weathering products.
After inspection and correction of minor flaws, the model was ready for paint.
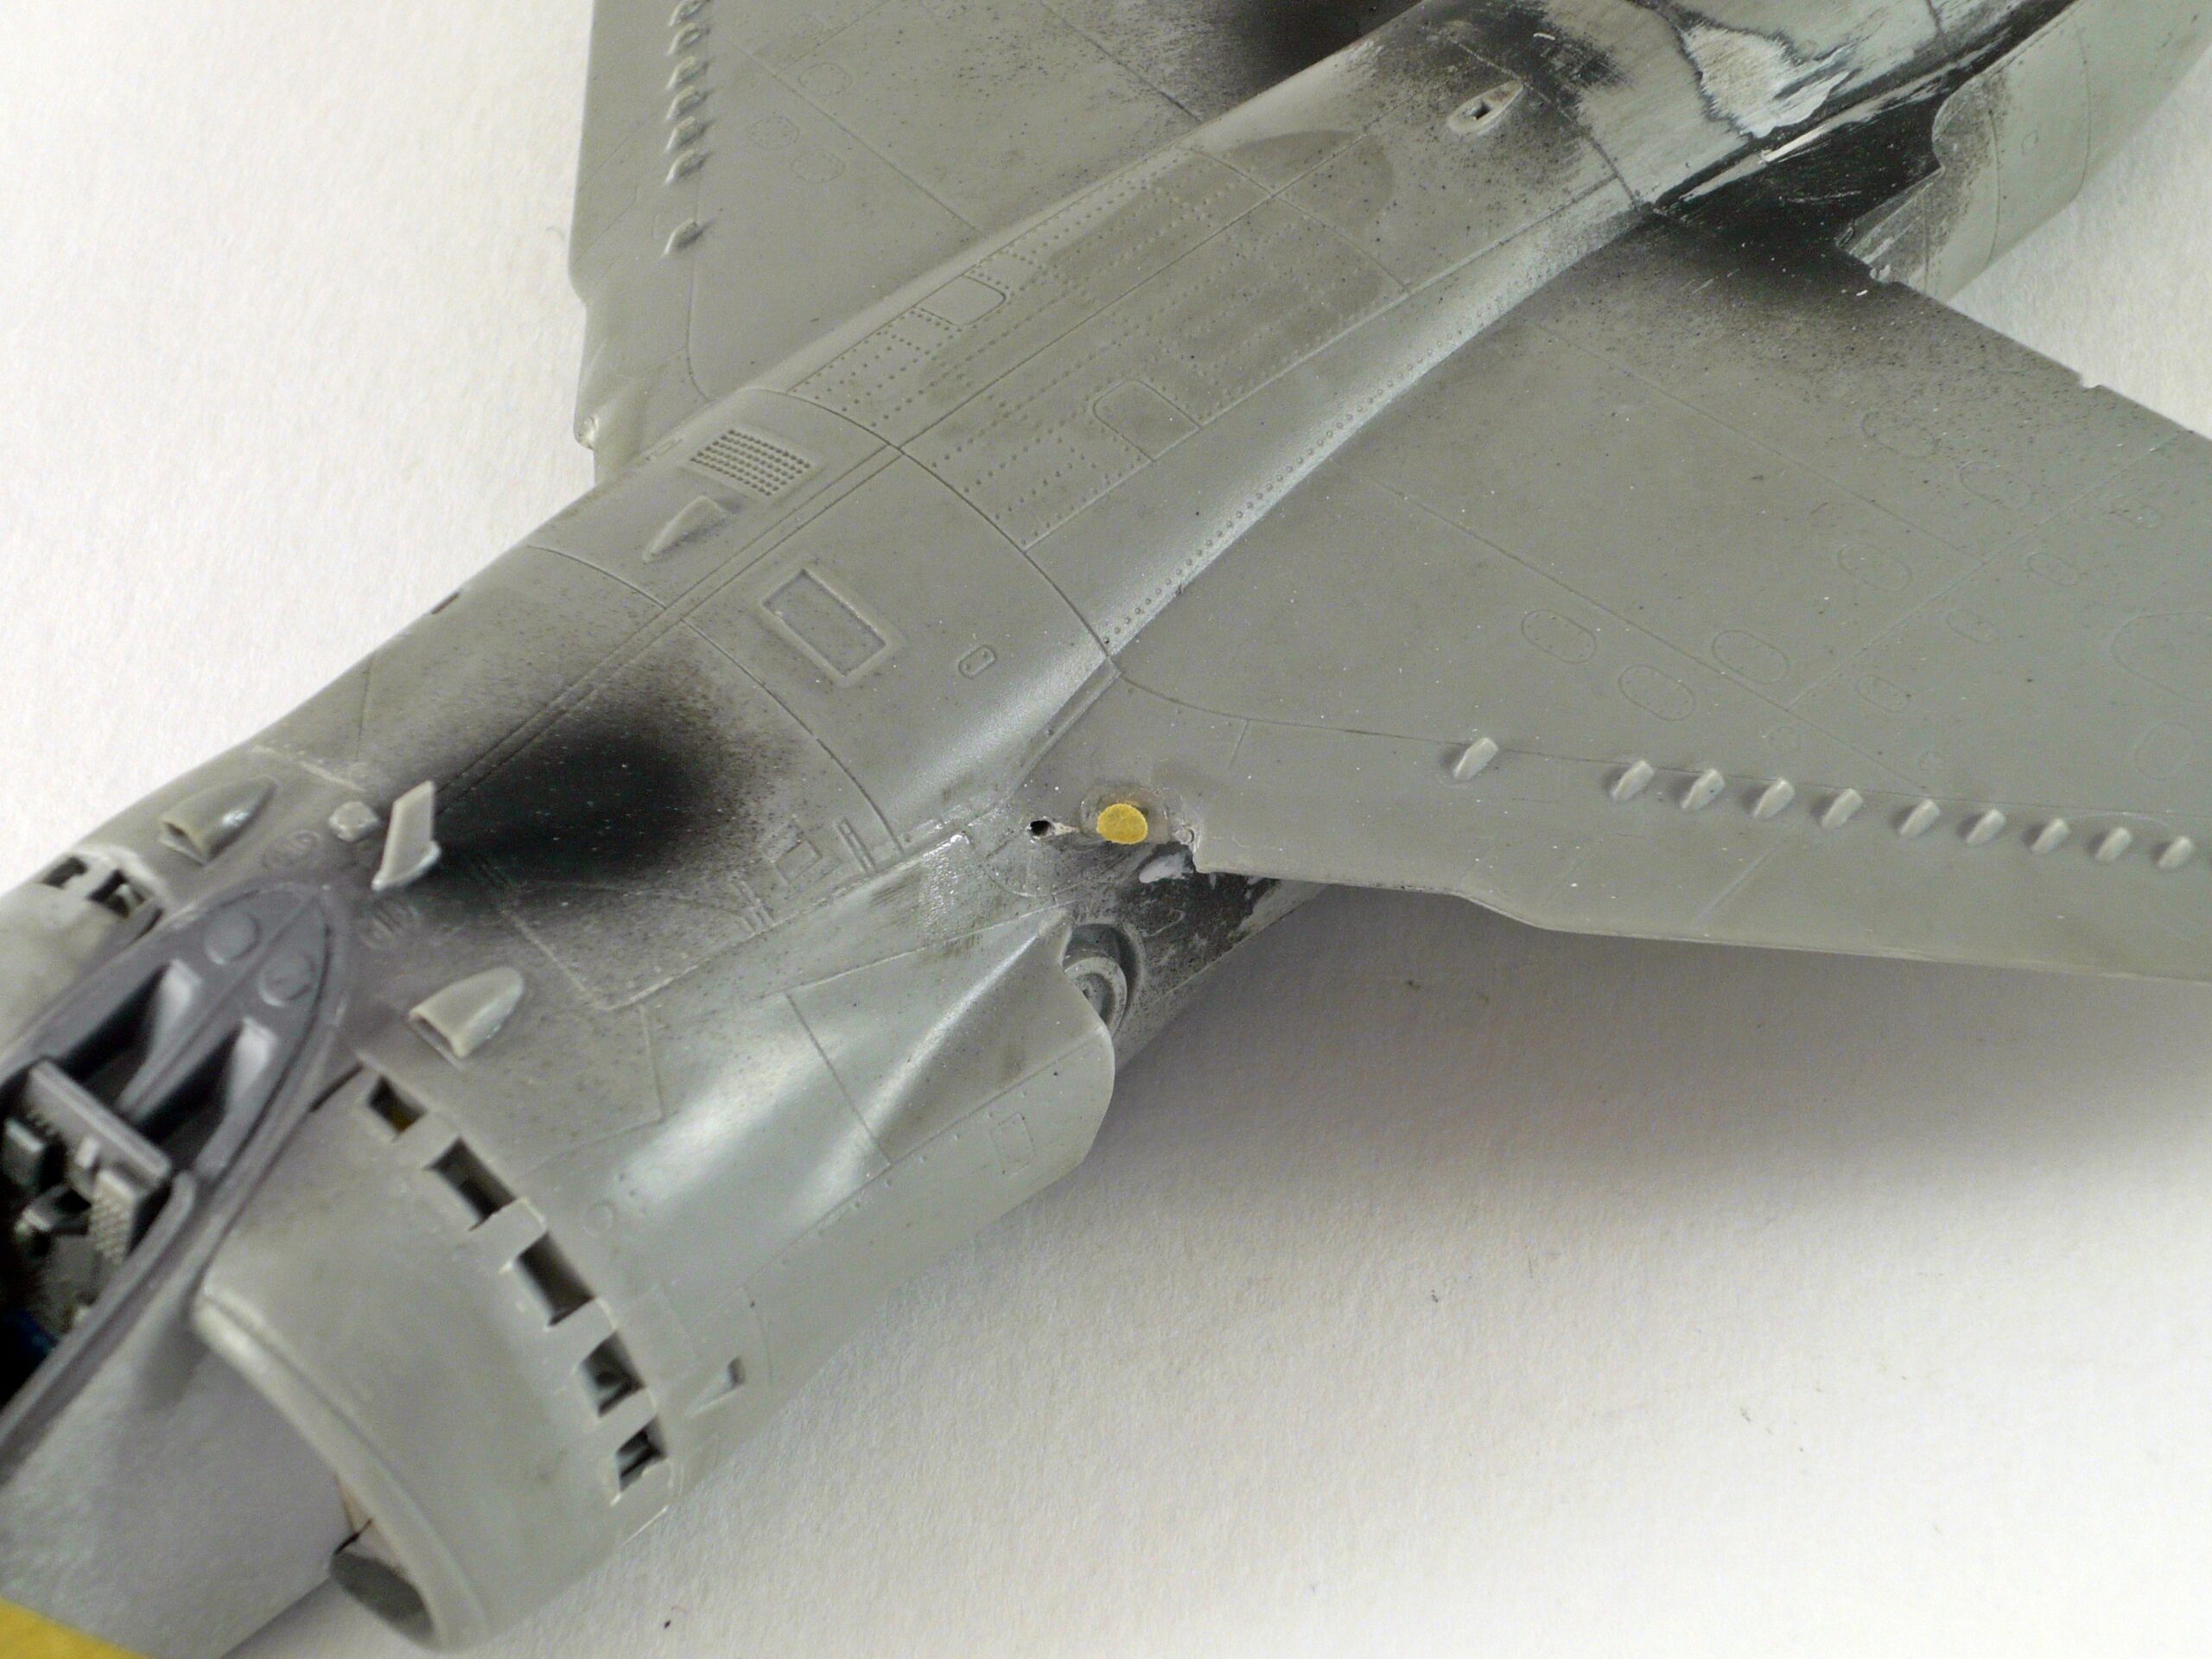
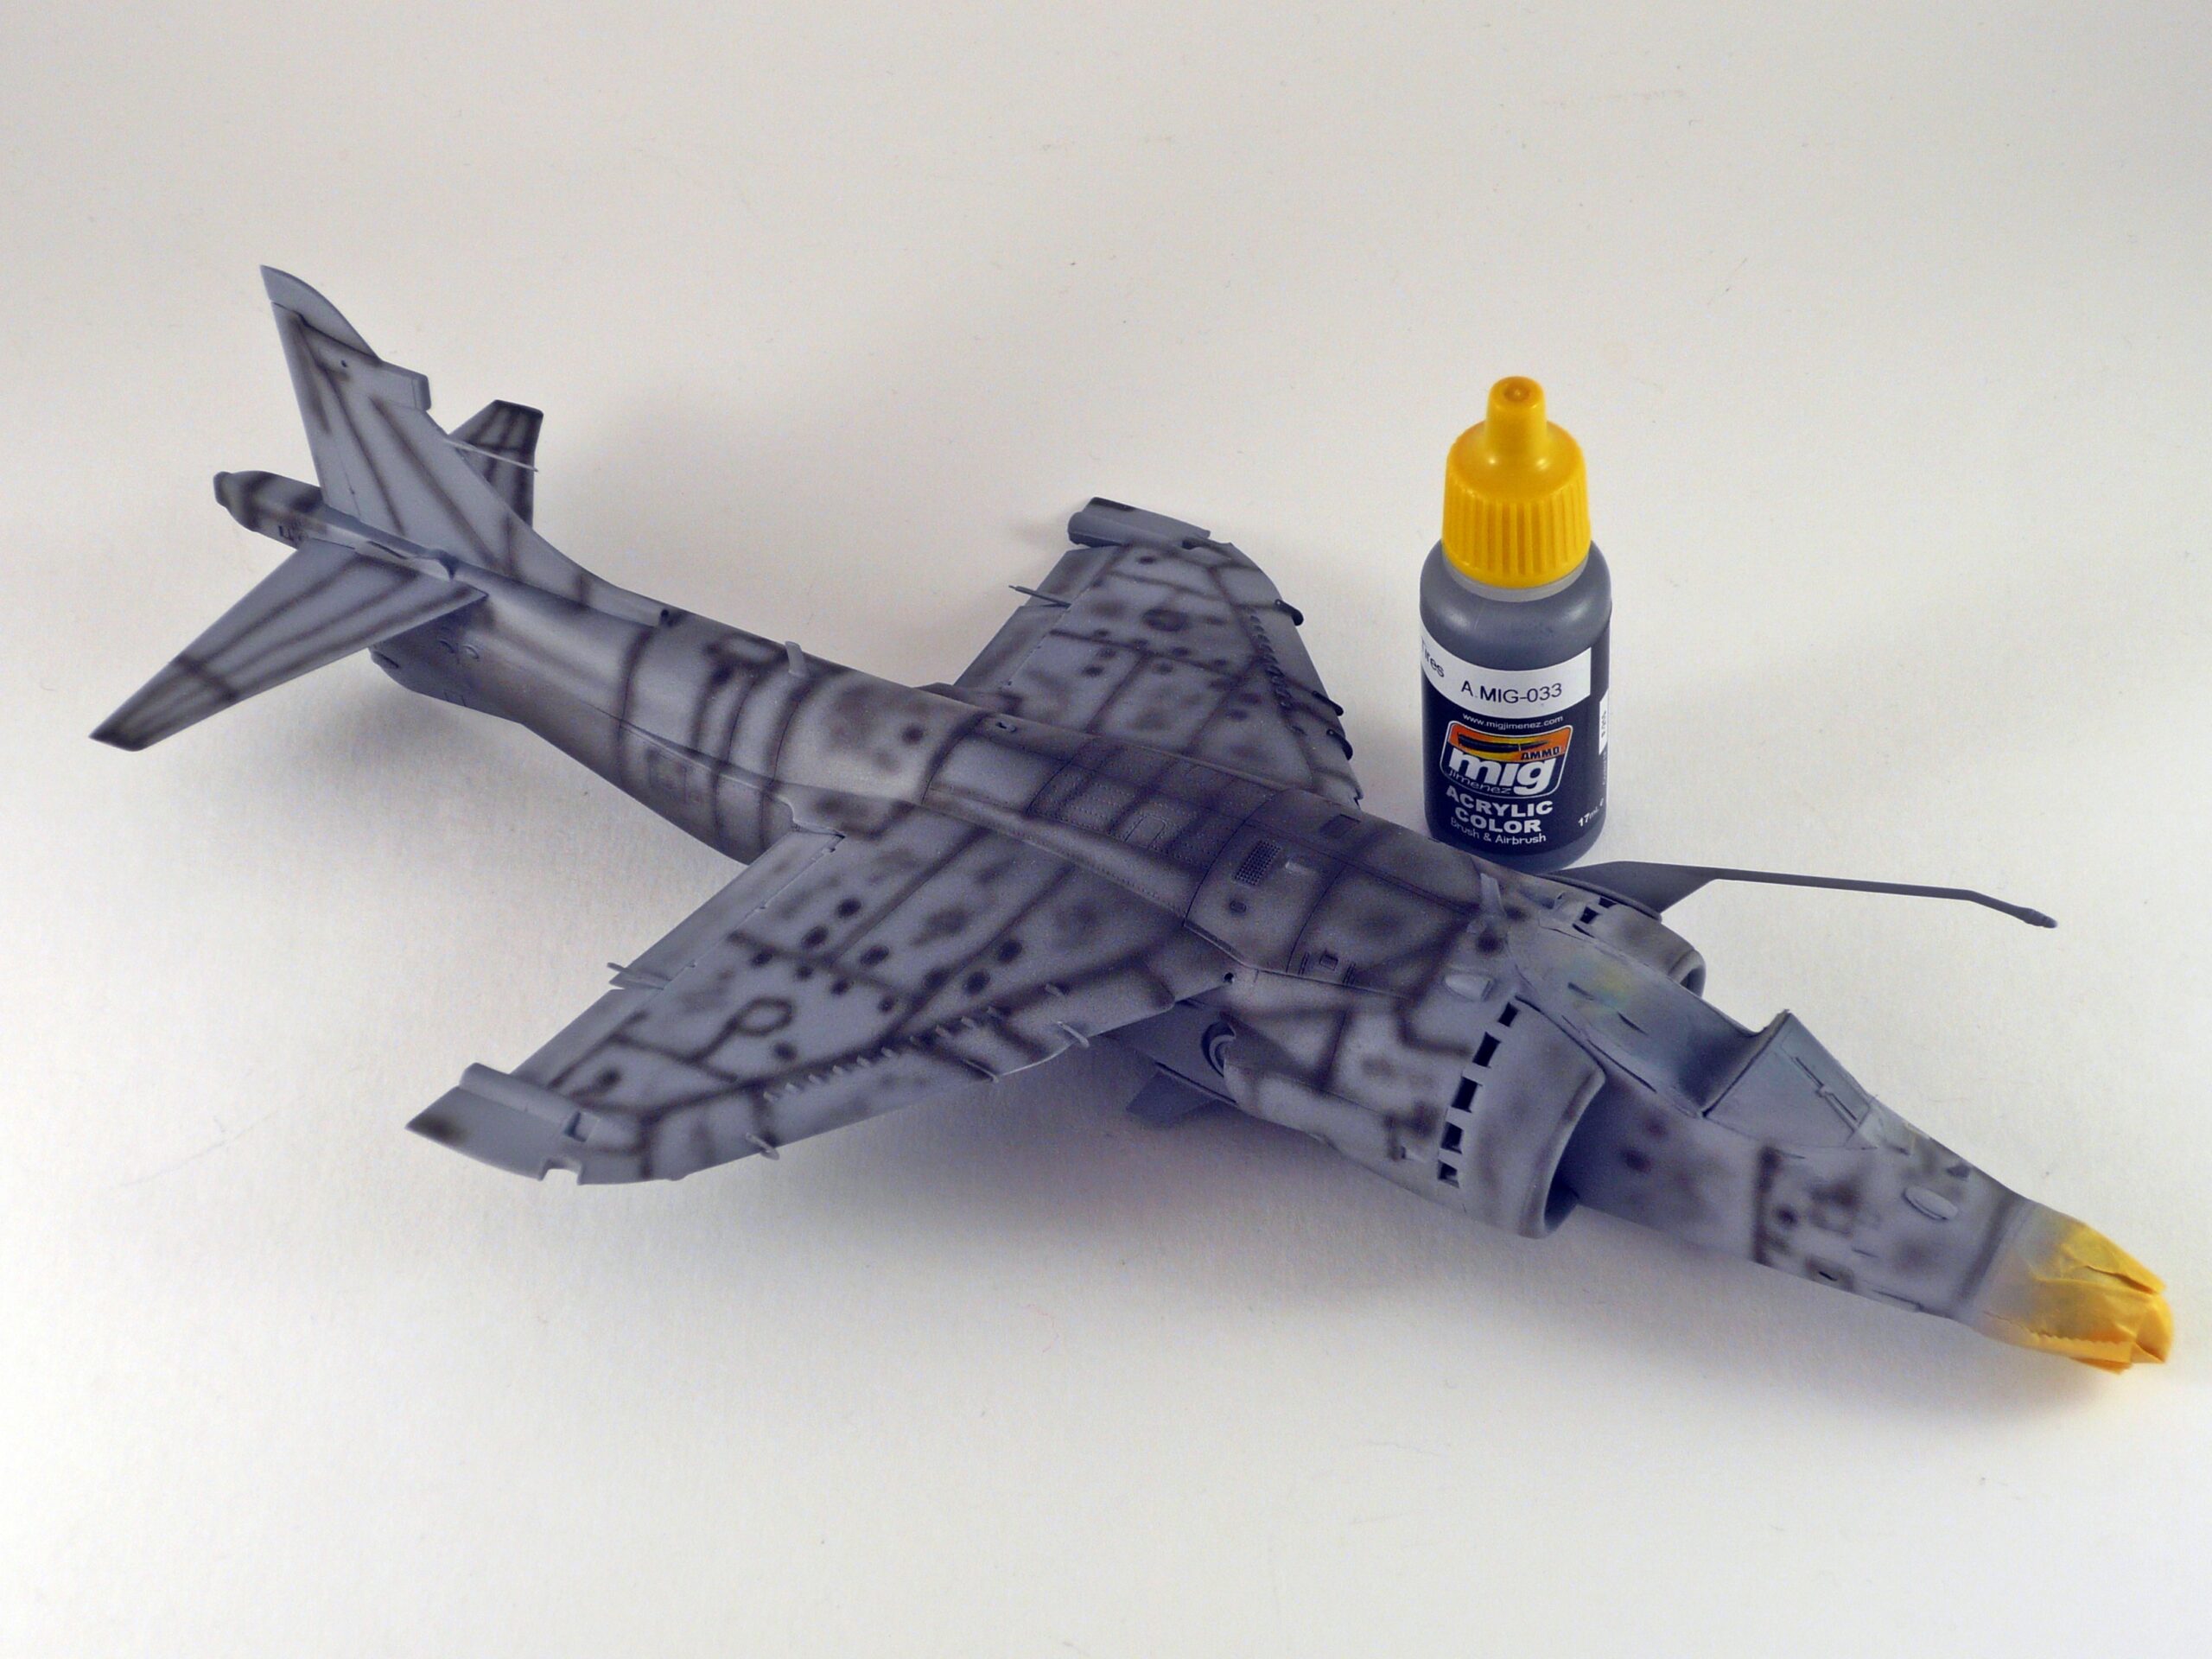
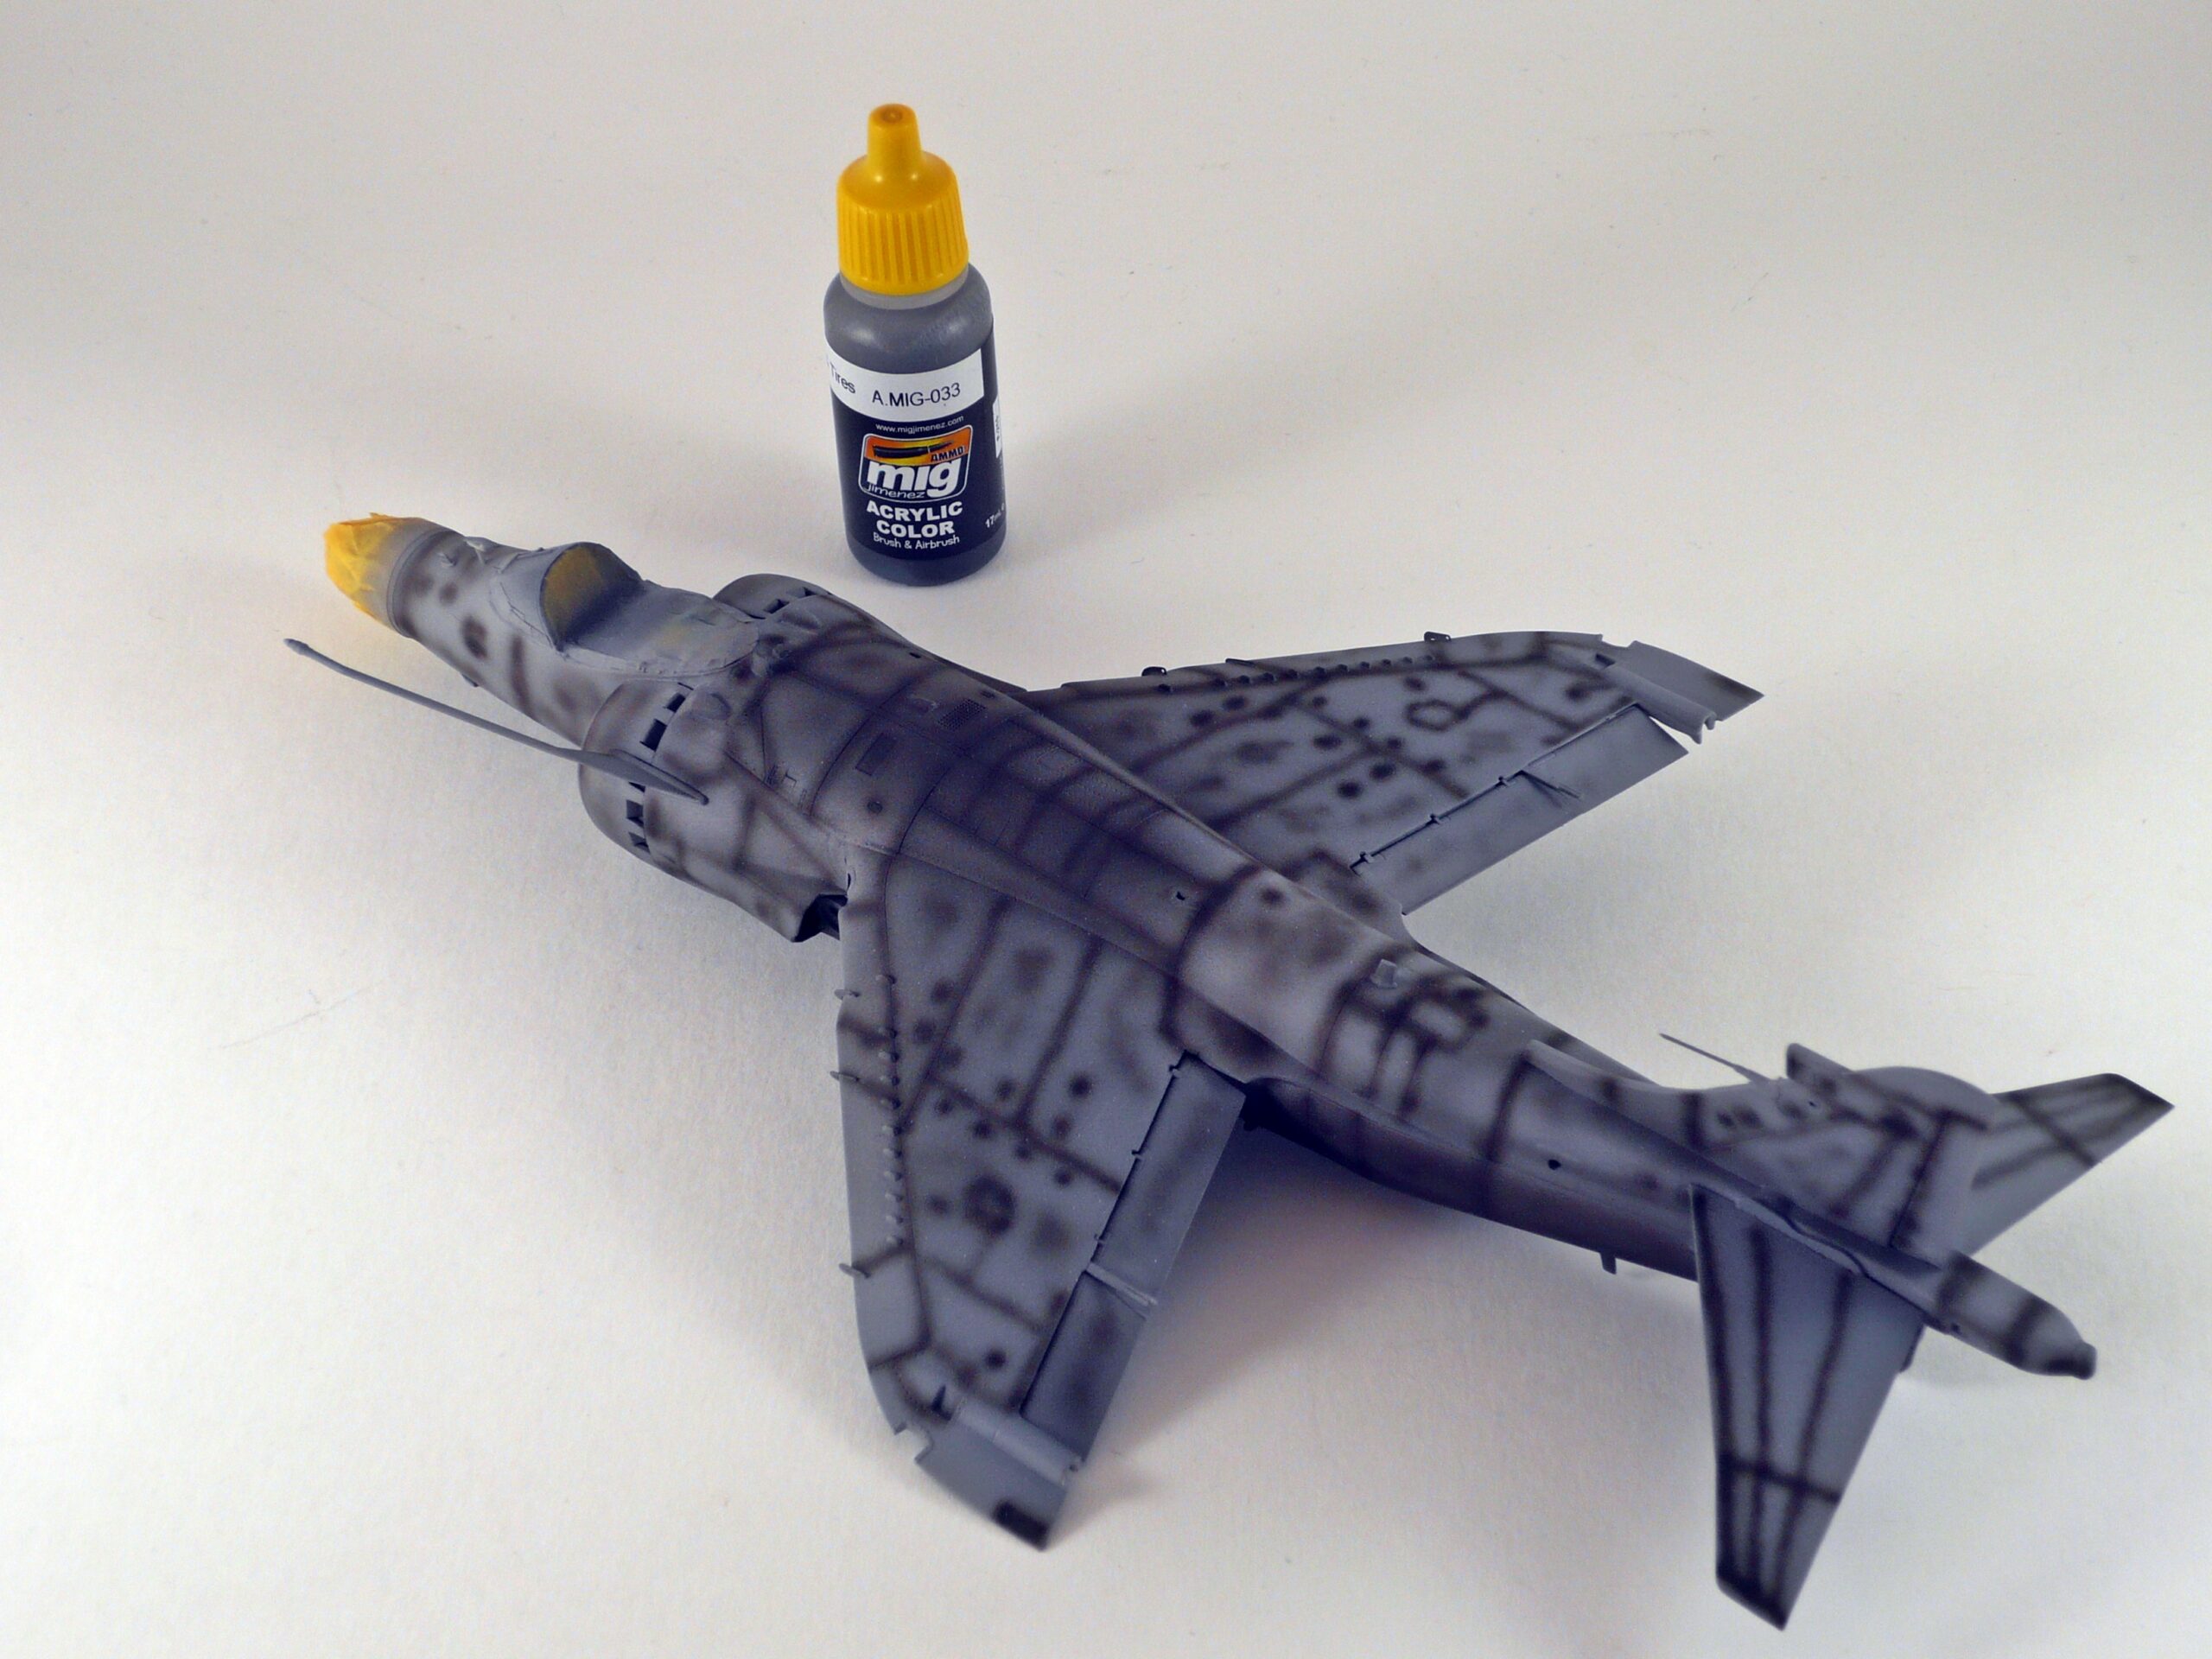
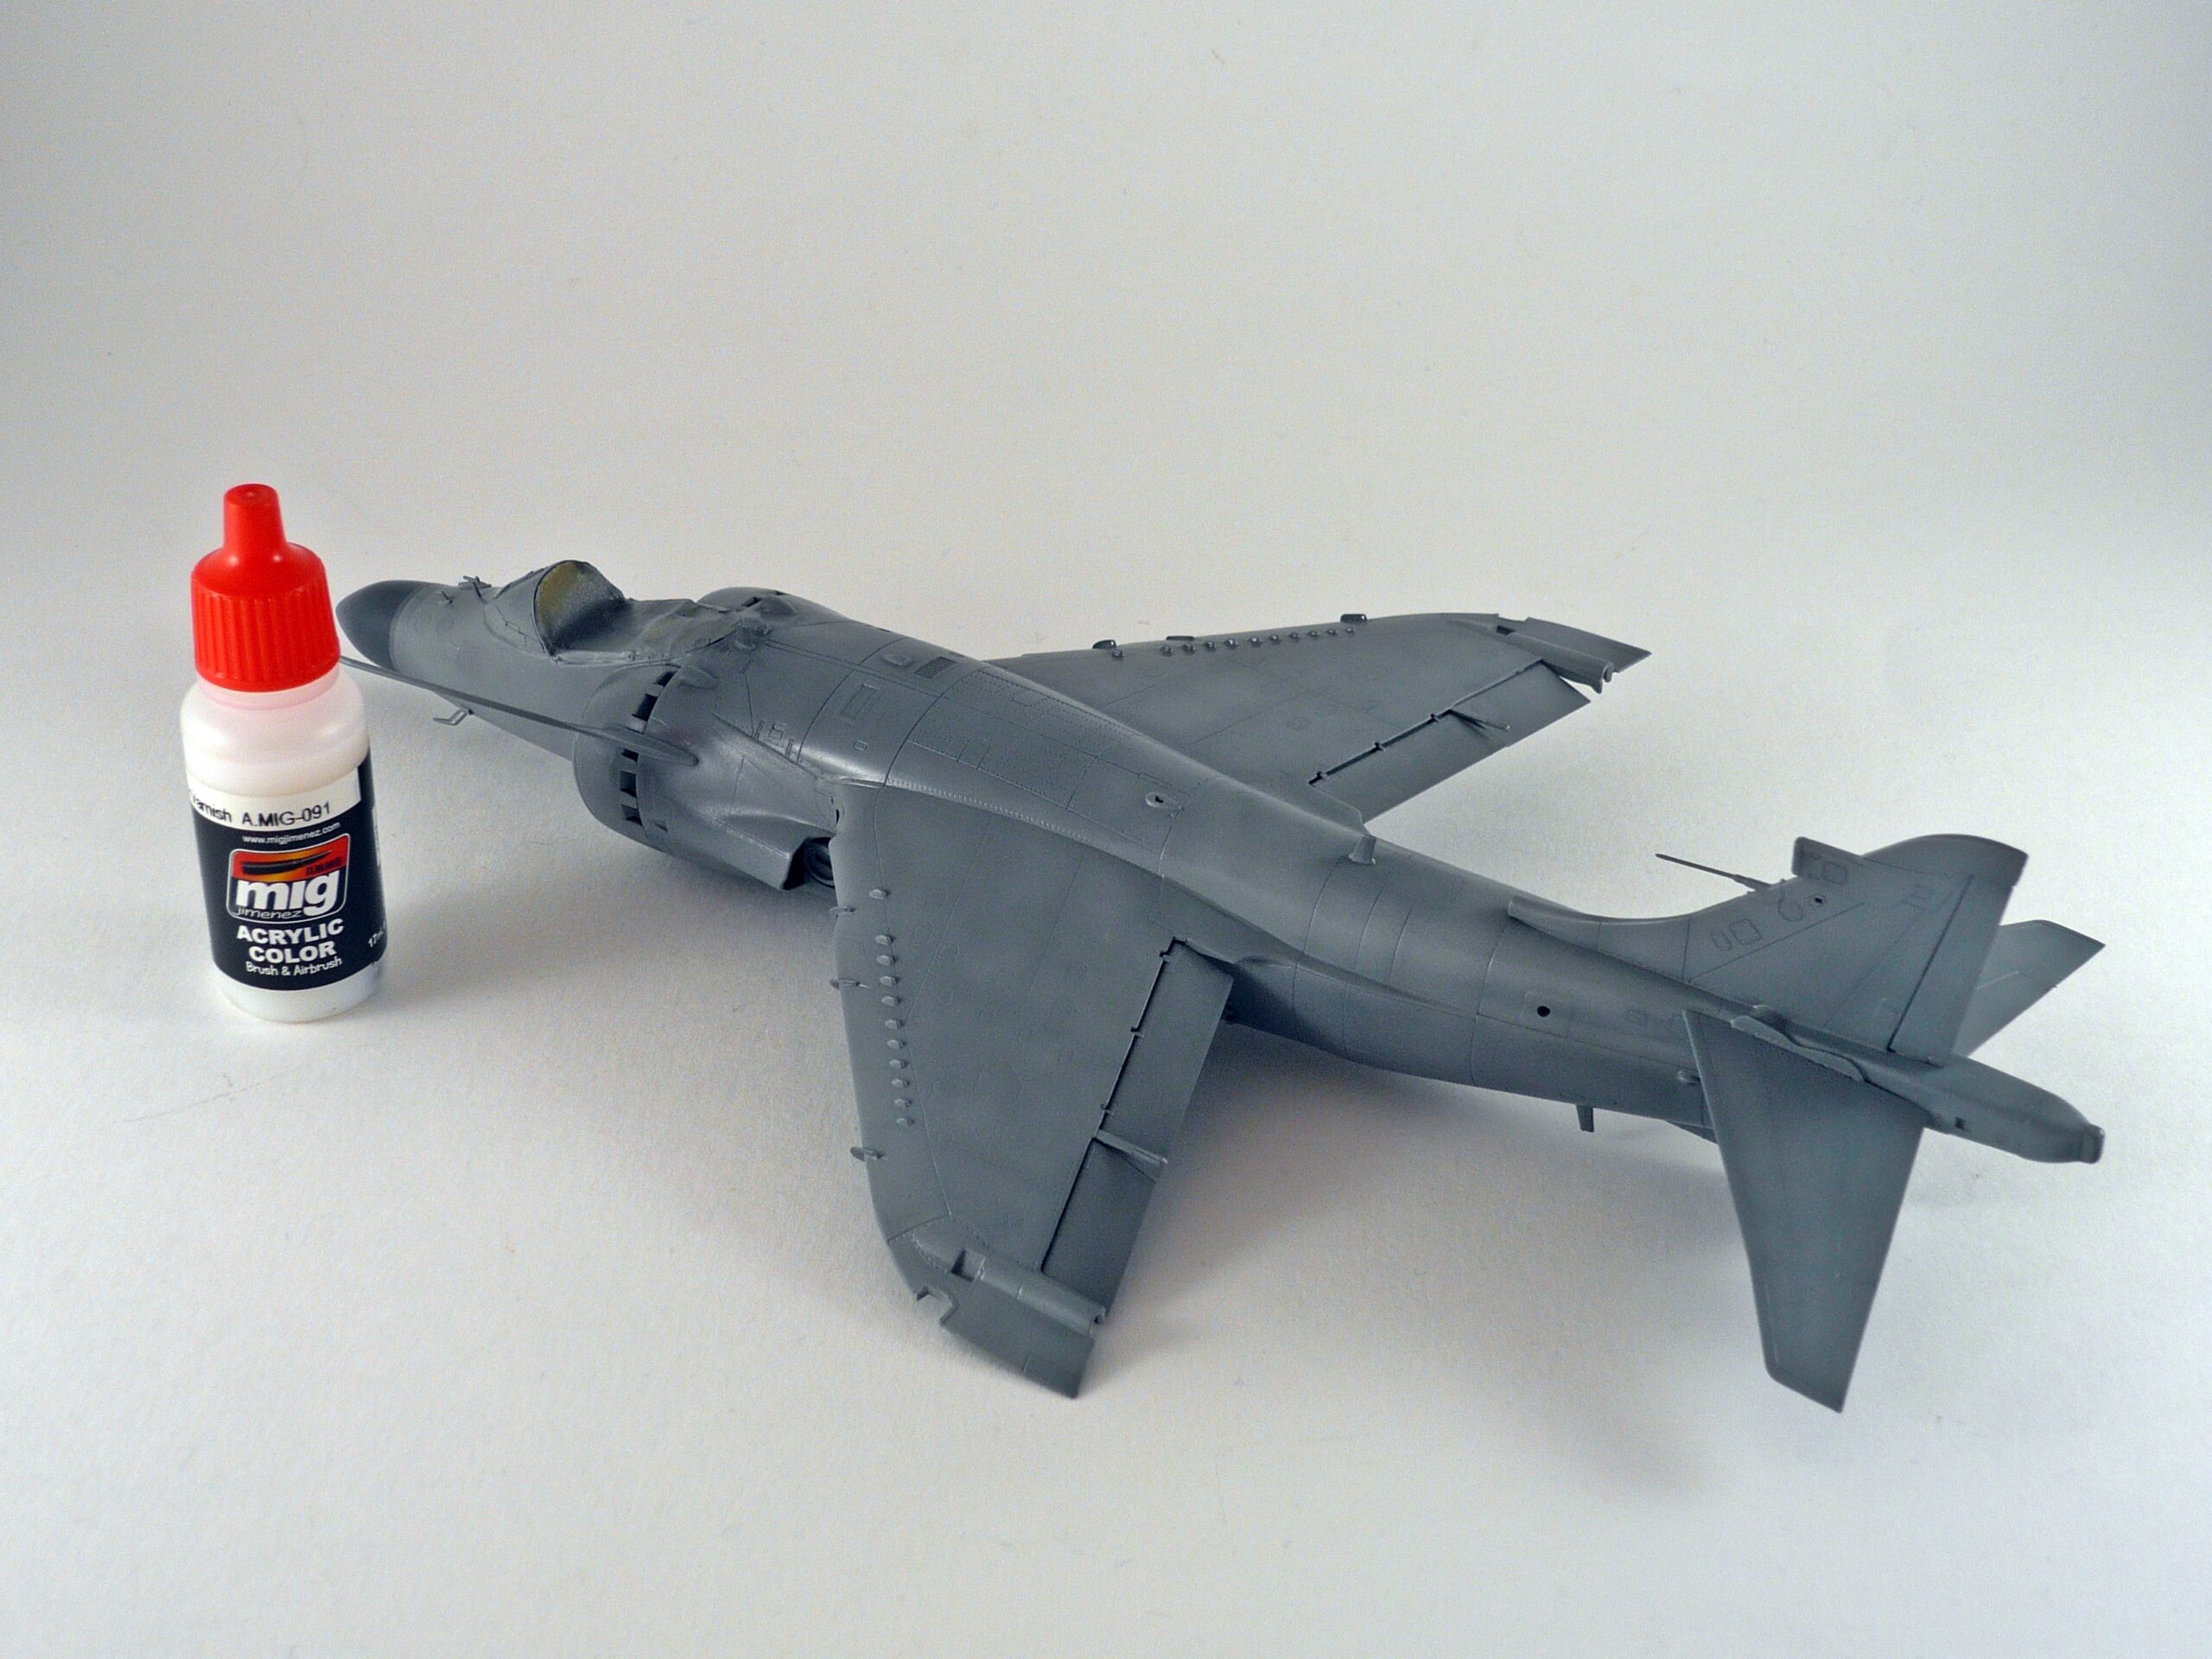
Pre-Shading for Depth and Realism
To create tonal variation and visual depth, a pre-shading stage was carried out using Tire Black paint.
This technique involves spraying dark lines along panel lines, structural joints, and recessed areas. When the main camouflage colors are applied in thin layers, the underlying shadows remain subtly visible, creating a more realistic scale effect.
Pre-shading is especially effective on modern military aircraft such as the Harrier FA.2, where large grey surfaces can otherwise appear flat and featureless.
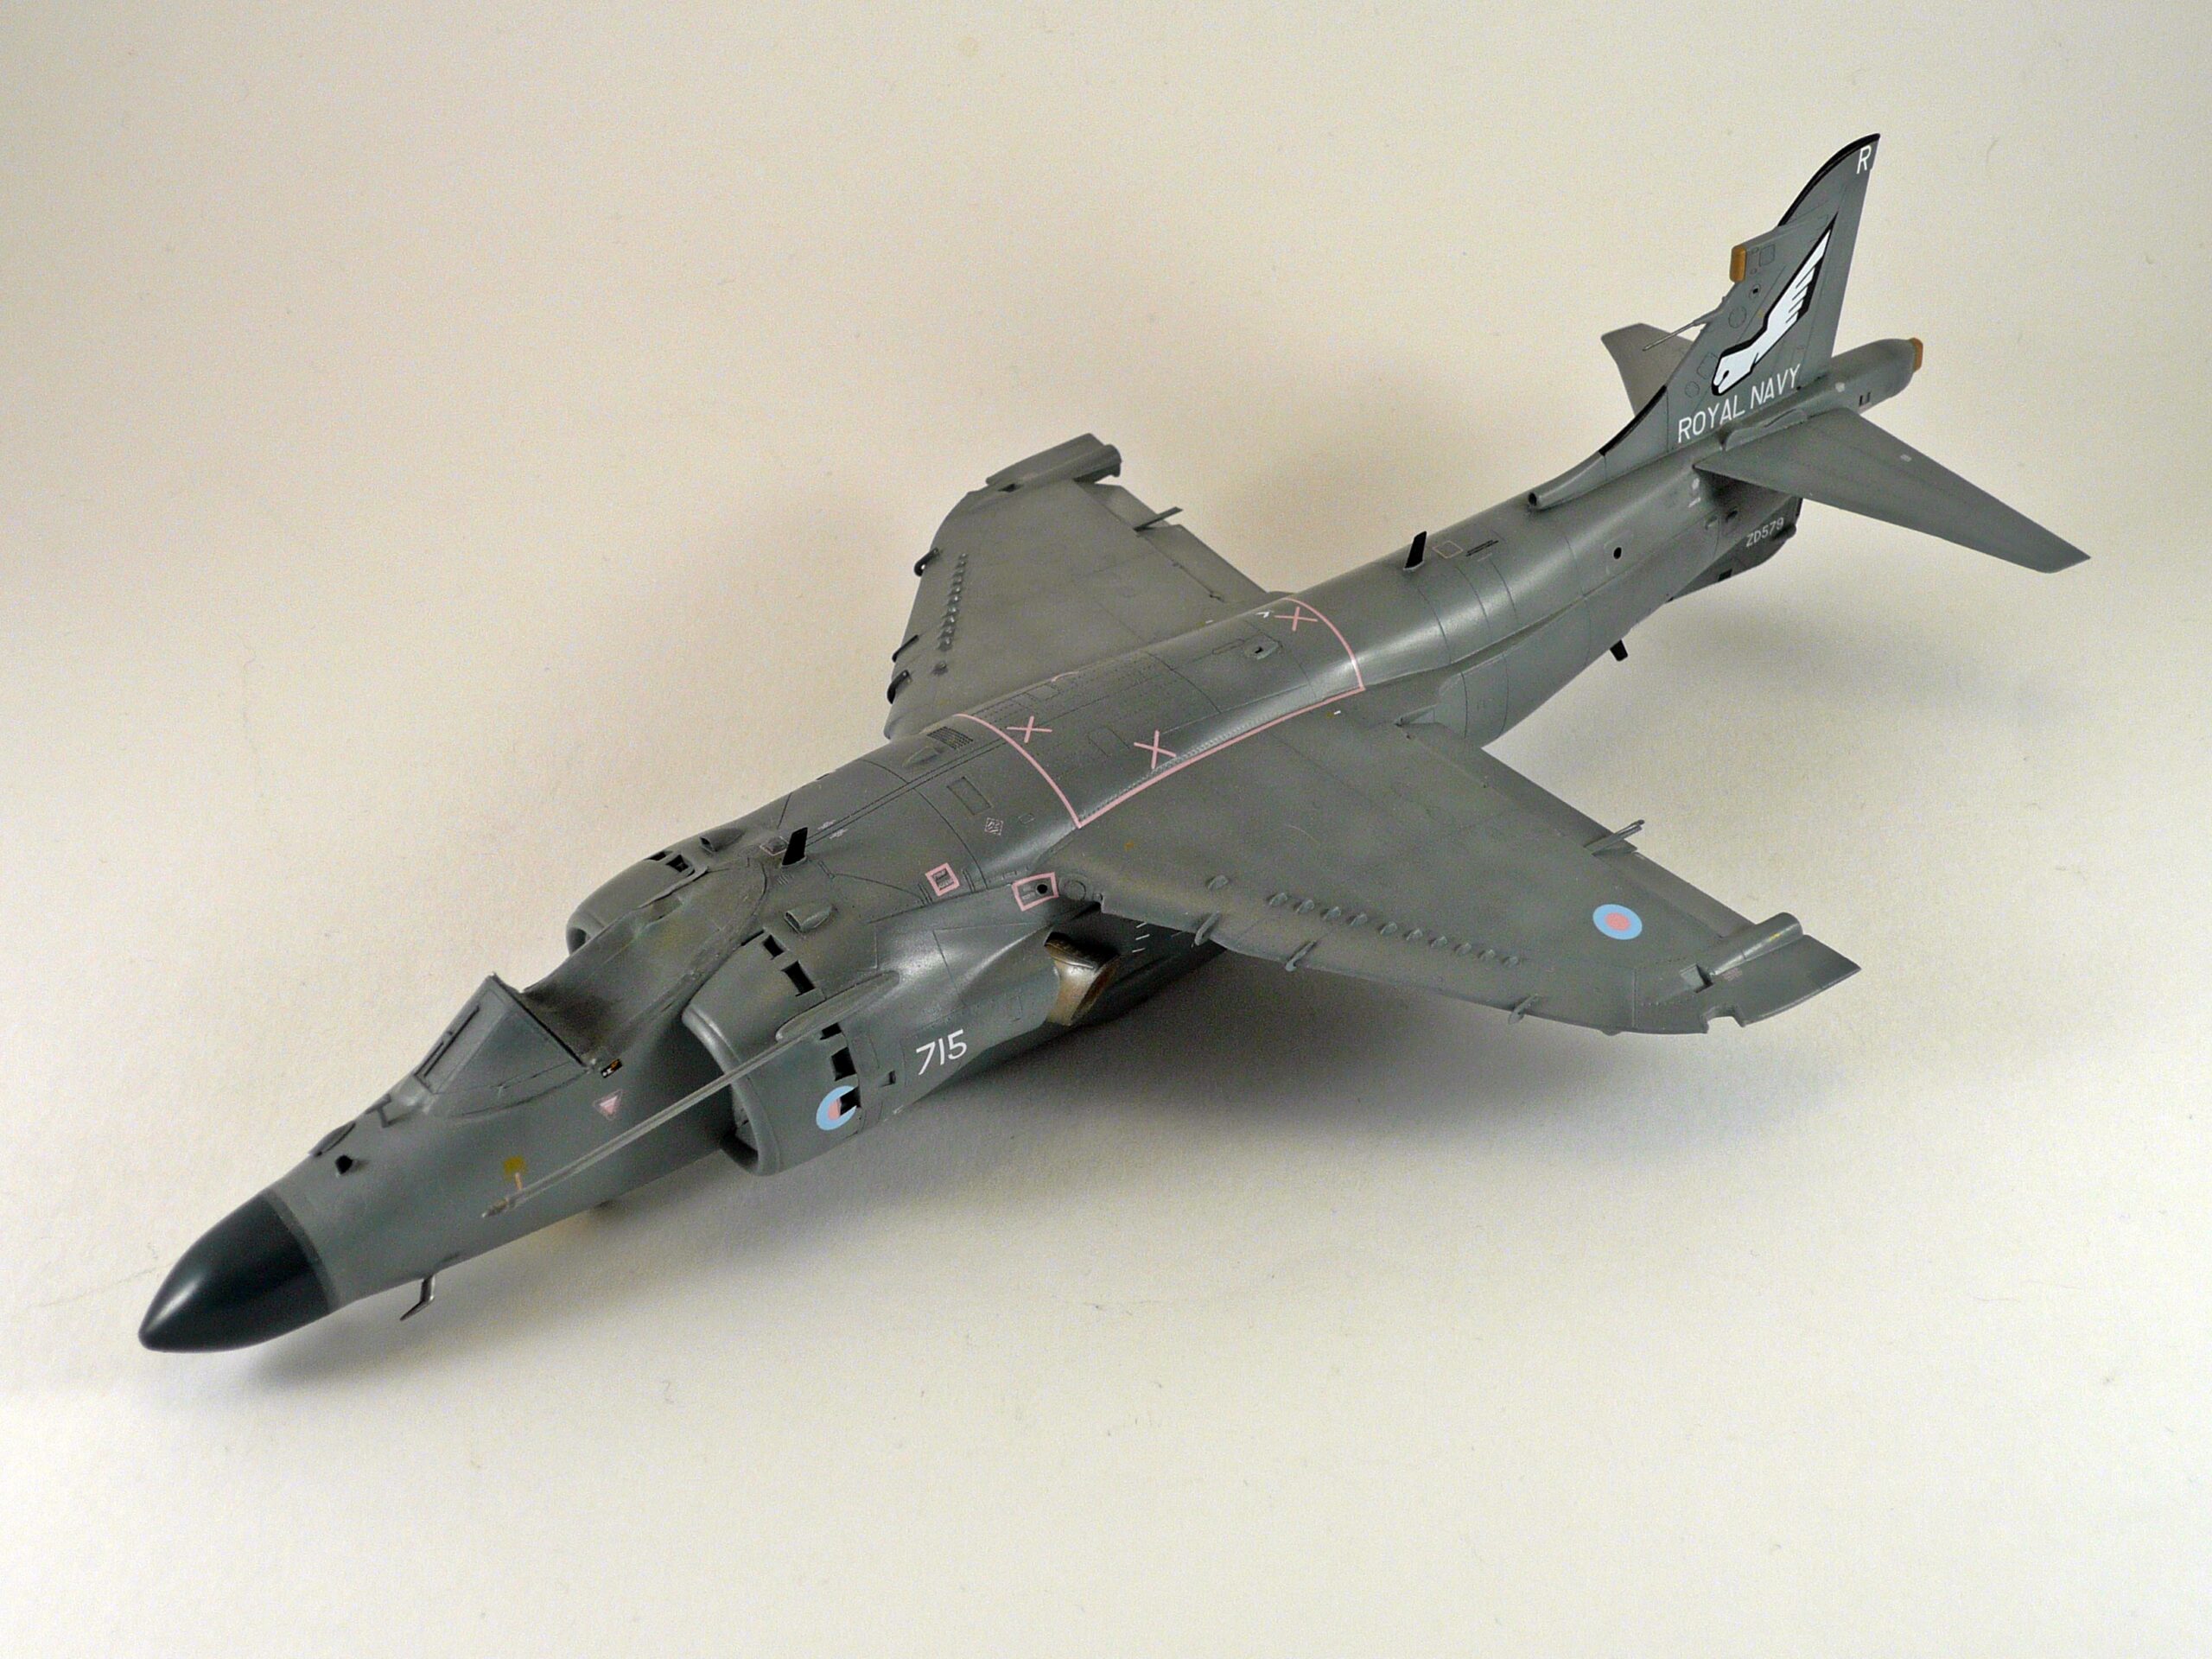
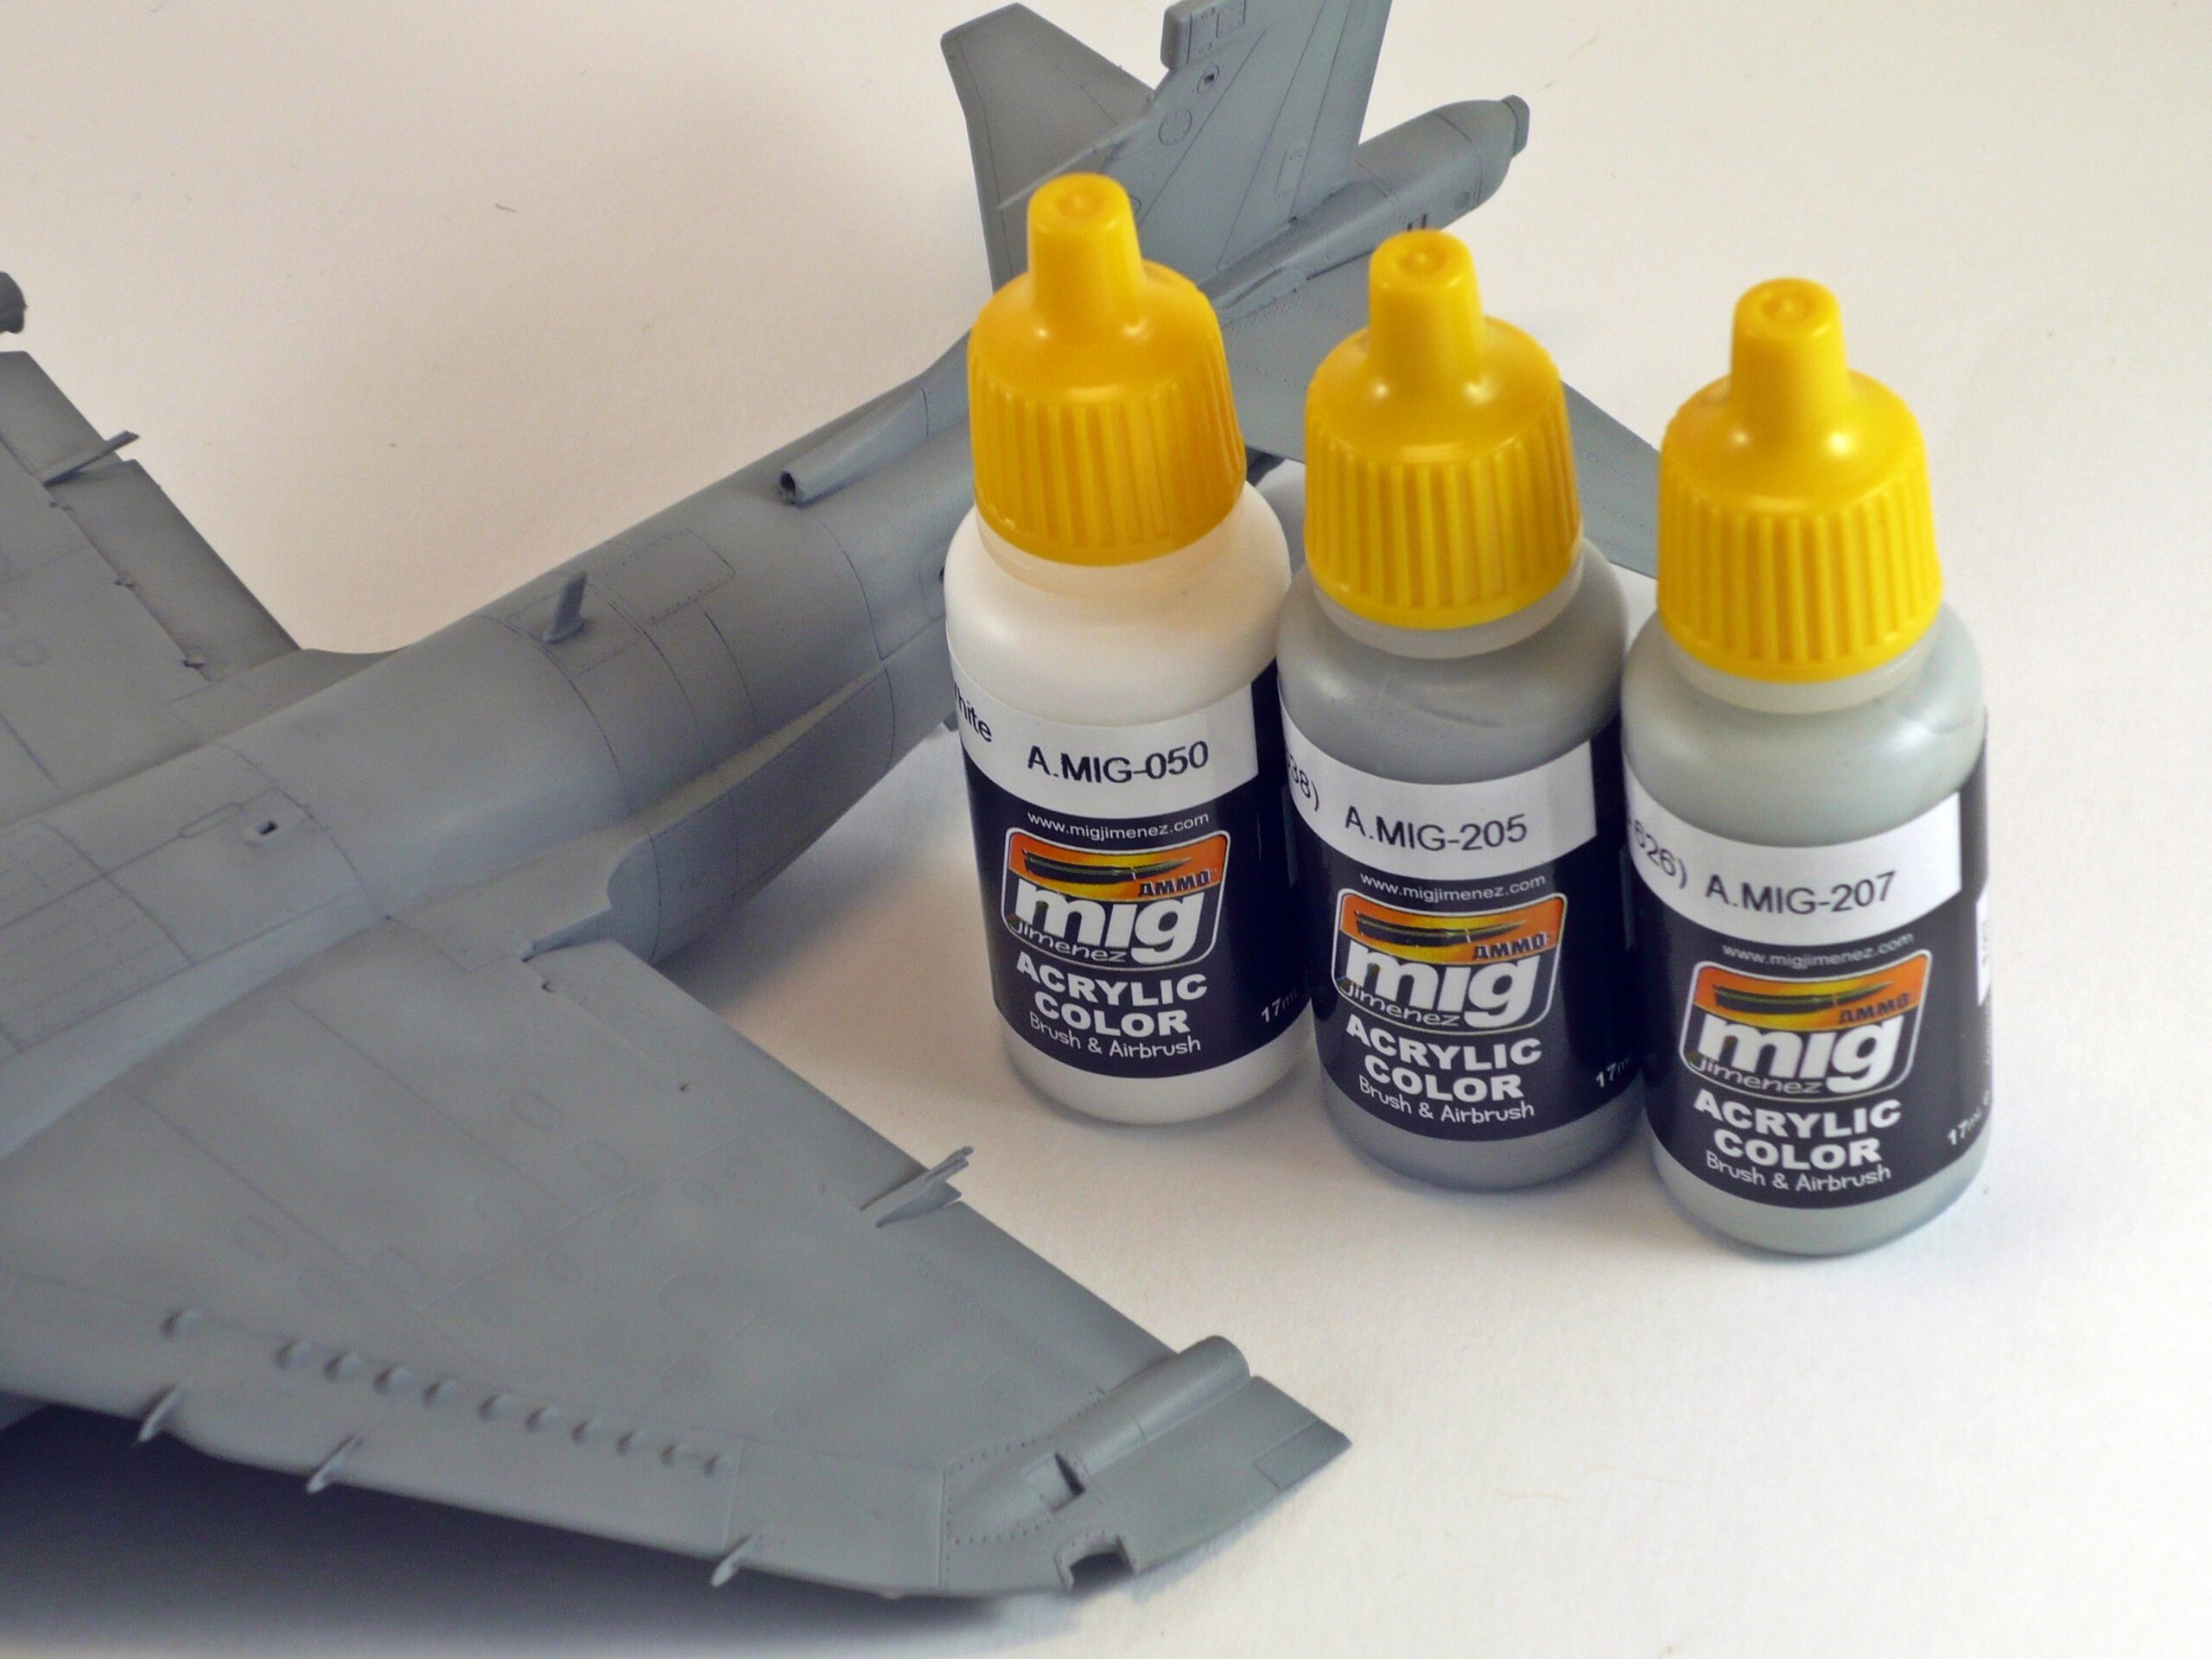
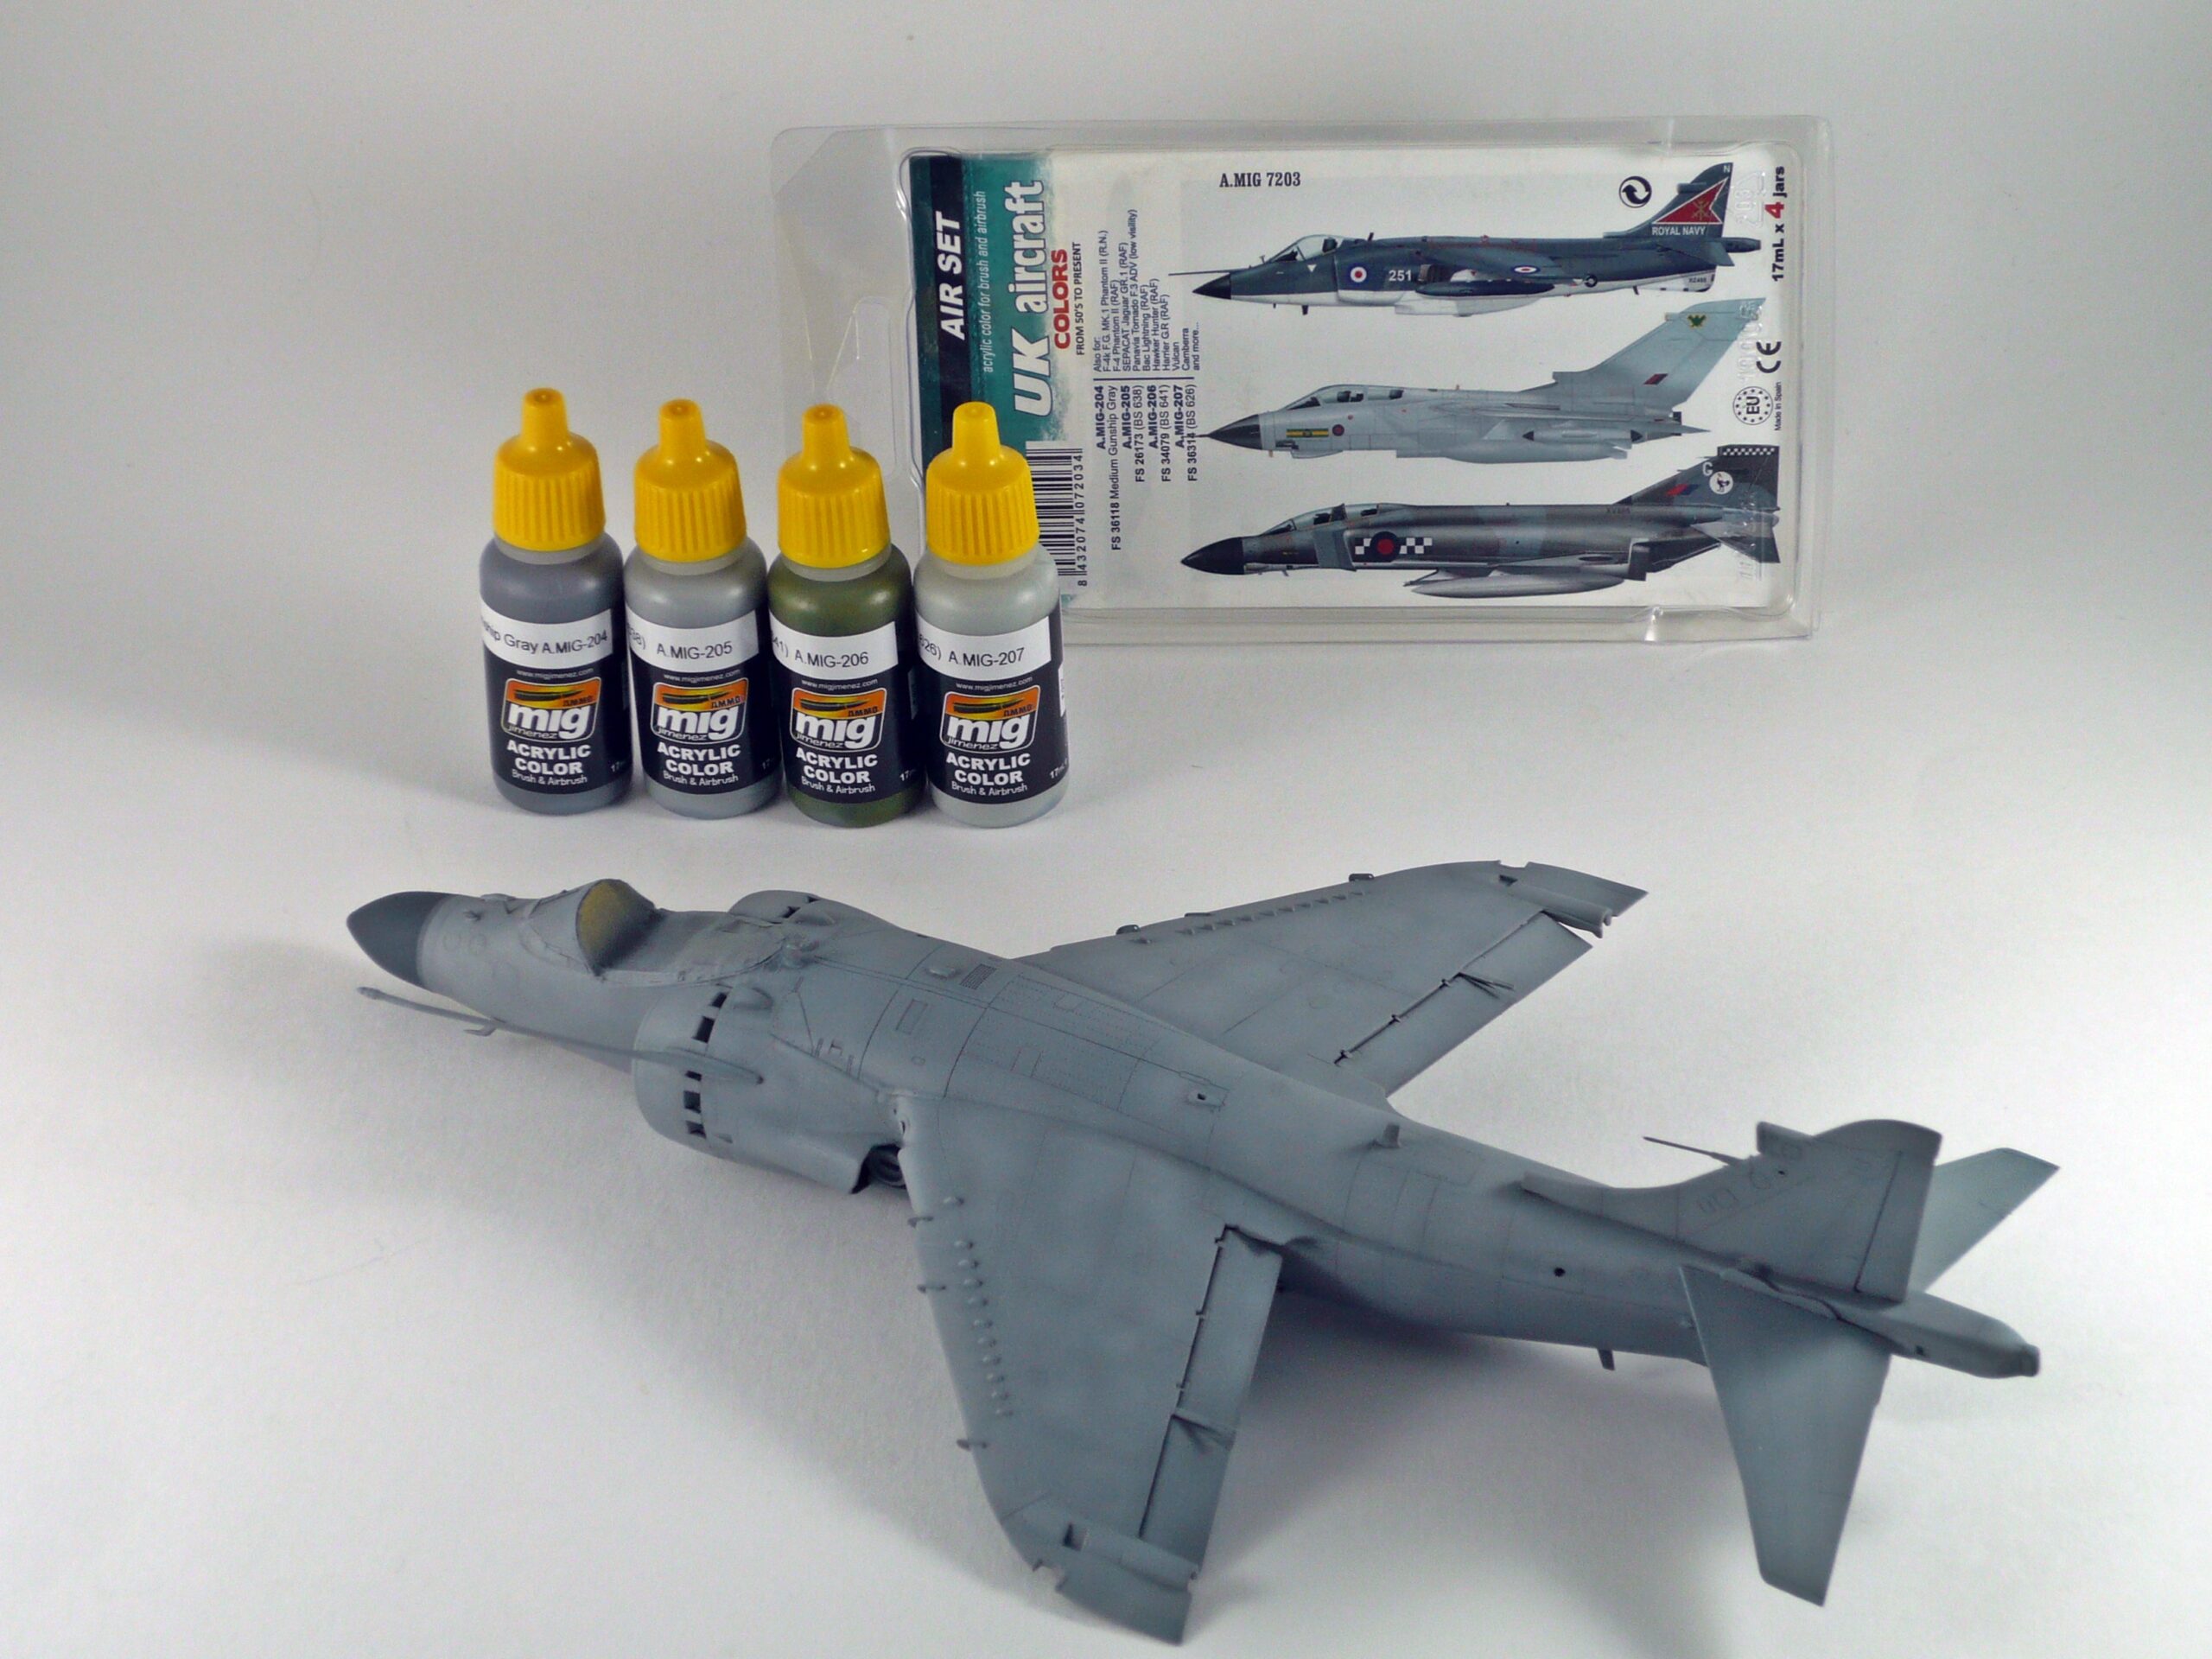
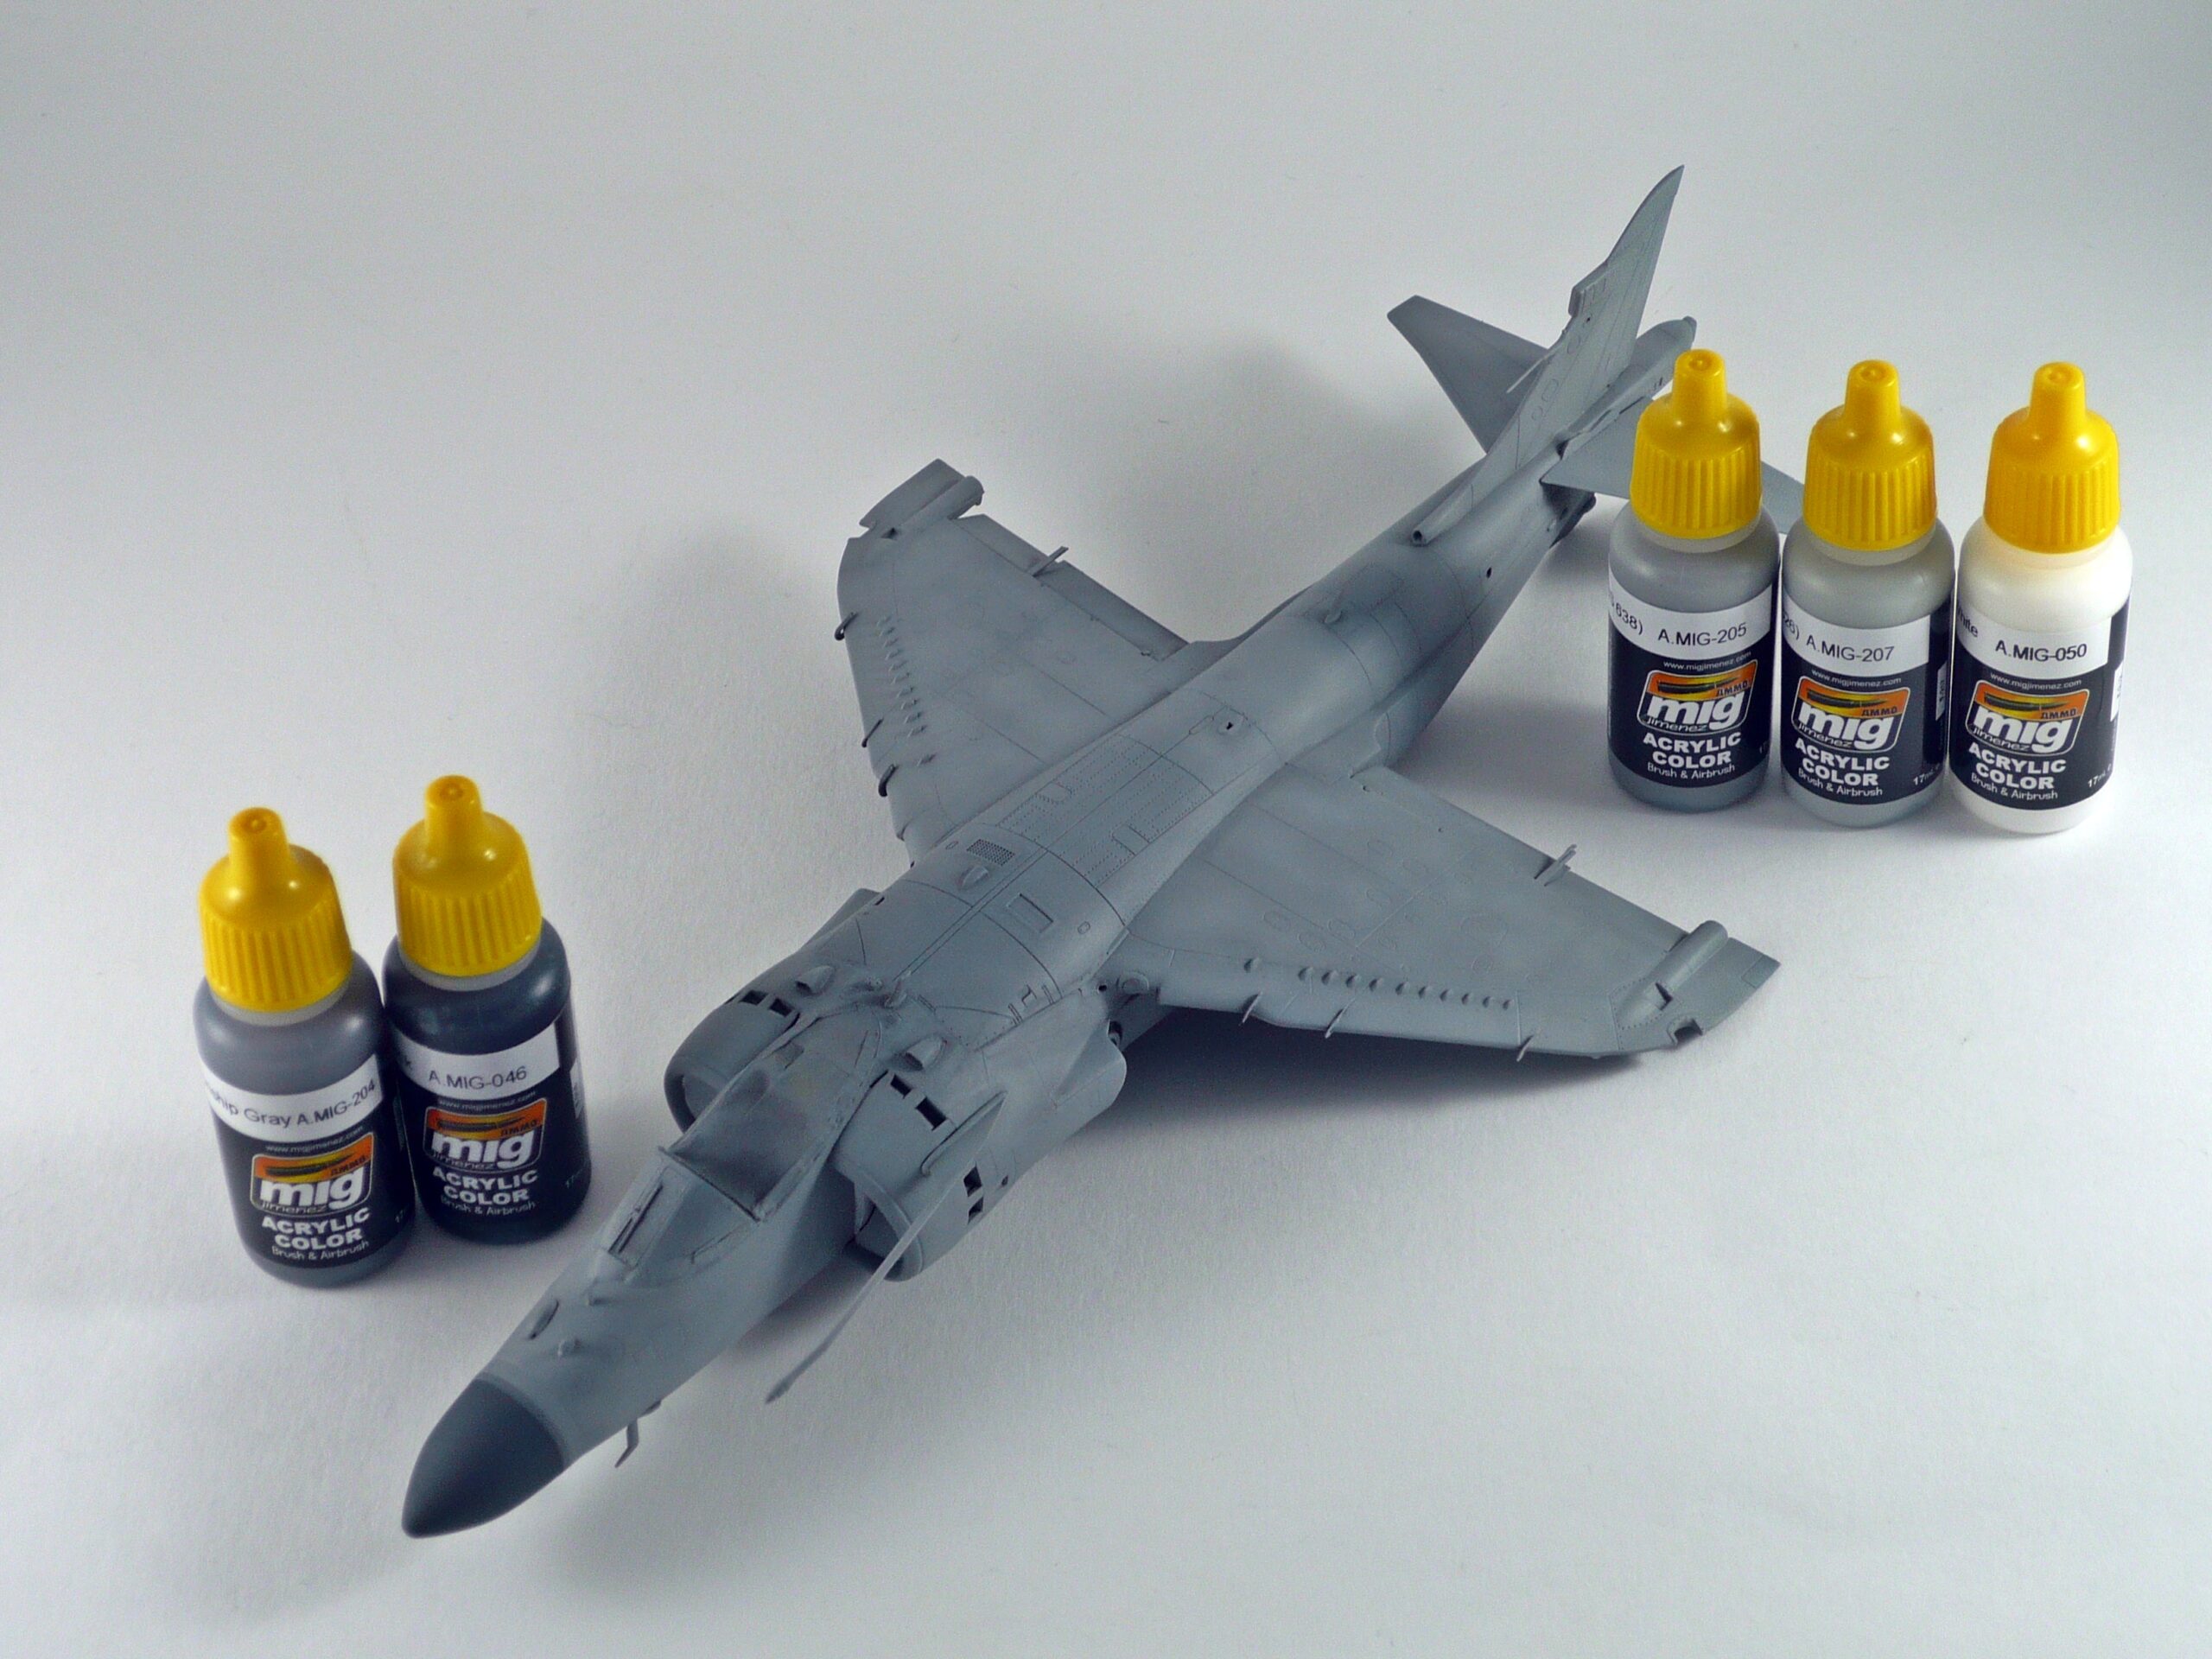
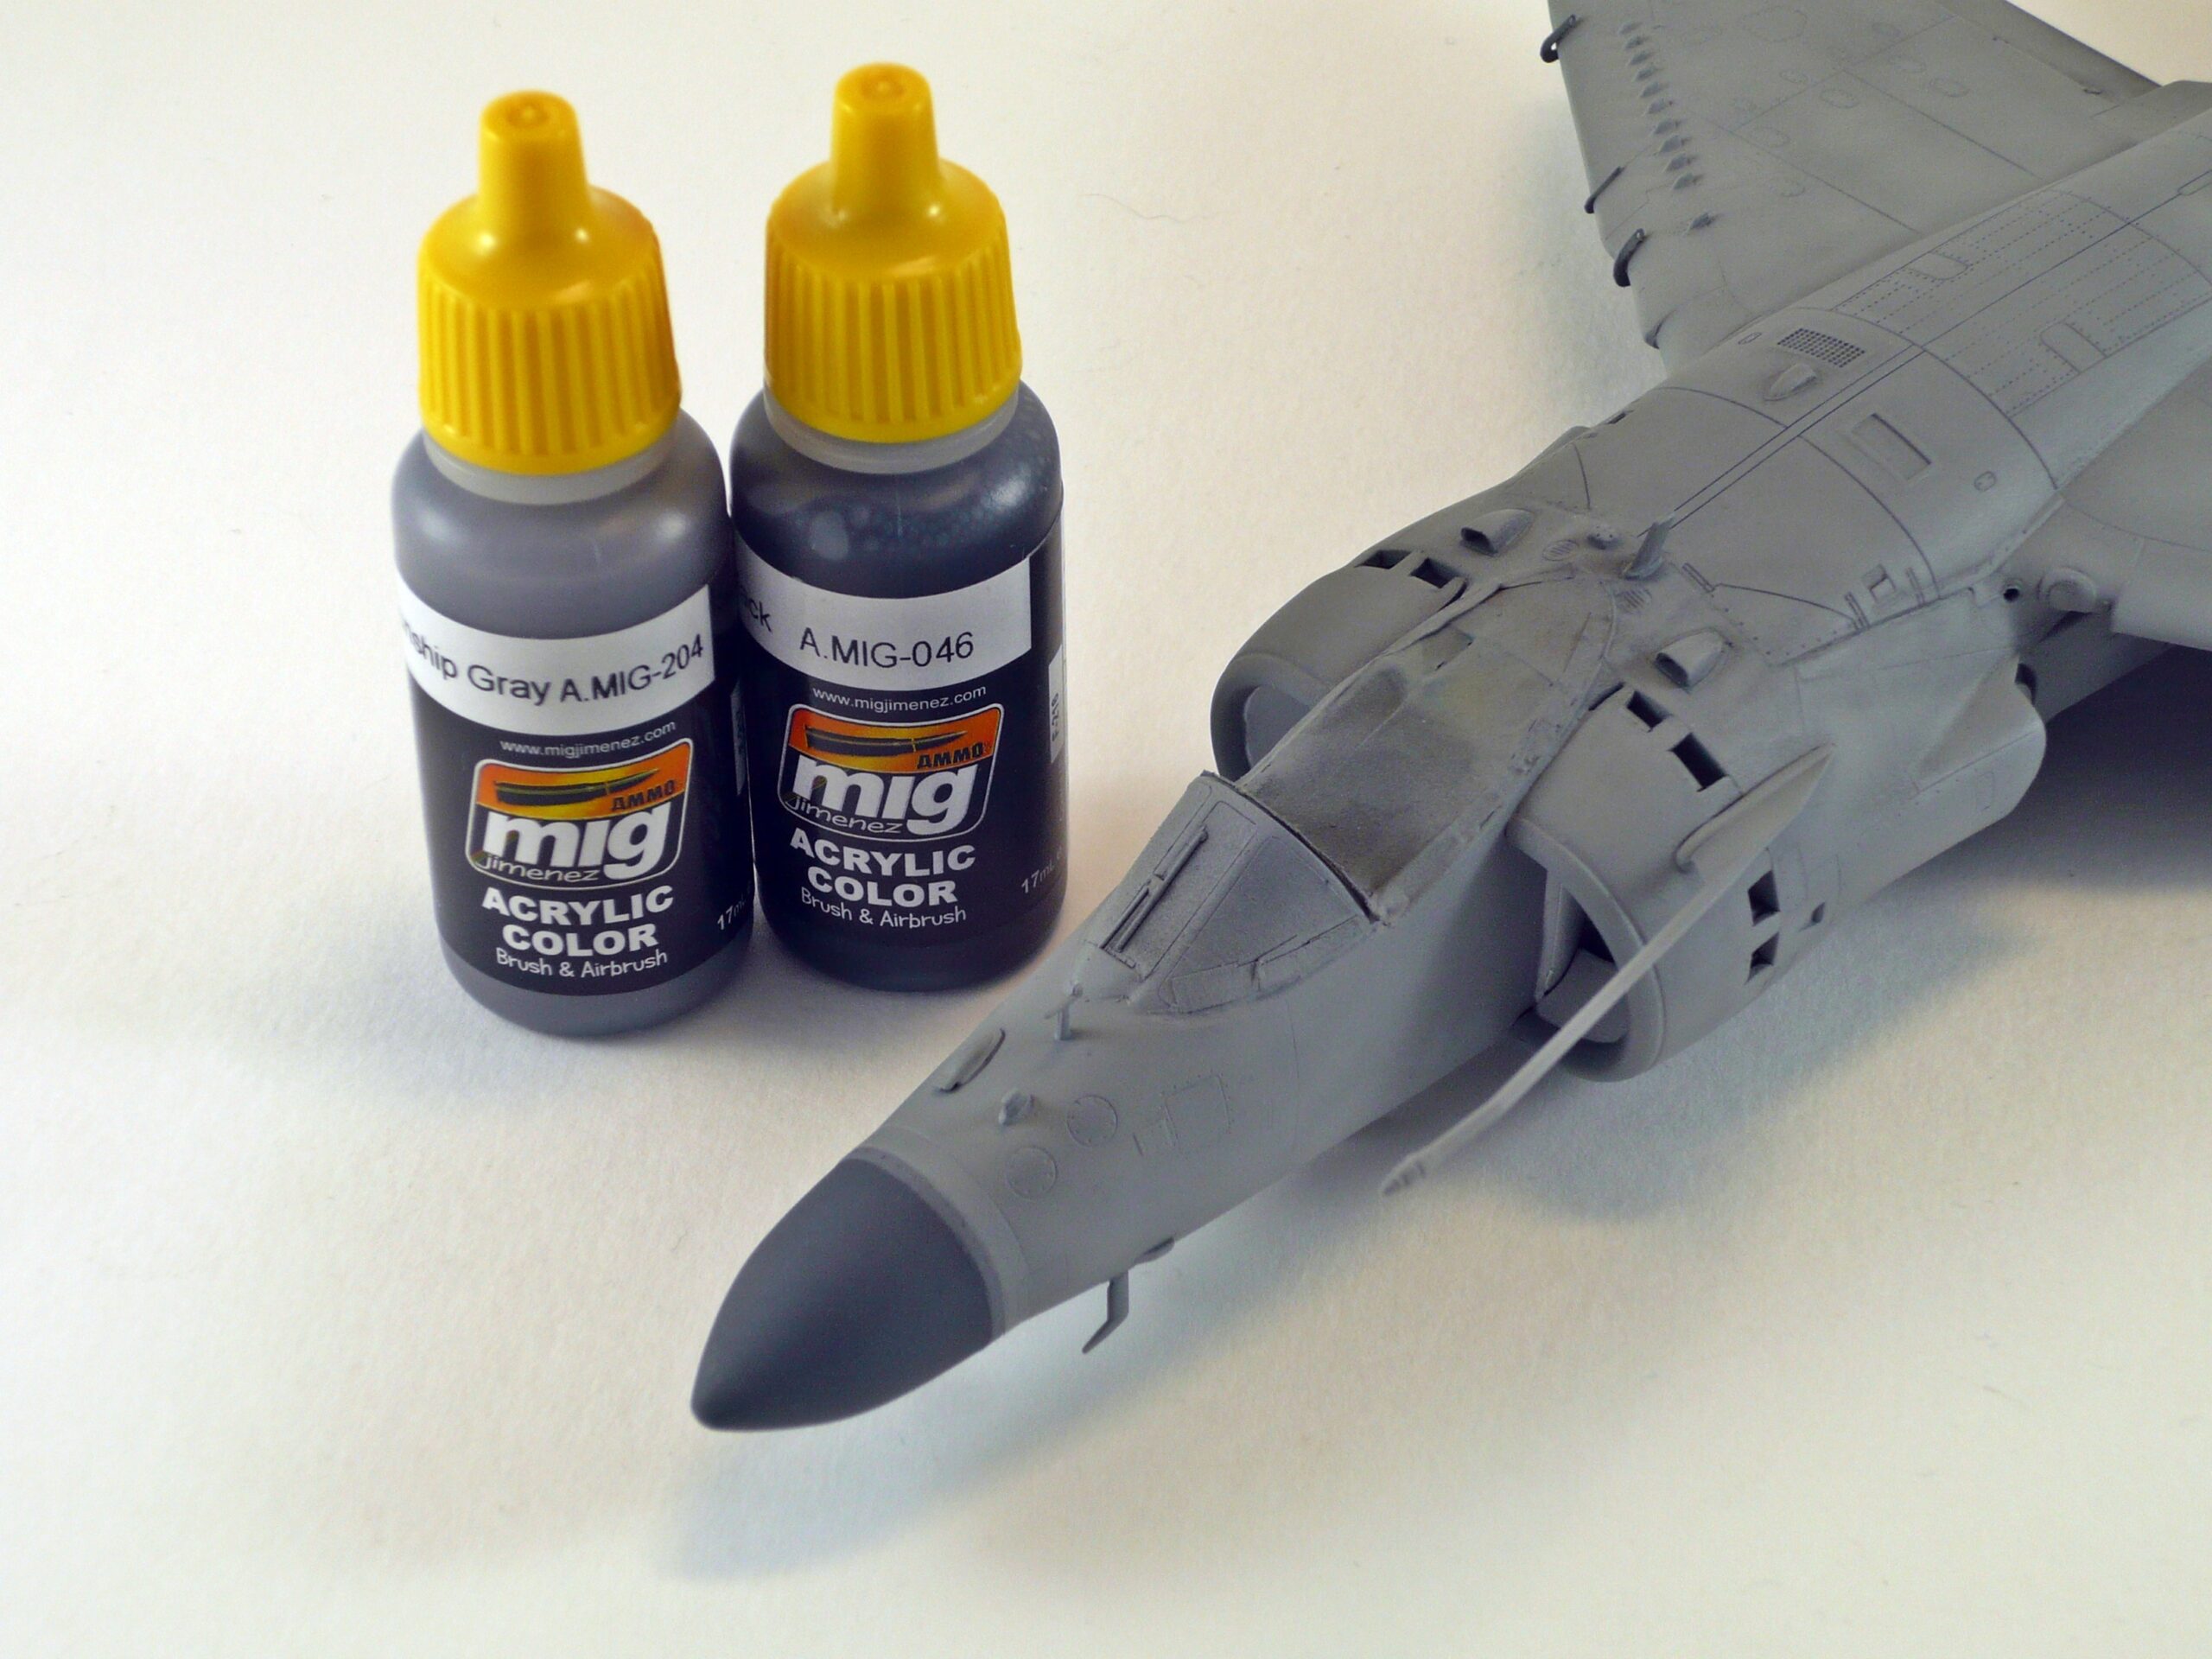
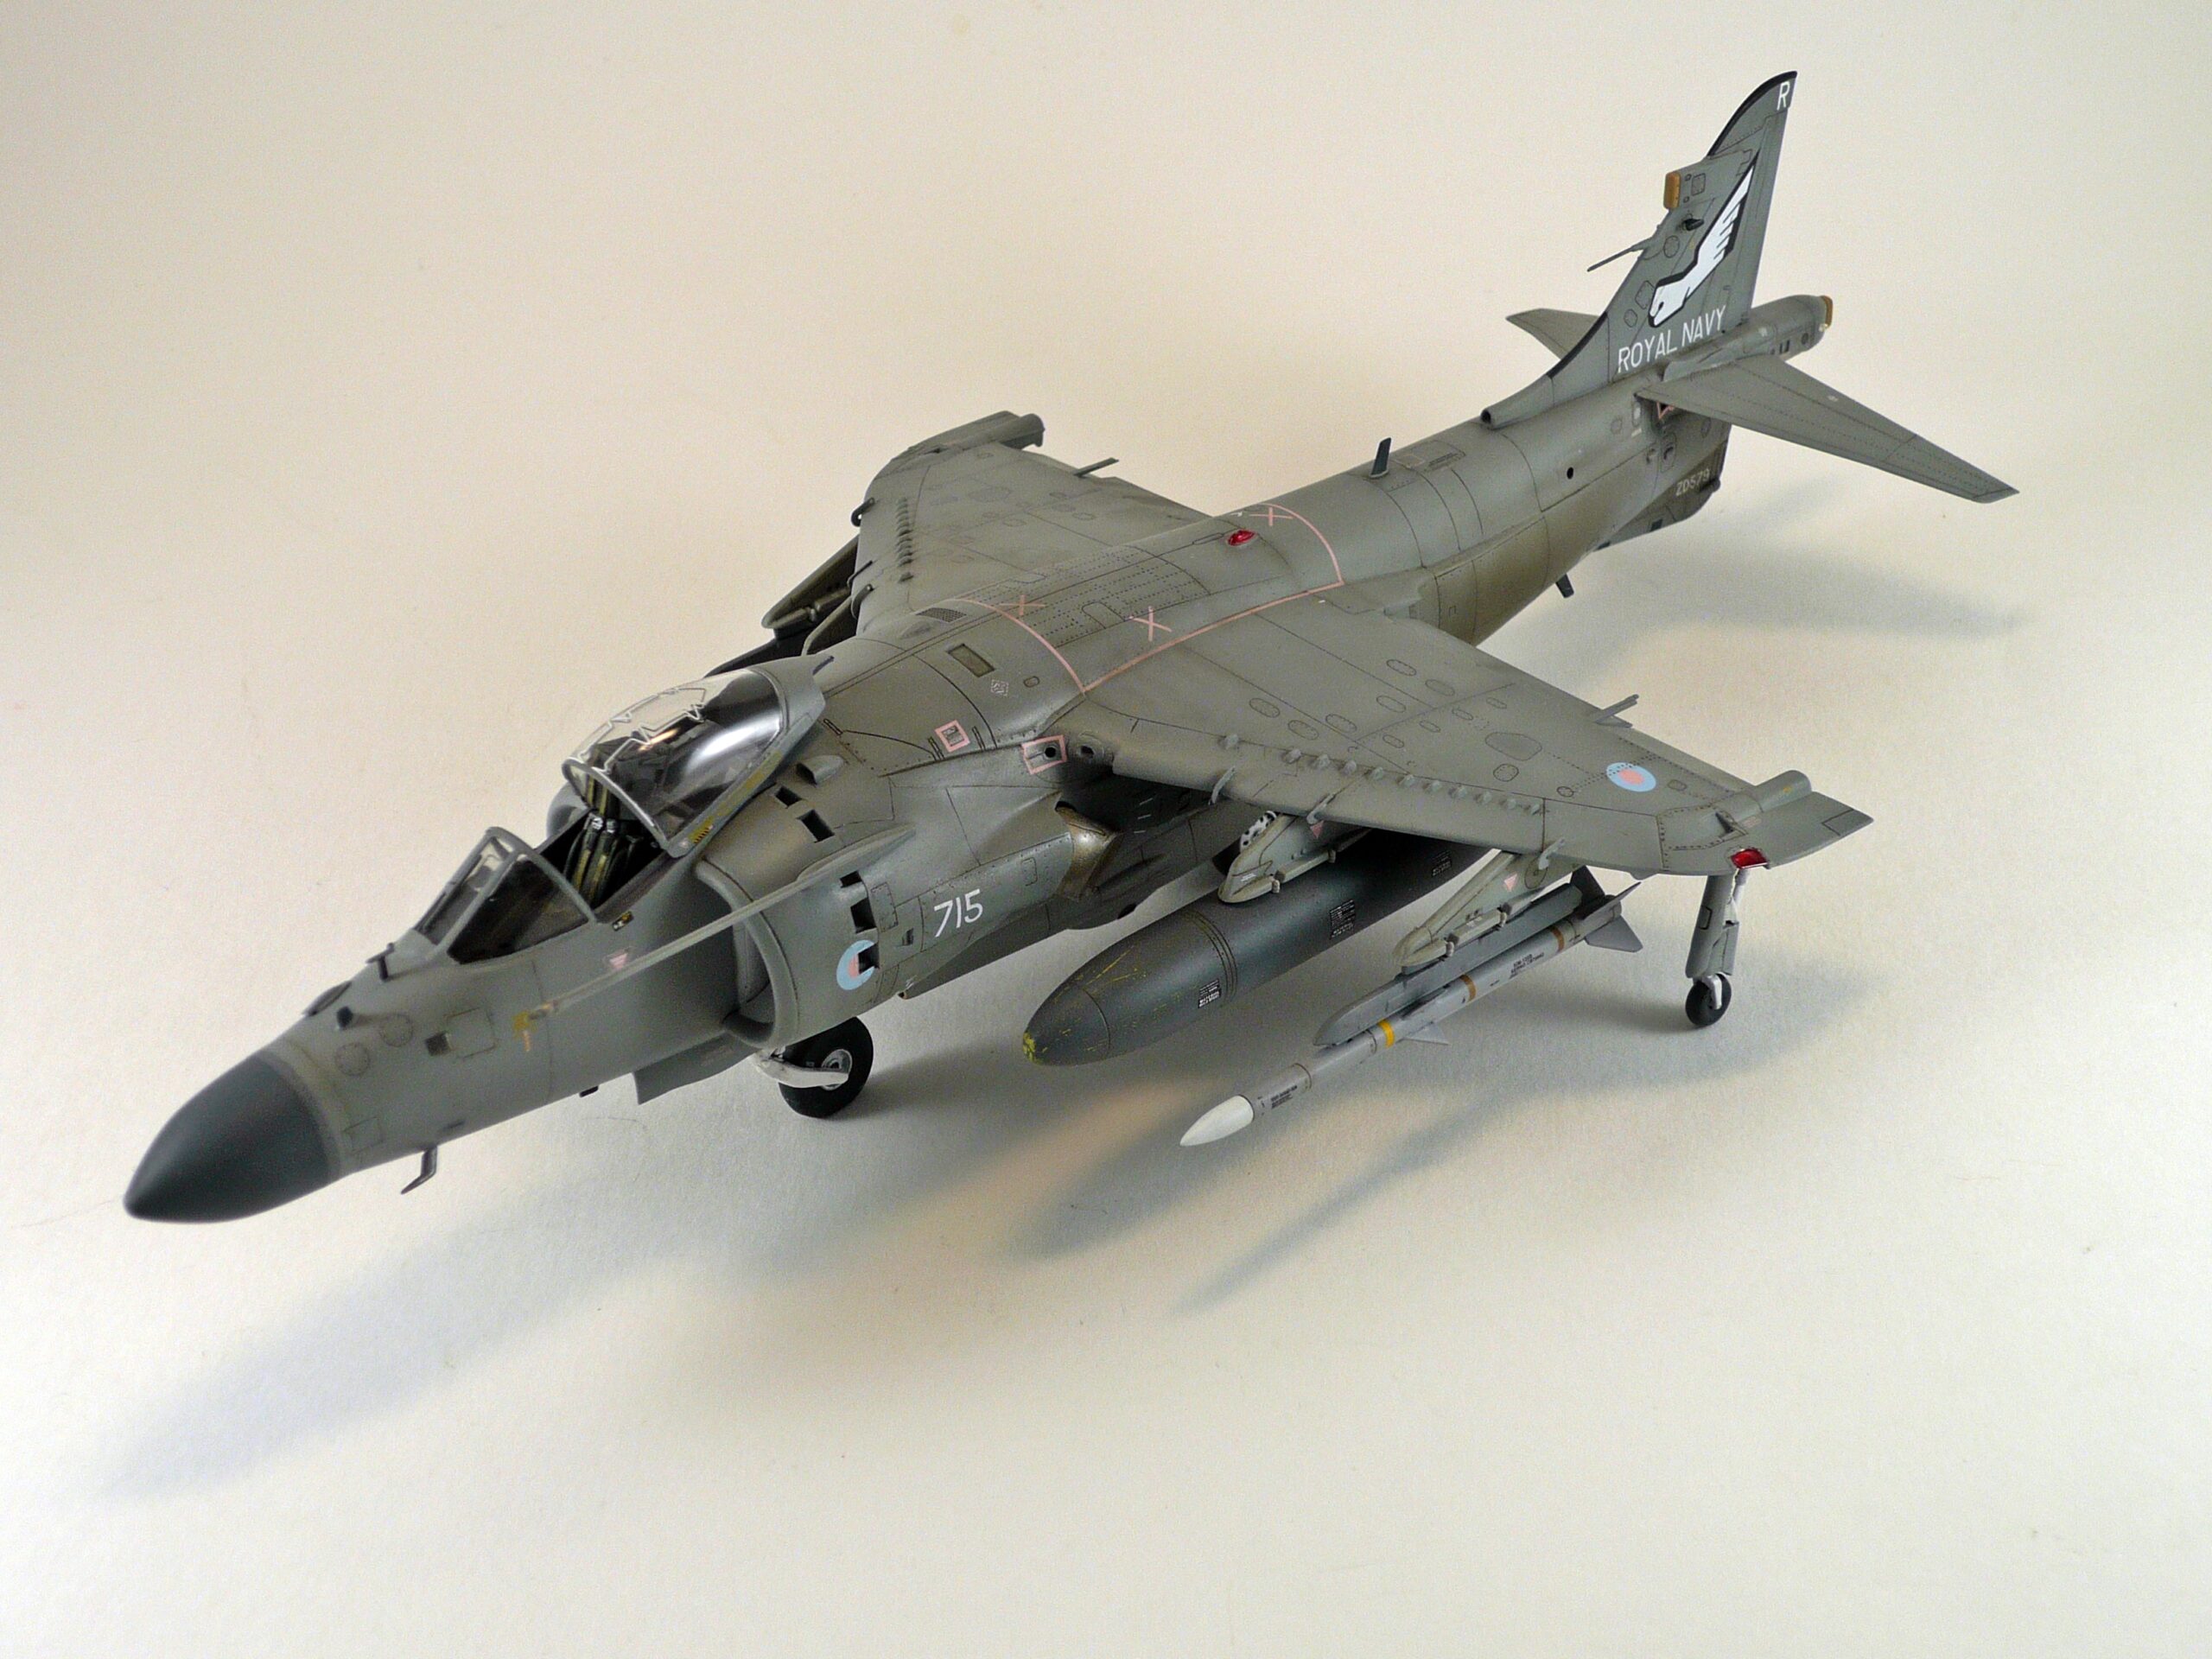
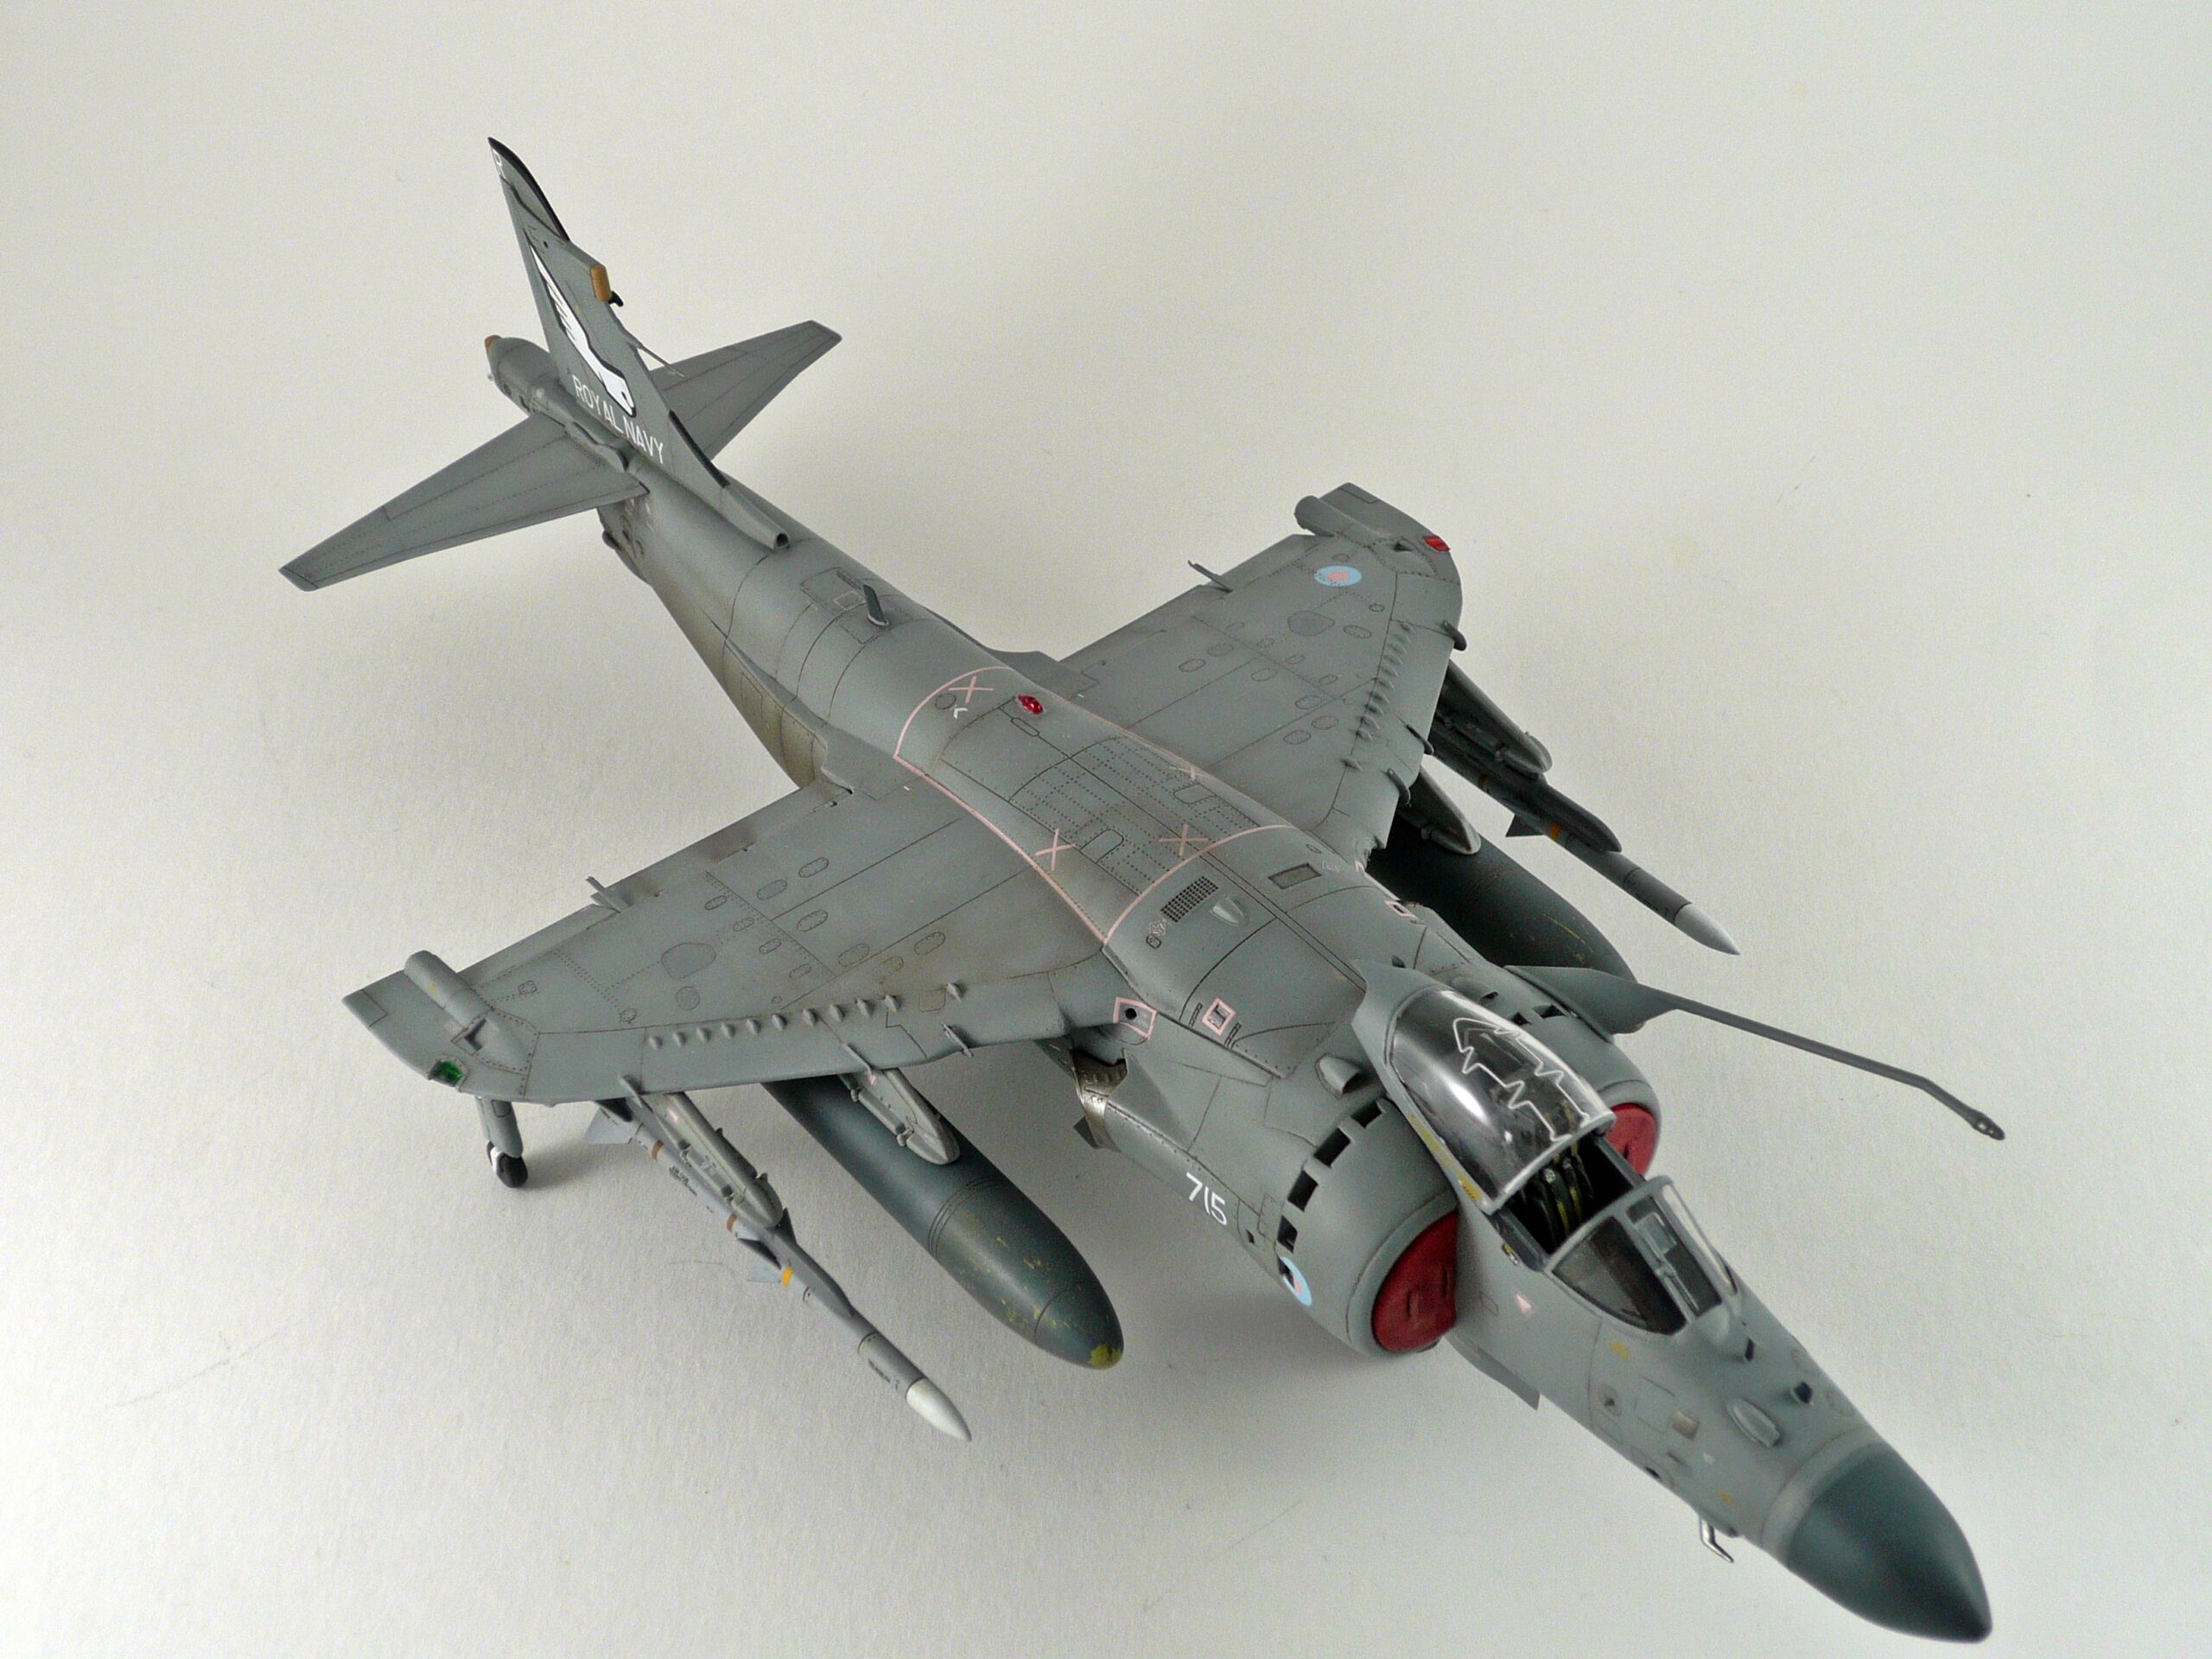
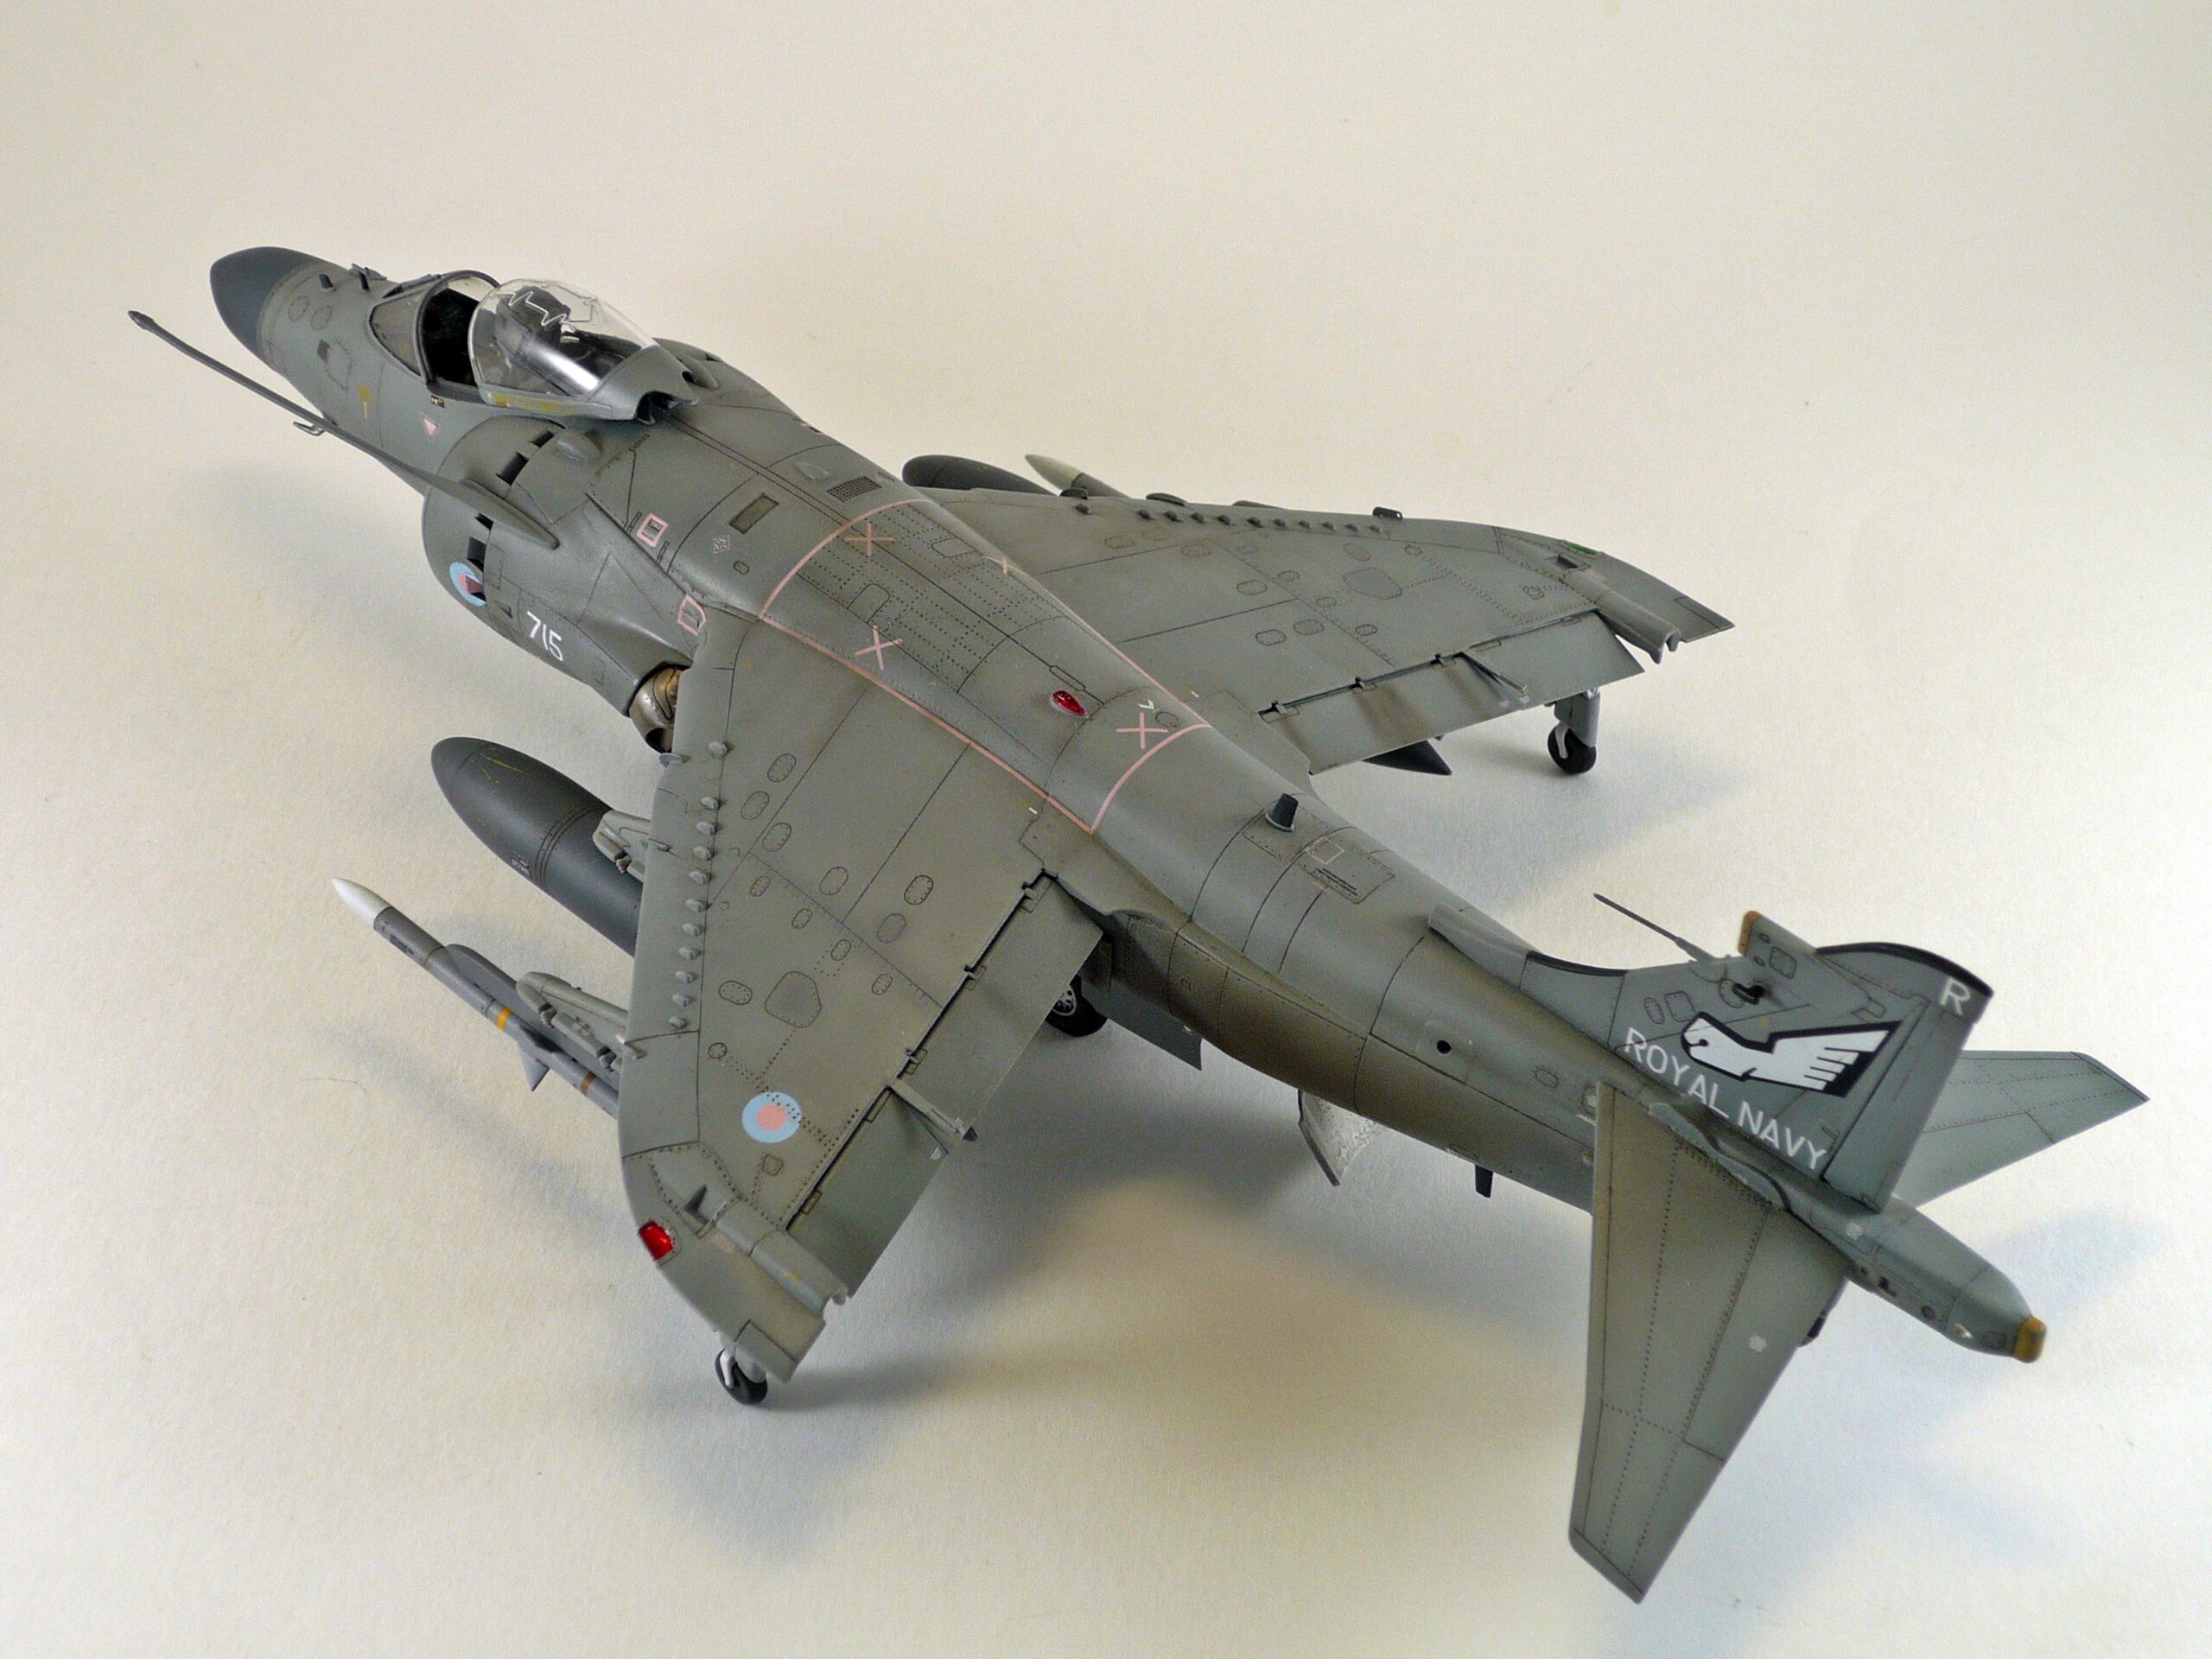
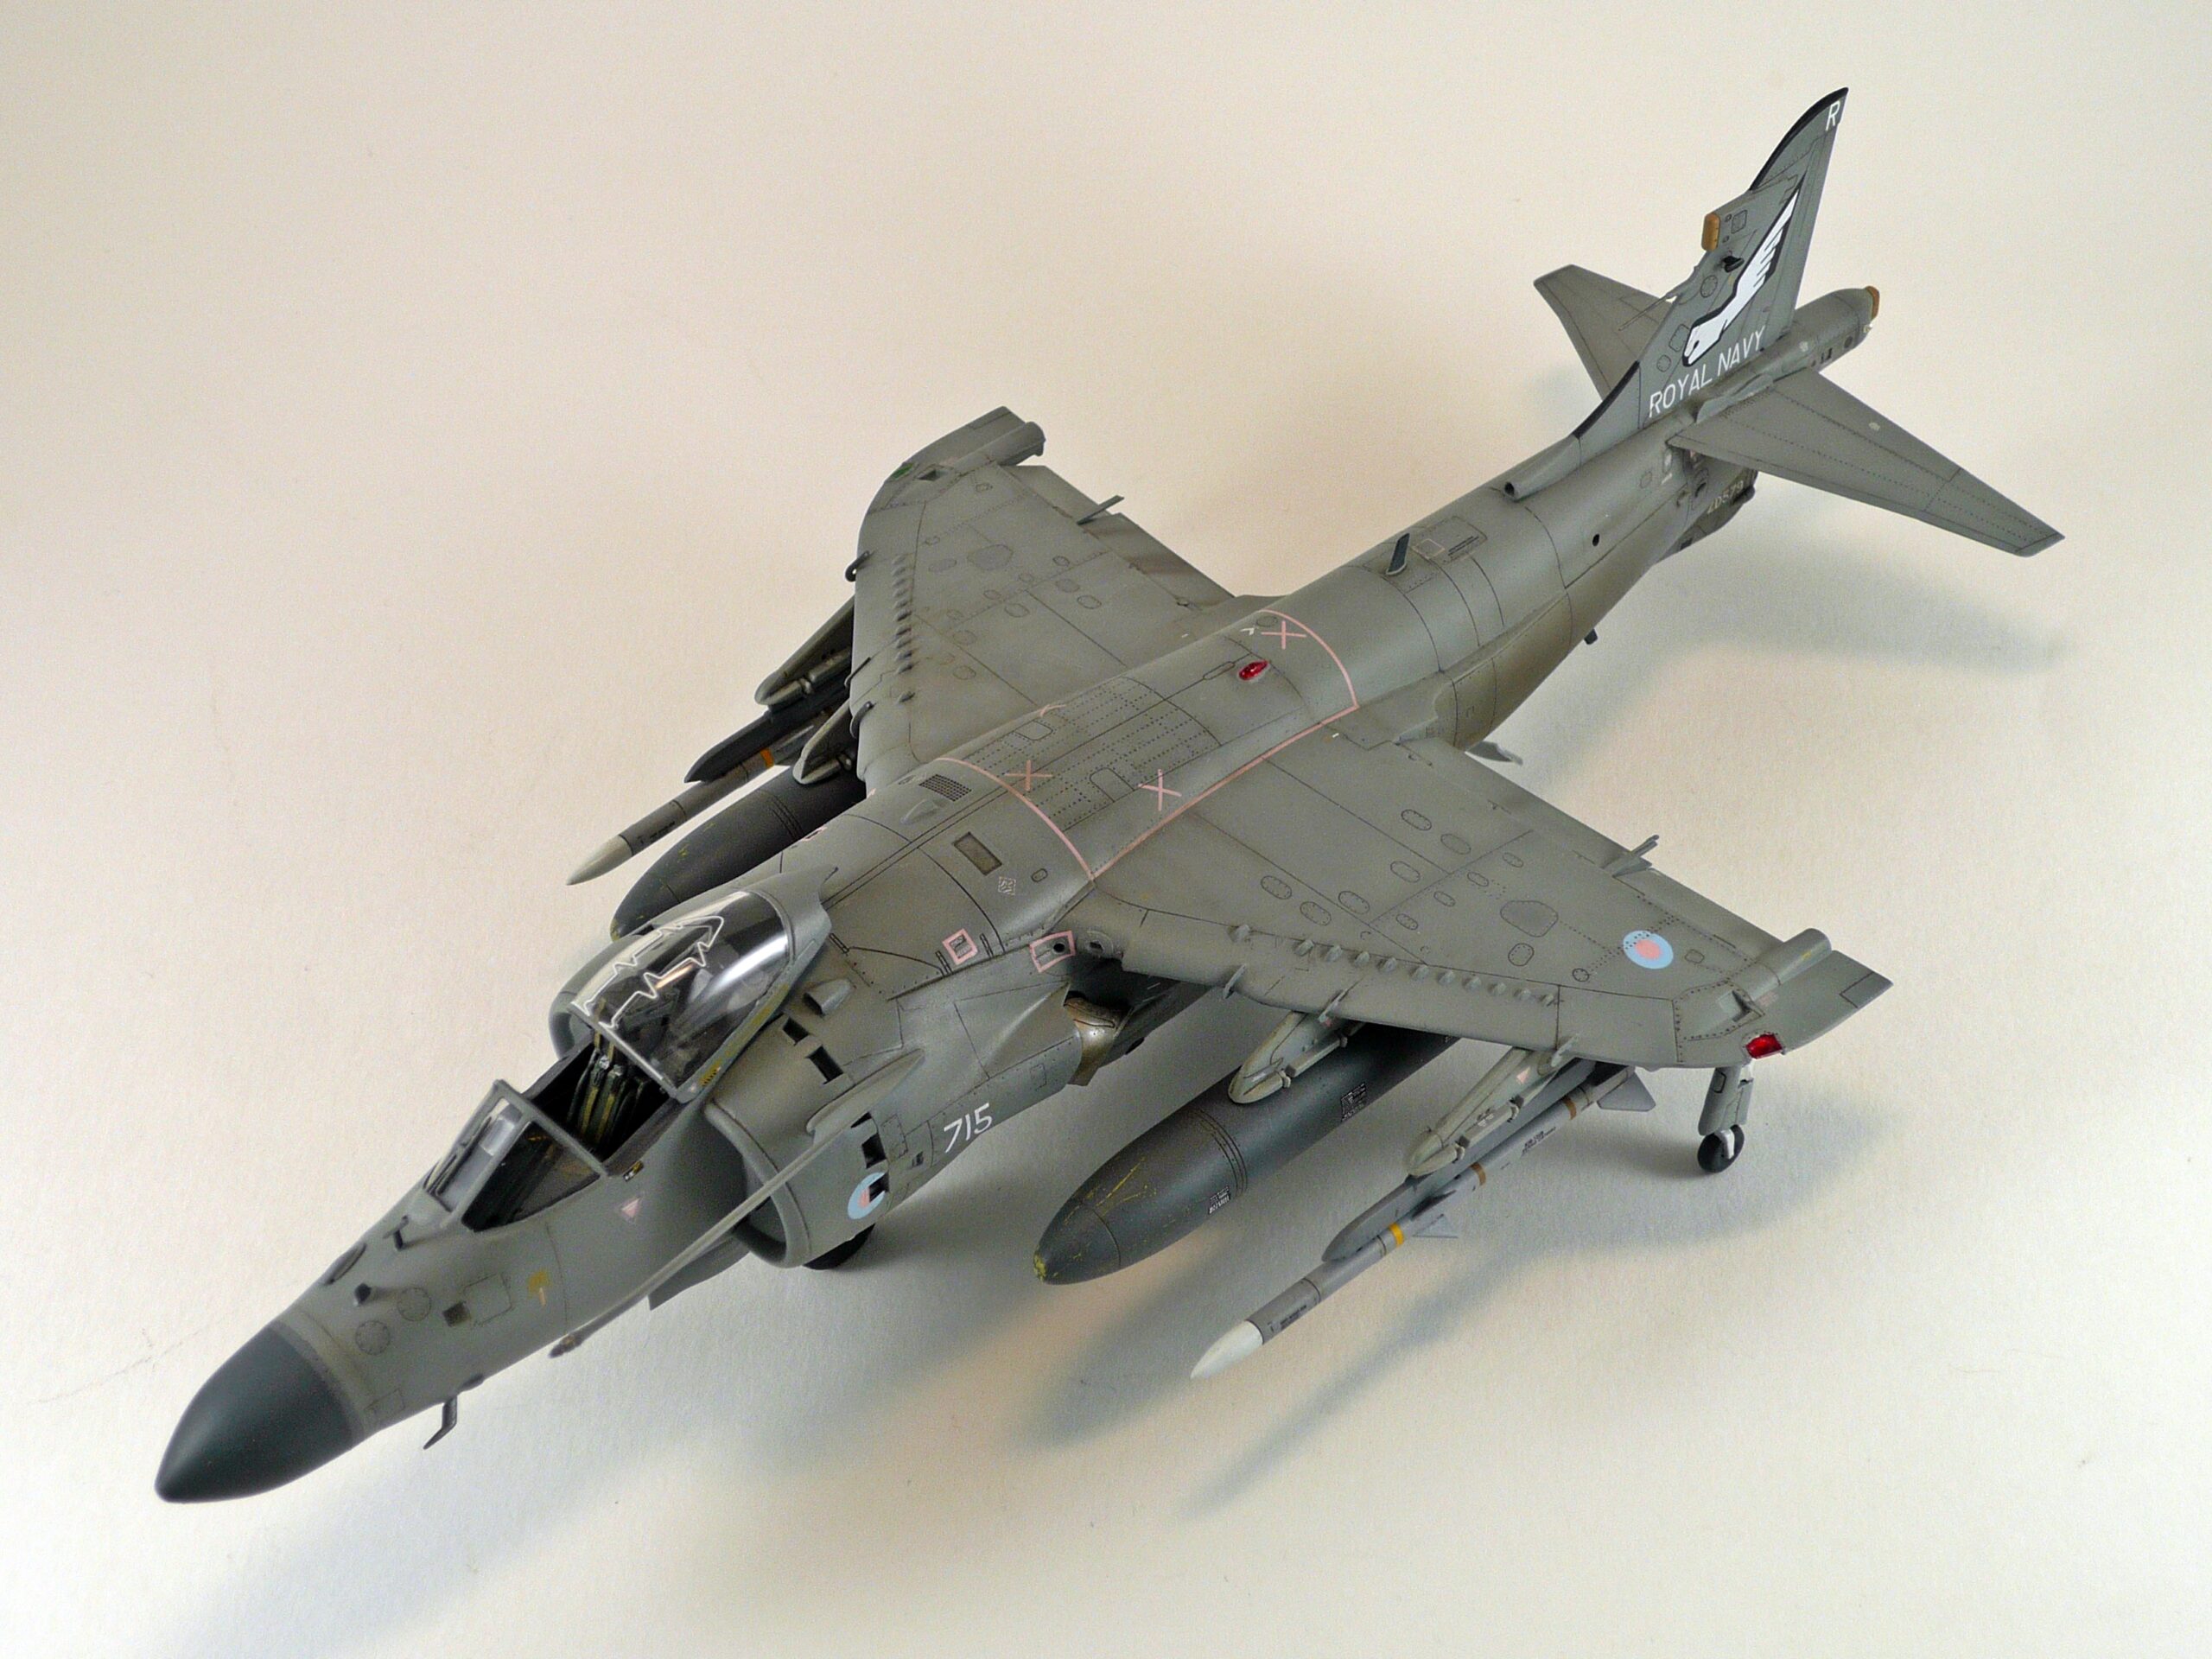
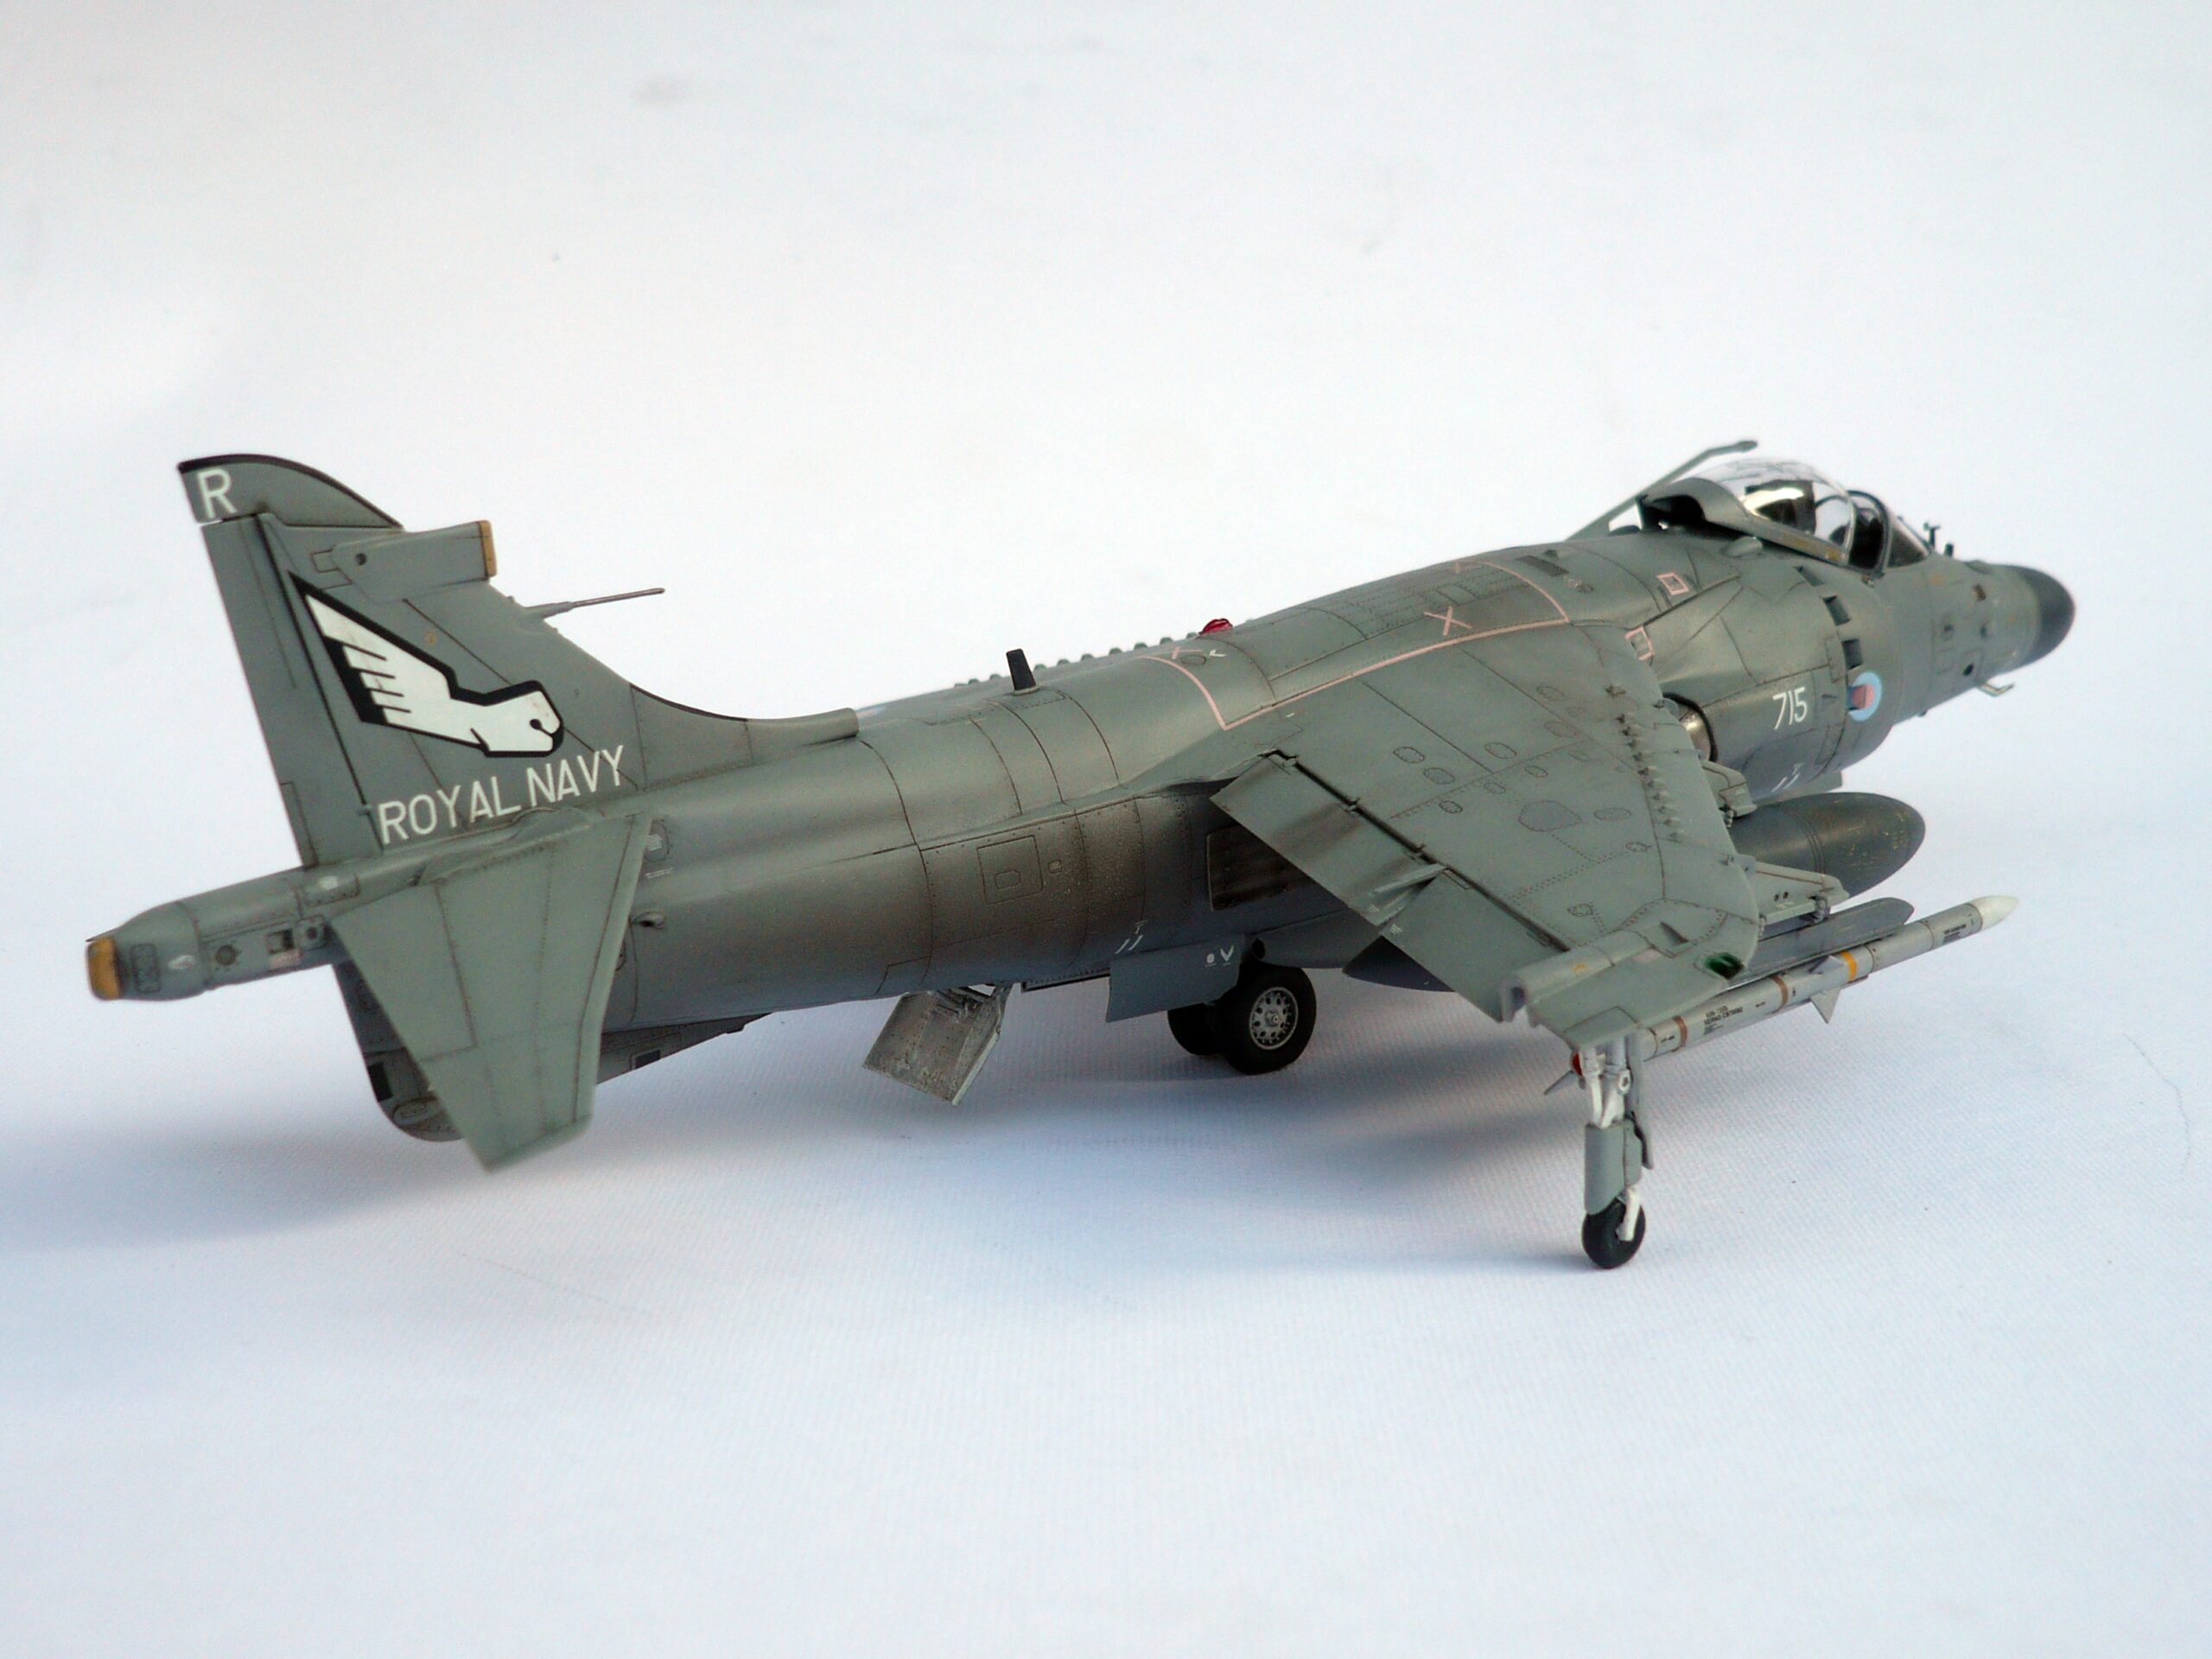
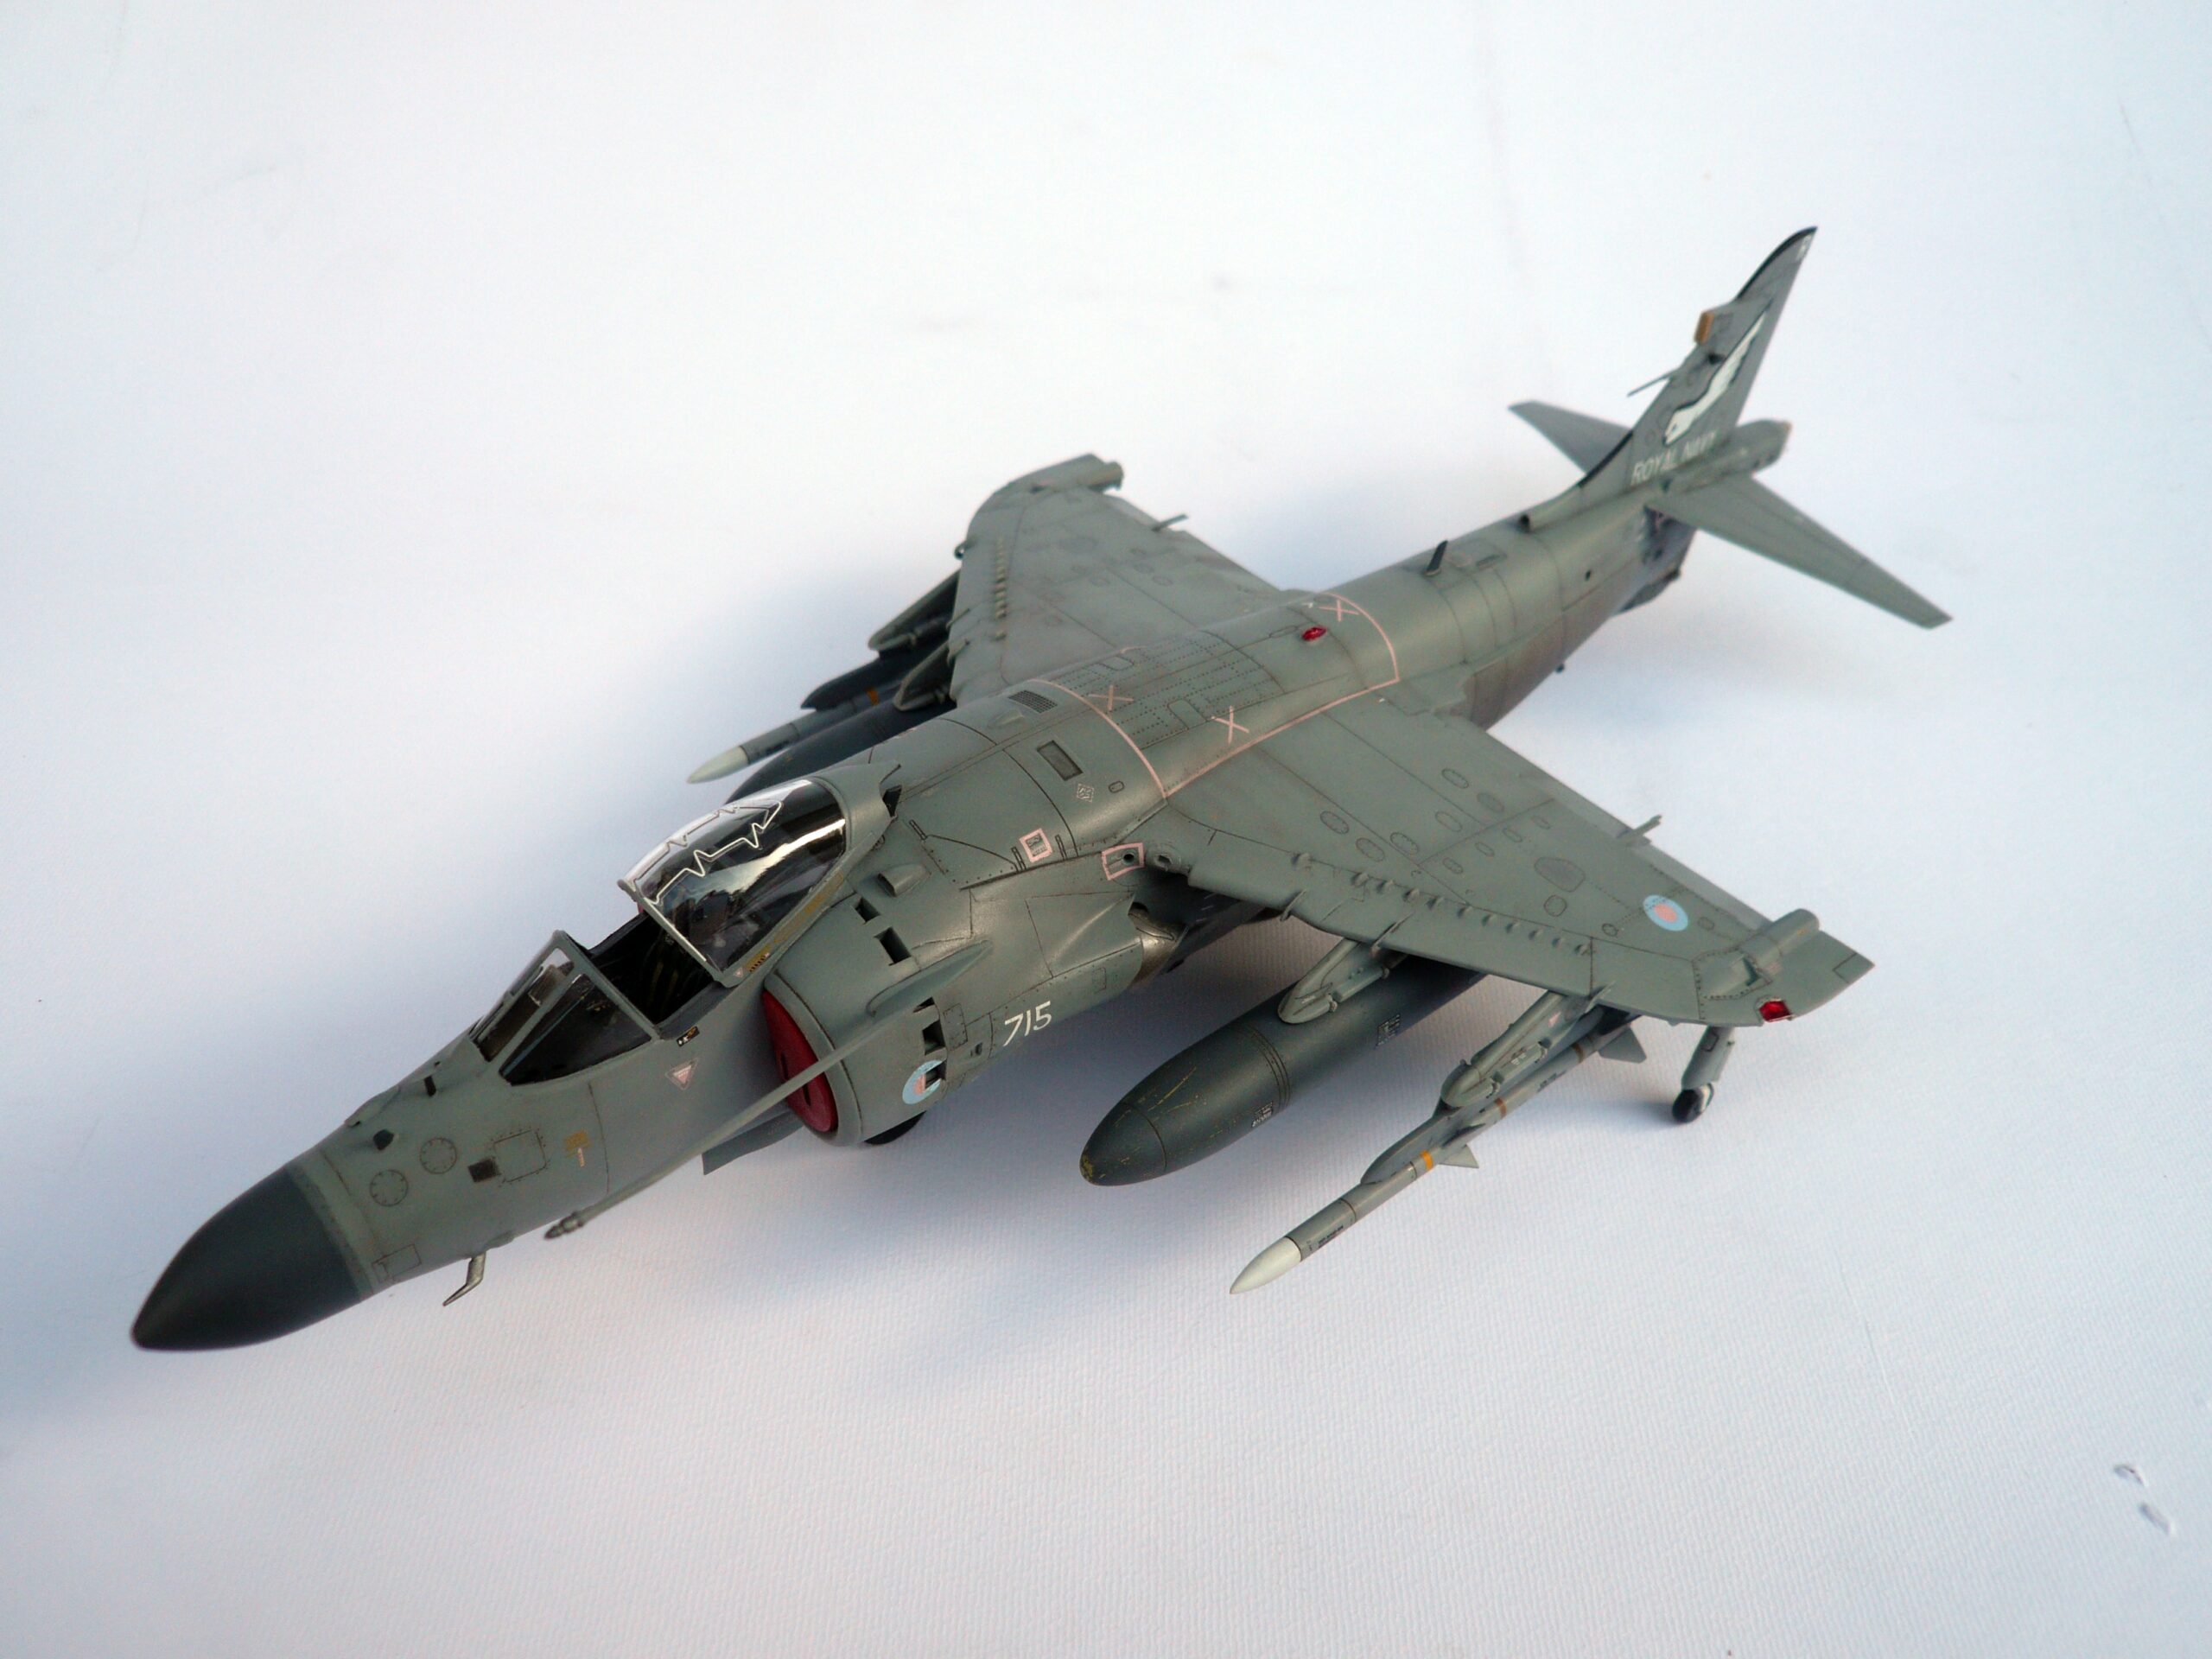
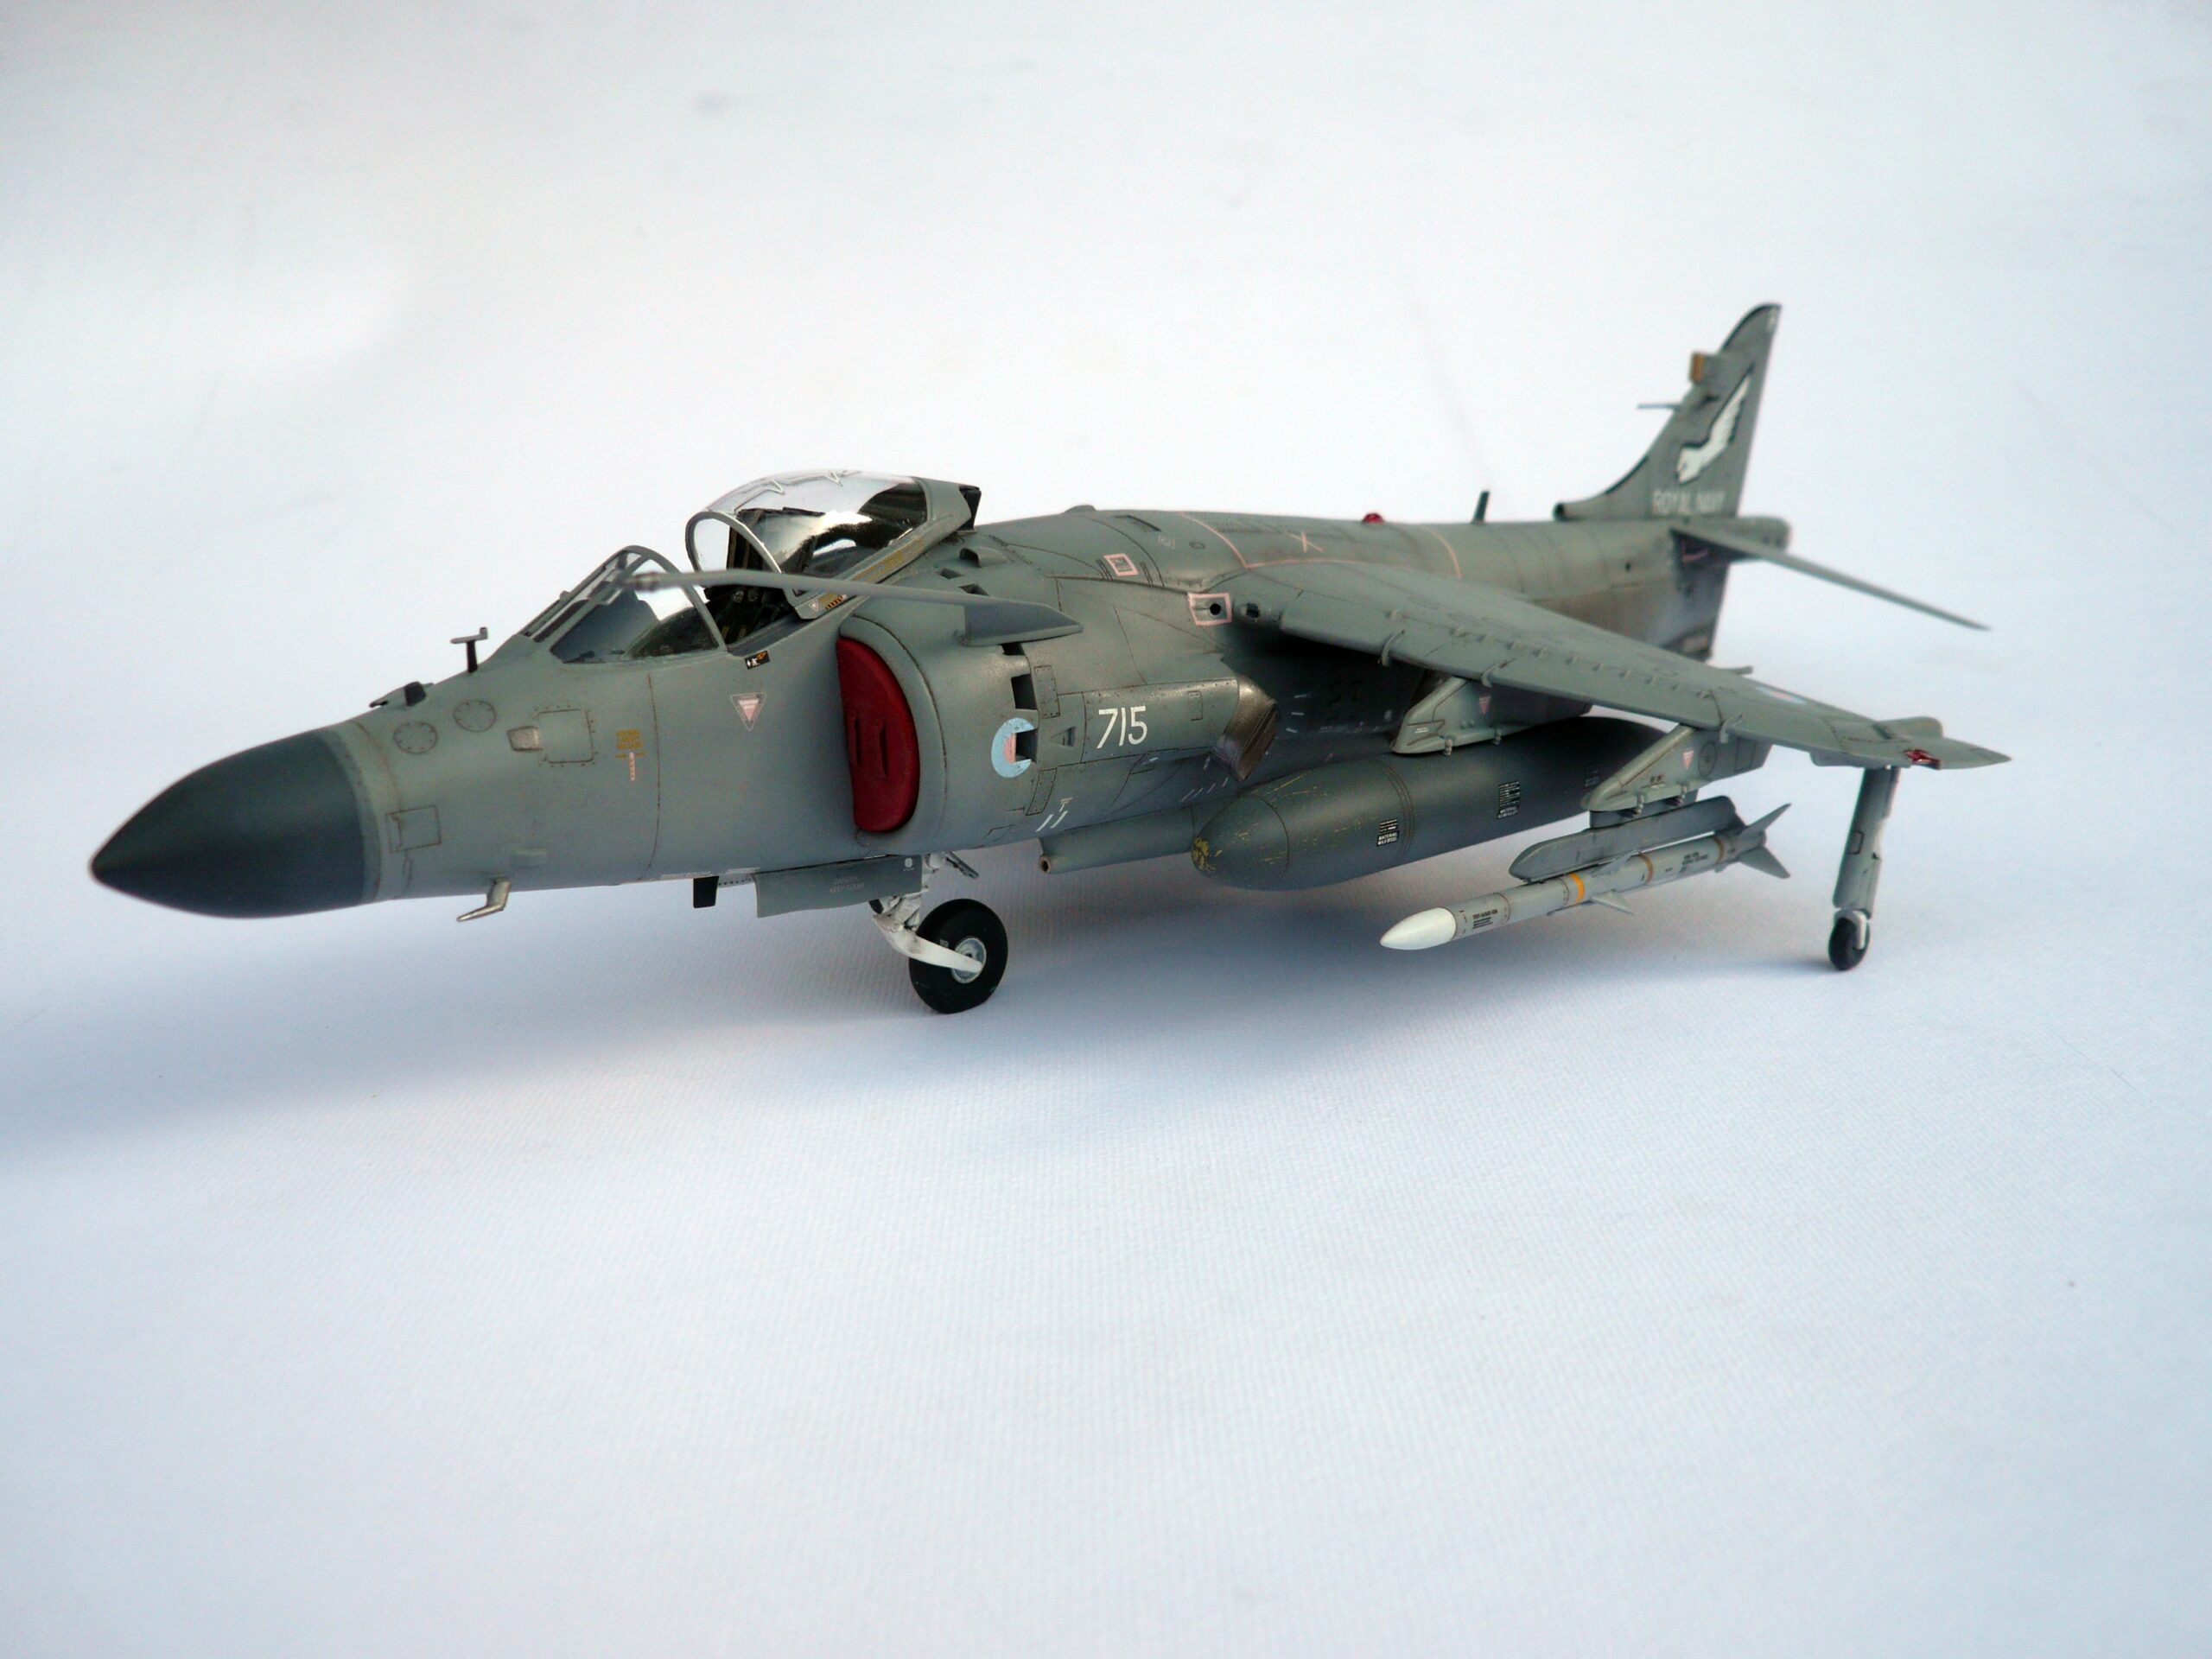
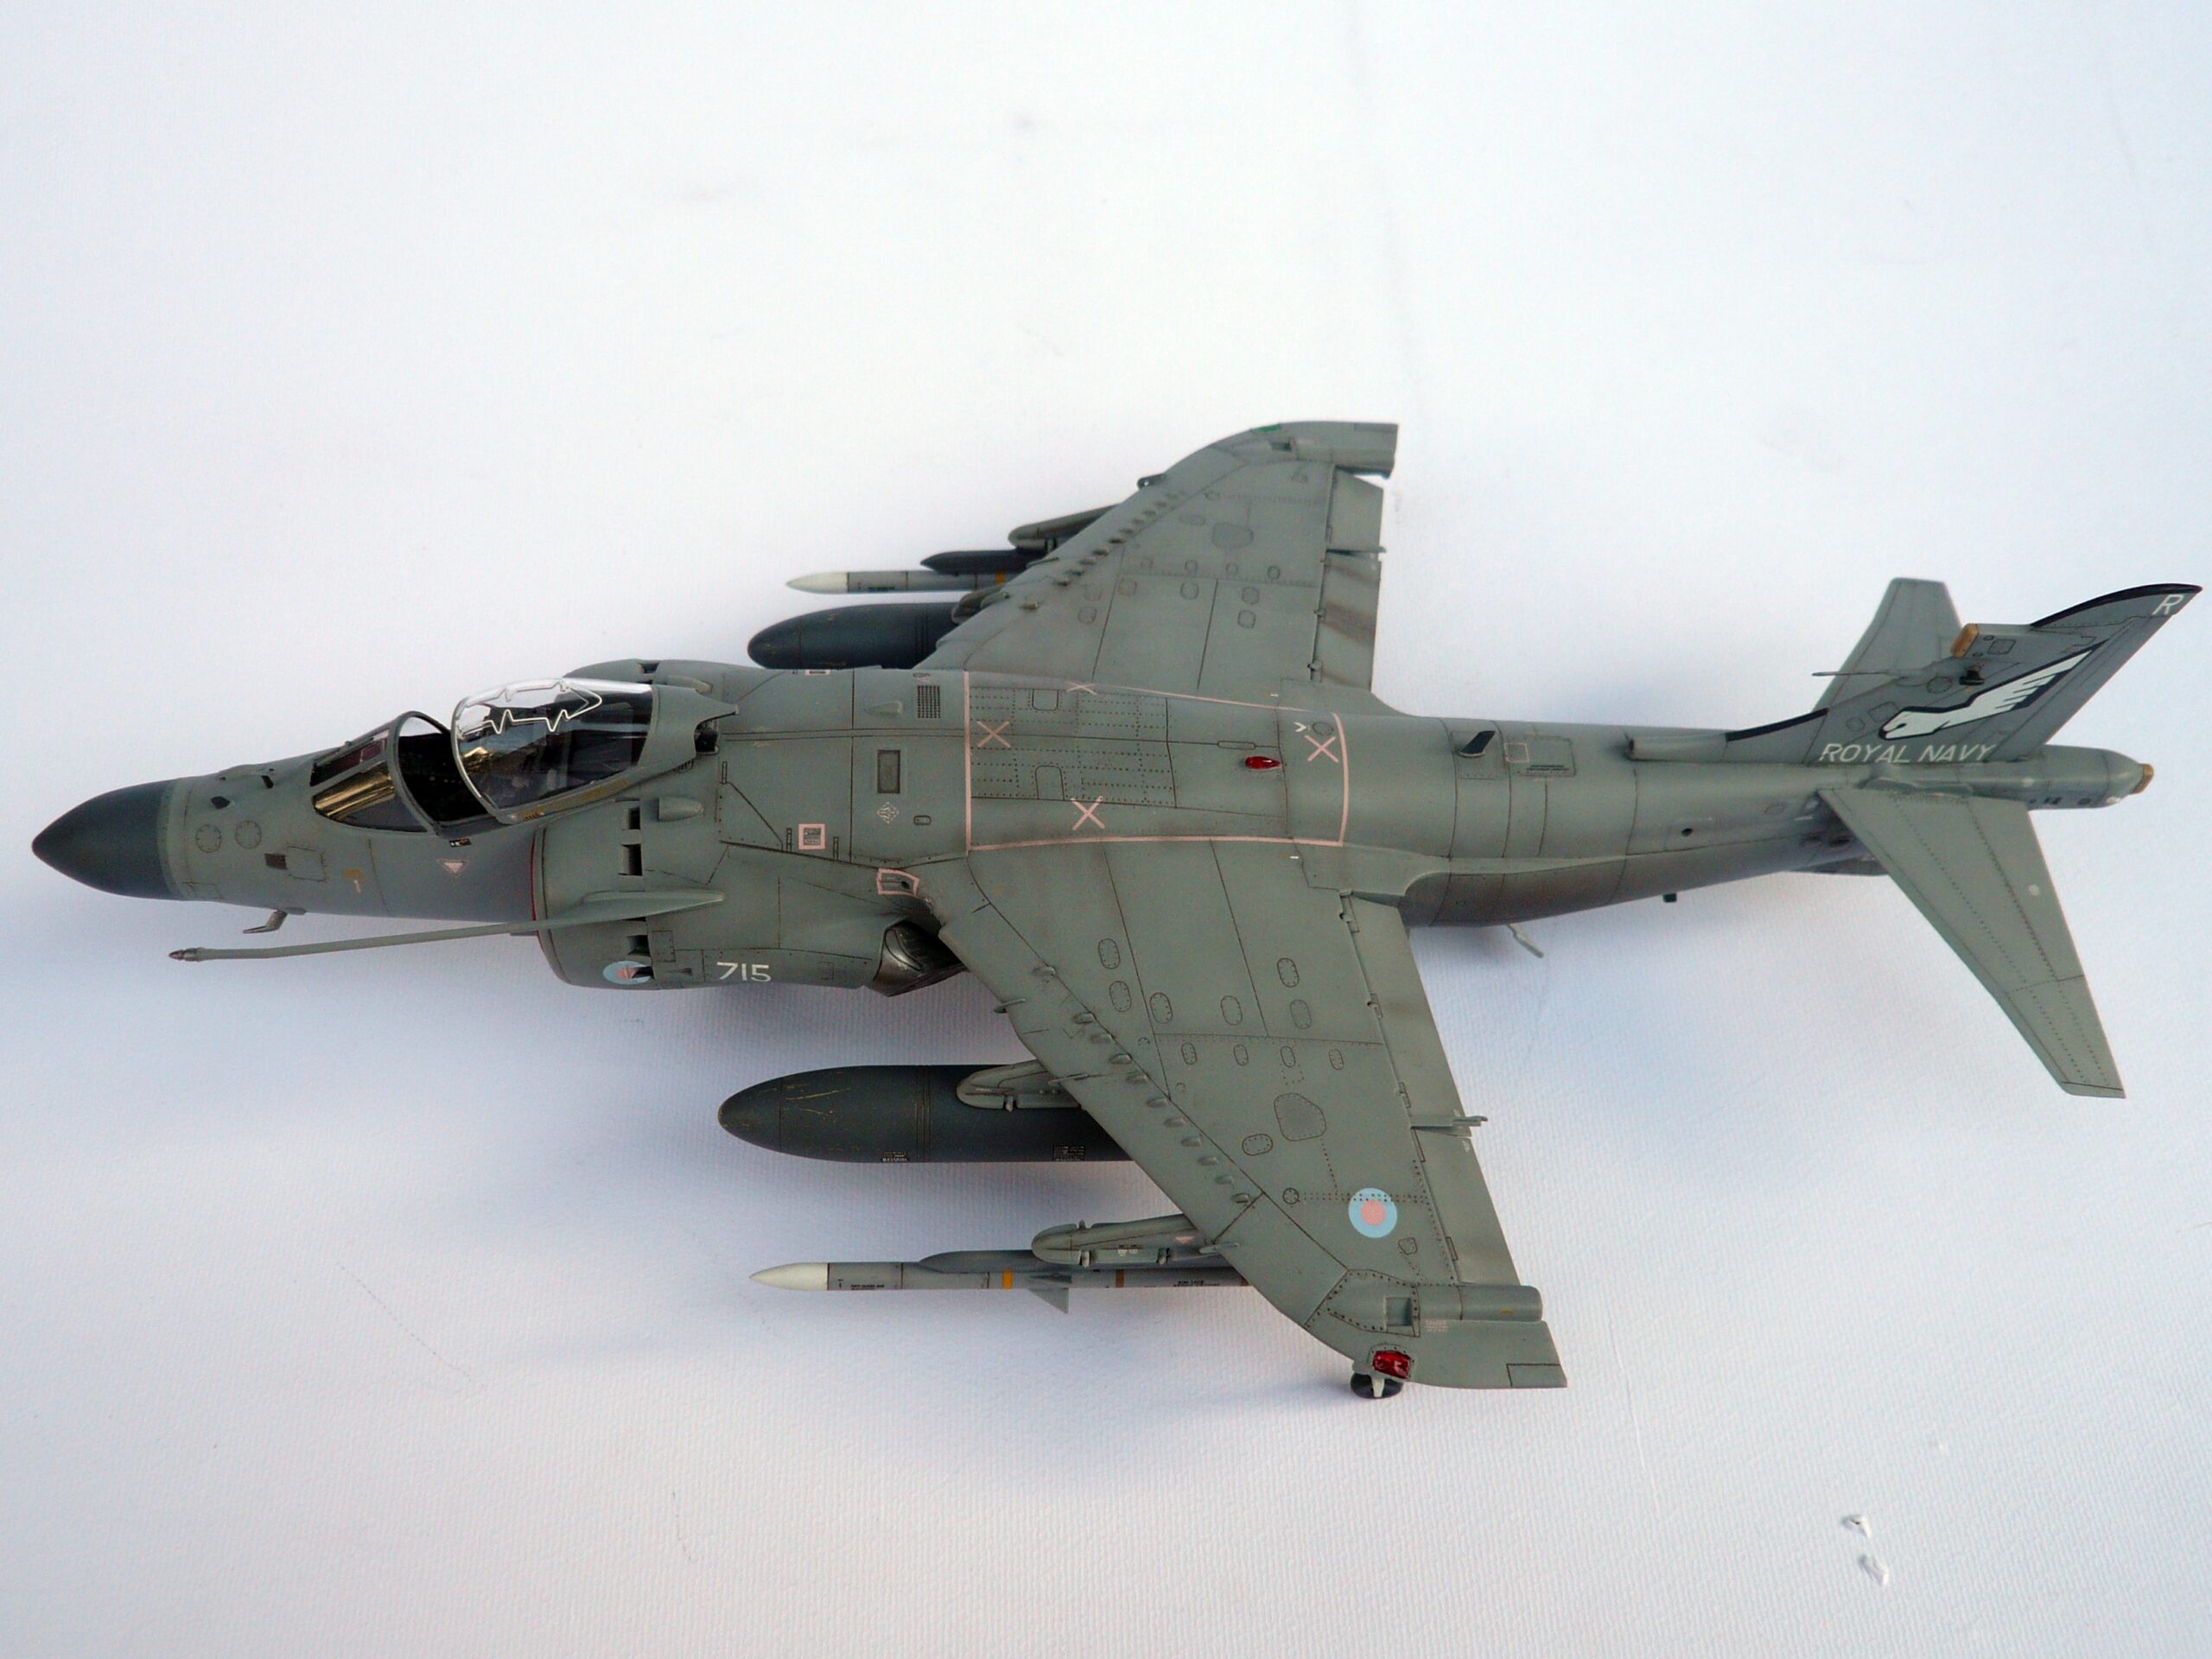
Painting the Harrier FA.2
The painting process utilized a dedicated British aircraft paint set.
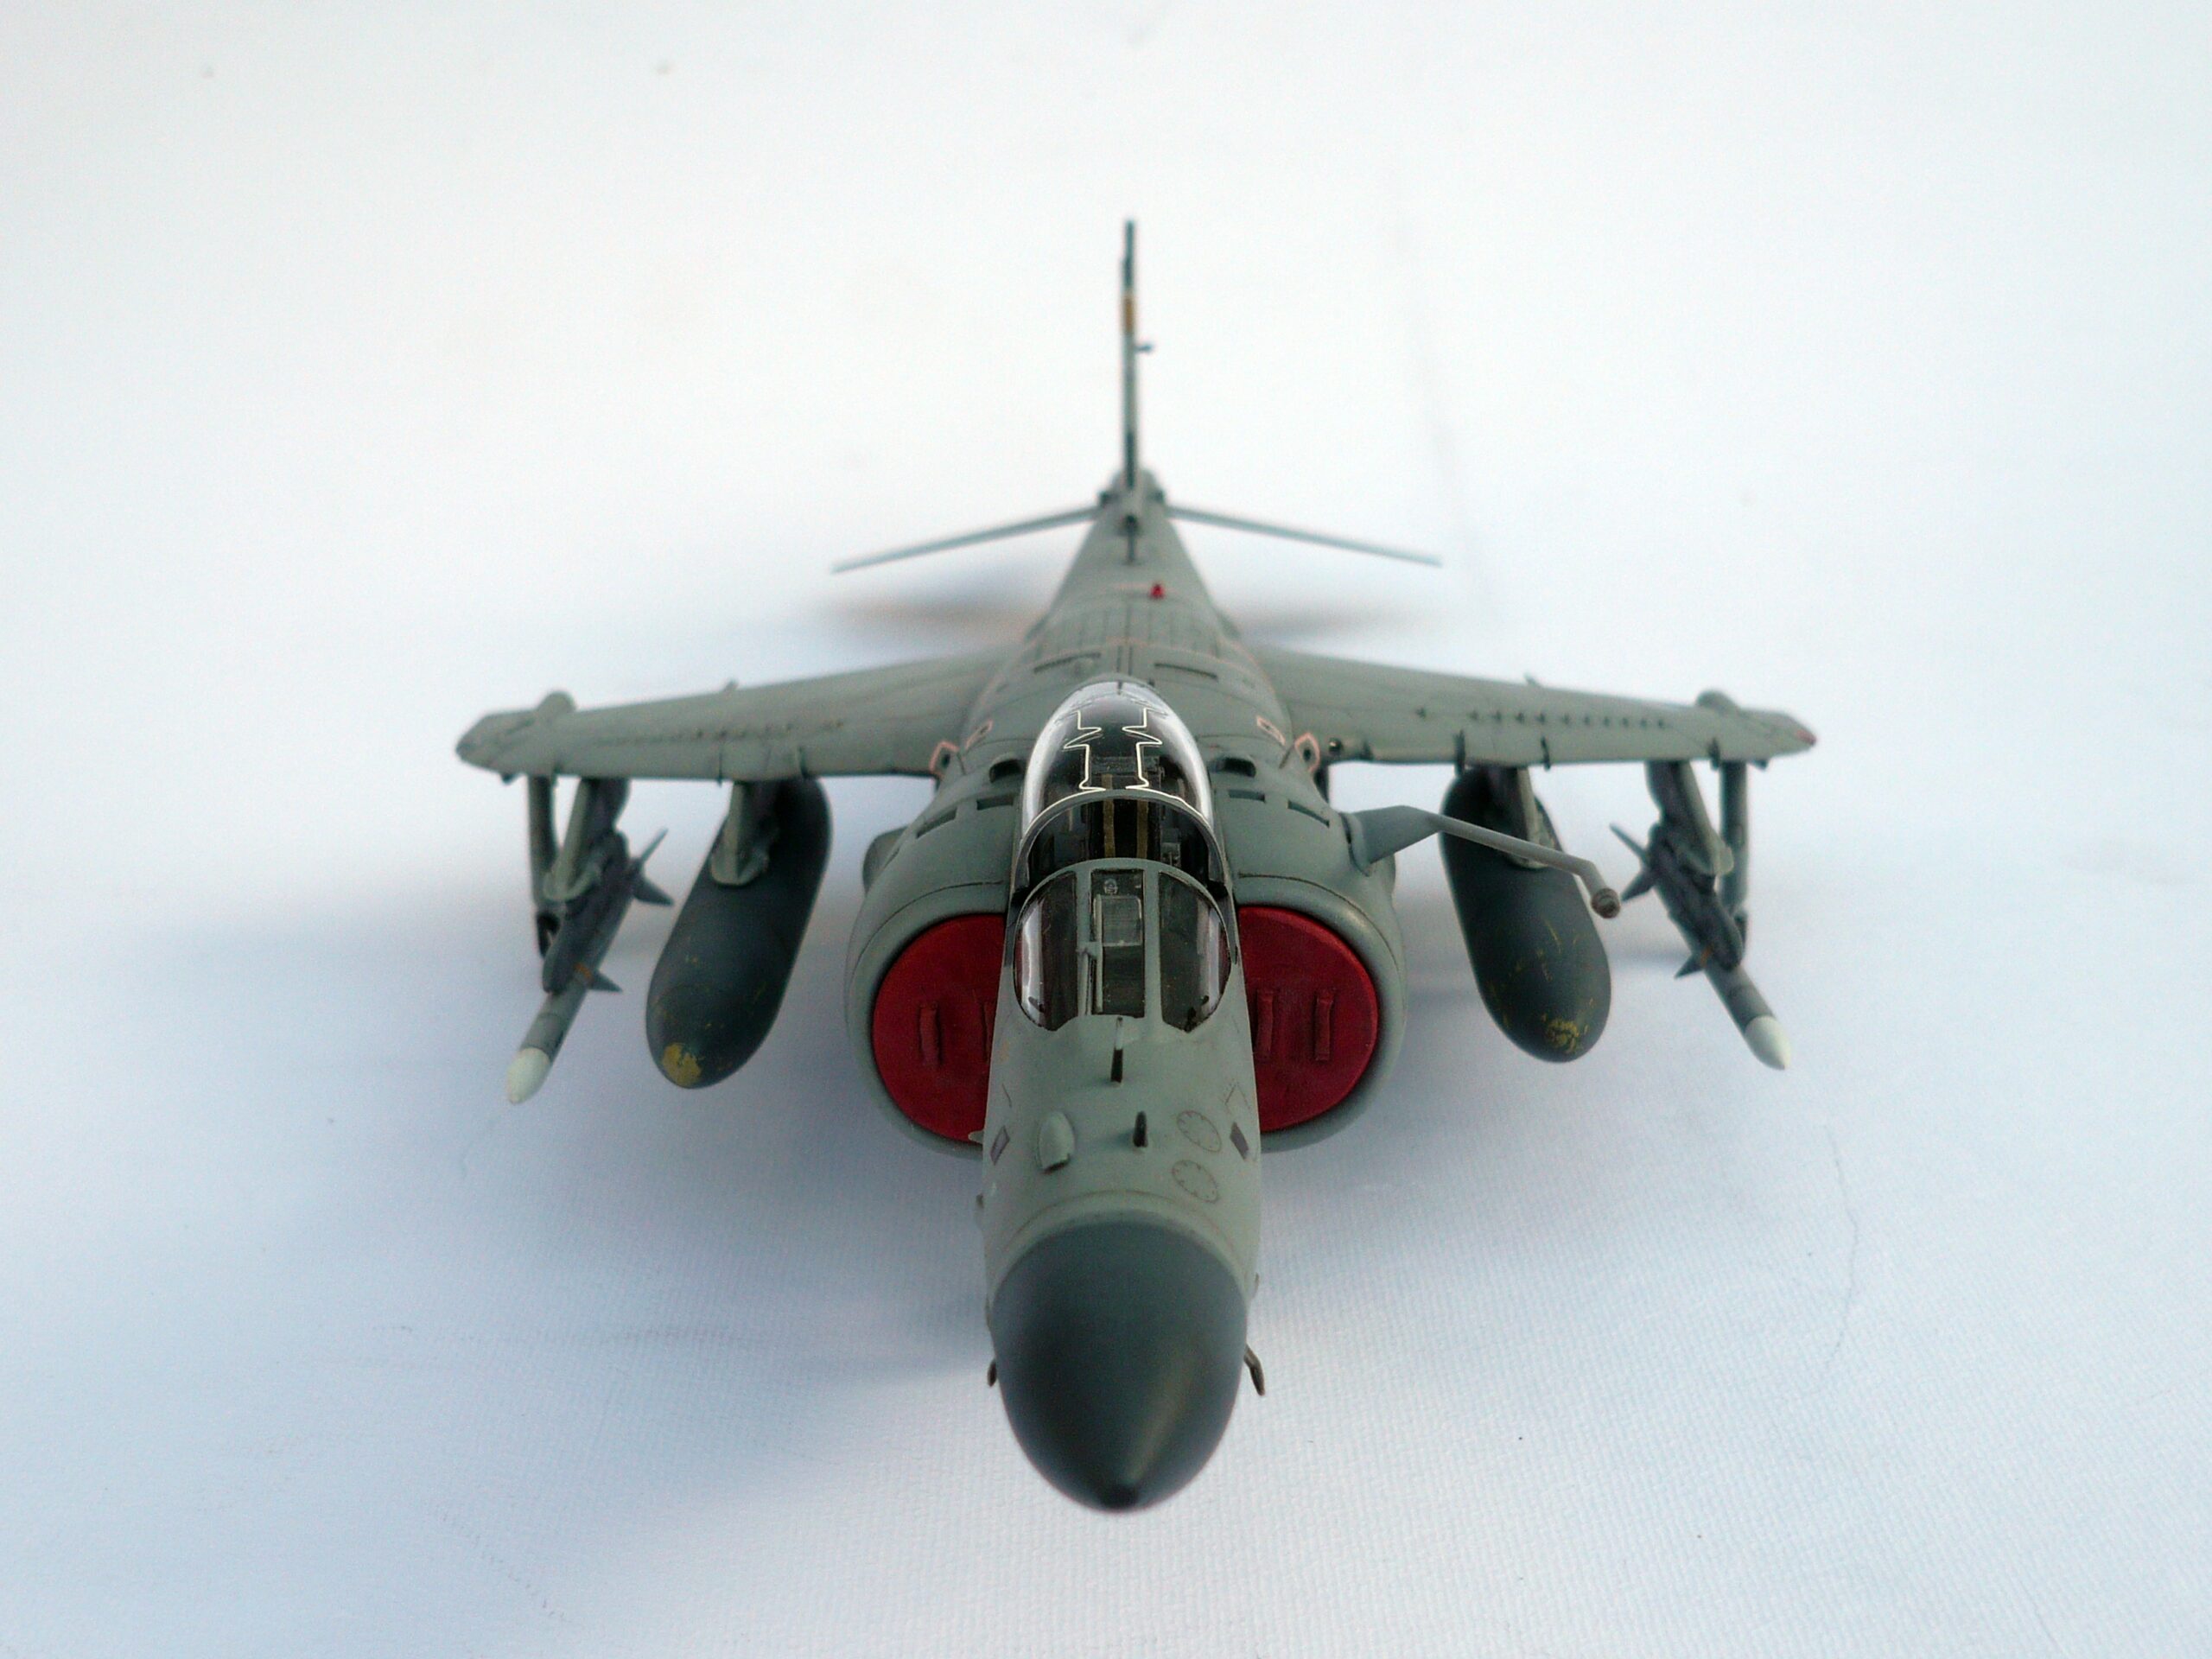
The radome was painted using a custom mix of Medium Gunship Grey and White, with additional adjustments using black to achieve the slightly darker tone commonly observed on operational aircraft.
The remainder of the airframe received a carefully balanced grey finish, with multiple tonal variations achieved by adding small amounts of black or white to the base color.
These subtle adjustments helped replicate the weathered appearance of Fleet Air Arm aircraft operating in demanding maritime environments.
Highlights and shadow areas were gradually built up using the airbrush, creating a convincing scale representation without excessive contrast.
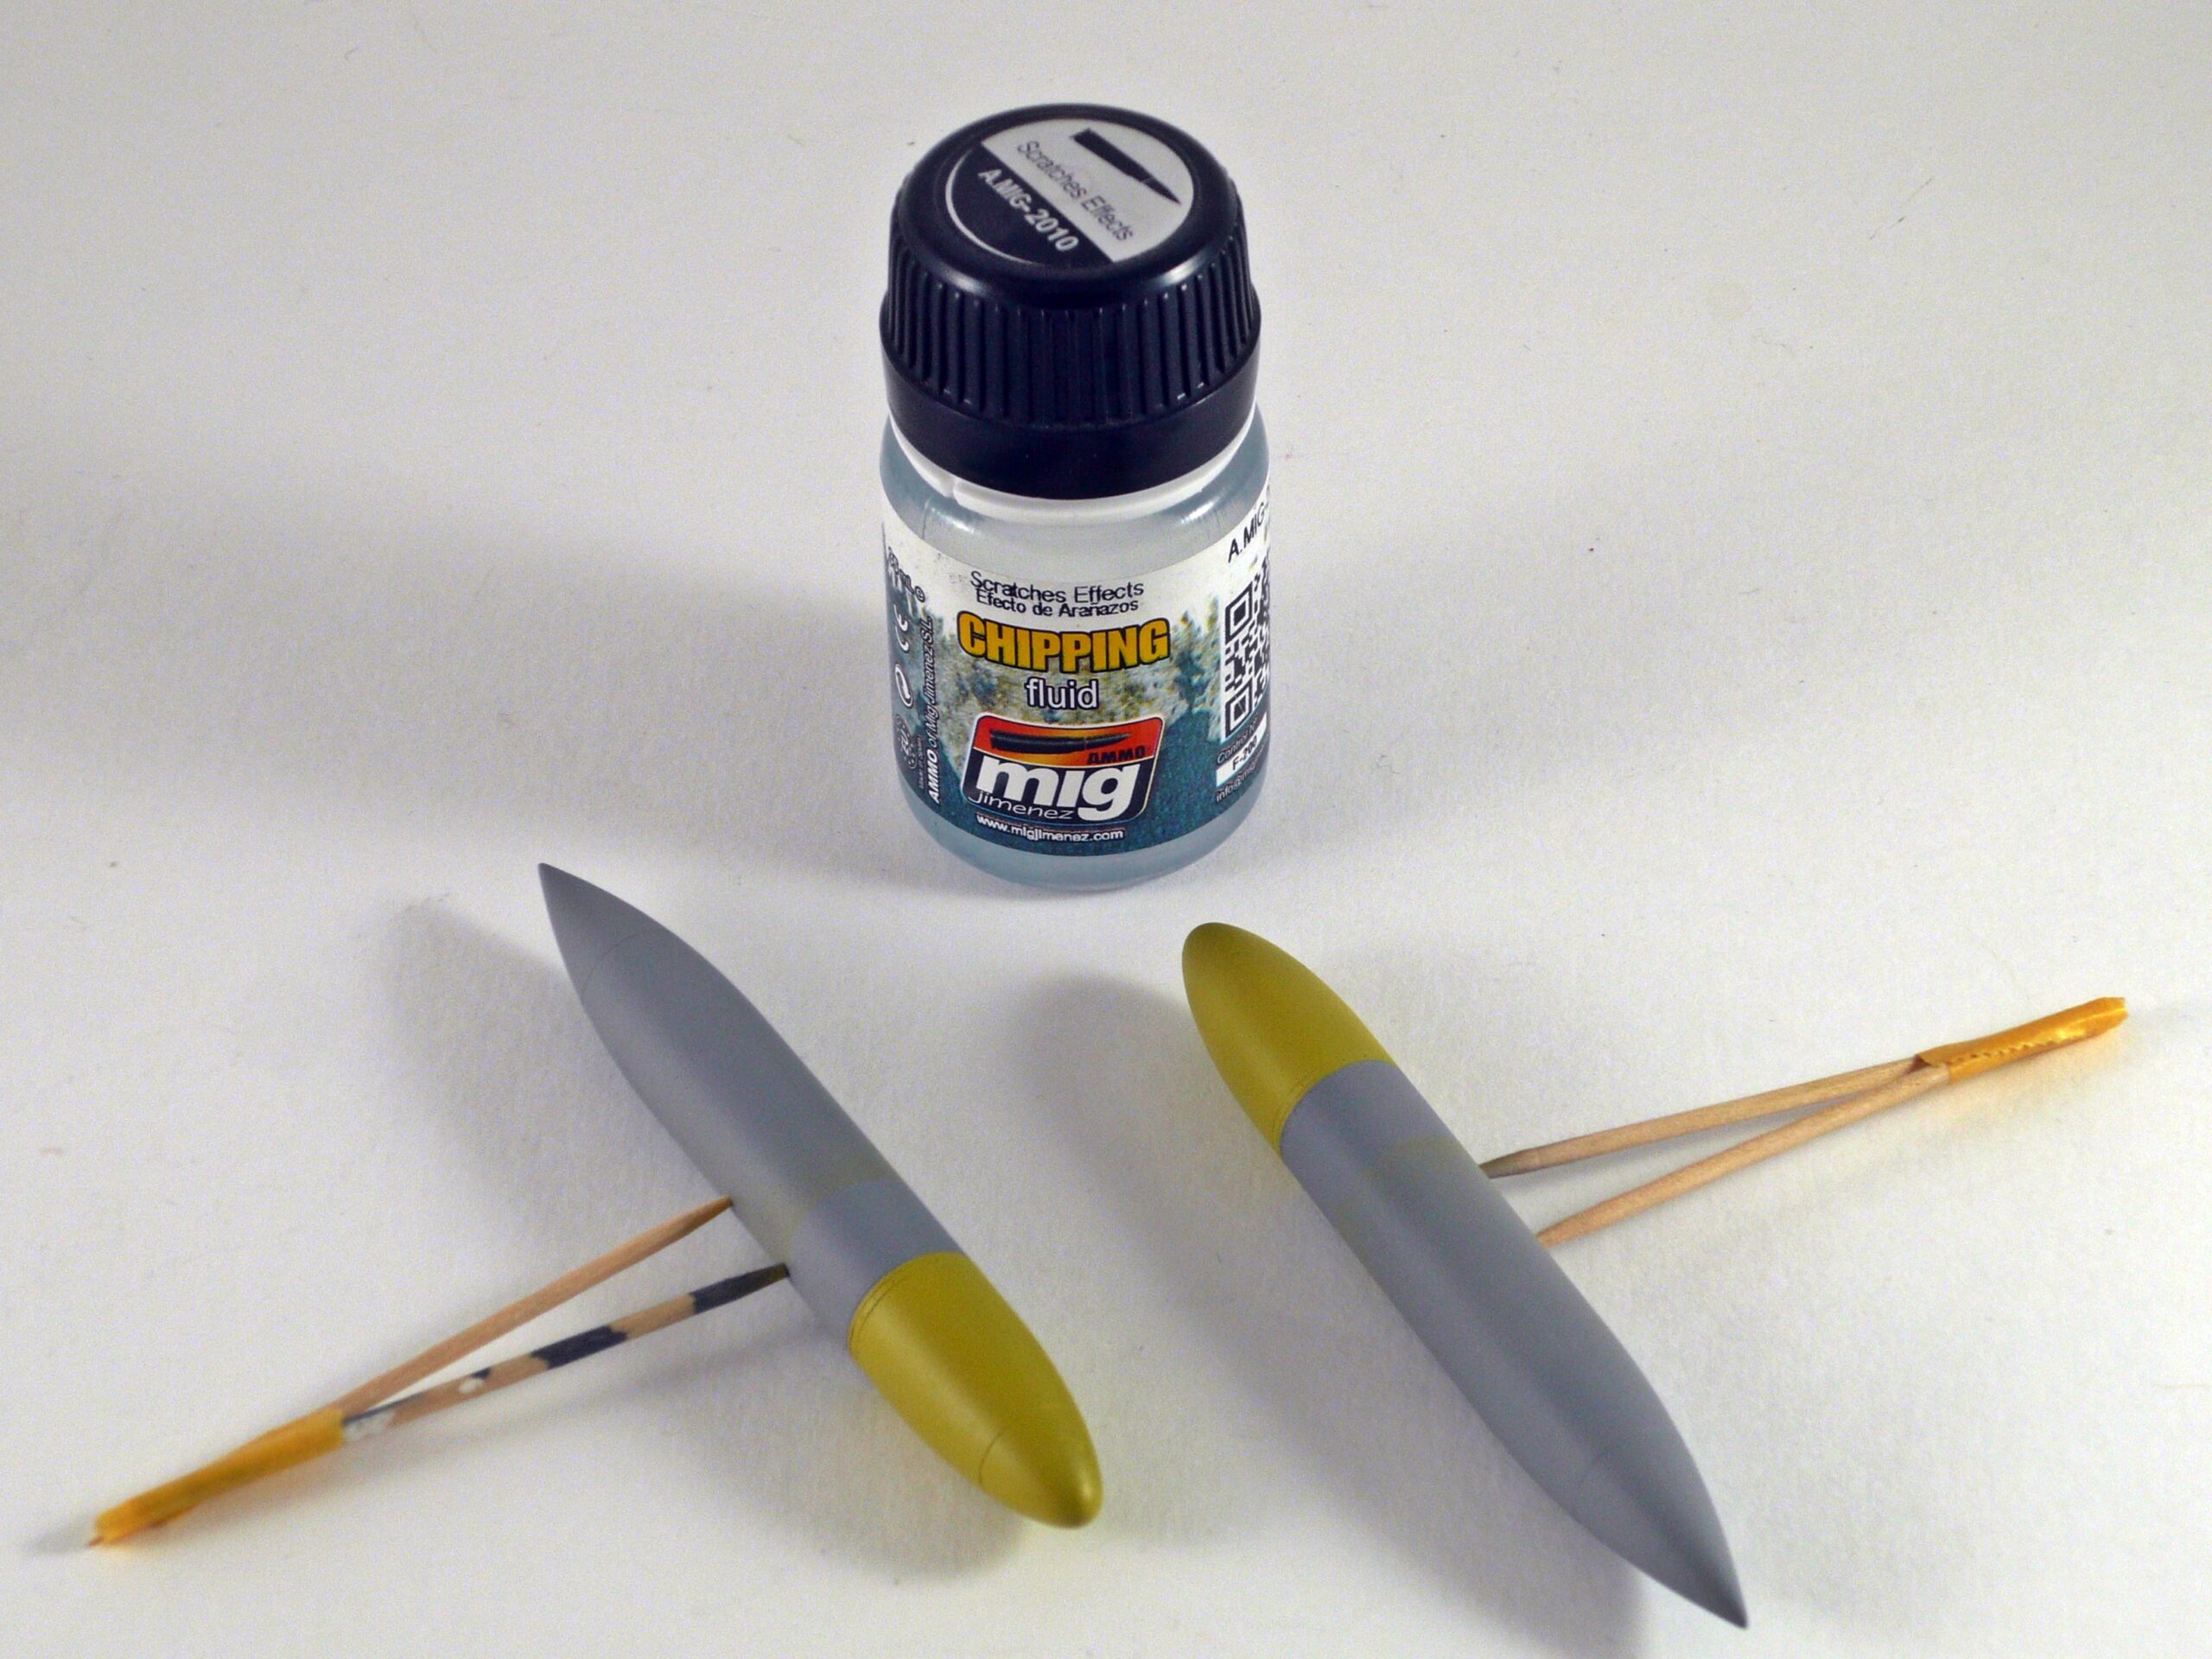
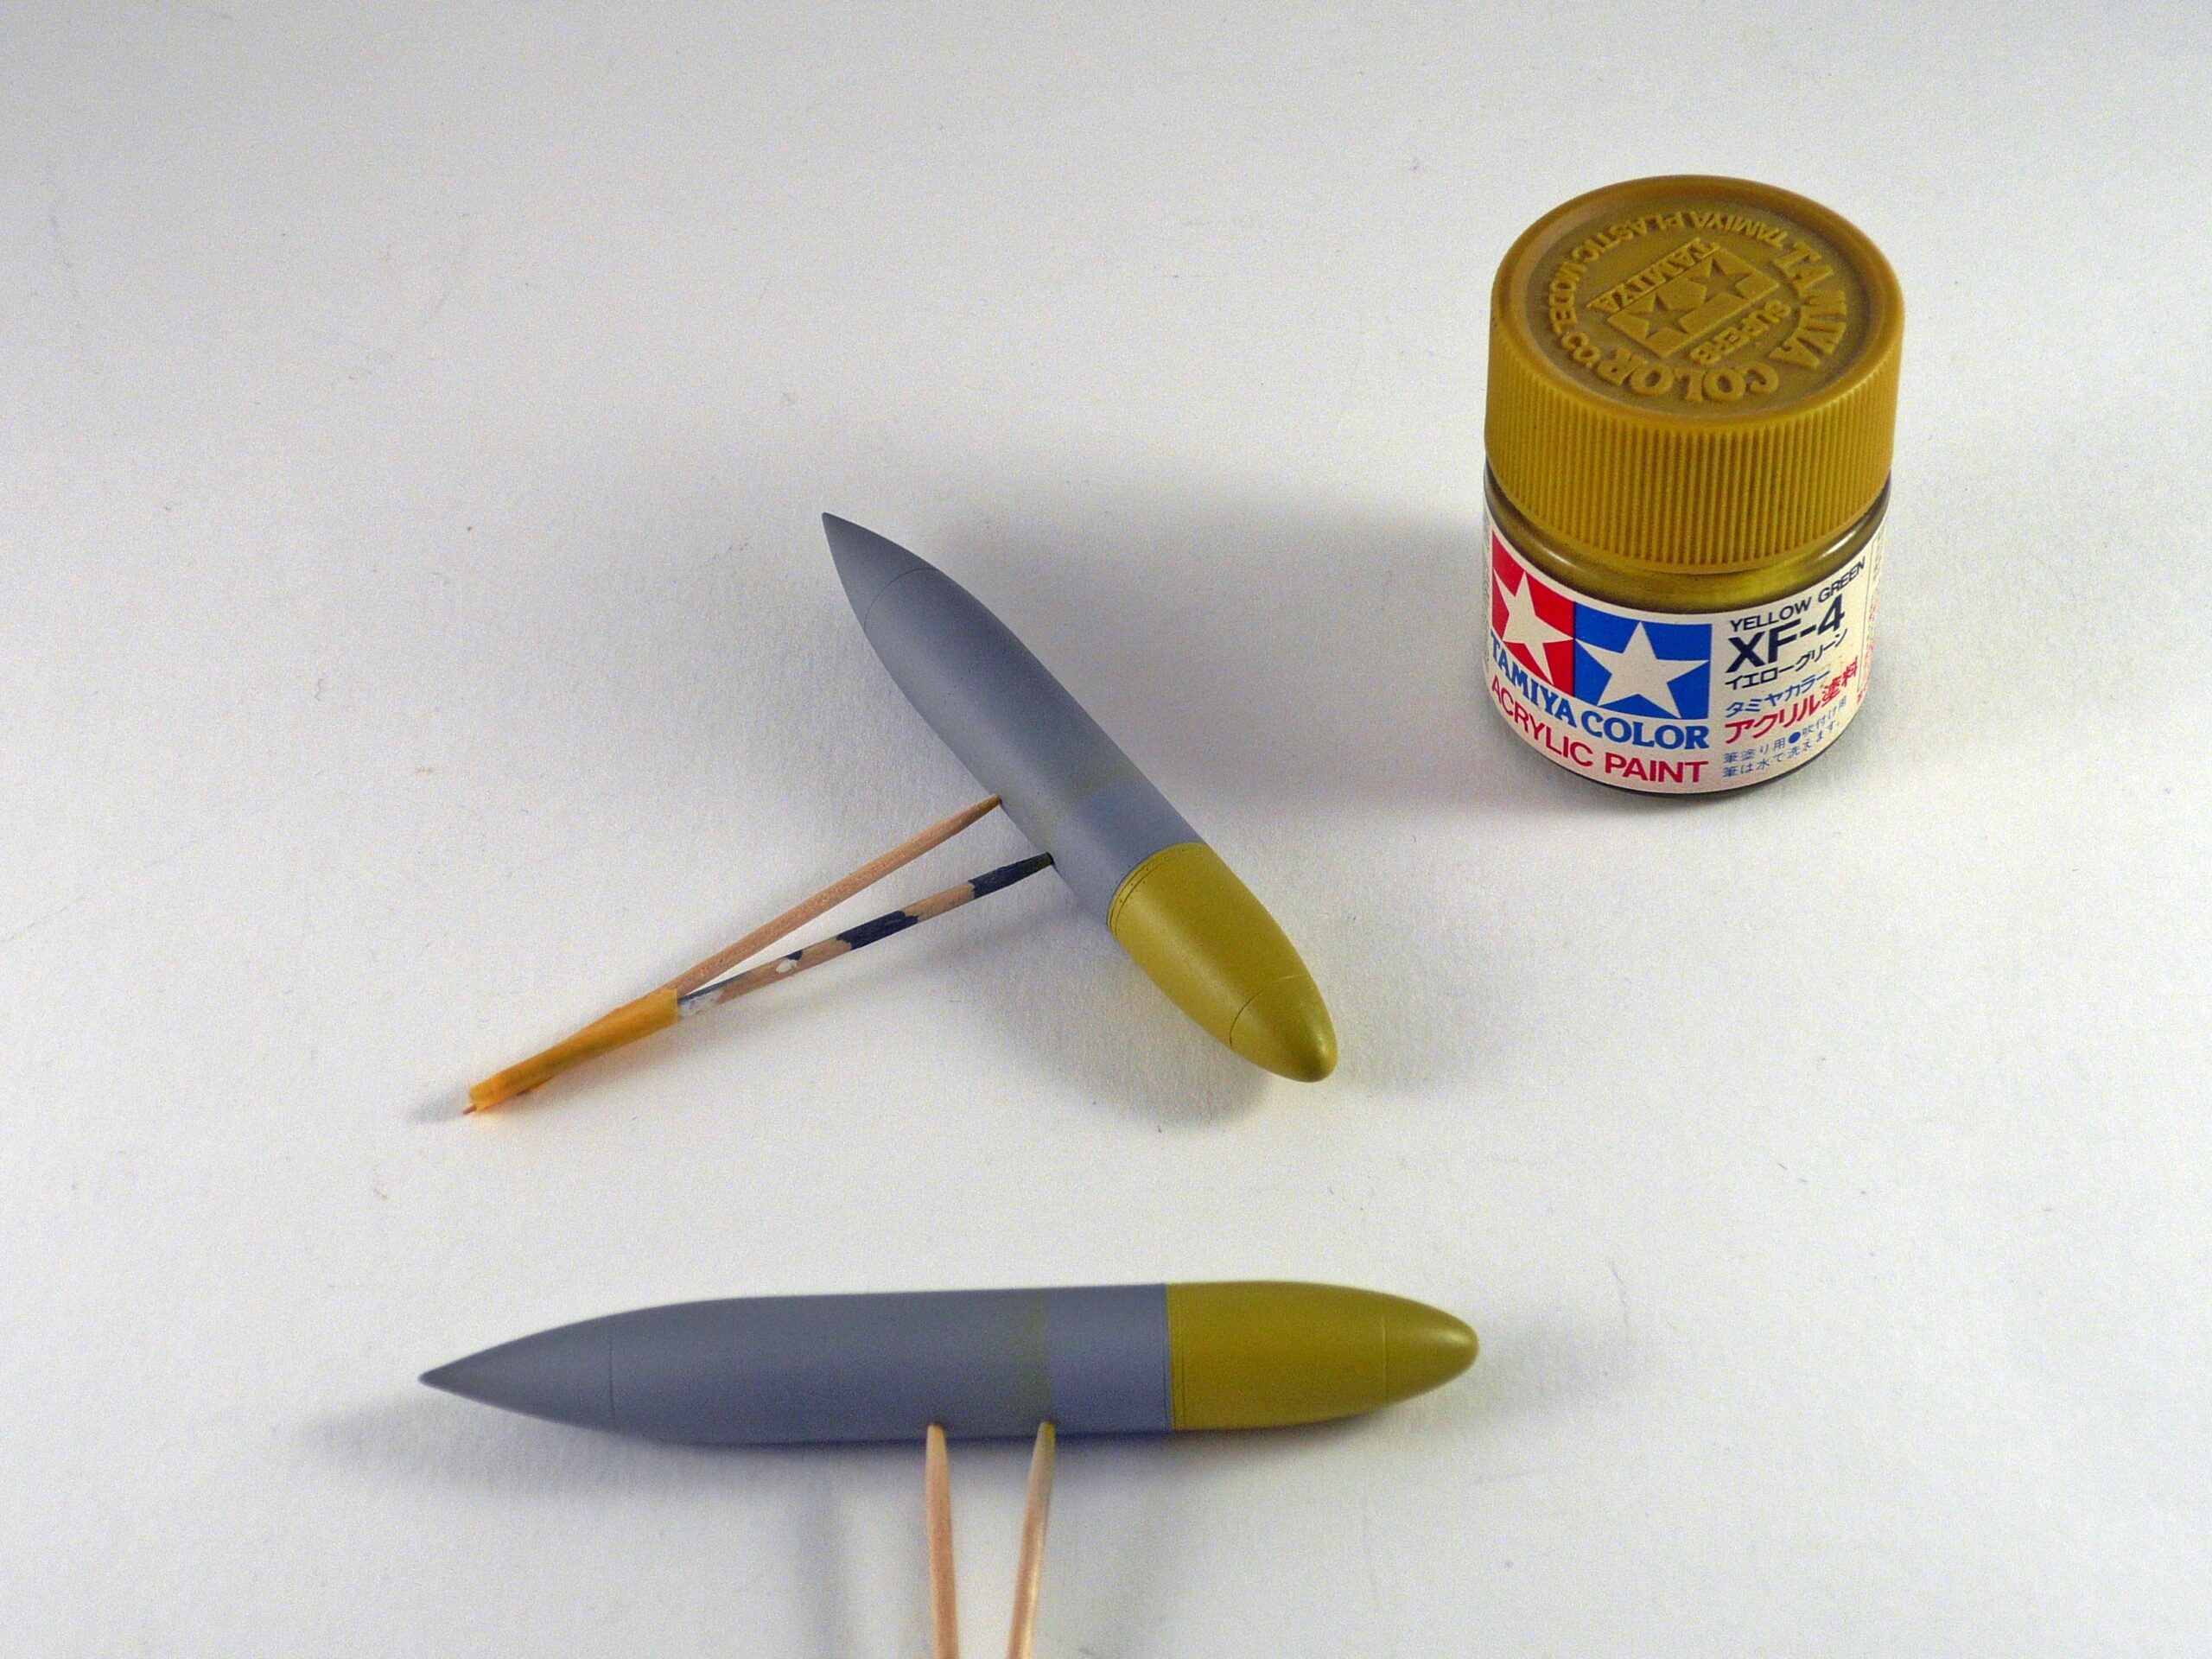
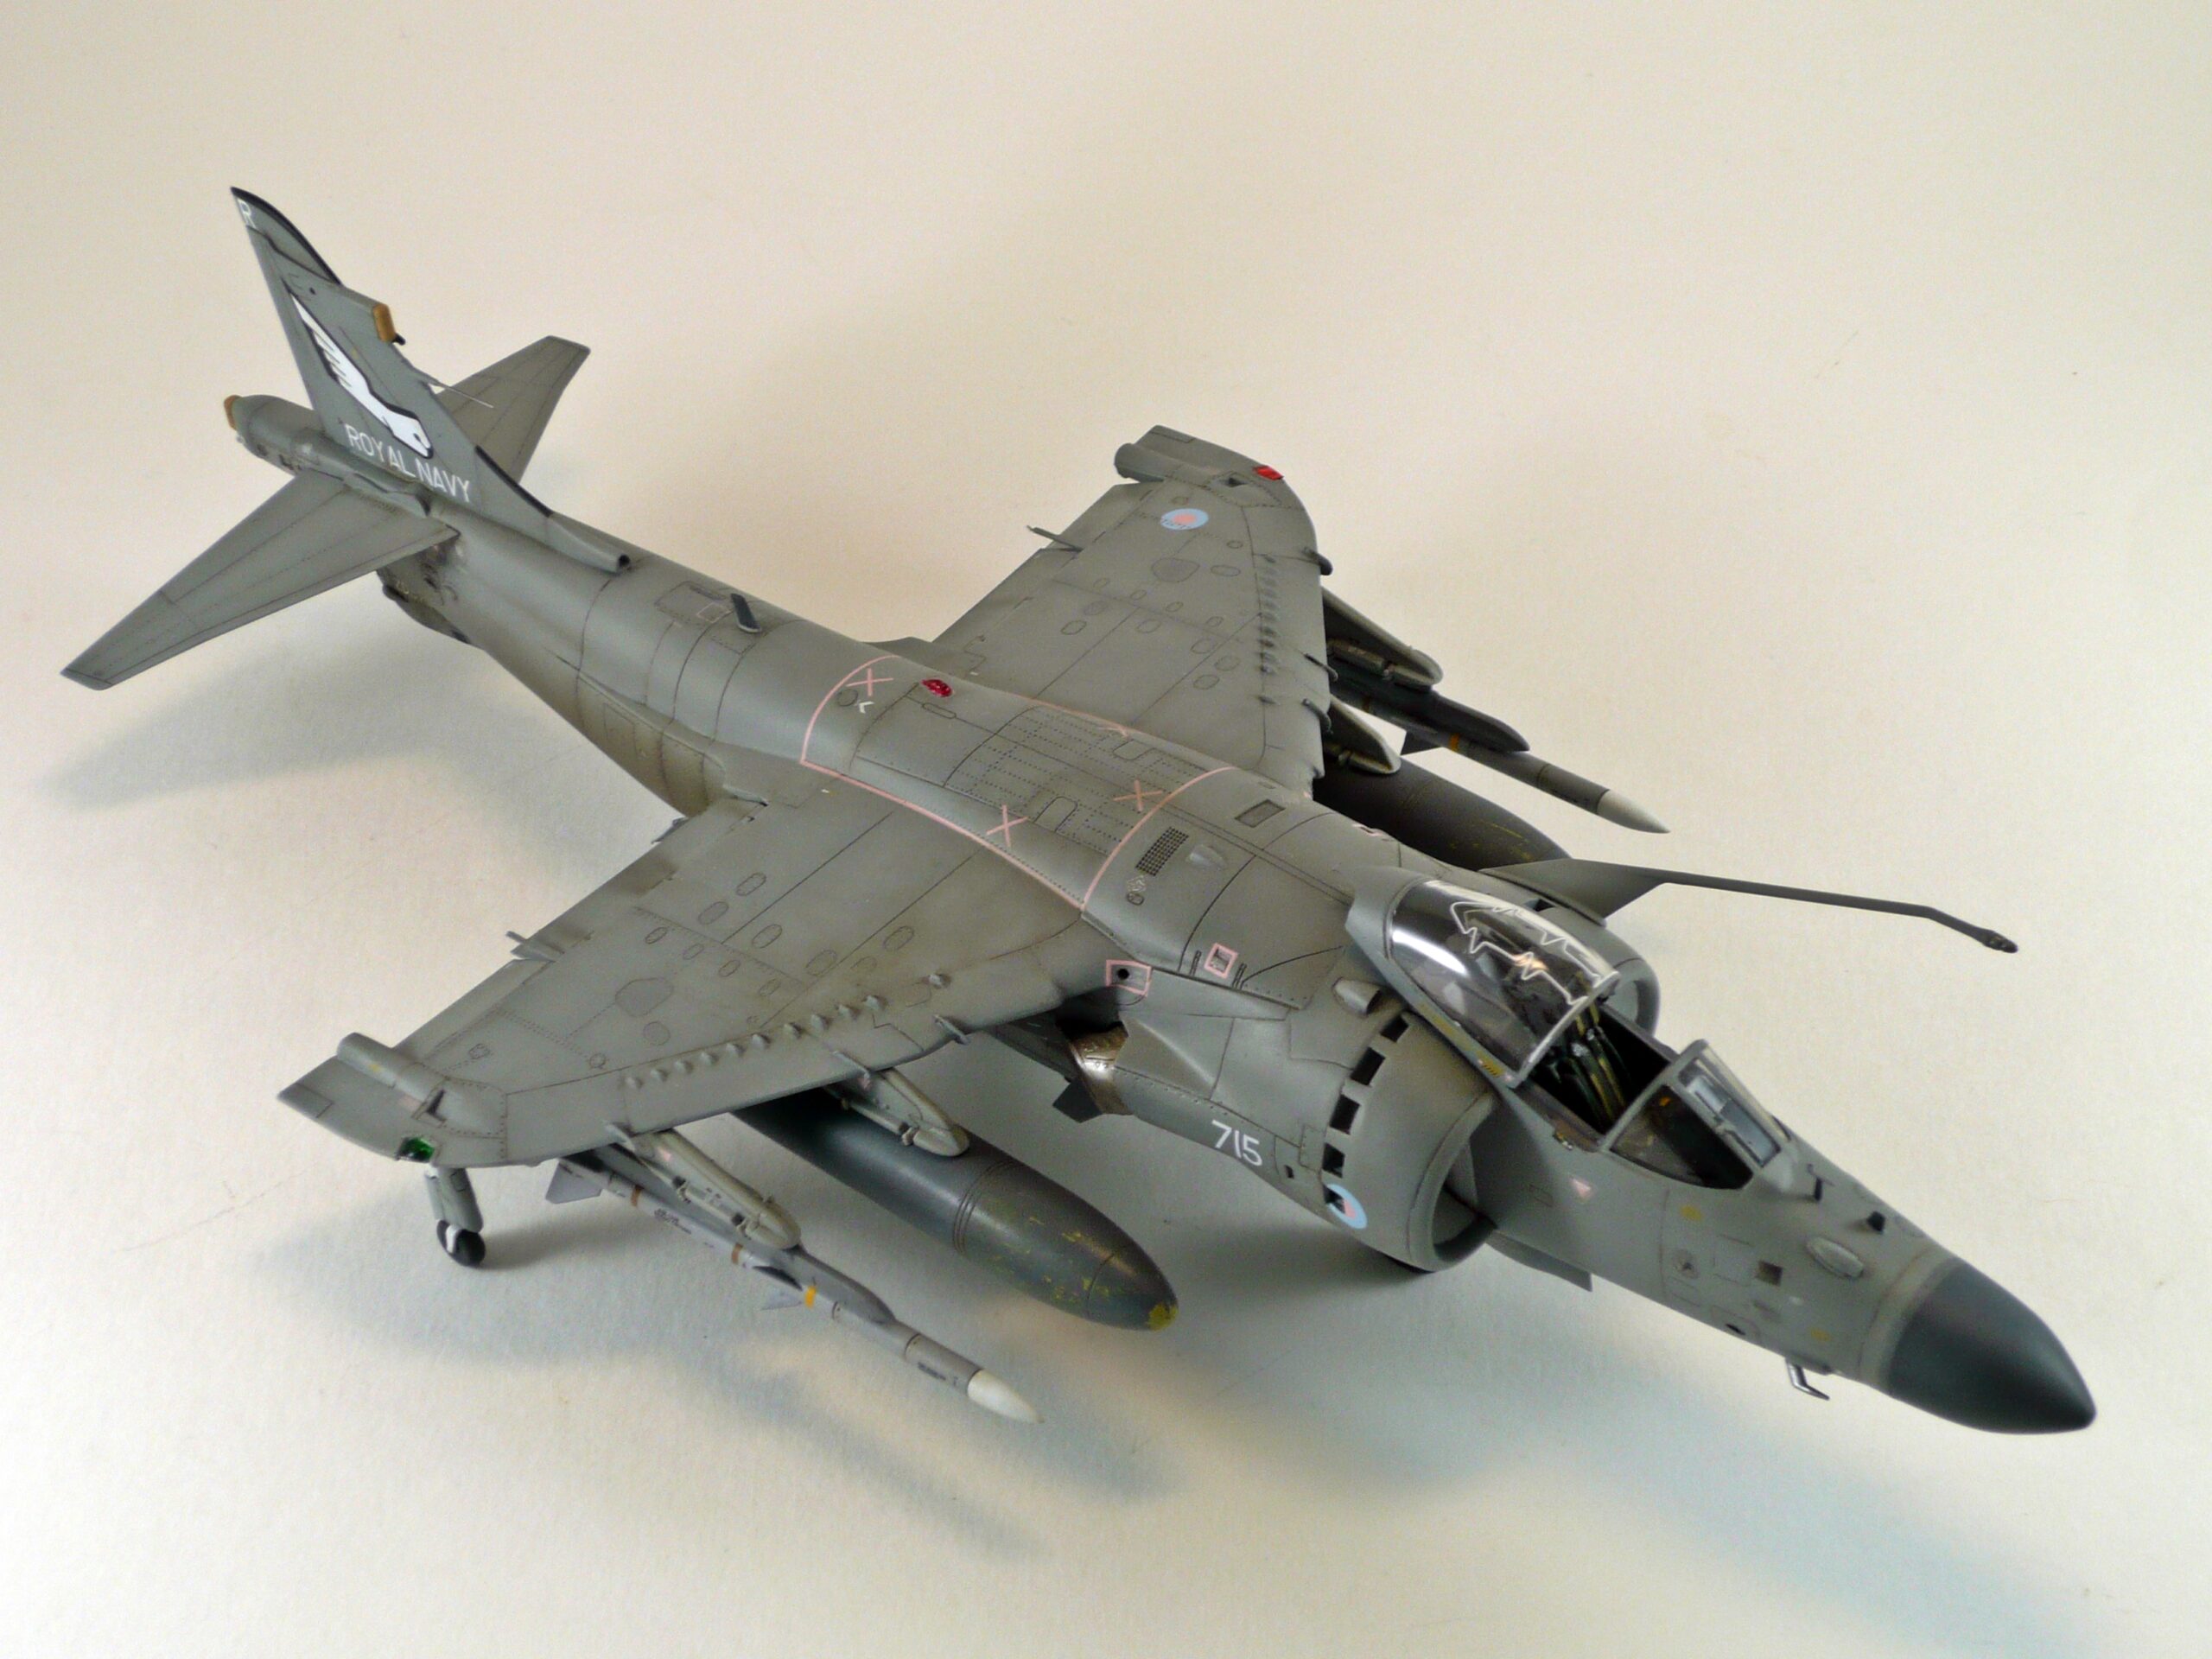
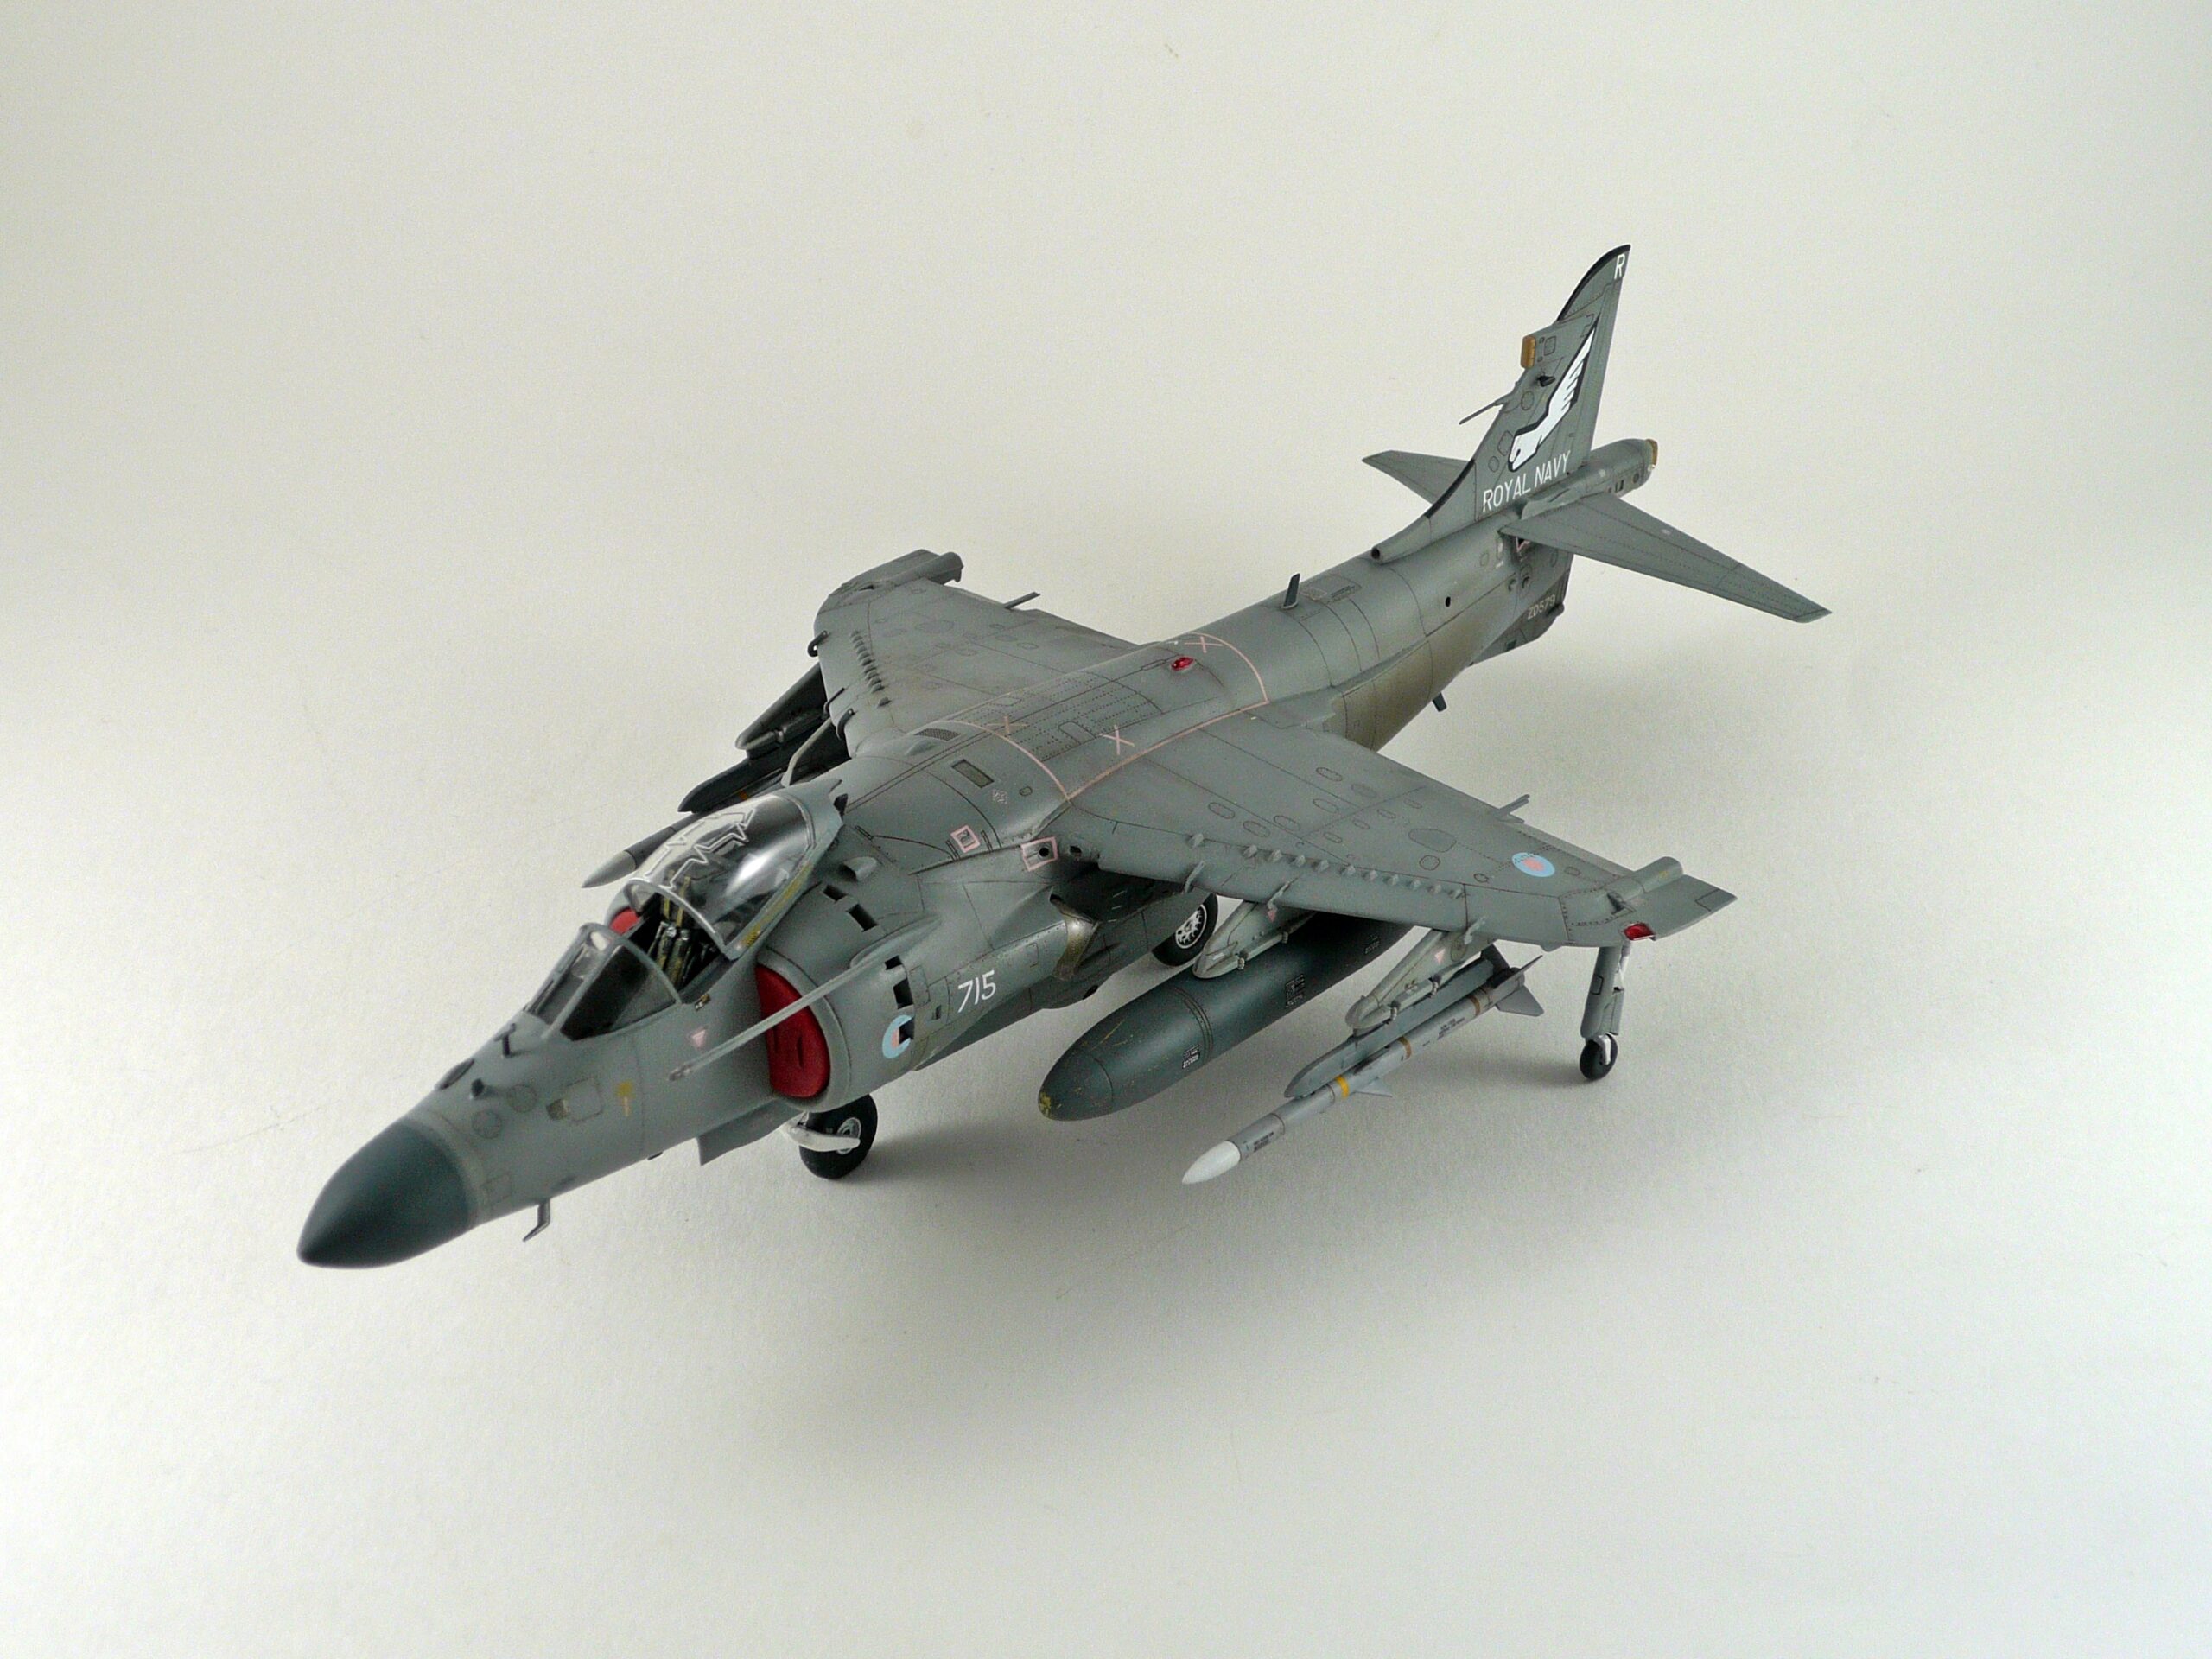
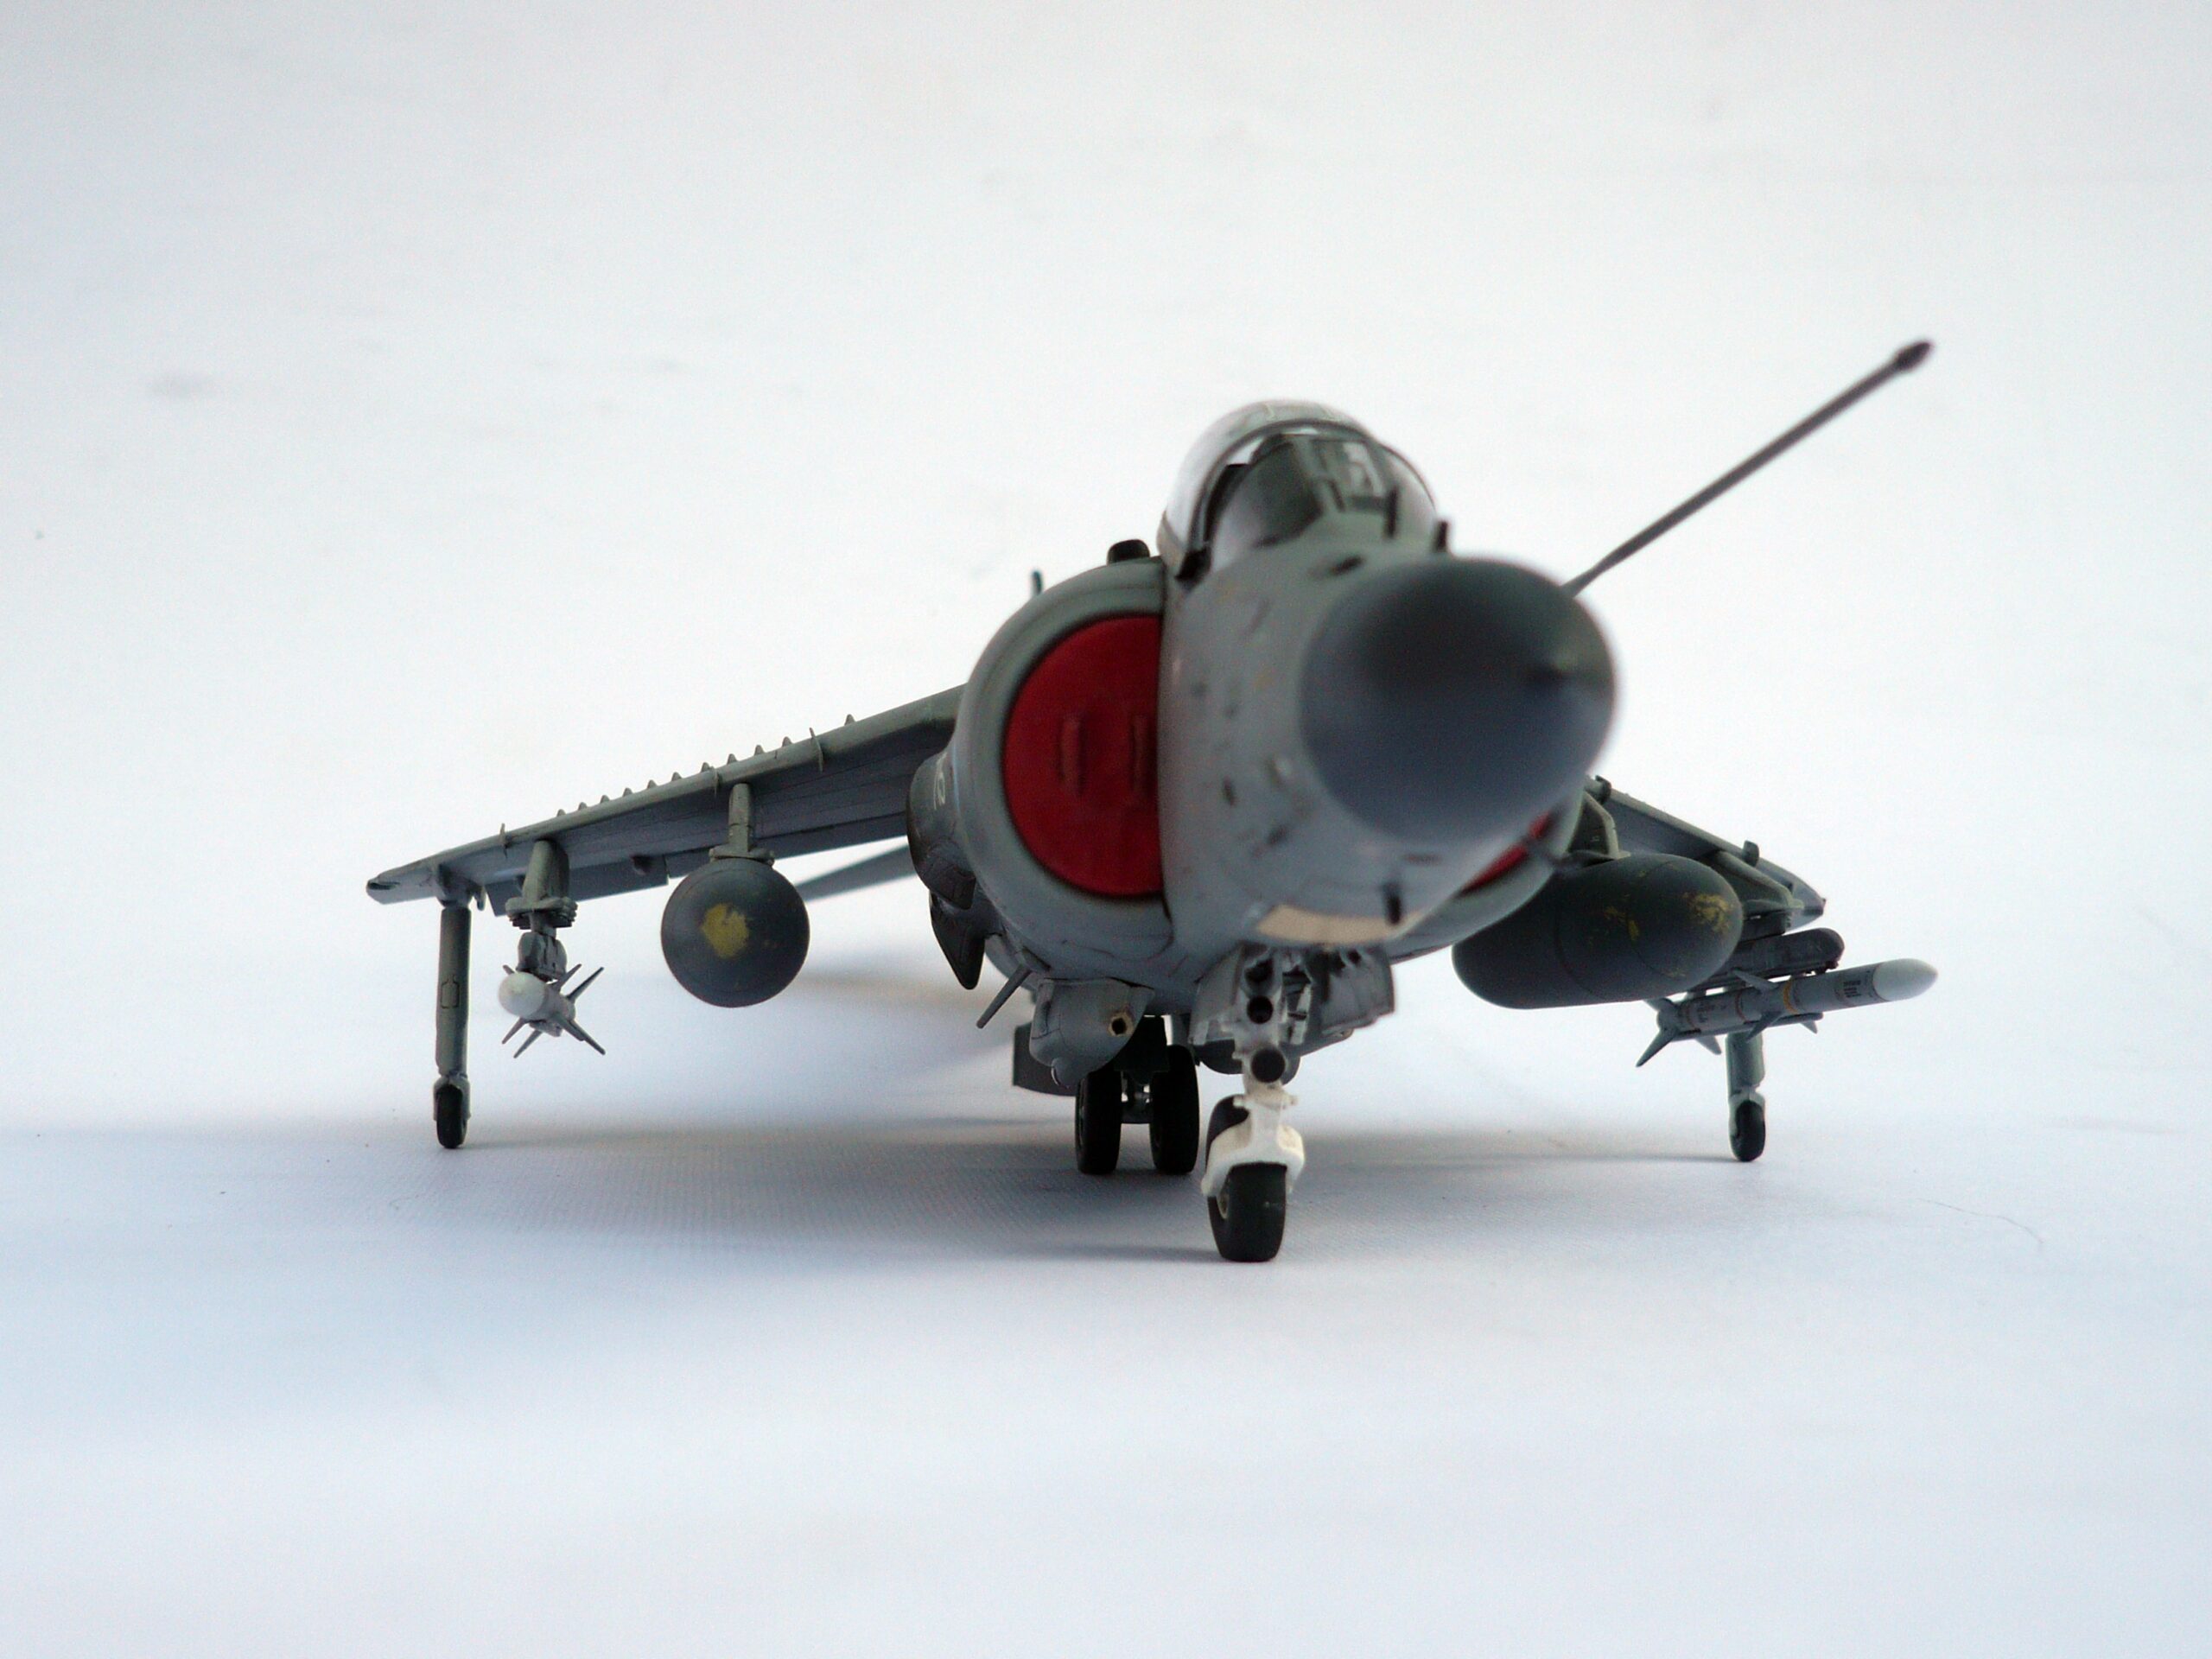
Fuel Tanks and Operational Wear
The external fuel tanks were painted using the same color family as the radome to maintain visual consistency.
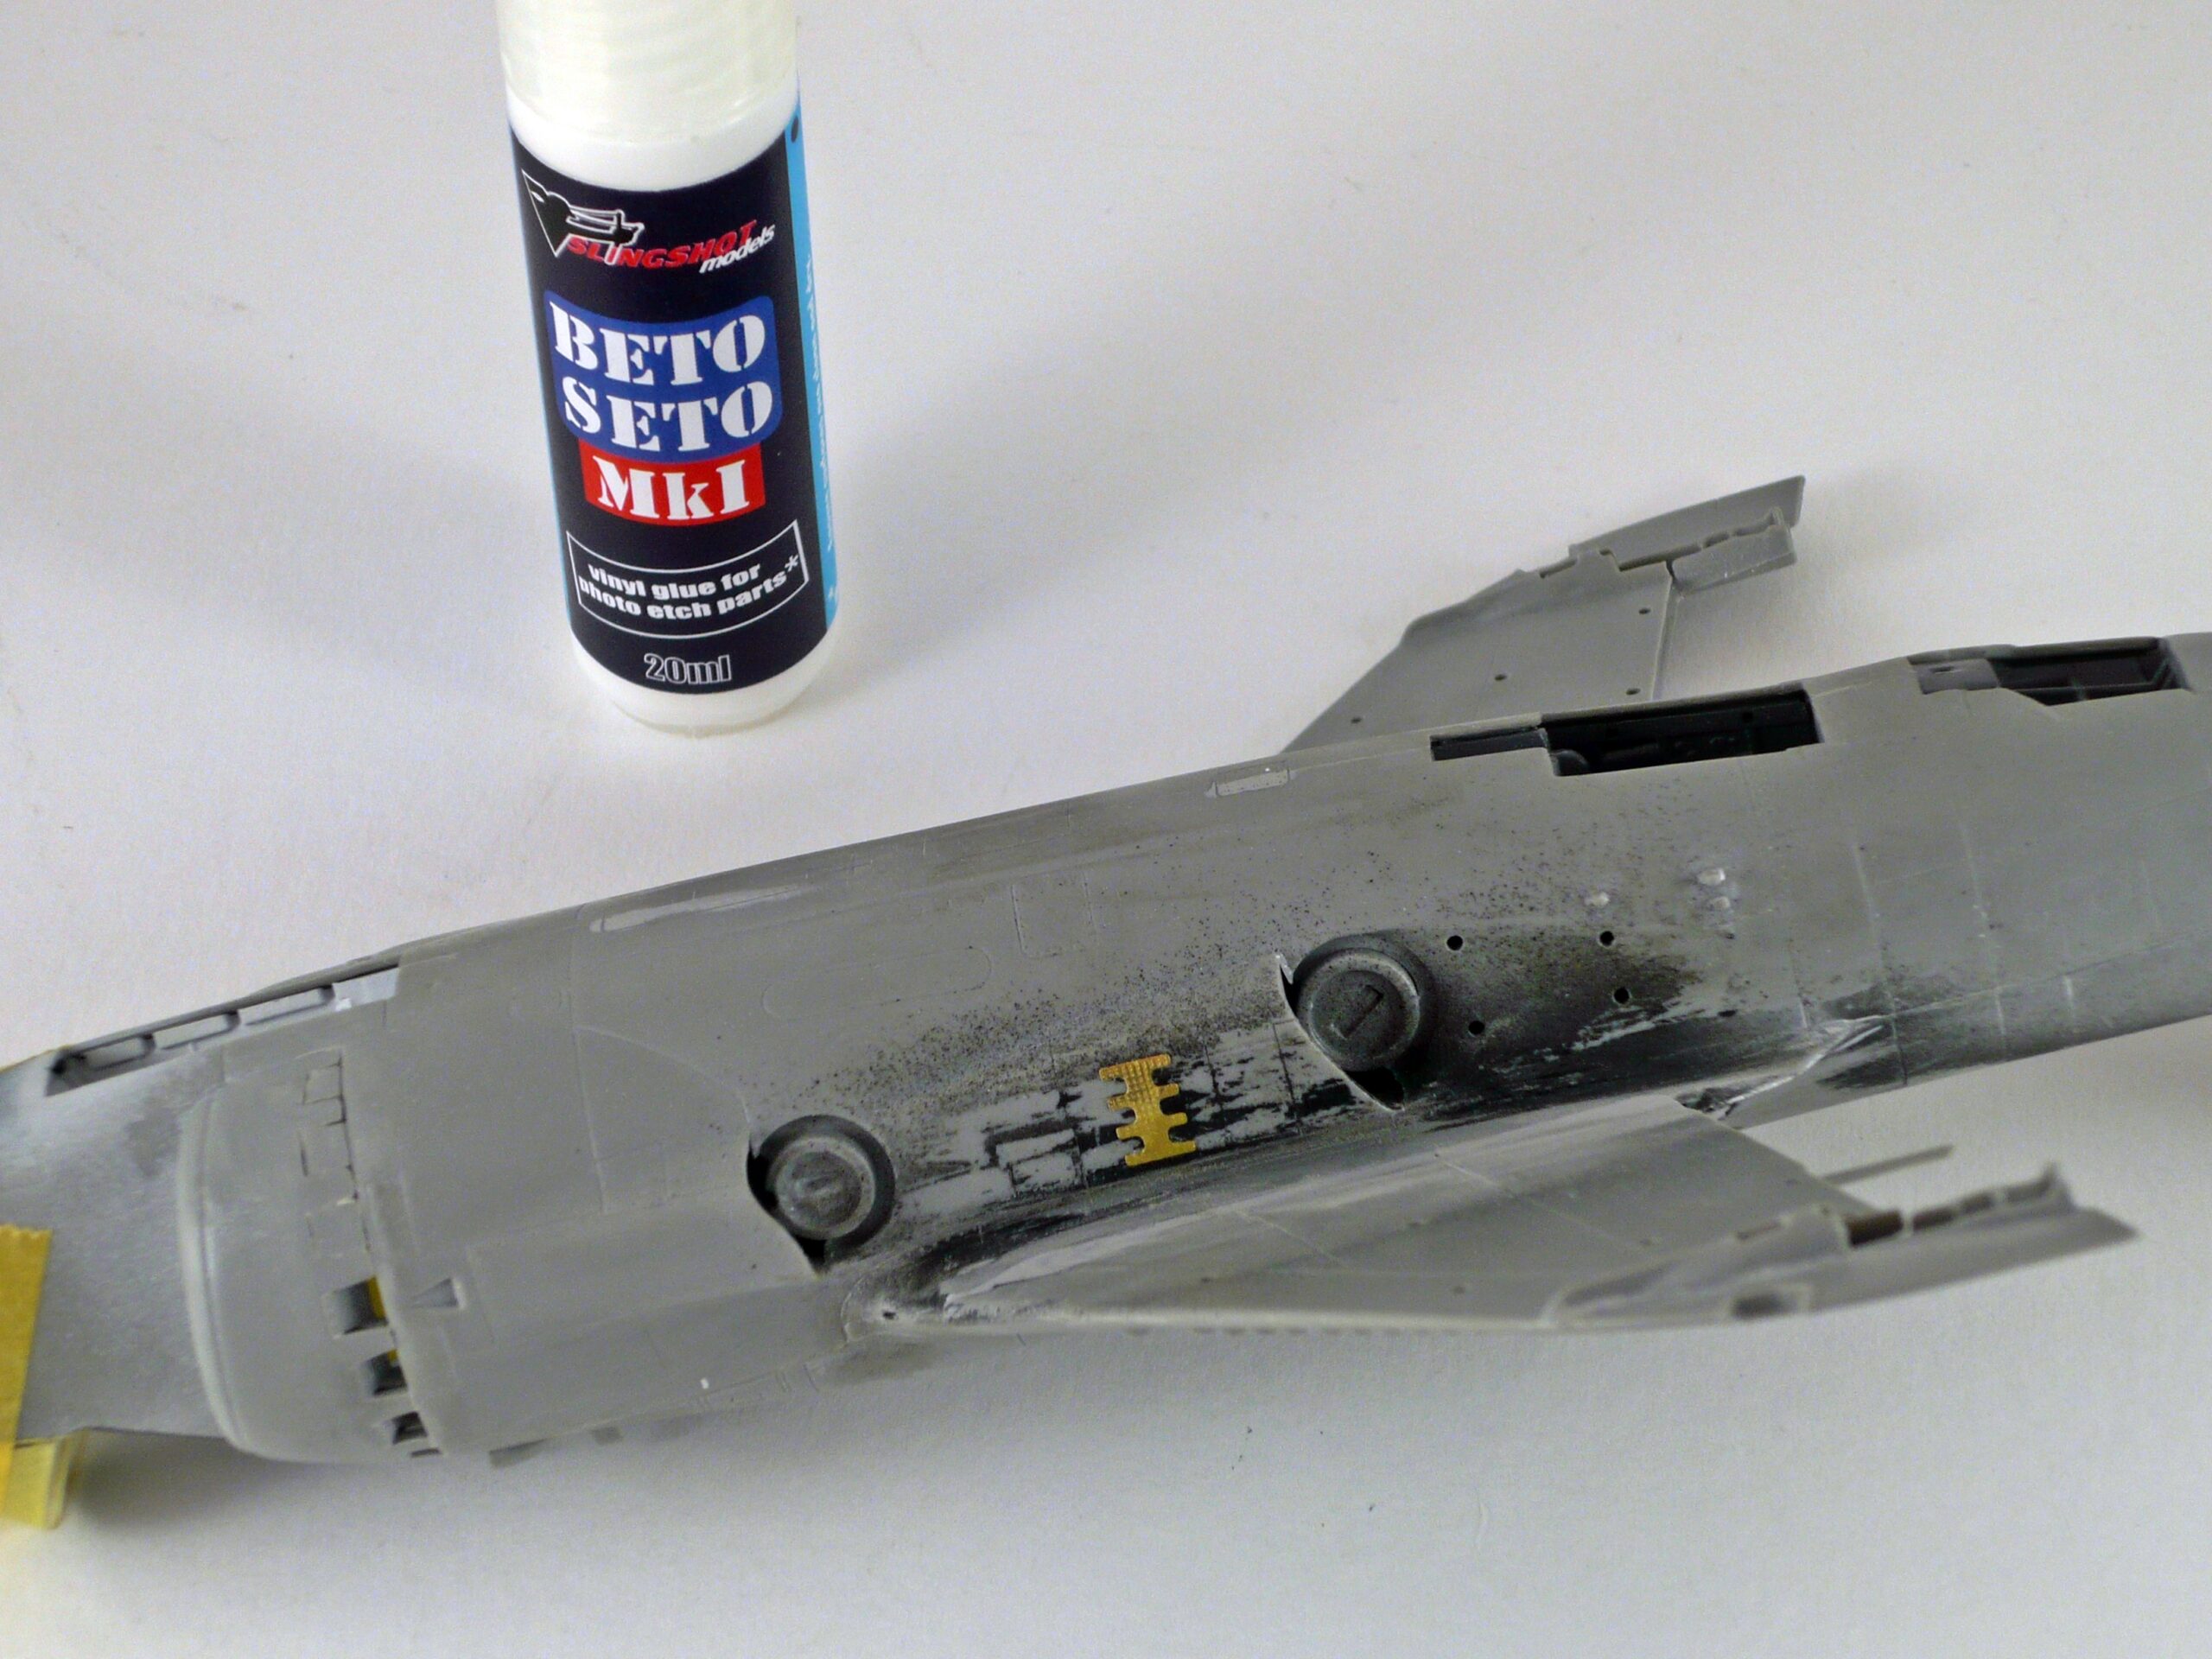
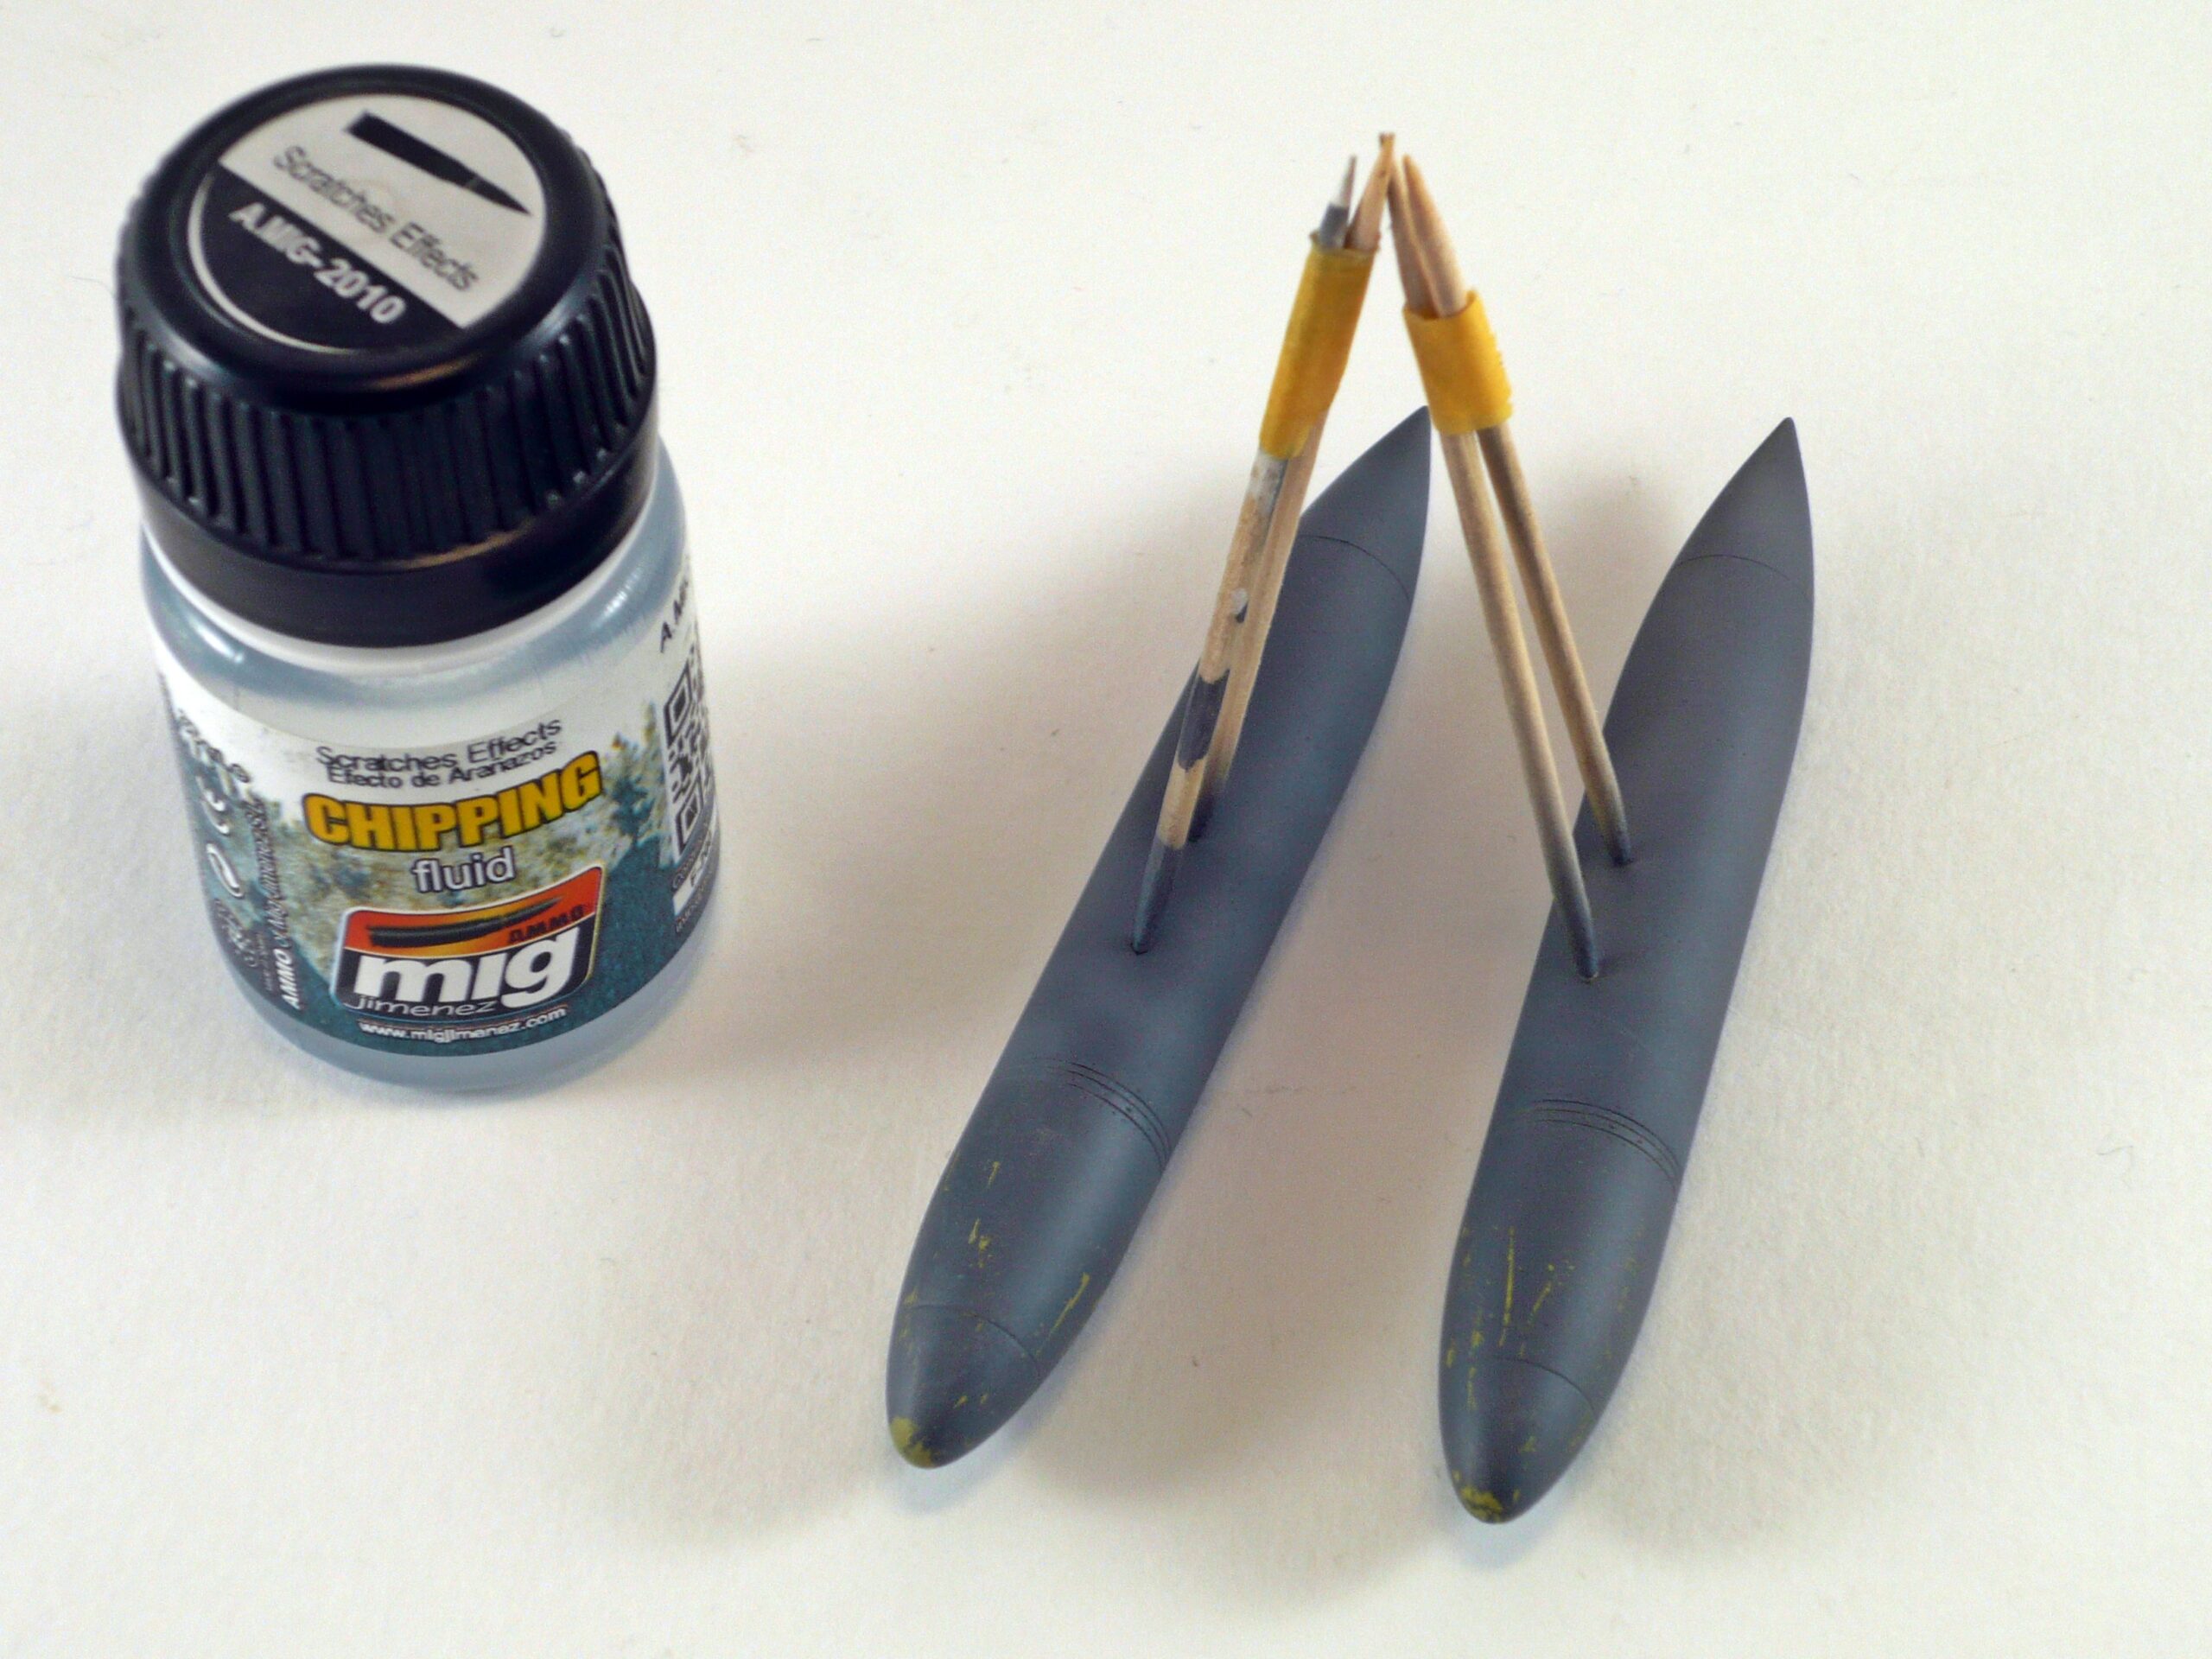
The forward sections were painted separately and weathered using chipping techniques. Chipping fluid was applied beneath the top coat, allowing realistic paint wear and scratches to be reproduced.
This process helped replicate the operational wear commonly seen on frequently serviced aircraft.
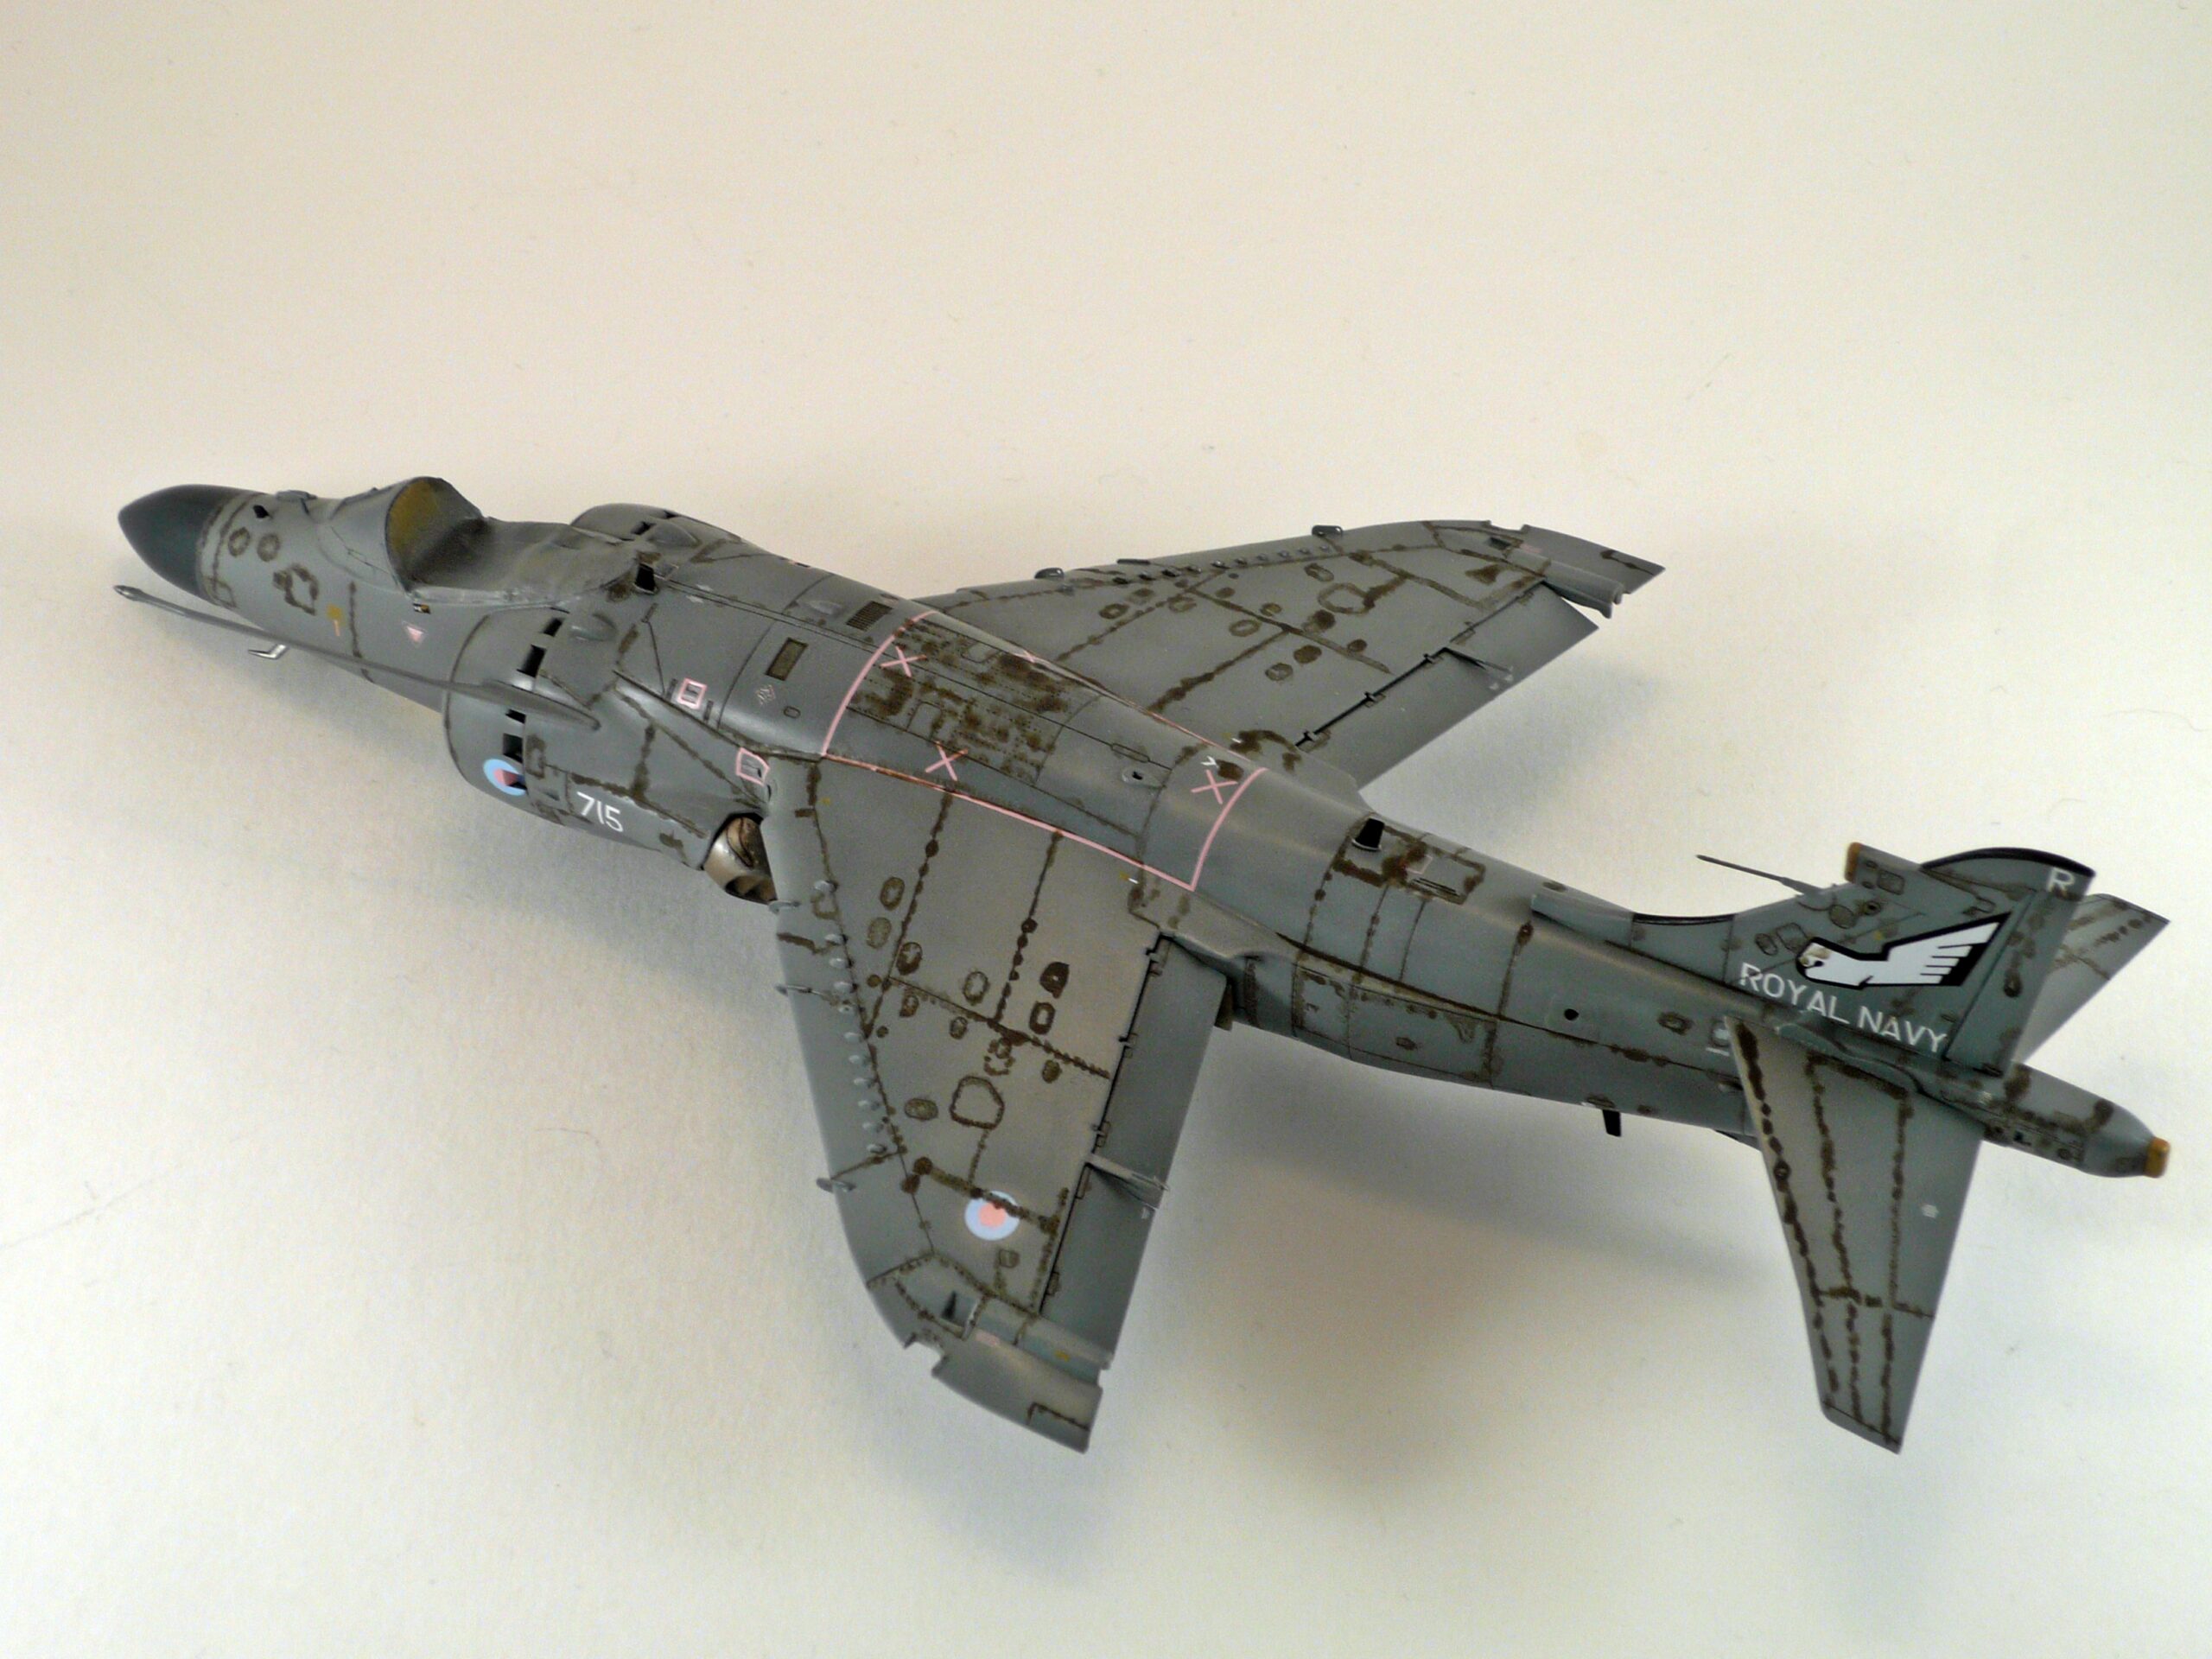
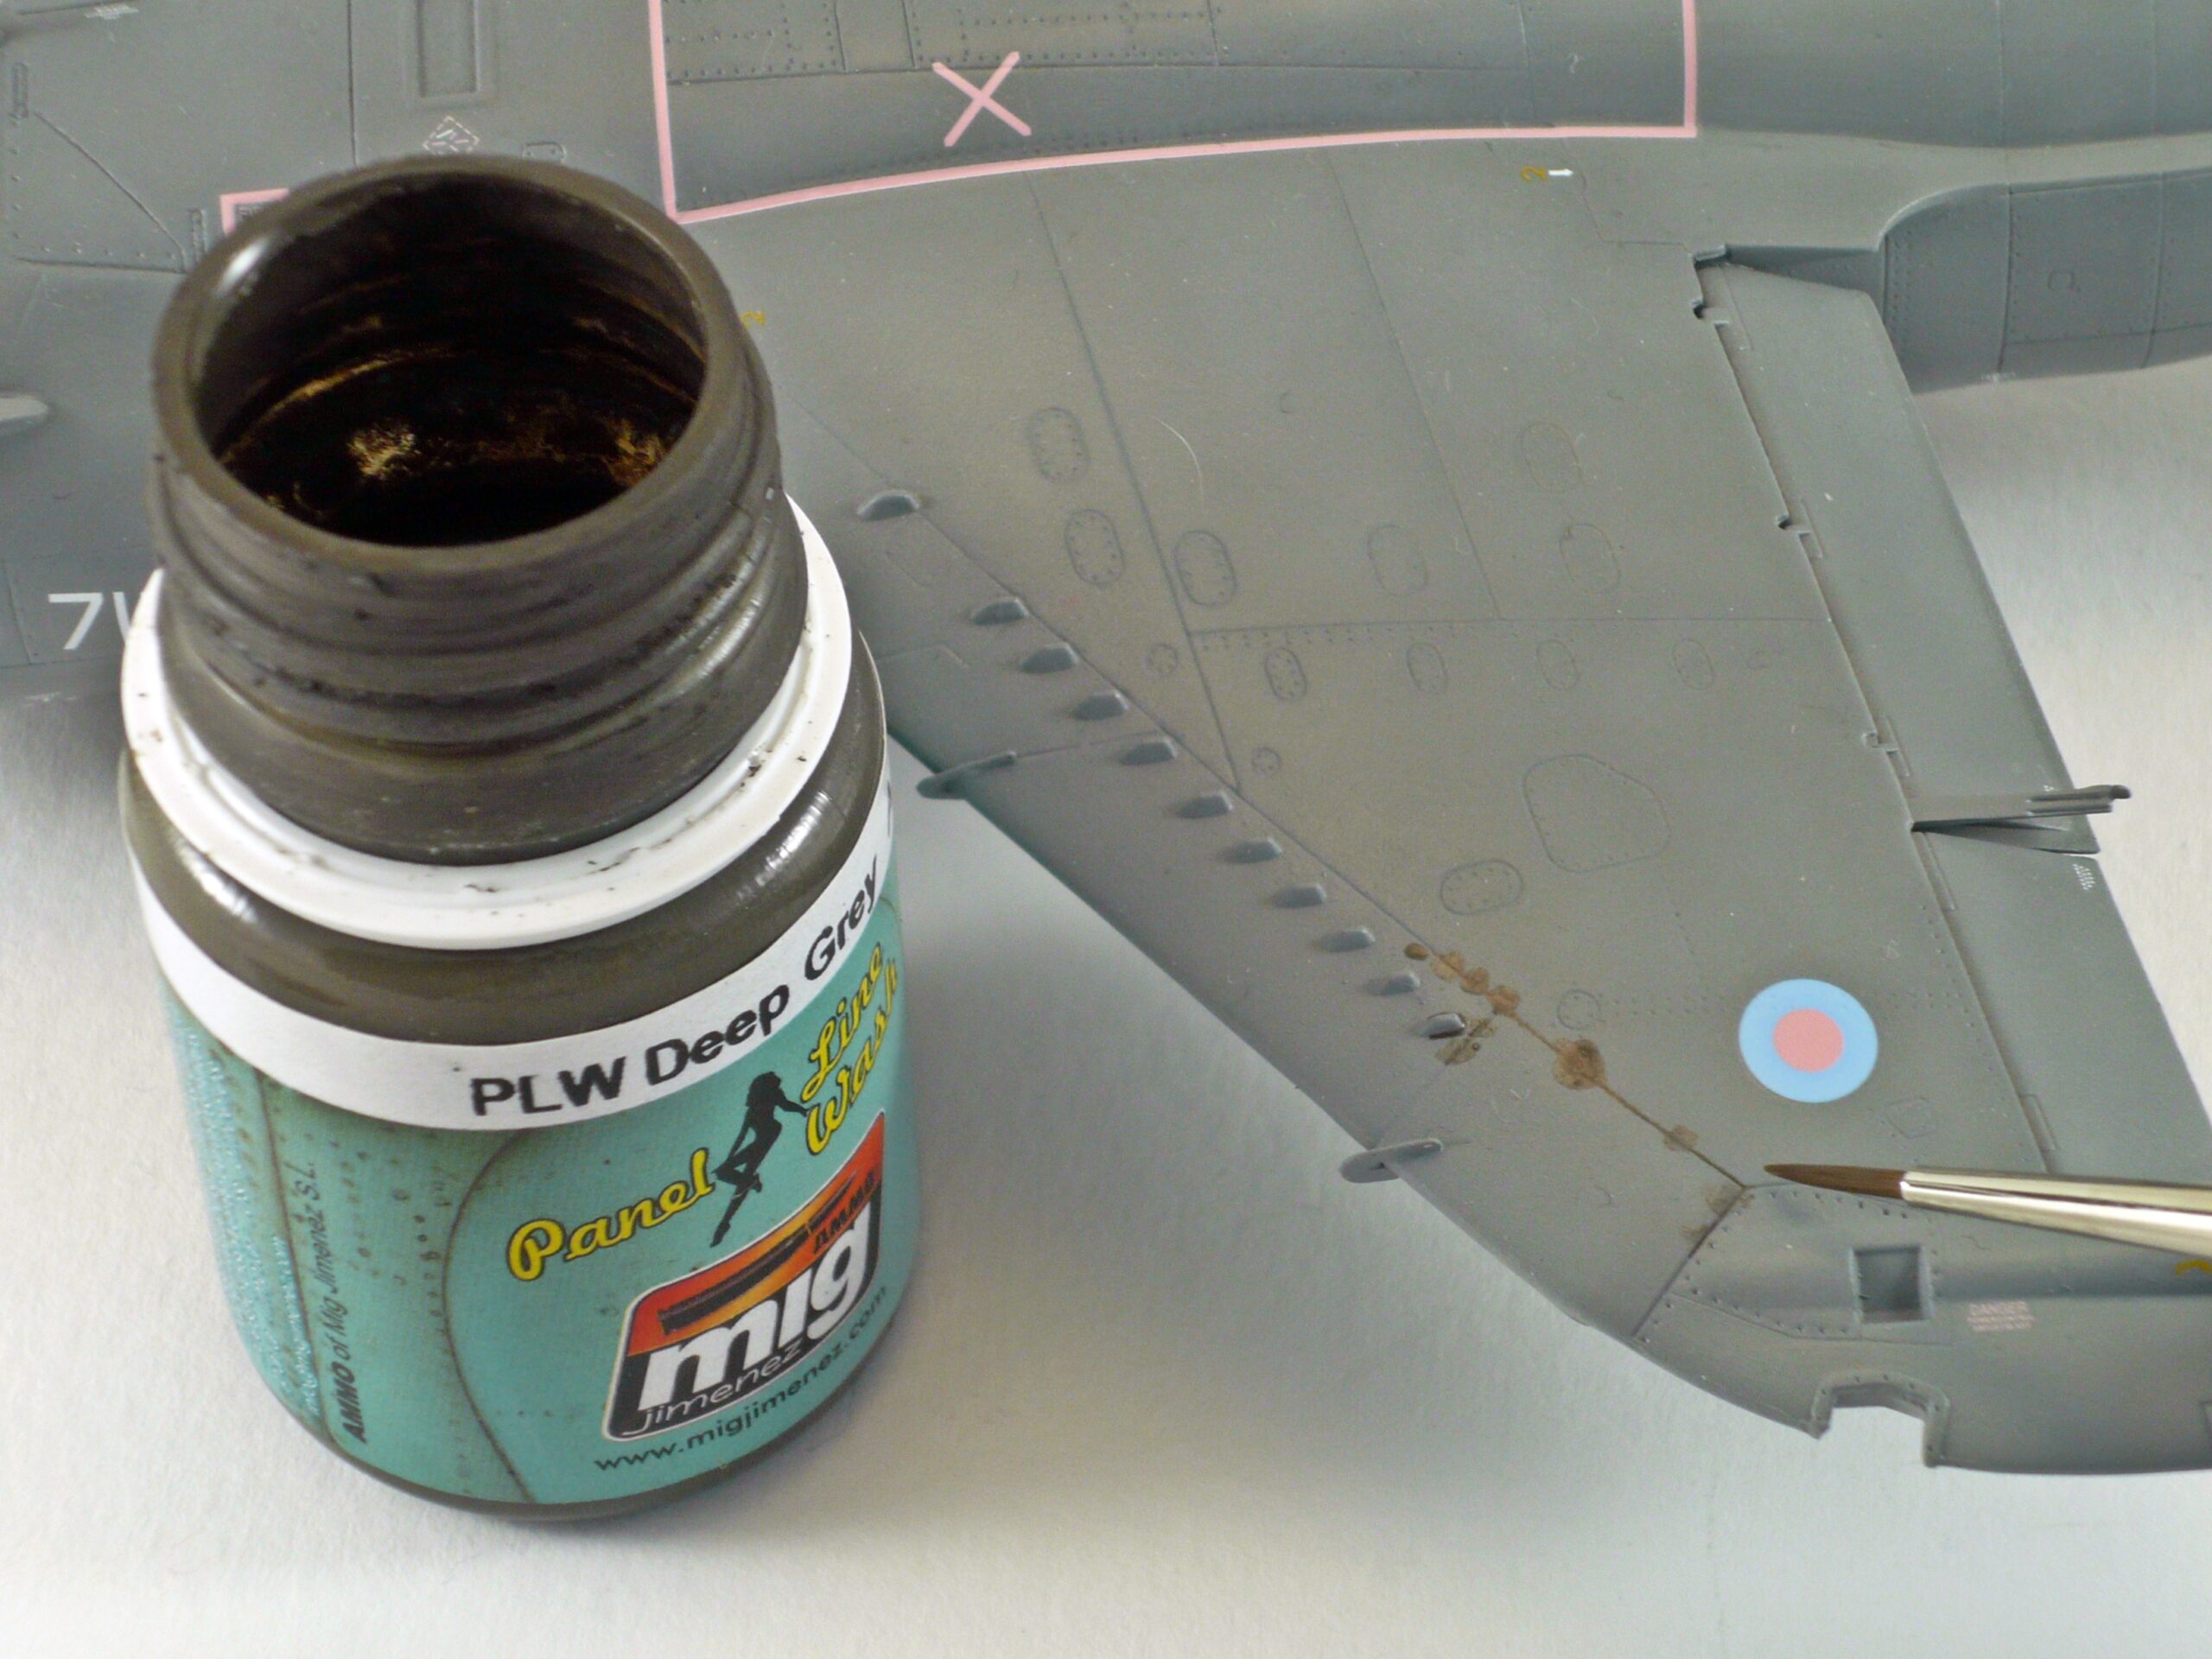
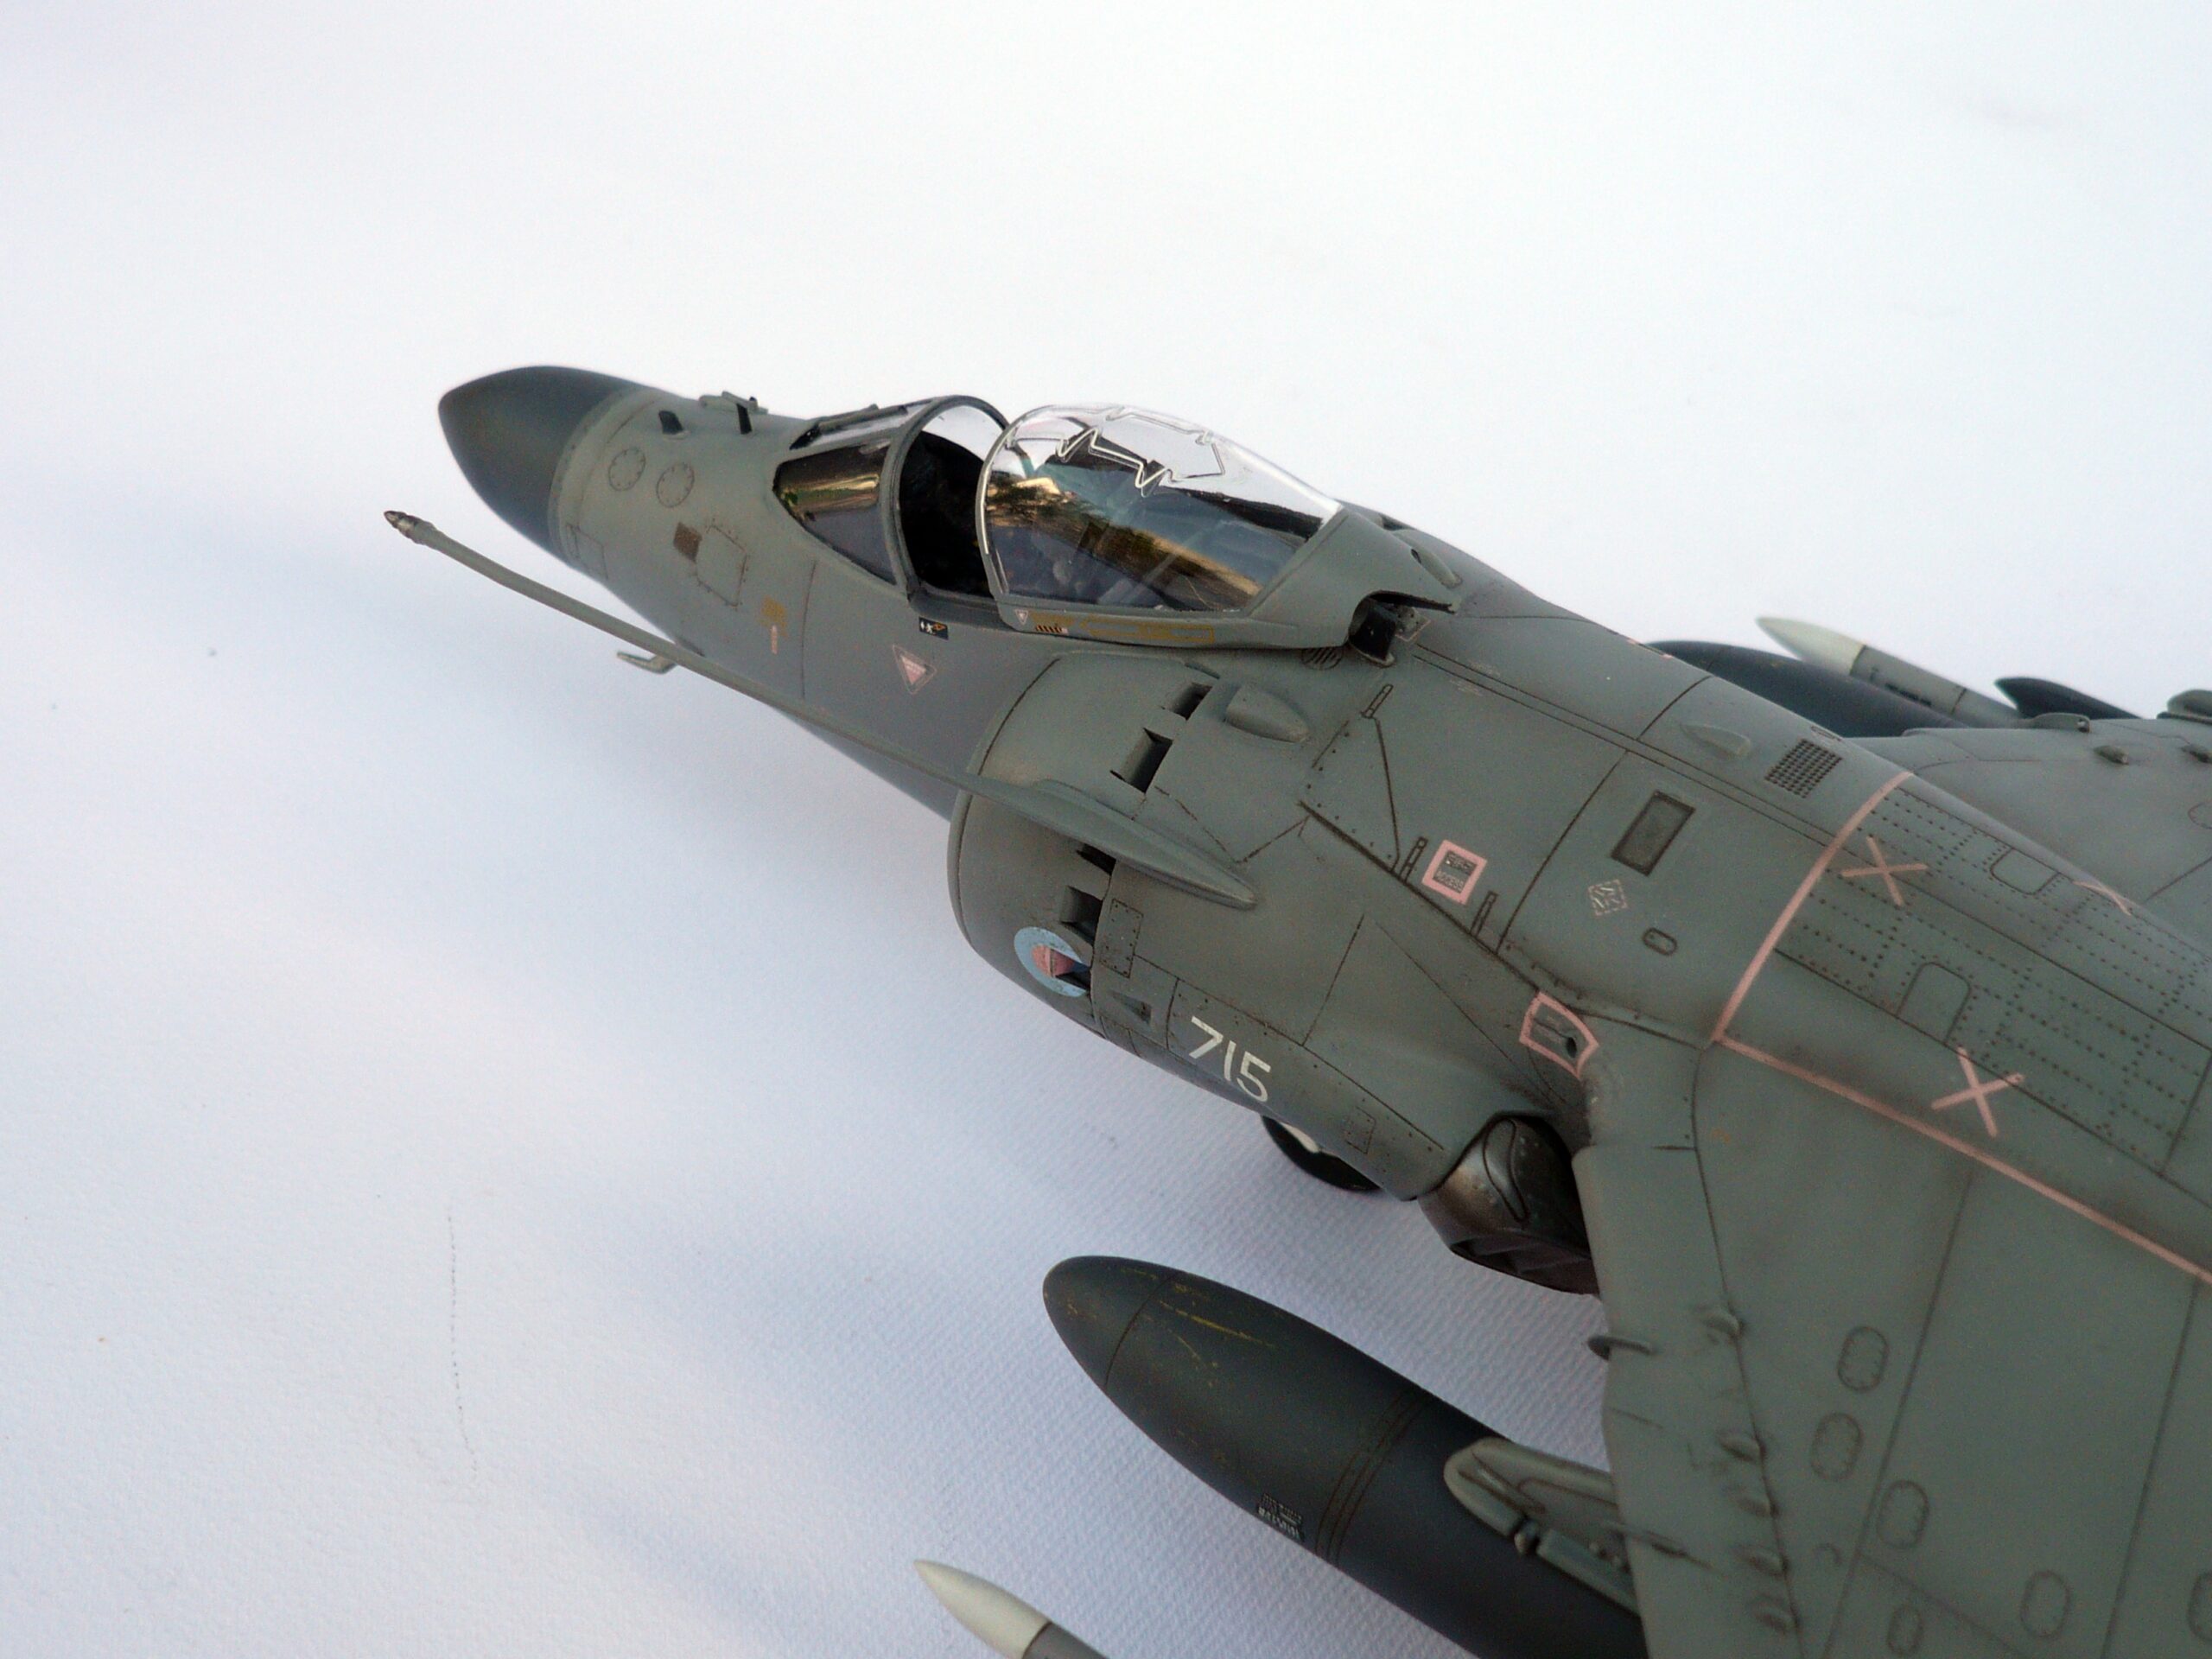
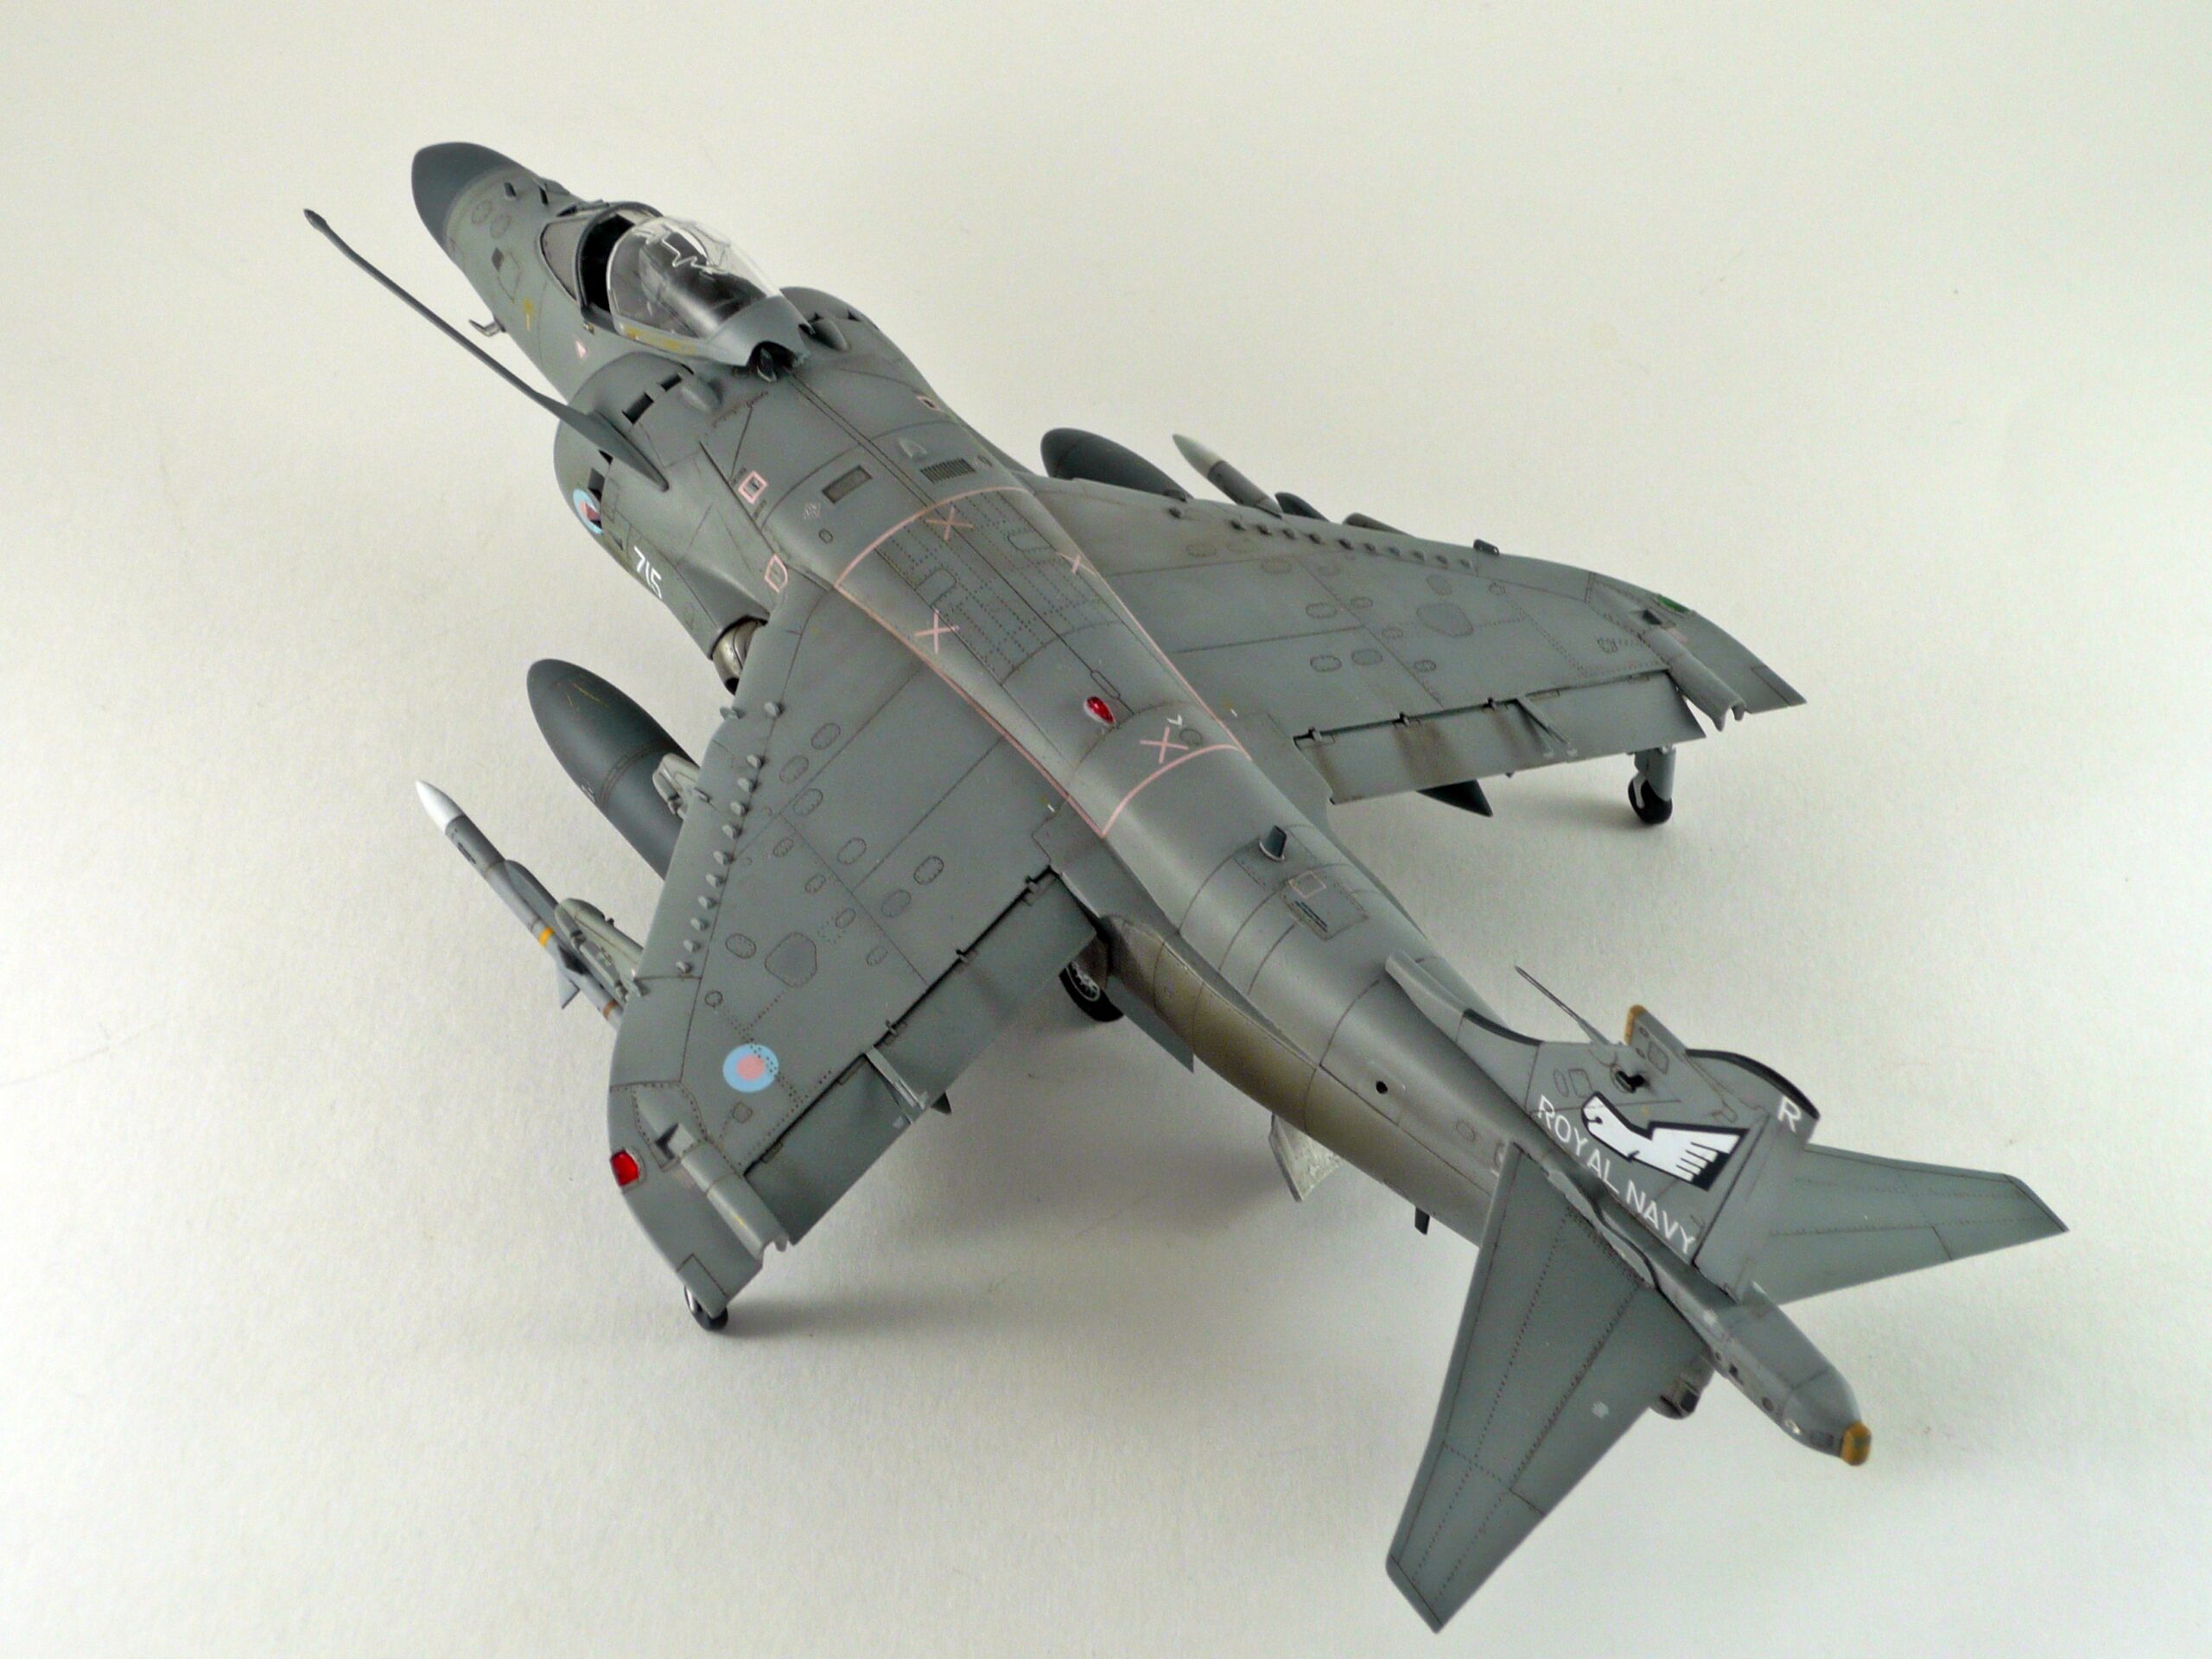
Decals and Panel Line Wash
After painting was completed, three coats of clear gloss varnish were applied.
The gloss finish serves several purposes:
- Creates a smooth surface for decal application.
- Prevents silvering beneath decals.
- Improves wash flow into recessed detail.
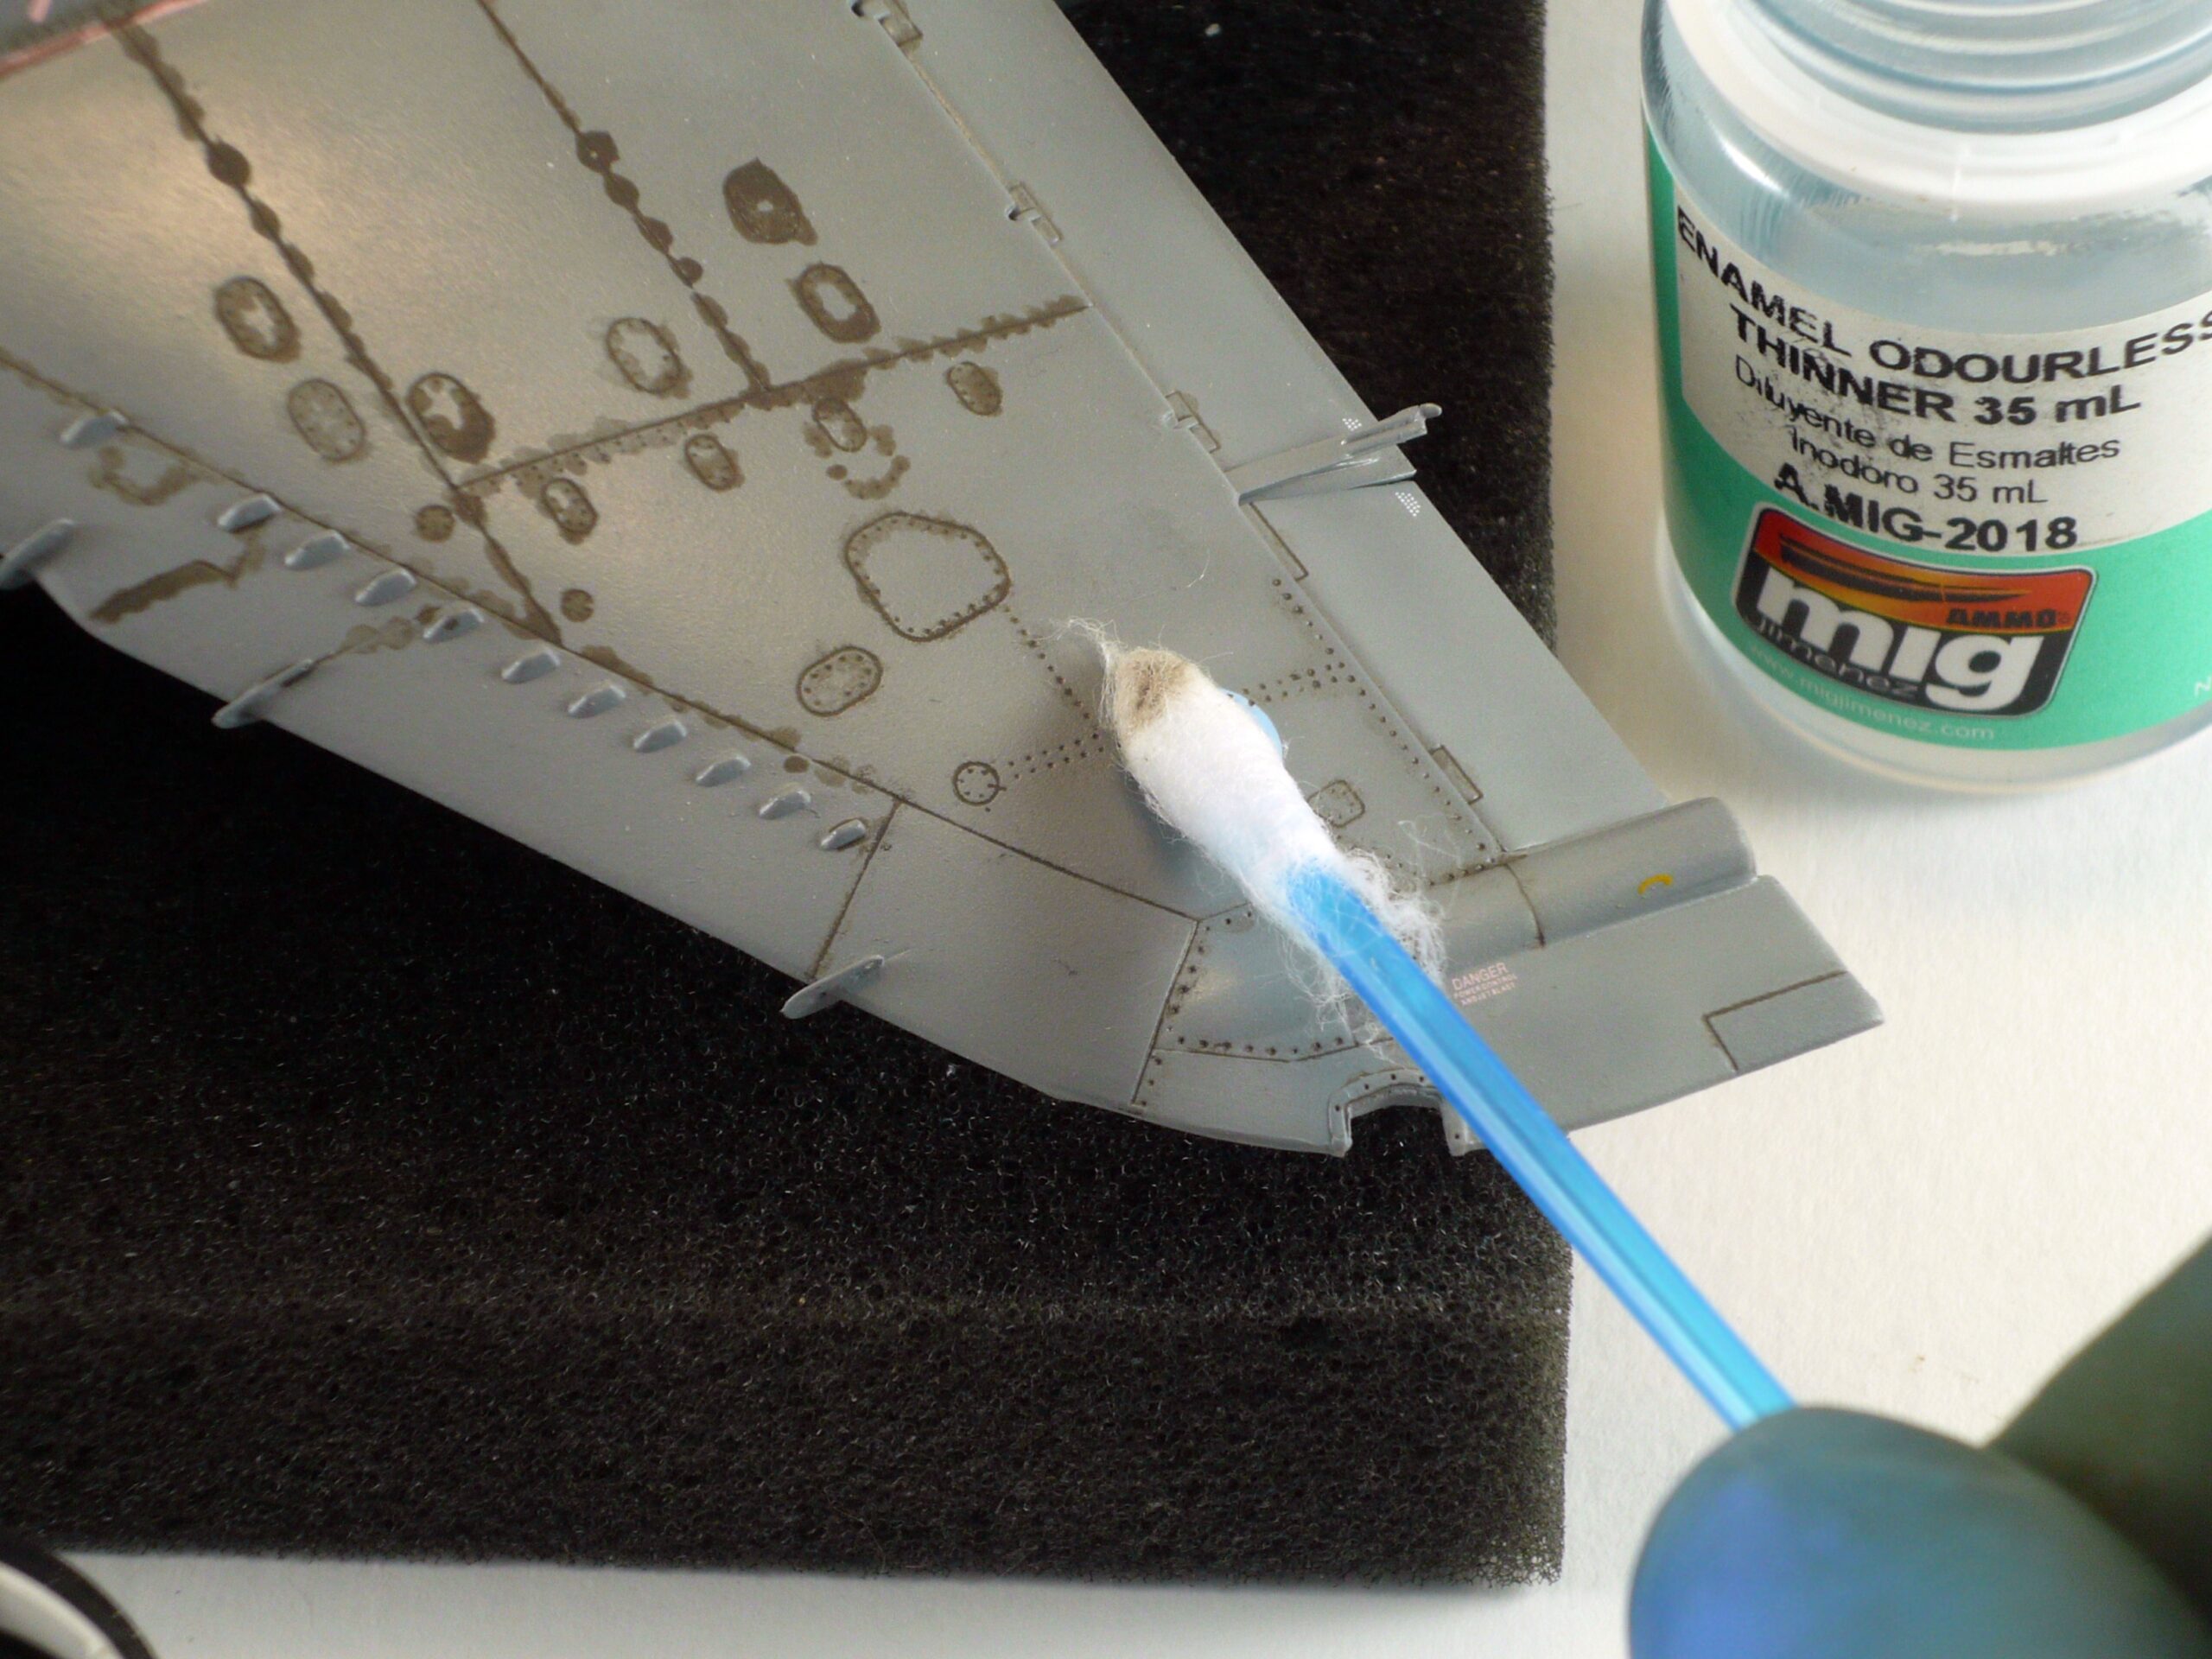
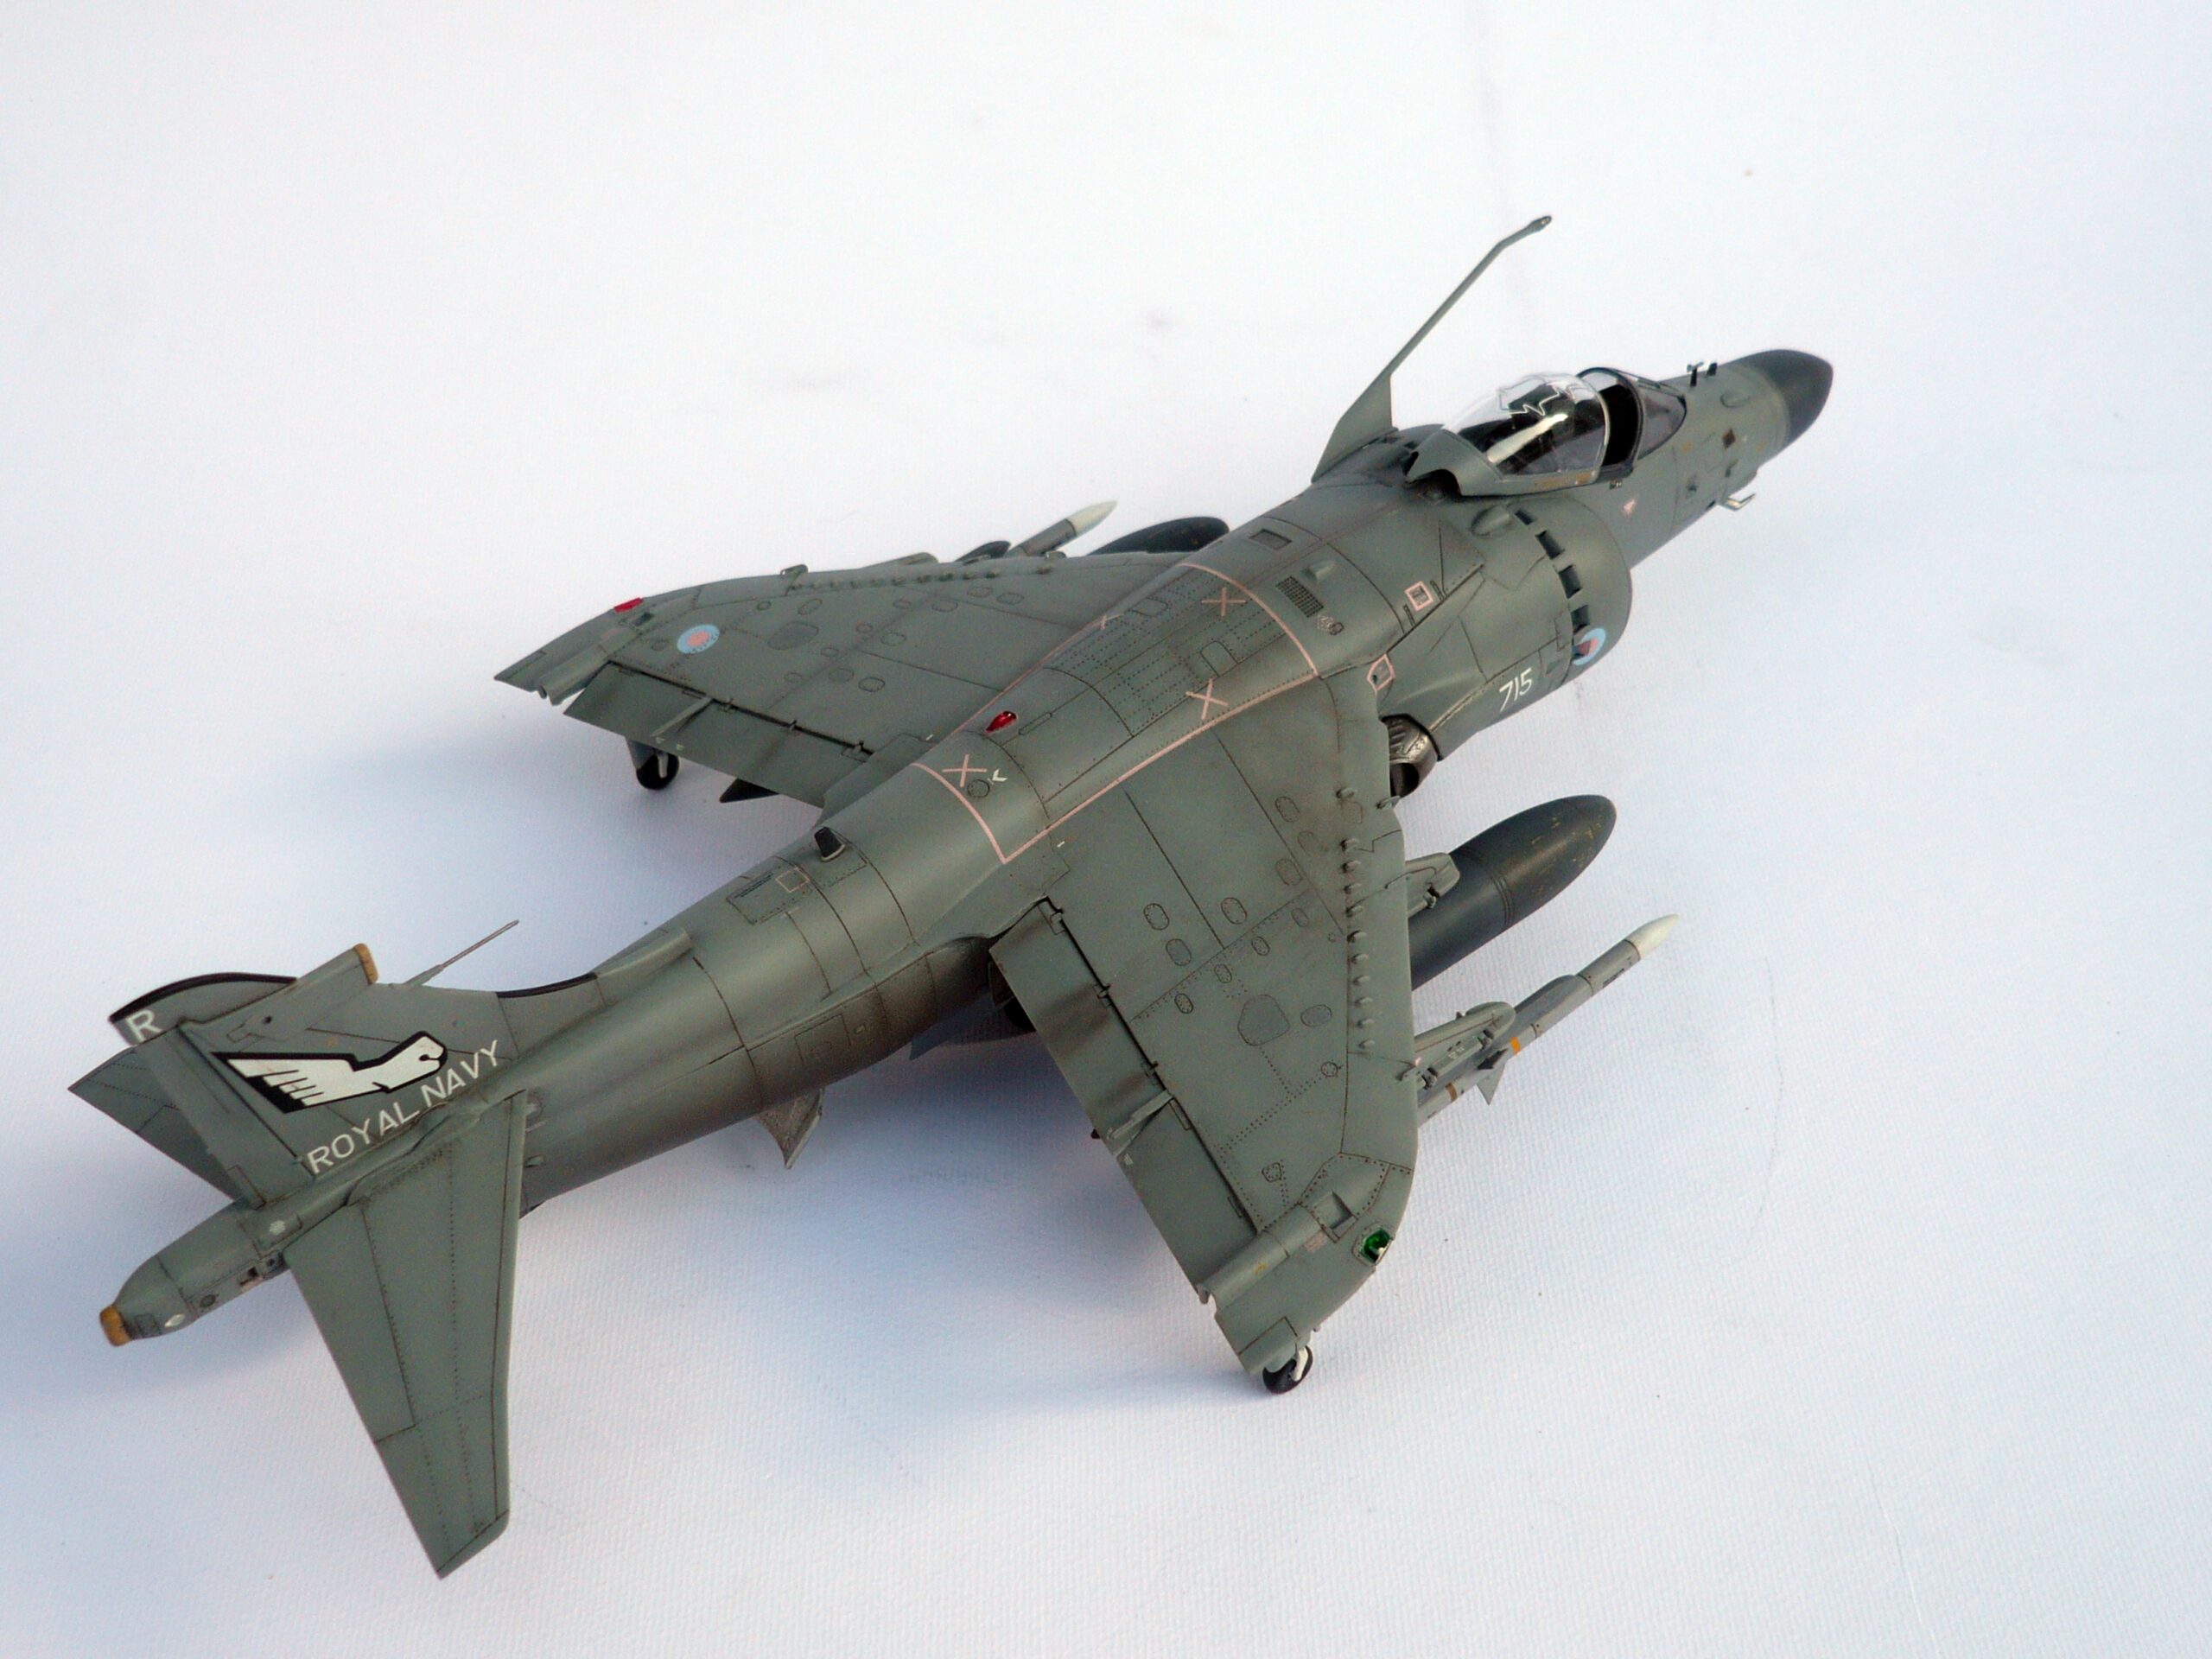
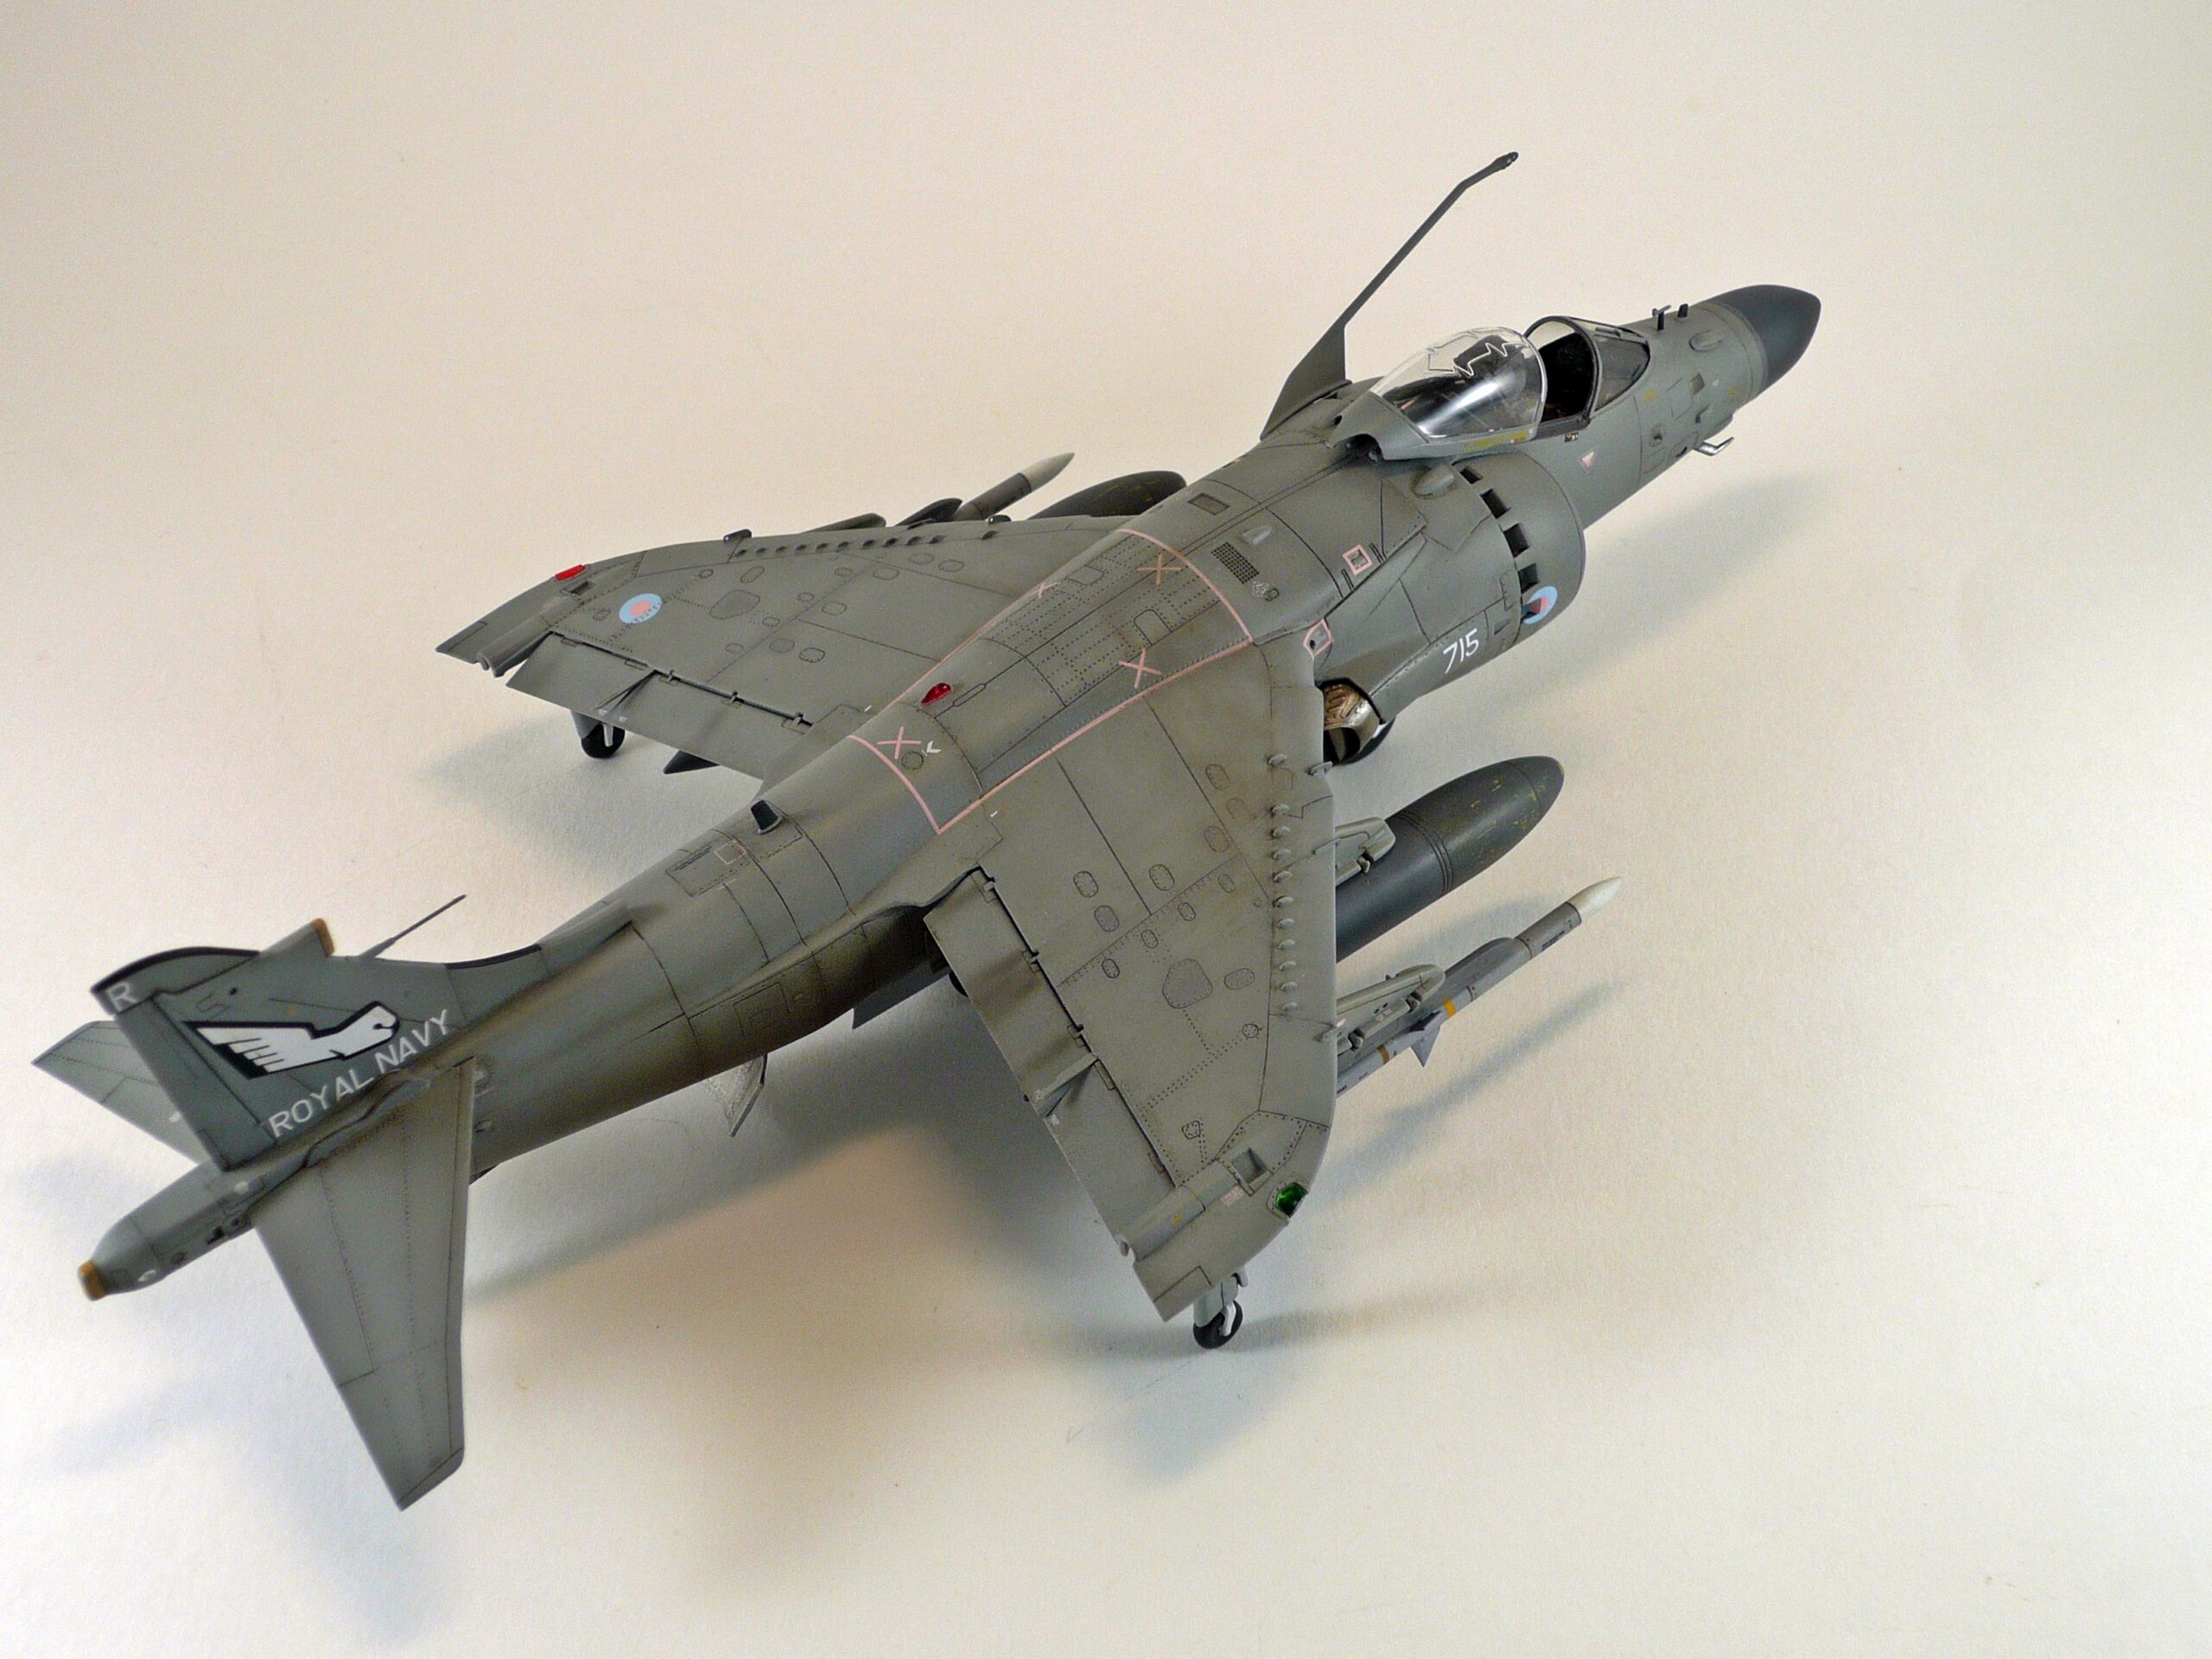
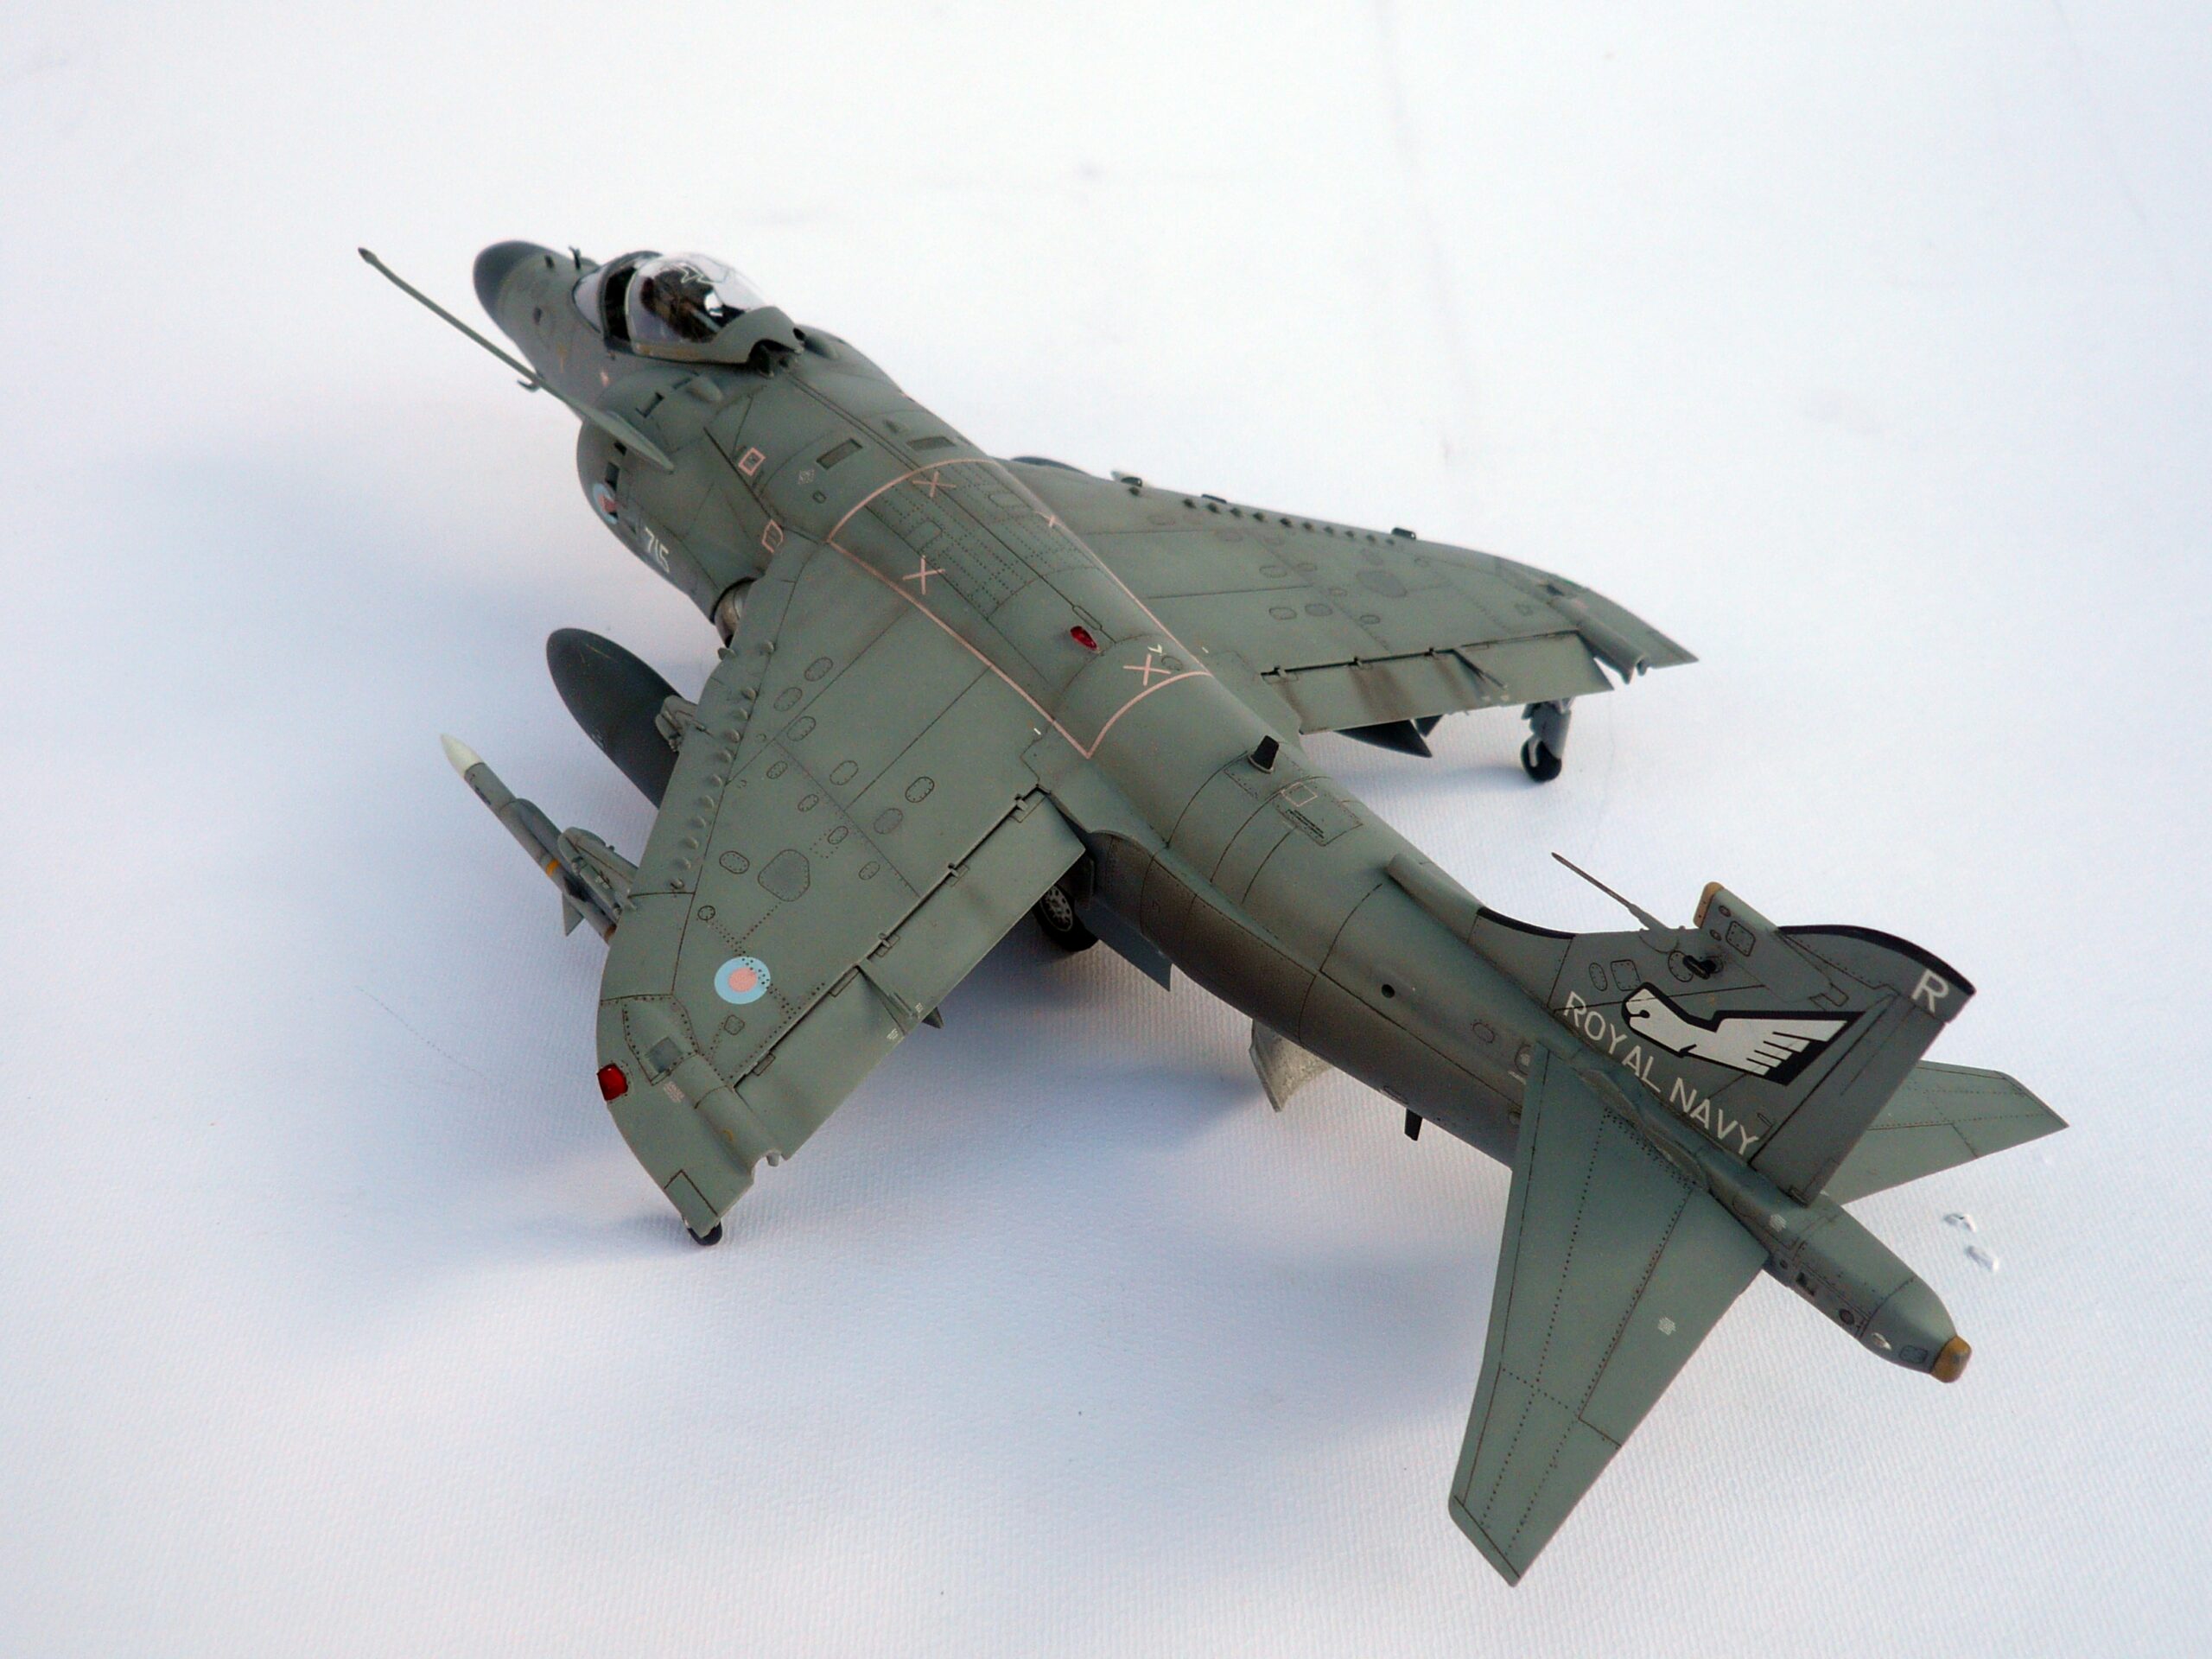
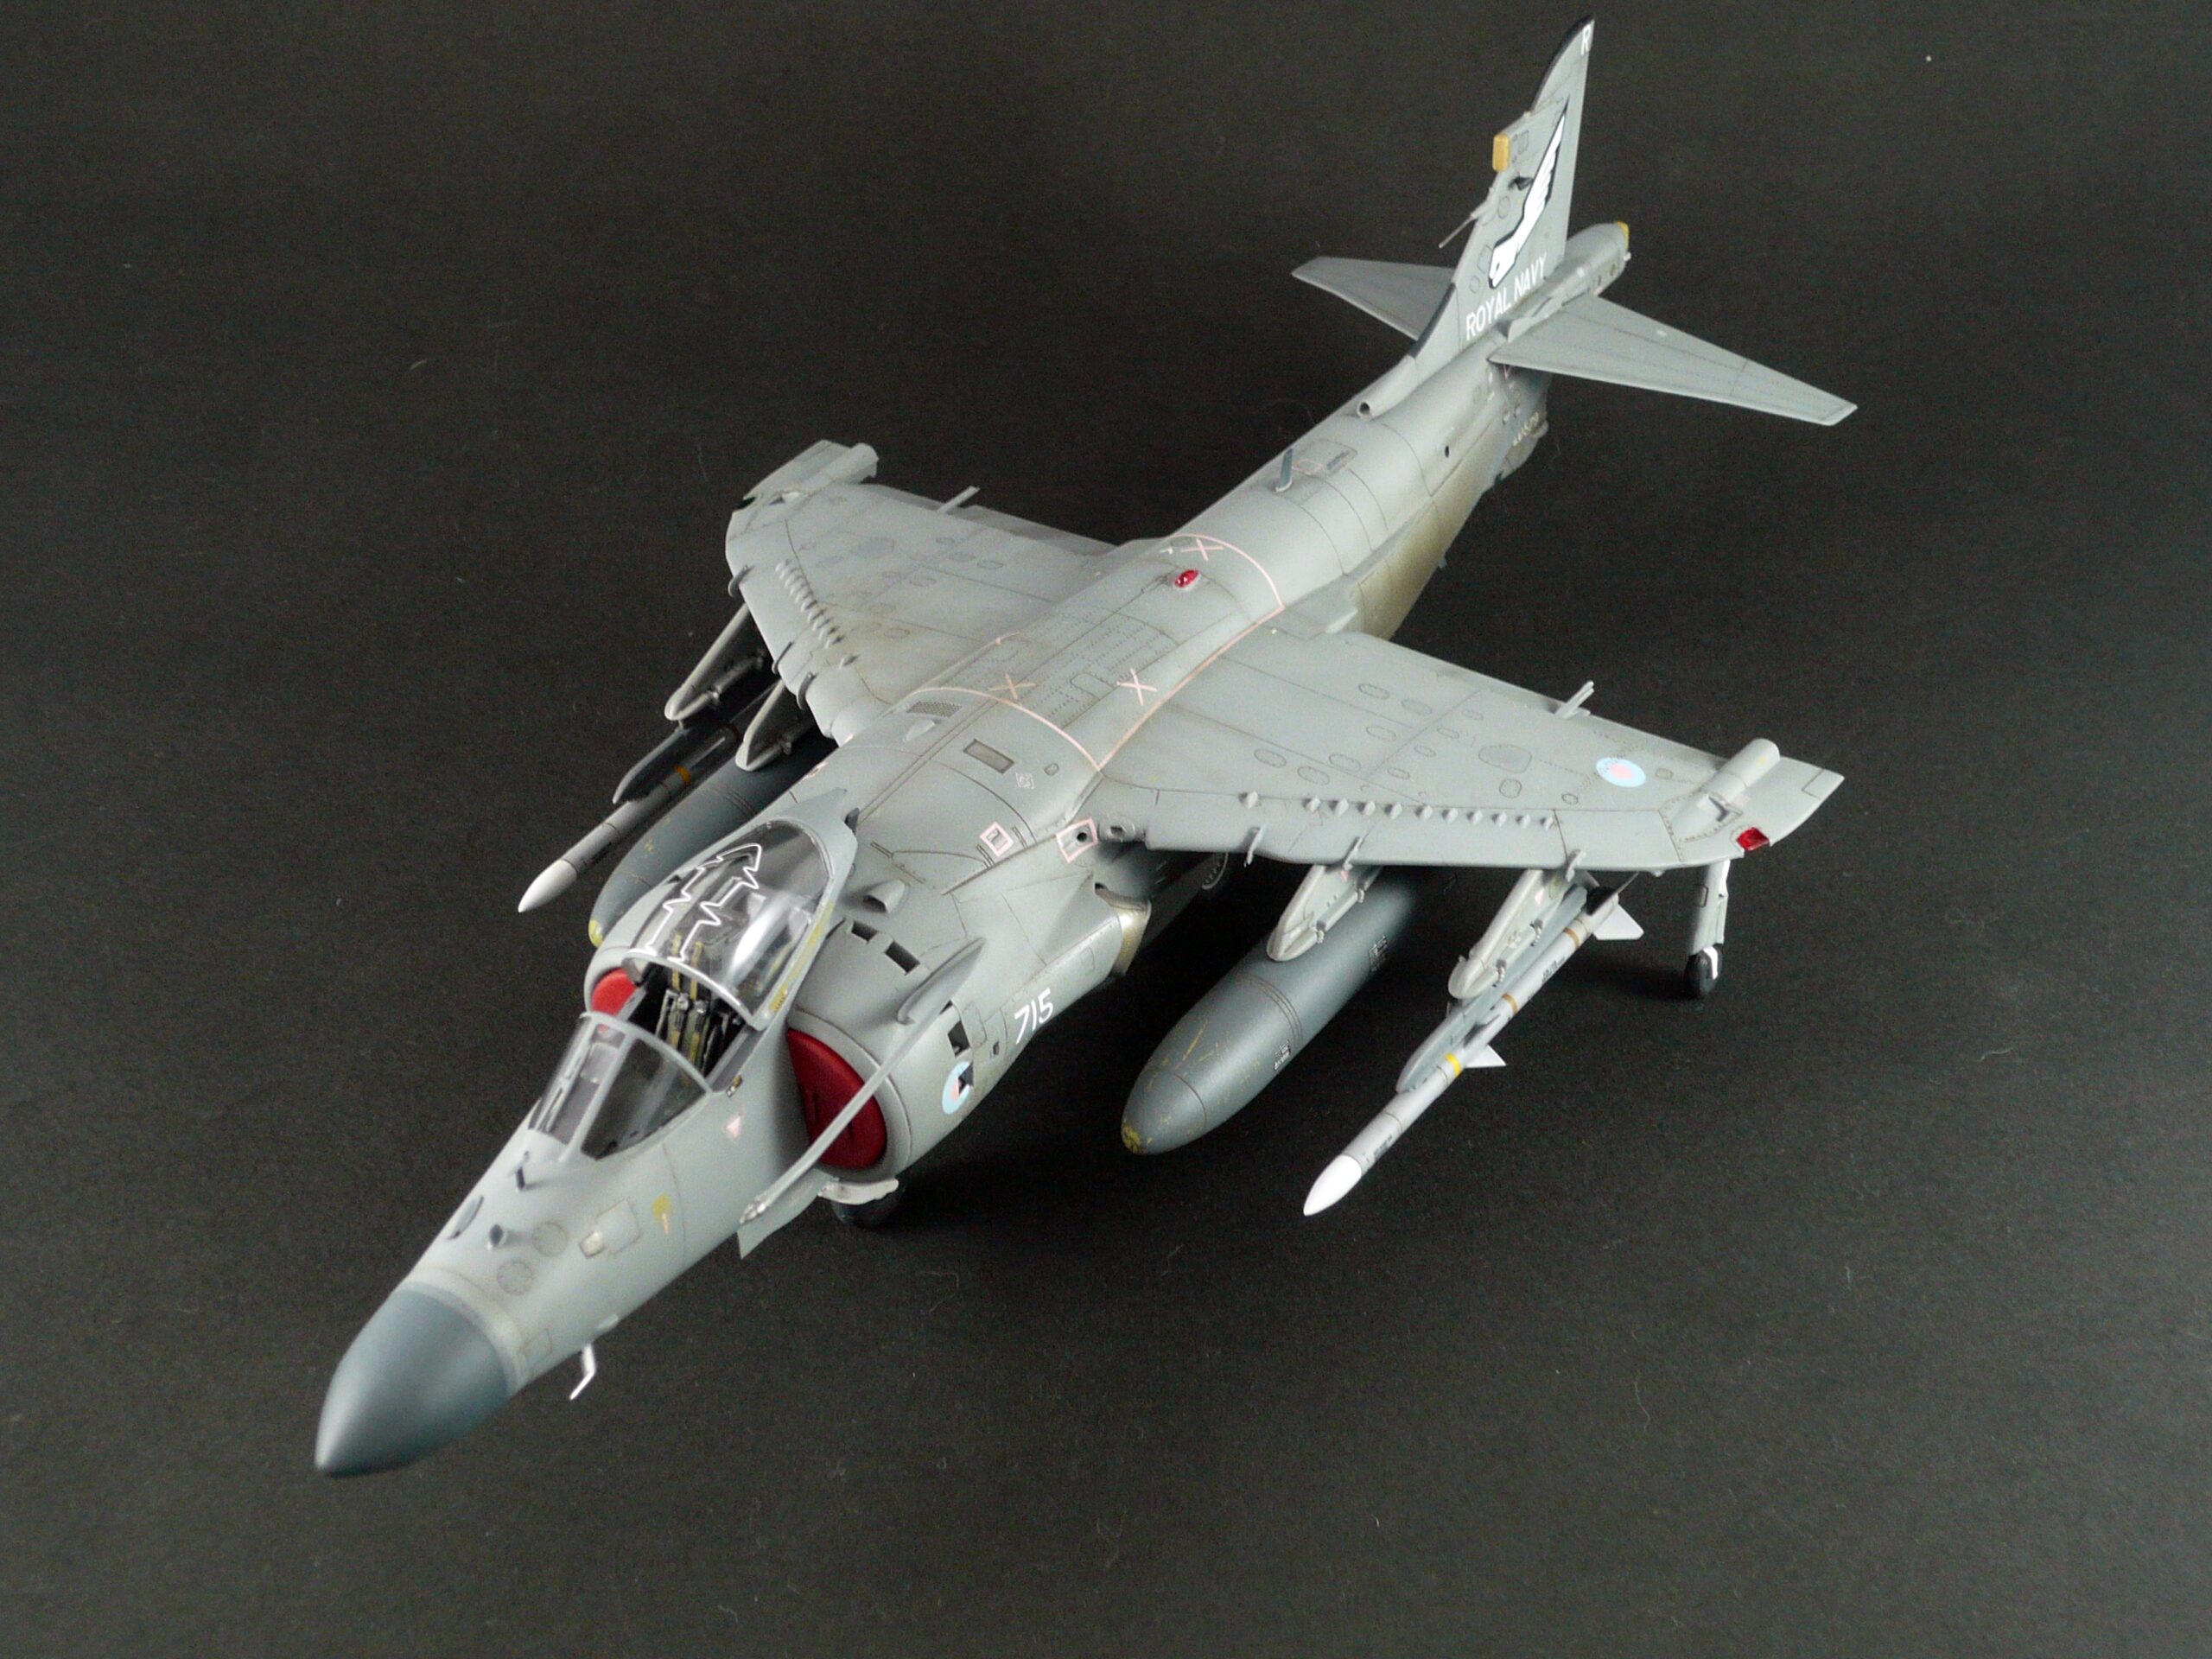
Following decal application, a deep grey panel line wash was used throughout the model.
The wash was allowed to dry before excess material was removed using thinner and cotton buds. This process highlighted panel lines and structural details while maintaining a realistic appearance.
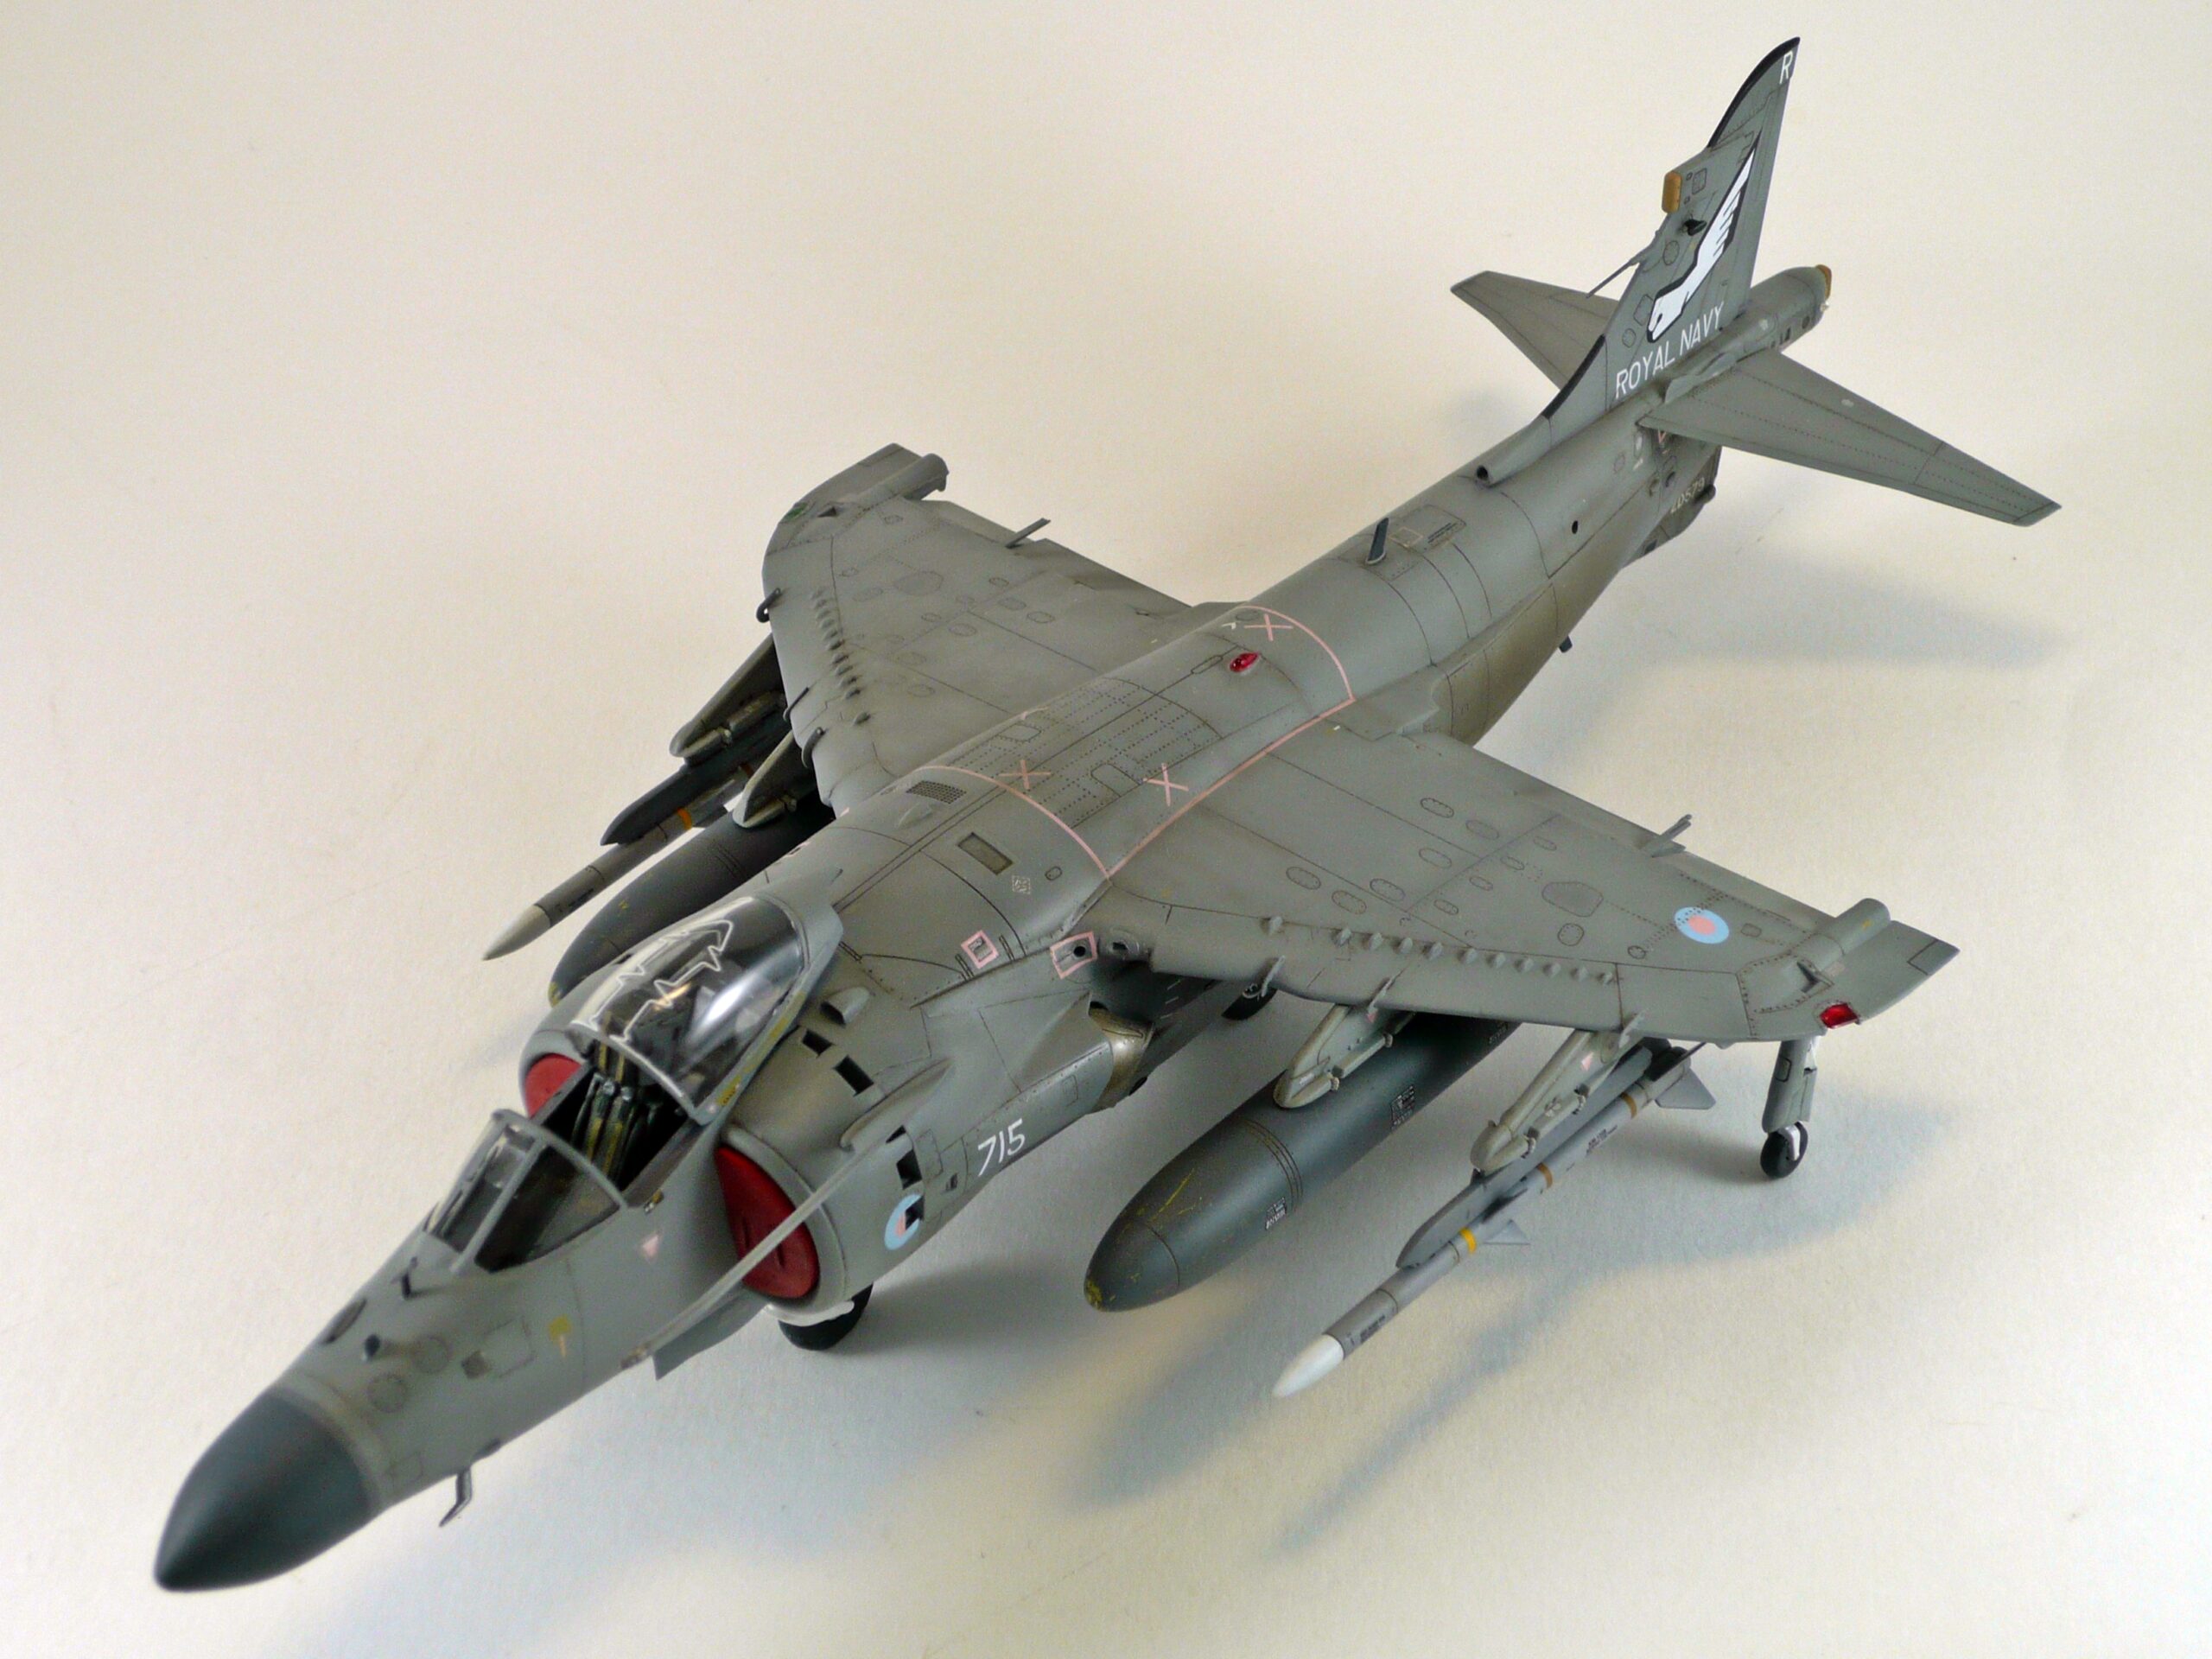
Weathering the Harrier’s Characteristic Exhaust Staining
One of the most recognizable features of operational Harrier aircraft is the staining created by engine exhaust gases and heat exposure.
To reproduce this effect, highly diluted black and brown tones were airbrushed around:
- Engine access panels.
- Rear fuselage surfaces.
- Nozzle areas.
- Upper fuselage sections.
- Wing root regions.
The same mixture was used to recreate the unique patchy weathering often visible on Harrier airframes. These subtle effects contribute significantly to the authentic appearance of the finished model.
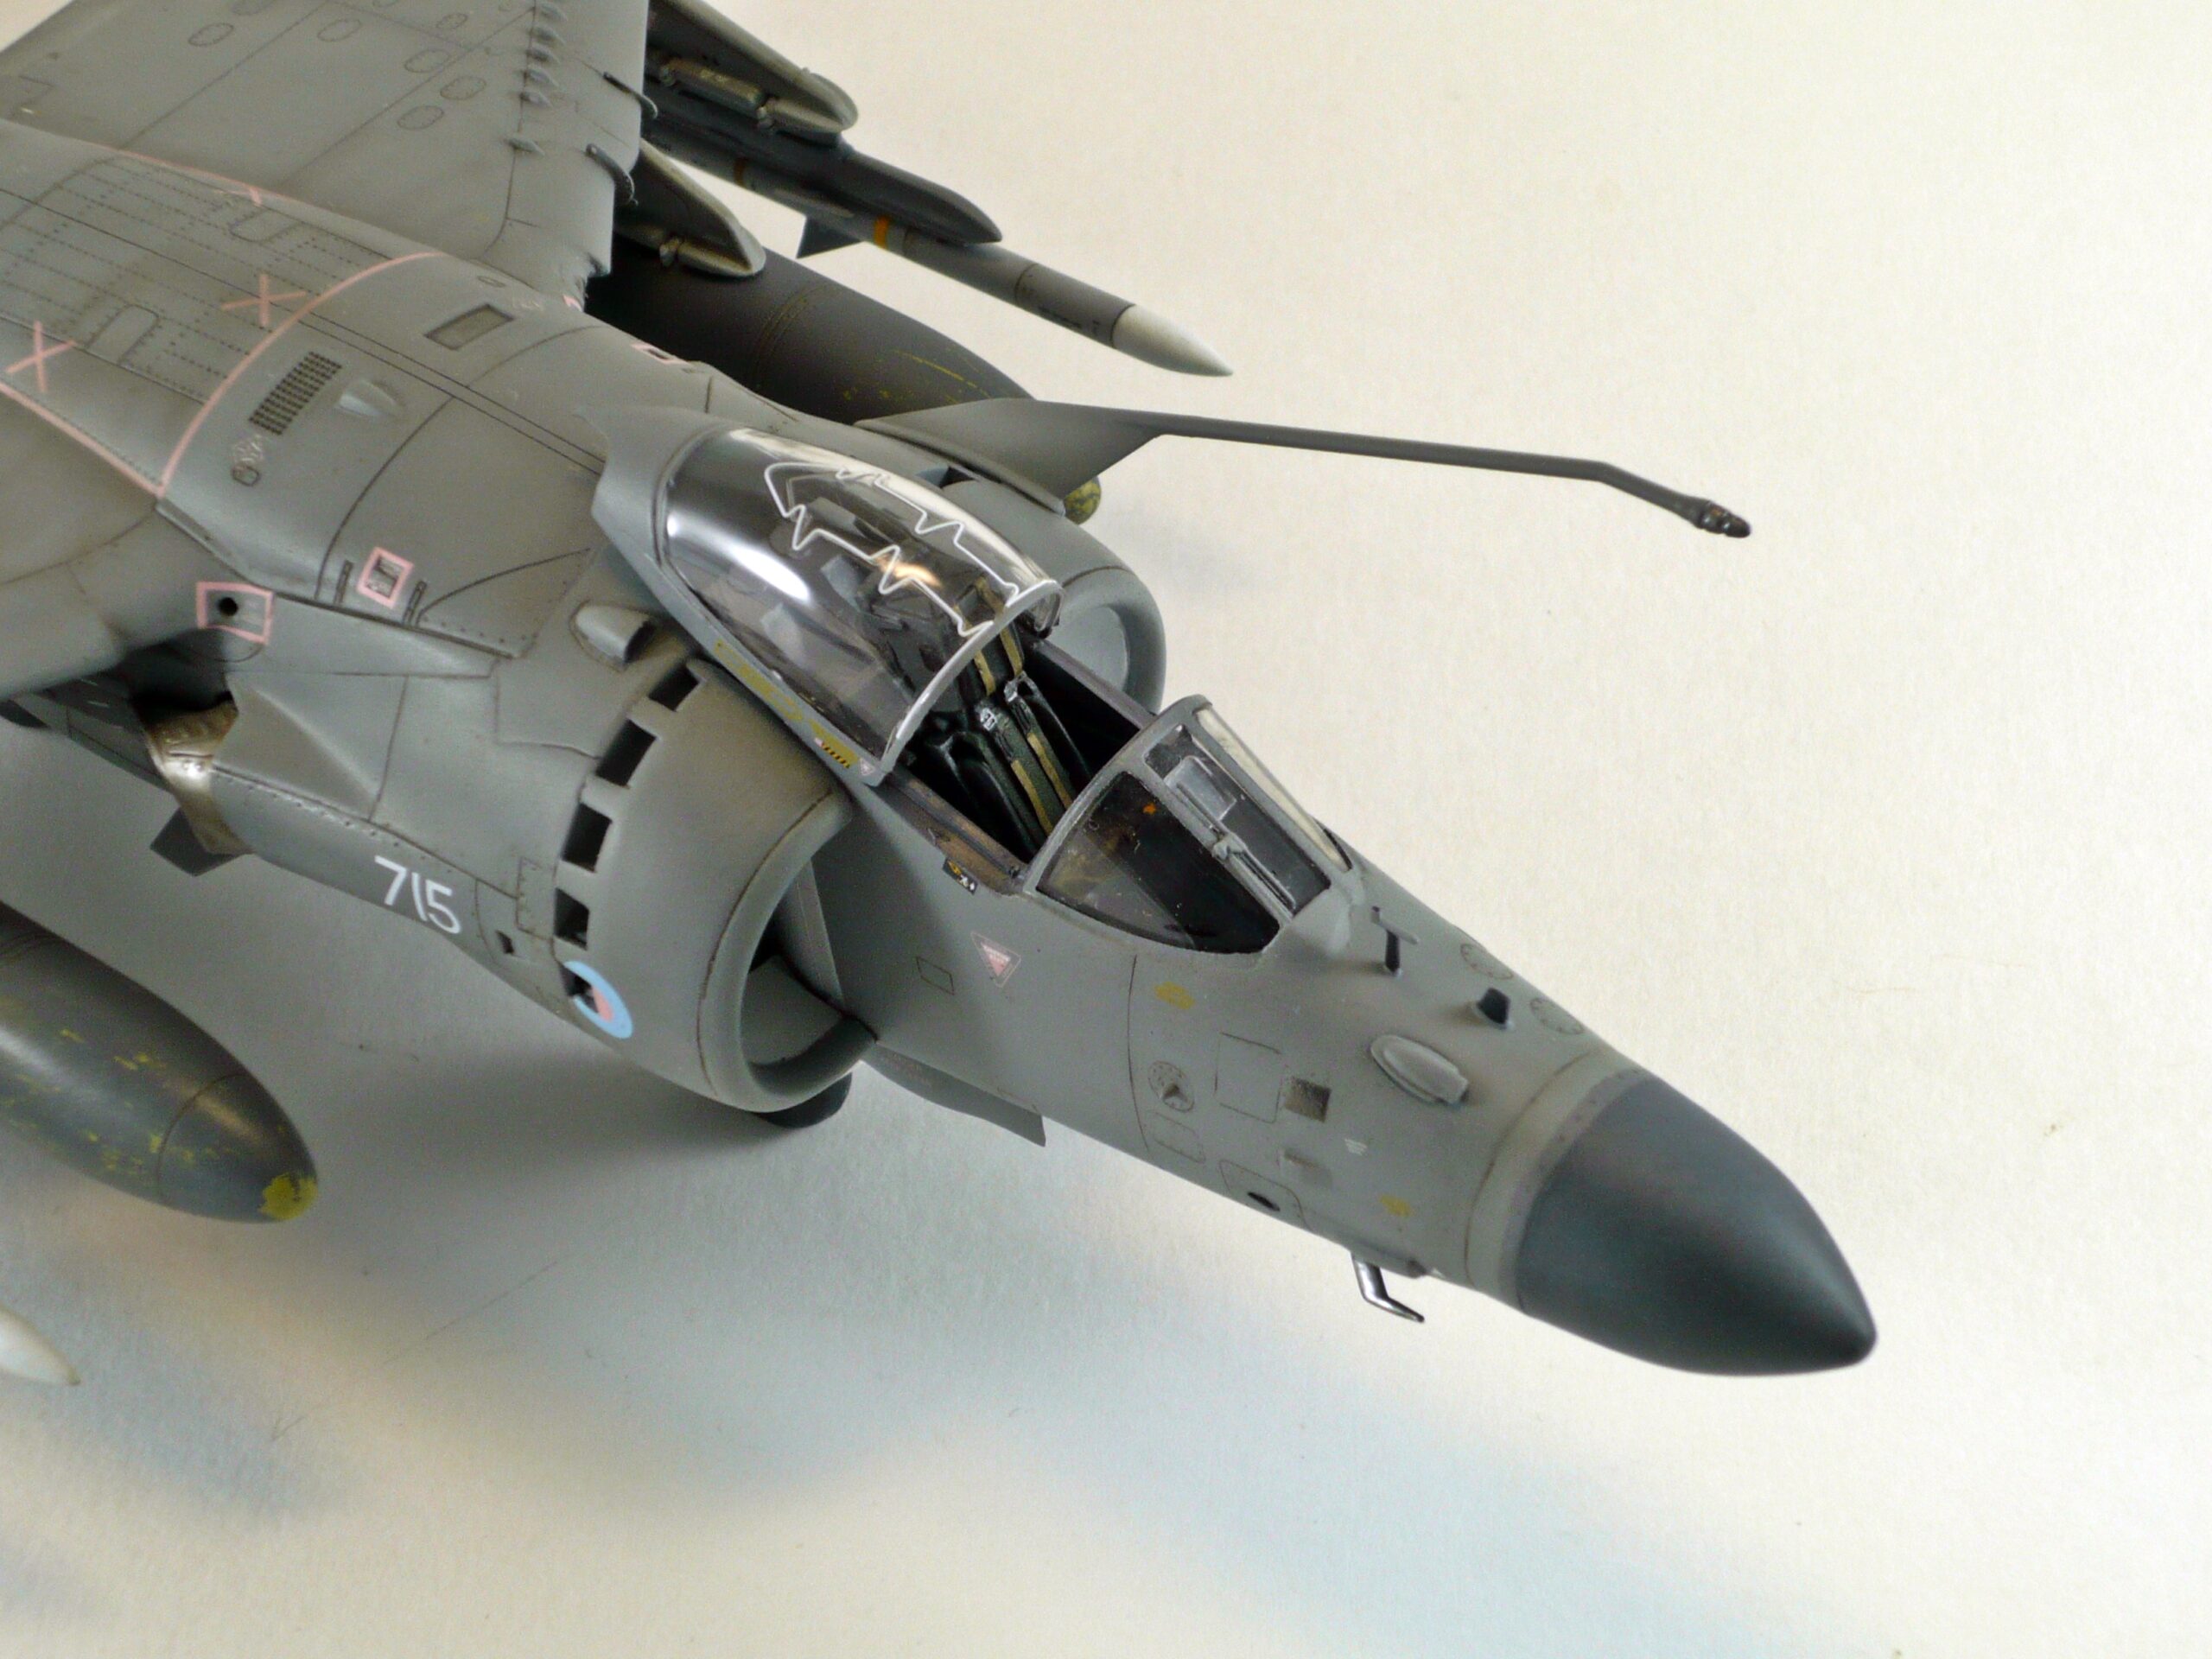
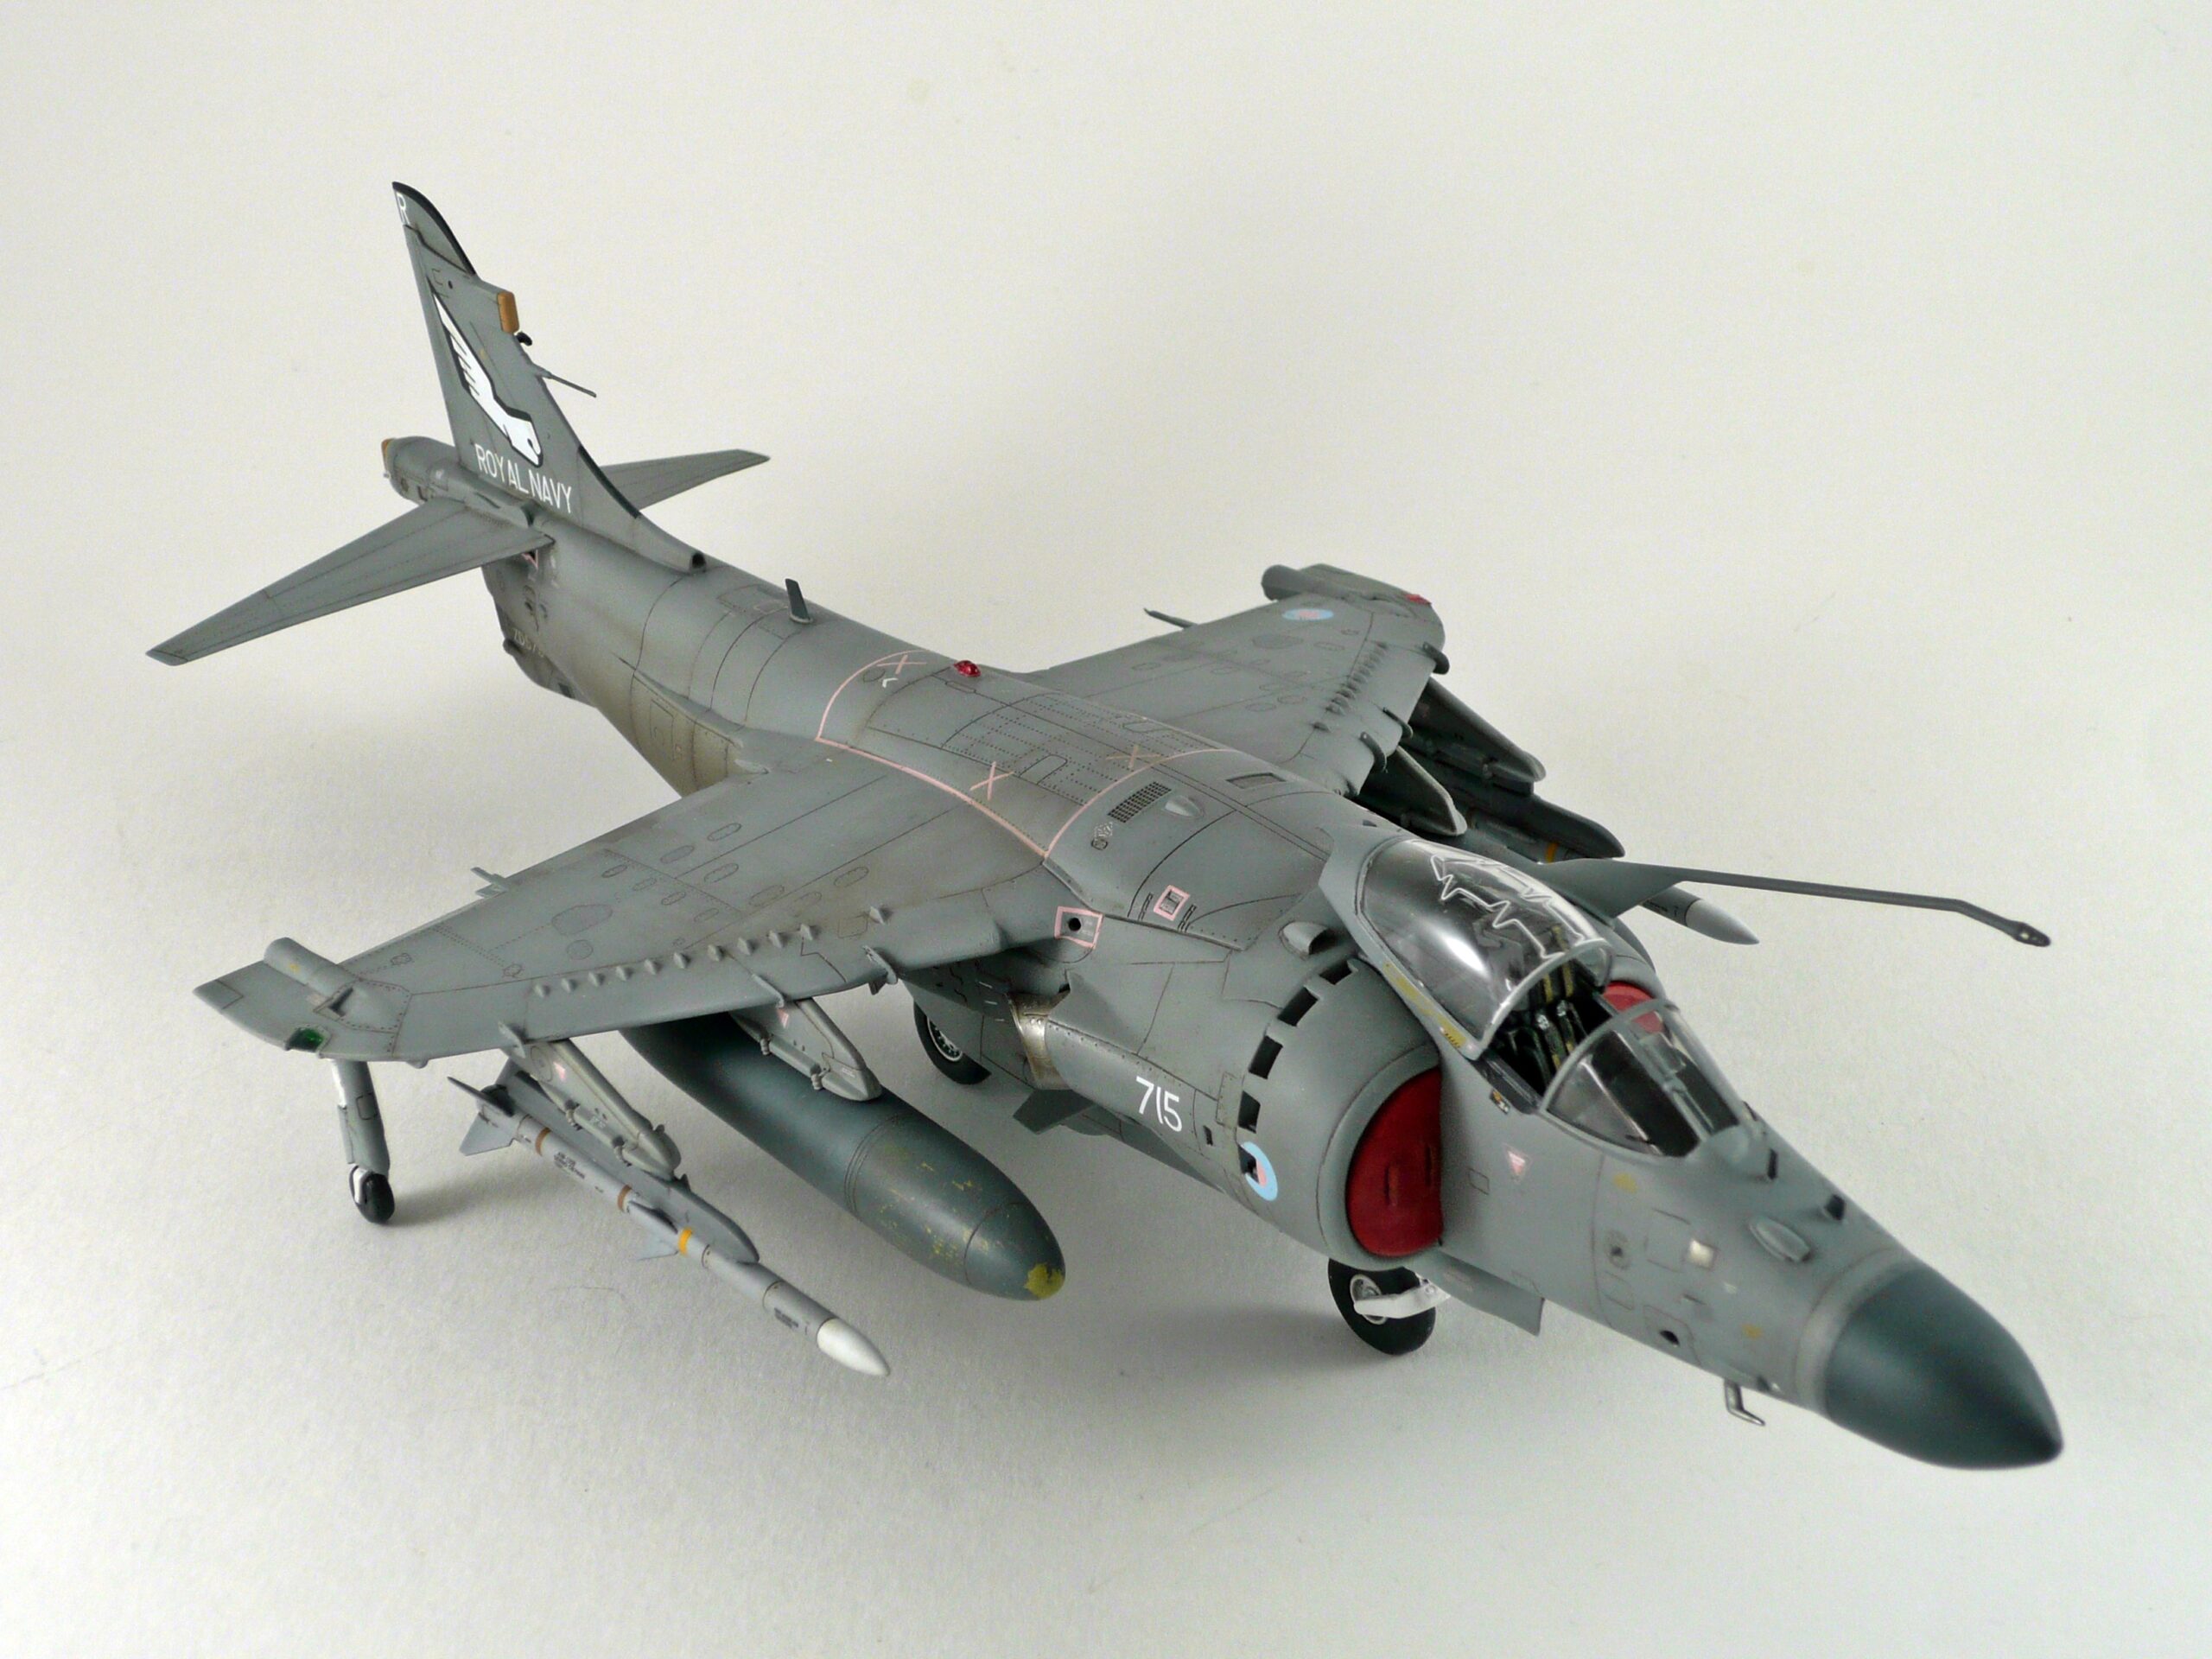
Final Finishing and Matt Coat
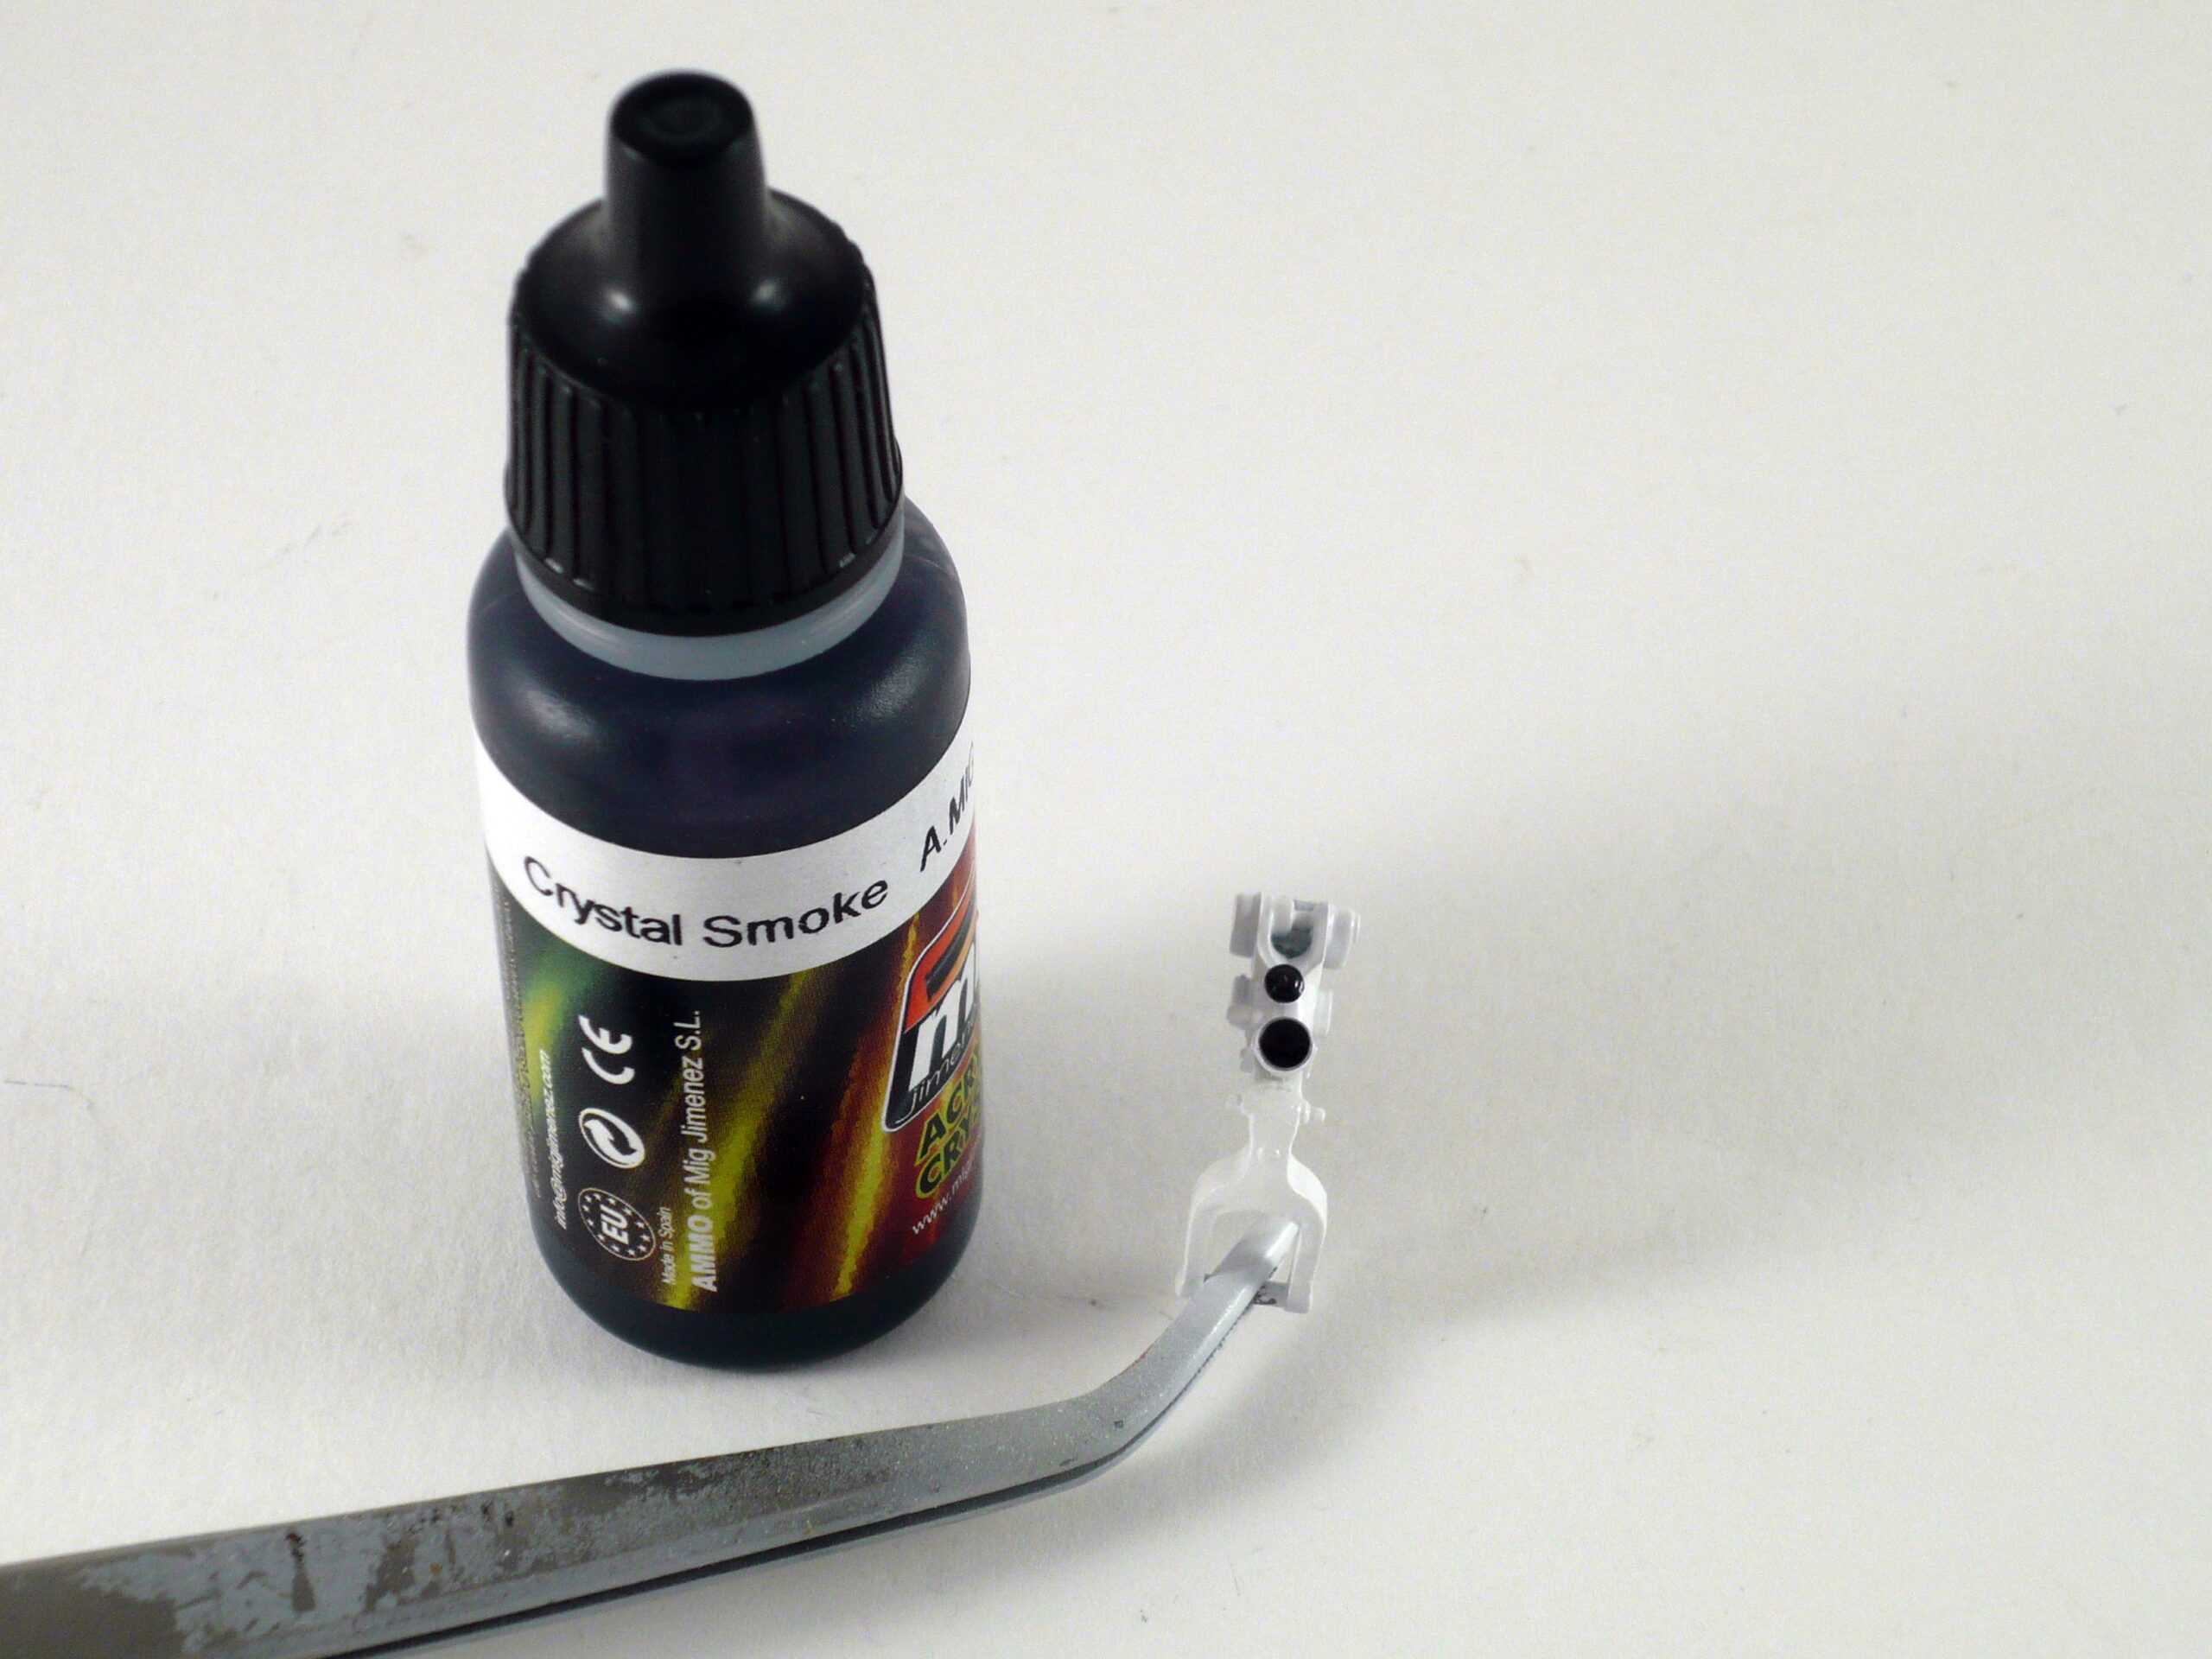
The final details included treatment of the forward wheel lights using transparent smoke color to reproduce the appearance of dark-tinted lenses.
Once all weathering work was complete, the model received a final matt varnish coat. This unified the finish, reduced unwanted shine, and blended all previous weathering layers together.
Allowing sufficient drying time after the matt coat is essential to avoid fingerprints and damage during final handling.
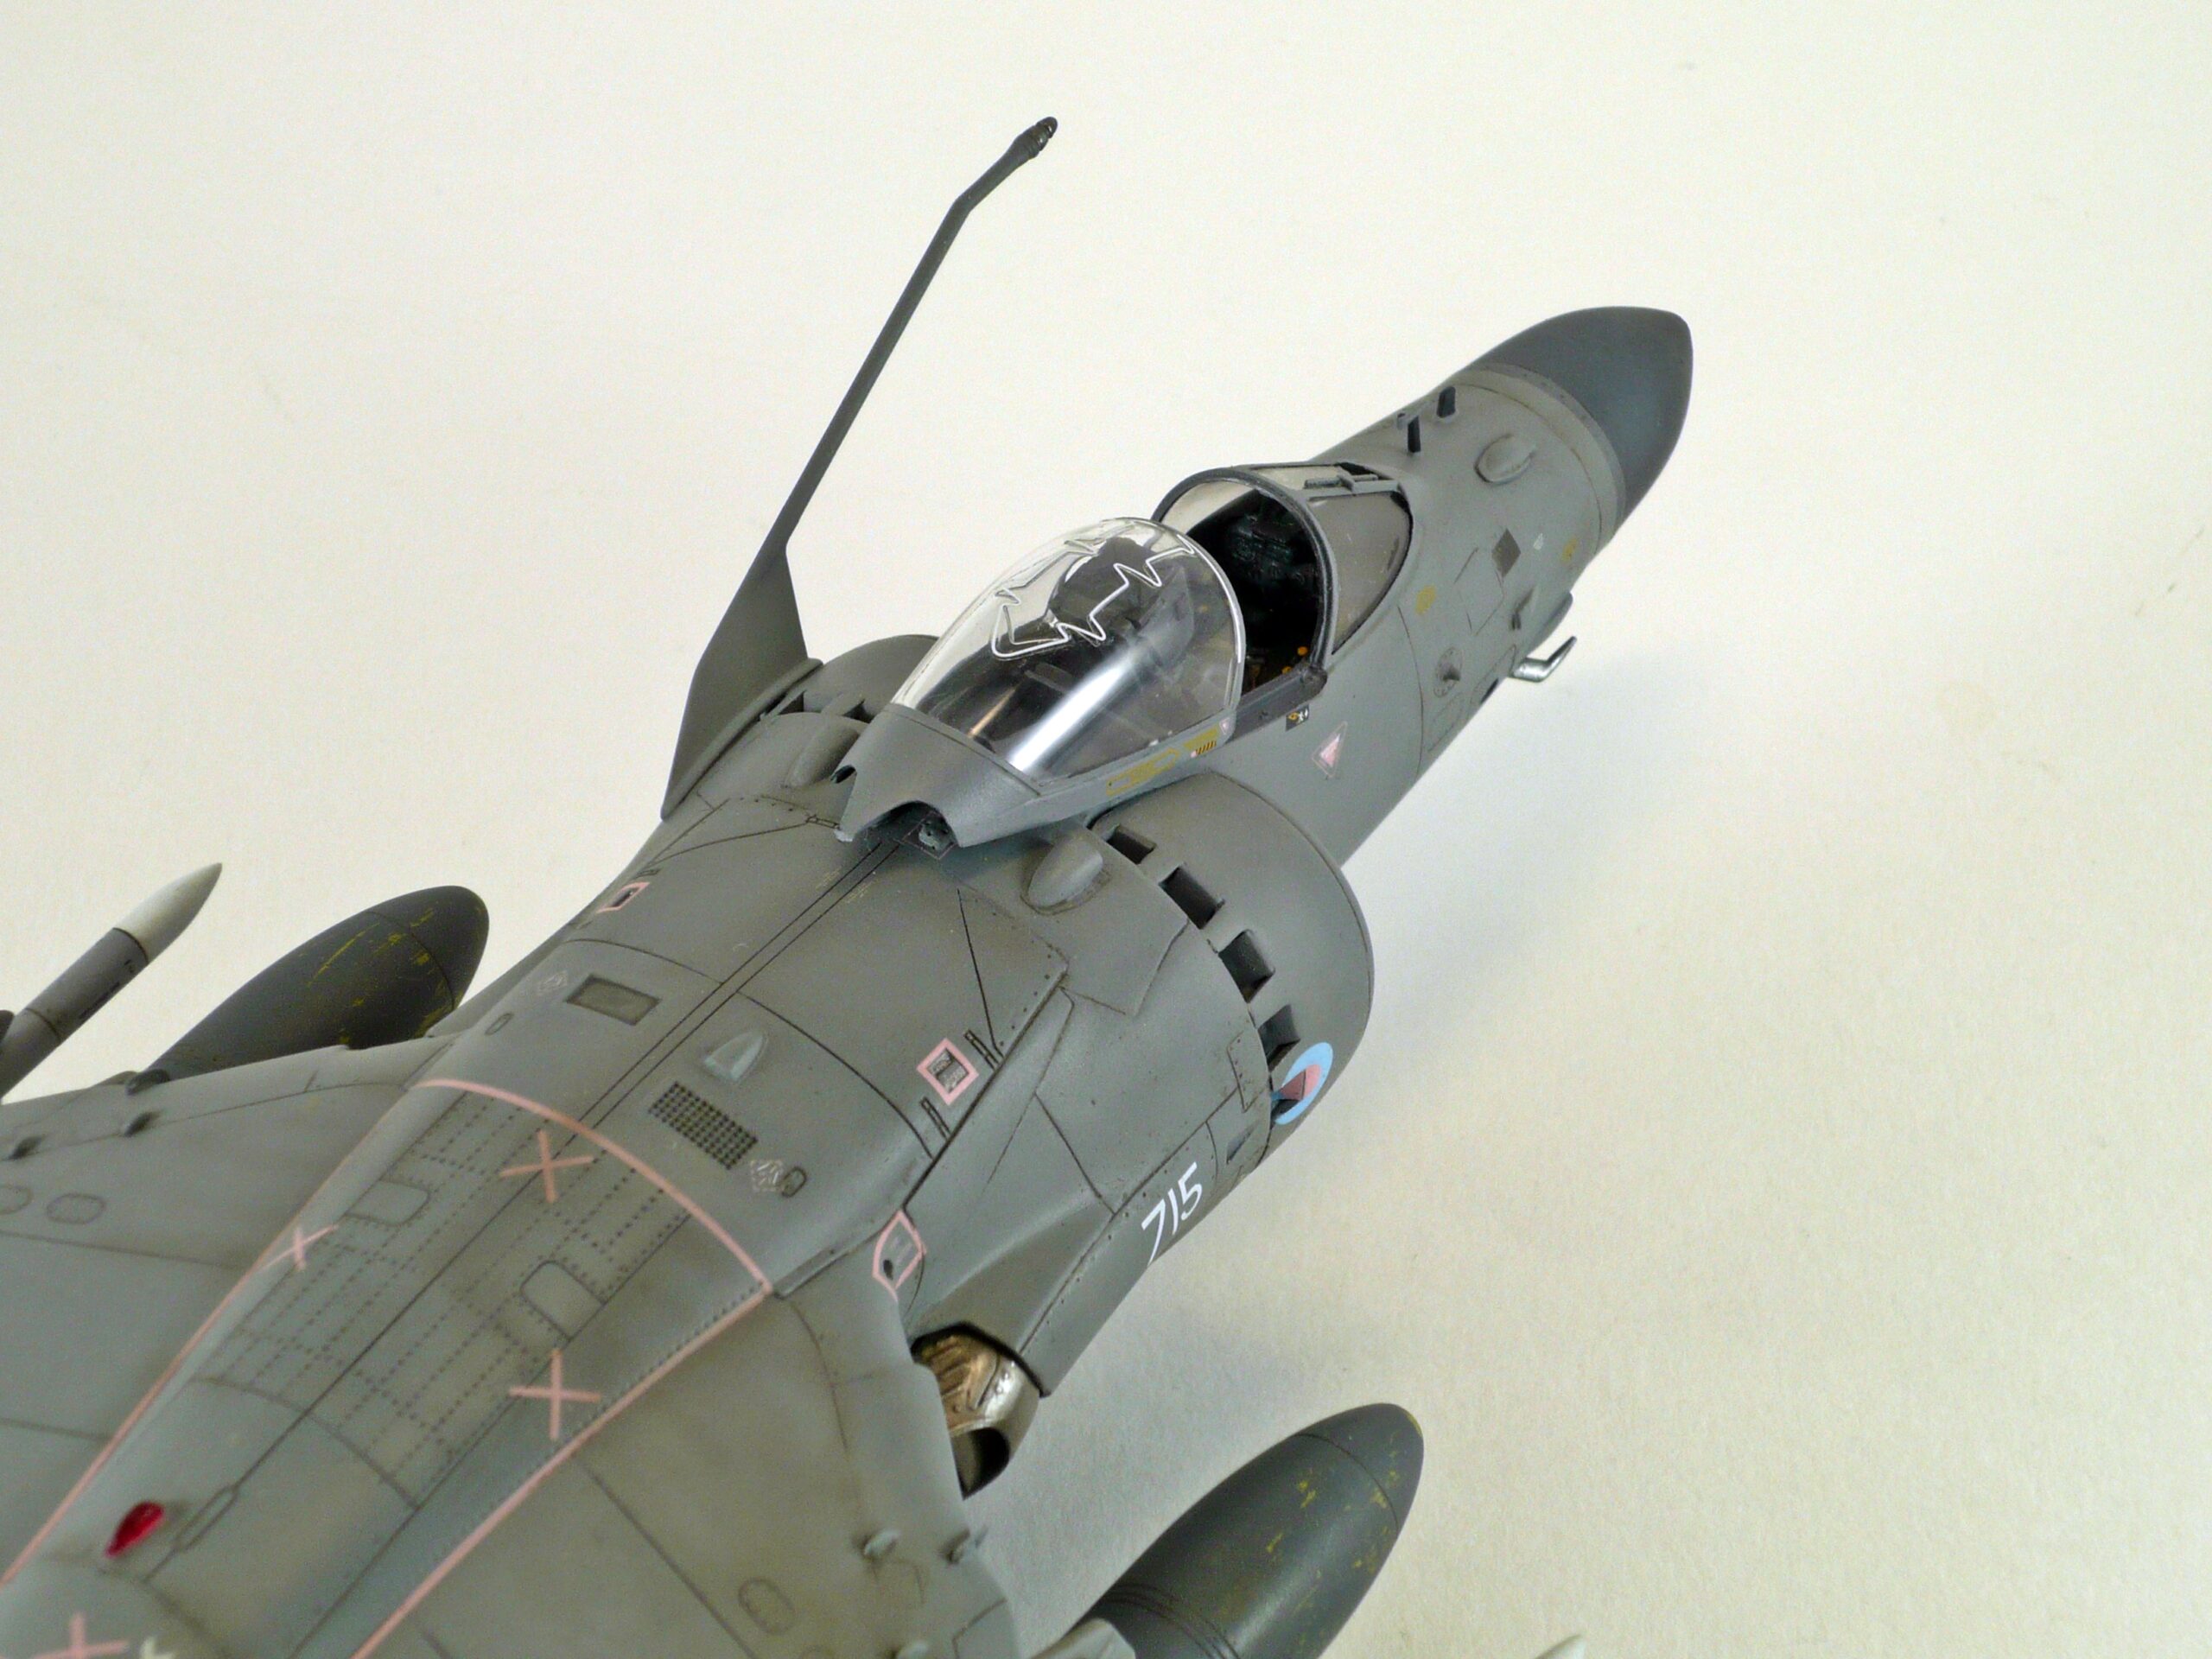
Conclusion
The Harrier FA.2 remains one of the most fascinating aircraft subjects available to scale modellers. Its distinctive design, operational history, and heavily weathered appearance provide countless opportunities for detailing and artistic finishing.
This project demonstrates how careful cockpit enhancement, thoughtful assembly improvements, layered painting techniques, and realistic weathering can transform a standard kit into an impressive representation of Britain’s legendary V/STOL fighter.
For modellers interested in modern Fleet Air Arm aircraft, the Harrier FA.2 offers the perfect combination of technical challenge and visual appeal, making it a rewarding addition to any collection.
AV-8B Harrier II Plus (USMC)Dark Shape Camouflage