article
F4U-1A Corsair Tamiya 1/48: A Unique Aircraft on the Factory Assembly Line
A Different Approach to the F4U-1A Corsair
The F4U-1A Corsair is one of the most recognizable aircraft of World War II and one of the most popular subjects among scale modelers. For Hubert Ortinger, however, building another conventional Corsair was not enough.
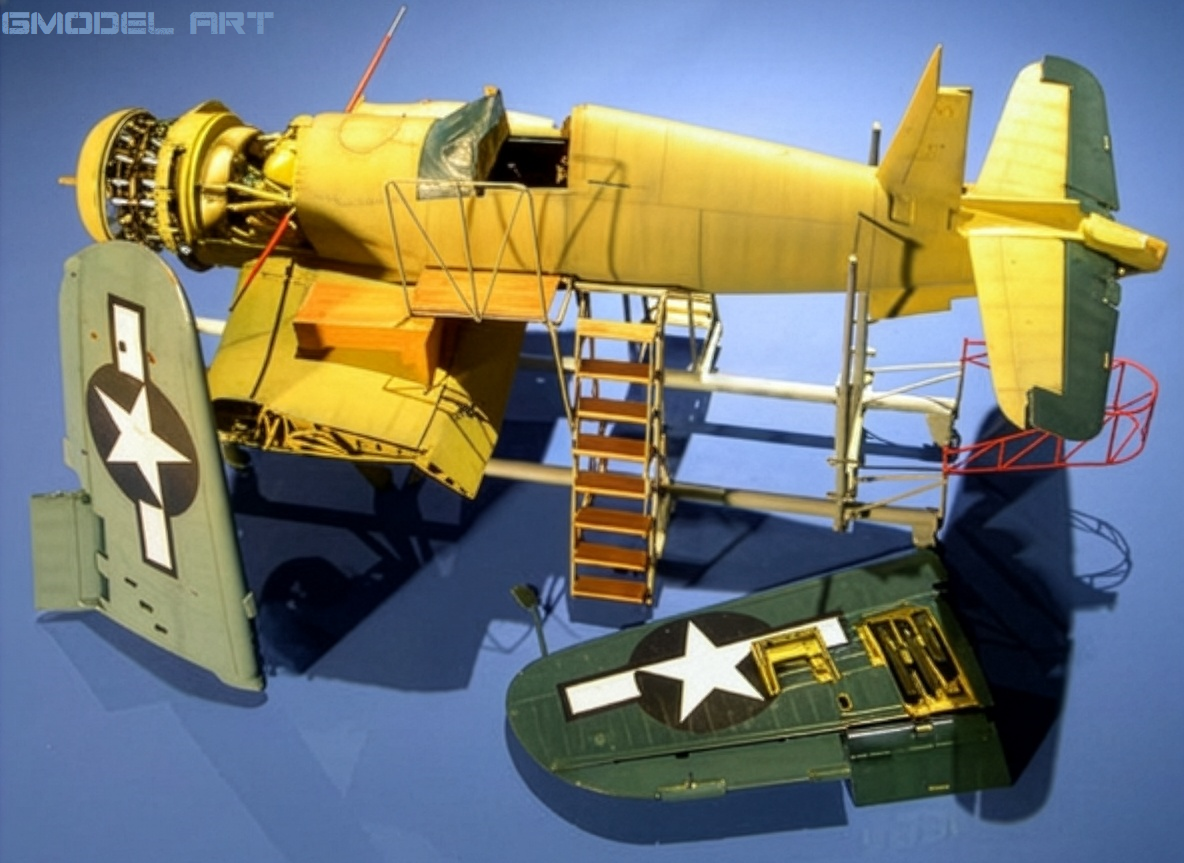
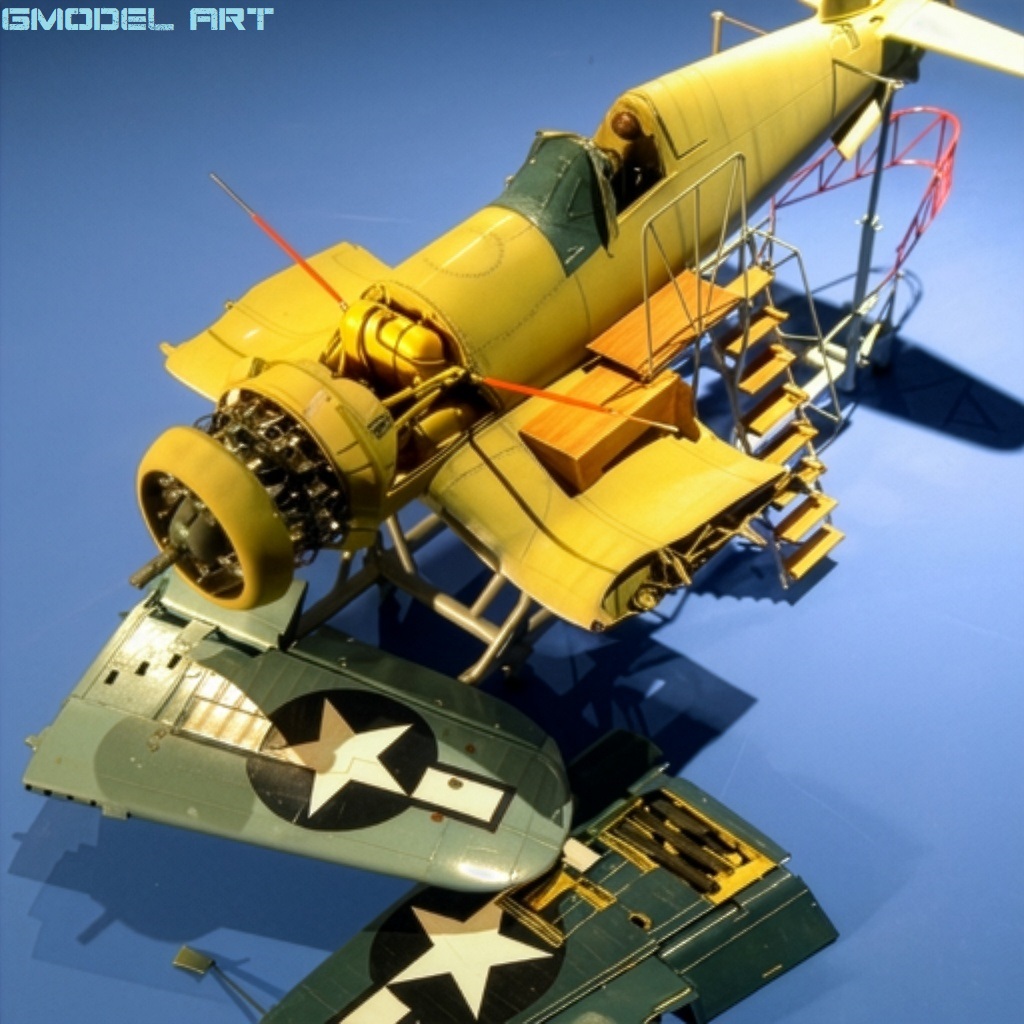
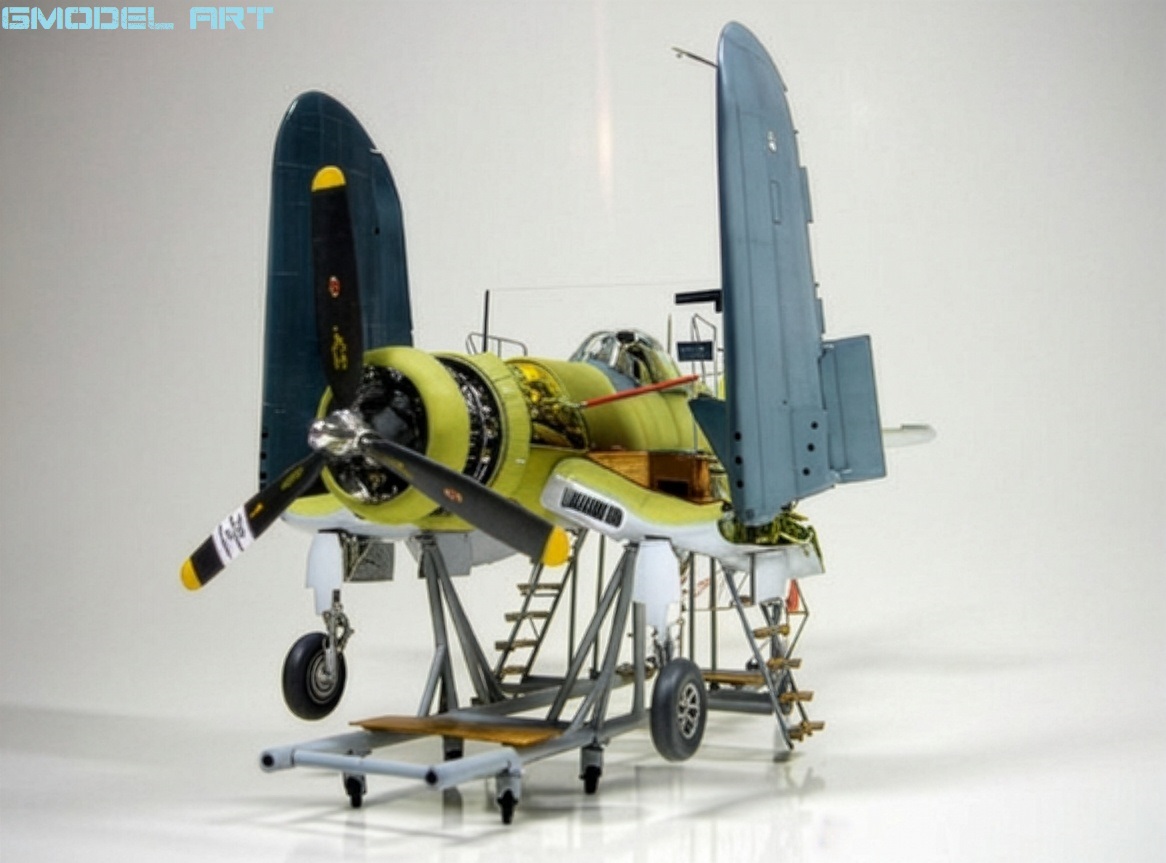
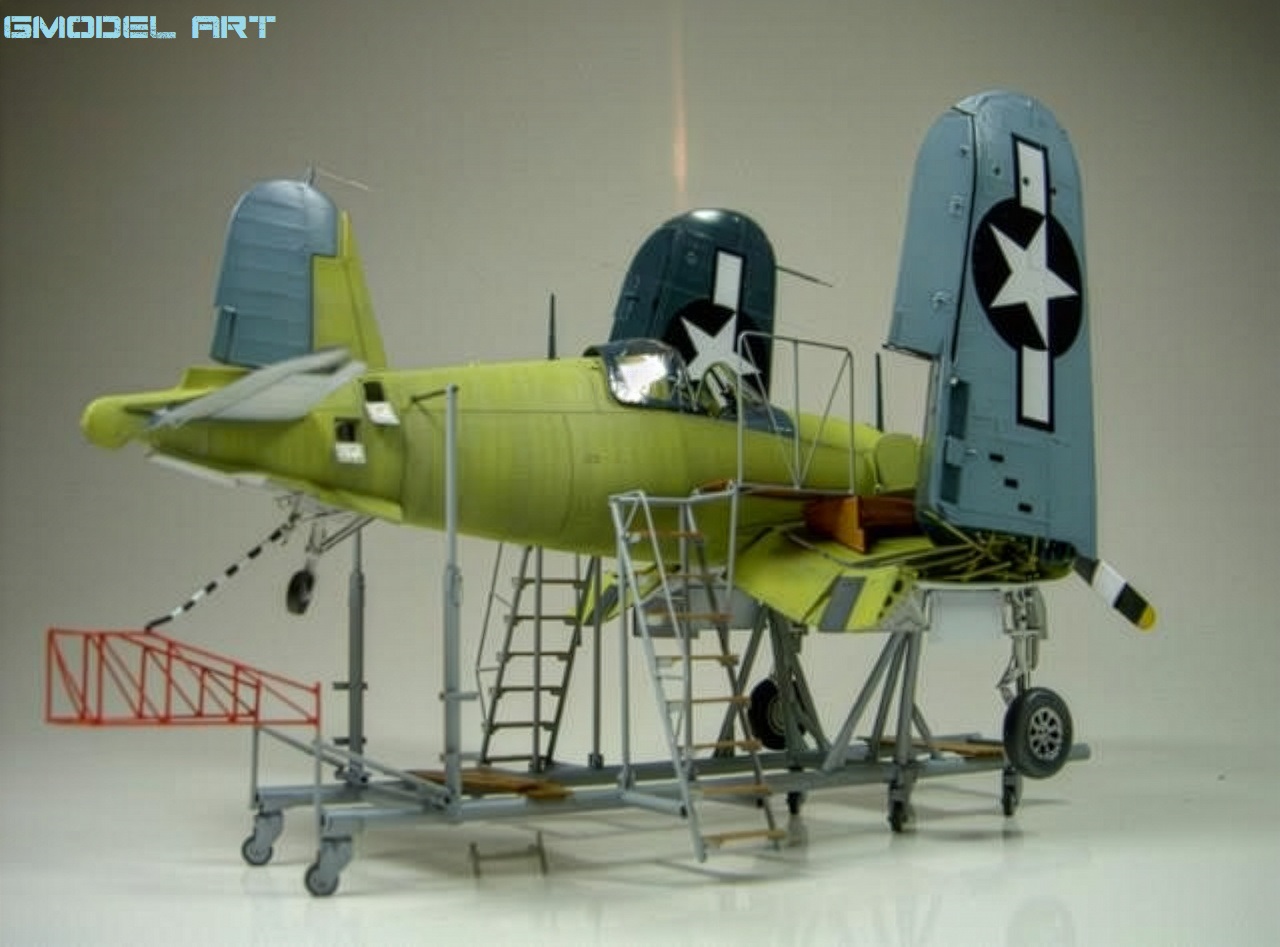
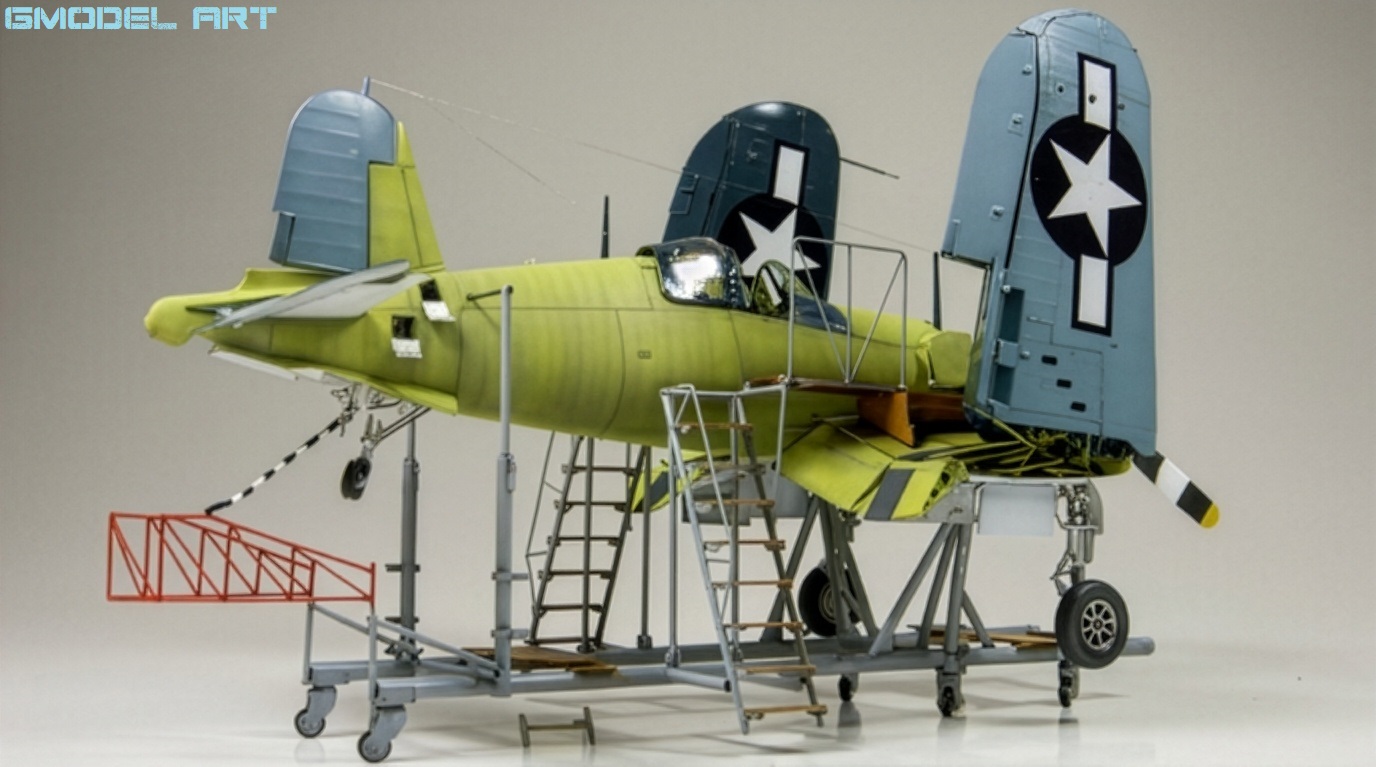
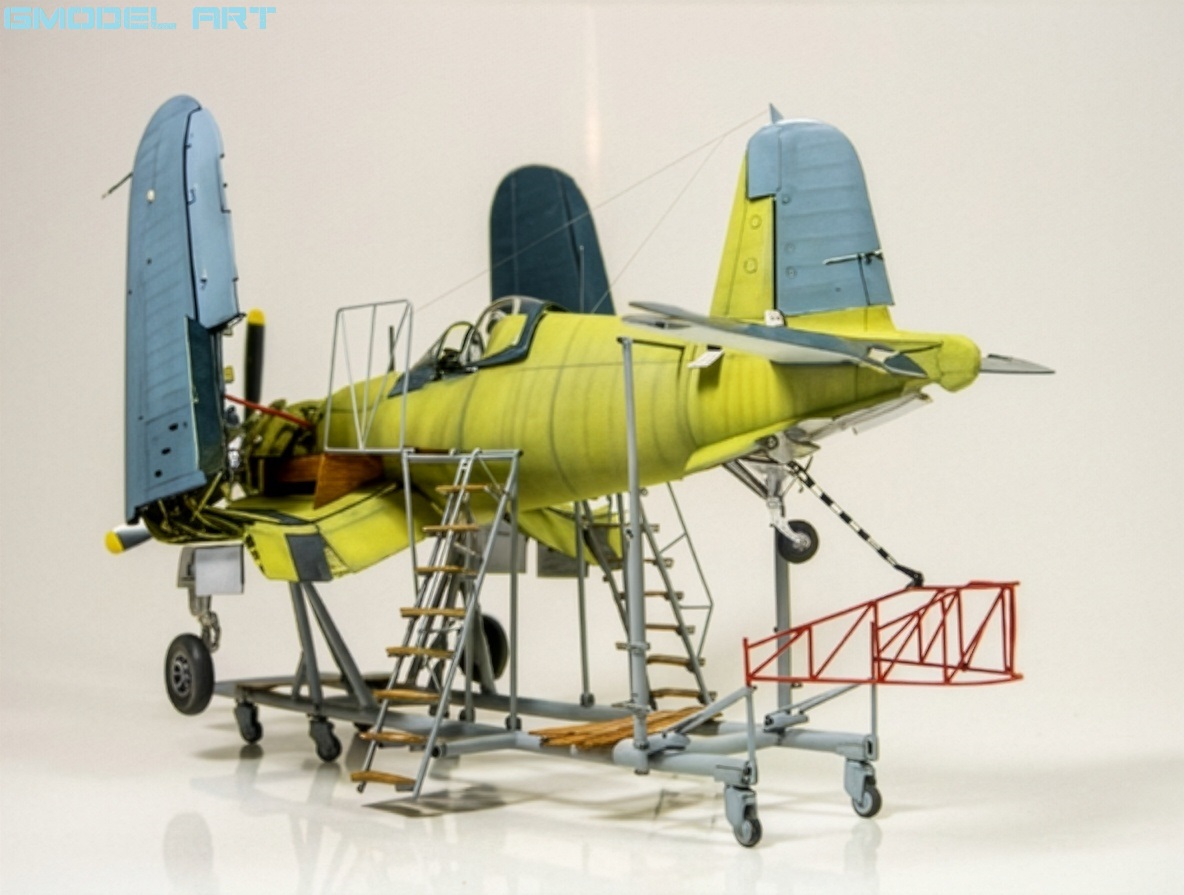
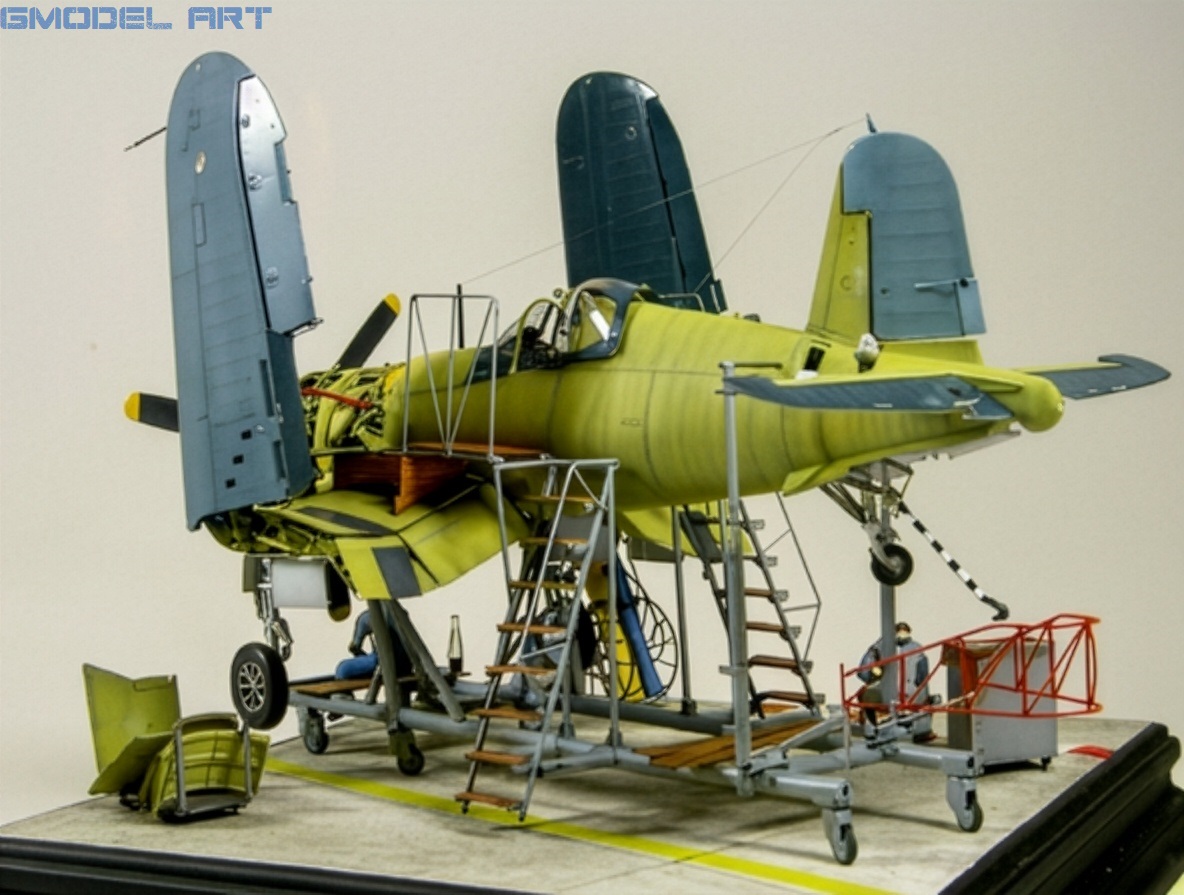
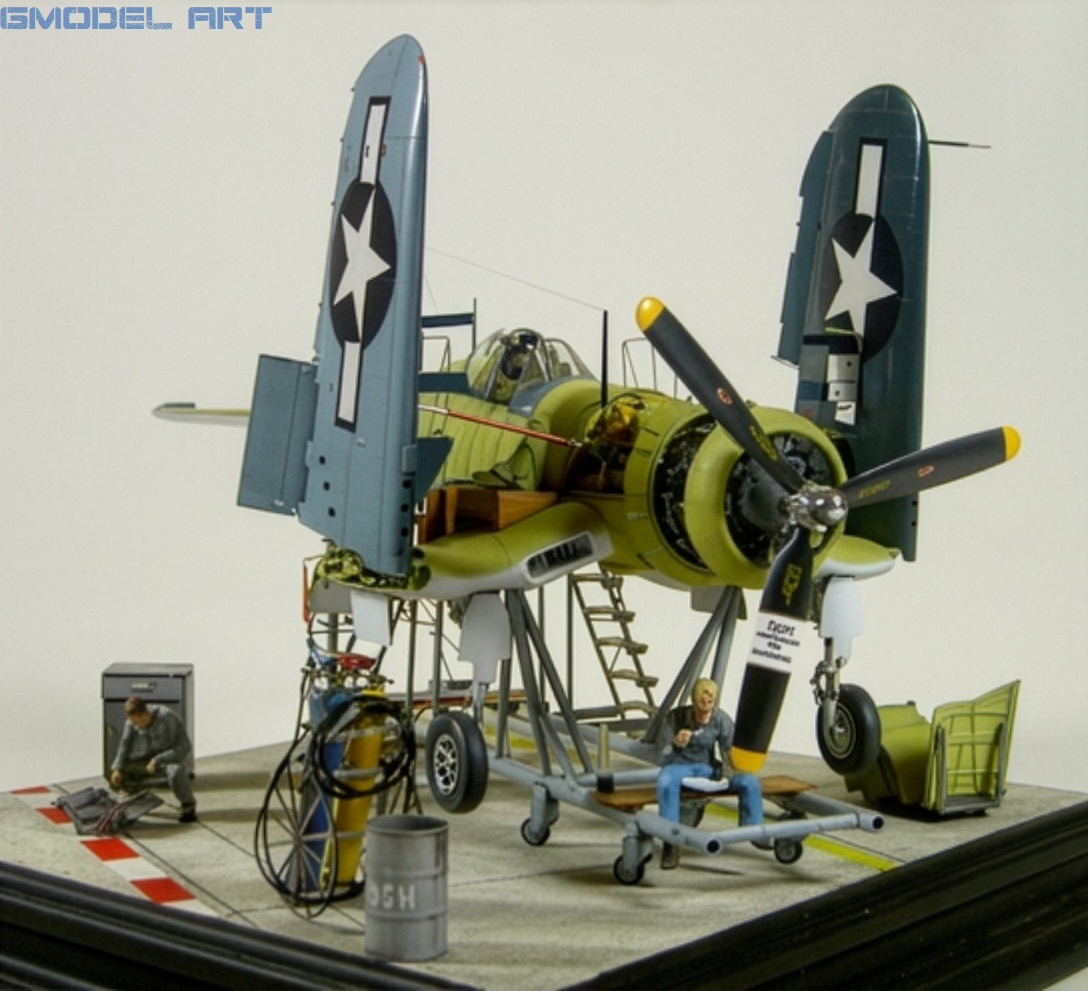
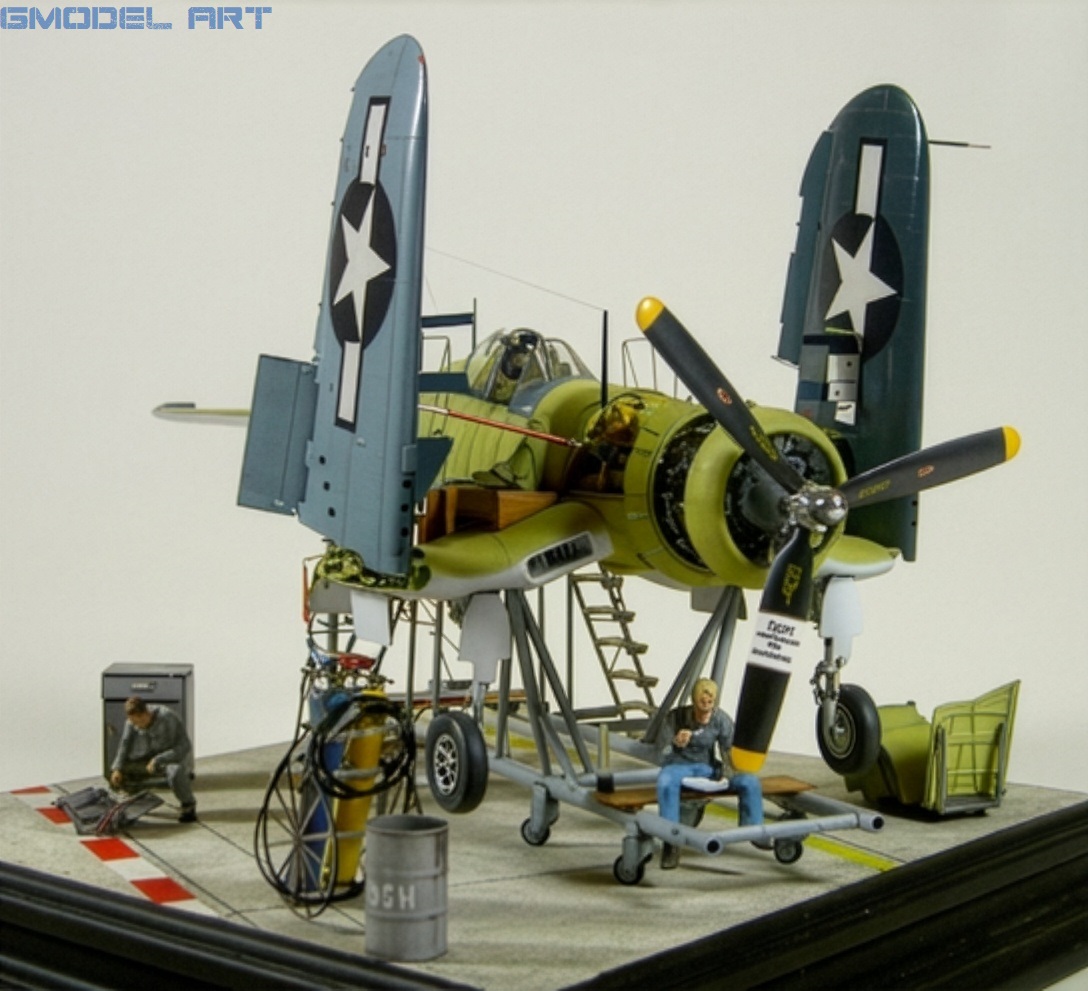
Using the Tamiya 1/48 scale kit, he decided to create something different: an F4U-1A Corsair depicted as an unfinished airframe on the factory assembly line.
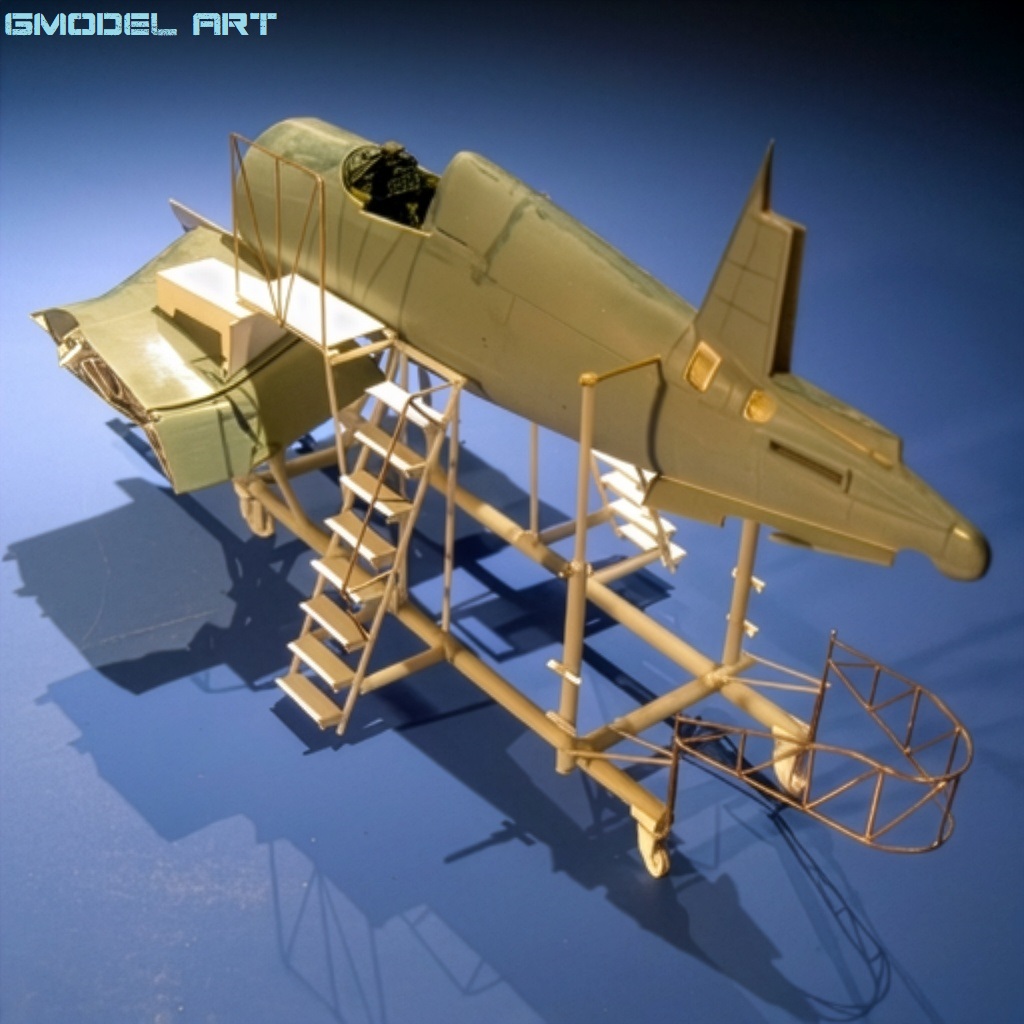
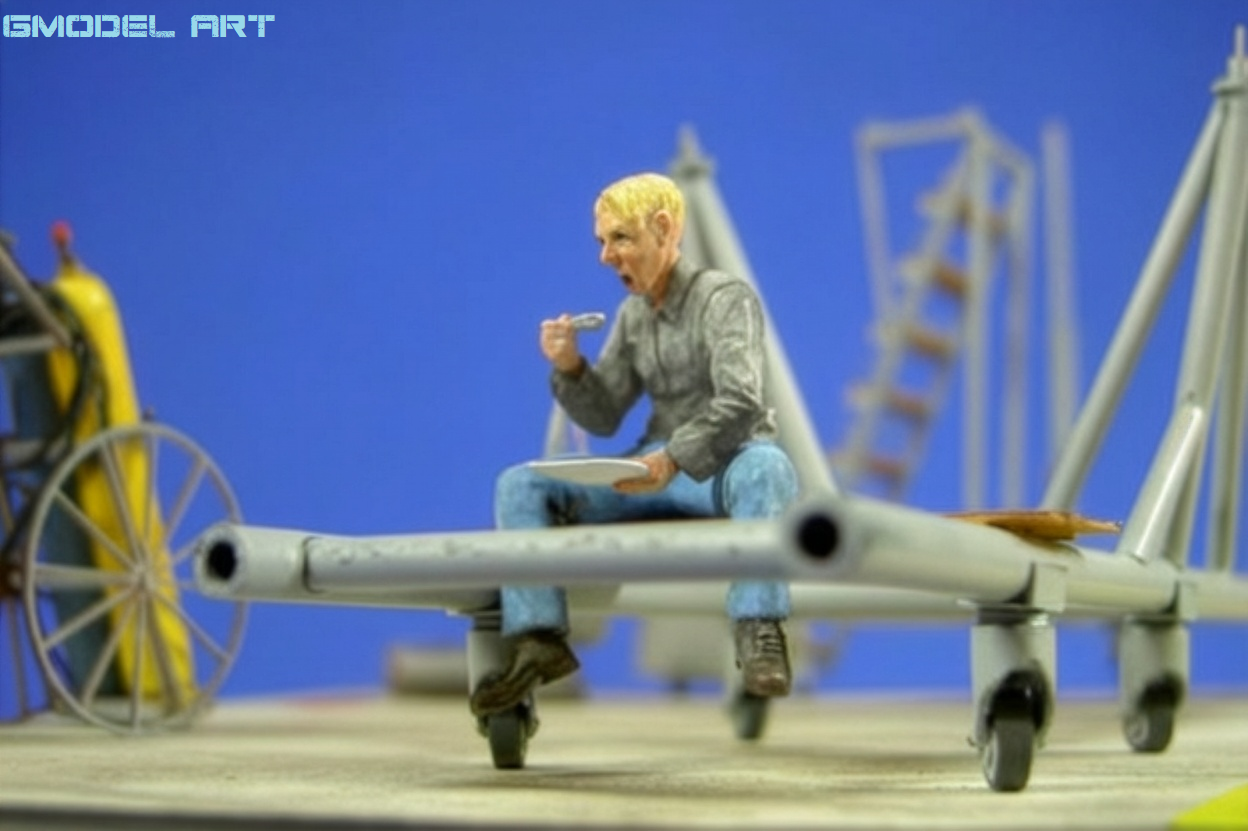
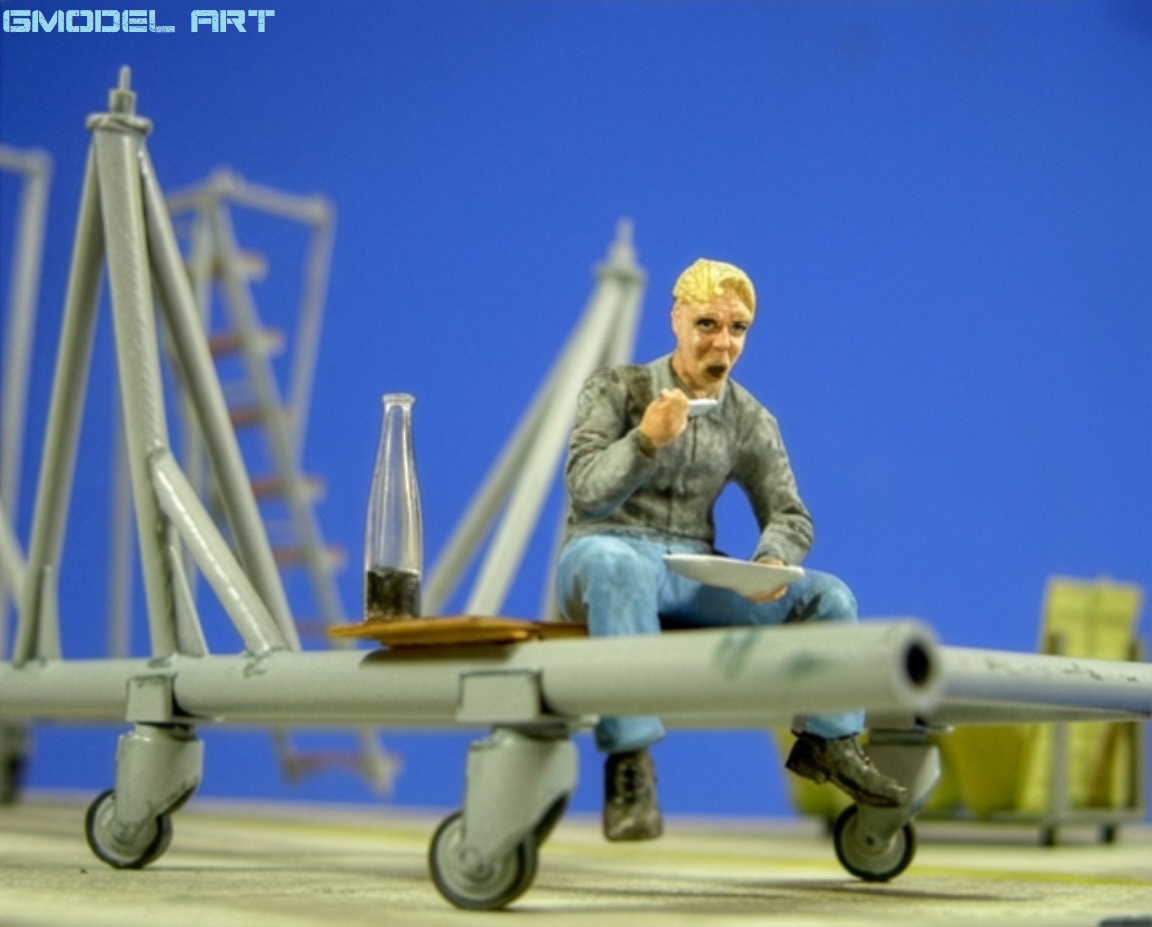
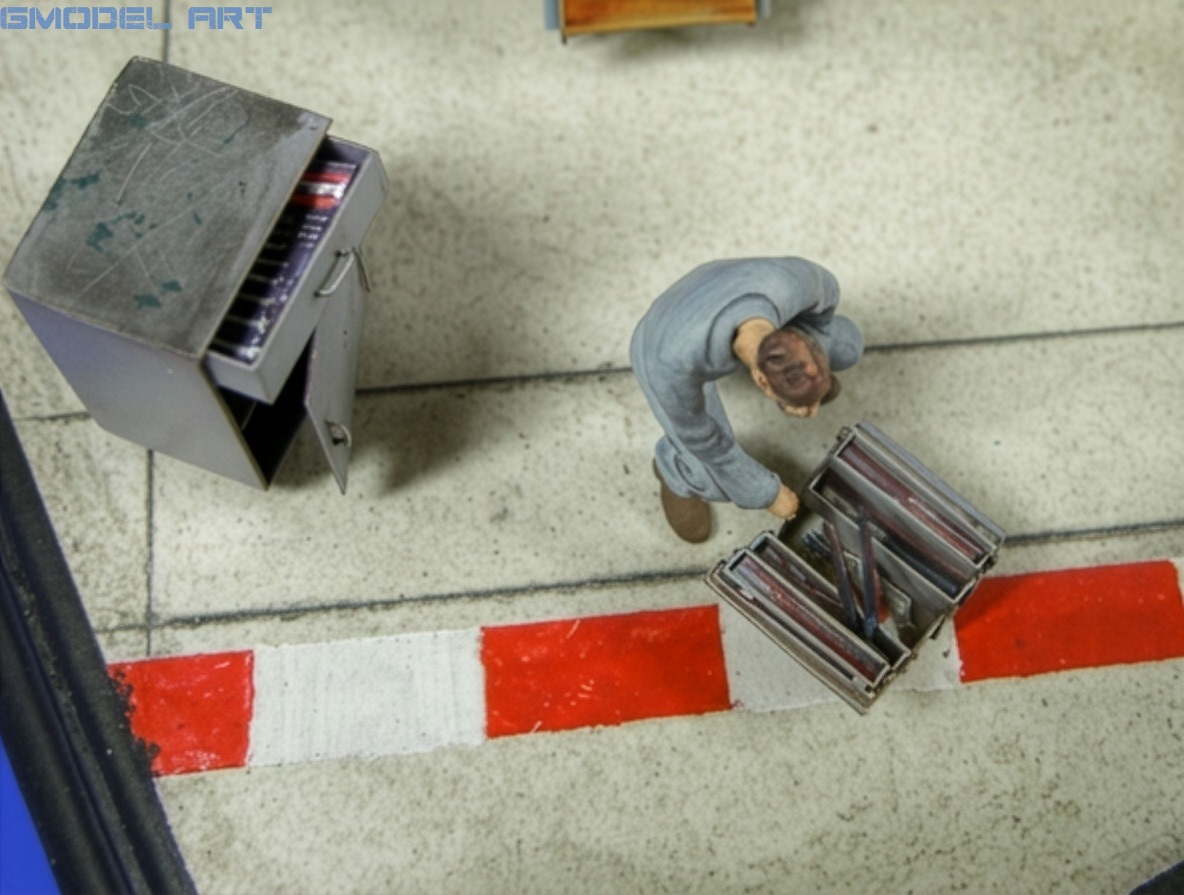
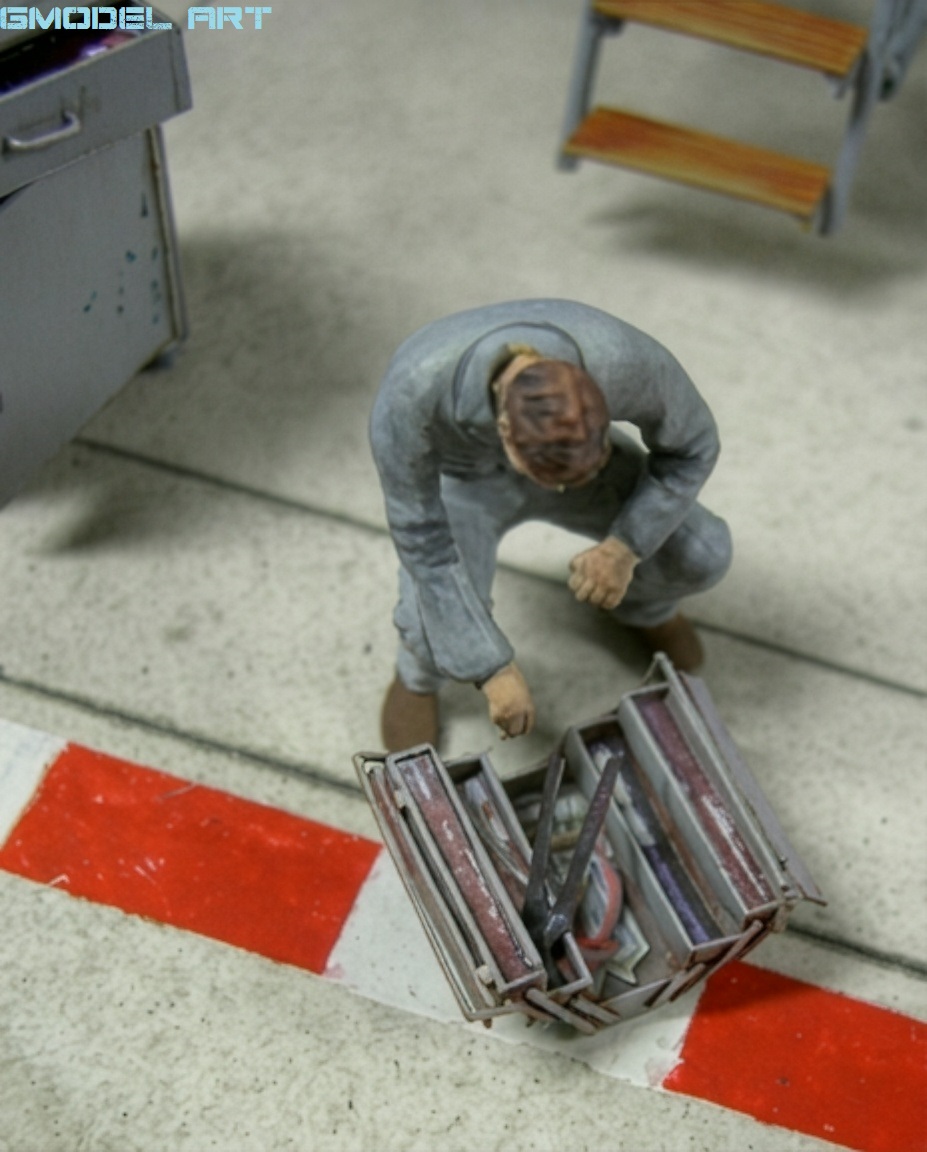
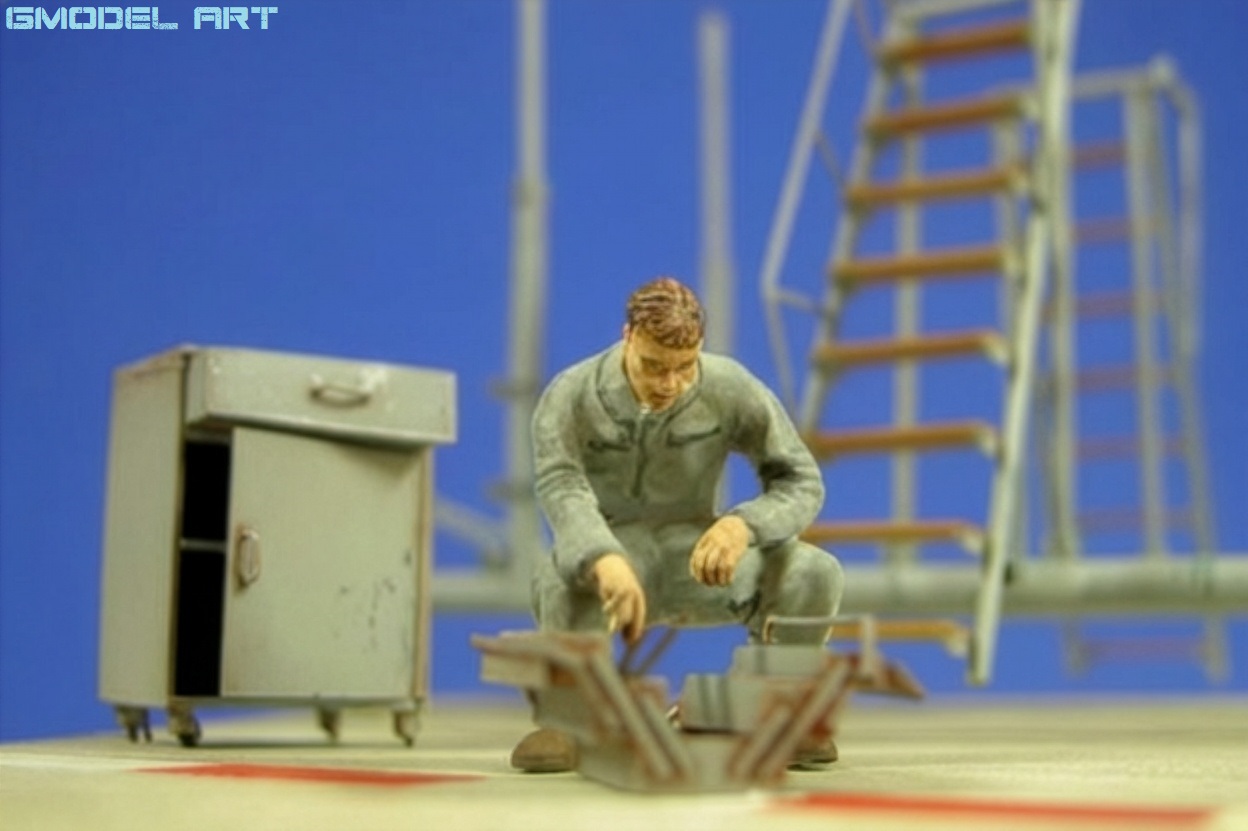
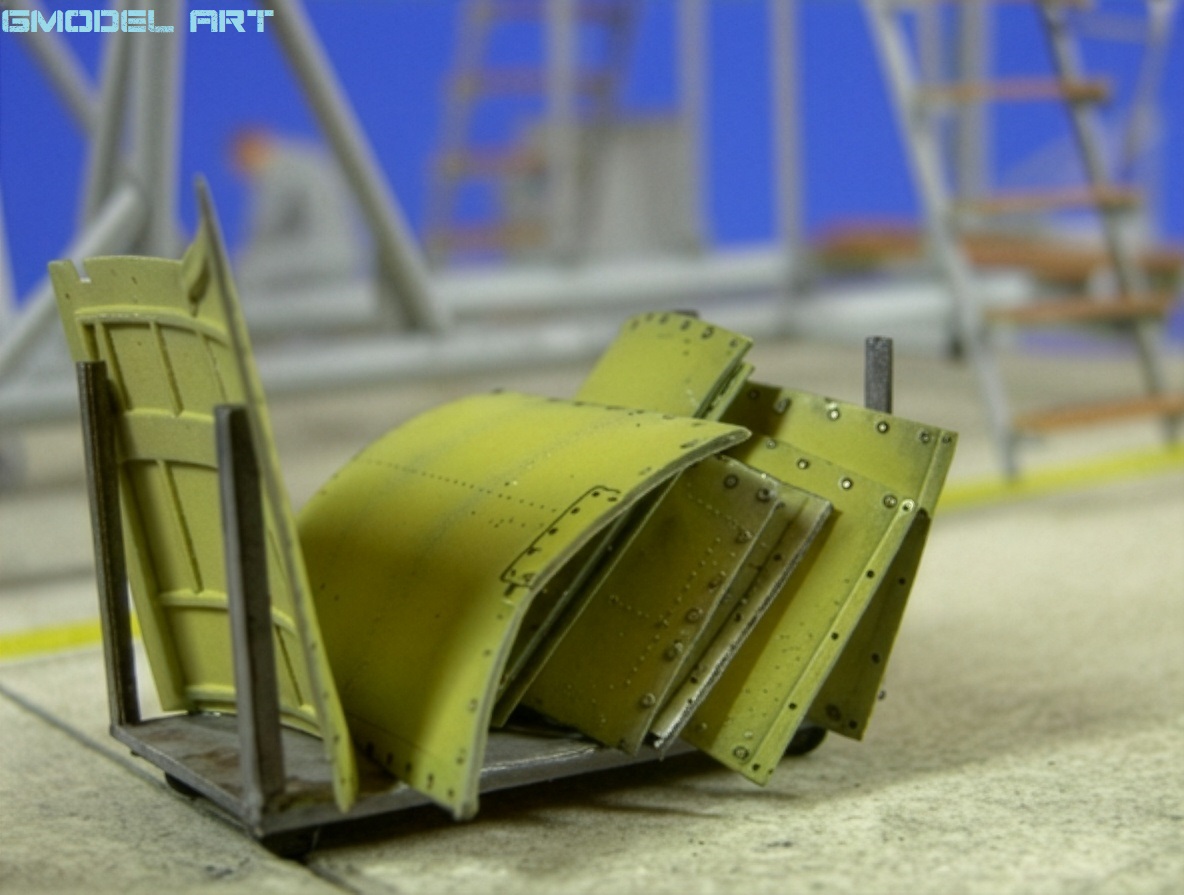
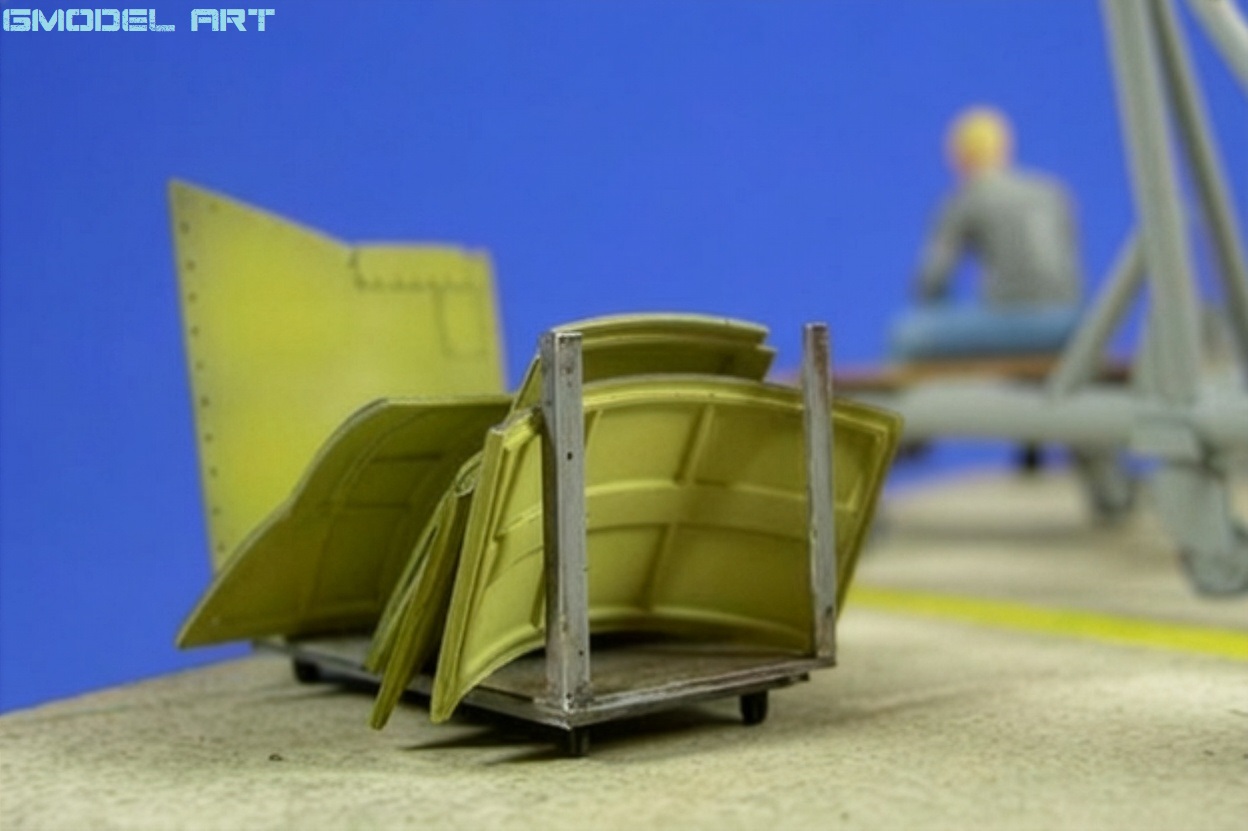
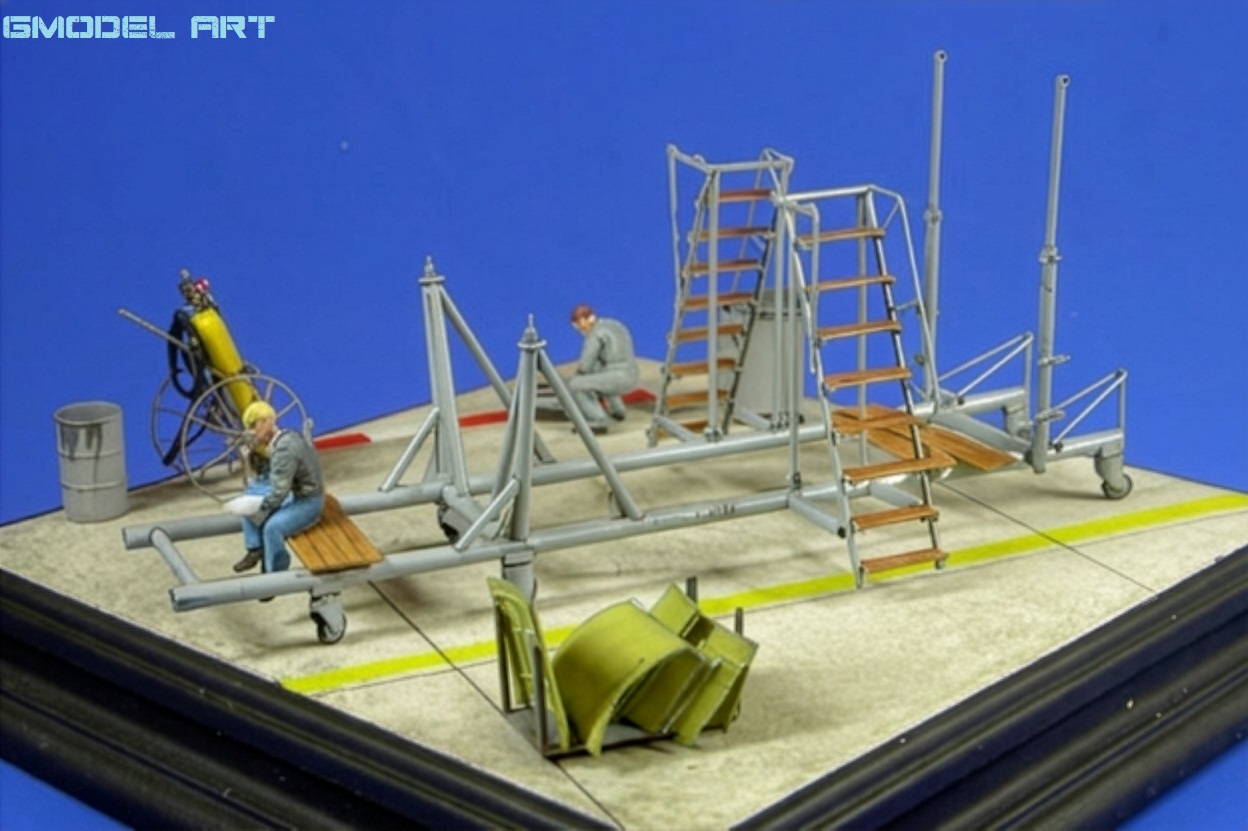
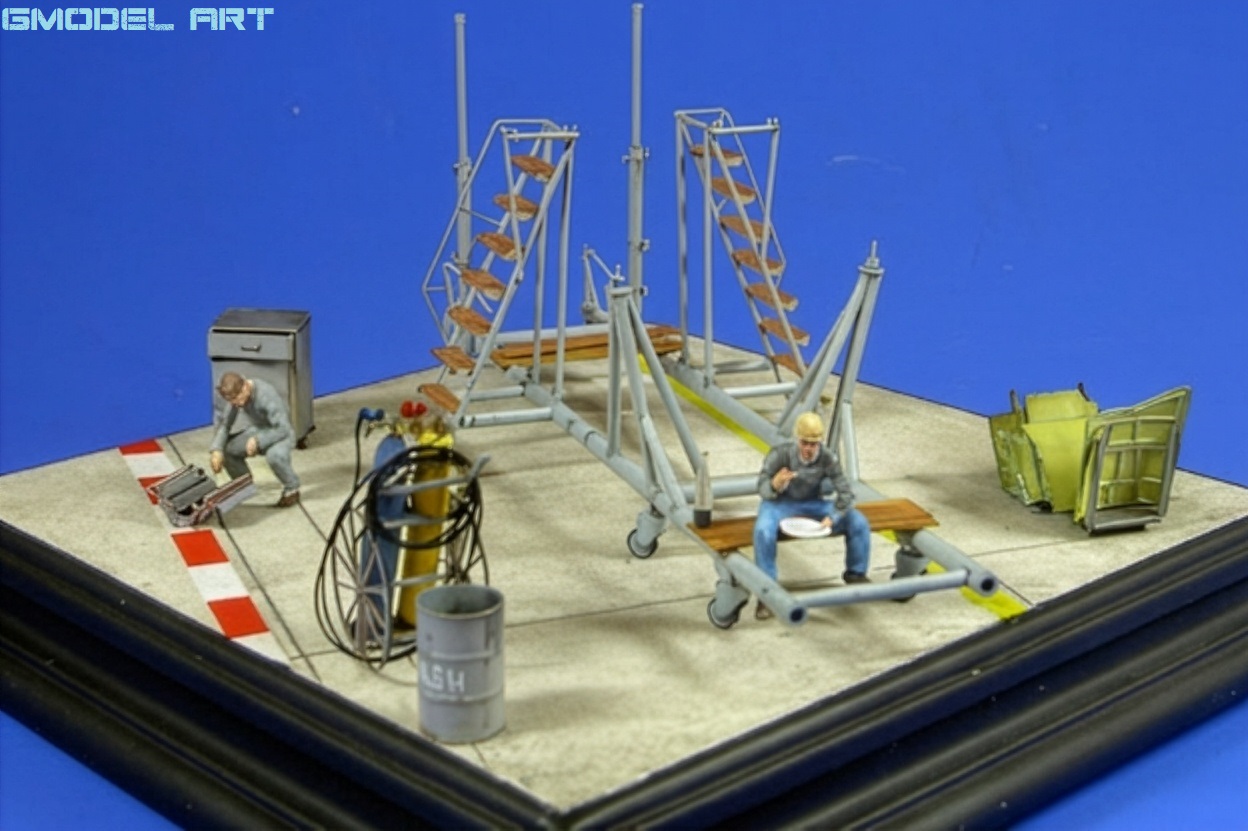
The idea was inspired by a photograph published in the Squadron Corsair in Action book. Instead of presenting the completed aircraft in operational condition, the modeler wanted to capture a specific moment in the manufacturing process, complete with assembly jigs, support structures and partially completed components.
The challenge was therefore much greater than simply assembling and painting the aircraft. The factory equipment itself had to be designed and scratch-built.
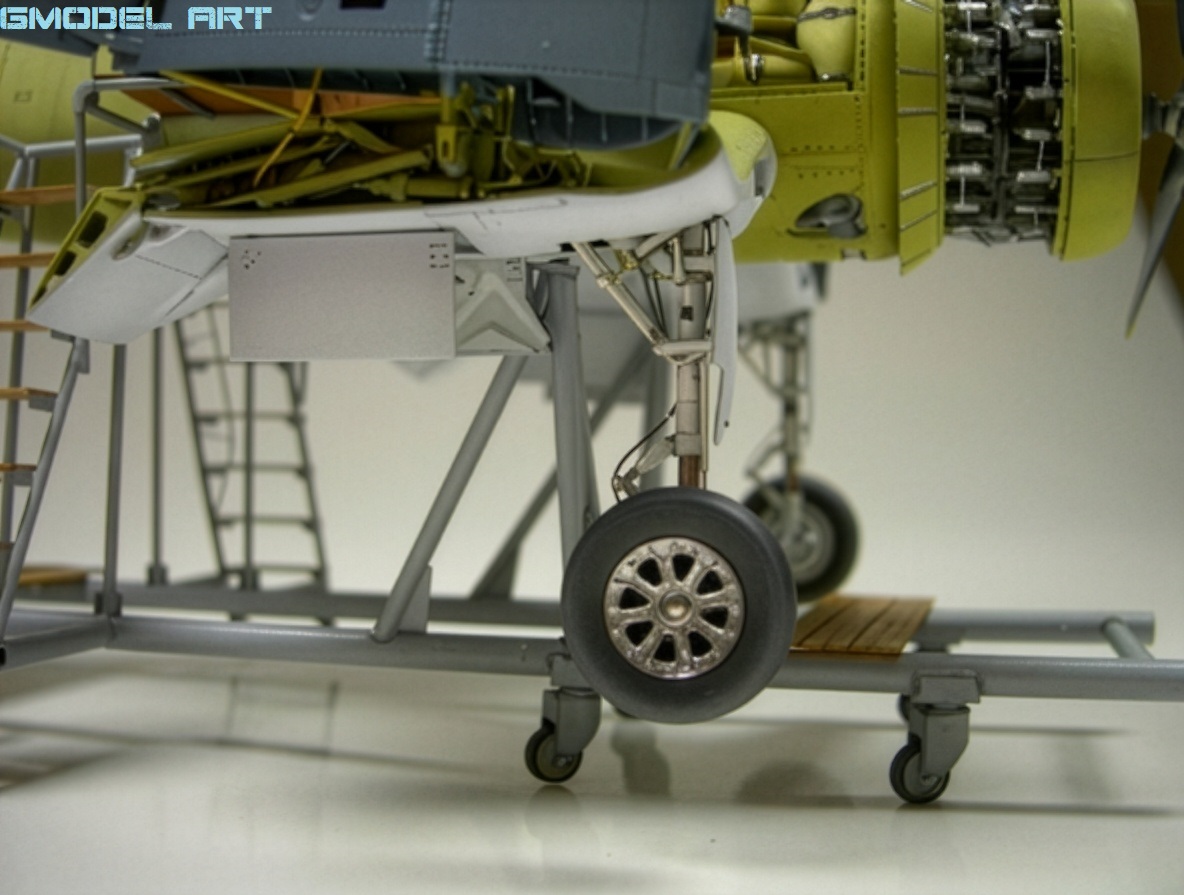
Building the Factory Assembly Jig
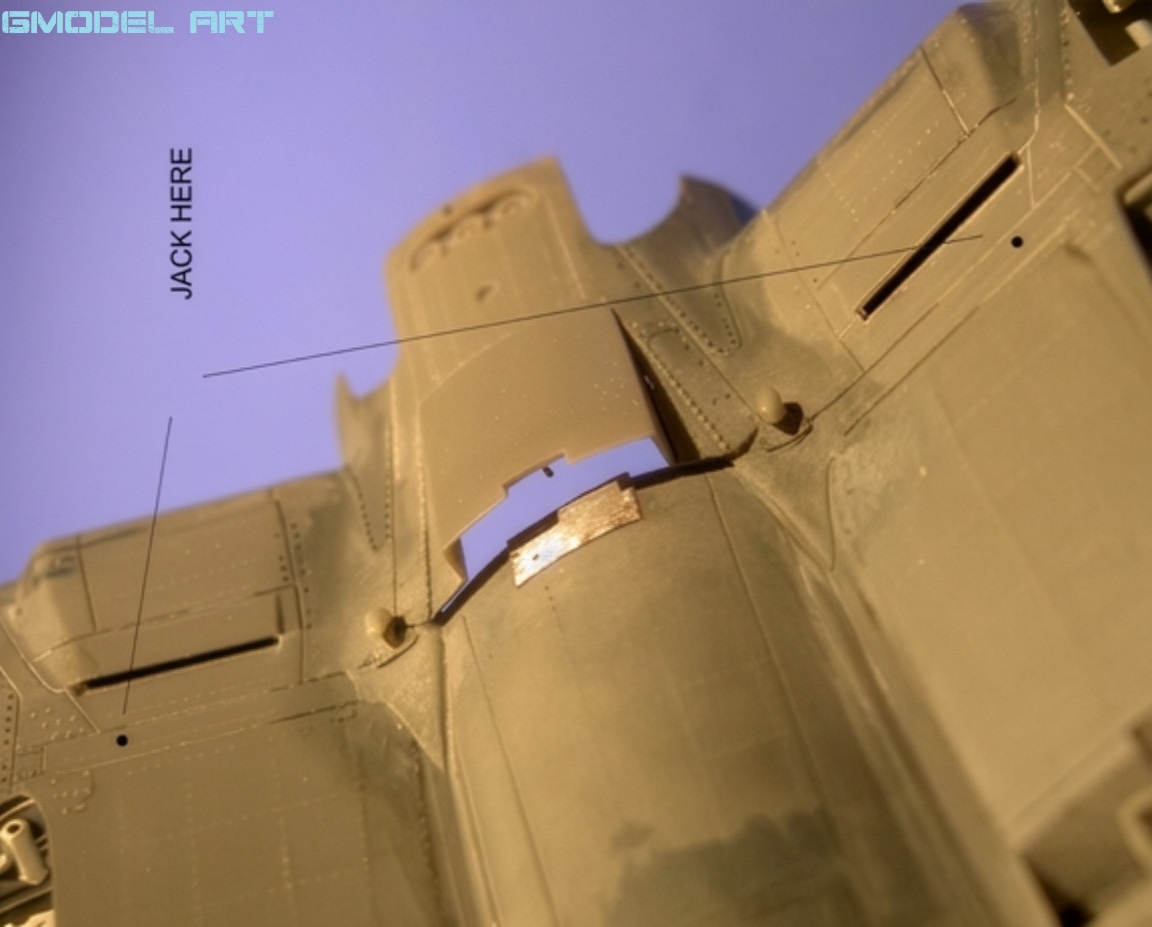
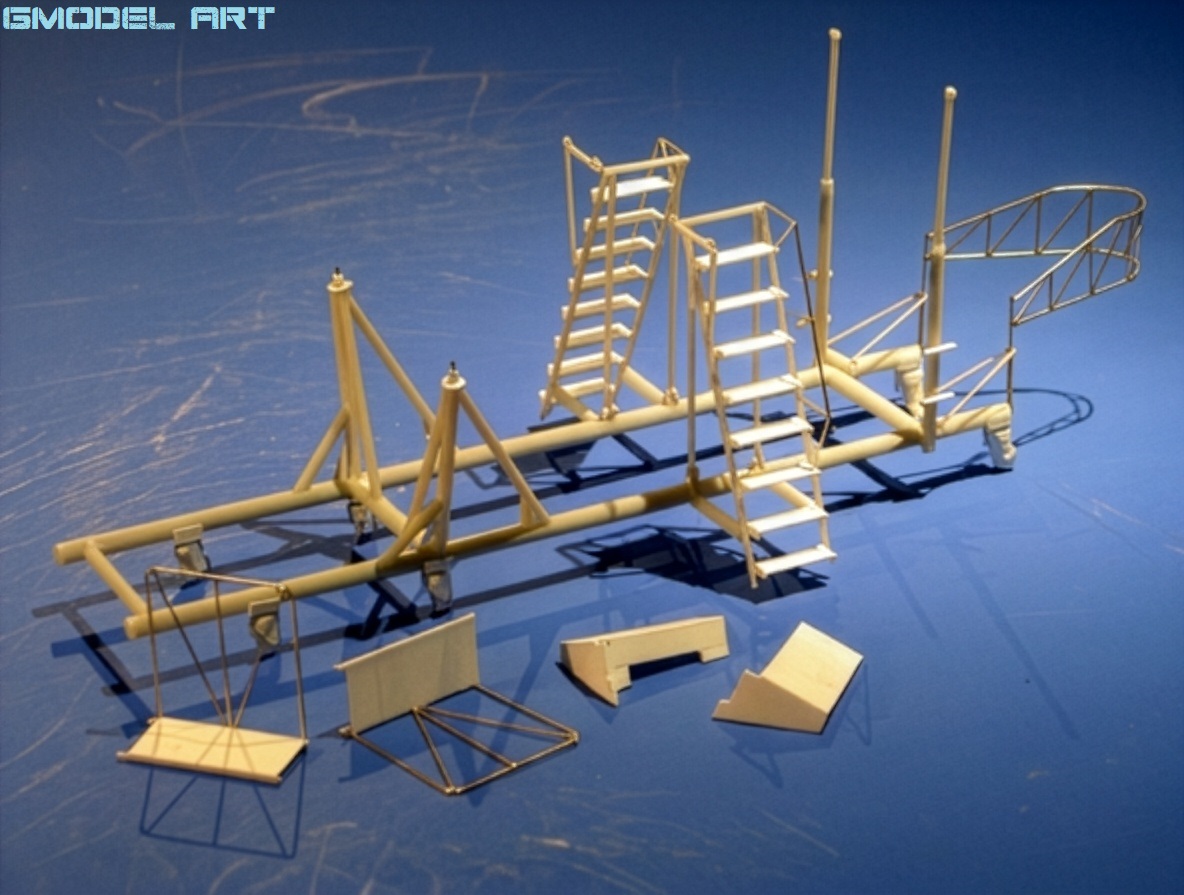
The construction began with sketches based on 1/48 scale side drawings of the aircraft. Particular attention was given to determining the correct position of the lifting points underneath the airframe.
After several unsuccessful attempts, the cylinders were eventually constructed from plastic sheet of different thicknesses. The process had to be repeated six times, as the modeler initially underestimated the possibility of leakage.
Large quantities of plastic profiles were then assembled to create the main framework. The beams and structural components were joined using superglue.
A previously built model of a similar type was also used as a reference for determining the correct arrangement of the measuring instruments and hydraulic components.
For additional strength, the main frame was reinforced with a metal tube. This was an important consideration because the finished aircraft would place considerable weight on the assembly structure.
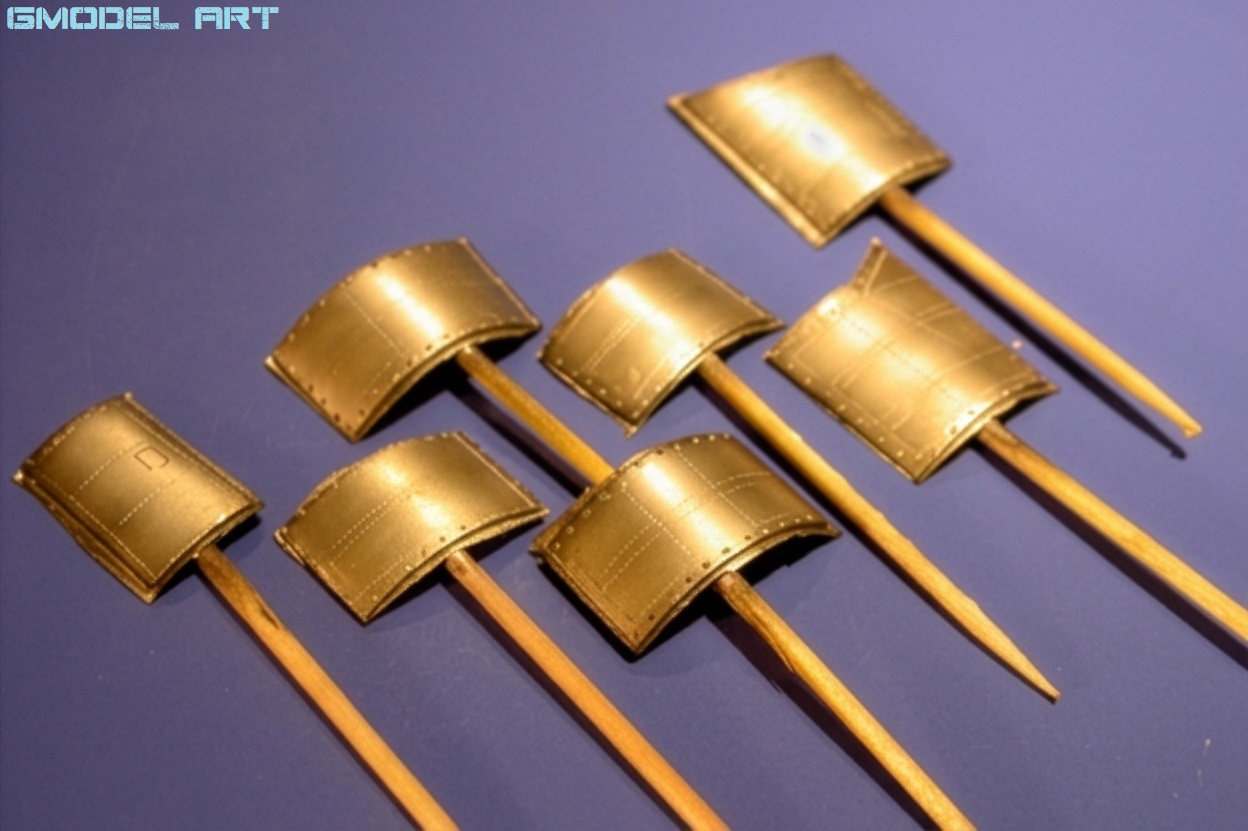
The platform gauges positioned around the wings were also scratch-built from sheet plastic, carefully measured, carved and assembled.
Details of the Assembly Structure
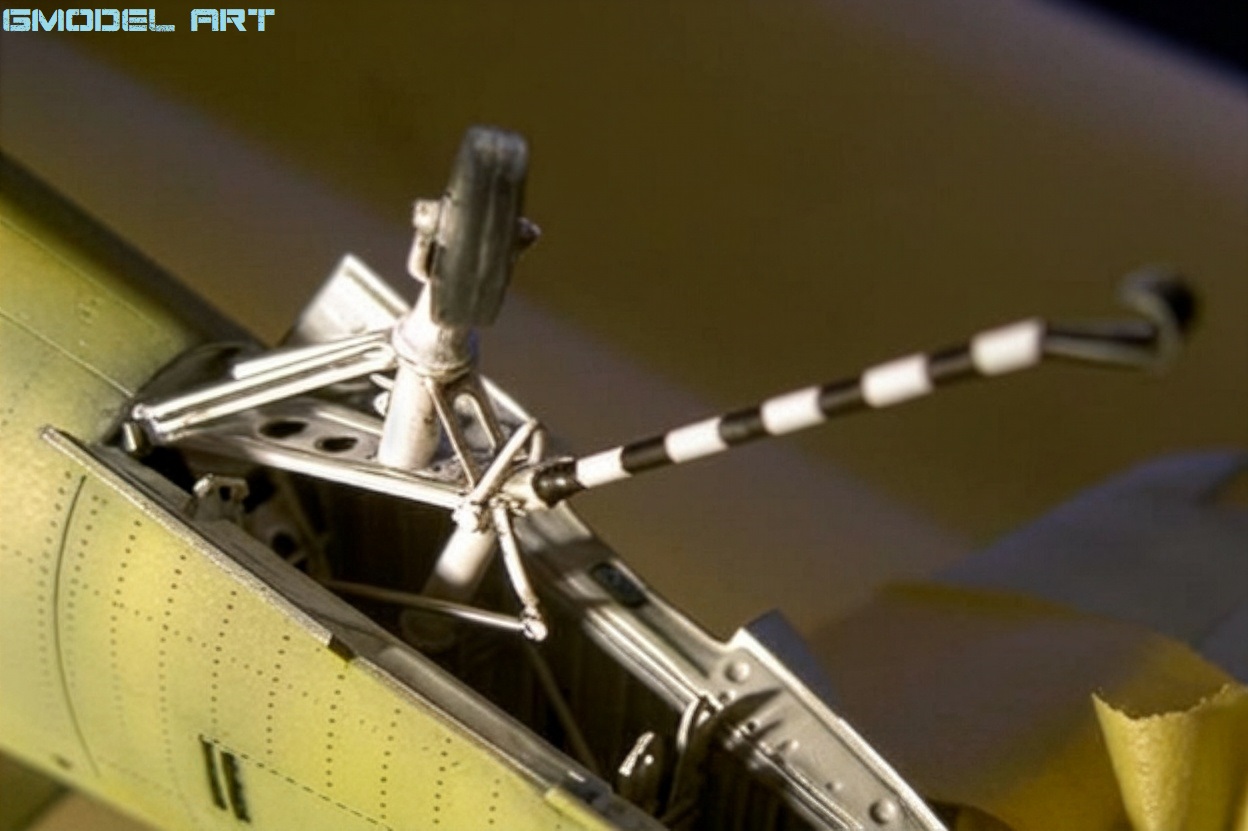
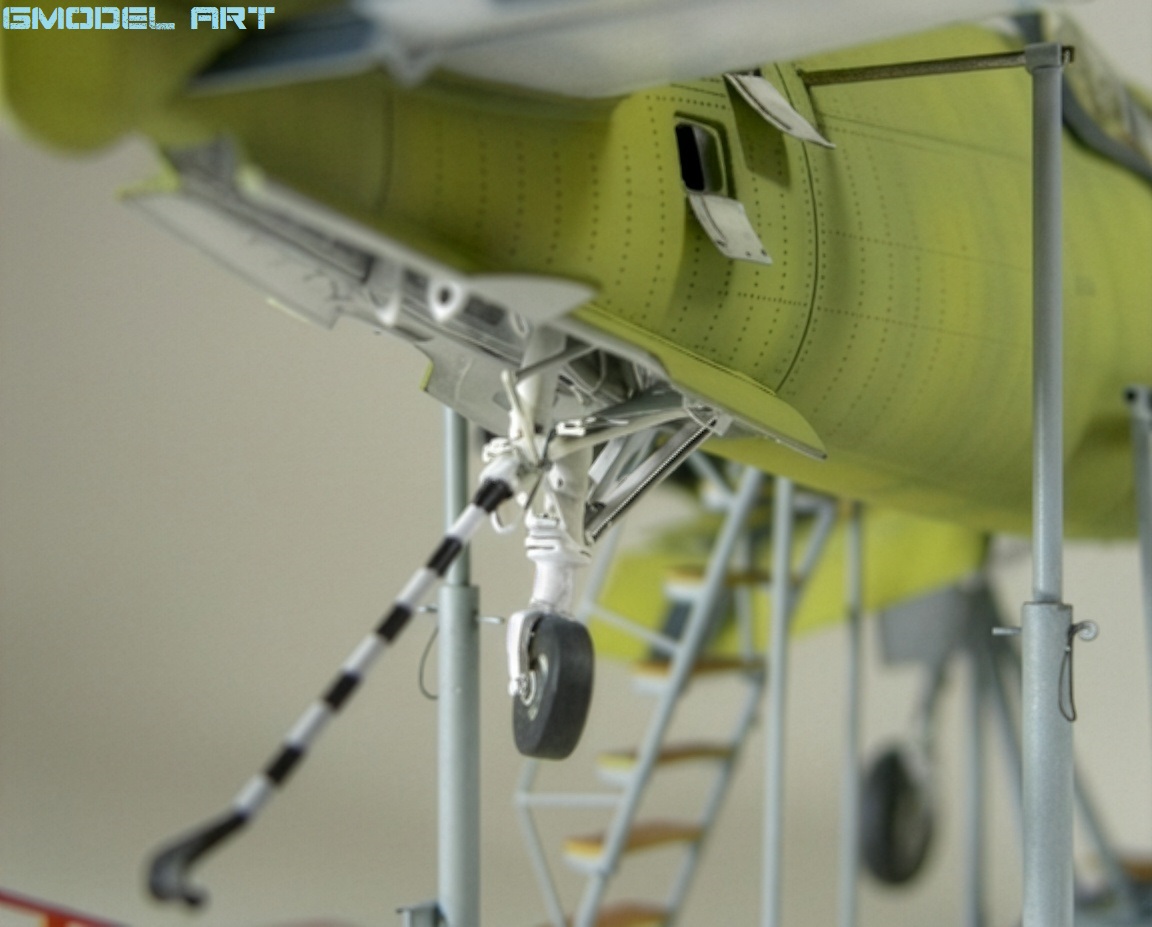
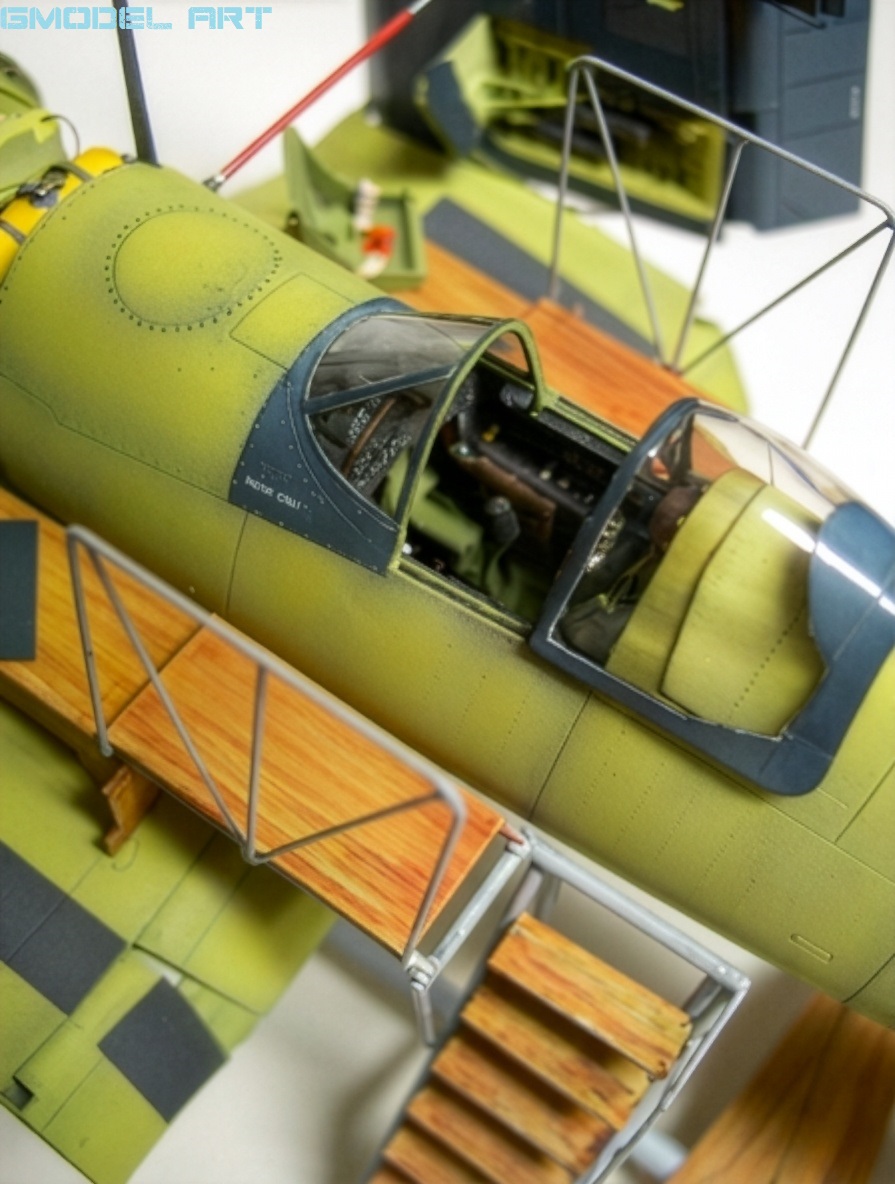
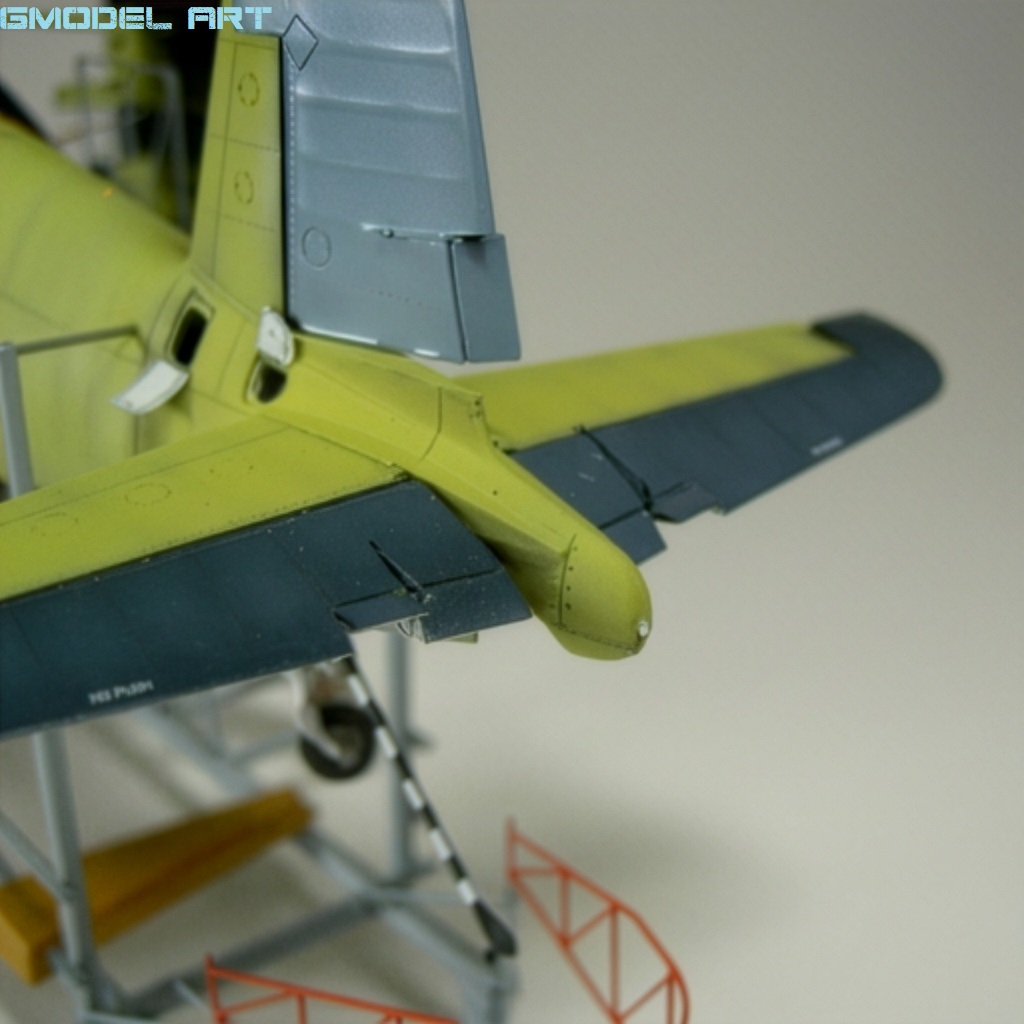
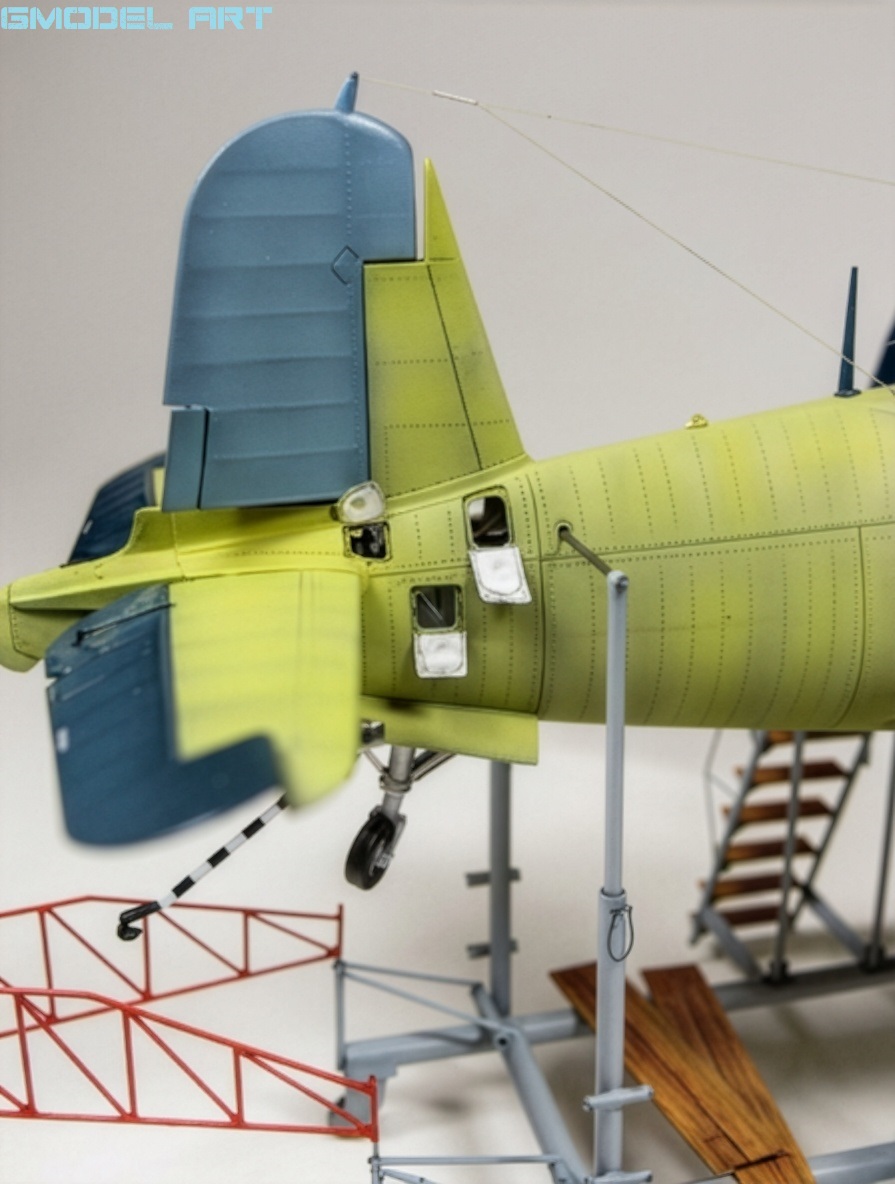
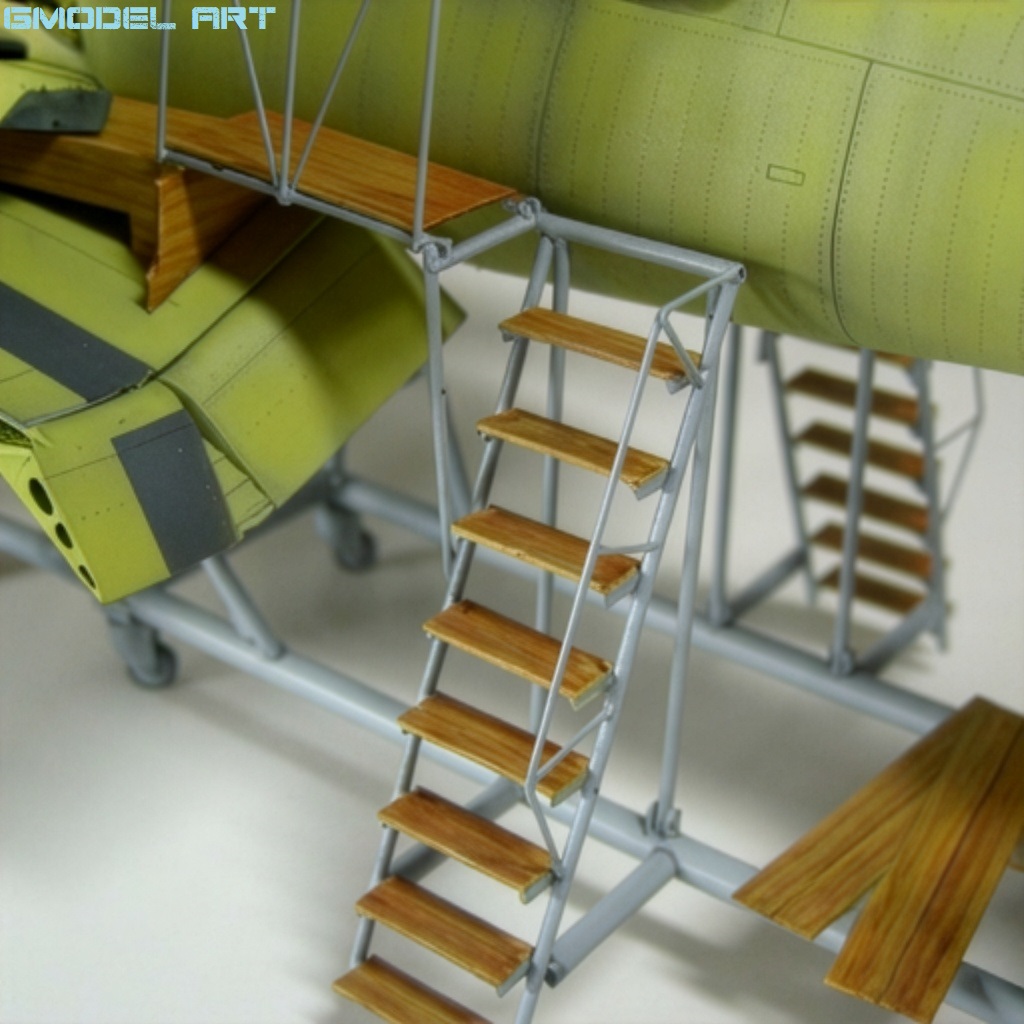
The stair handrails, bridge railings and tail safety loop were made from curved brass wire.
The wooden sections of the structure were reproduced using a technique inspired by World War I scale modelers. The parts were first painted in sand and leather tones. After allowing them to dry thoroughly, brown oil paints were applied with an old brush to create a convincing wood grain.
The excess paint was then removed with a cloth lightly moistened with lighter fluid, leaving behind a subtle natural wood effect.
The entire structure was sprayed in semi-gloss gray, while darker gray was used around selected corners and edges to reproduce realistic signs of wear.
The red-painted safety loop provided an additional visual detail and helped make the otherwise industrial-looking assembly jig more convincing.
F4U-1A Corsair Tamiya 1/48: Working on the Wings
The wings were one of the most important parts of the entire project.
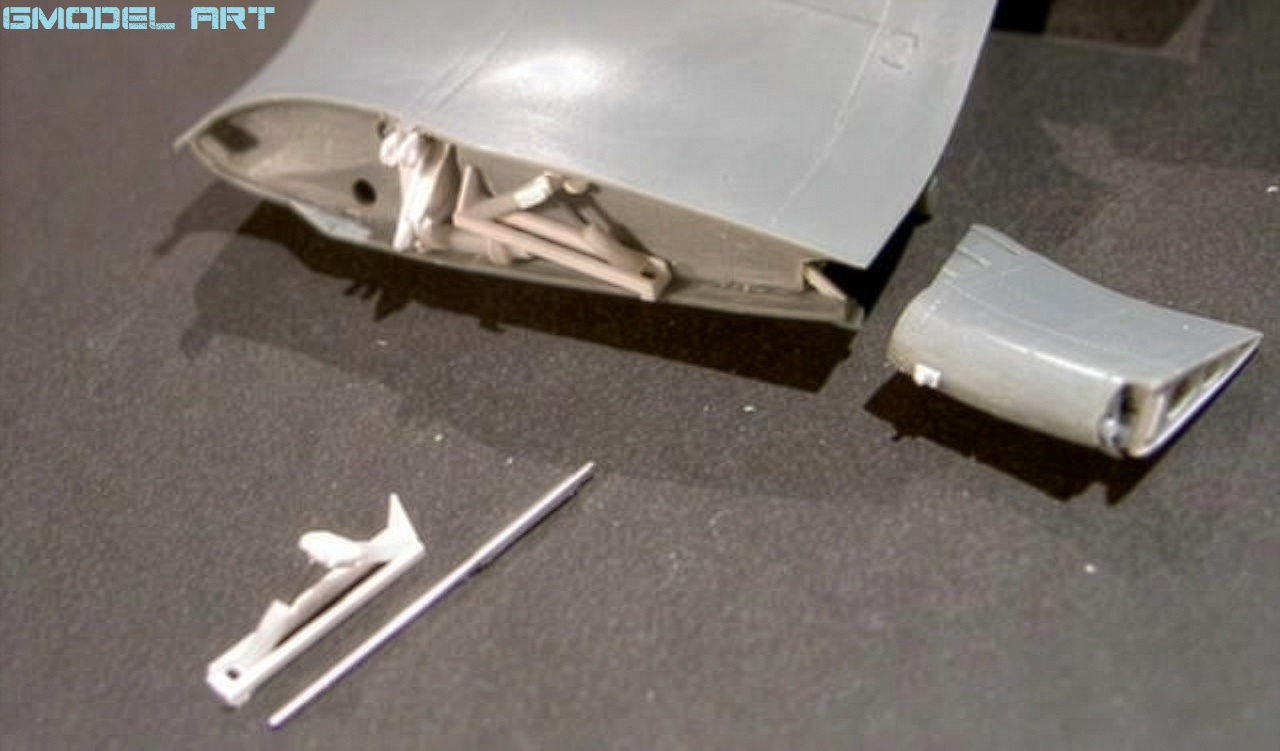
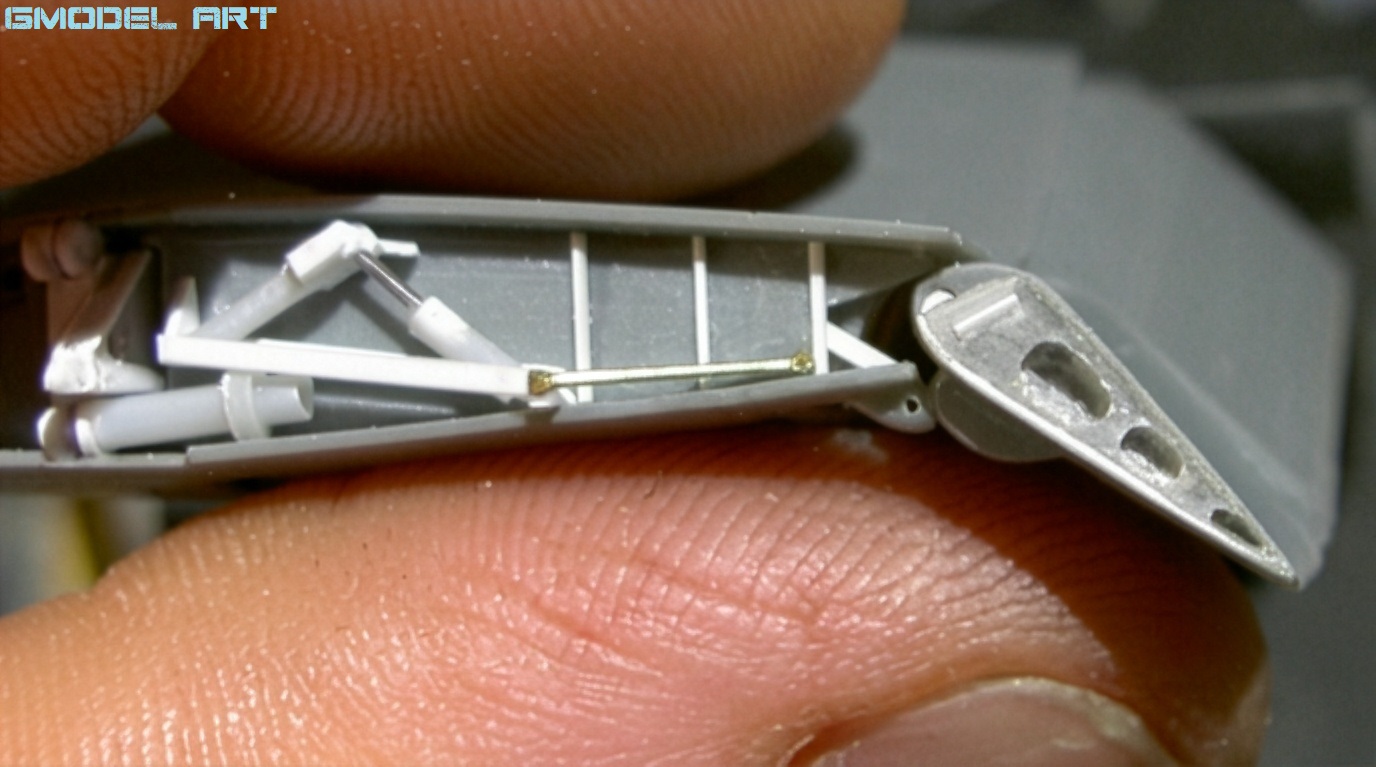
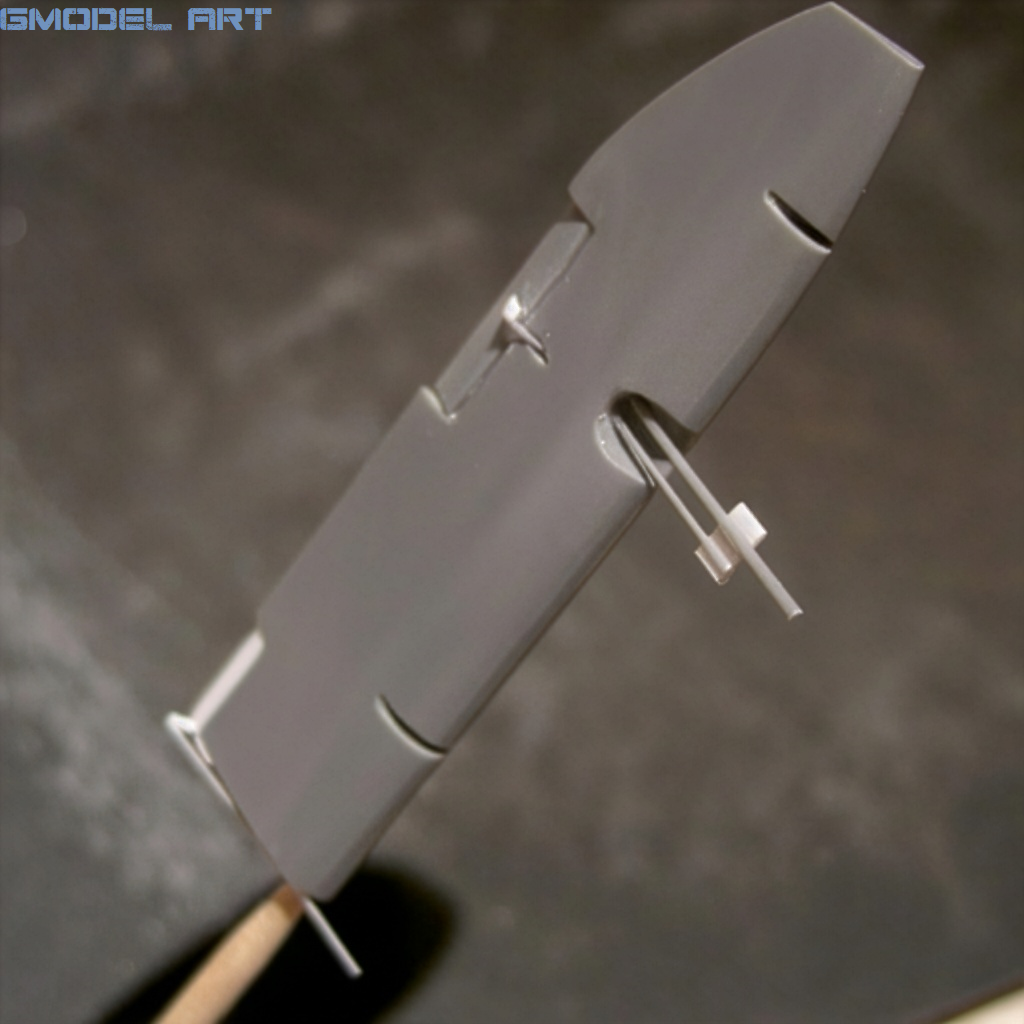
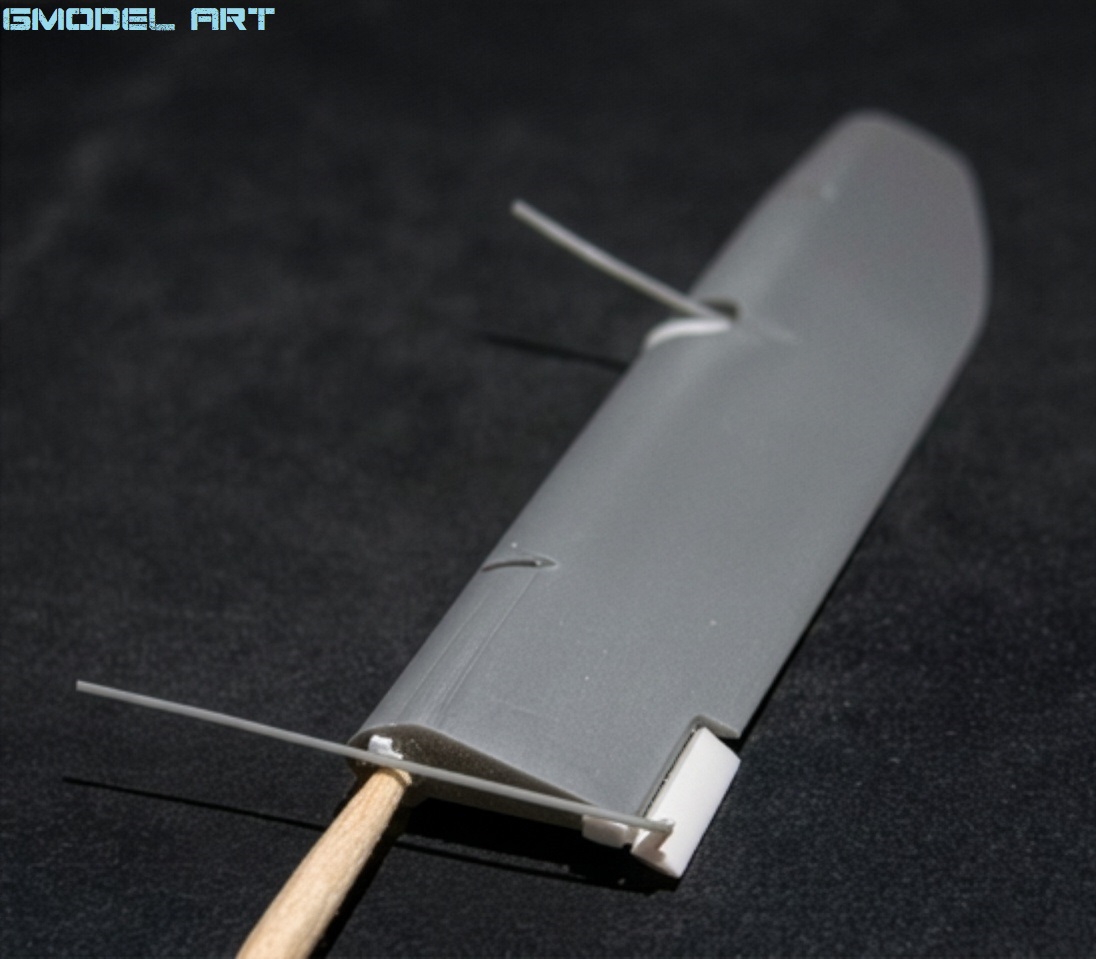
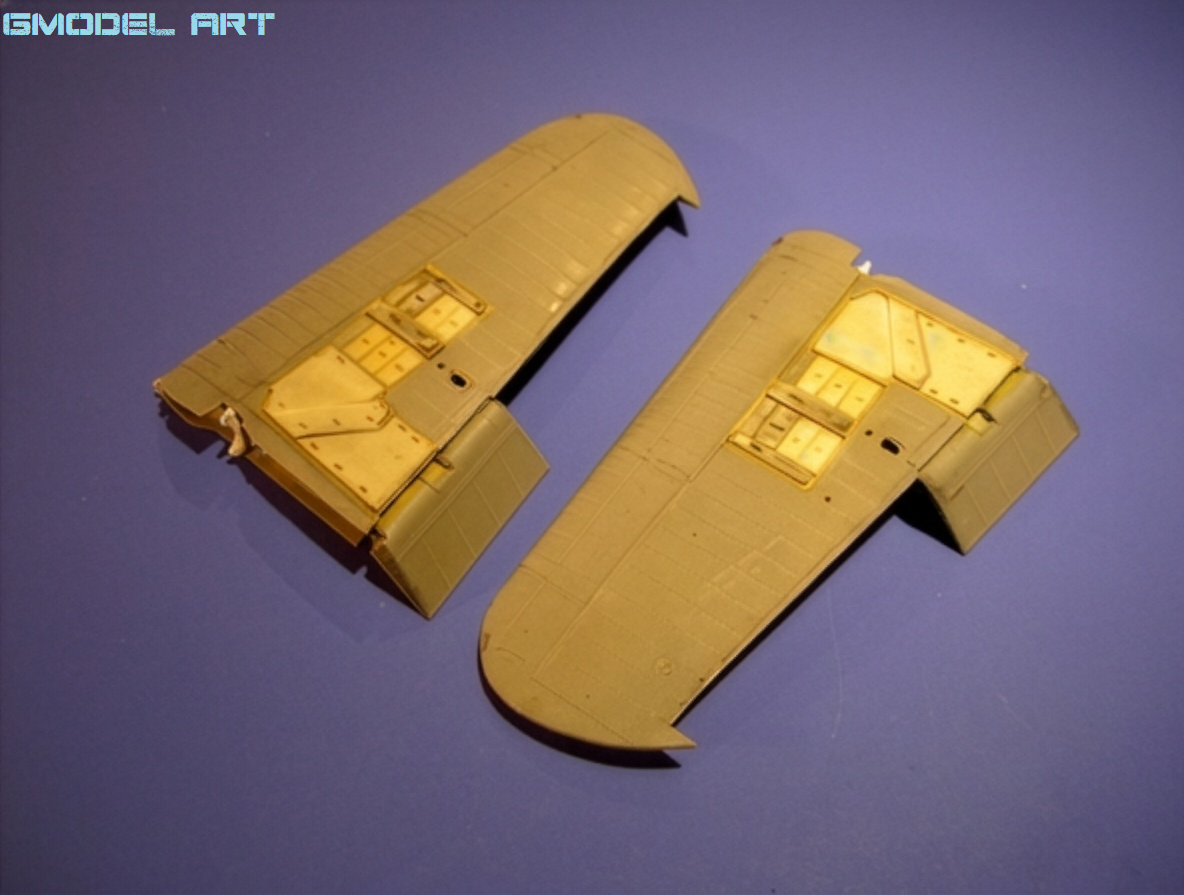
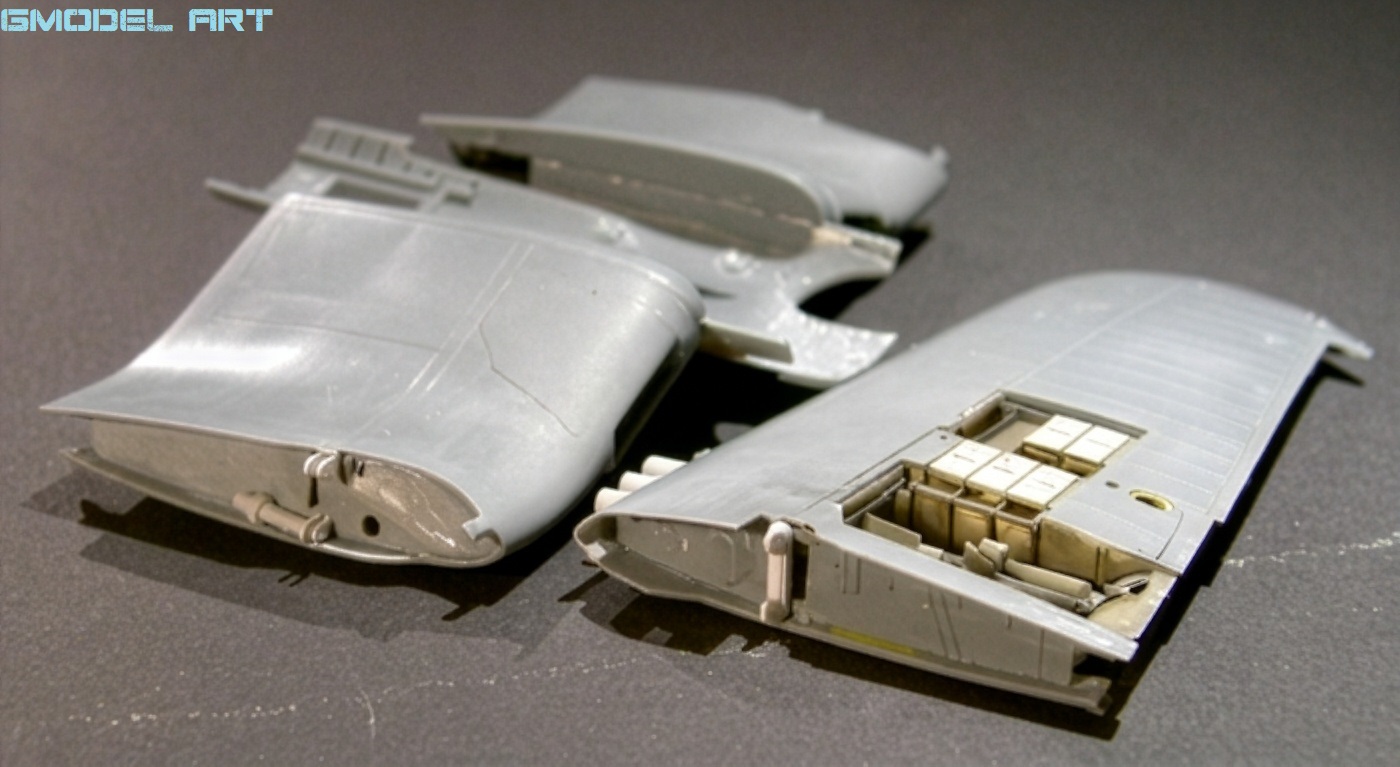
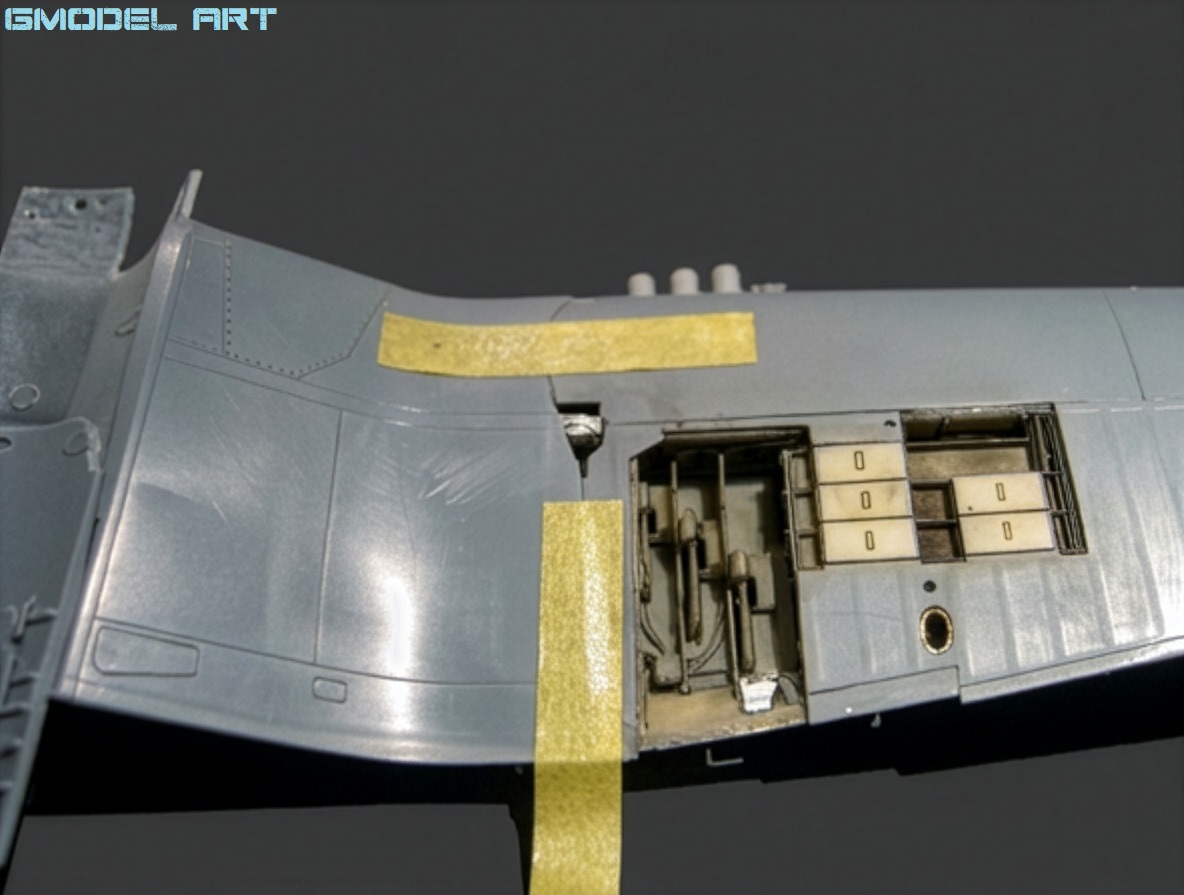
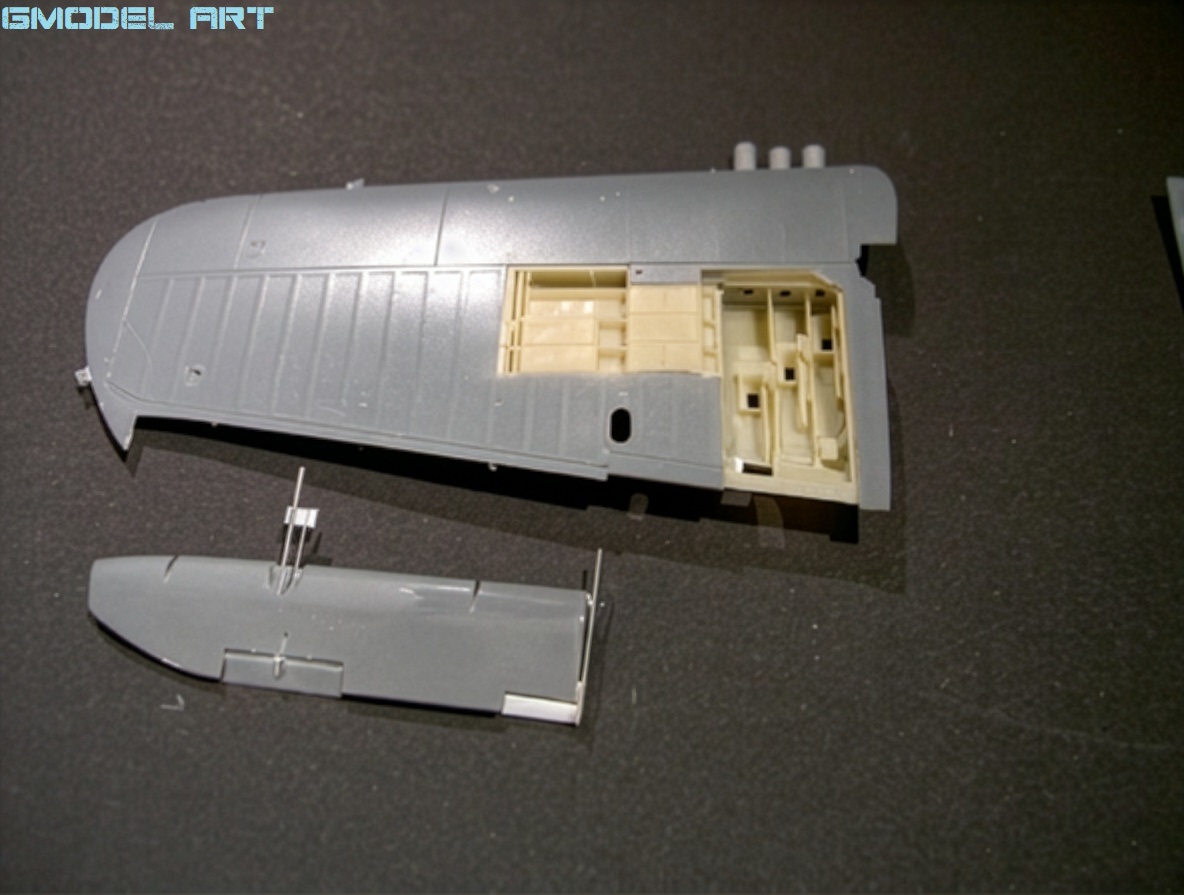
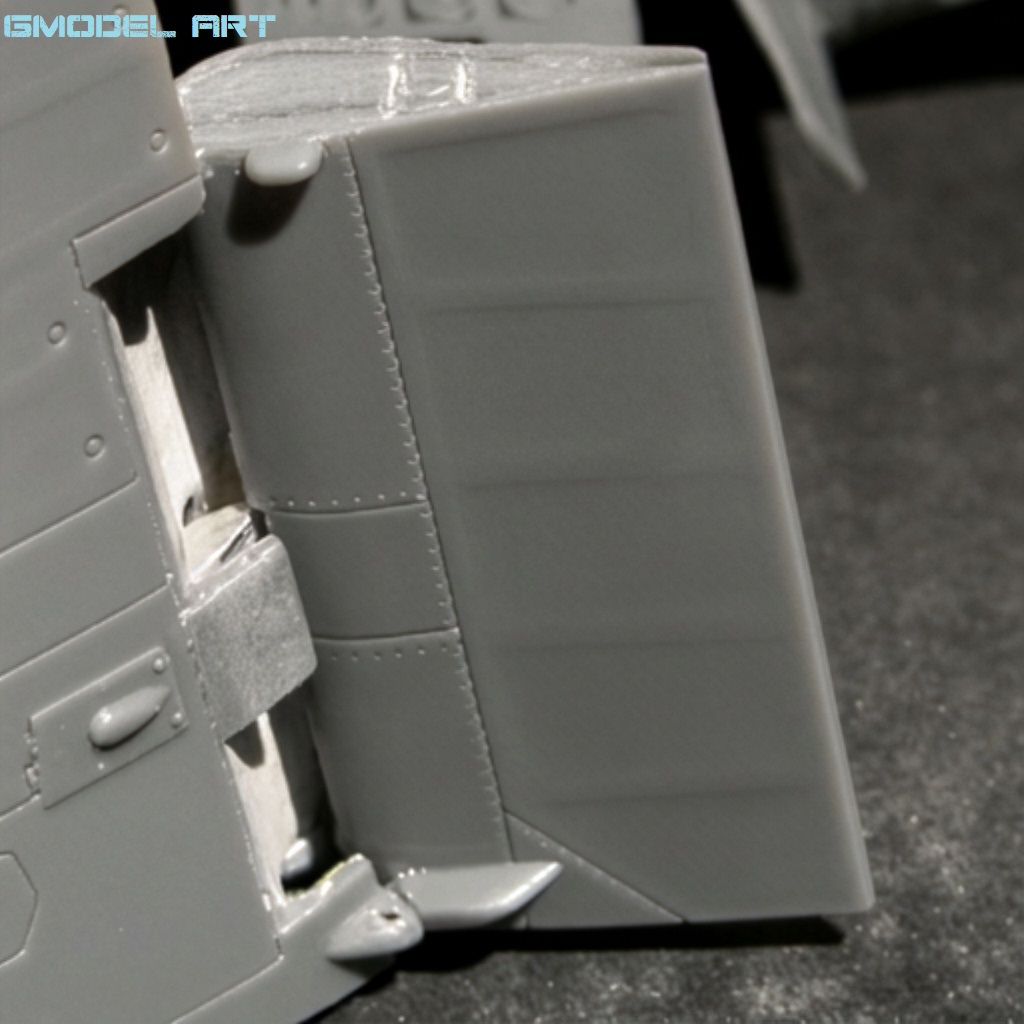
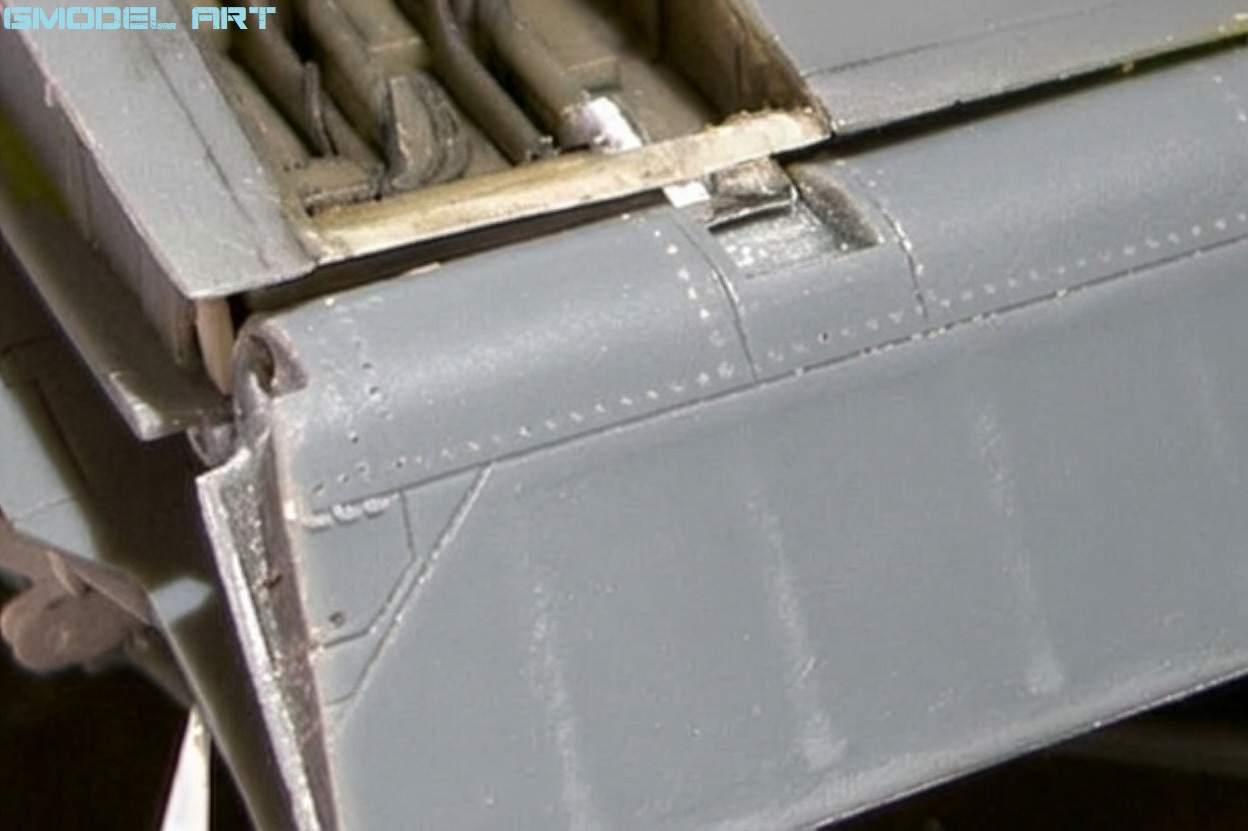
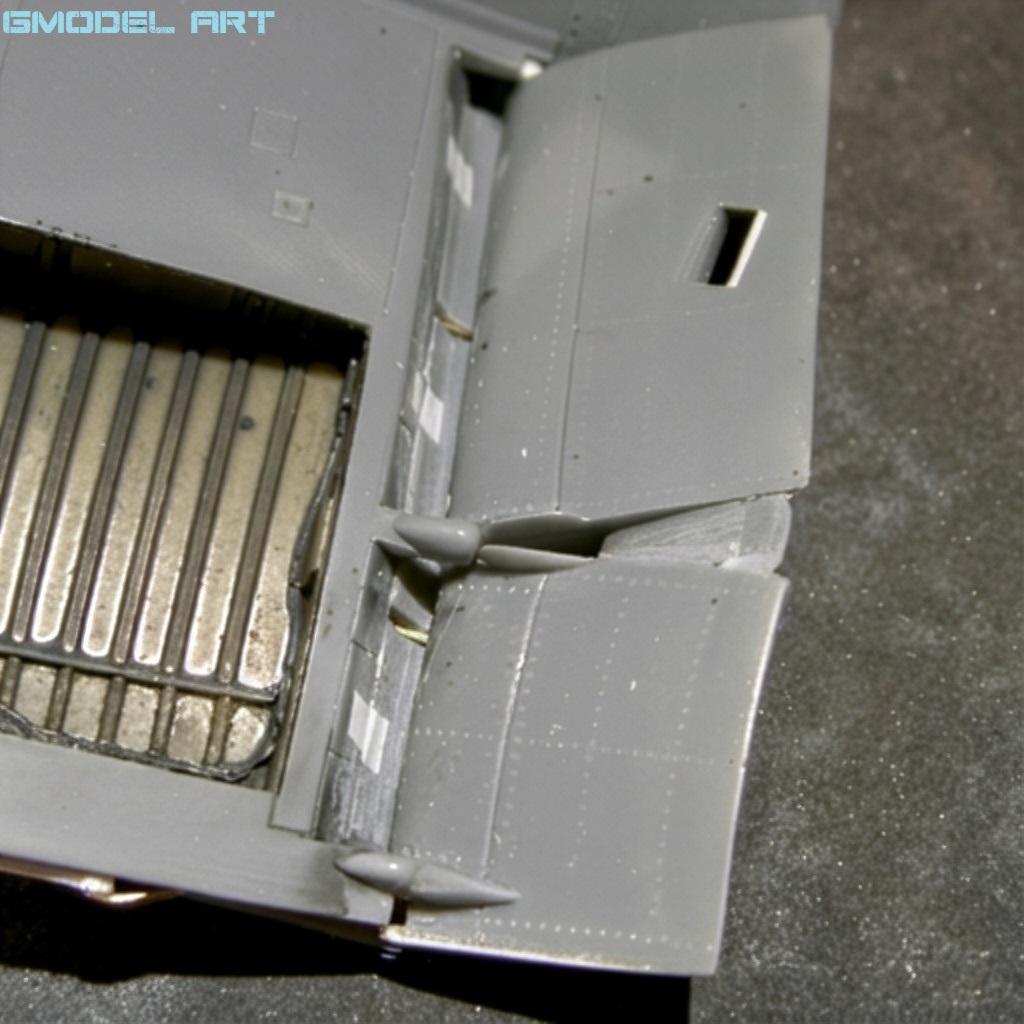
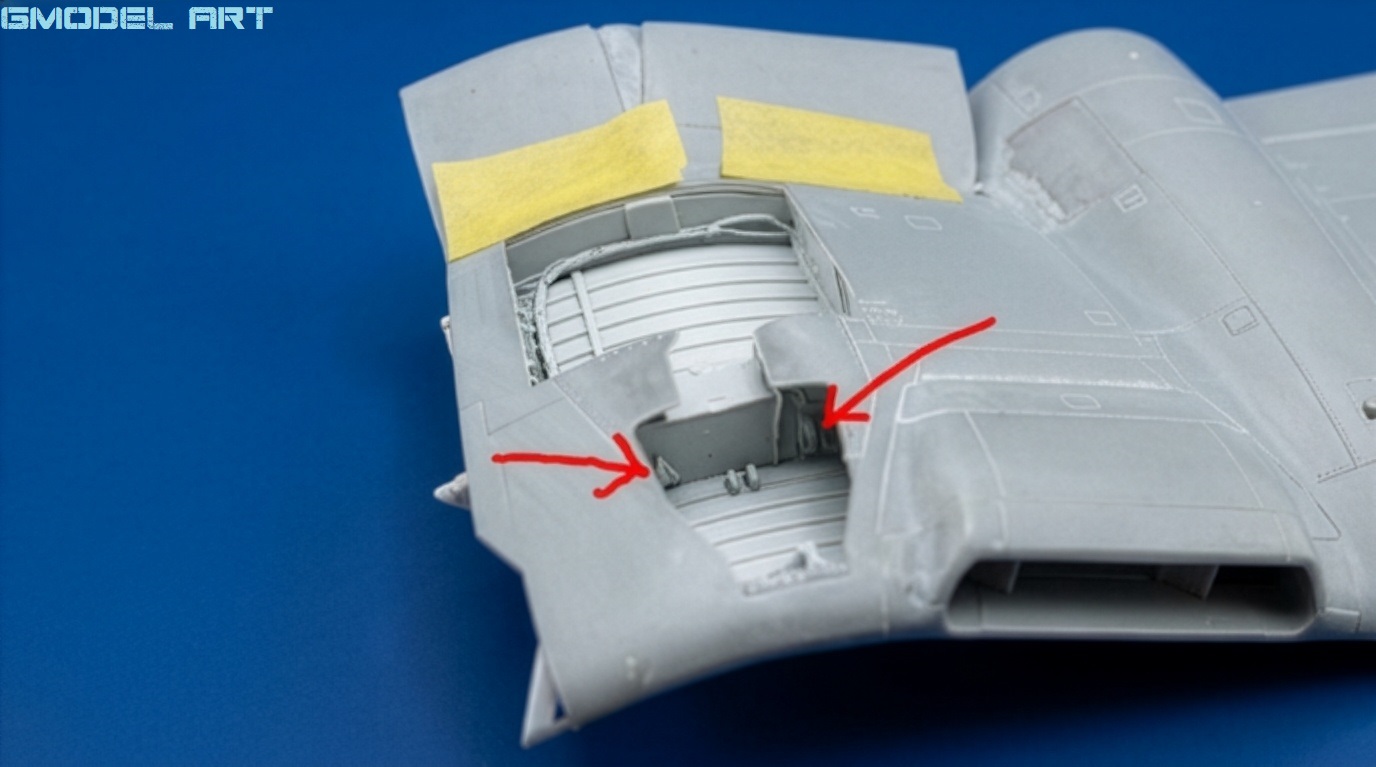
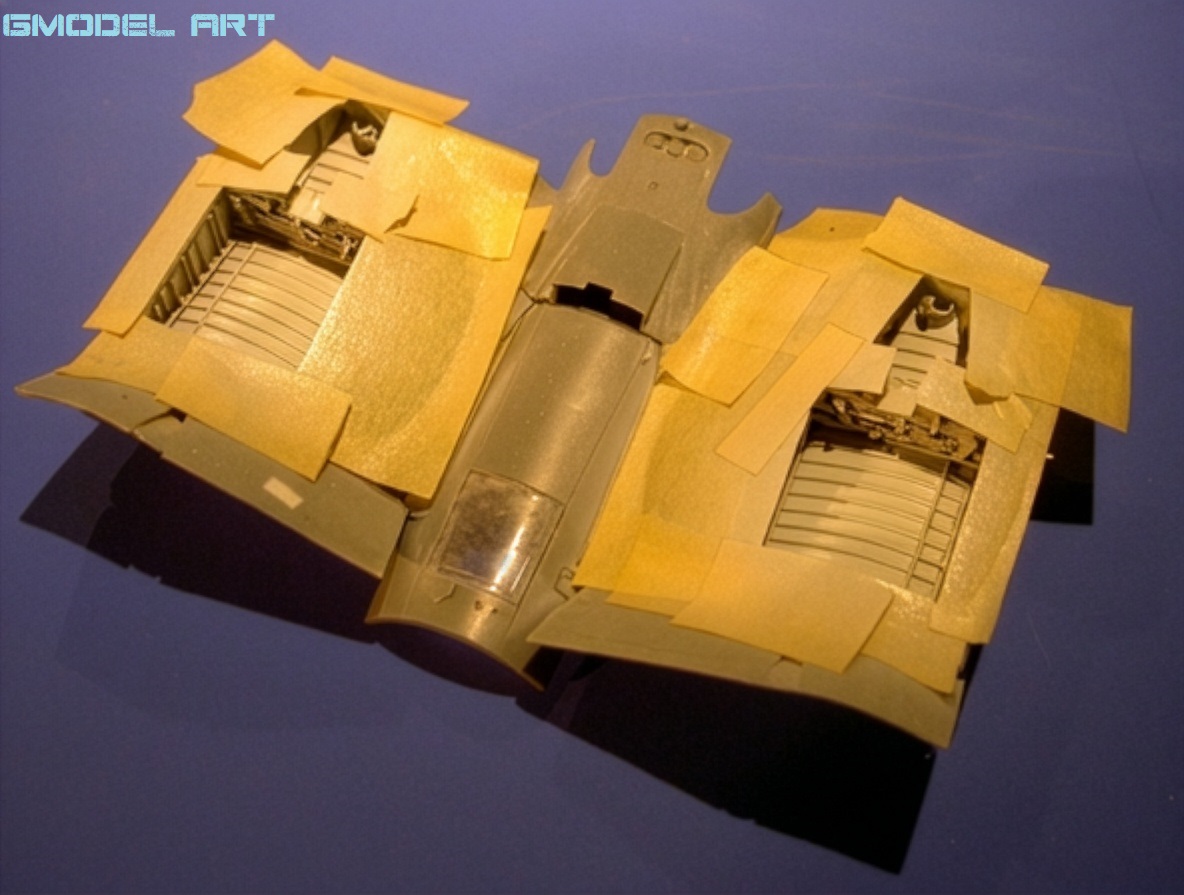
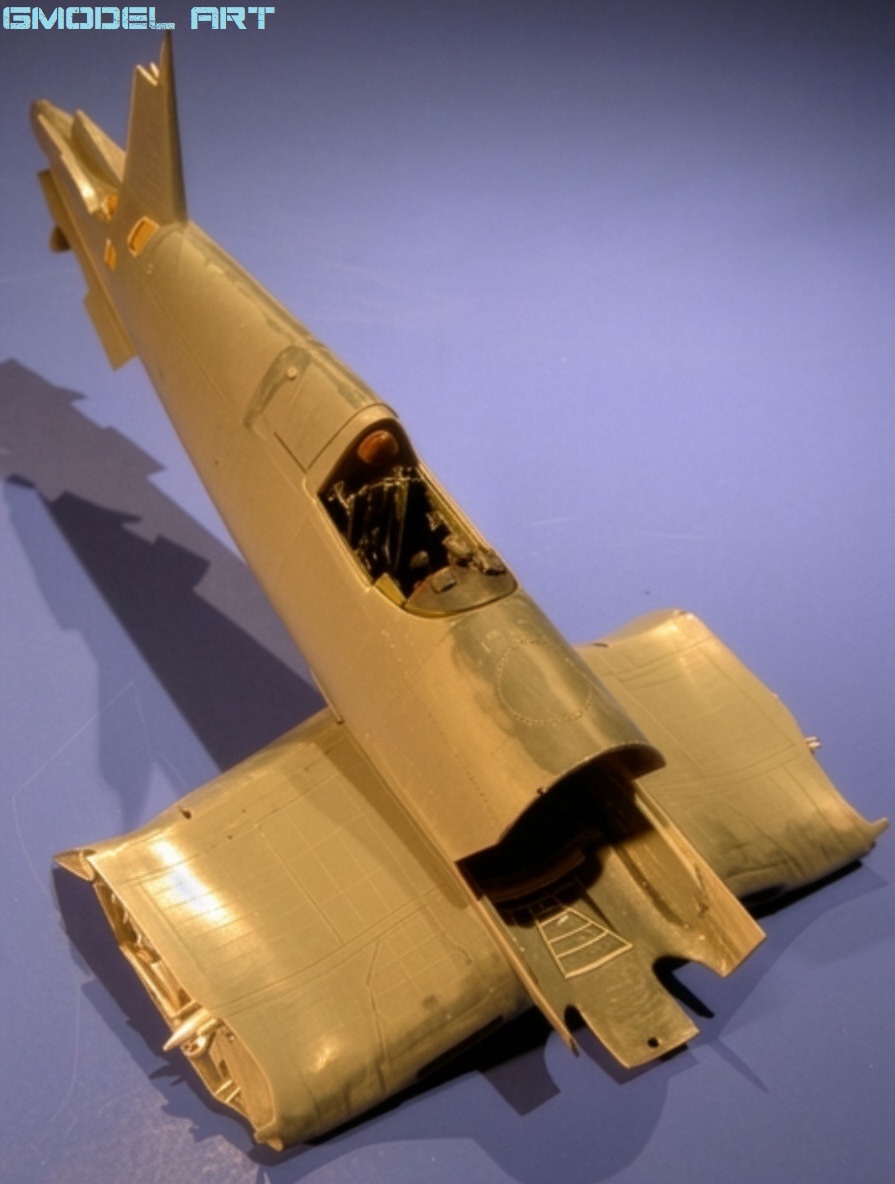
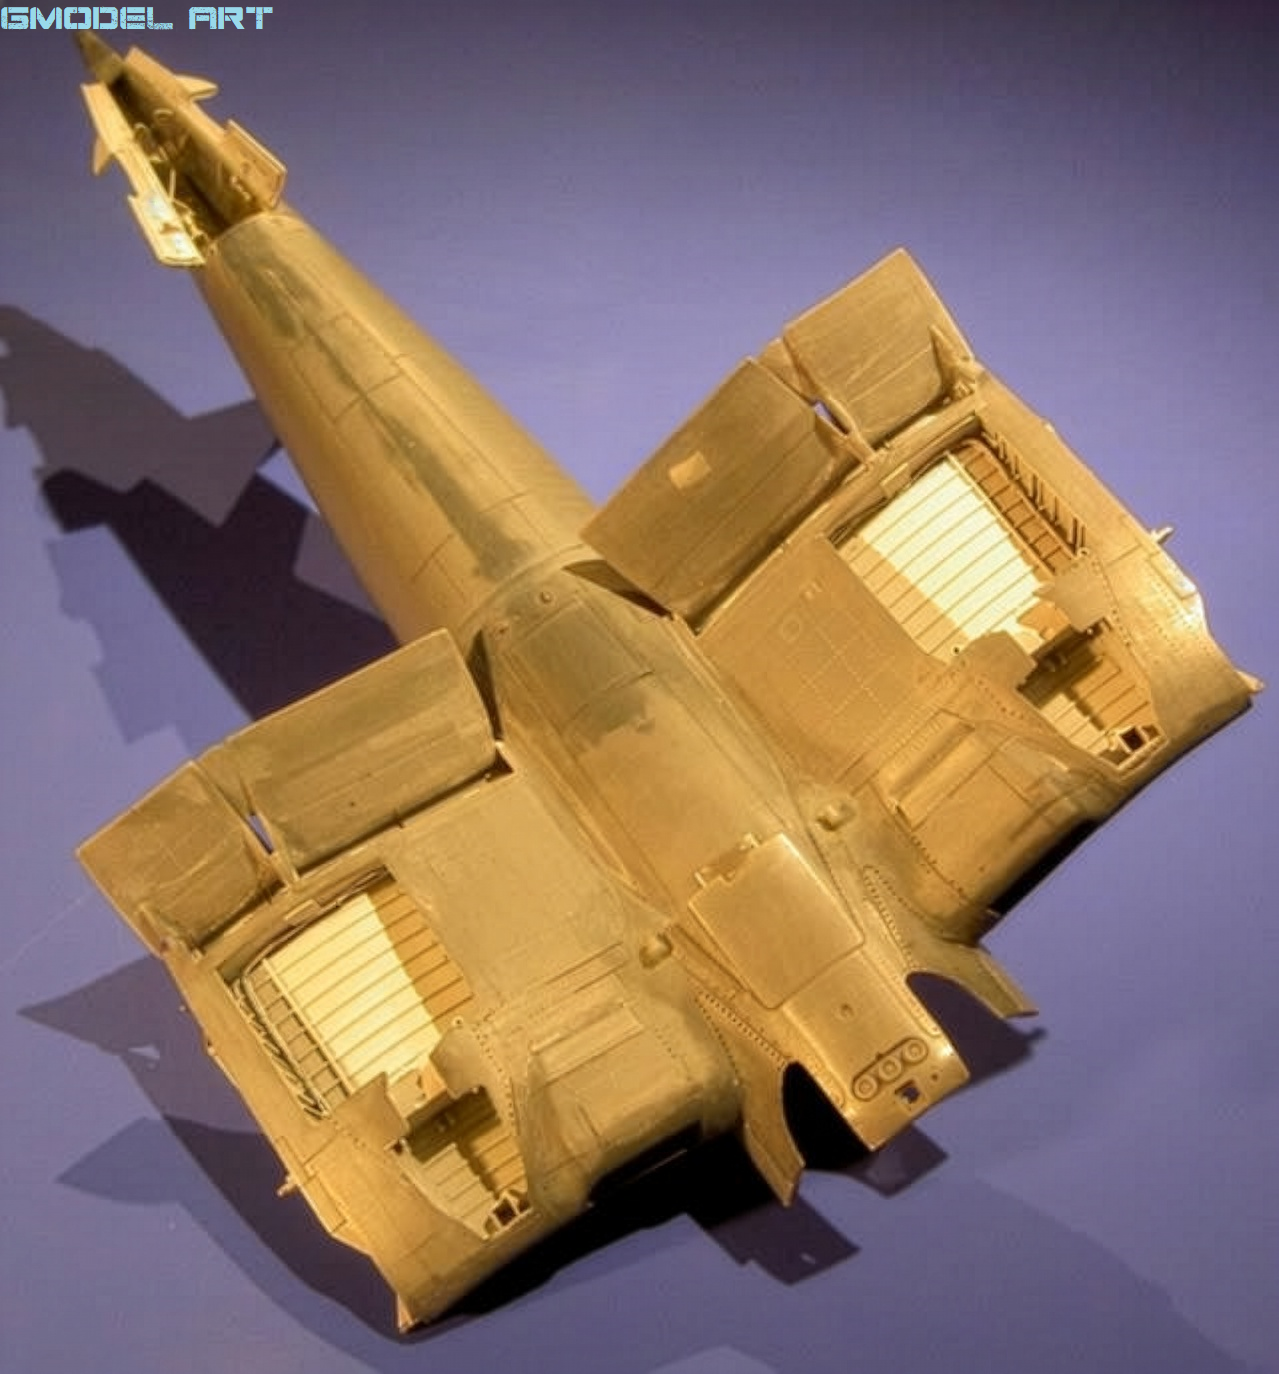
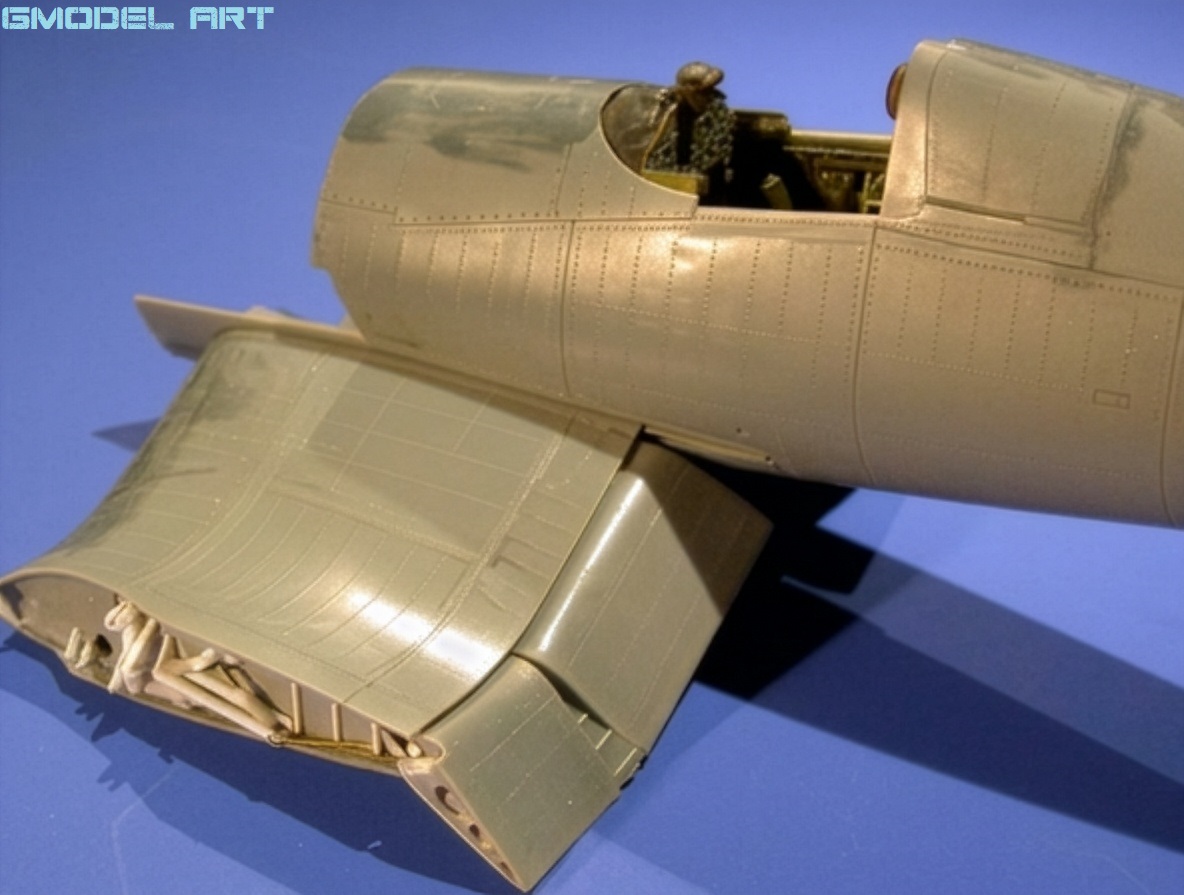
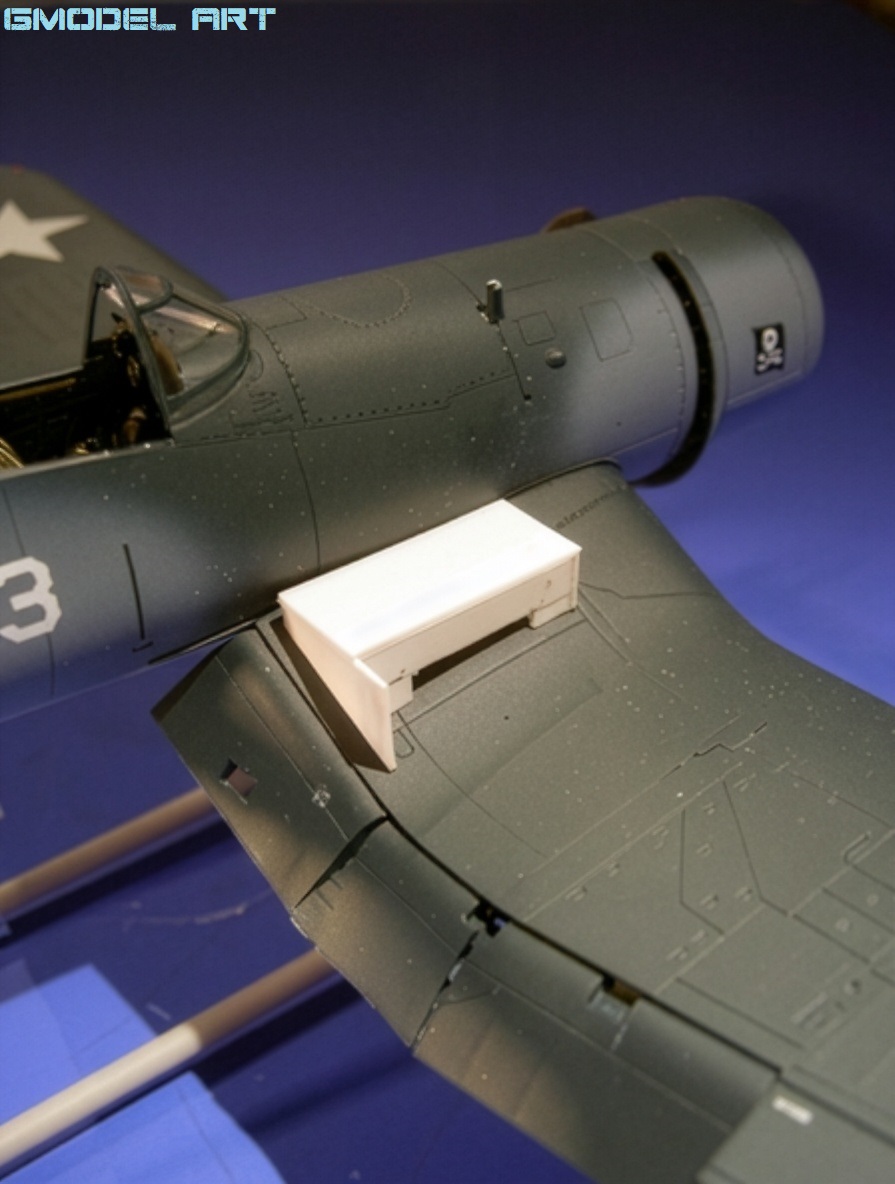
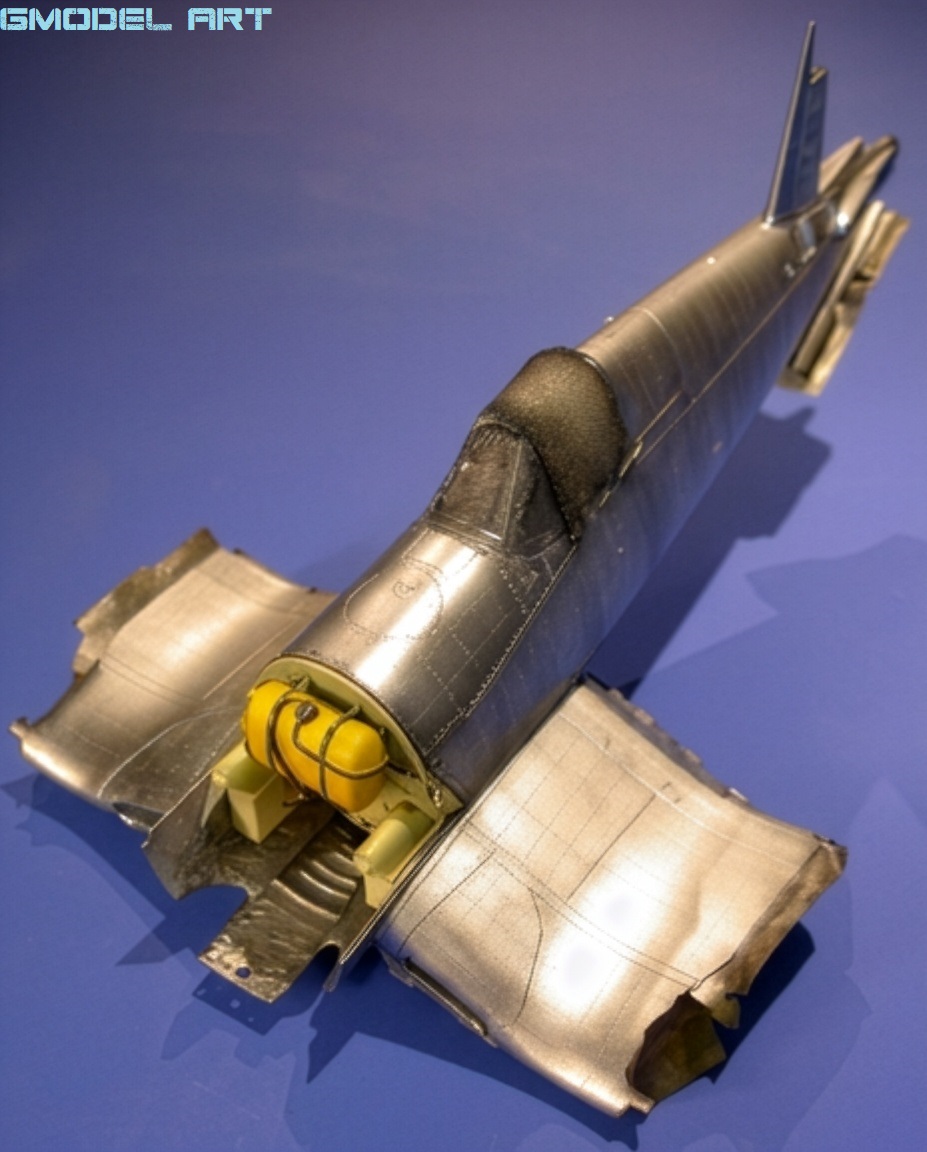
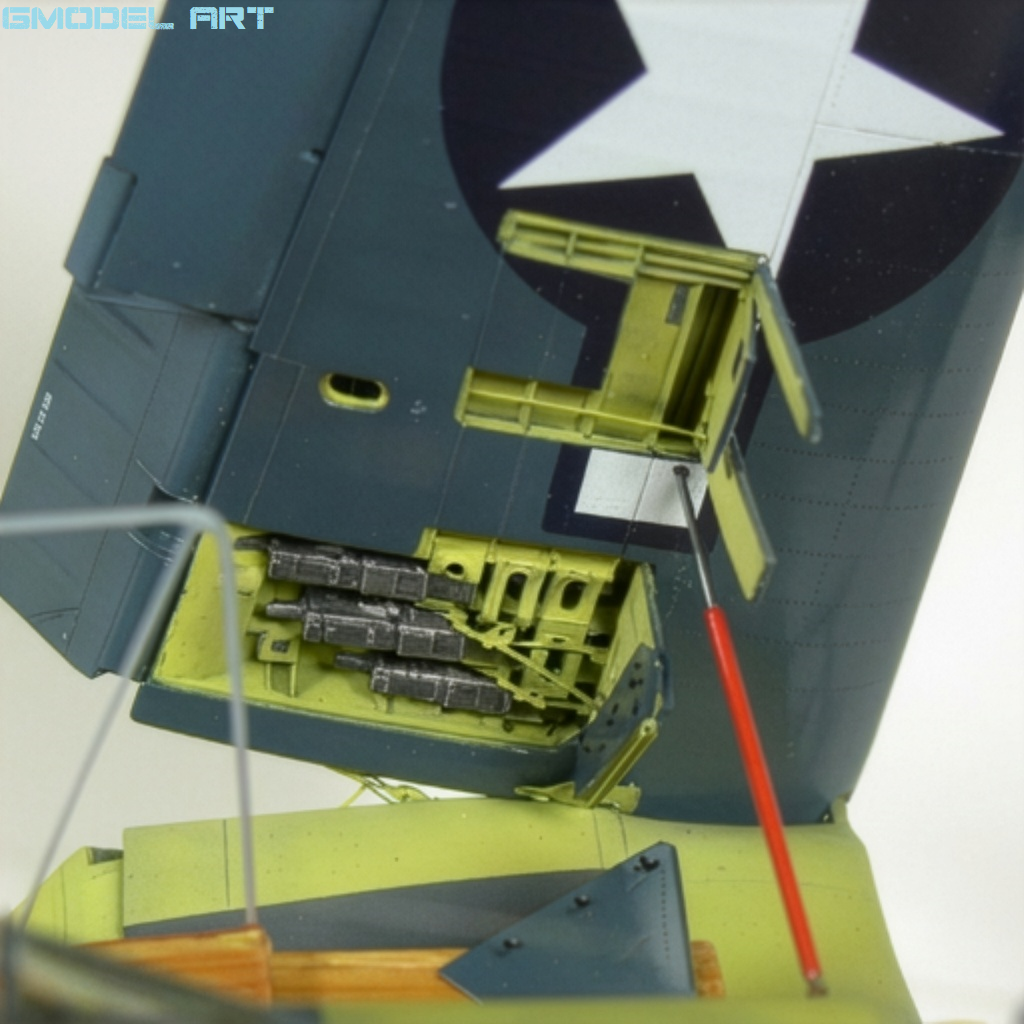
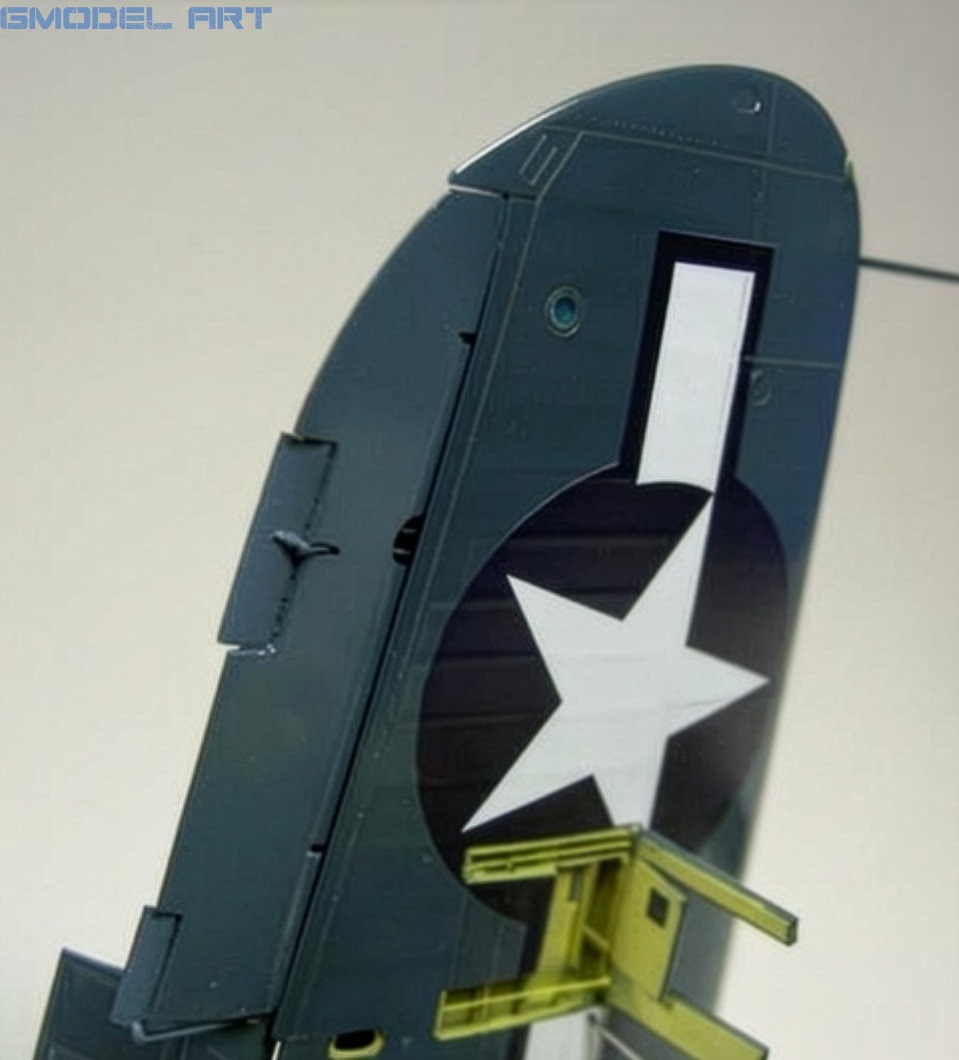
The goal was to display the wings in an upright folded position, allowing the viewer to see both the folding mechanism and the weapon bays.
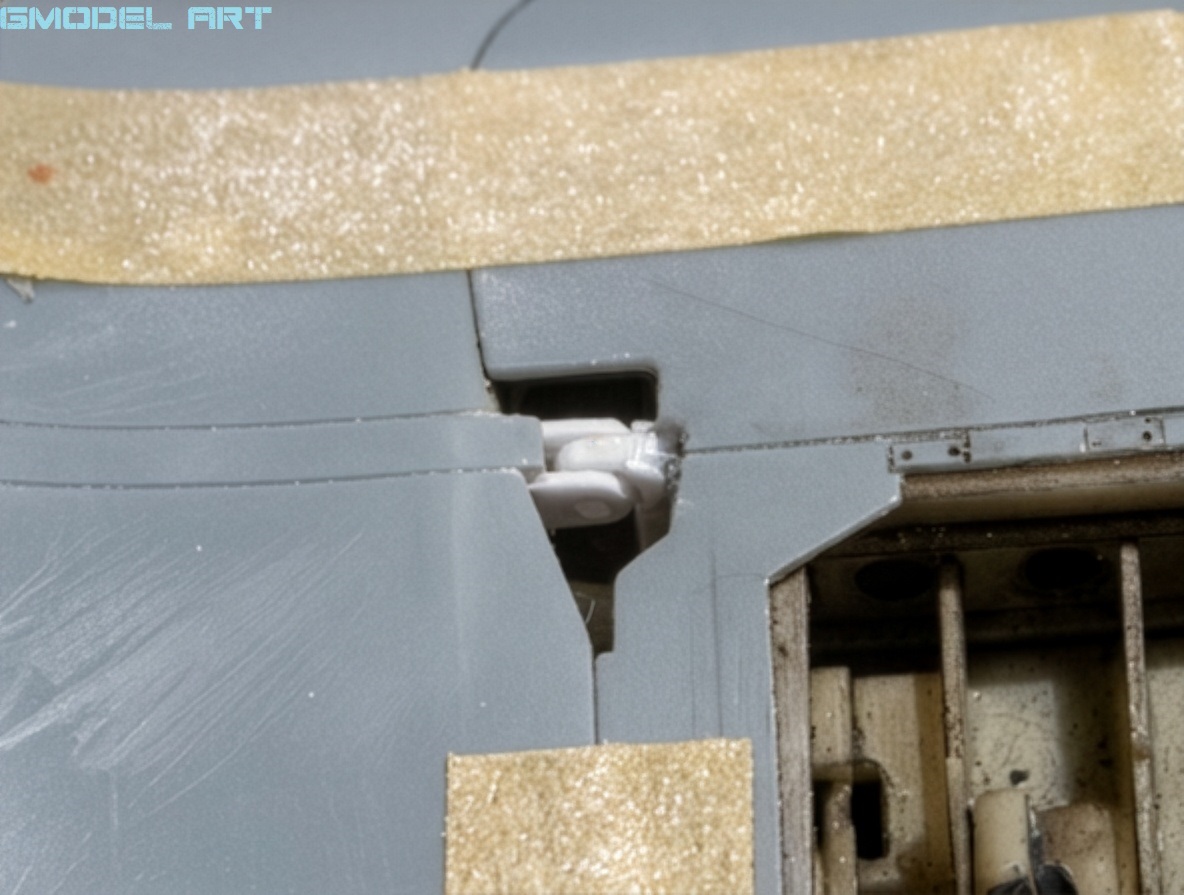
However, the hinge arrangement supplied by the Tamiya kit was not suitable for the intended configuration. Considerable modification was therefore necessary.
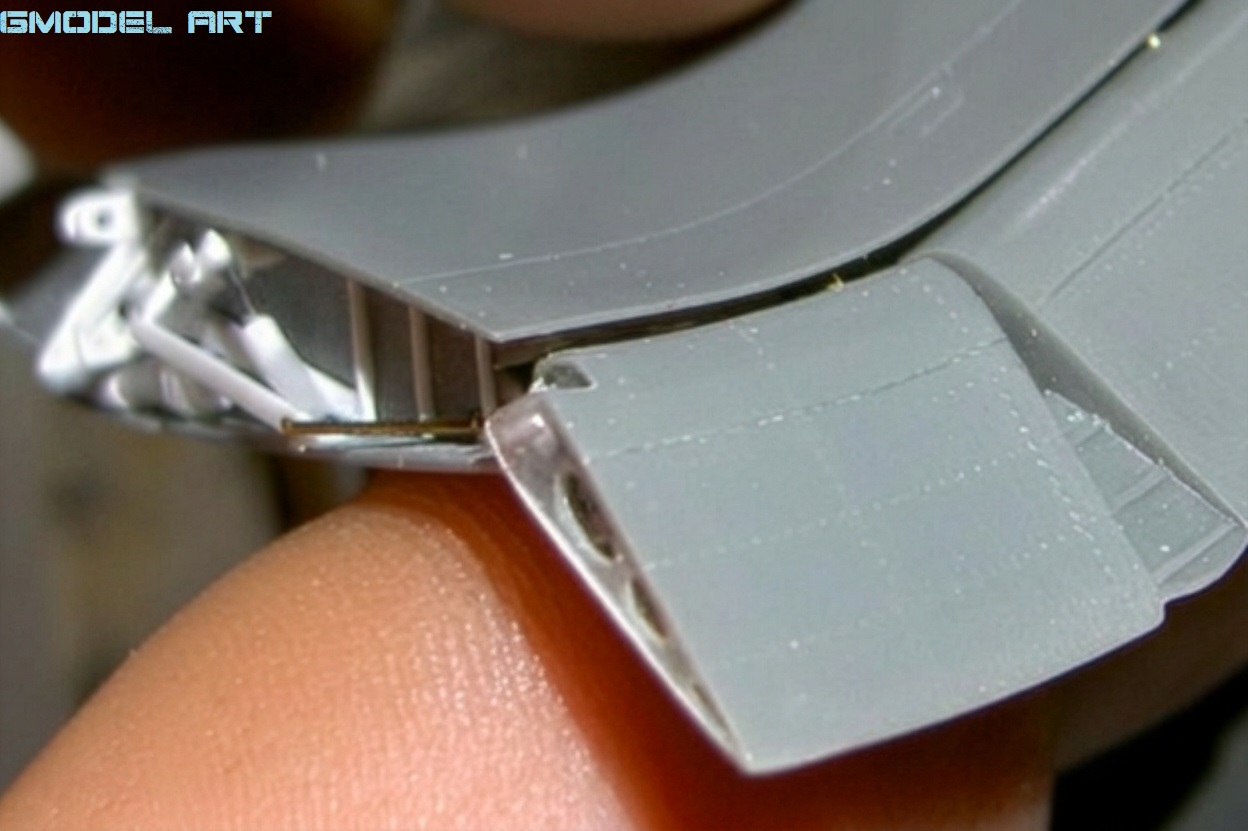
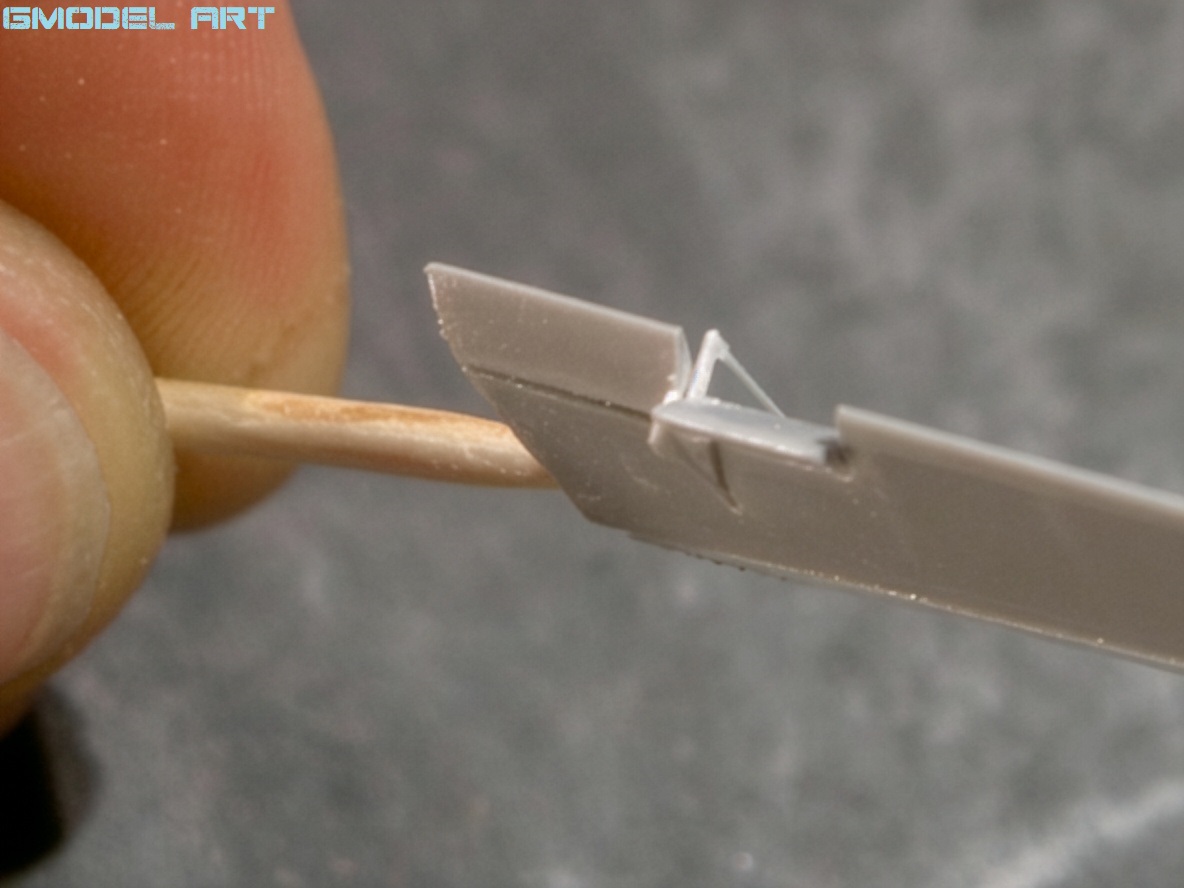
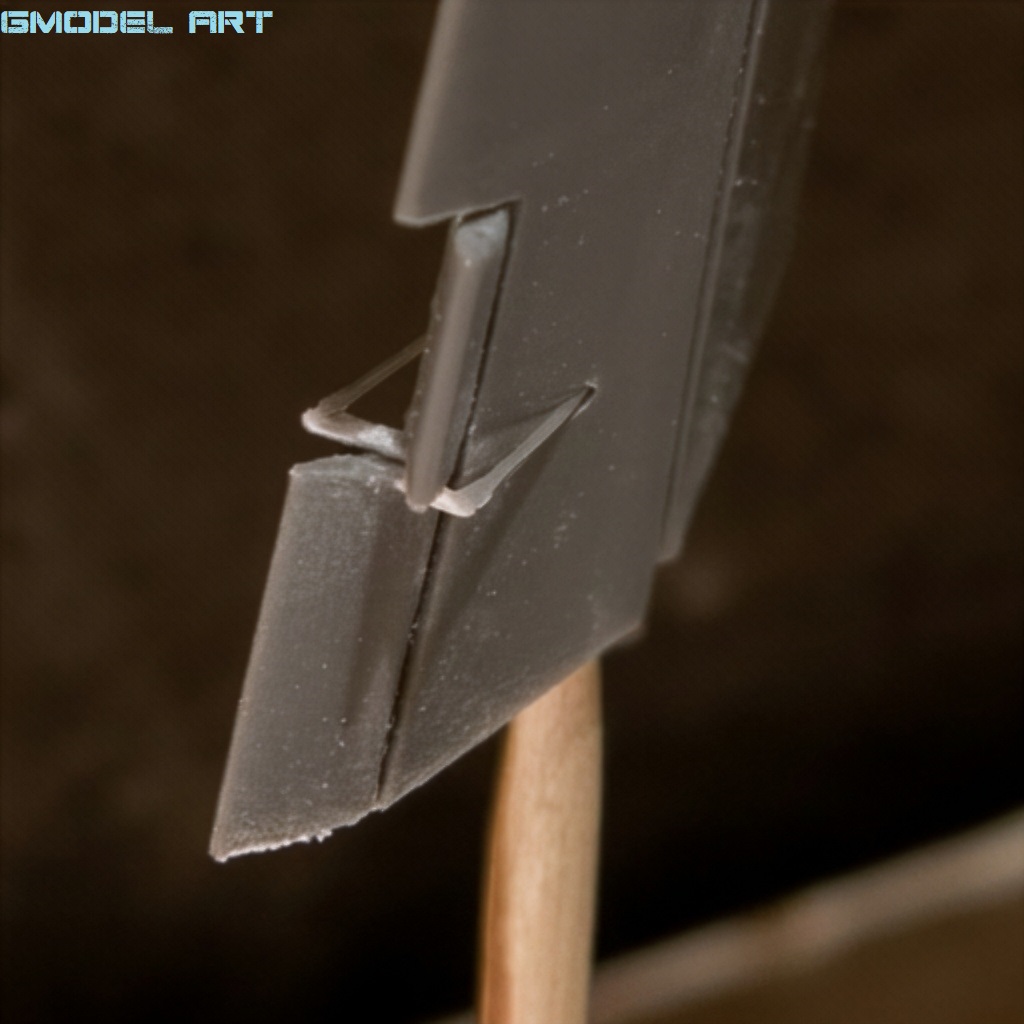
The original junction had to be sanded away, while the folding mechanism and hinges were rebuilt using Evergreen plastic material.
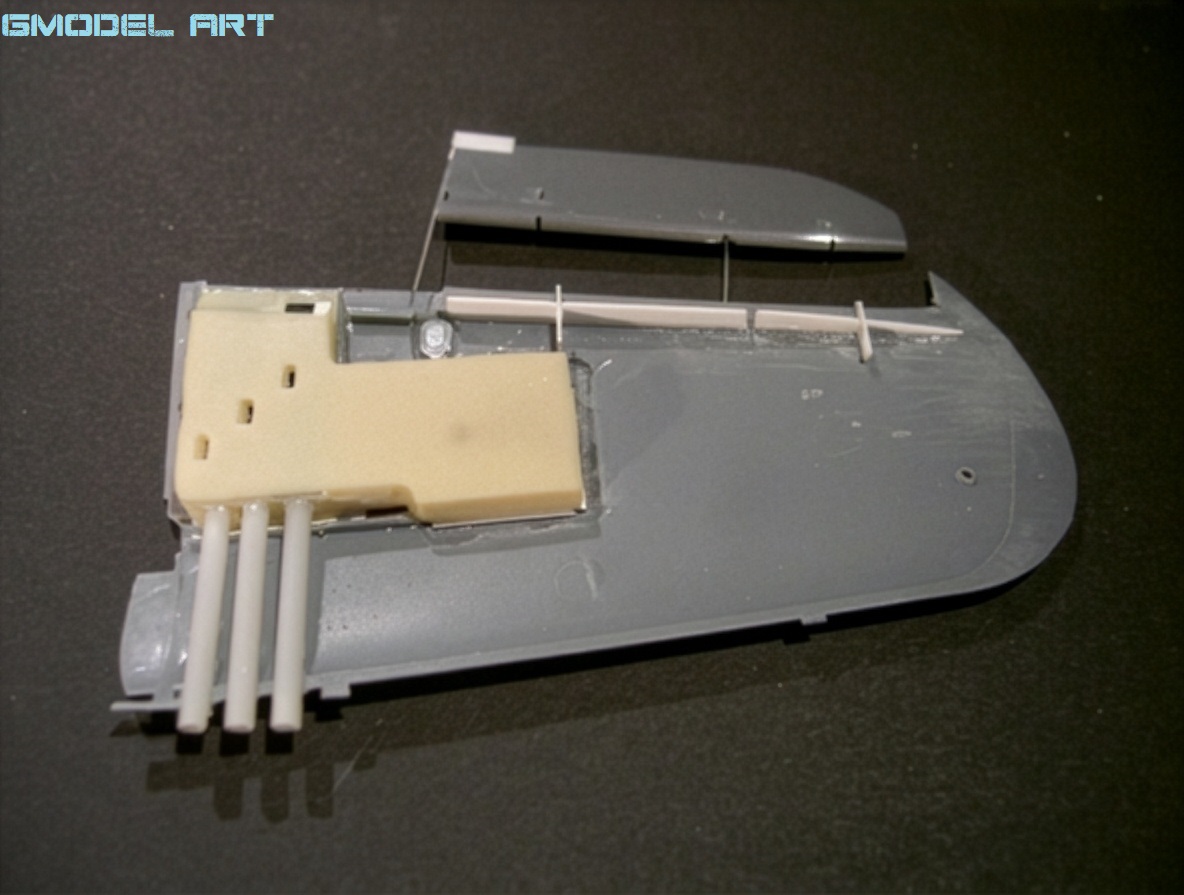
Resin wheel wells and resin weapon bays were also incorporated, requiring careful fitting and modification.
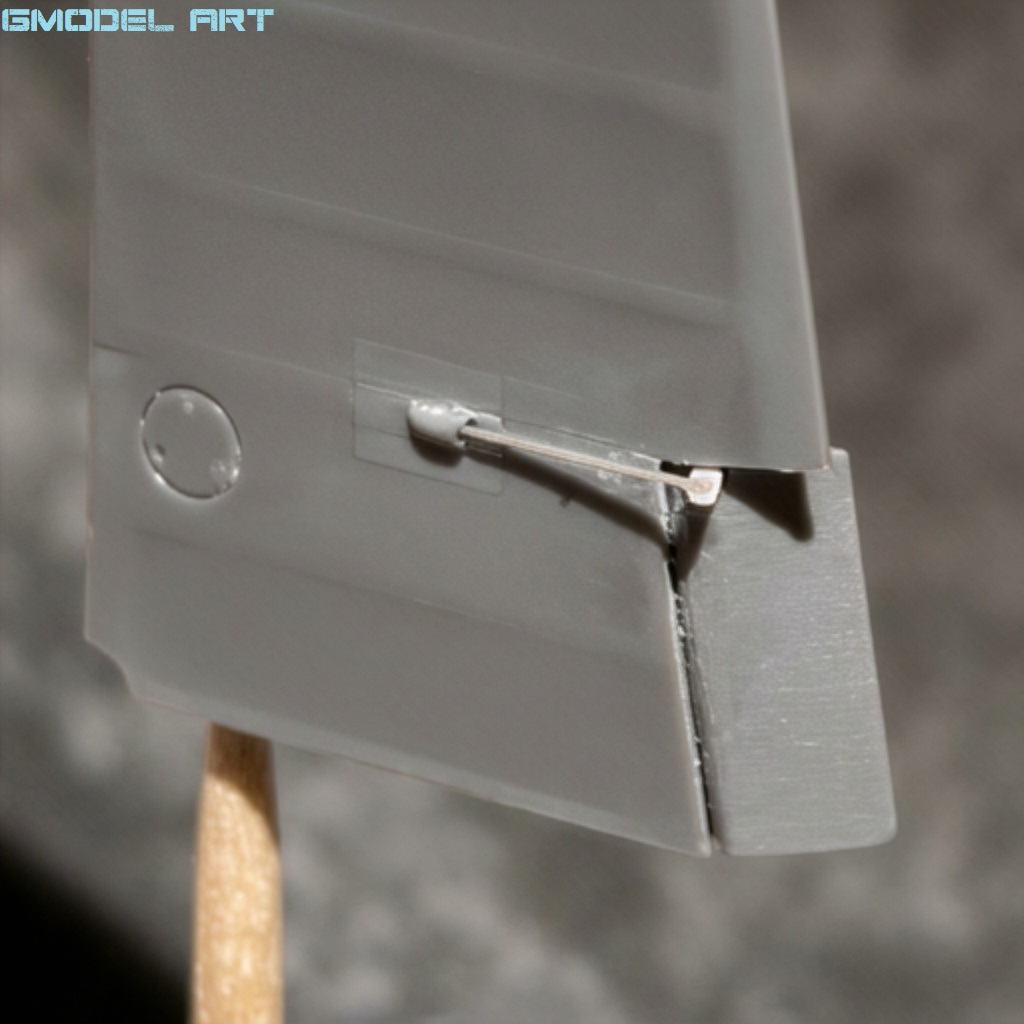
The control surfaces were cut away and replaced with Aires parts. The flaps and trim tabs were also modified.
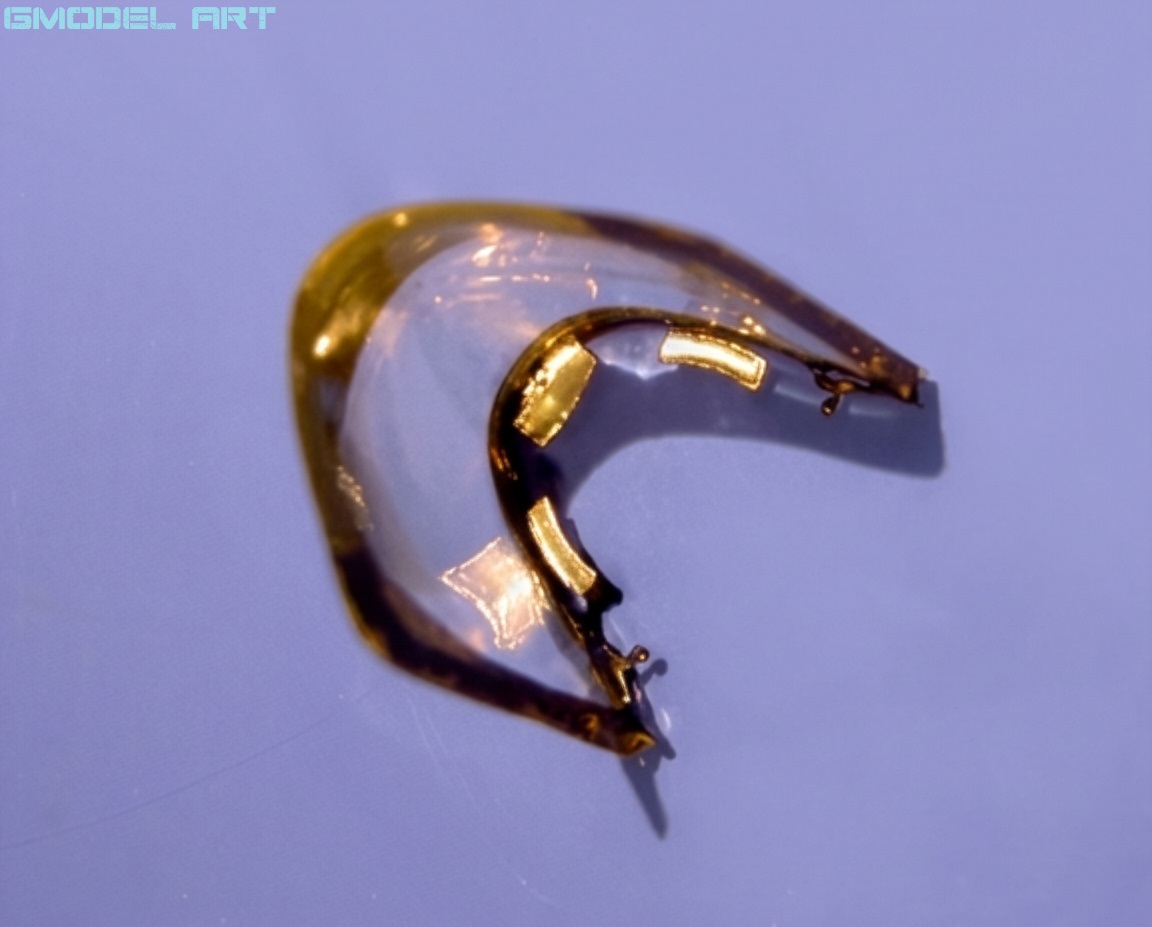
To improve the appearance of the machine-gun openings along the leading edge, suitable plastic tubes were used. The position lights at the wingtips were removed and replaced with transparent plastic.
Even the small pins supplied for the landing flaps were modified. Instead of simply attaching them as provided in the kit, they were connected to the joints using small pieces of wire, producing a finer and more realistic appearance.
The philosophy of the build was simple: wherever a component could be improved, modified or replaced, it was given additional attention.
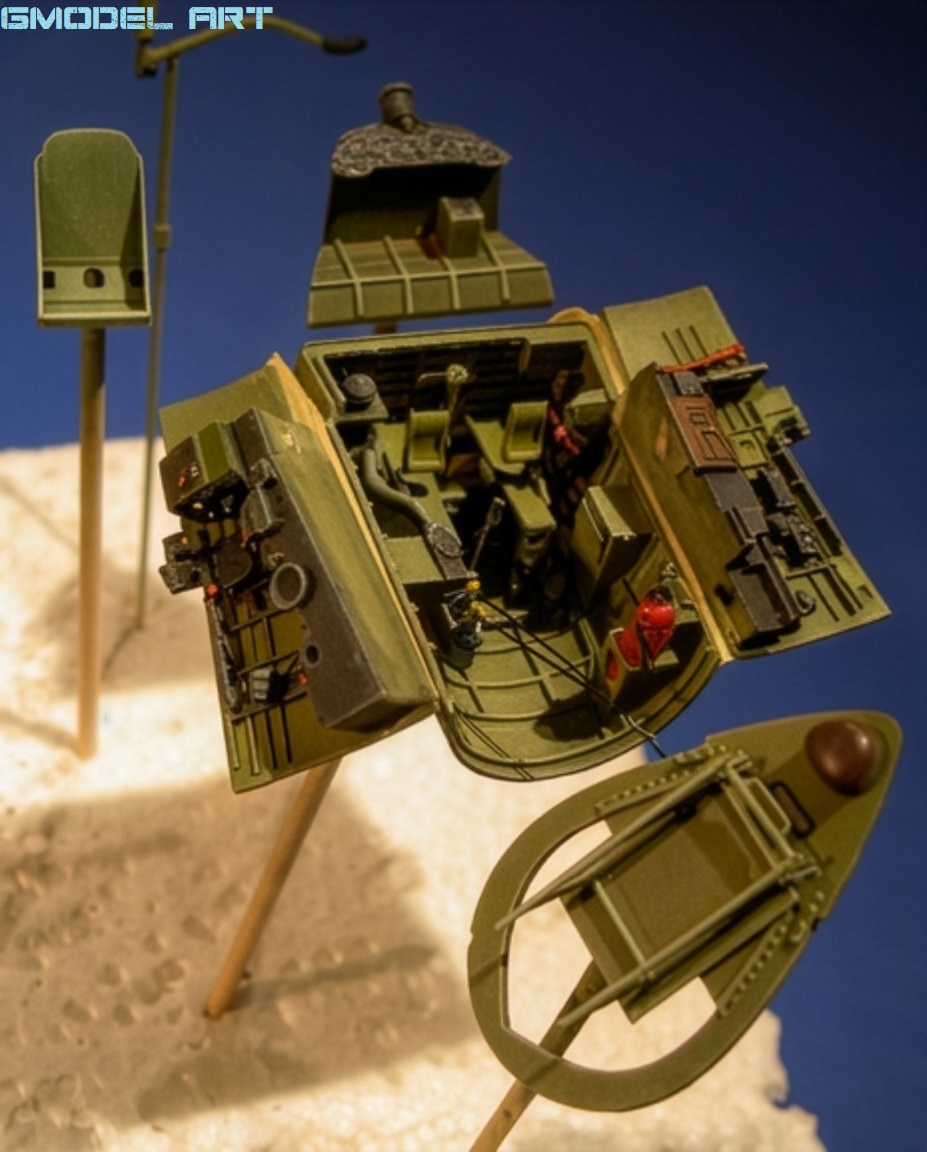
Detailing the F4U-1A Corsair Cockpit
The cockpit was another area that received extensive attention.
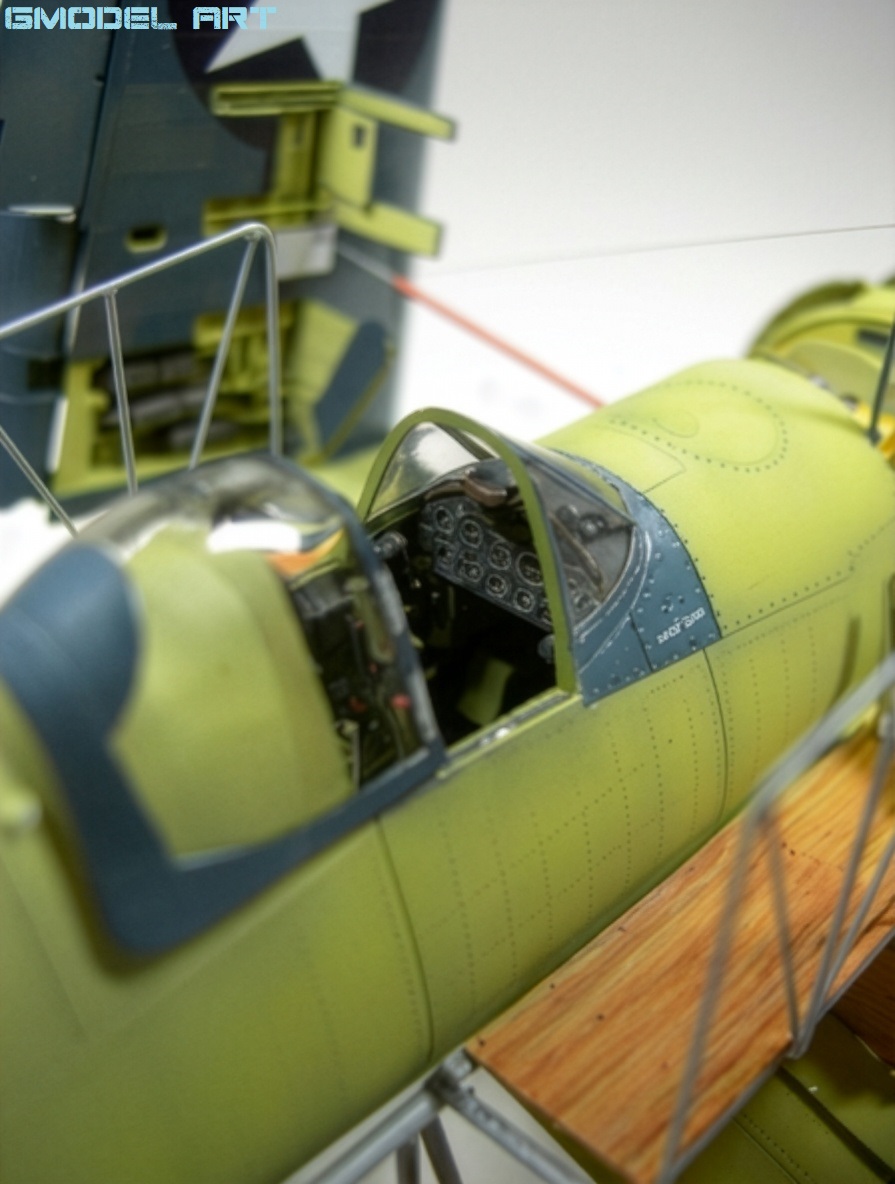
Because the modeler wanted the interior to remain clearly visible, the seat required modification. The original seat support was not suitable for the intended configuration and had to be redesigned and adapted to the rear section of the cockpit.
This approach allowed the cockpit to become a much more visible part of the finished model.
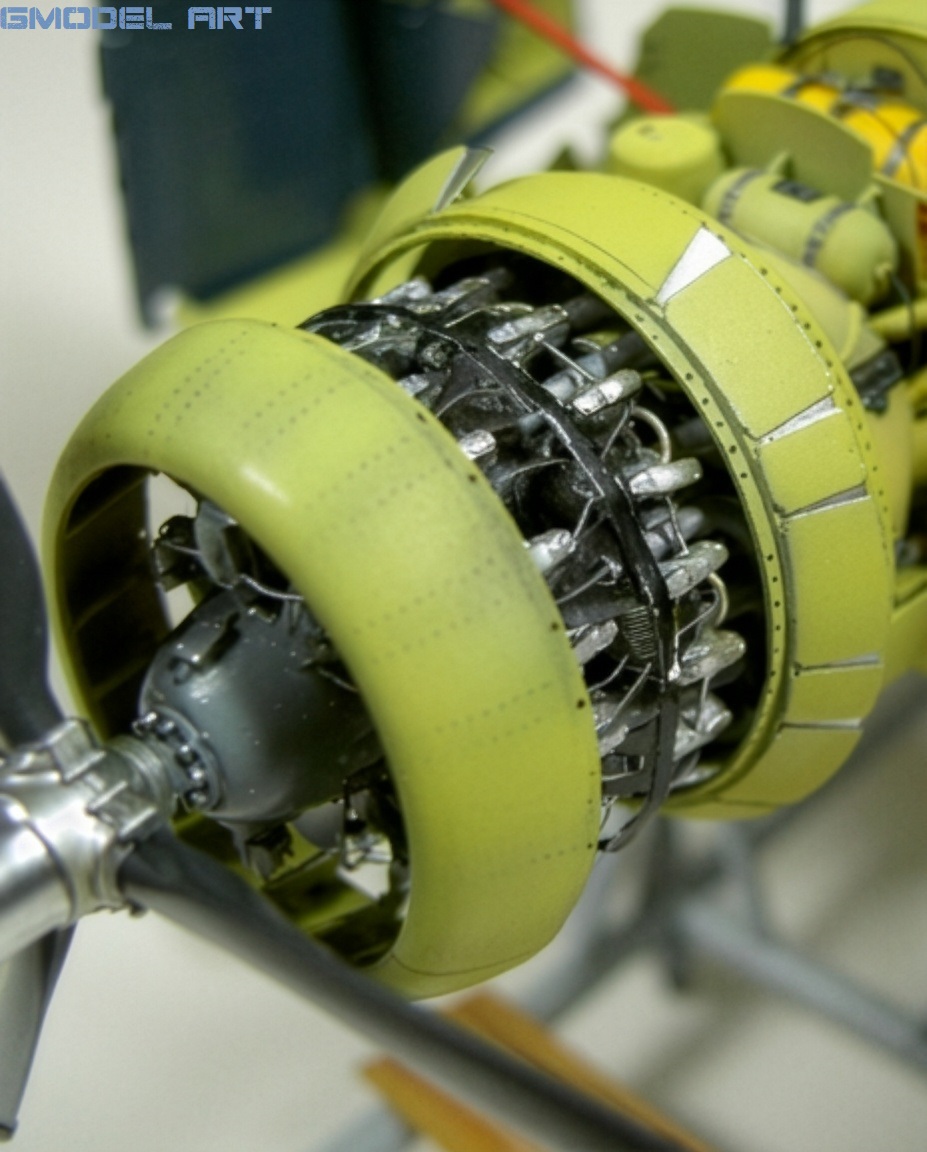
Detailing the F4U-1A Corsair Engine
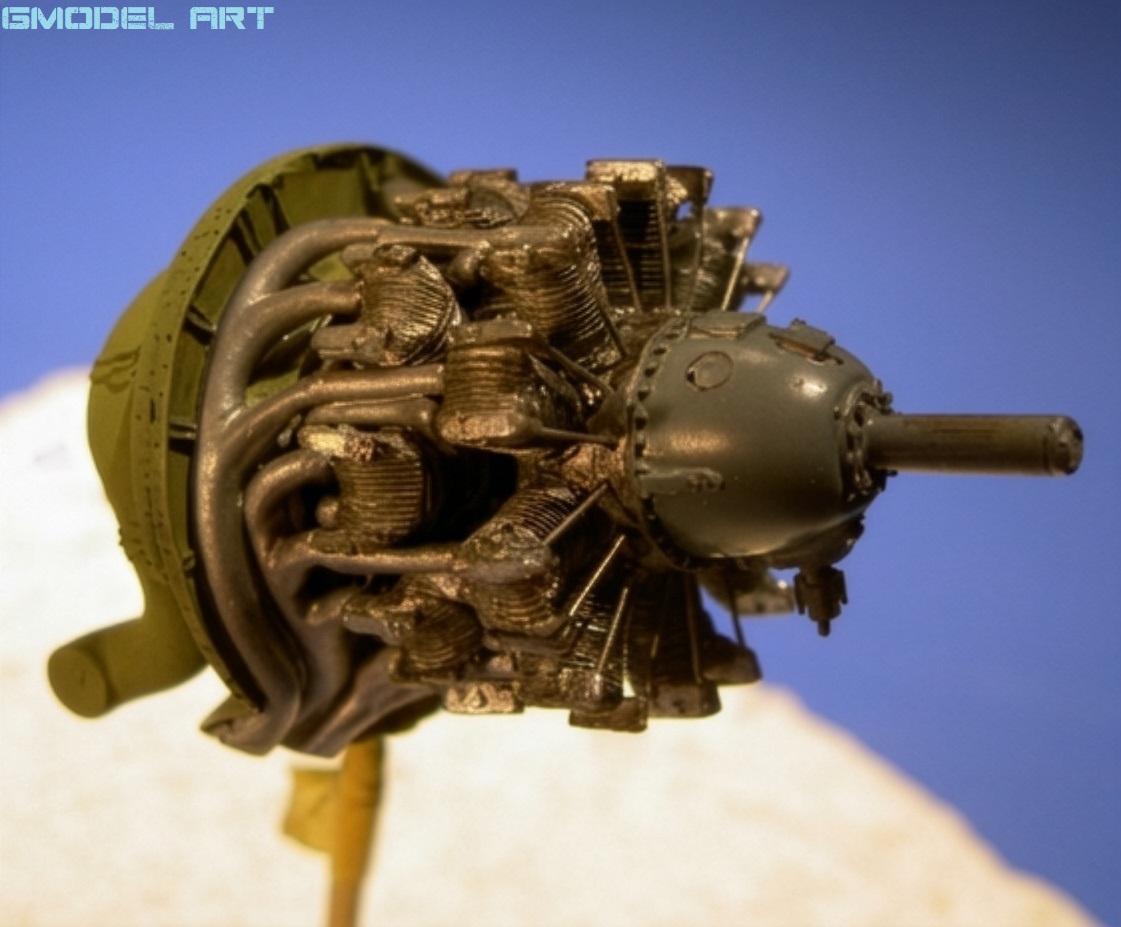
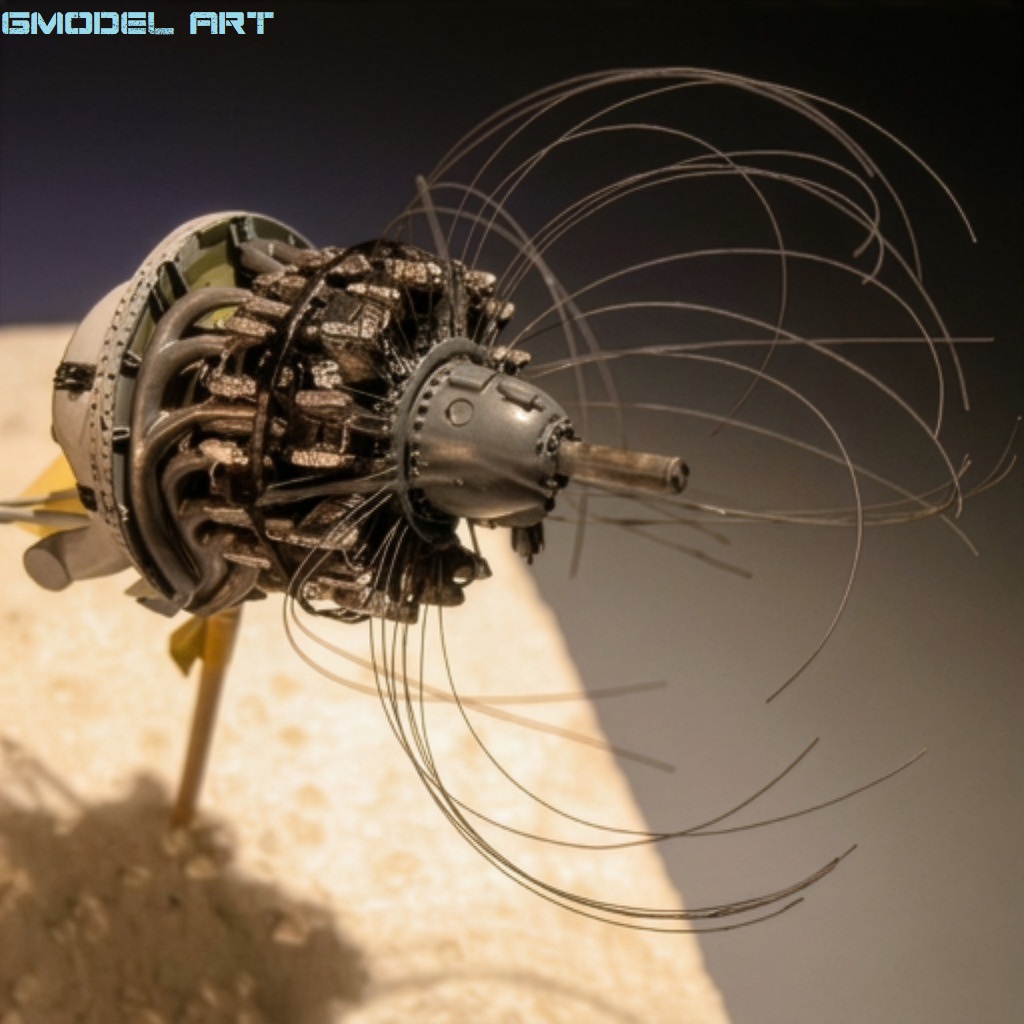
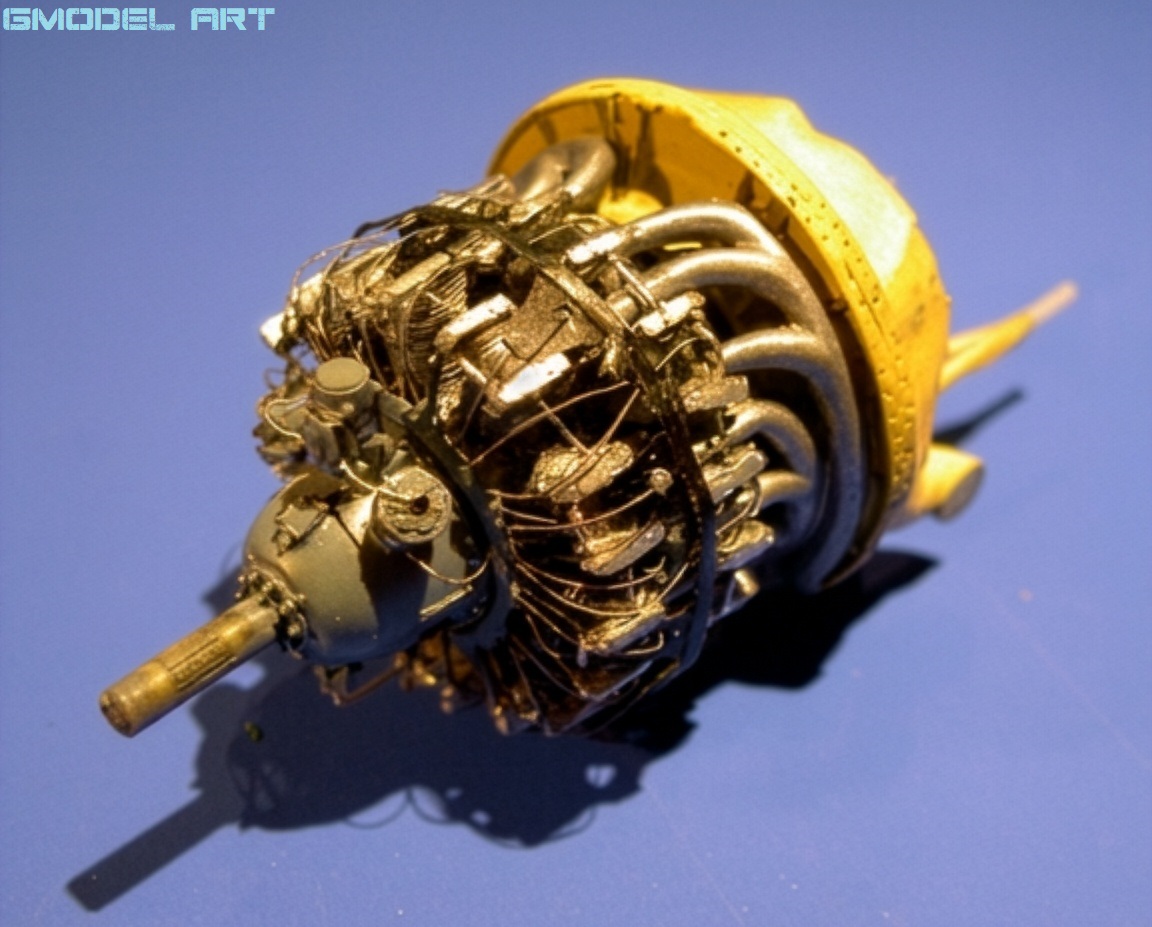
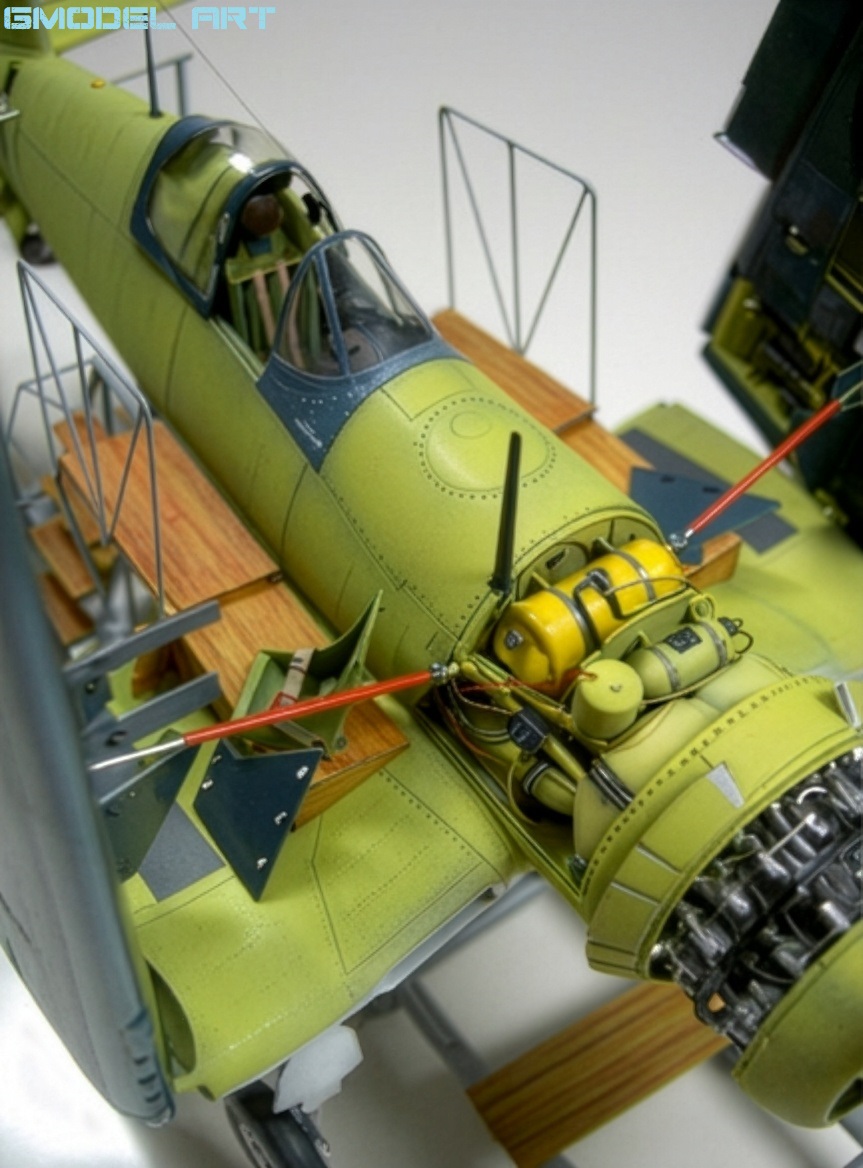
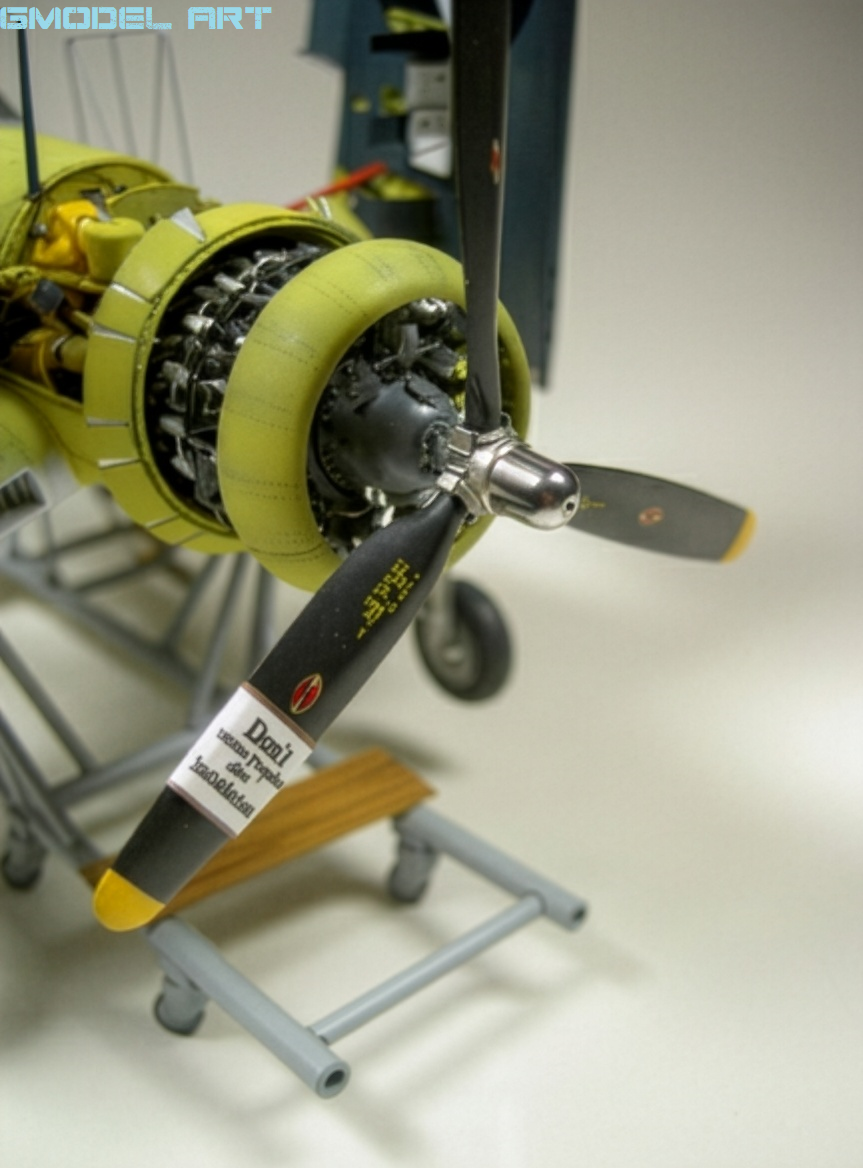
The engine was practically a model within the model.
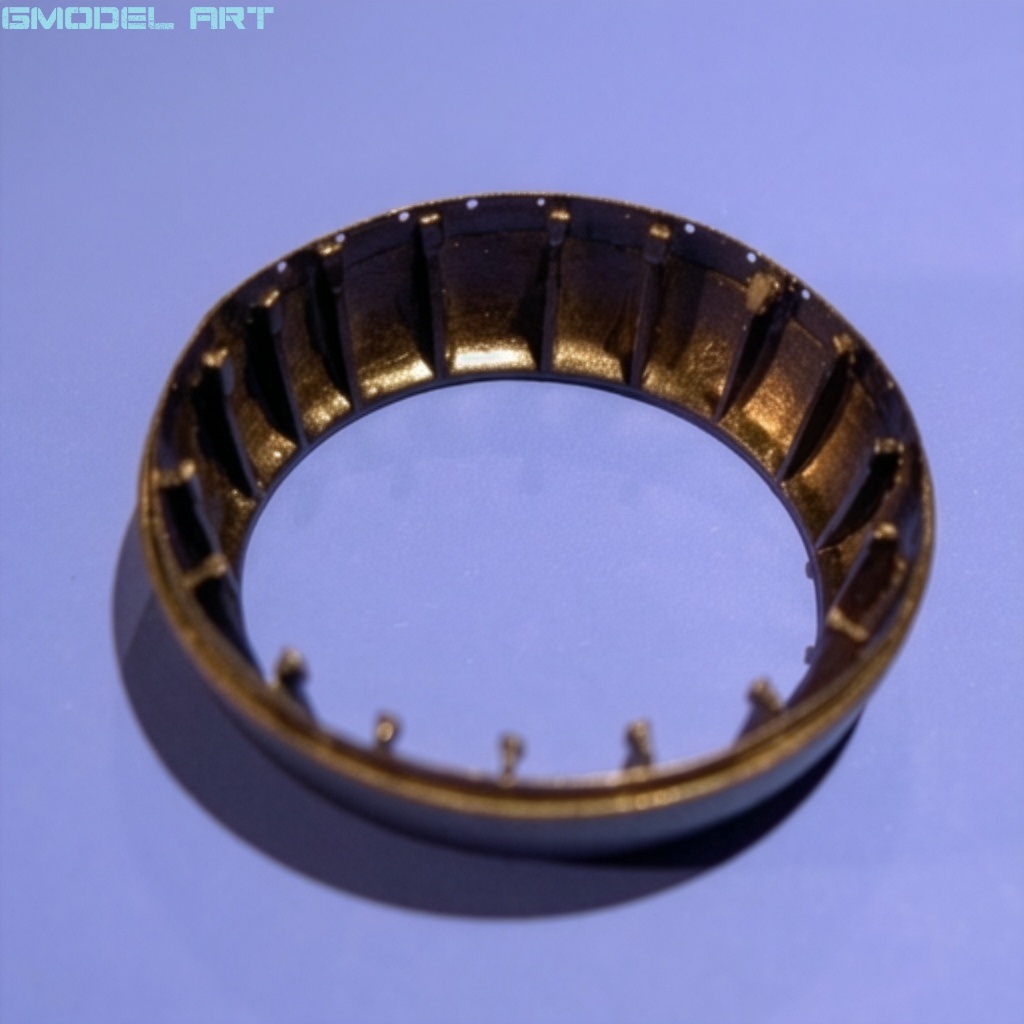
Thin fishing line was used to reproduce the ignition wires, while the ring that organizes and supports the wires around the cylinders was also detailed.
Painting the engine proved particularly challenging because some of the exhaust manifold joints had already been installed.
There was another important consideration: the finished aircraft had to represent an airframe fresh from the factory.
That meant keeping weathering to a minimum and avoiding the heavily worn appearance often associated with operational Corsair models.
Tail Wheel and Landing Gear Details
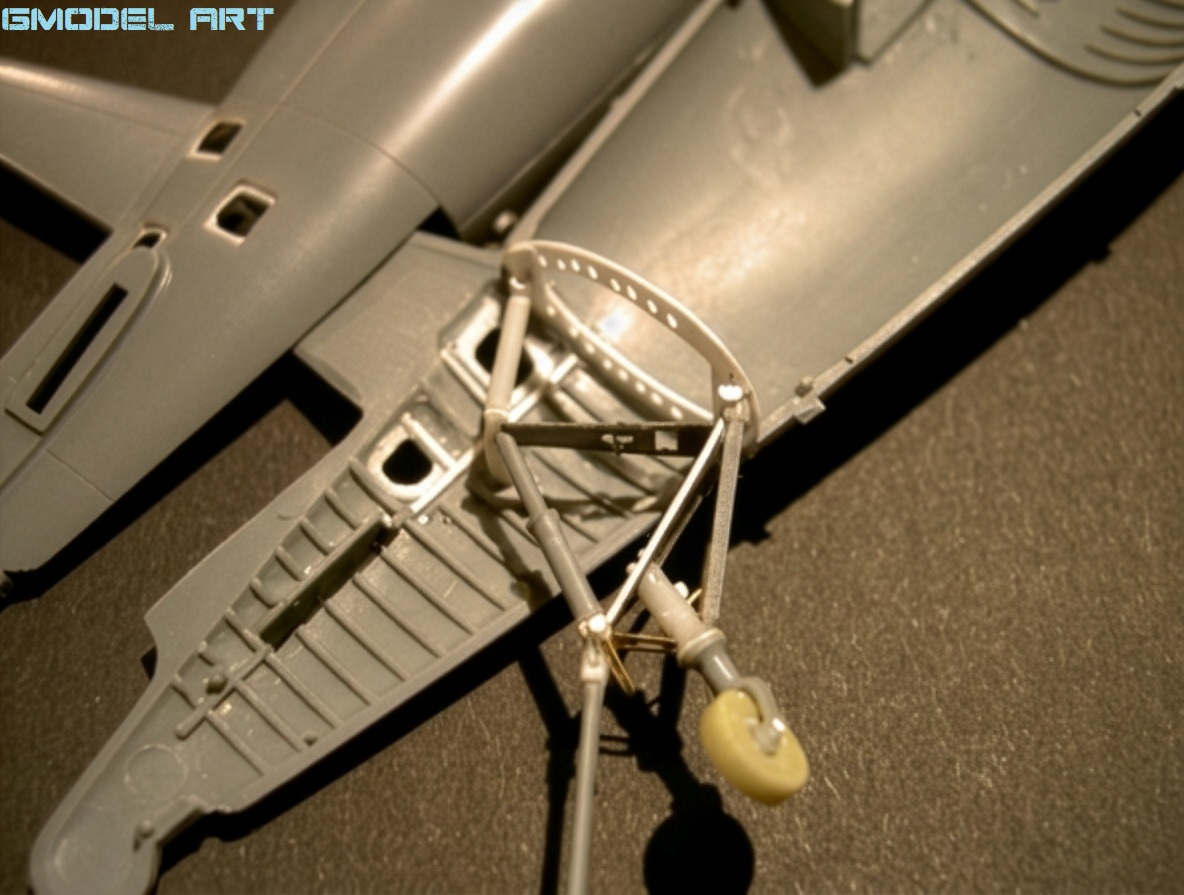
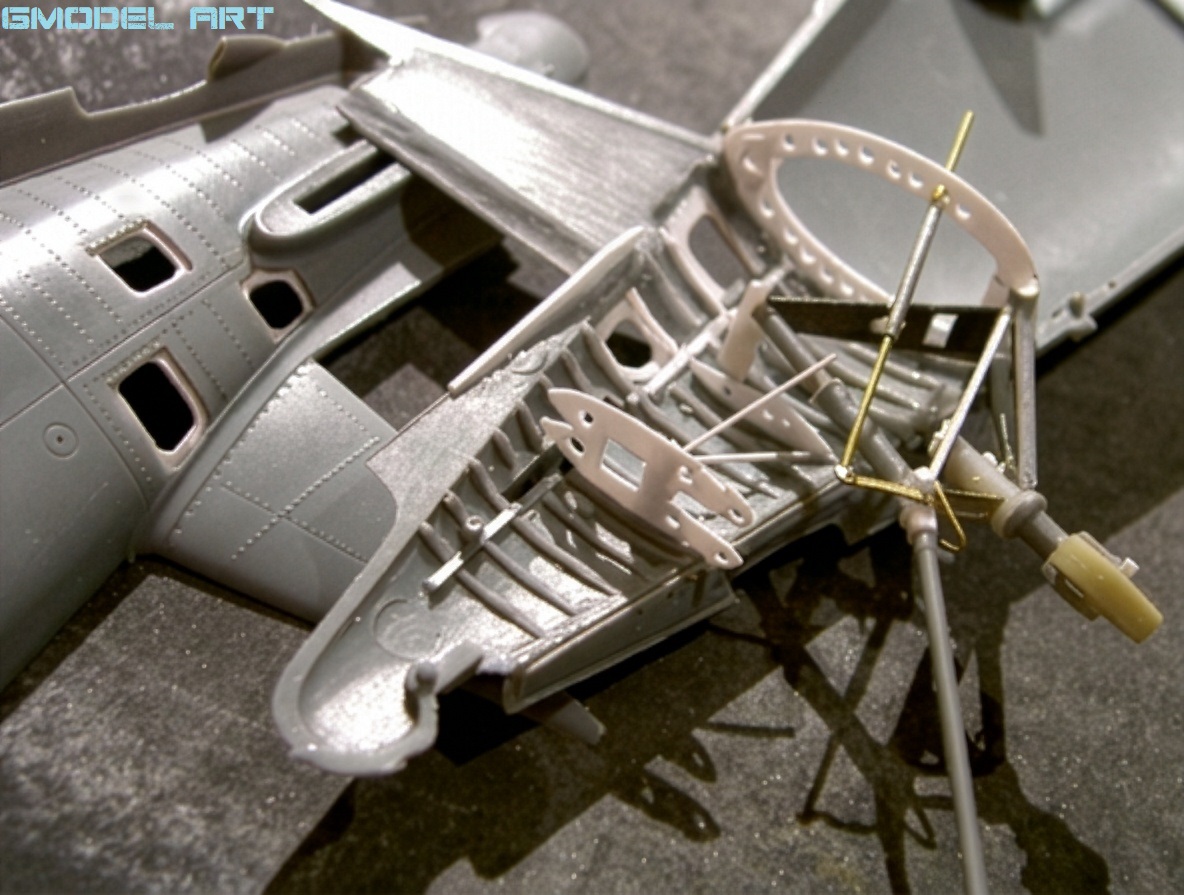
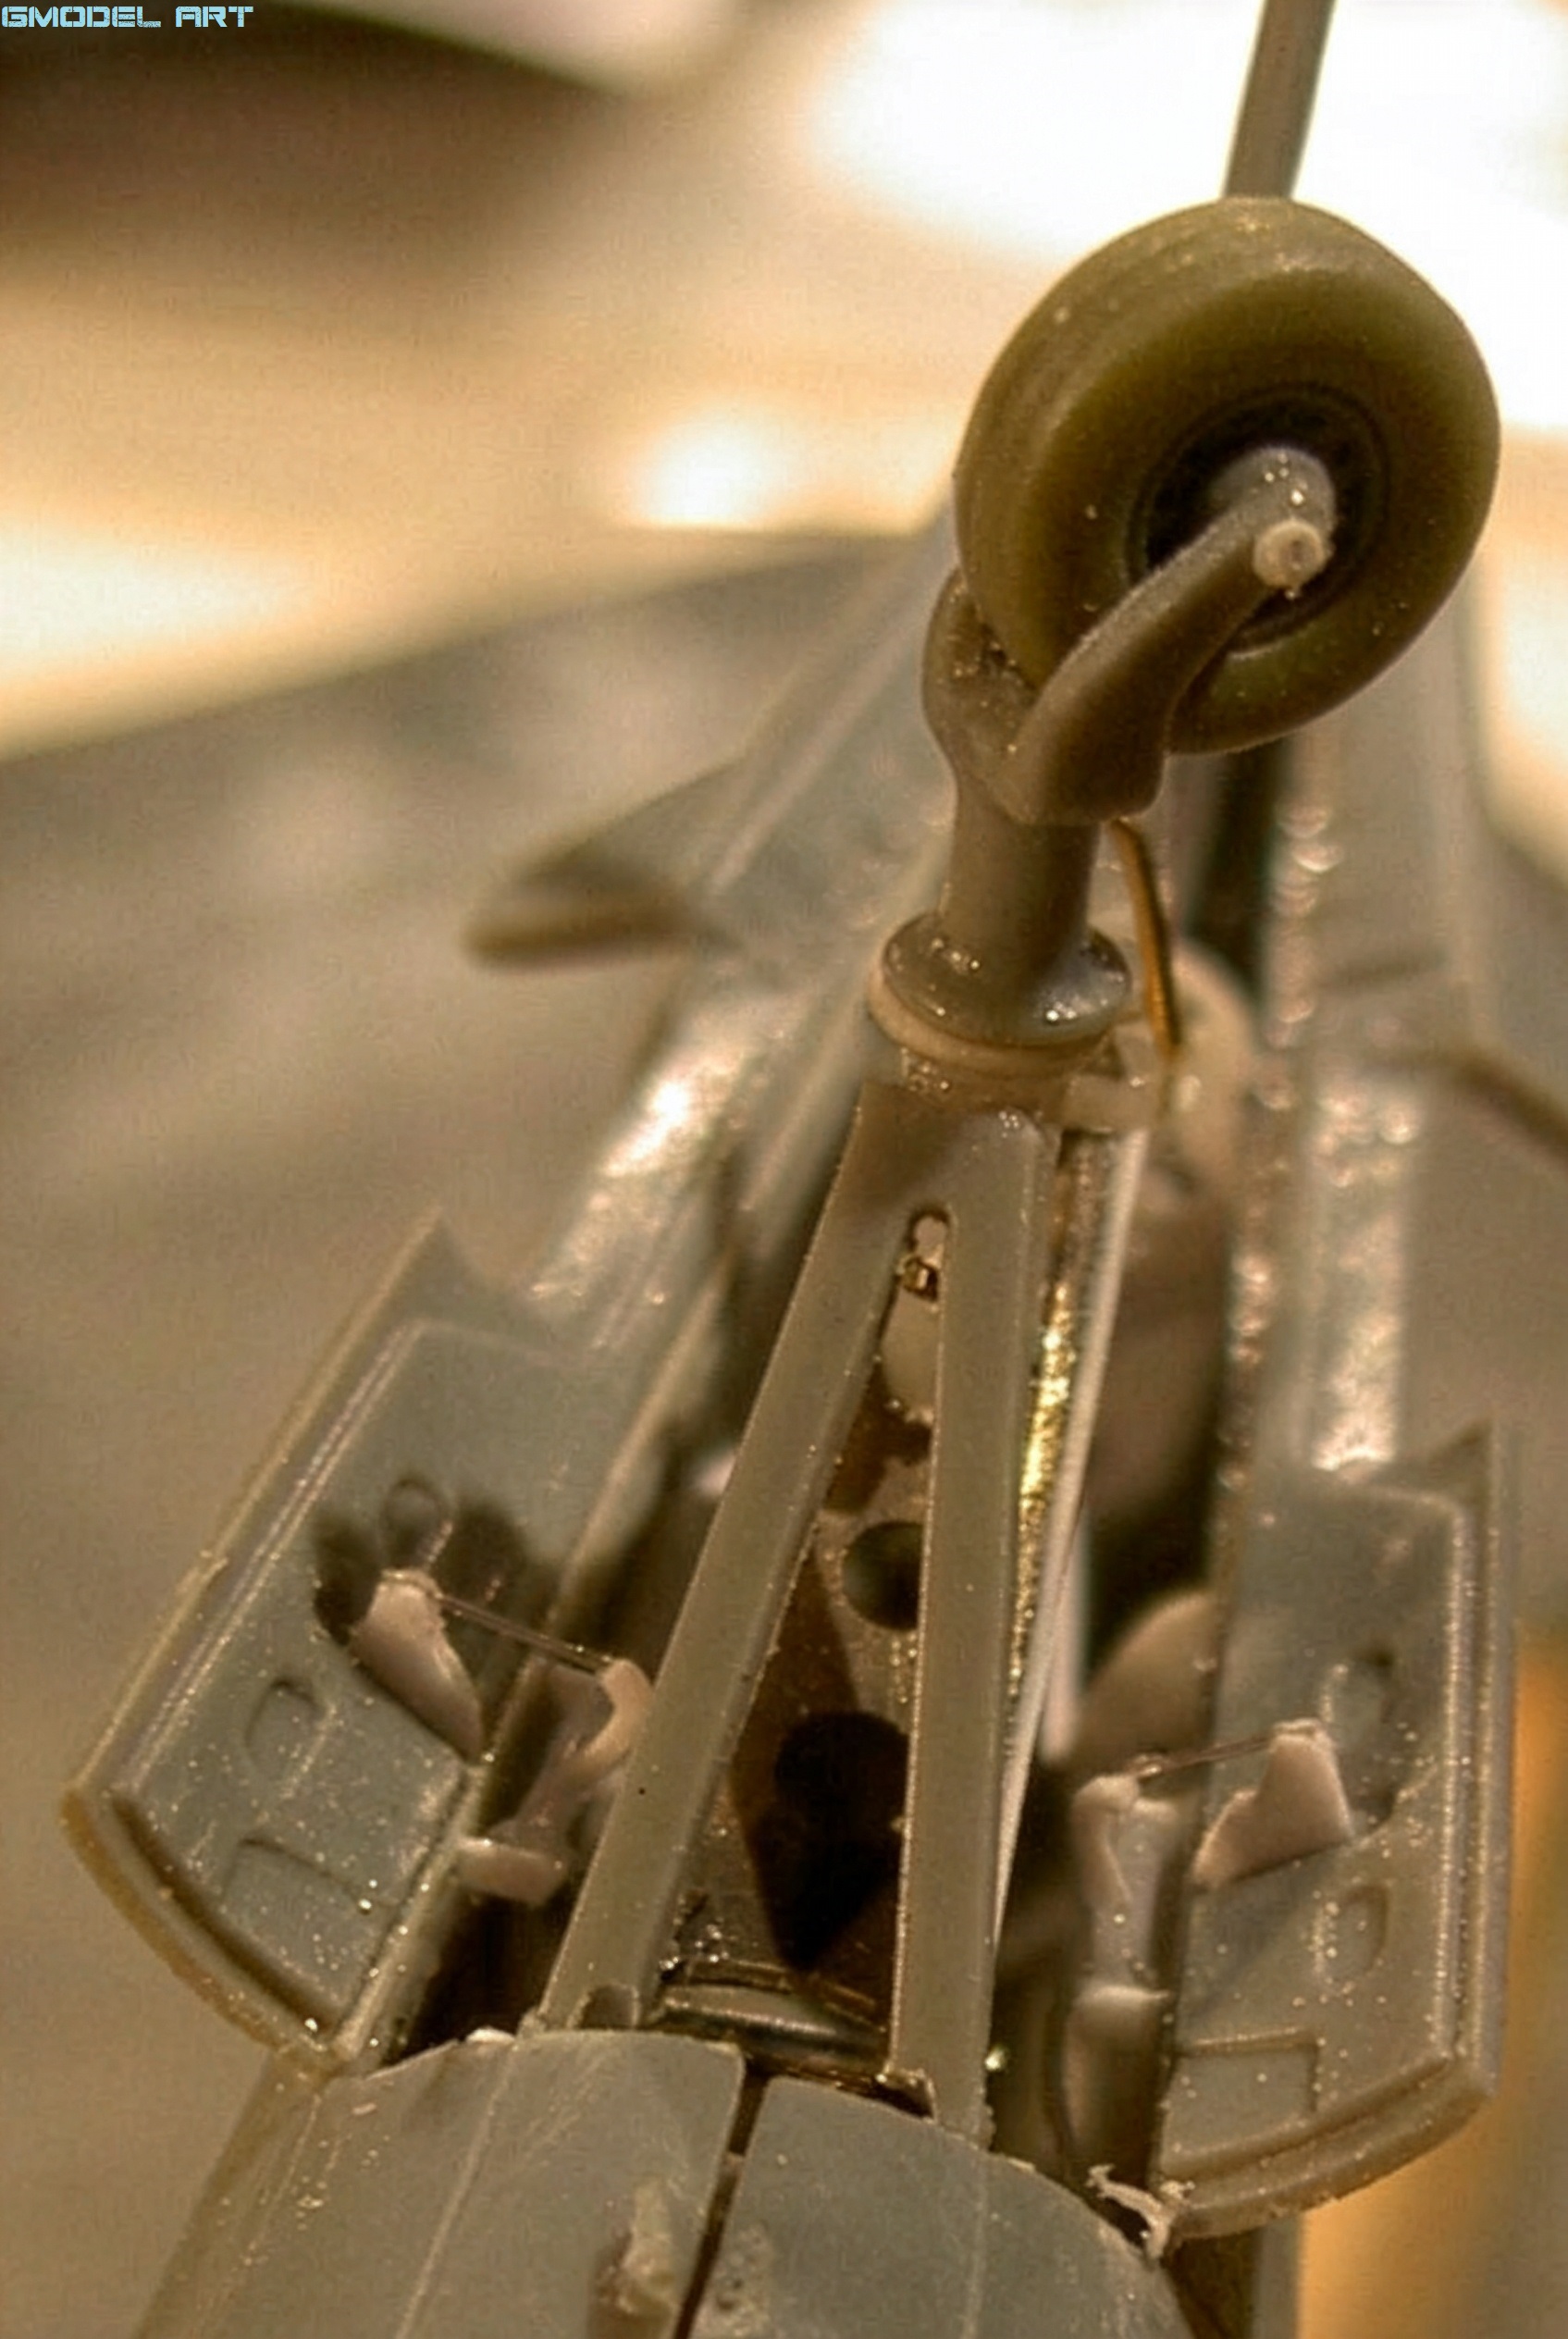
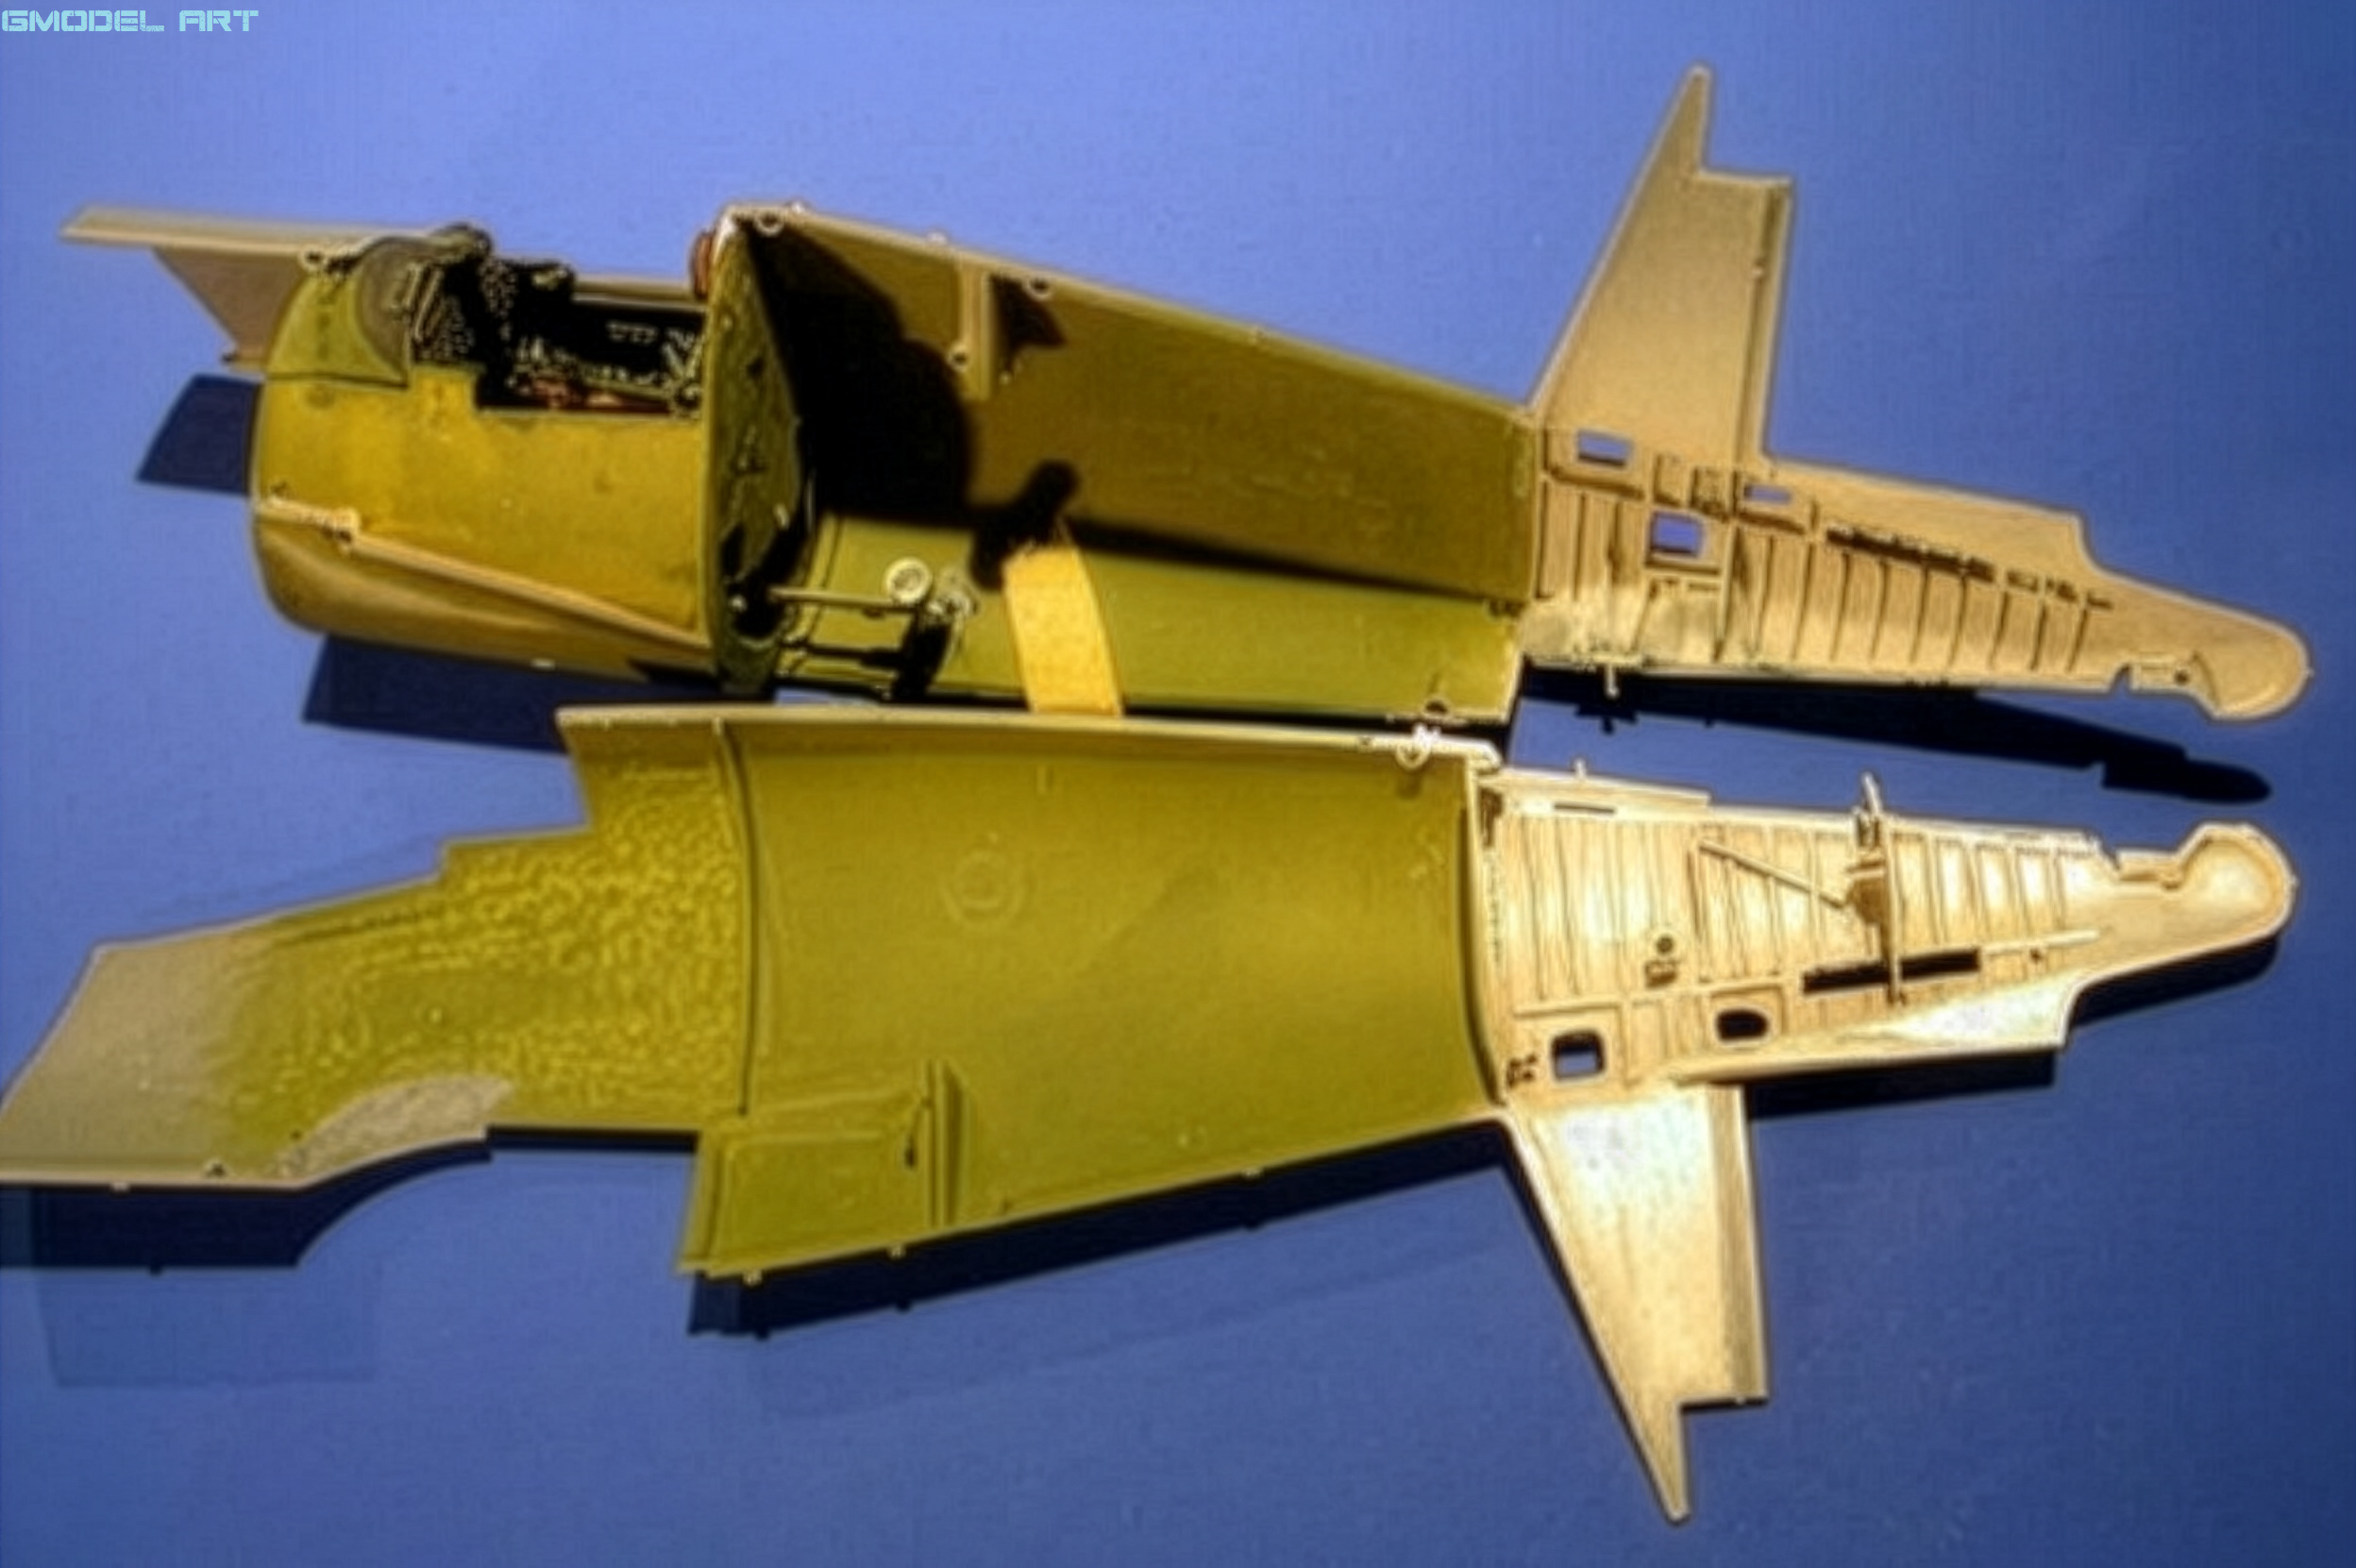
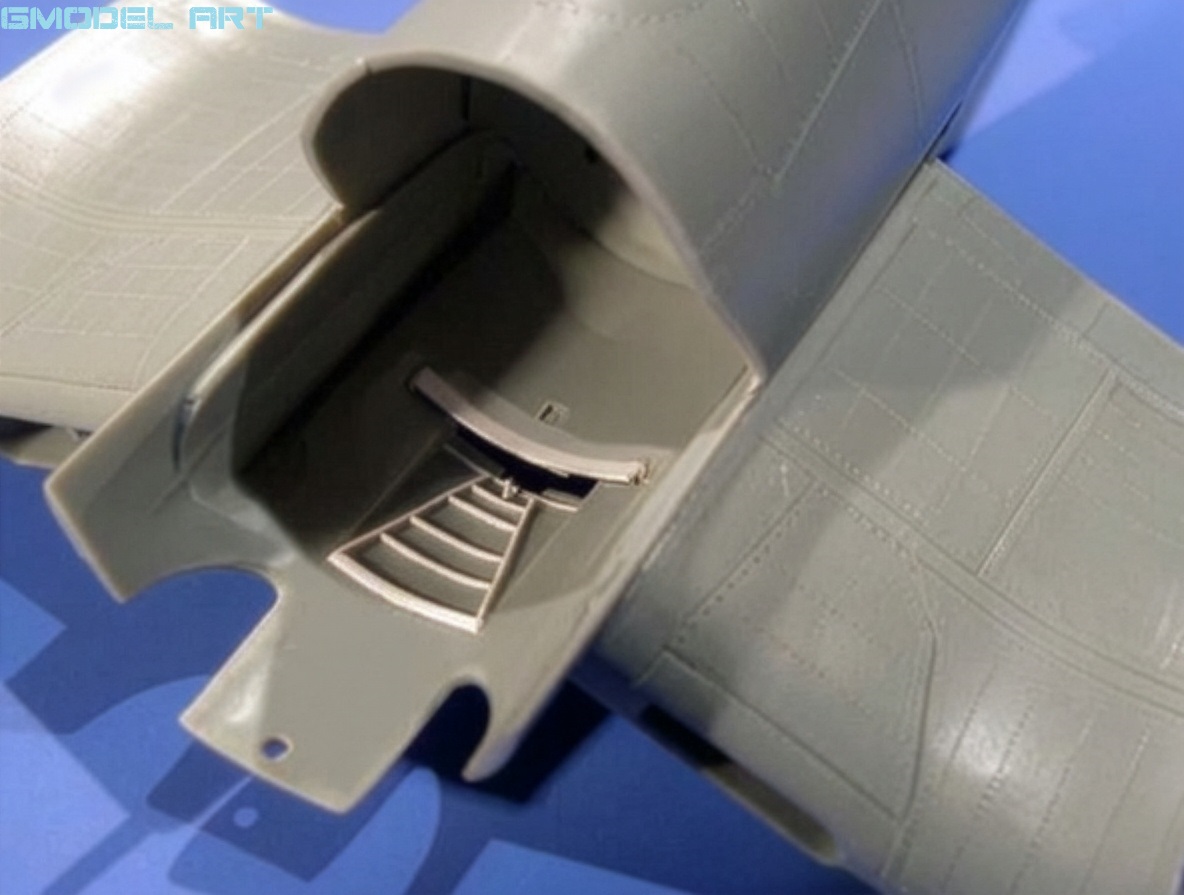
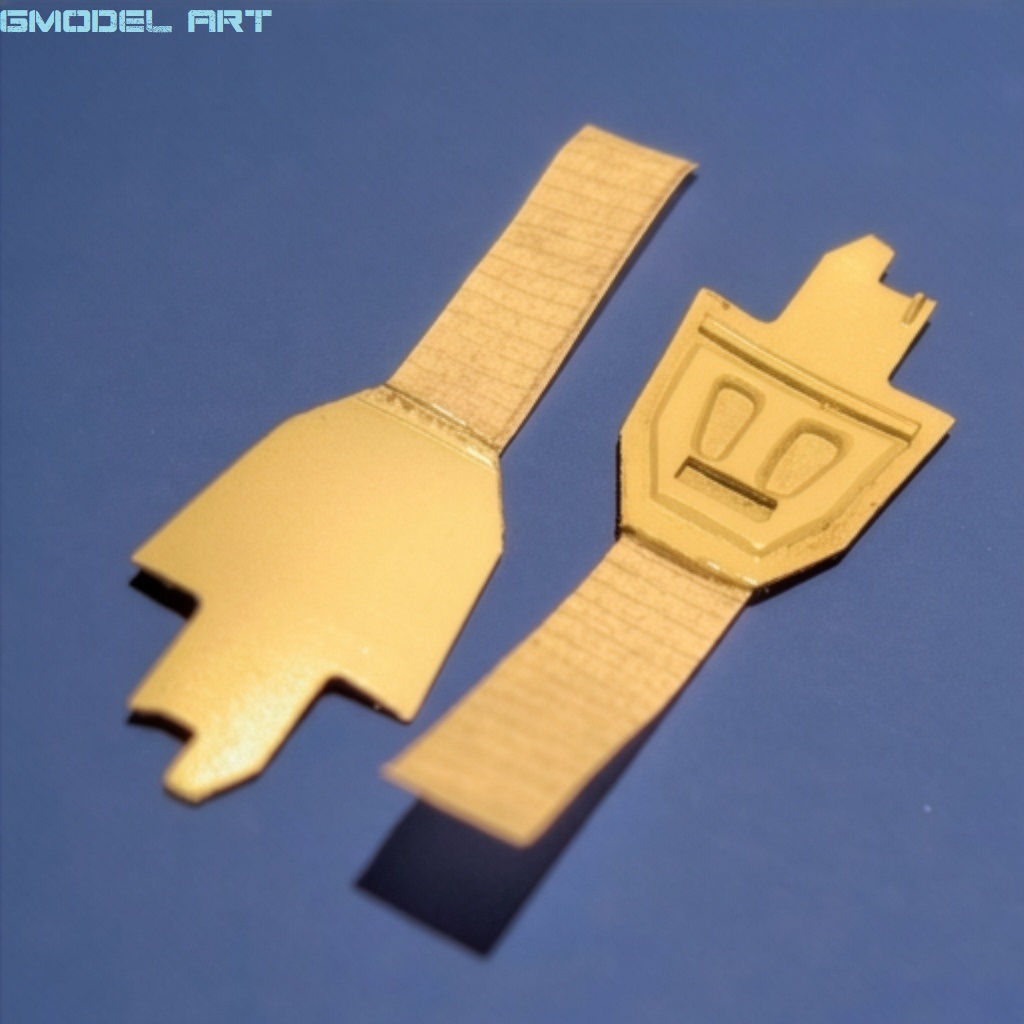
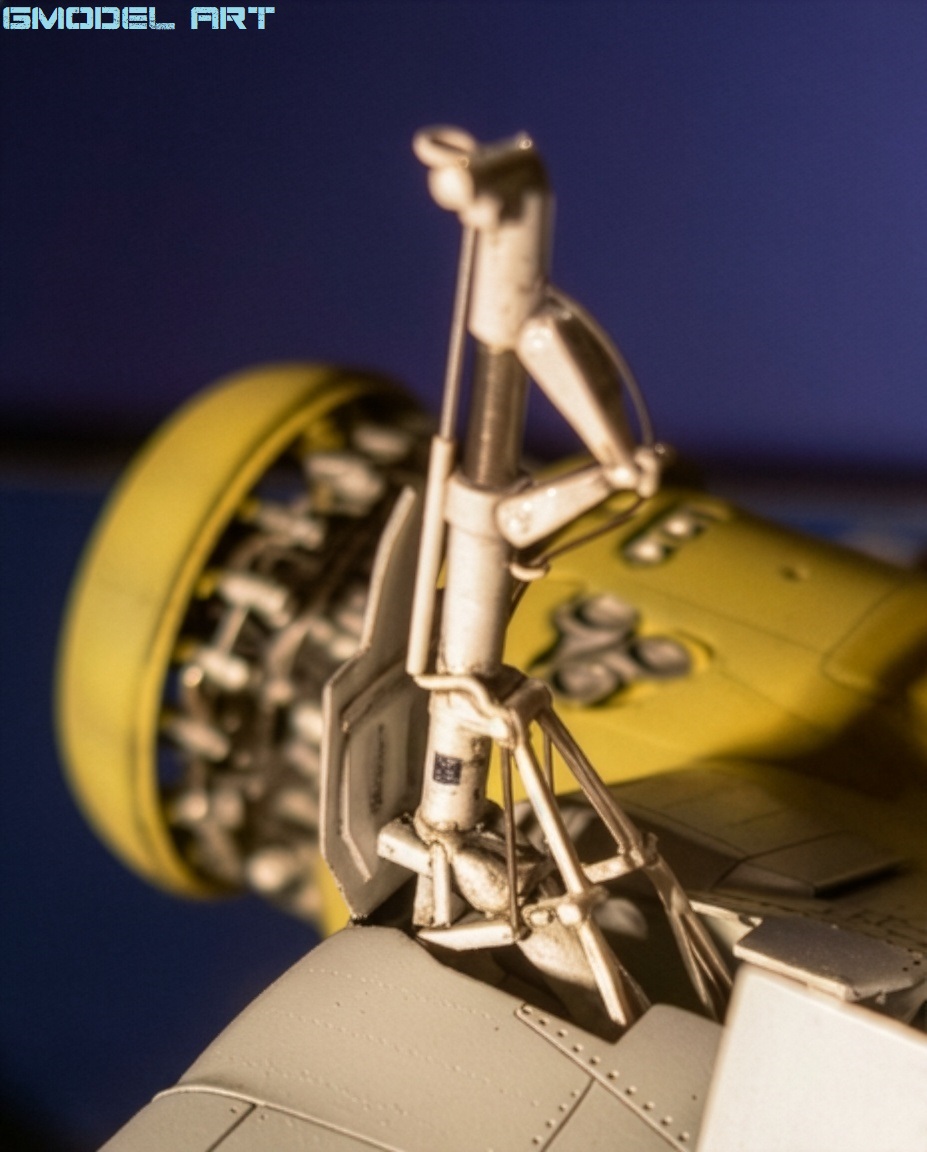
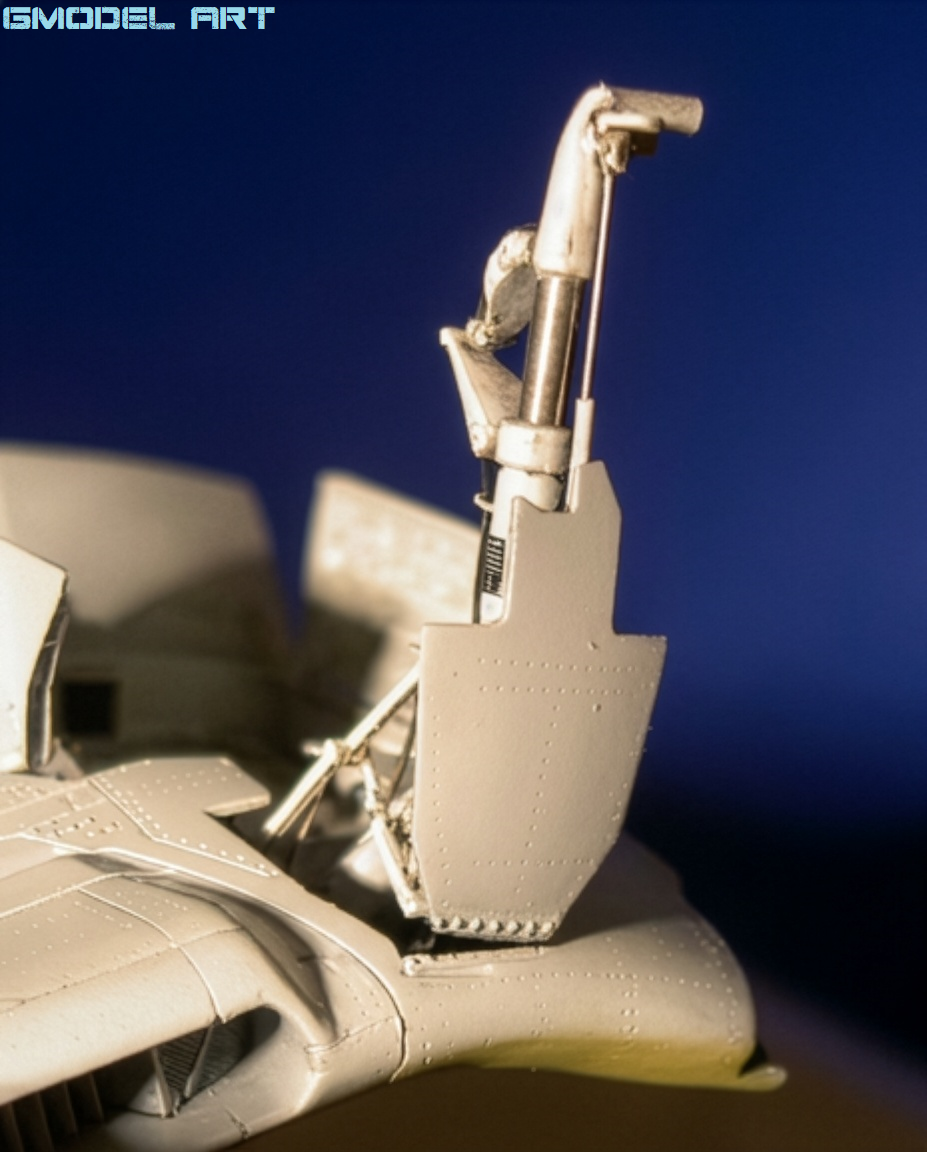
Before joining the fuselage halves, the modeler decided to represent the service covers around the tail landing gear in the open position.
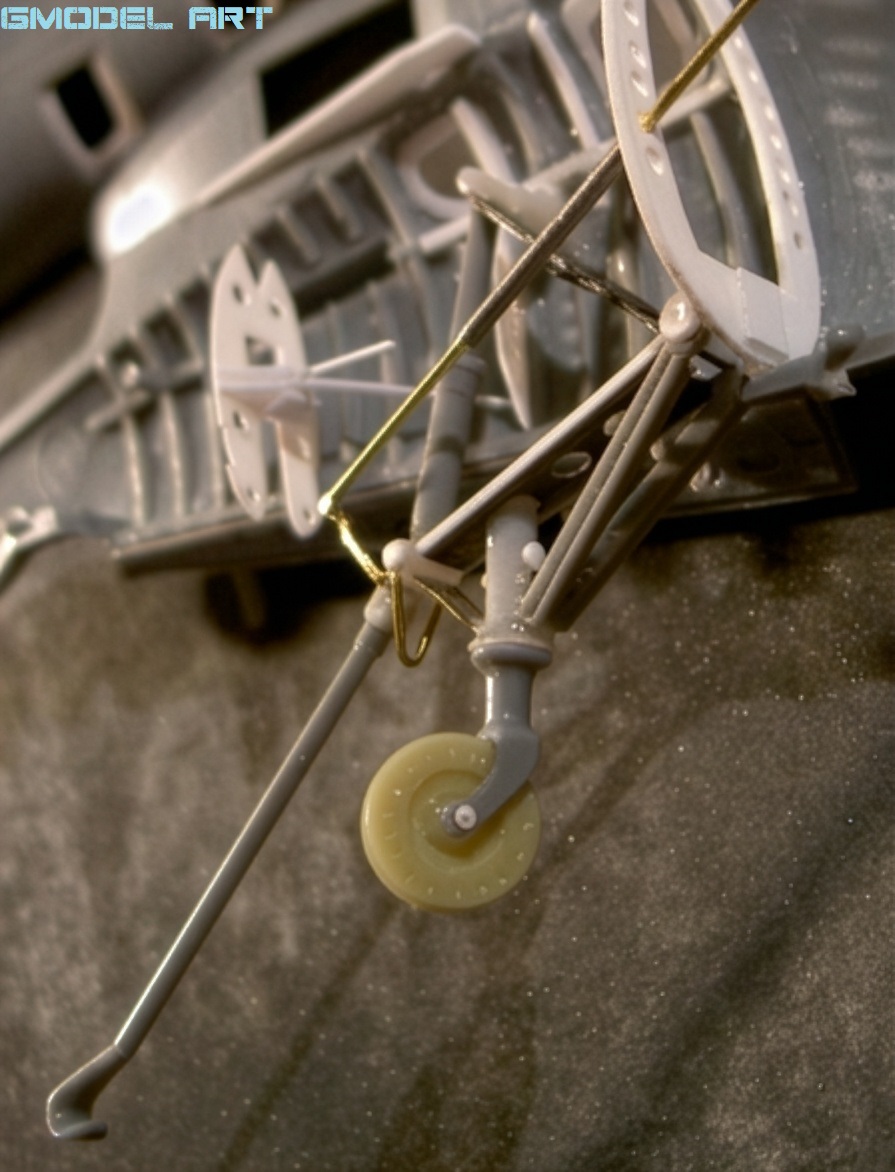
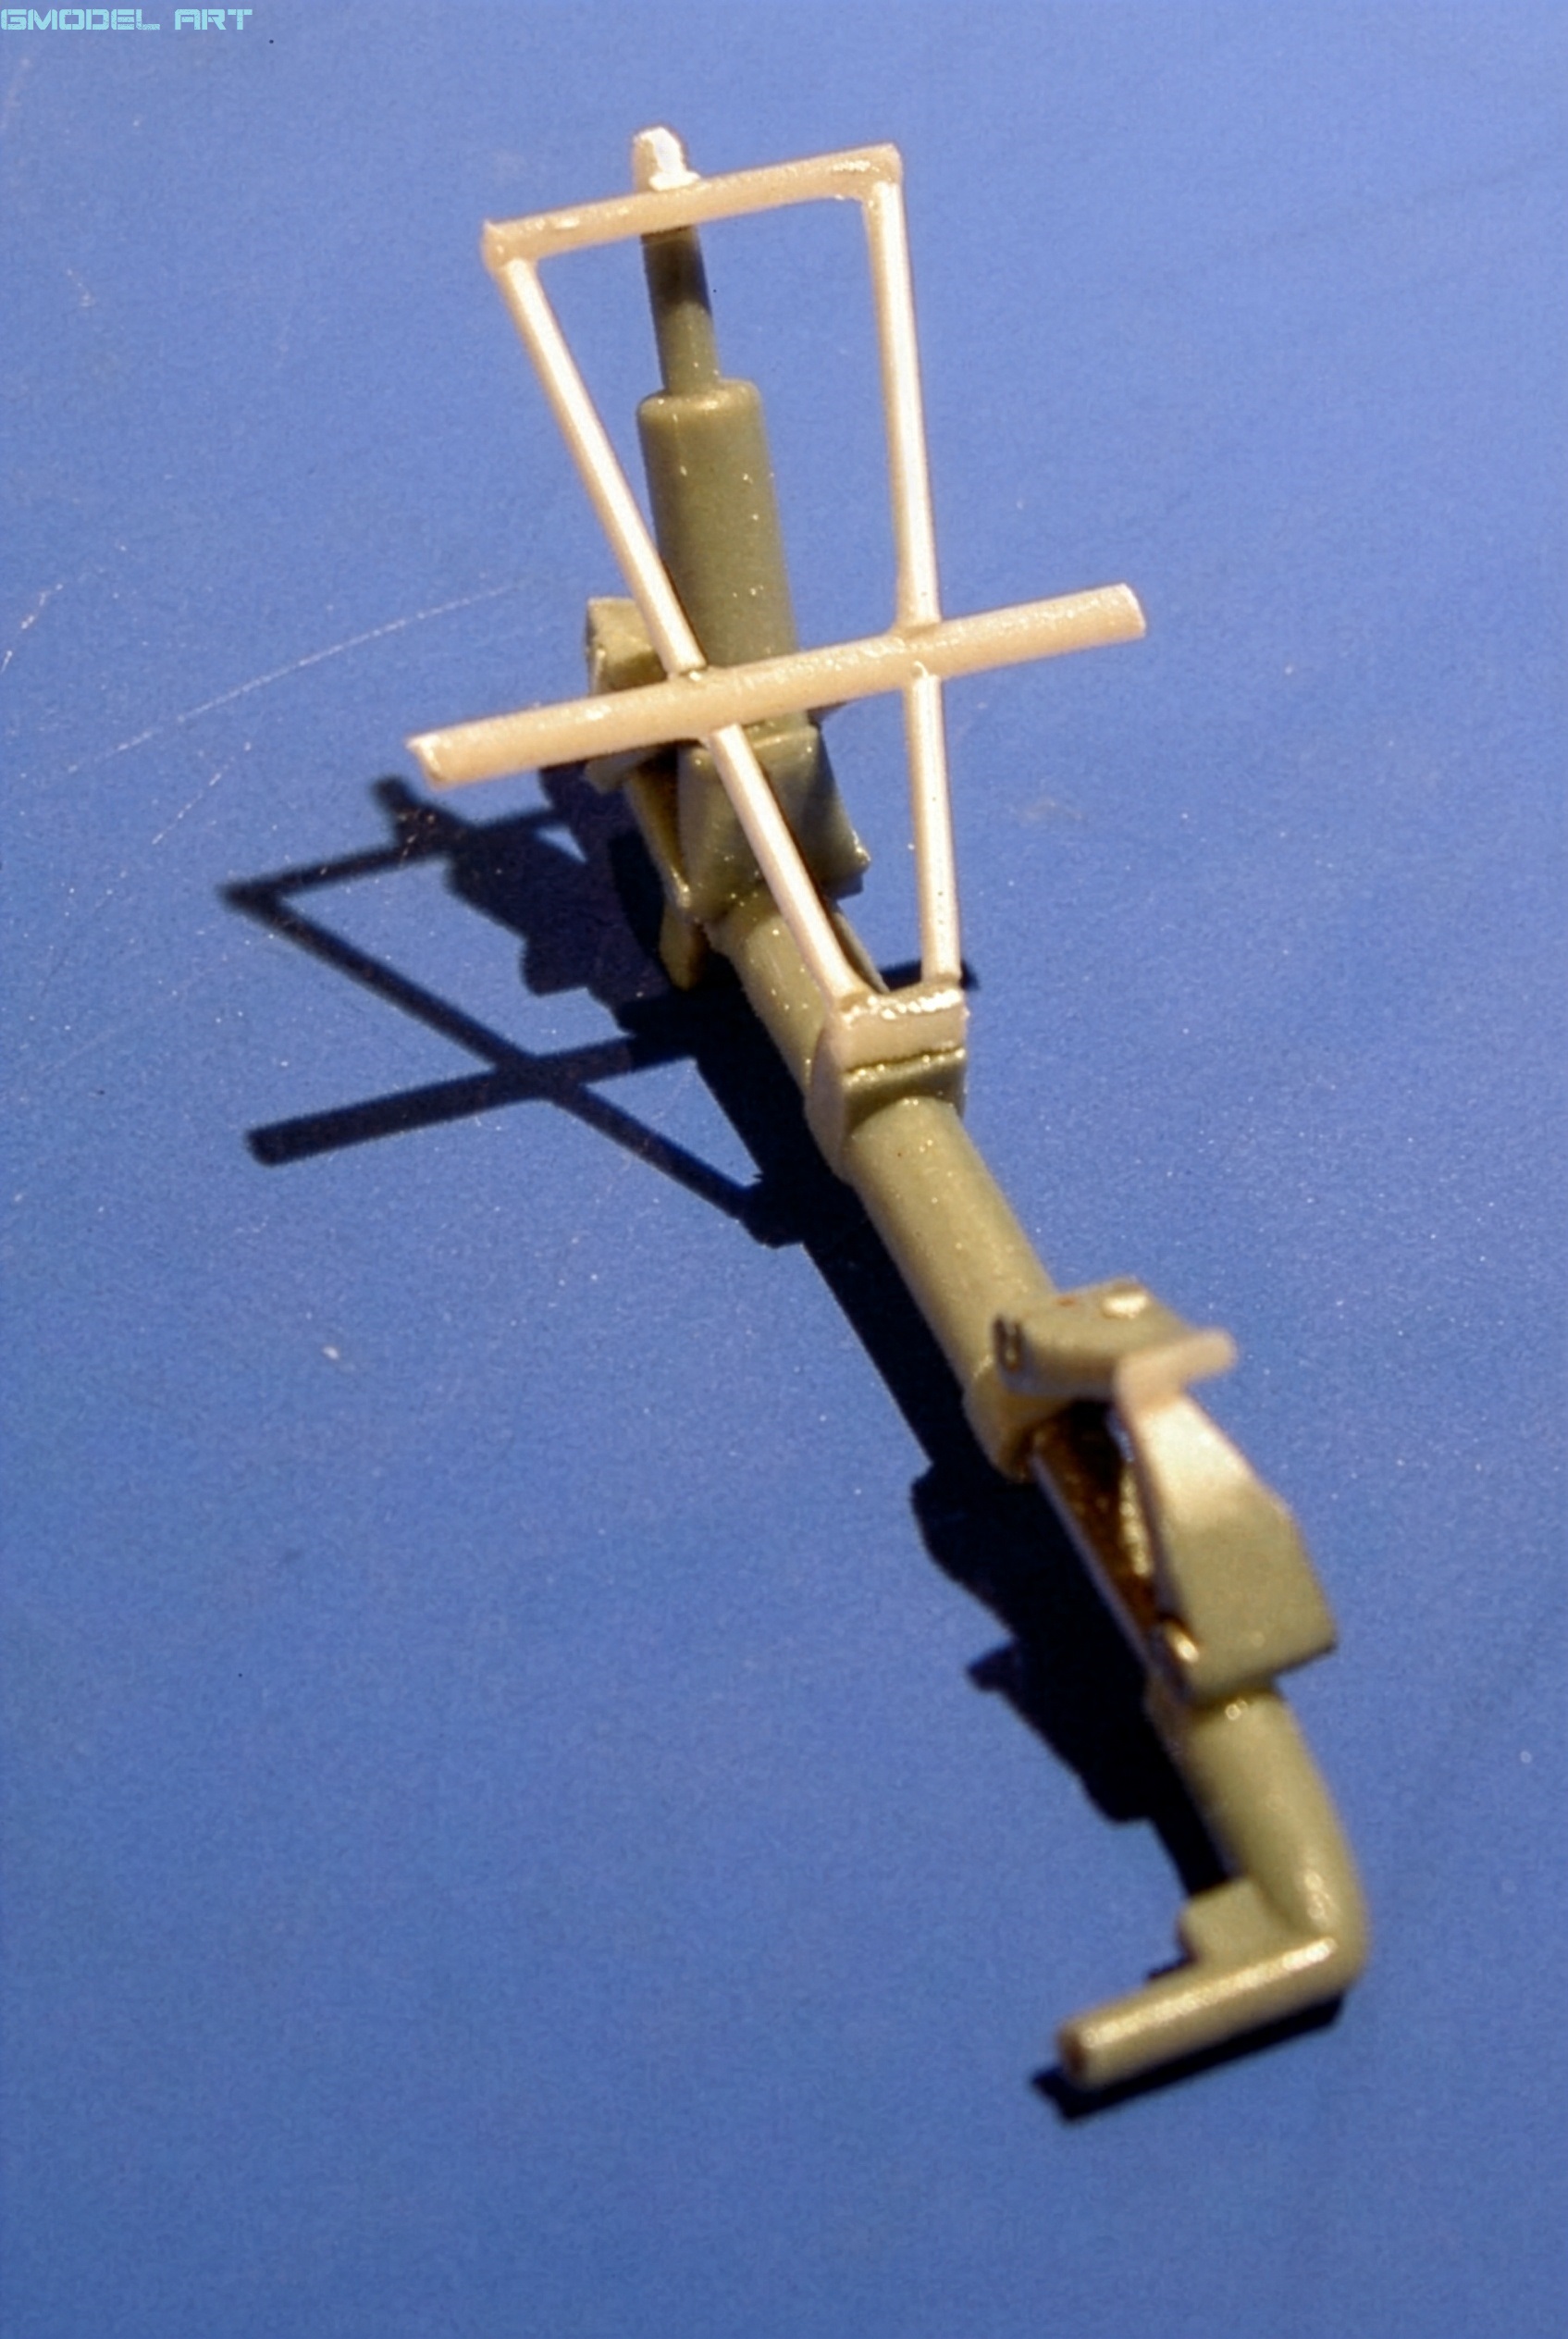
The complete mechanism was reproduced so that it could be installed after painting. The original tail-wheel doors supplied by the kit were retained, but their closing mechanism was further detailed.
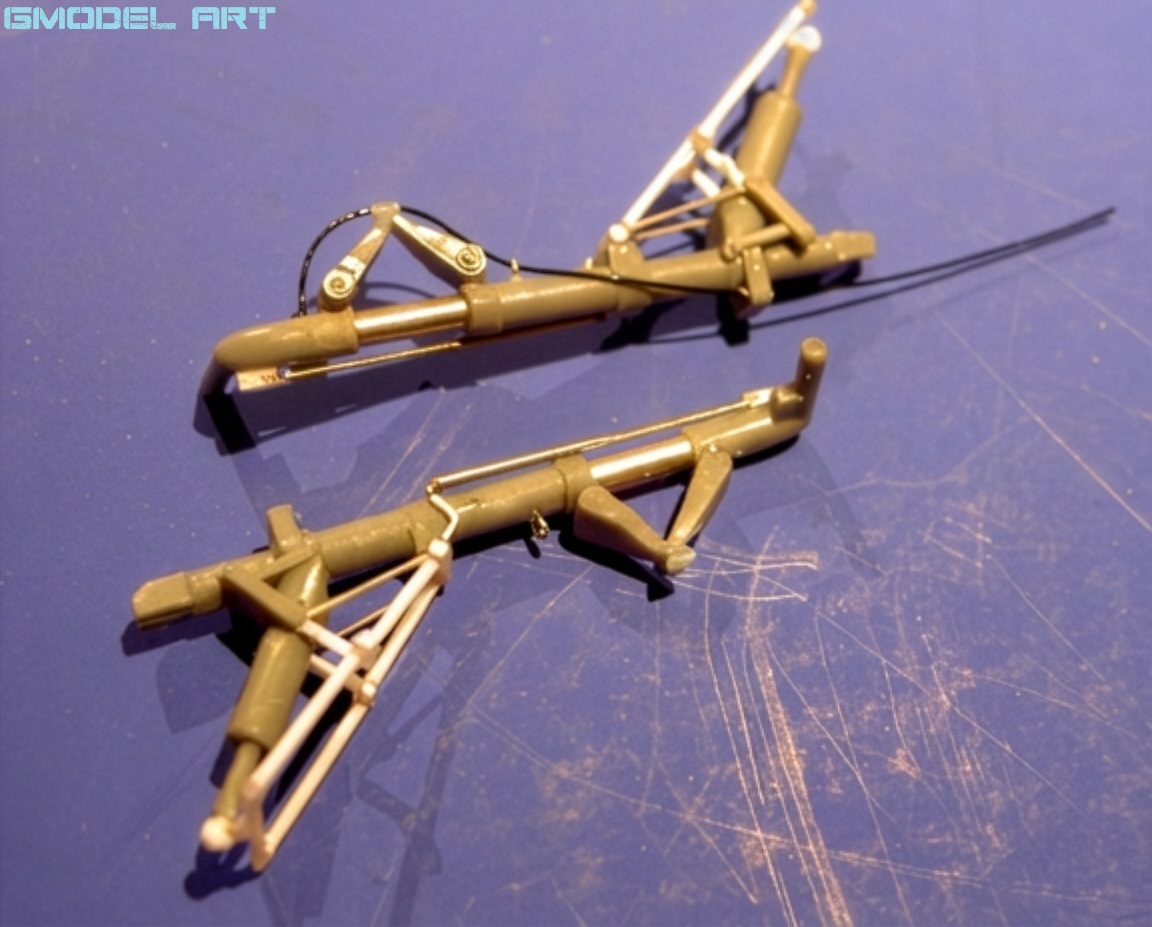
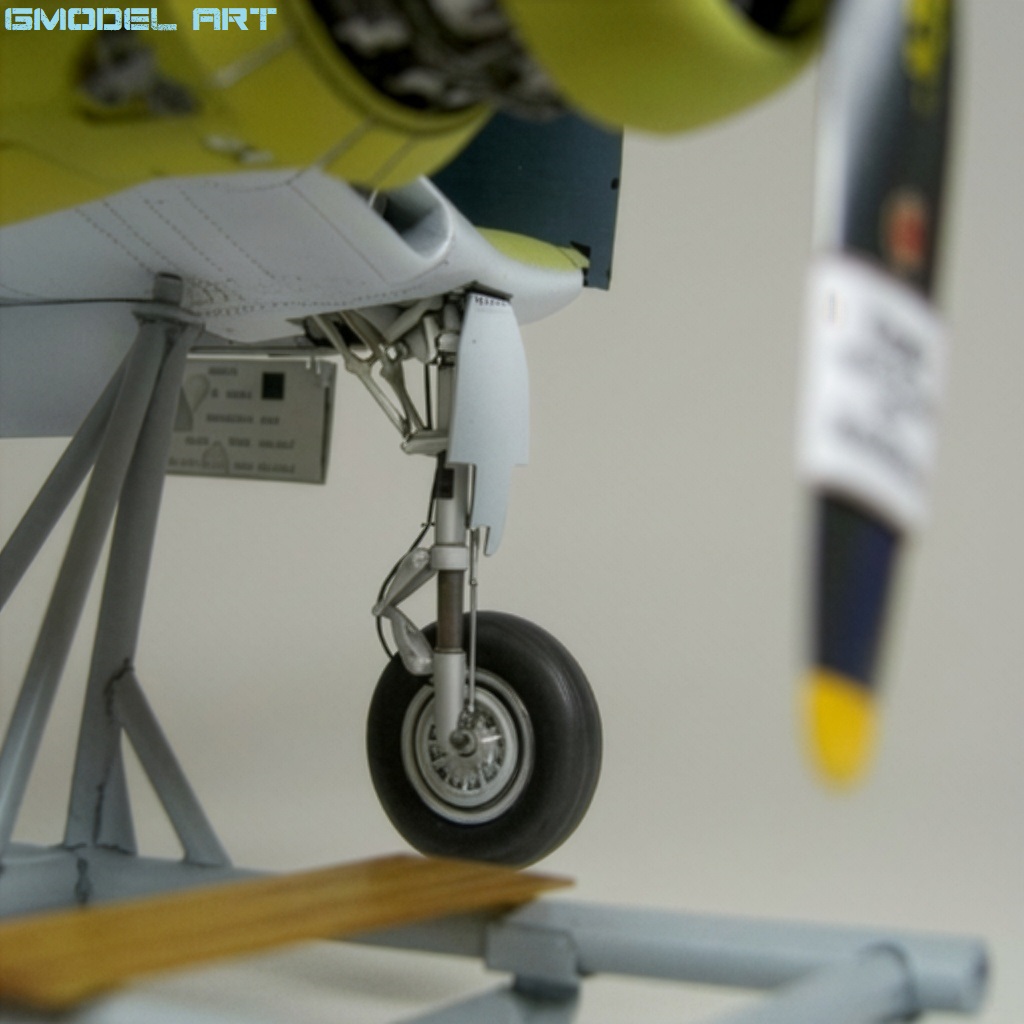
The main landing gear required equally careful attention.
The Tamiya kit represents a loaded landing gear configuration, while this particular model required the landing gear to be presented differently.
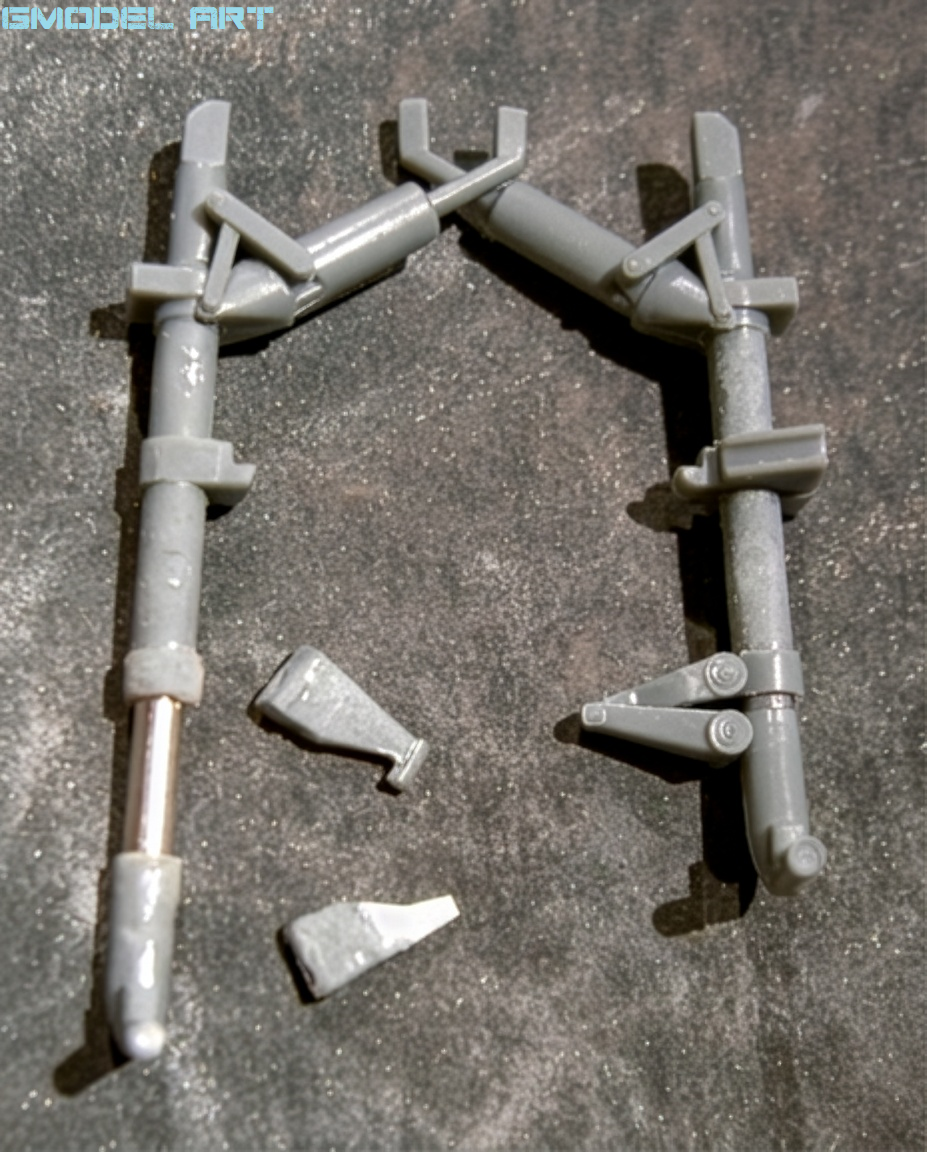
The wing and spring strut were modified, the damper pistons were replaced with metal pins, and the assembly was positioned more openly.
The front mechanism responsible for turning the wheel through approximately 90 degrees was also missing from the kit representation and had to be added.
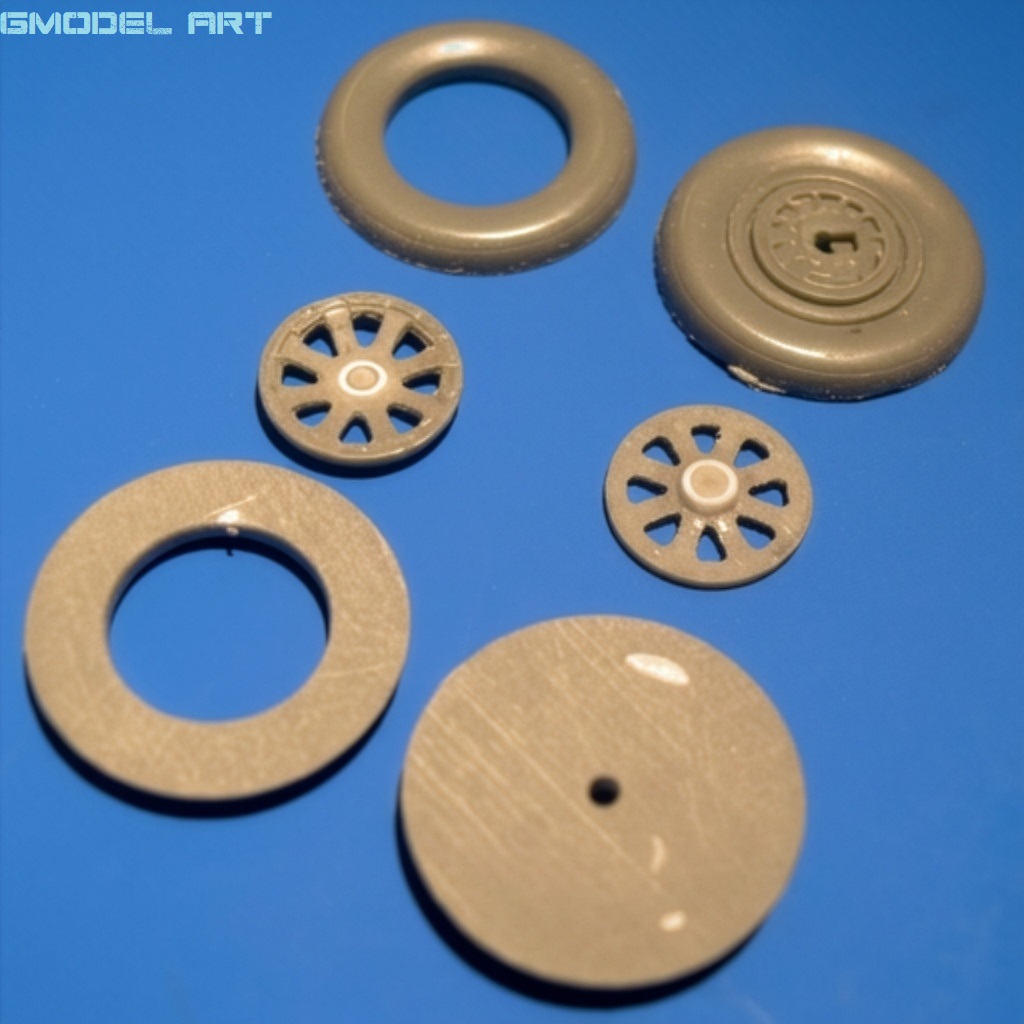
Even the wheels were modified. They were taken apart, sanded thinner and reassembled to achieve a more convincing scale appearance.
Creating Realistic Tire Tread
The tires were painted anthracite and the tread pattern was then highlighted with a dry-brushing technique using light gray.
The result produced a surprisingly convincing representation of the tire surface without relying solely on aftermarket components.
The individual wheel rims were also carefully thinned, removing excess plastic between the spokes and creating a much more delicate appearance.
Rosie the Riveter: Recreating the Rivet Detail
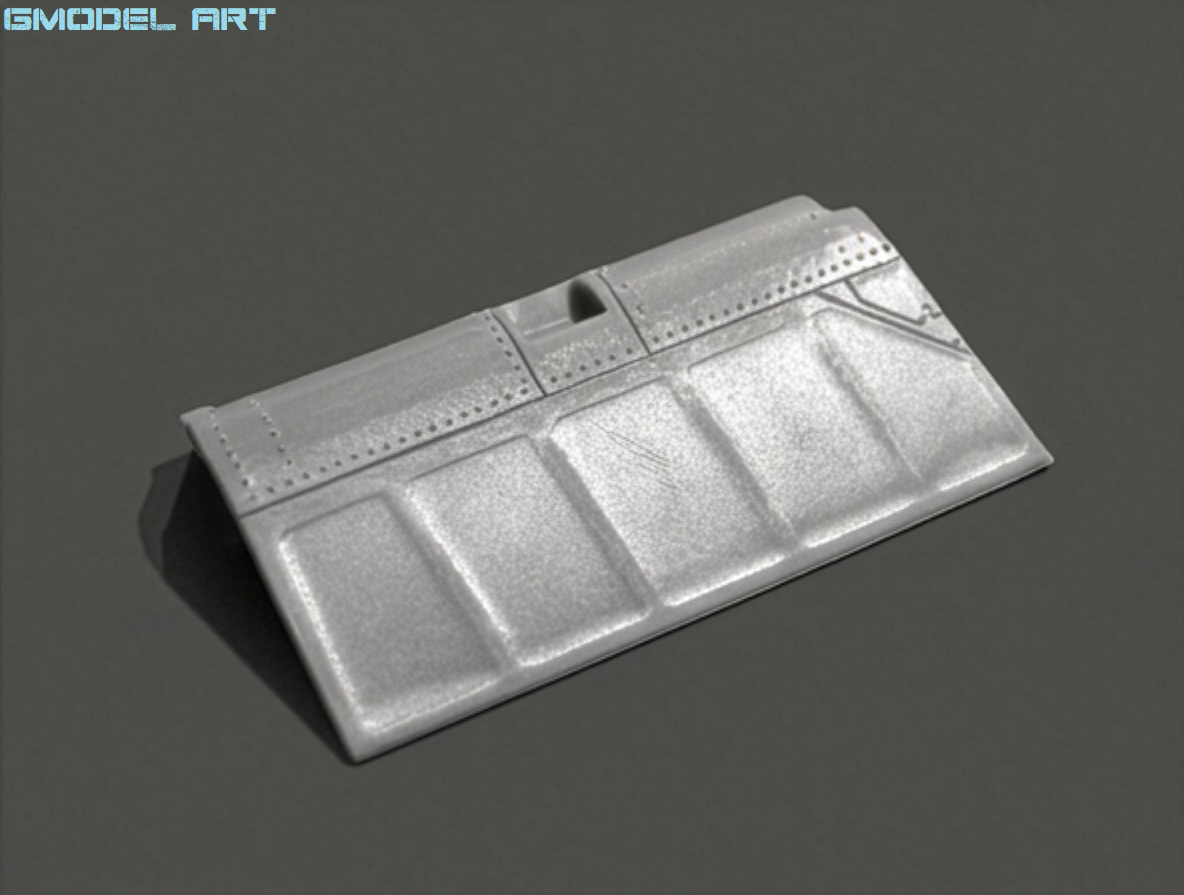
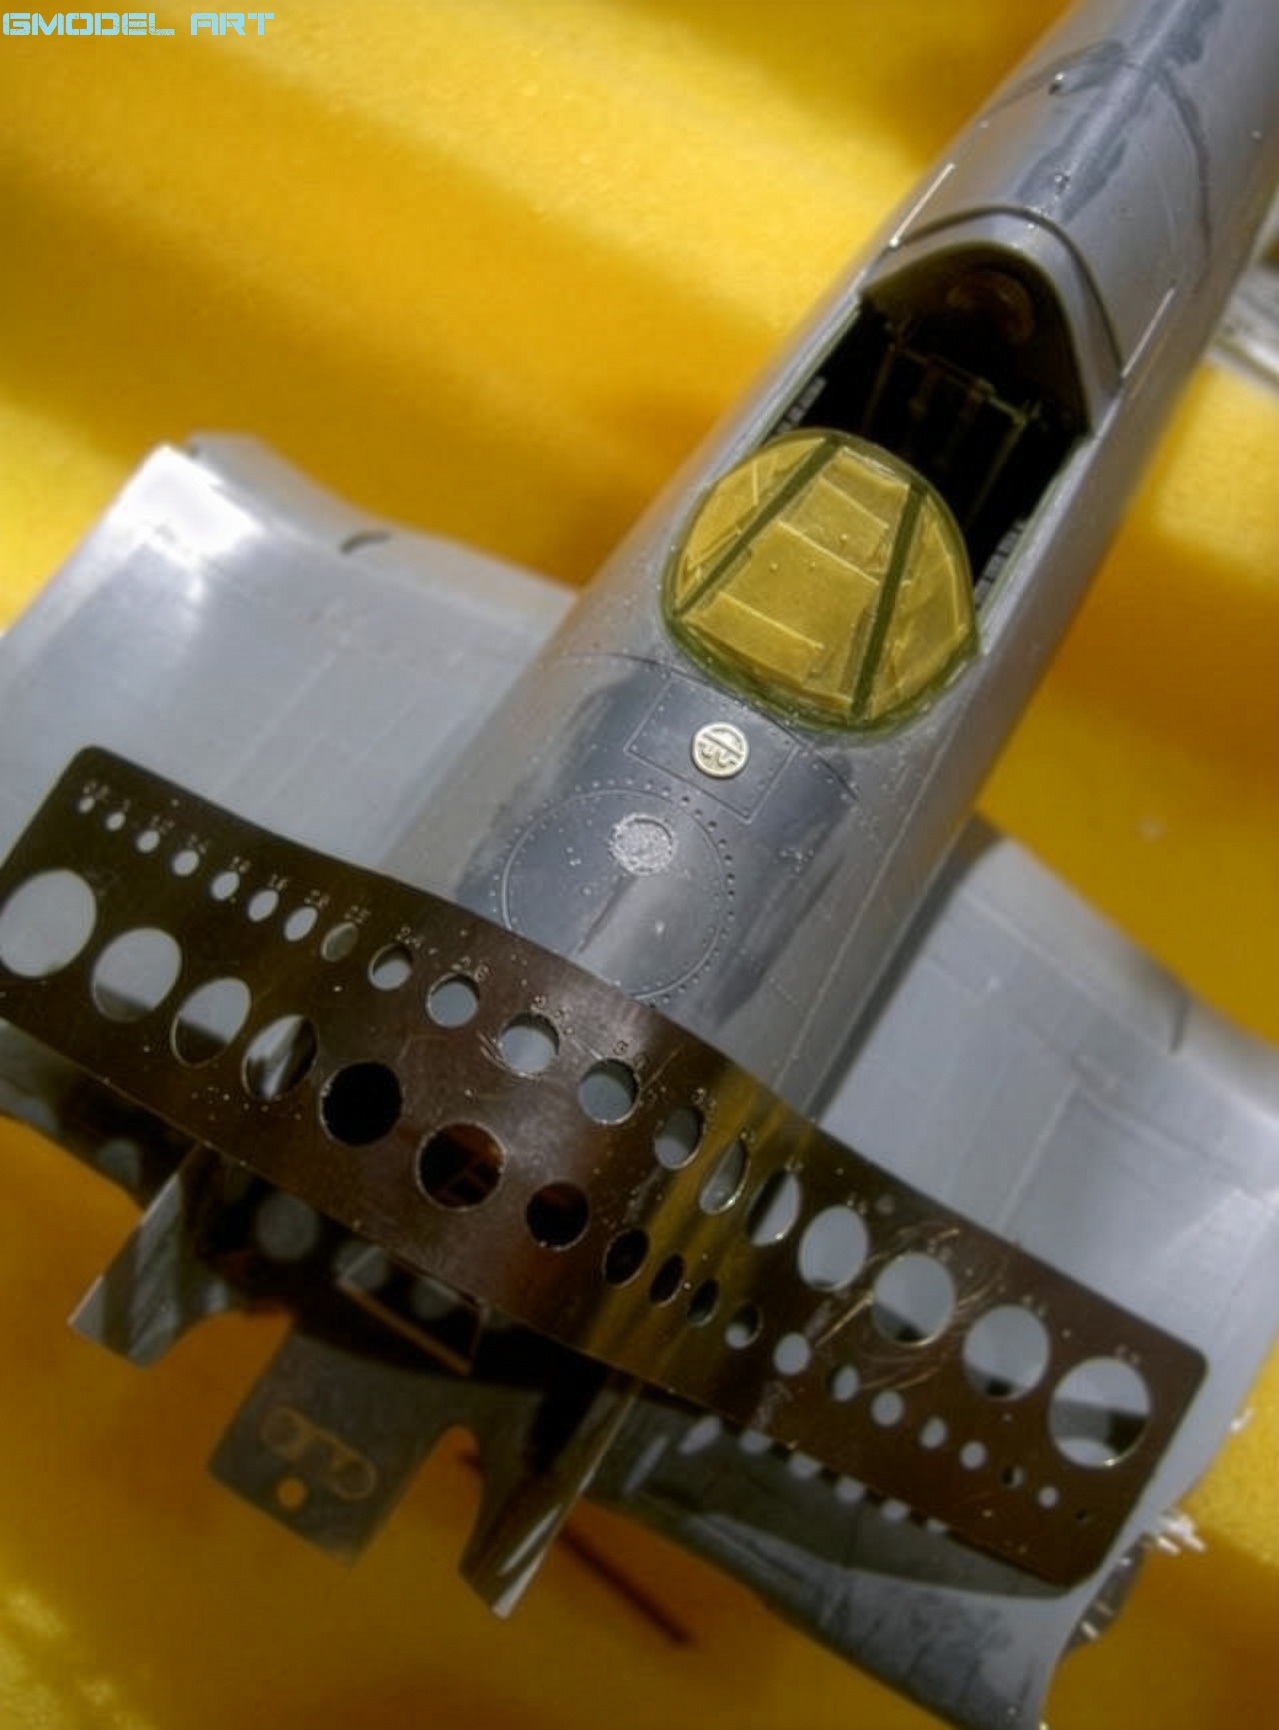
One of the most demanding surface-detailing stages involved the use of the Rosie the Riveter riveting tool.
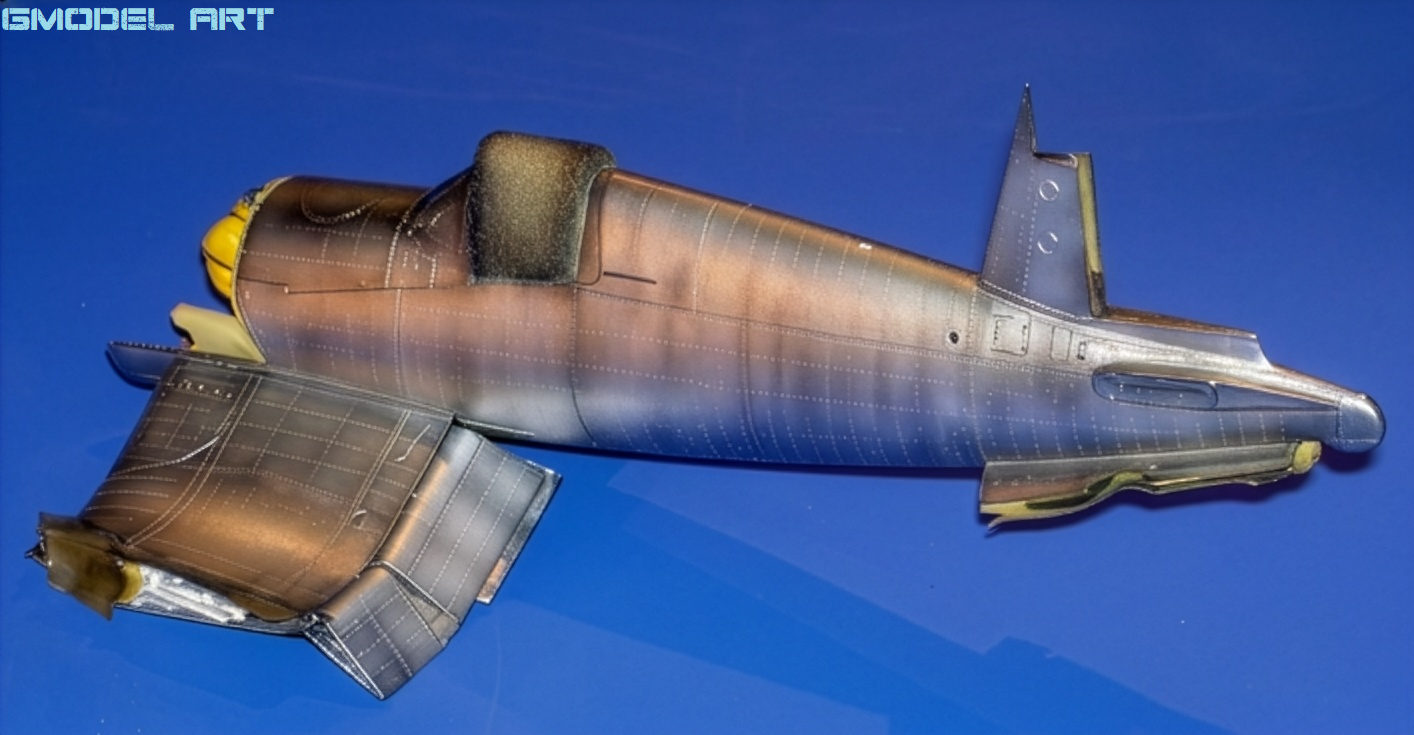
Before joining the fuselage halves, the surface of the aircraft was carefully studied. Using reference photographs, model photographs and careful observation, the modeler marked the rows of rivets with a pencil.
Before working on the actual model, the tool was tested on discarded plastic parts until the correct pressure and technique had been mastered.
The rivets were then added along the marked lines using light and controlled pressure. The work was extremely time-consuming and required considerable concentration, particularly in areas where the plastic was very thin or contained joints that could easily crack under excessive pressure.
The modeler also considered reproducing the characteristic stressed-skin effect seen on some aircraft. However, the original surface was relatively smooth due to the welding process used, so an exaggerated stressed-skin effect was avoided.
After the riveting work was completed, the fuselage could finally be assembled and the interior details completed.
Supporting the Folded Wings
One of the most important engineering challenges was finding a reliable way to support the folded wings.
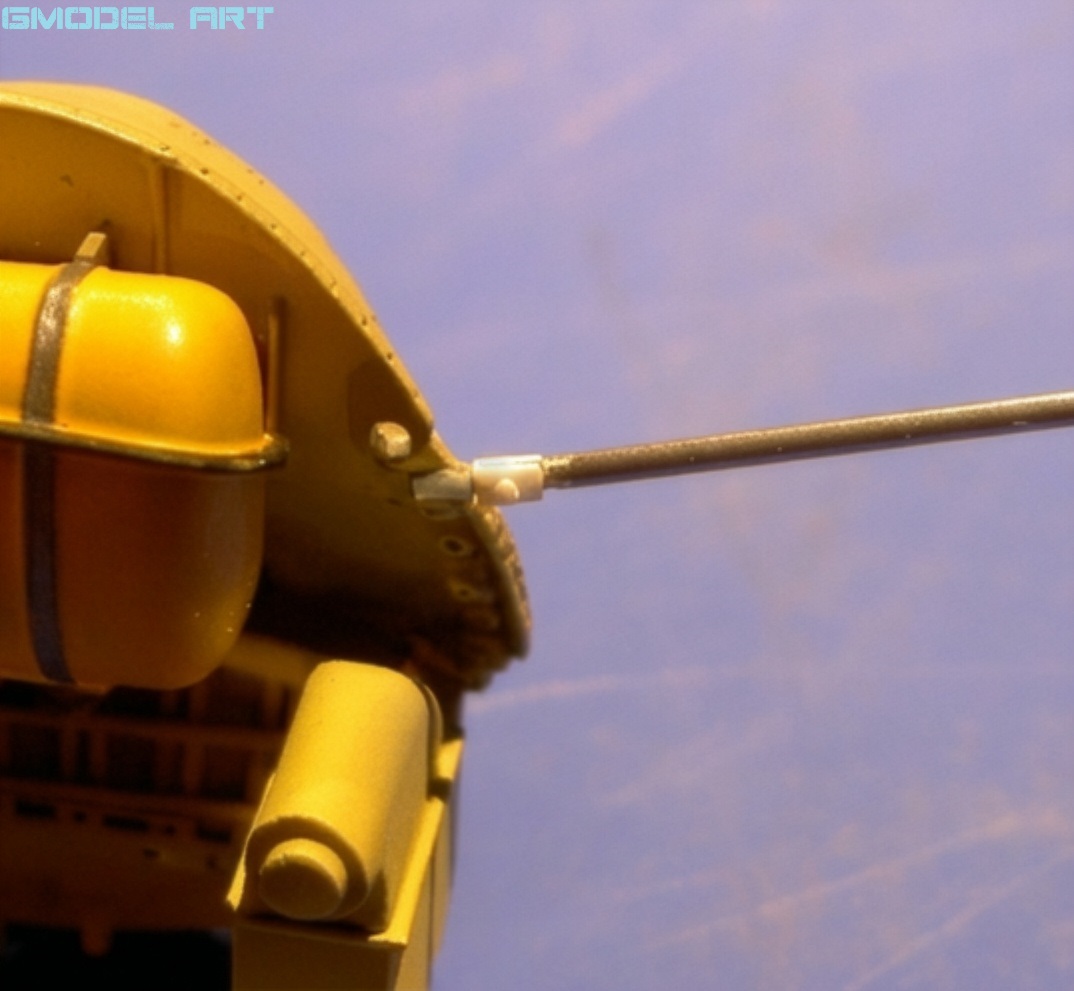
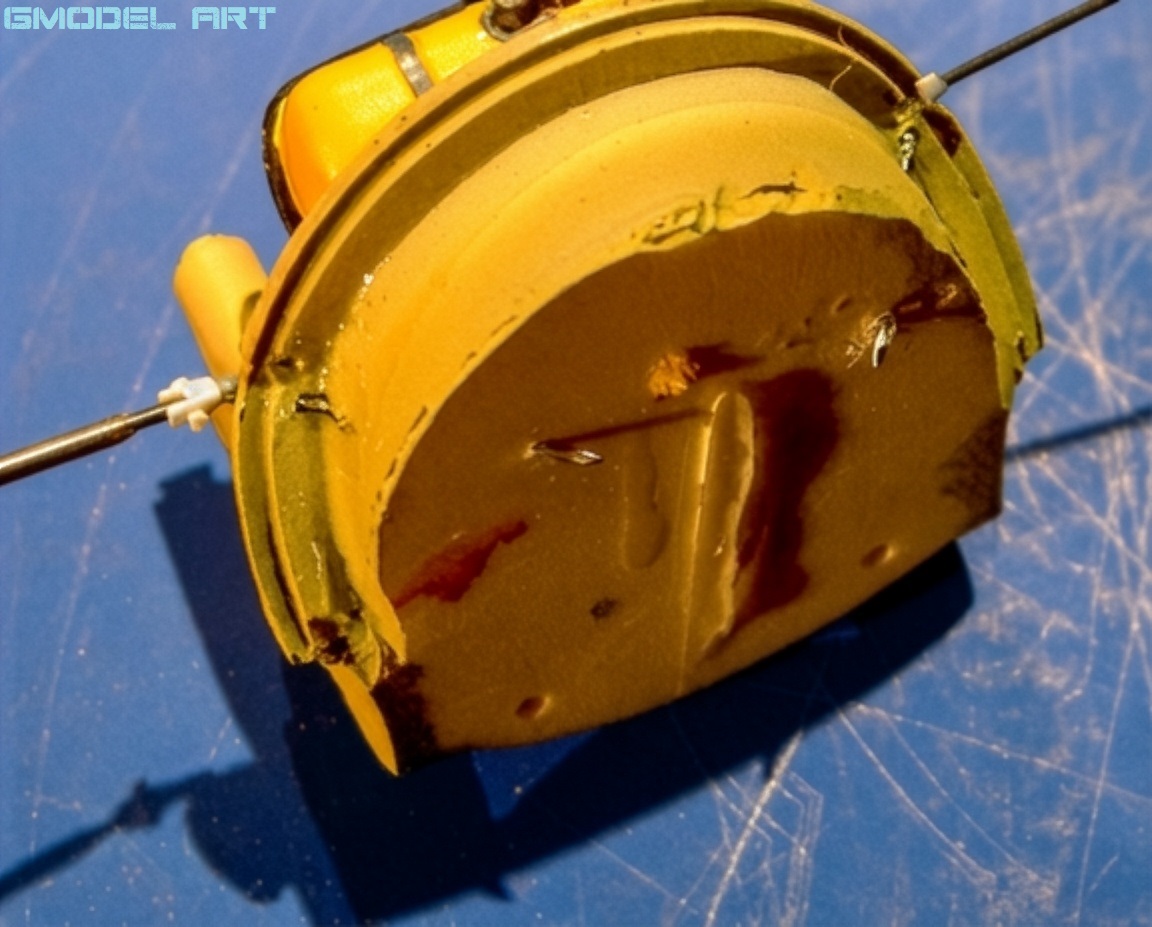
The solution involved constructing a functional support system using 0.5 mm steel wire.
Diagonal holes were drilled into the appropriate resin components and the steel wires were inserted and secured with epoxy glue. The bars were then bent to the correct angle and detailed according to both the kit components and the original aircraft.
The result was more than a decorative representation.
The finished structure actually supports the folded wing, providing the necessary strength and stability for the final display.
Canopy and Transparent Parts
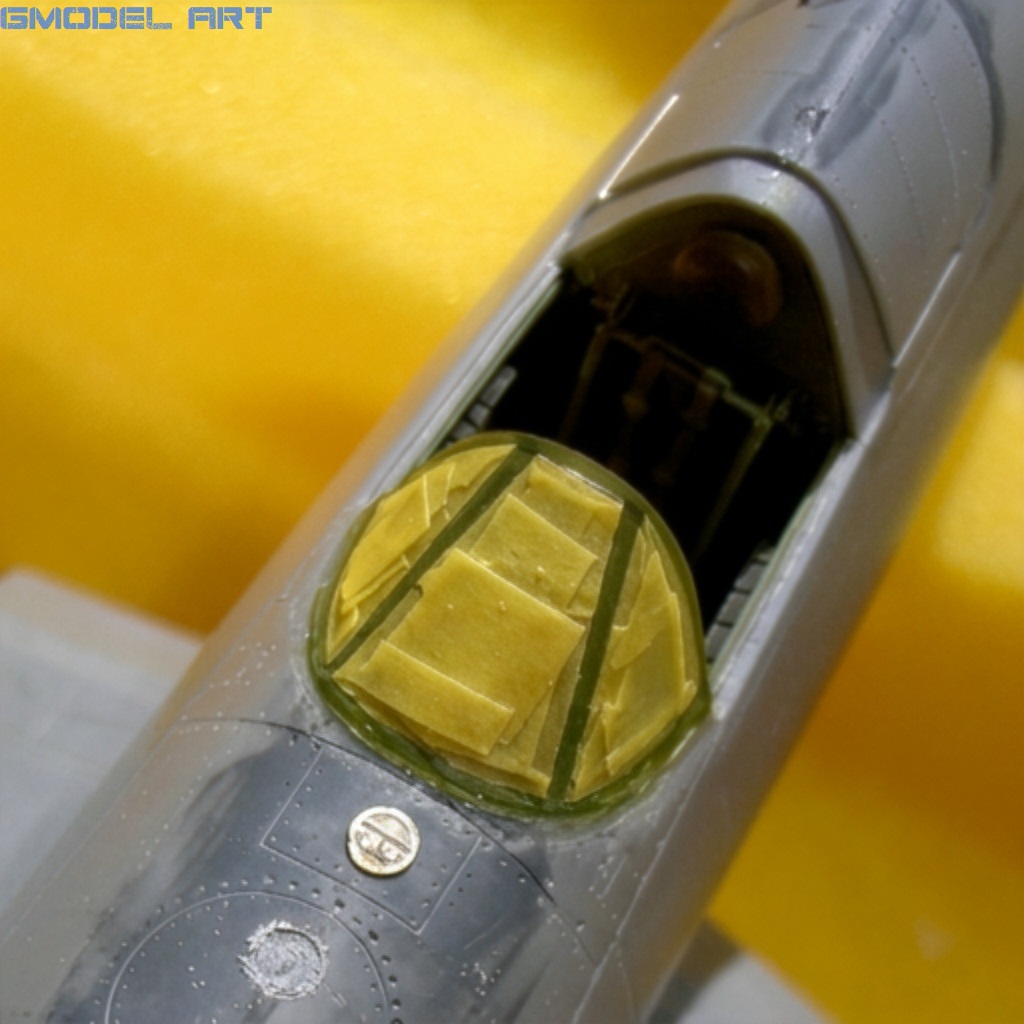
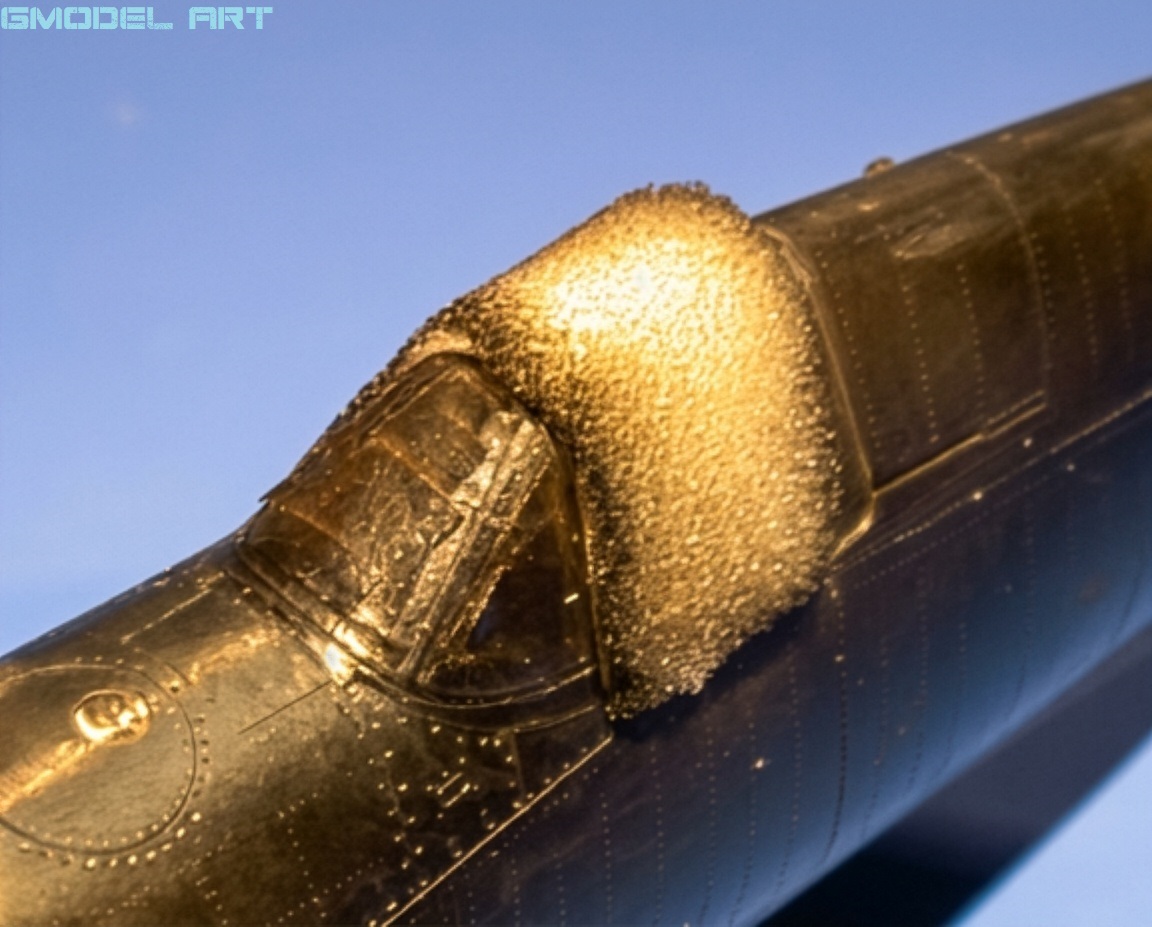
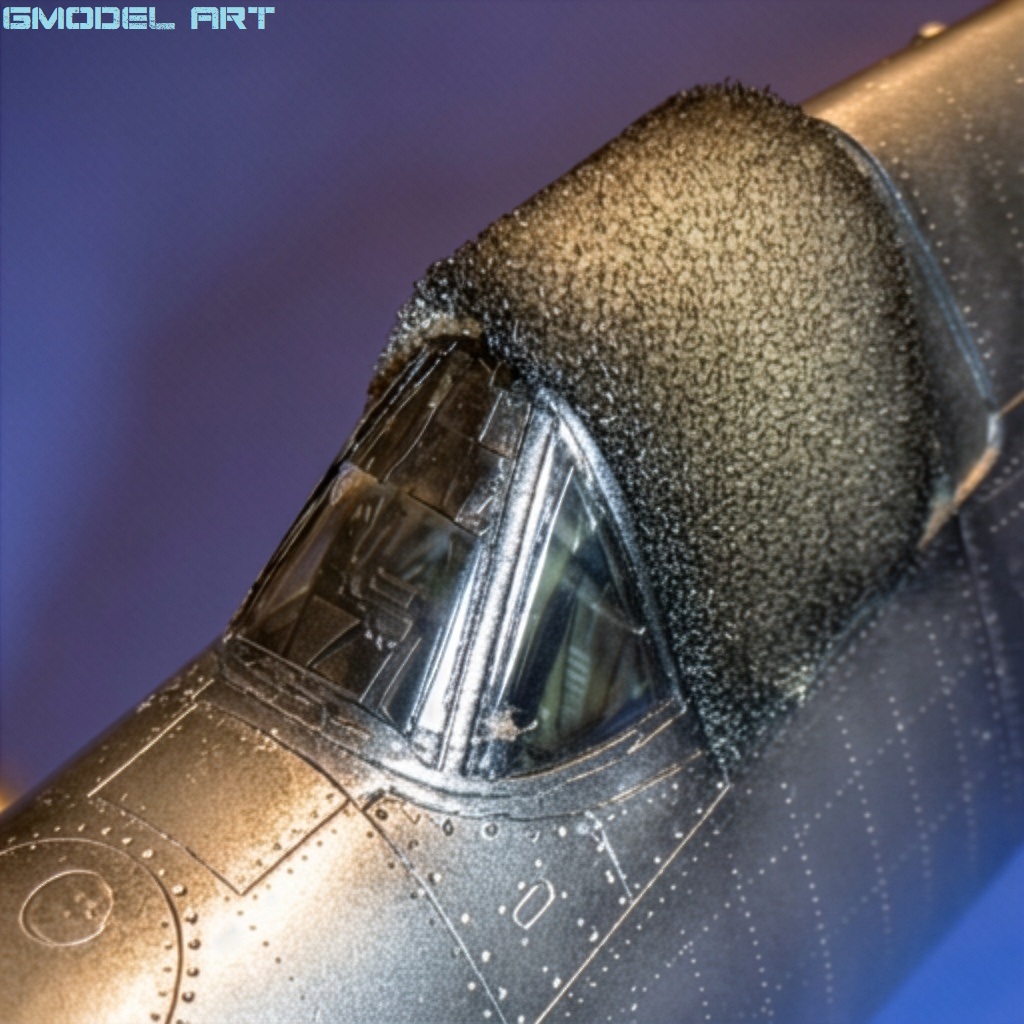
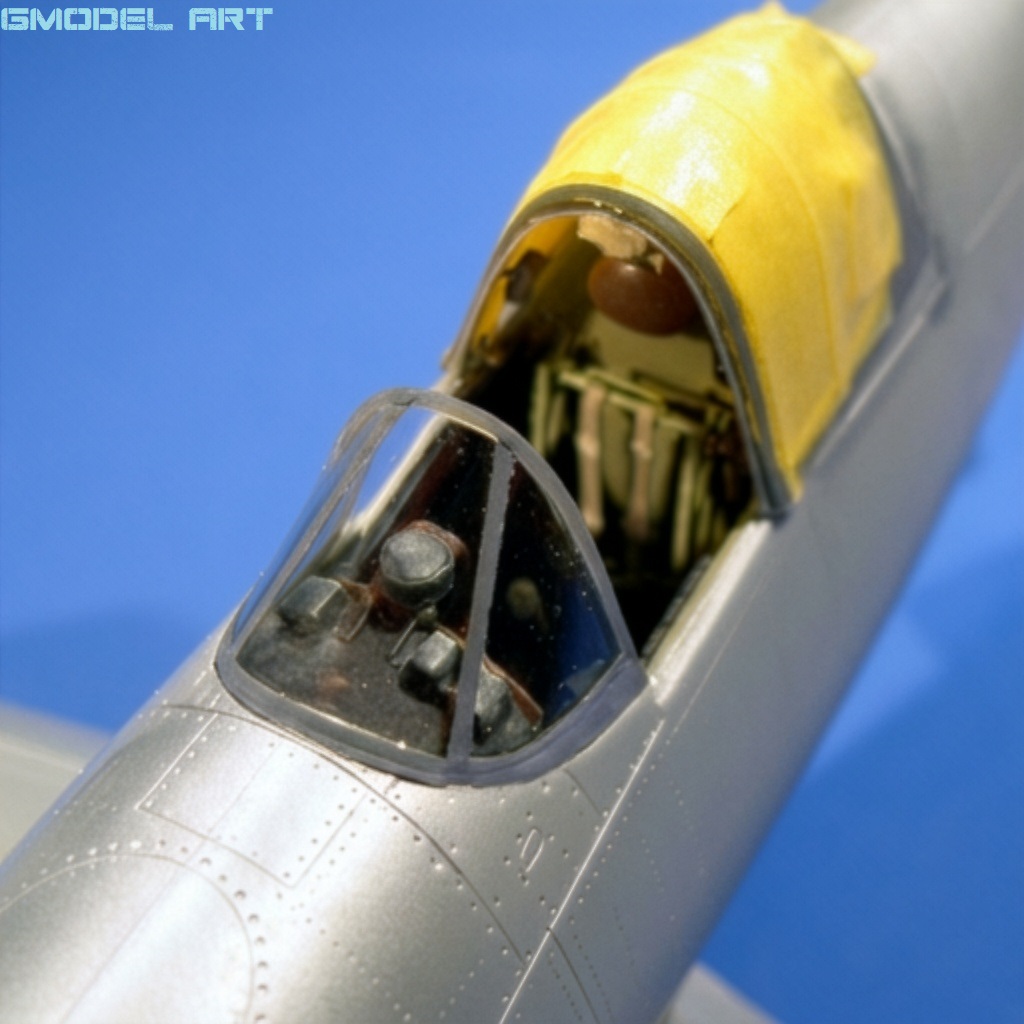
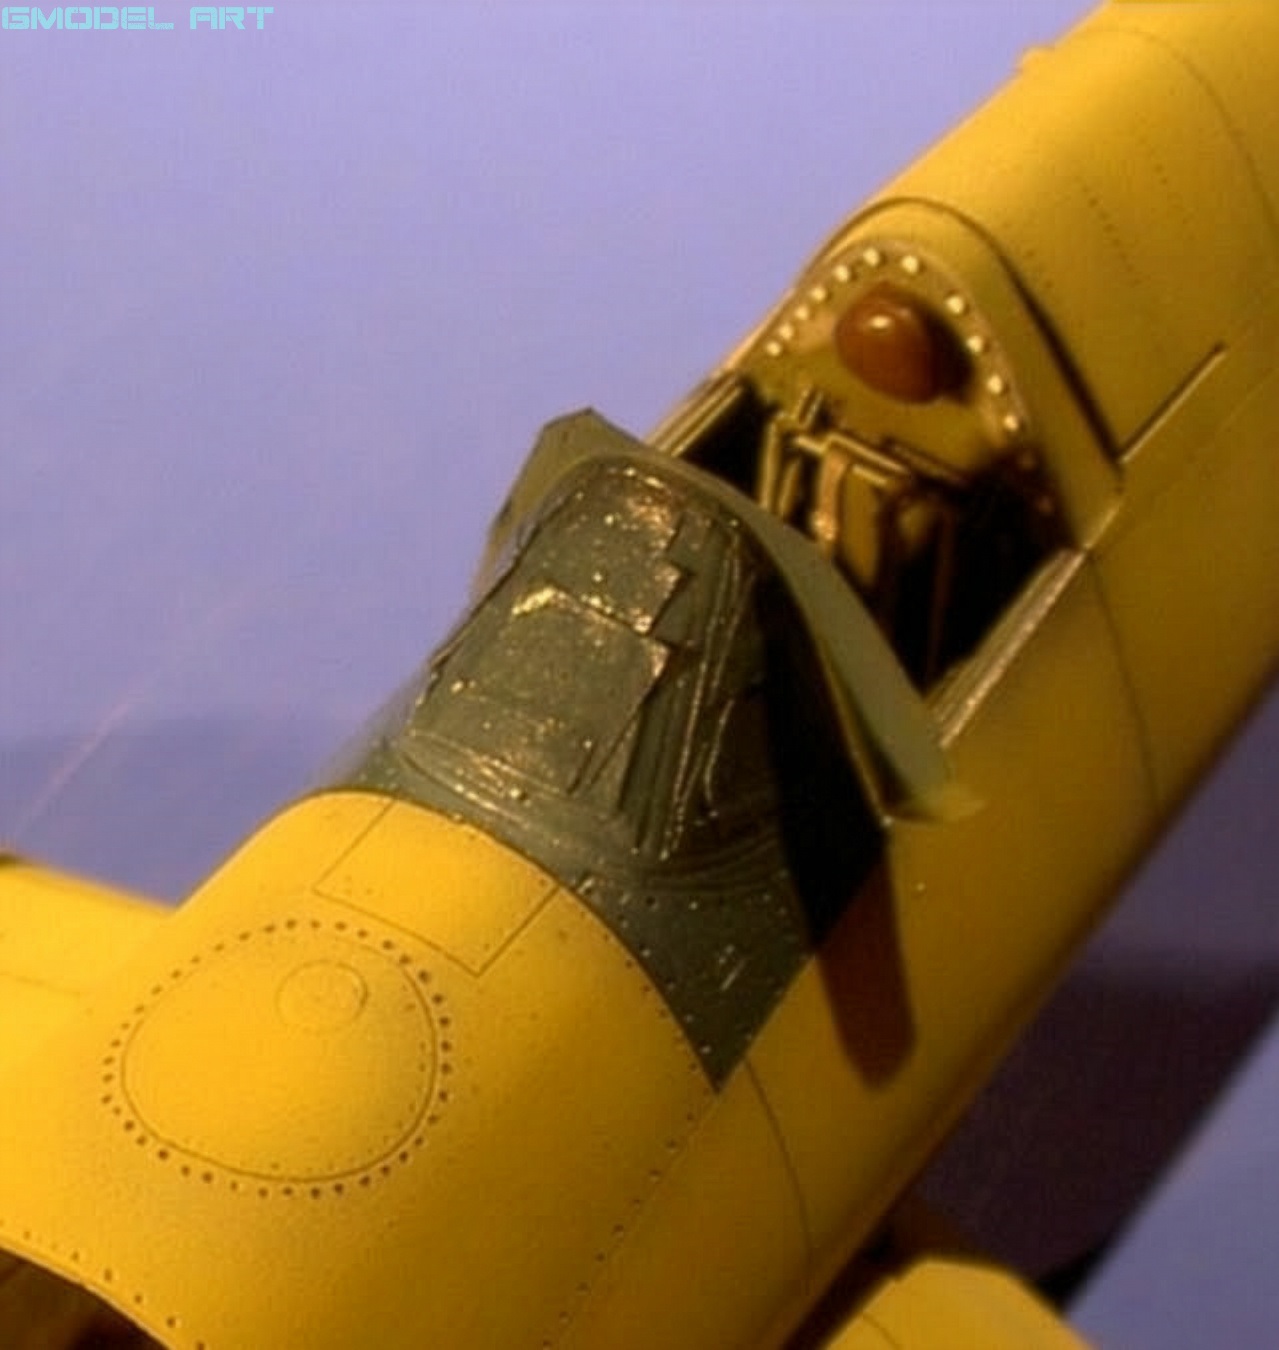
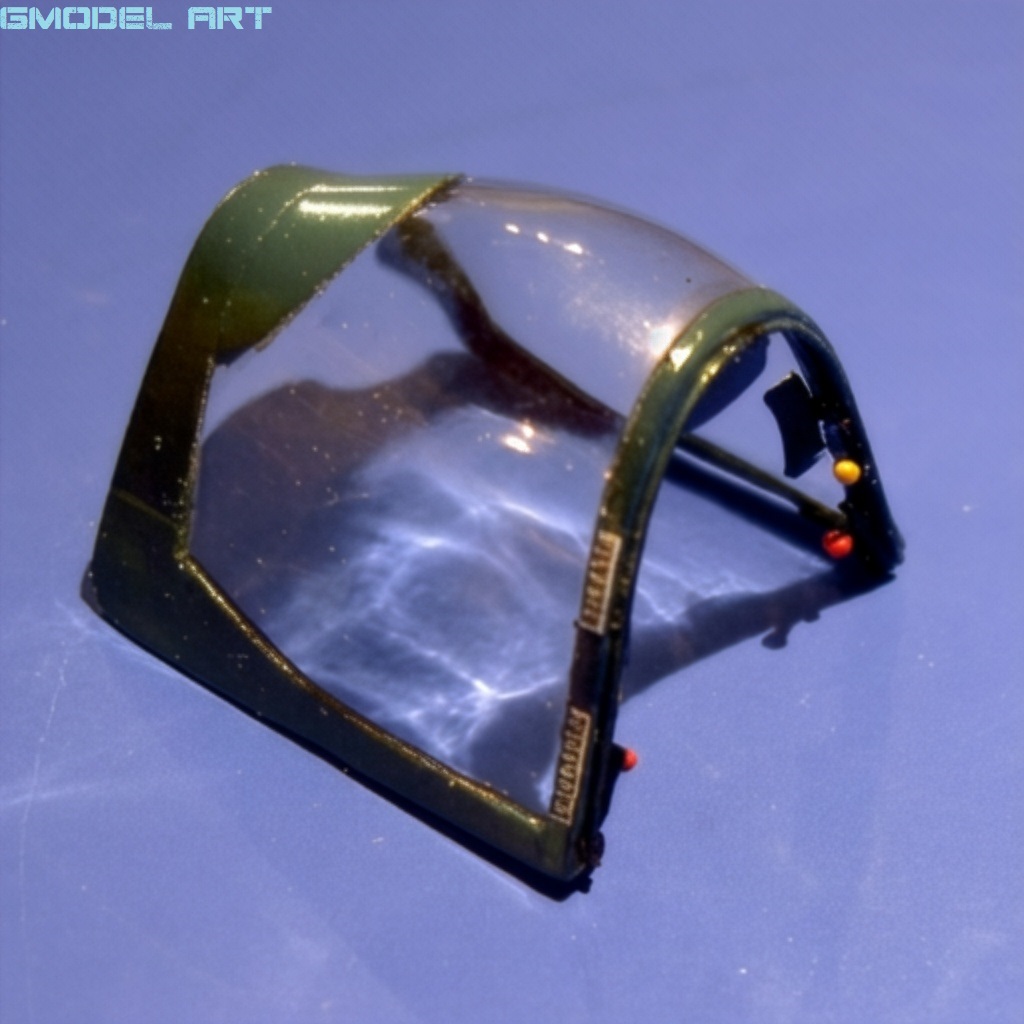
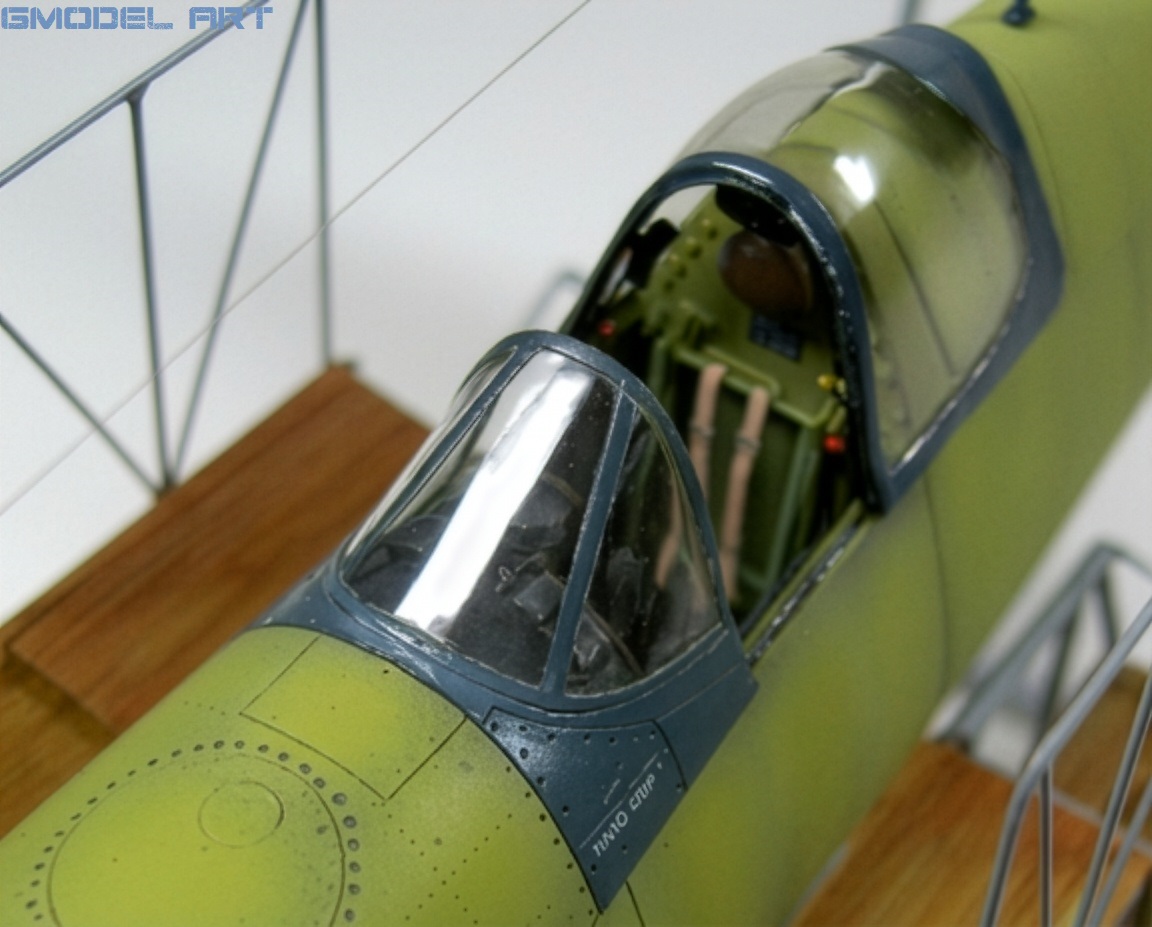
The transparent cockpit canopy received the same level of attention as the rest of the aircraft.
The window frames were initially painted freehand in the cockpit interior color. The windshield was then carefully fixed in position.
Tamiya tape was used to mask the appropriate areas before the assembly was secured with additional adhesive.
After sanding, the panel lines were carefully restored.
The sliding canopy was further detailed with the locking levers and three rear-view mirrors. Chrome sheet was used on the inside of the mirrors to reproduce their reflective surfaces.
Even the grooves along which the canopy moved were carefully reproduced, adding another layer of realism to the cockpit area.
Painting the F4U-1A Corsair
Painting was one of the most demanding stages of the entire project.
After studying the available reference material, the modeler concluded that the aircraft, including its major assemblies and fuselage, should be represented with an unfinished factory appearance.
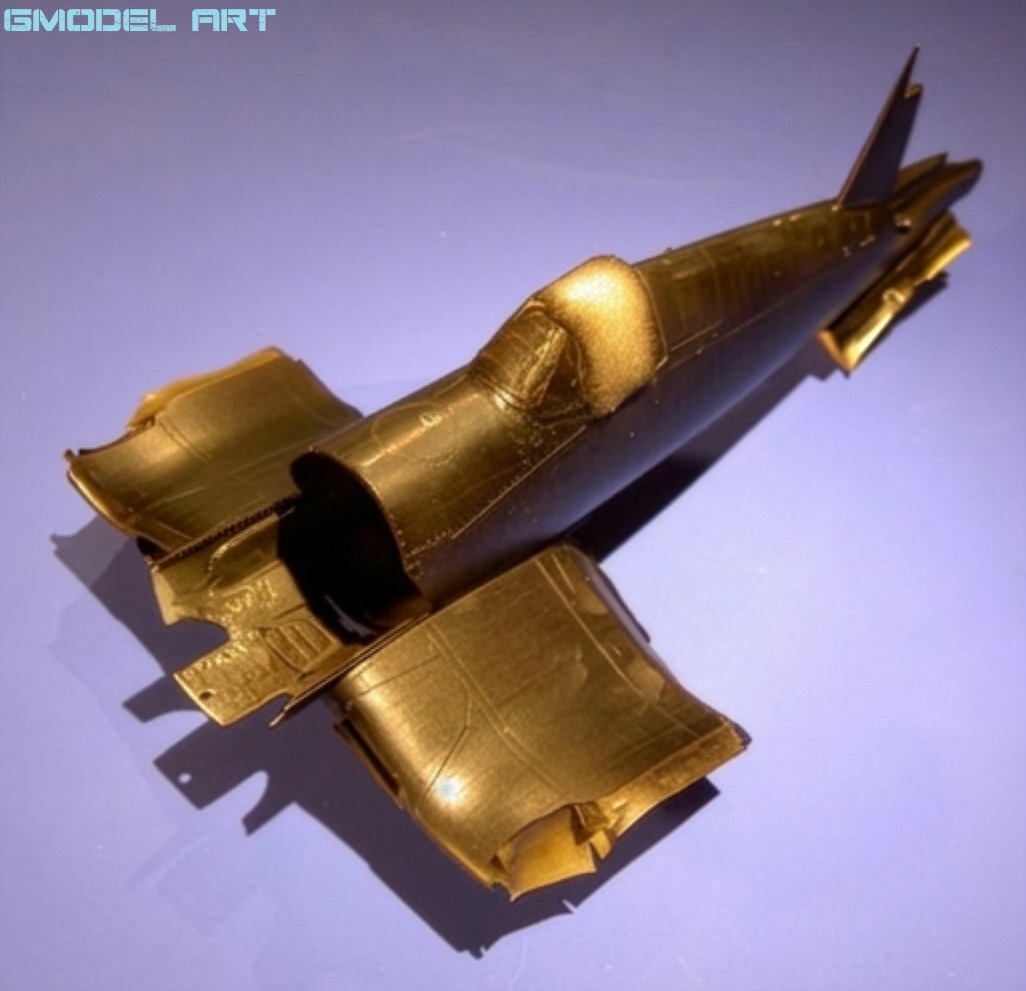
To create a subtle underlying effect, the entire surface was first primed in gloss black, followed by a thin layer of Alclad White Aluminum.
The metallic finish and subsequent paint layers were applied panel by panel, creating subtle tonal differences across the airframe.
The intention was not to create a heavily weathered aircraft, but rather a newly manufactured machine with the subtle variations that can be seen across different painted surfaces.
Zinc chromate yellow was then applied over surfaces of different underlying colors. This naturally produced several slightly different yellow tones across the airframe.
The result avoided the flat, uniform appearance that can occur when a single color is applied over an entire surface.
Factory-Fresh Paint and Markings
The outer wing sections, the control surfaces of the horizontal and vertical stabilizers, and the canopy were represented as components that had already received their initial coating.
The fabric surfaces were painted gray, while subtle variations were introduced across the different panels.
On the upper wing surfaces, light shading was used to create depth, followed by subtle tonal variations across the individual panels.
For the lower surfaces, wing tips and central sections, light gray semi-gloss was used as the starting point, followed by brighter white to create additional depth.
The Glossy Sea Blue was toned down with semi-gloss white to reduce its reflective appearance. The Intermediate Blue was also kept smooth enough to provide a suitable surface for the decals.
The overall effect was deliberately restrained.
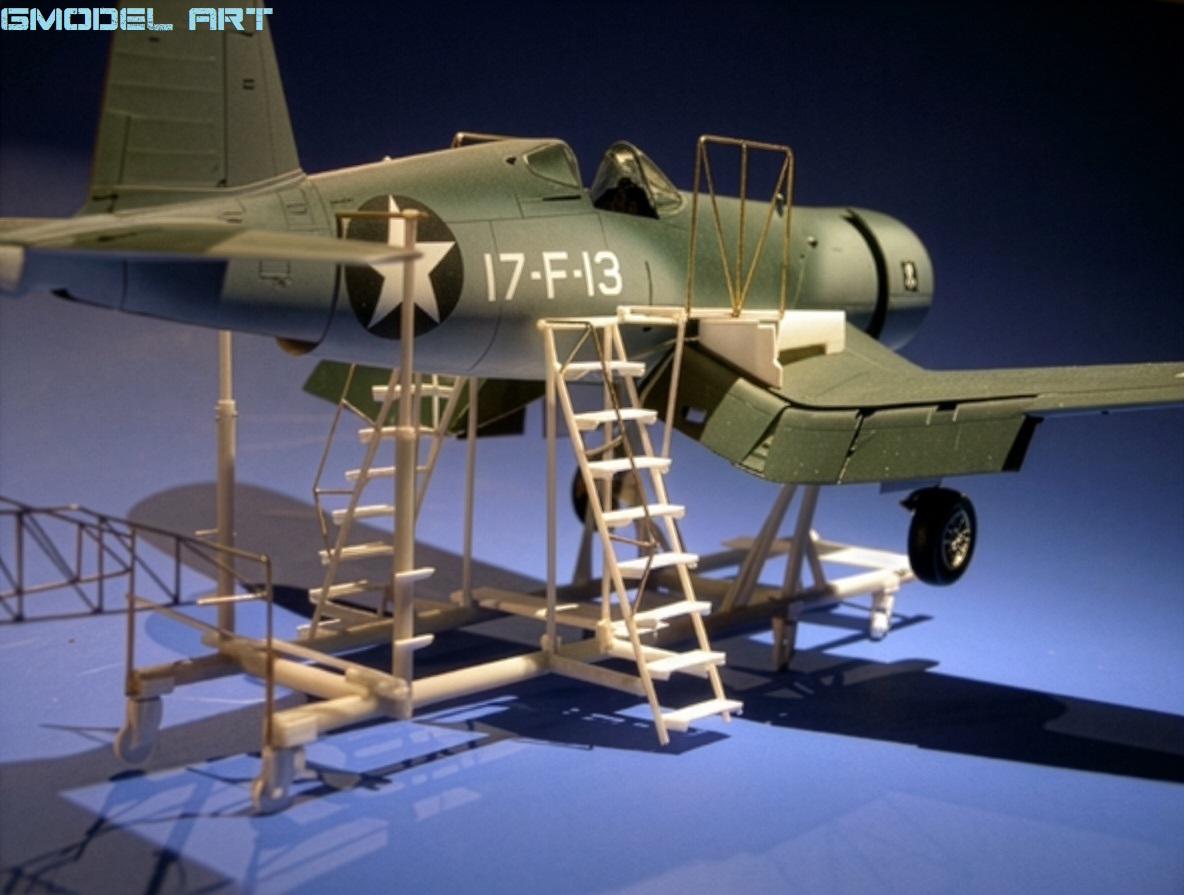
Instead of depicting a battle-worn F4U-1A Corsair, the model presents an aircraft that is fresh from the factory and still part of the manufacturing process.
Final Assembly
The final assembly involved positioning the control surfaces at different angles, installing the landing gear components and completing the various mechanical details.
The brake lines were replaced with finer material, while the cannons and gun and ammunition bay doors were installed.
The folded wing sections could finally be positioned vertically and secured using the specially engineered support mechanism.
The canopy was not simply placed onto the fuselage. Both the front and rear sections were carefully attached to the guide rails using tiny fixing points, producing a much more realistic representation.
The engine compartment received additional wiring in different colors, and various maintenance panels were added wherever they were considered necessary.
Finally, one propeller blade received a small but memorable warning:
“Don’t rotate…”
A fitting finishing touch for a model that is presented as an aircraft still undergoing assembly.
F4u-1 “Birdcage” Corsair: Factory production line and conversions
A Different Kind of F4U-1A Corsair Model
Hubert Ortinger’s project demonstrates how a familiar scale-model kit can become much more than another static aircraft model.
The Tamiya F4U-1A Corsair 1/48 scale kit became the foundation for a highly detailed scene focused not only on the aircraft itself, but also on the manufacturing process surrounding it.
The folded wings, scratch-built support structure, factory assembly jig, rivet detailing, cockpit, engine and carefully controlled paintwork all contribute to a convincing representation of an aircraft still being assembled.
The most interesting aspect of this project is that it does not simply attempt to show a beautiful F4U-1A Corsair.
It tells a story.
It captures the moment when the aircraft is still being built, inspected and assembled on the factory floor.
And that is what transforms this highly detailed scale model from a static display piece into a genuine piece of modeling storytelling.