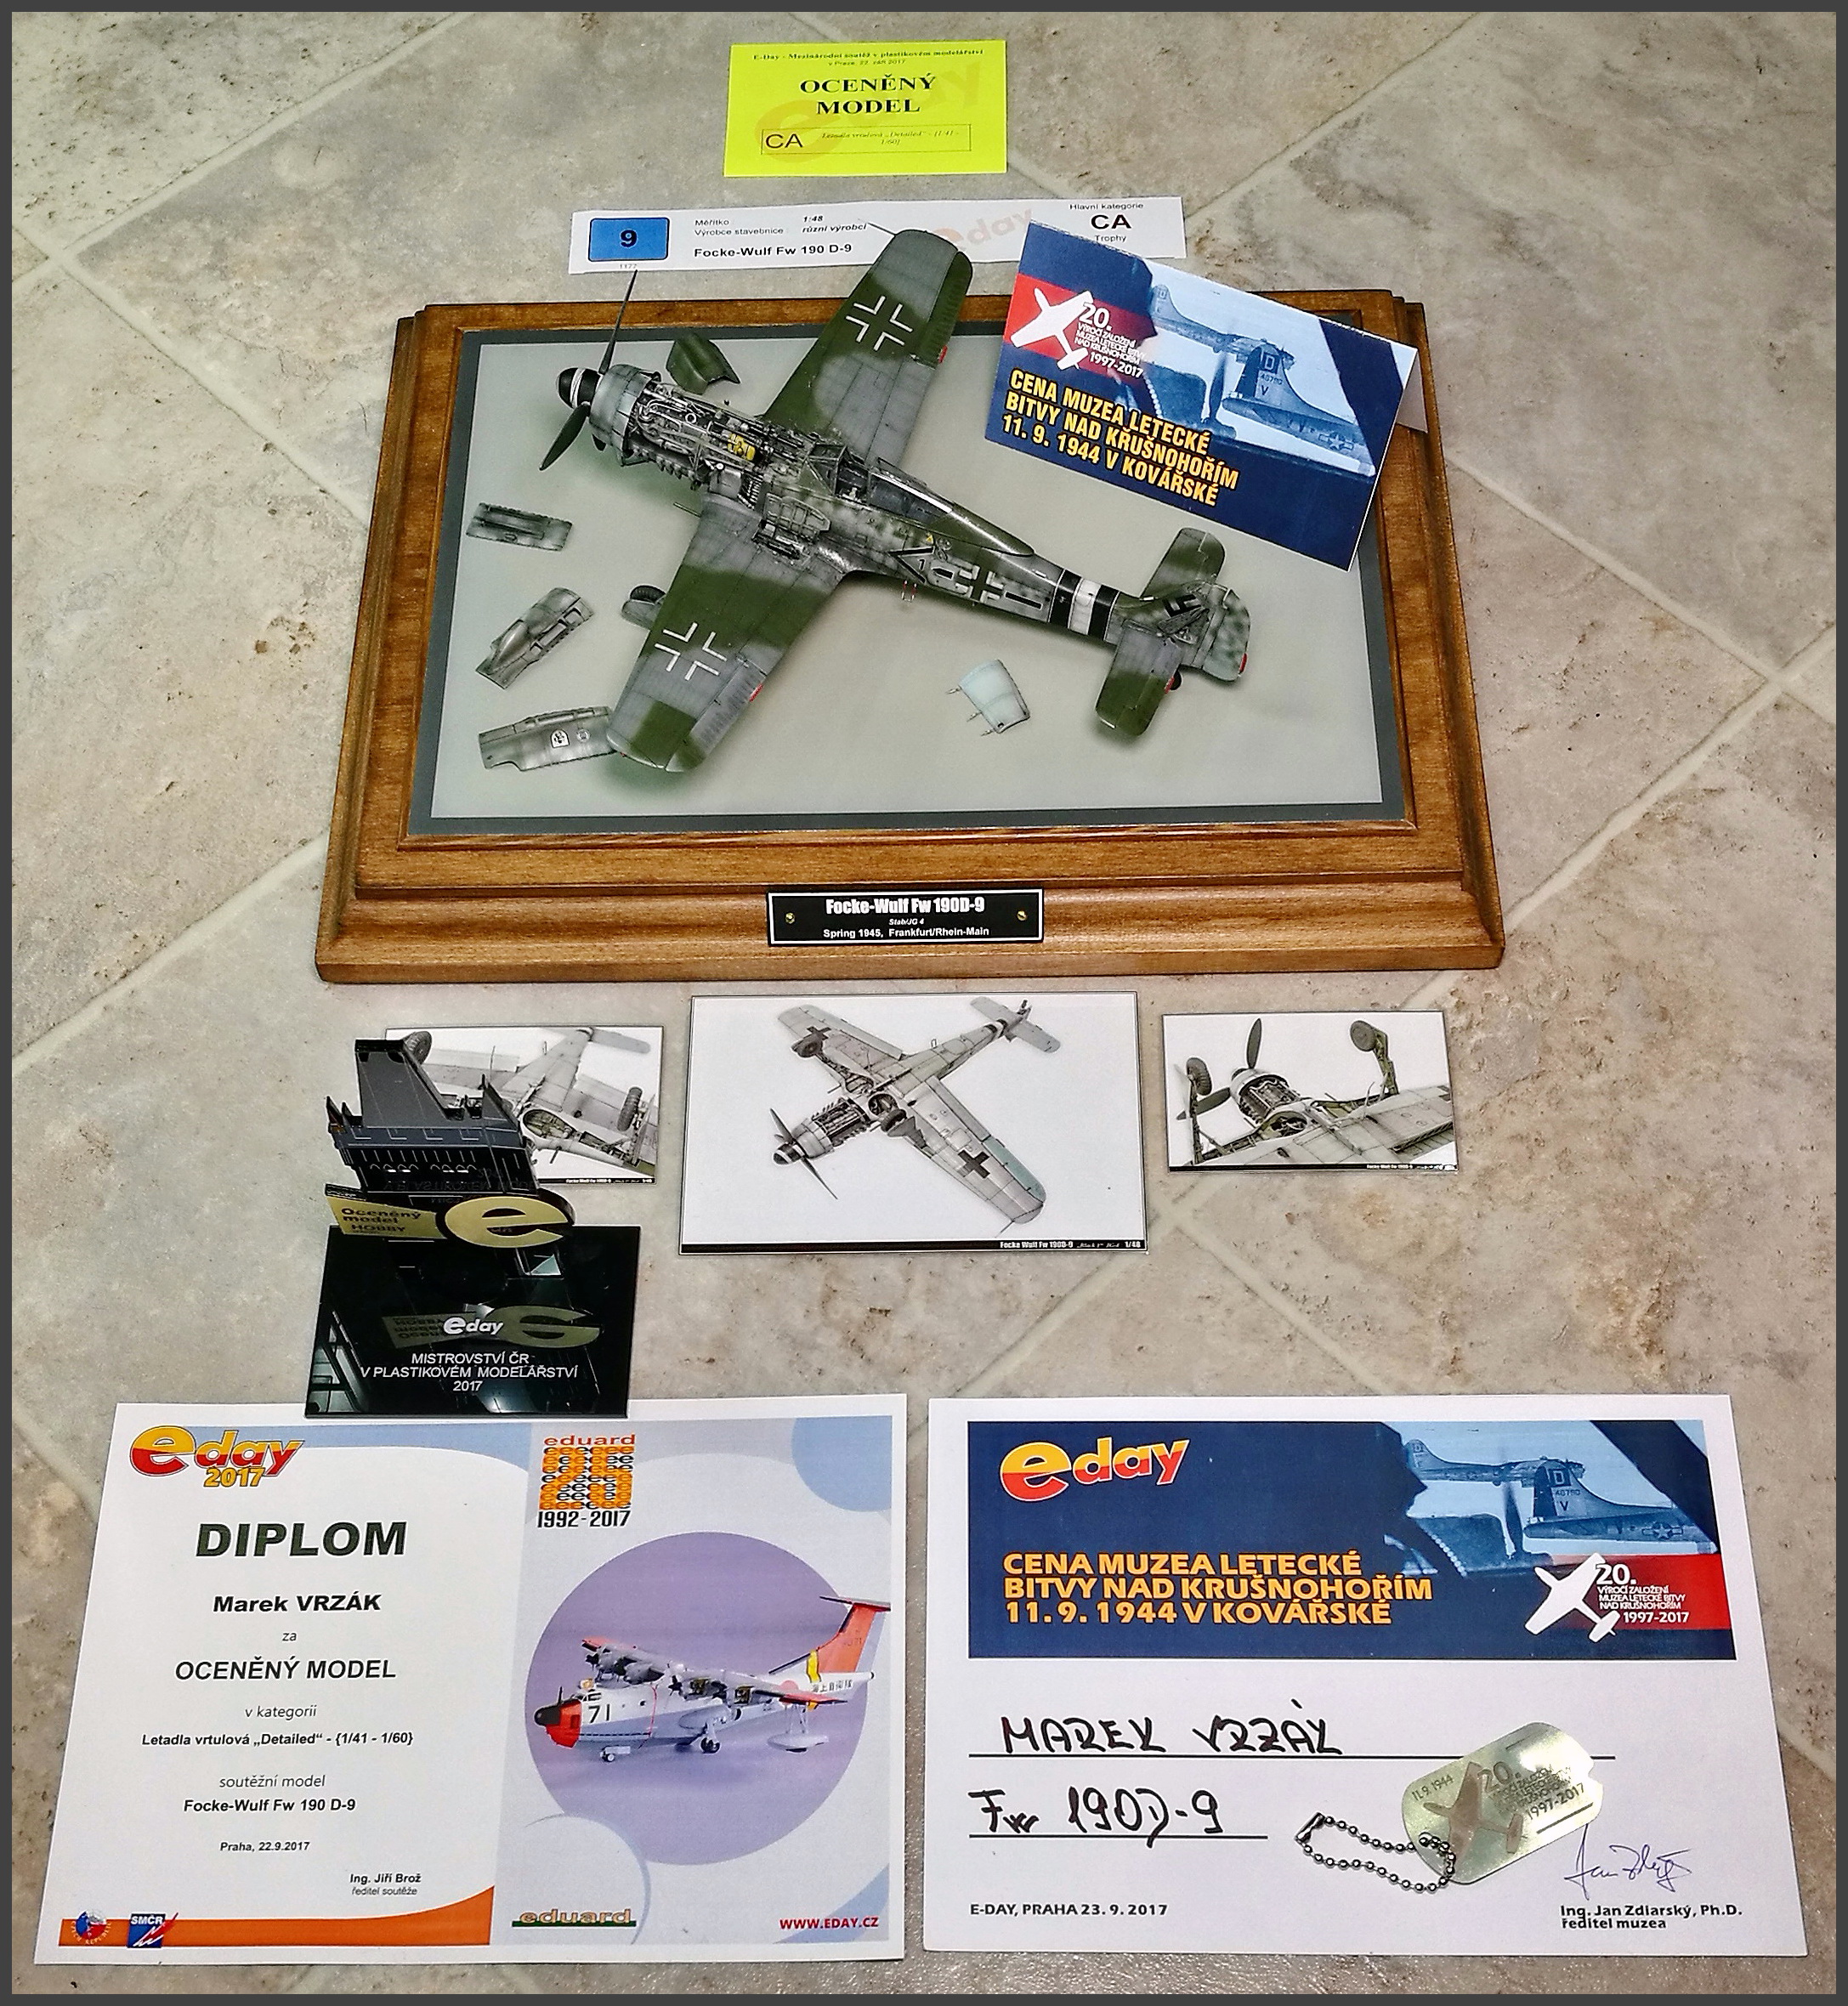
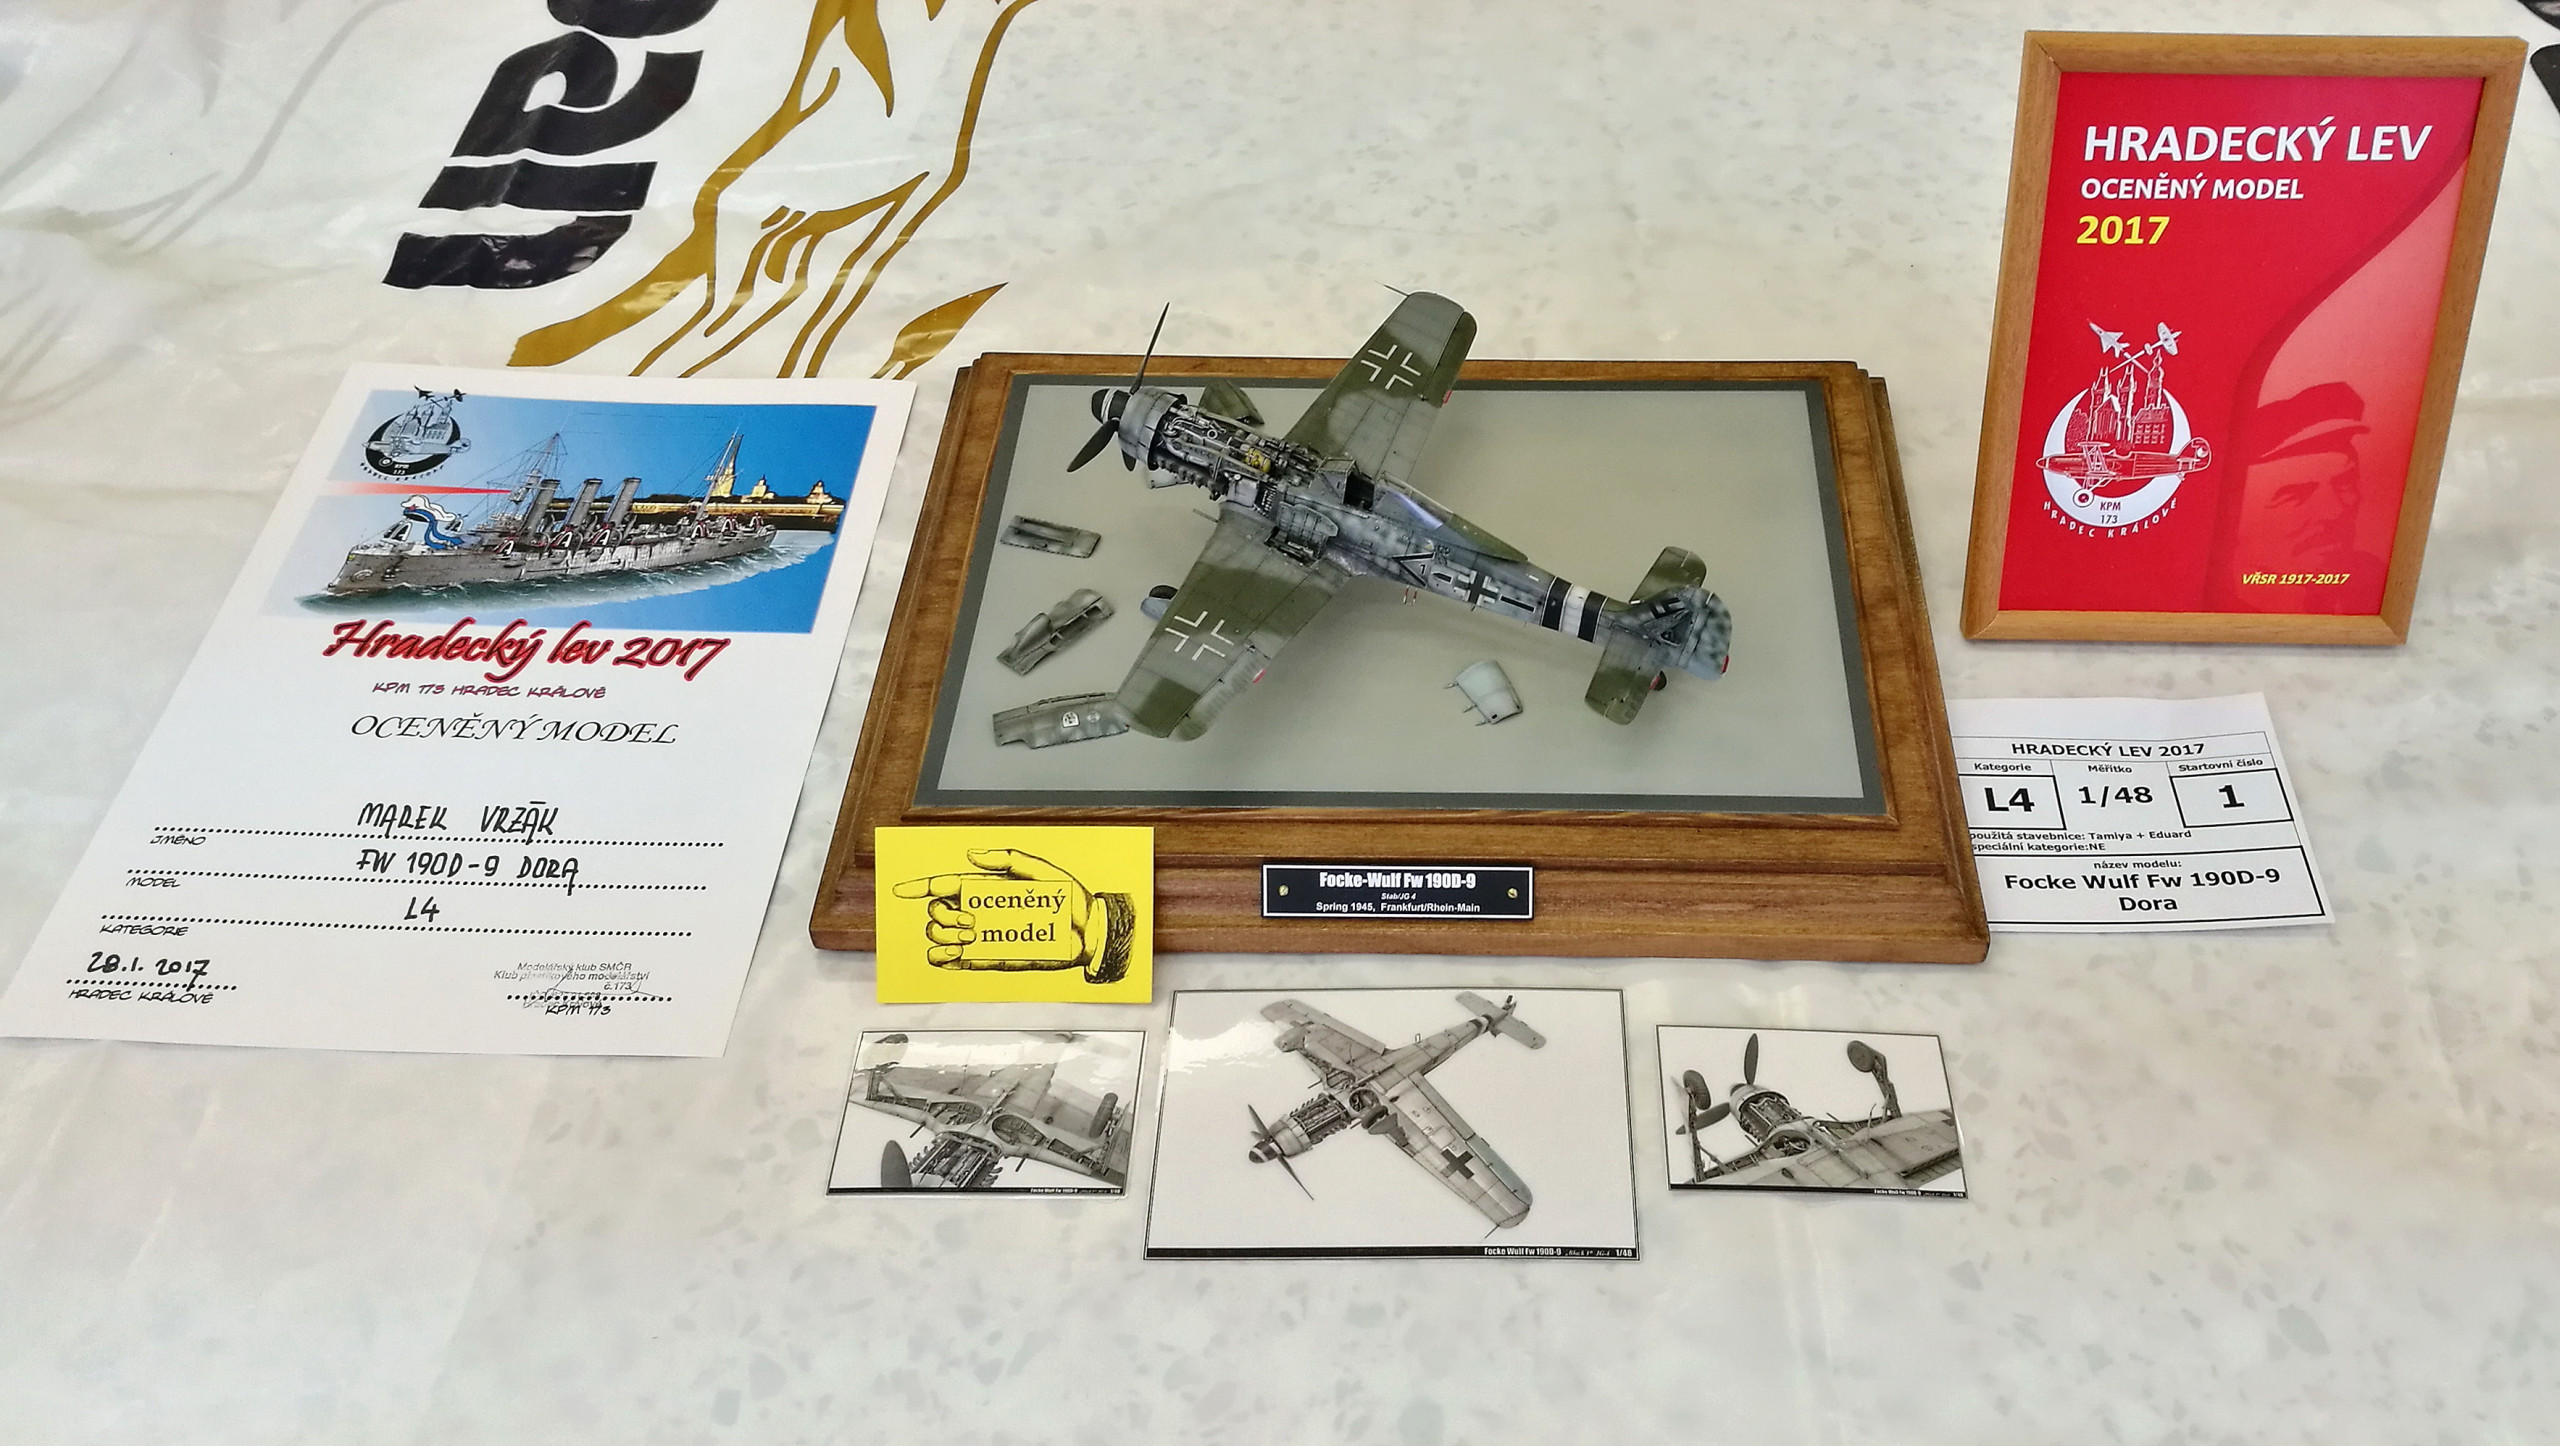
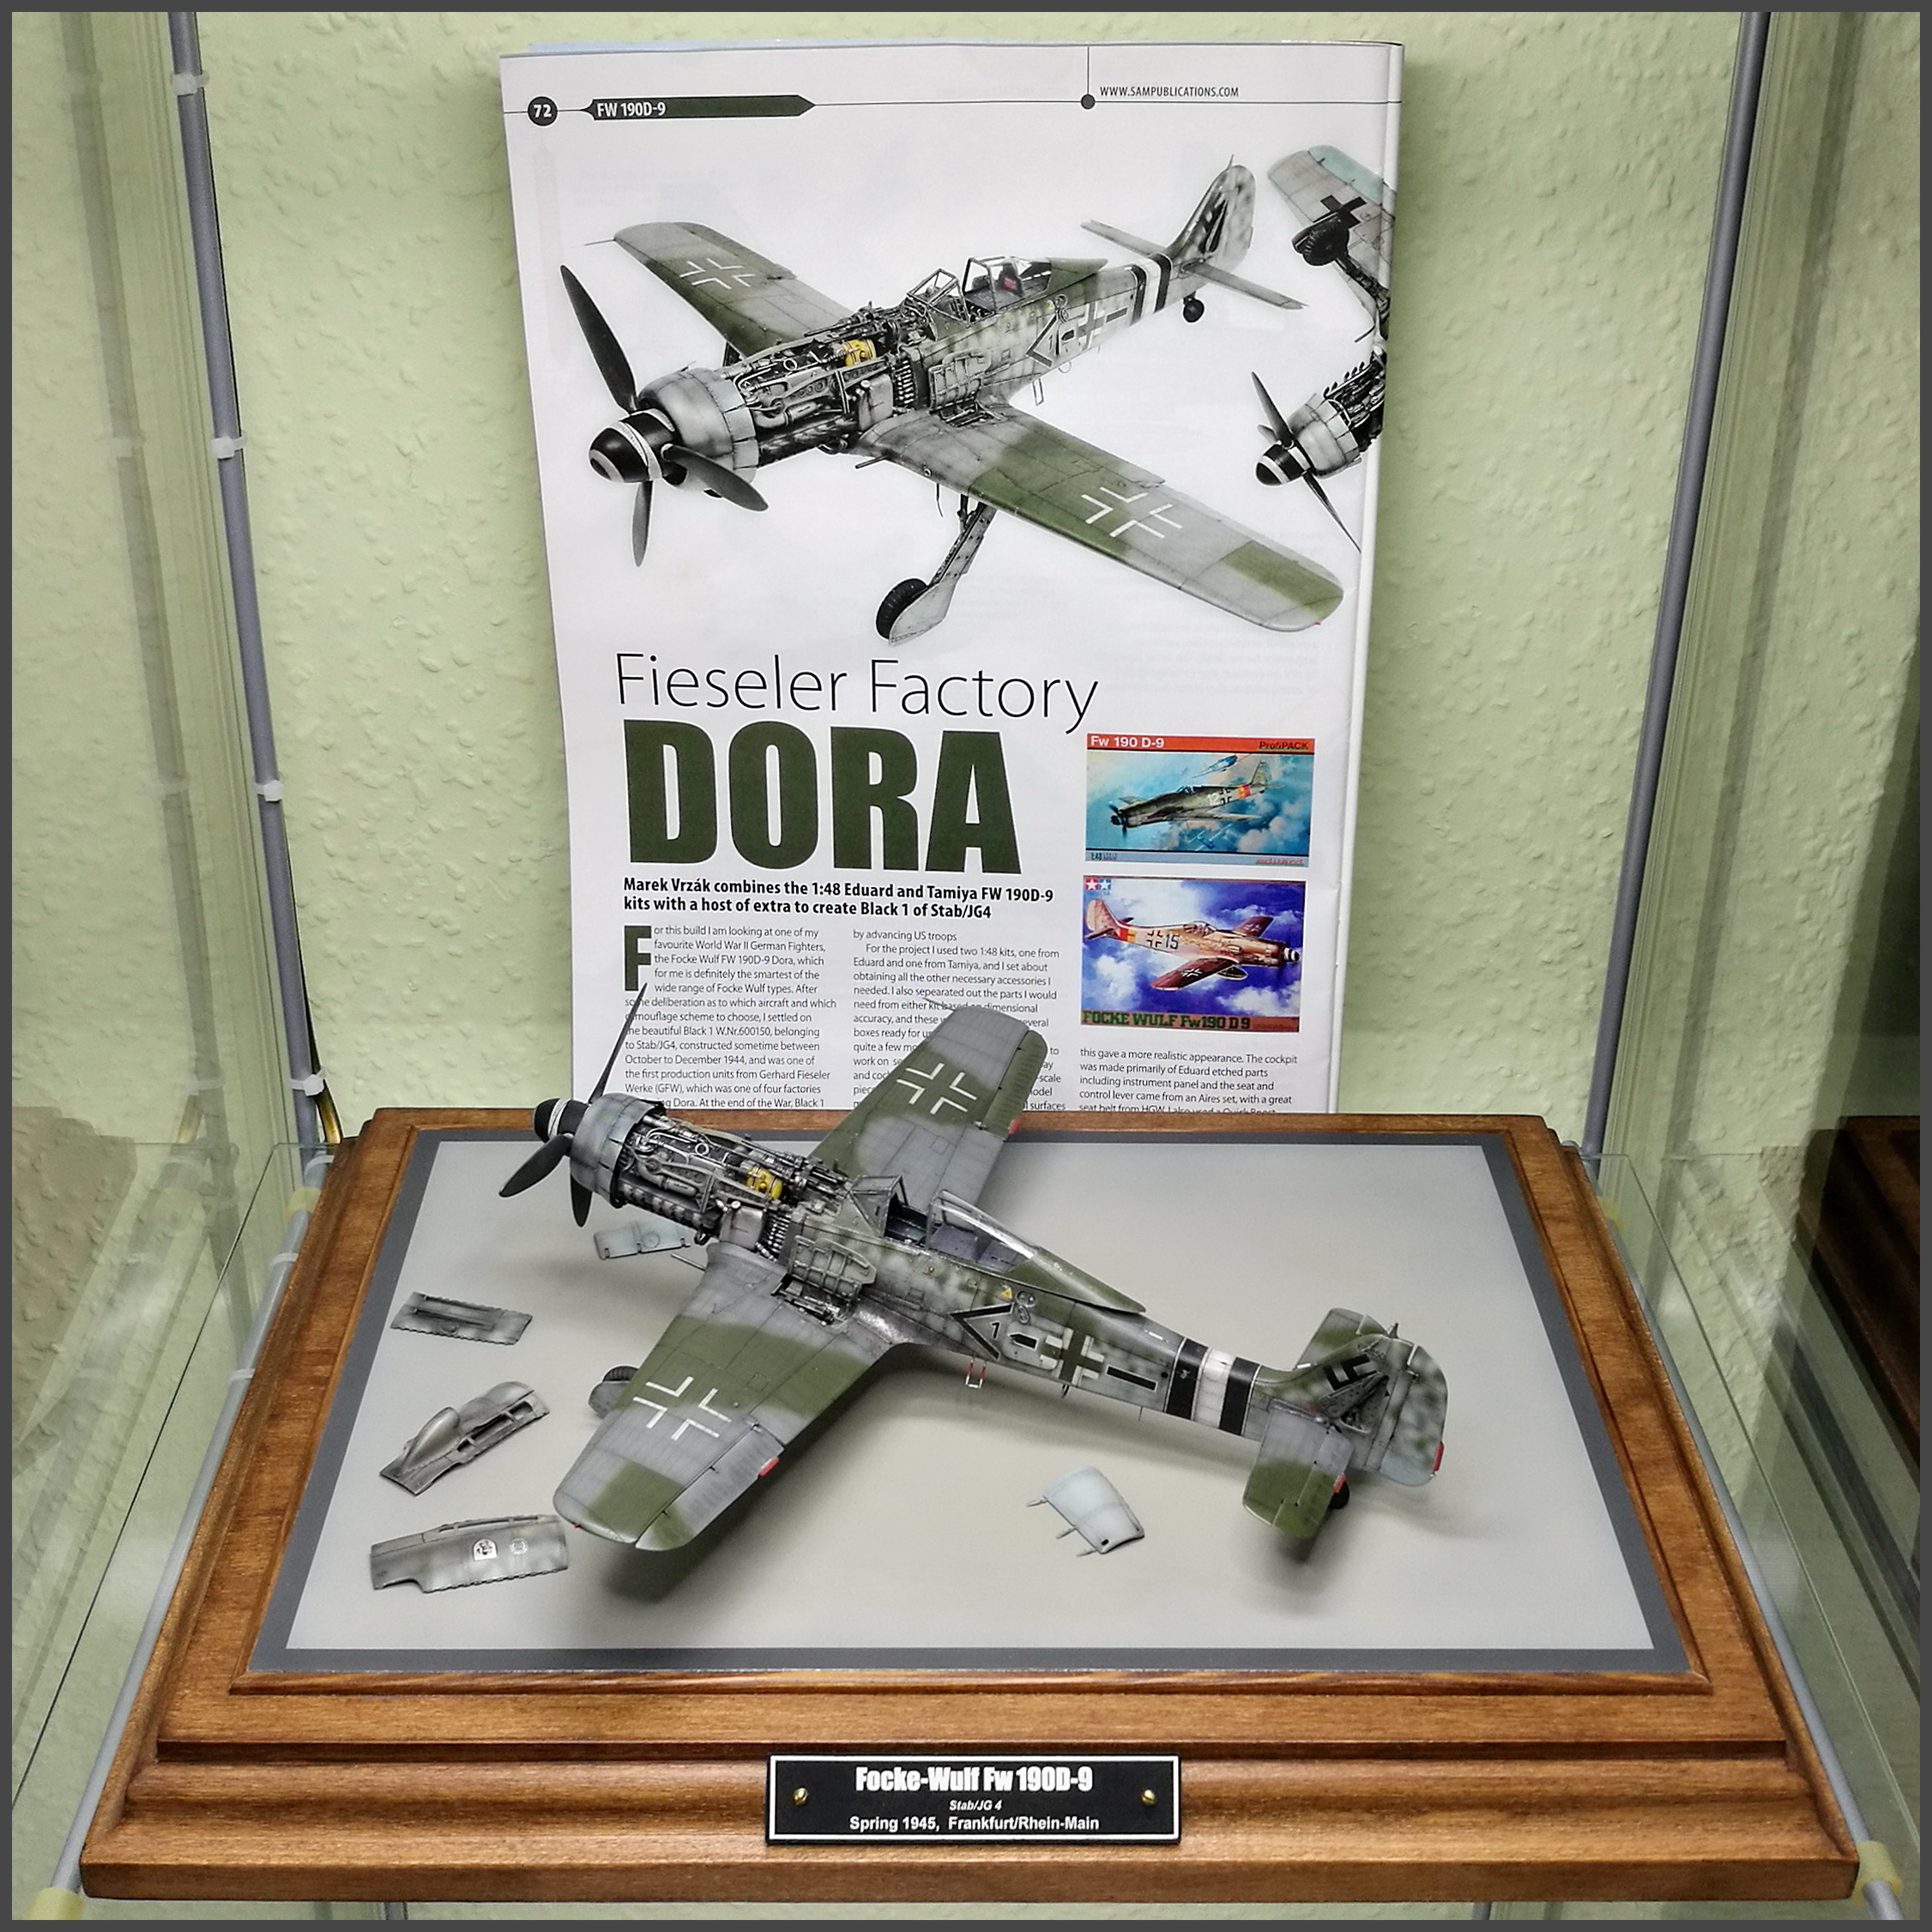
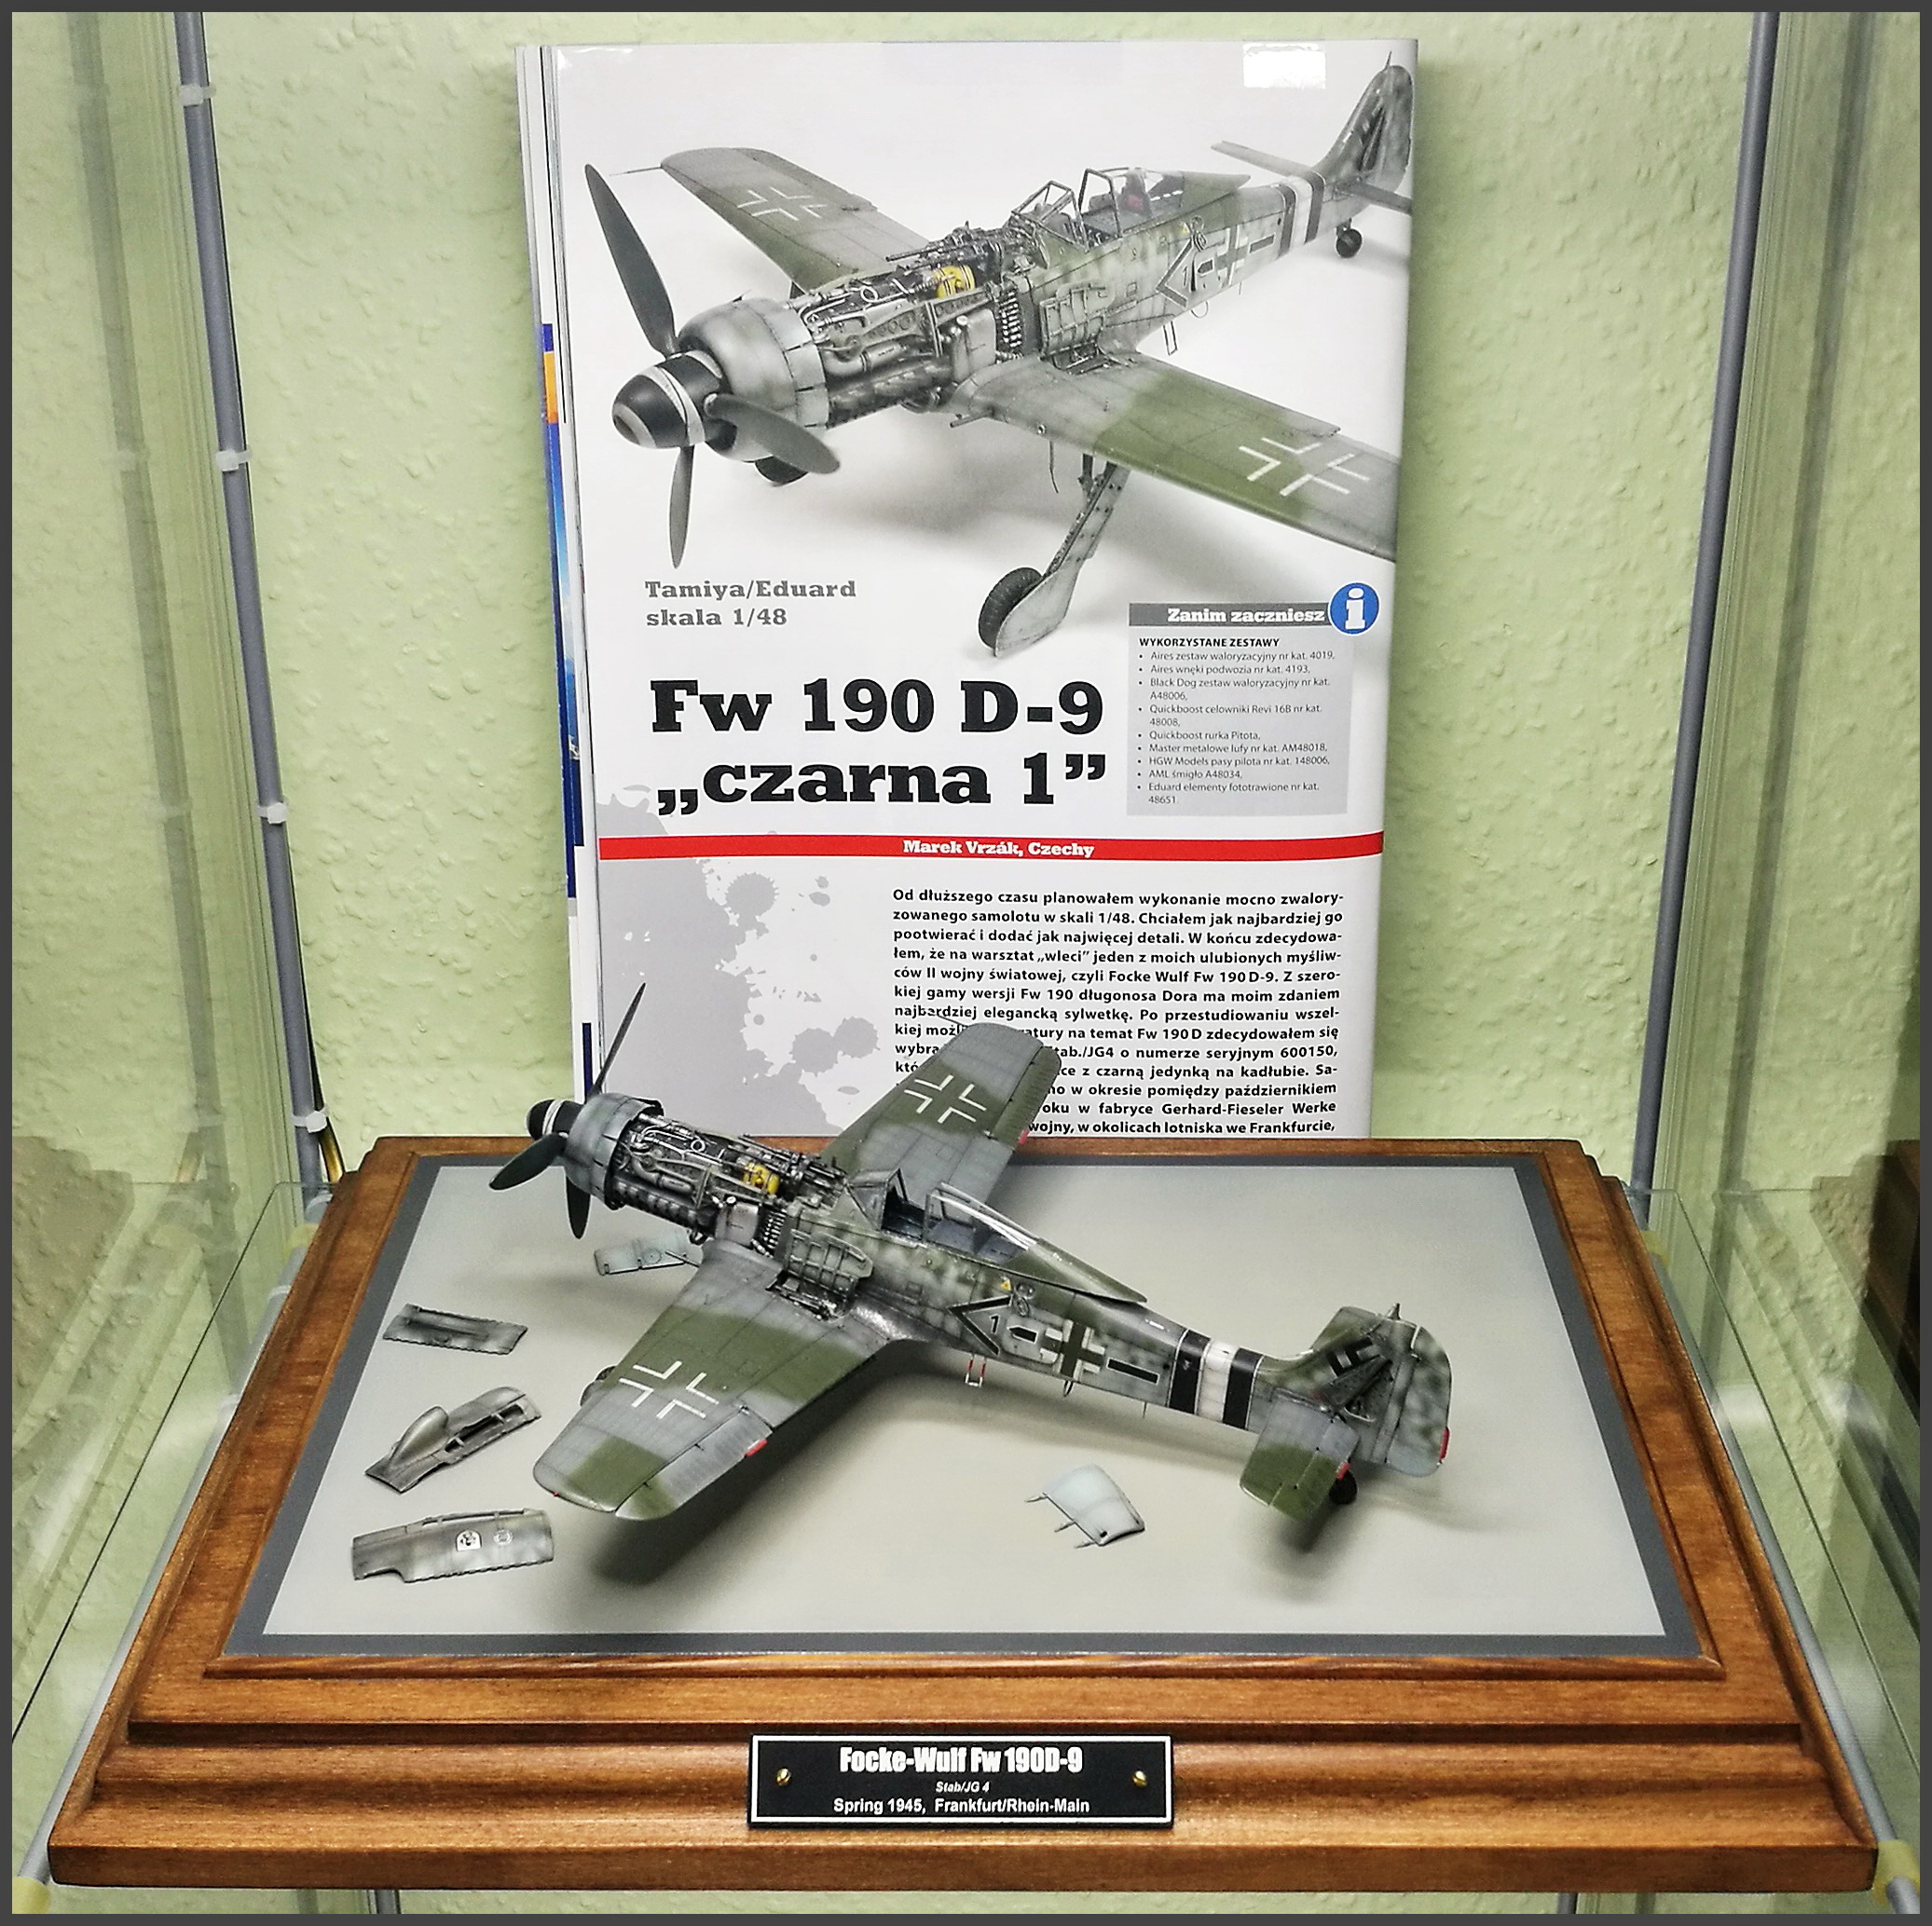
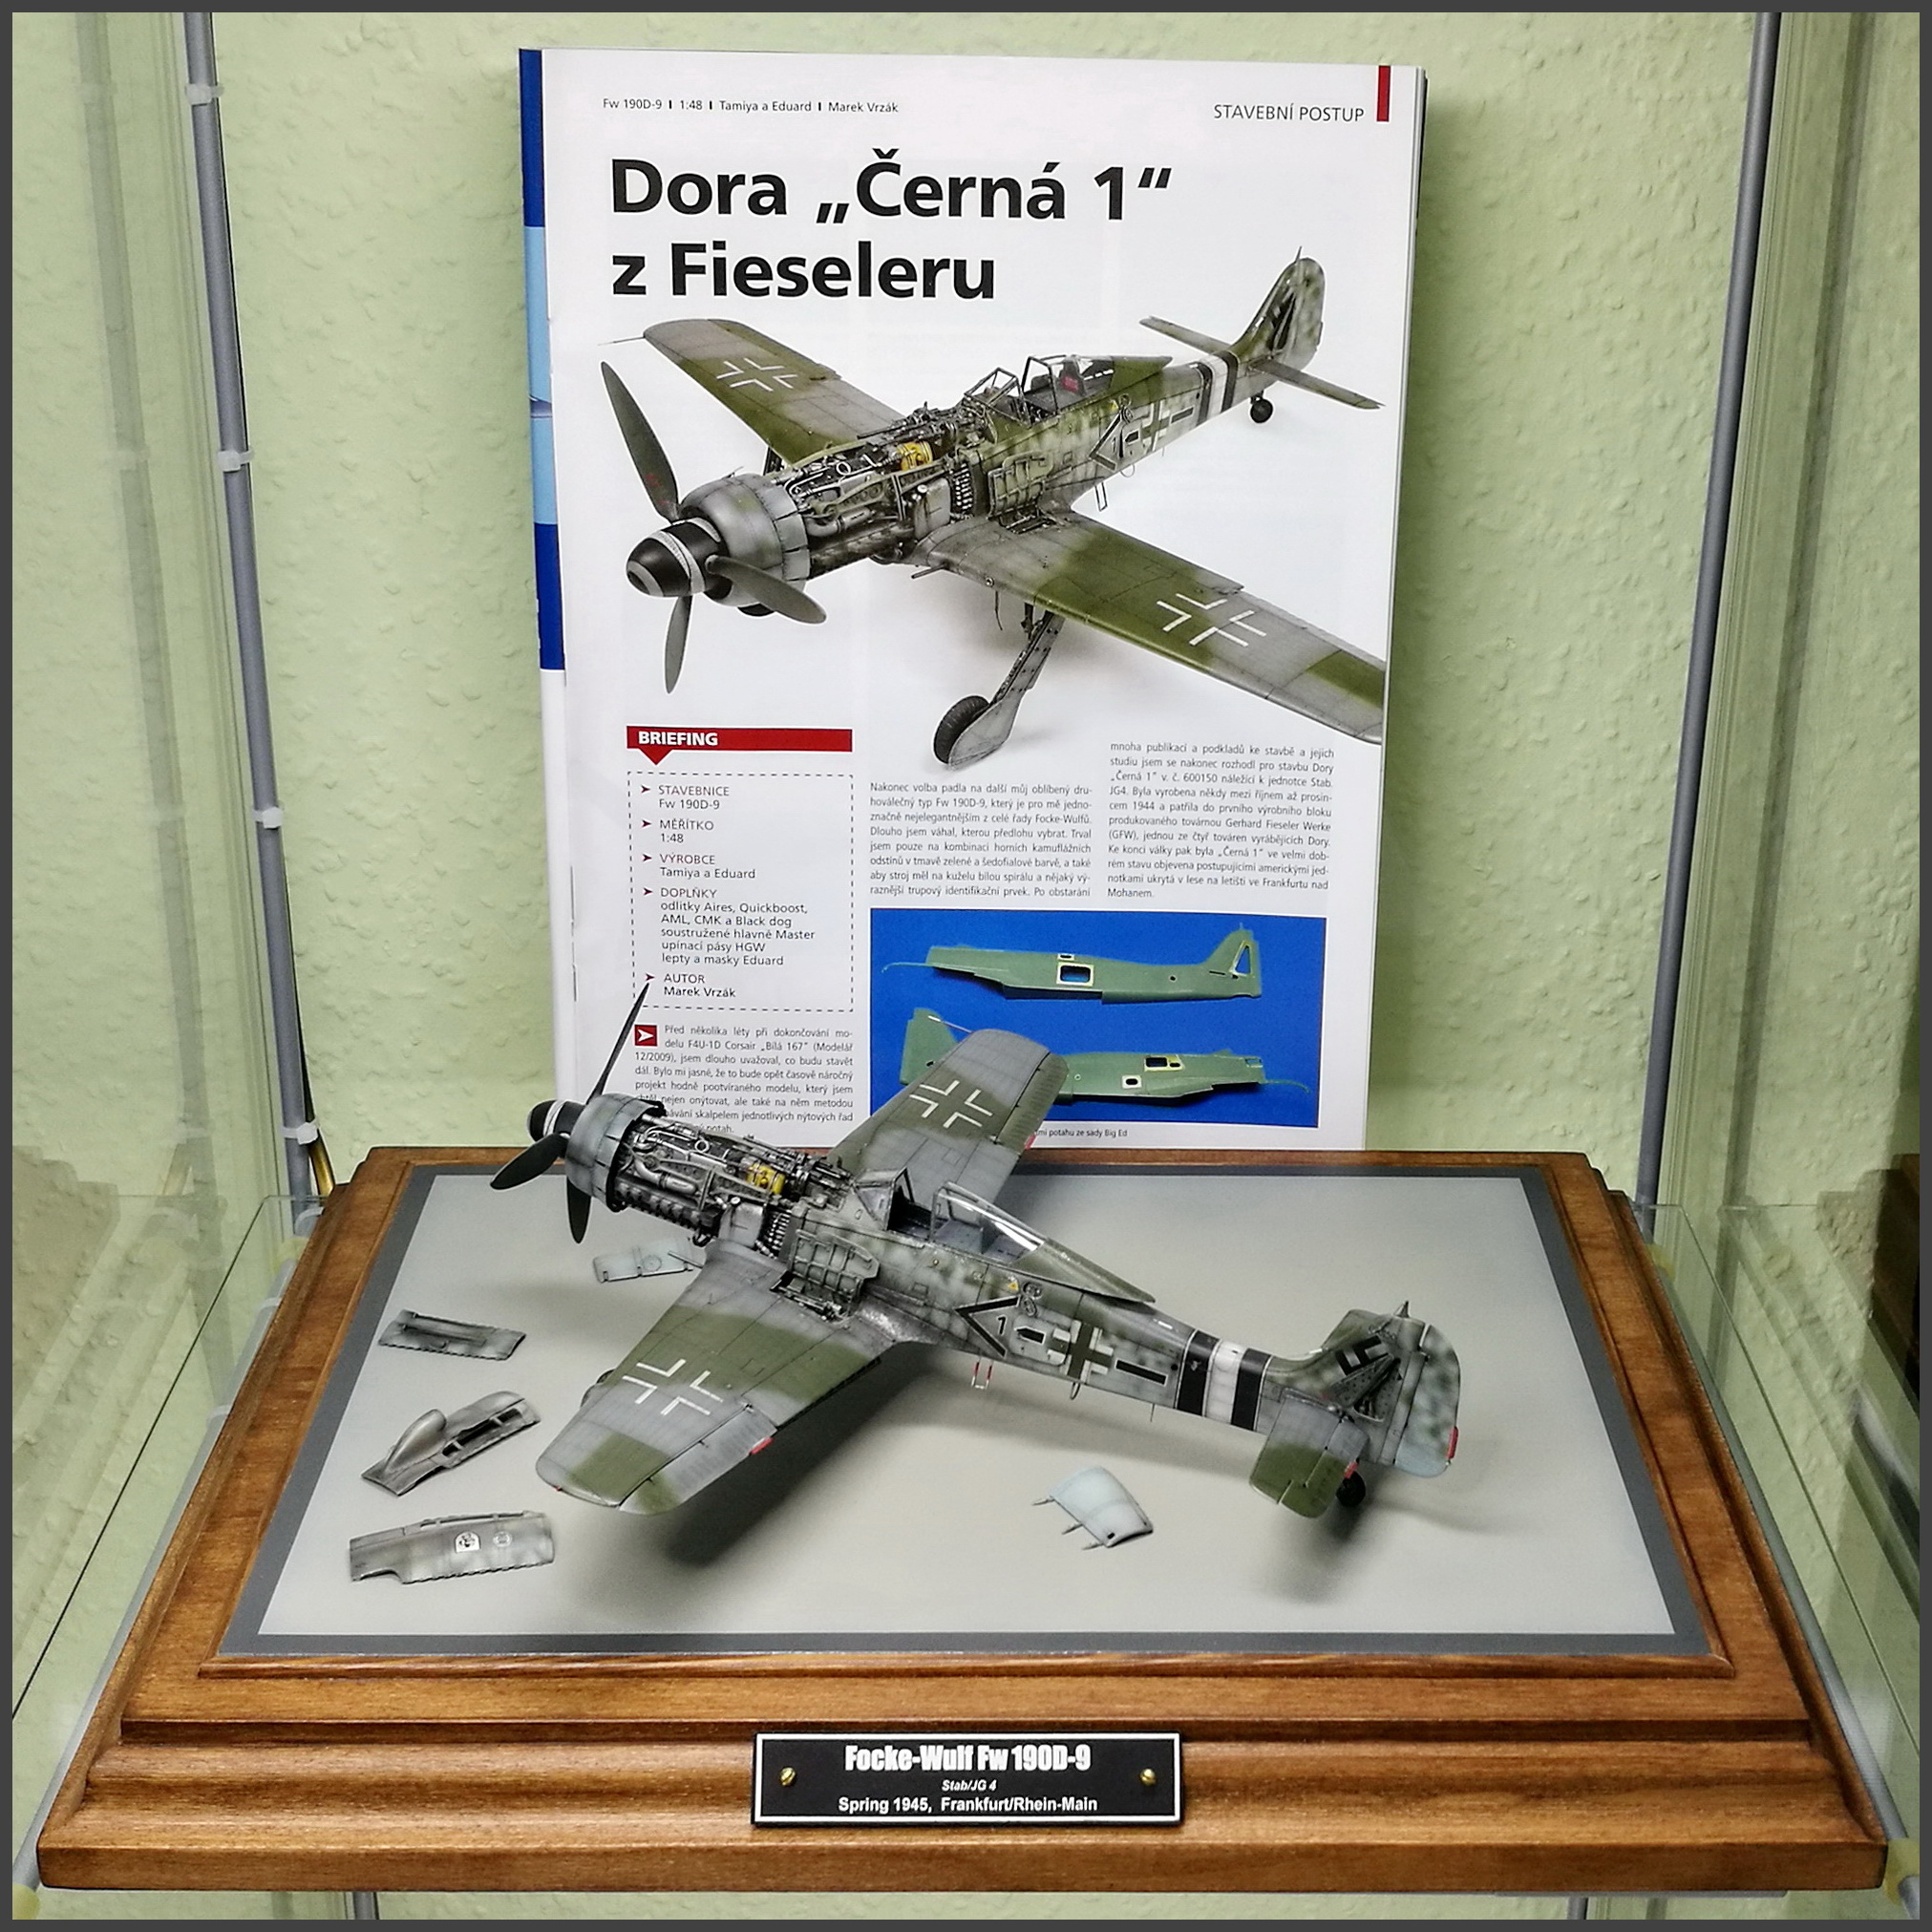
Dora „black 1“ from Fieseler
Briefing:
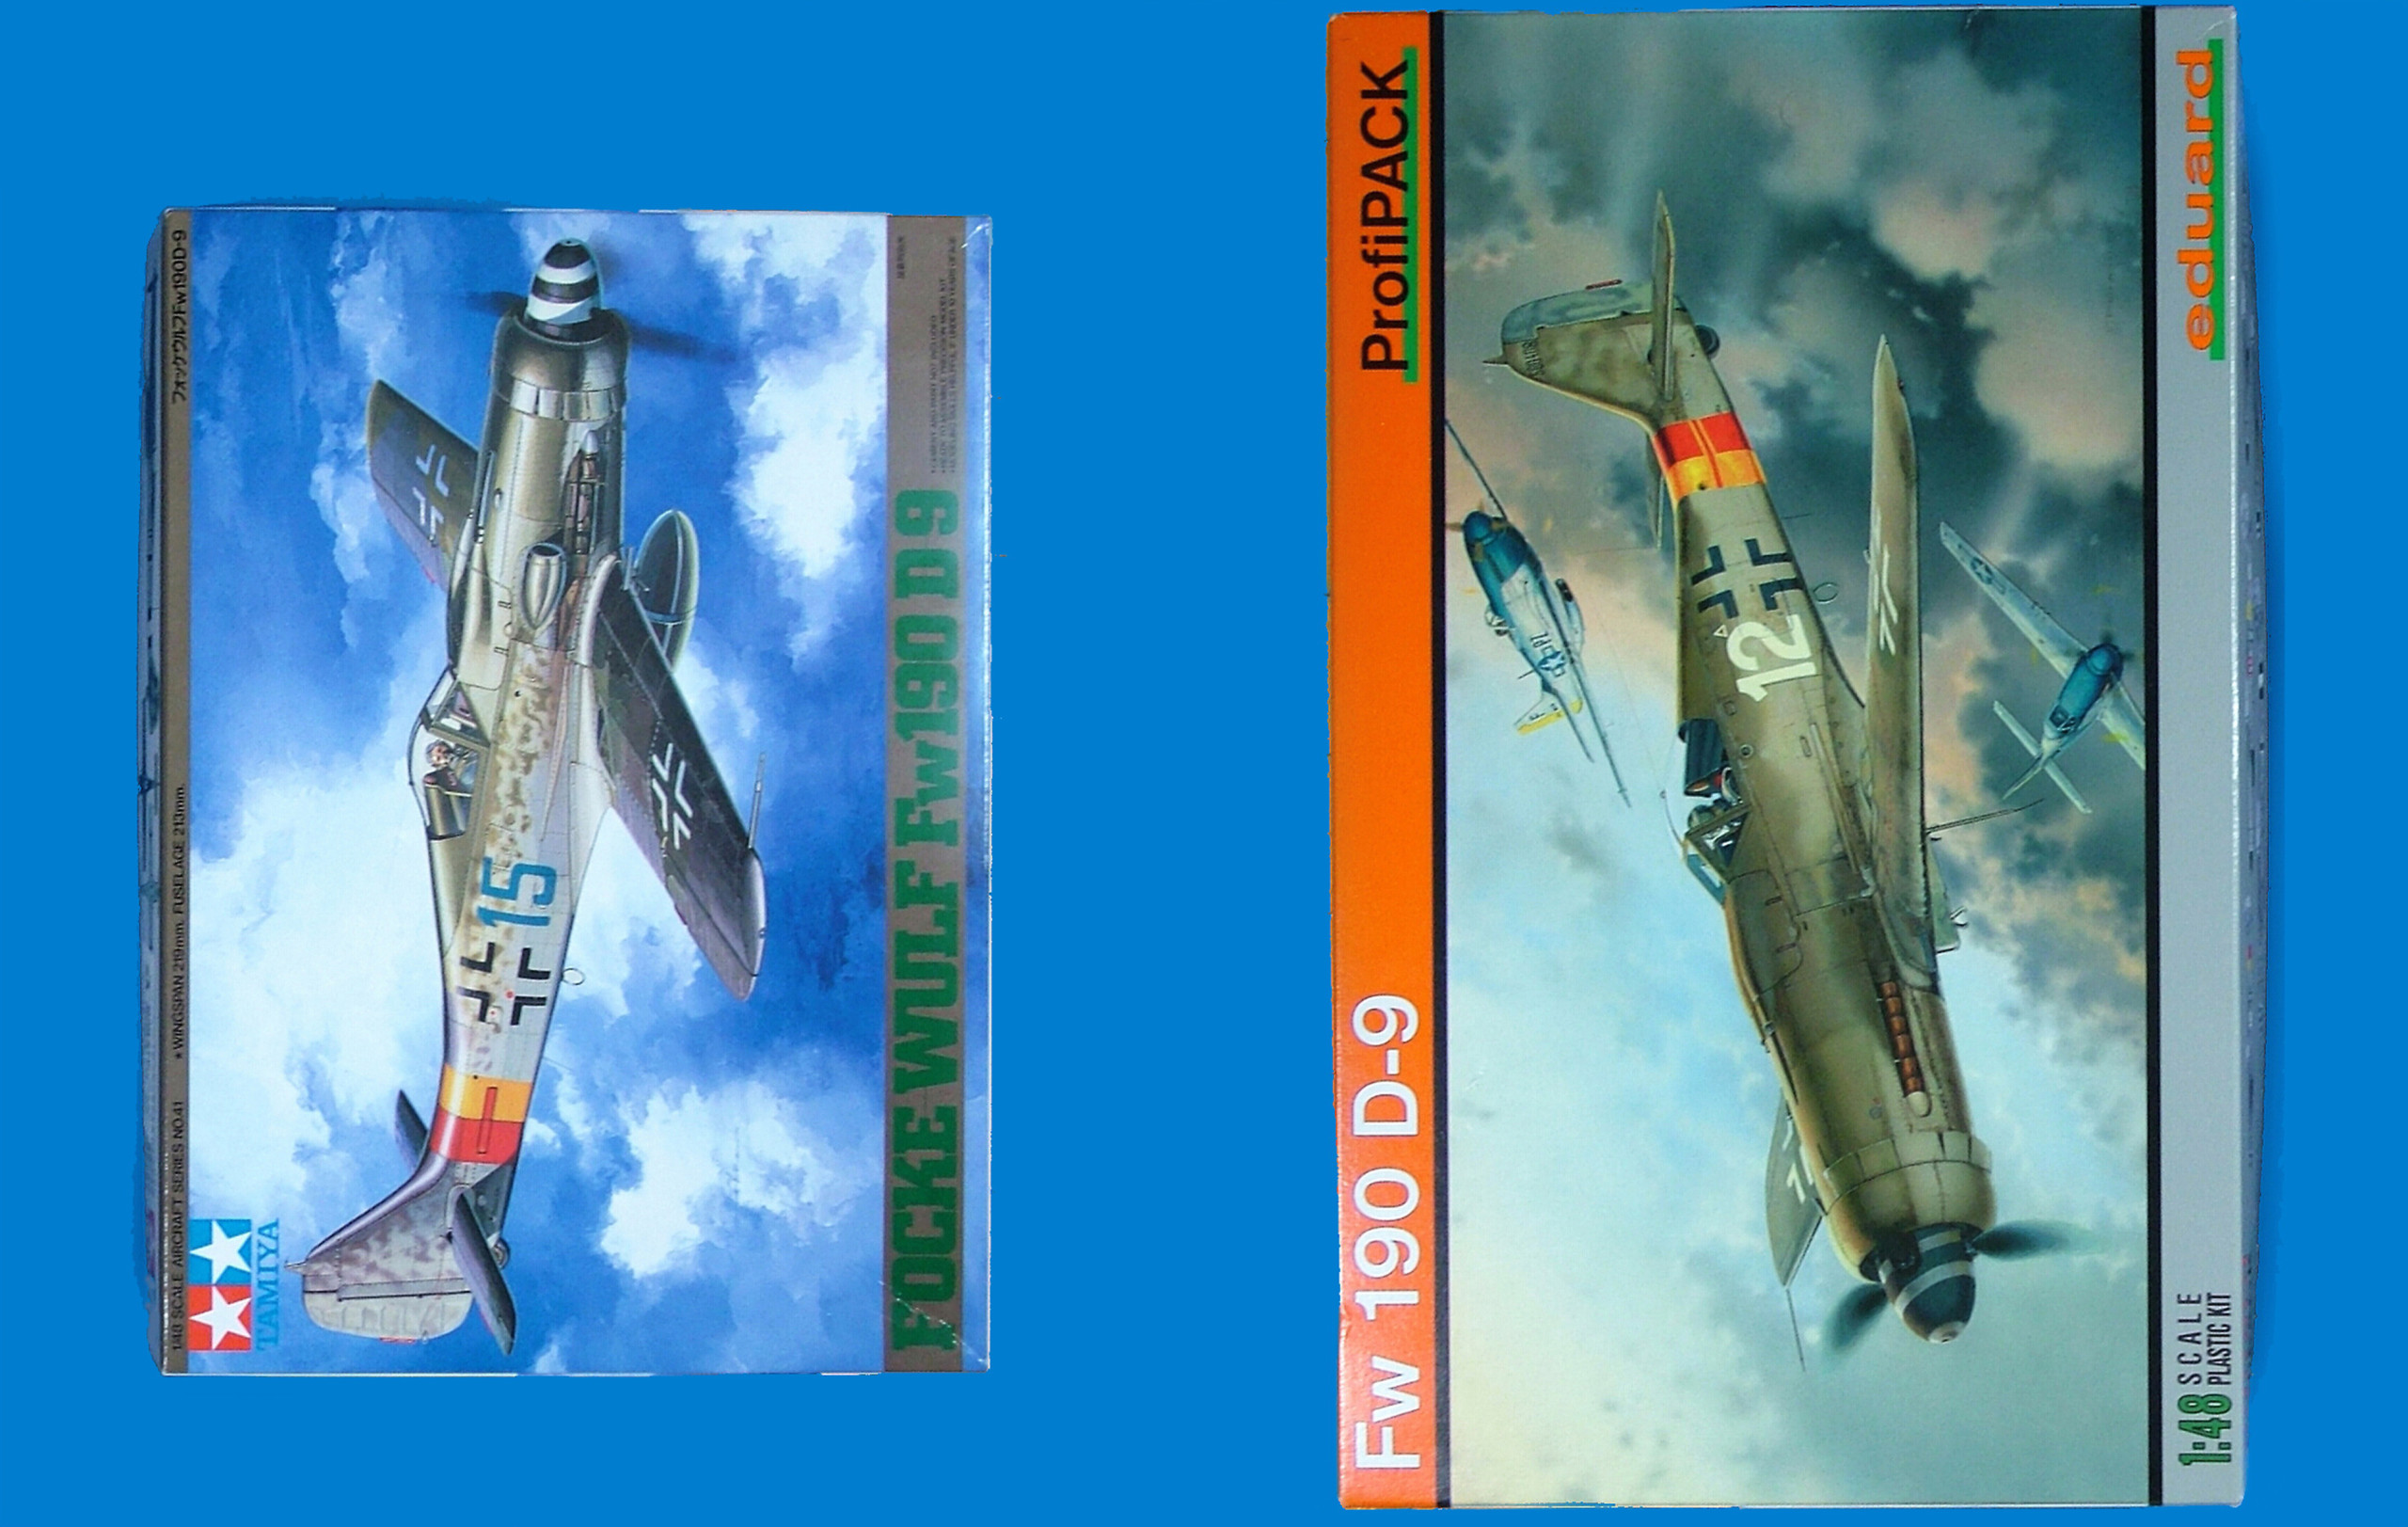
Kit: Focke-Wulf Fw 190D-9 ,,Dora“
Scale: 1/48
Manufacturers: Tamiya + Eduard
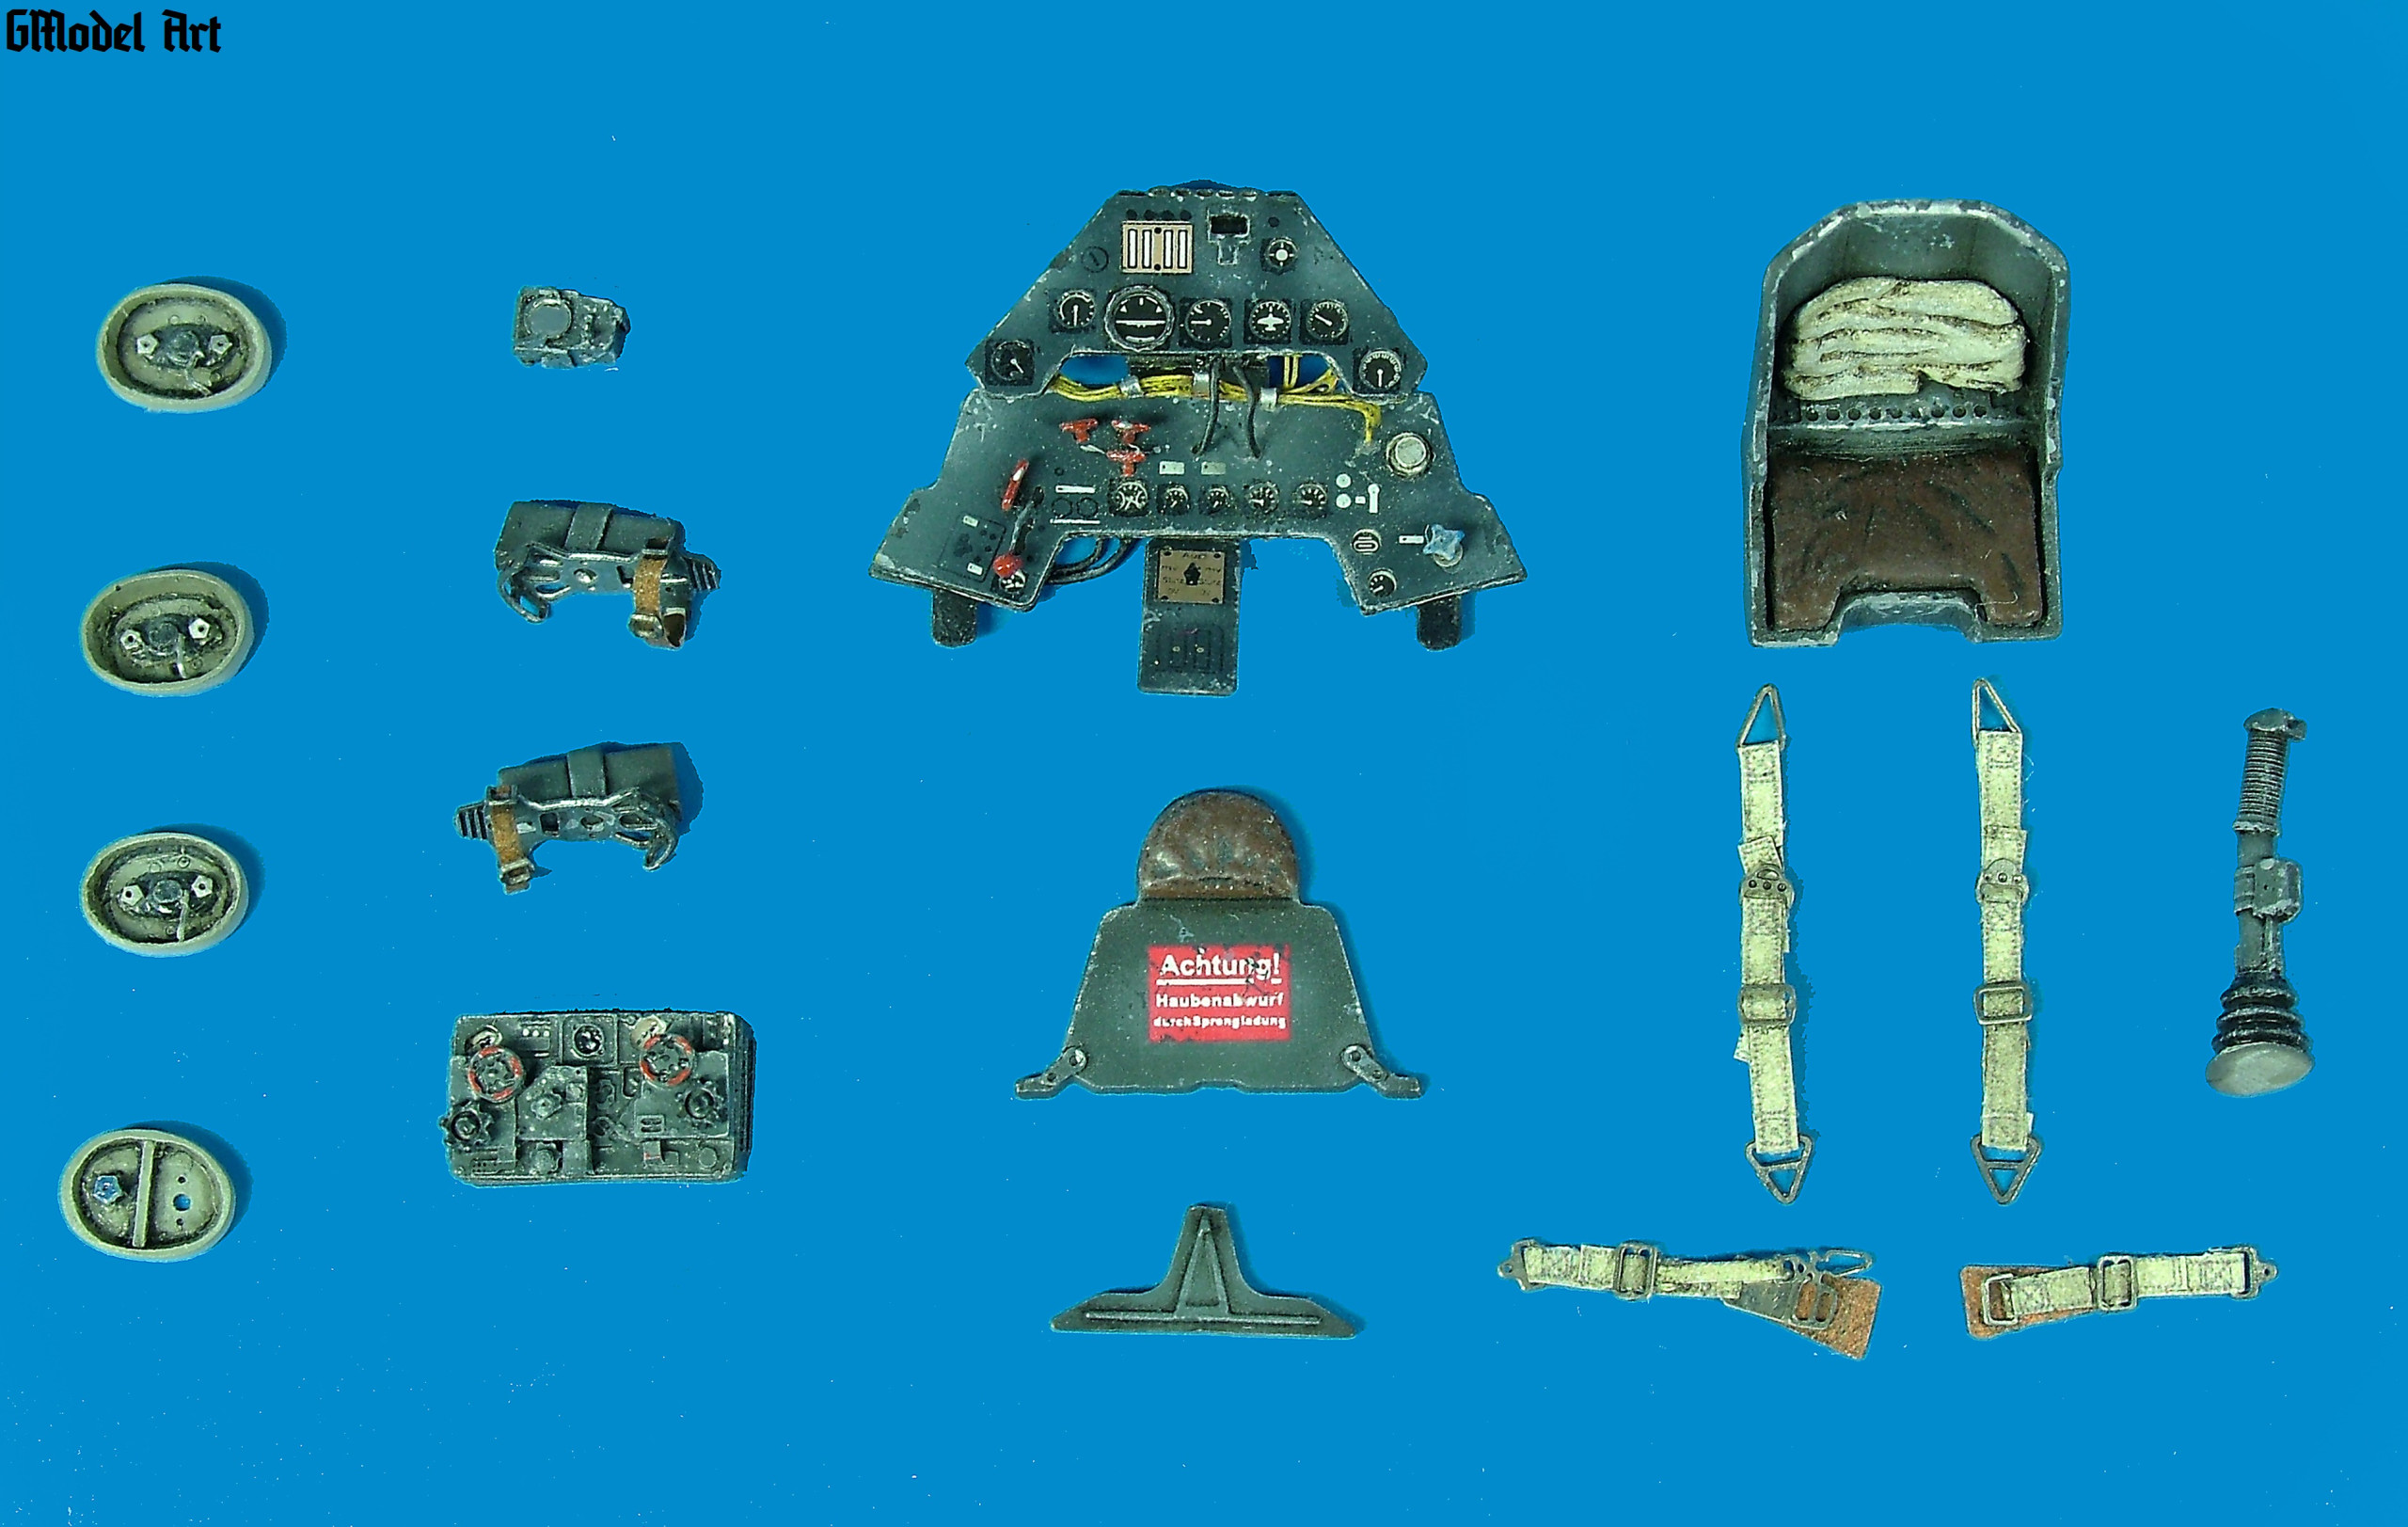
Accessories: Detail set Aires
Main wheel well Aires + Tail wheel well Black dog
Radio station Aires
Gun sight Quickboost
Pitot tube Quickboost
Metal guns barrels Master
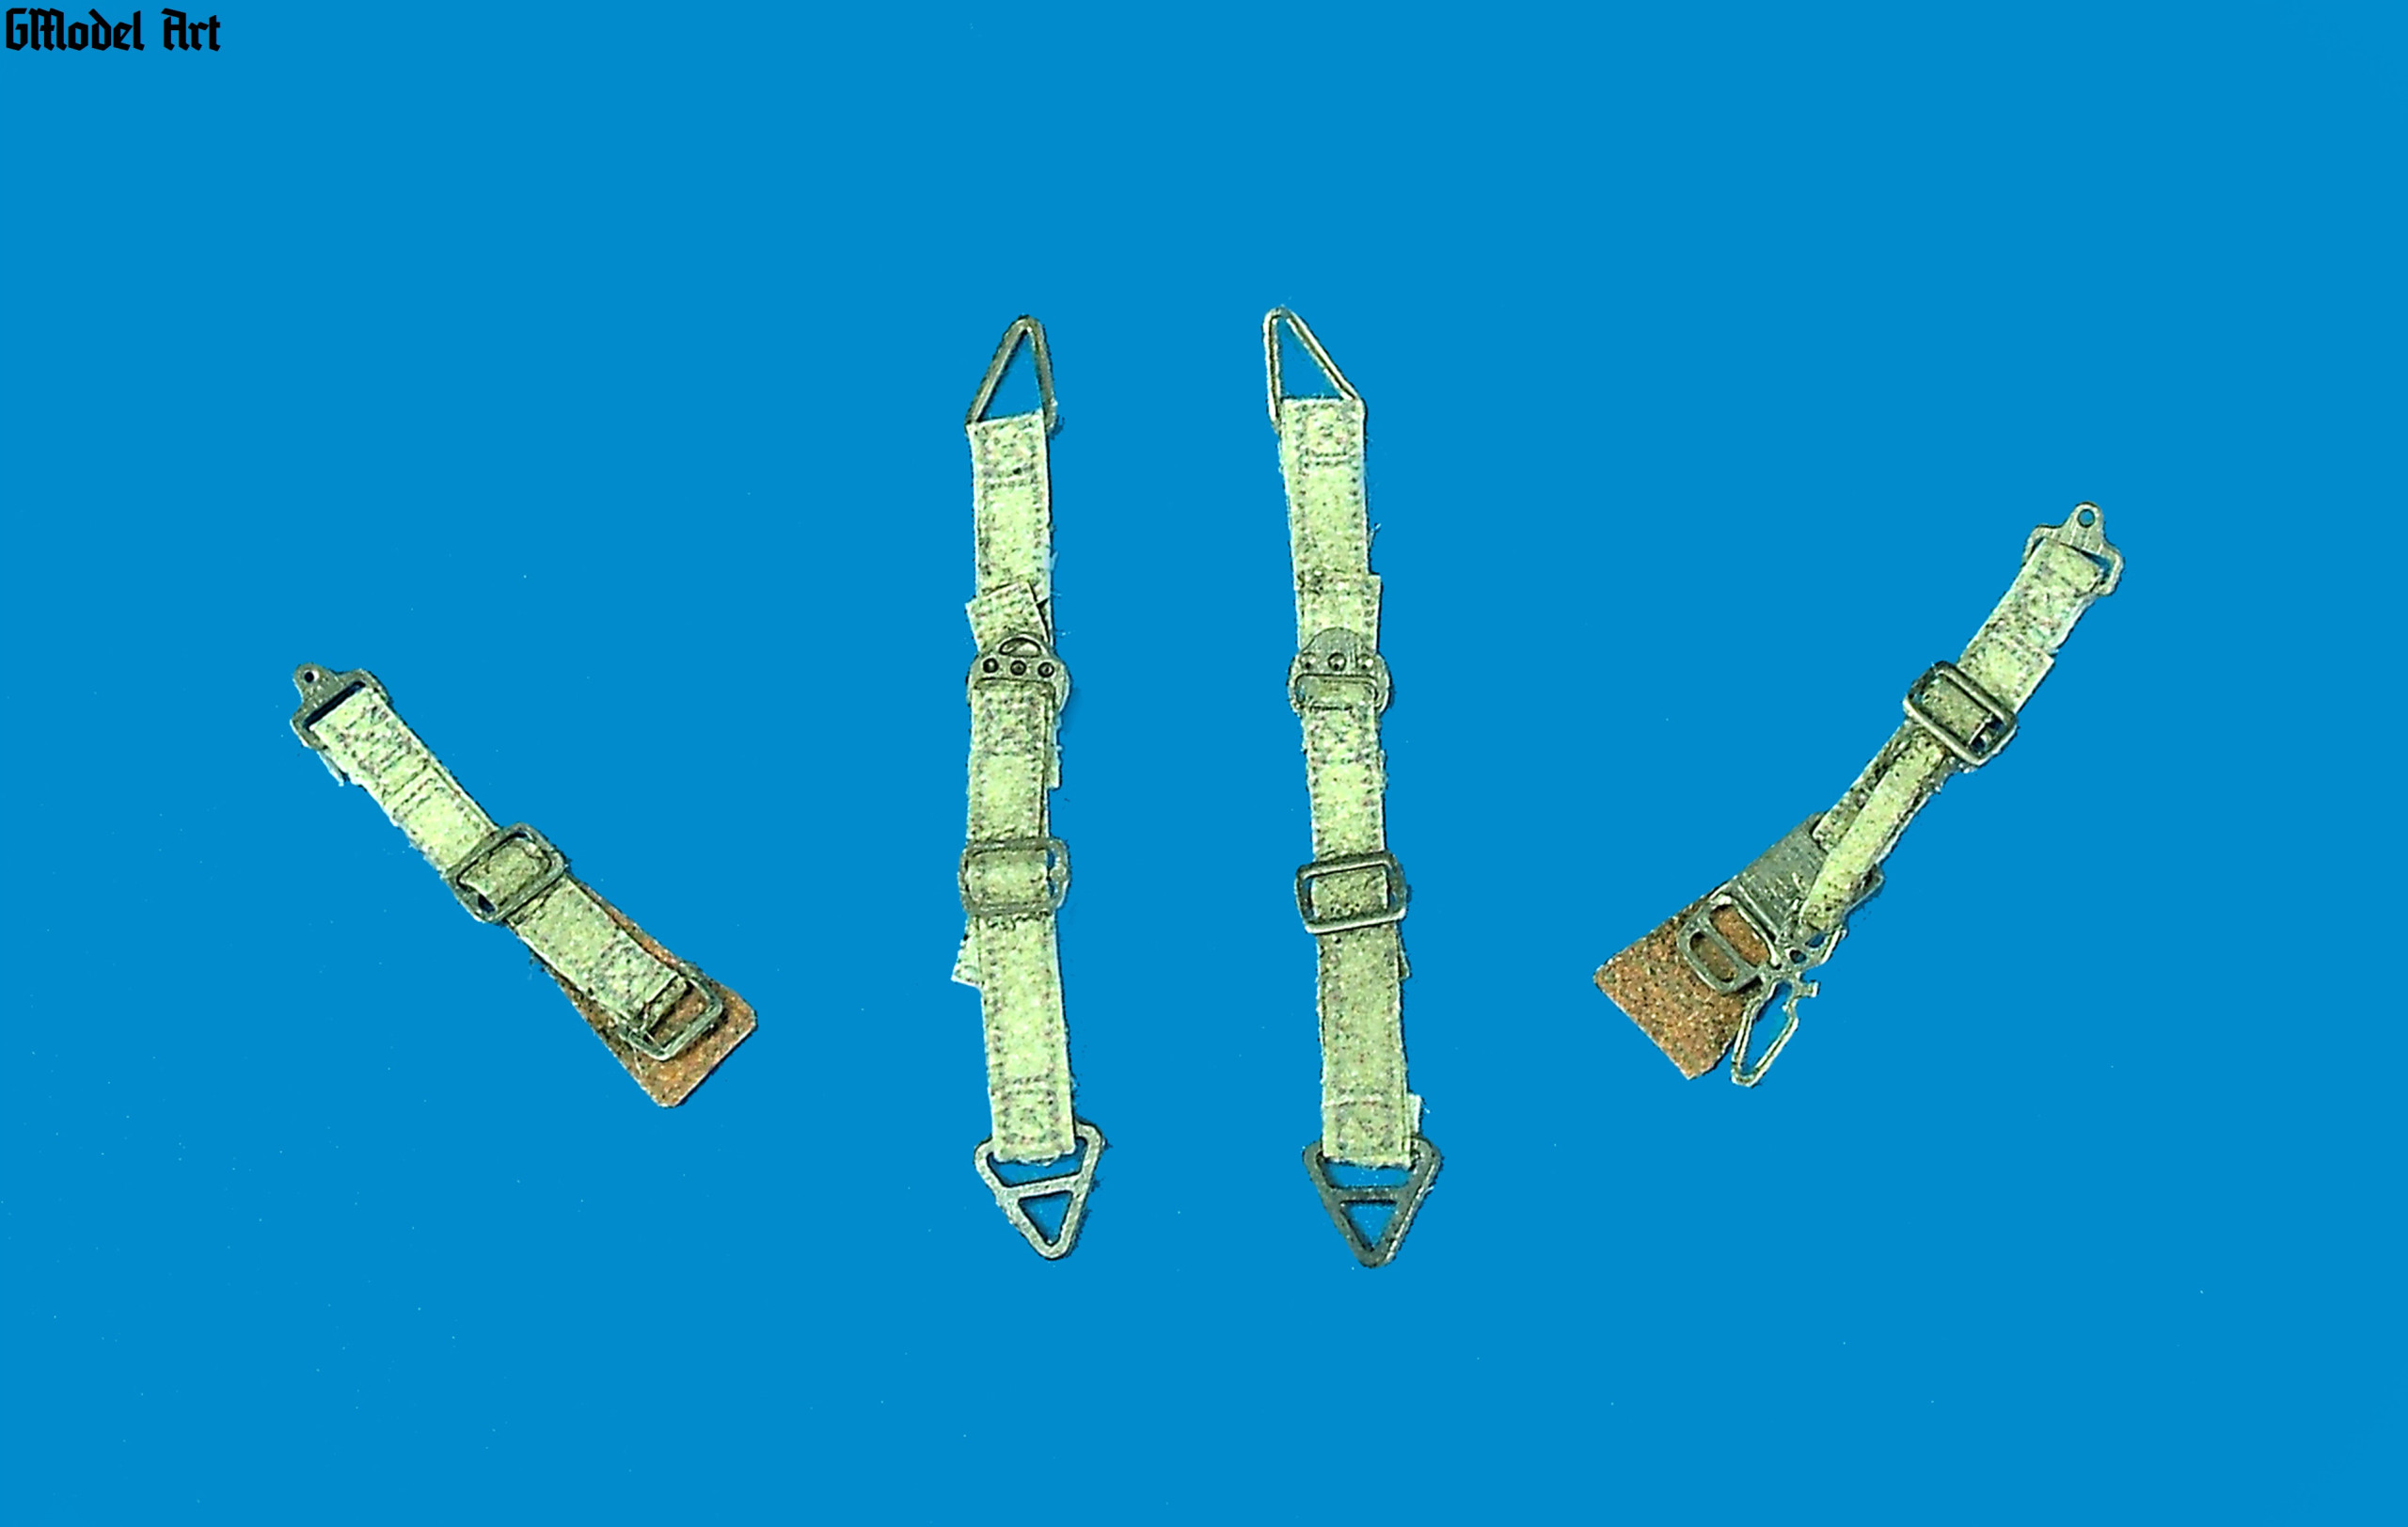
Seat belts HGW
Propeller AML
Photo etched parts + Masks Eduard
Engine cowl locks + Filler hatches CMK
Lot of hand made parts
Colors:
GSI Mr. Color
Vallejo
Metalic pastes and Pigments Agama
Abteilung oil paints
Coloured pencils
Glues:
GSI Mr. Cement deluxe
Thin cyanoacrylate Flash super glue
Cyanoacrylate Loctite gel
Water-based Herkules glue
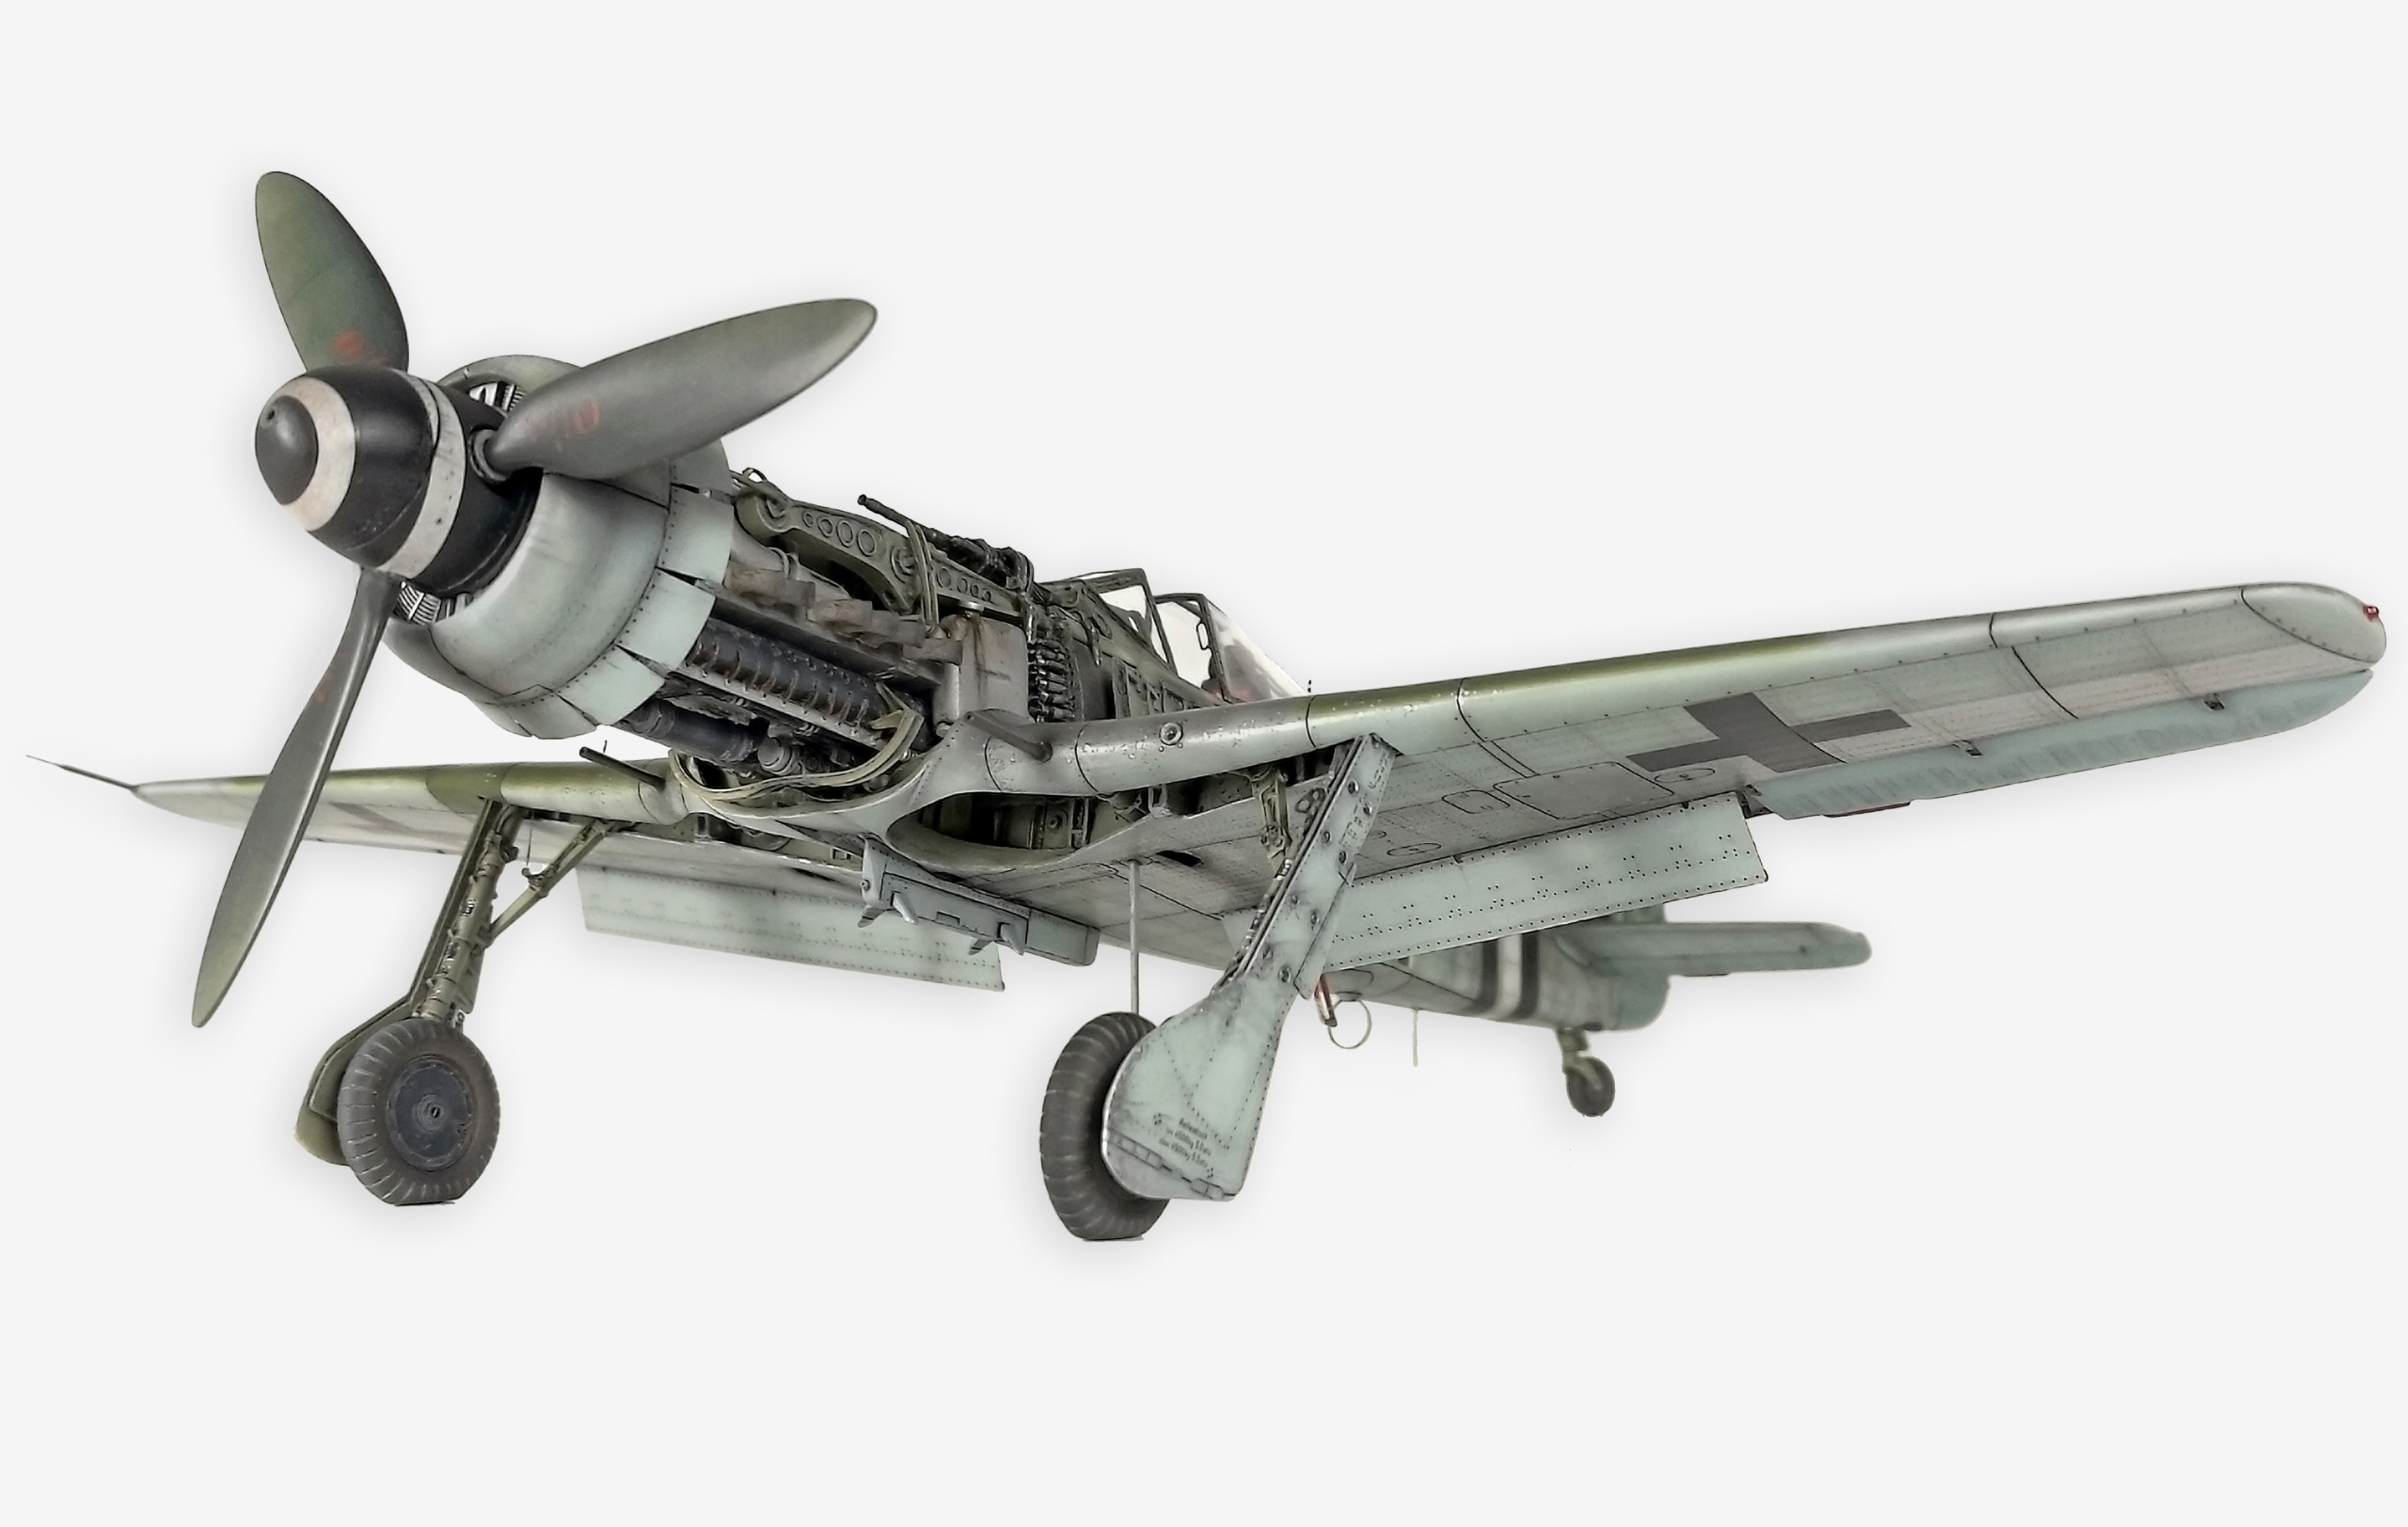
… upon completation of my previous model Corsair F4U-1D “white 167” a few years ago, I have a long thought what I will continue to built. I knew it will again be time consuming project very detailed and openable model, in which I wanted to bring more to the reality, of not only rivet the entire surface , but also portray curled or wrinkled surface by scraped off with a scalpel of each rivet line.
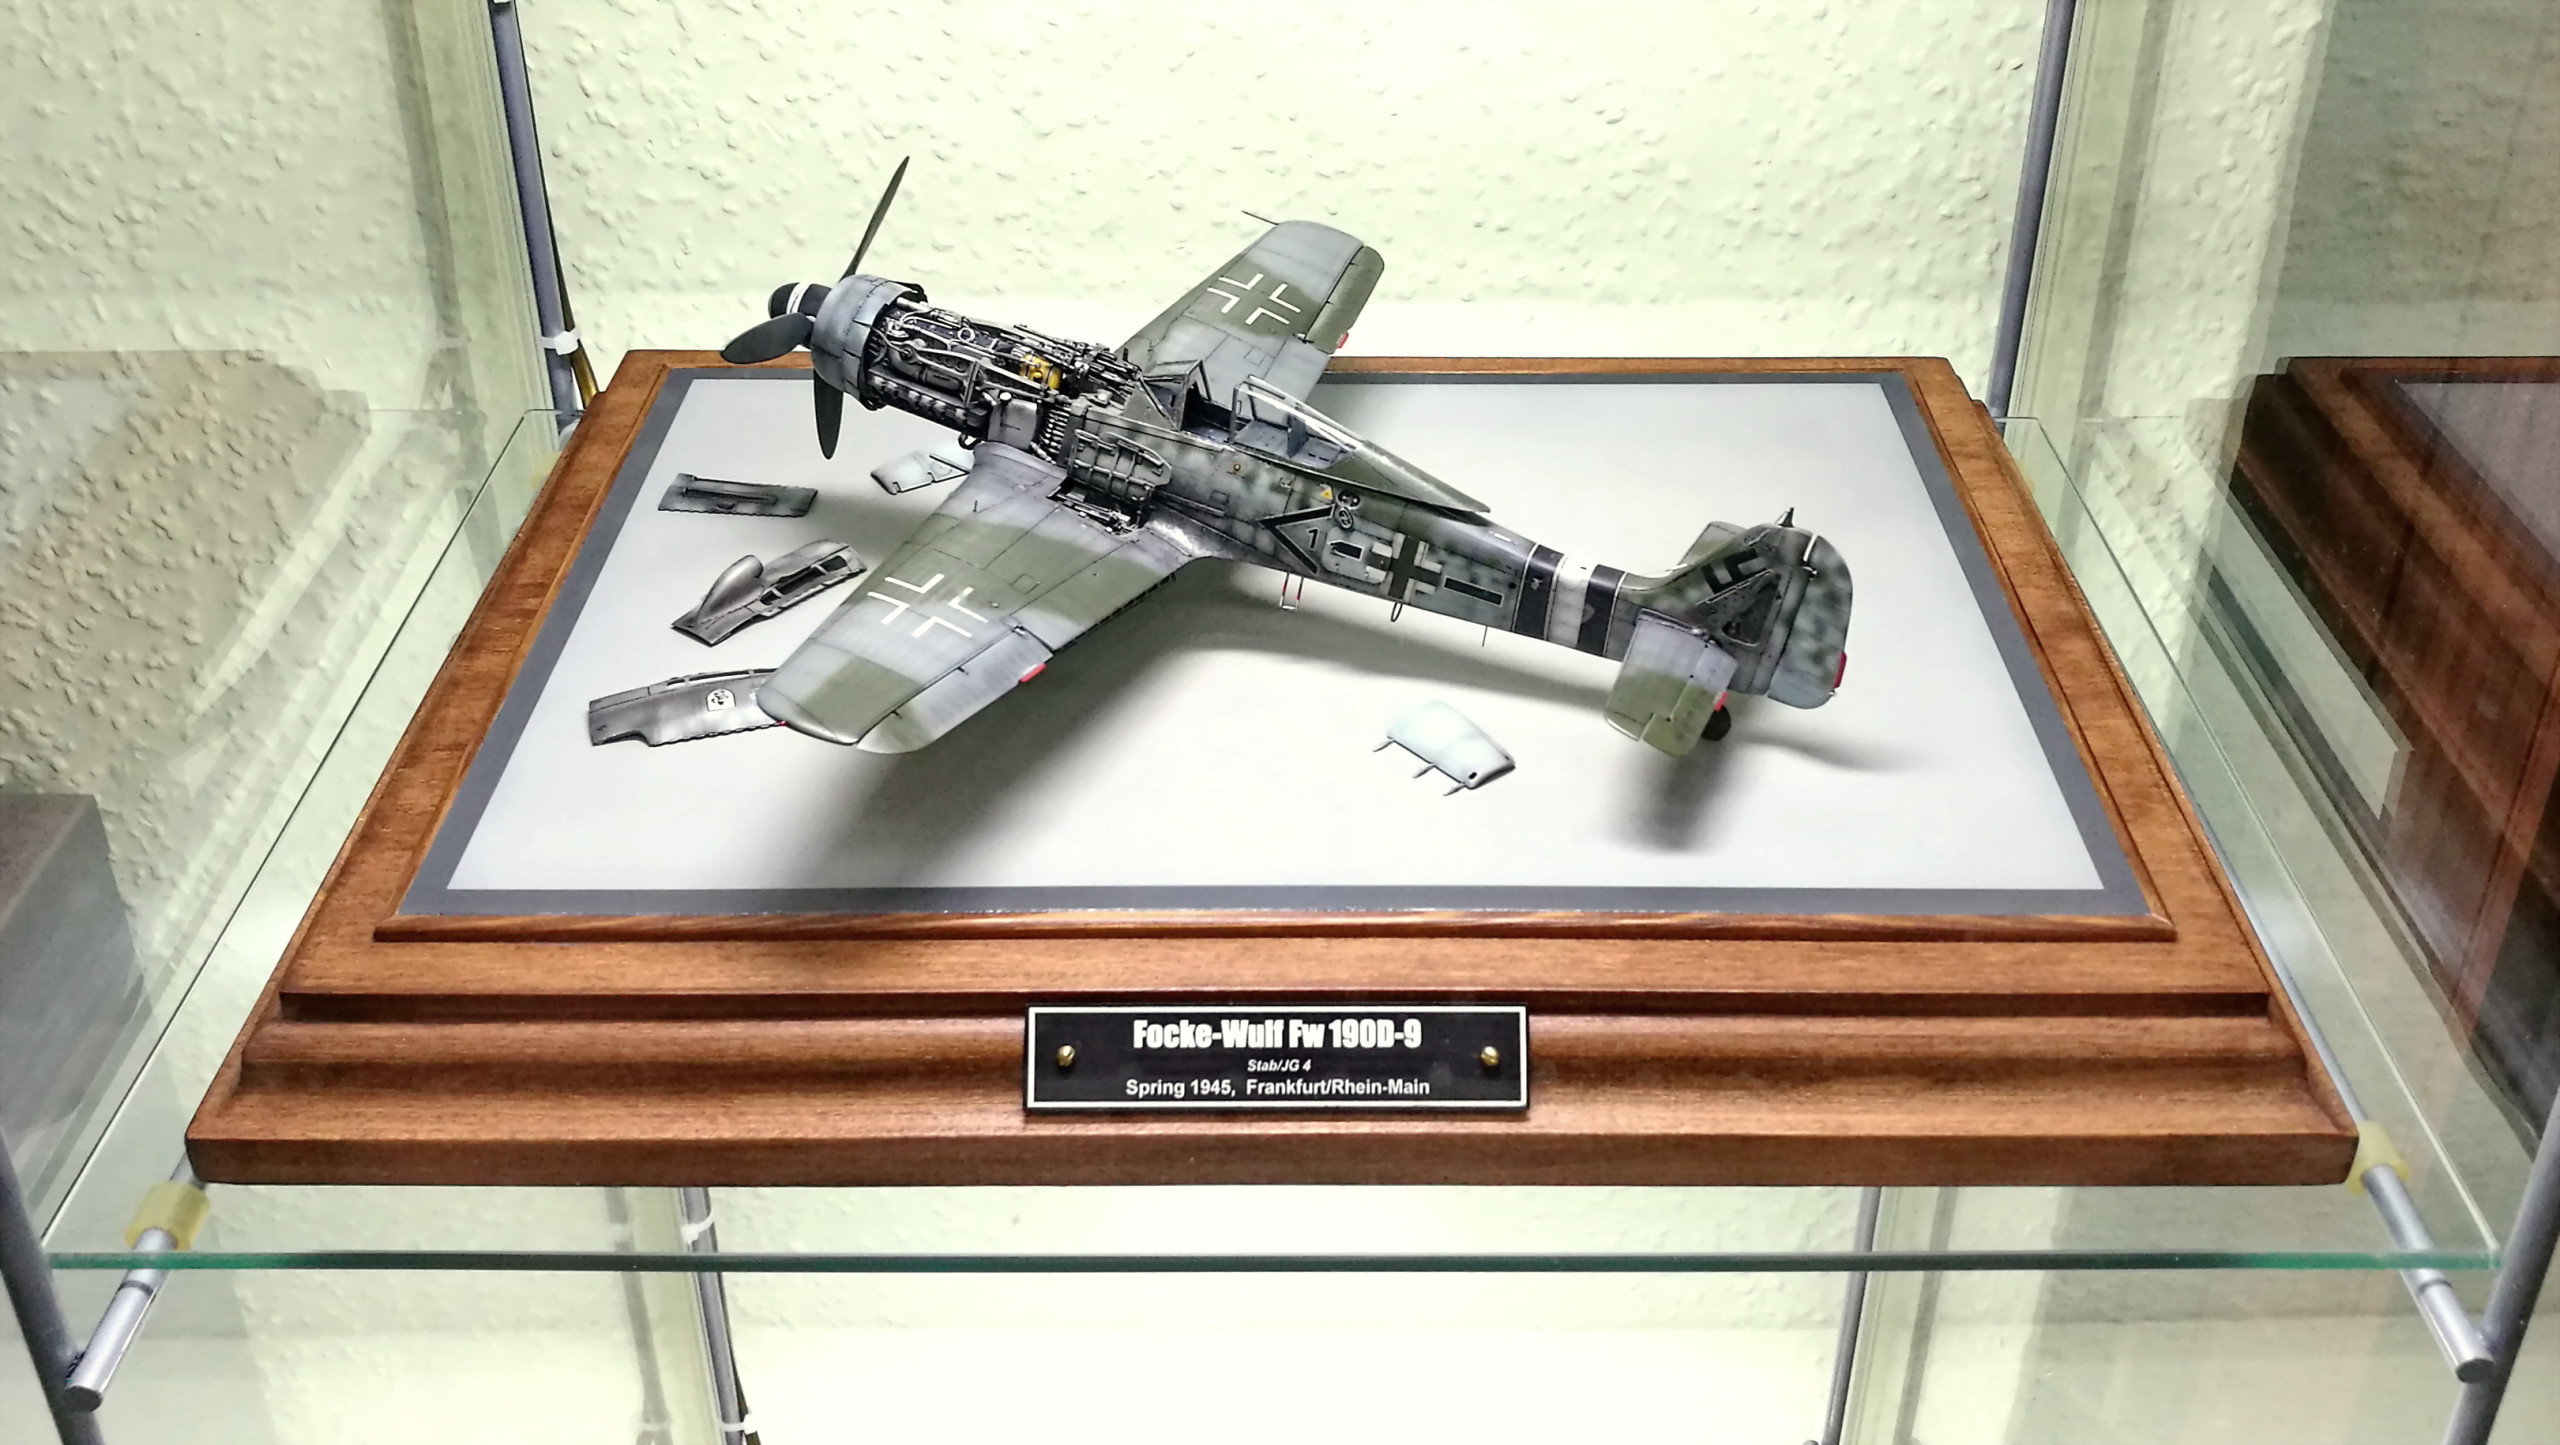
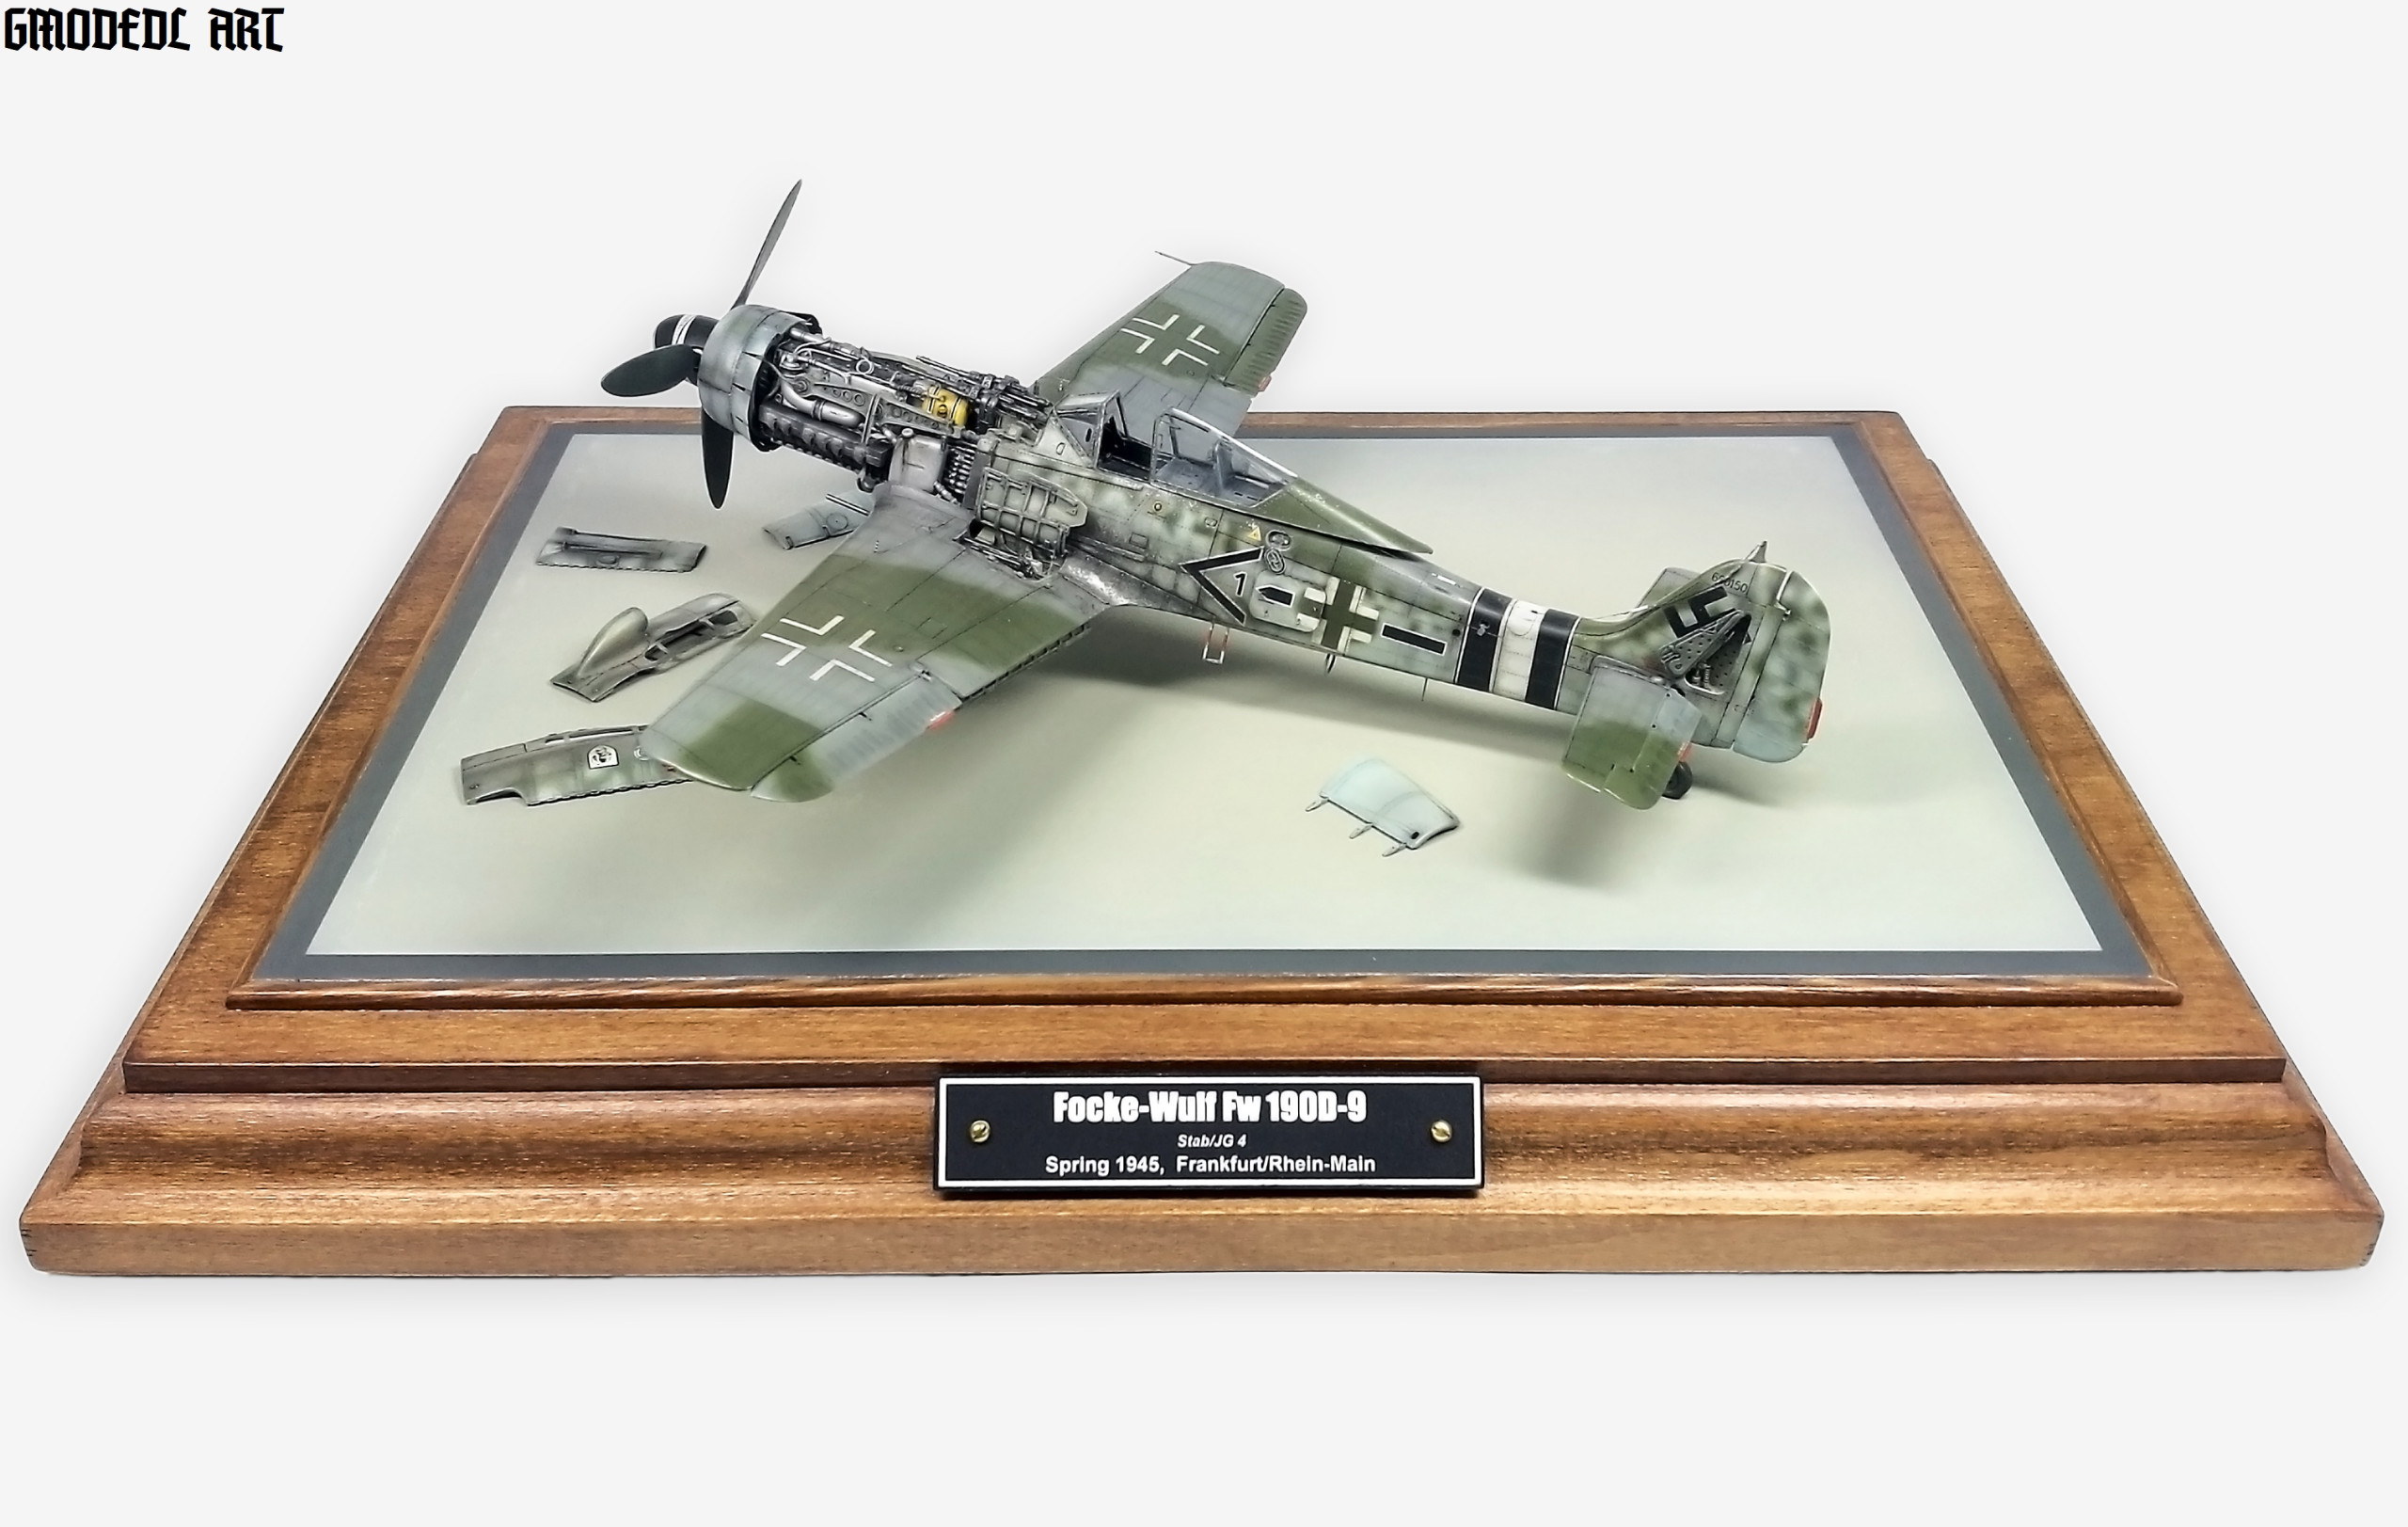
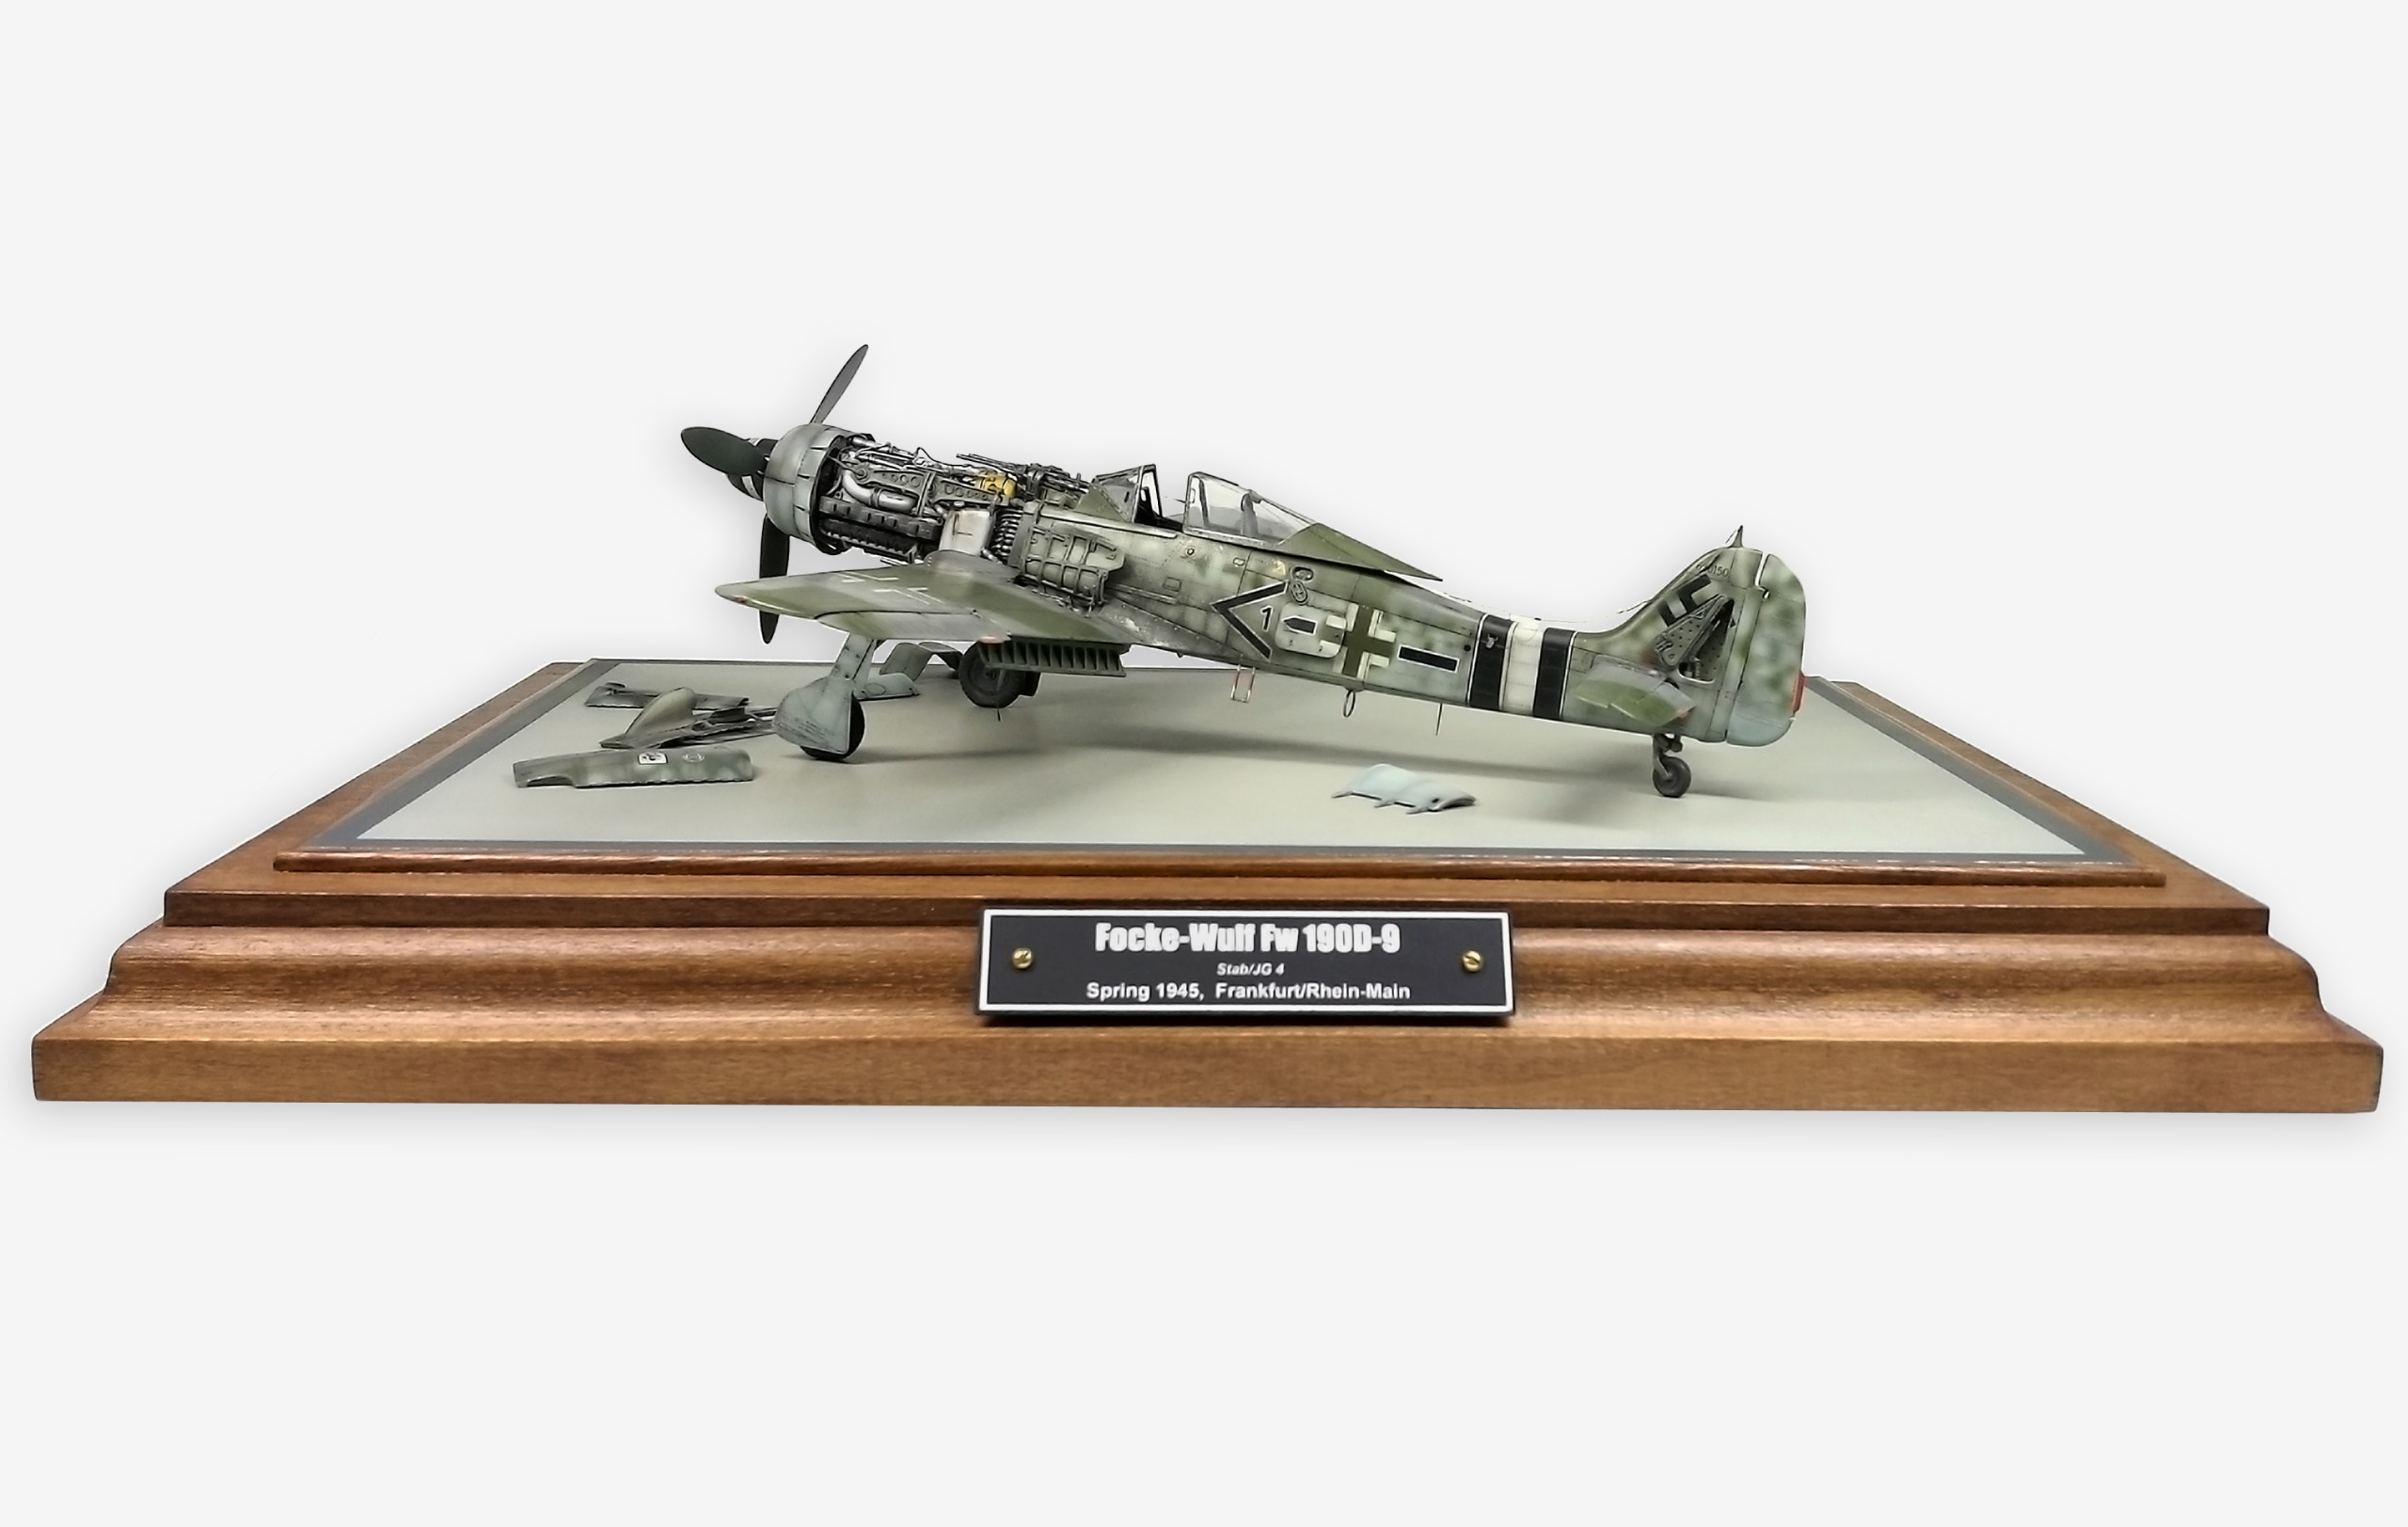
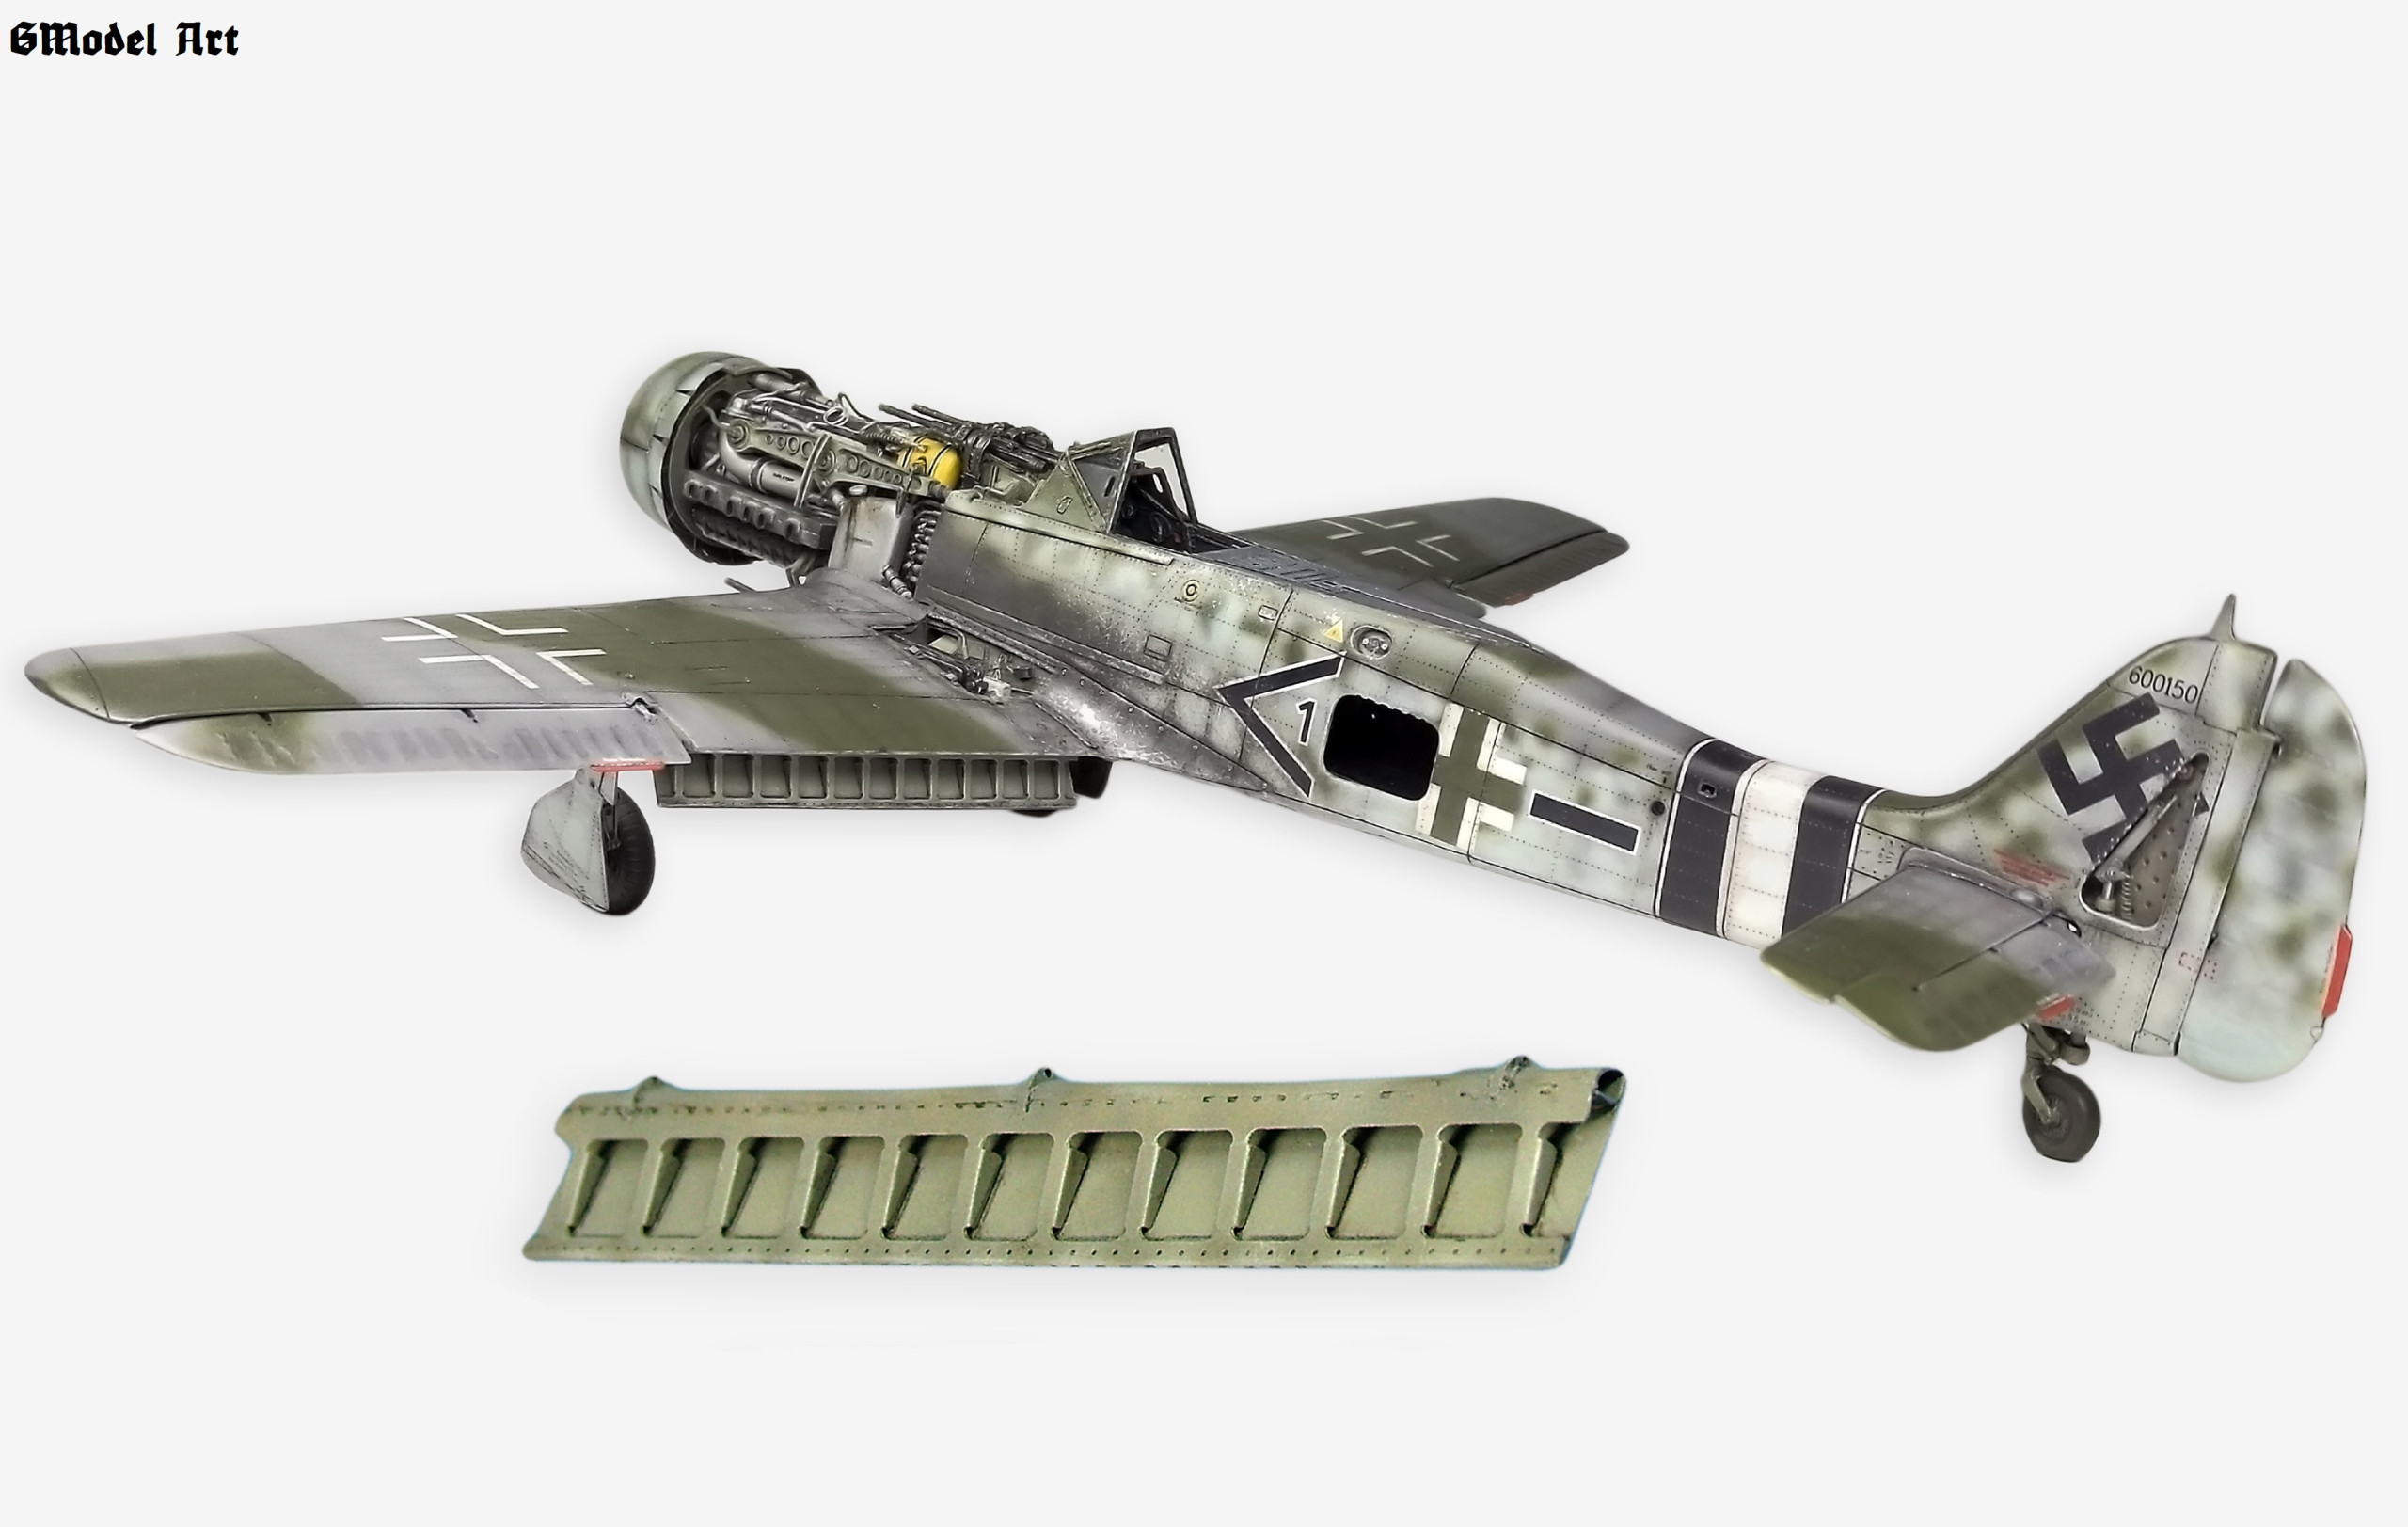
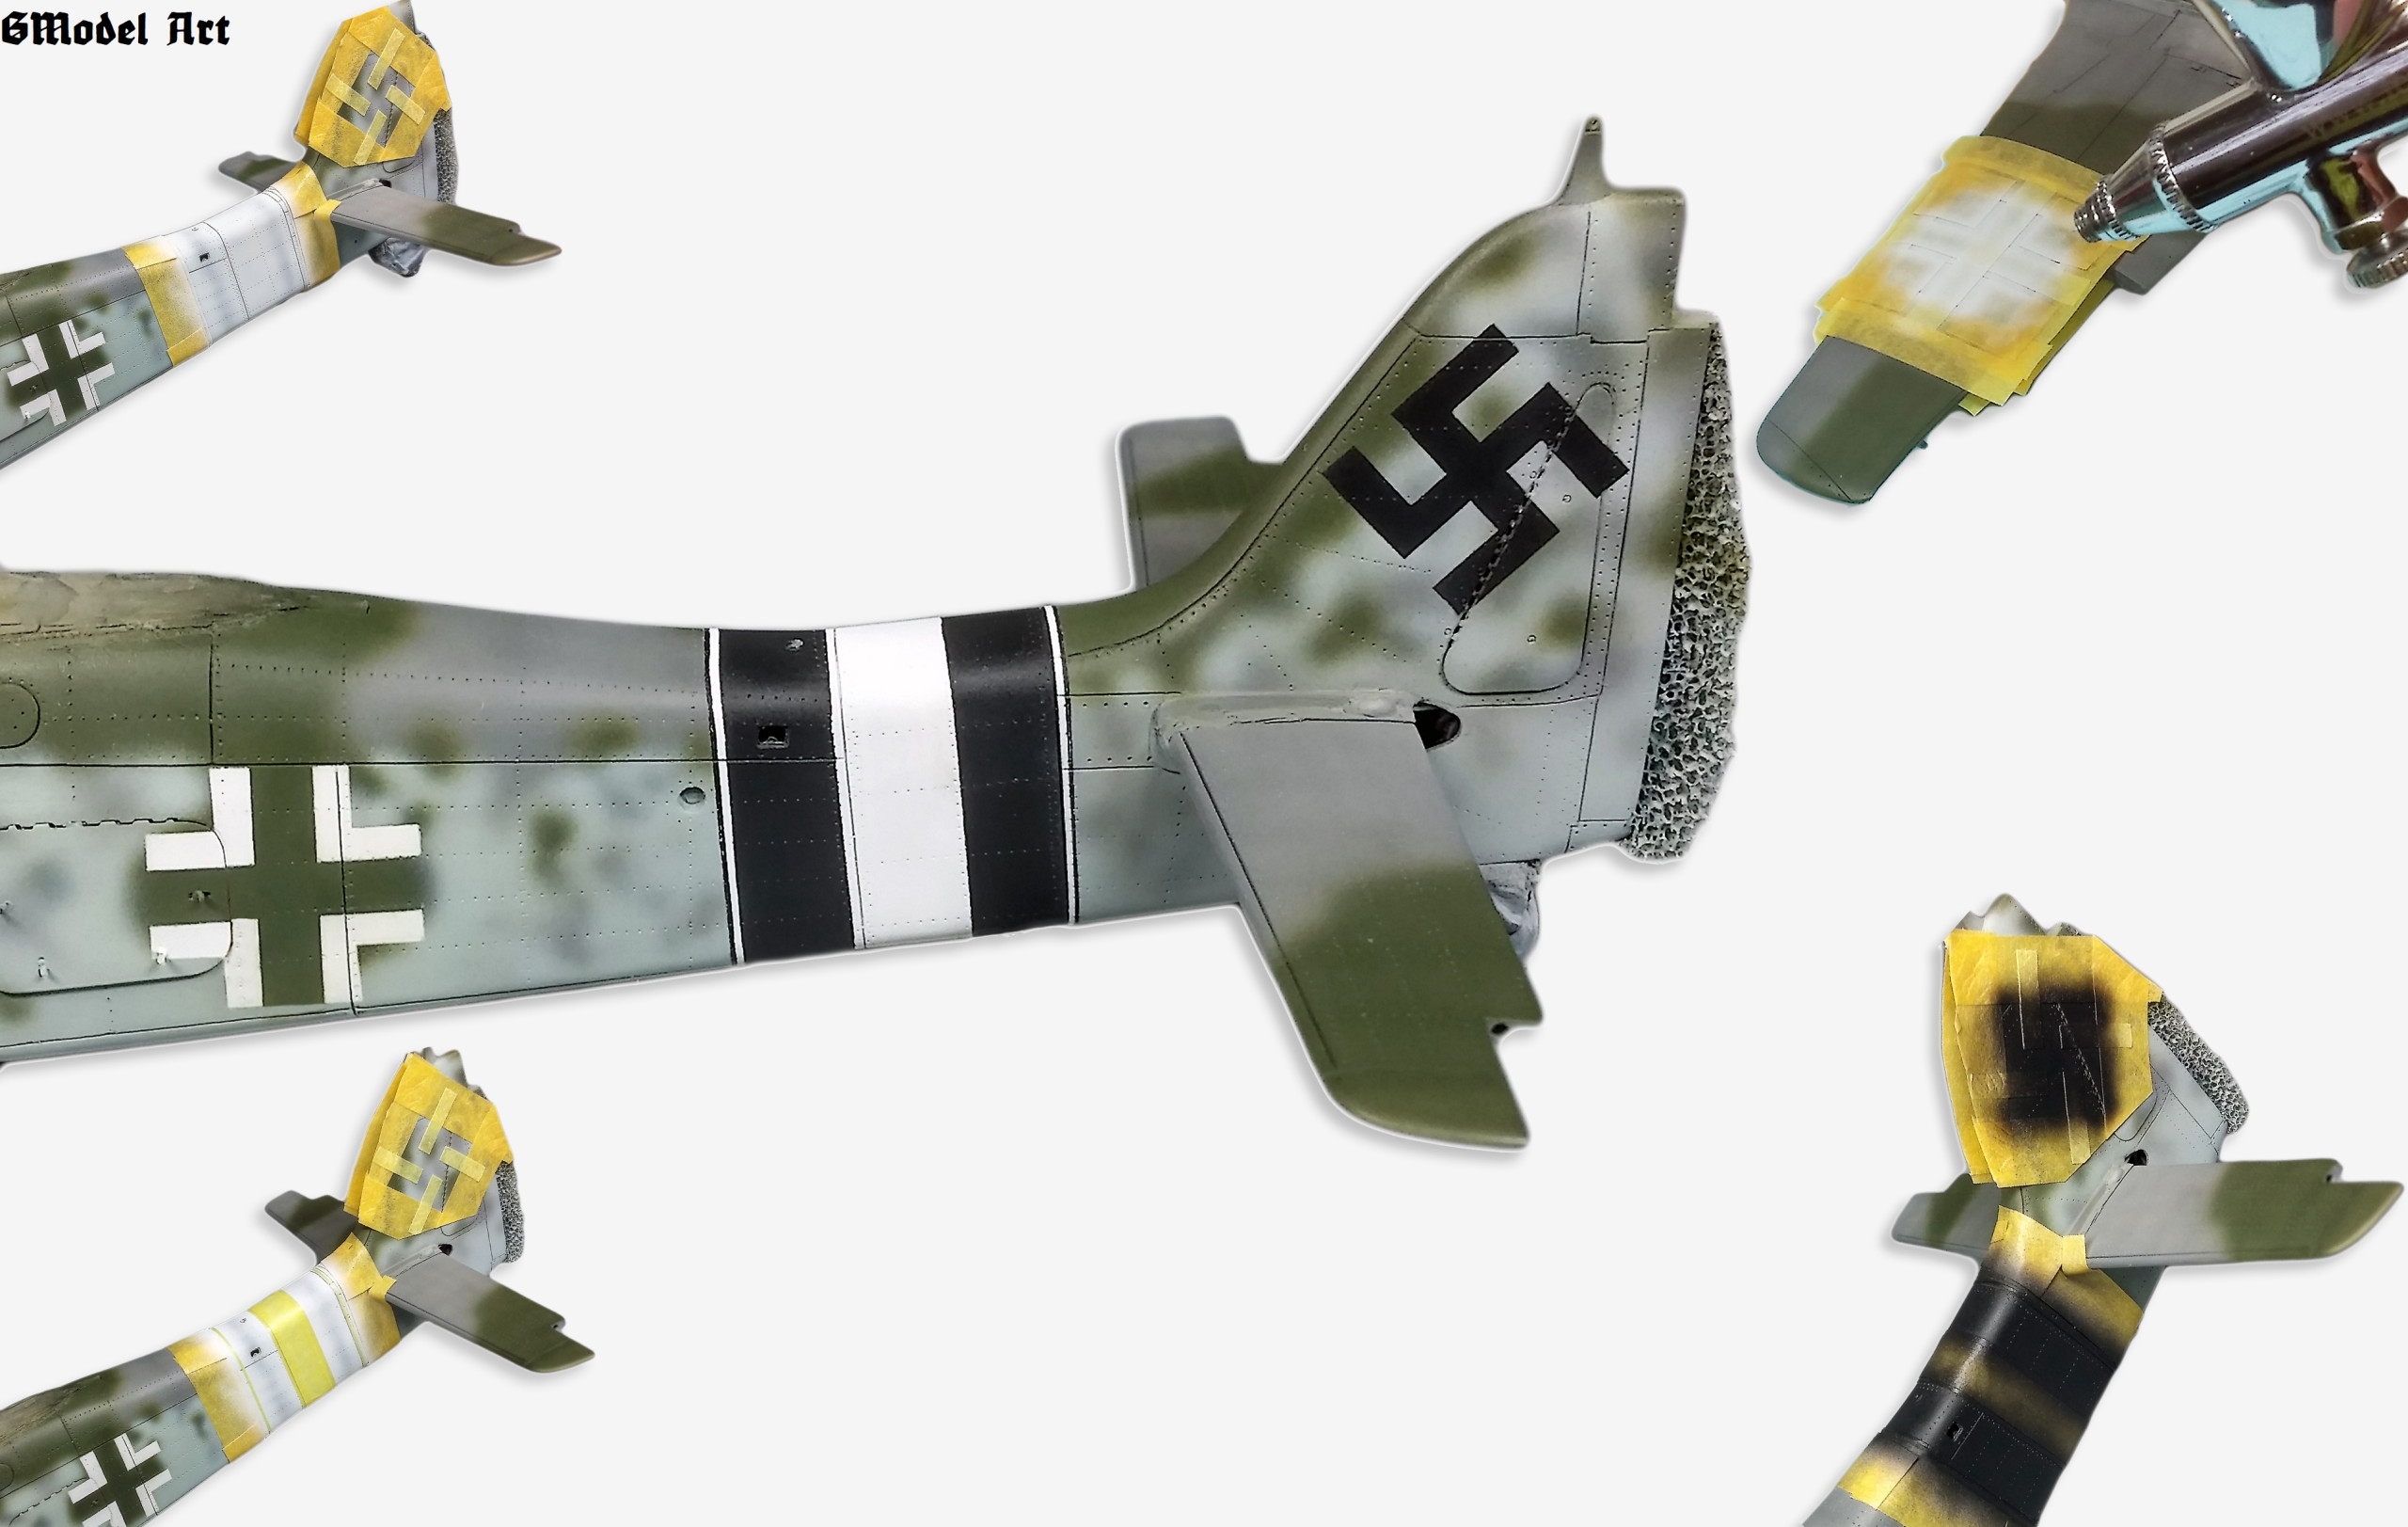
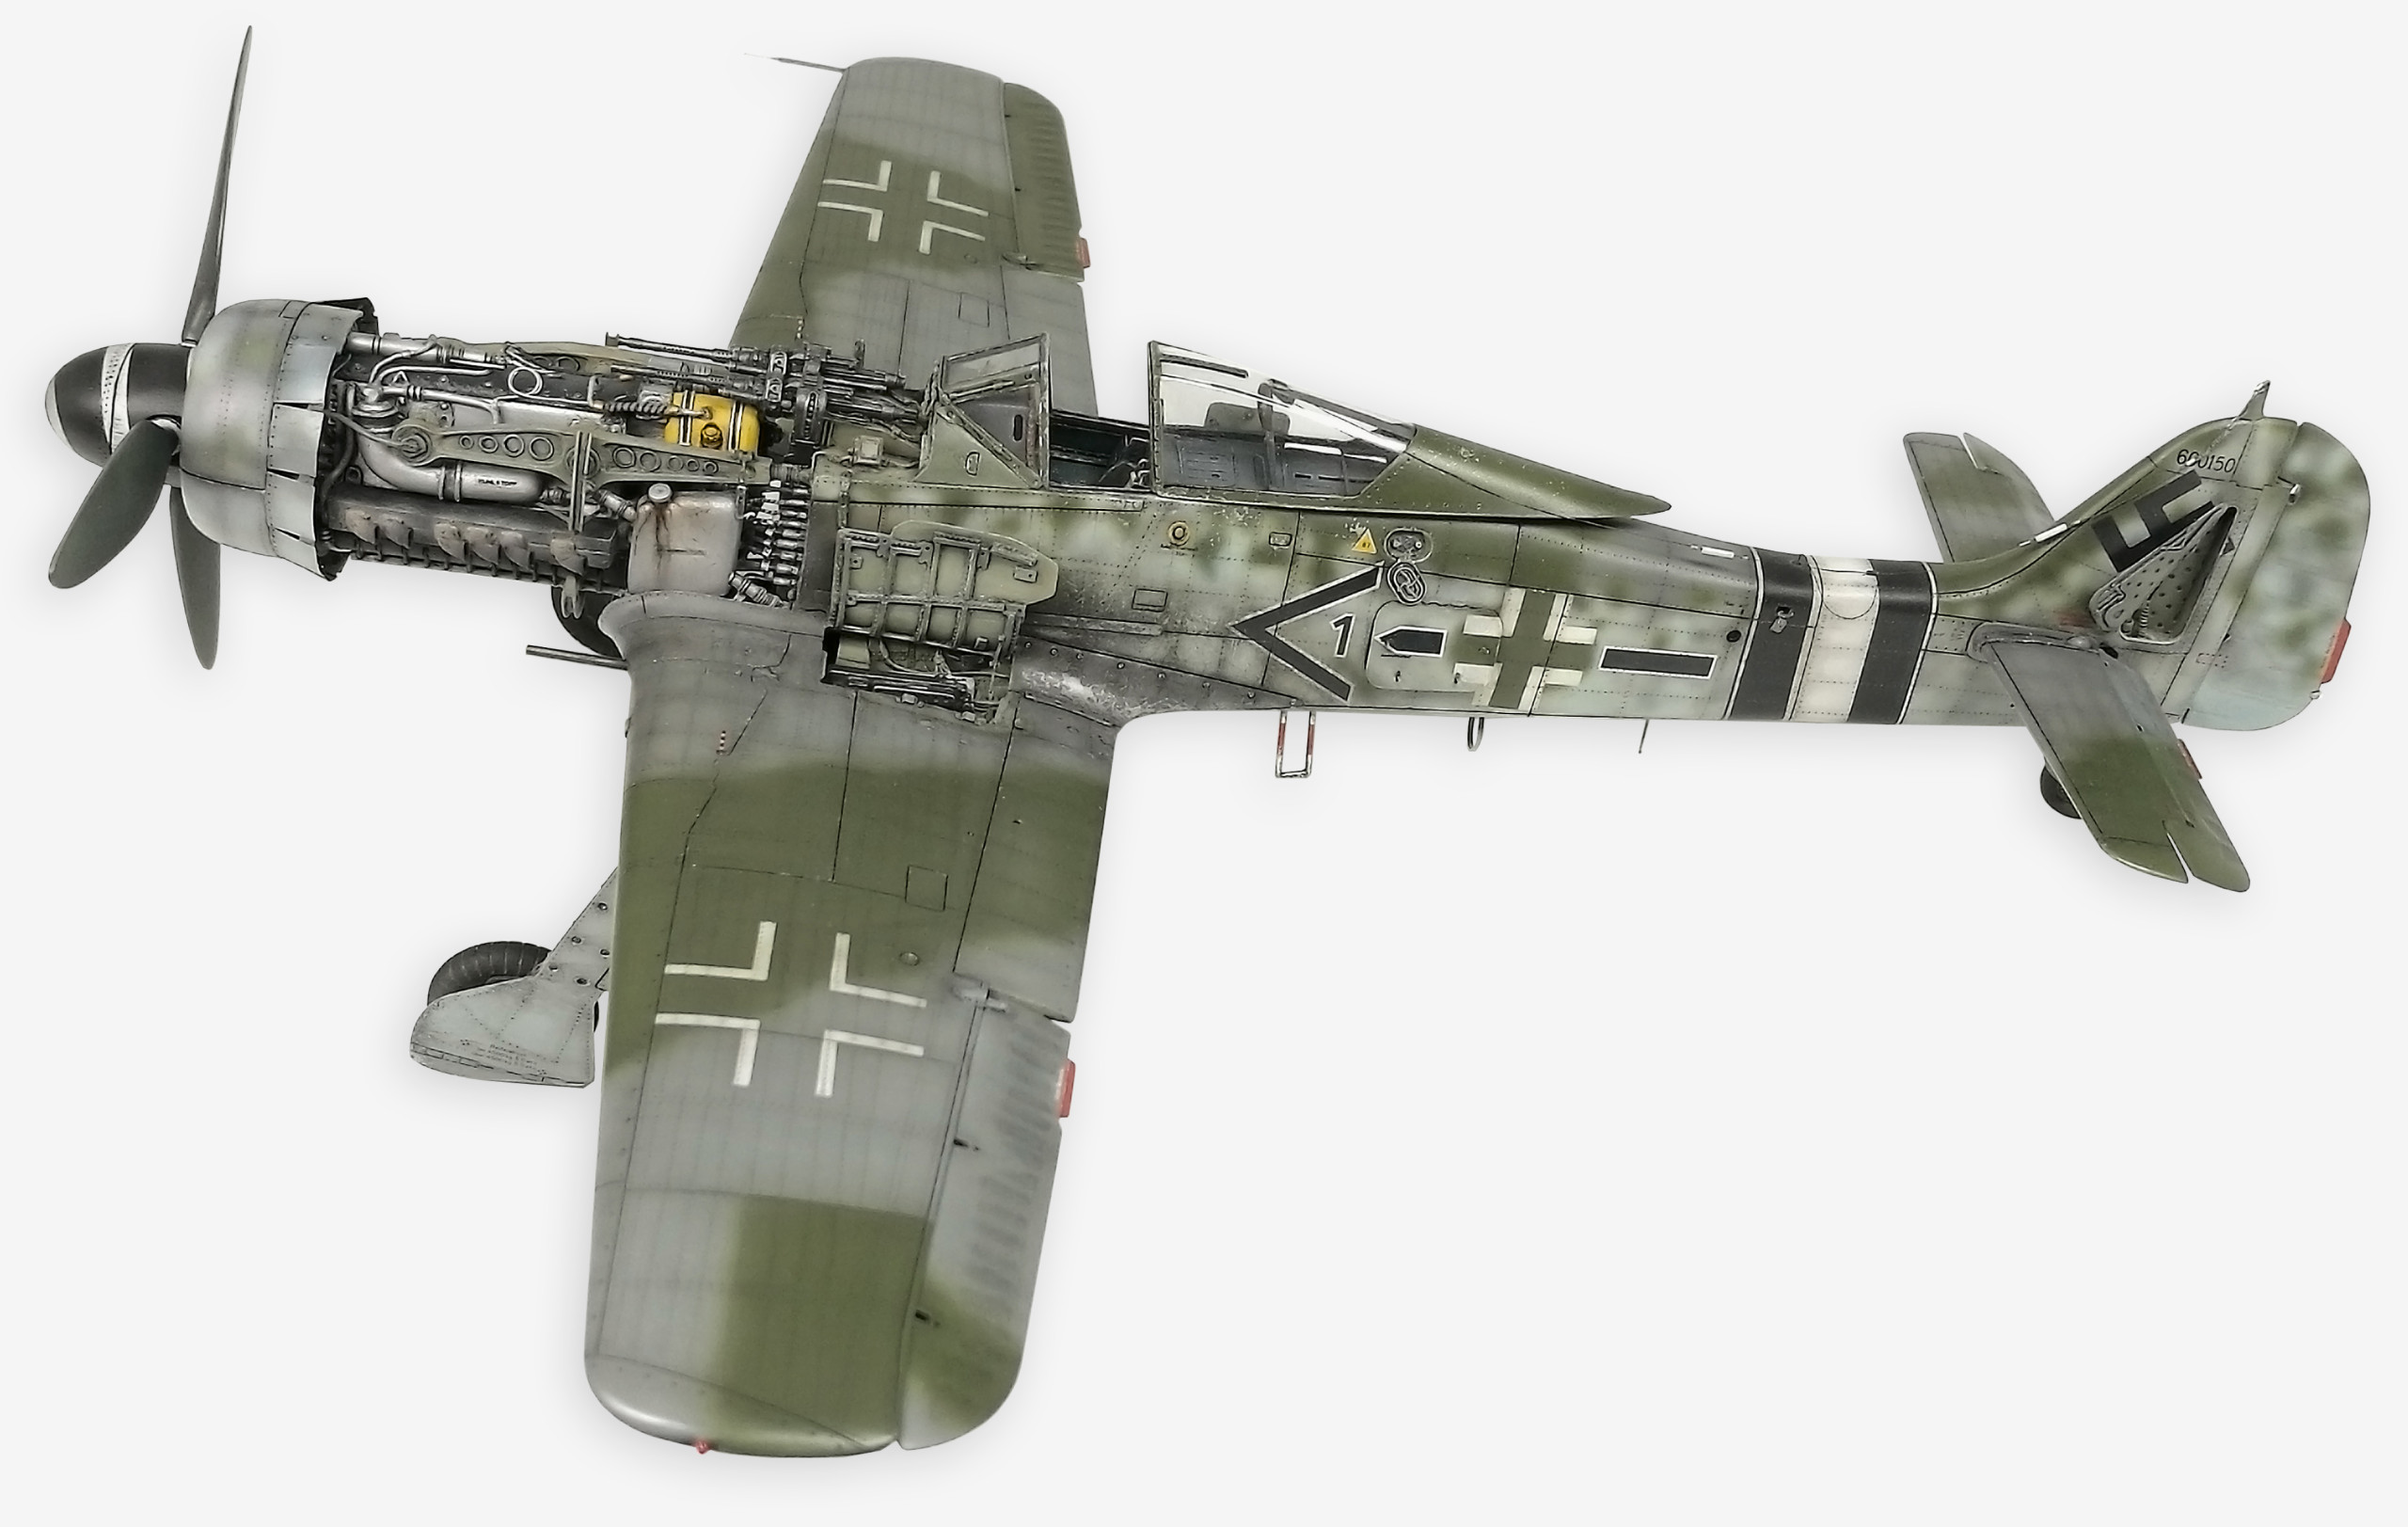
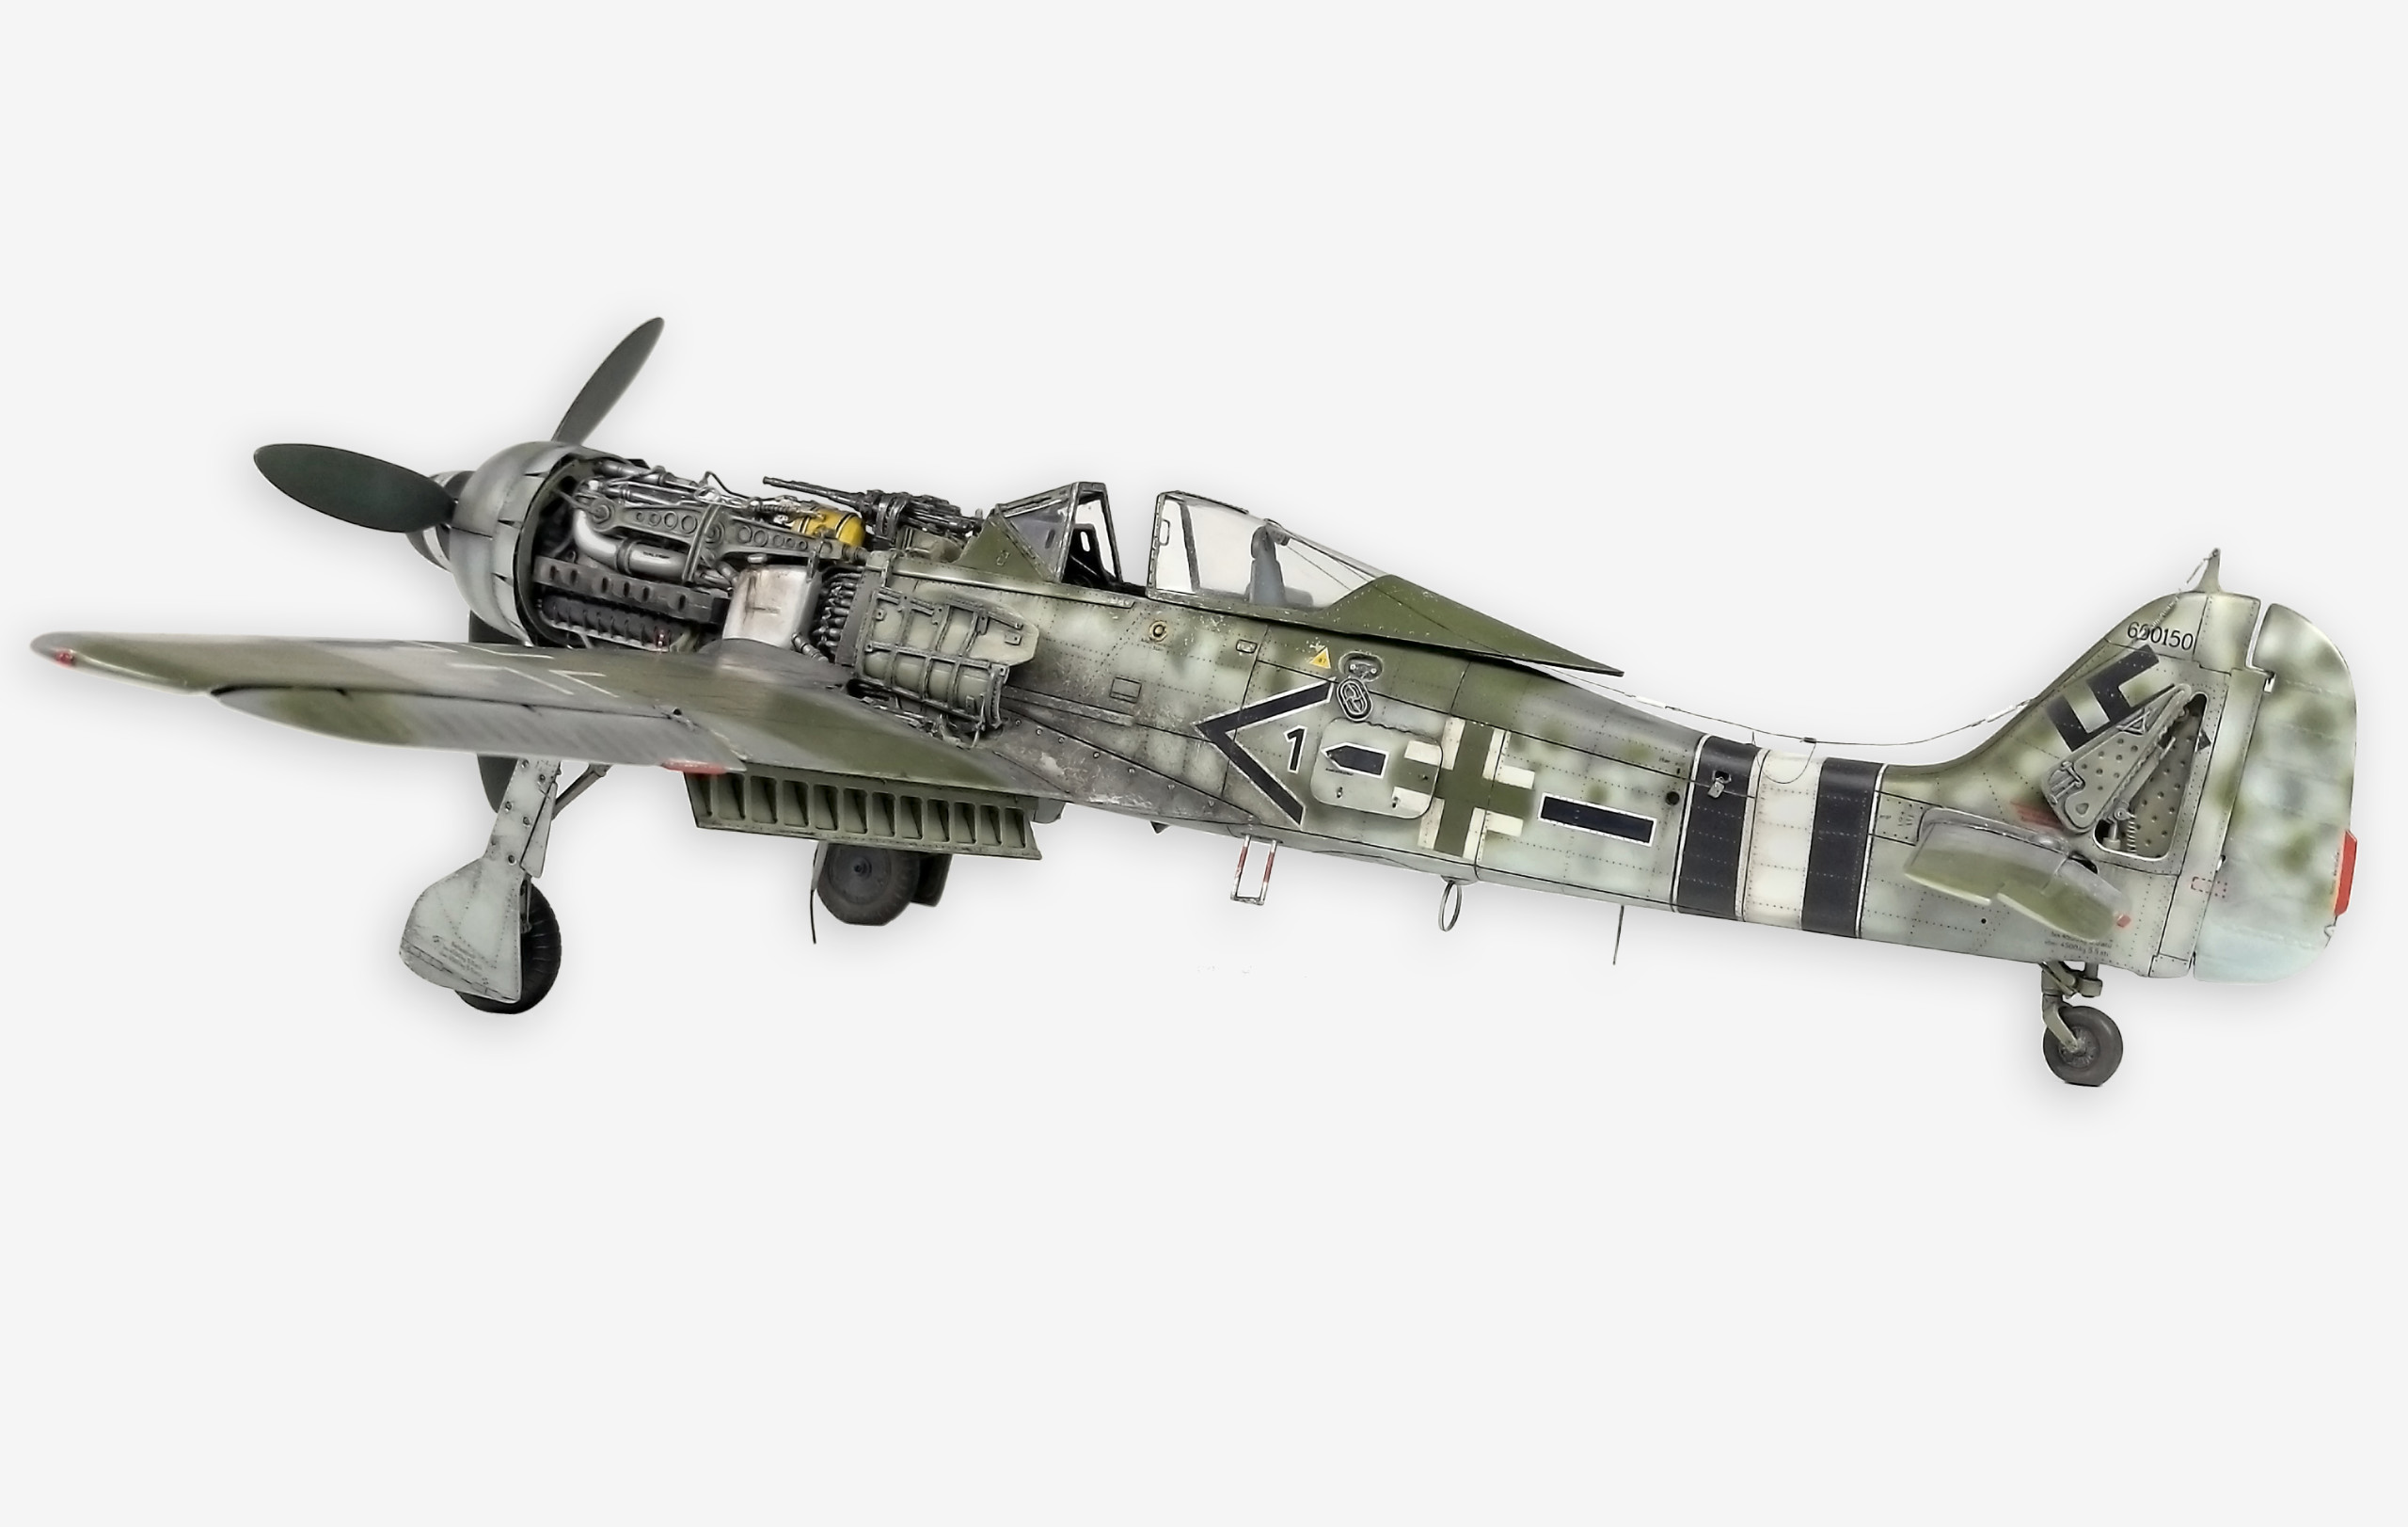
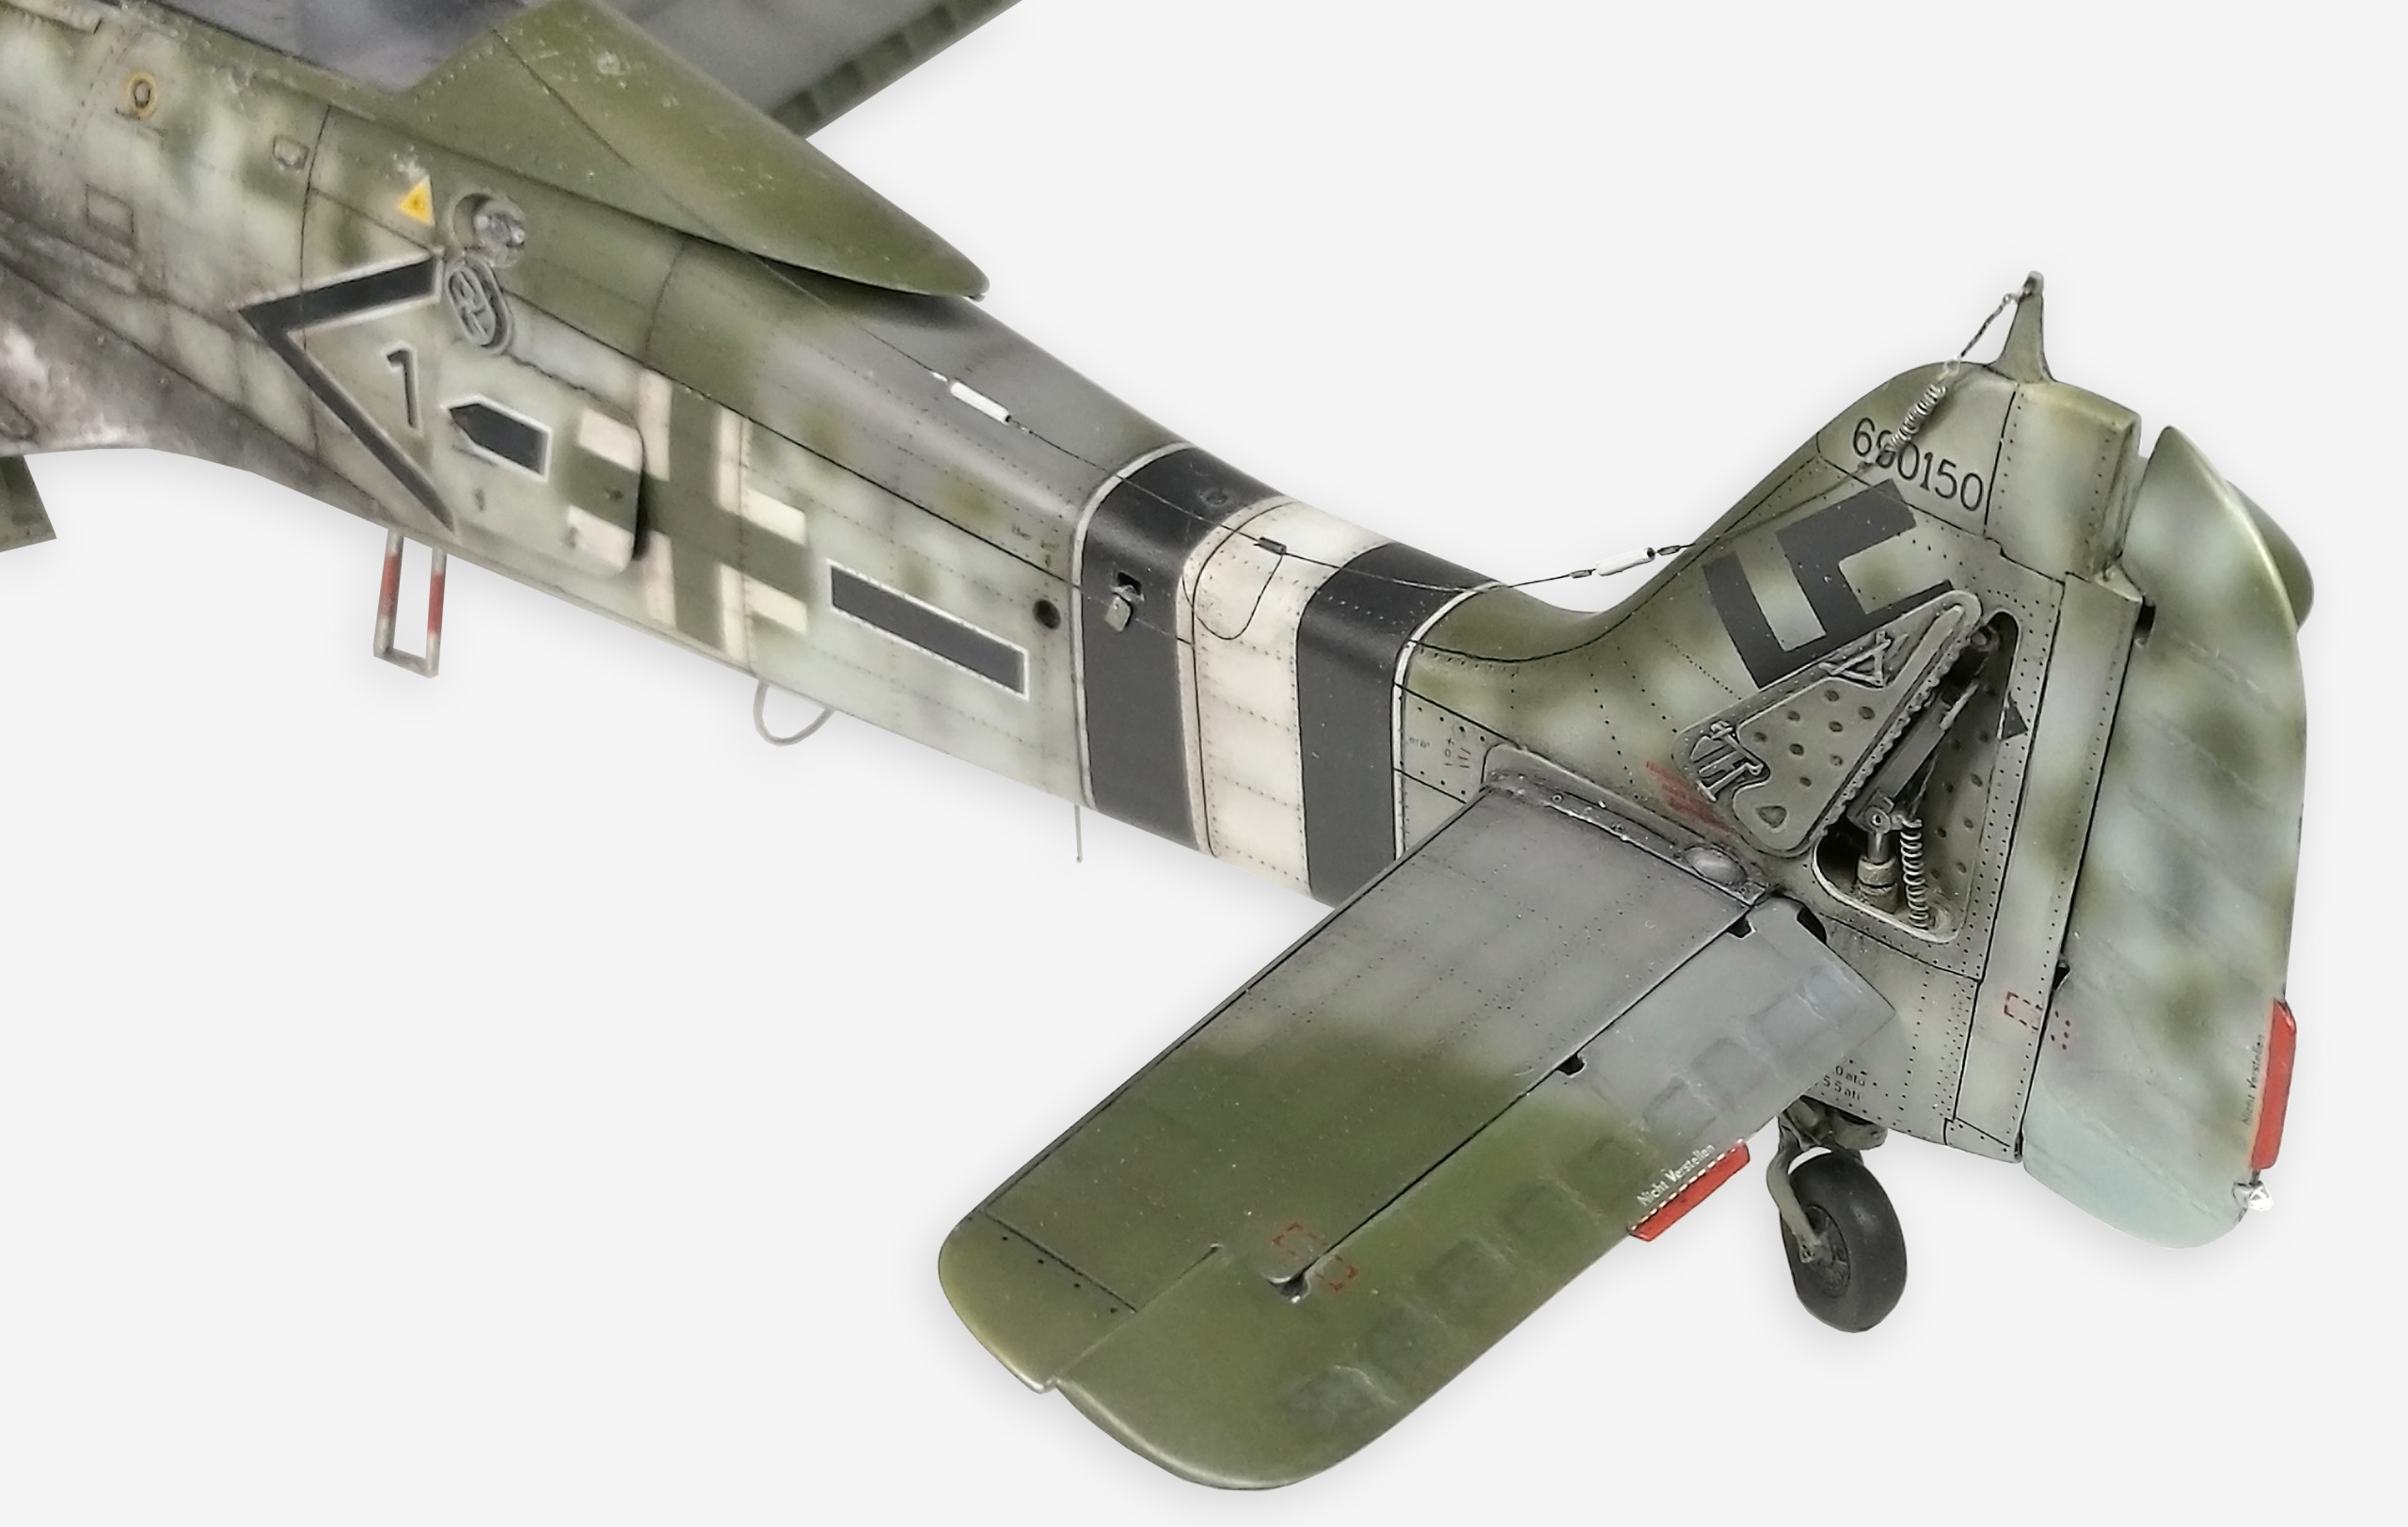
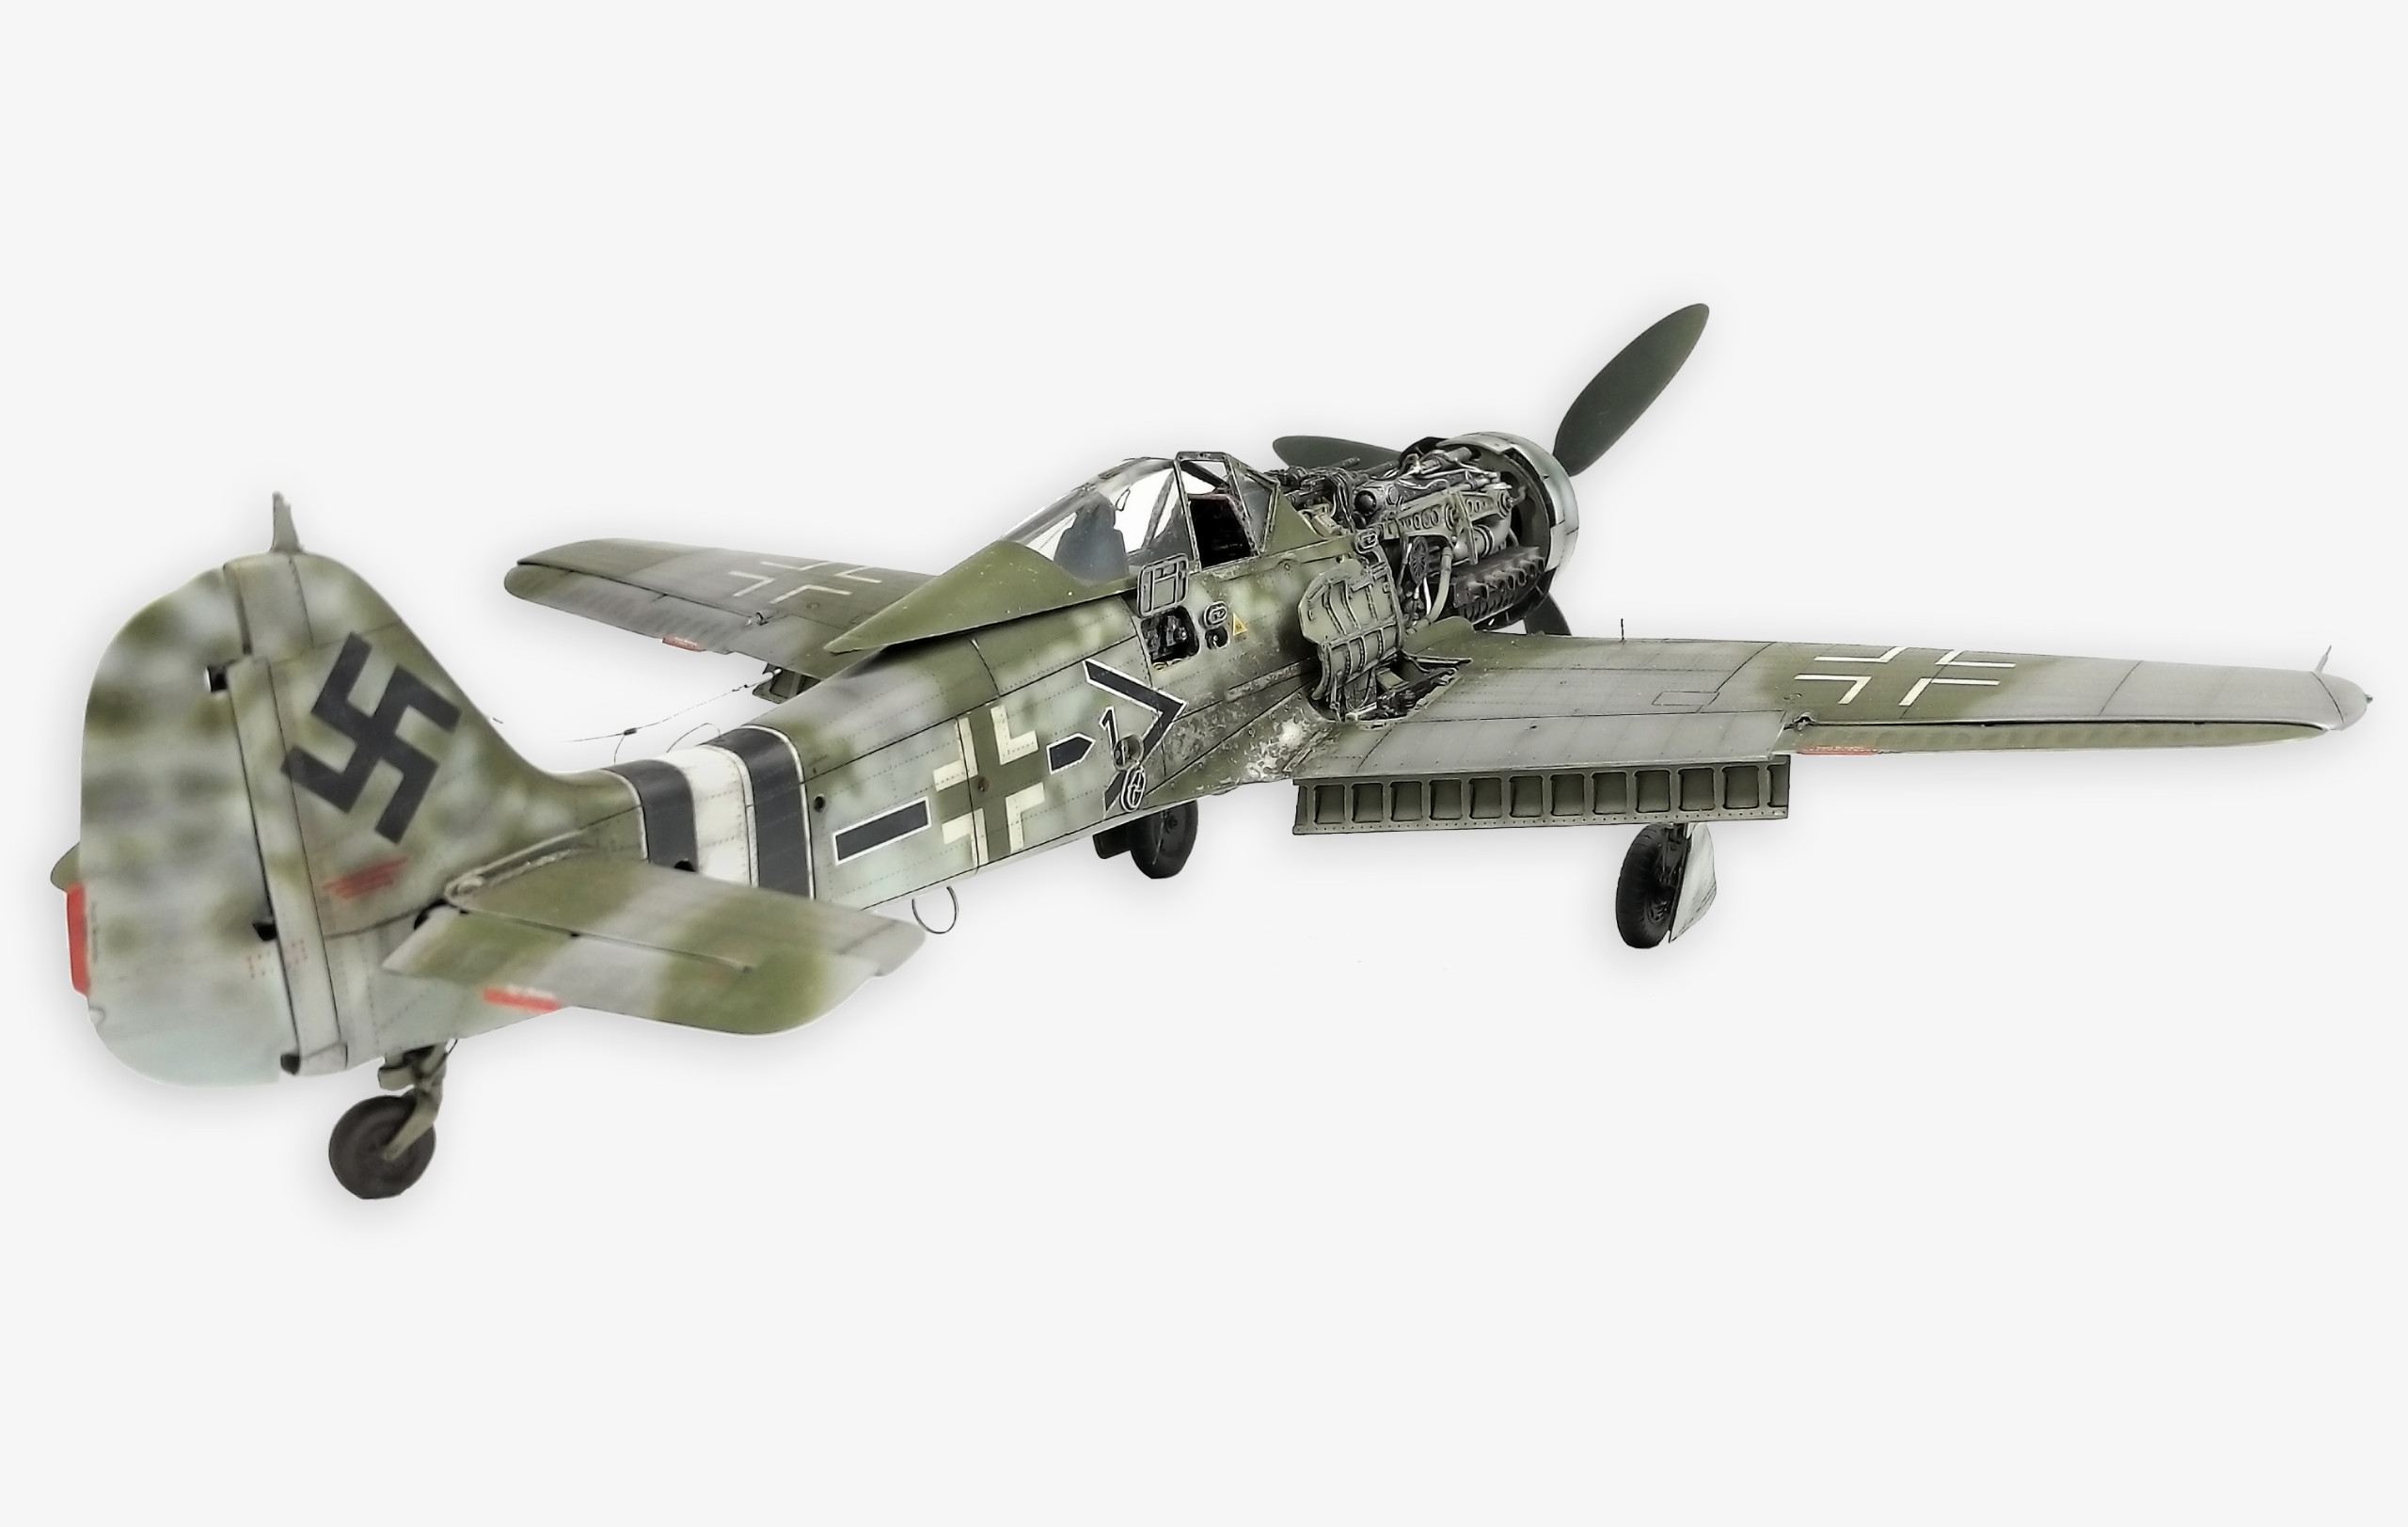
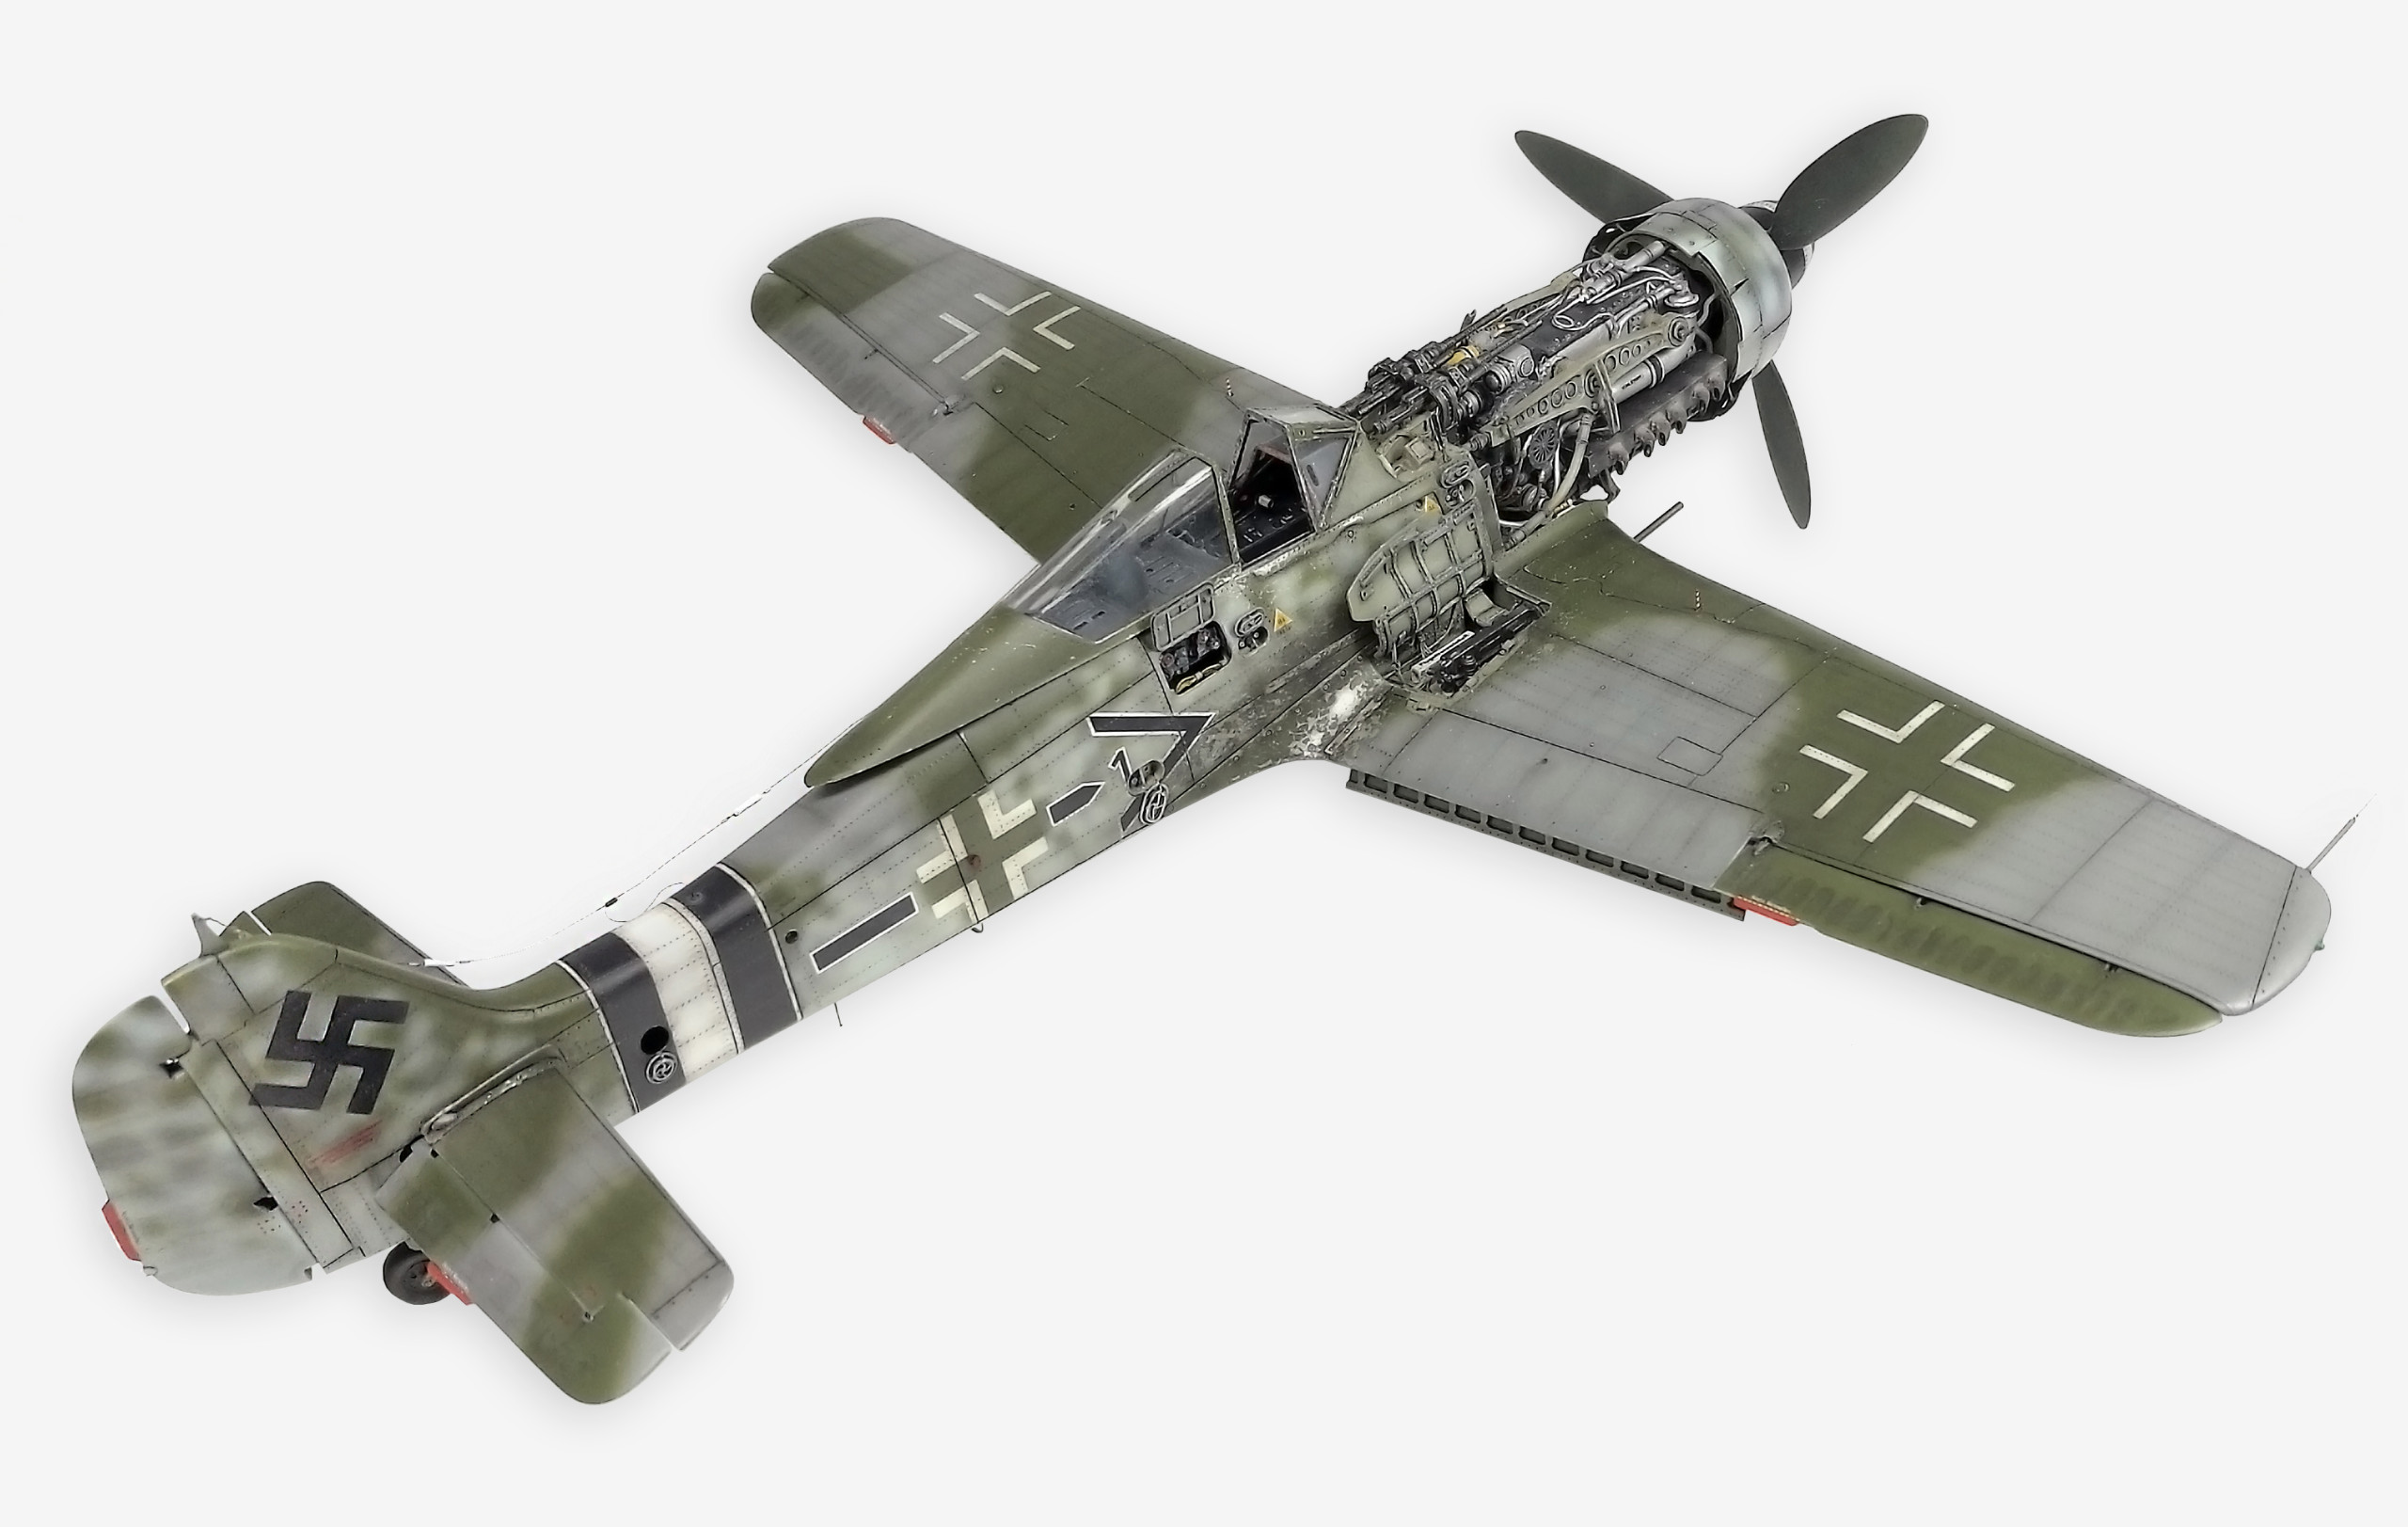
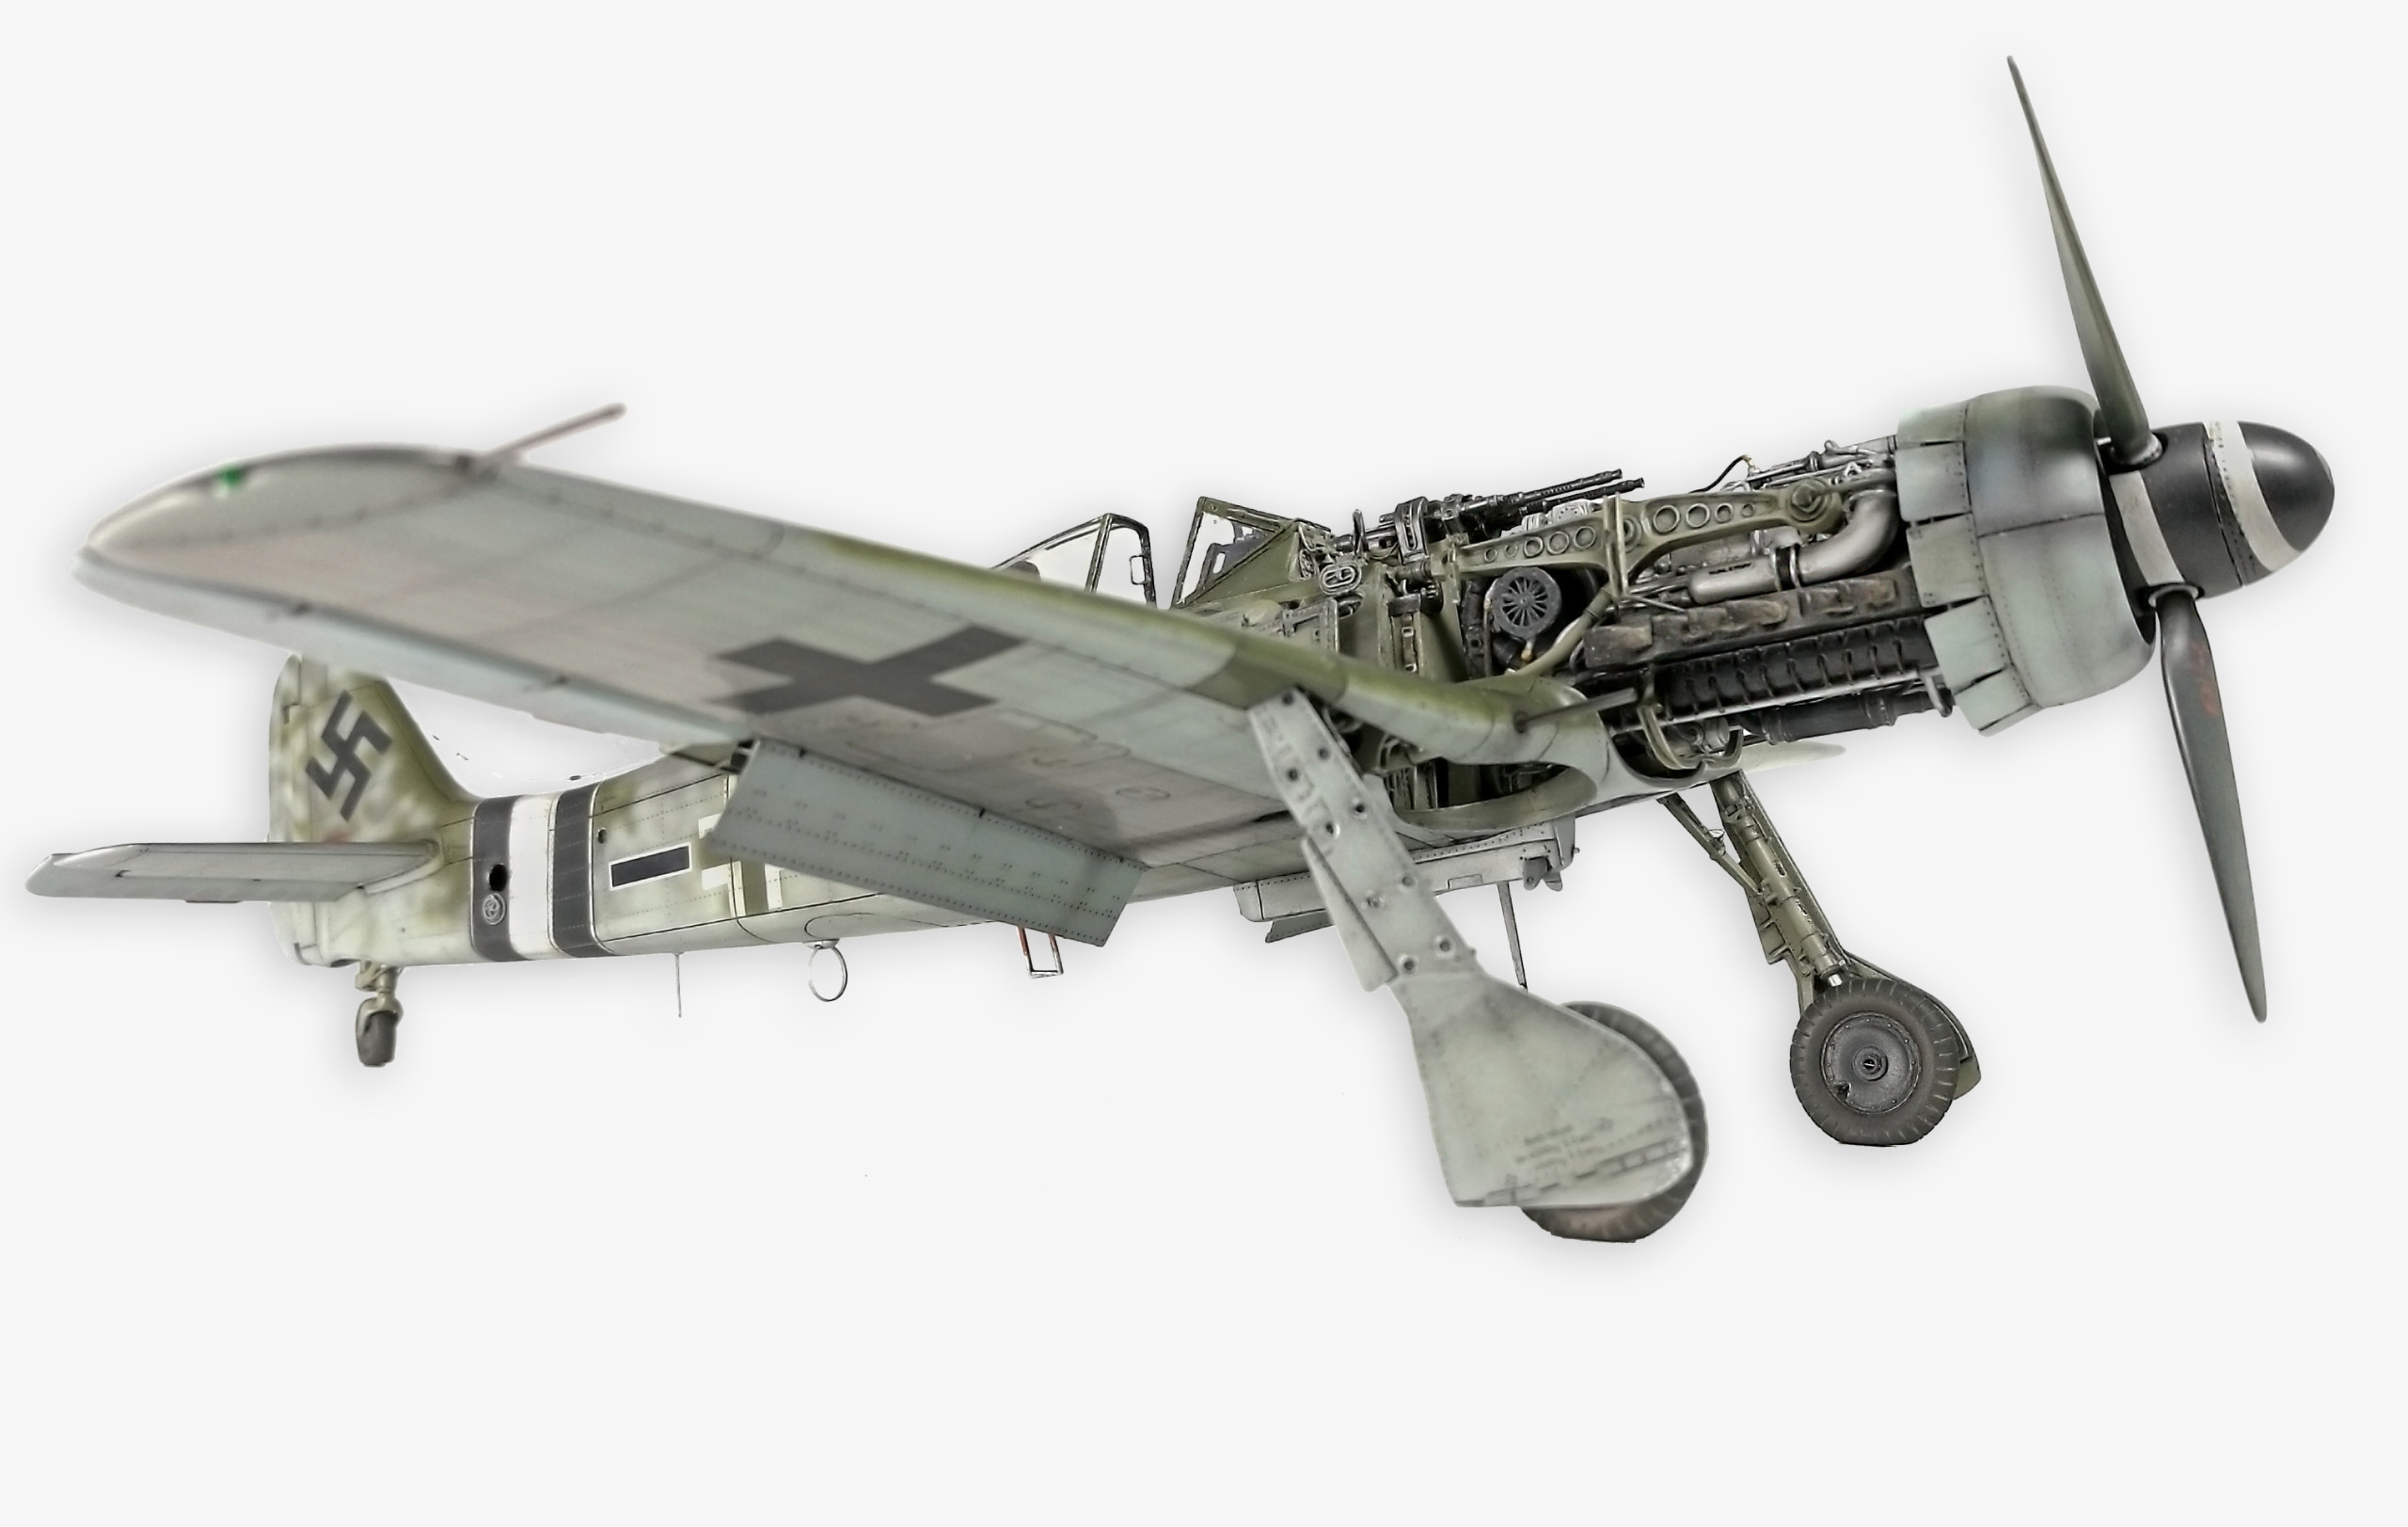
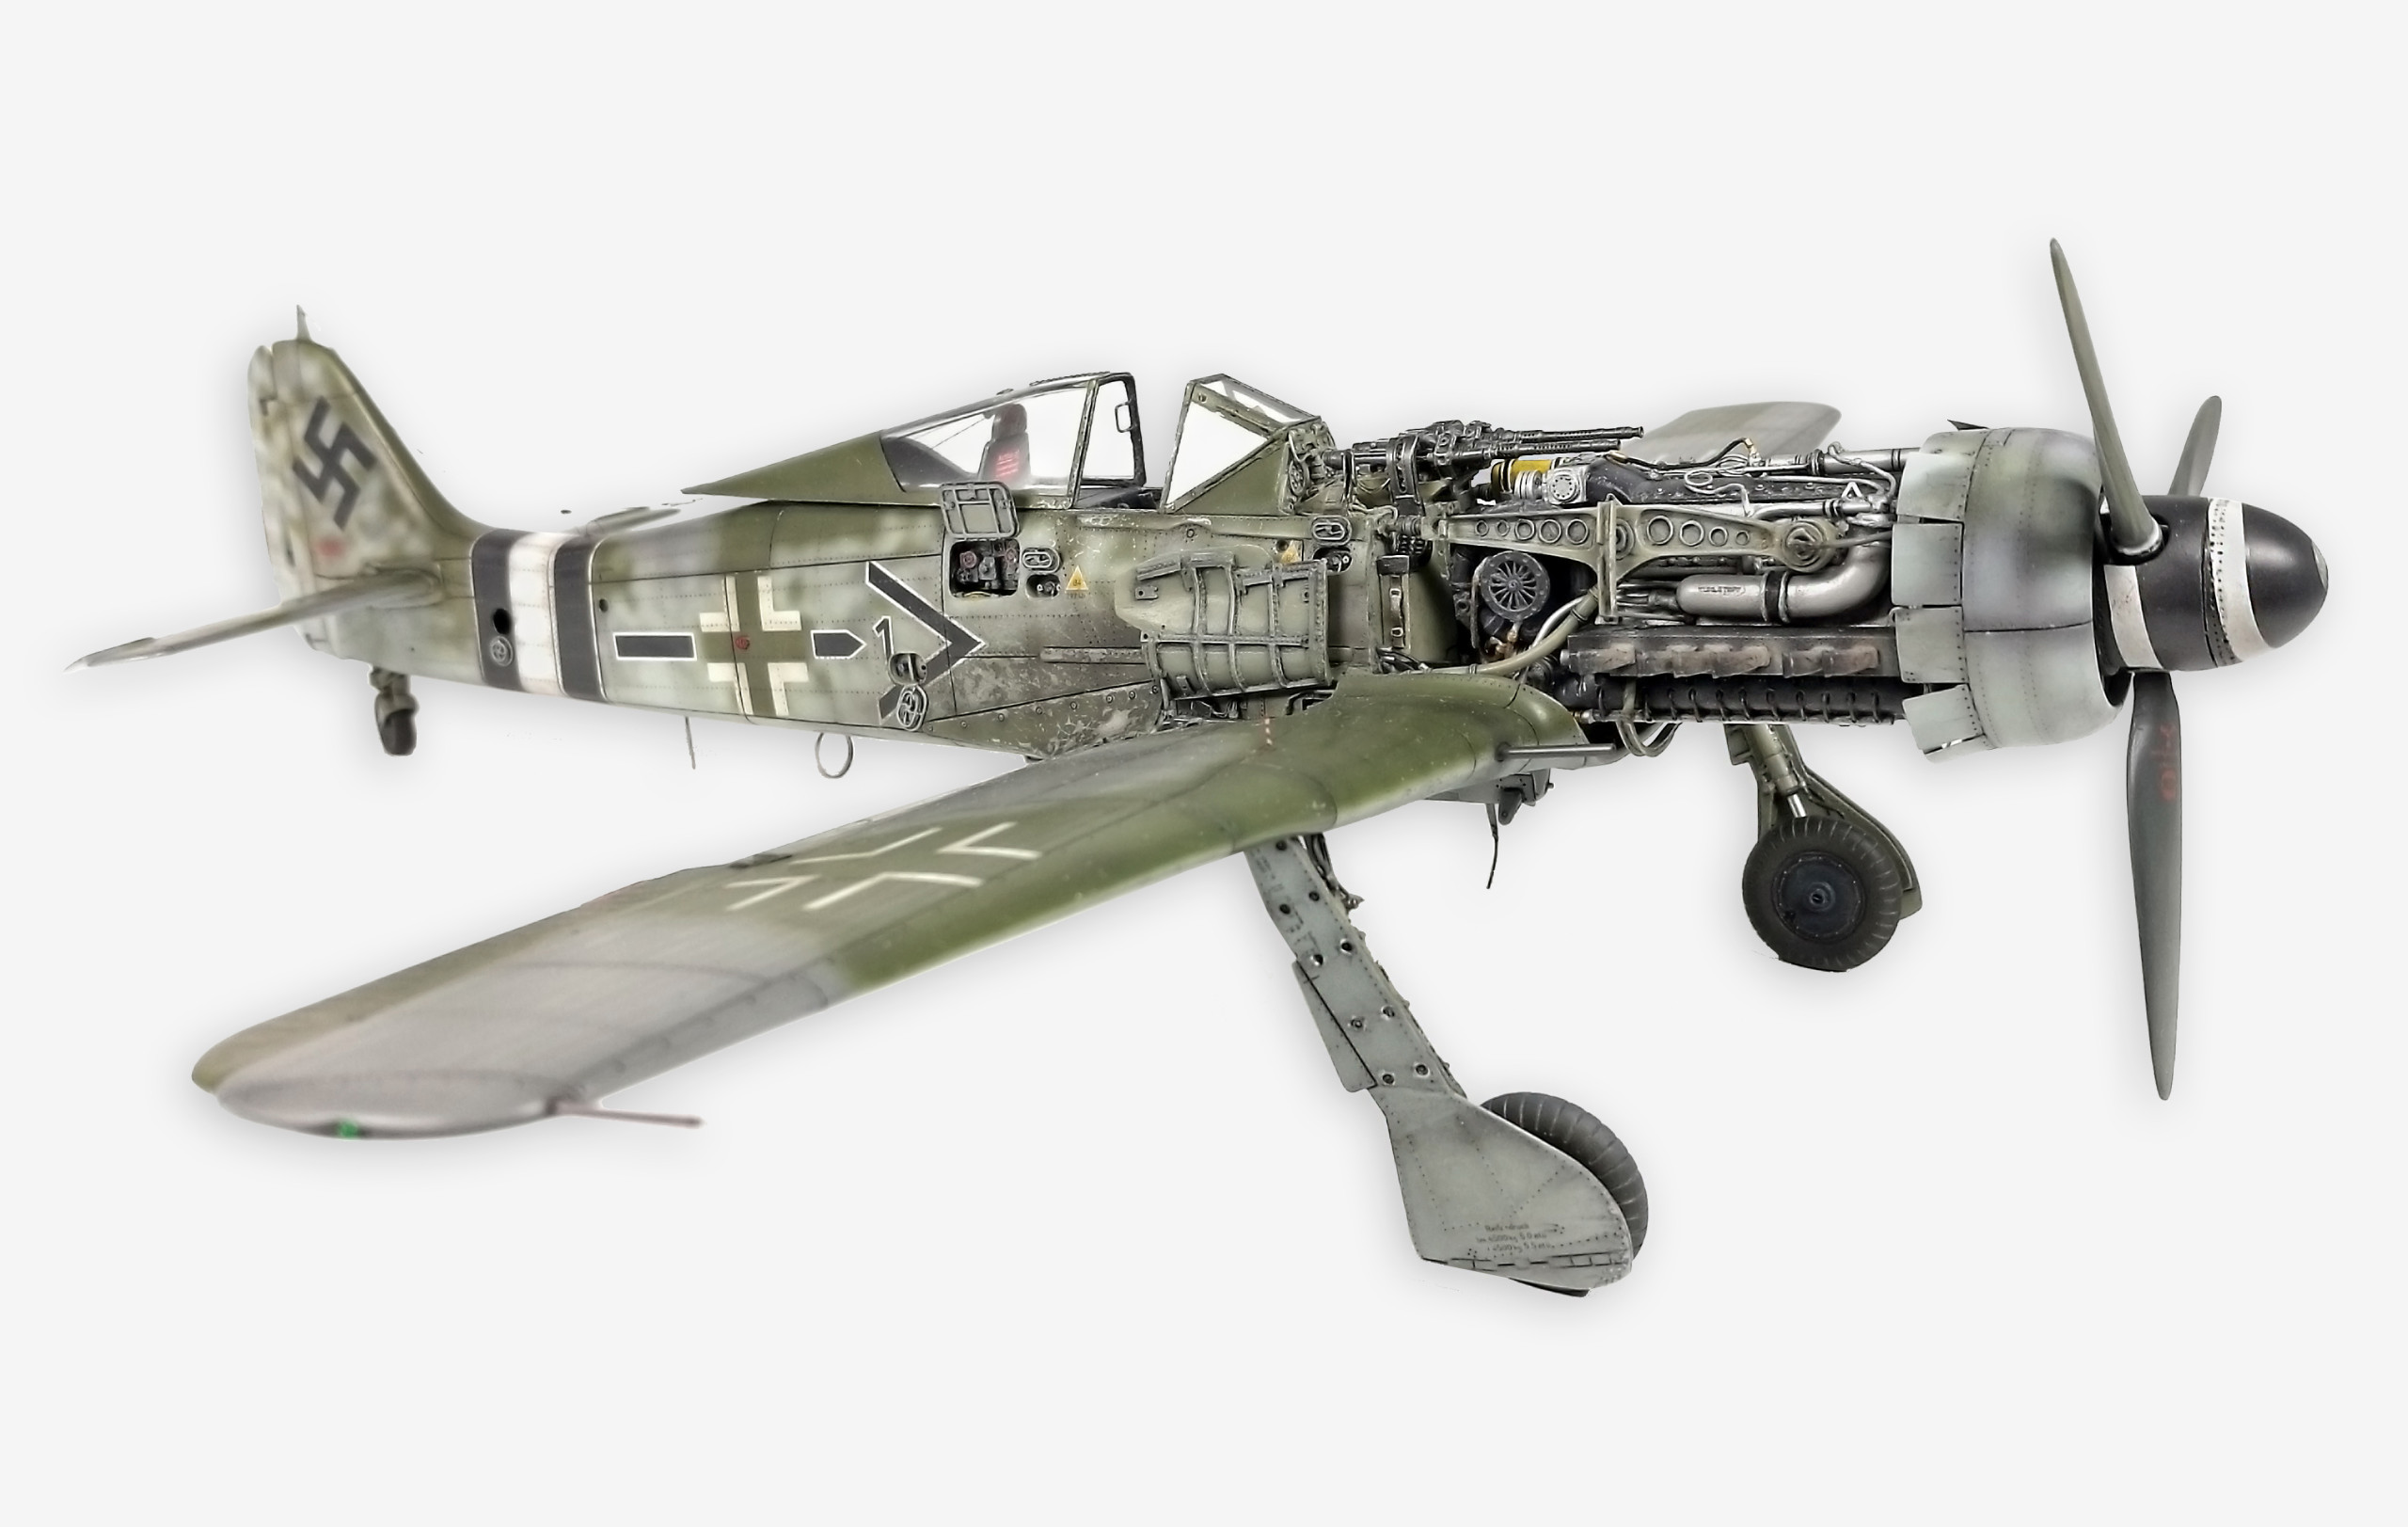
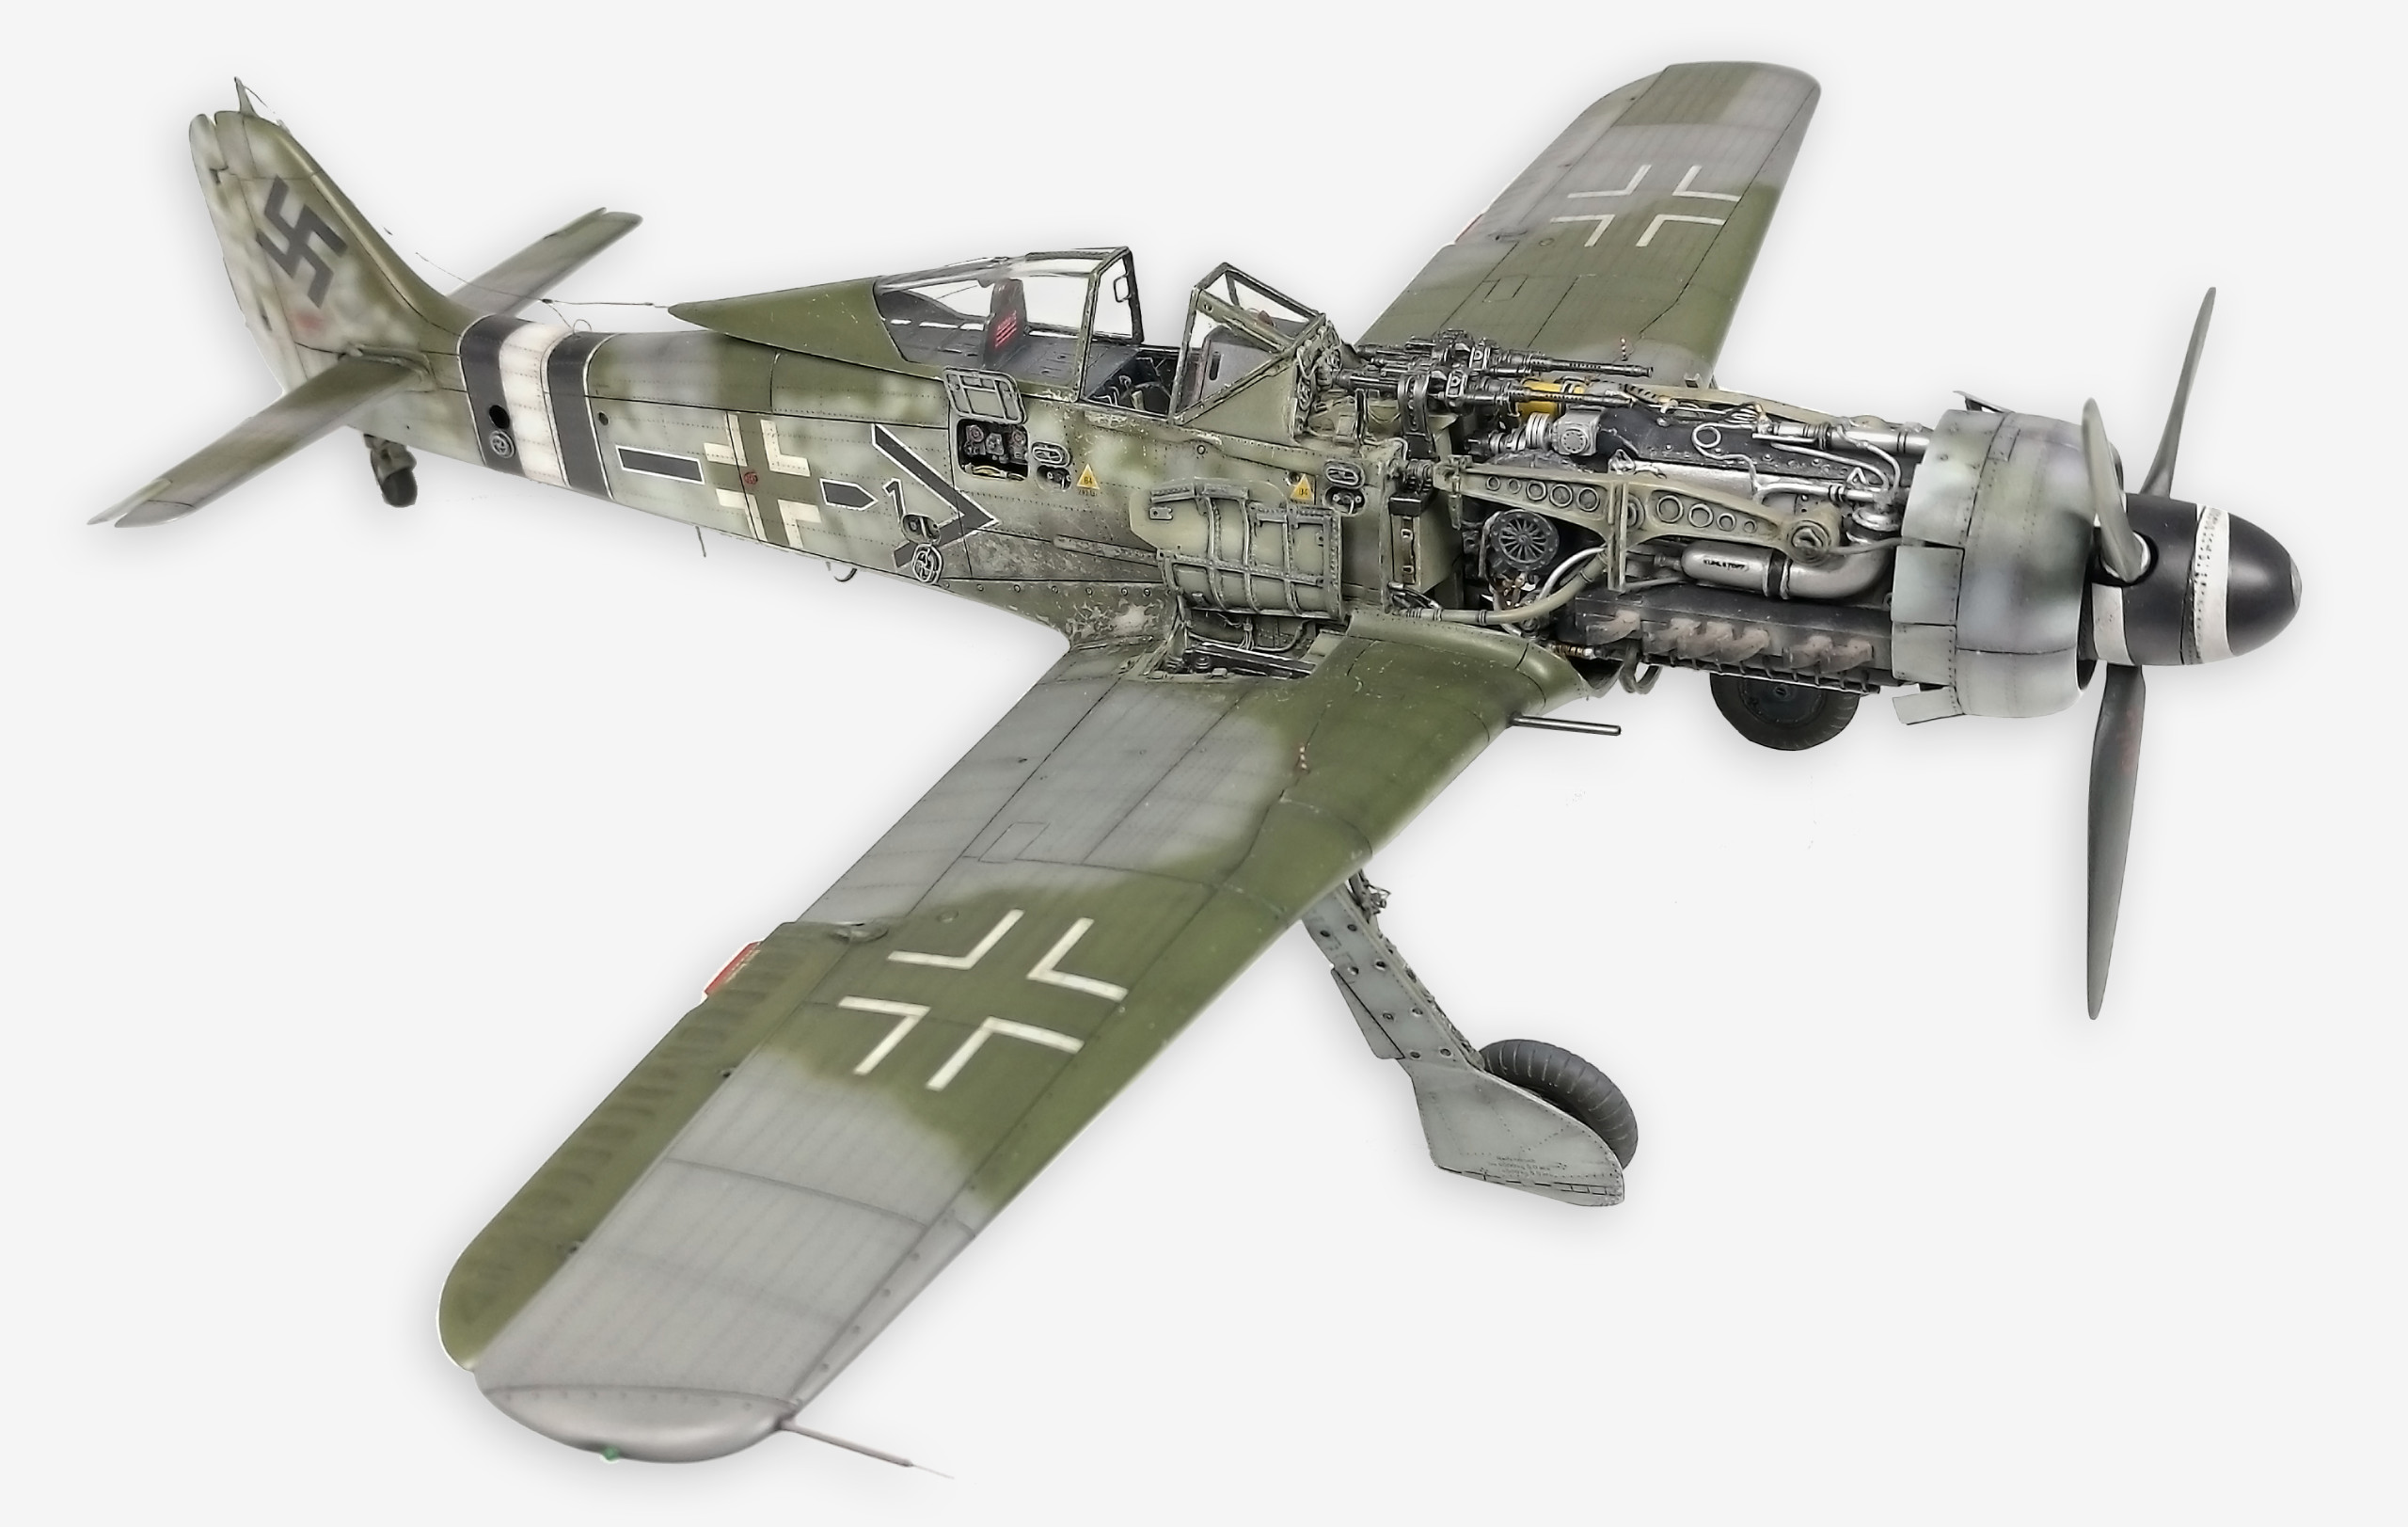
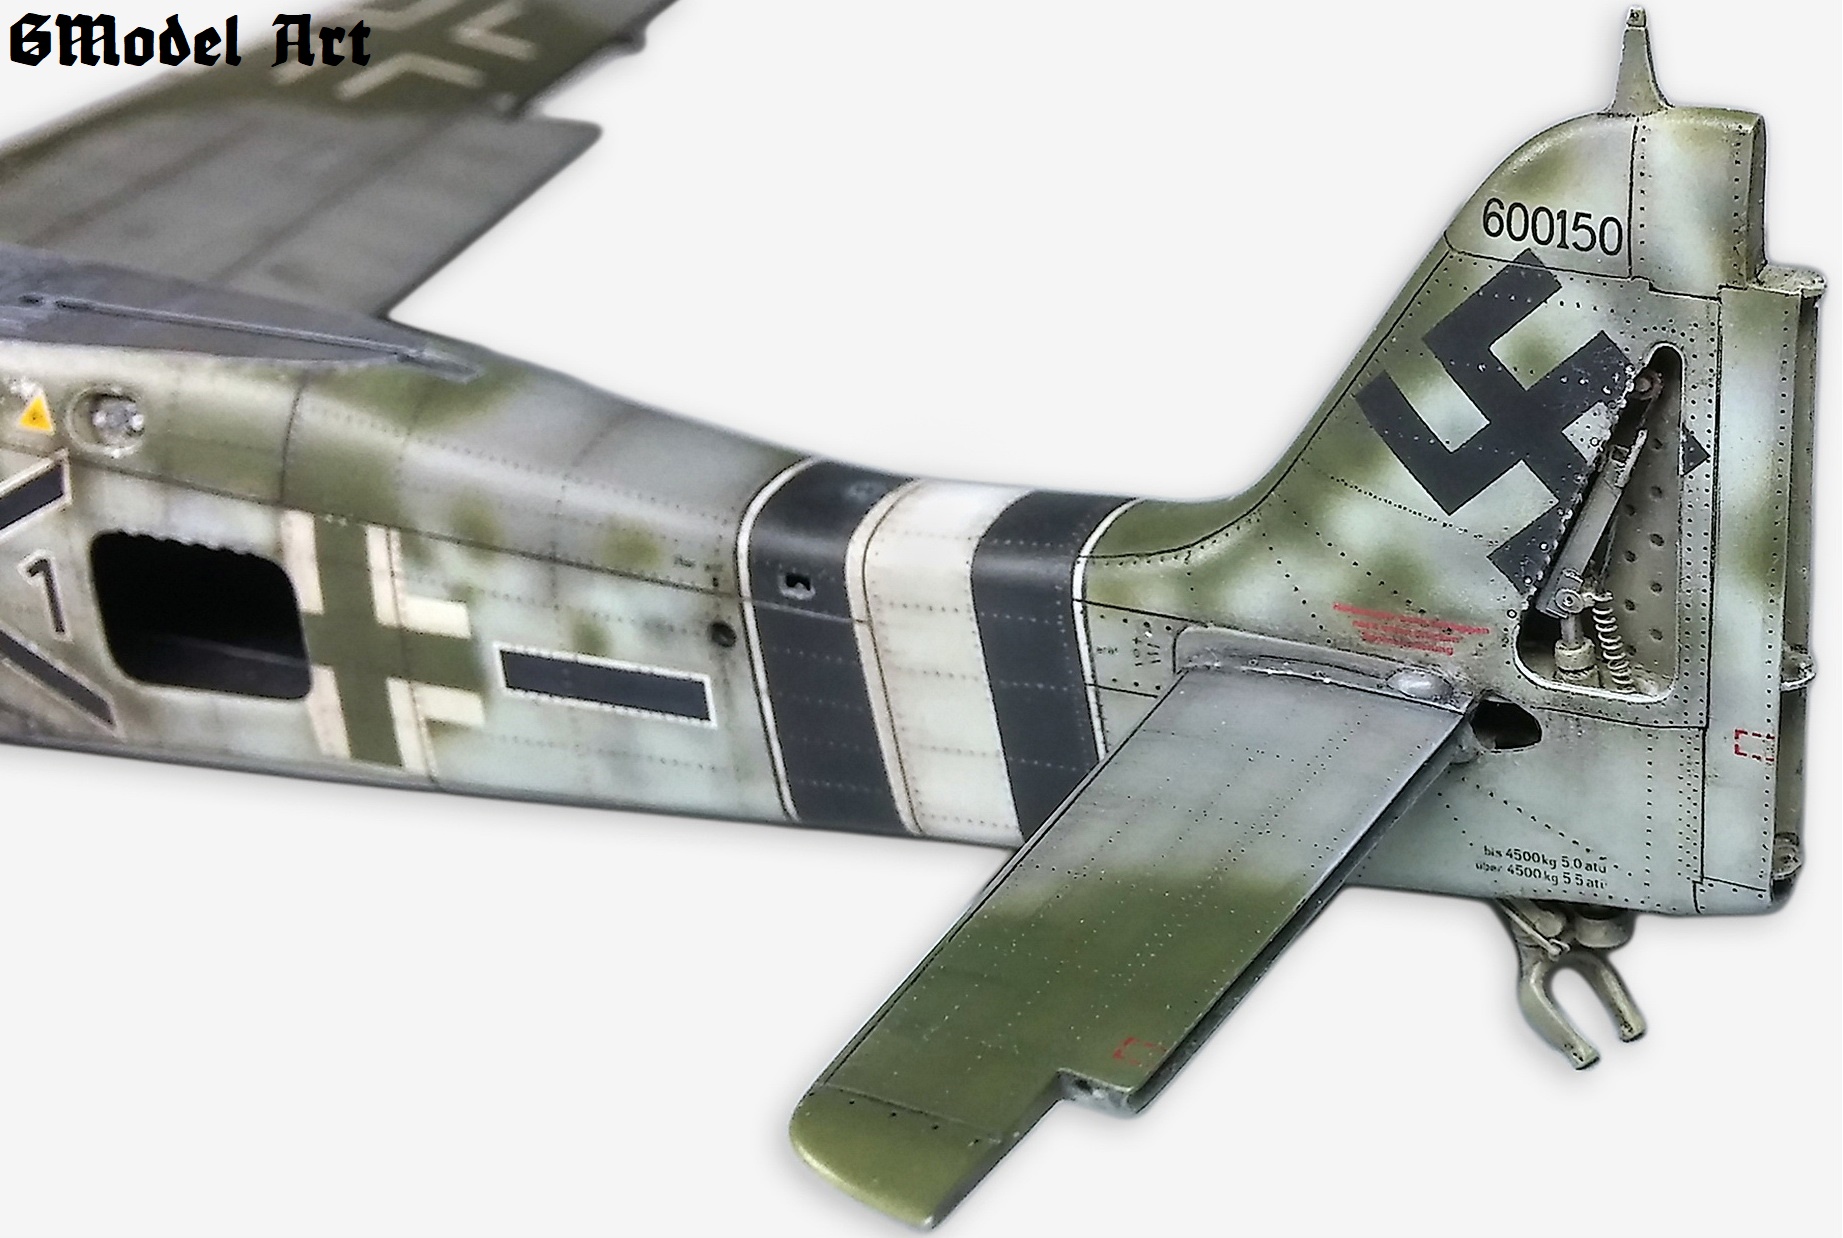
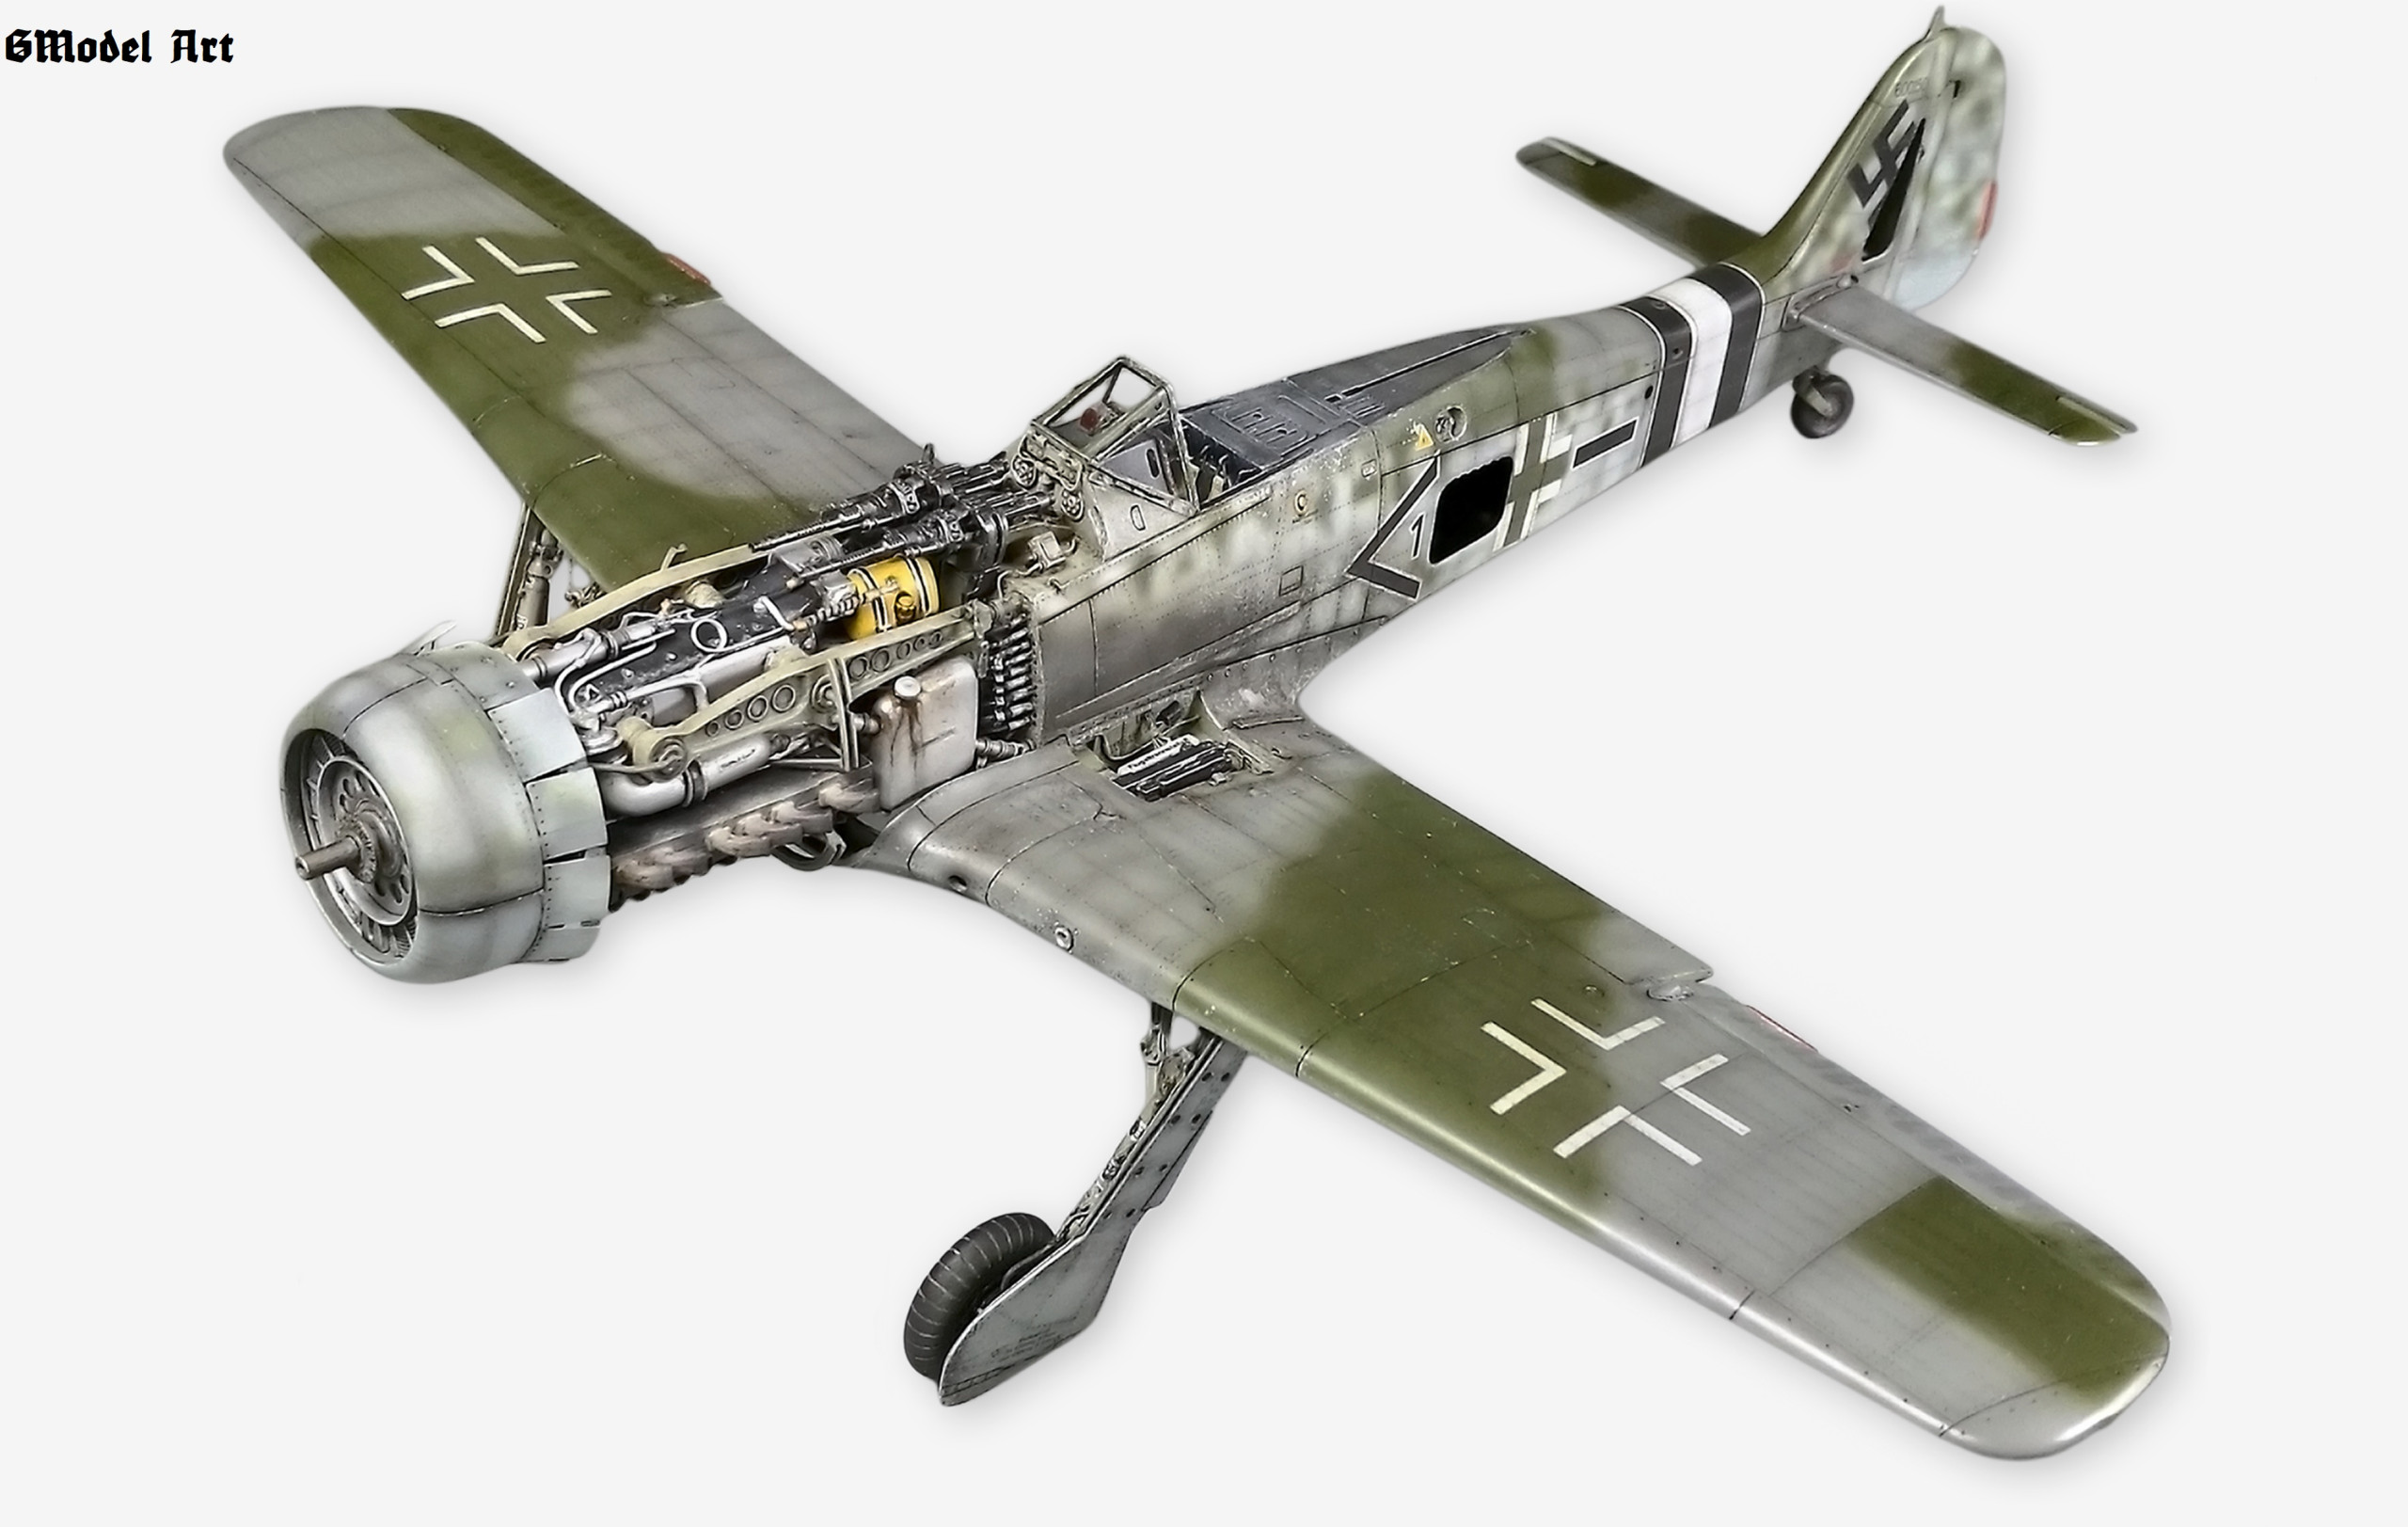
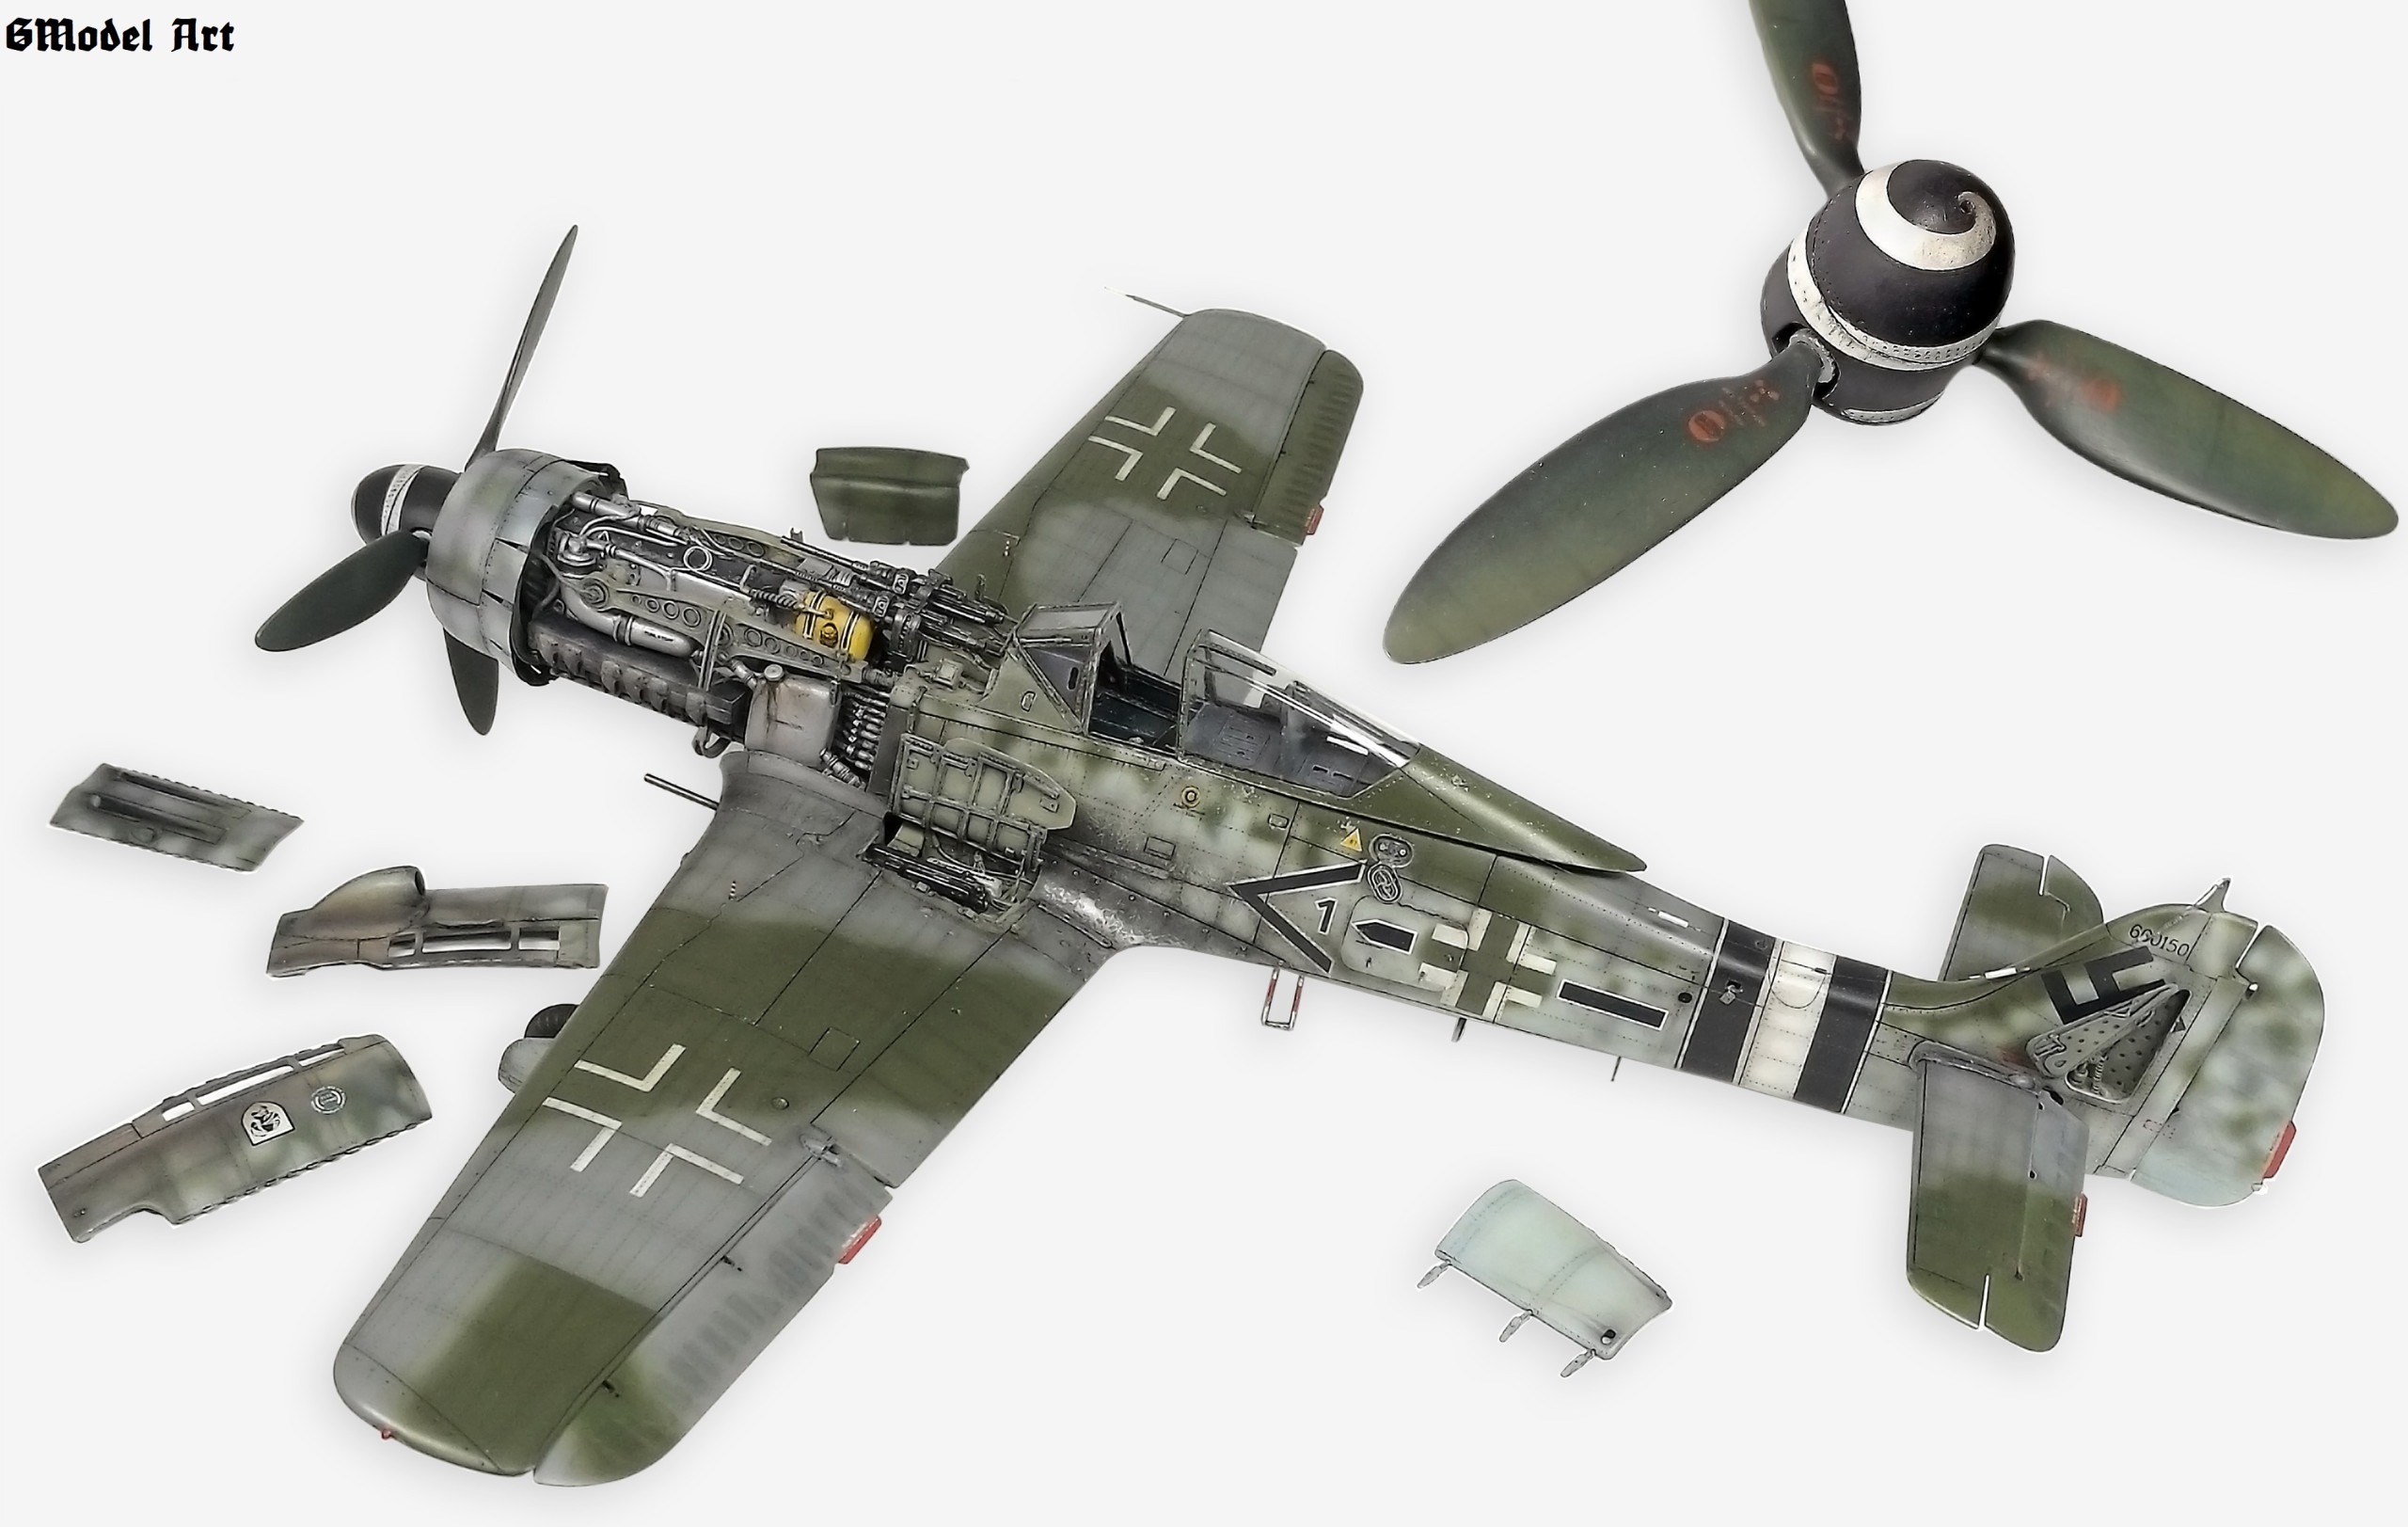
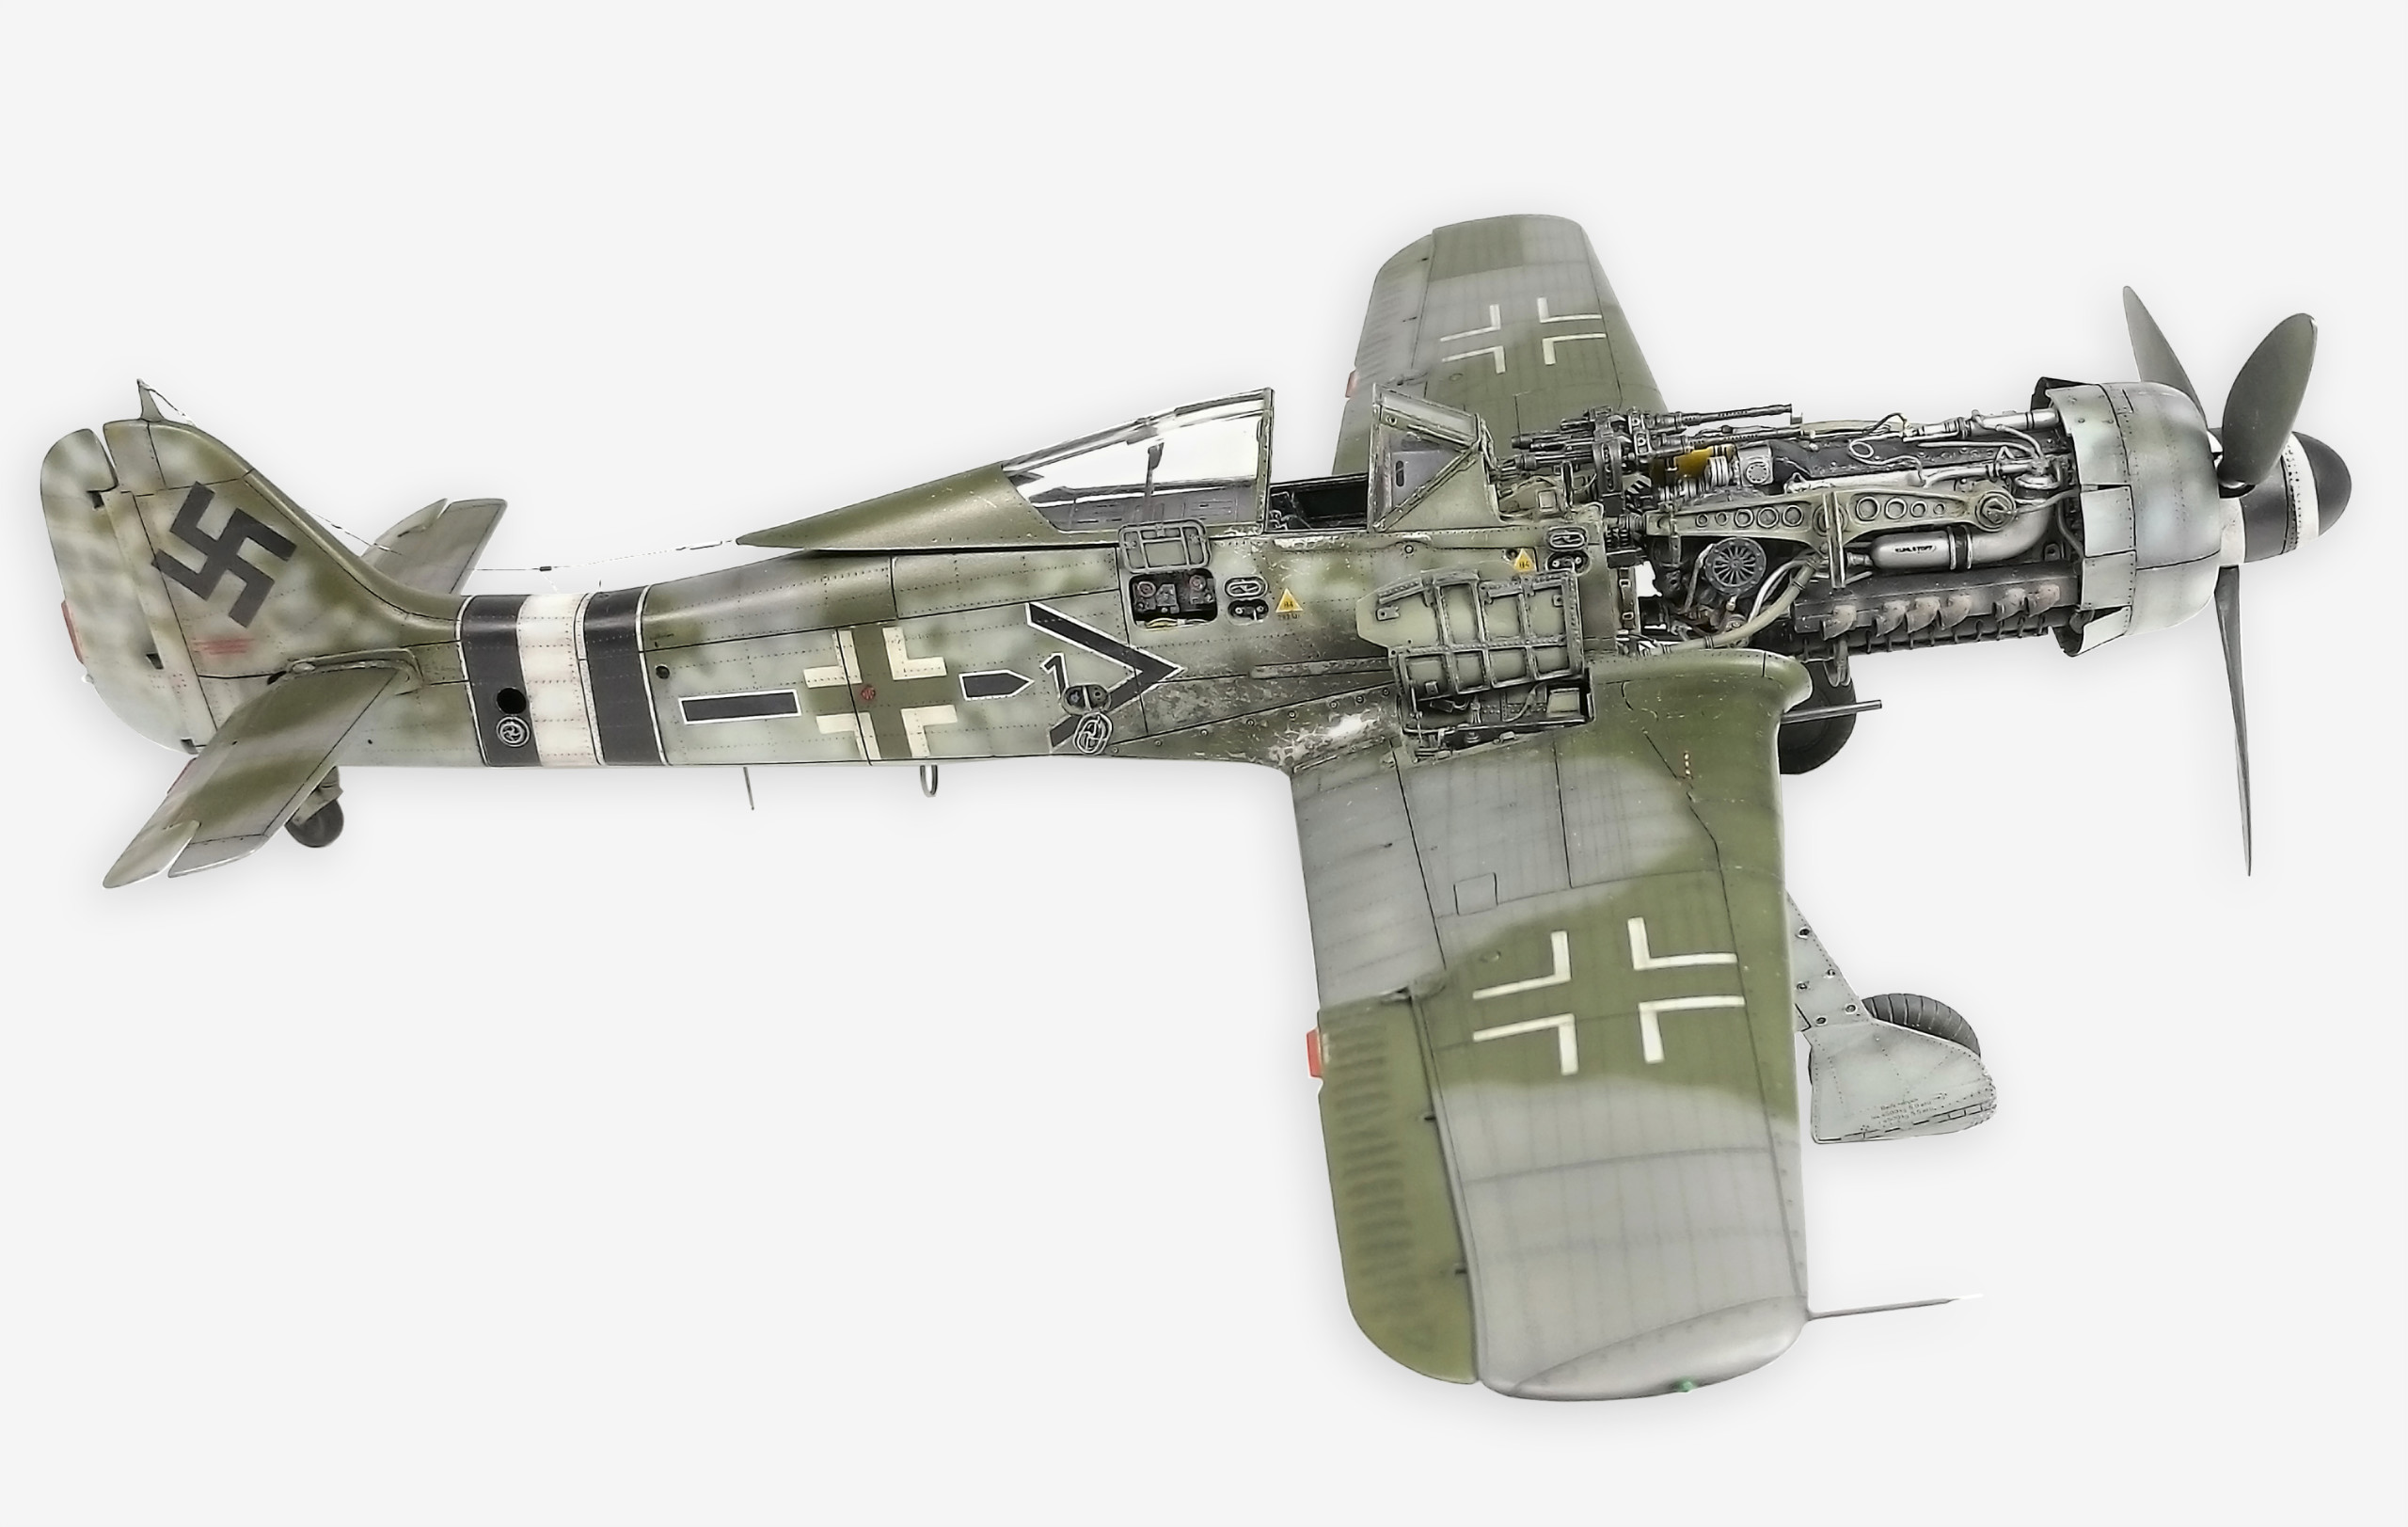
Finaly the choice fall on another of my favorite WWII fighter – Focke Wulf FW 190D-9 „Dora“ which for me is definitely the smartest from a wide range of Focke Wulf types. I hesitated for a long time, that particular model I choose. I insisted only on a combination of upper camouflage shades of dark green, plus gray-purple color and on the white cone spiral and stronger fuselage identification unit. After obtaining numerous publications and materials for the construction and study . I decided to build a beautiful Dora „black 1“ W. Nr. 600150, belonging to Stab/JG4. It was made sometime between October to December 1944 and was one of the first production unit produced by factory Gerhard Fieseler Werke (GFW), which was one of four factories producing „Dora“.
In the end of the war was a „black 1“ discovered in good condition by advancing US troops hidden in the forest at the Frankfurt´s Rhein-Main airfield.
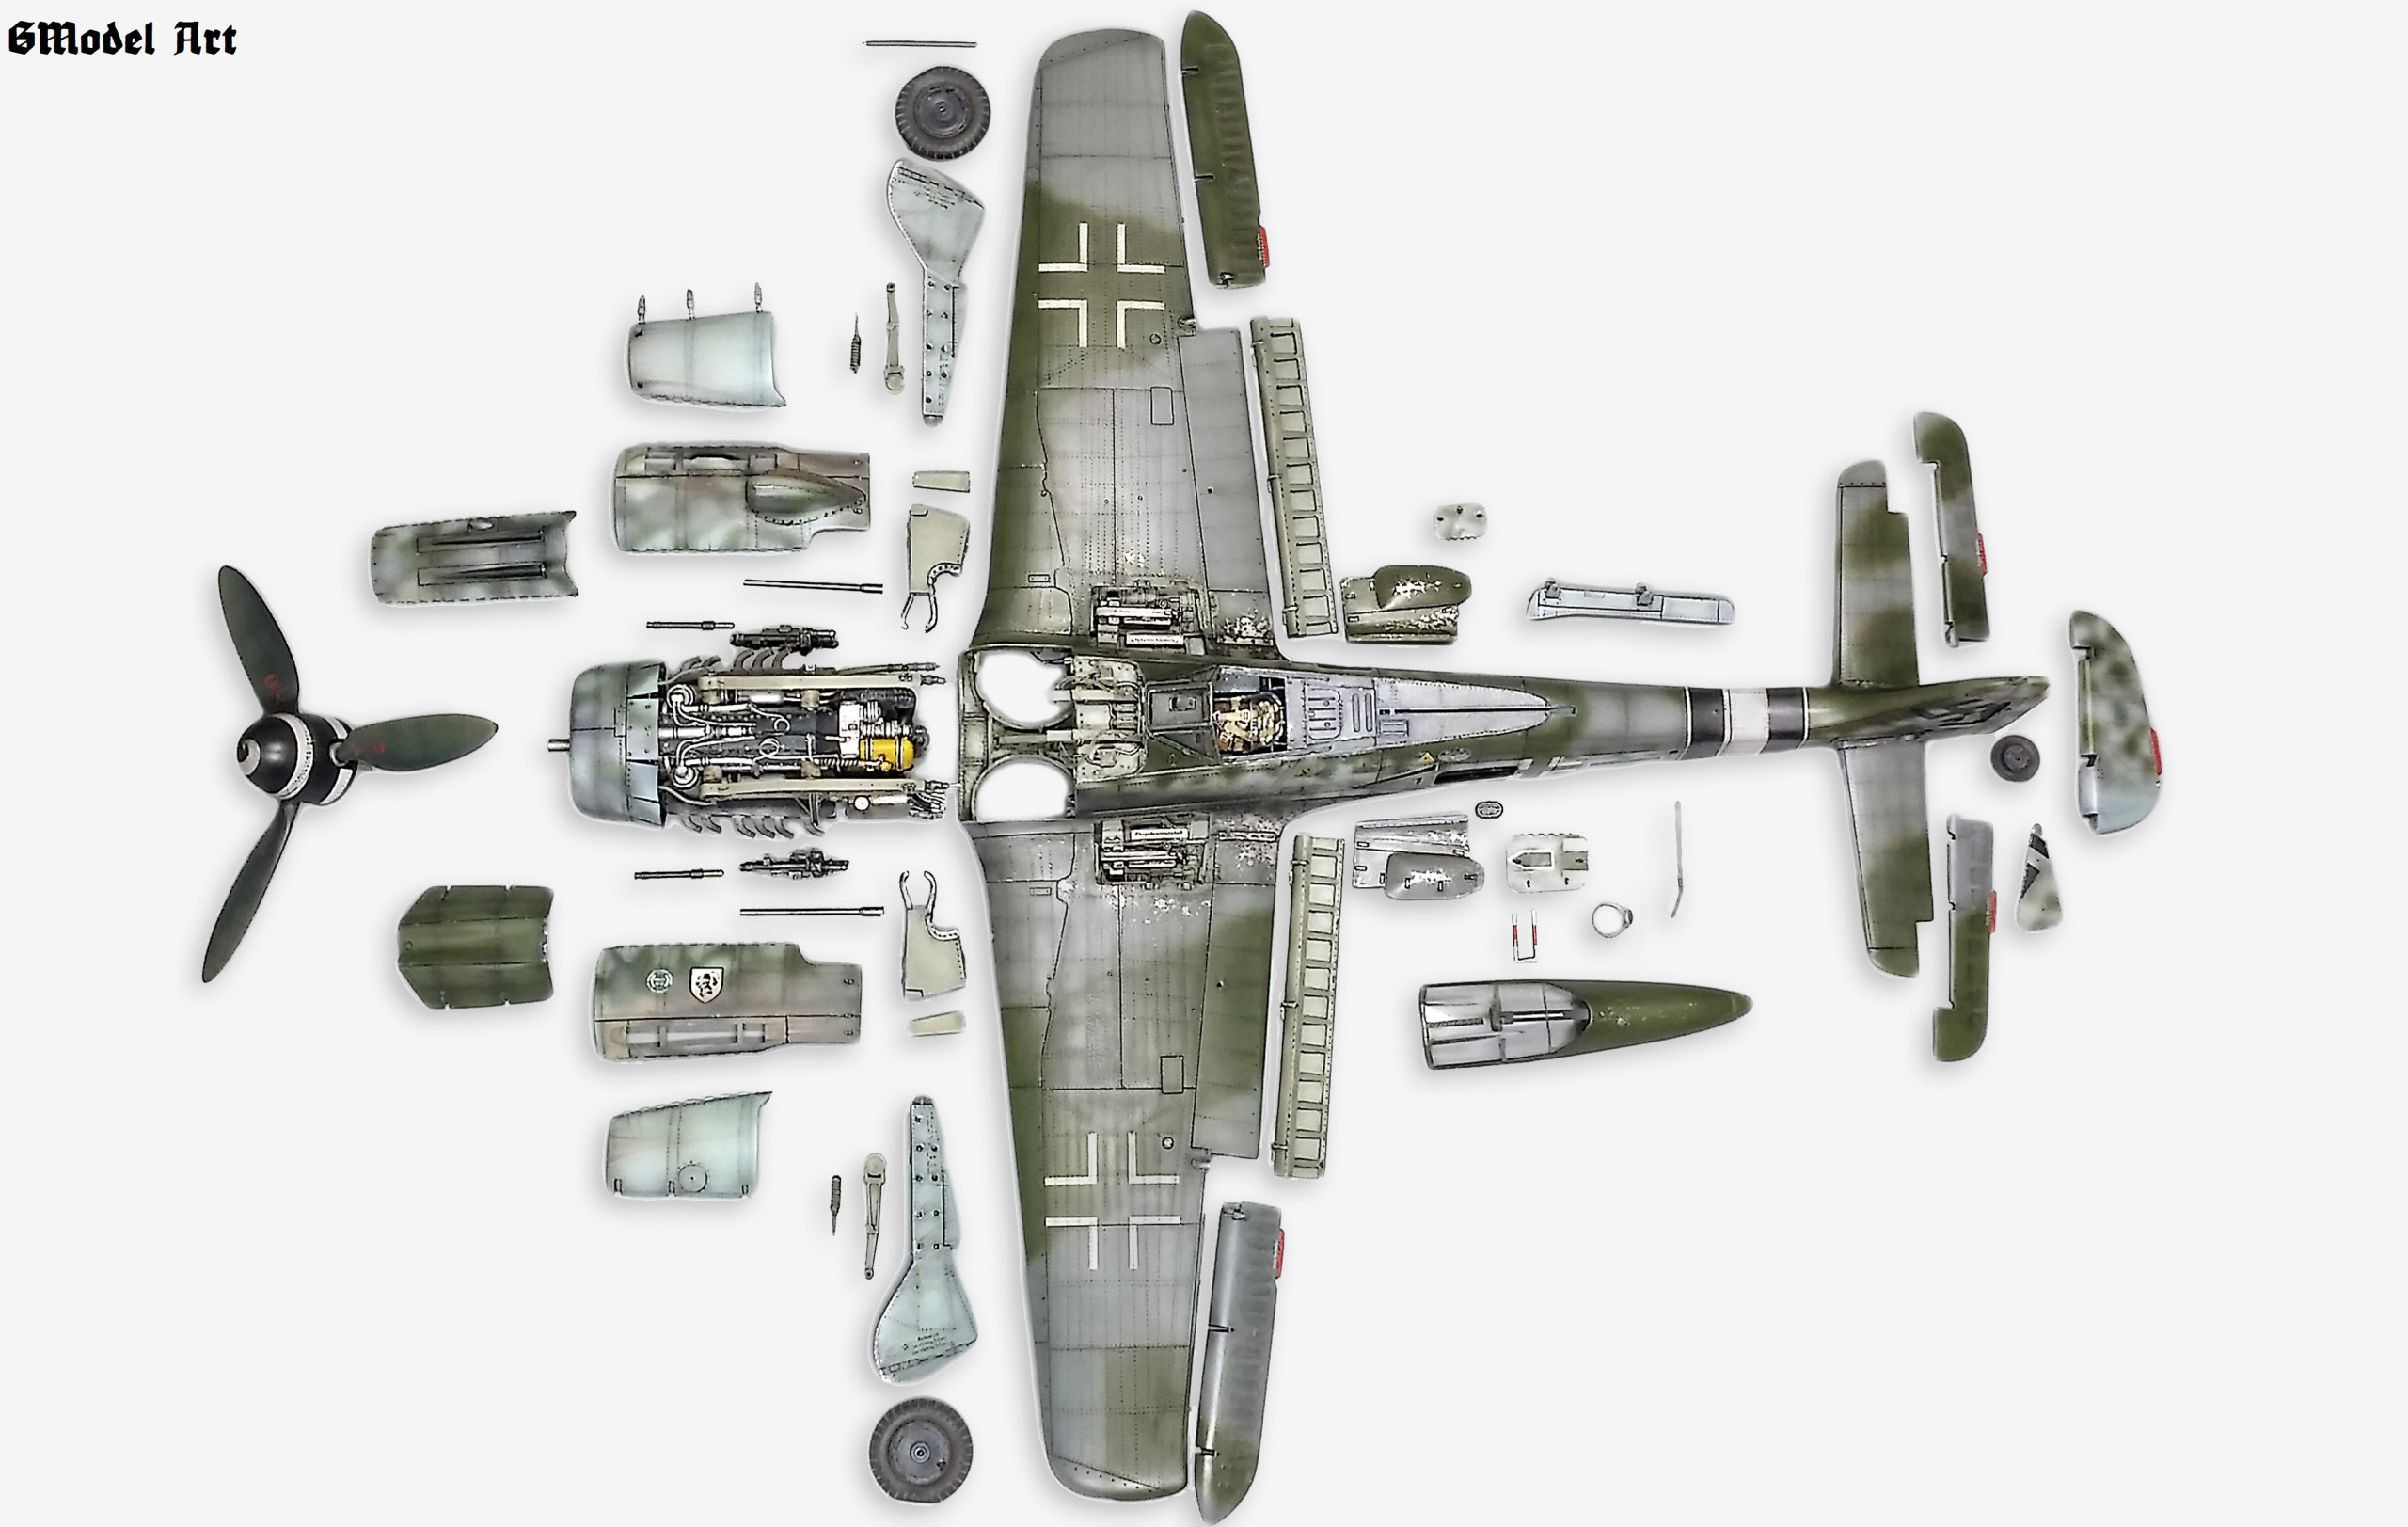
Building:
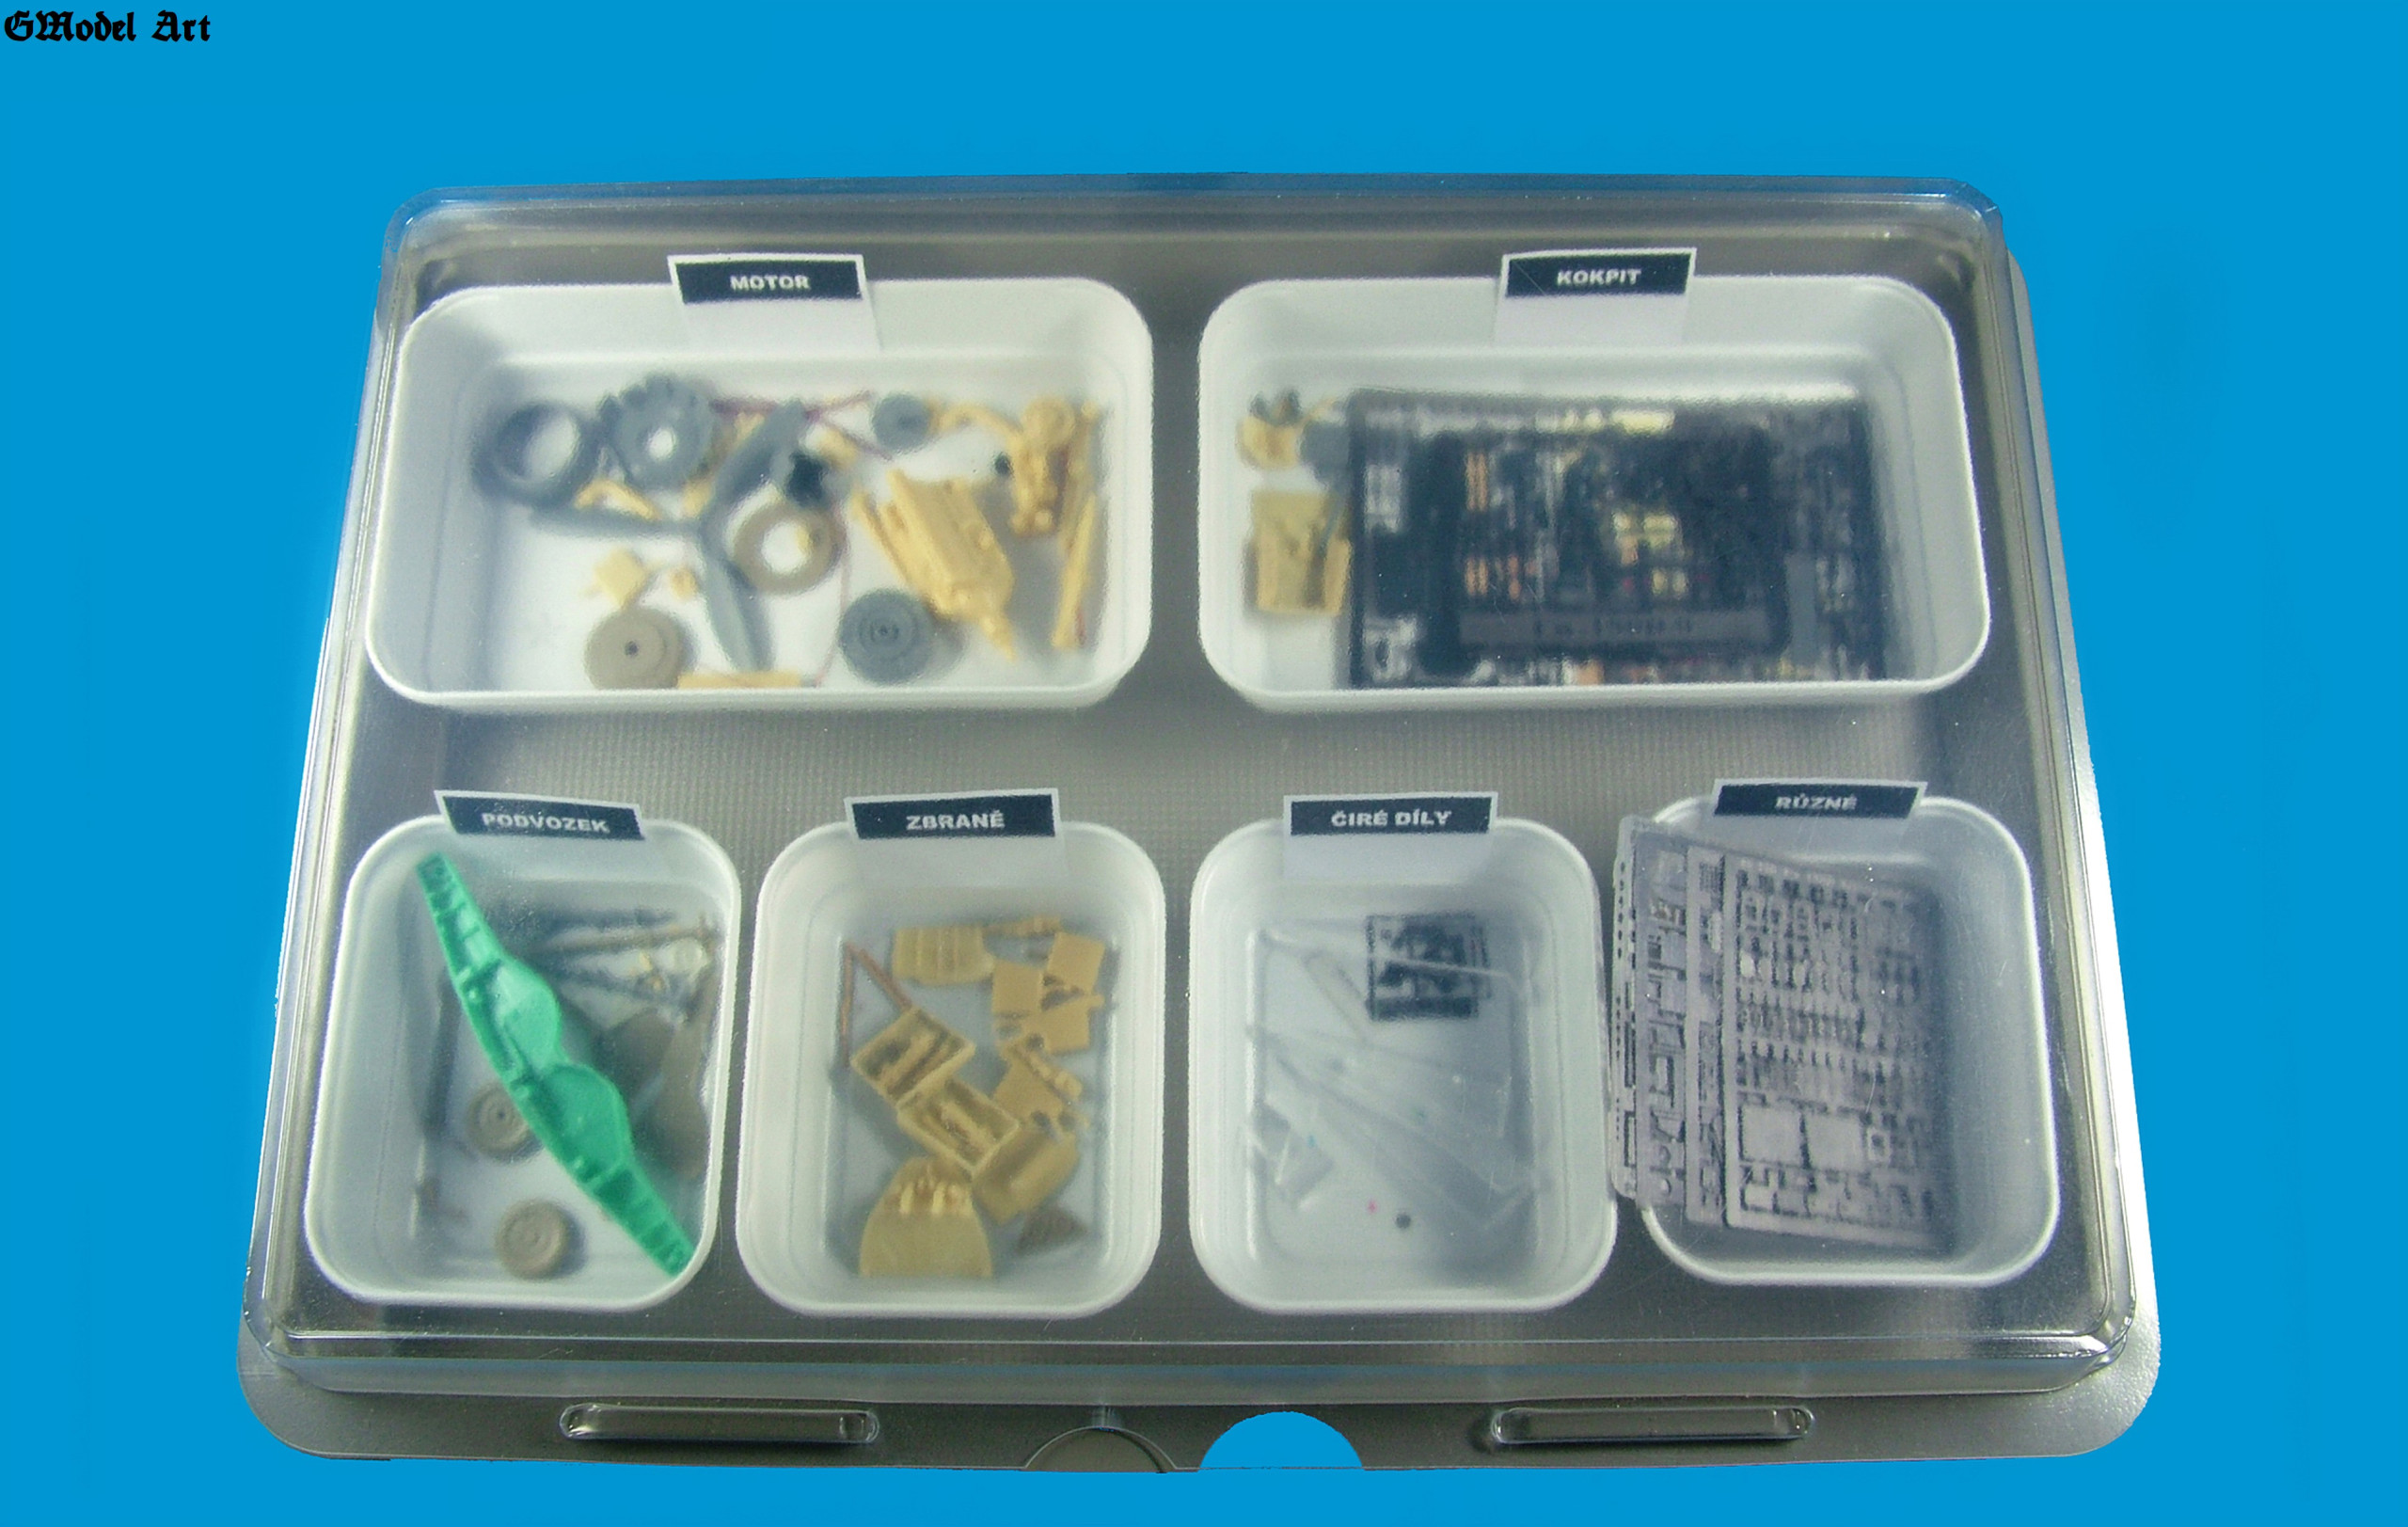
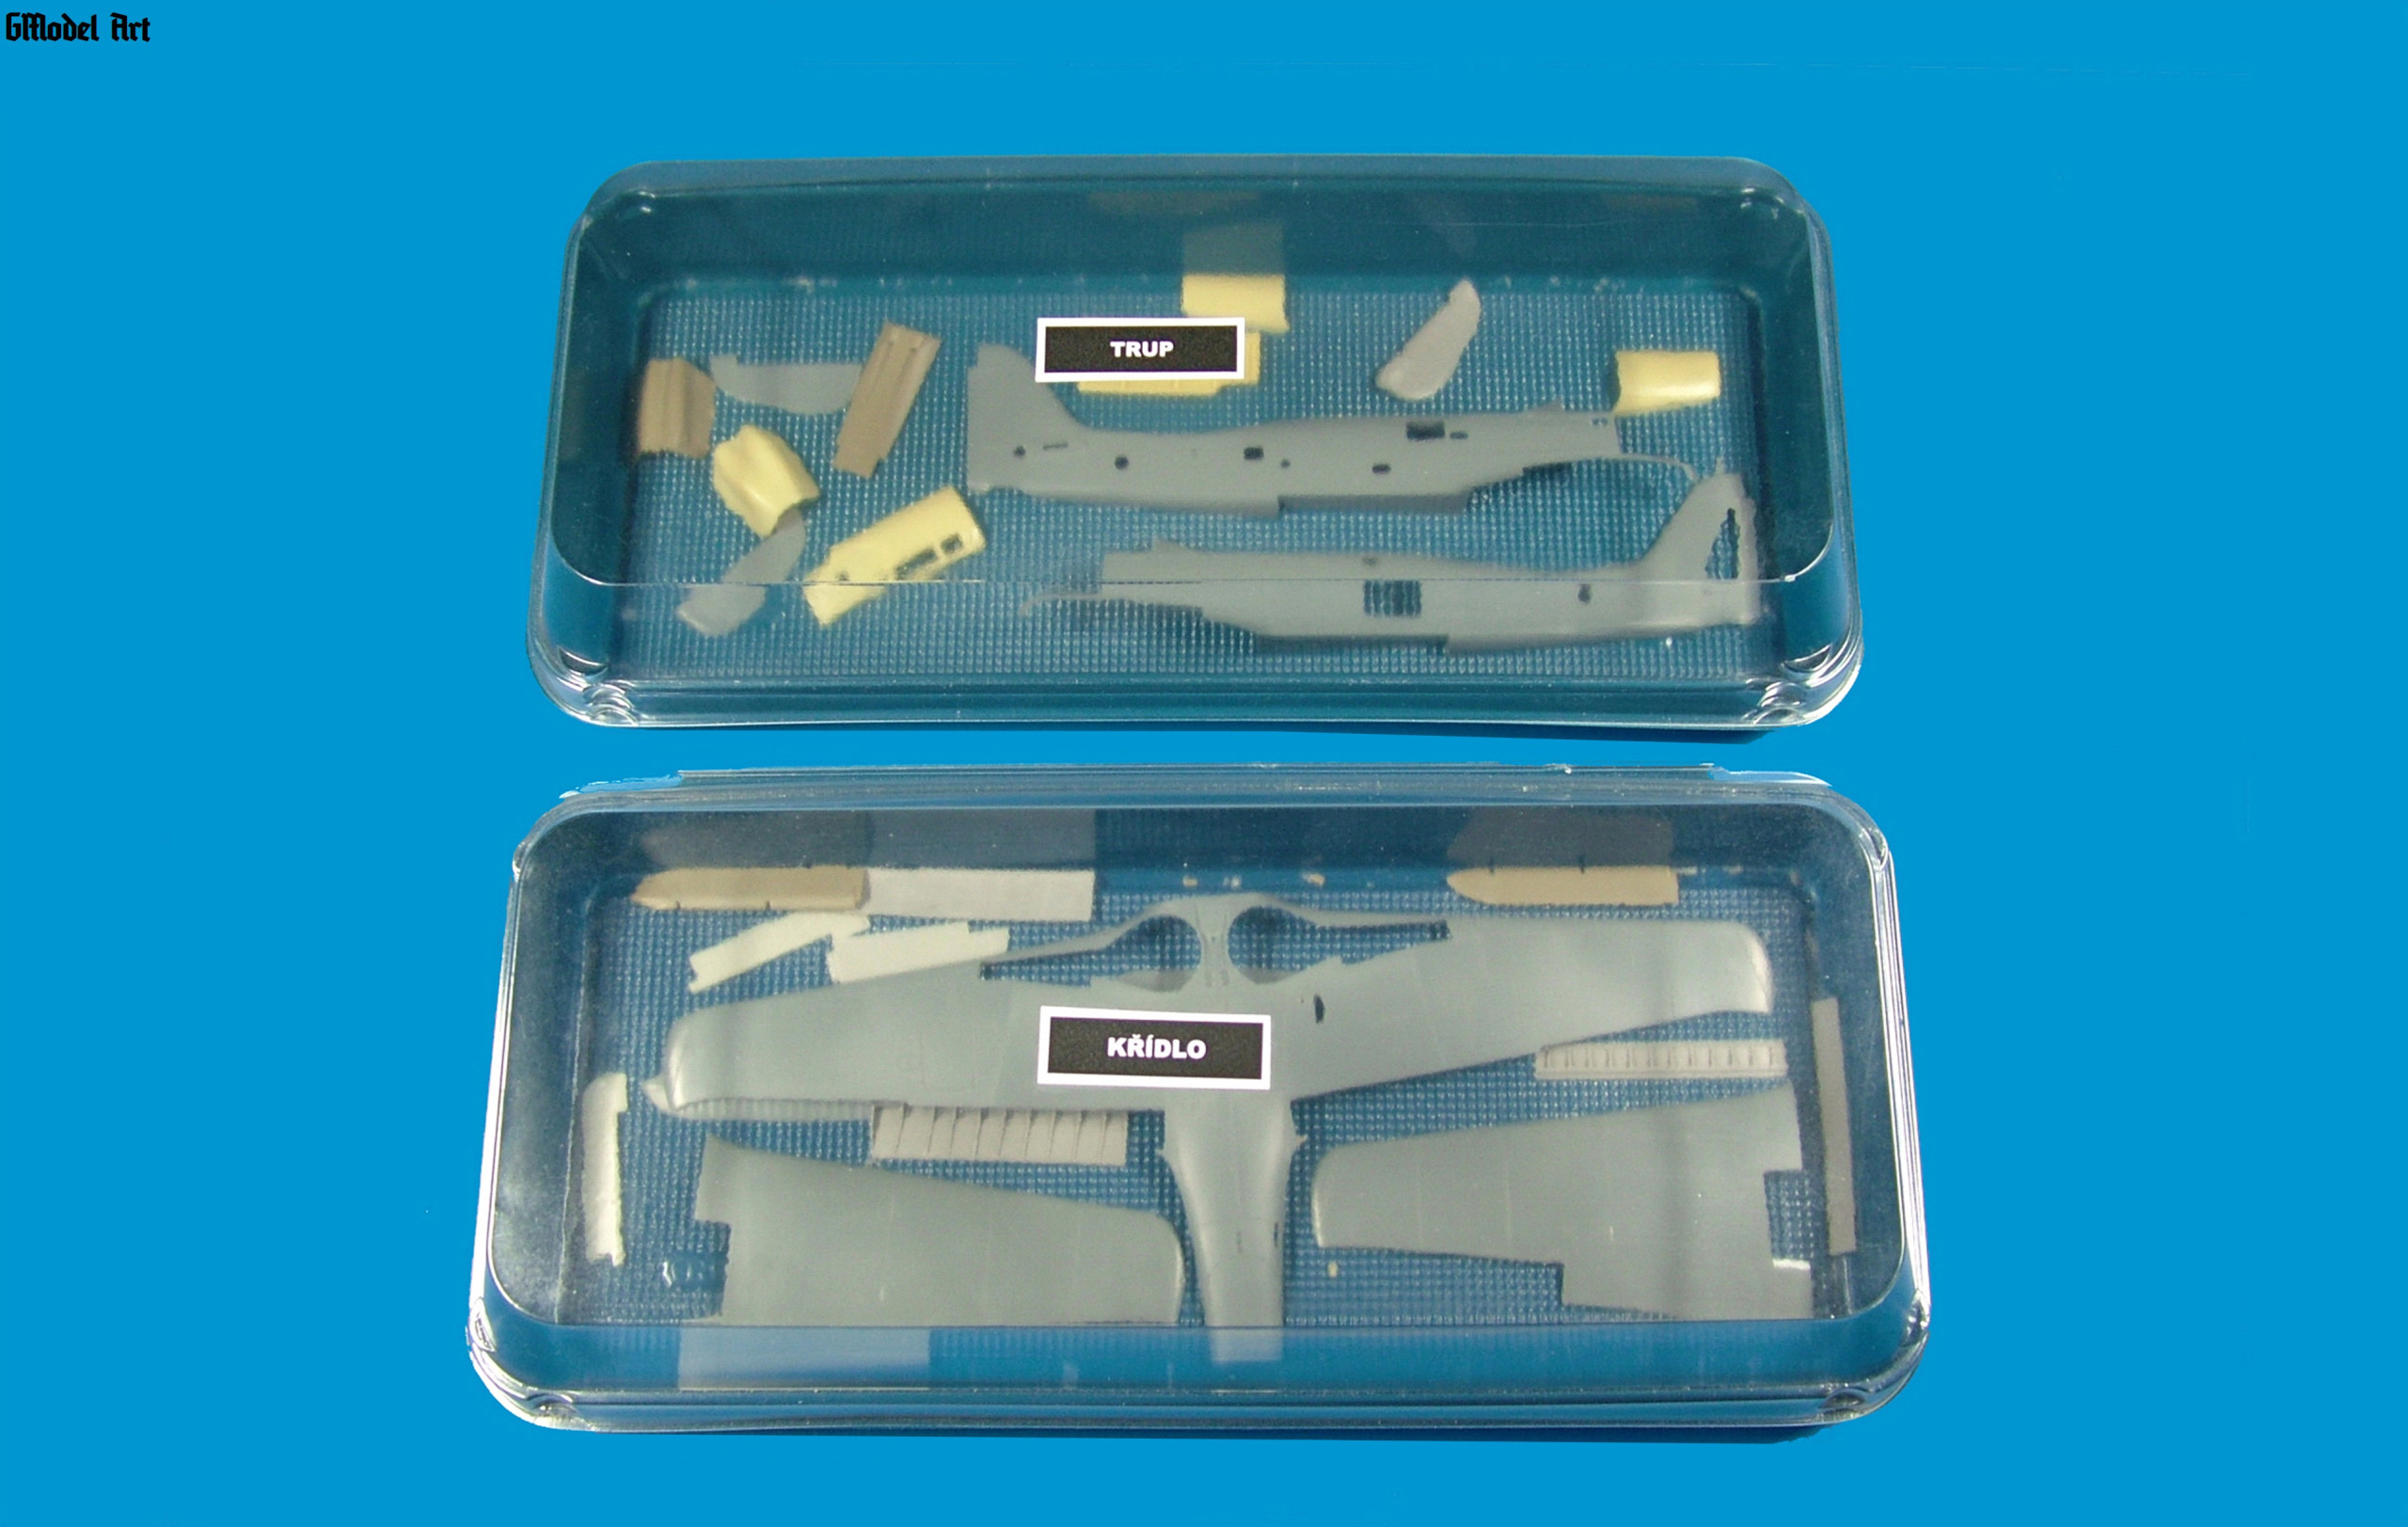
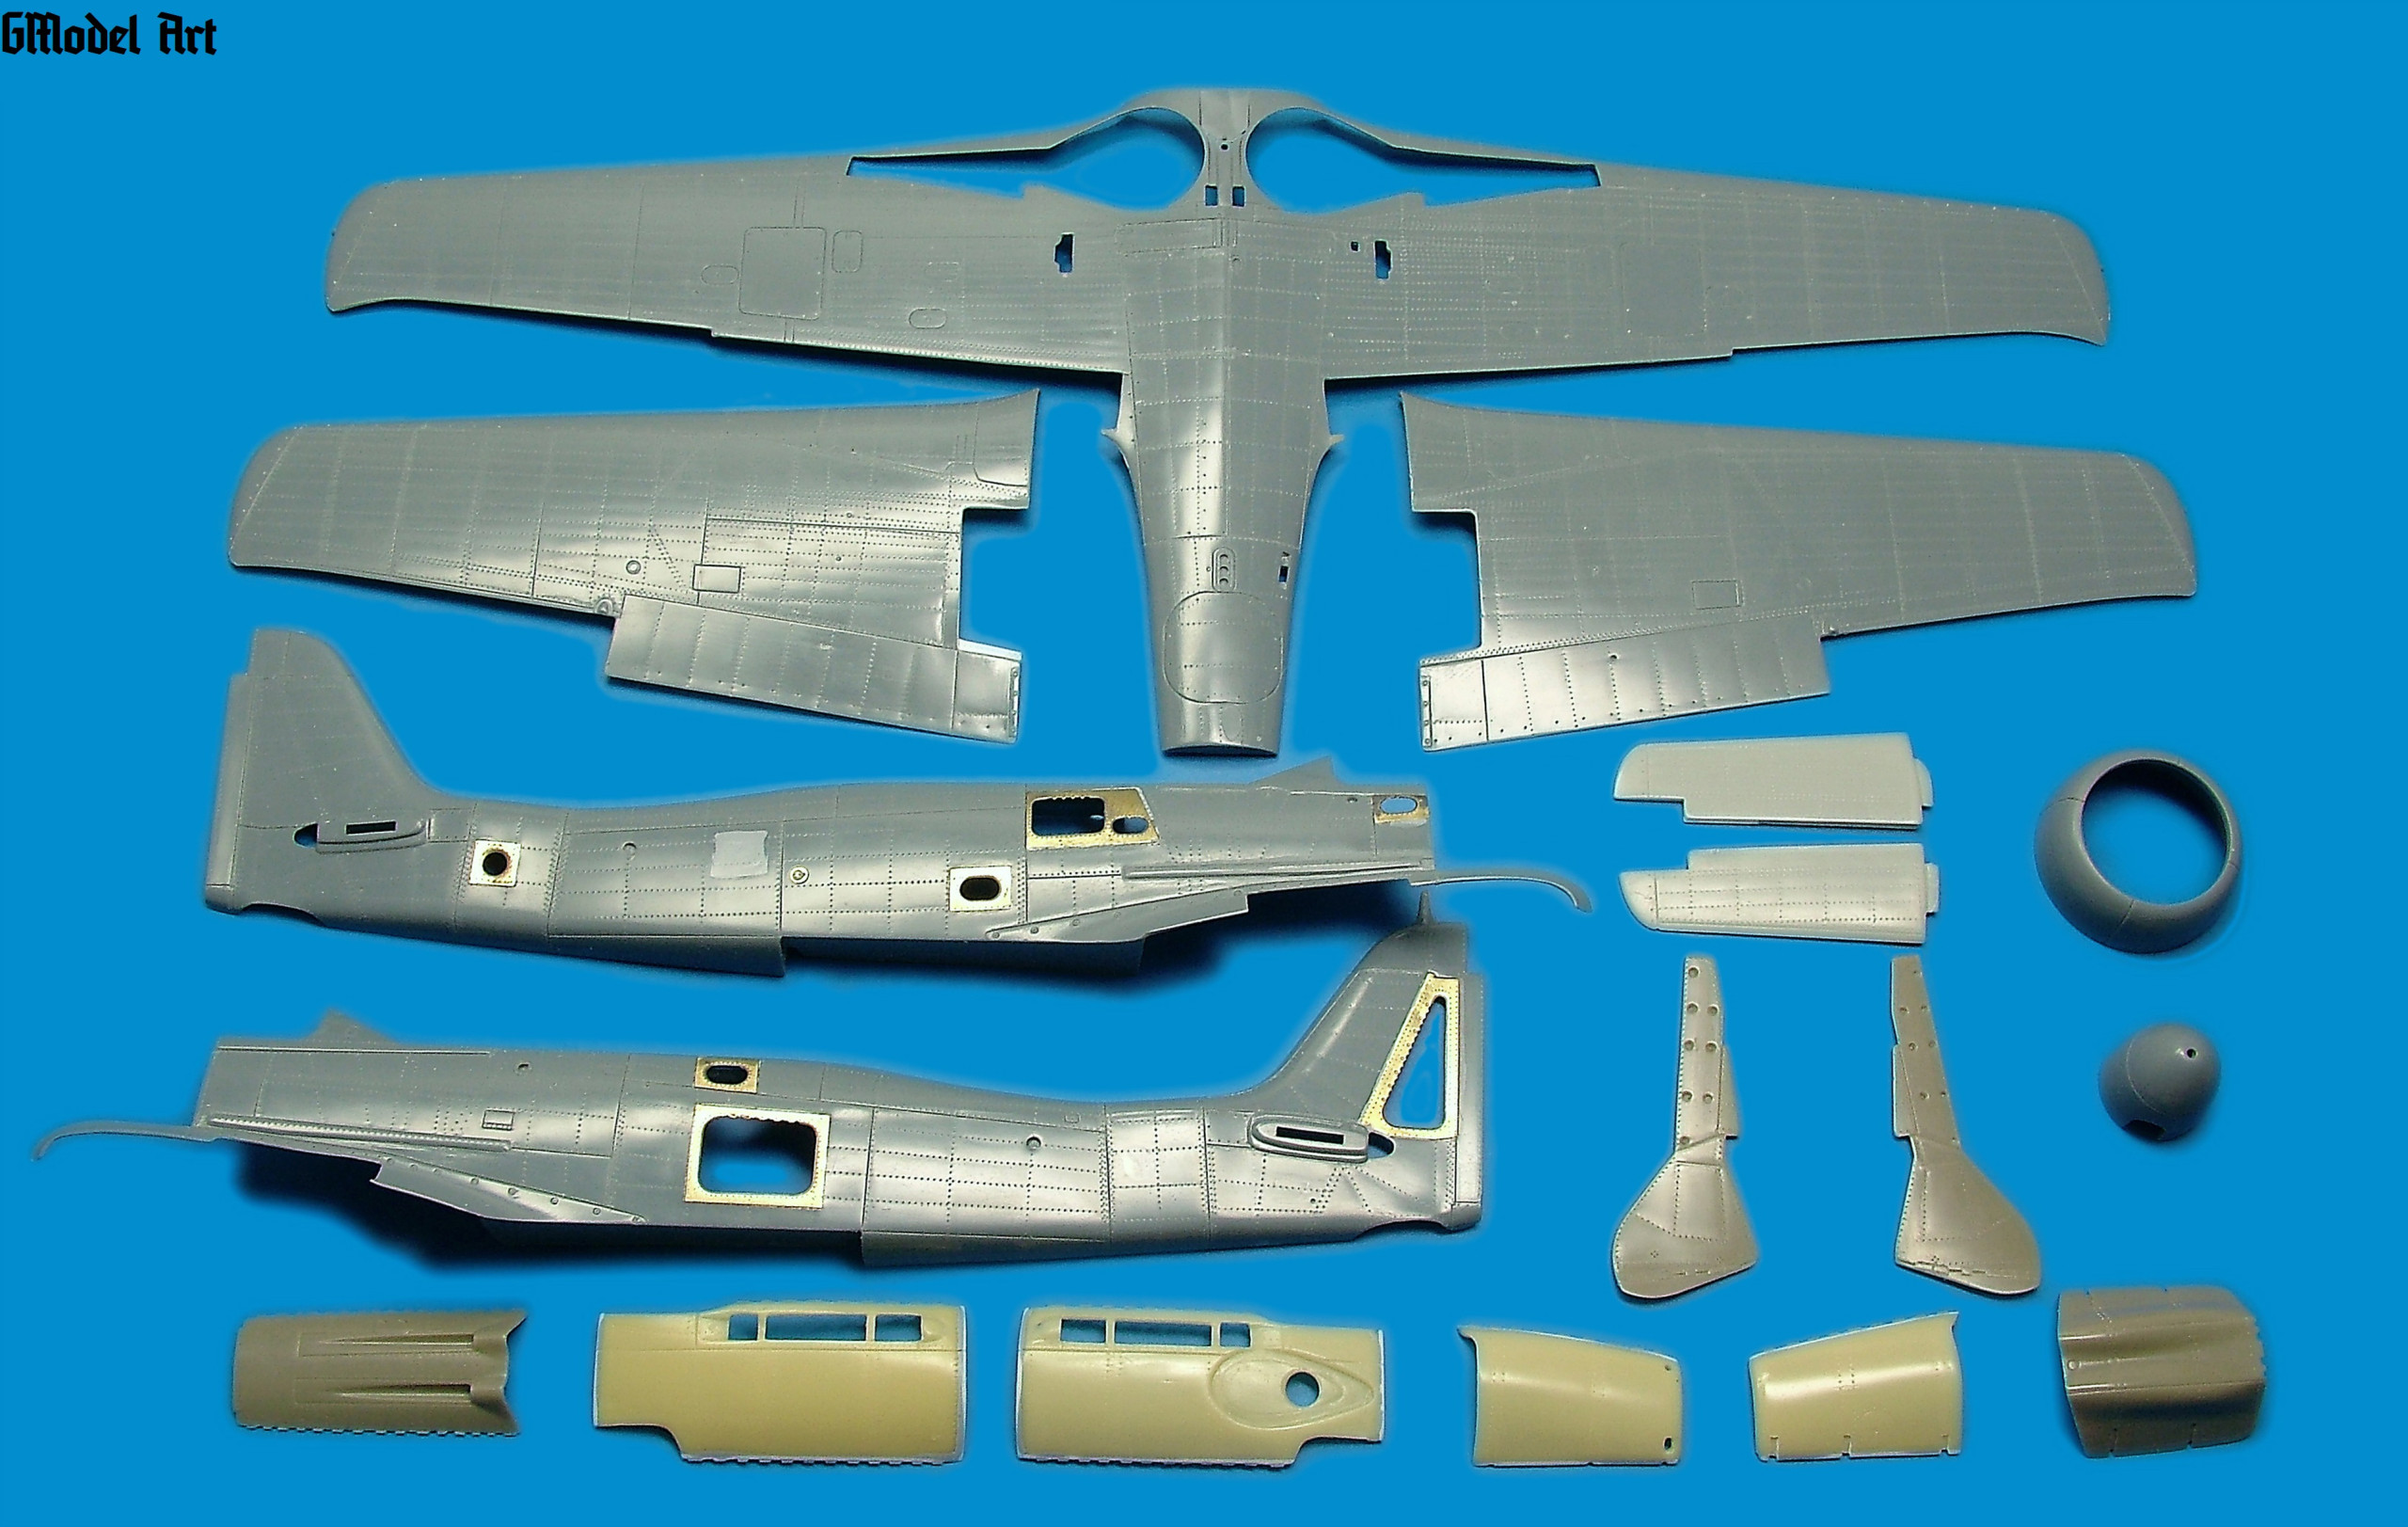
For the building I bought two kits of Dora…proven and quality Tamiya plus the quite new kit Eduard. Gradually also bought all necessary accesories. Since virtually all the accesories primarily designed for Tamiya kit , I finaly decided for that one because with the fact it more or less will be a combination of both kits. However from Eduard kit will be rather used those parts which in comparison with documentation and drawings had Eduard compared Tamiya detailed and most dimensionaly accurate. These were mainly the undercarriage, windshield, cockpit canopy and other smaller parts. All parts of kits and accesories I thoroughly cleansed and divided into several boxes by each part of model.
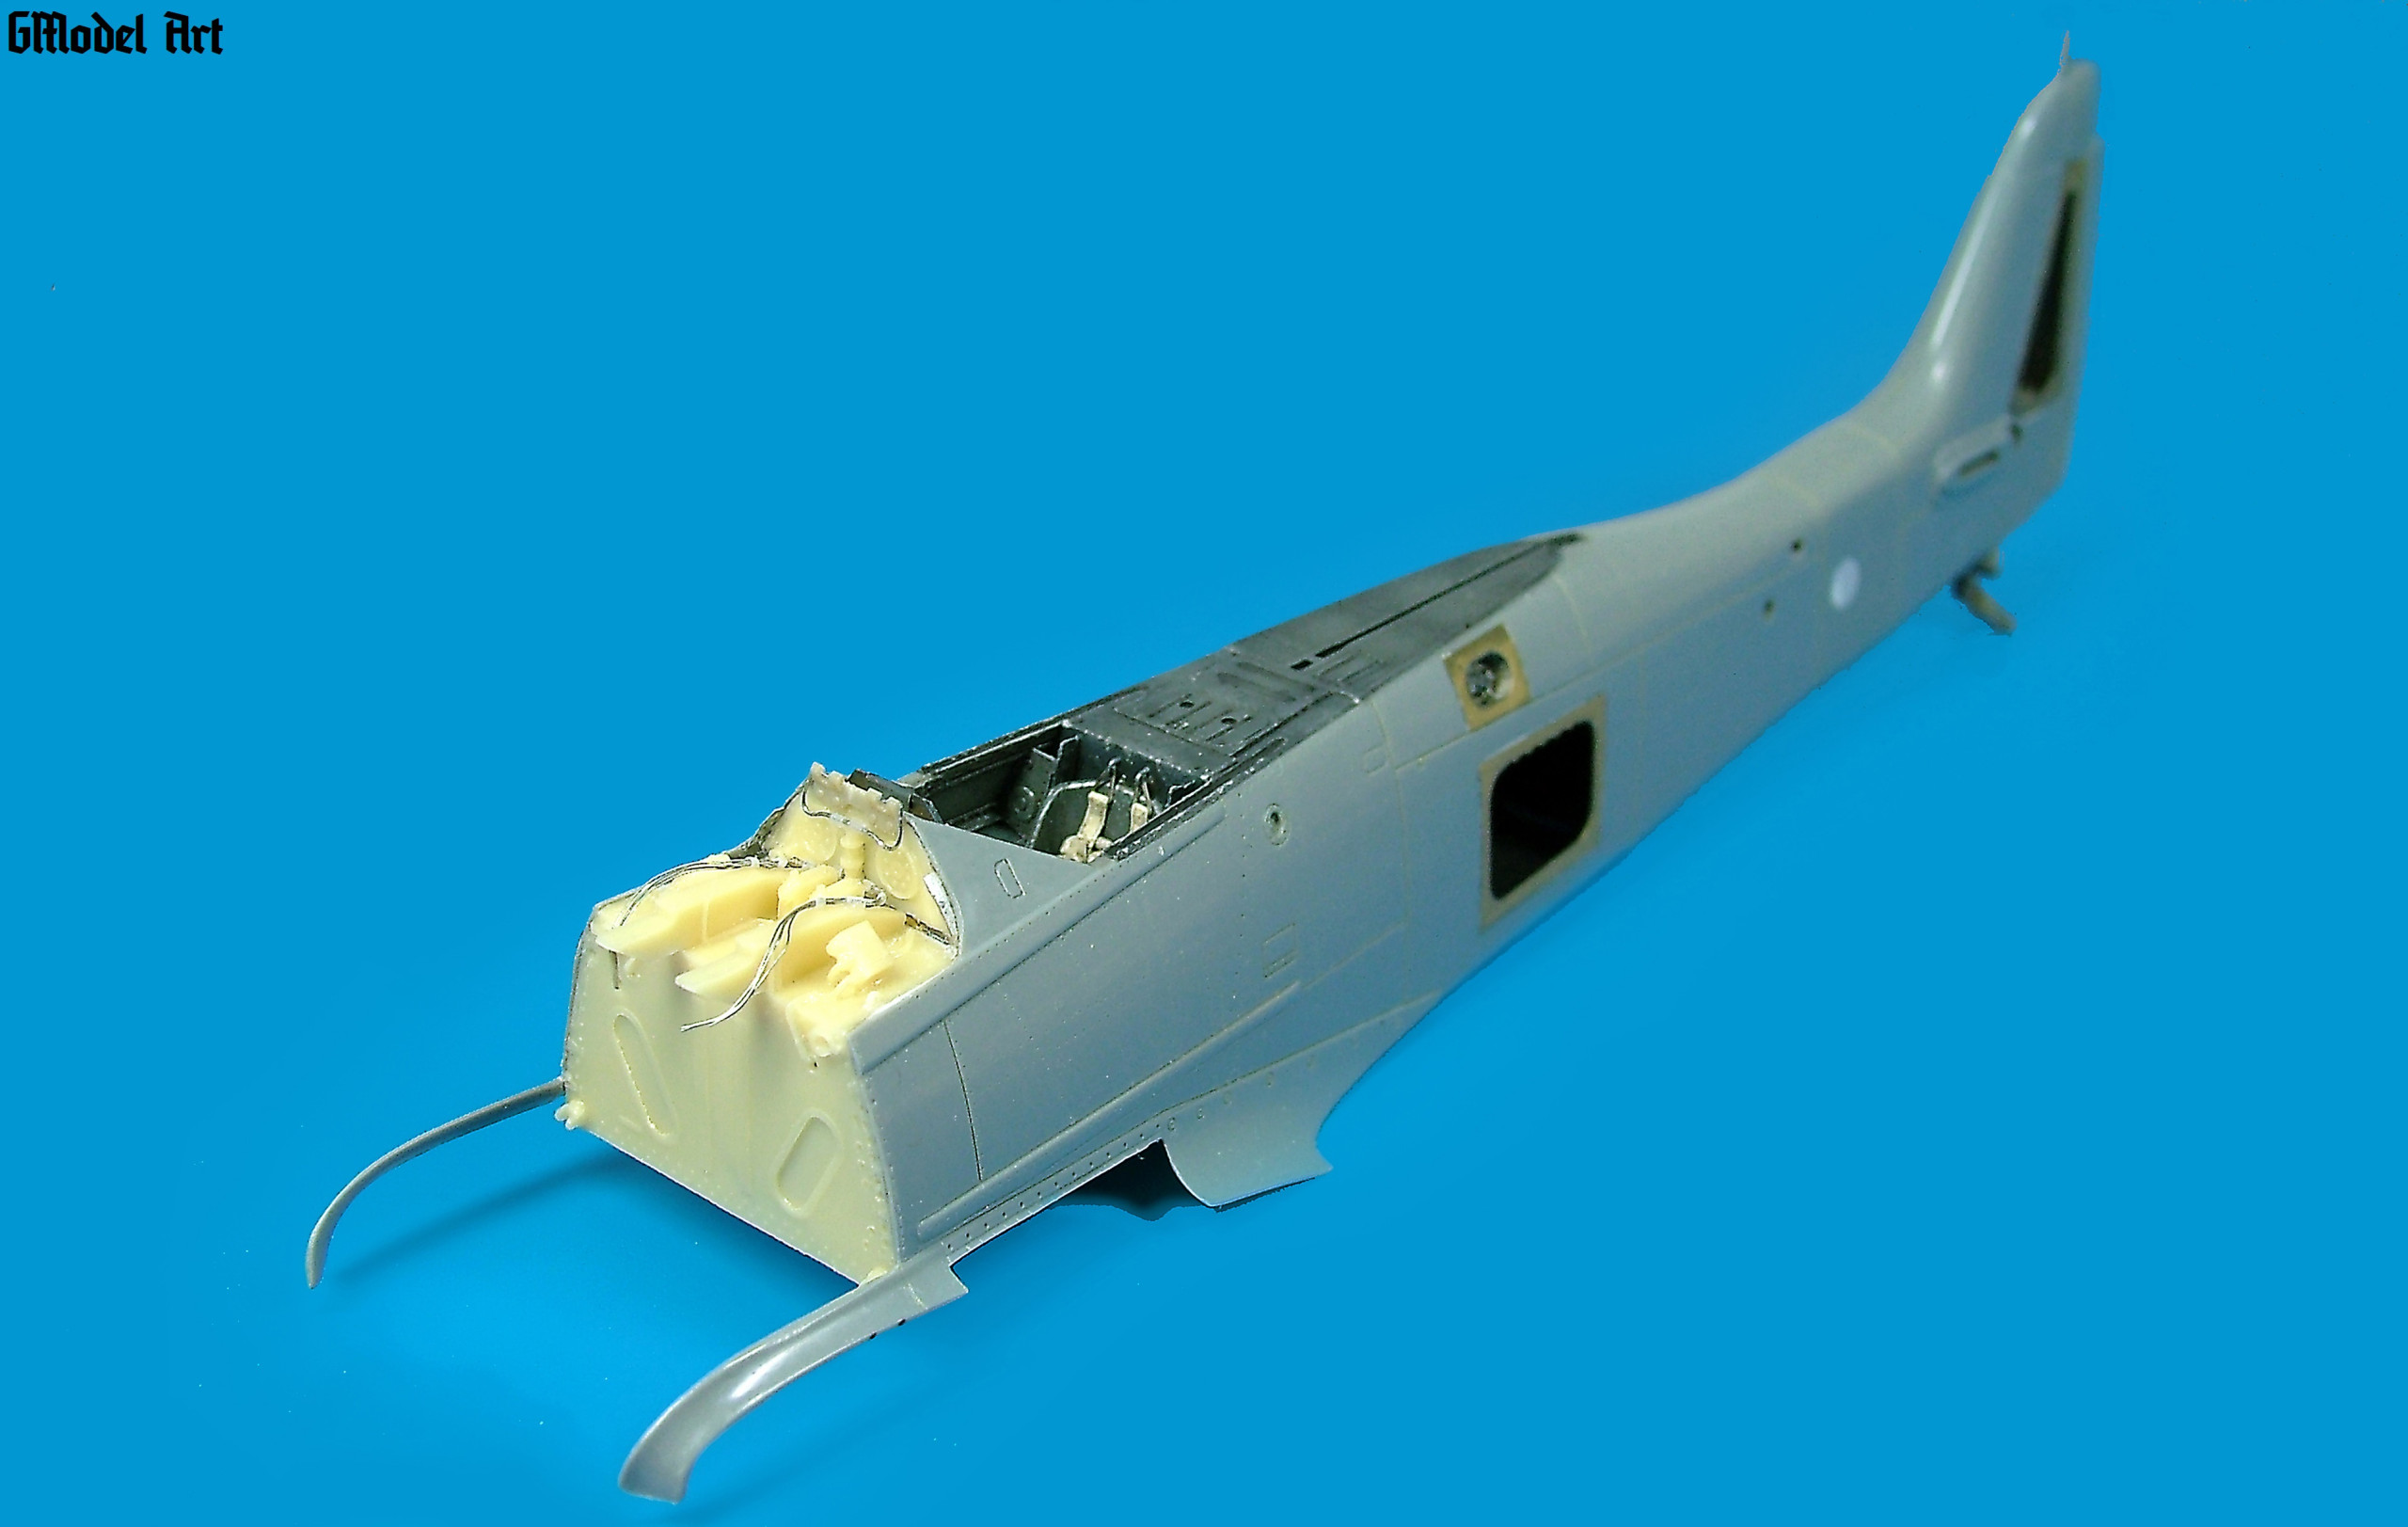
Fuselage:
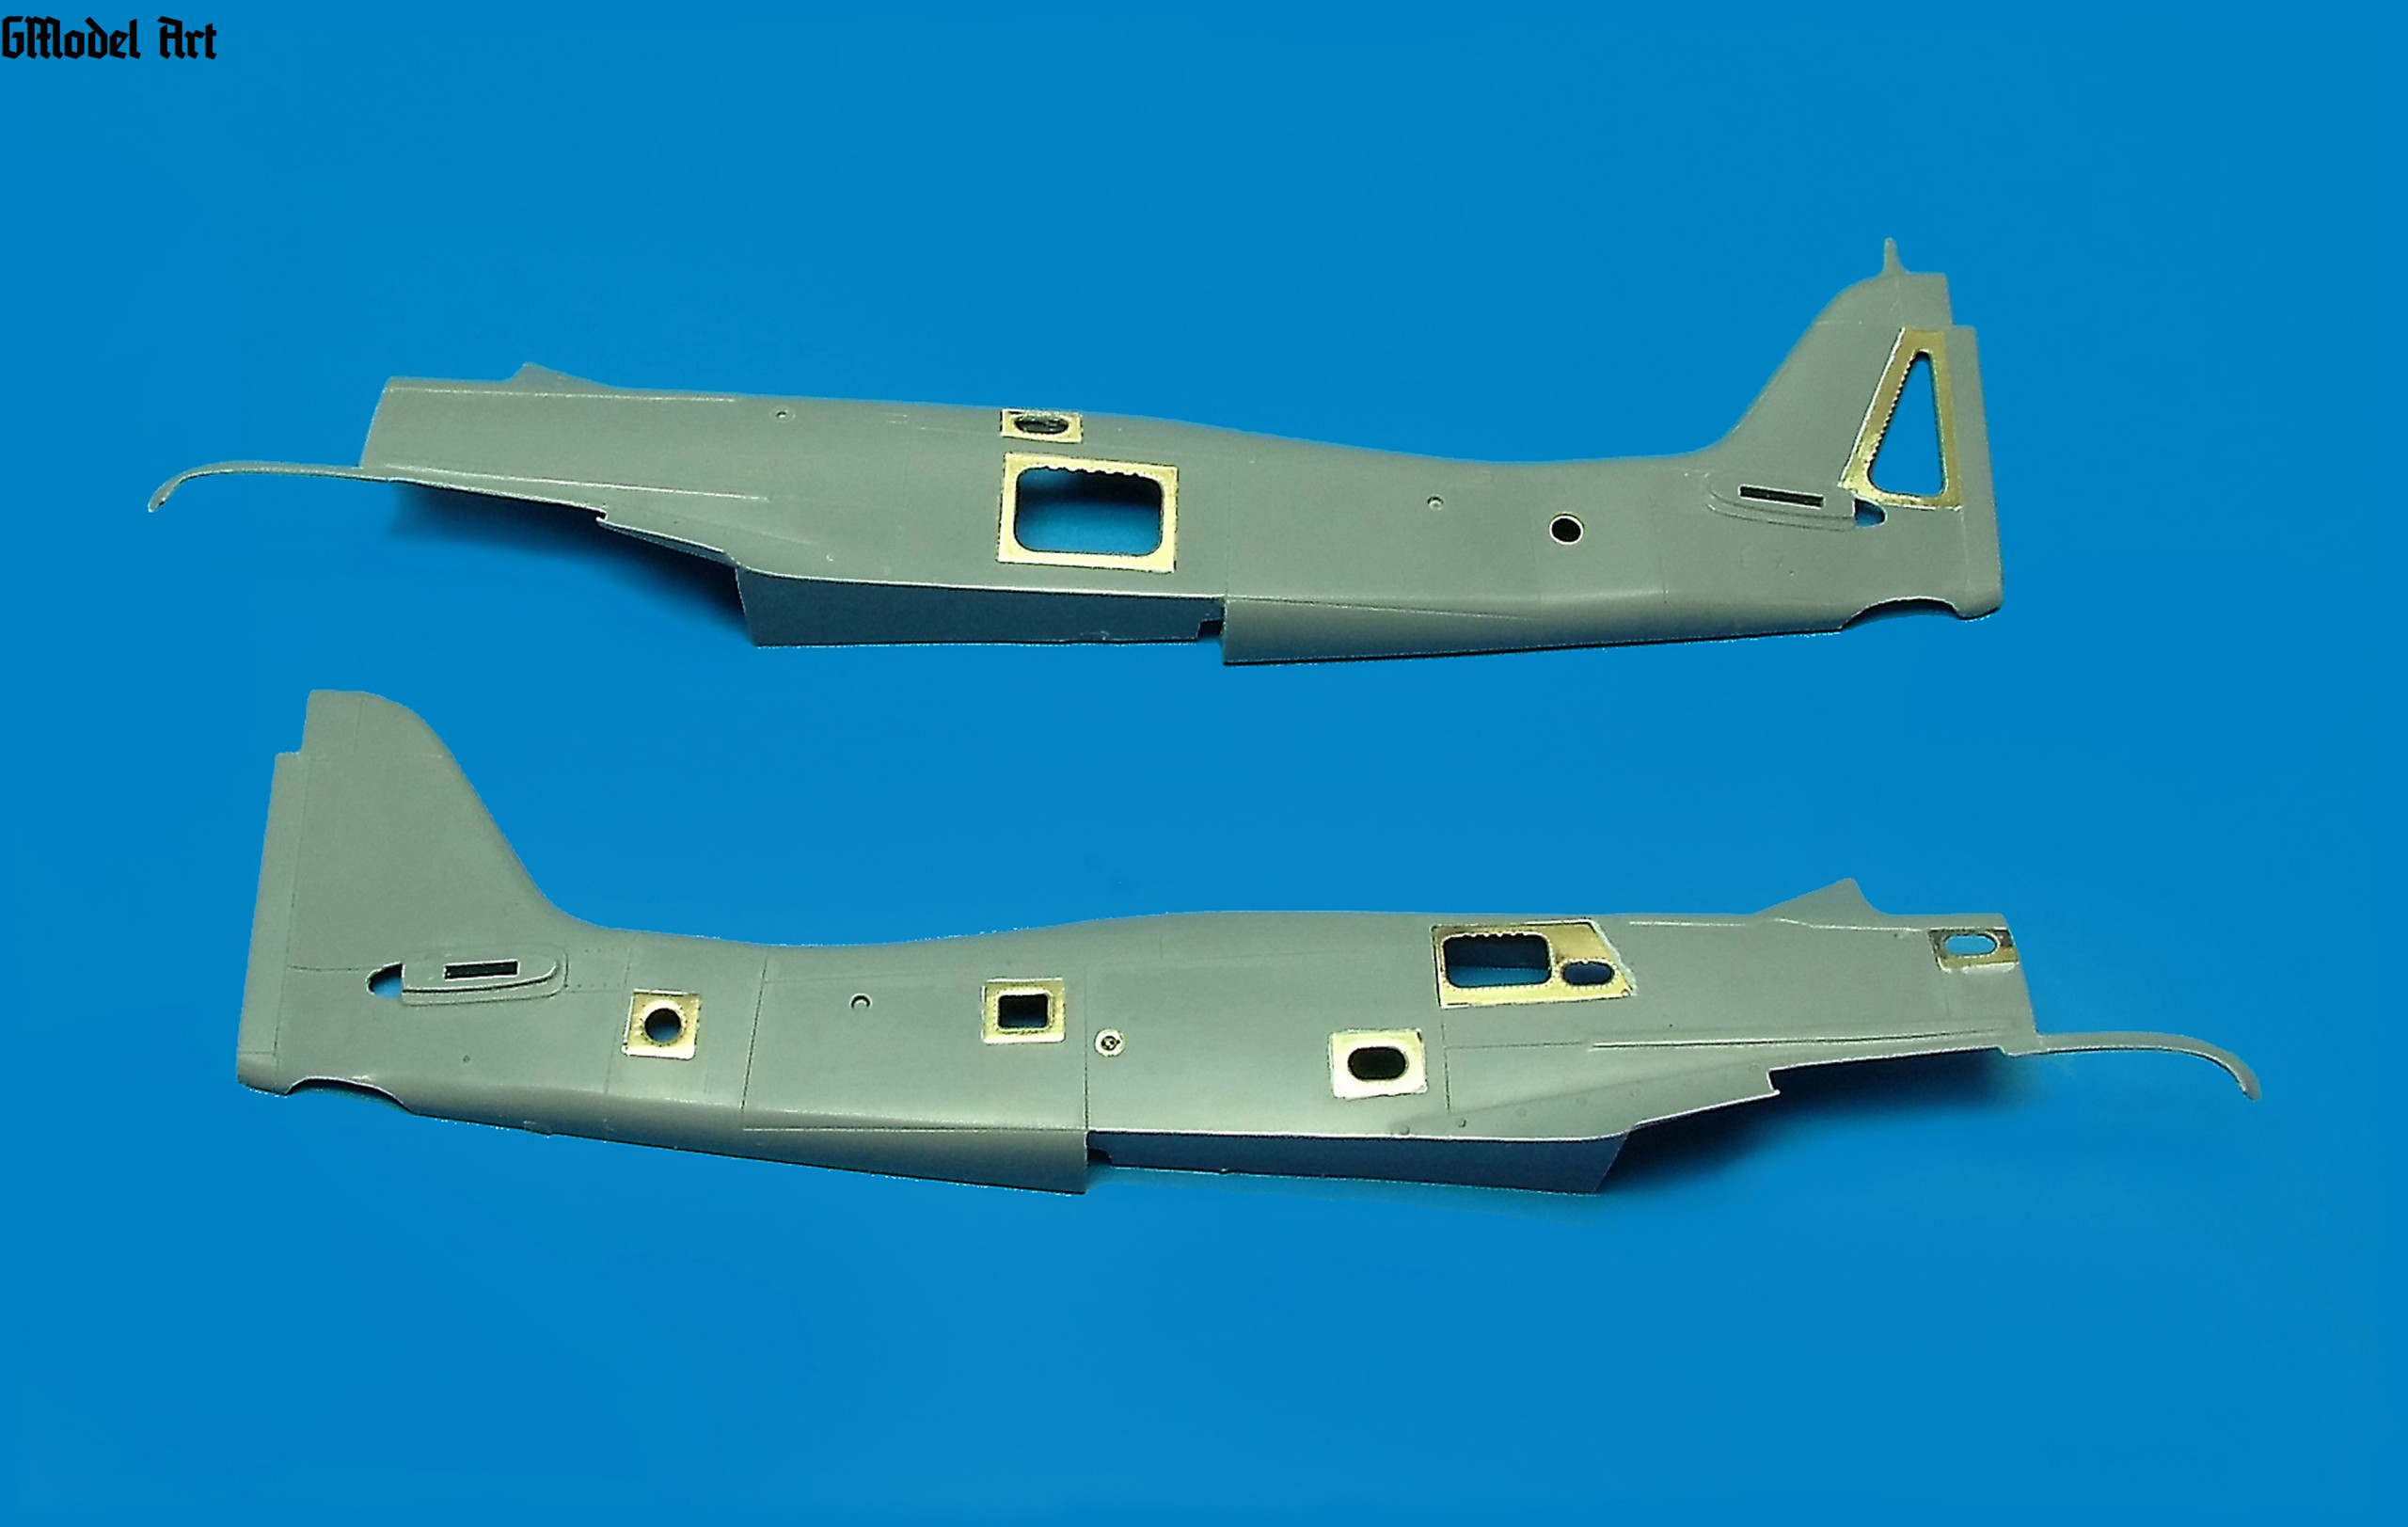
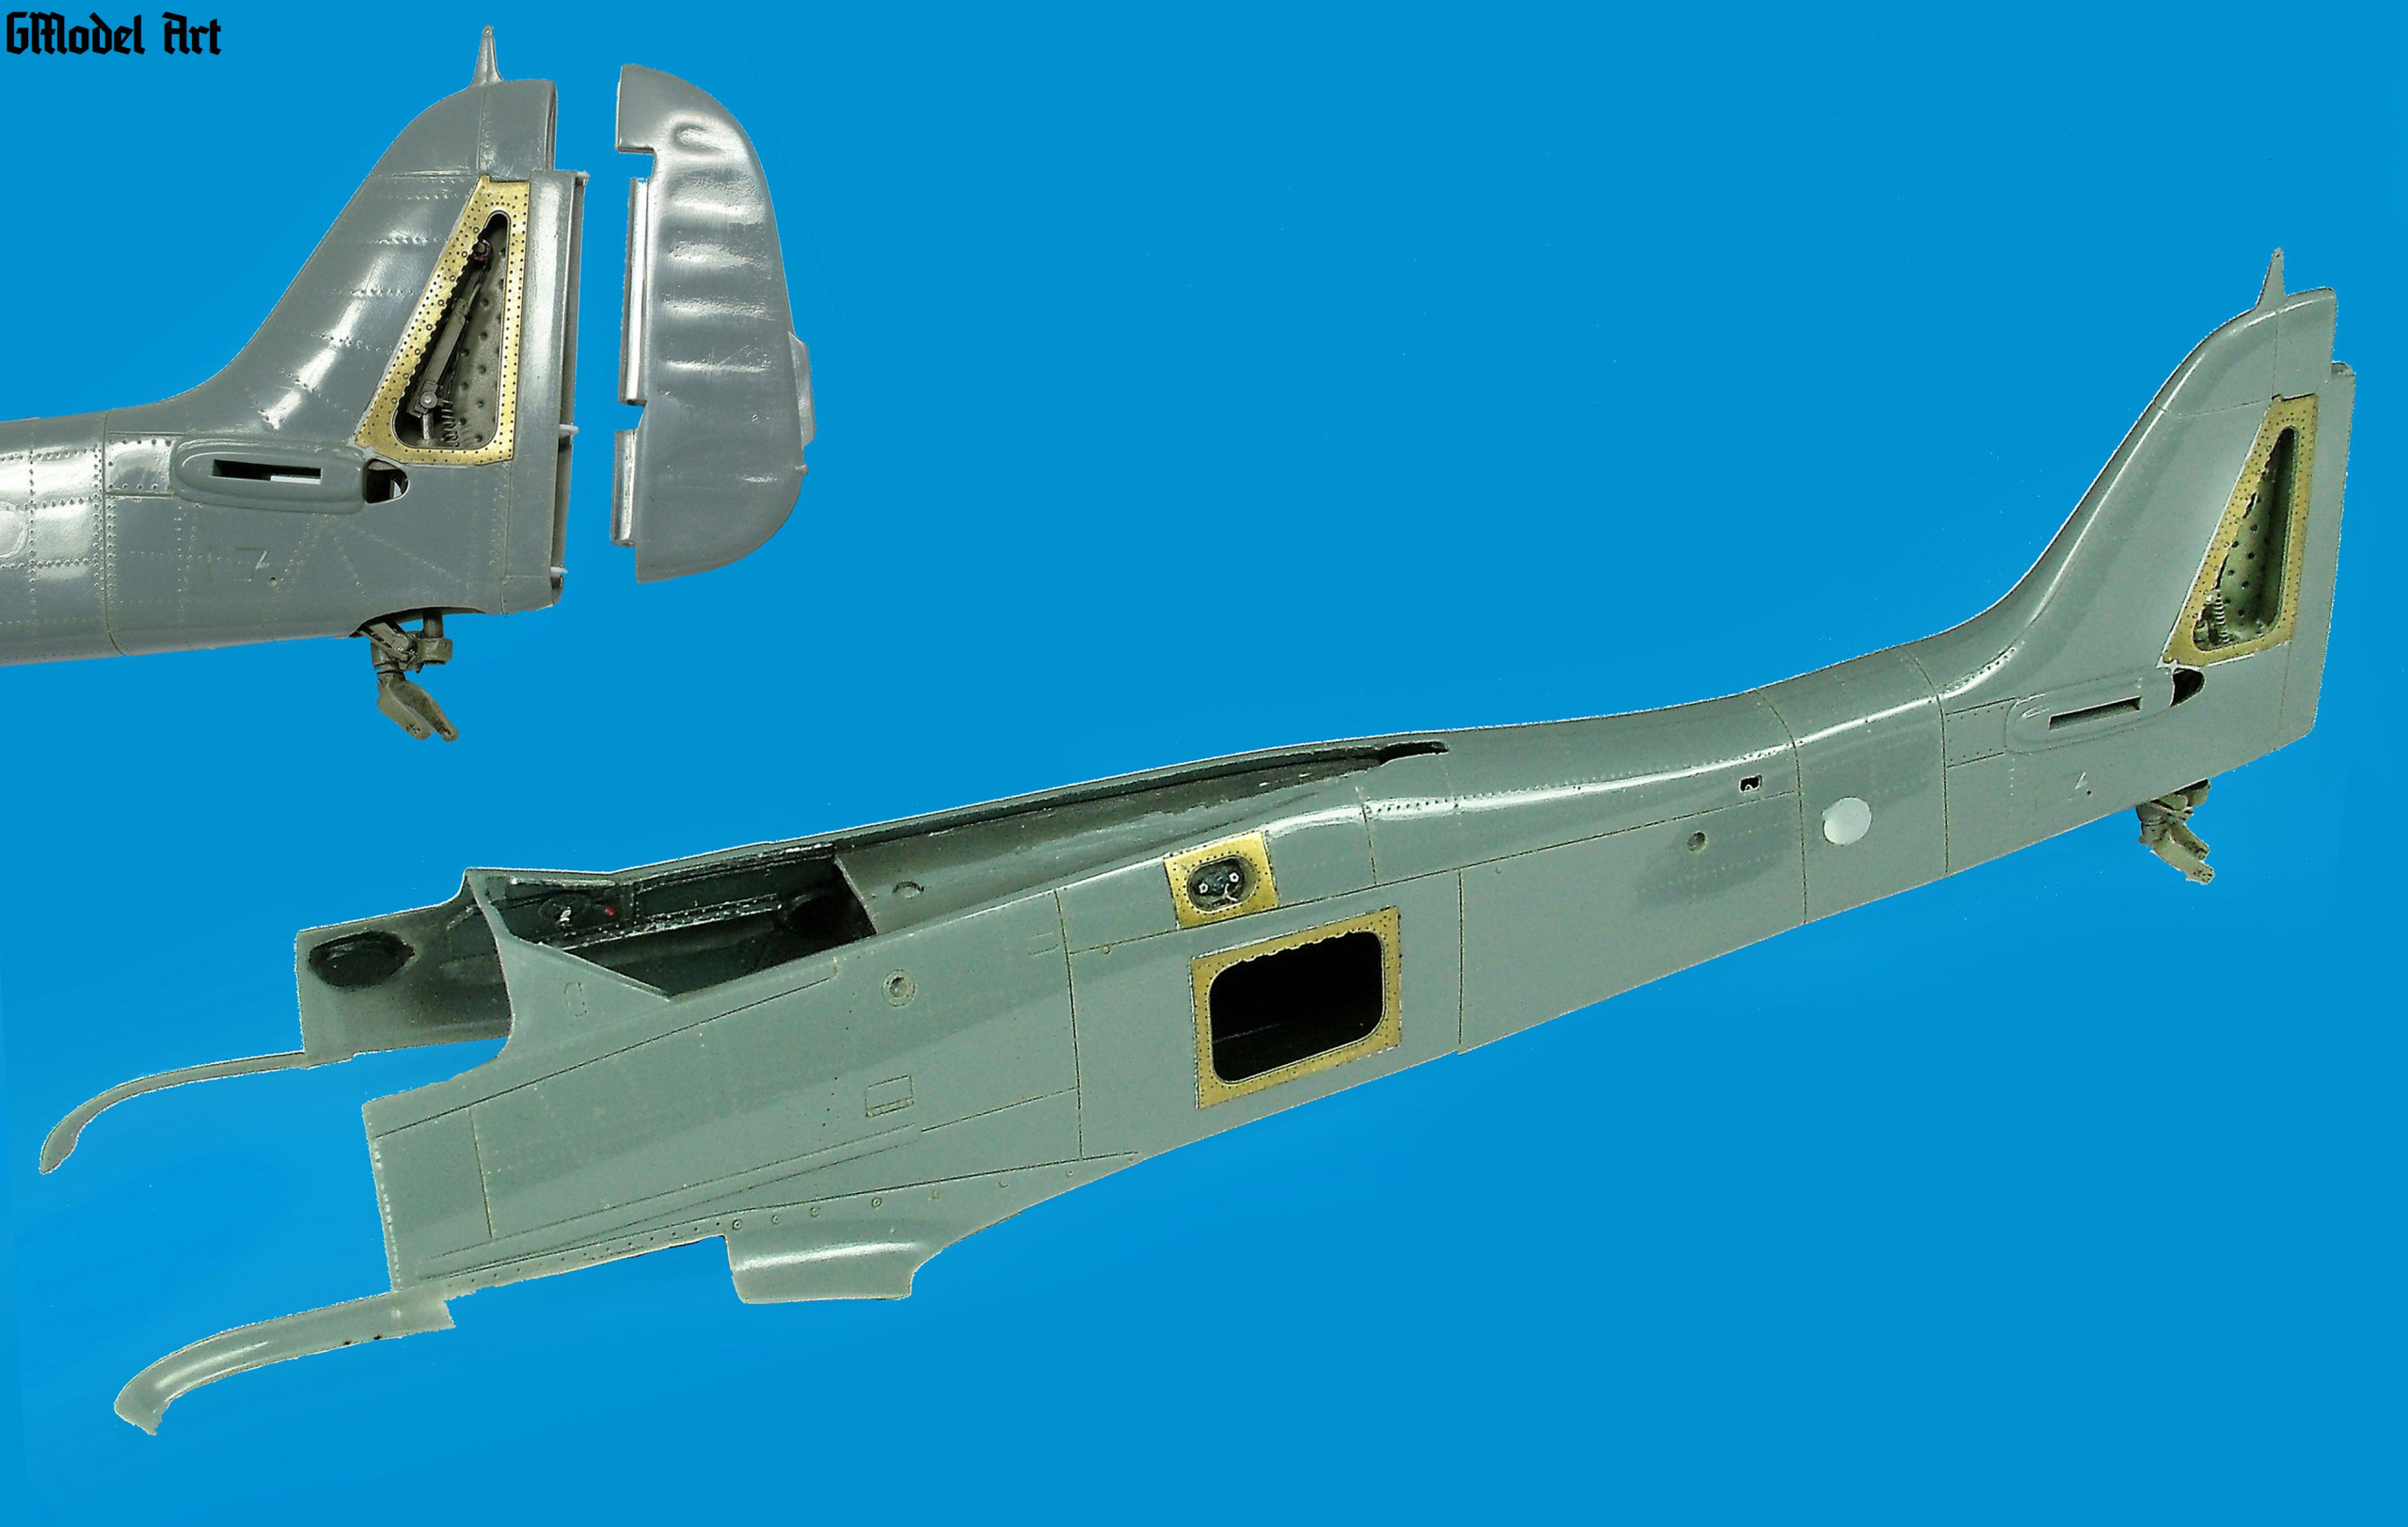
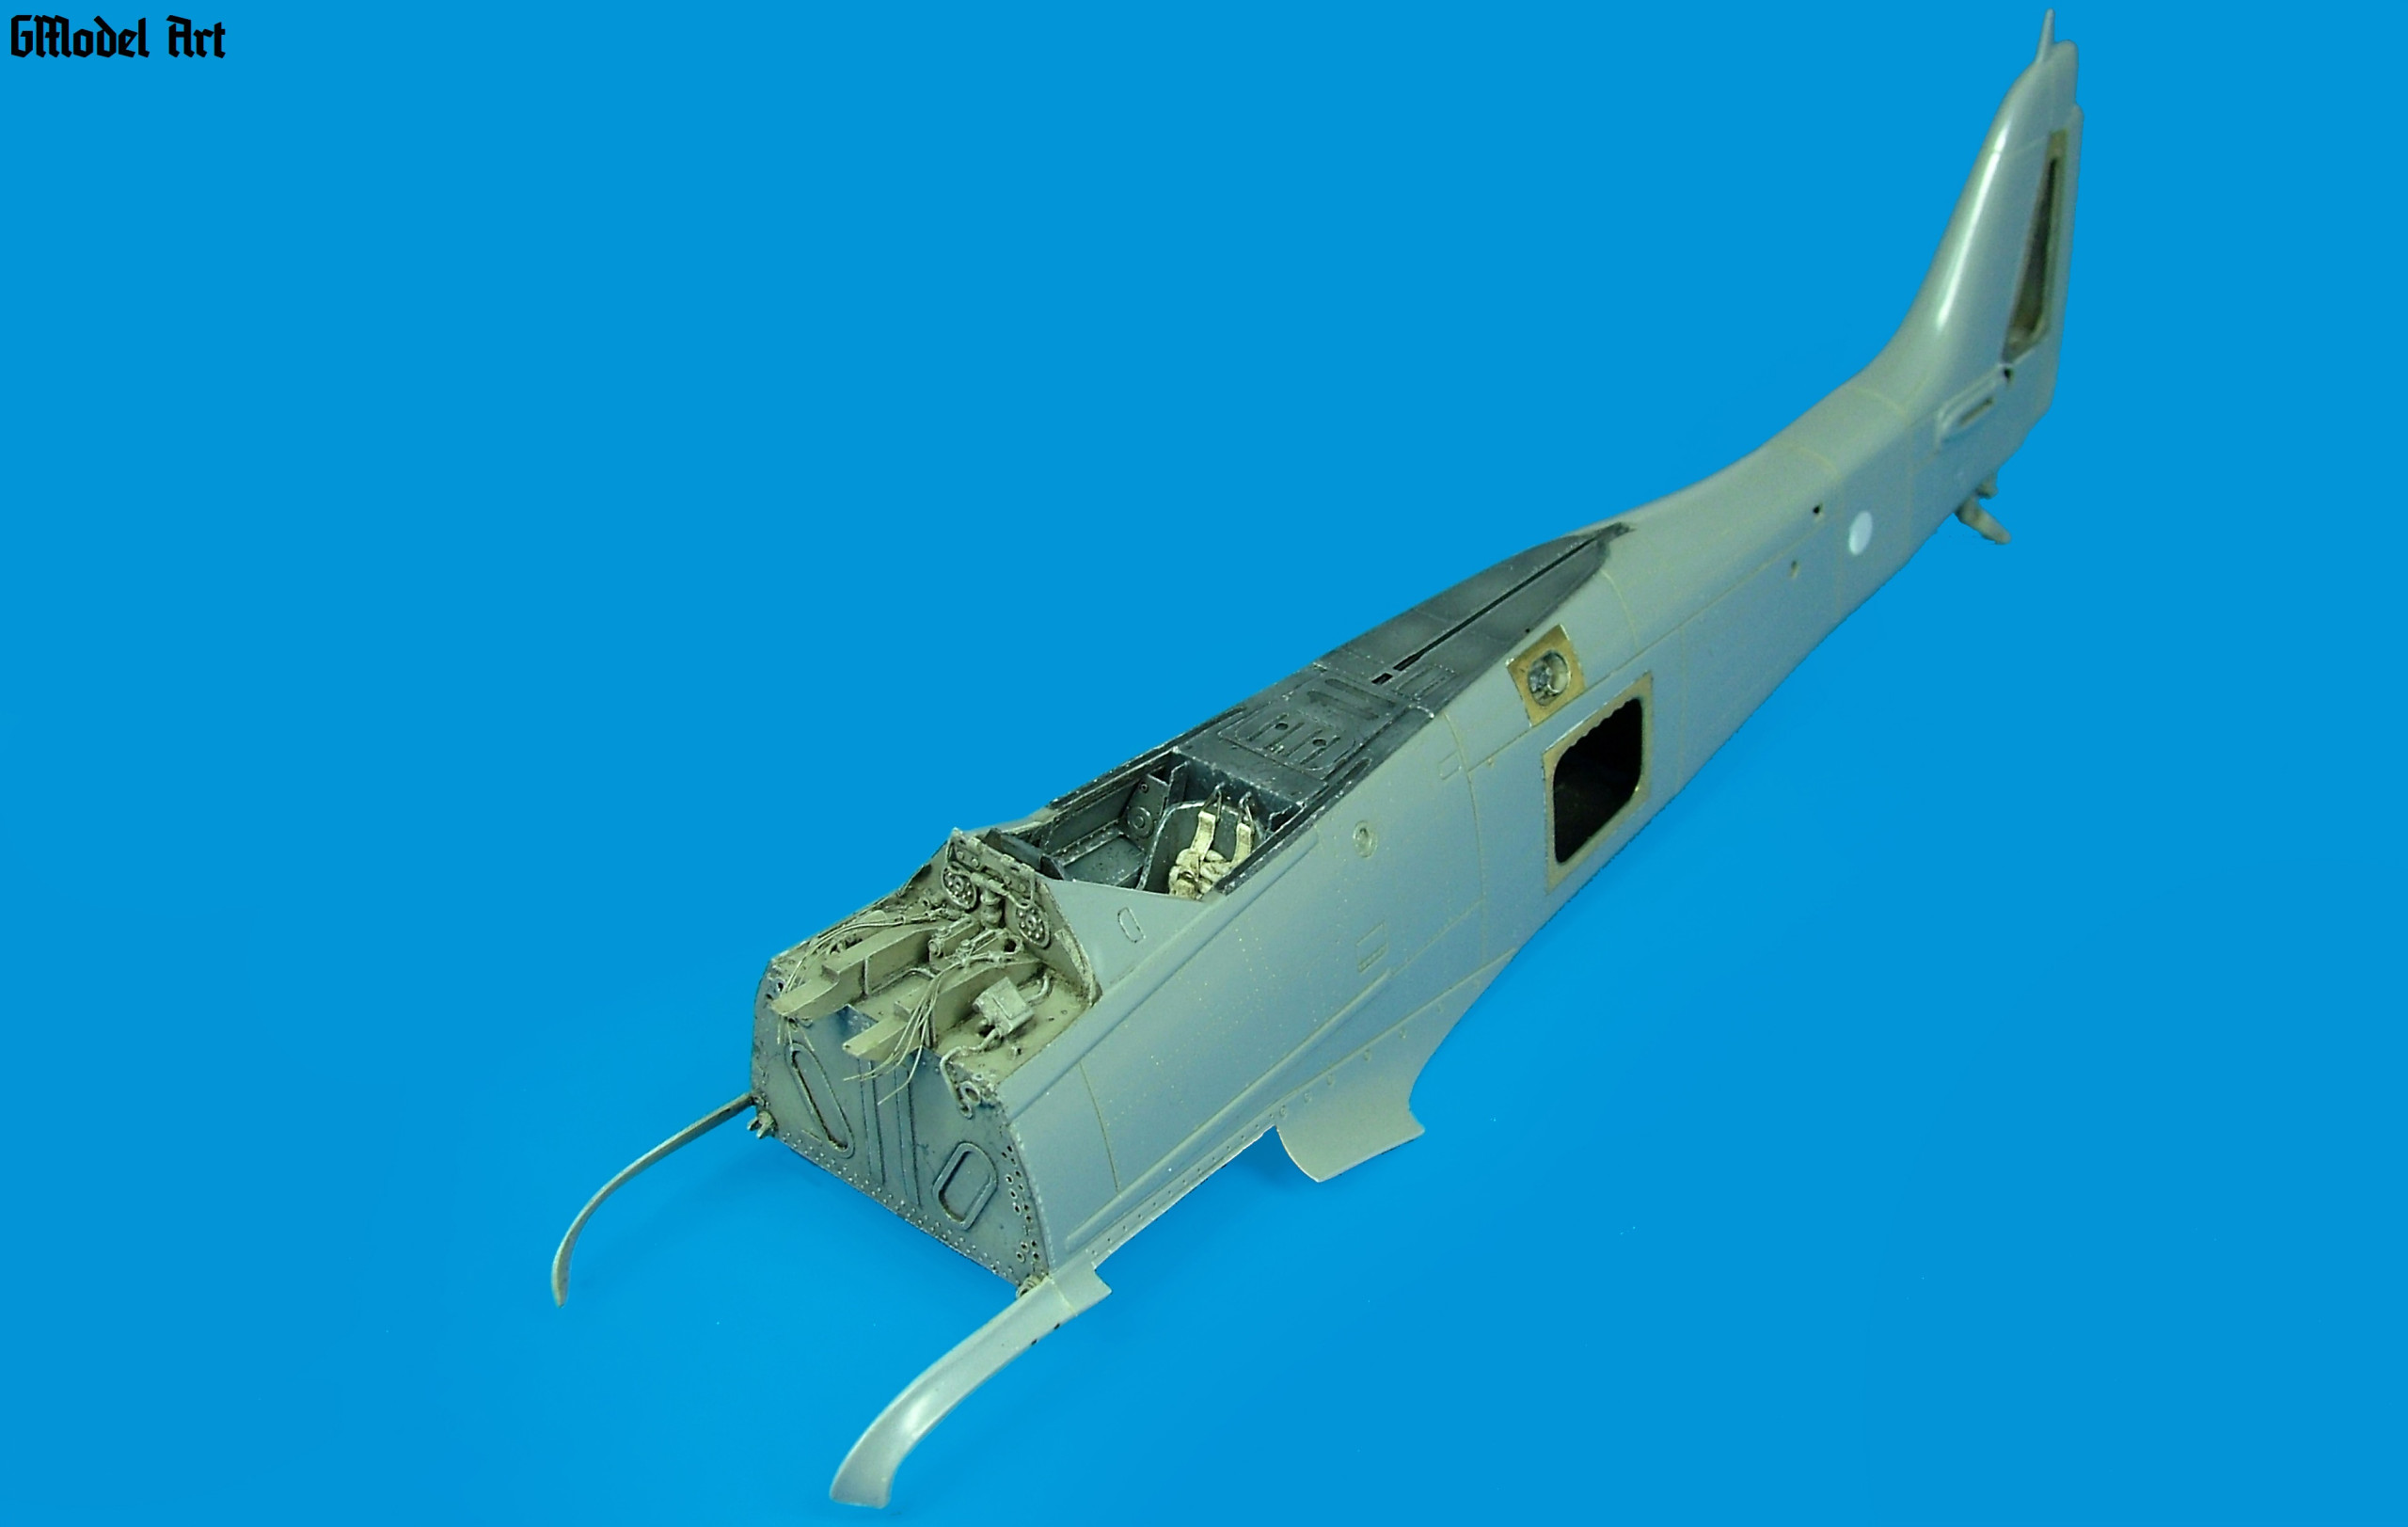
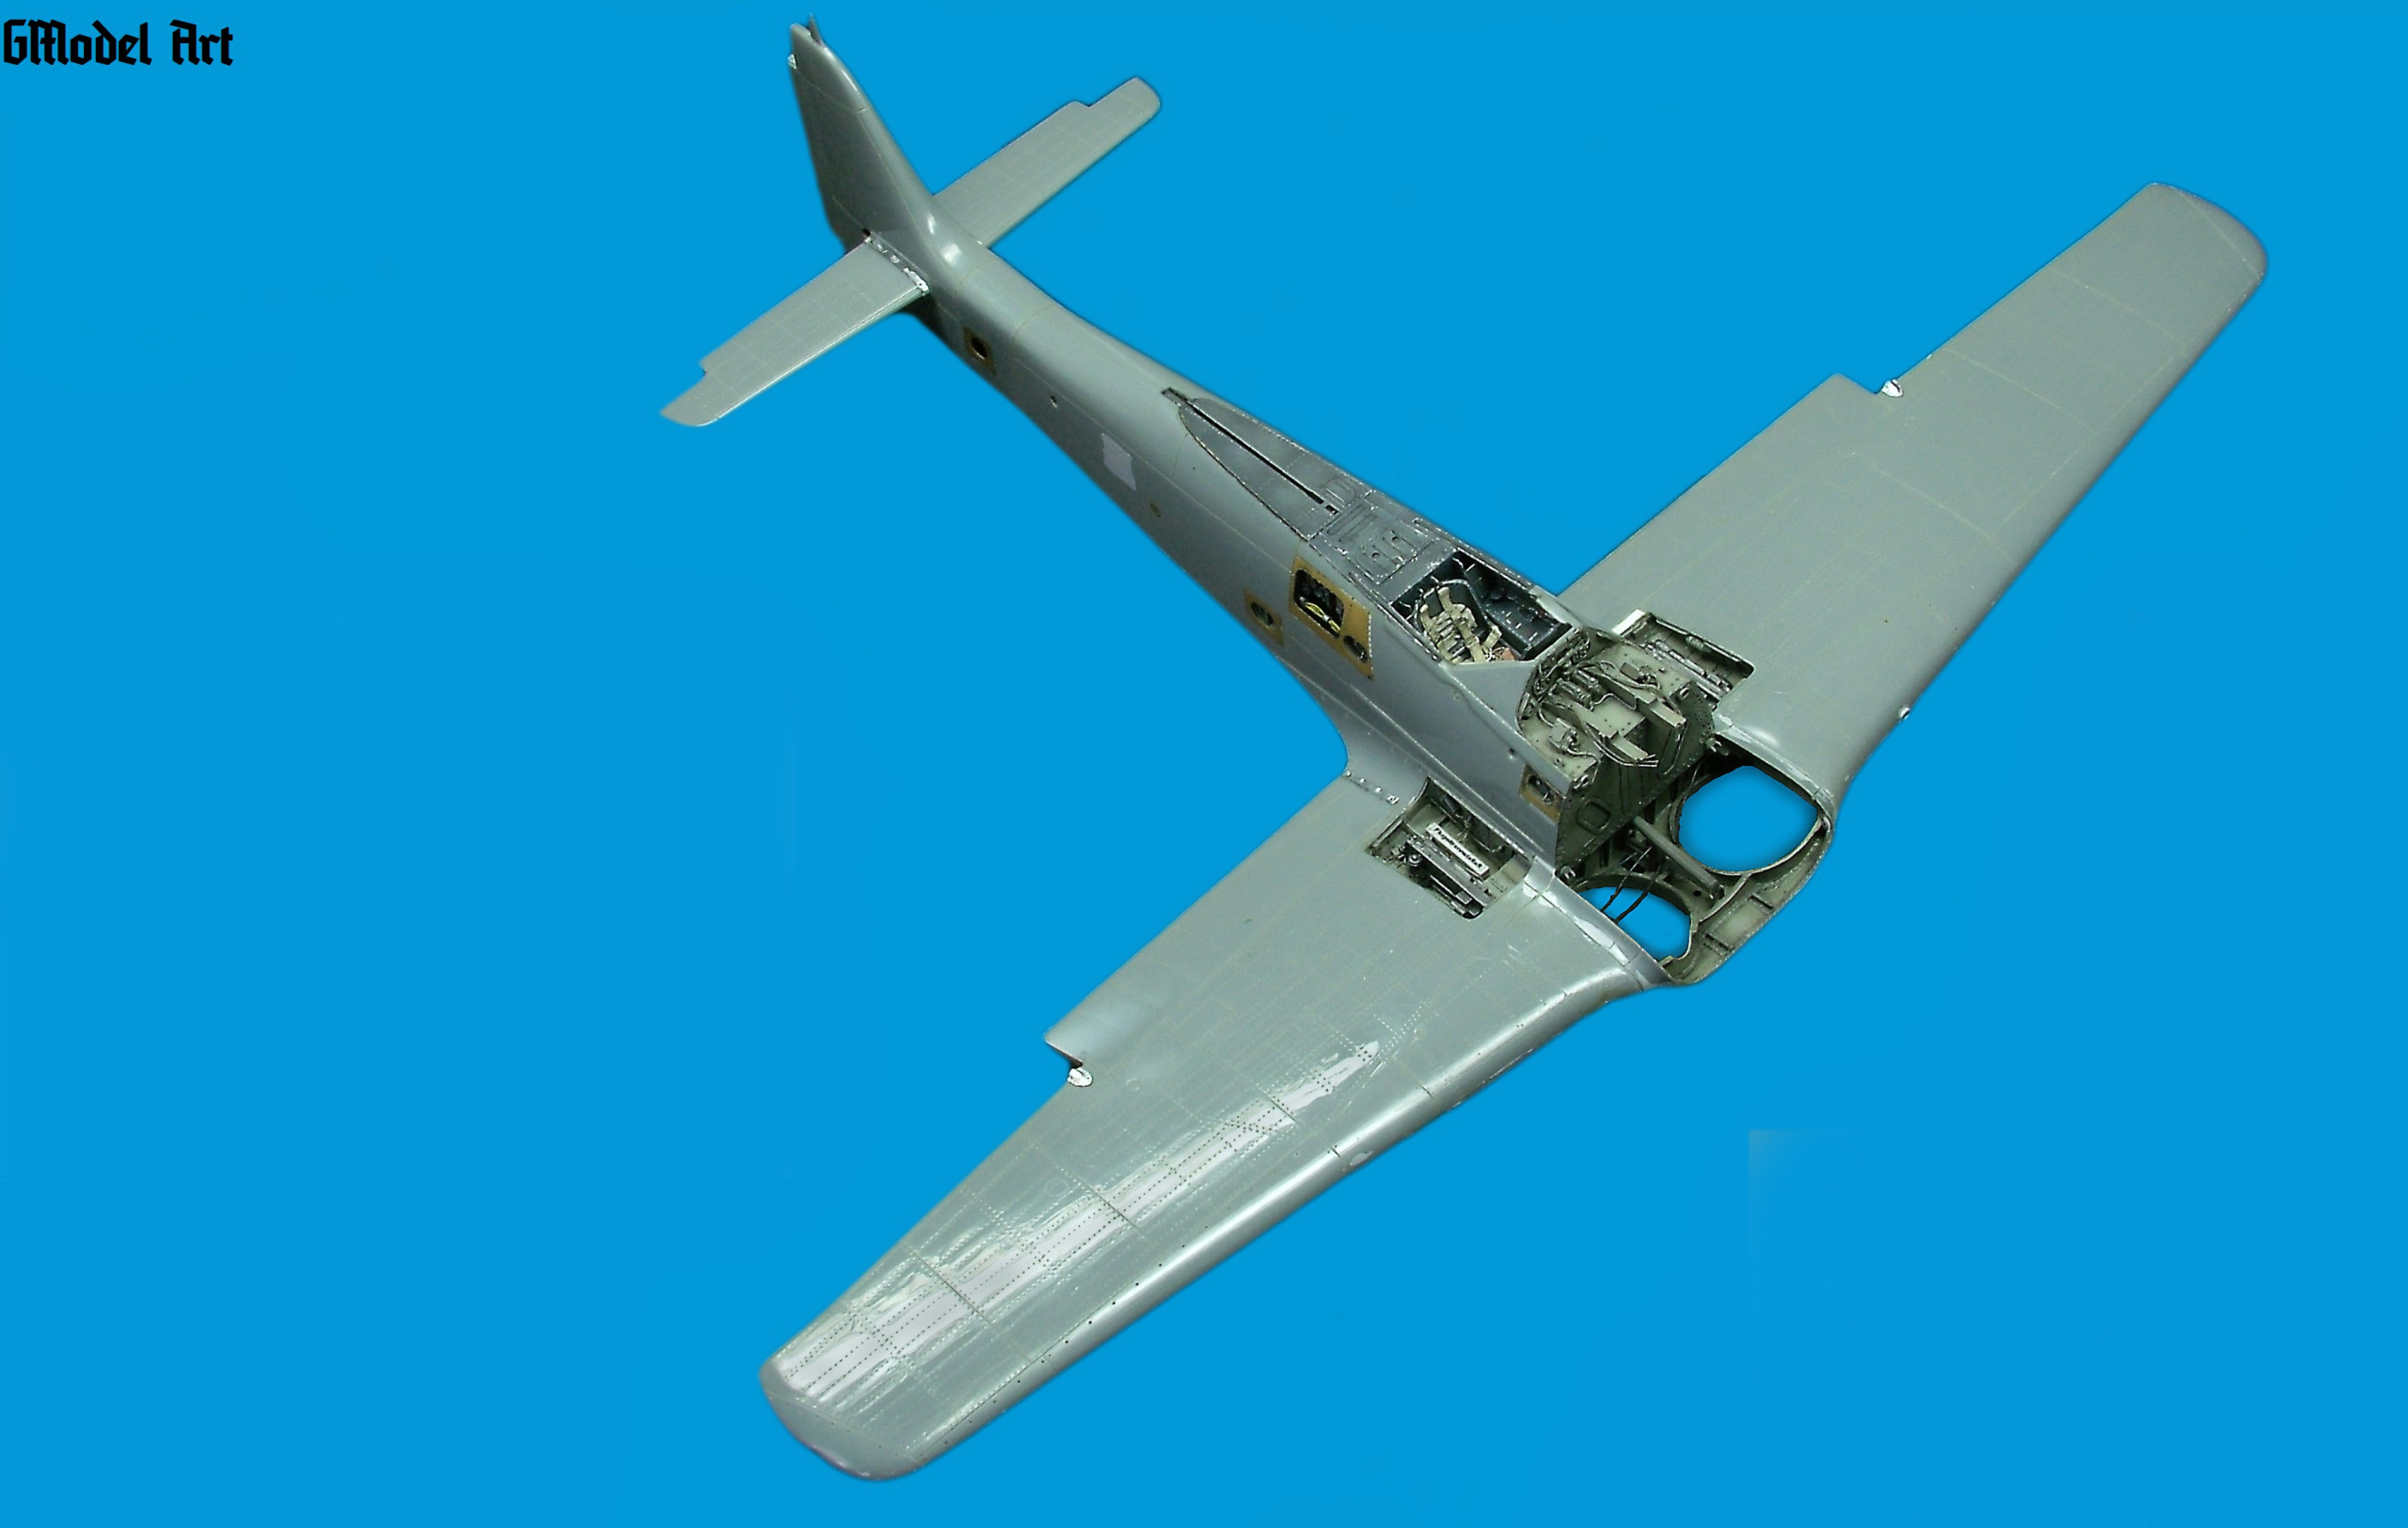
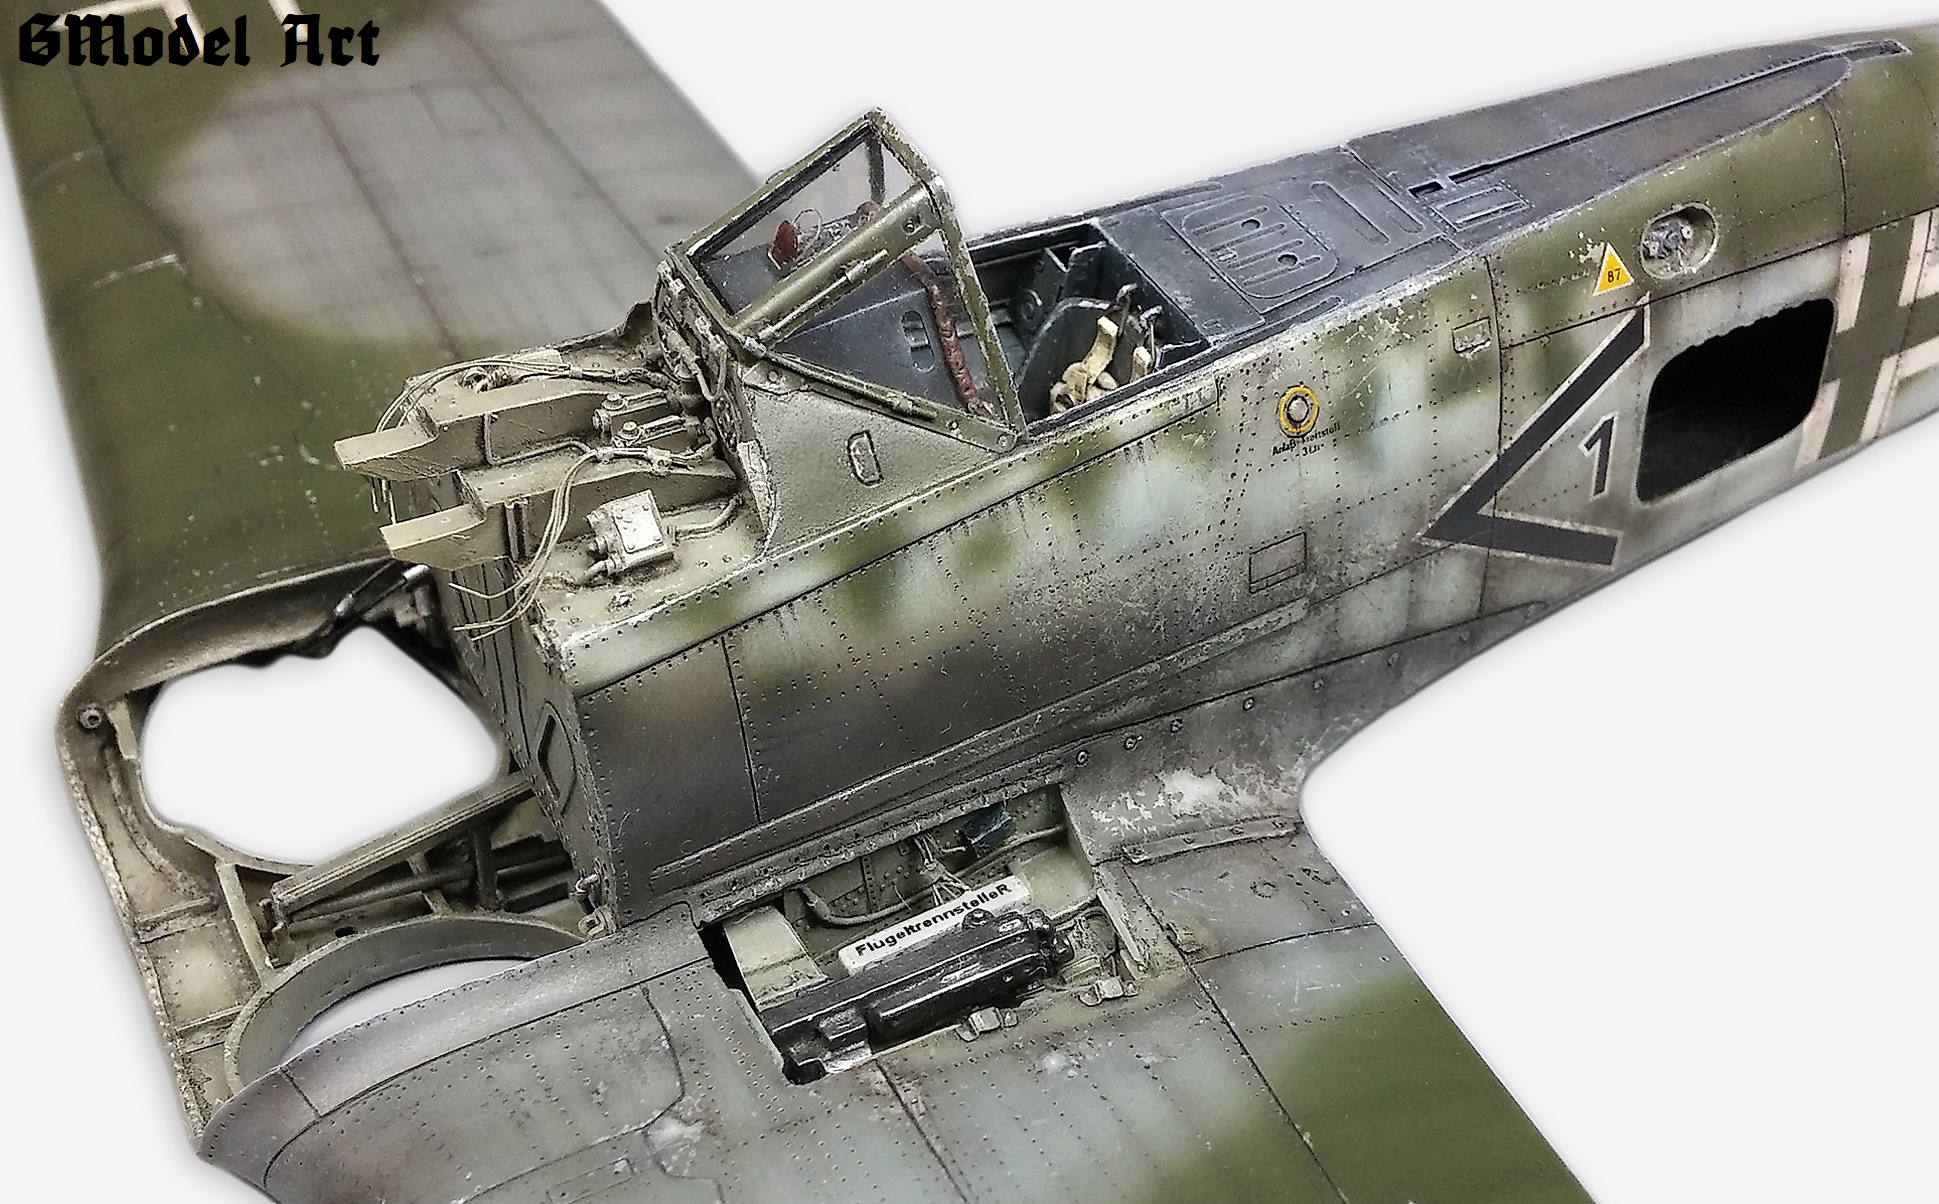
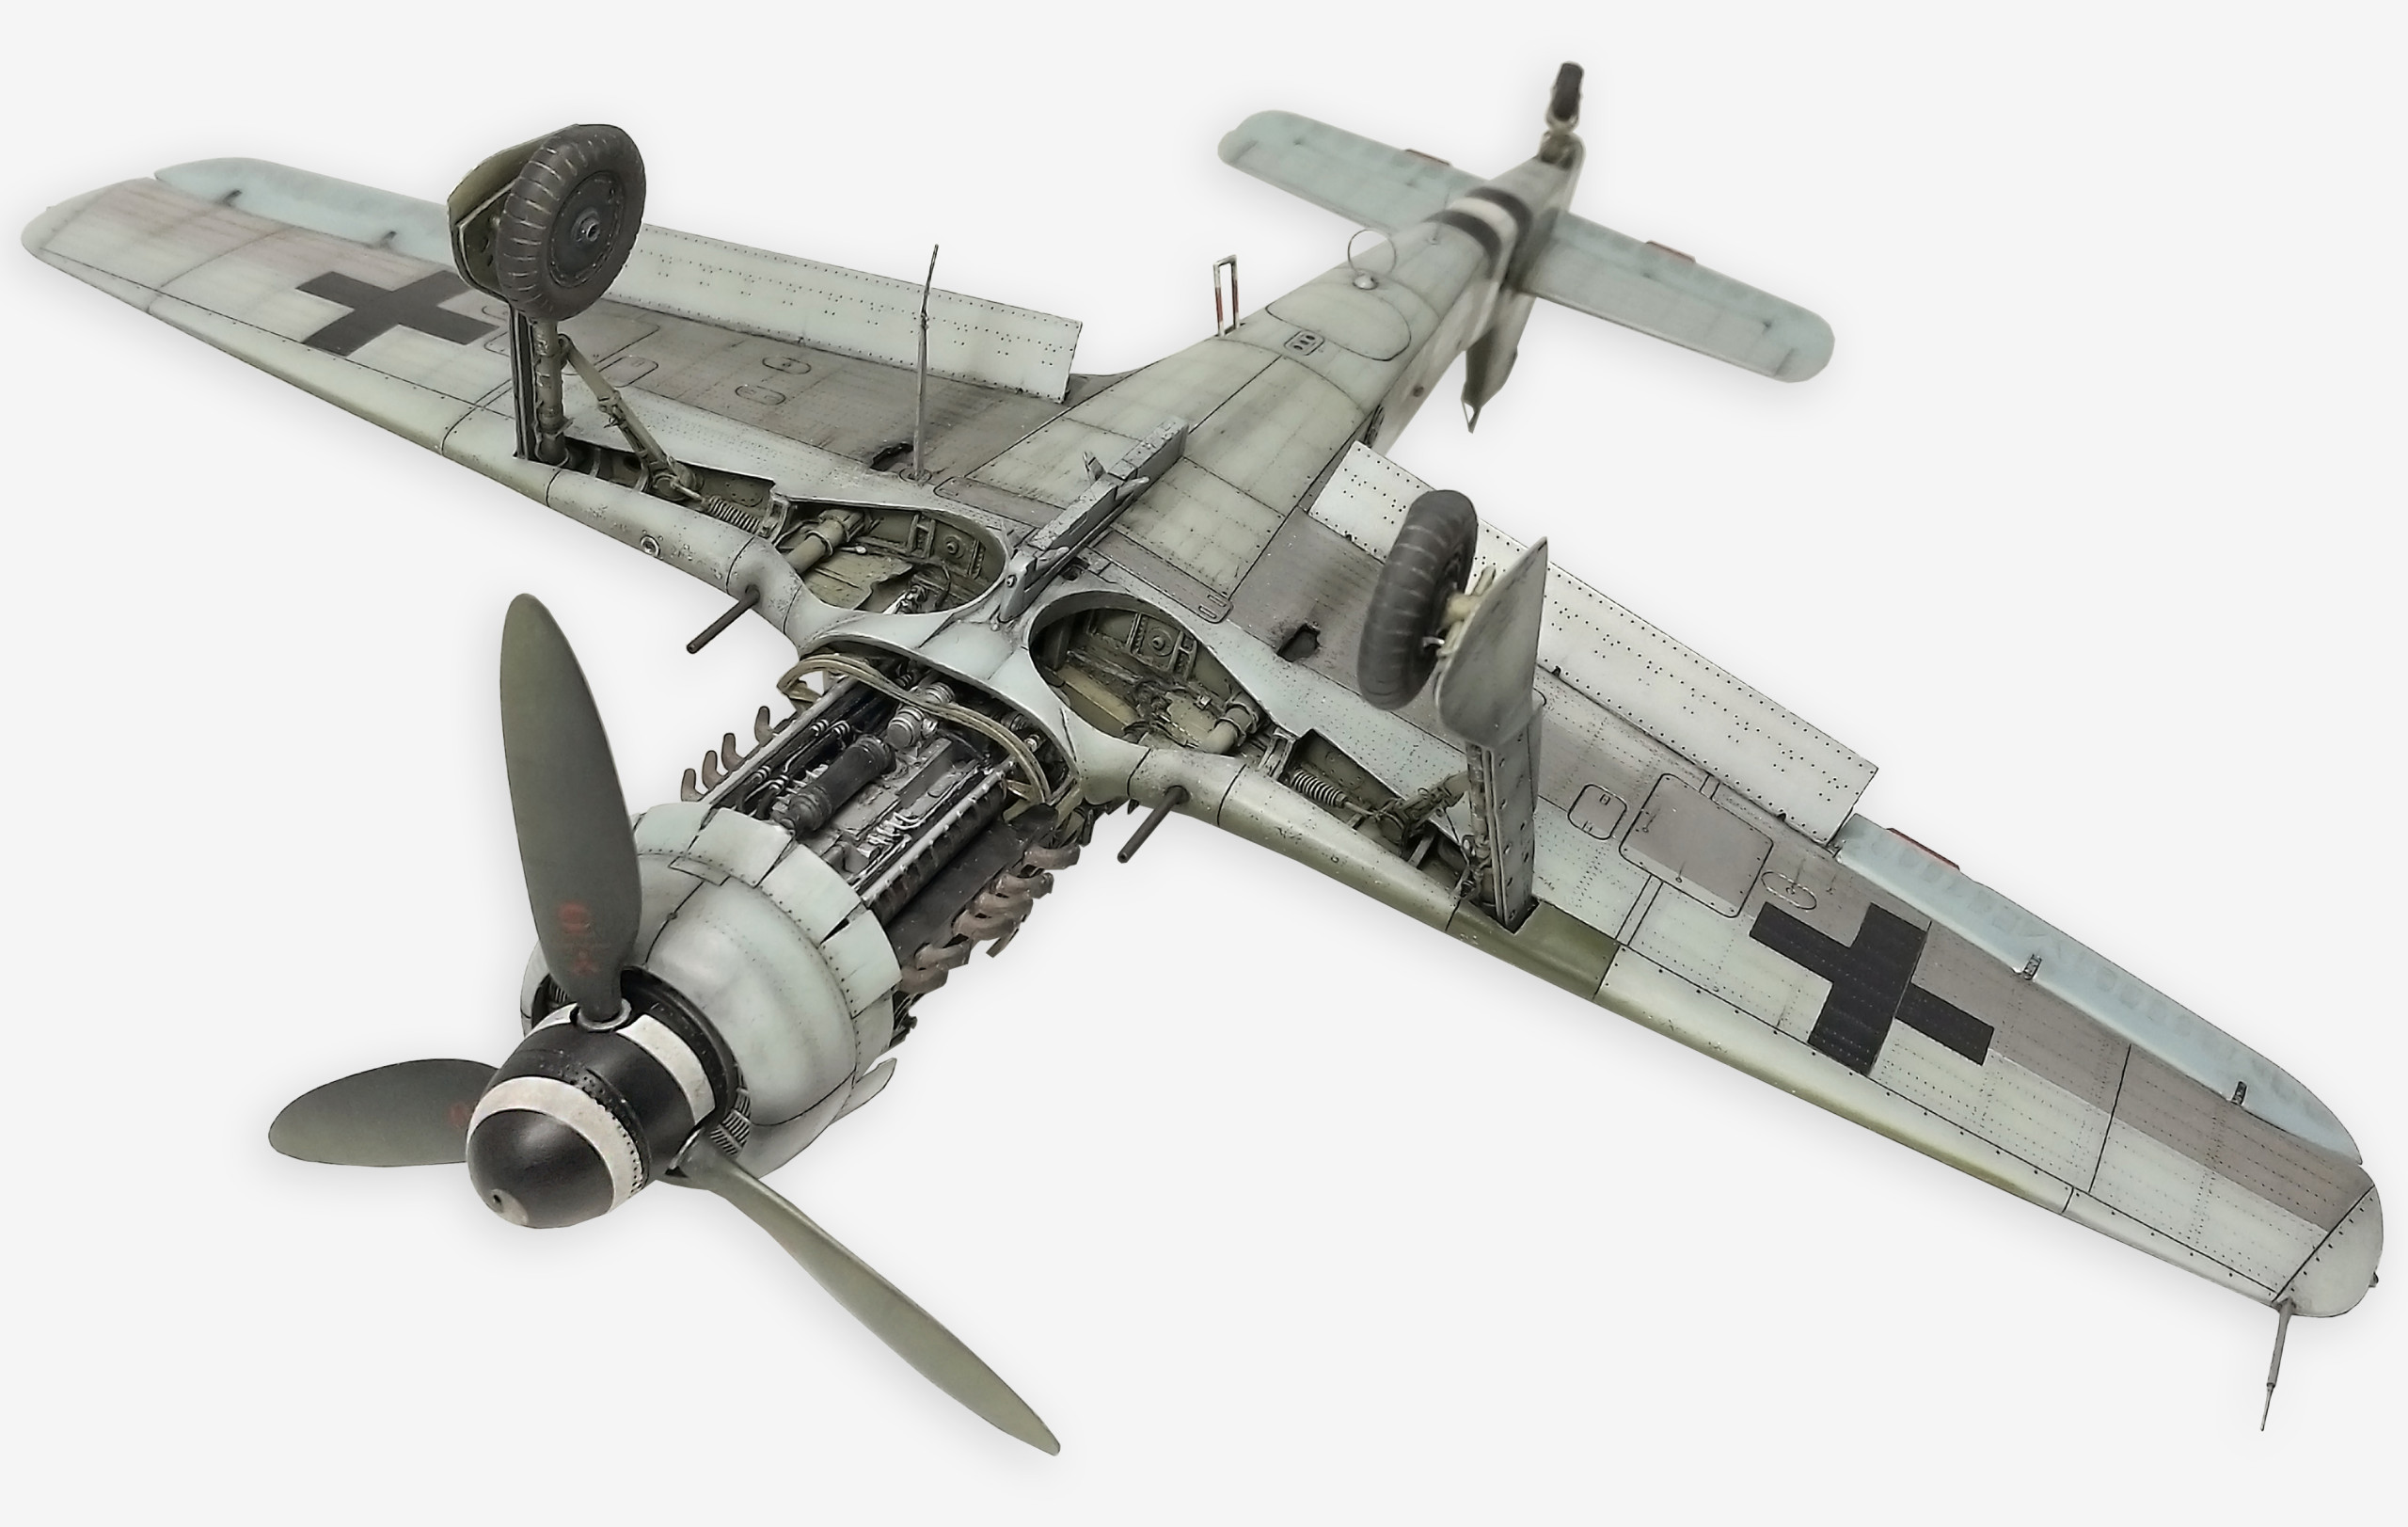
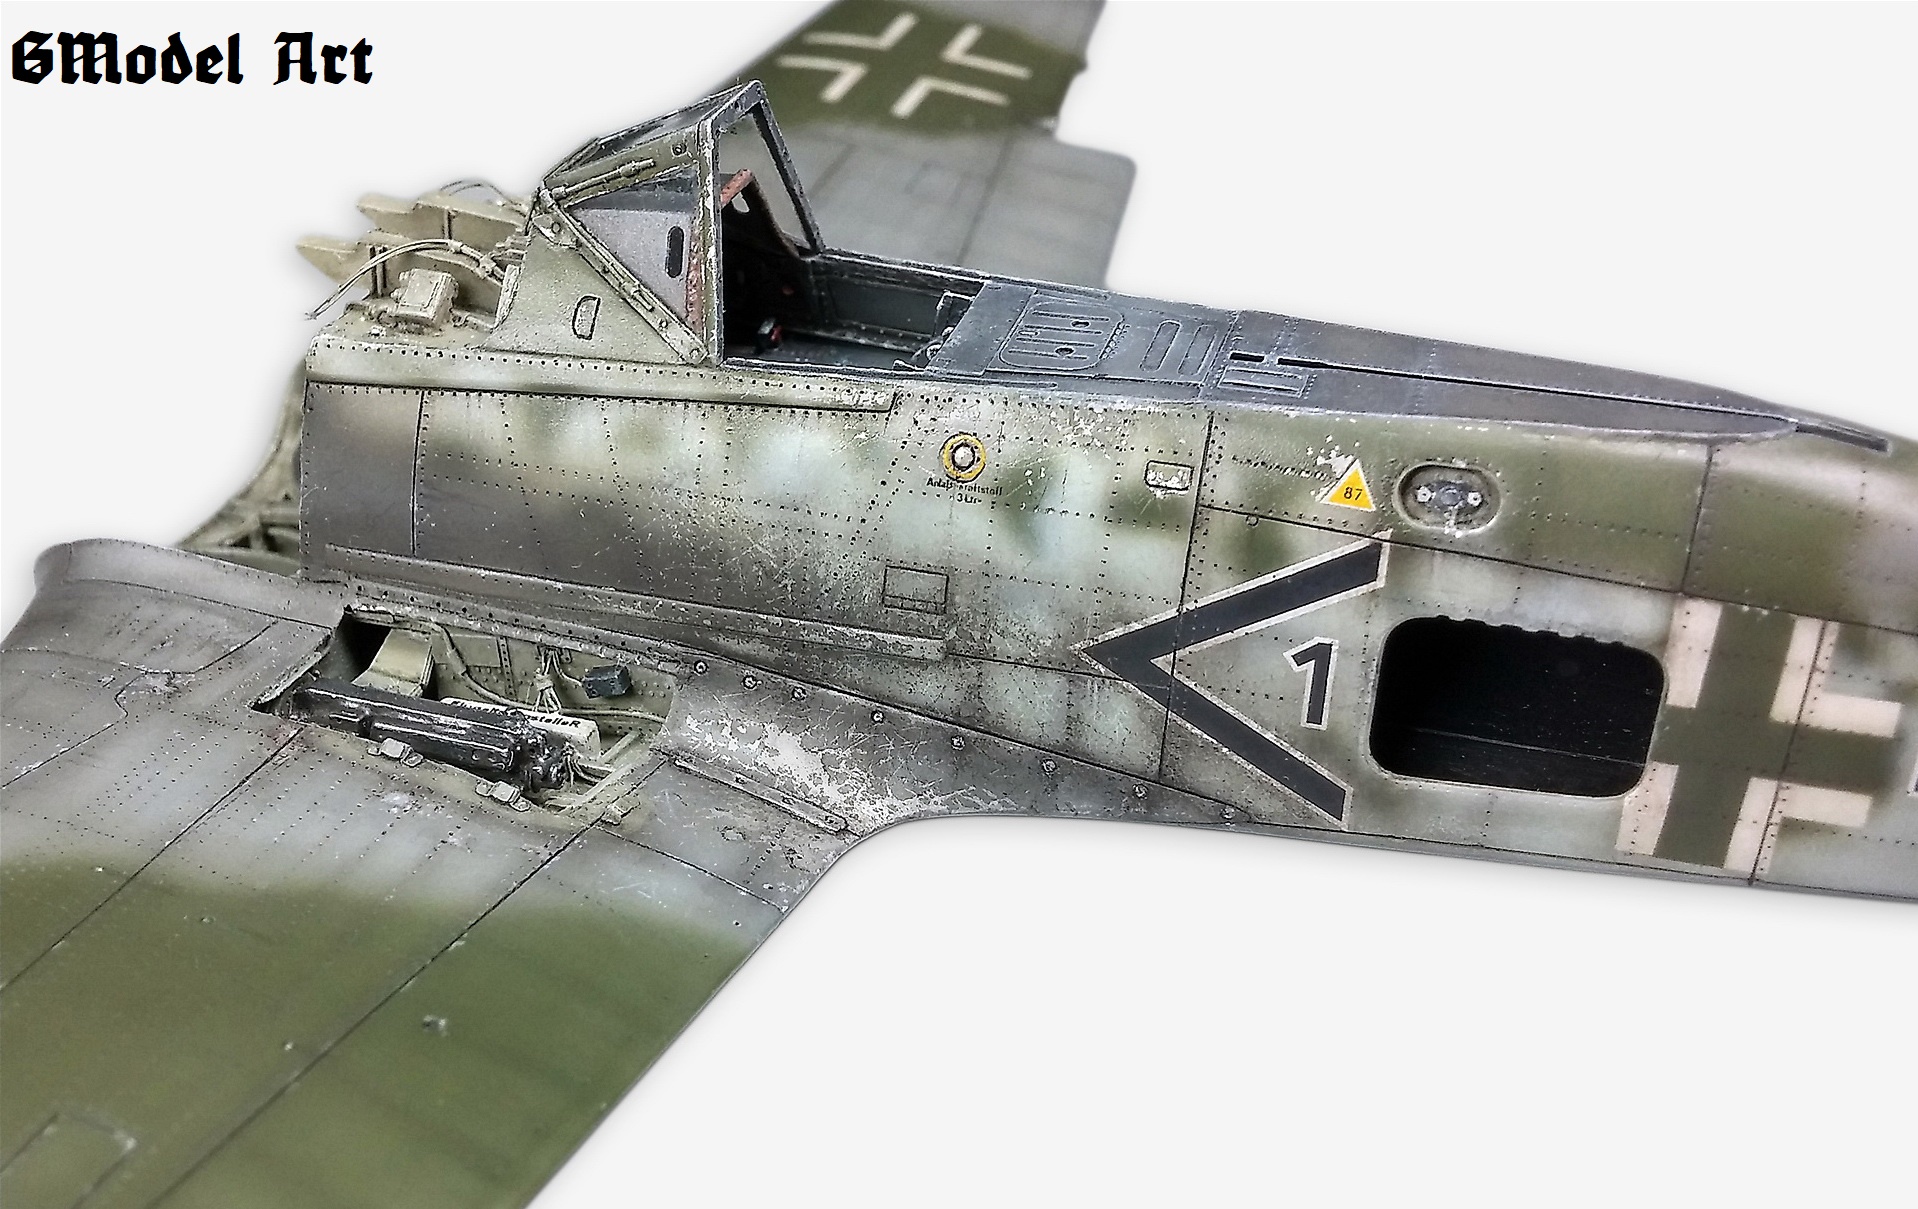
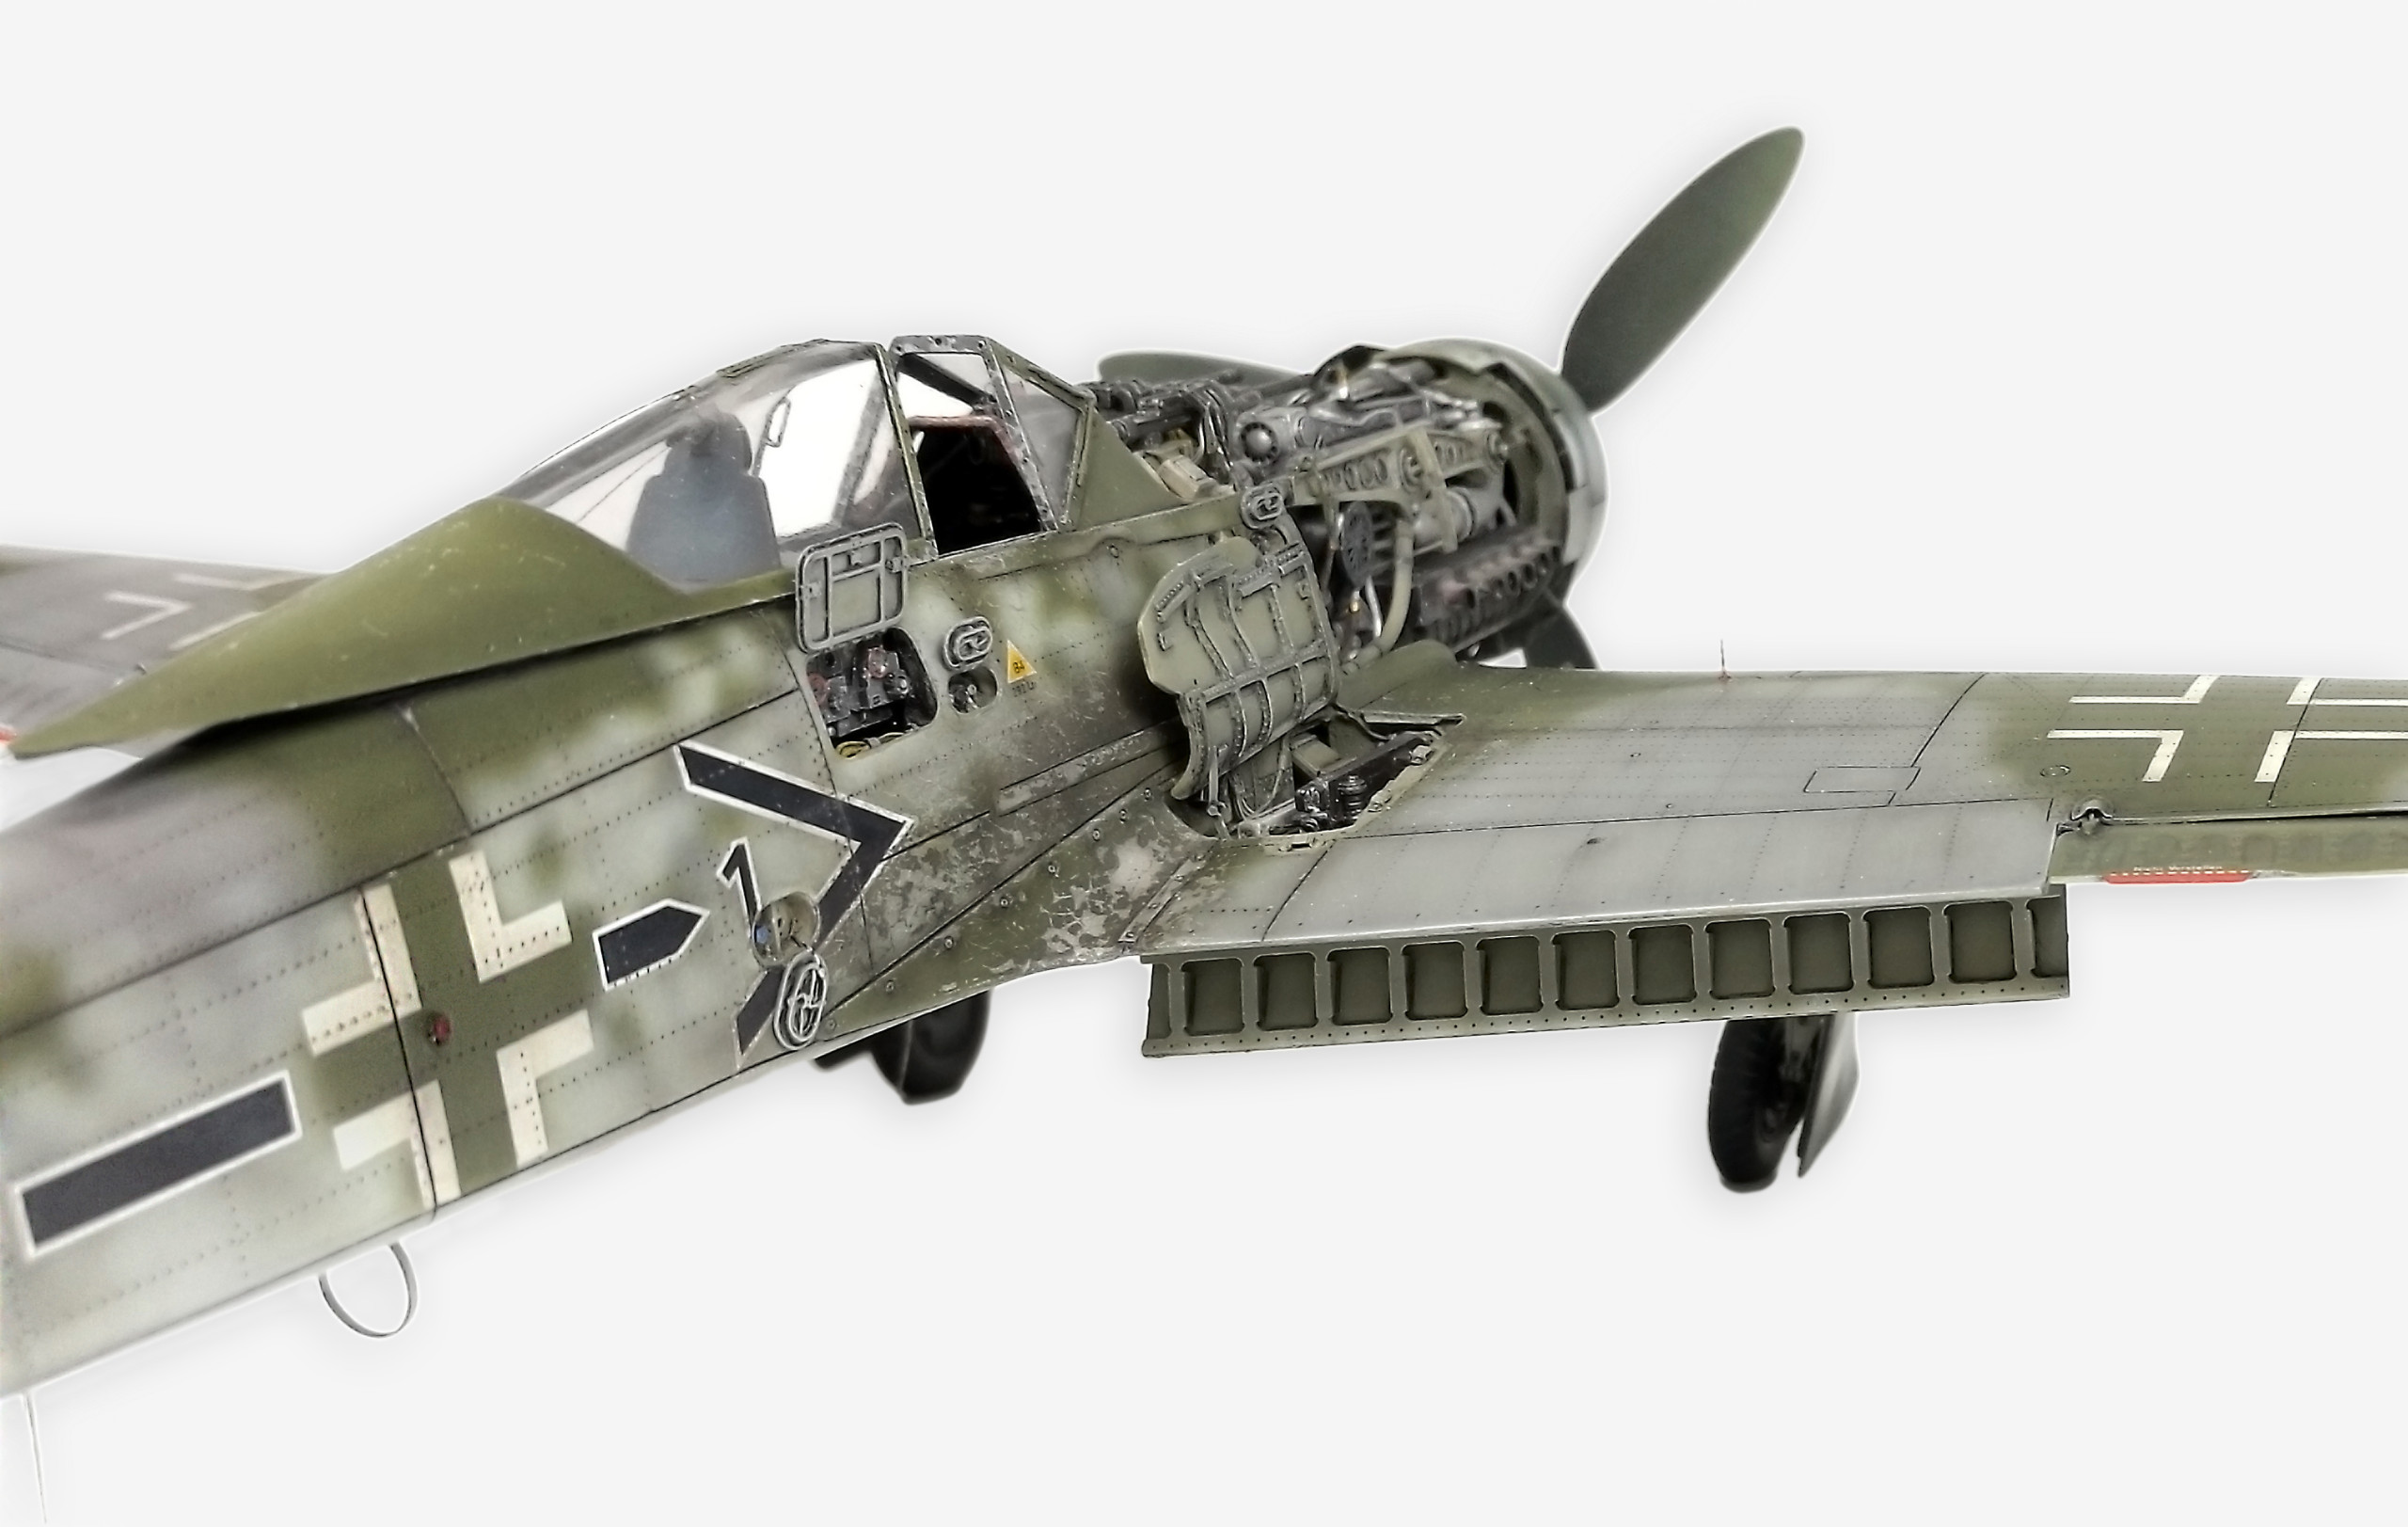
I first embarked on extensive fuselage modification. It was necessary to carve places around the engine, cockpit manholes, which are then installed a detailed sections of cover with openings for the cover, which replaced the original plastic surface. It was also necessary to finish the inside of the fuselage and make thinner walls of the fuselage to install resin accessories.
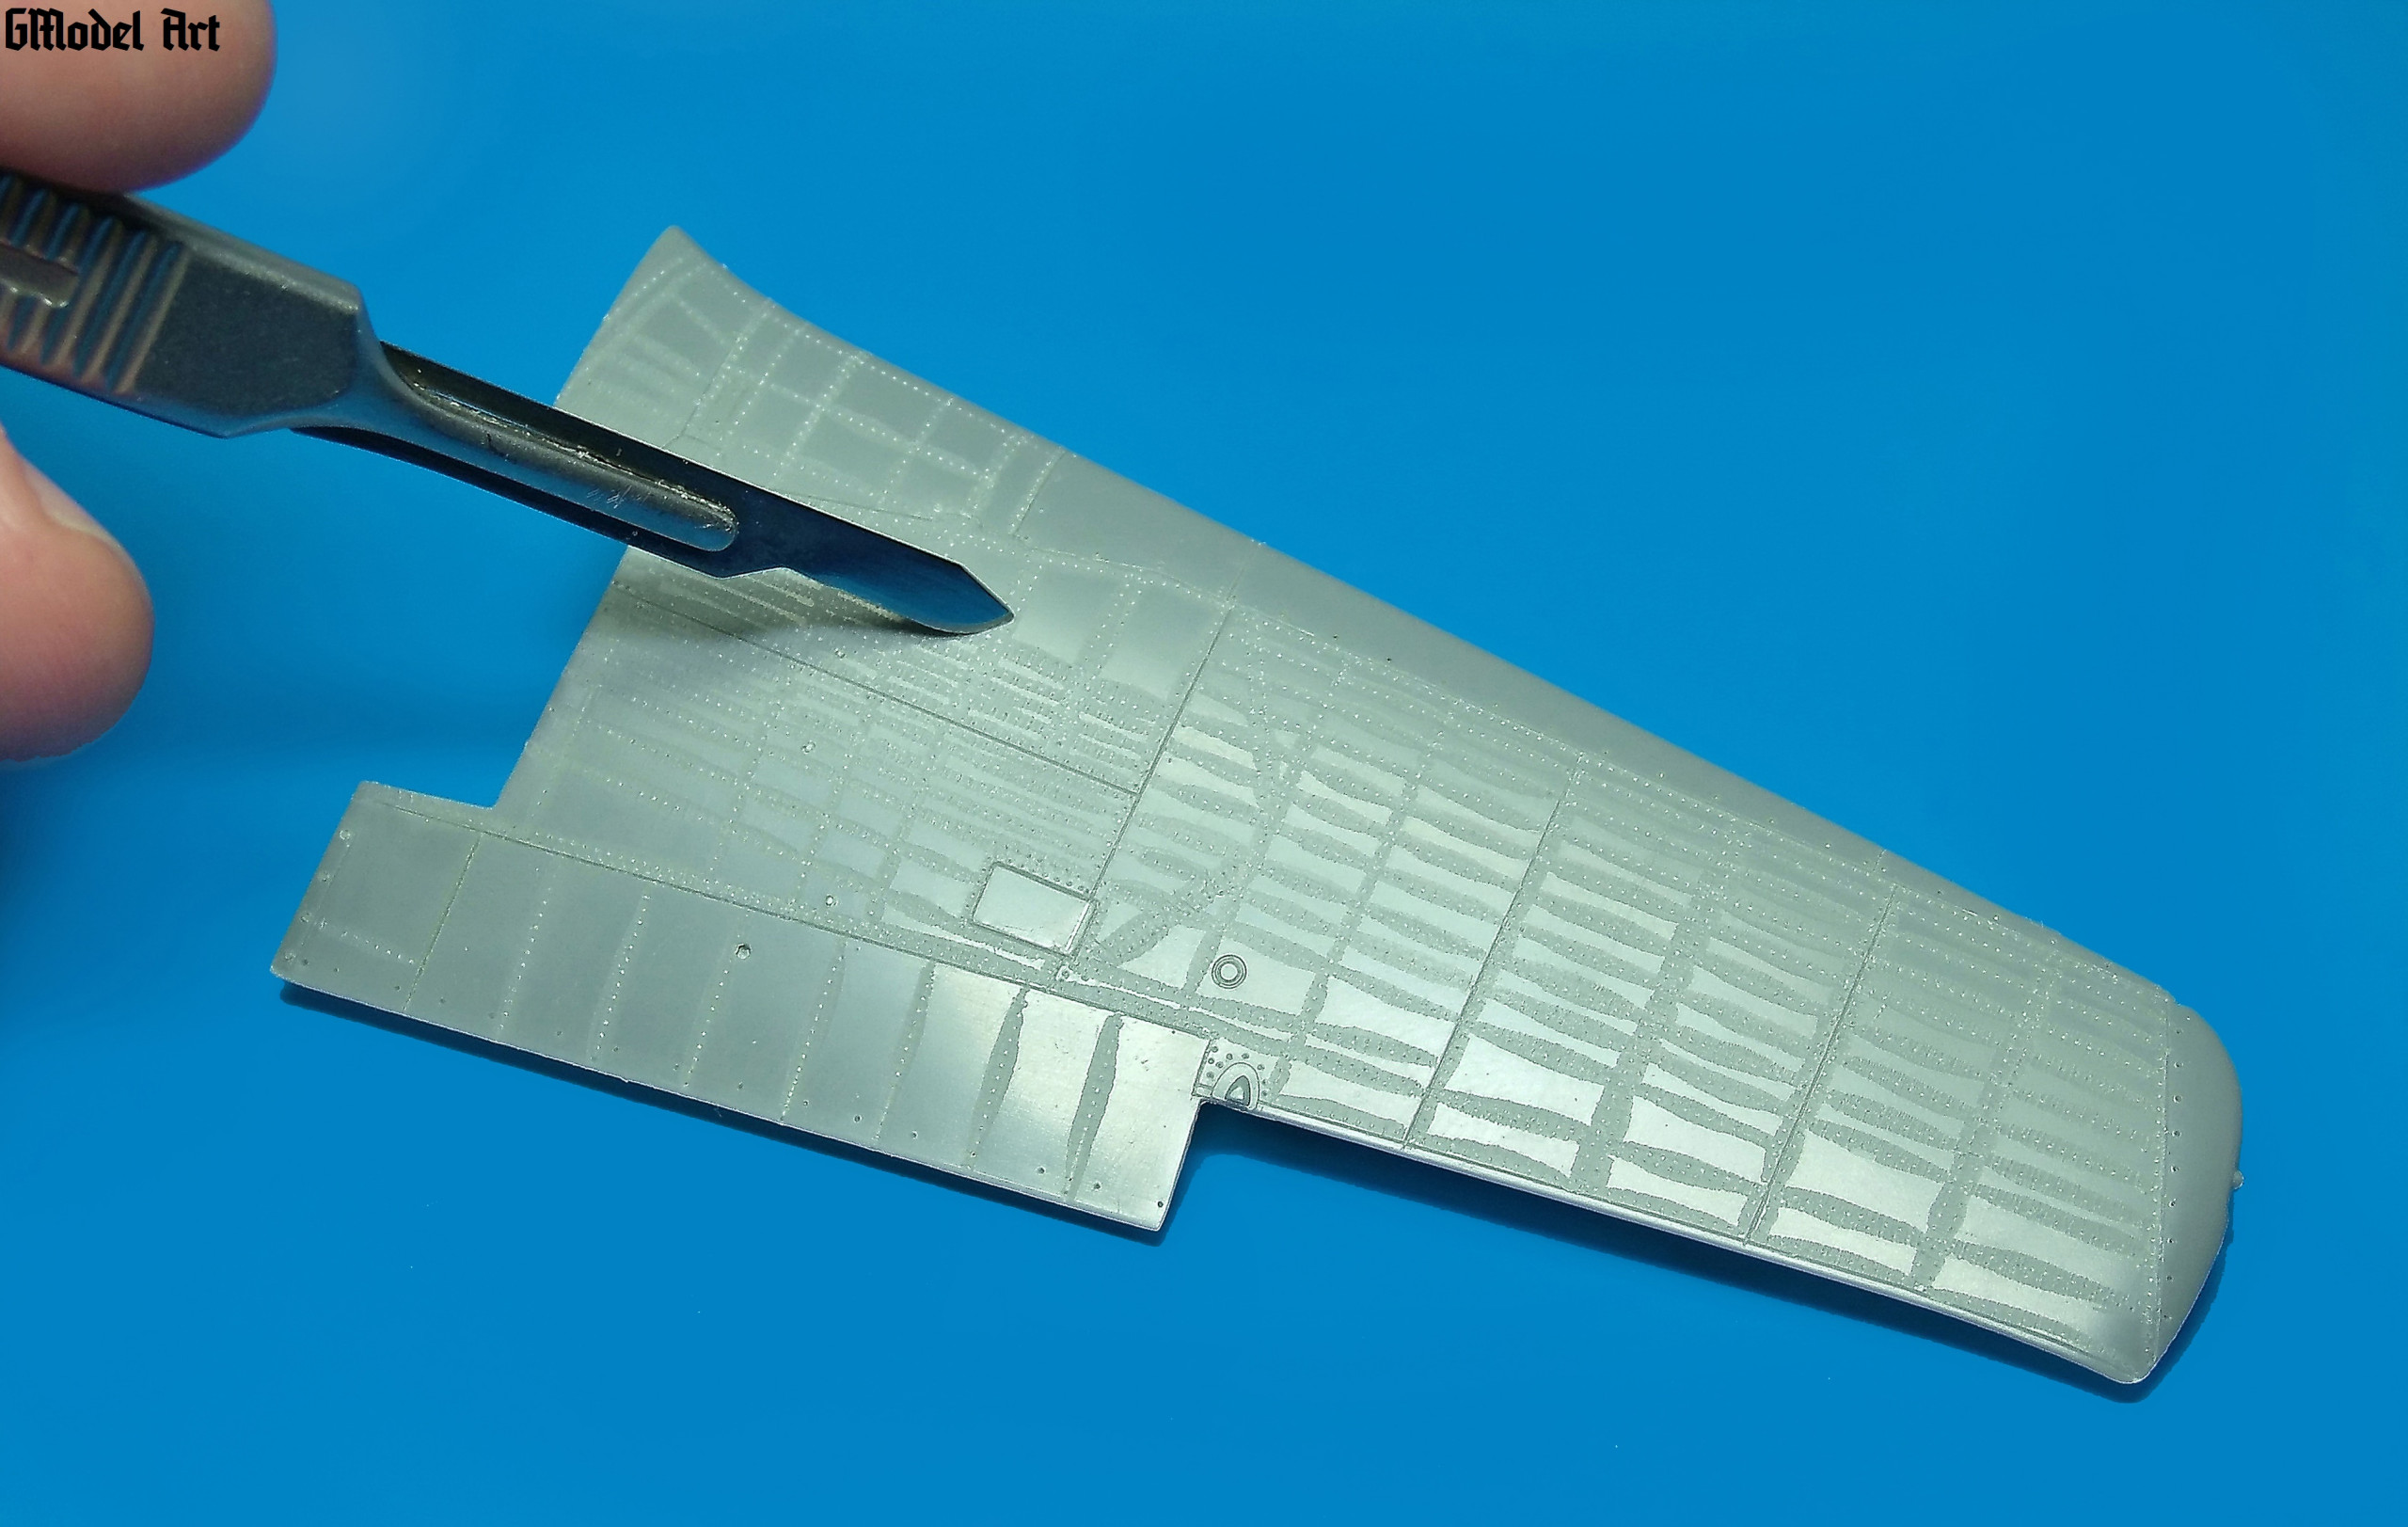
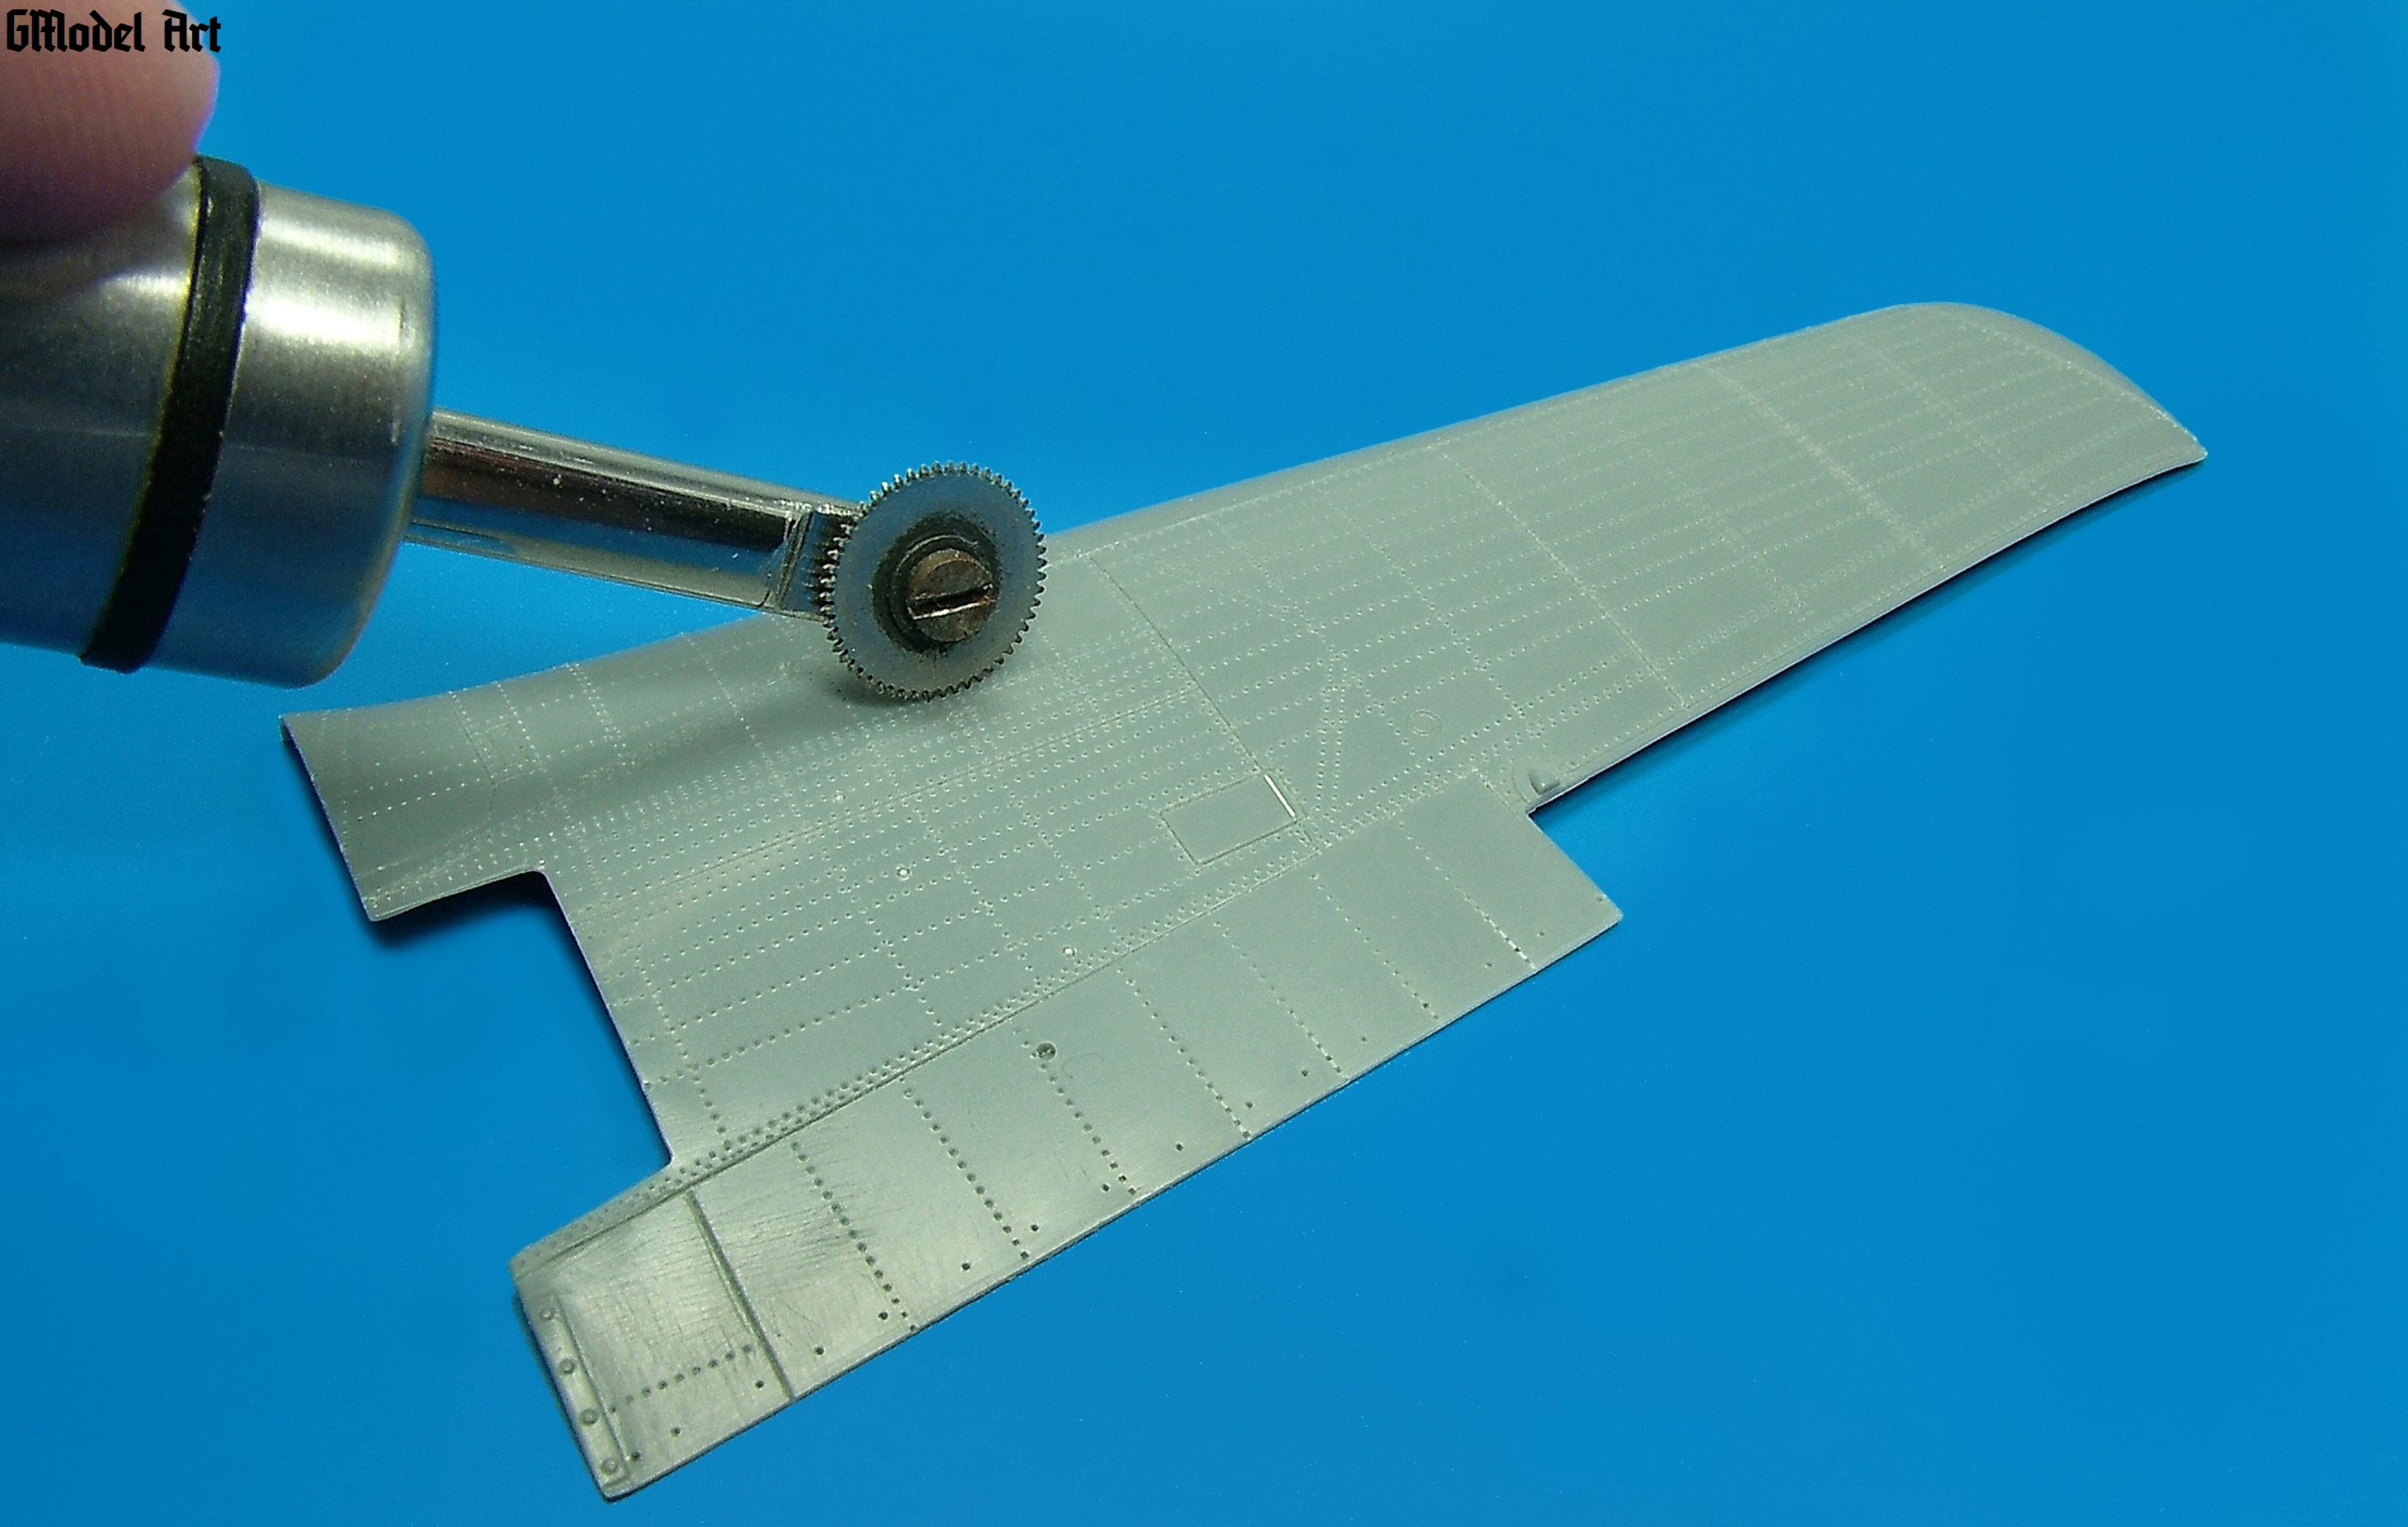
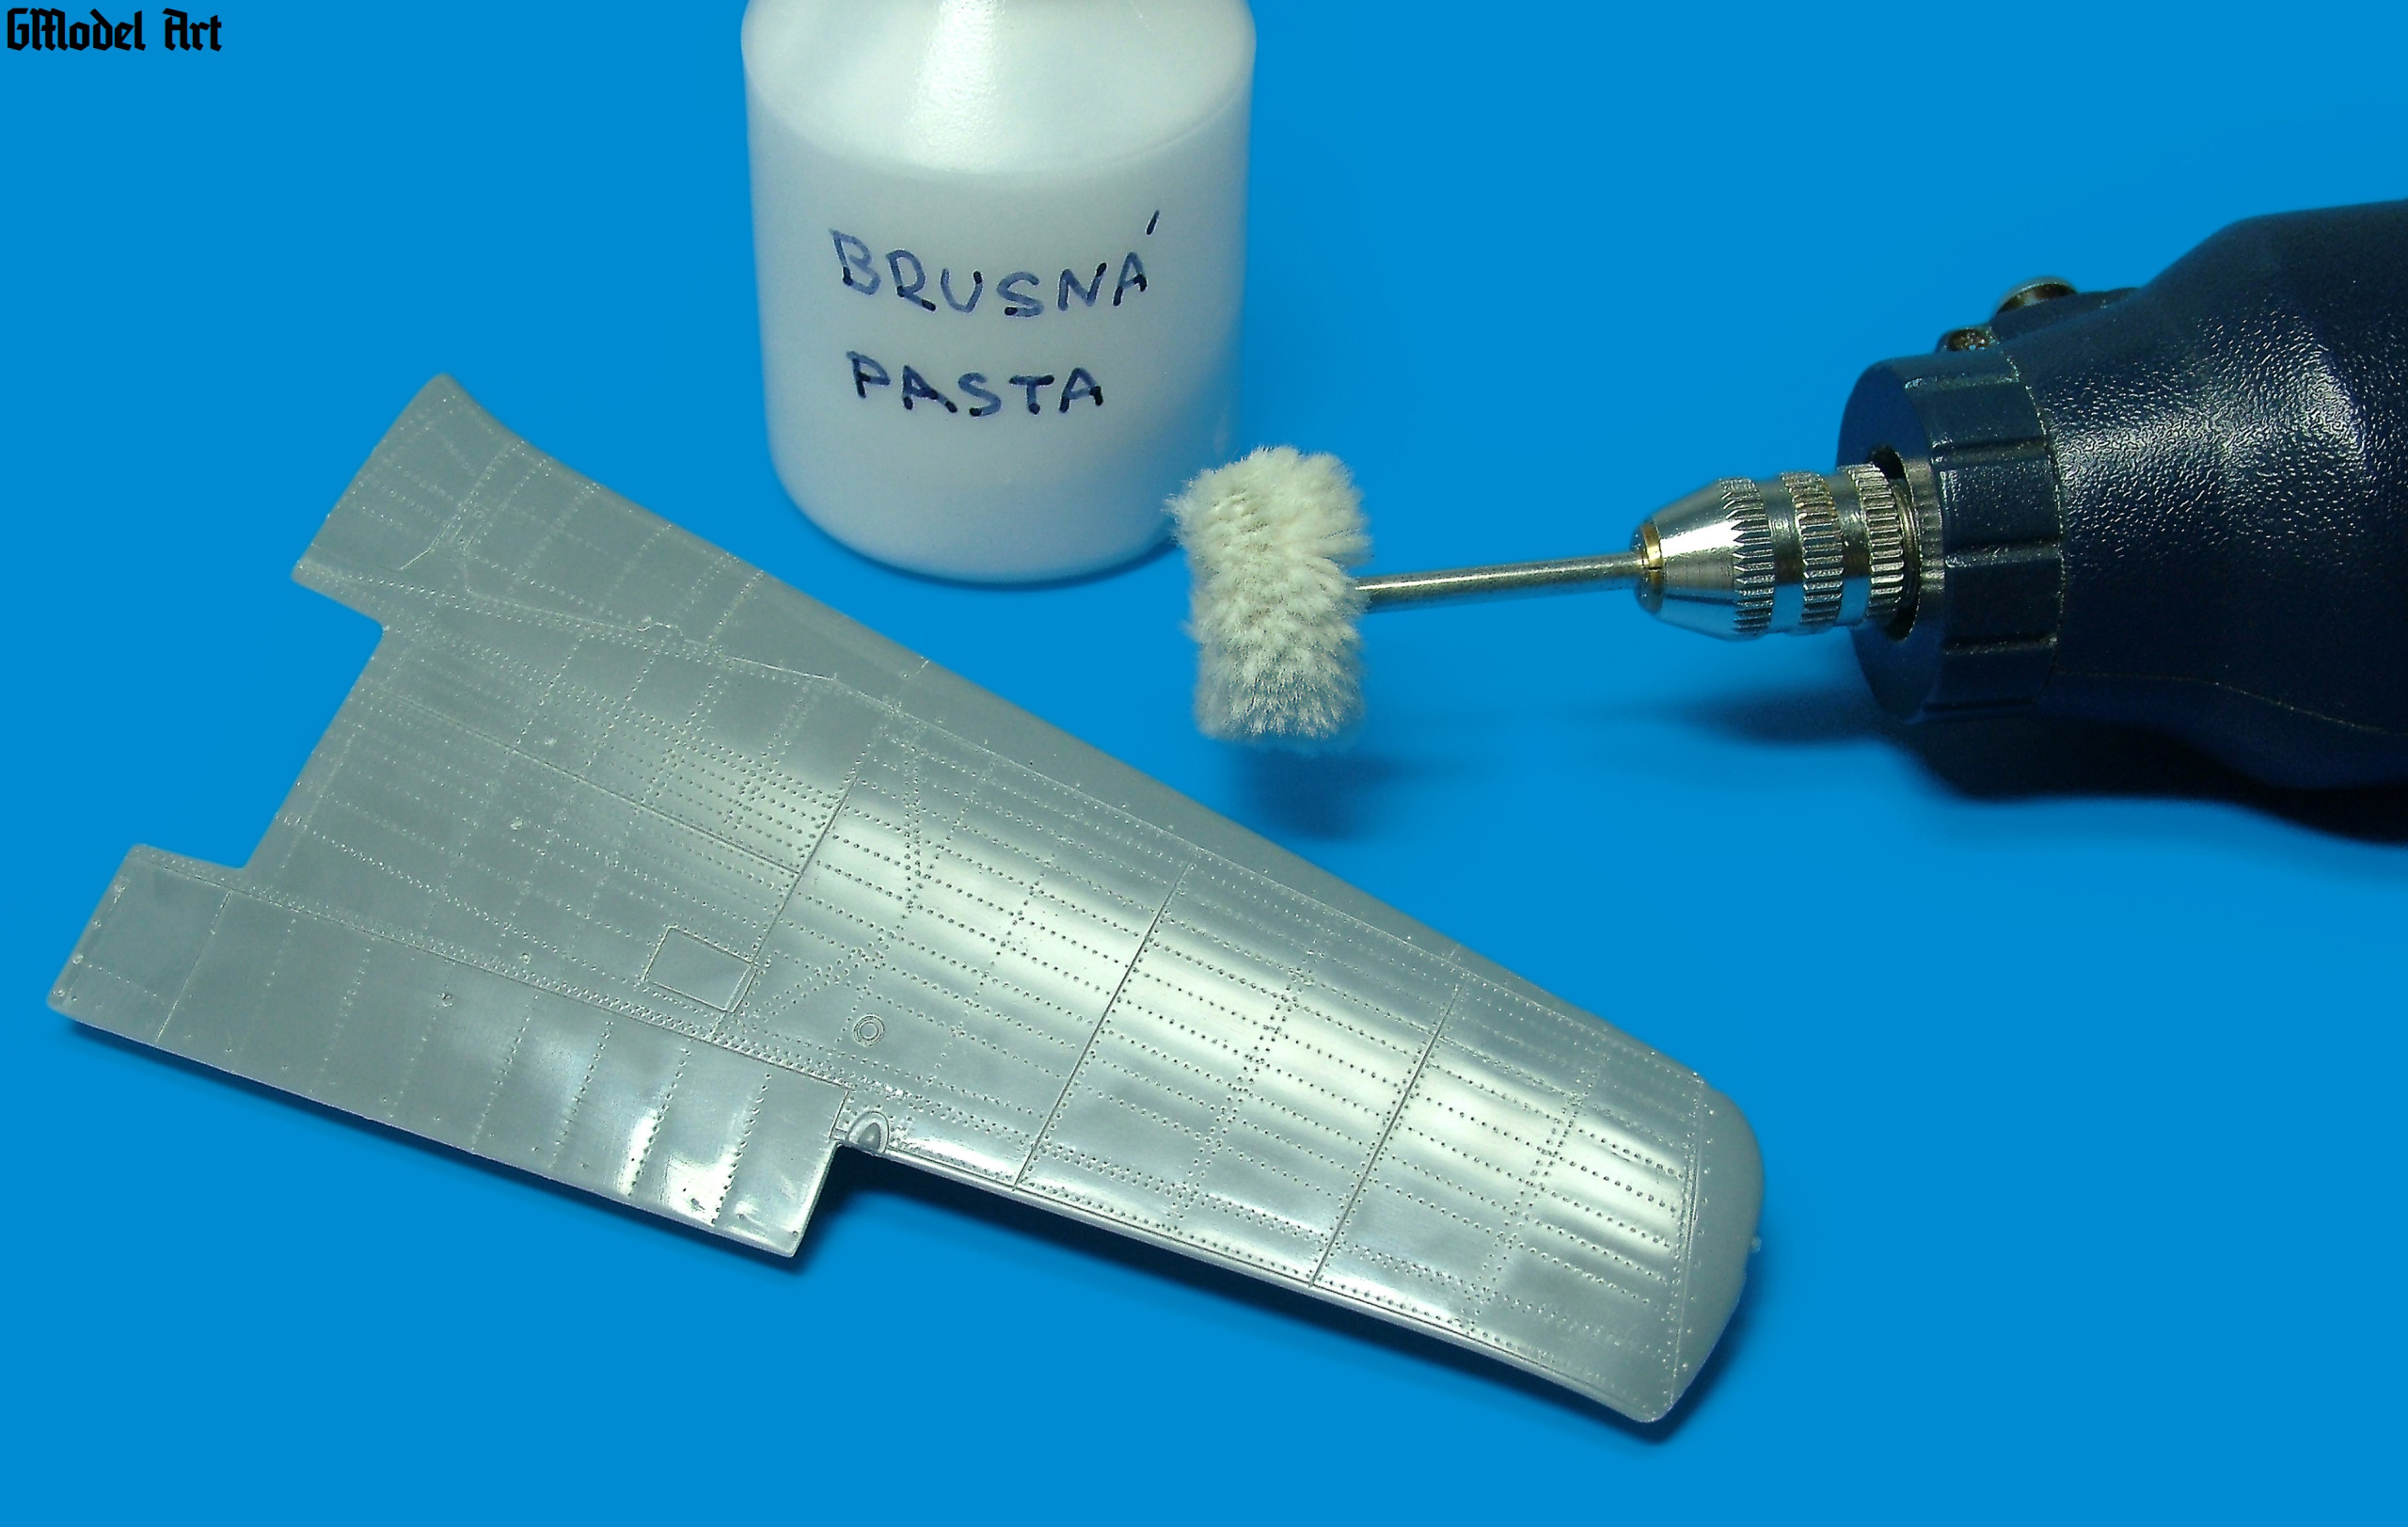
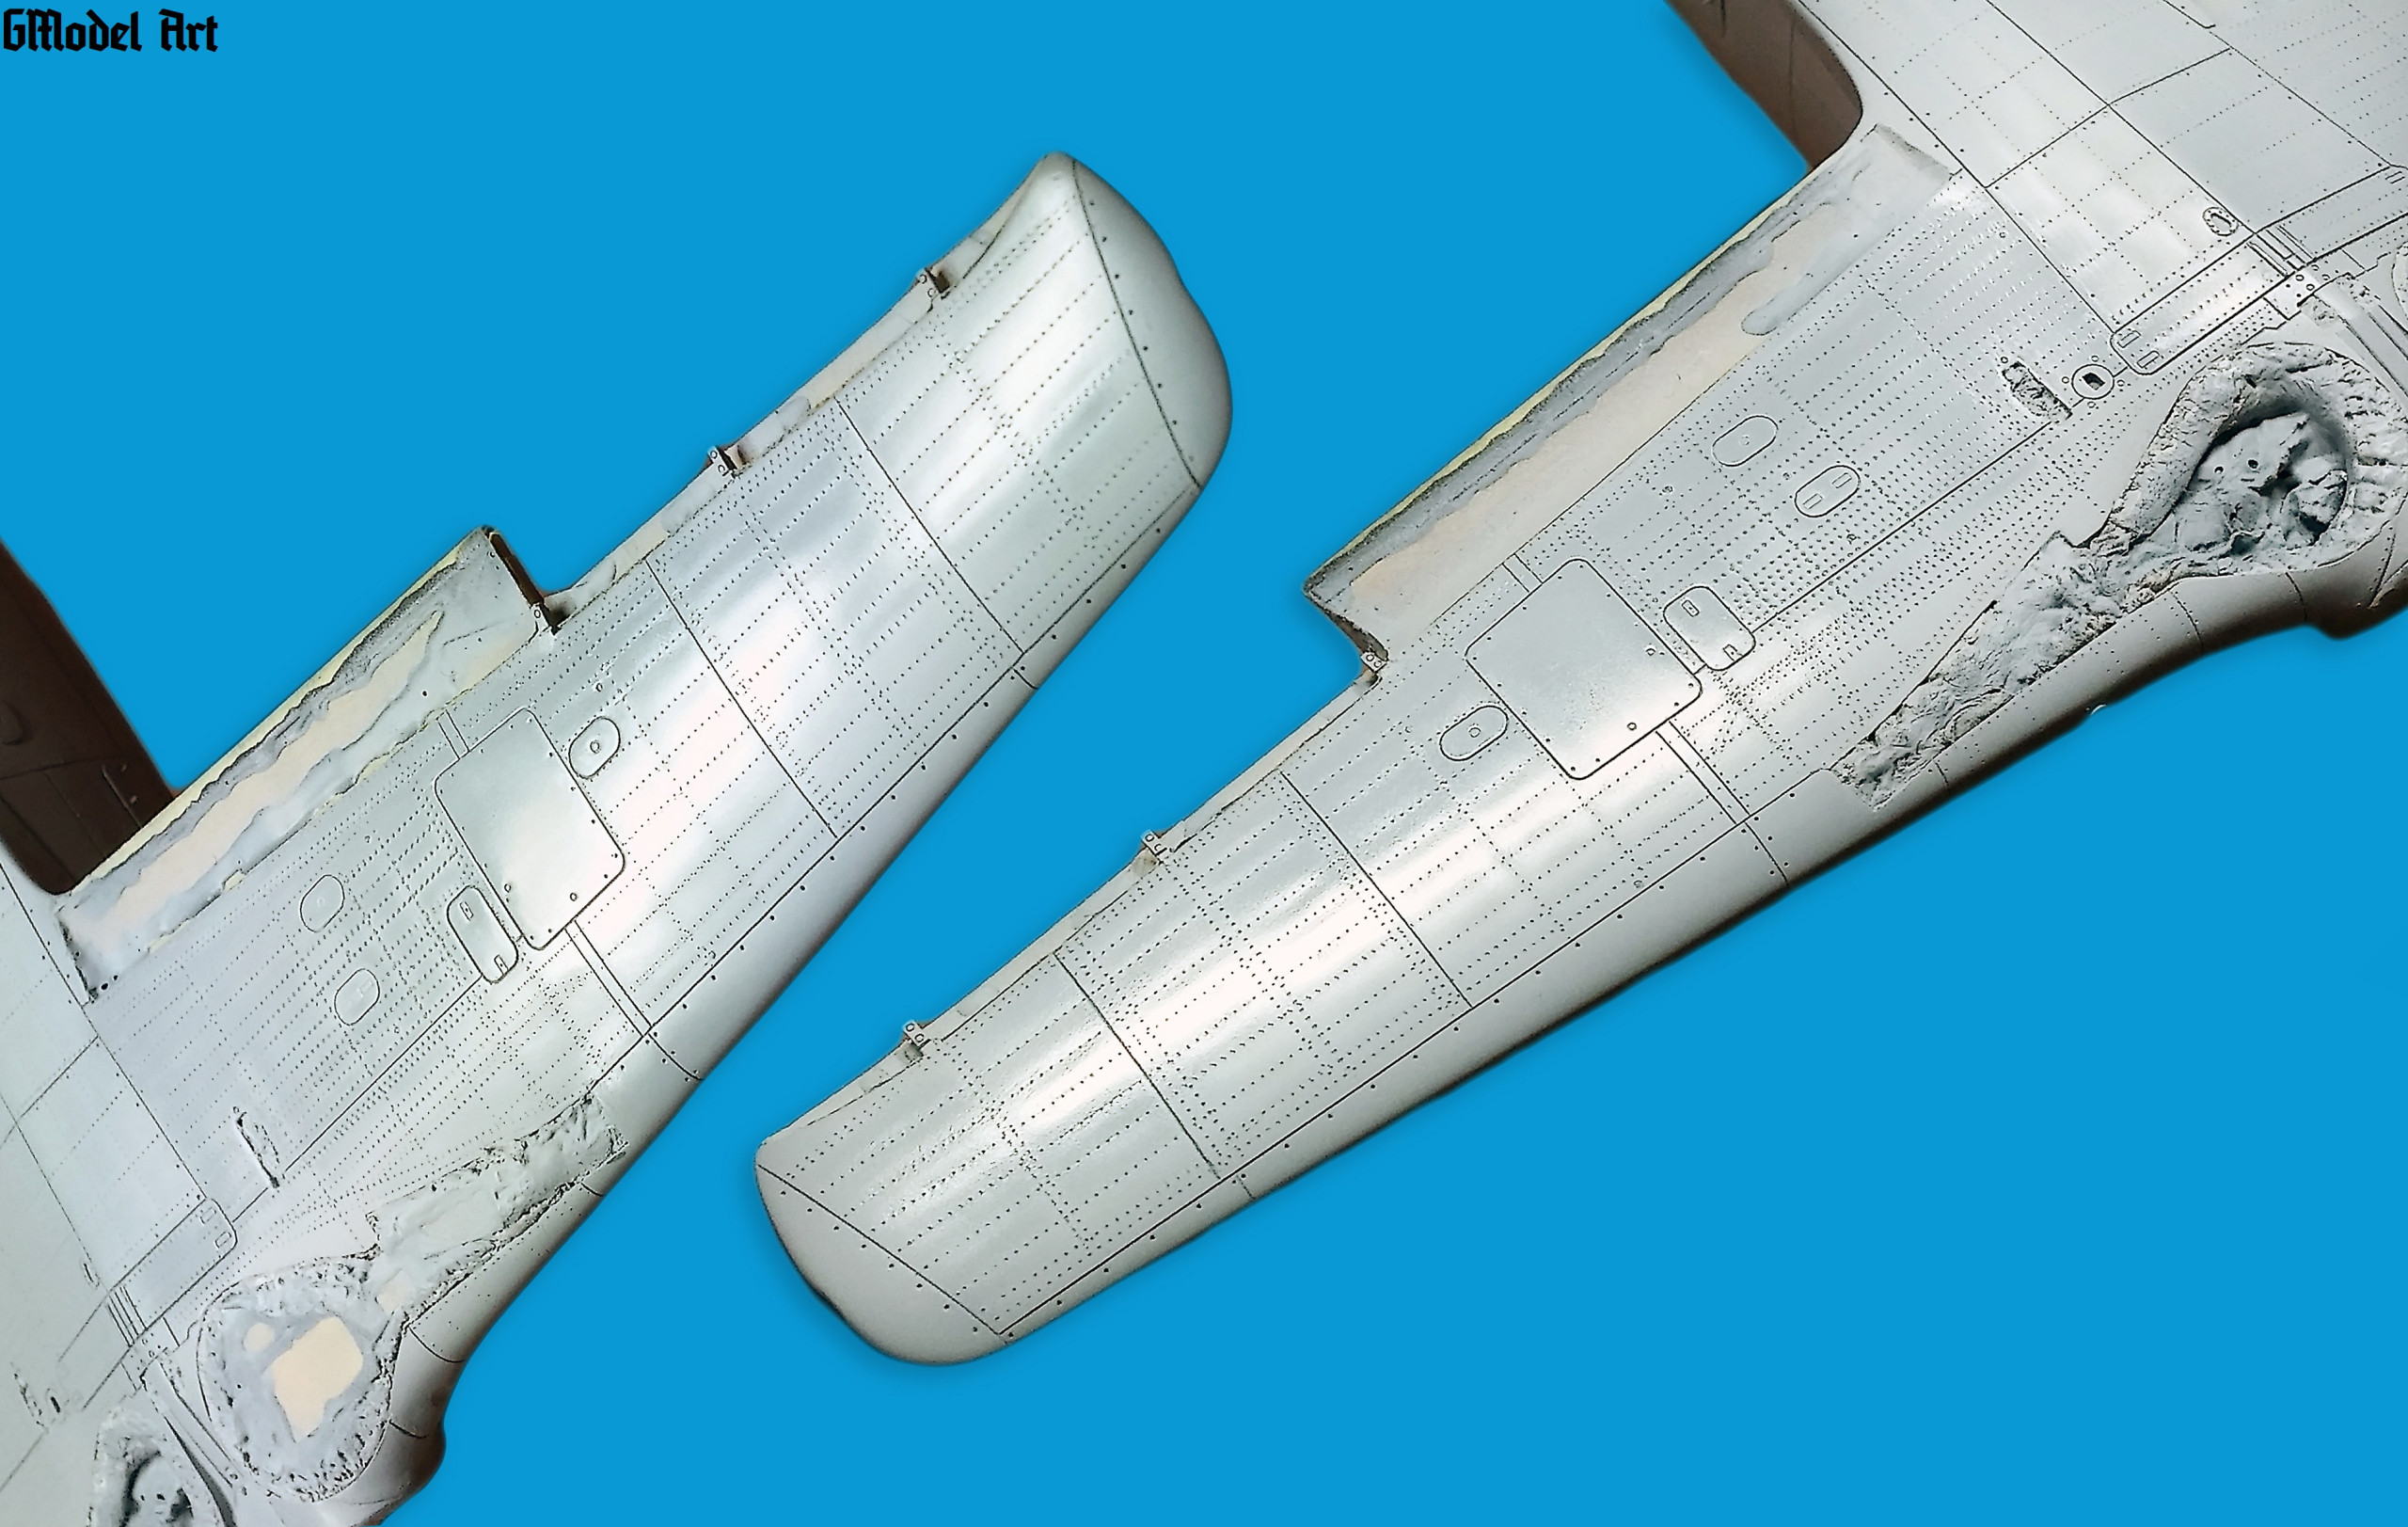
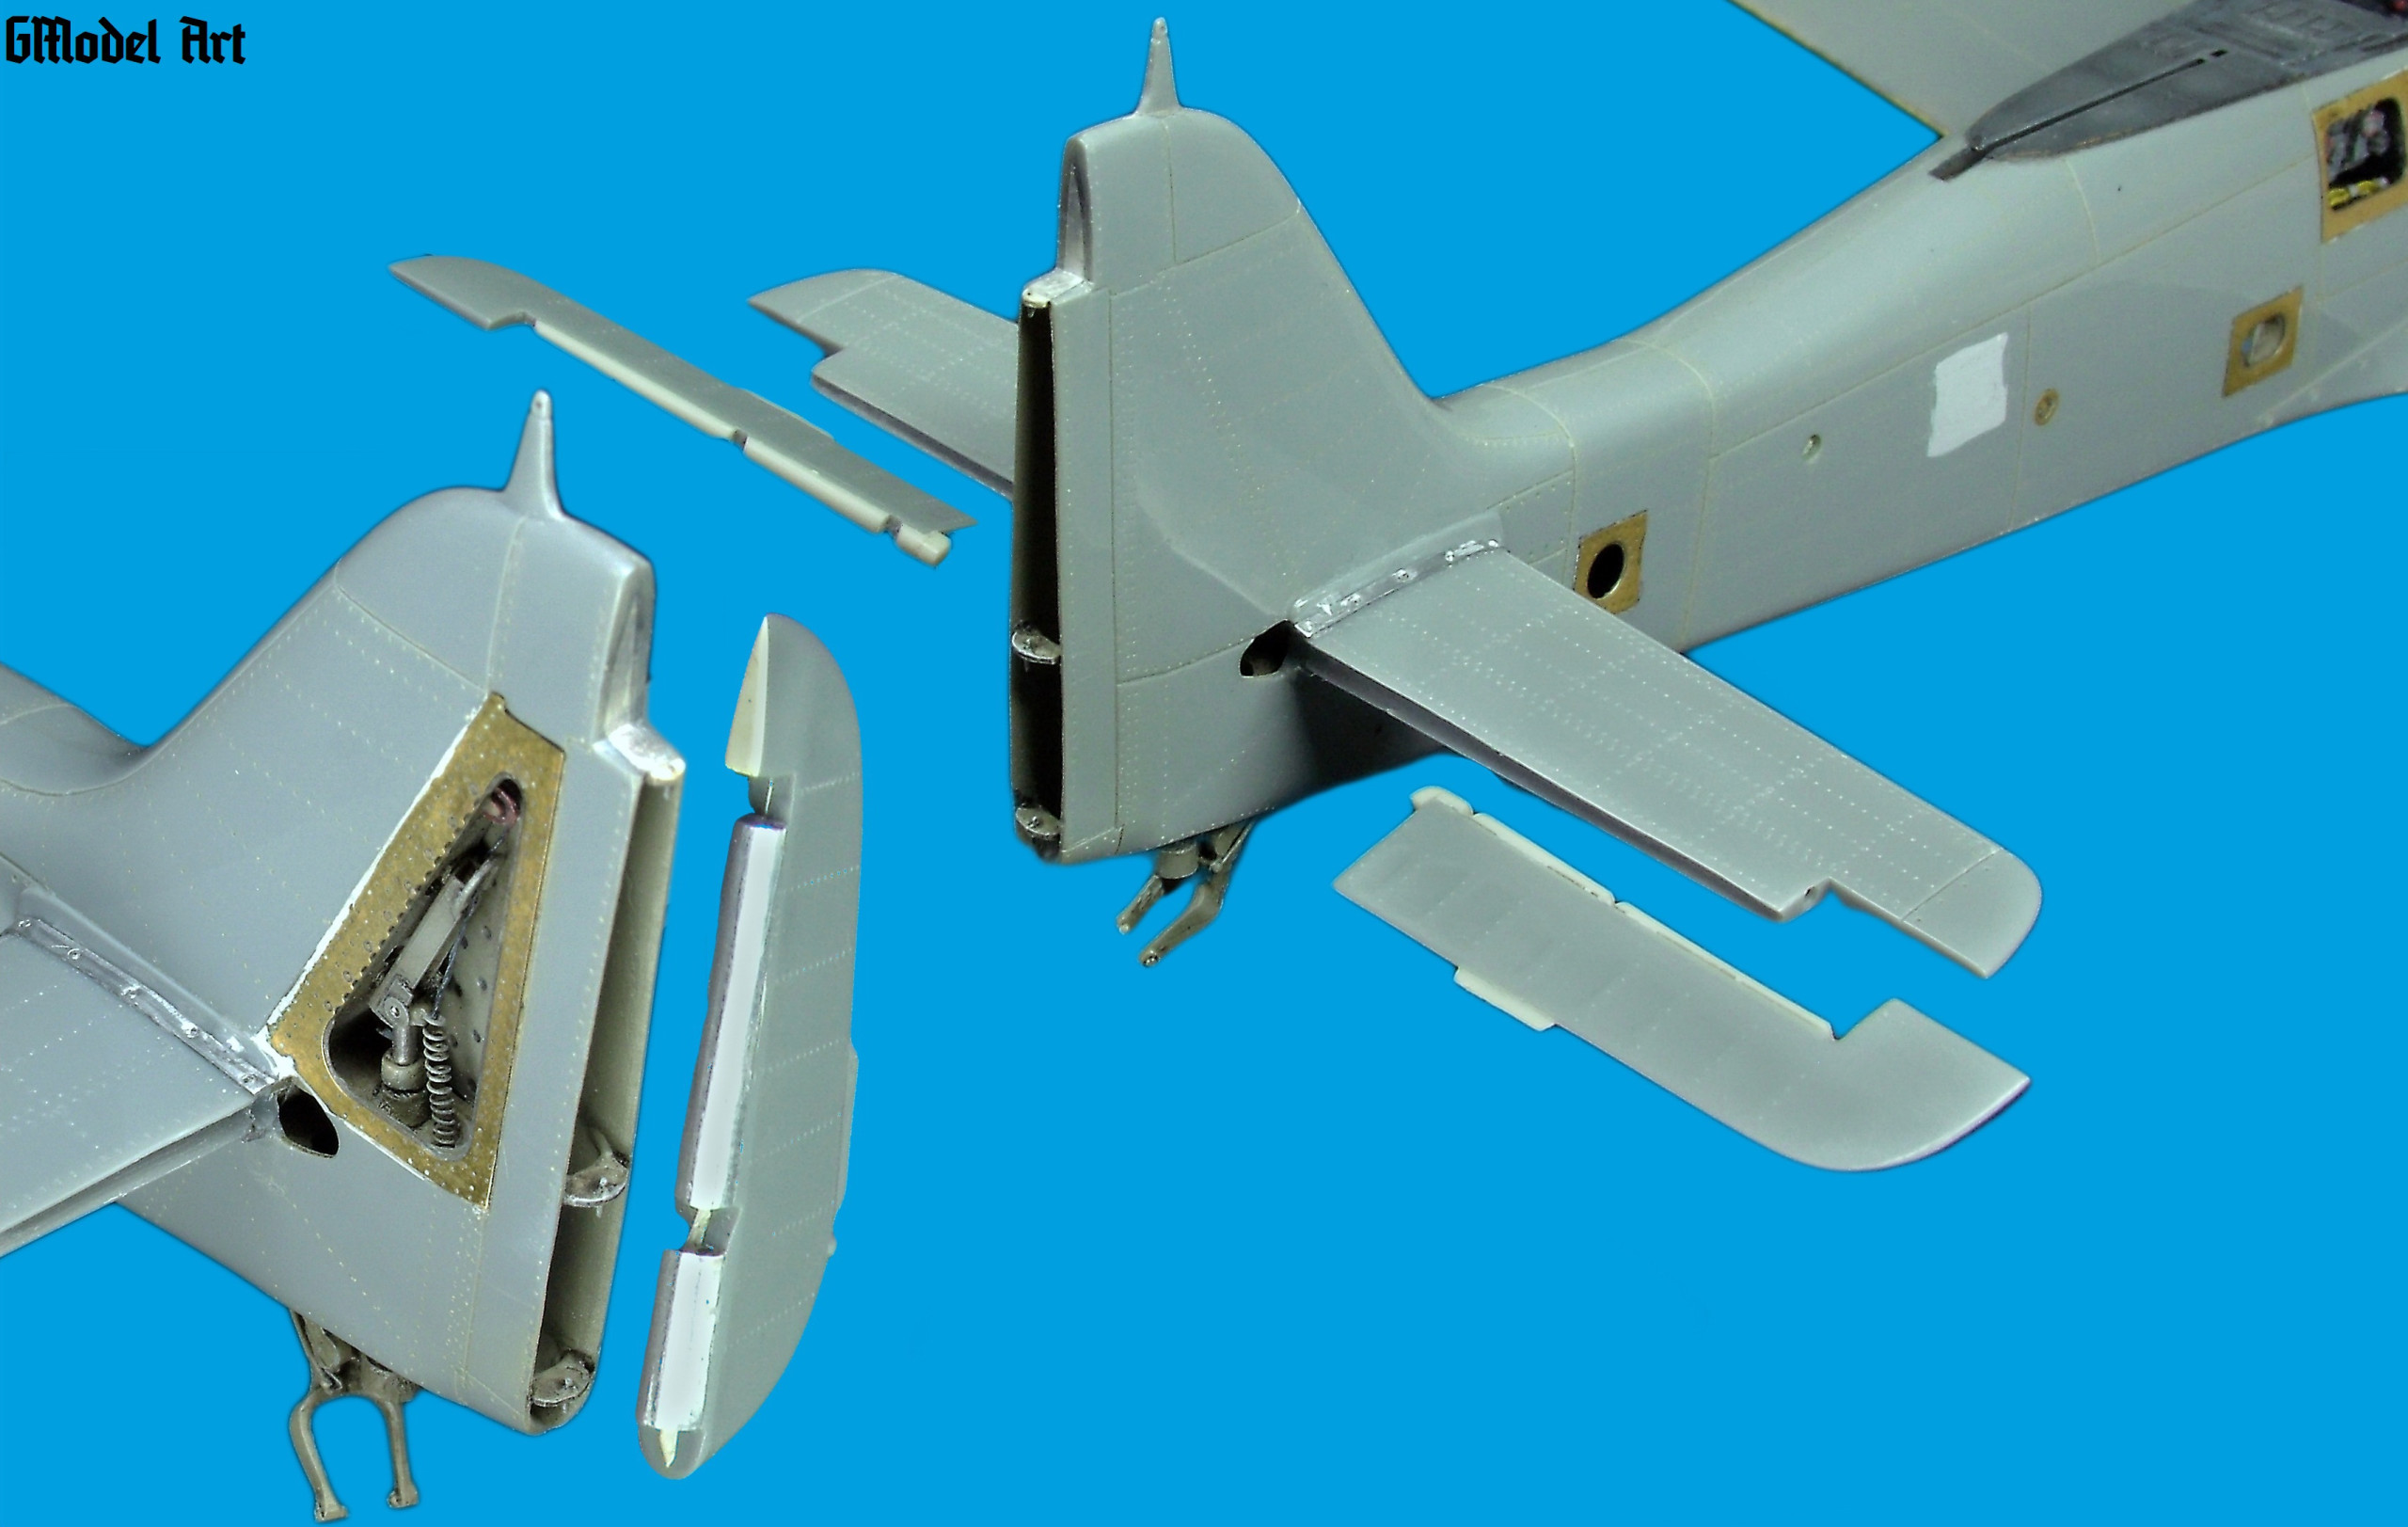
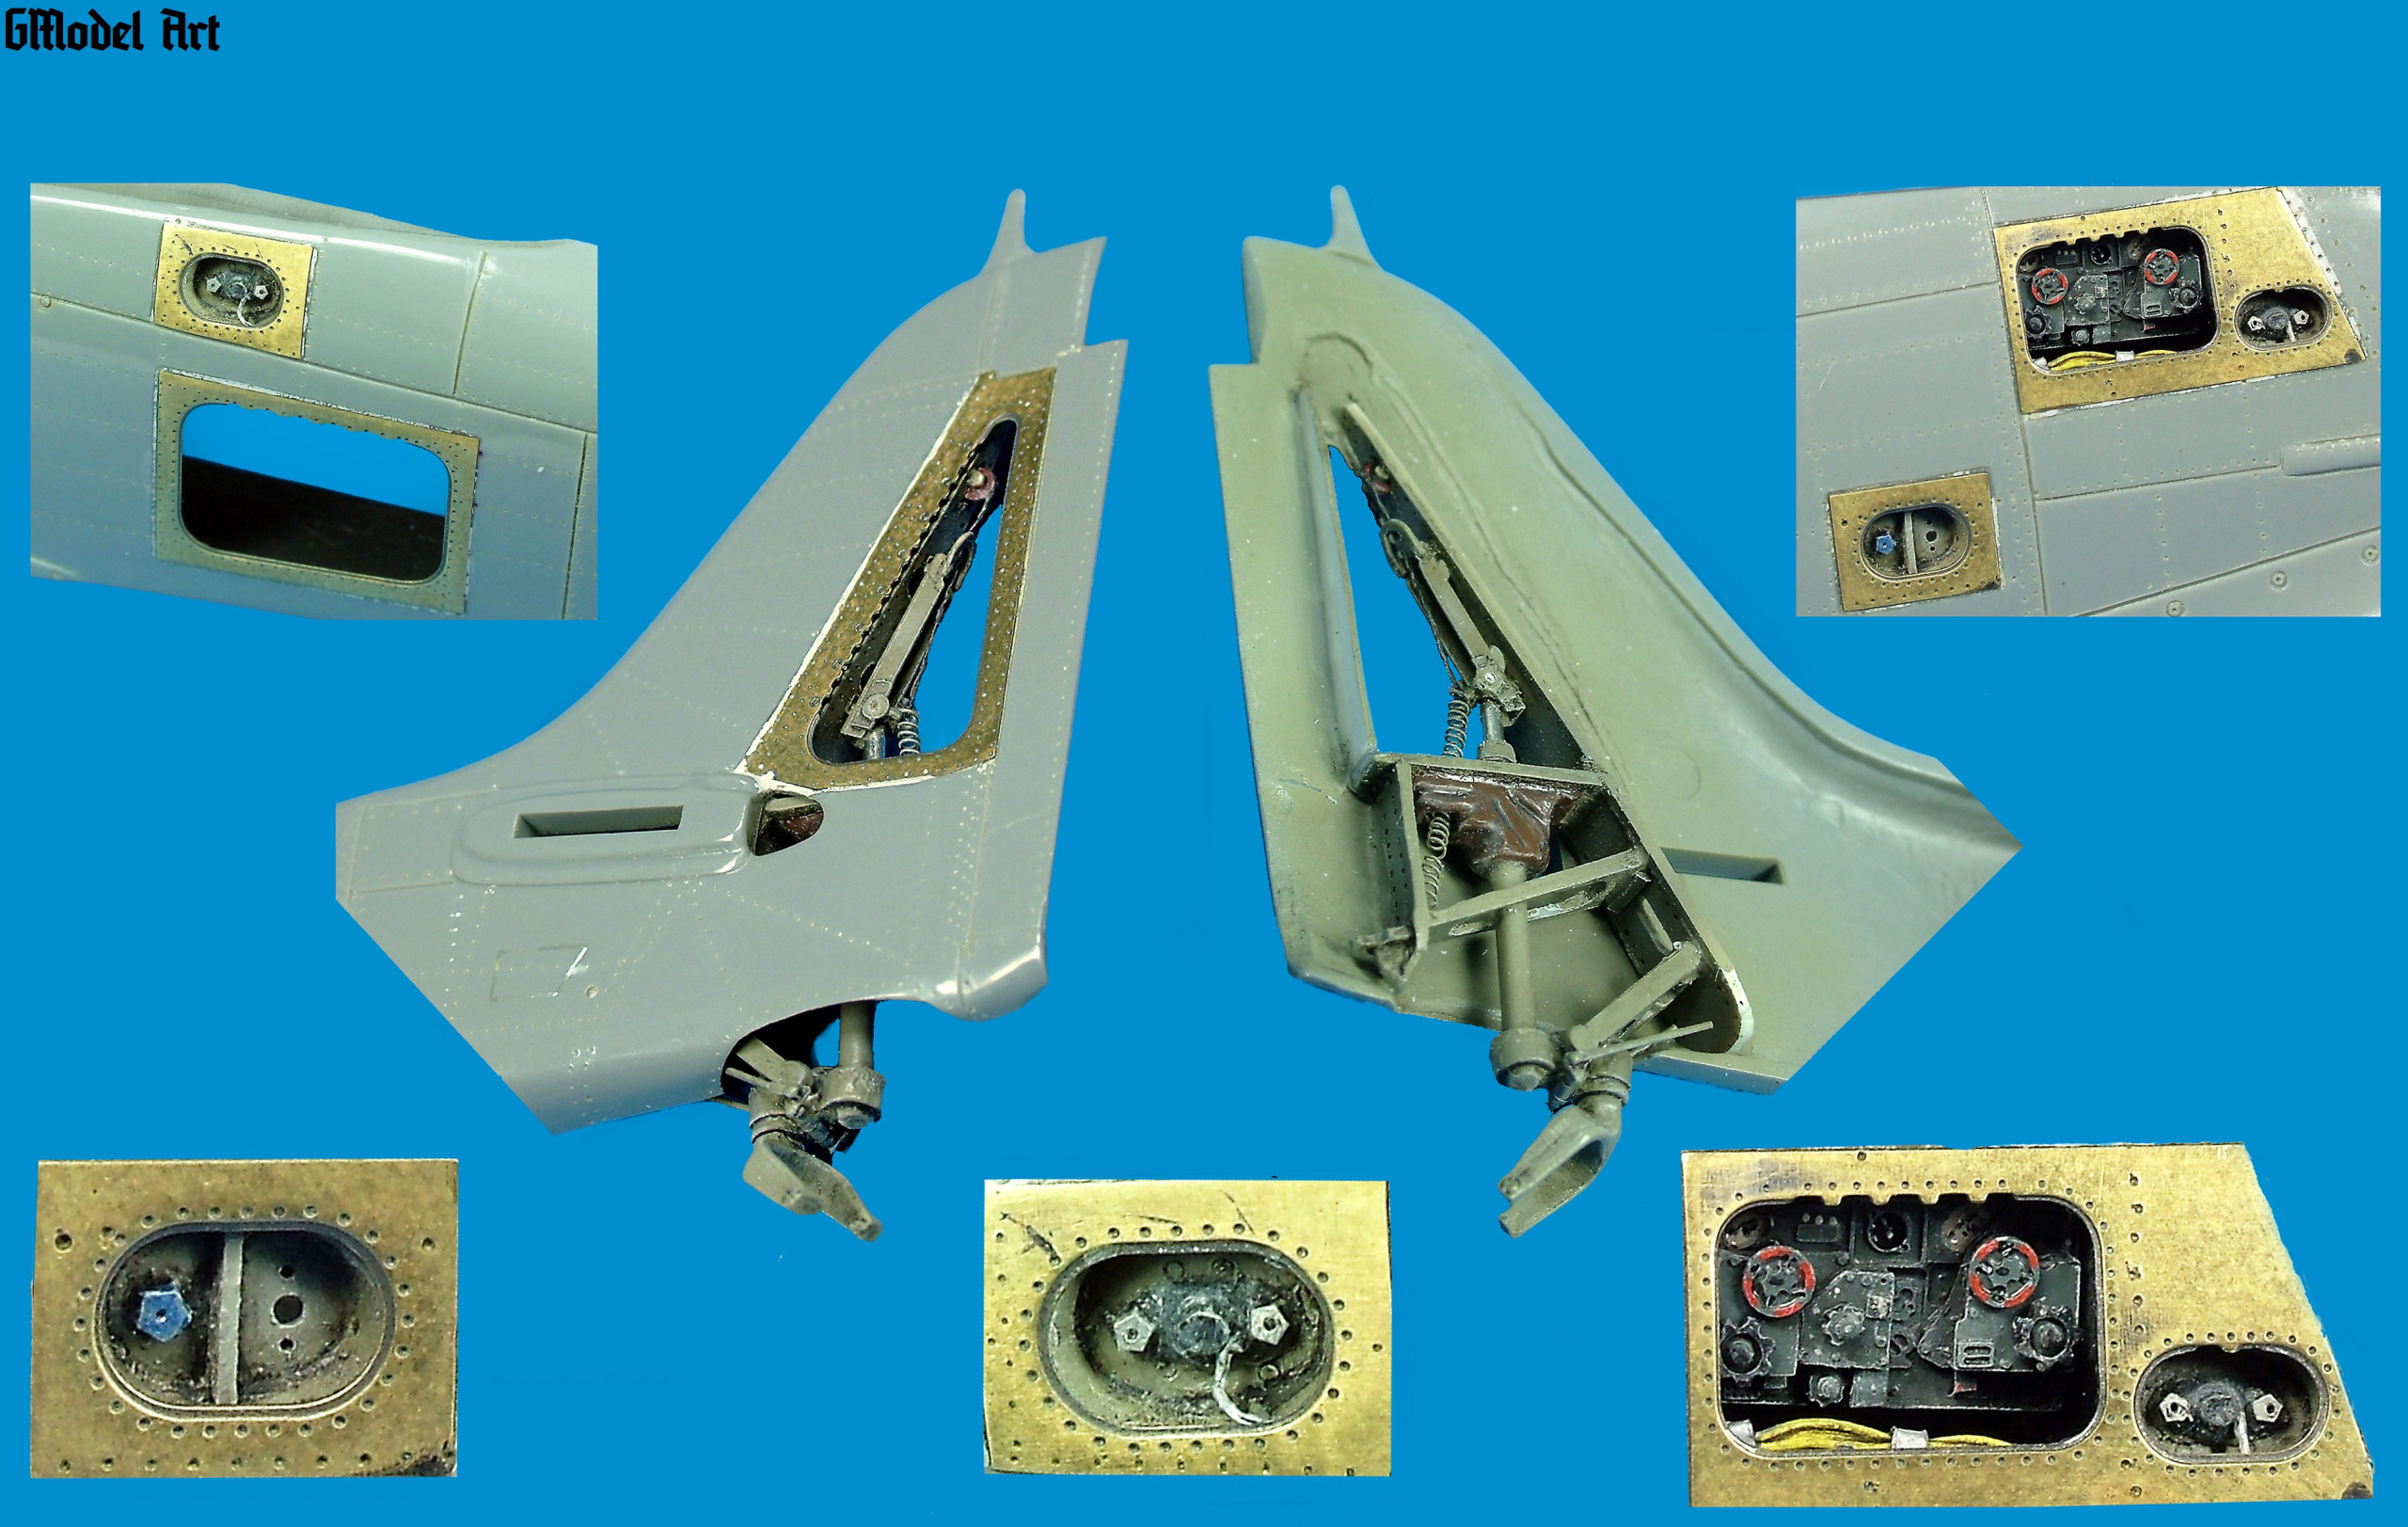
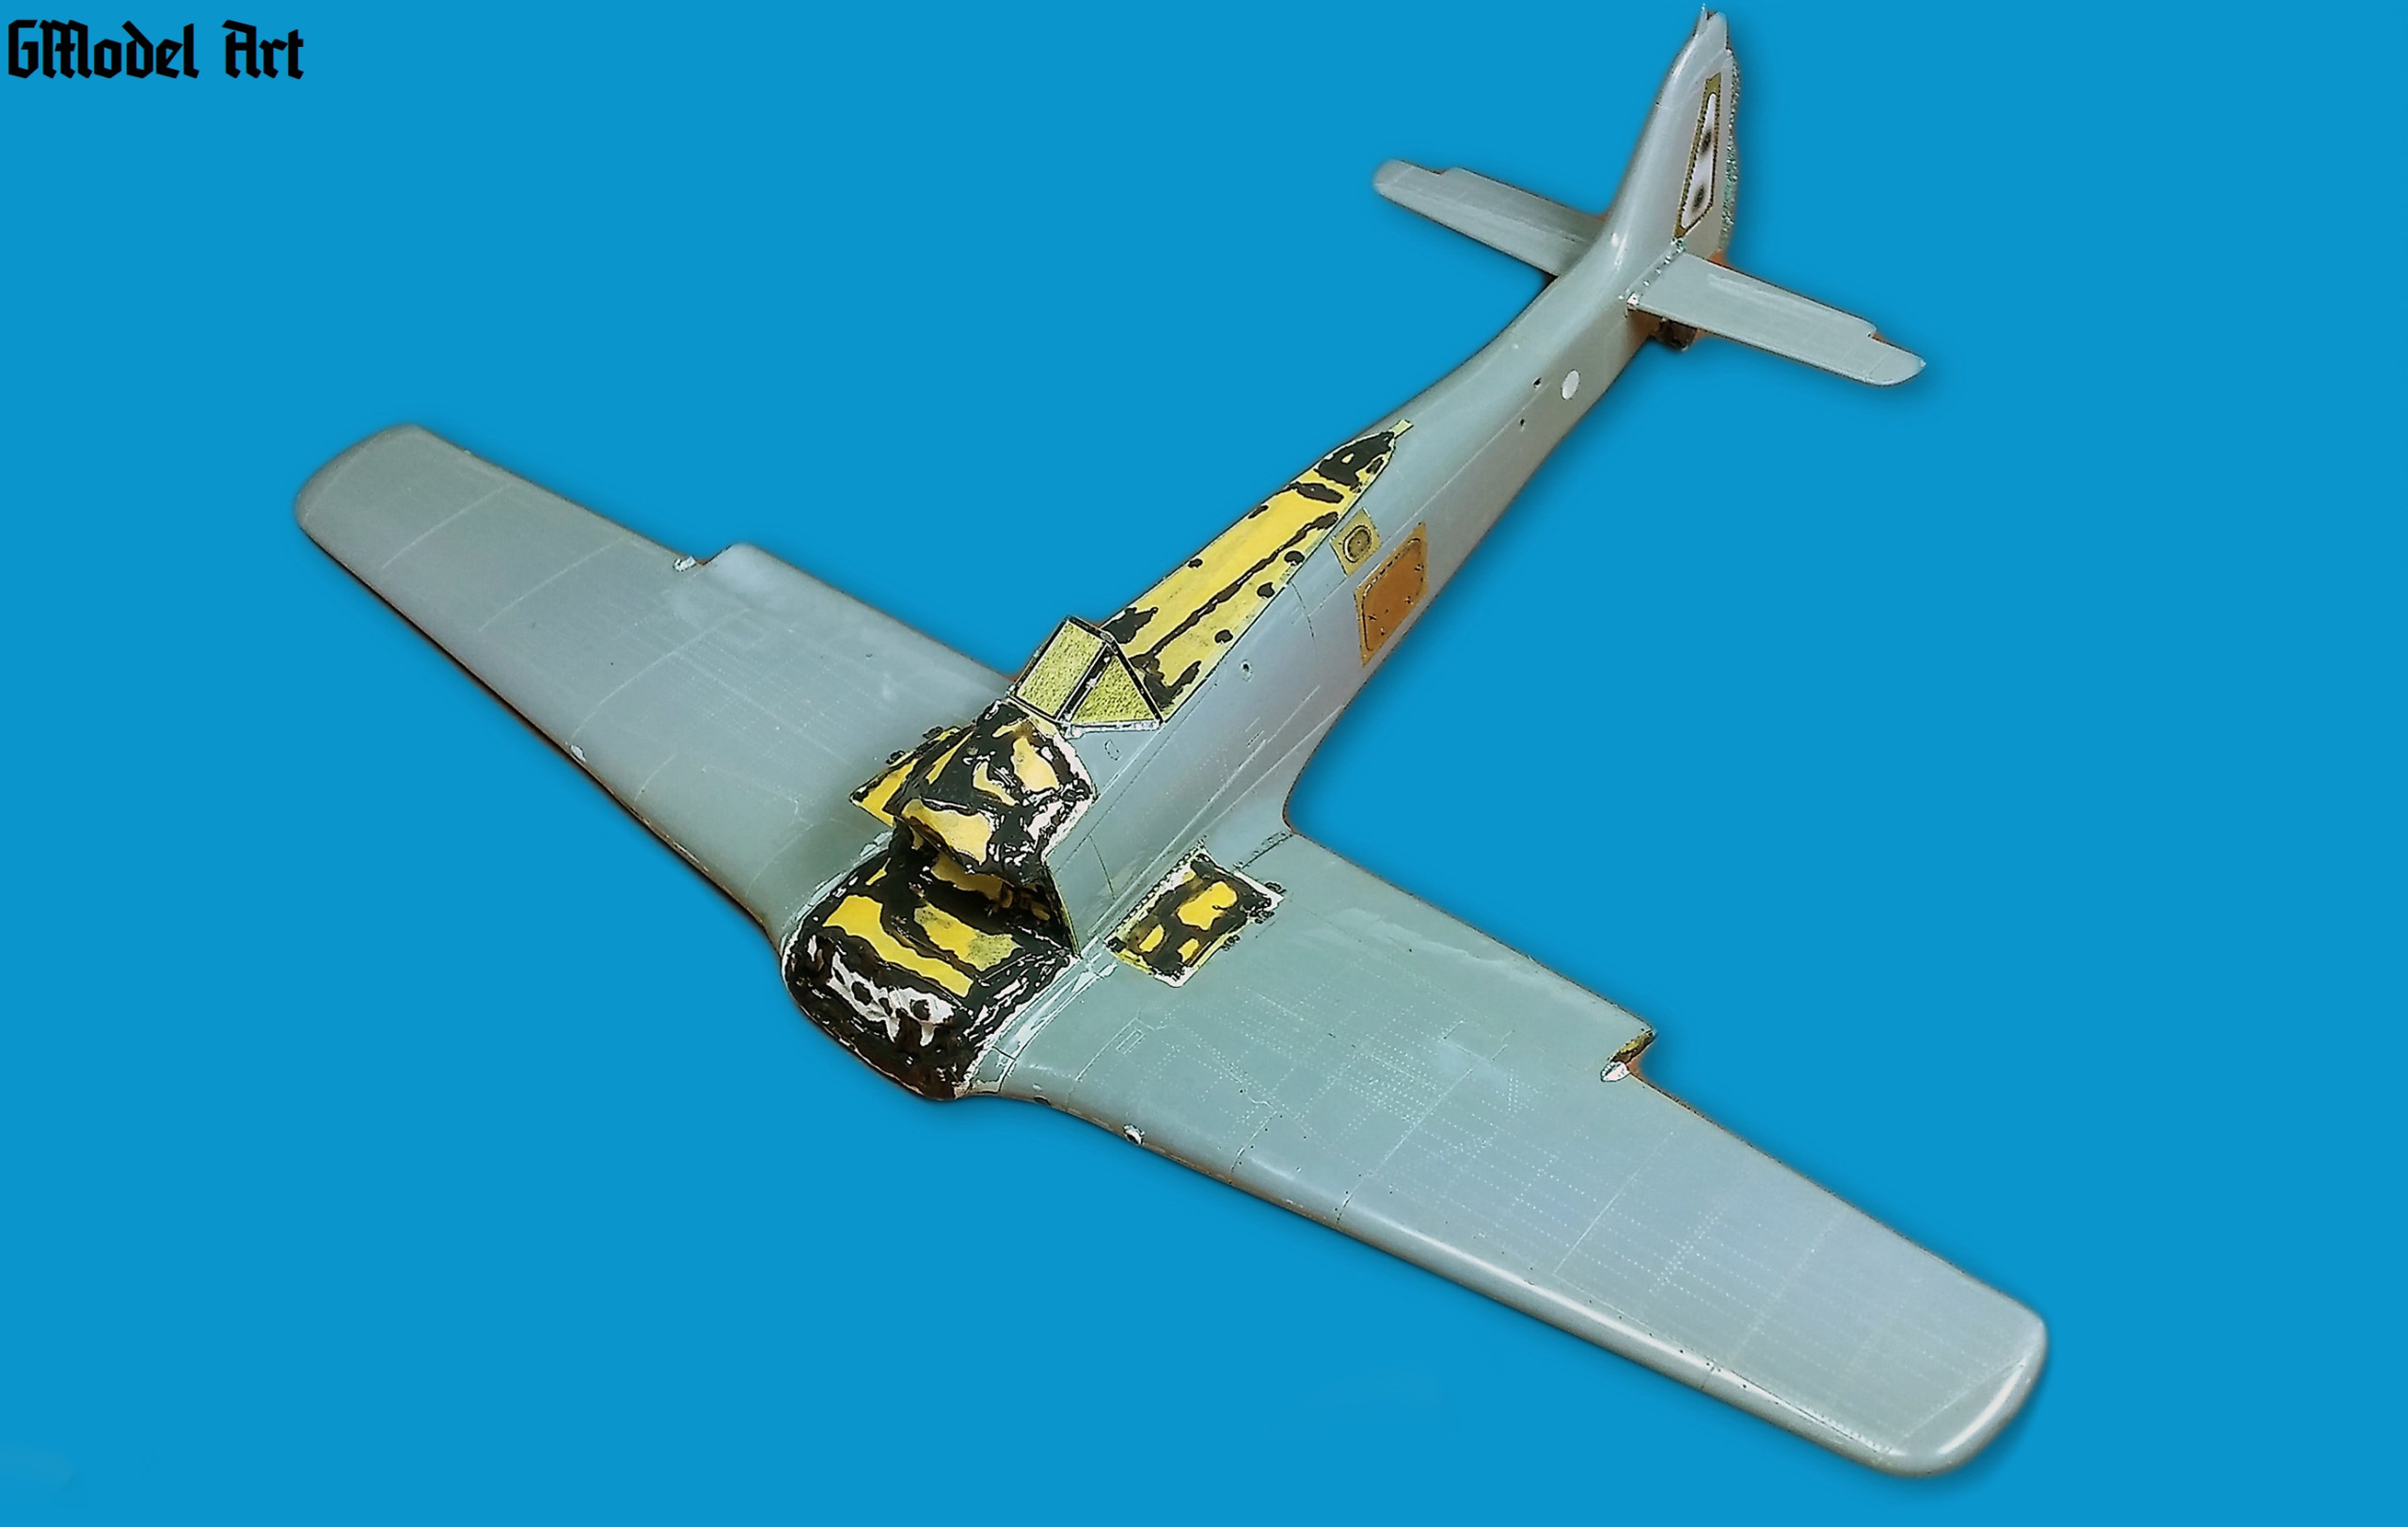
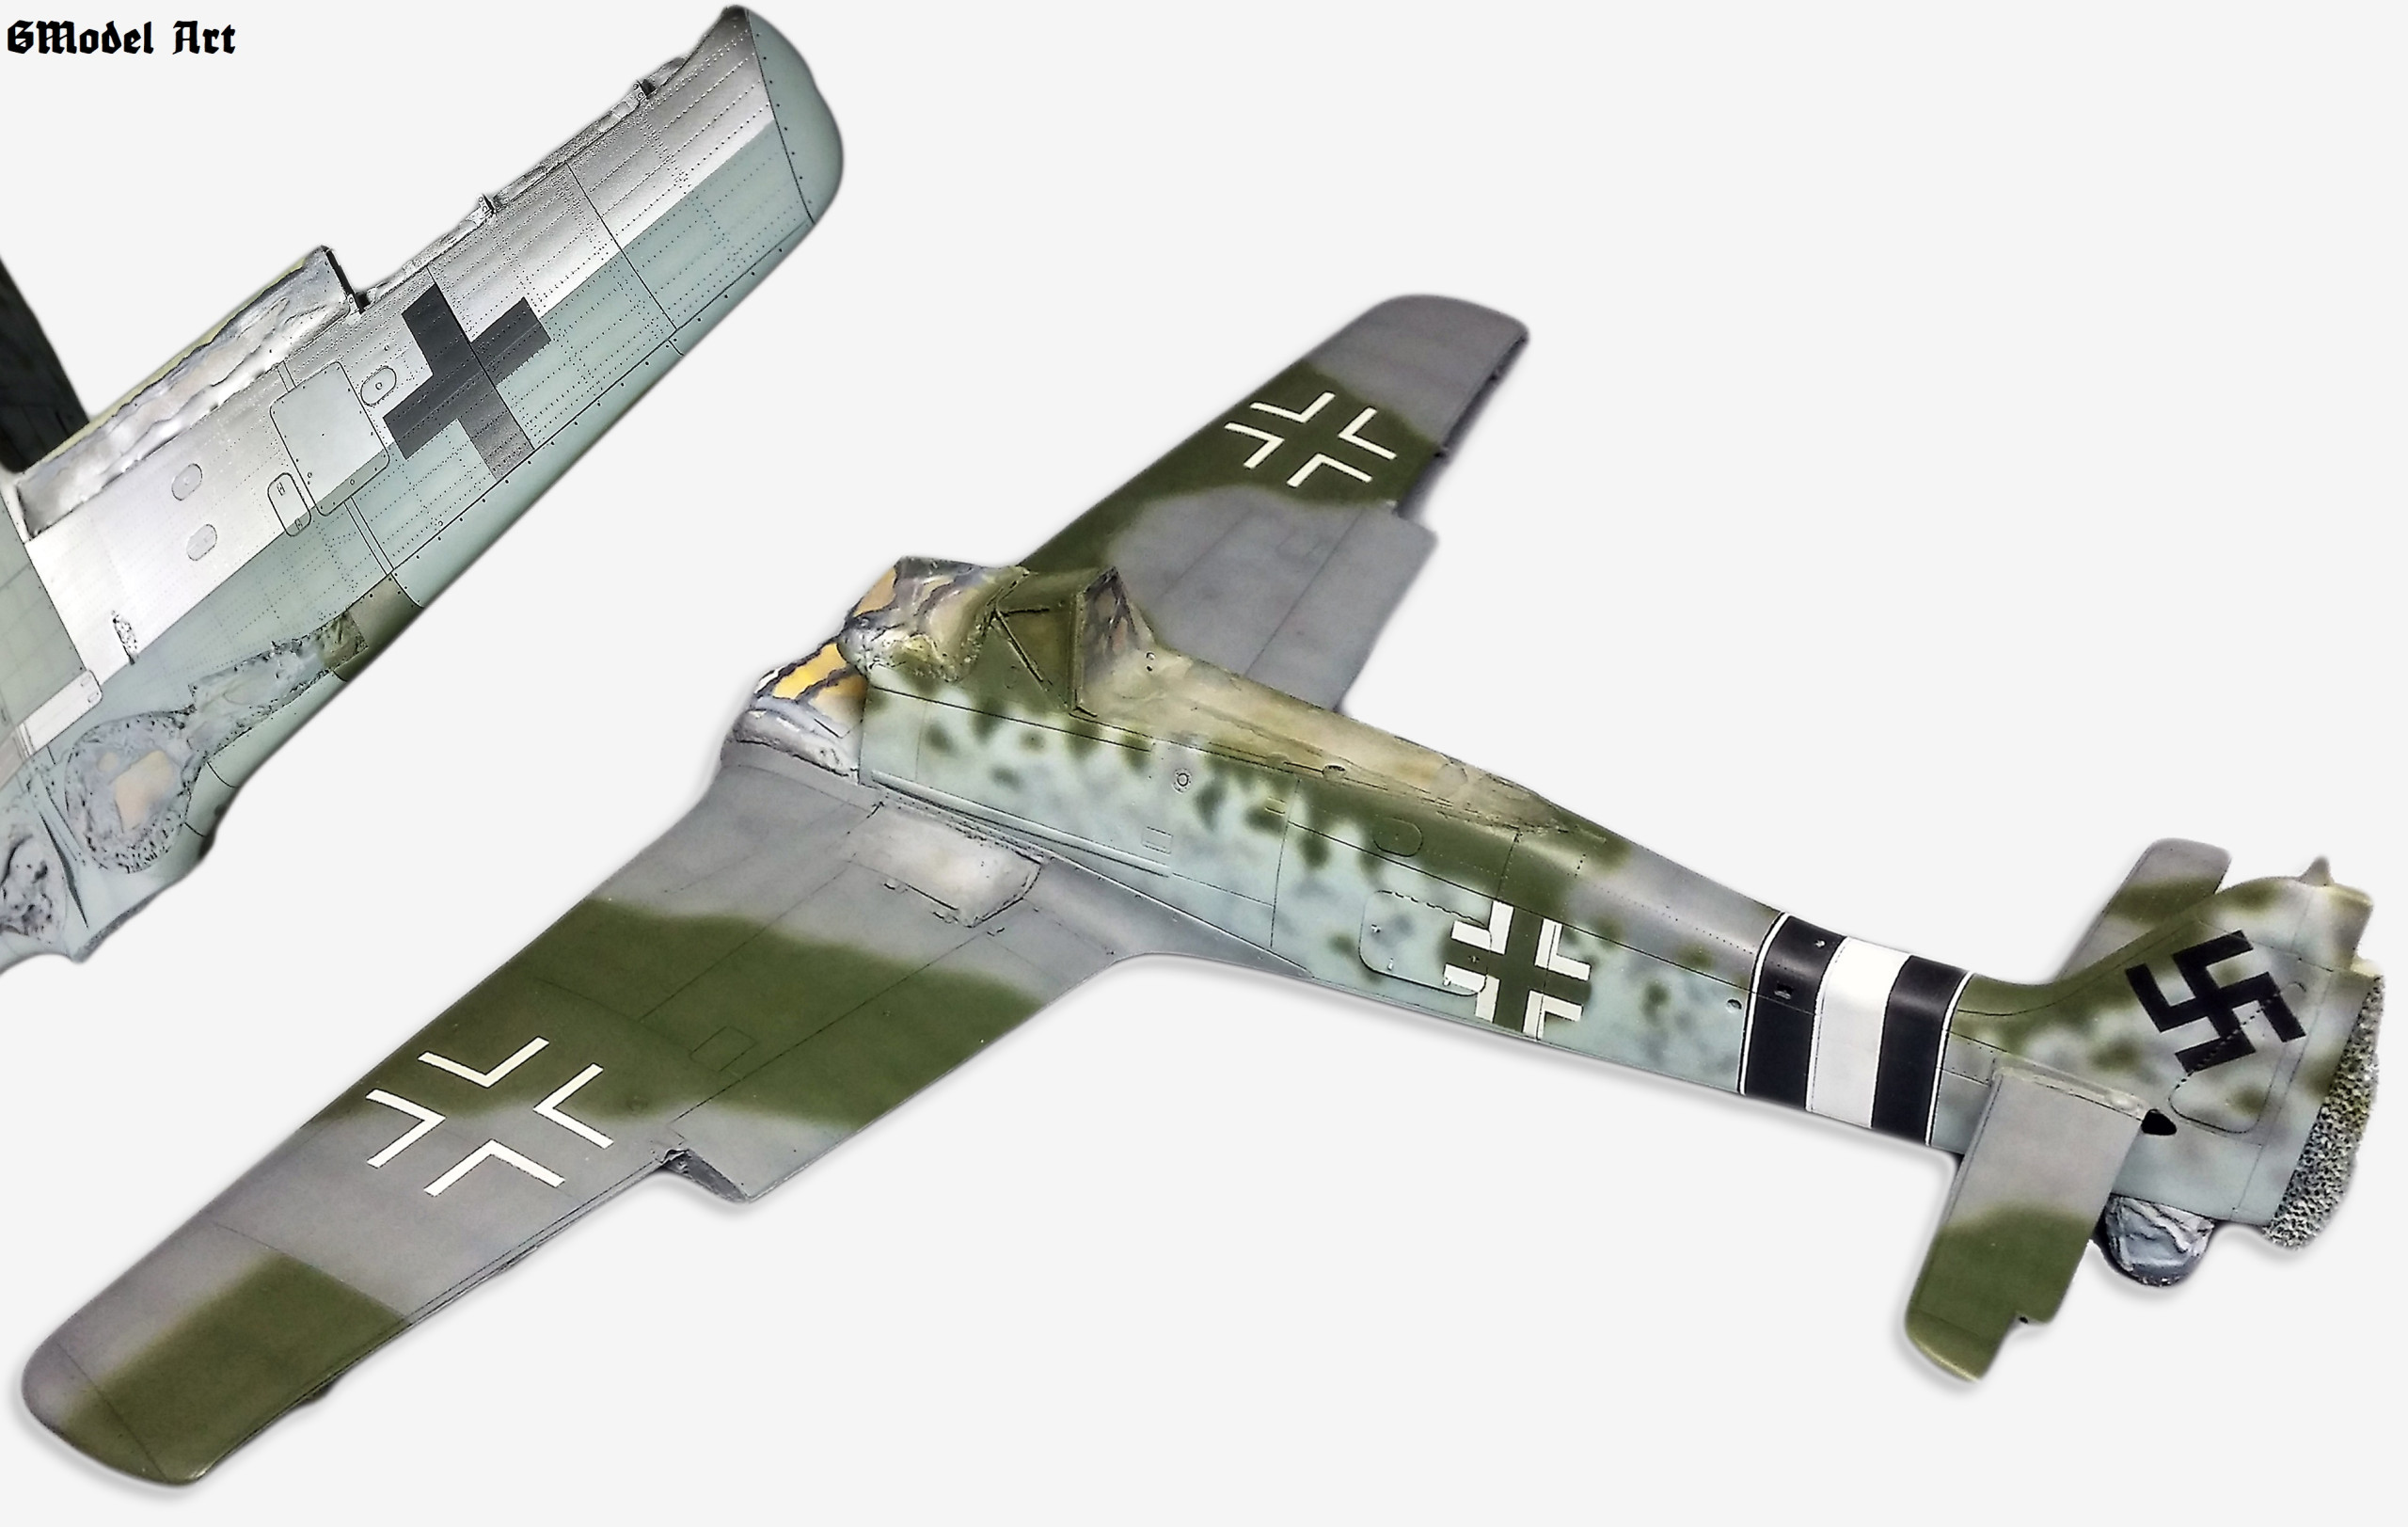
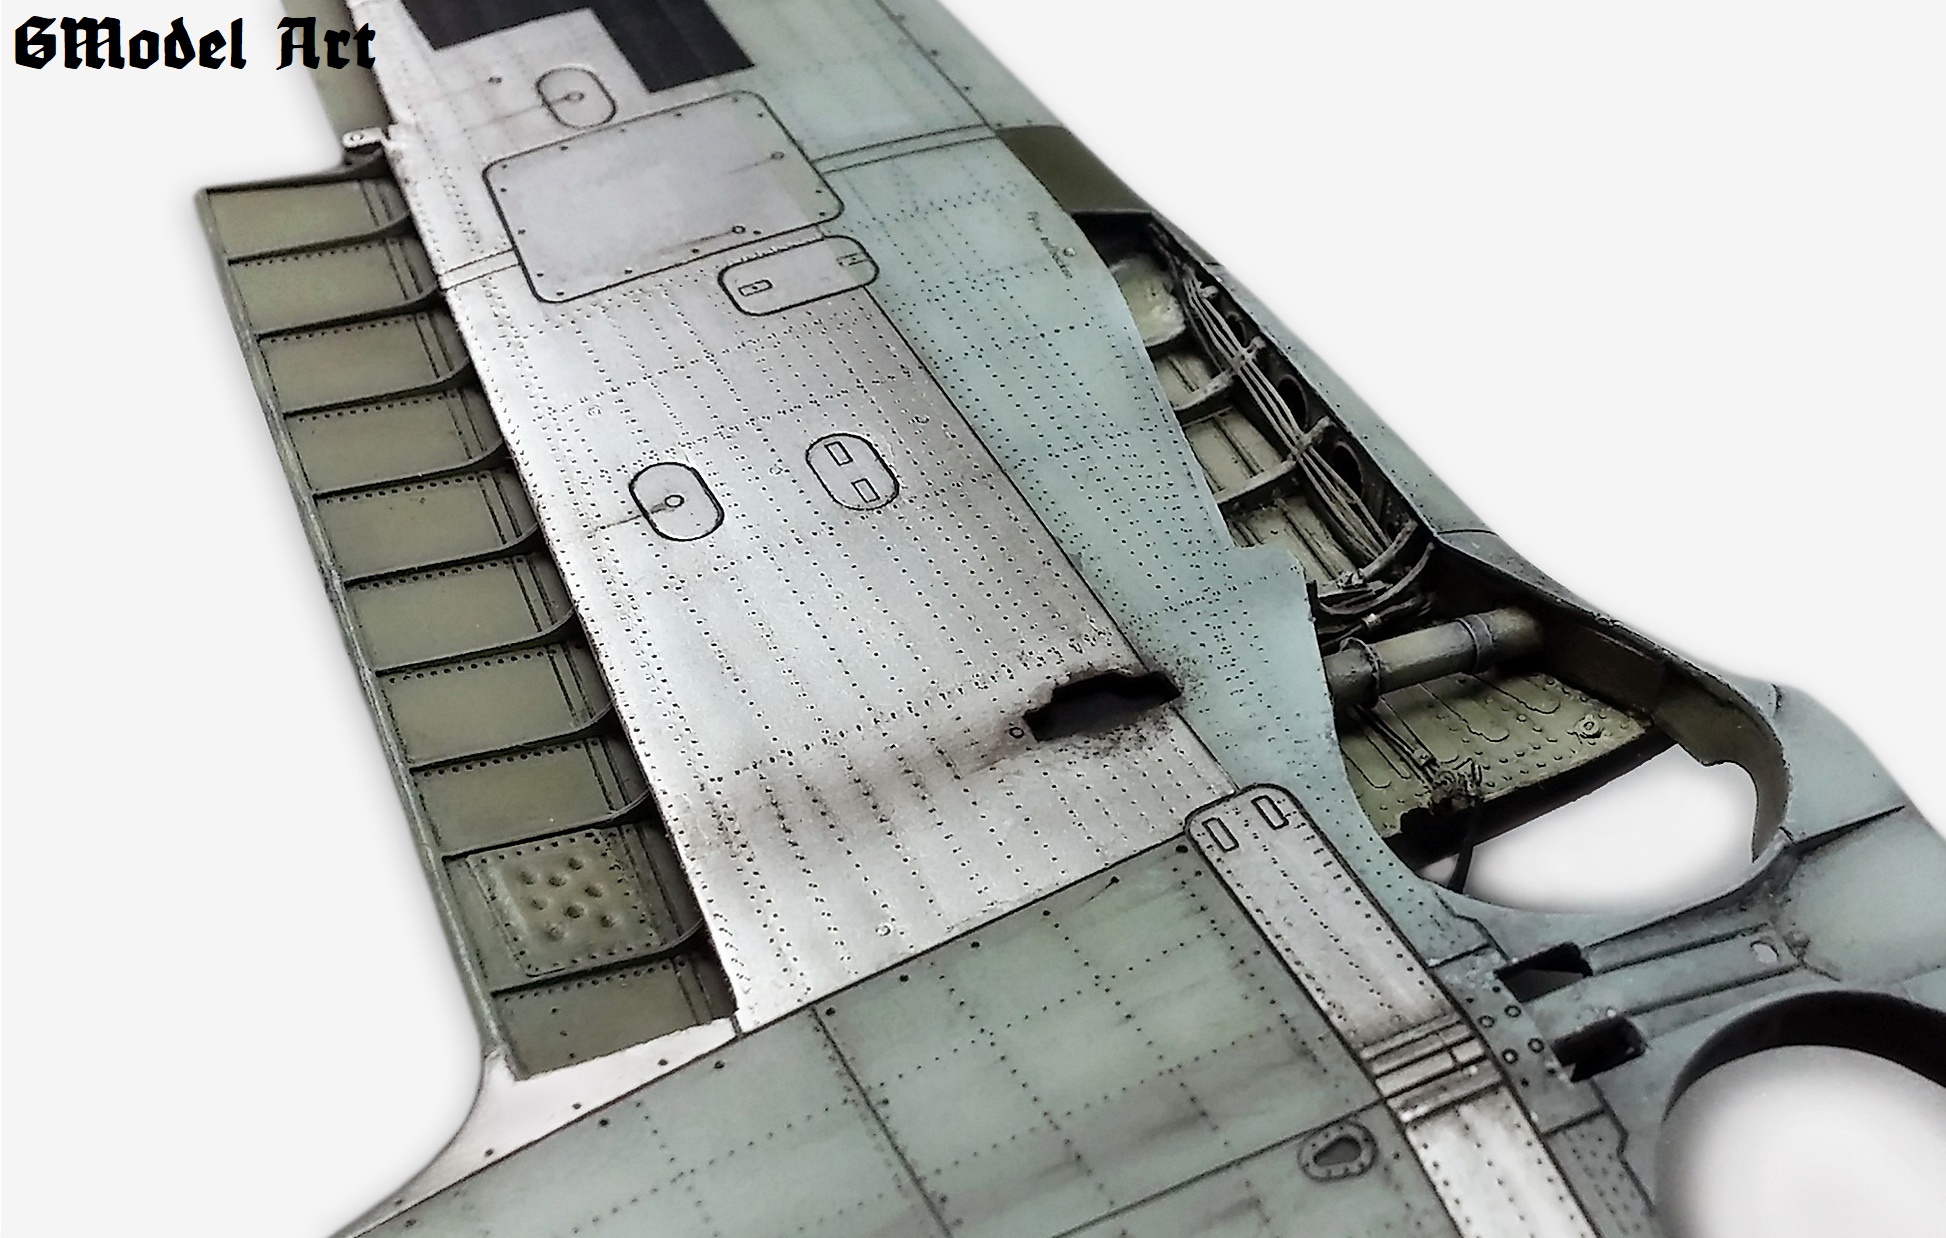
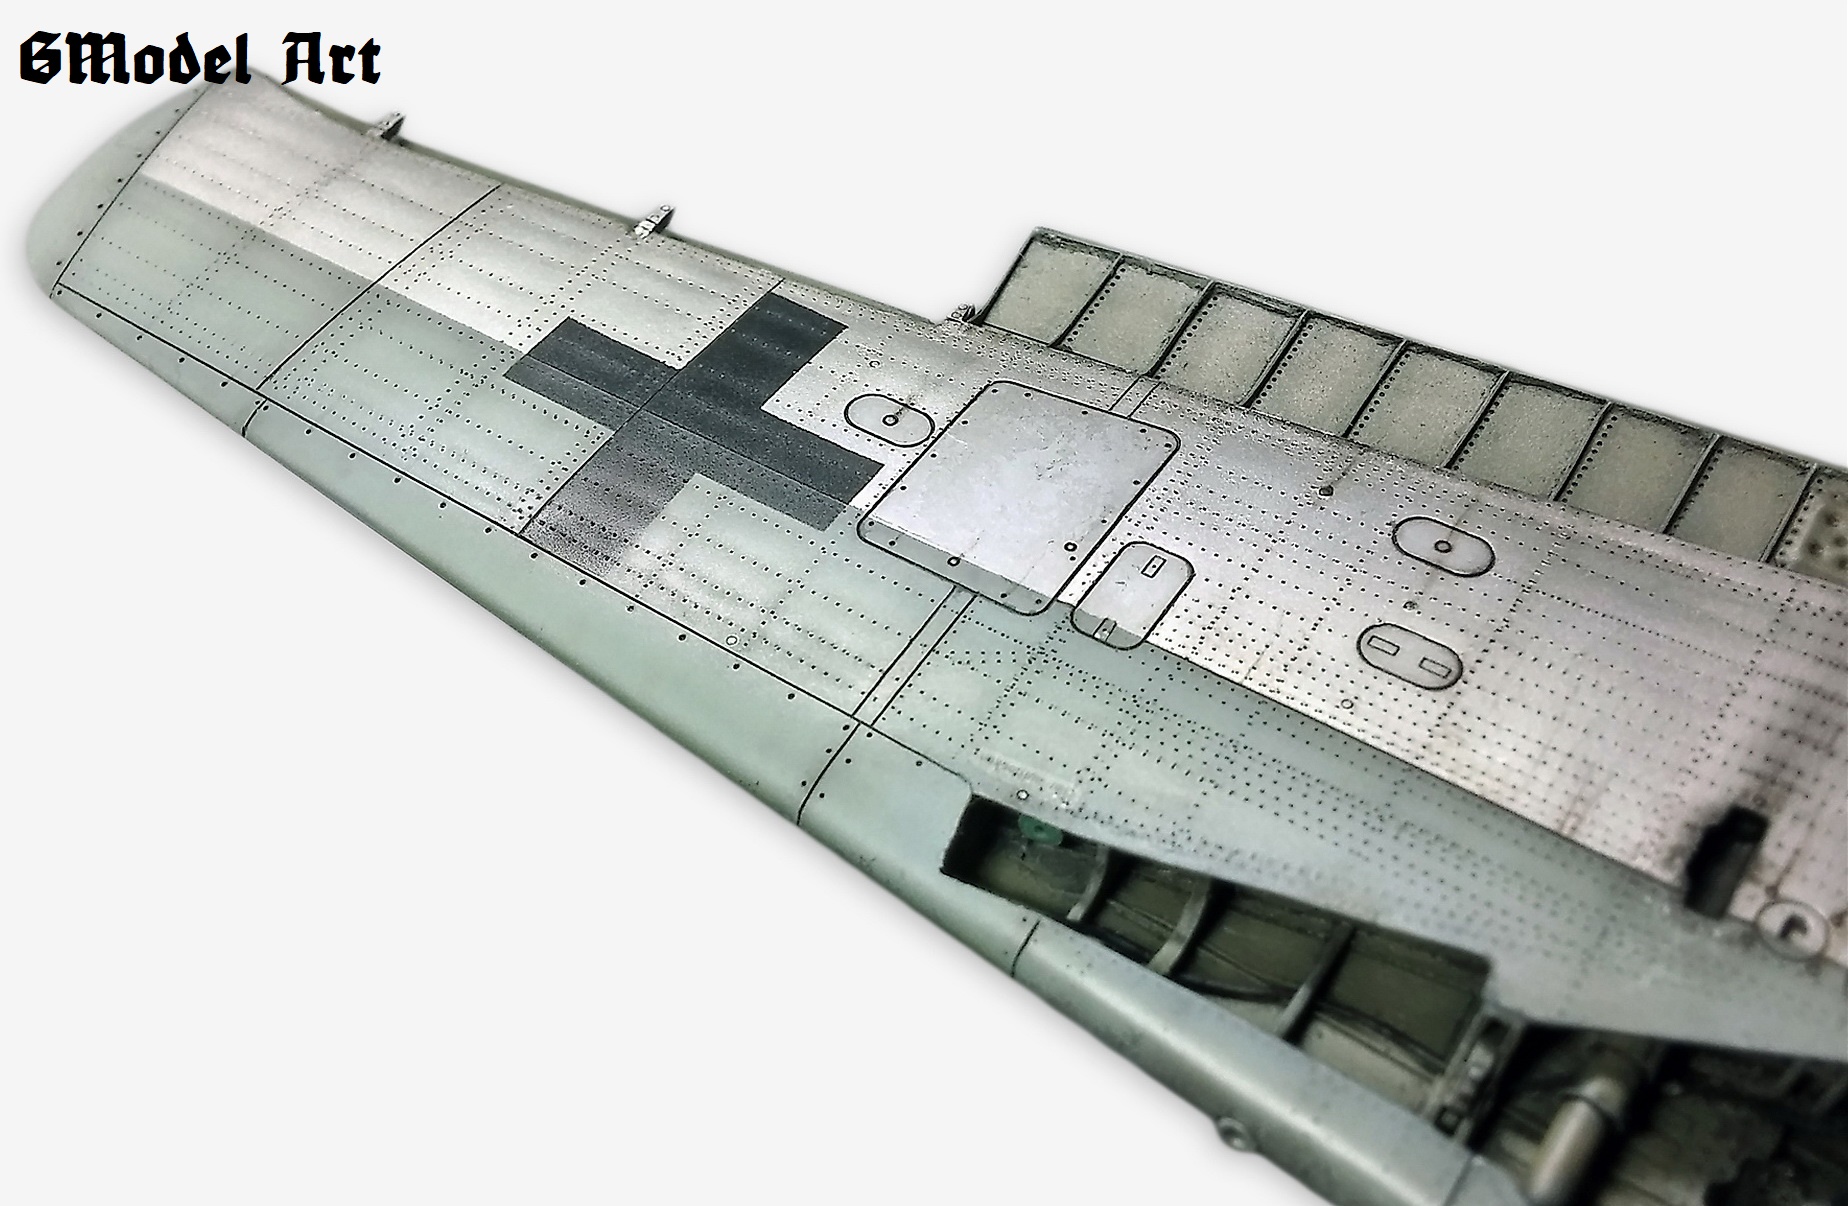
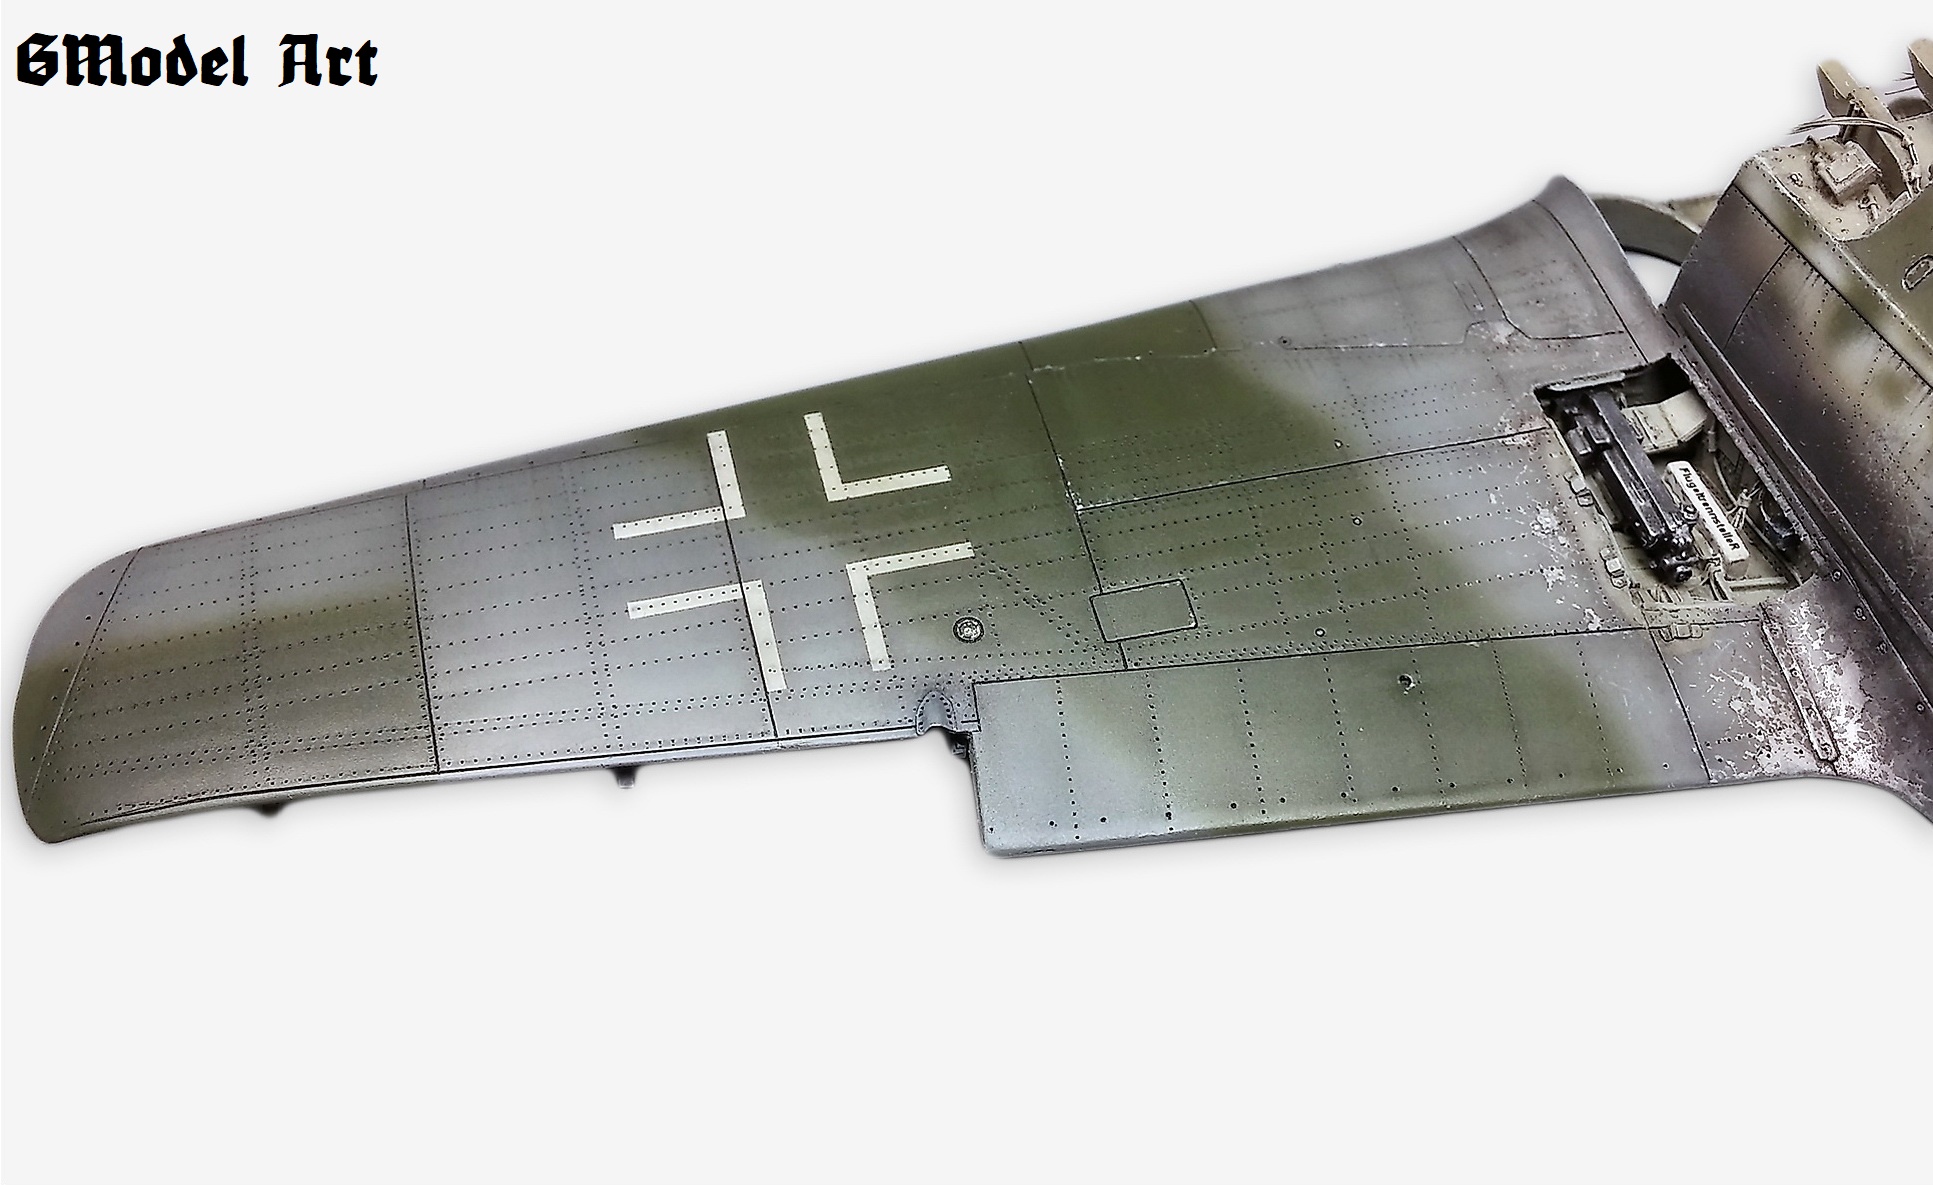
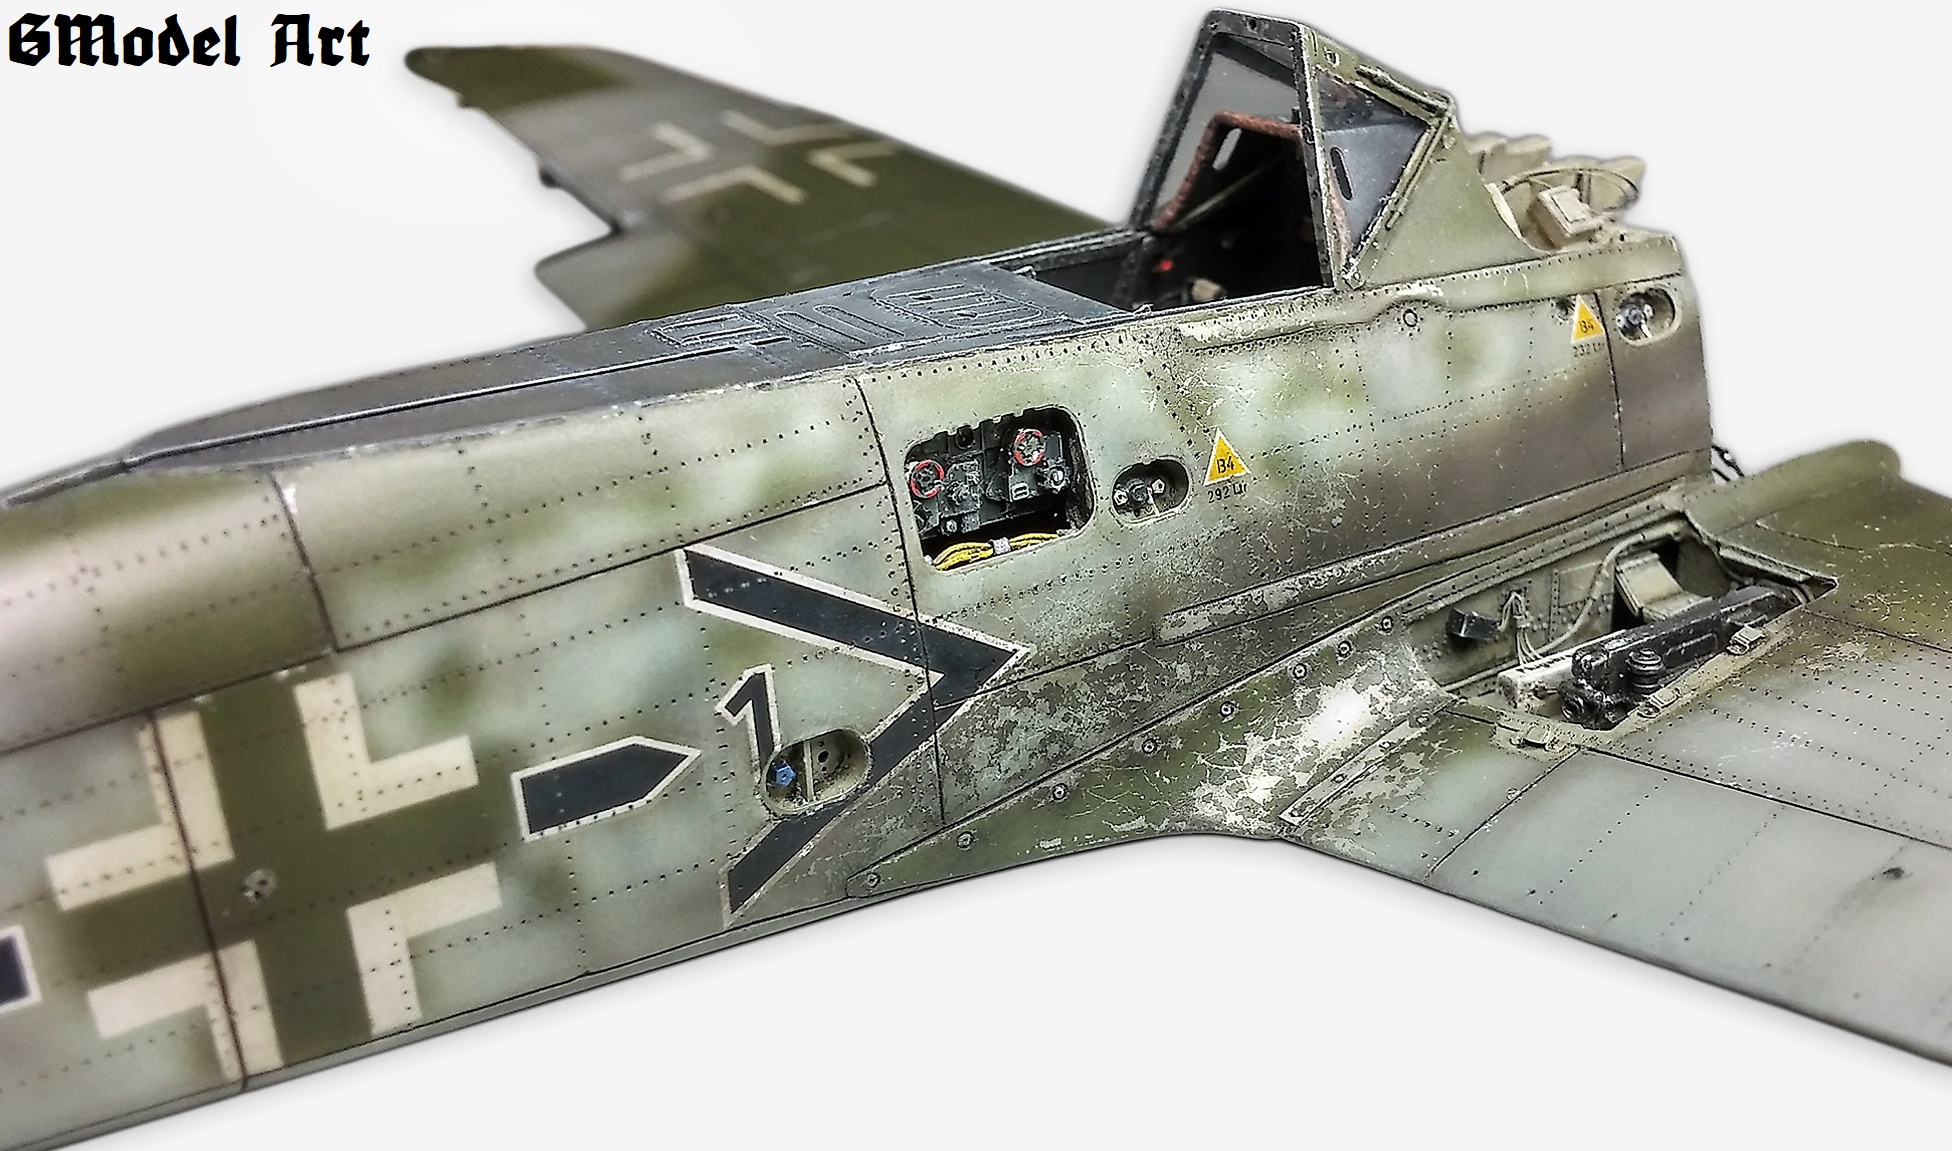
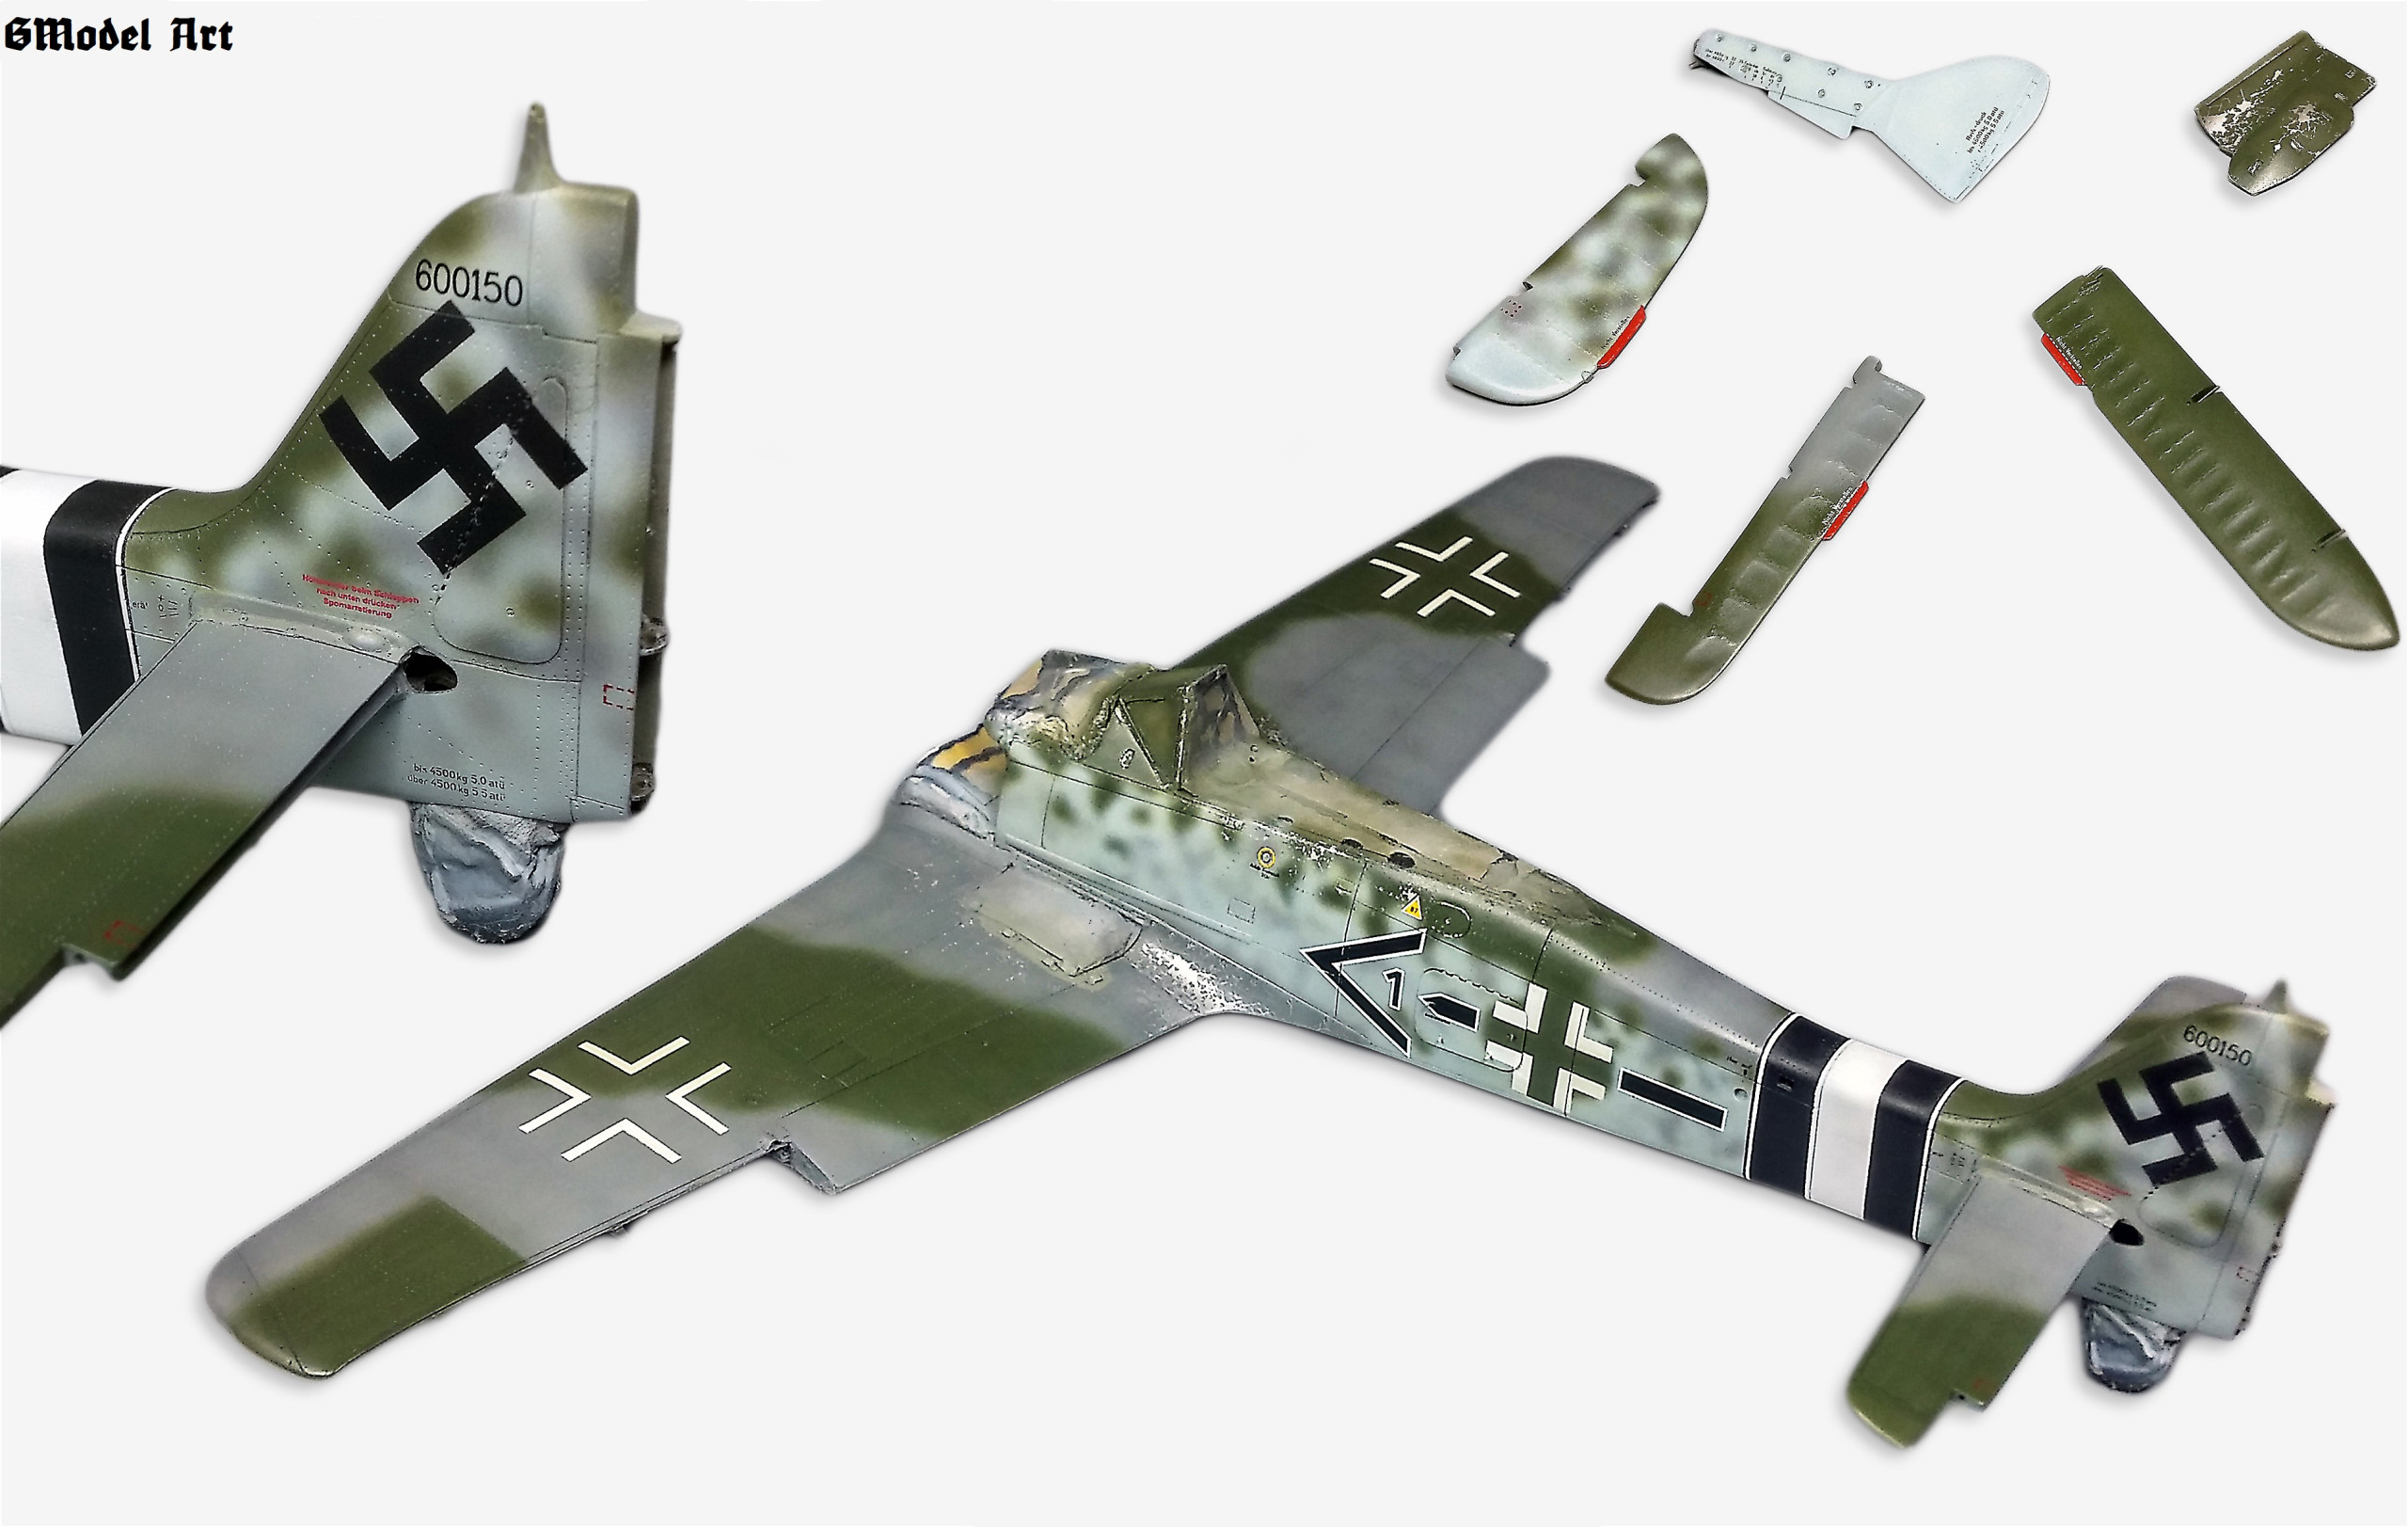
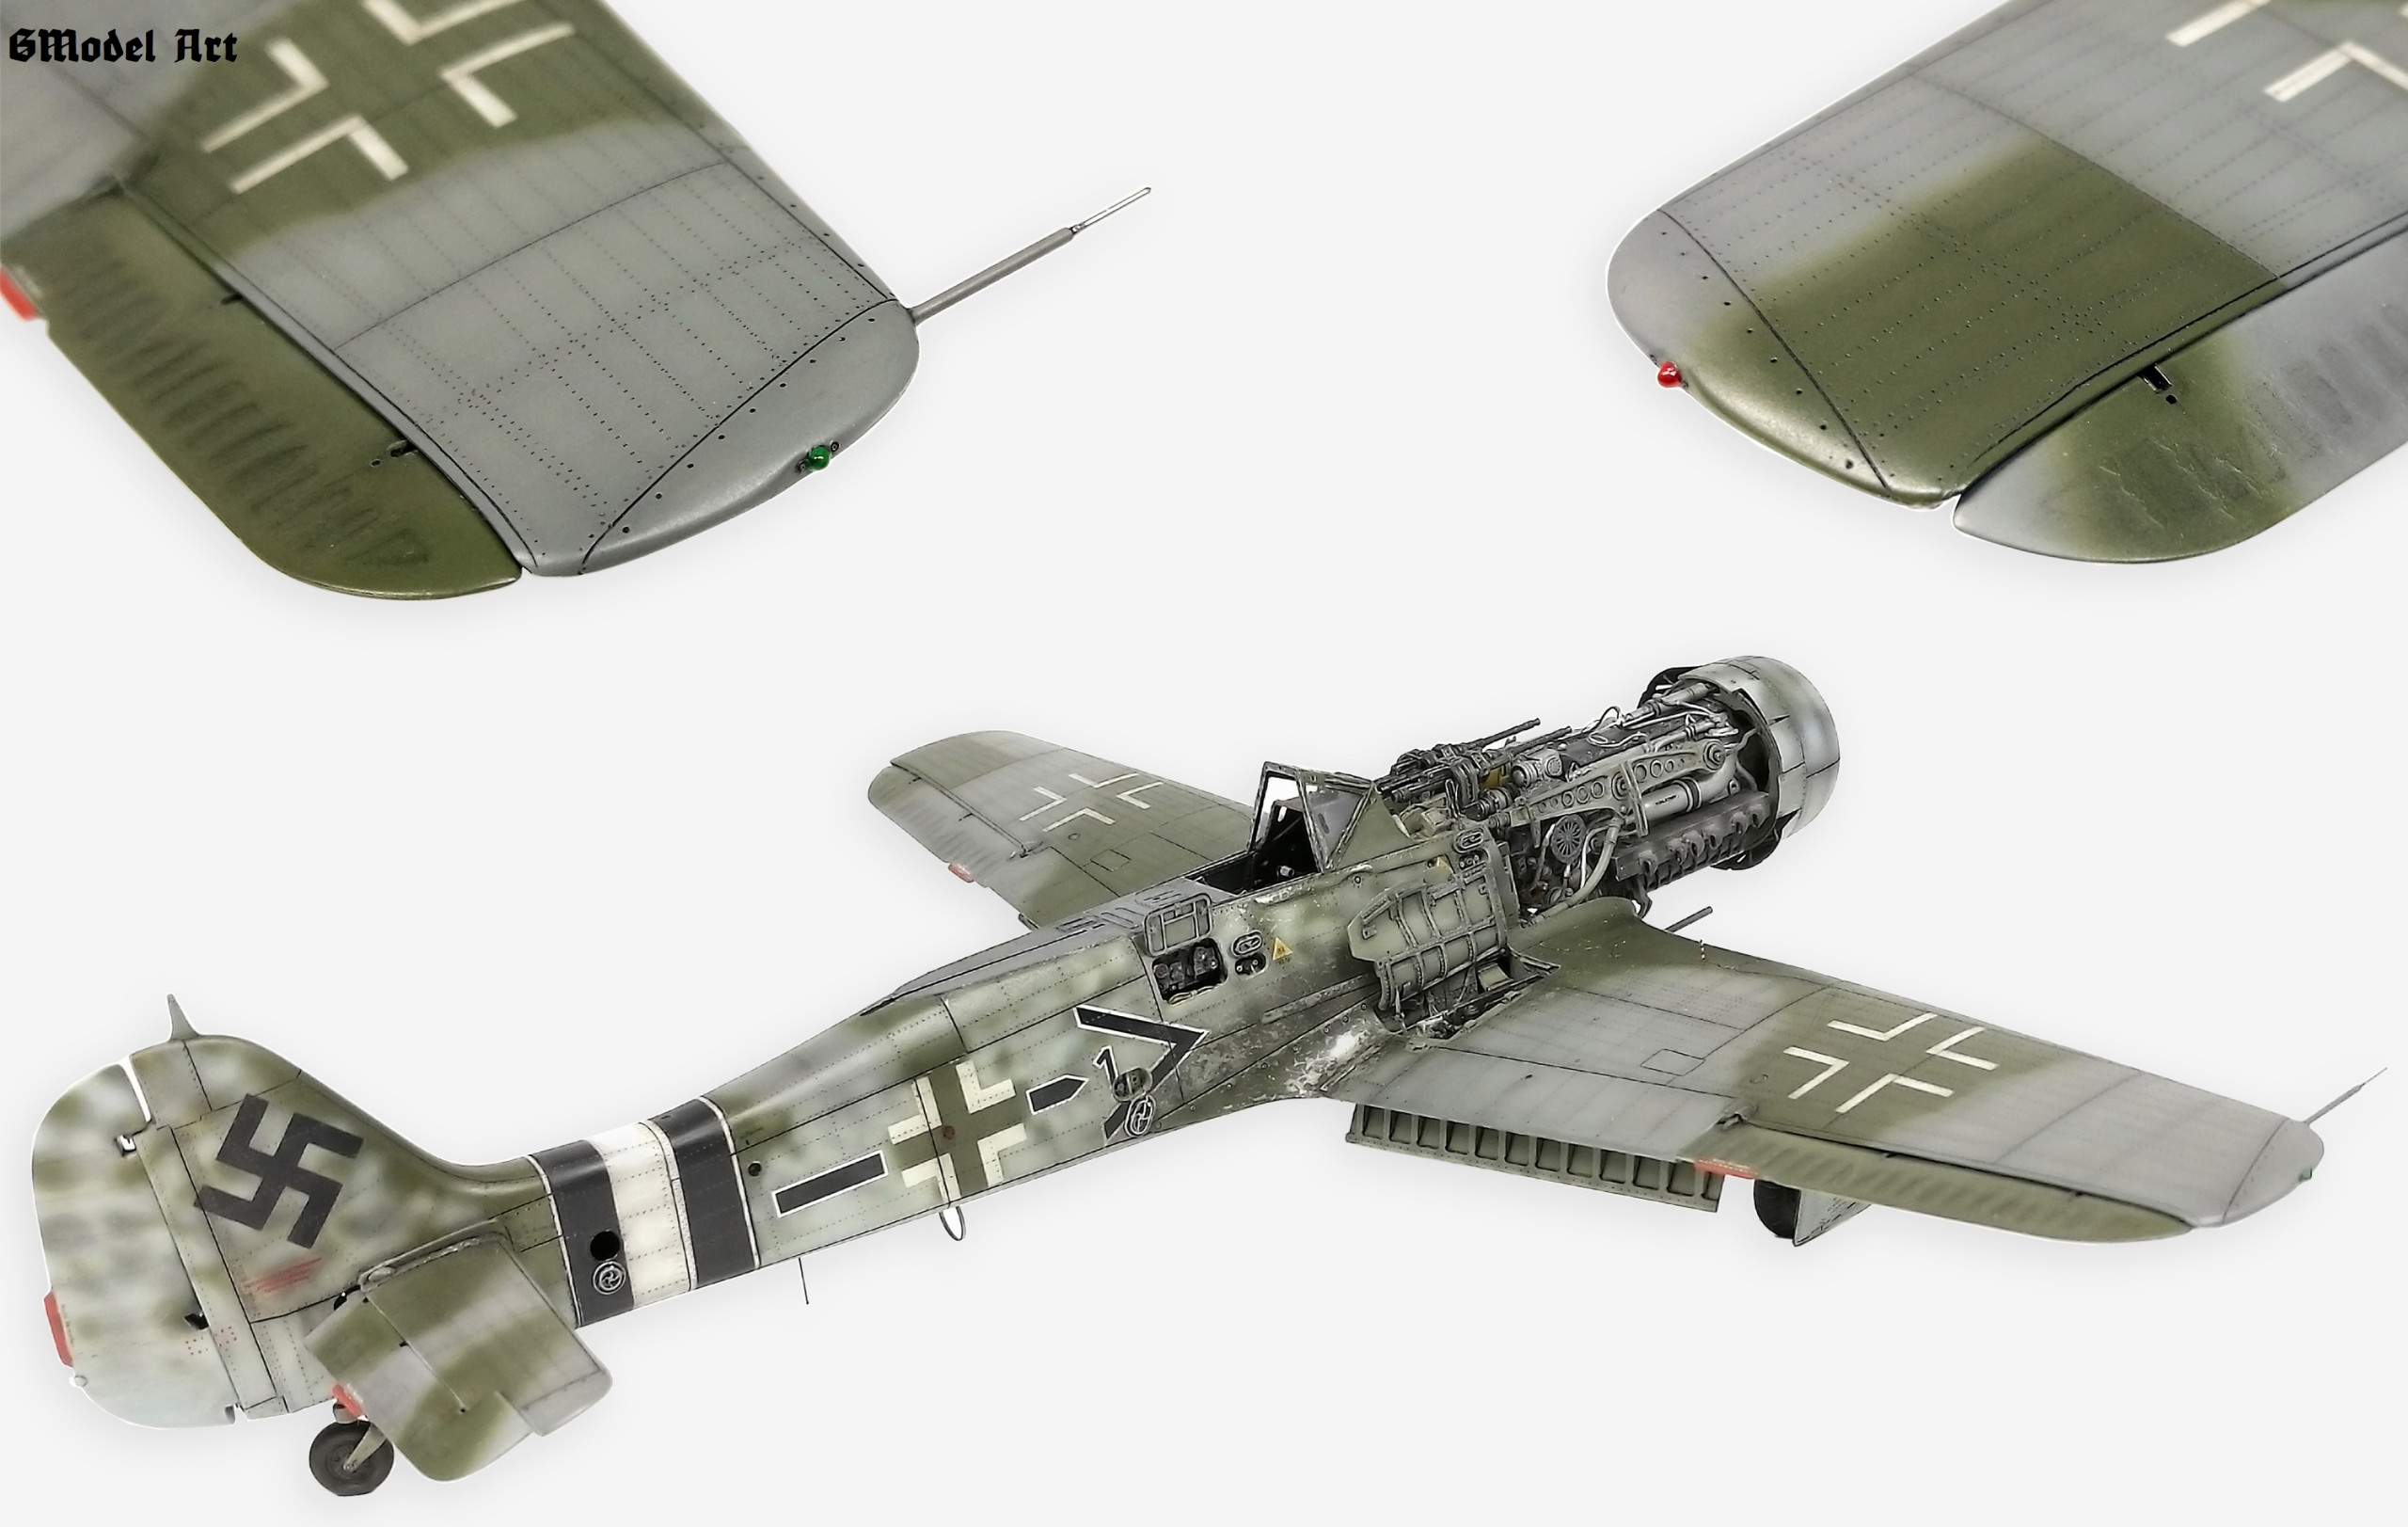
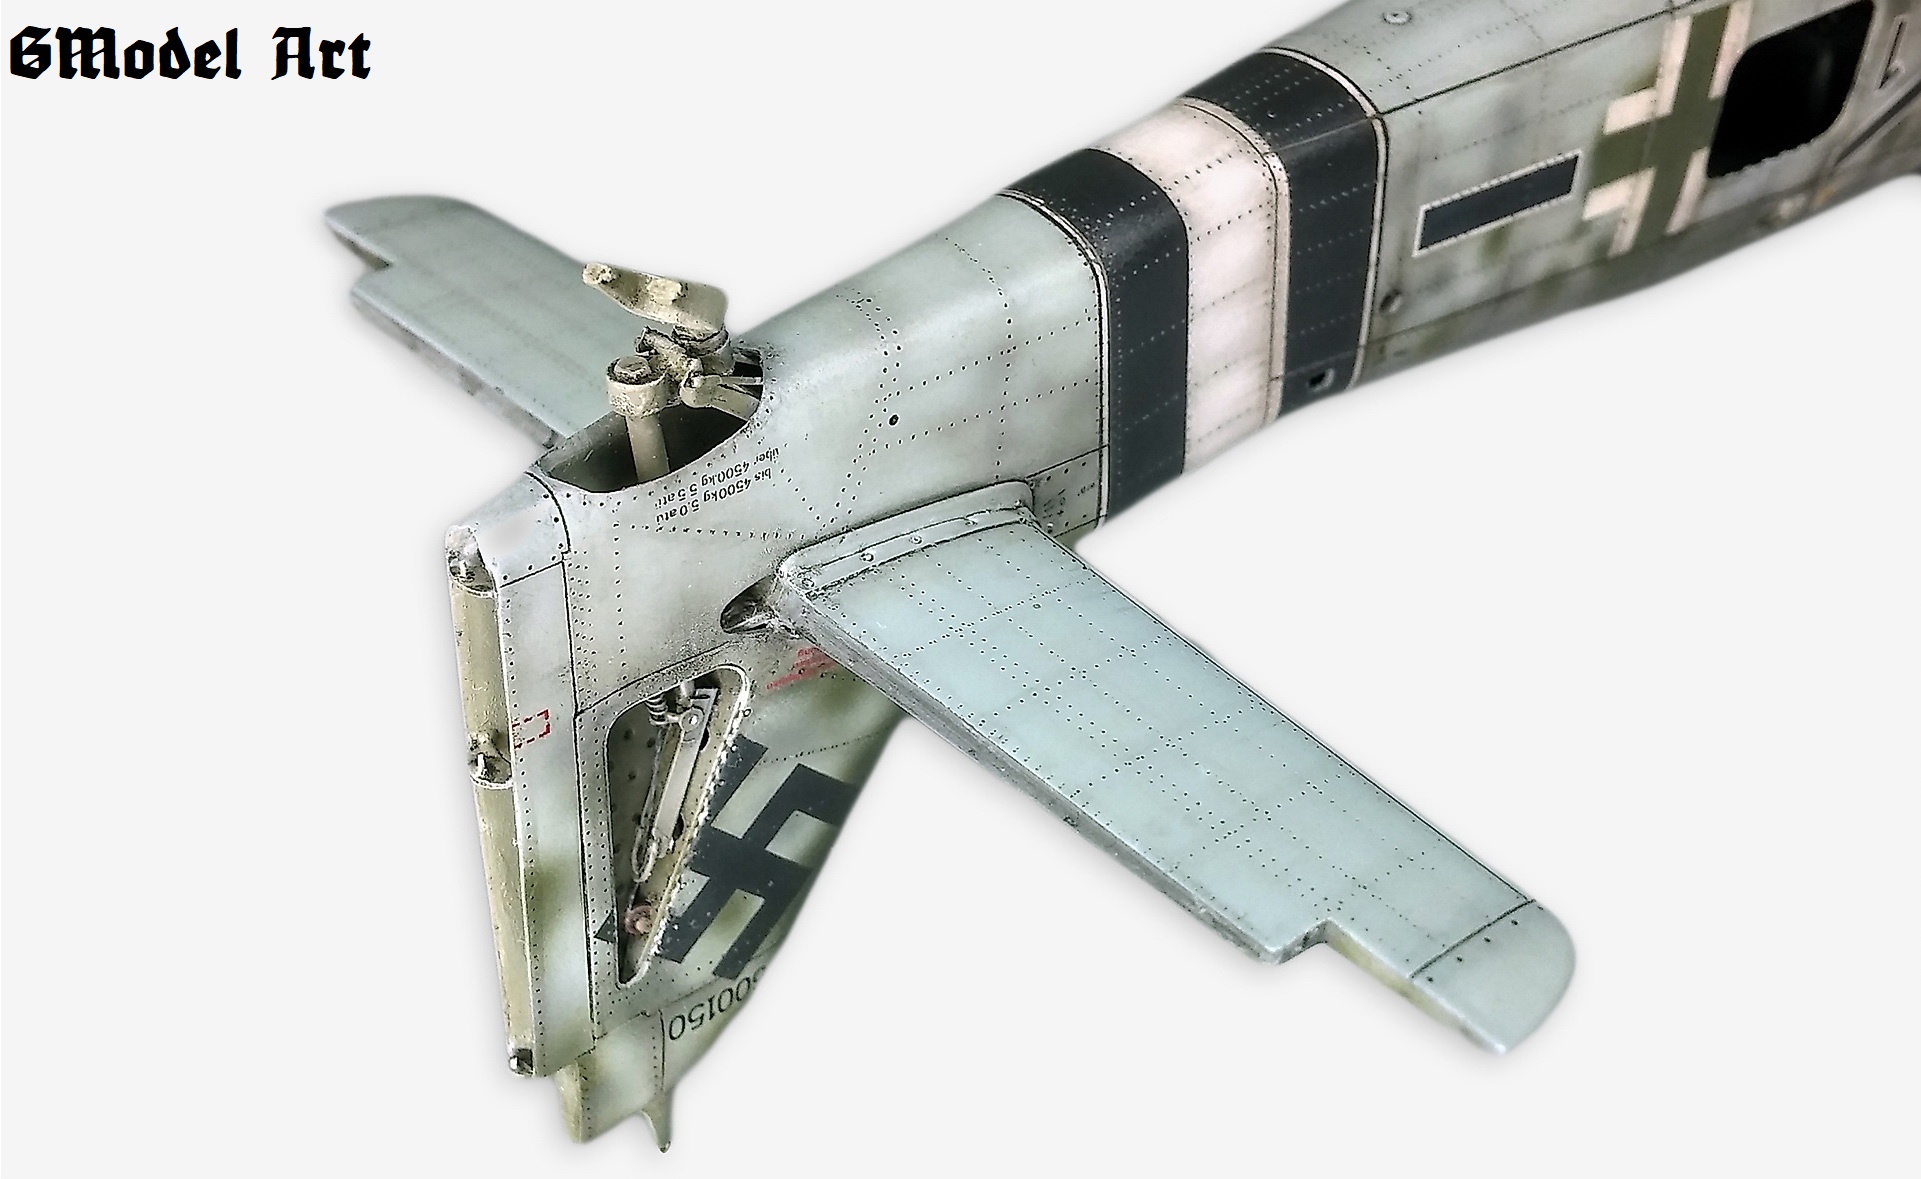
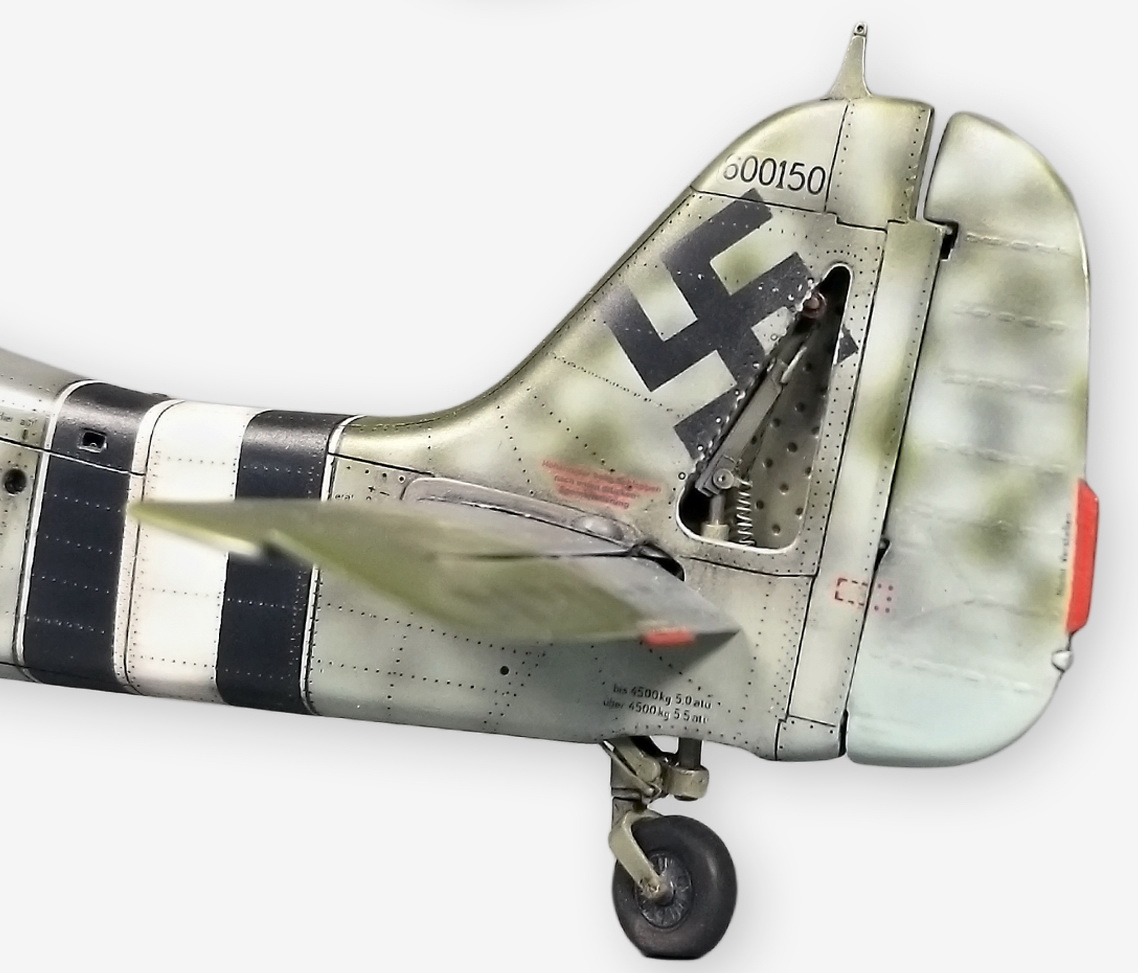
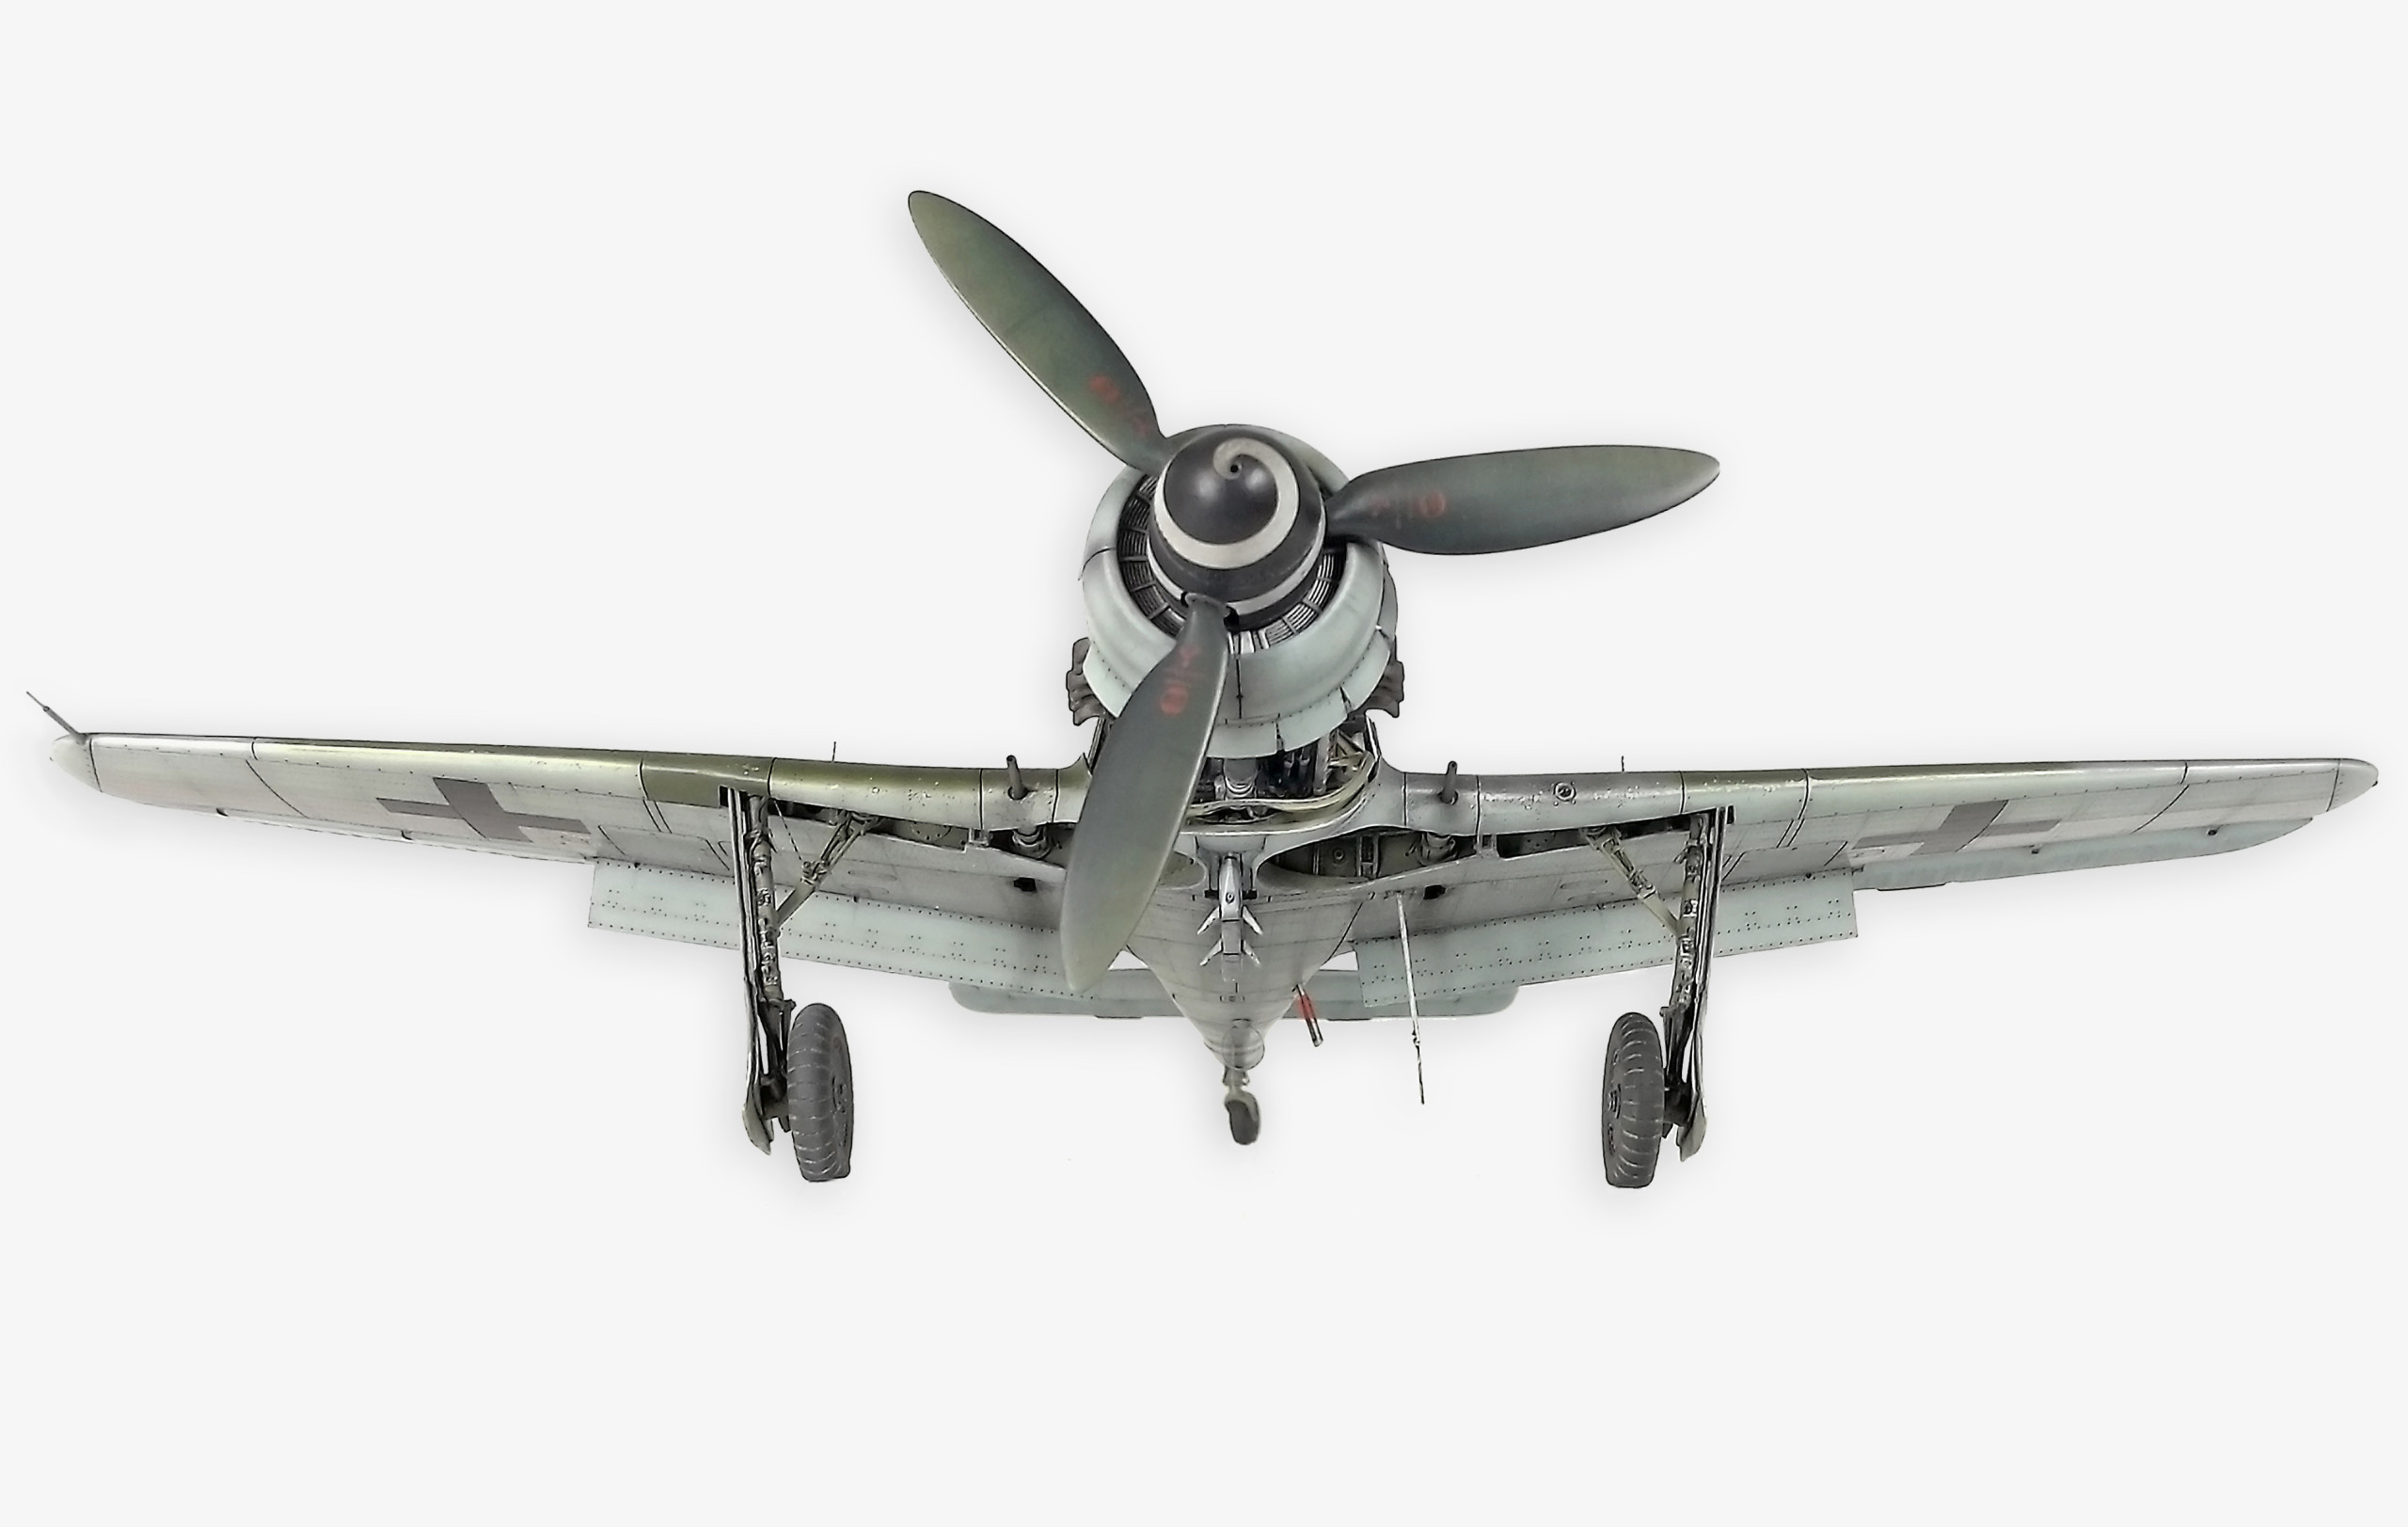
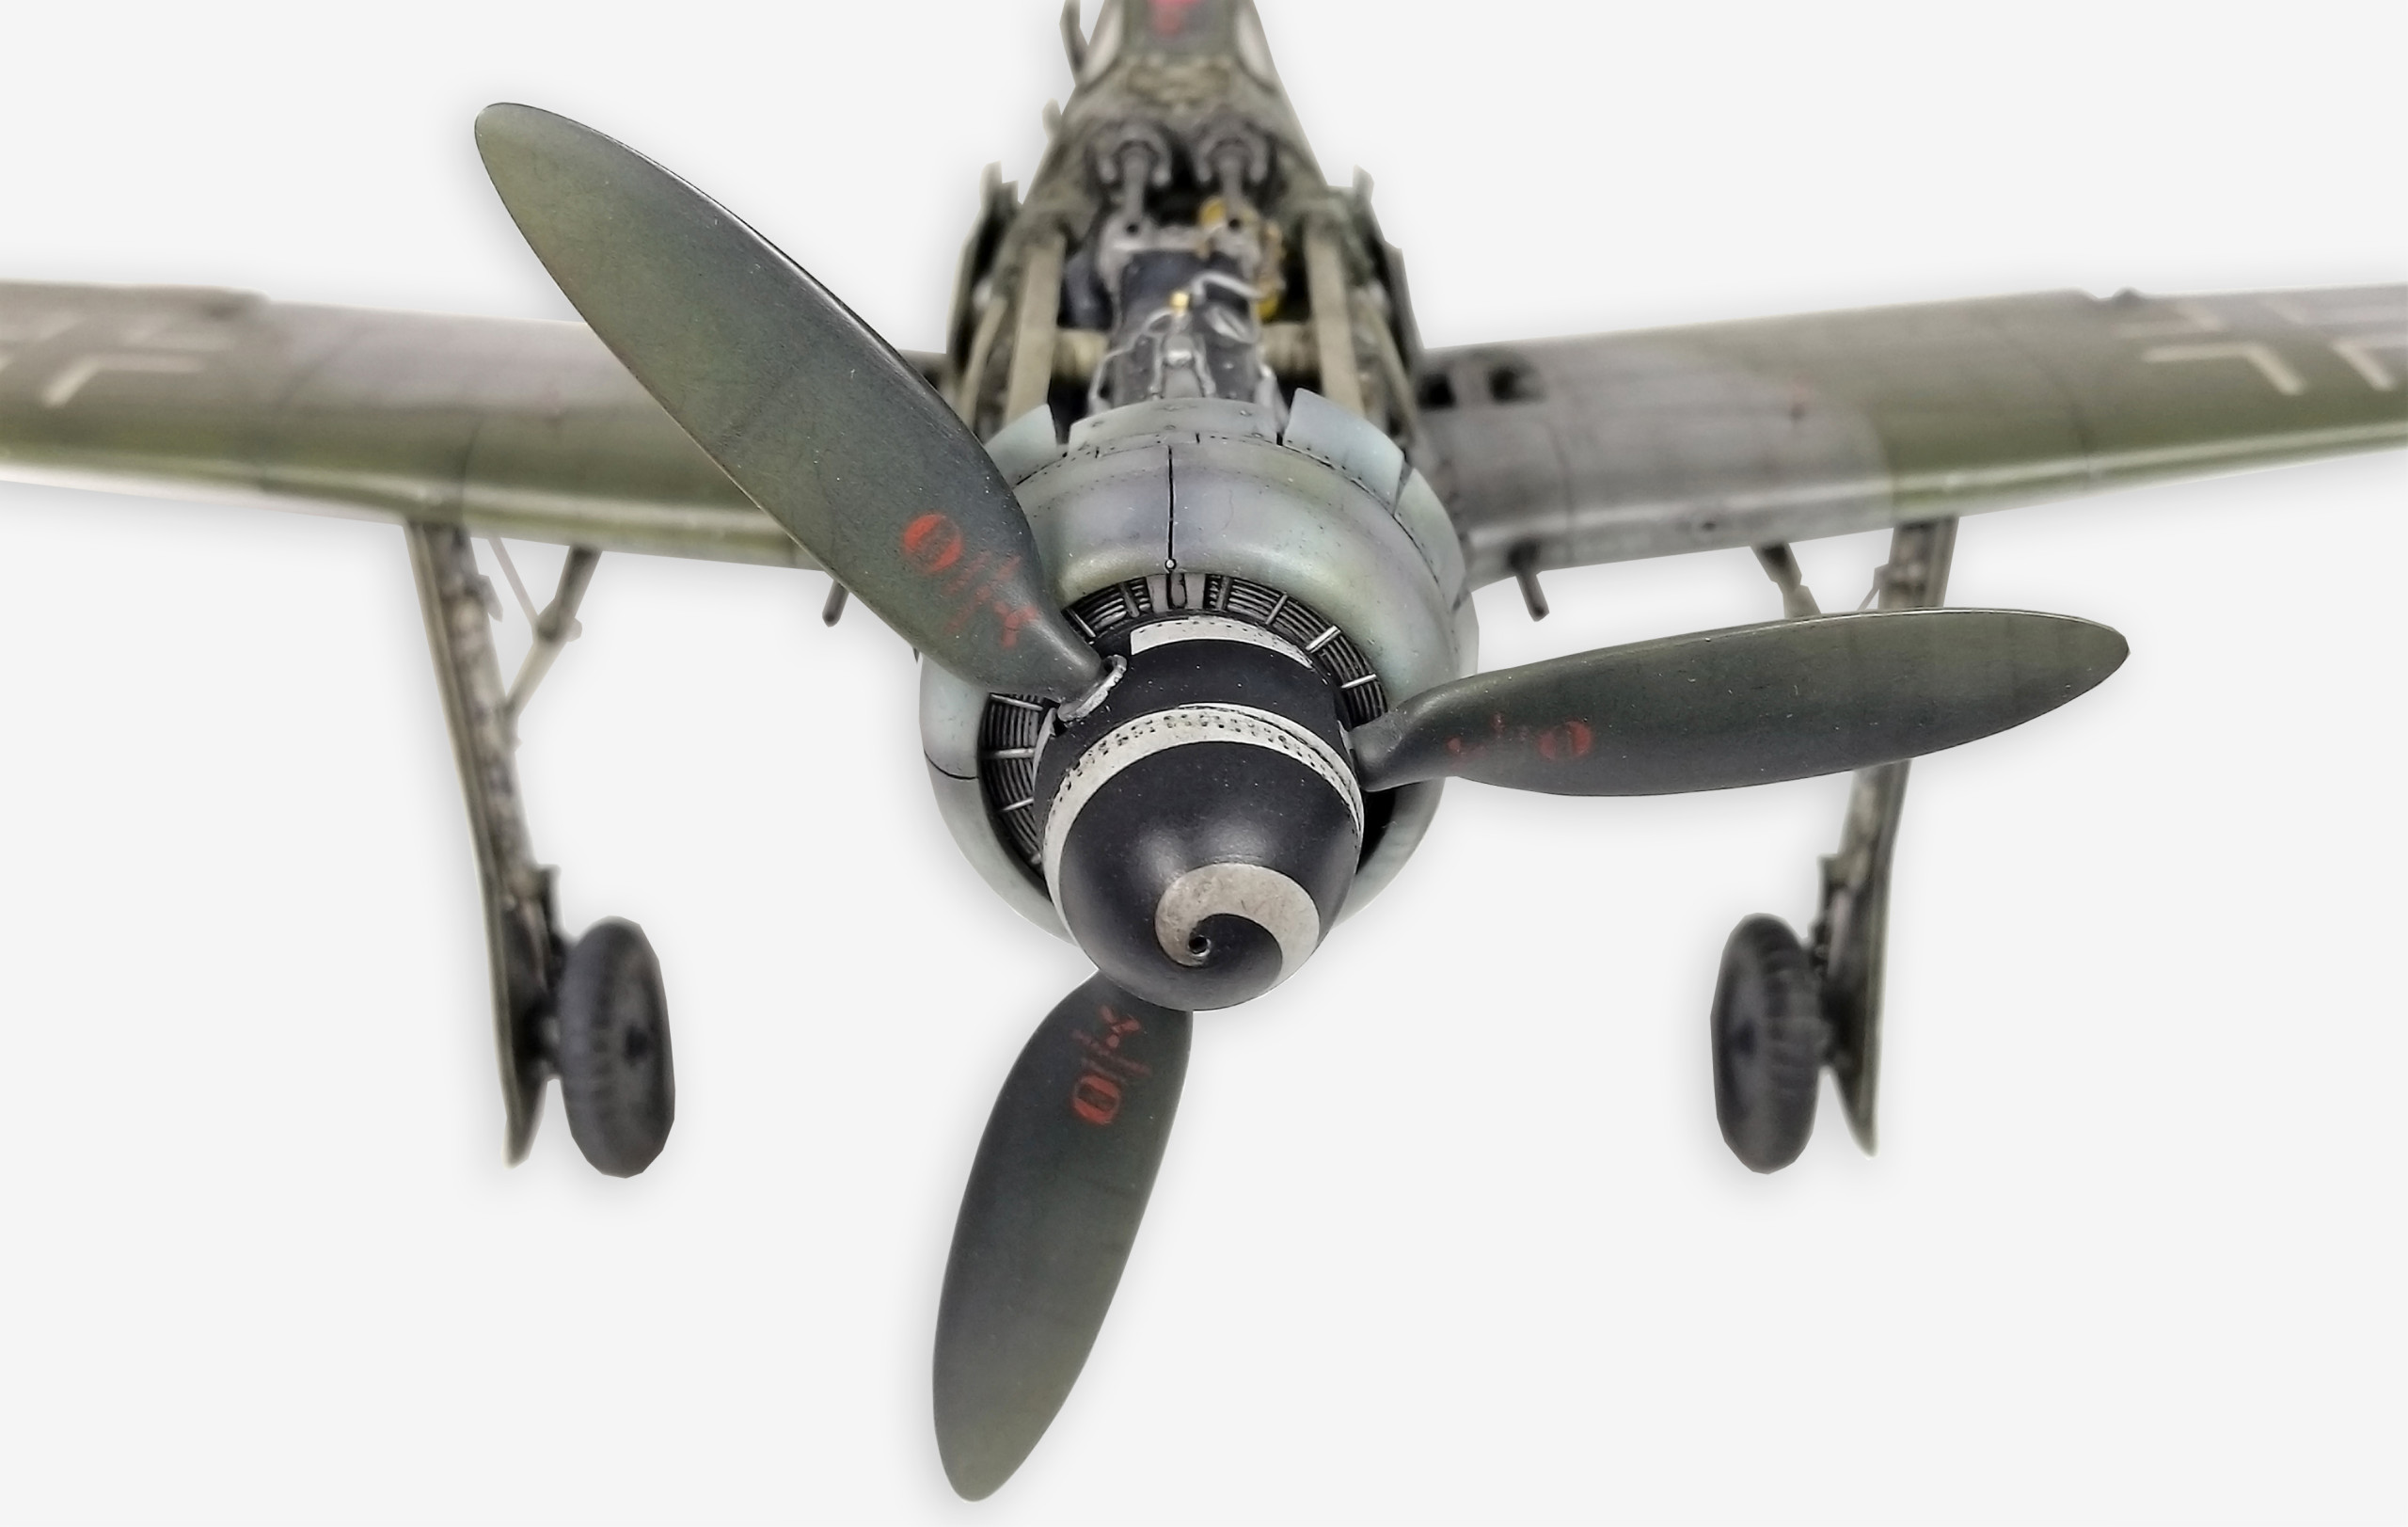
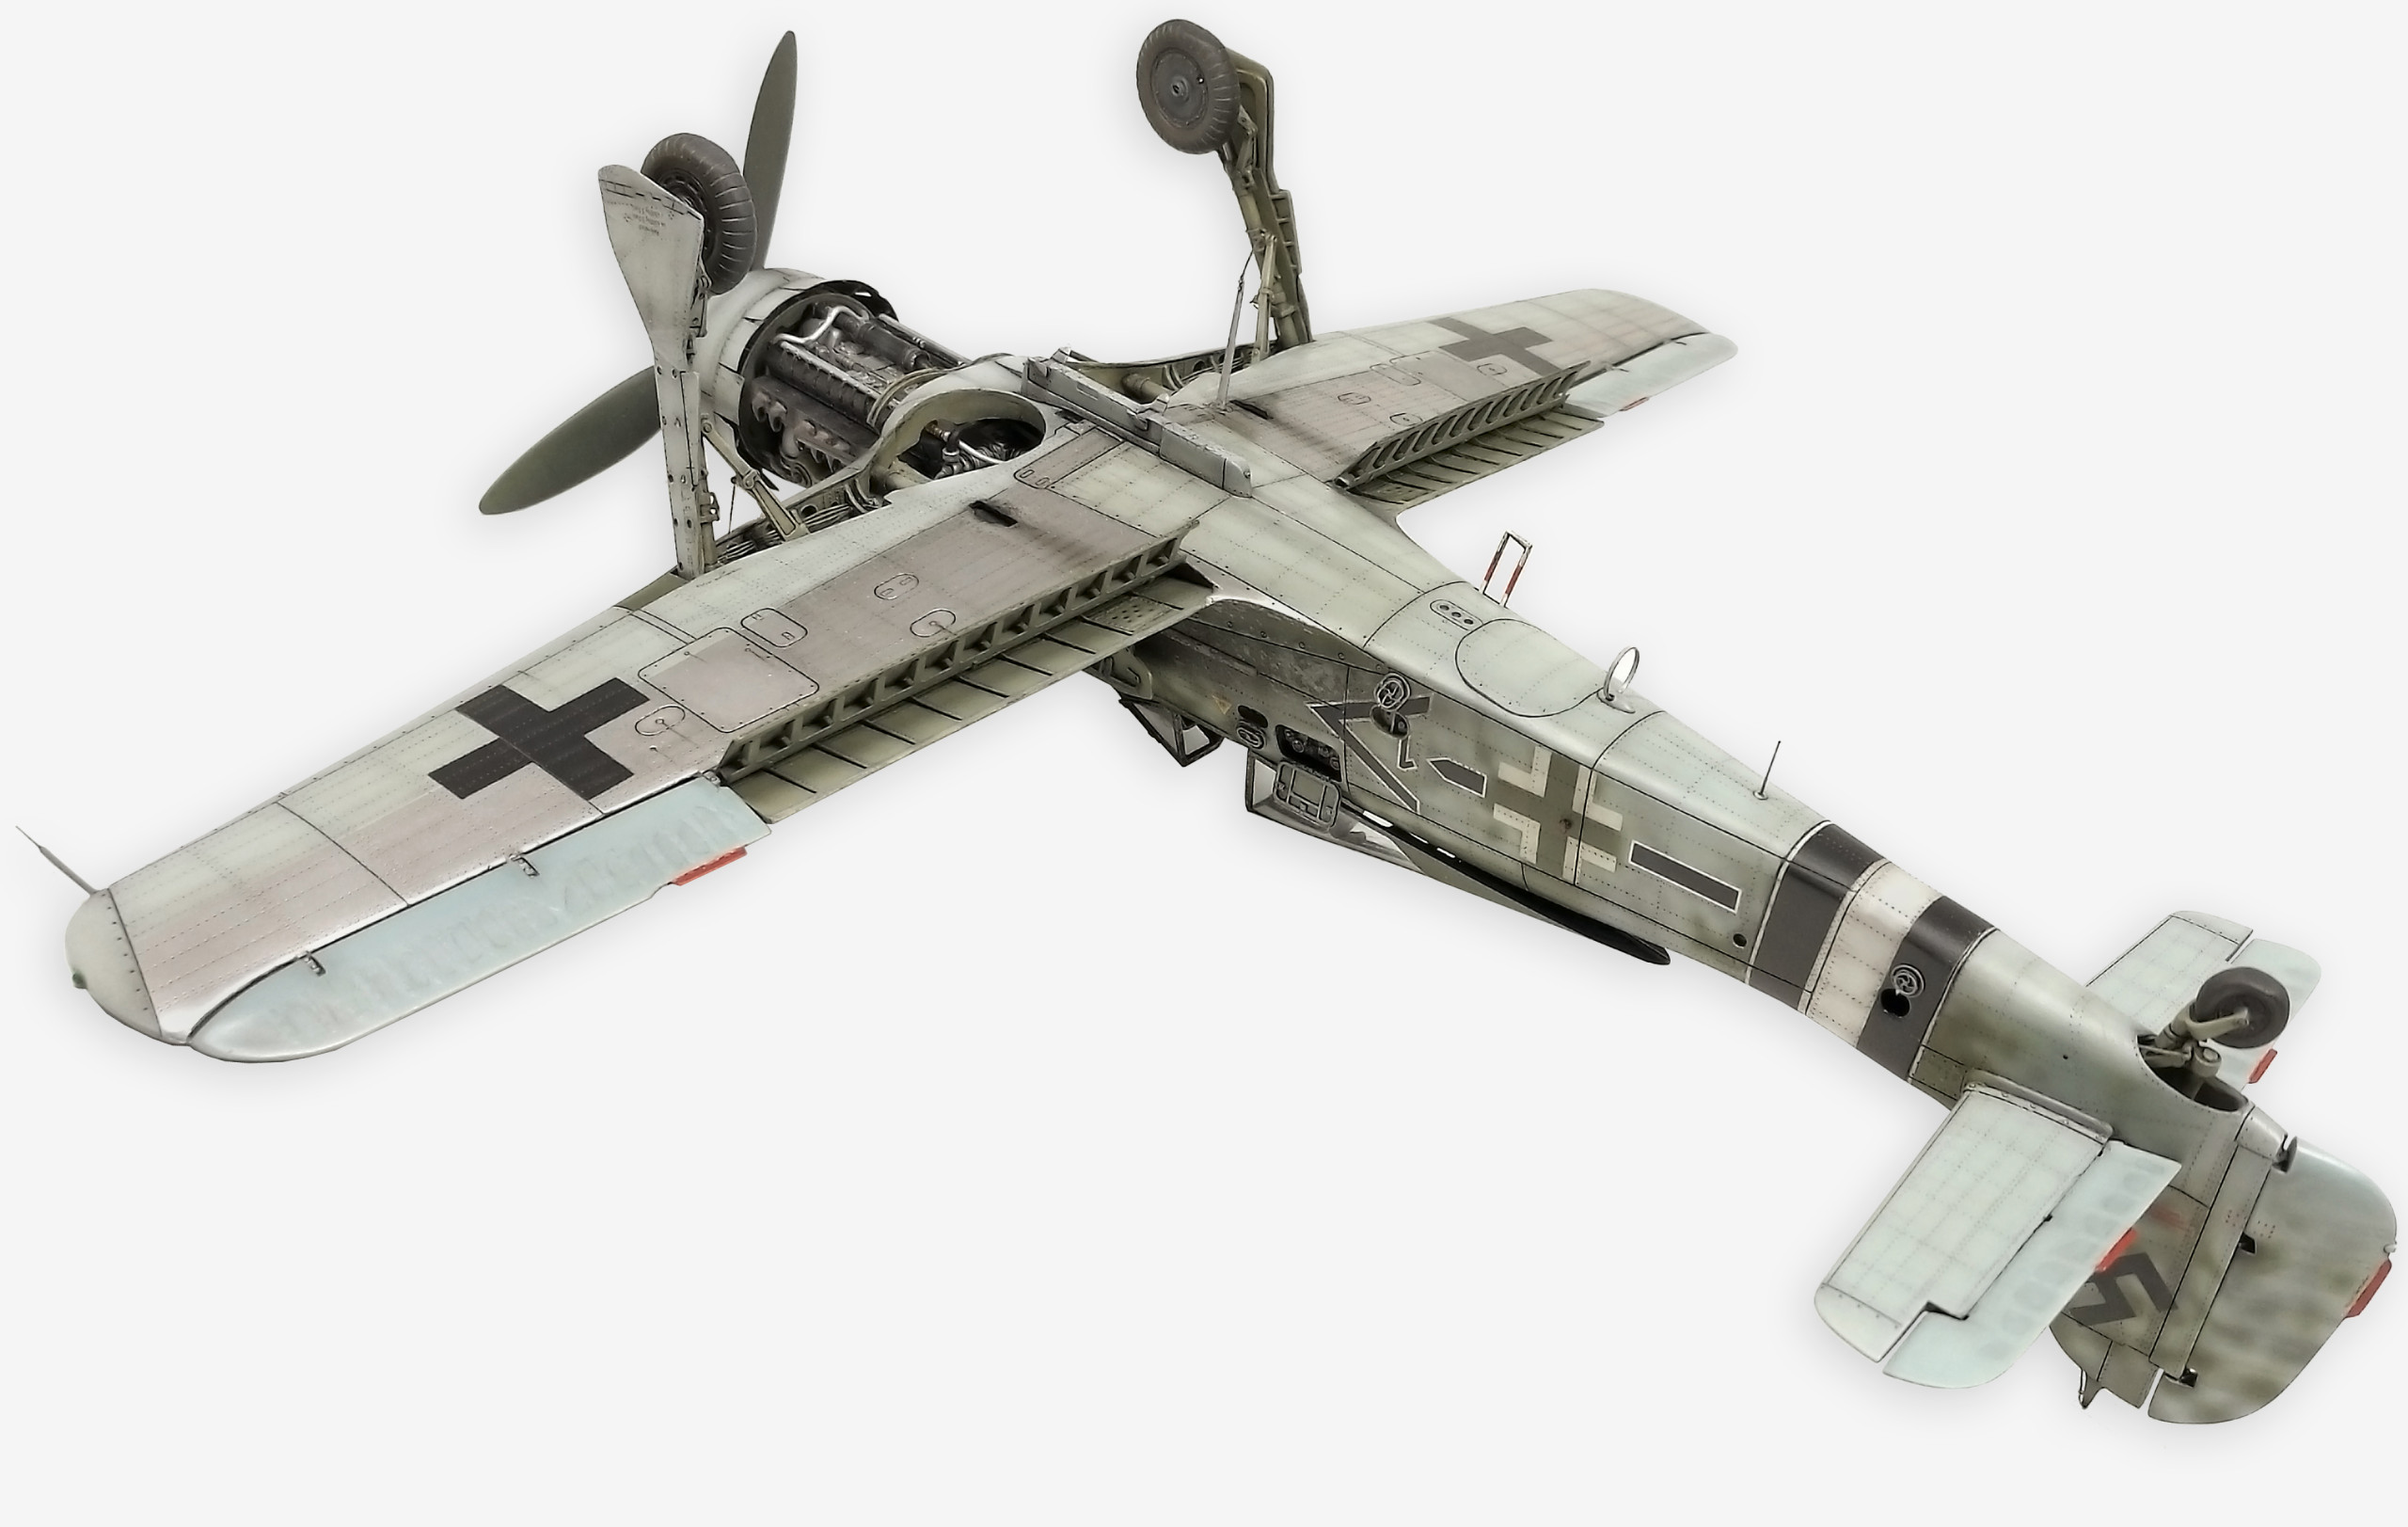
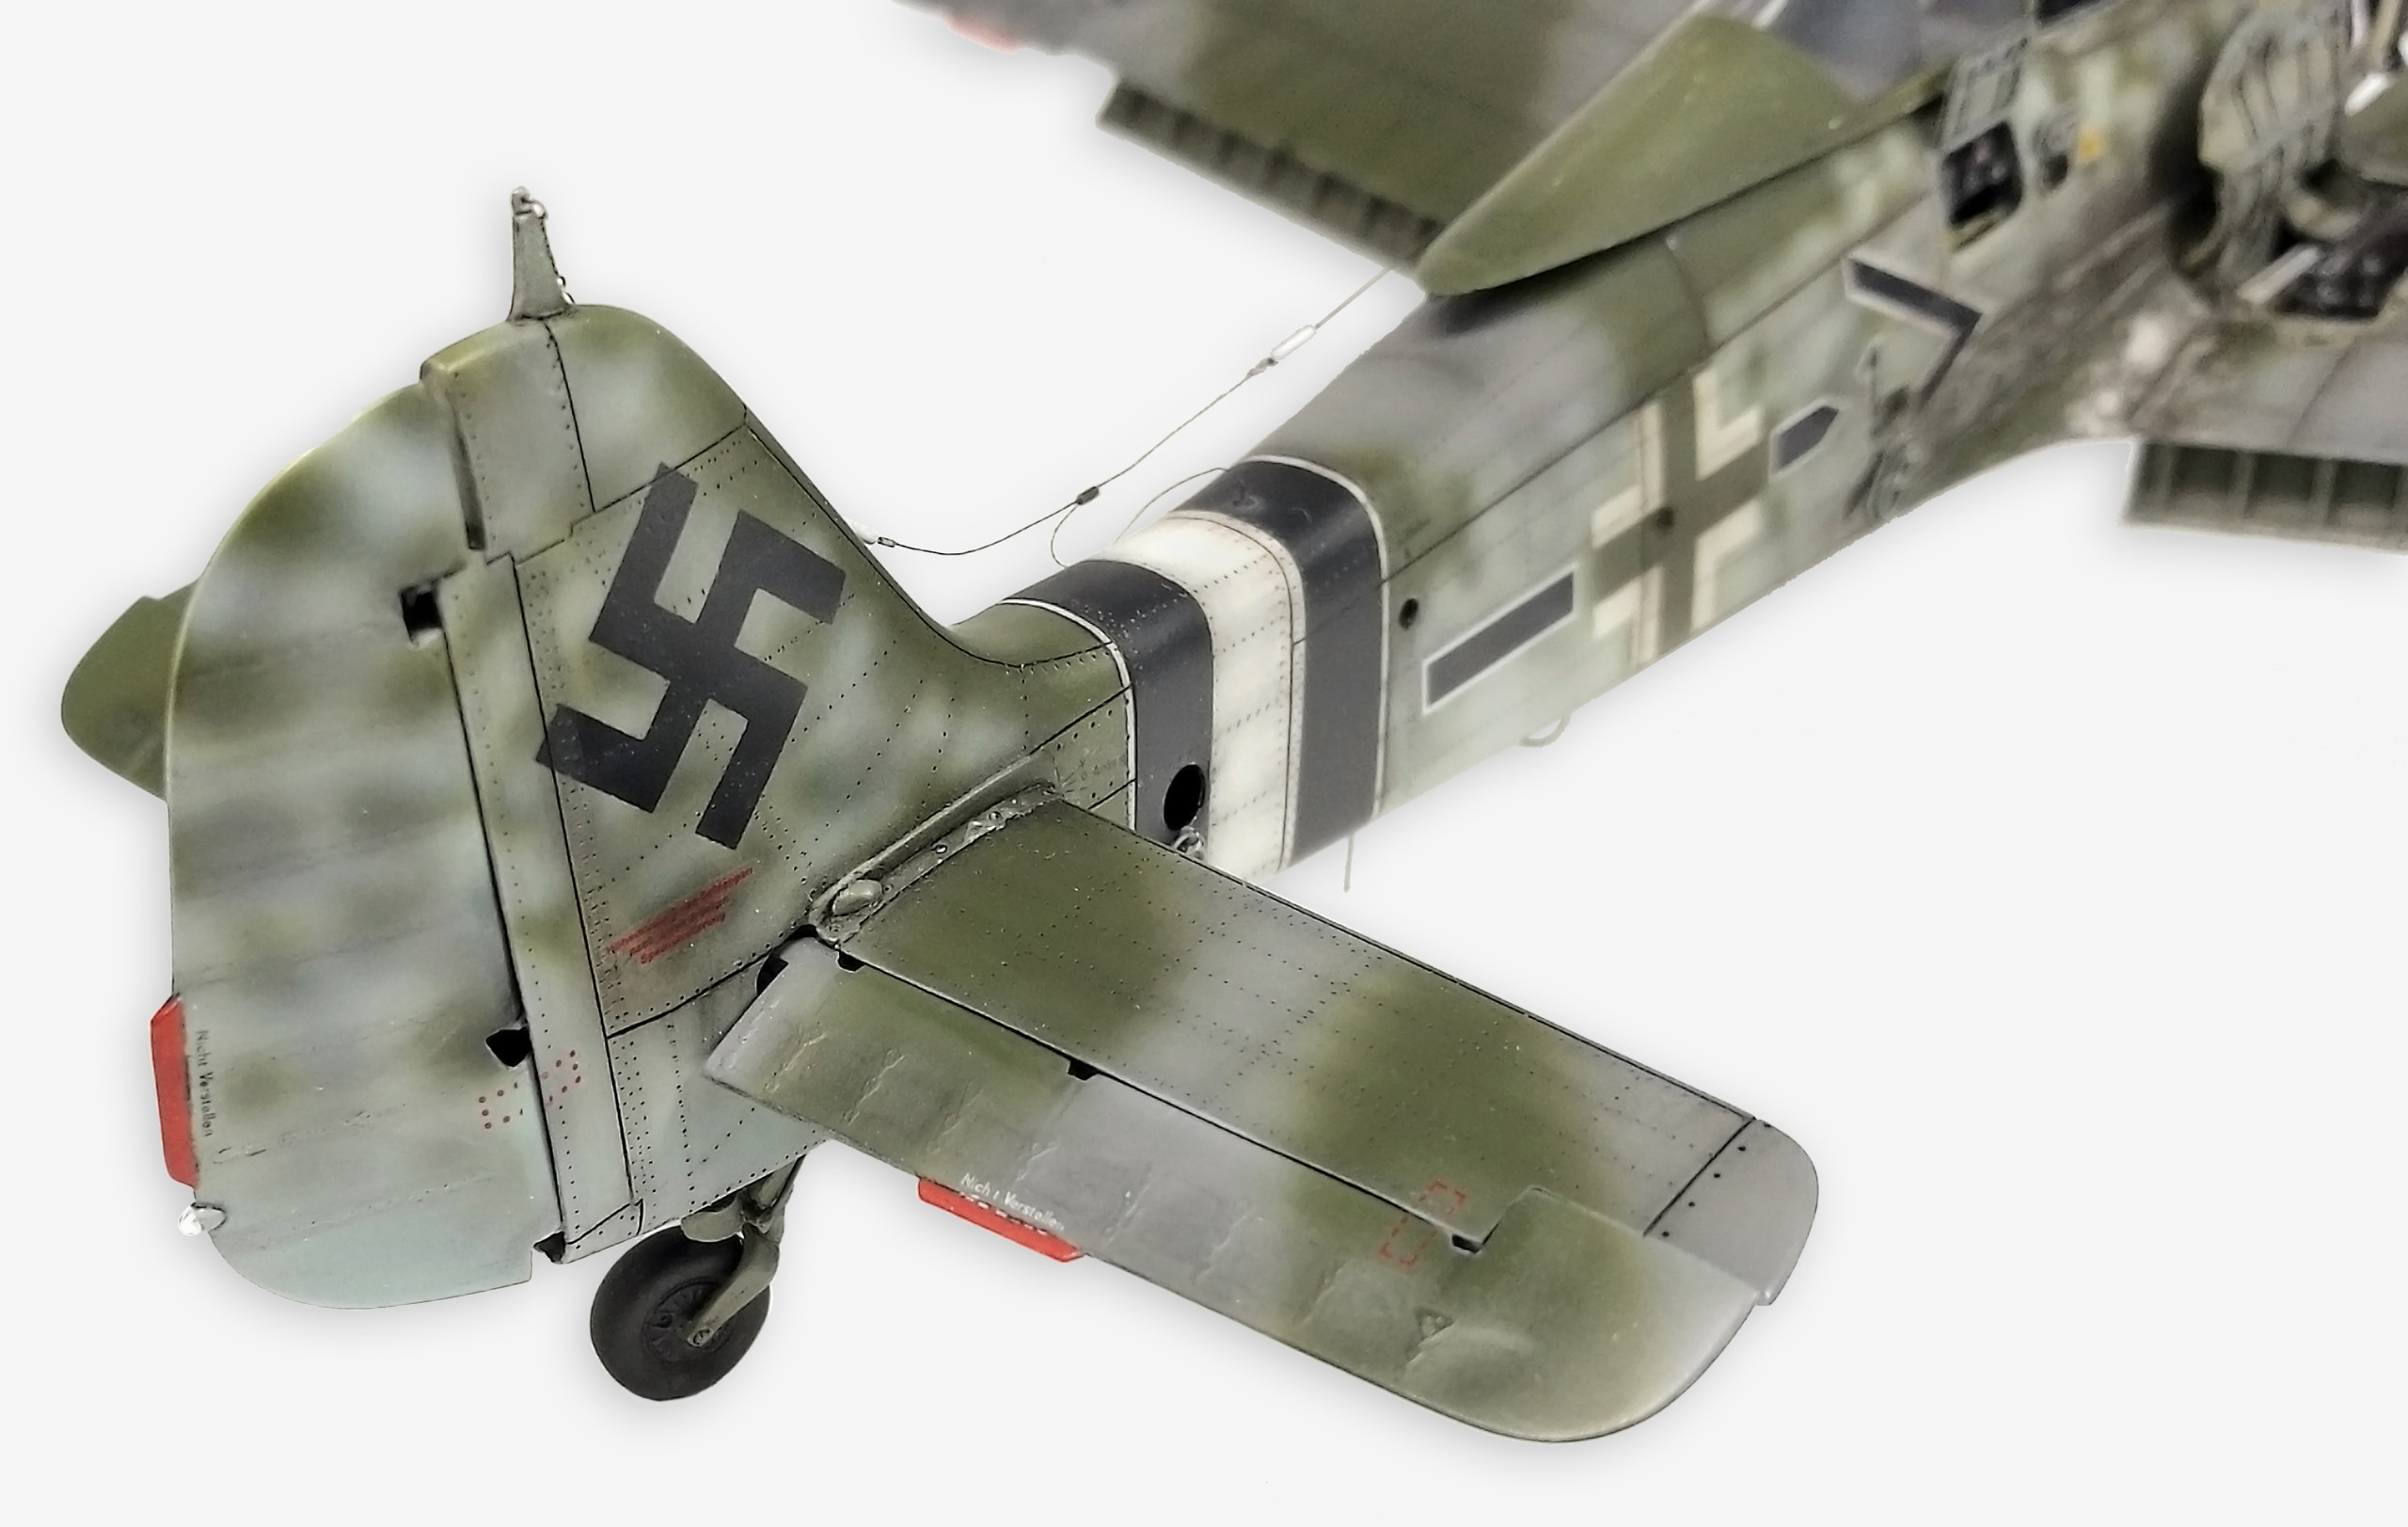
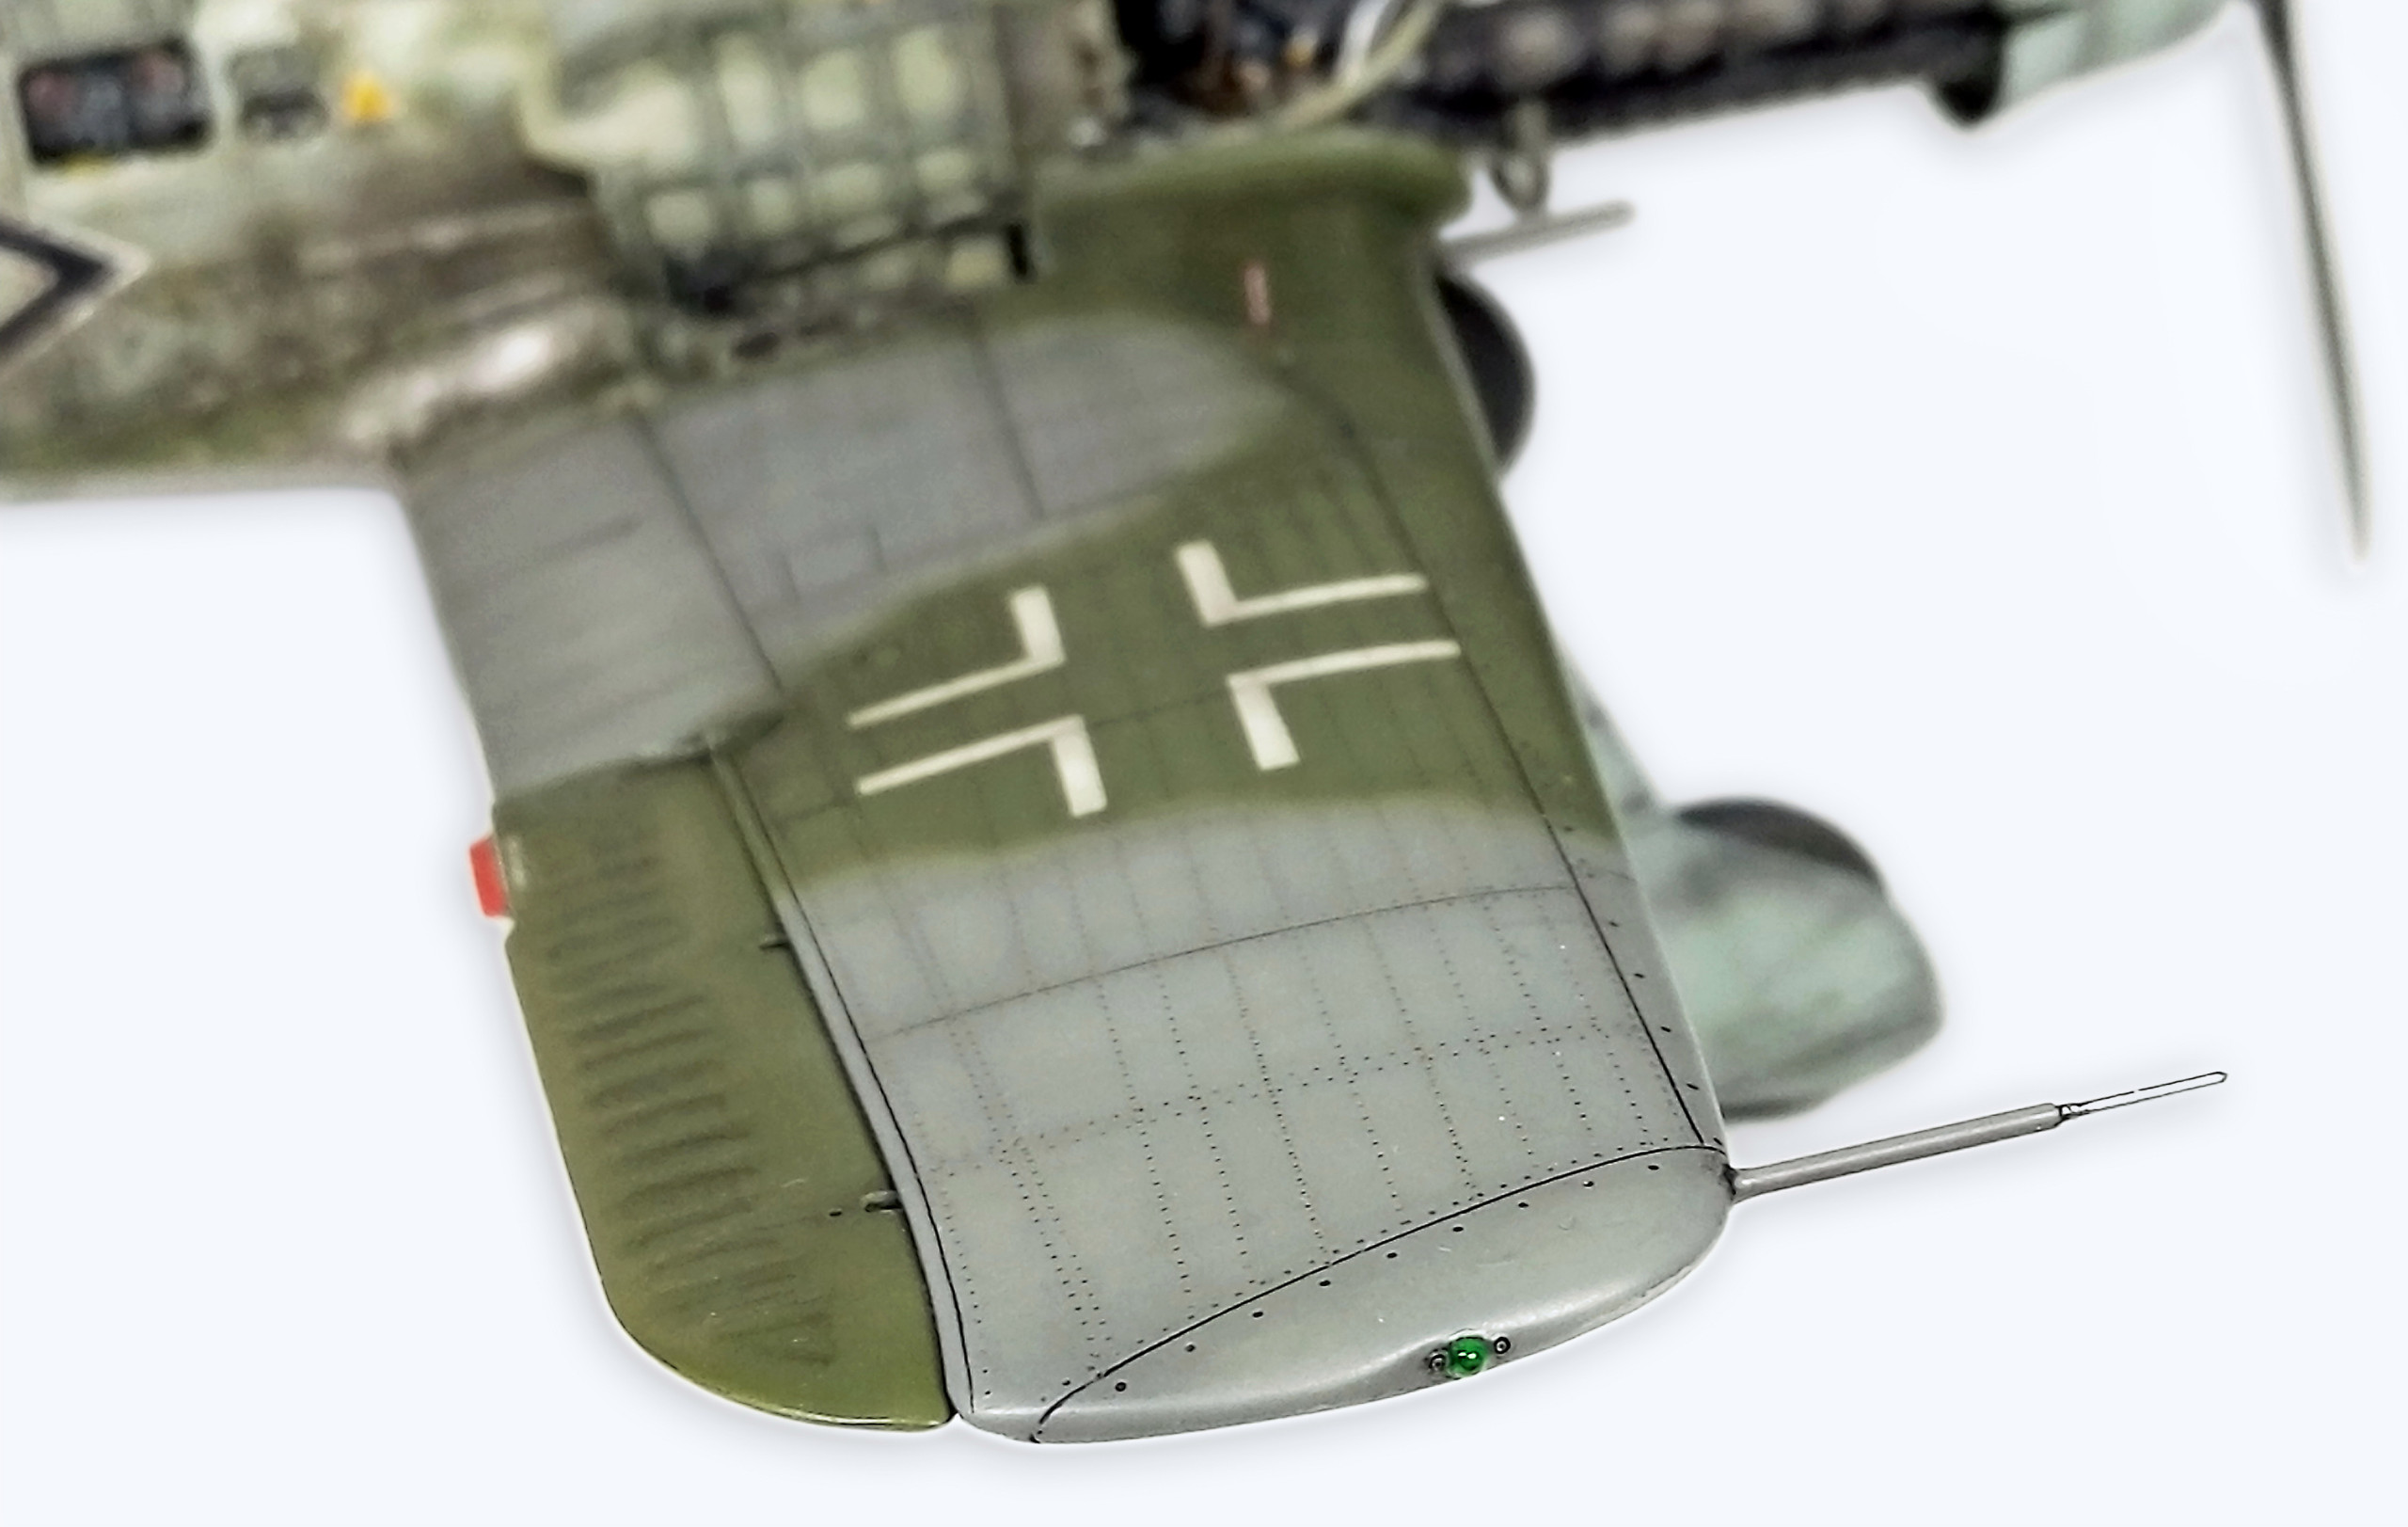
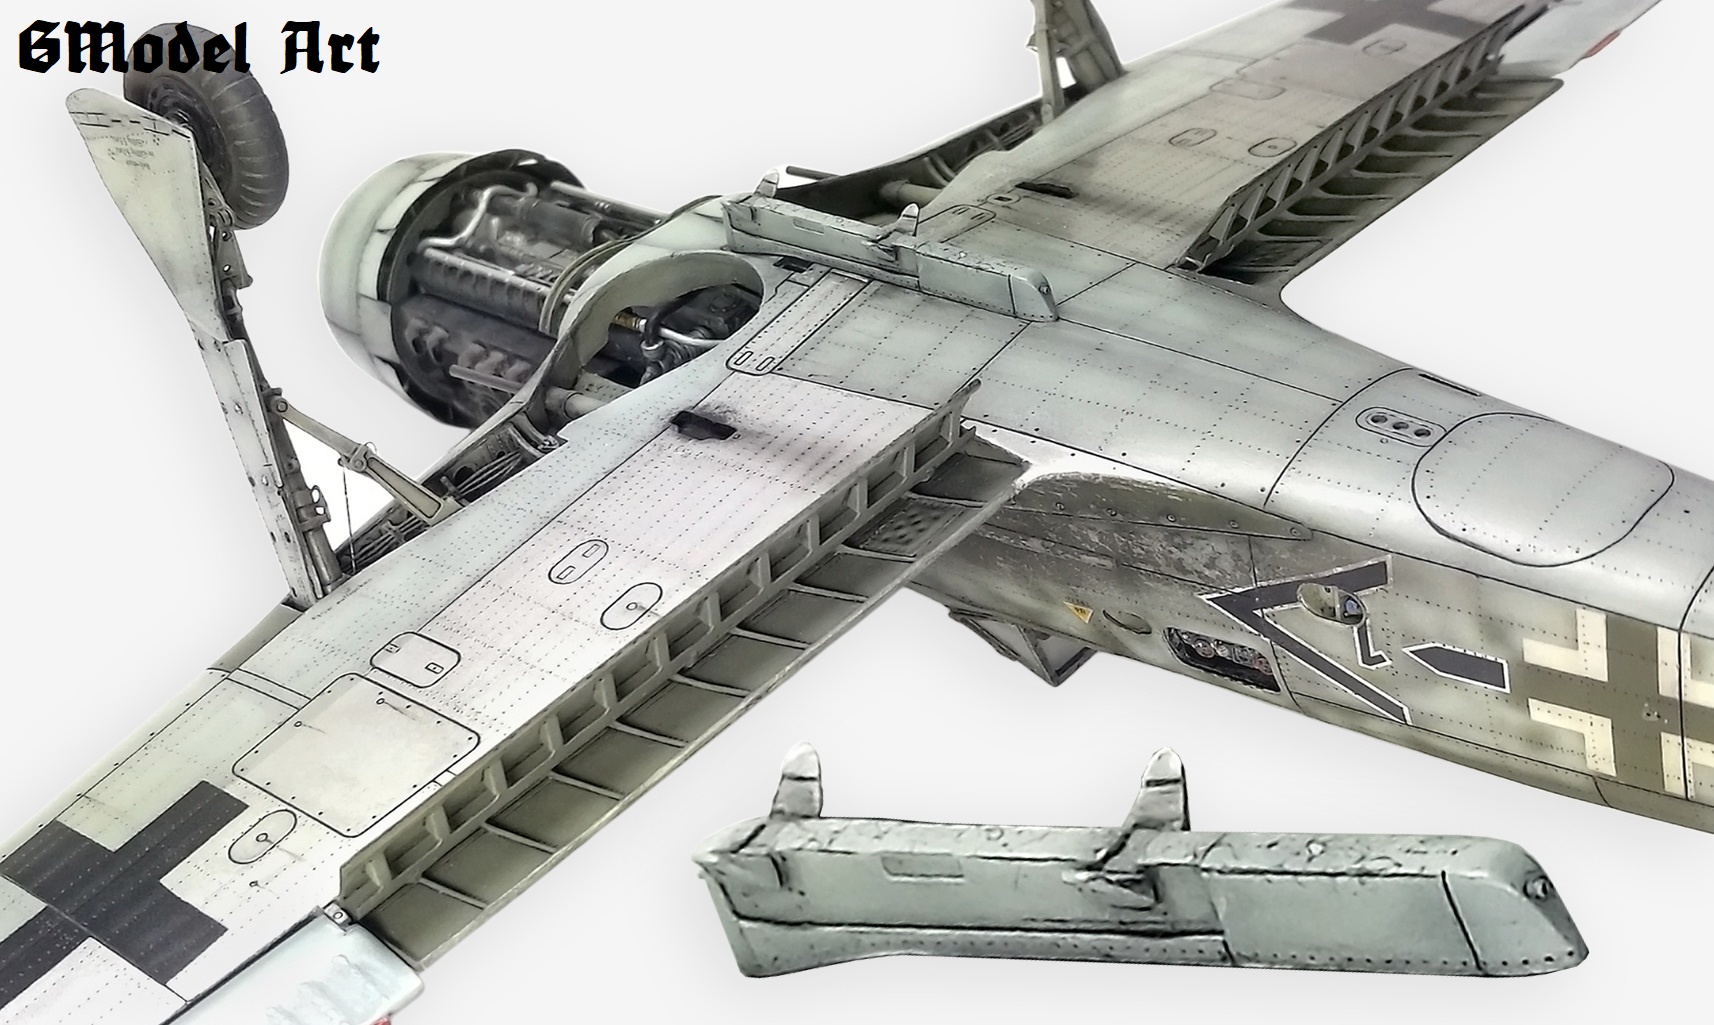
As always, I wanted to make the model more attractive of the individual deflecting control surfaces. It Was necessary to separate the rudder from the stabilizer, and rework it also with hinges . Also portray by riveting the entire surface as I mentioned above and scraped off each rivet line with a scalpel to achieve a more realistic appearance of the surface. It’s relatively difficult operation and take a long time, but I think the surface looks great after polishing, especially as regards the natural metal finish places.
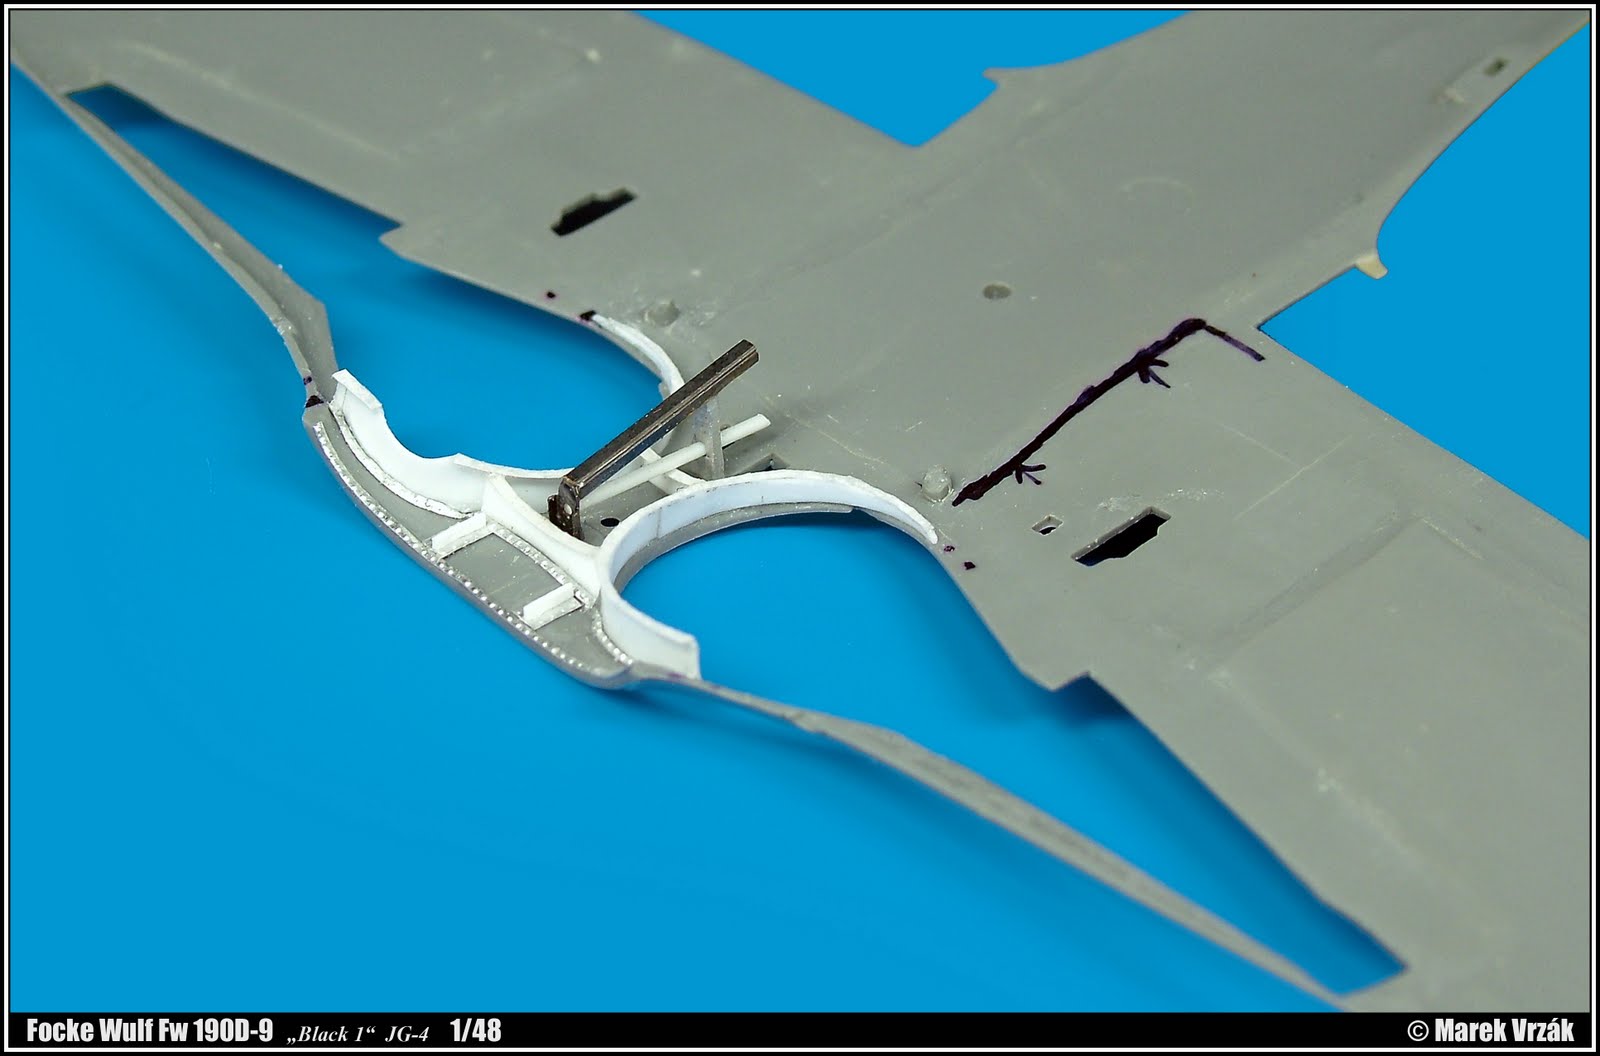
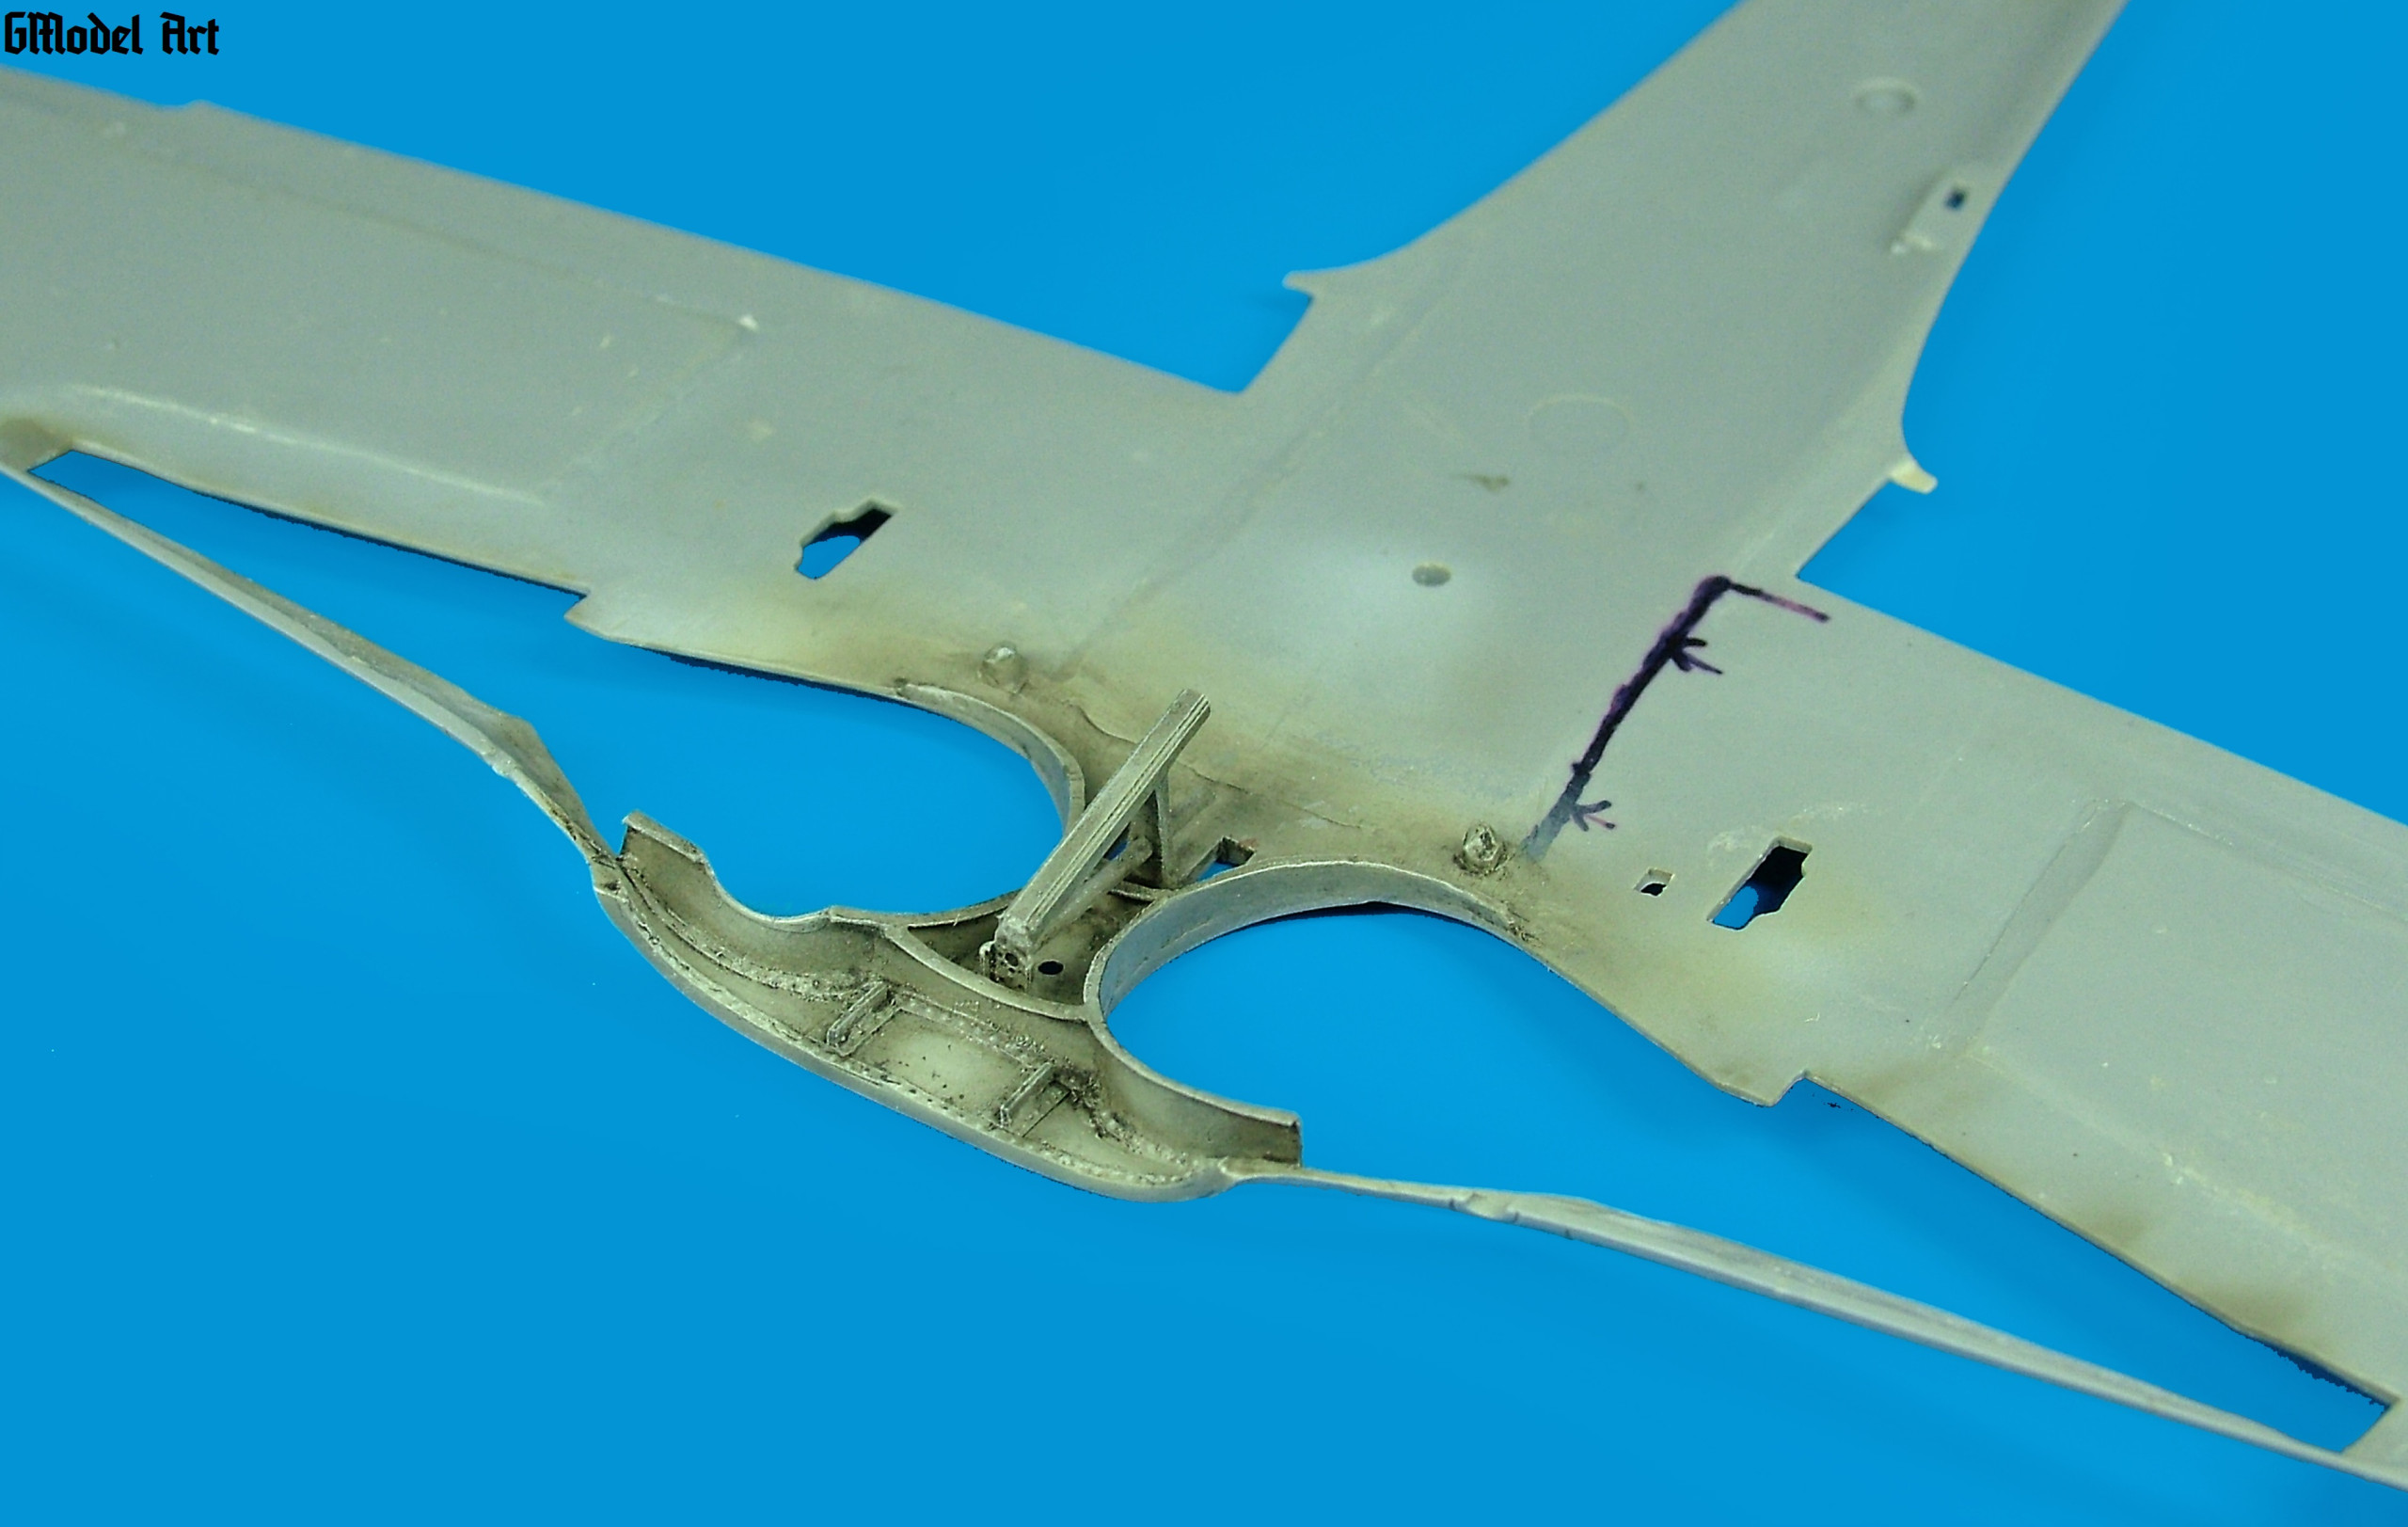
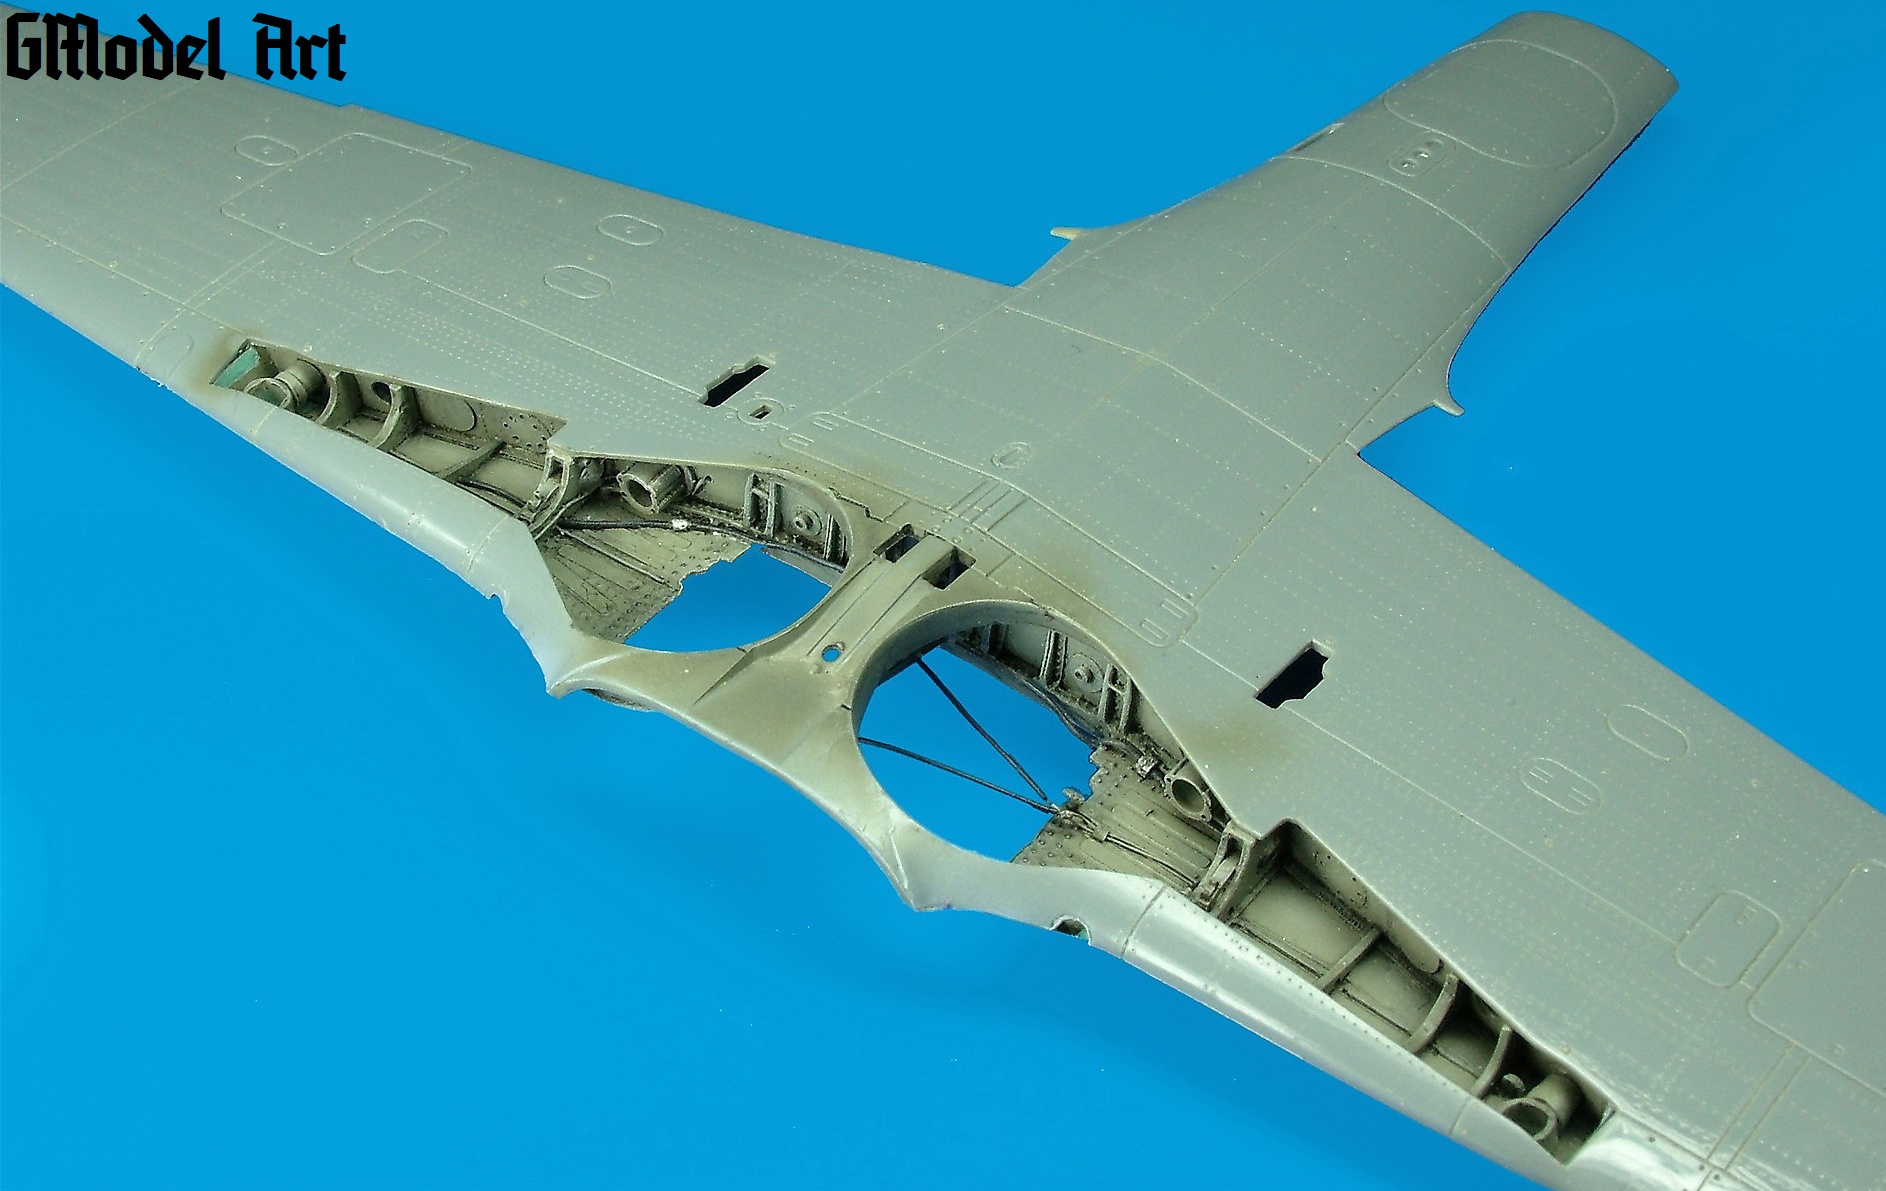
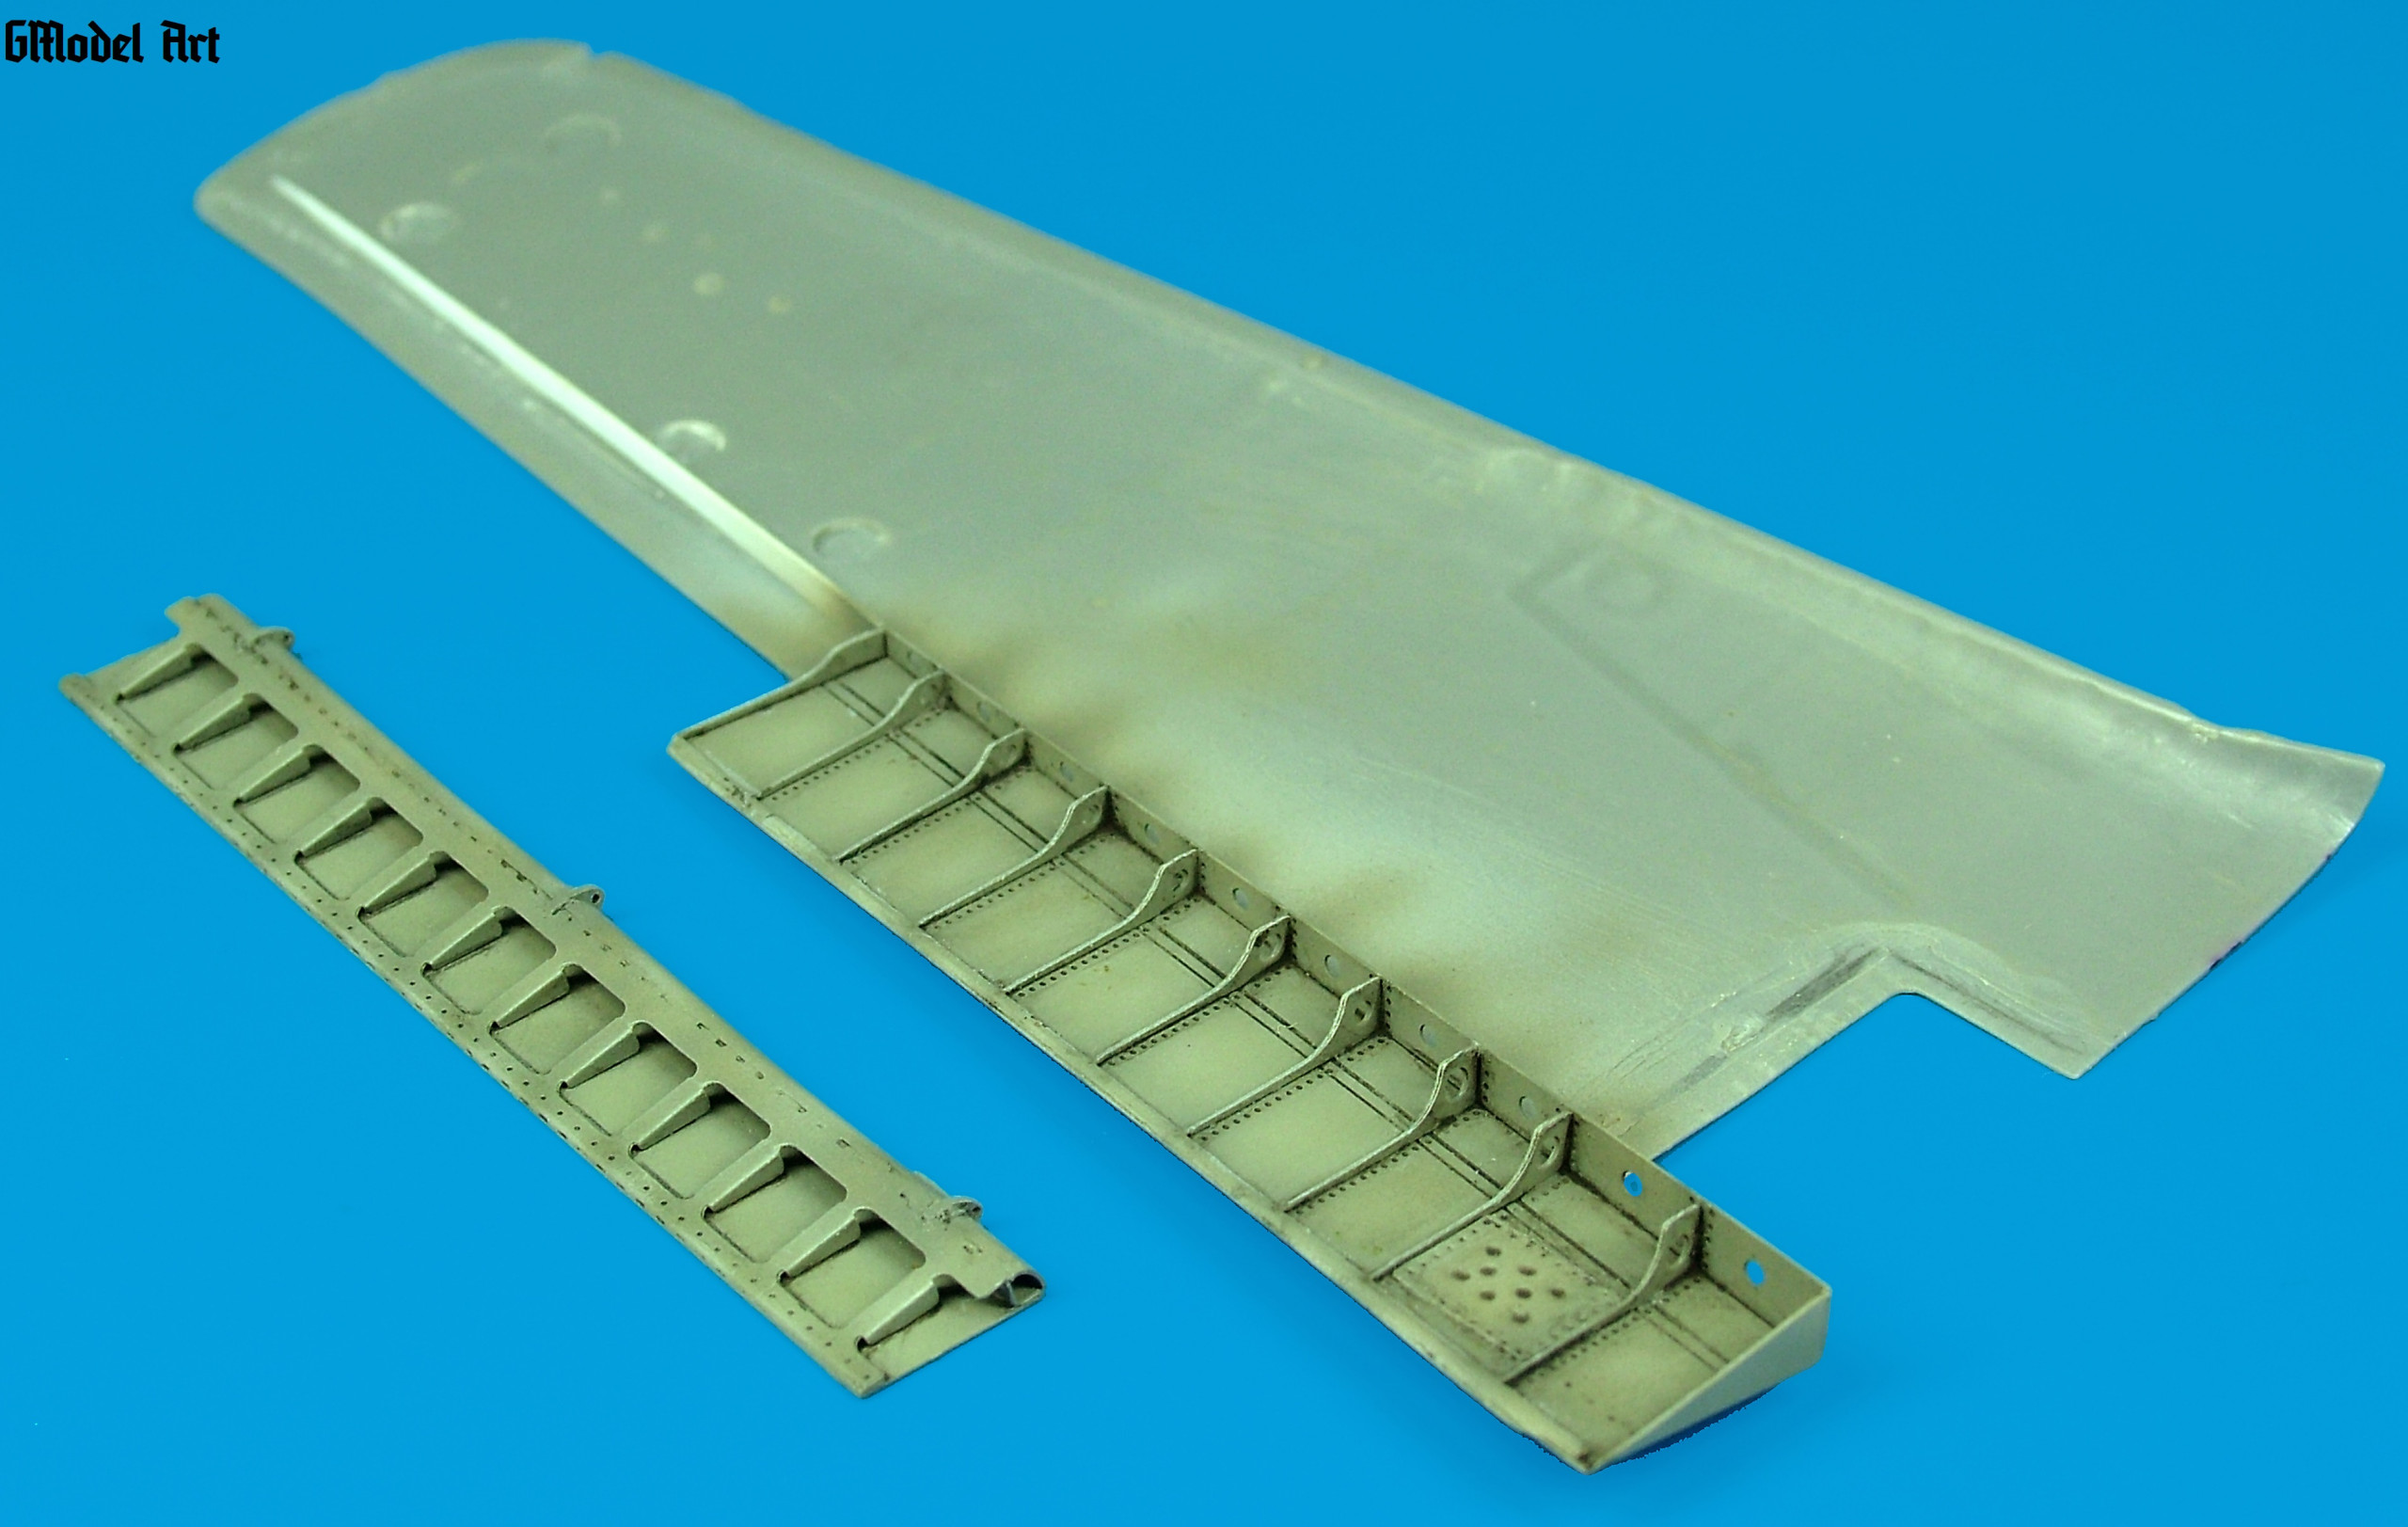
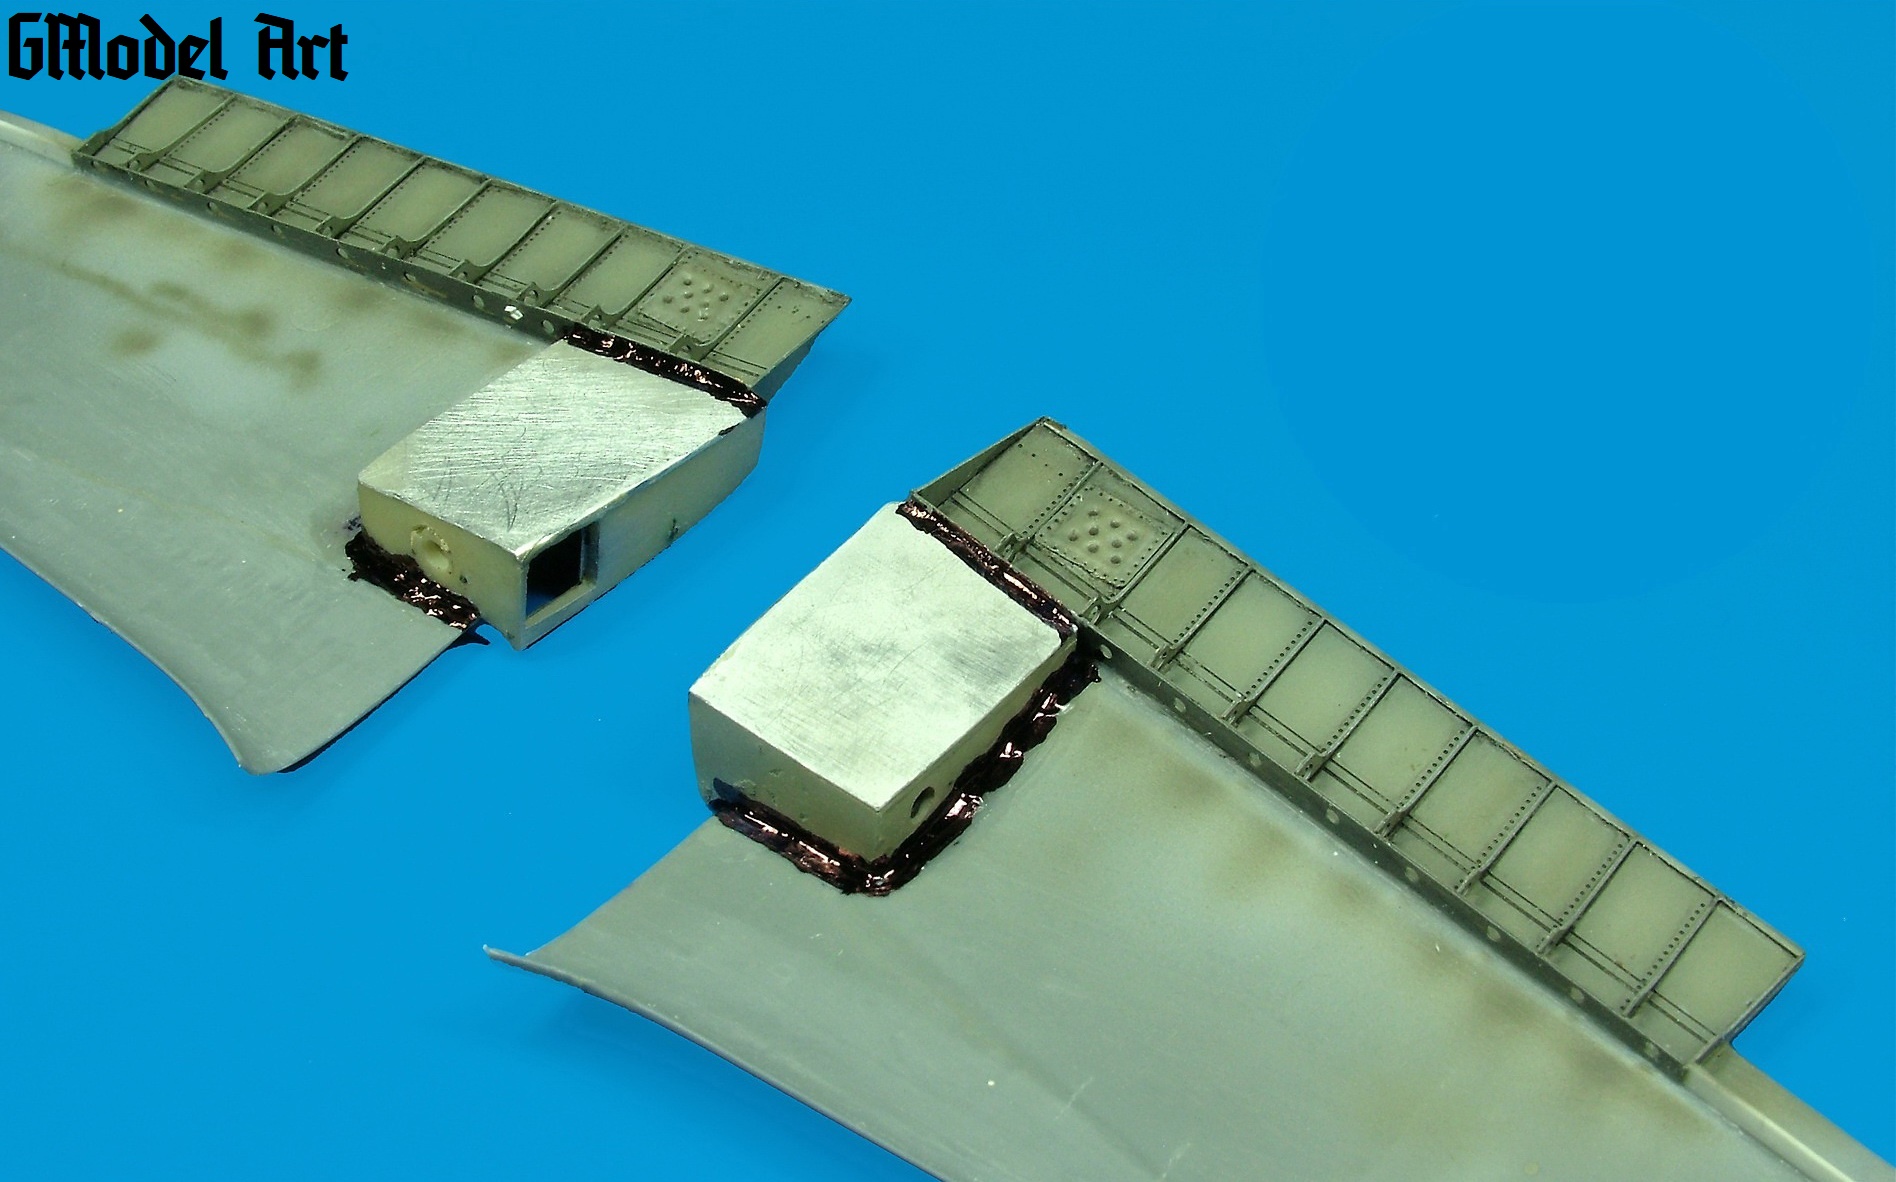
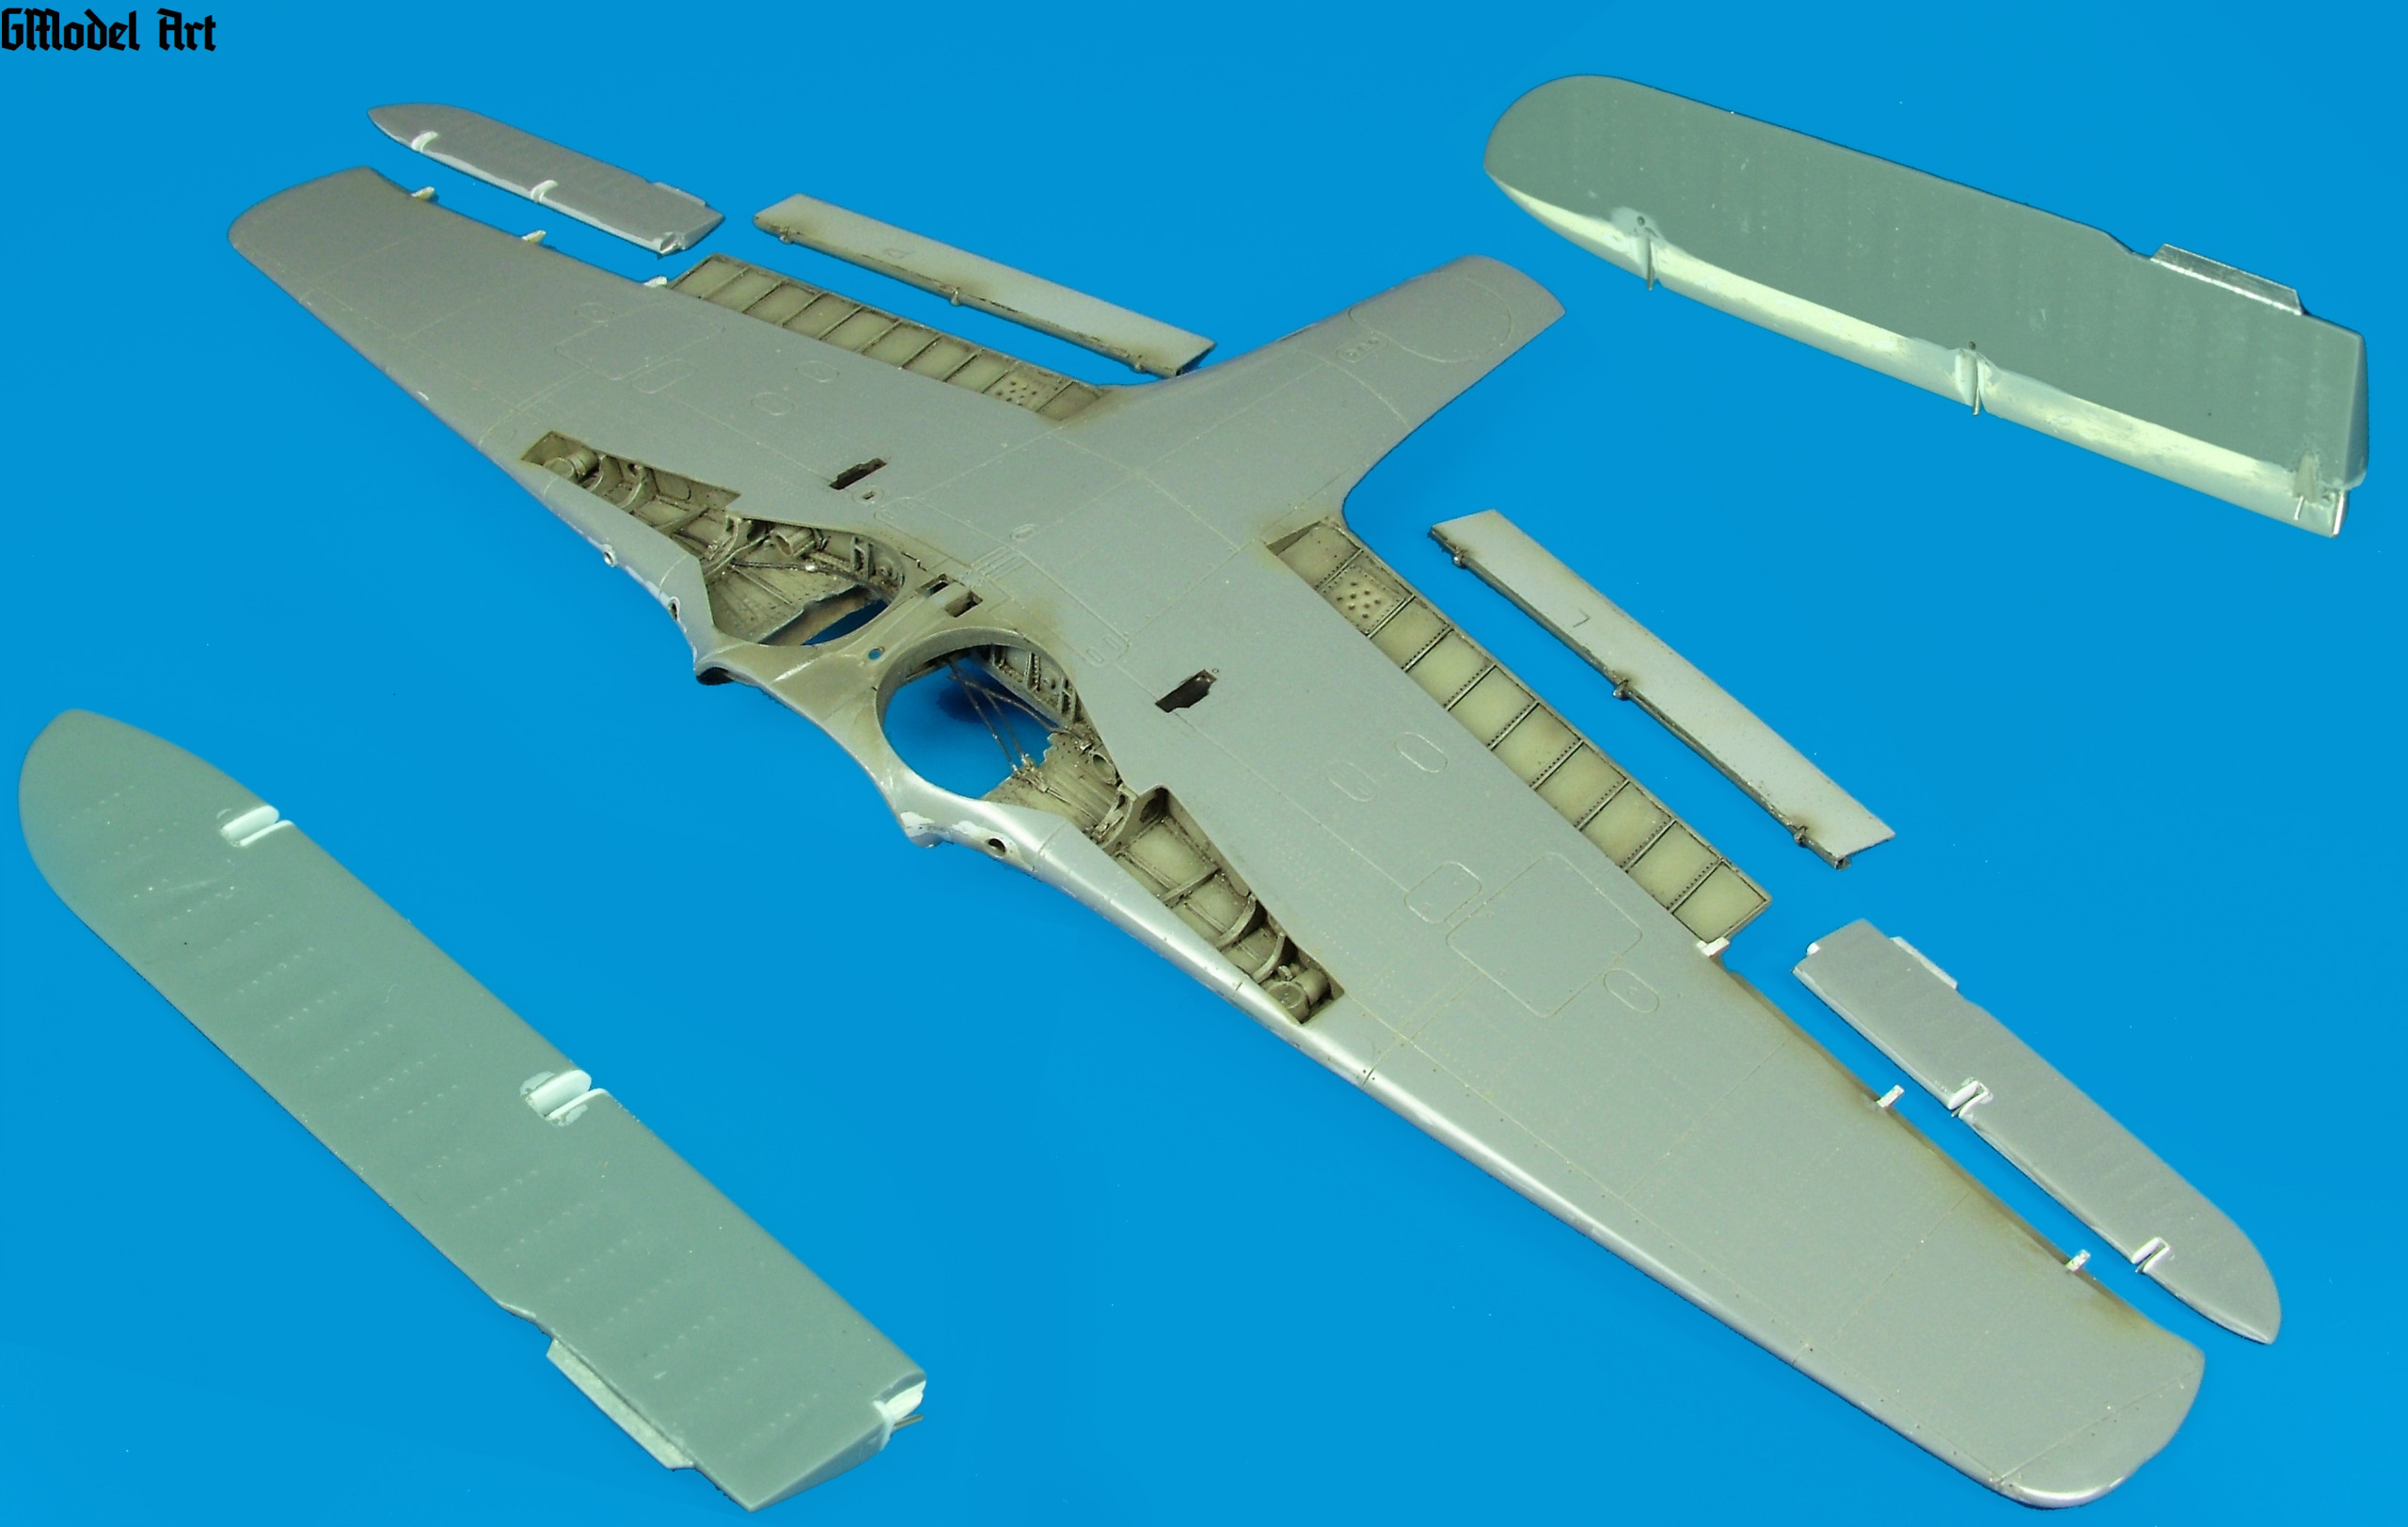
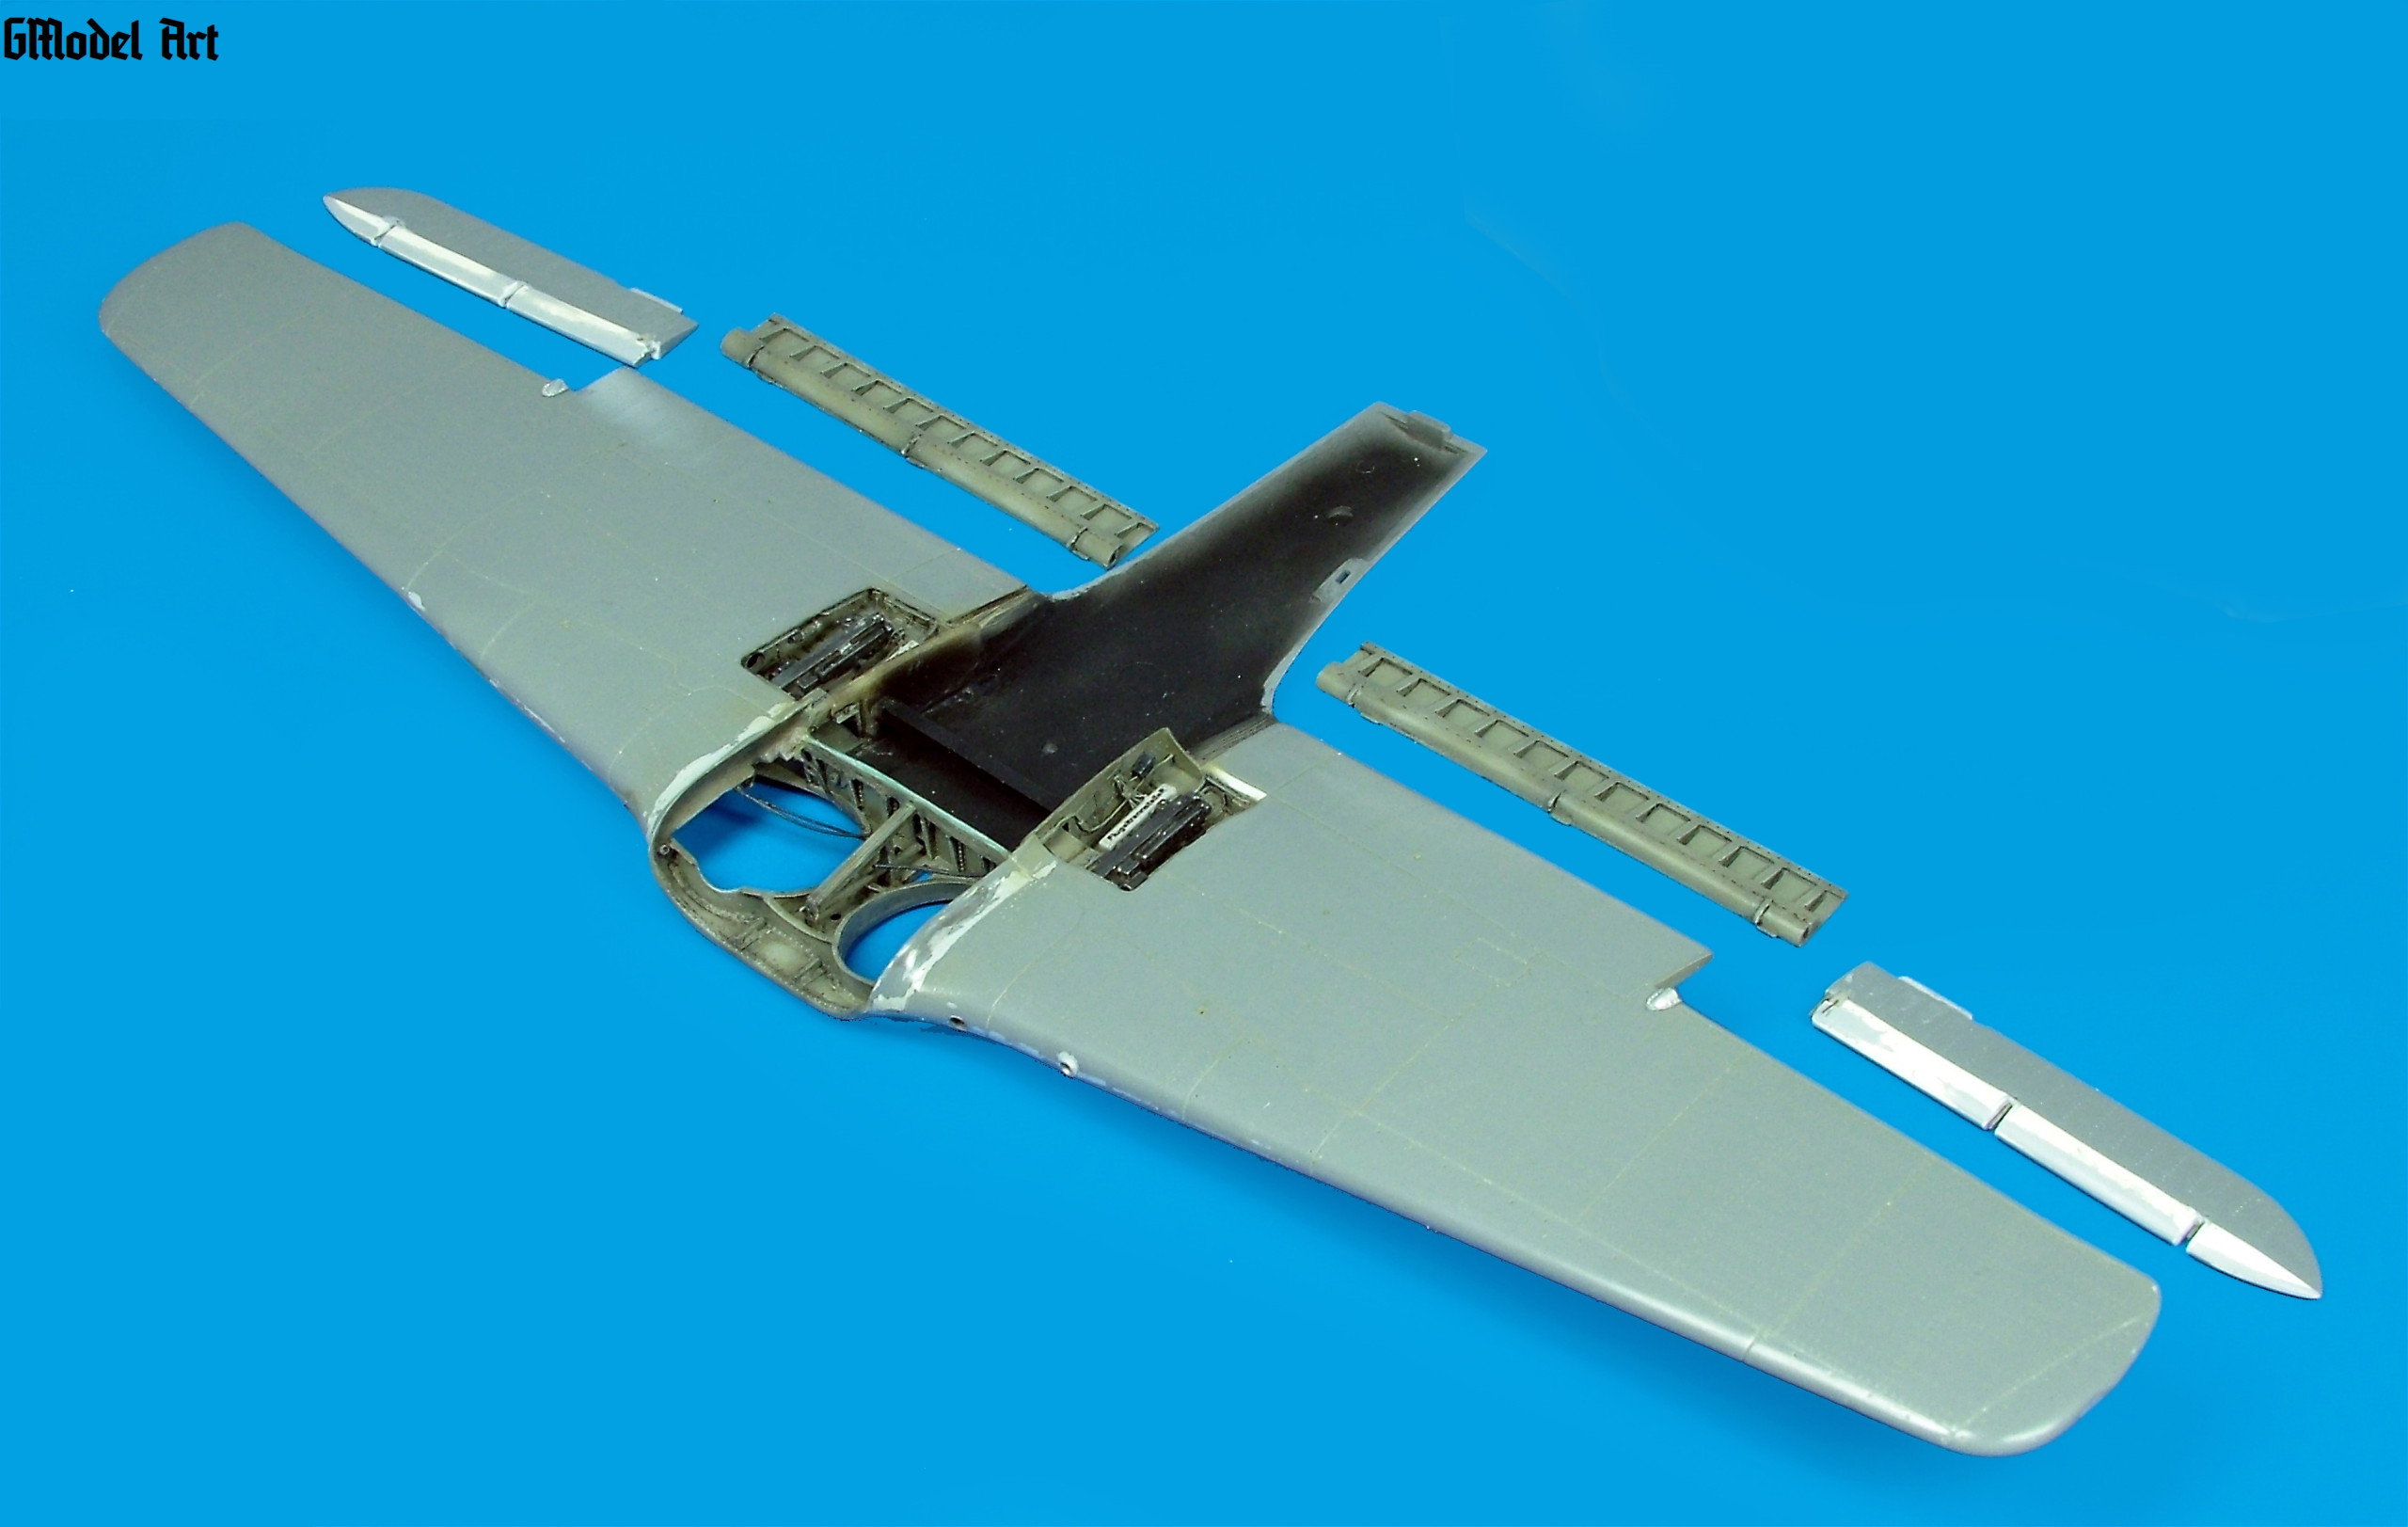
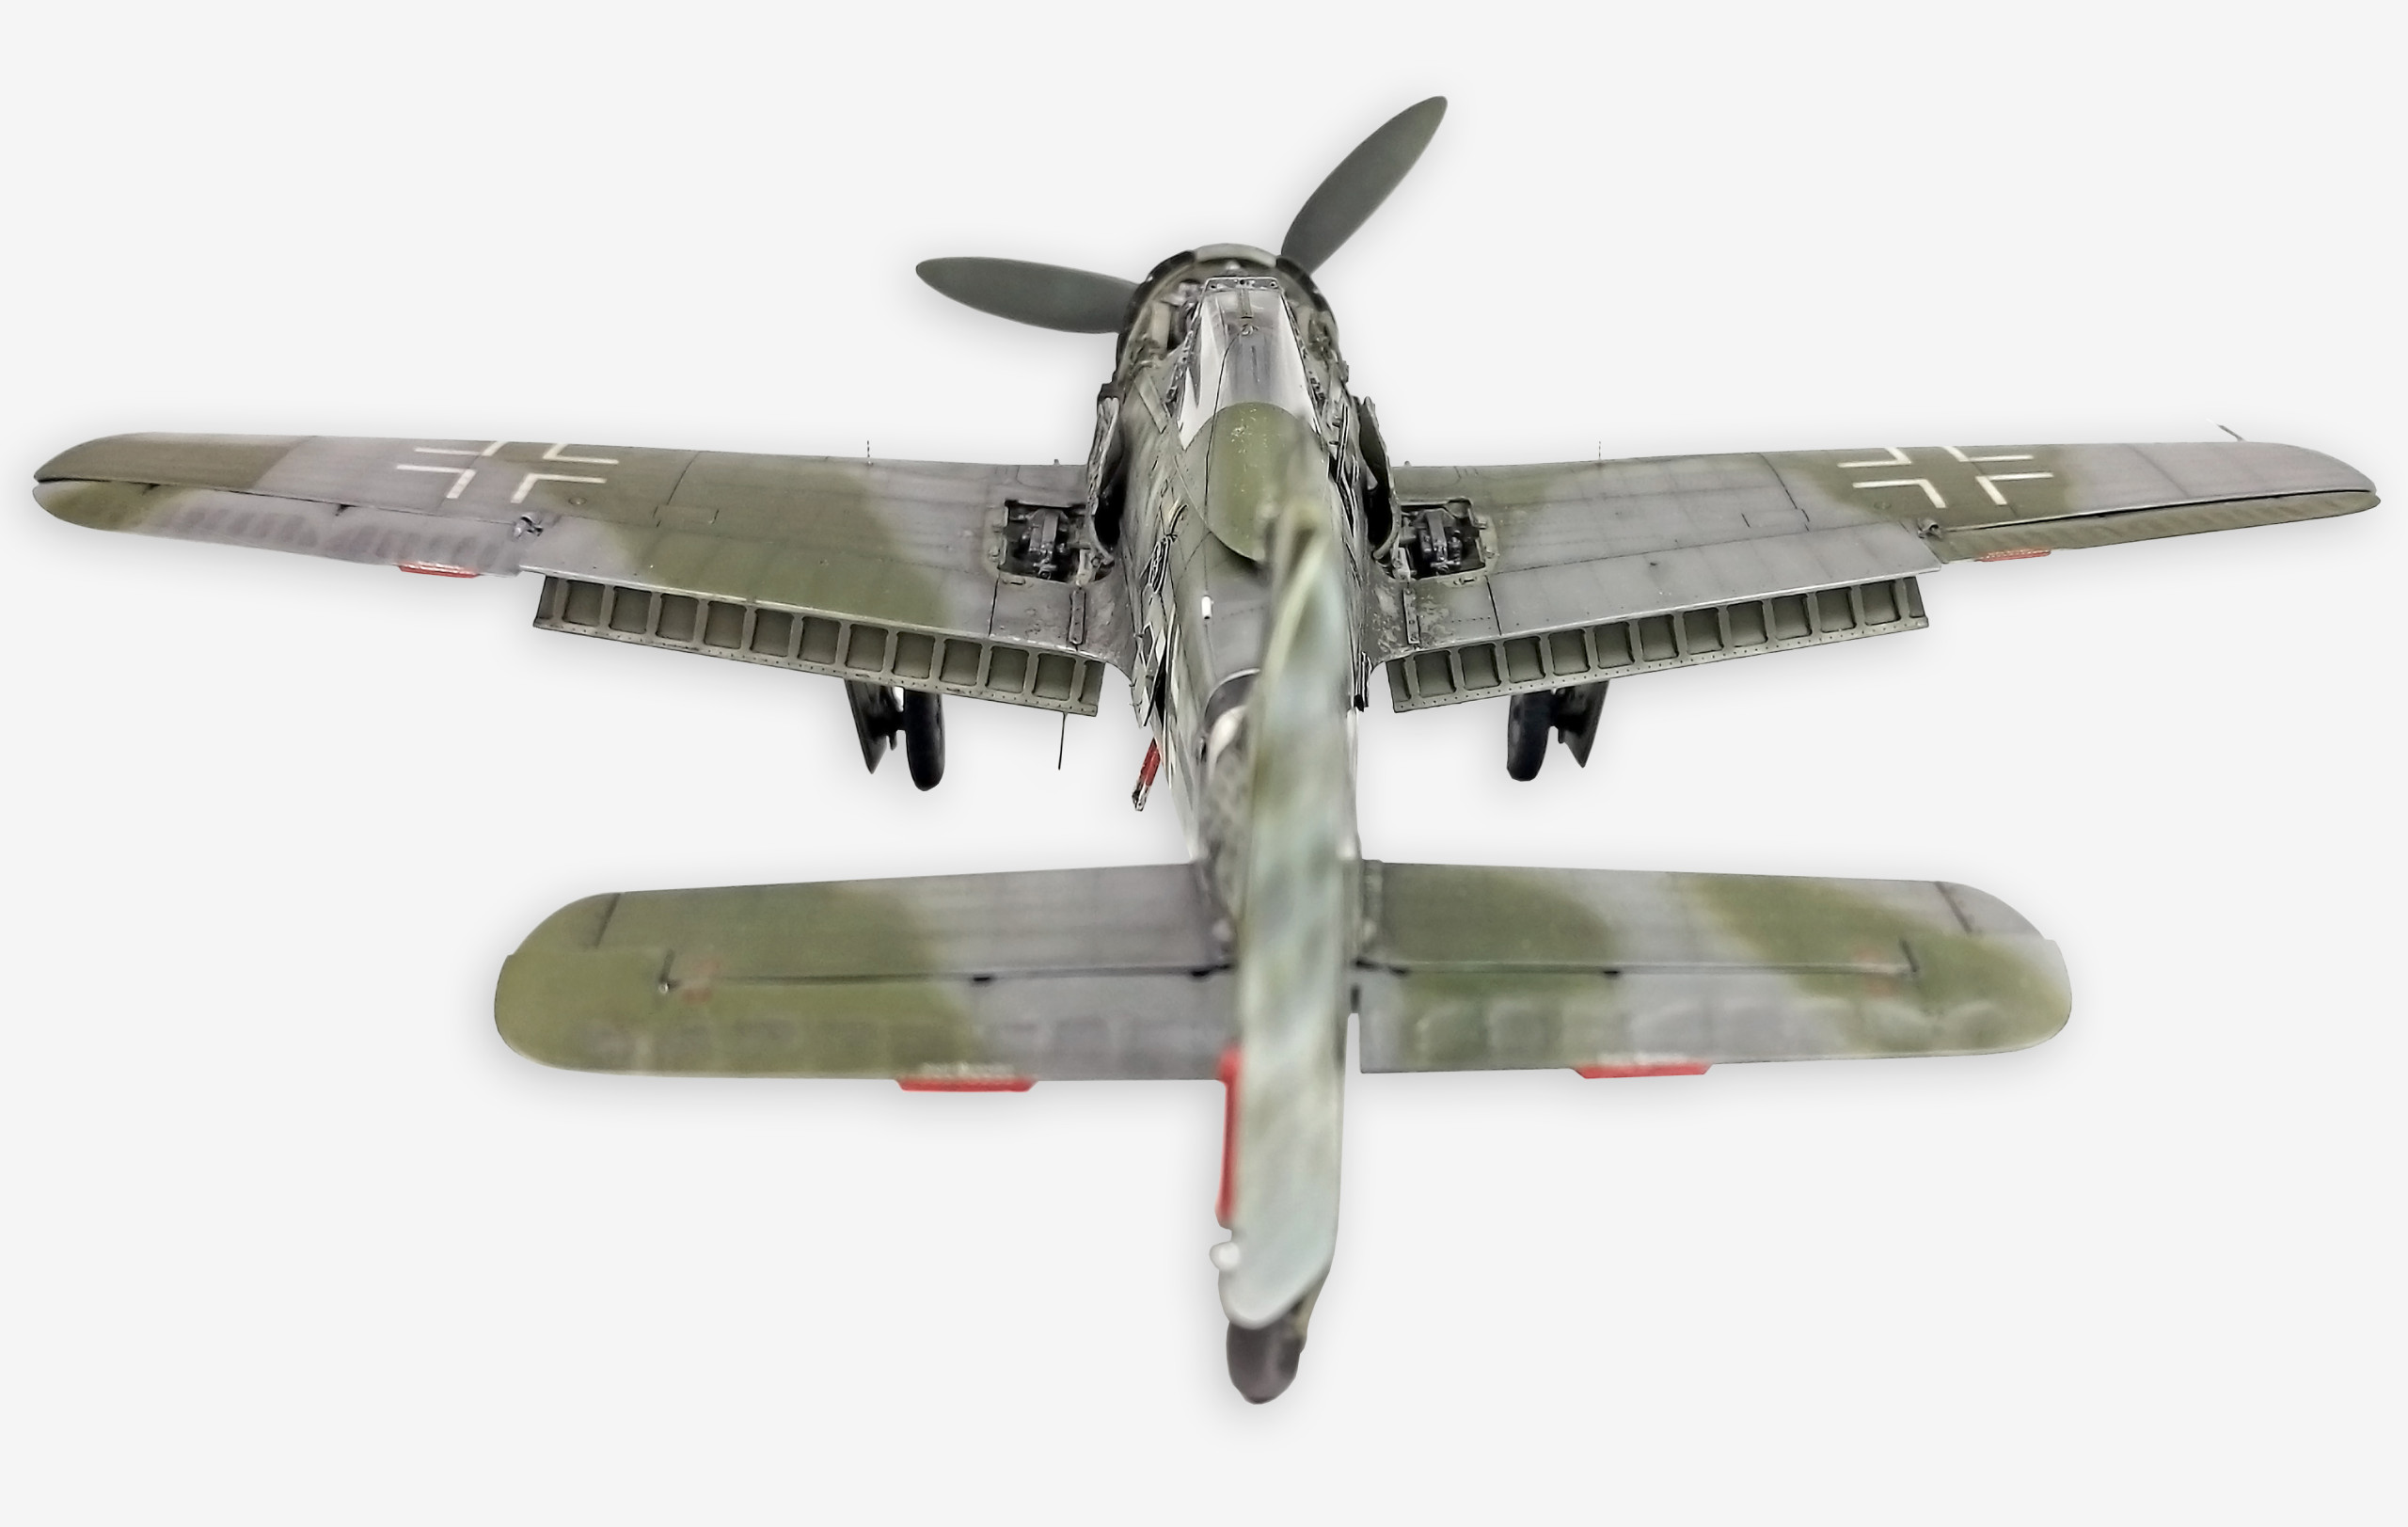
Wings:
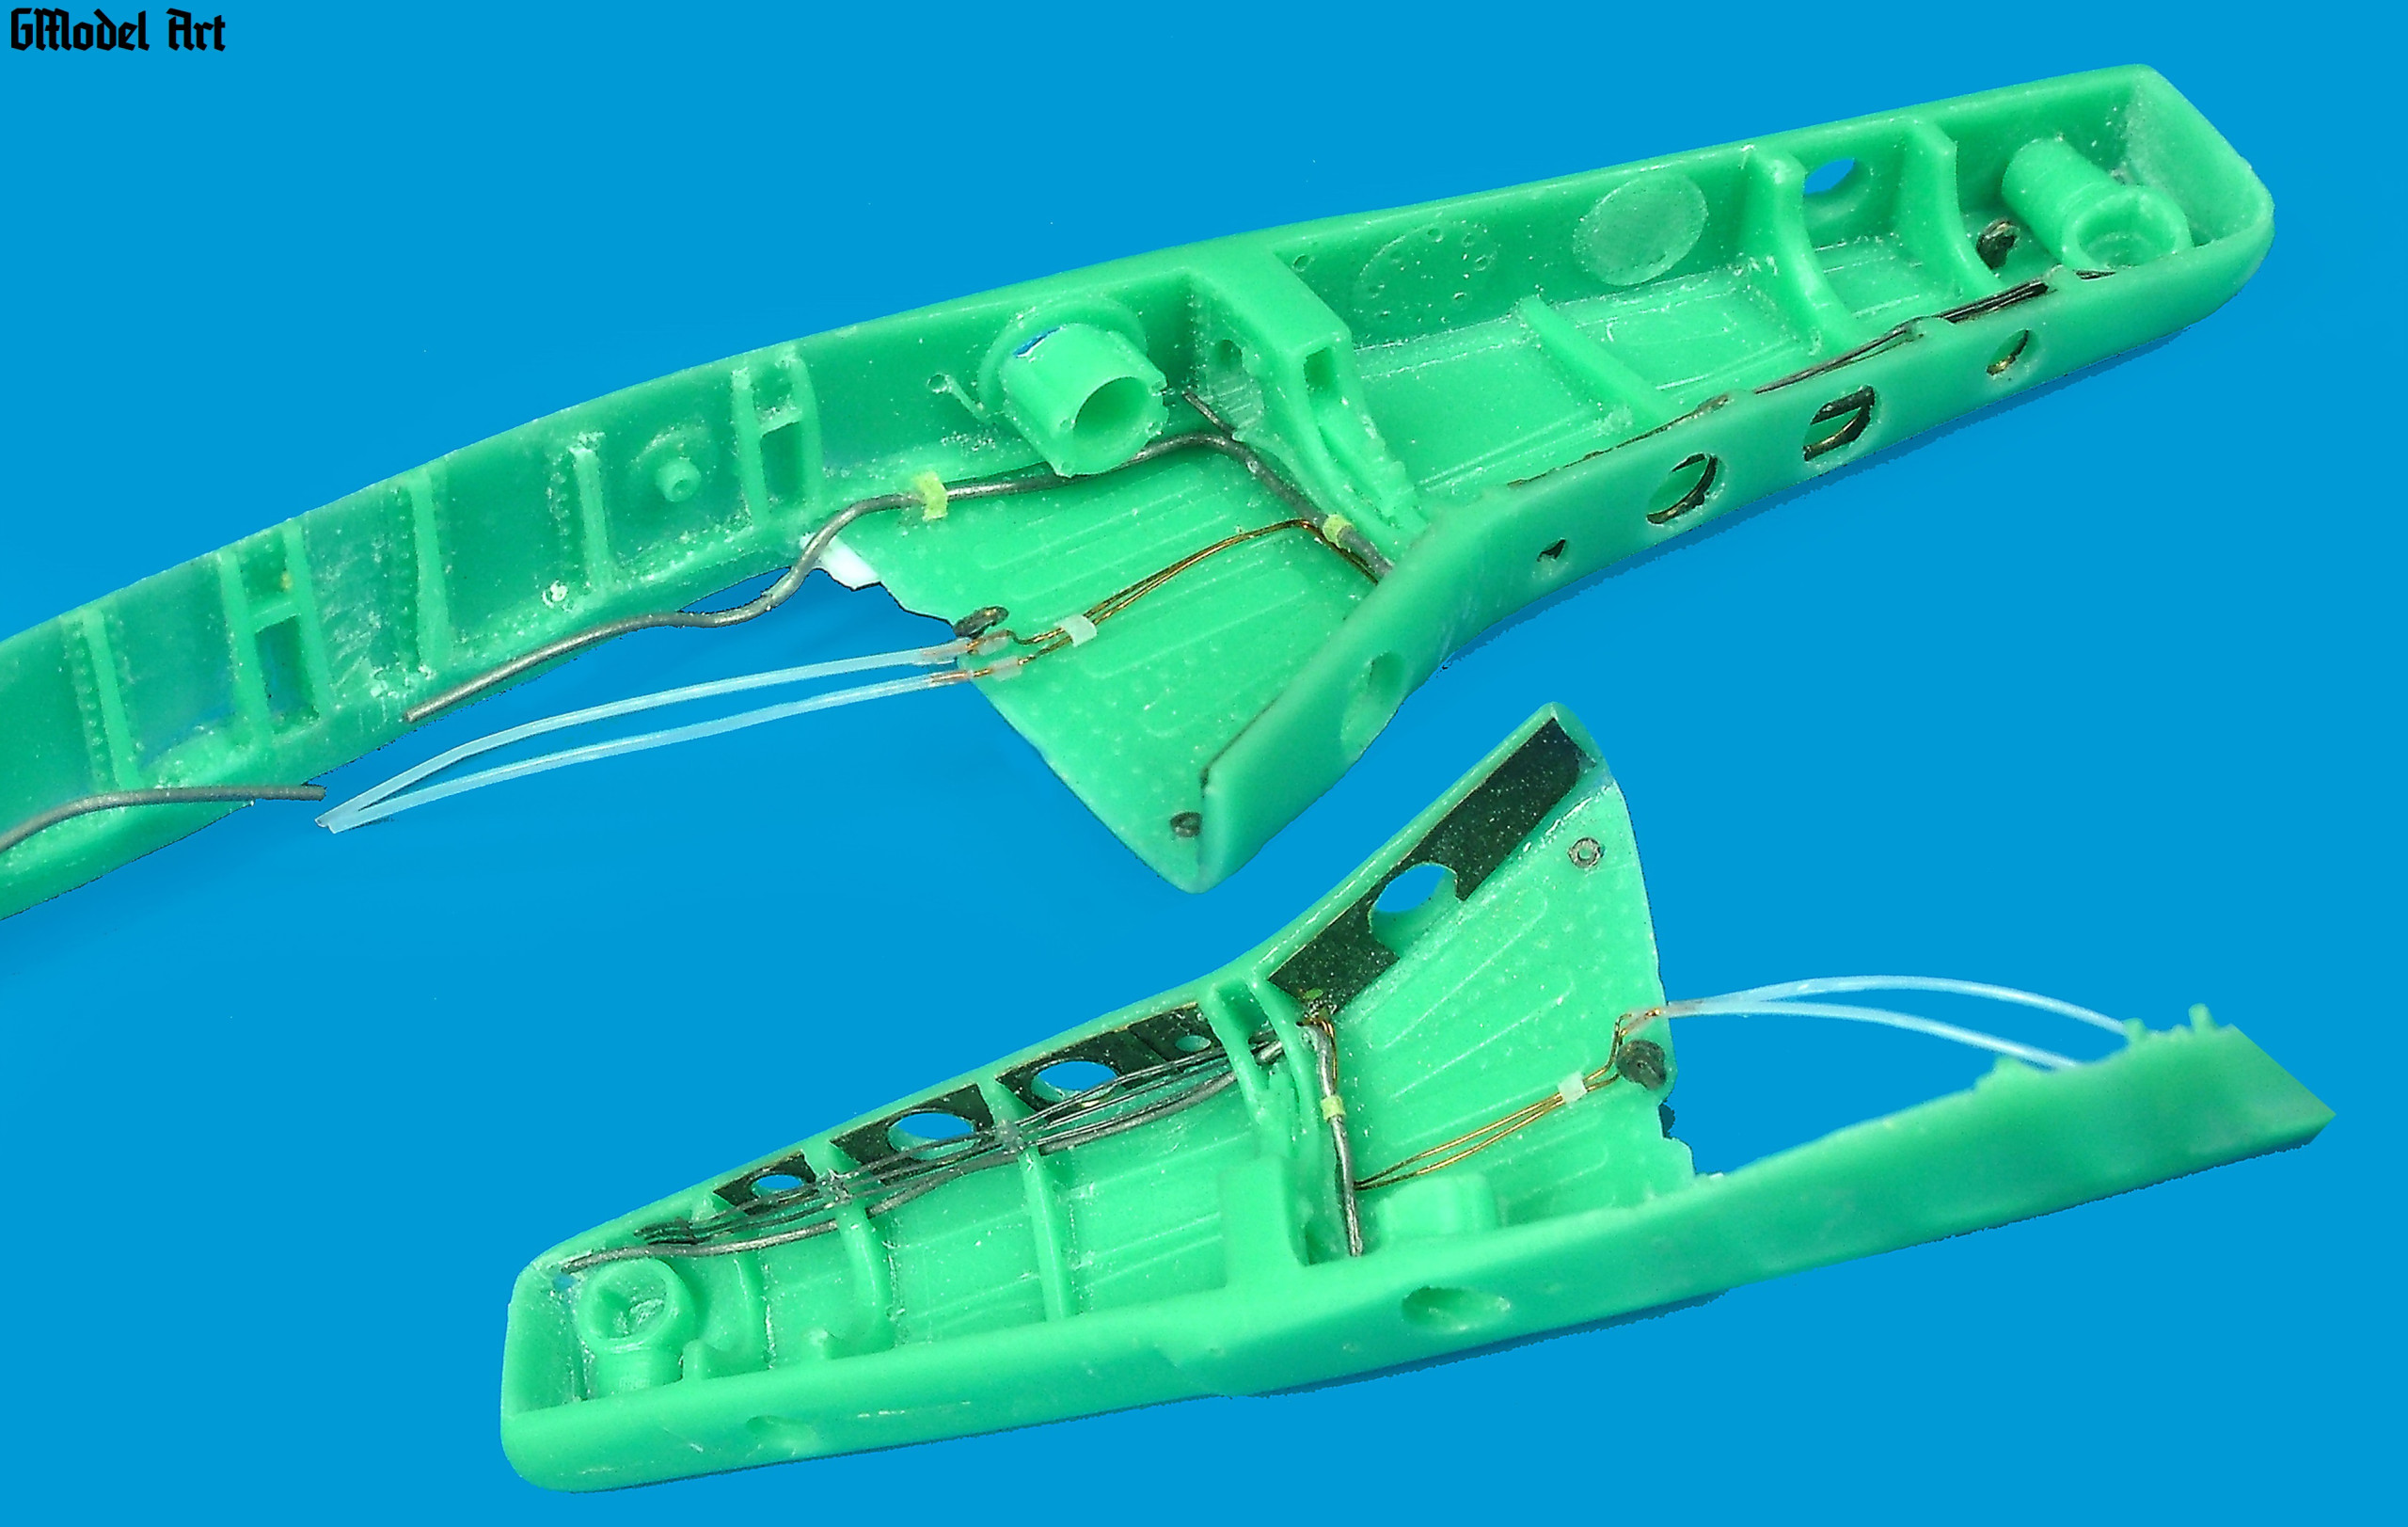
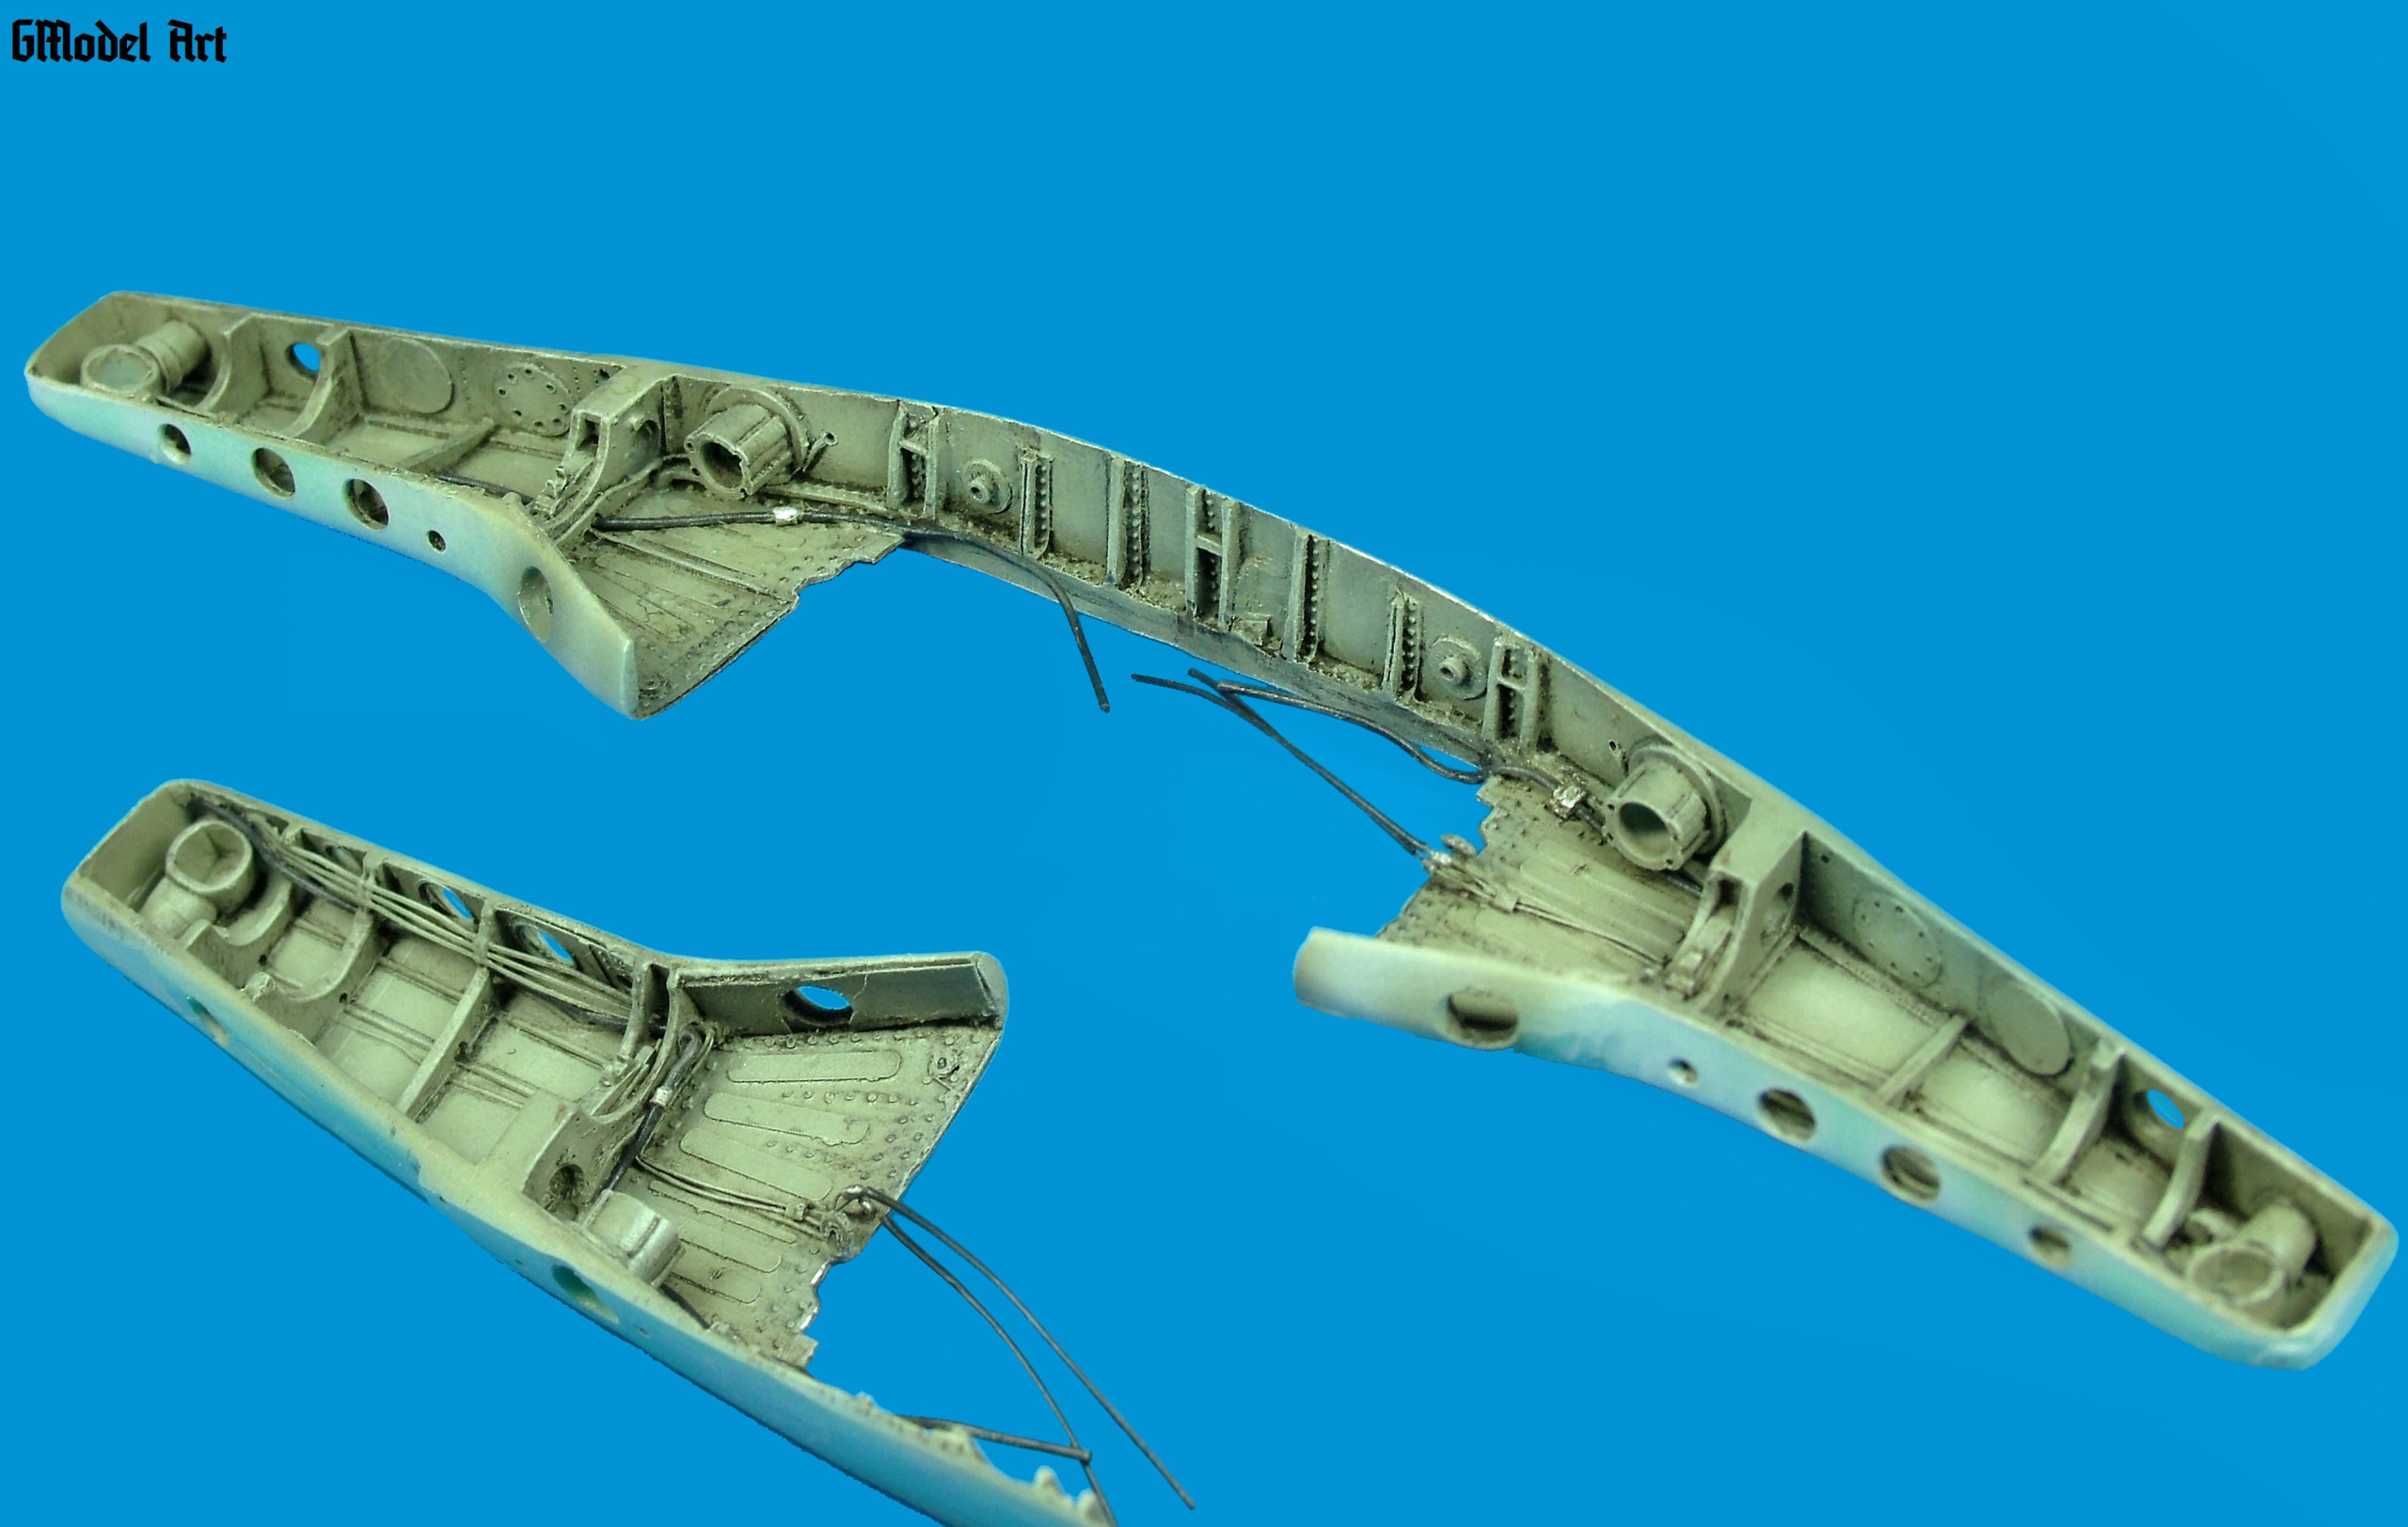
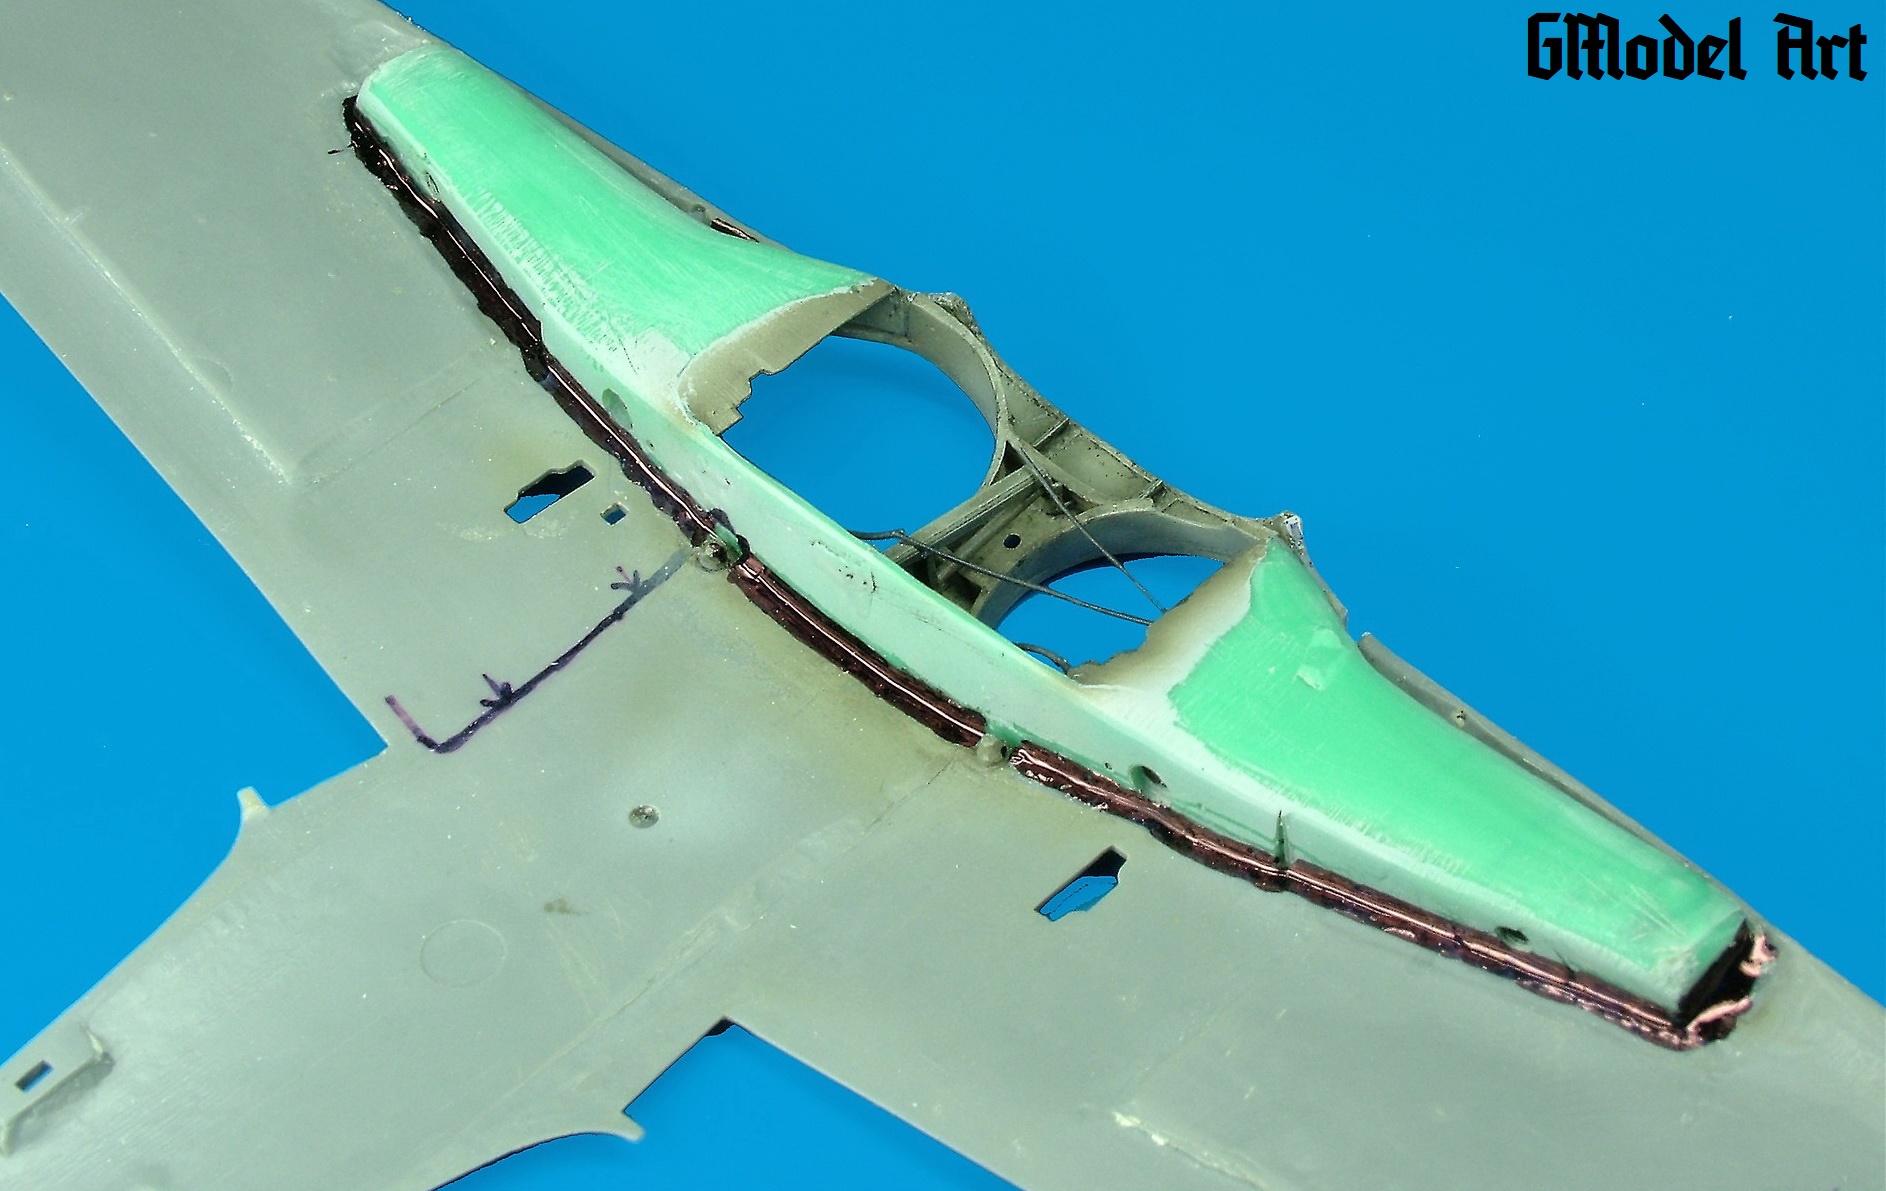
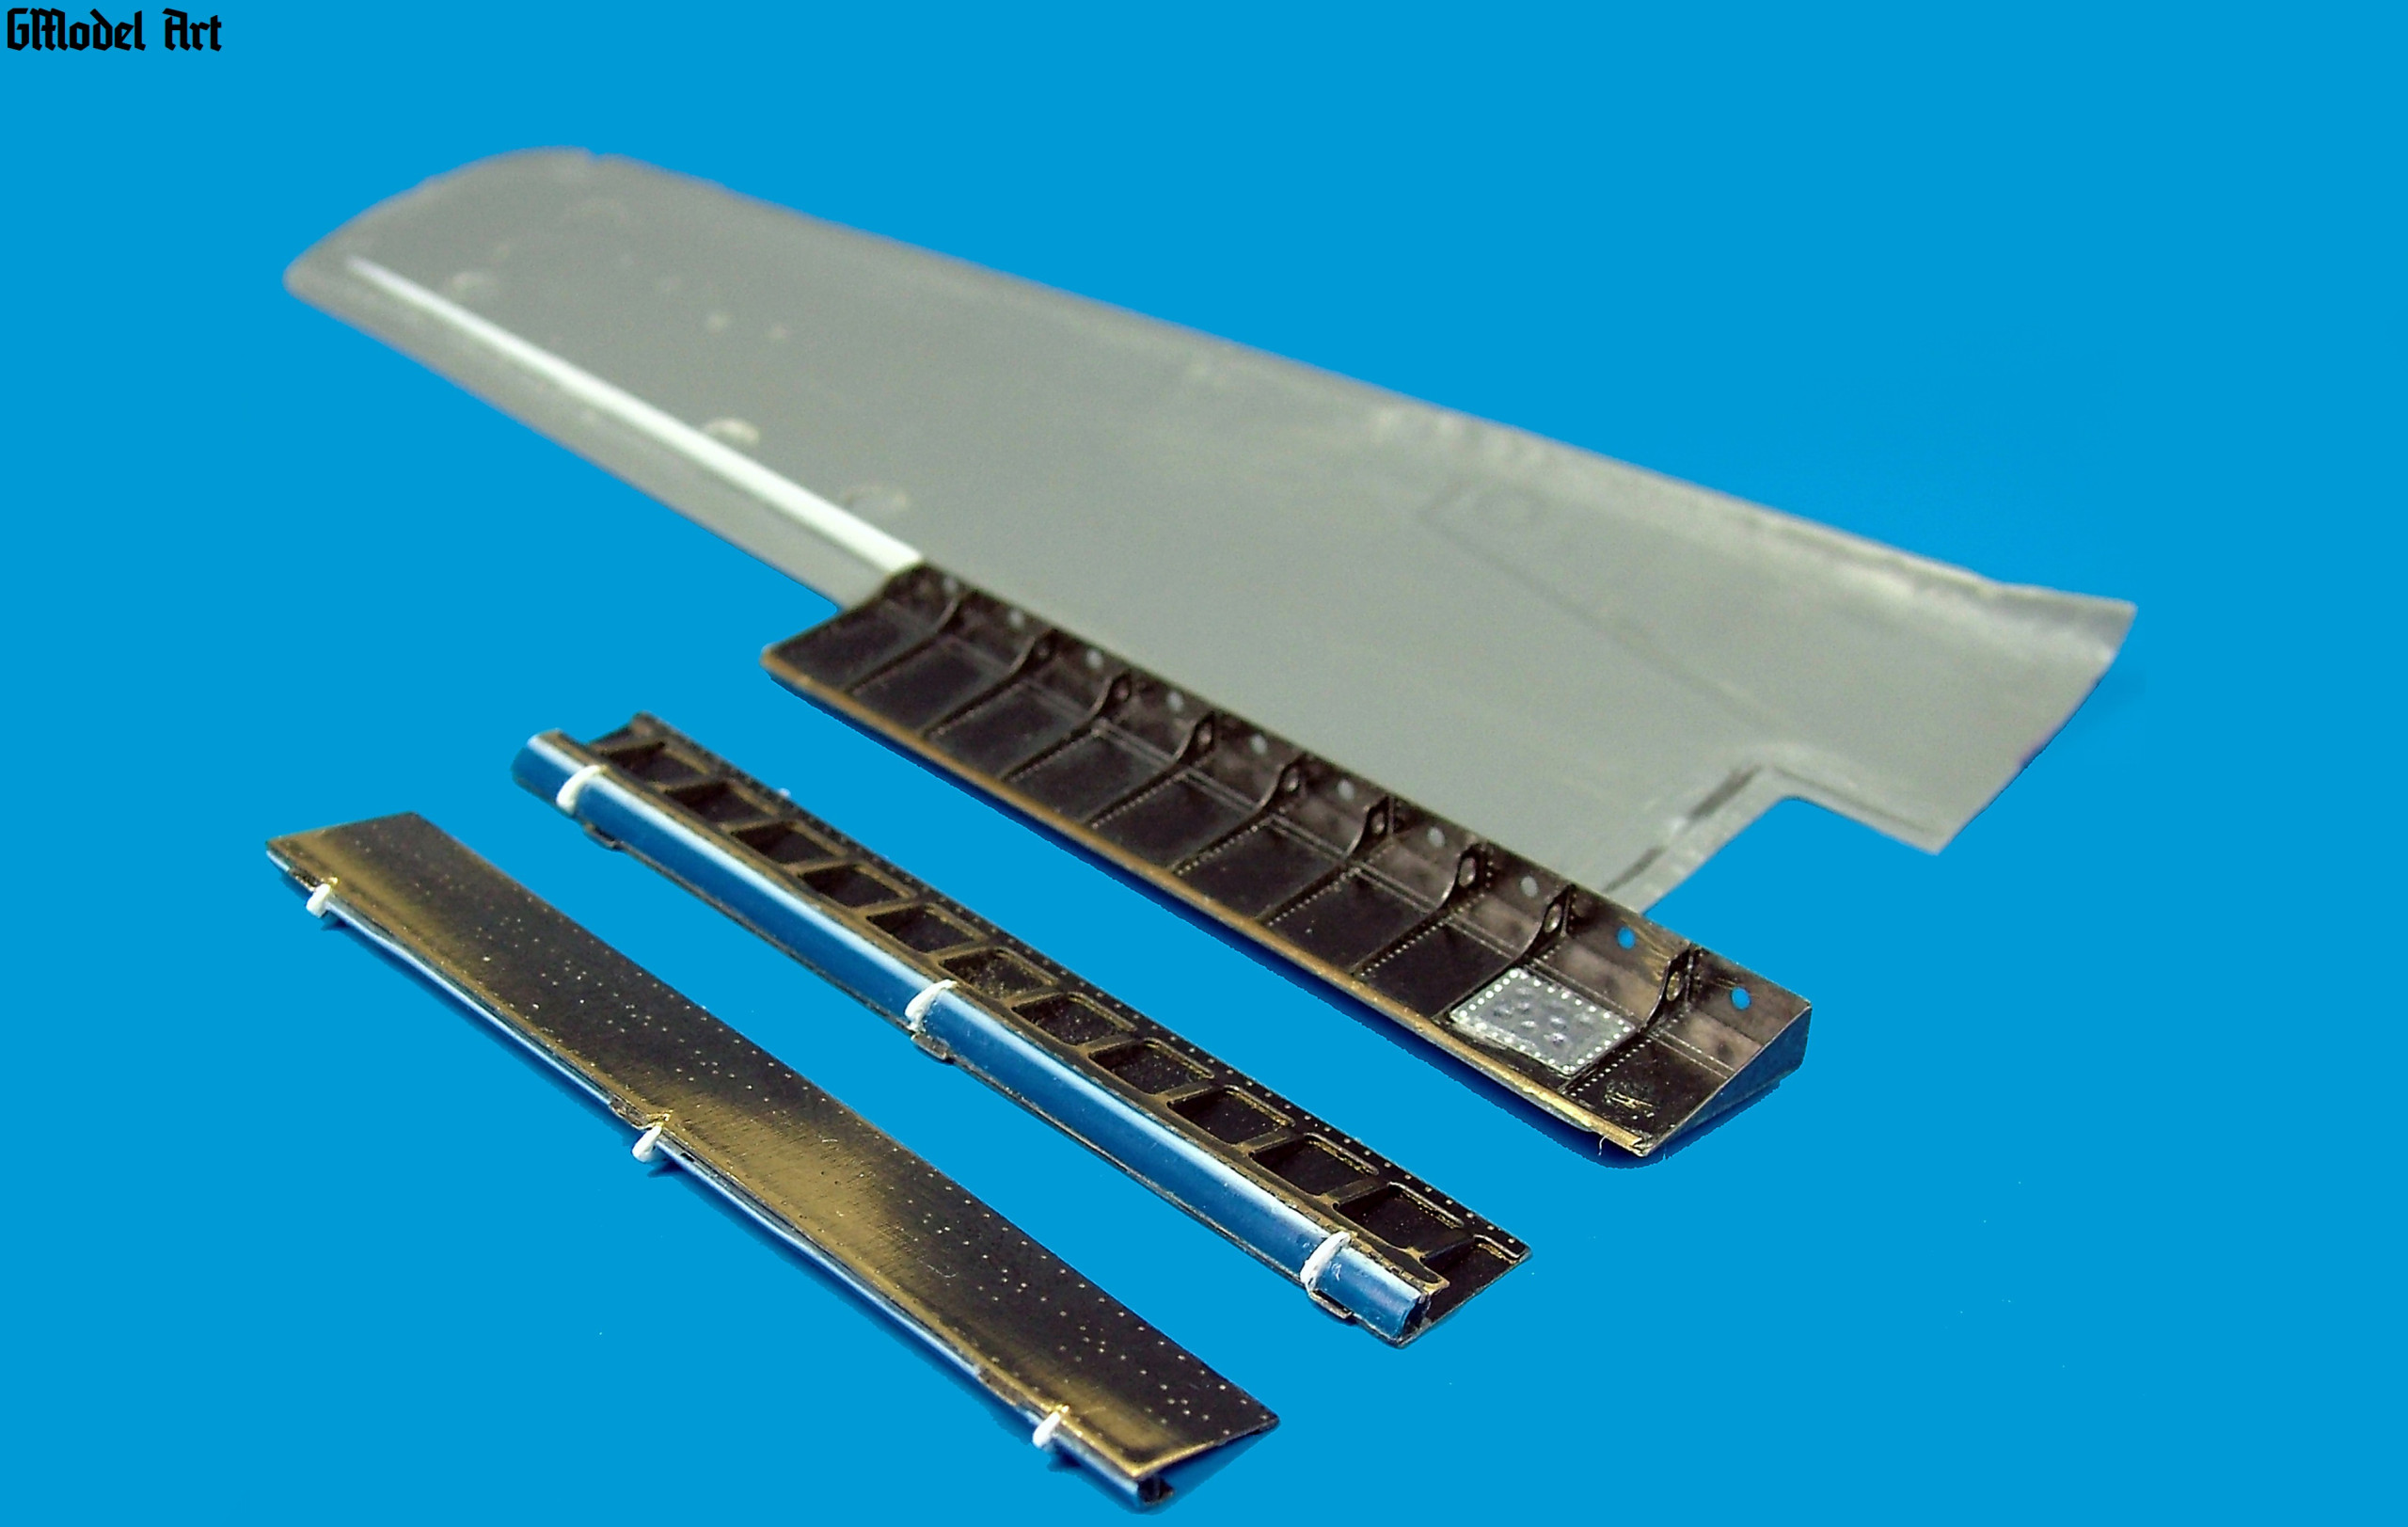
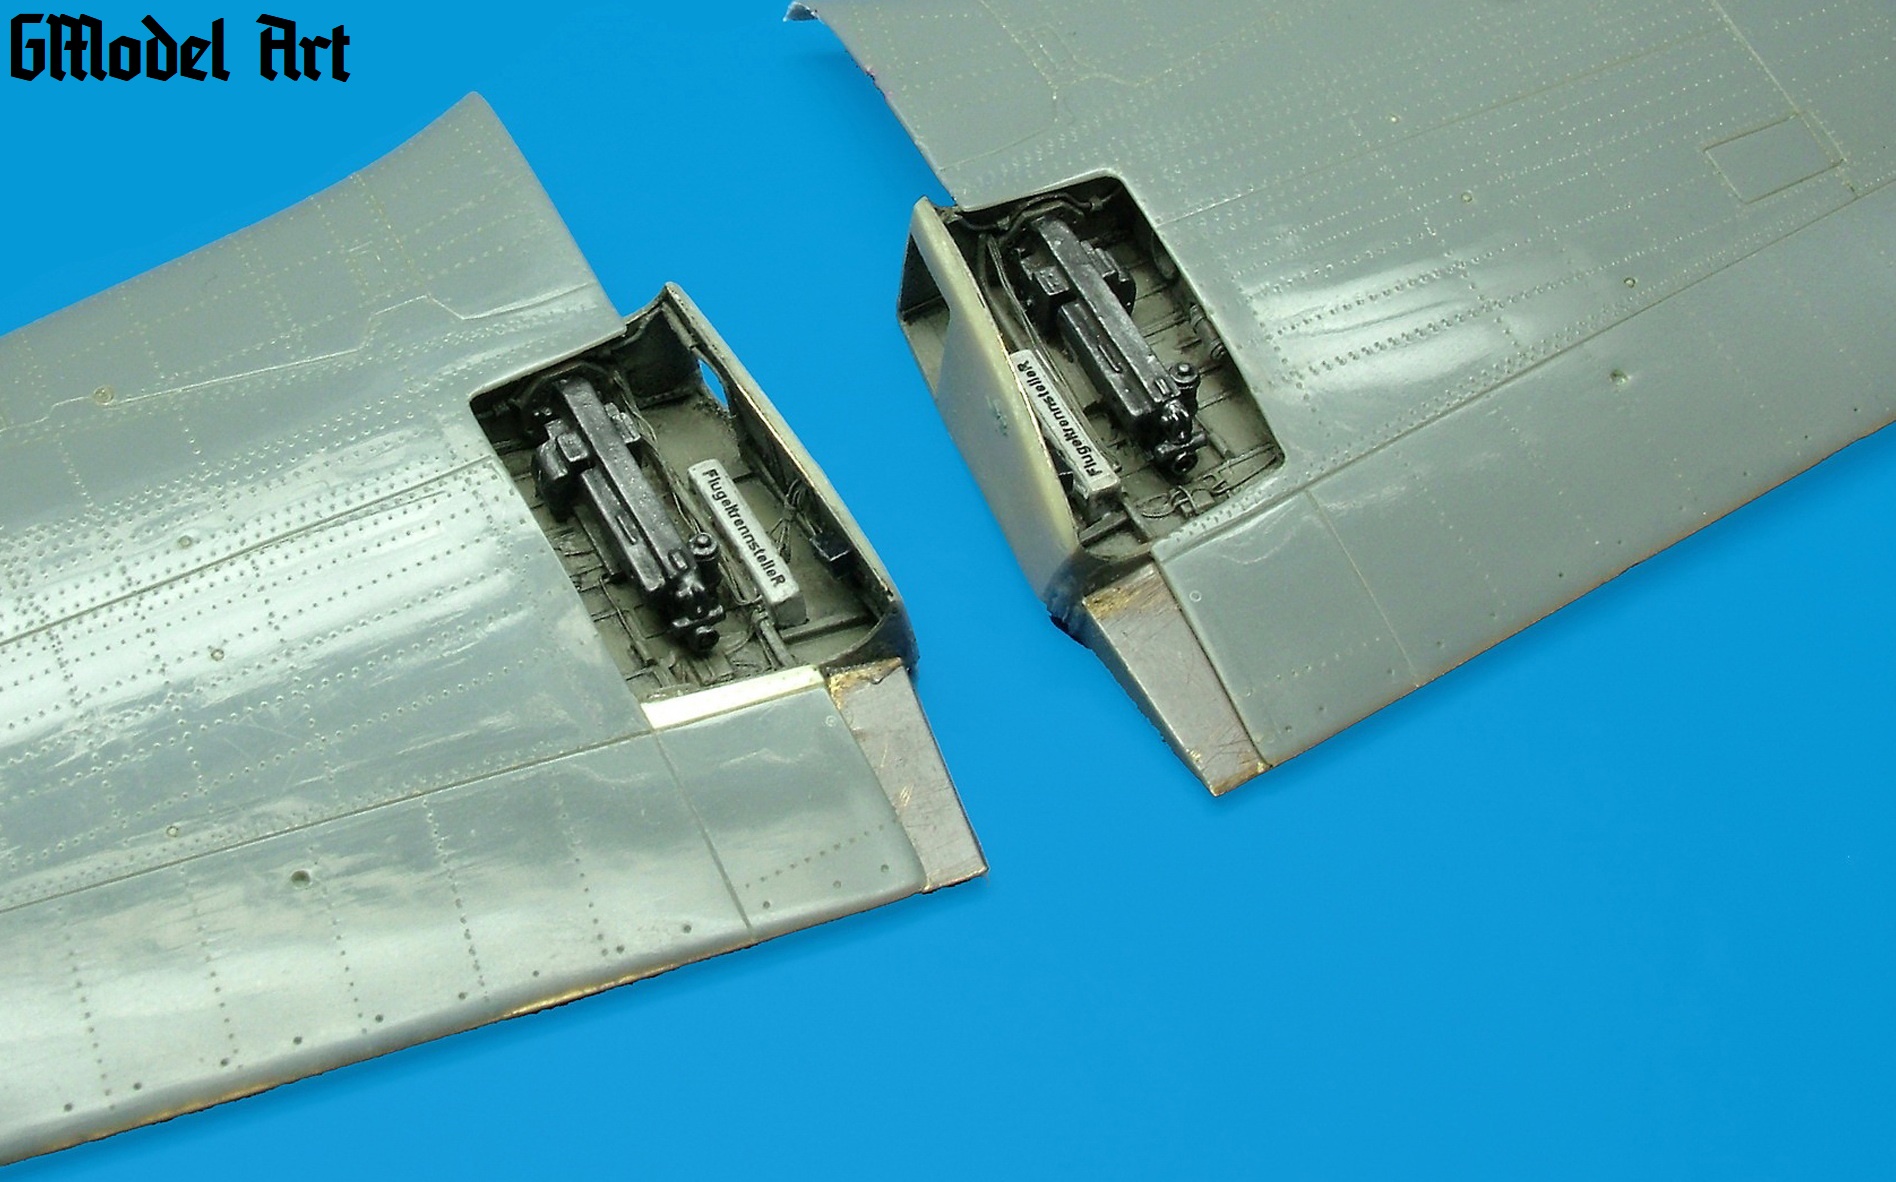
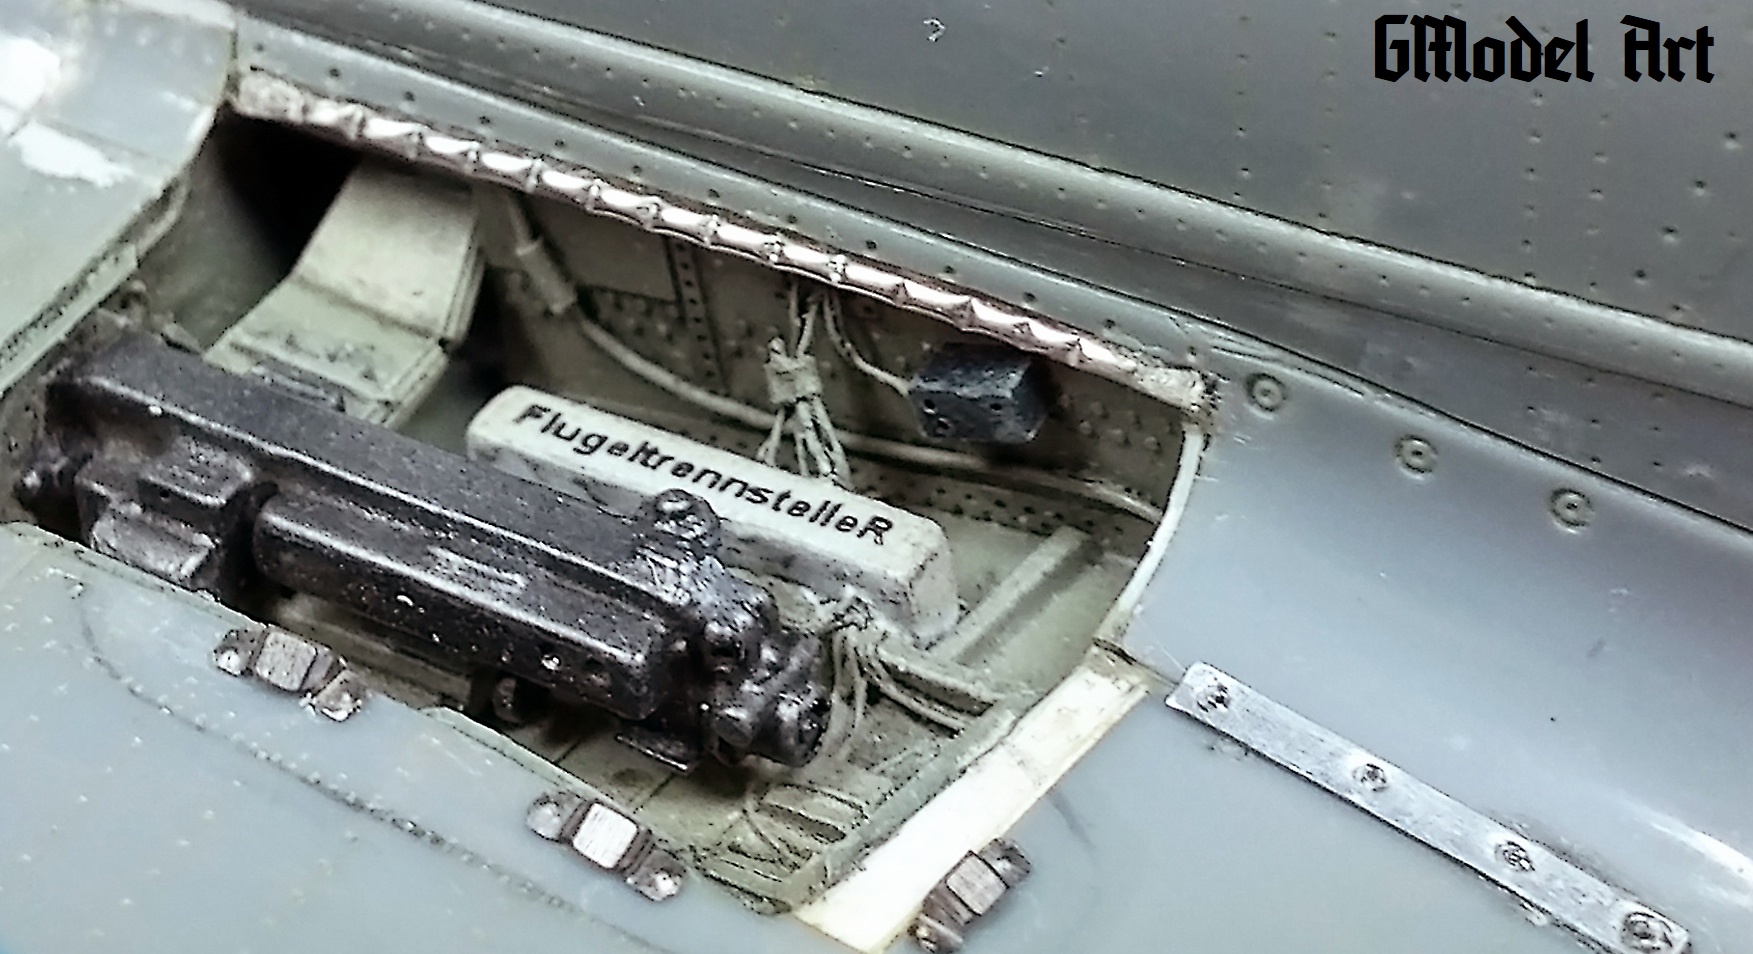
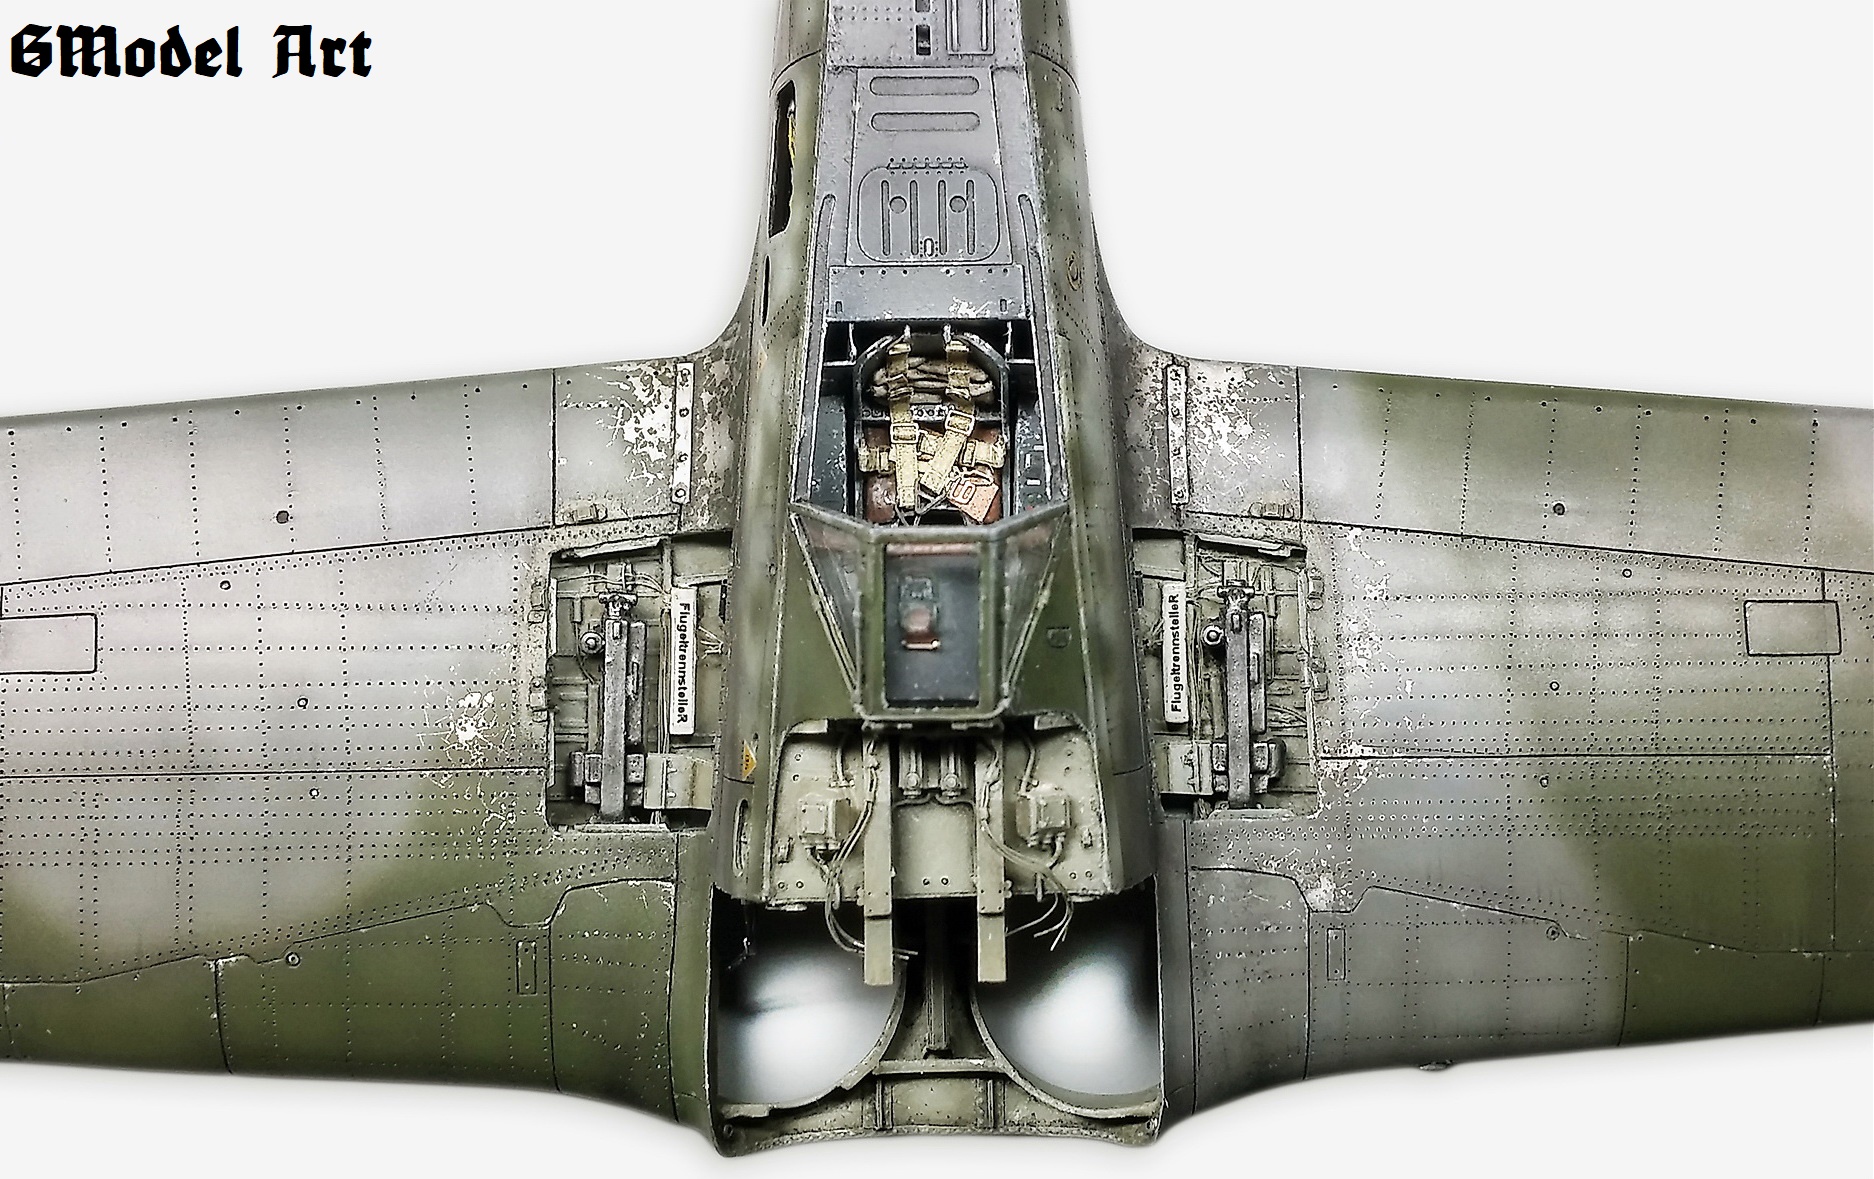
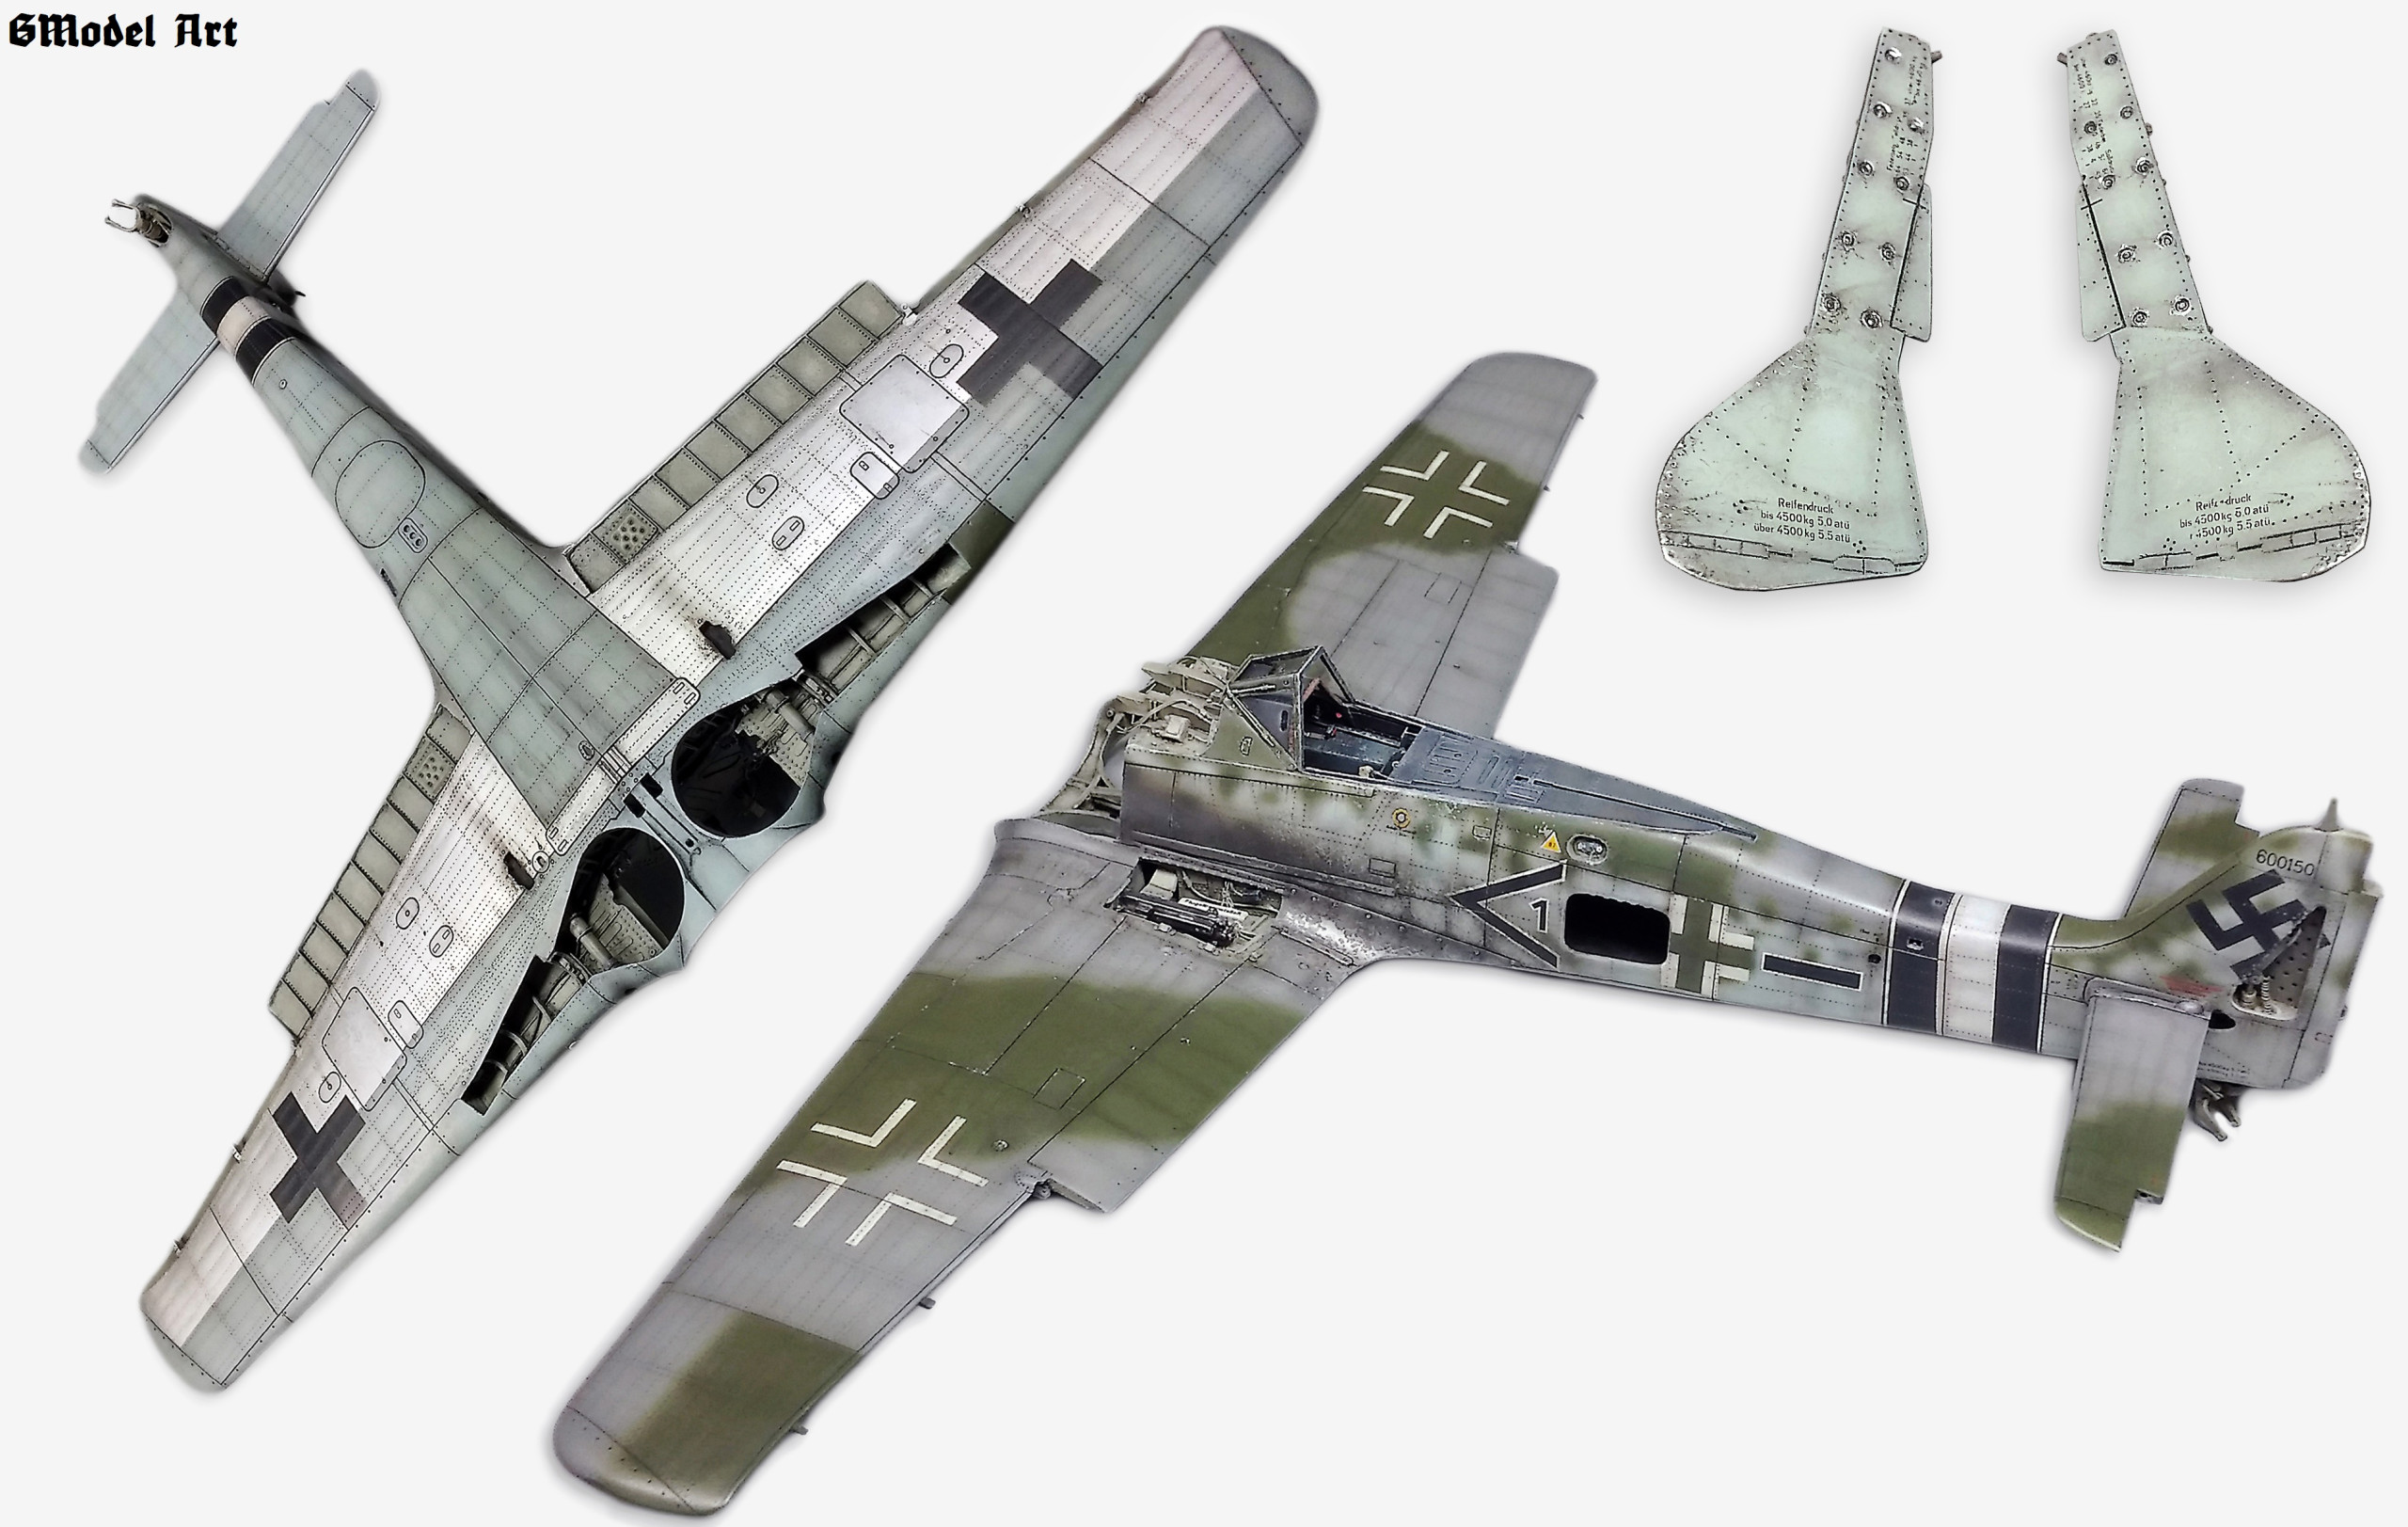
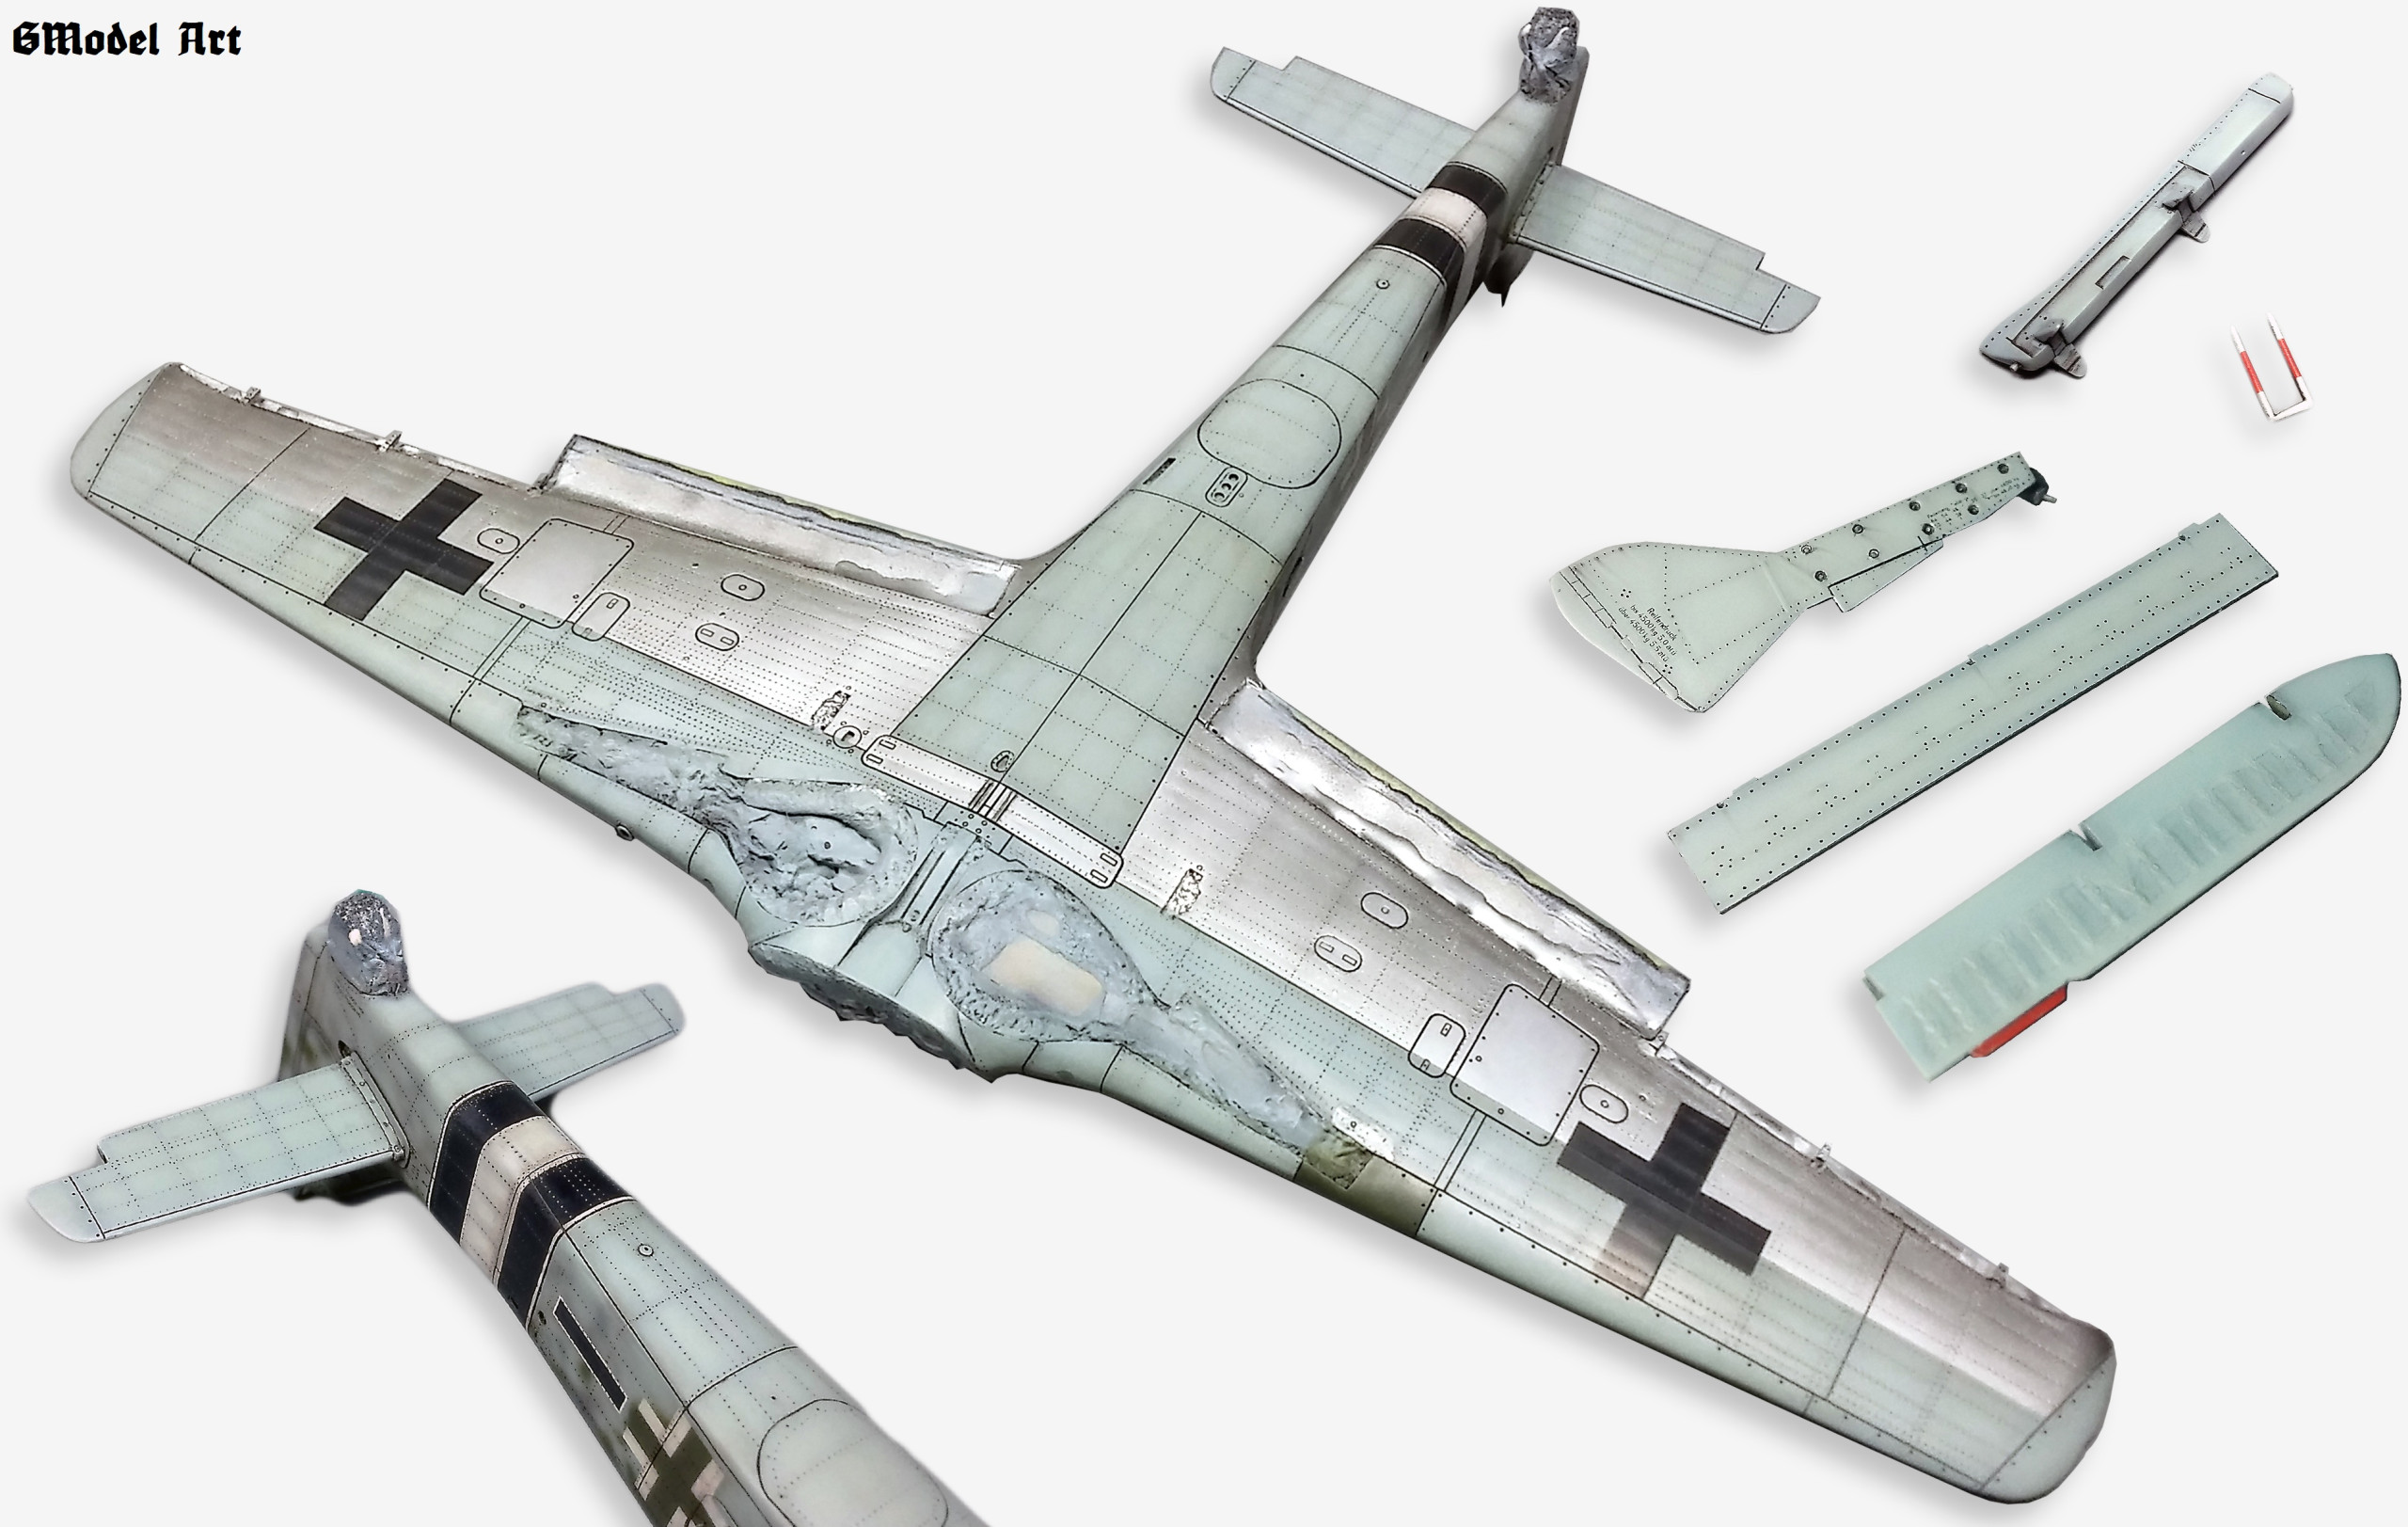
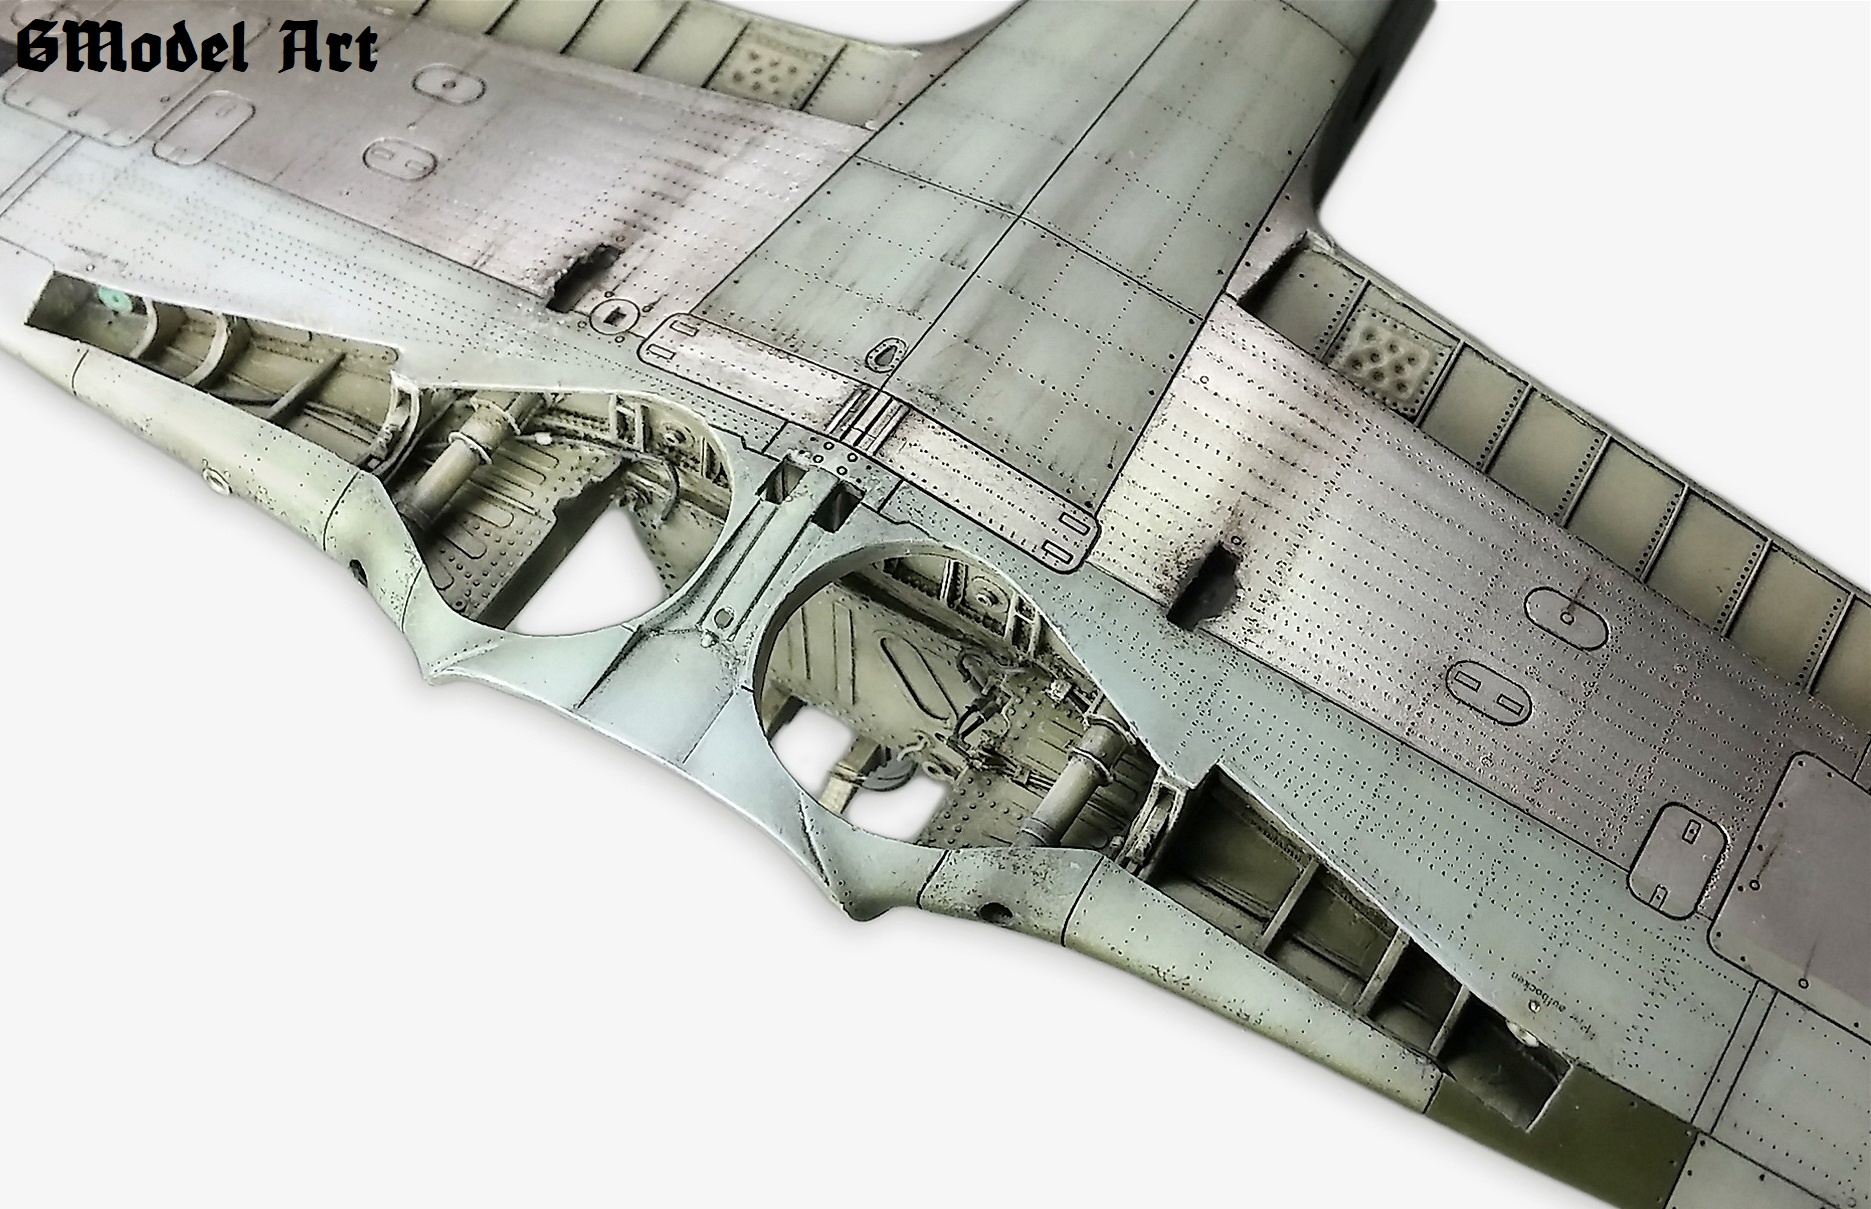
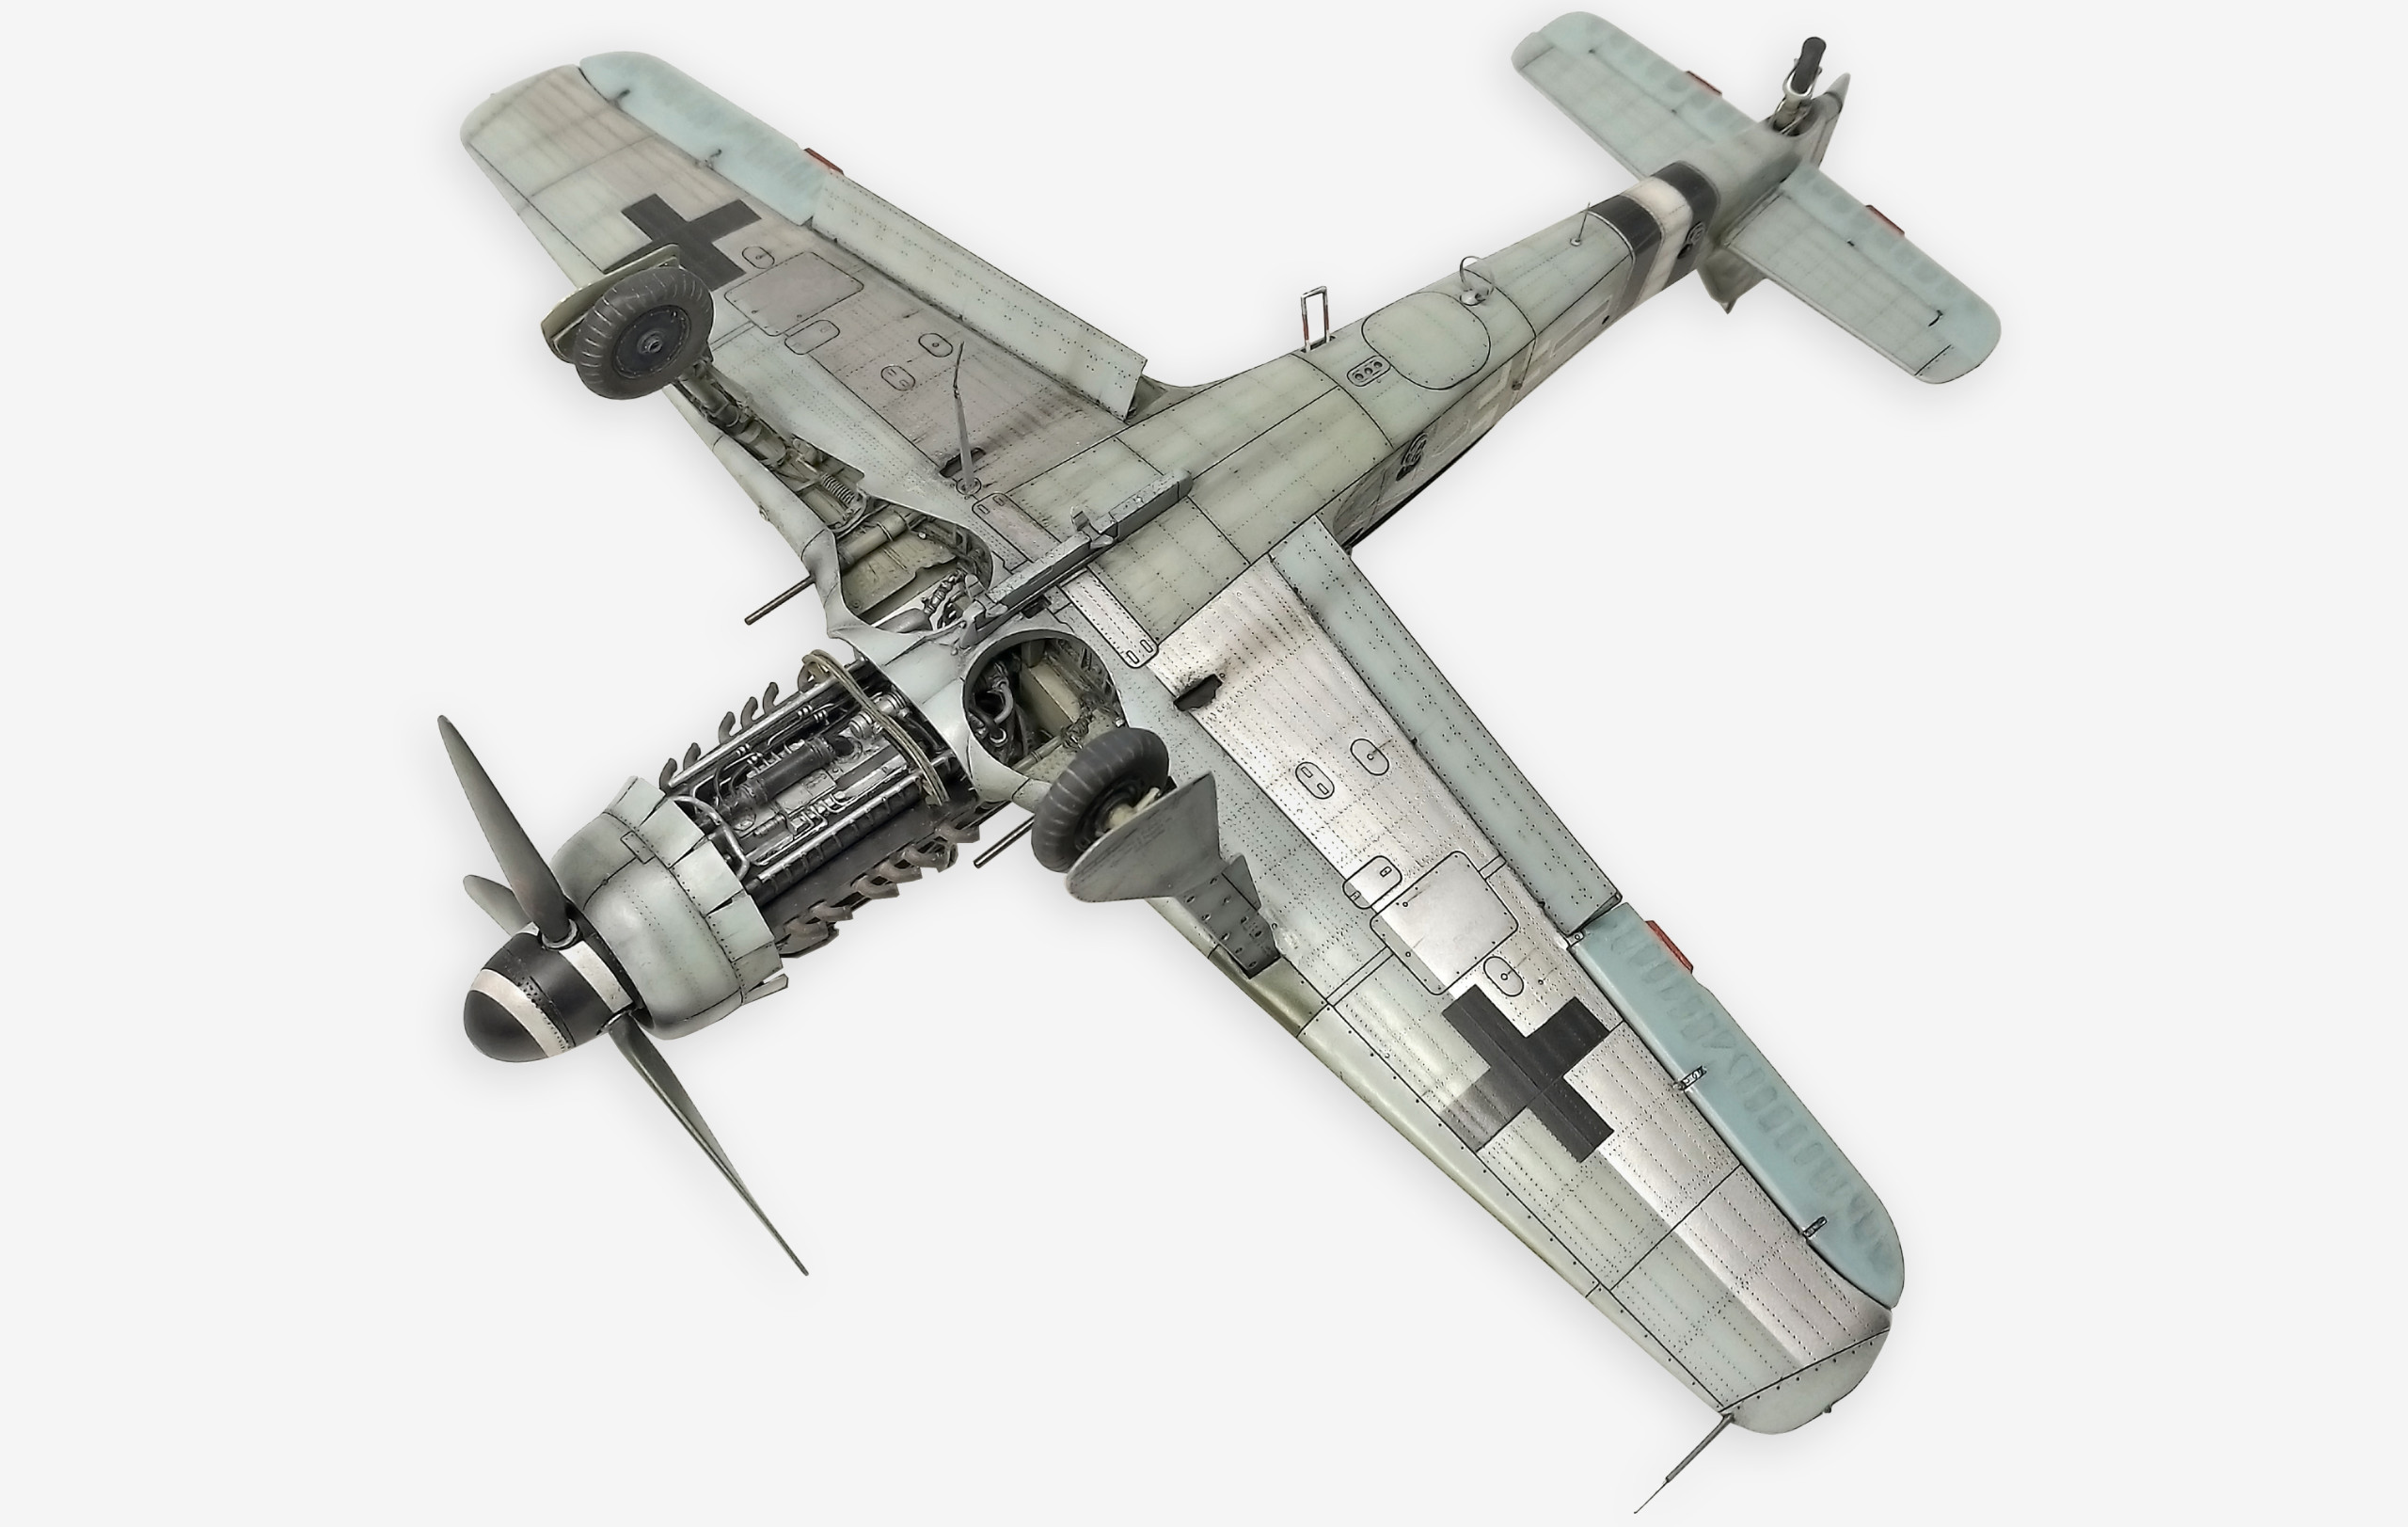
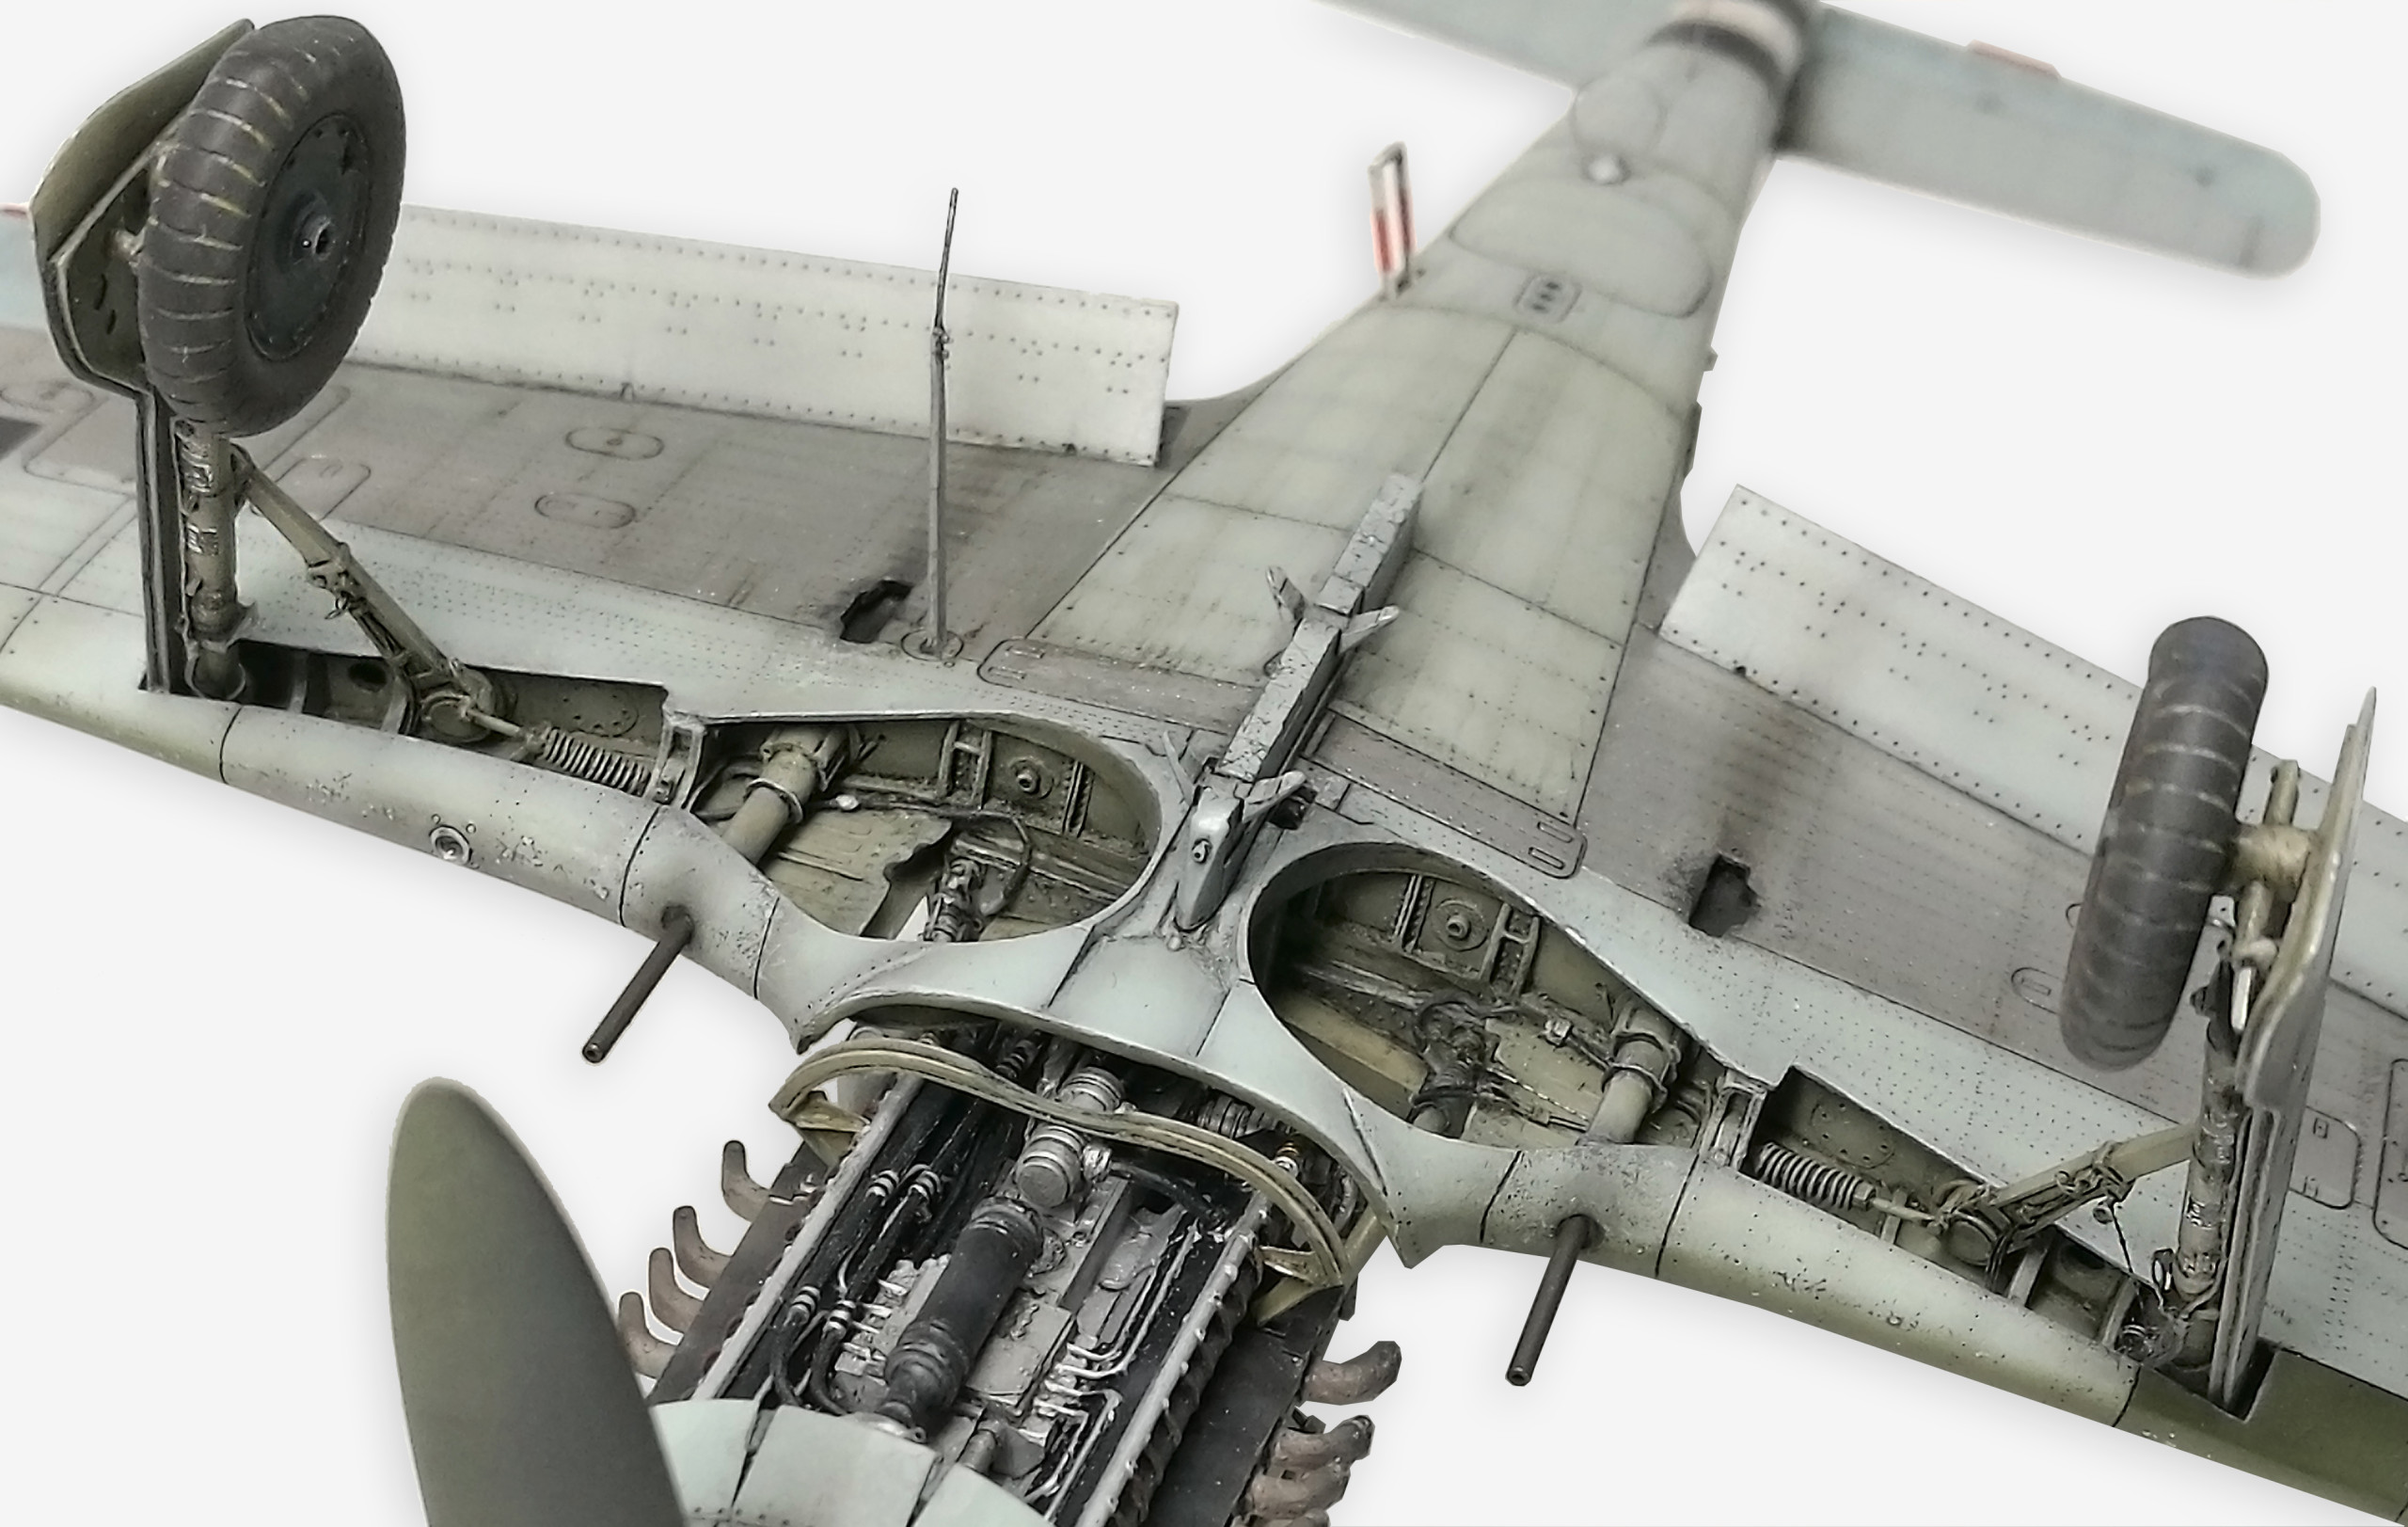
Working similar to the fuselage i.e. cutting, thinning and other modifications for installation of resin cannon and wheel wells, etched flaps and ailerons in a deflected position and portray by riveting, scraped off the entire surface of wings too.
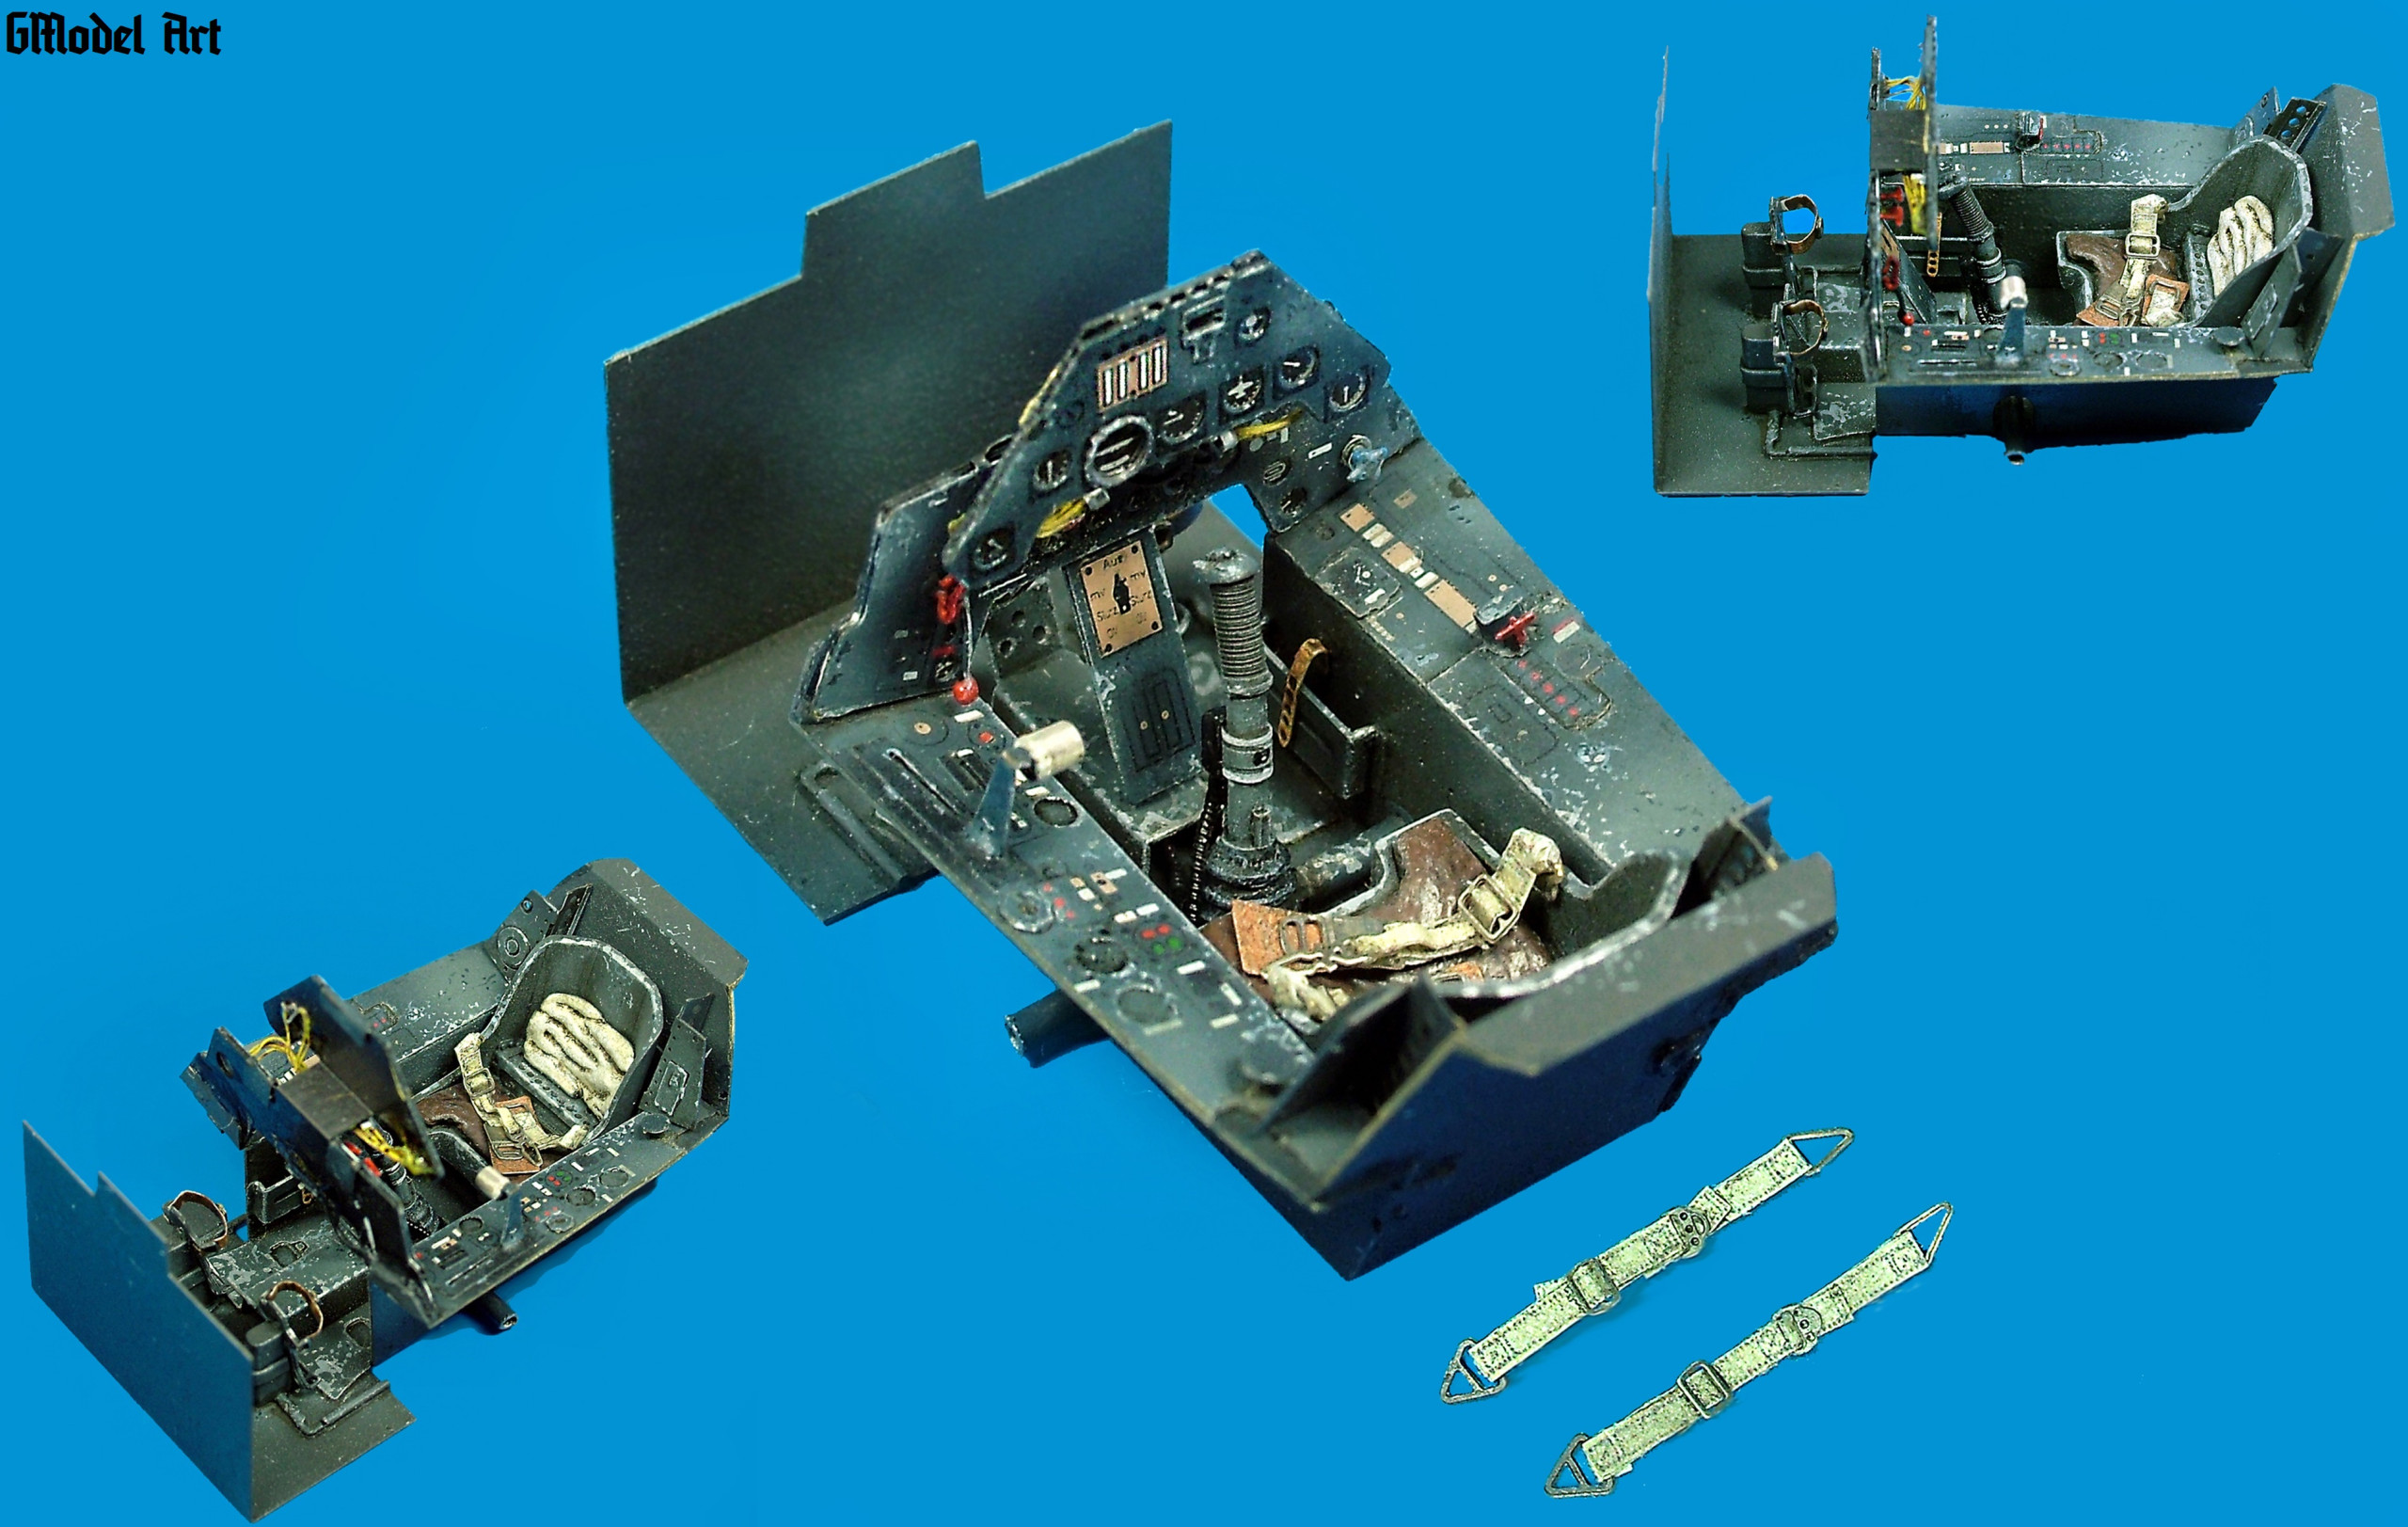
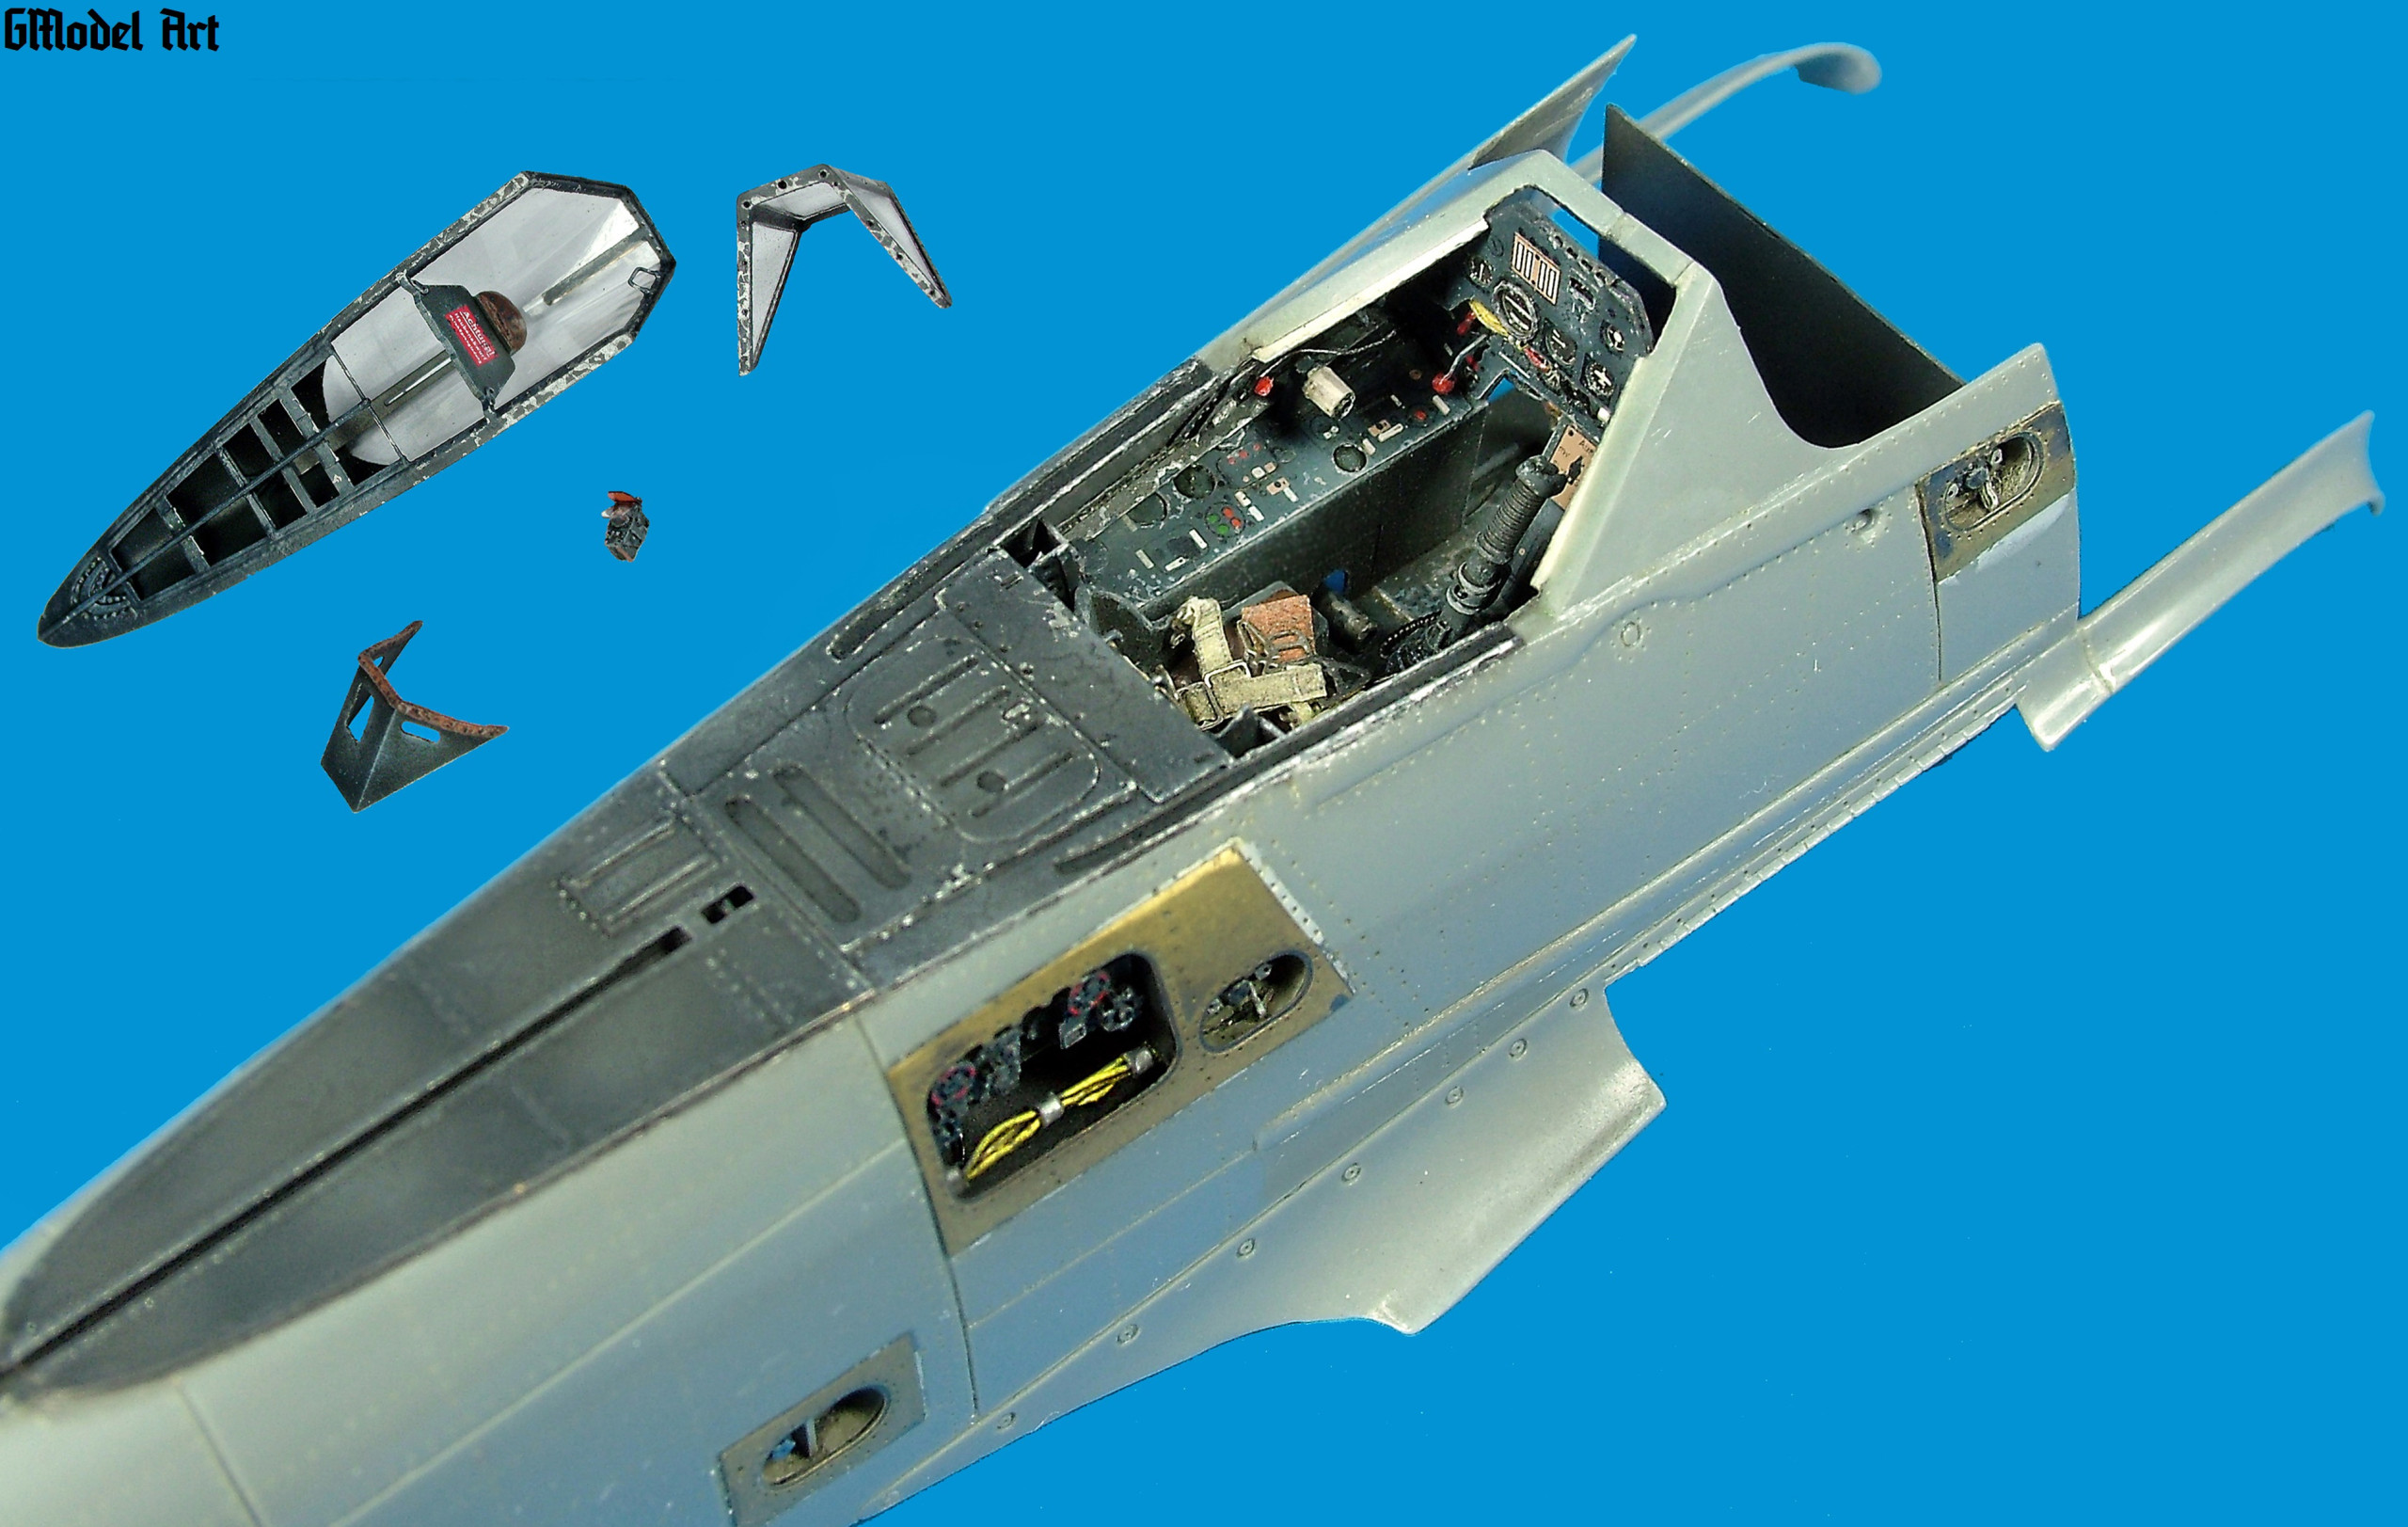
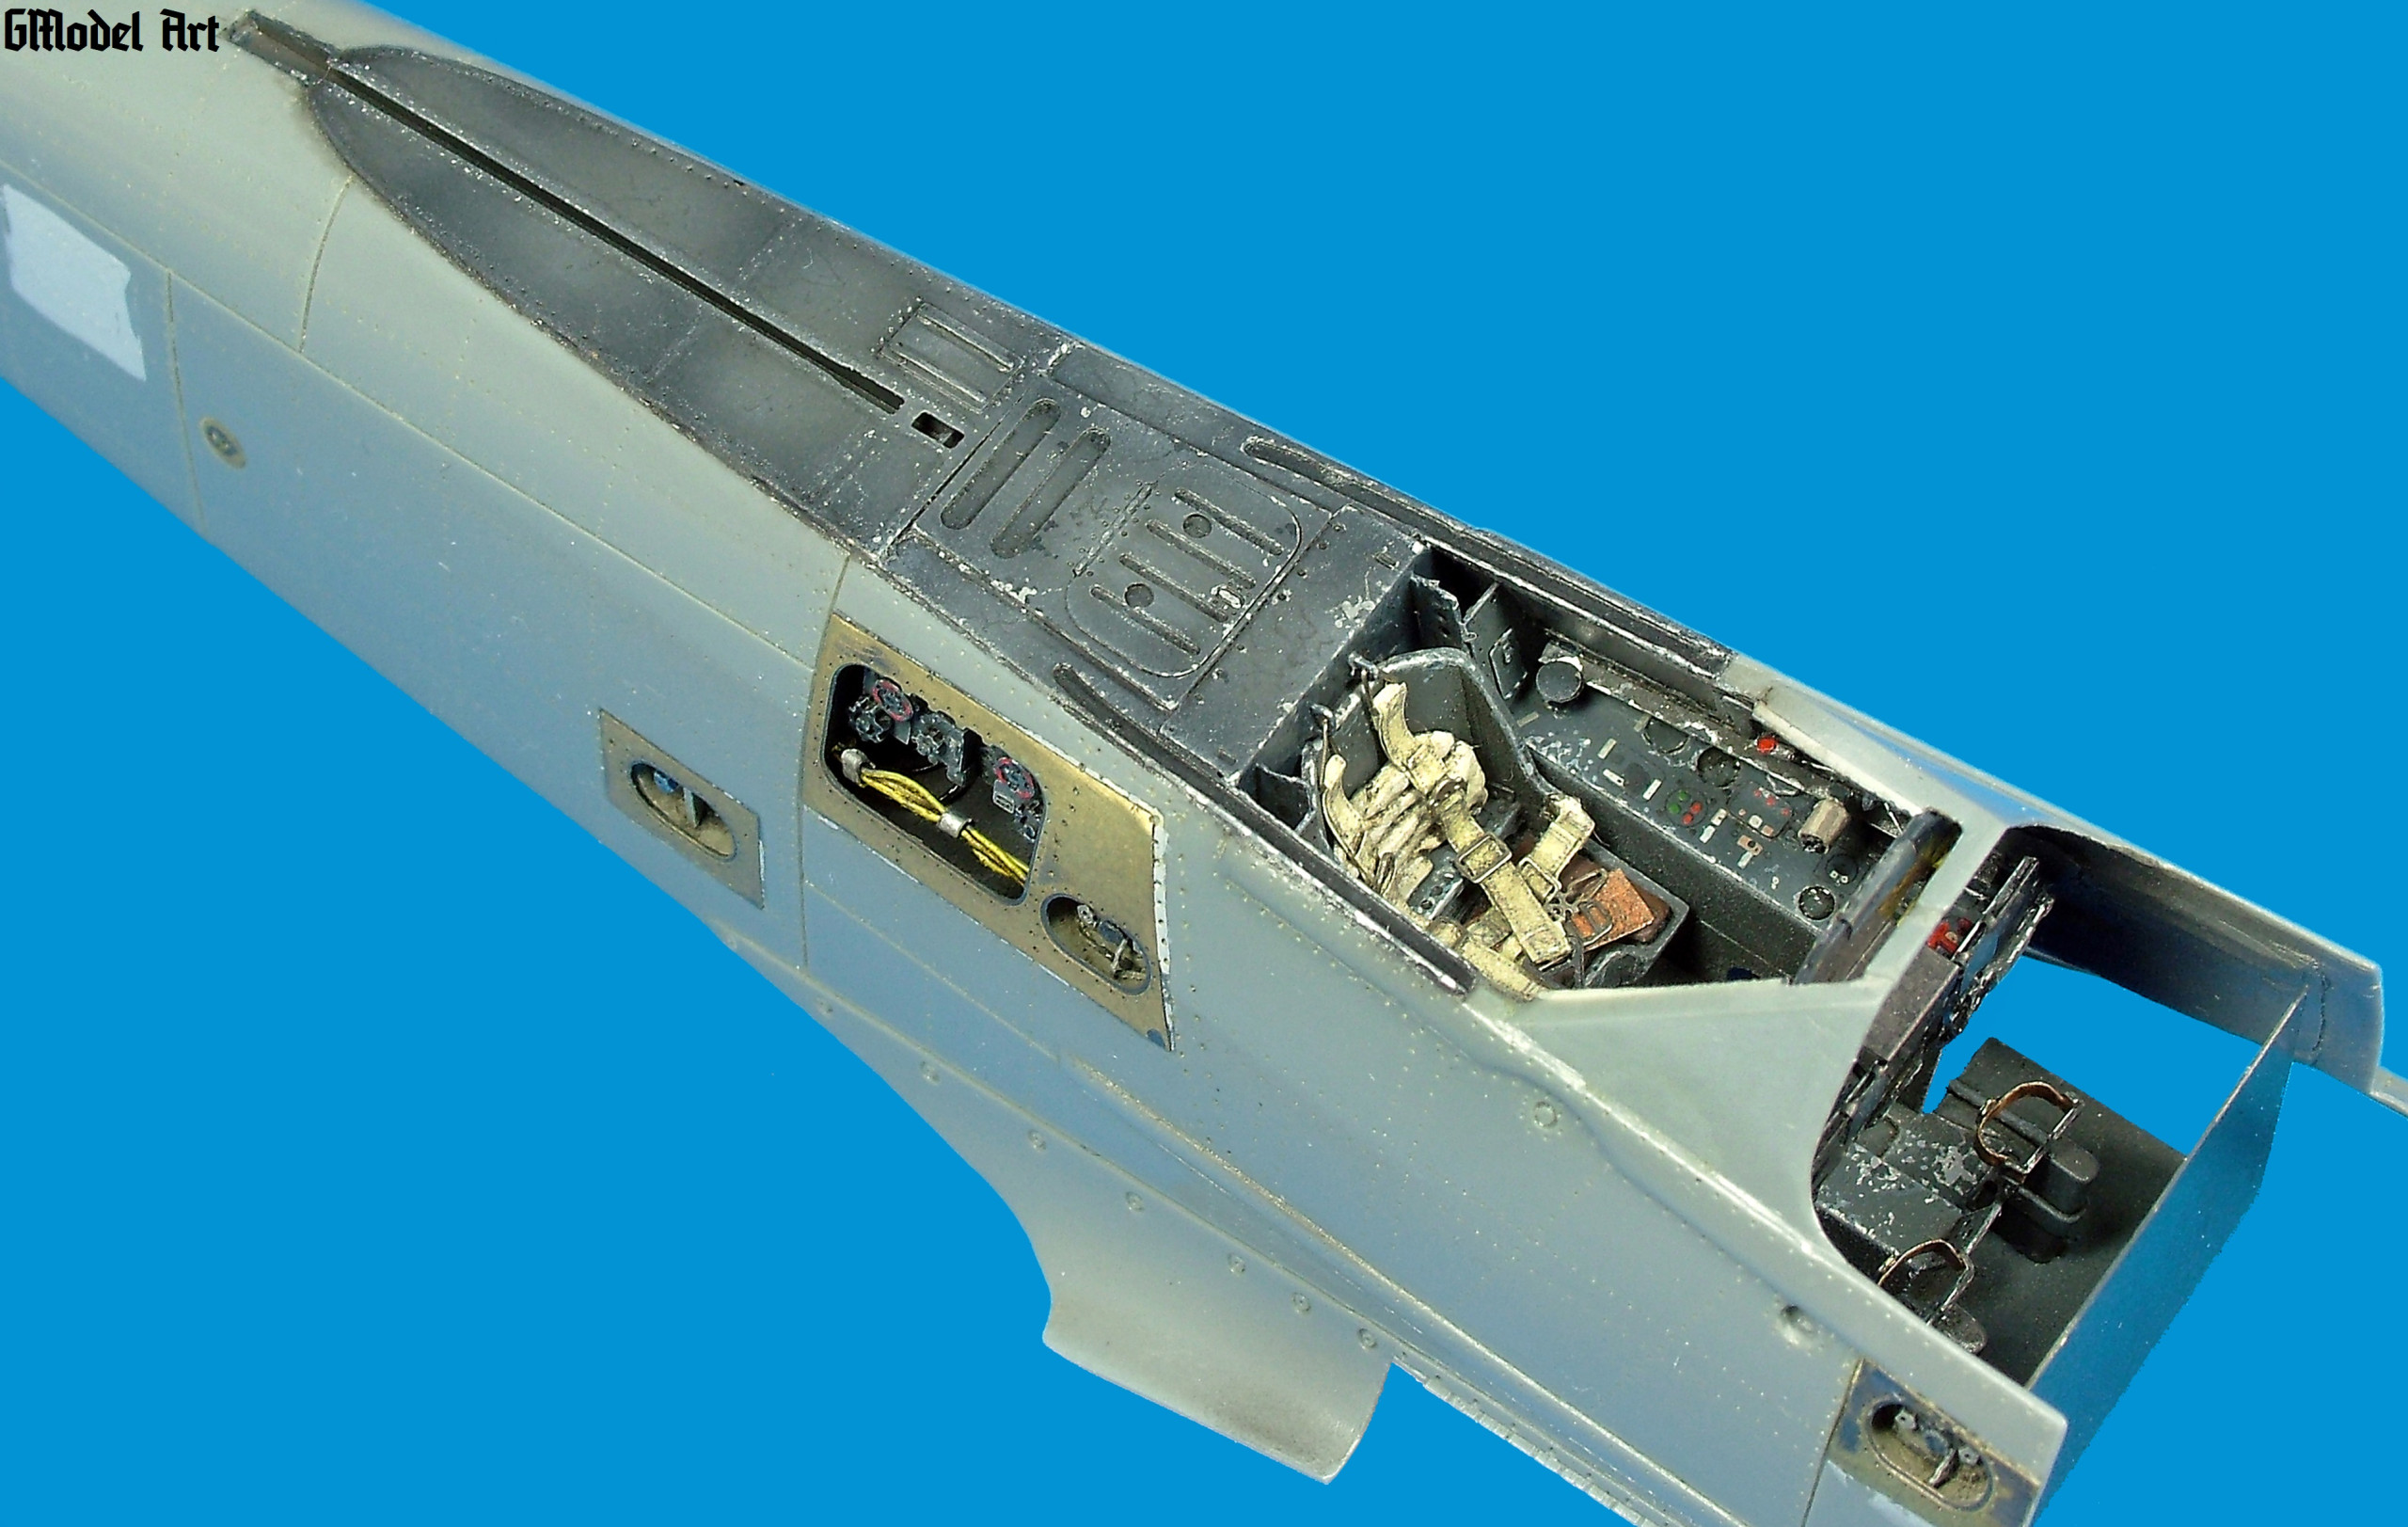
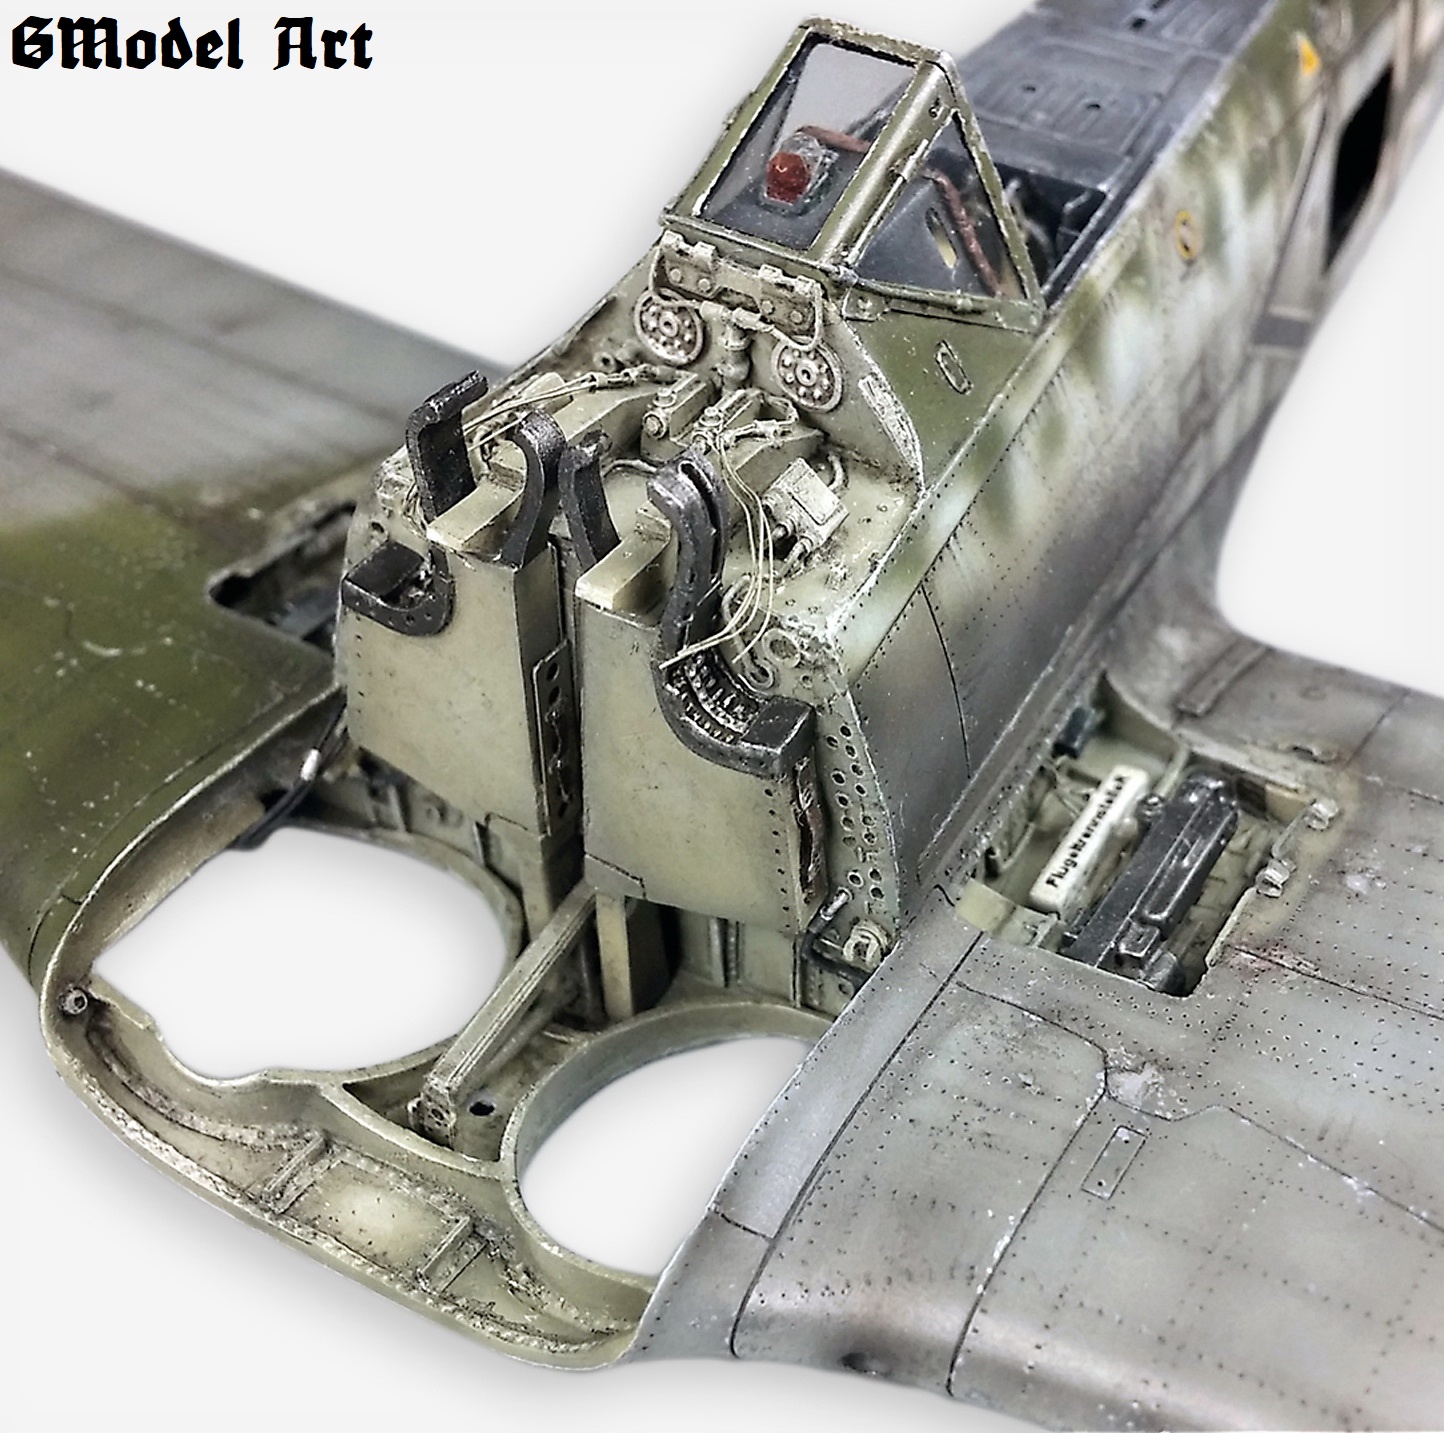
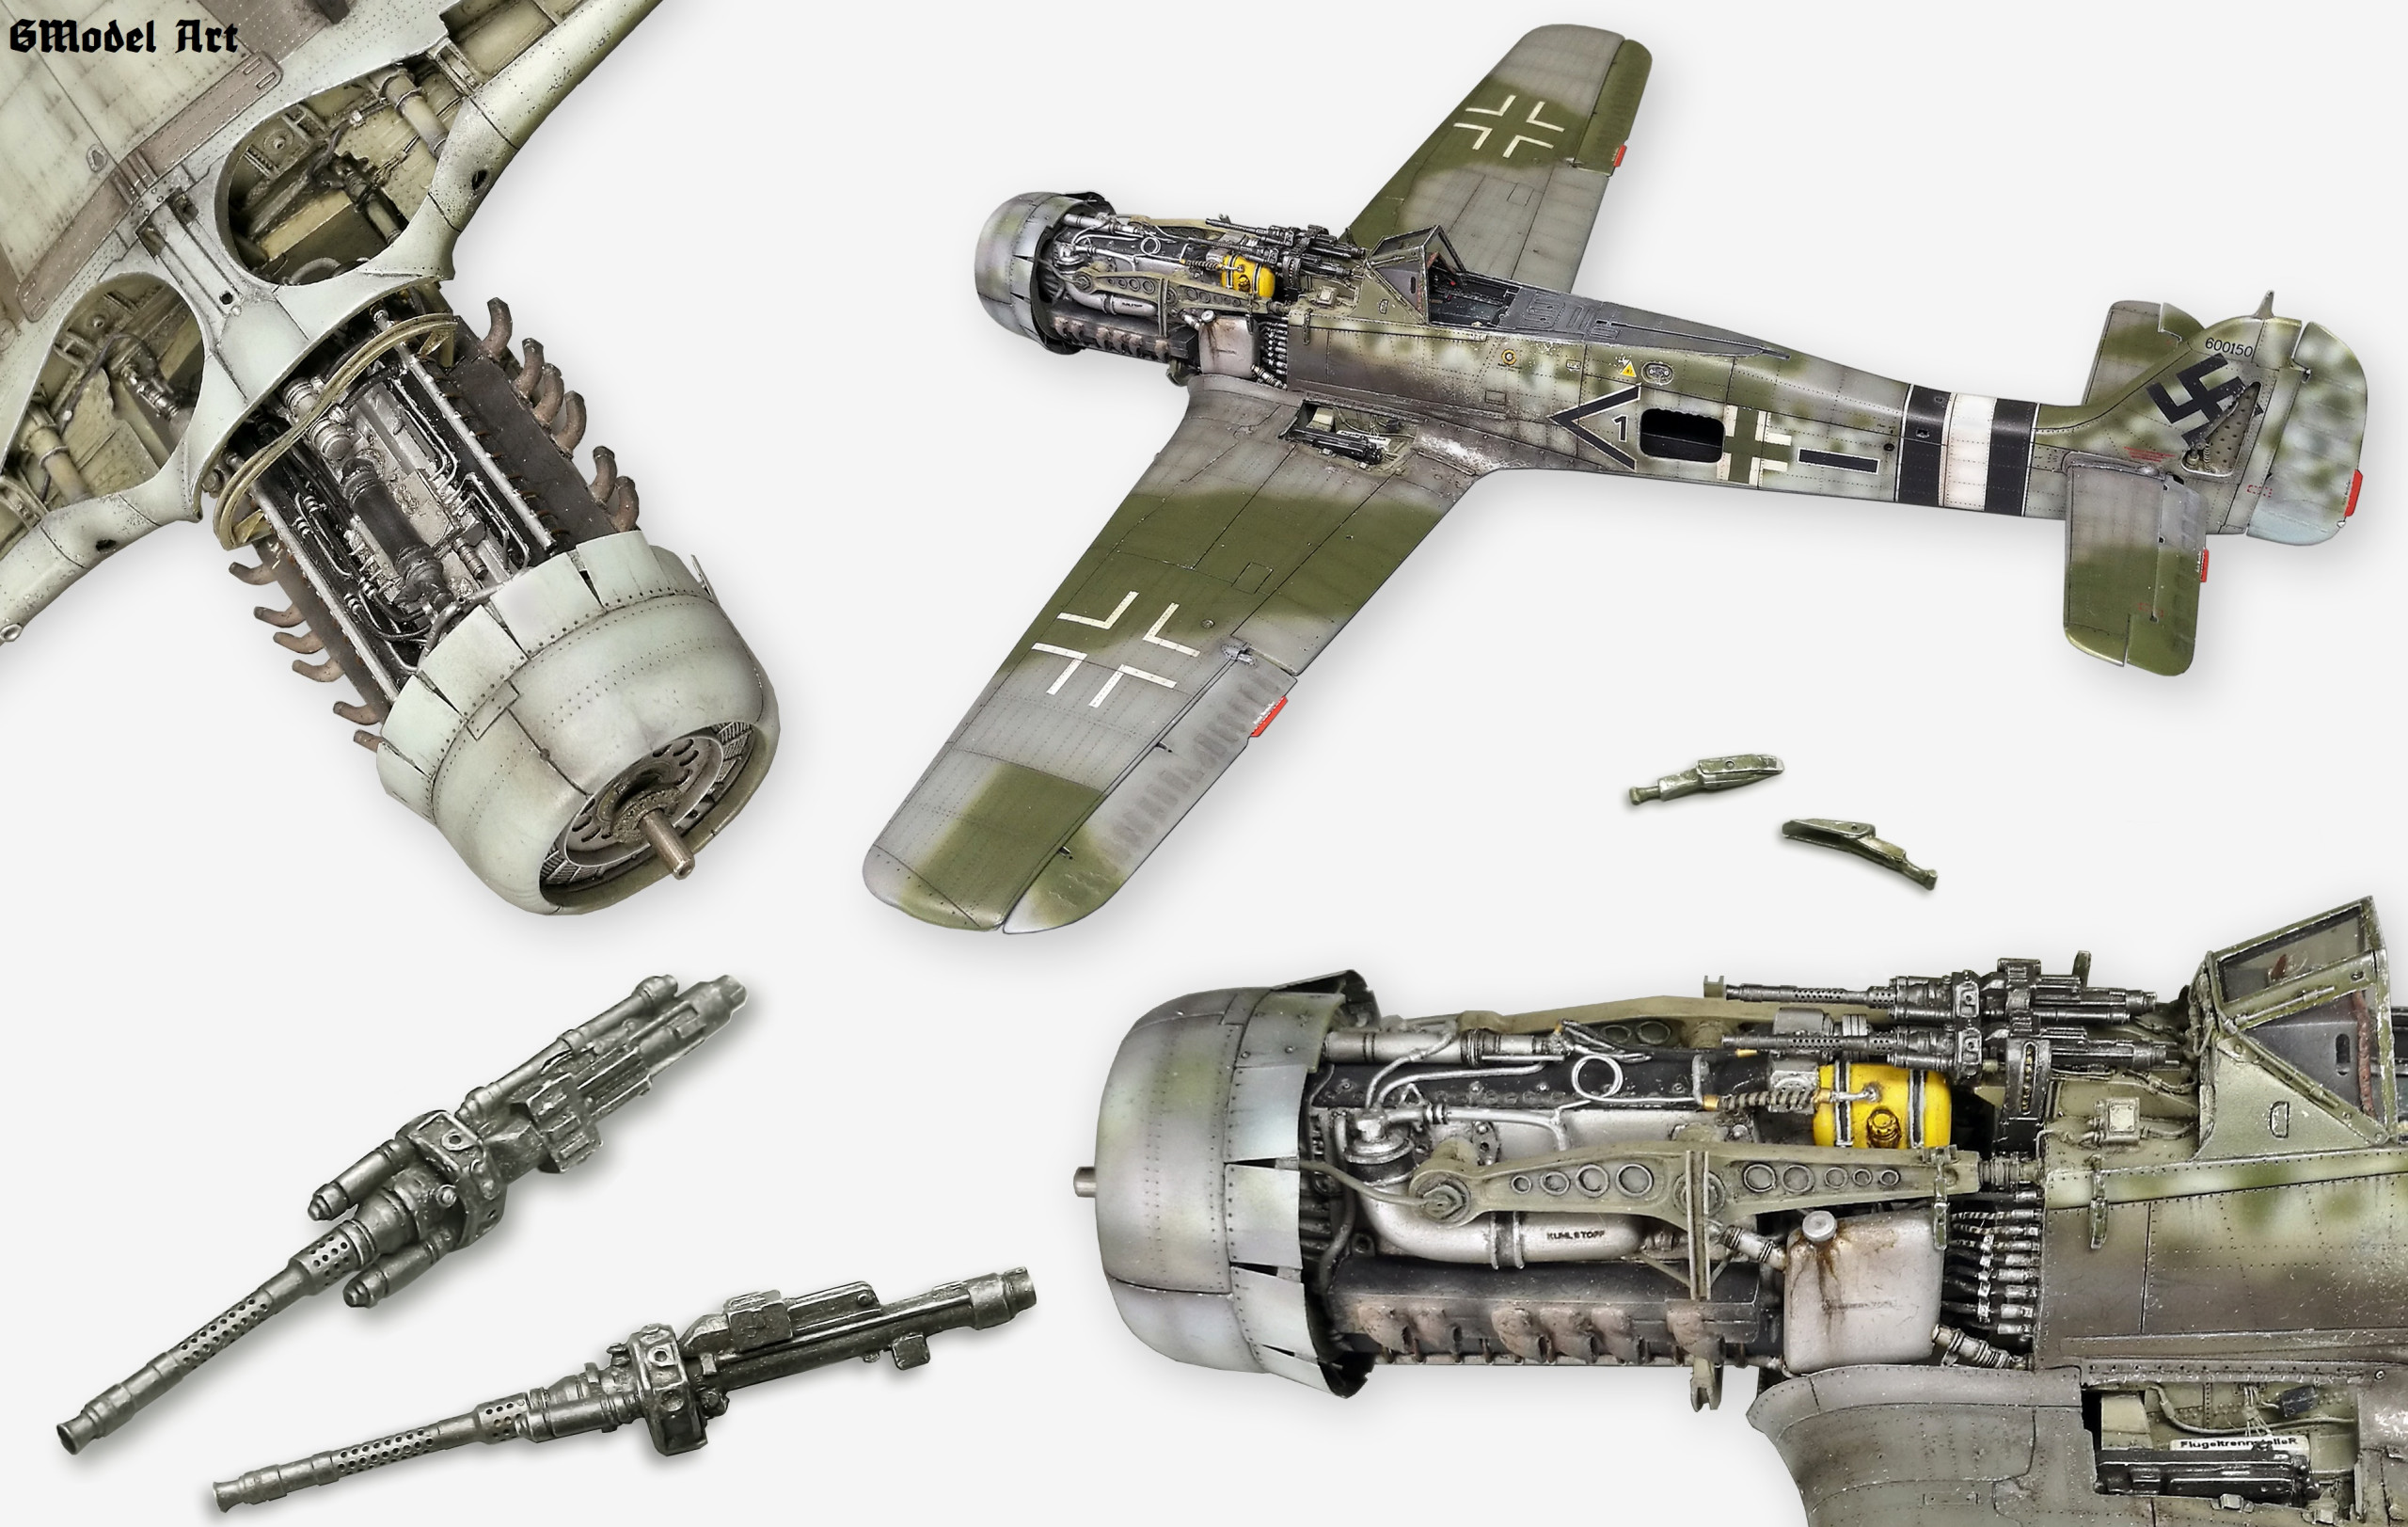
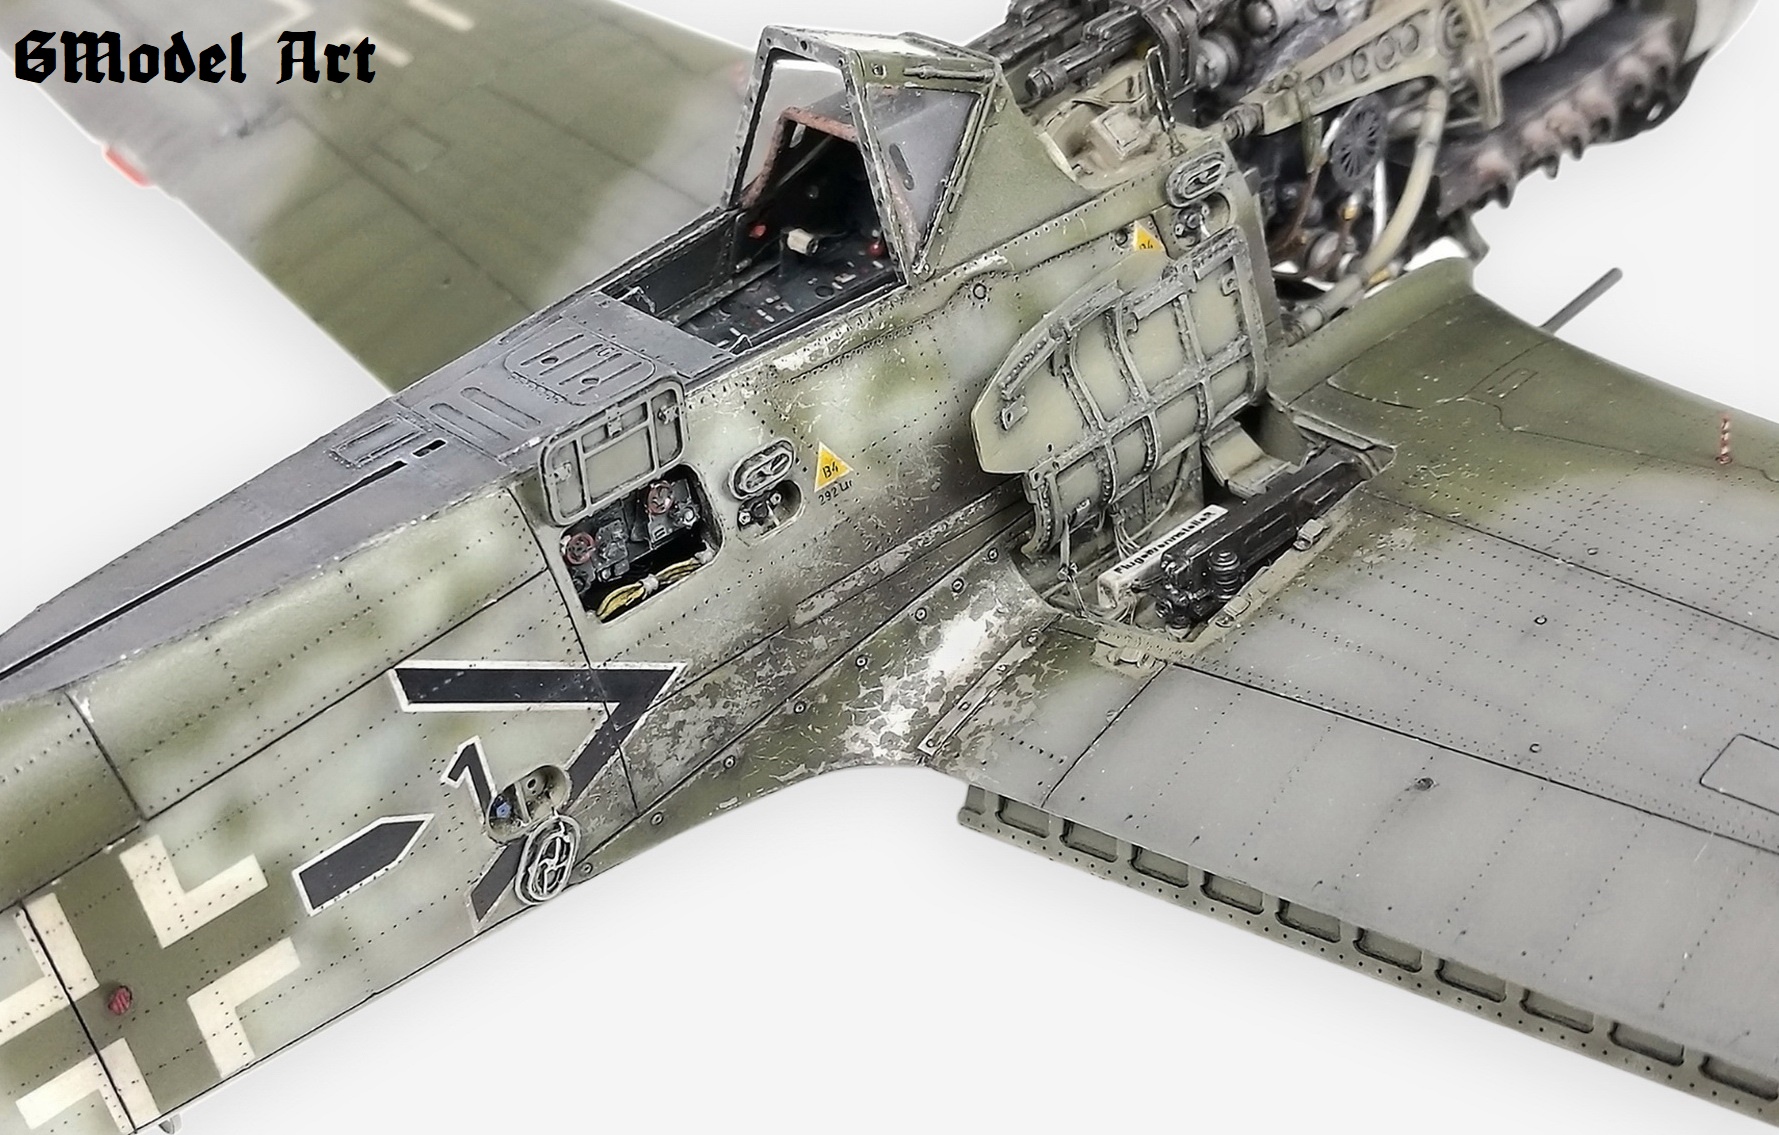
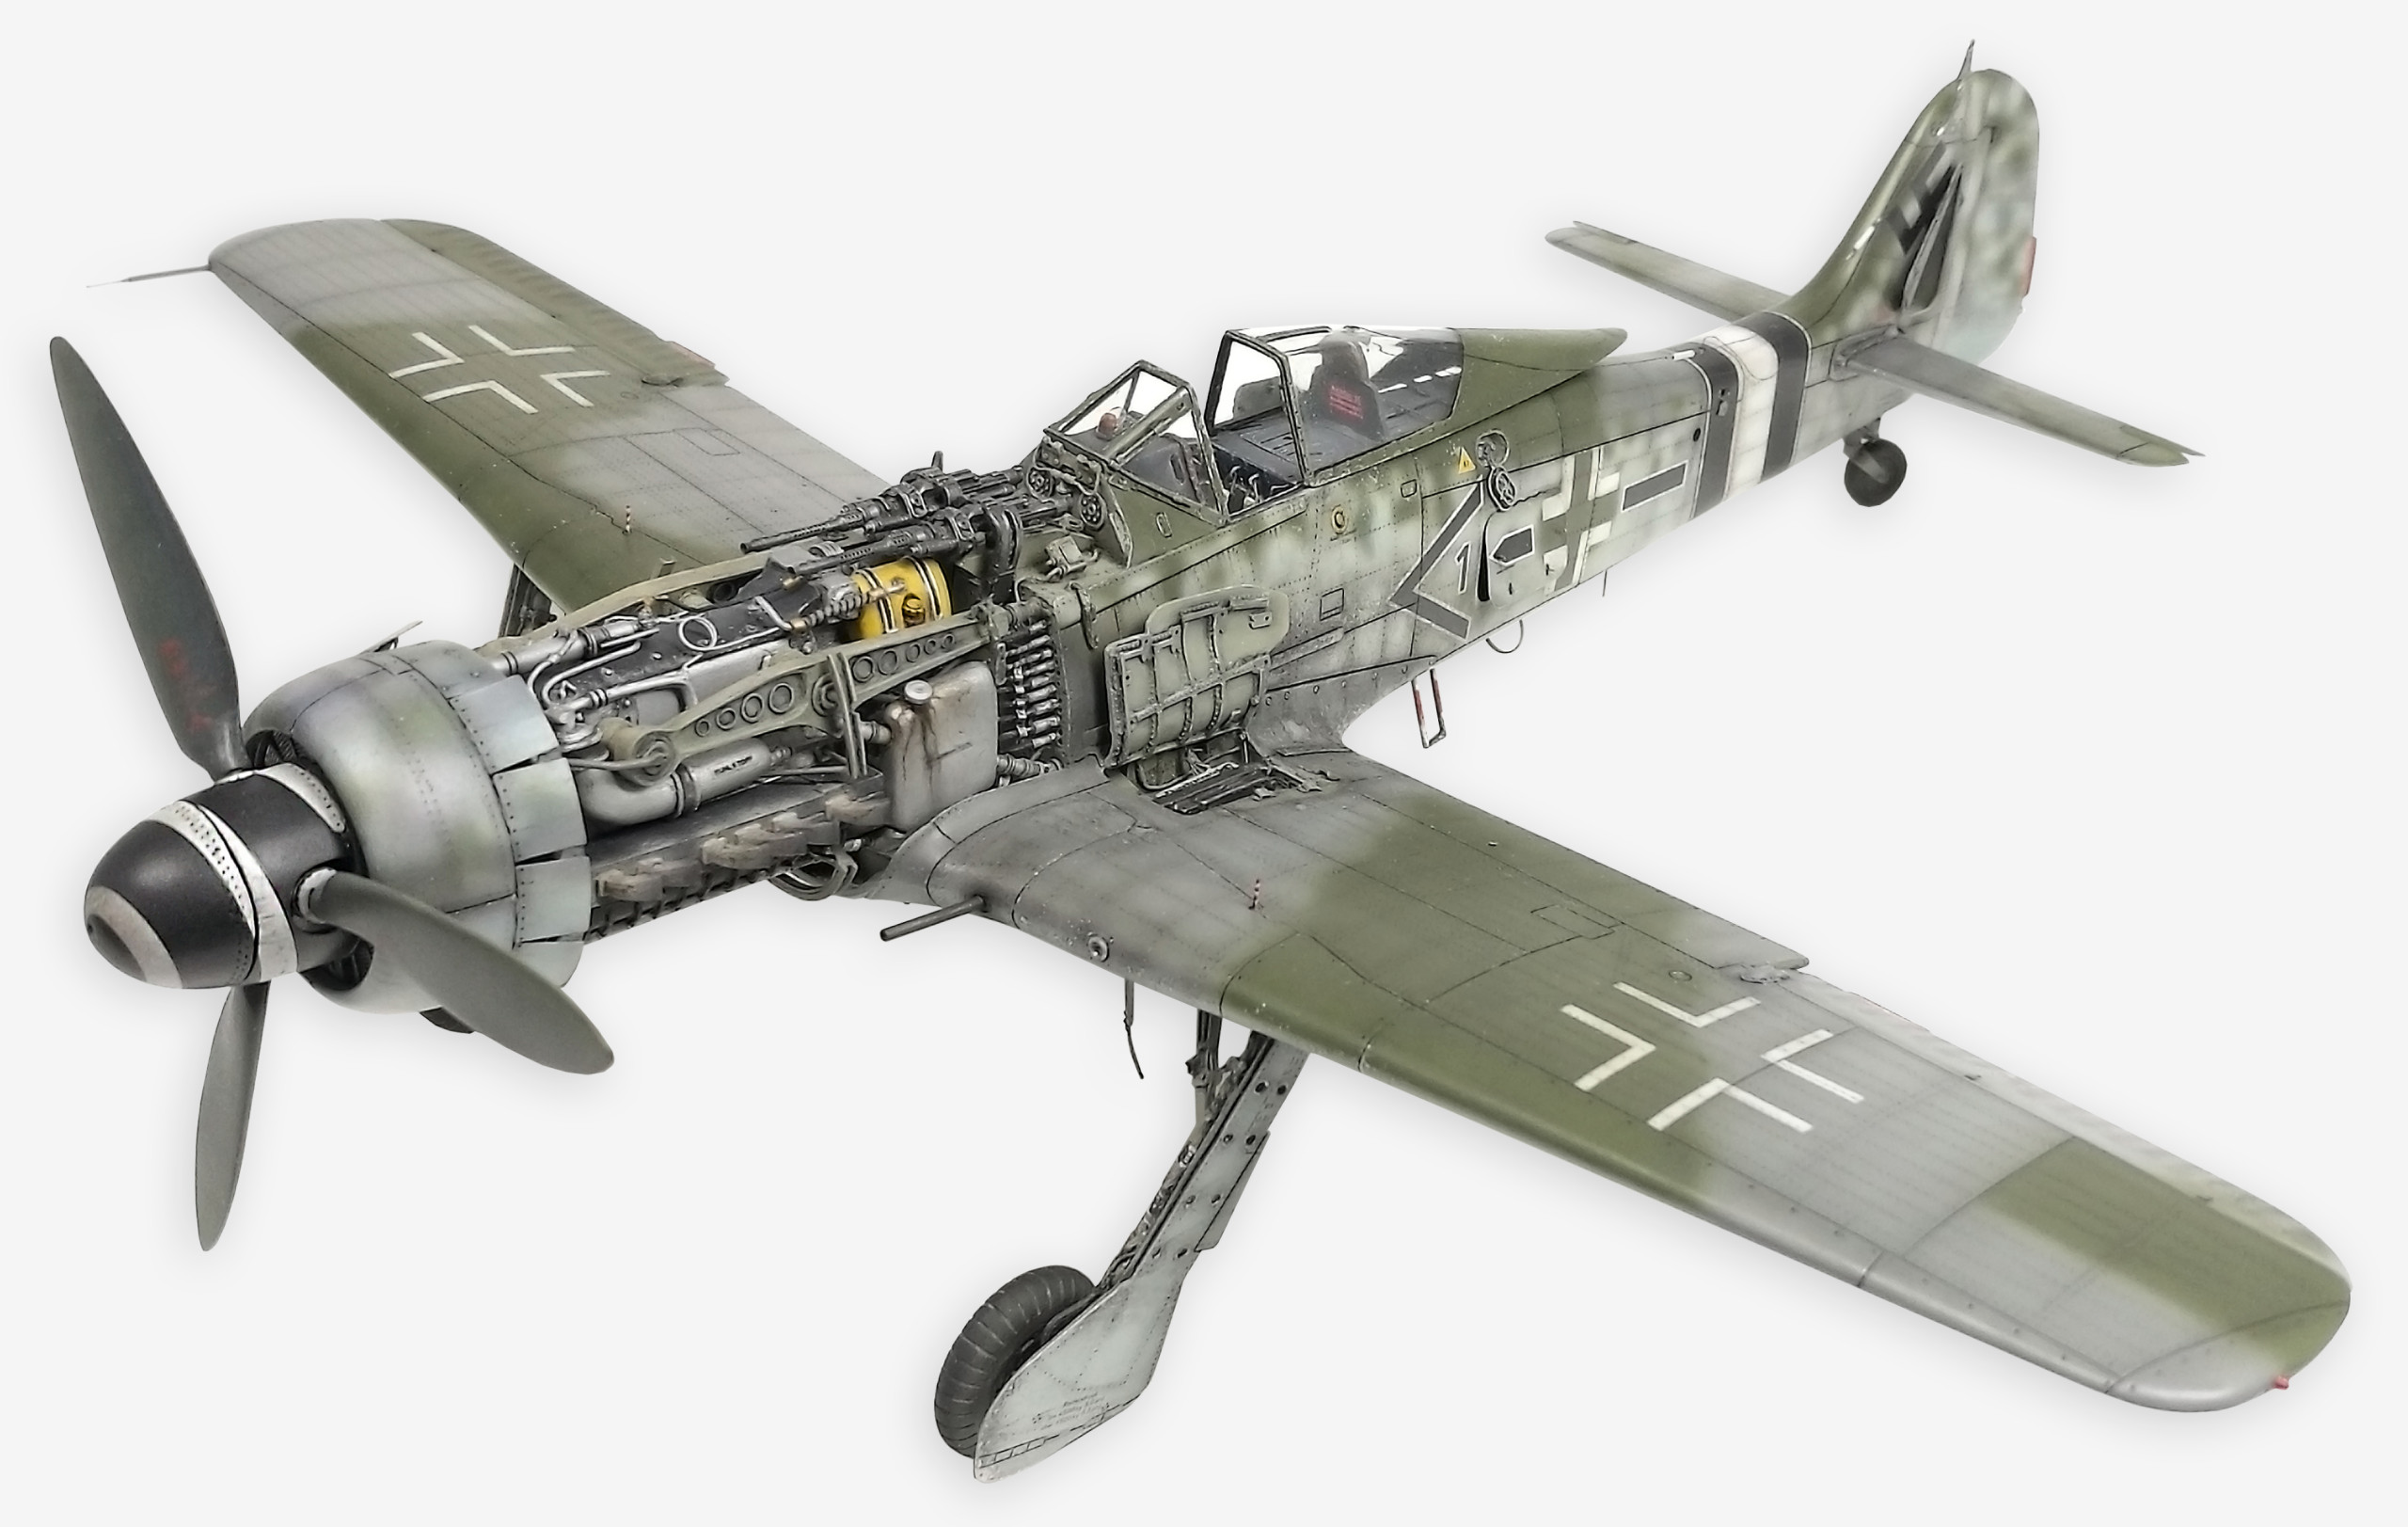
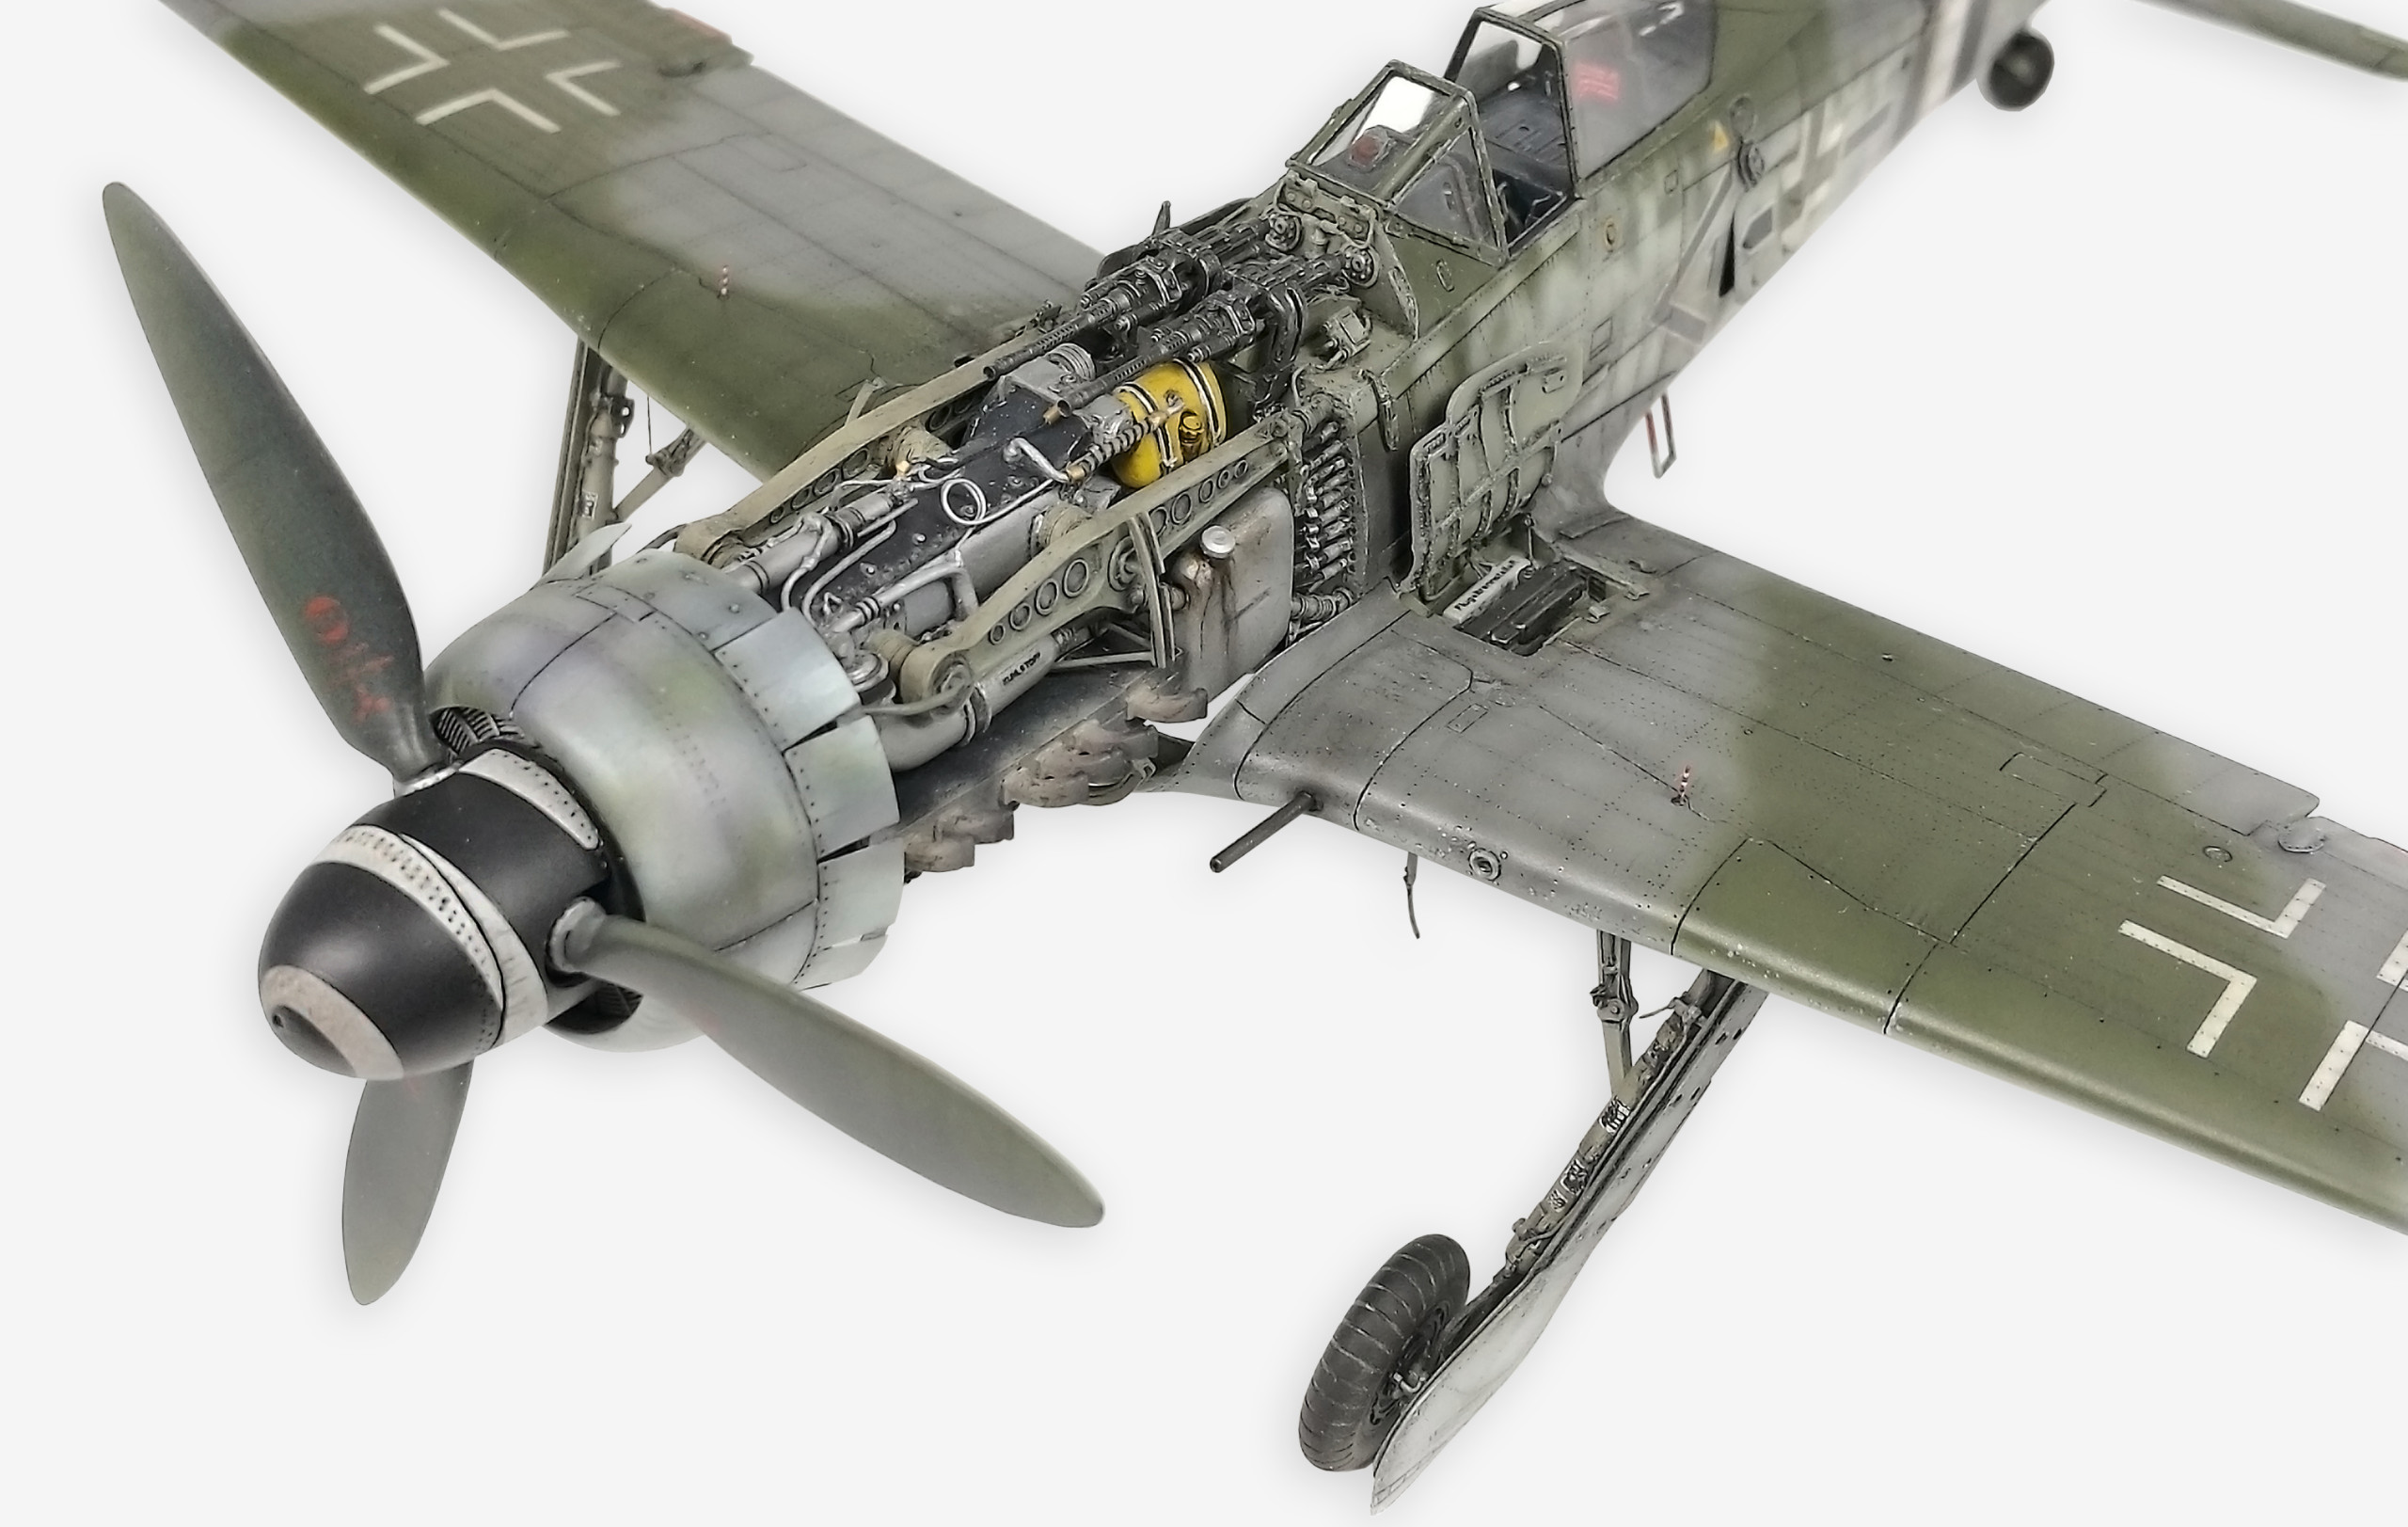
Cockpit and other interior parts of the fuselage:
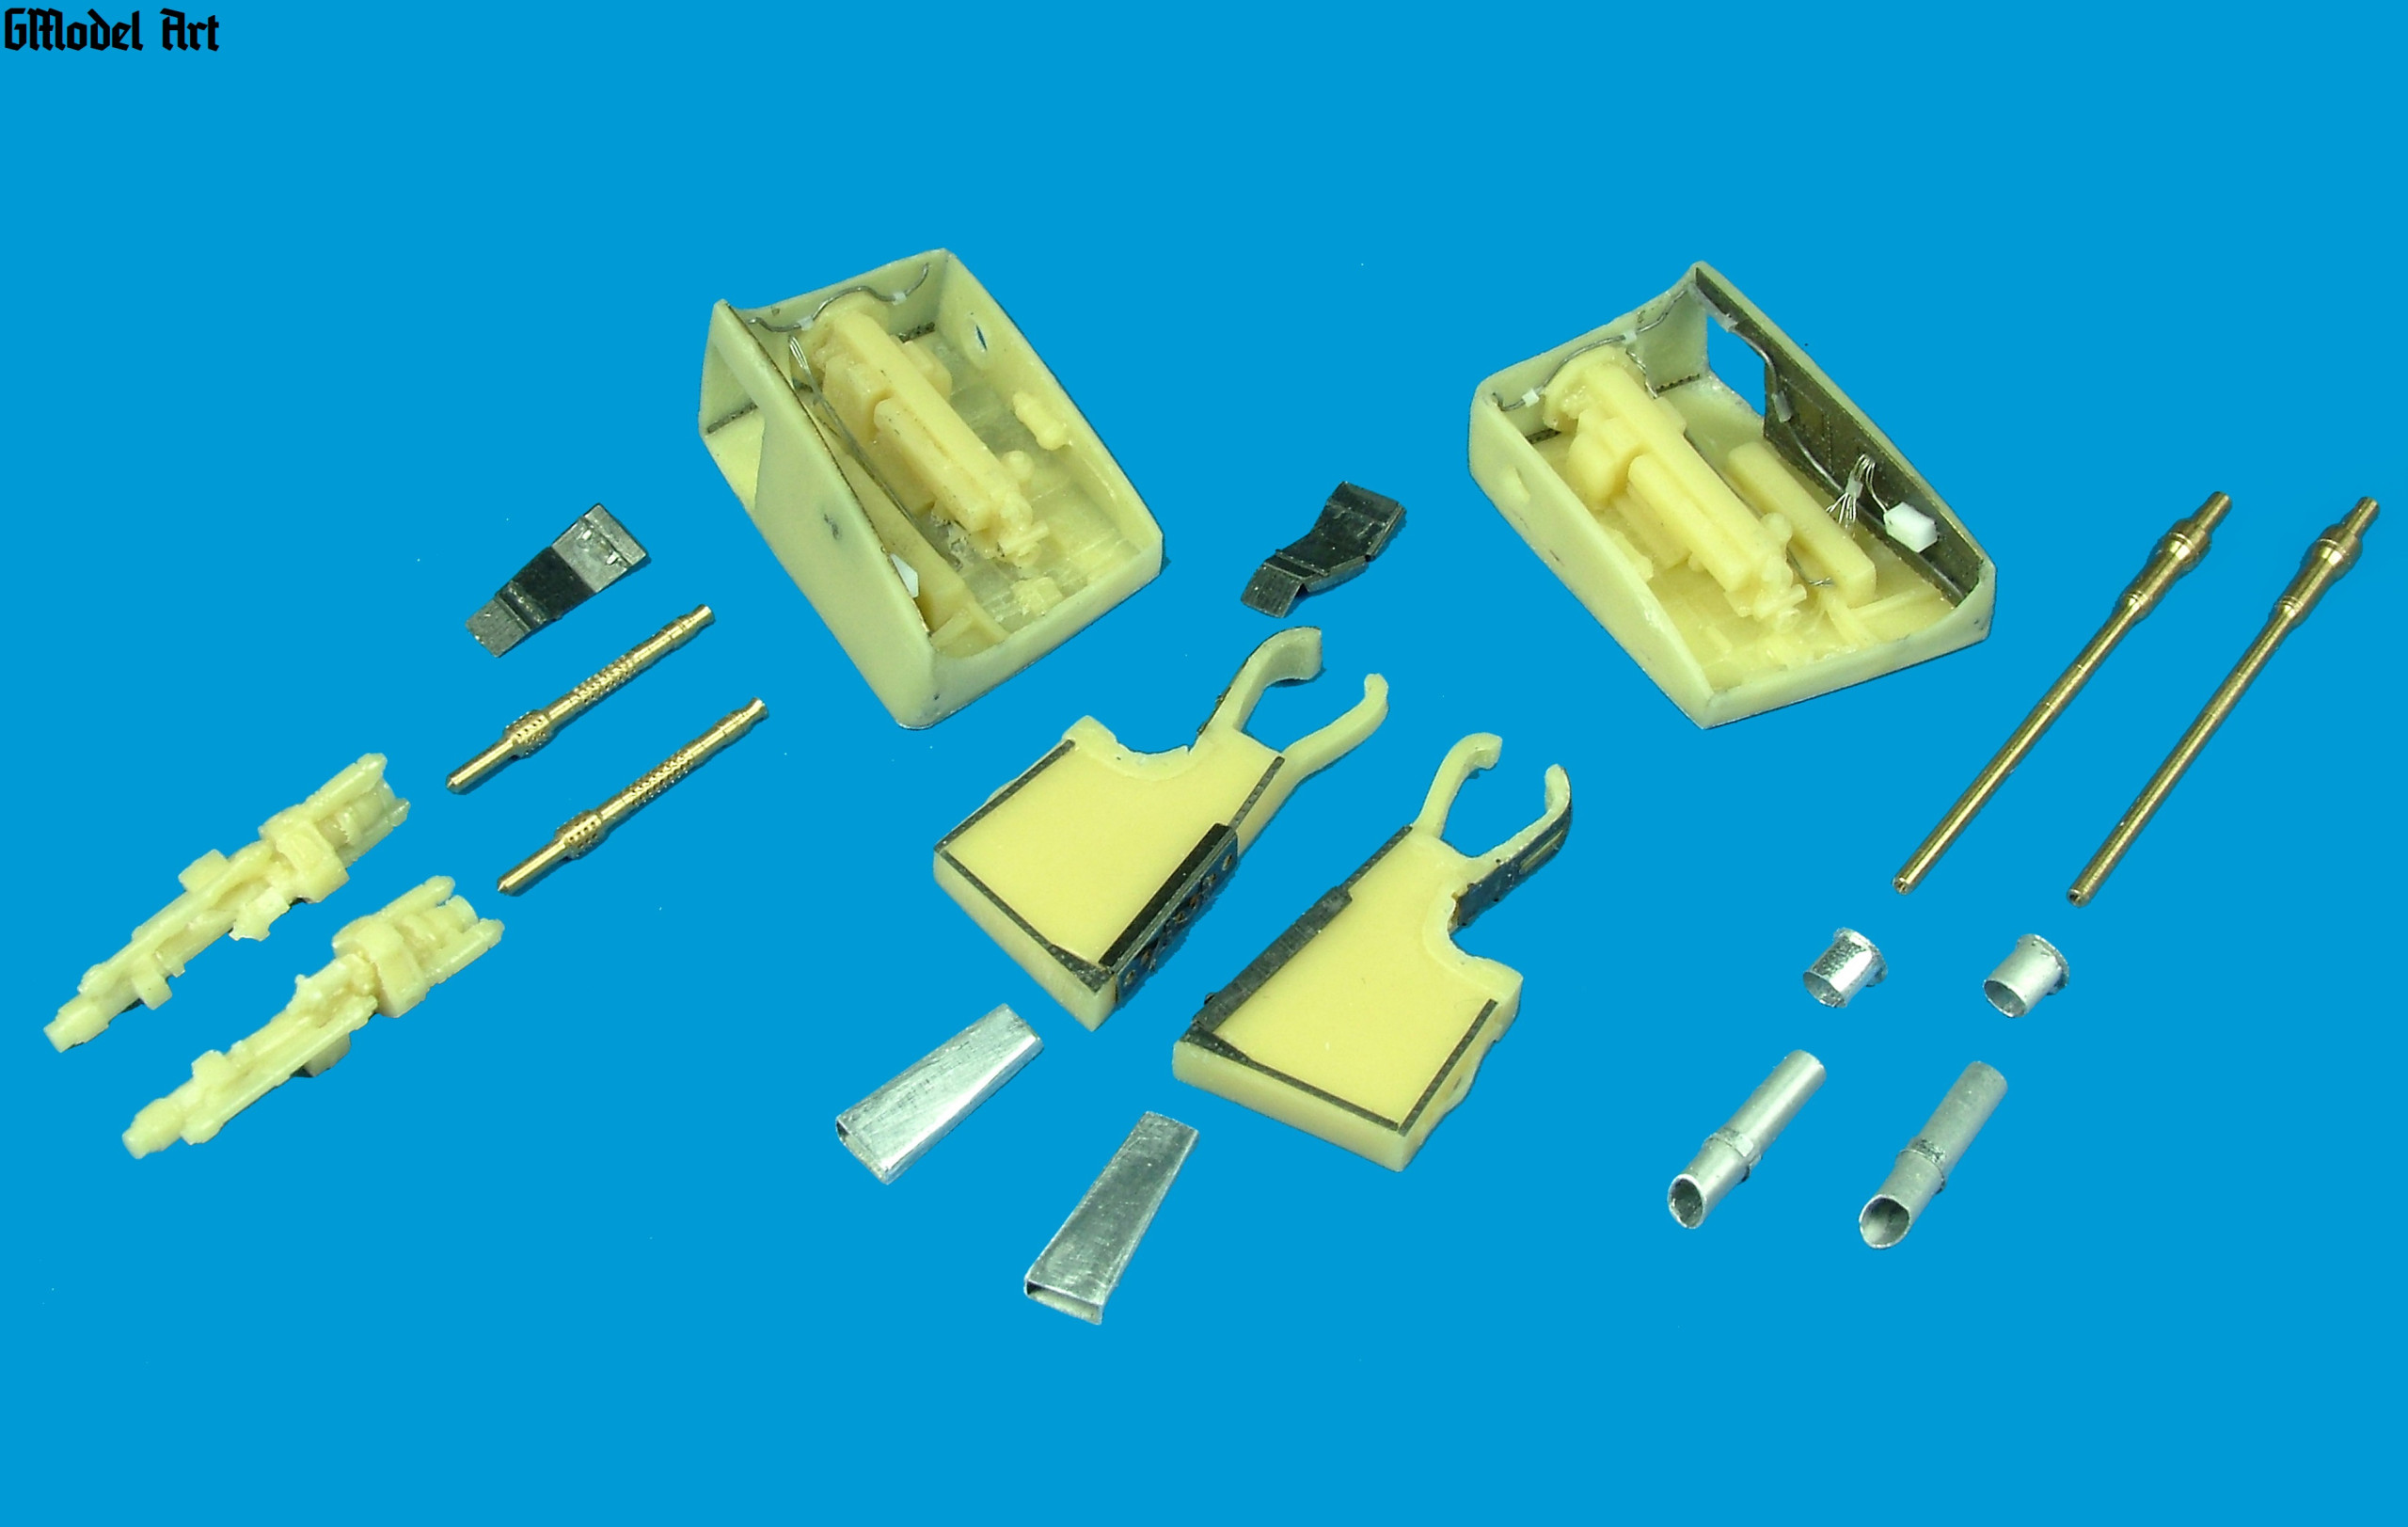
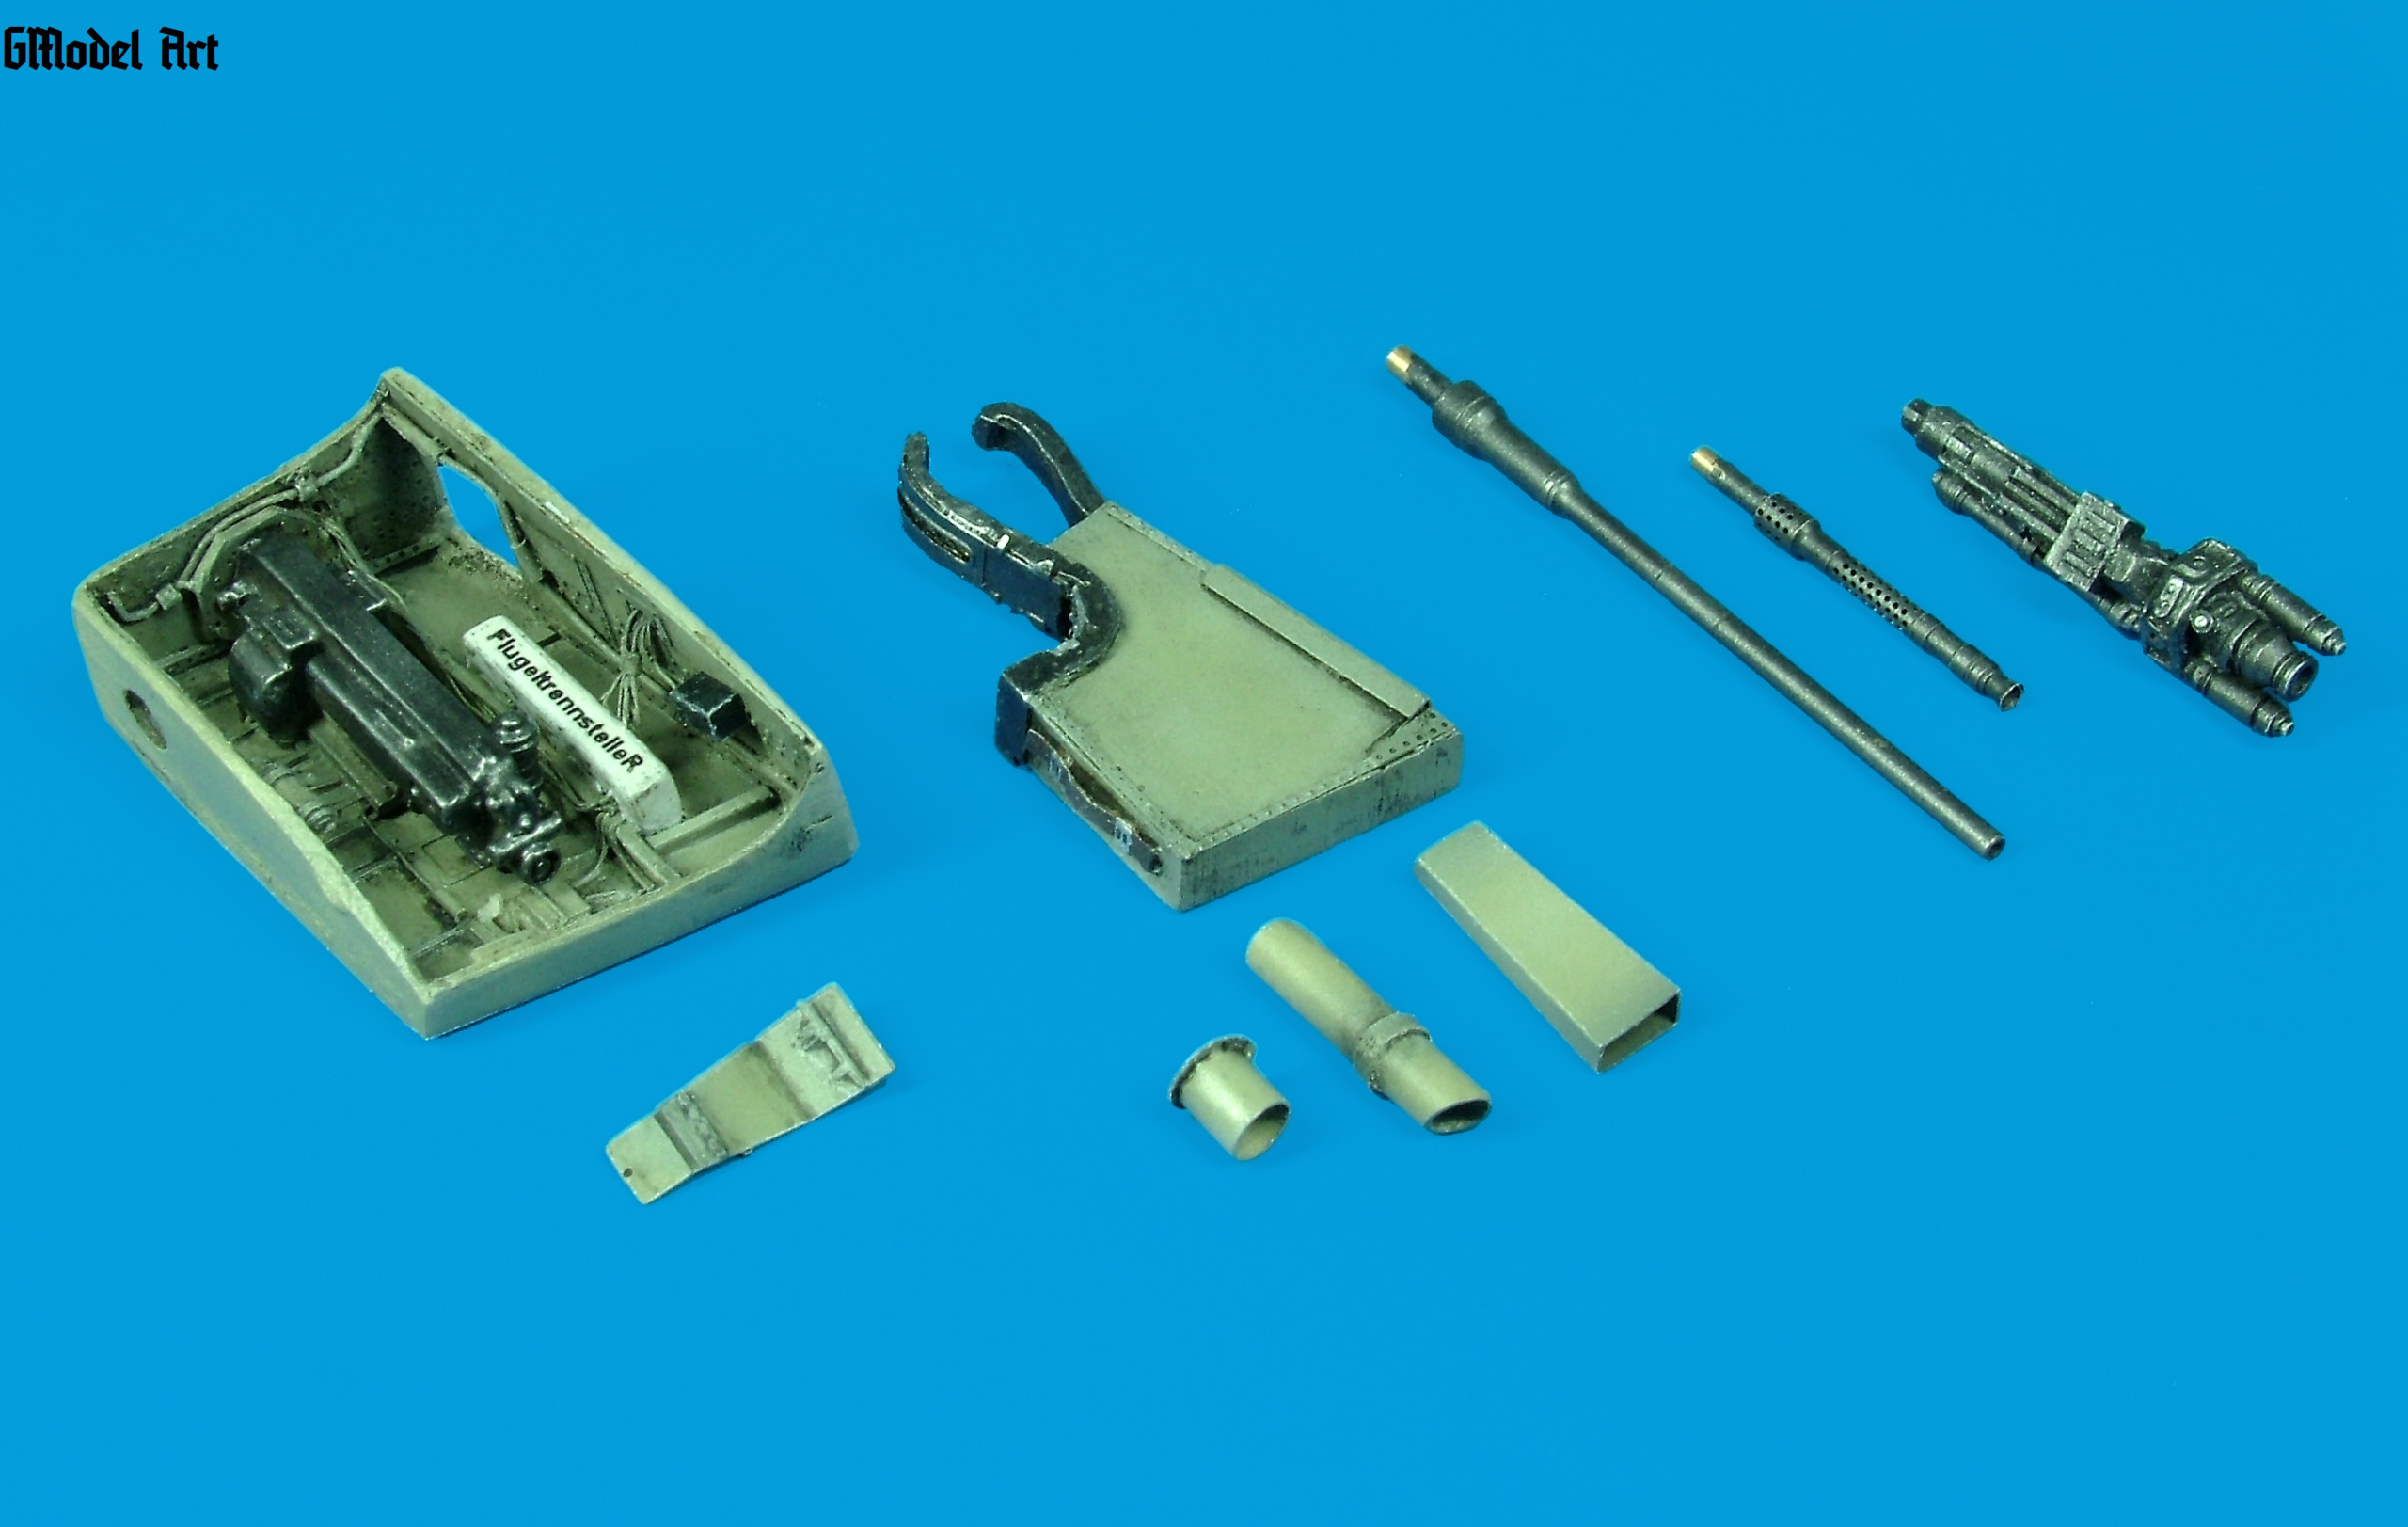
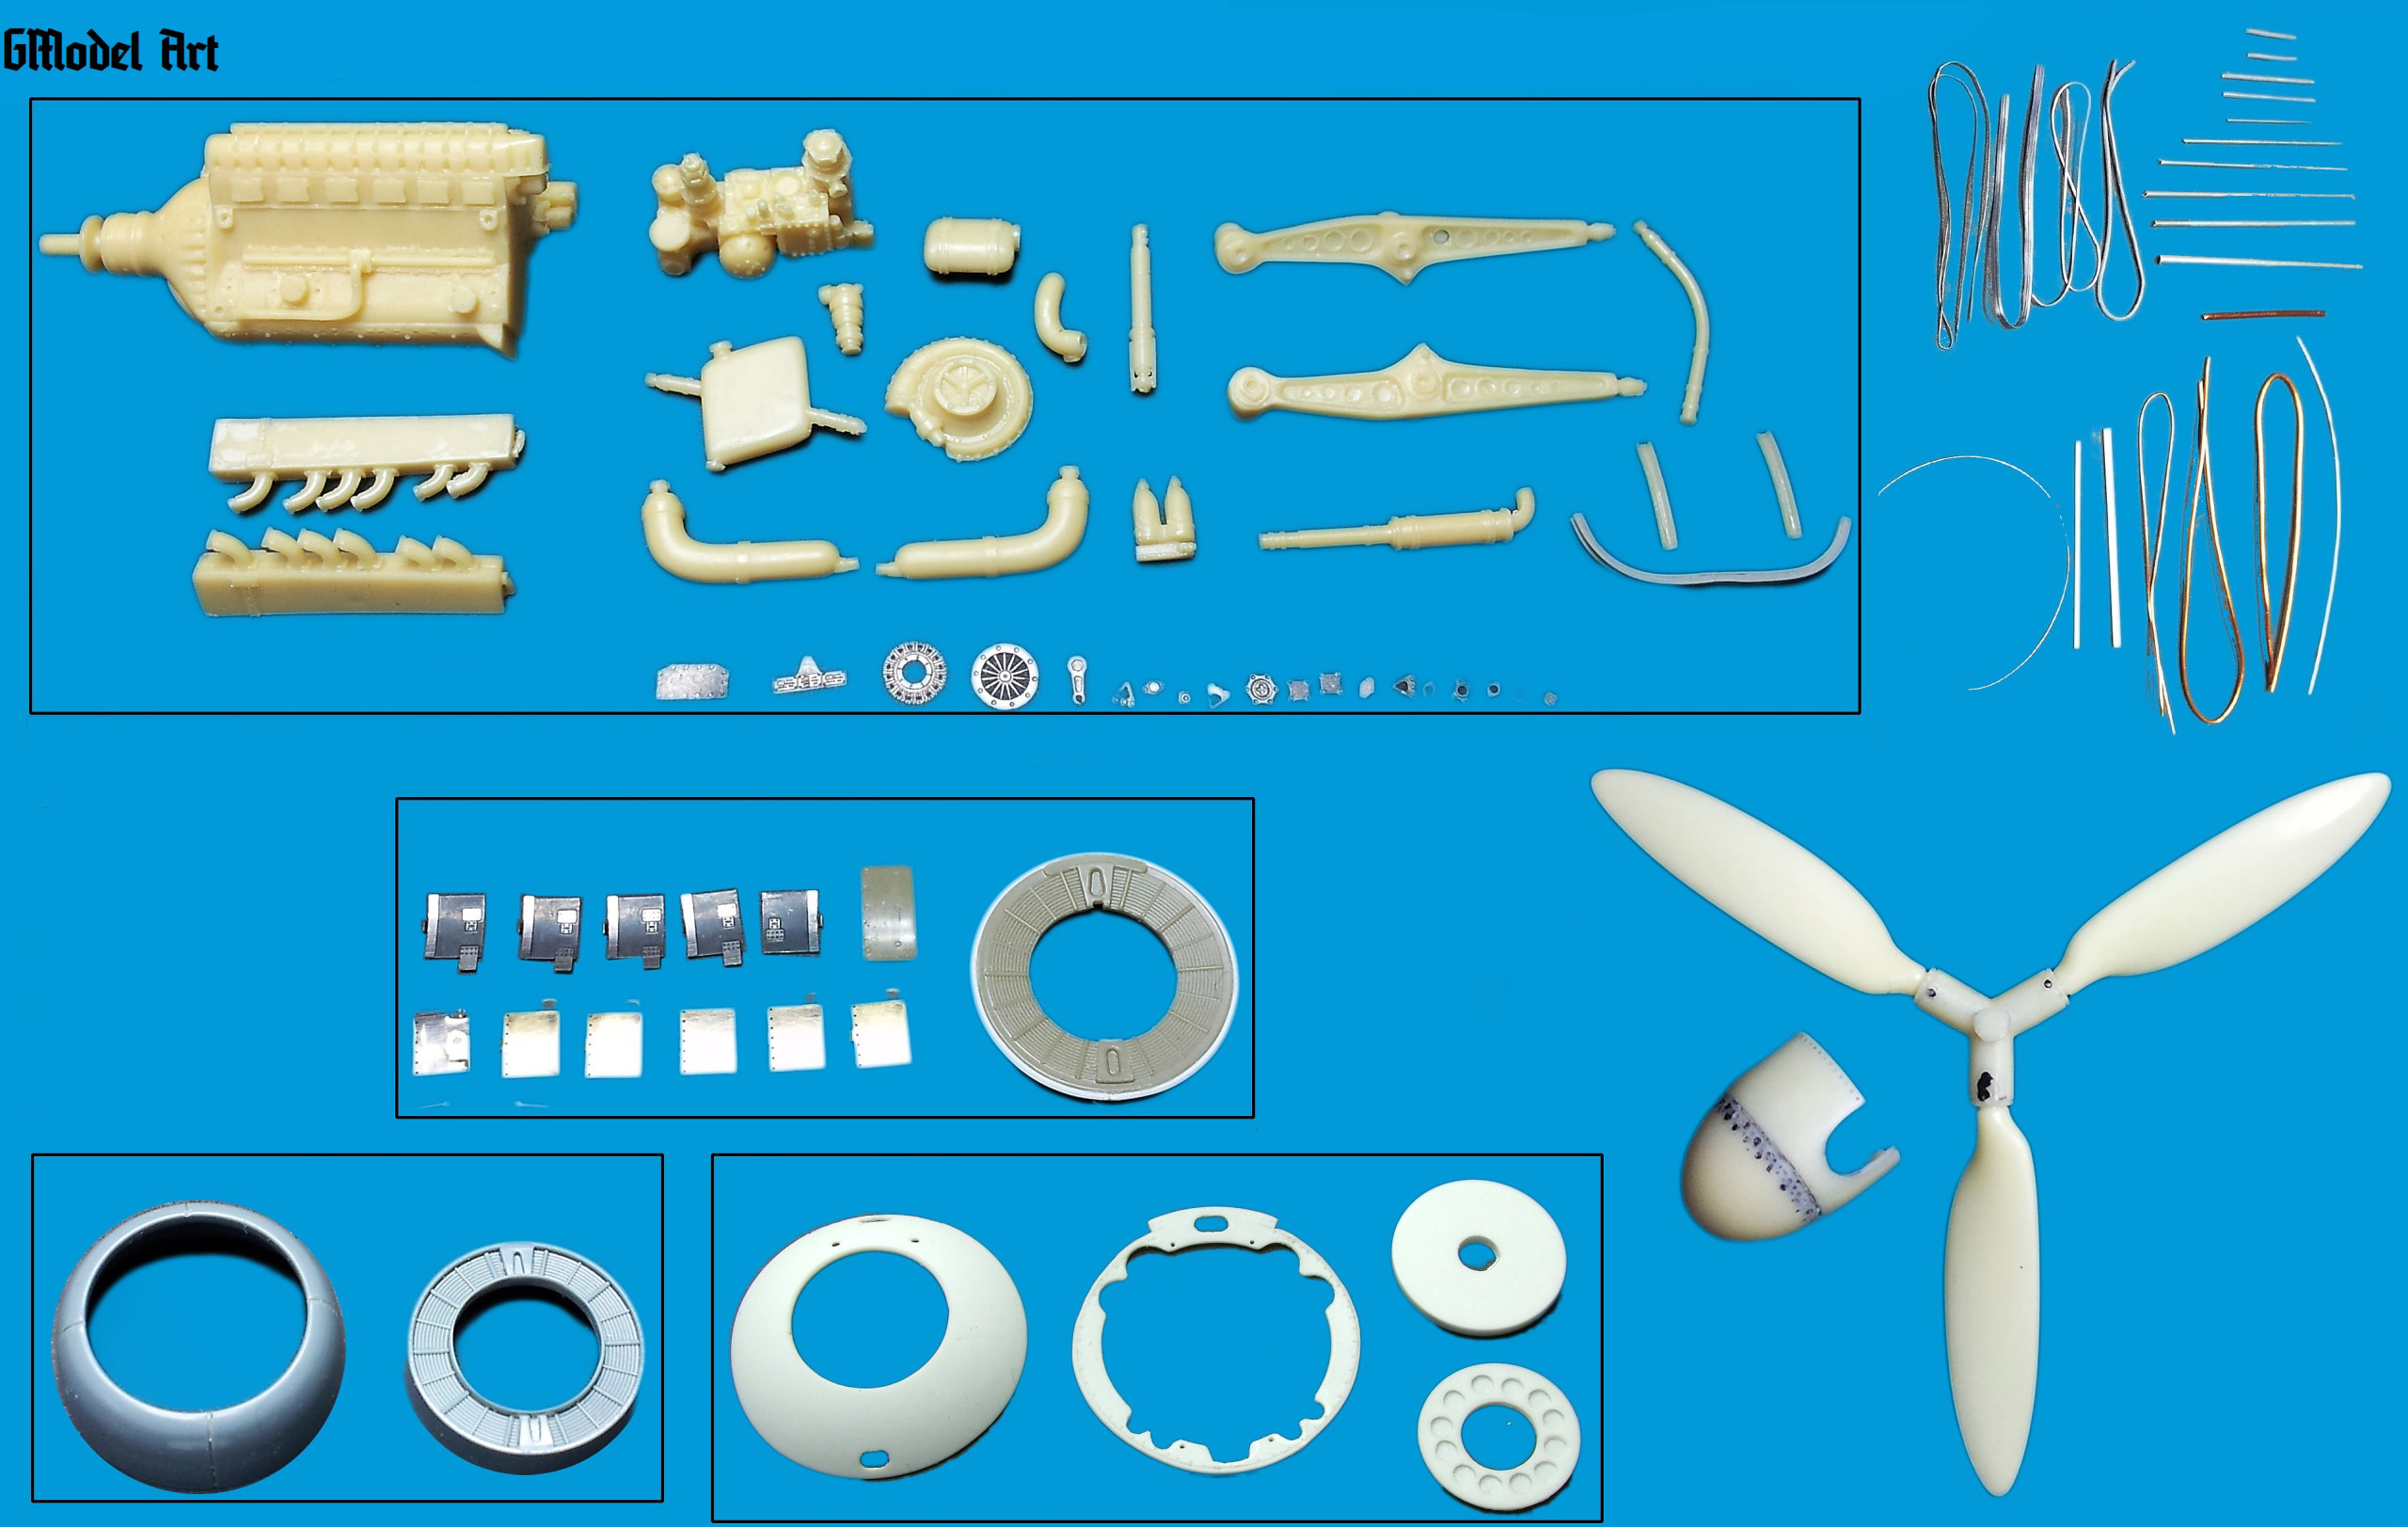
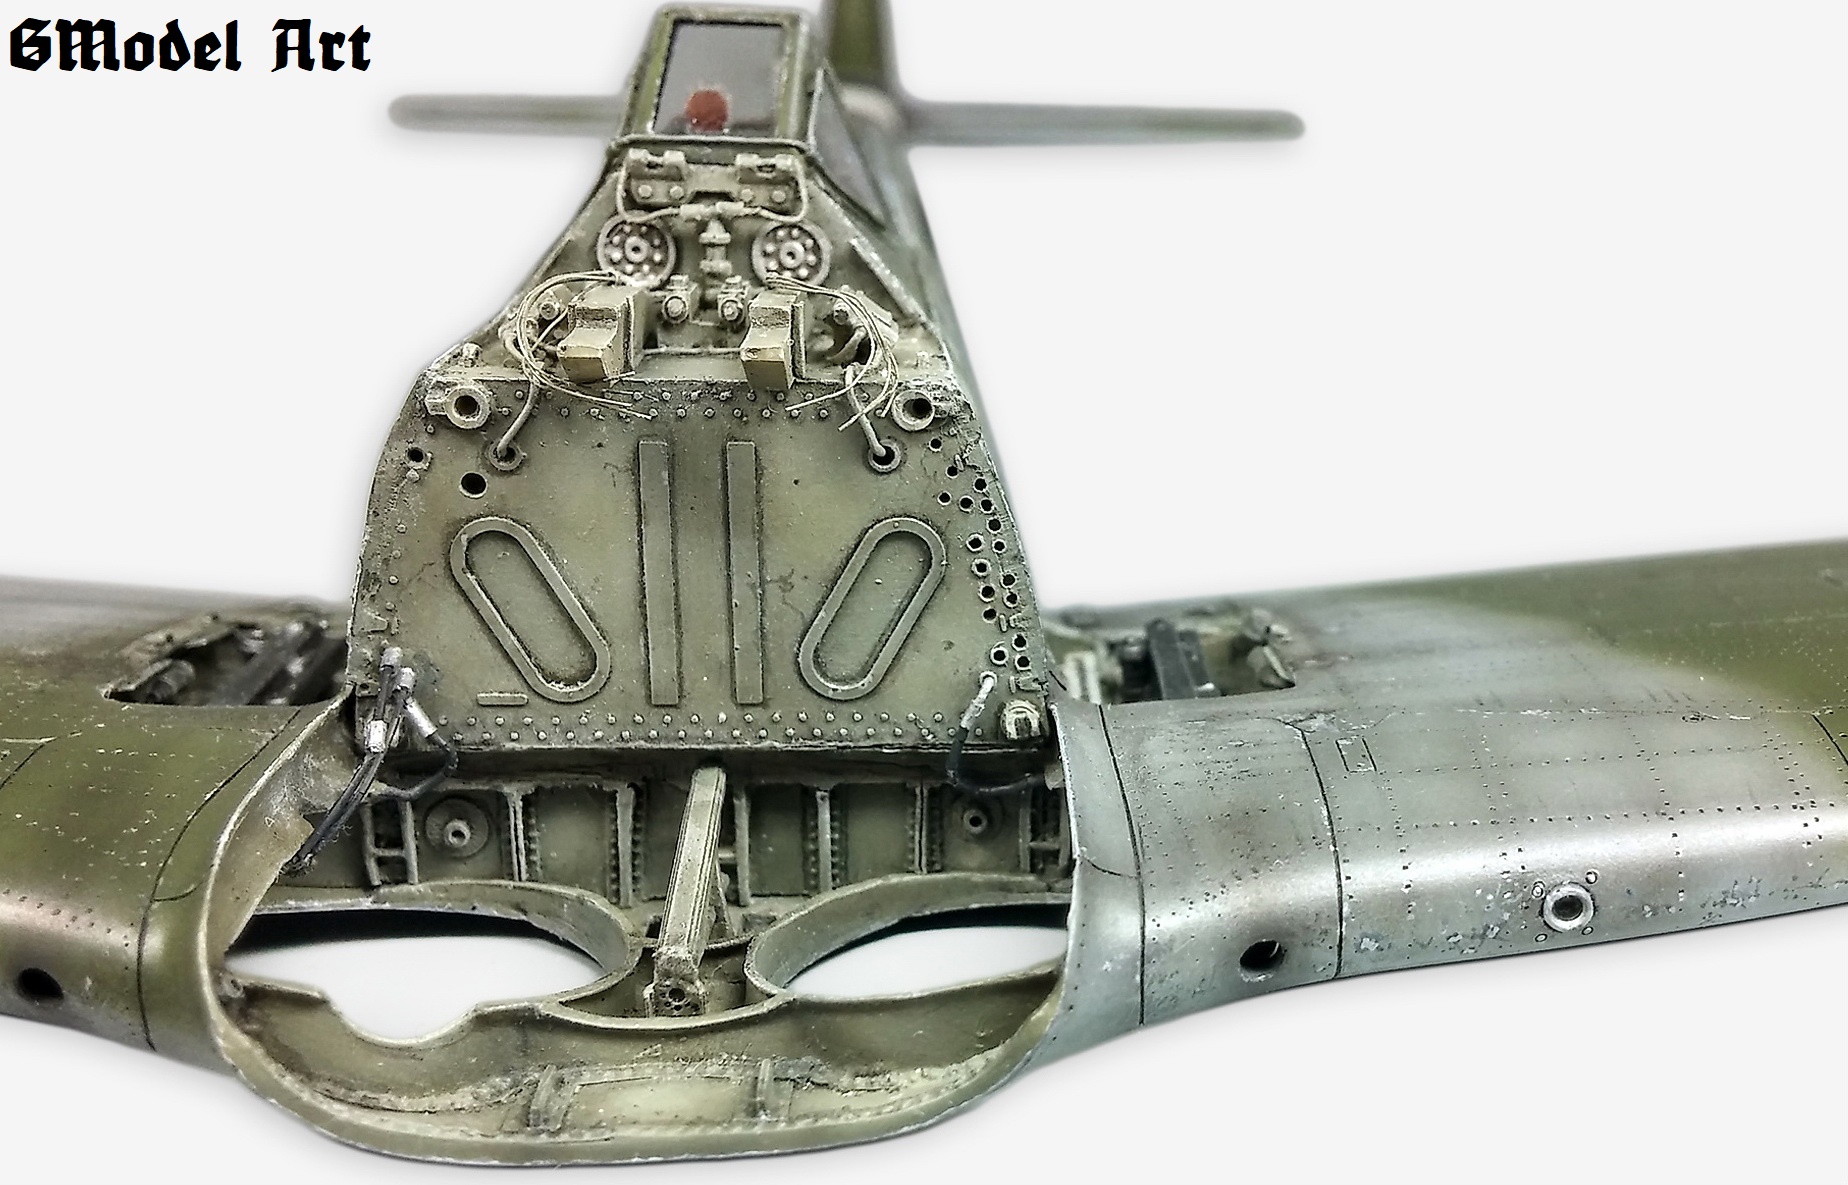
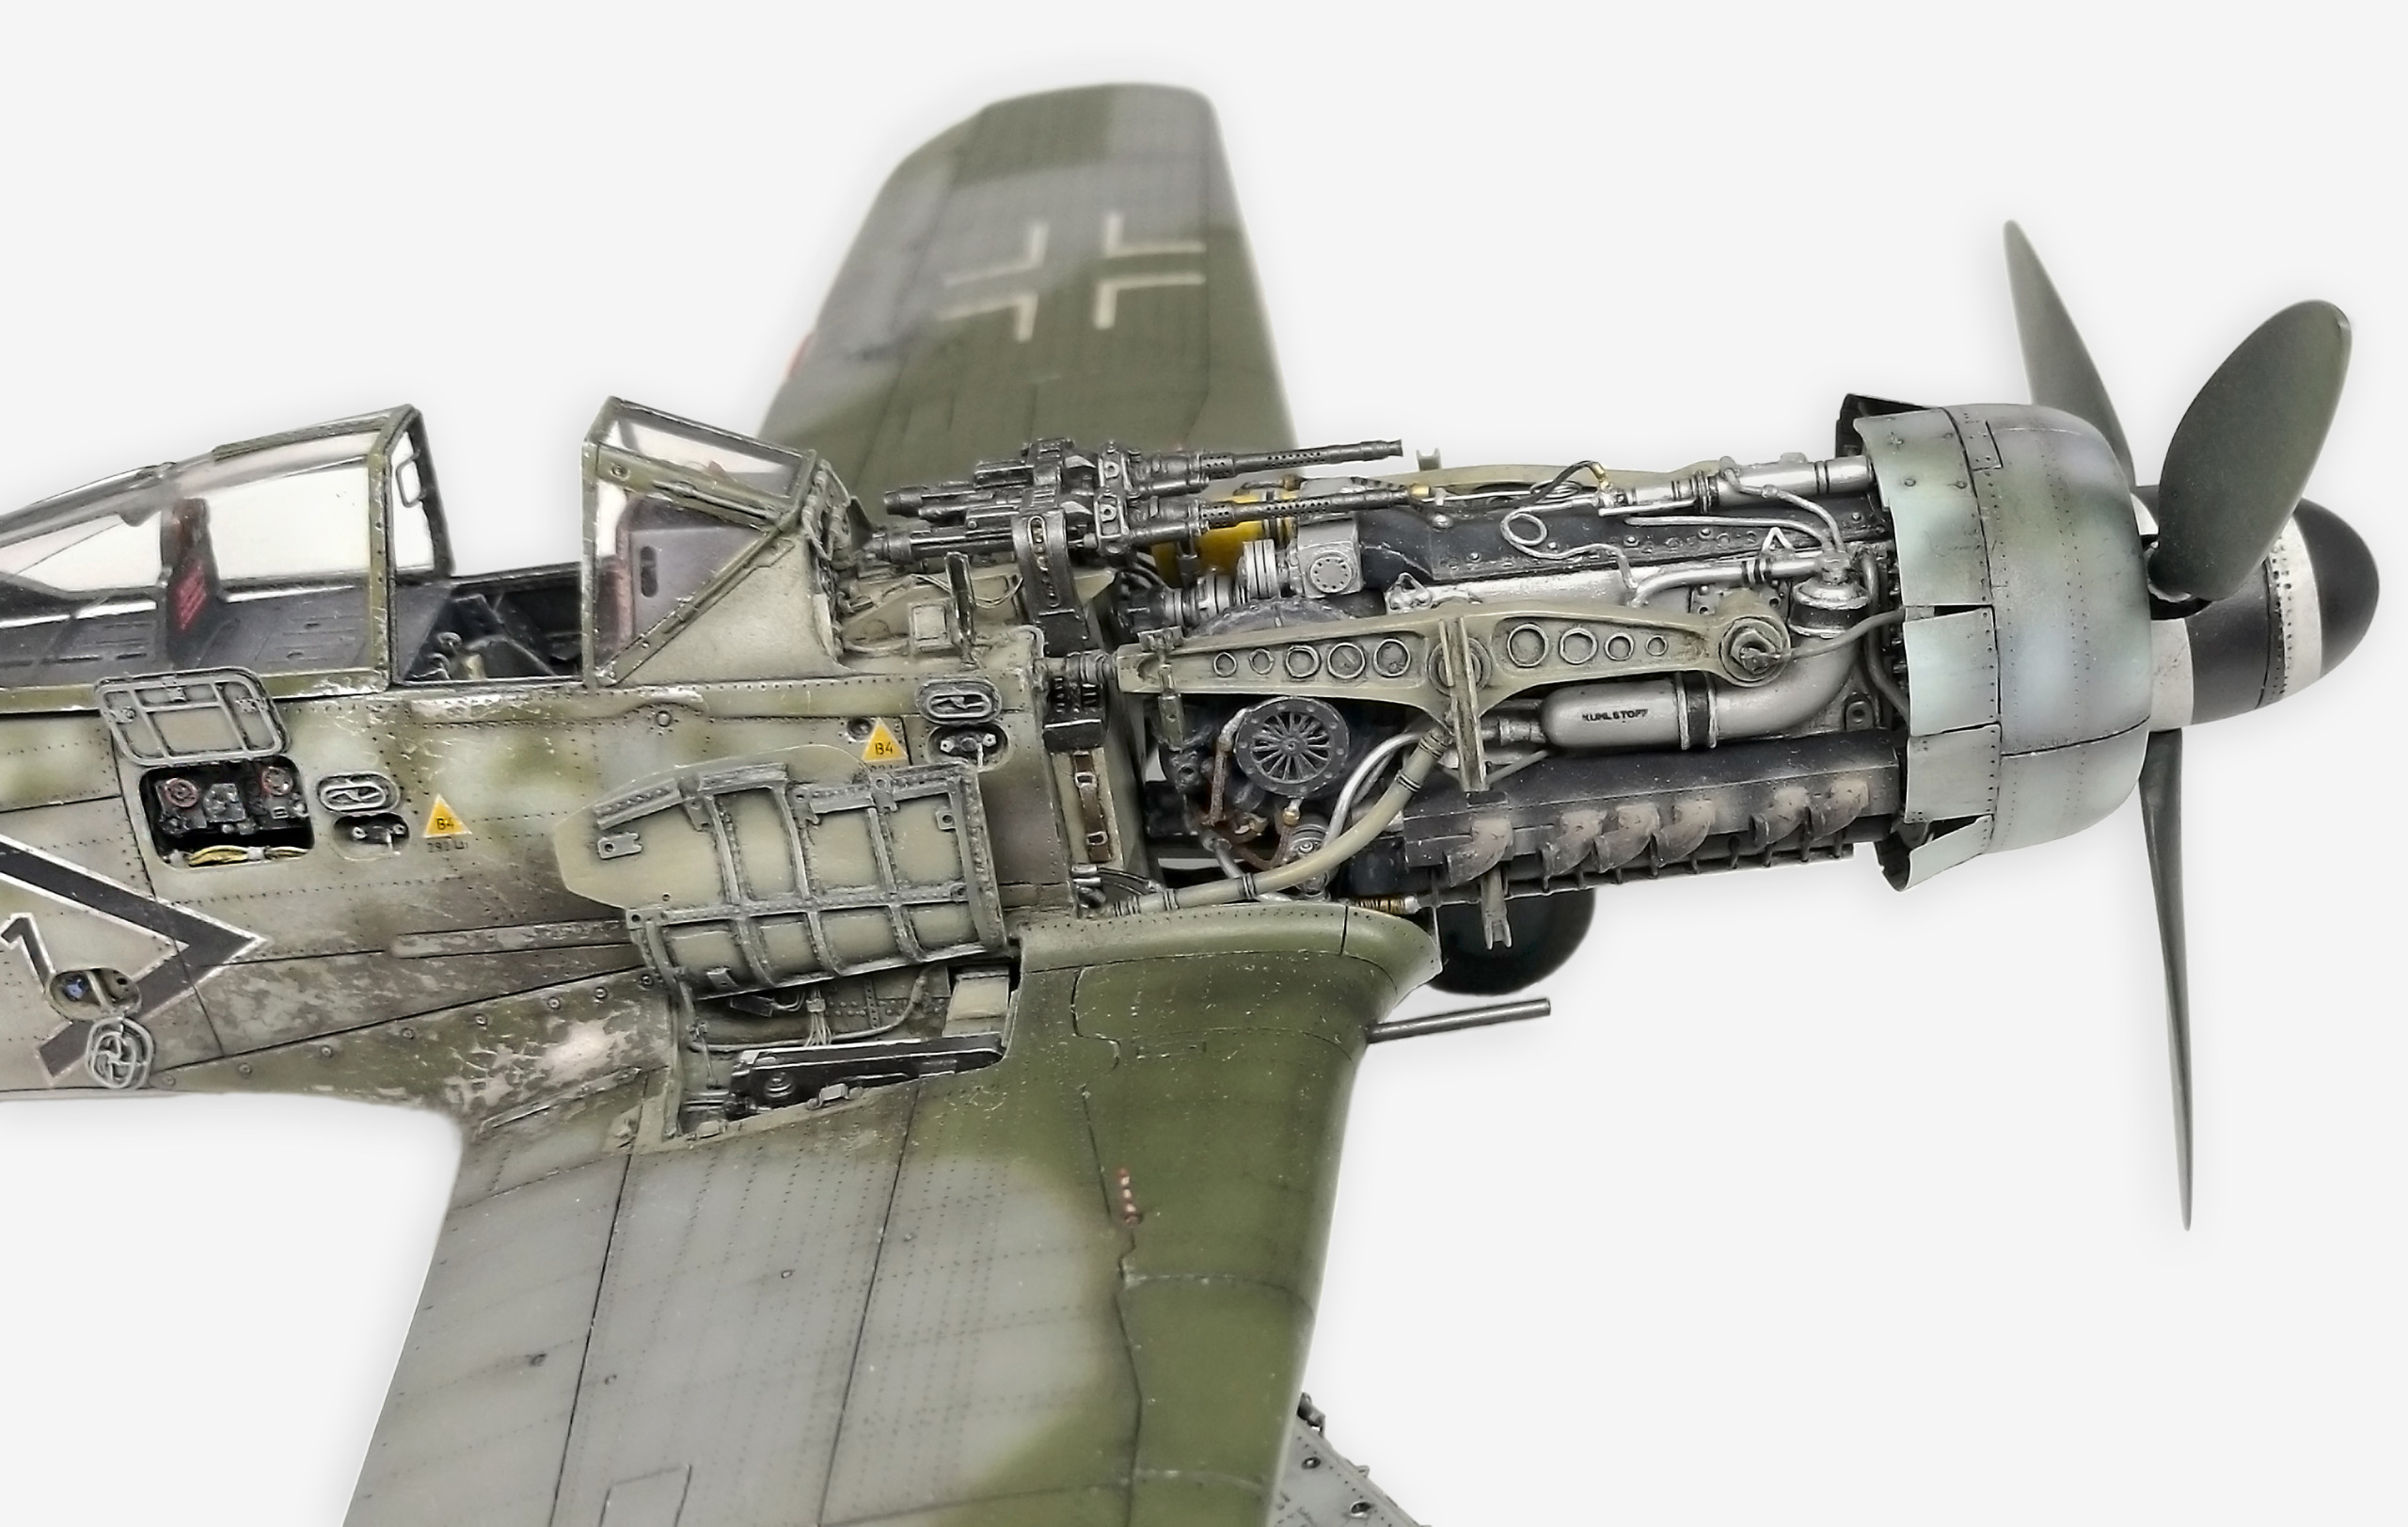
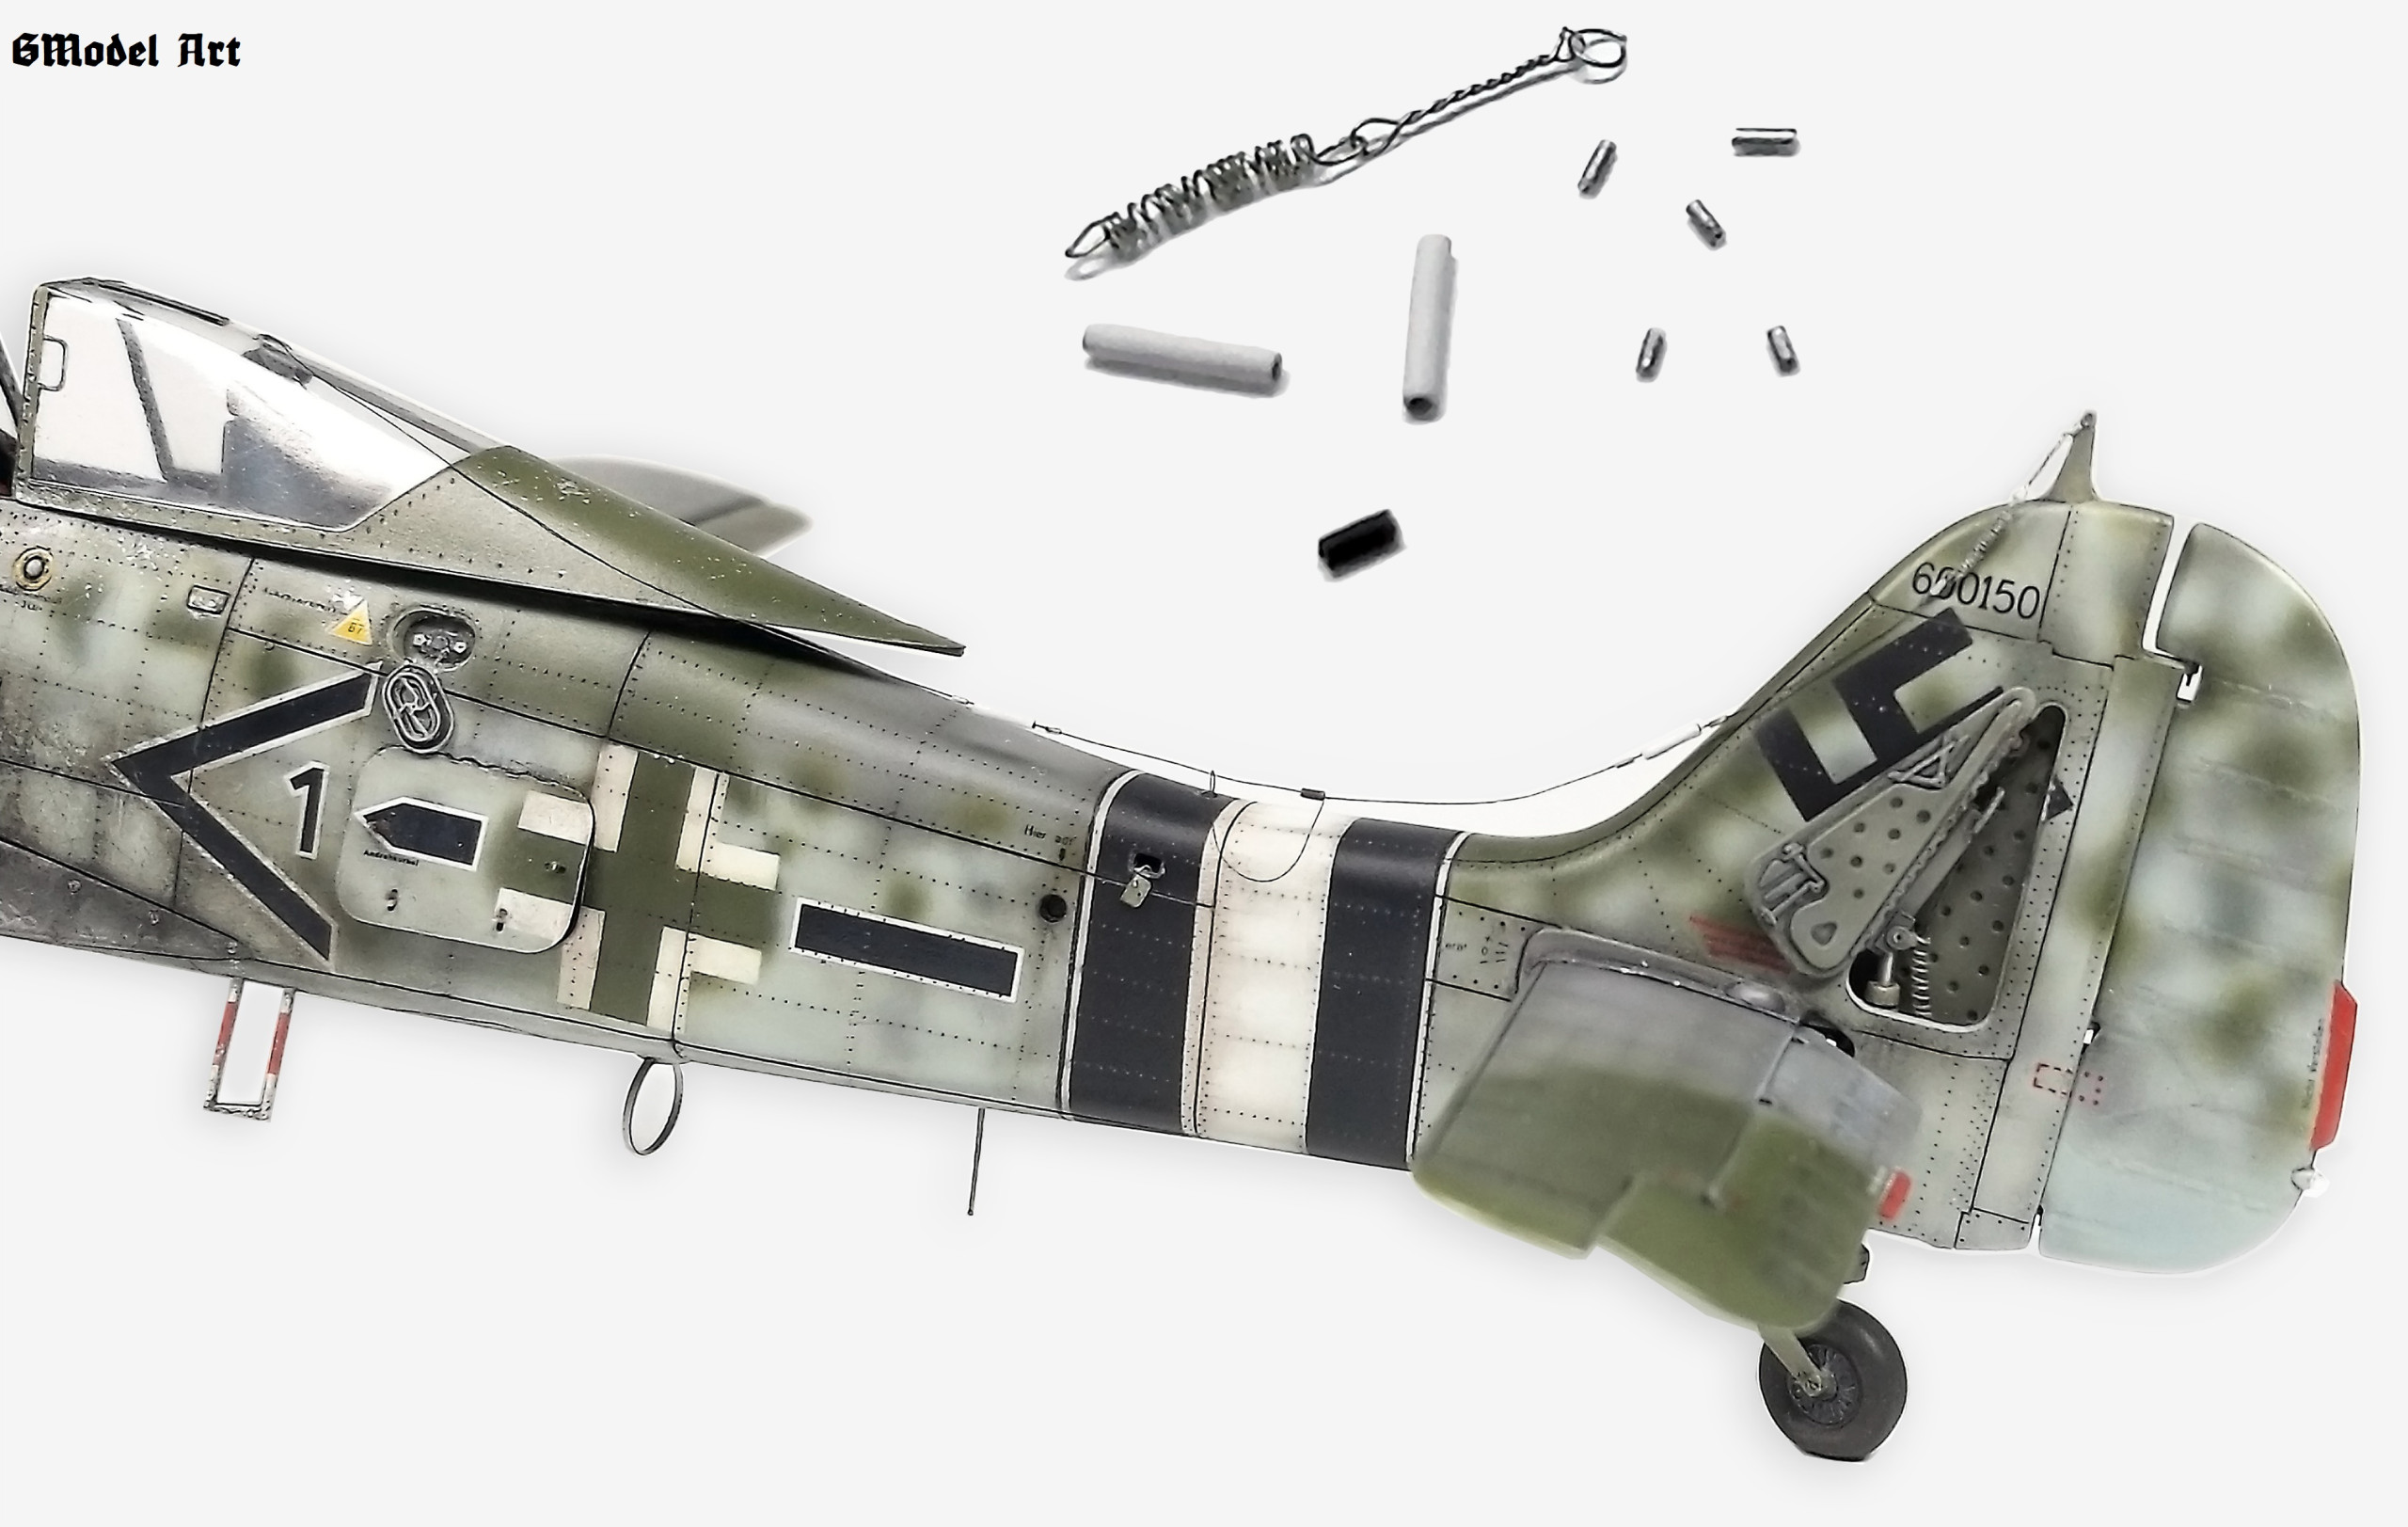
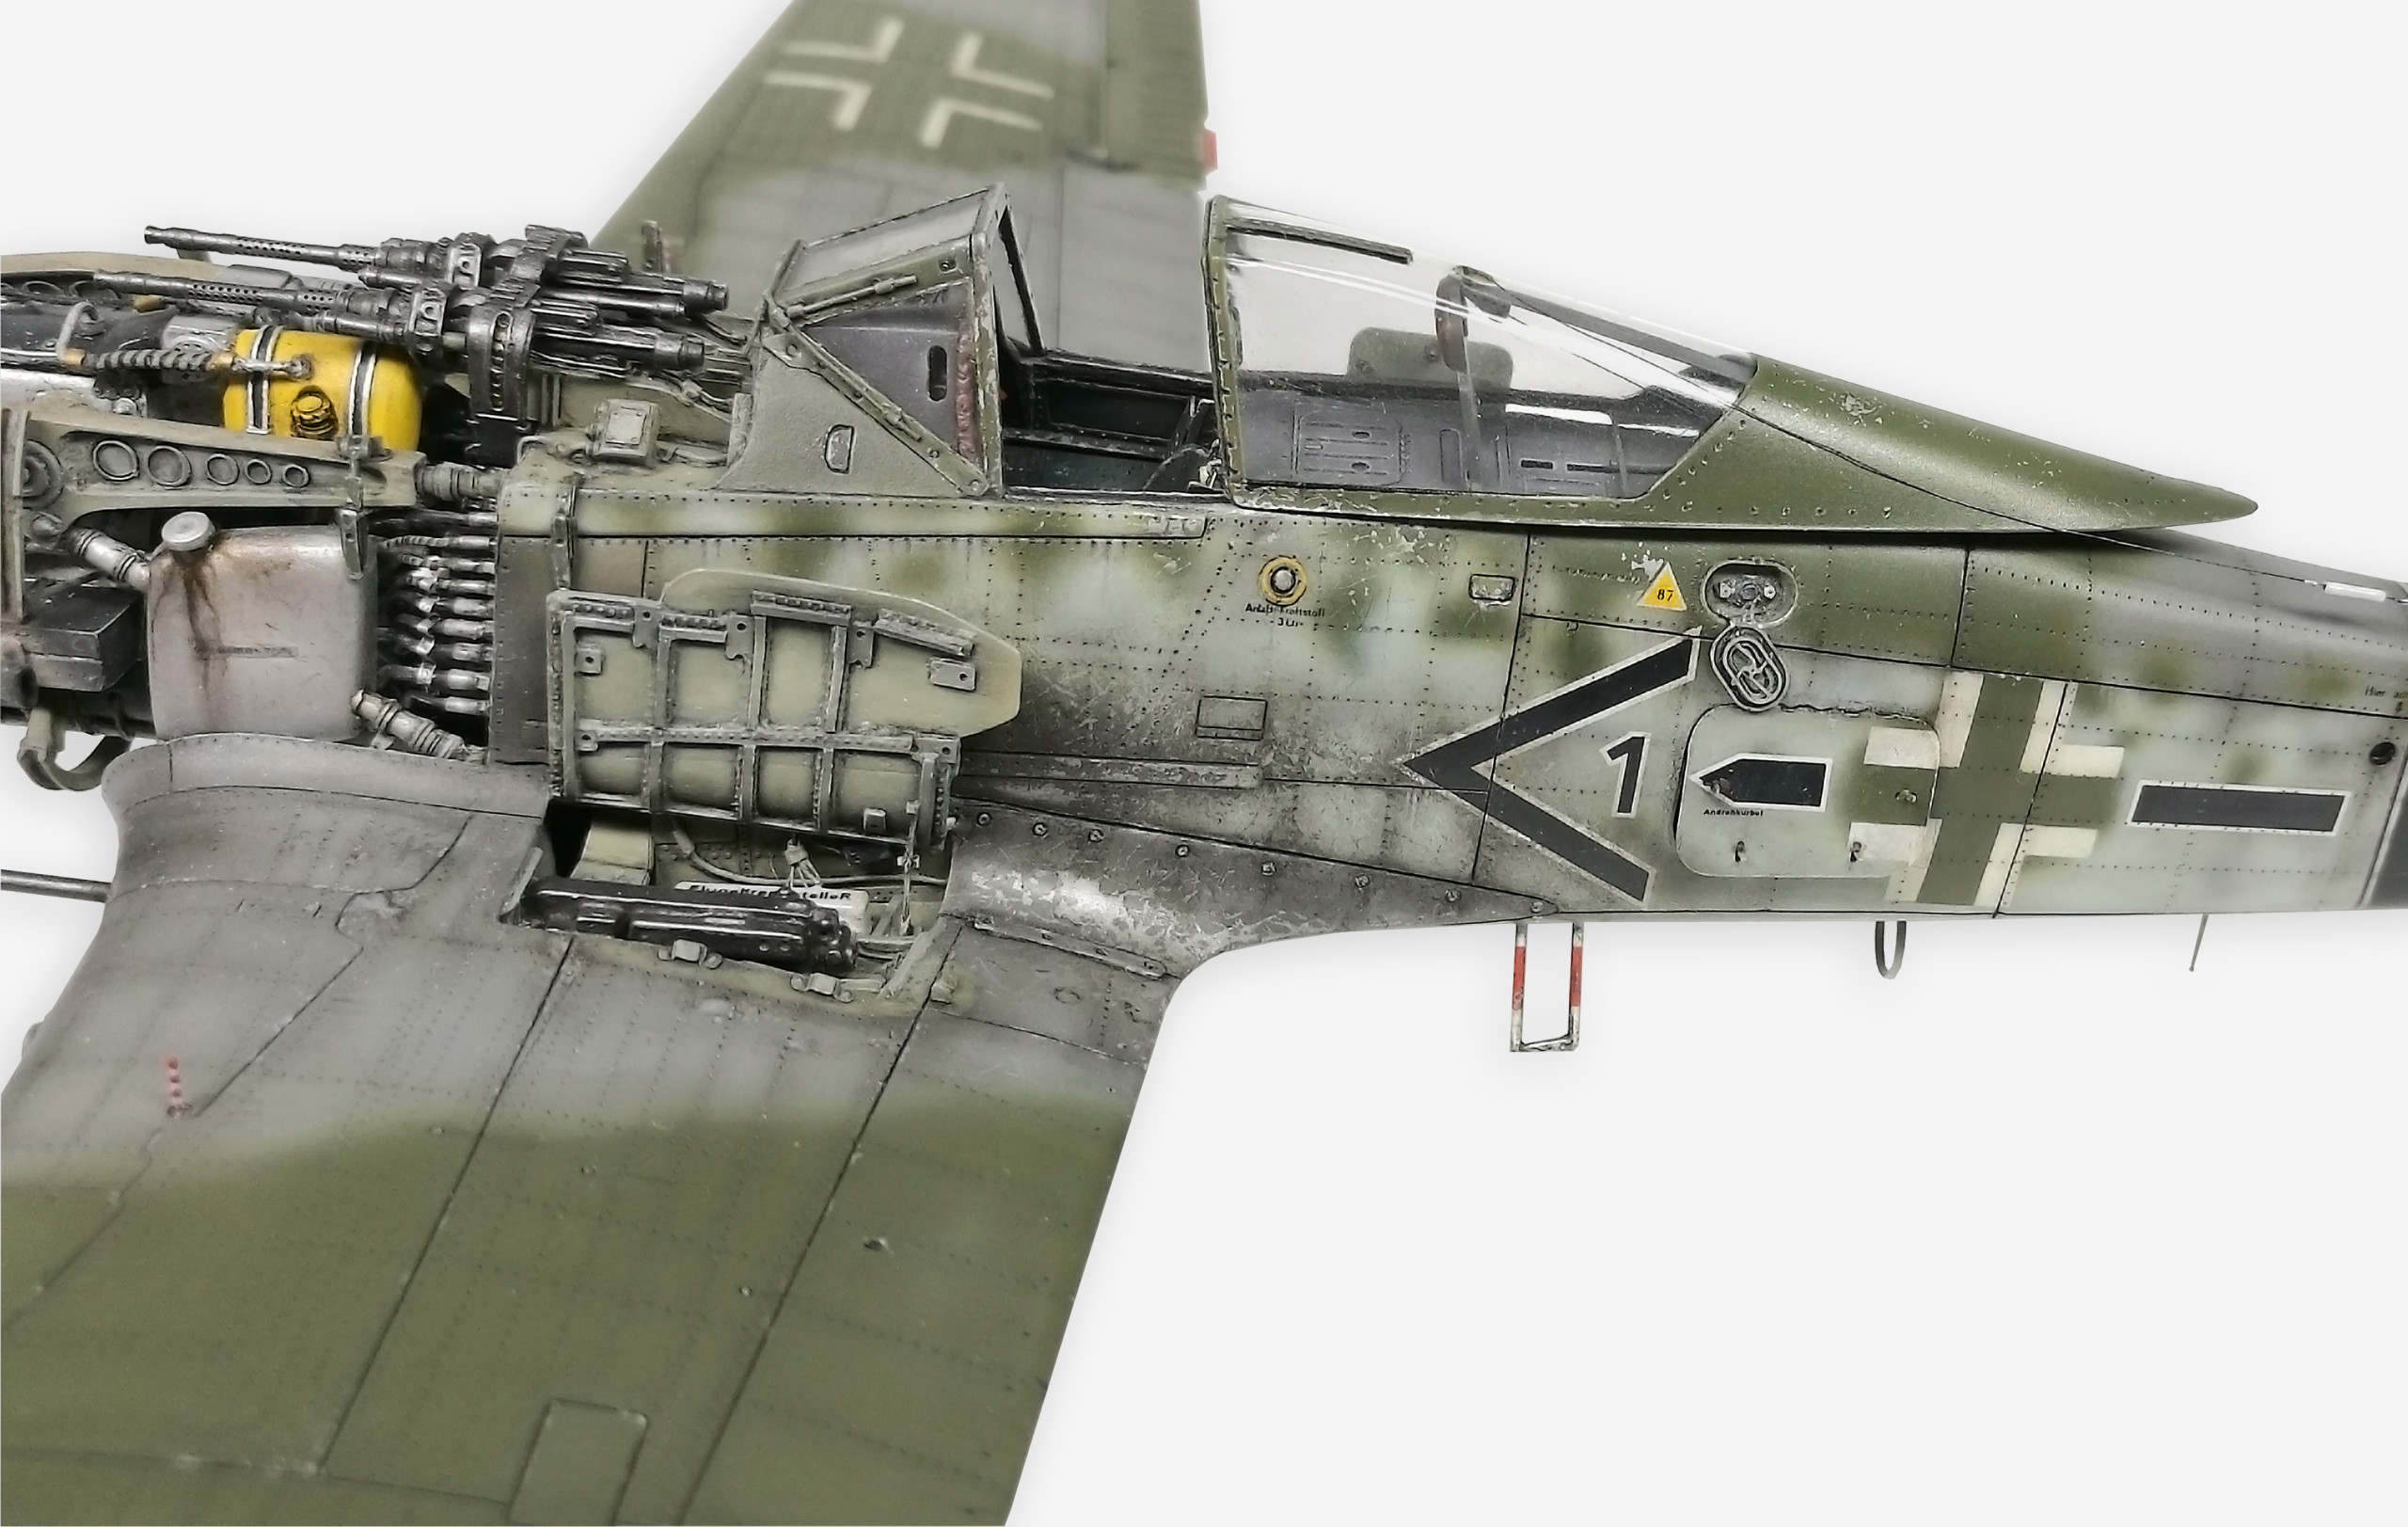
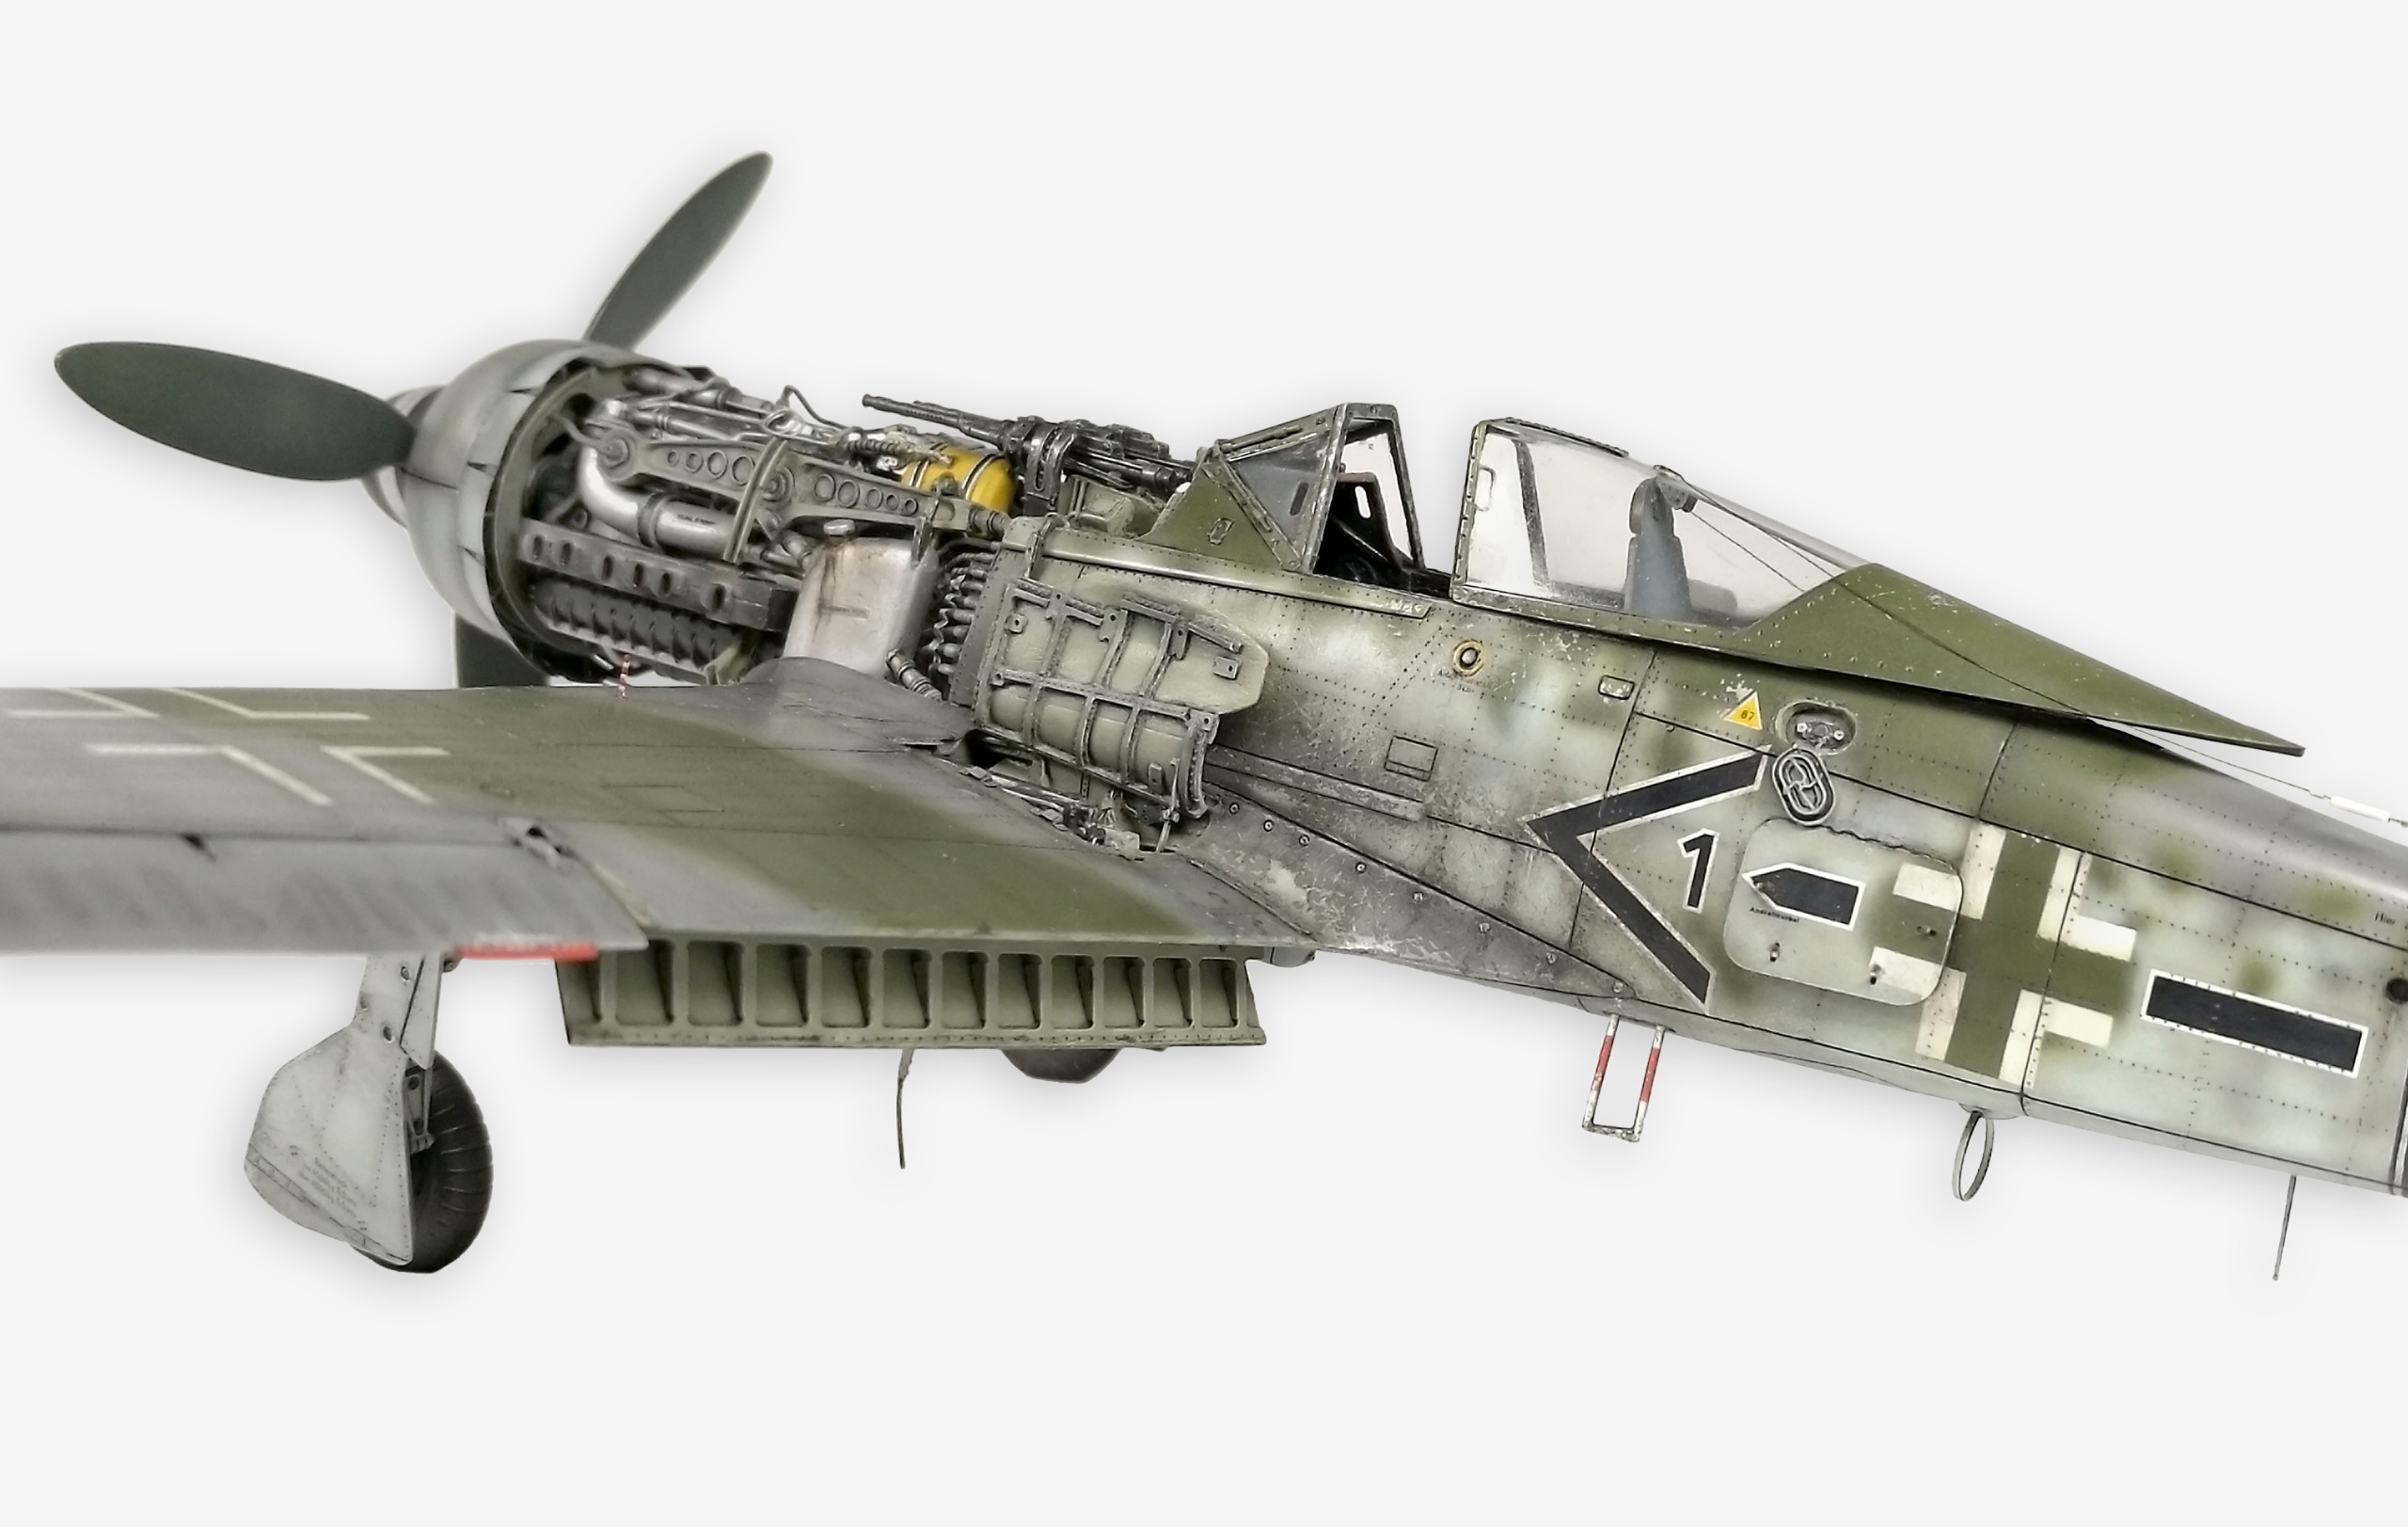
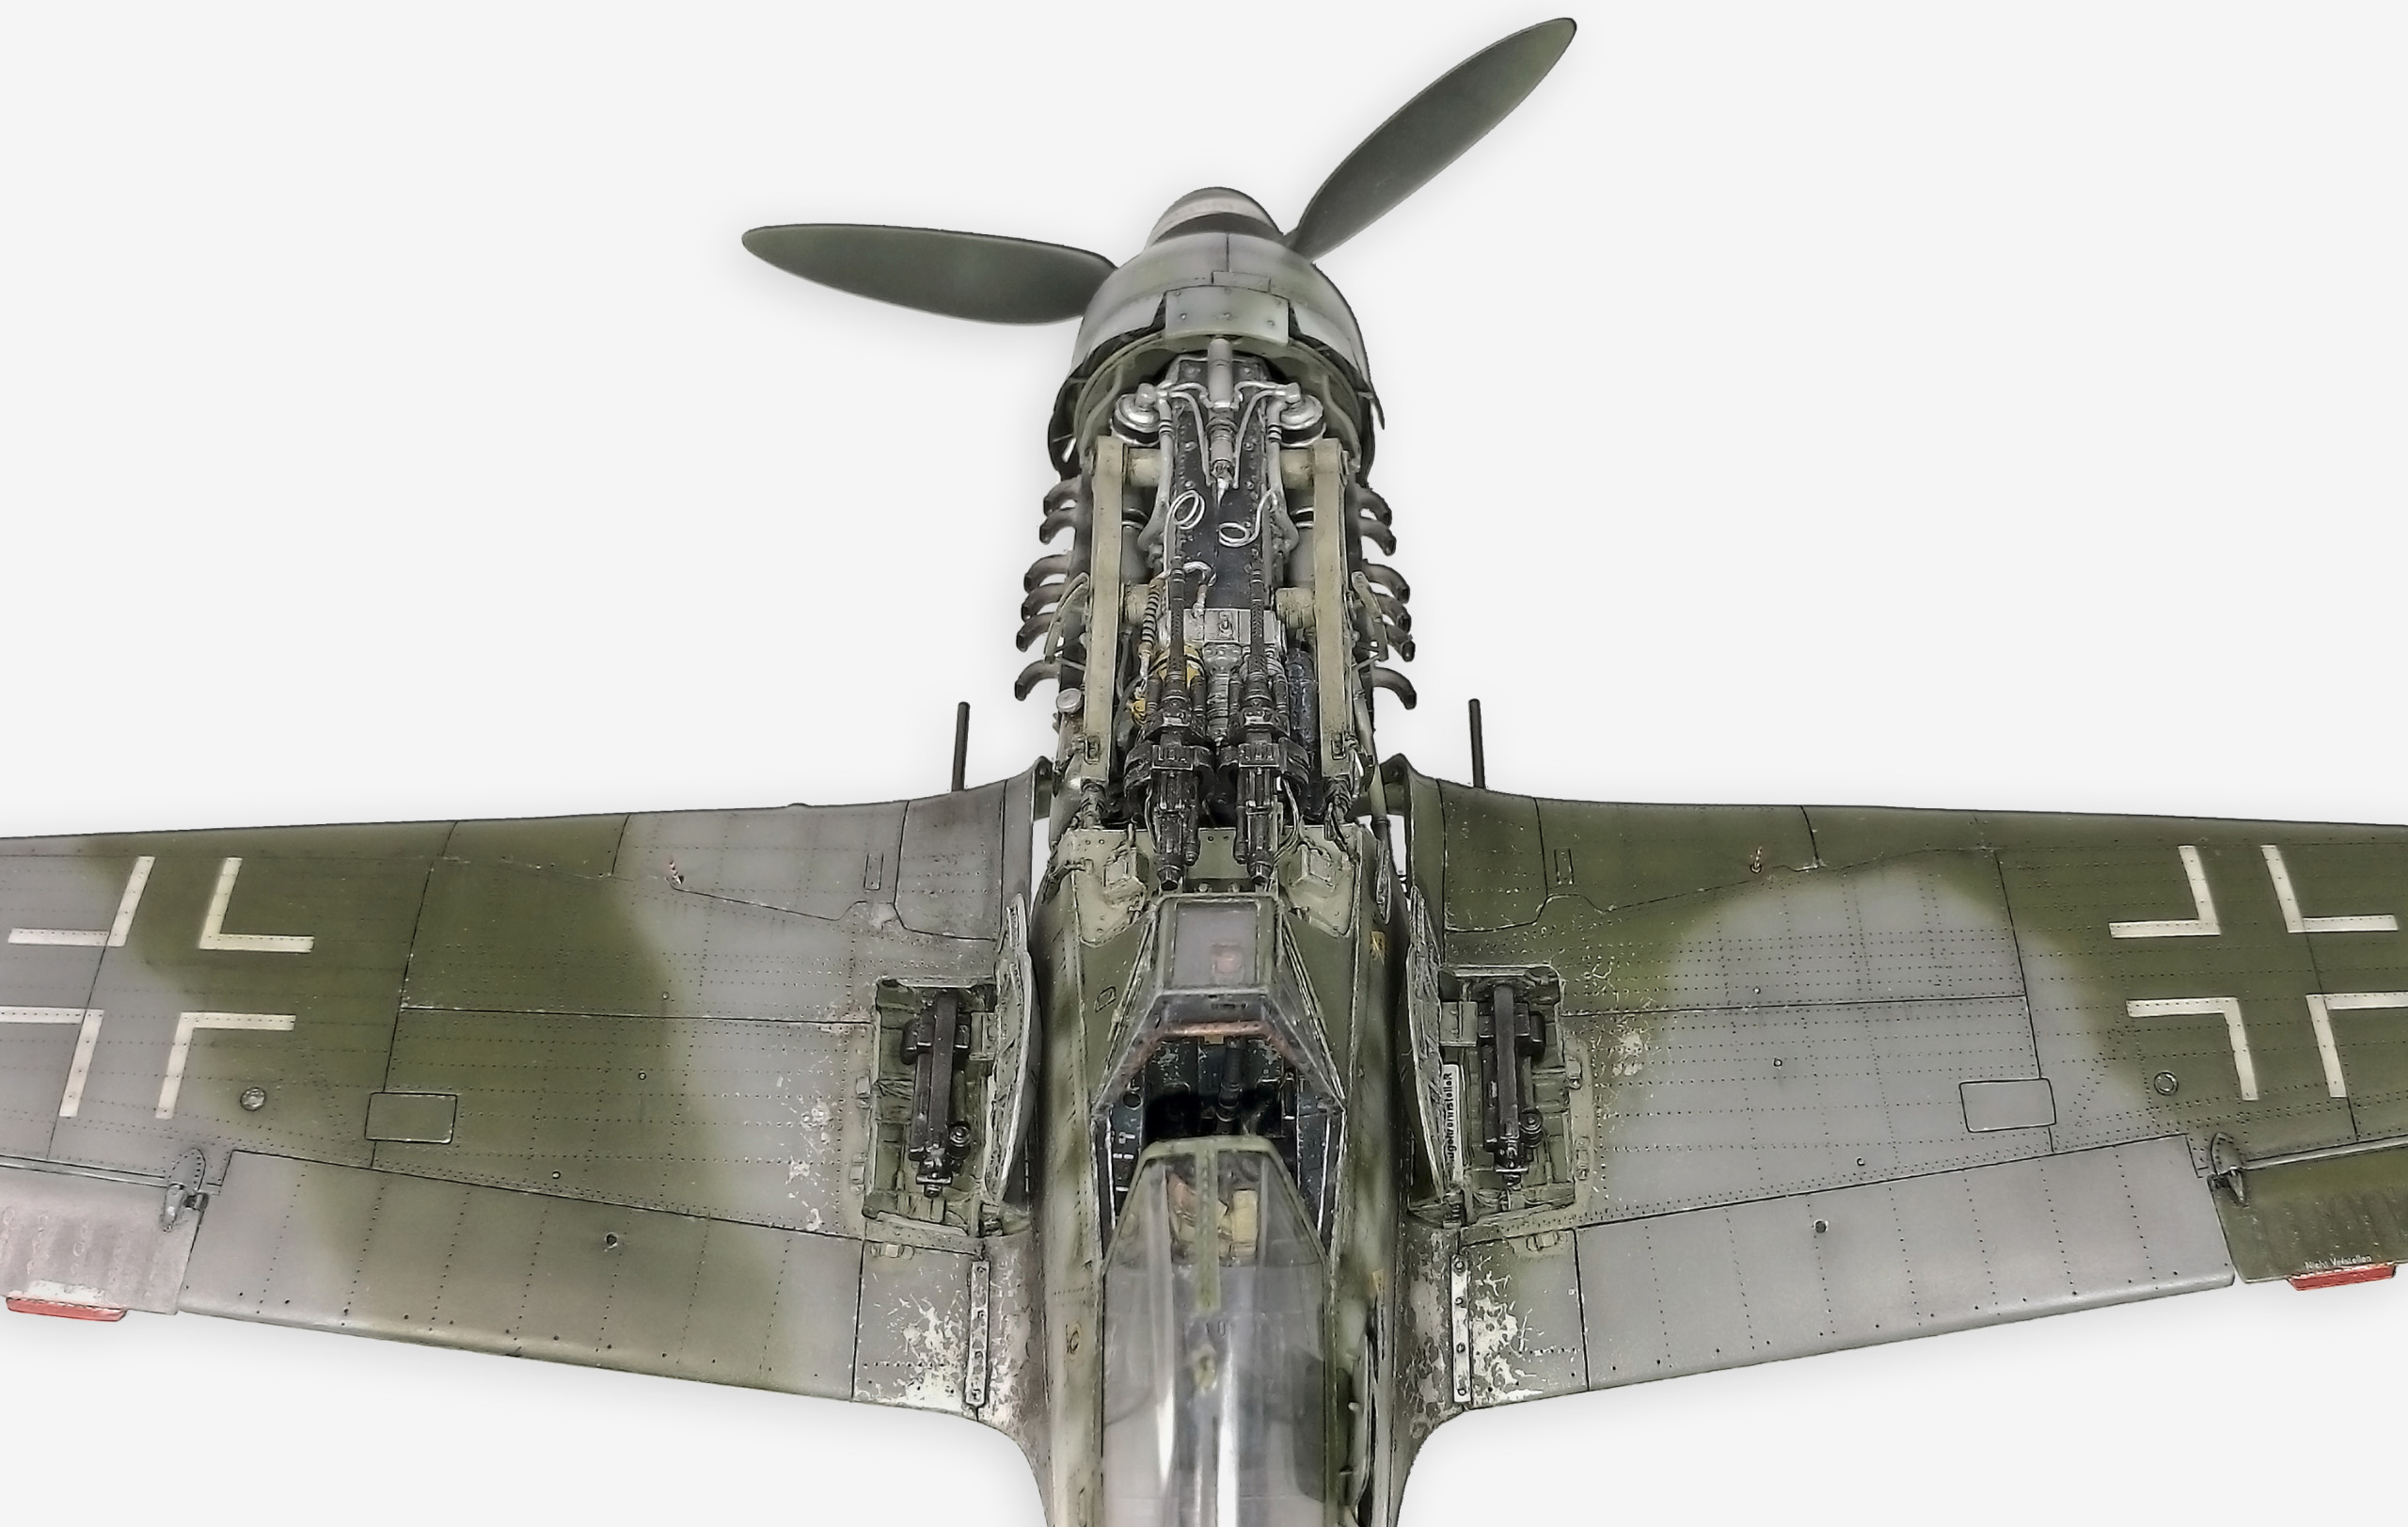
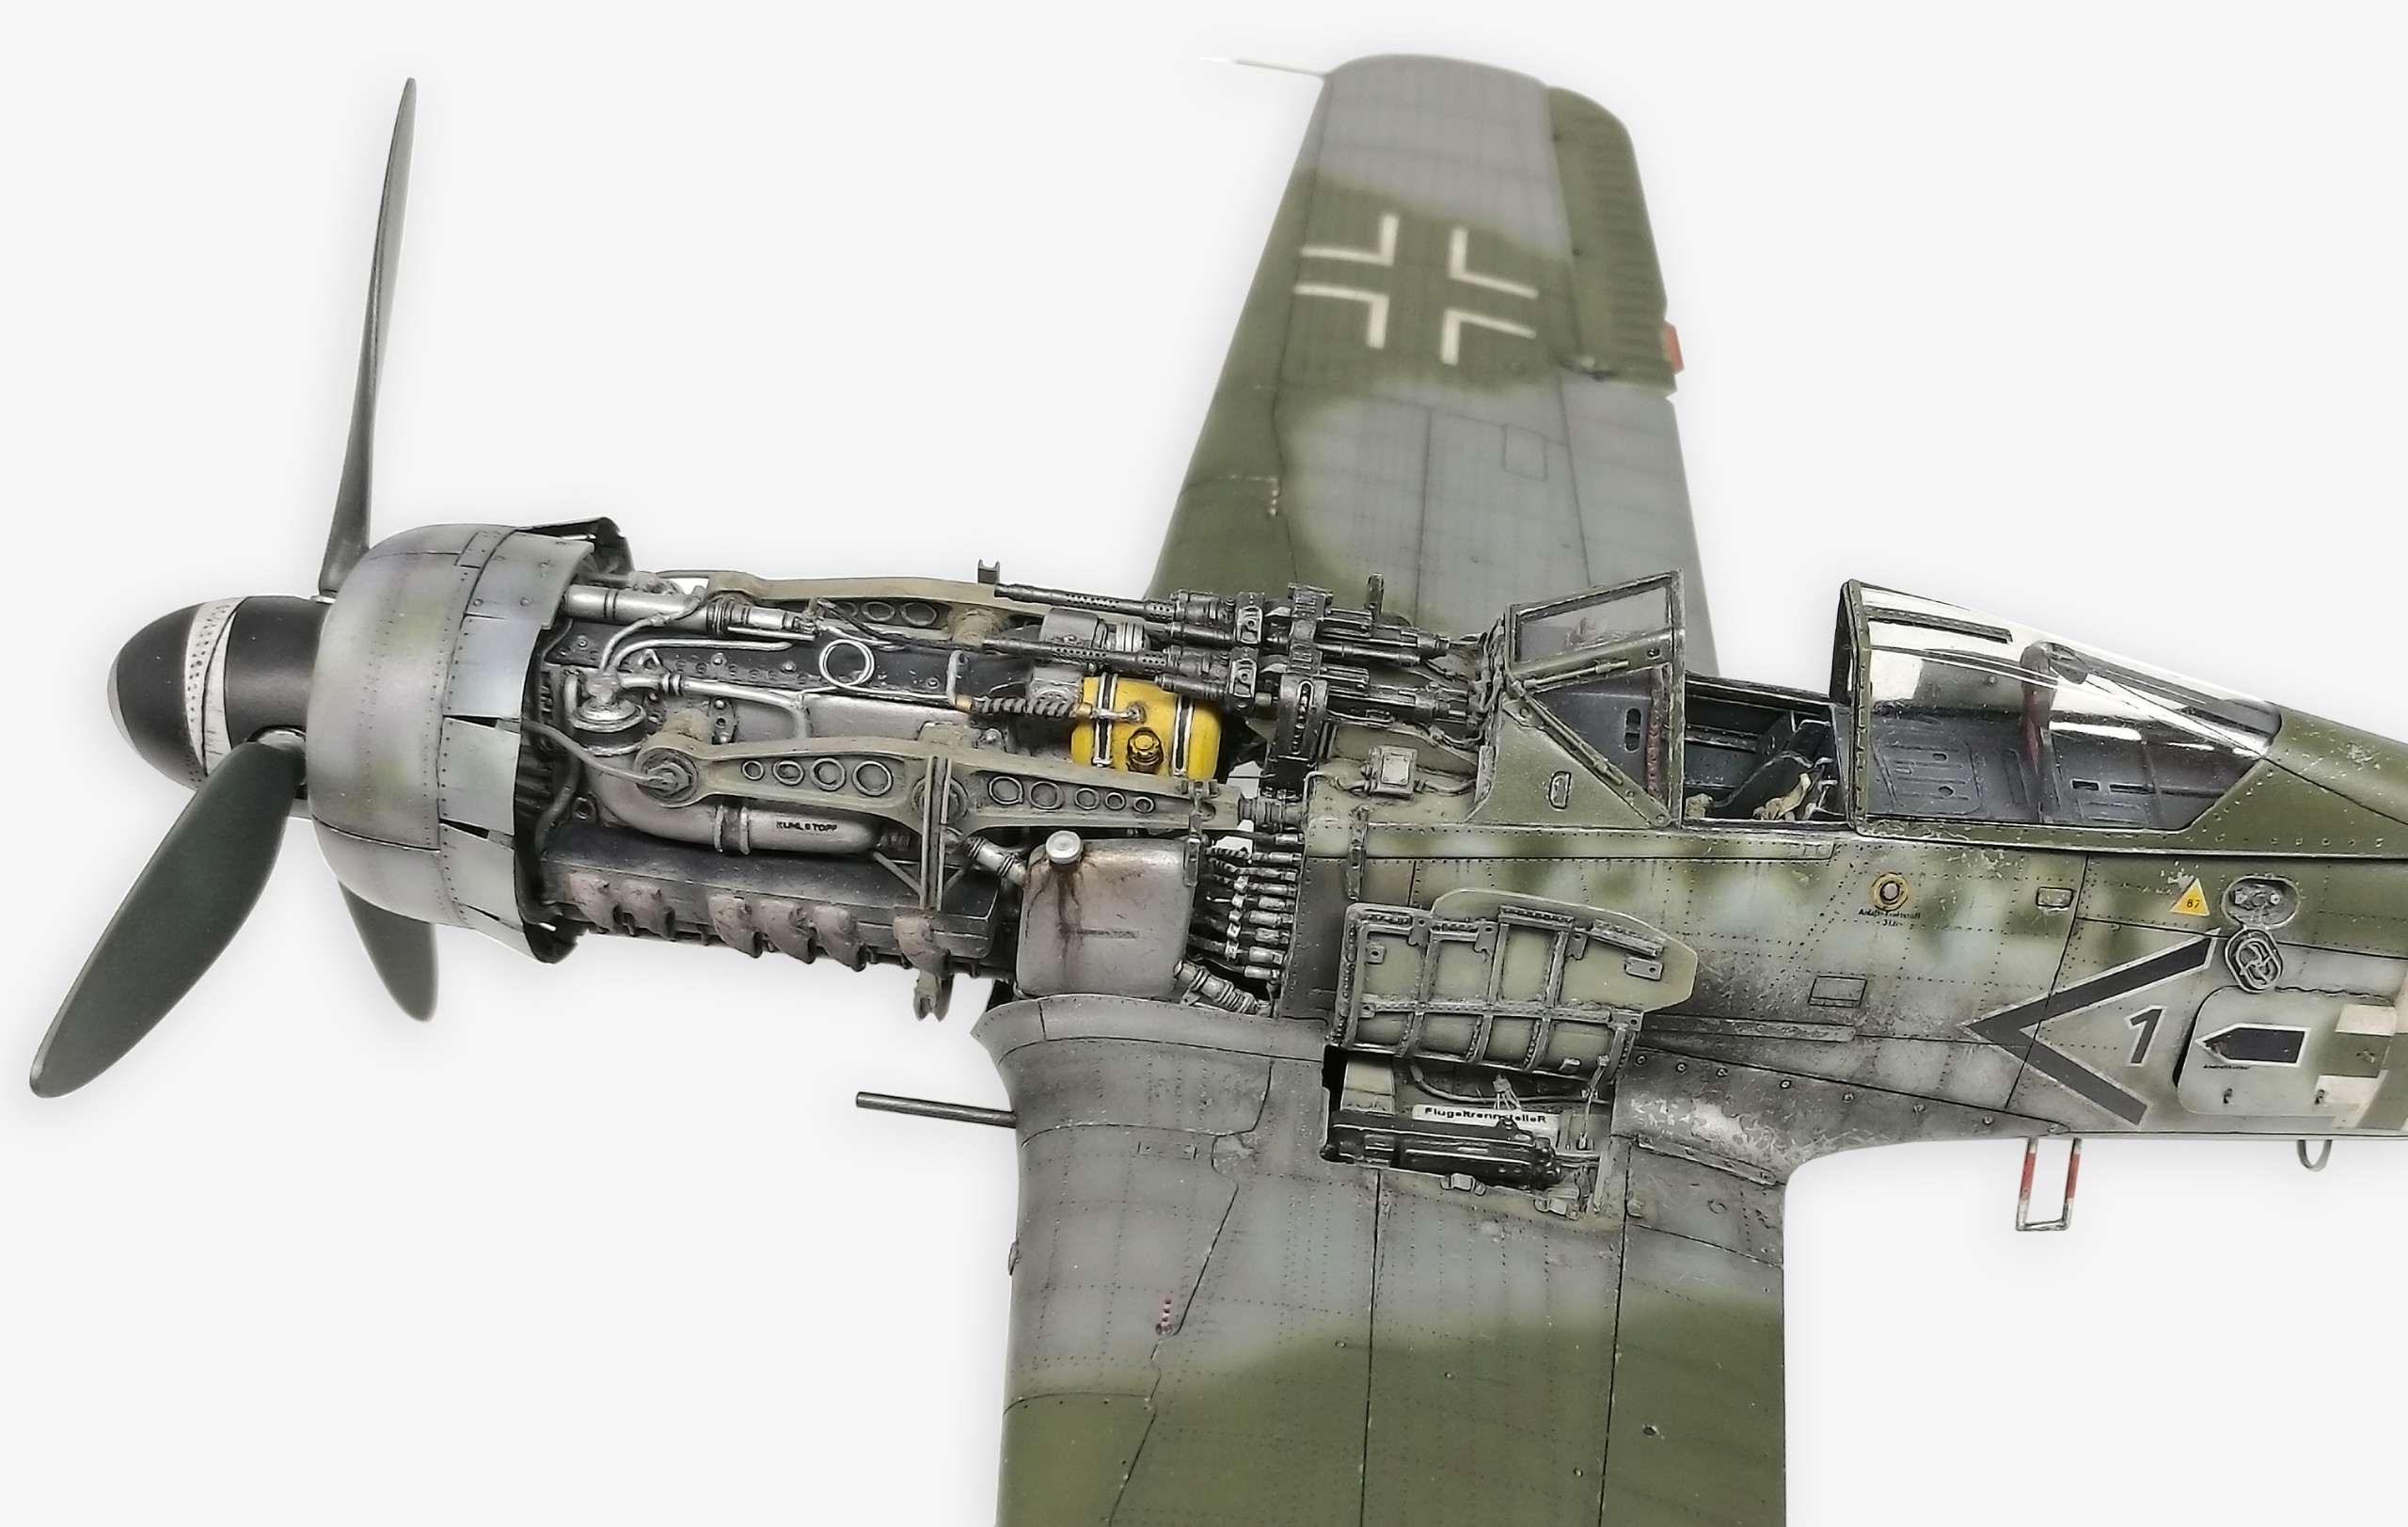
The cockpit was finally made primarily of Eduard etched parts including dashboard. The seat and control lever I used from Aires set, with a great seat belts from HGW. Gunsight Revi 16B is separately sold supplement from Quick Boost. Furthermore I used also a cast of radio station FuG 16ZY from Aires, individual resin filling shafts with necks from CMK and also internal structure with the rear portion of landing gear including a wheel from Black dog. All is completed by hand-made parts and electrical wiring etc.
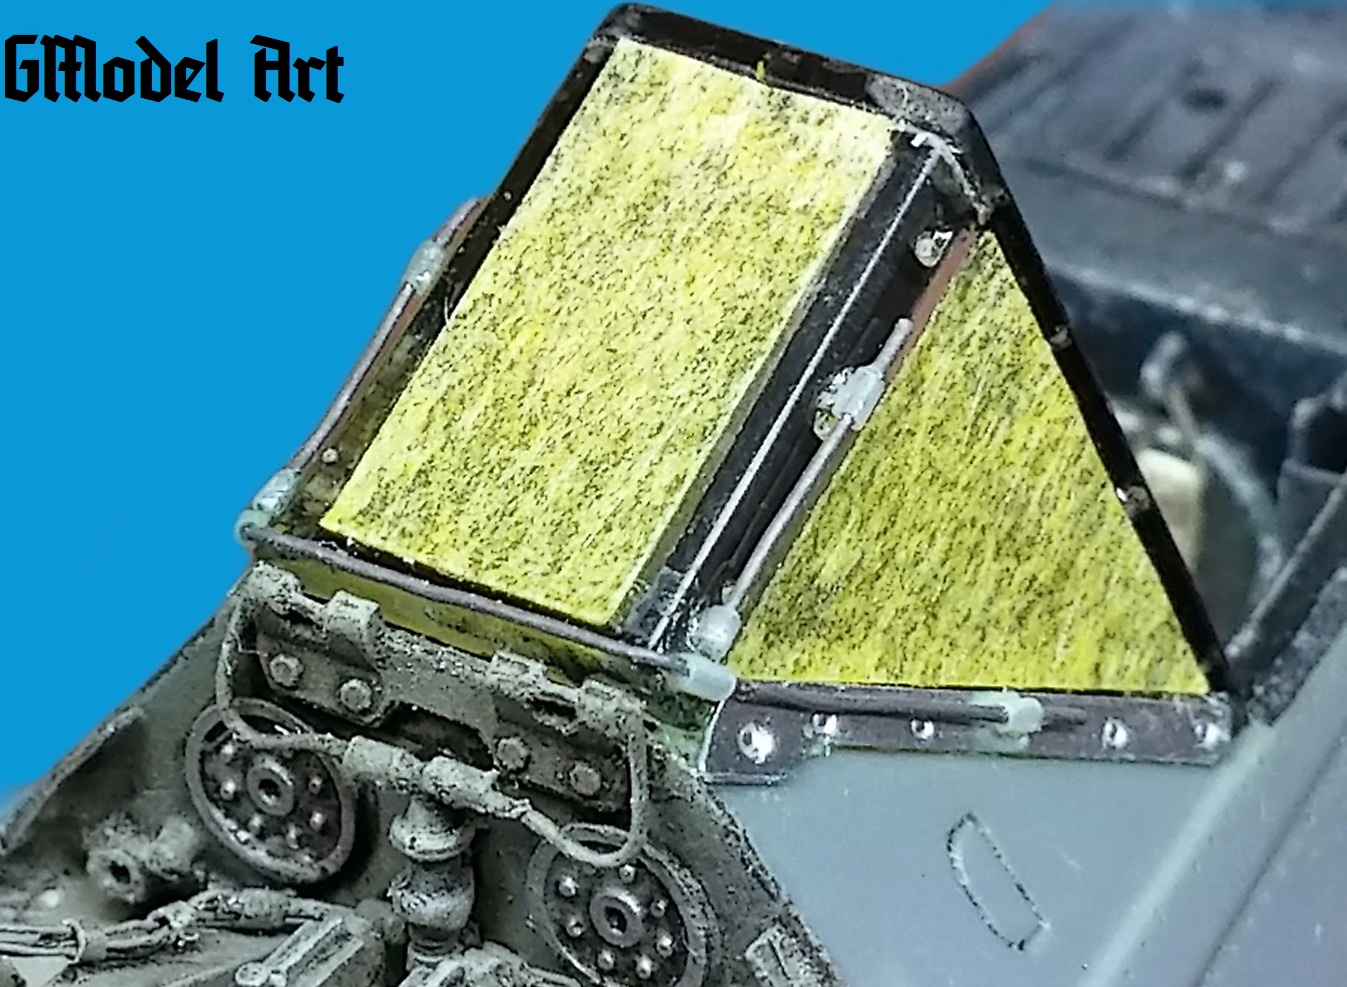
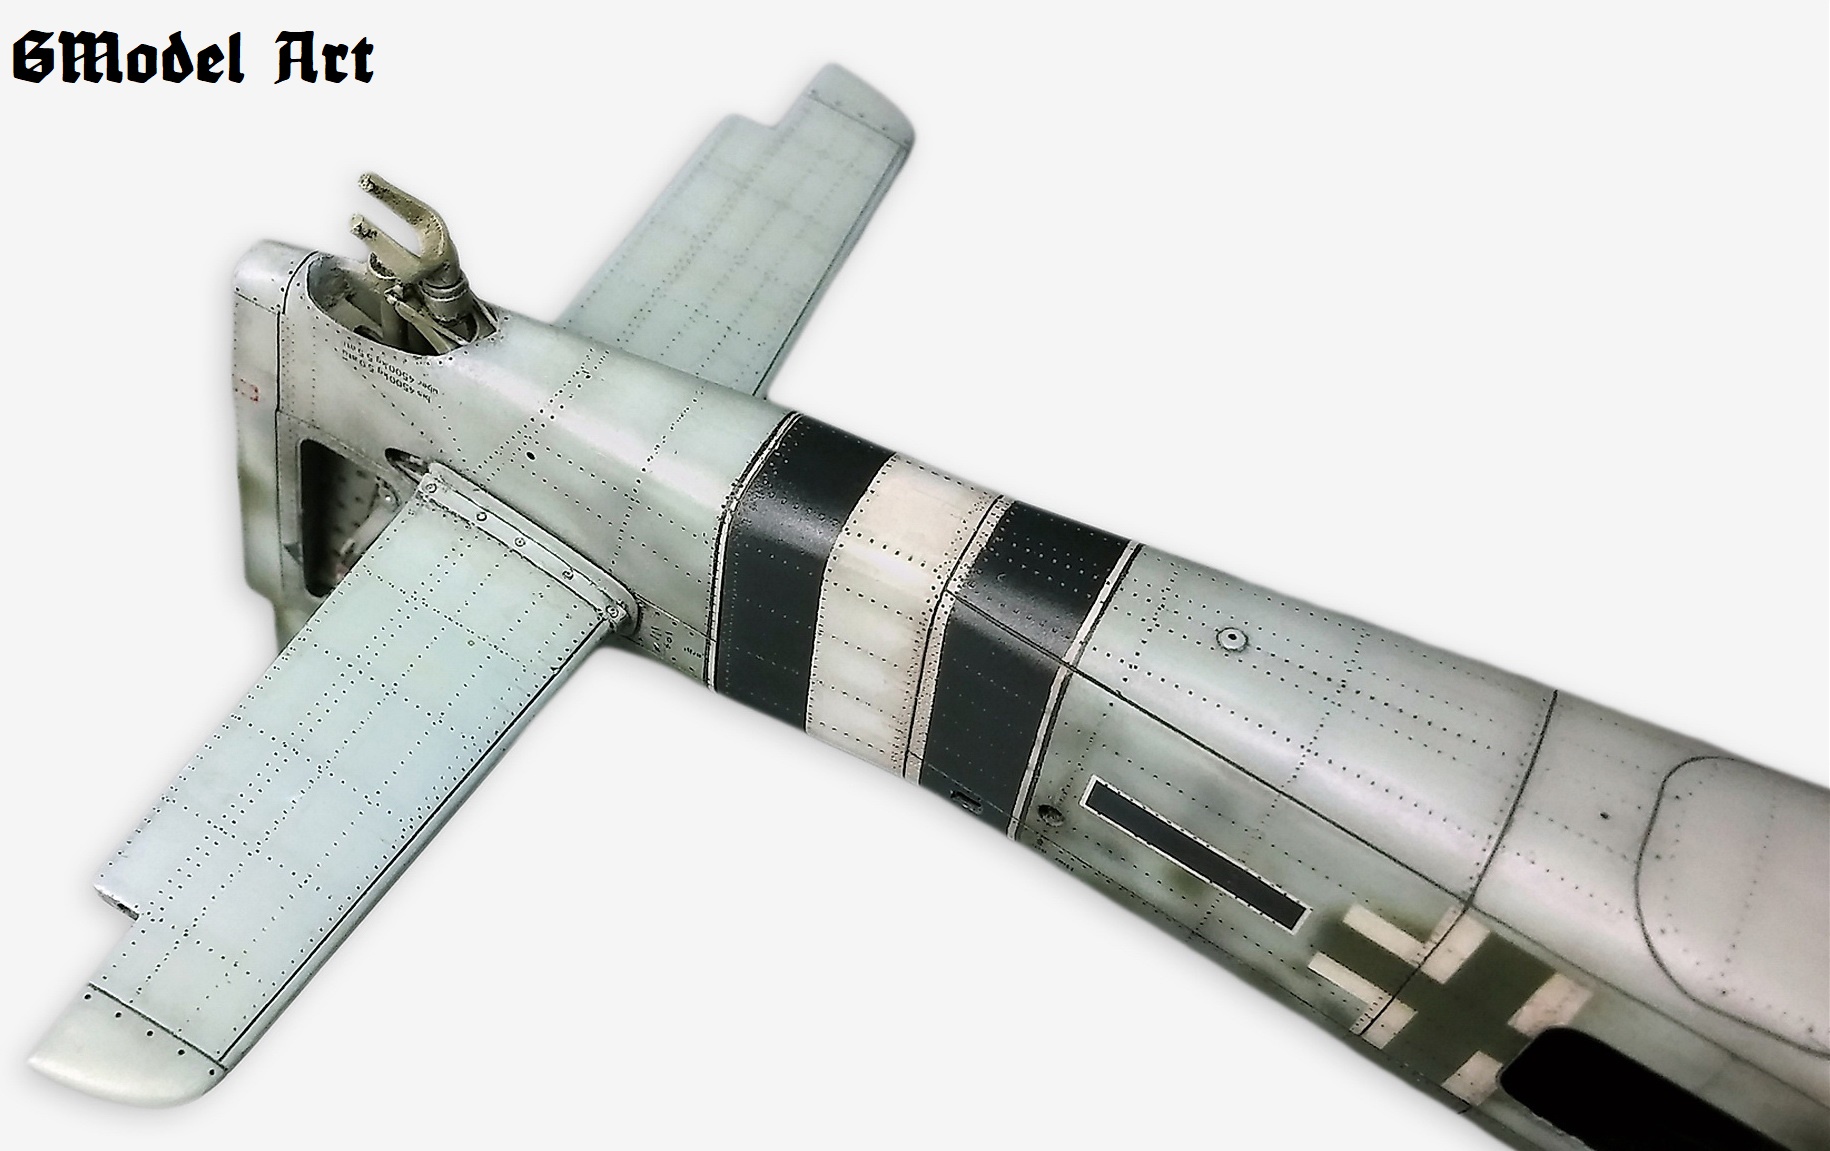
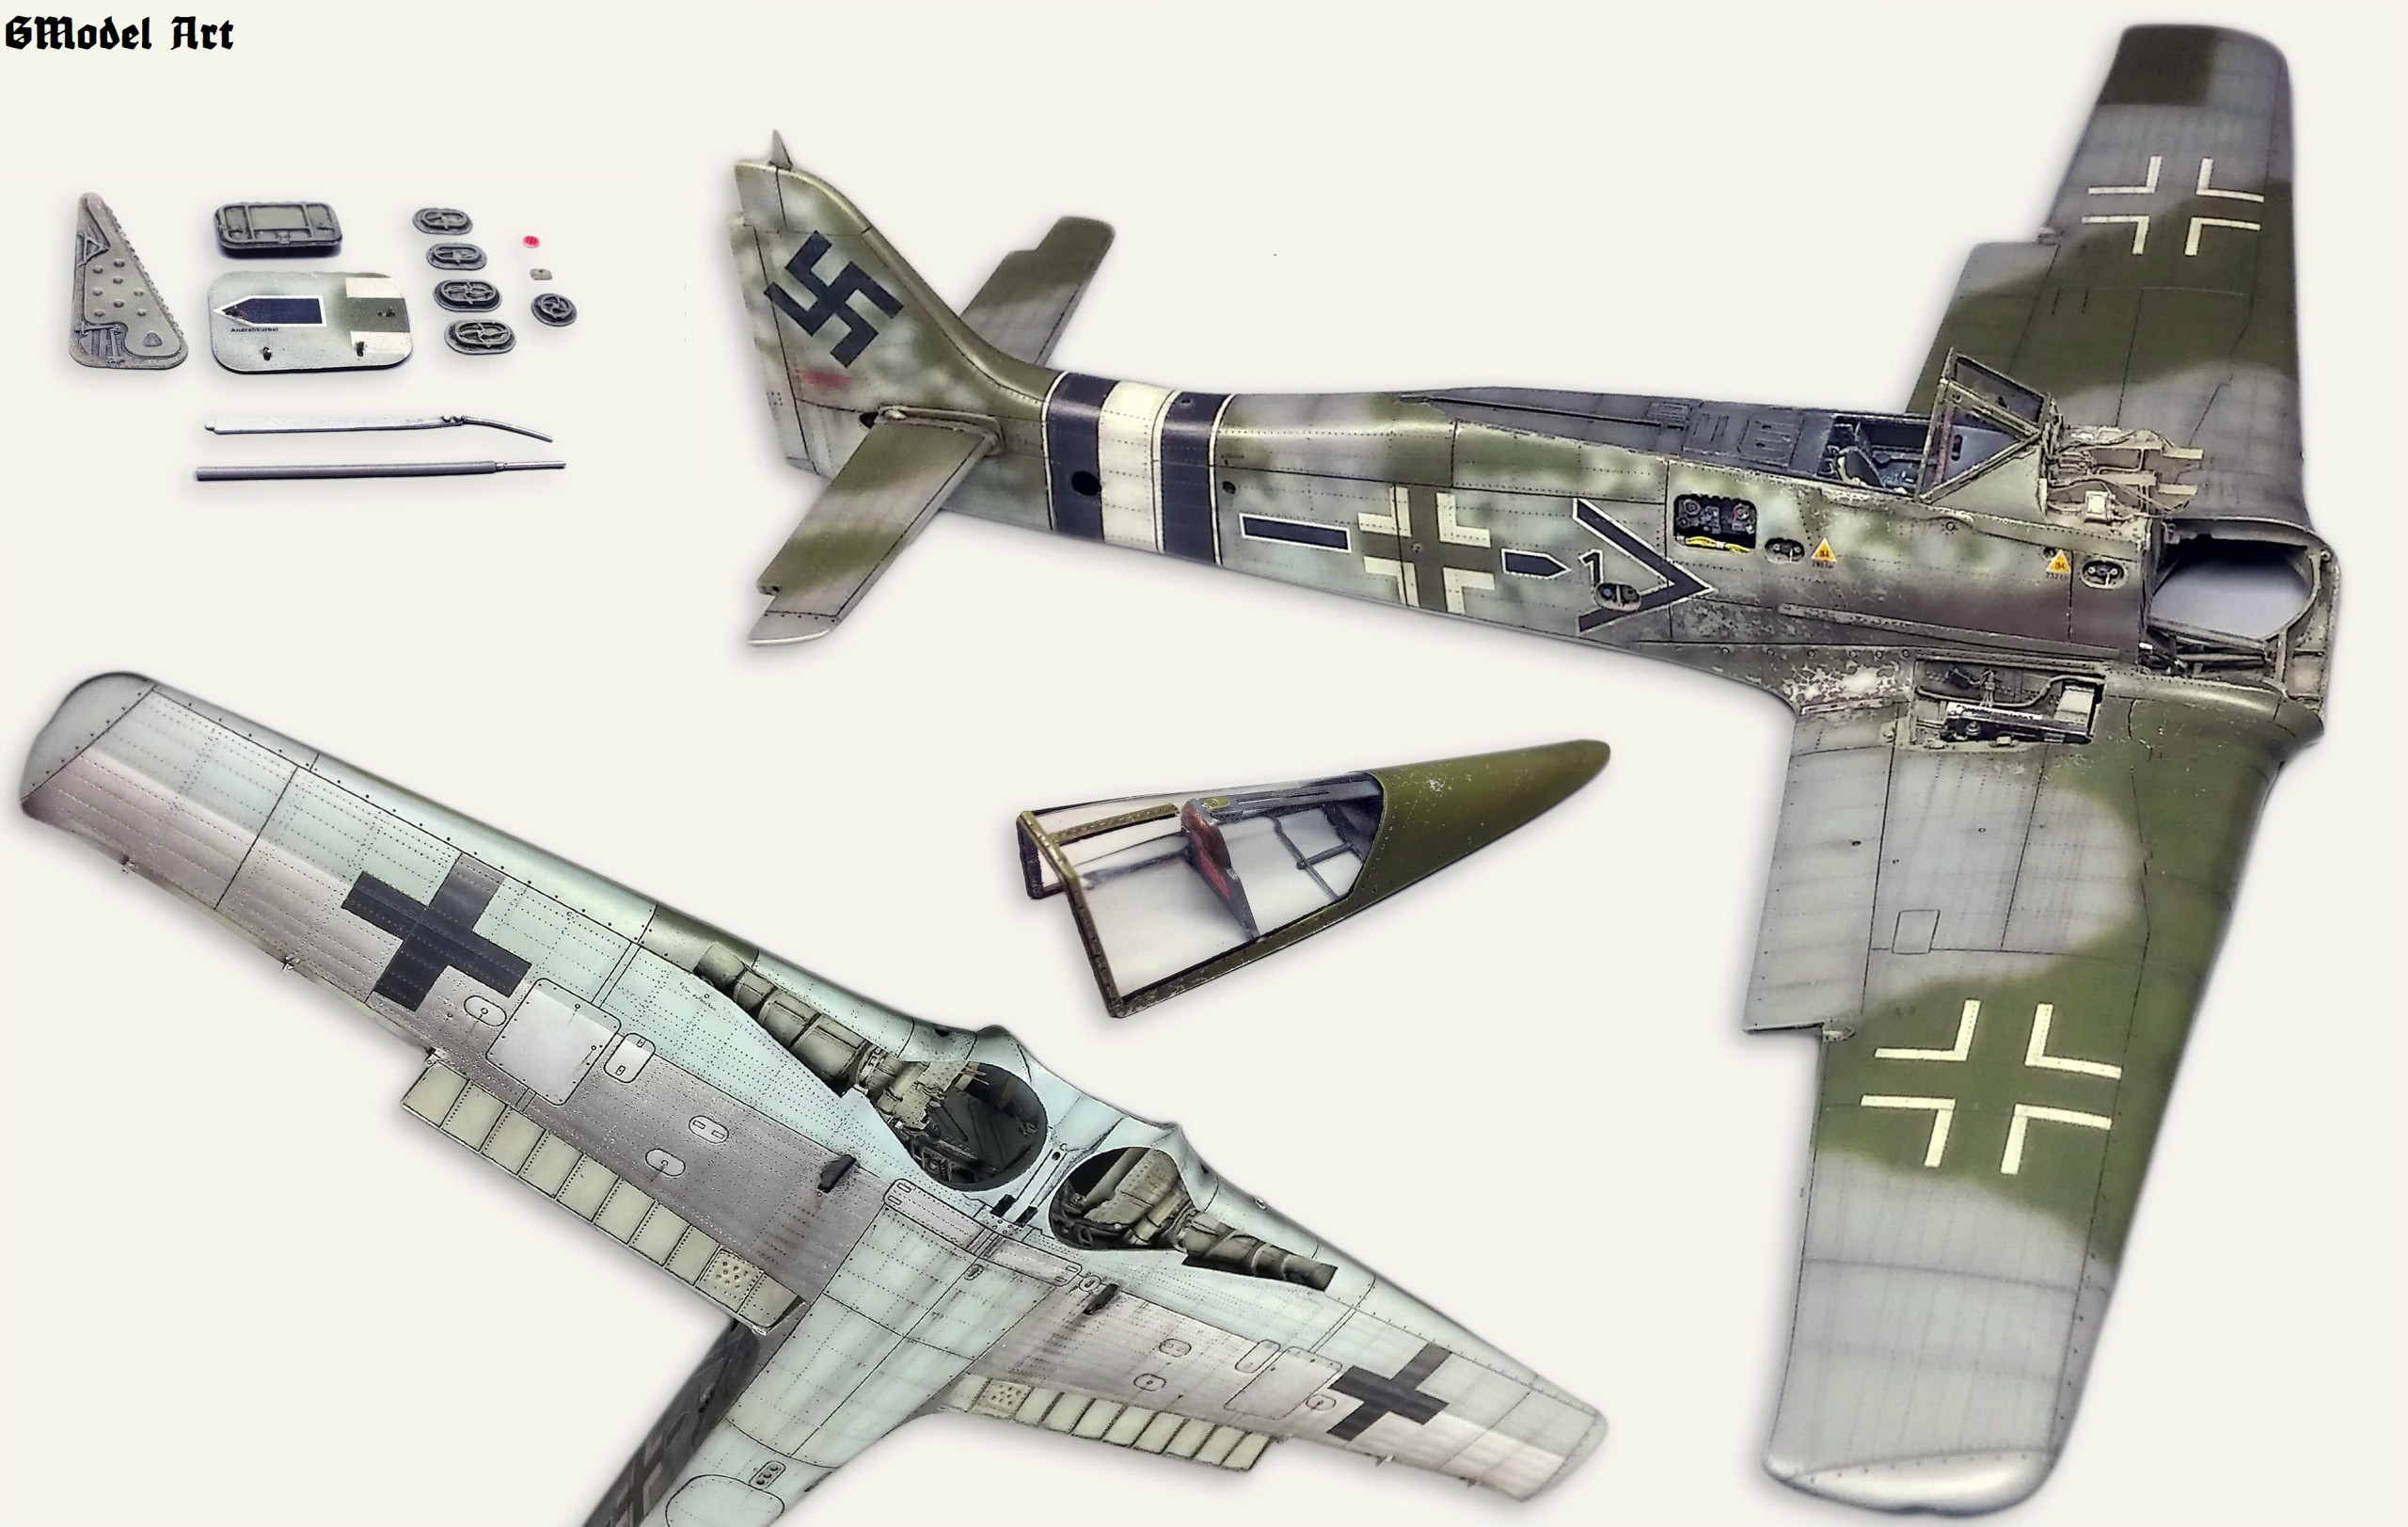
When all was in place I glued both halves of the fuselage together and could to add also a cast of firewall Aires and some electrical wiring to guns. I added a metal hemming and also deicing system on the wind shield.
The sliding rear part of the canopy taken from the Eduard kit (allows us to choose the cover position of either “open” or “closed”), which is on the upper side of the middle-installed longitudinal metal hinge, in reality was enabled during the closing and marginalization of the
housing constriction, respectively, stretching its front width in dependence of the varying spread of the split fuselage grooves to which it was attached, and which moved forward and backward.
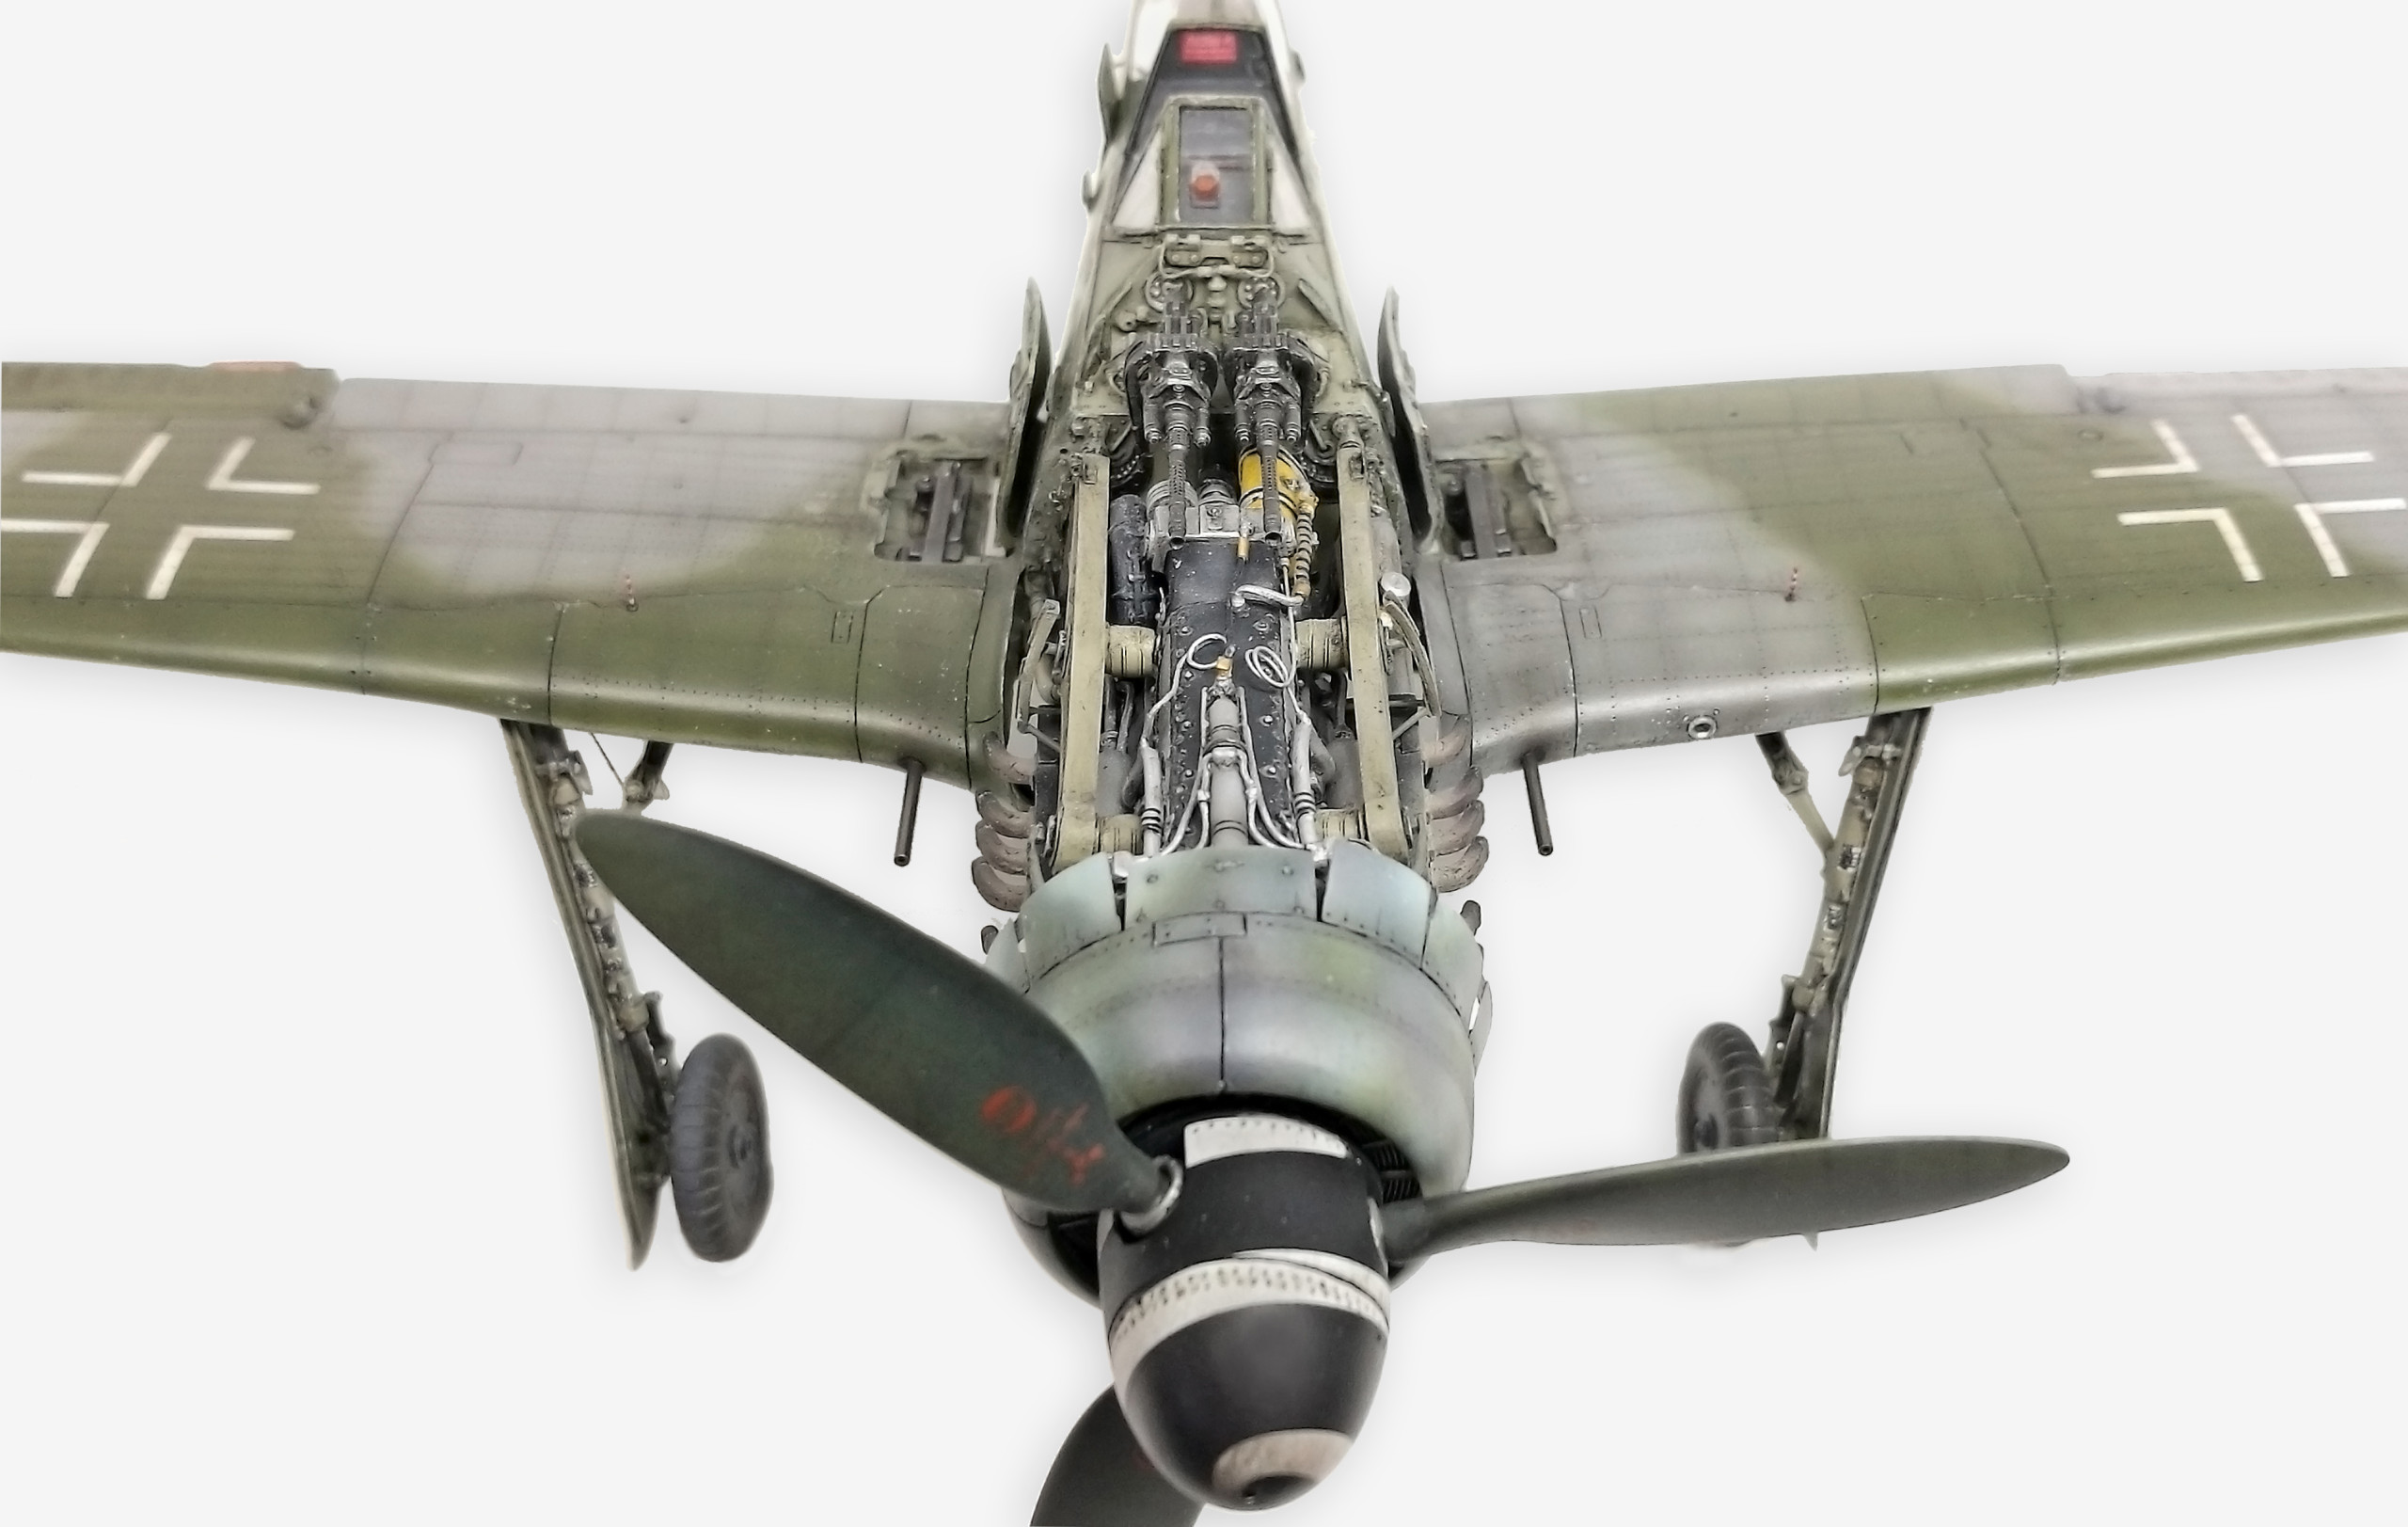
weapons bays:
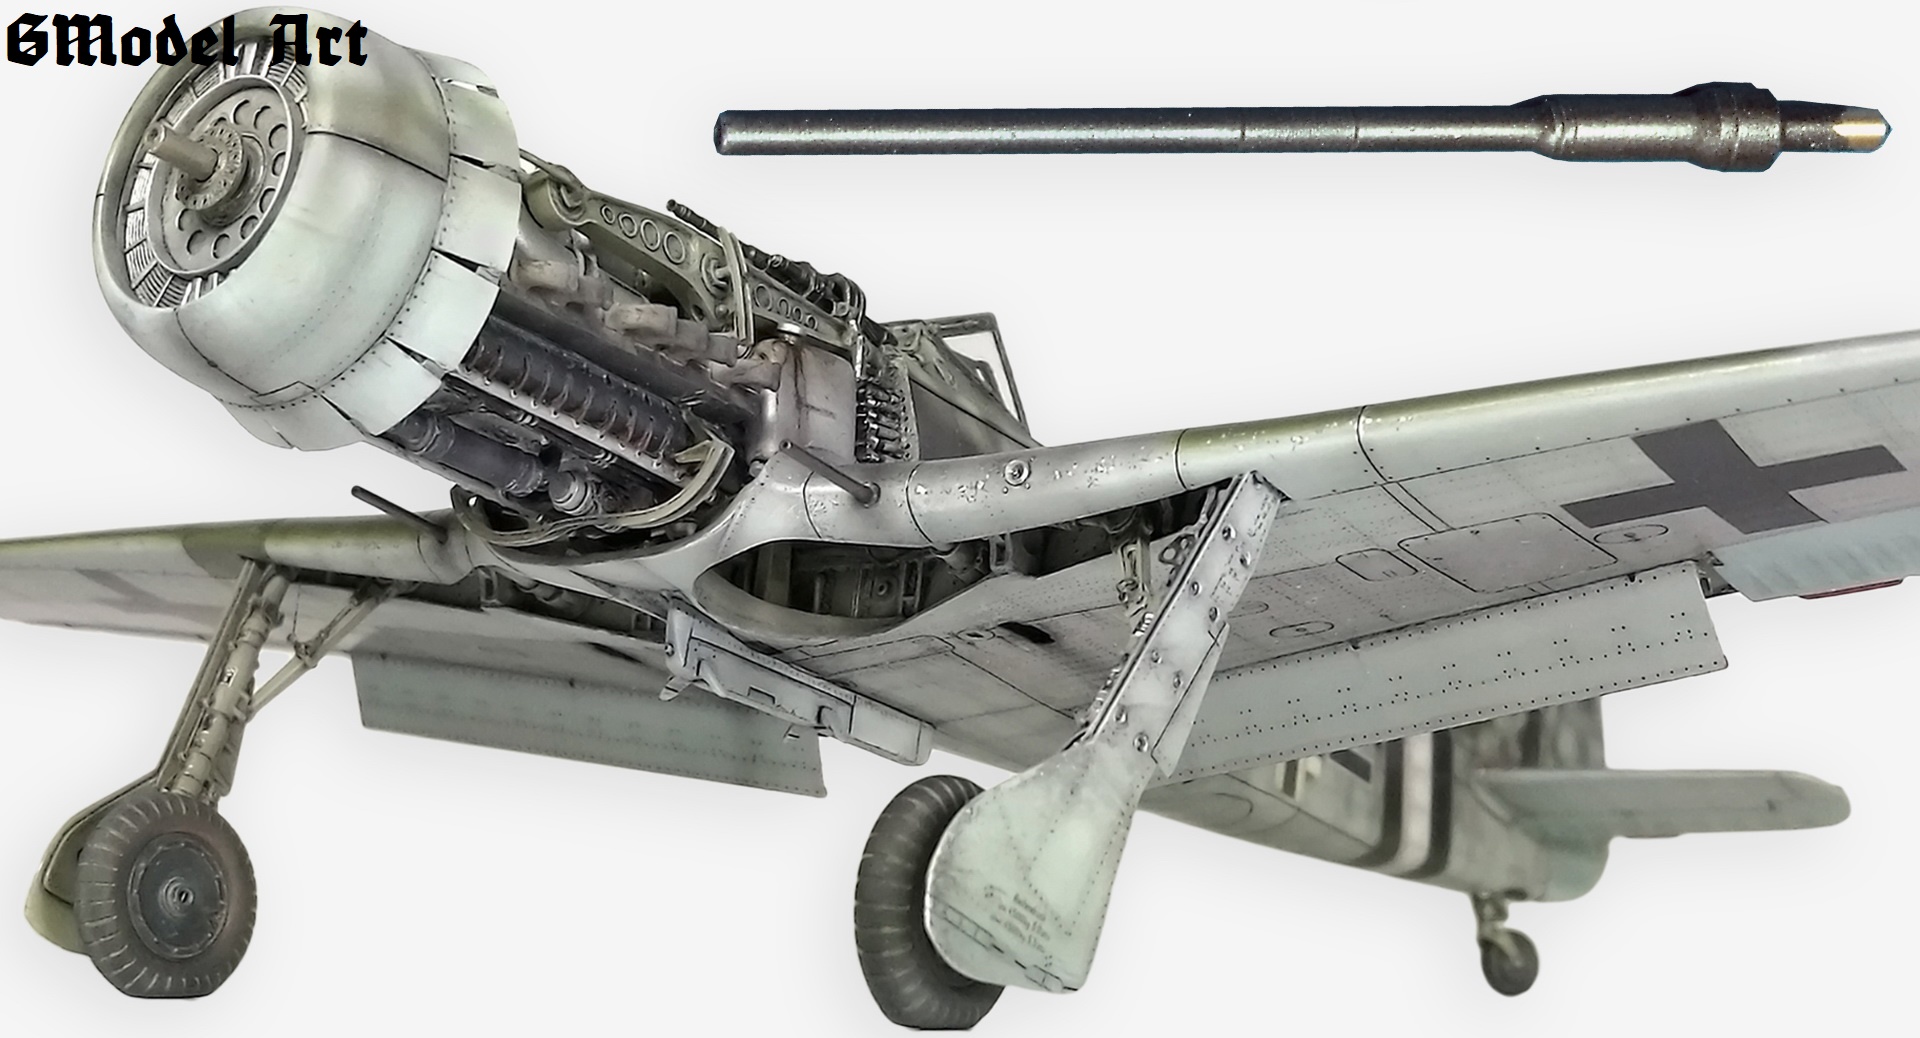
Including covers with beautifully outlined internal structure are component of large Aires set. However it was necessary to complement the electrical wires and adjust (make thinner walls) to fit between the both halves of the wings.
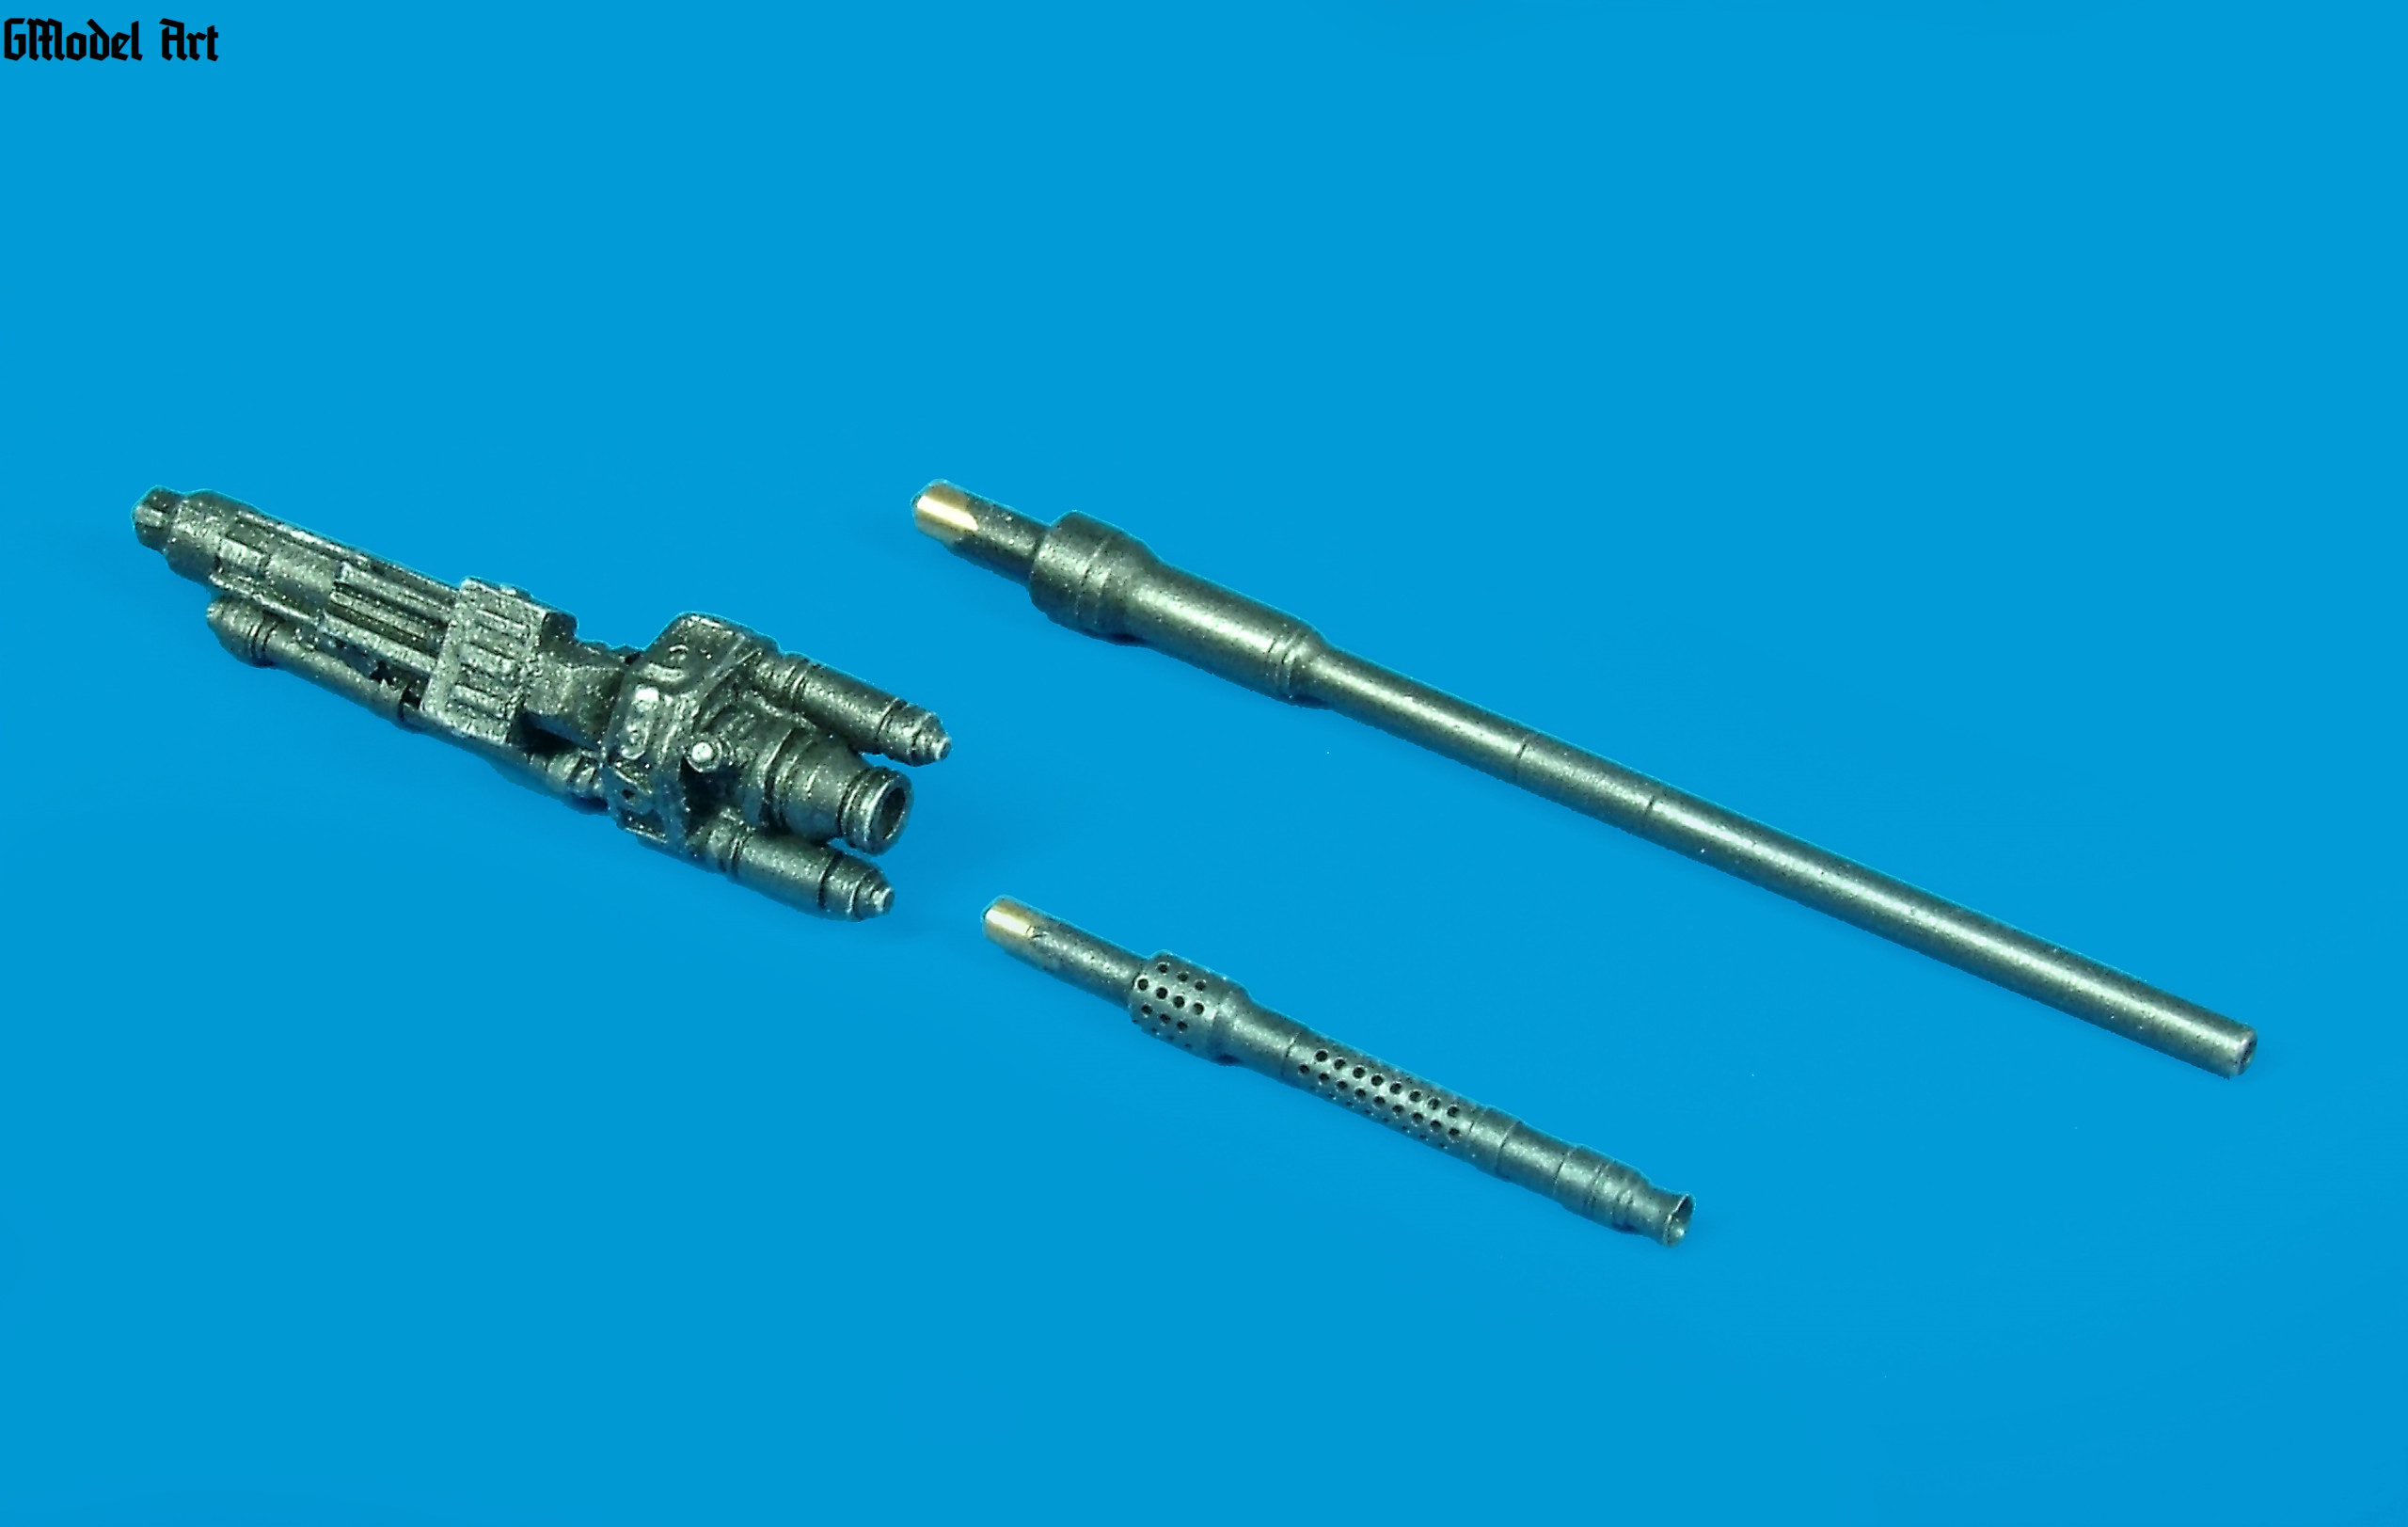
Metal barrels of cannons and large-caliber machine guns come from Master set. I created a tiny tunnels for gun barrels that led through wheel wells from thin aluminum sheet and downspouts empty ammunition from a machine guns.
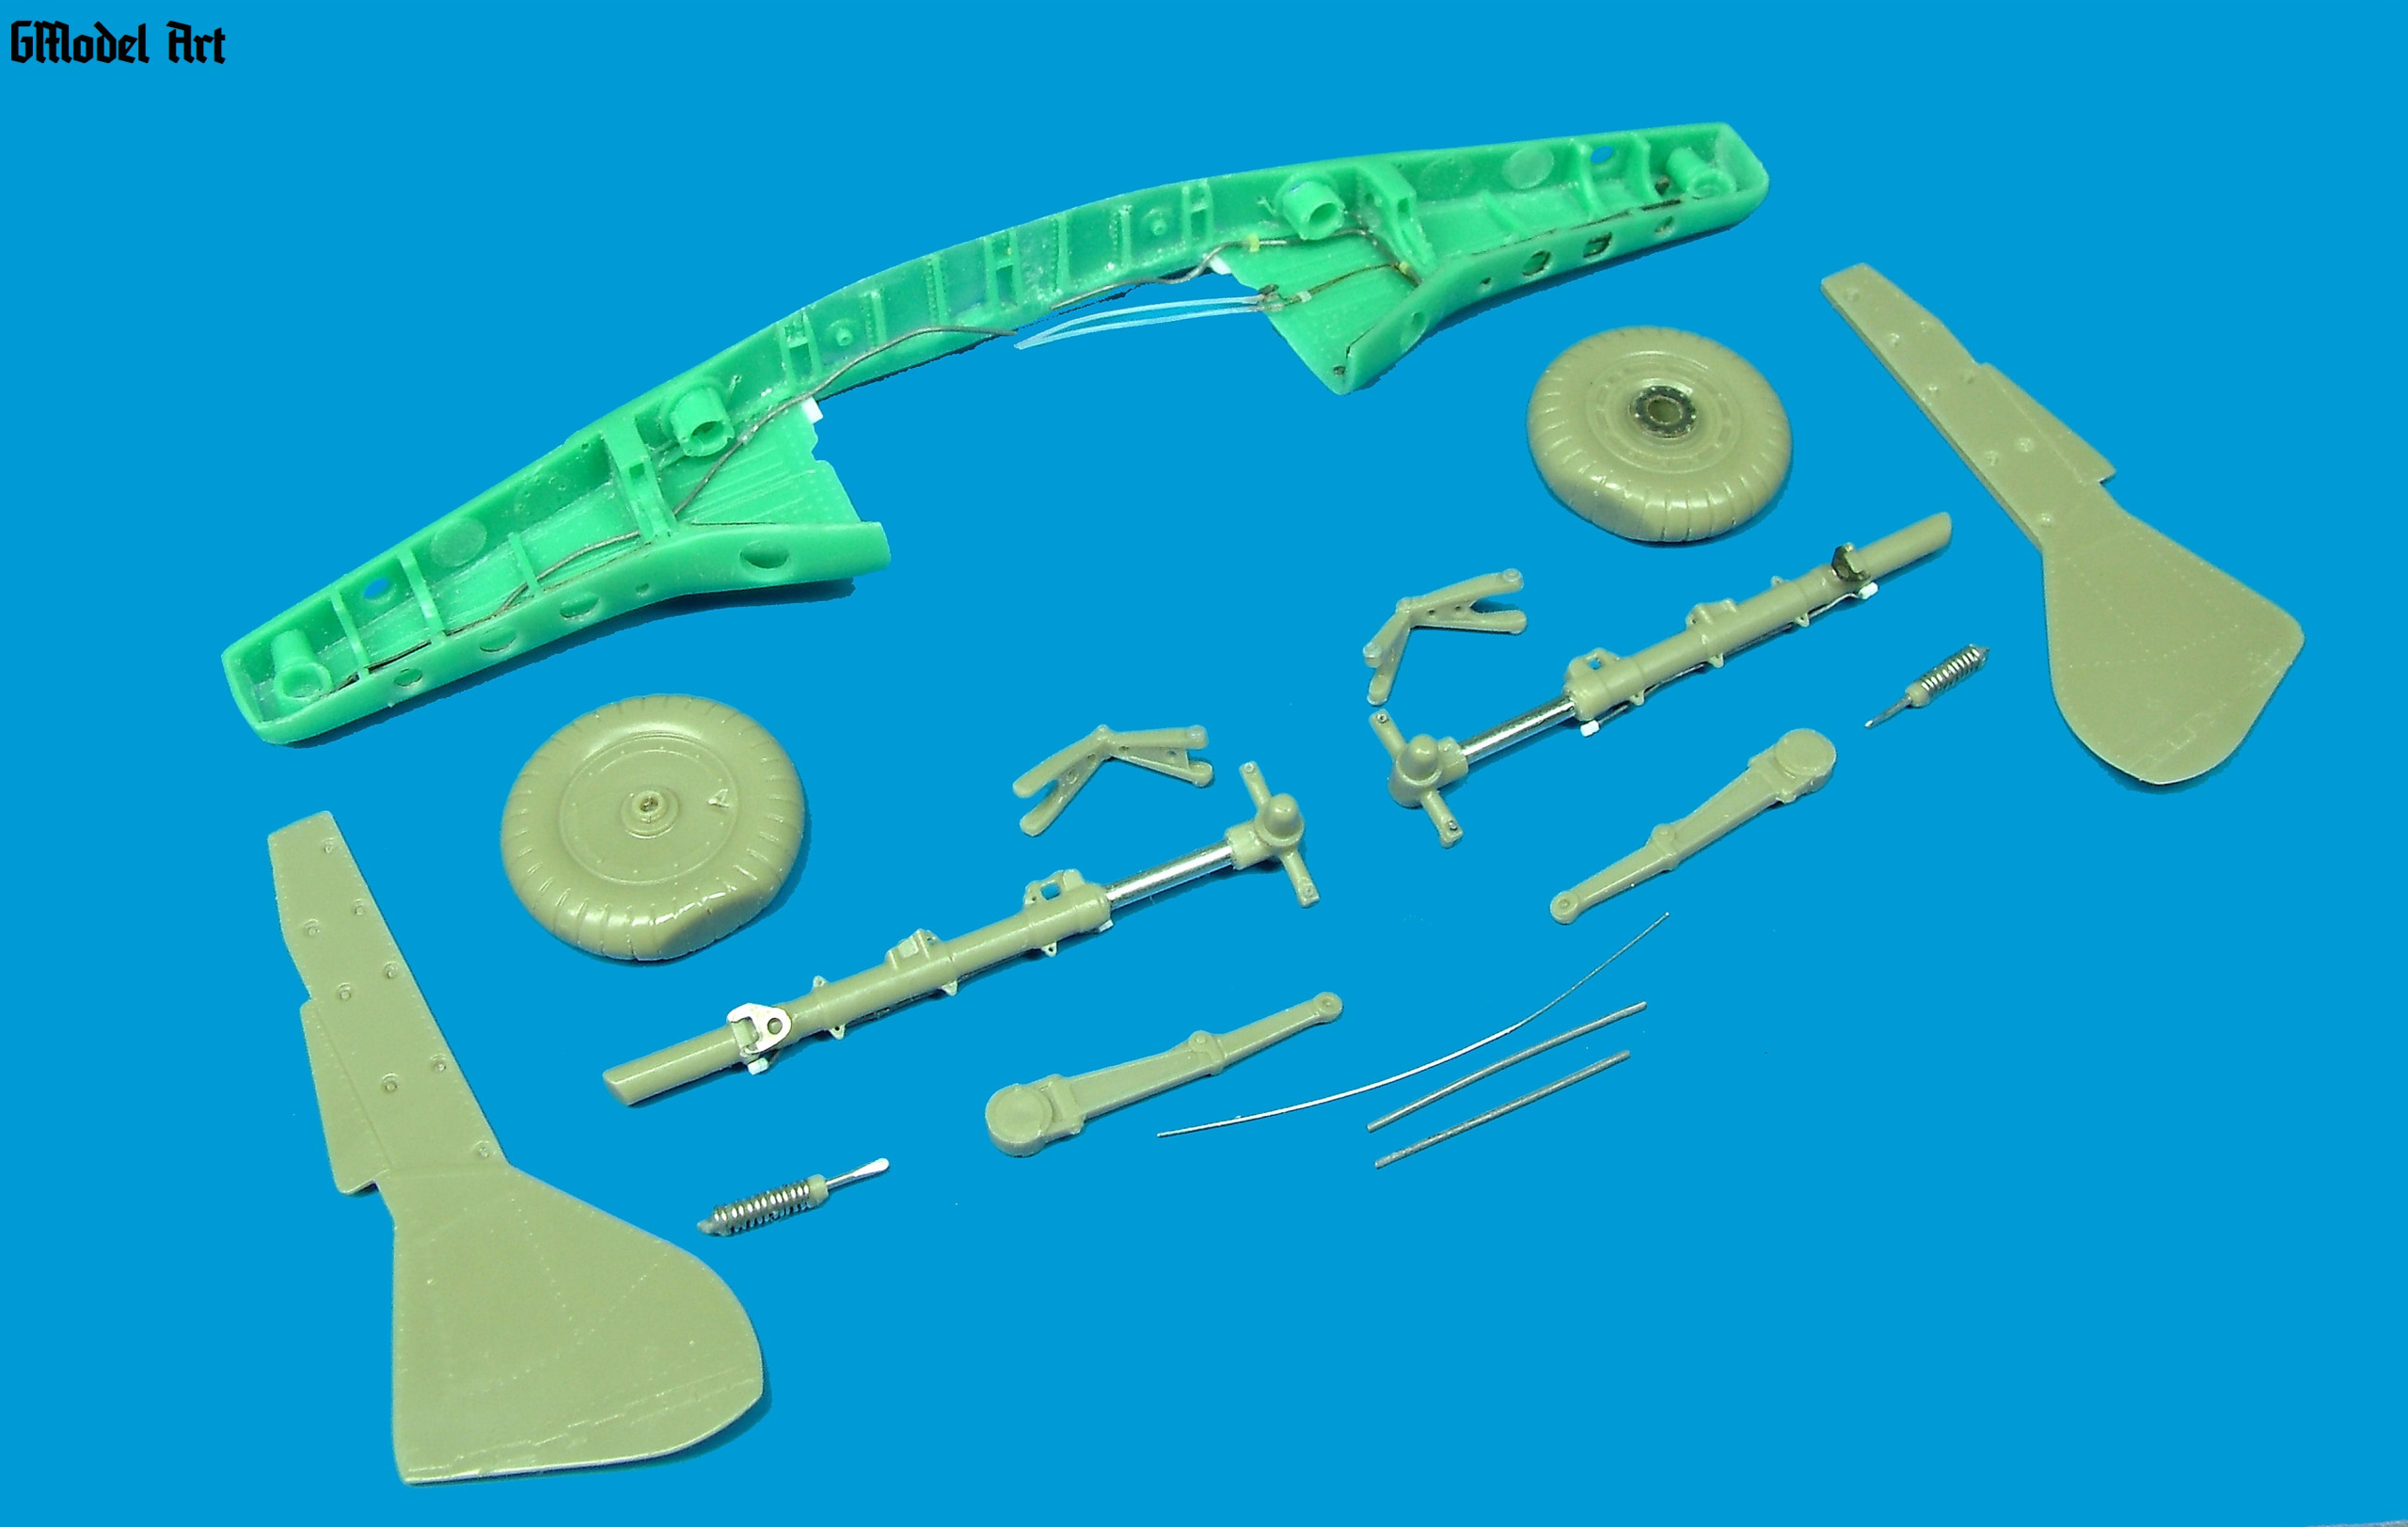
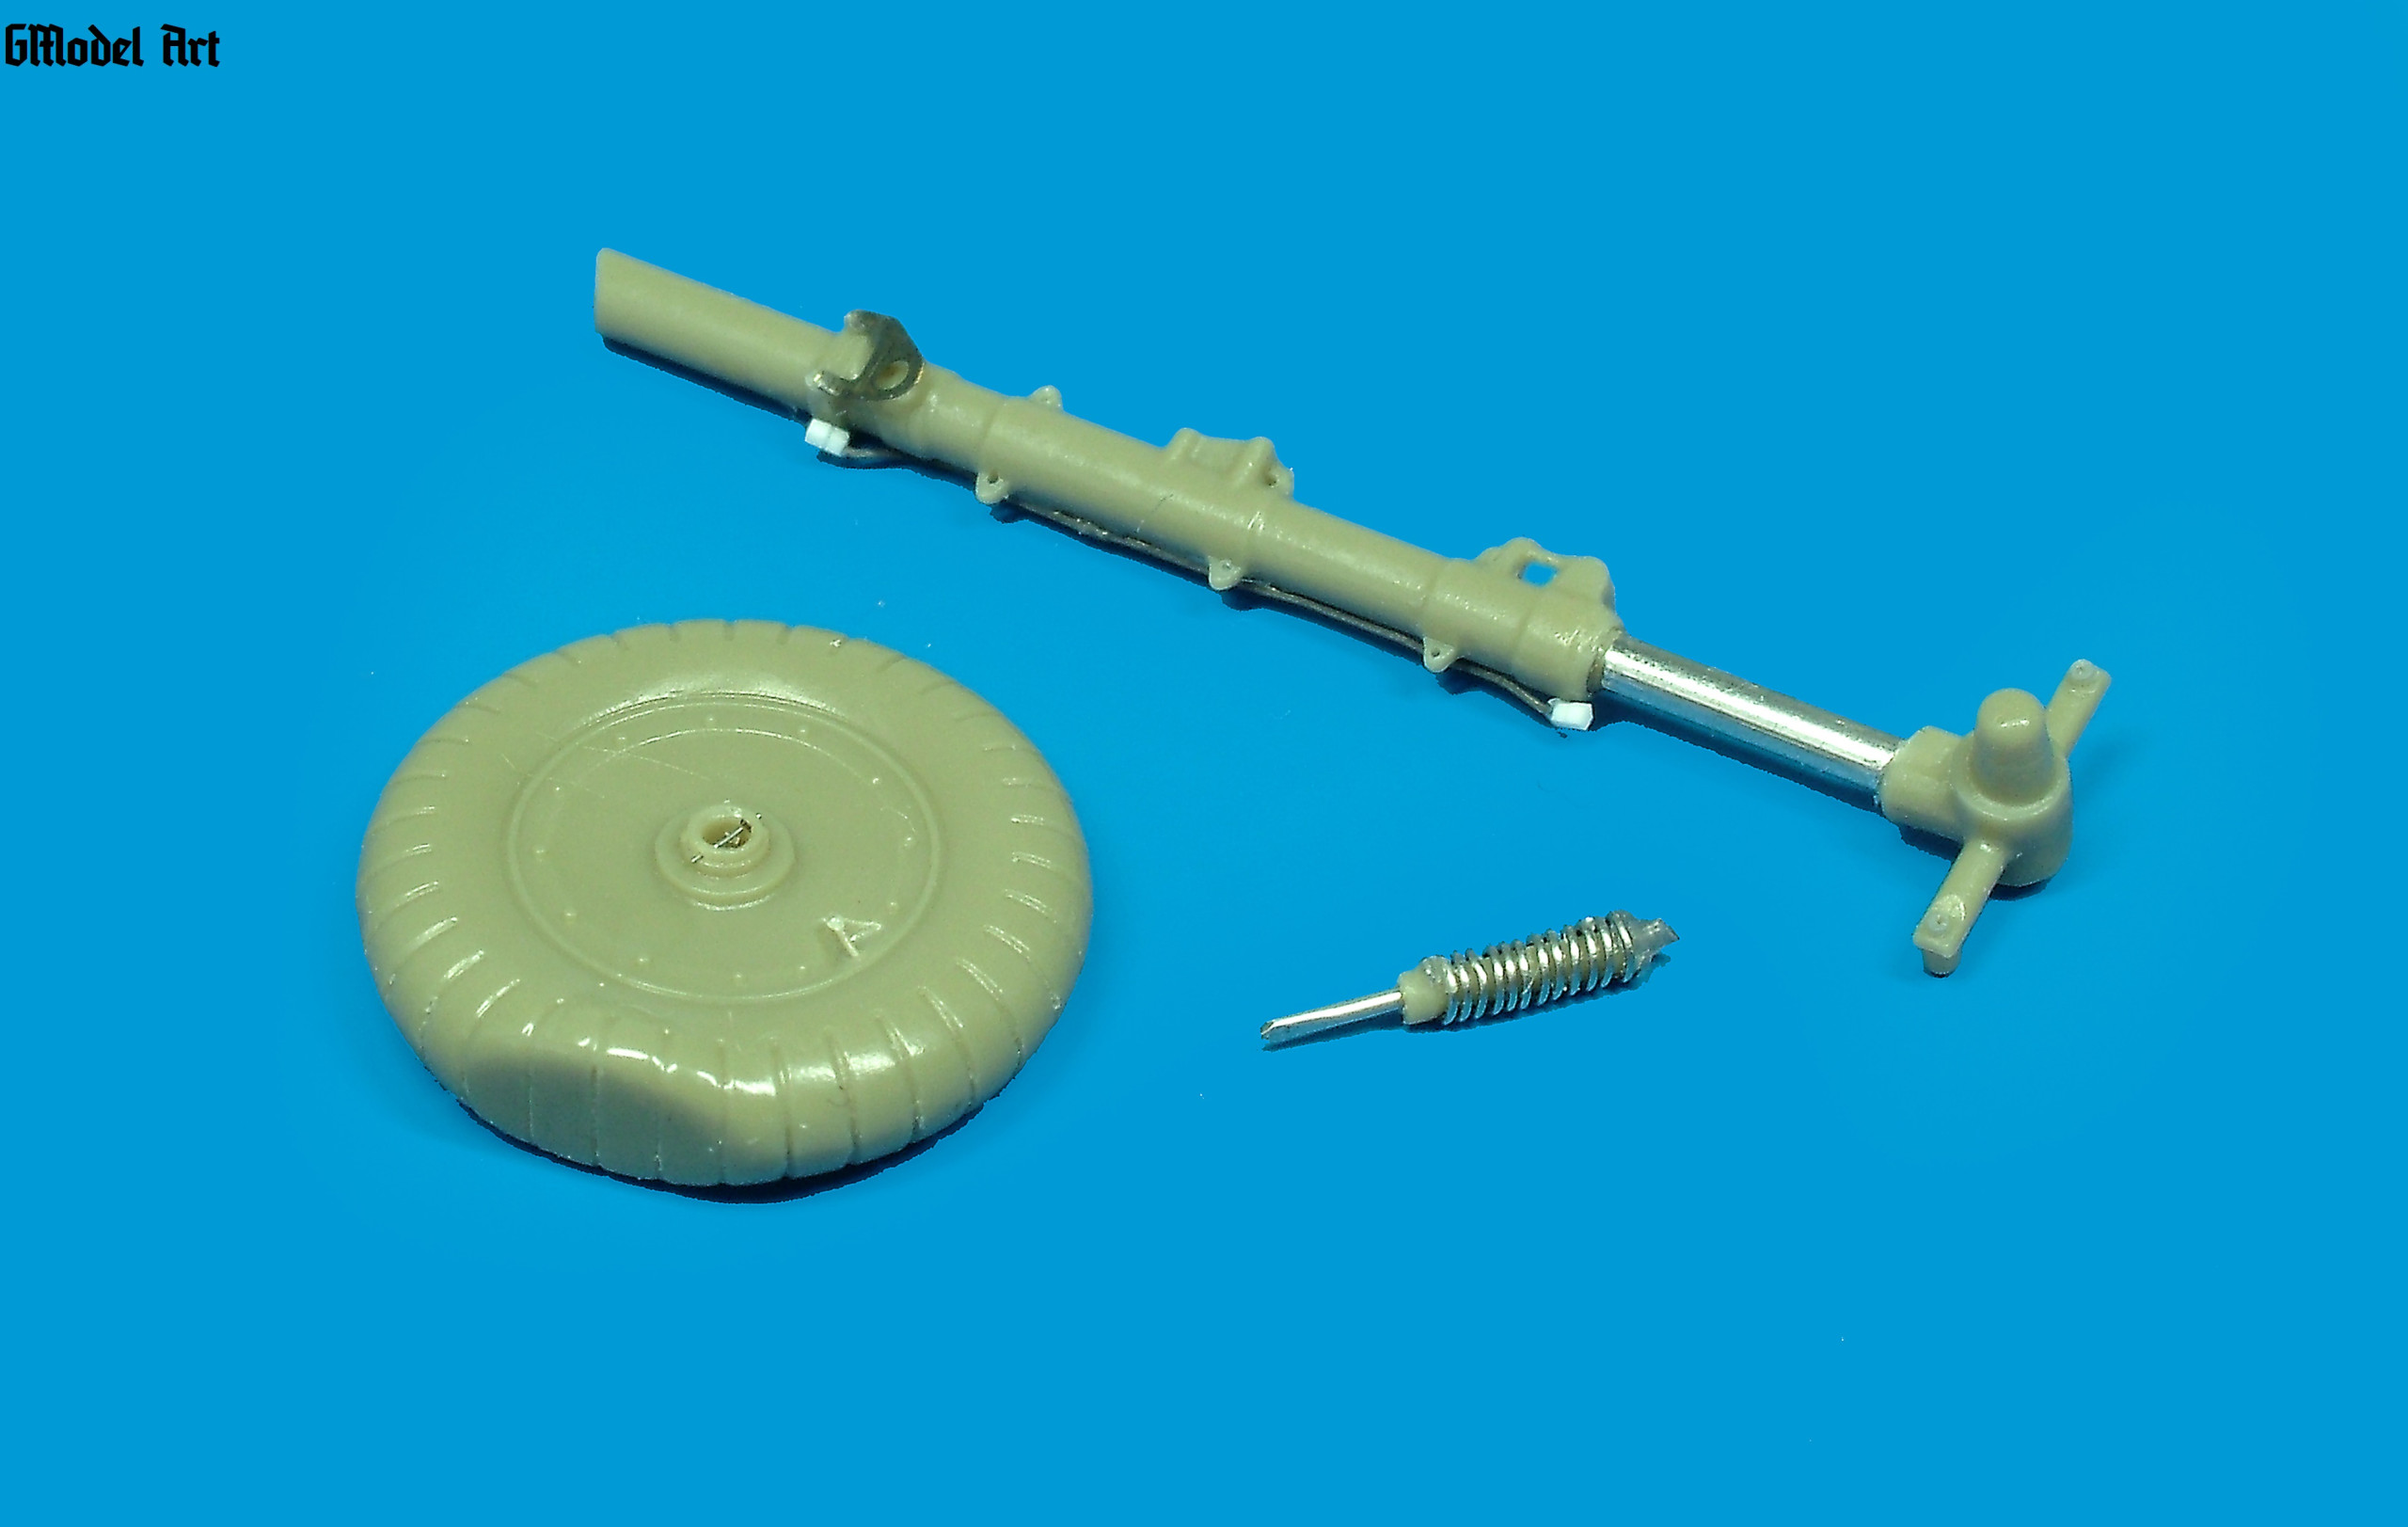
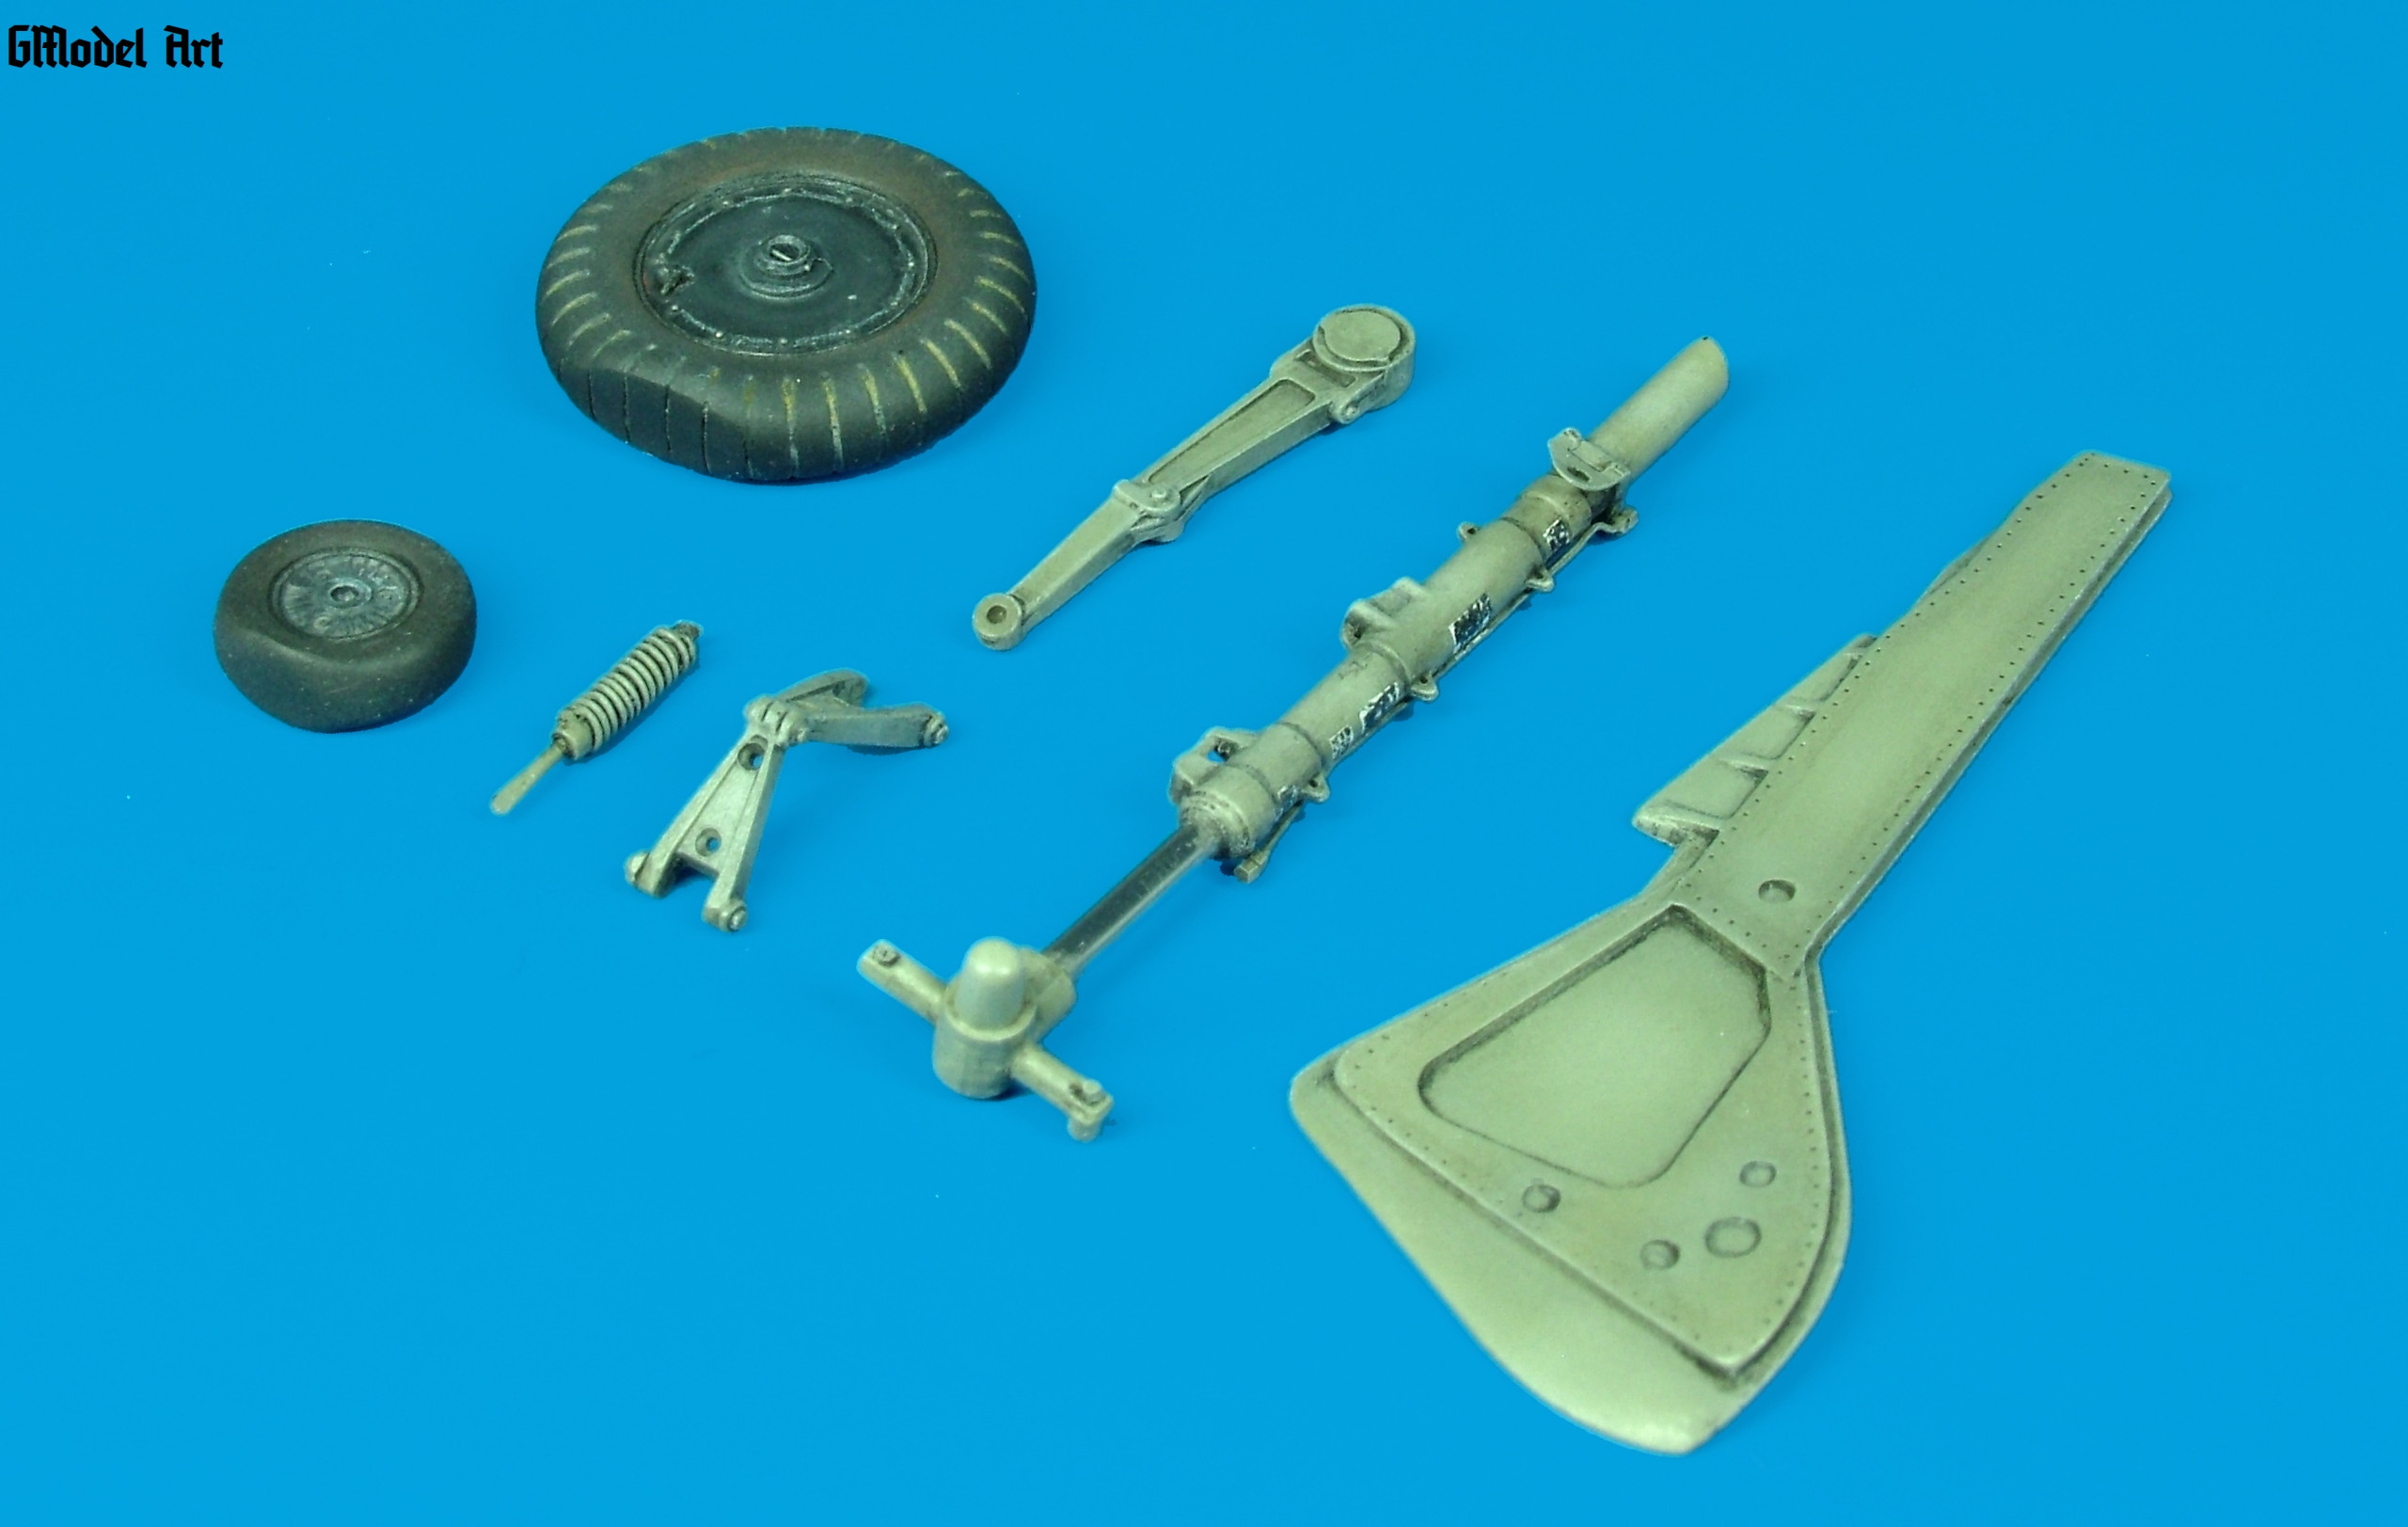
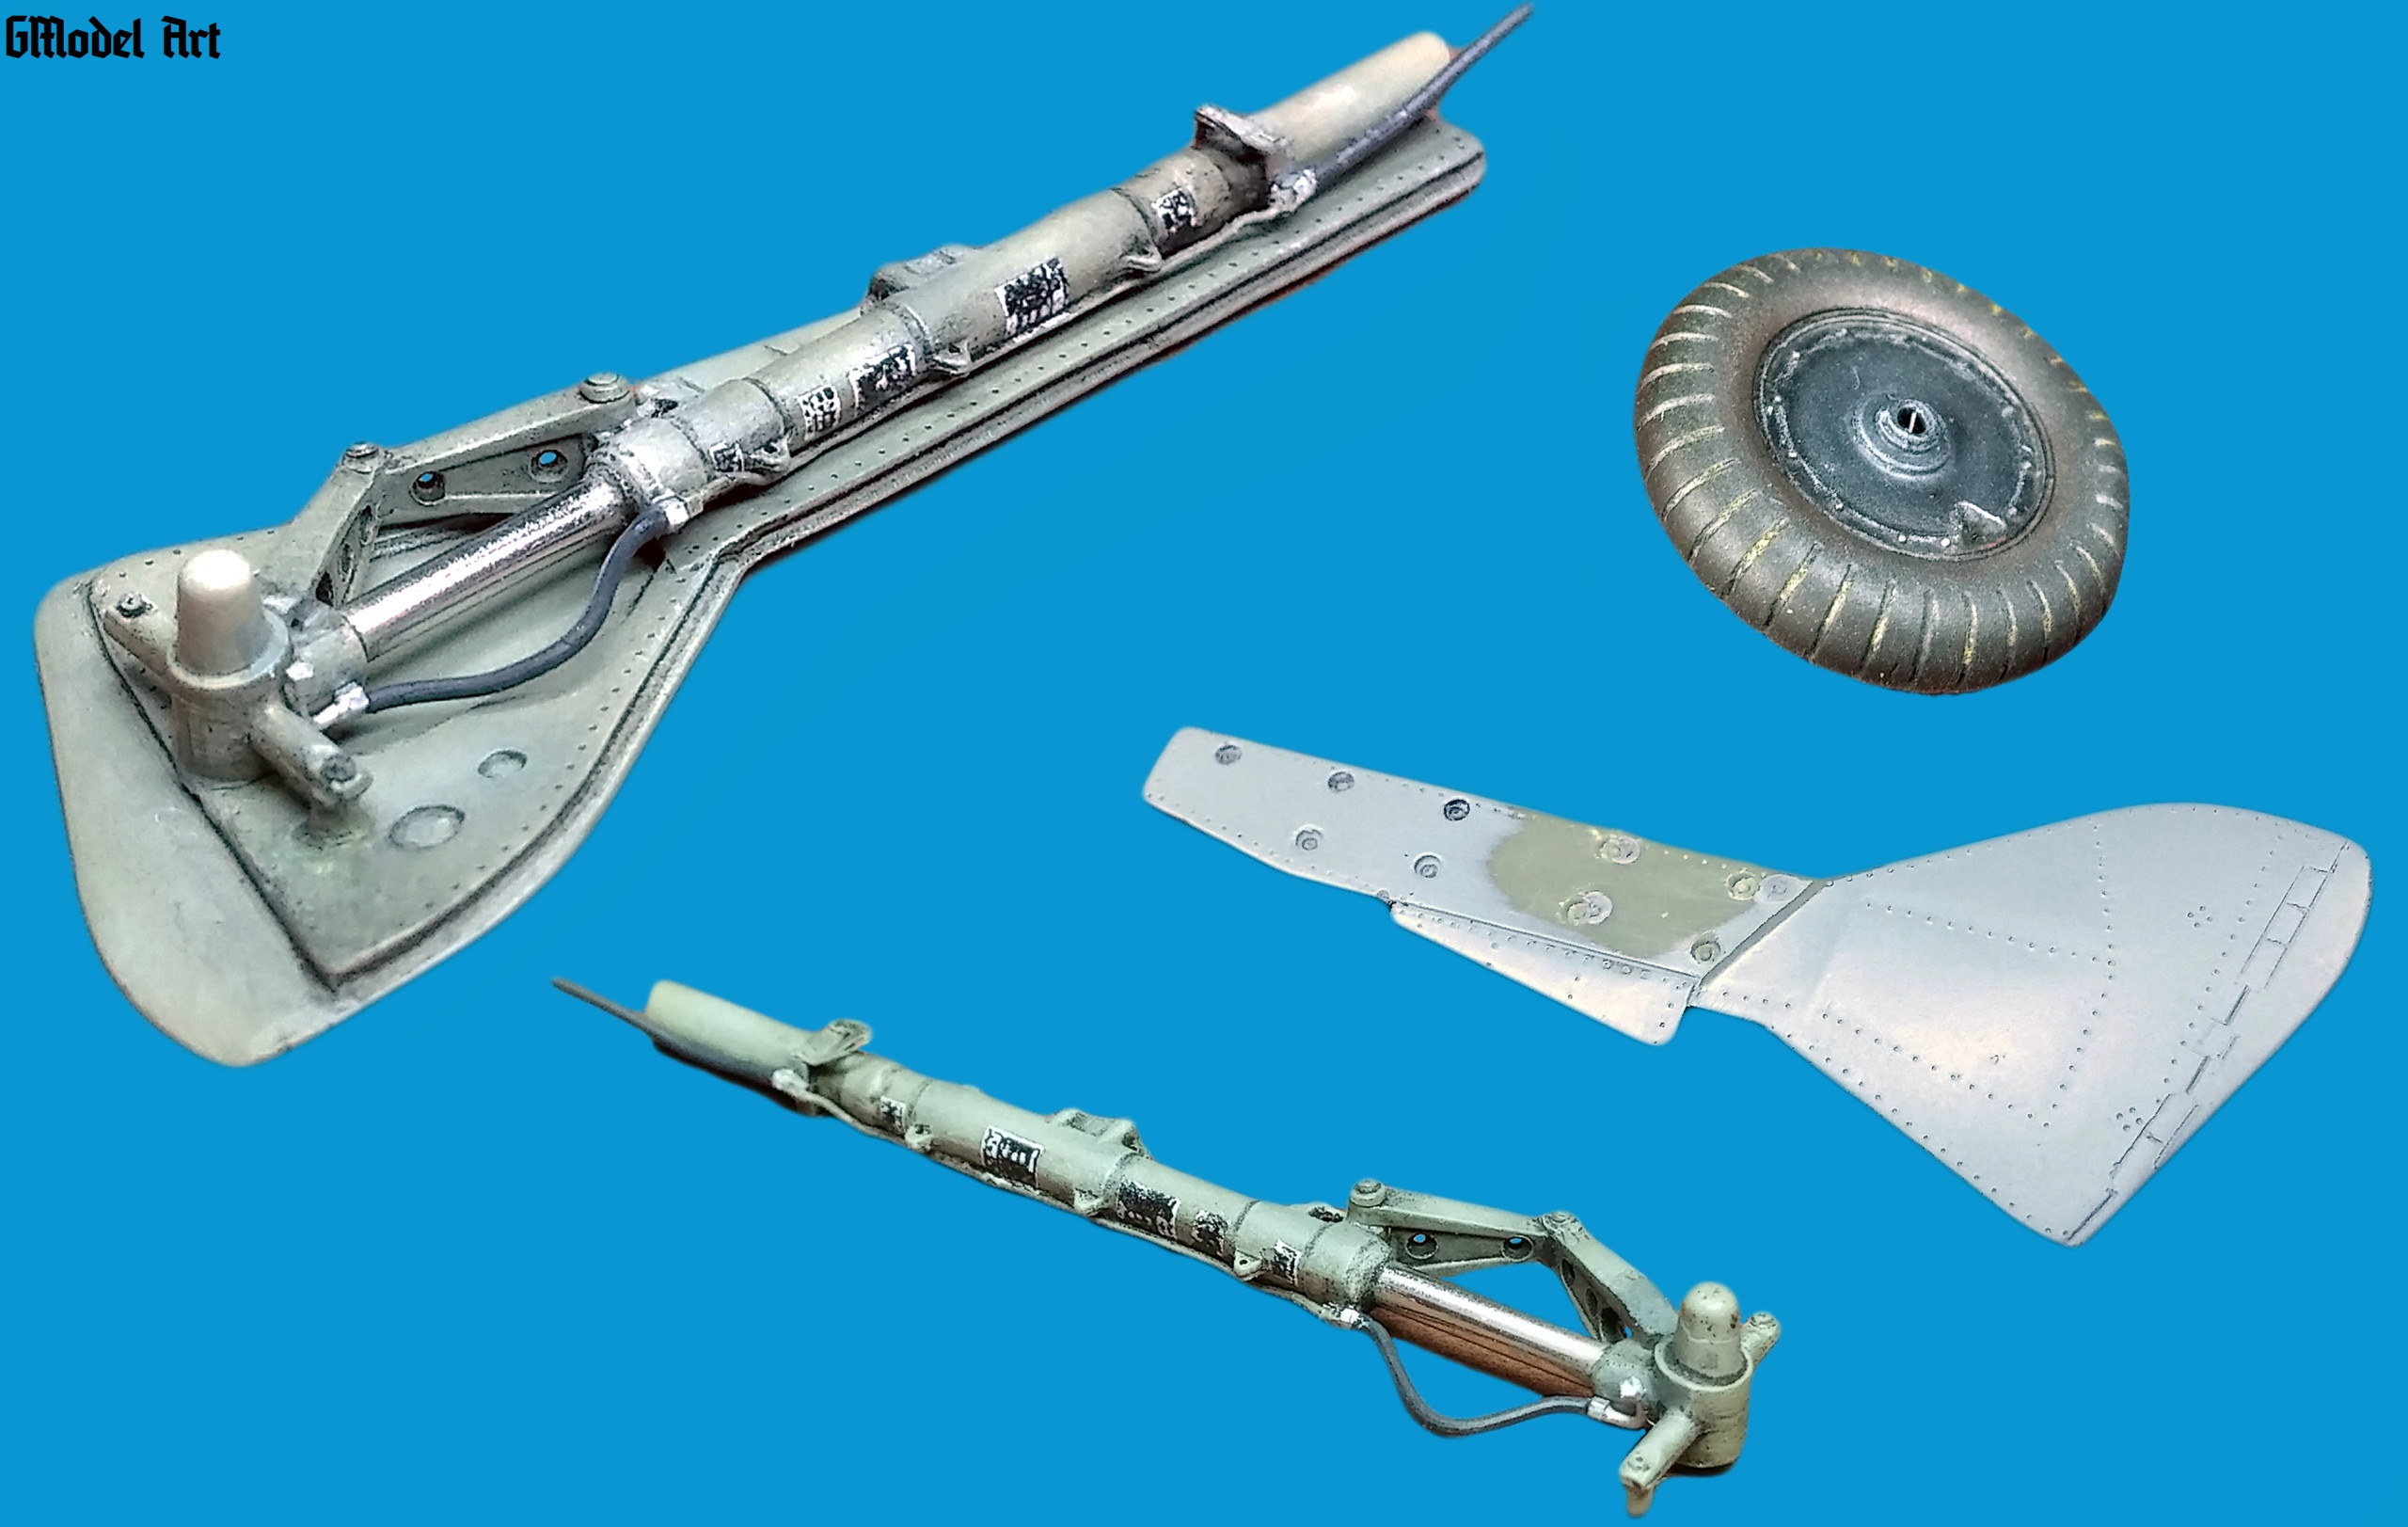
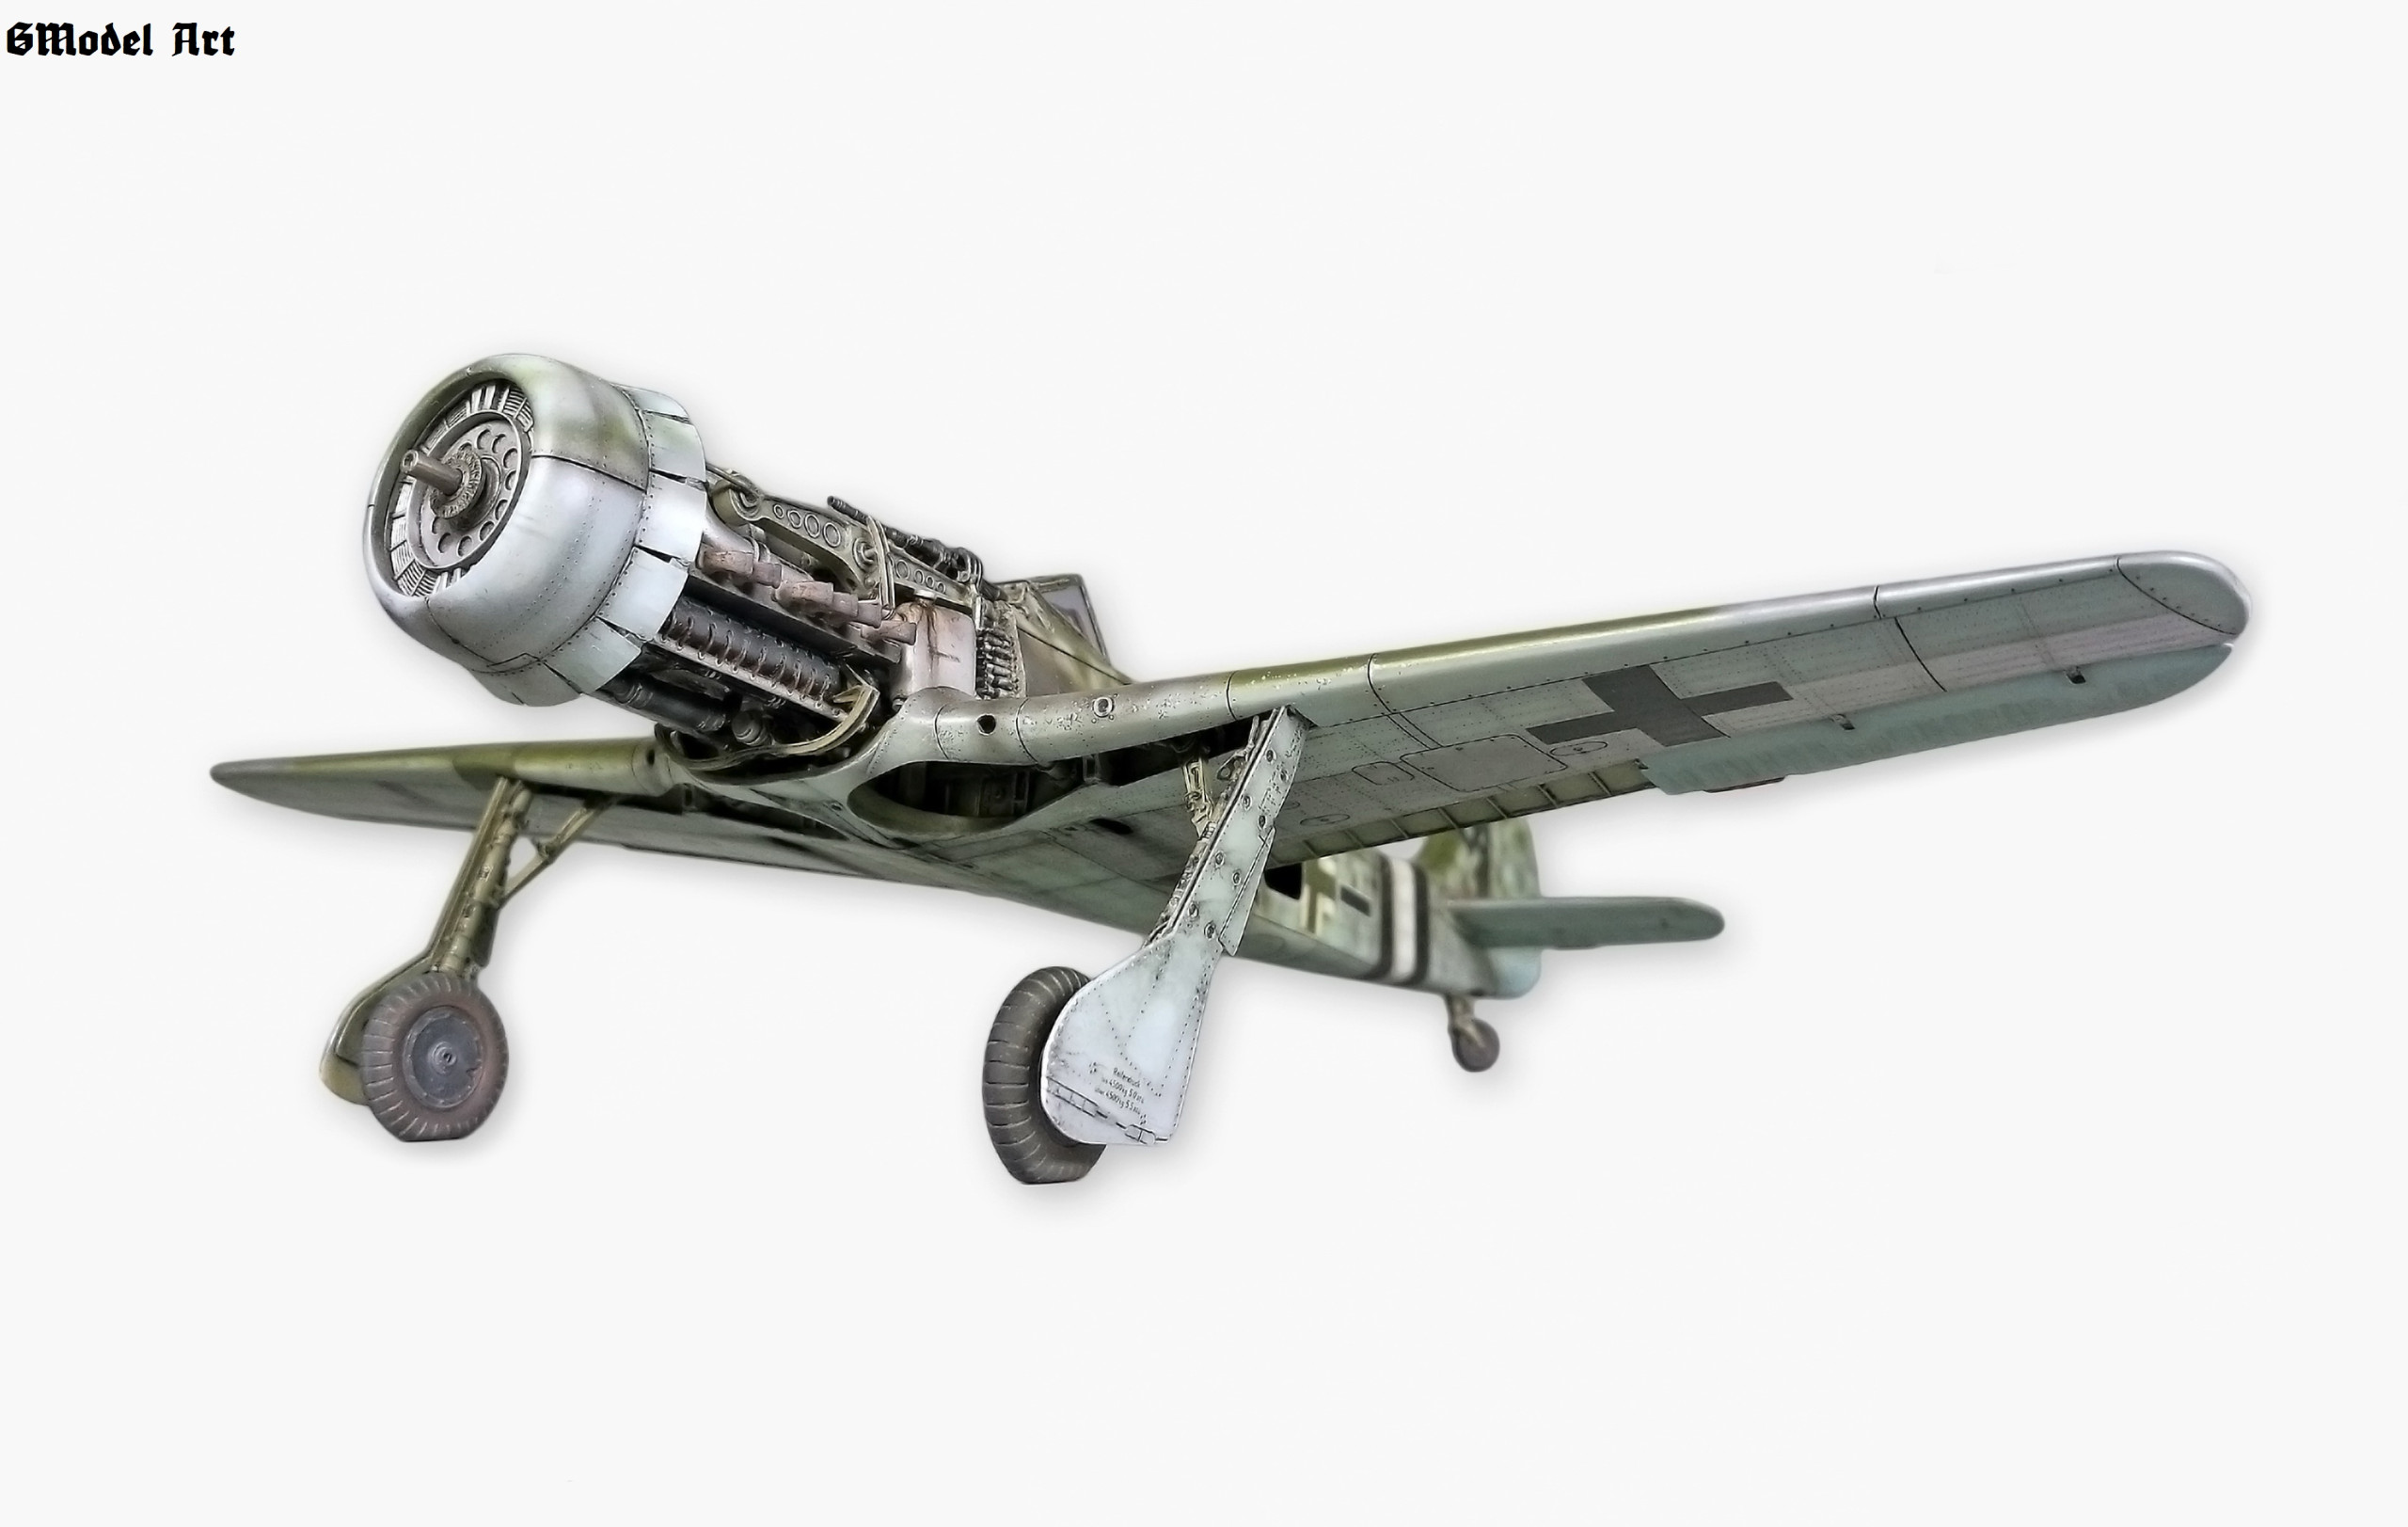
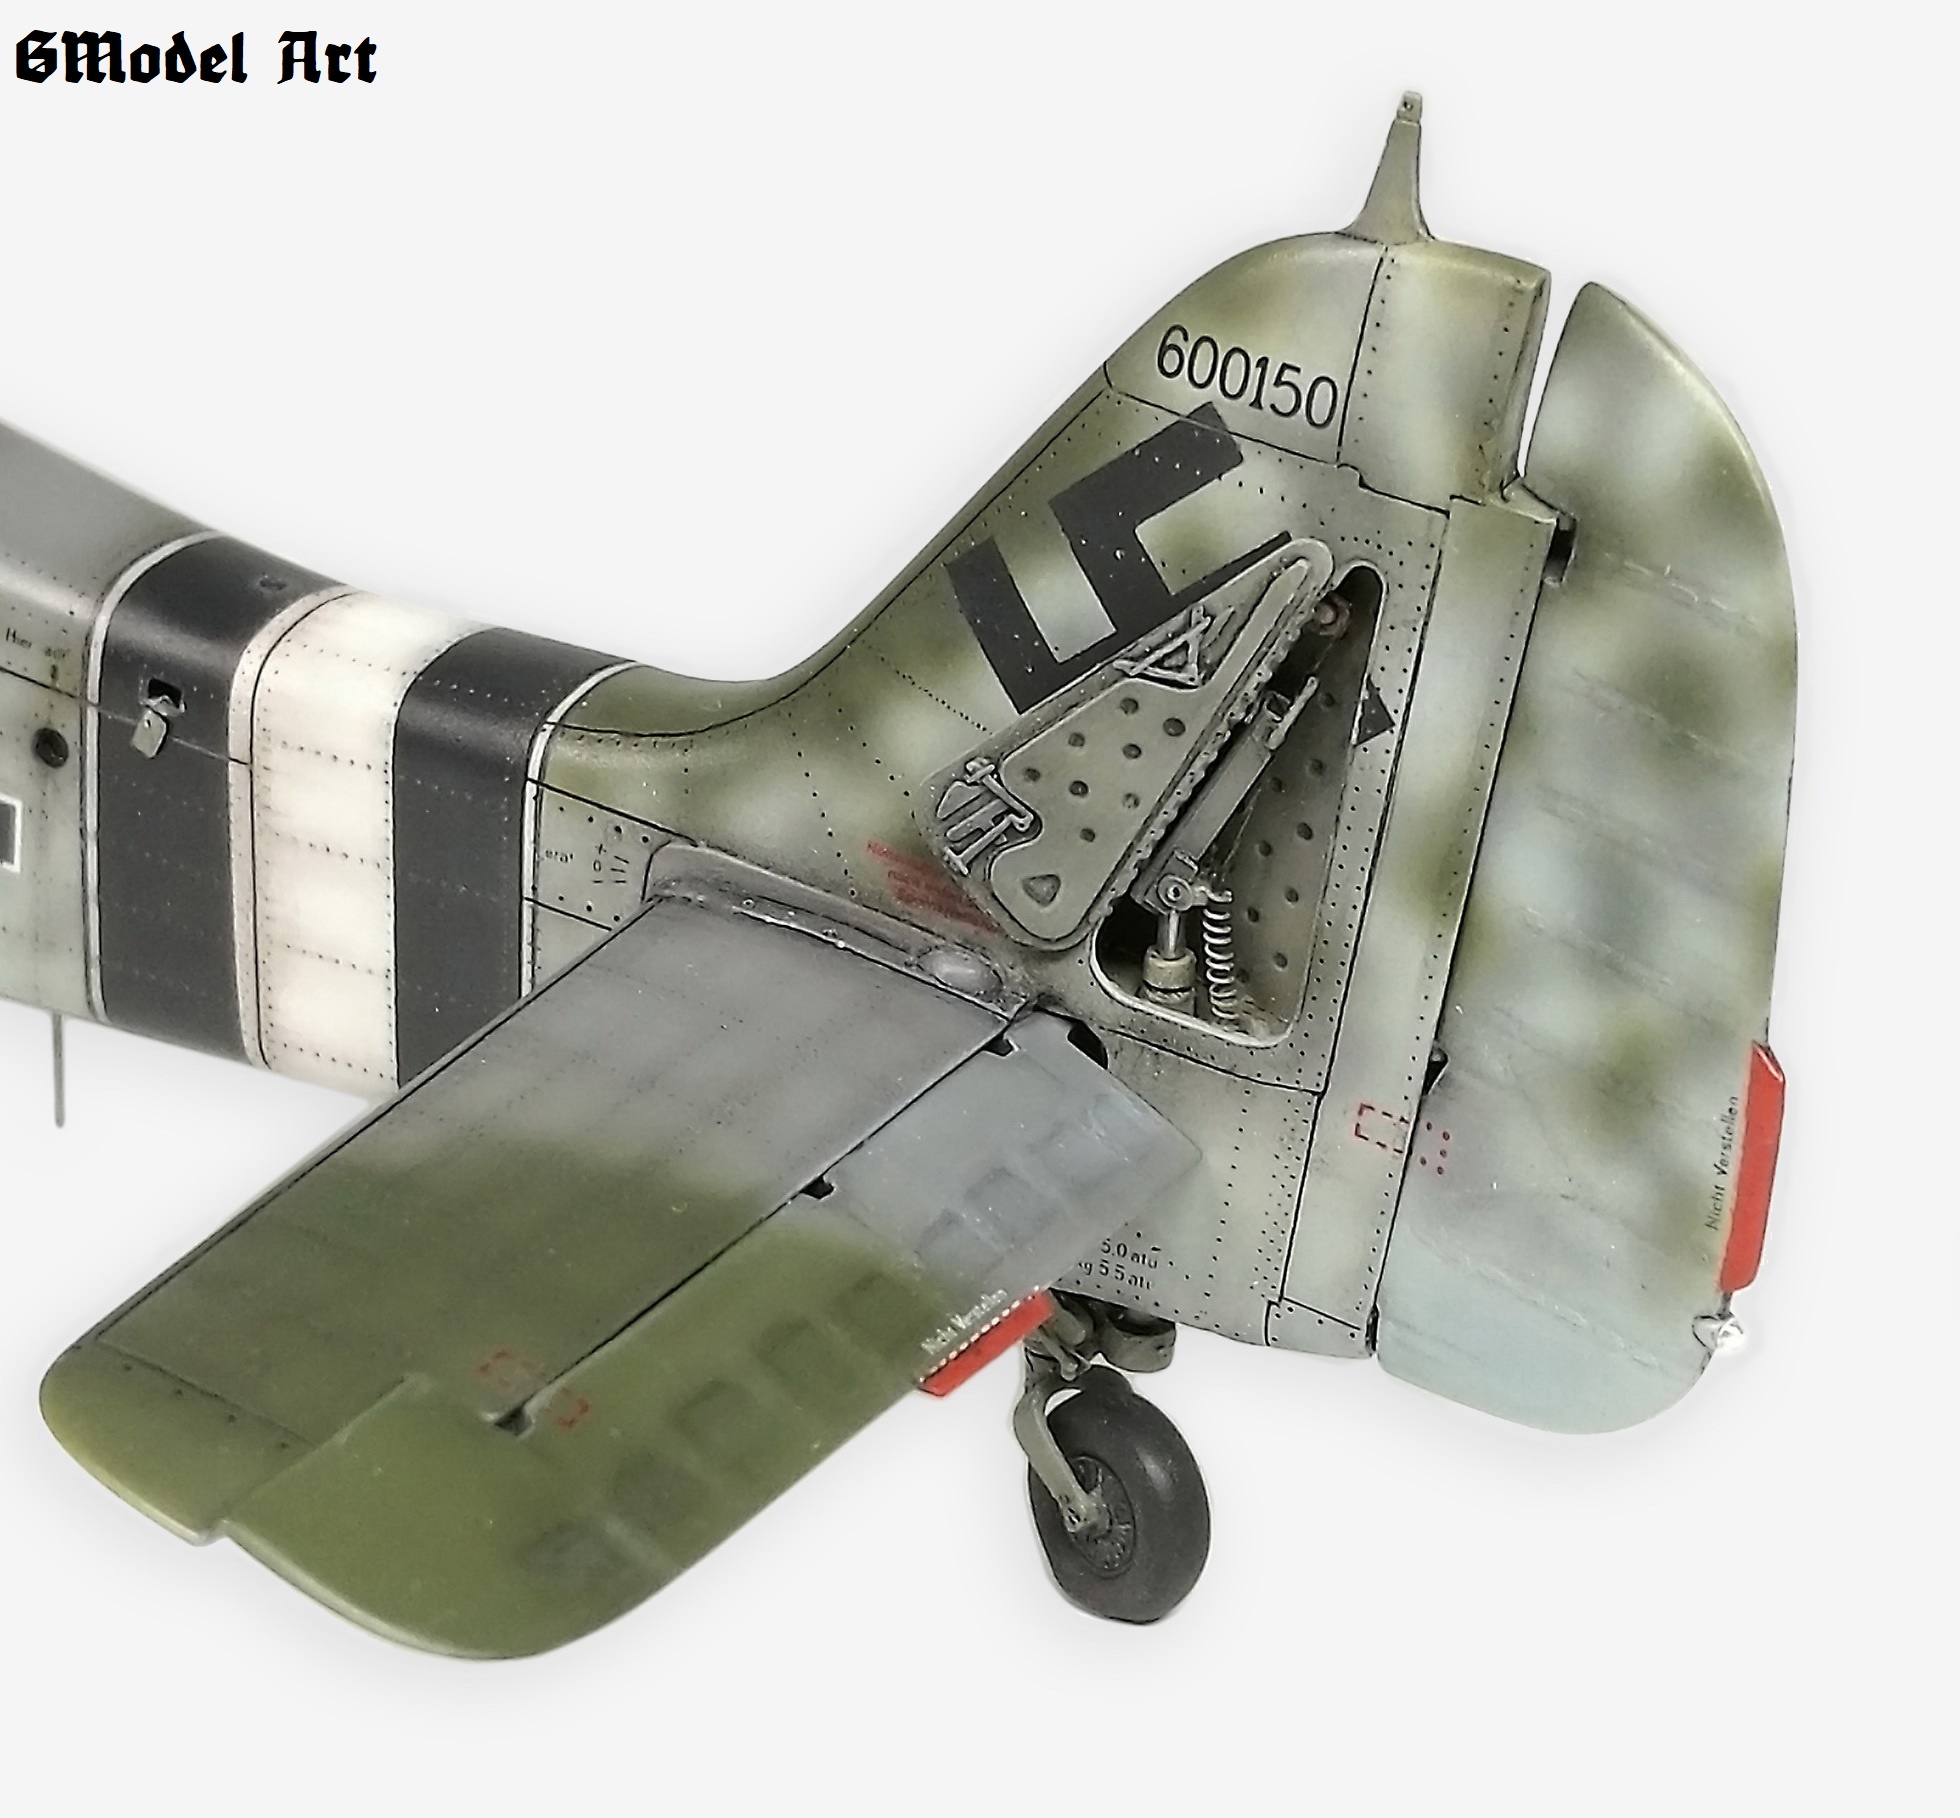
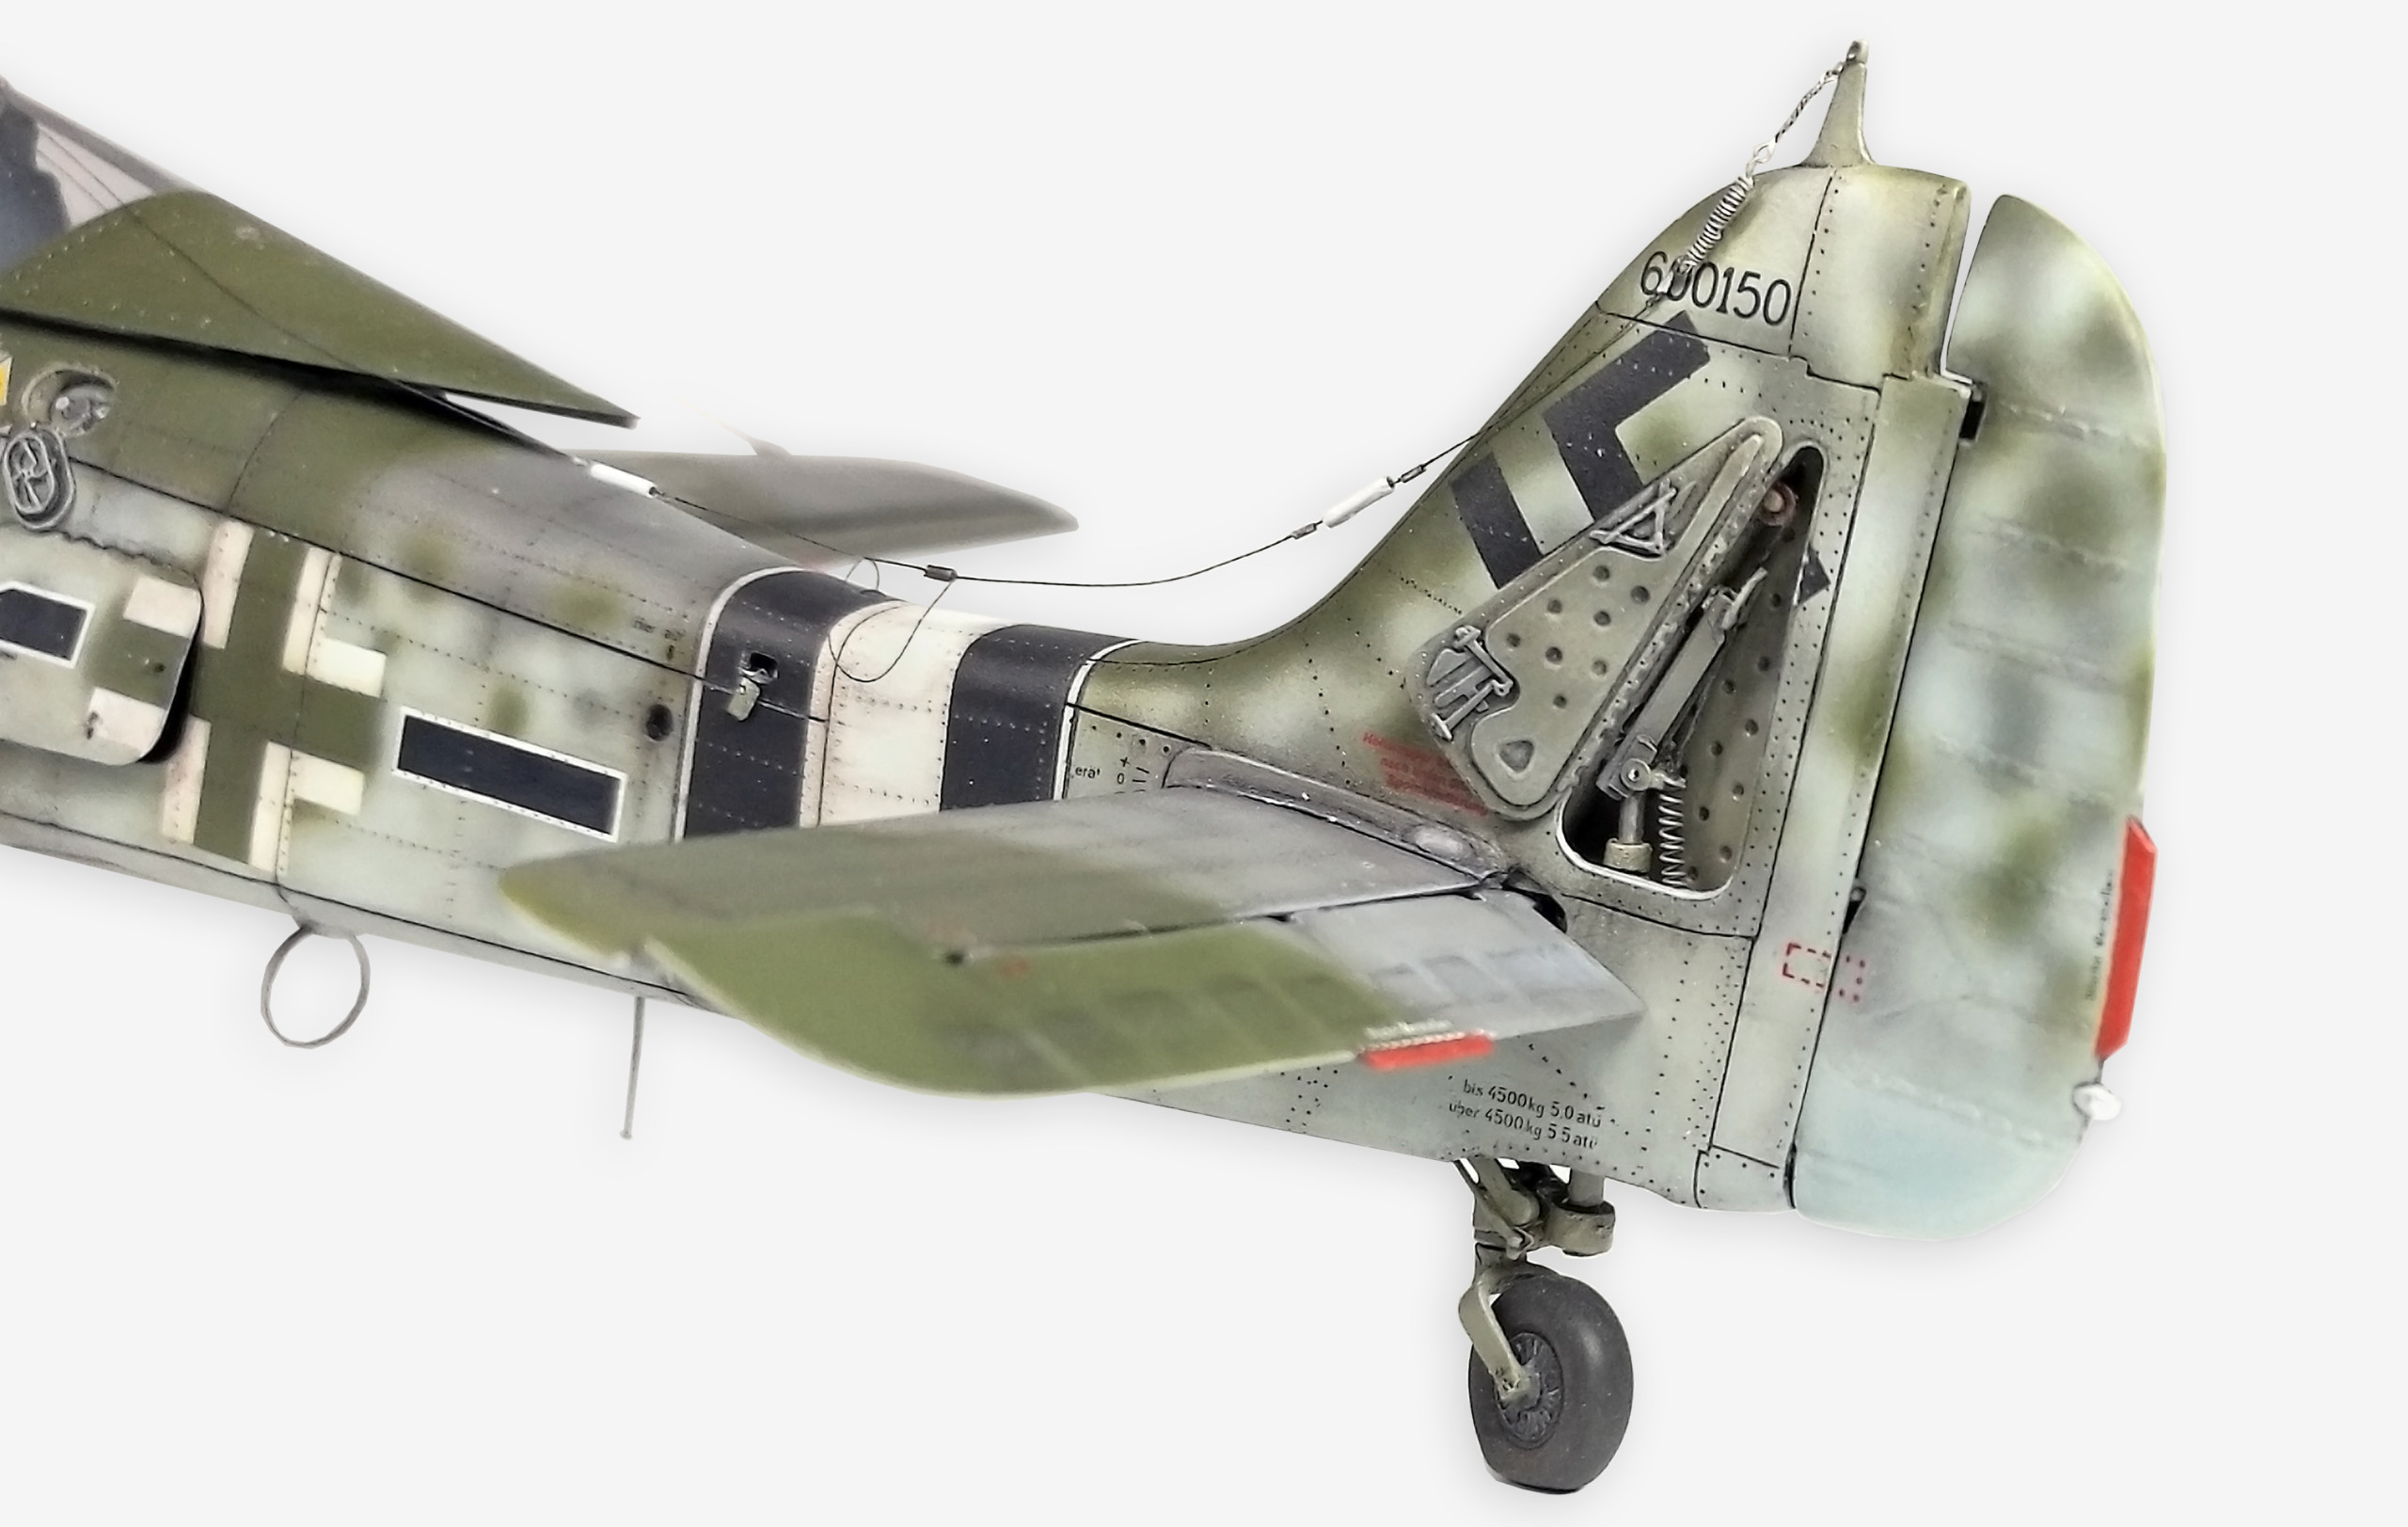
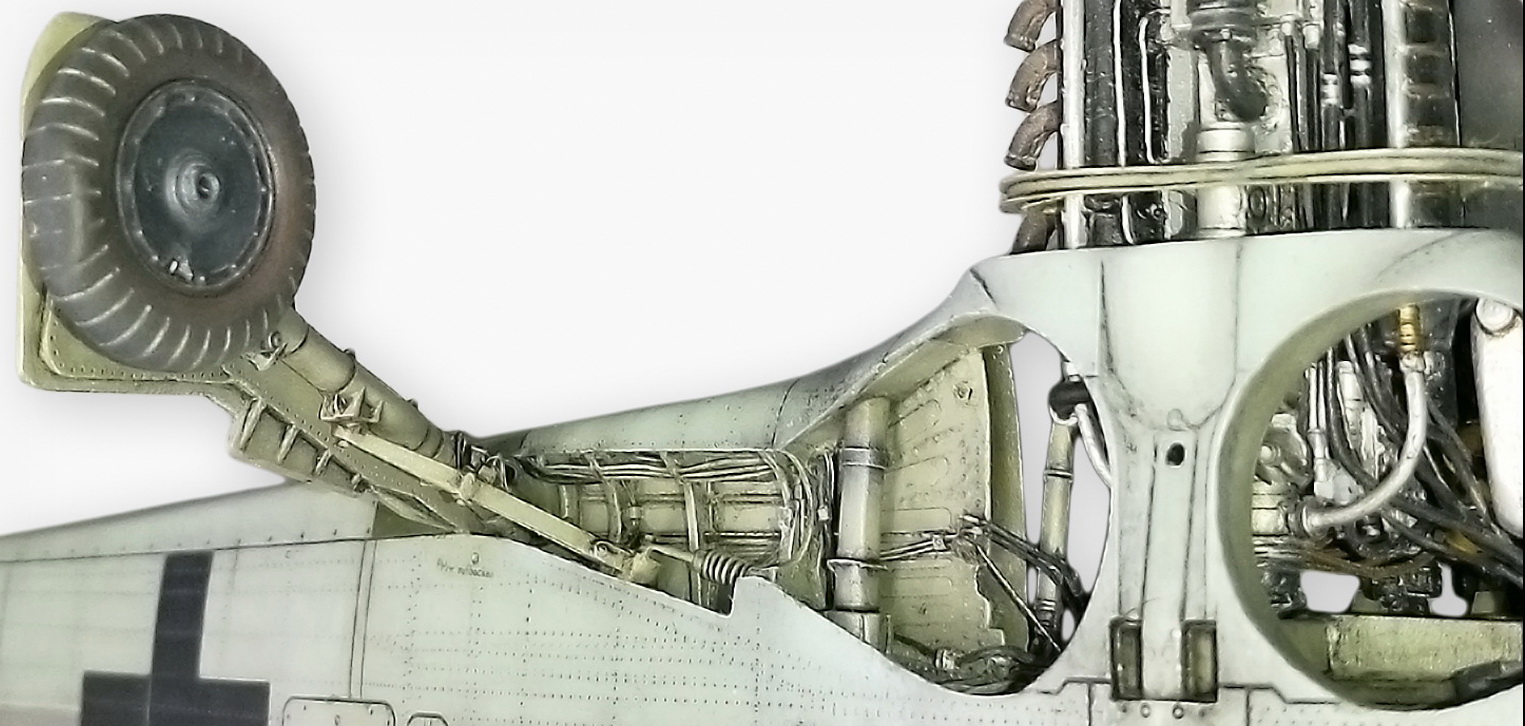
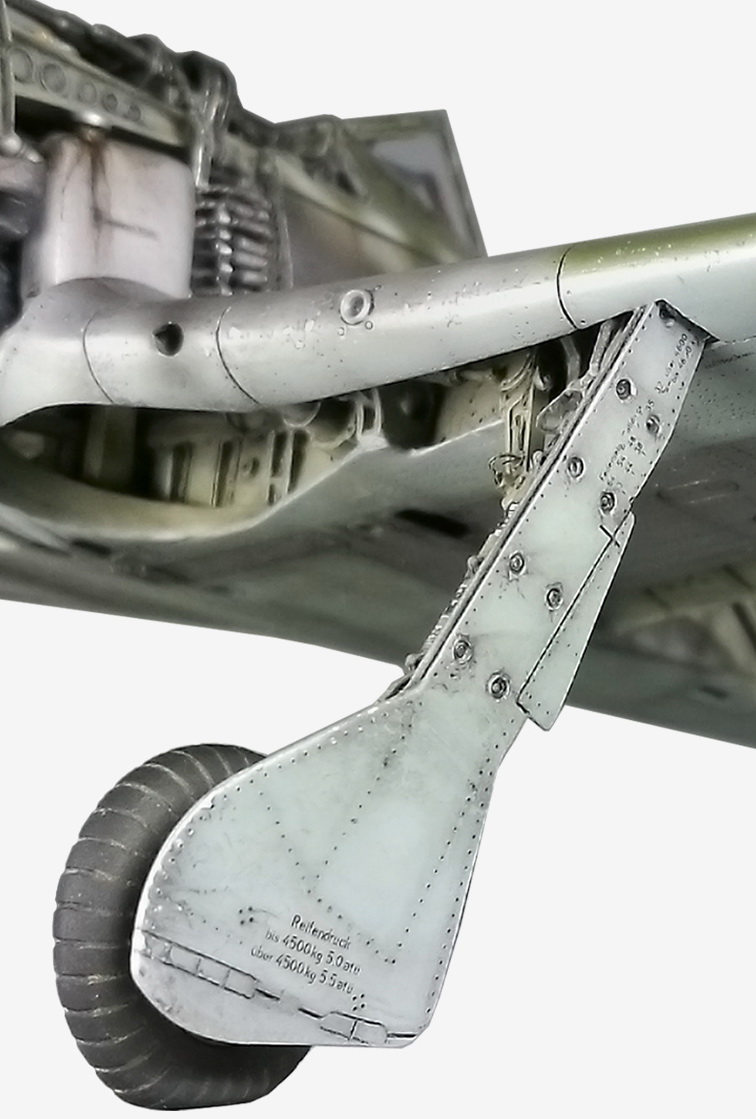
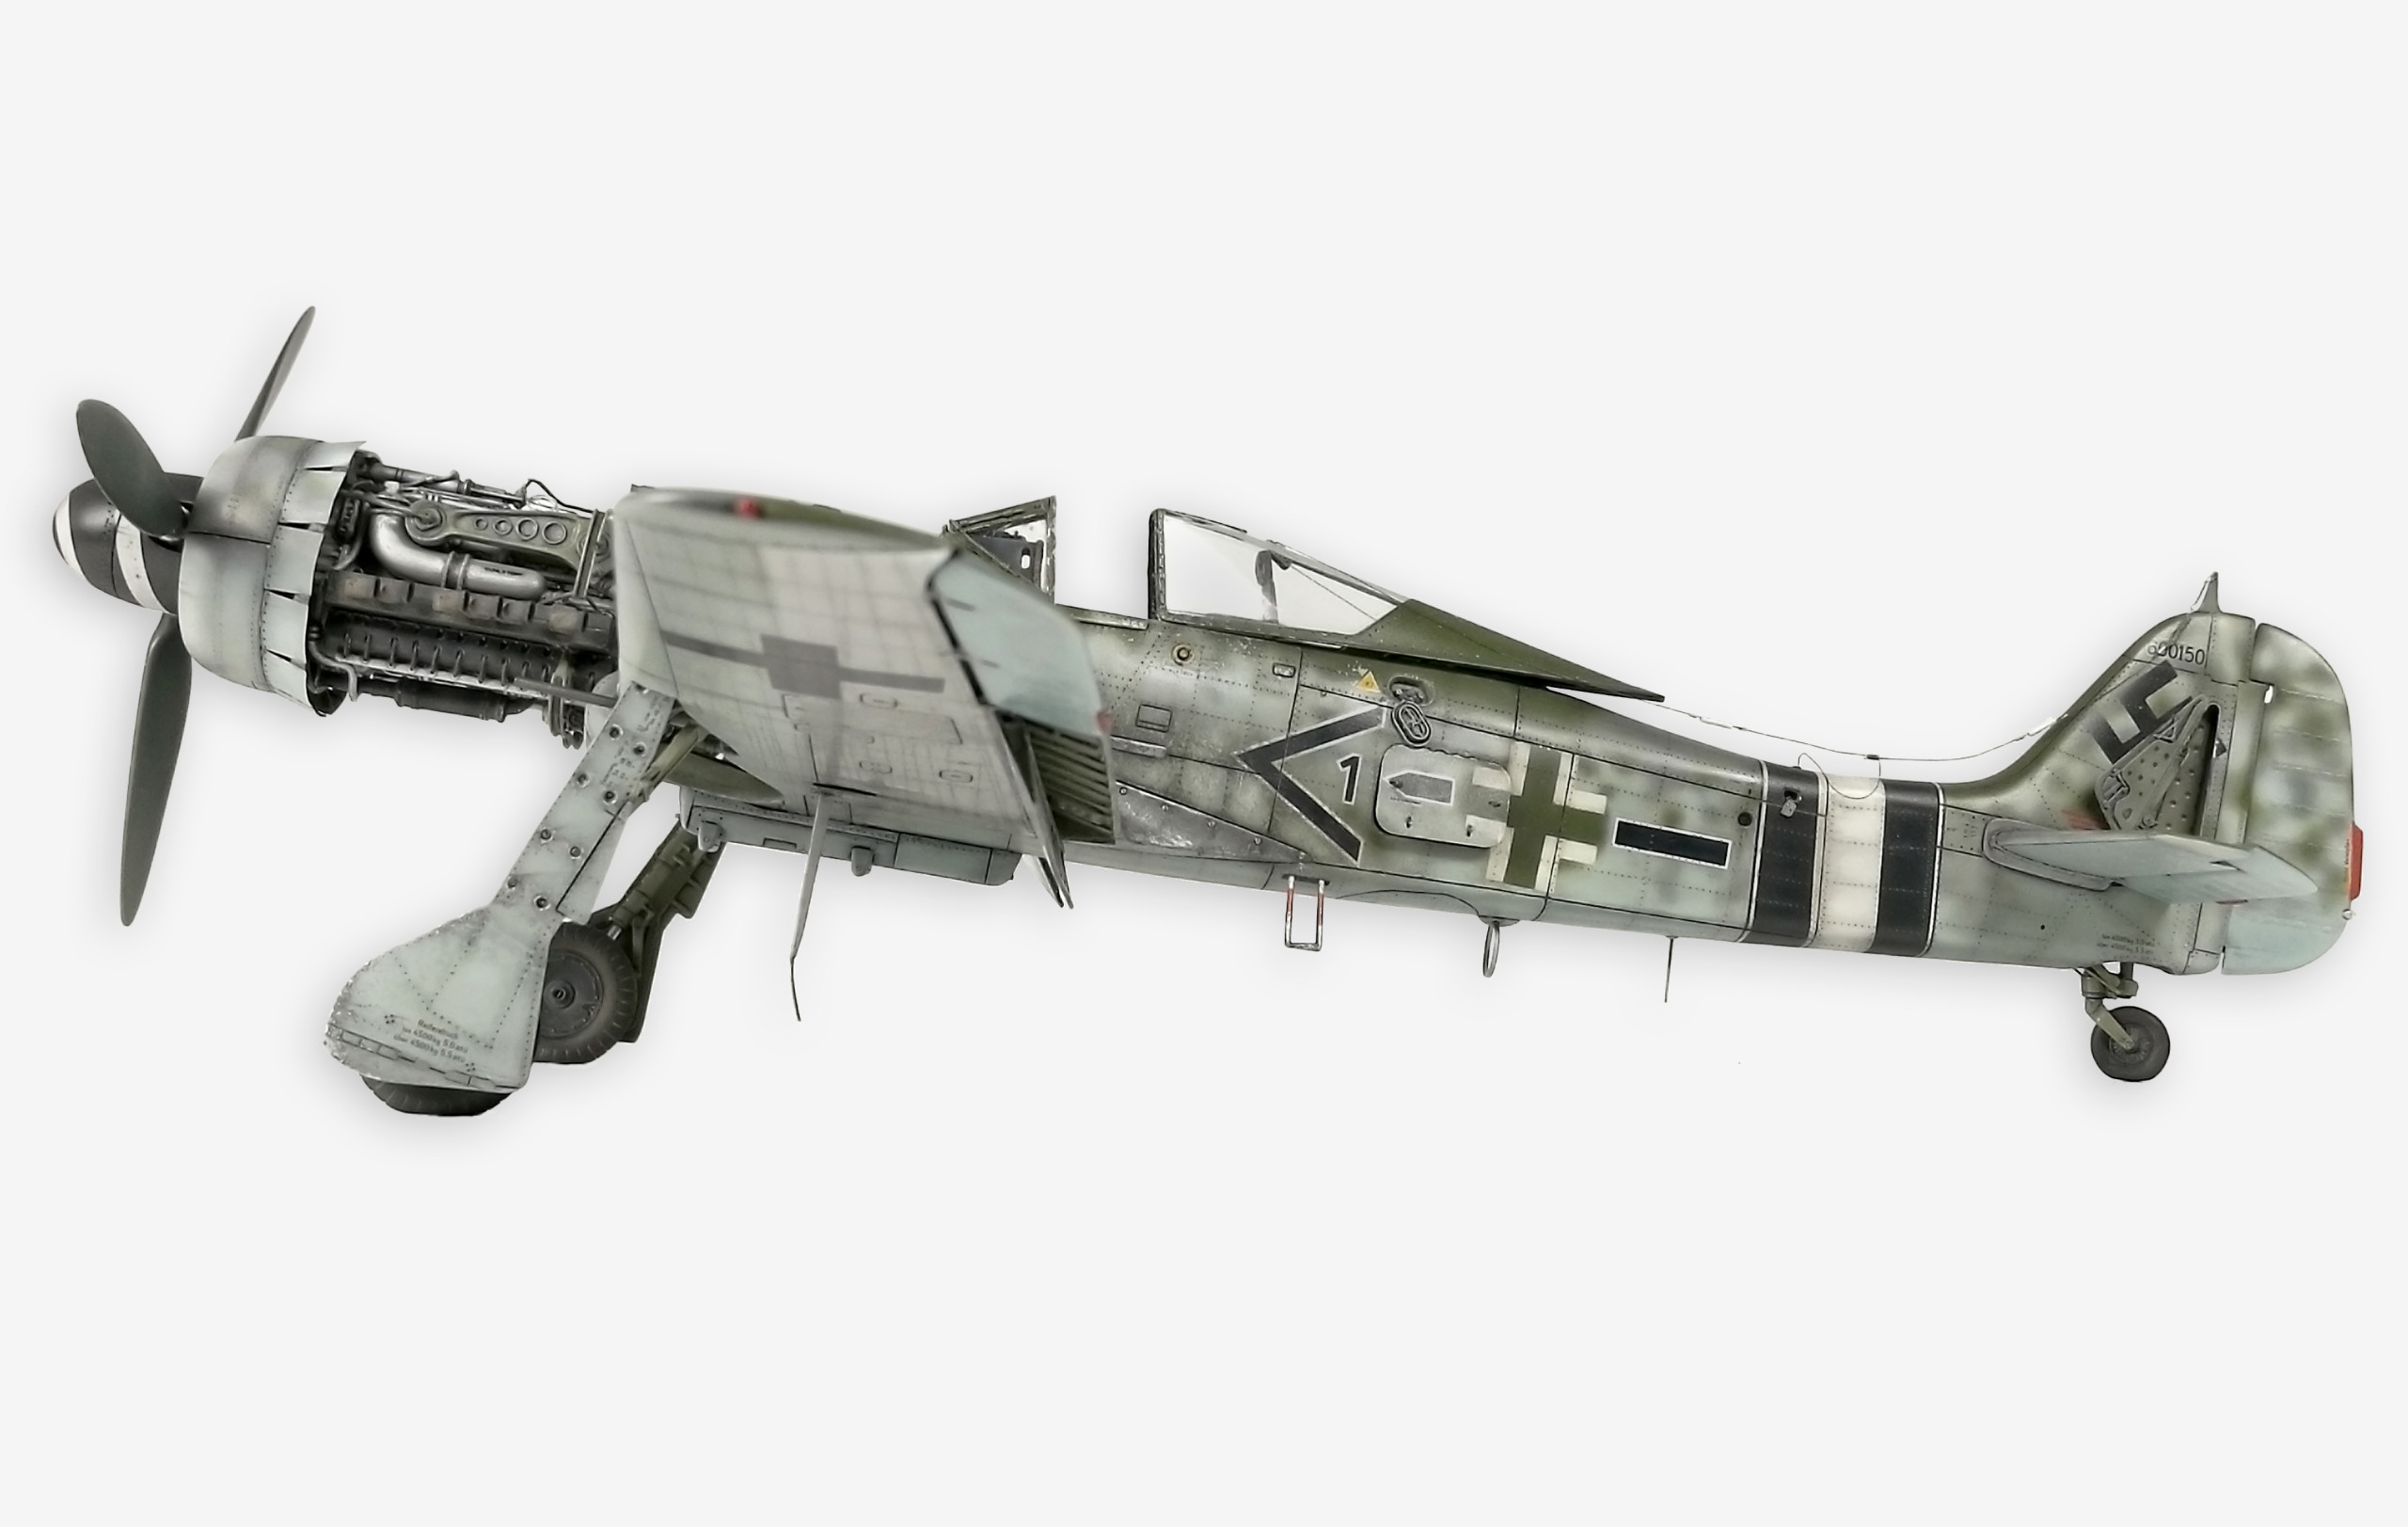
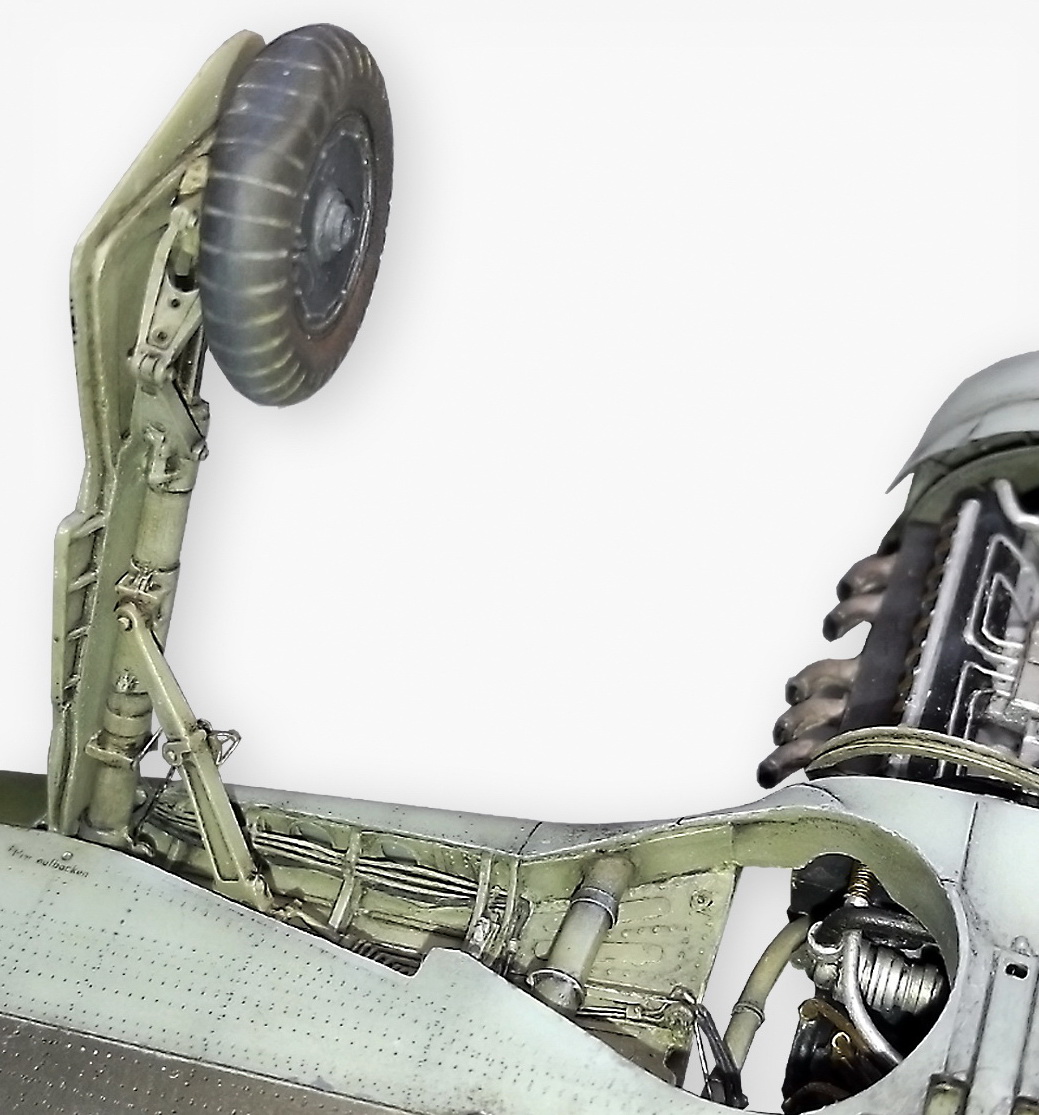
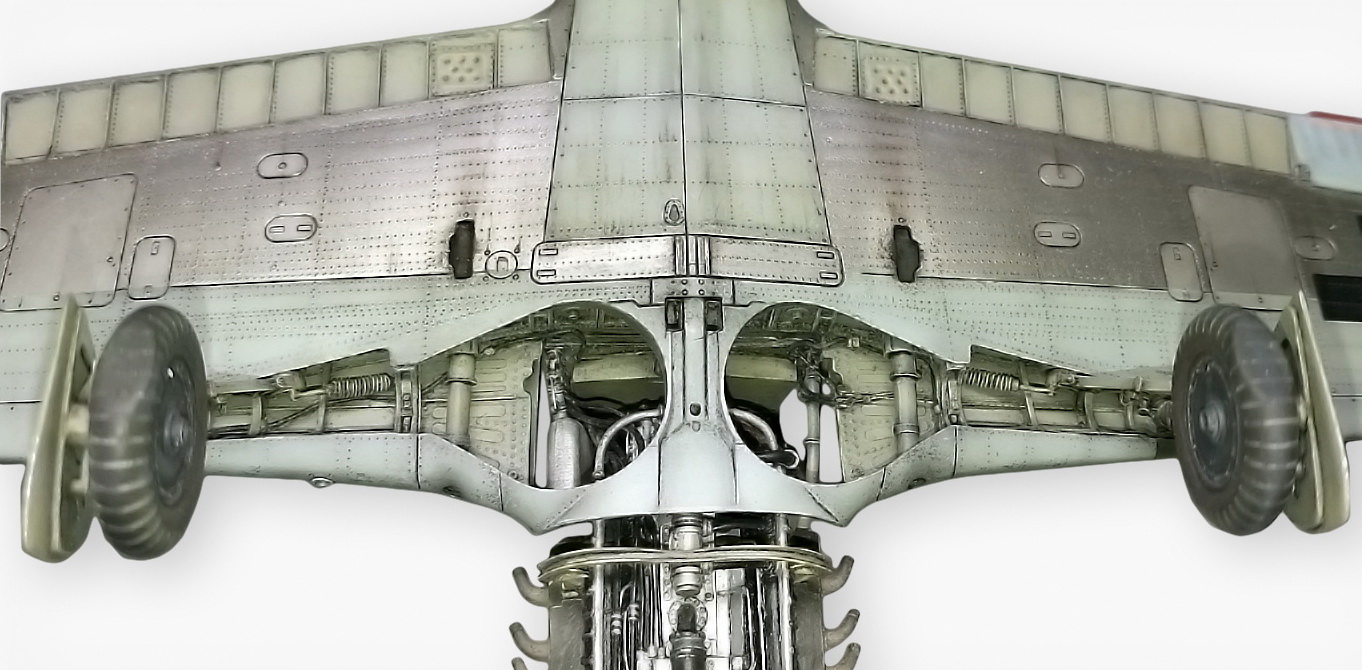
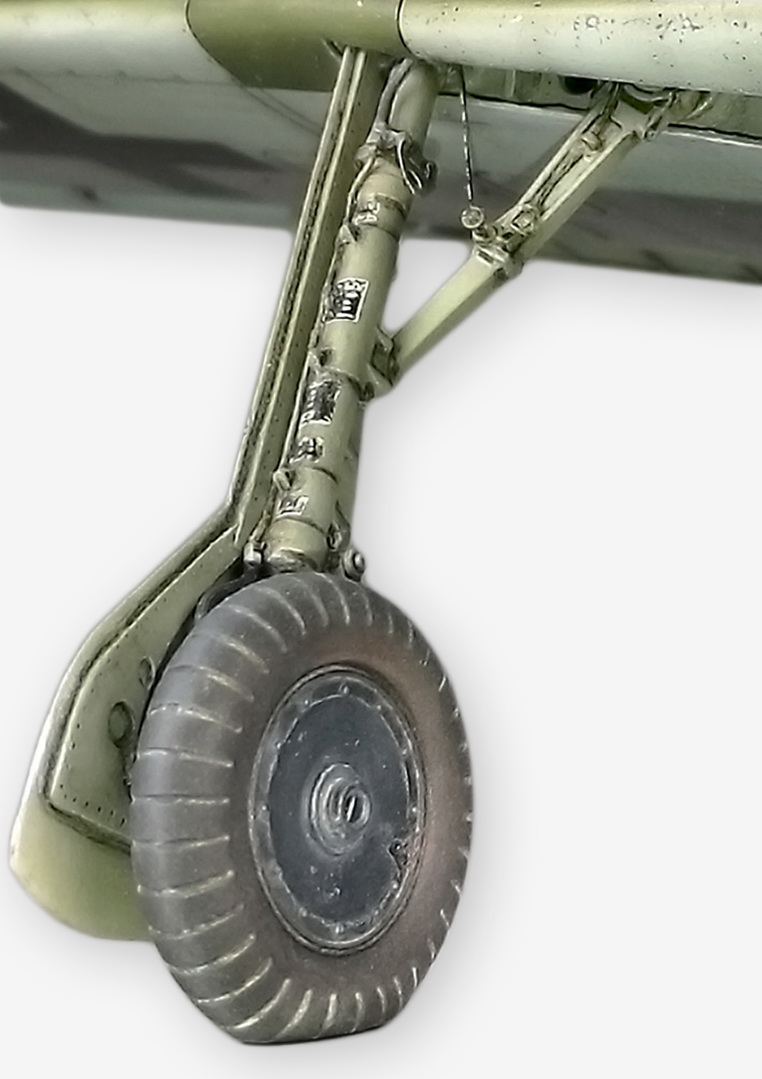
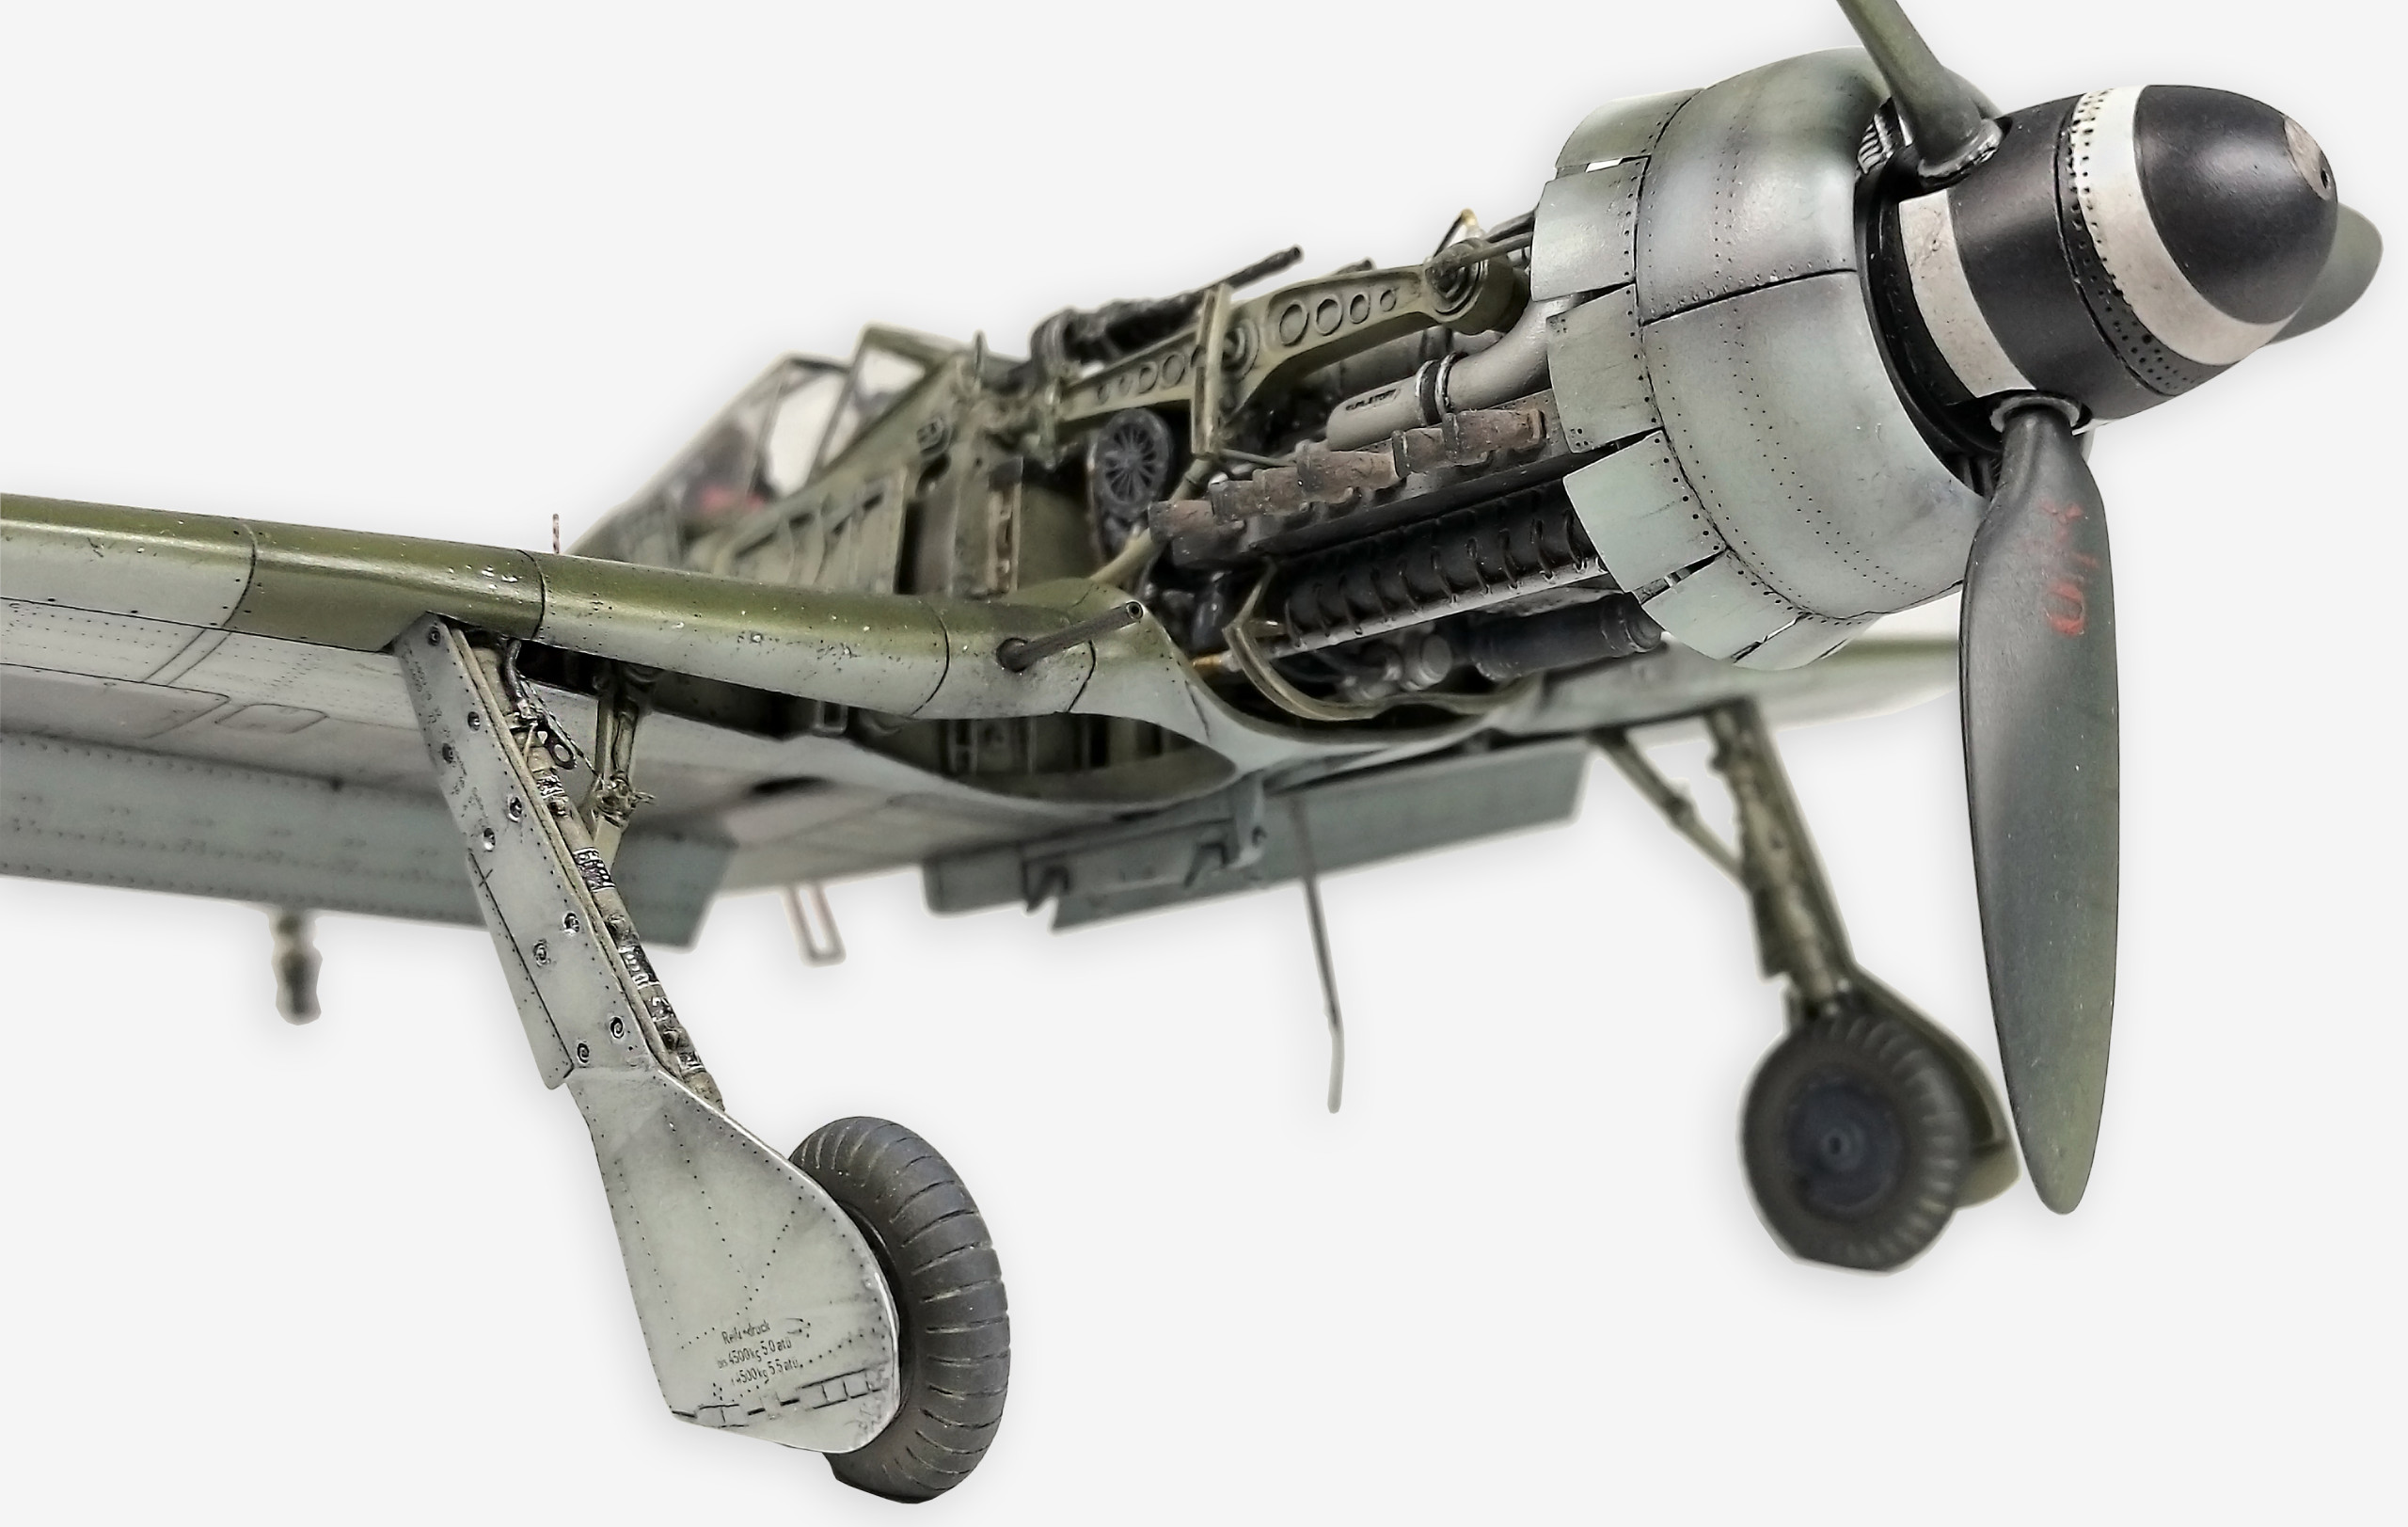
Undercarriage:
Was quite challenging part of the building. I bought a beautifully detailed cast wheel wells for the Fw 190A-3 from Aires. It needed only to be slightly modified. After the removal of the cover sheets can be used on a type of D-9. As soon as I put cast of wheel well from Aires to the hole in the wing after cutting the original plastic wheel well, I found with horror that the cast from Aires is much reduced and shorter by 4mm !!! Therefore I decided to write to firm Aires, whether this problem could be solved in exchange for another not so much diminished piece. Mr. Lajer willingly complied with my request and sent me almost “original” cast of wheel well from unusual green resin. This has already been absolutely precise and after its thinning perfectly fitted to a hole in the wing.
The sides of the wheel well I have added by a couple of metal sheets and details from Eduard set. I also made its hemming with centre construction and electrical wiring and hydraulics. For earlier mentioned reasons I prefer to use undercarriage legs also with its struts and wheels from Eduard kit. I replaced a plastic pistons for a corresponding portion of the syringe needle.
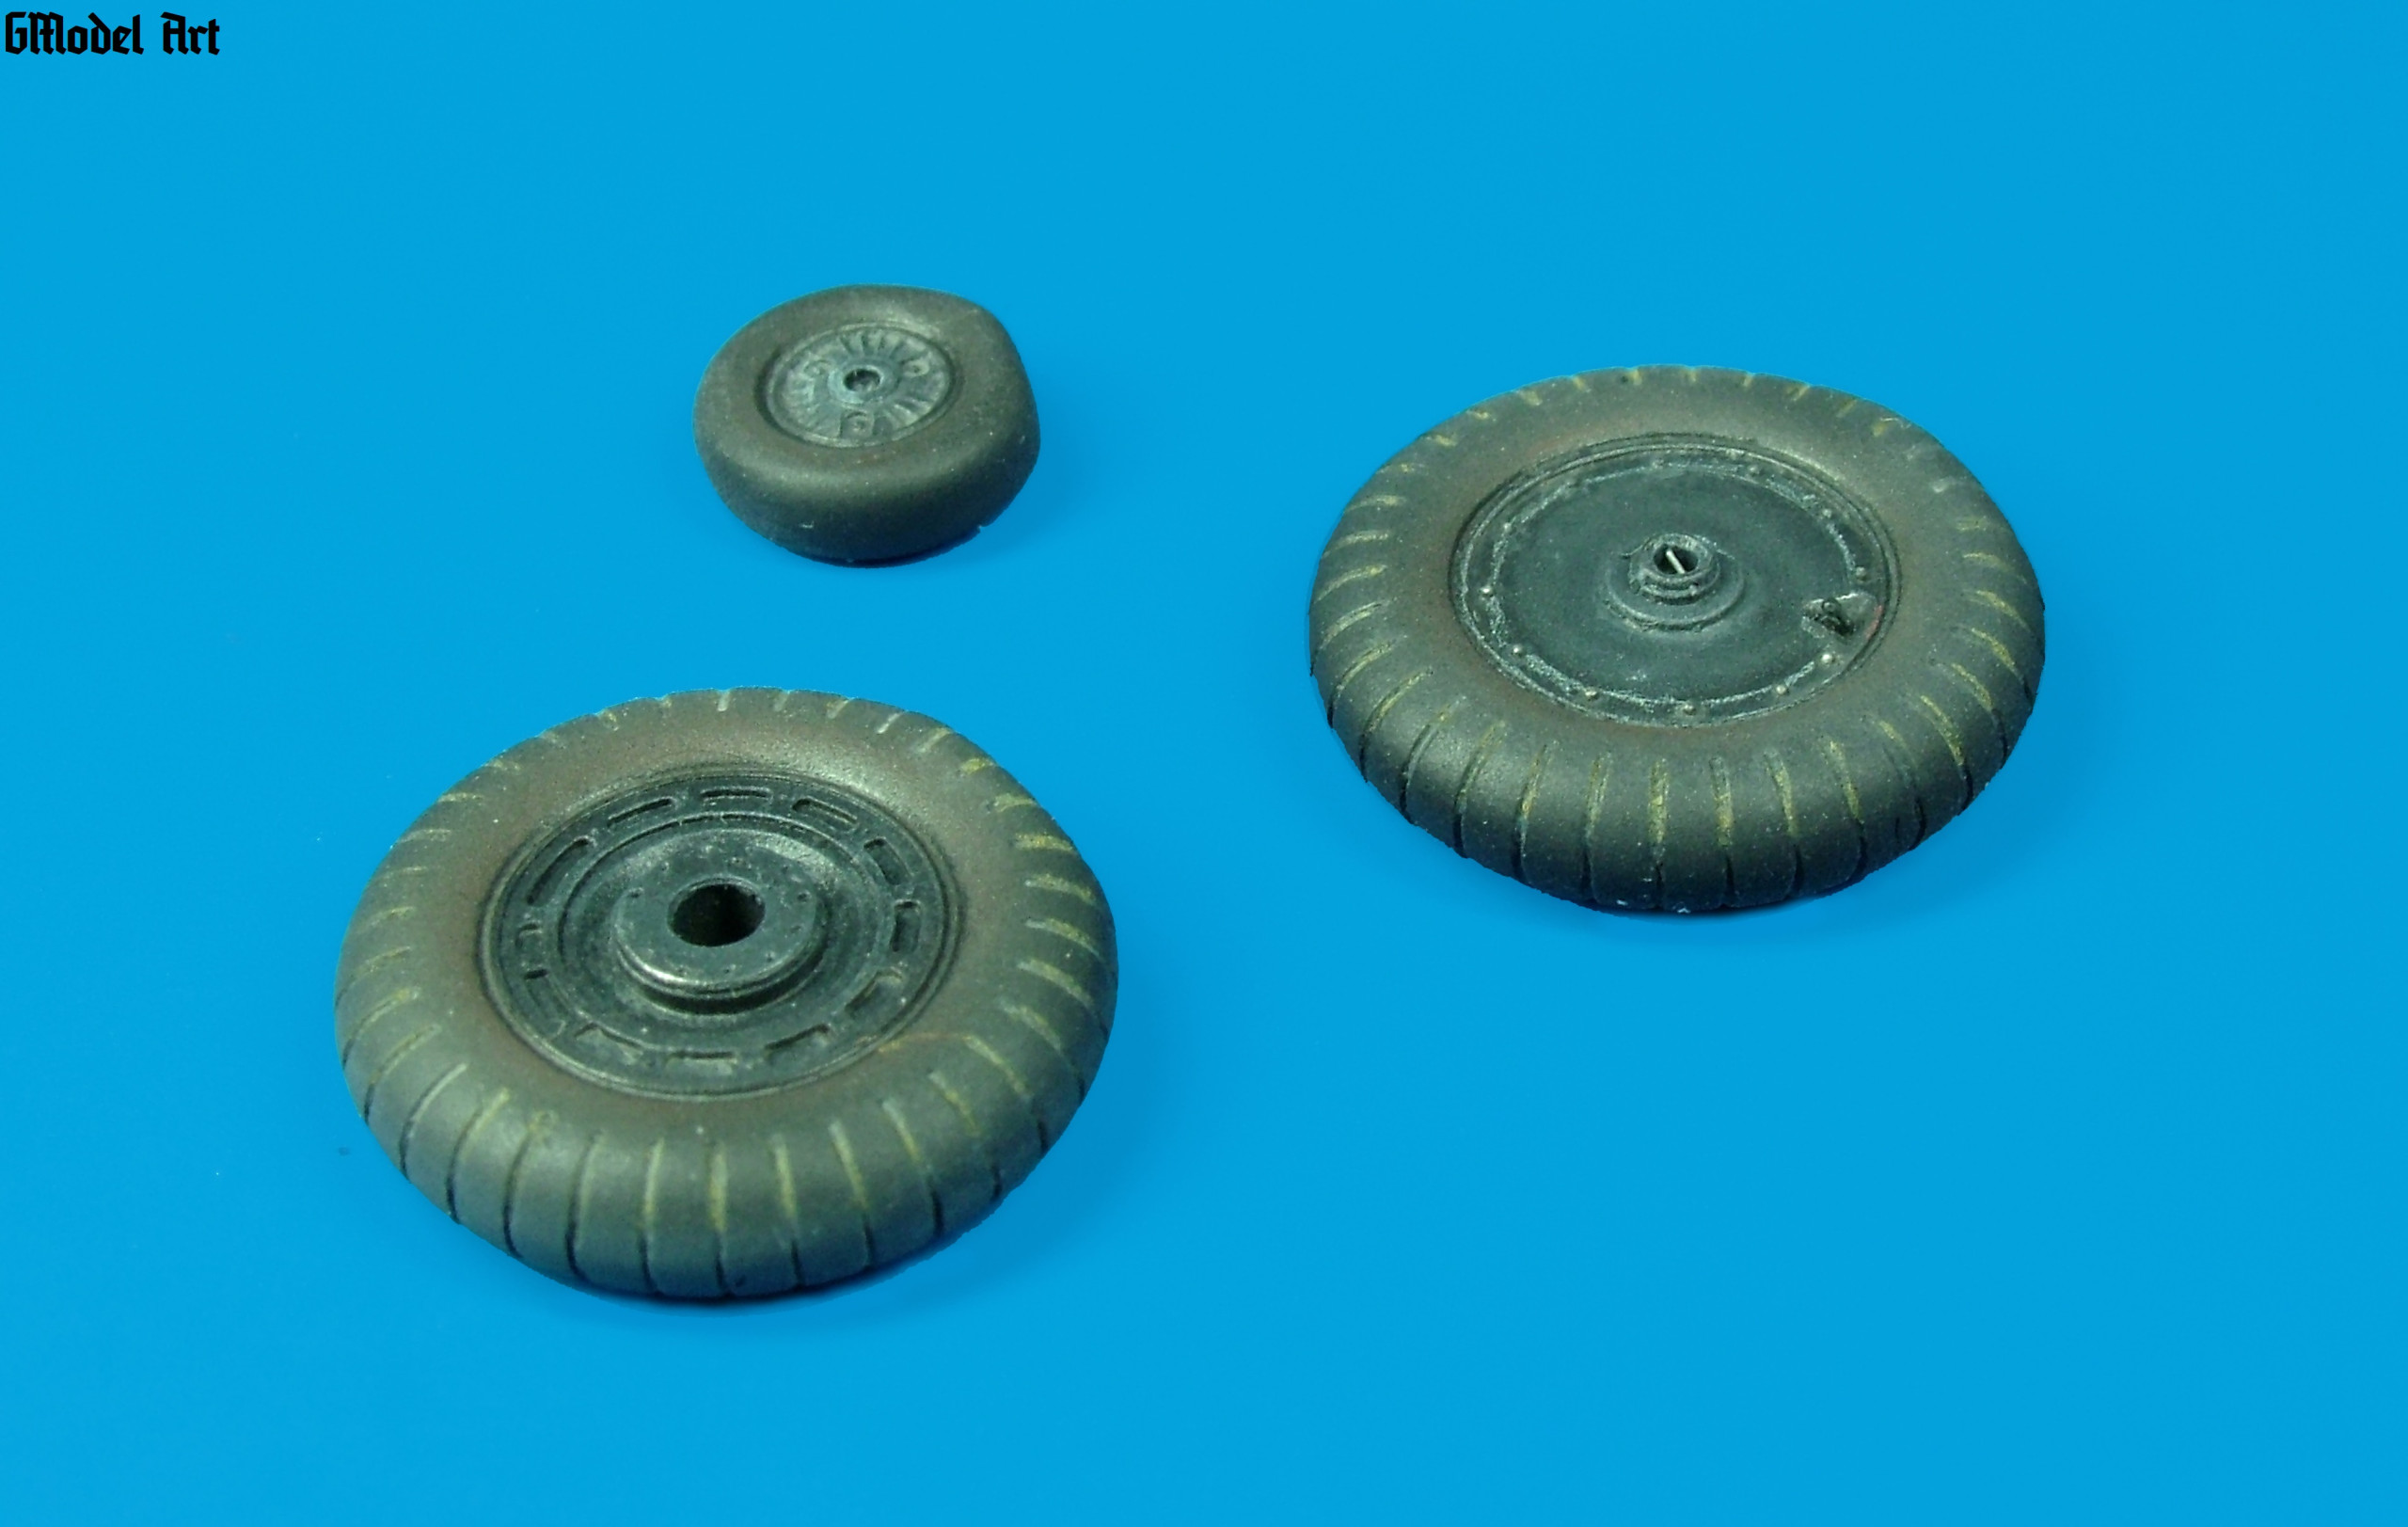
Finally came the “load” of tyres. Their lower and partly also lateral portion had to be very carefully warm up and in the right moment push against the desk. This will create the necessary natural tire bulging on the wall side as in reality.
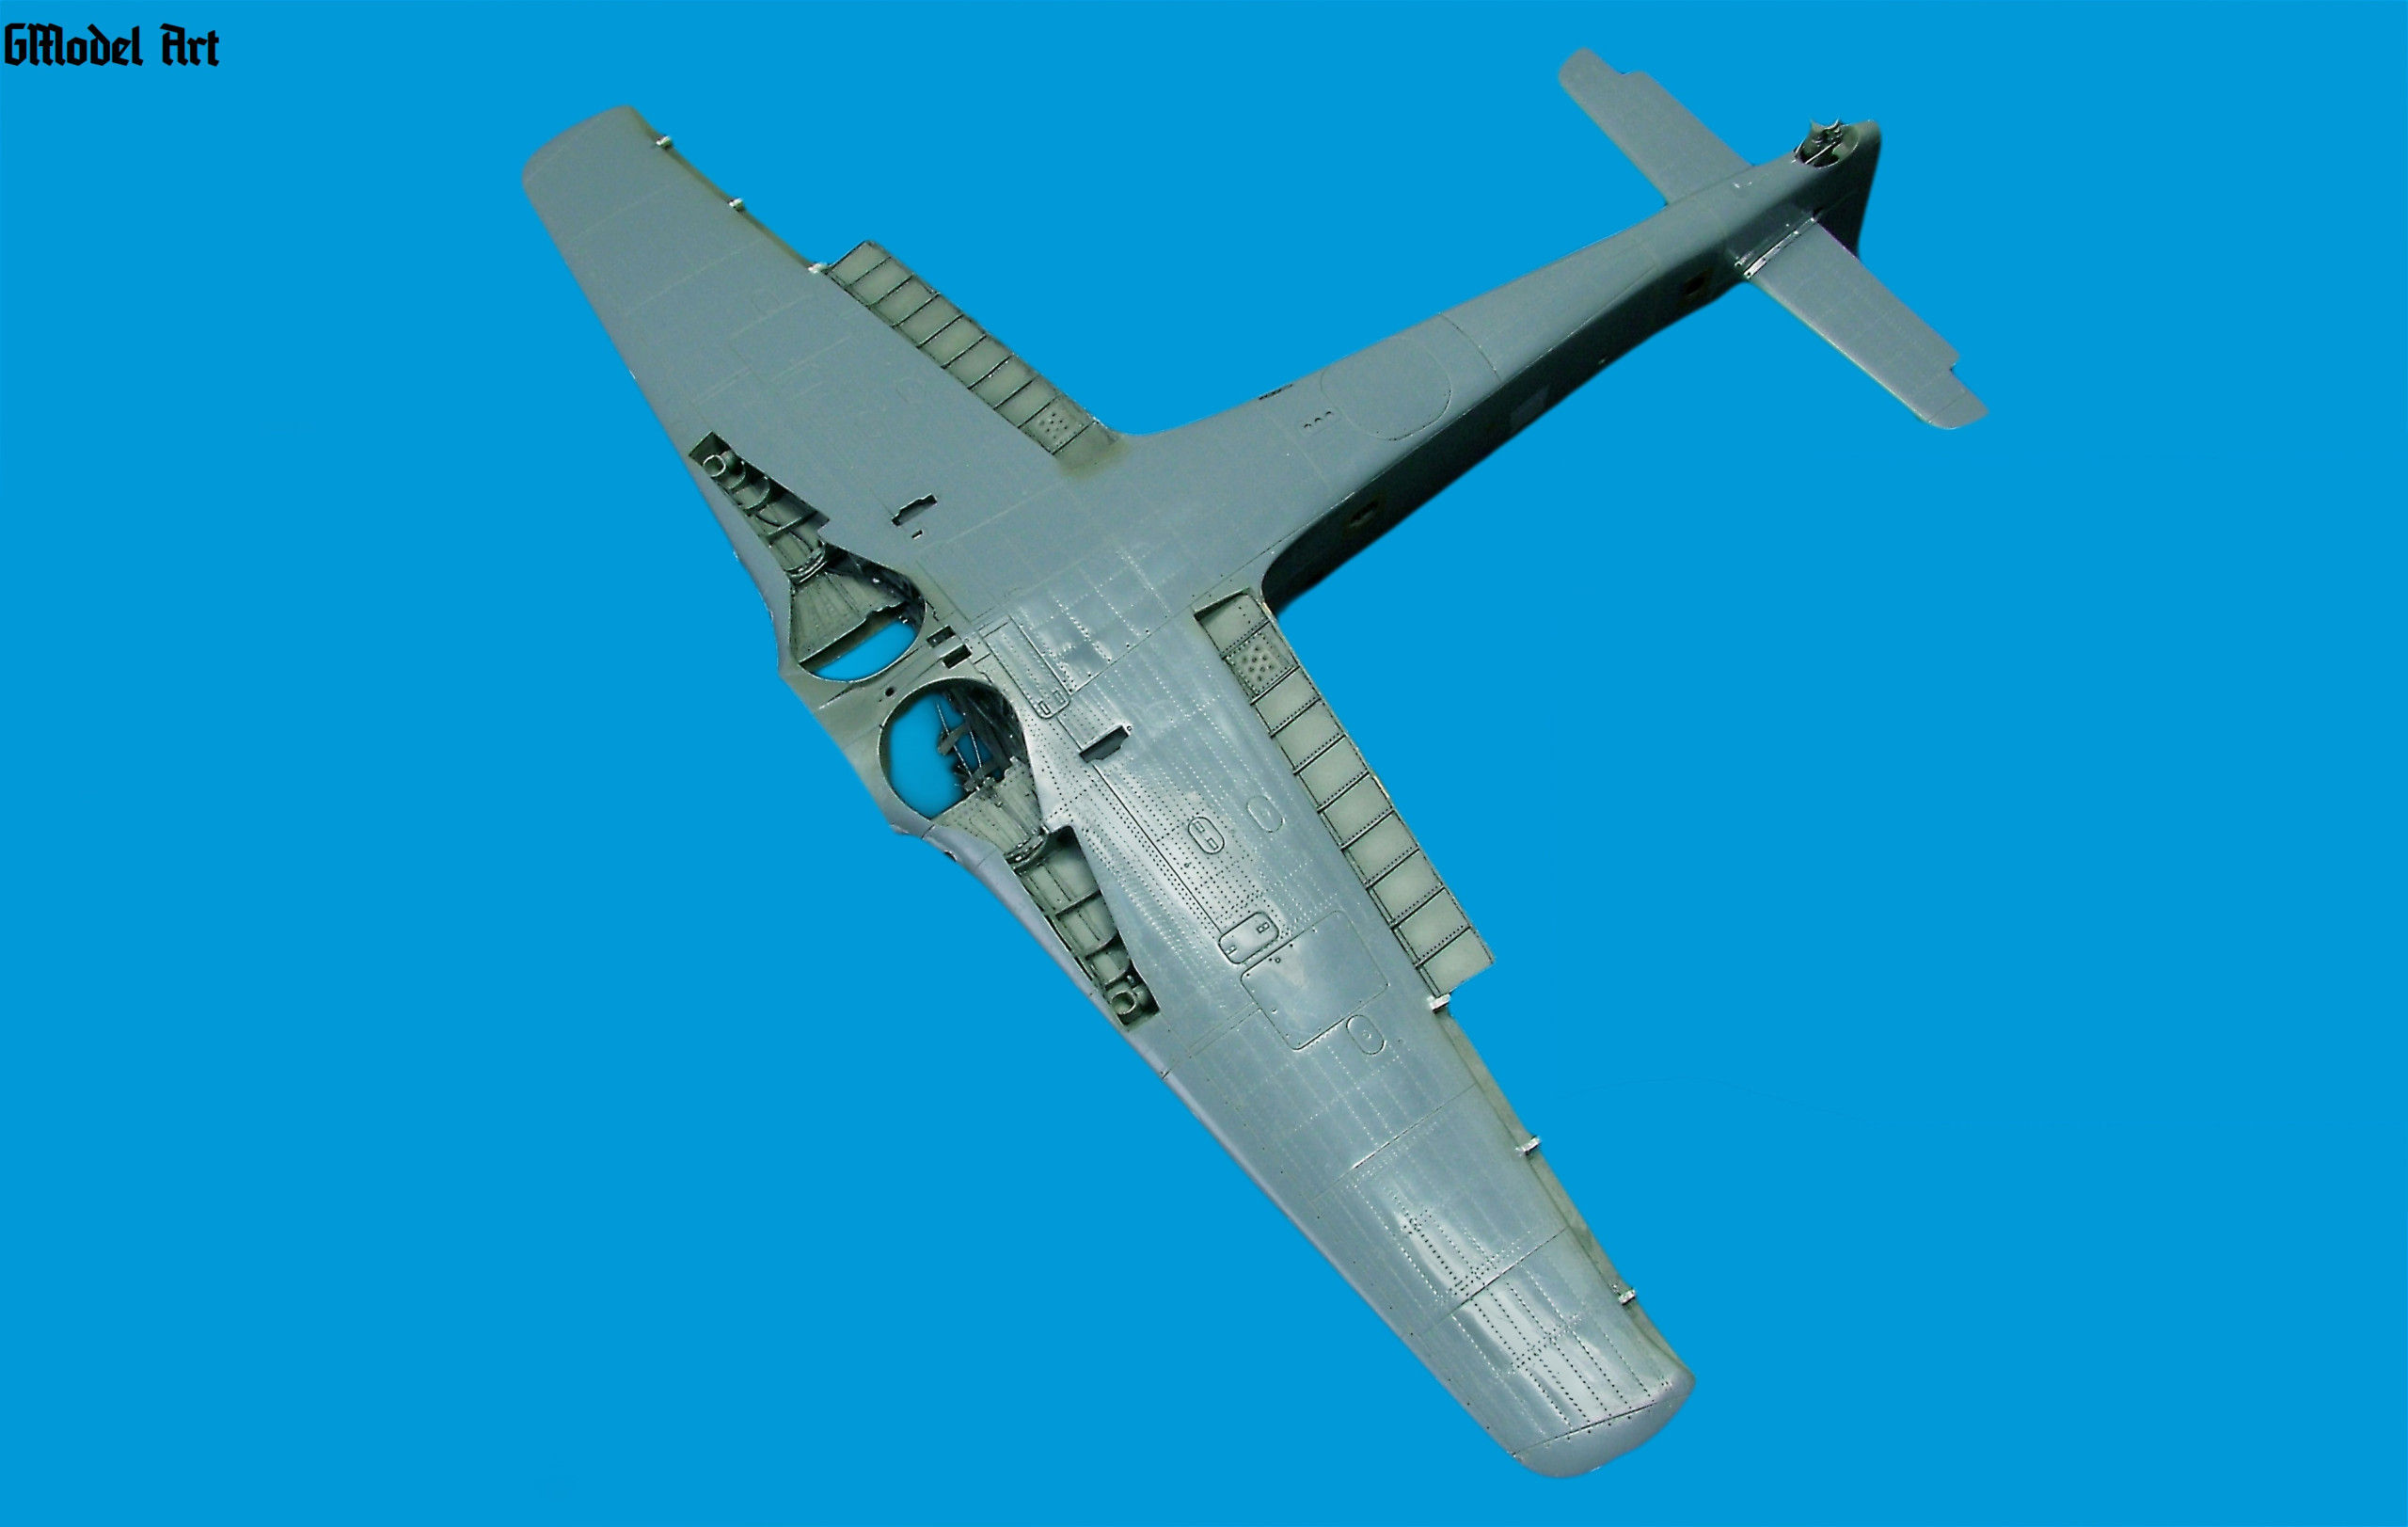
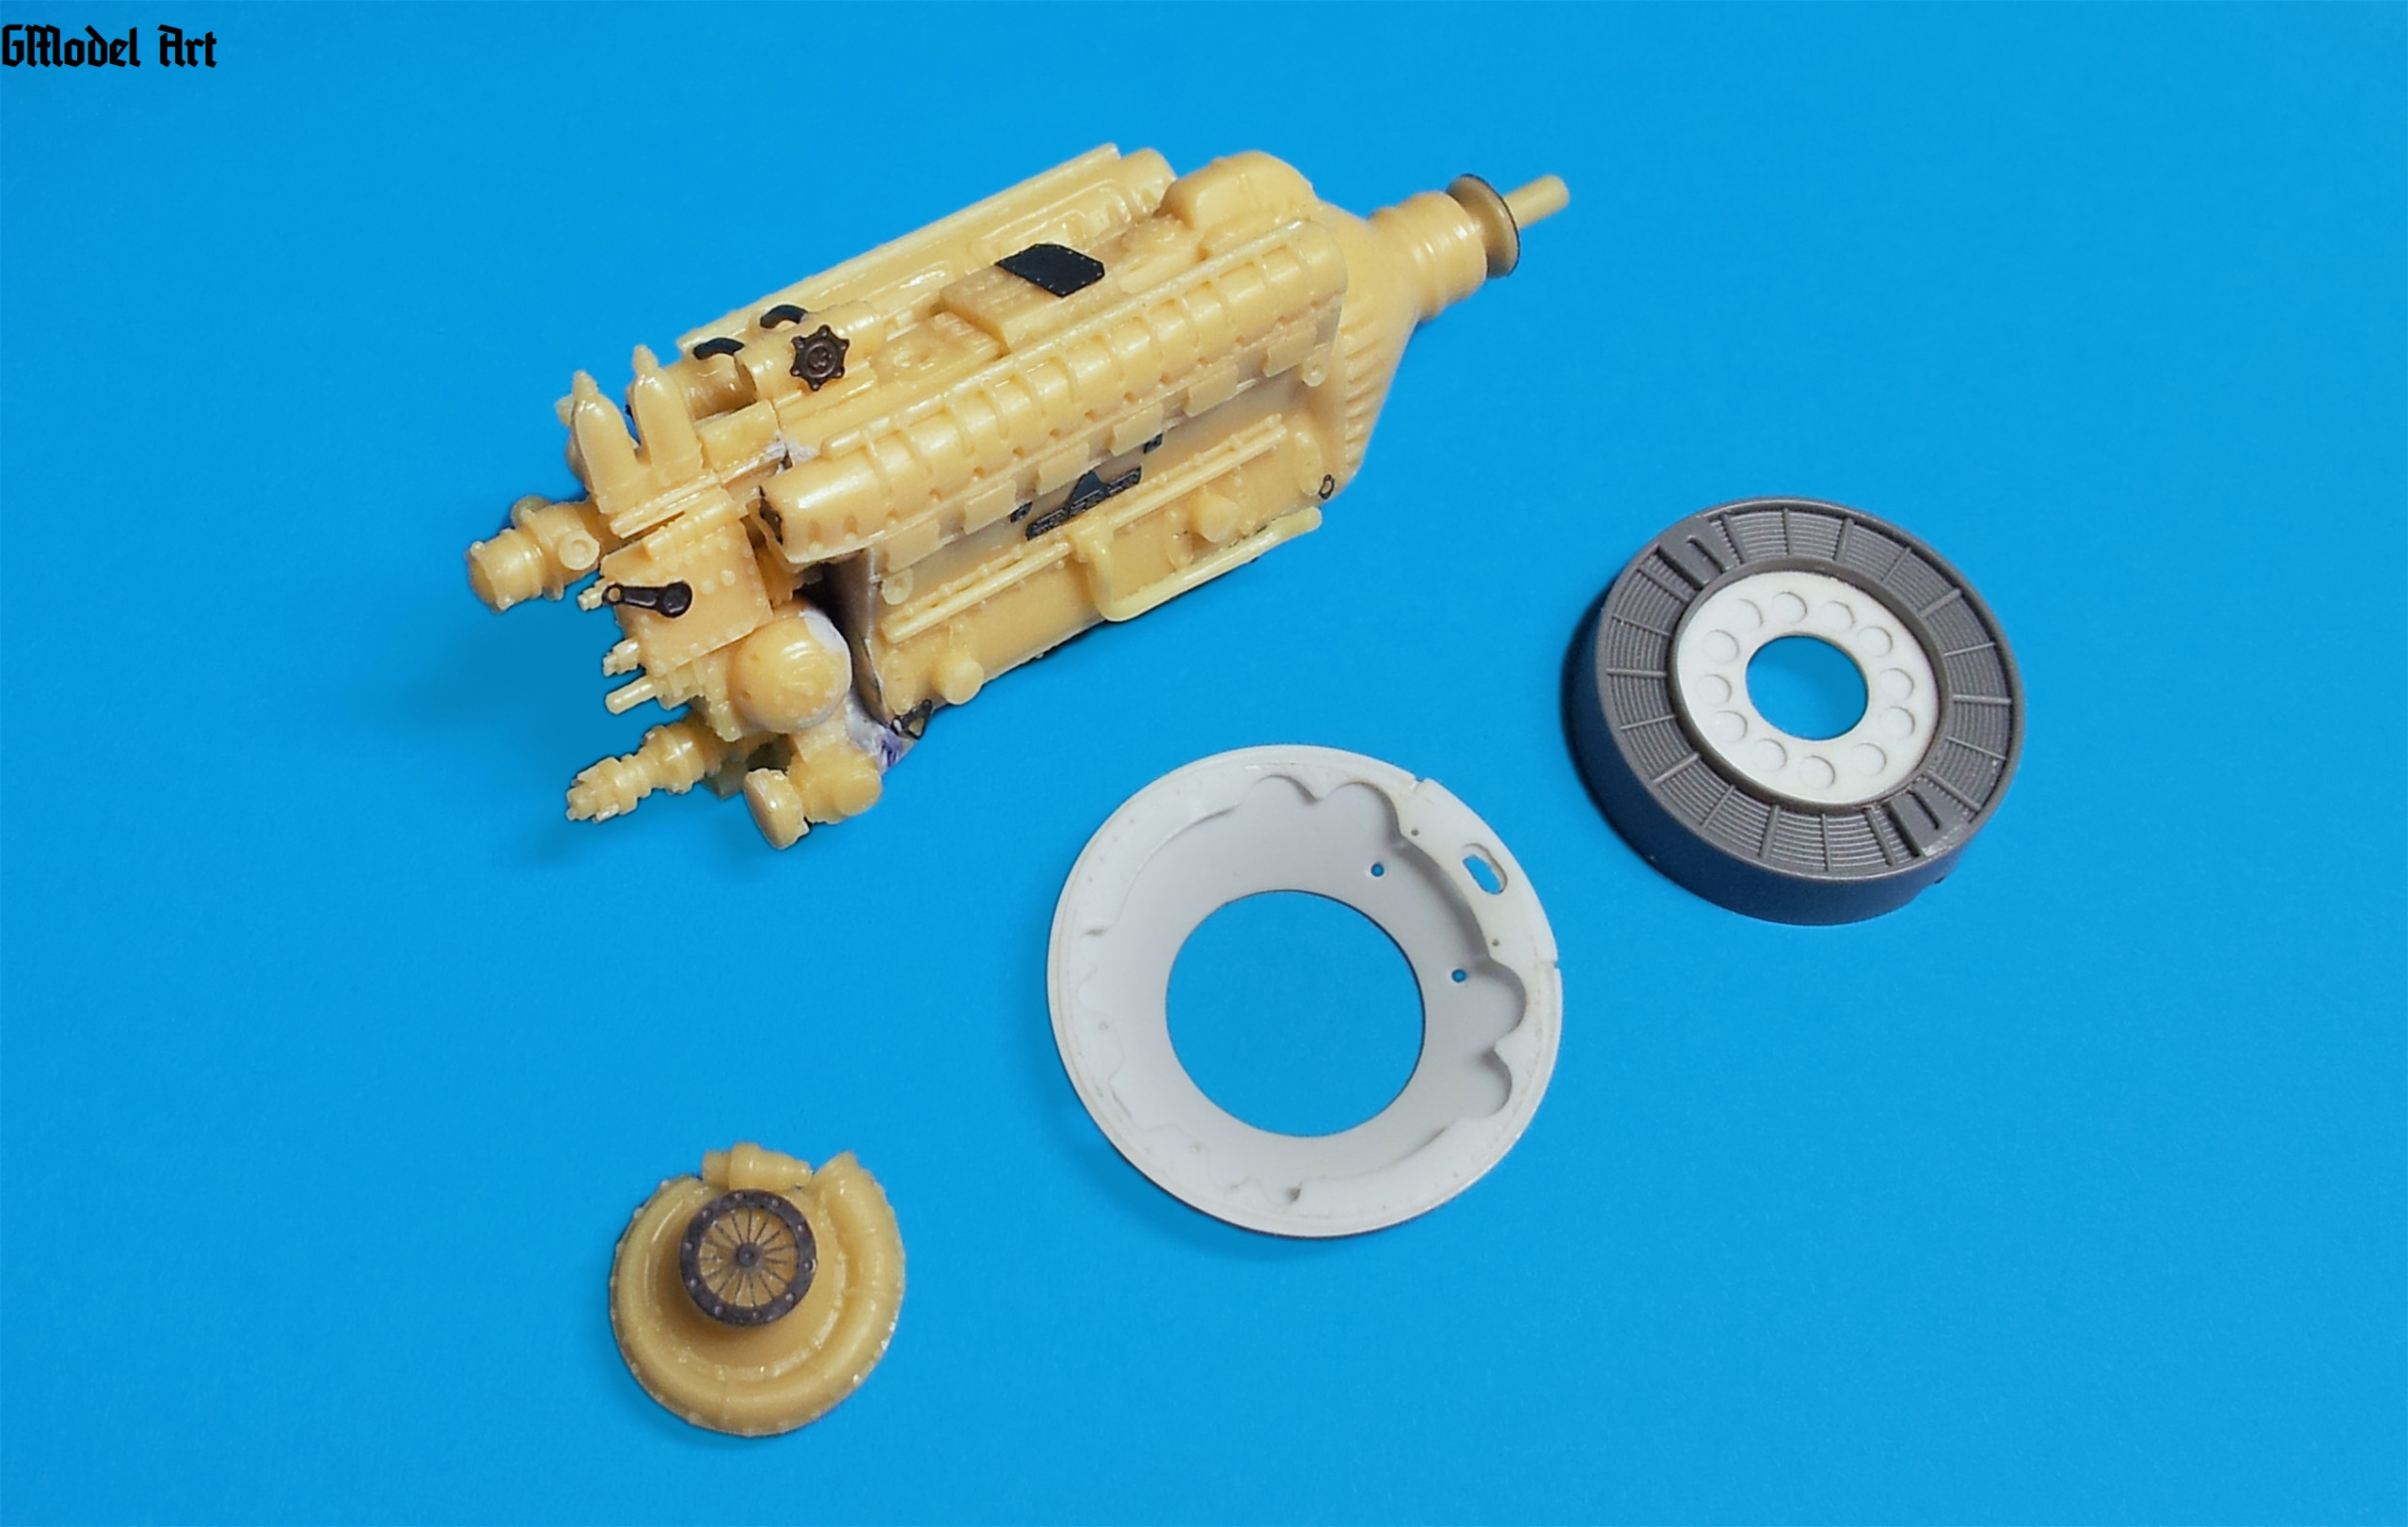
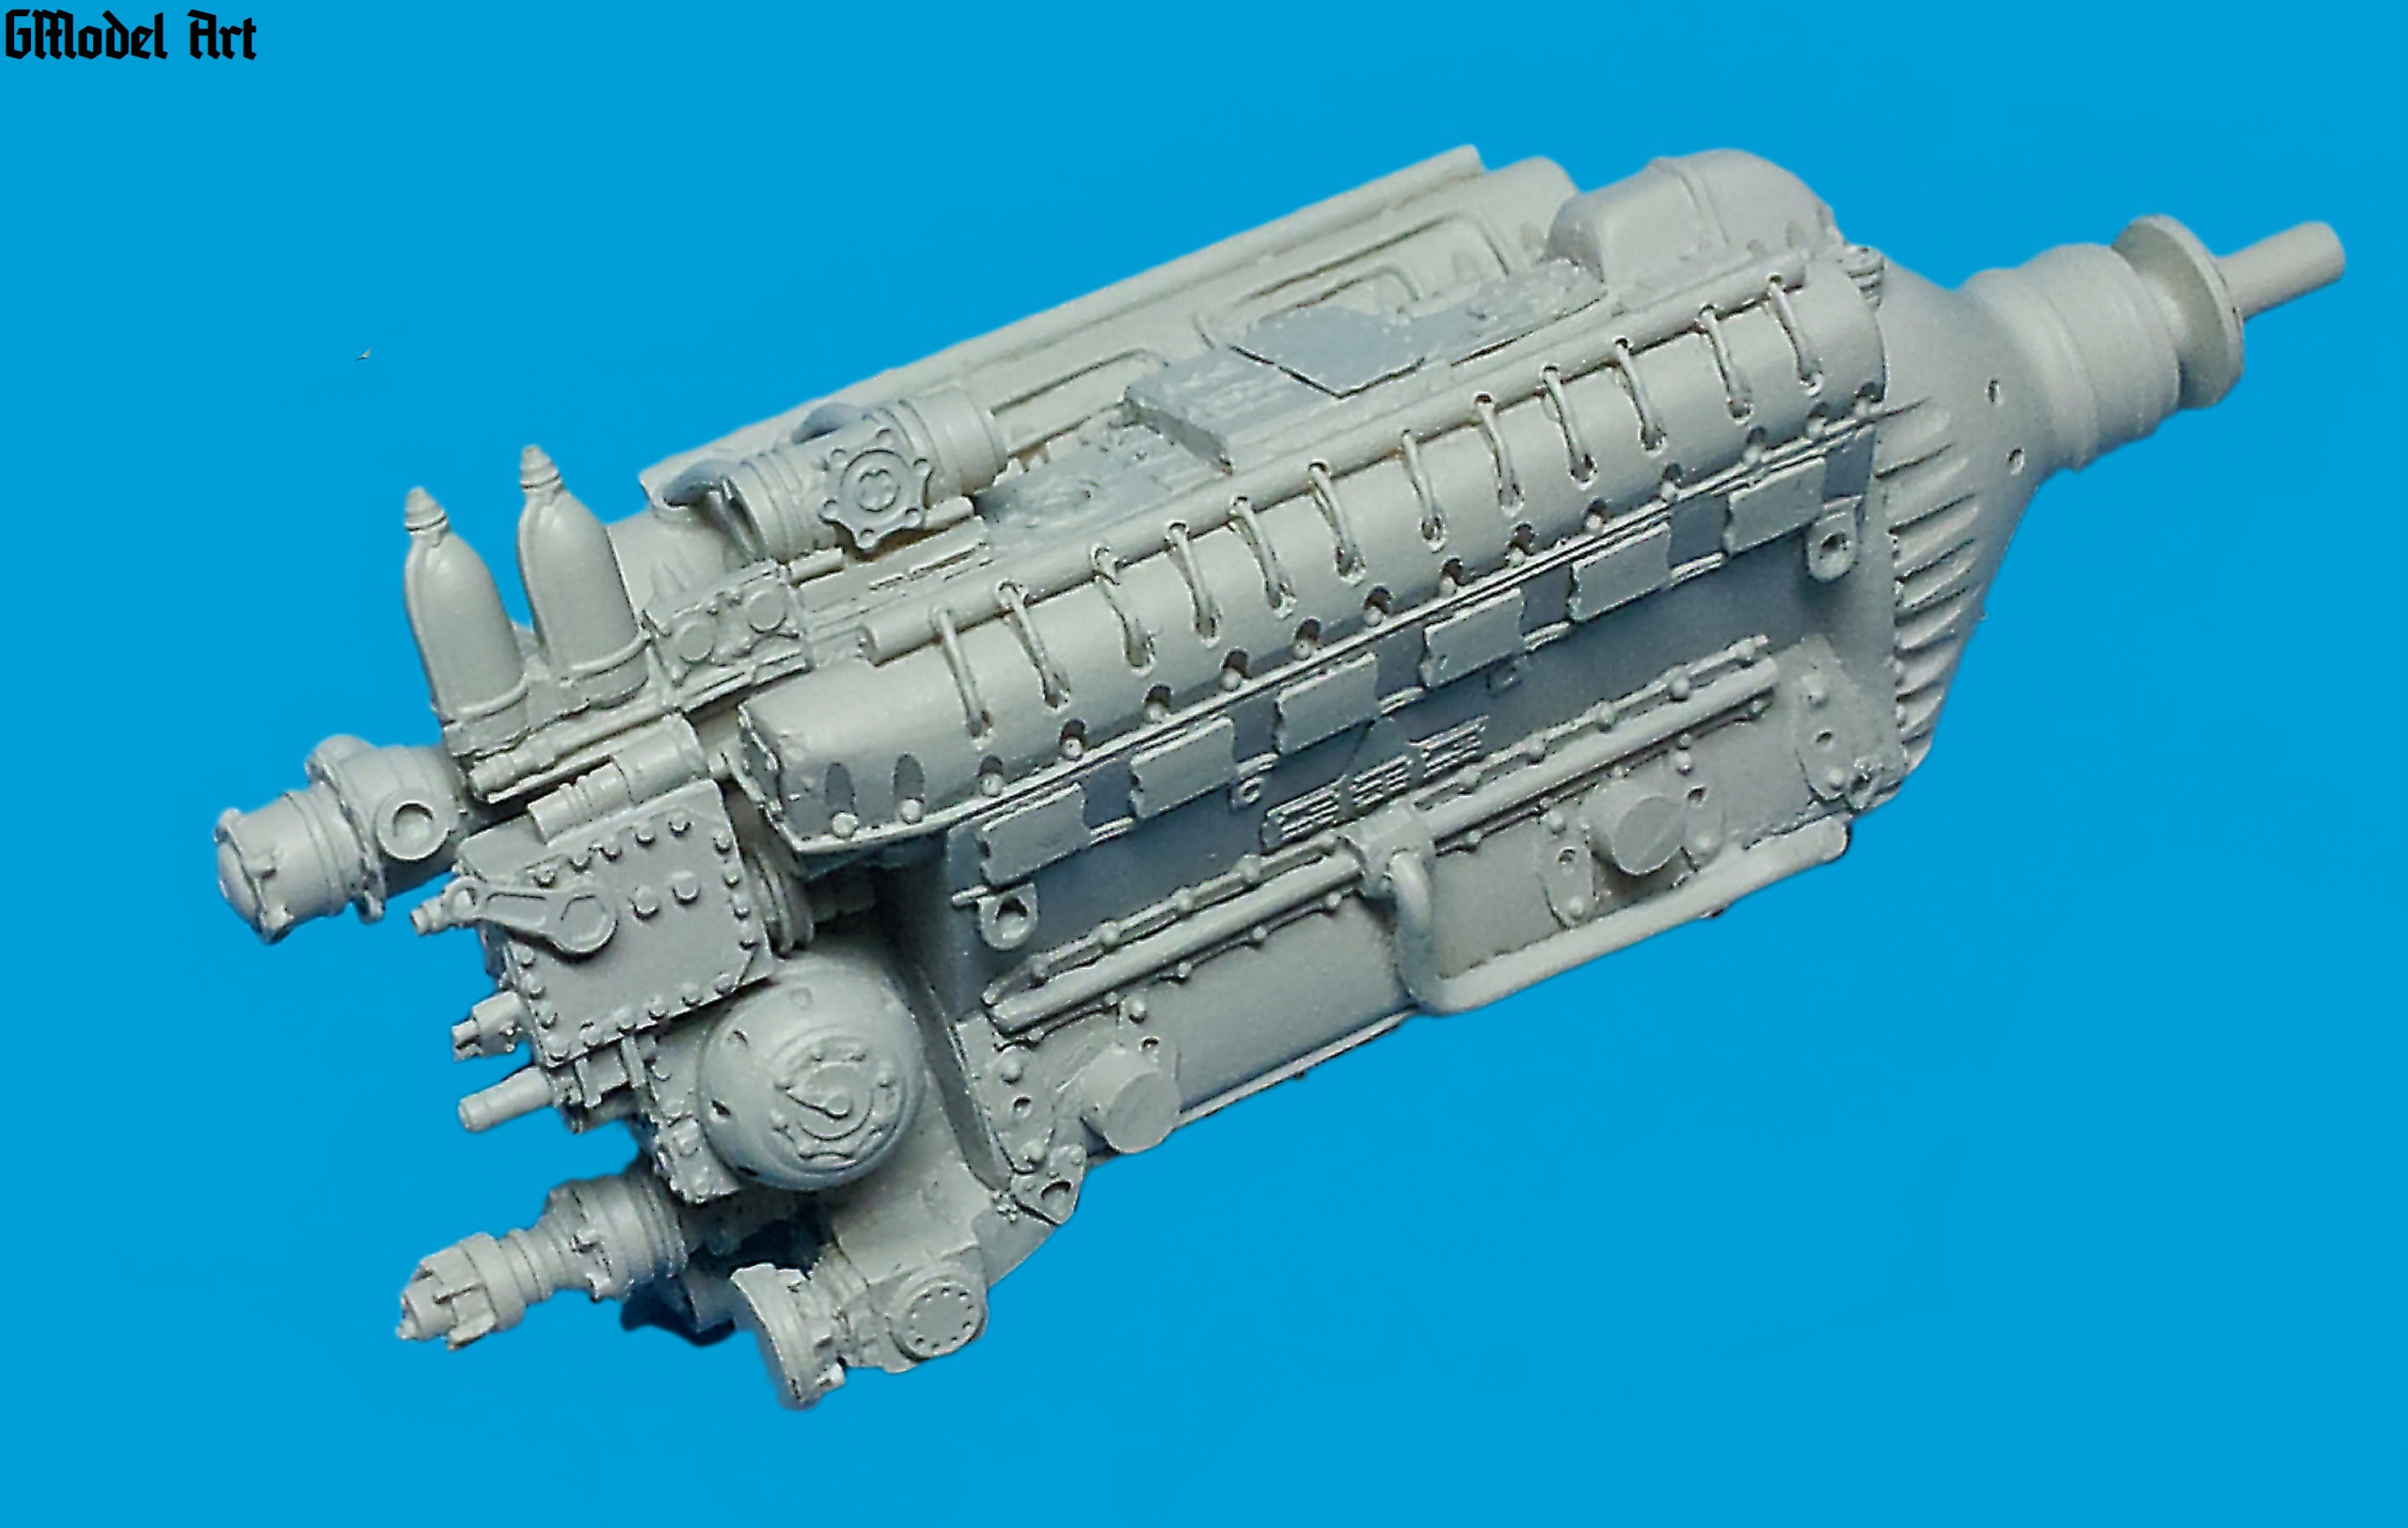
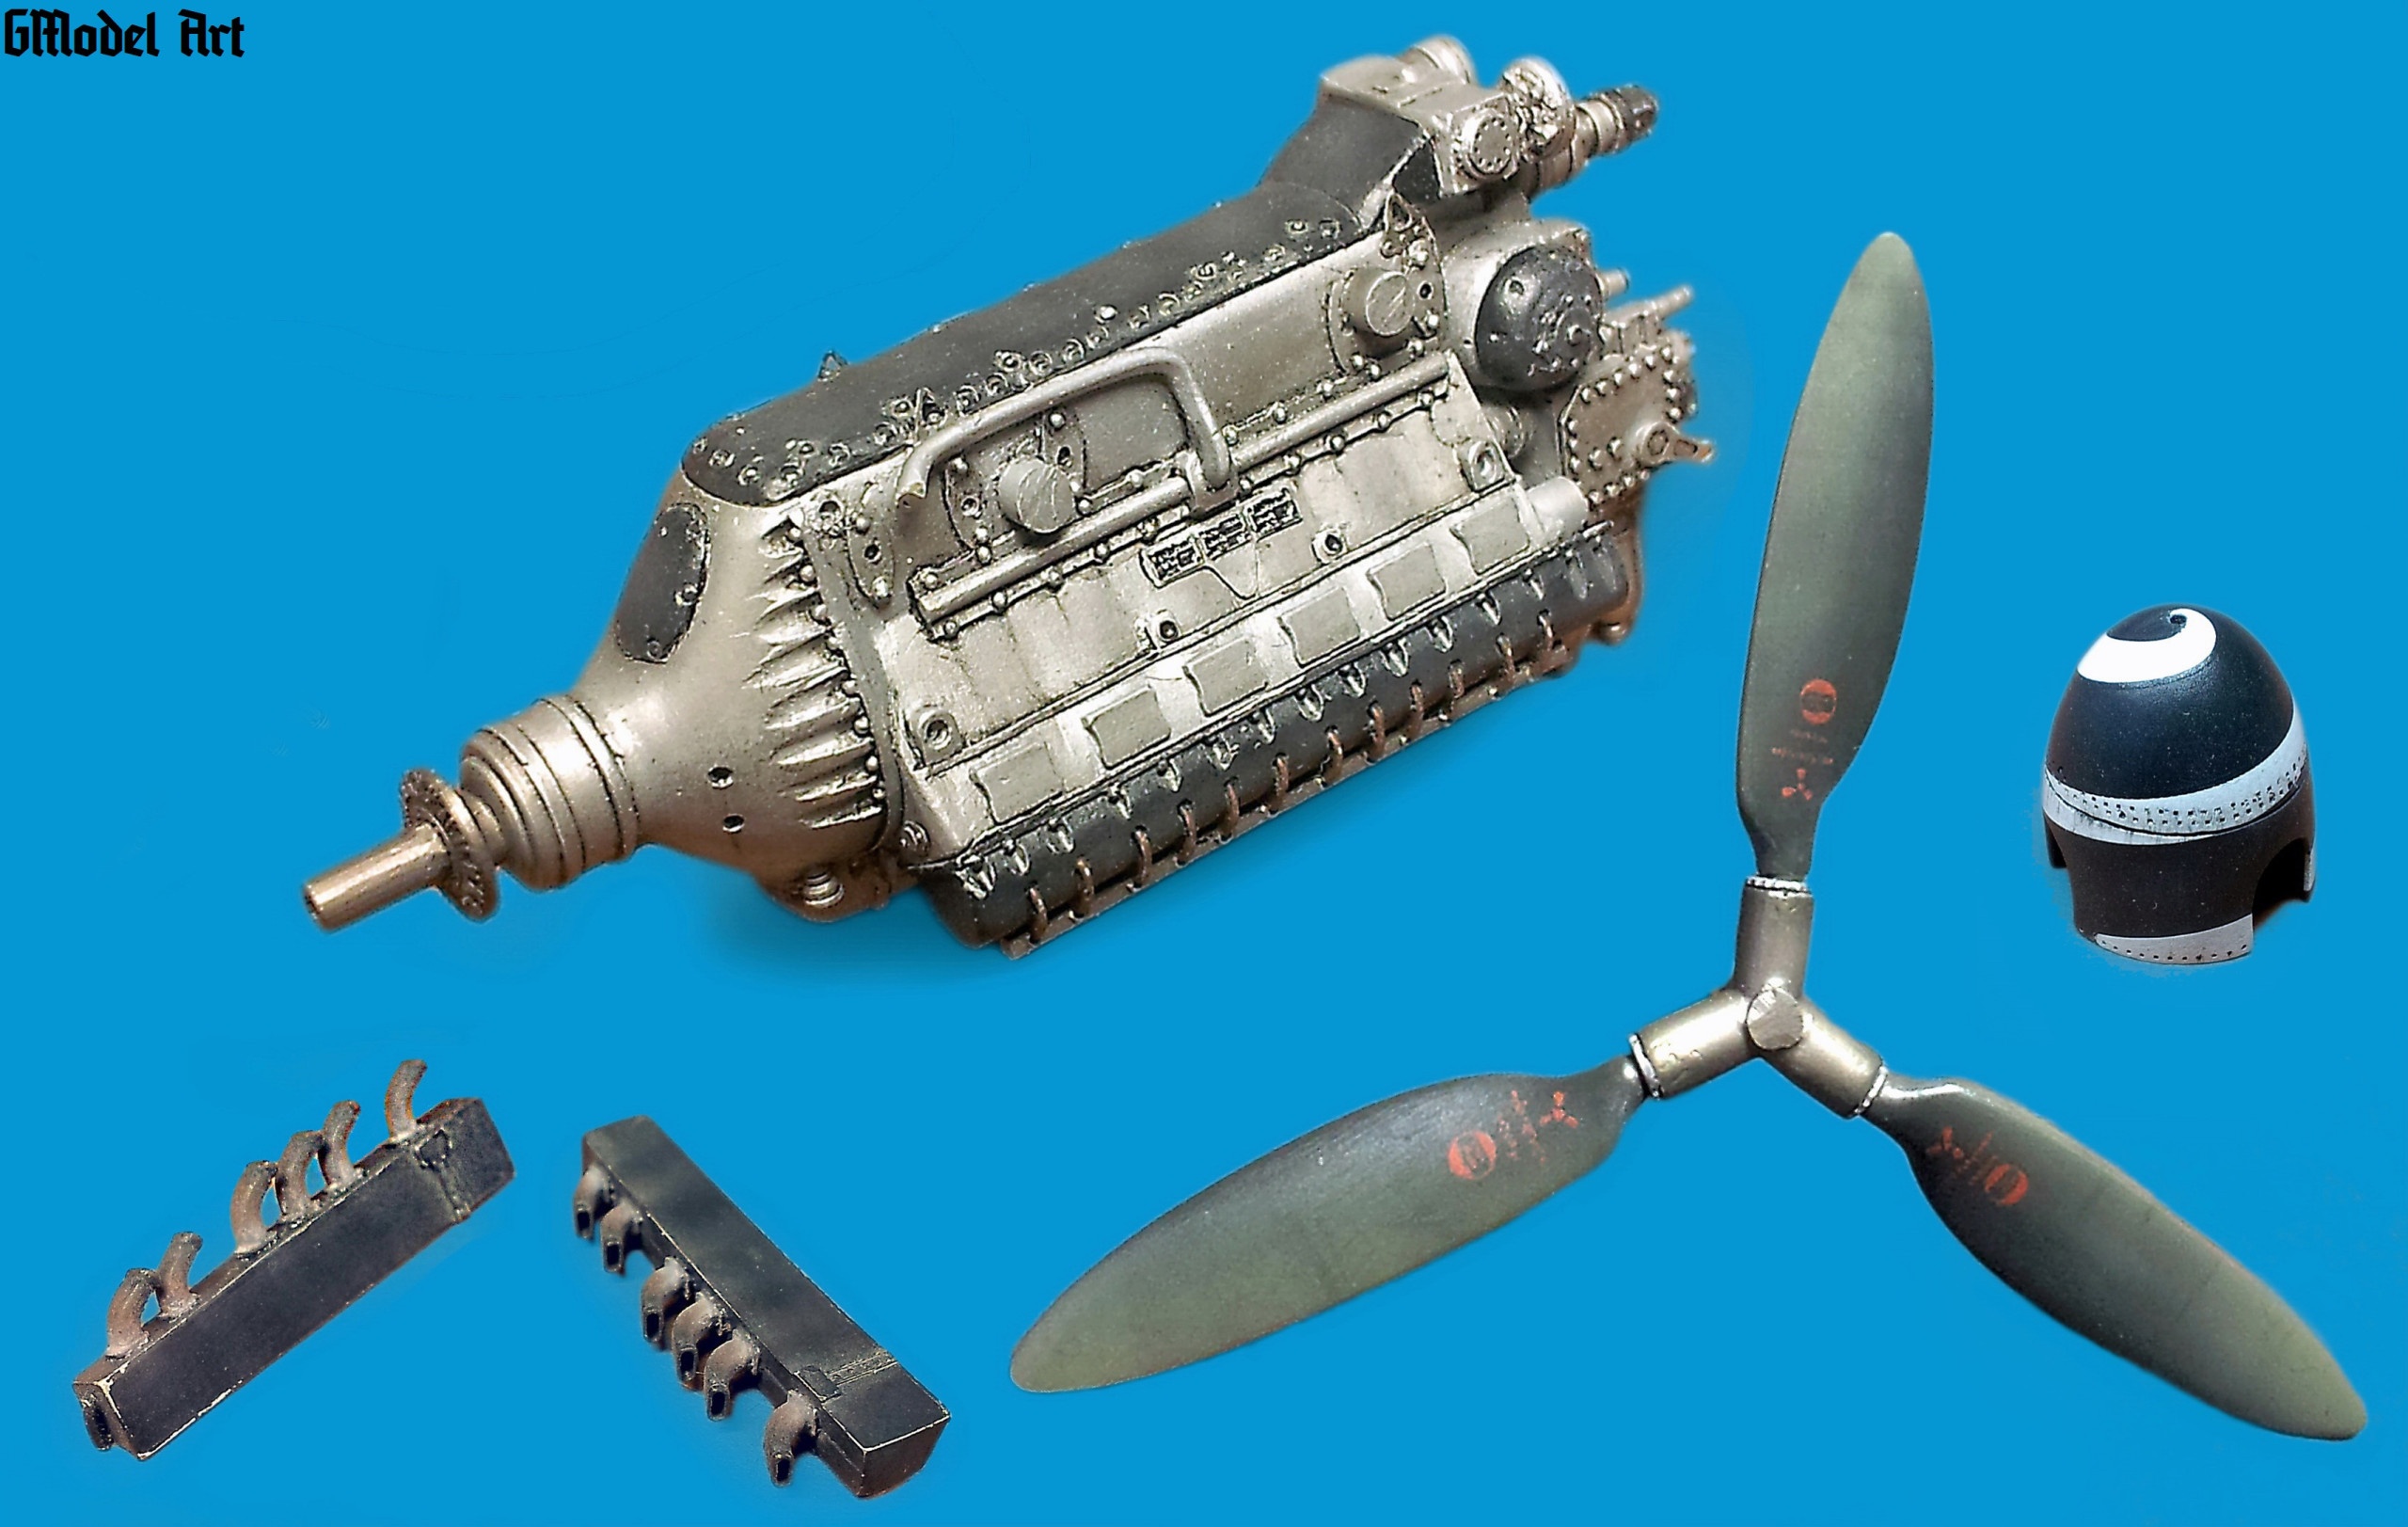
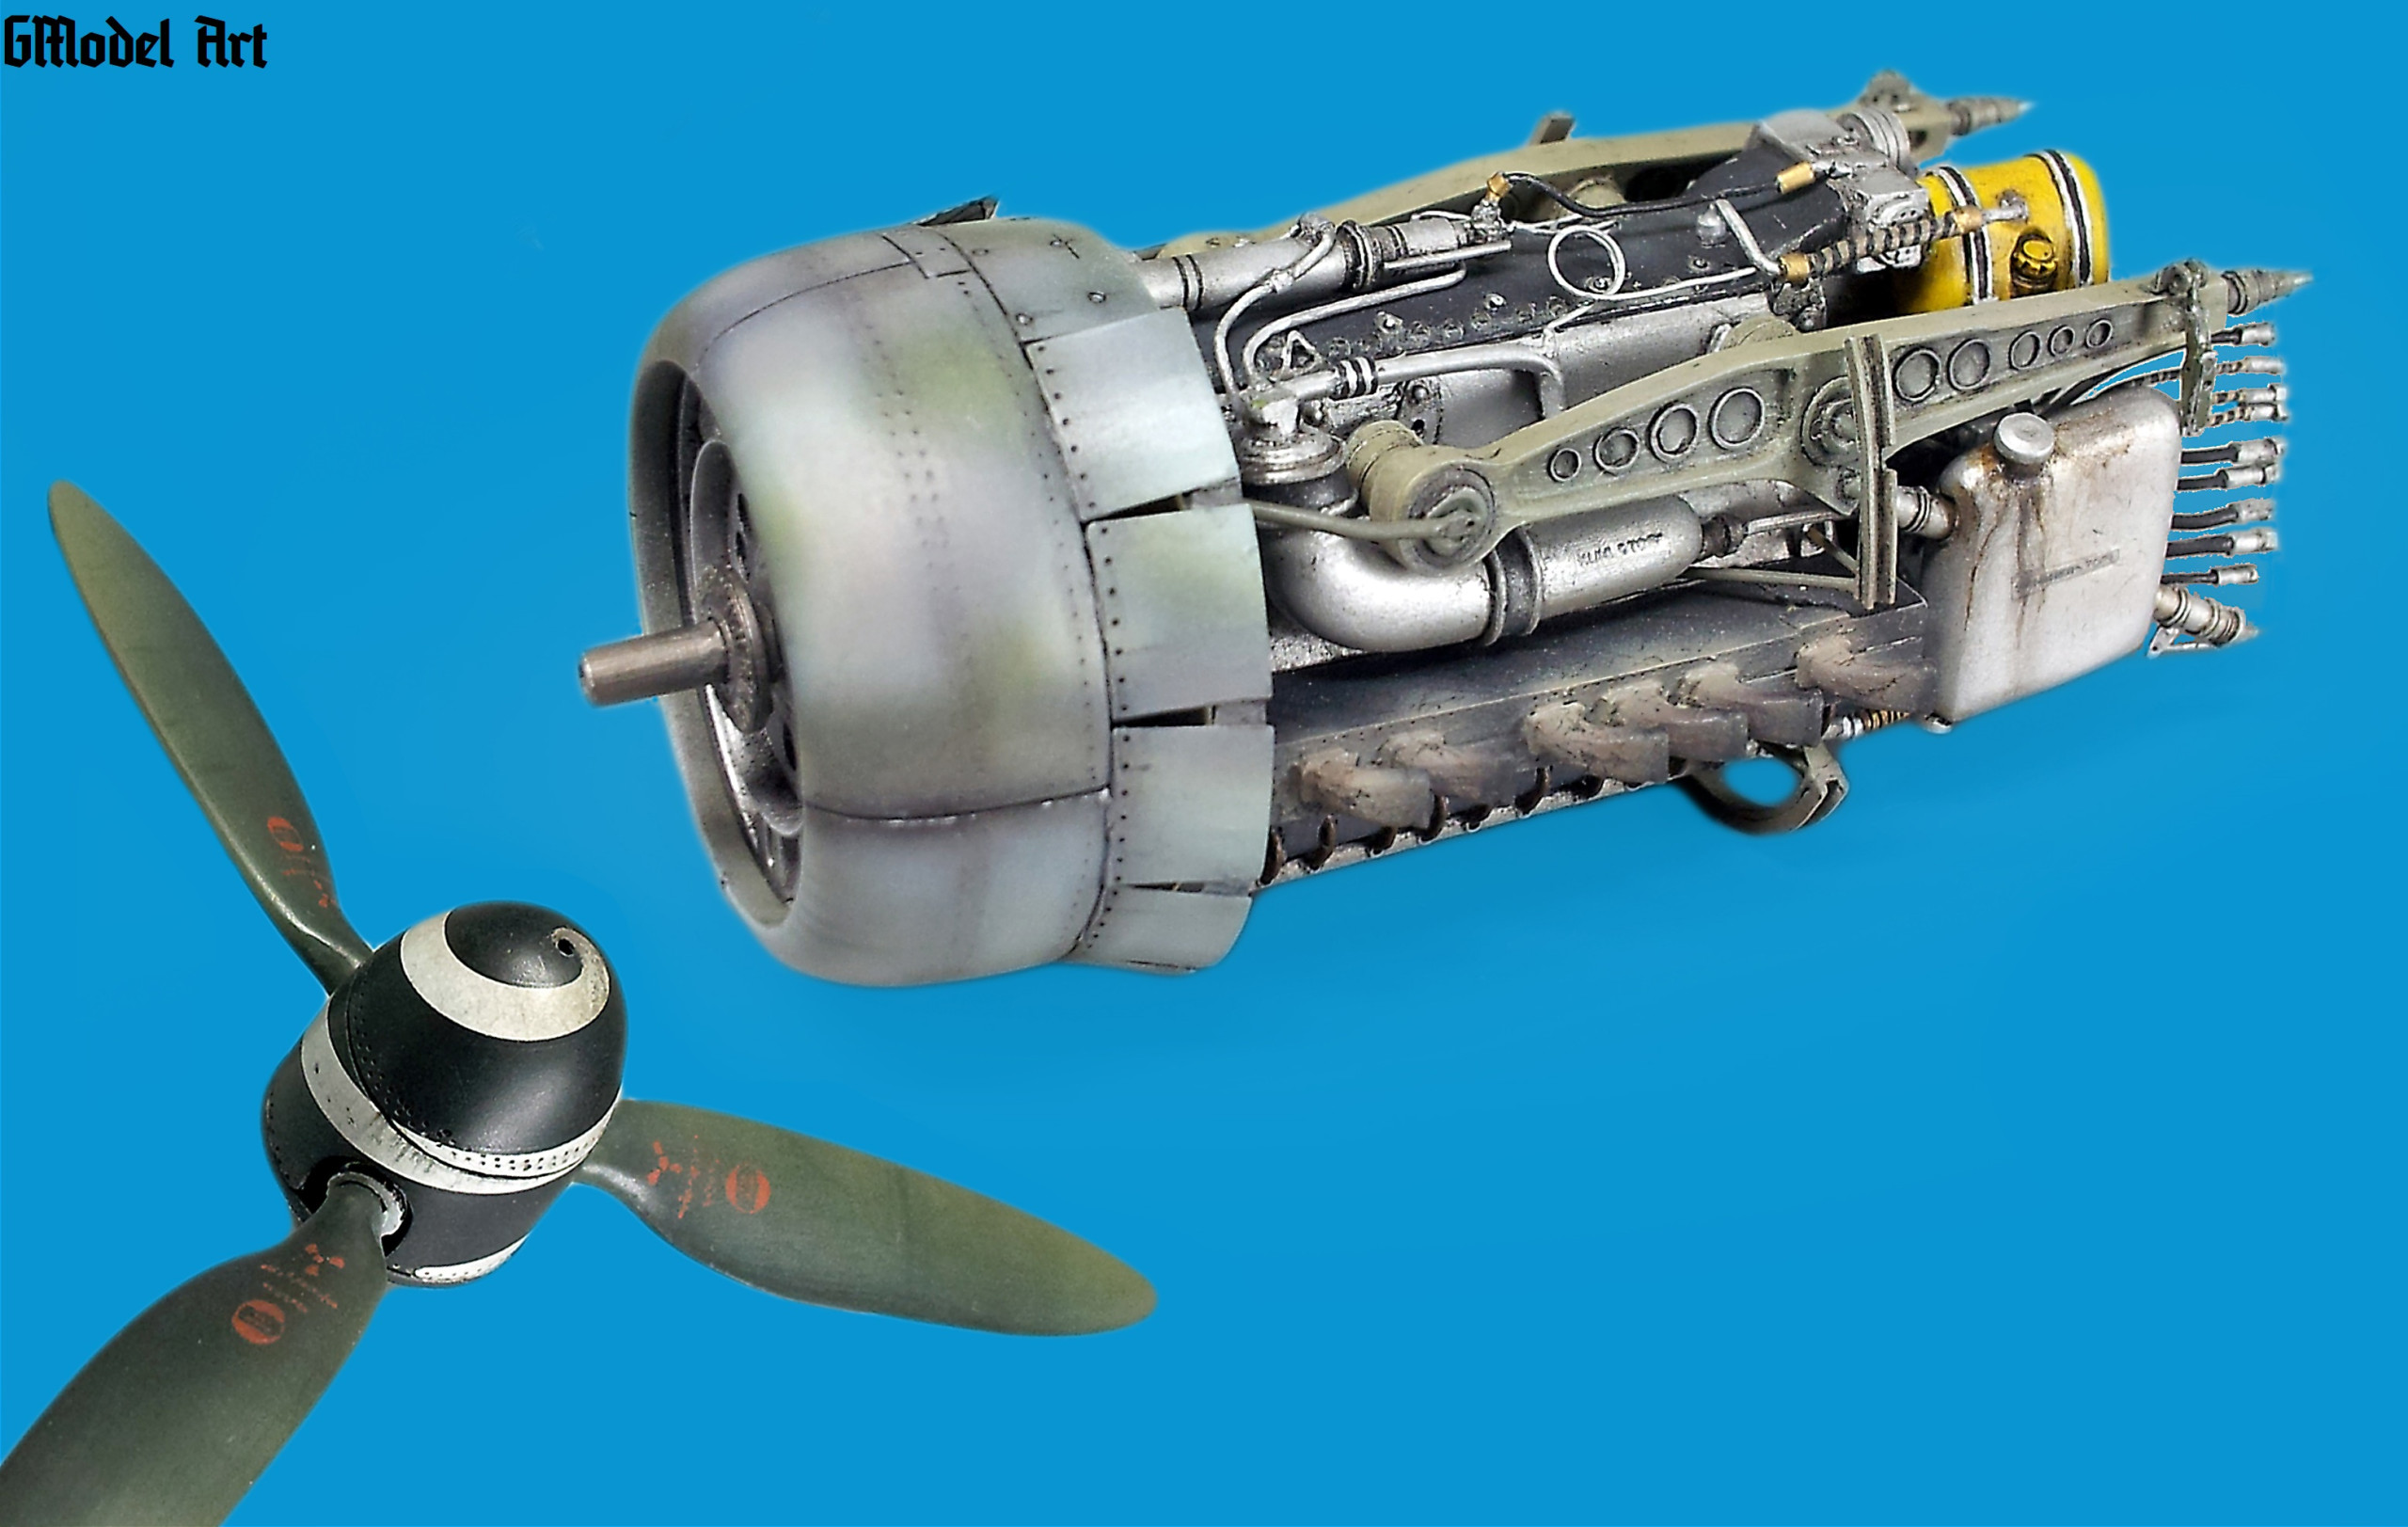
Engine:
No doubt the most complex and most problematic installation of the entire model. It is not only on the number of parts (including lot of hand made parts) but also maintaining geometry and colouring. The main parts of the engine come from that Aires set. Propeller and spinner was replaced by cast of AML set on which I am slightly adjusted riveting lines on the spinner. I also took advantage of some parts of Tamiya and Eduard kit and of course the amount of hand made parts. A complex installation of cables wiring and subsequently control of the individual parts to allow all components mounted on the firewall without colliding each other, took me a long time. Thanks to location of machine guns just above the engine and a large feeder of bullets at the front of engine firewall we have very little space and potential errors can not be forgiven.
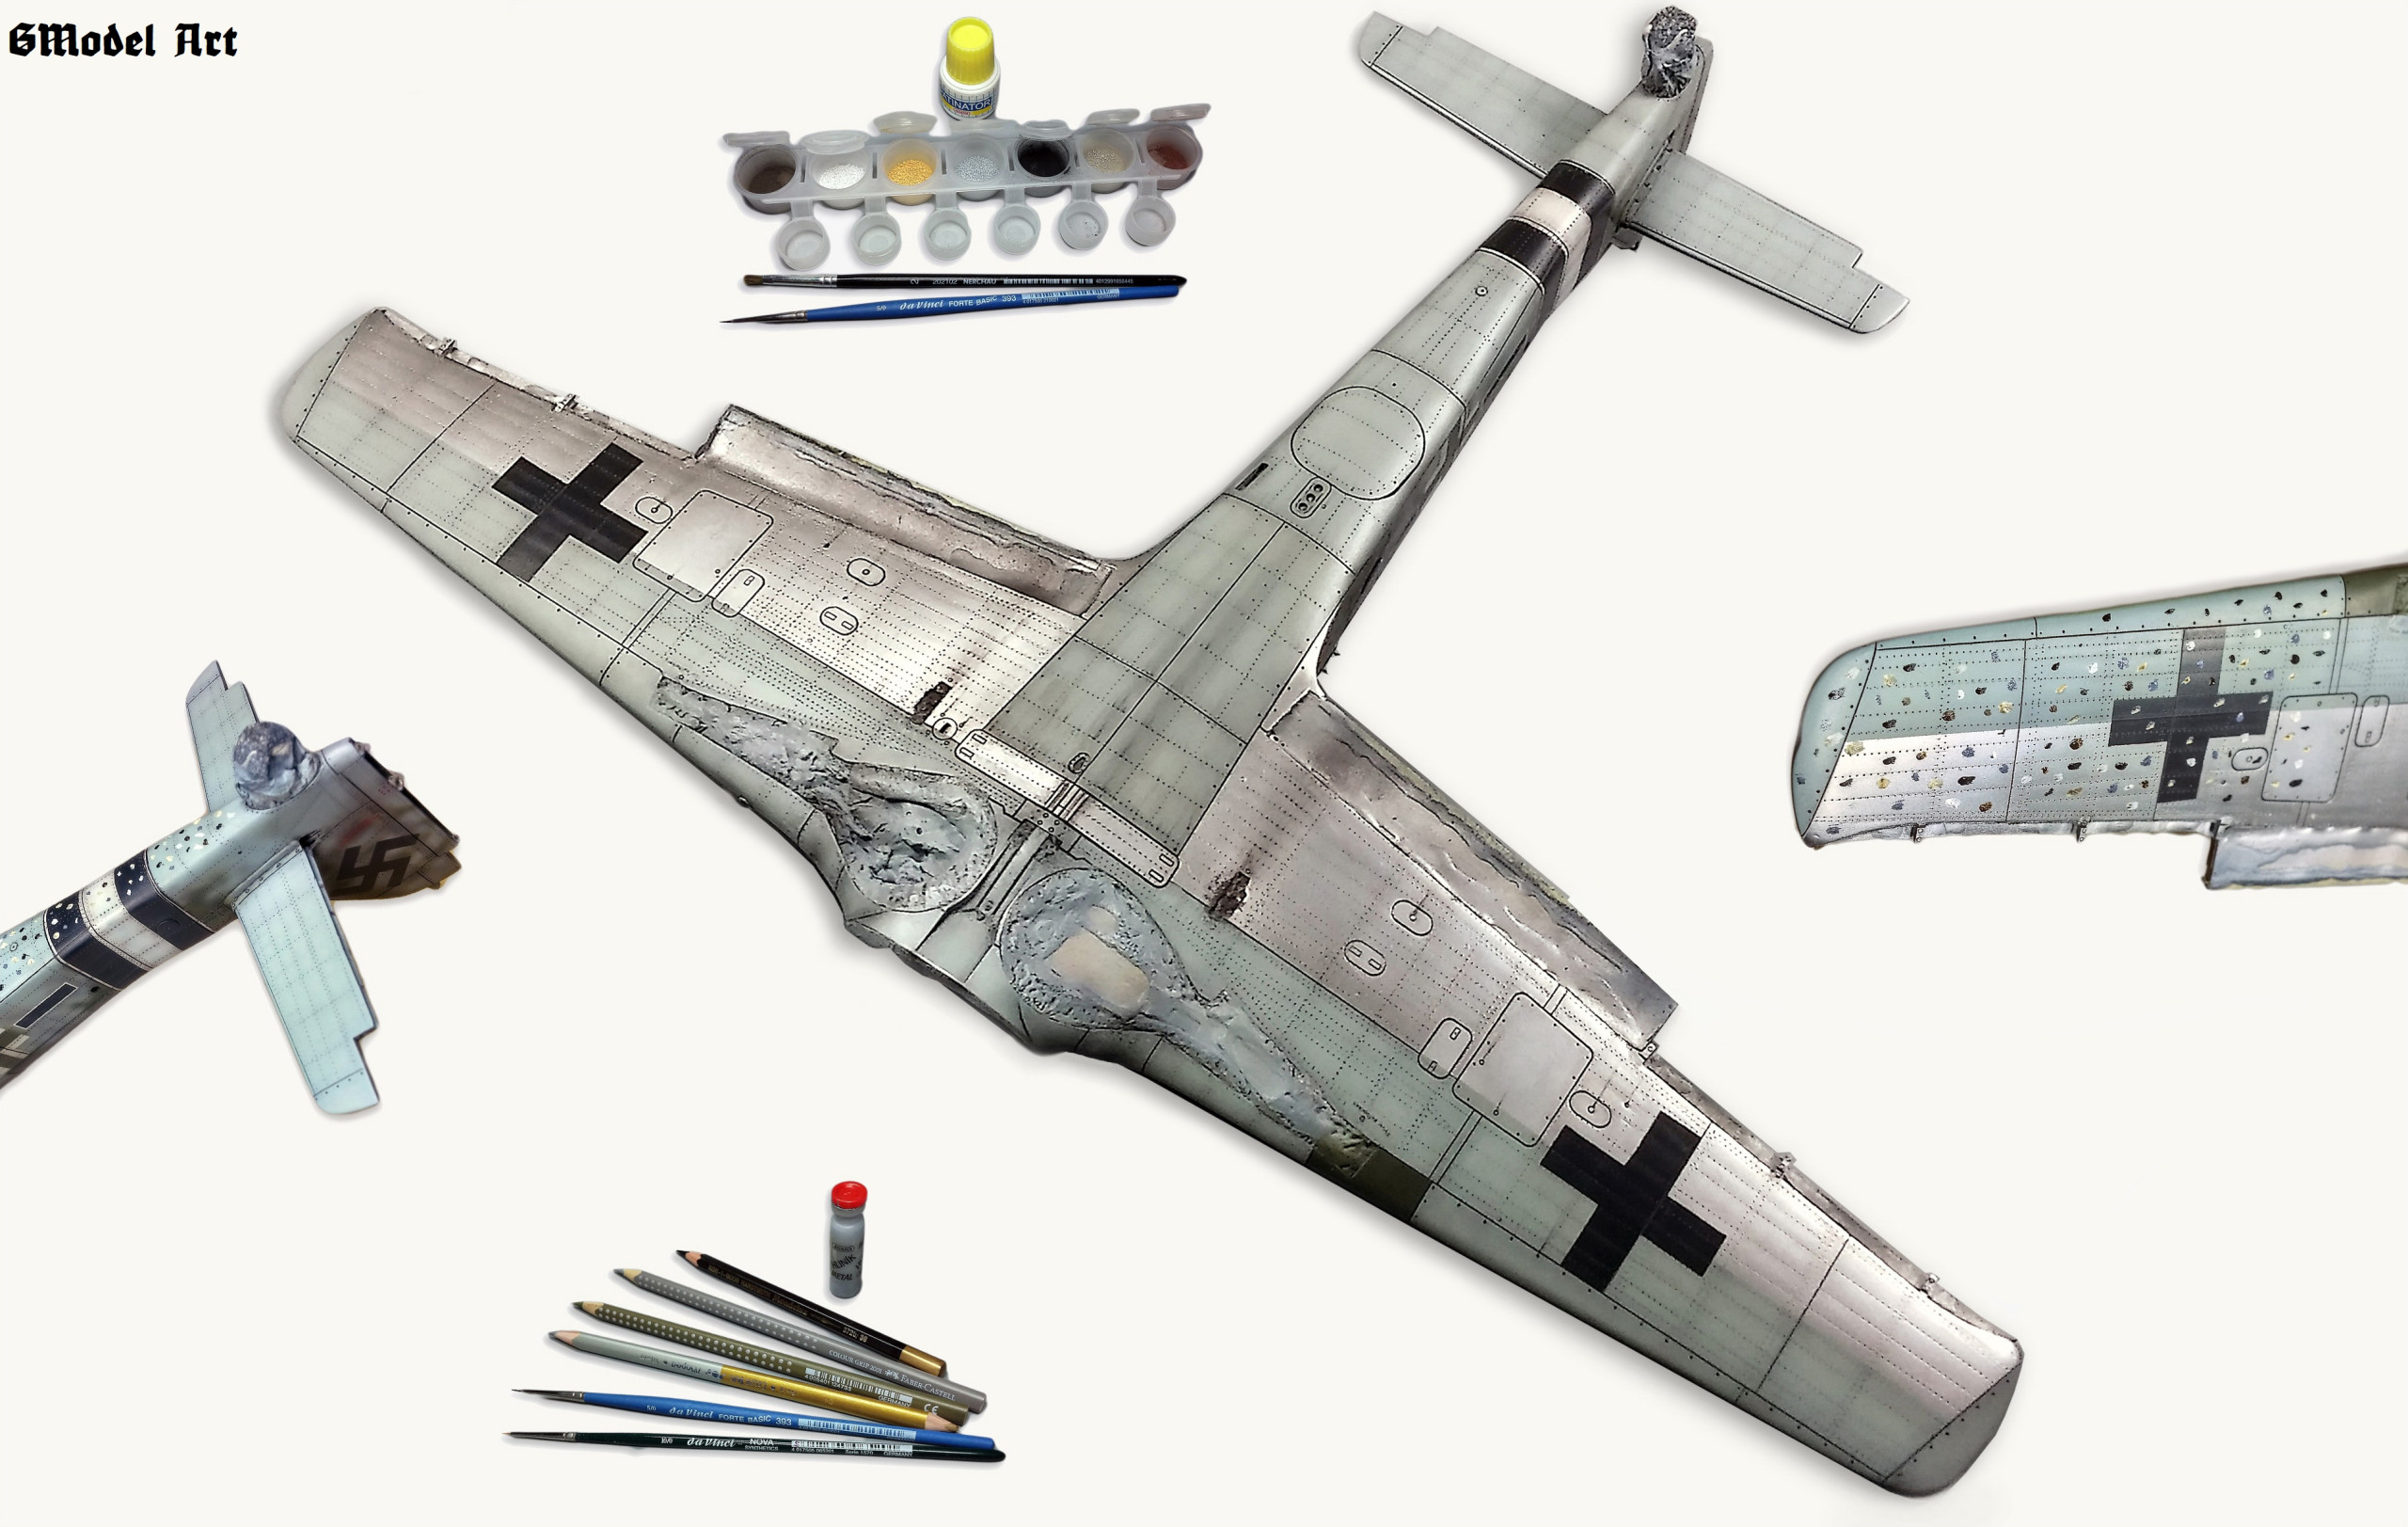
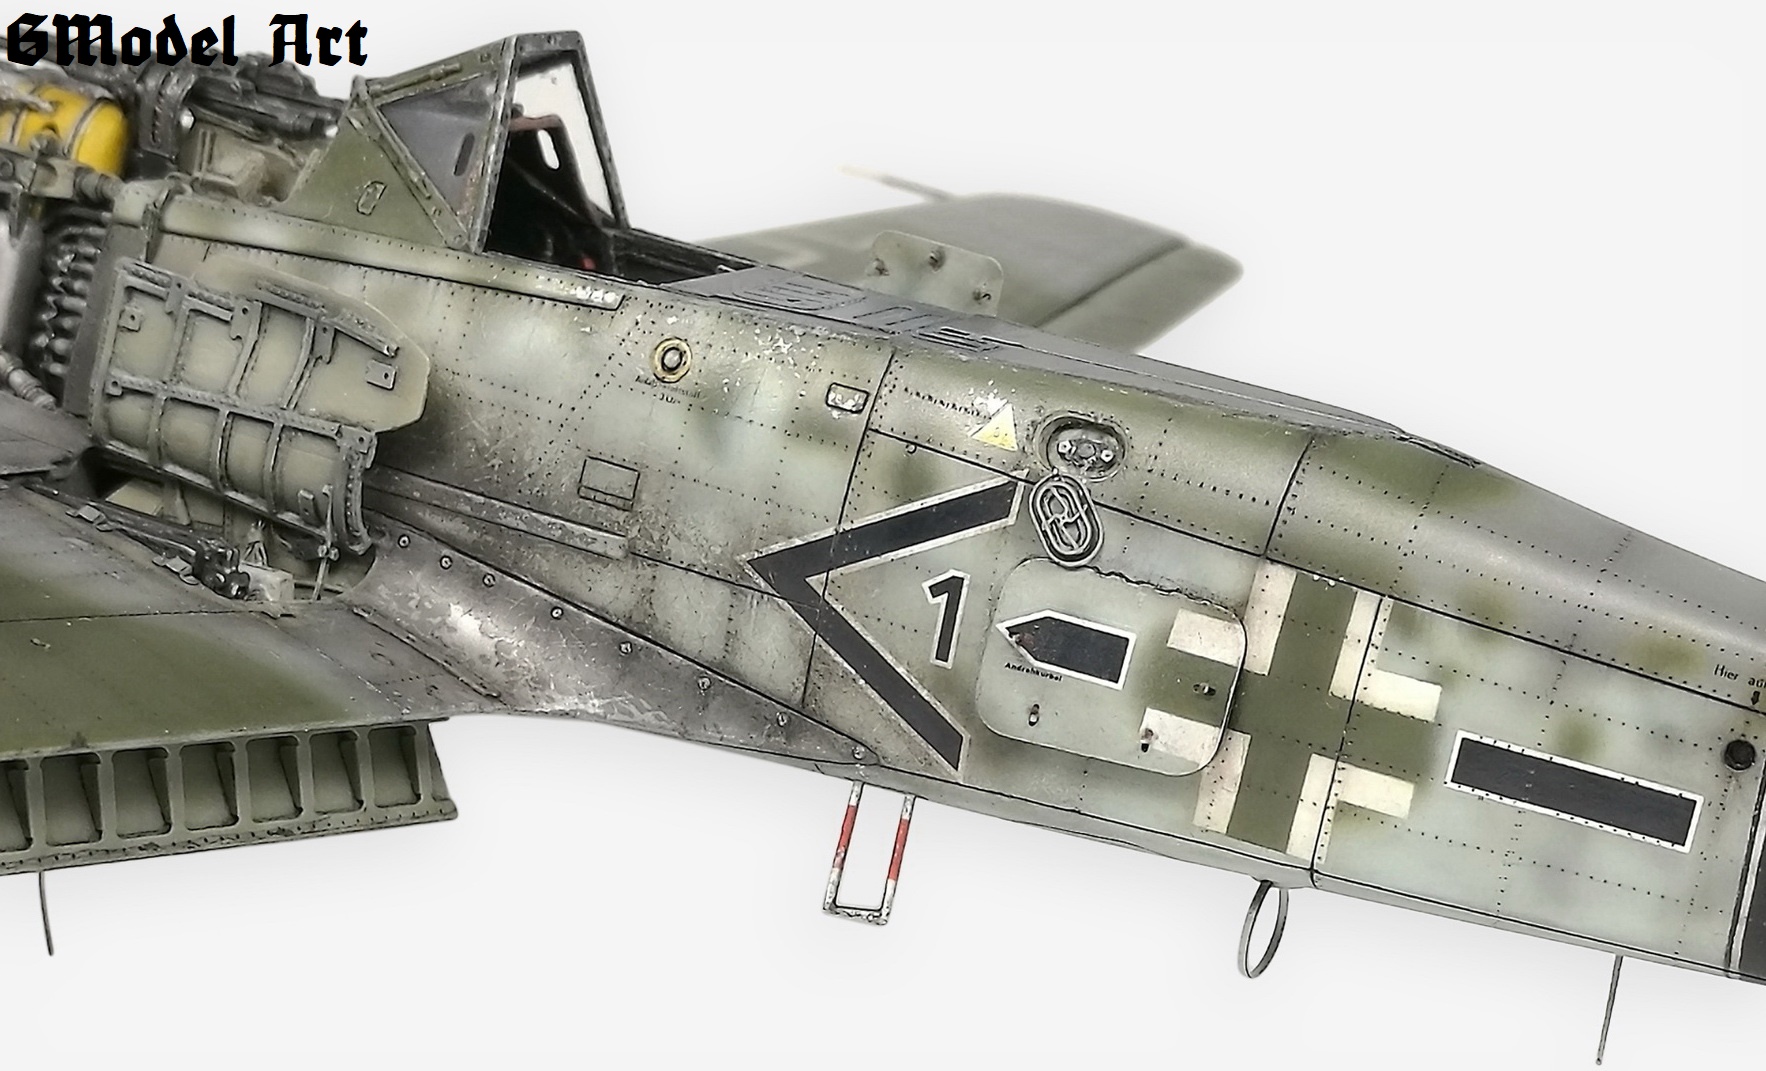
Surface finishing:
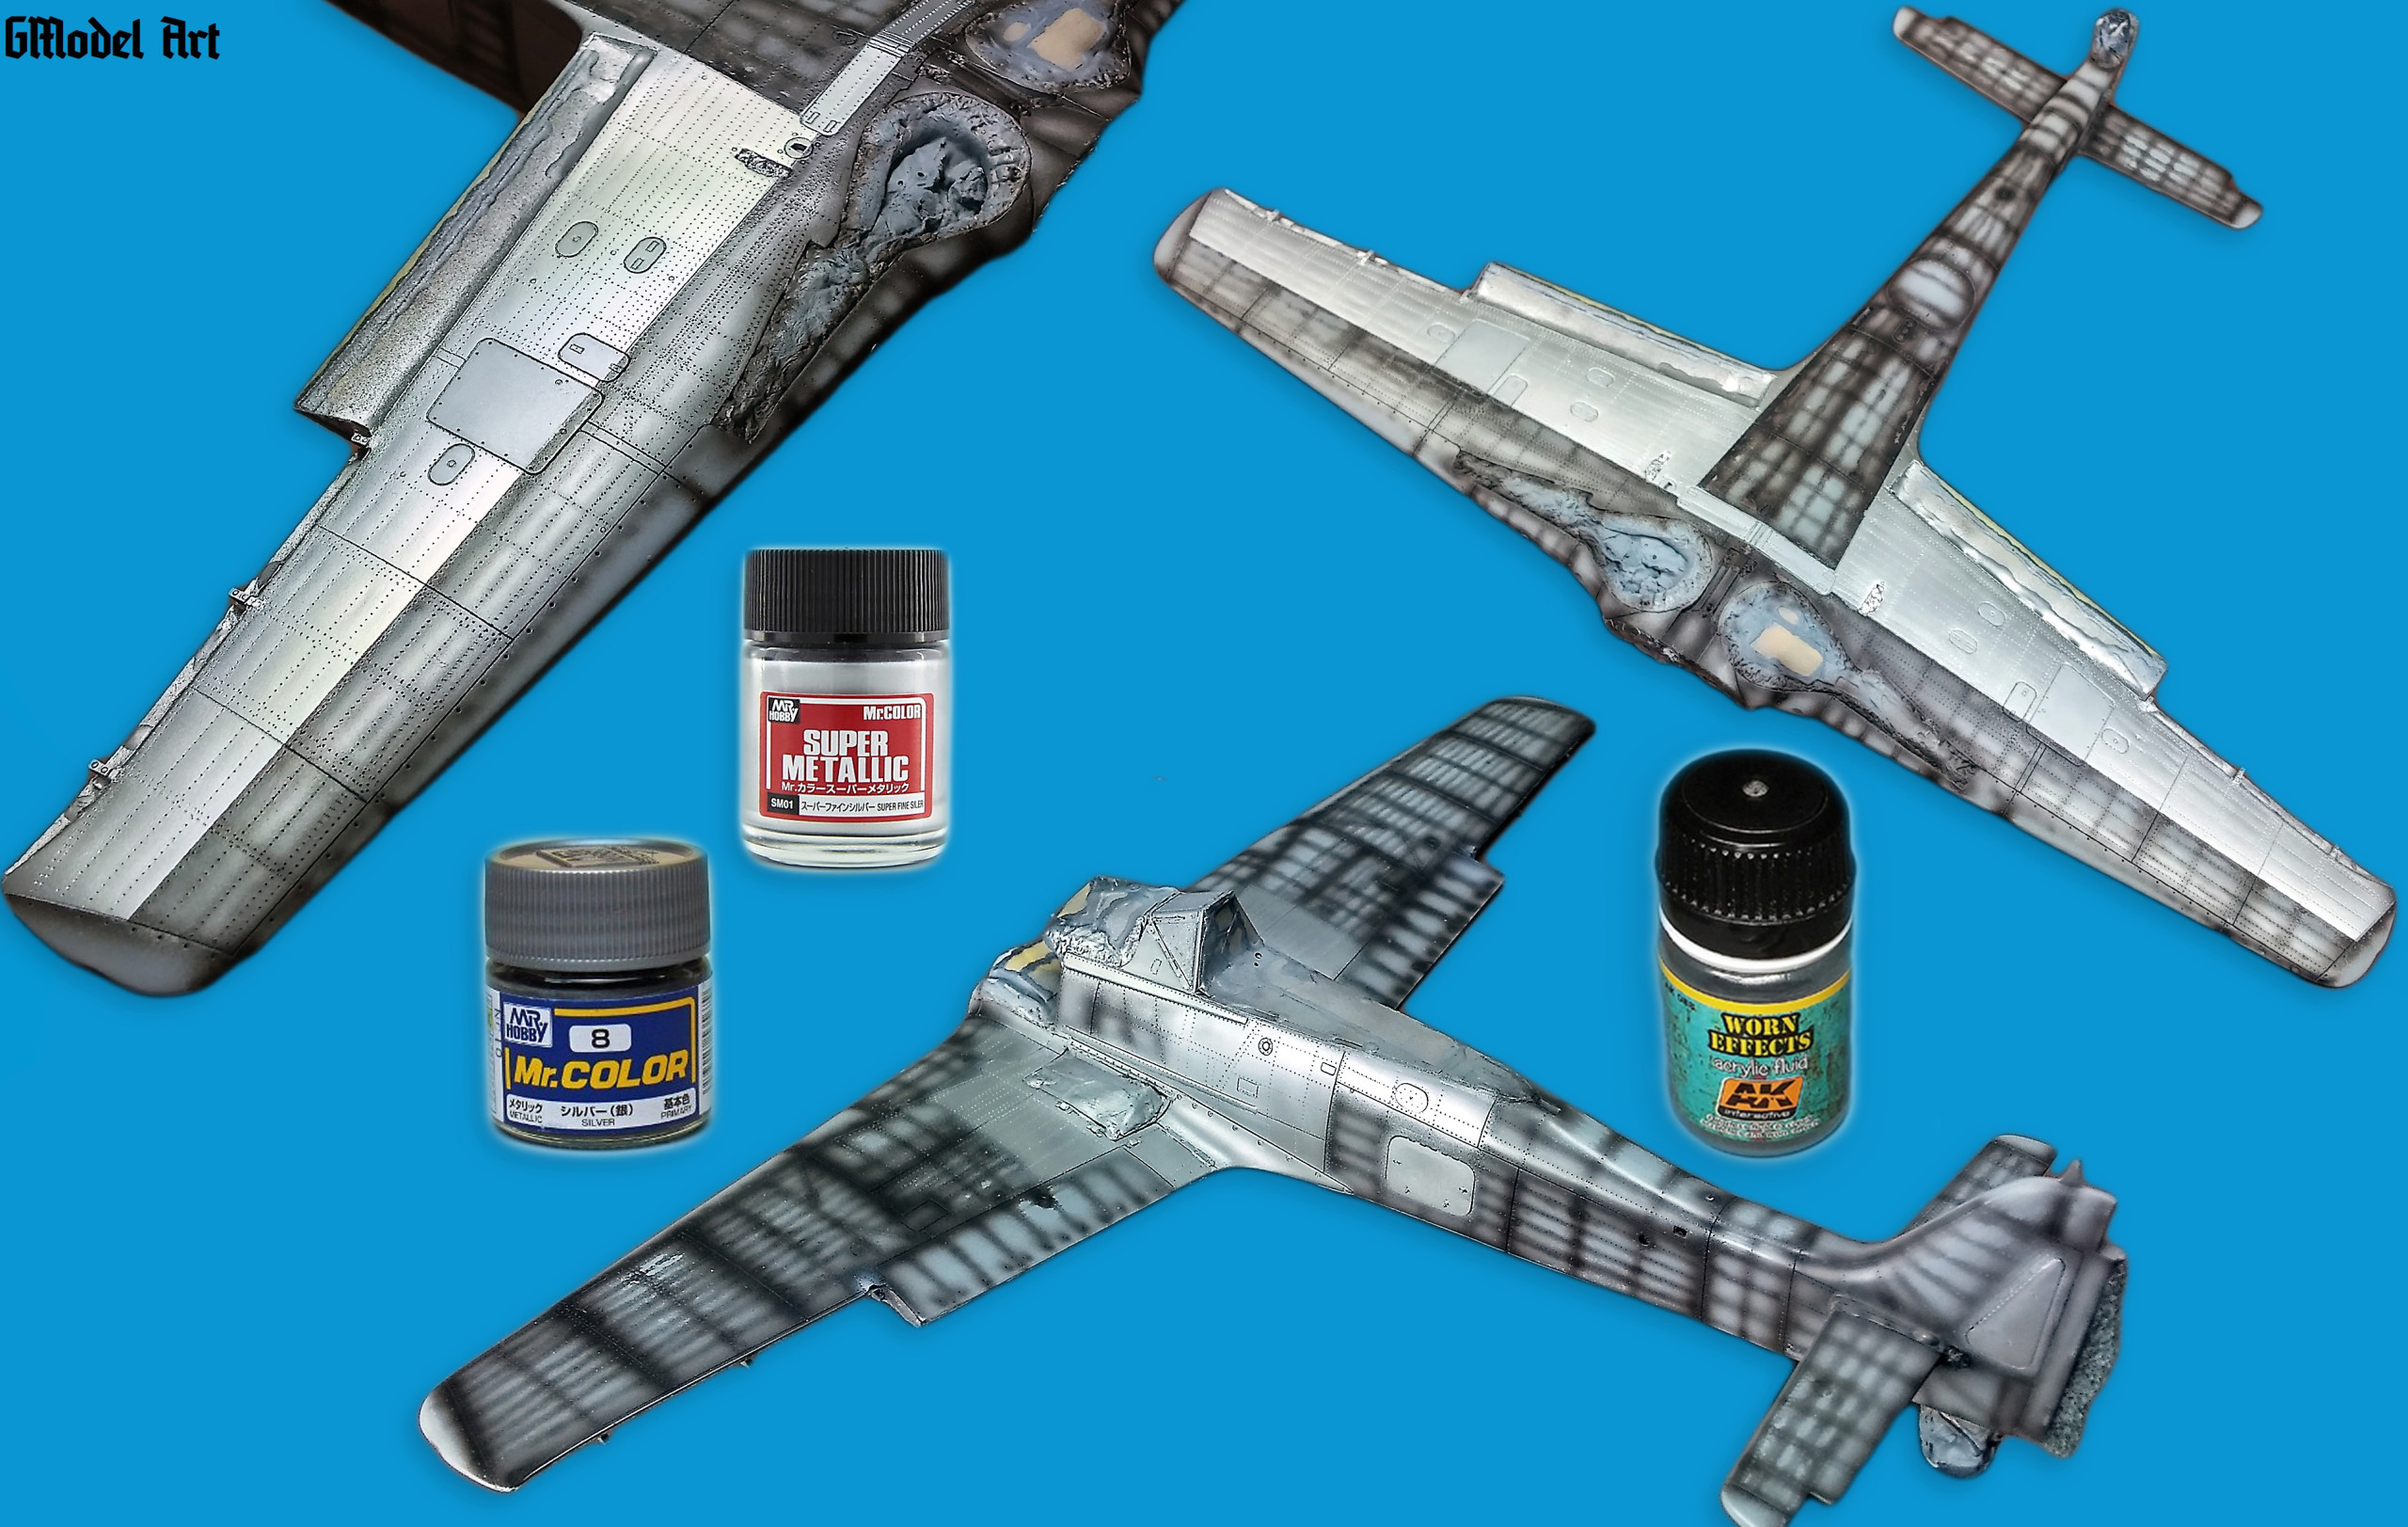
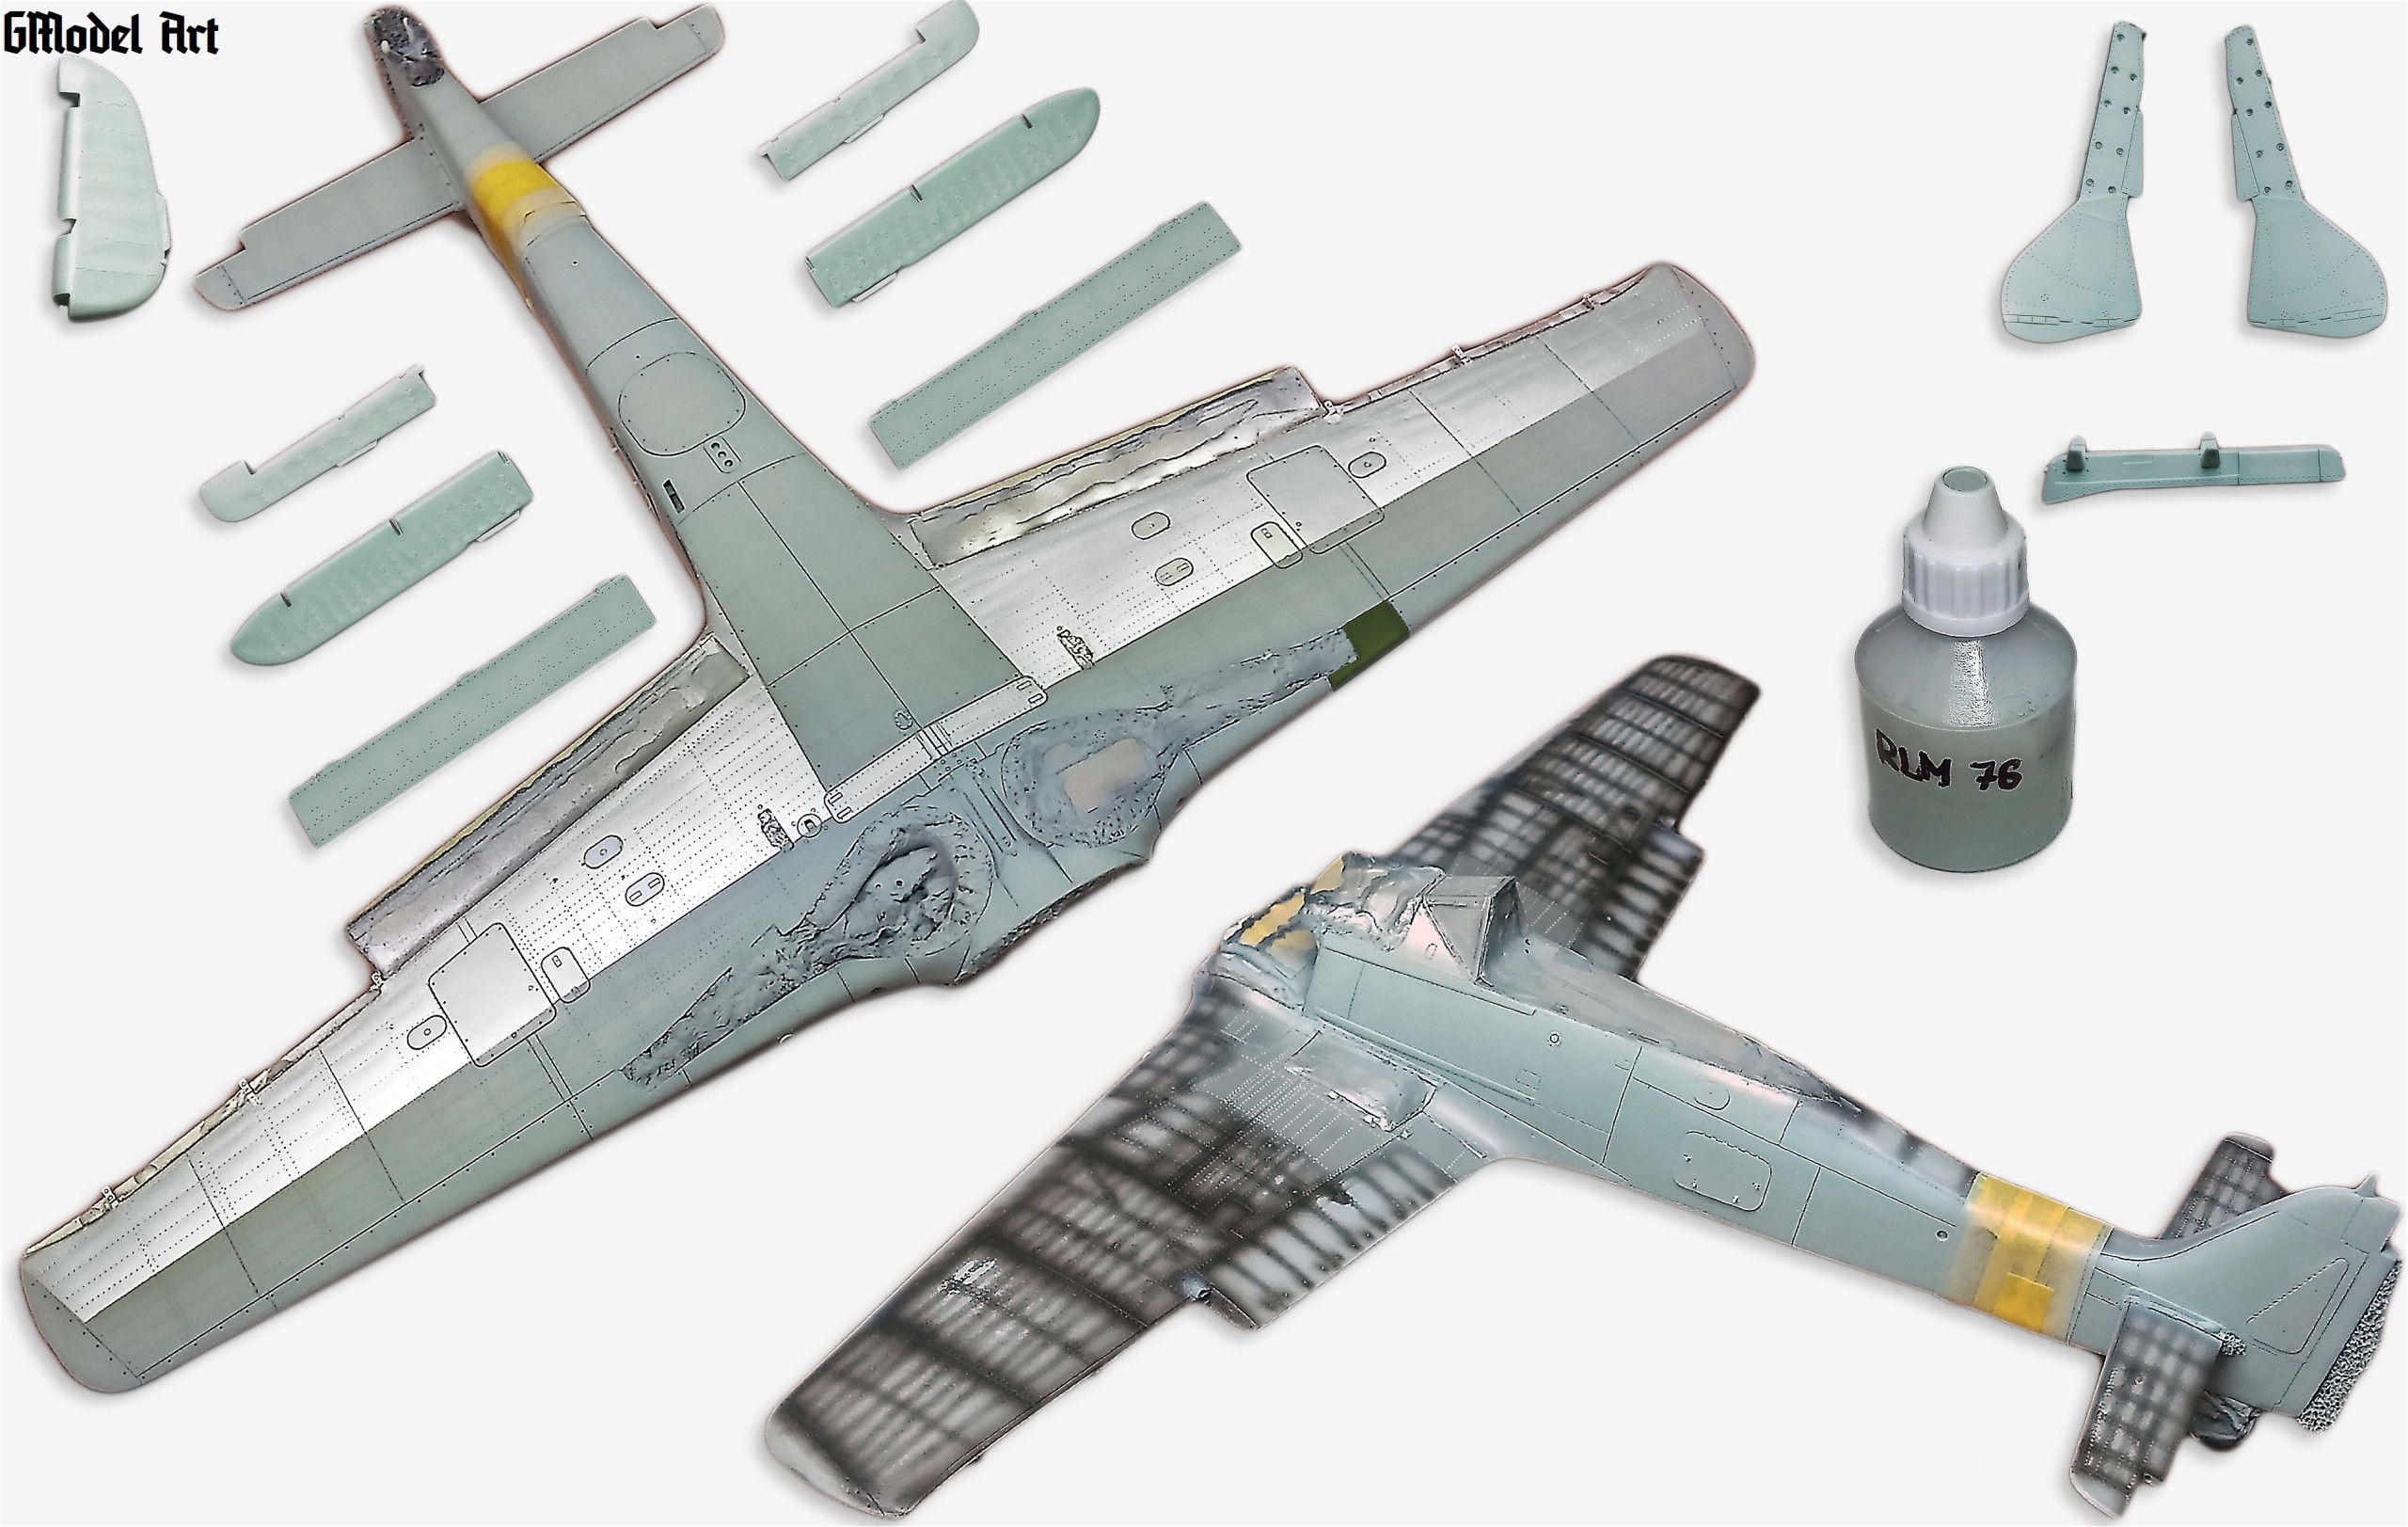
All units of the kit were individually painted and patinated. Finally it was time to finish the surface of the entire airframe. In the main spraying I used colors GSI series C and thinner Mr. Color Leveling Thinner with small amount of drying retardant Mr. Retarder Mild of GSI.
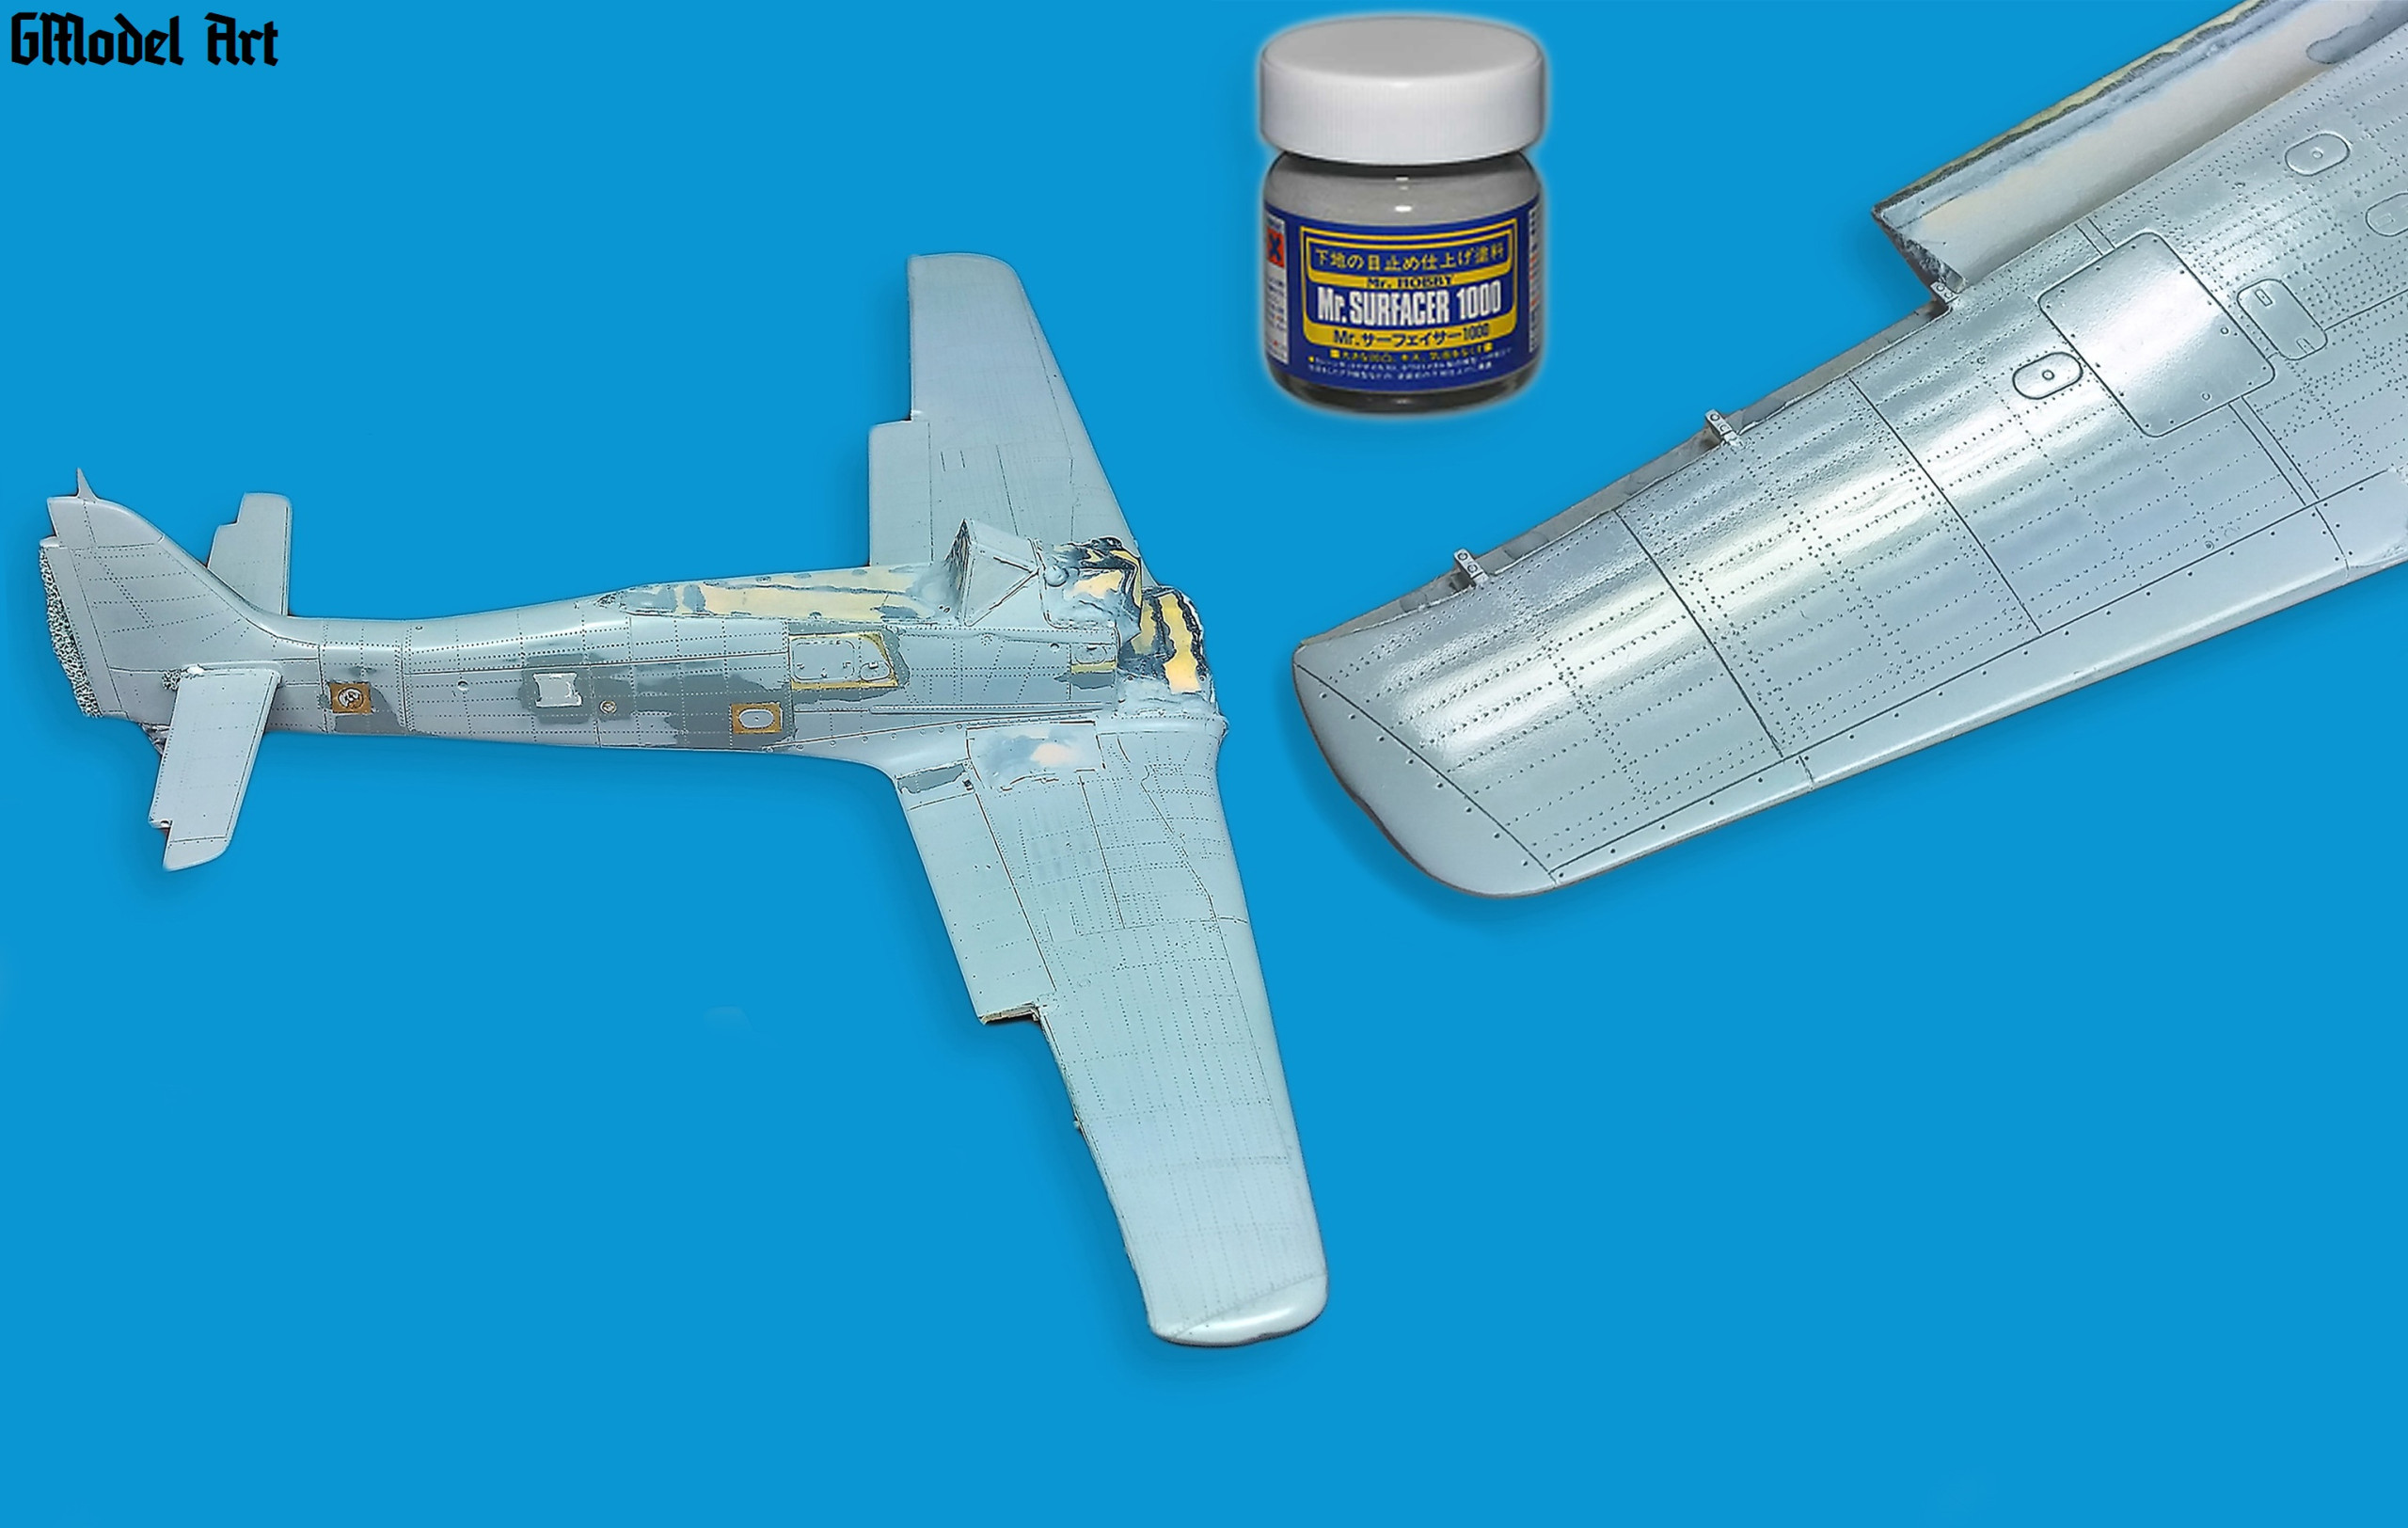
All places I have already painted I carefully masked out, degreased surface with degreasing agent and sprayed first layer of Surfacer 1000 GSI. This was to unity the all surface and to reveal any imperfections. I corrected a few places and I can sprayed the final layer of Surfacer 1000. It is very important before spraying colors perfectly grind and polish the surface into almost a mirror shine, mainly due to large surface on bottom of wings was in nature metal finish.
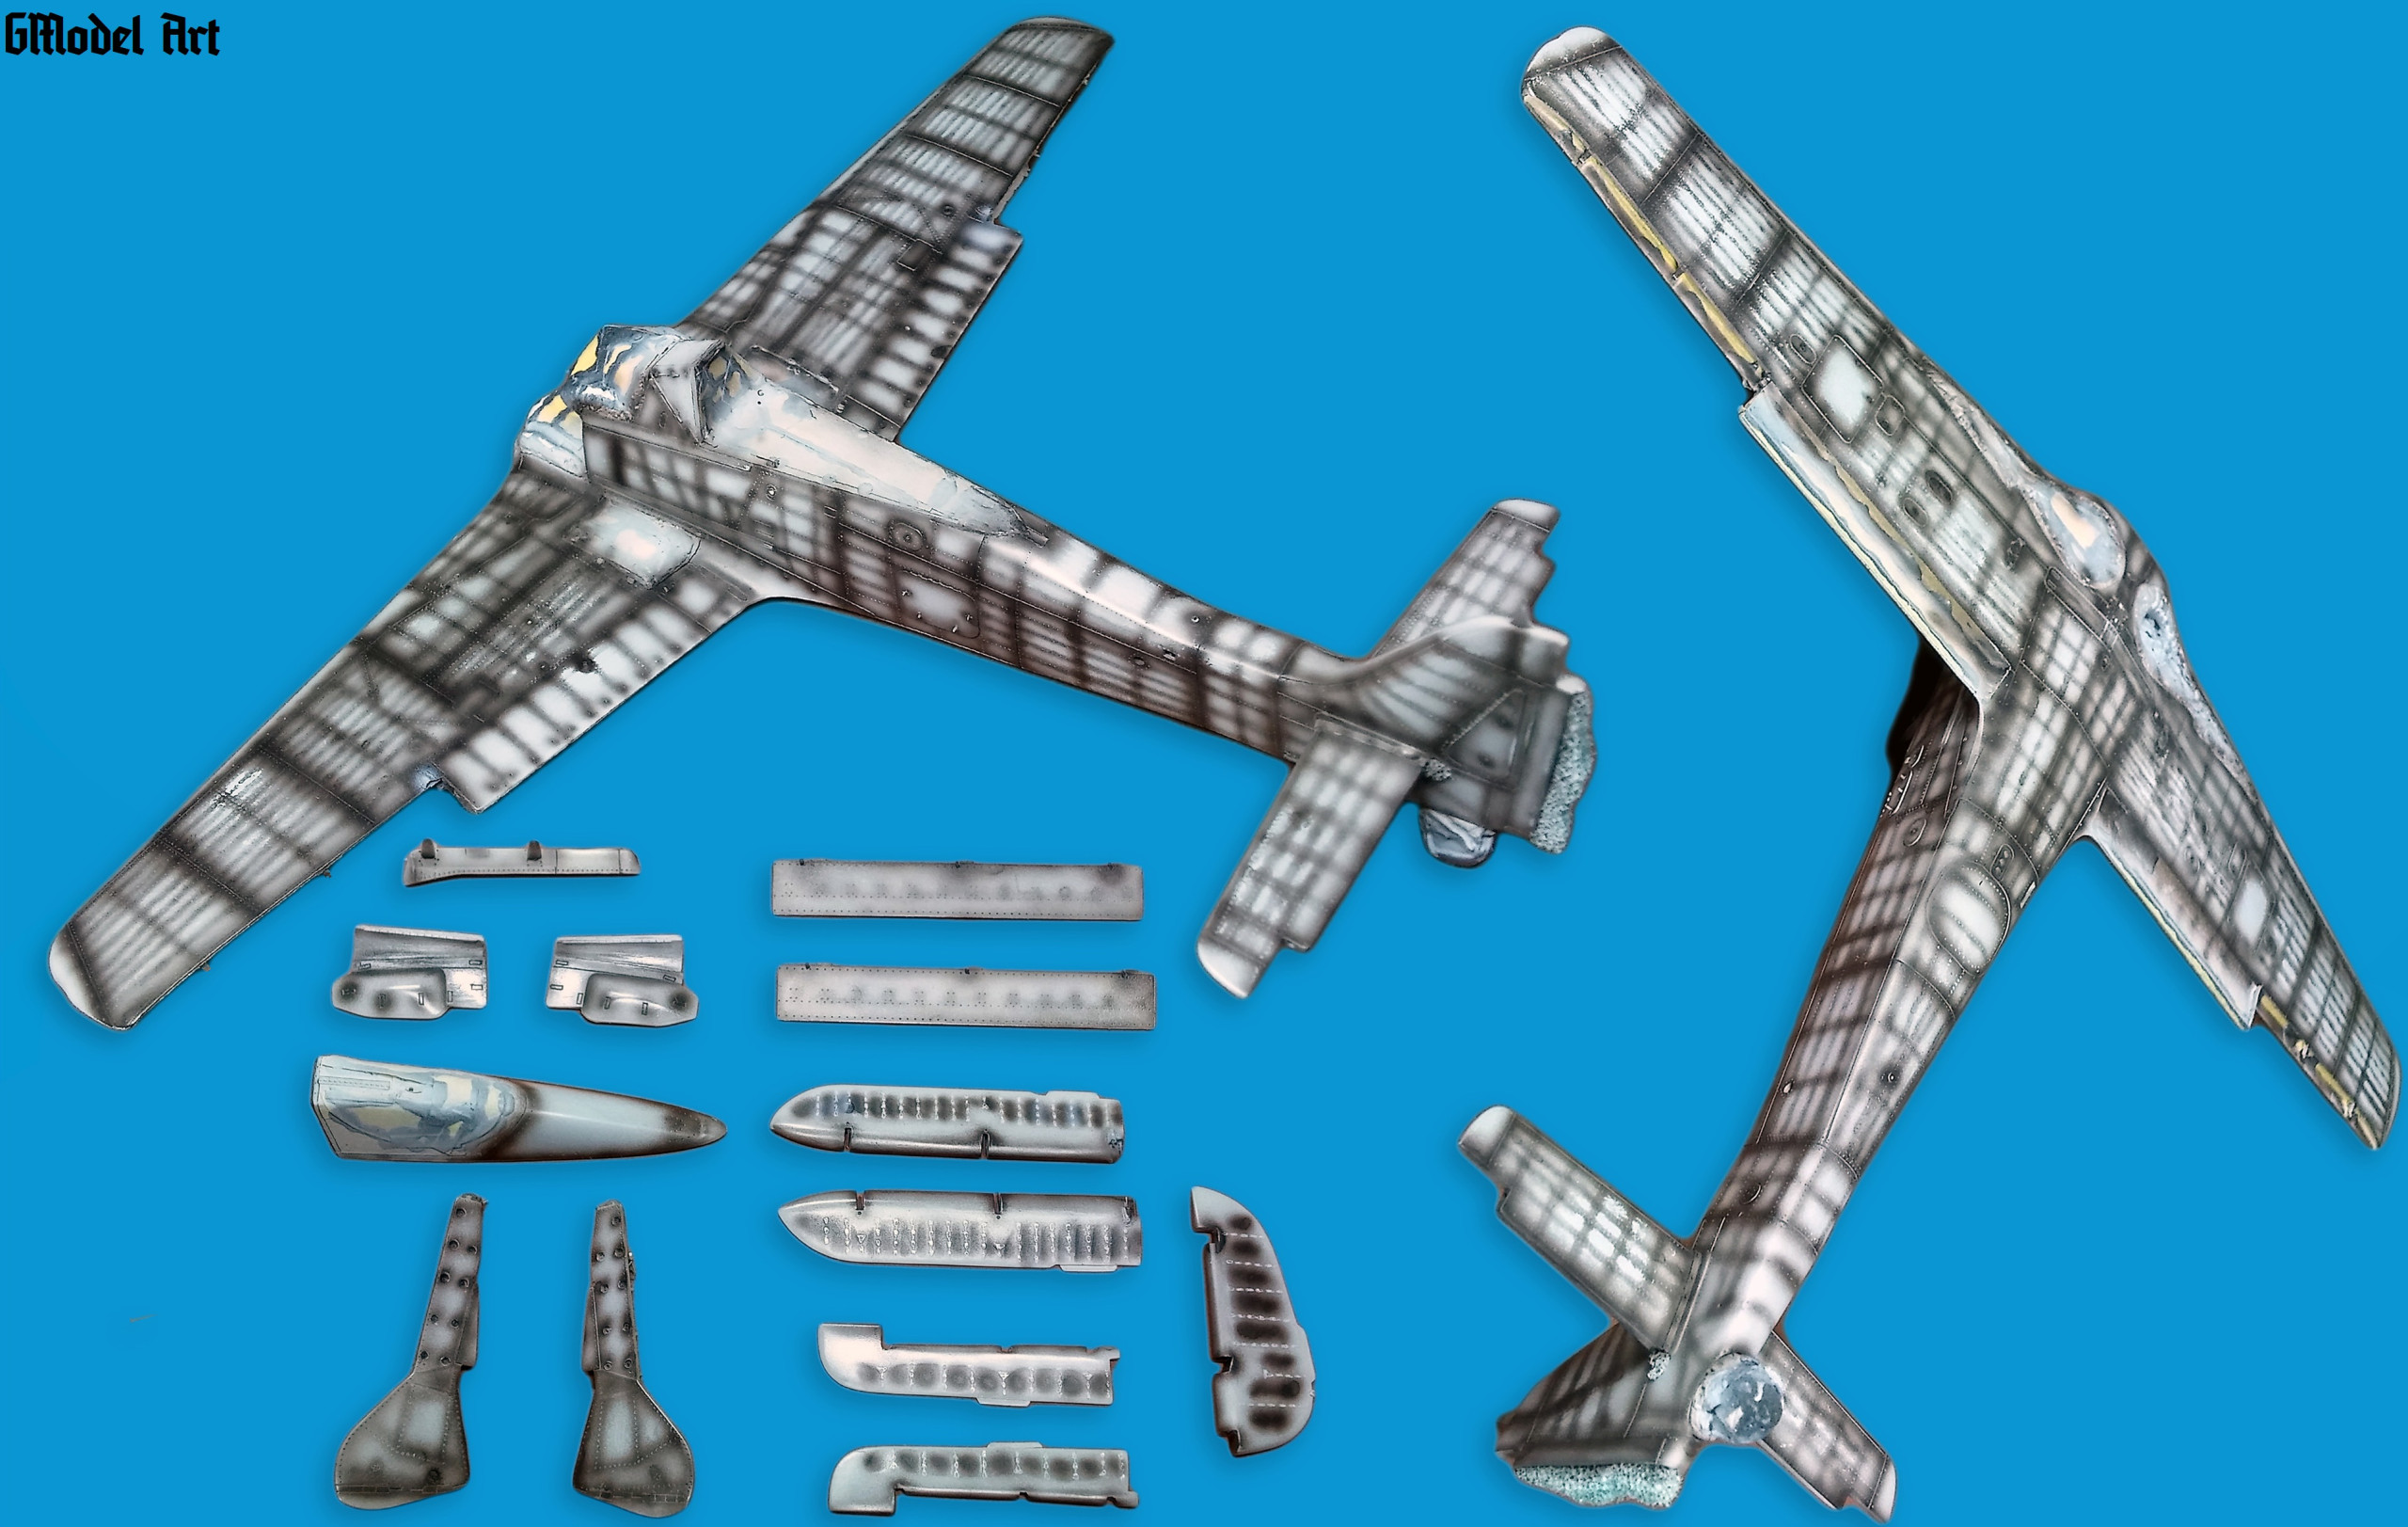
Then followed by pre-shading of lines of surface panels with dark brown almost black shade. For later scraping of camouflage colors up to „metal“ finish and to create a „natural metal finish“ appearance on the bottom of the wings I chose the top color GSI Supermetalic SM01 „Super fine silver“ and combined it with proven GSI 8 „Silver“ and create a differentiate „metal“ finish surface on some individual covers. The reminder of the another parts of bottom faces is sprayed by modified and slightly different shades RLM 76 GSI in accordance with material used.
Before I mixed camouflage colors, I contacted Mr. Poruba, one of the autors of excellent publications JaPo Fw 190D camouflage and markings with a question asked for a different interpretation of shade dark green color on the aircraft „black 1“. In the above publication is shown RLM 83, while in the work by Jerry Crandall shade RLM 74. Its answer indicated that under their investigation unlike Jerry Crandall, they are more inclined to shade RLM 83. So I mixed and slightly lightened (allow for scale) just this color RLM 83 and used on my Dora too.
Most exposed locations on the center wing-fuselage section that will subsequently be abraded to the color of metal , I applied several layers of special clear solution from AK Interactive Worn Effects on the silver base and let it dry. After spraying camouflage I alternately used lighter and darker shades of camouflage colors called „Post-shading“ which contributed significantly to improved the plasticity of surfaces.
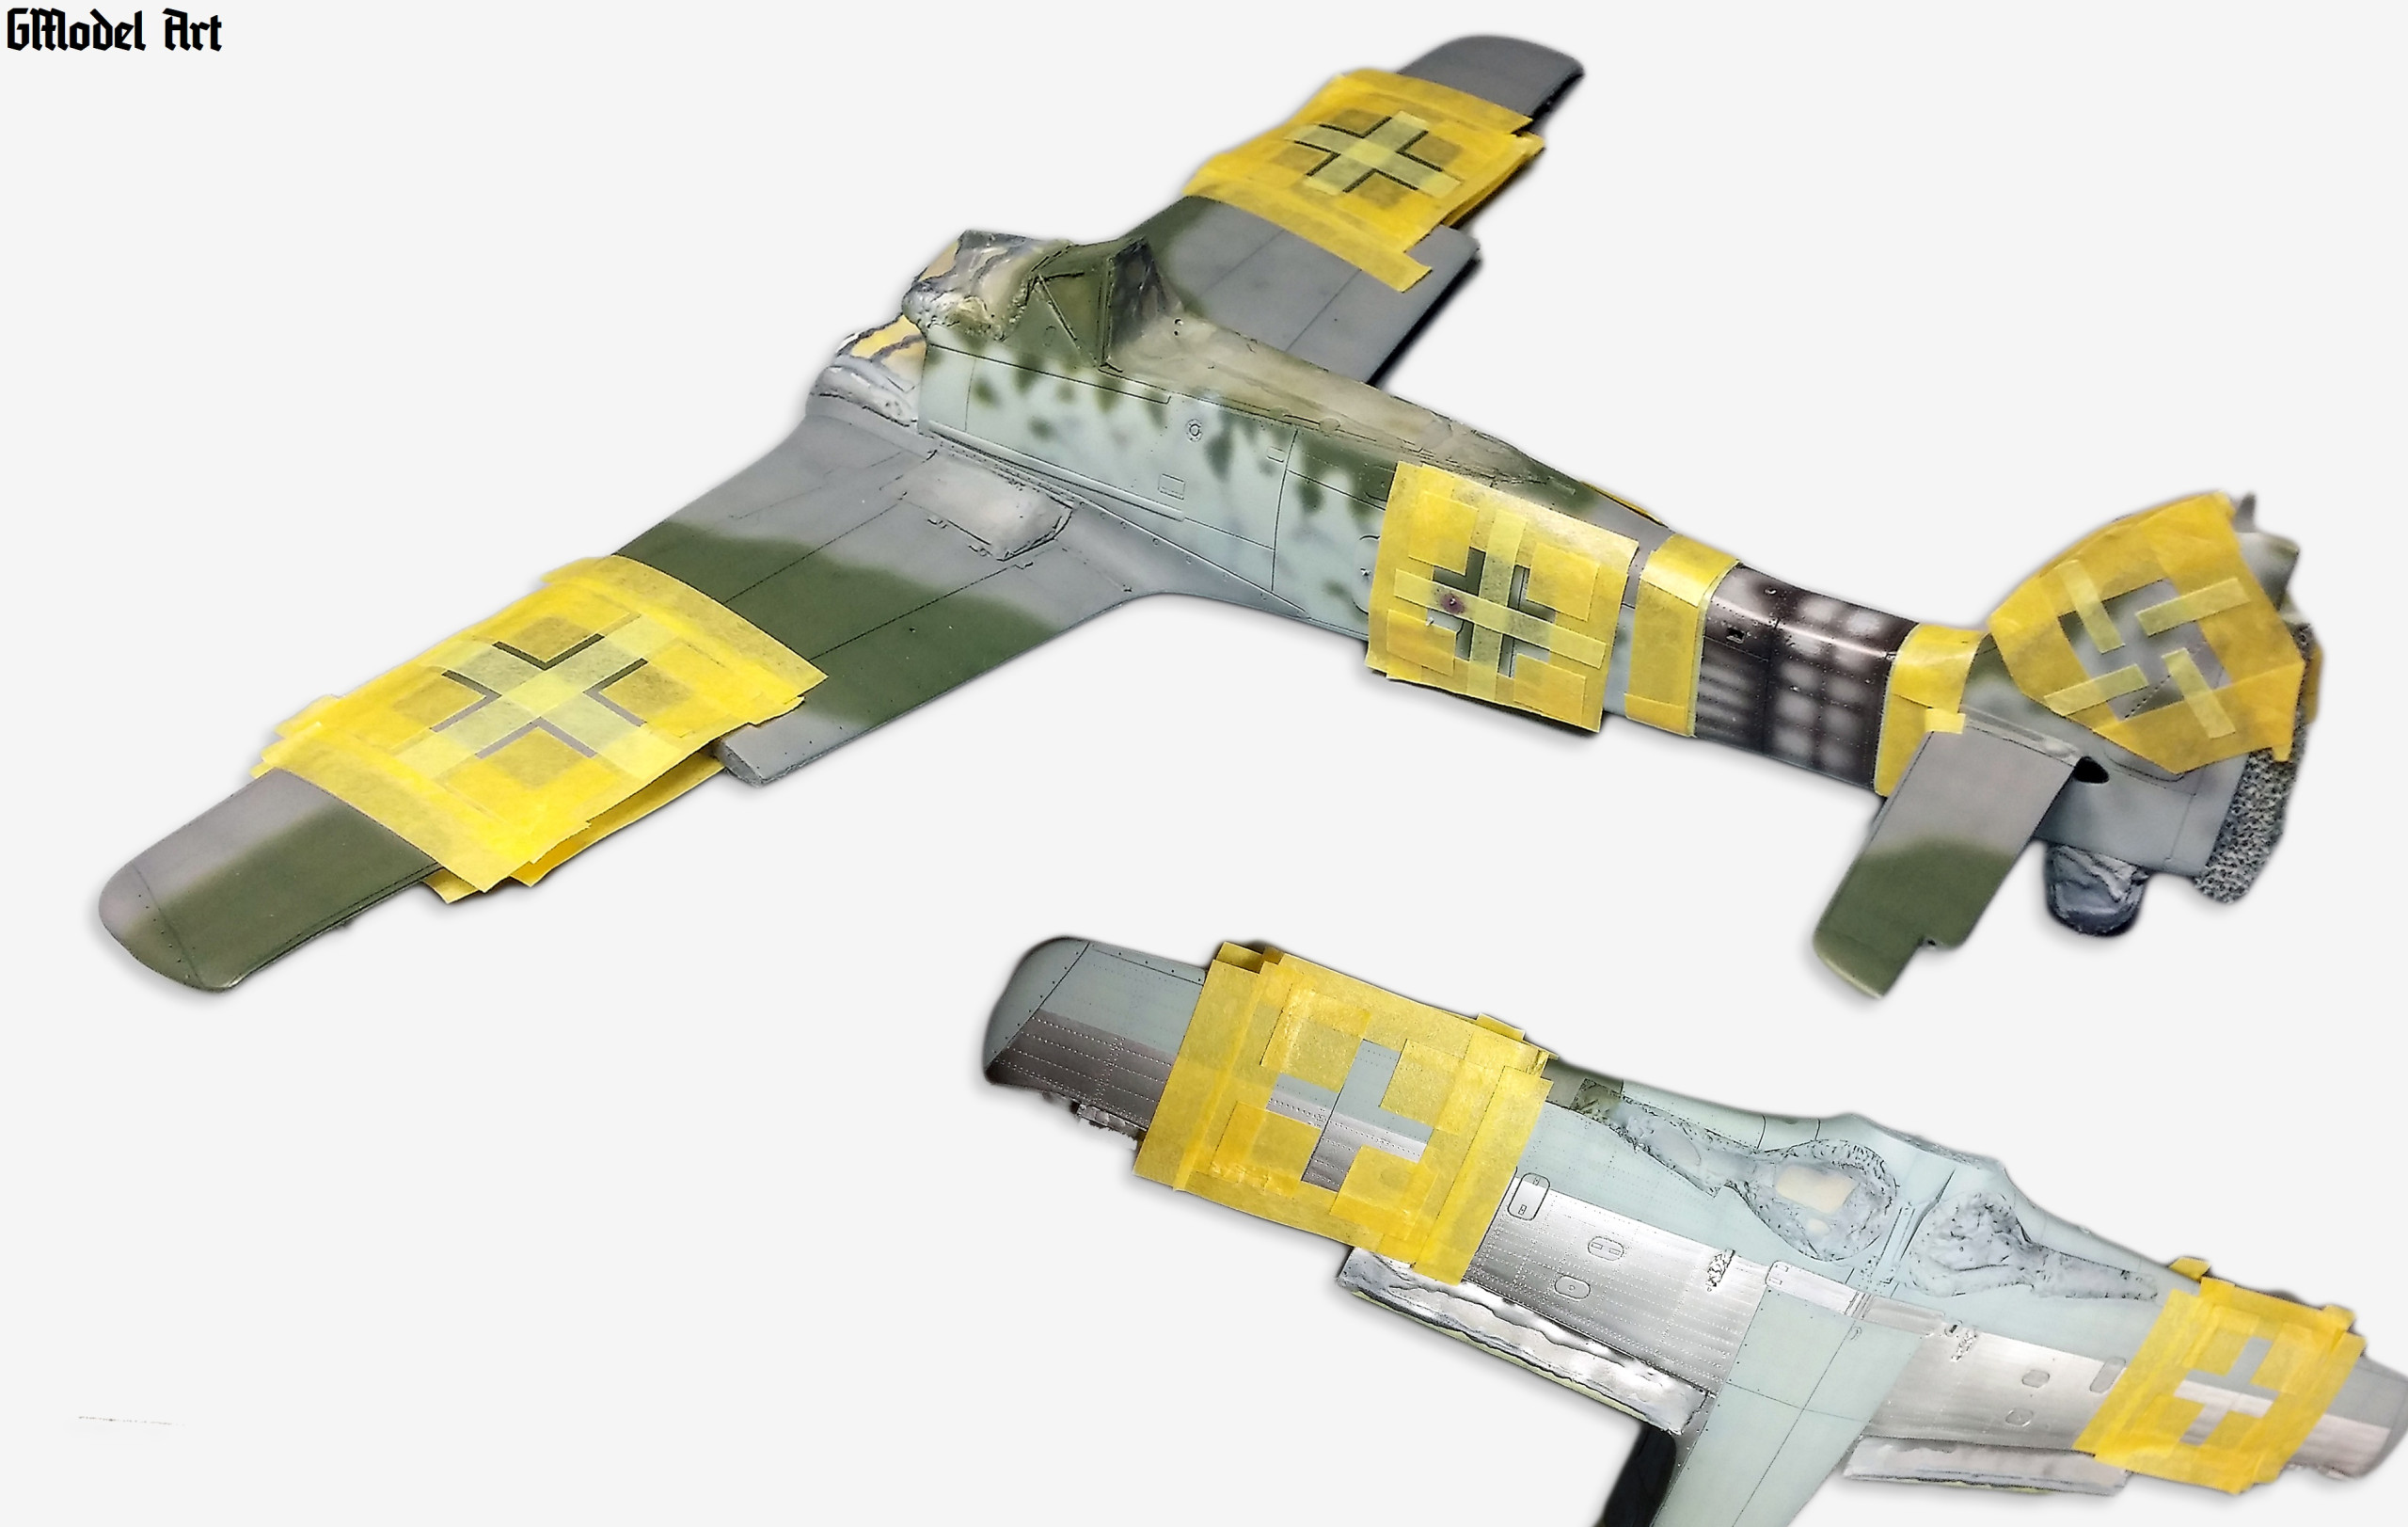
This was followed by coverage of the surface by using masks for future marking including identification strips. To this I used airbrush. The rest of markings and labels are decals Eduard and AJ Press applied to shiny surface using a decal solution GSI.
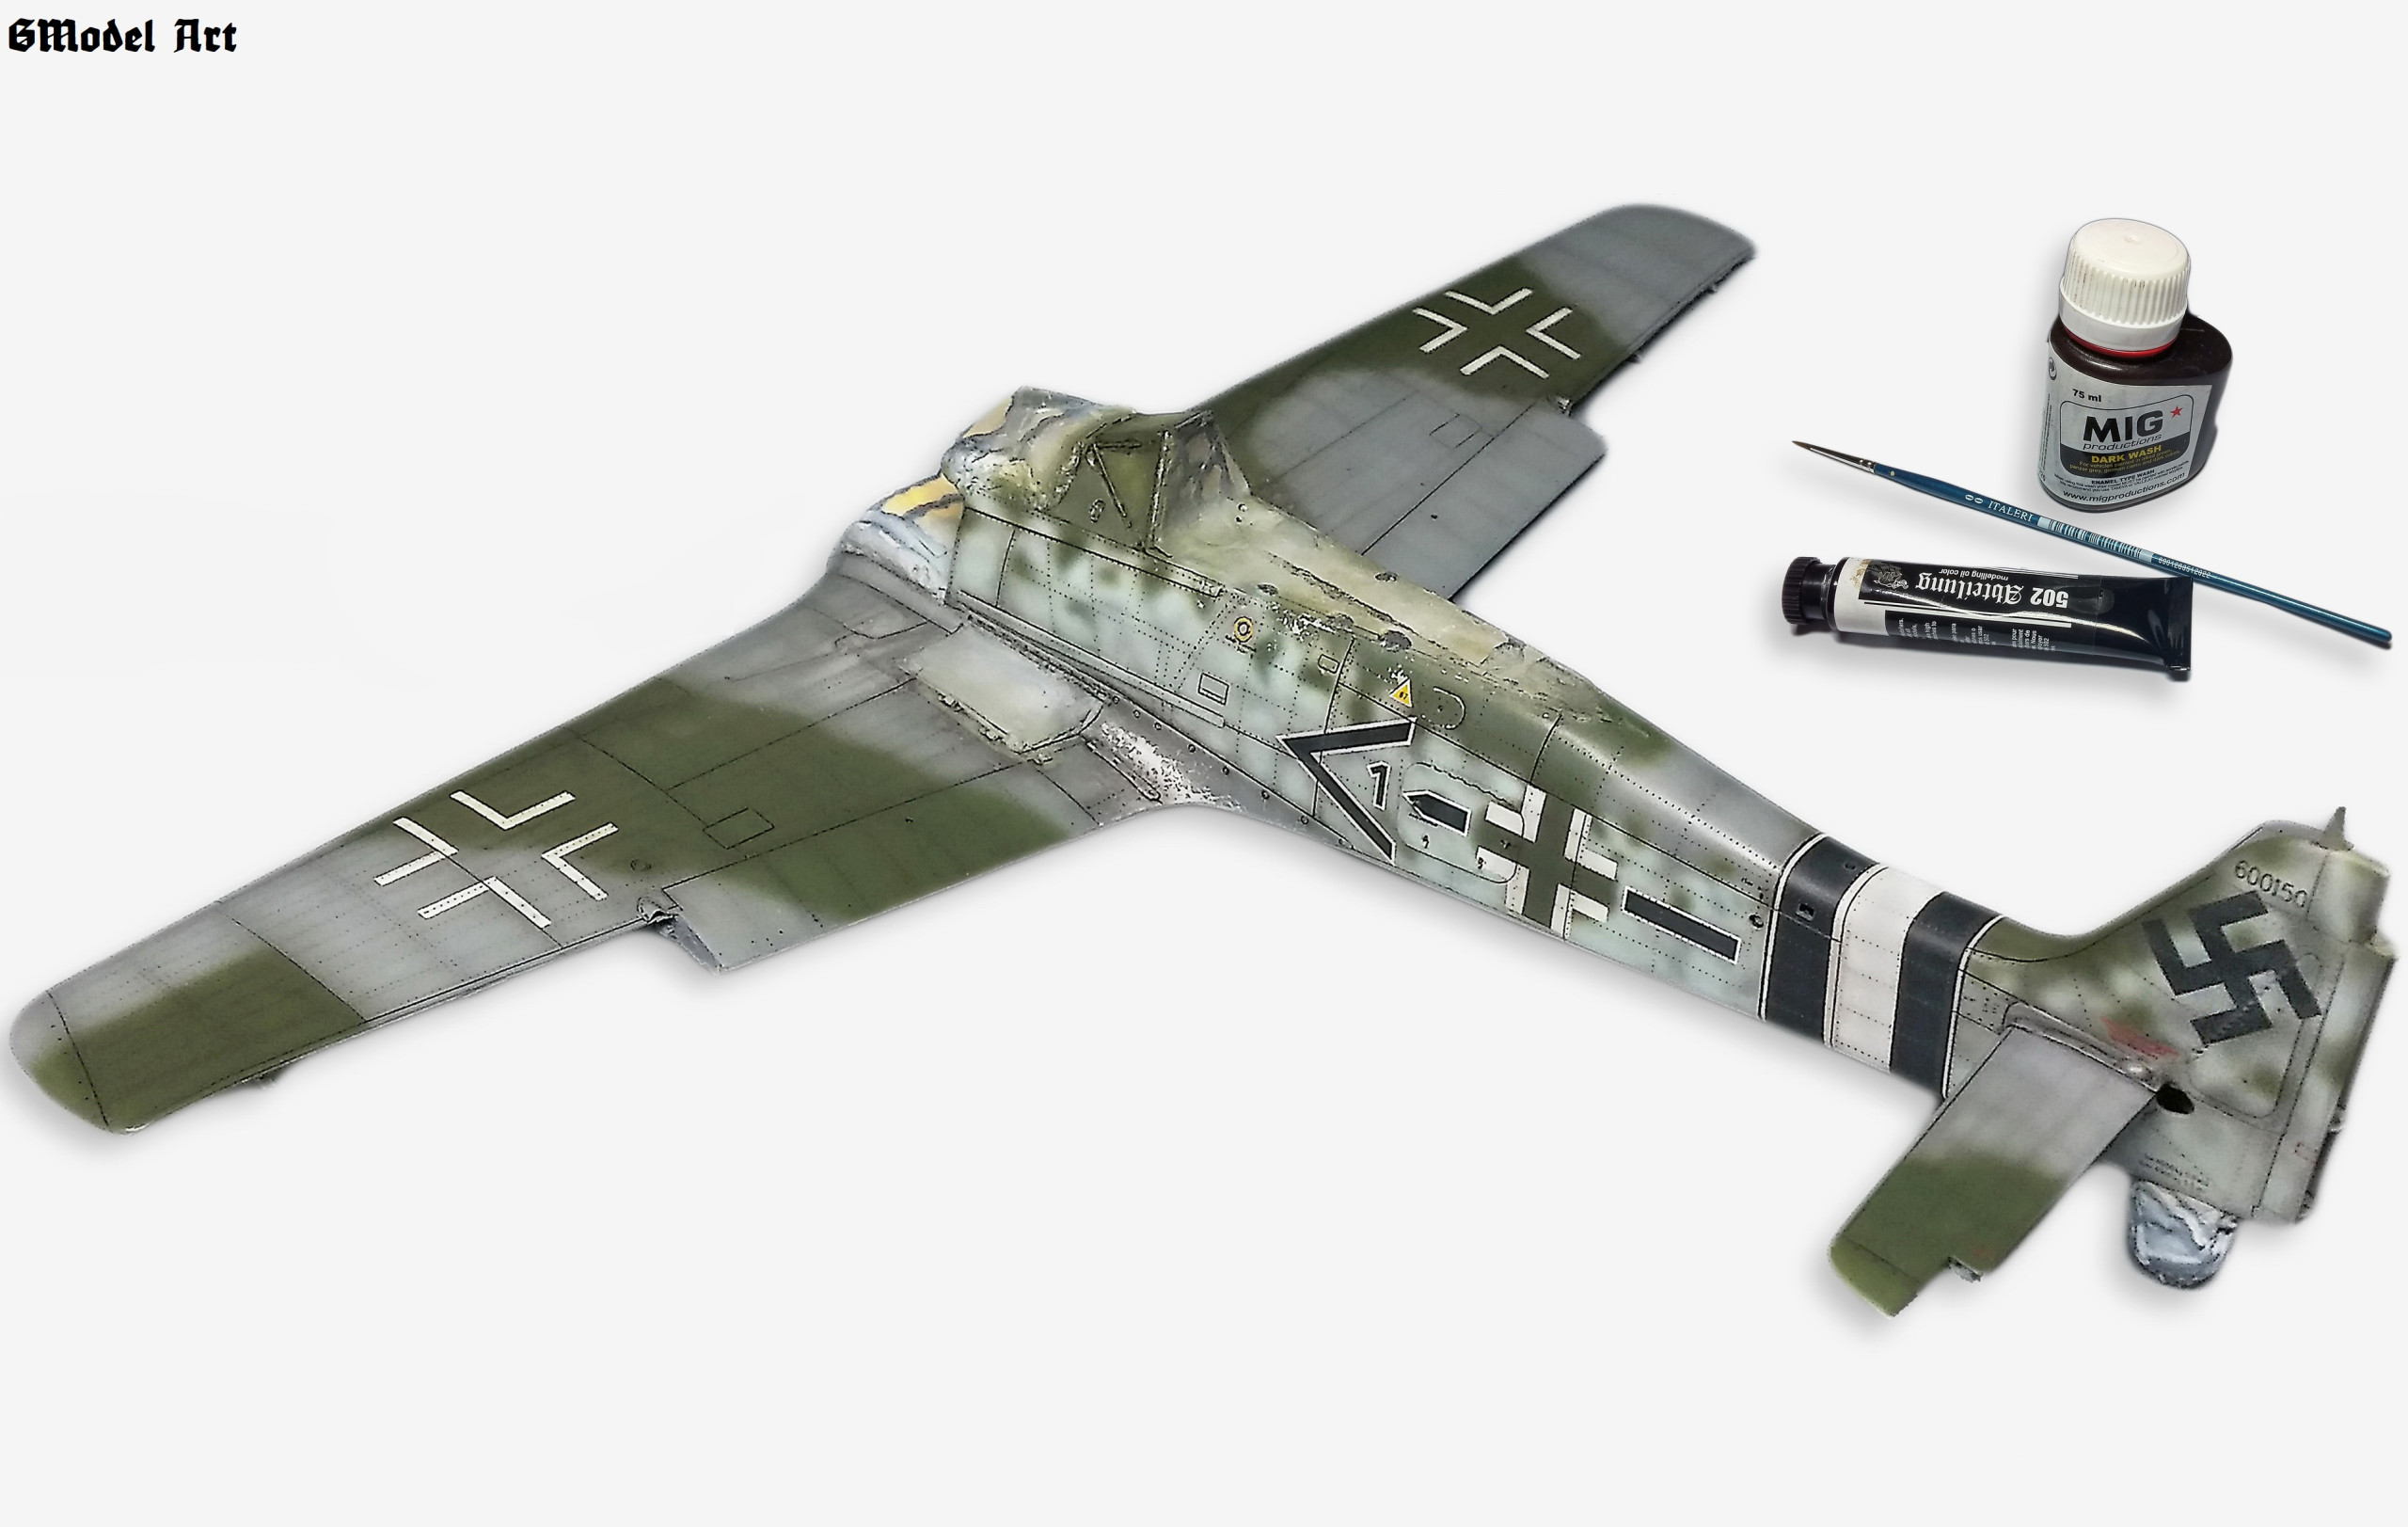
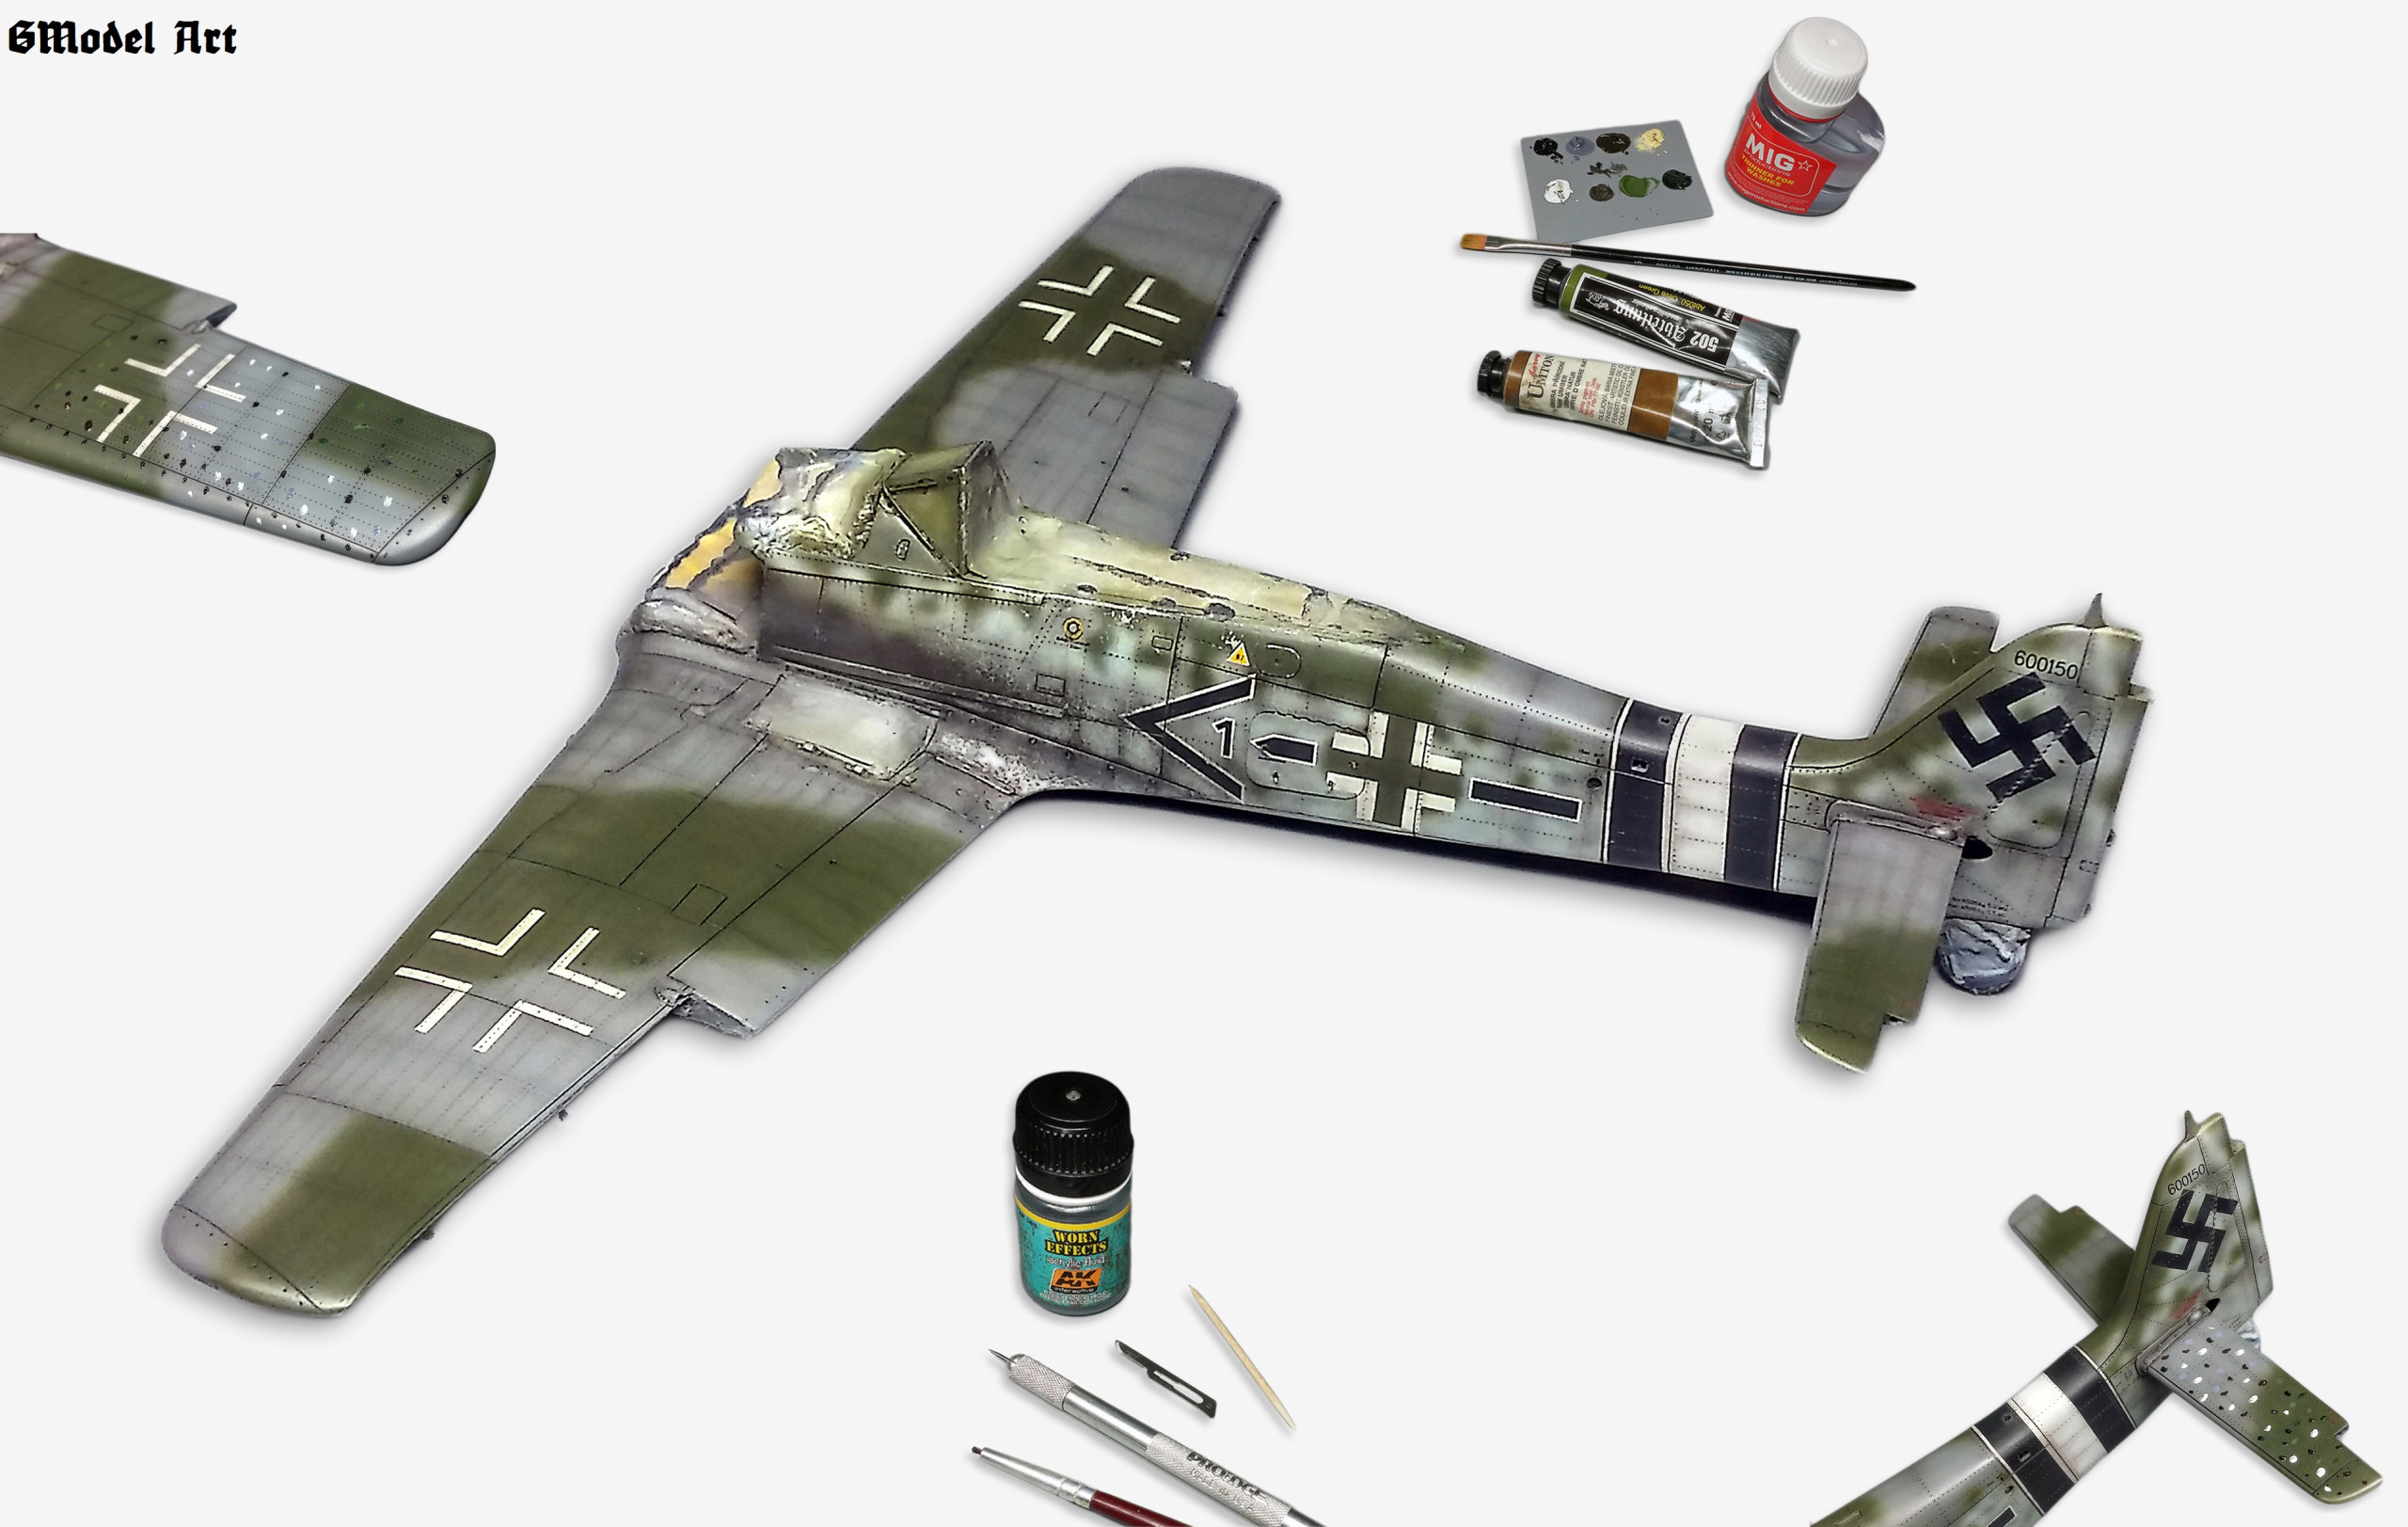
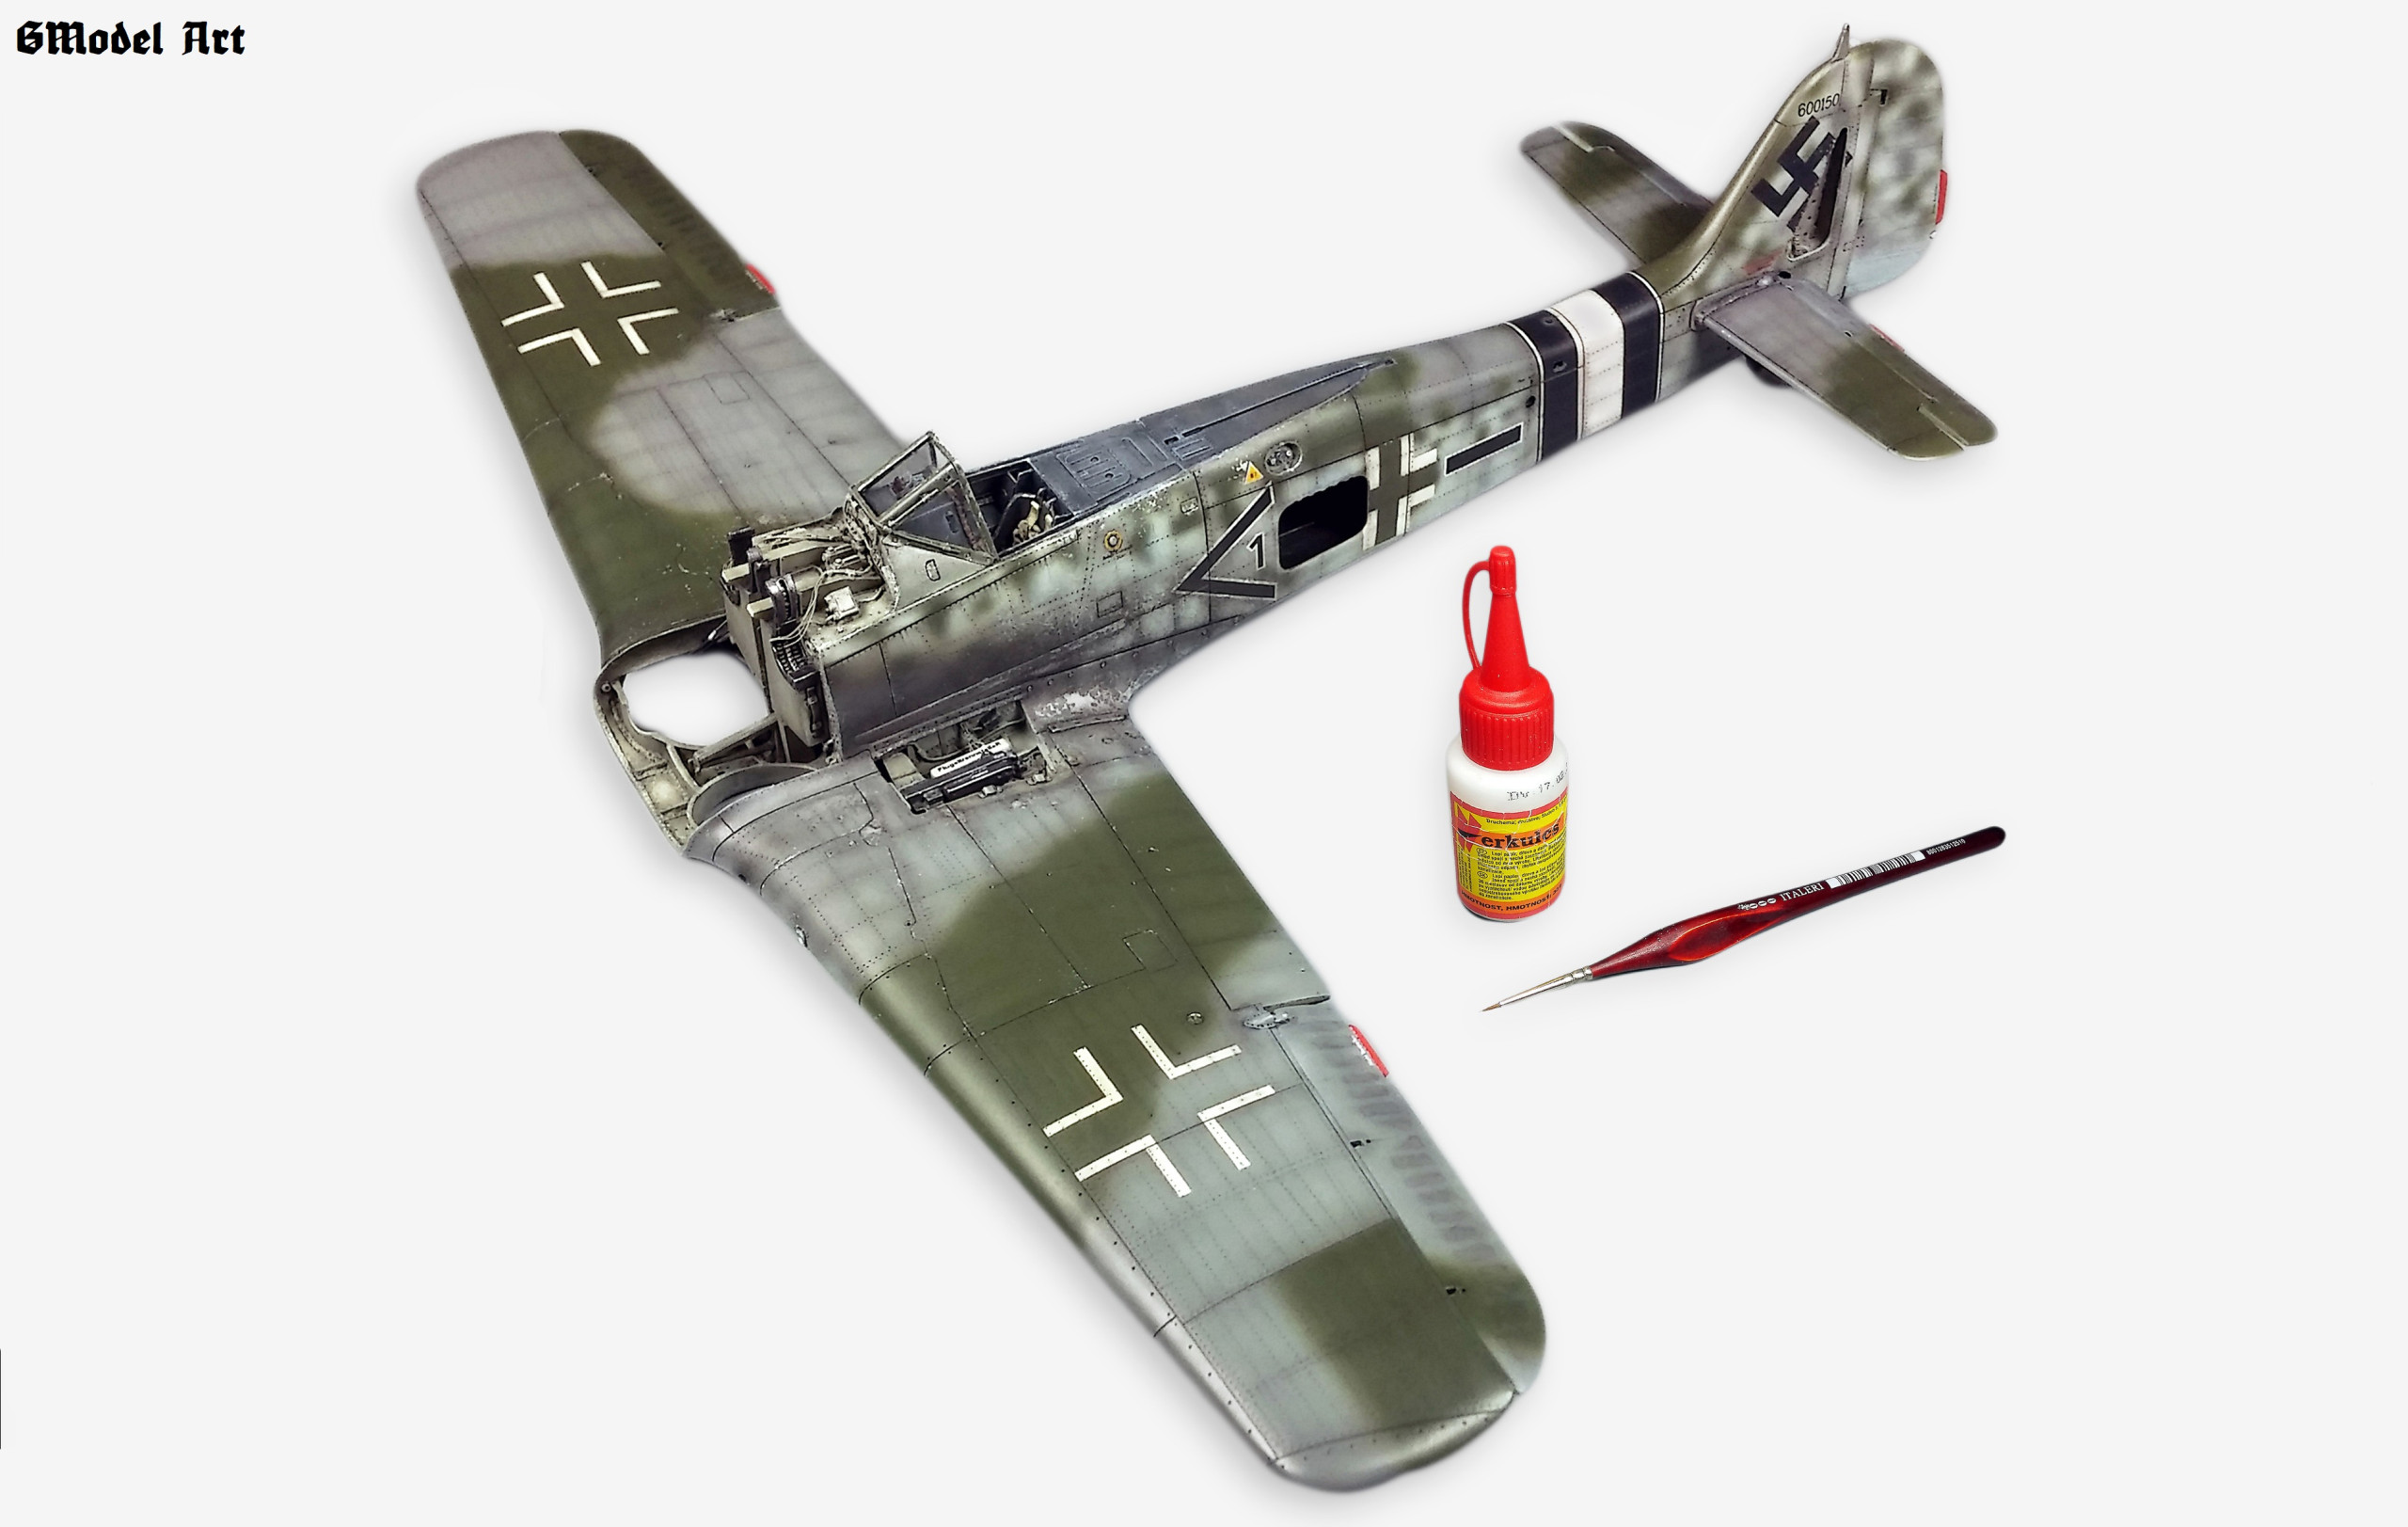
Then came a series of lengthy operating patina and weathering for entire surface. Always I try to use a variety of methods and means for achieving the best result. Nothing must hurry because each method provides something very special for the surface.
First „Chipping“ which is scraping of damp surface to the metal color base using hard brush, toothpick, needle etc. in places it was used a peeling preparation. Followed by adding minor scratches and gentle peeling paint with thin brush, coloured pencils, pencil. Than dark „Wash“ embedded into the lines of surface panels and rivets lines as well and mopped it after partial drying by cotton ear cotton tampons. There was even „Fading“ which is stippling shades of oil paints and the subsequent wiping brush dampened in a thinner MIG. This will increase the vividness of shadow colors. In some places I combined dust pigments and oil paints. Spraying smoky color for cannons, exhausts and holes on fired bullets was also needed in some places slightly patinated. The last step was an indication of leakage of operating fluids with using oil colors, lighten of the edges using the technique of „dry brush“ and the protection of surface with layer semi gloss warnish.
Final completion:
Now remained to complete the whole model of individual subassemblies, which was quite challenging especially in the construction of the engine and undercarriage.
I would like to especially mention that I was in some problematic cases unconventionaly also used my favorite water base glue „Herkules“ . It has quite exellent properties in comparsion with other glues that are traditionaly used in plastic modelling. These are mainly for smaller parts which already painted and patinated and there is a danger that damage or demolition of colors. Fof example poorly accesible parts where sometimes we need more experiments and time to fix. If anything goes wrong, there is no problém to remove it with brush dipped in water and just start over again. Without risk this also removes an excess glue around glued and painted parts – unlike cyanoacrylate glue and following using of debonder would be demaged paint area around. Herkules dries to satin-matt finish. I tis also advantage, because the joint is basically invisible, flexible and does not crack and after drying pretty strong. Glue Herkules is diluted with water to the desired density and then applied with thin brush. After complete drying produces very thin layer. For me it is an indispensable and very cheap tool.
Since the cover of cabin „black 1“ had no tensioner pulley the rope of antenna remained slack and fall beside fuselage. So I did it out of thin copper wire and colored with a dark metallic color. It can then be creeping up on the model. Insulators are adapted from plastic tube pulling over small flame. To complete the model still lacks hand made a small spring in the end of the antenna rope and it is finally done.
Conclusion:
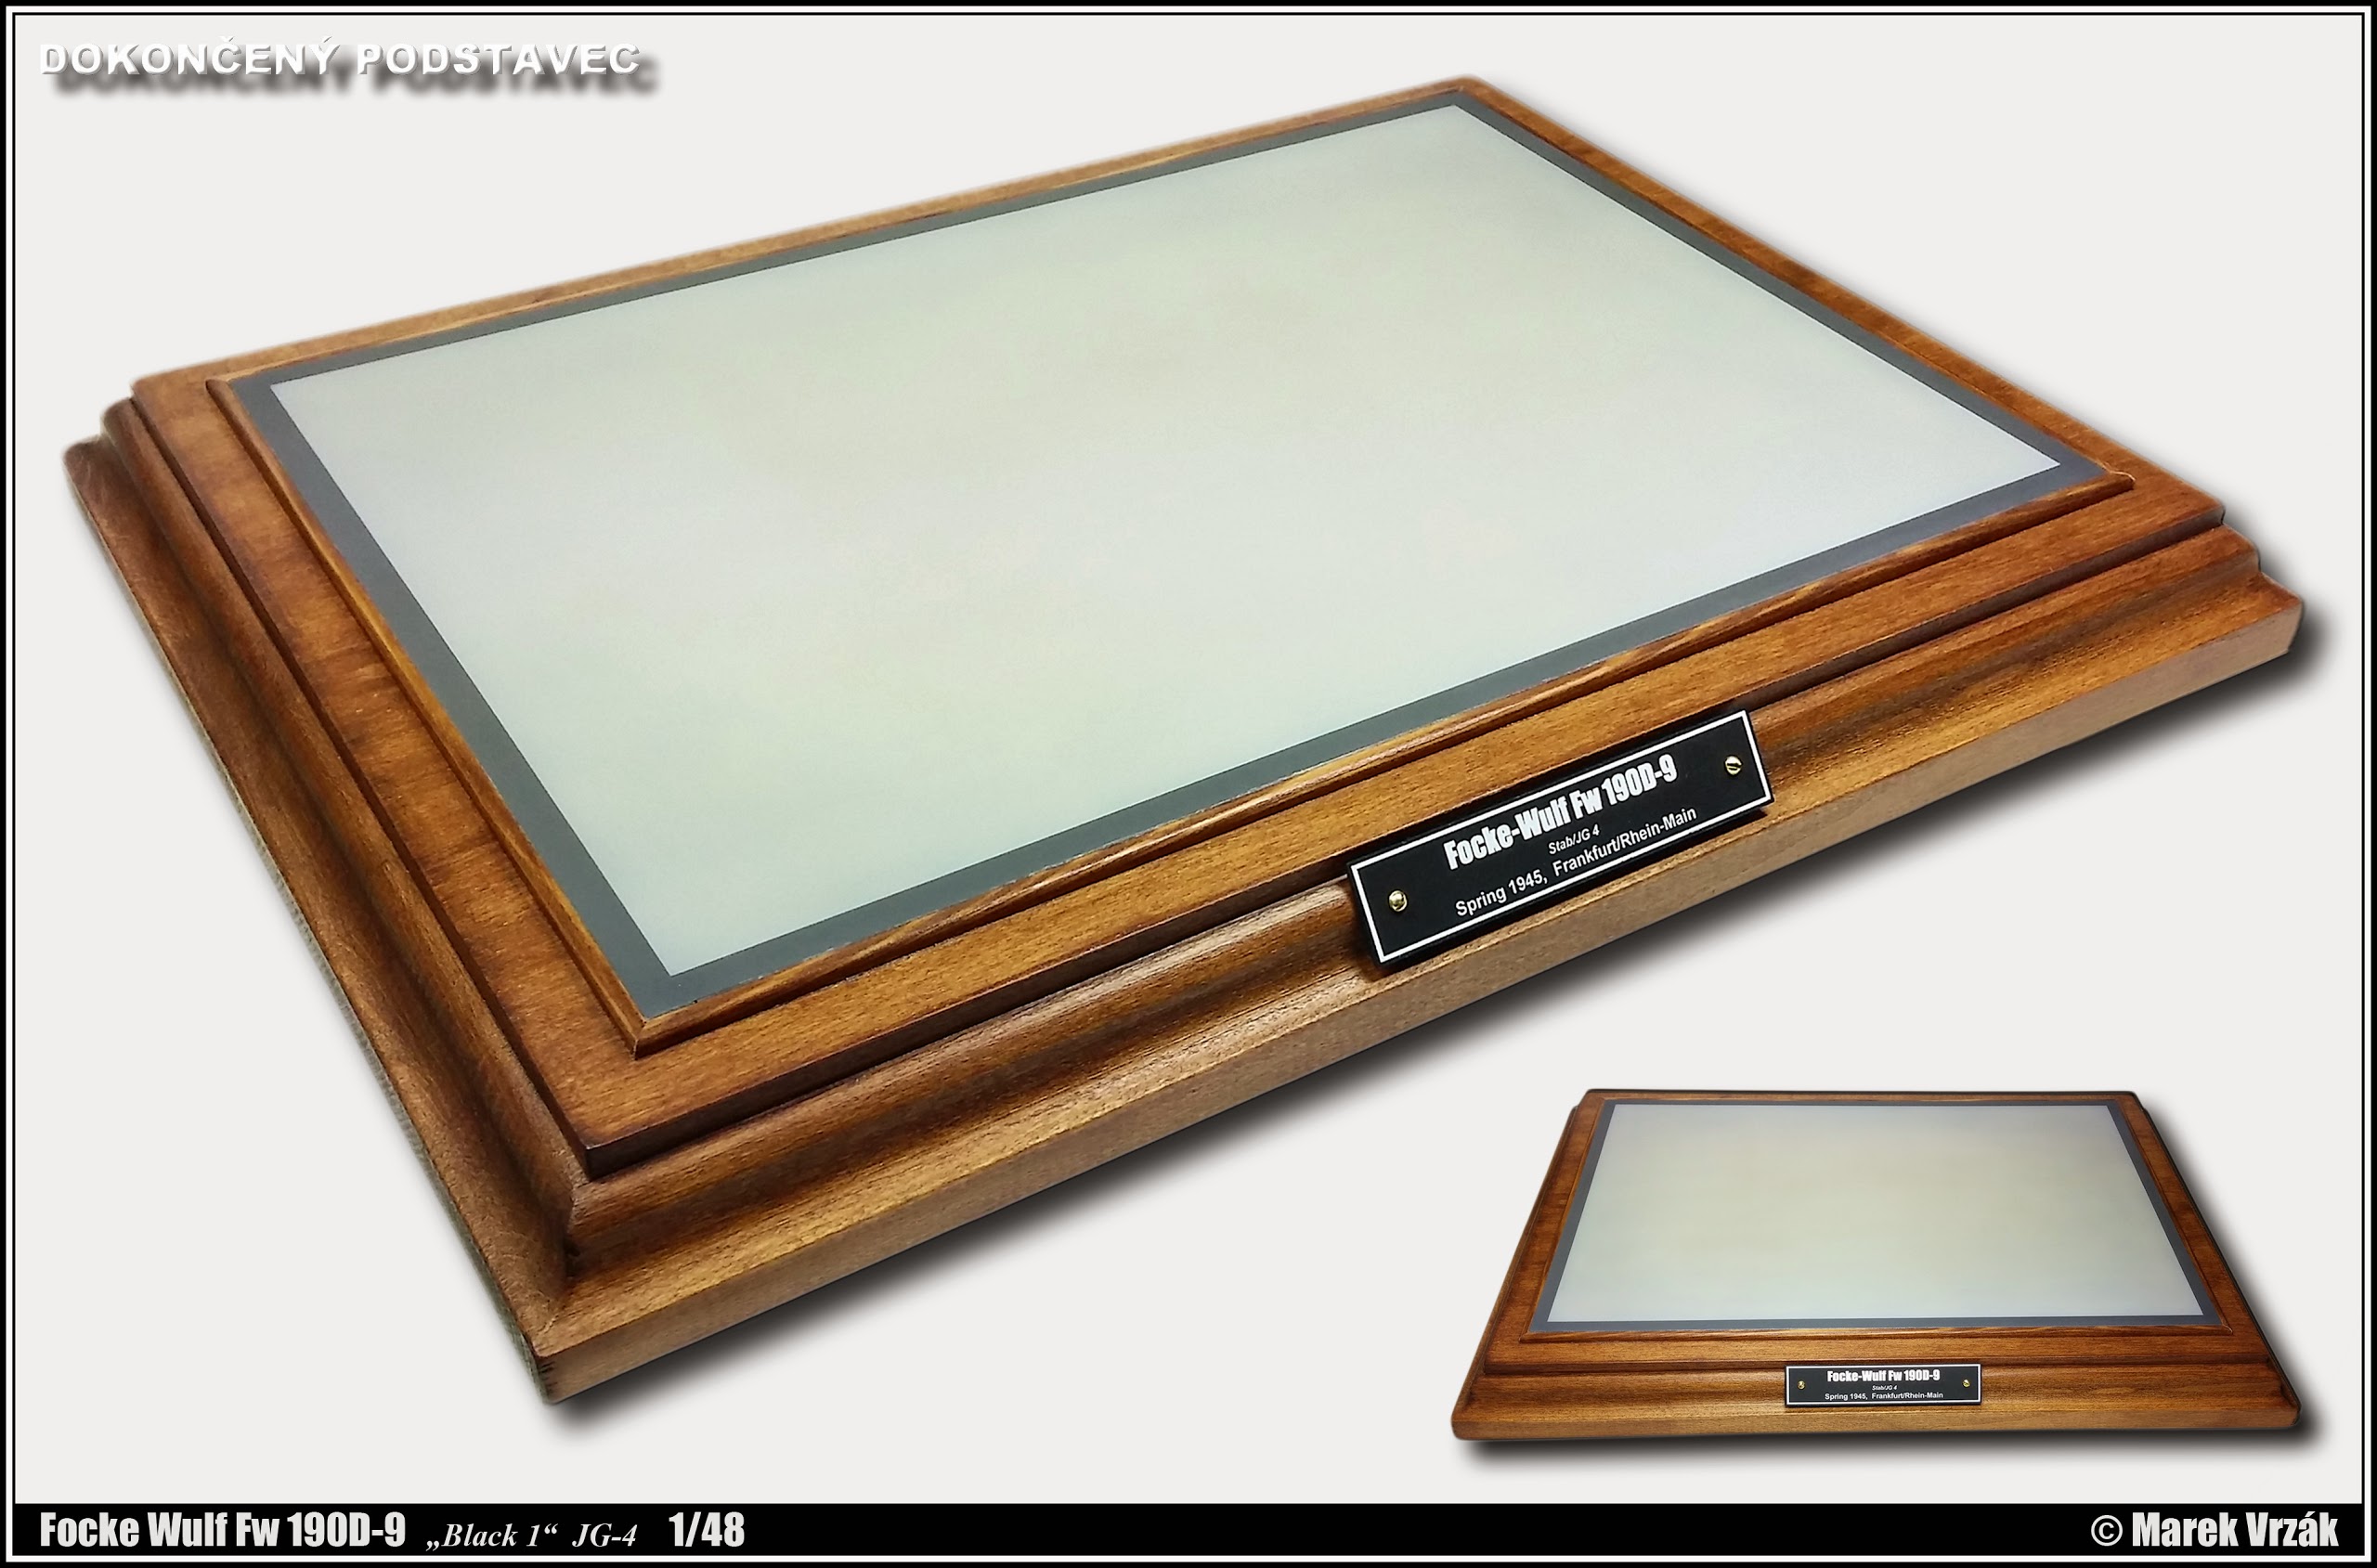
For the model of Dora I ordered a wooden pedestal custom-made. I stained it with several layers of walnut shade. I used also balsa wood profiles and made a tiny frame around the upper plastic plate and finally added an identification label.
Sources:
Focke-Wulf Fw 190D (camouflage & markings) Part I, II – JaPo
Focke-Wulf Fw 190D, Modelmania 7 – AJ-Press
Focke-Wulf Fw 190D Dora – Modeler´s Eye Series
Focke-Wulf Fw 190D – Aero Detail 2
Walk Around Fw 190D – Squadron/Signal Publications
The Internet