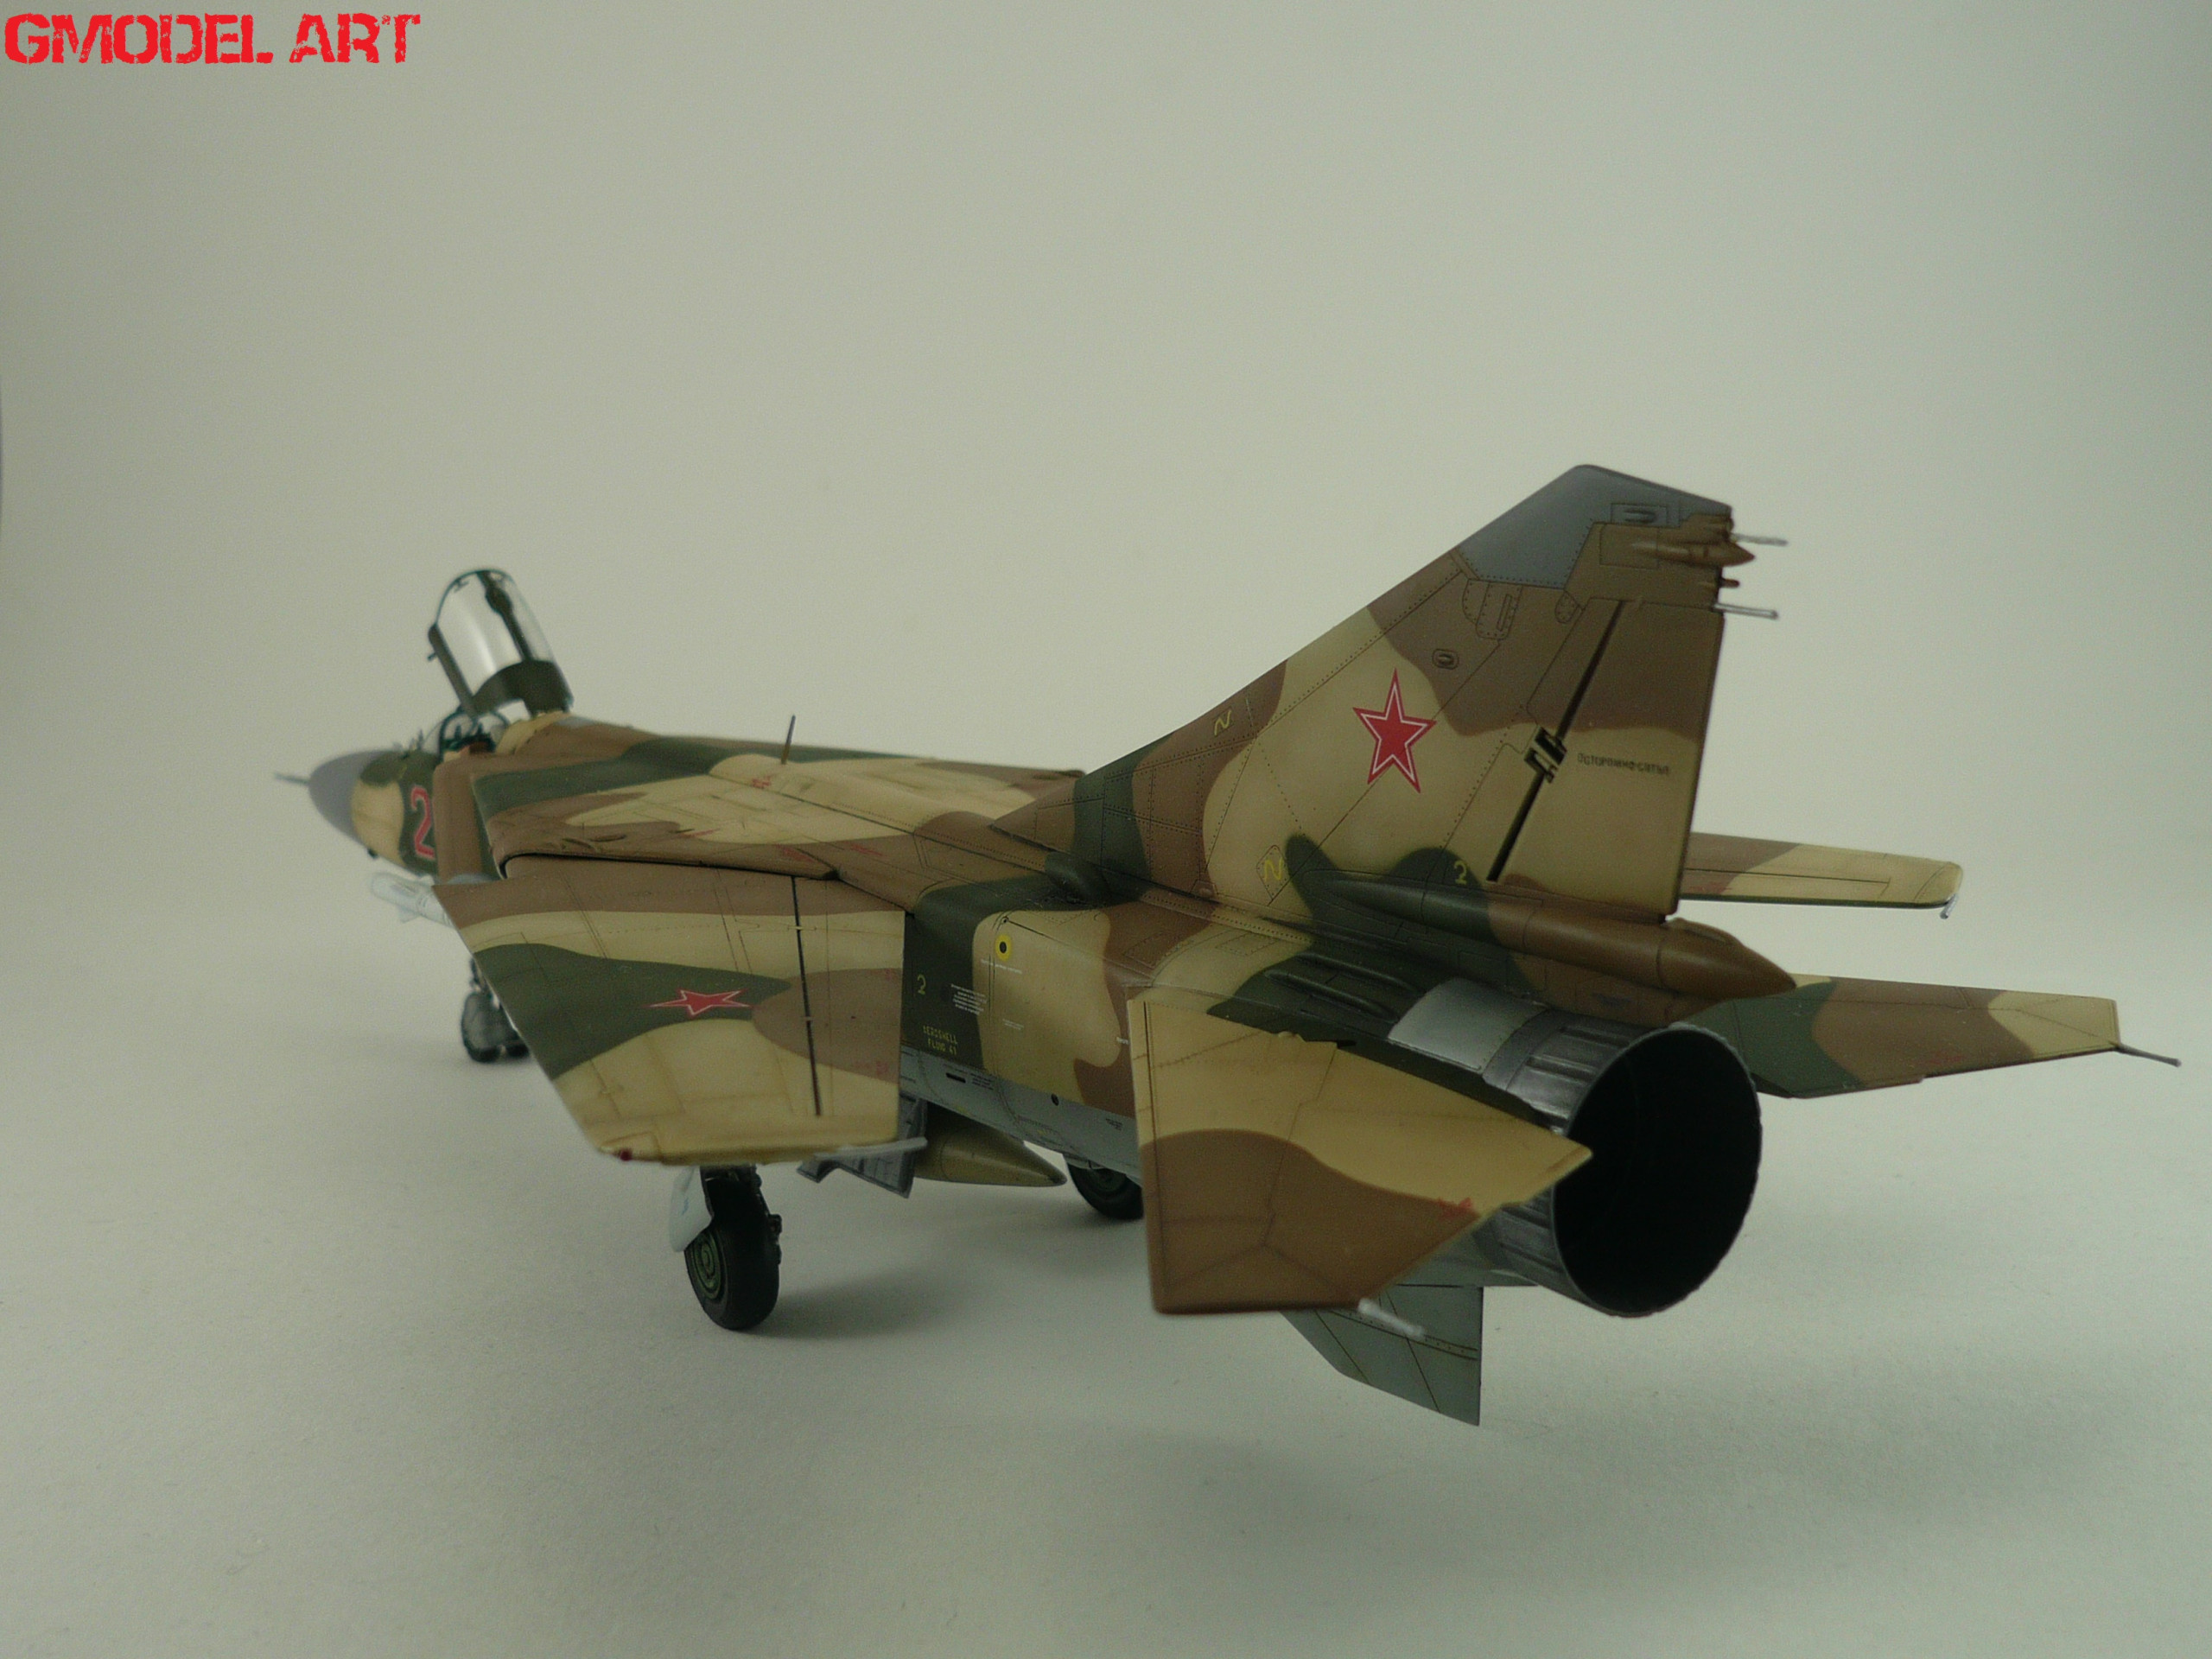
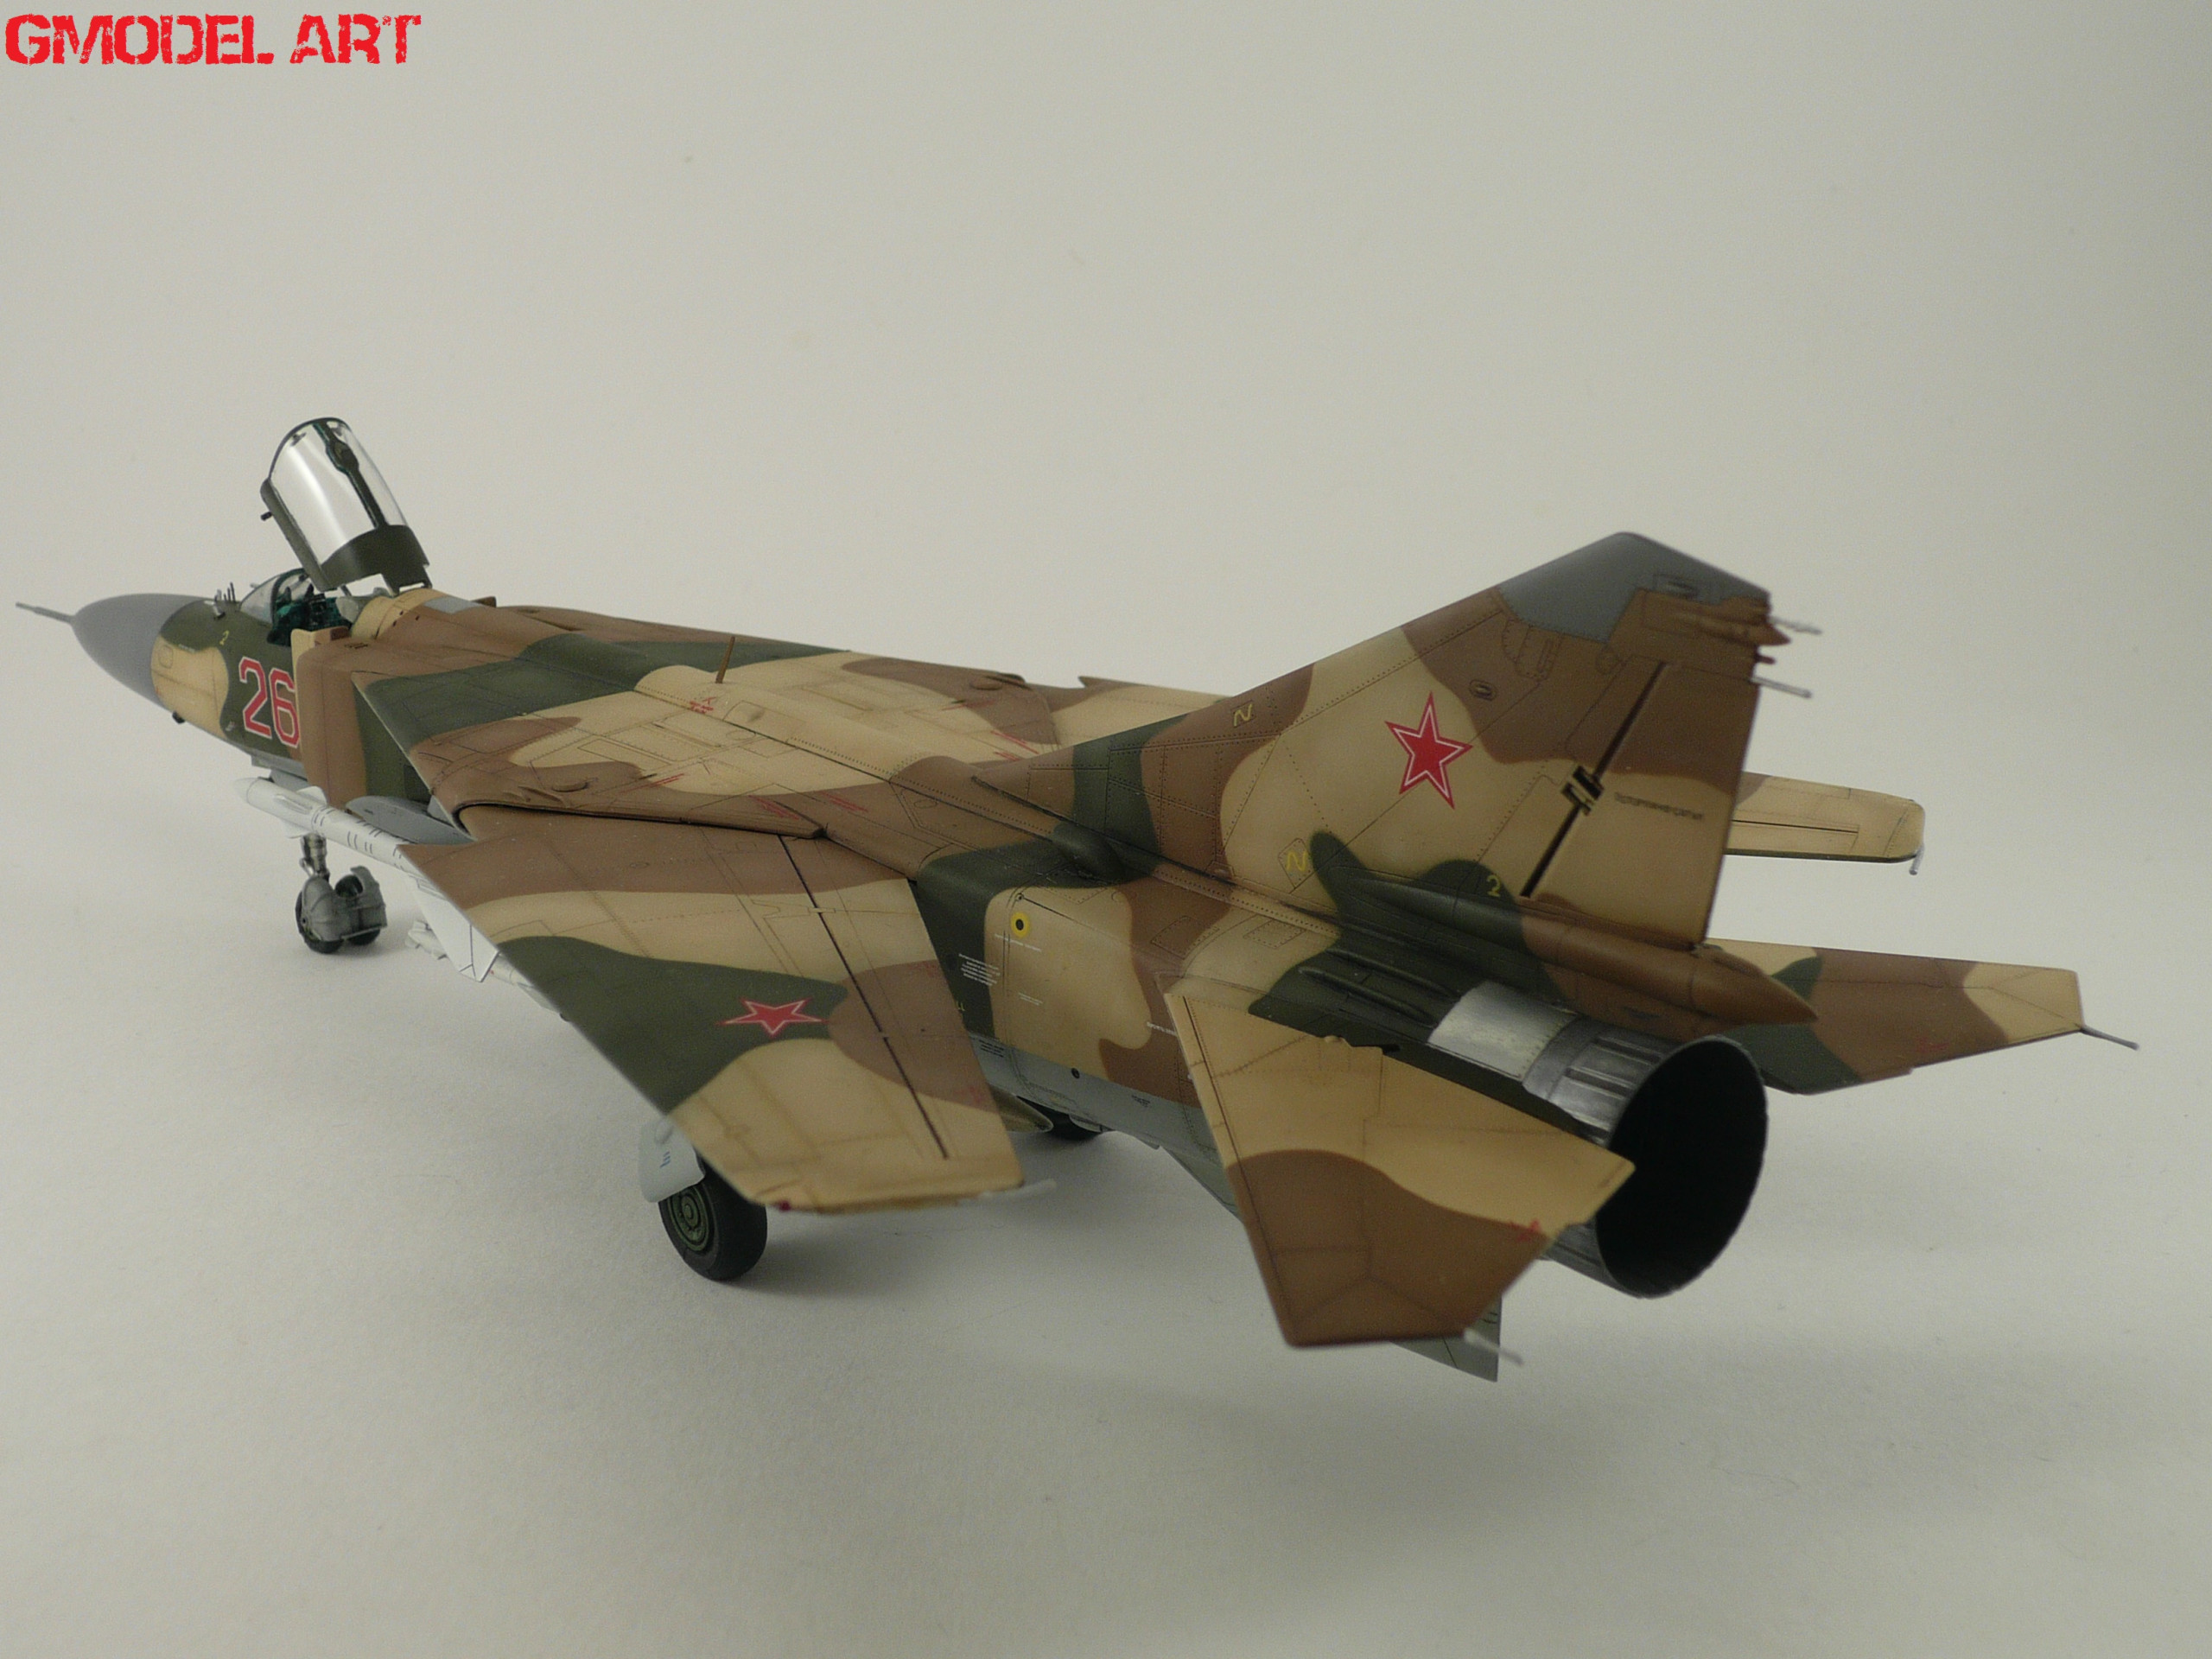
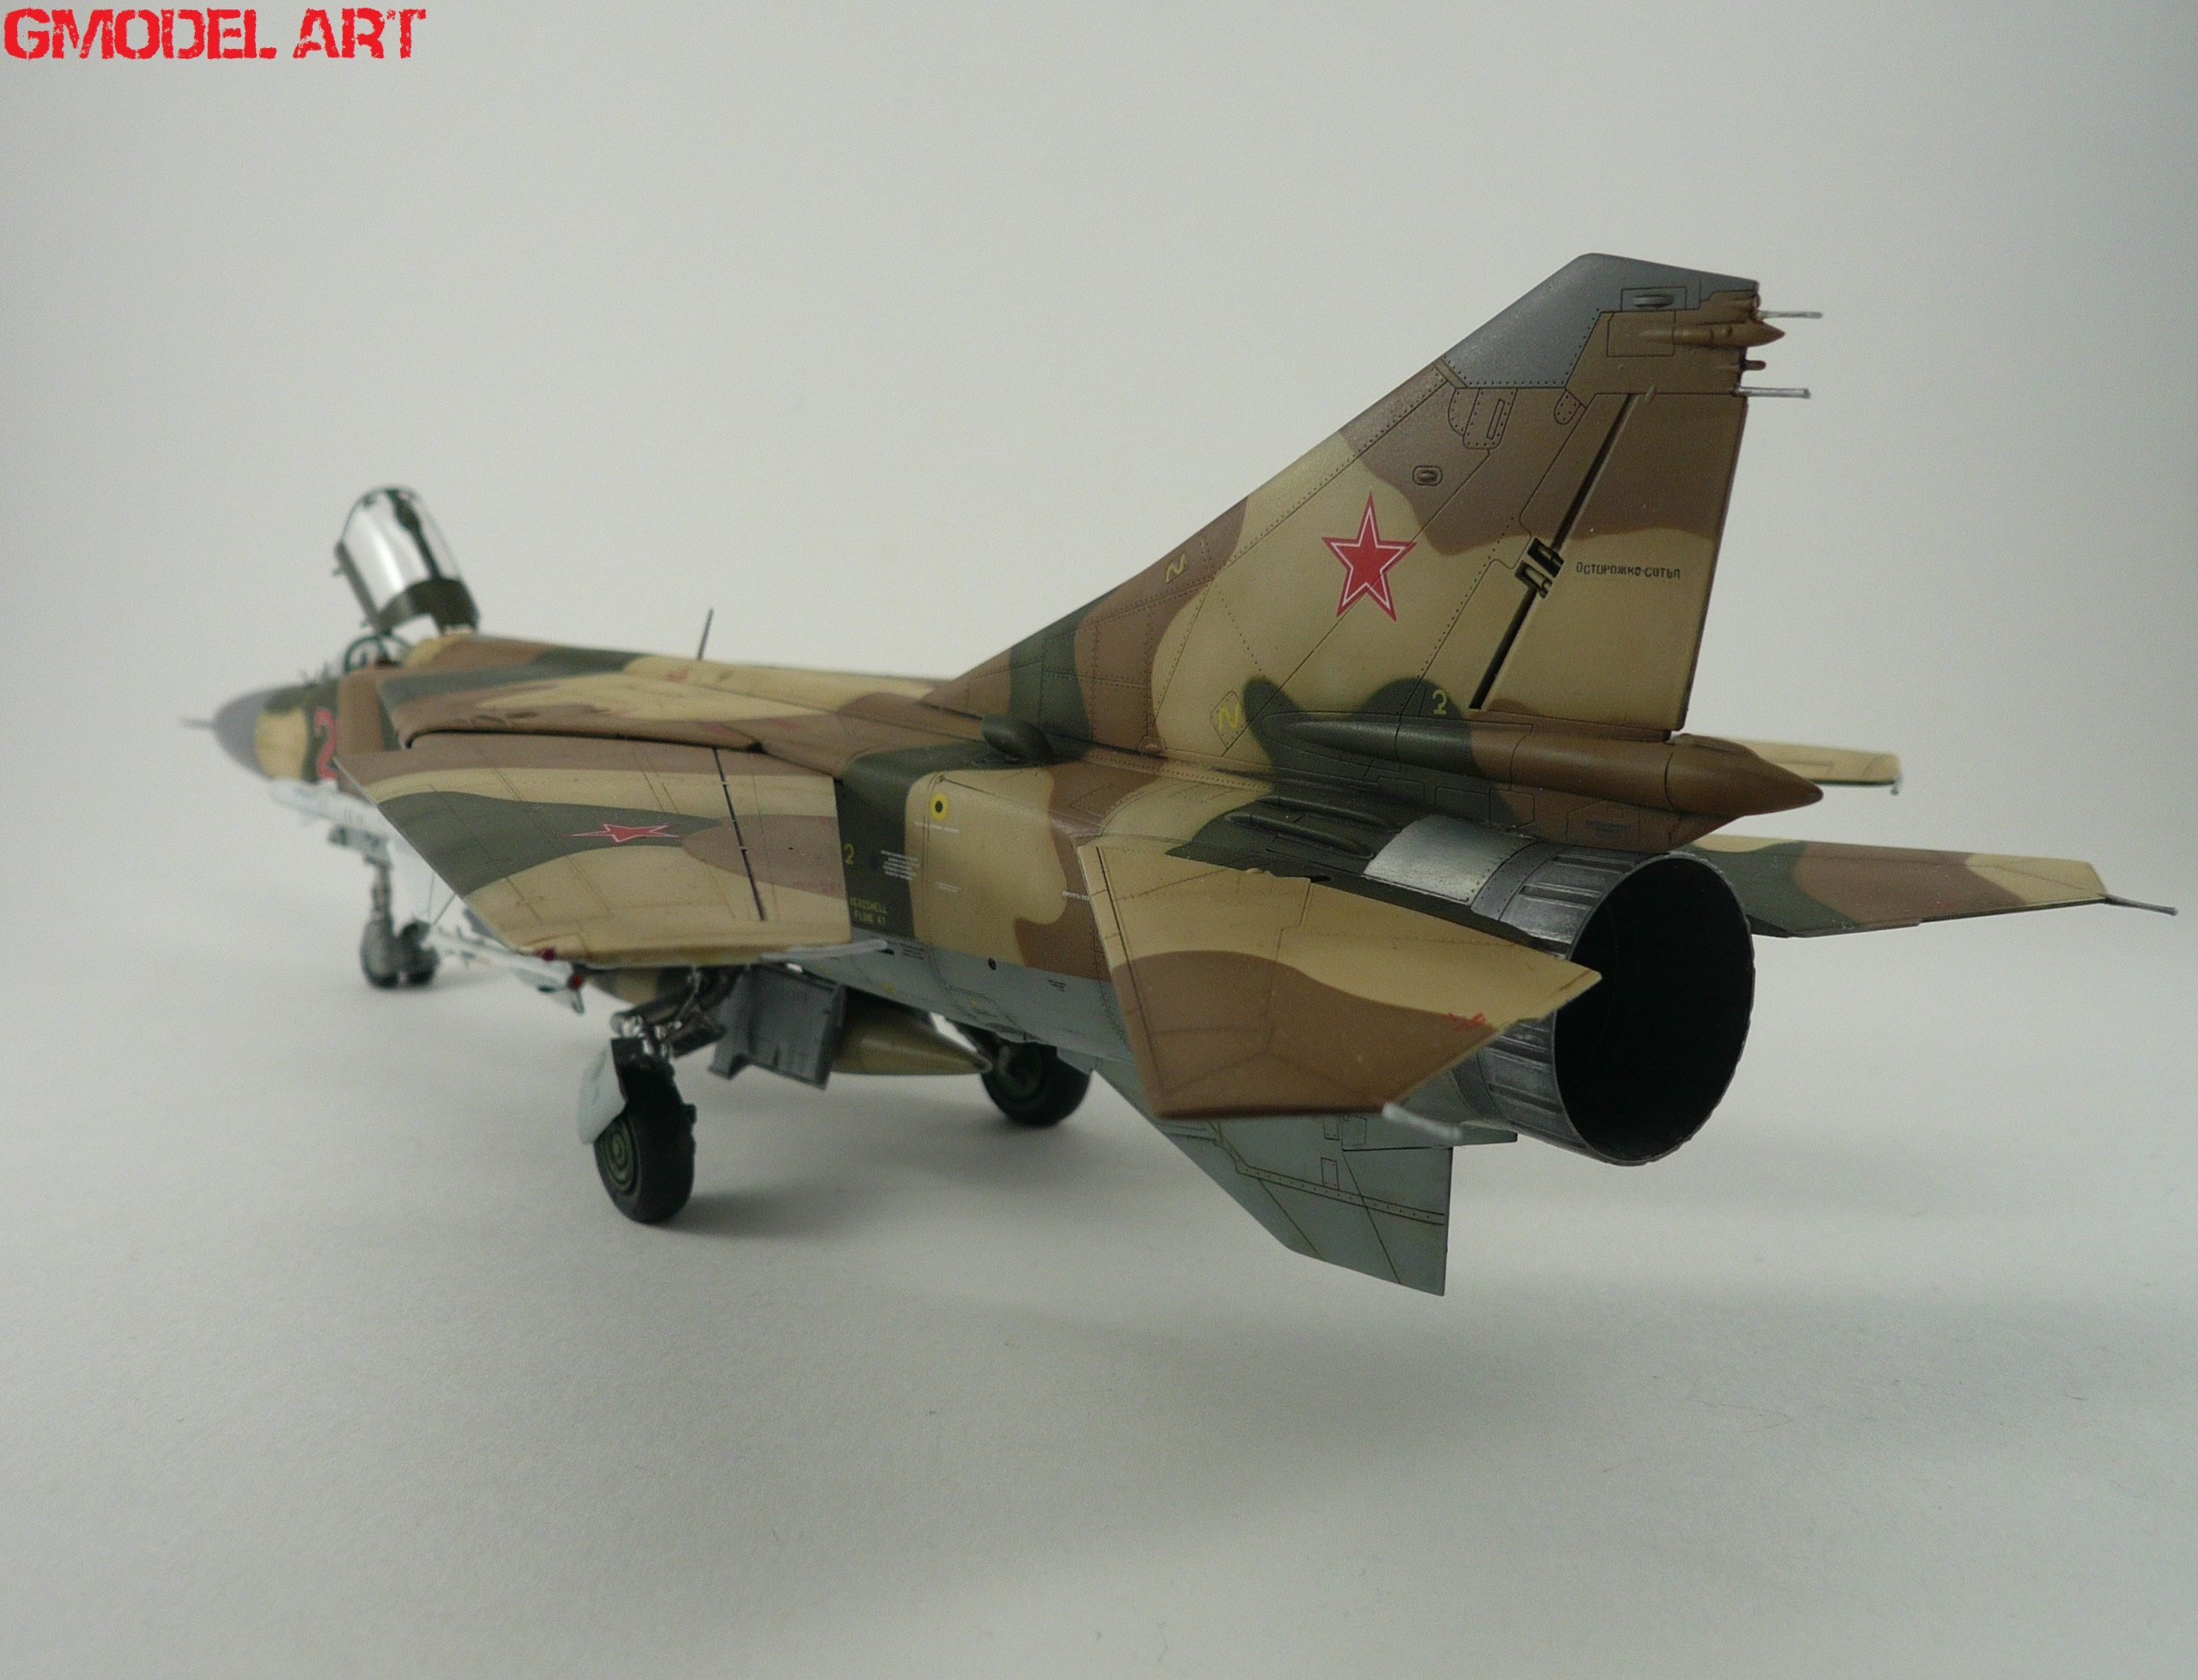
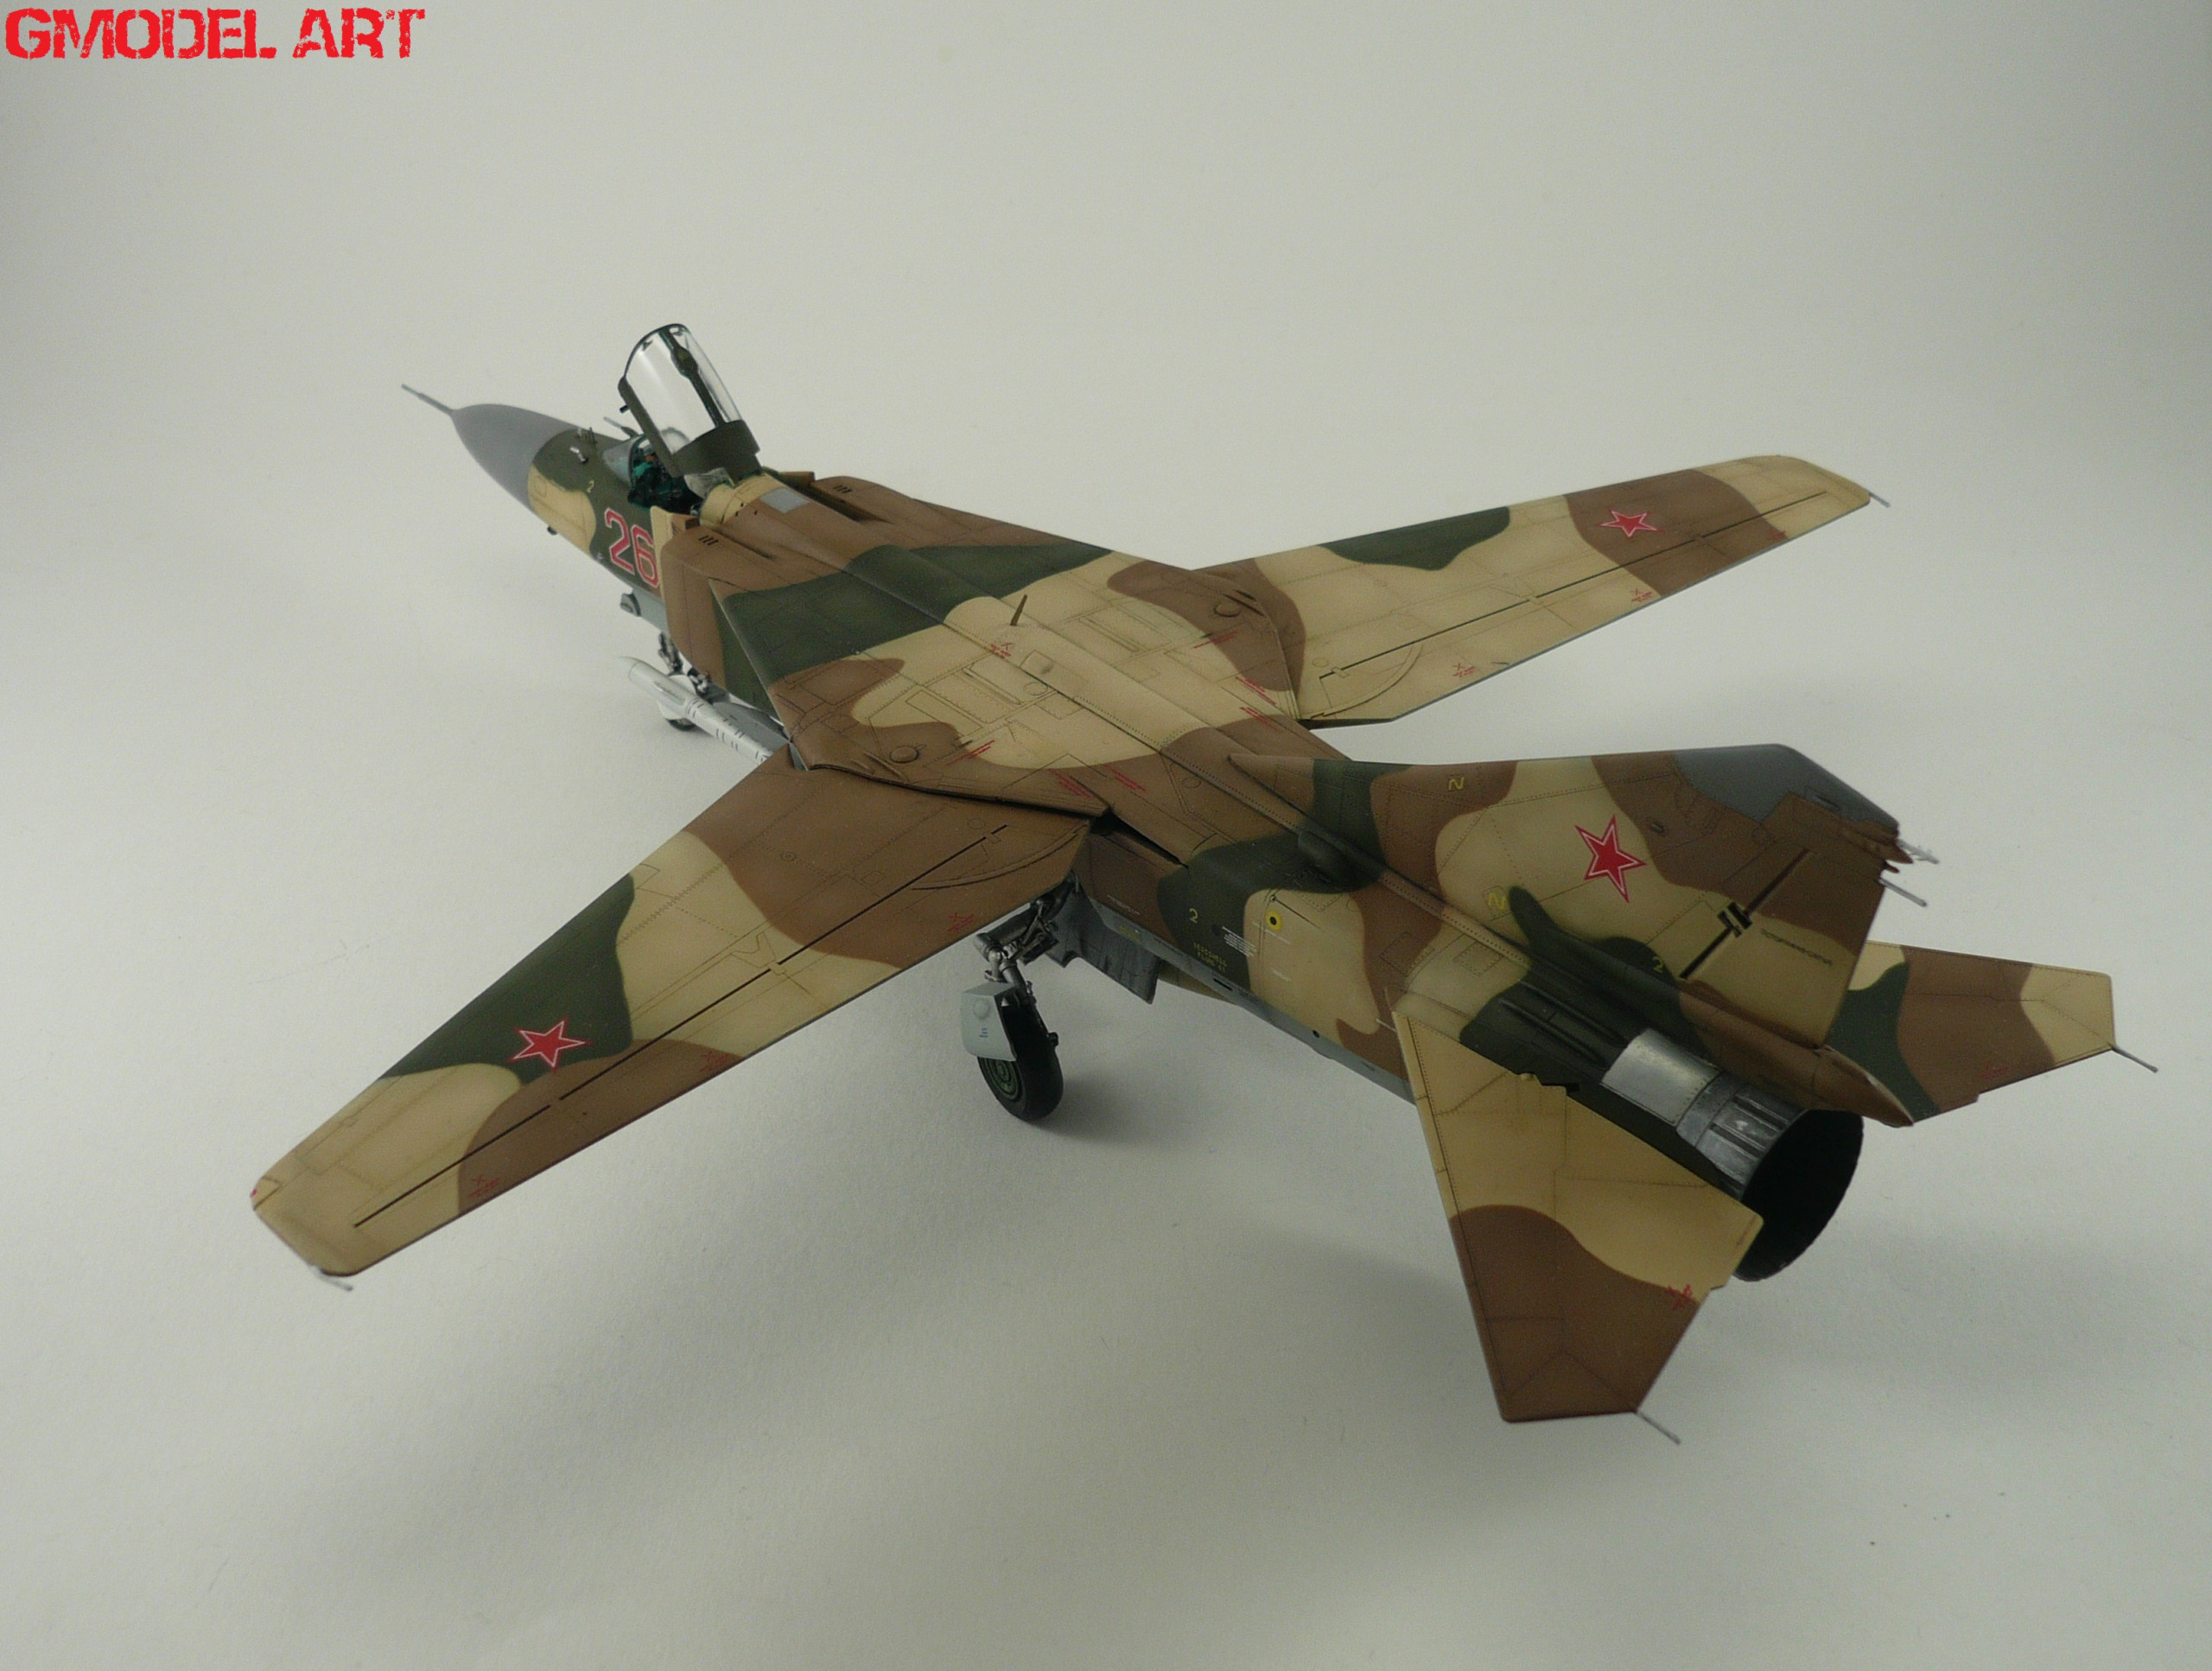
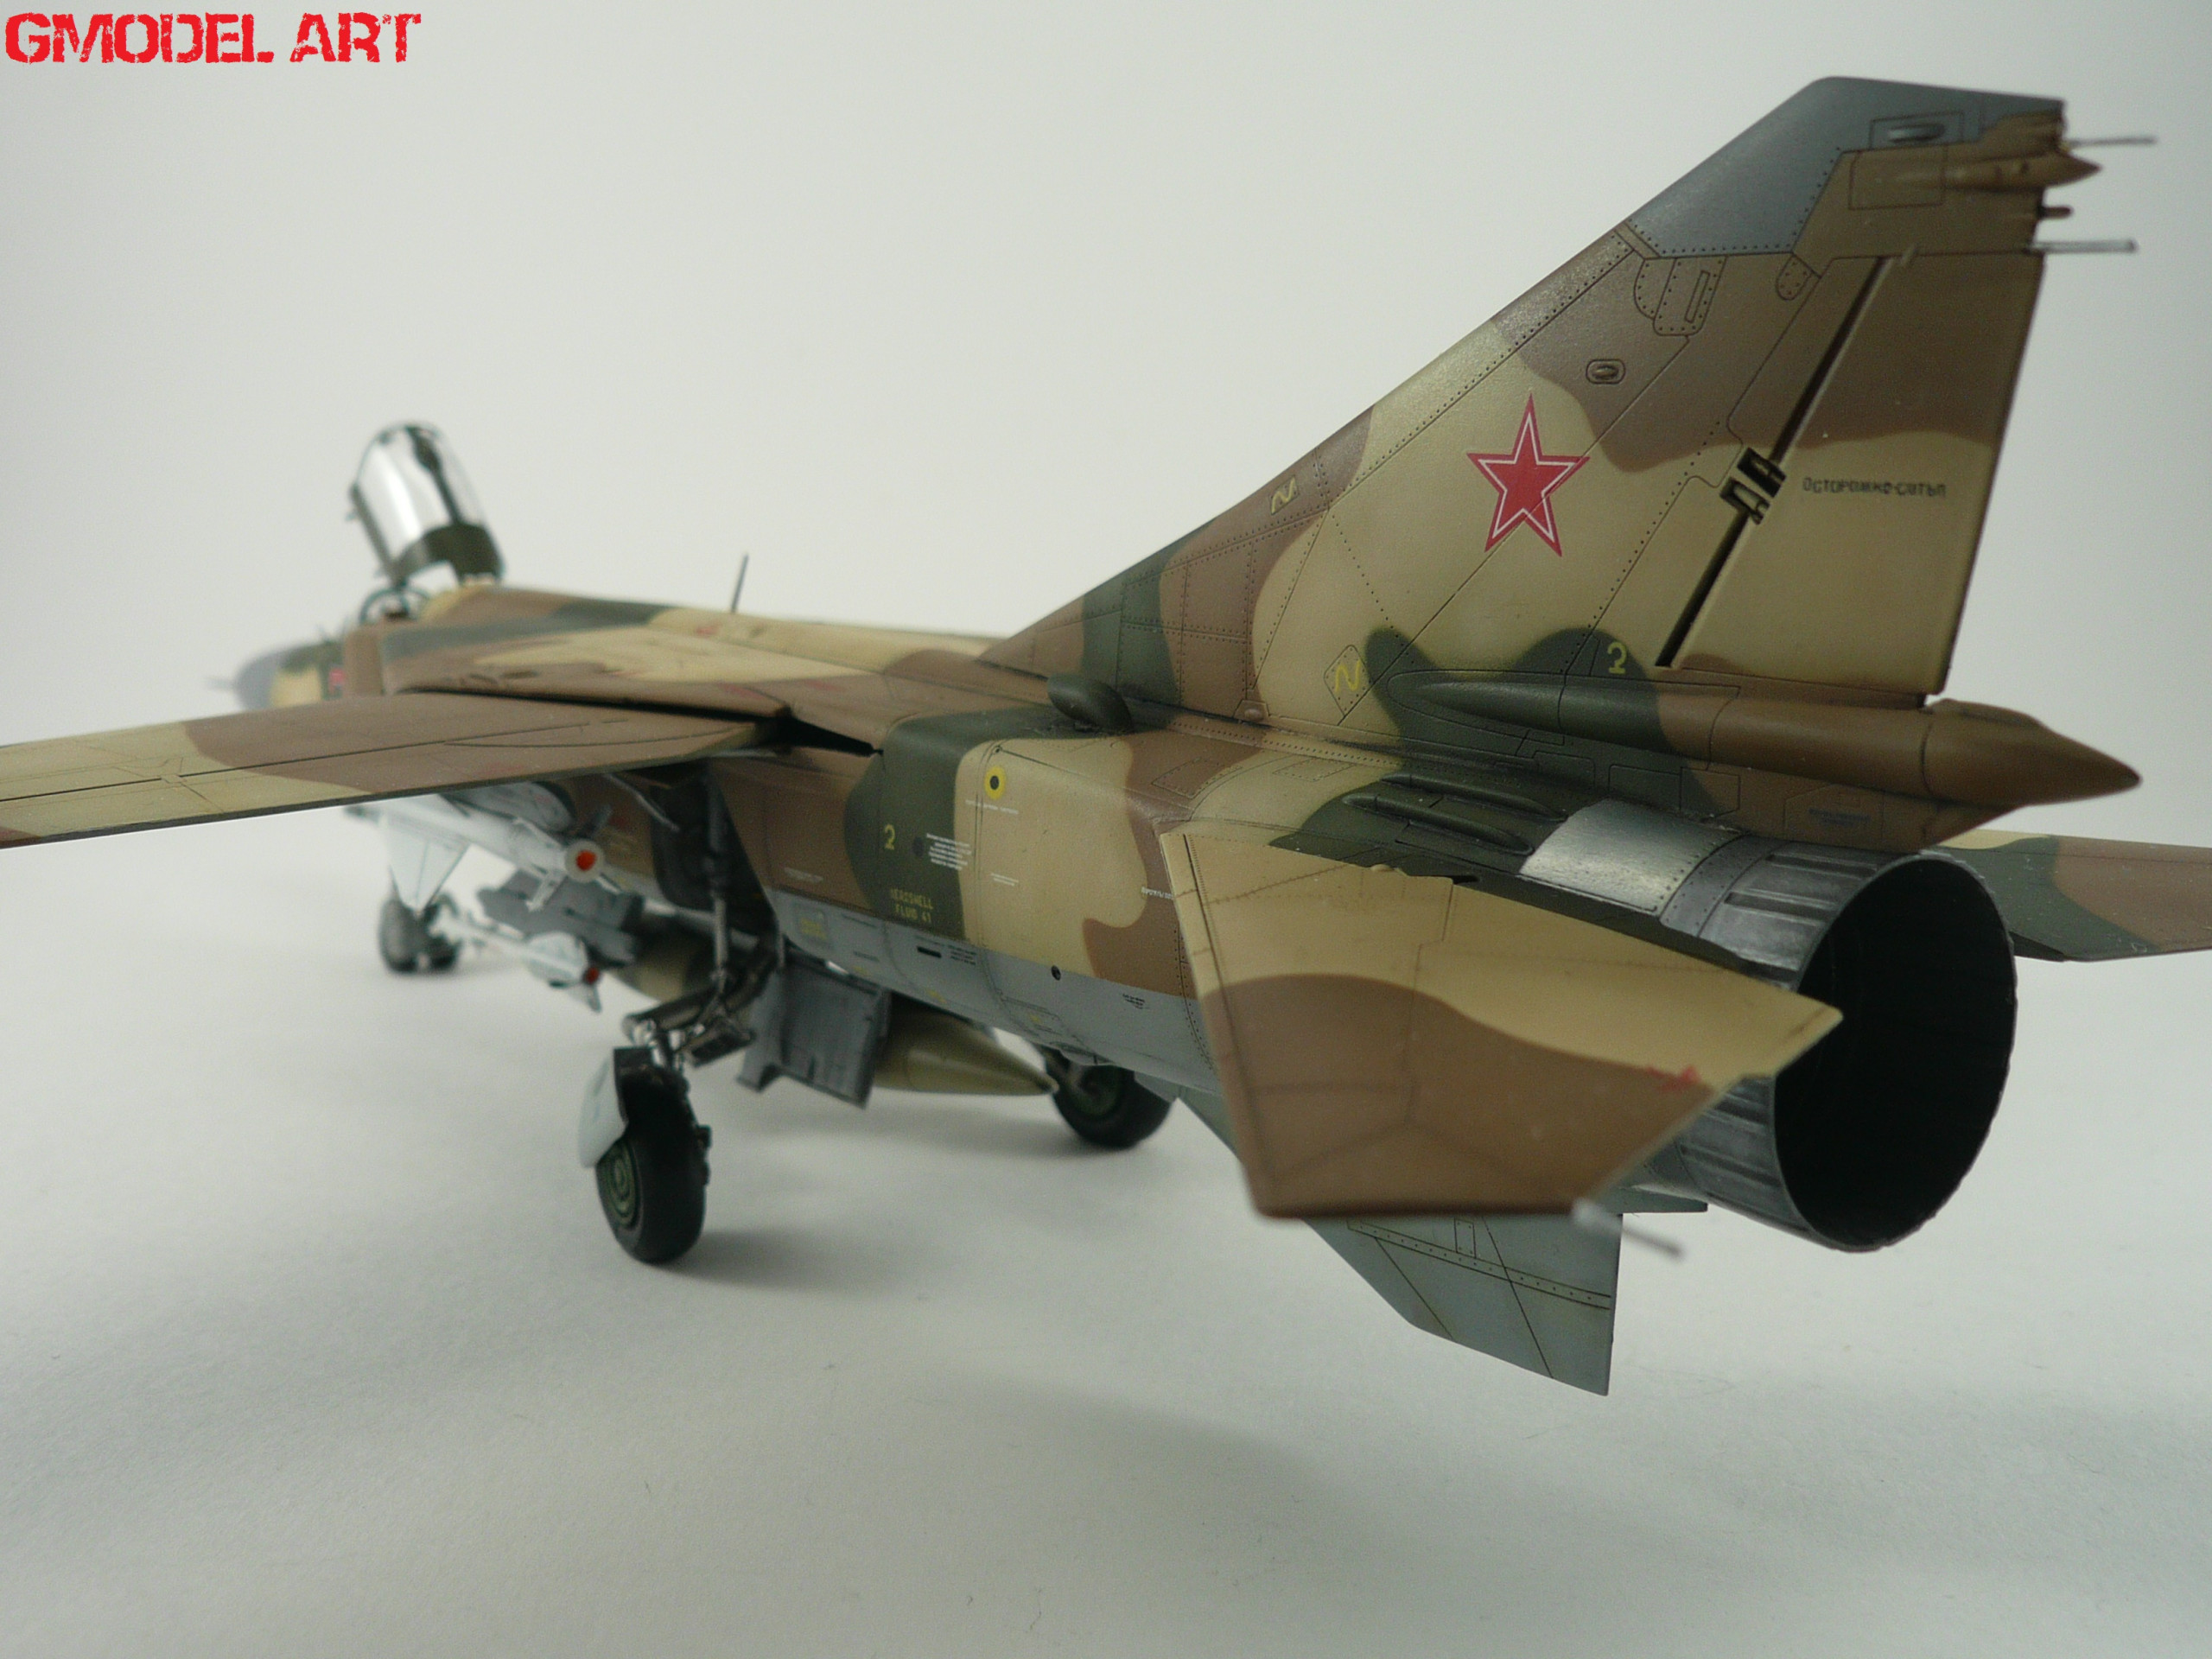
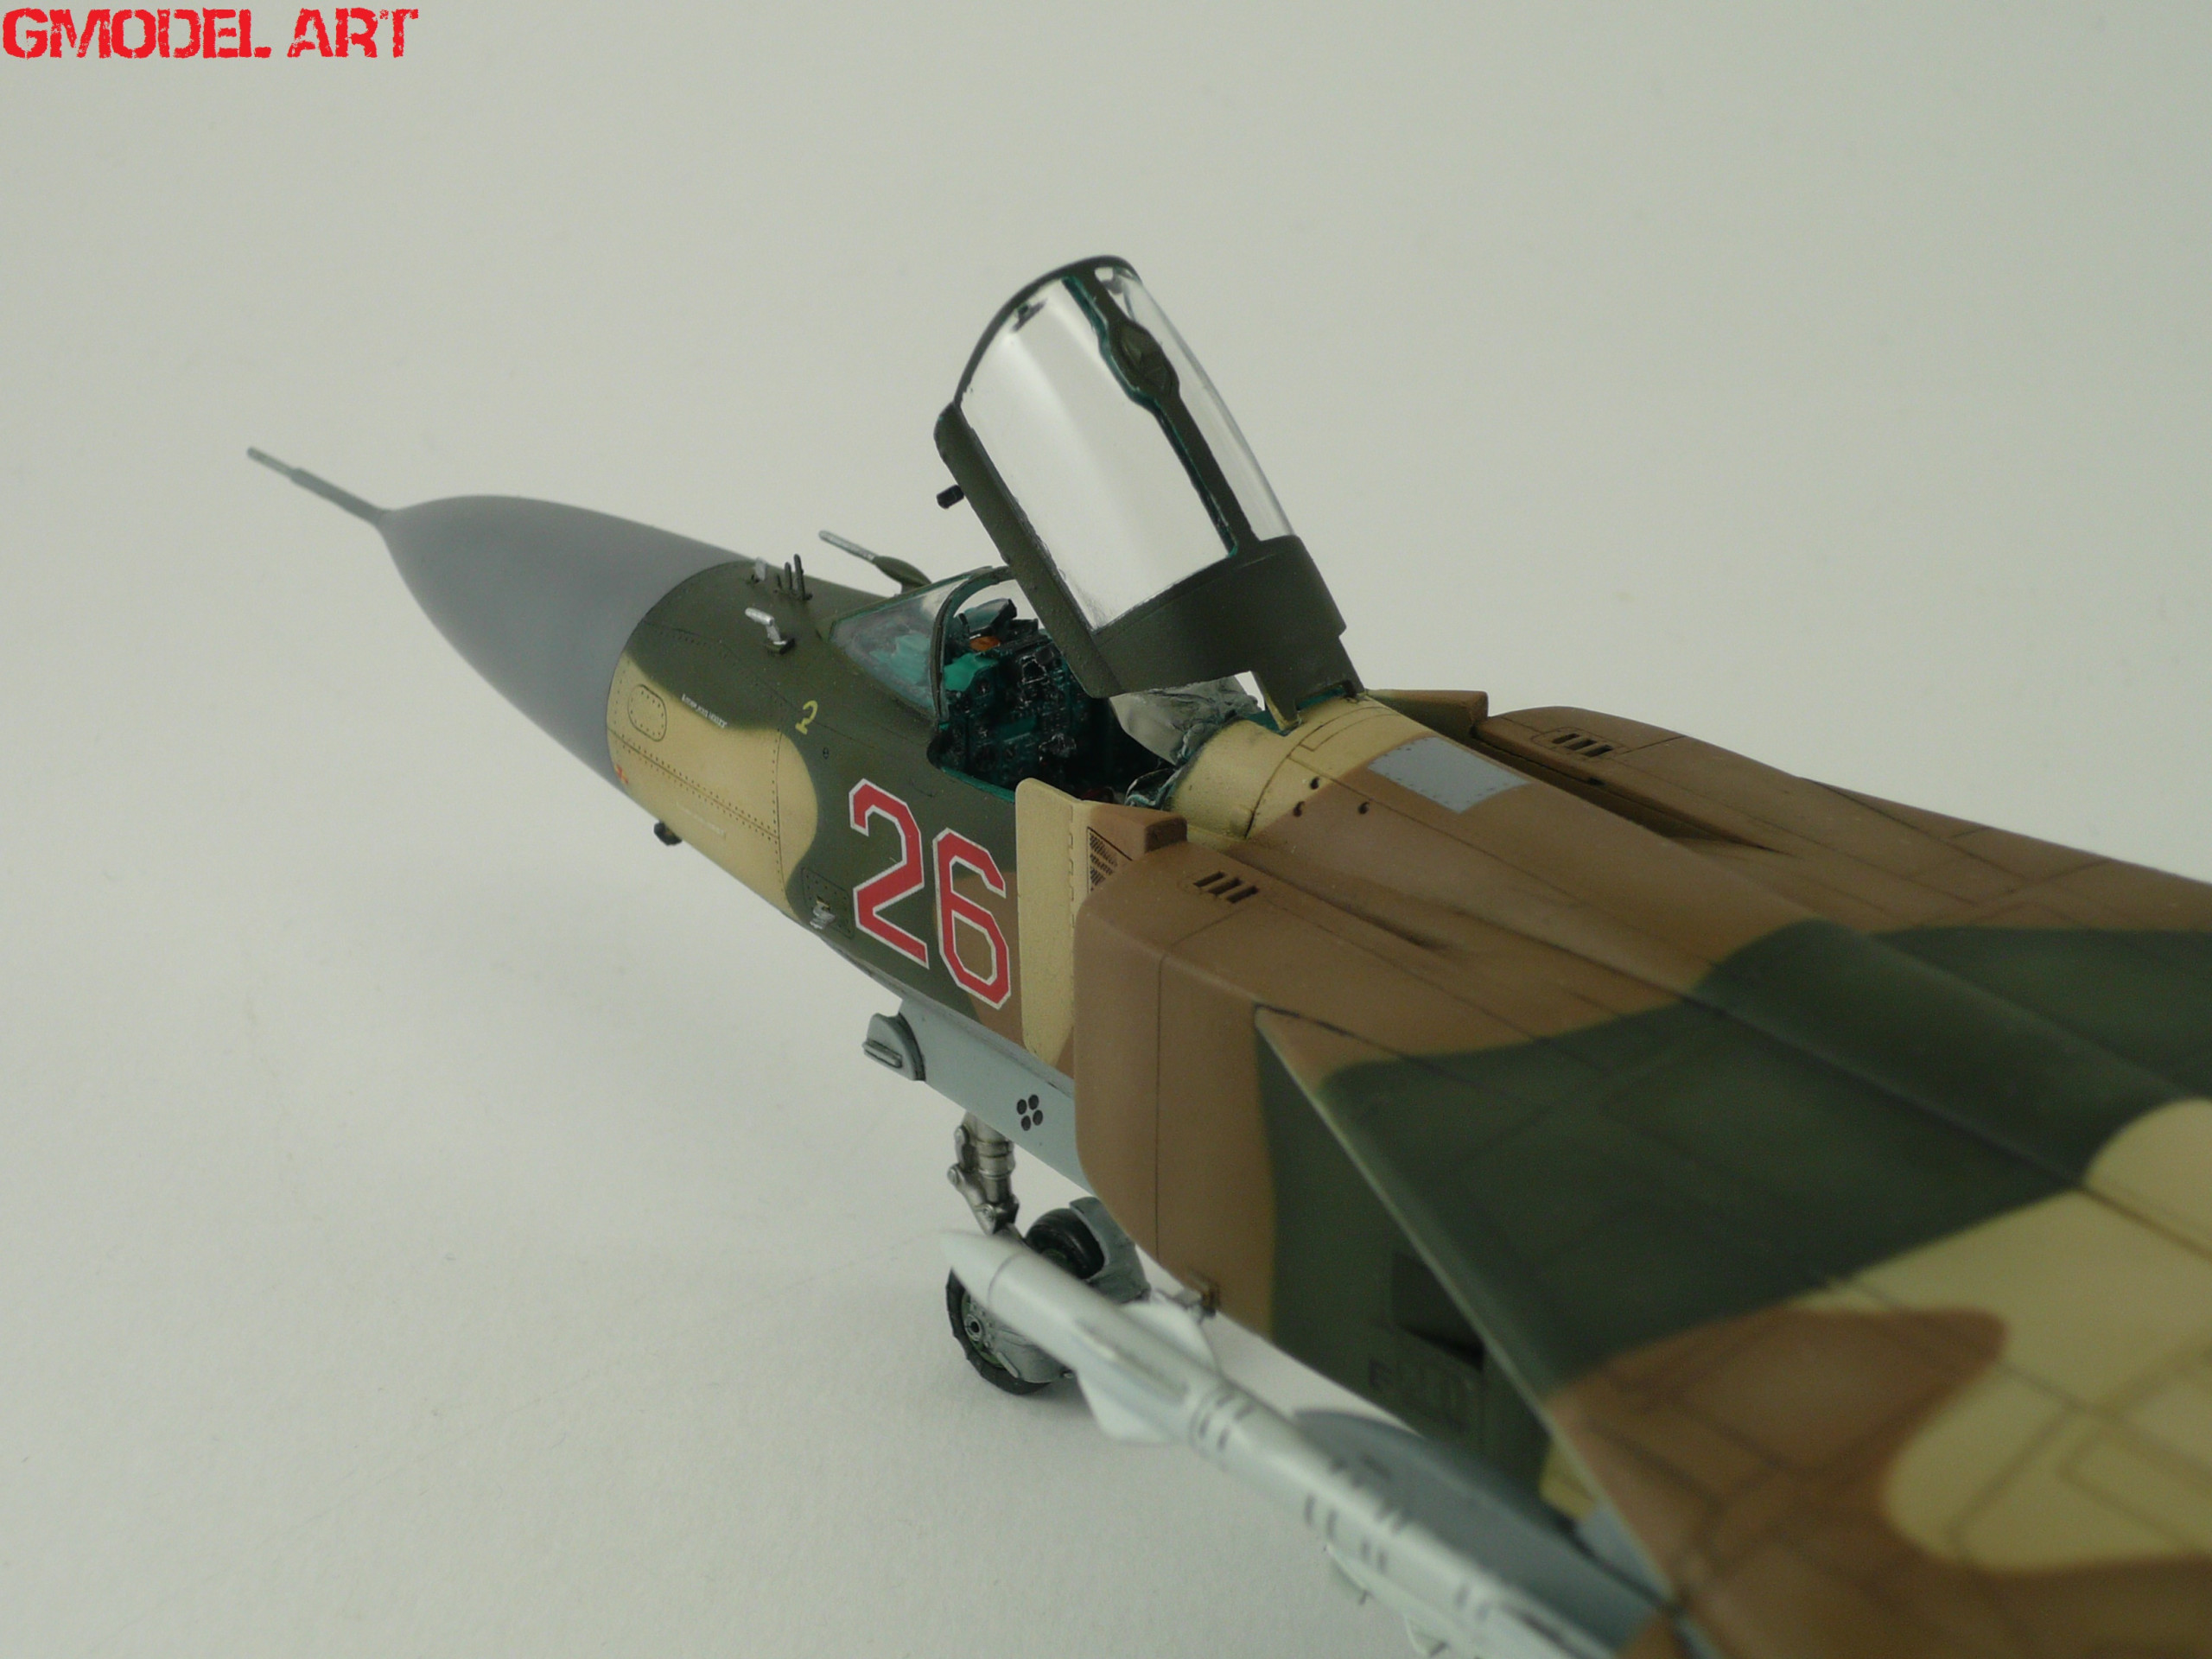
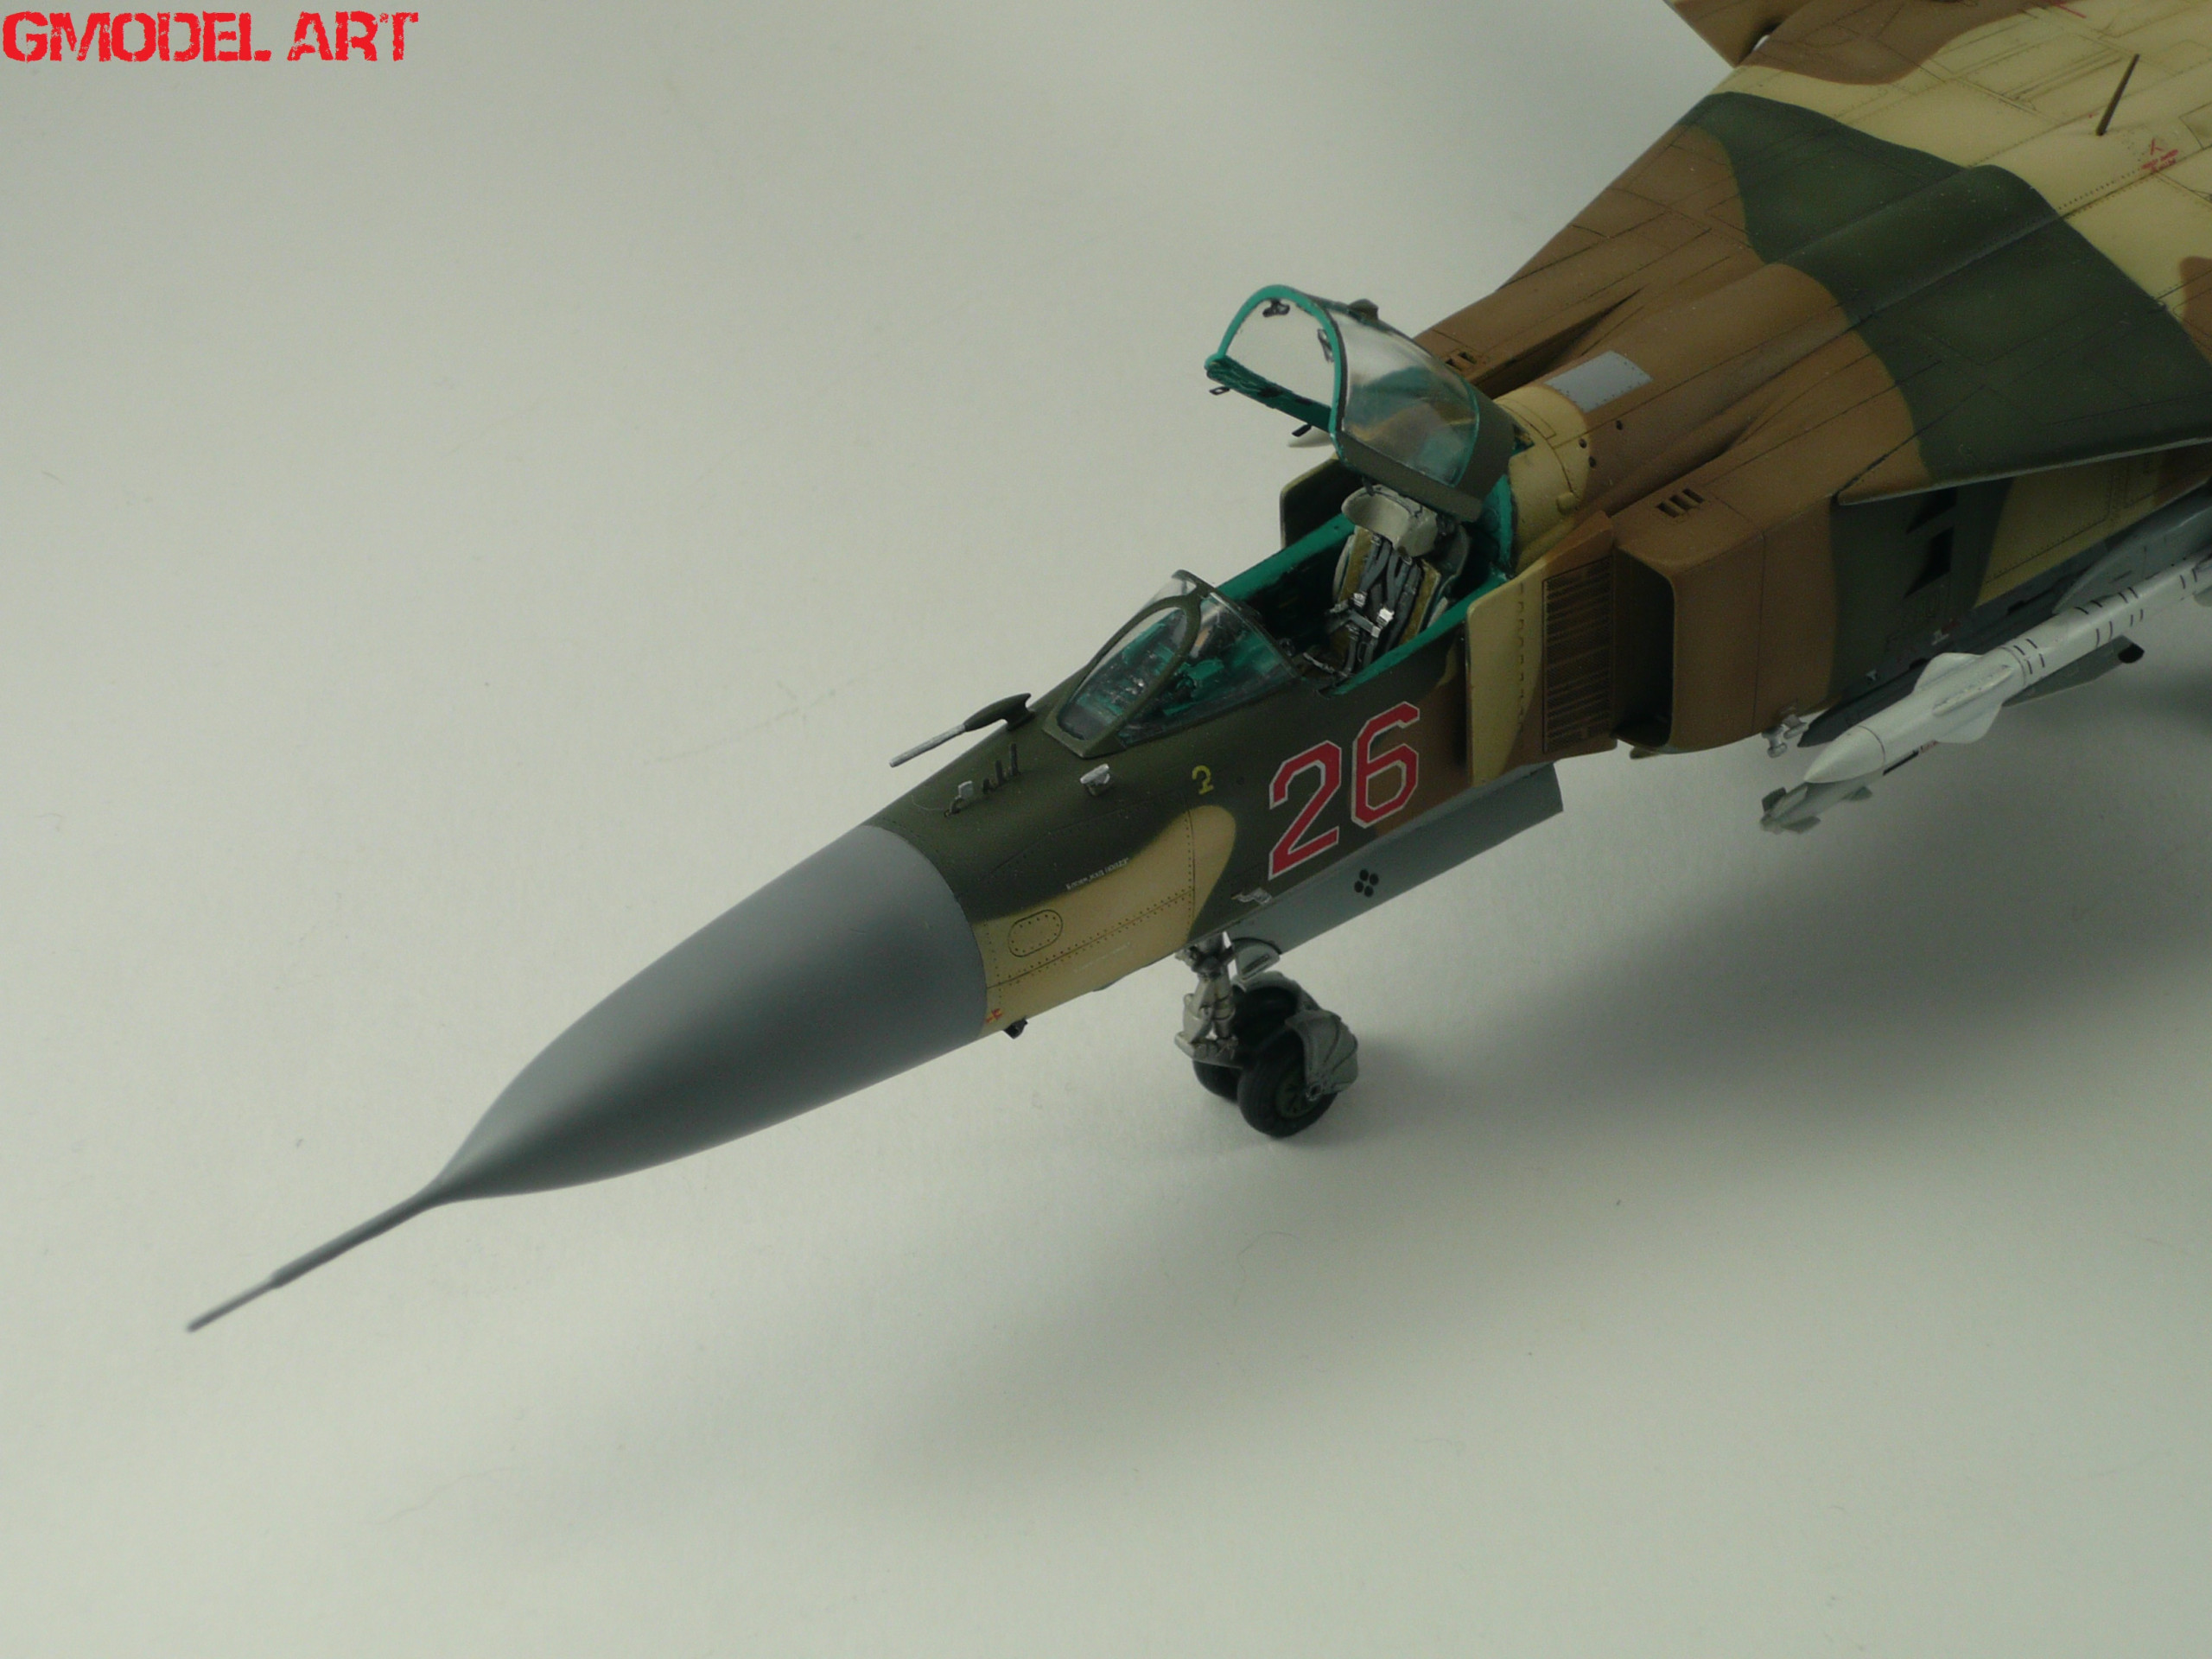
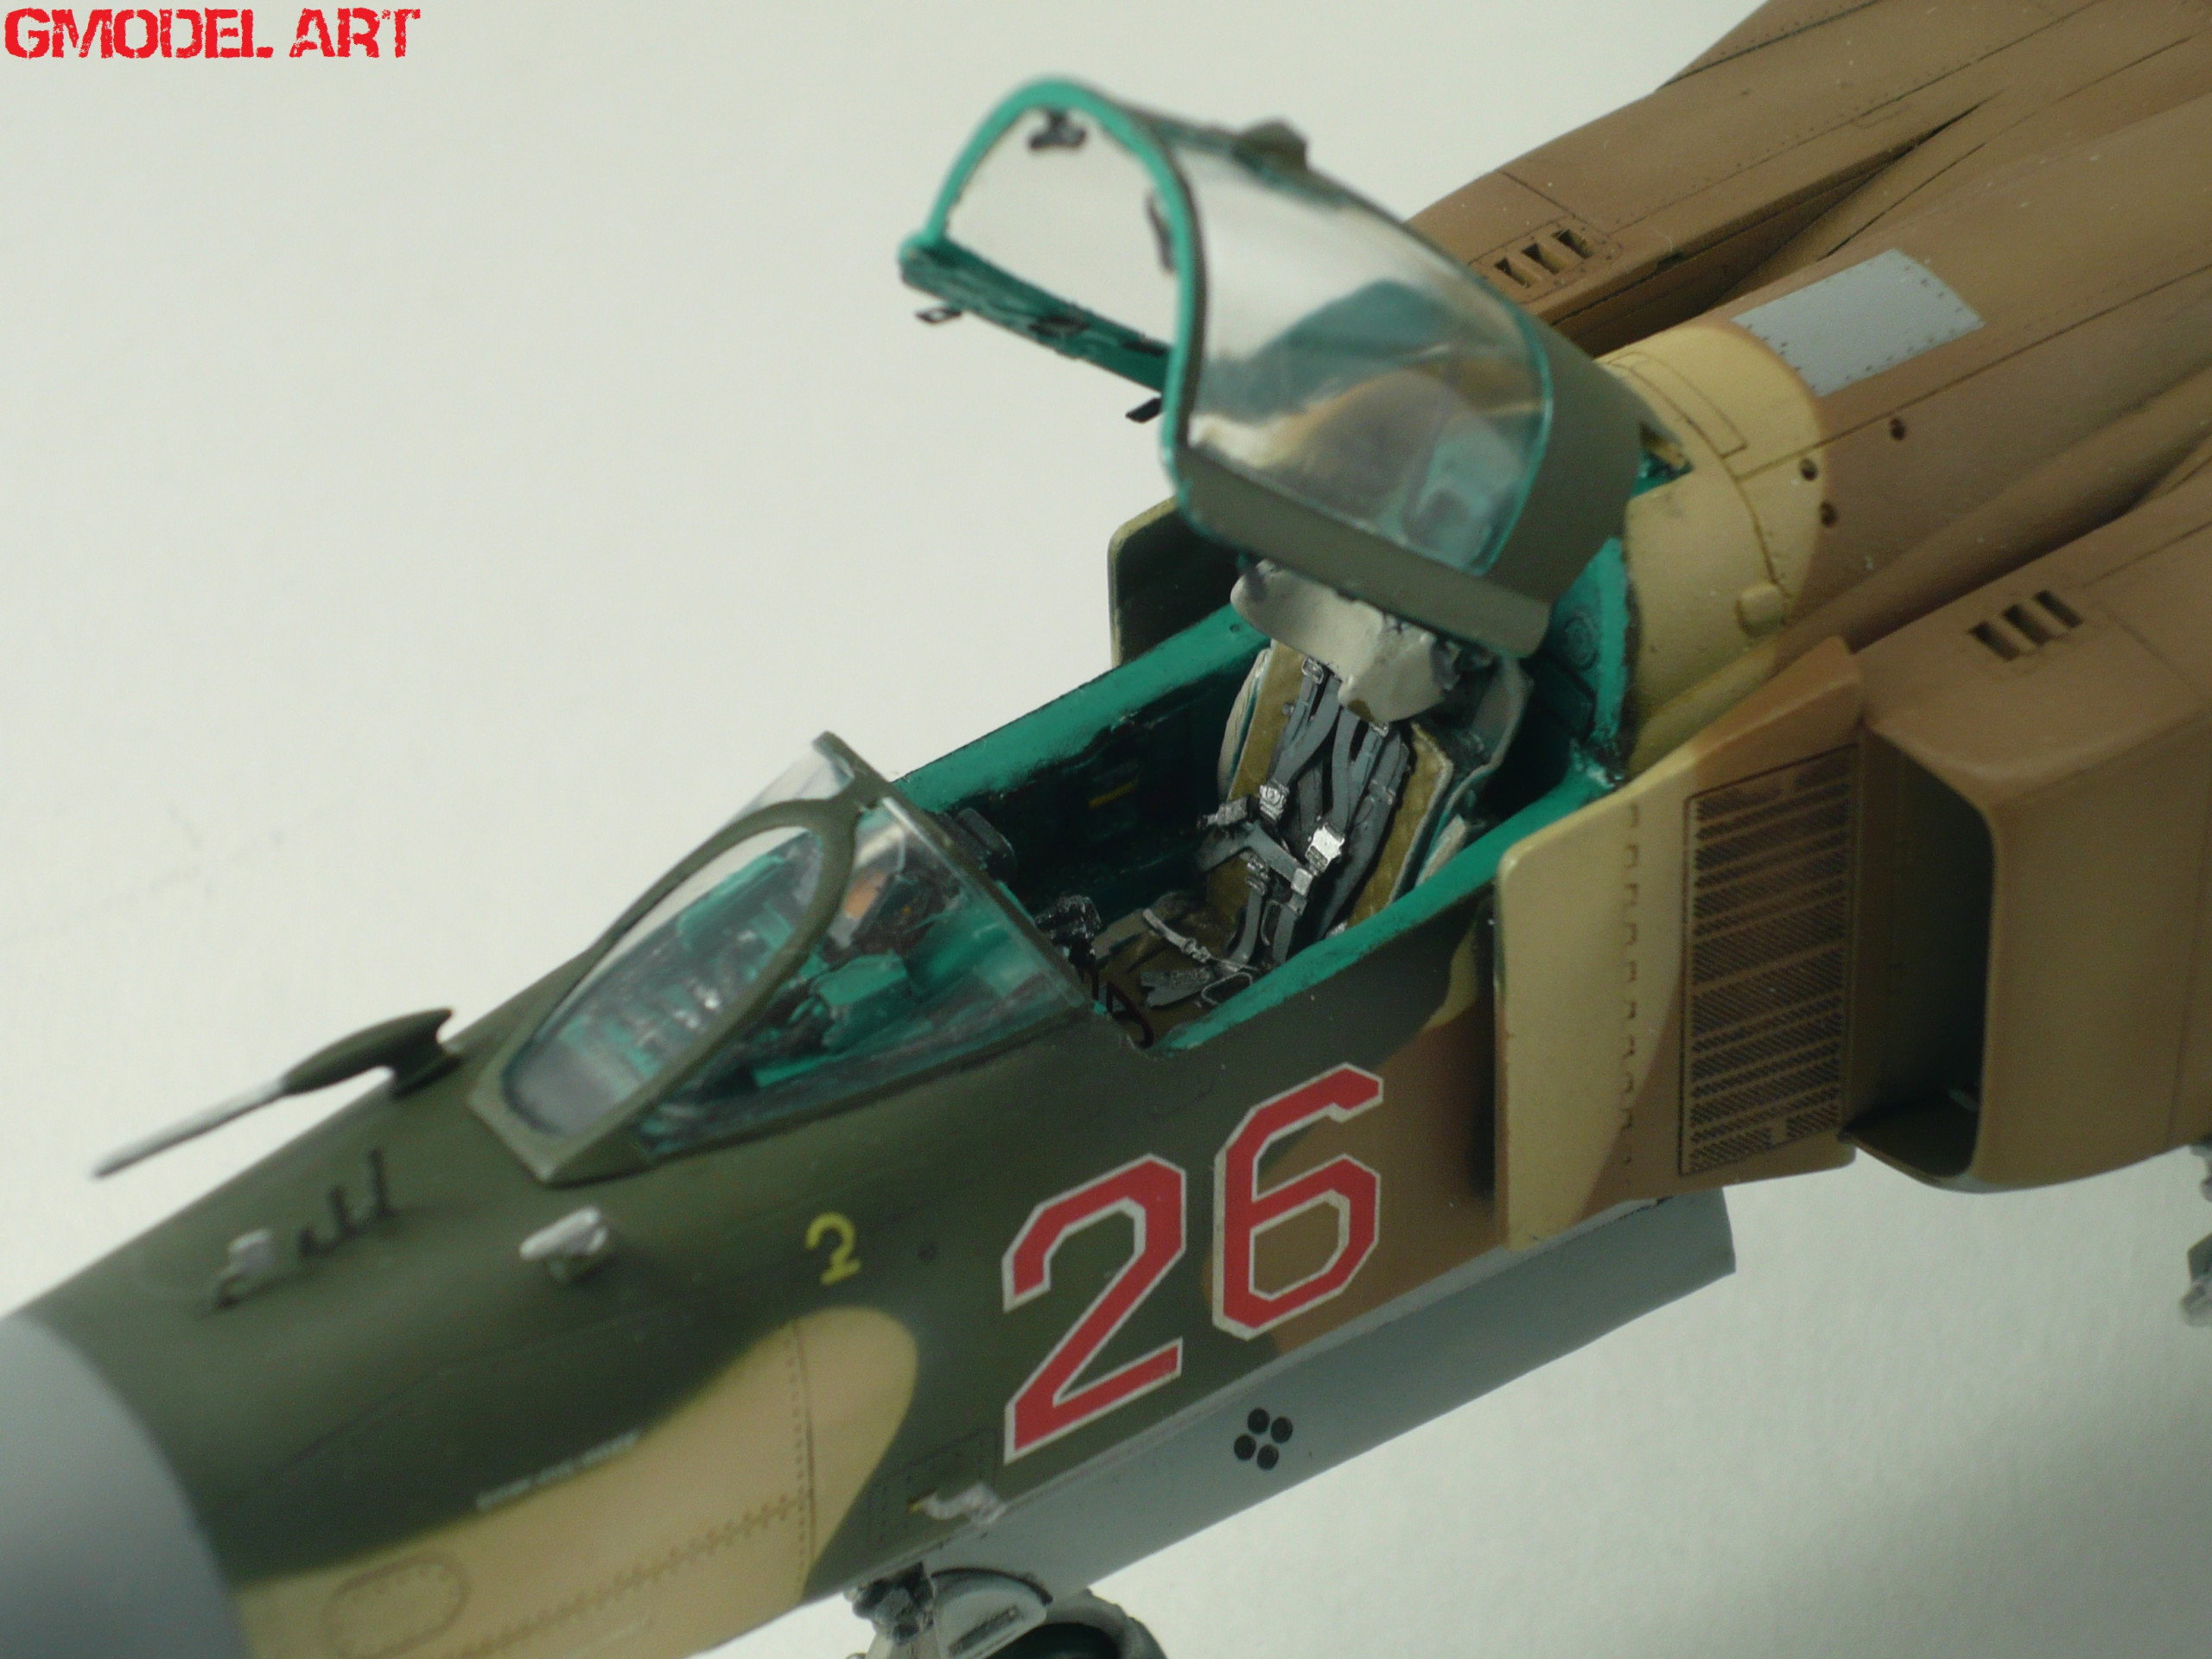
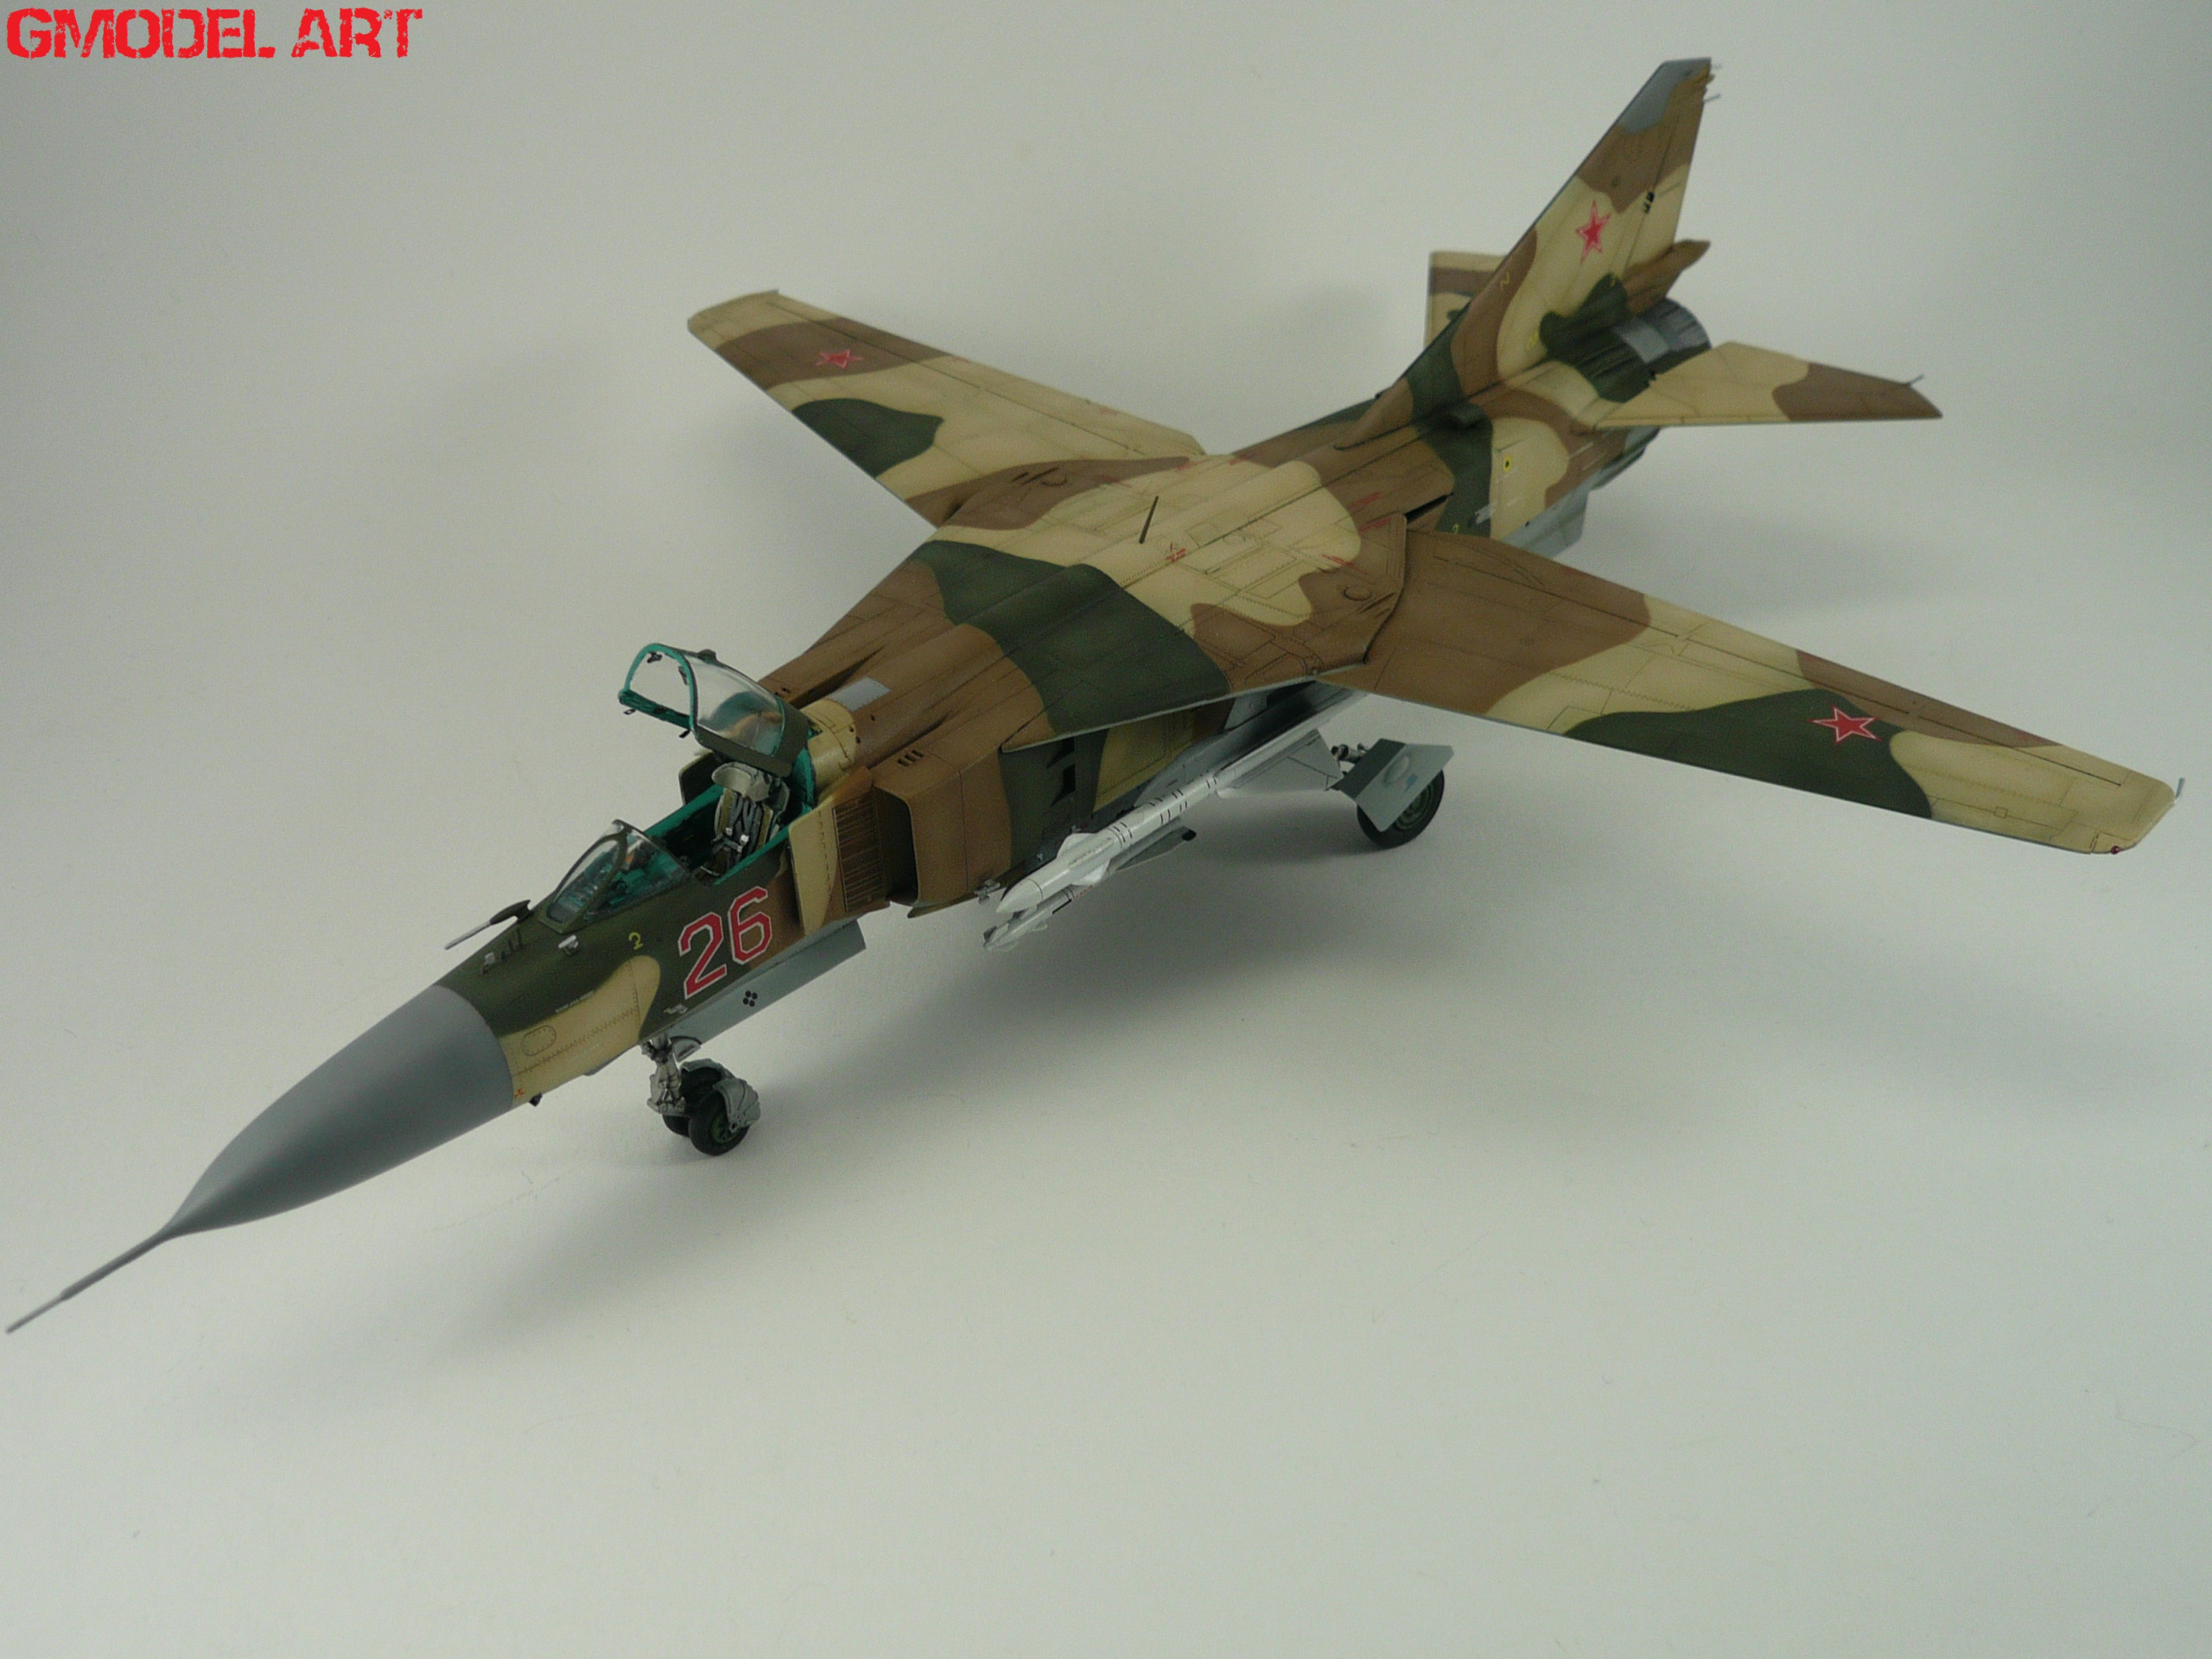
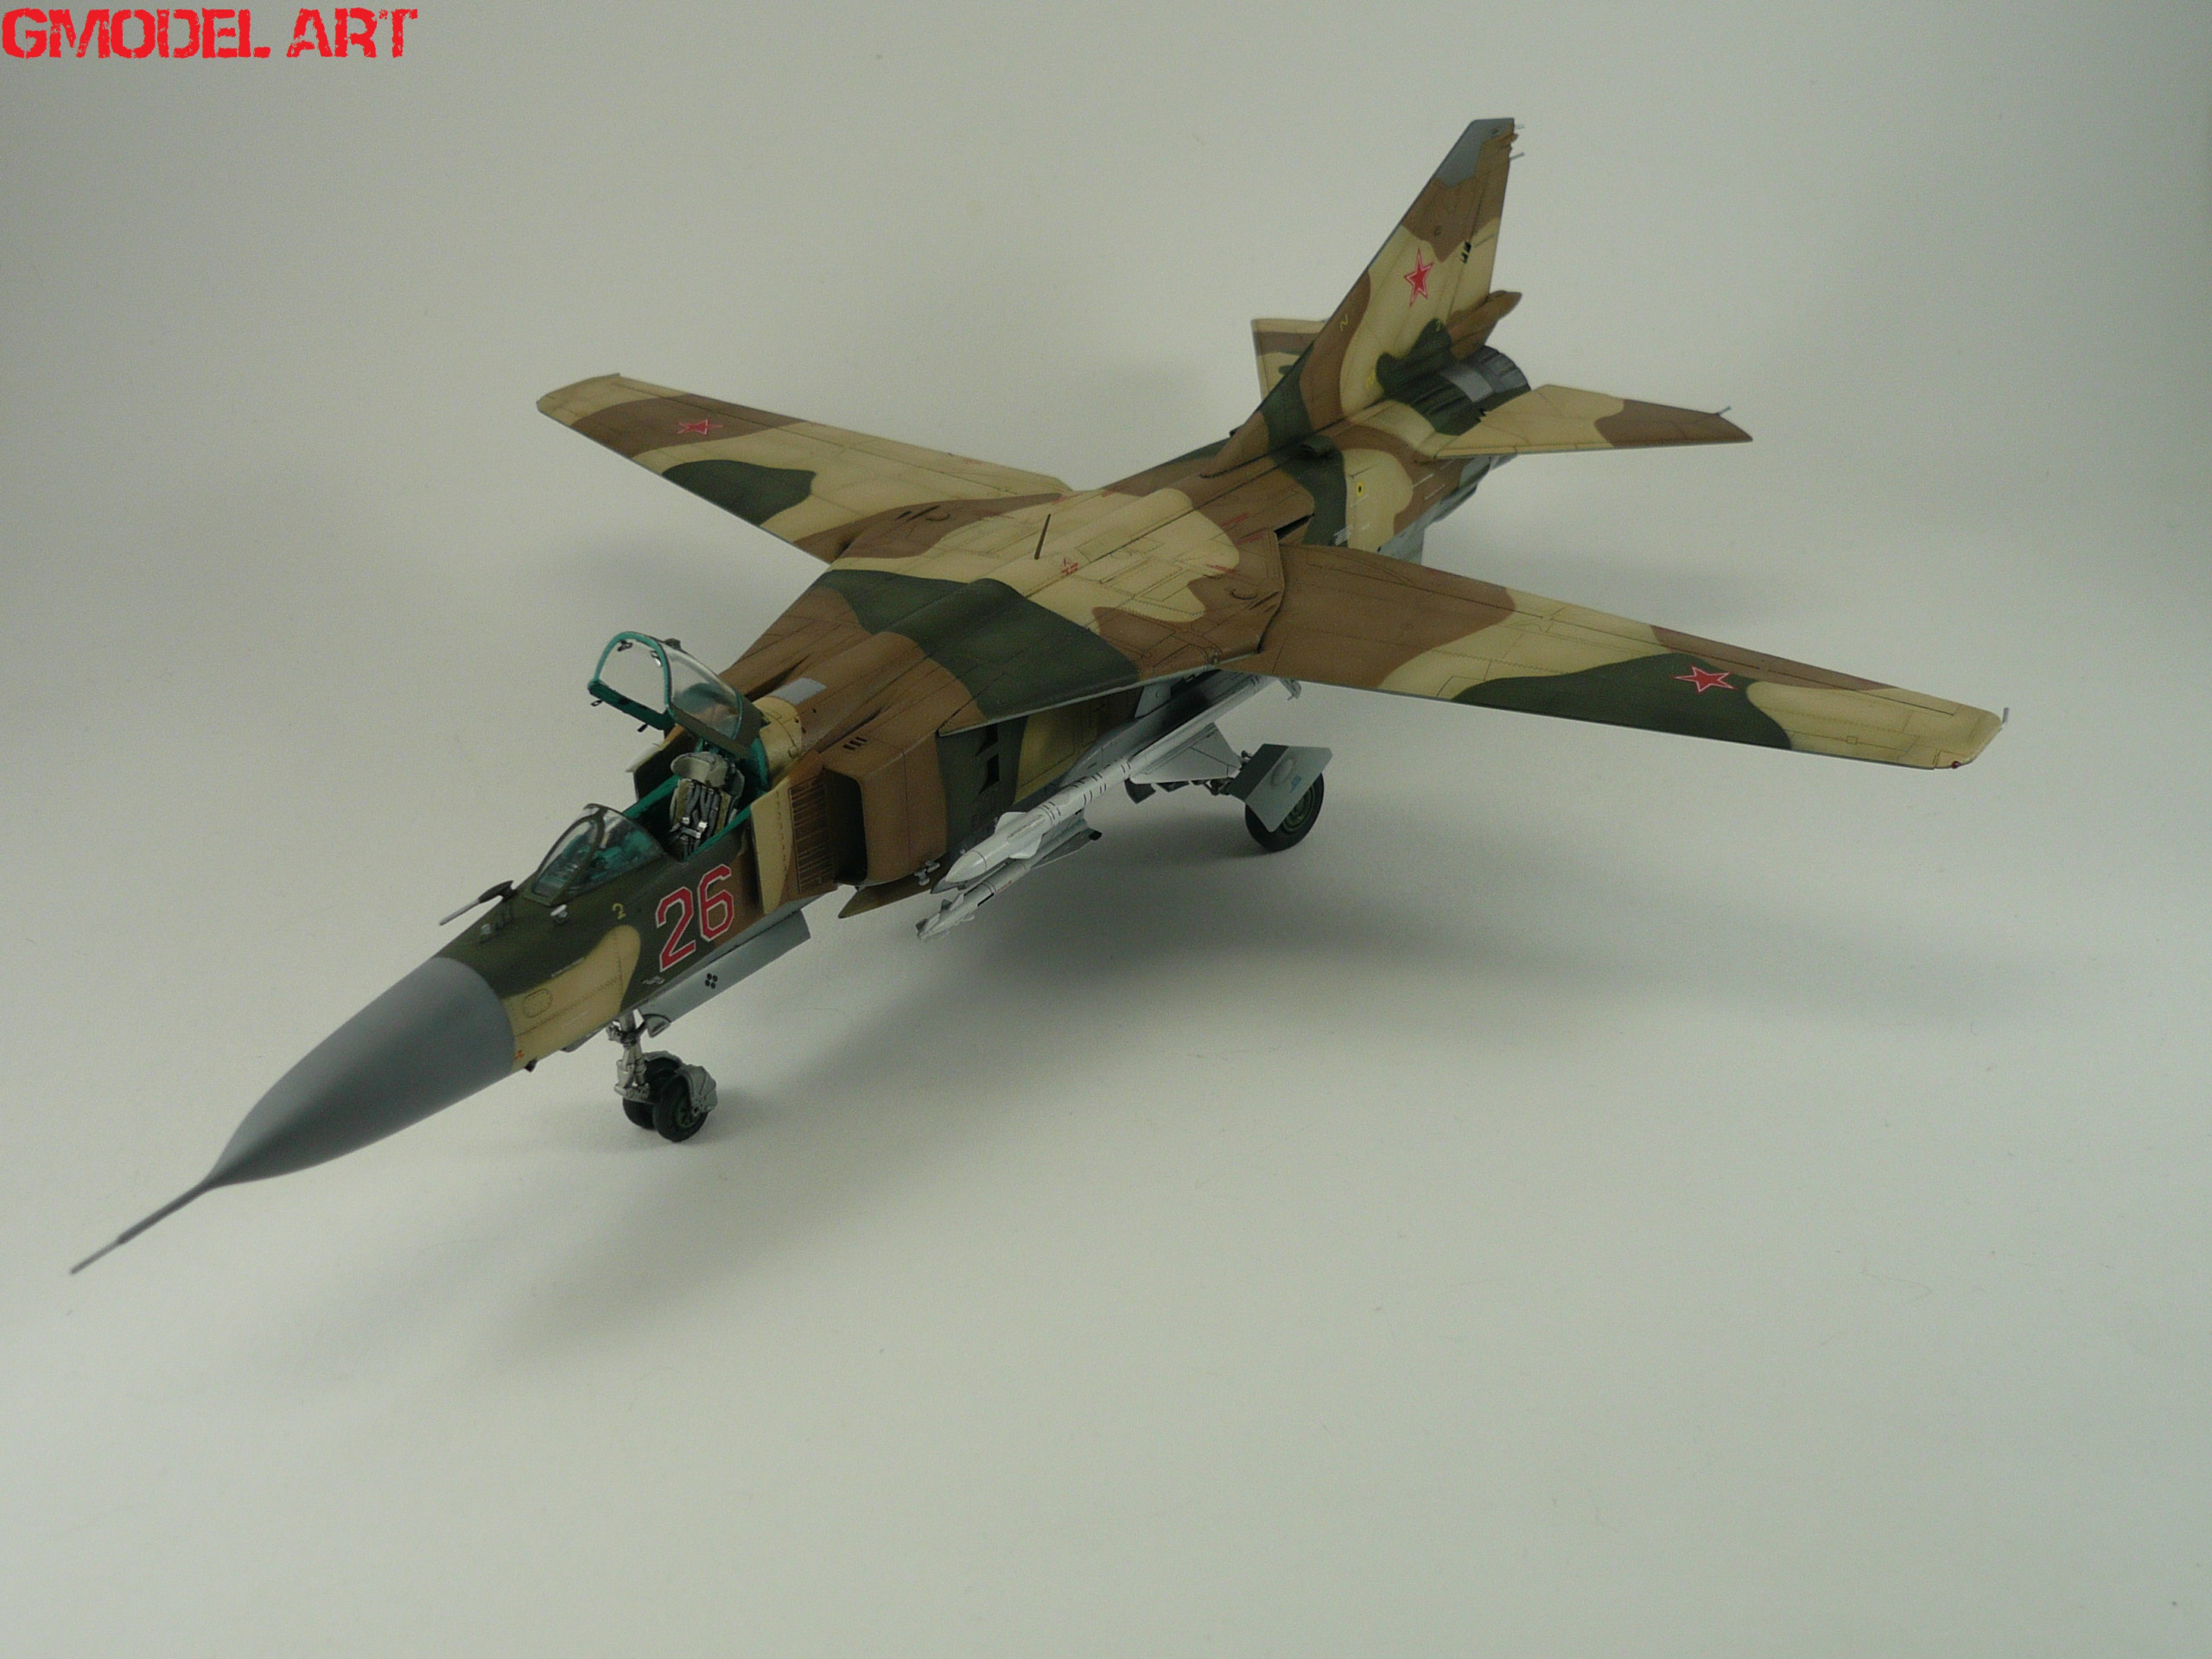
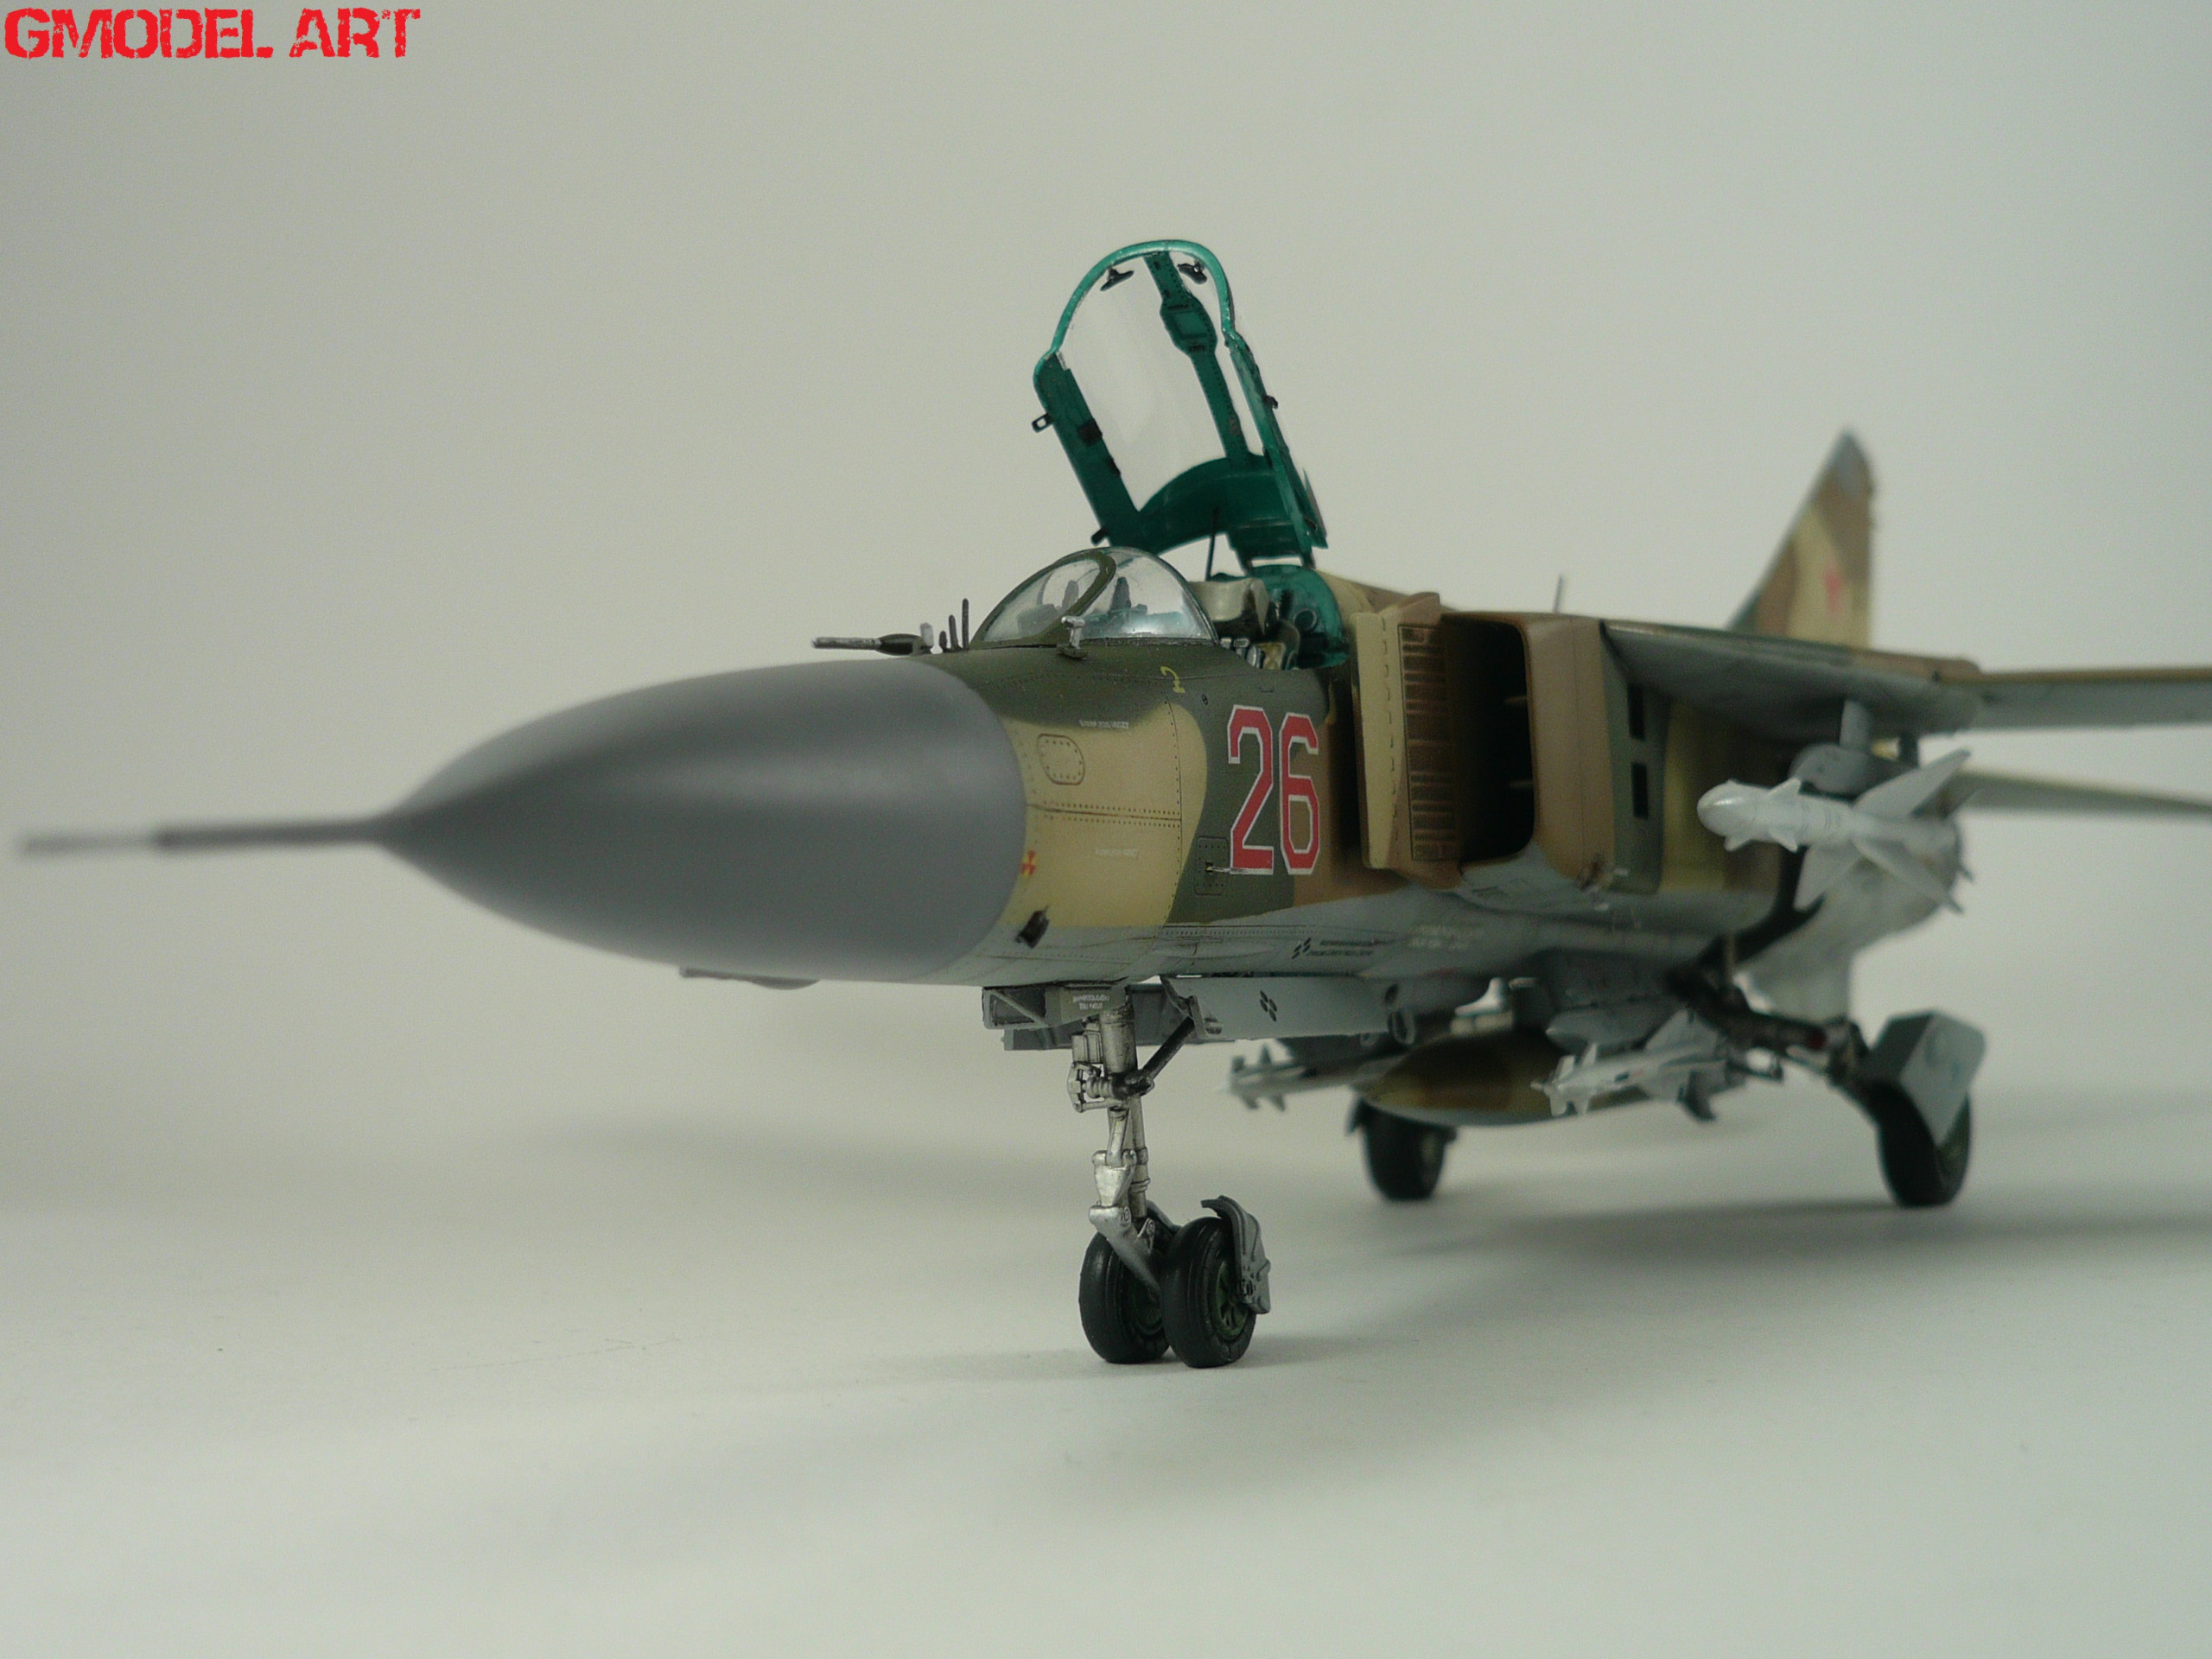
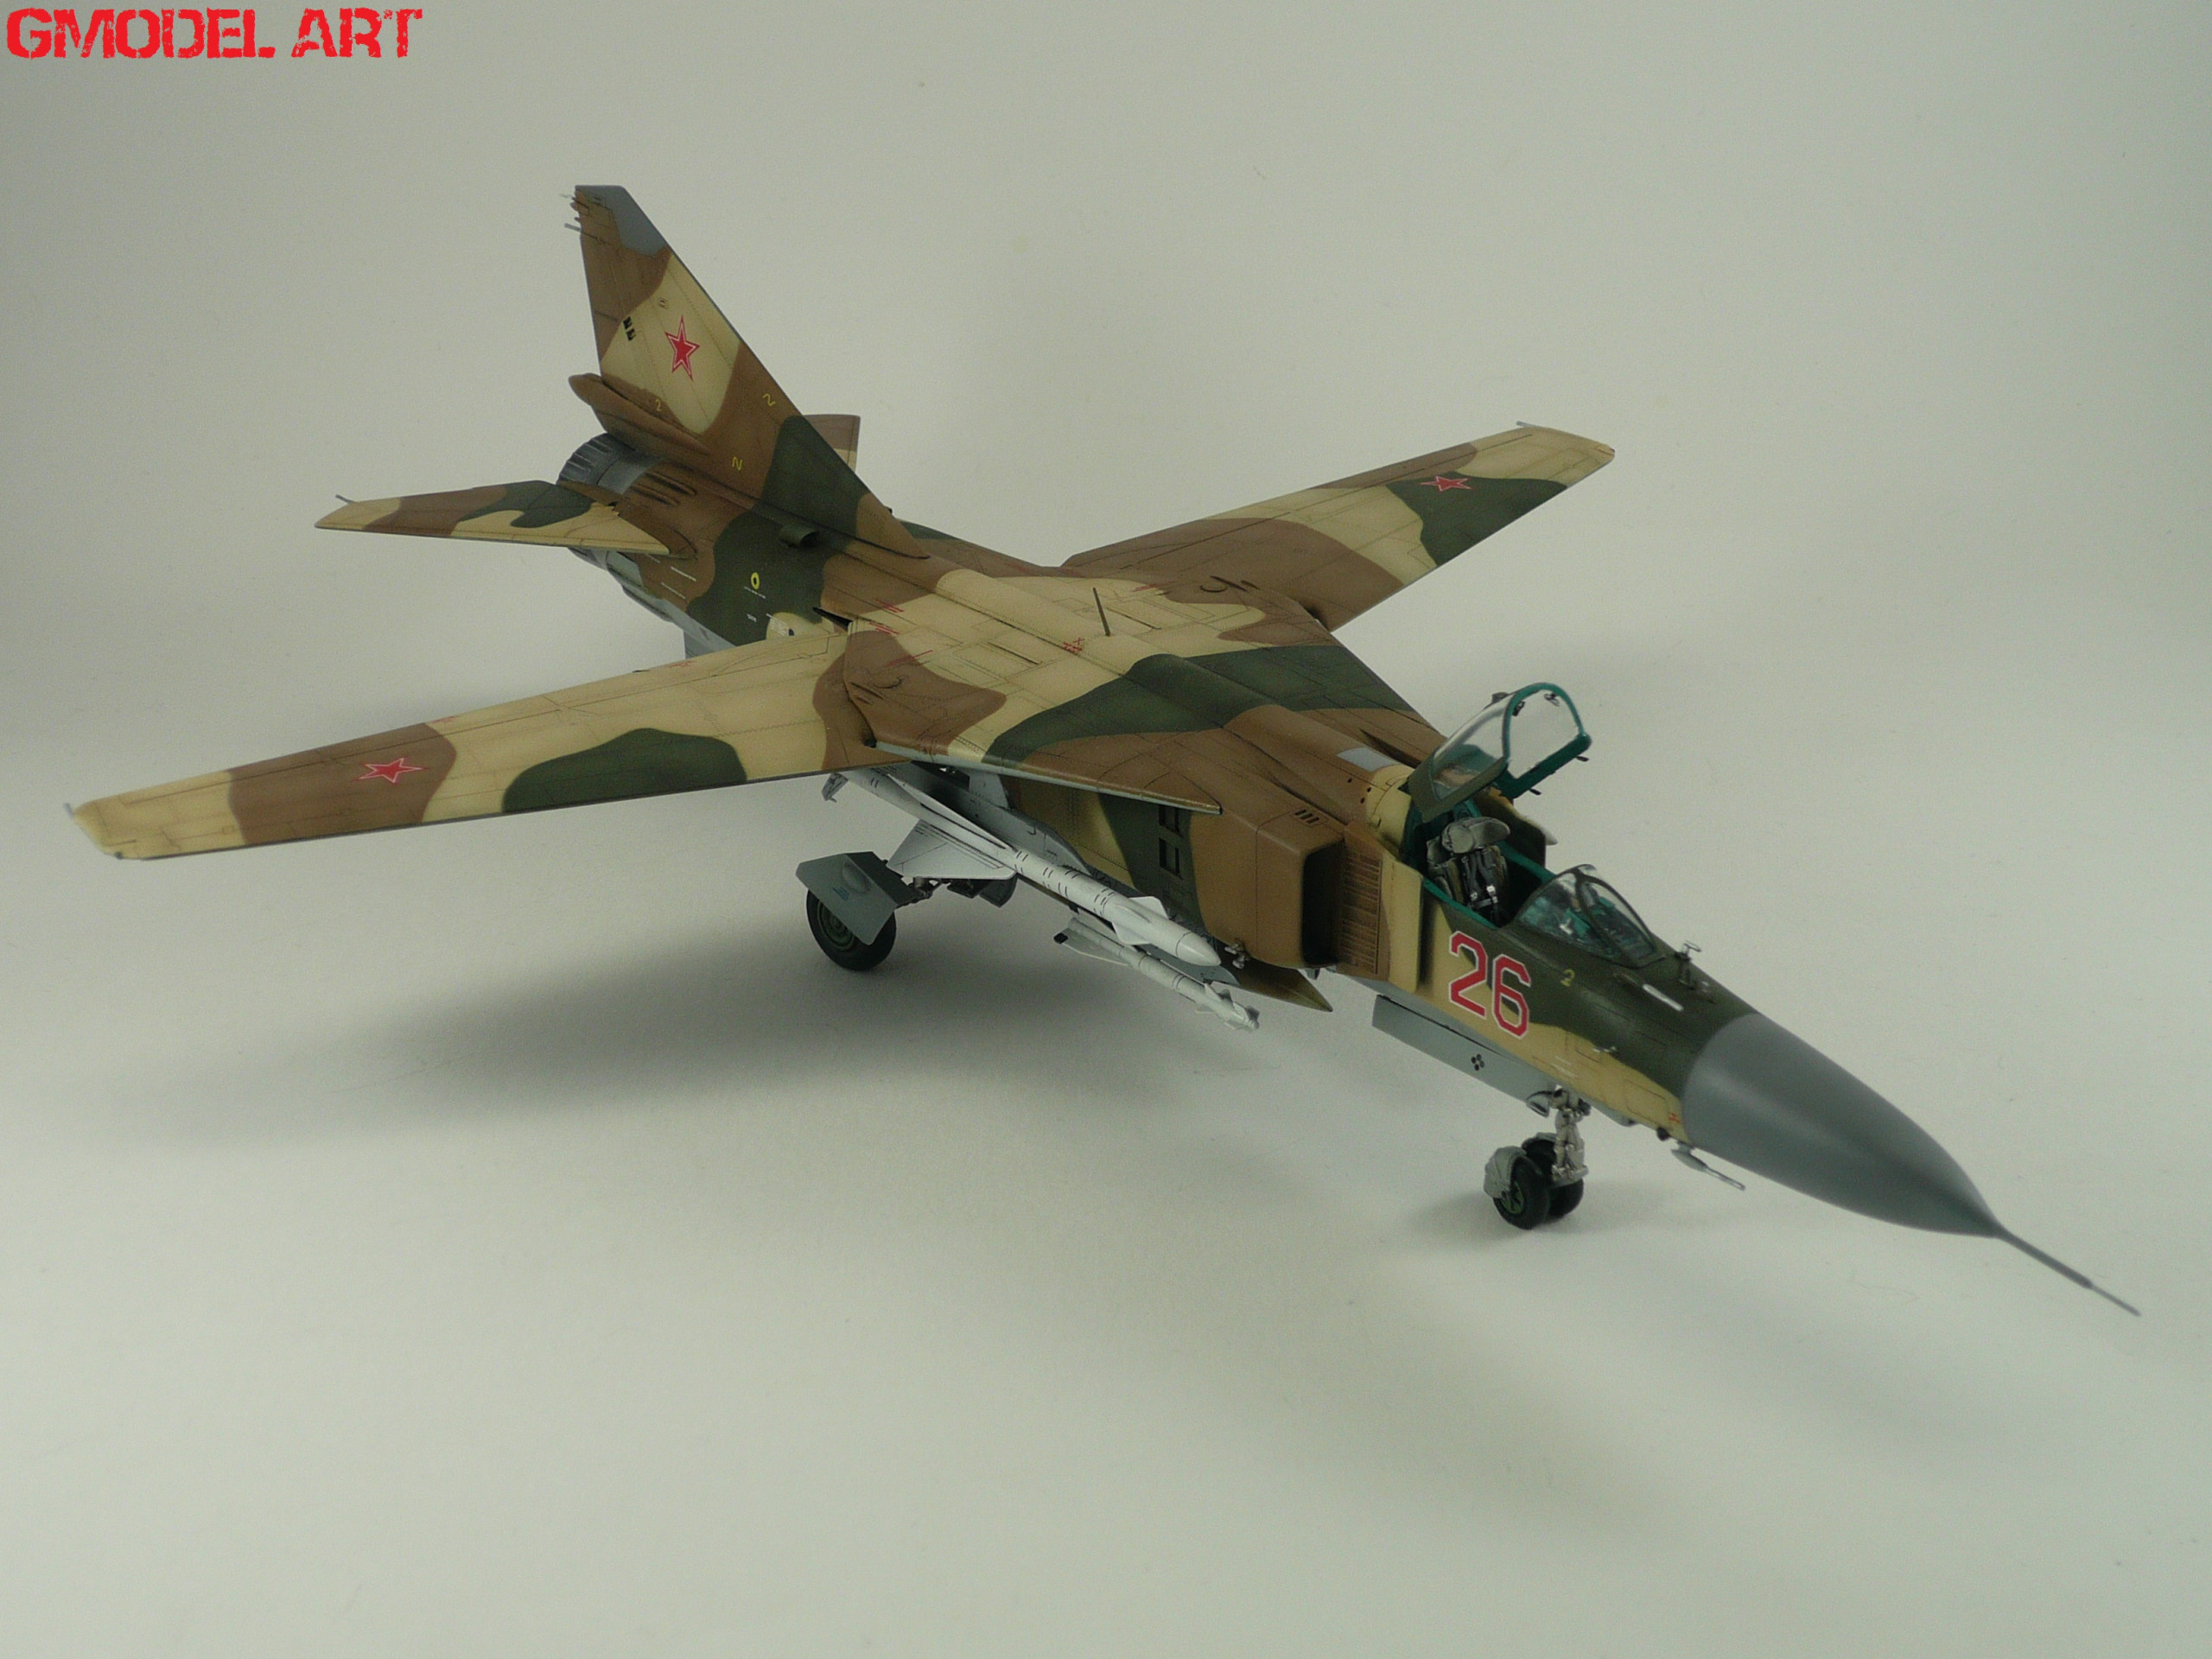
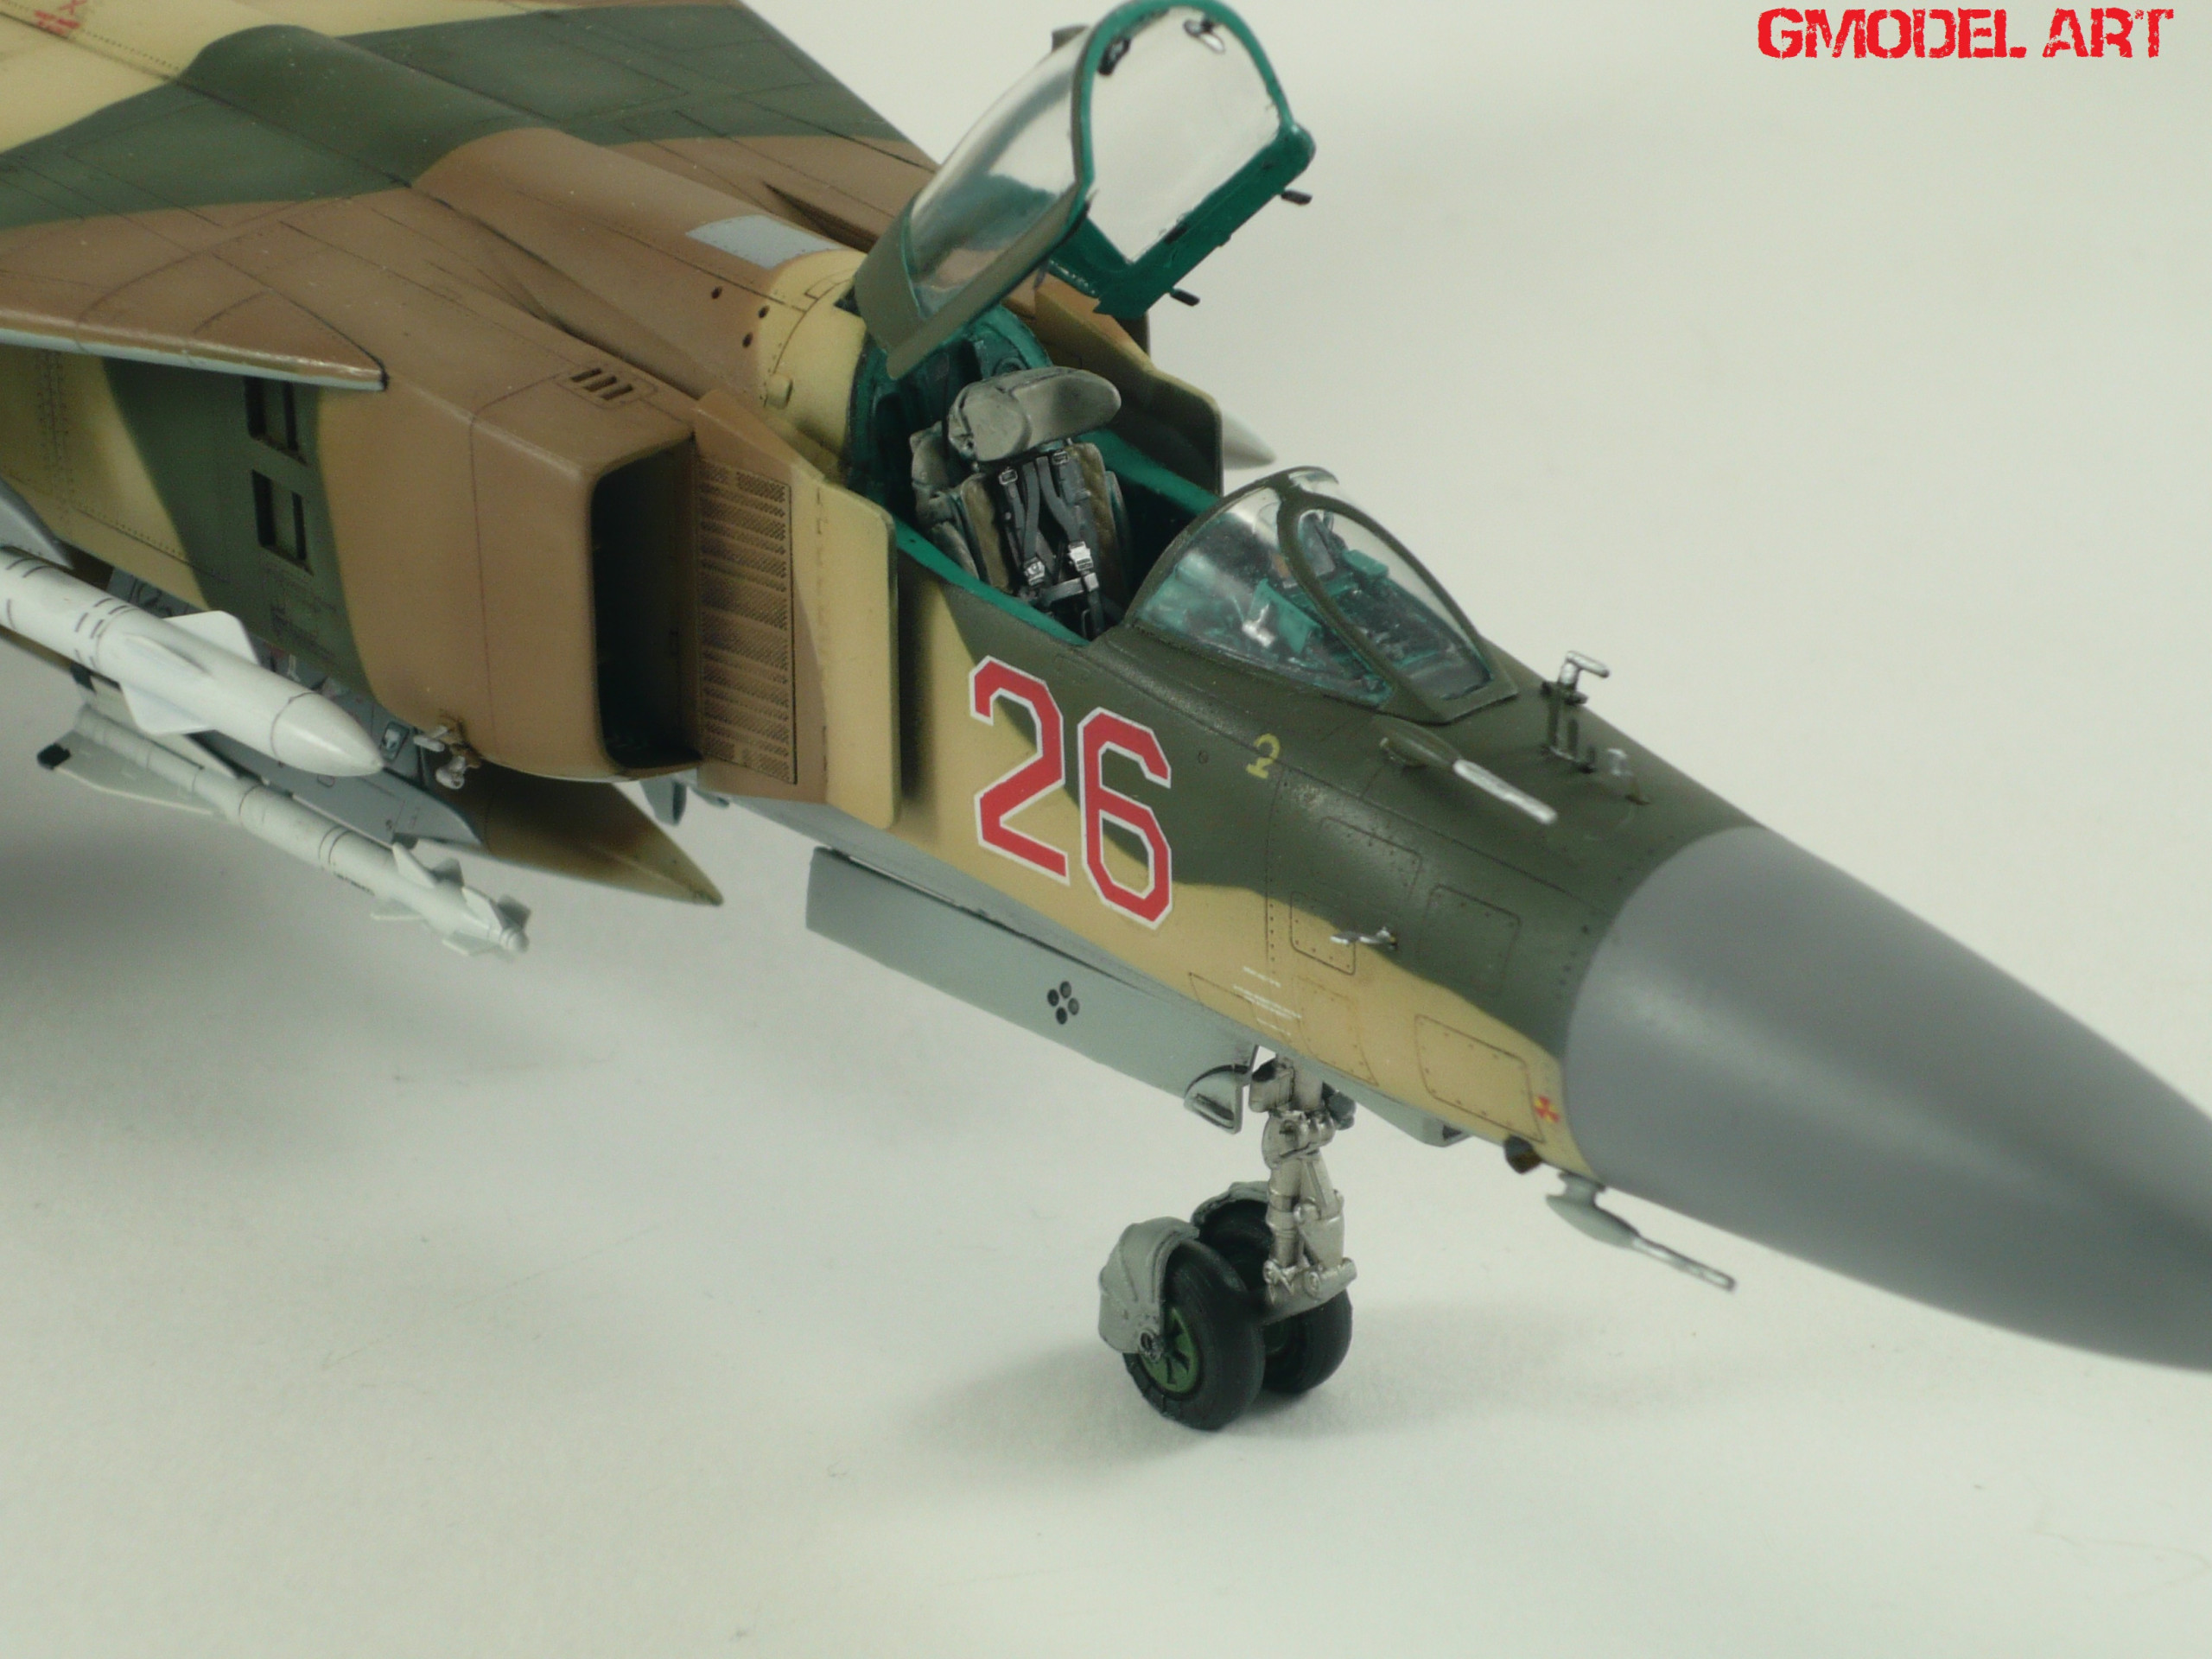
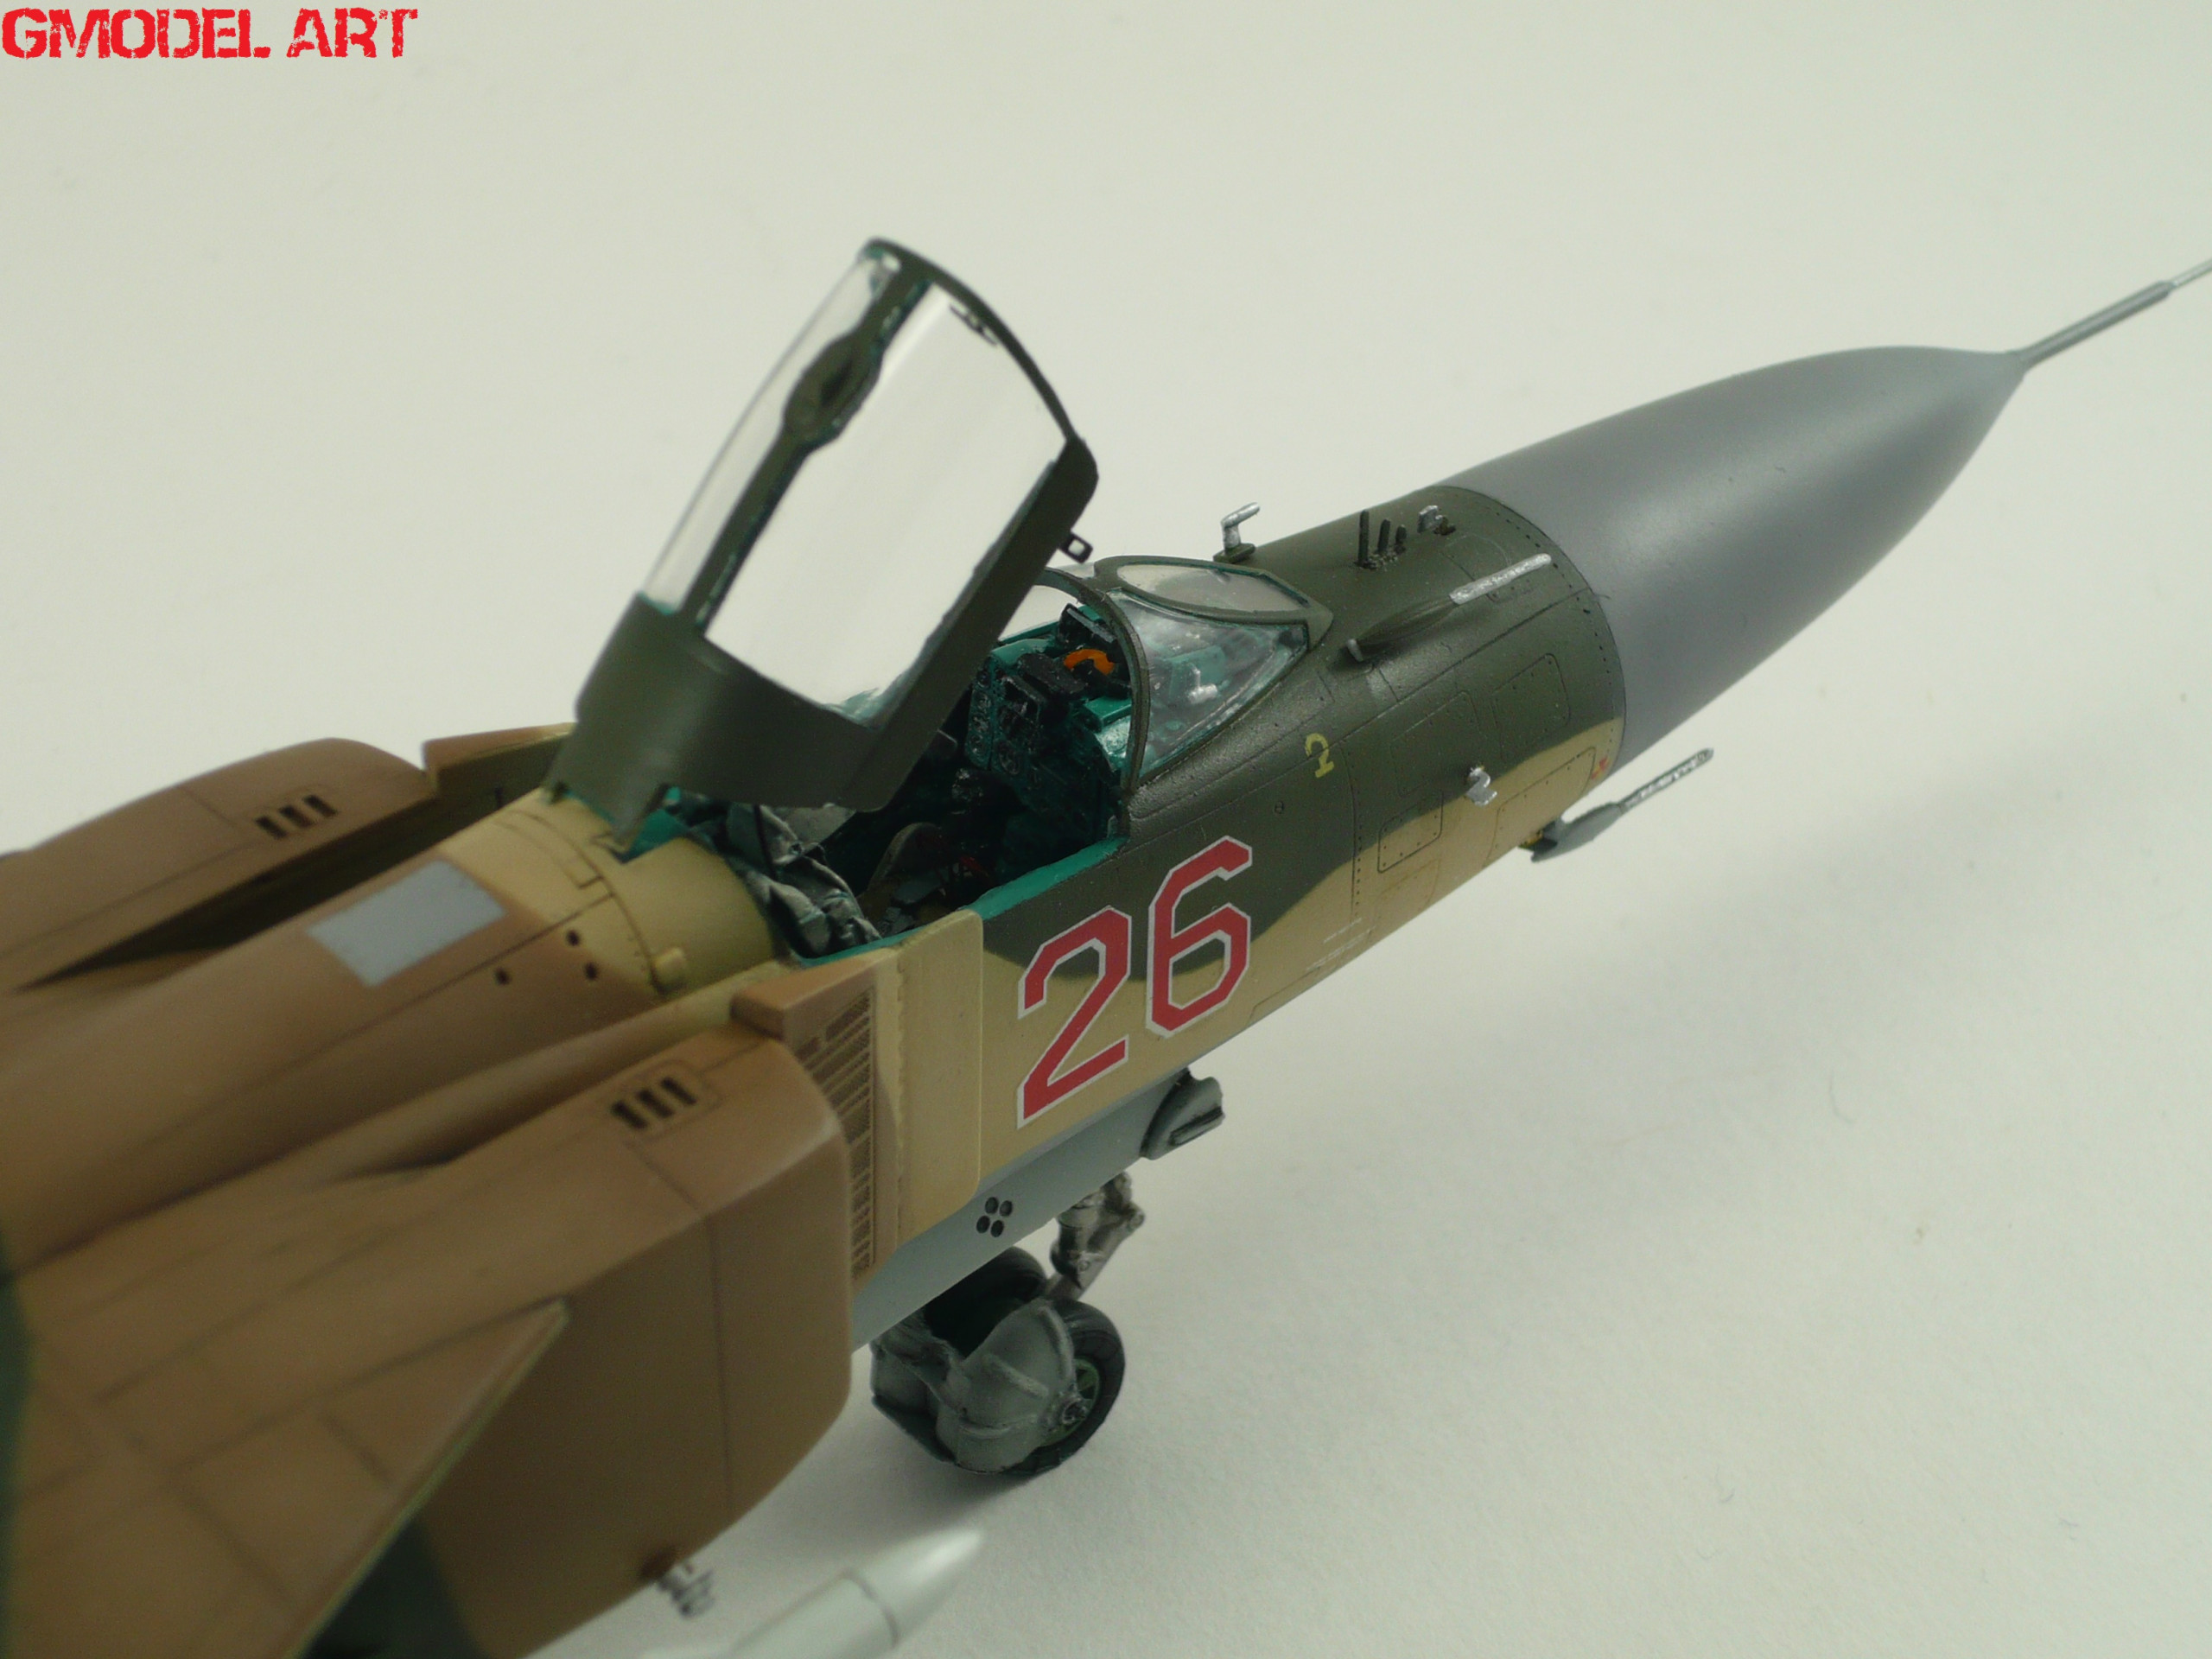
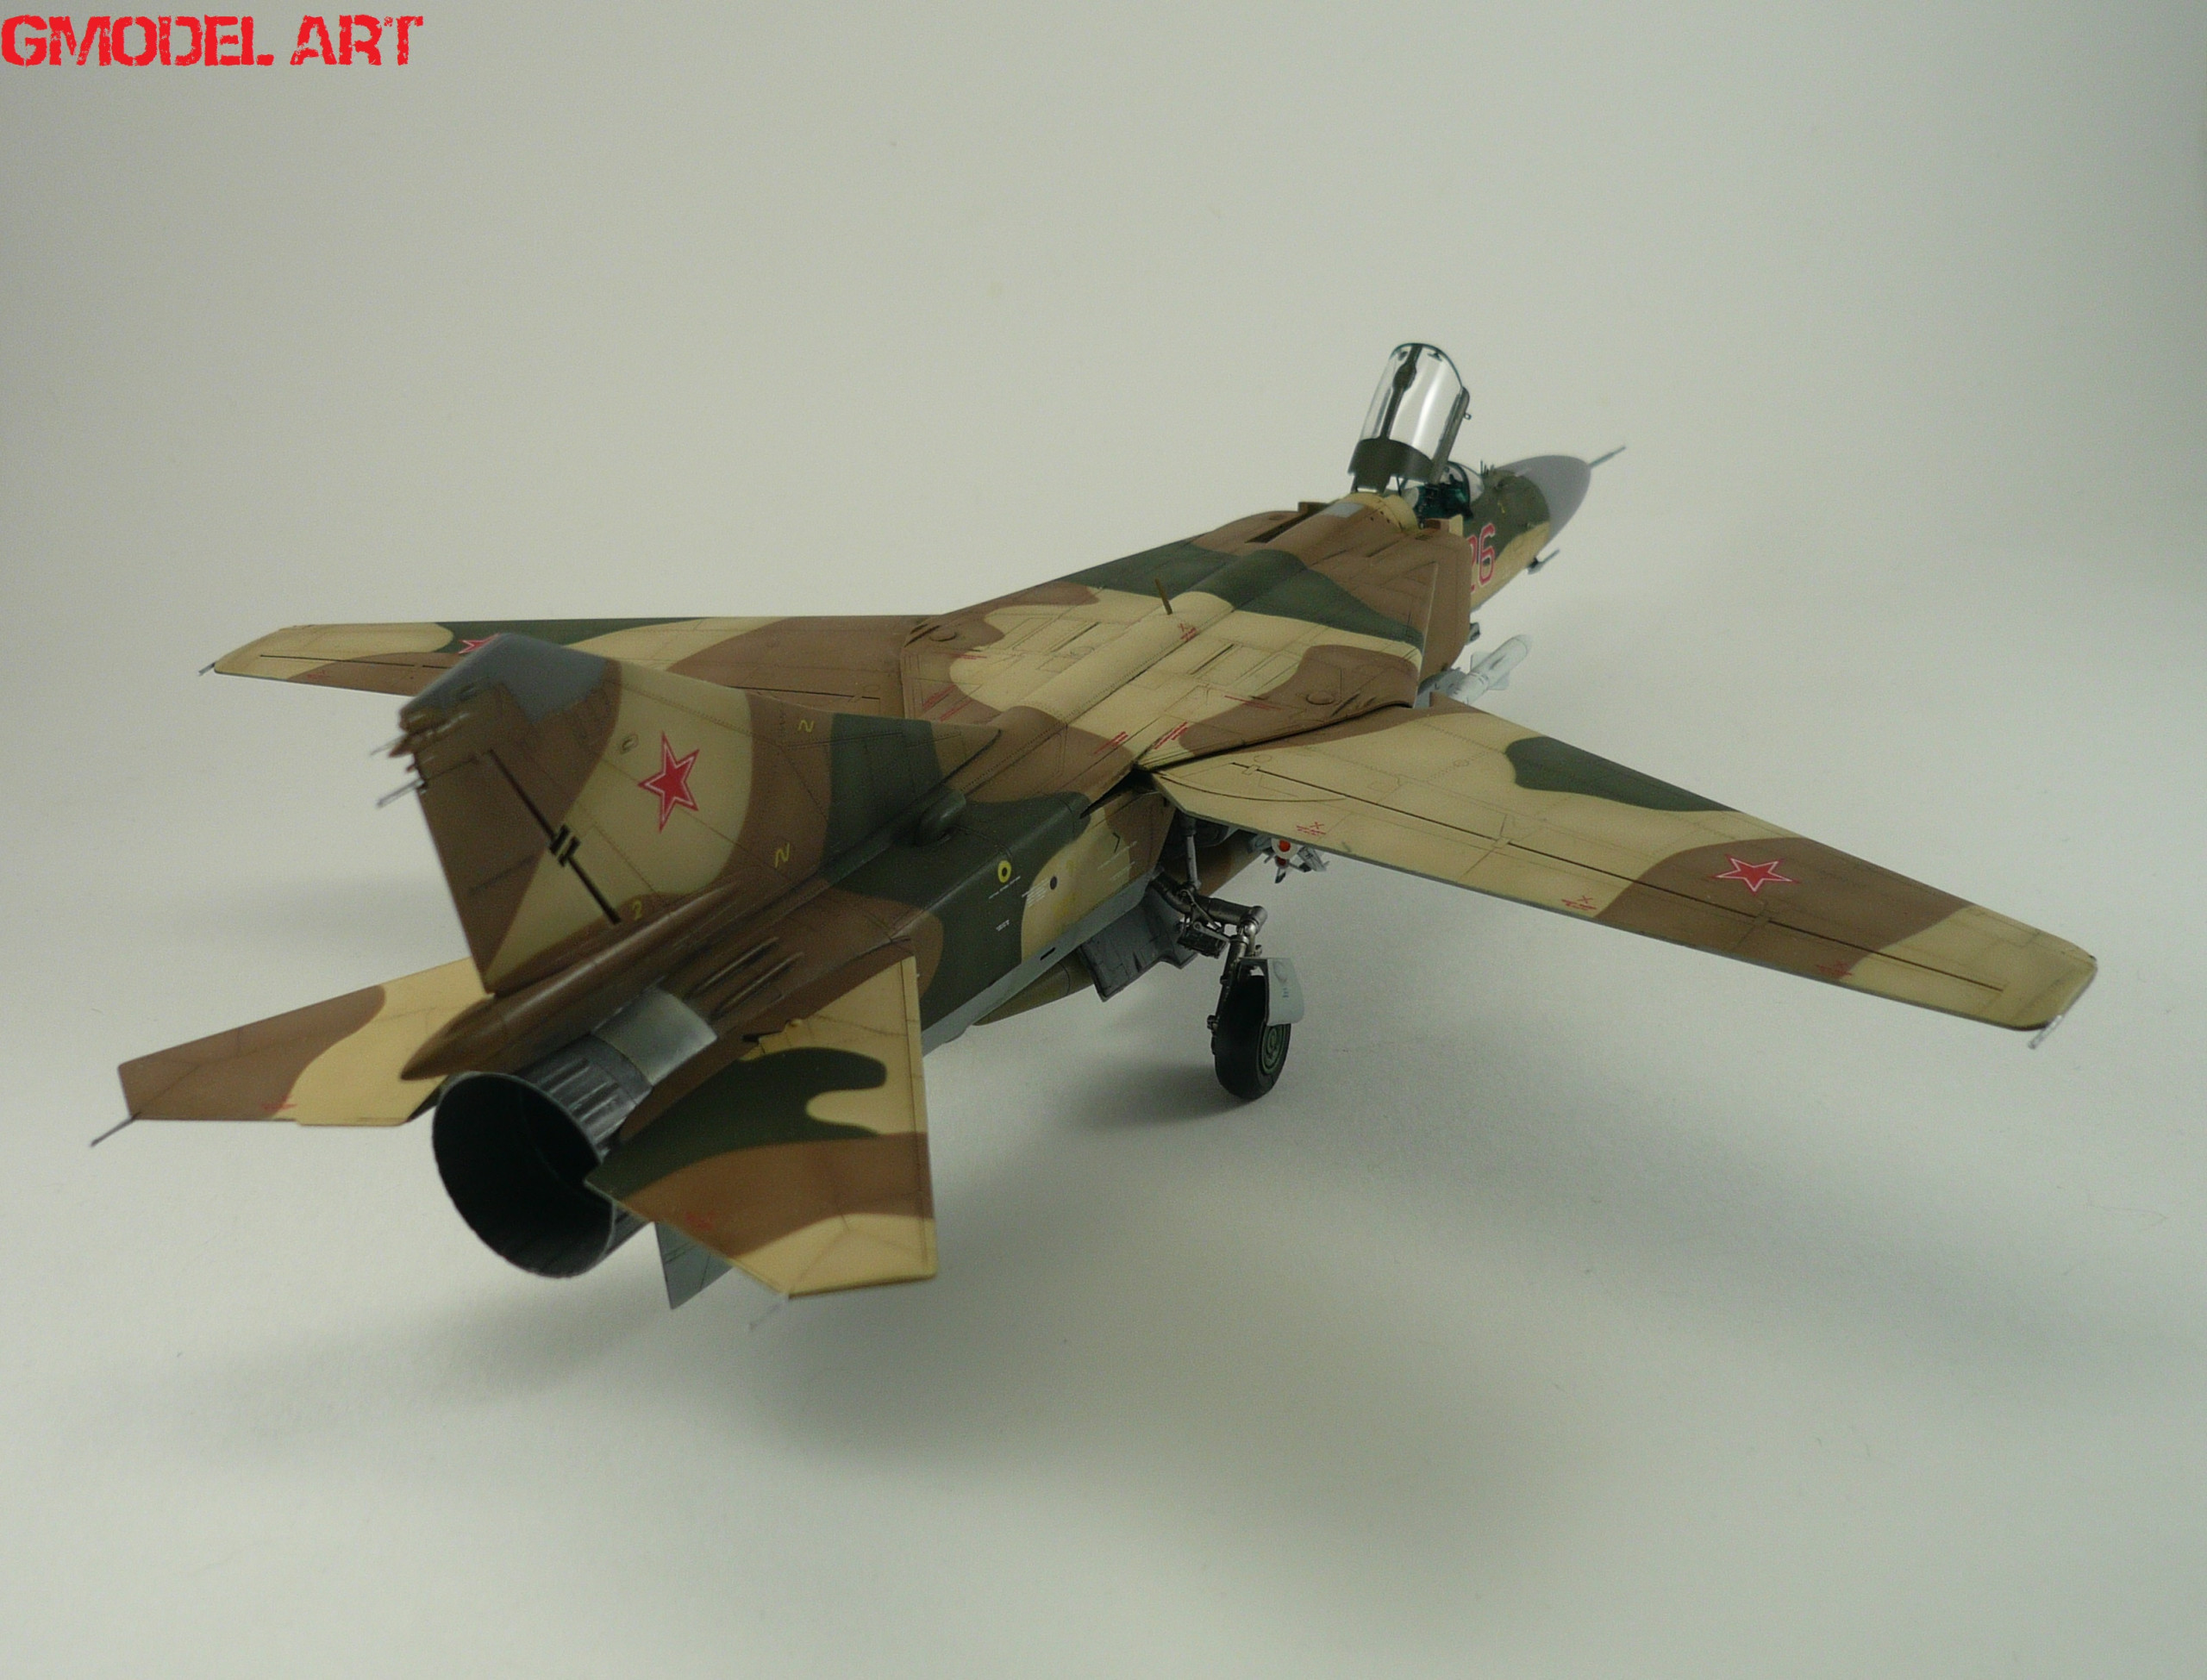
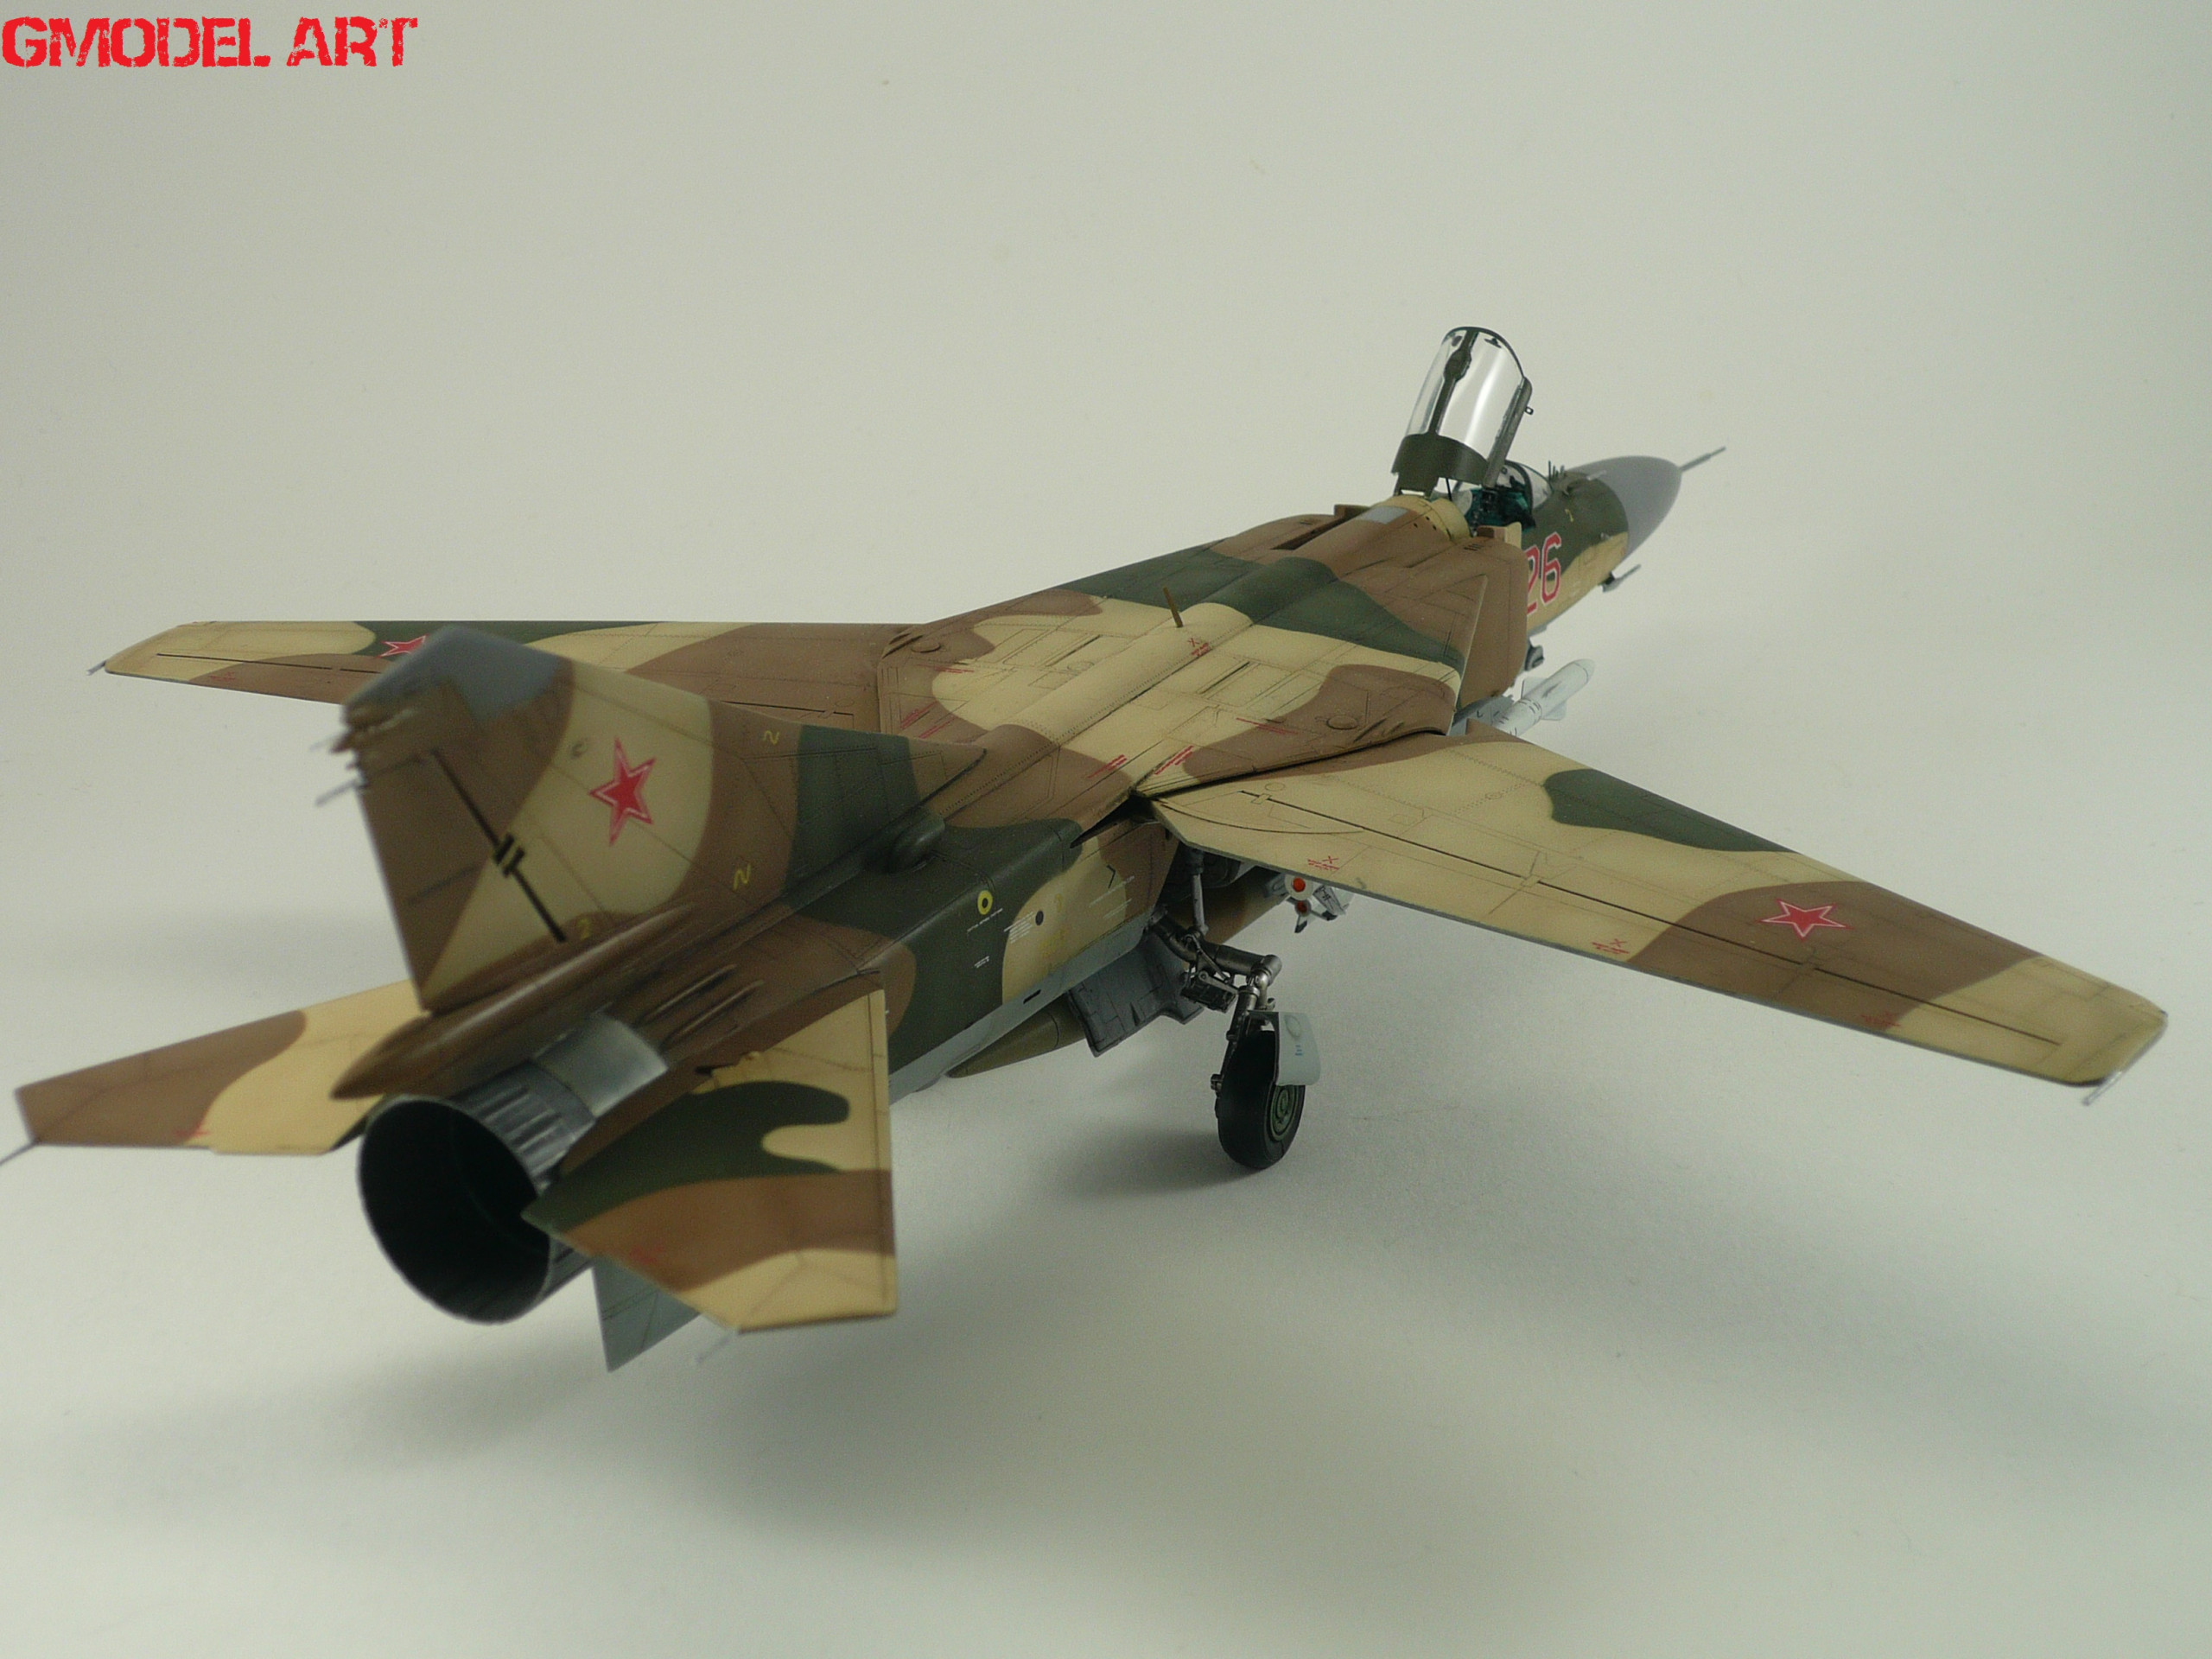
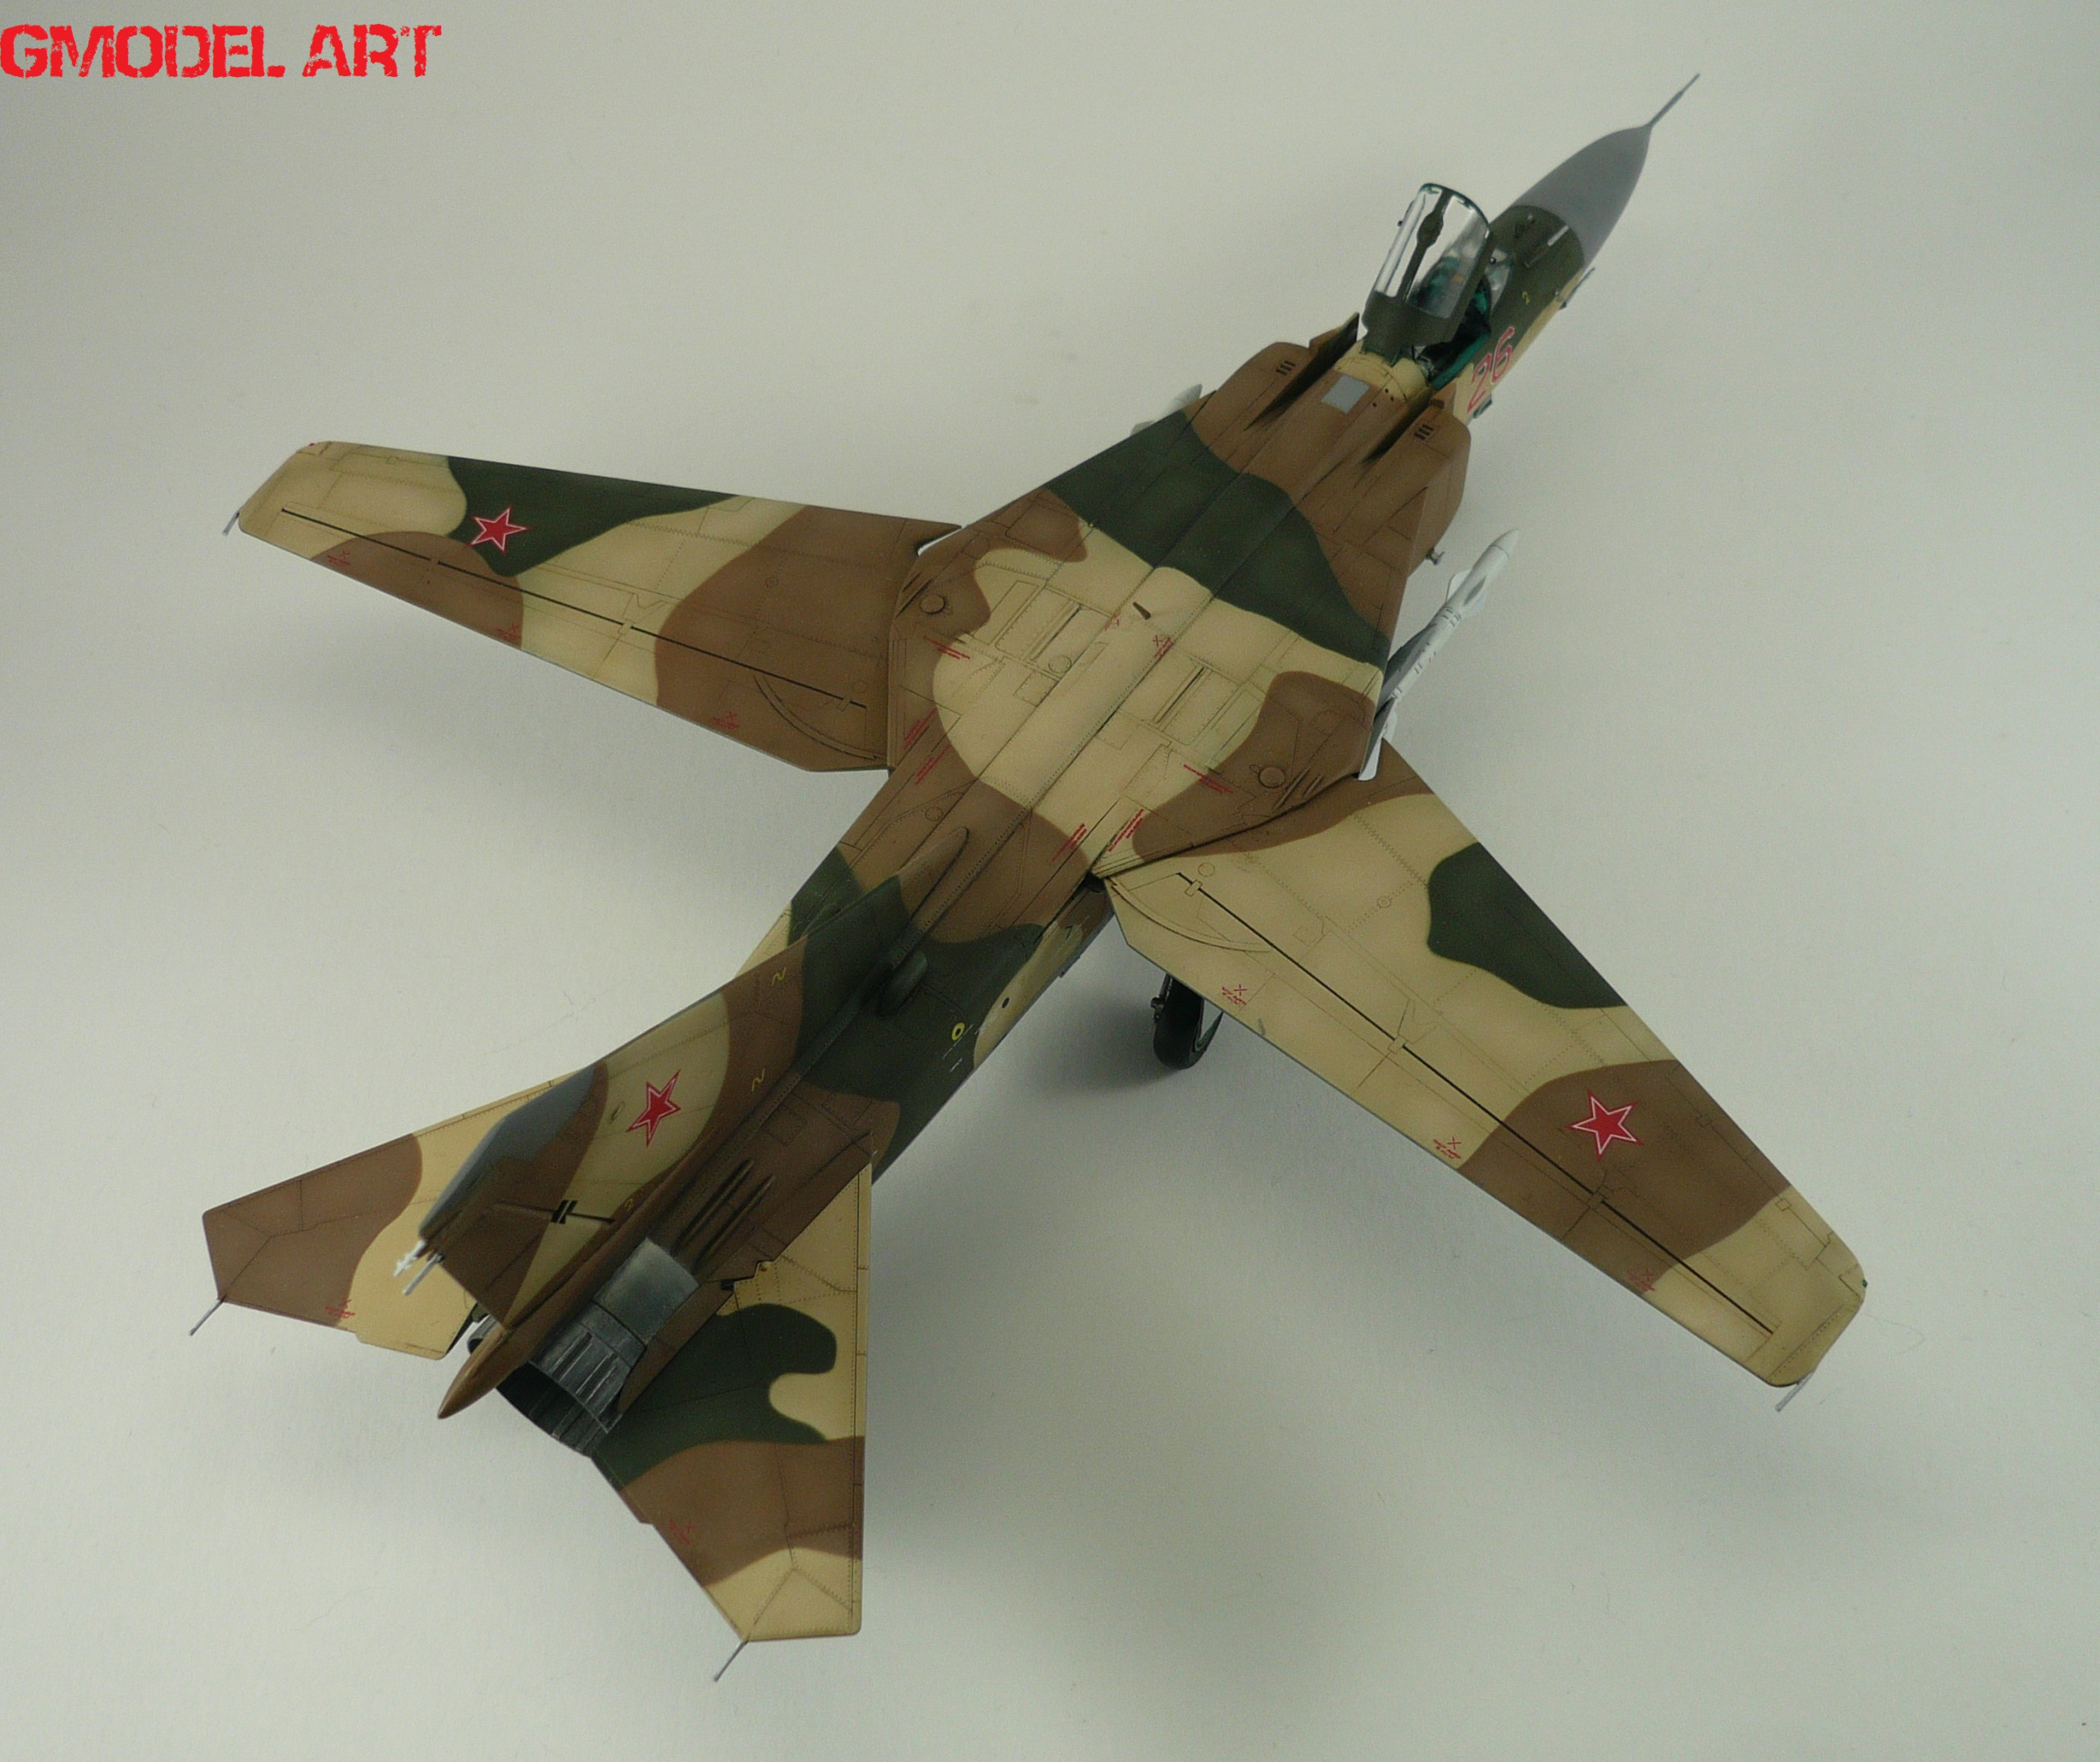
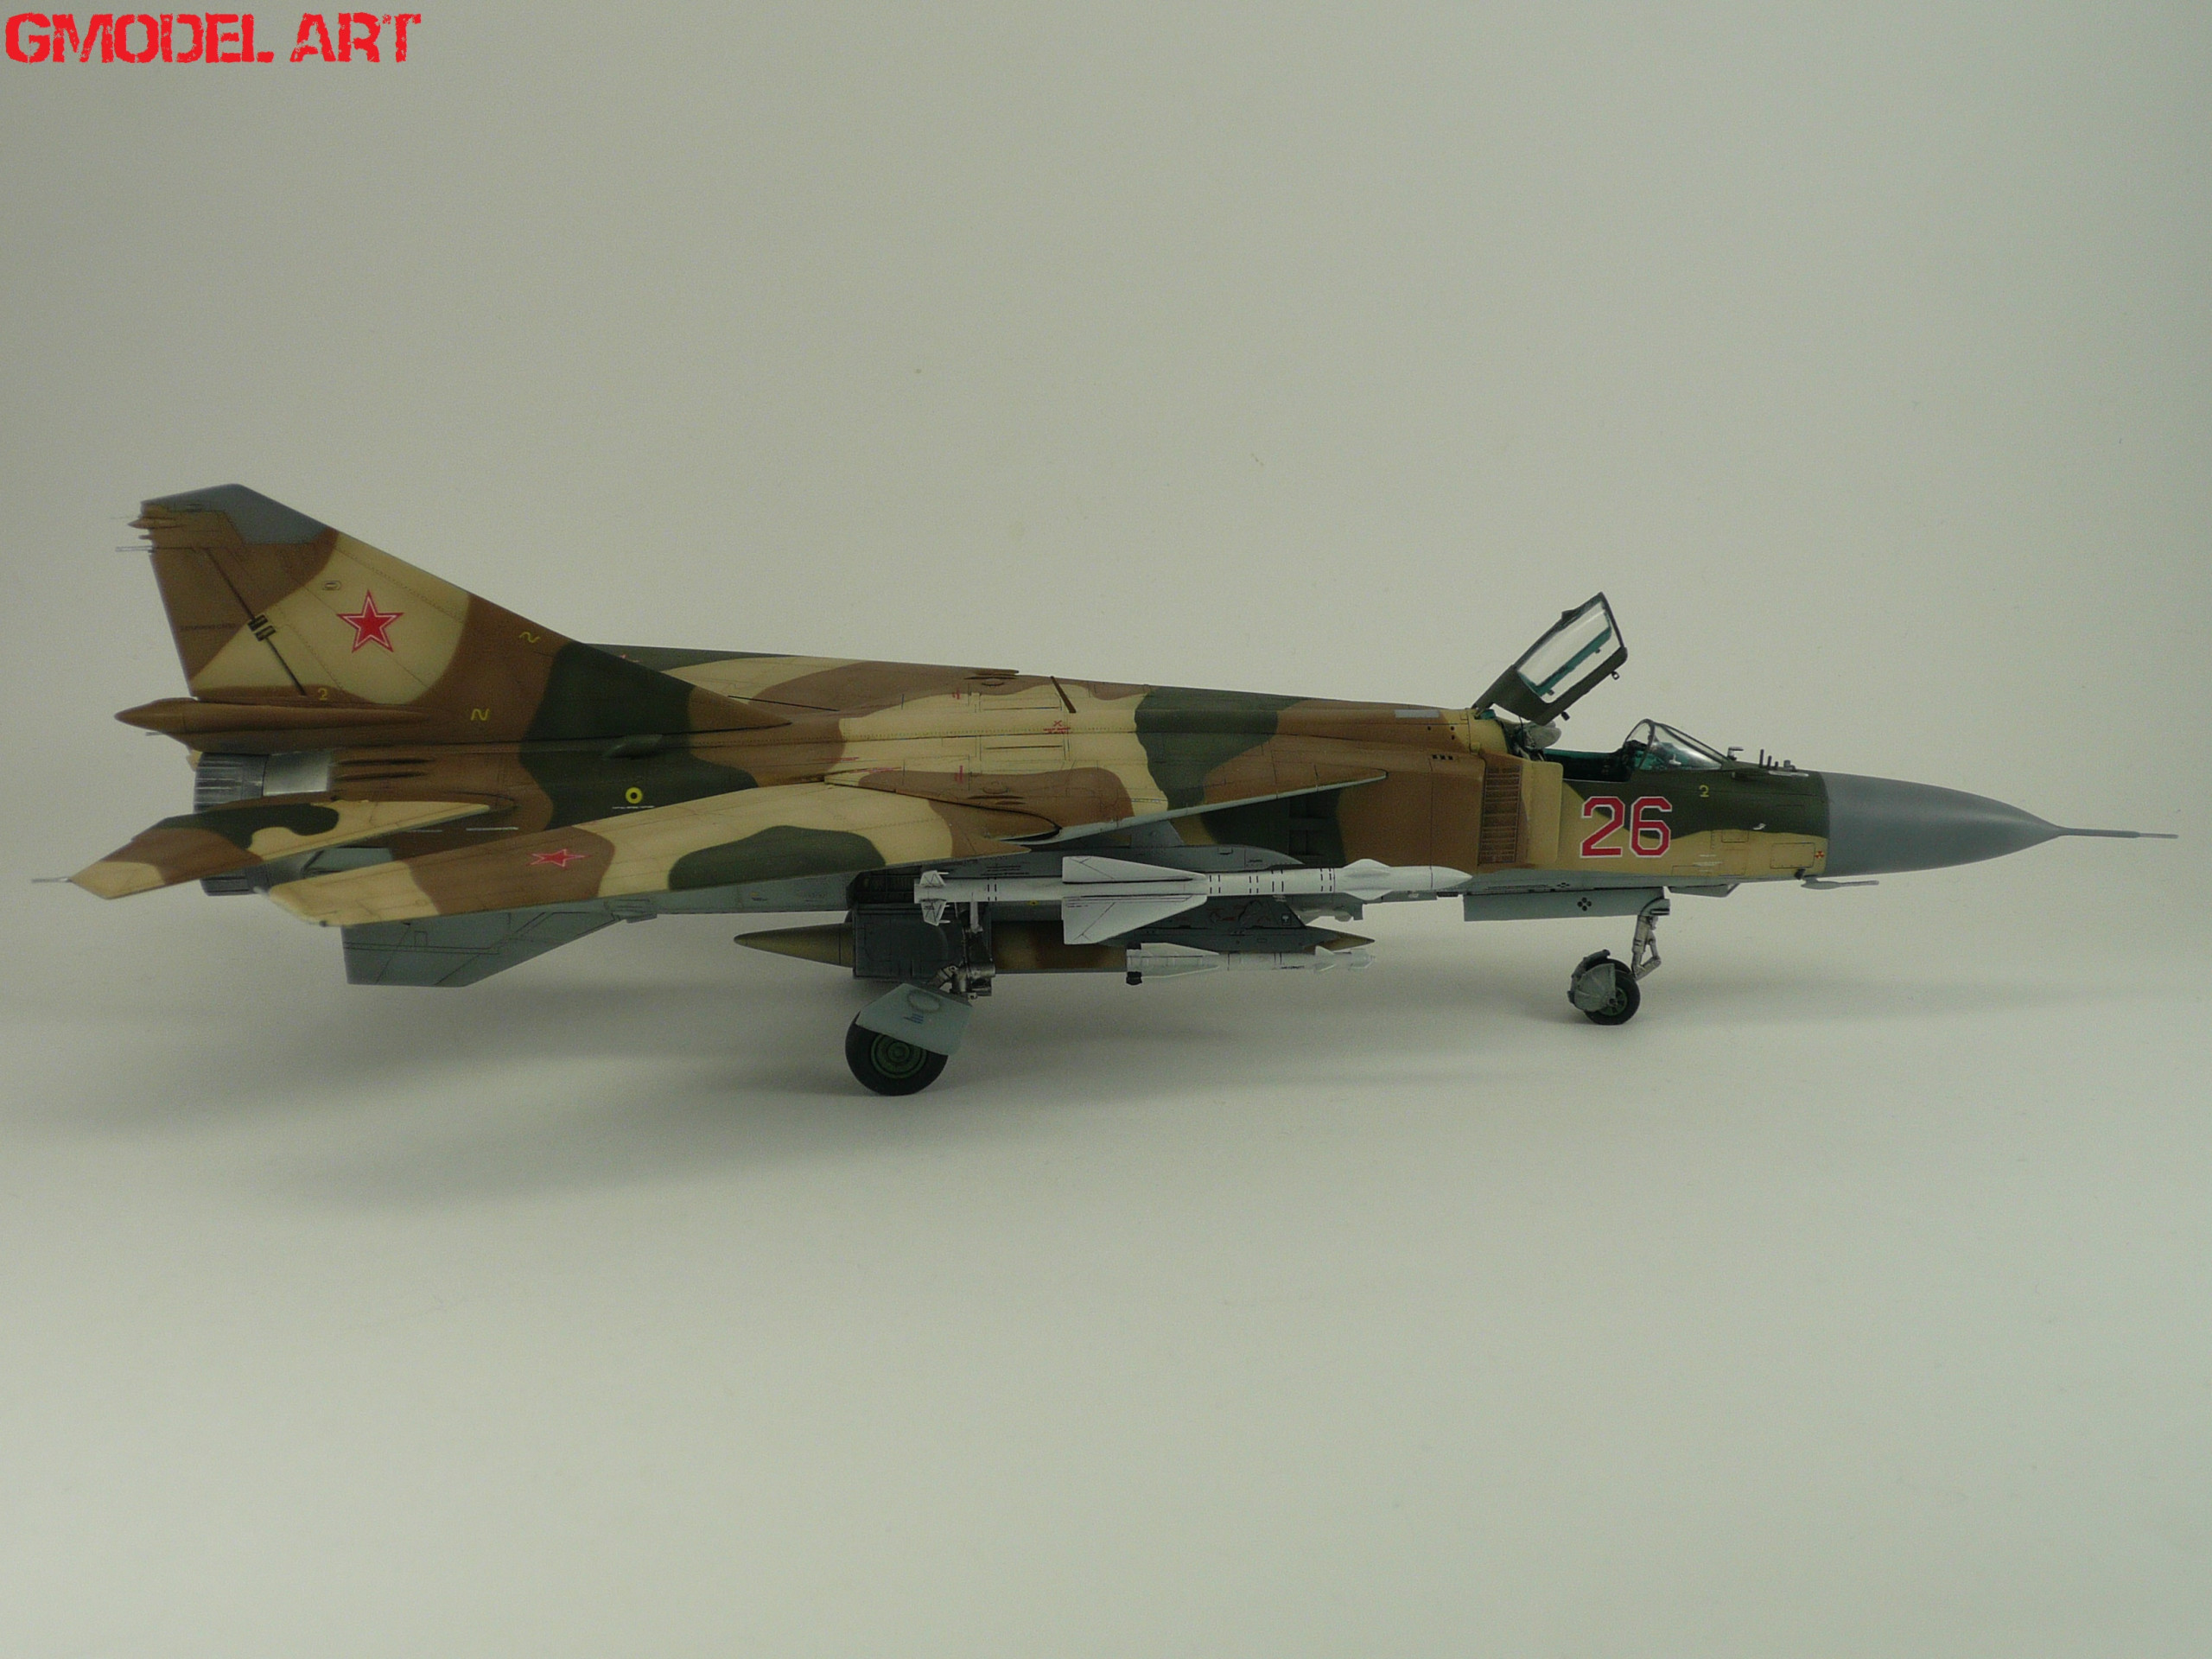
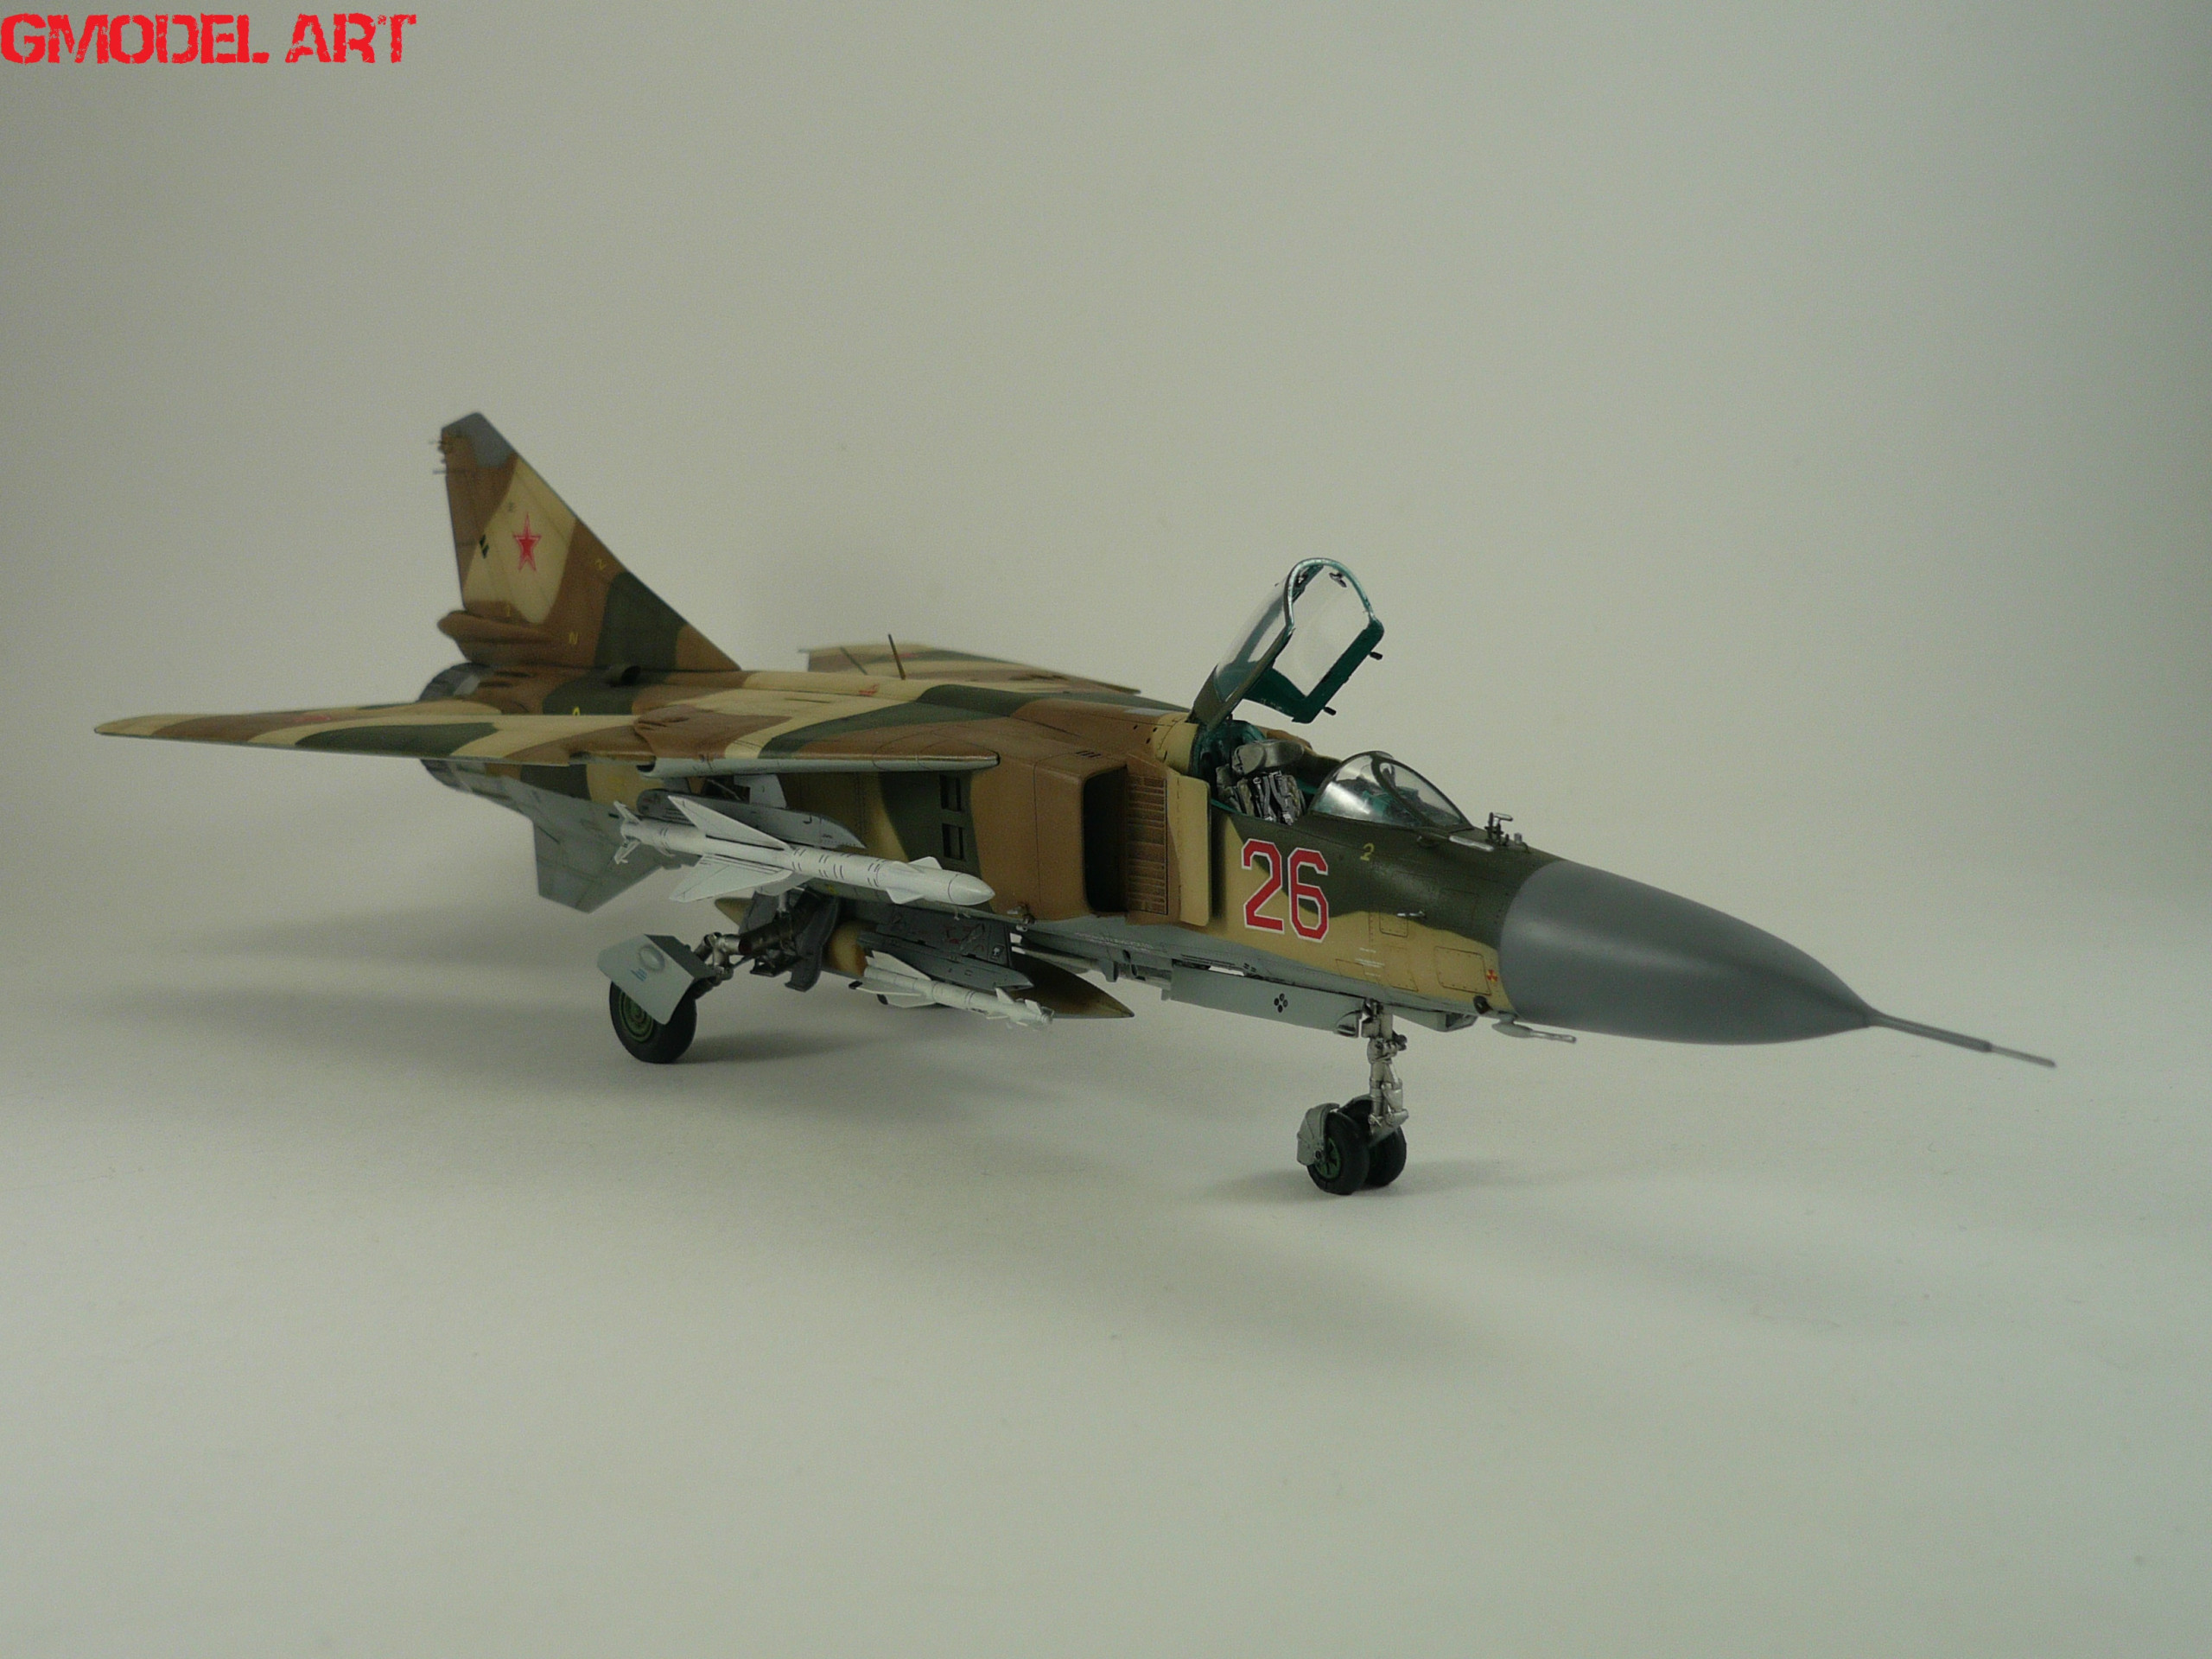
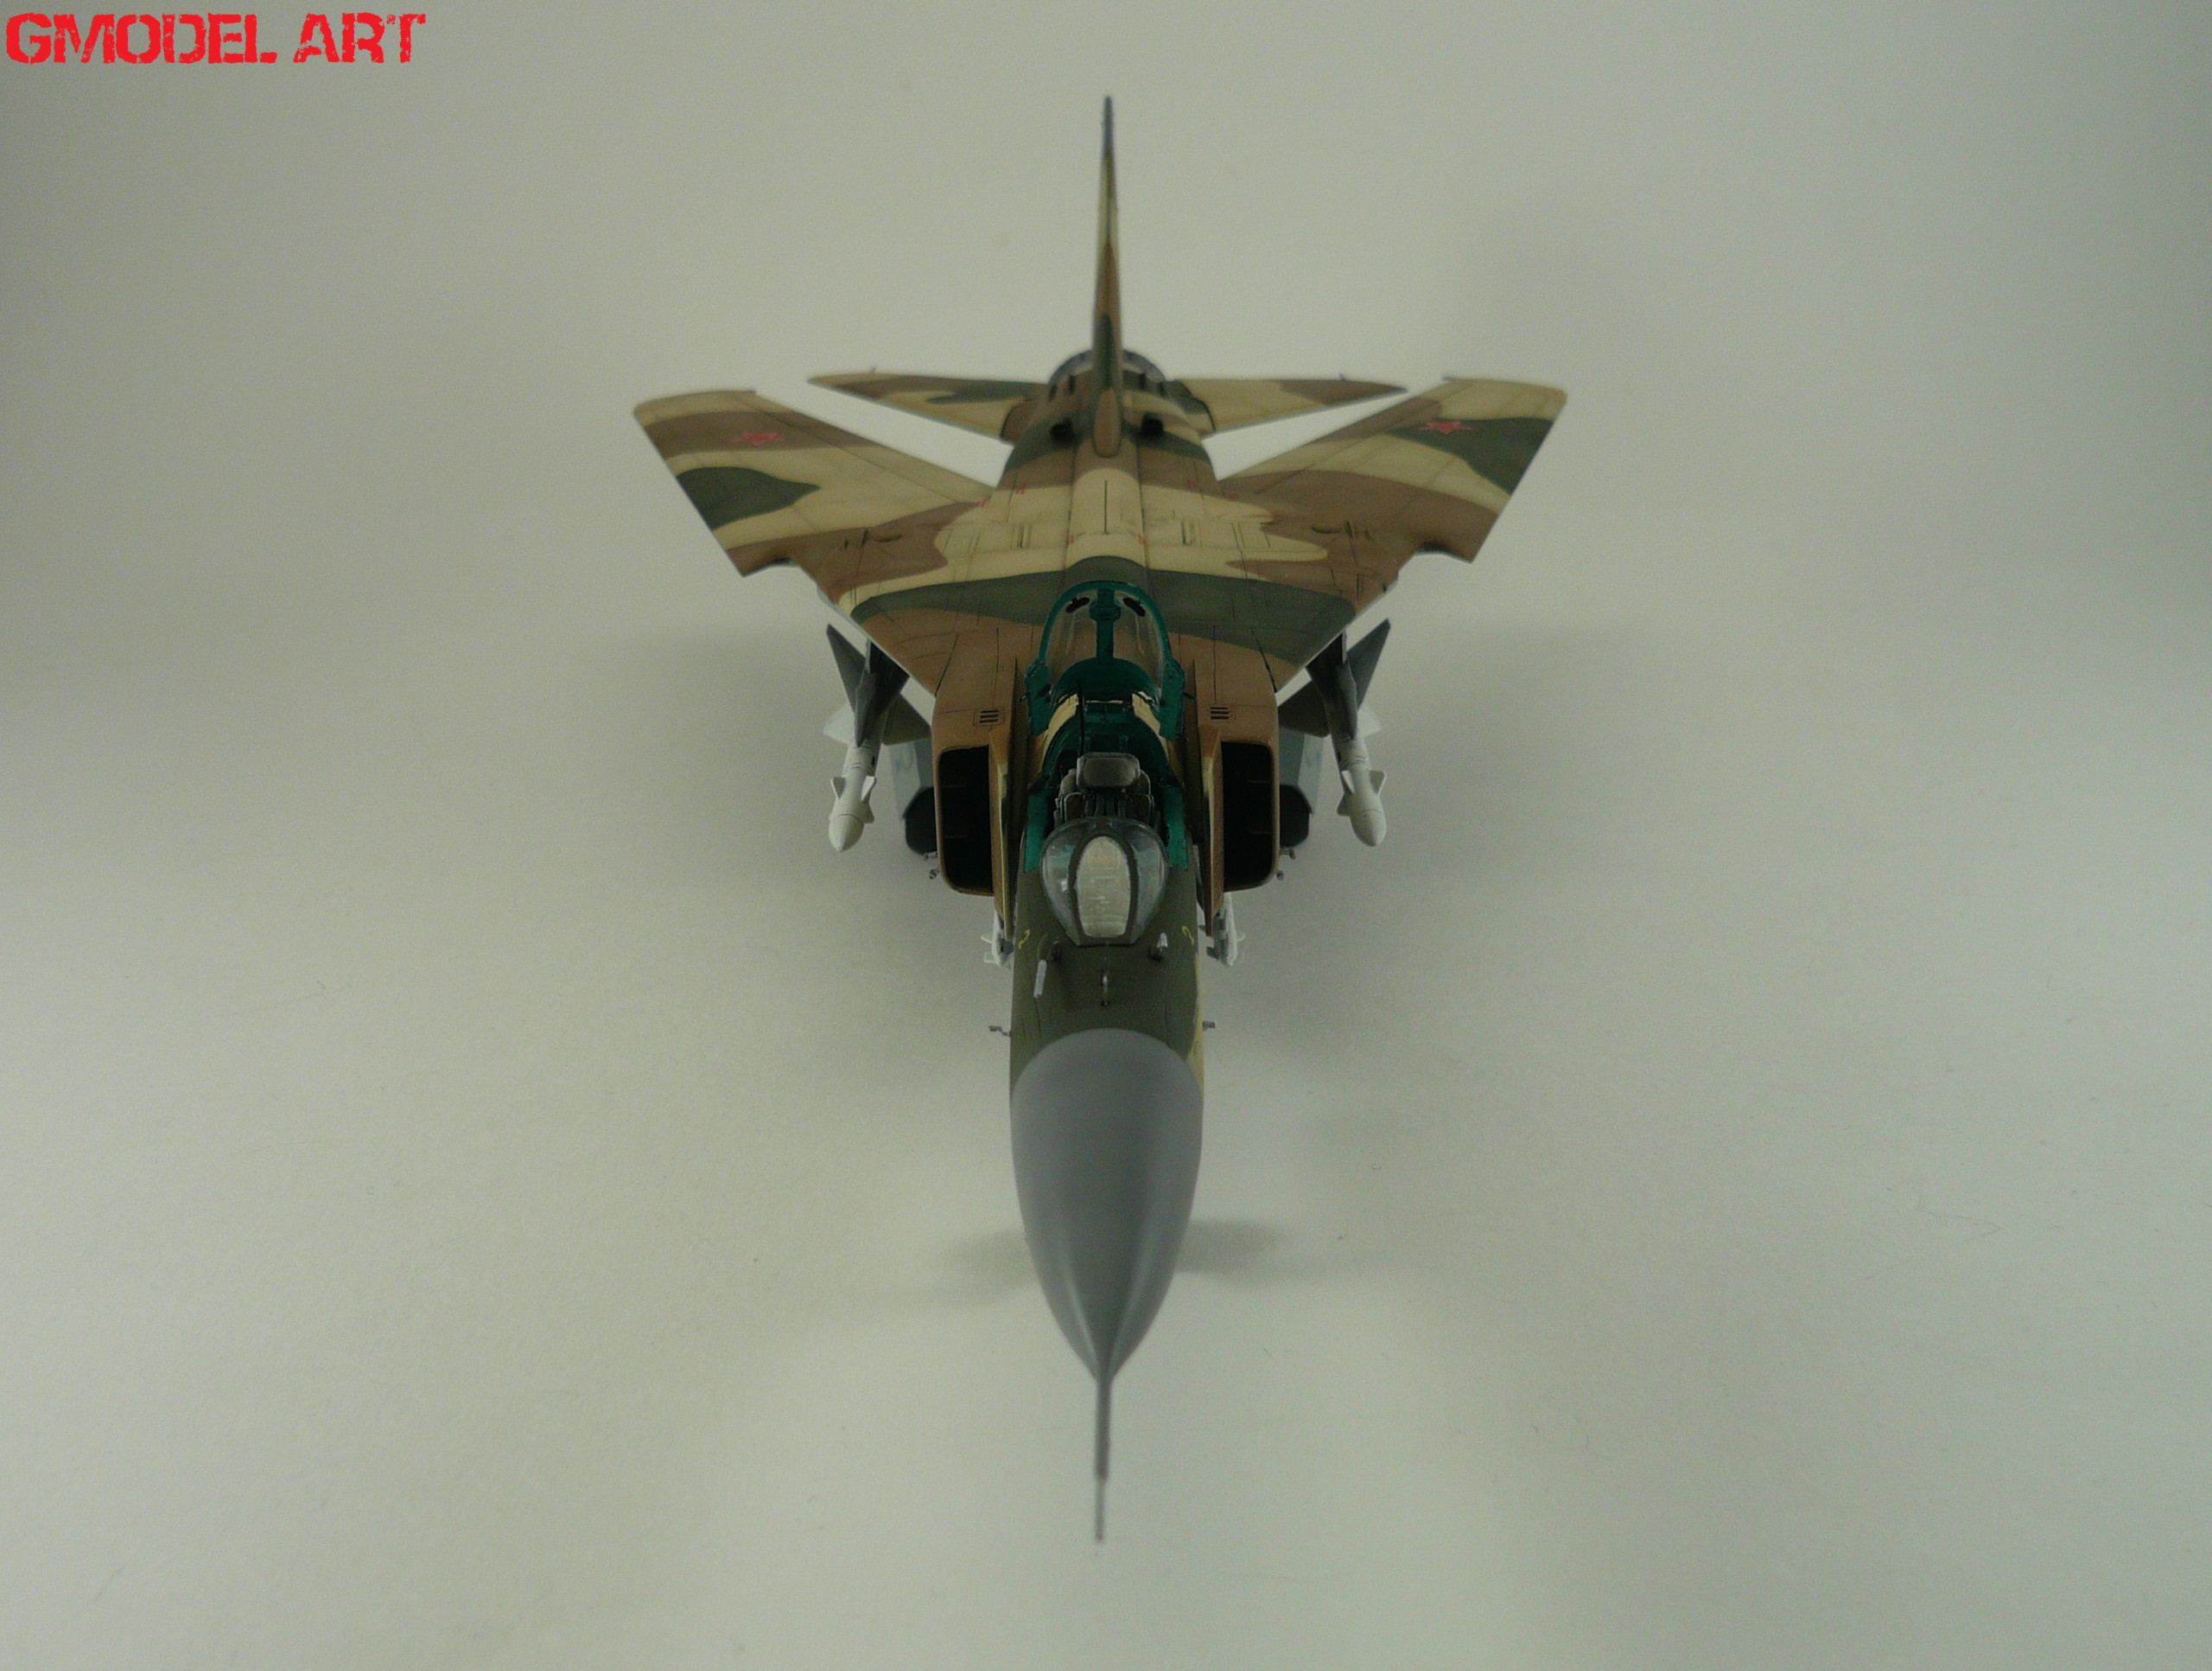
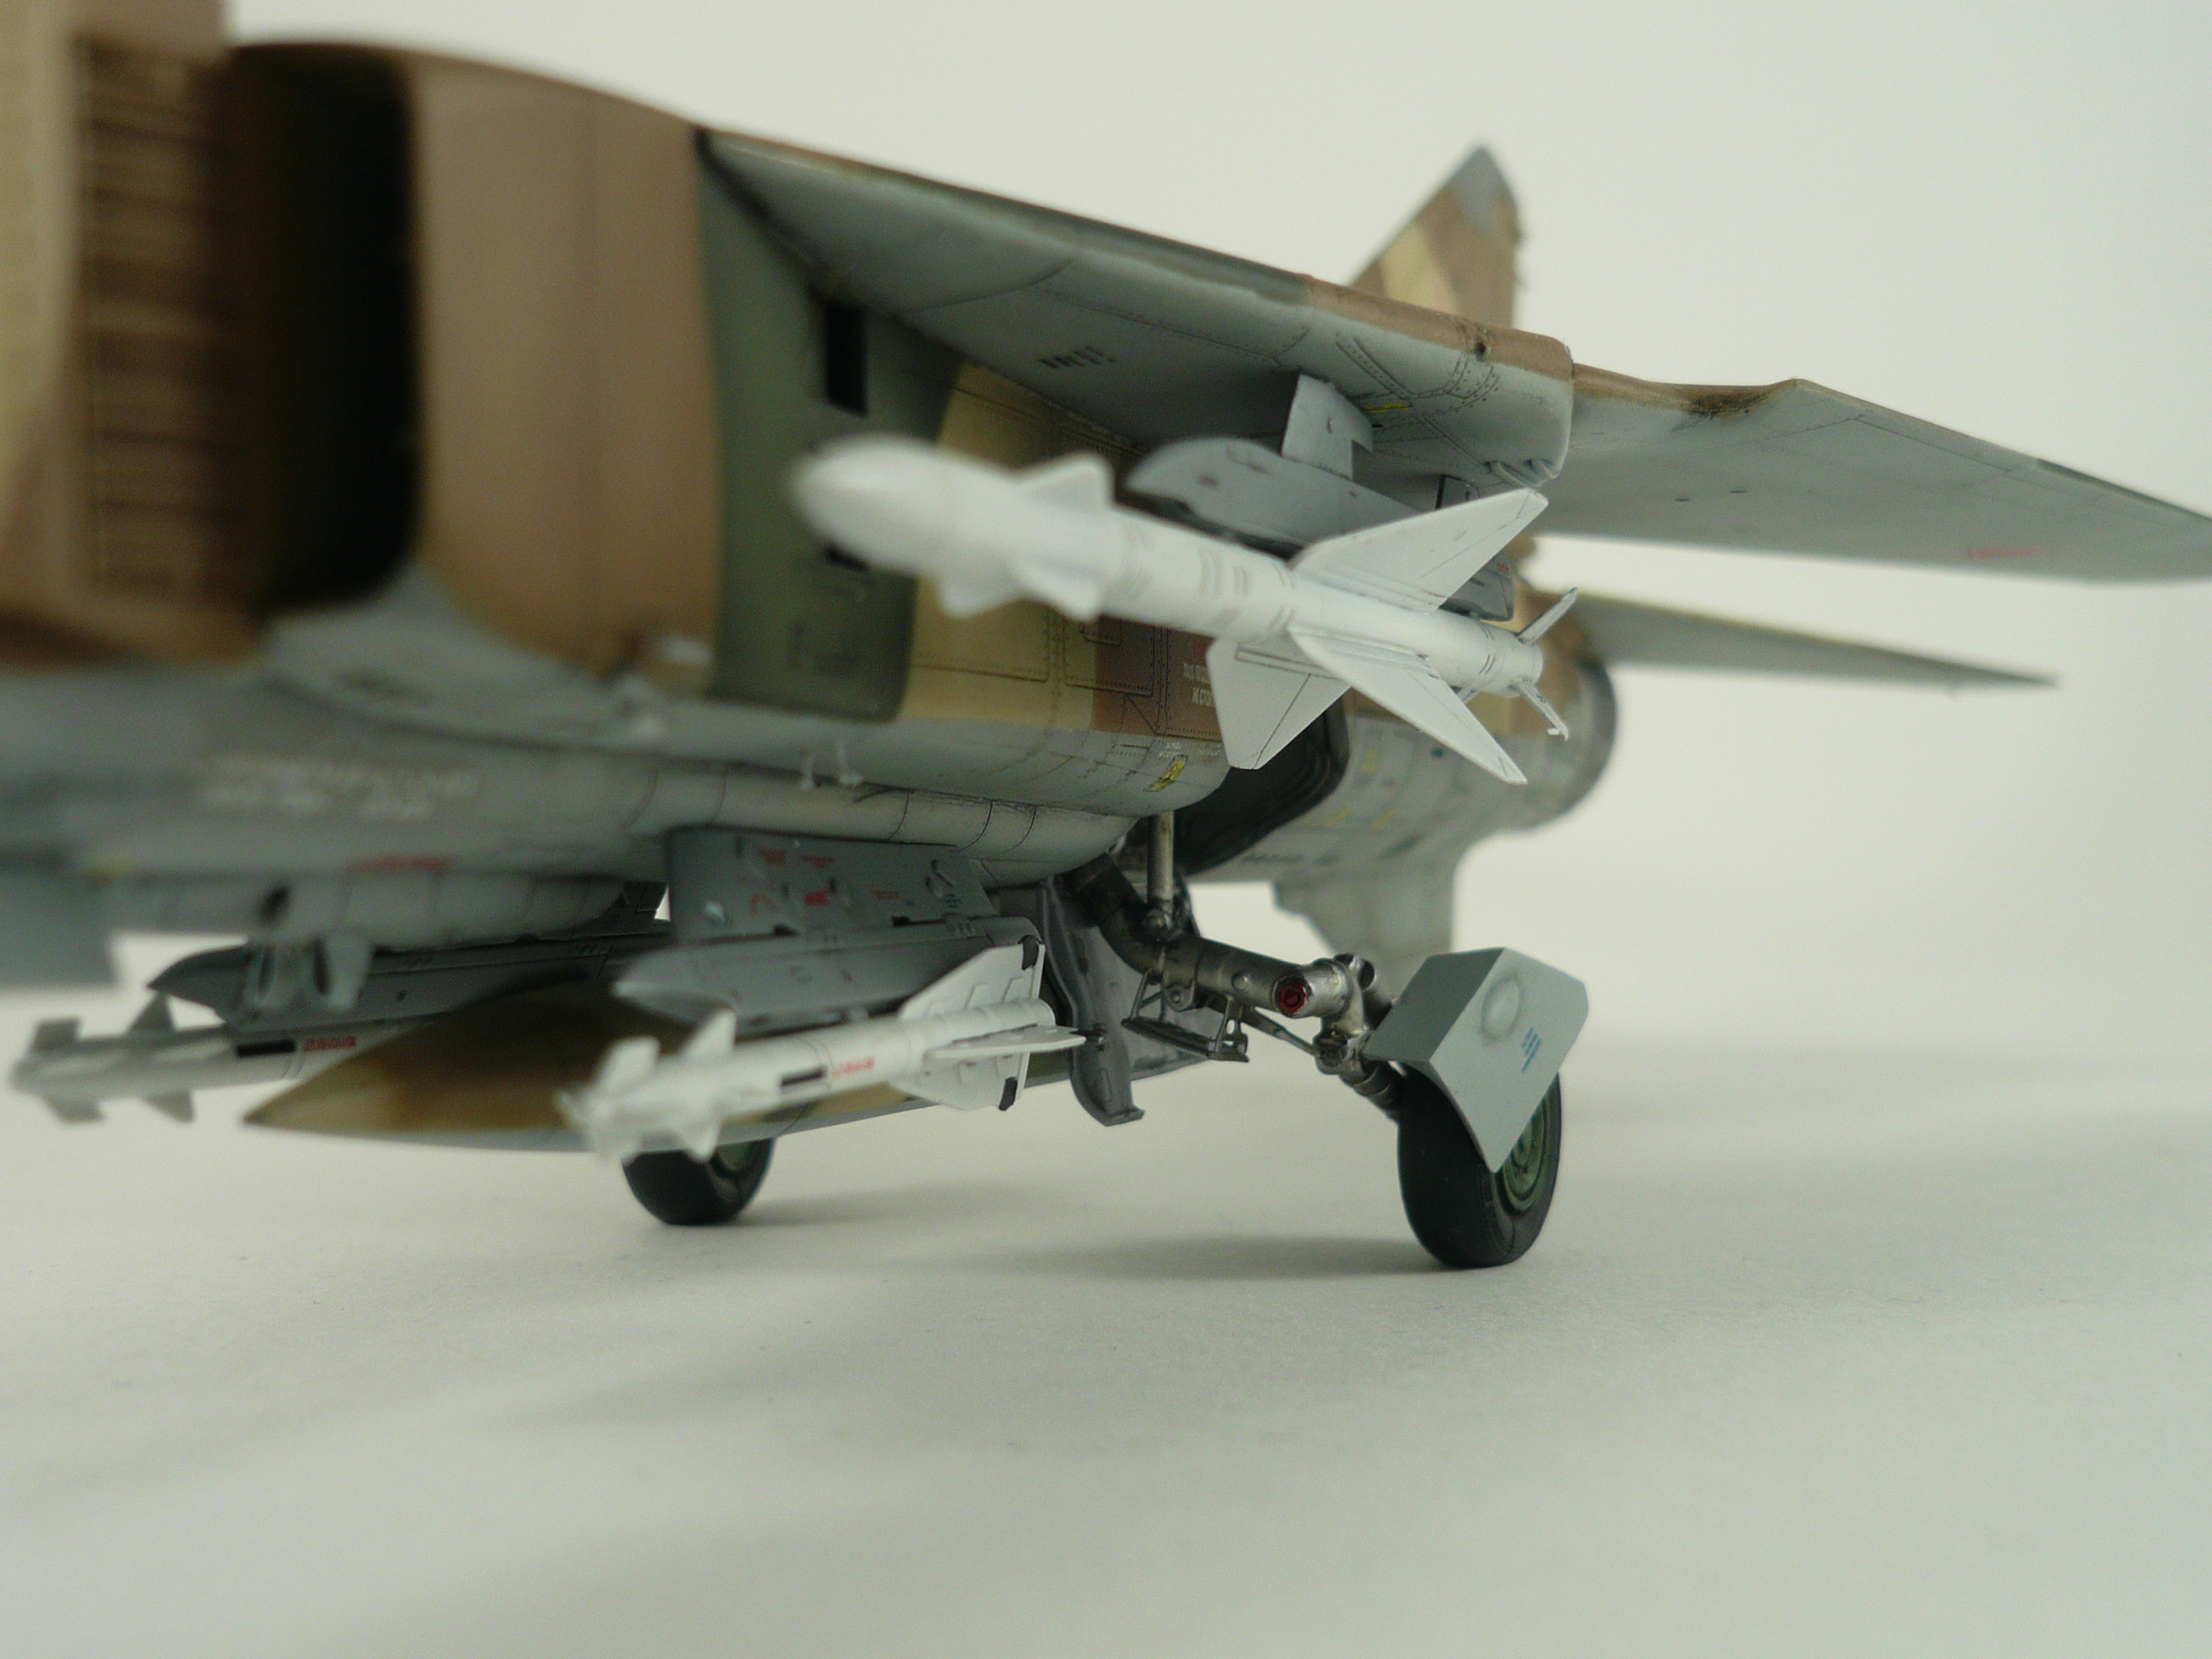
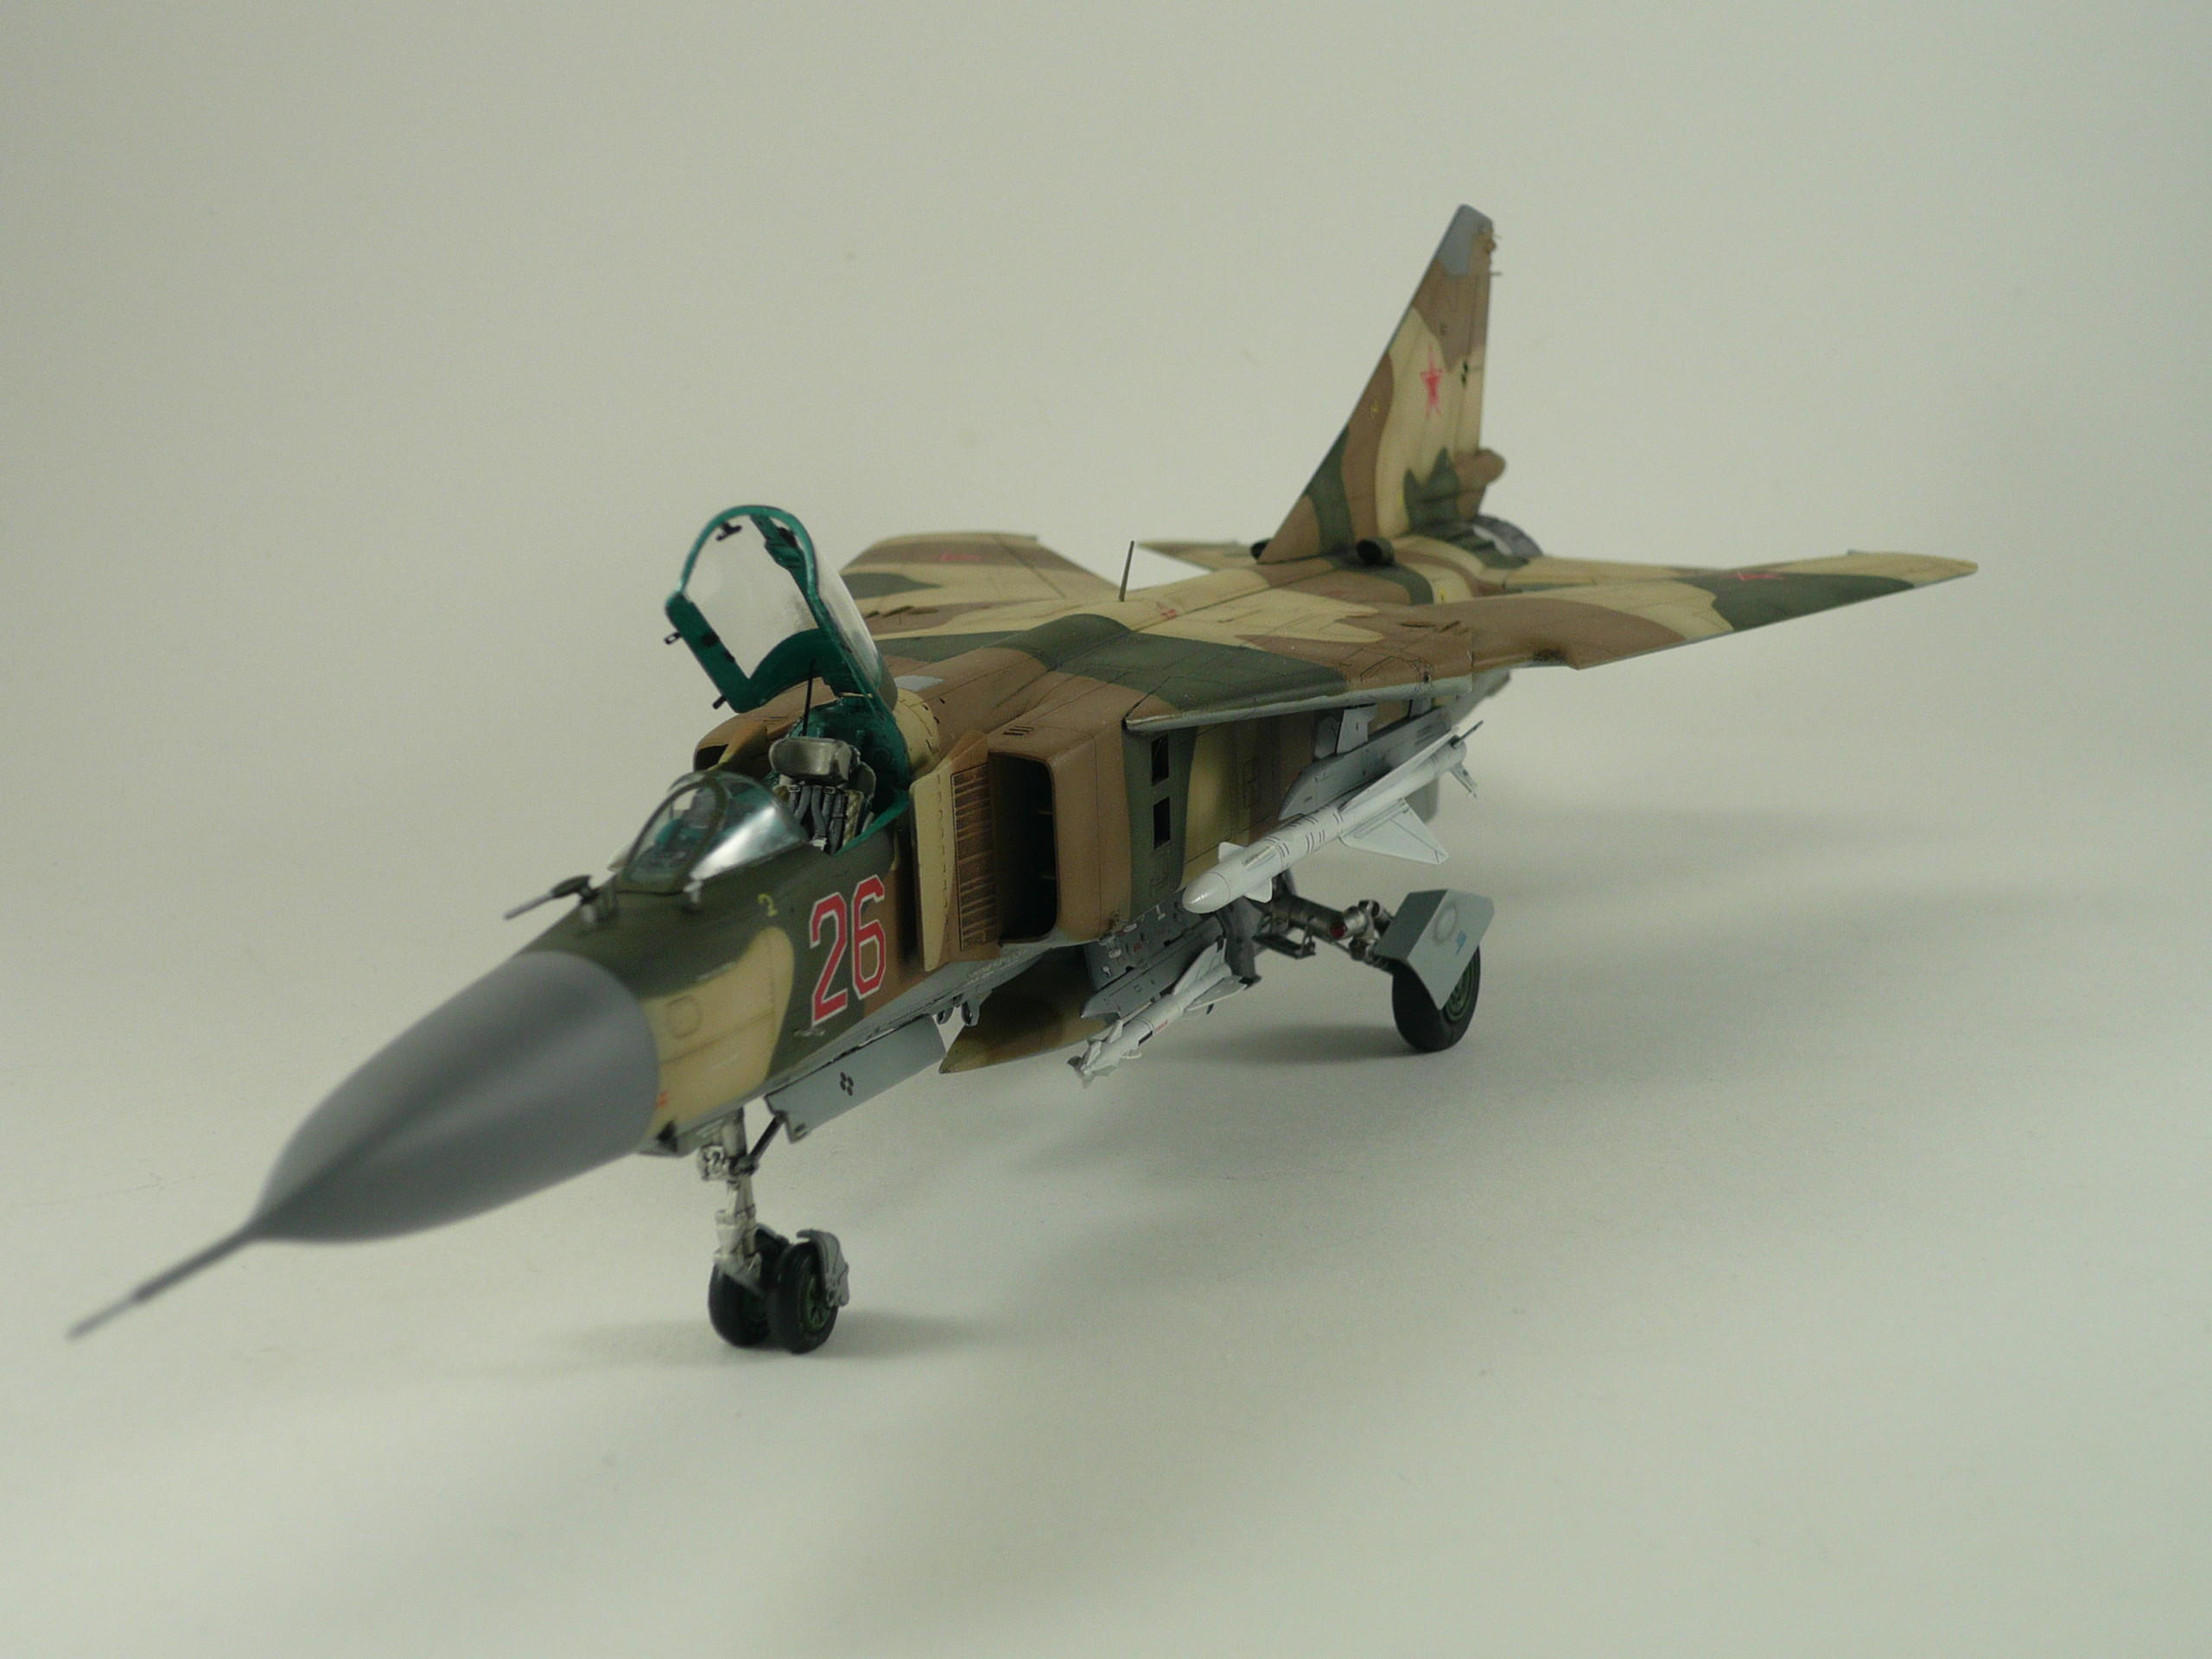
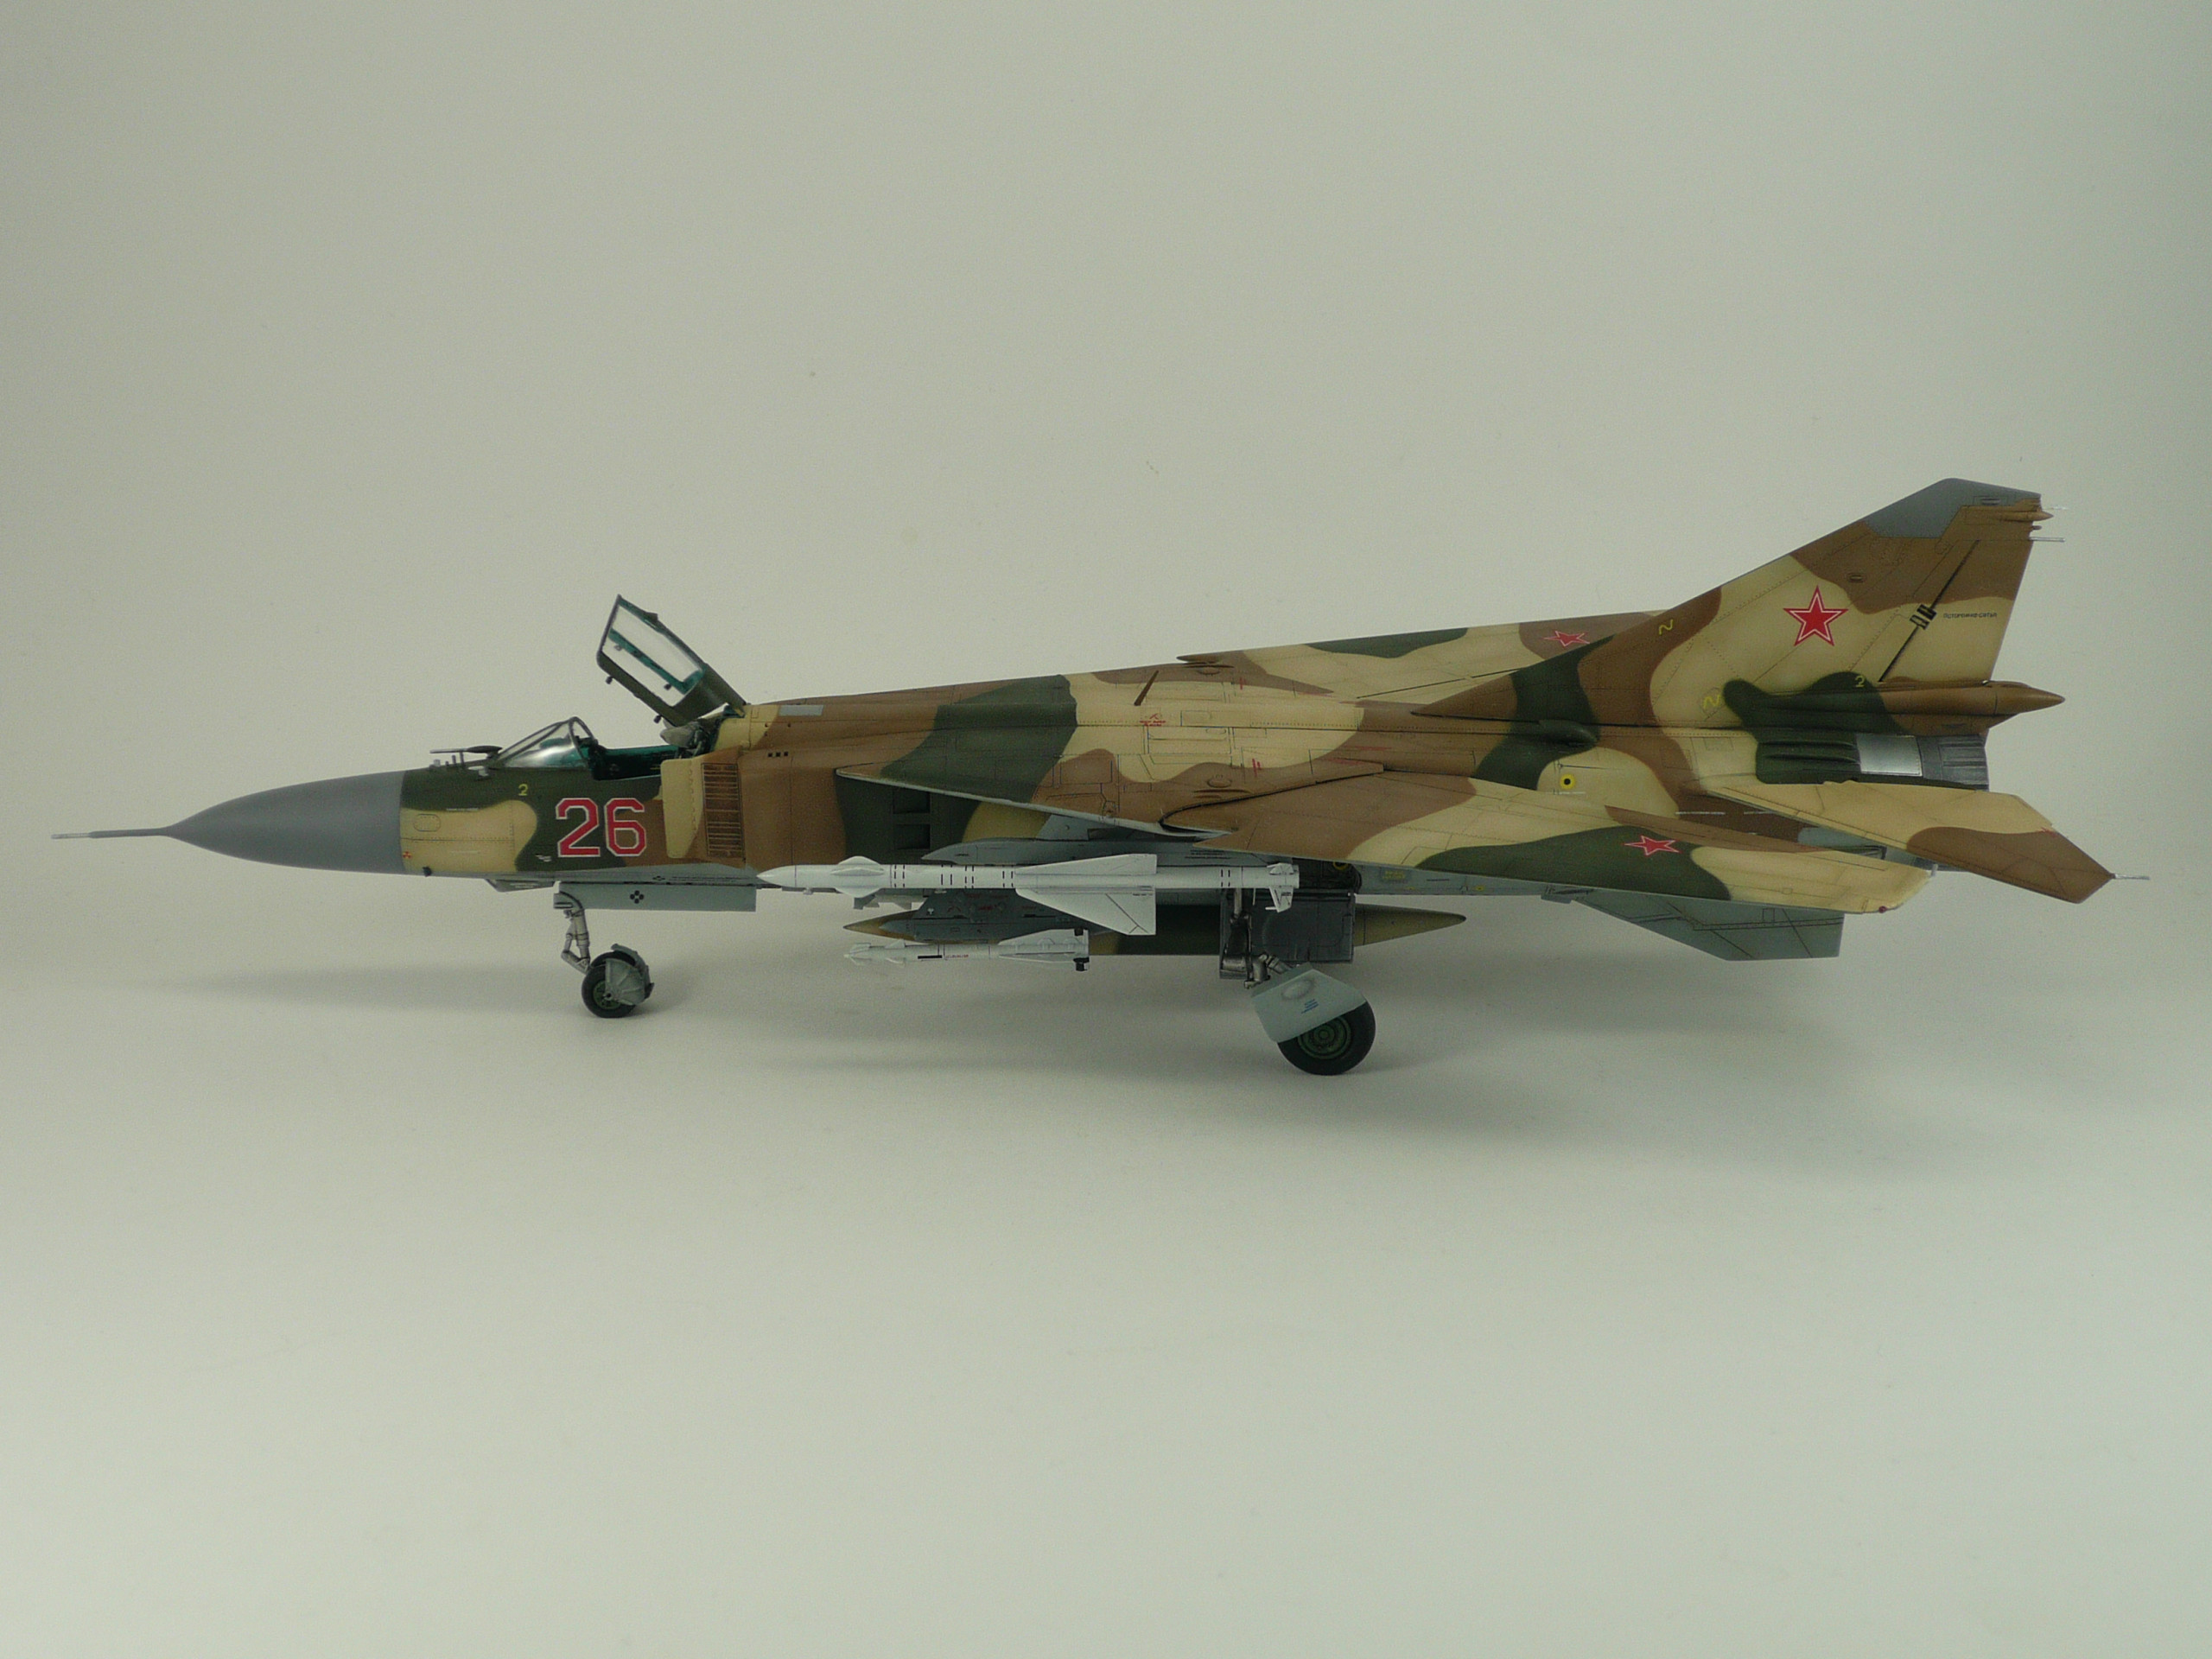
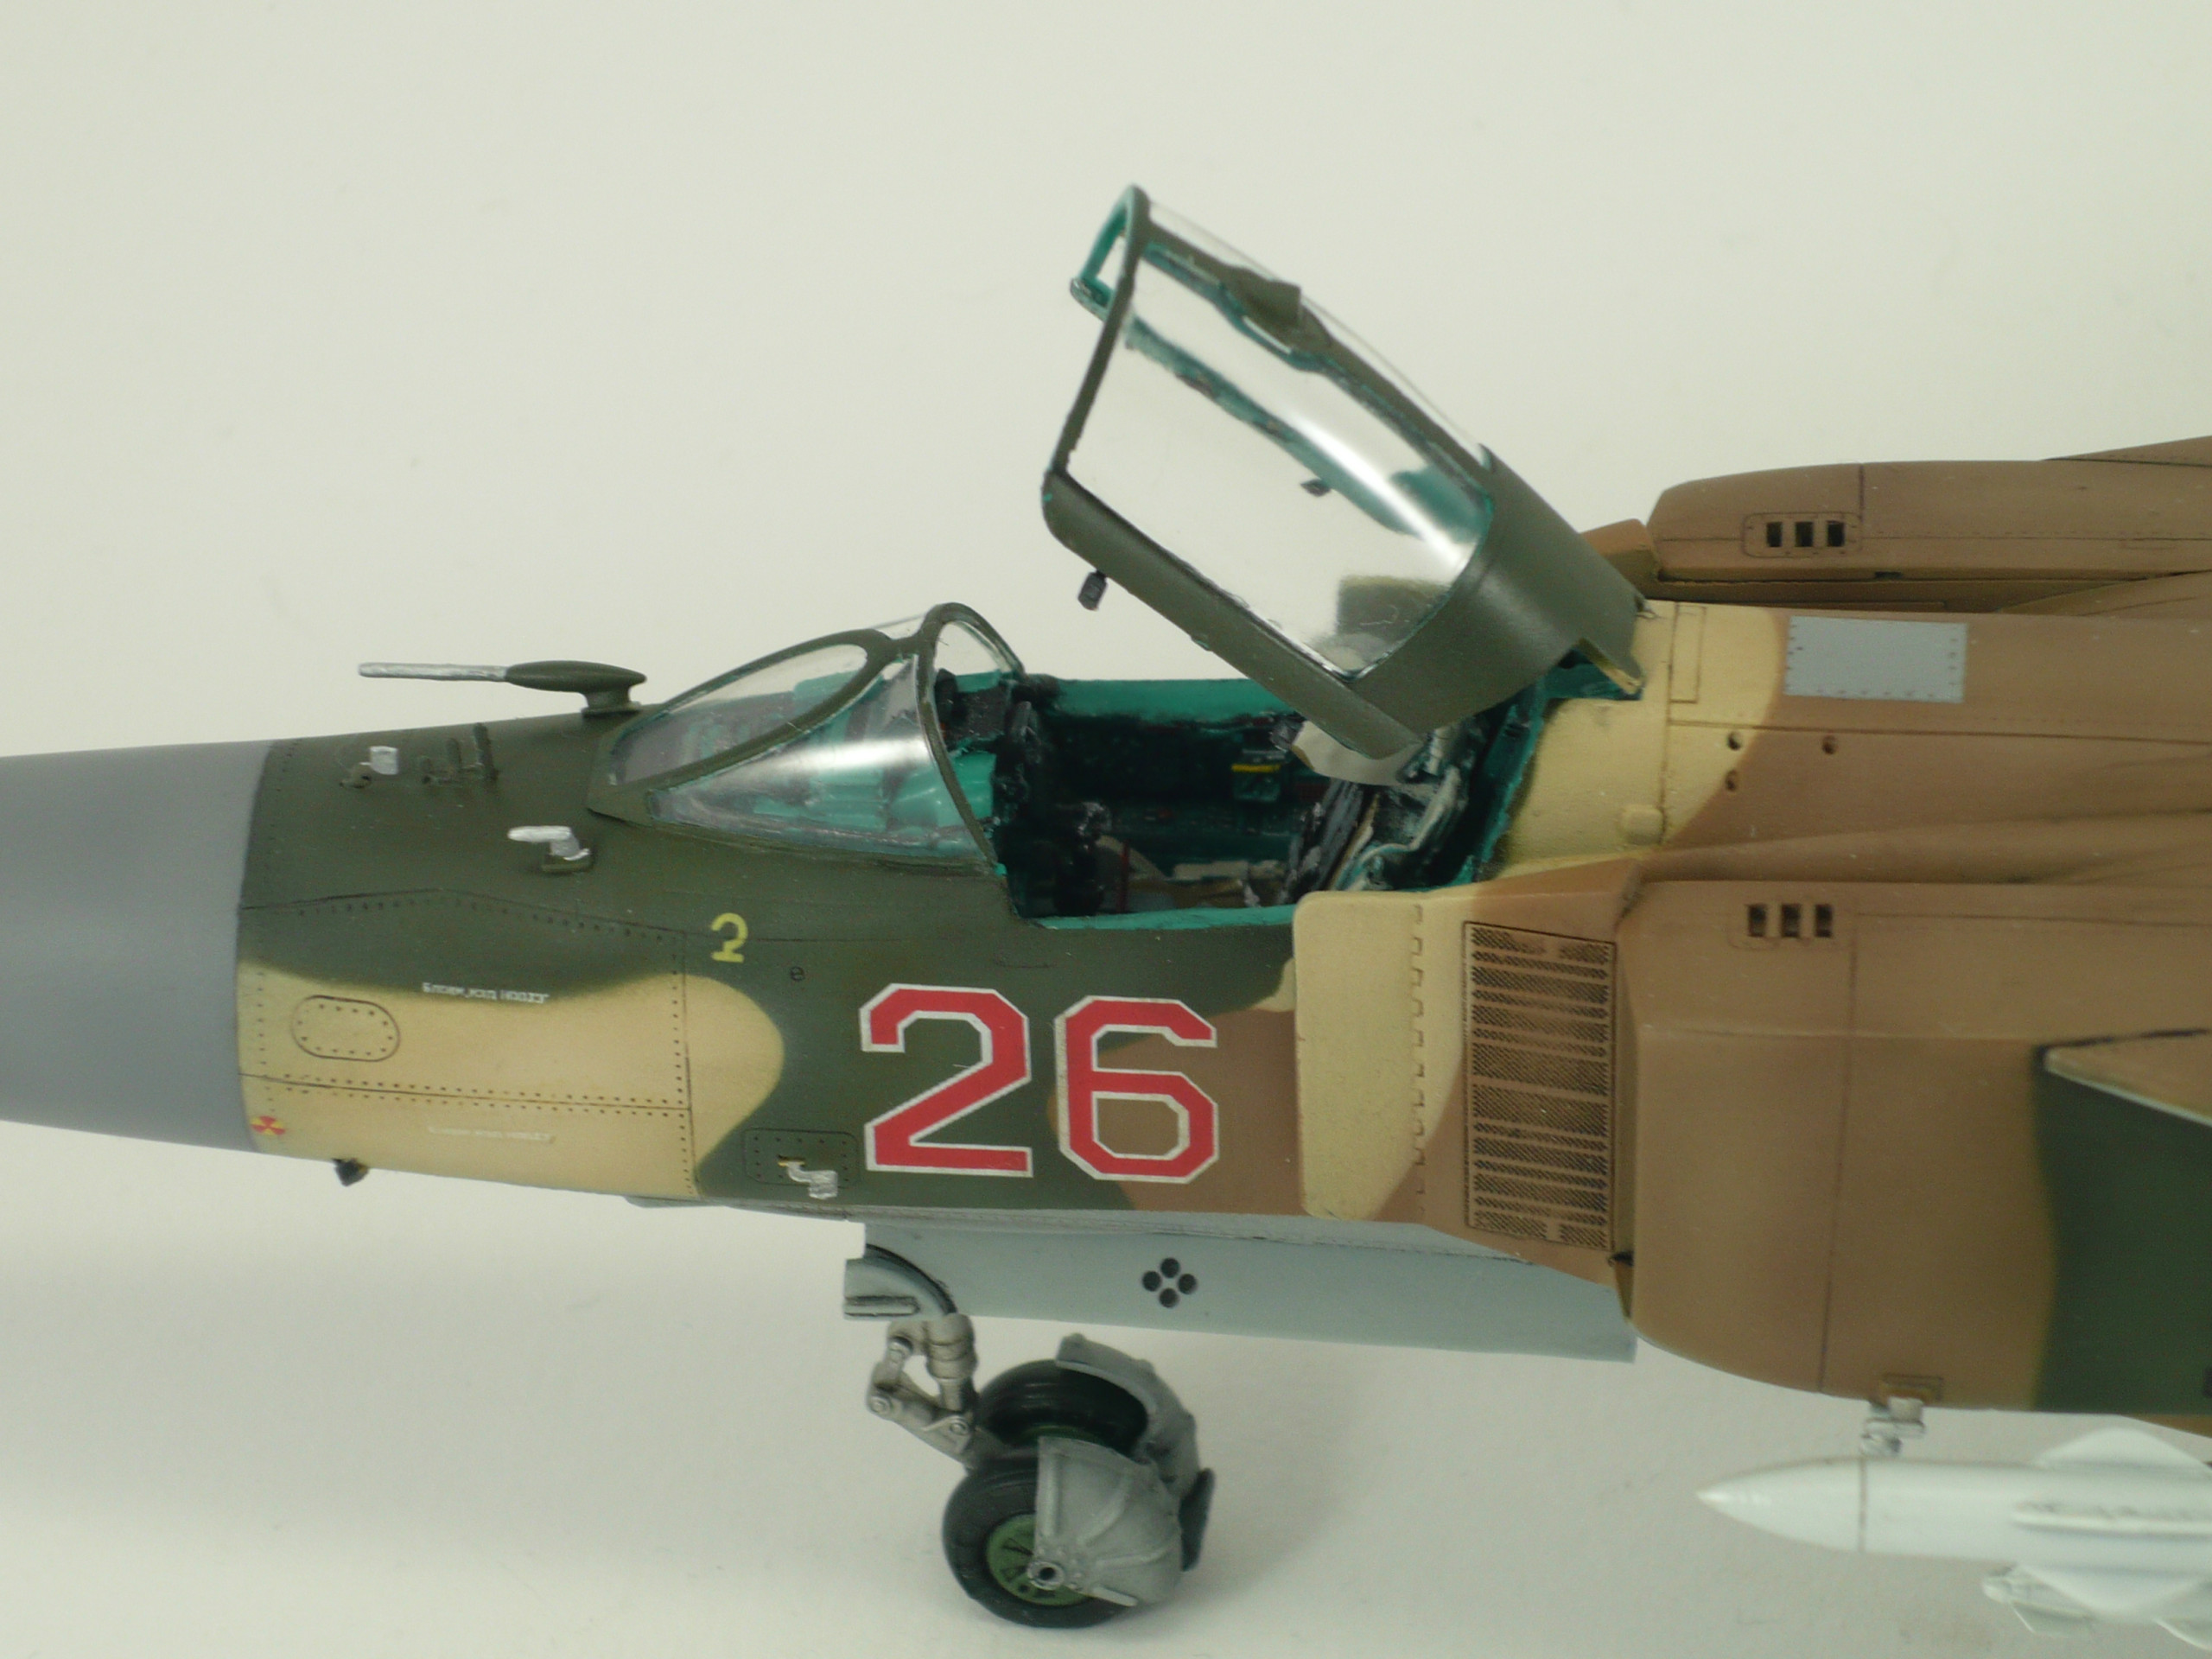
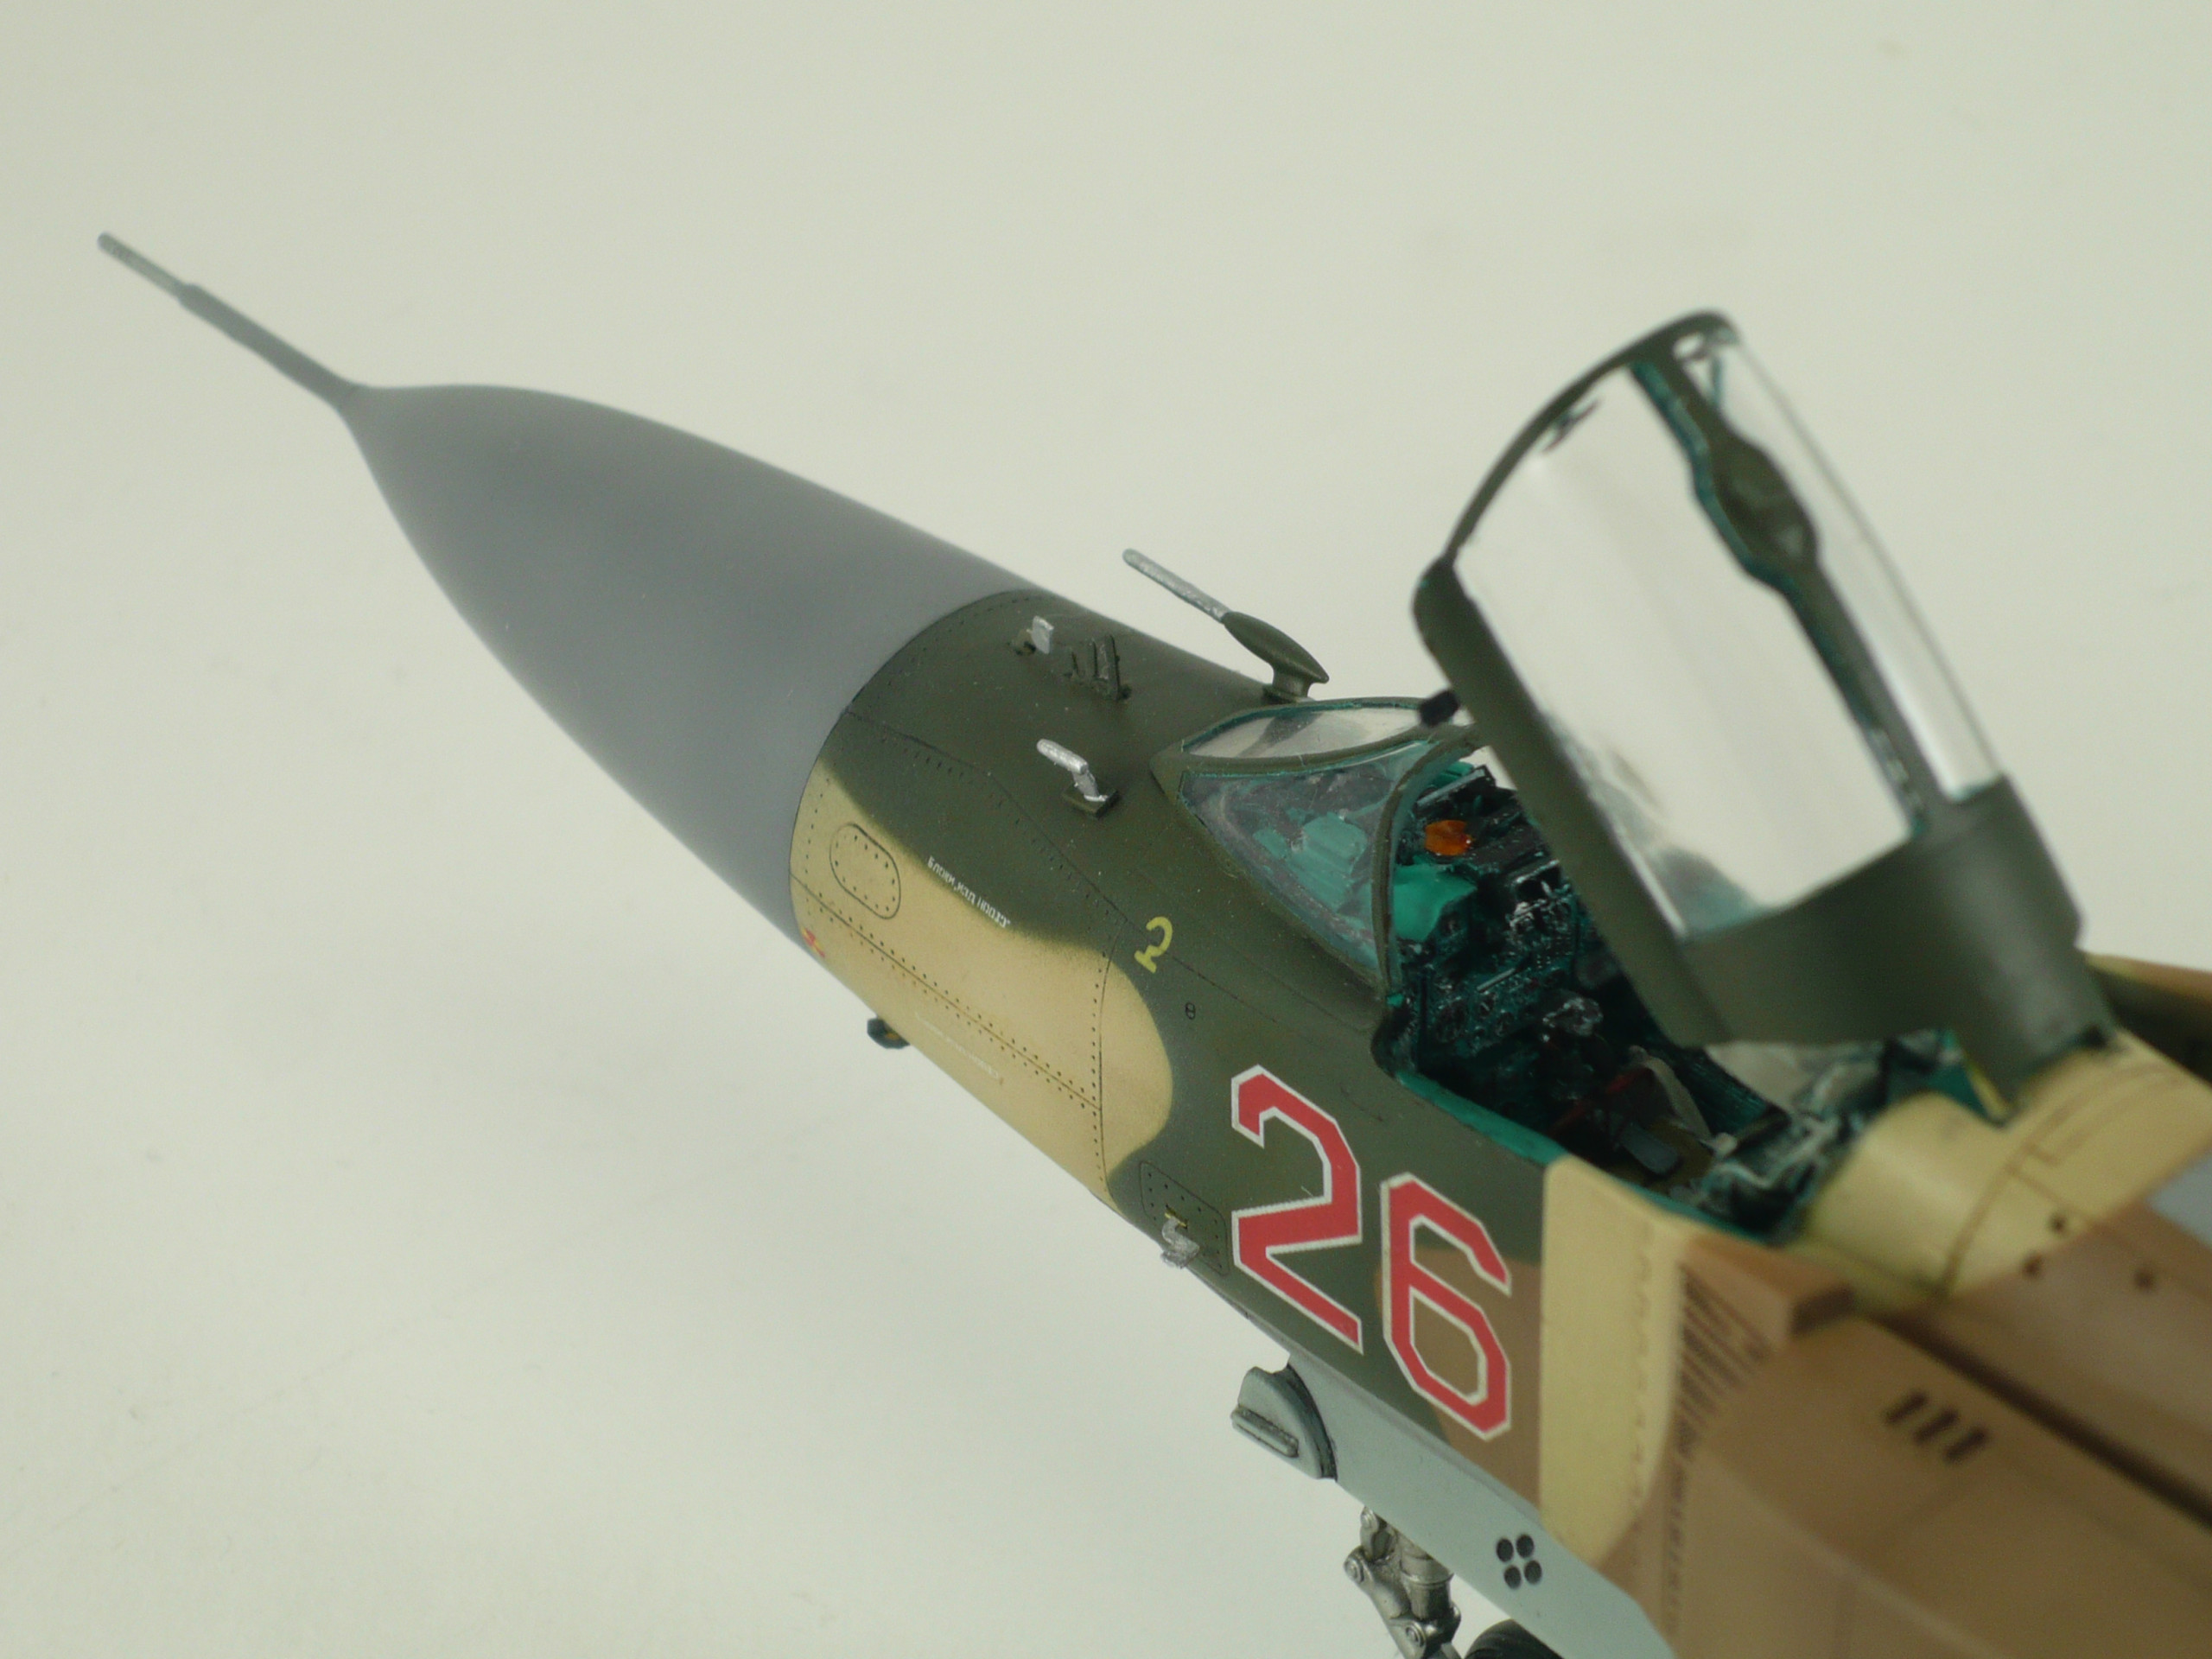
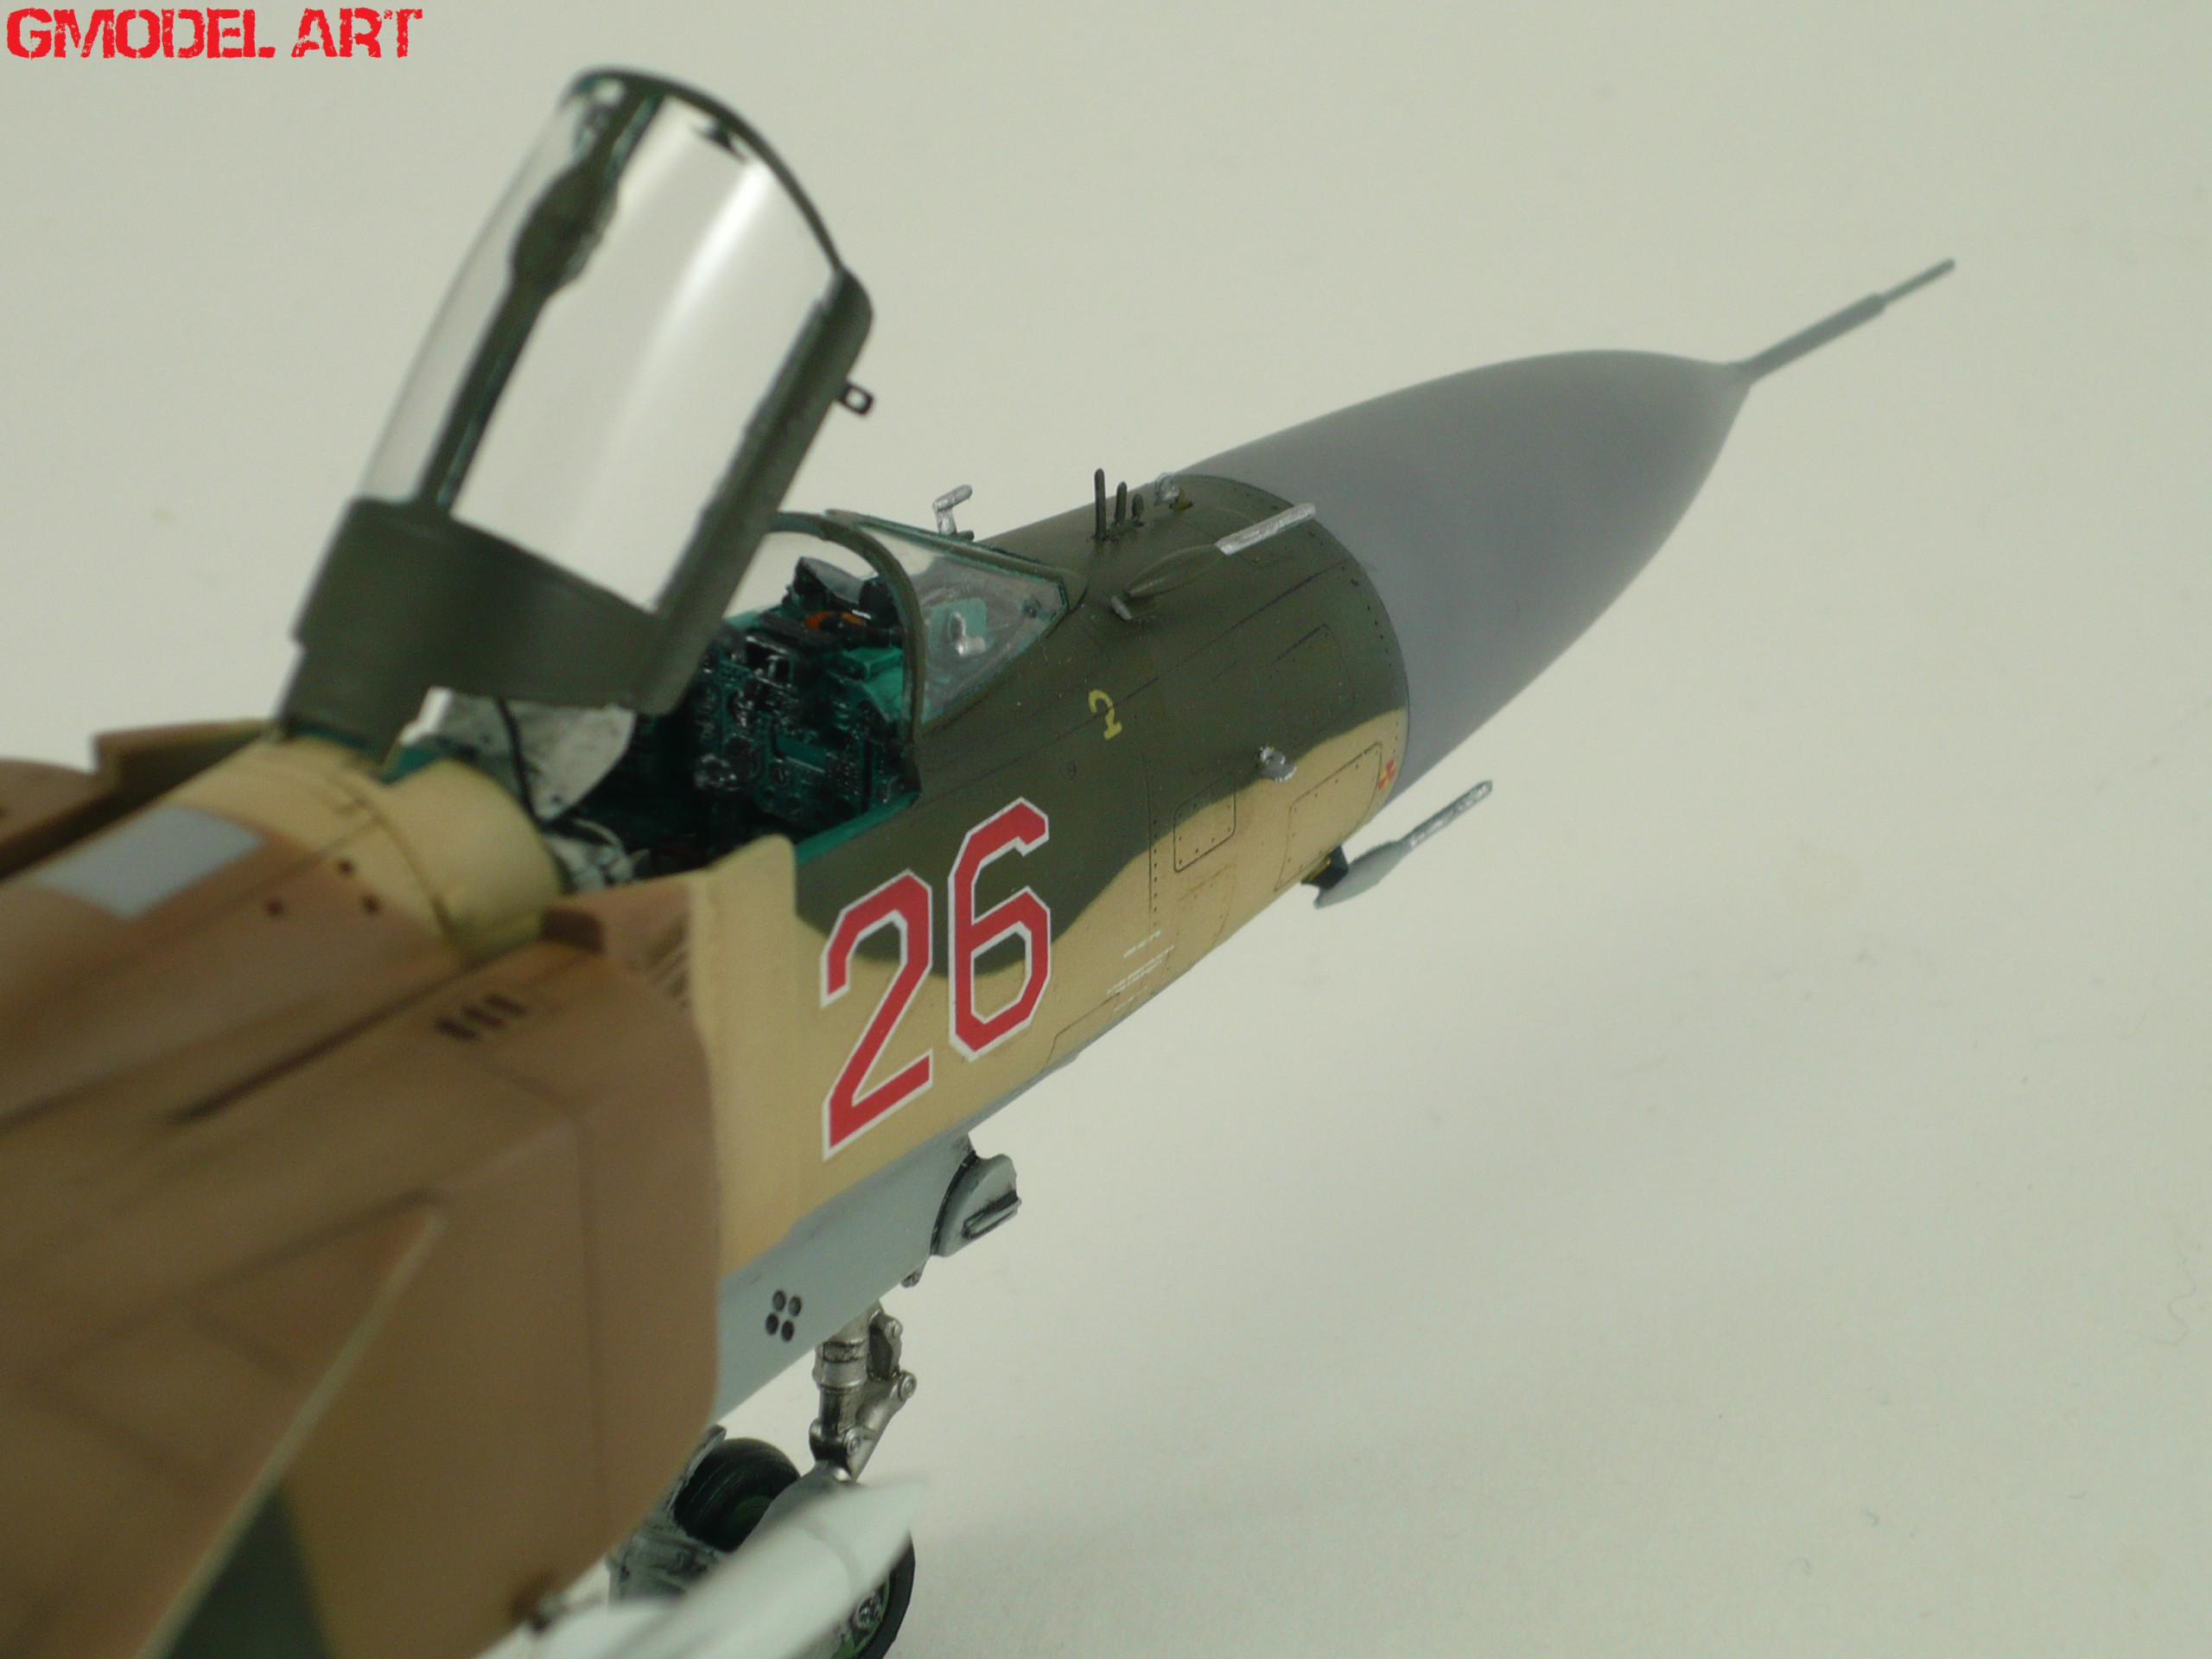
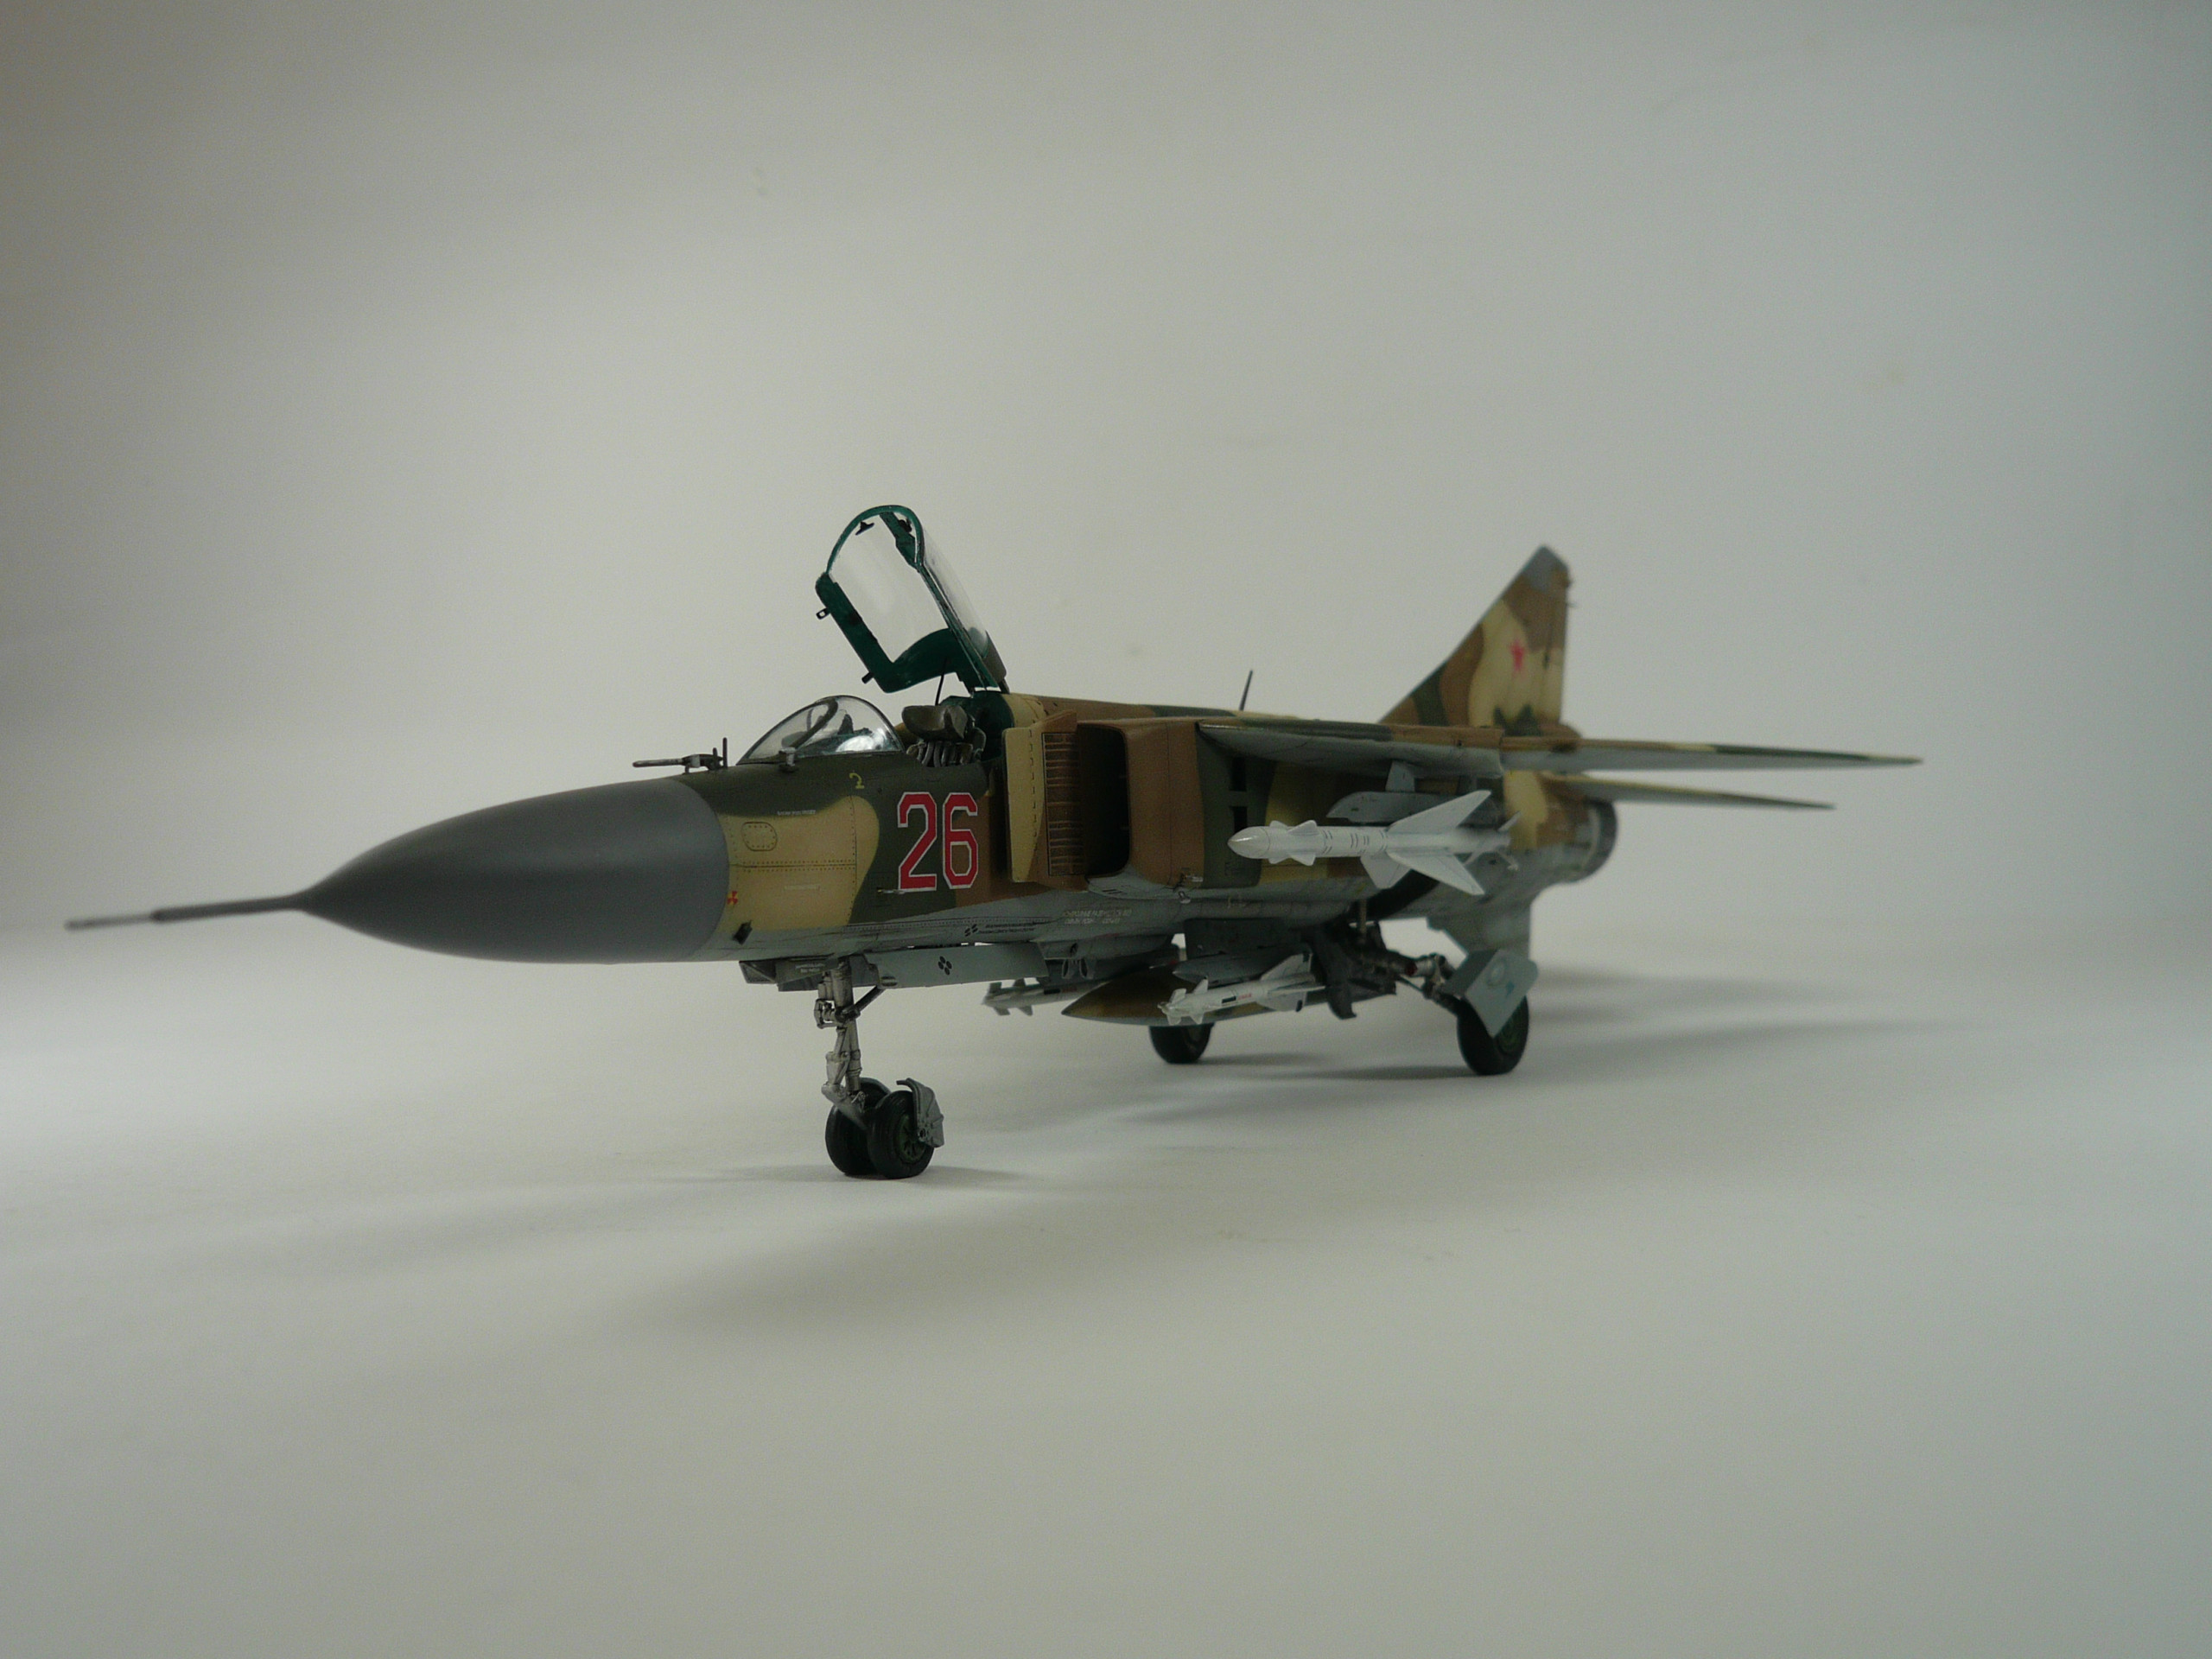
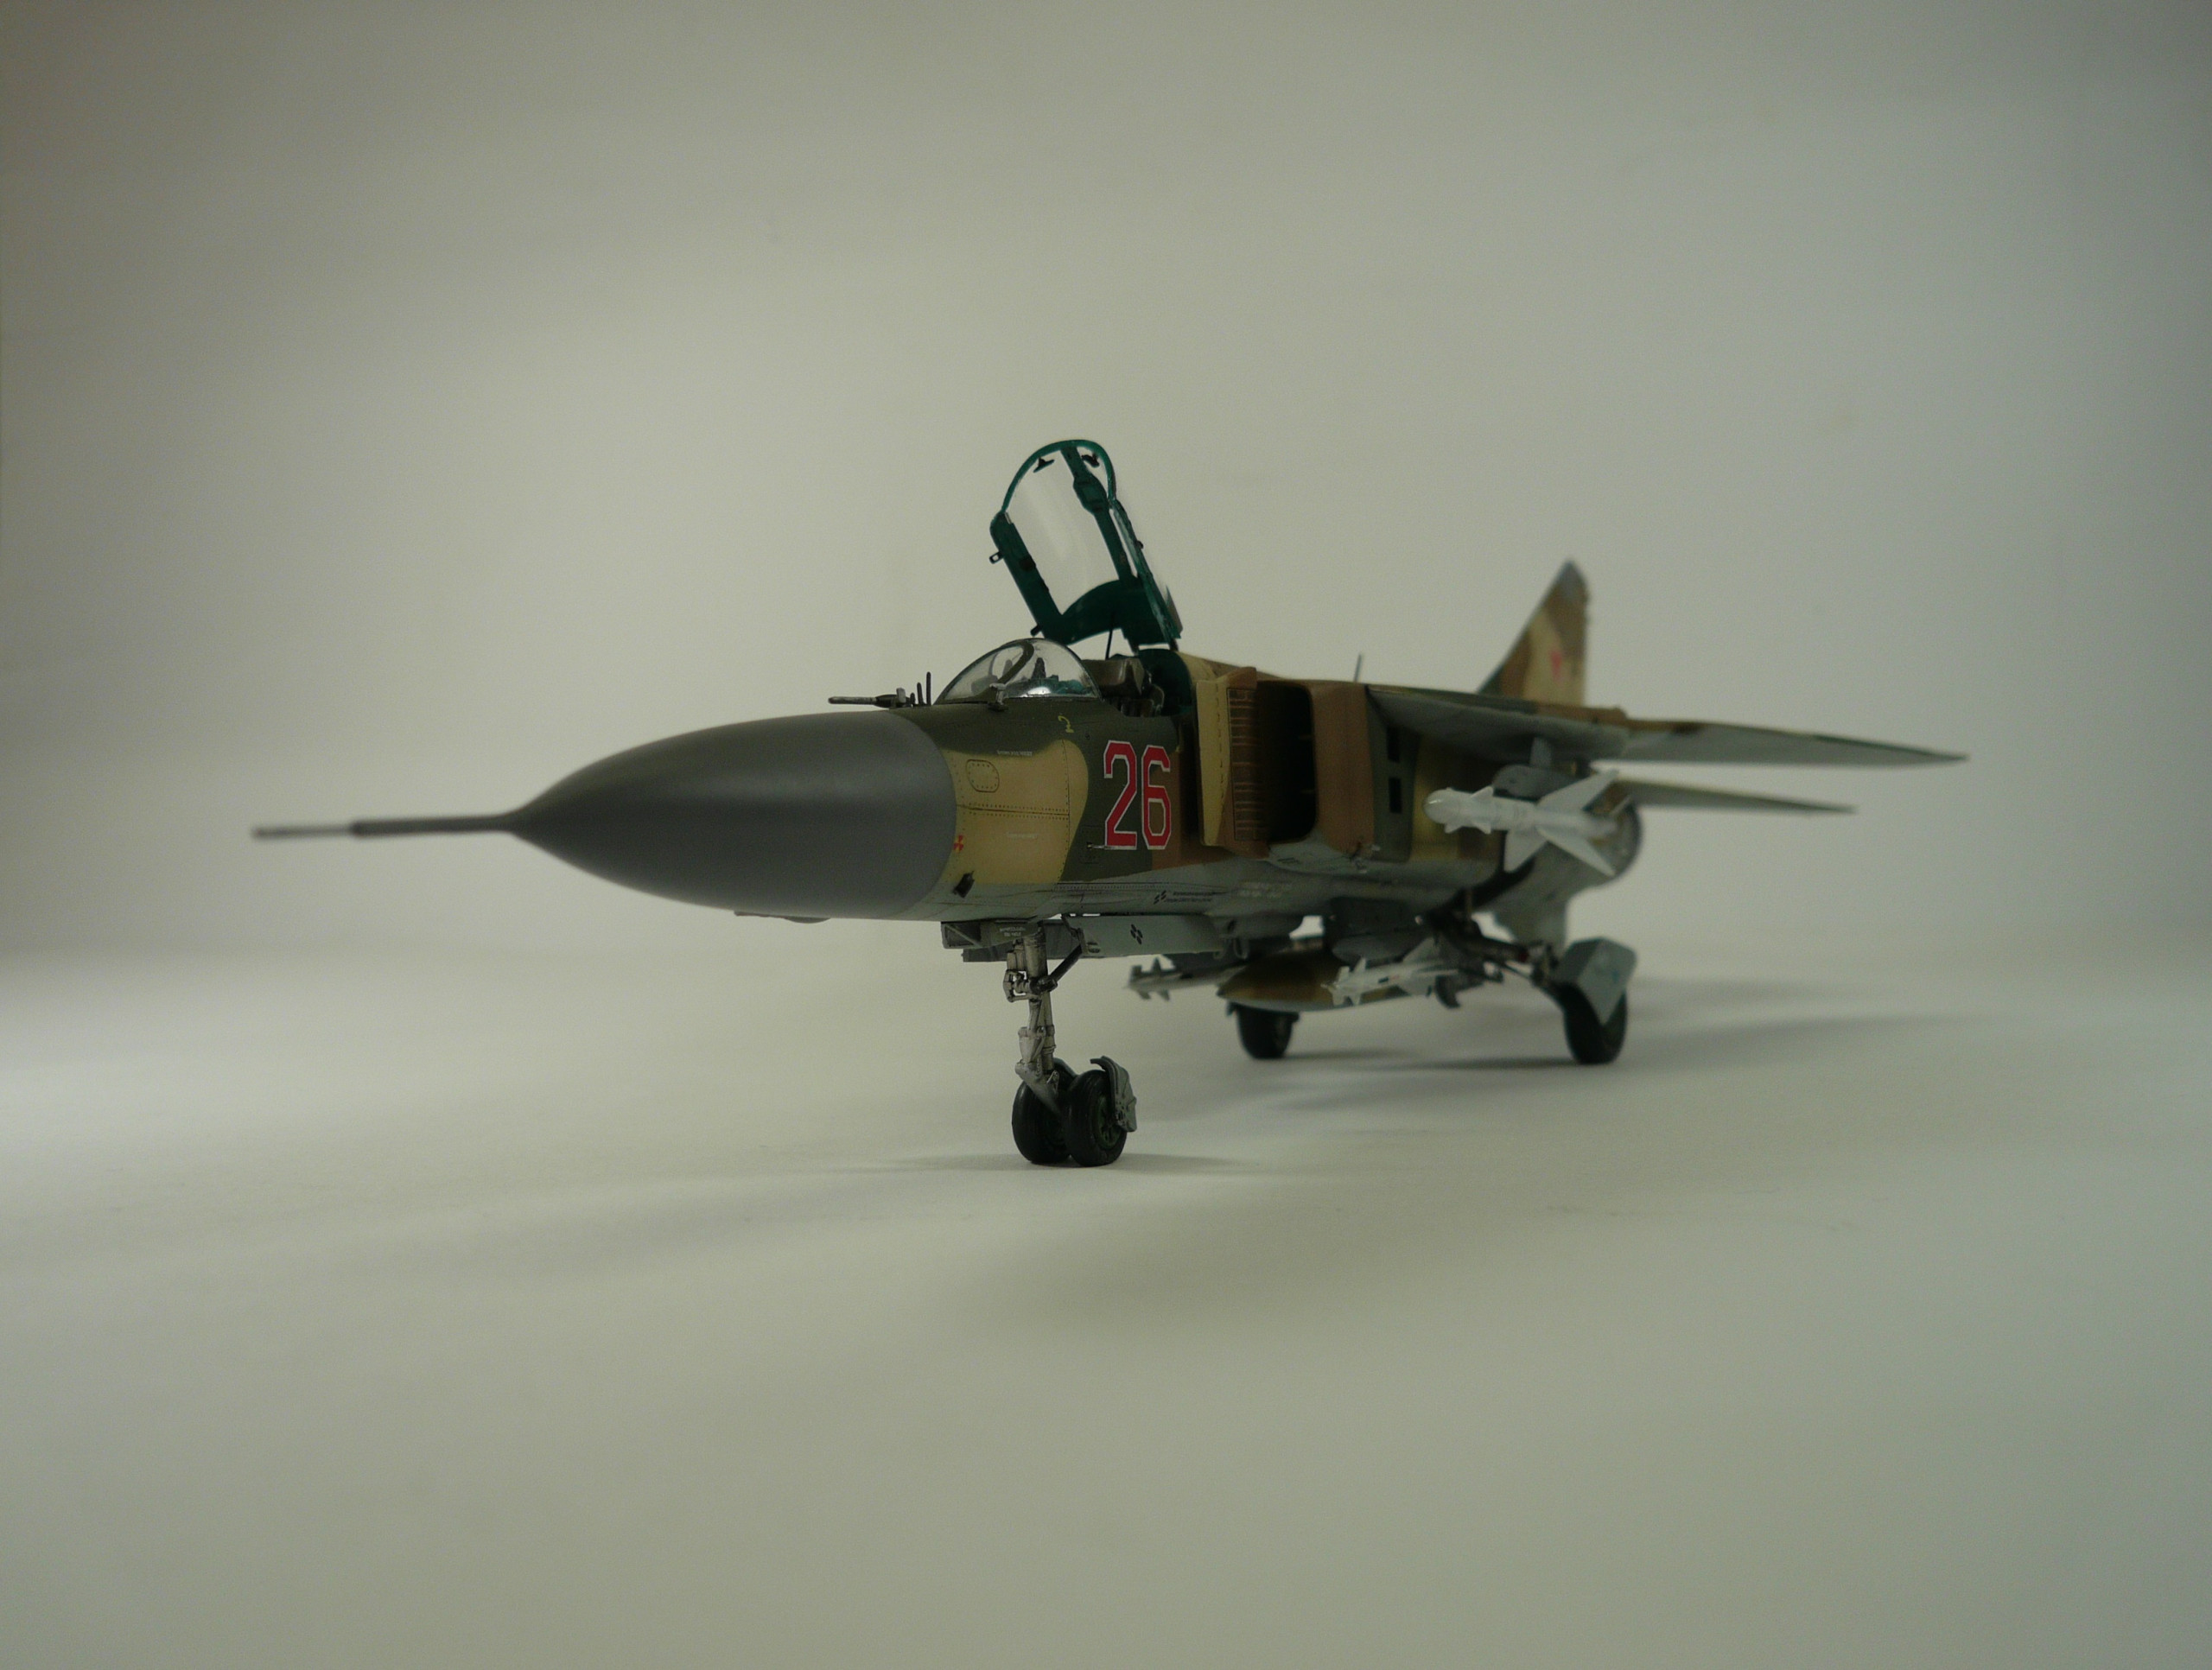
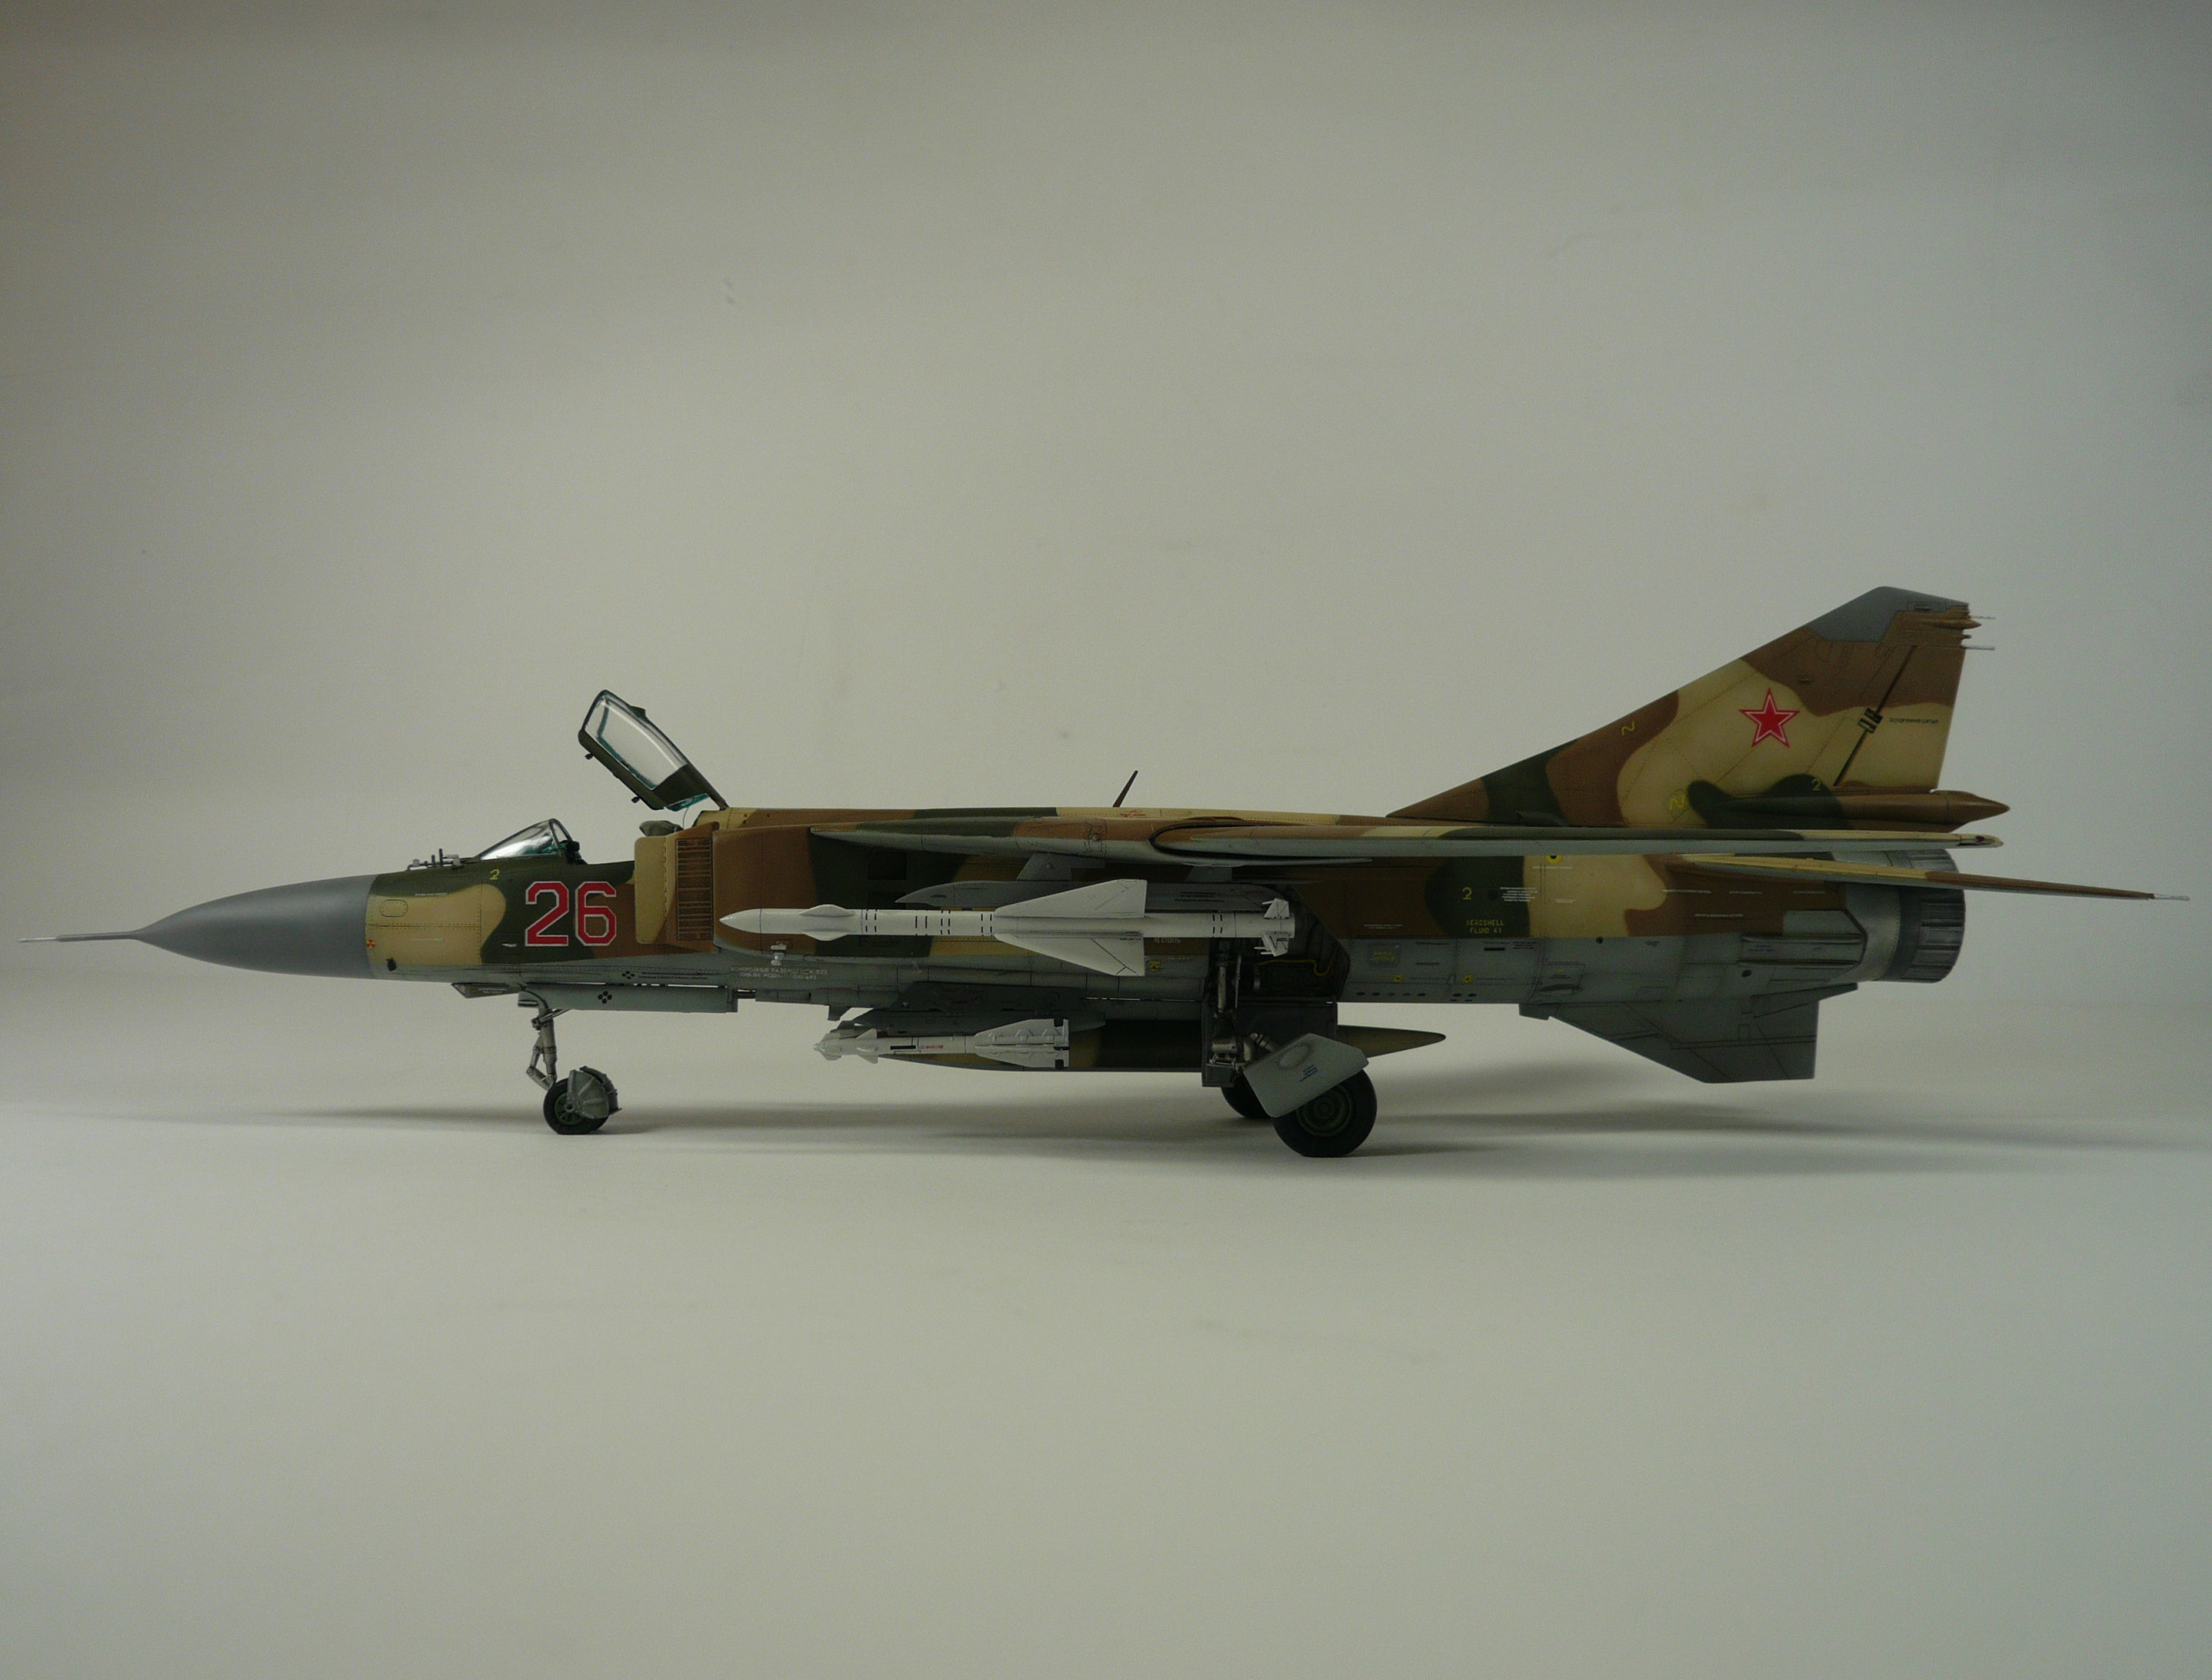
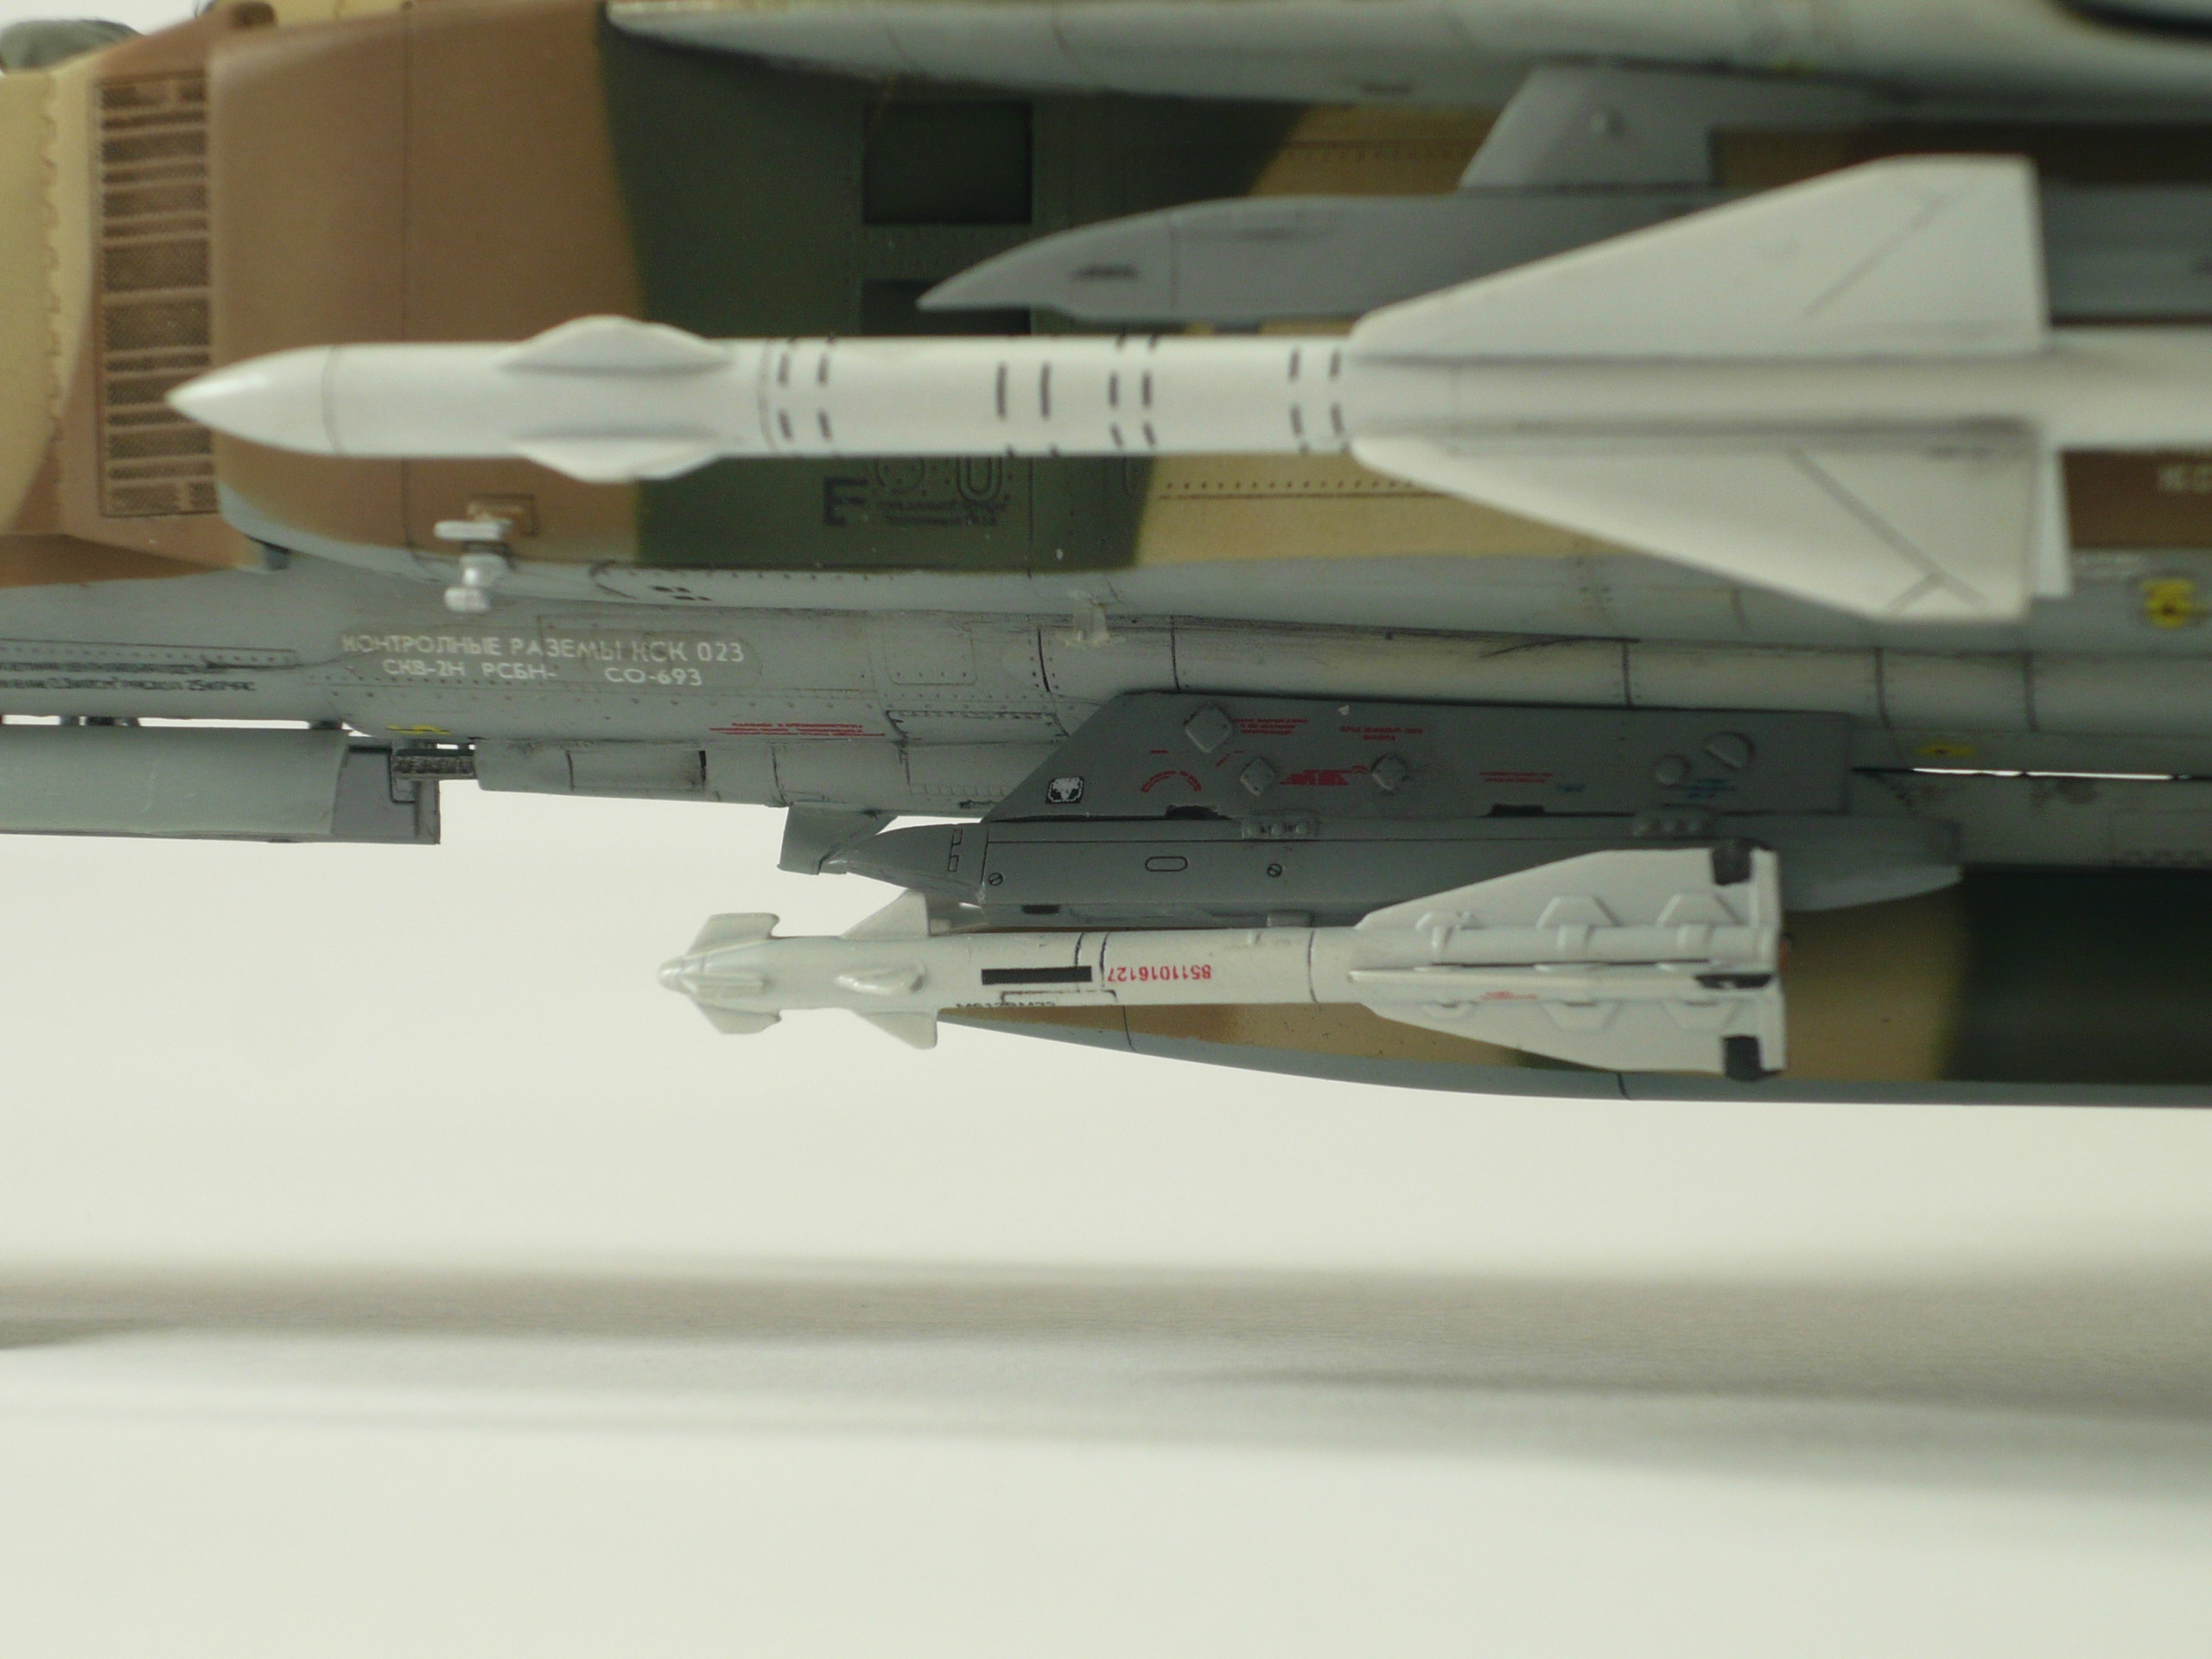
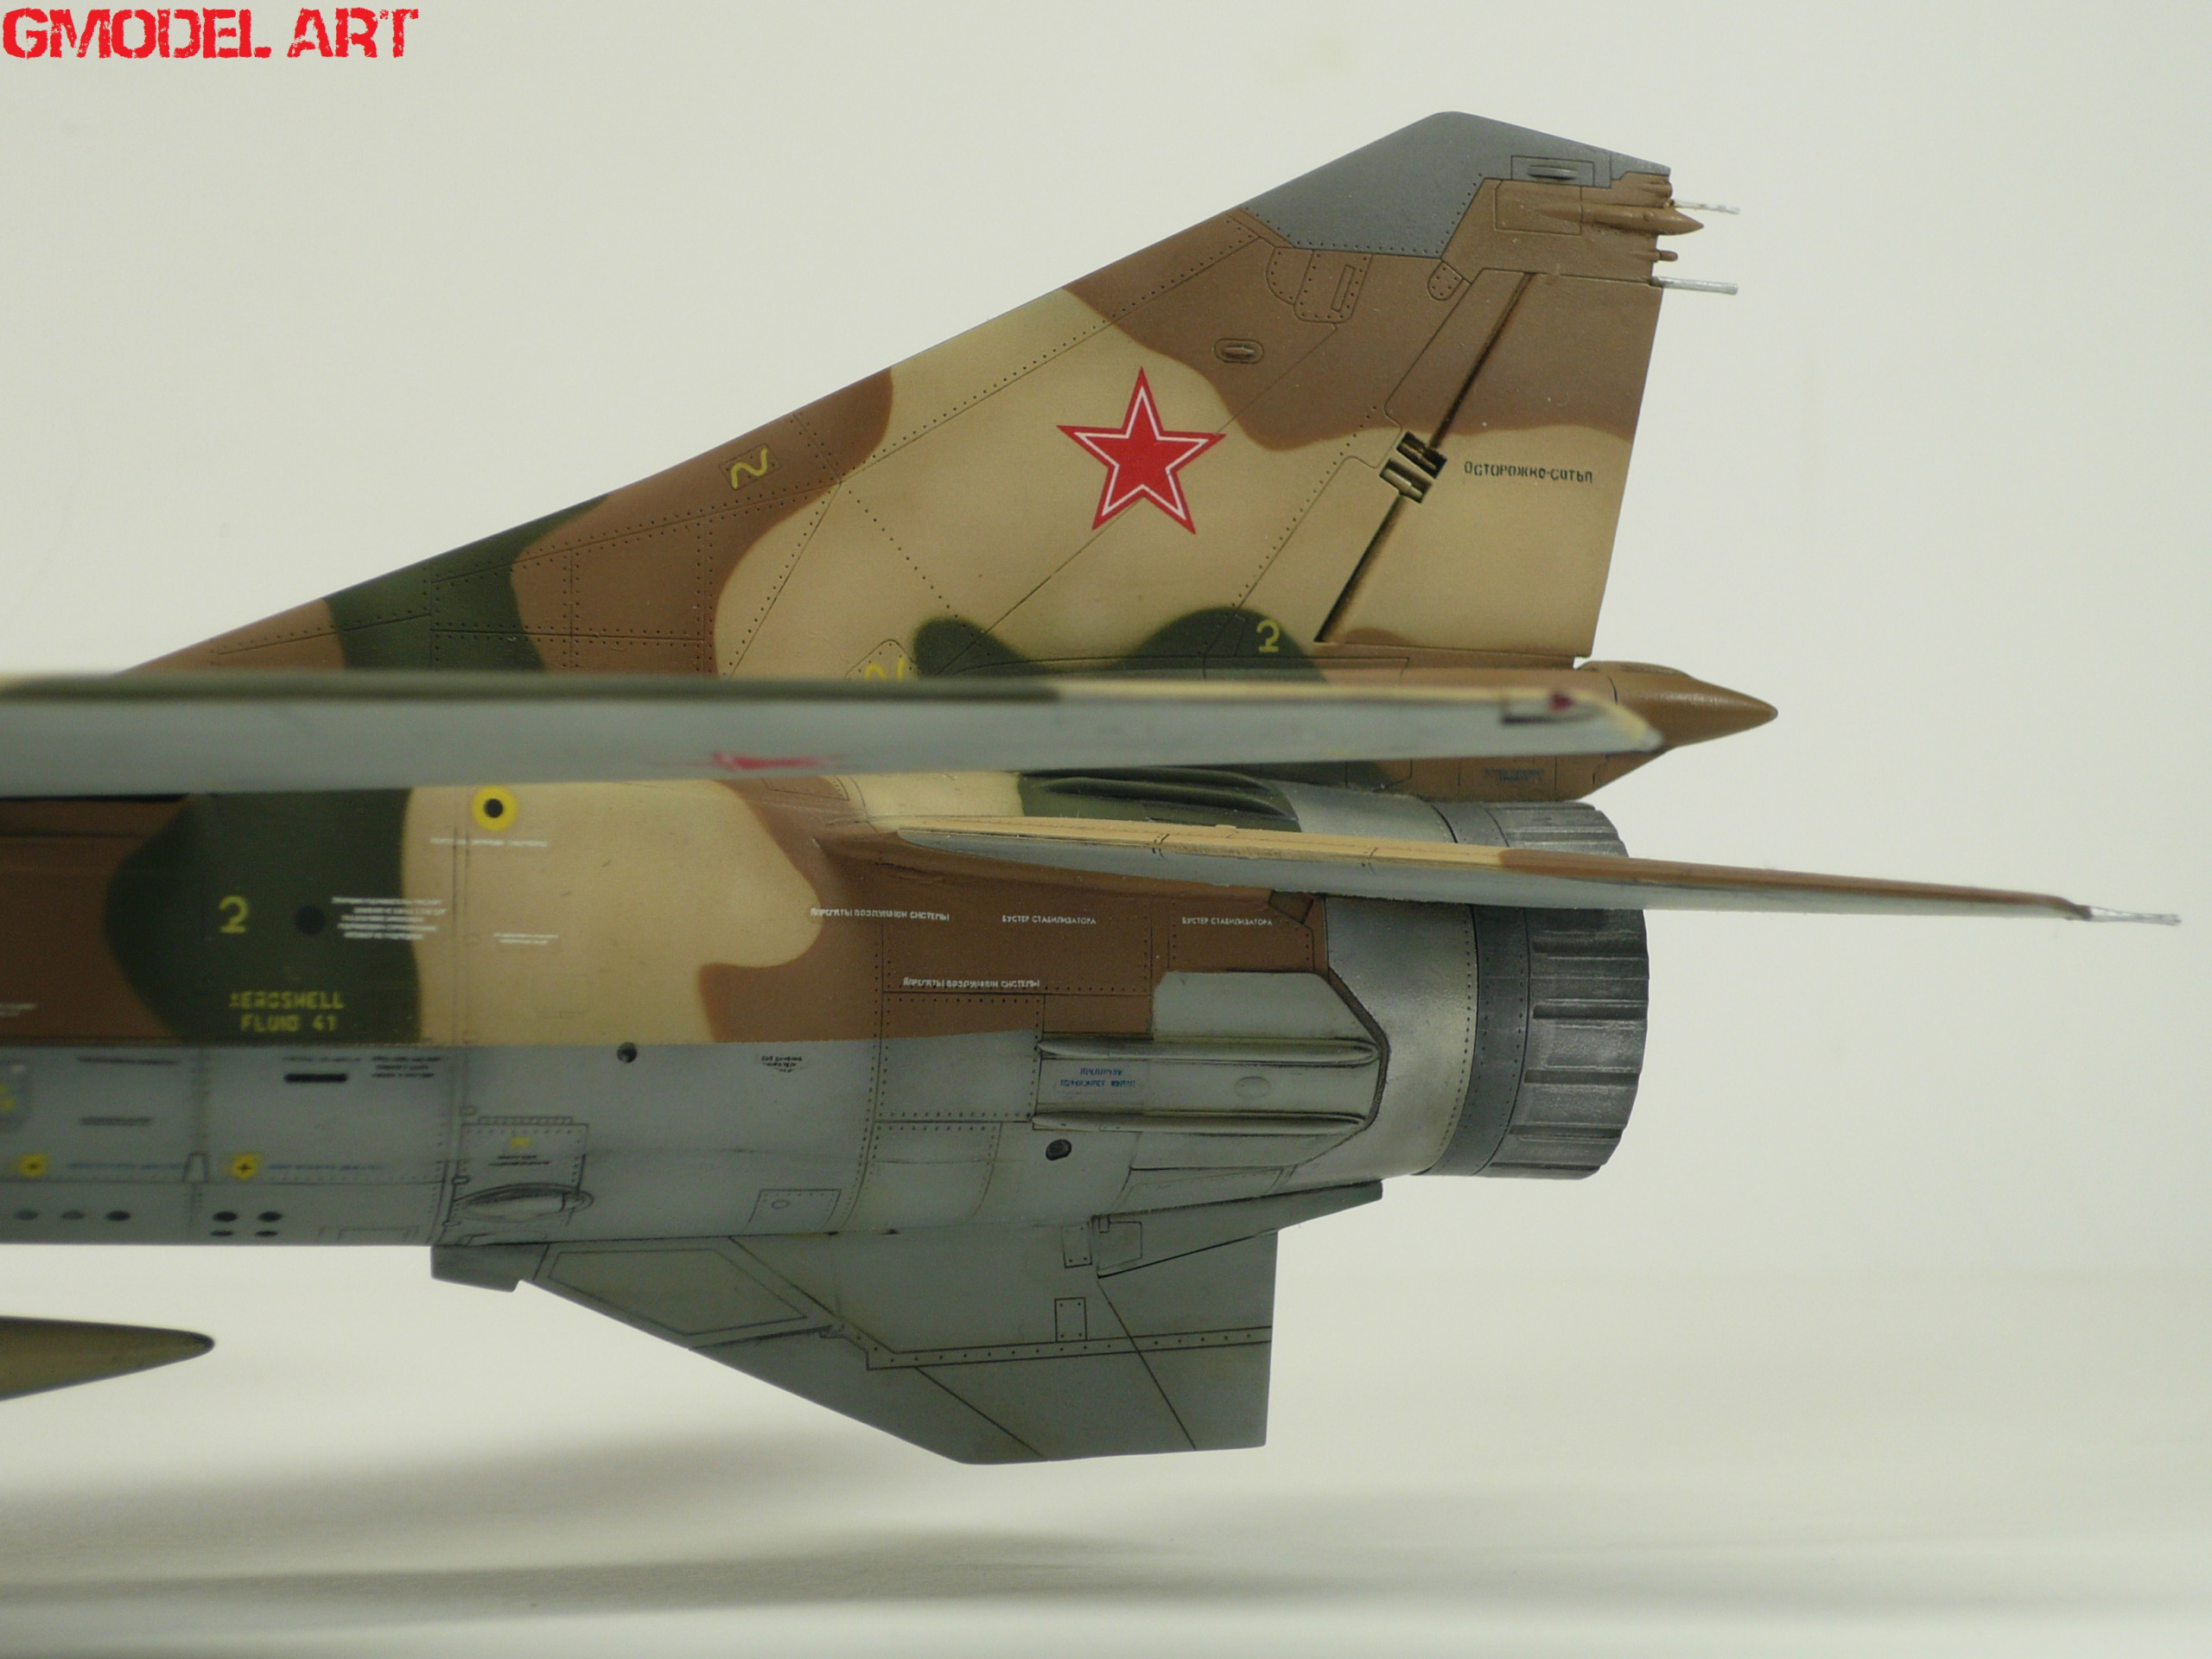
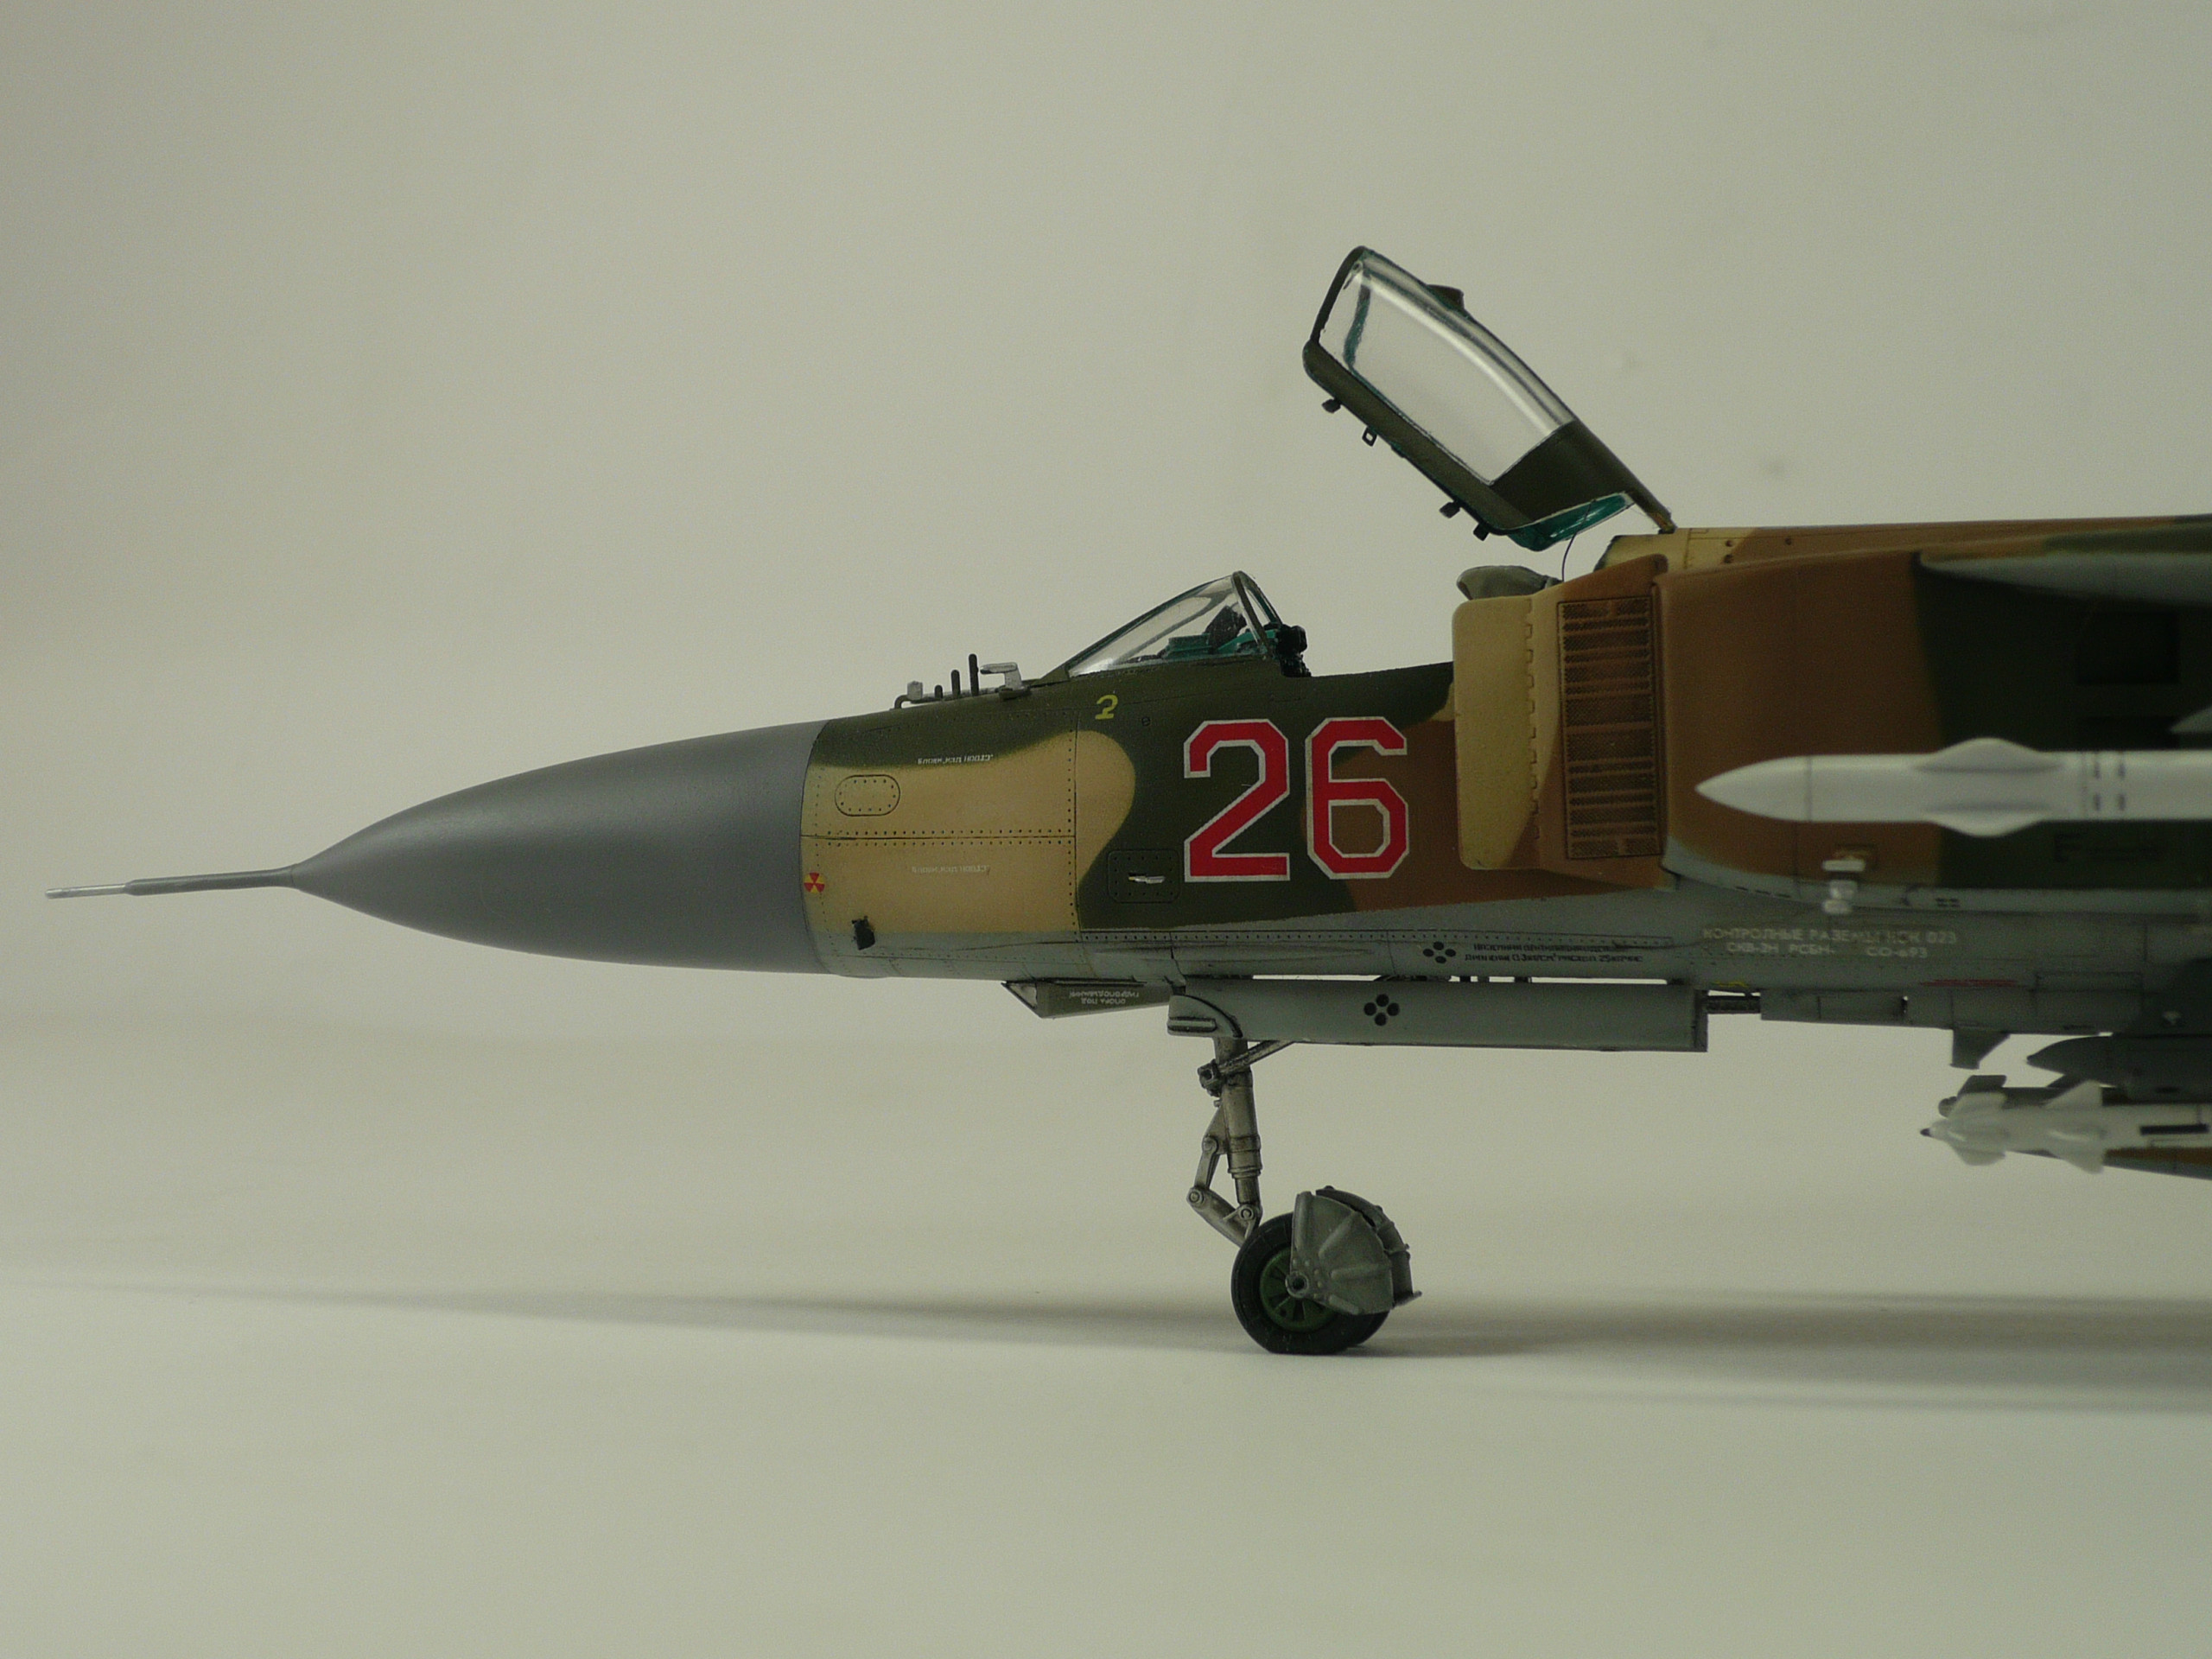
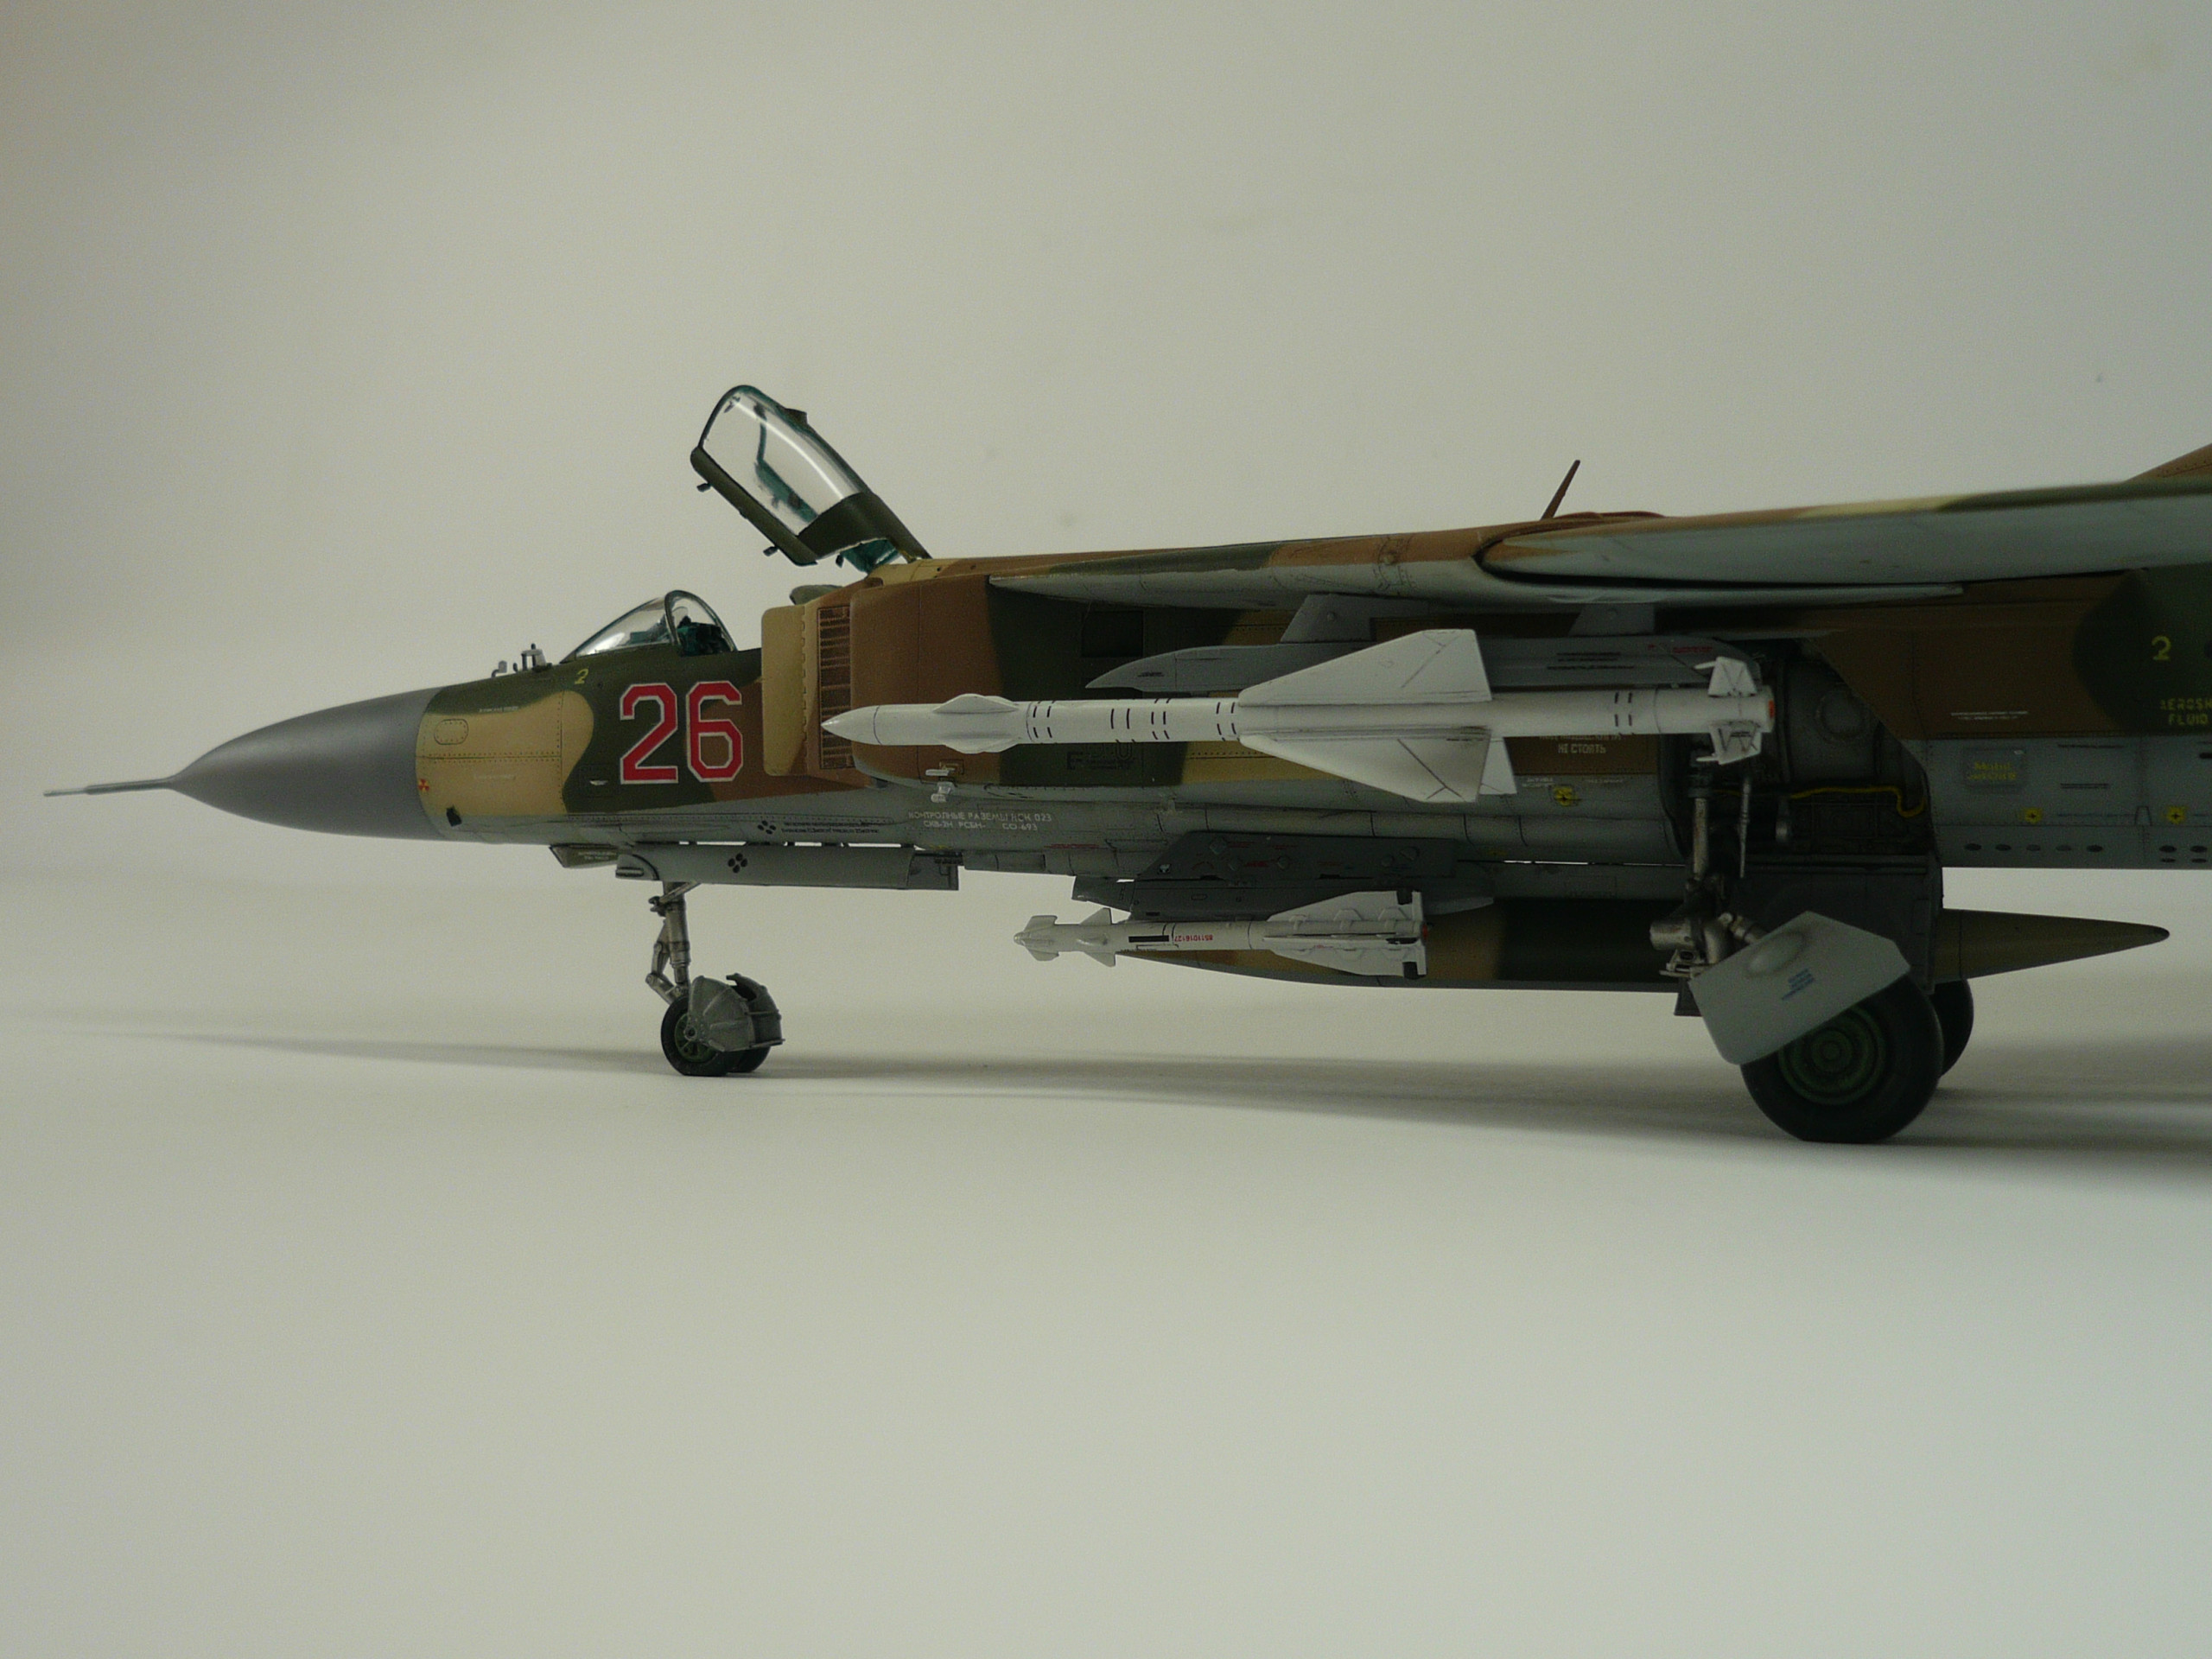
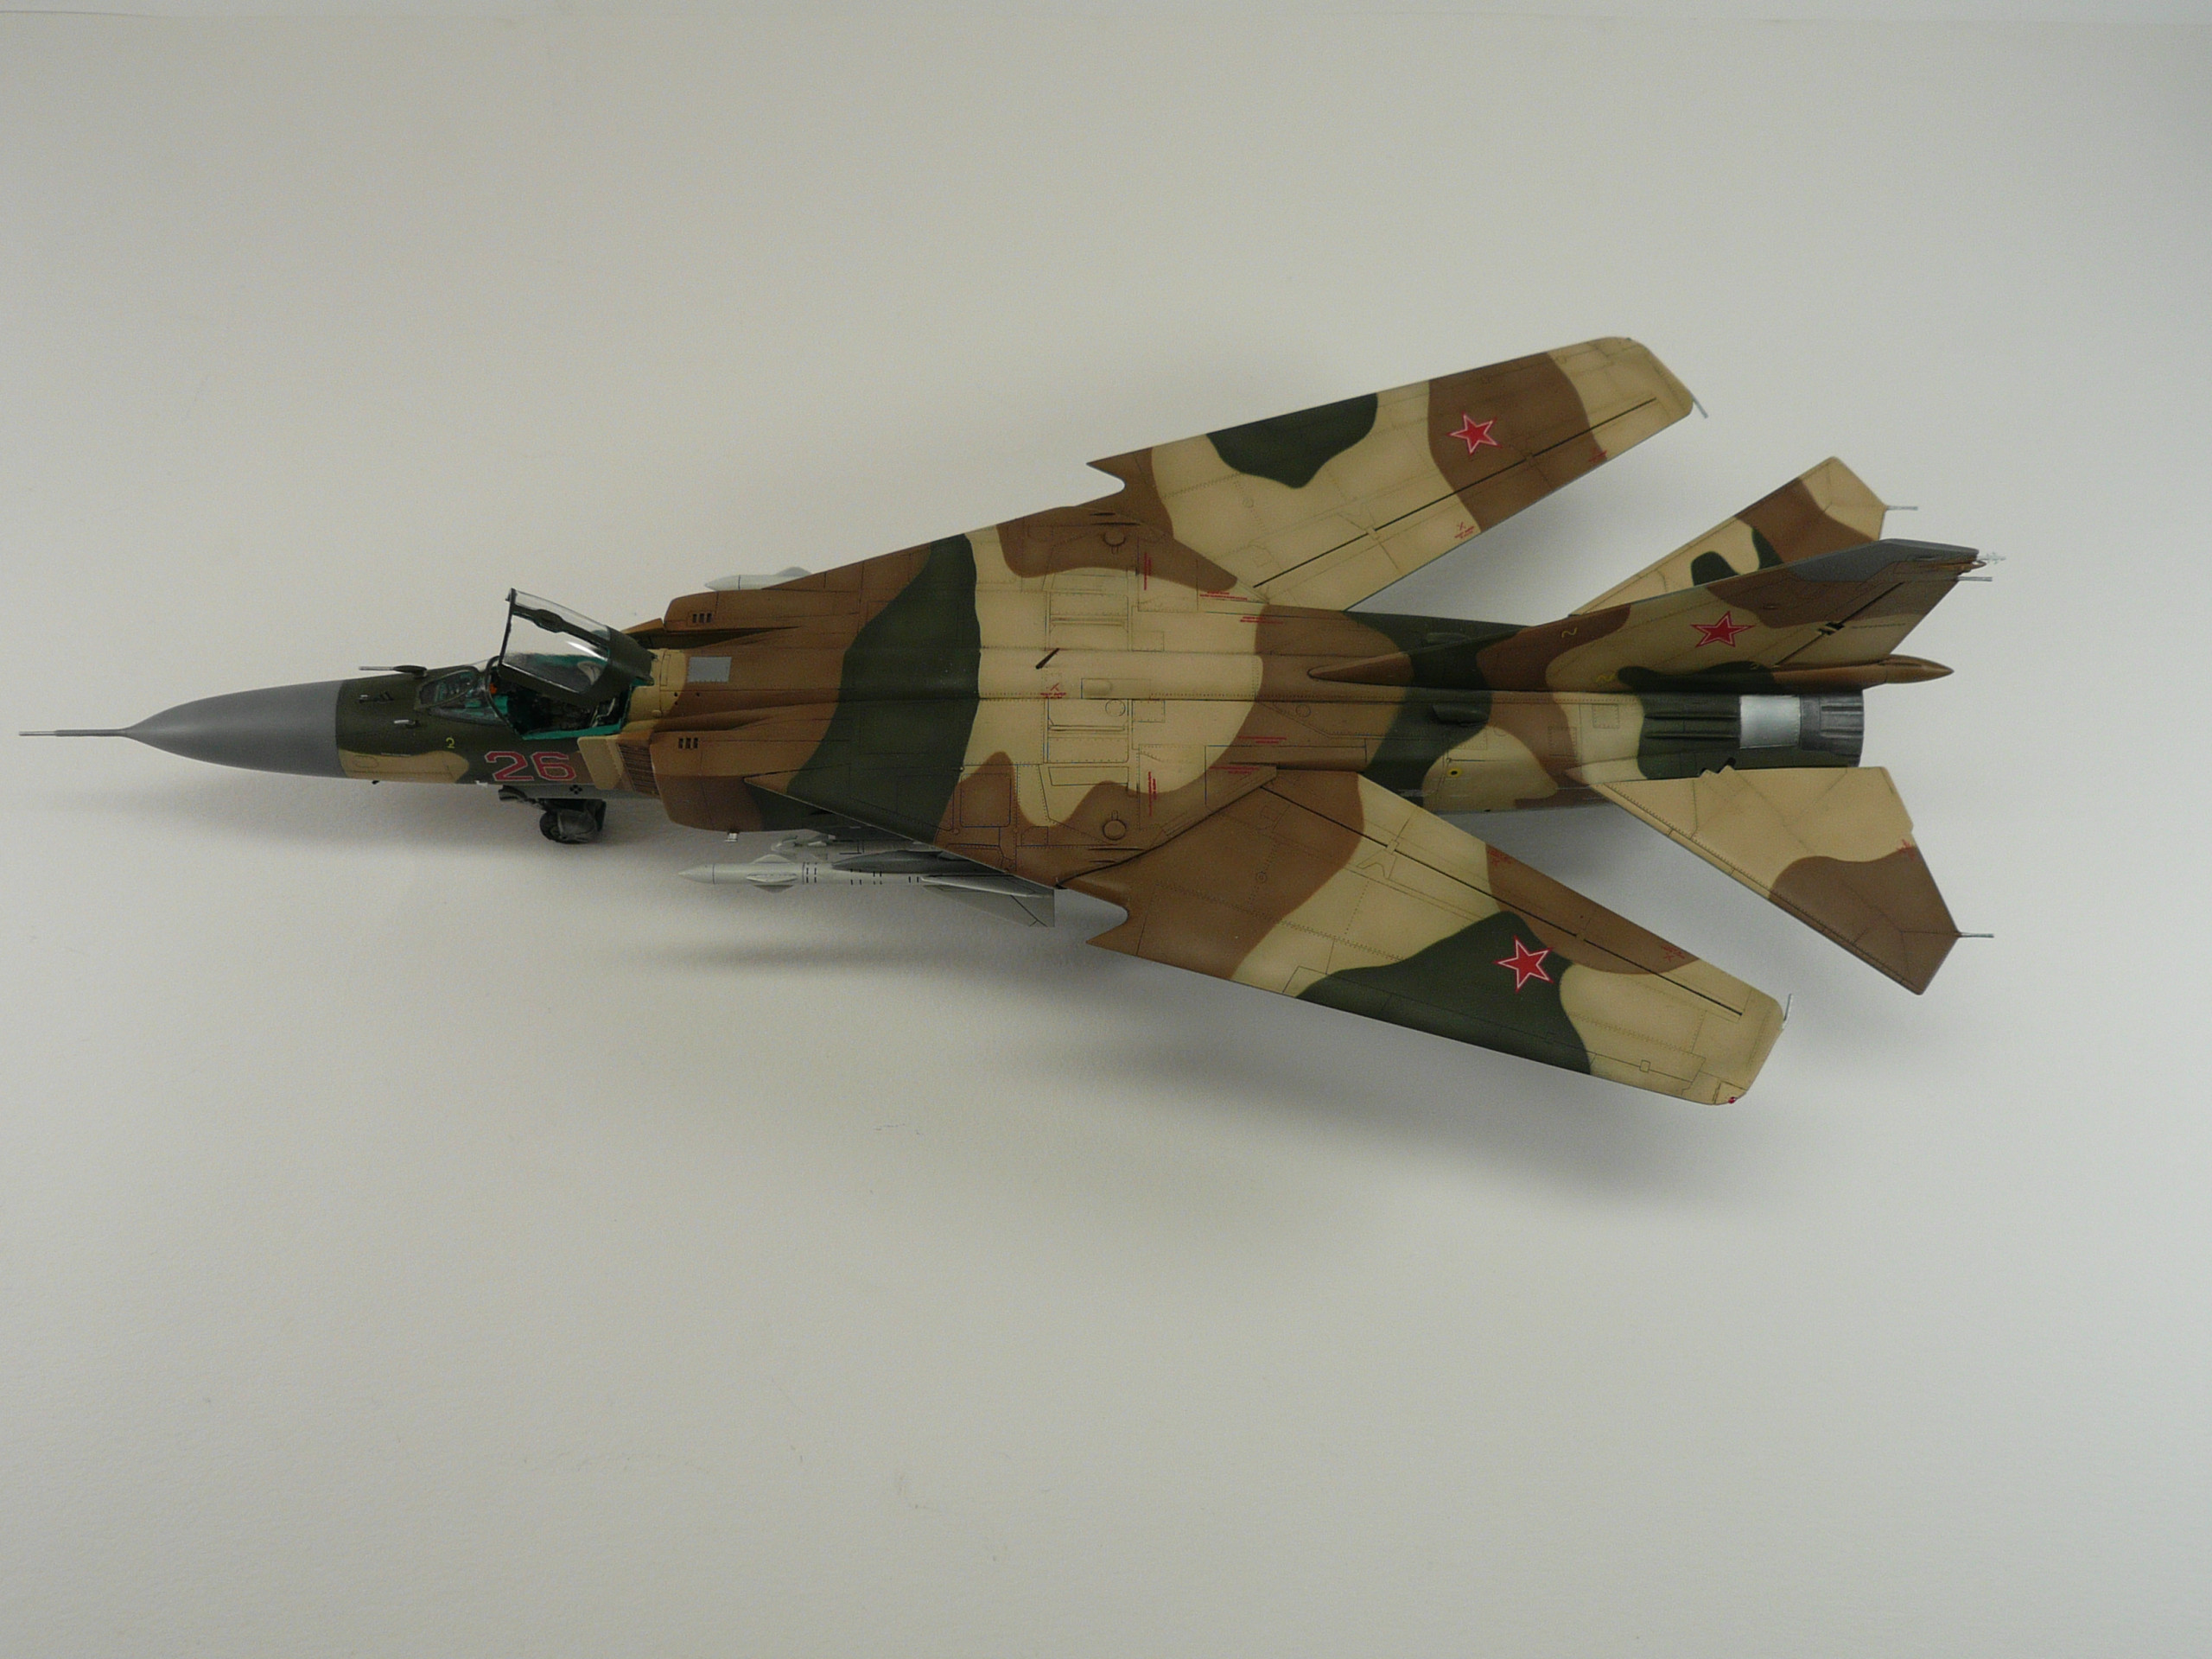
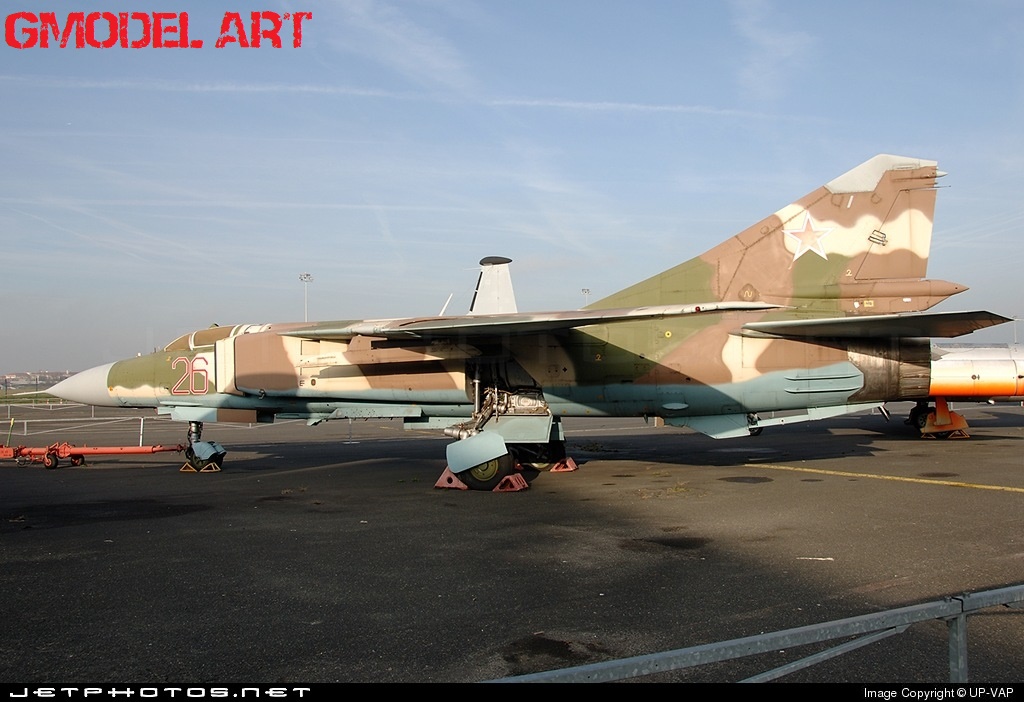
MIG-23ML Flogger-G “Red 26”
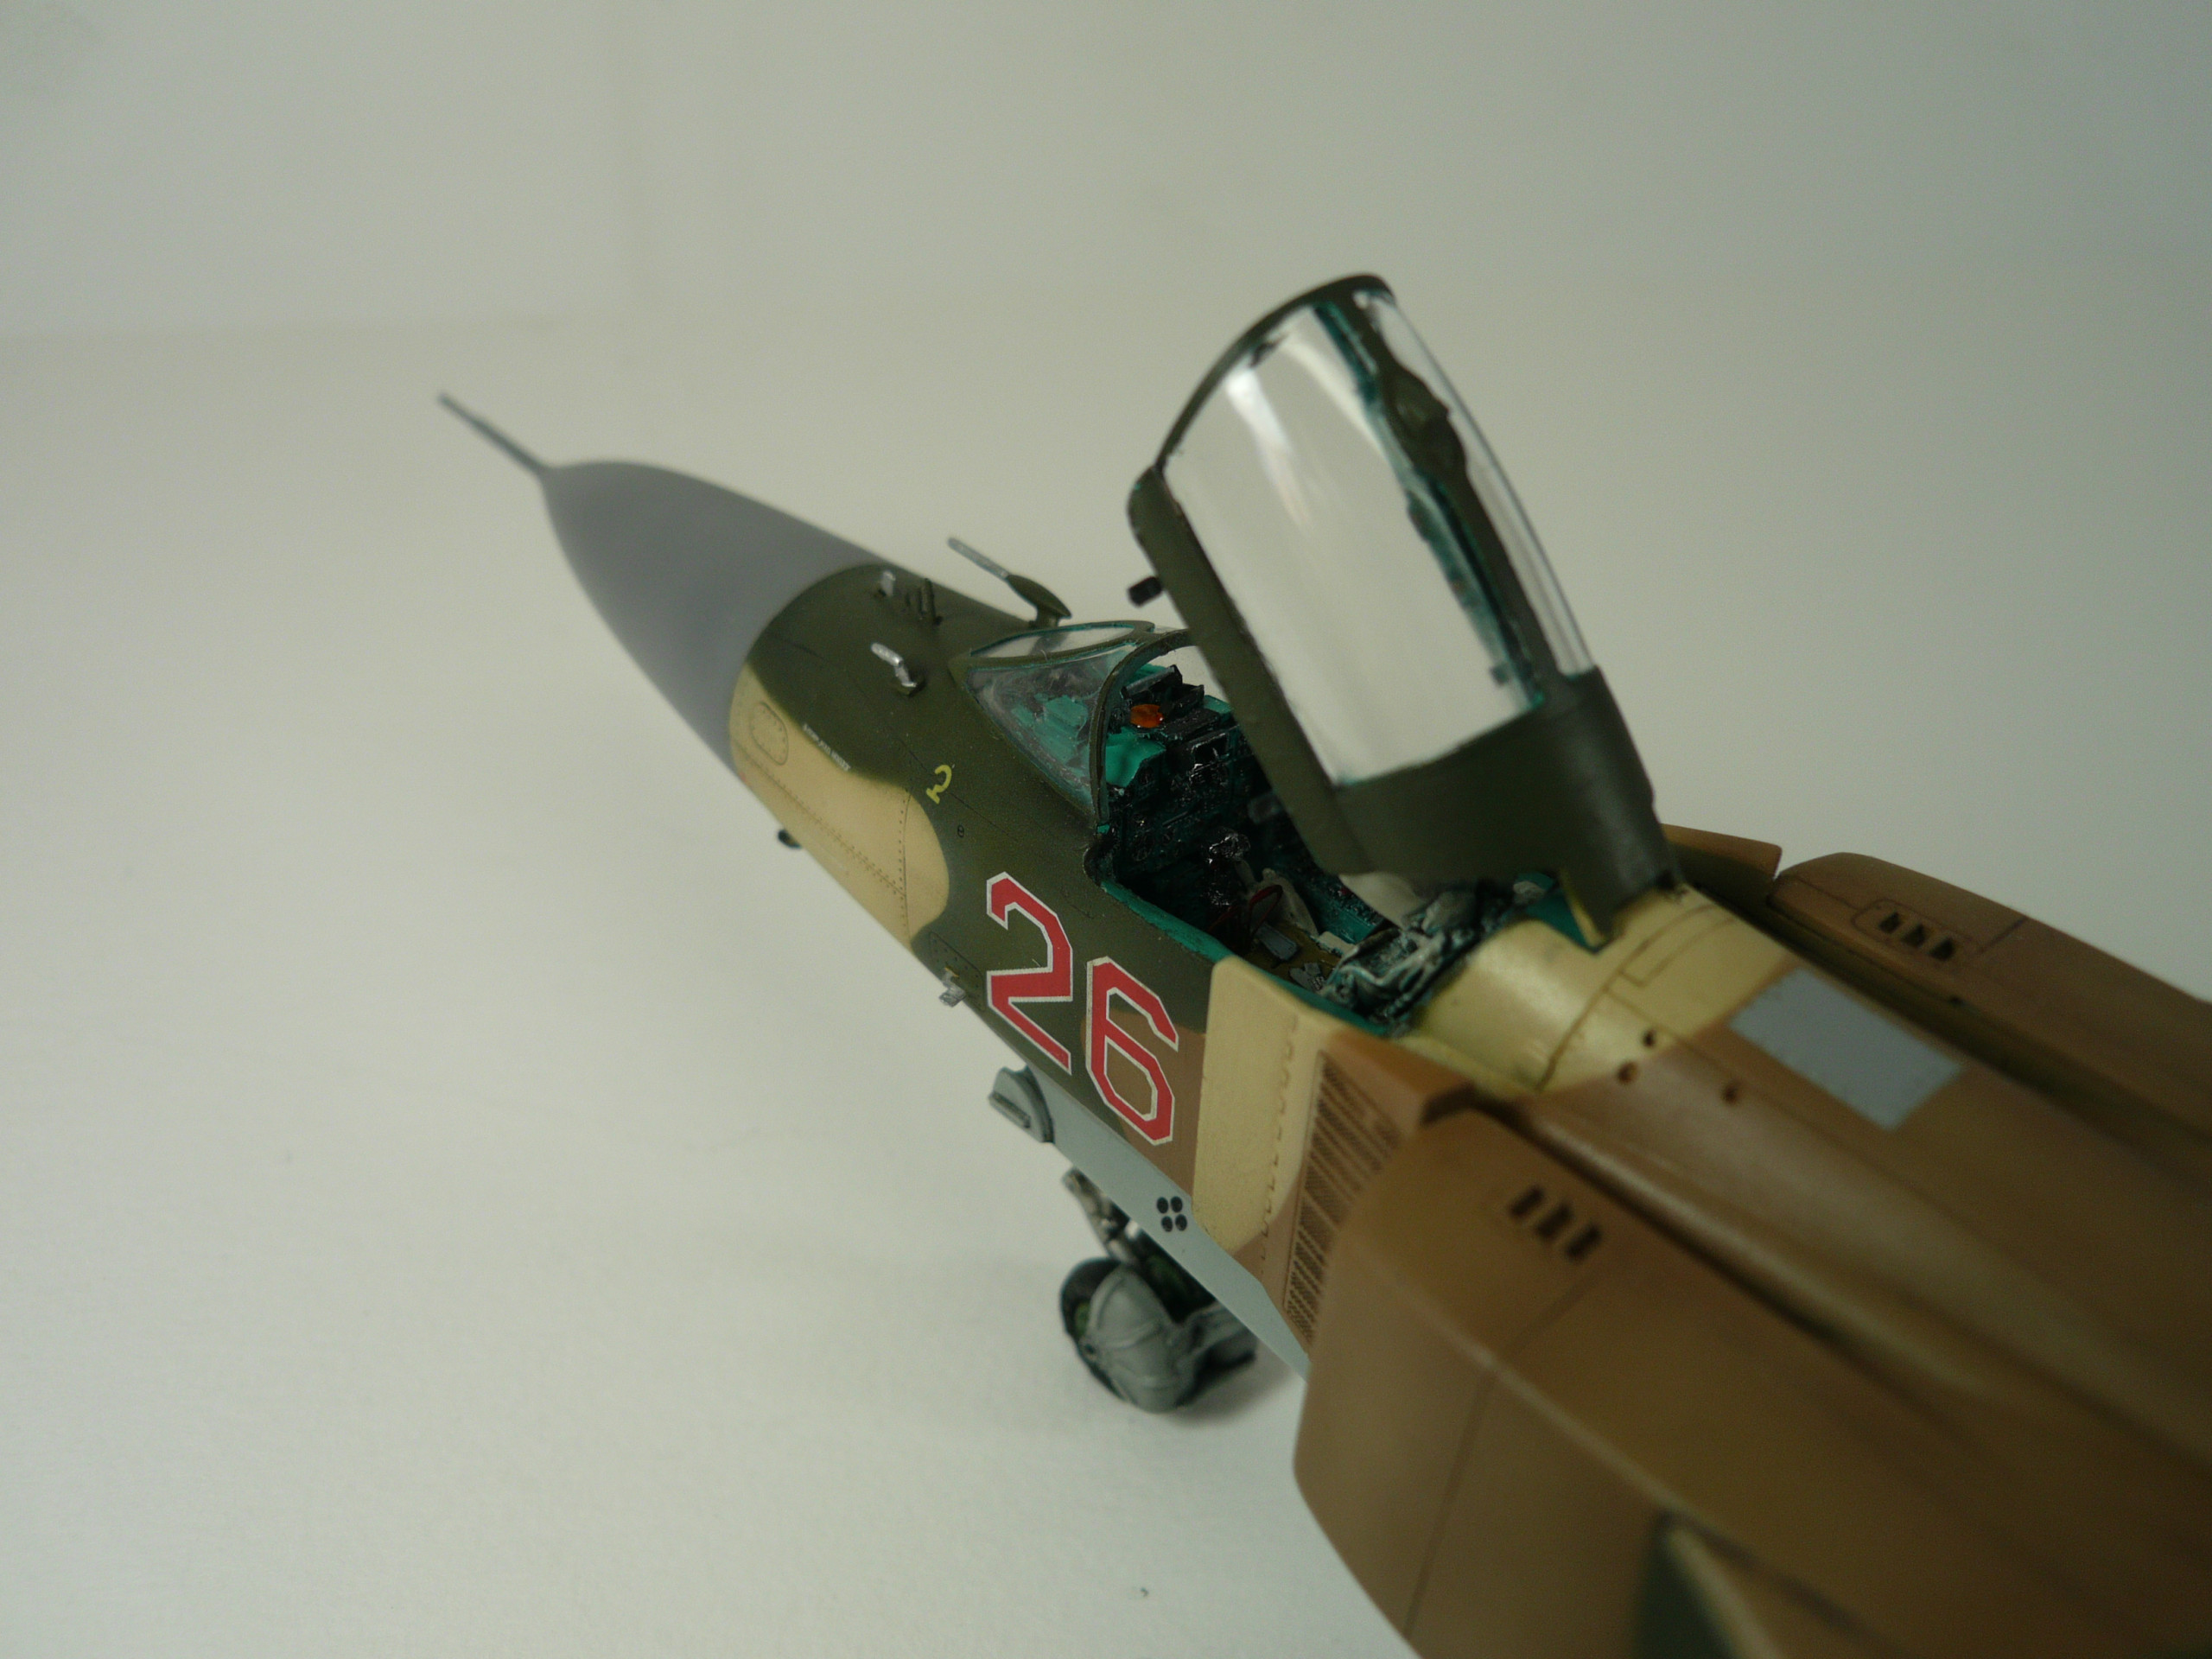
For this build I used Trumpeter’s Mig-23ML Flogger-G 02855 kit and Aires’ cockpit and wheel well resin parts.
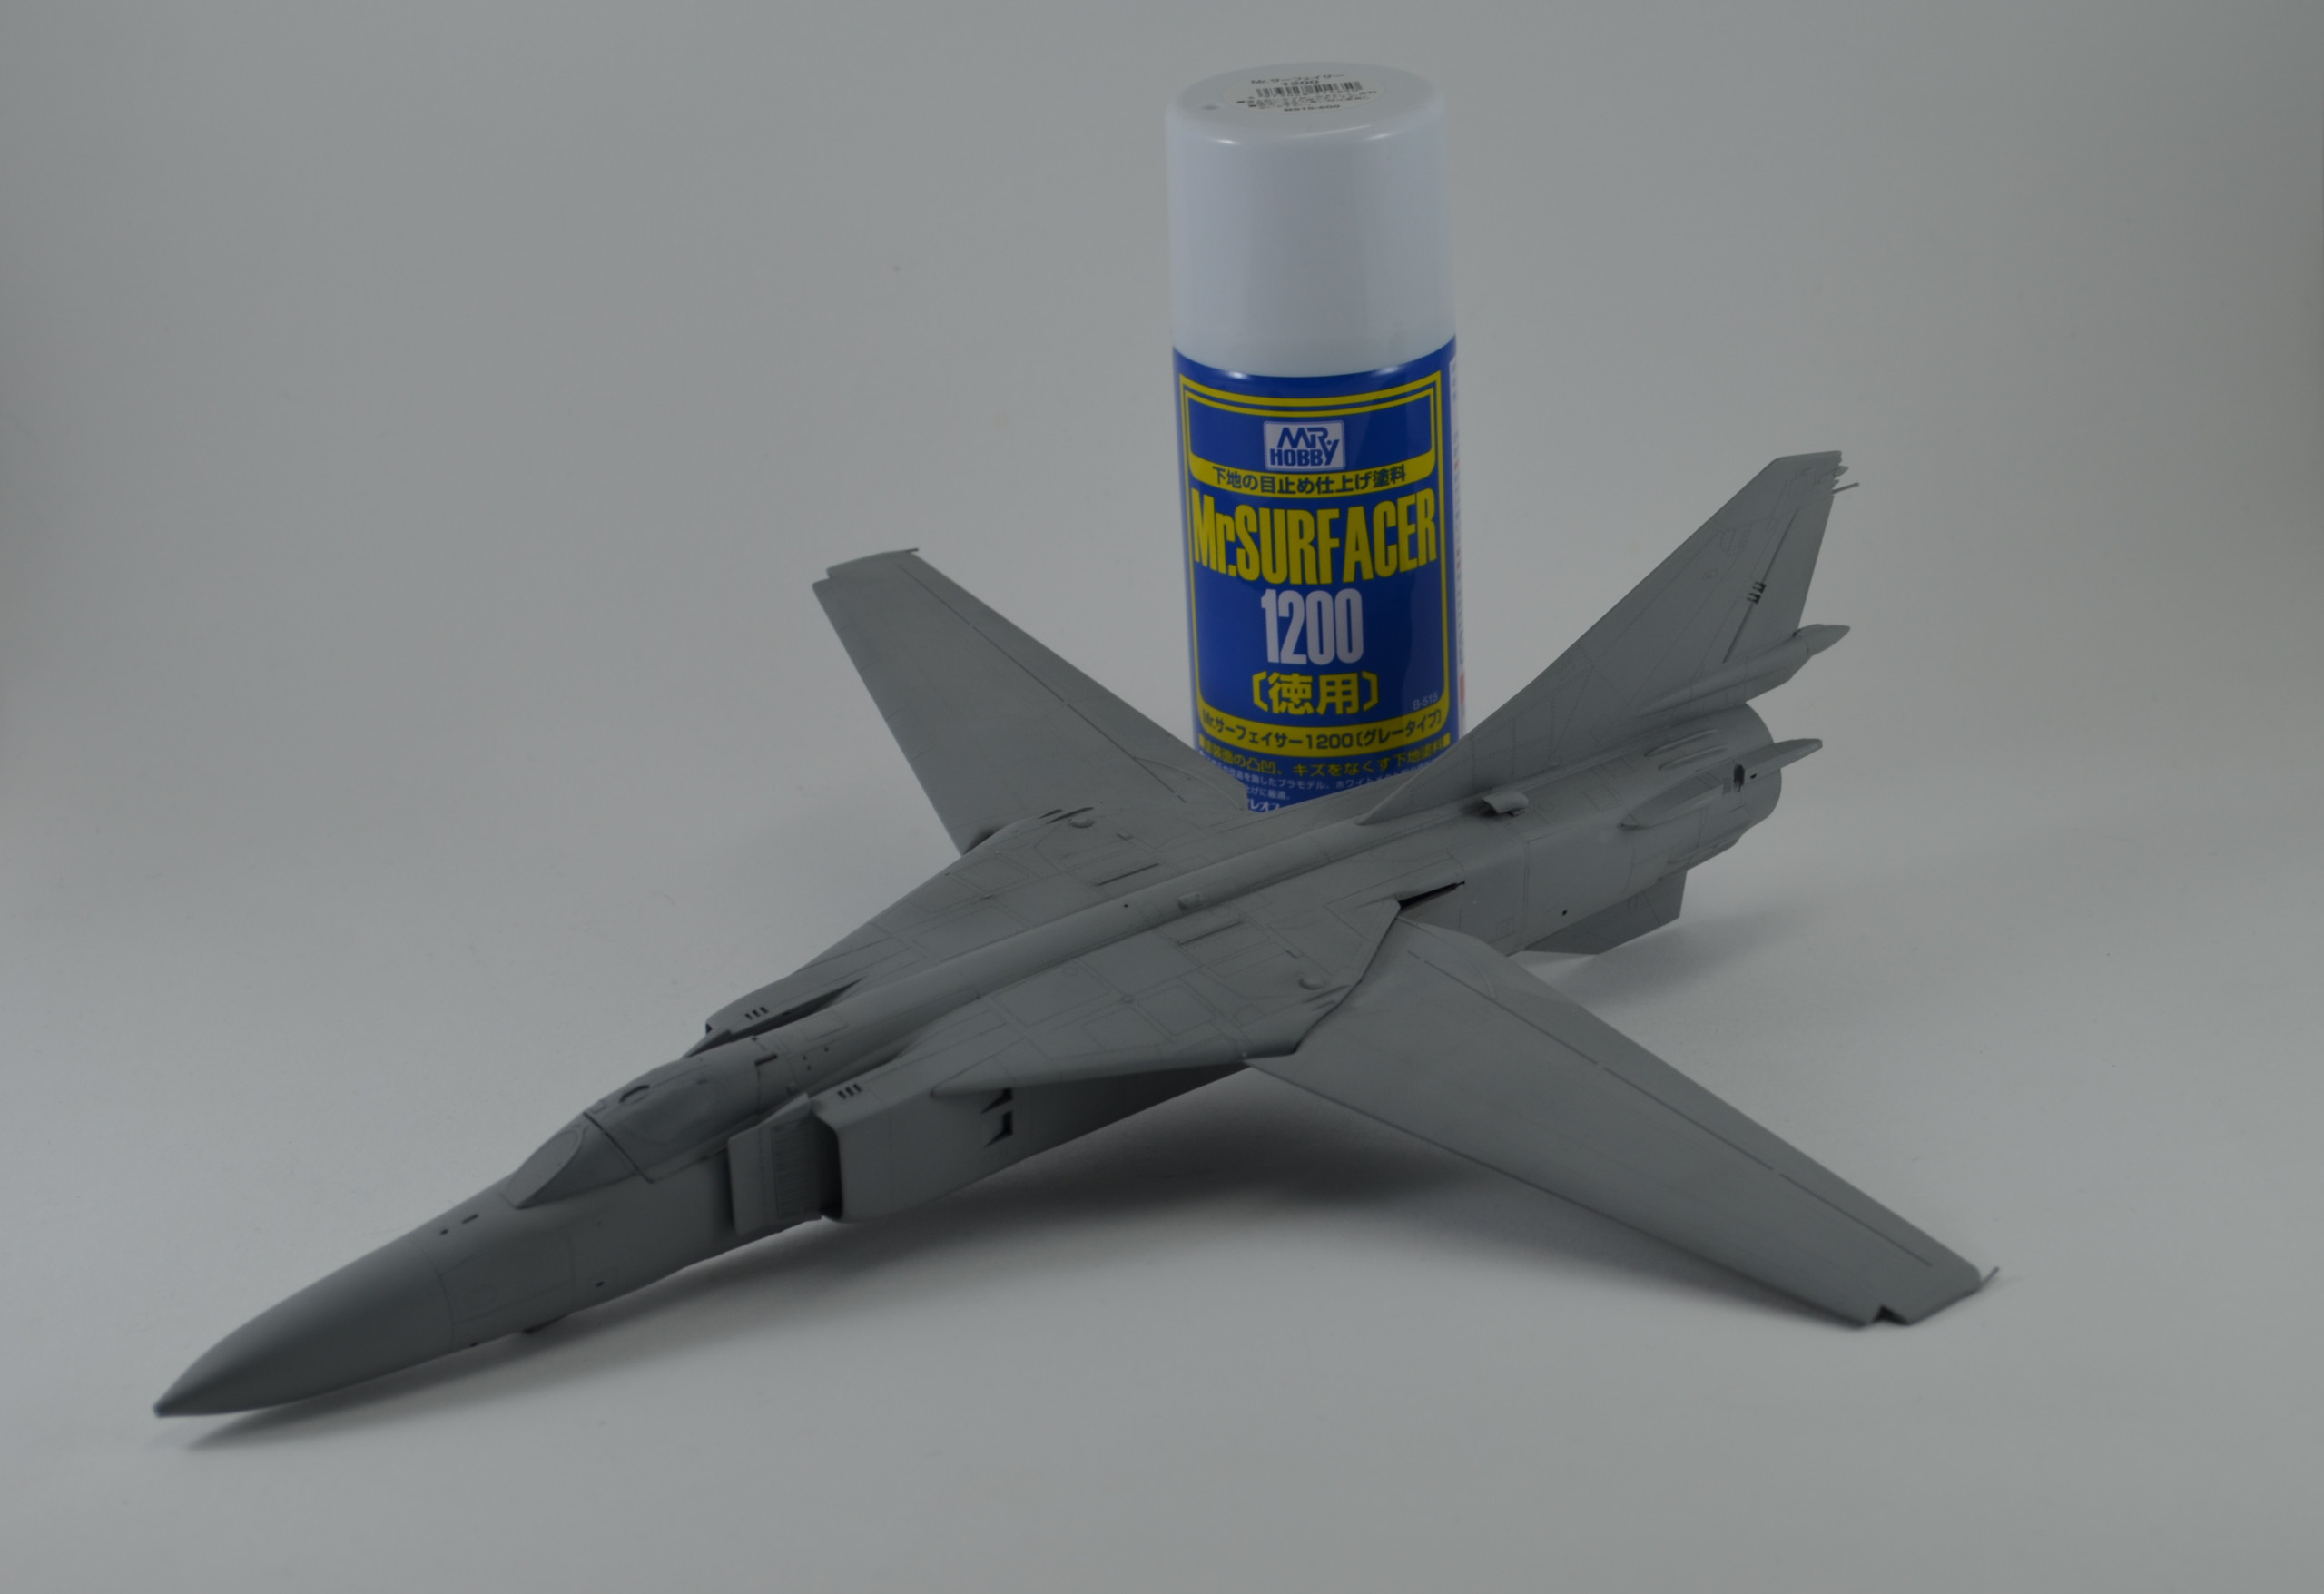
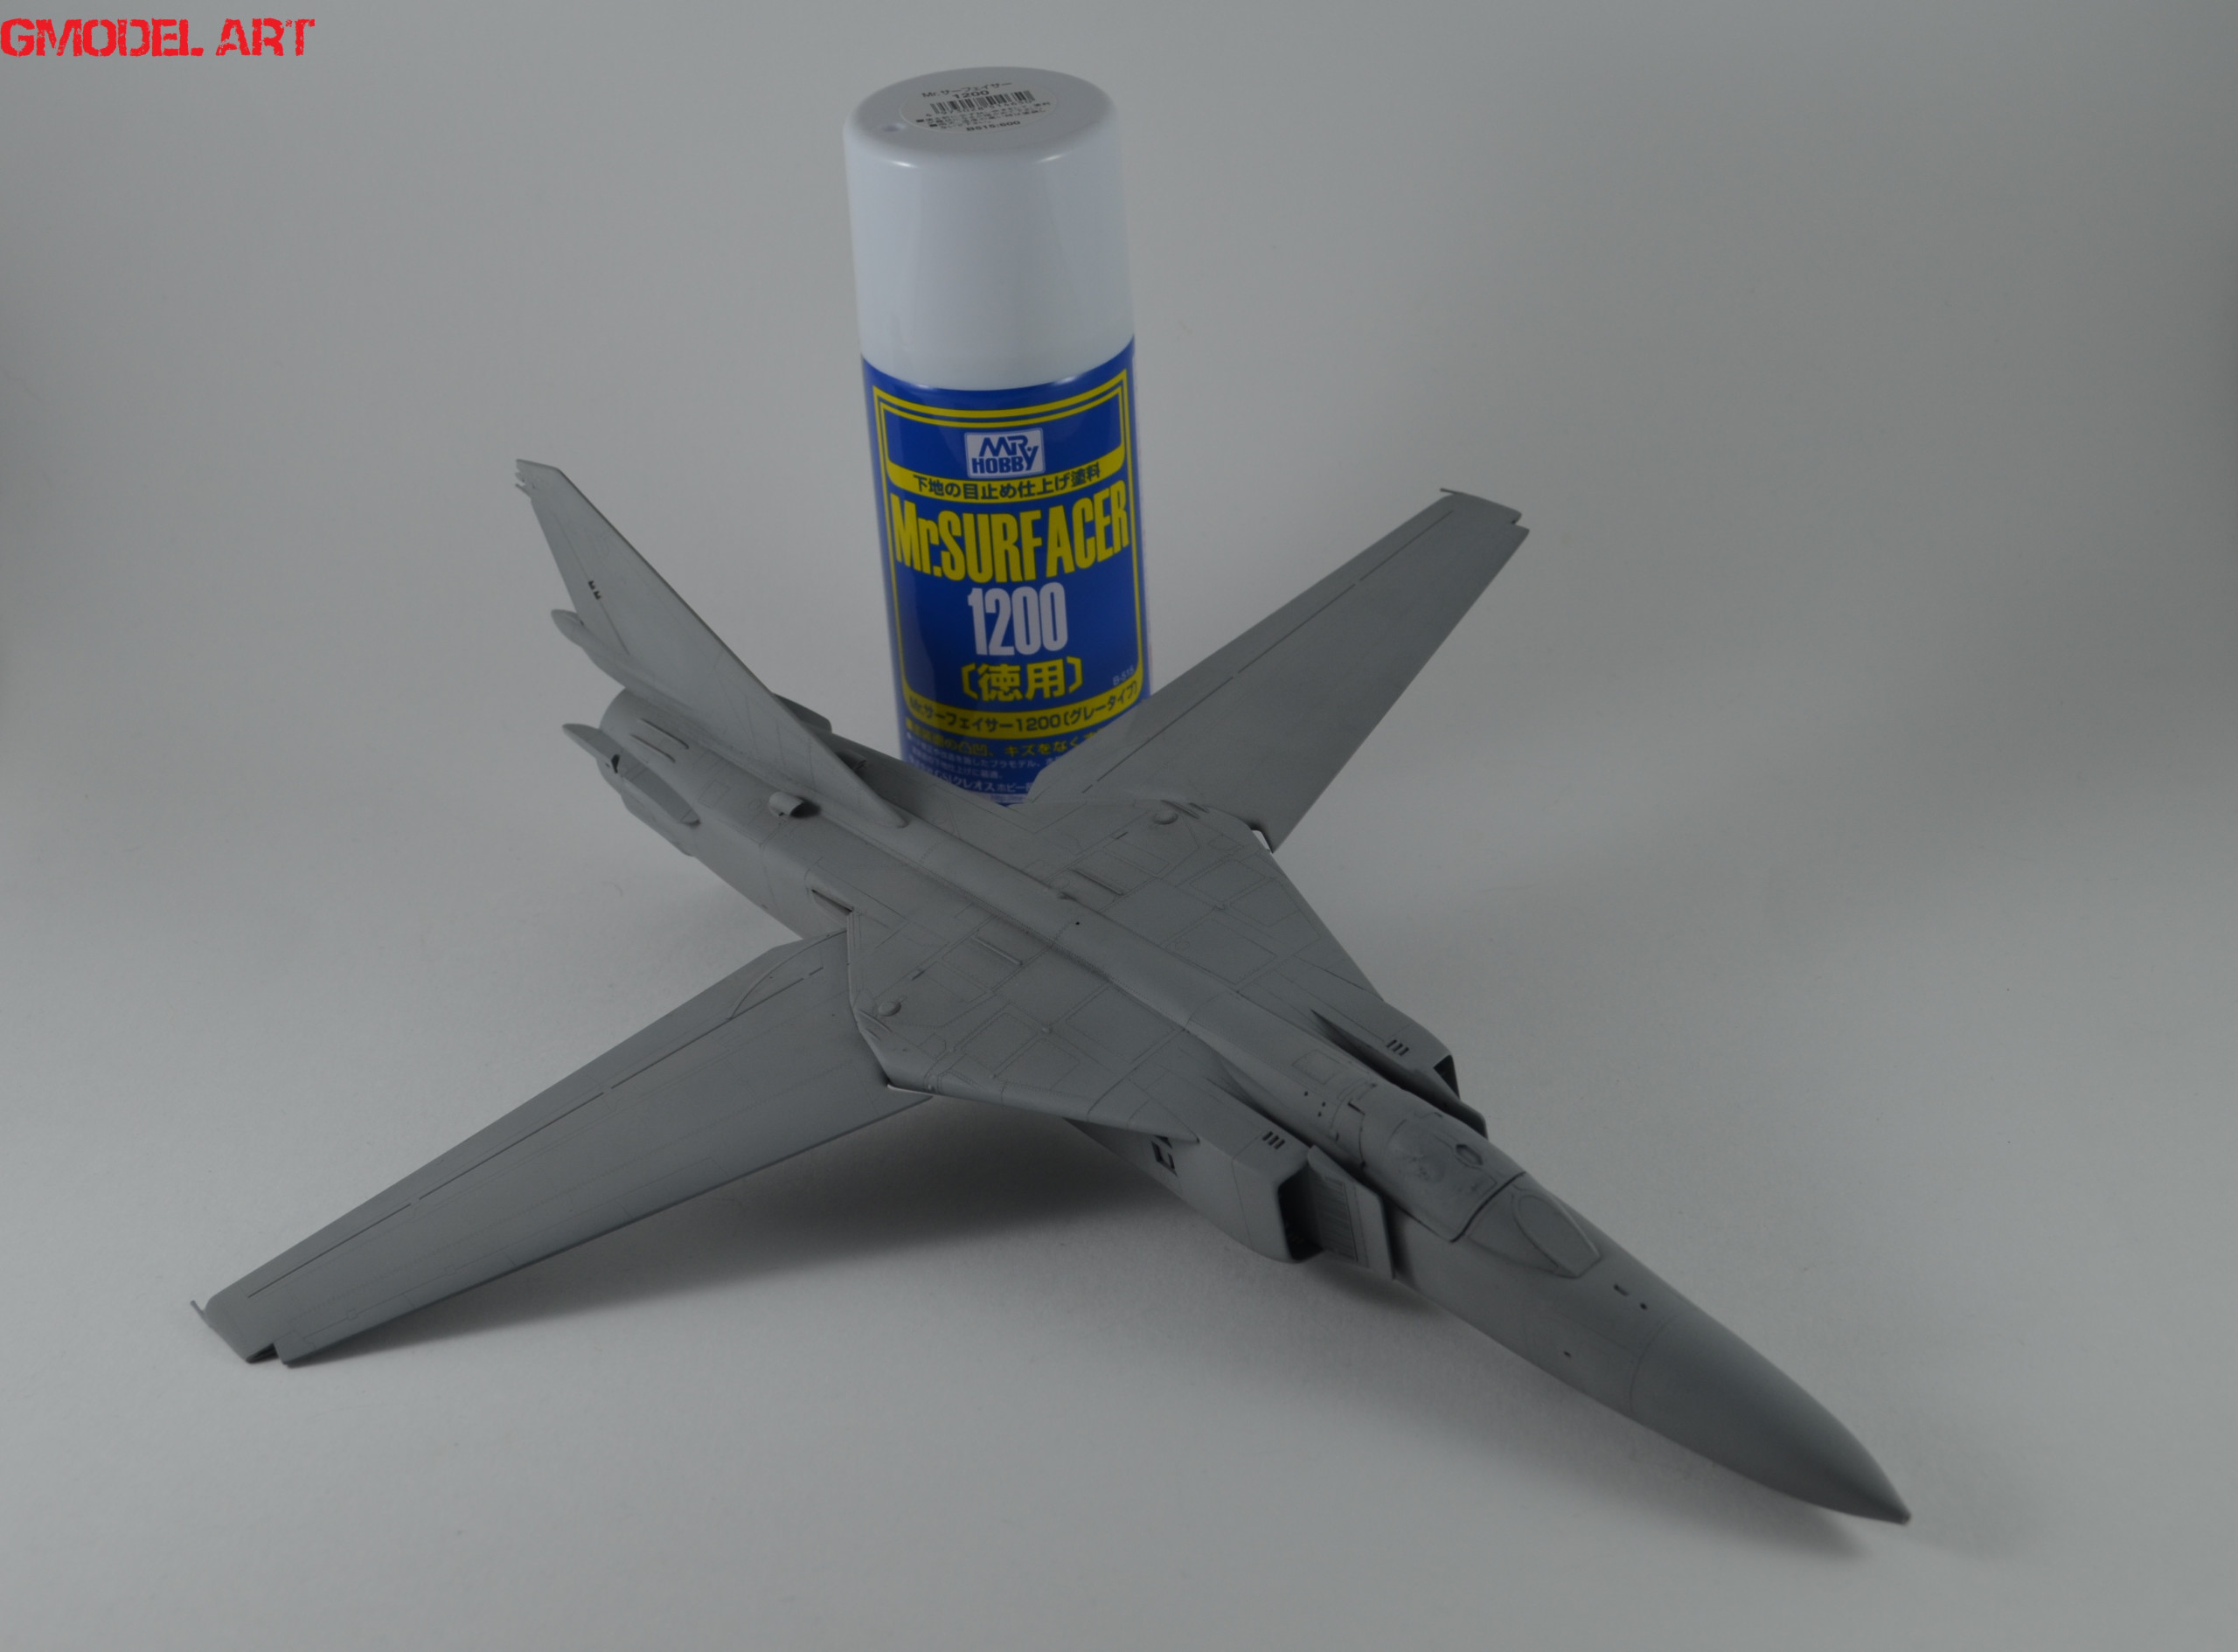
After the basic build finished, I prepared the model for the painting procedure. I washed it with soap water to remove any grease from my hands and dust remains. The first stage started by spraying Mr Surfacer 1200 primer (pic.1-2) Using primers we can detect any flaws on our models and prepare the surface for the paint.
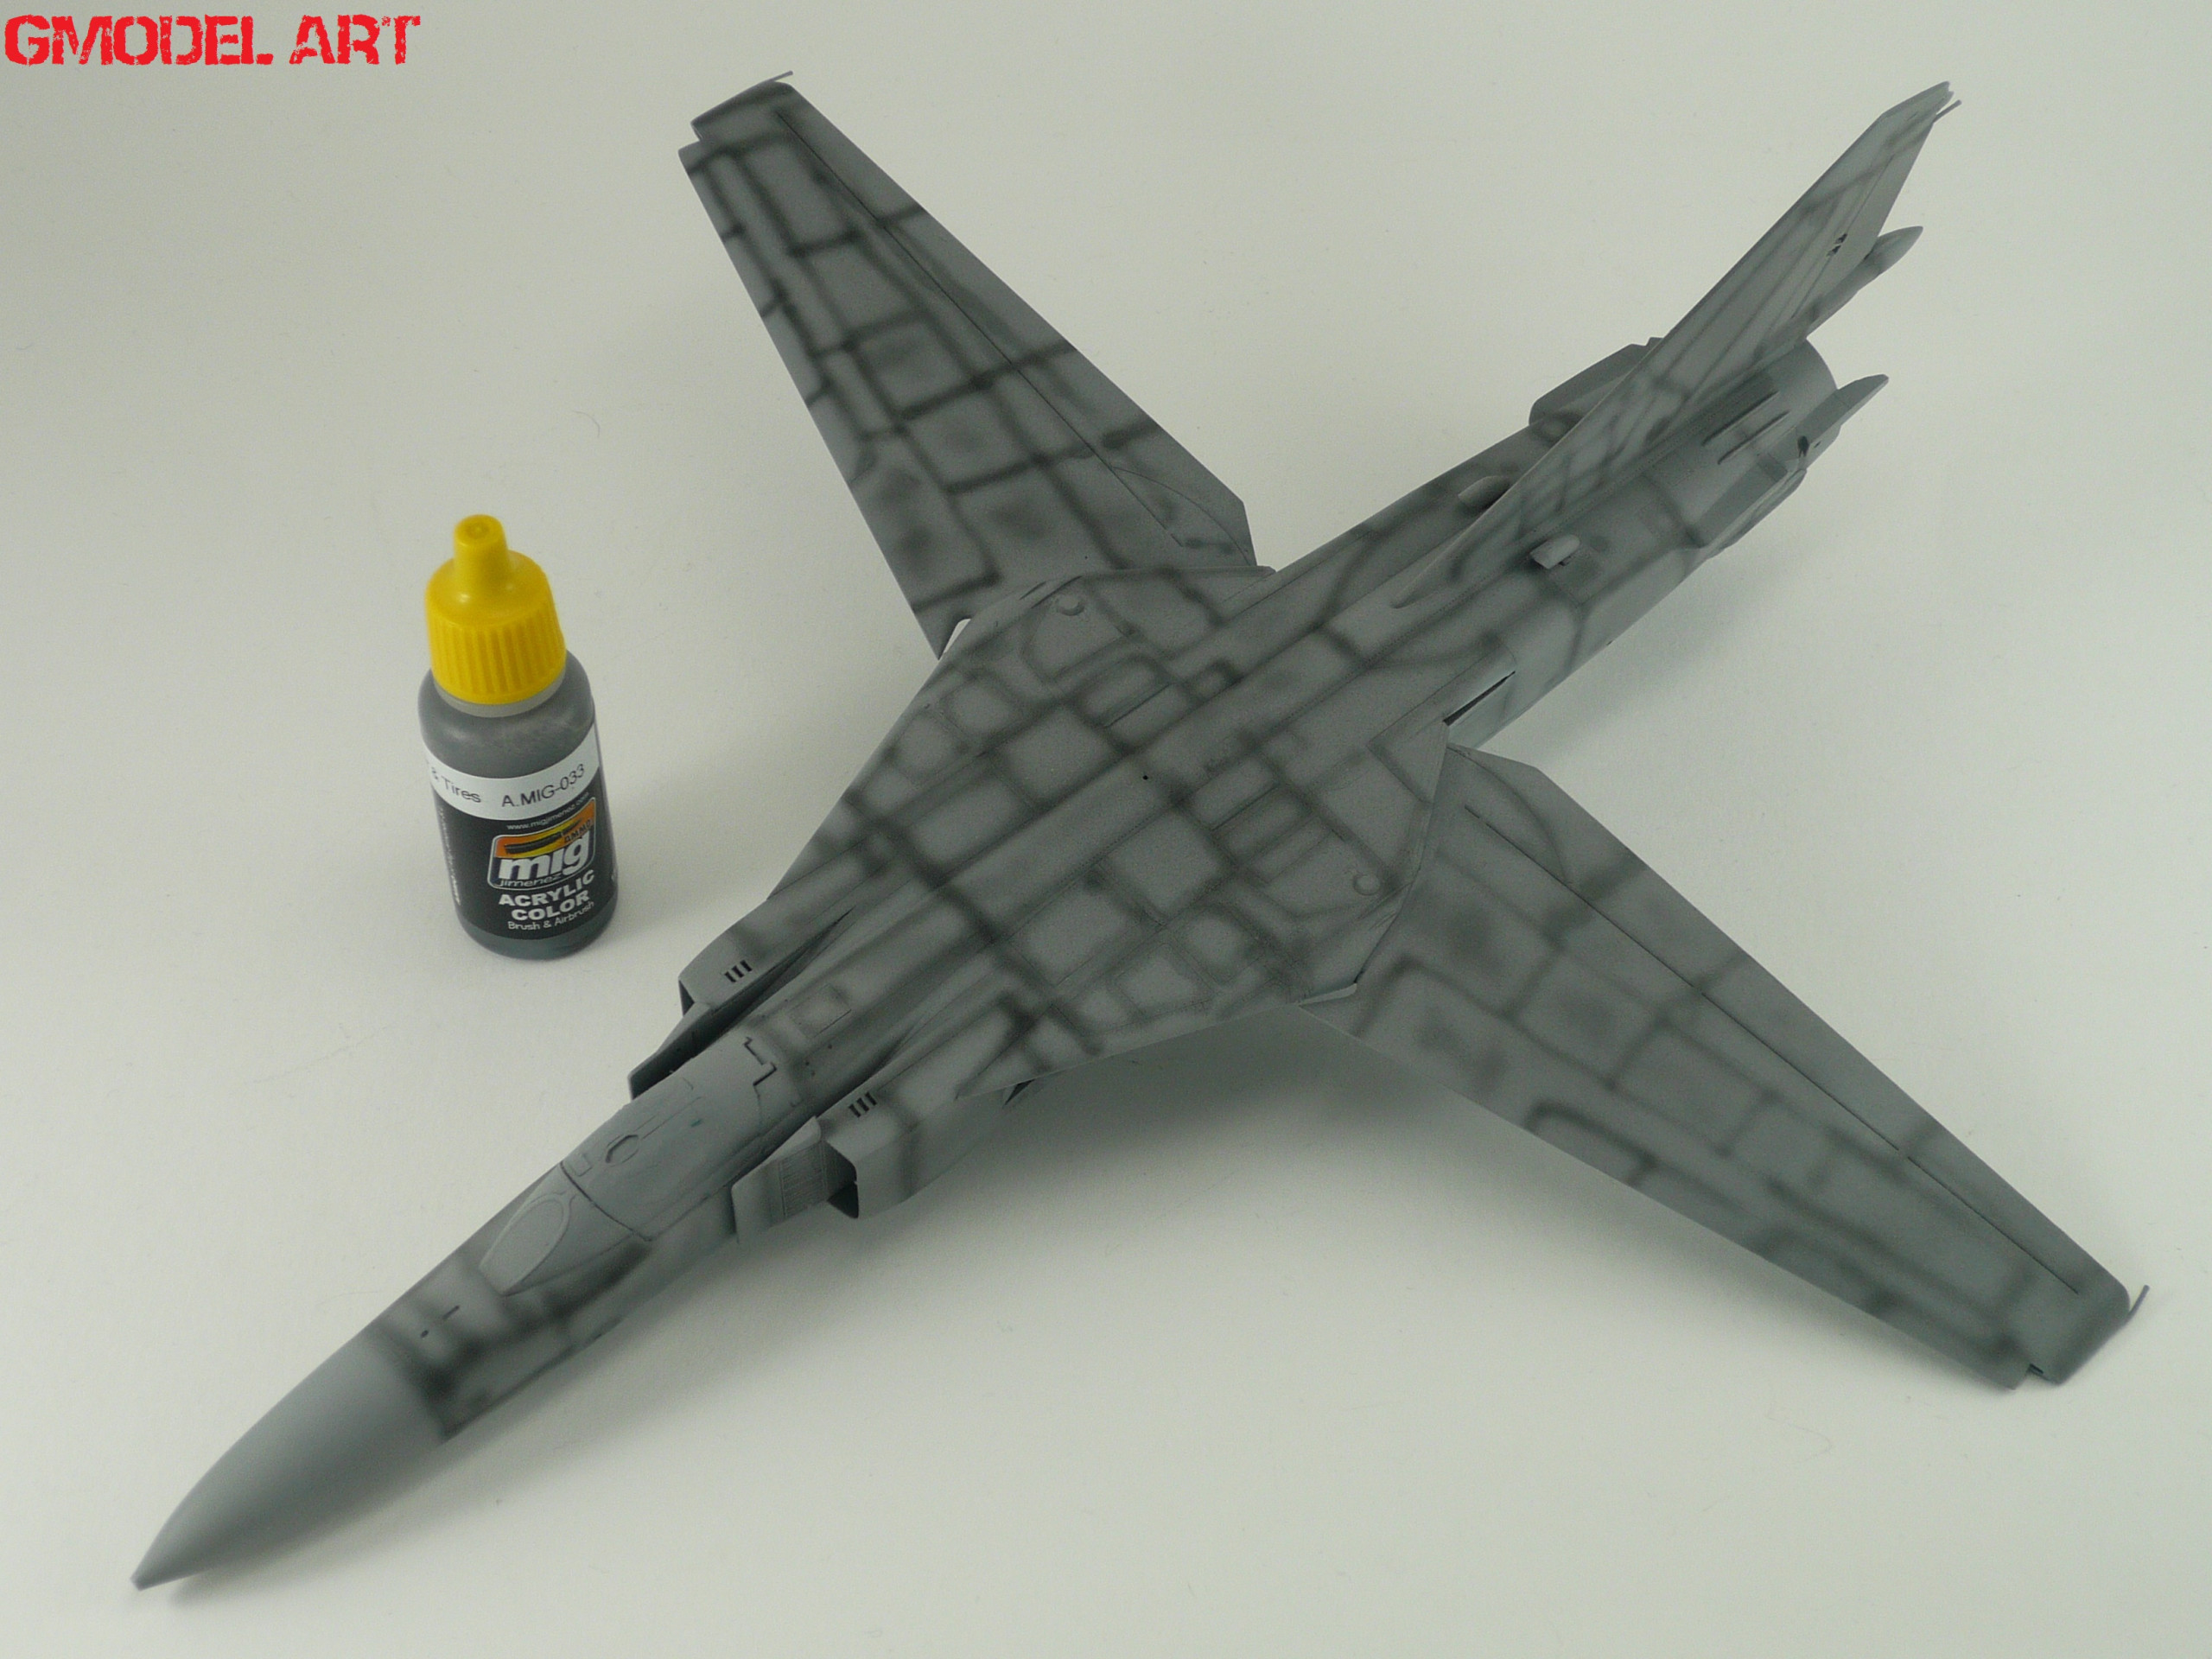
The next stage is to give some shadow effect in the low surfaces using the preshade technique. I used Mig Ammo’s Rubber and Tire black to do that (pic.5)
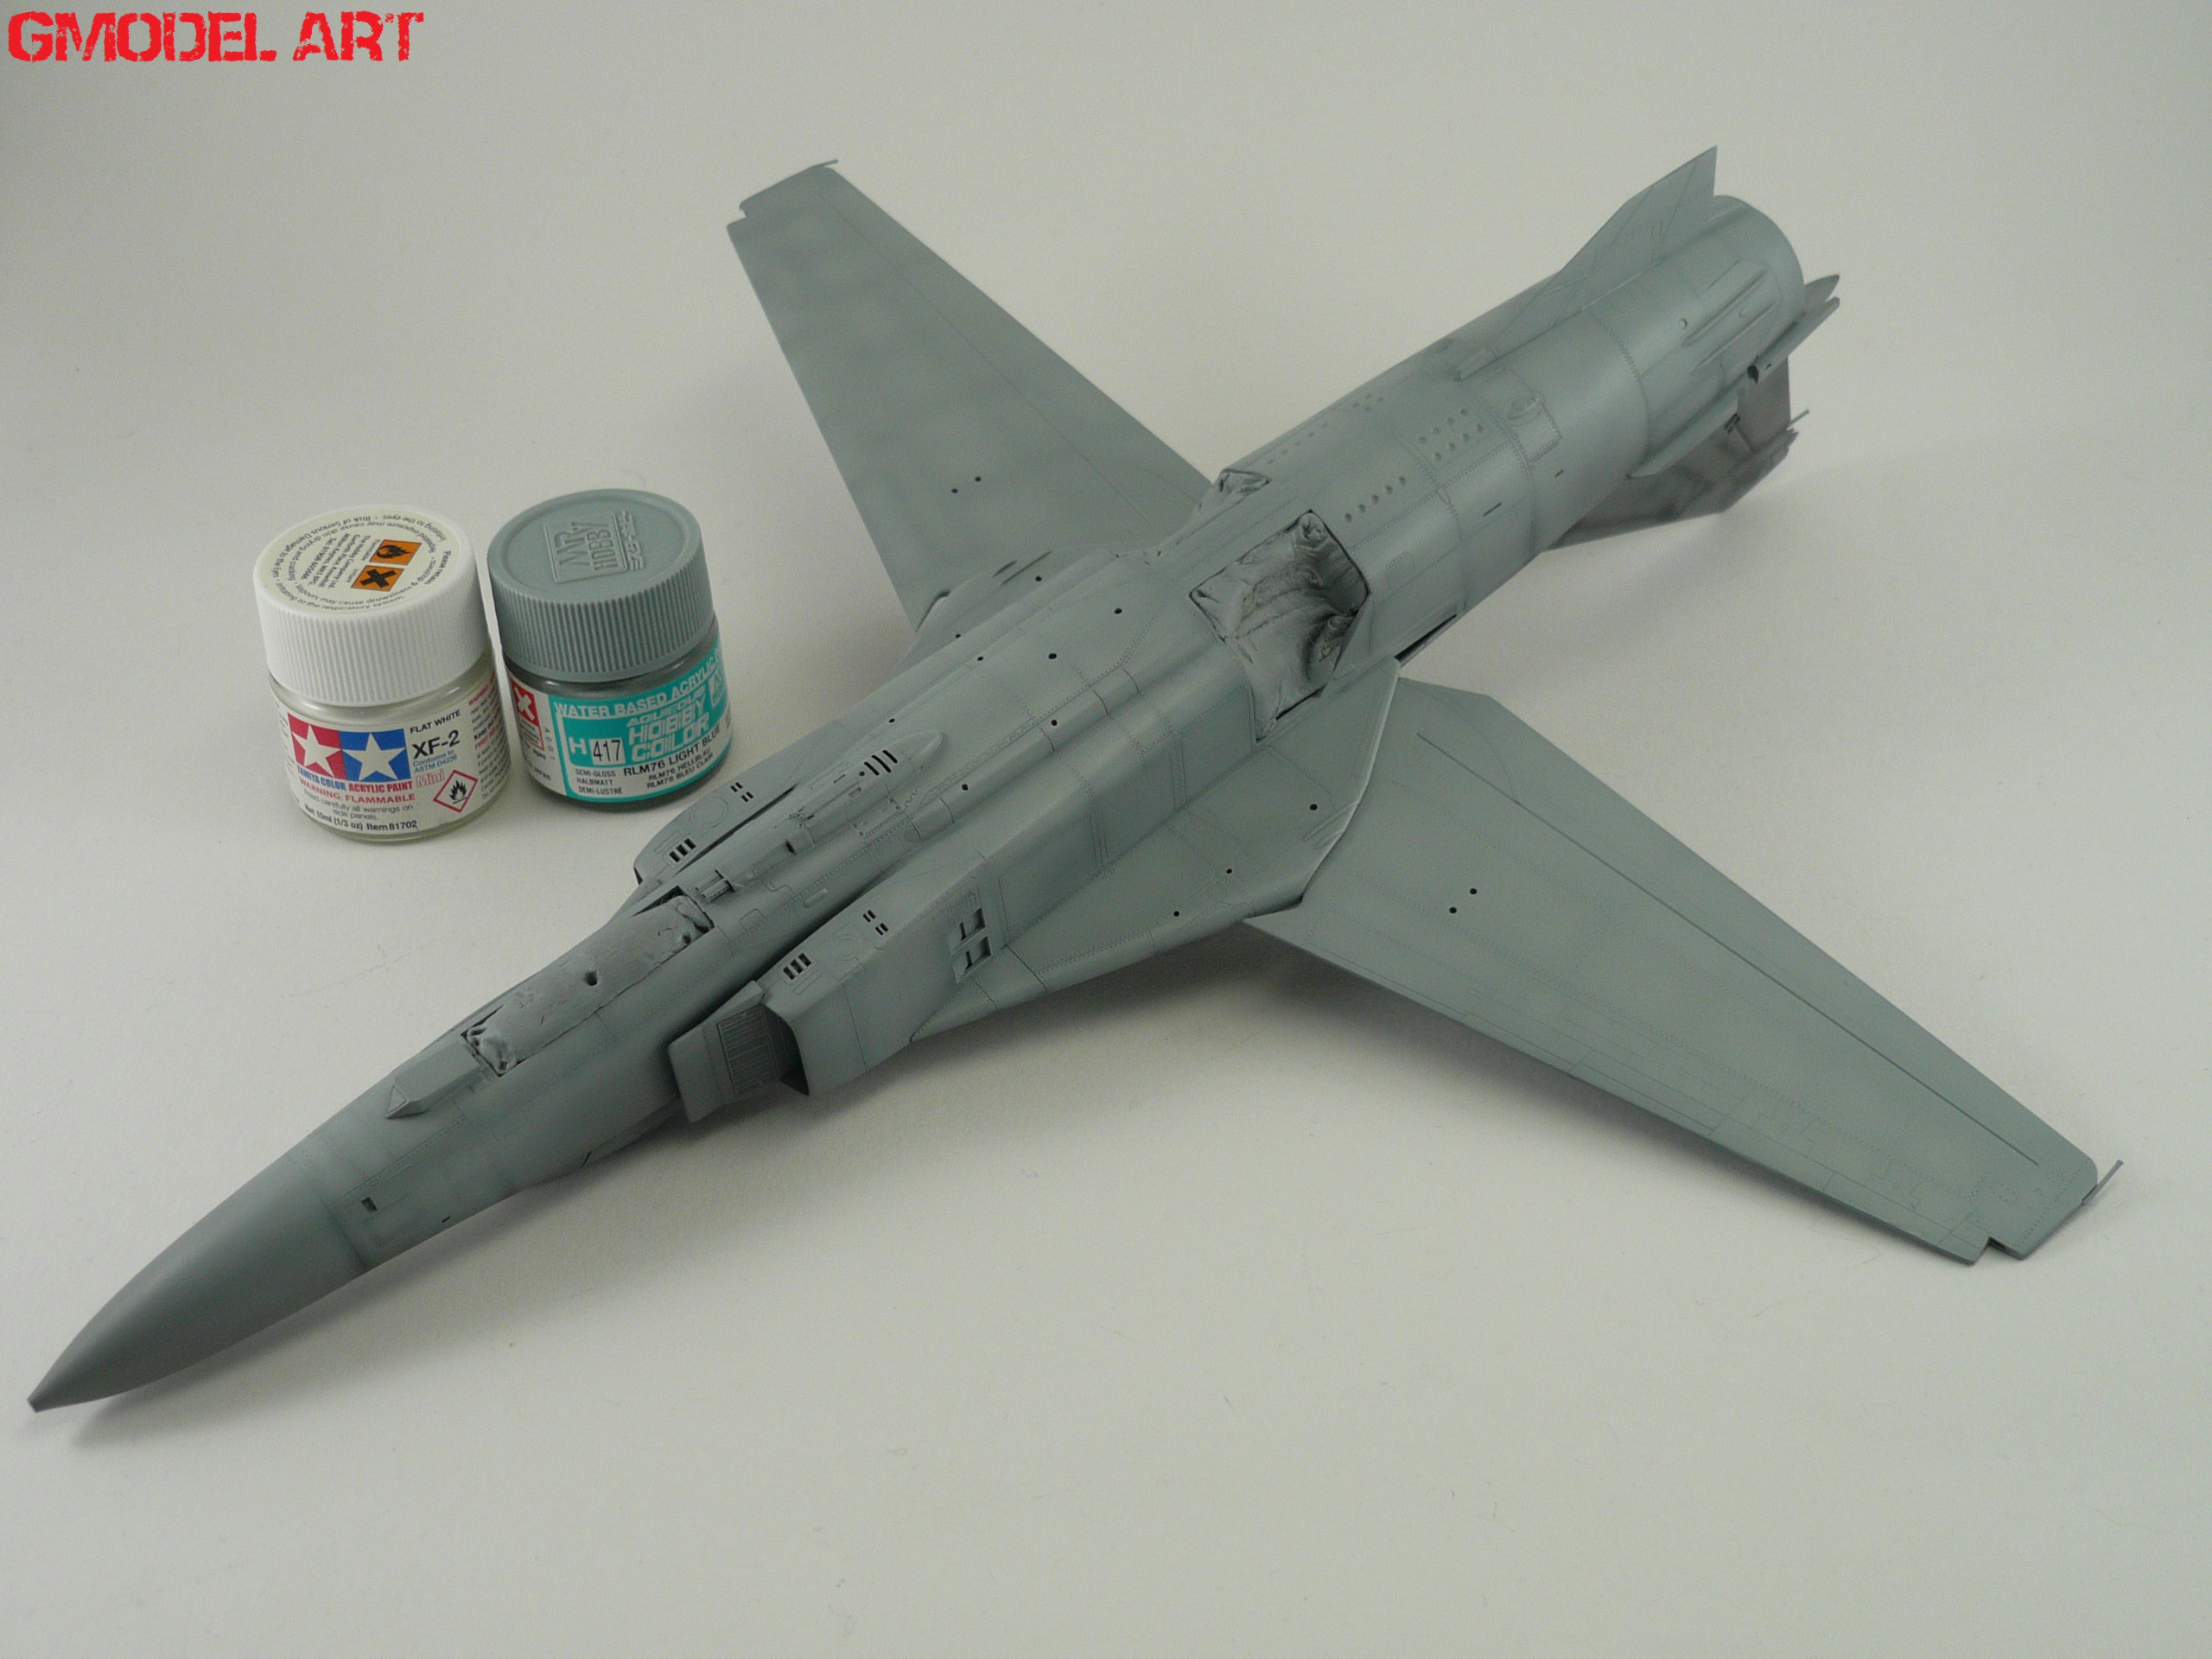
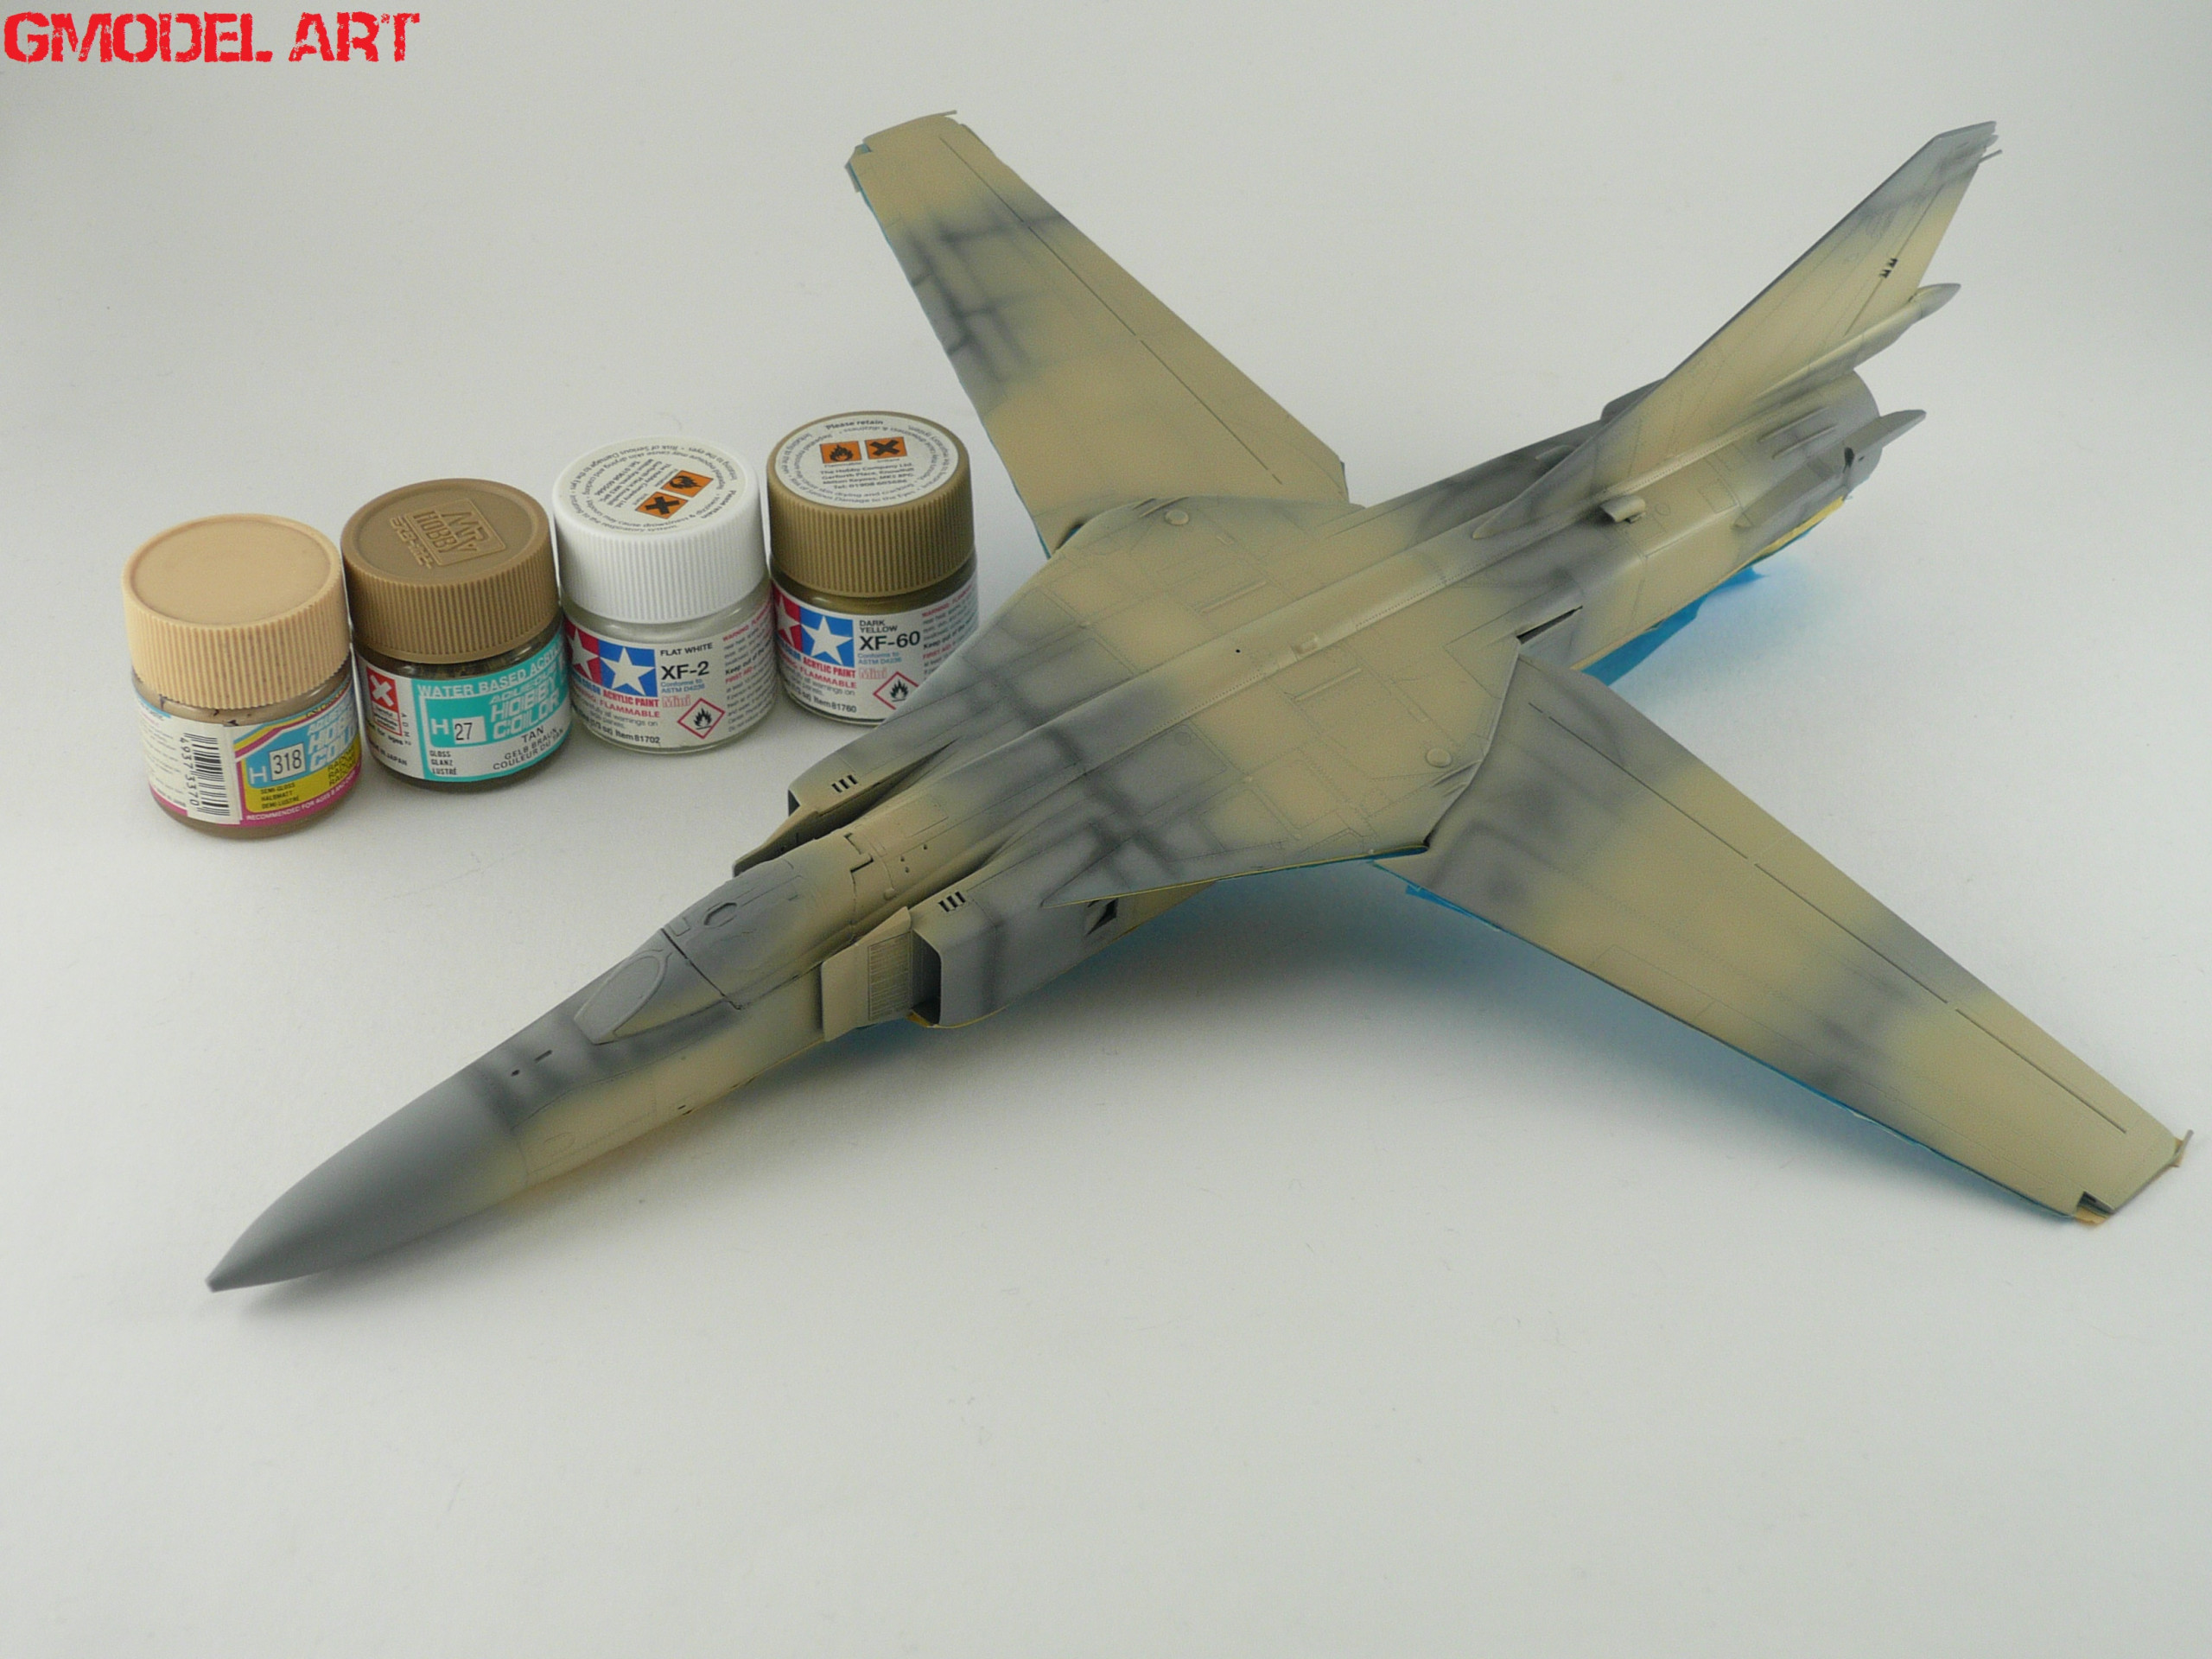
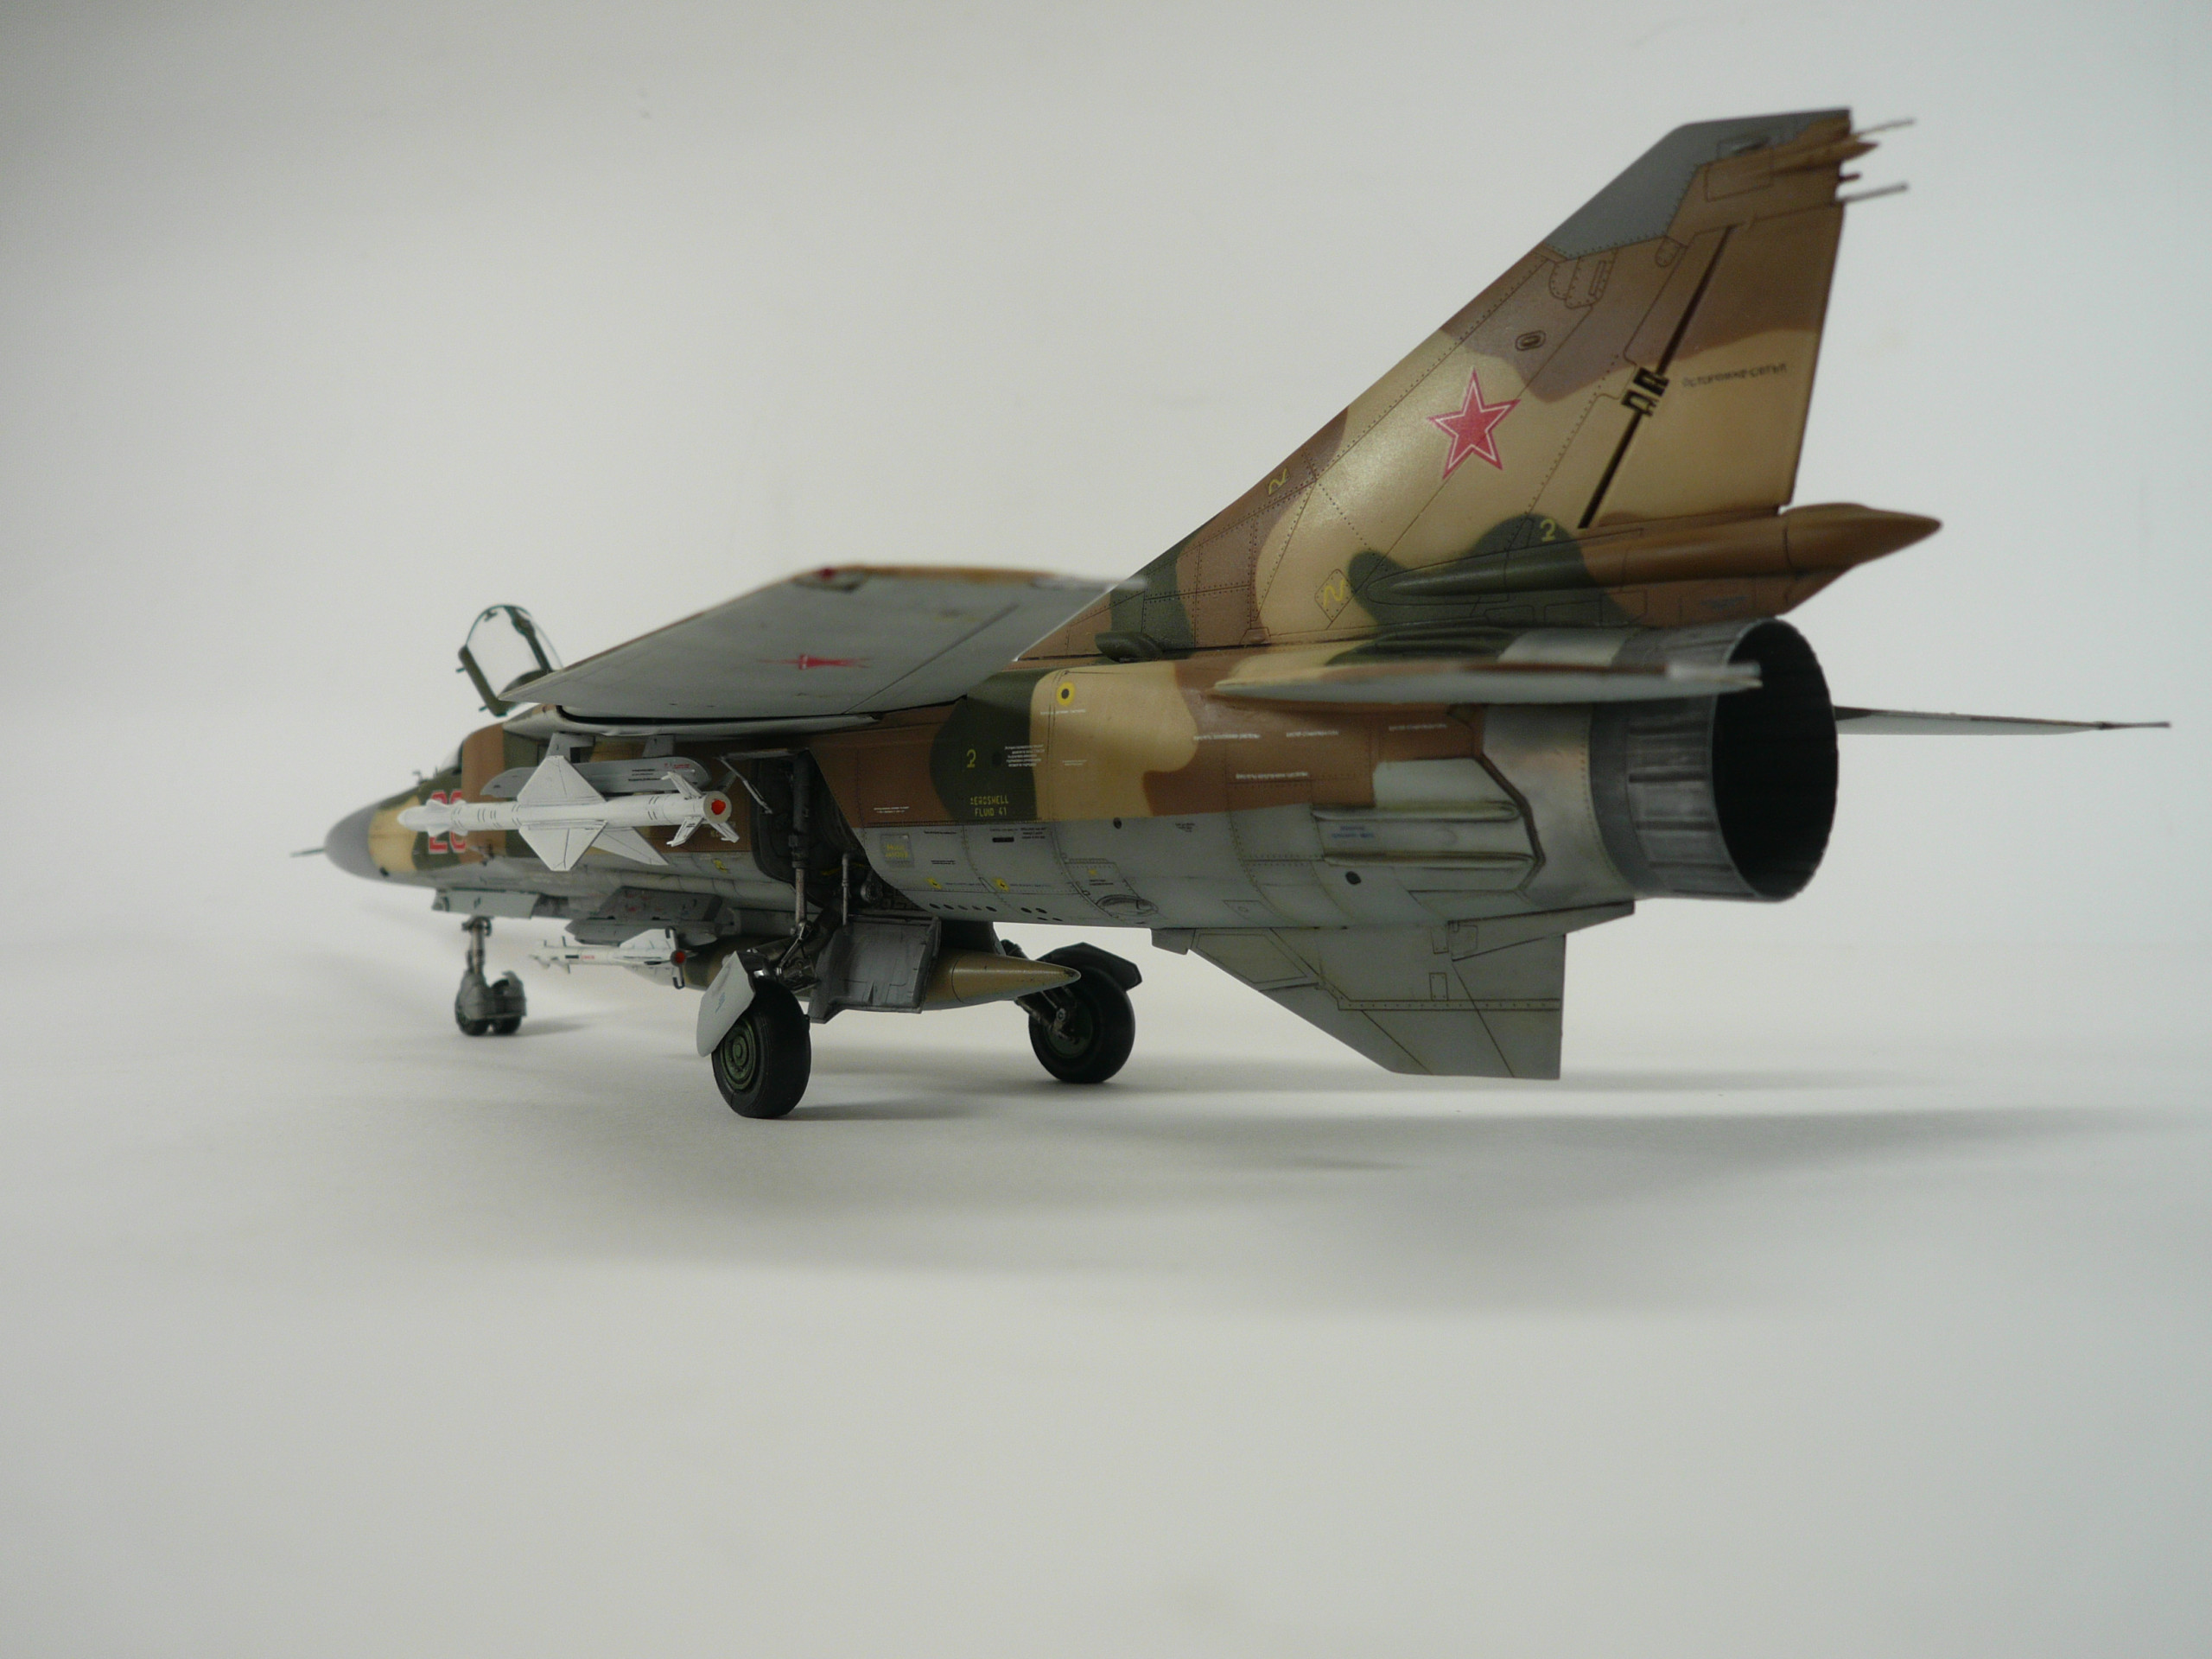
The painting procedure started painting the lower surfaces of the model using Mr Hobby’s H417 RLM 76 Light Blue. The various shades and highlights came from using the basic color with some drops of Tamiya’s XF-2 flat white (pic.6&7)
After the color of the lower surfaces is dried, we mask the whole area and proceed to the upper surfaces….We repeat the preshade technique procedure for the upper surfaces using the A.Mig 033 Rubber and Tire flat black again.(pic 9)
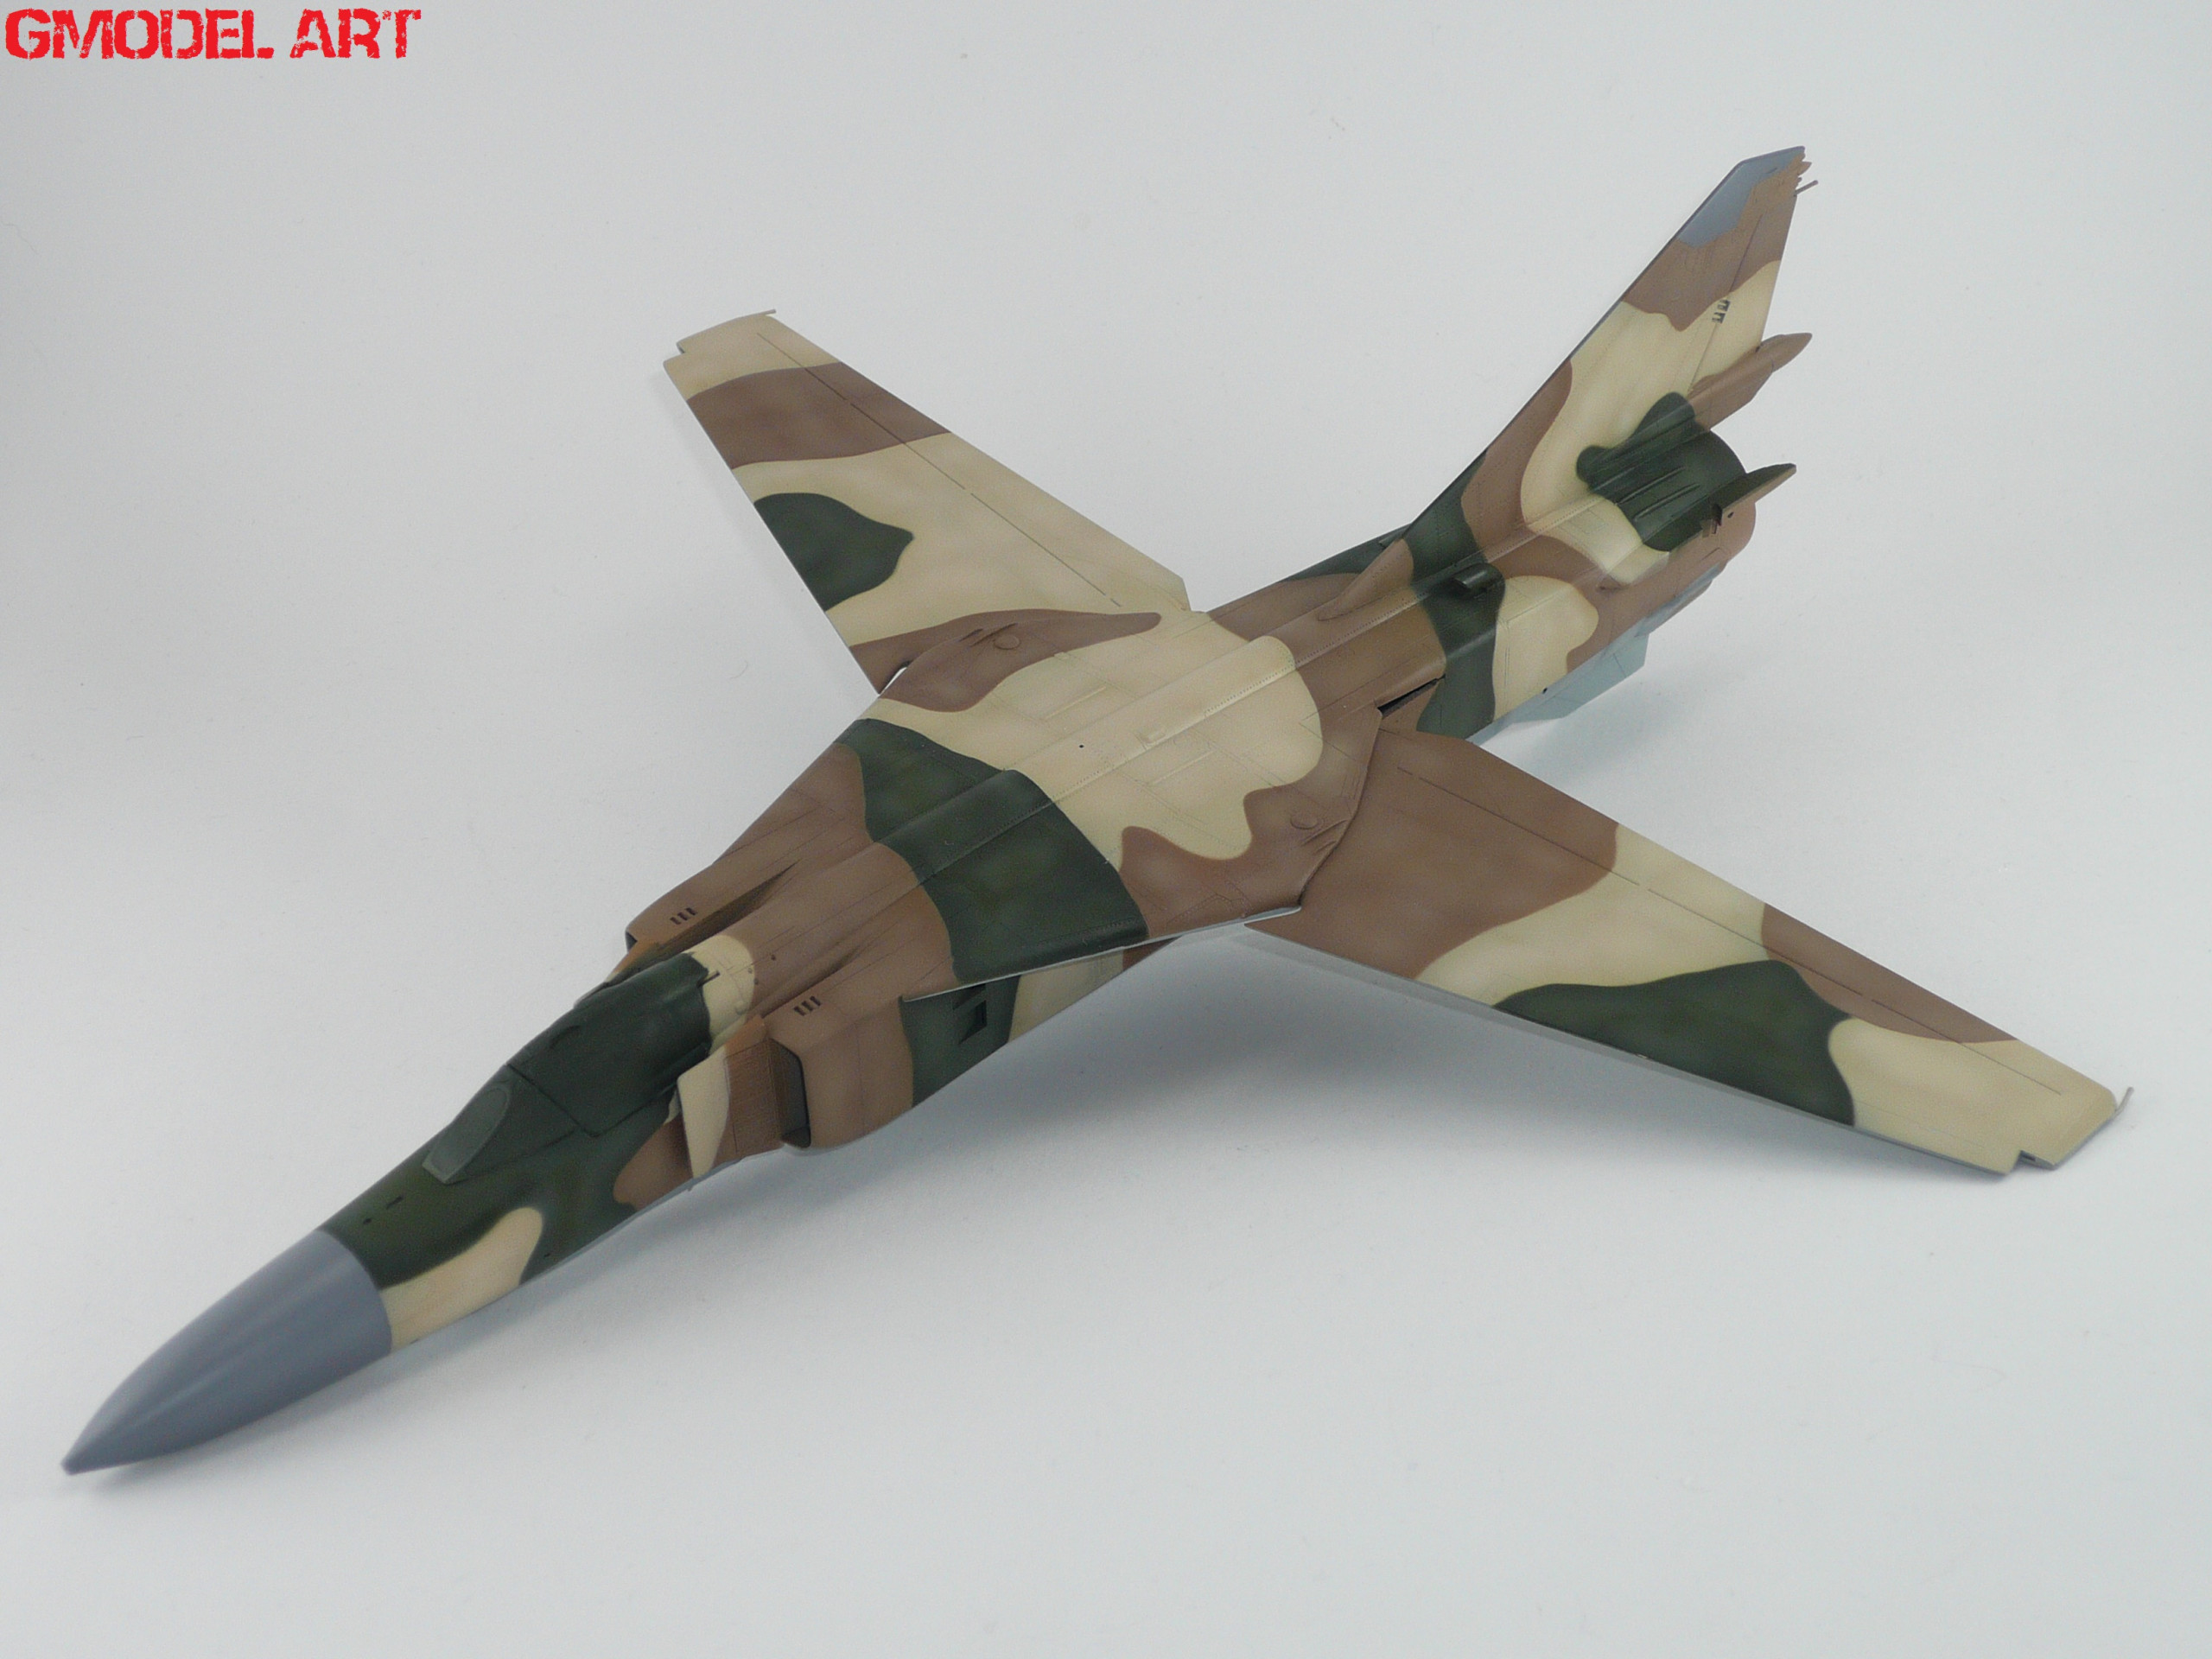
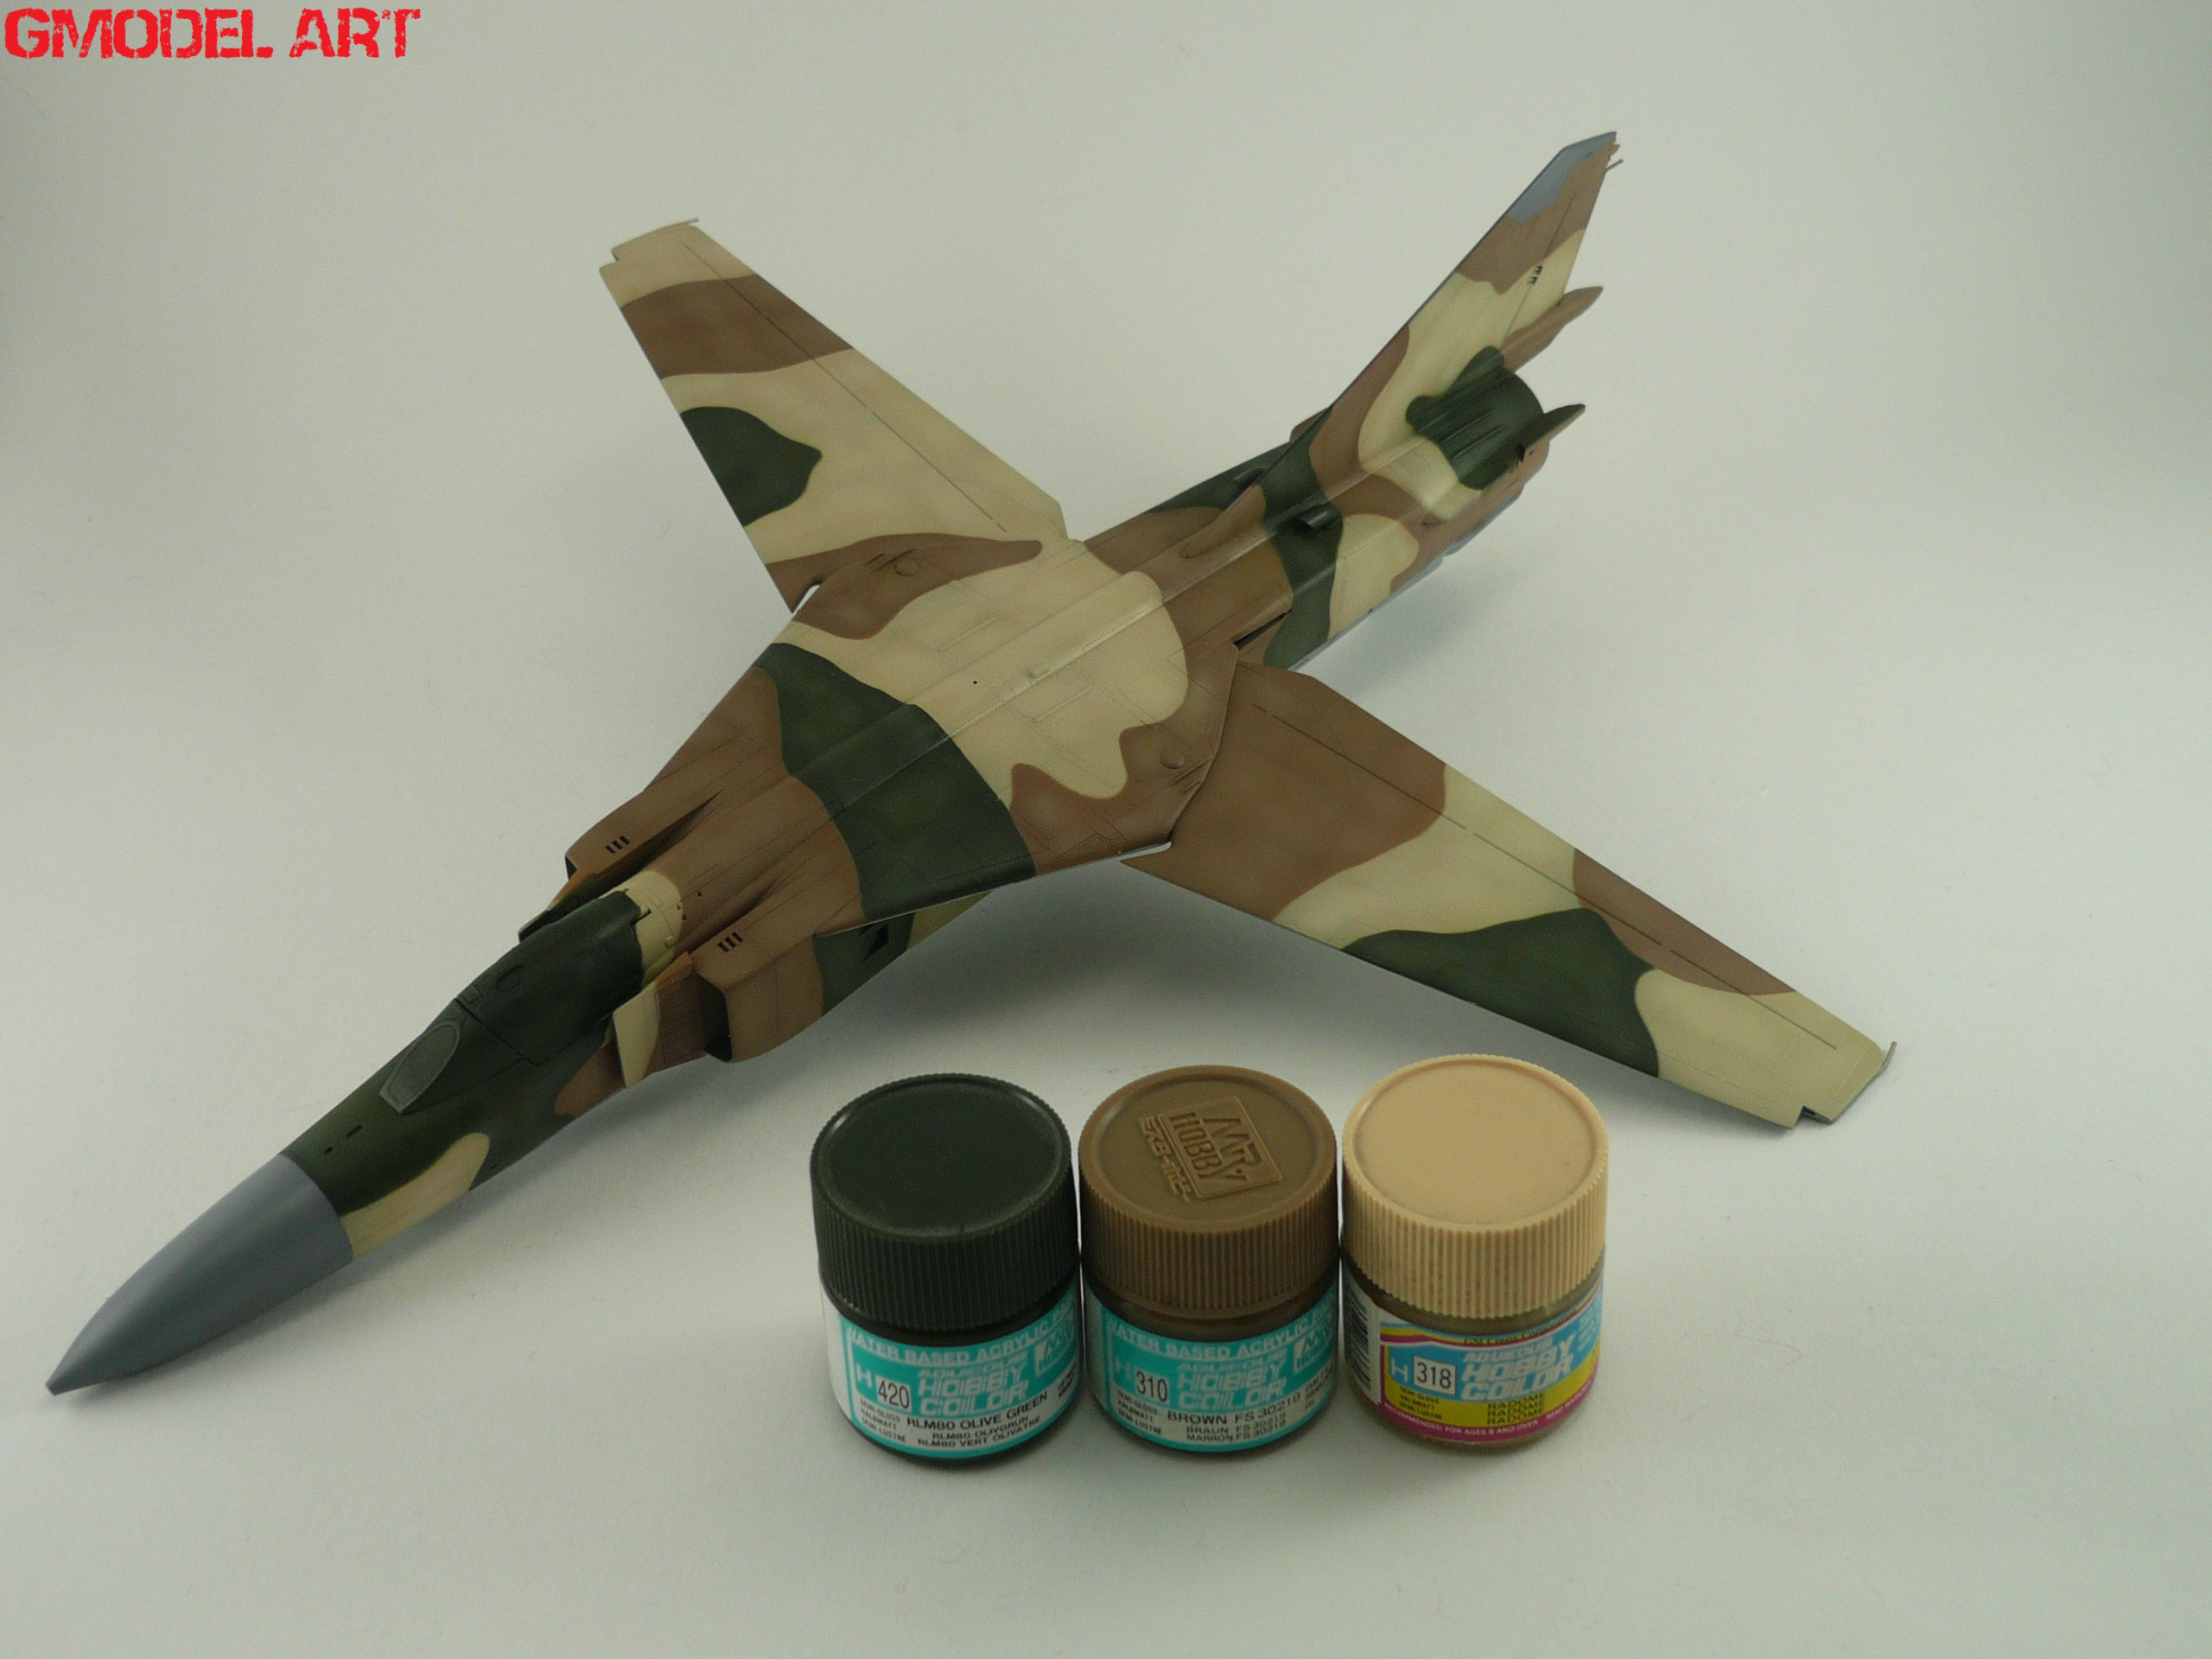
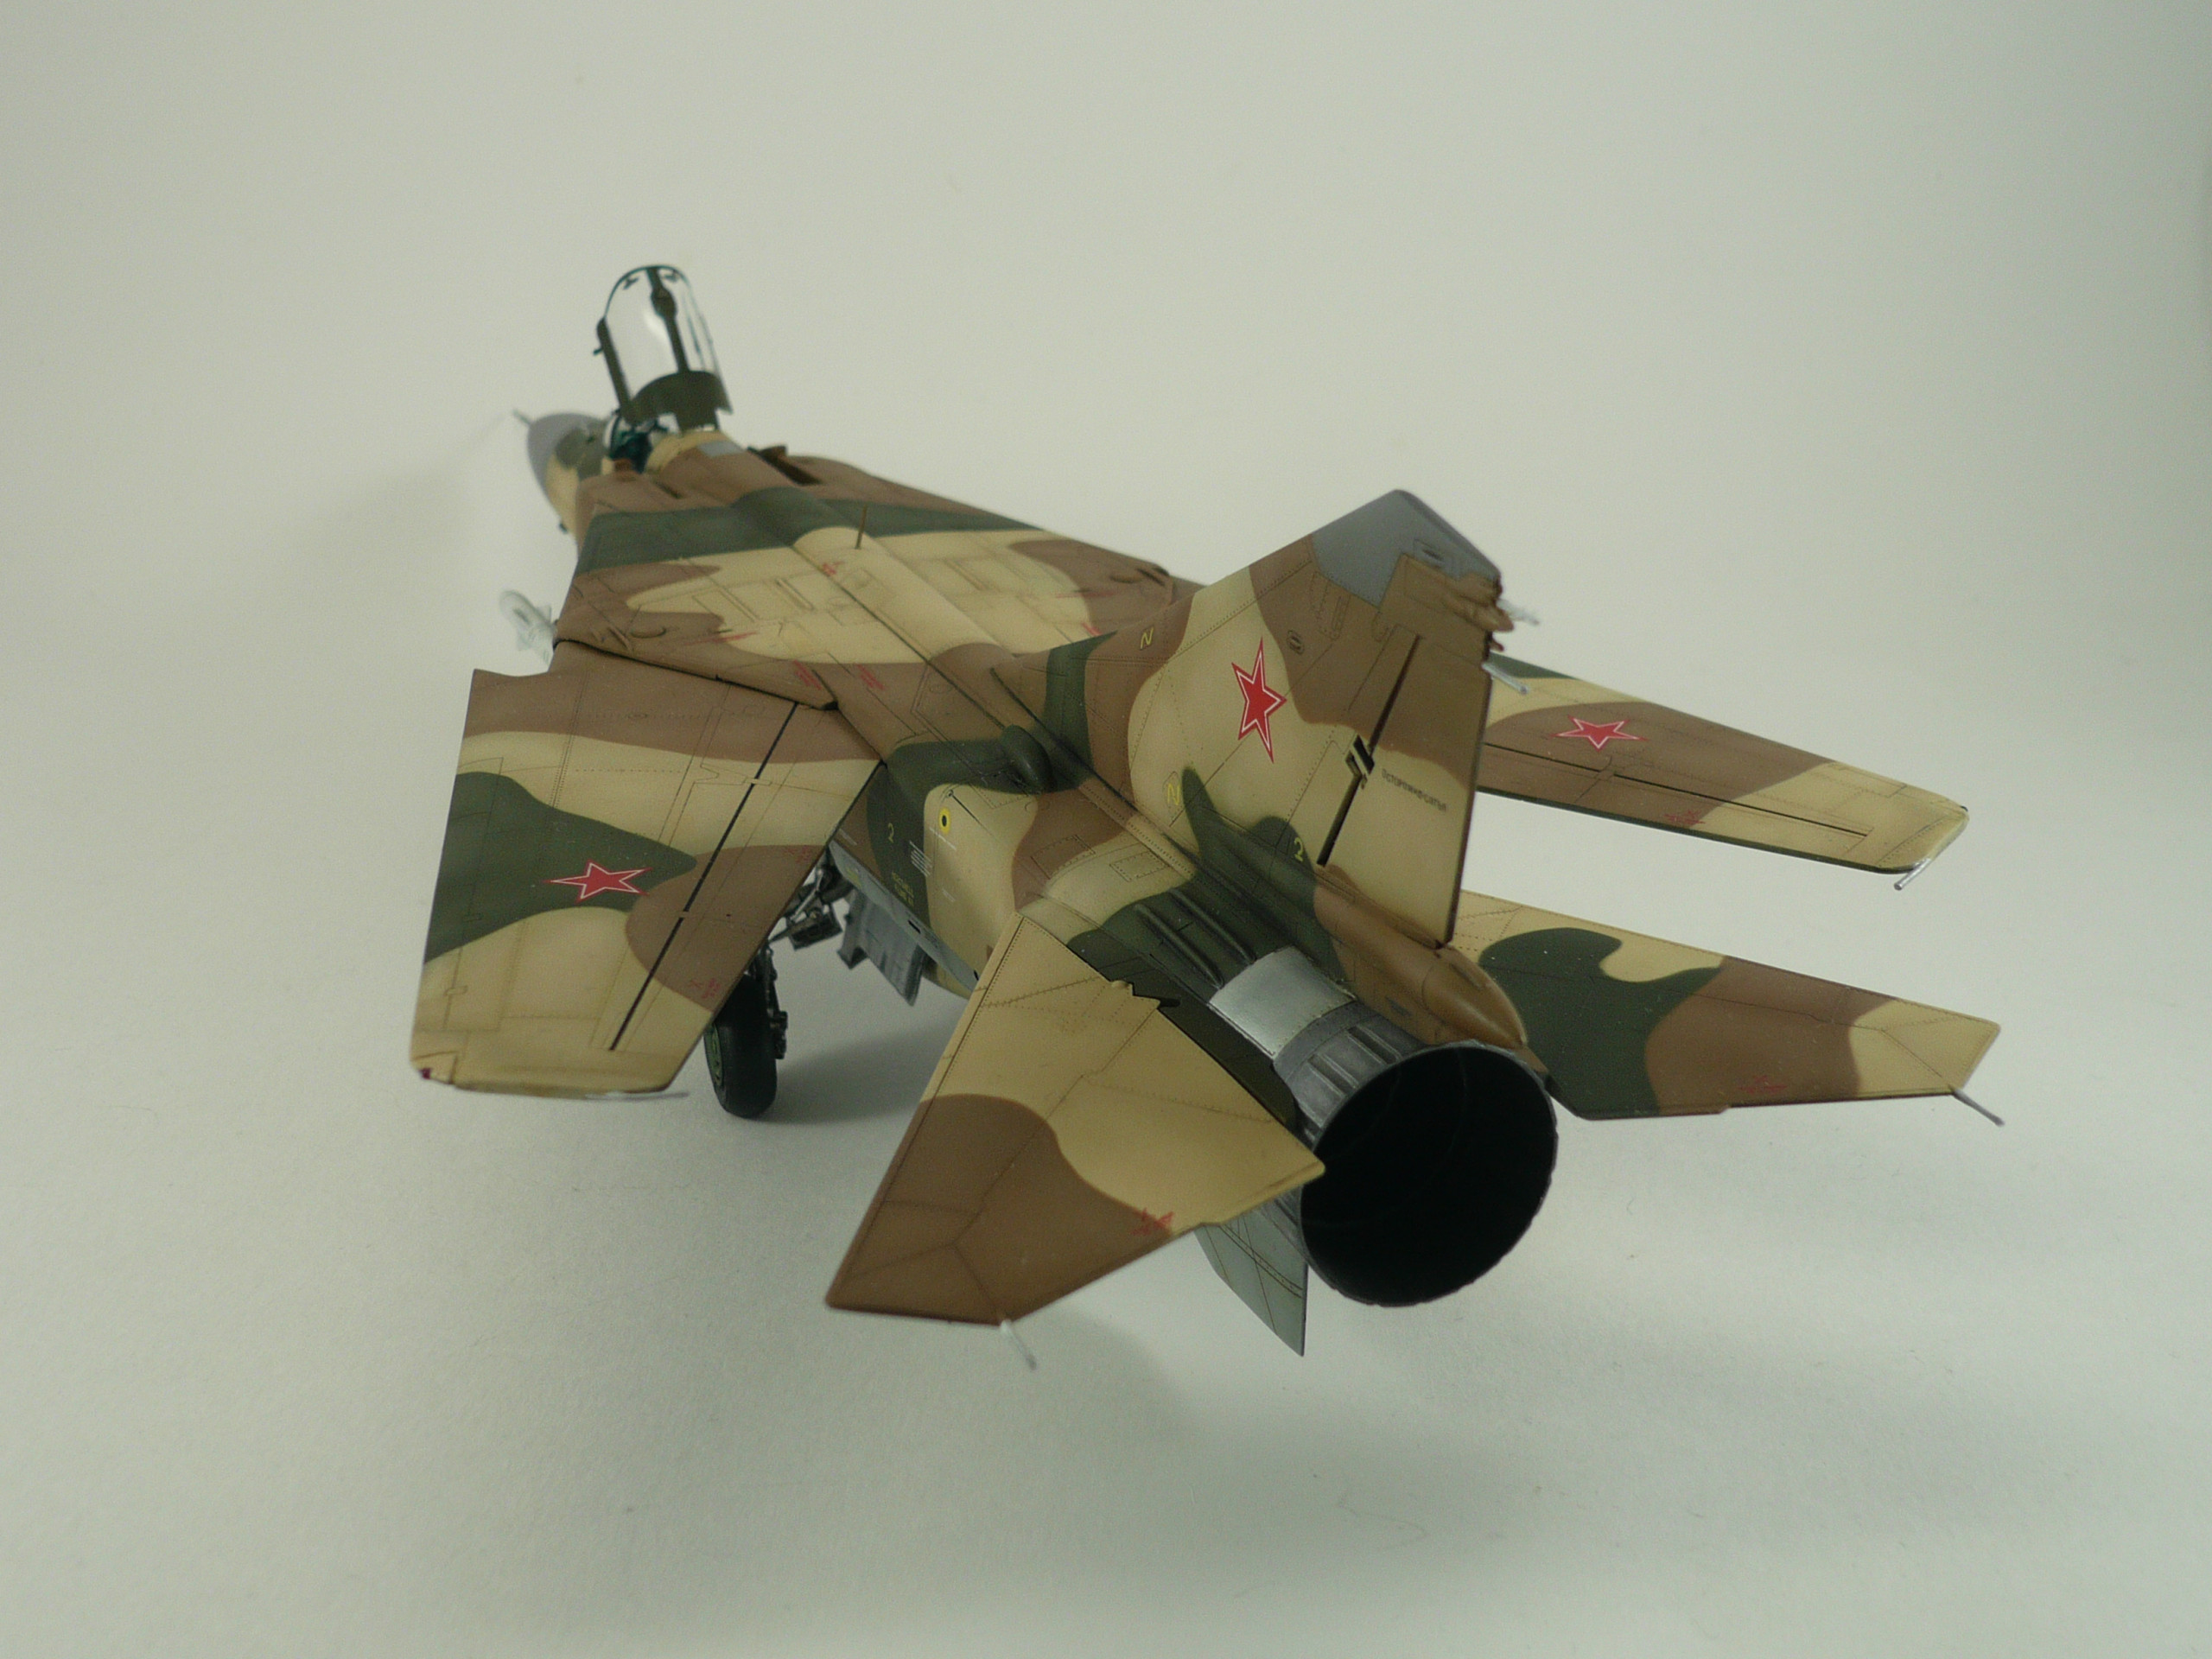
Then we begin the basic painting procedure…..For the upper surfaces and the 3 color cammo pattern I used Mr Hobby’s colors in various mixings and ratios…For the lighter color (sand) I used H318 radome as the basic color and added some drops of H27 tan and Tamiya’s XF-60 dark yellow. For highlighting the color I added some drops of Tamiya’s XF-2 flat white (pic 10). For the brown color I used Mr Hobby’s H310 brown with some drops of H72 dark earth to darken it. You could use H27 tan or add some drops of XF2 flat white to highlight the area’s. For the Green color I used Mr Hobby’s H420 RLM80 Olive green with addin in it few drops of H65 black green to darken it. For highlights I used H303 green. All the painting done using Blu-tak for the tight cammo (pic.11&12).
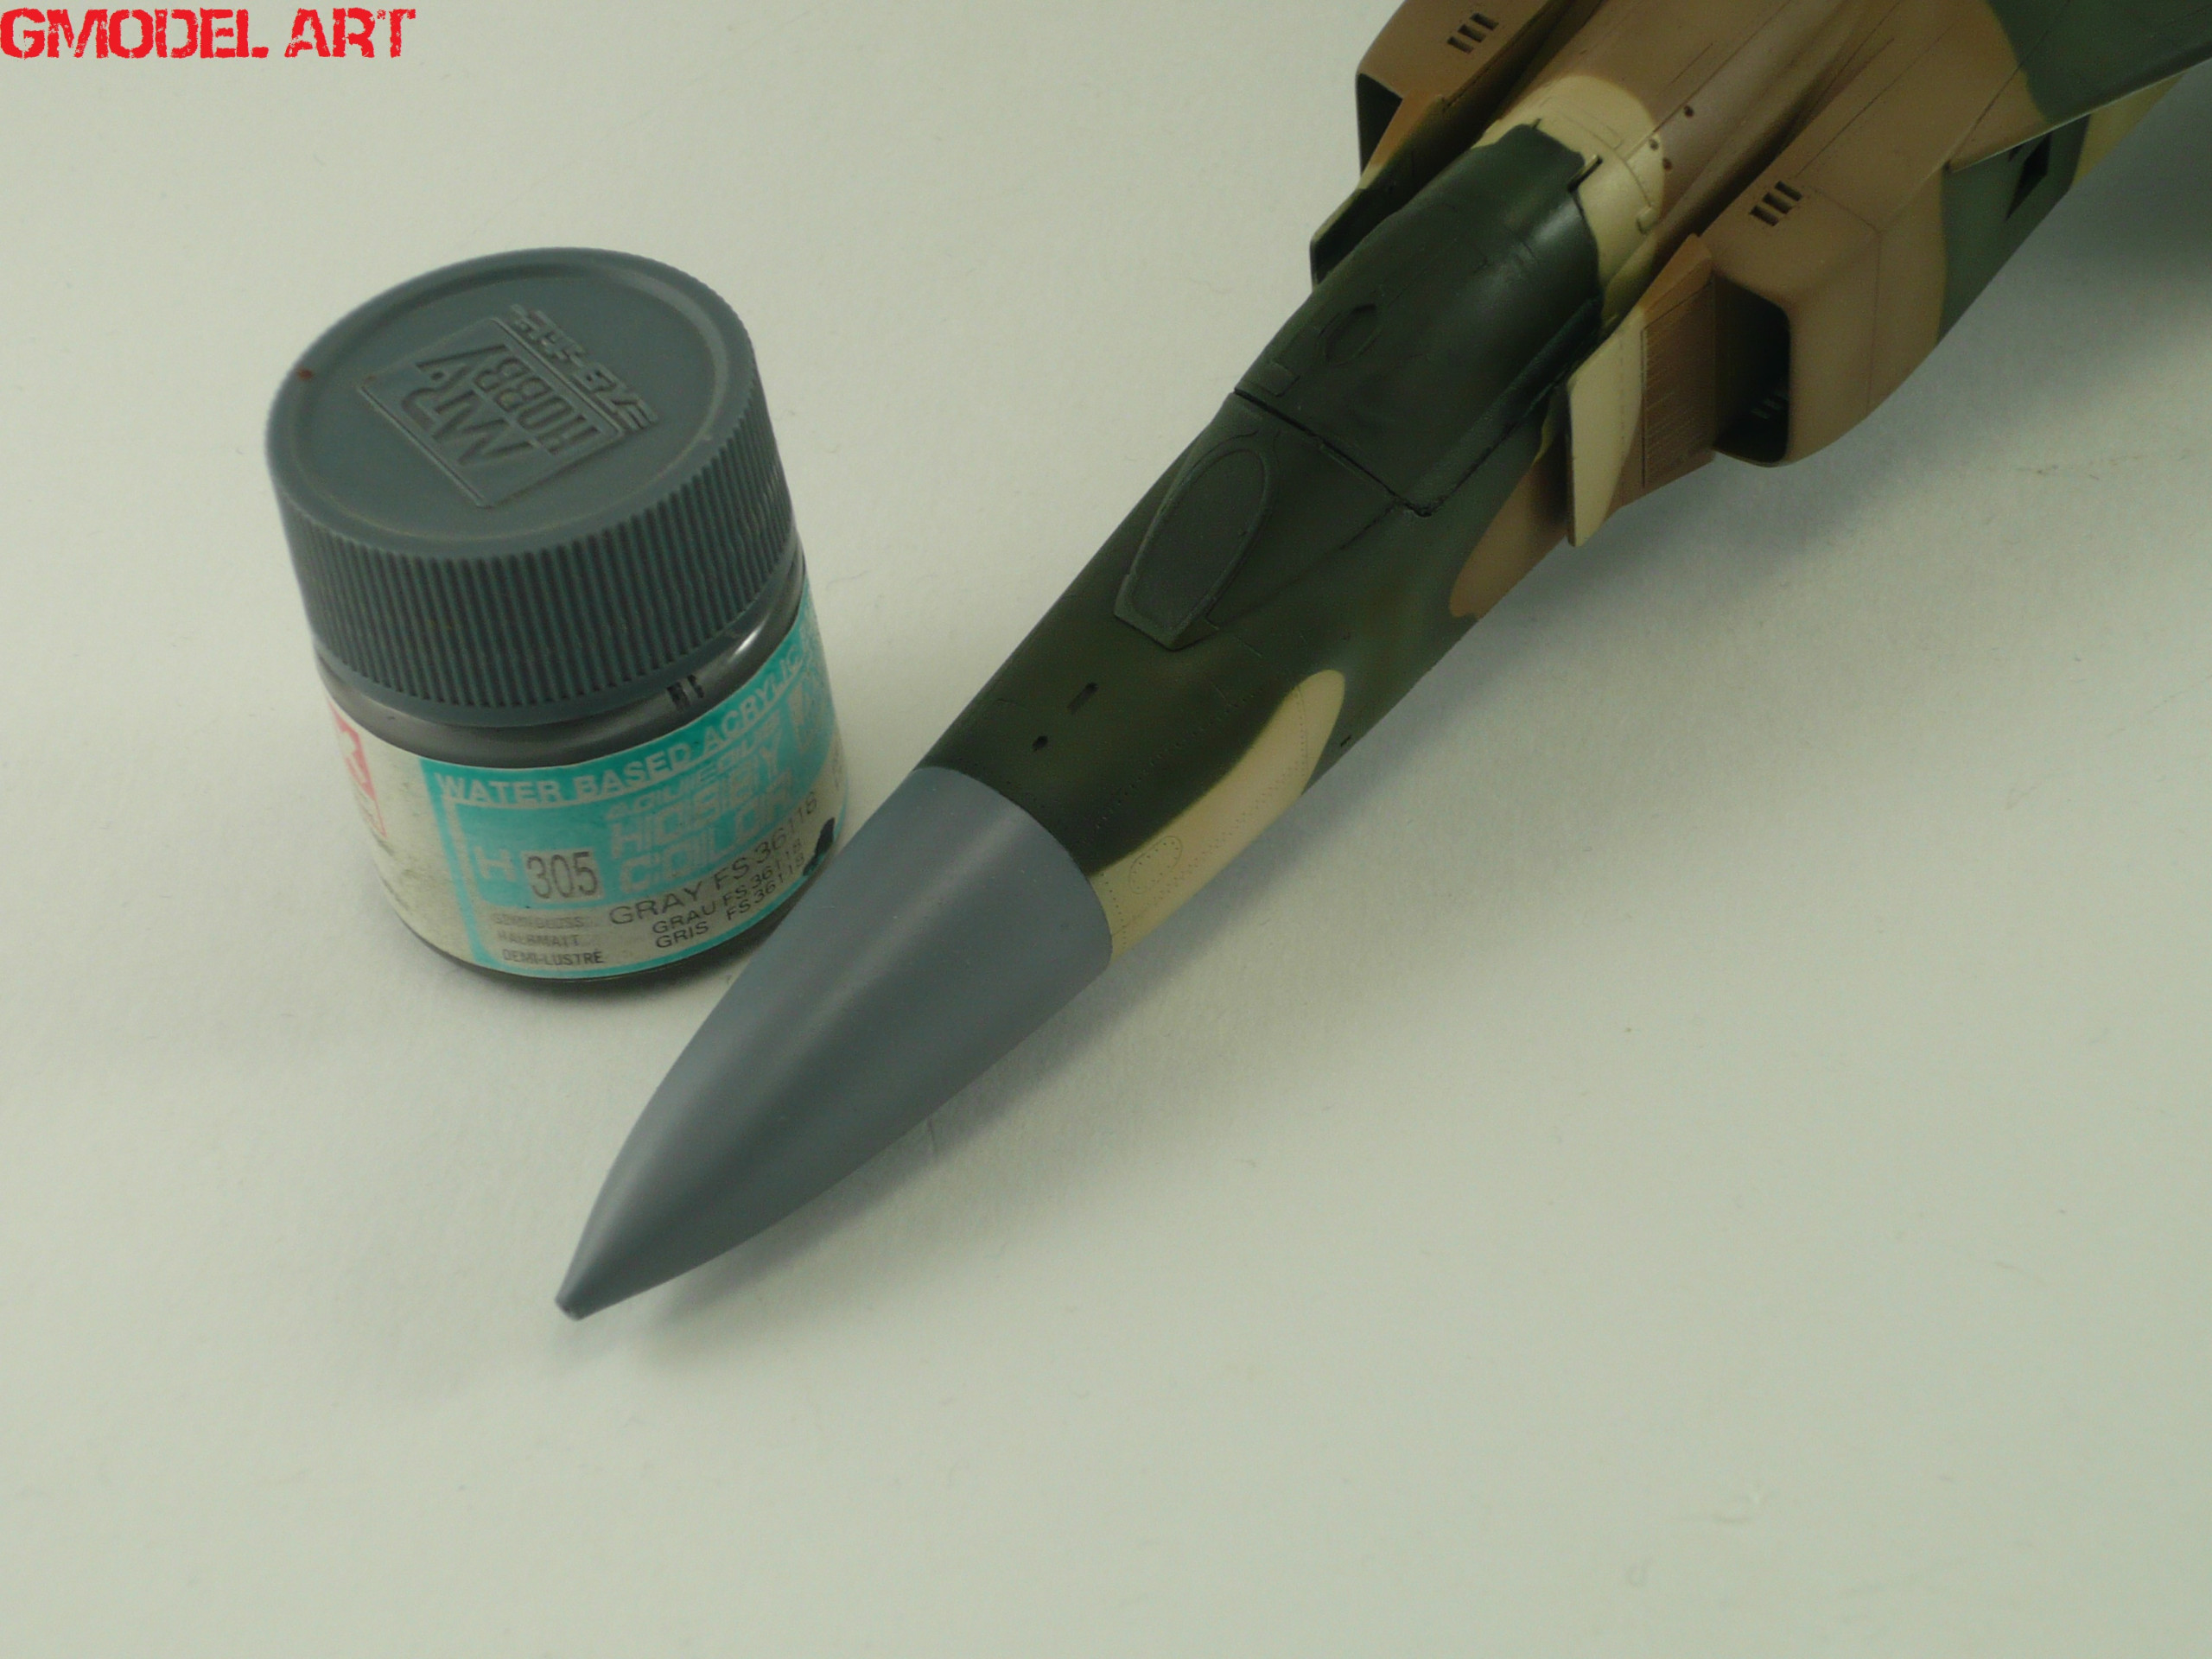
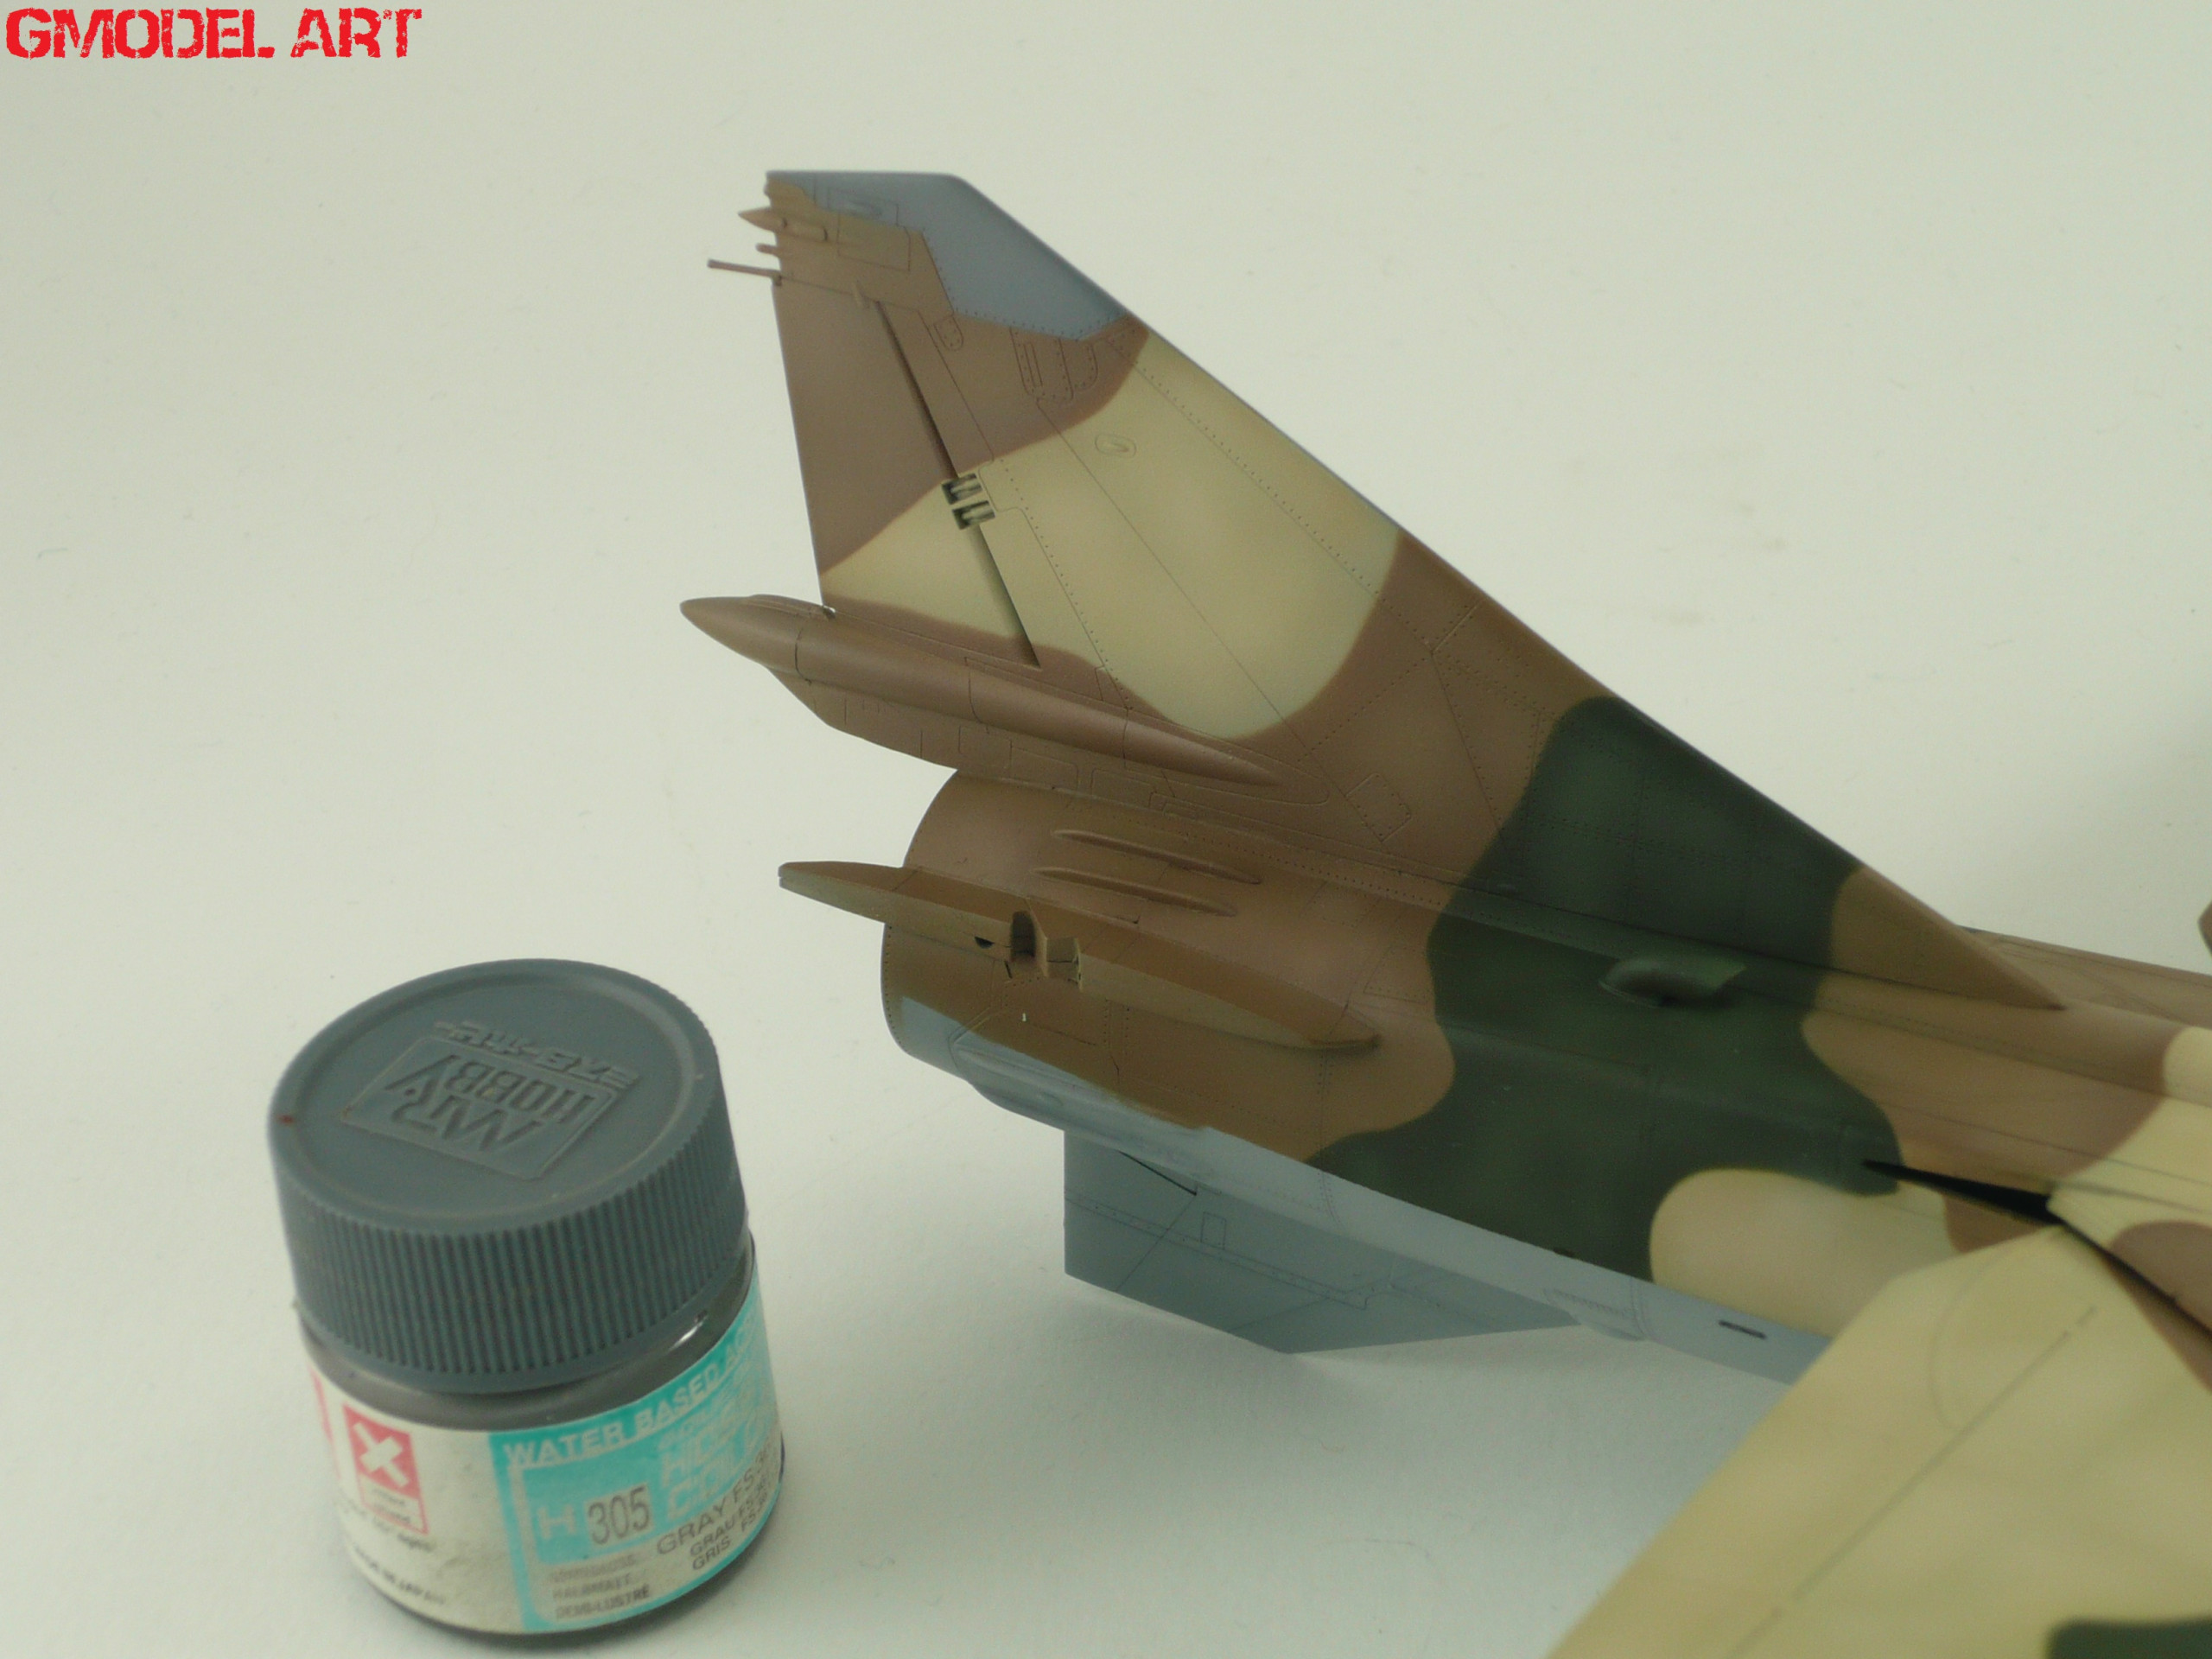
The radome and the dorsal fin’s gray area’s painted with Mr Hobby’s H305 gray (pic 13&14&15)
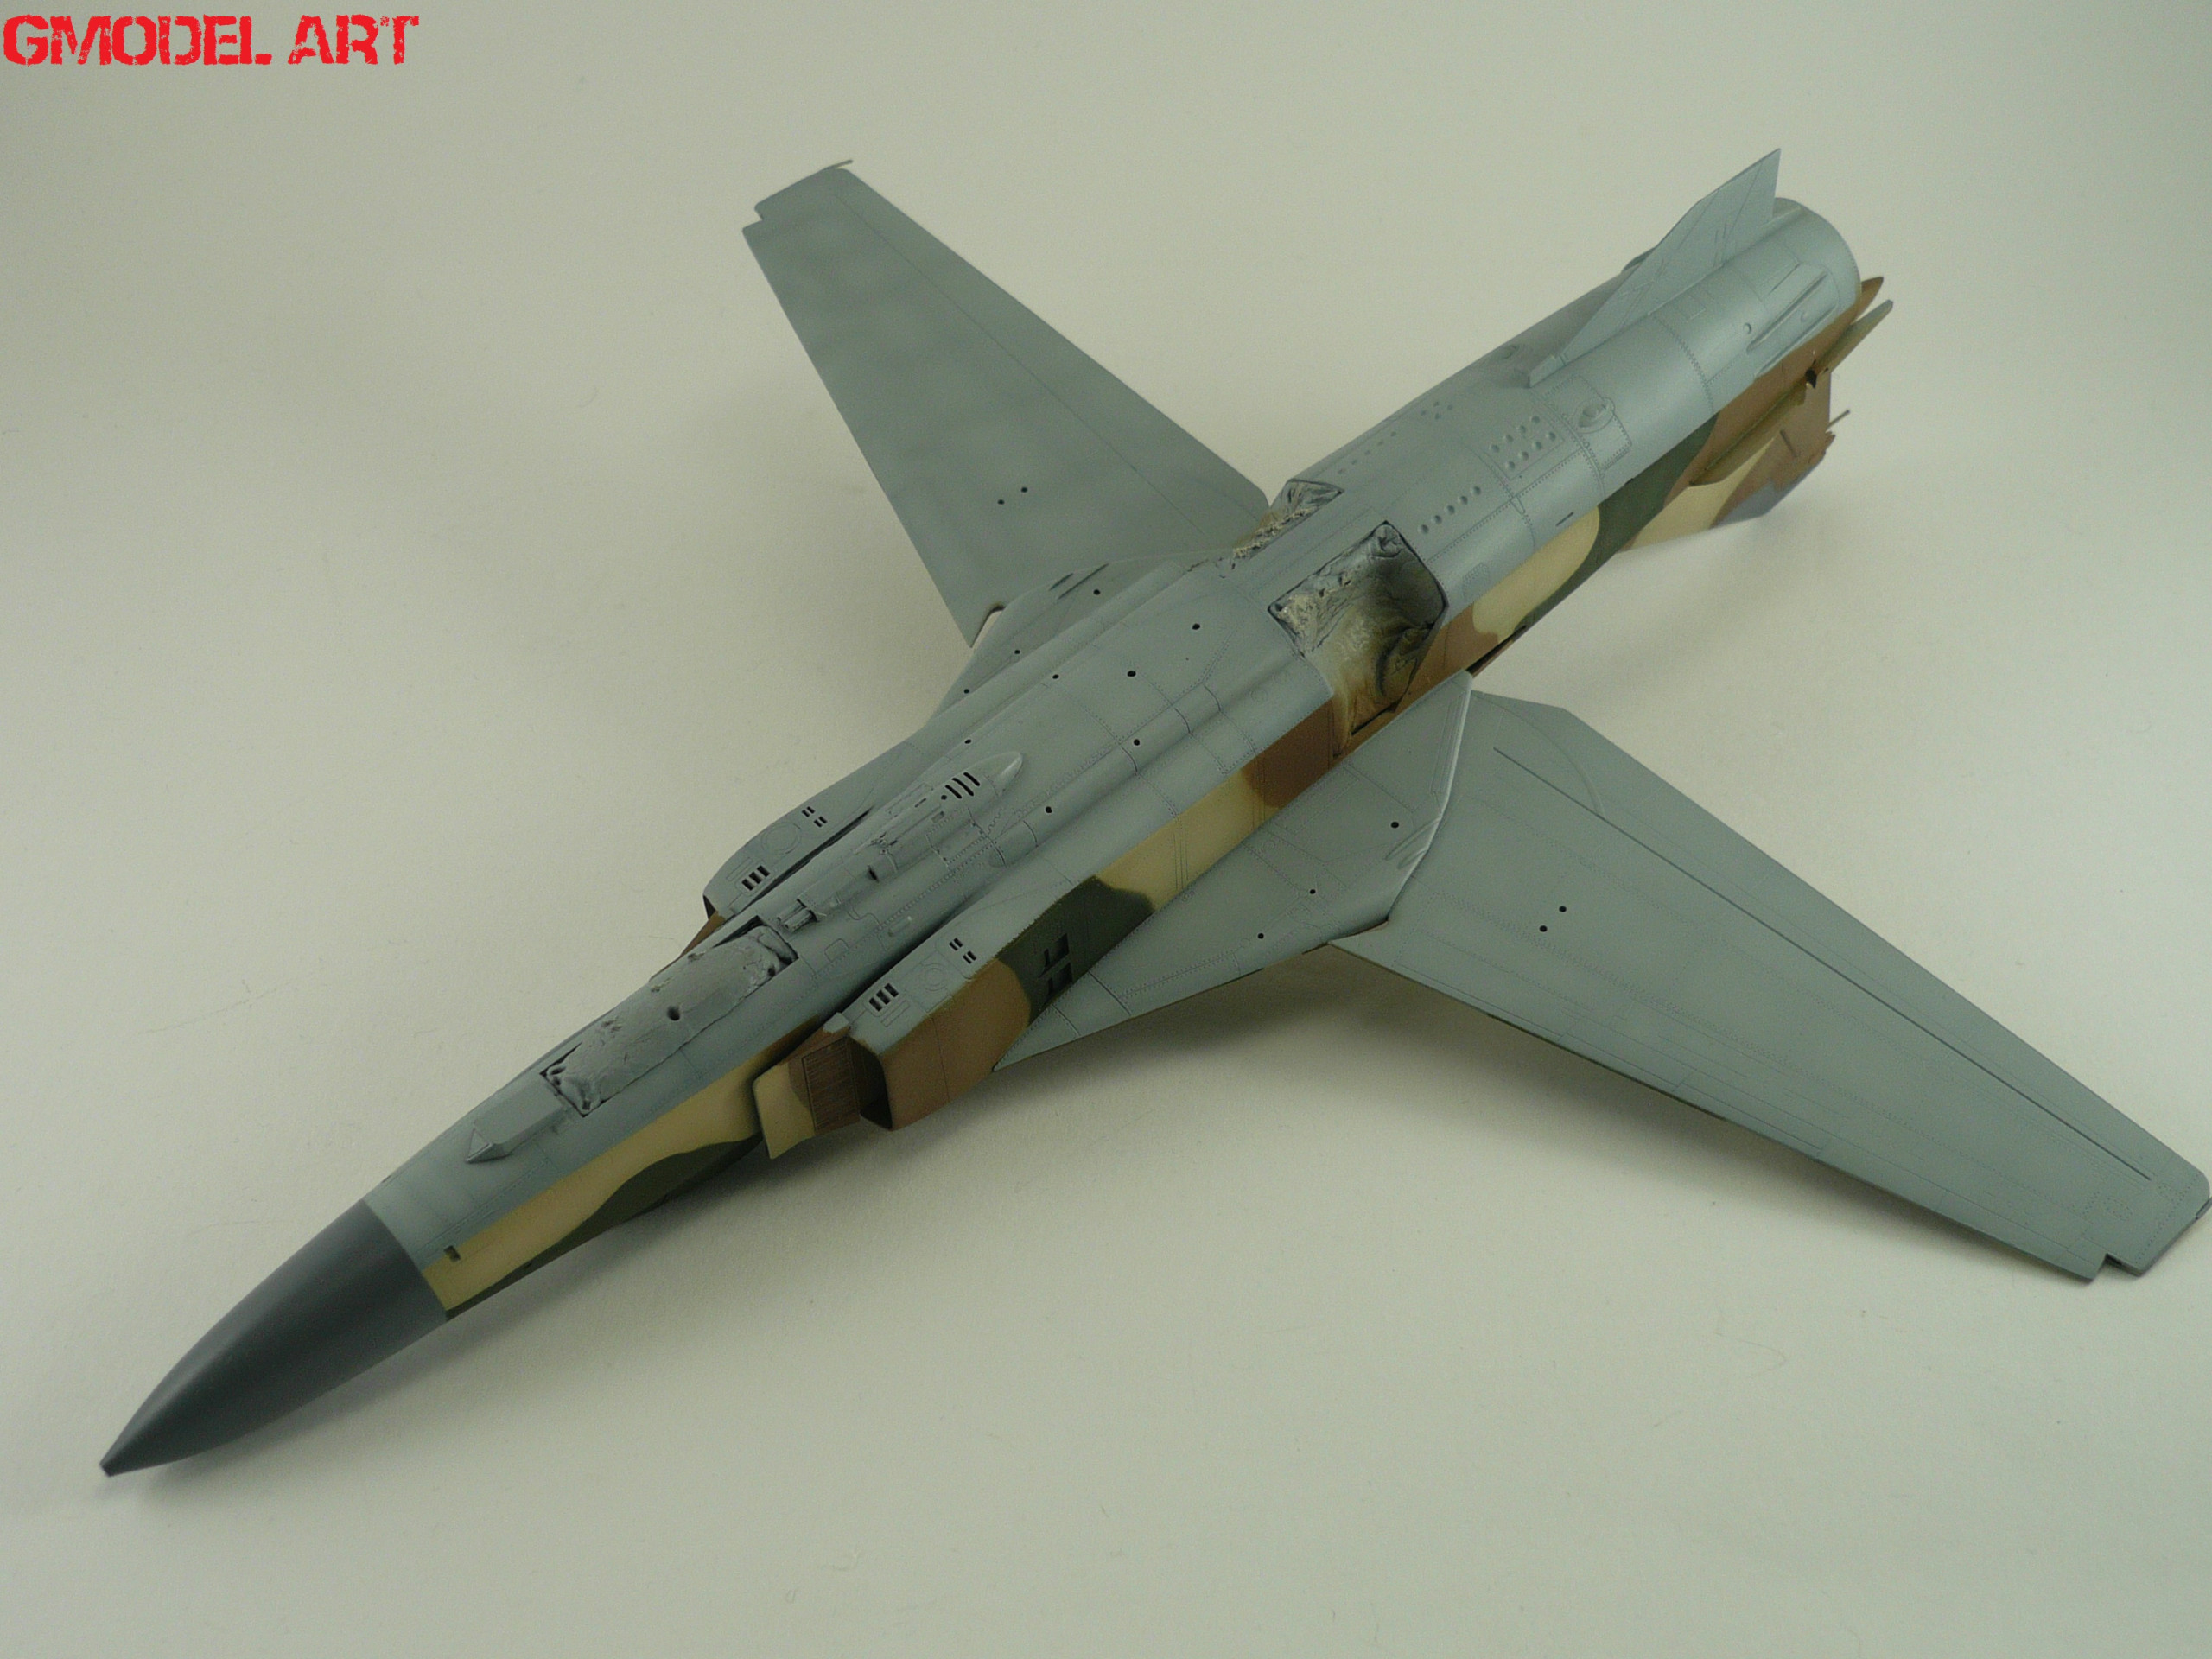
The masking tape was removed from the lower surfaces and we played a little bit with shadow effects by using the basic color with a few drops of white (pic 16)
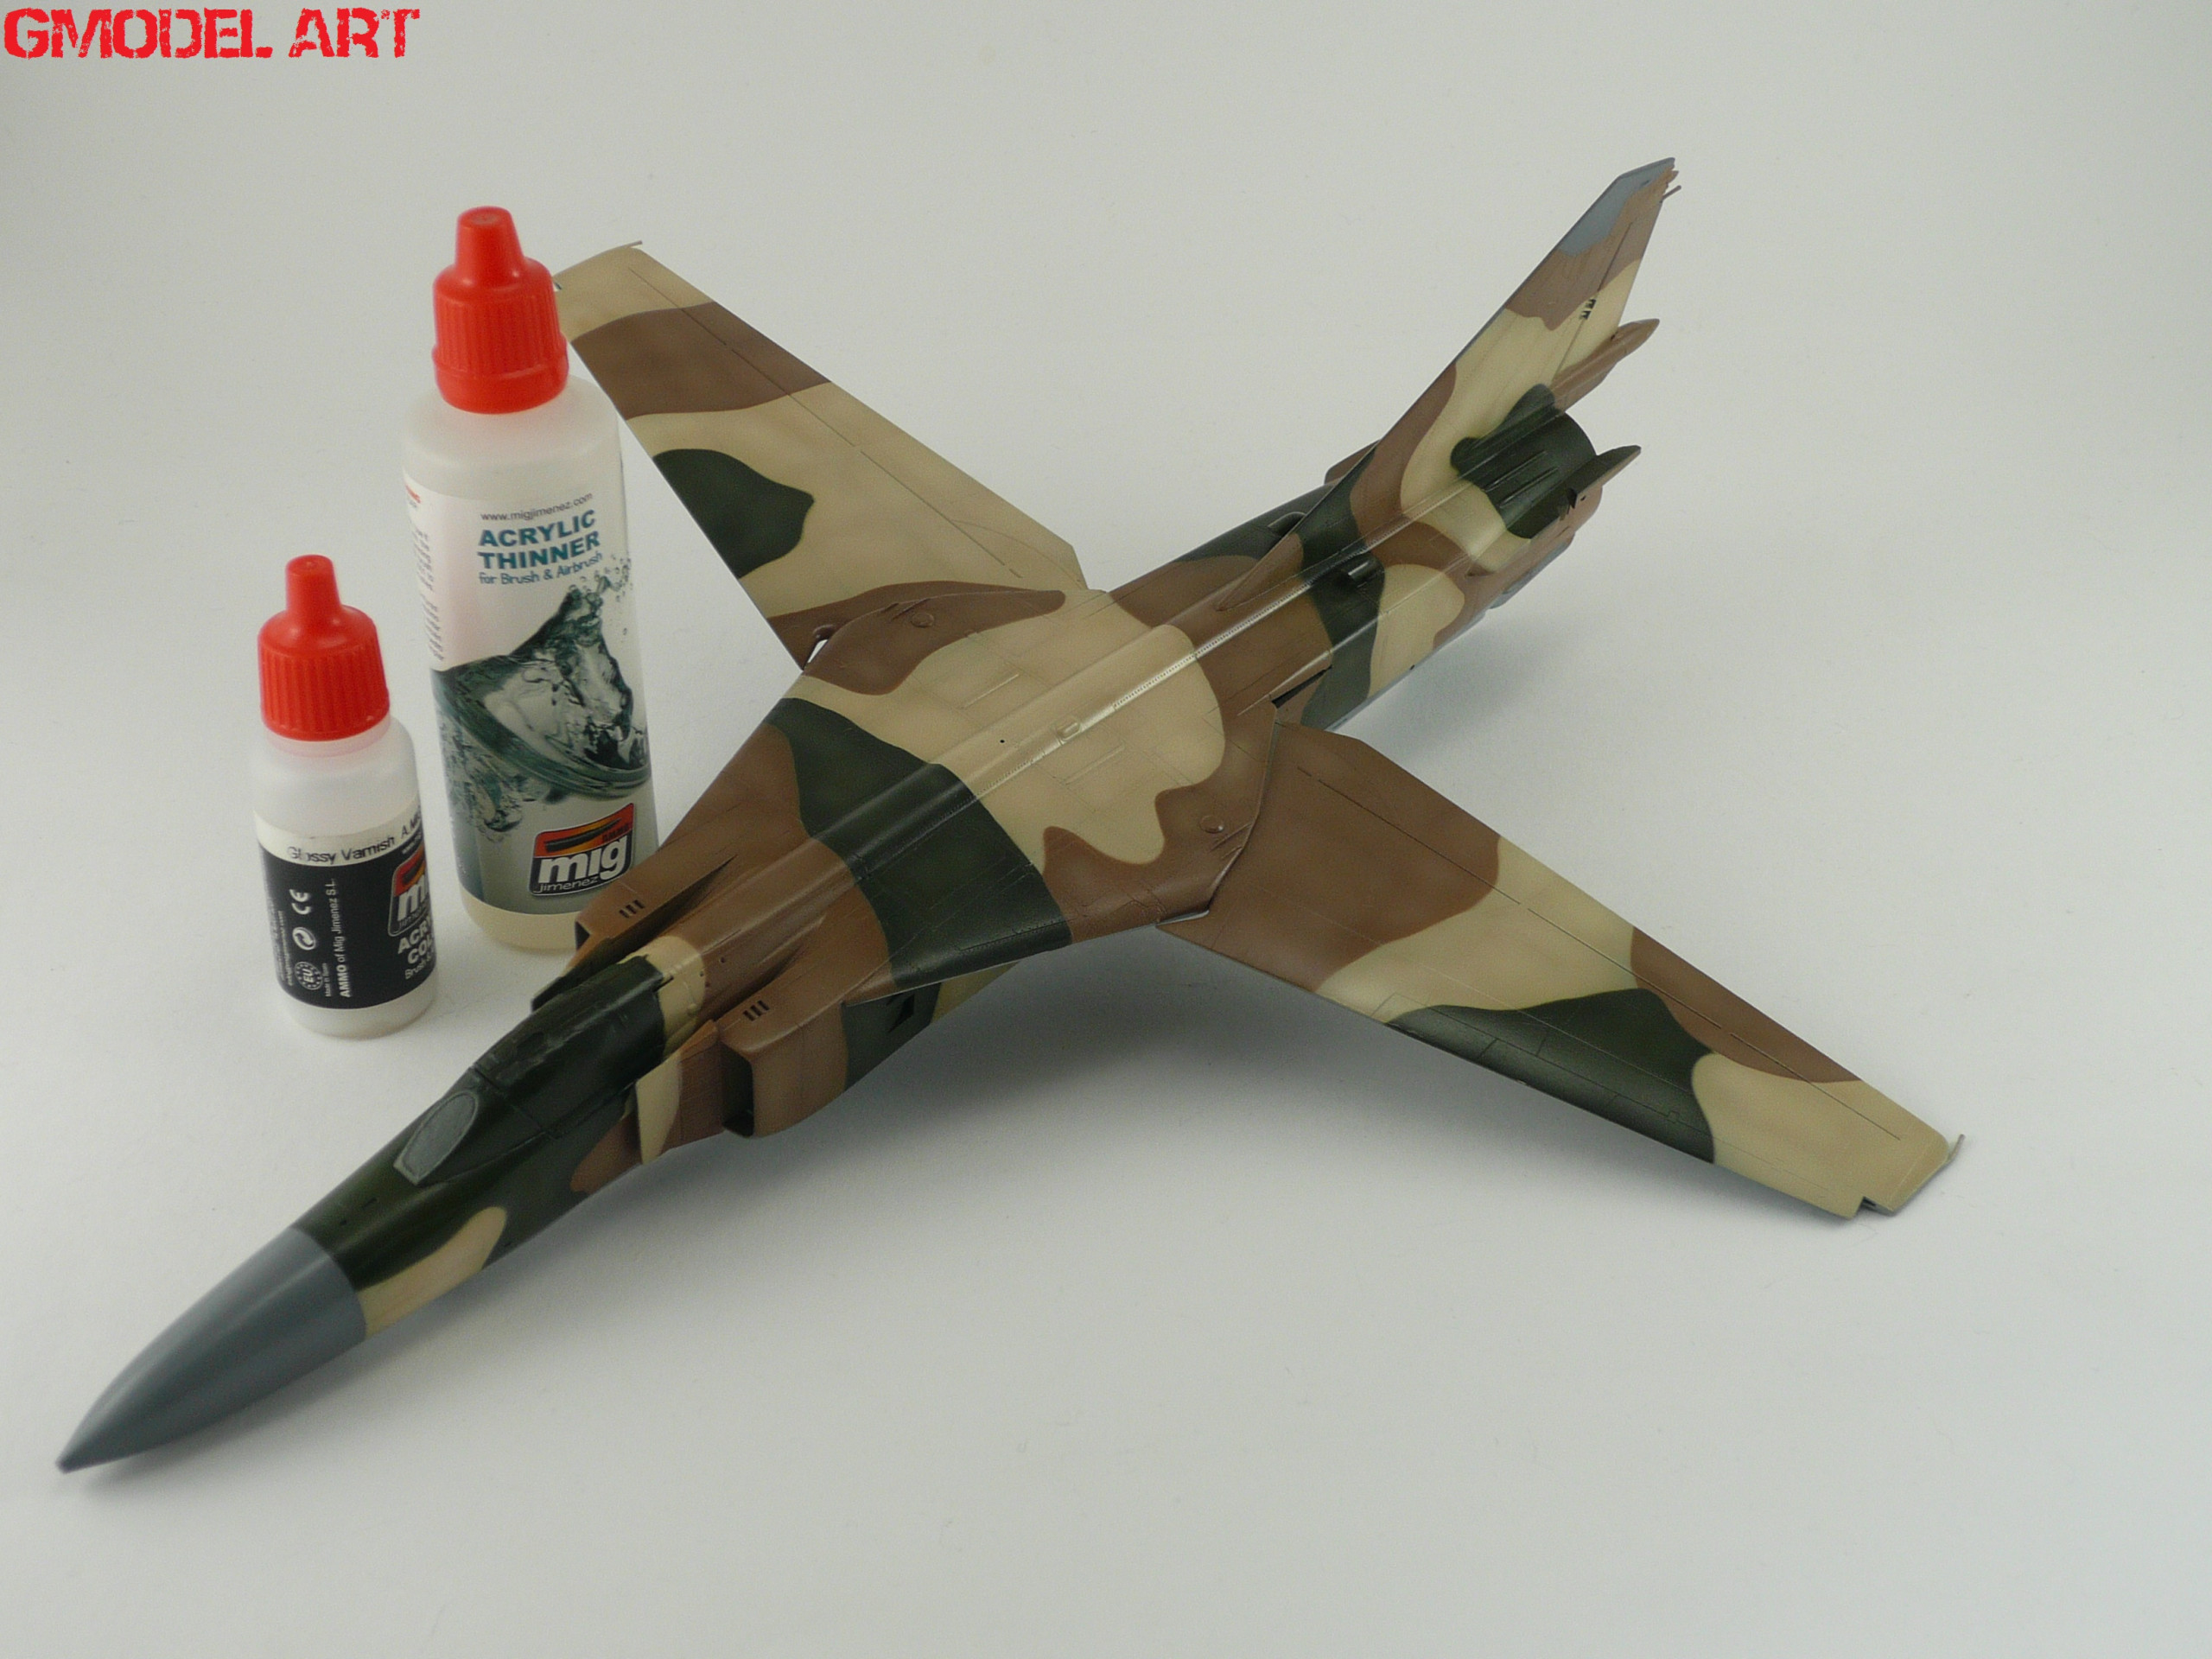
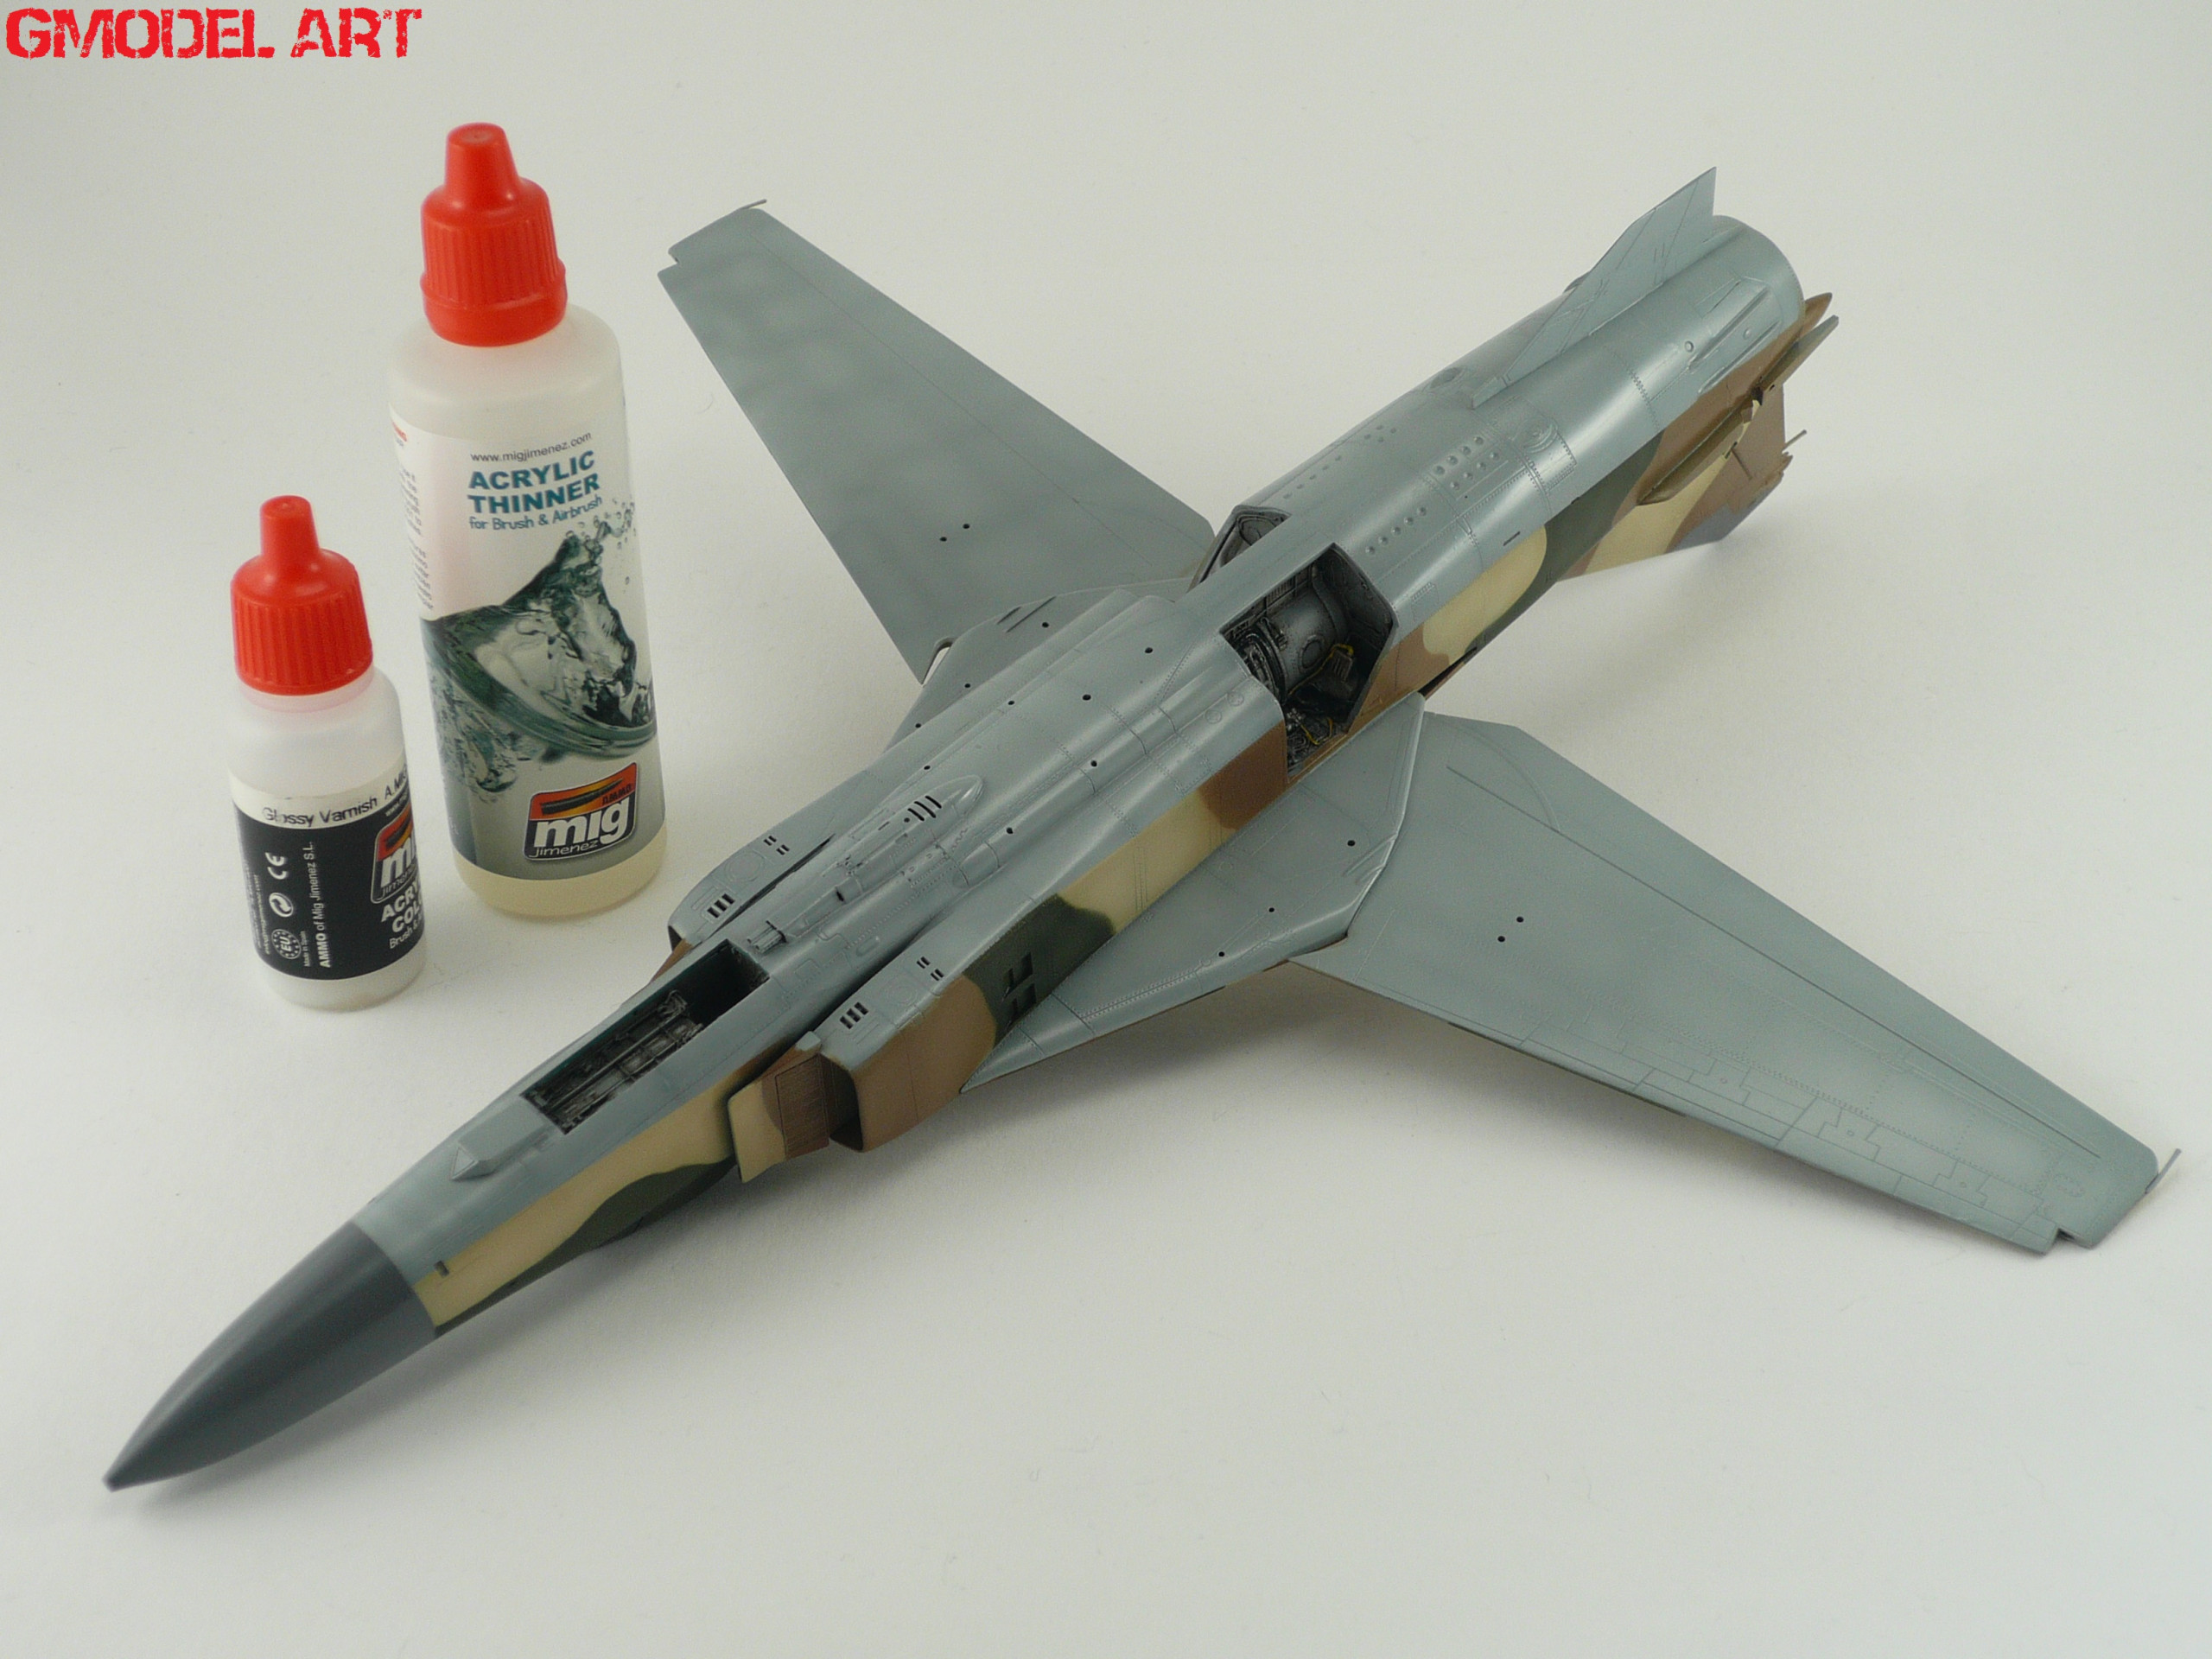
After the paint job finished I gave the whole model a coat of clear gloss varnish from Ammo range (pic.17 & 18)
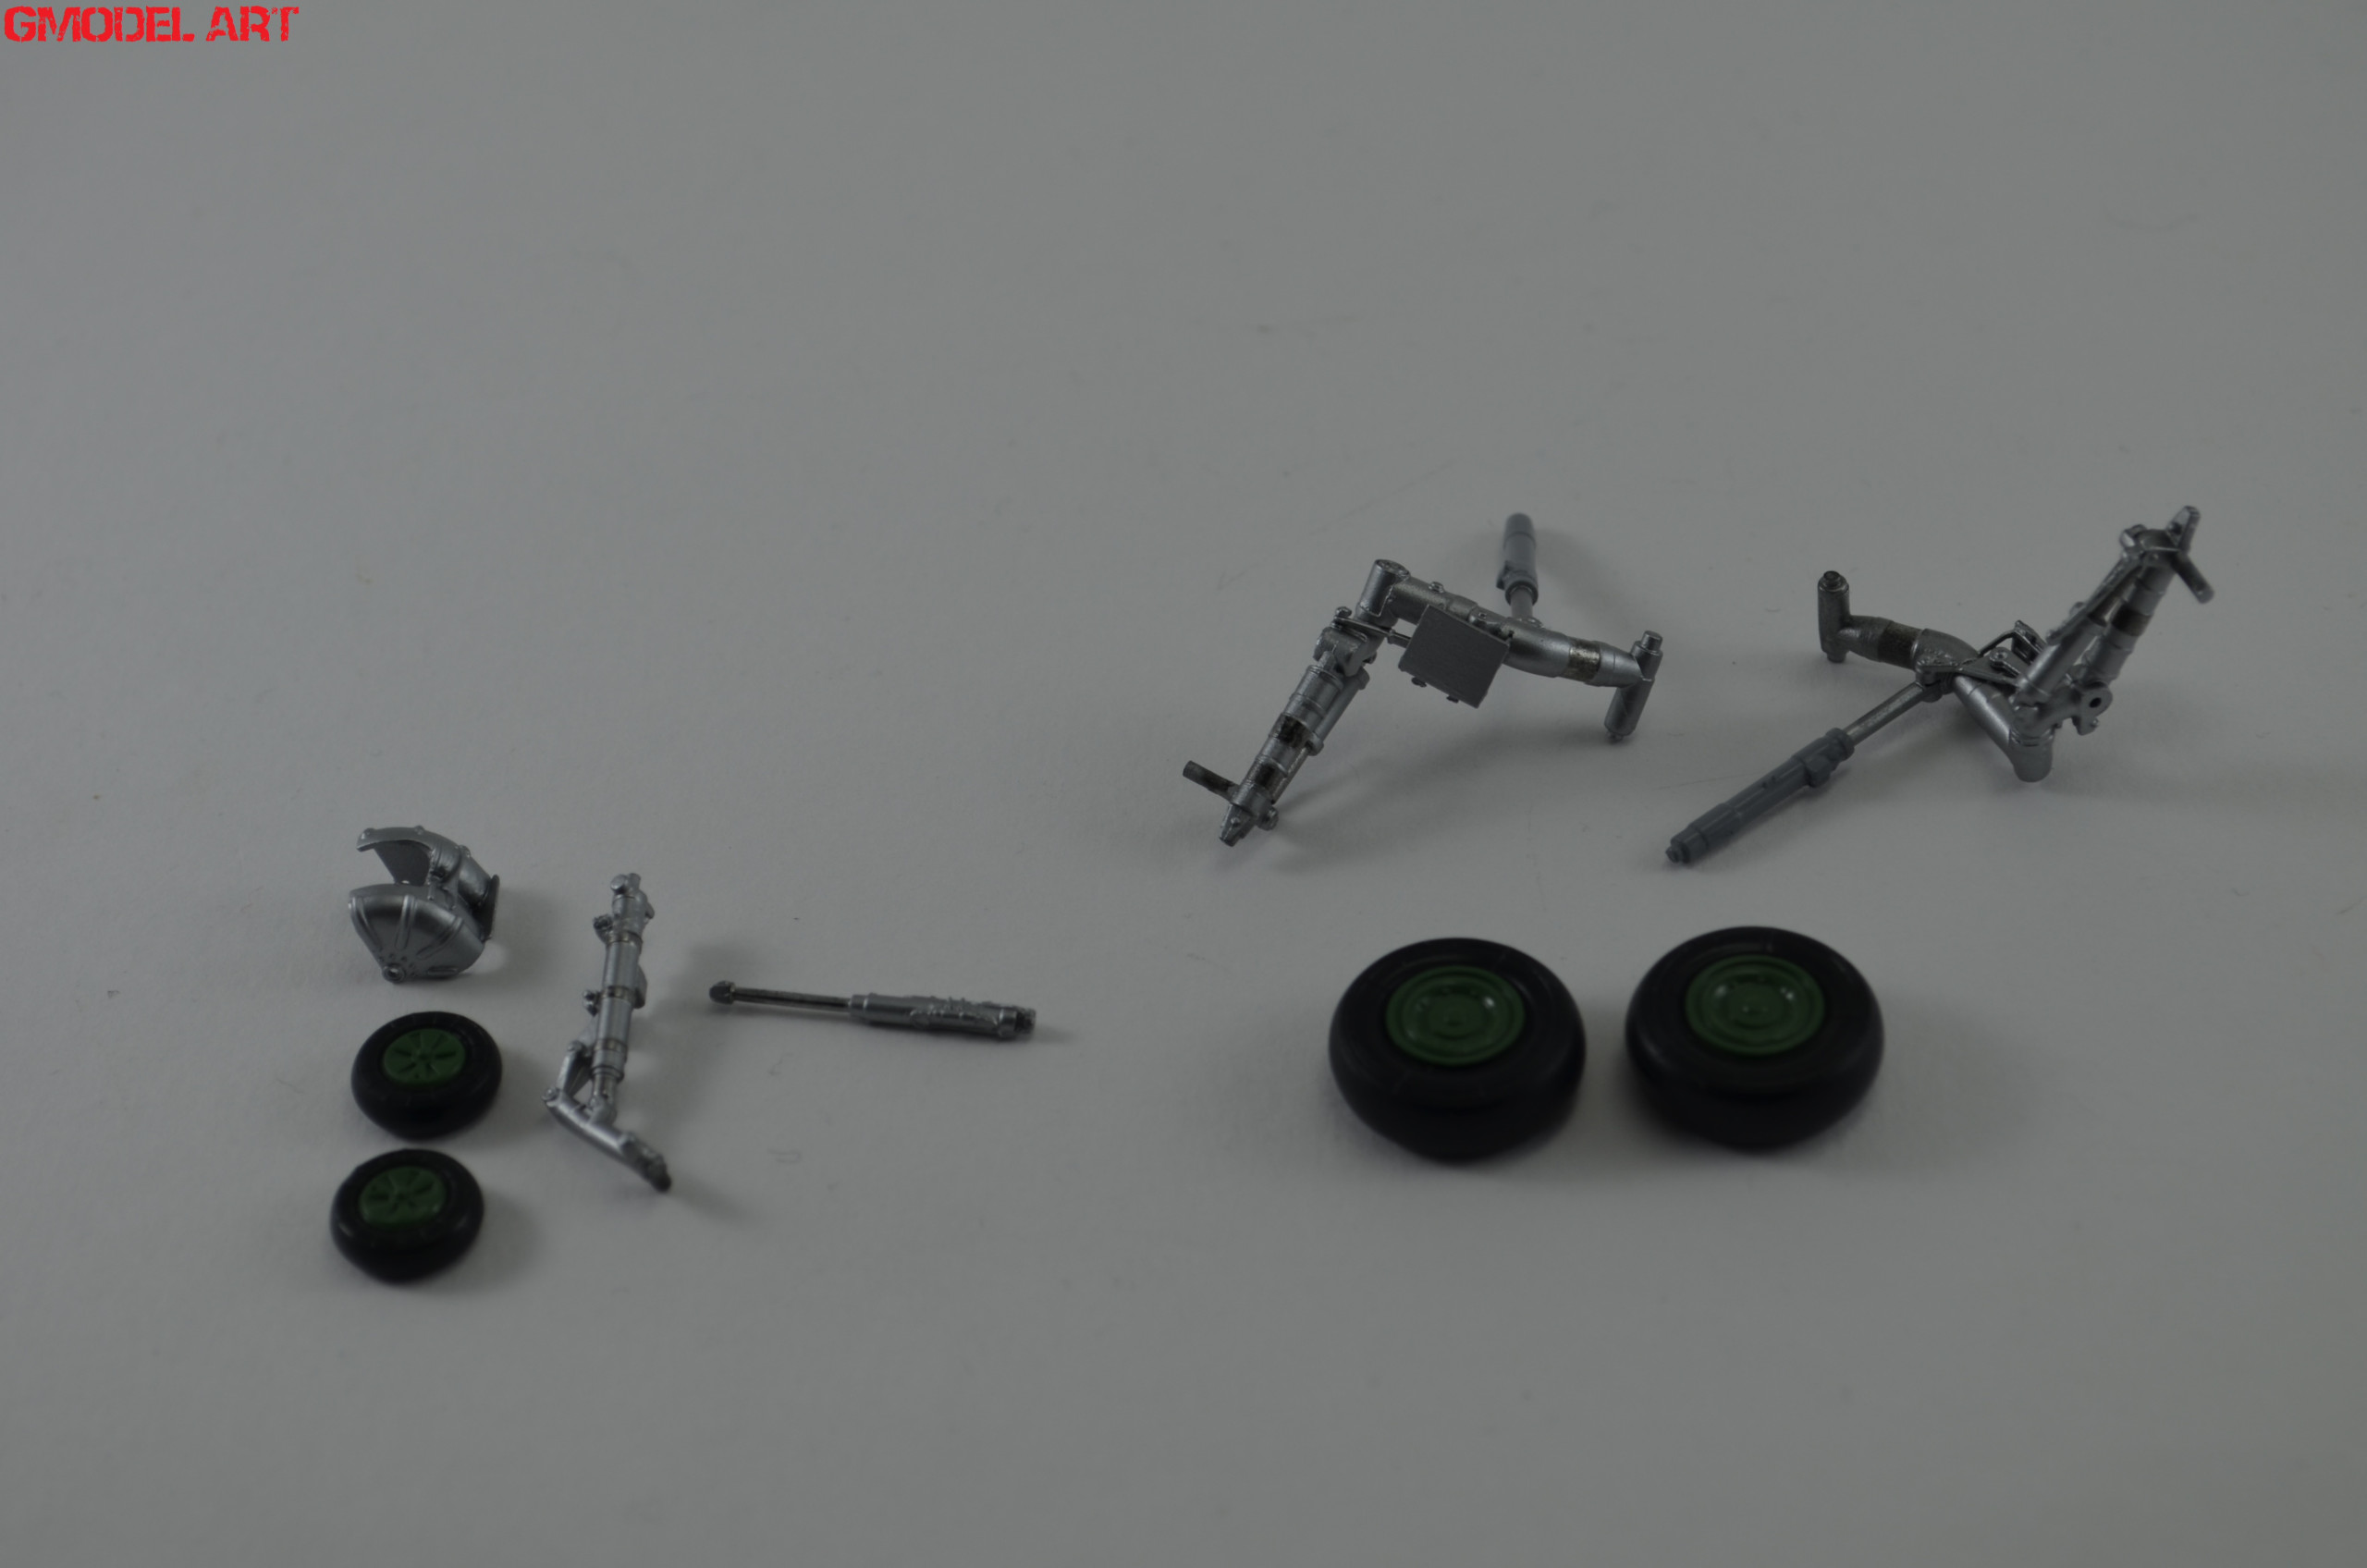
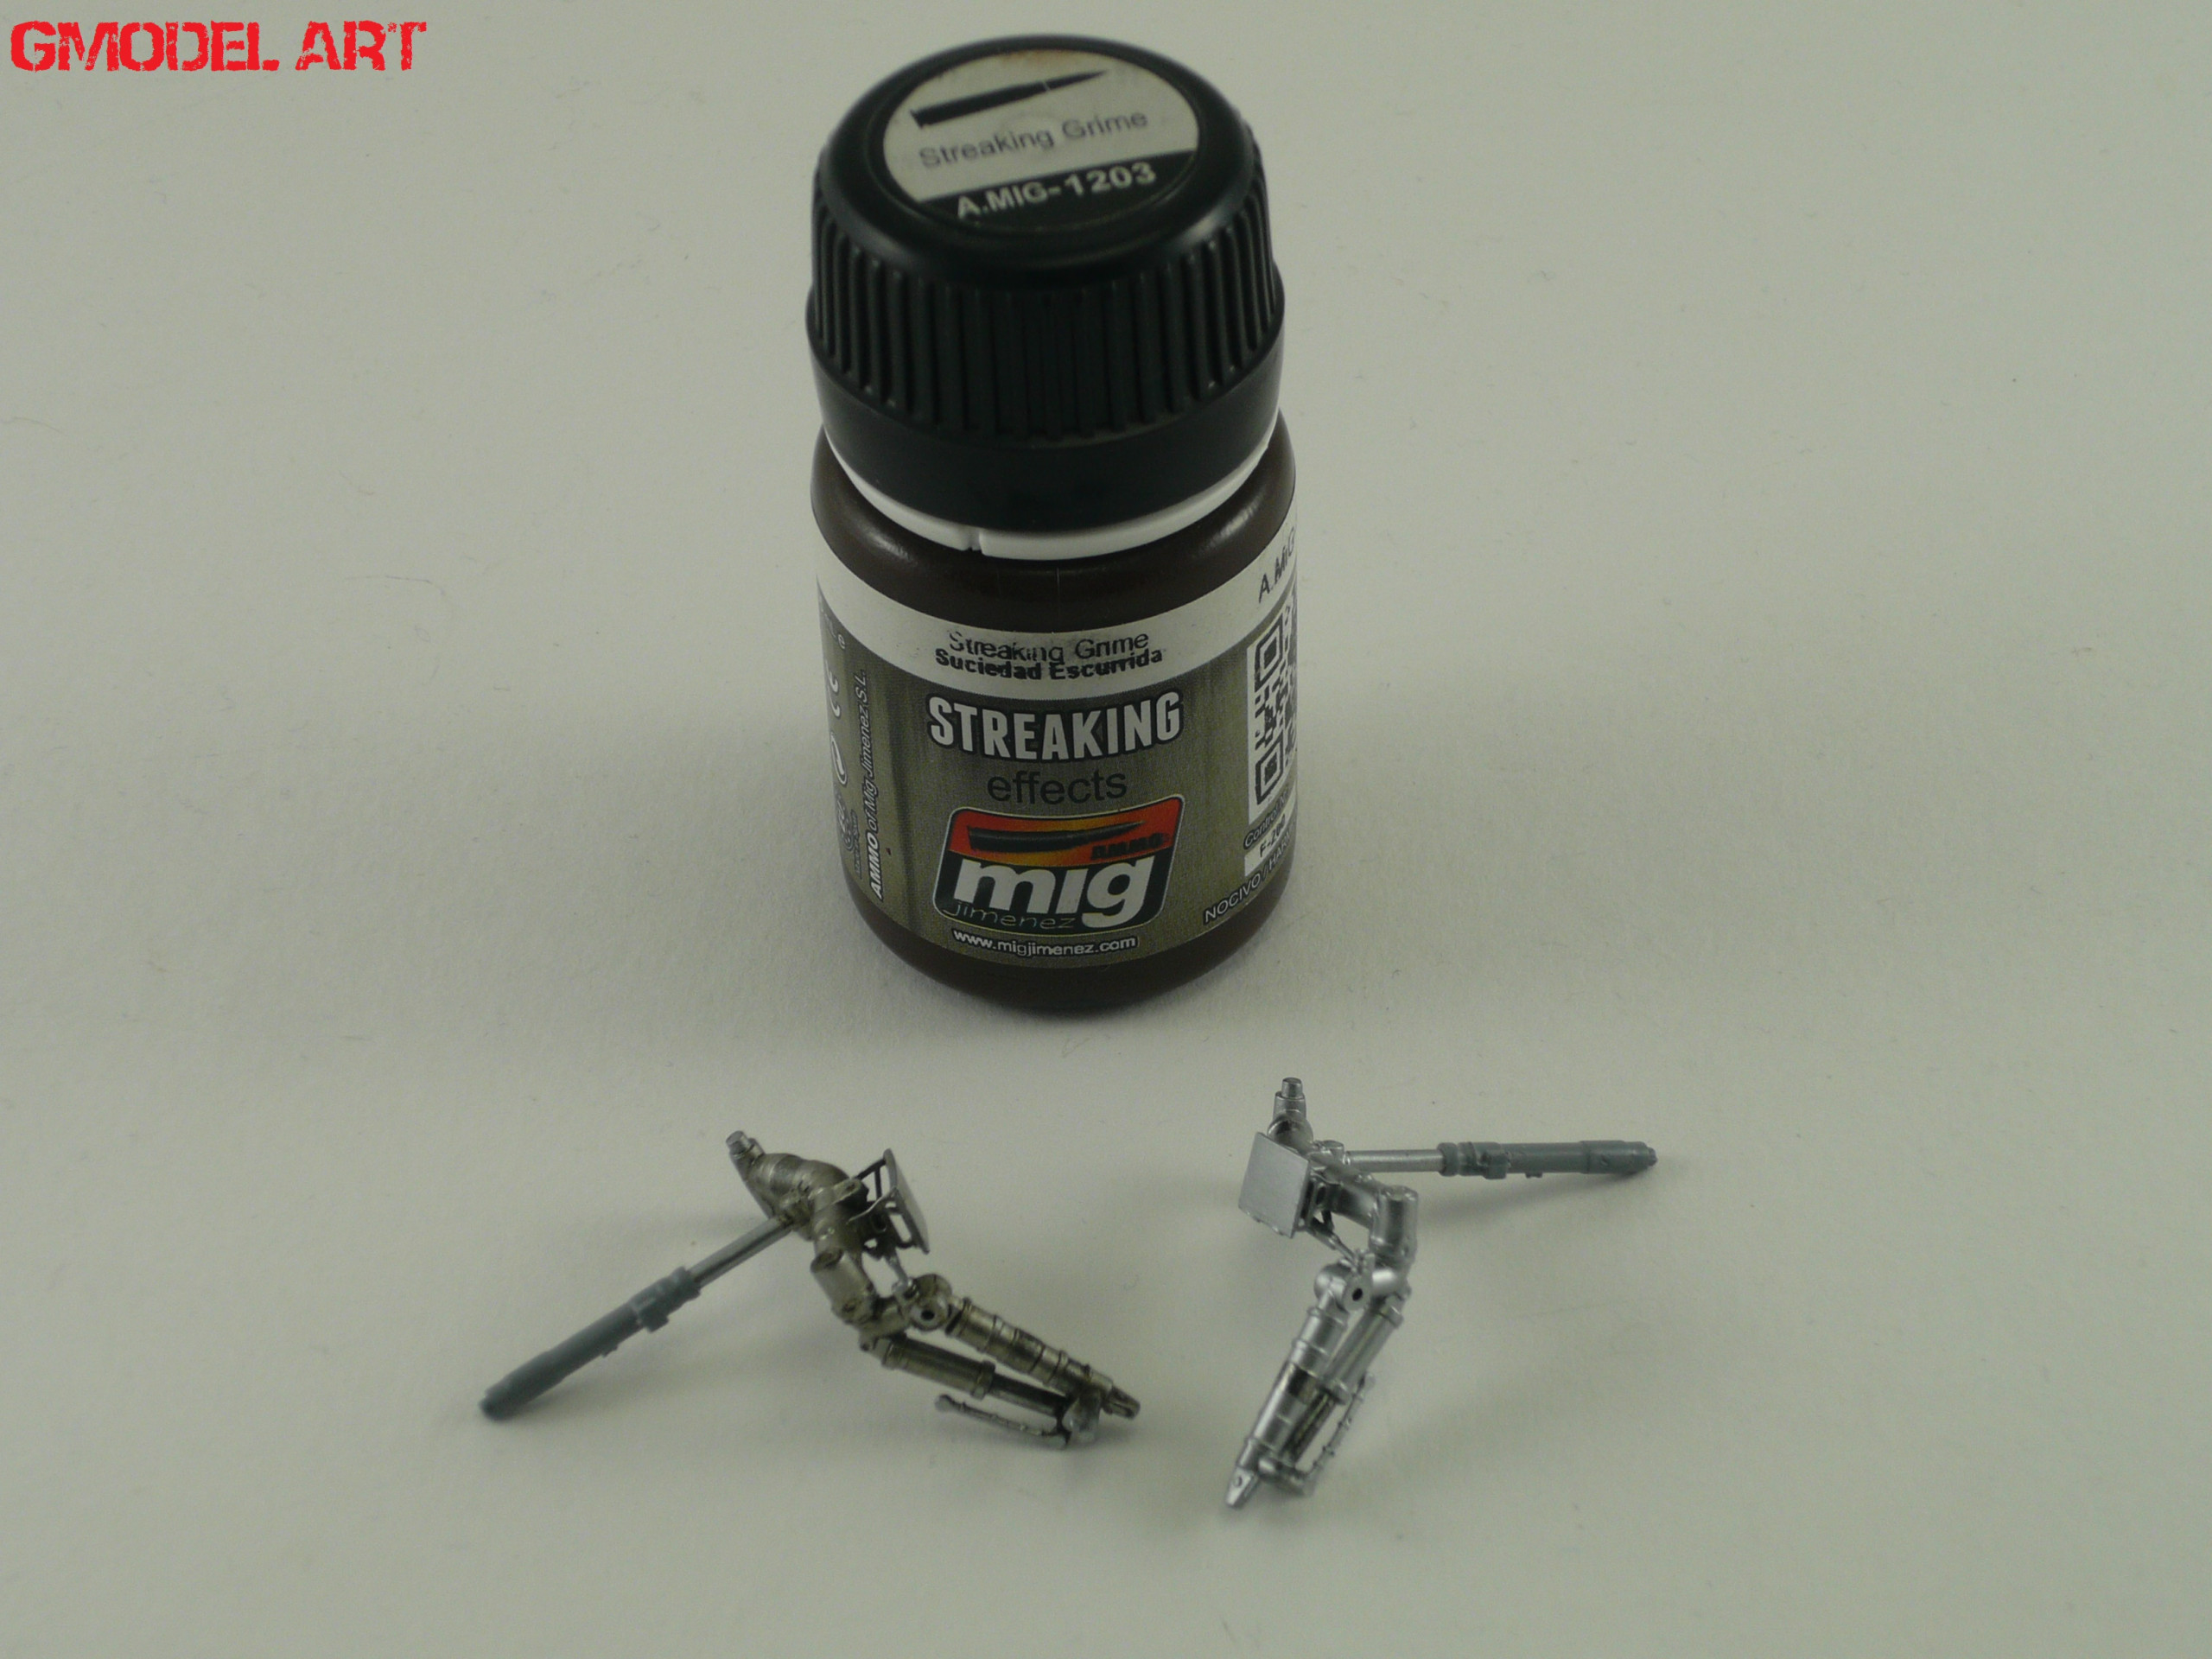
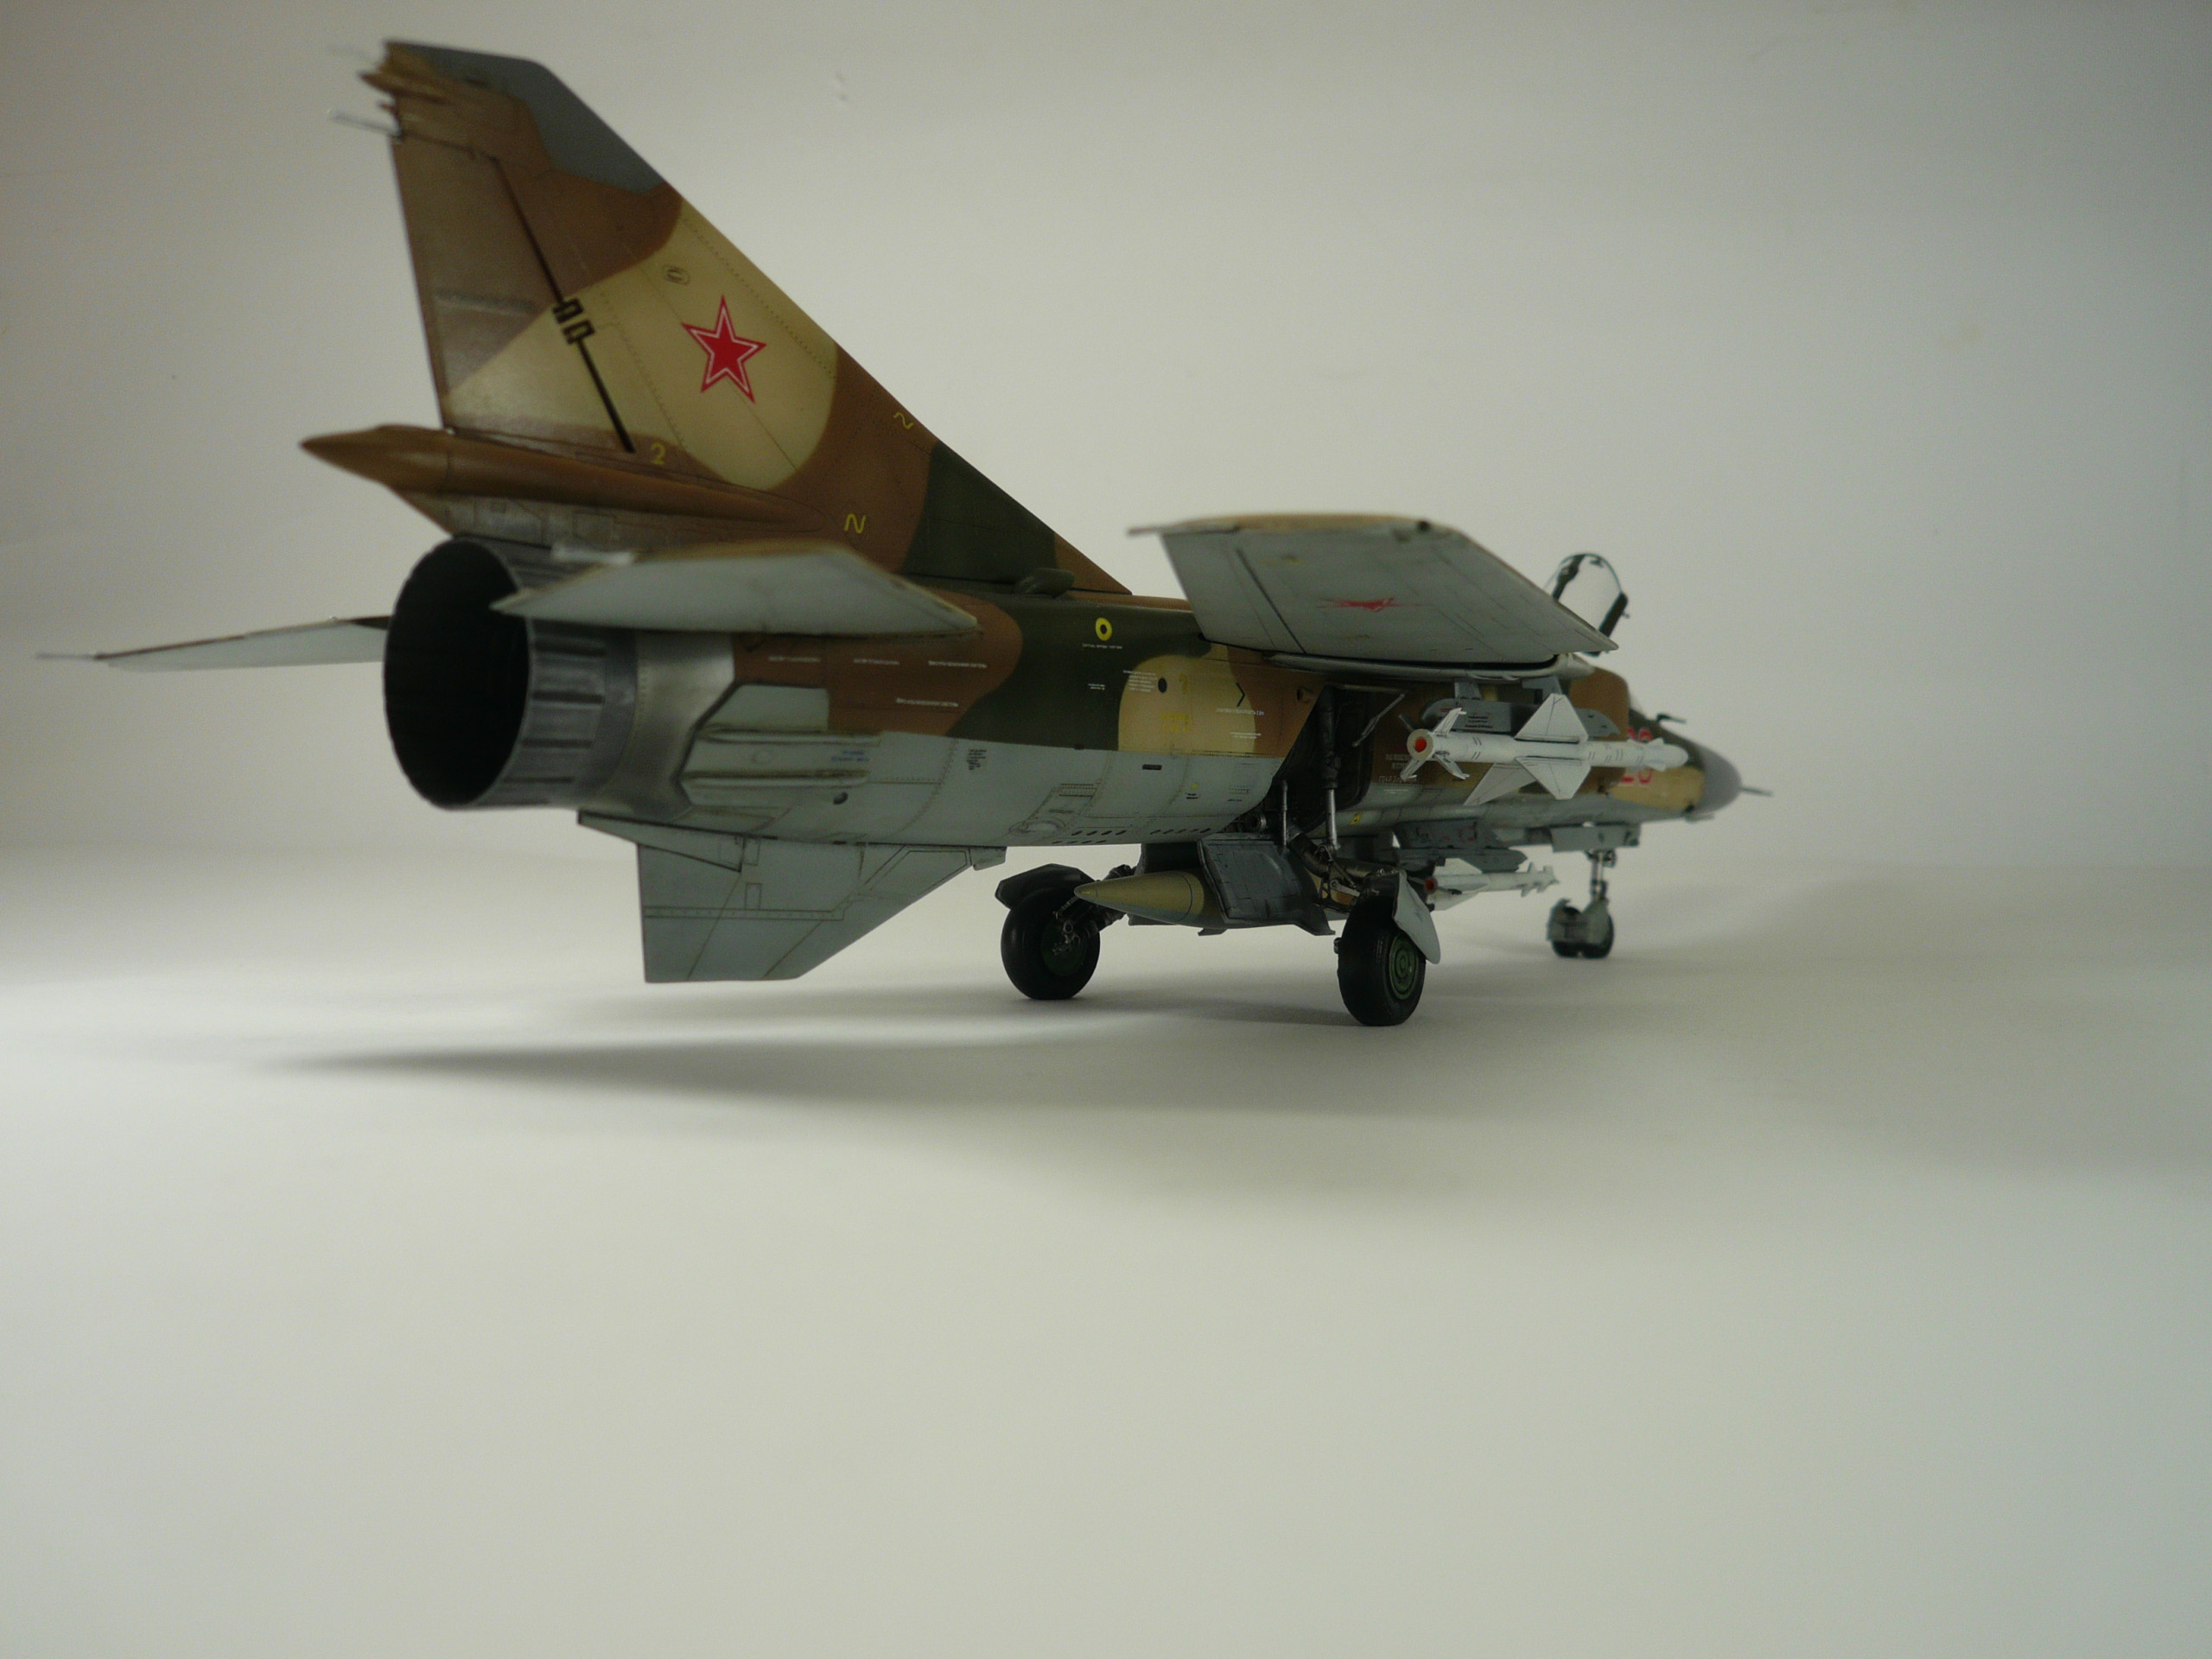
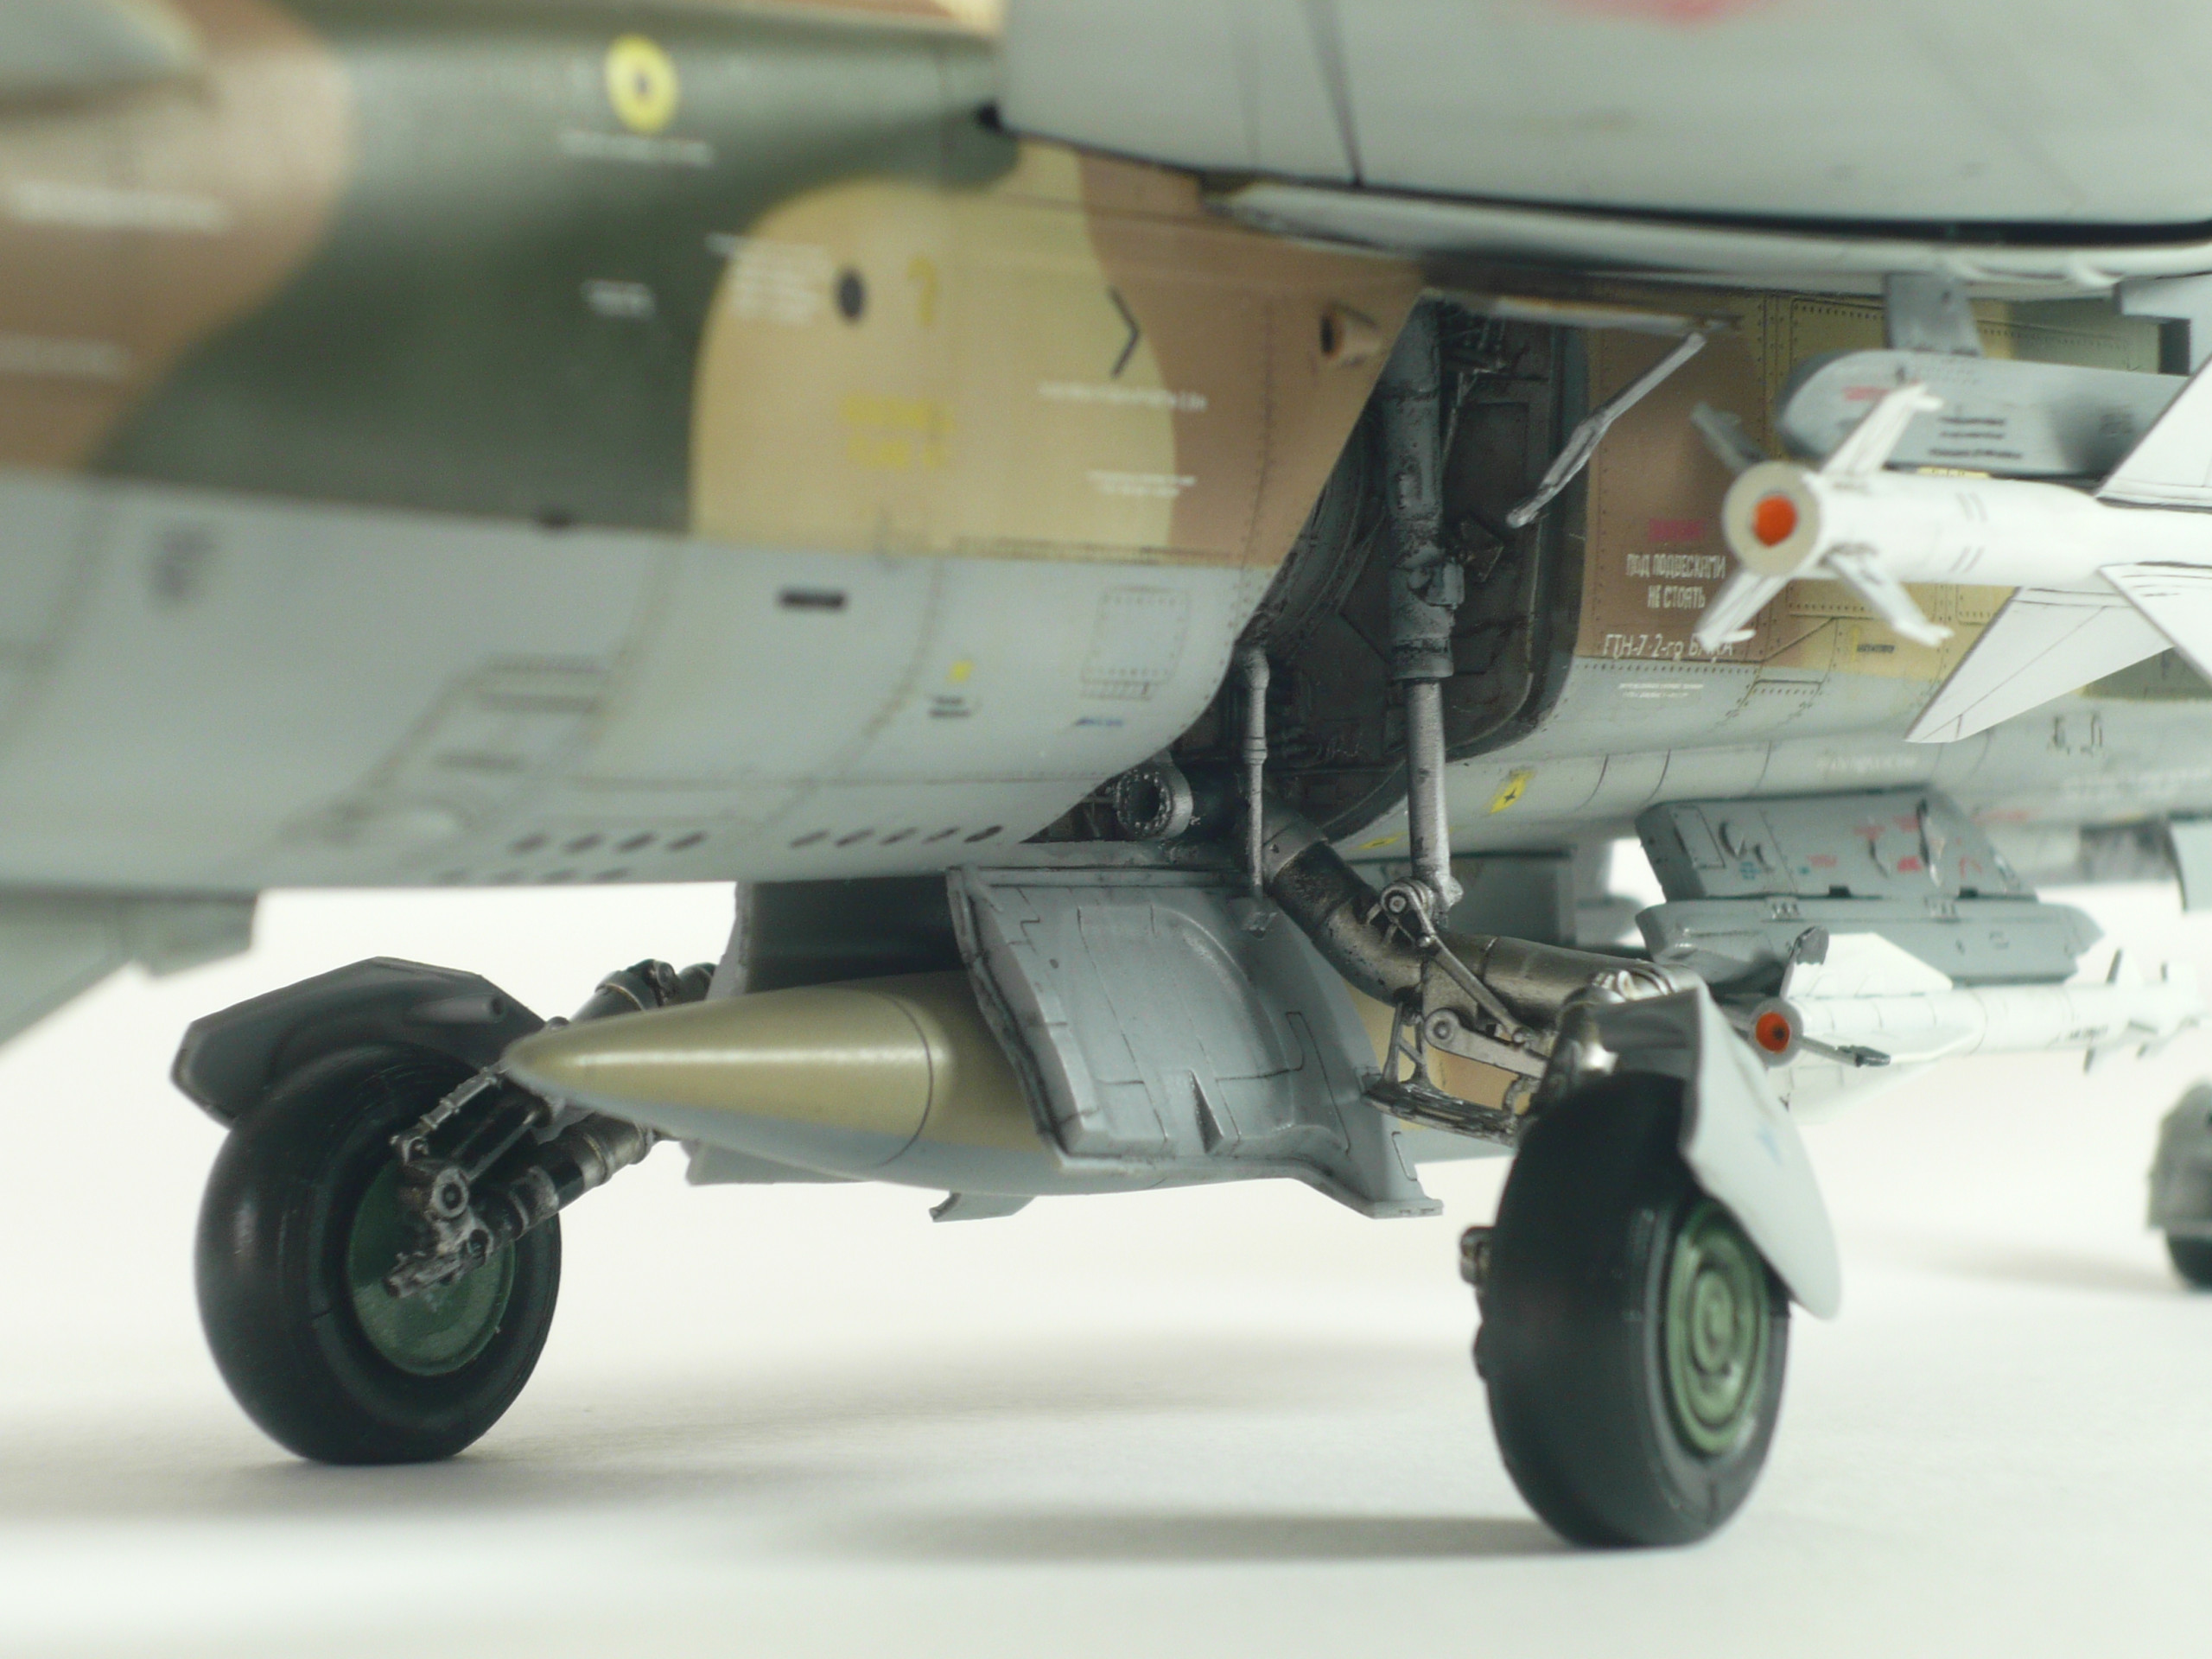
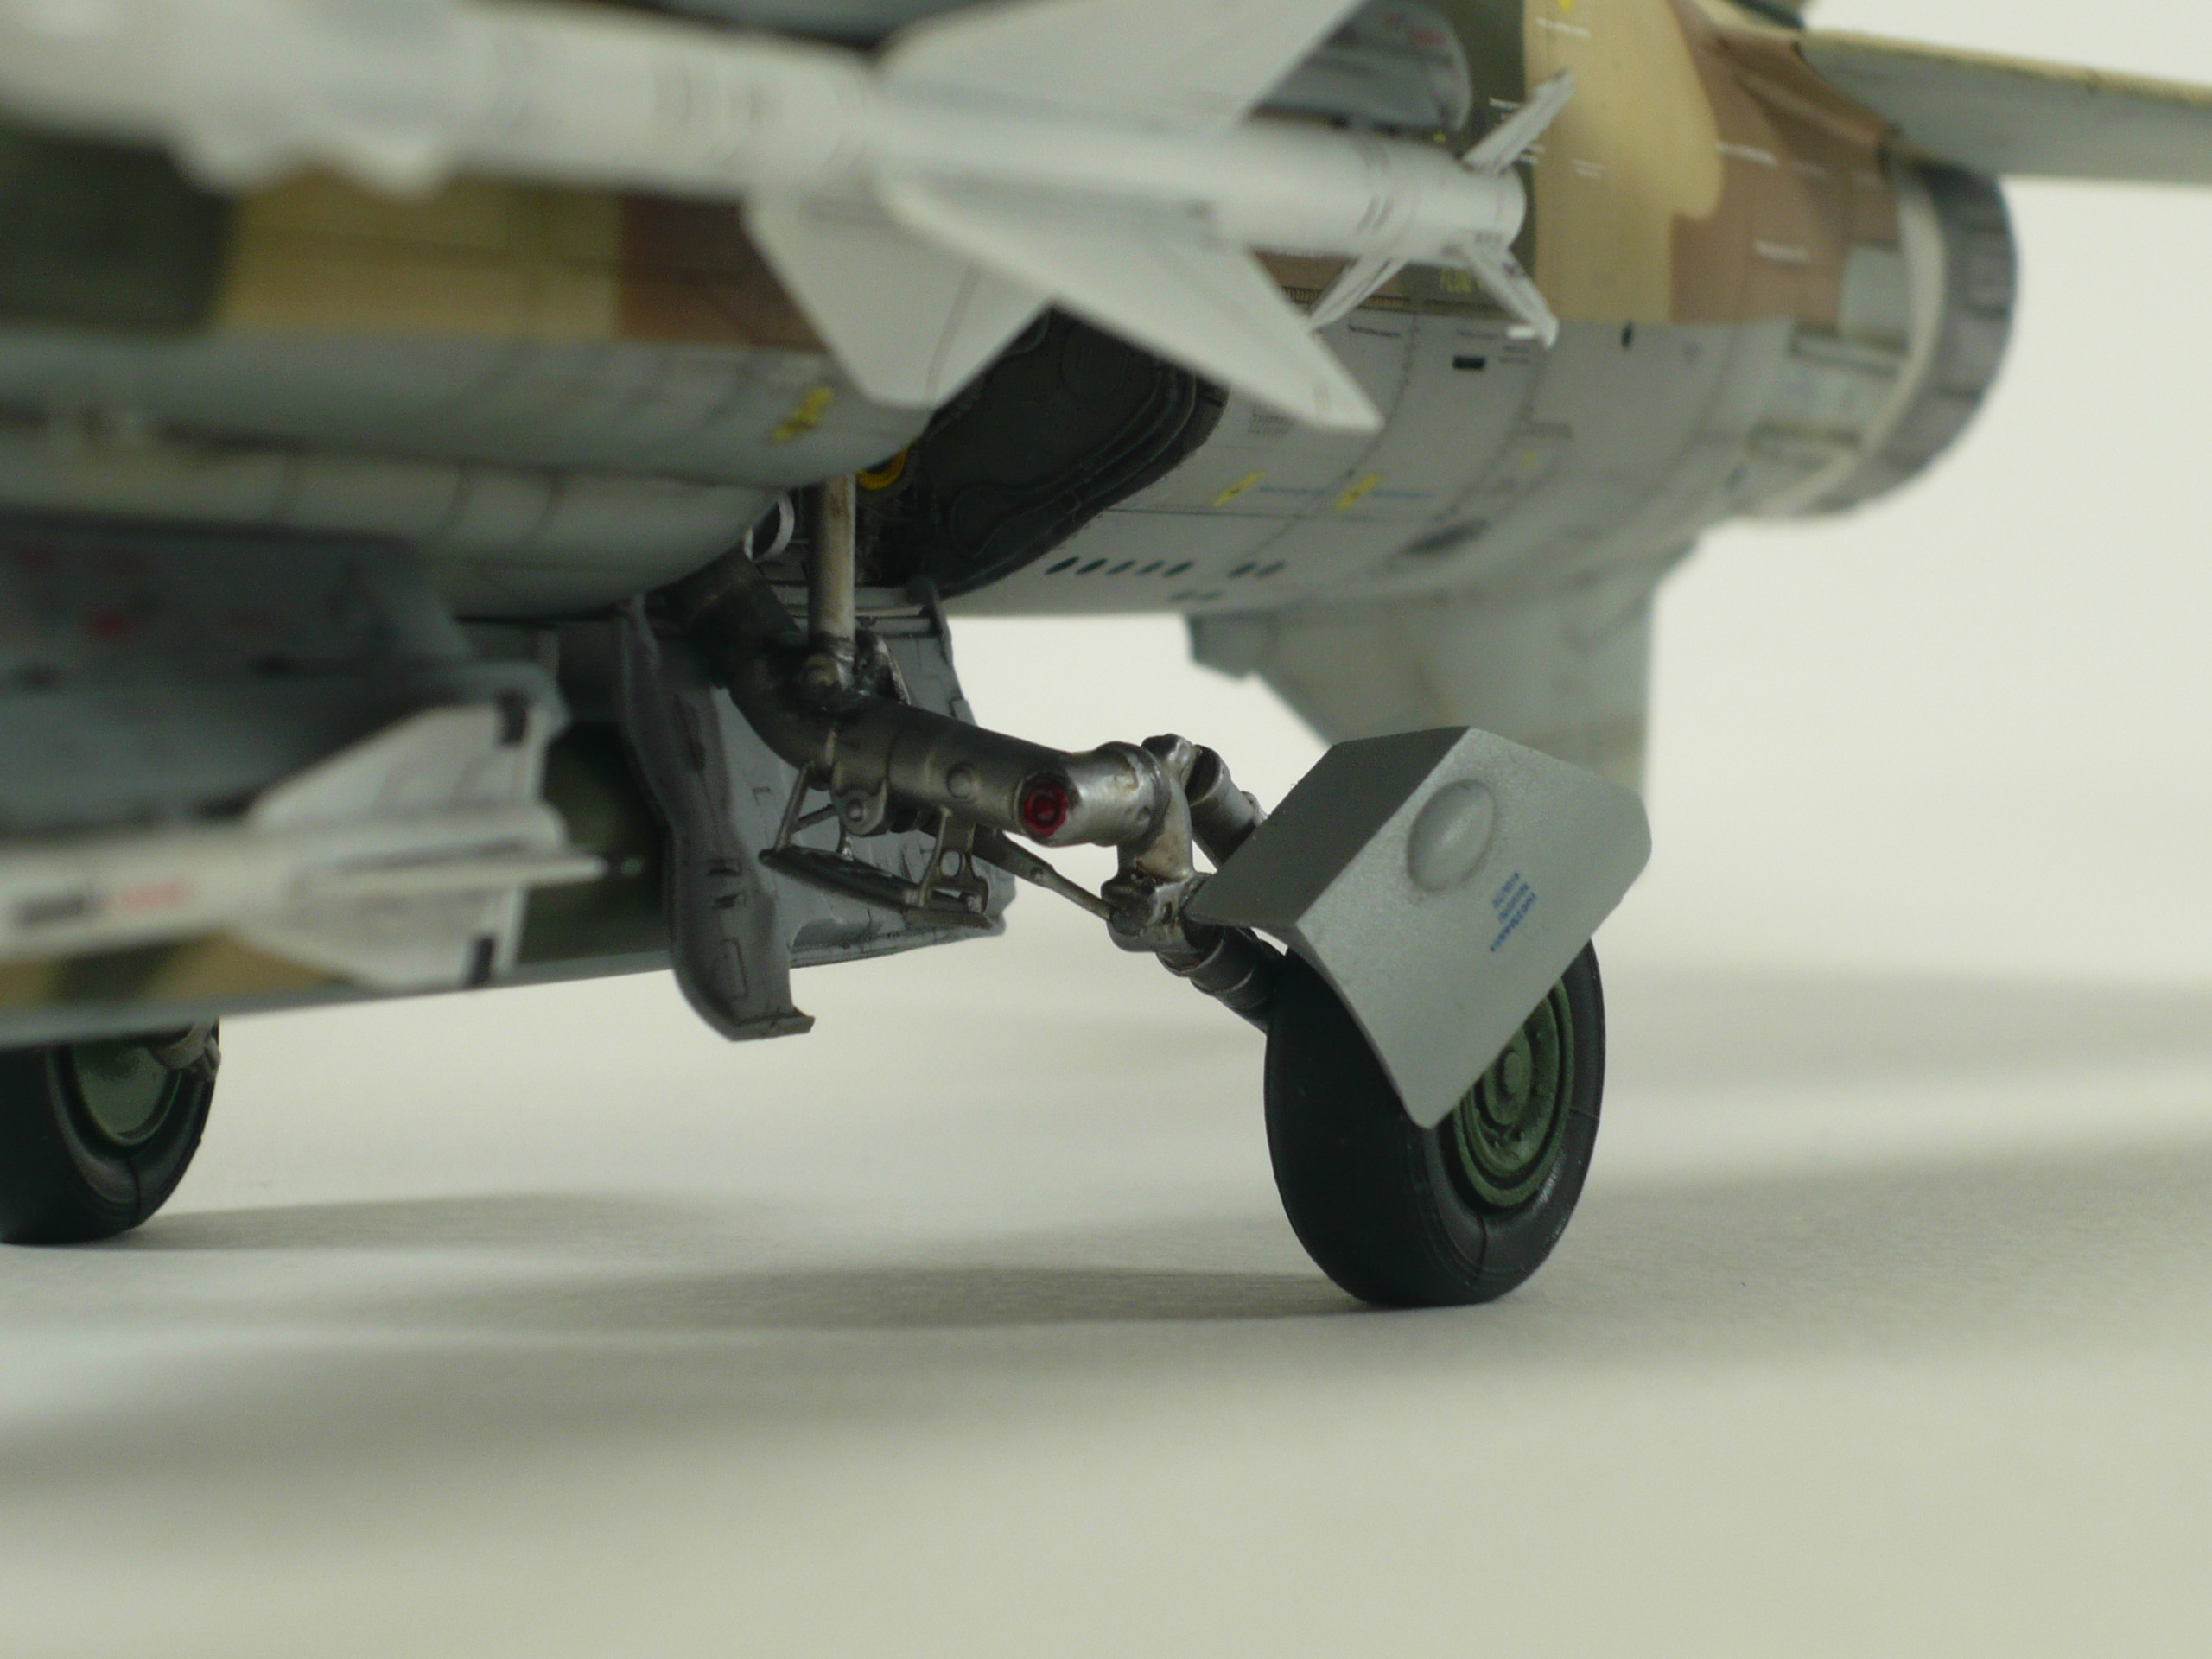
Then we took a break to fix the landing gear…After a gloss black primer applied, we sprayed the whole system by using Alclad’s Aluminum and some metal foil to break the one tone metal color. The wheels sprayed with Mr Hobby’s H319 light green and Mig Ammo Rubber black (pic 19-1). The we weathered the landing gear using Mig ammo streaking effects (pic 19-2)
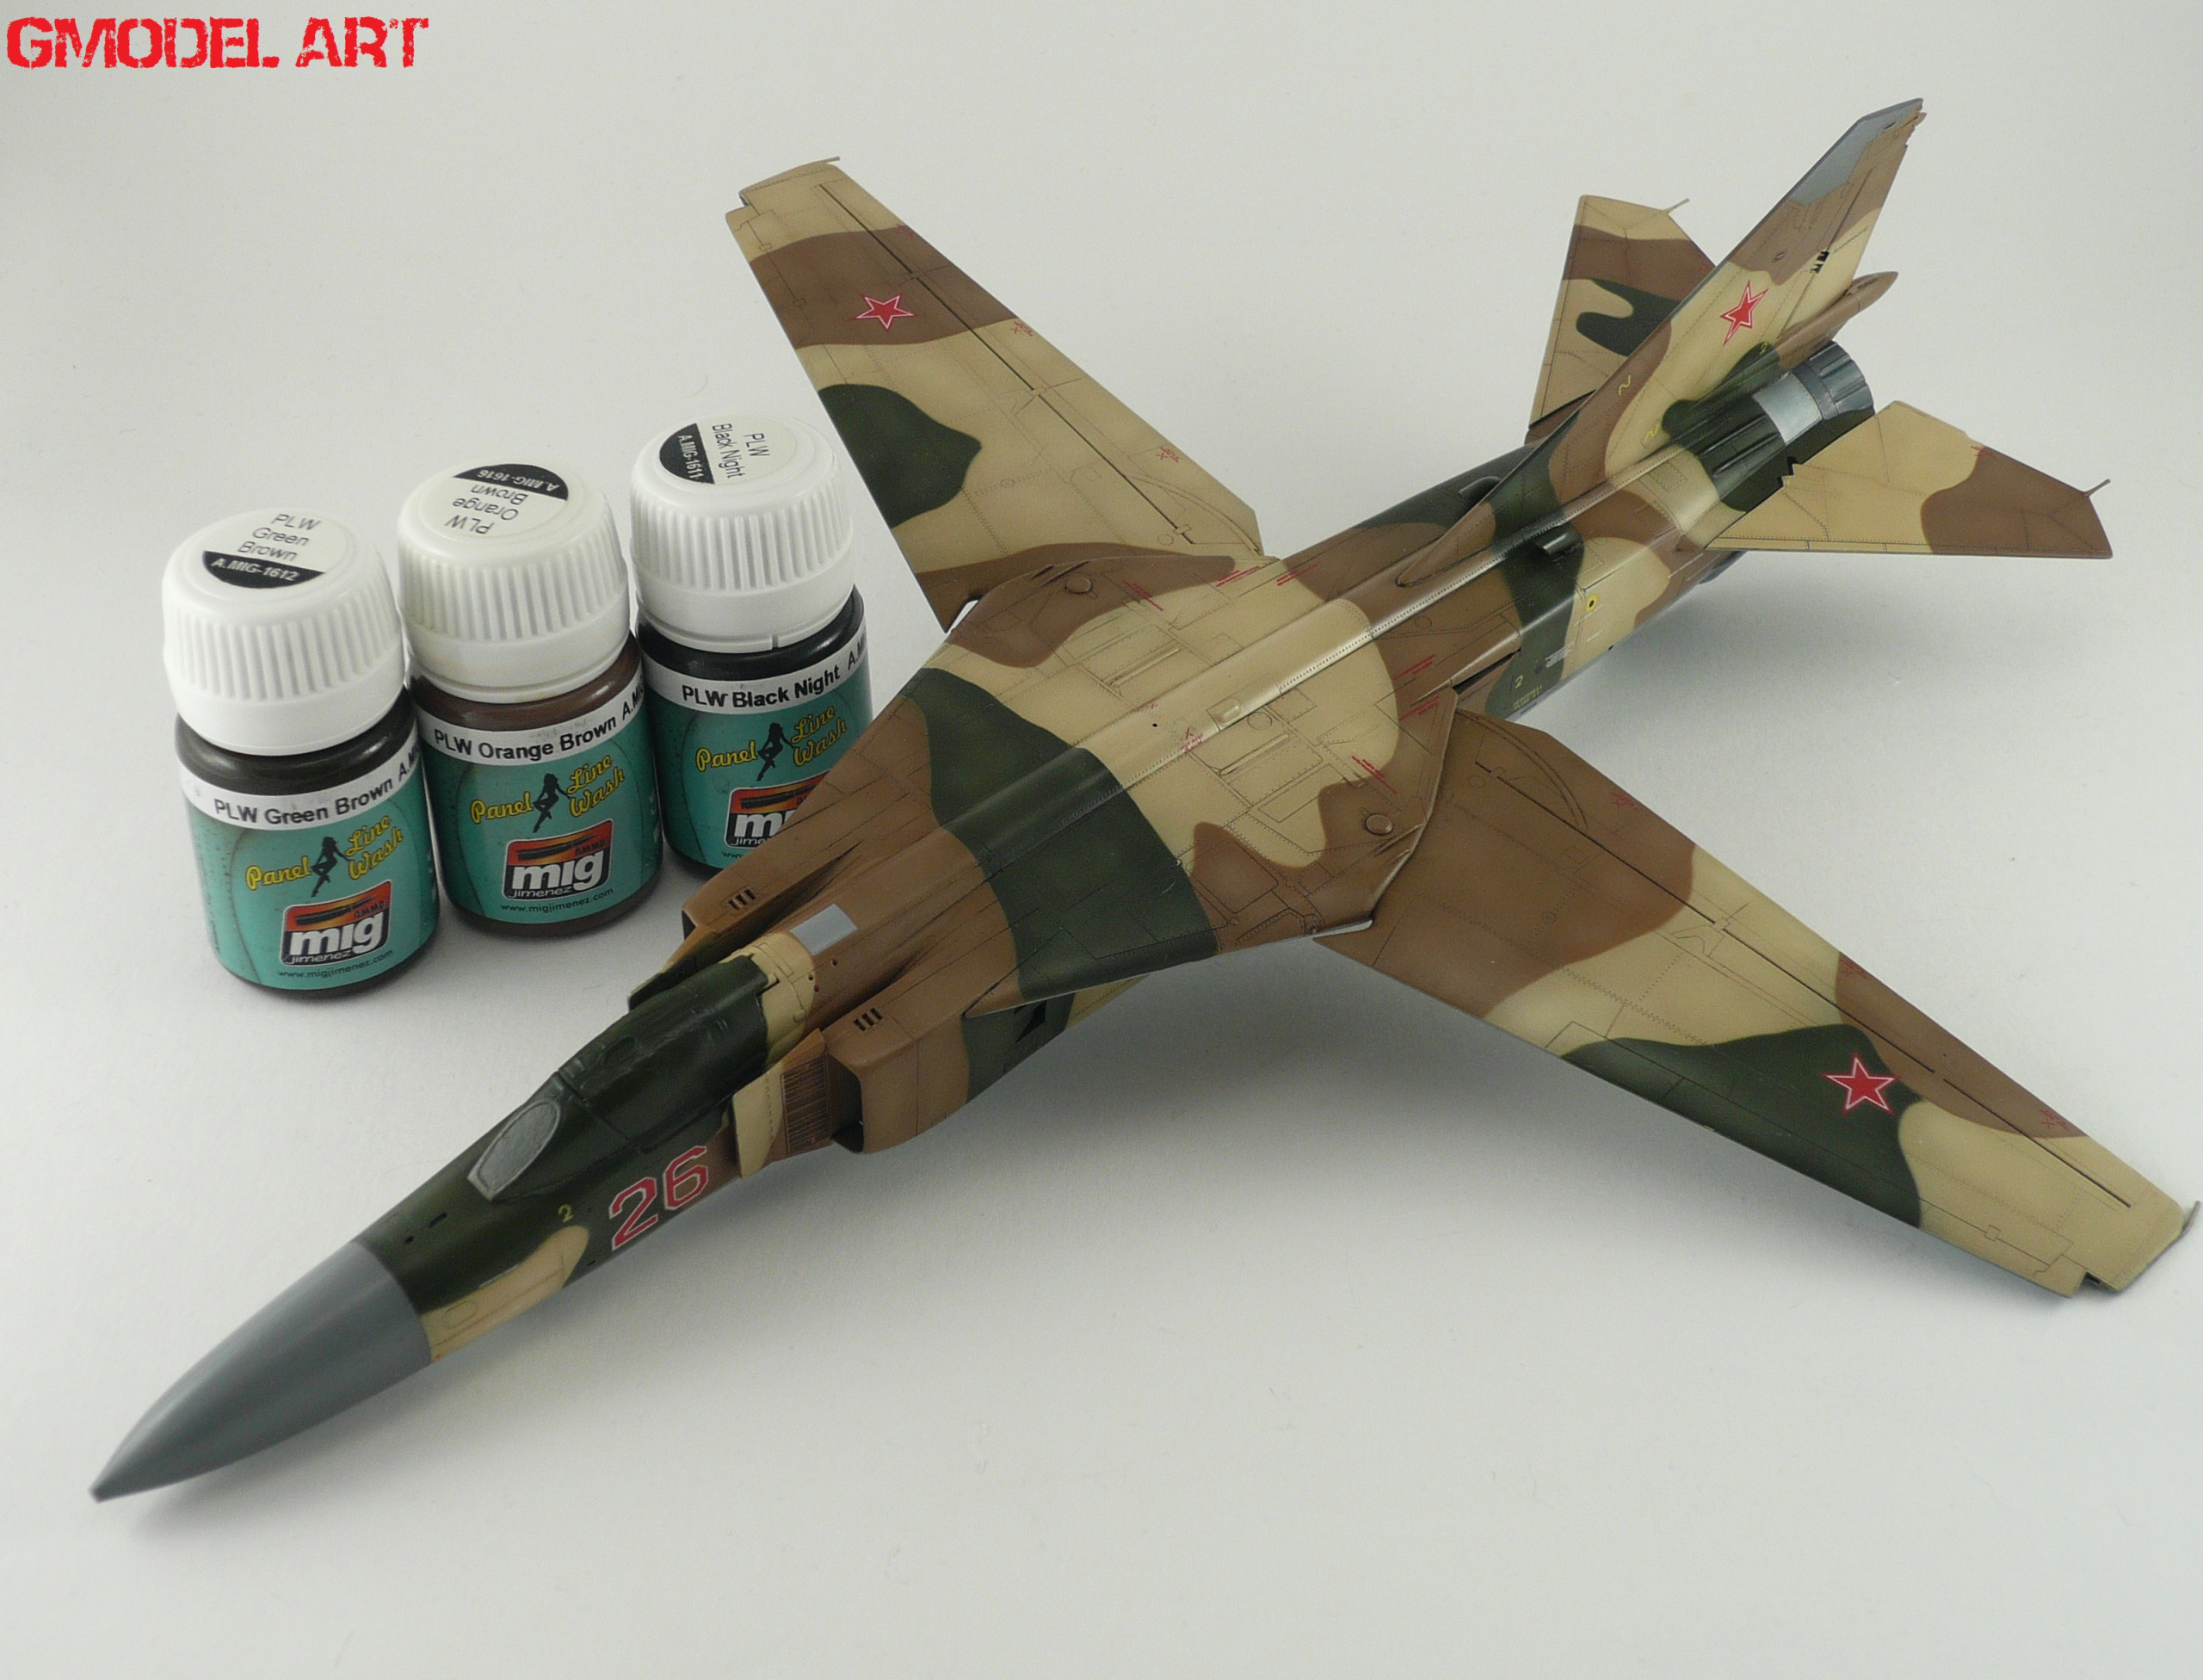
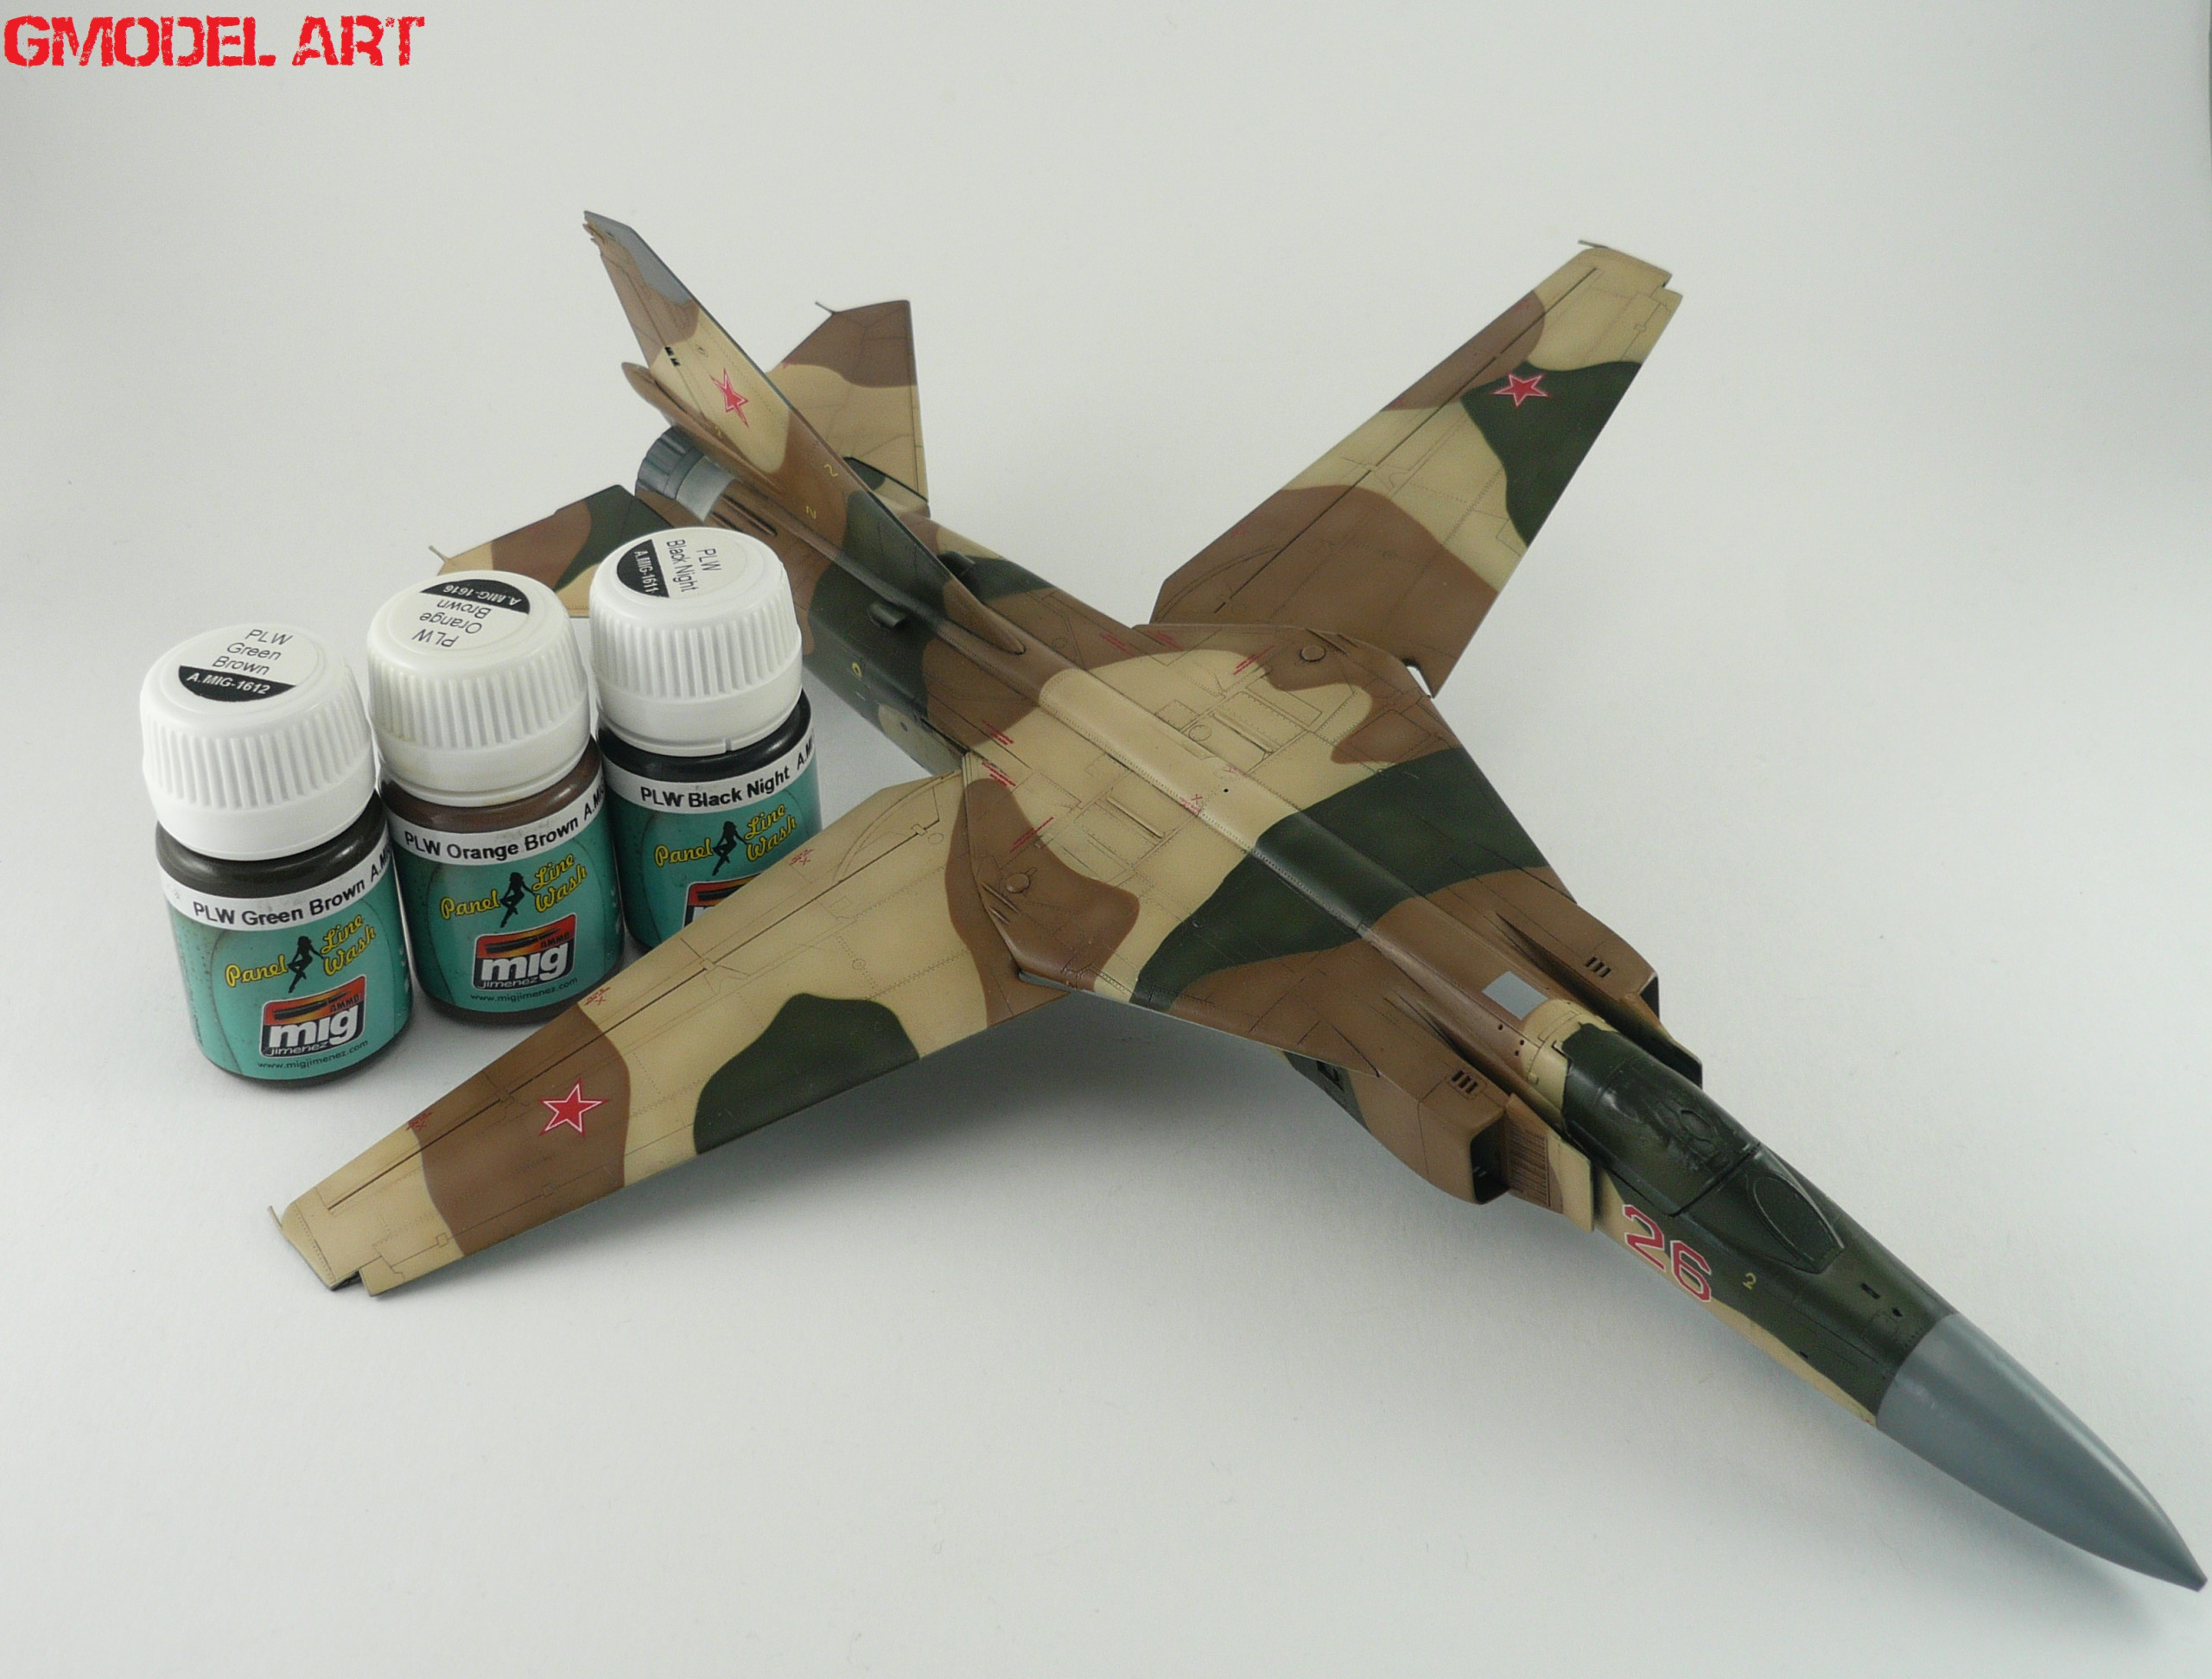
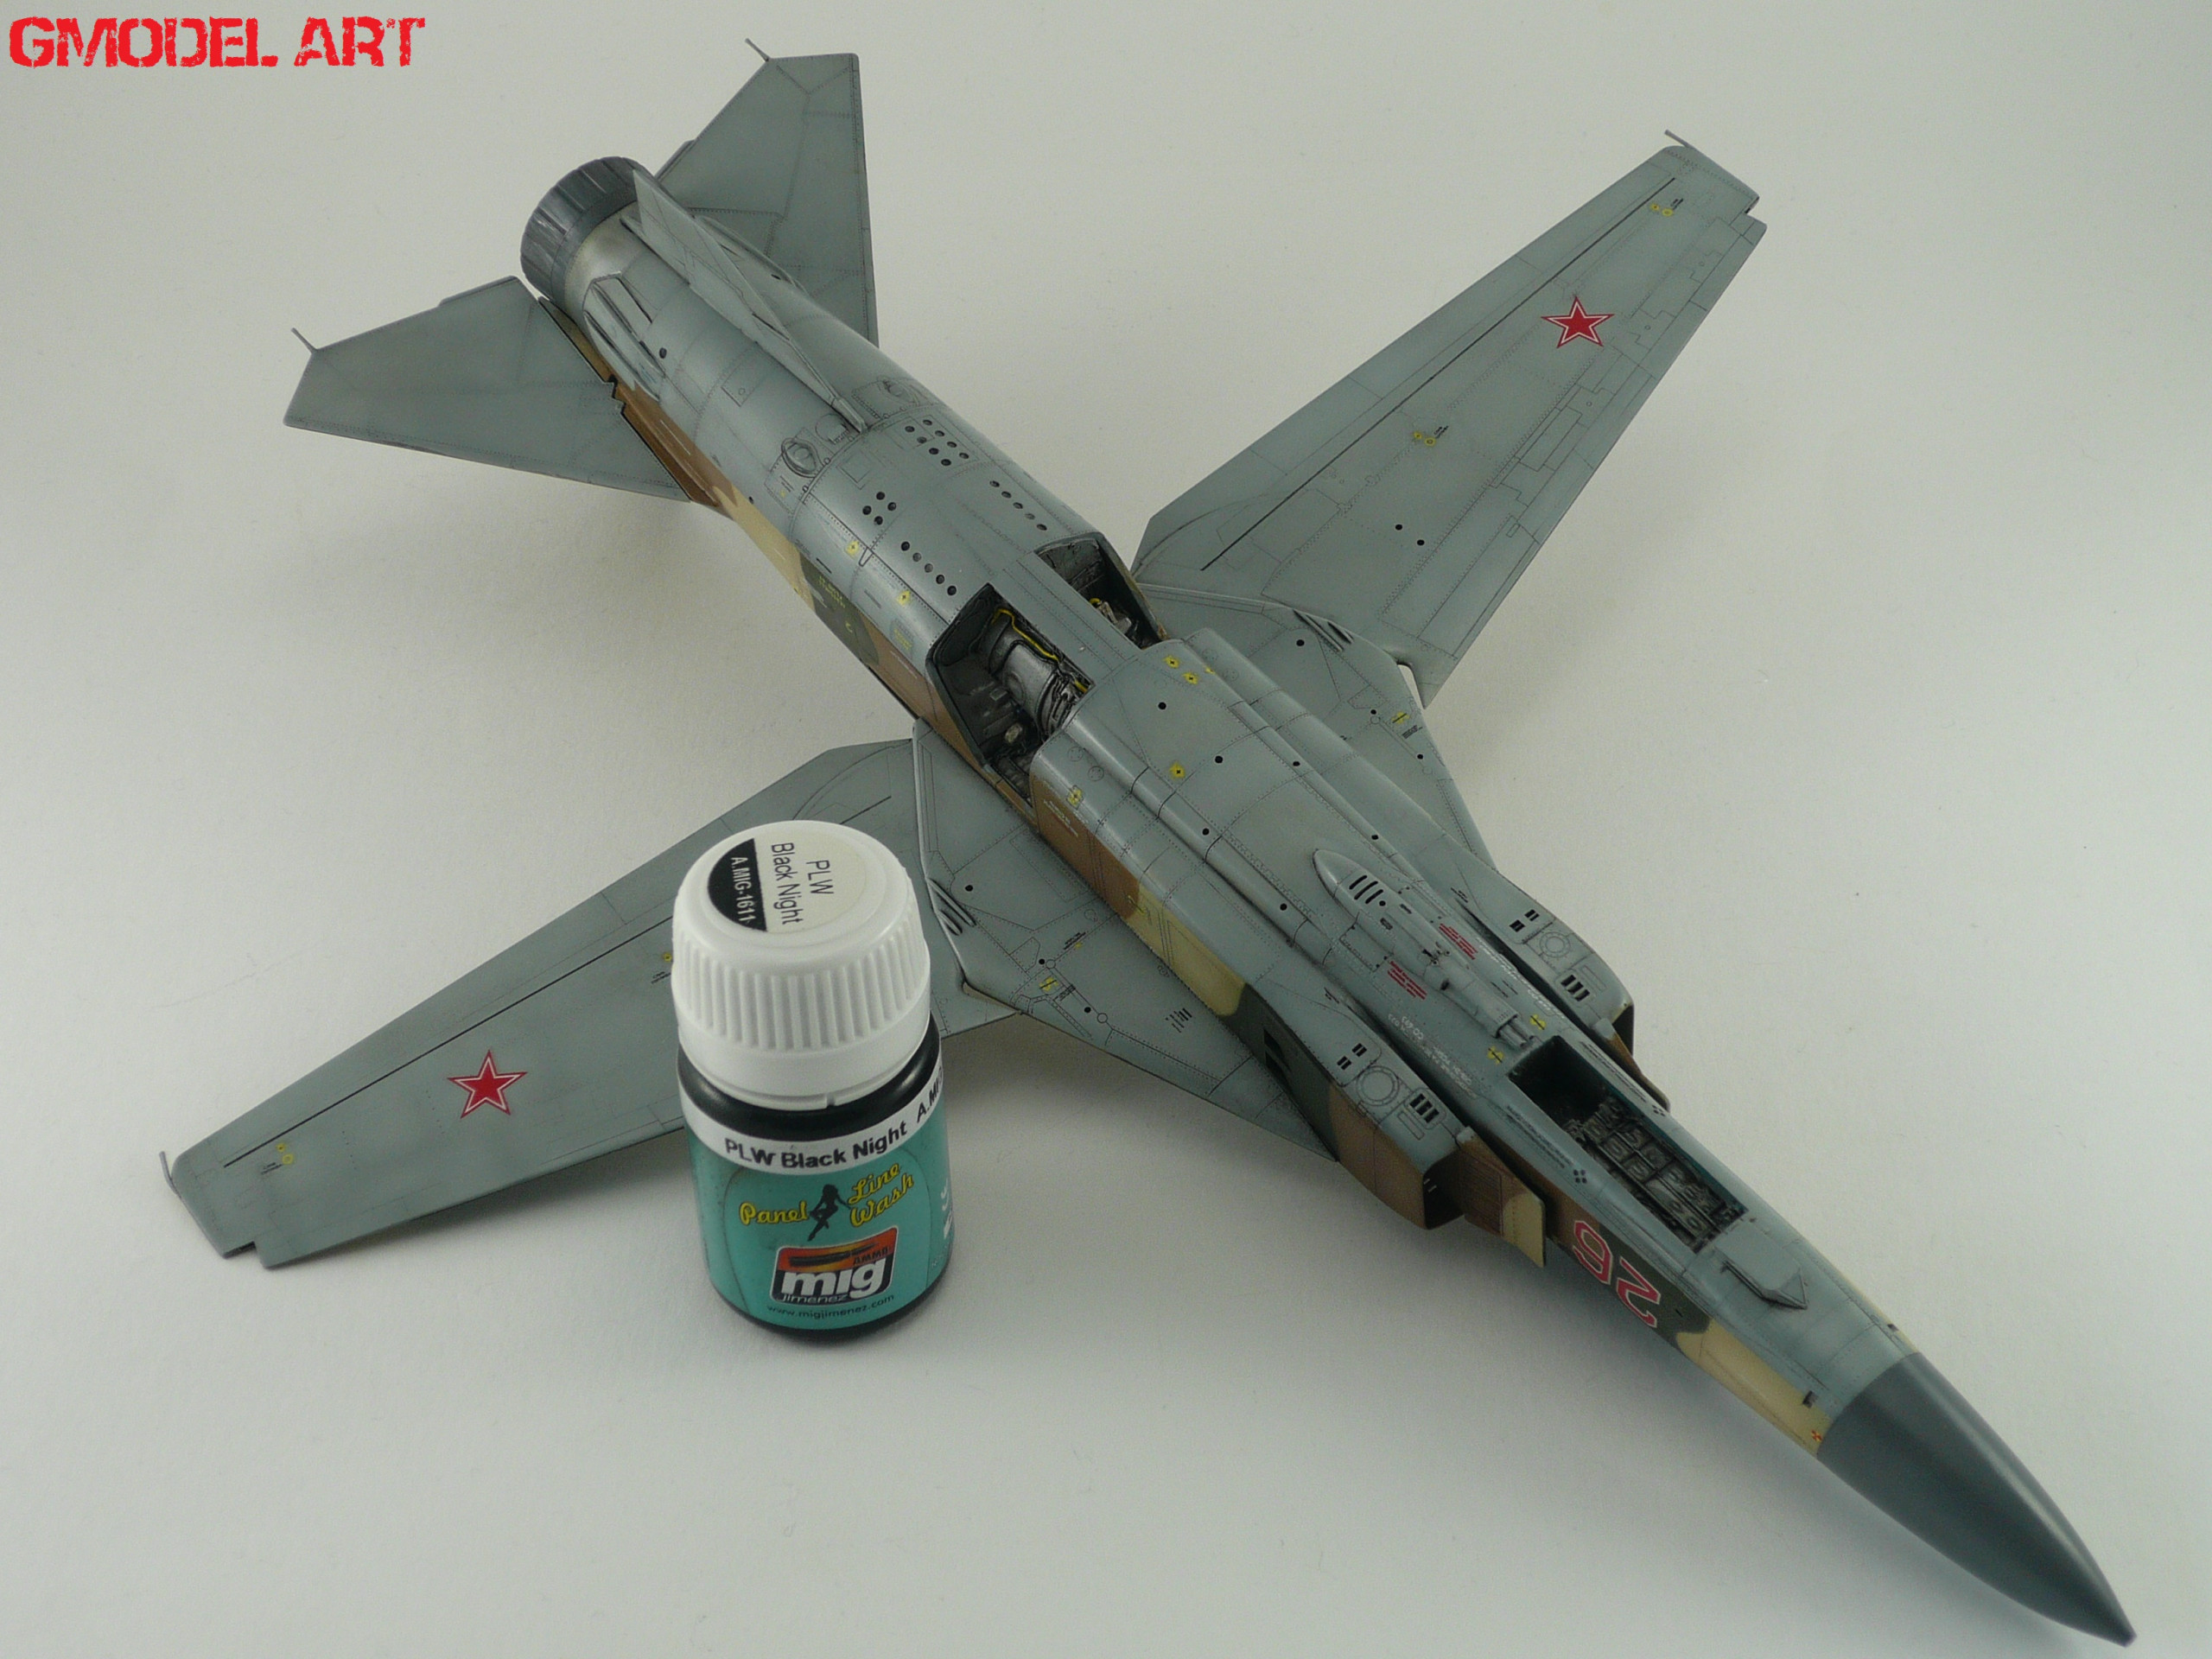
After placing decals to the whole model, weathering stage started using PLW Green Brown for the green area’s, PLW Orange Brown for the sand and brown area’s on upper surfaces (pic.20 & 21) and PLW Black Night for the lower surfaces (pic 22 ).Give it 2 hours to dry and then remove the excess with a cotton bud and some thinners help.Next stage was to enhance some panel lines and area’s in both upper and lower surfaces…For that reason I used oils.Raw umber,Yellow ochre and Lamp black were my 3 oils of choice to give some effects and offer realism to the model…Raw umber was used to brown color of the cammo, Yellow ochre to the sand and lamp black to the lower surfaces. For the wheel wells I used Mig Ammo’s oil stains/grease and PLW Black night (final pics)
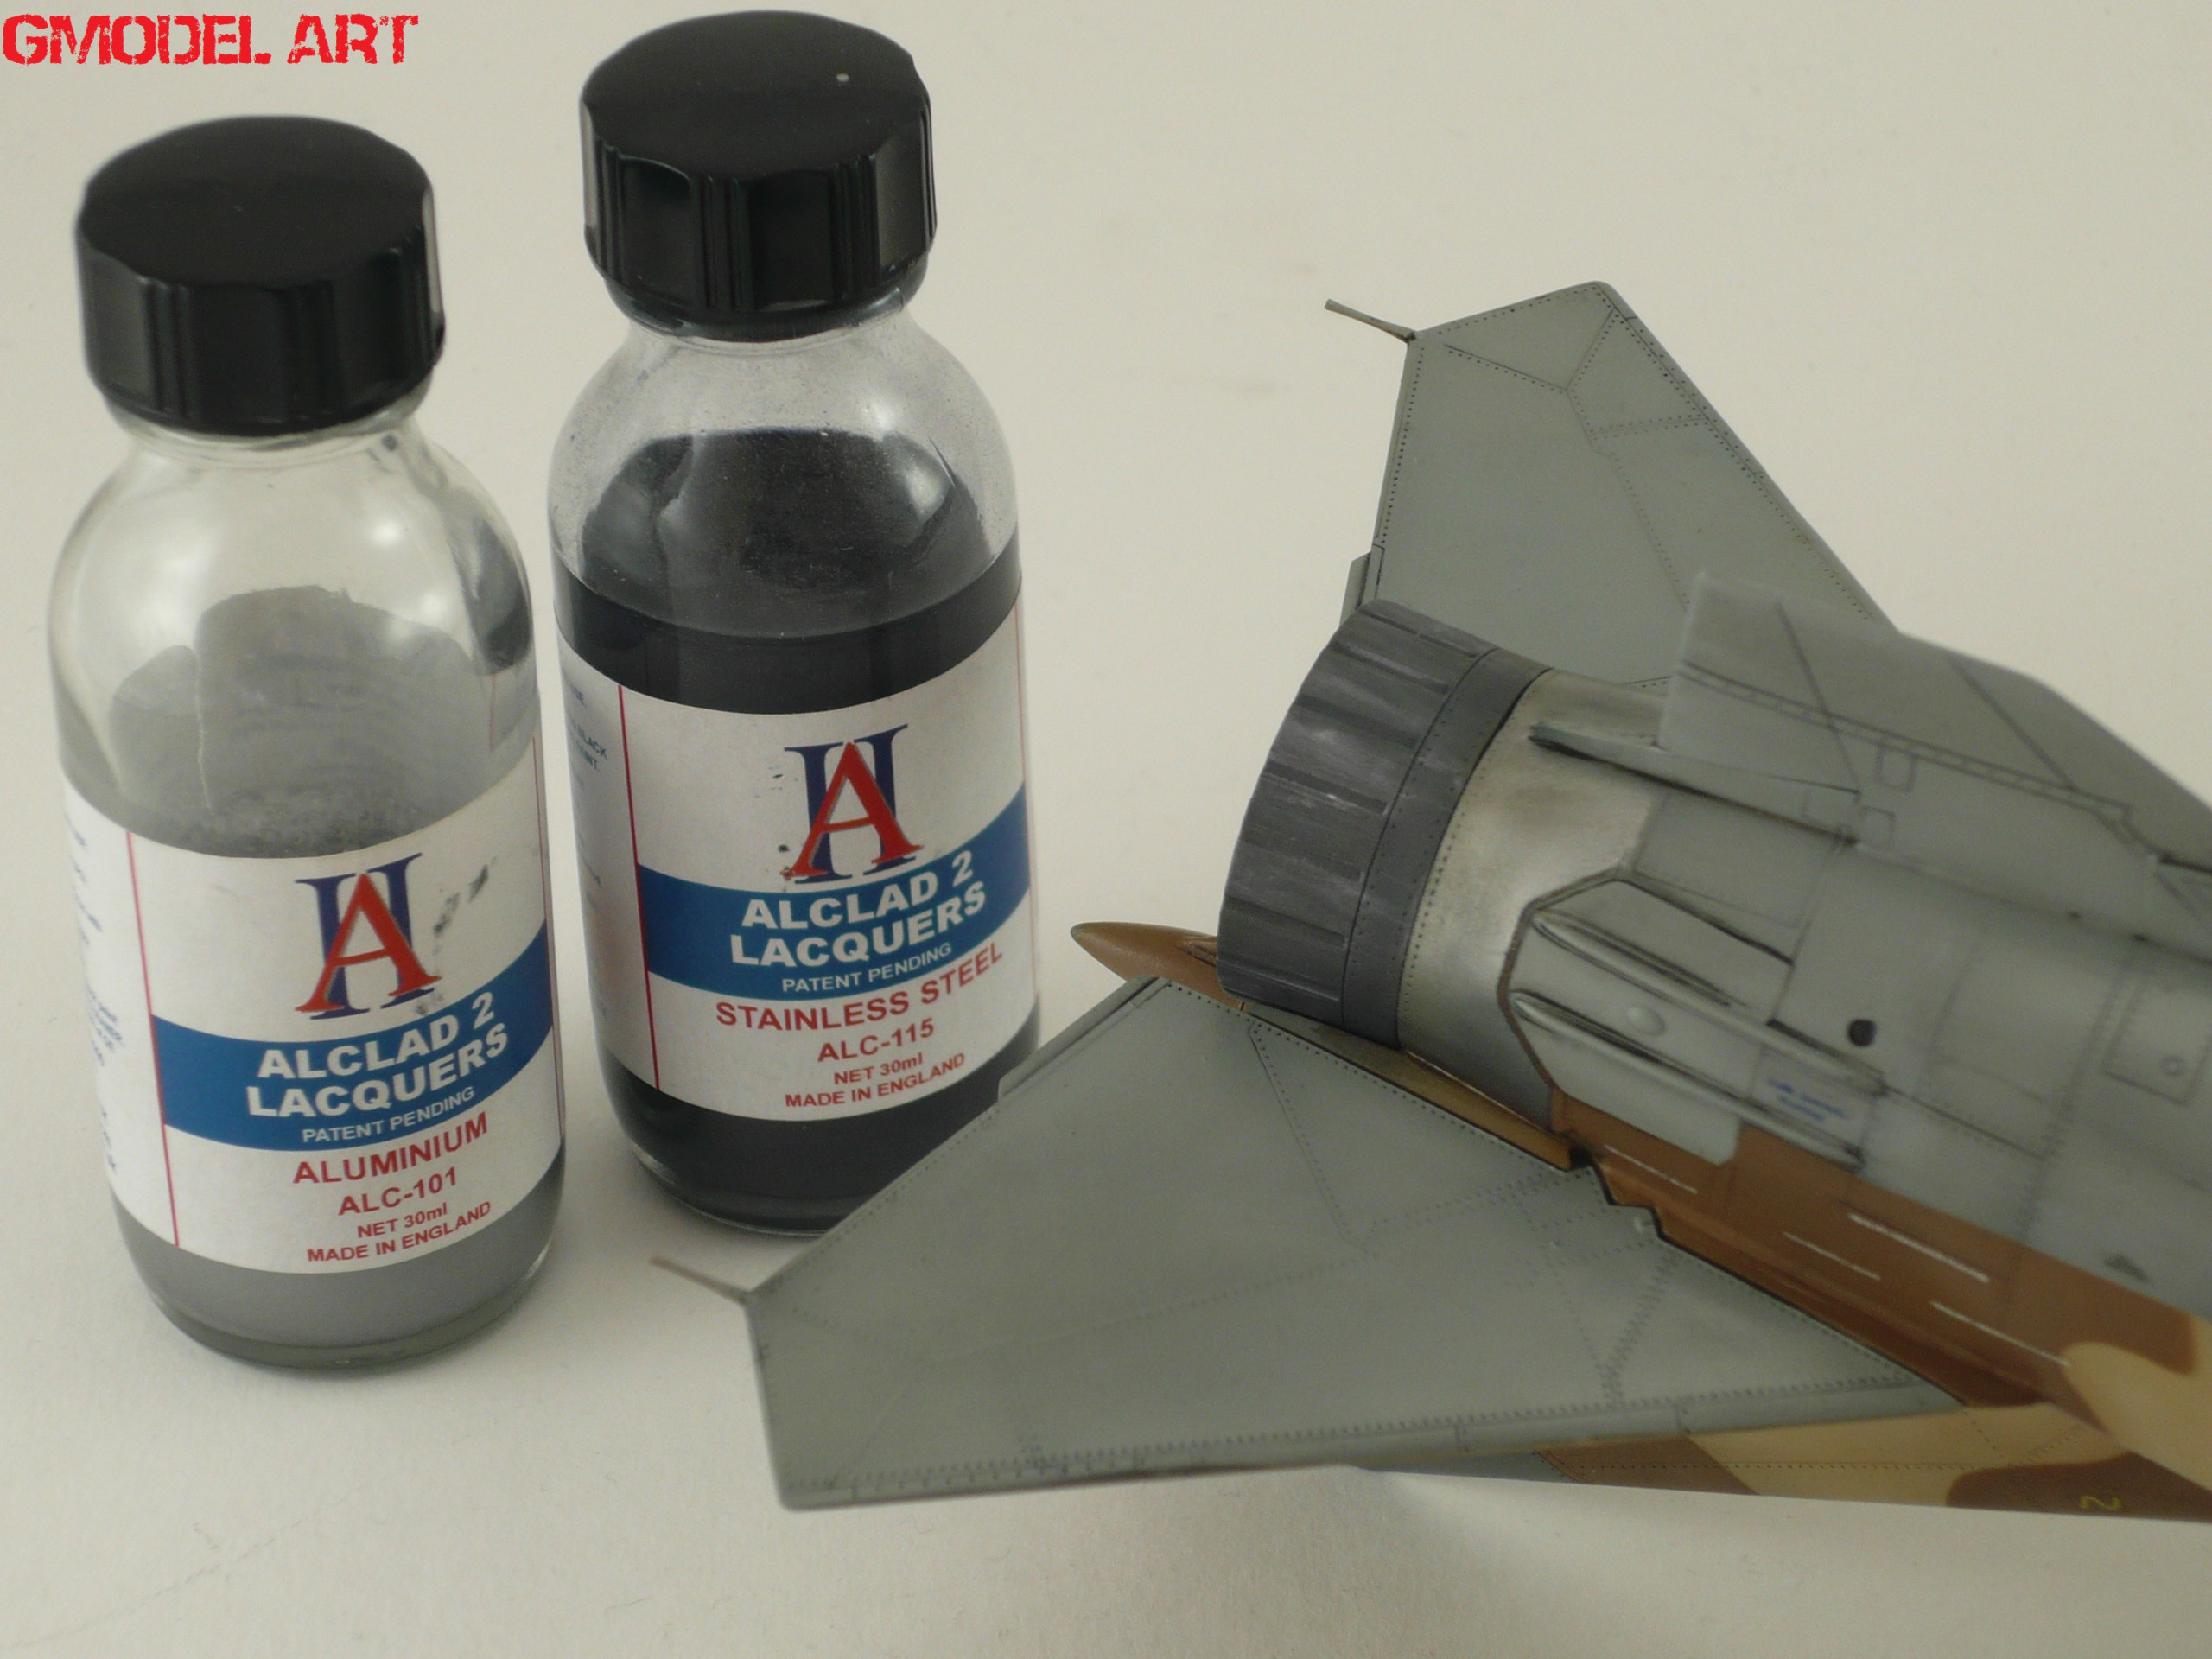
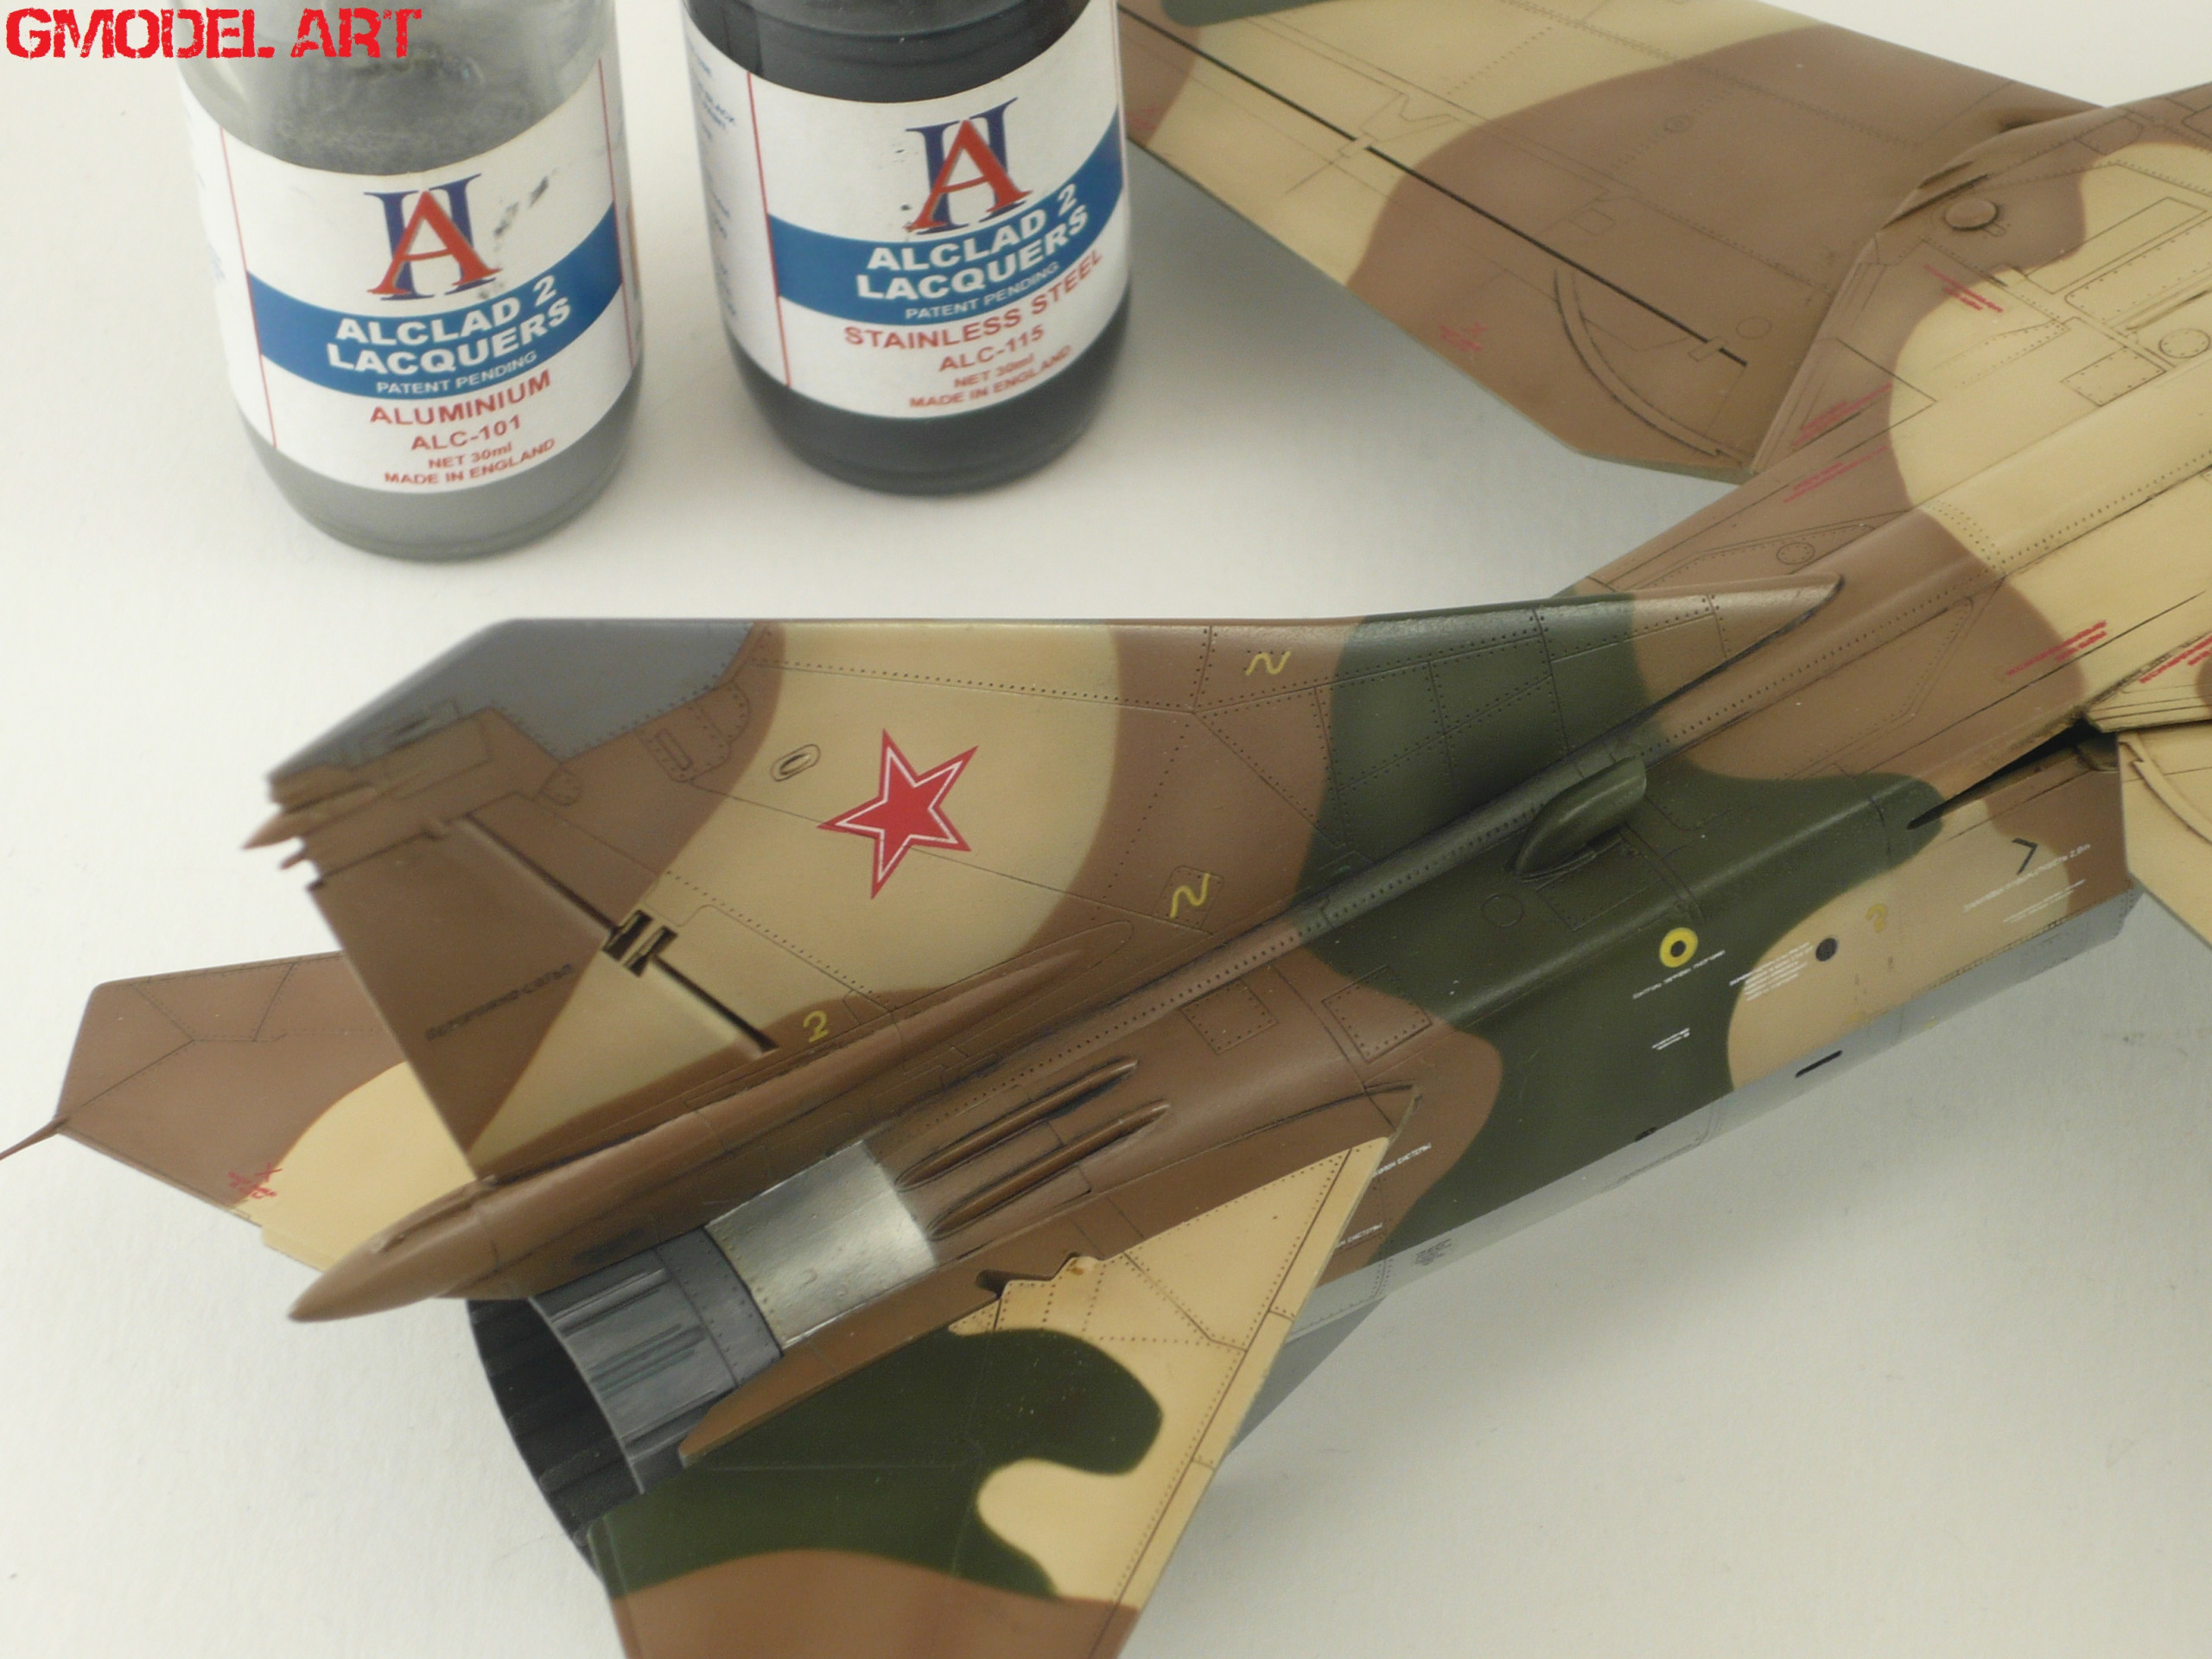
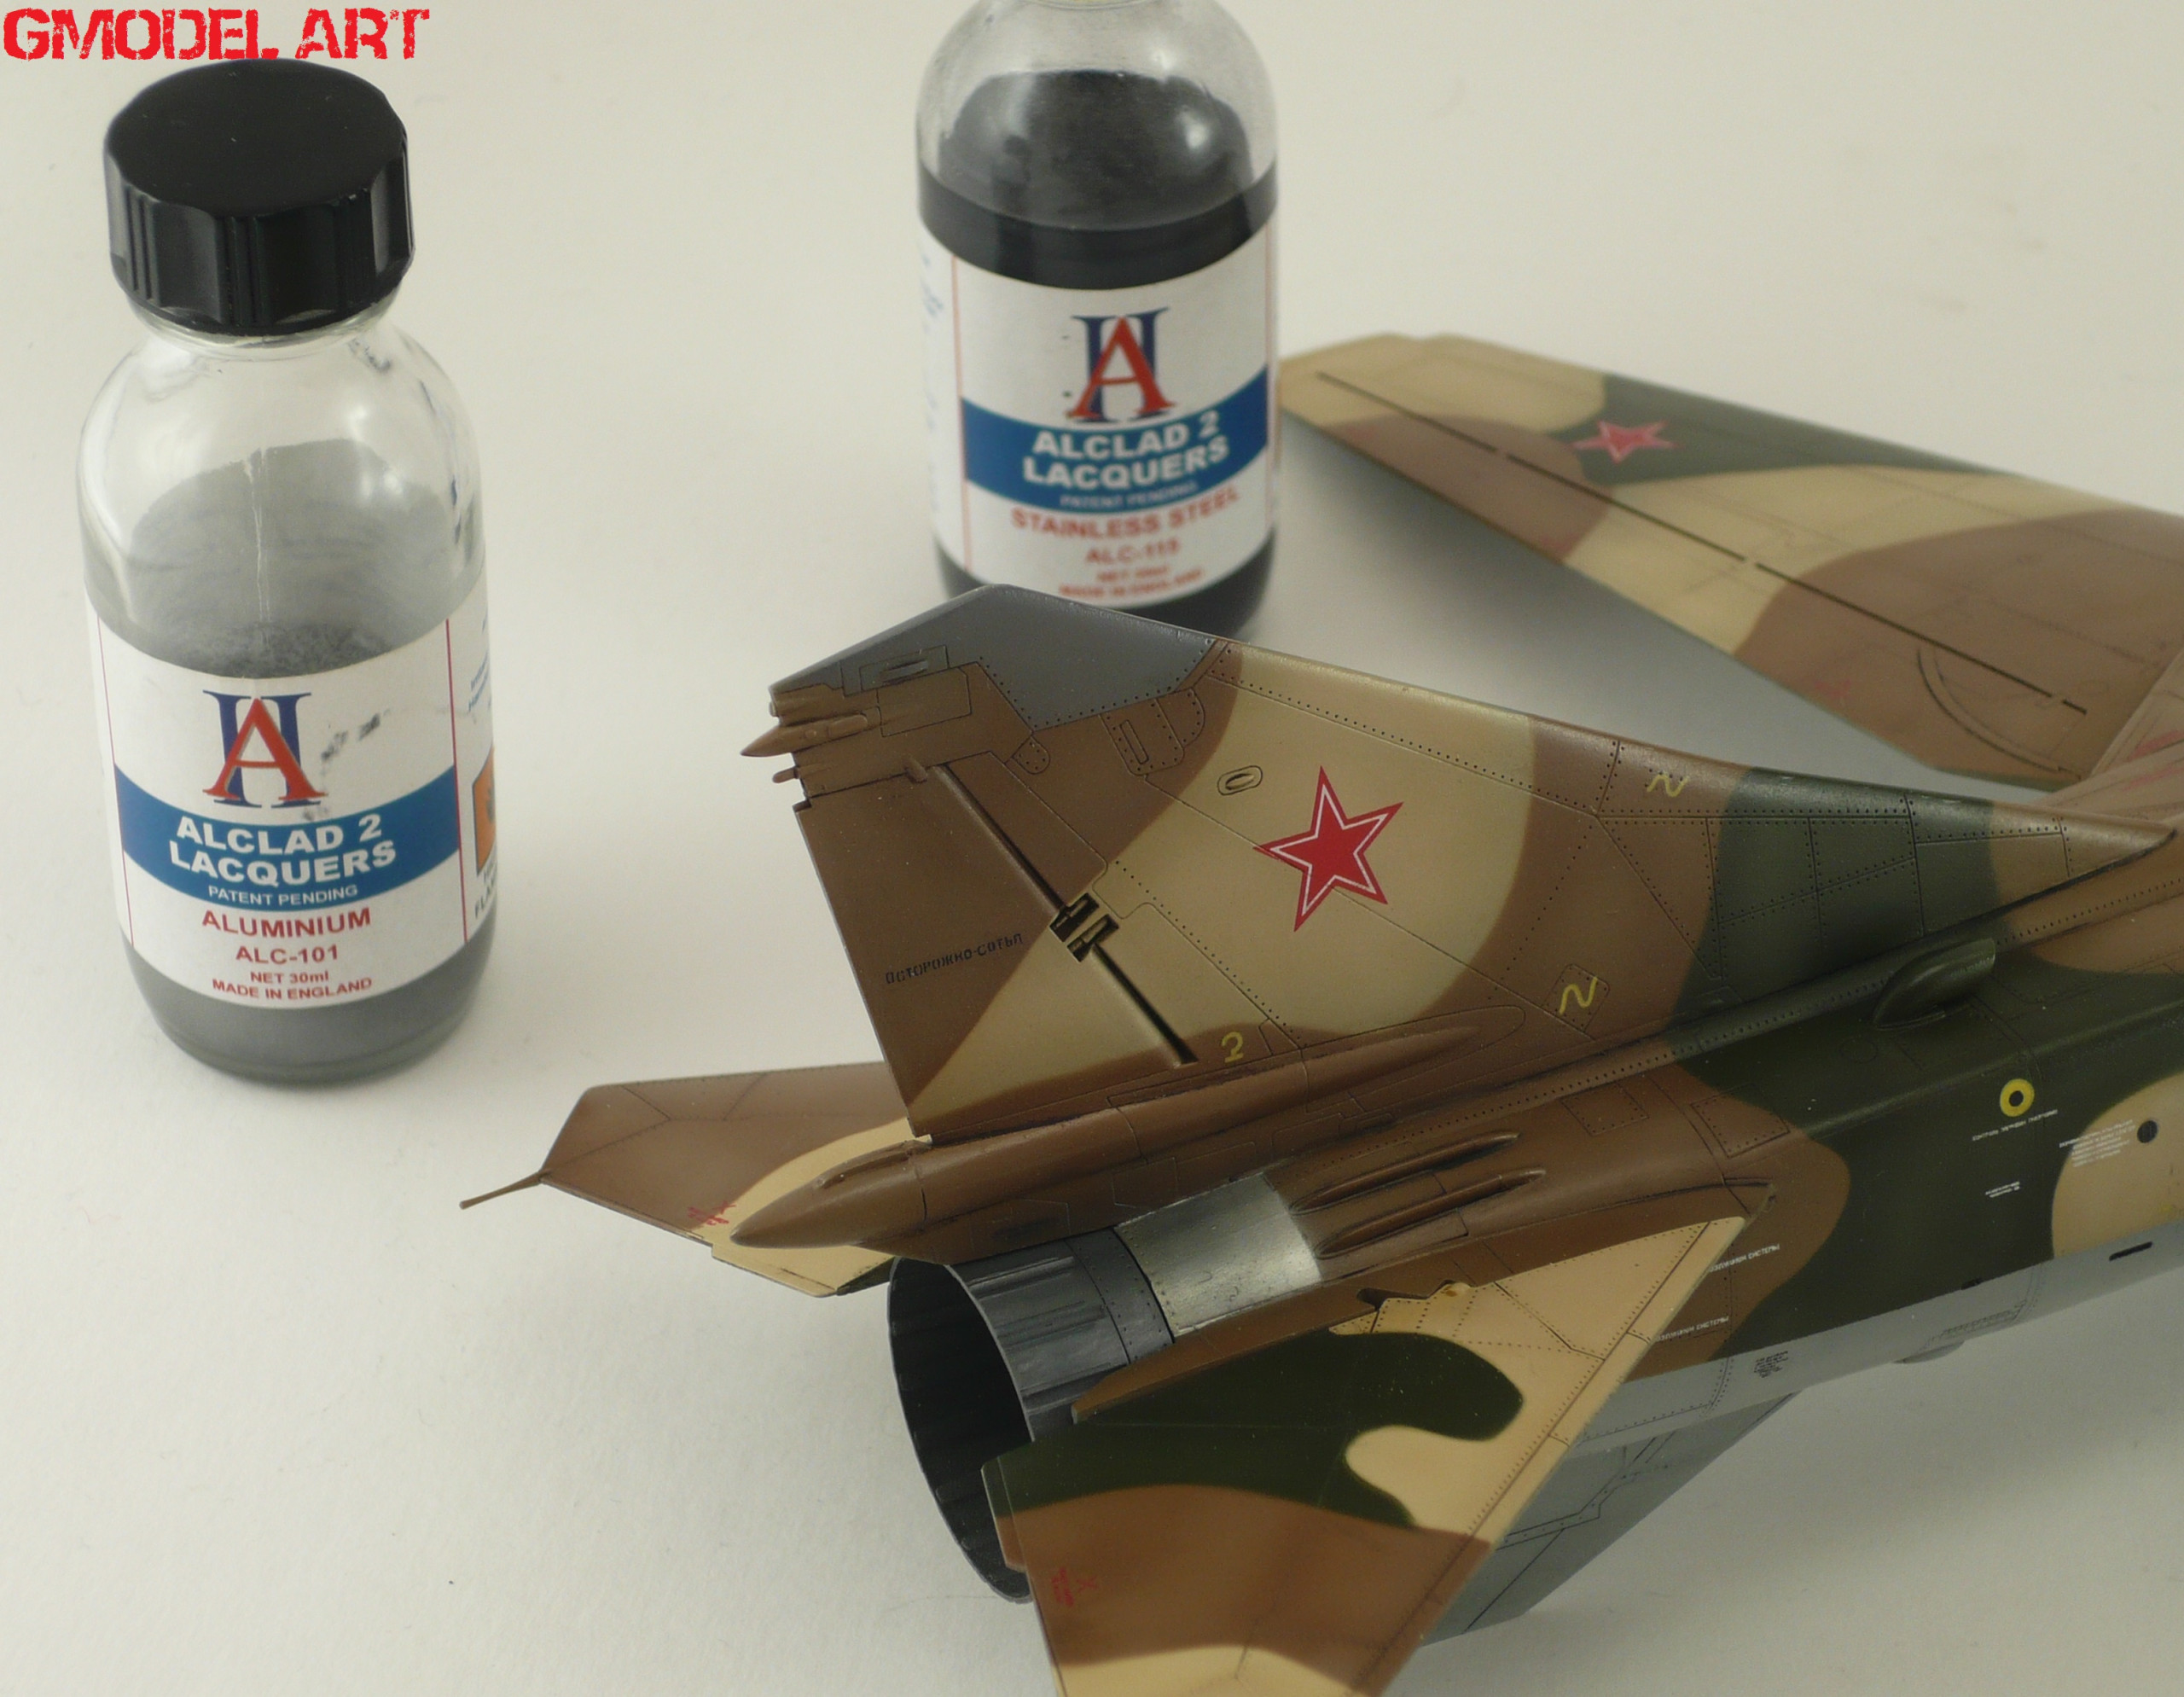
The engine metal area’s painted after masking with Alclad’s Aluminum and Stainless Steel (pic 23-24-25). Then we weathered the areas using dry brush techinque with Mr Metal color’s Iron and Tamiya’s weathering Set F (final pics)
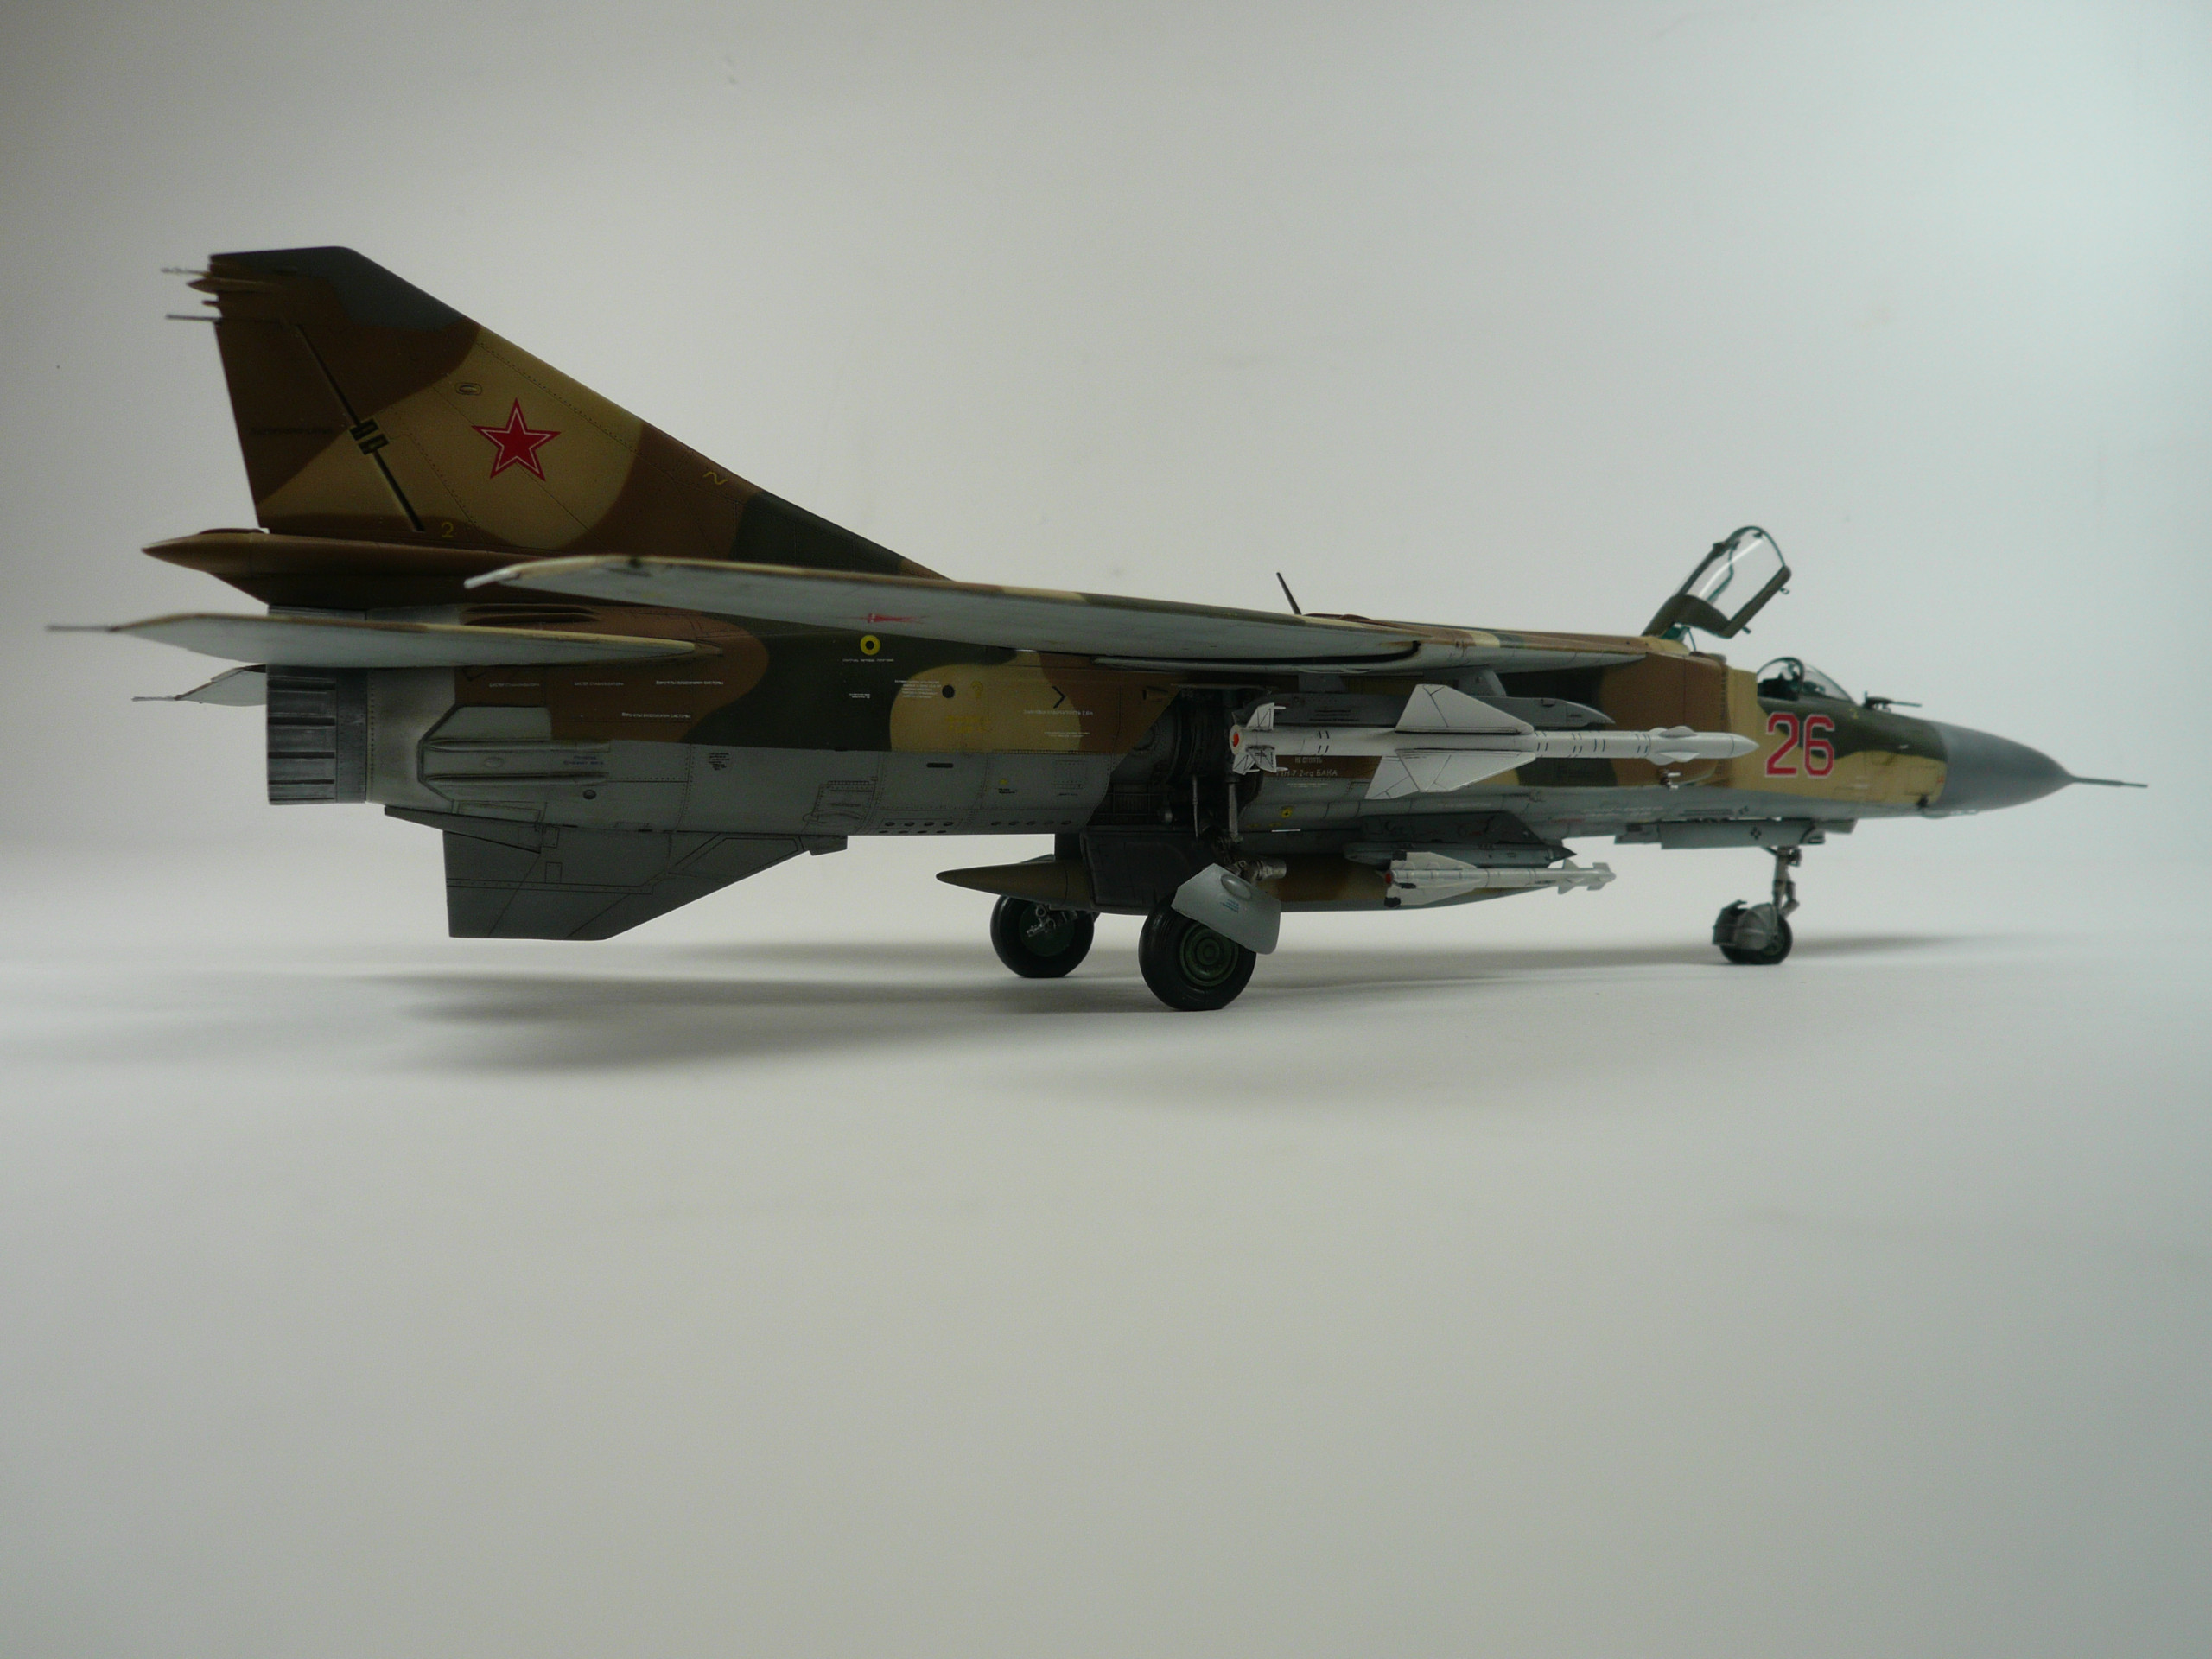
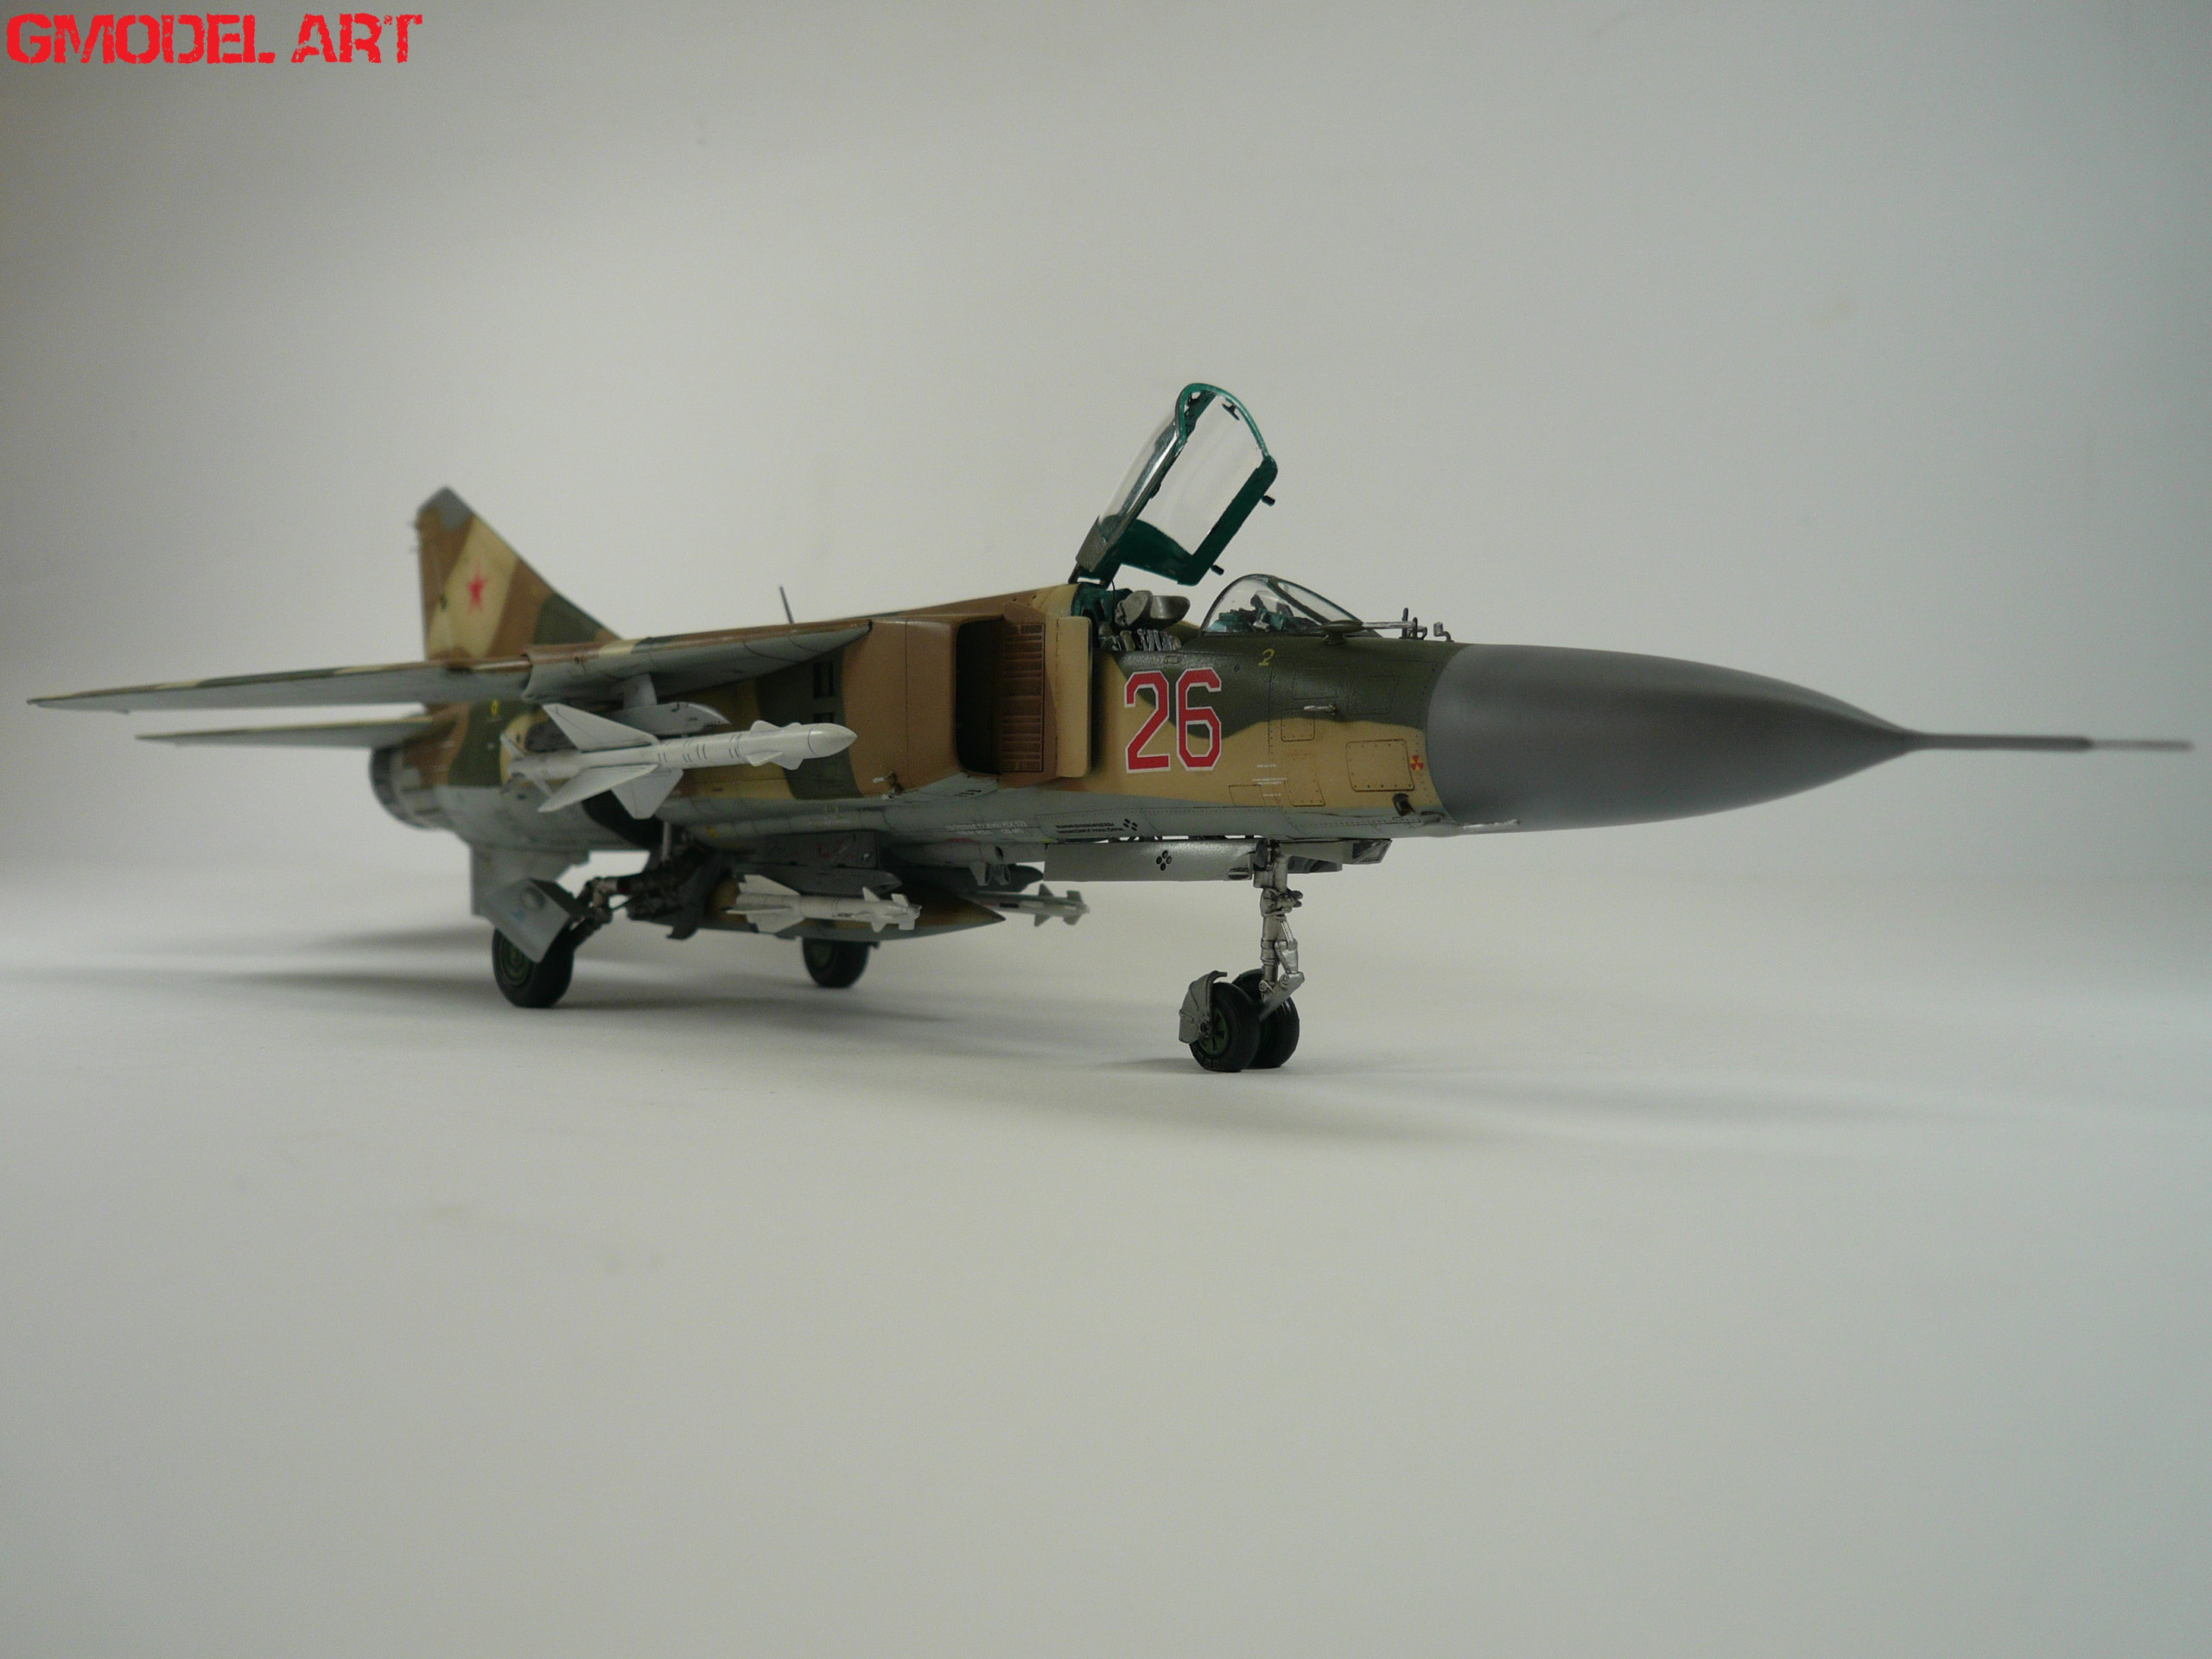
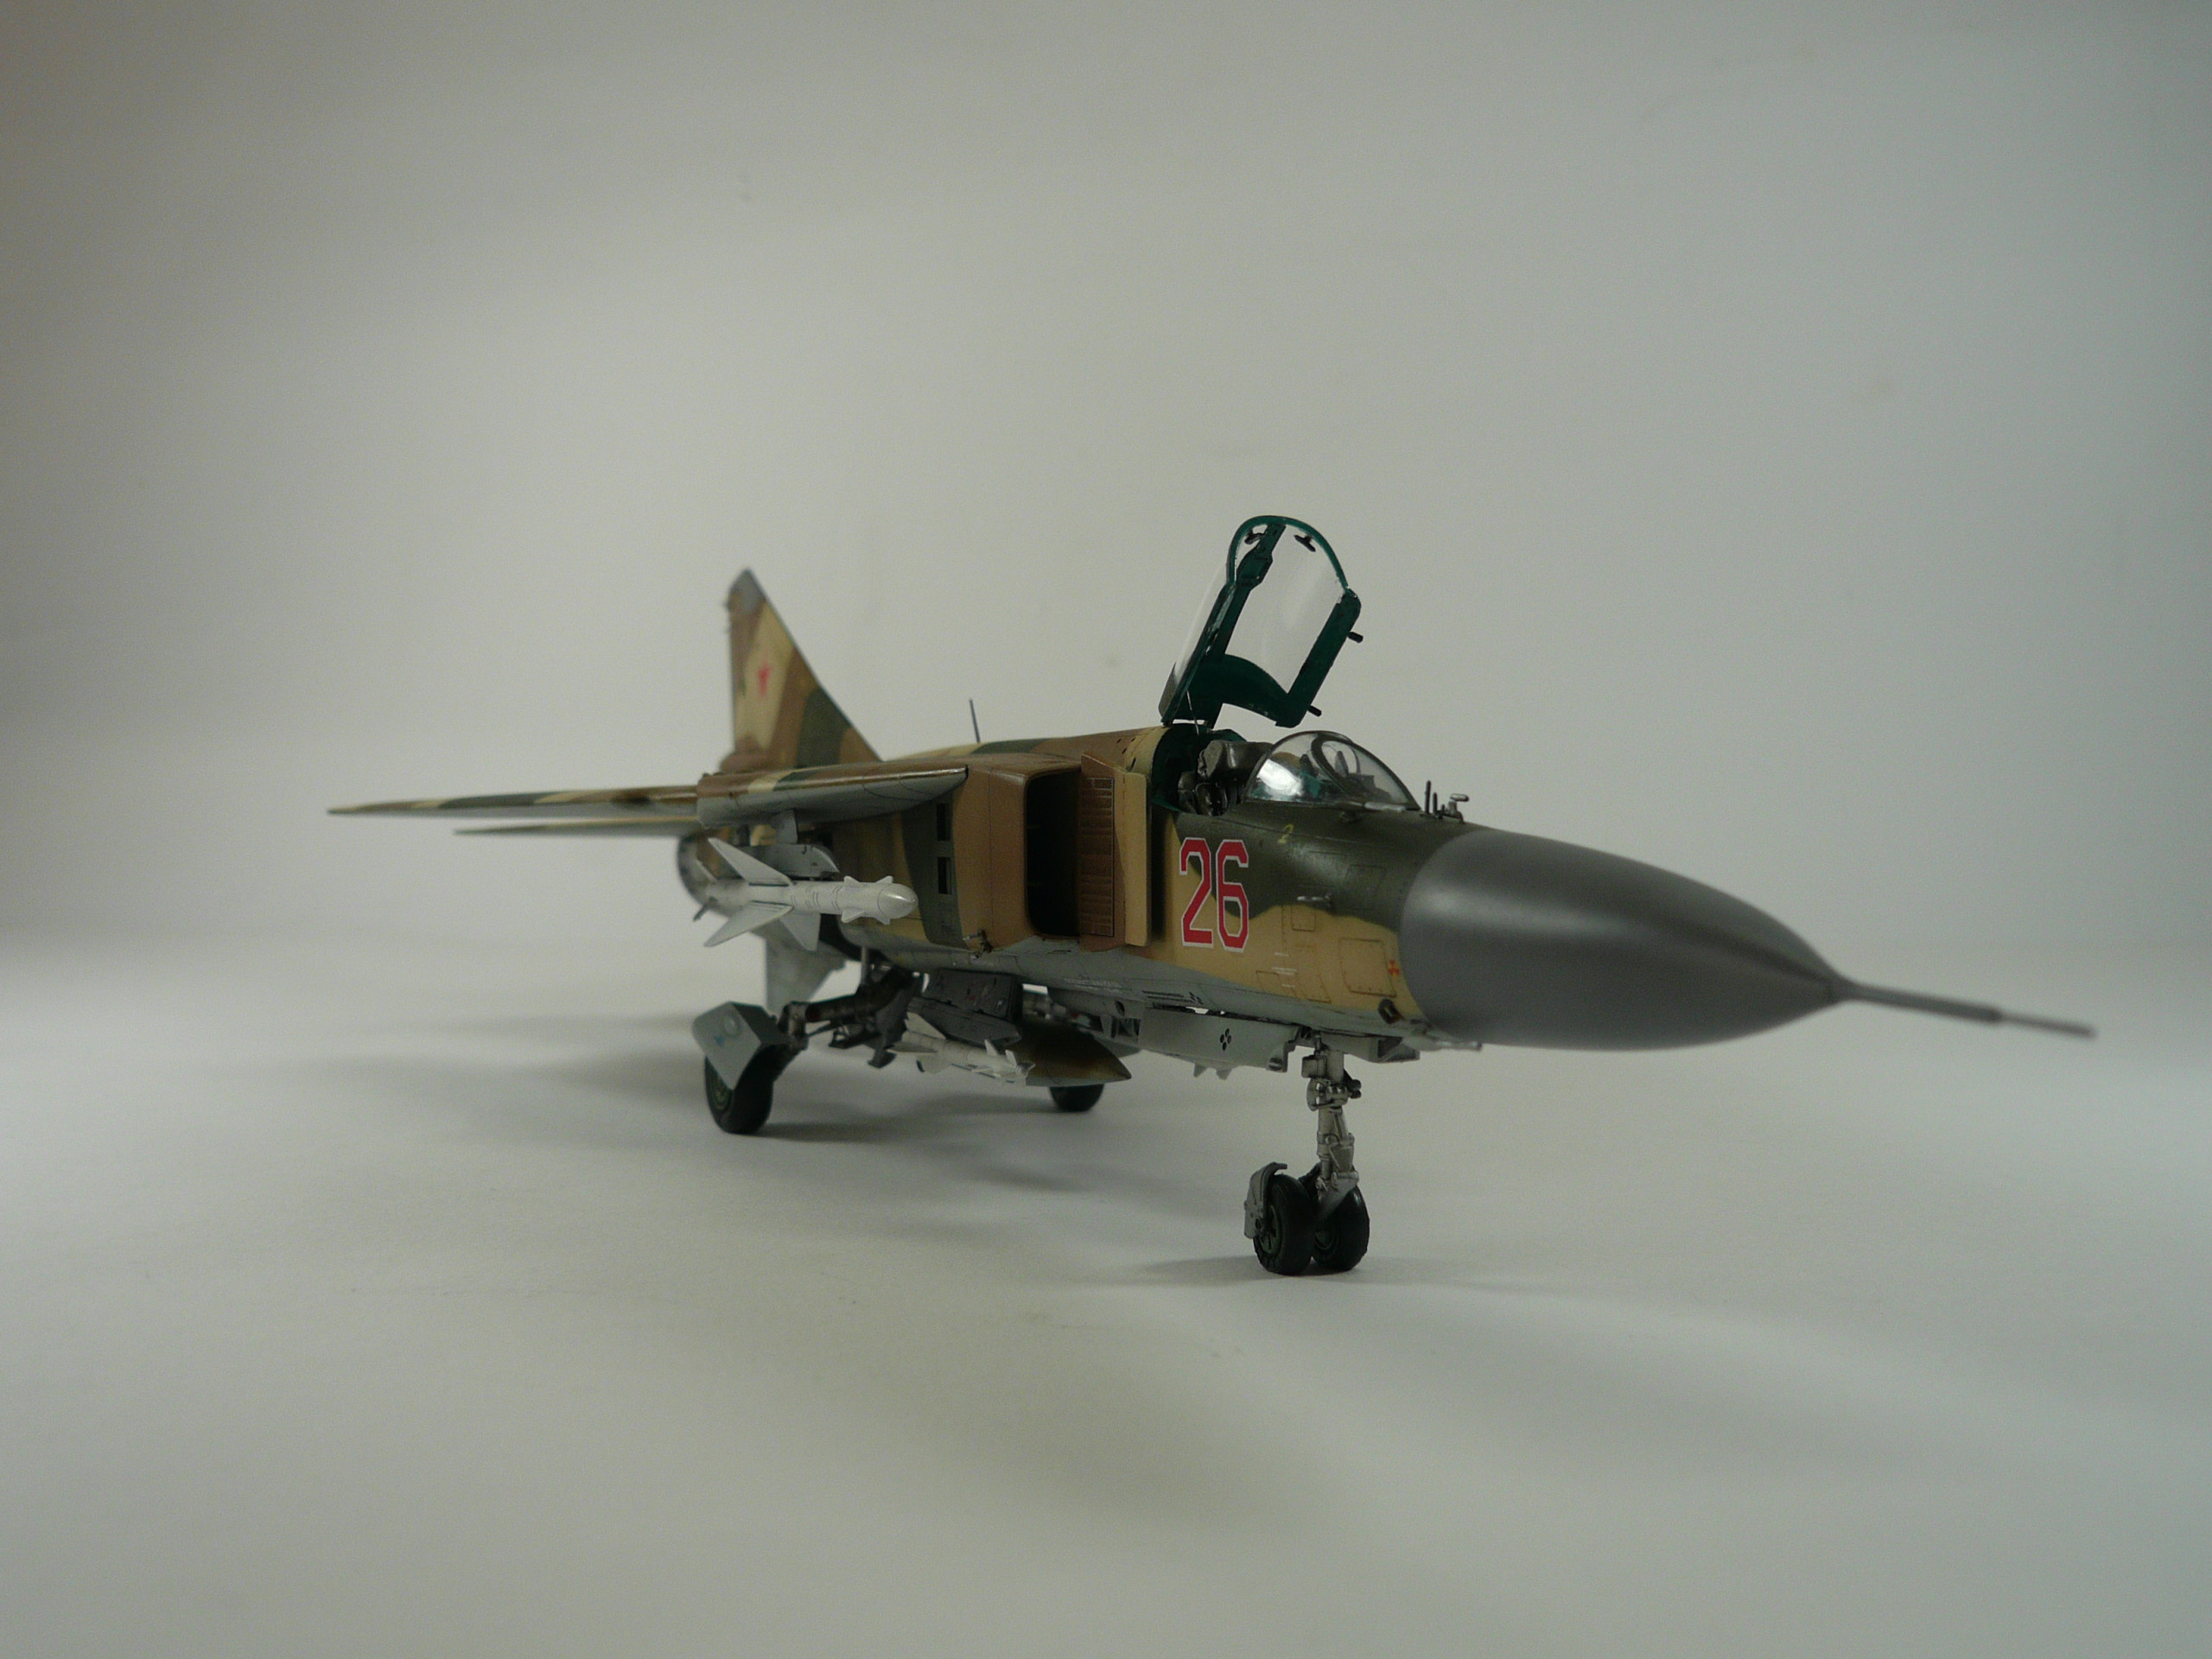
Finally I sprayed the model with matt varnish from Ammo. Give it at least 4-6 hours to dry before touching it…
Final Reveal pics following….