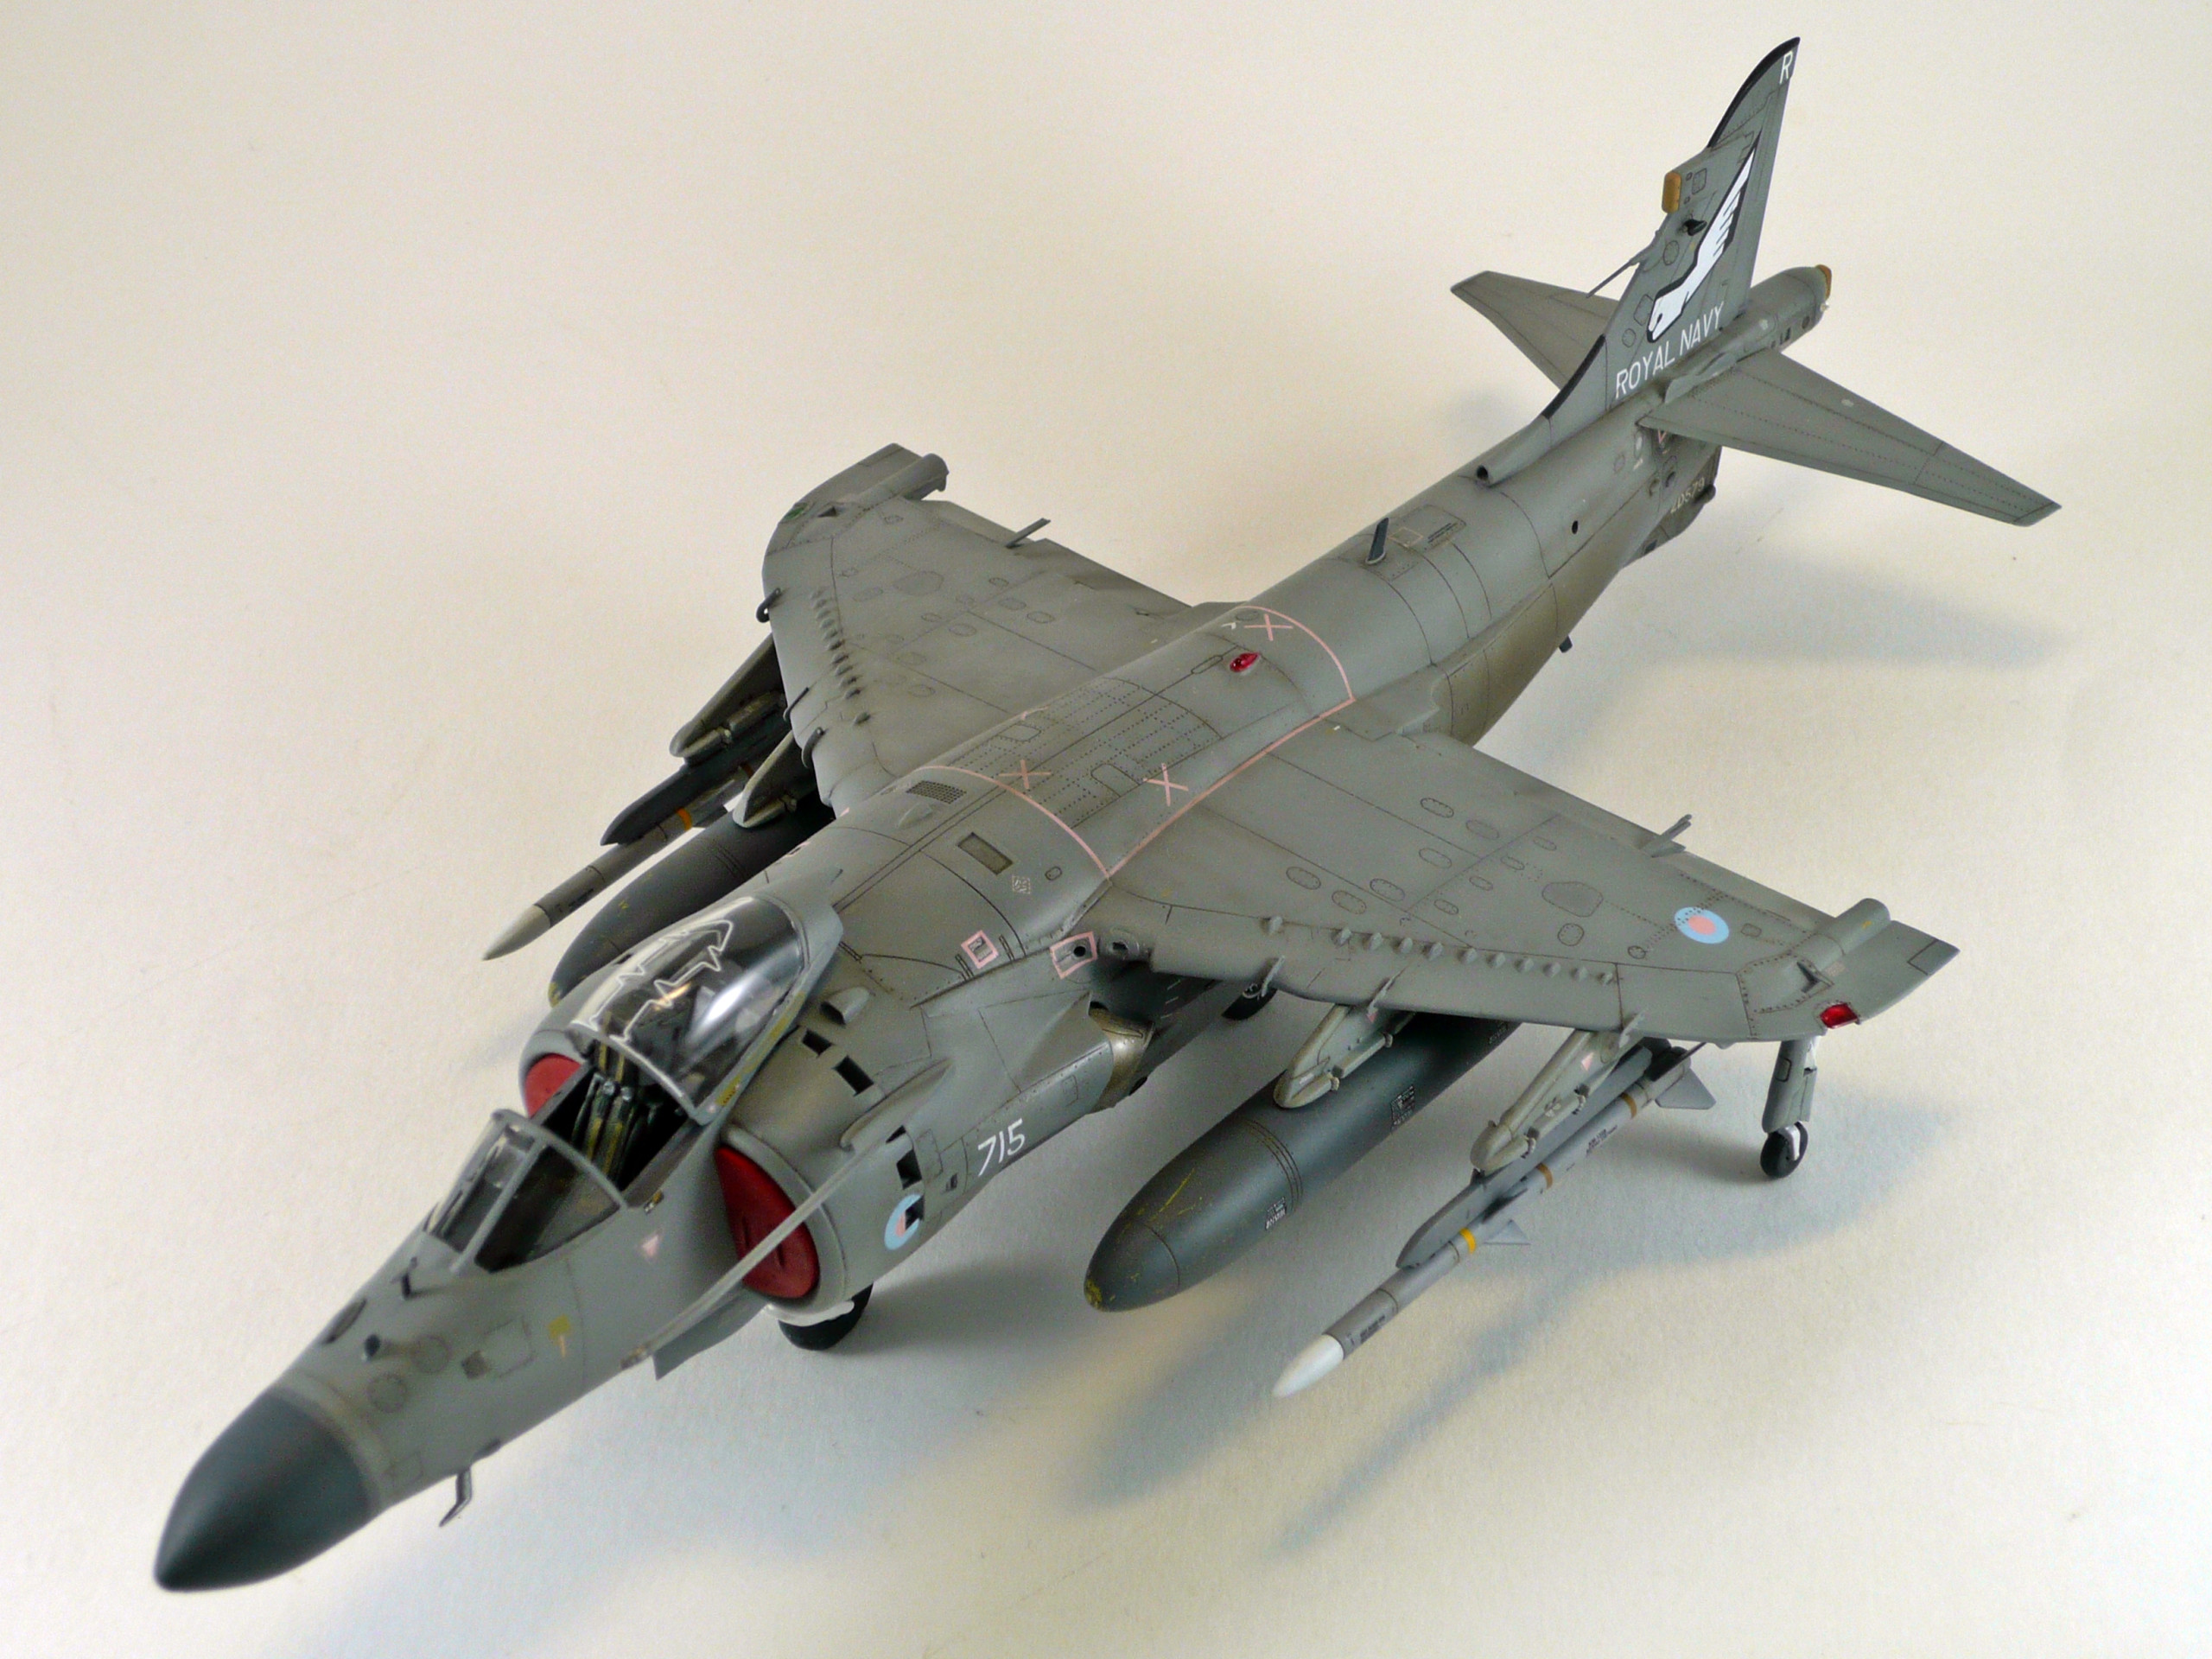
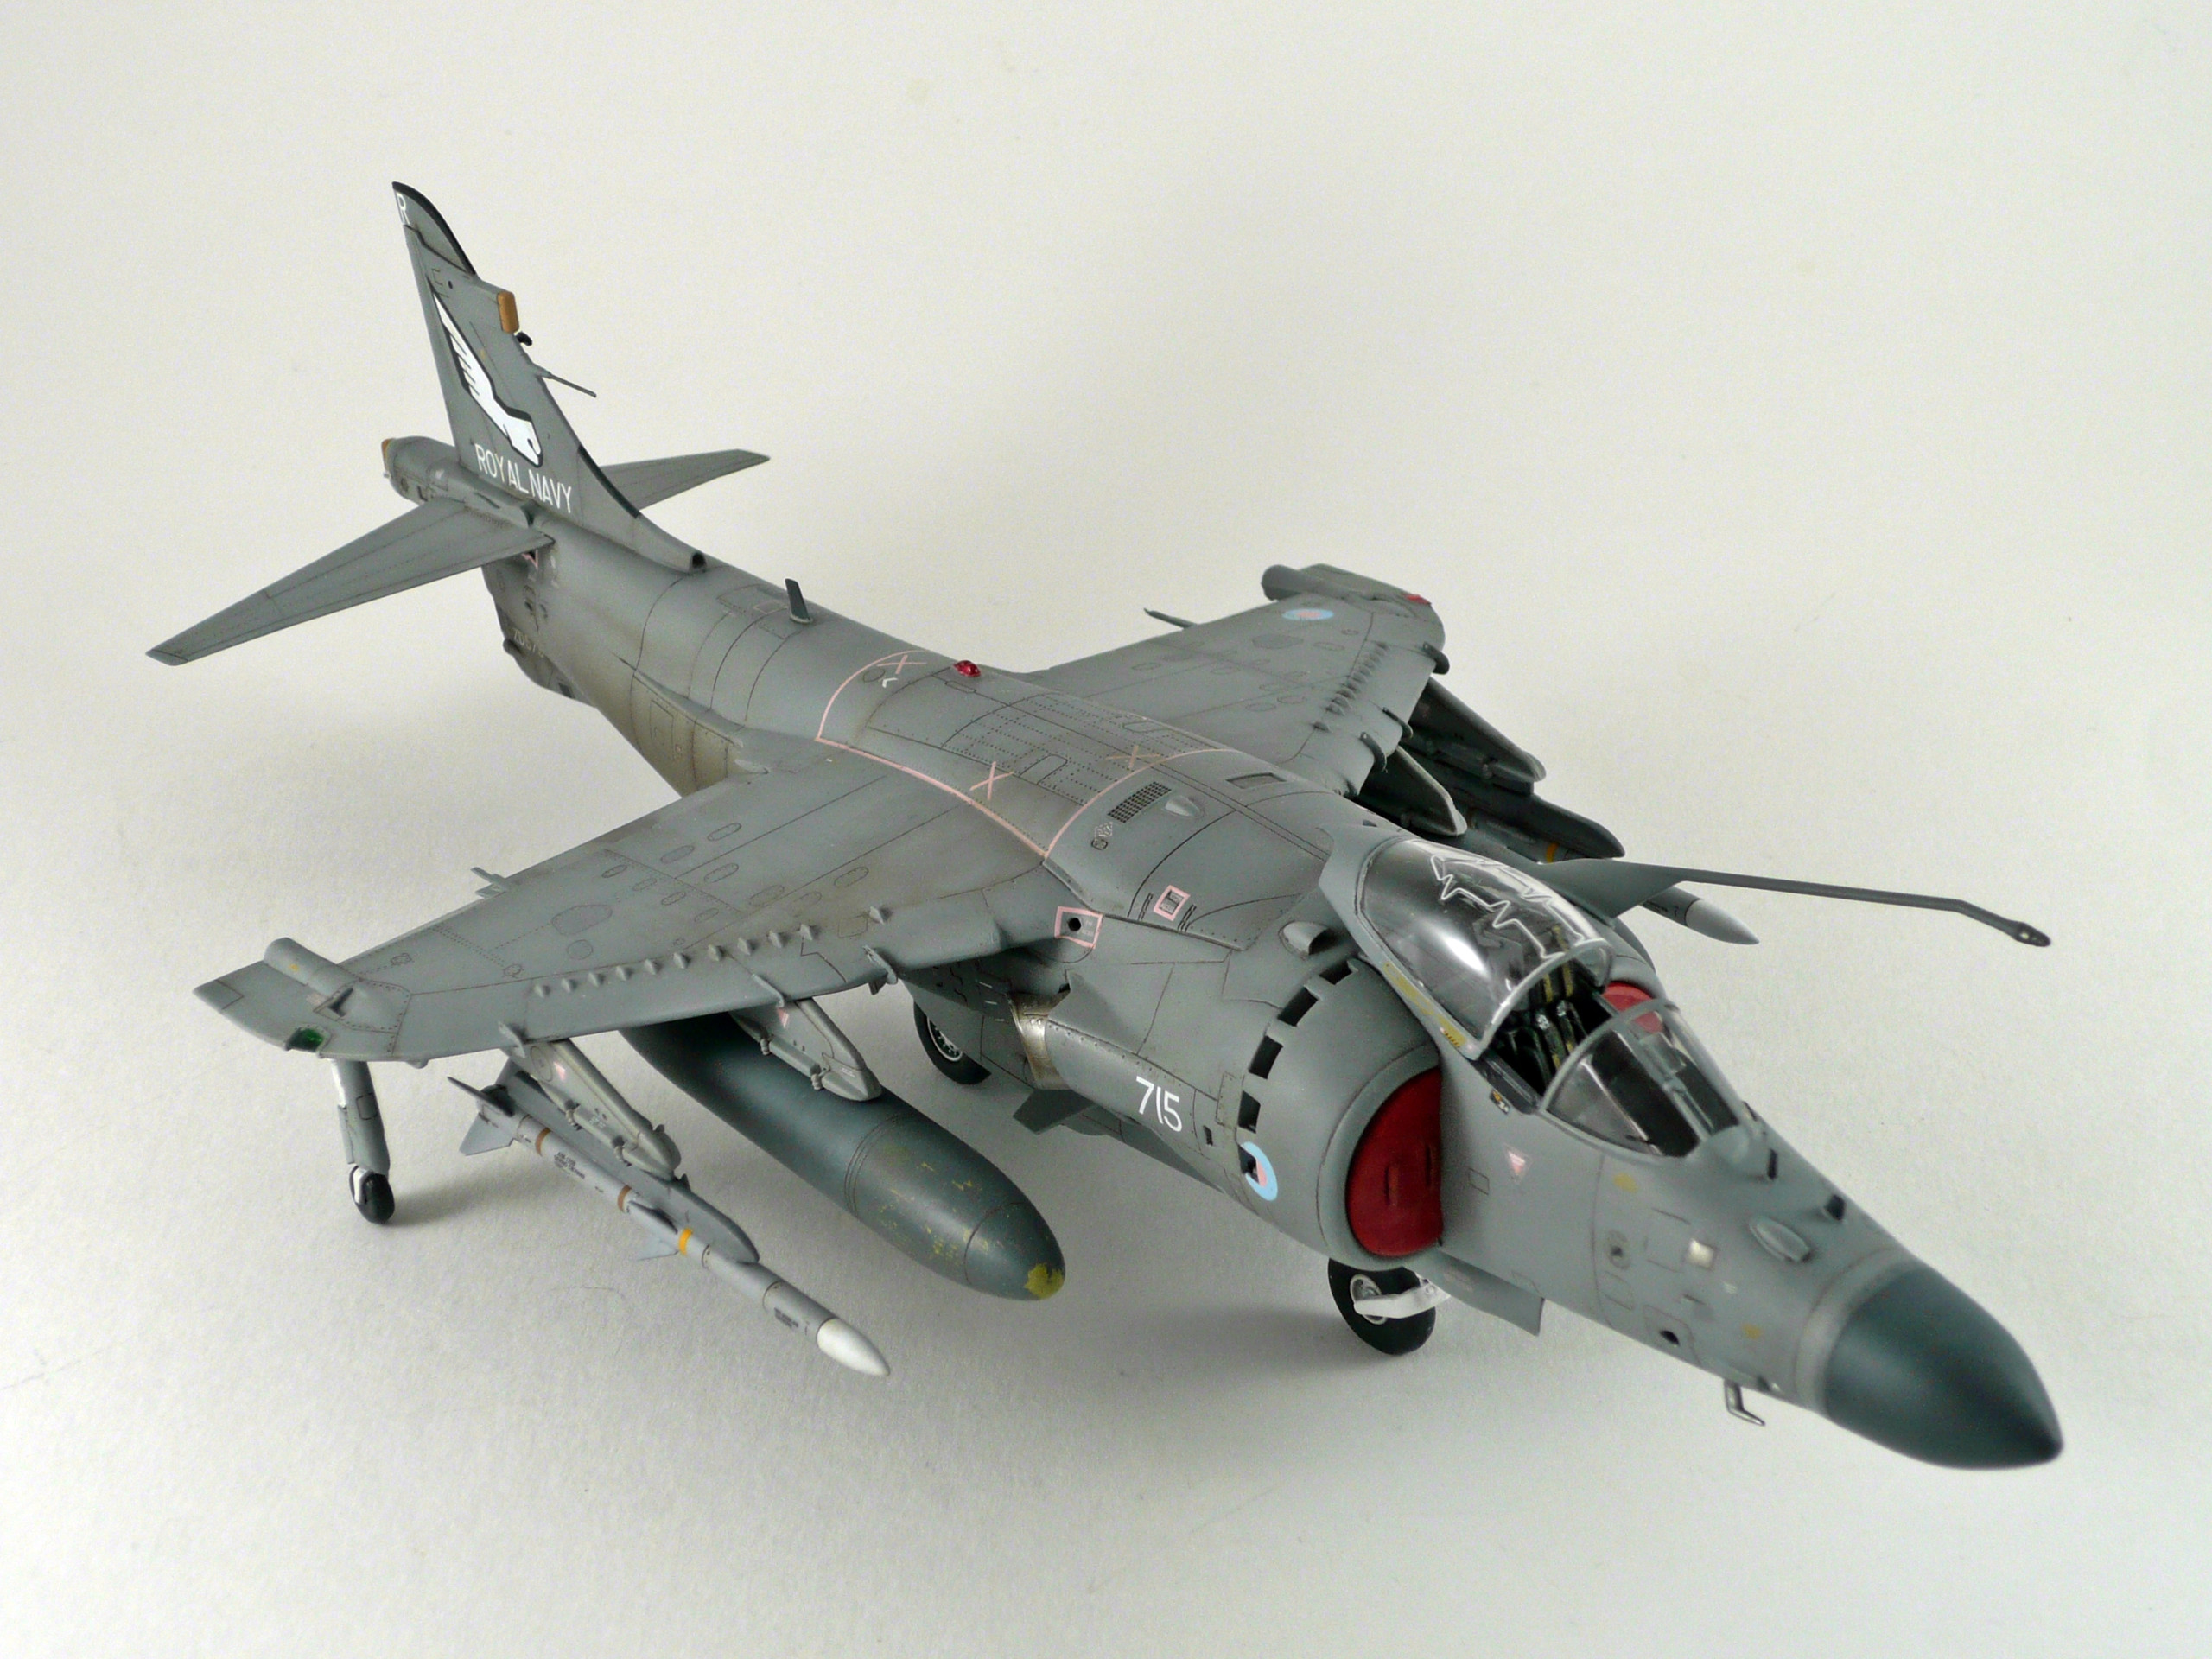
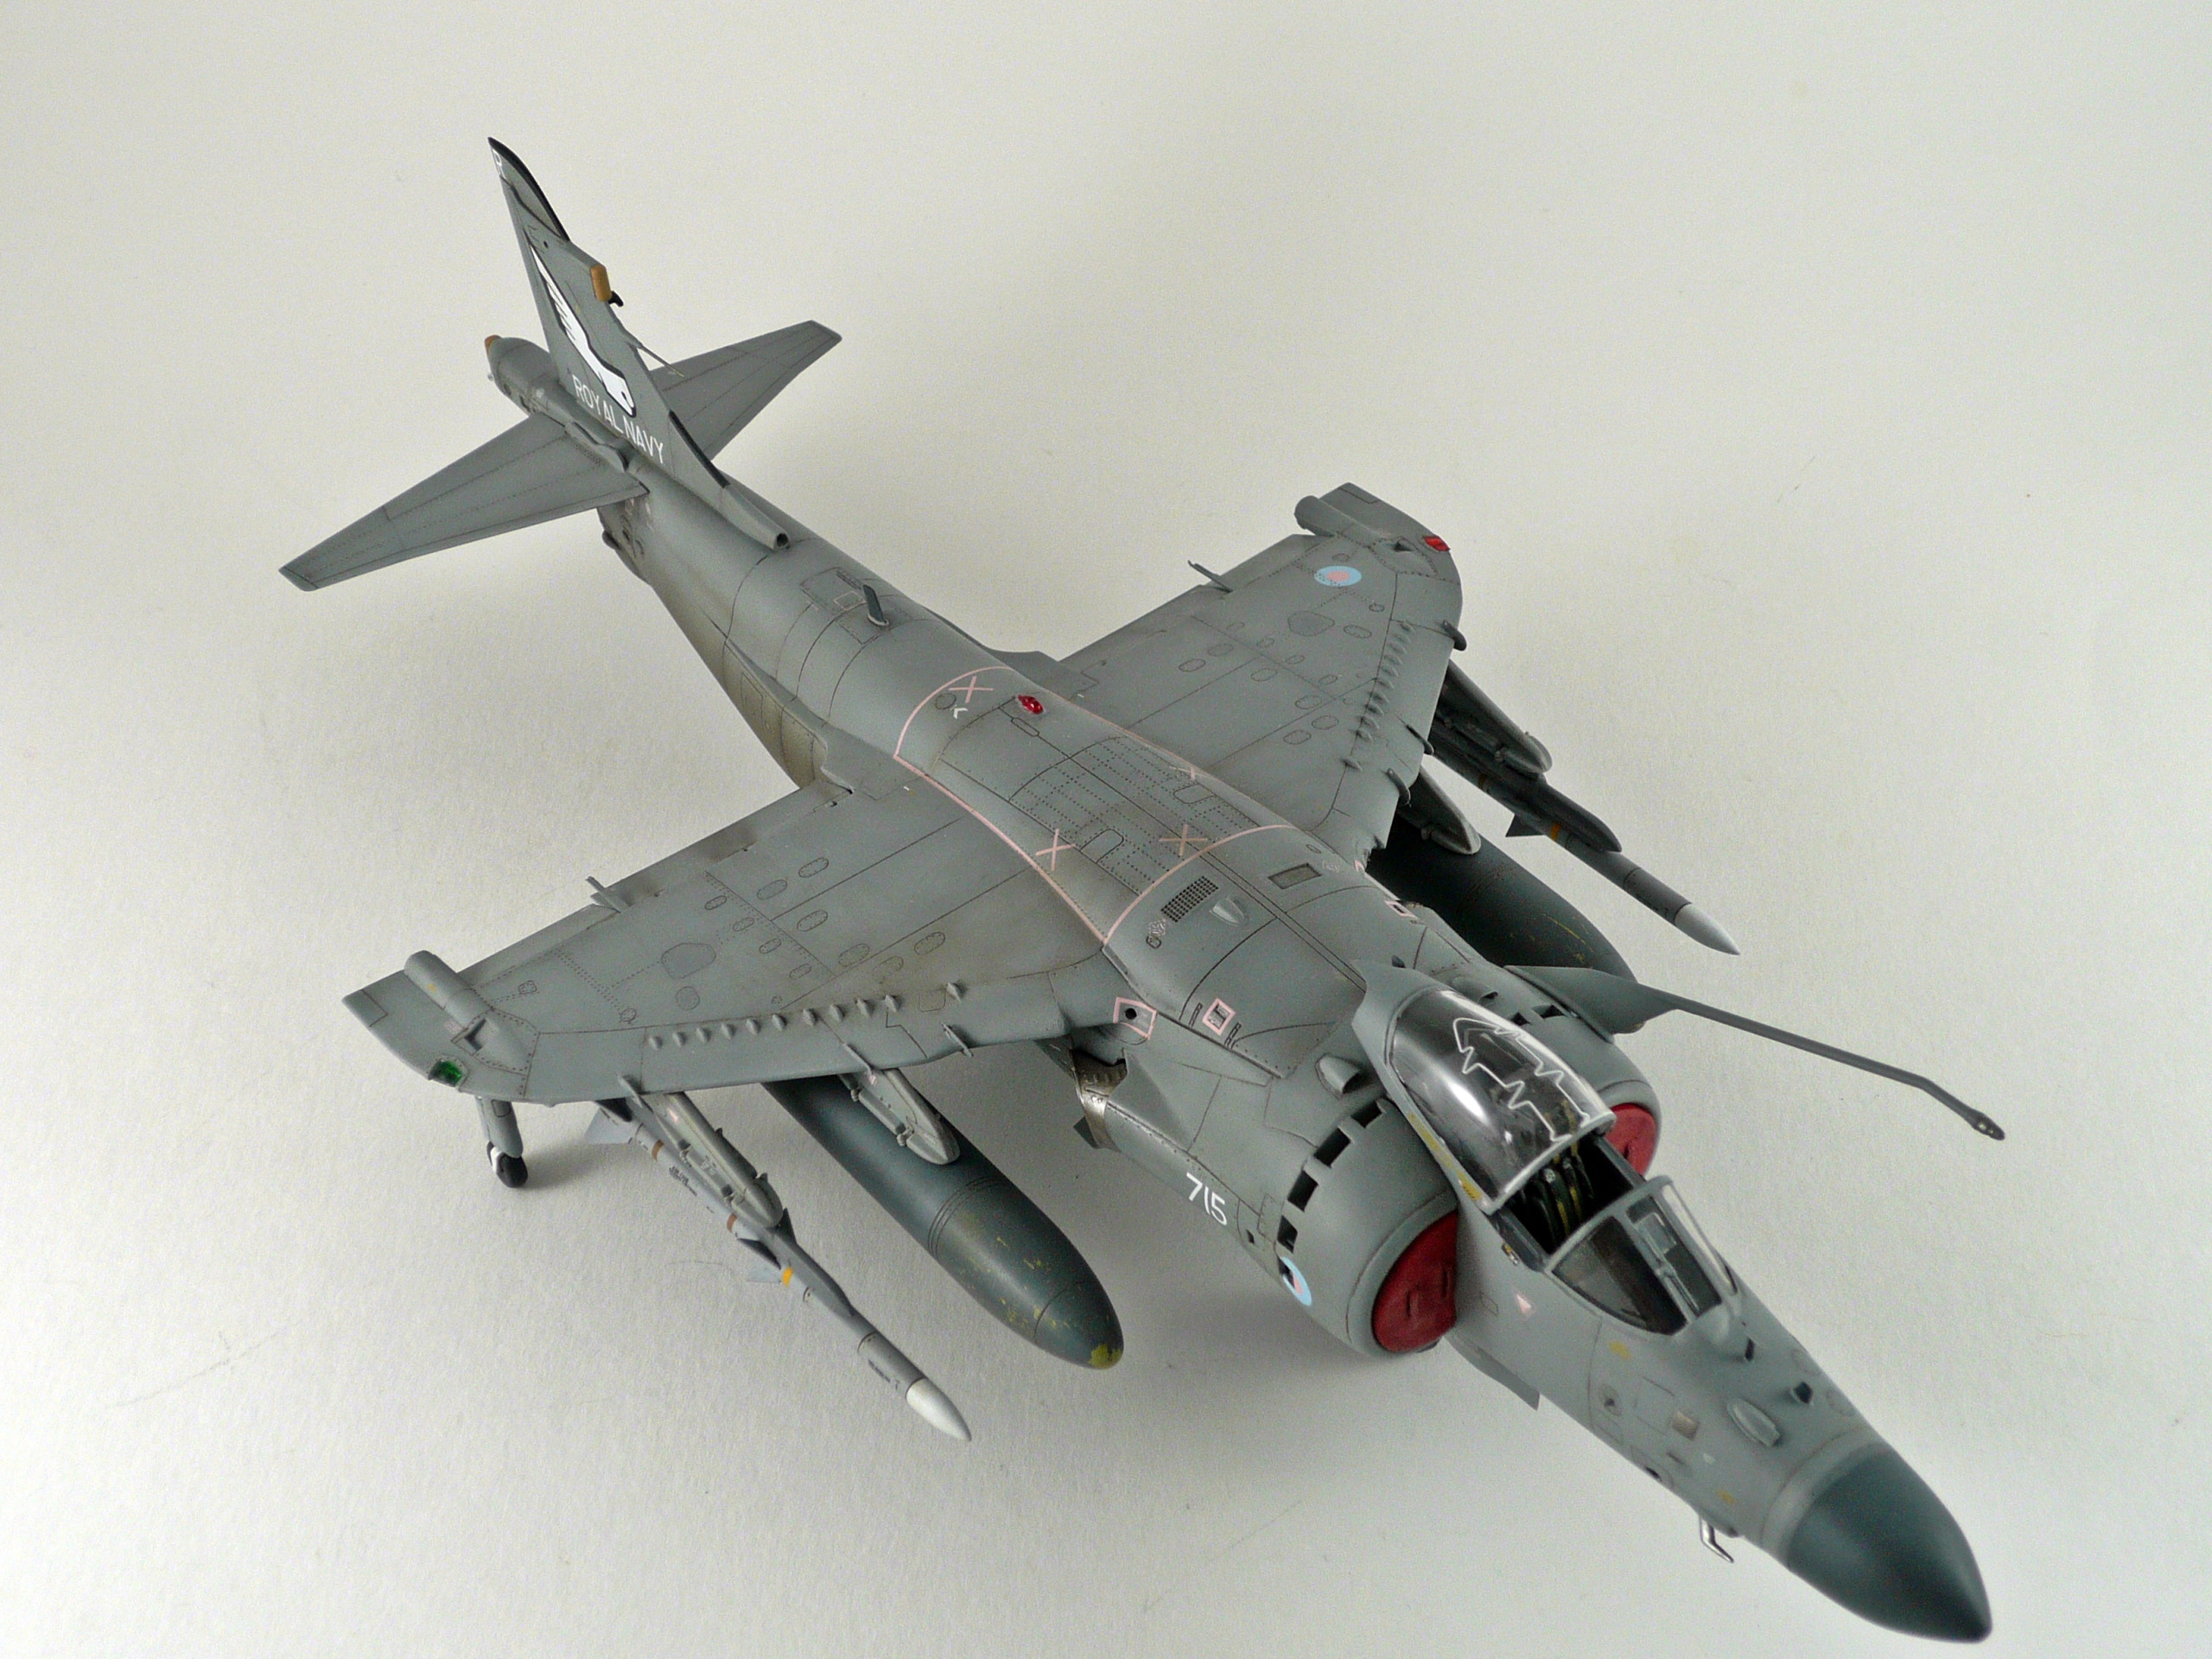
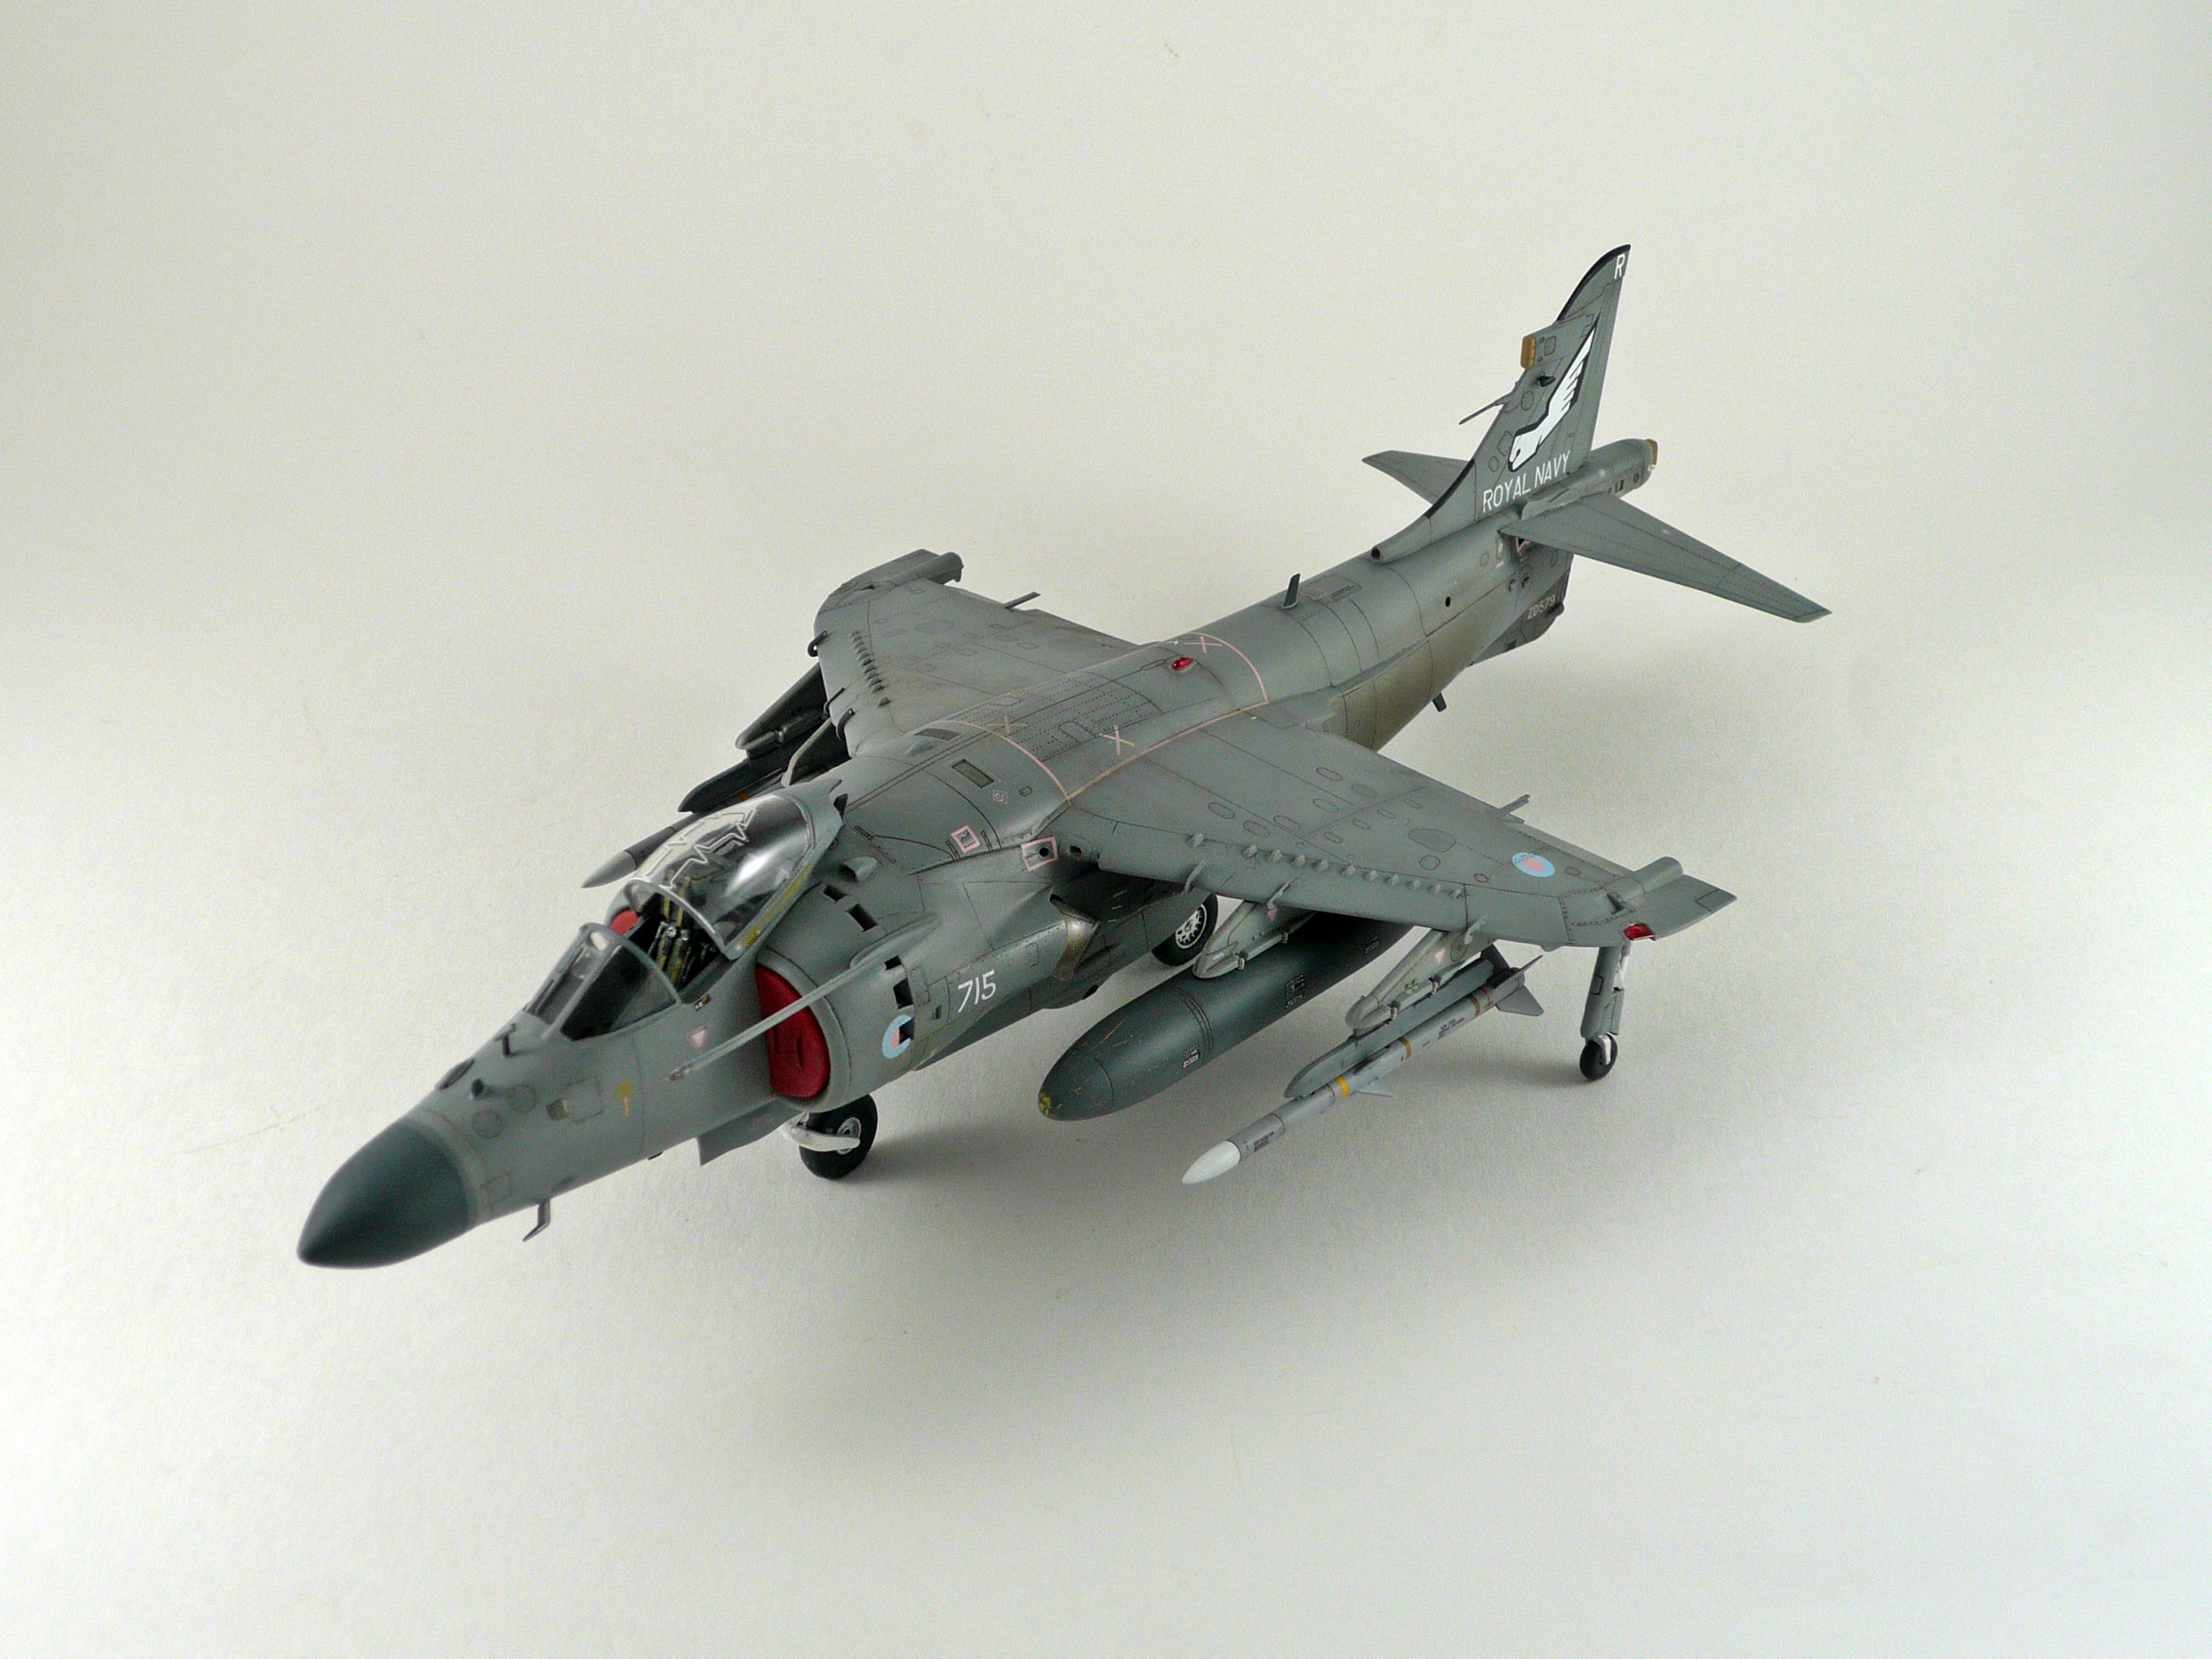
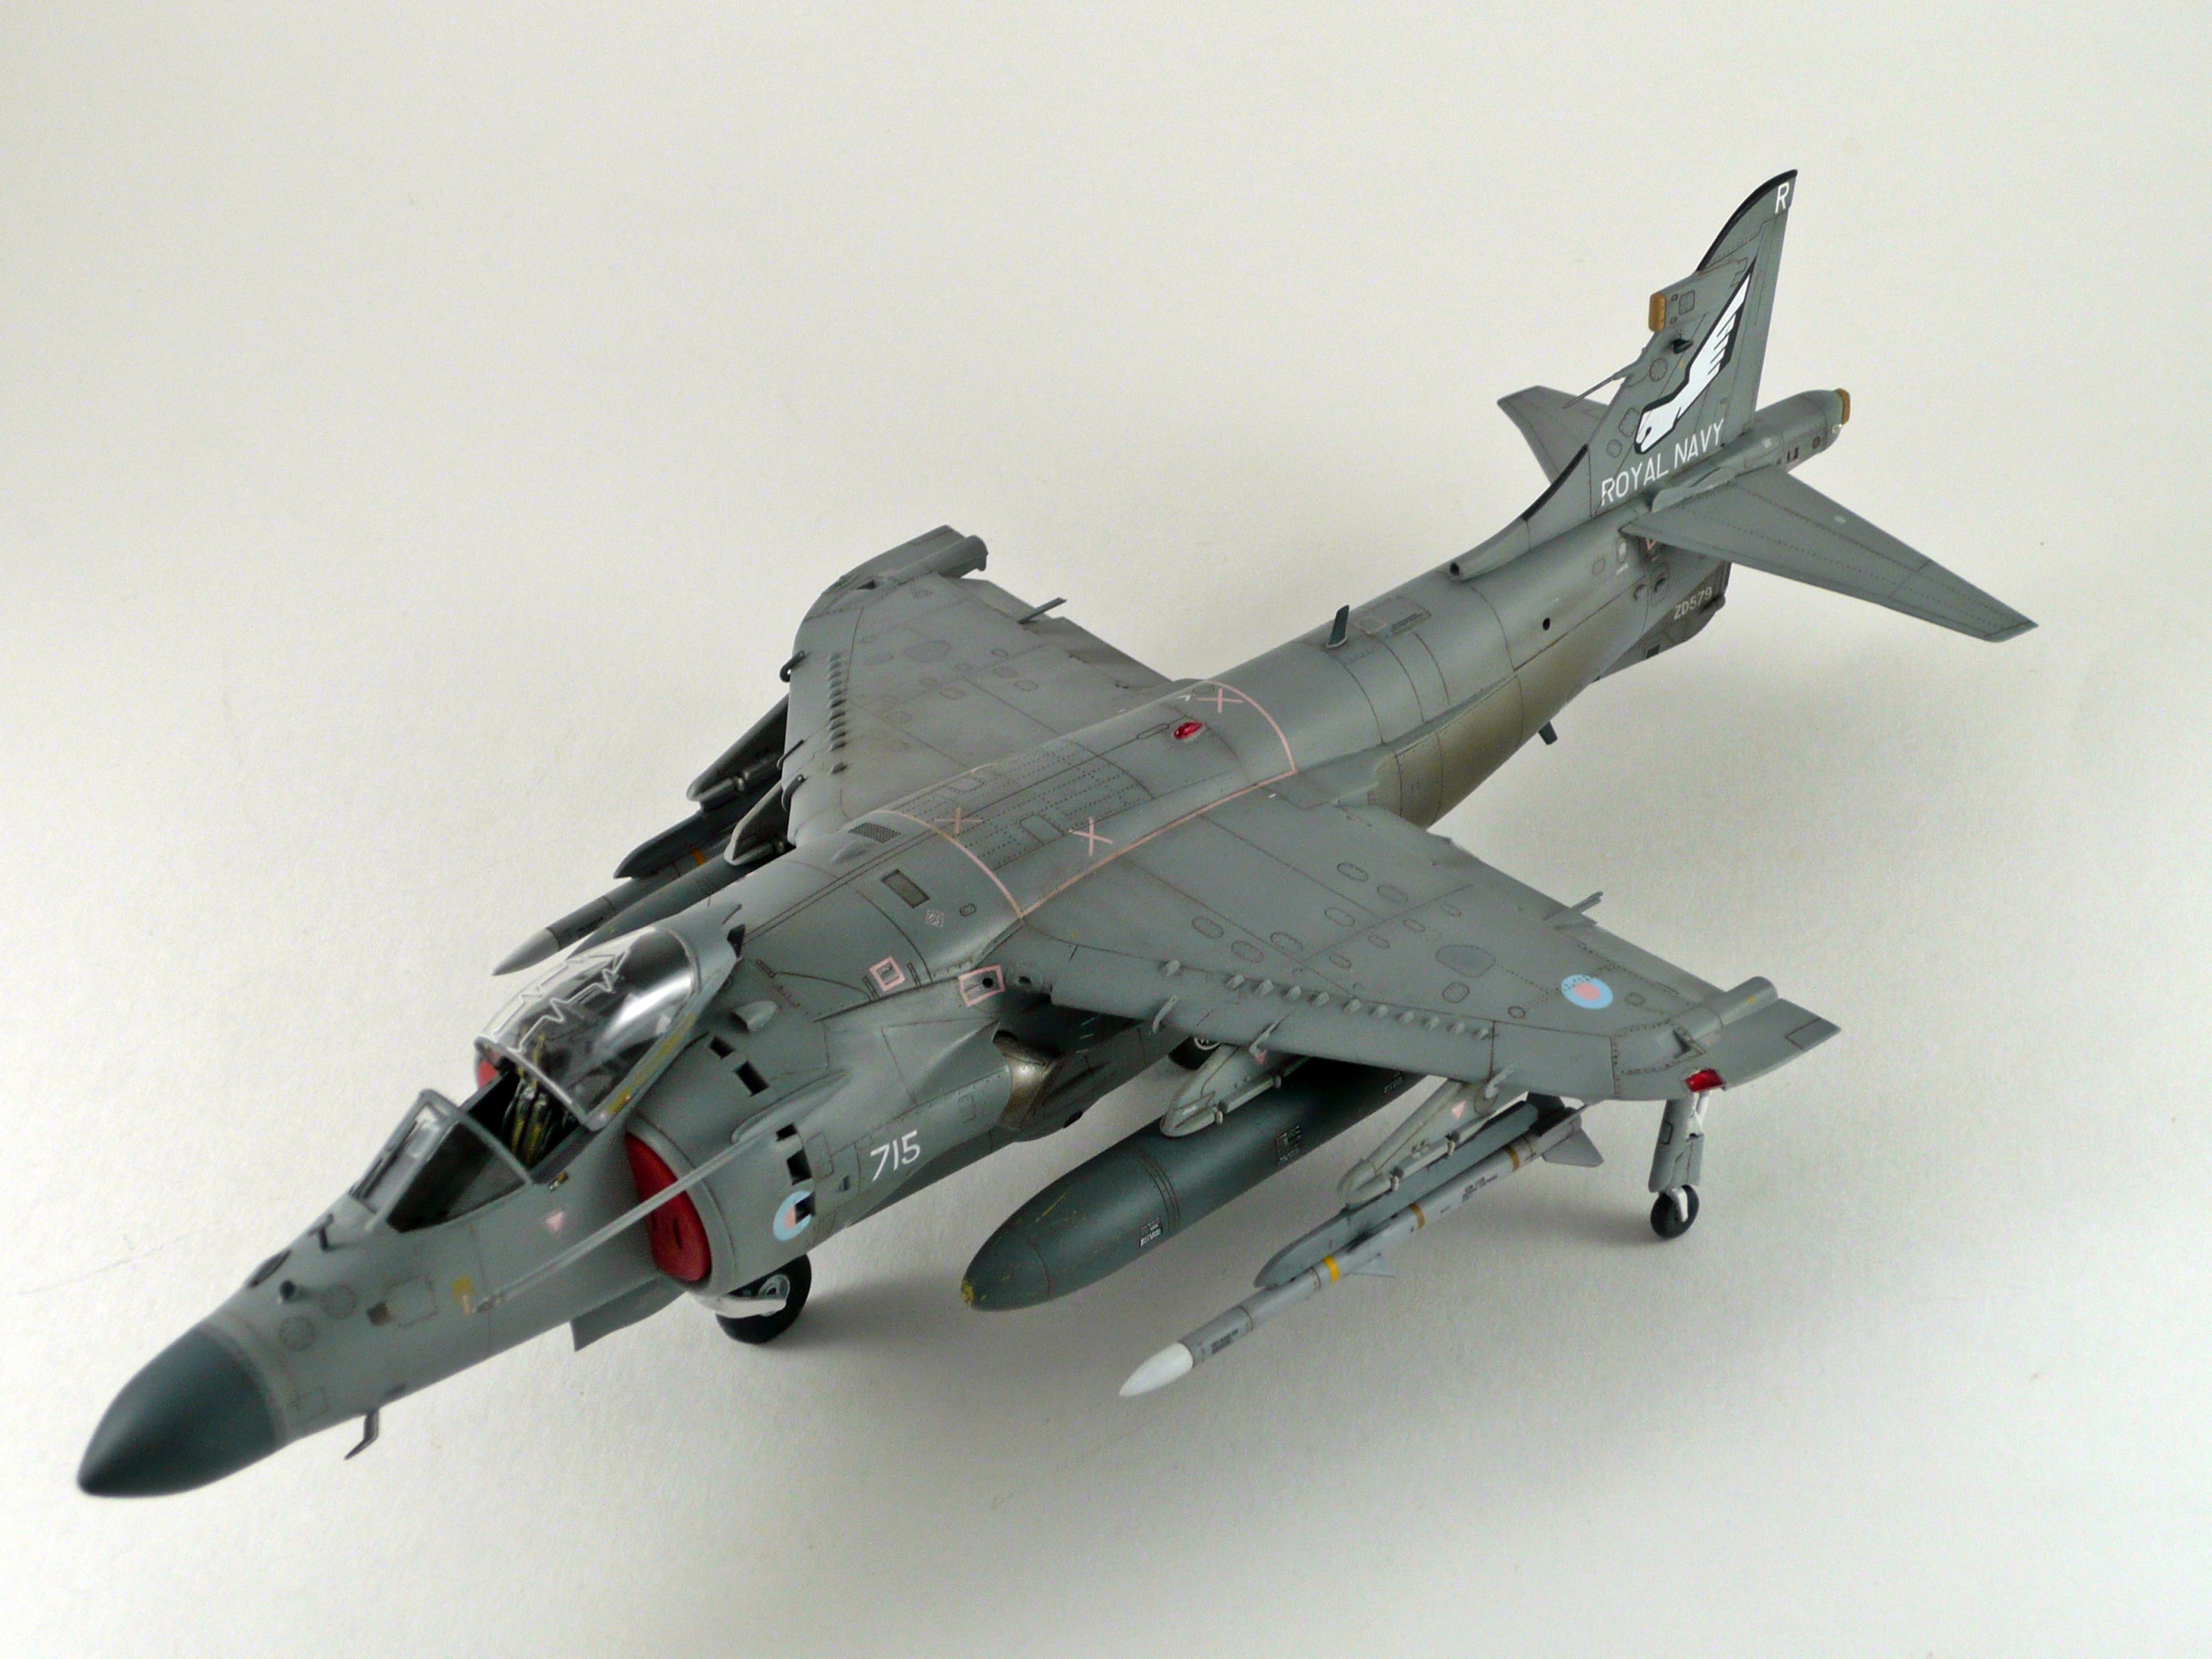
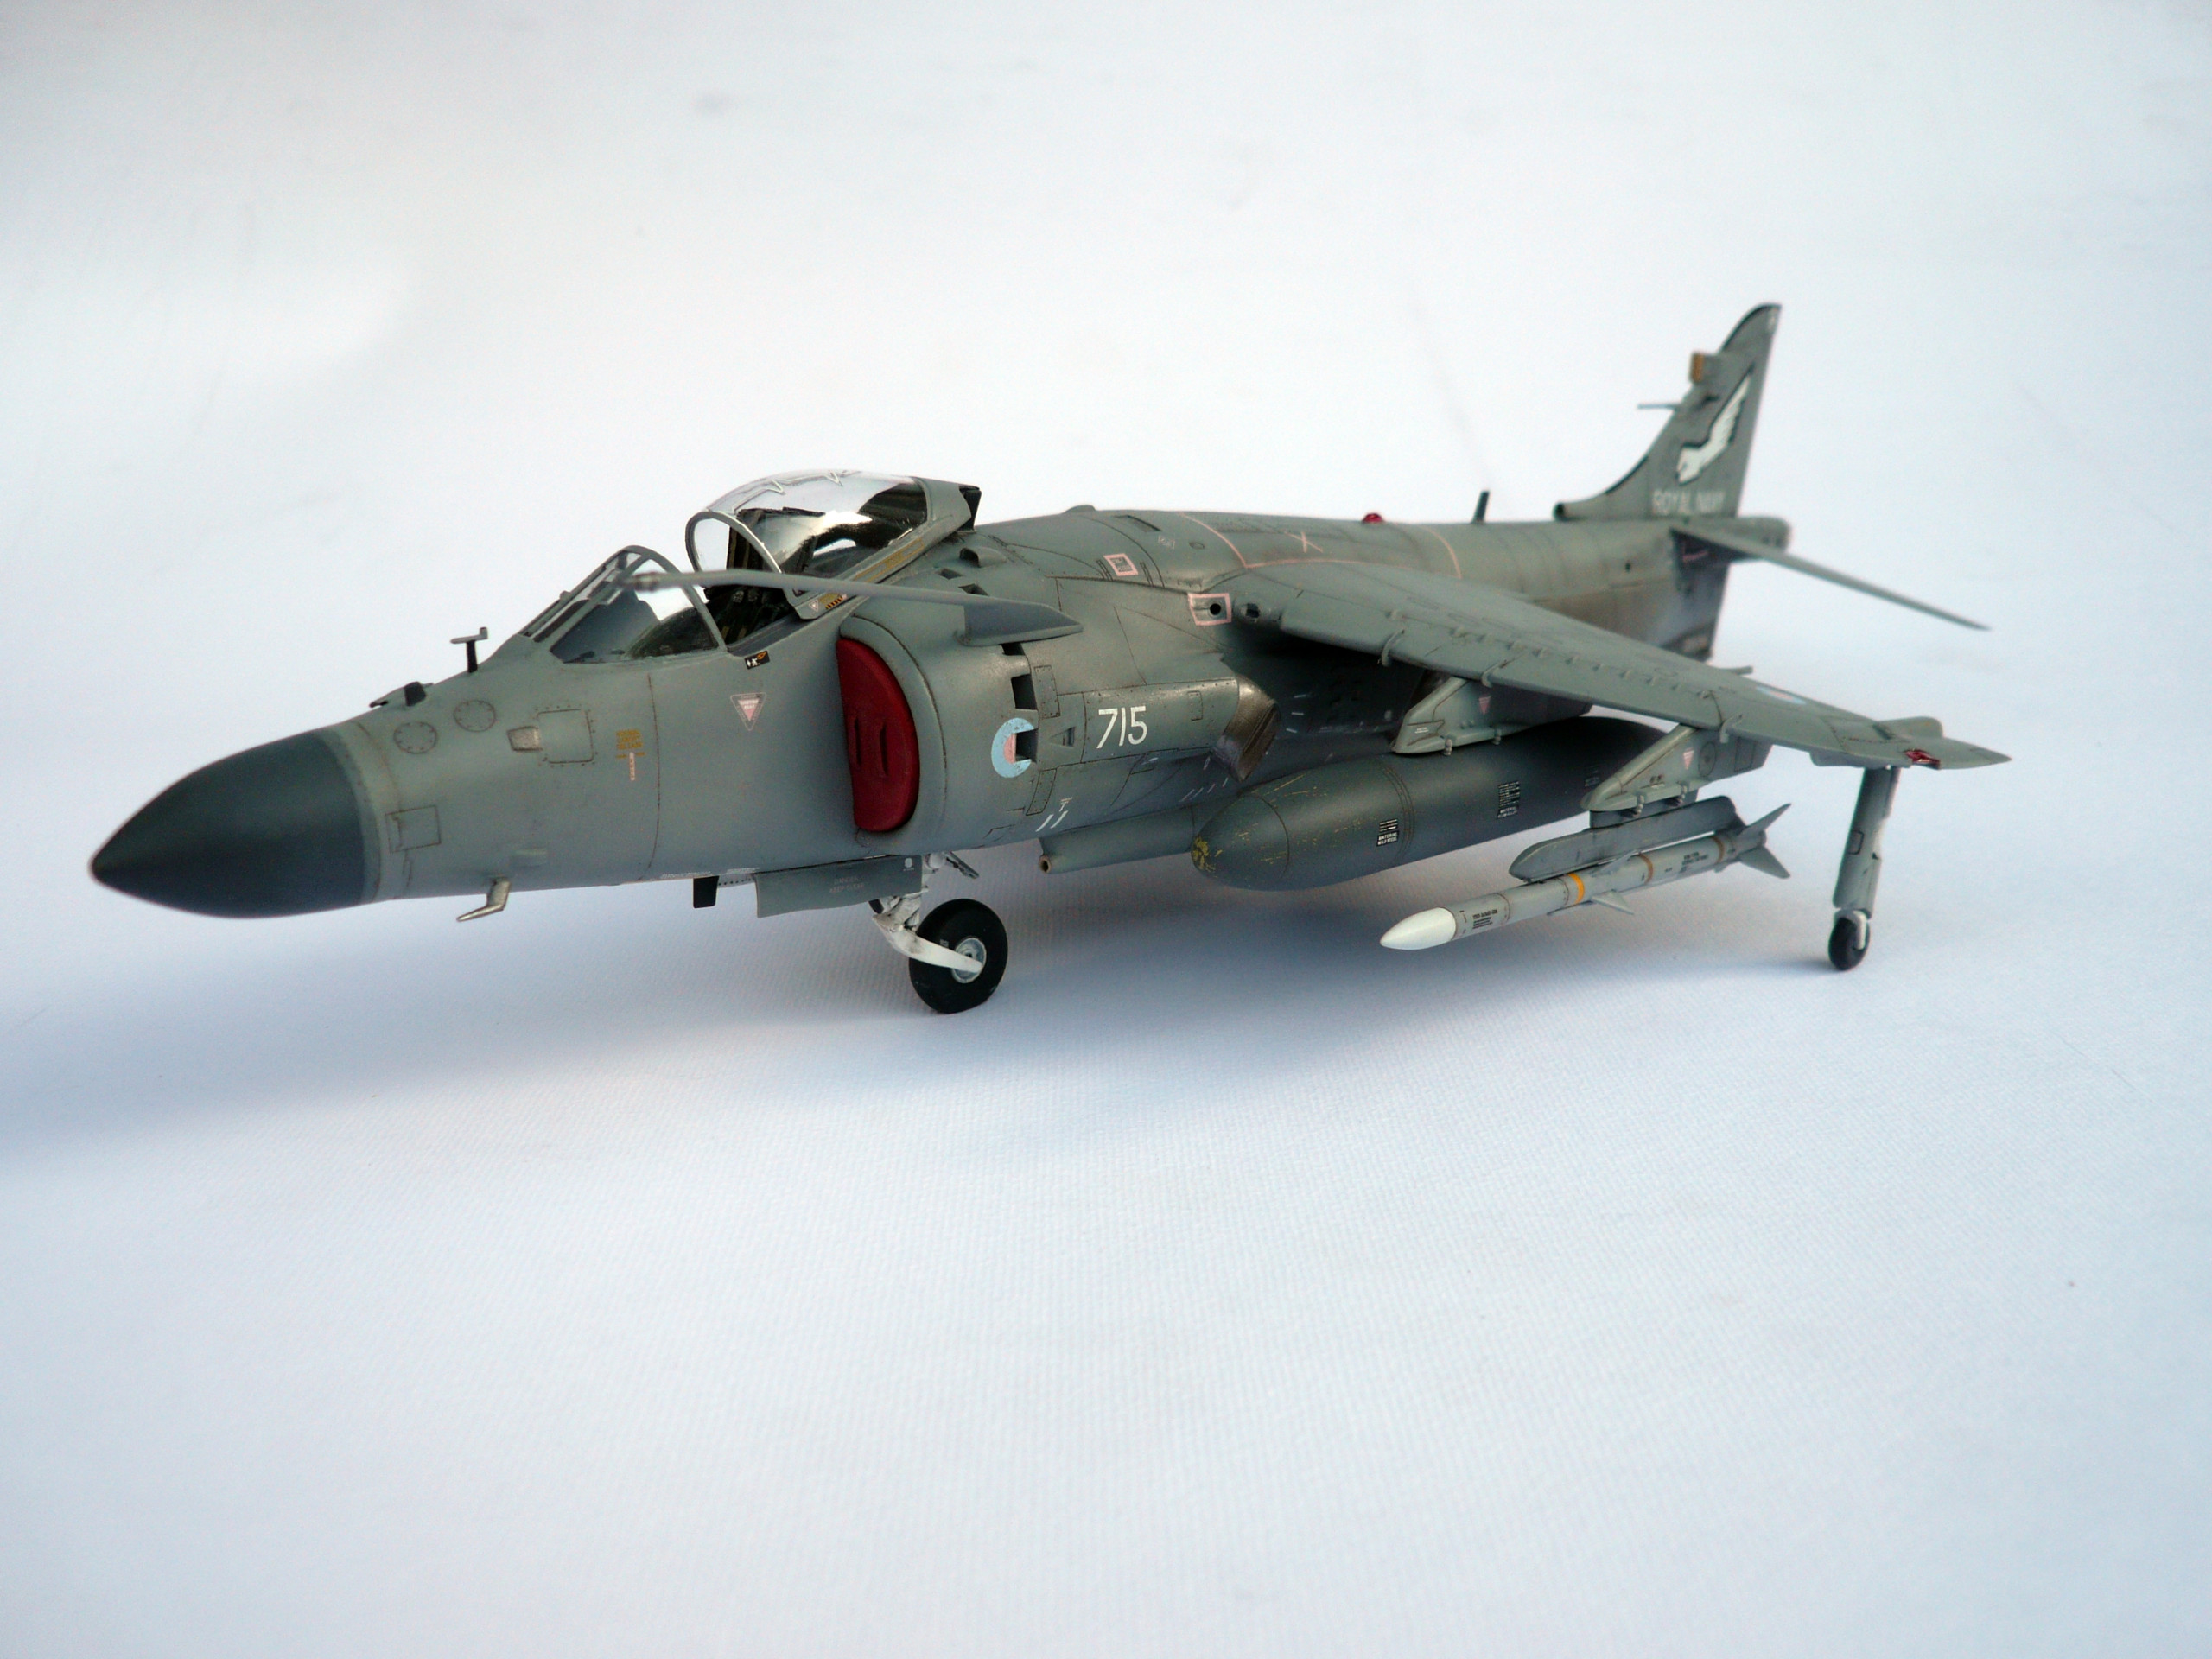
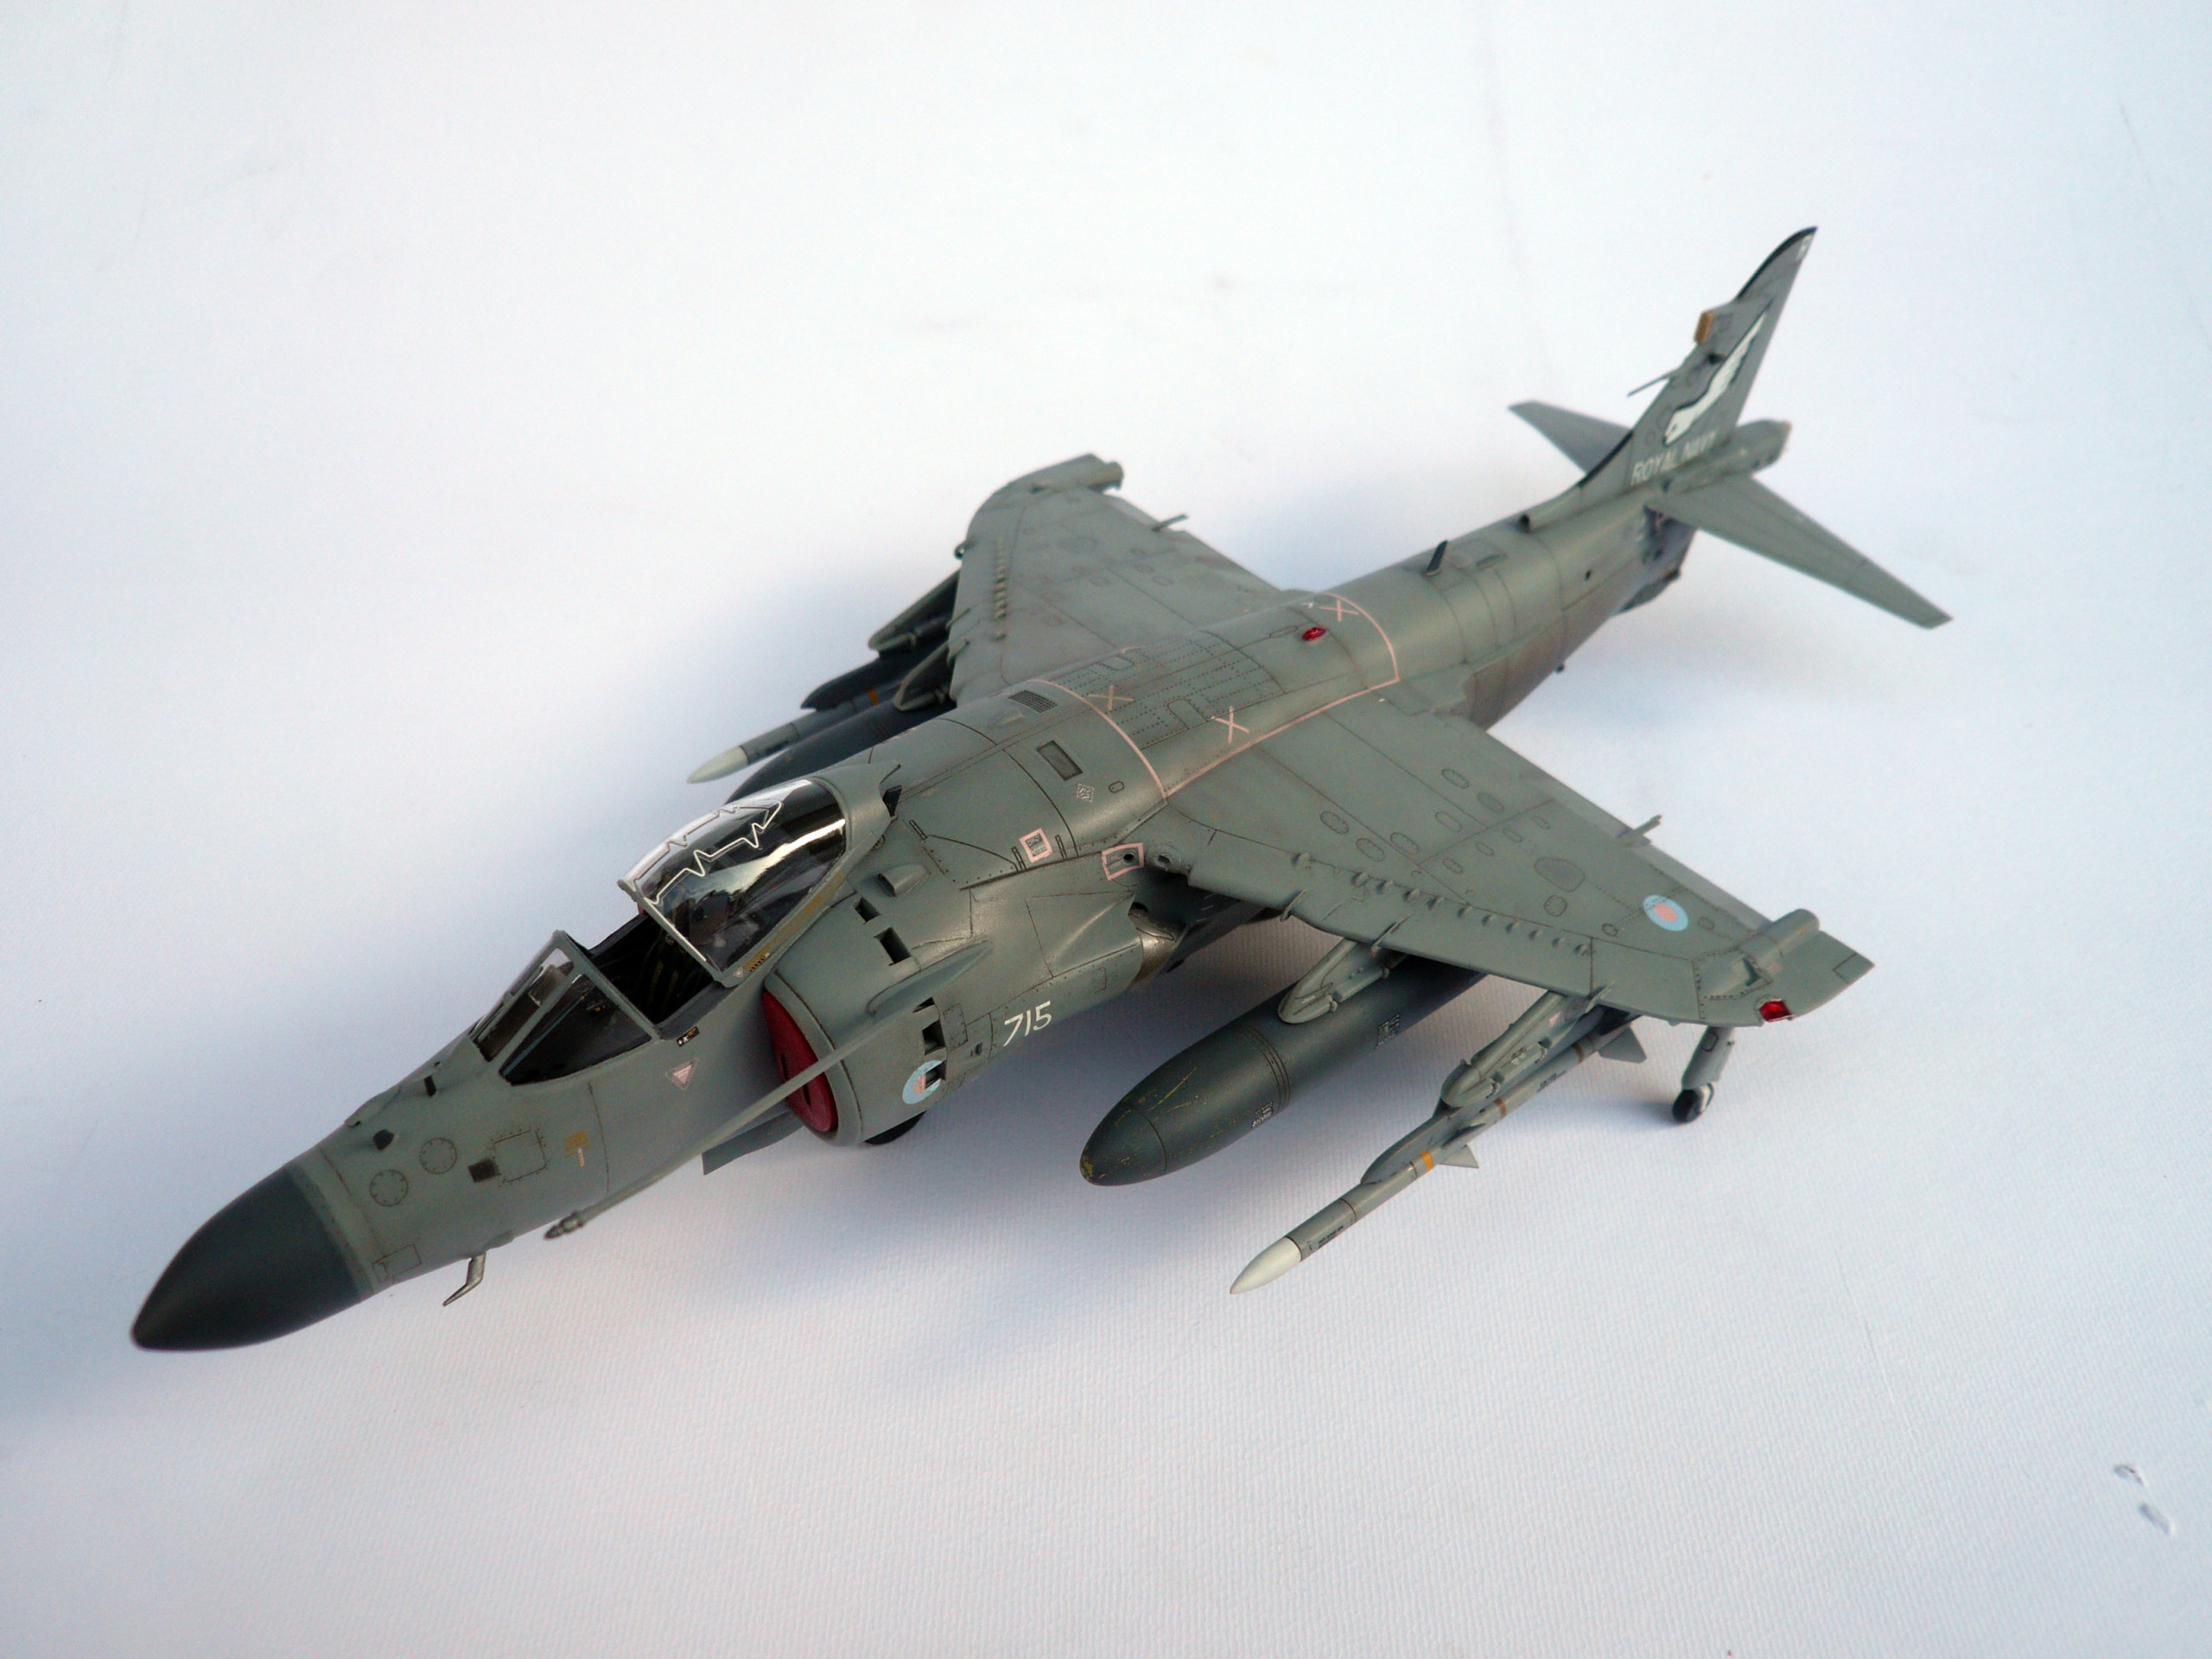
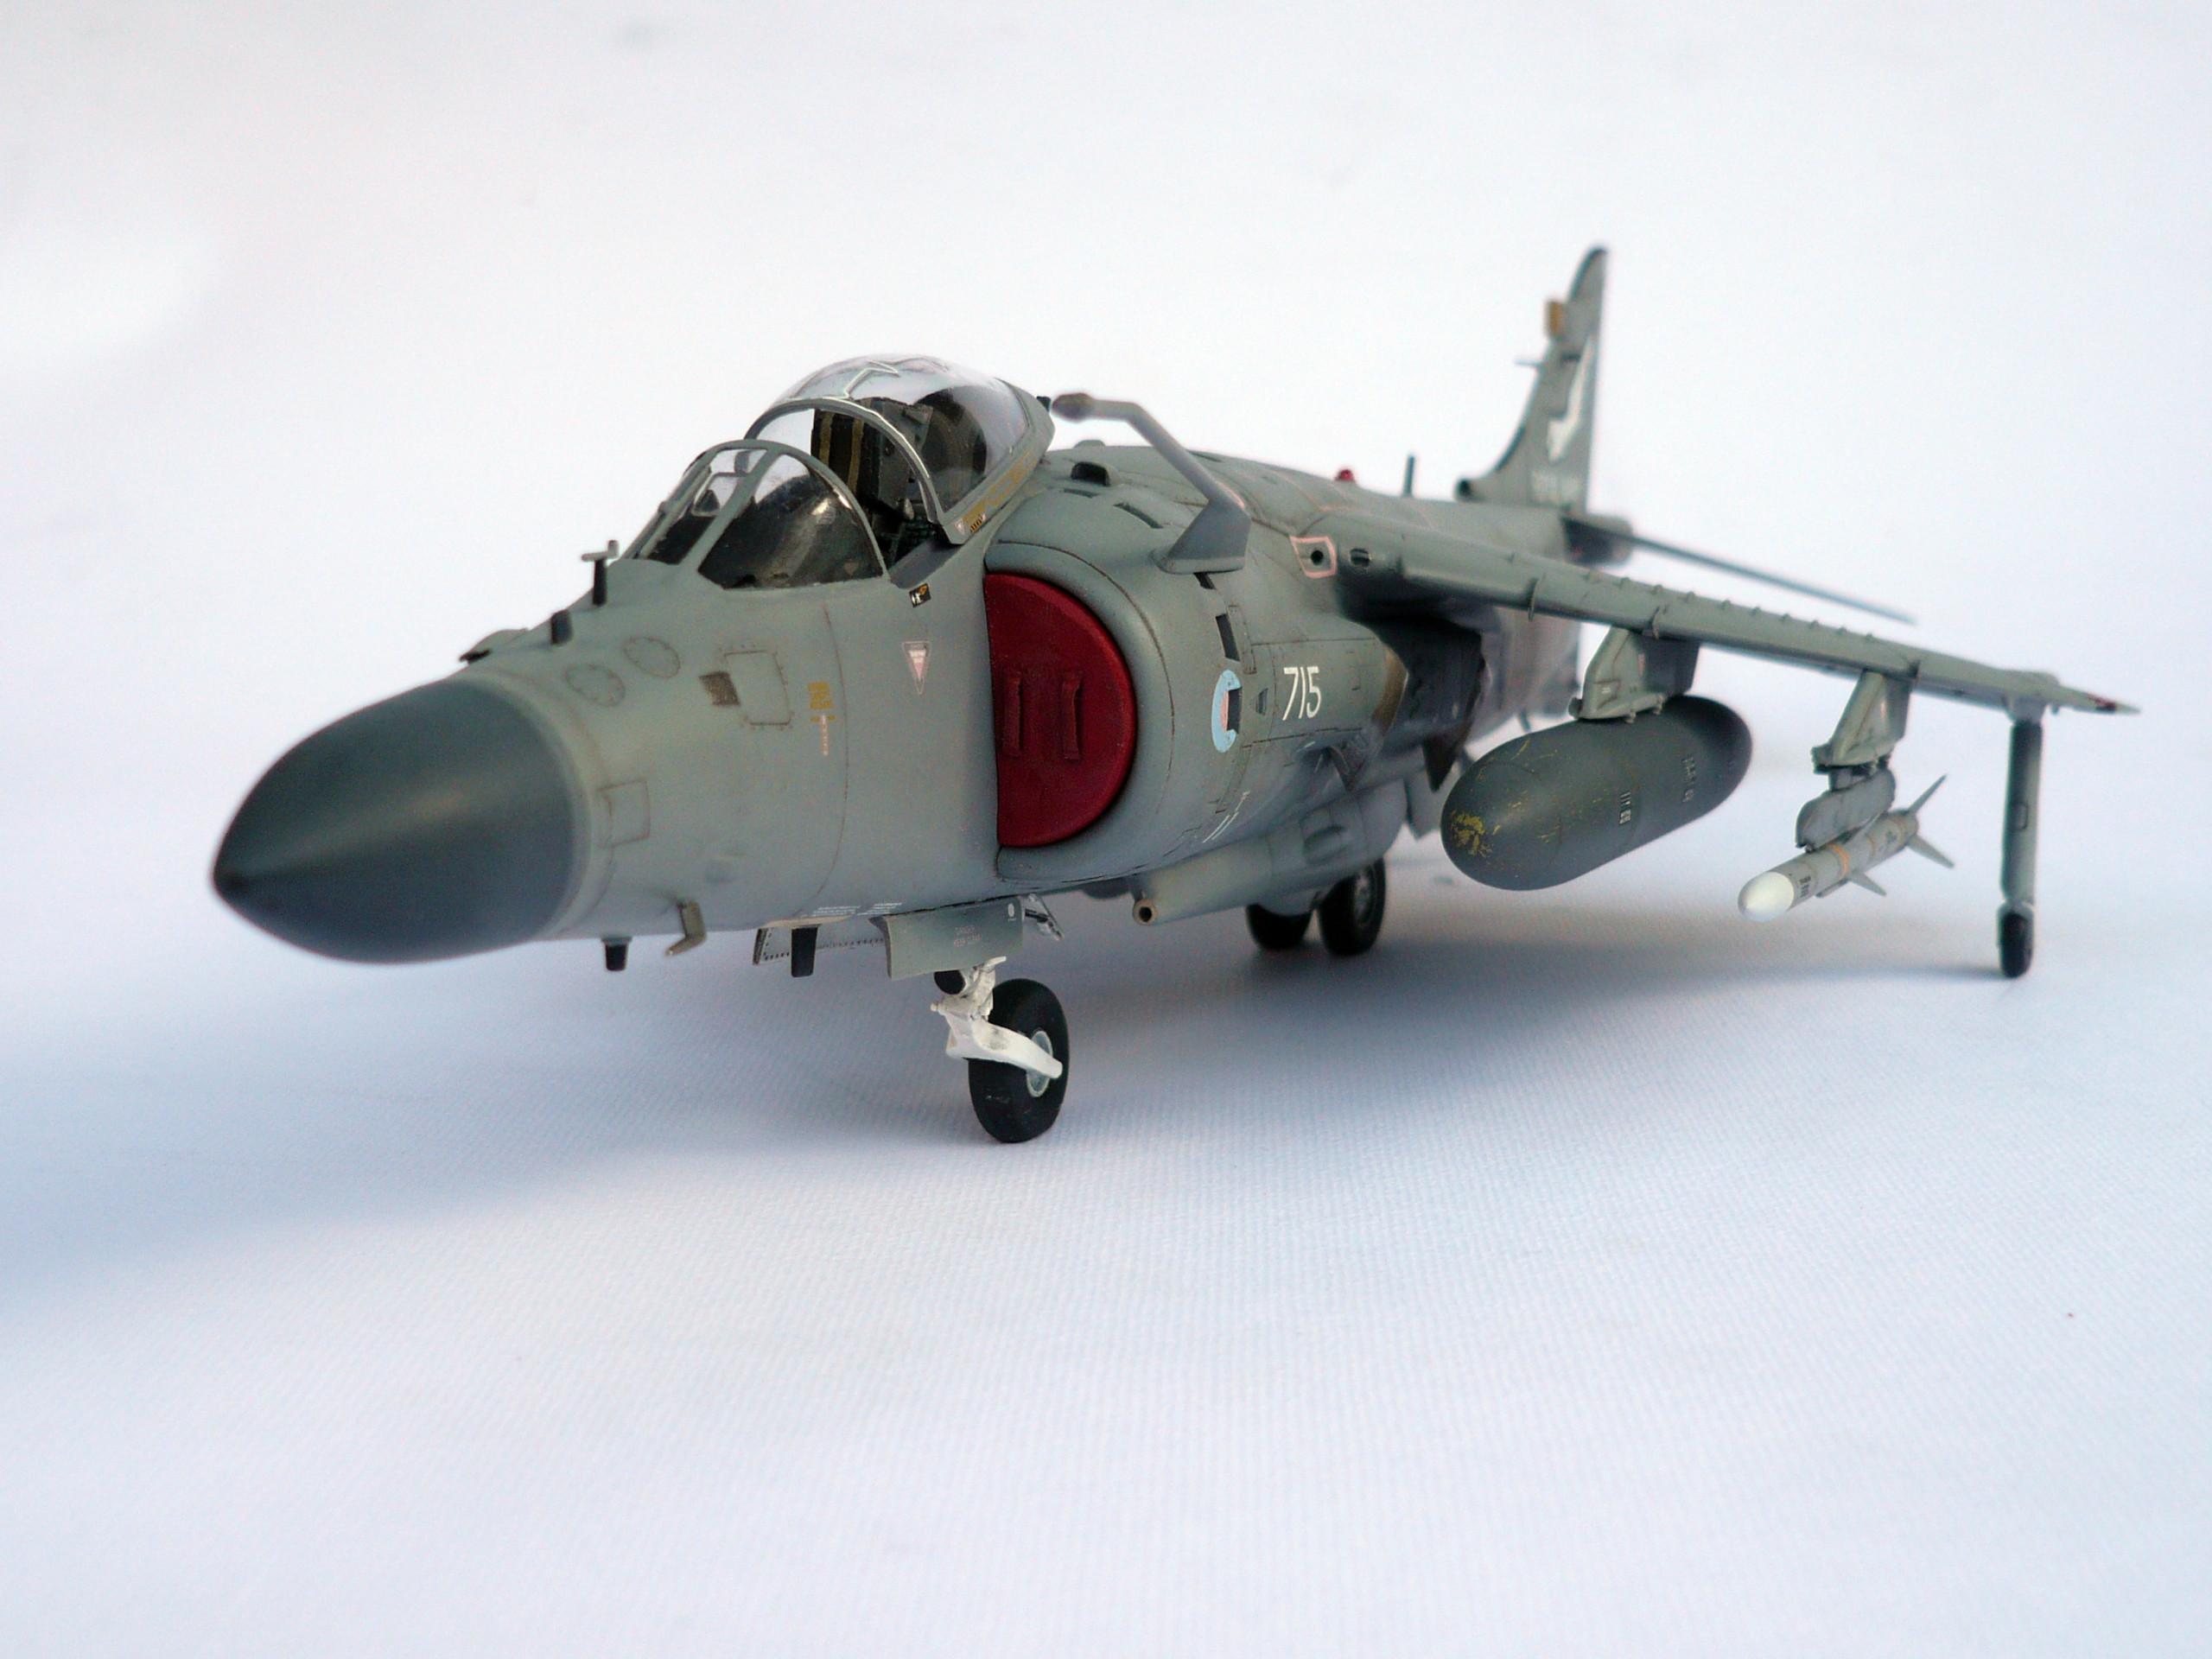
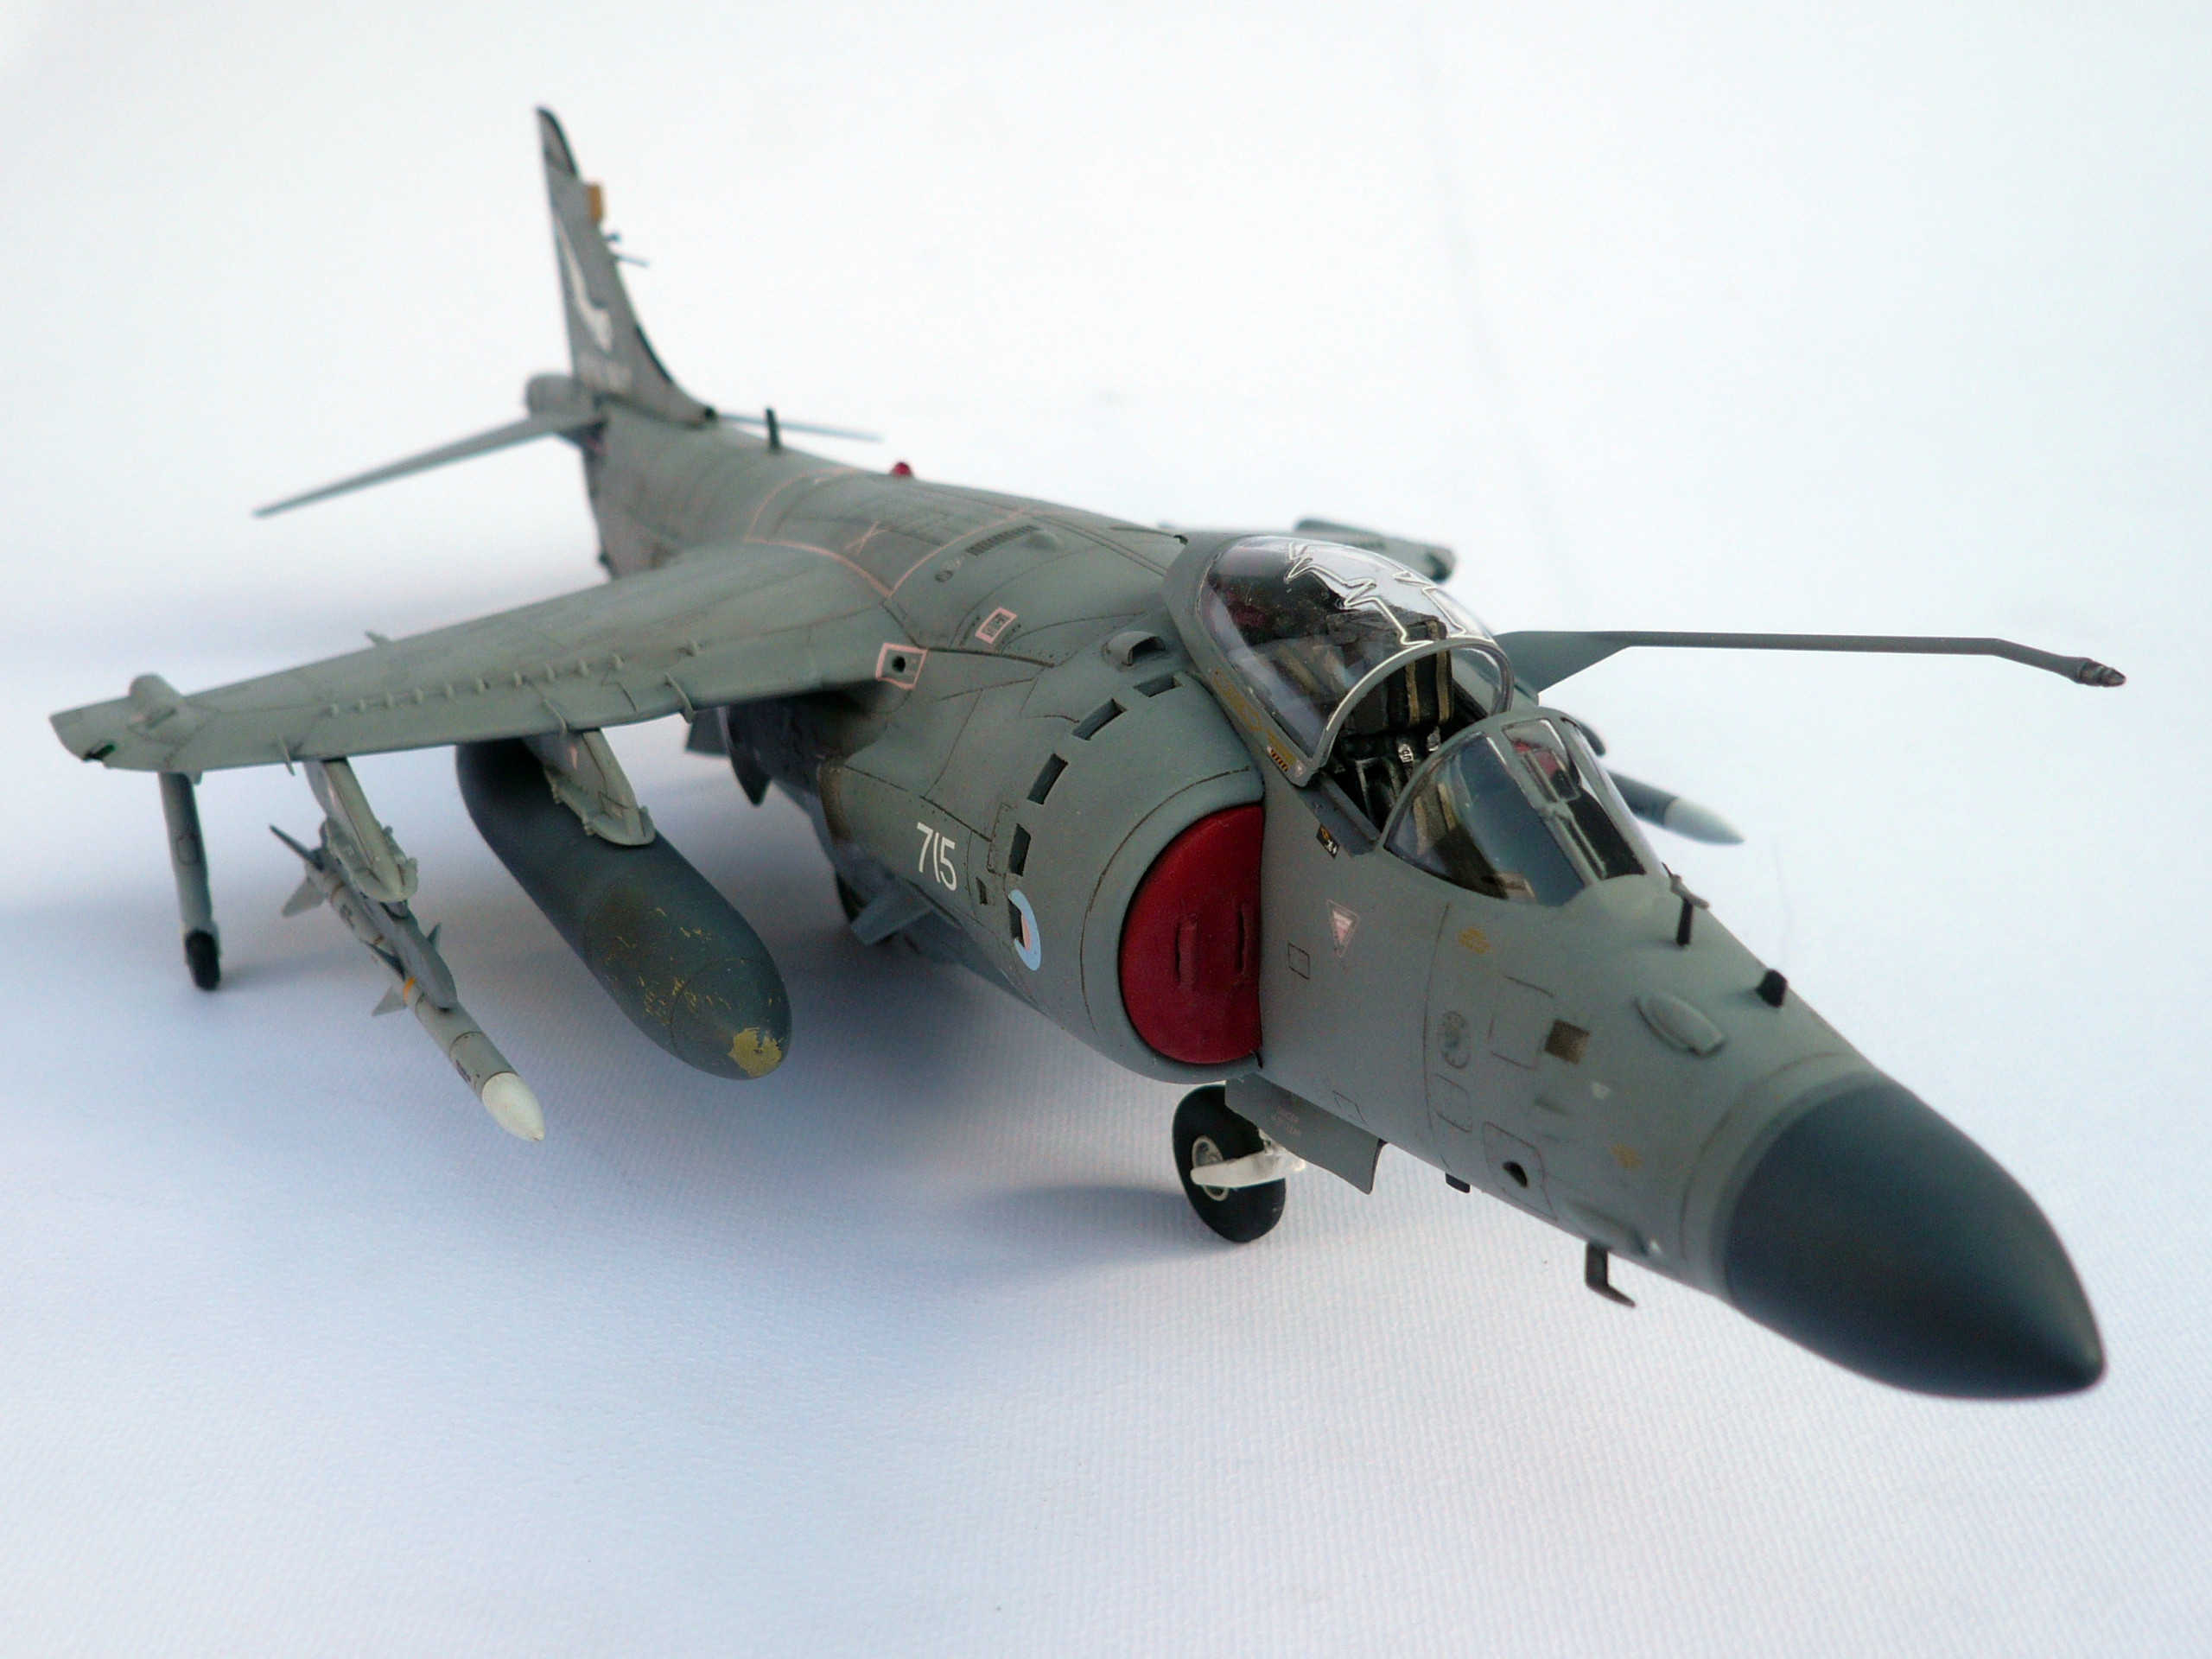
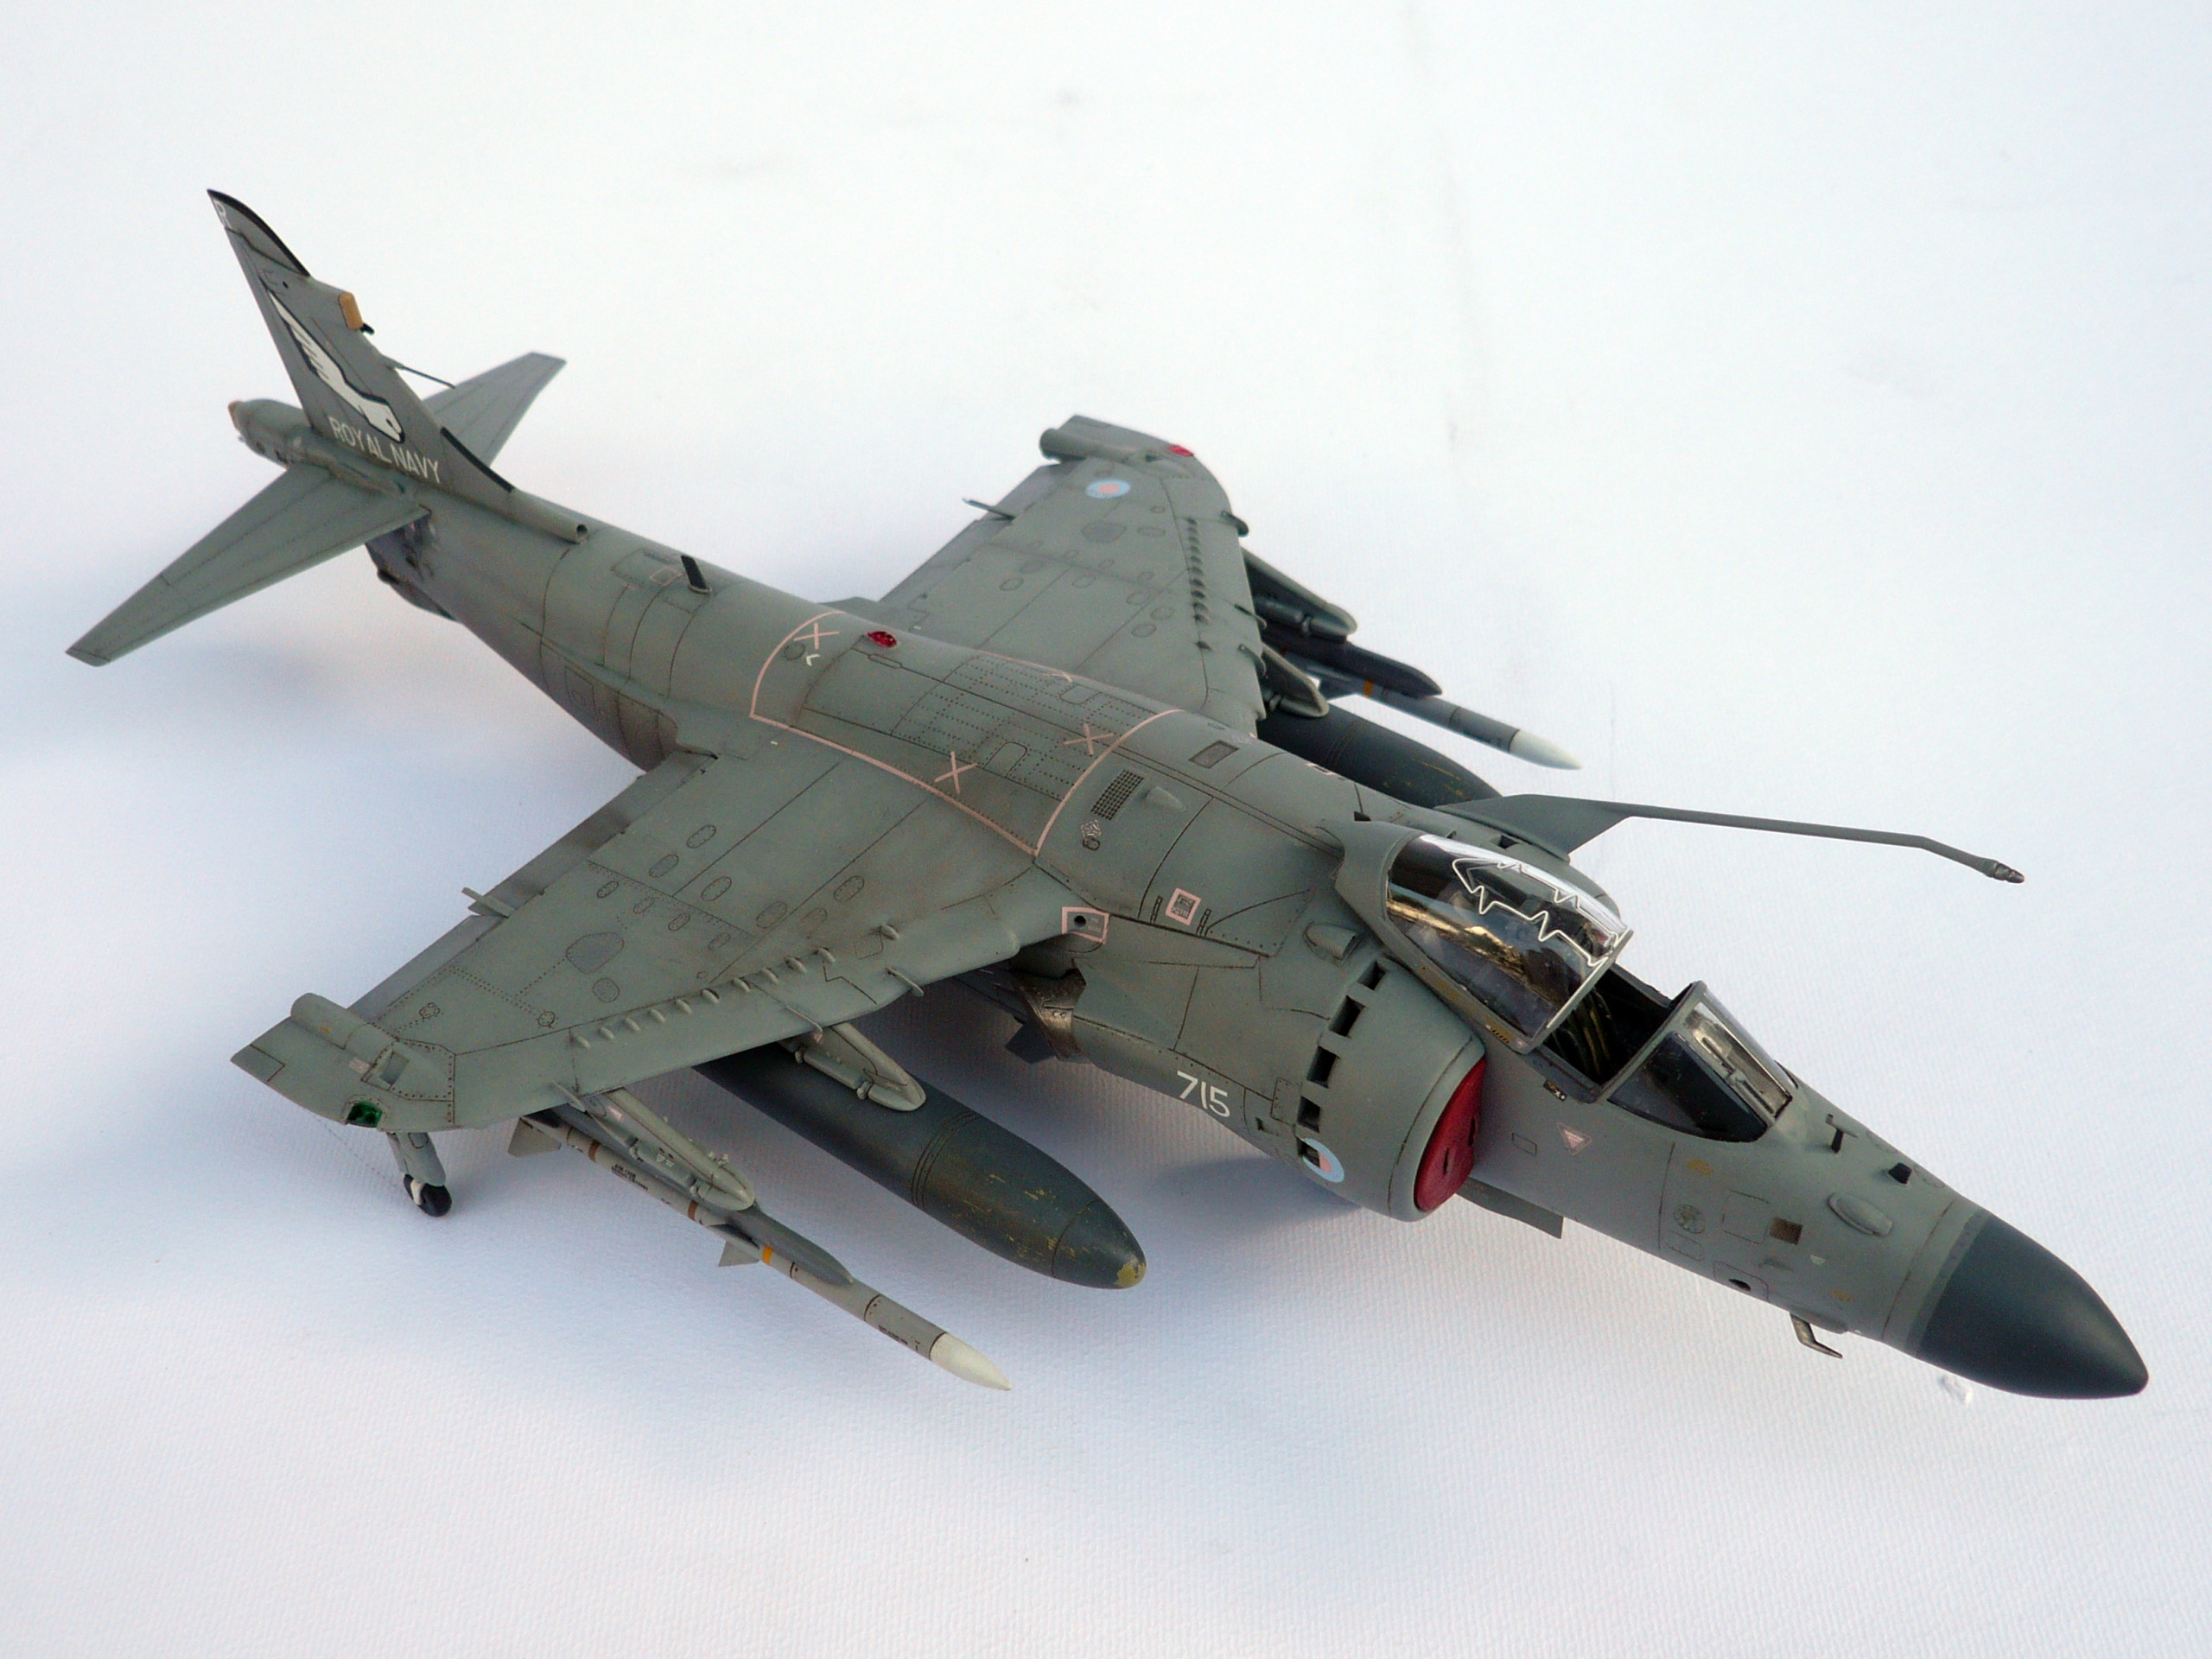
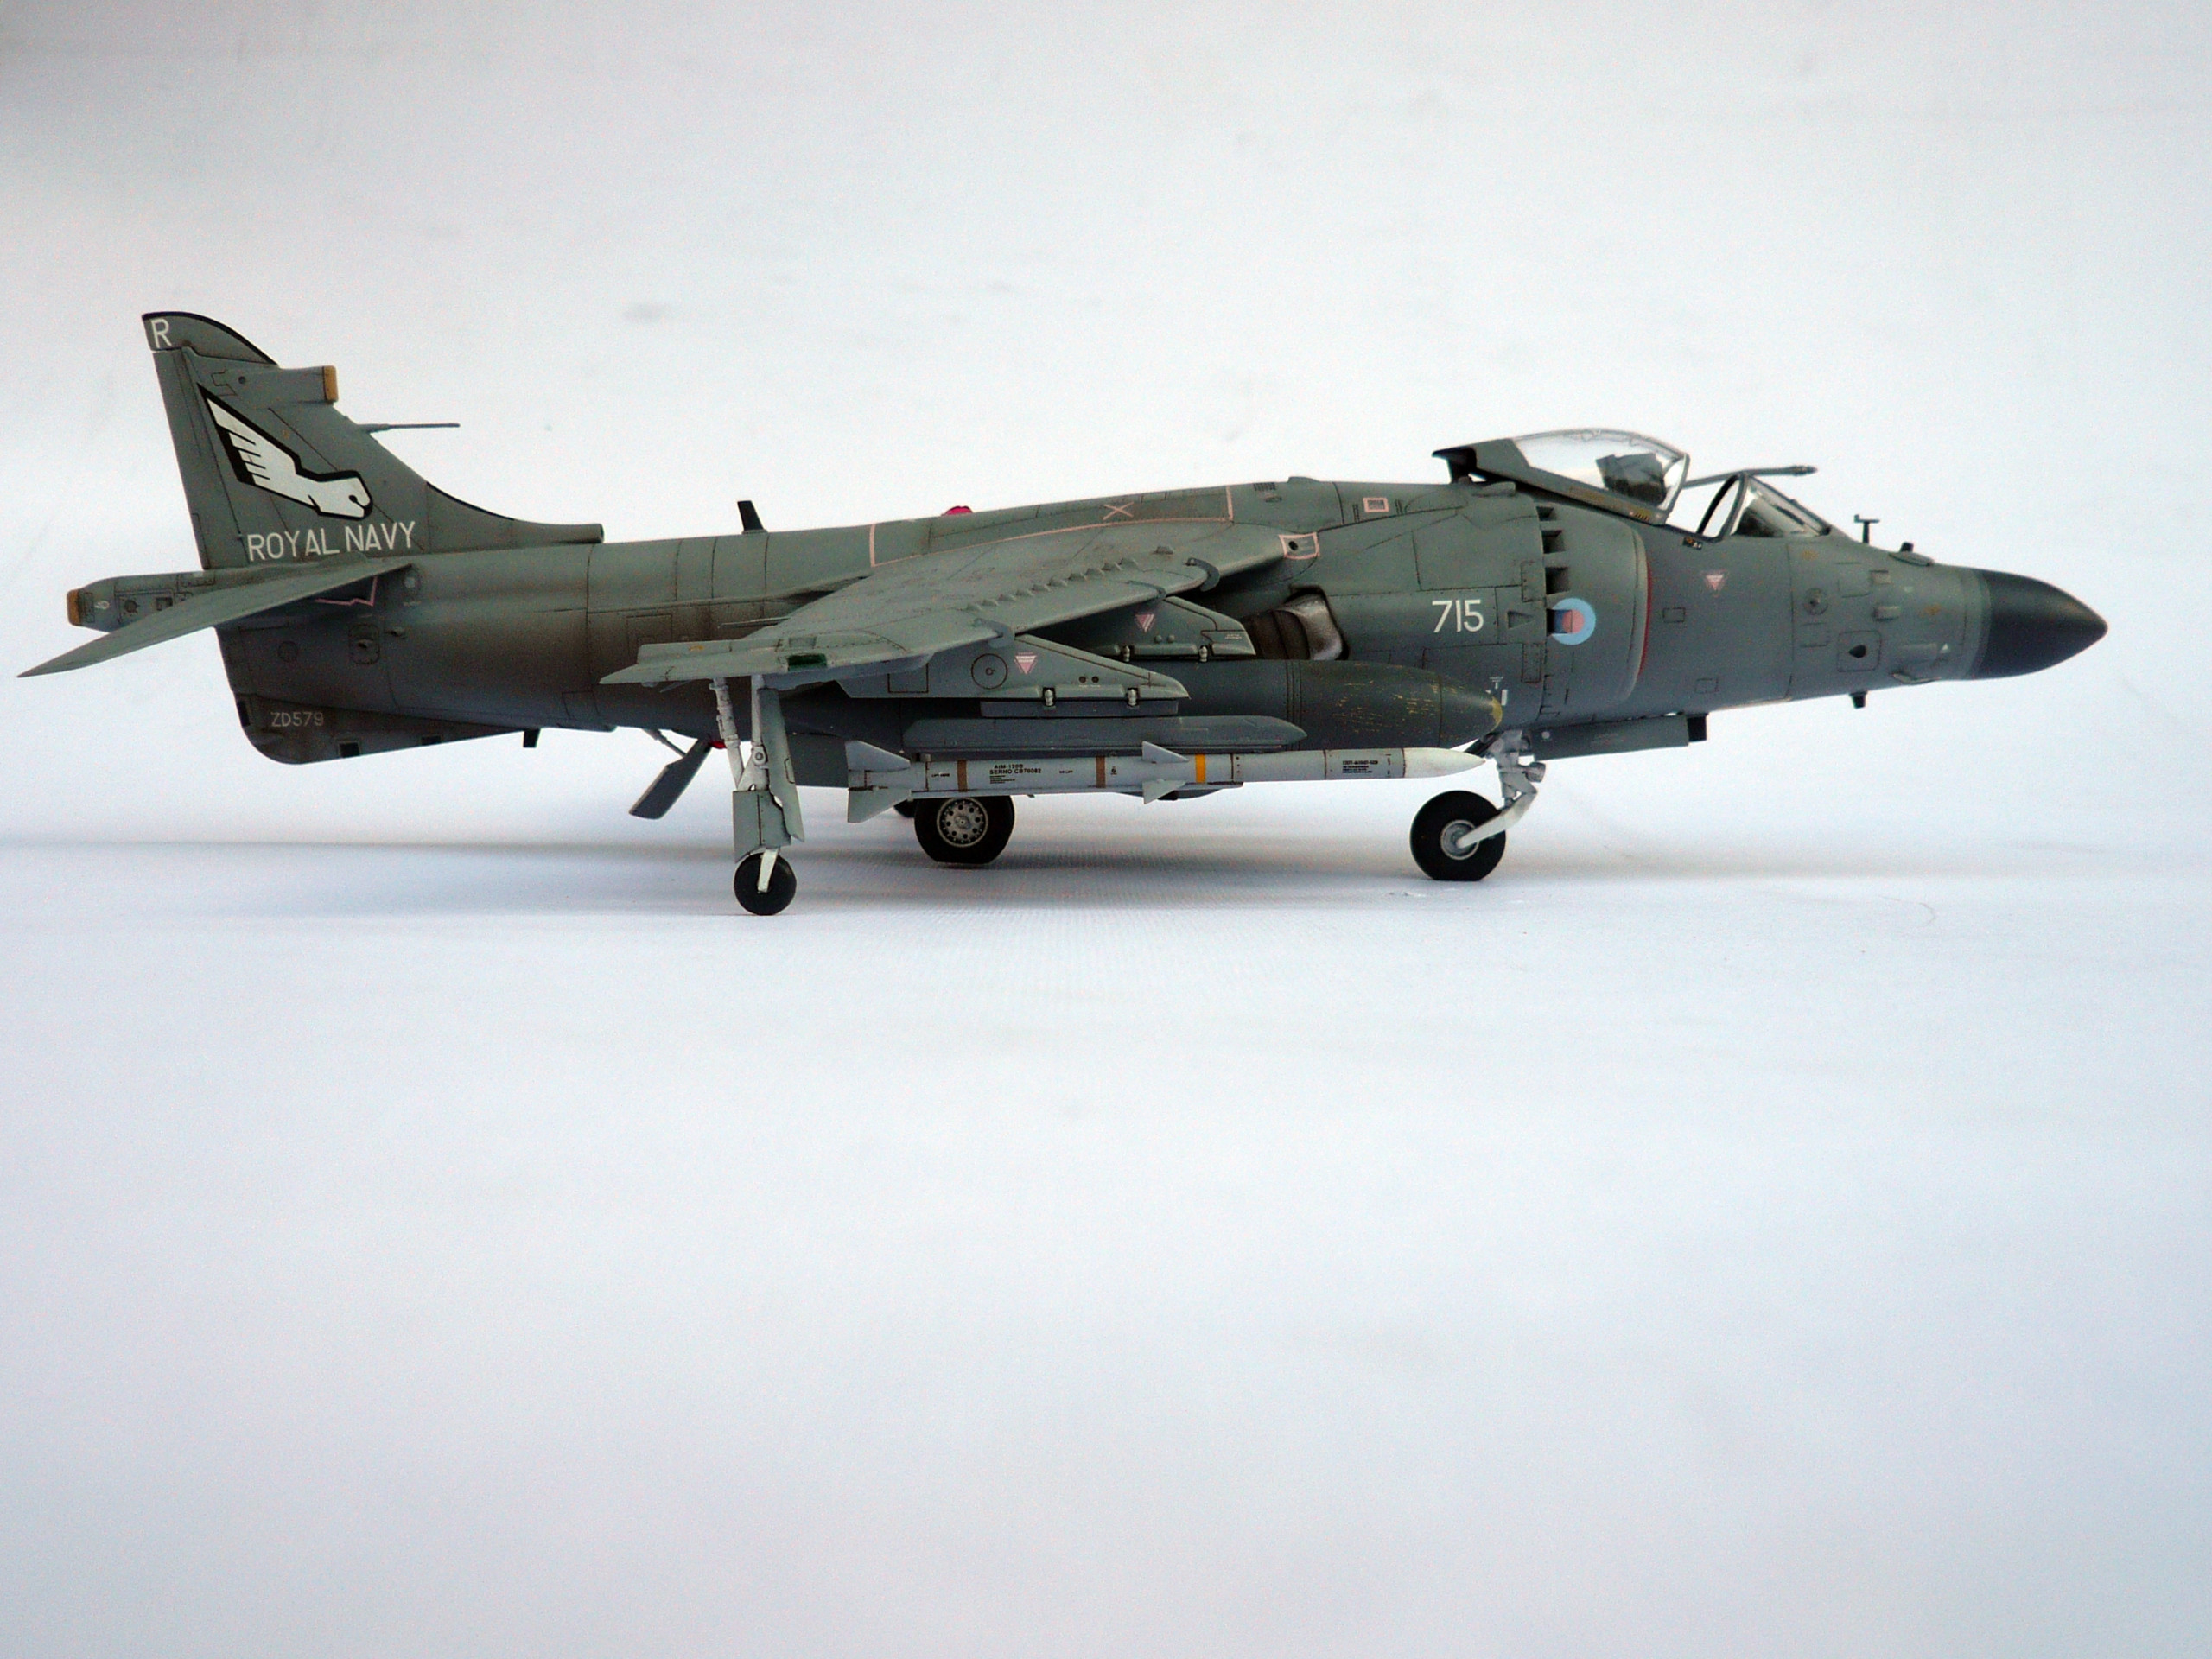
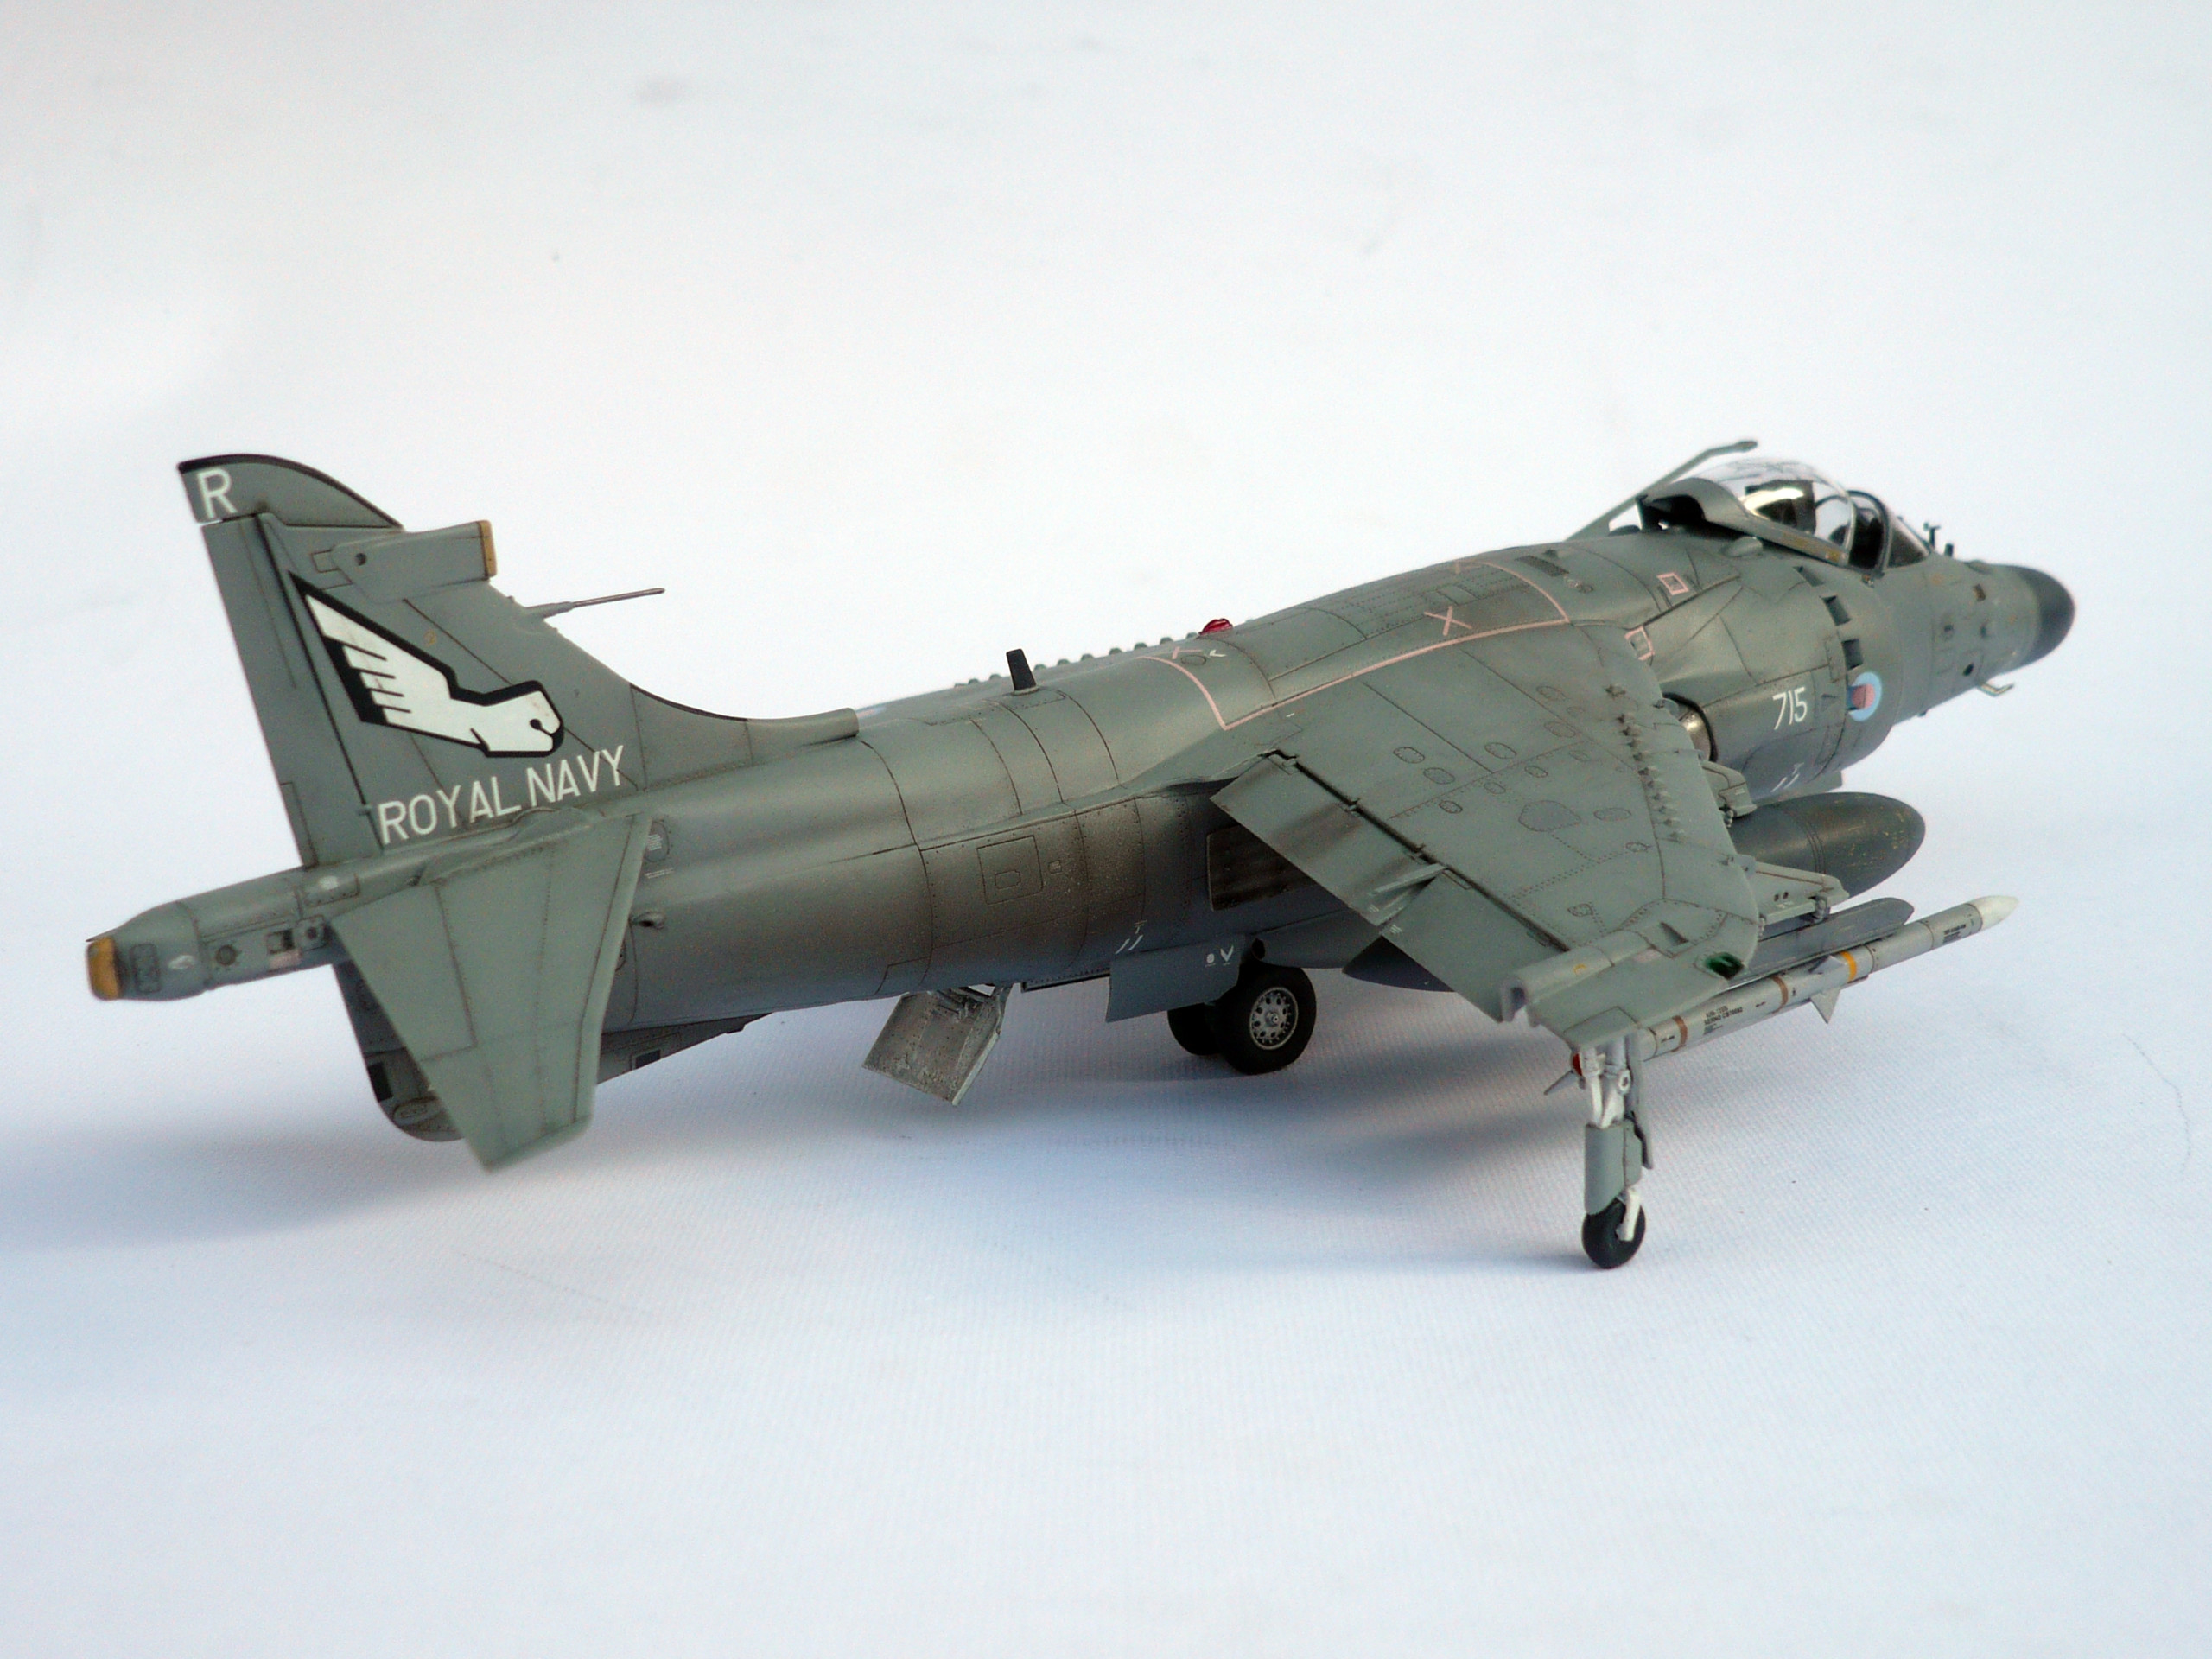
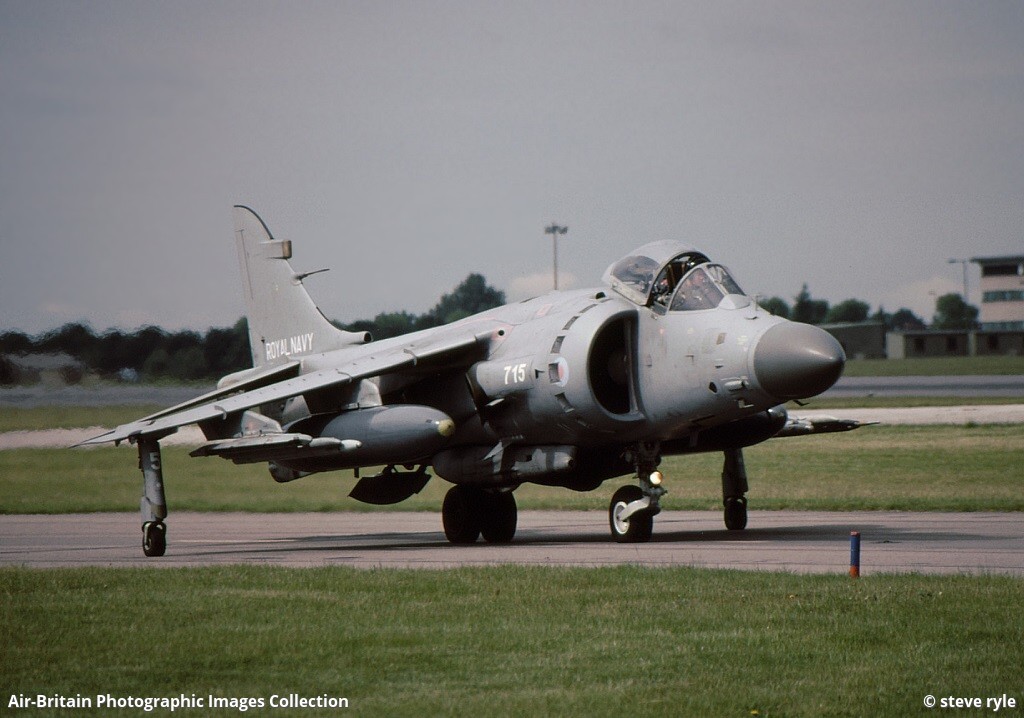
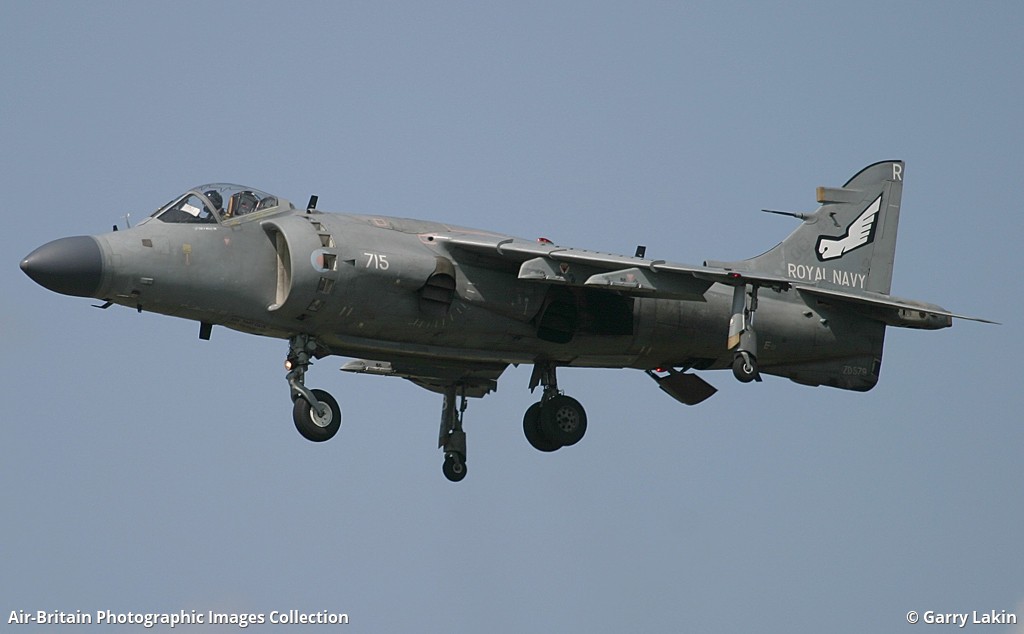
Sea Harrier F/A2, ZD579 / 41H/912042, Royal Navy
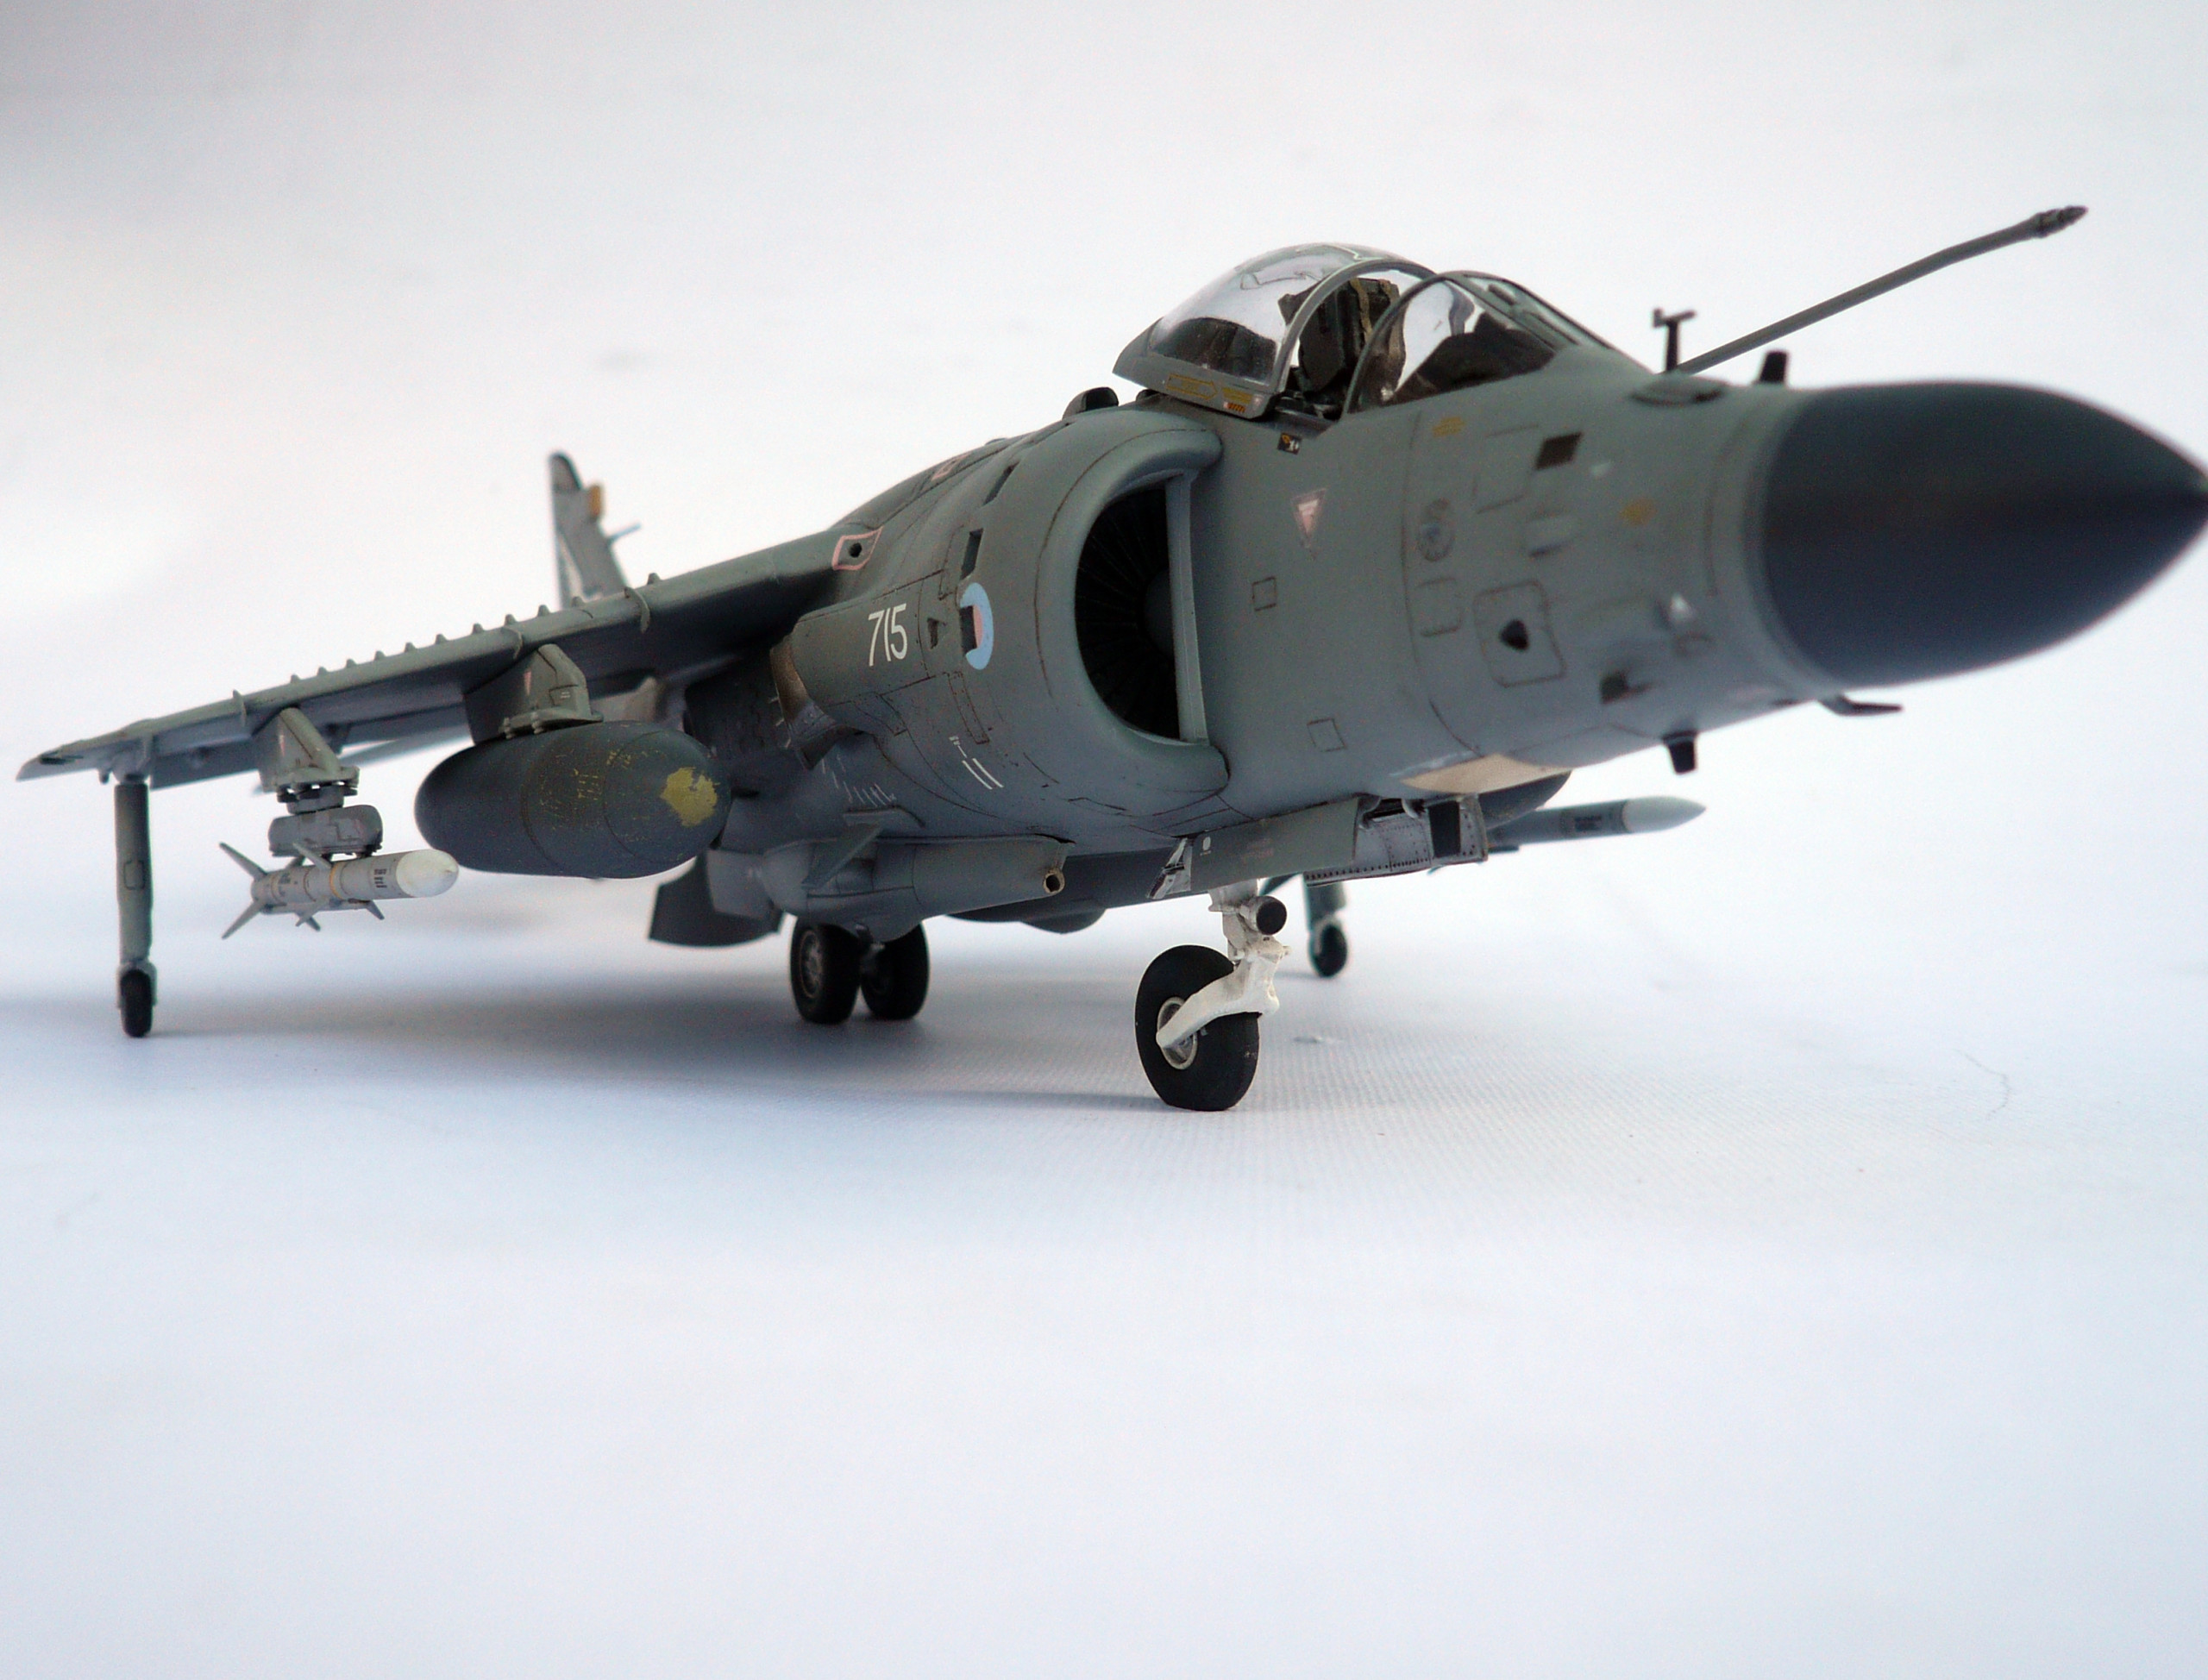
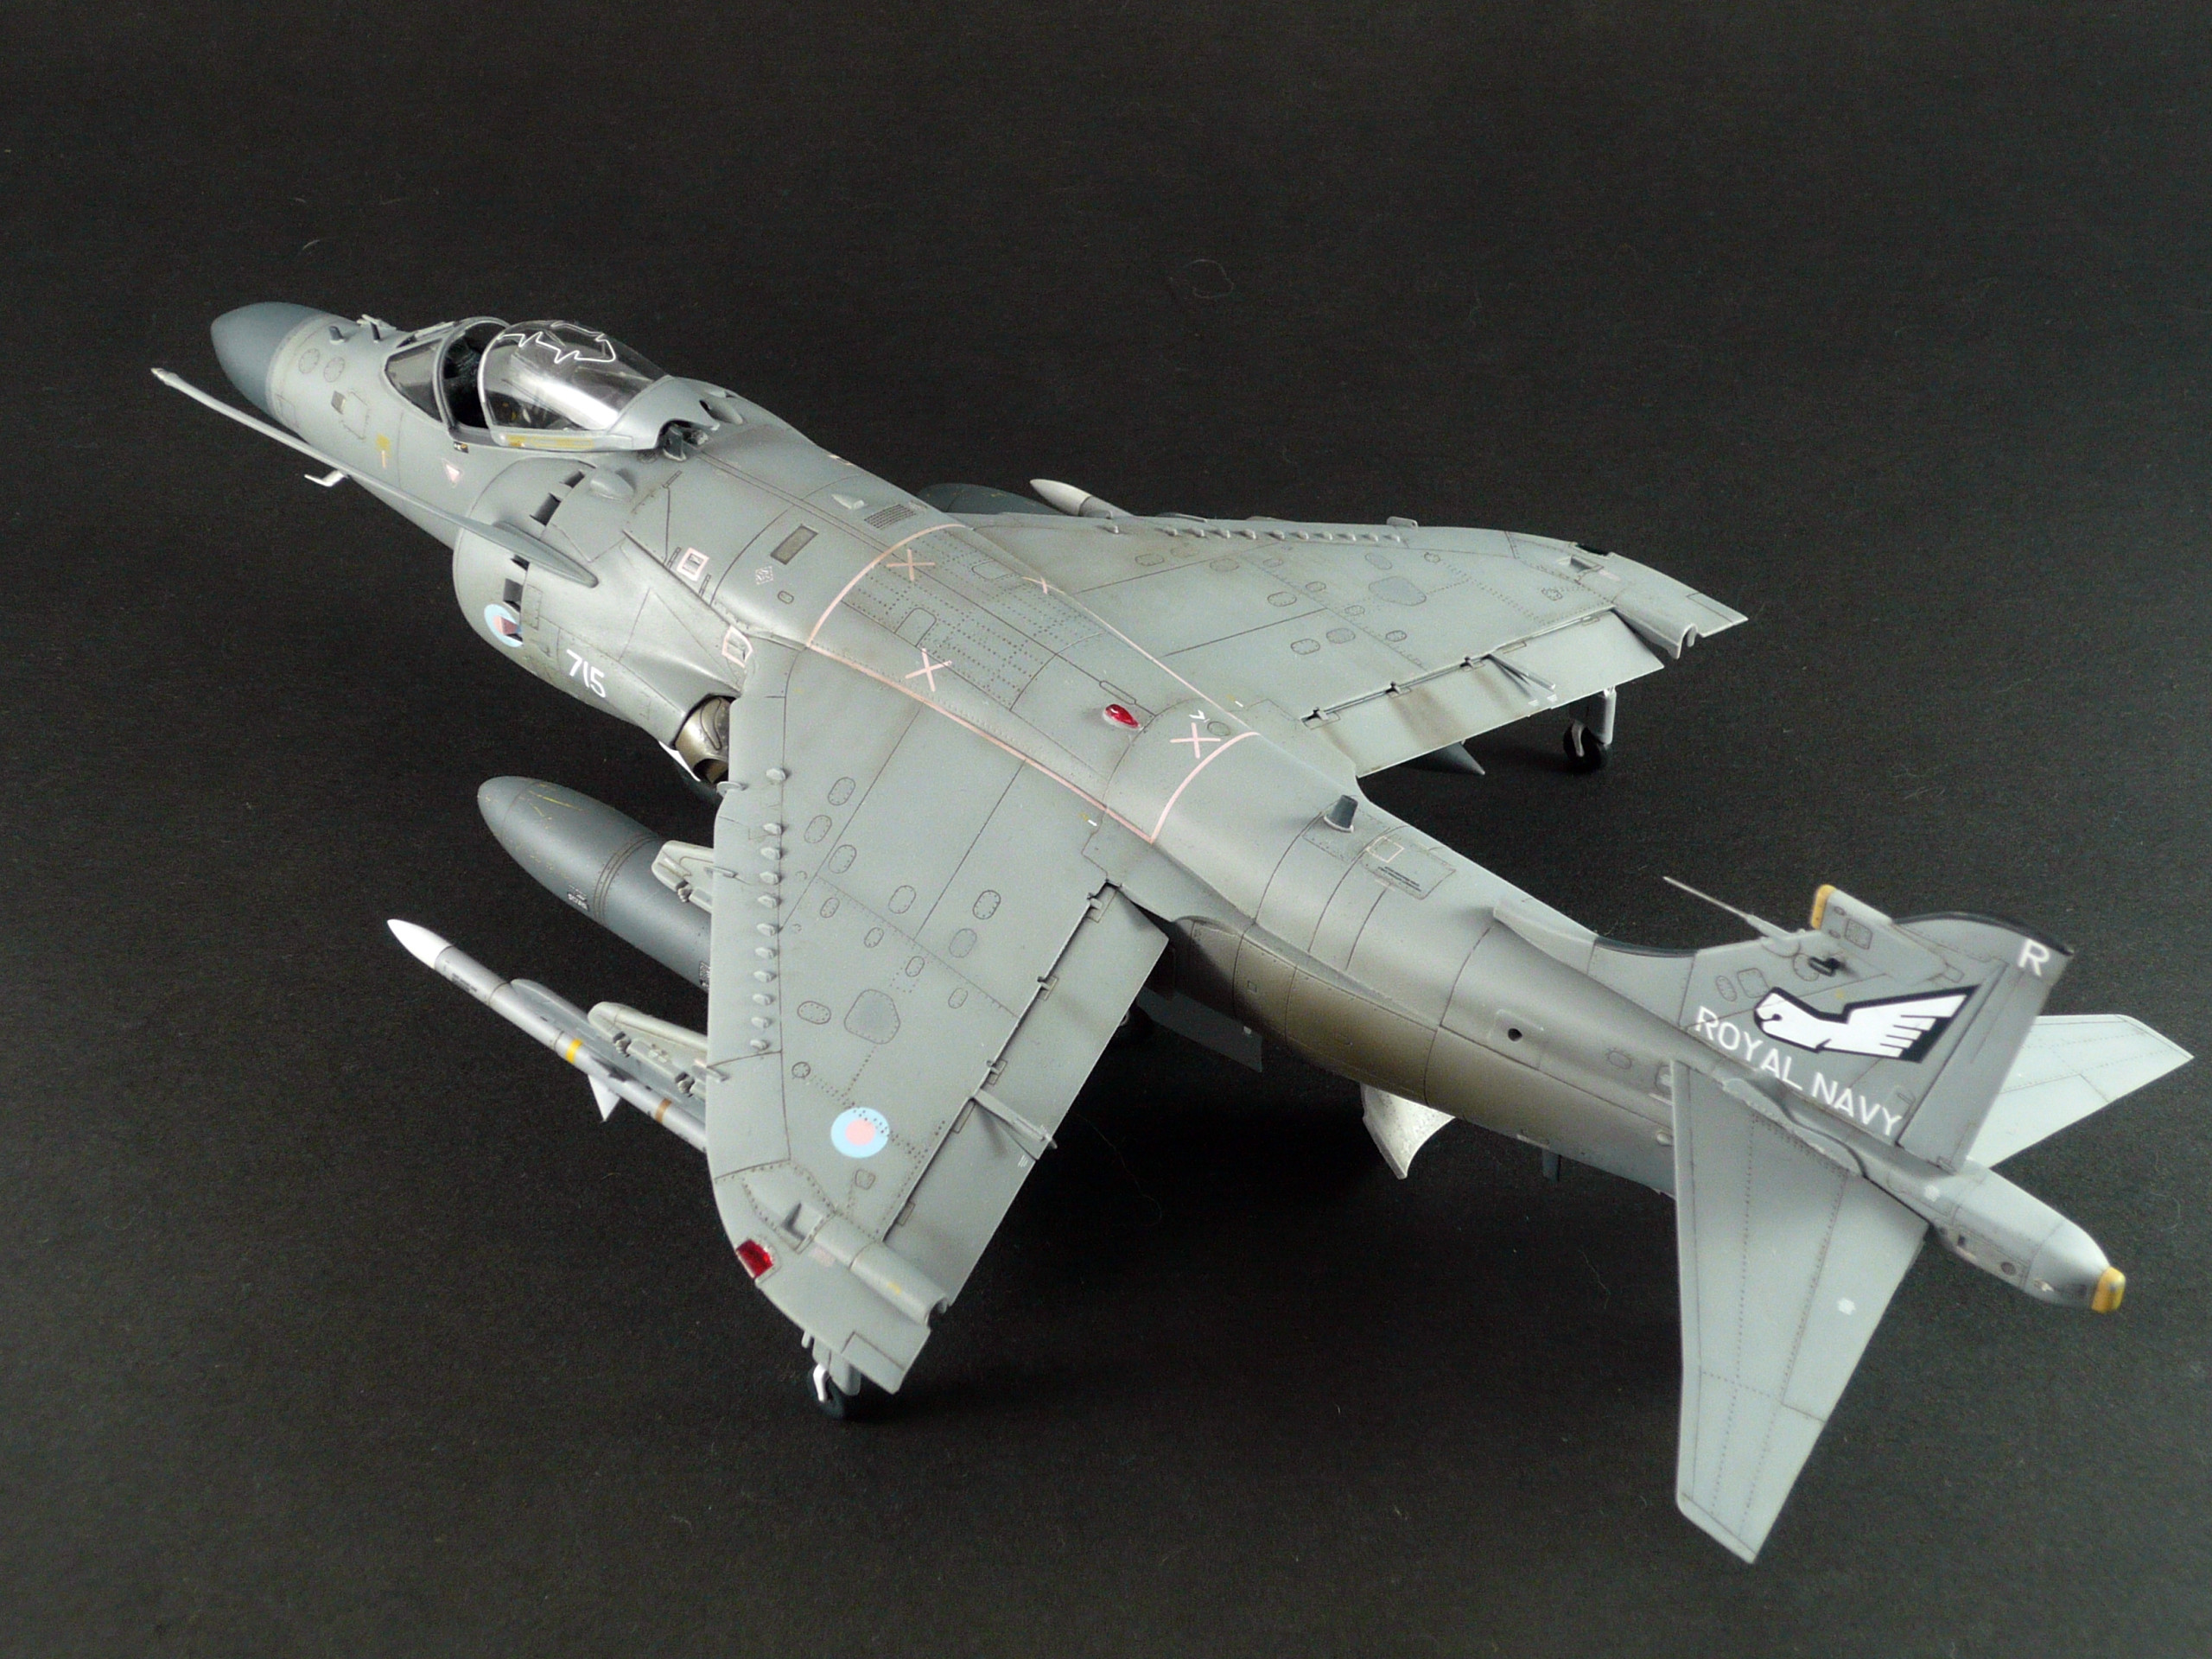
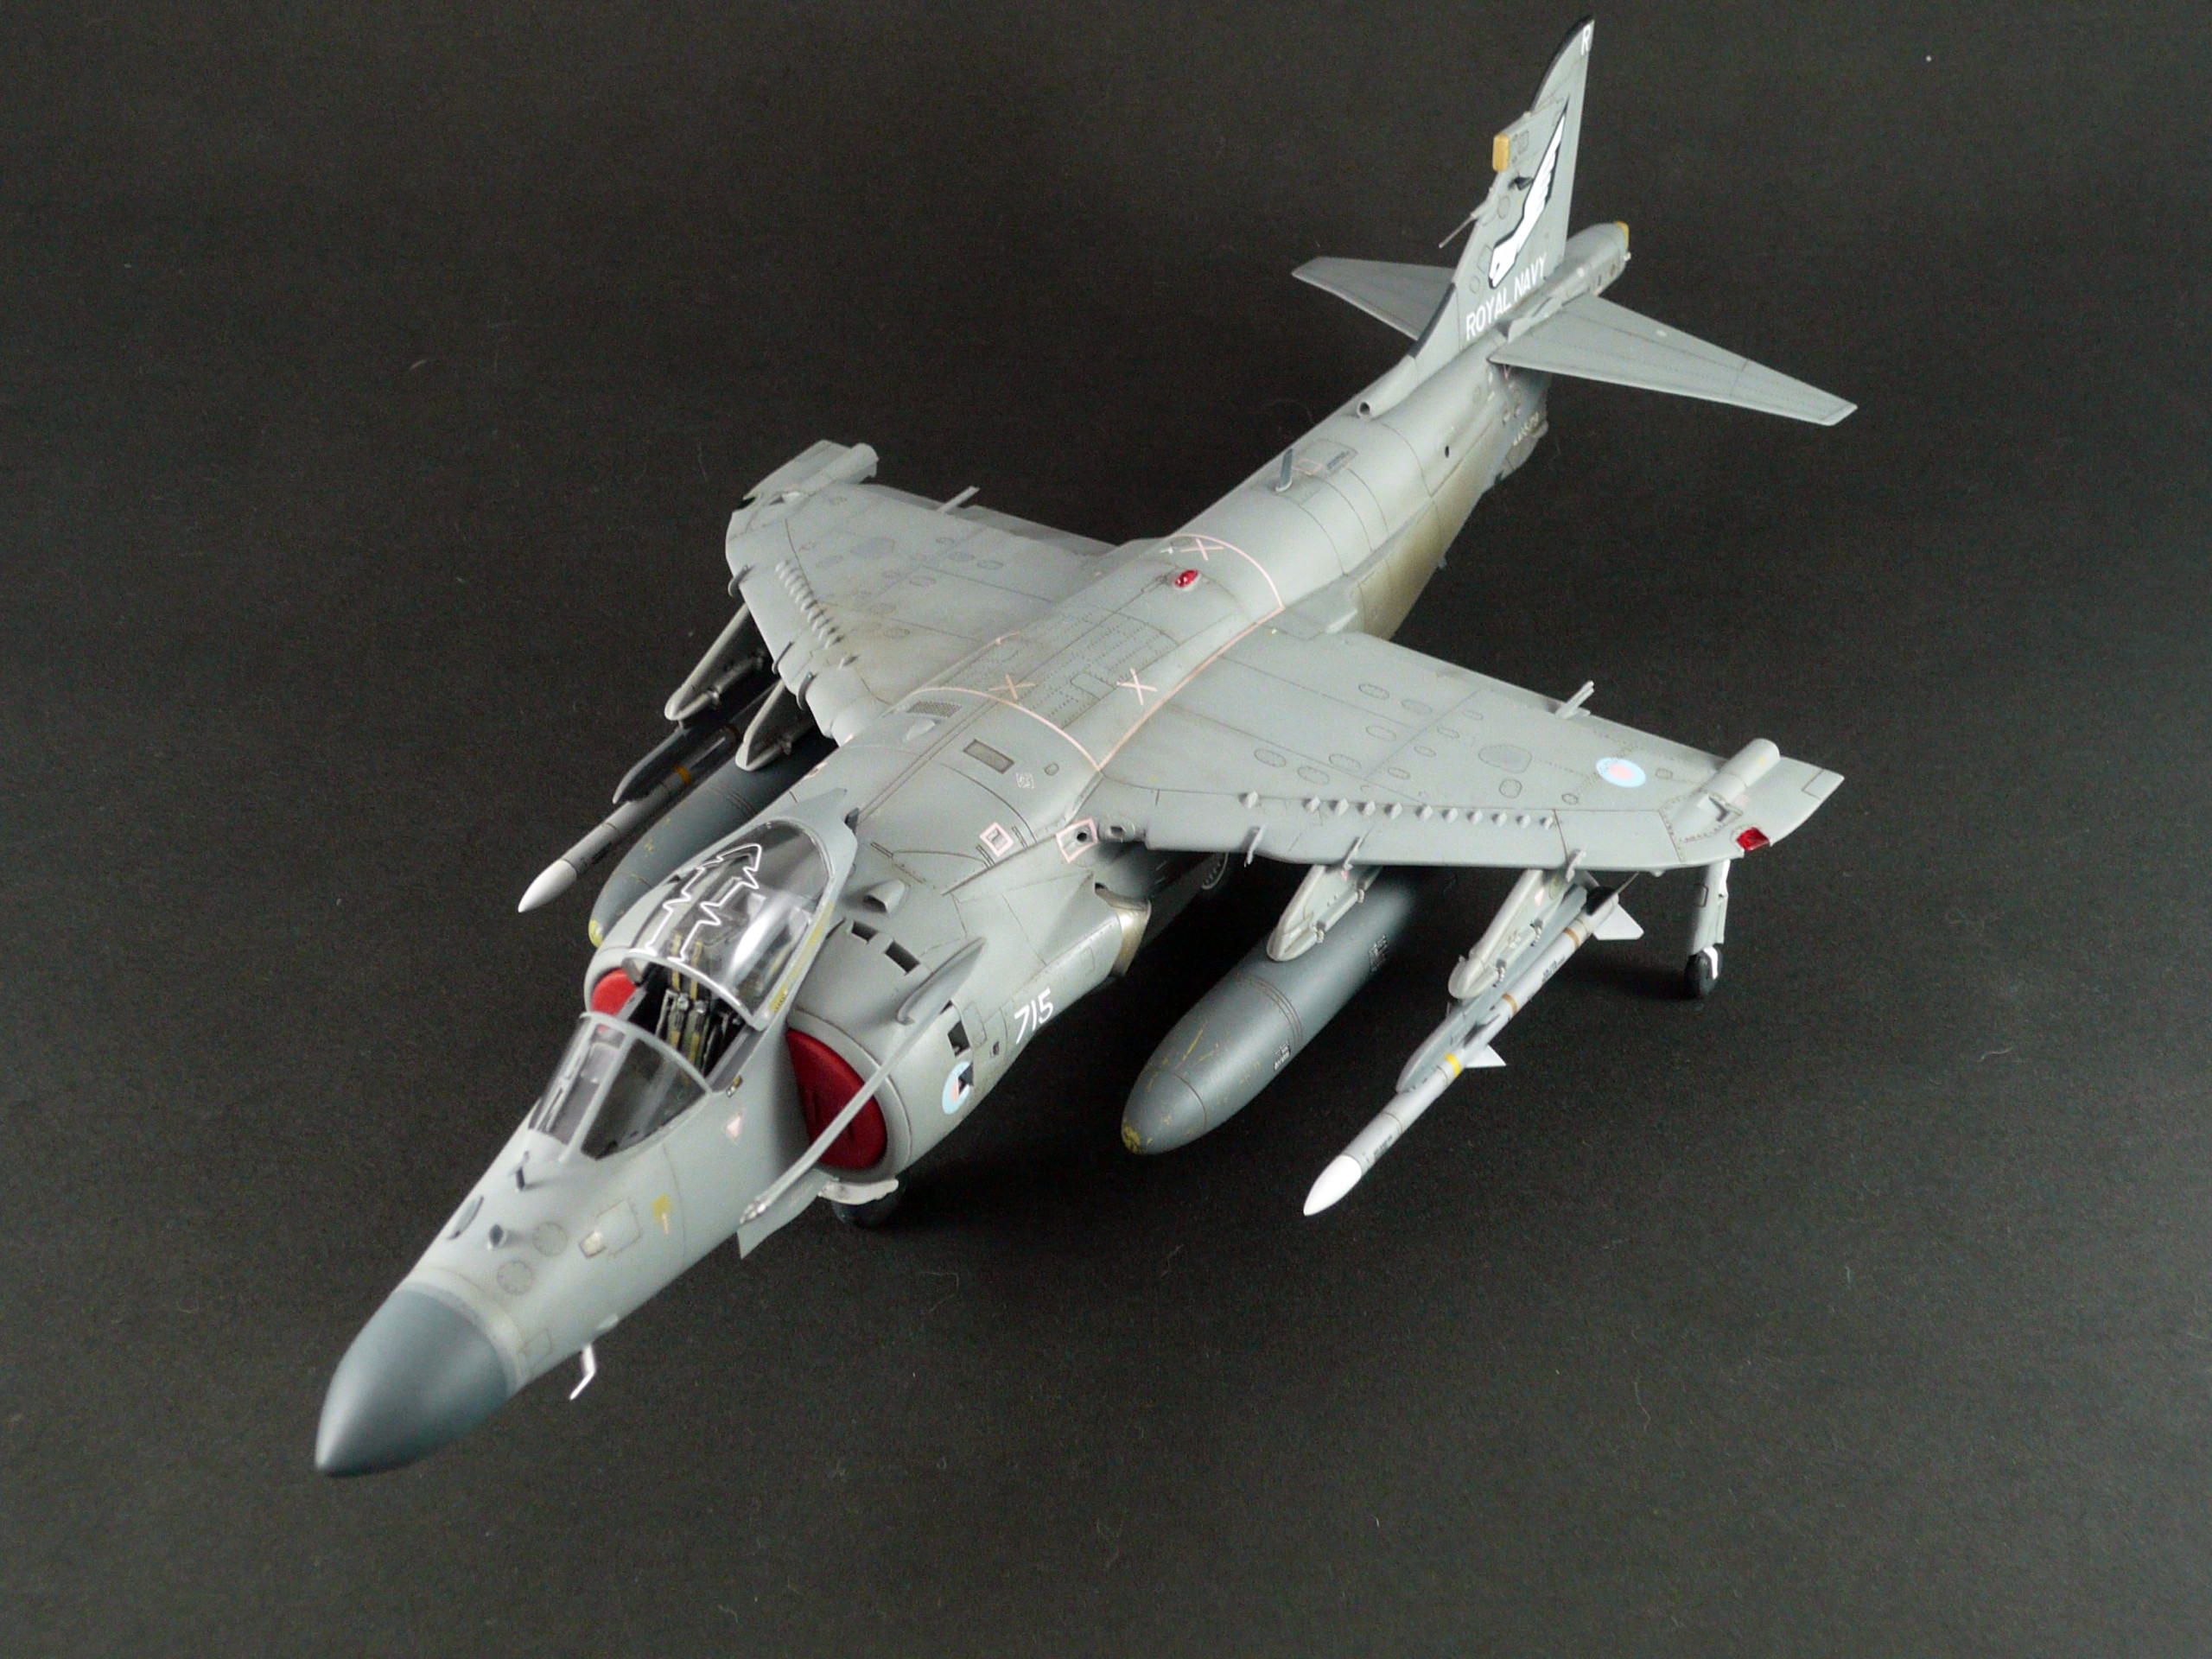
Harrier FA2 Project
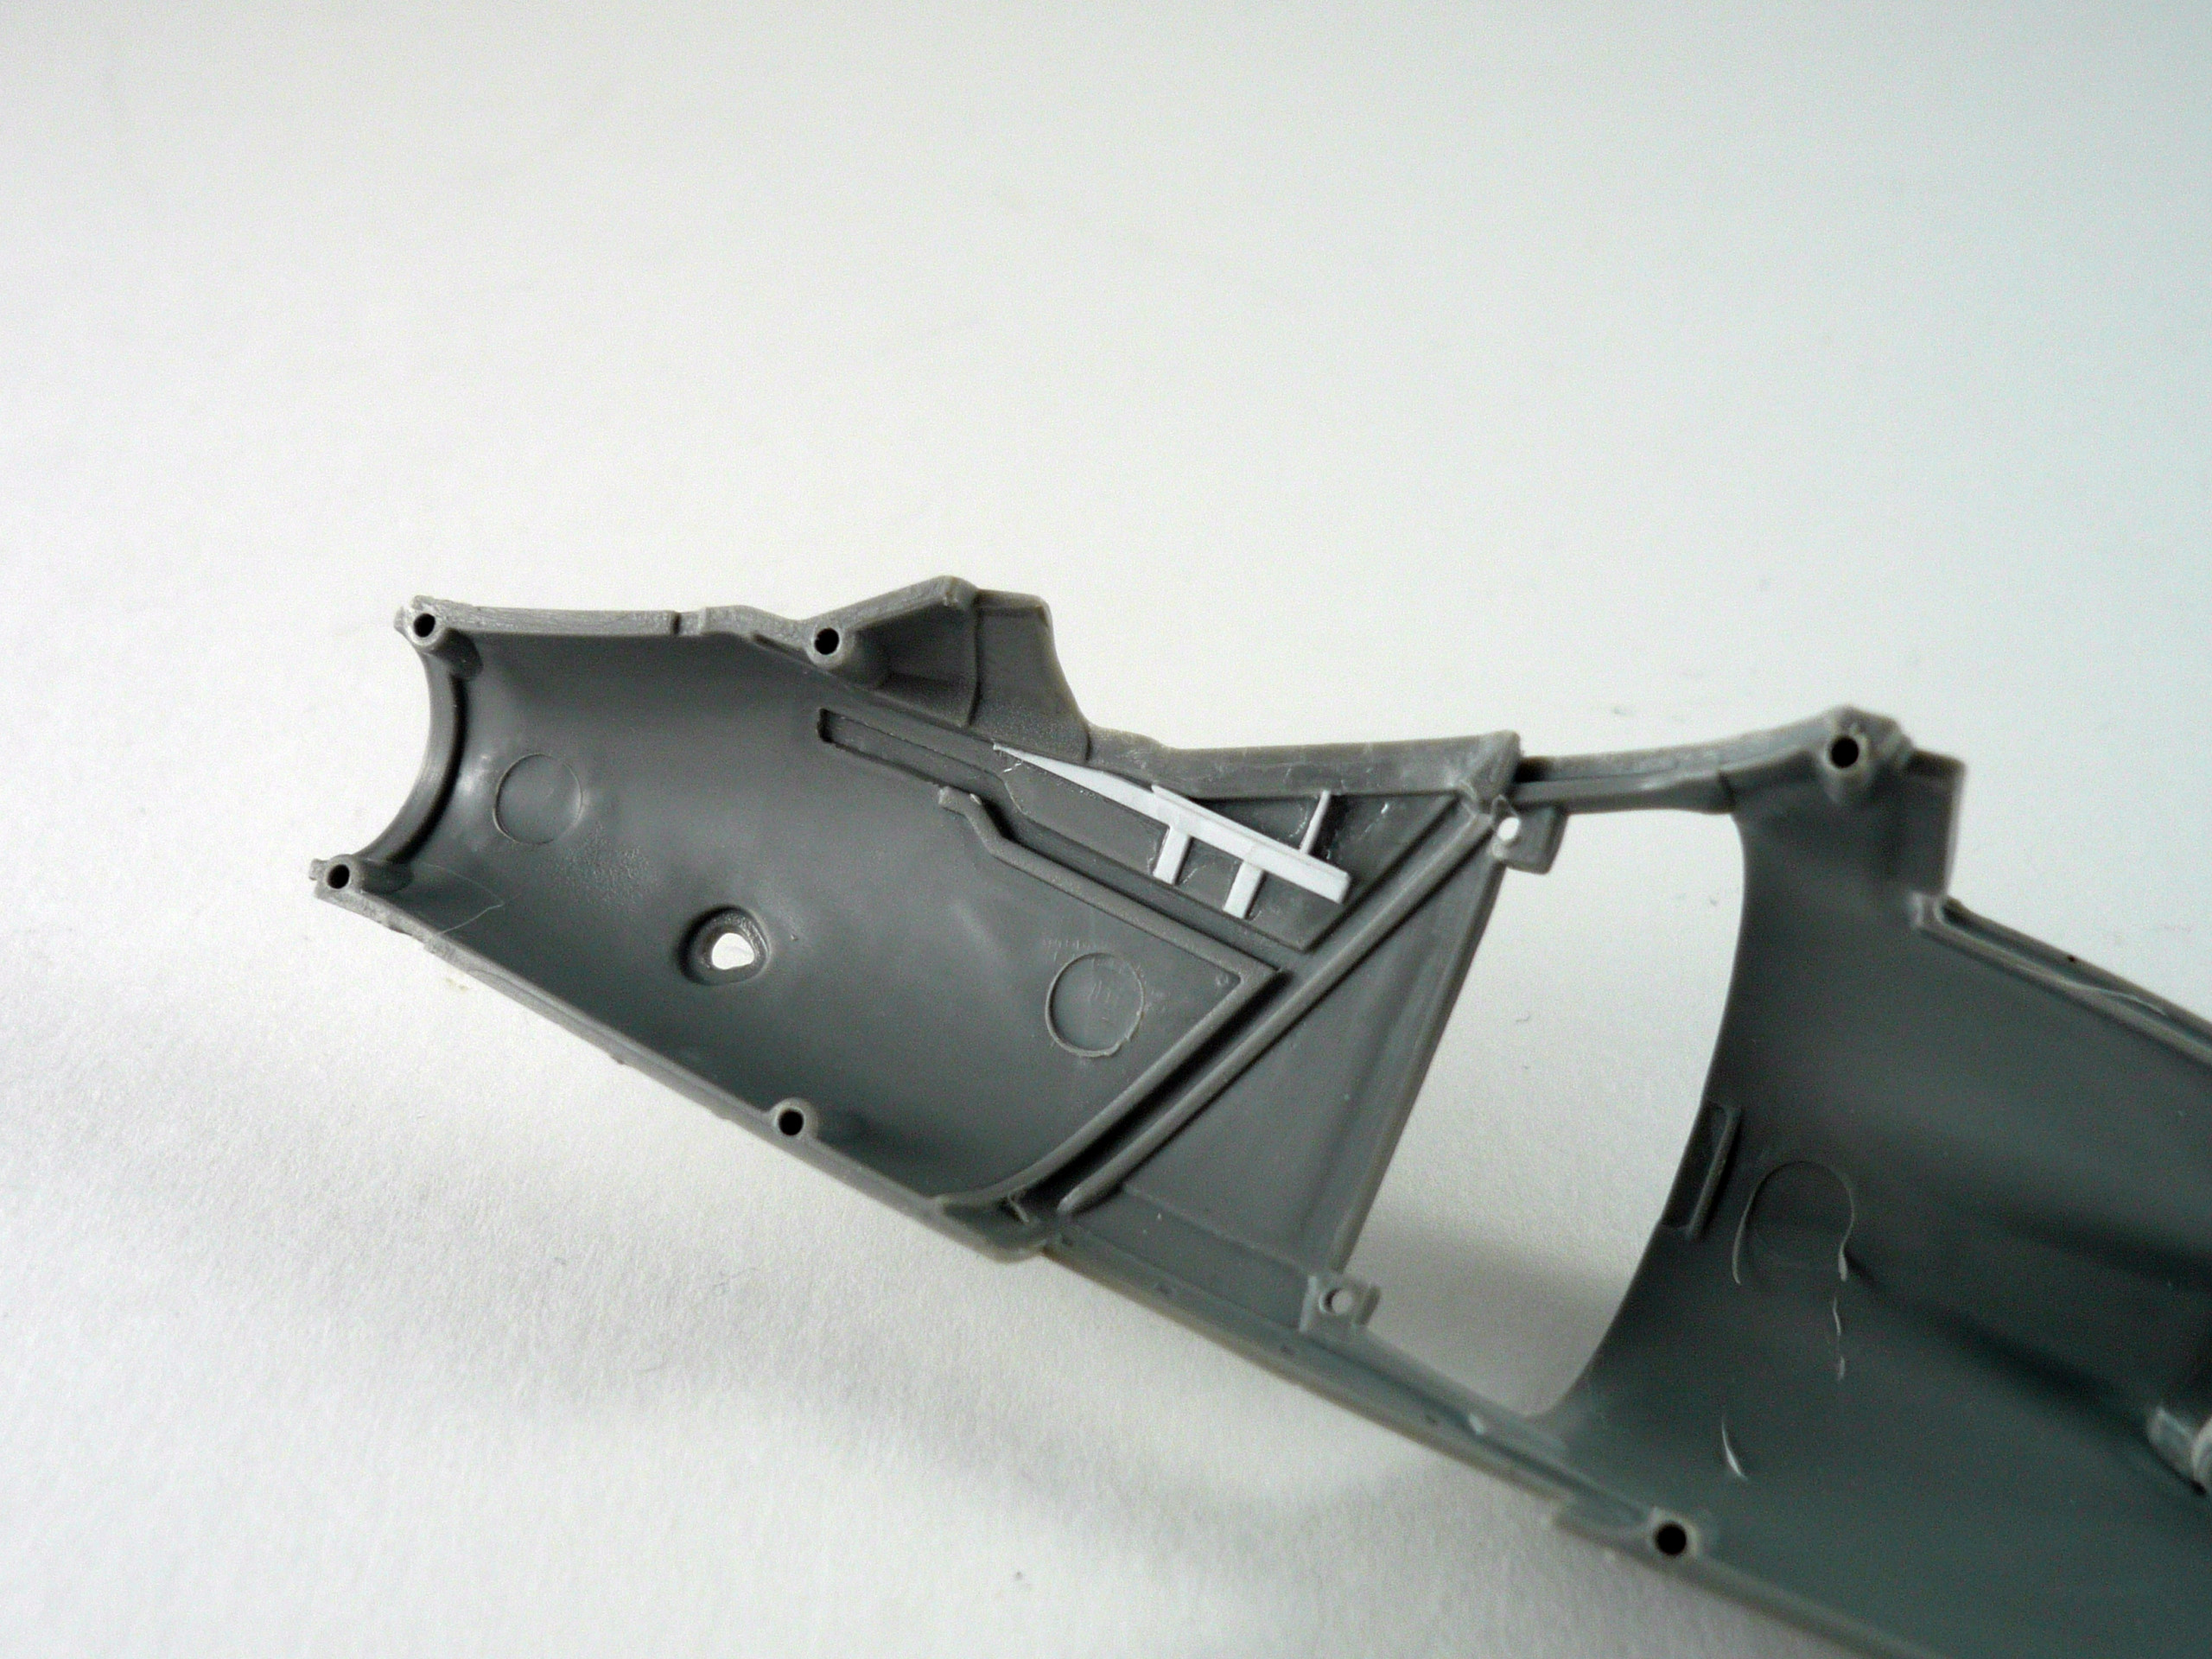
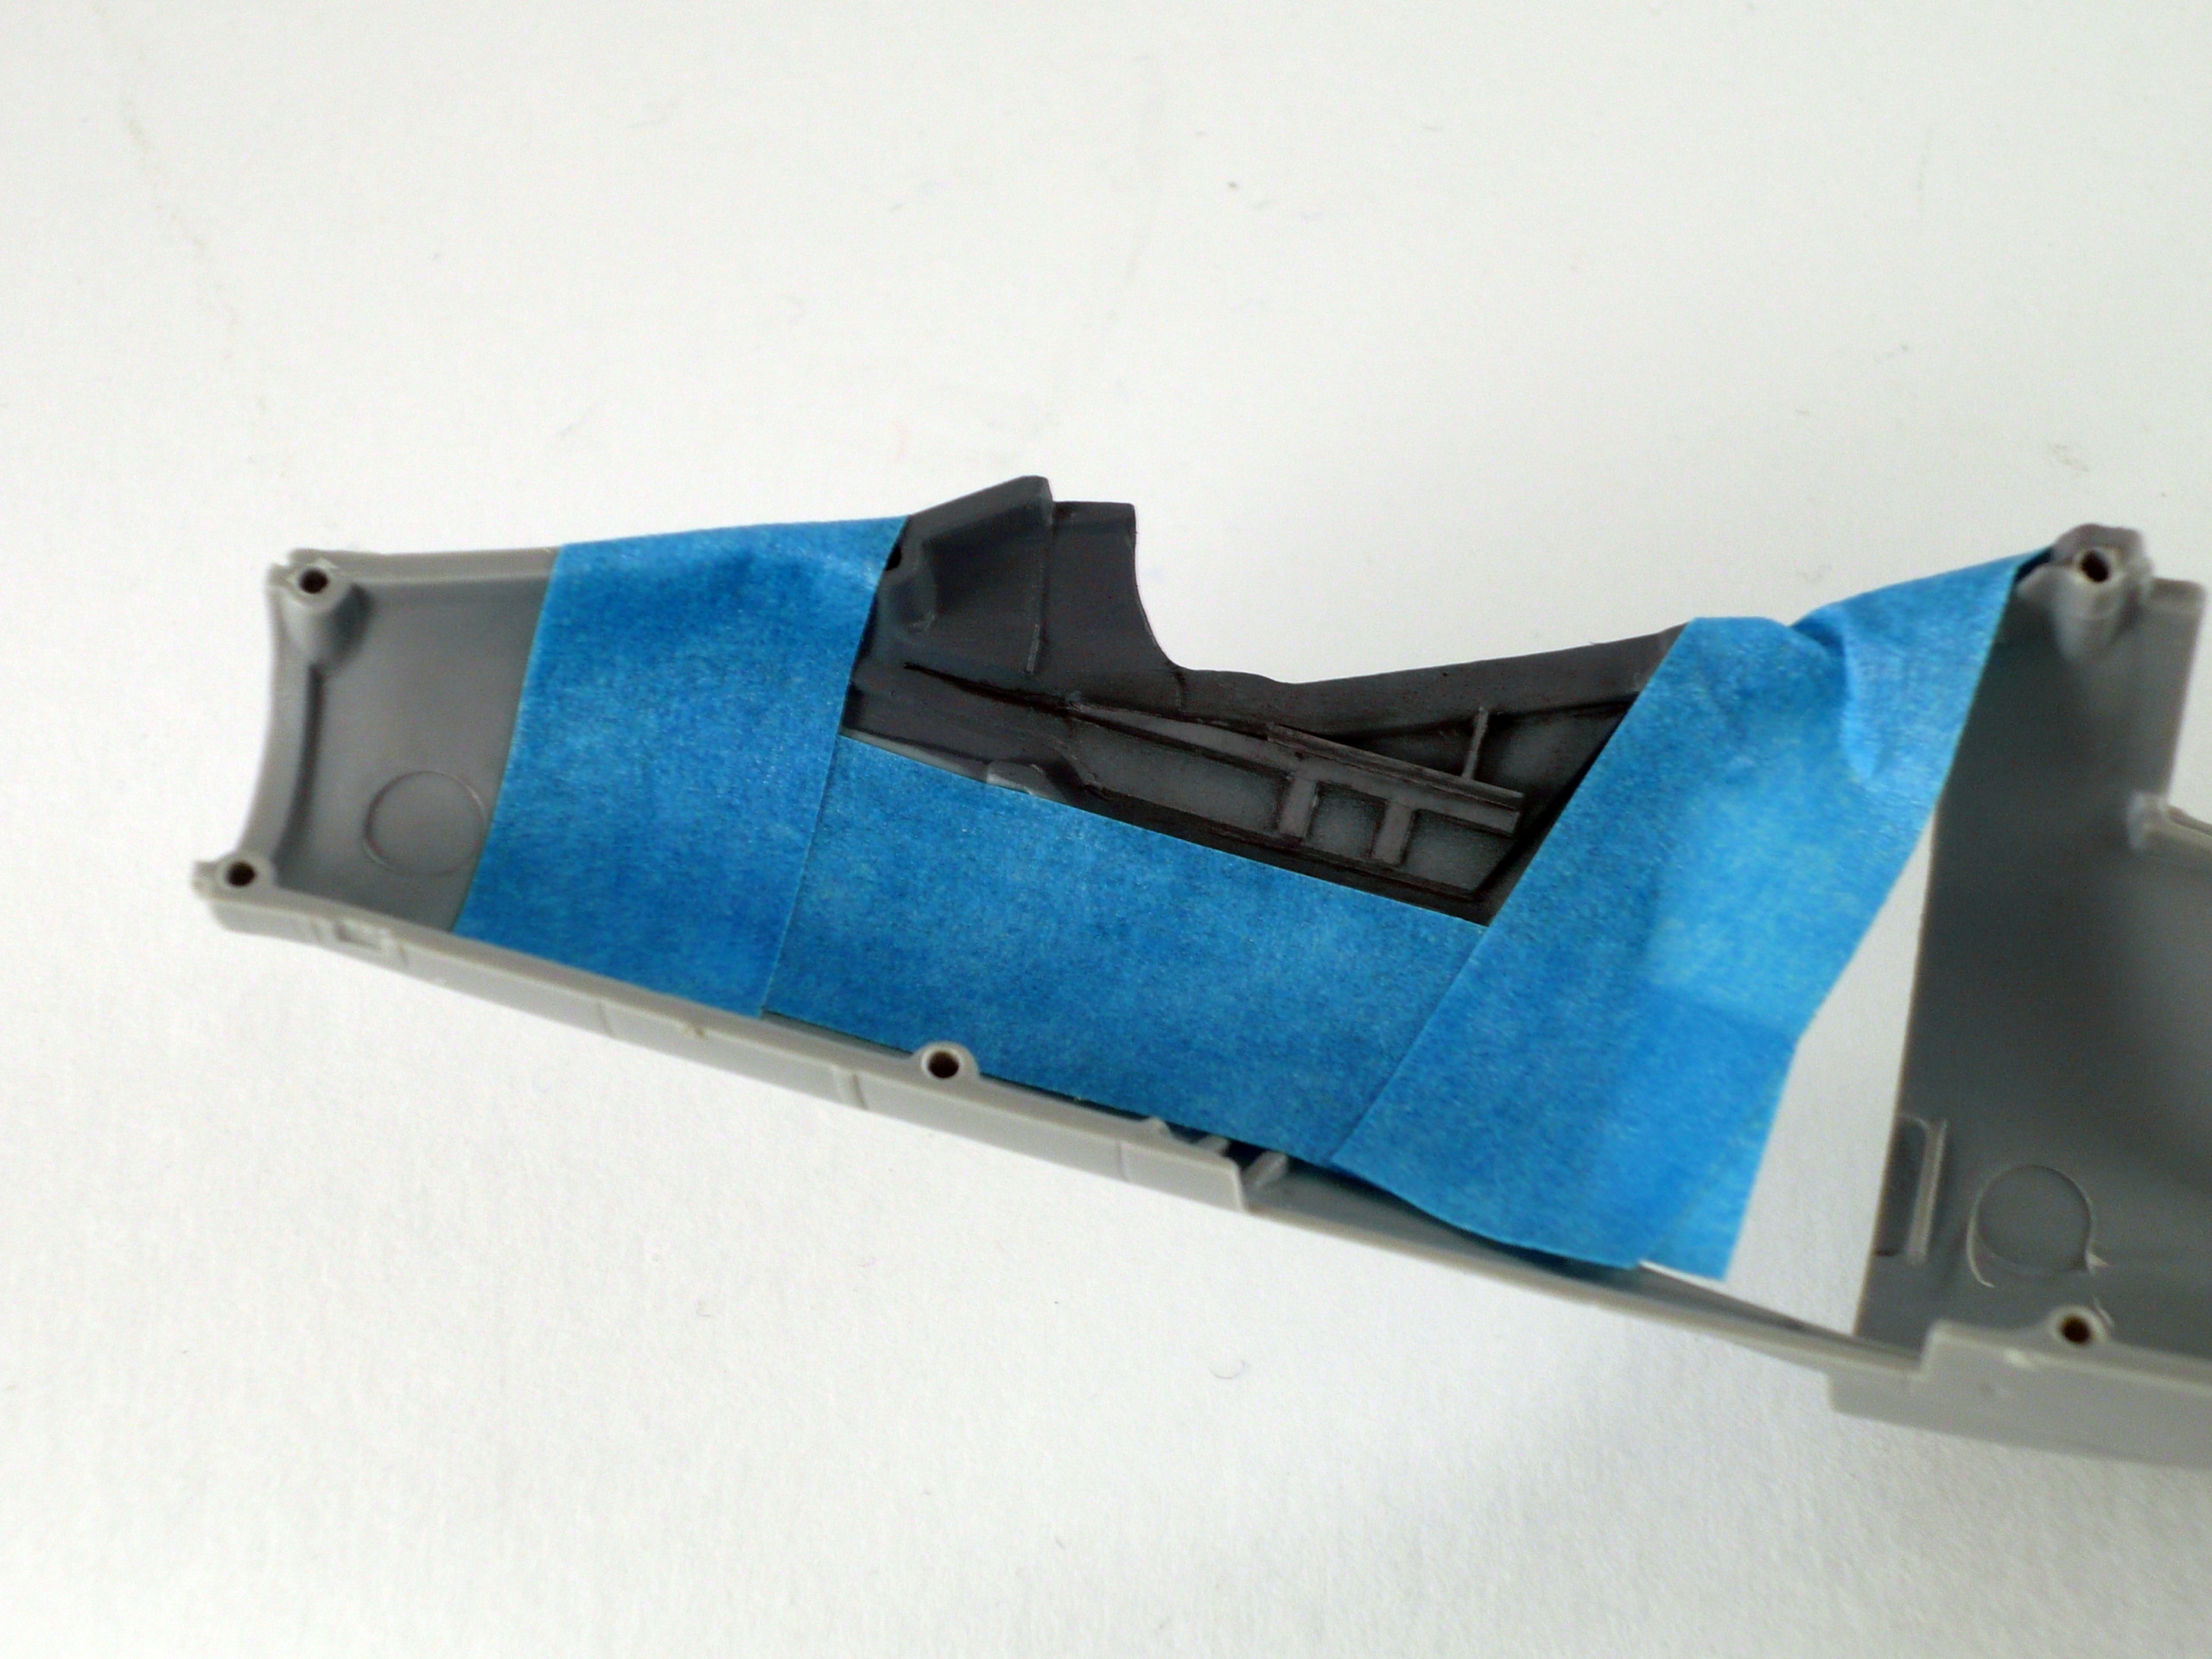
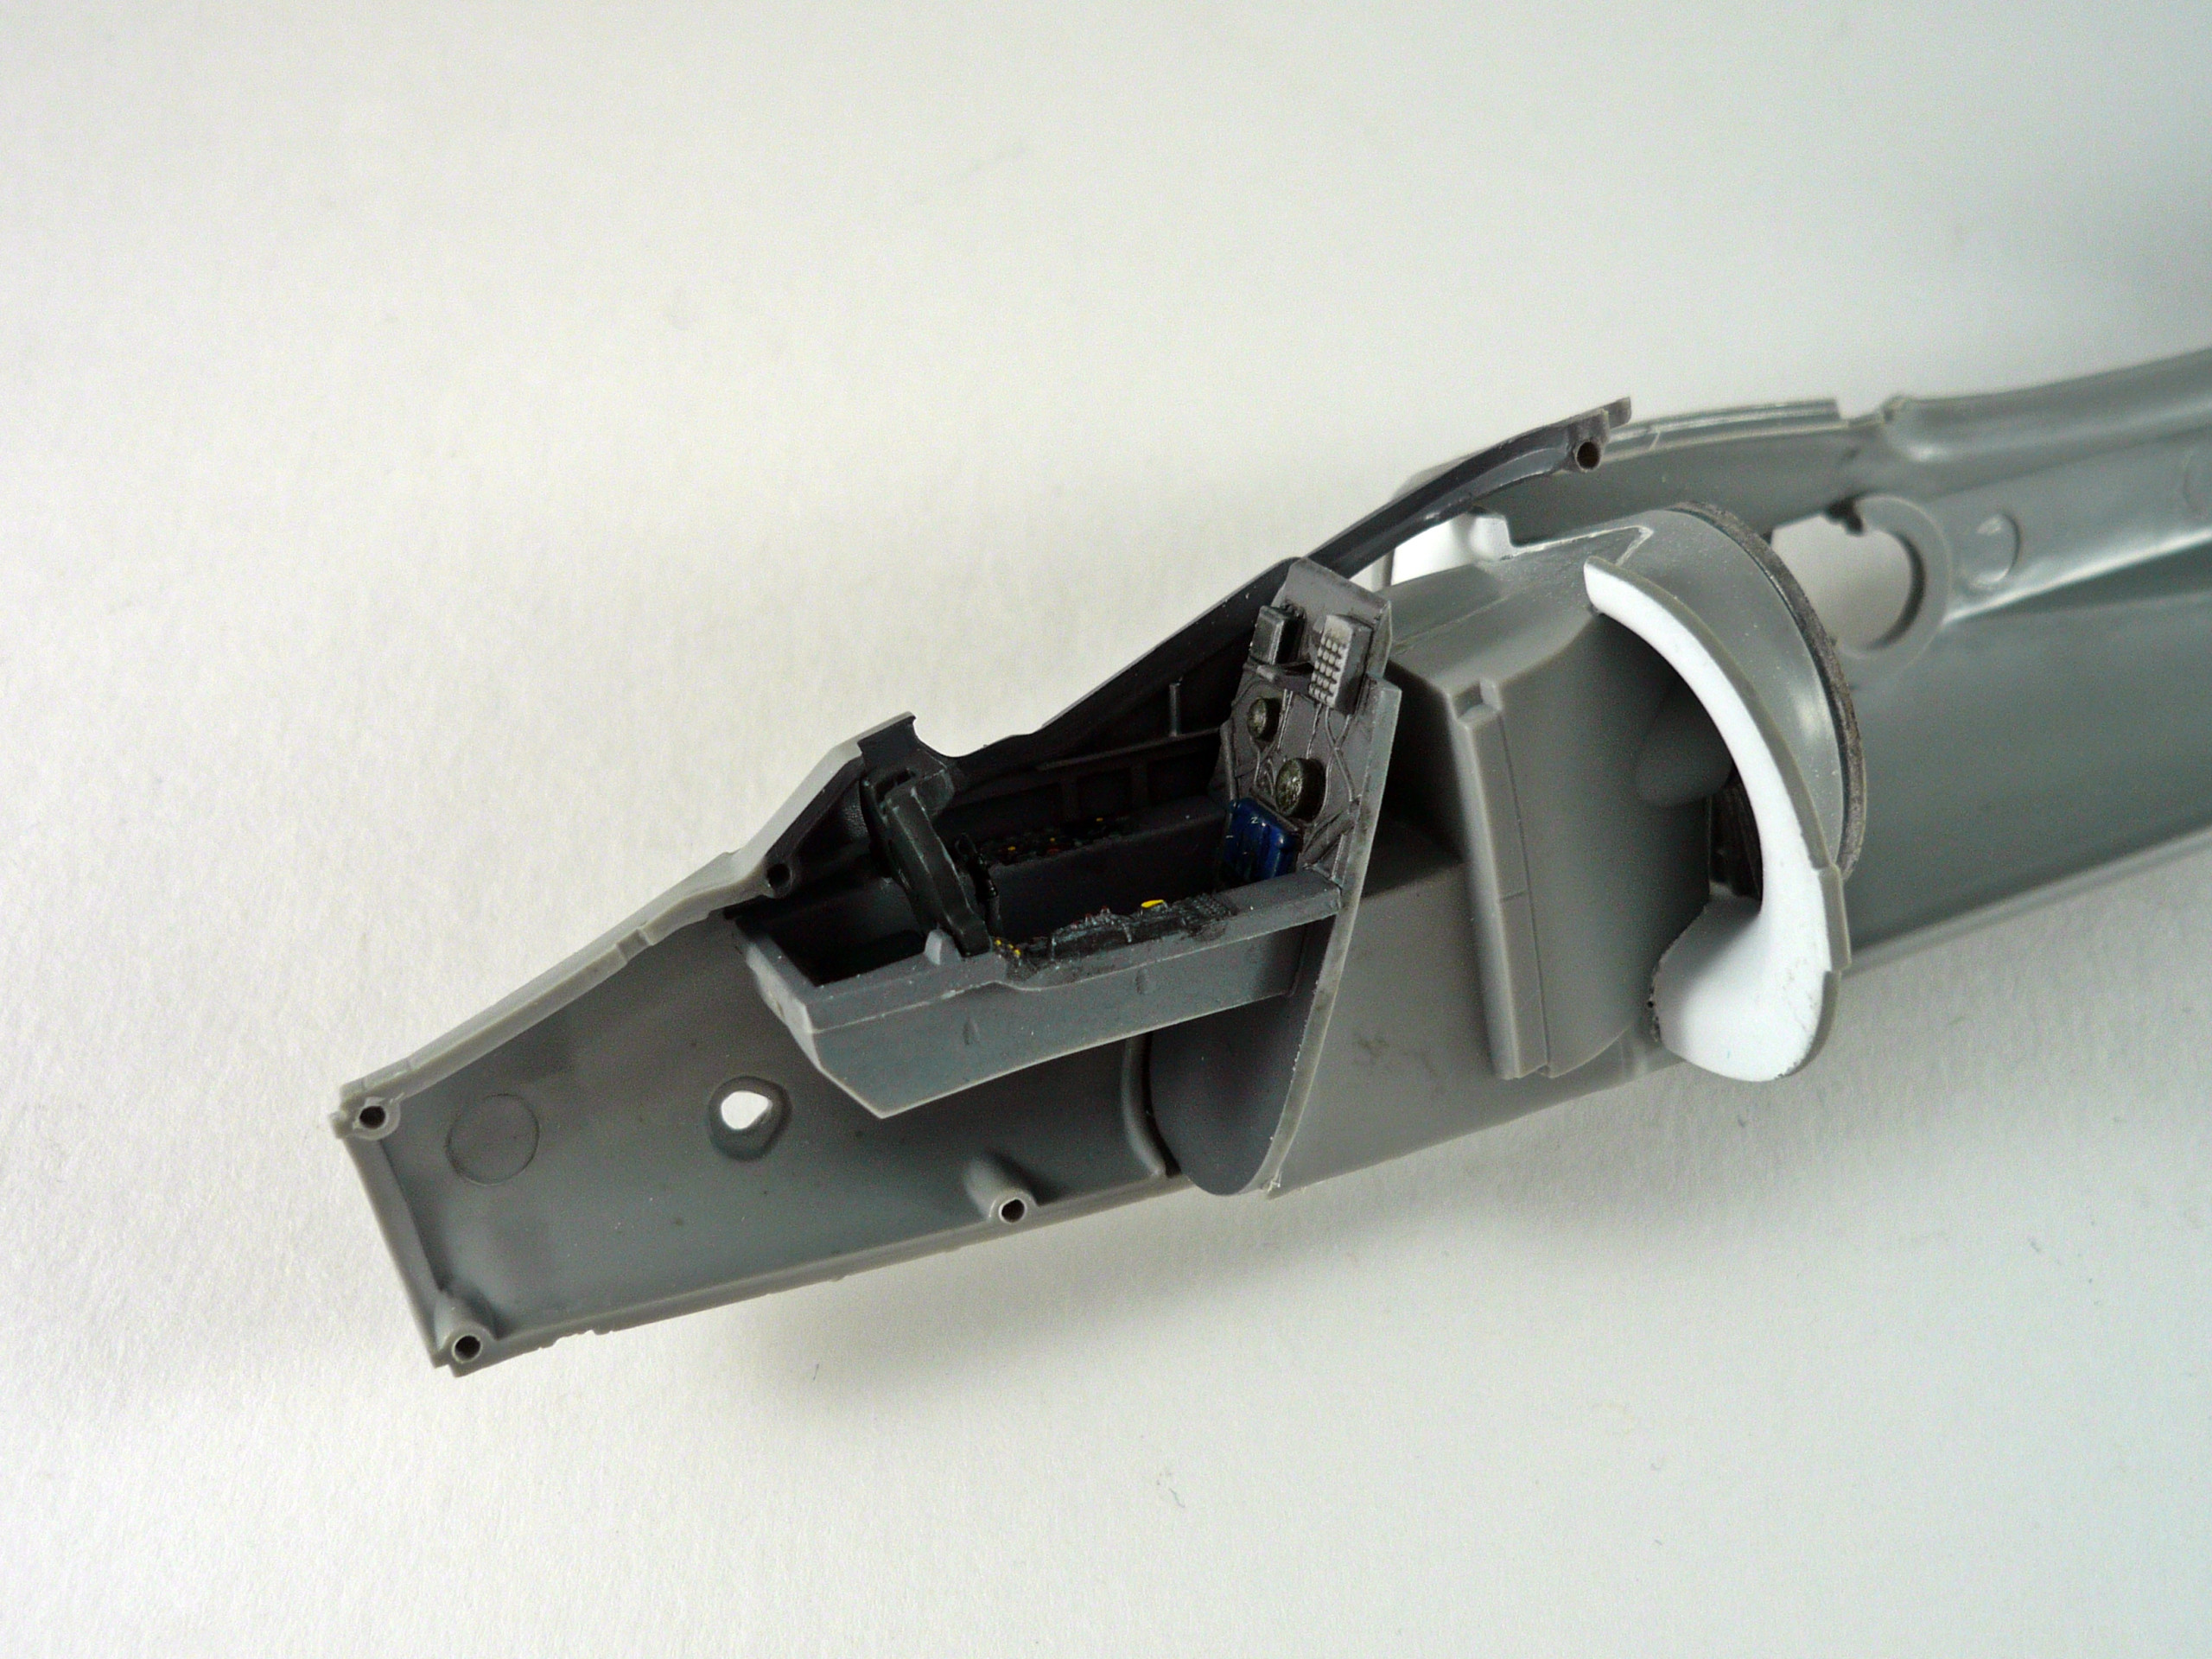
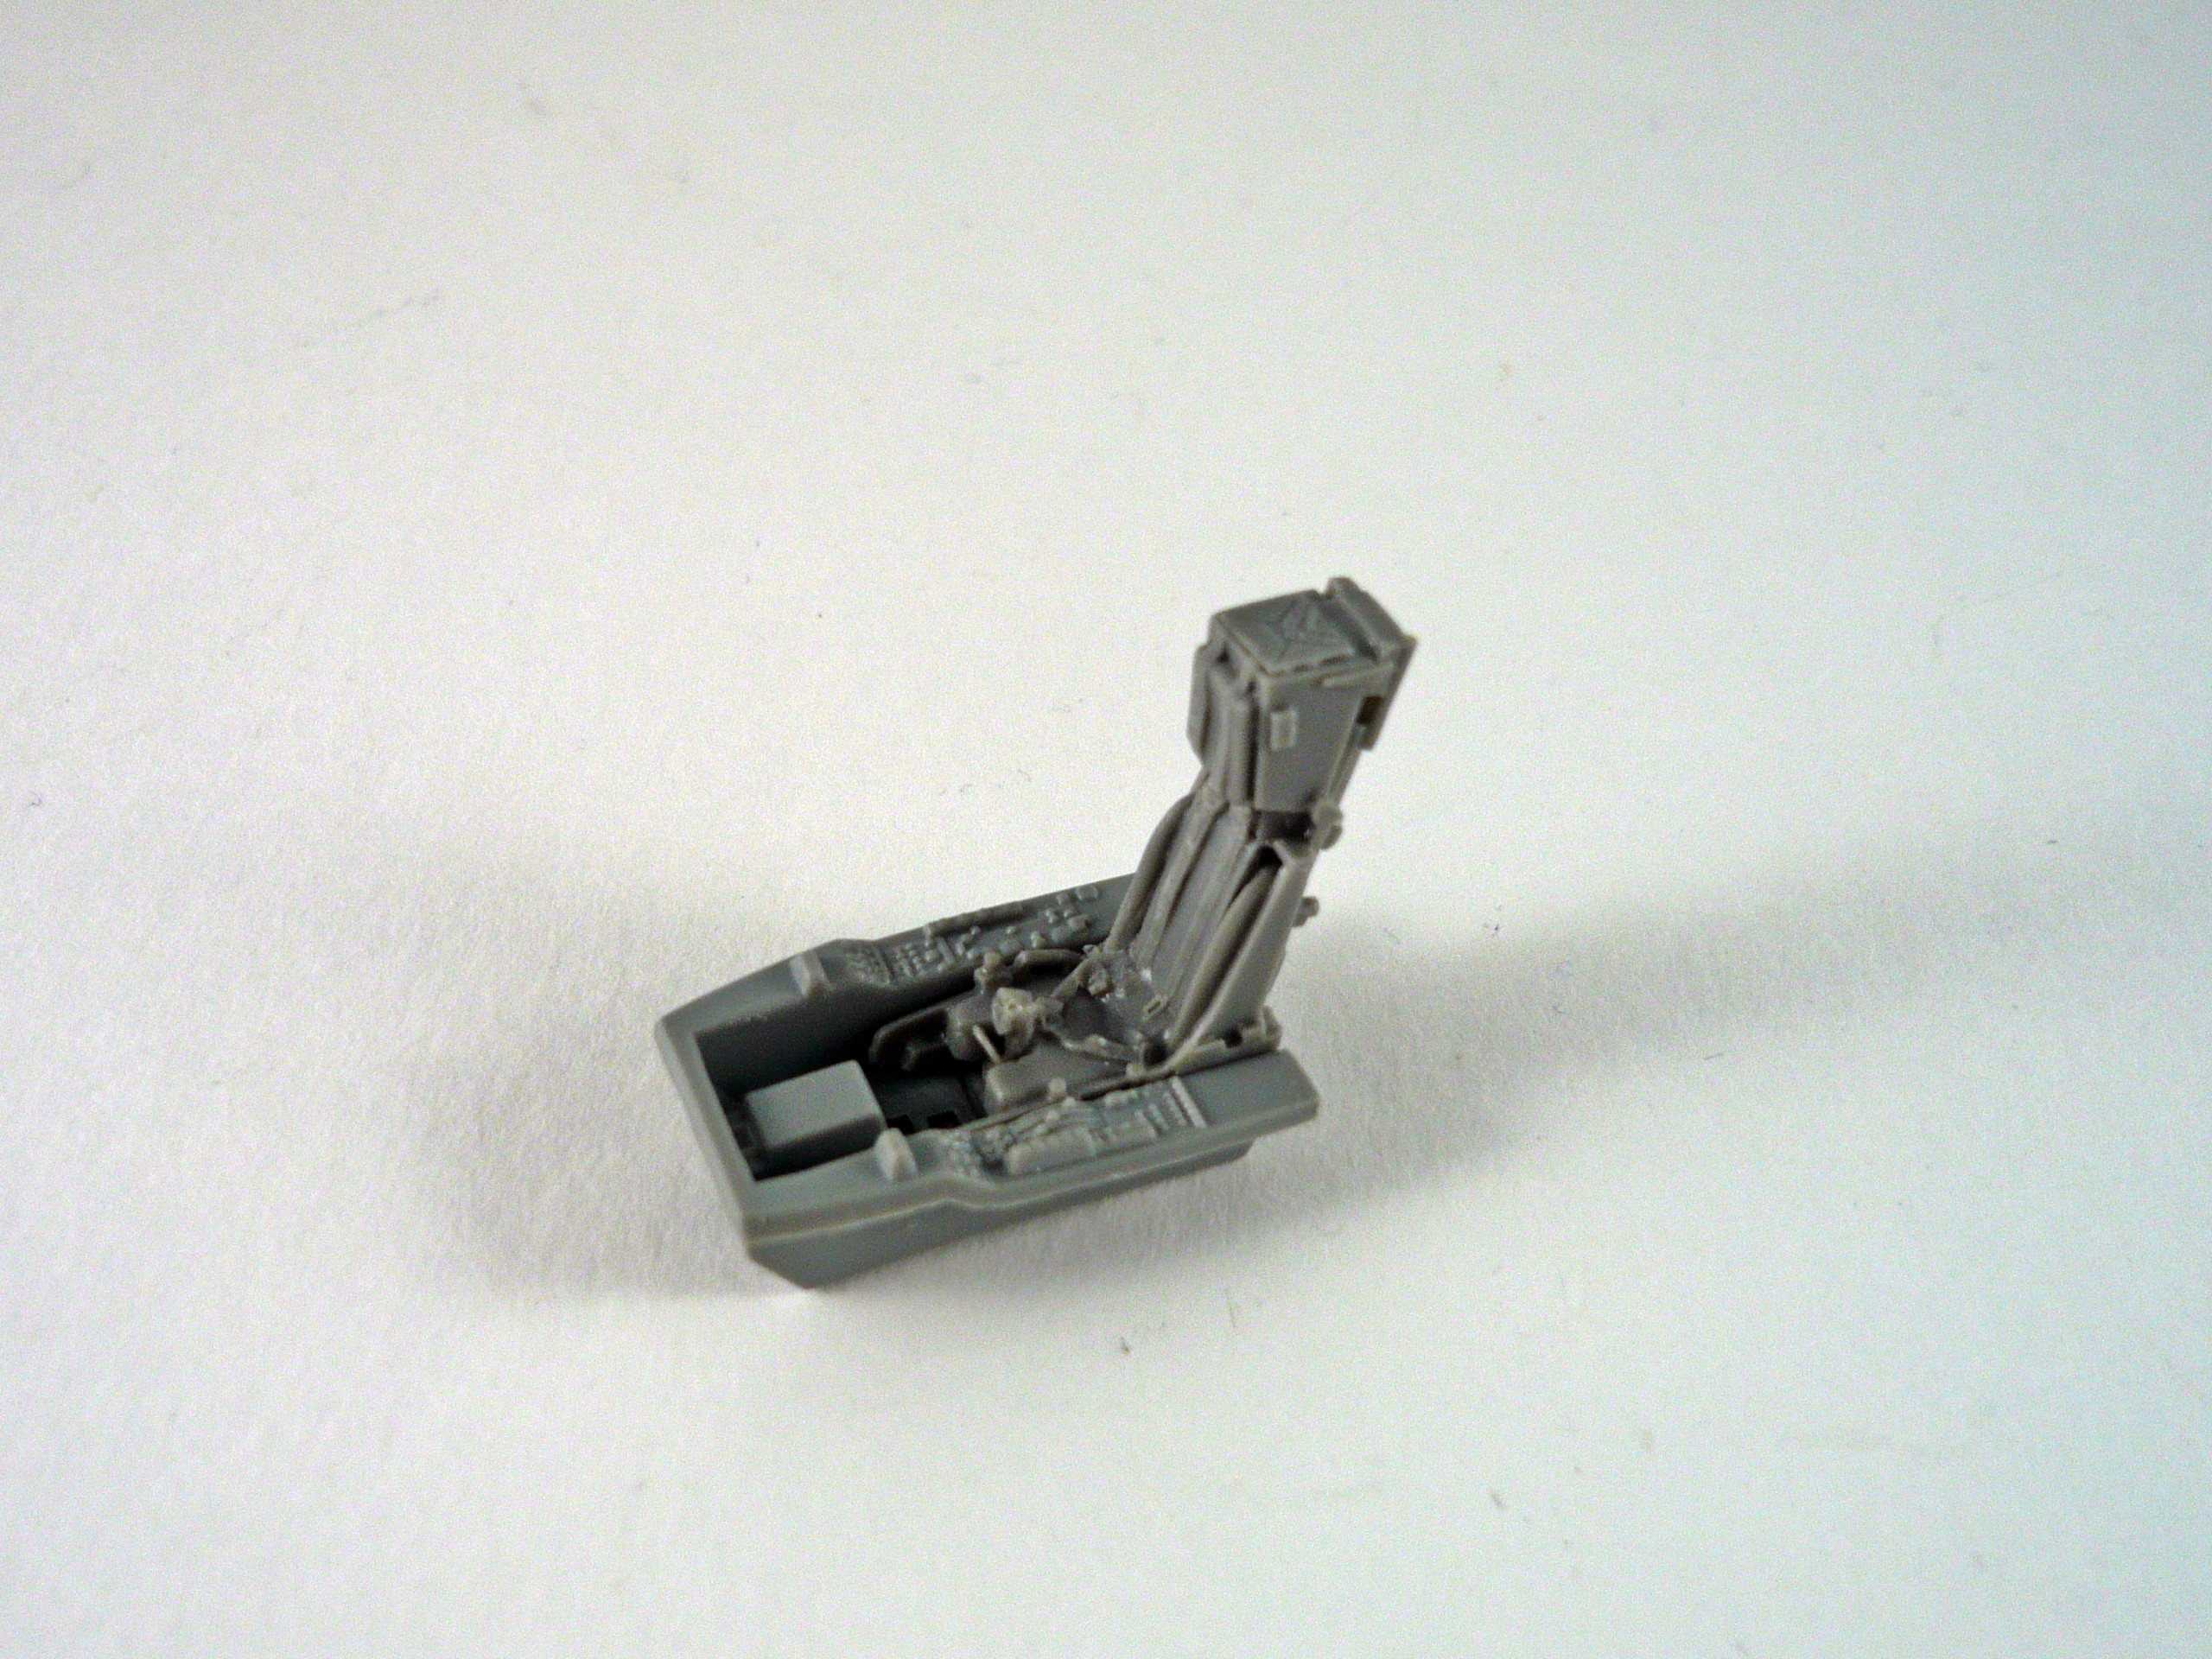
I first added some detail to the cockpit’s sidewalls using thin strips of Evergreen plastic strip (pics 1 & 2)
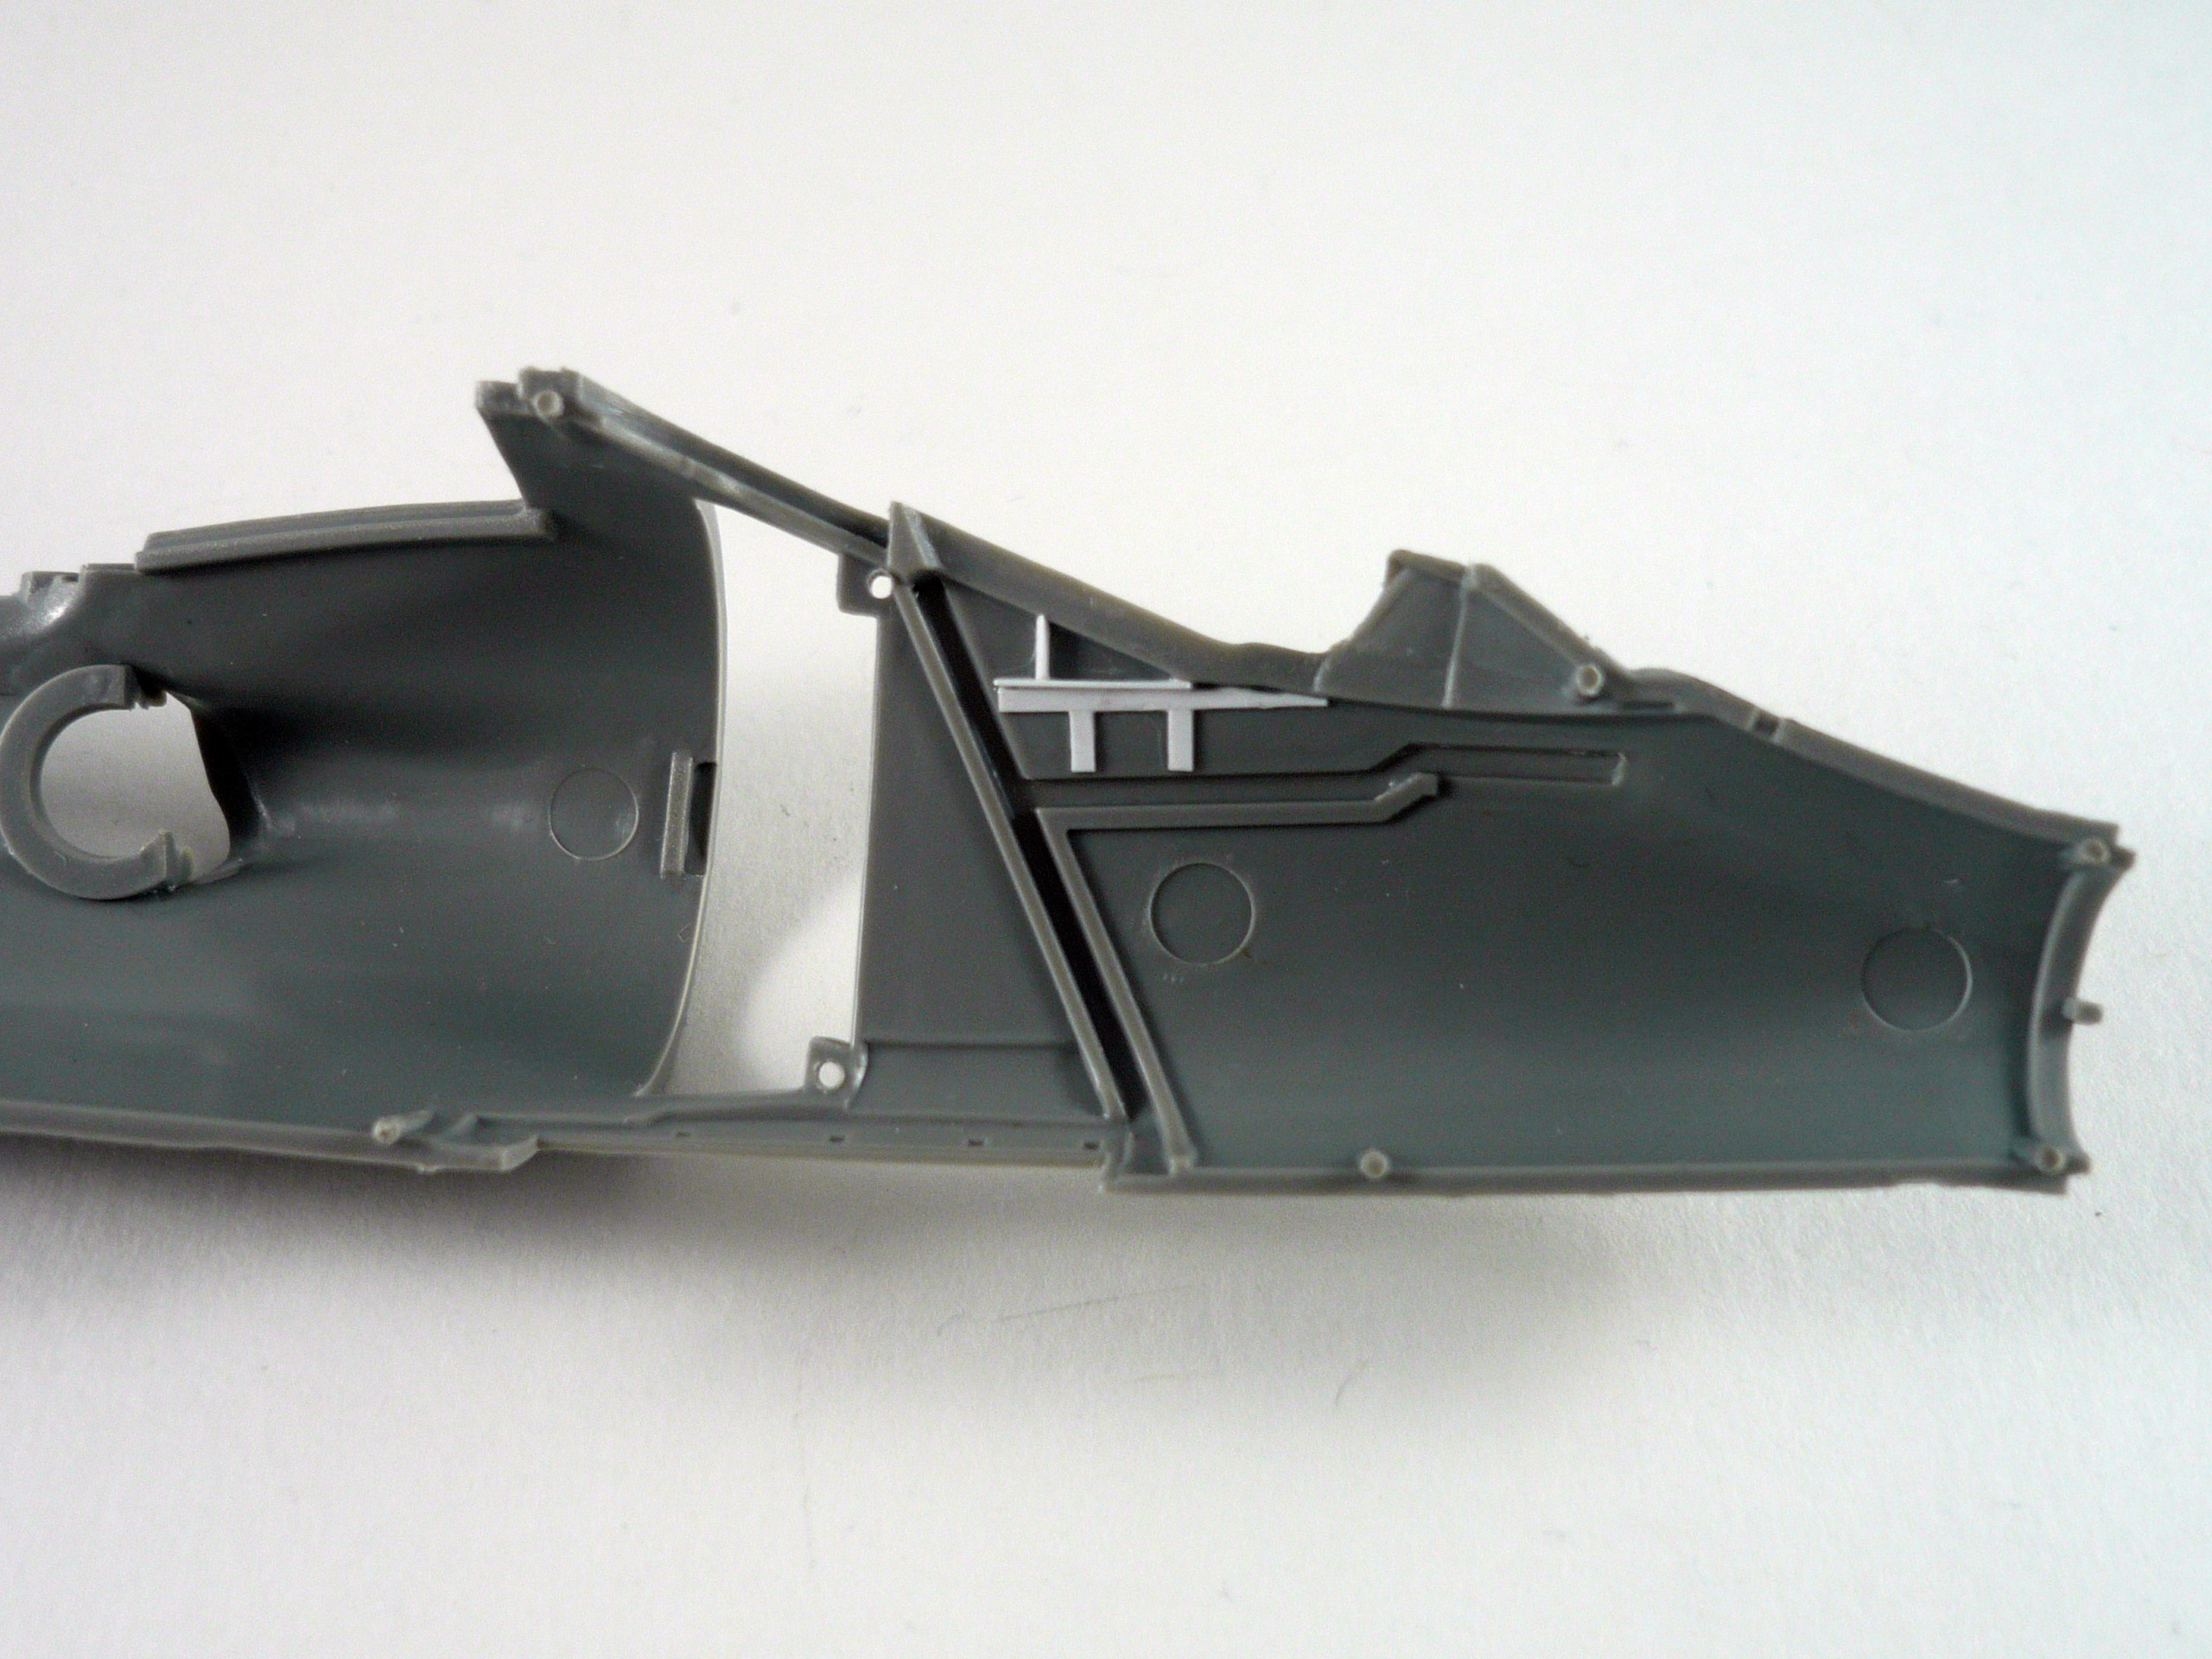
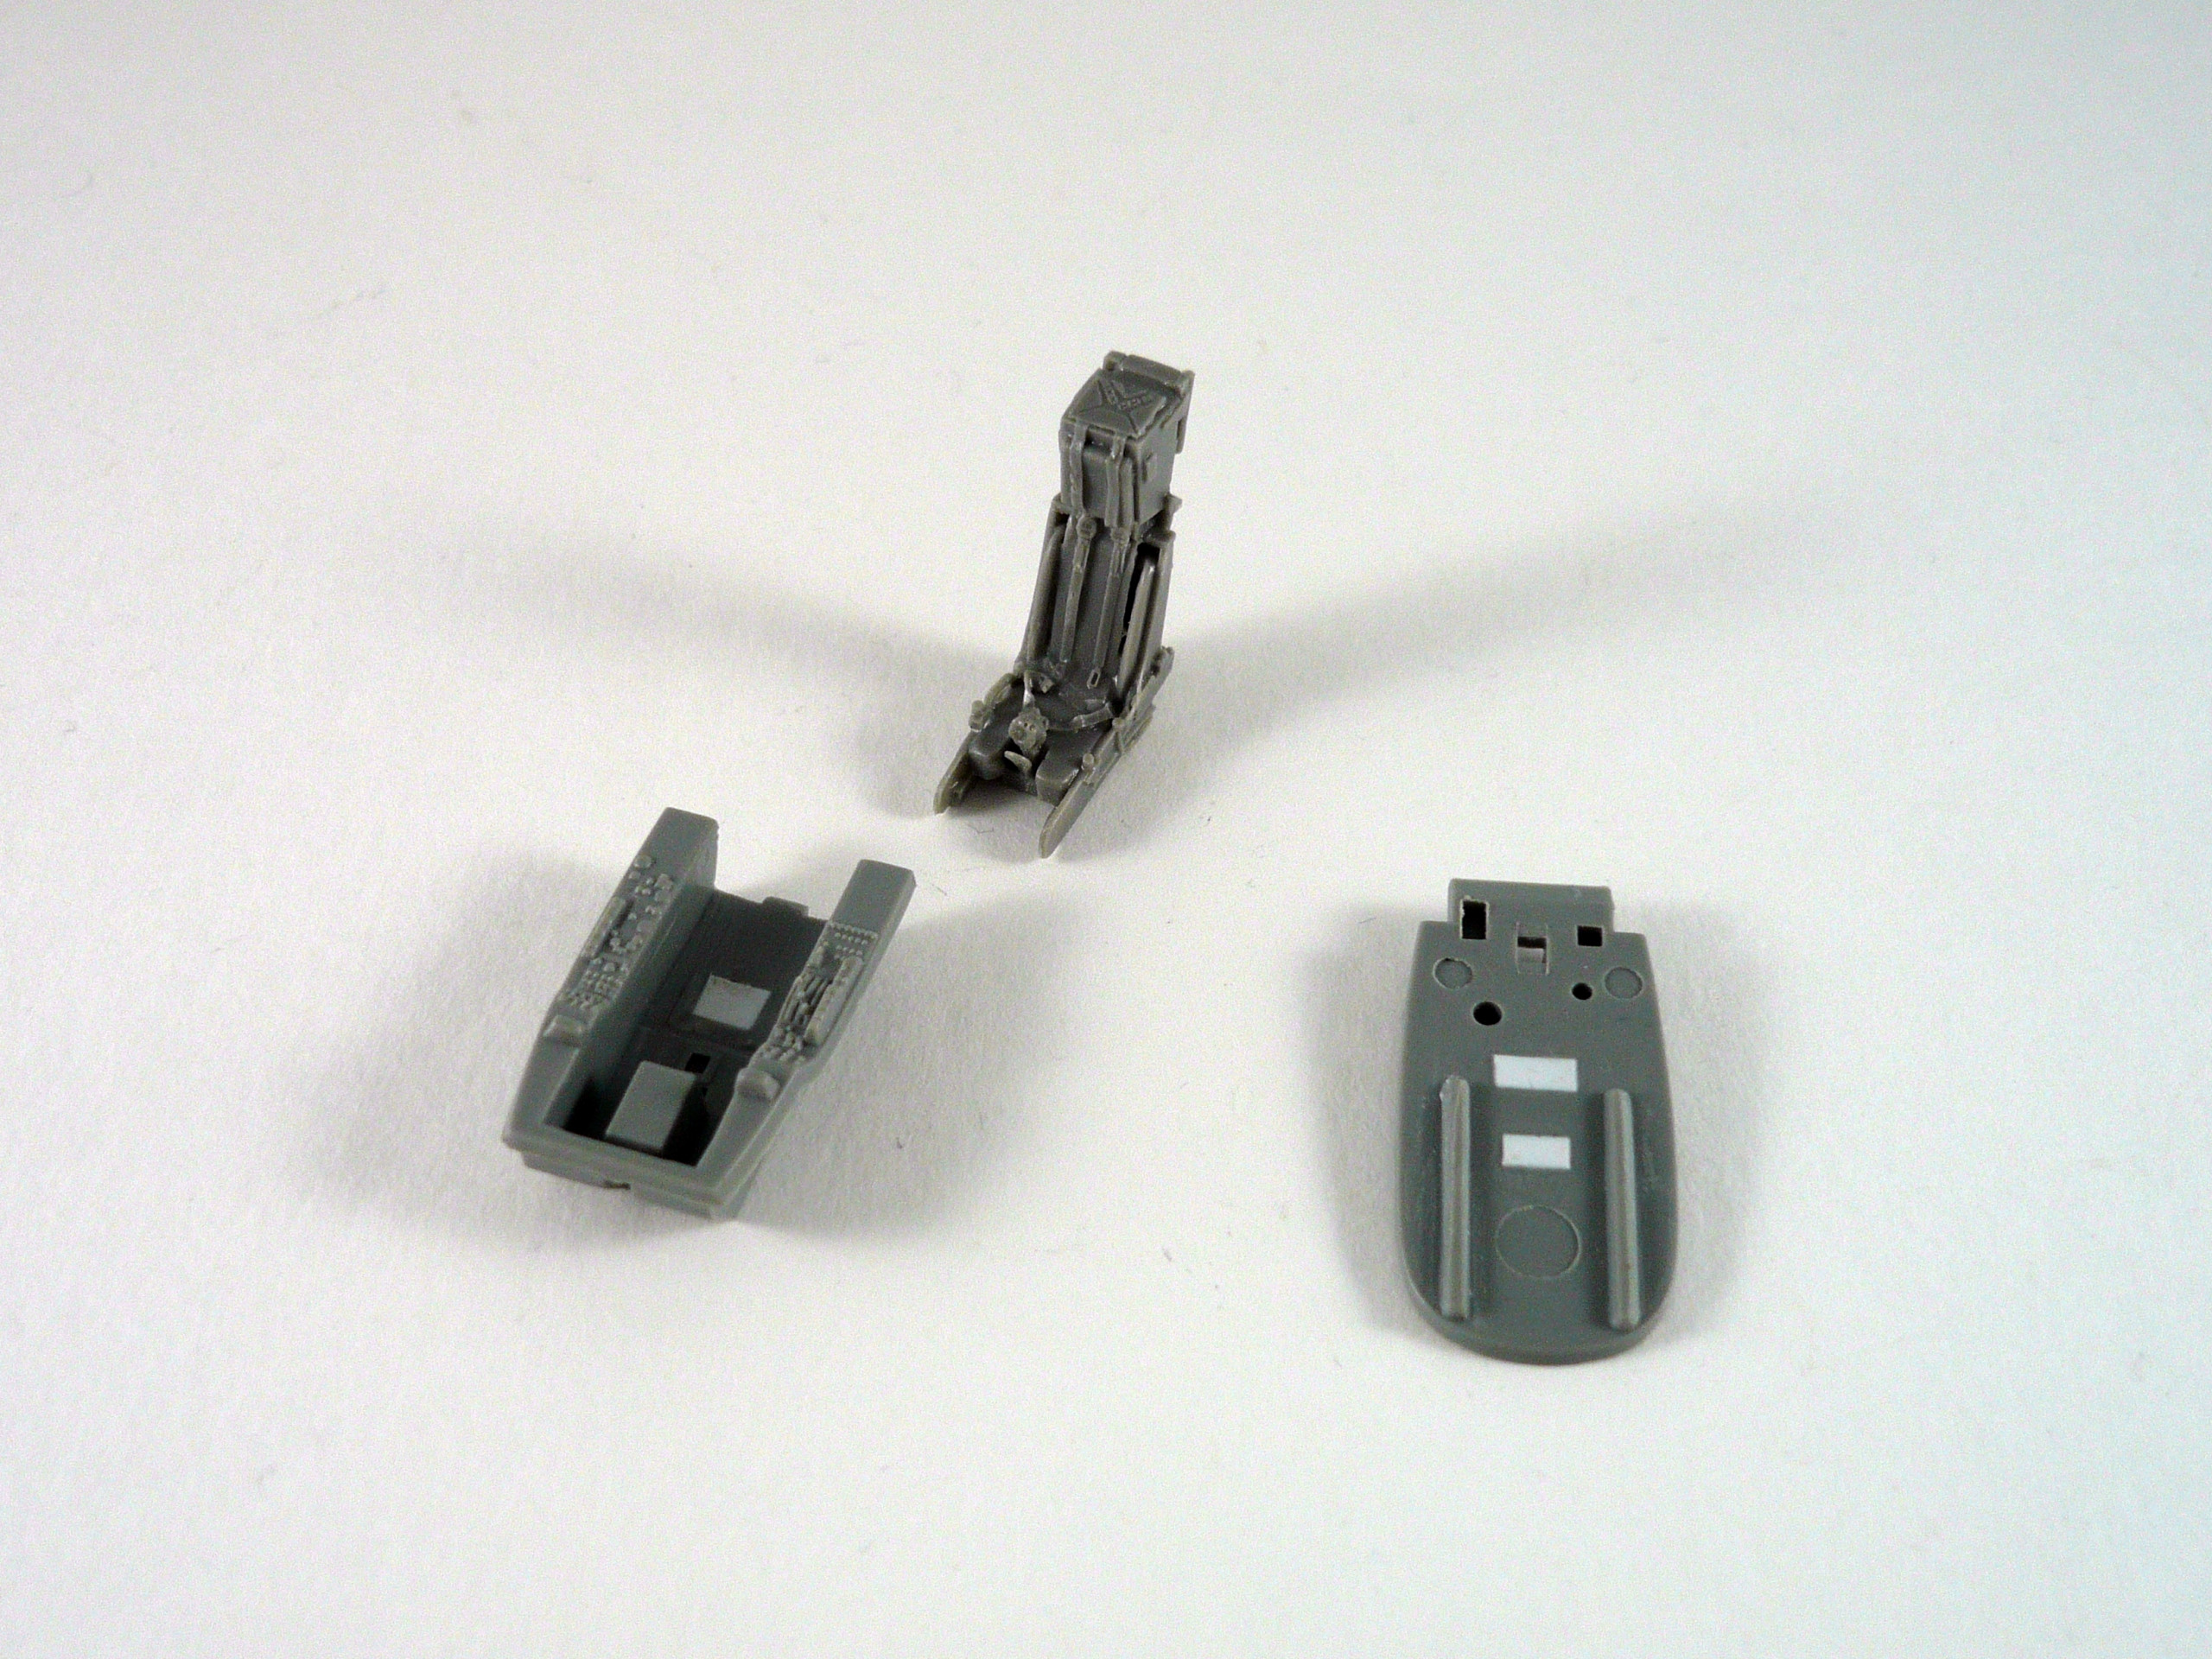
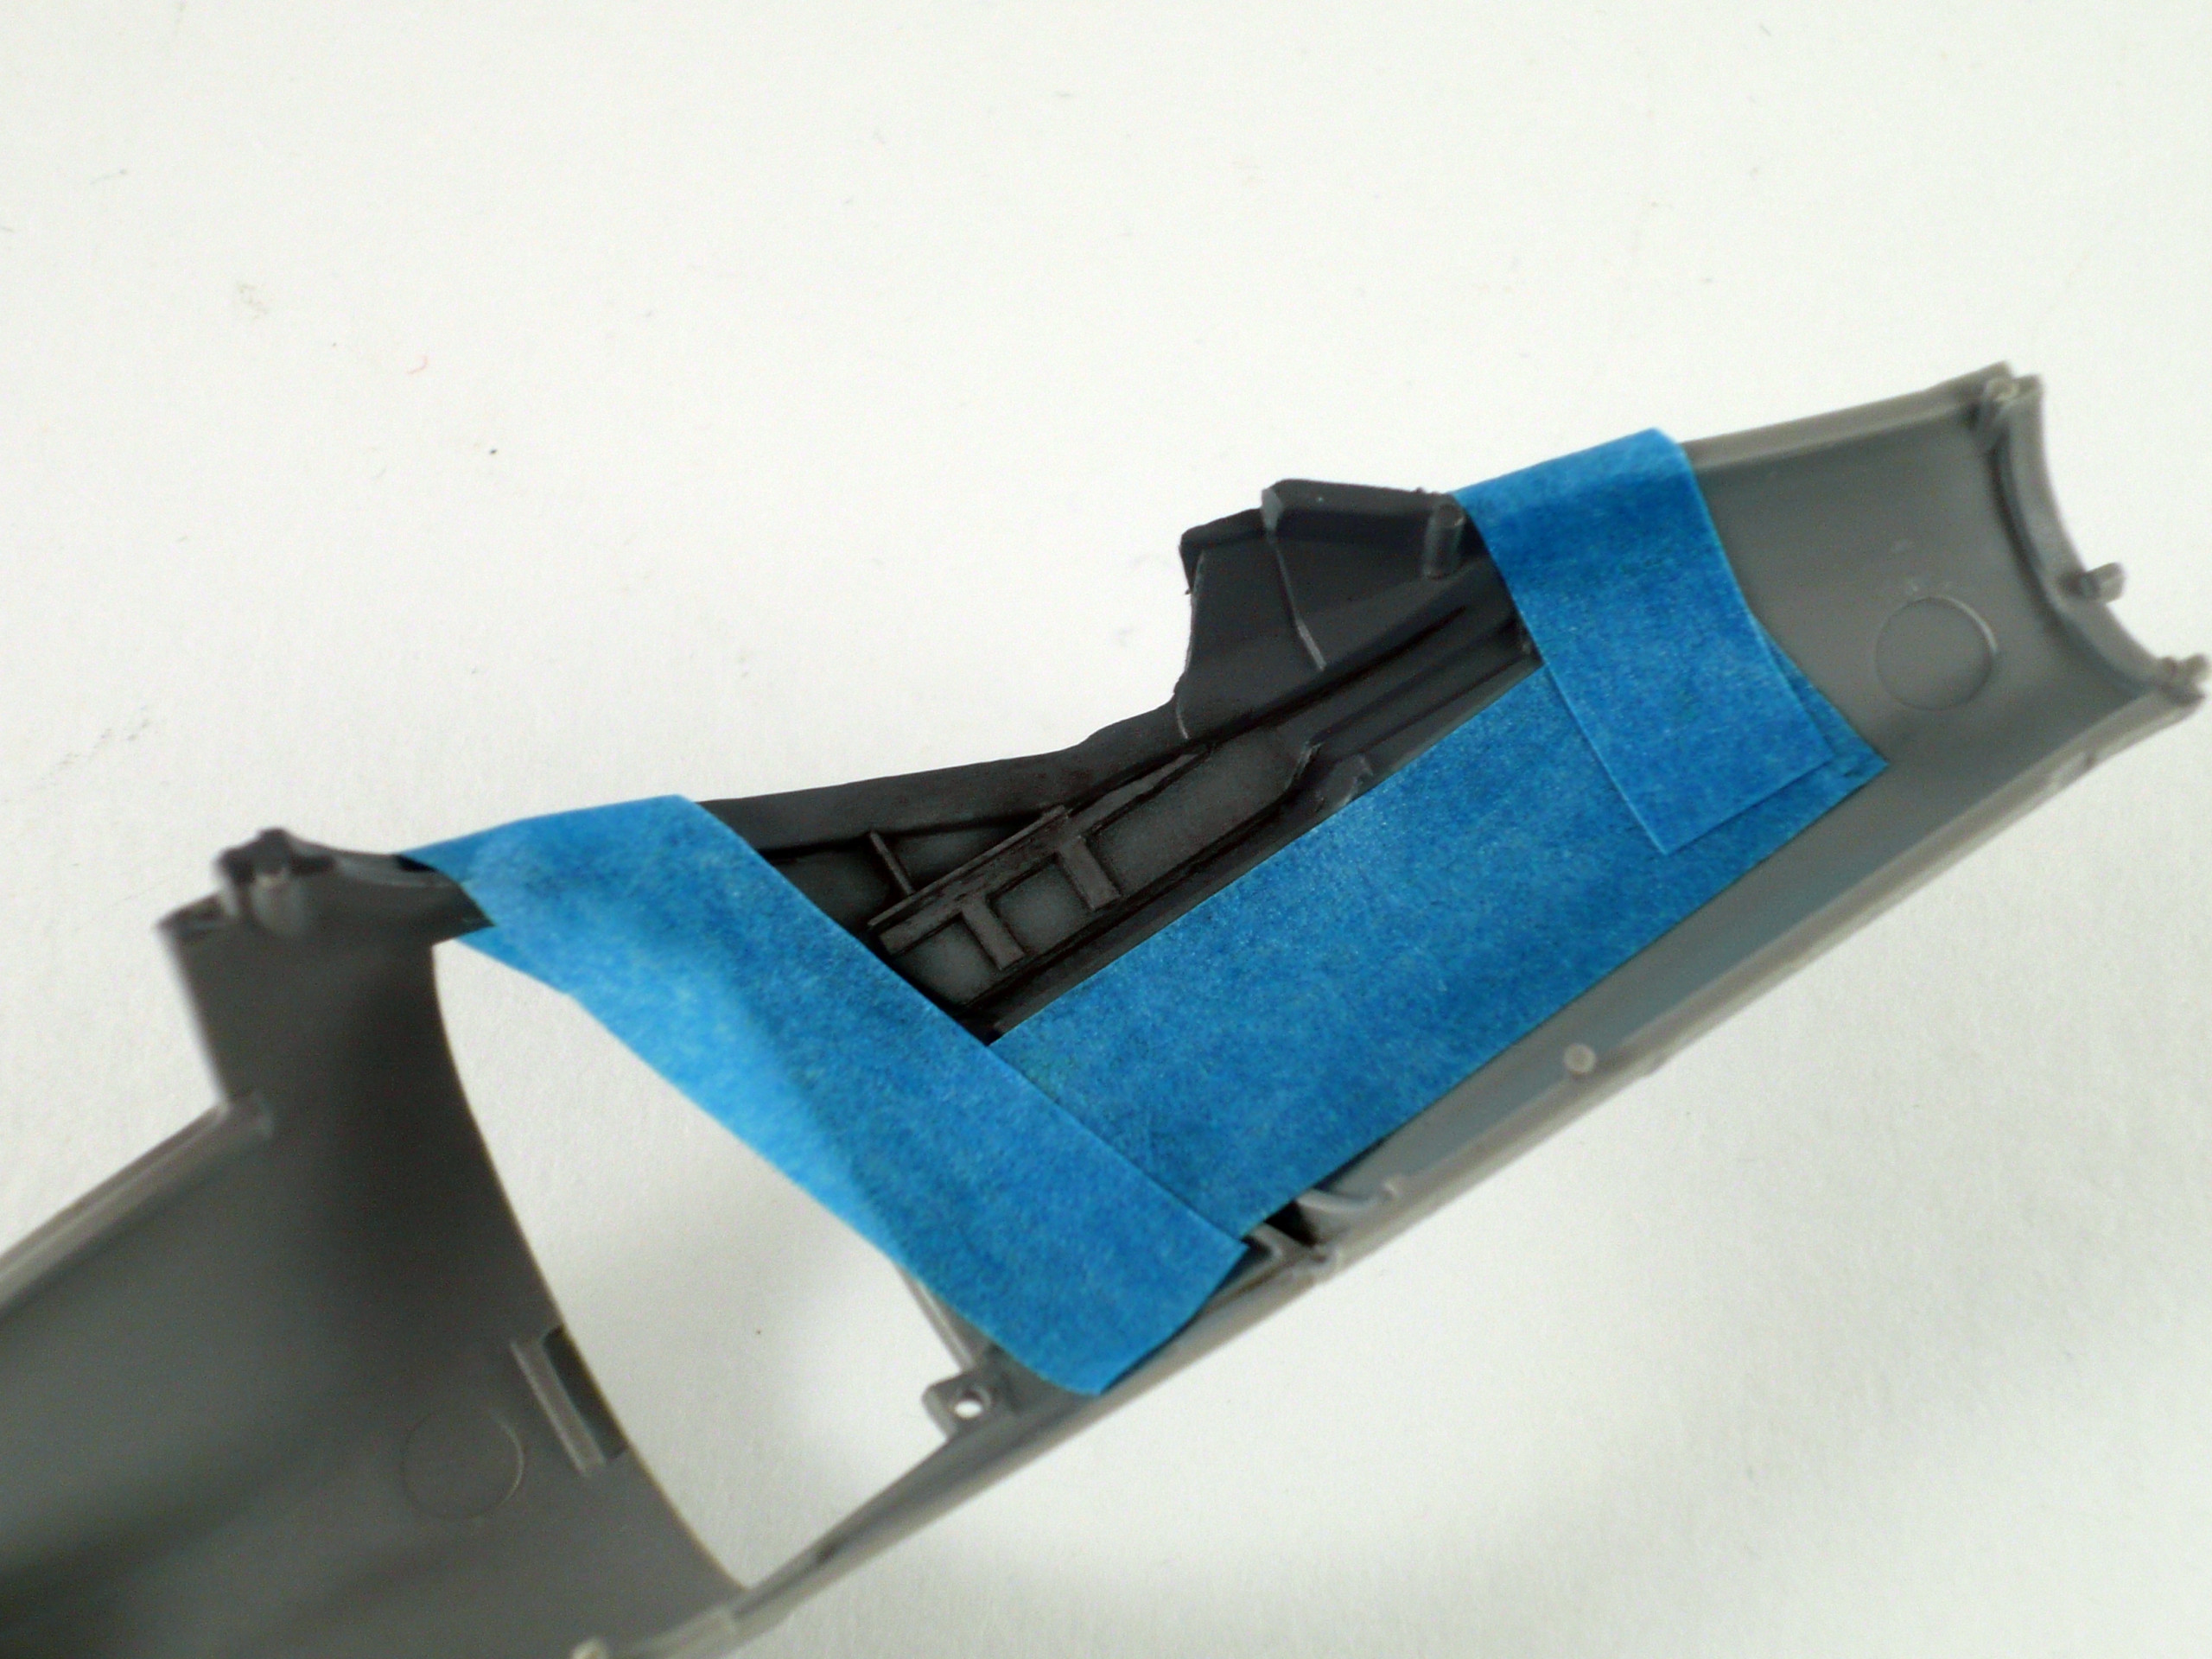
I cut off the mounting of the cockpit’s floor so I can fit the resin seat (pic.44). Then I closed the gap there and at the cockpit’s back panel with some Evergreen plasticard cut in shape (pic 3)
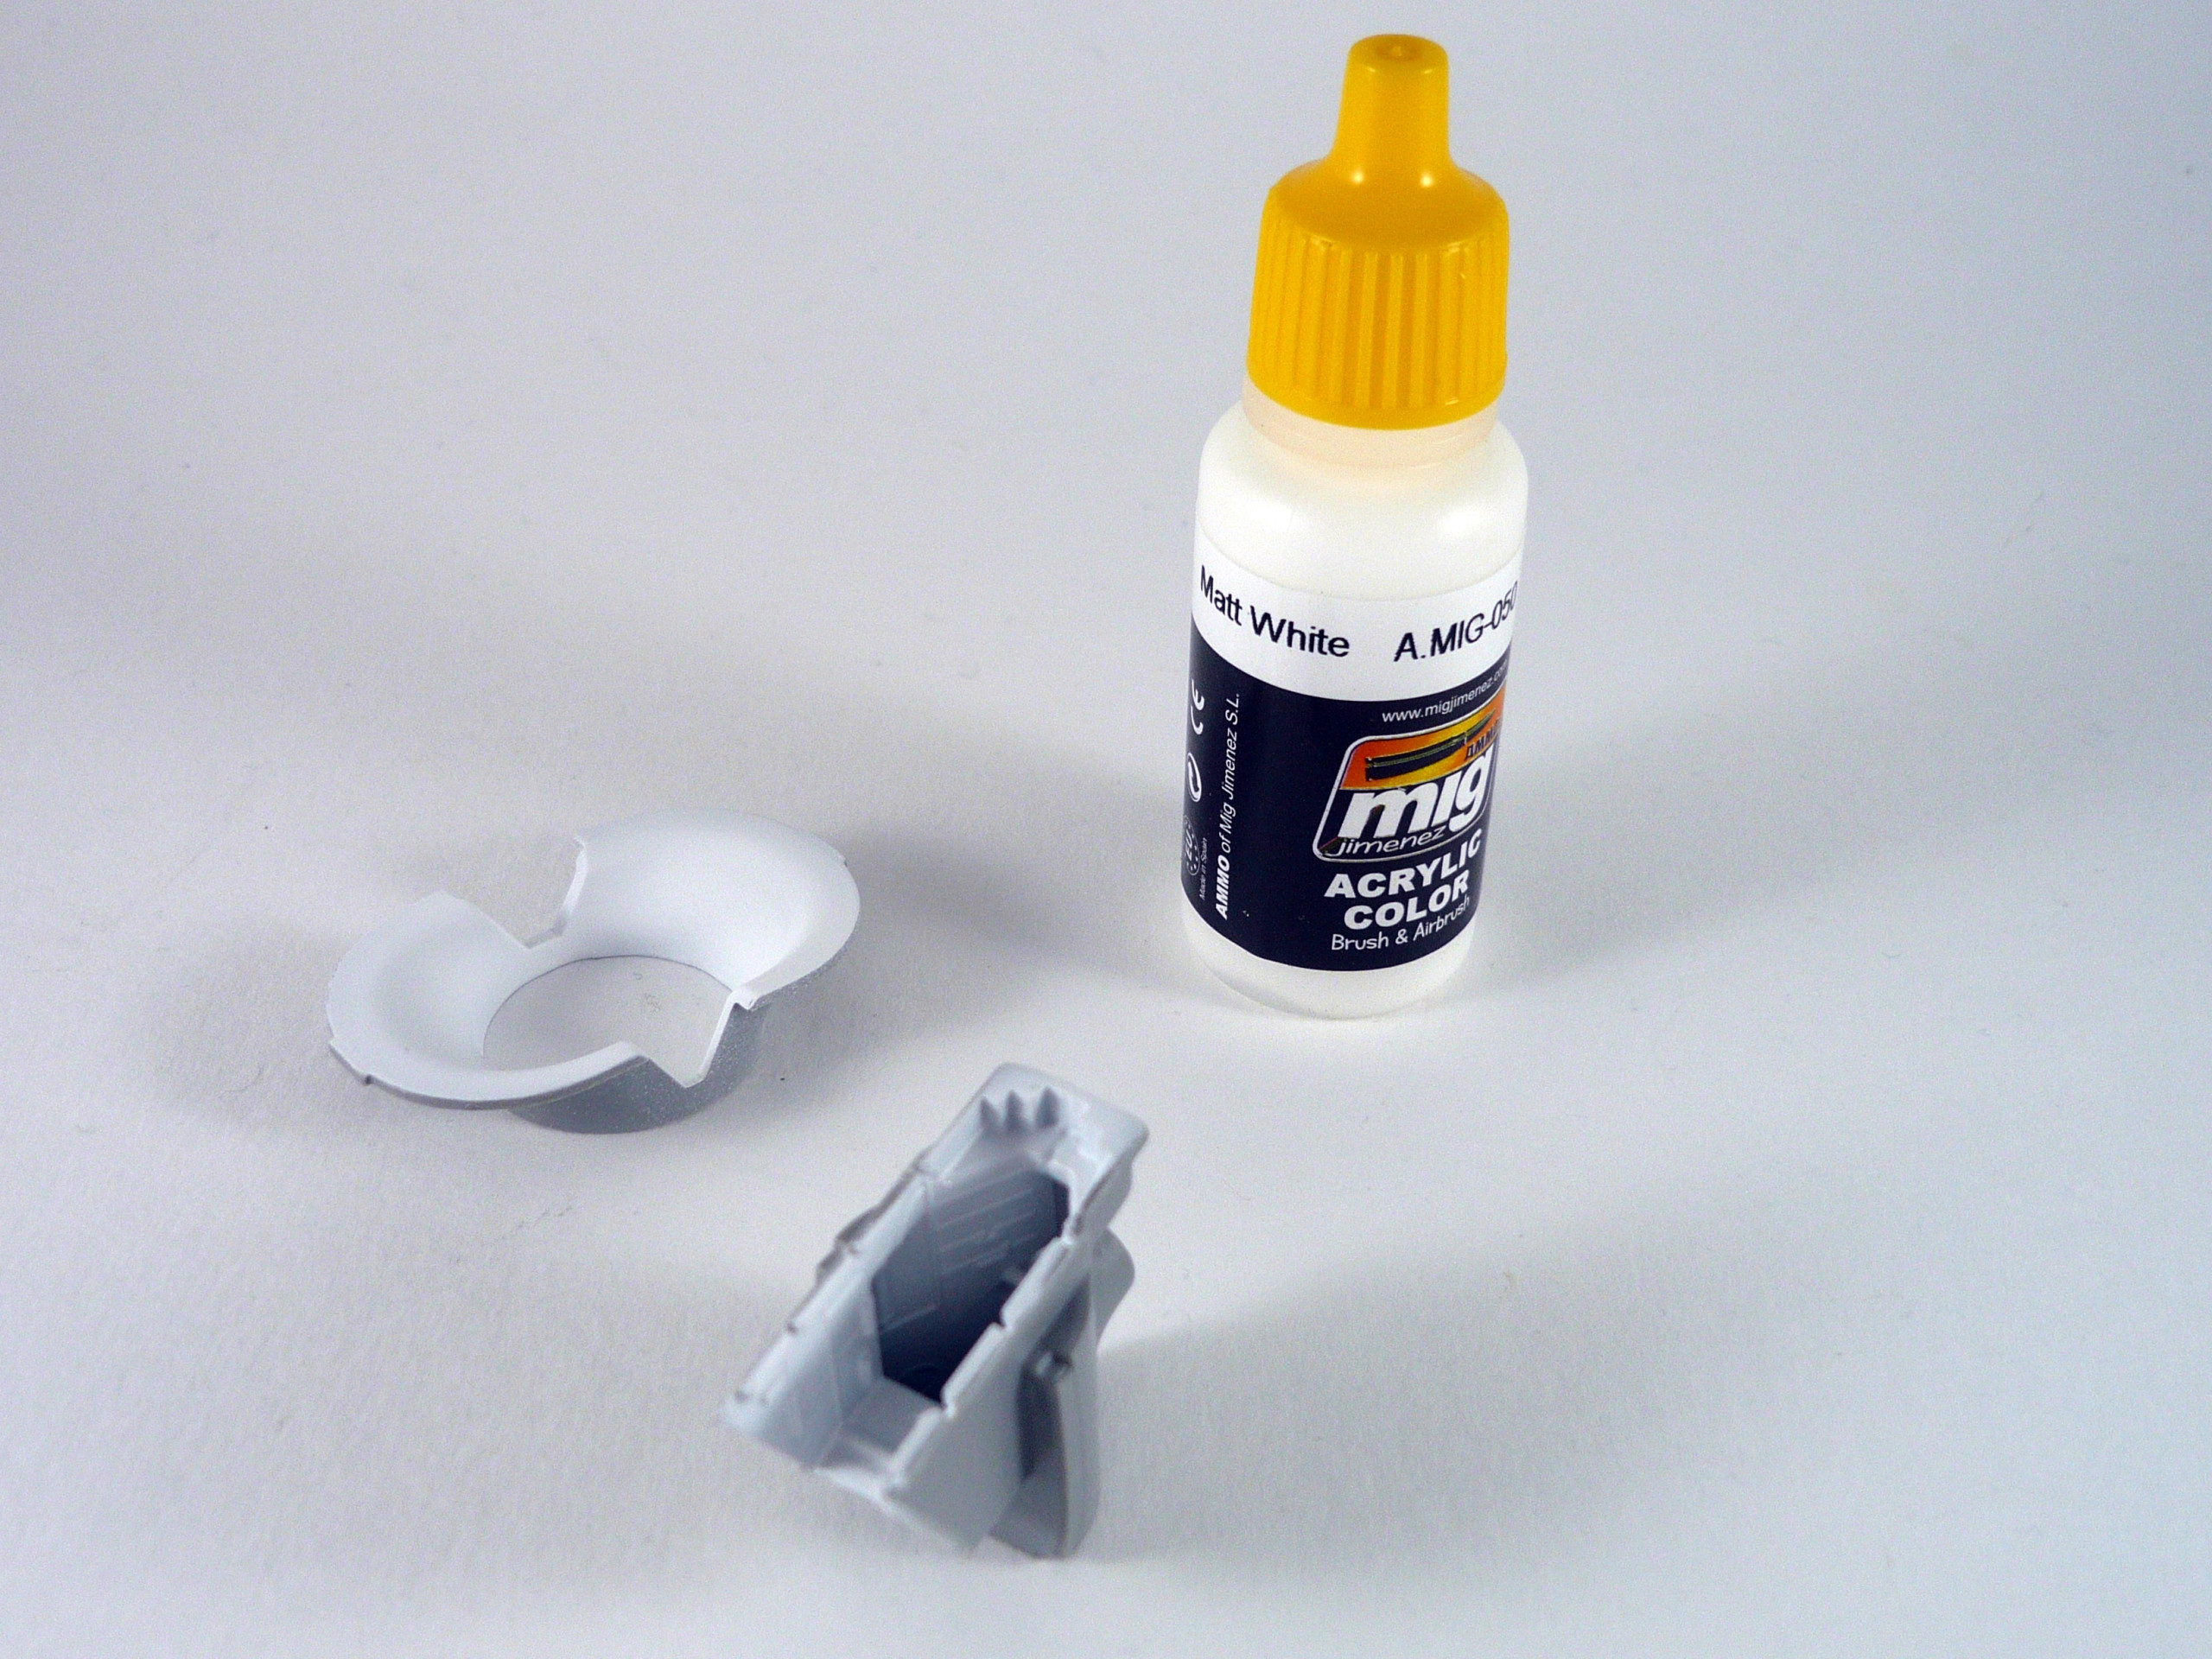
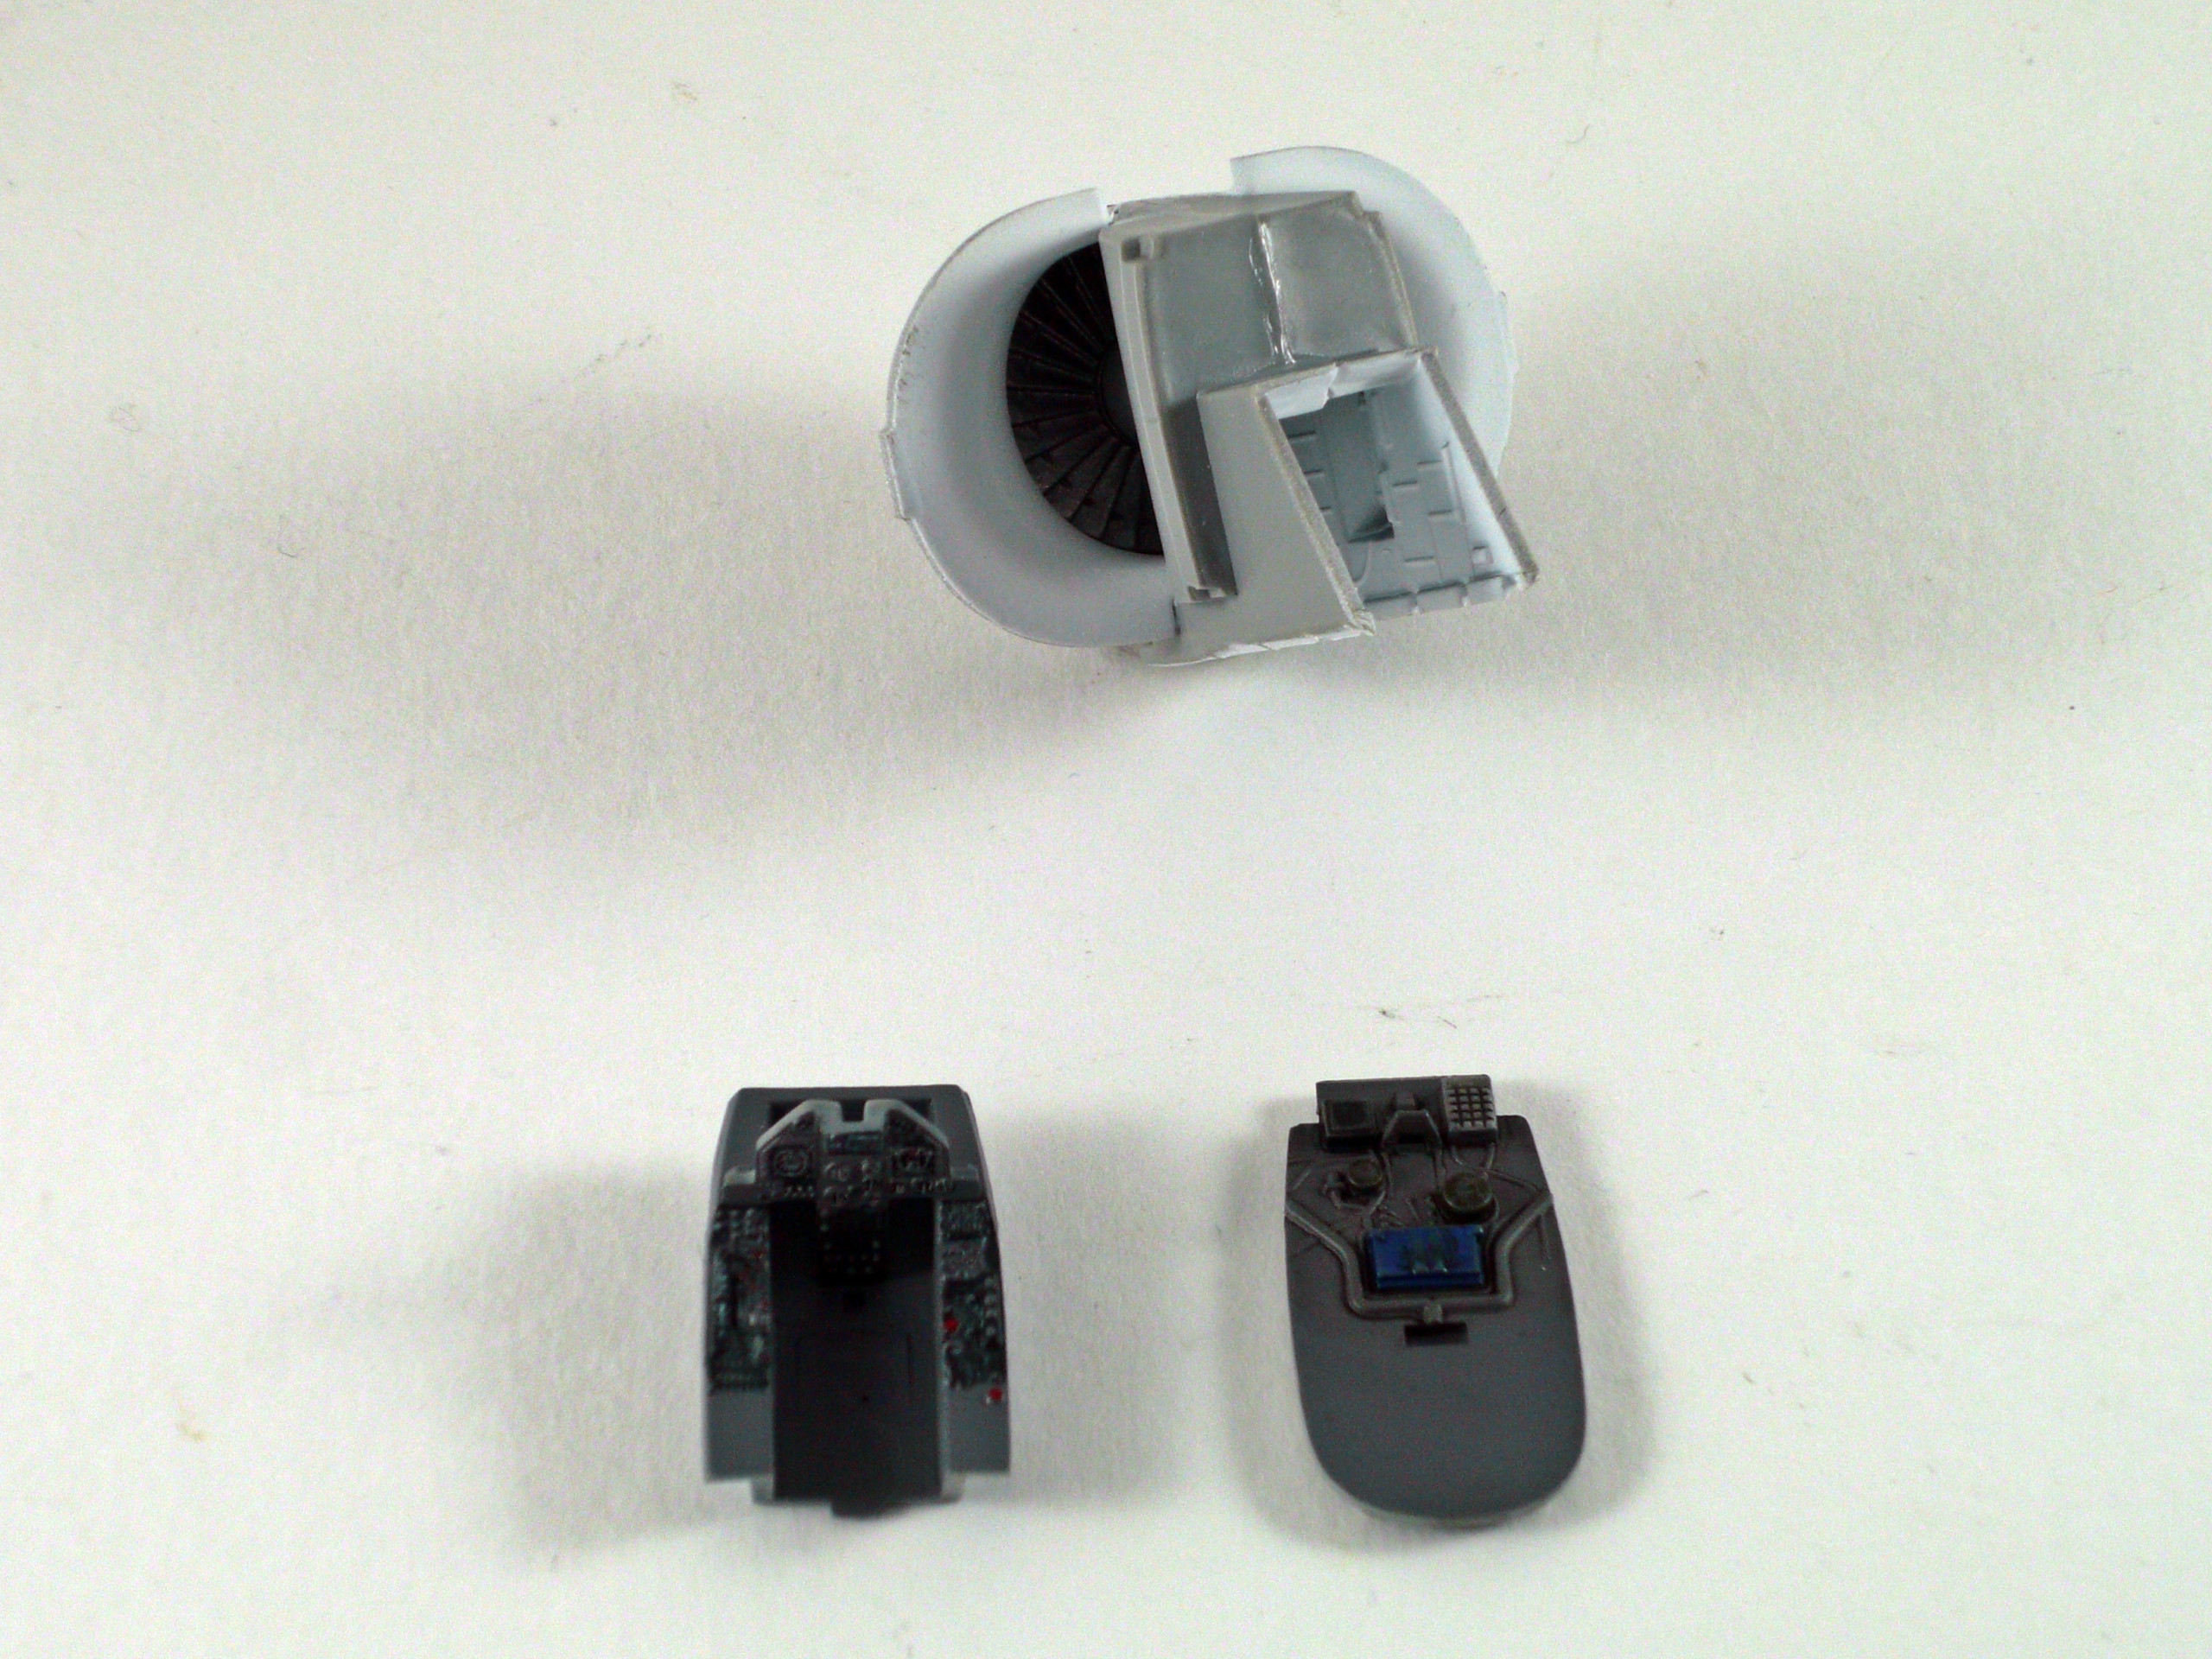
Then I sprayed the intake and the front wheelwell white using Mig Ammo matt white (pic 4)
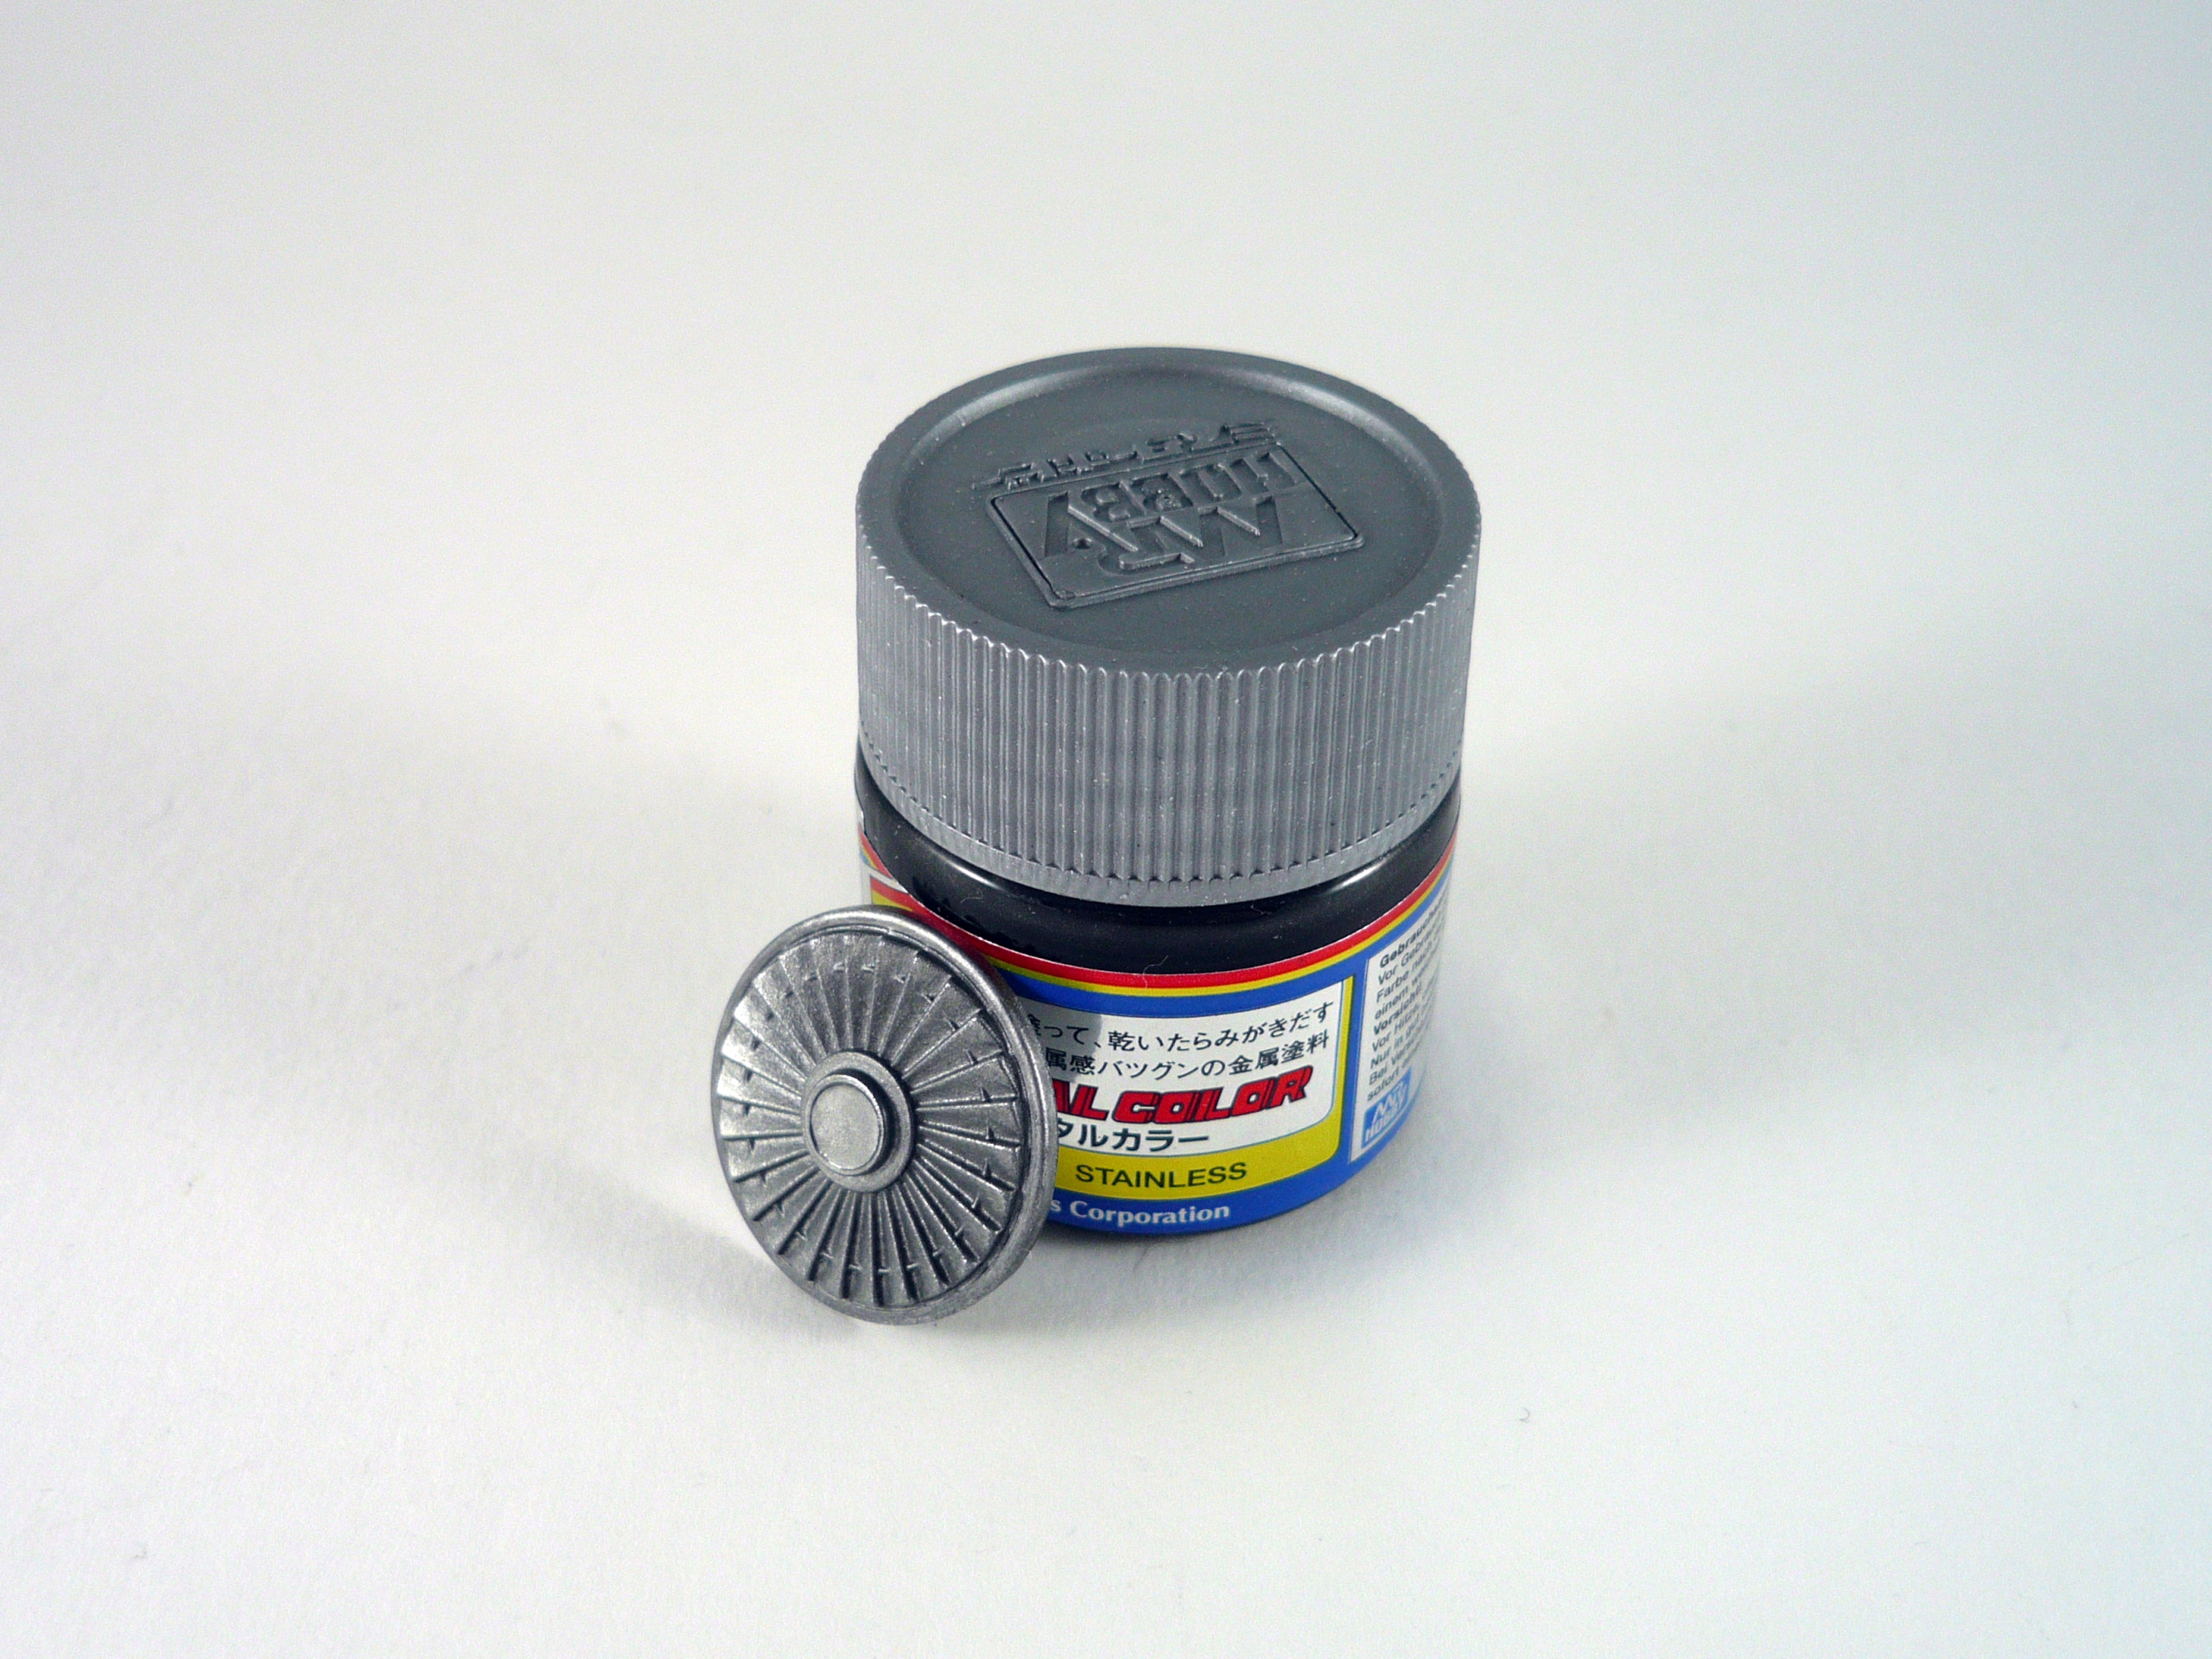
The engine fan painted using stainless color from Mr metal color range (pic5)
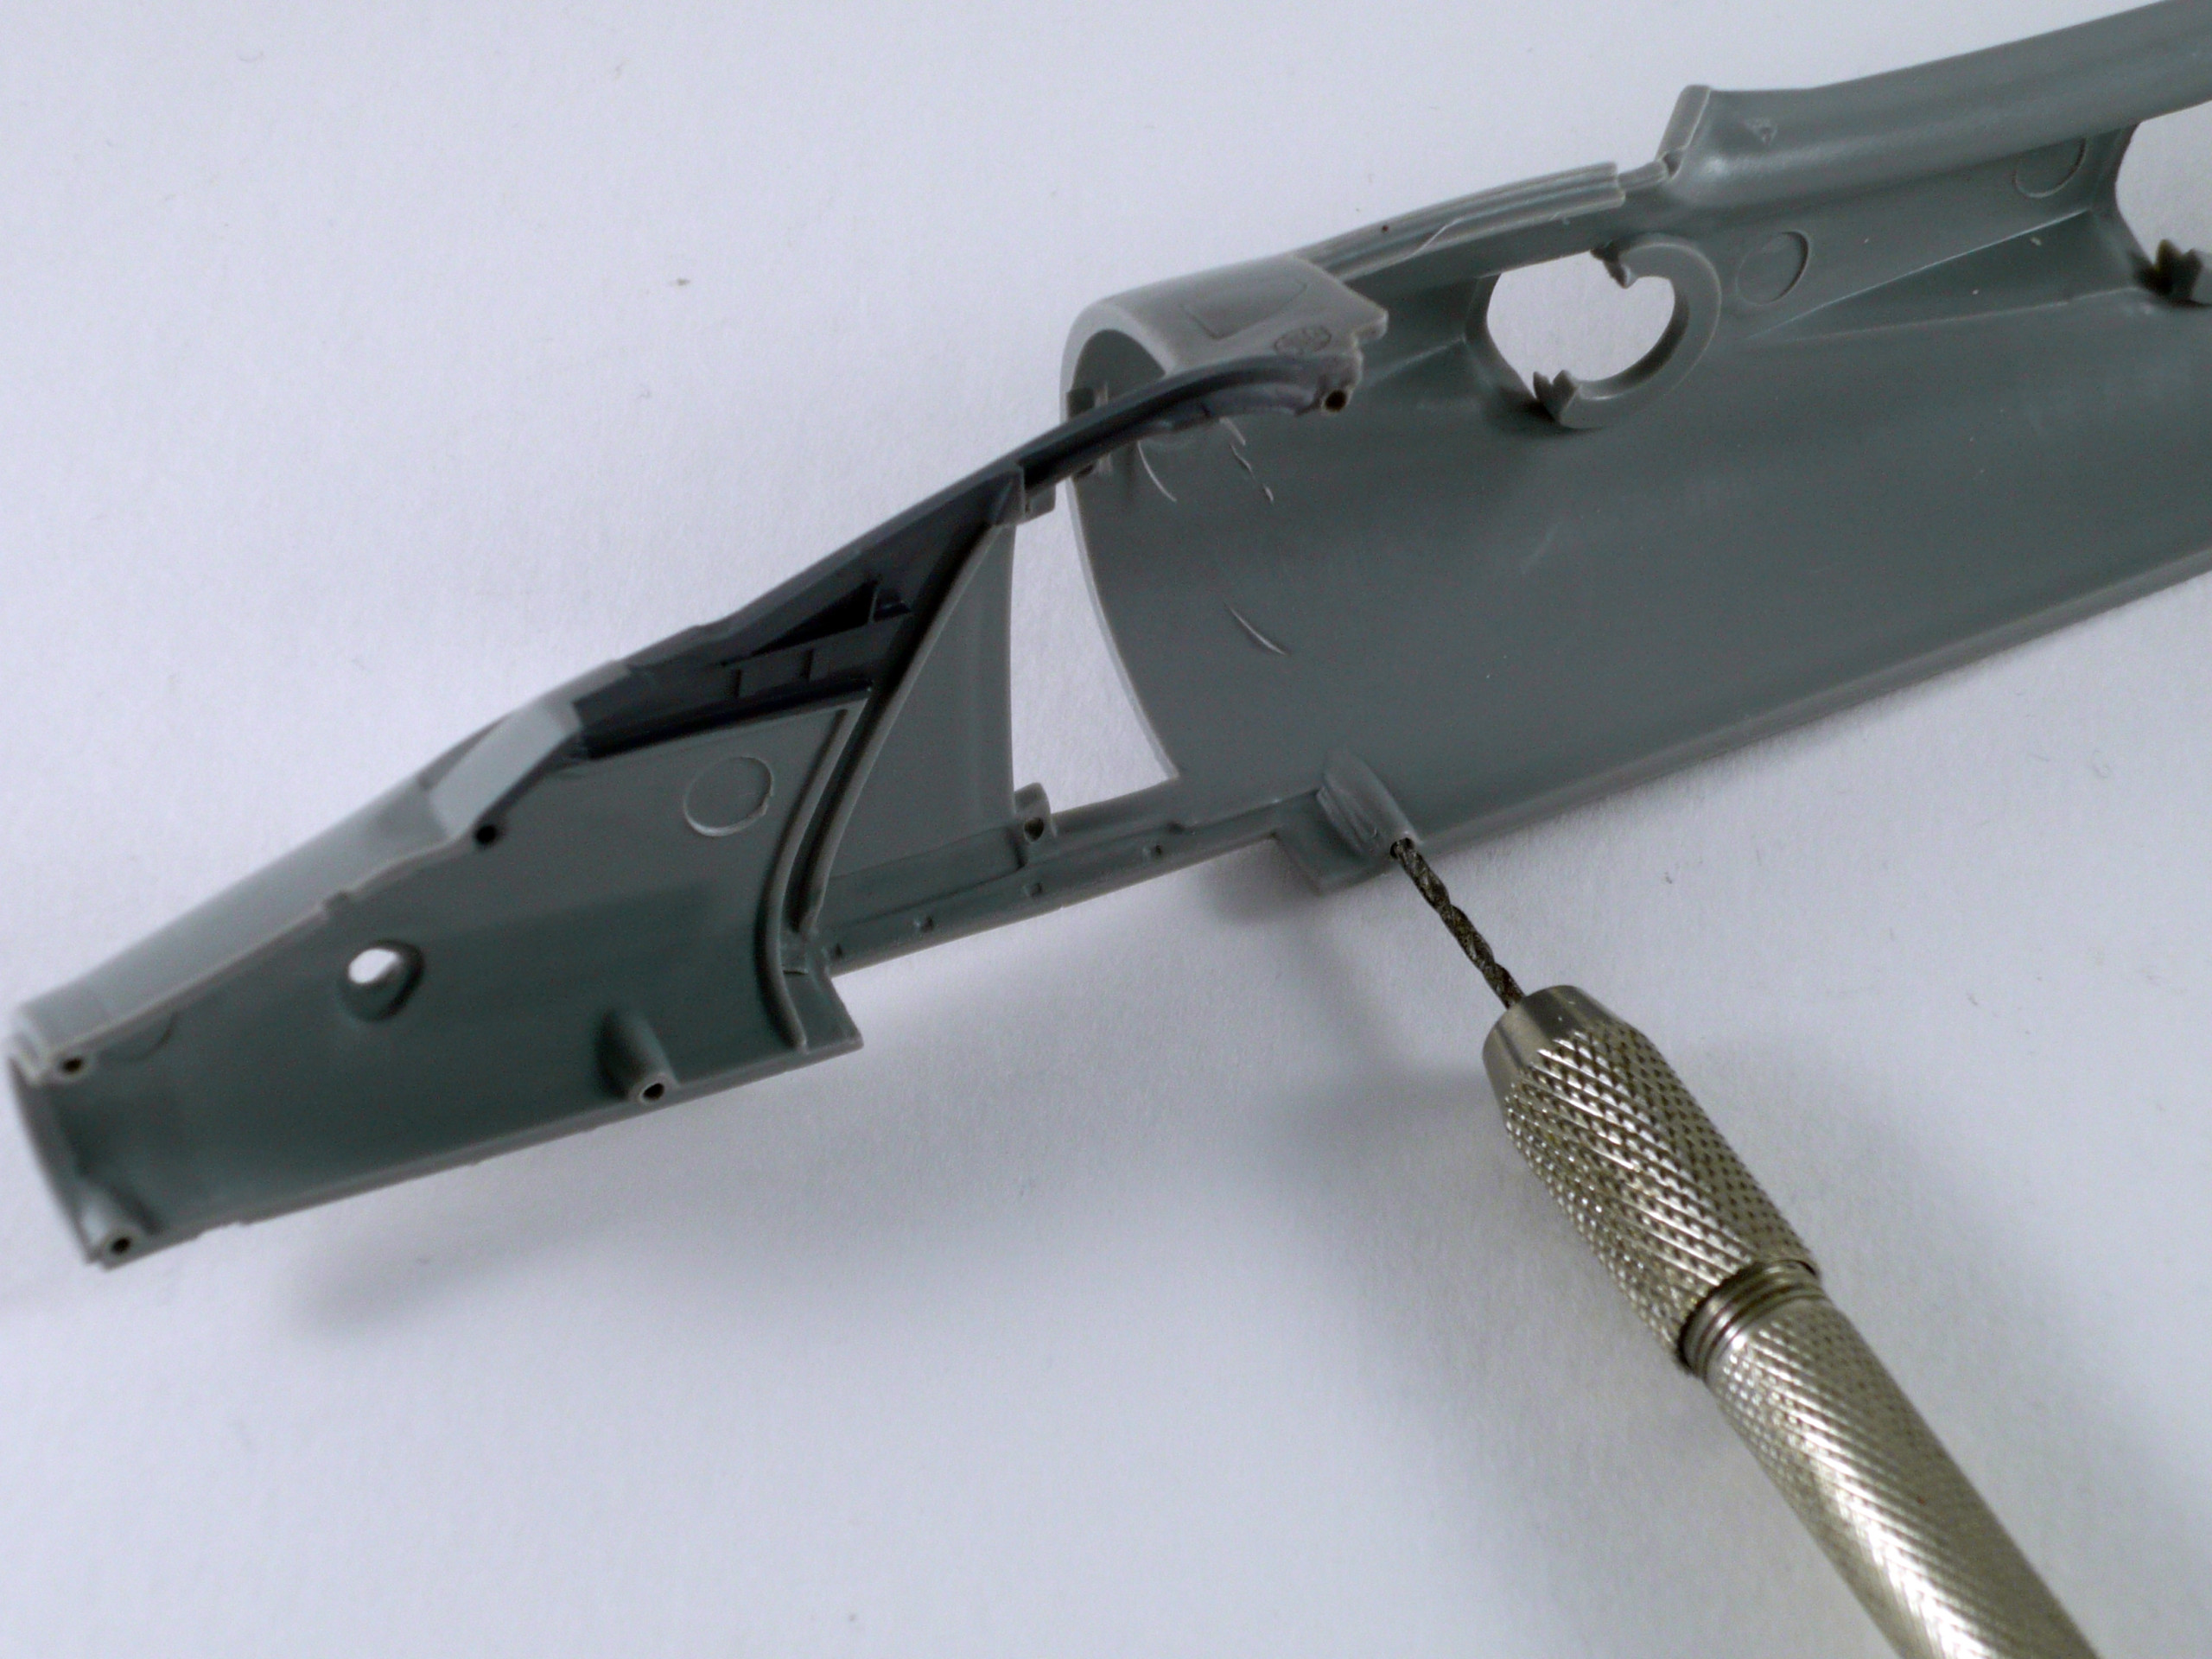
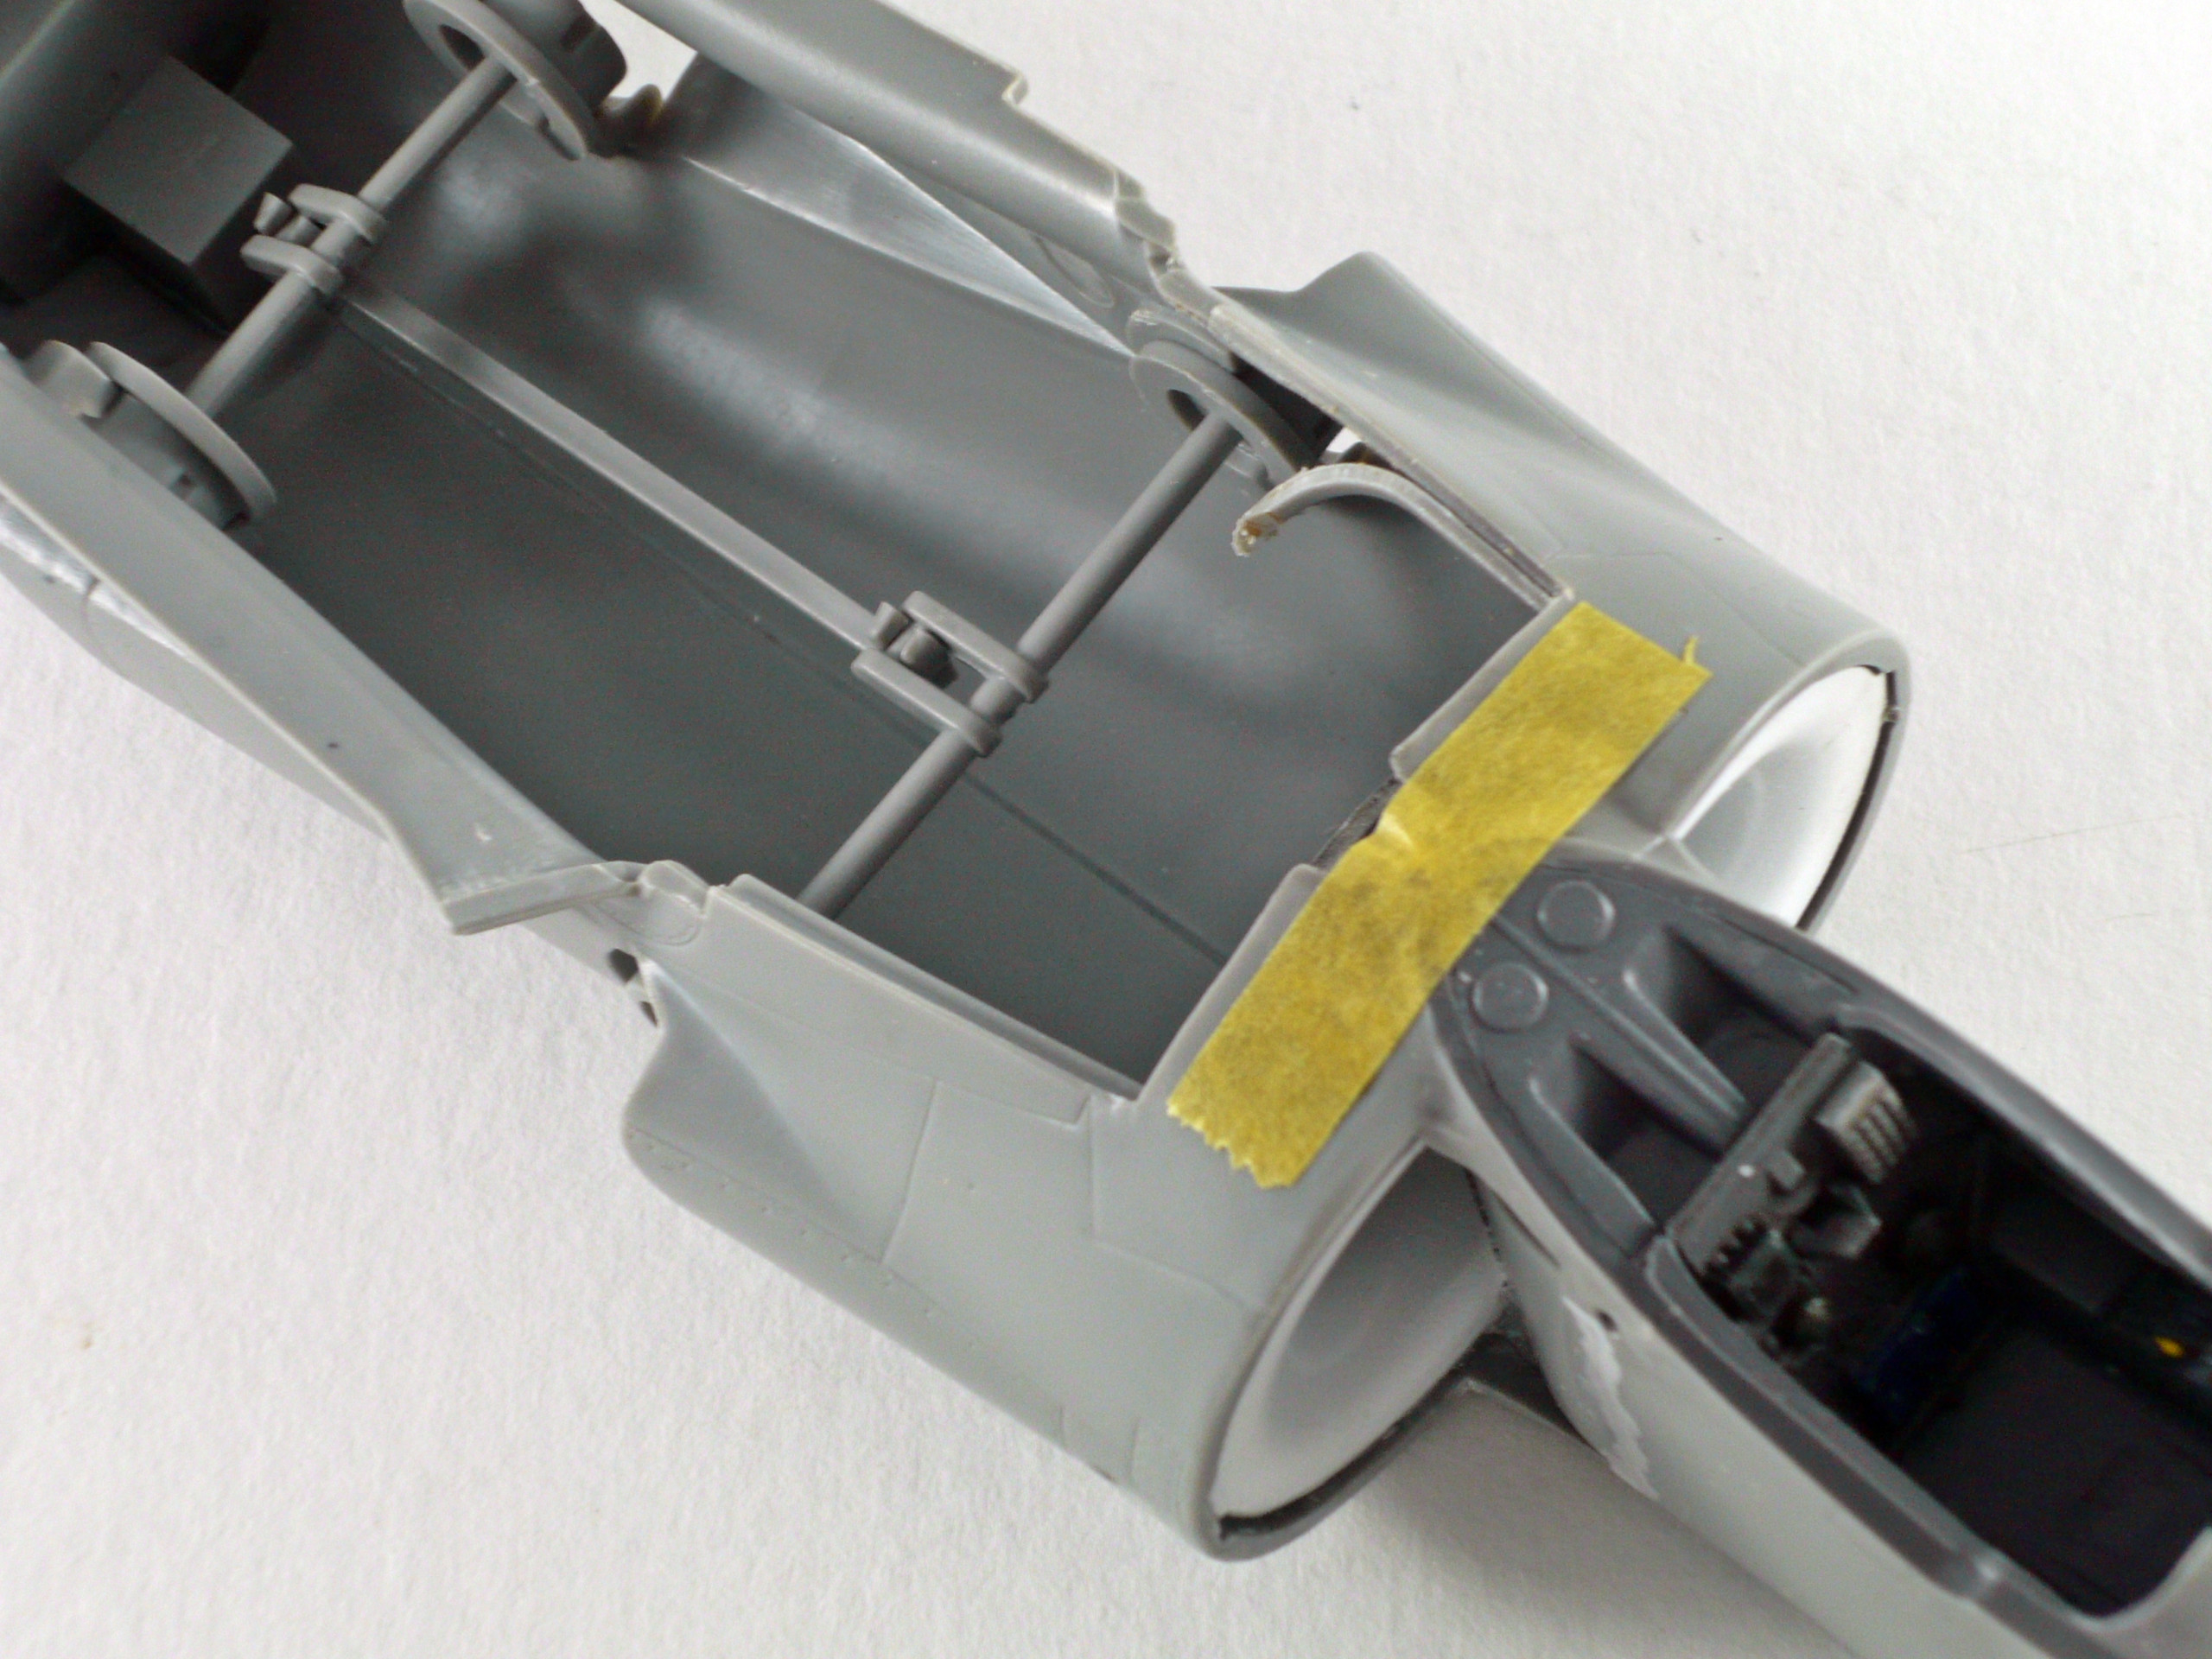
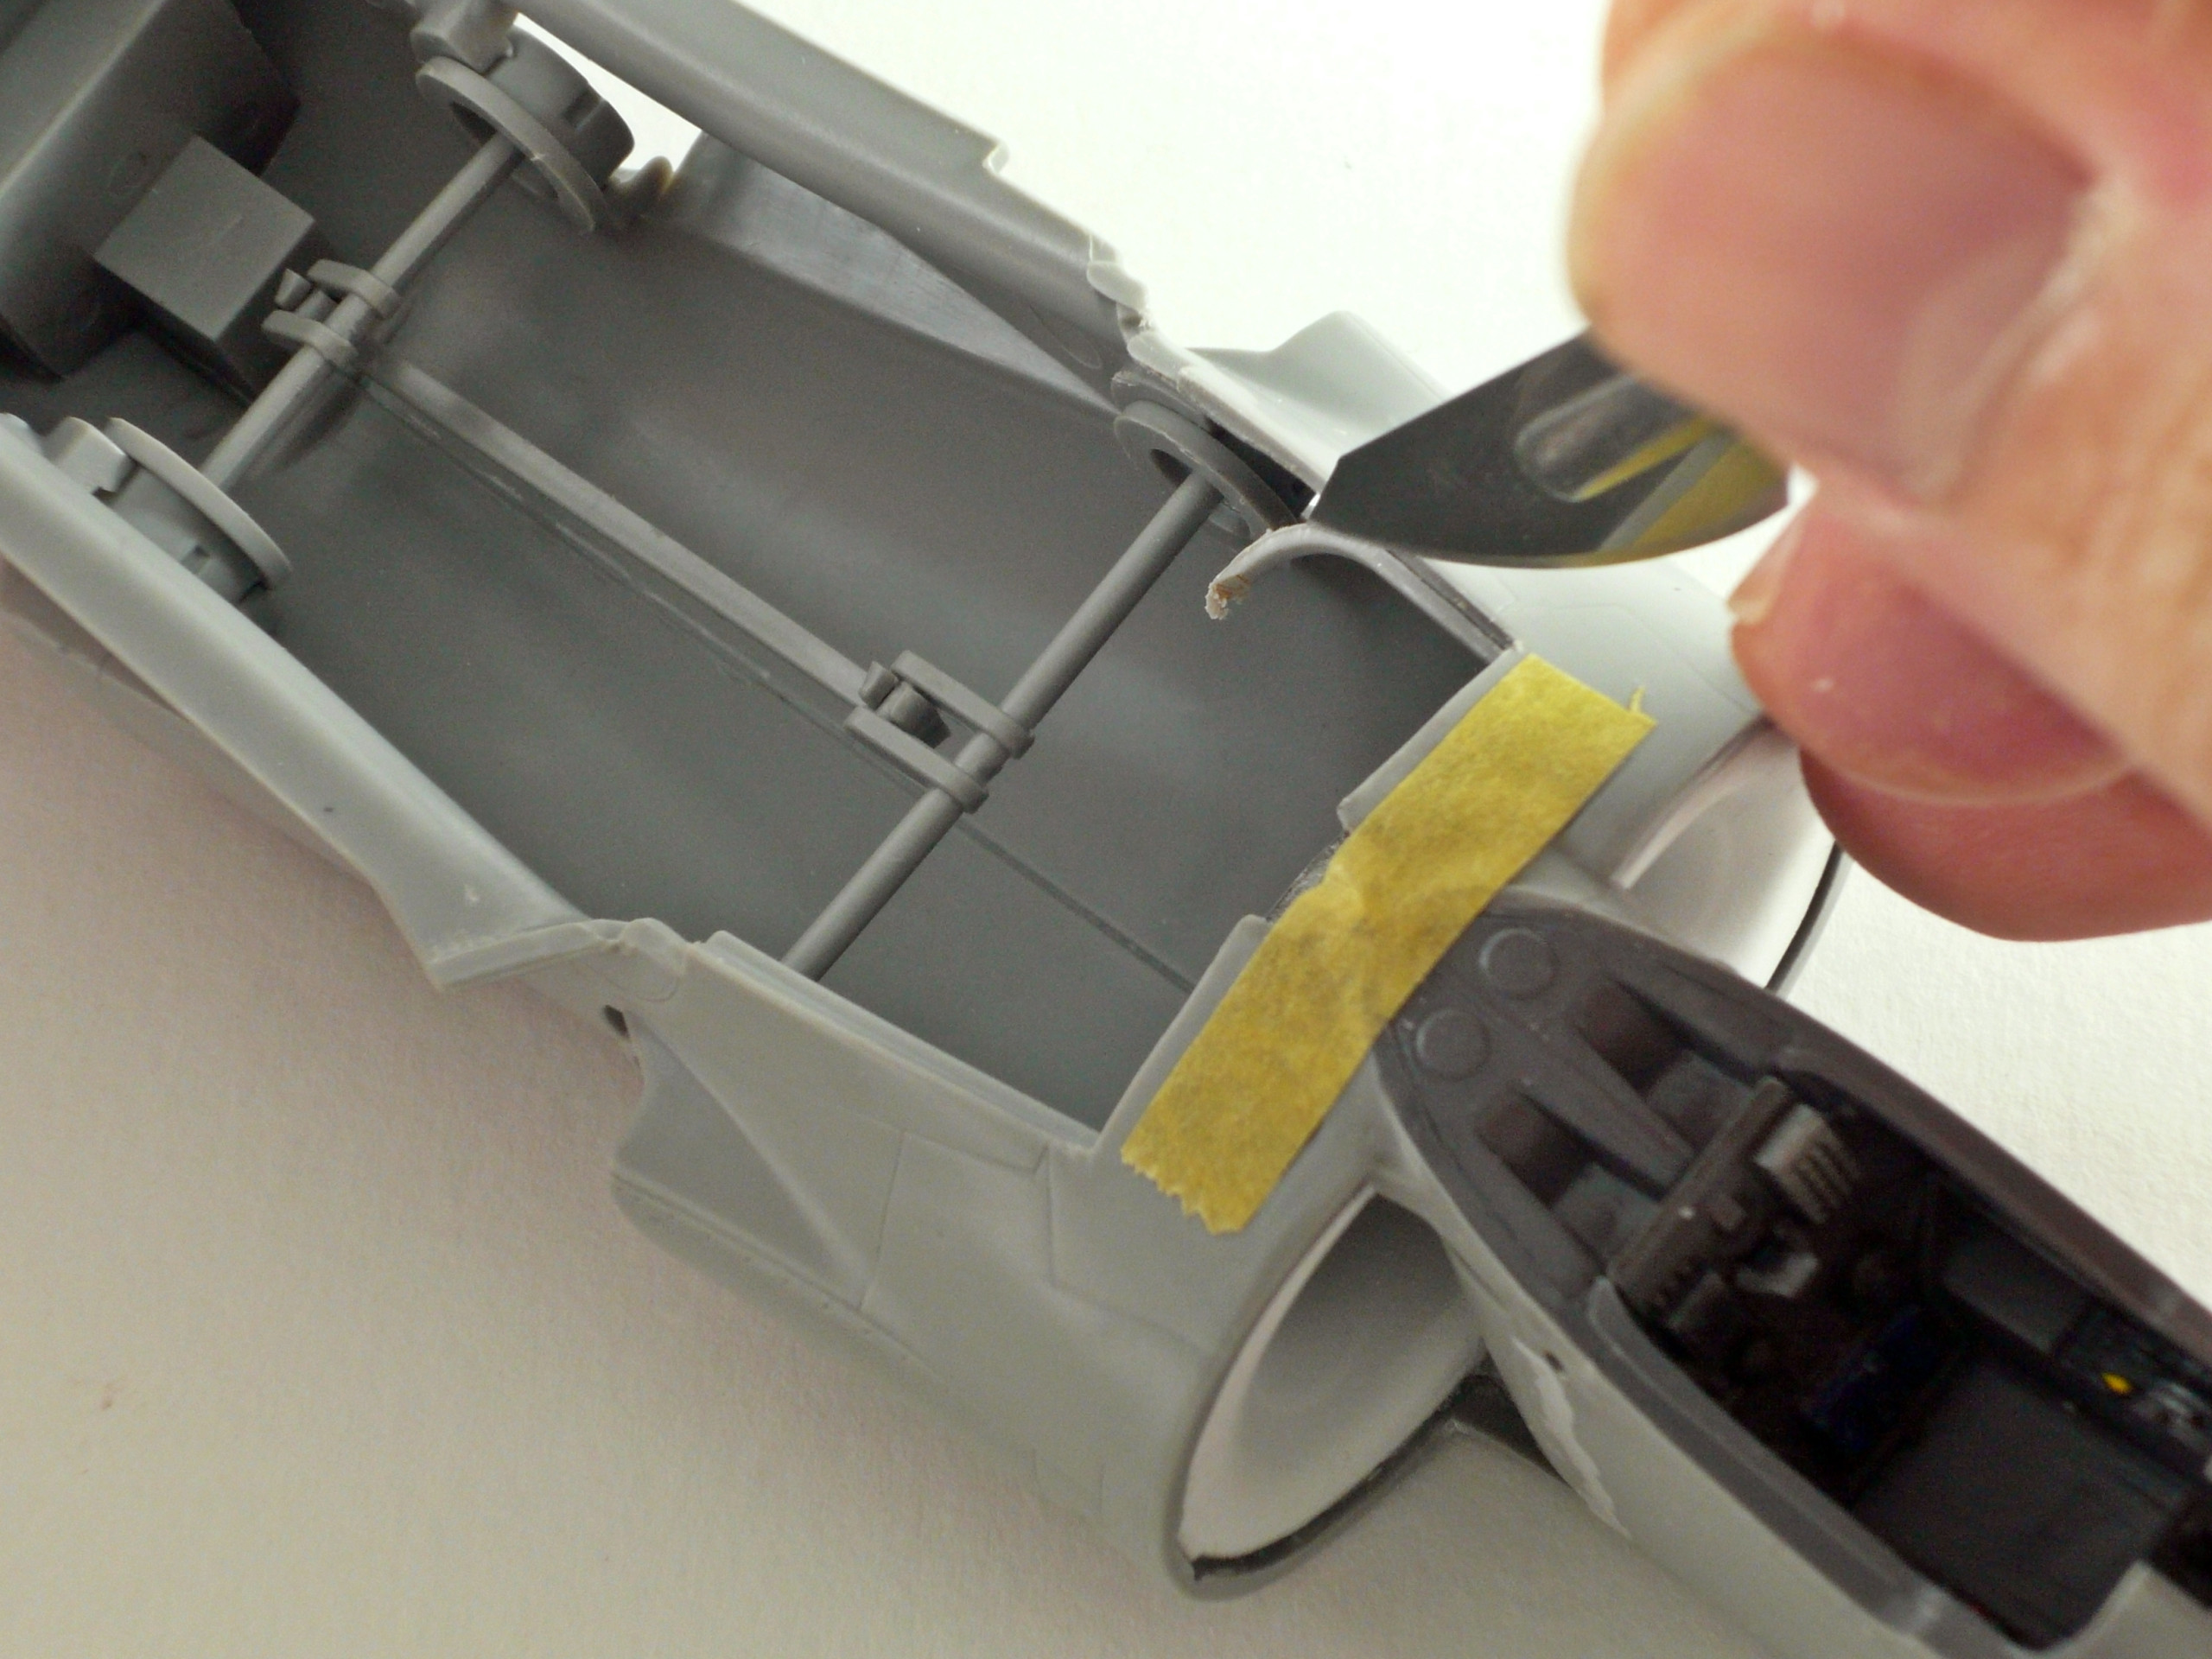
I opened up a little more the locating holes with a twist drill to achieve a better fit of the 2 fuselage parts (pic 6)
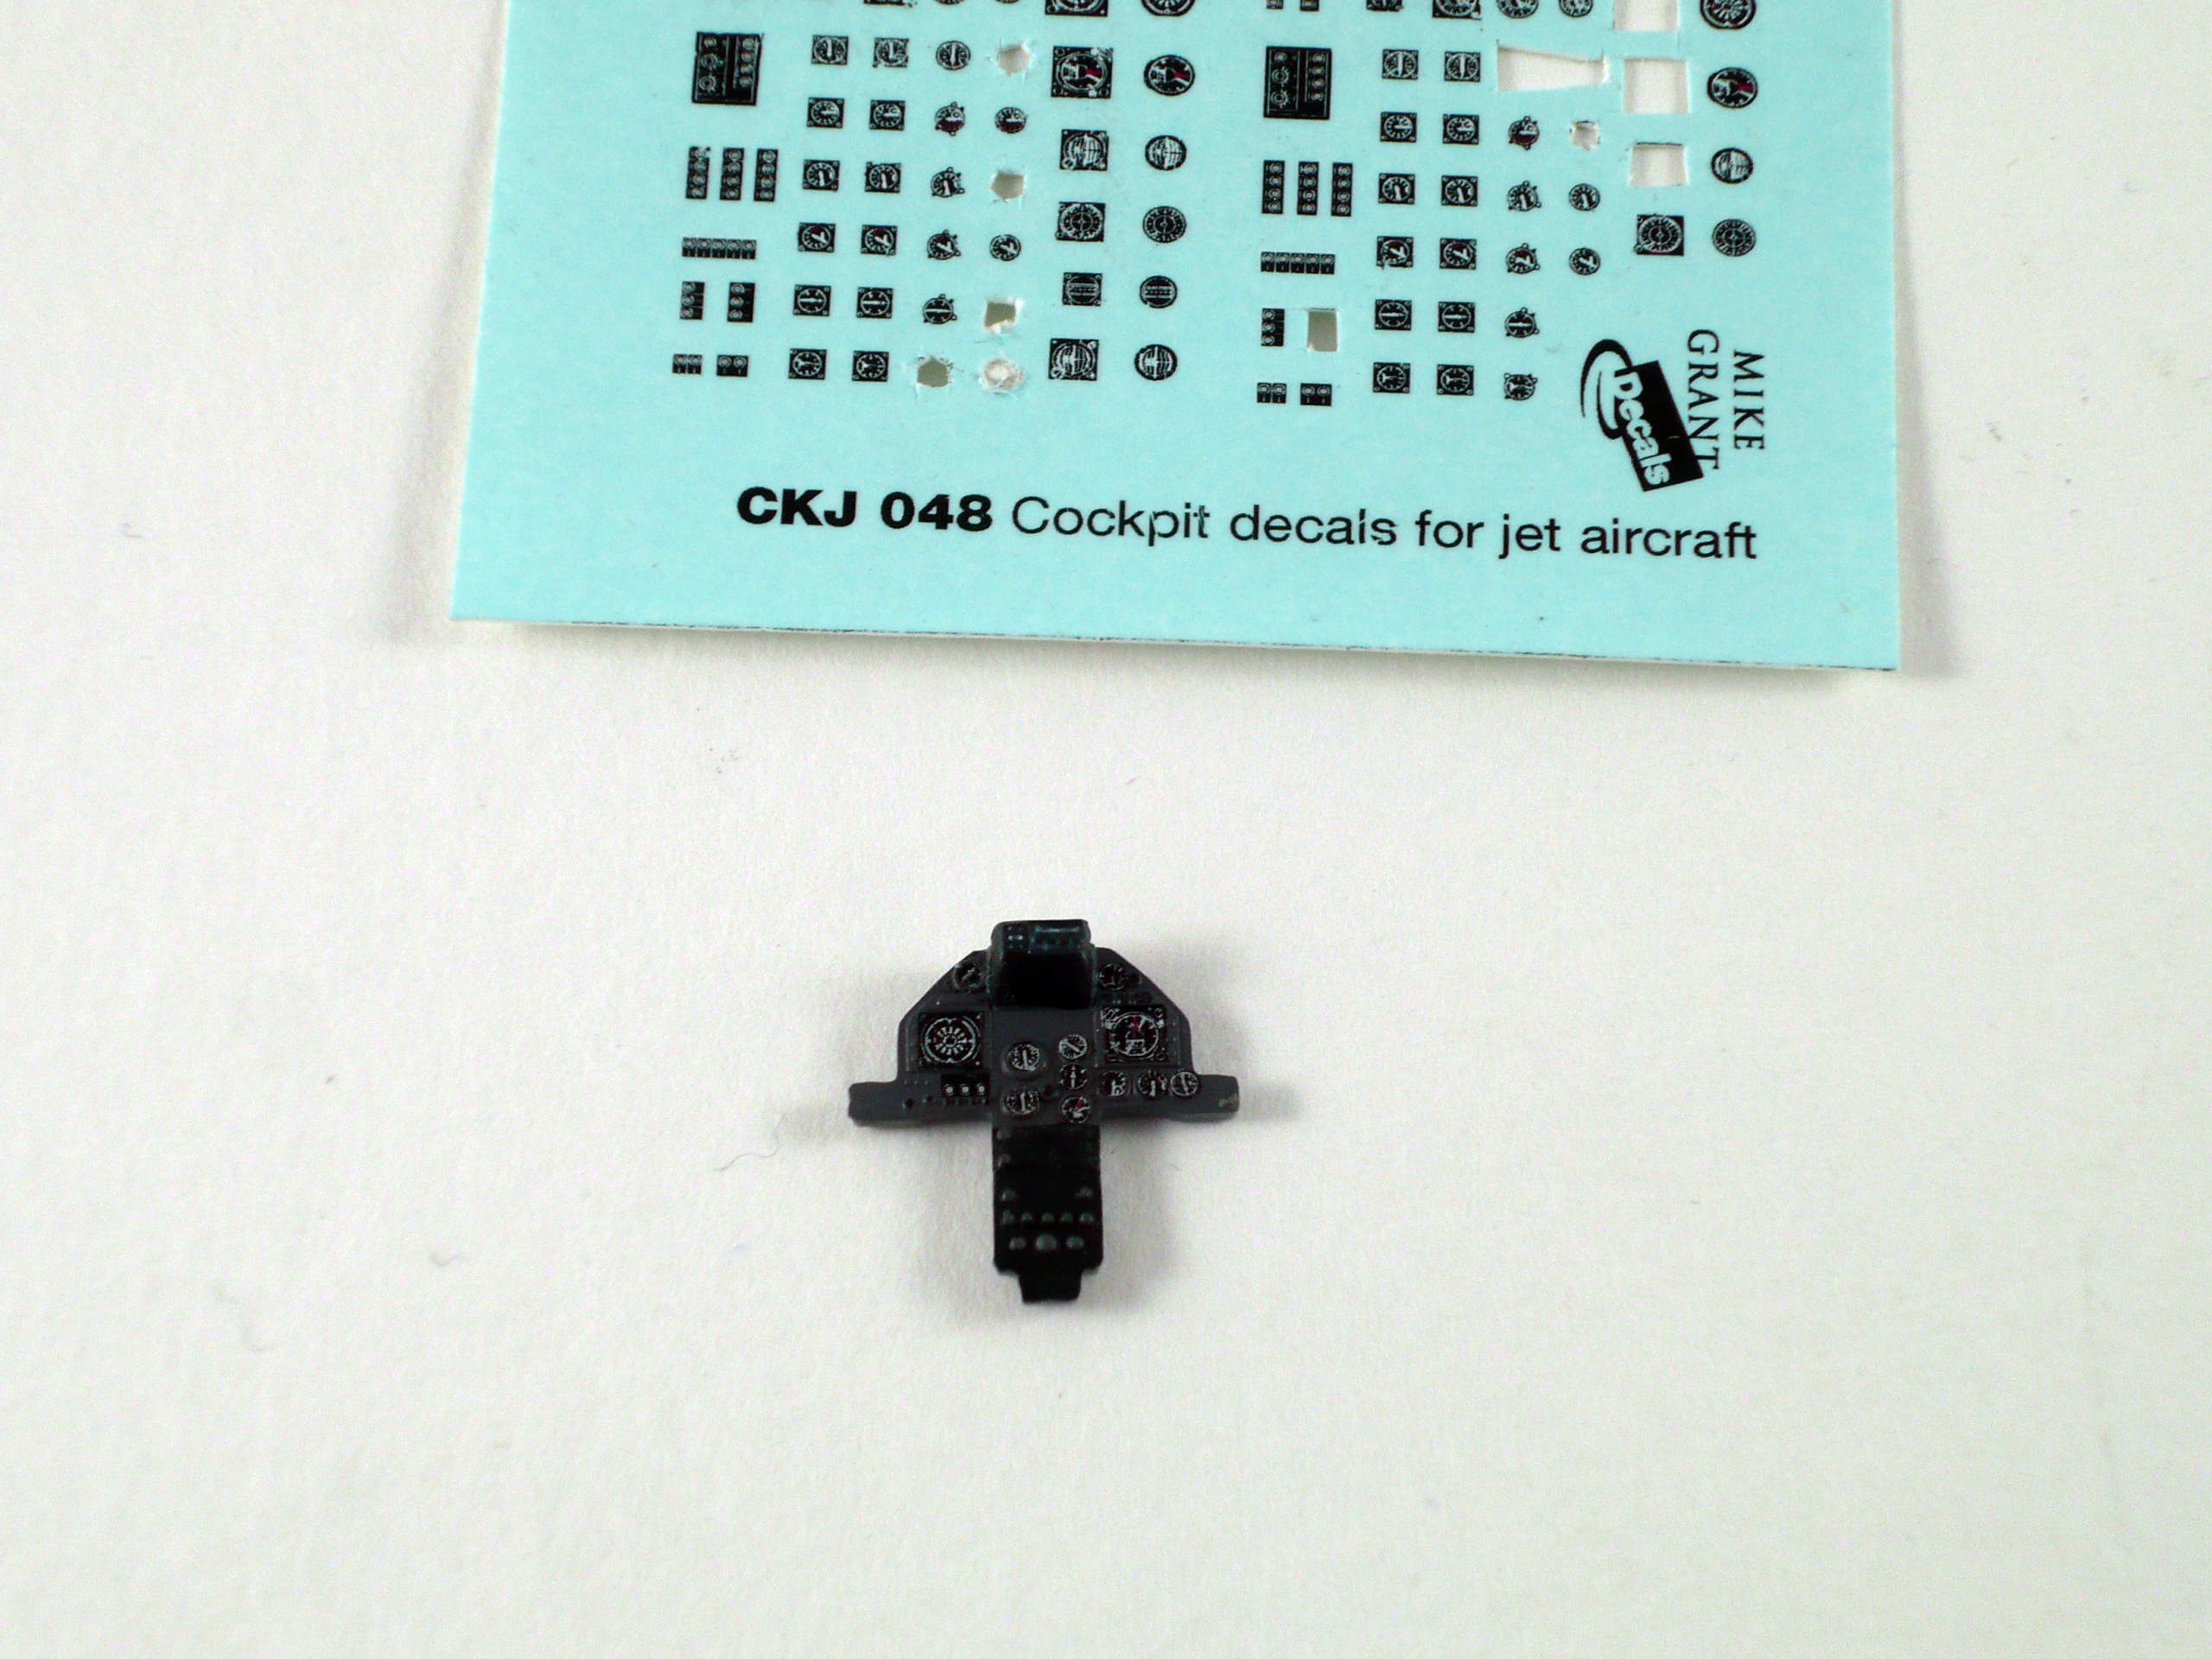
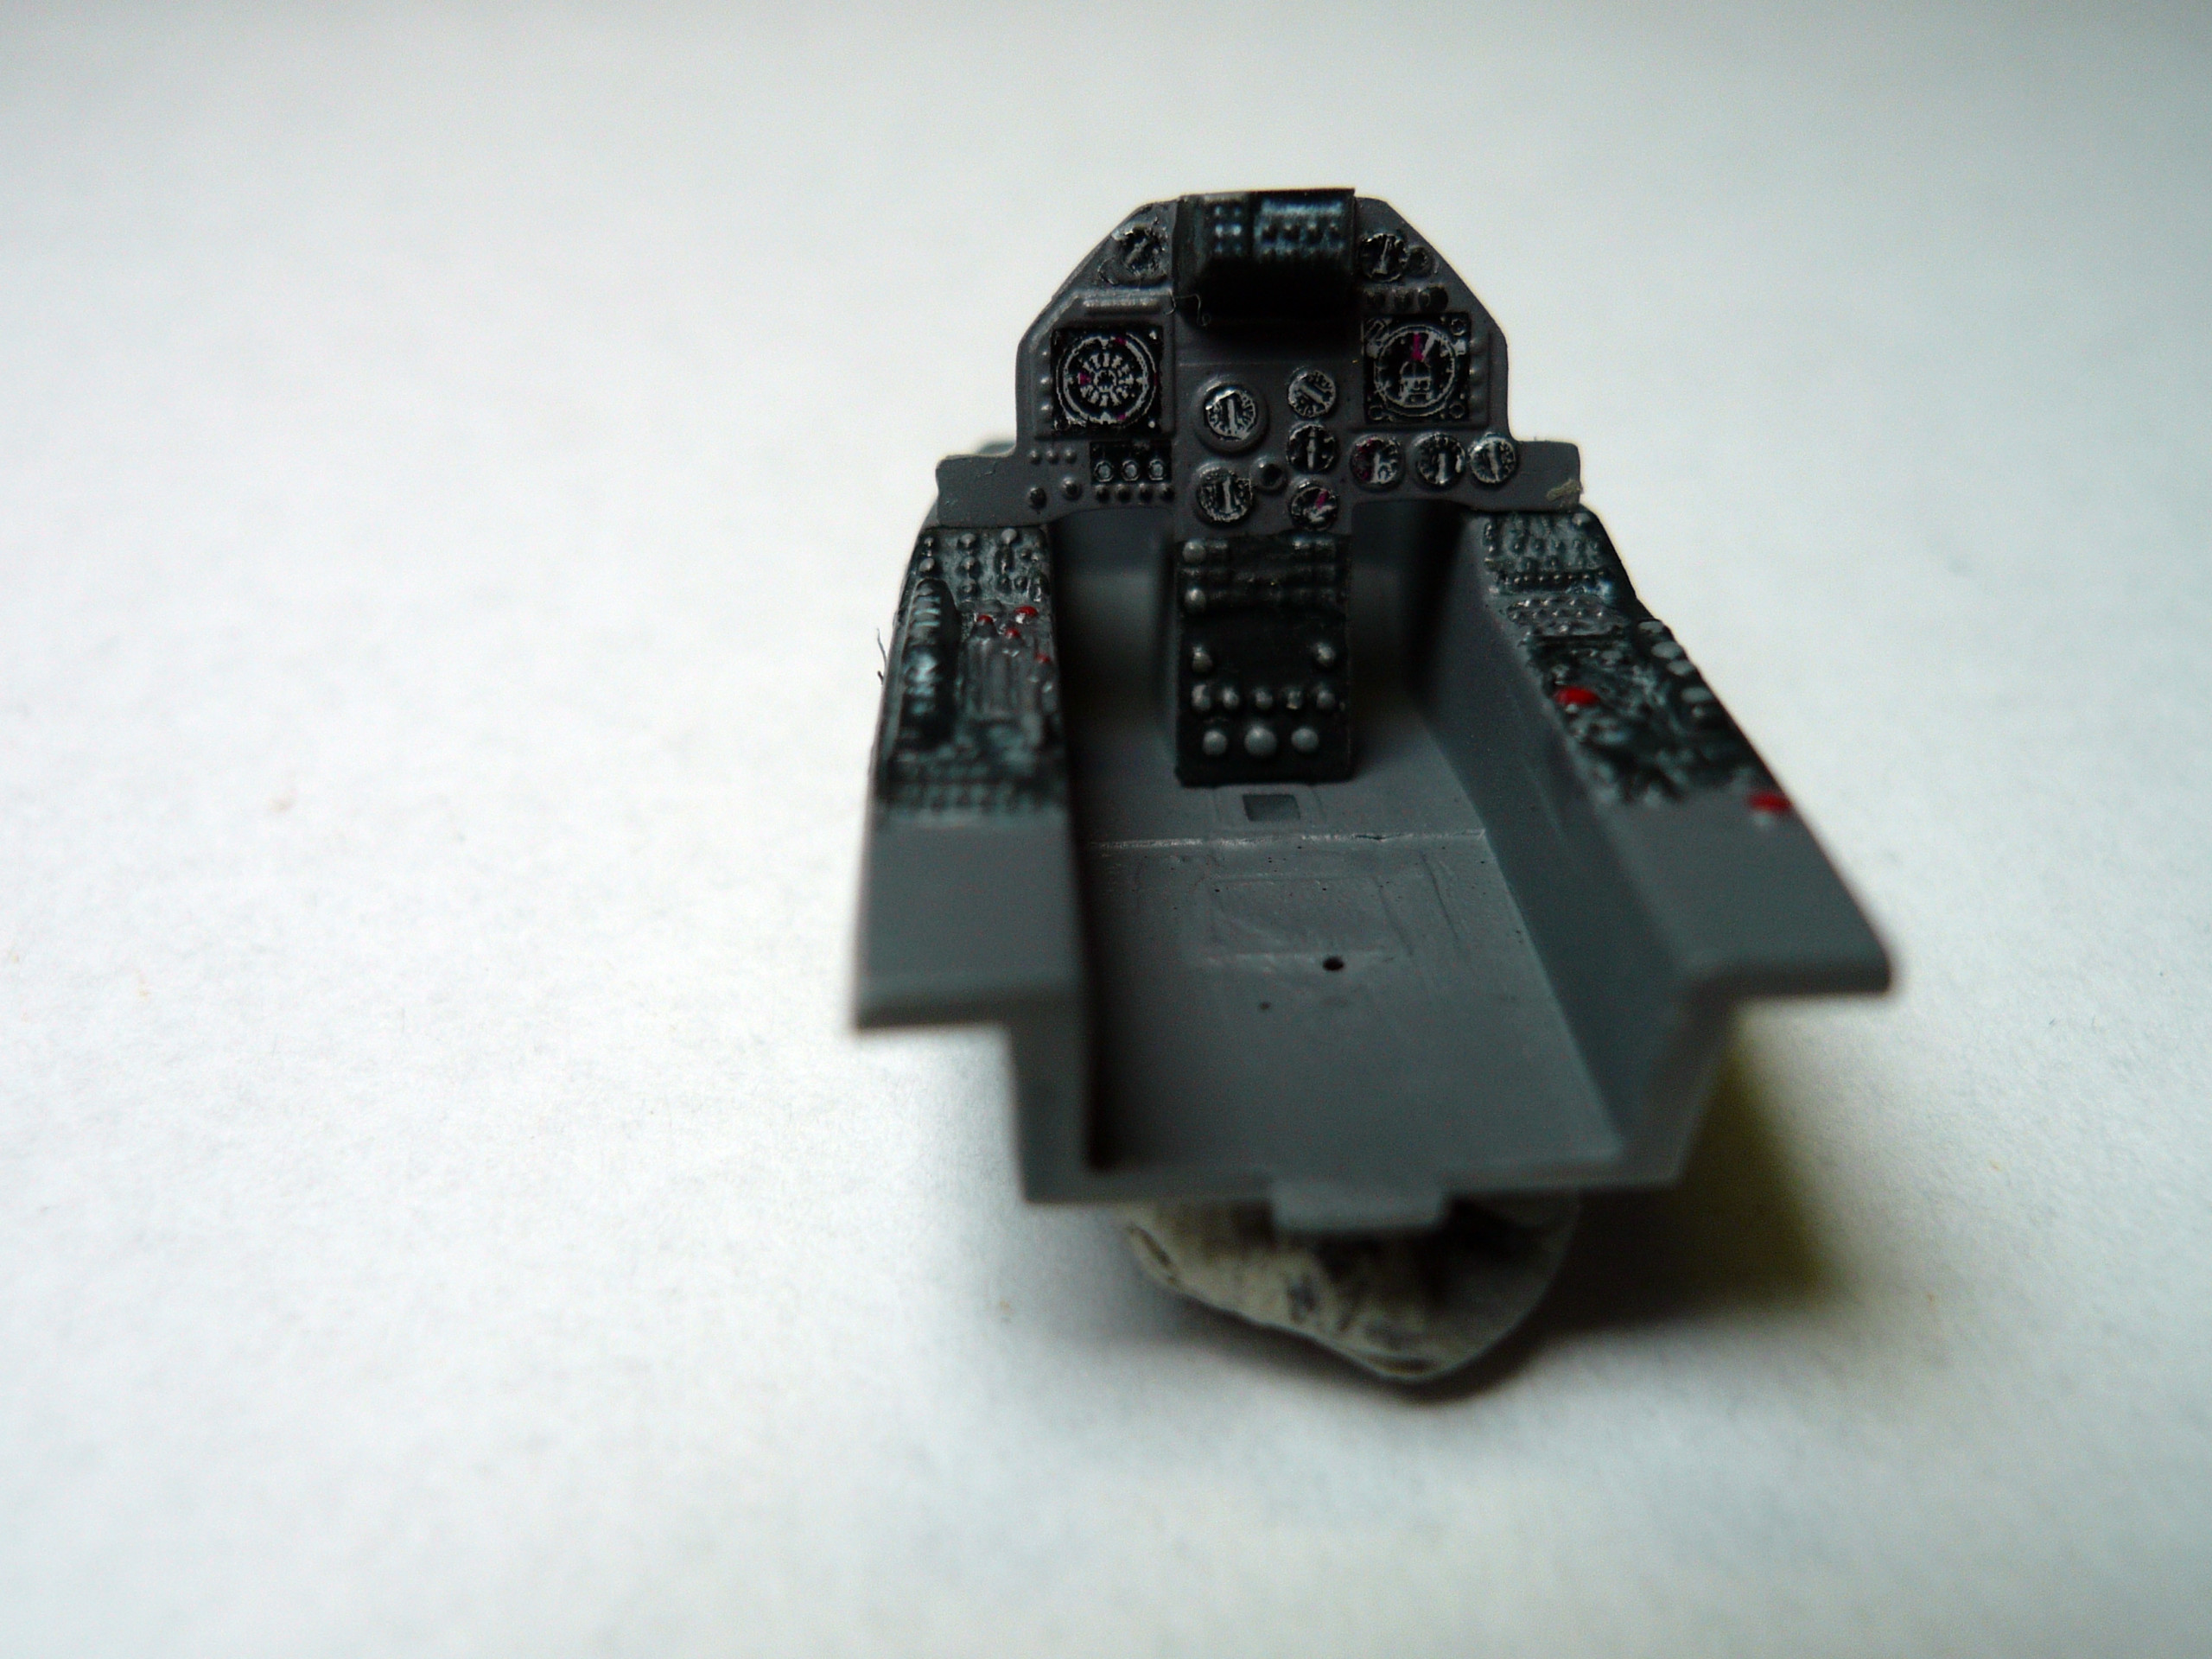
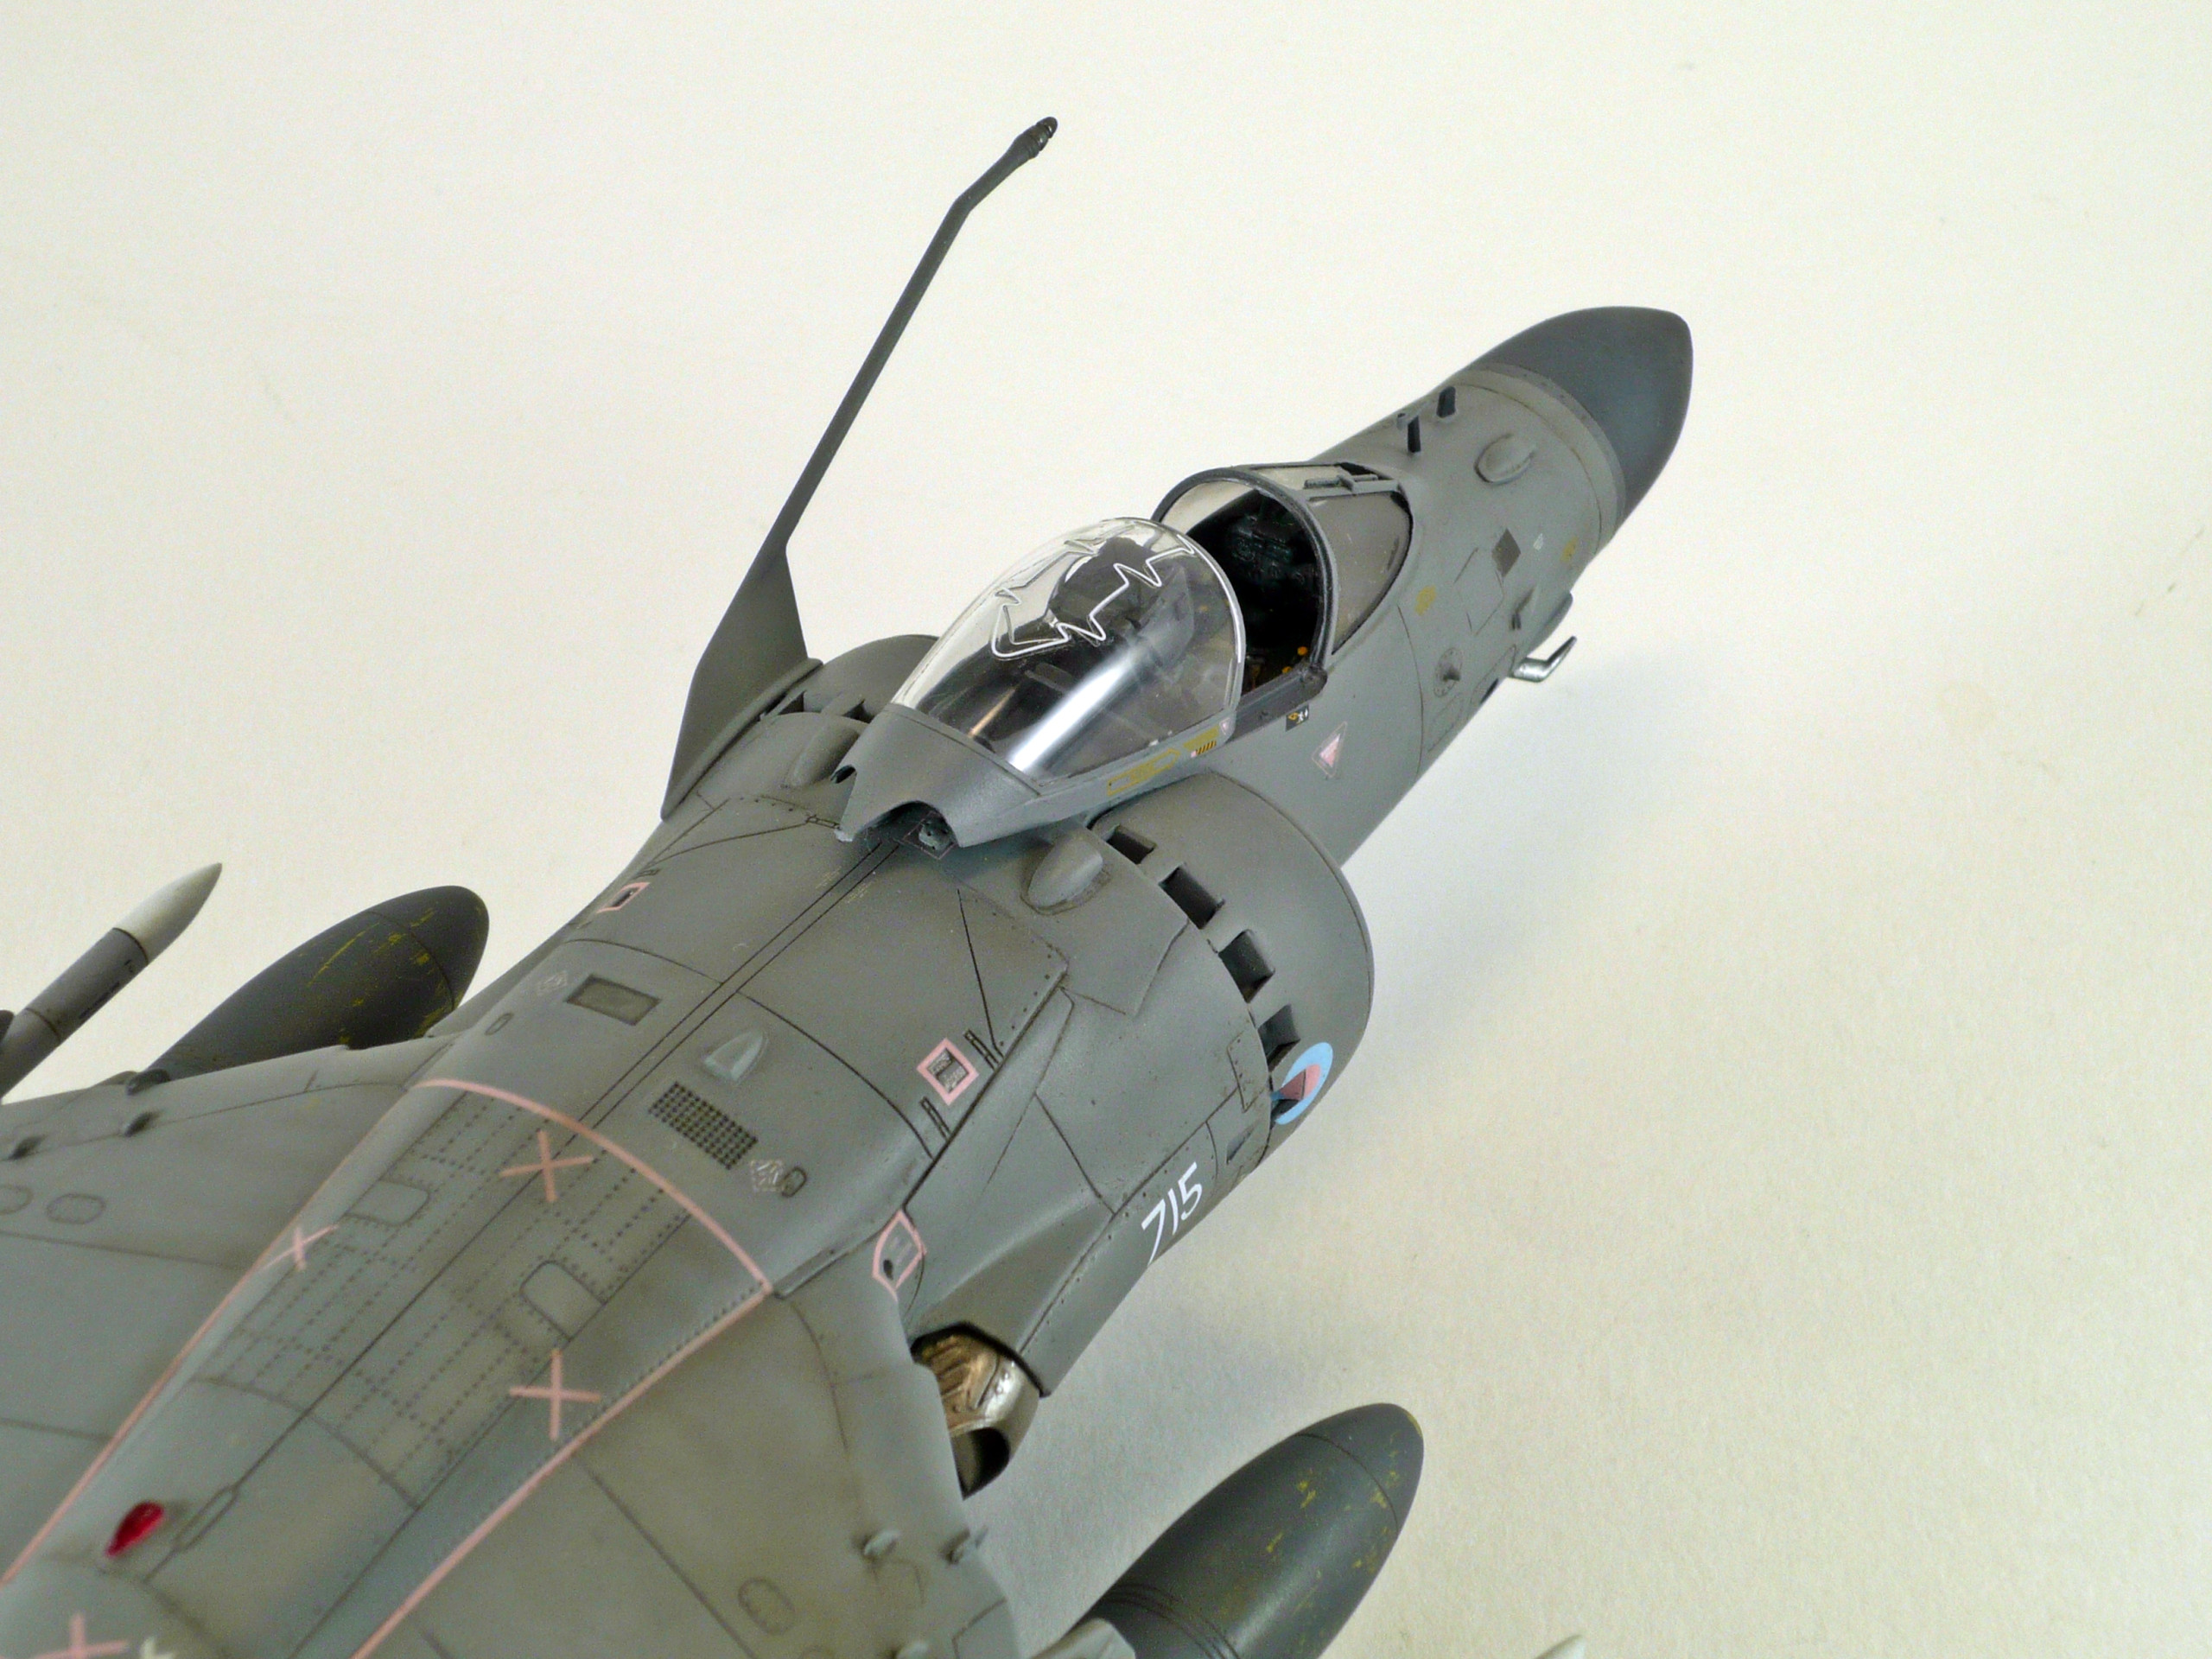
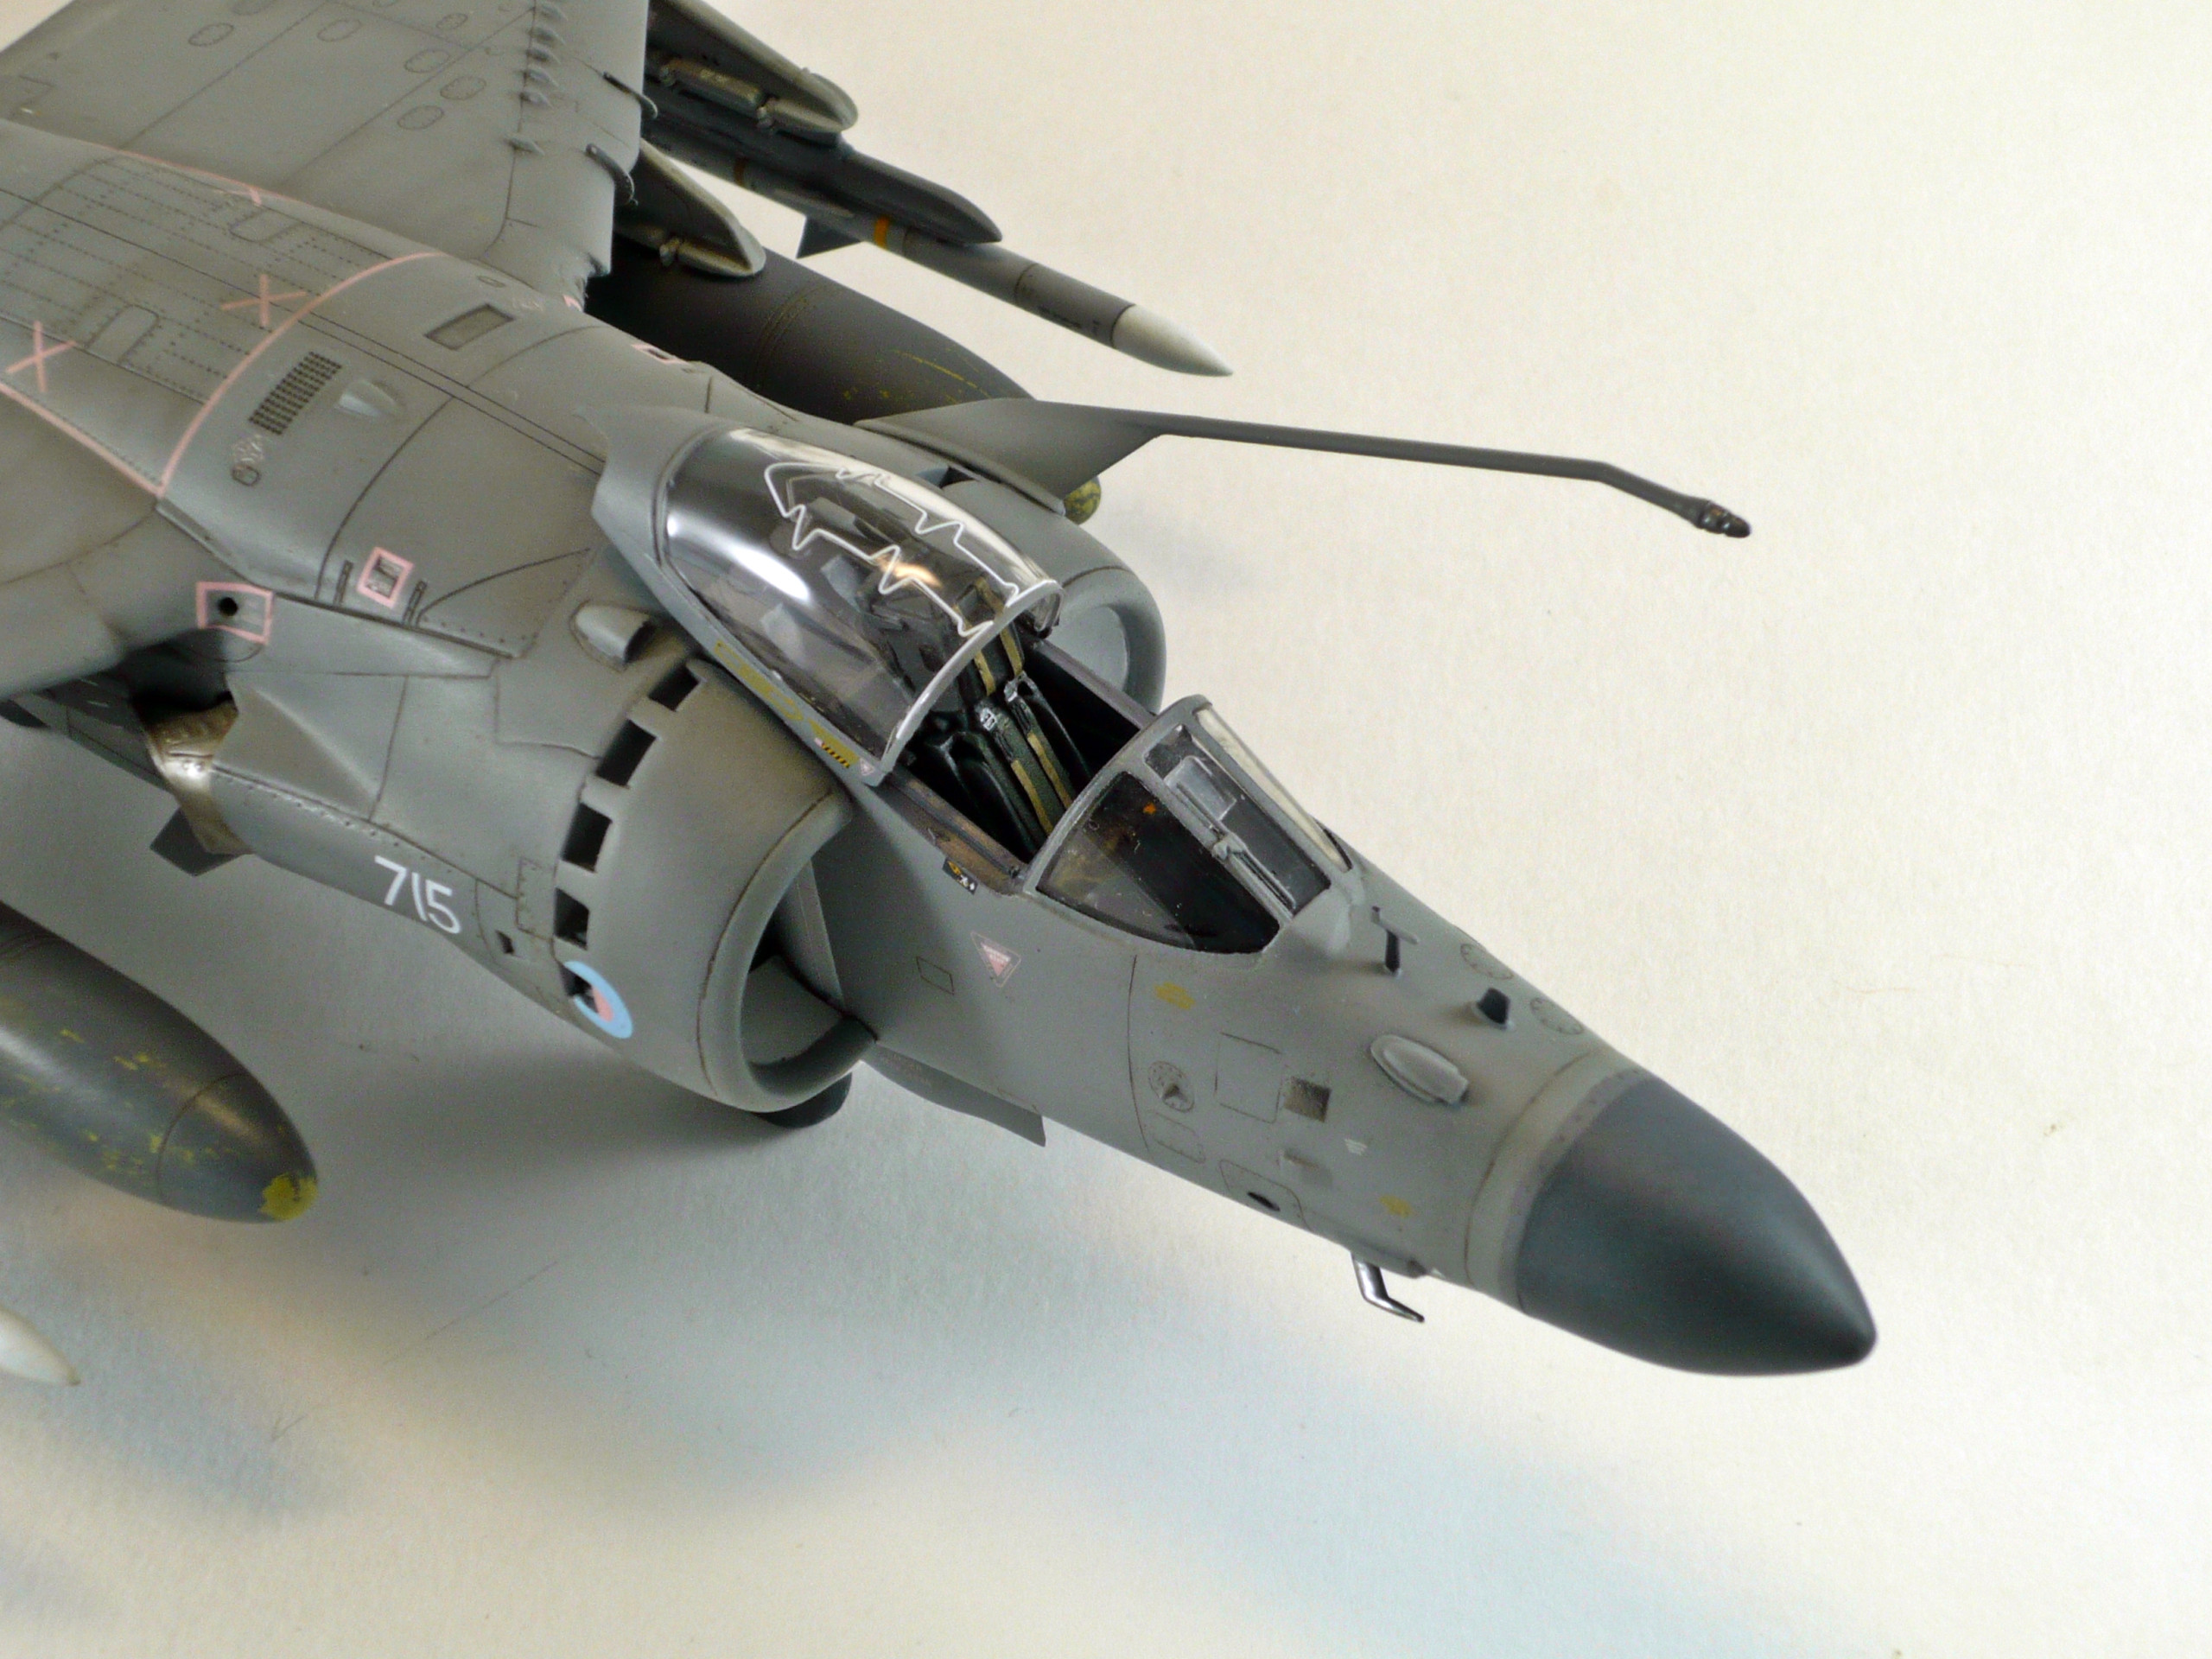
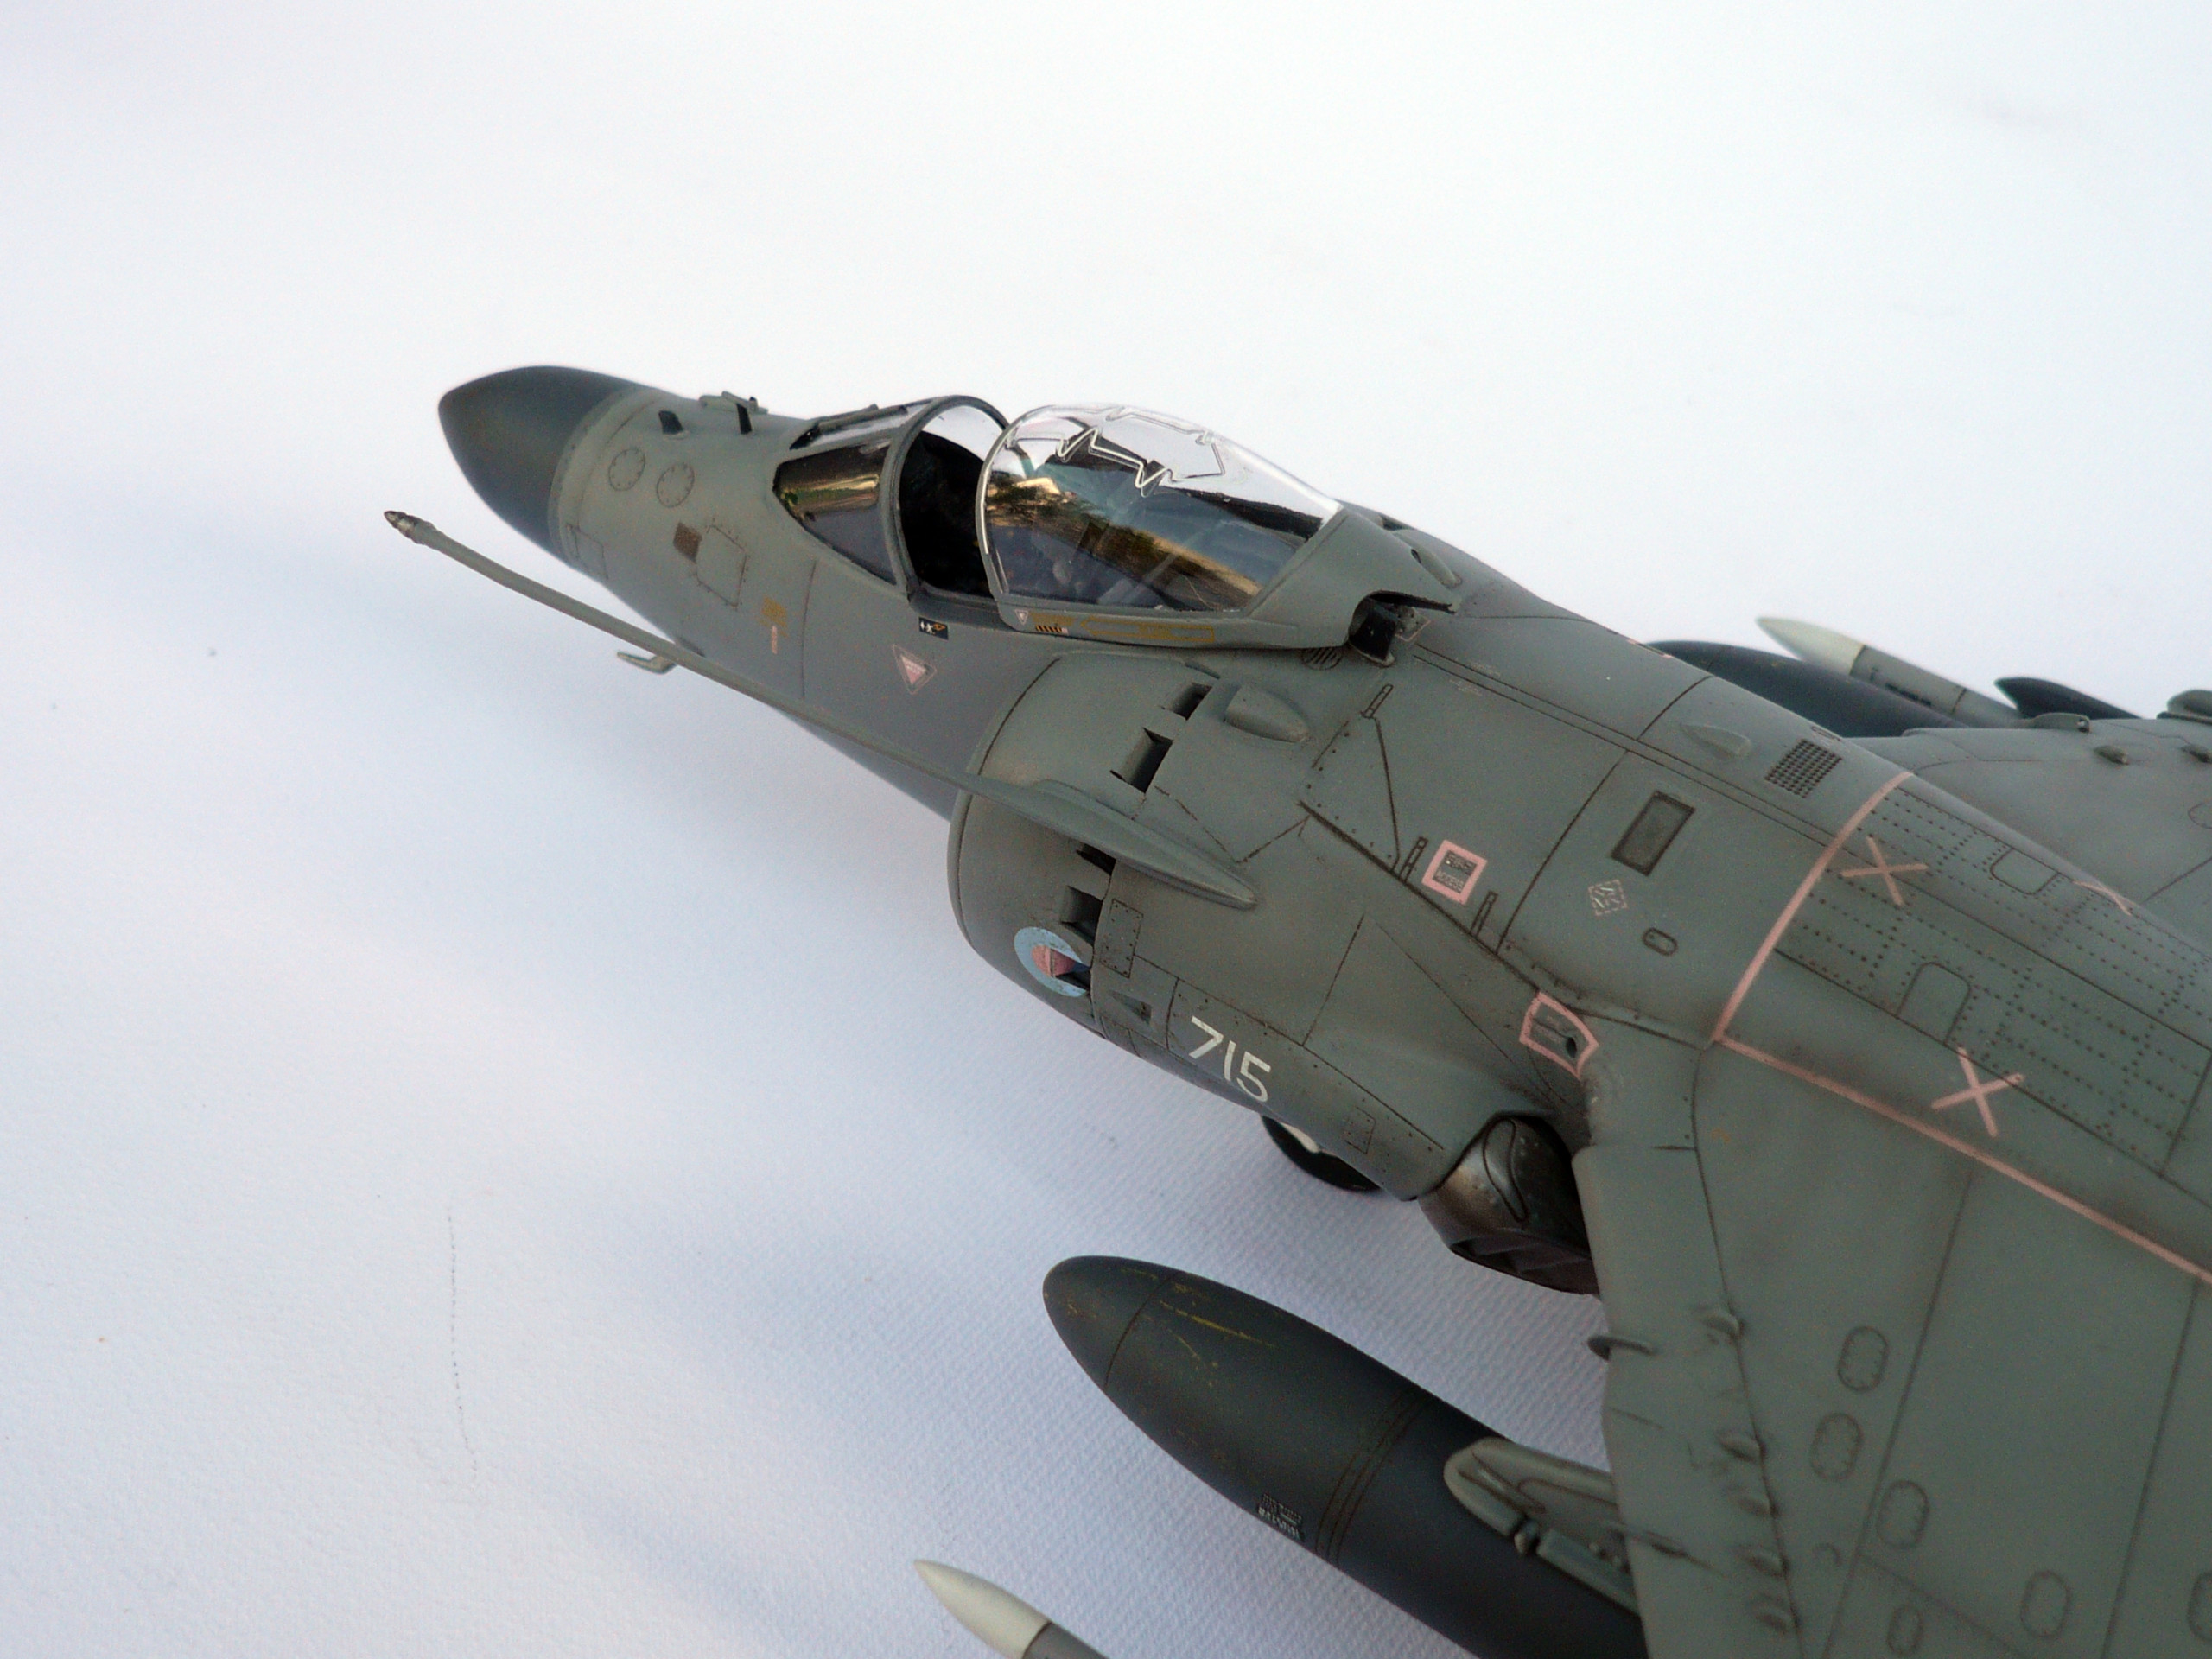
I improved a little more kit’s instrument panel using the very nice Mike Grant’s decal sheet (gauges and lcd’s) (pic 7)
I painted and made some wash and highlighting to the cockpit sidewalls (pics 8&9)
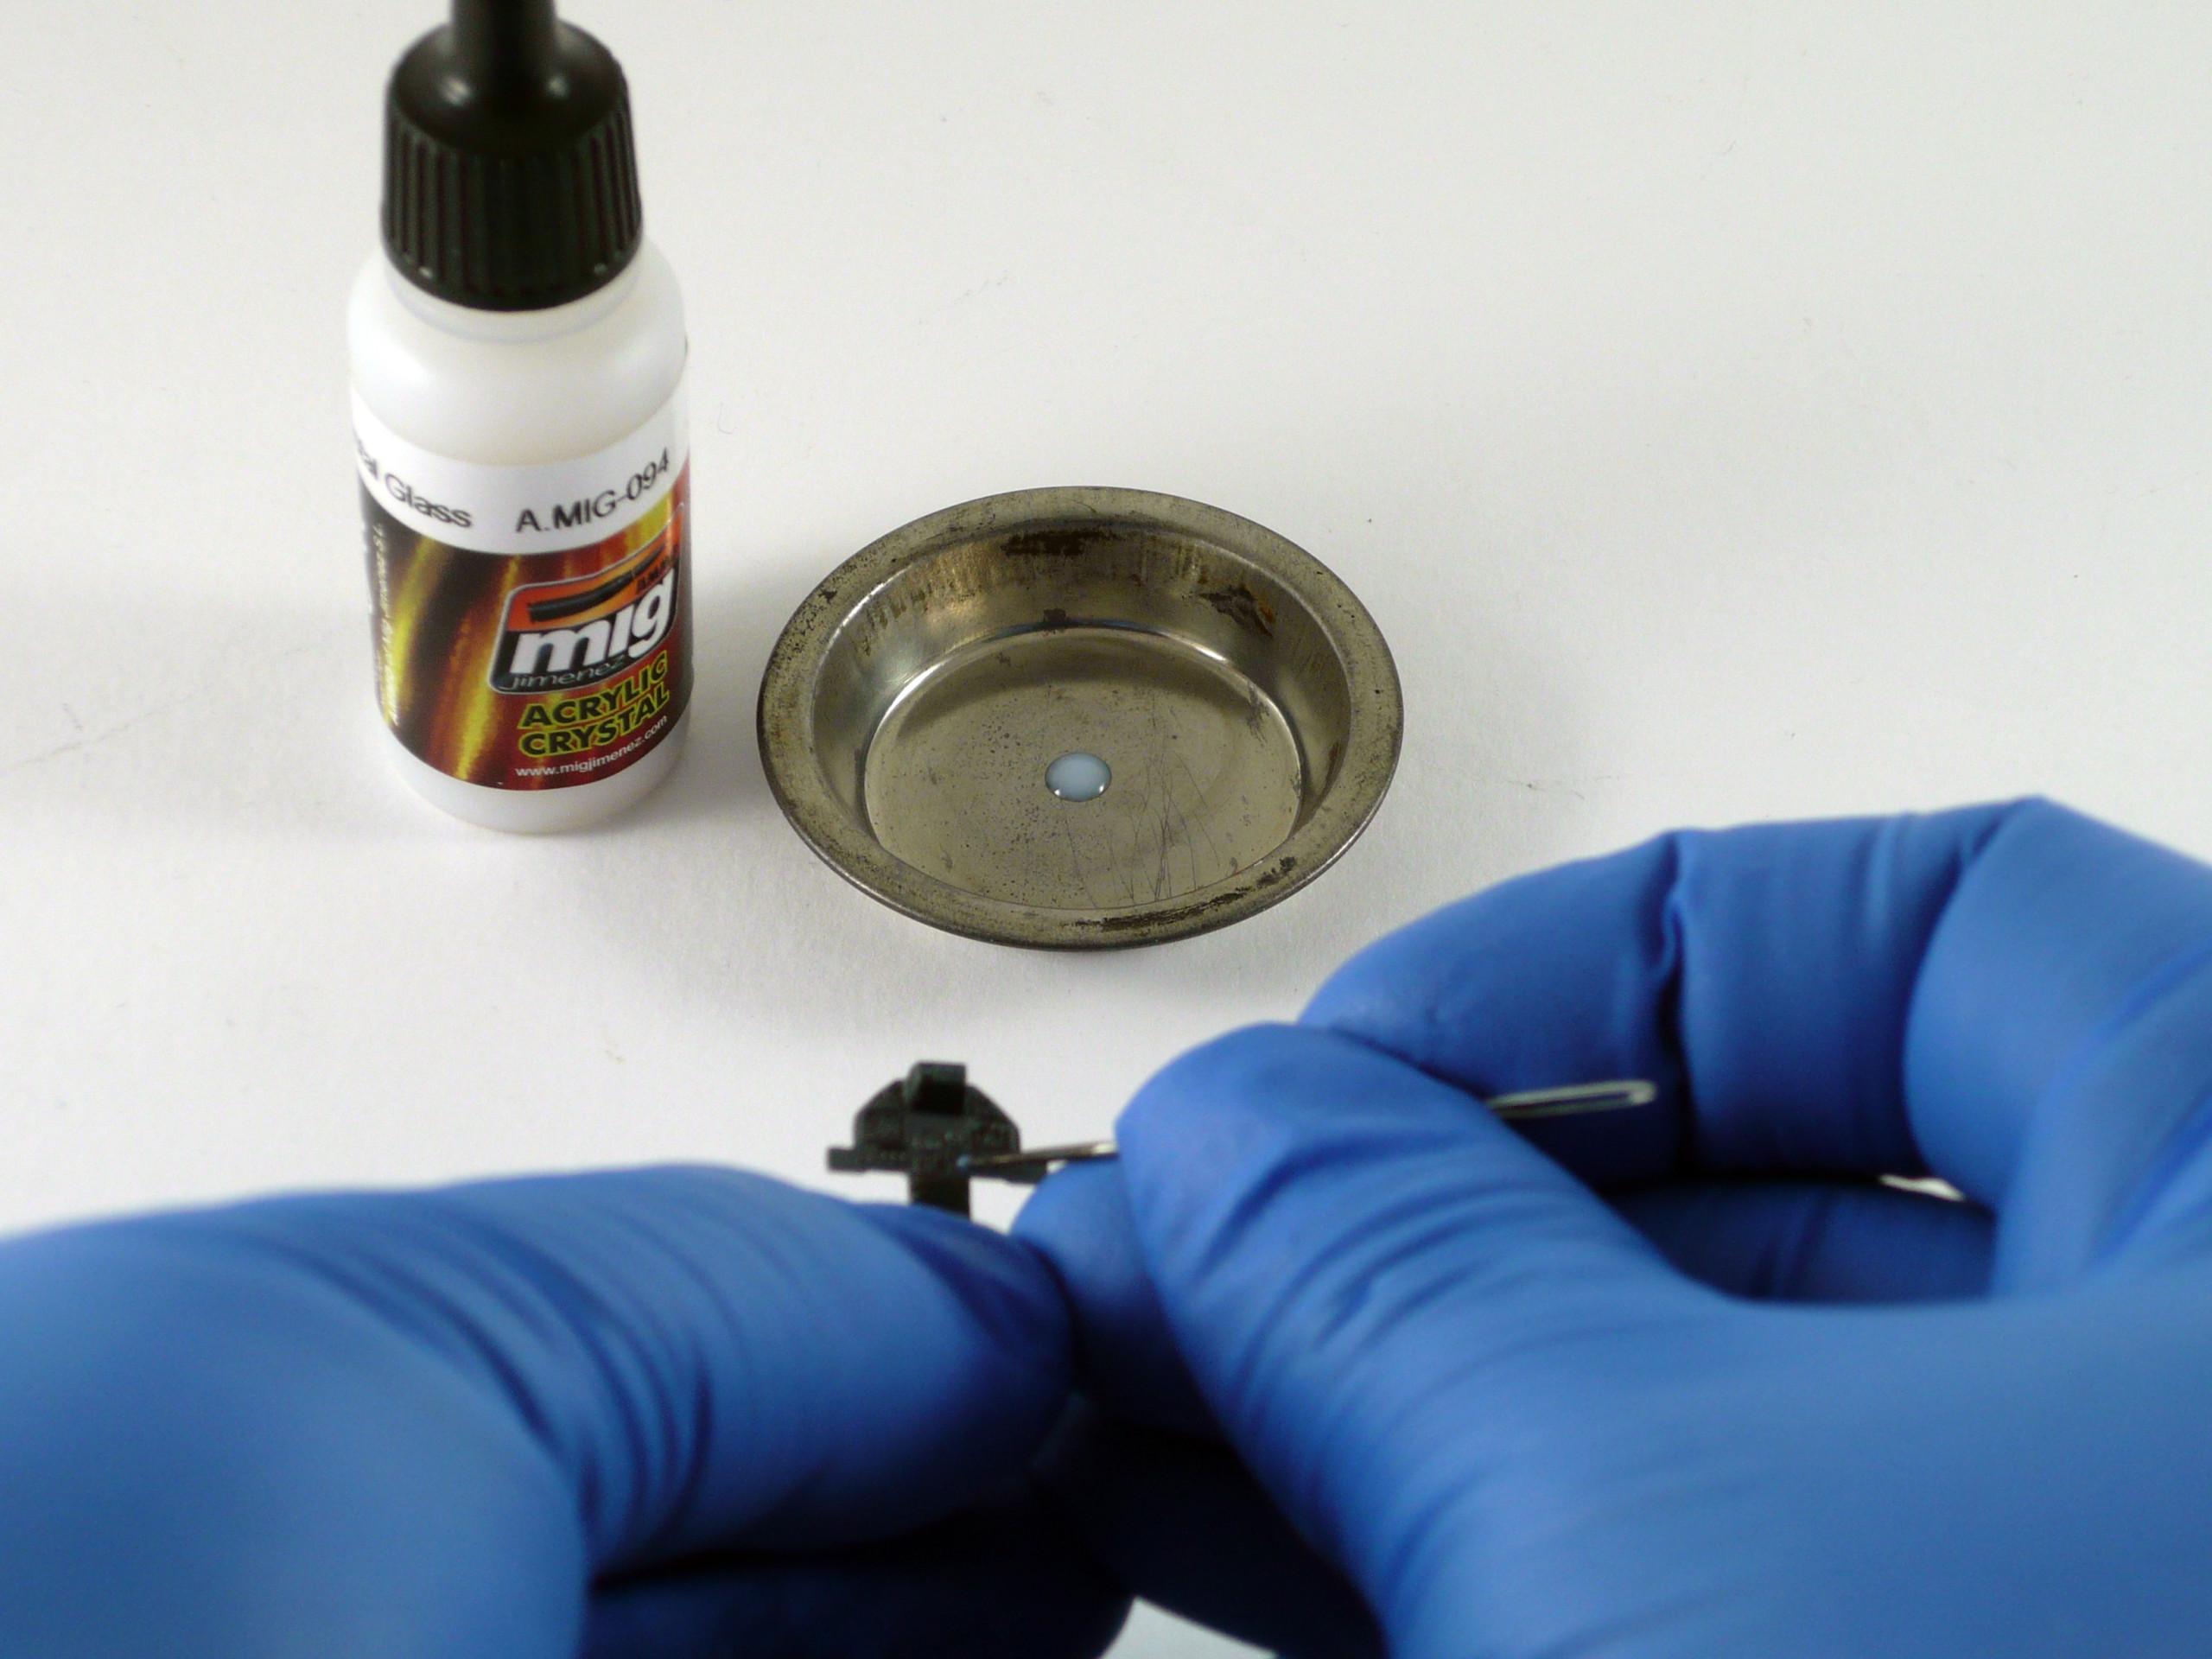
Using Mig Ammo Clear Glass I gave the gauges the shiny glass effect we need (pic 10)
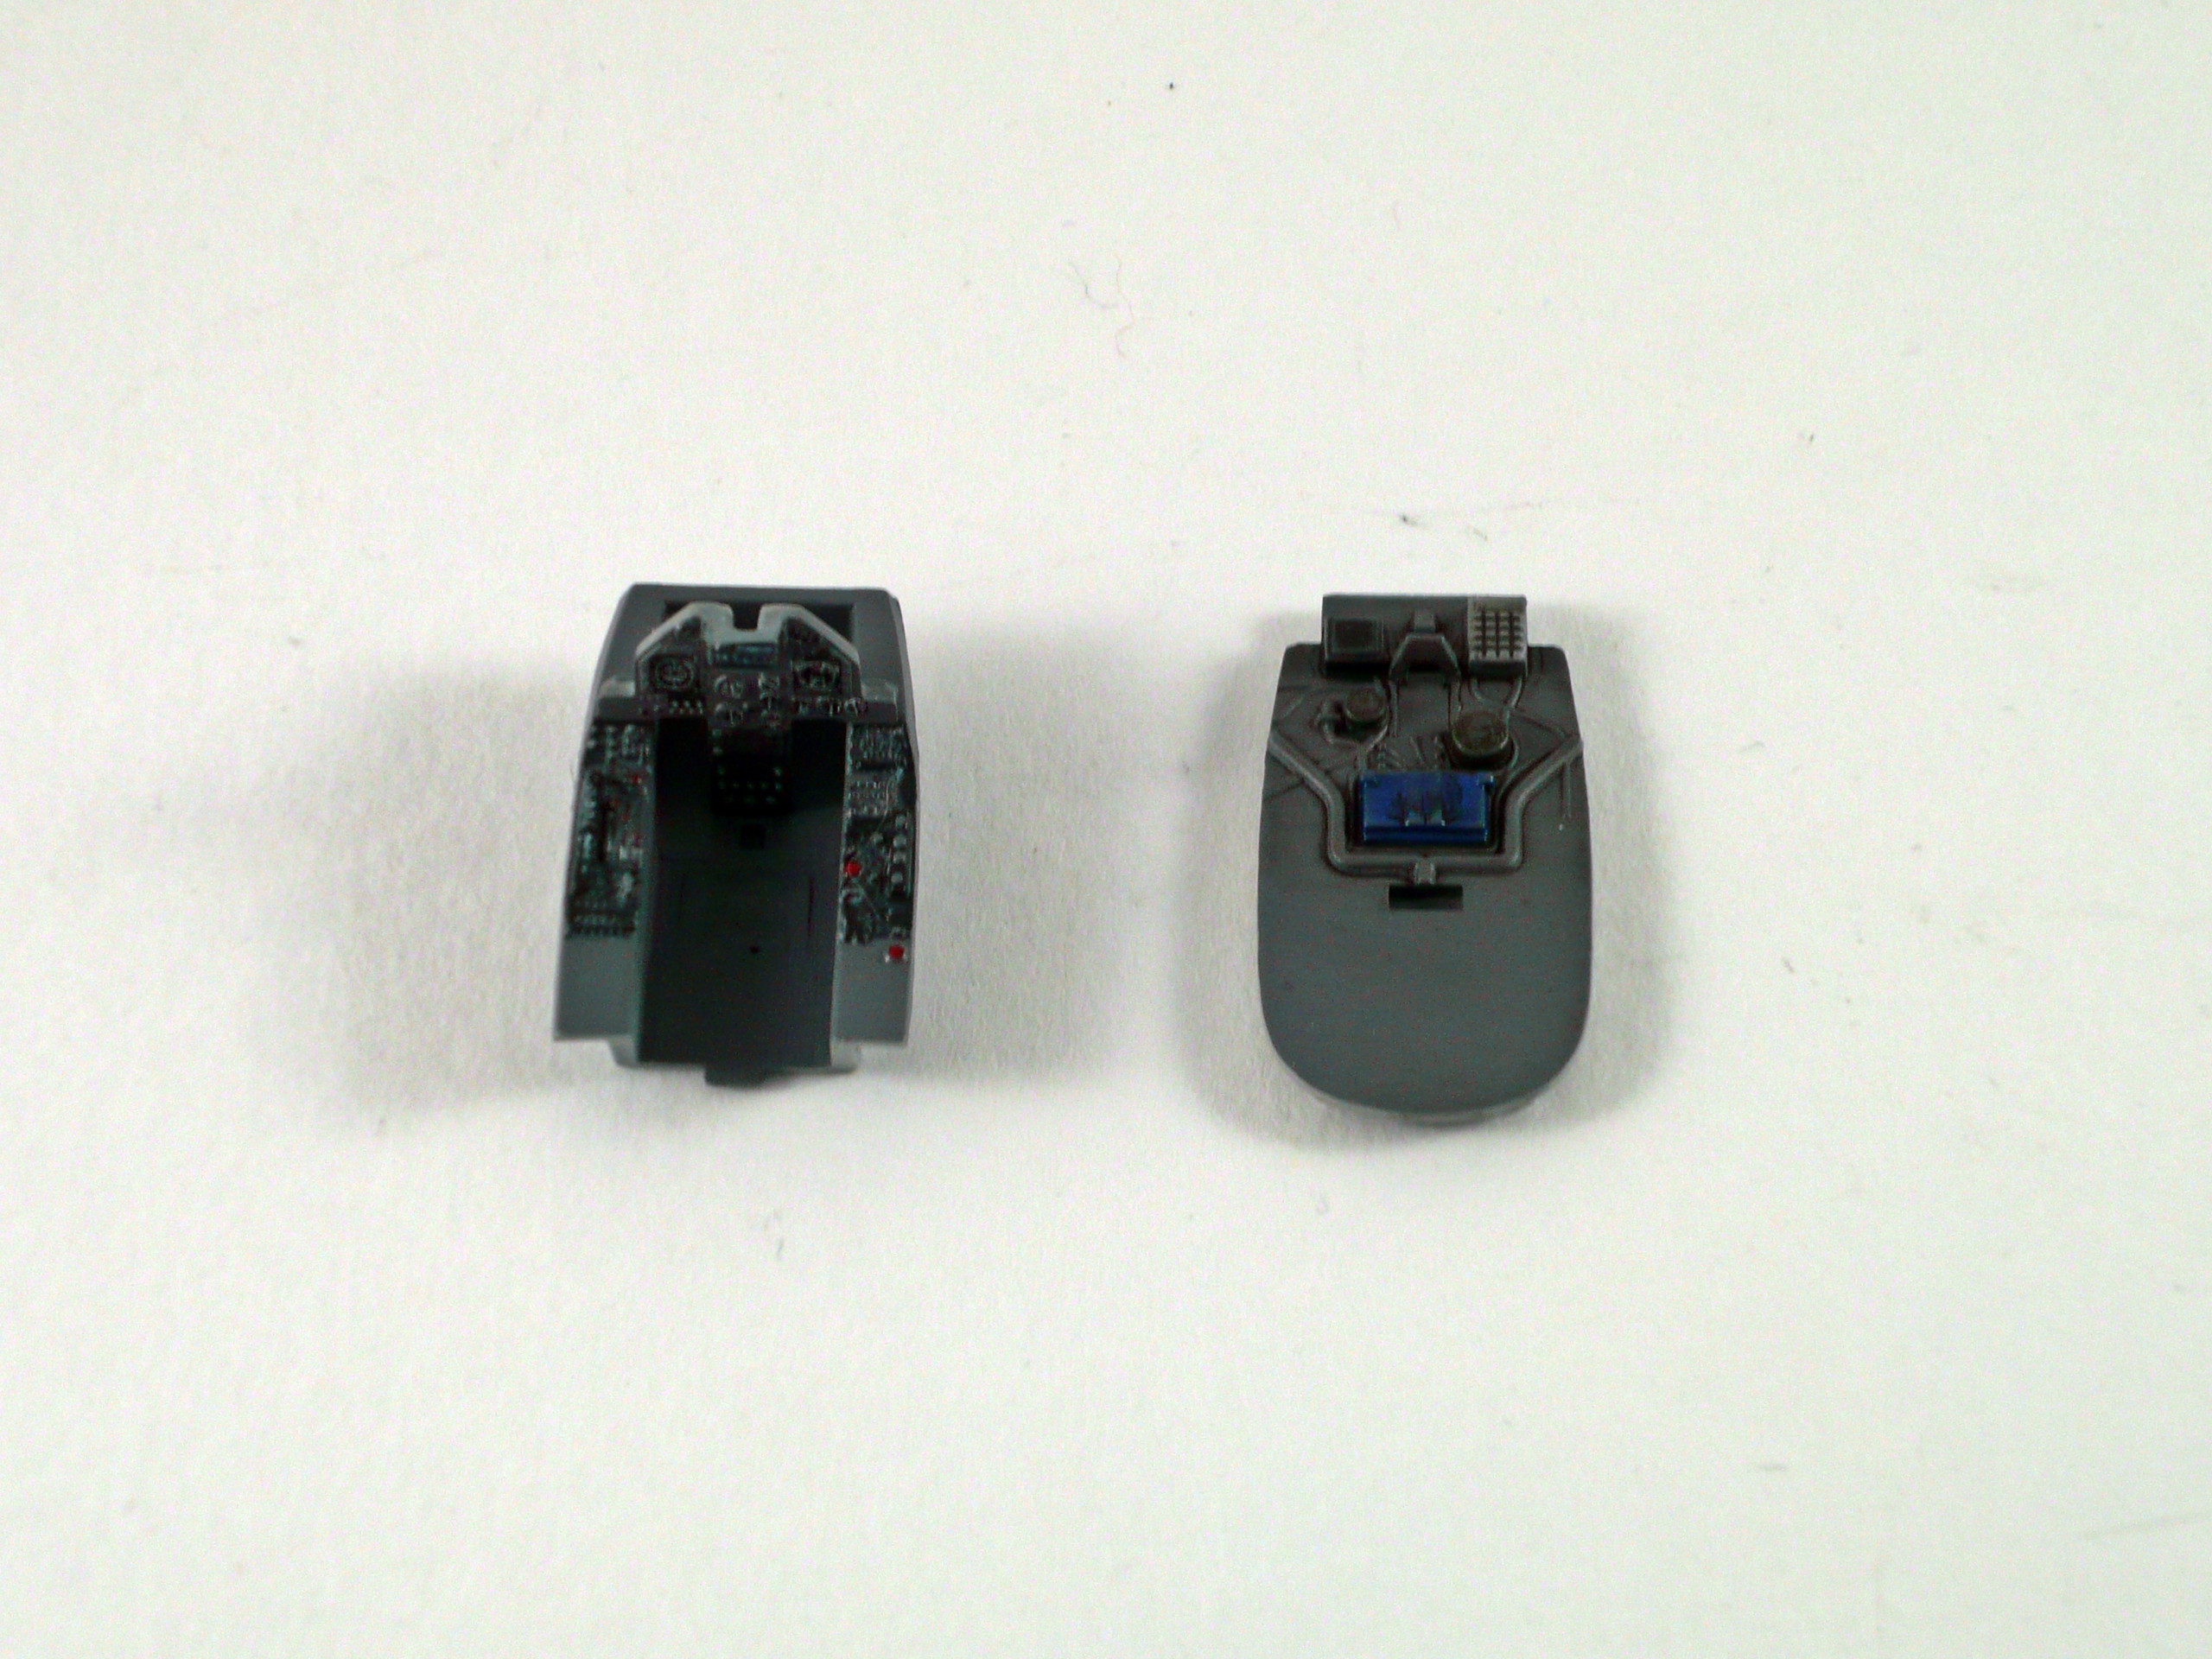
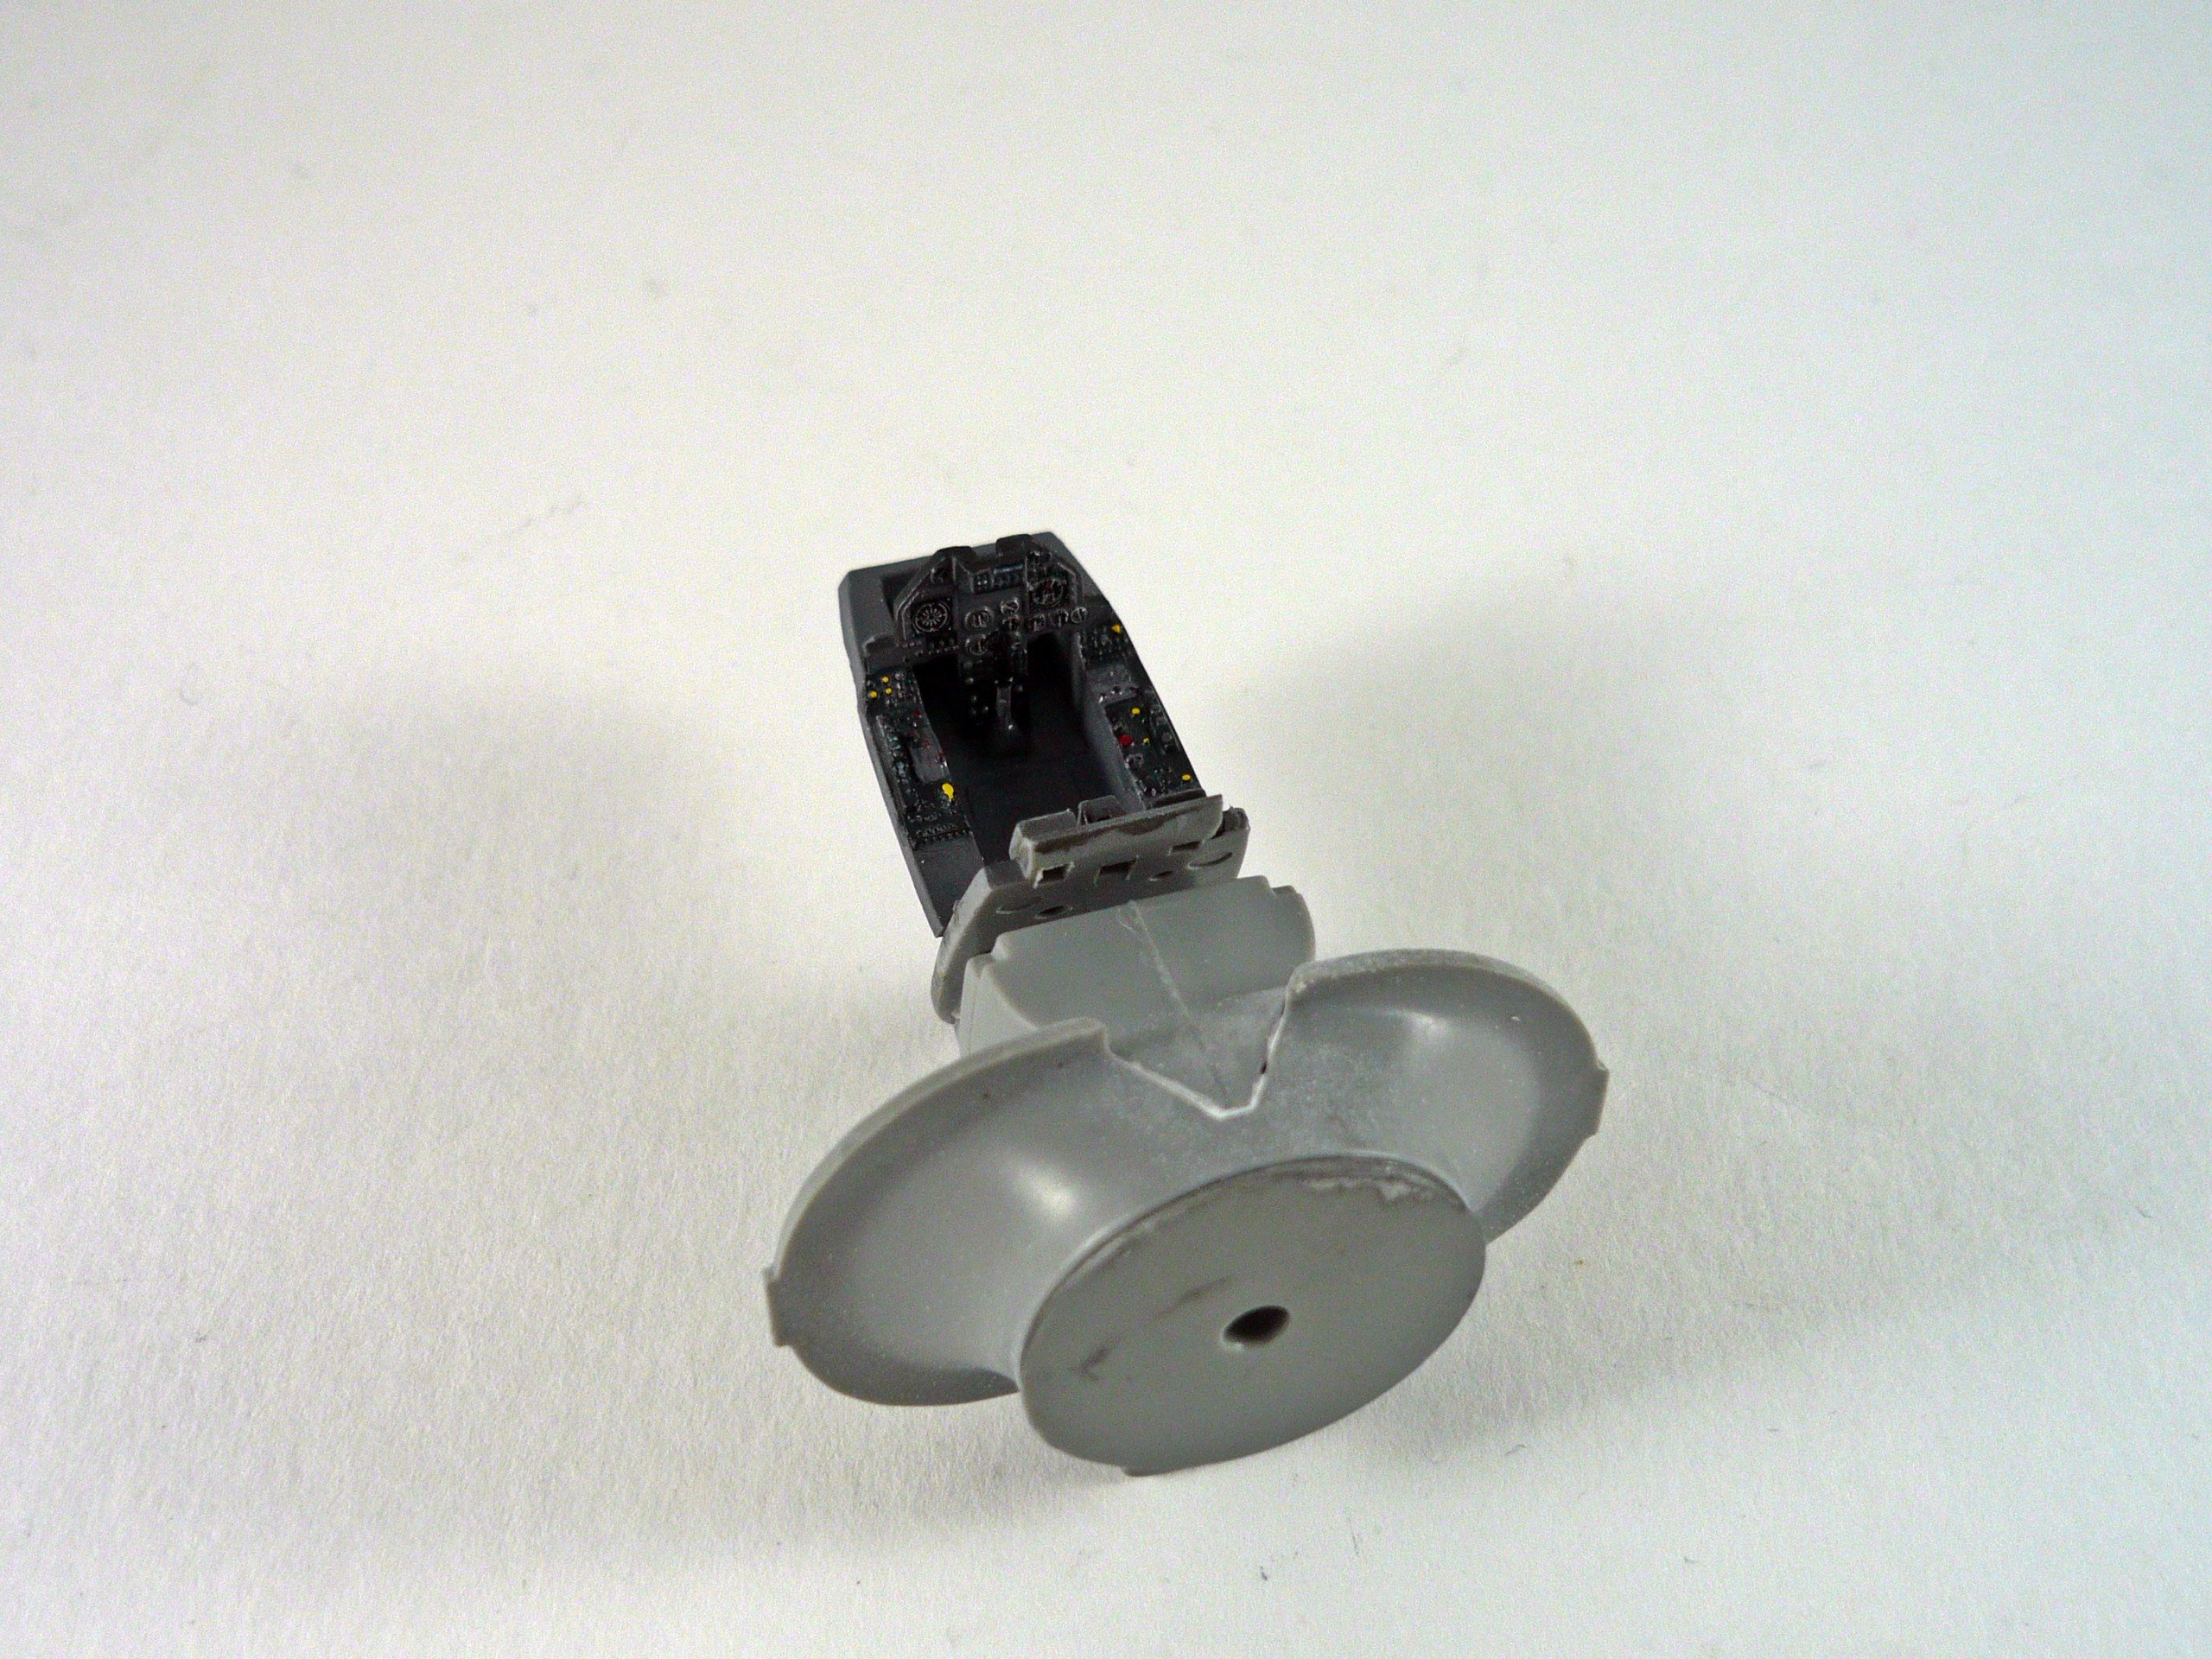
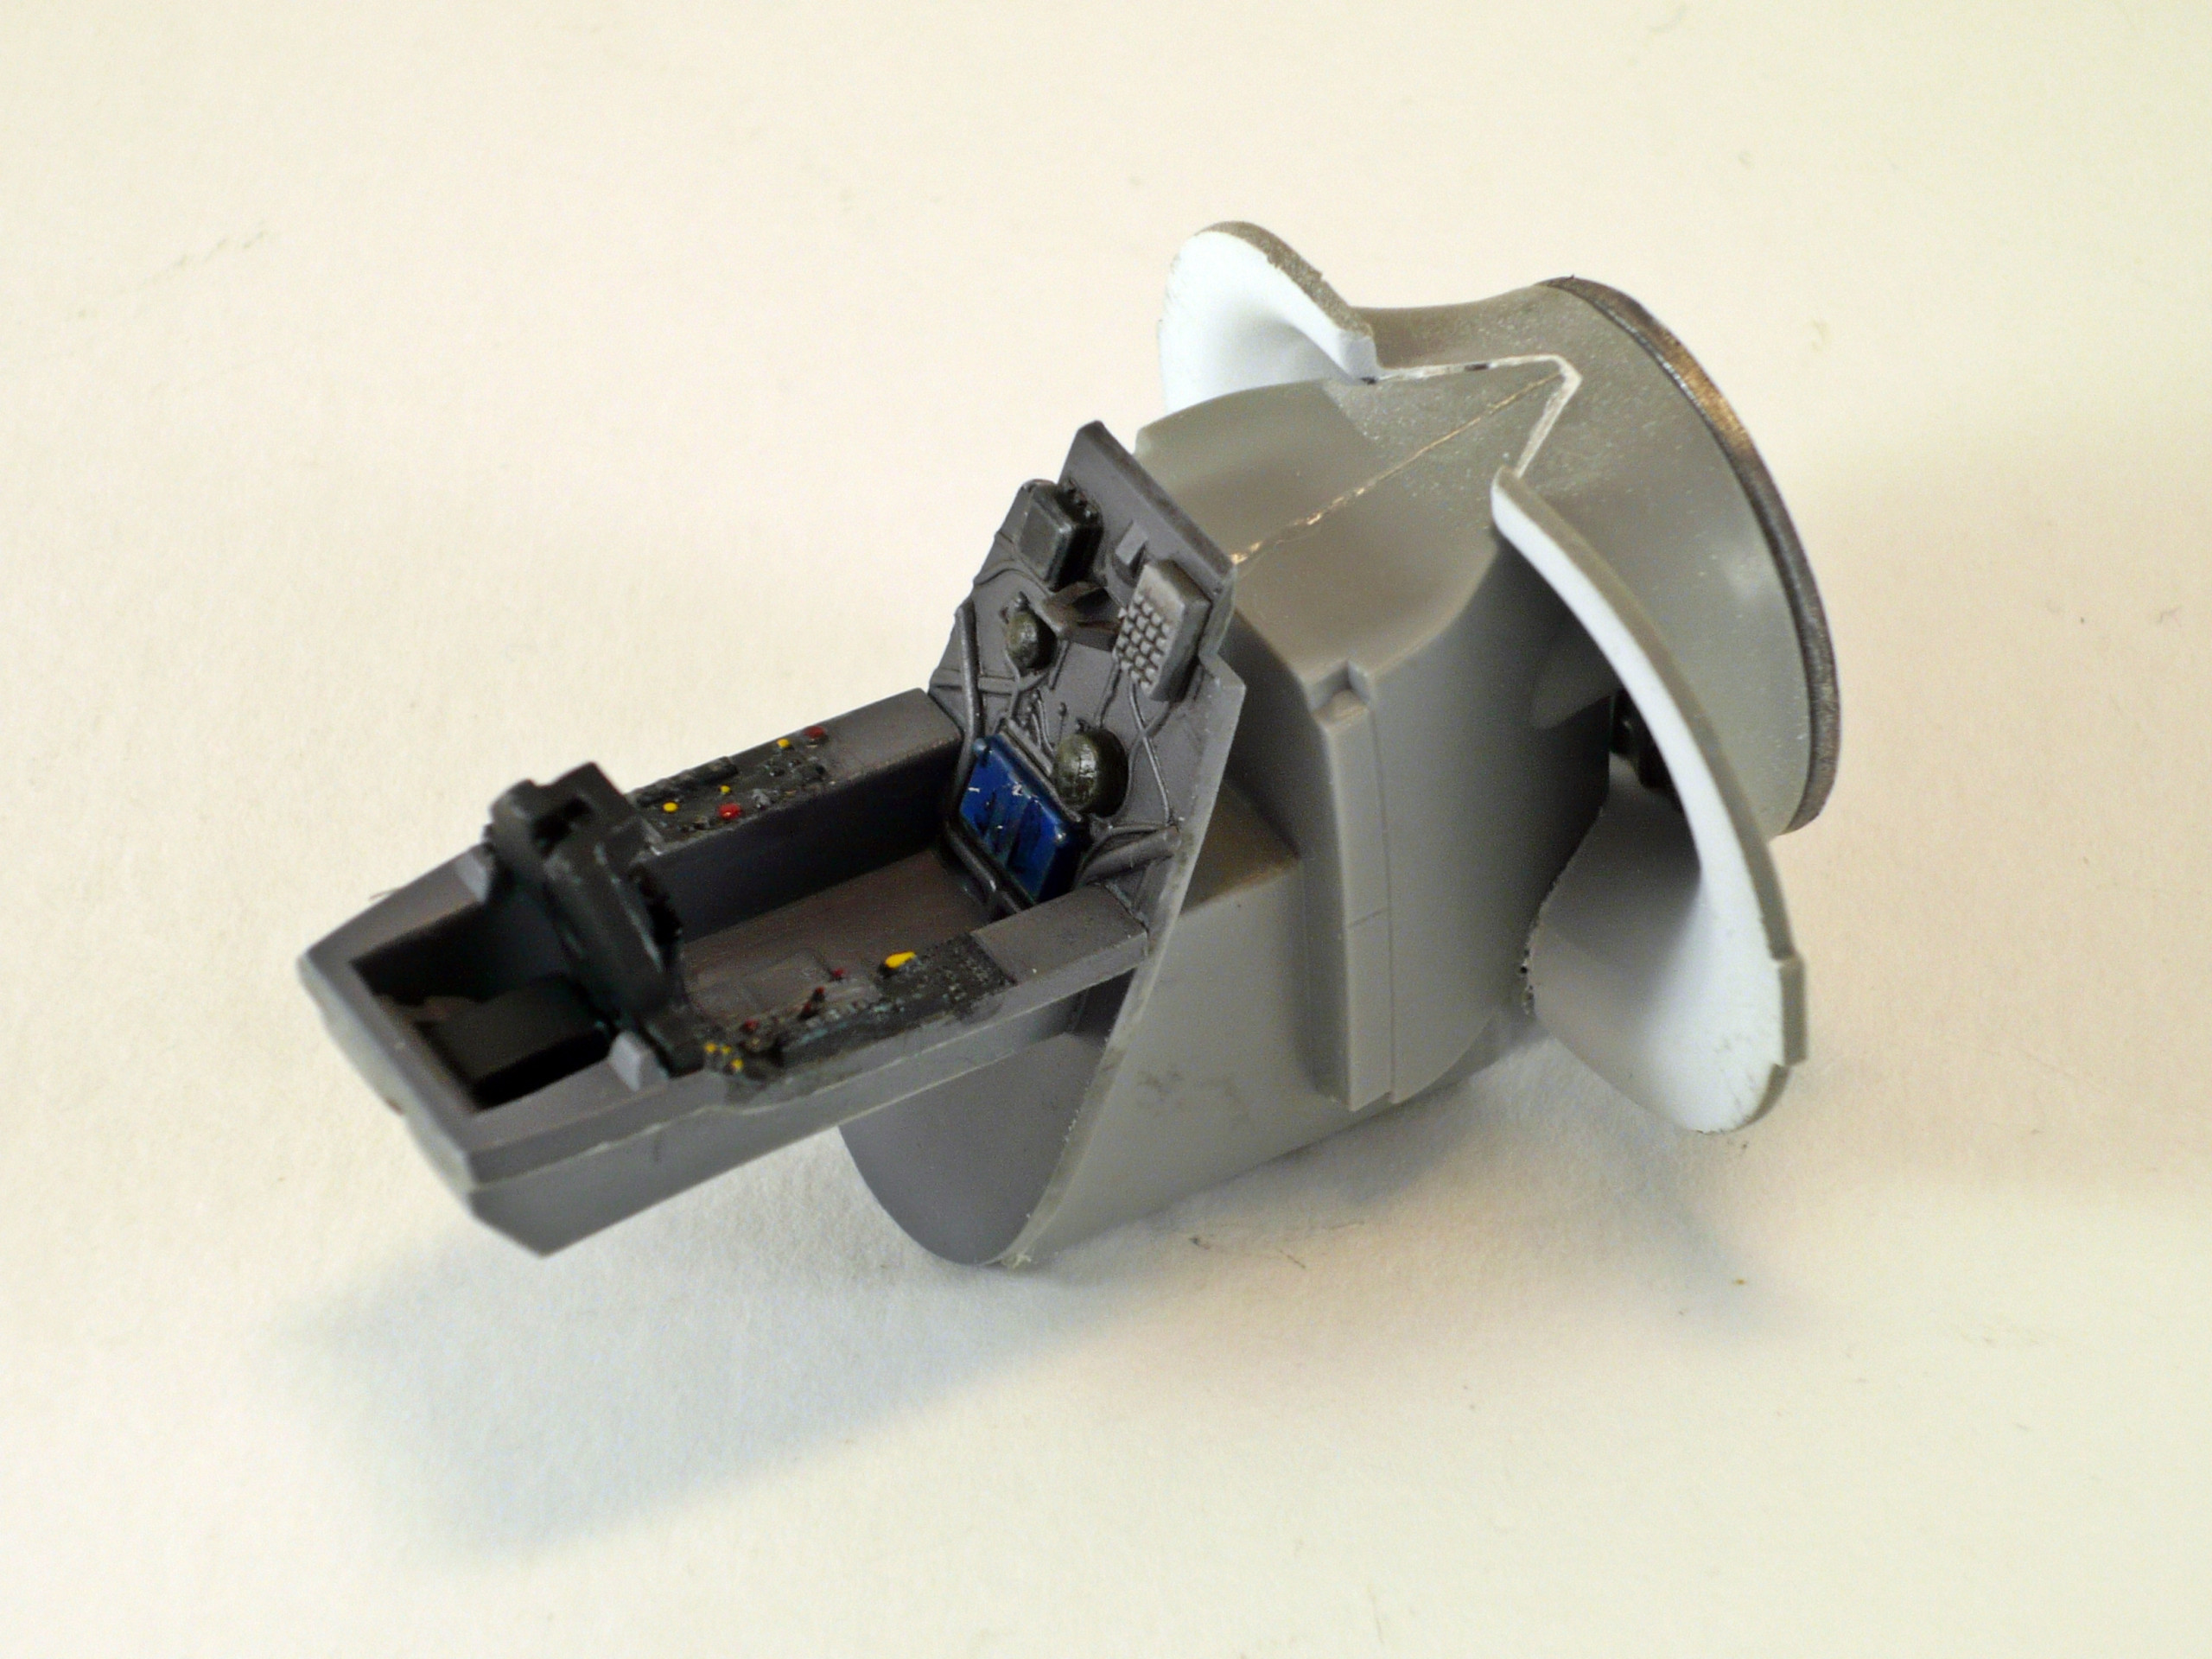
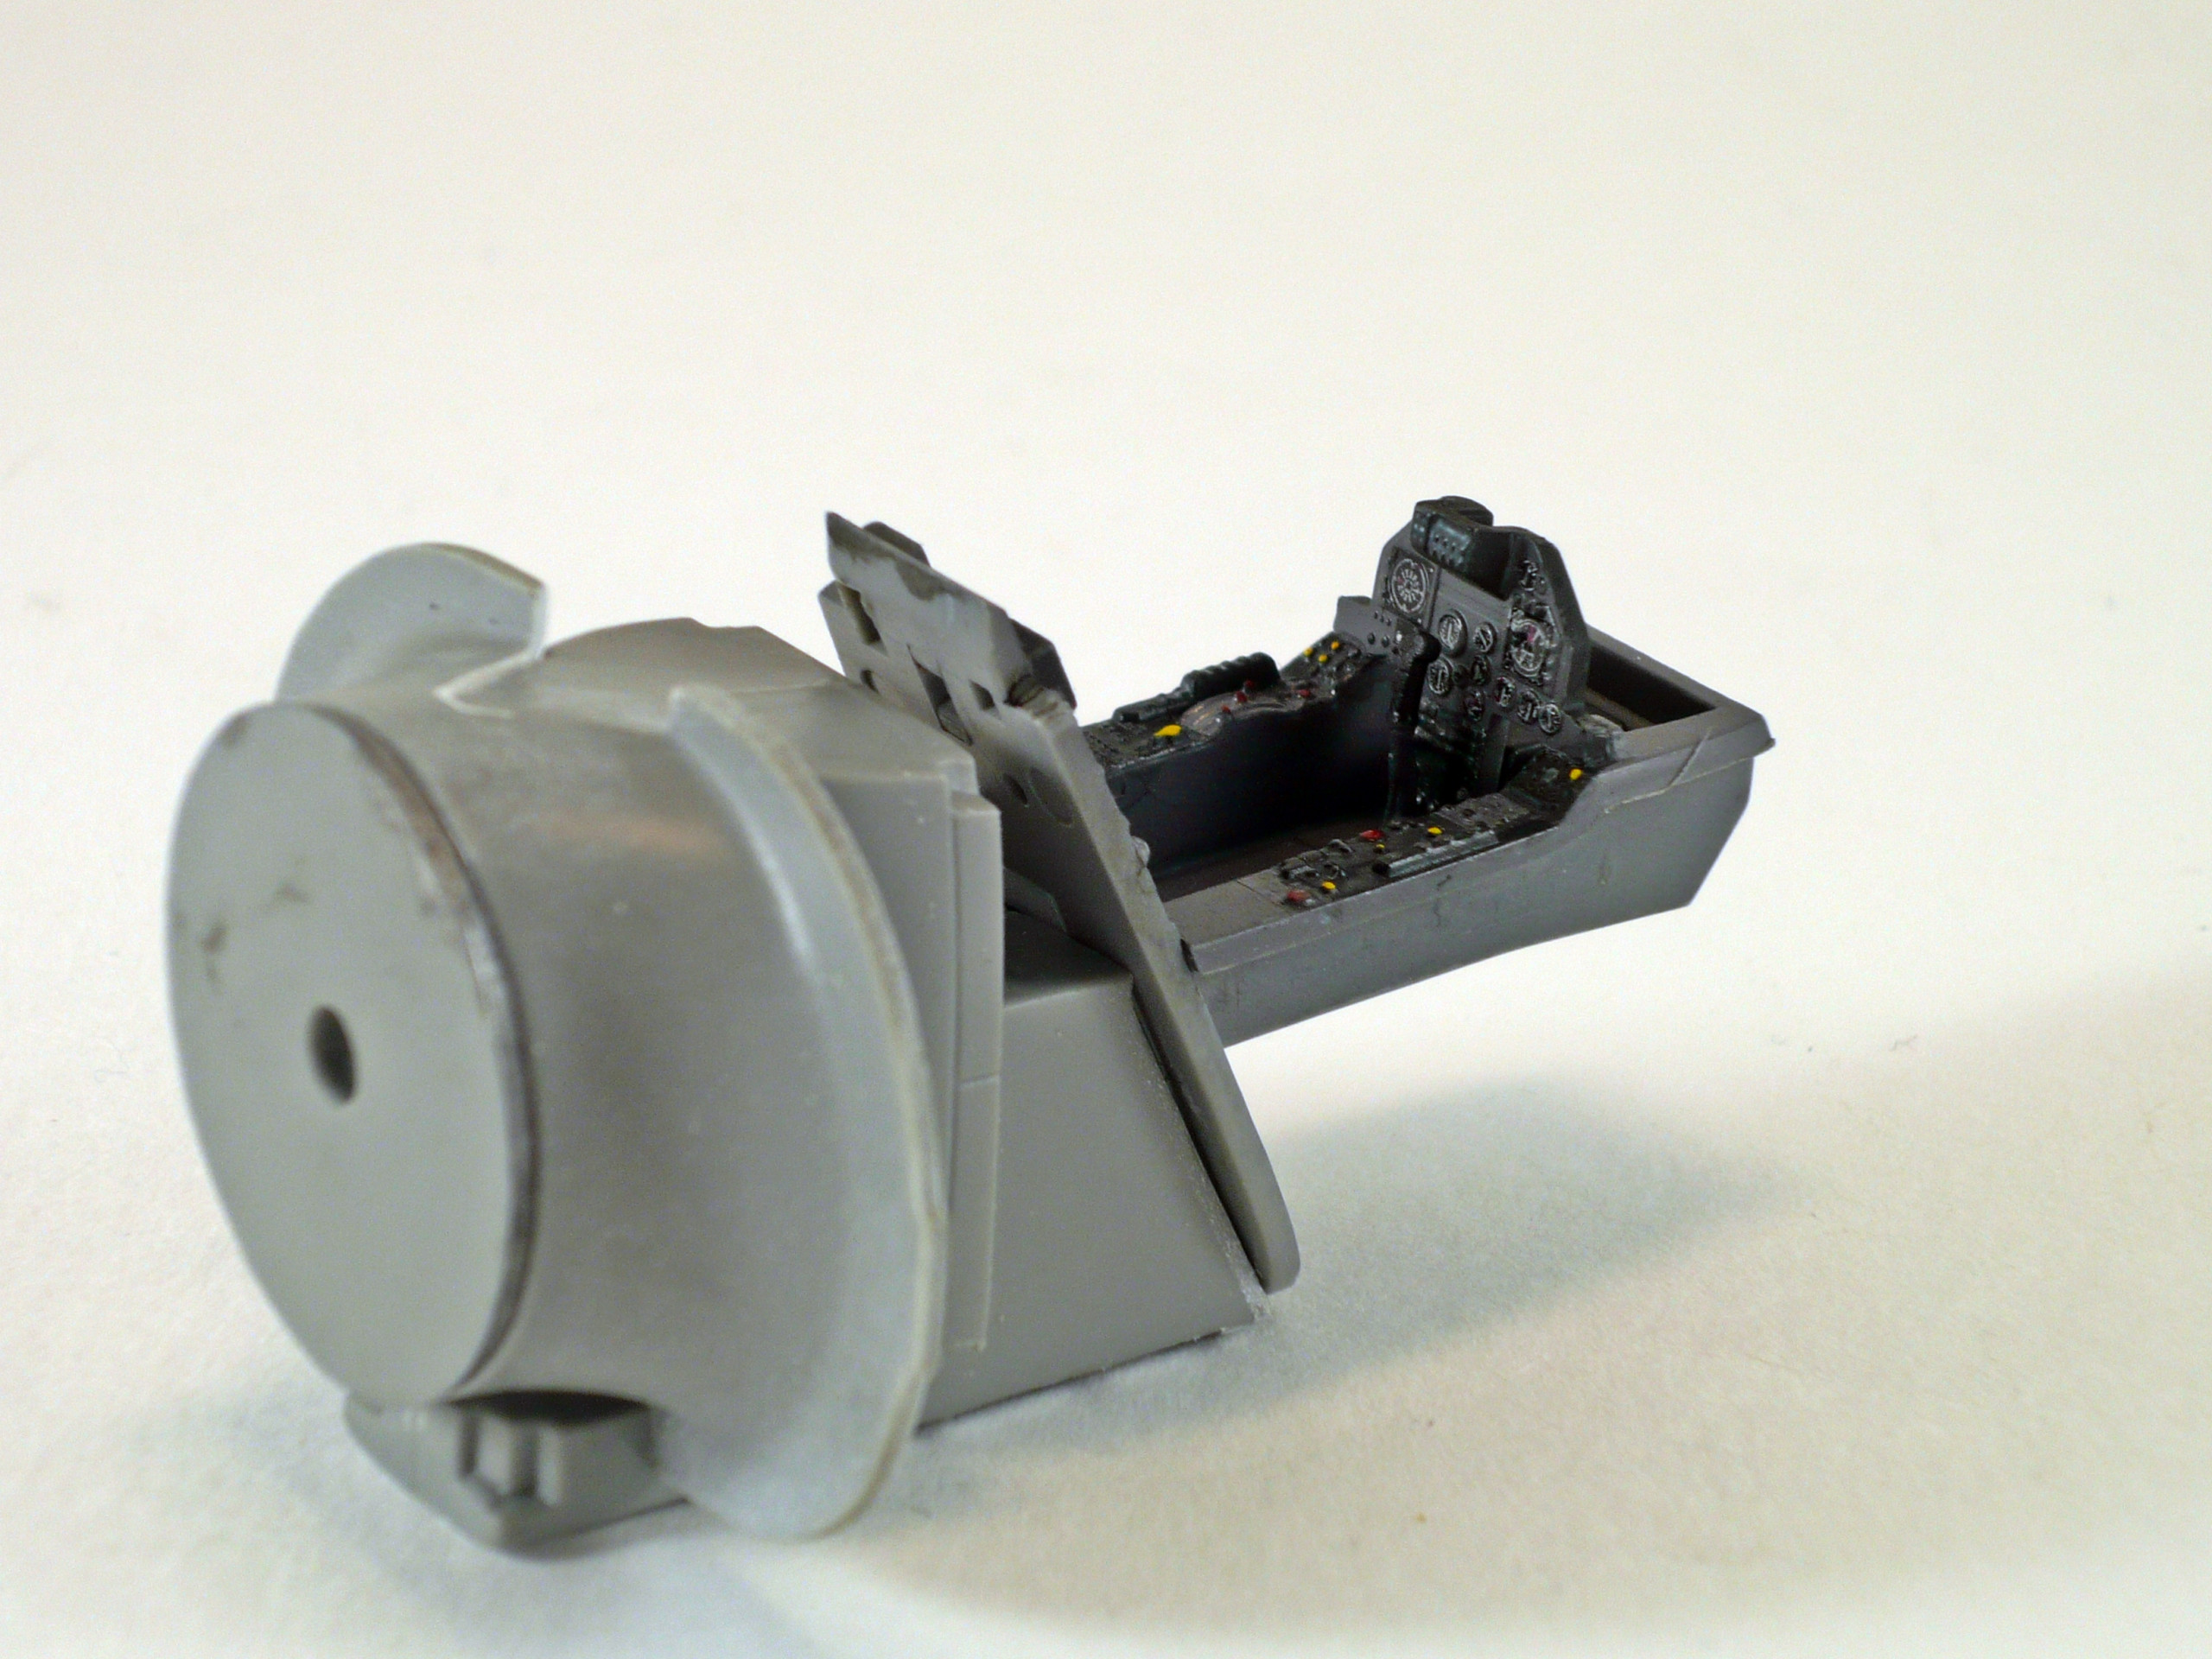
Cockpit parts almost ready to put together (pics 11,12,13)
Cockpit parts put together (pics 14,15,16) and glued to the fuselage (pic 17)
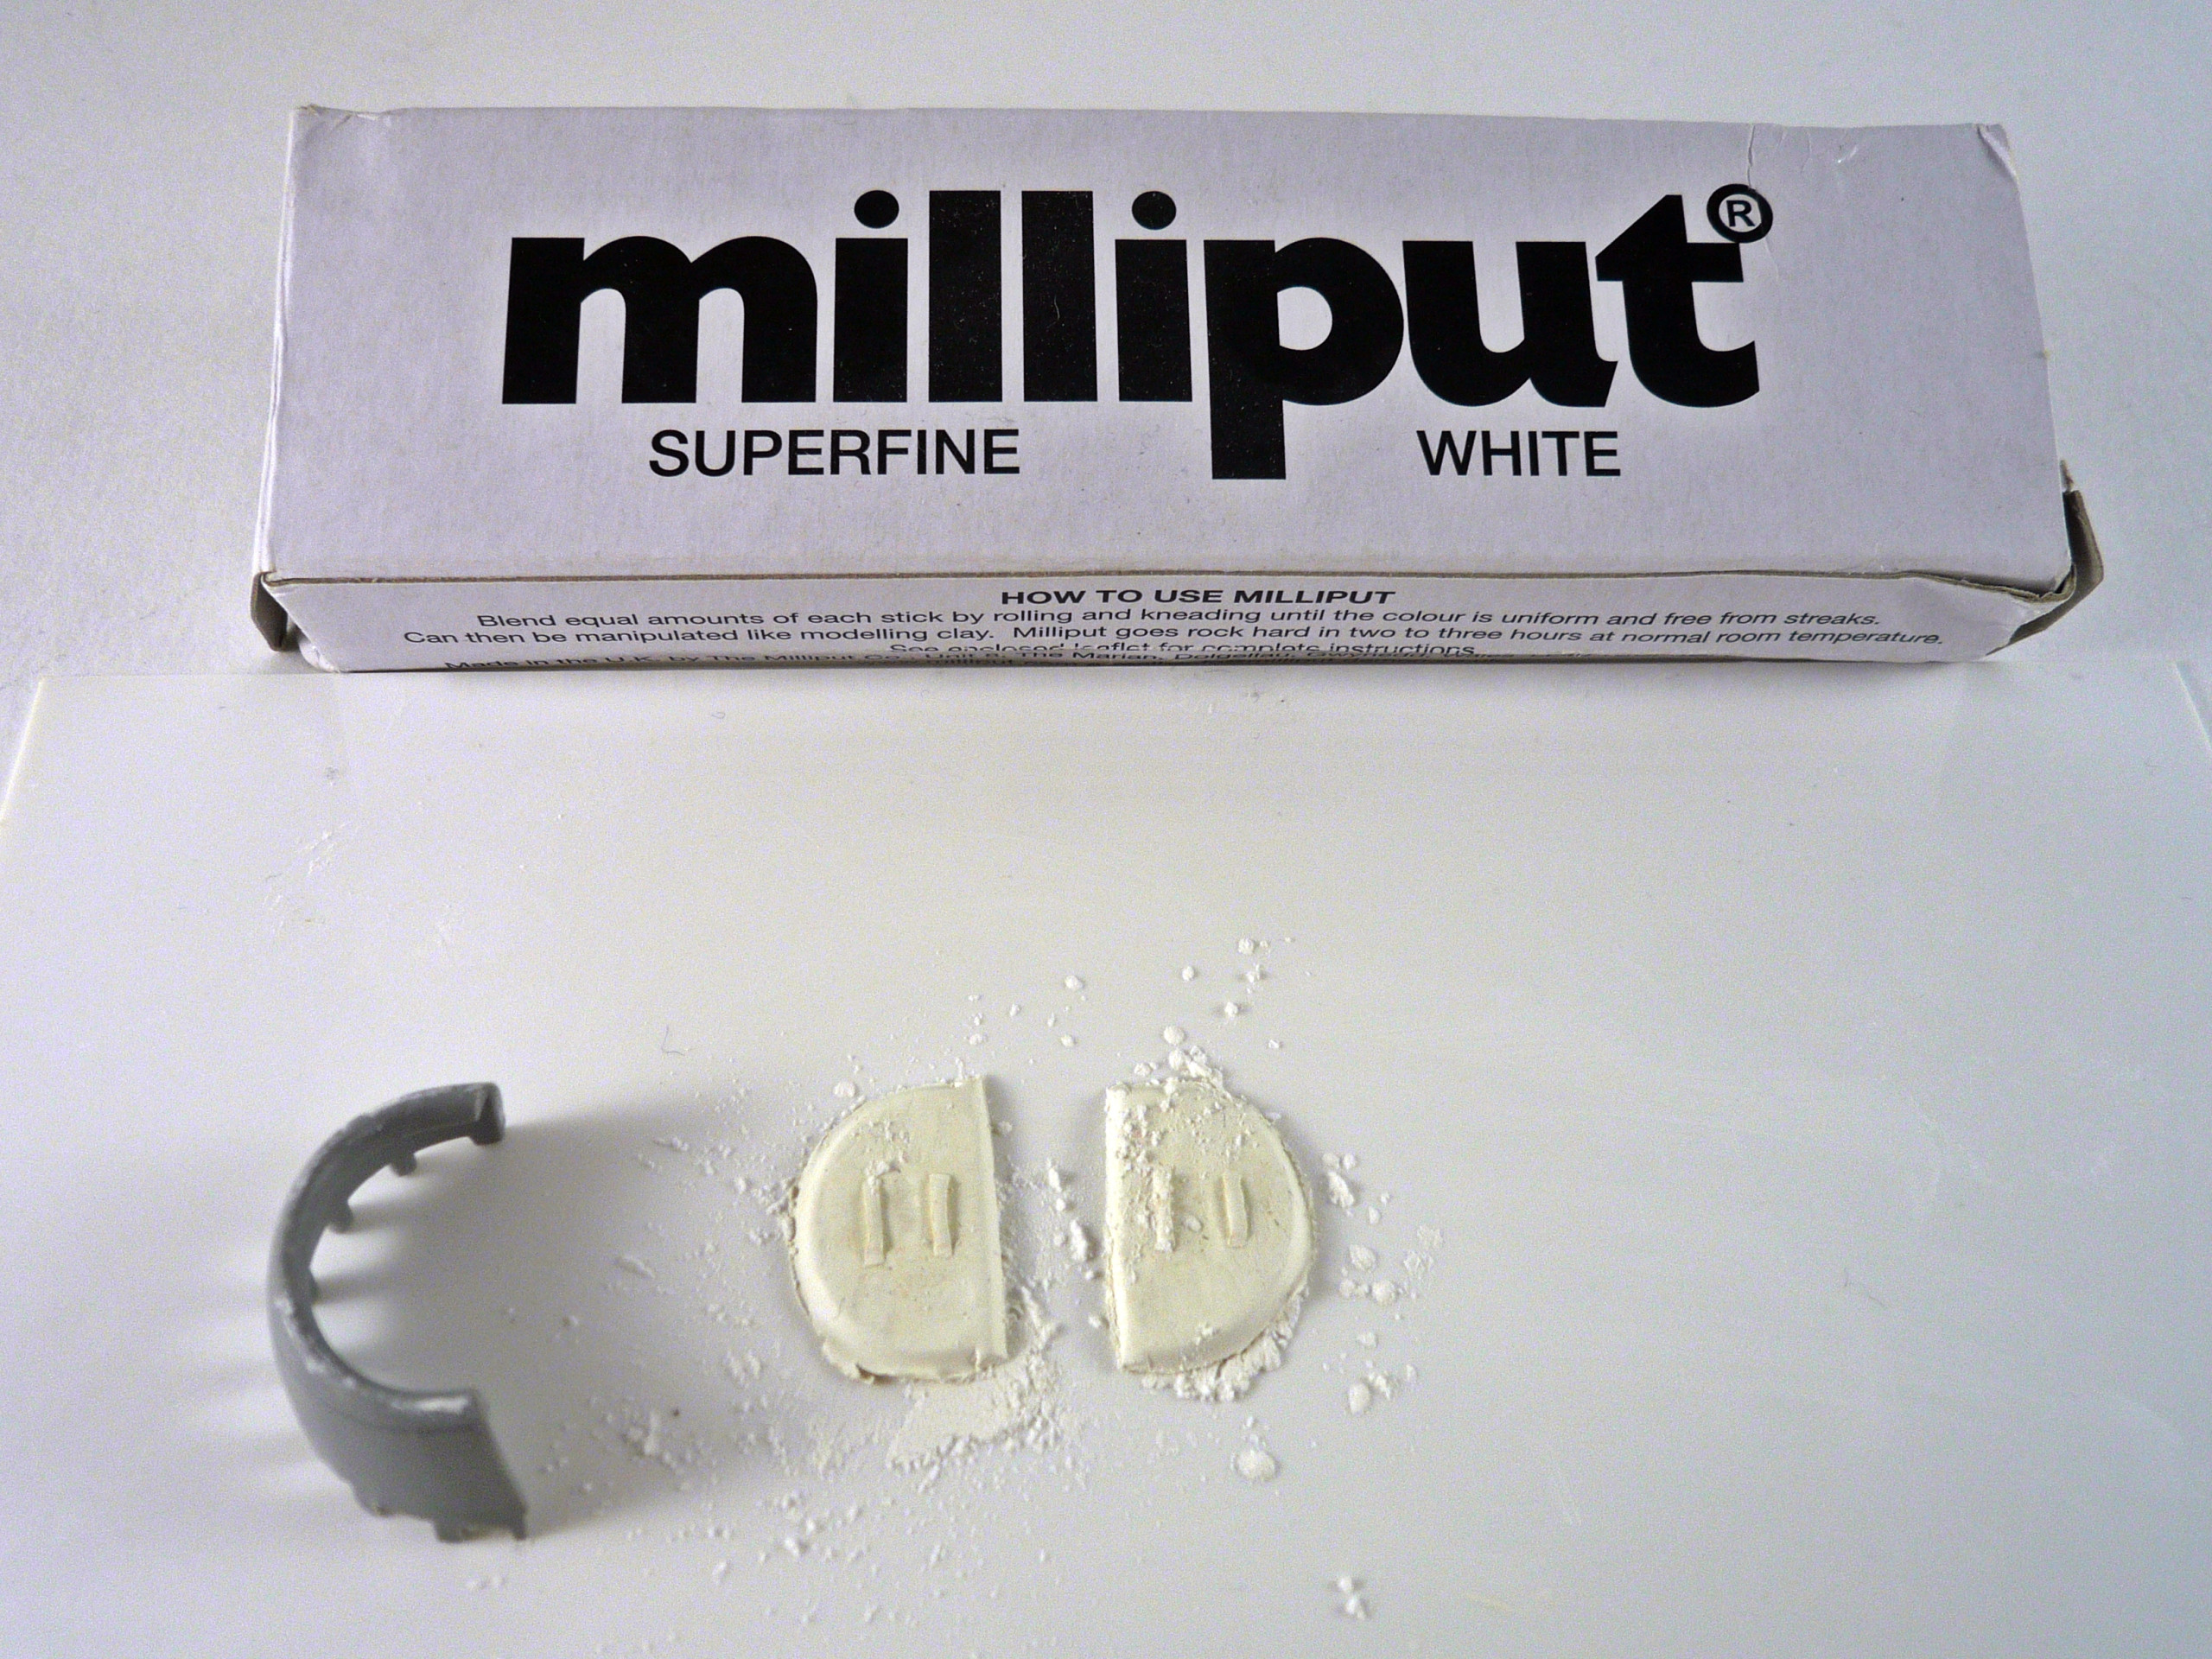
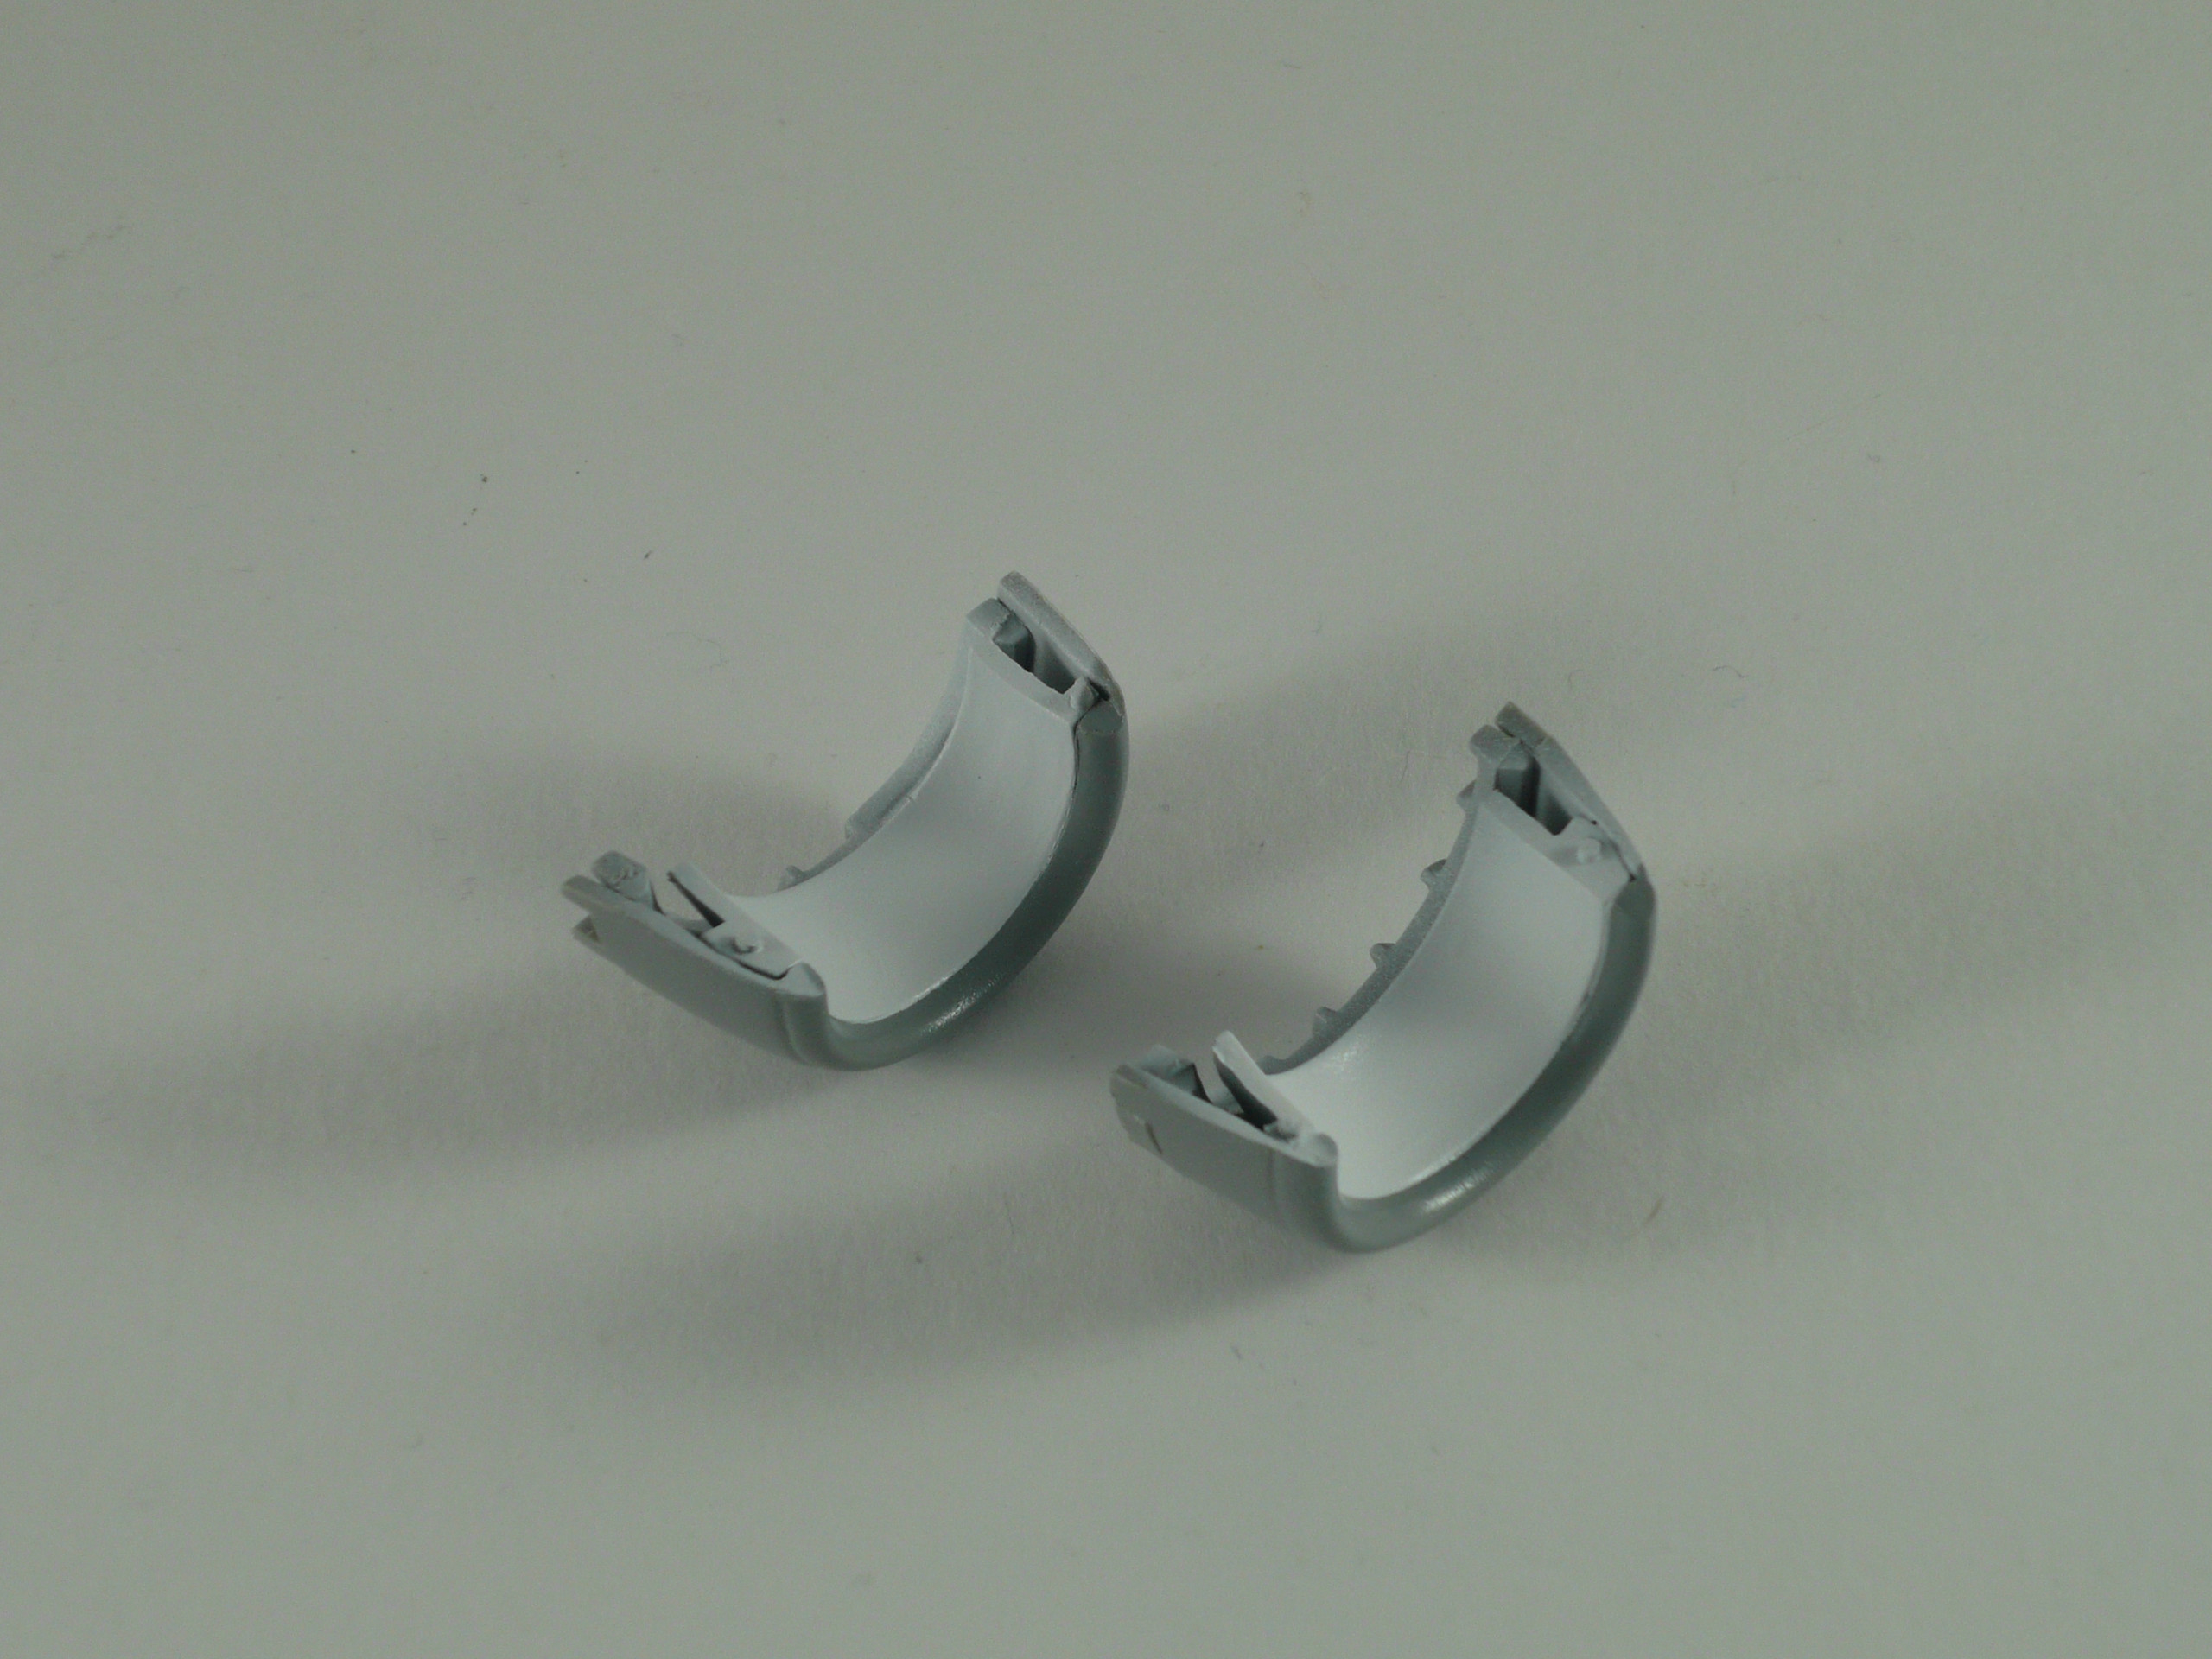
Using Milliput fine epoxy putty and the intake outer part of the kit I made the intake FOD’s (pic 18)
I removed the locating ridges molded on the fuselage with a blade for a better upper wing fit (pic 20)
I painted the intakes using Mig Ammo matt white and gloss varnish (pic 21)
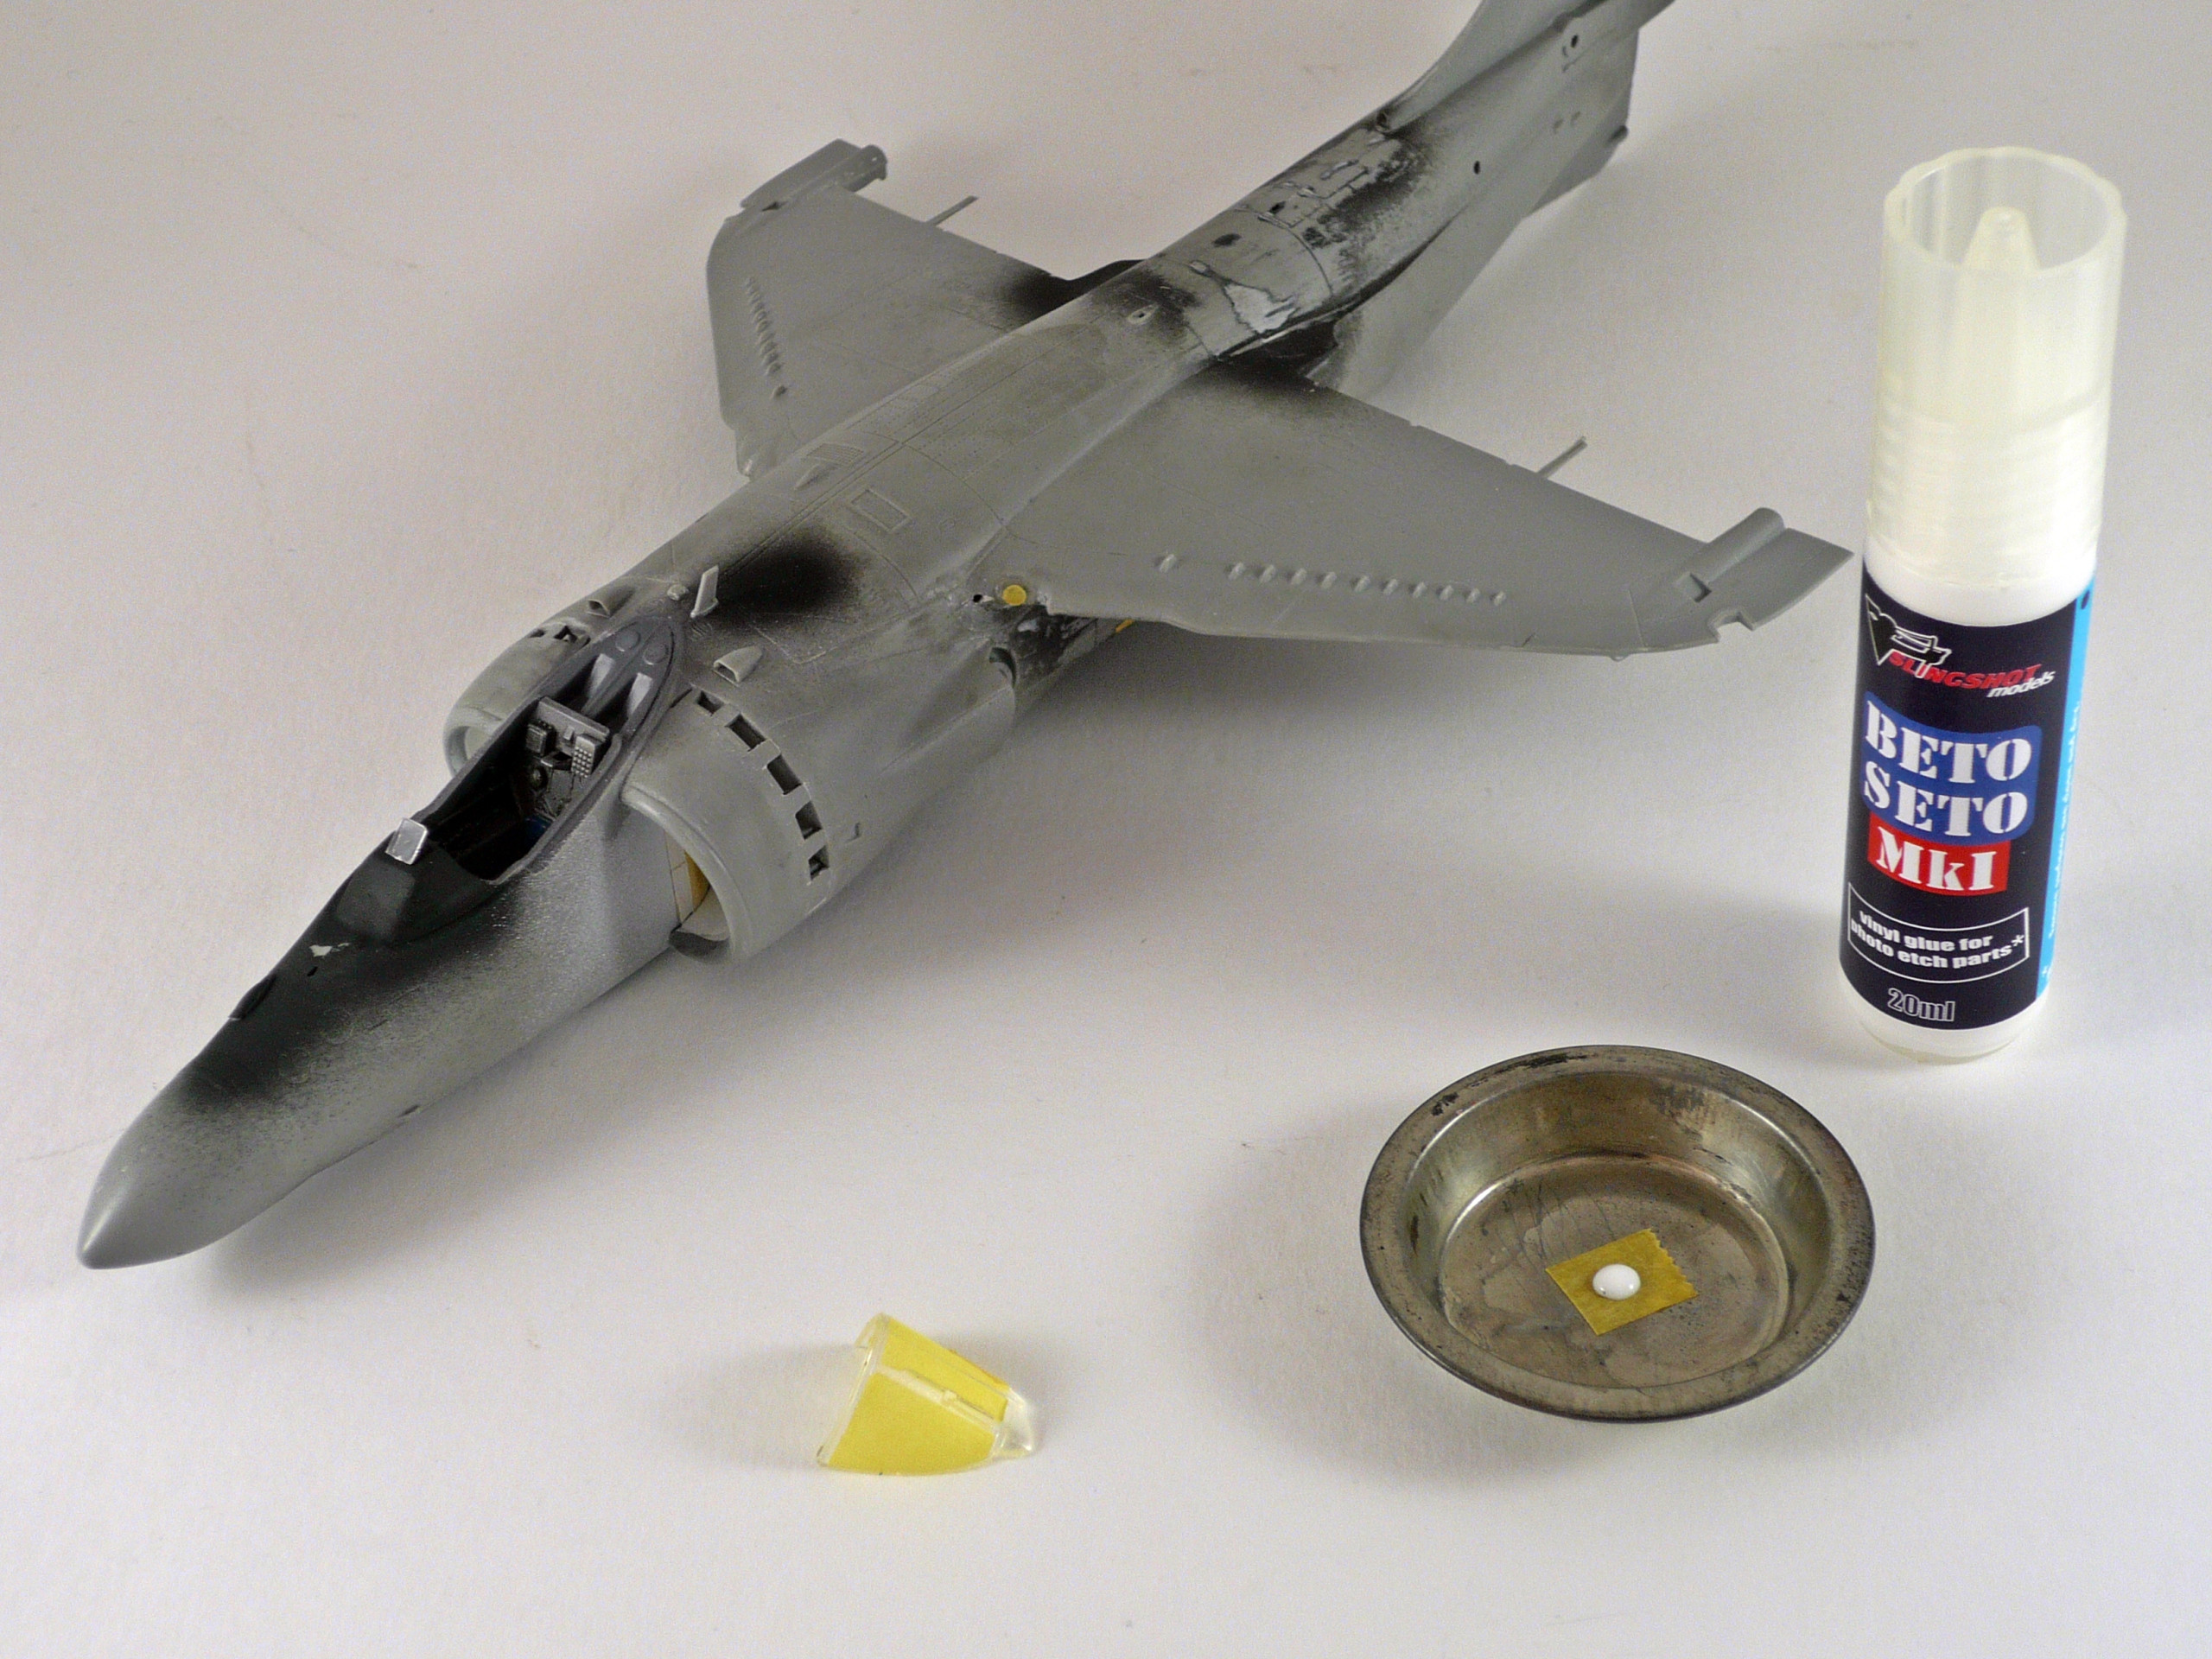
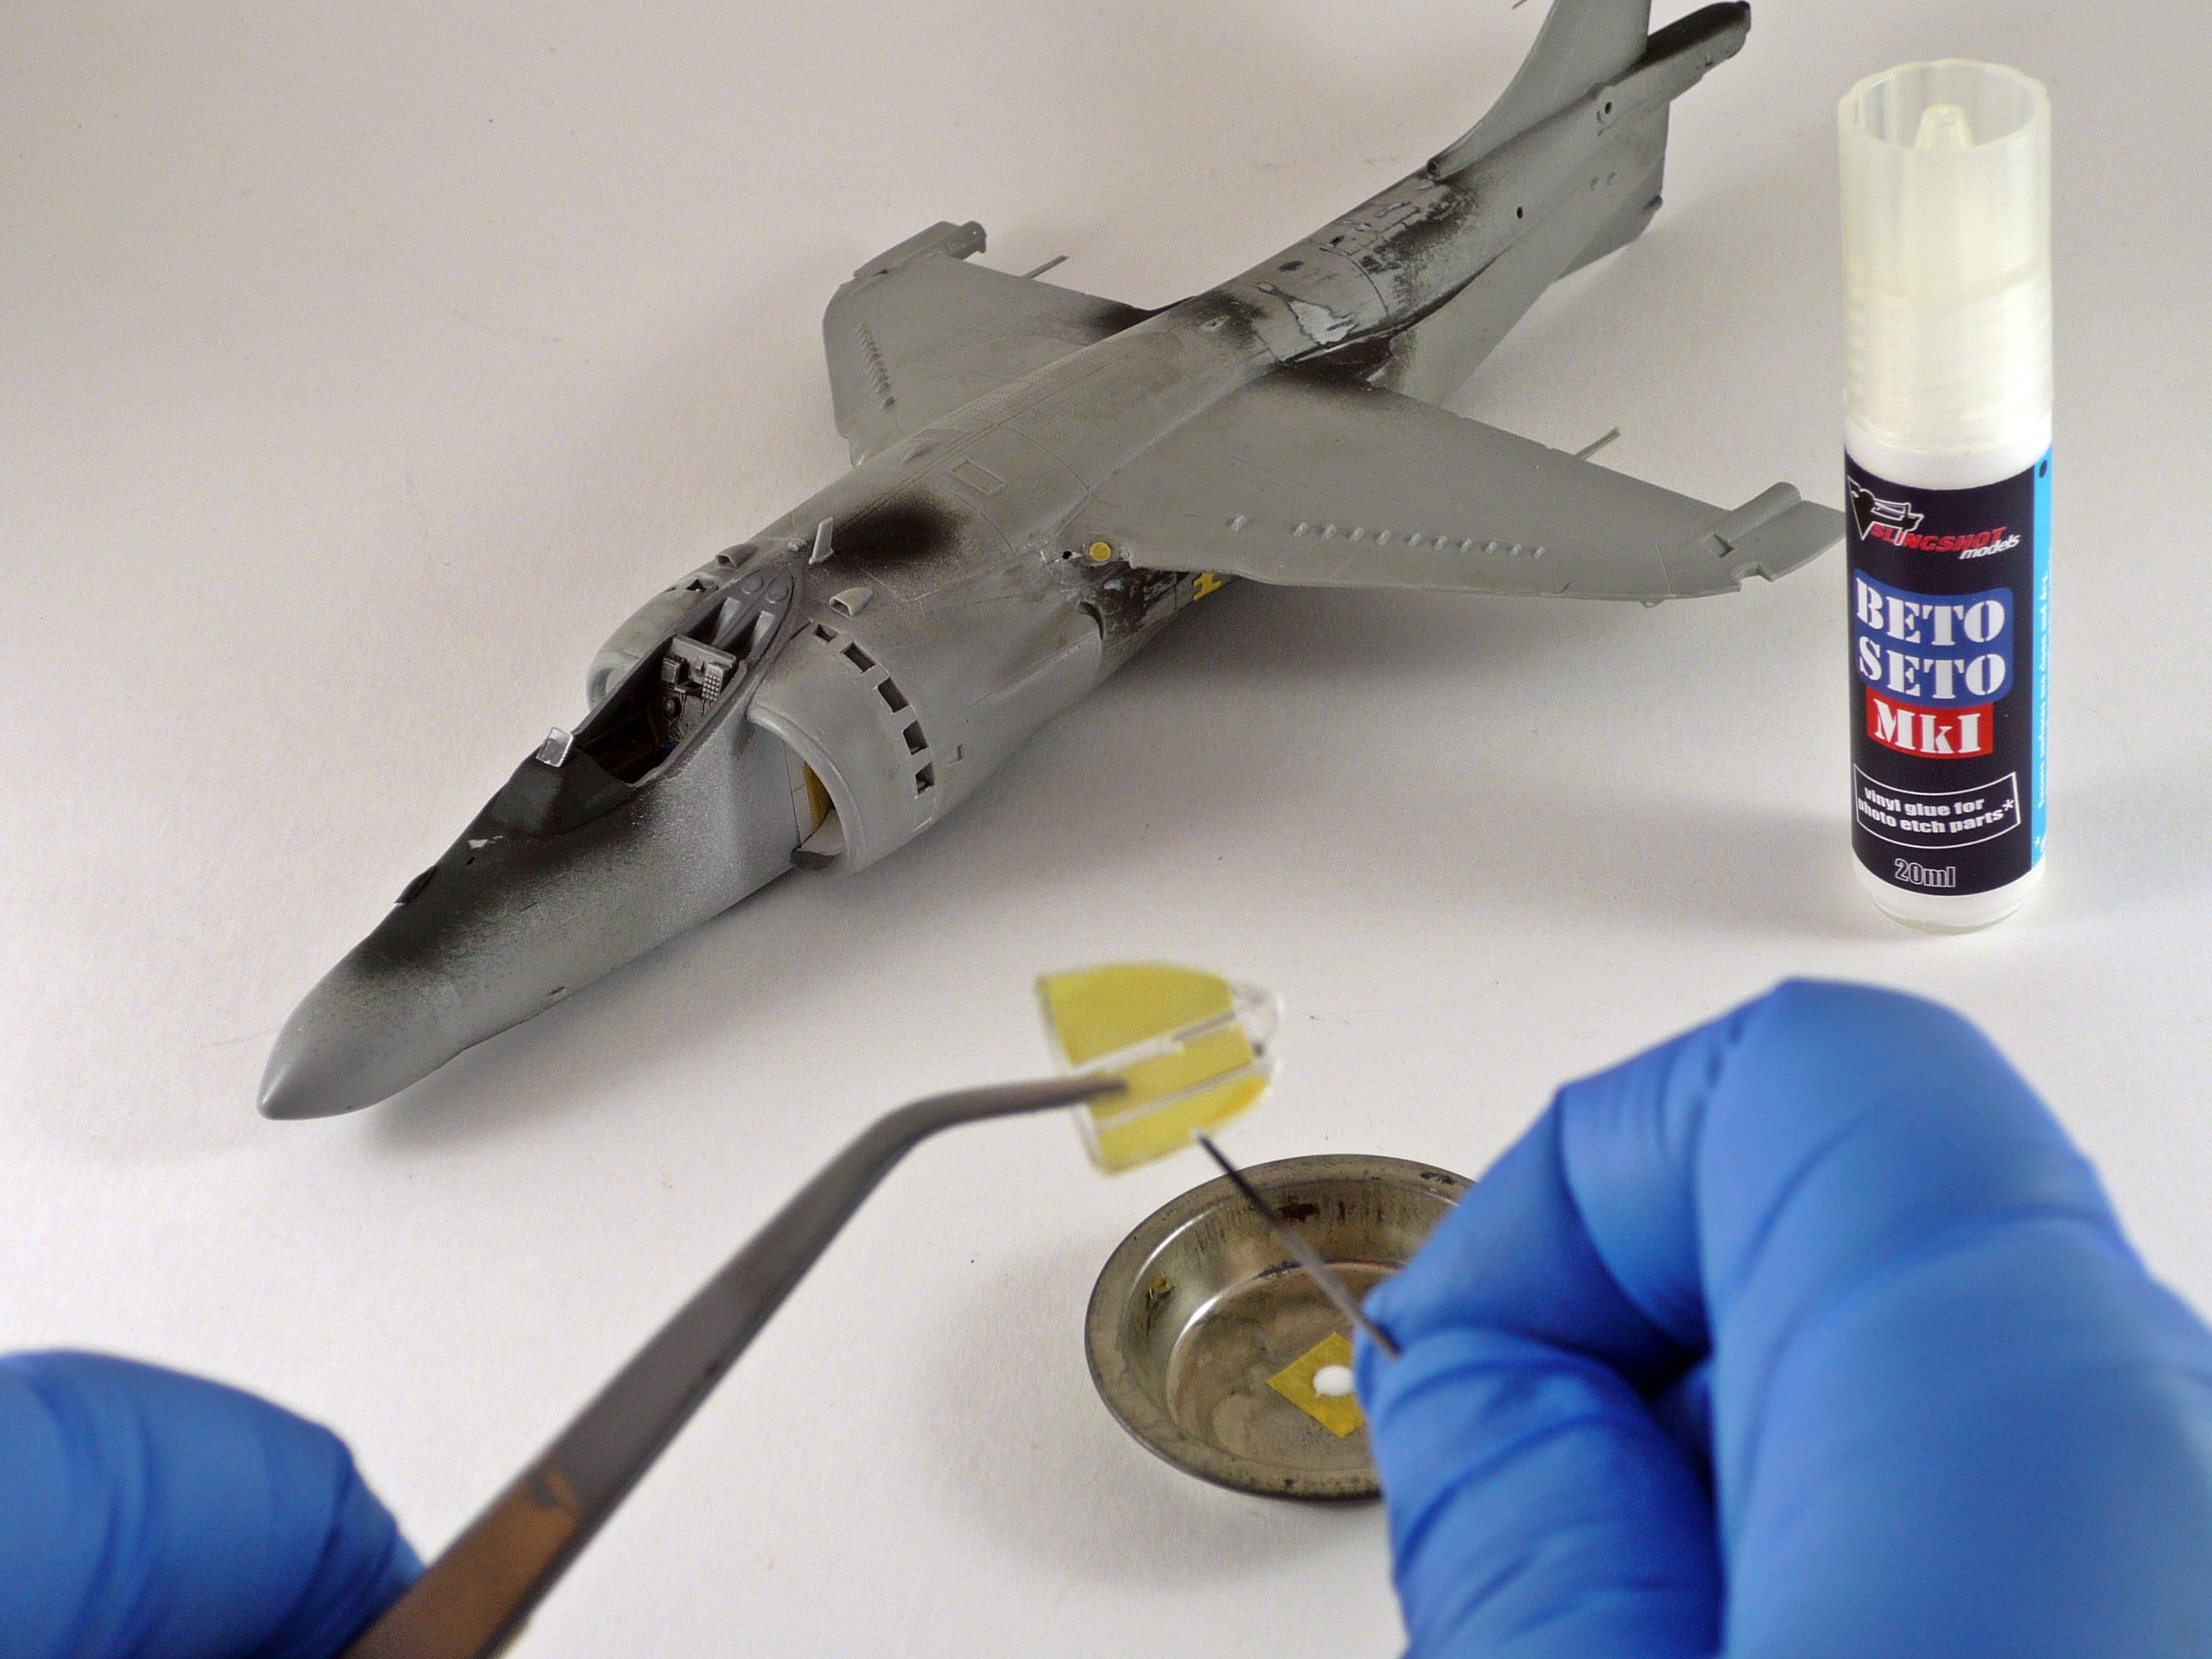
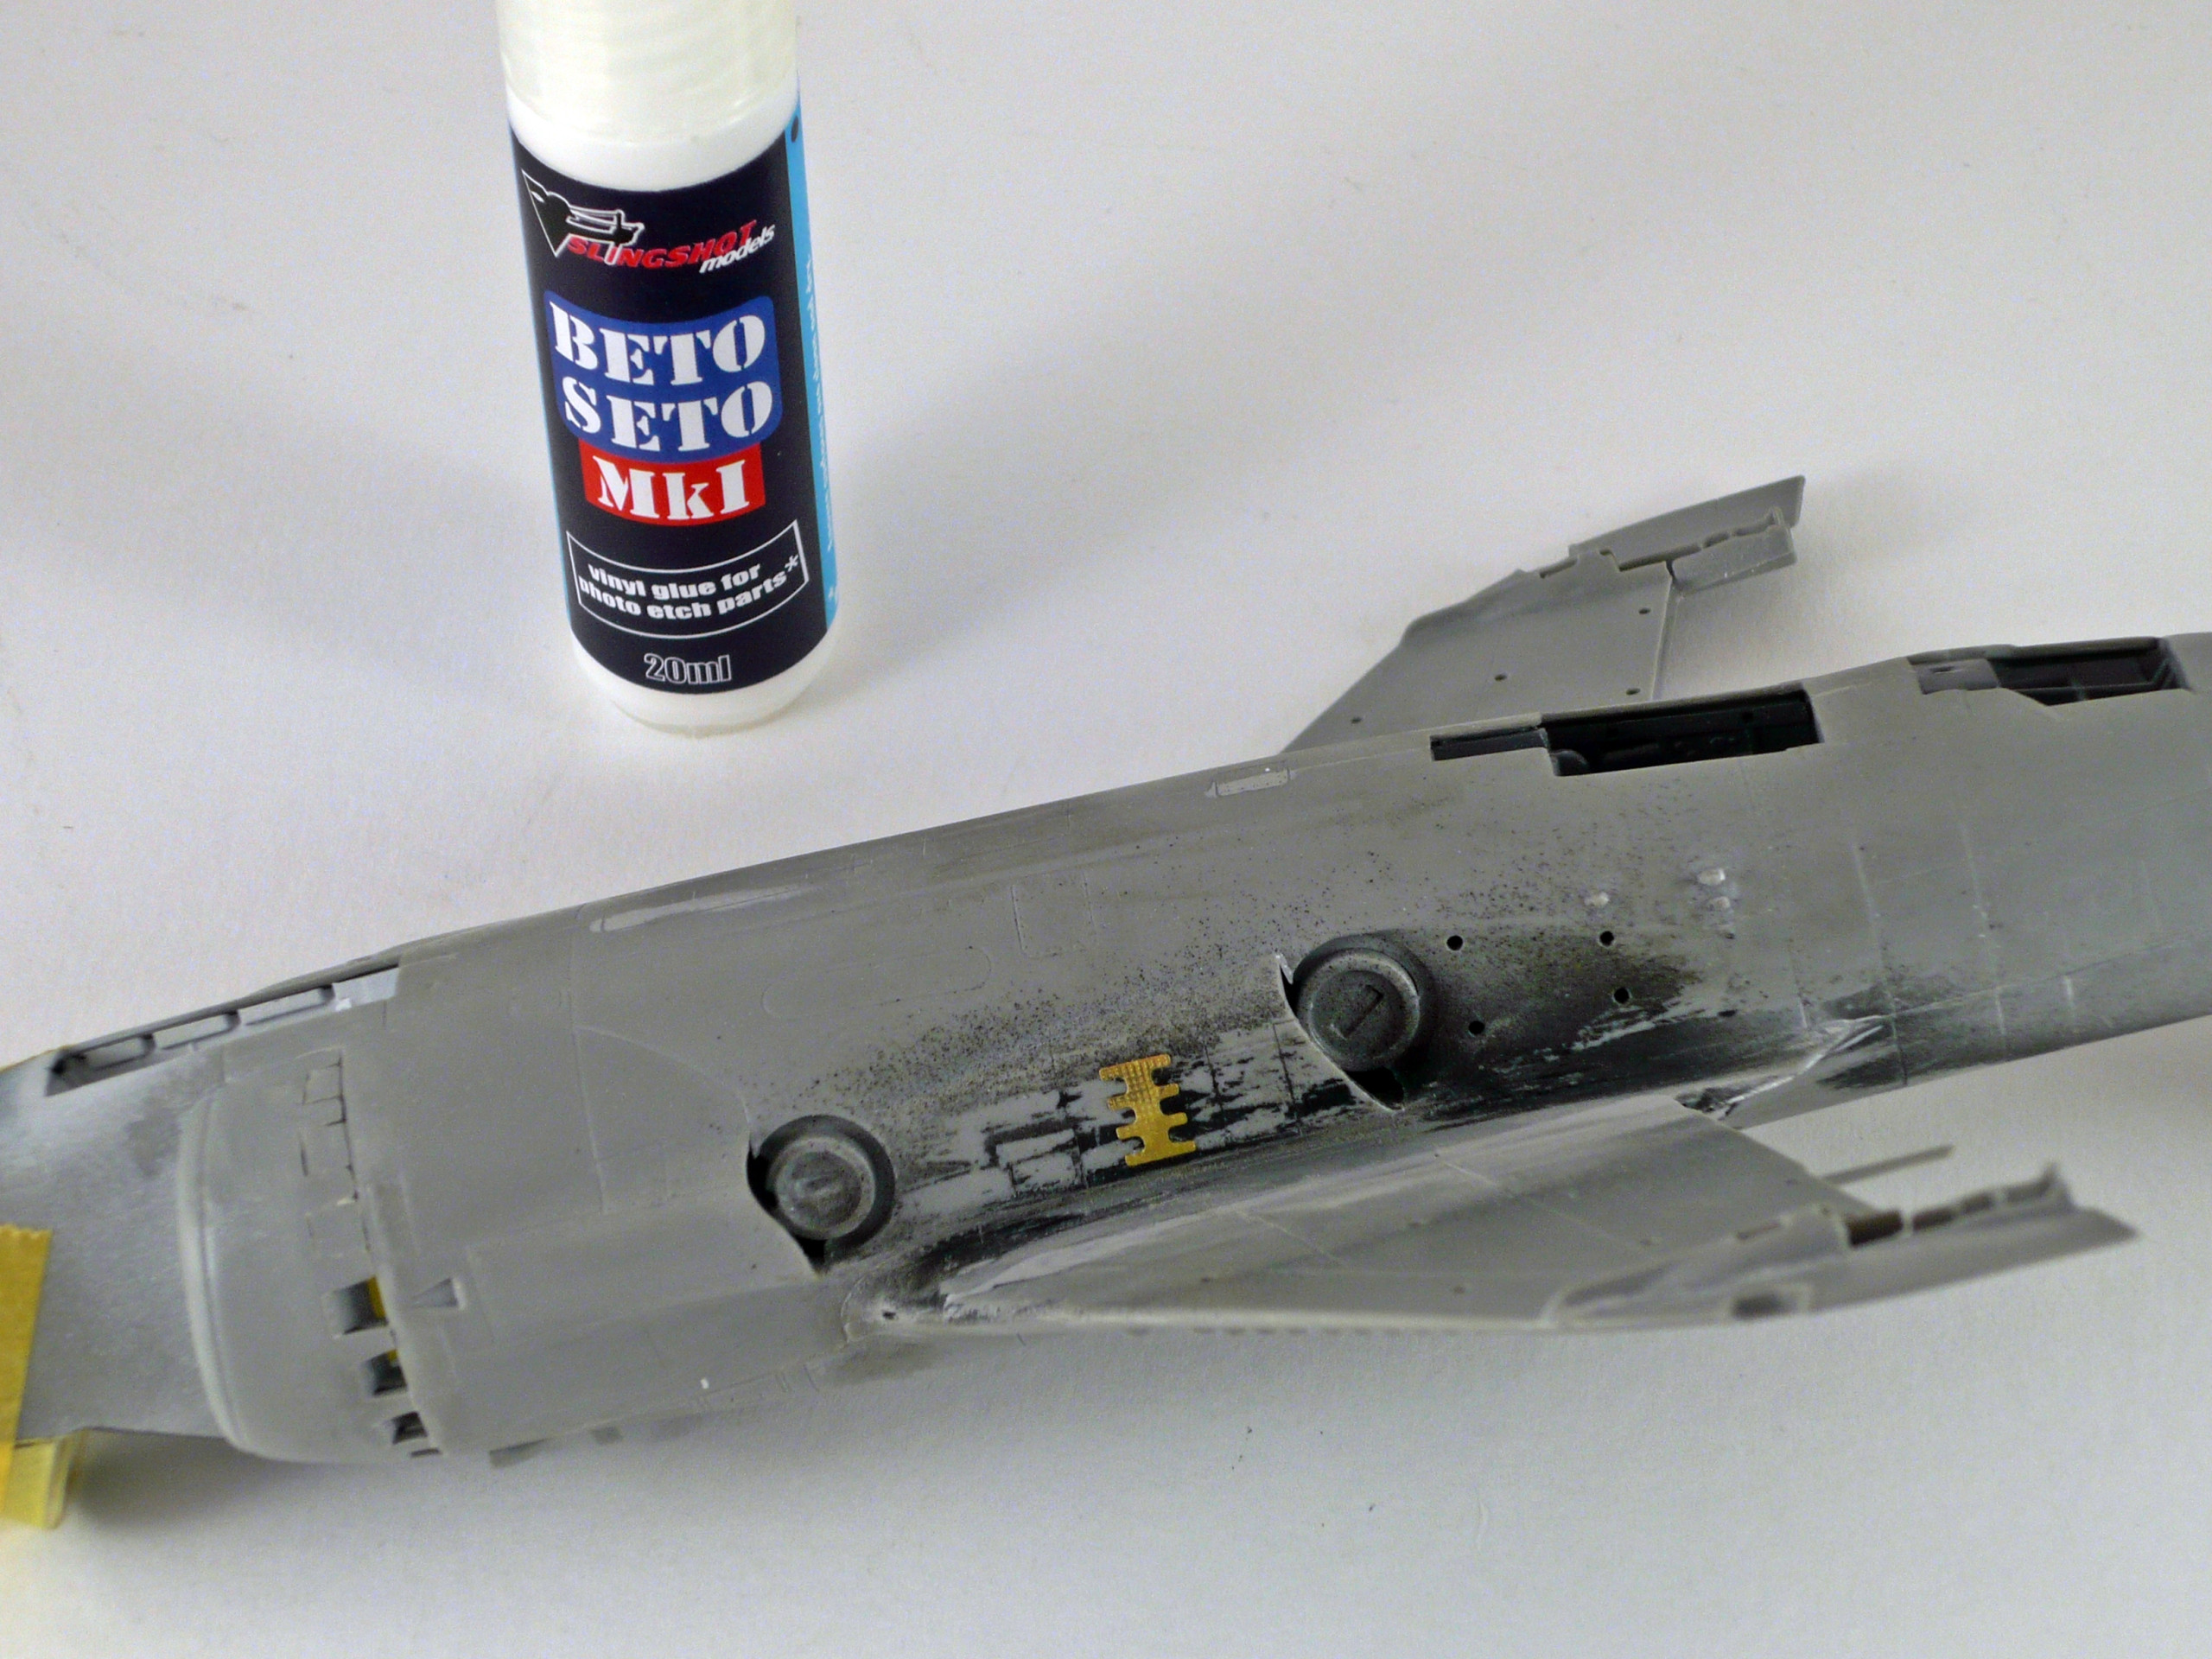
I masked up the windshield and using Slingshot Model’s BetoSeto white glue I placed it in position. The same thing with the photo etch parts of the kit… great stuff! (pics 22,23,24,25)
I punched a circular shape of masking tape to cover the wing’s headlight (pic 26)
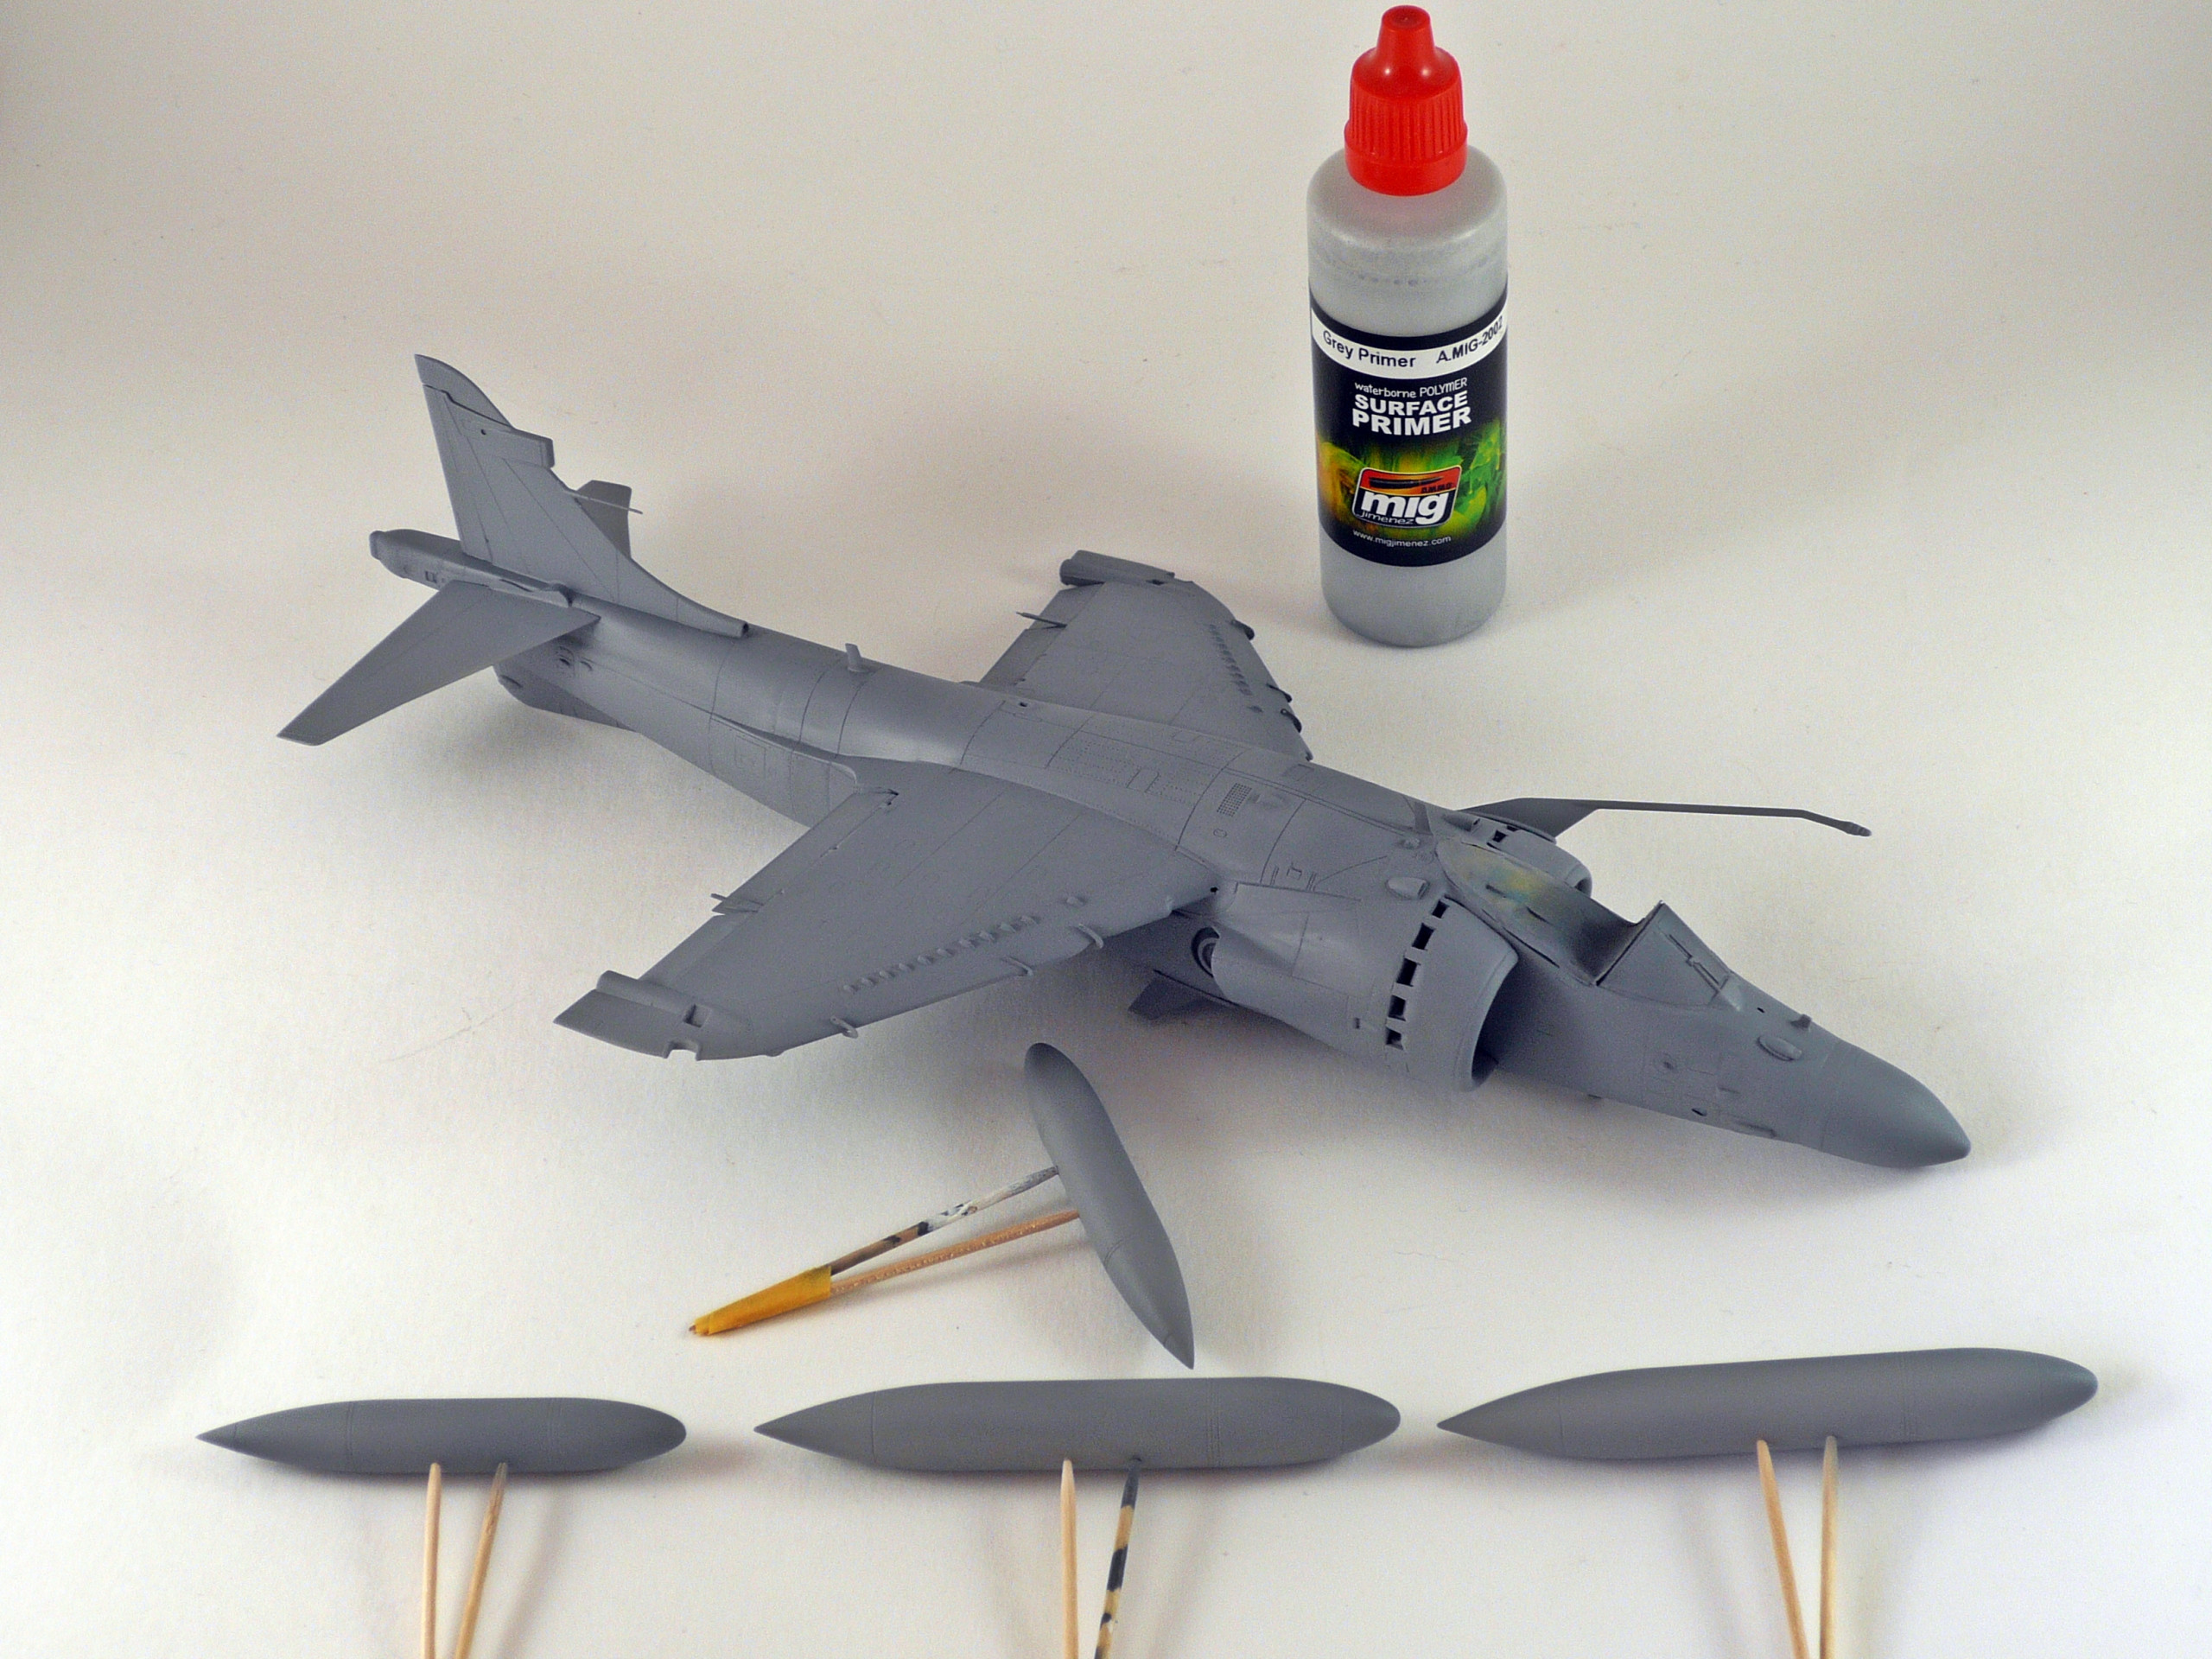
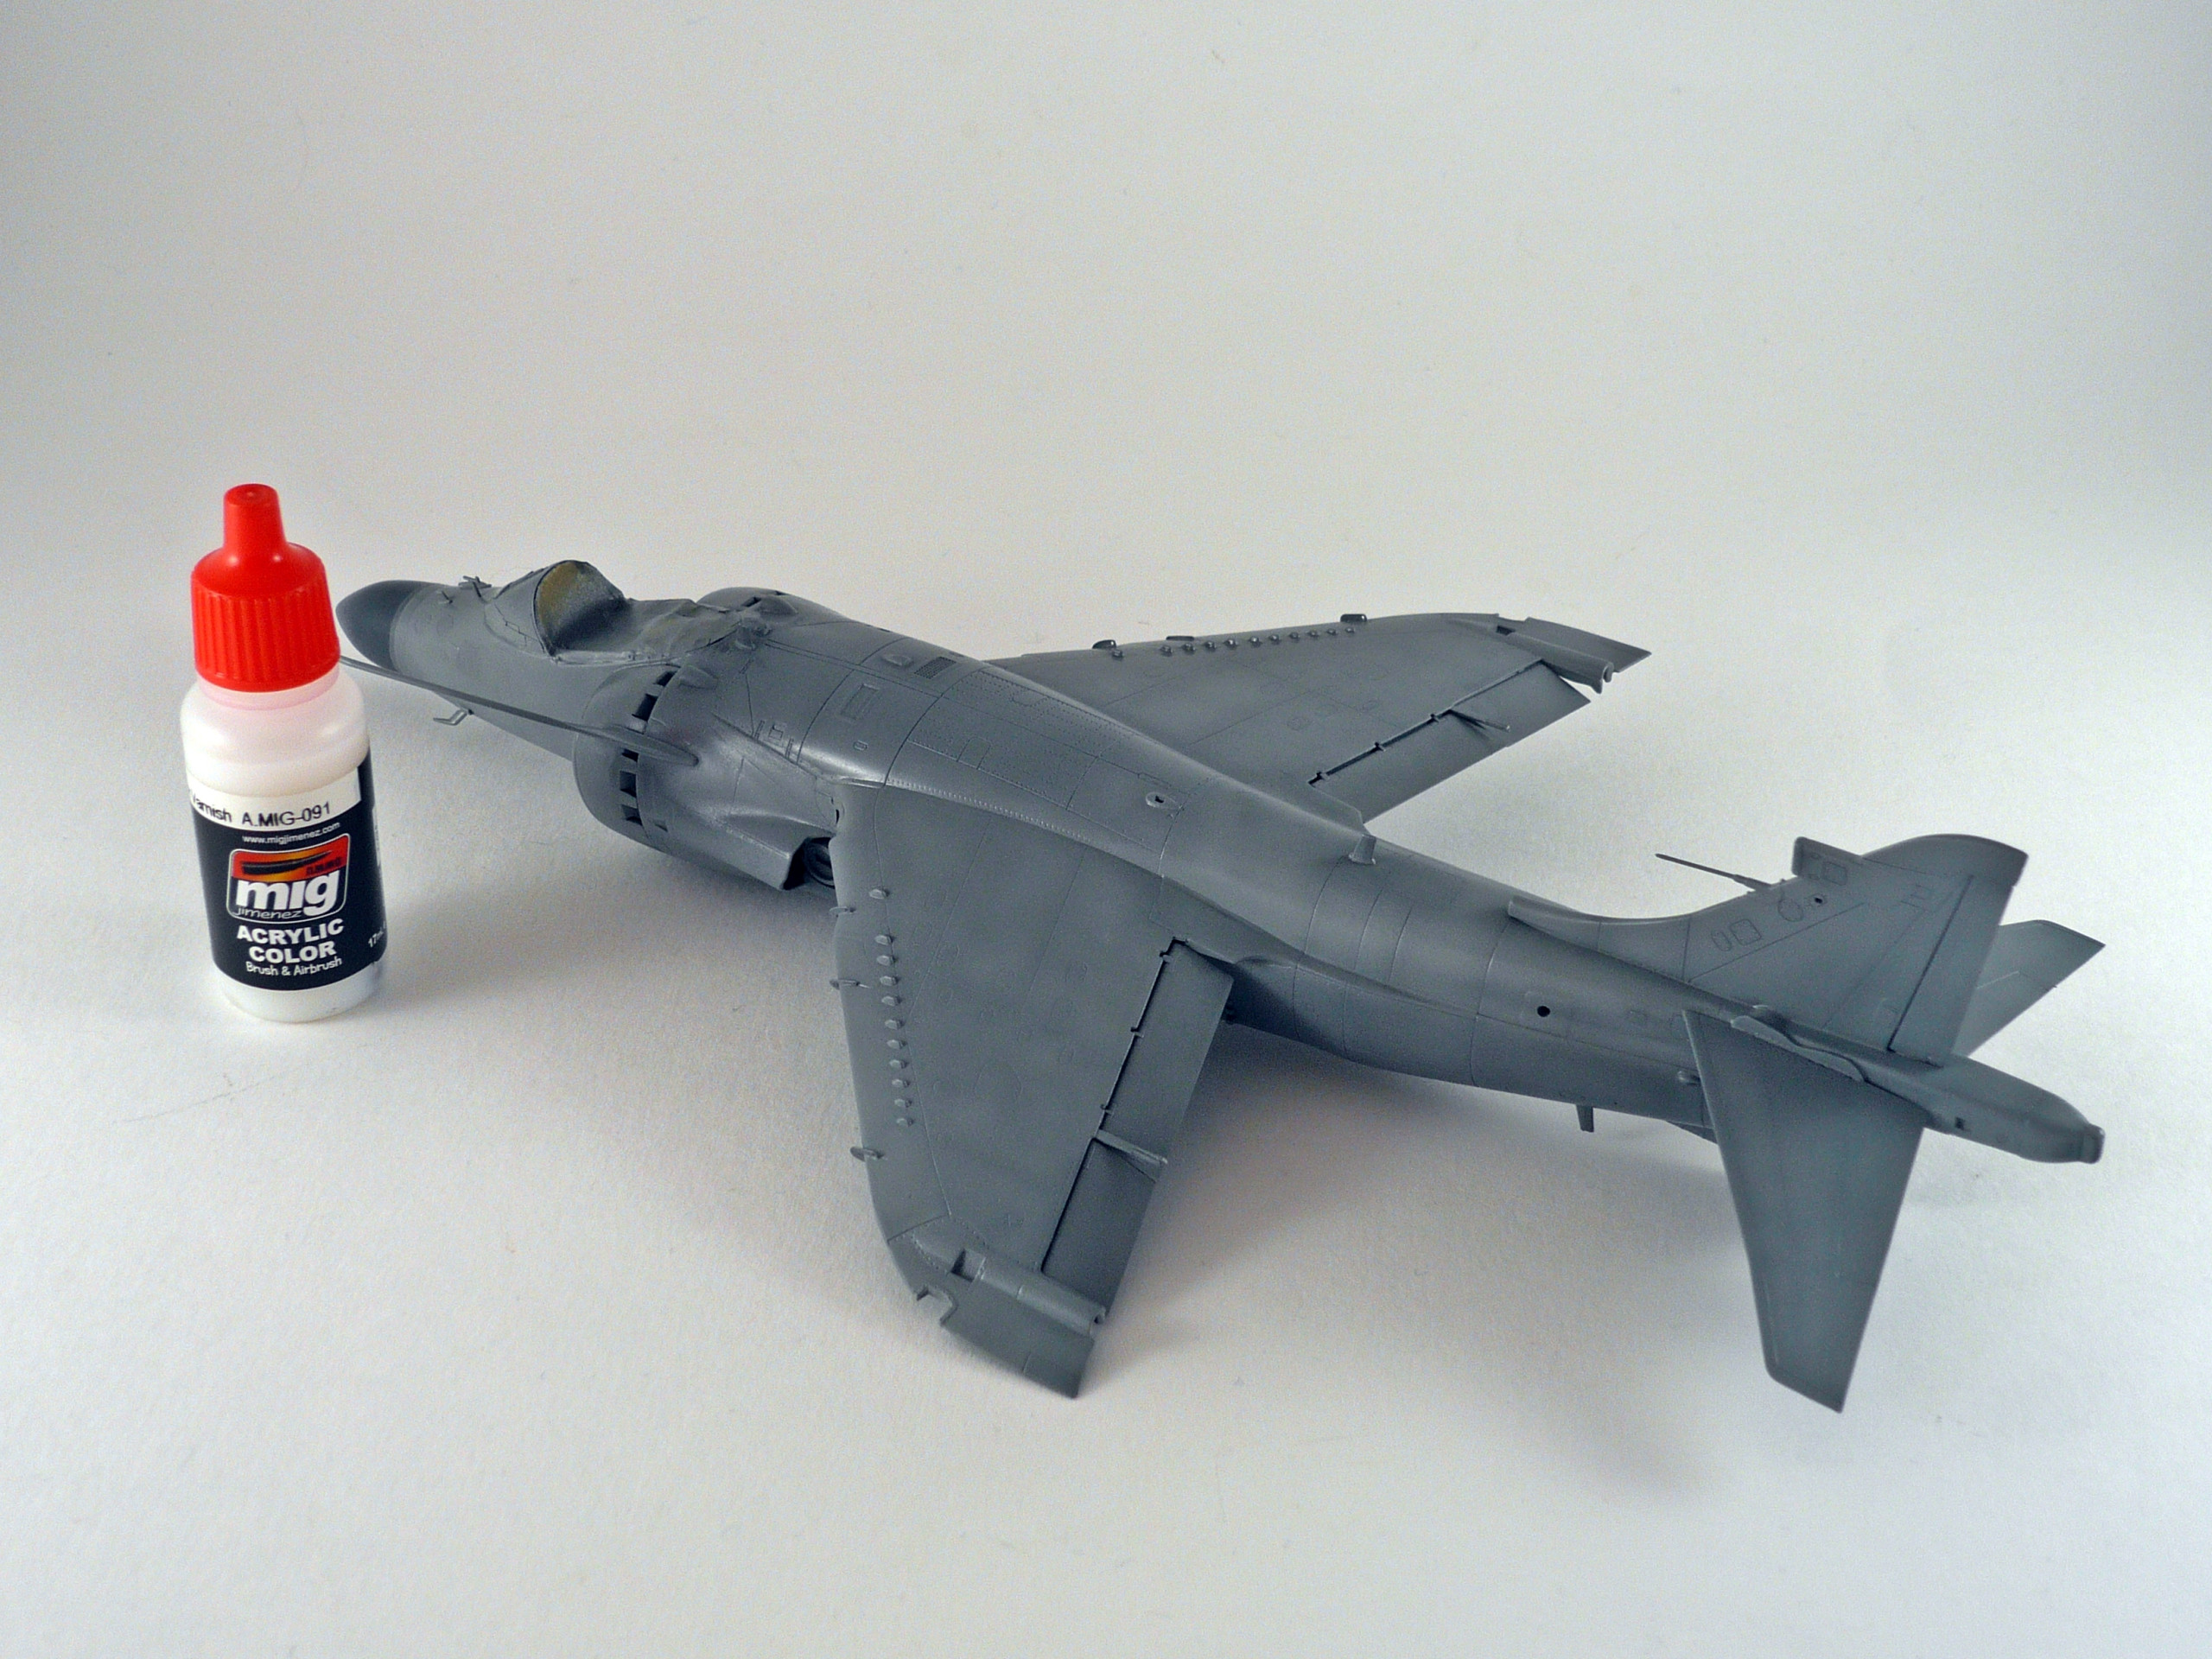
After the basic build finished, I prepared the model for the painting procedure. I washed it with soap water to remove any grease from my hands and dust remains. The first stage started by spraying Mig Ammo primer (pic 27)
Using primers we can detect any flaws on our models and prepare the surface for the paint.
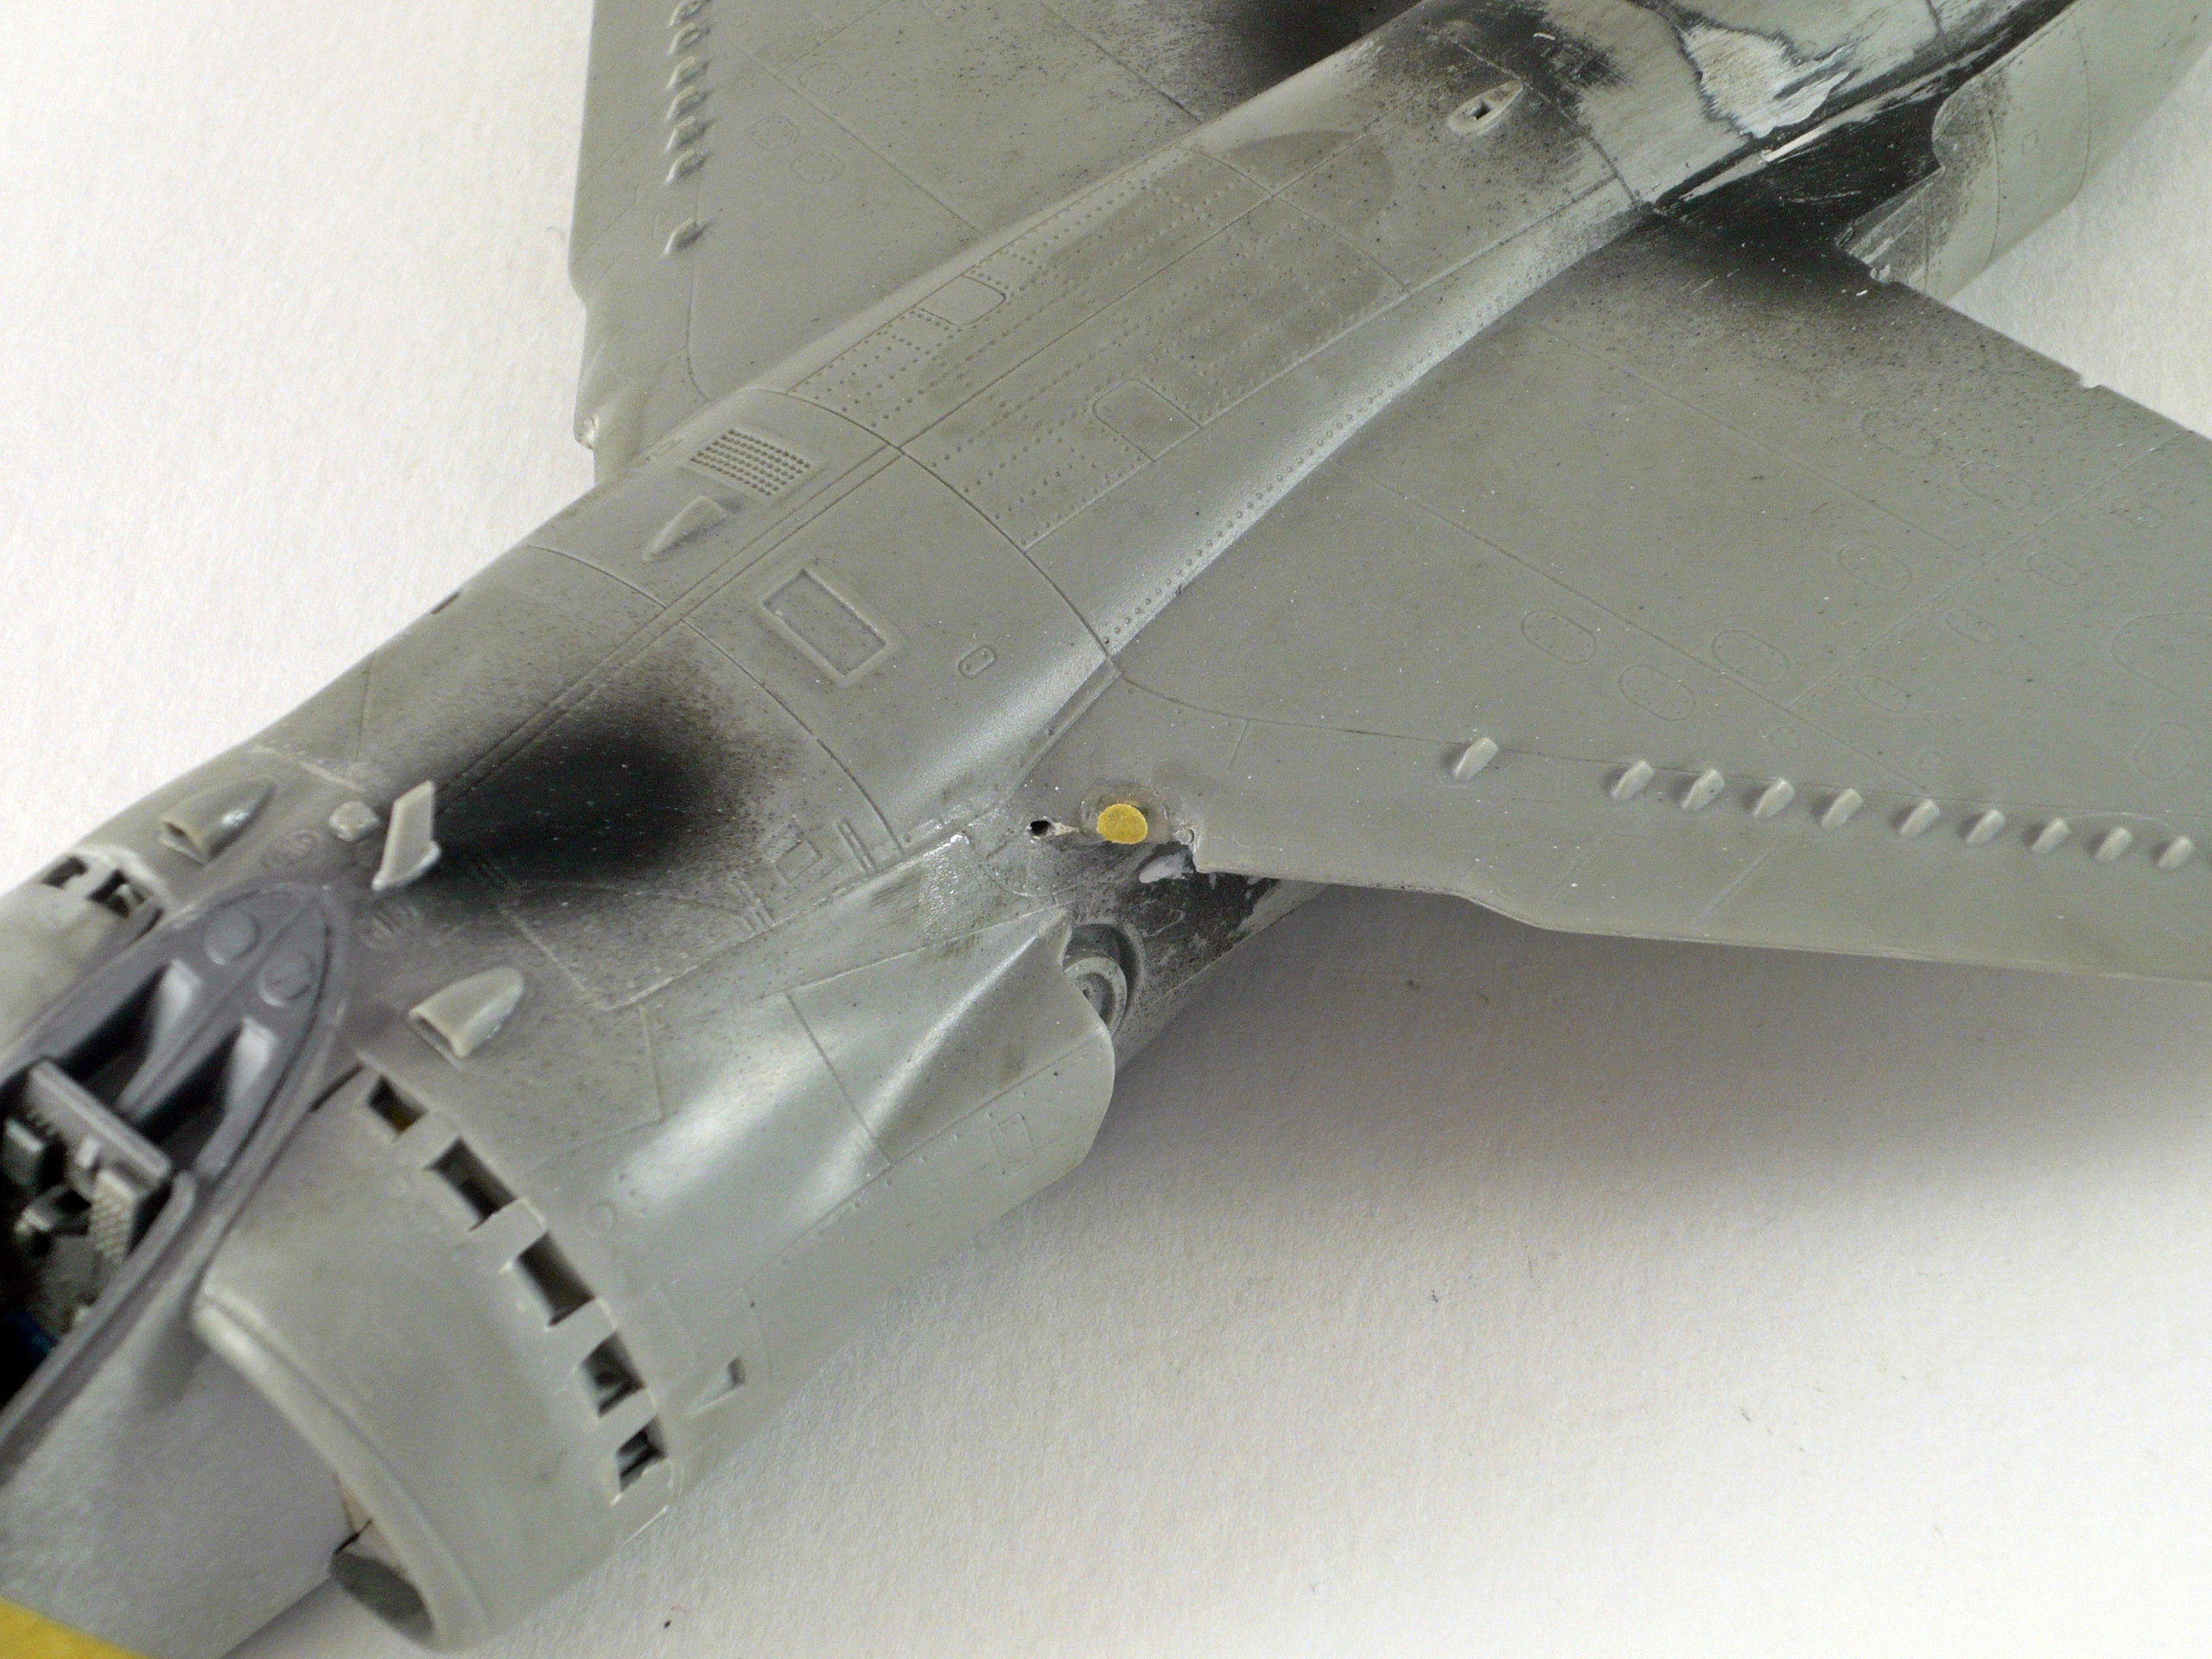
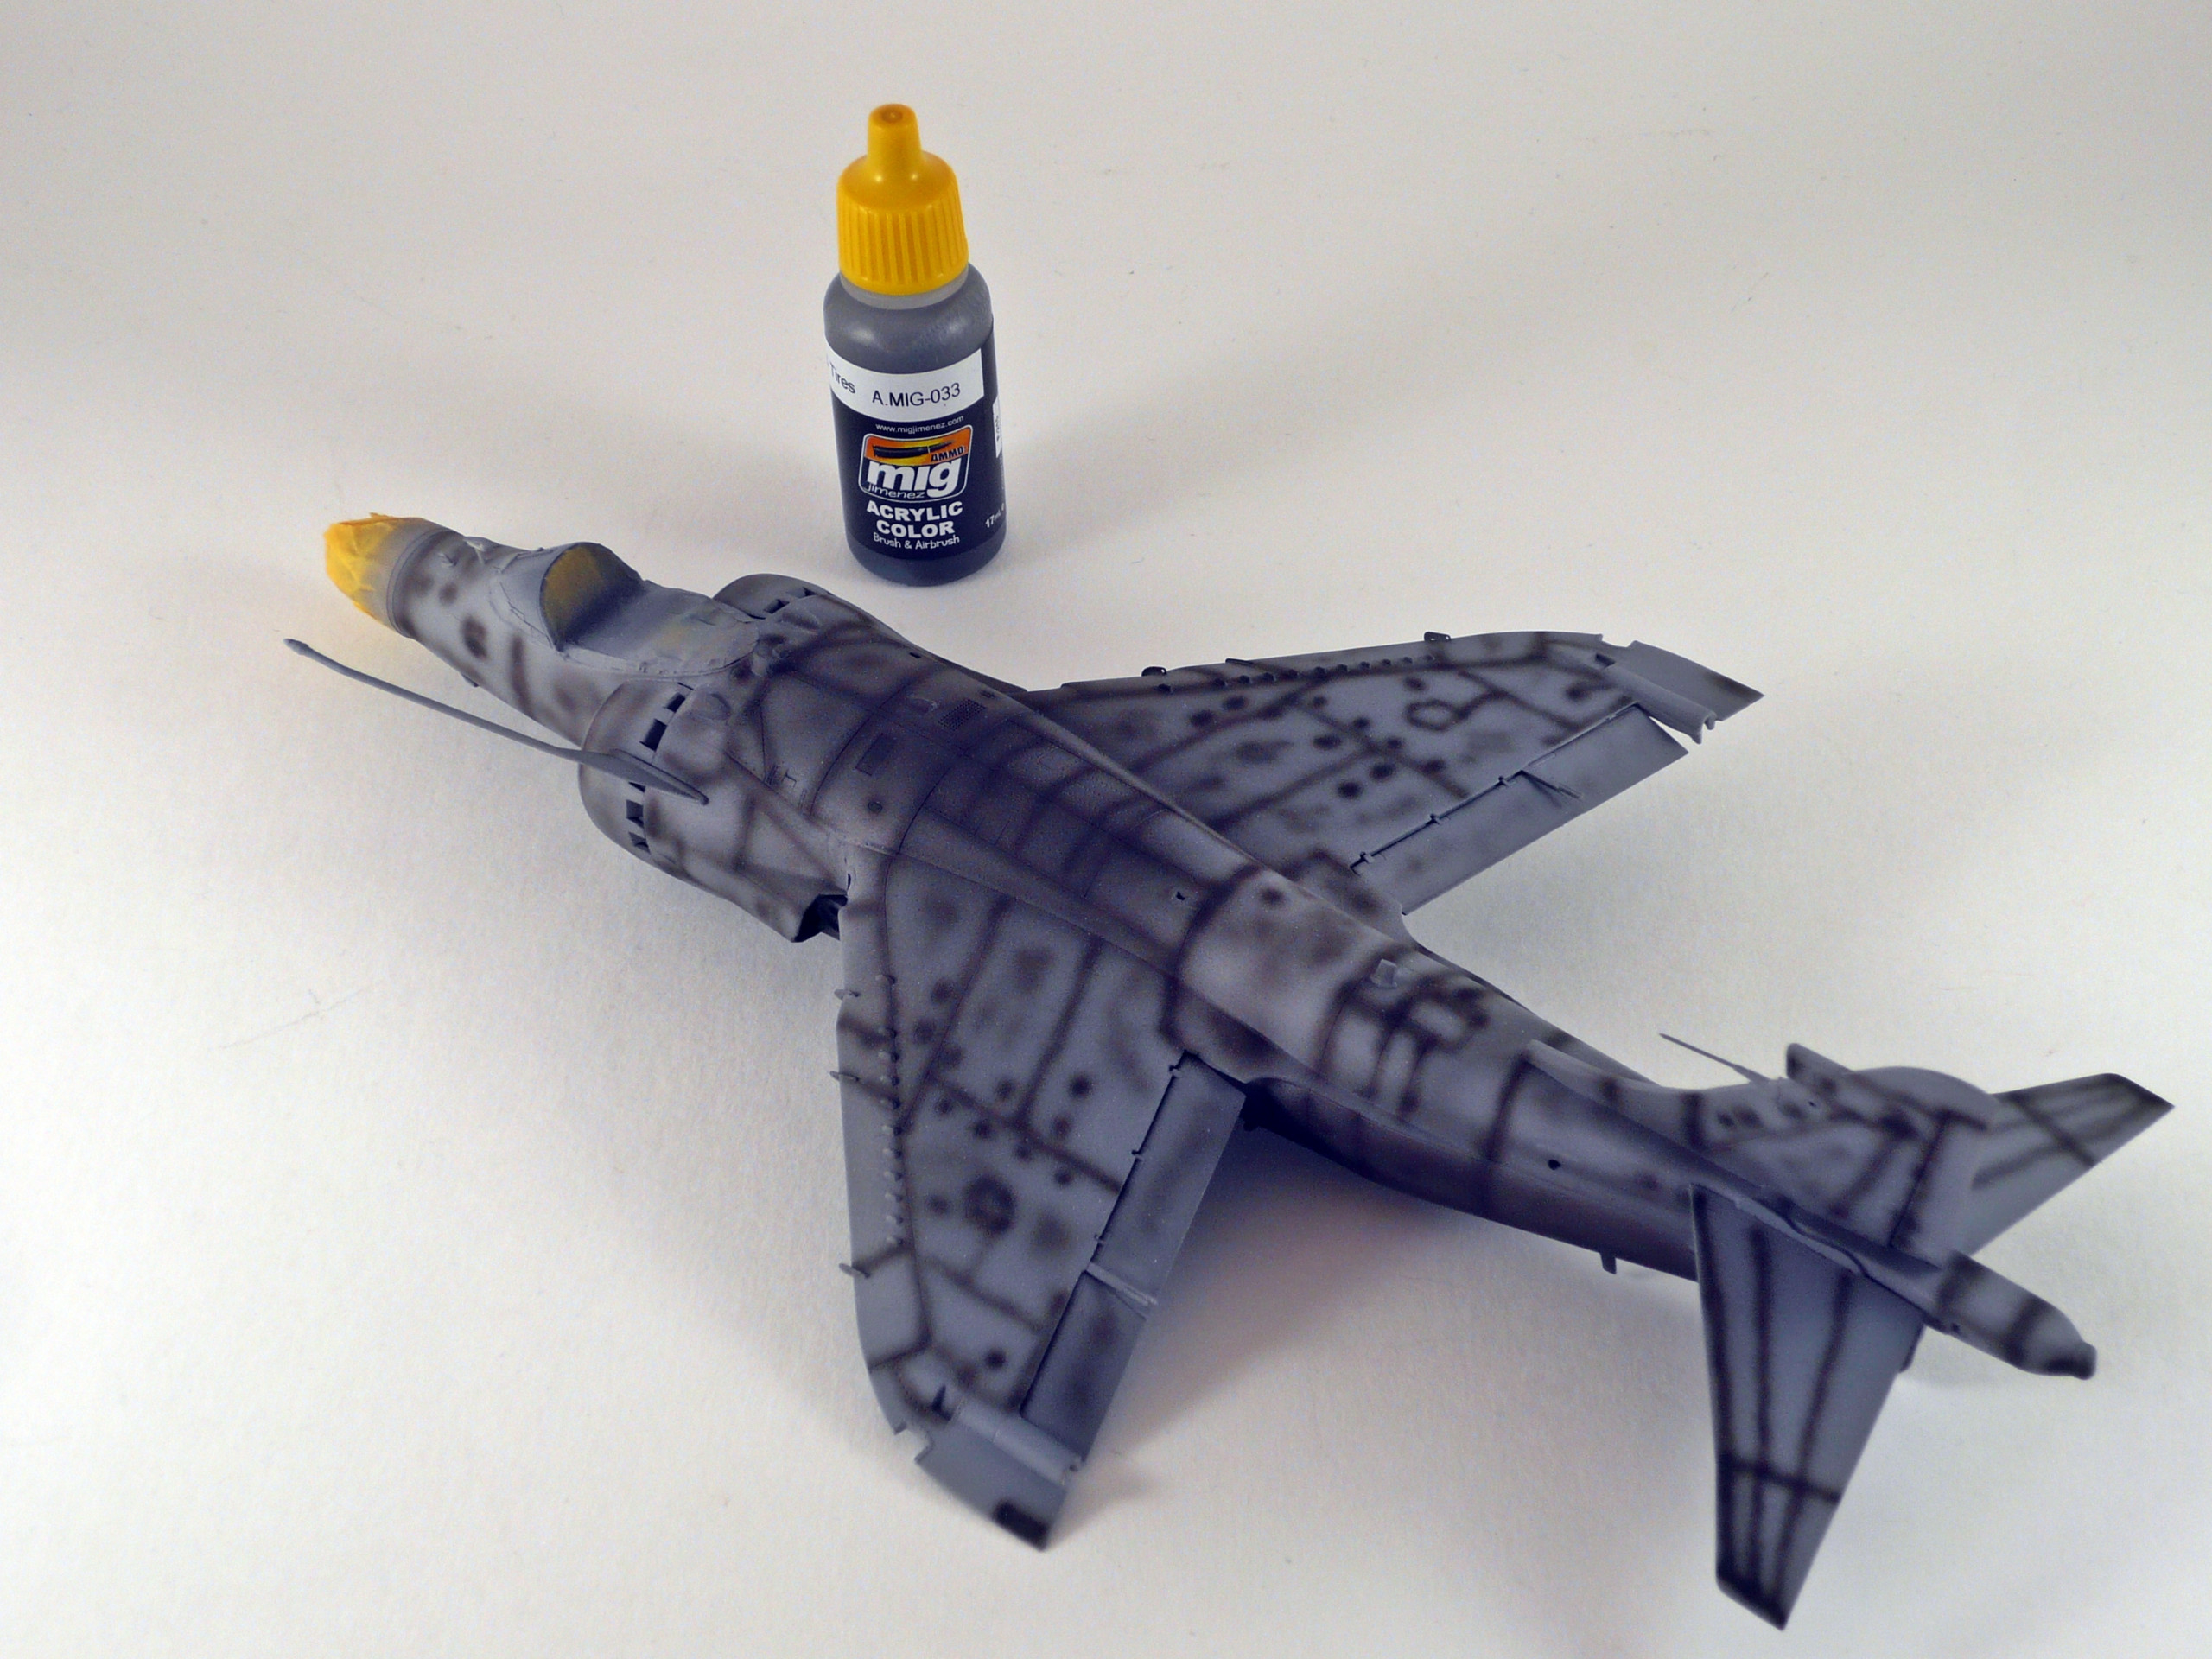
The next stage is to give some shadow effect using the preshadetechnique. I used Mig Ammo’s tire black to do that (pic.28,29)
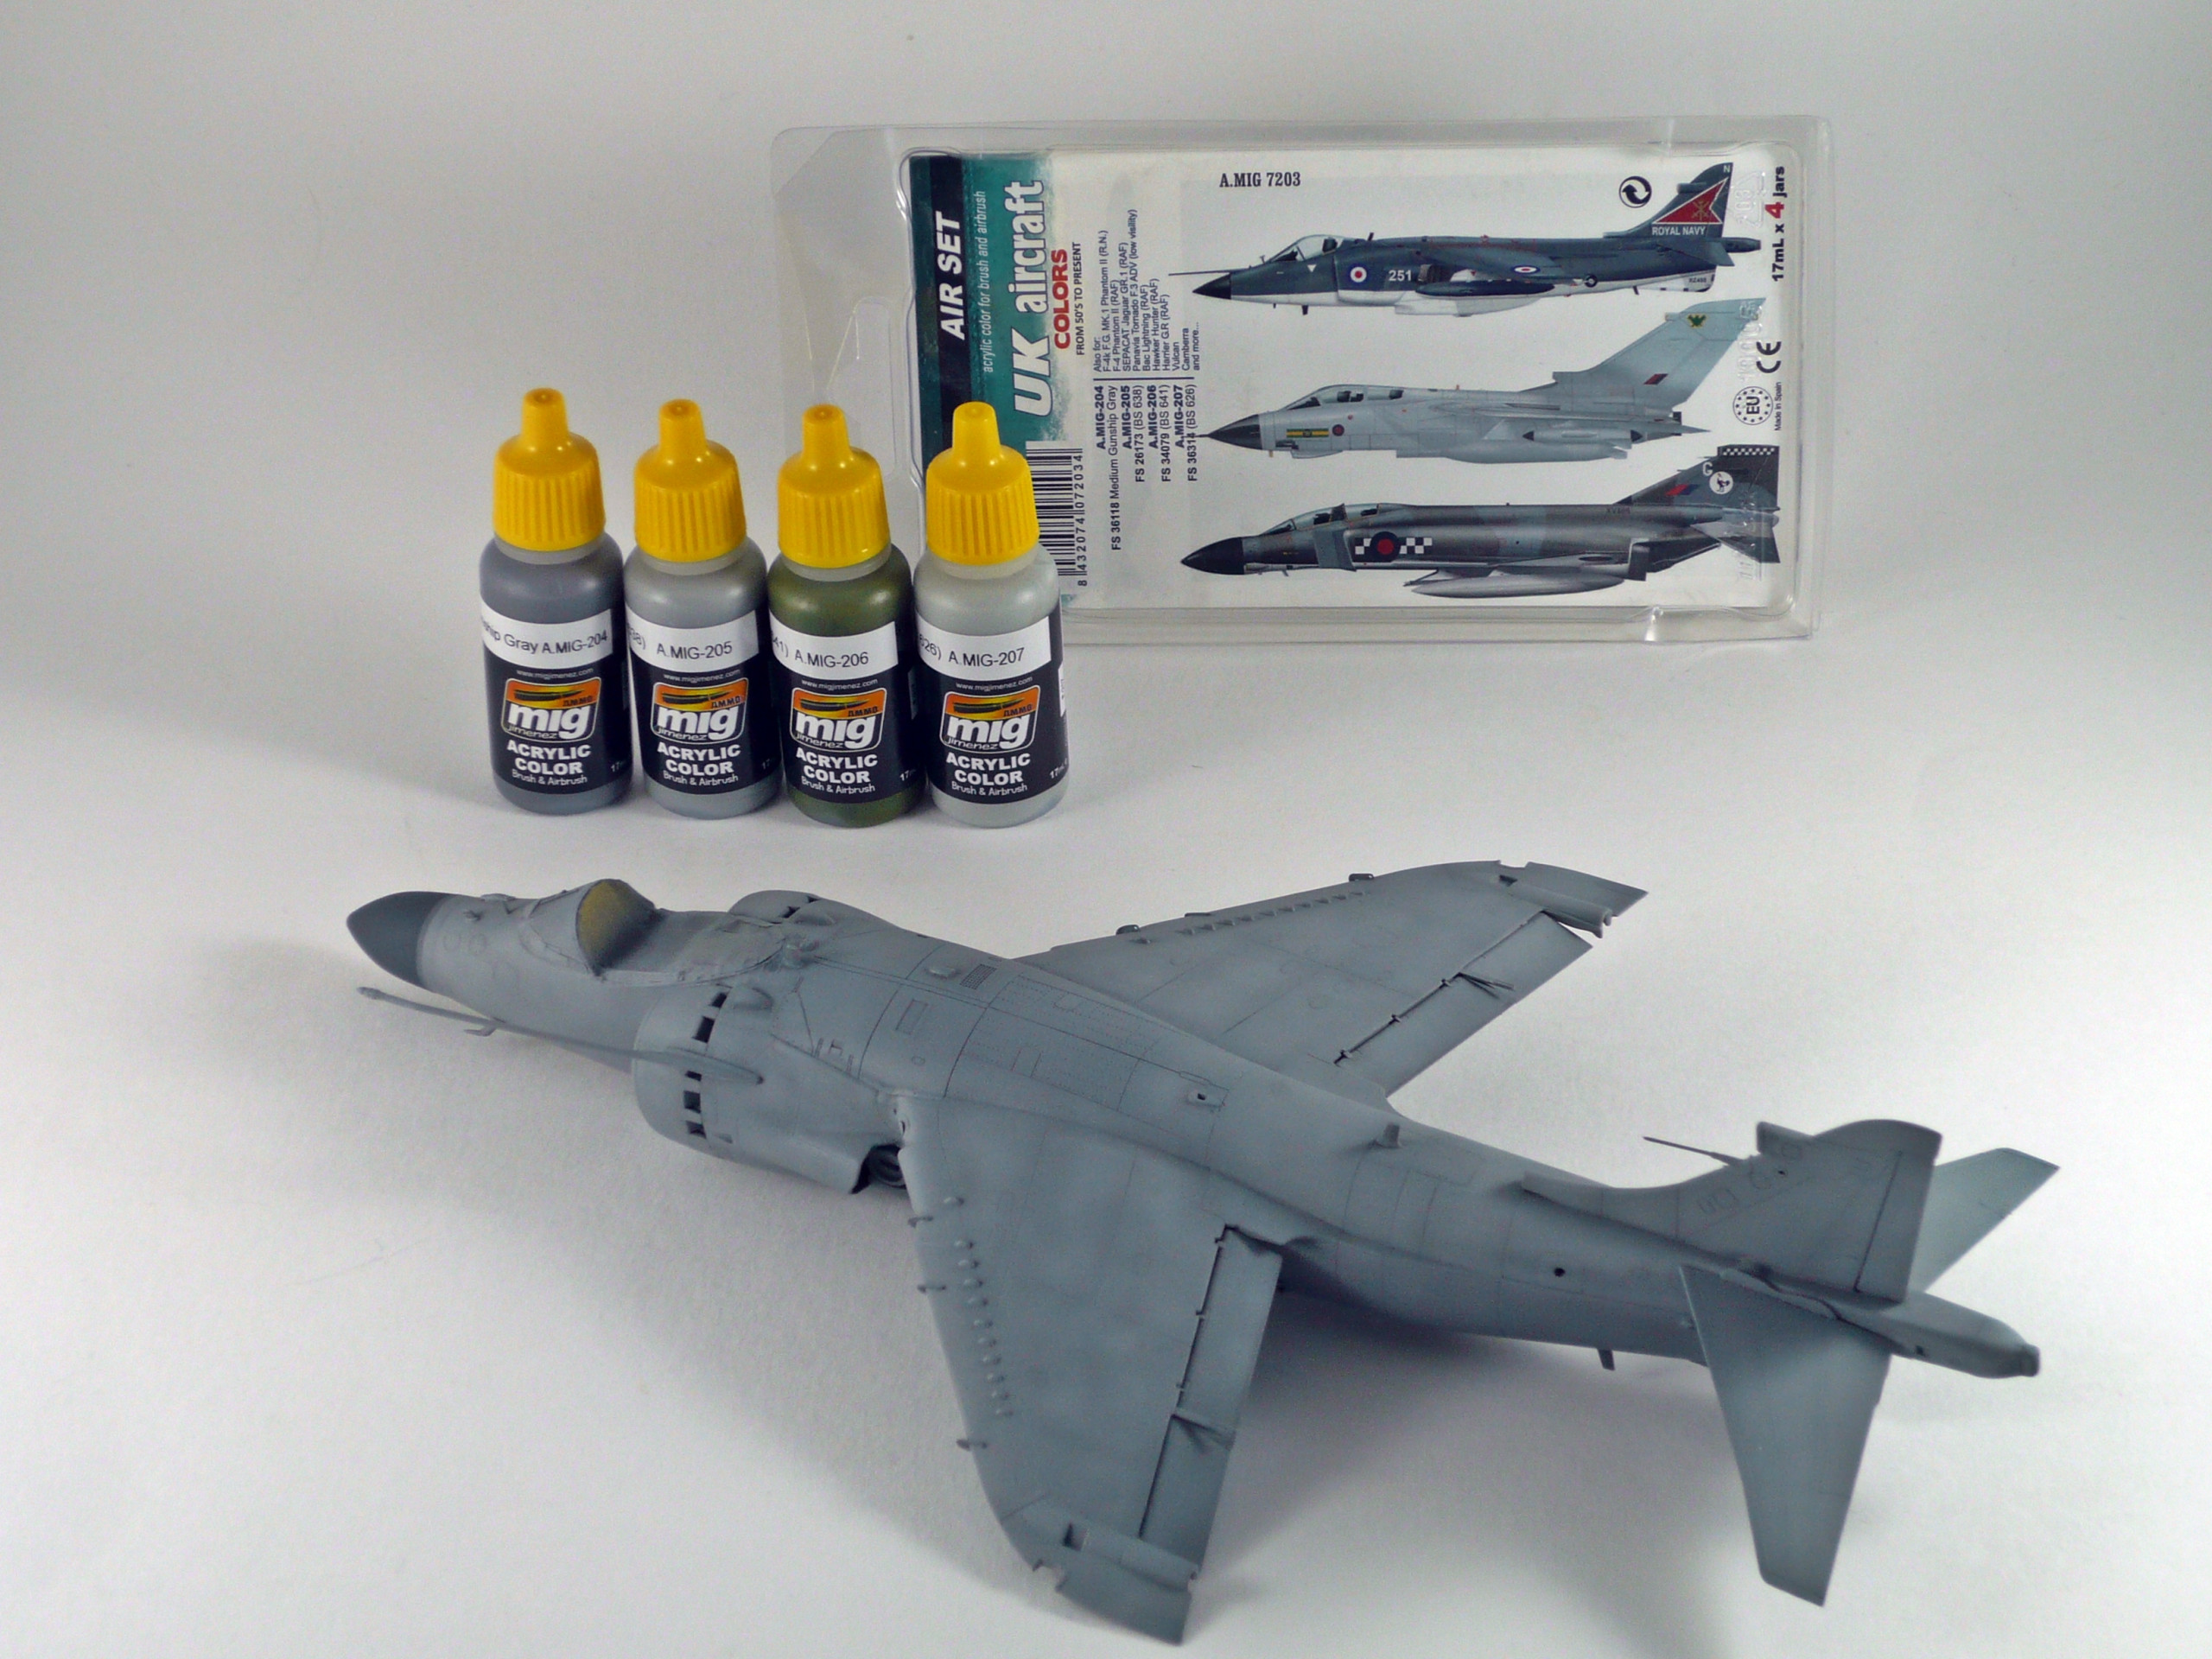
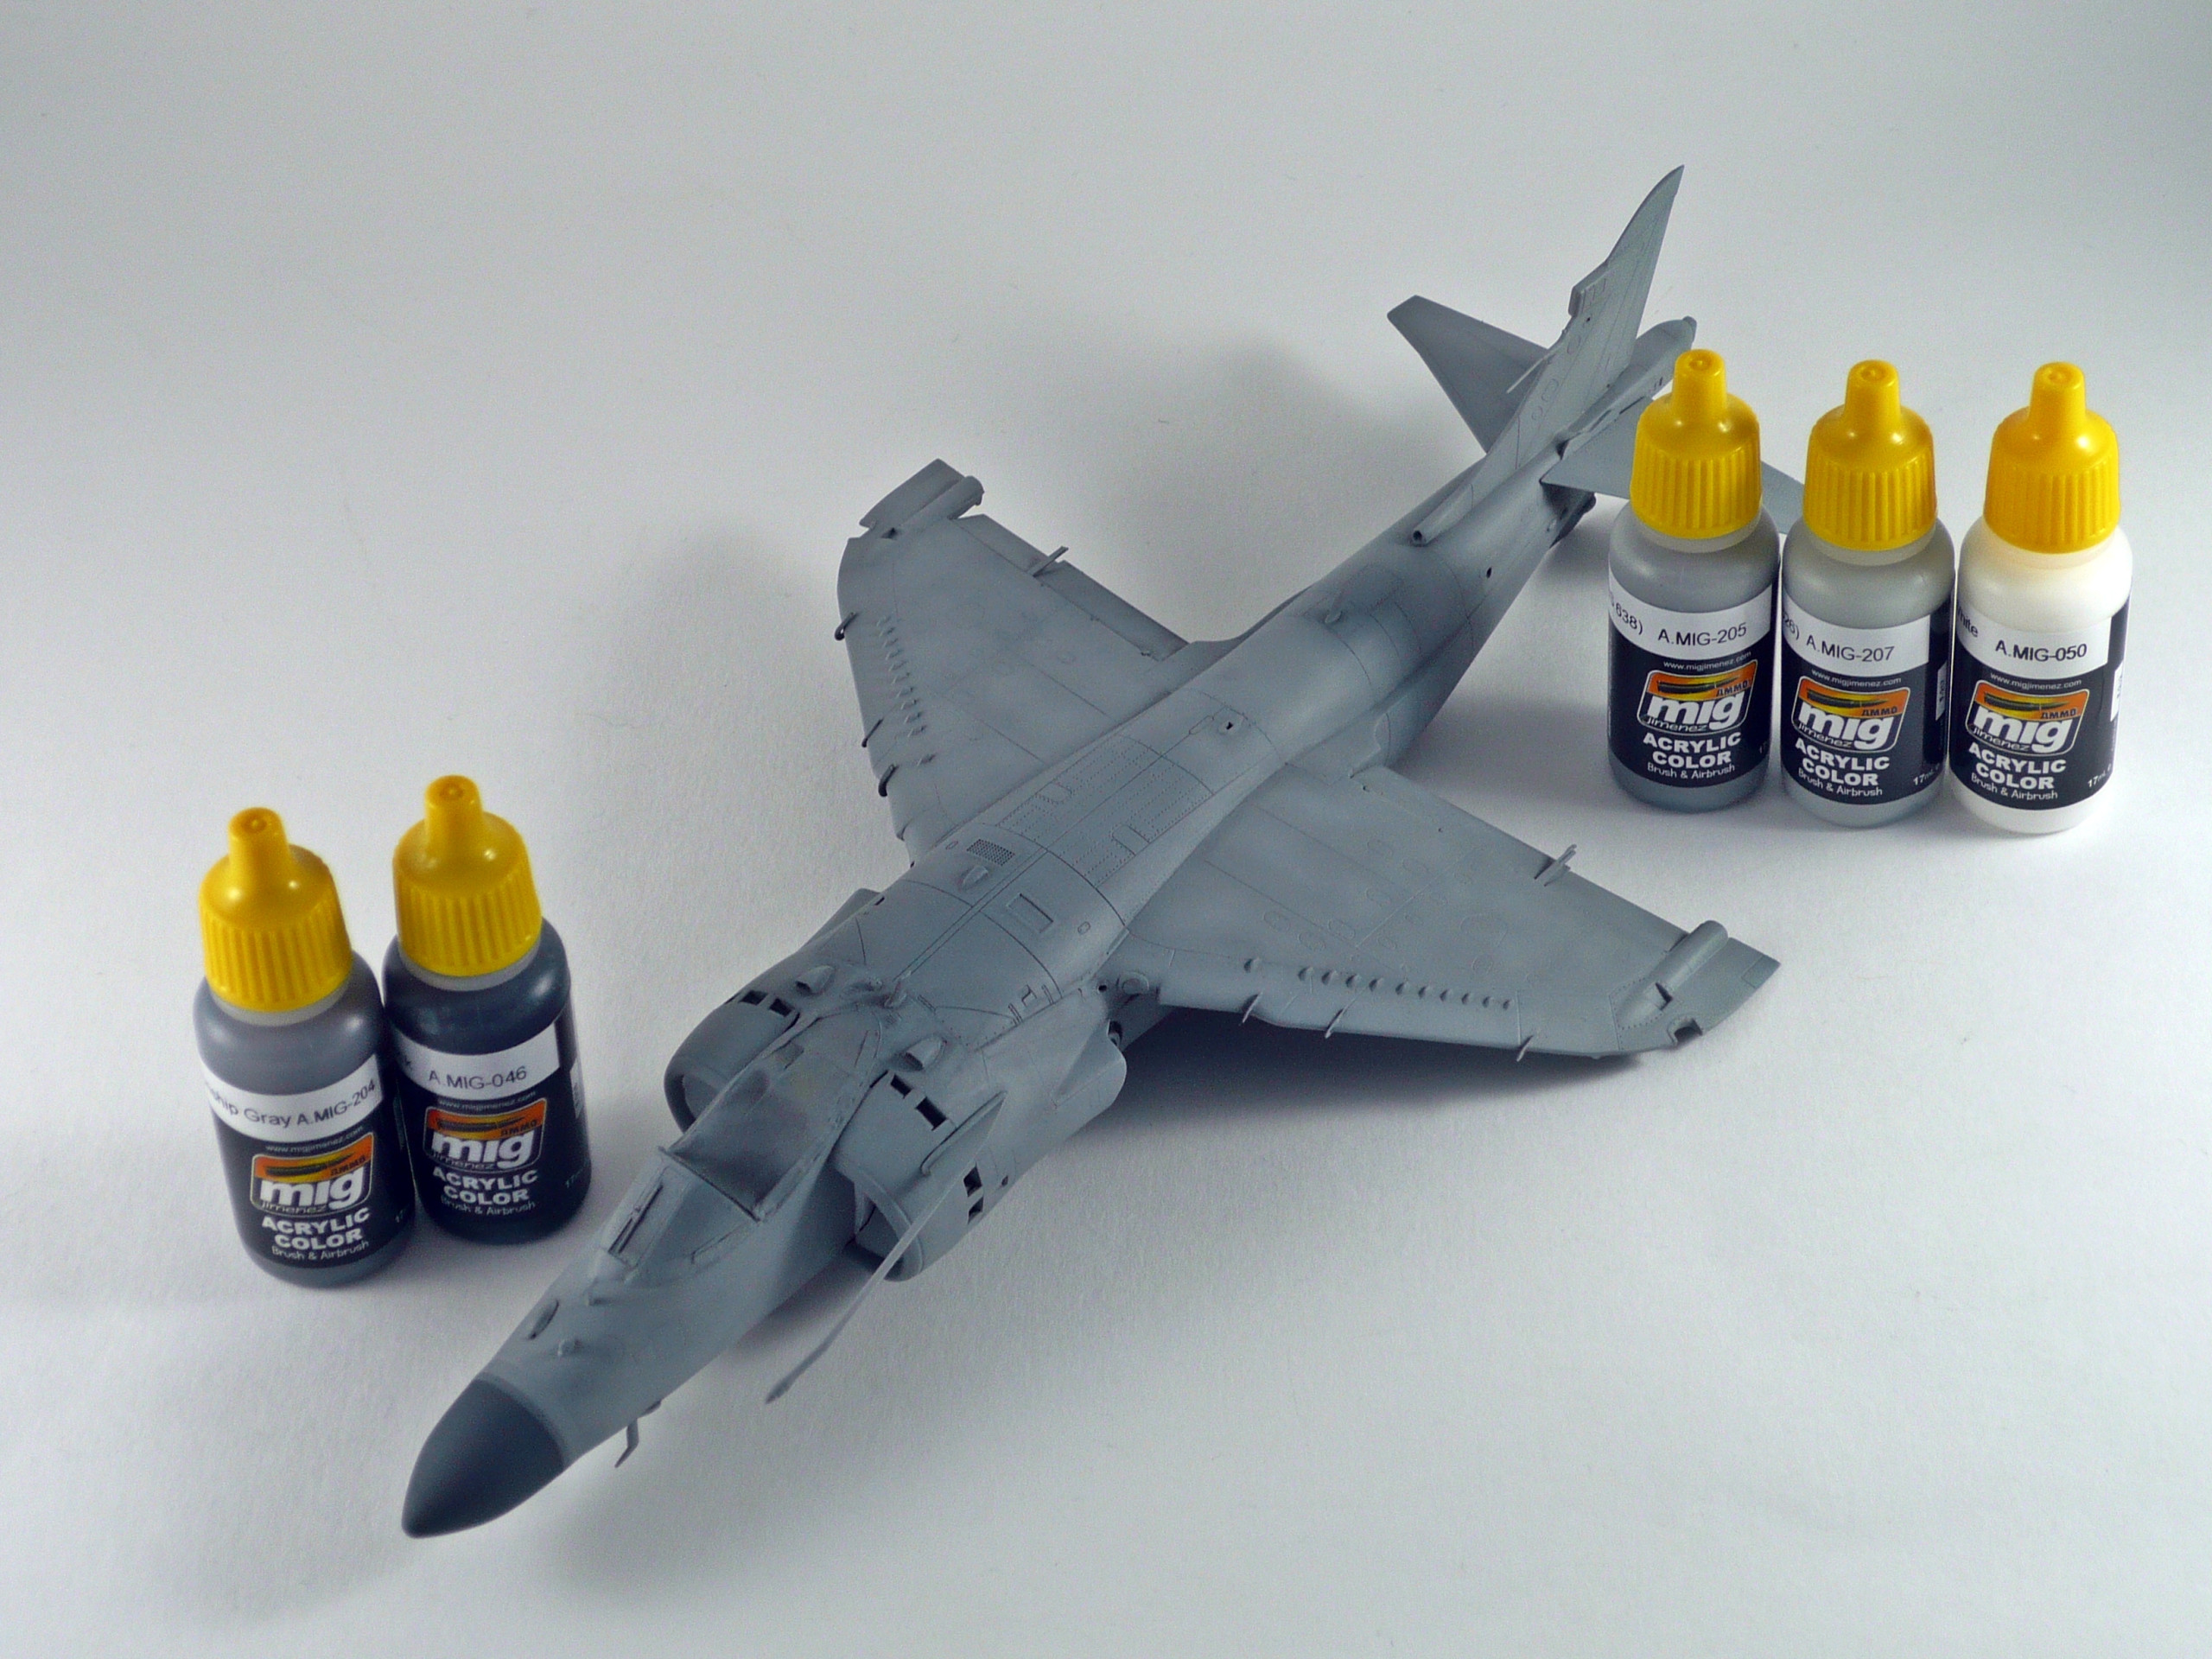
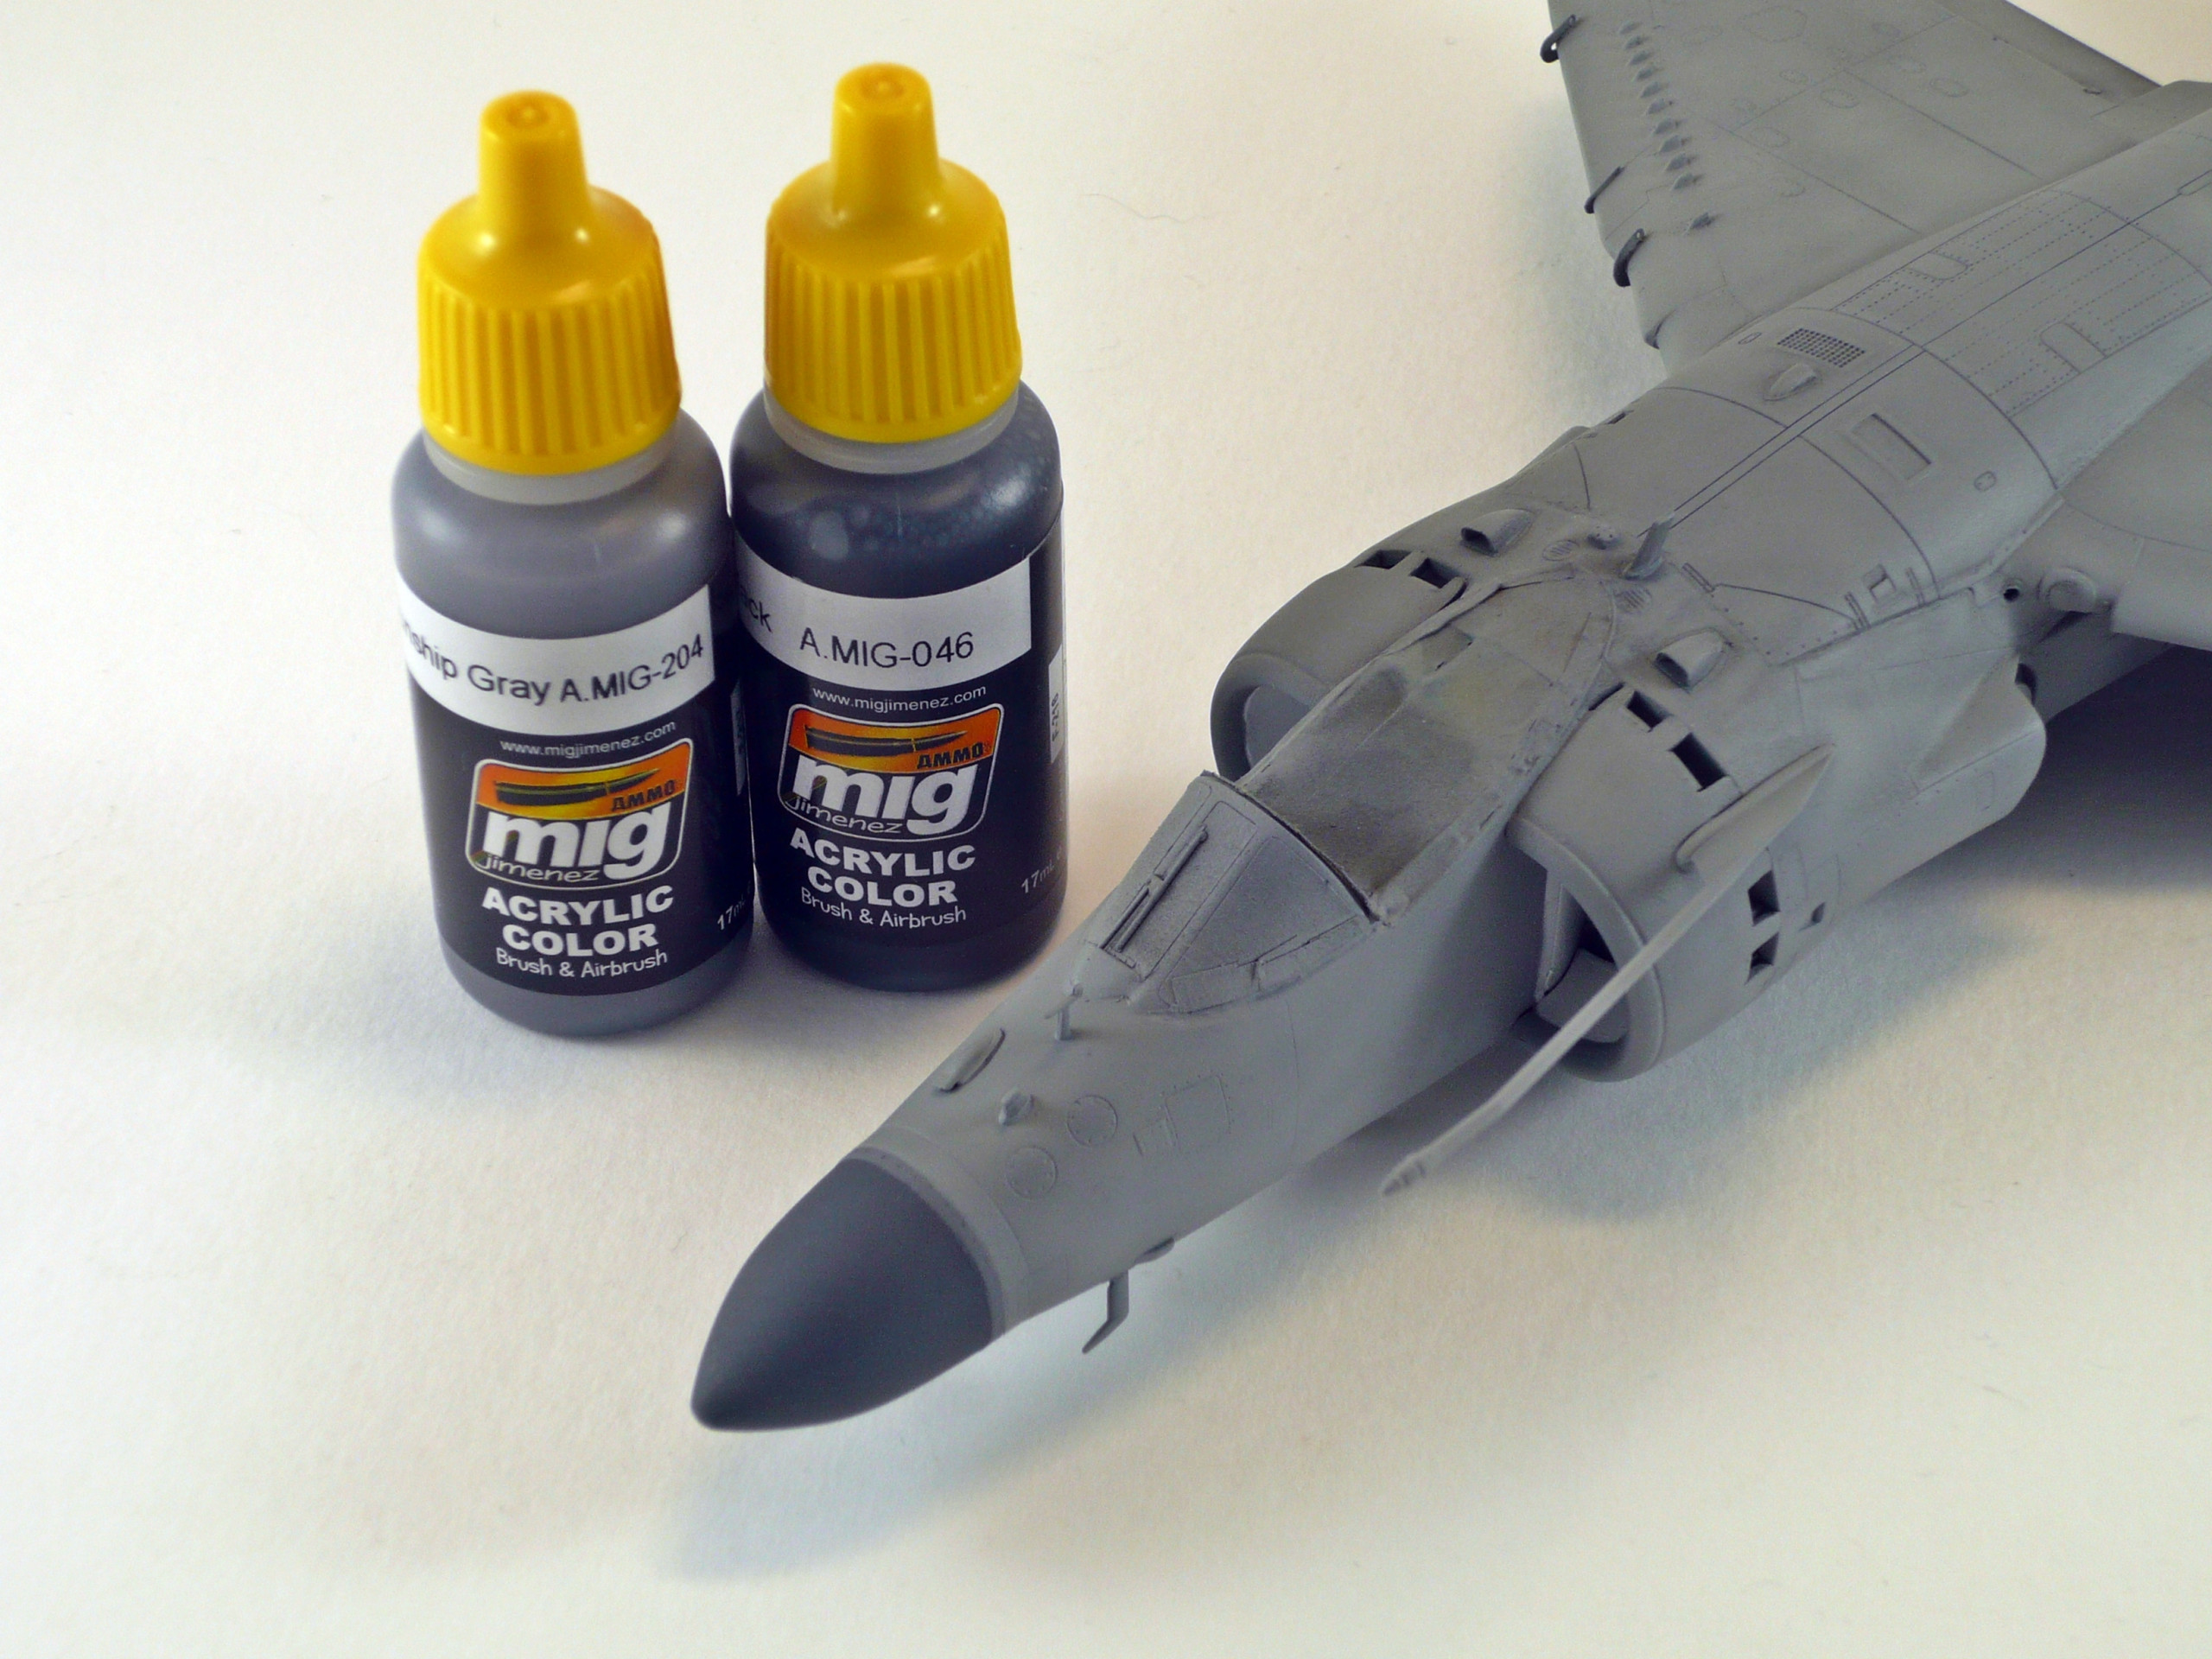
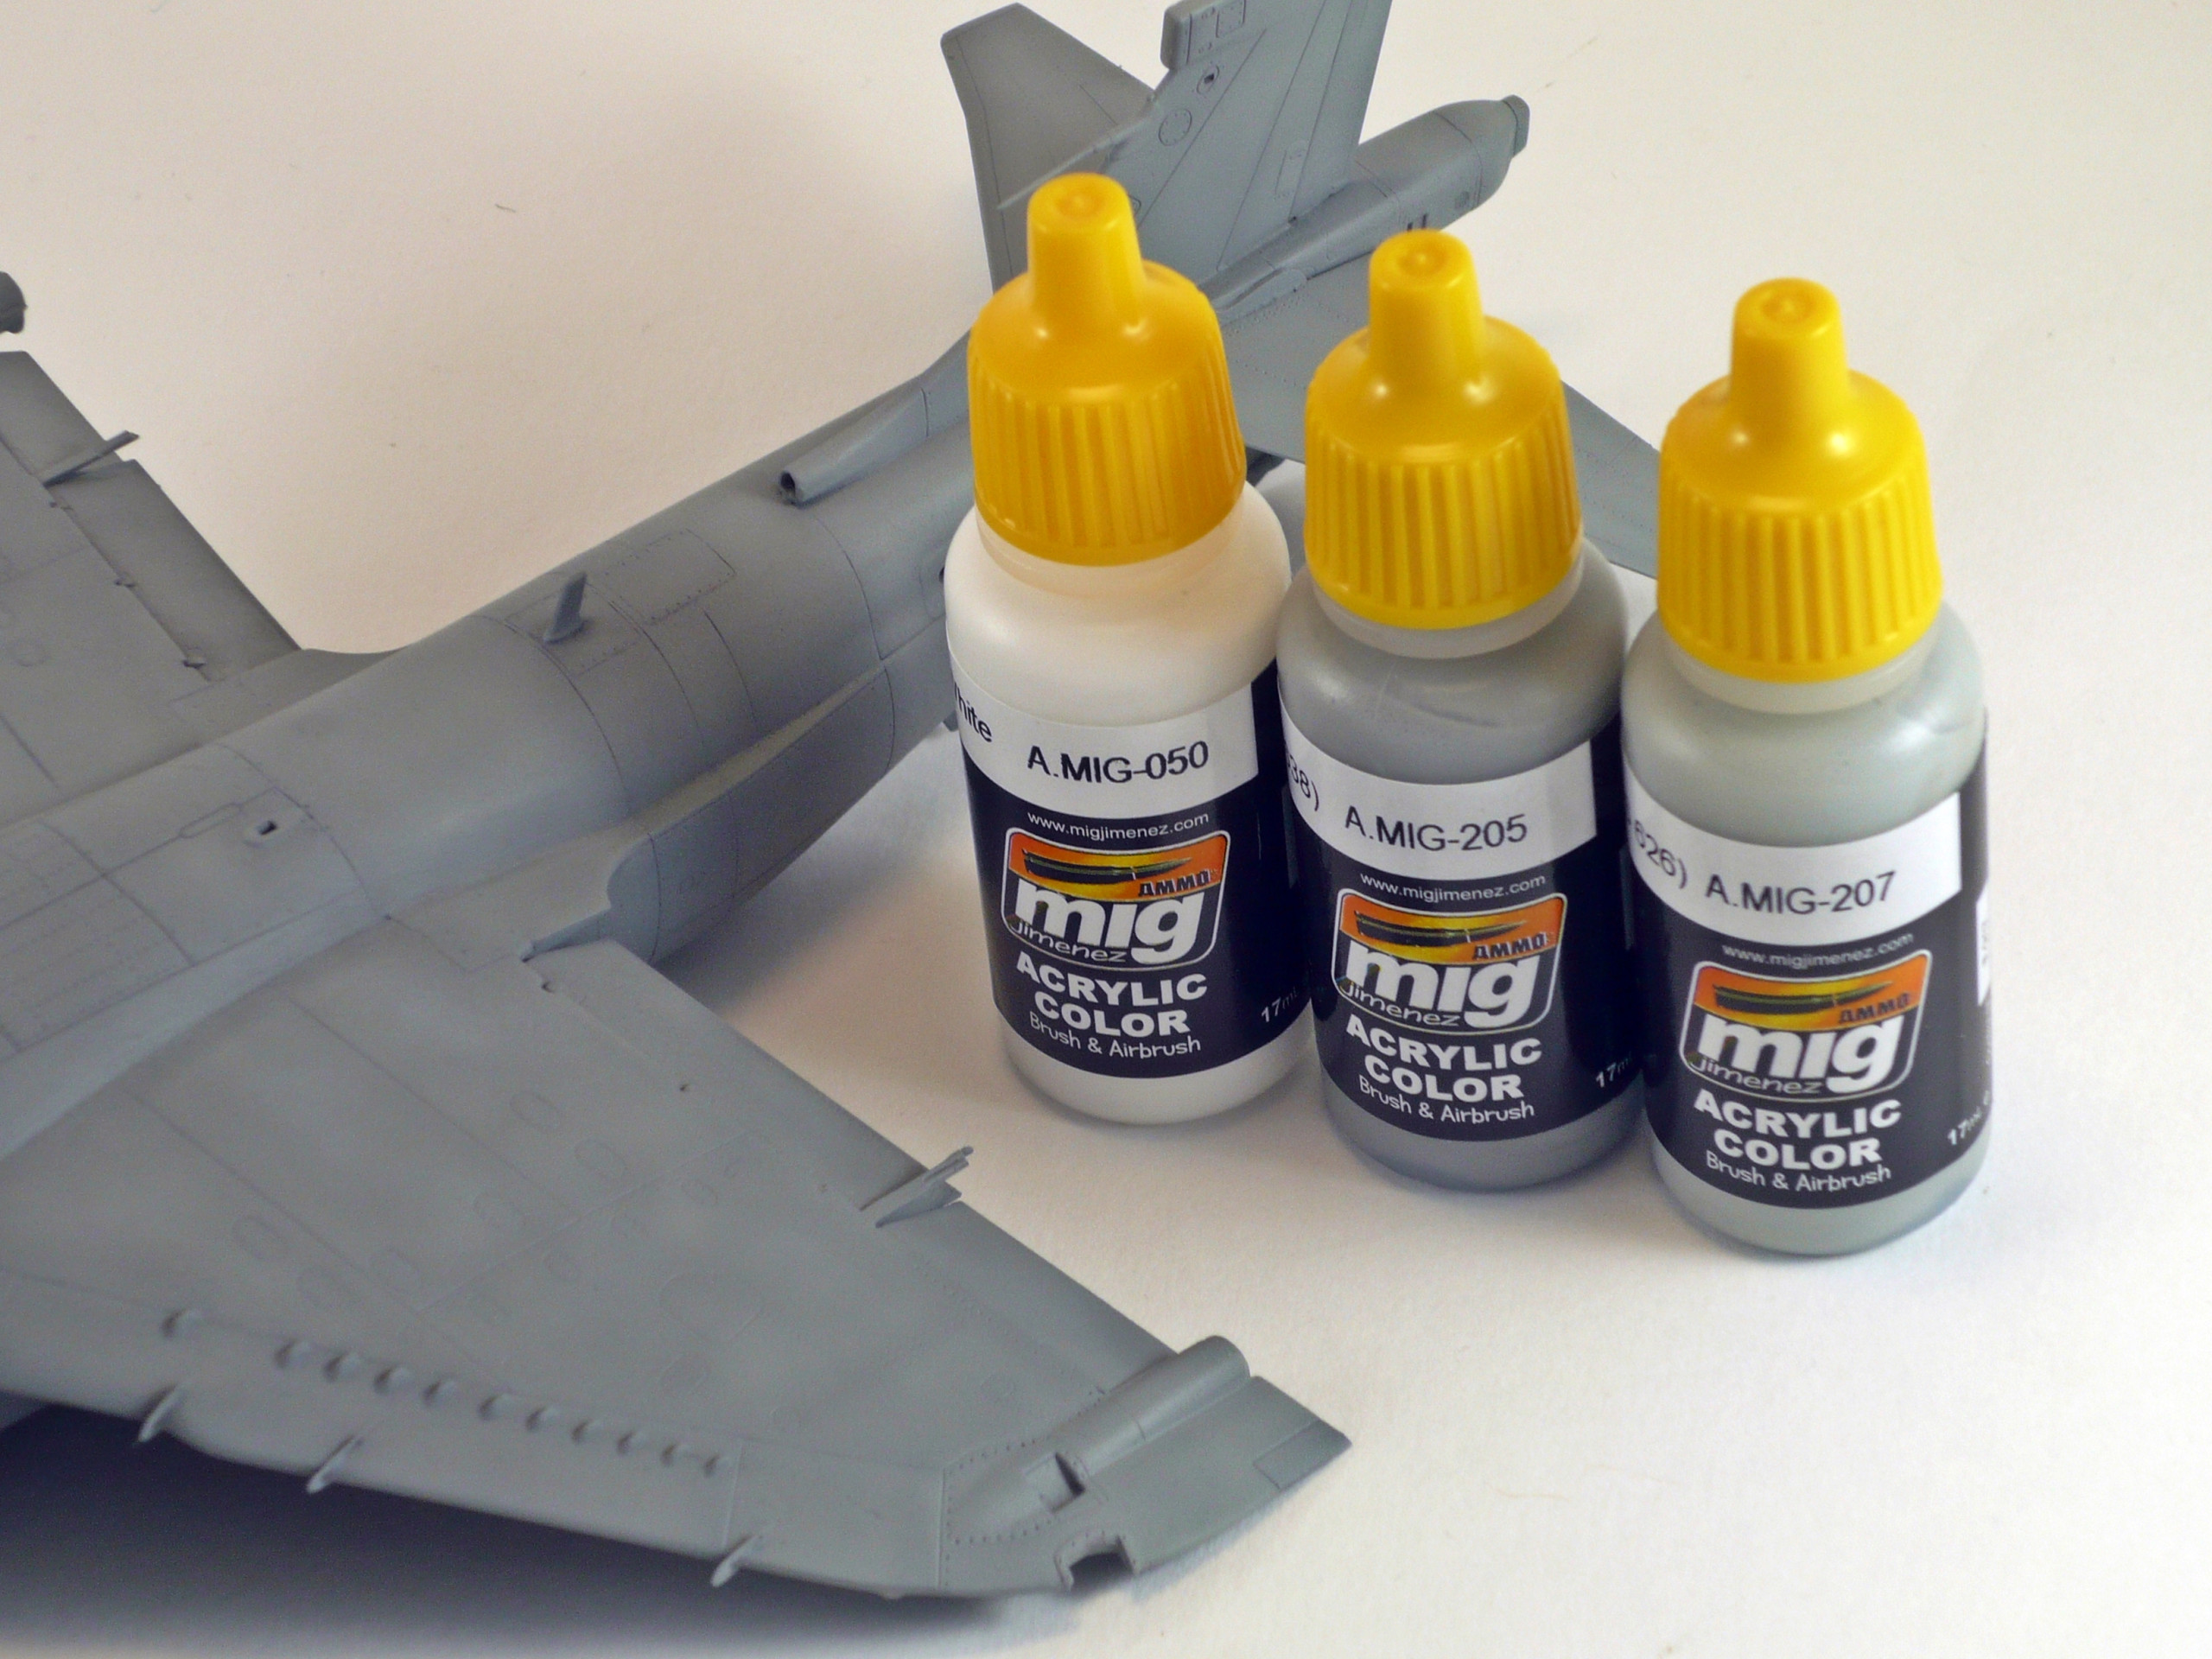
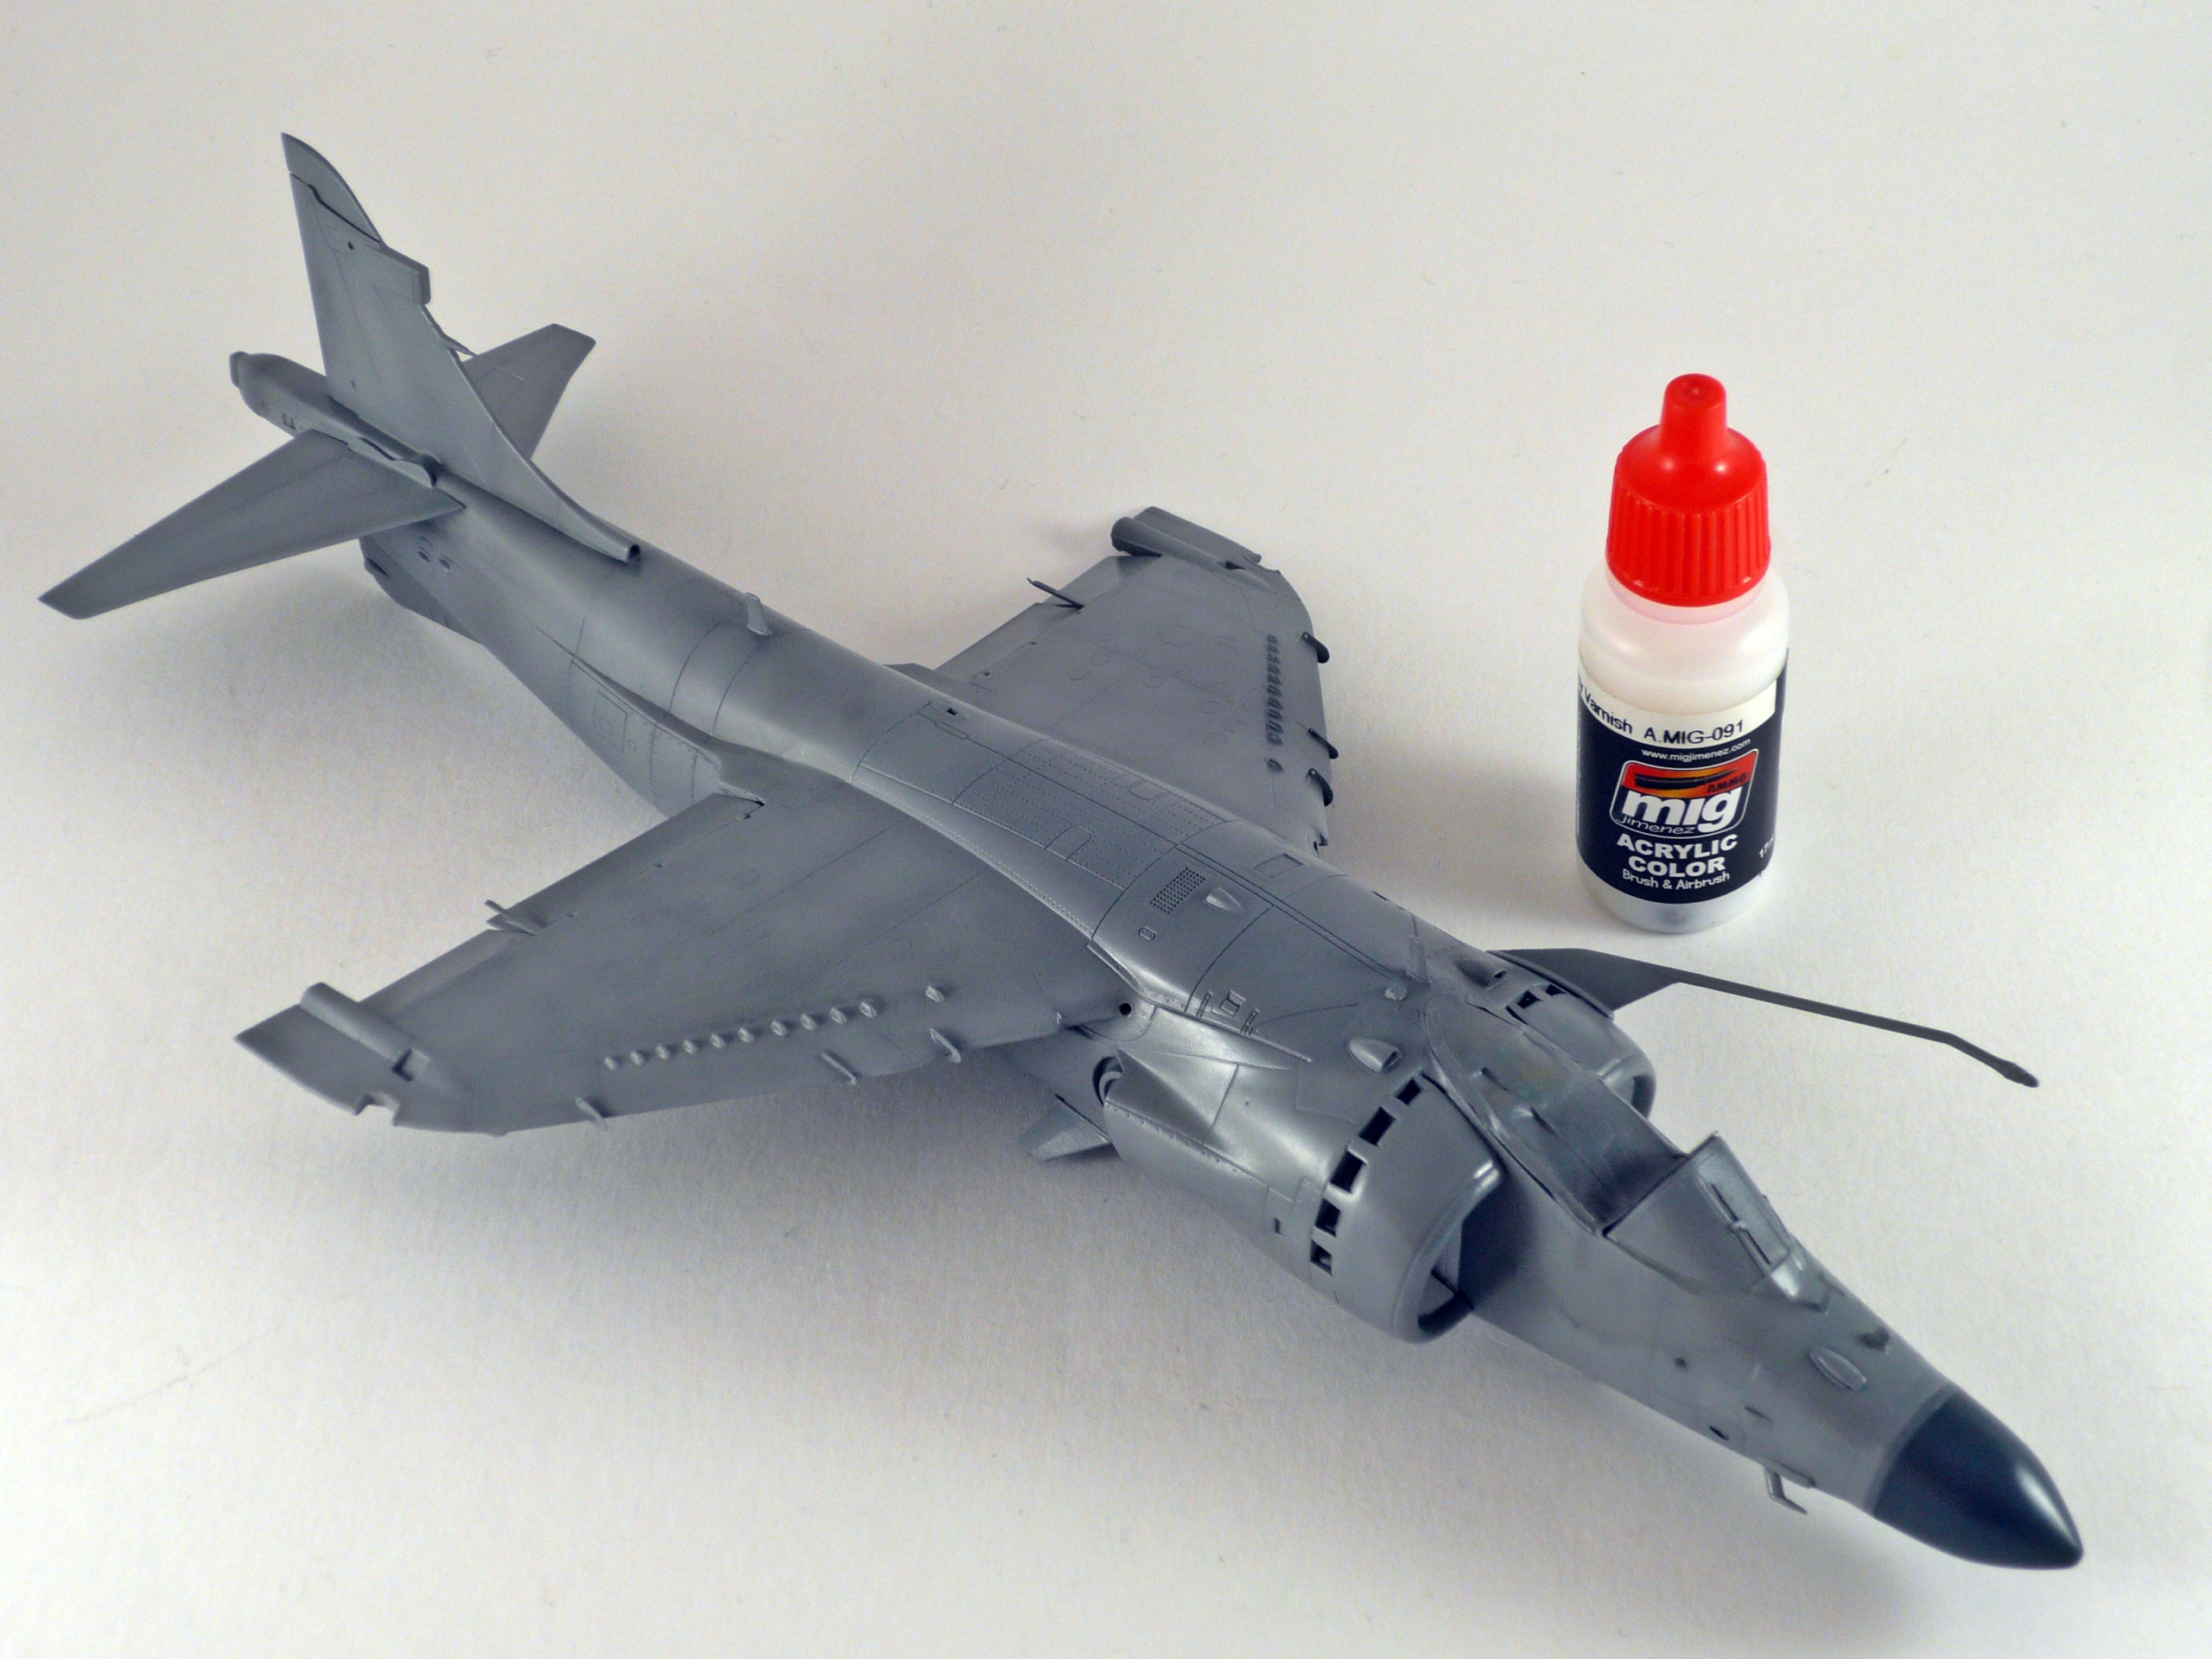
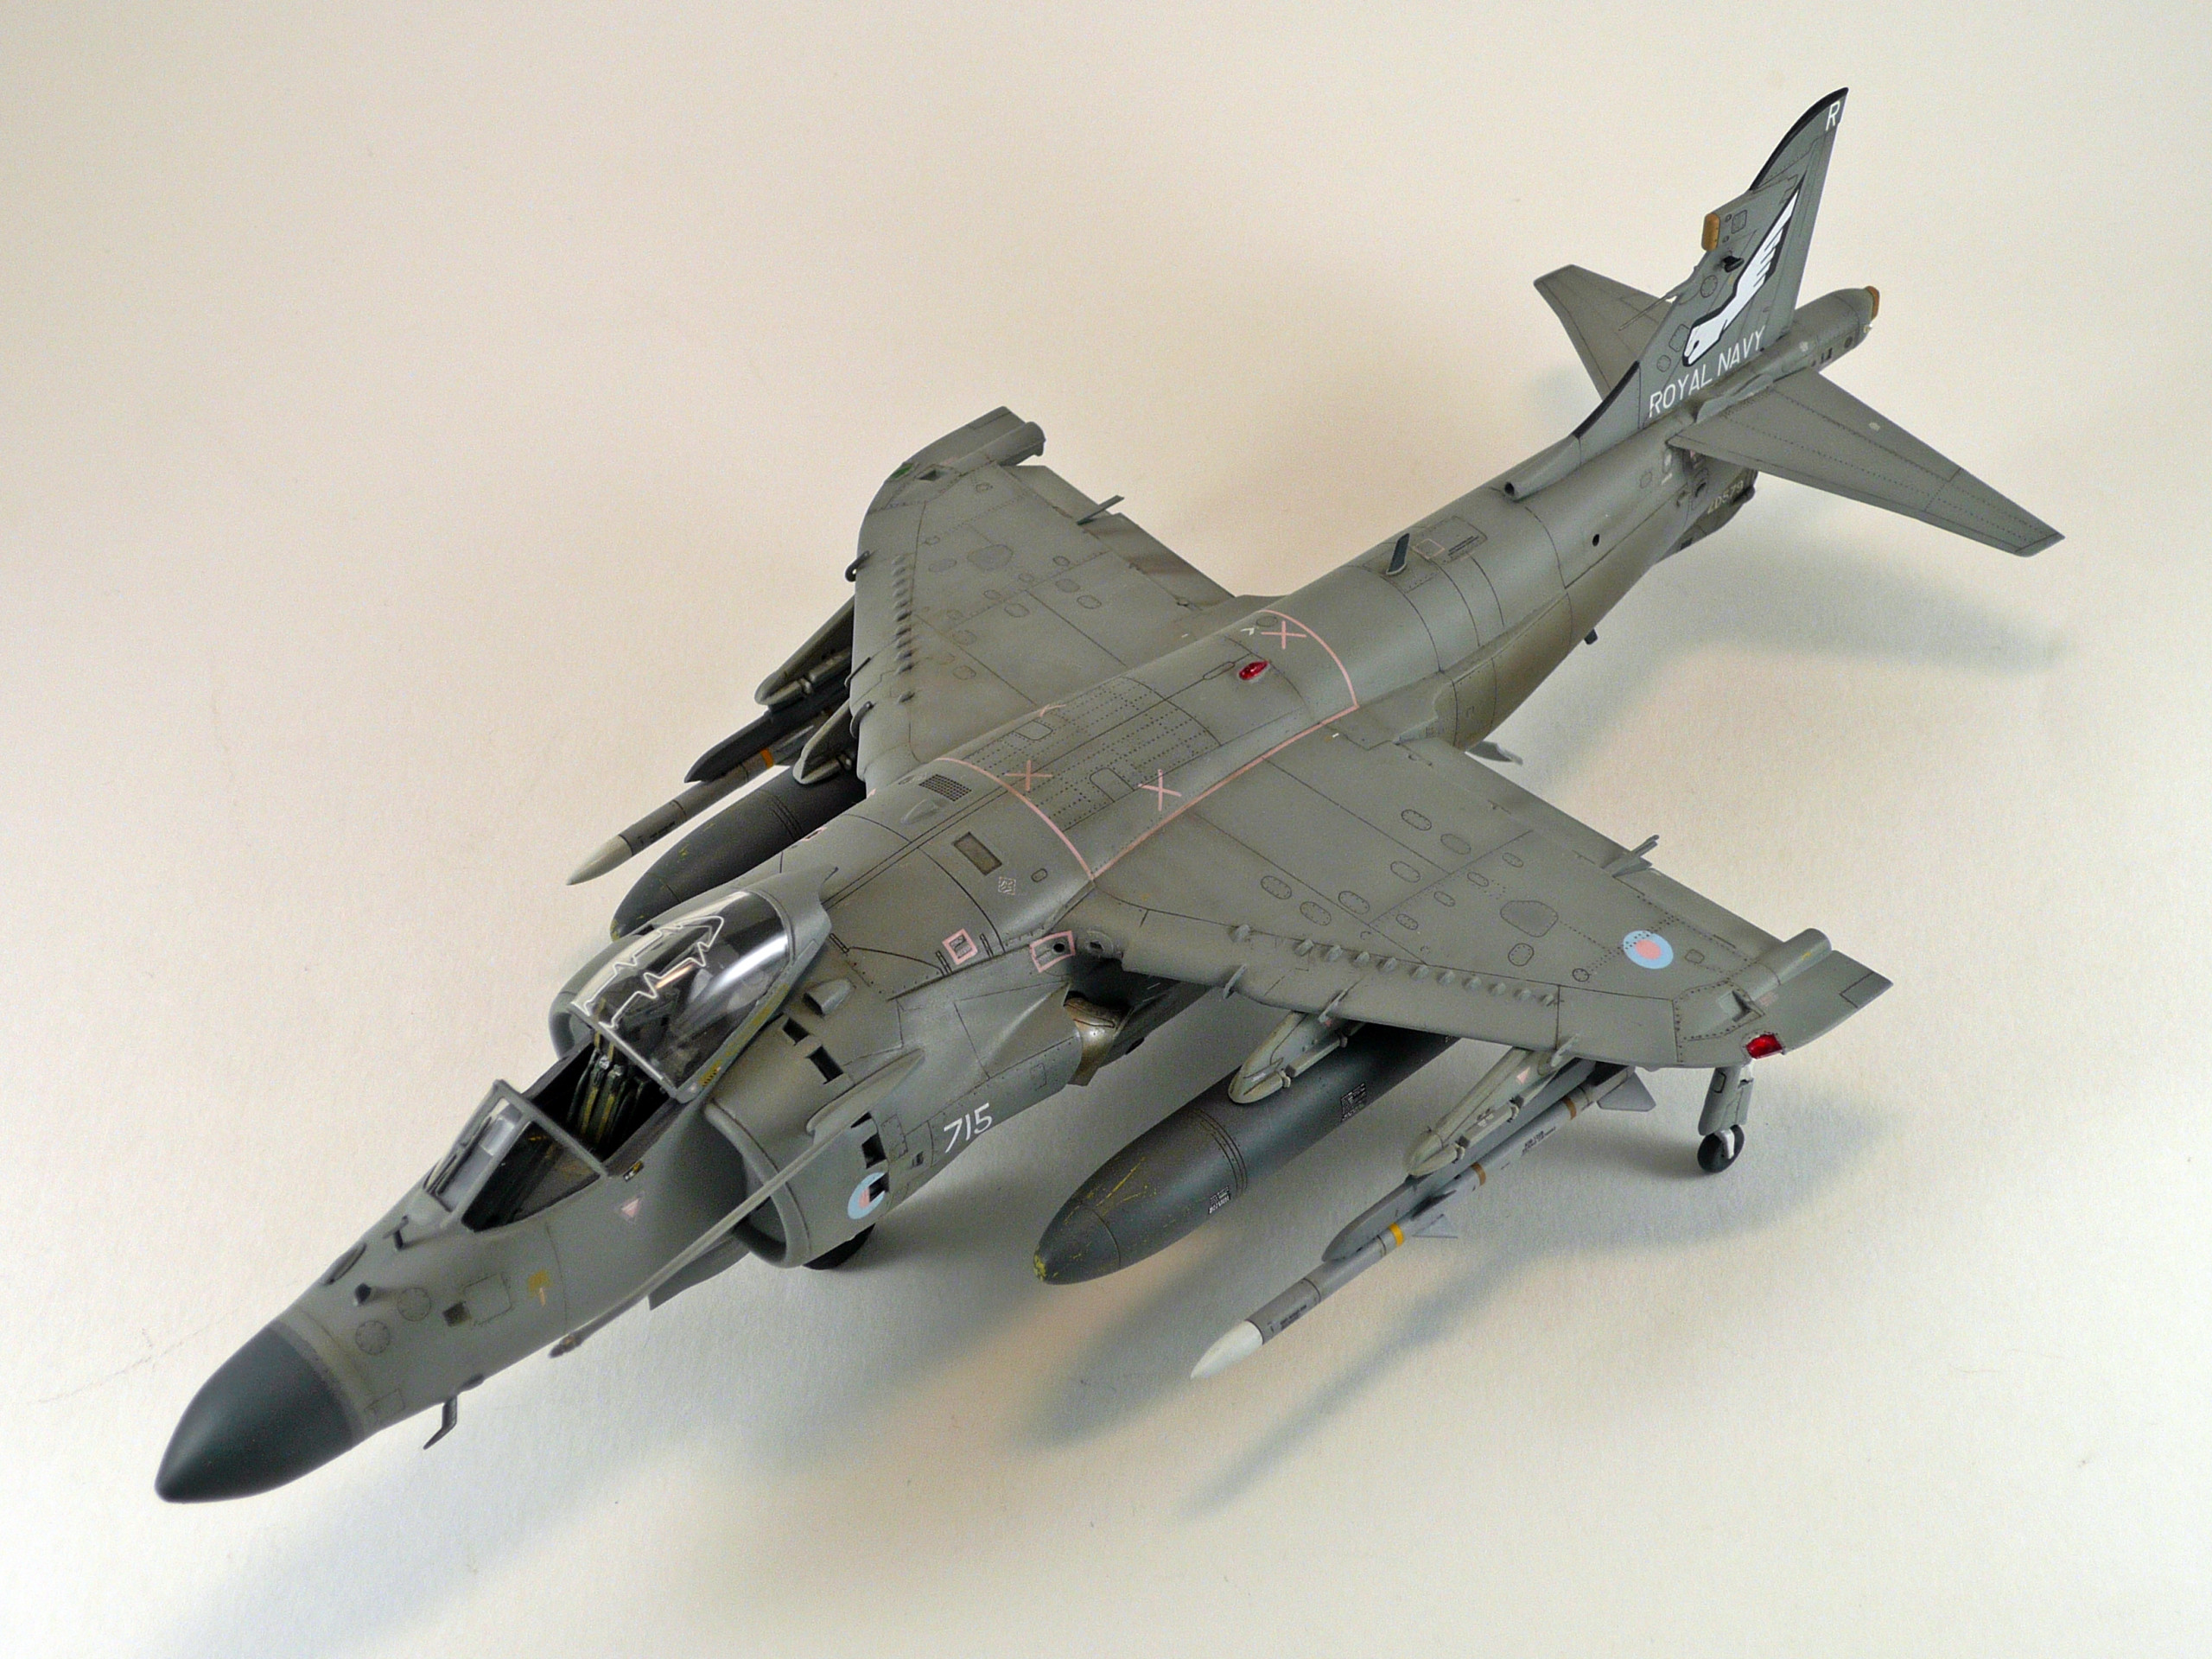
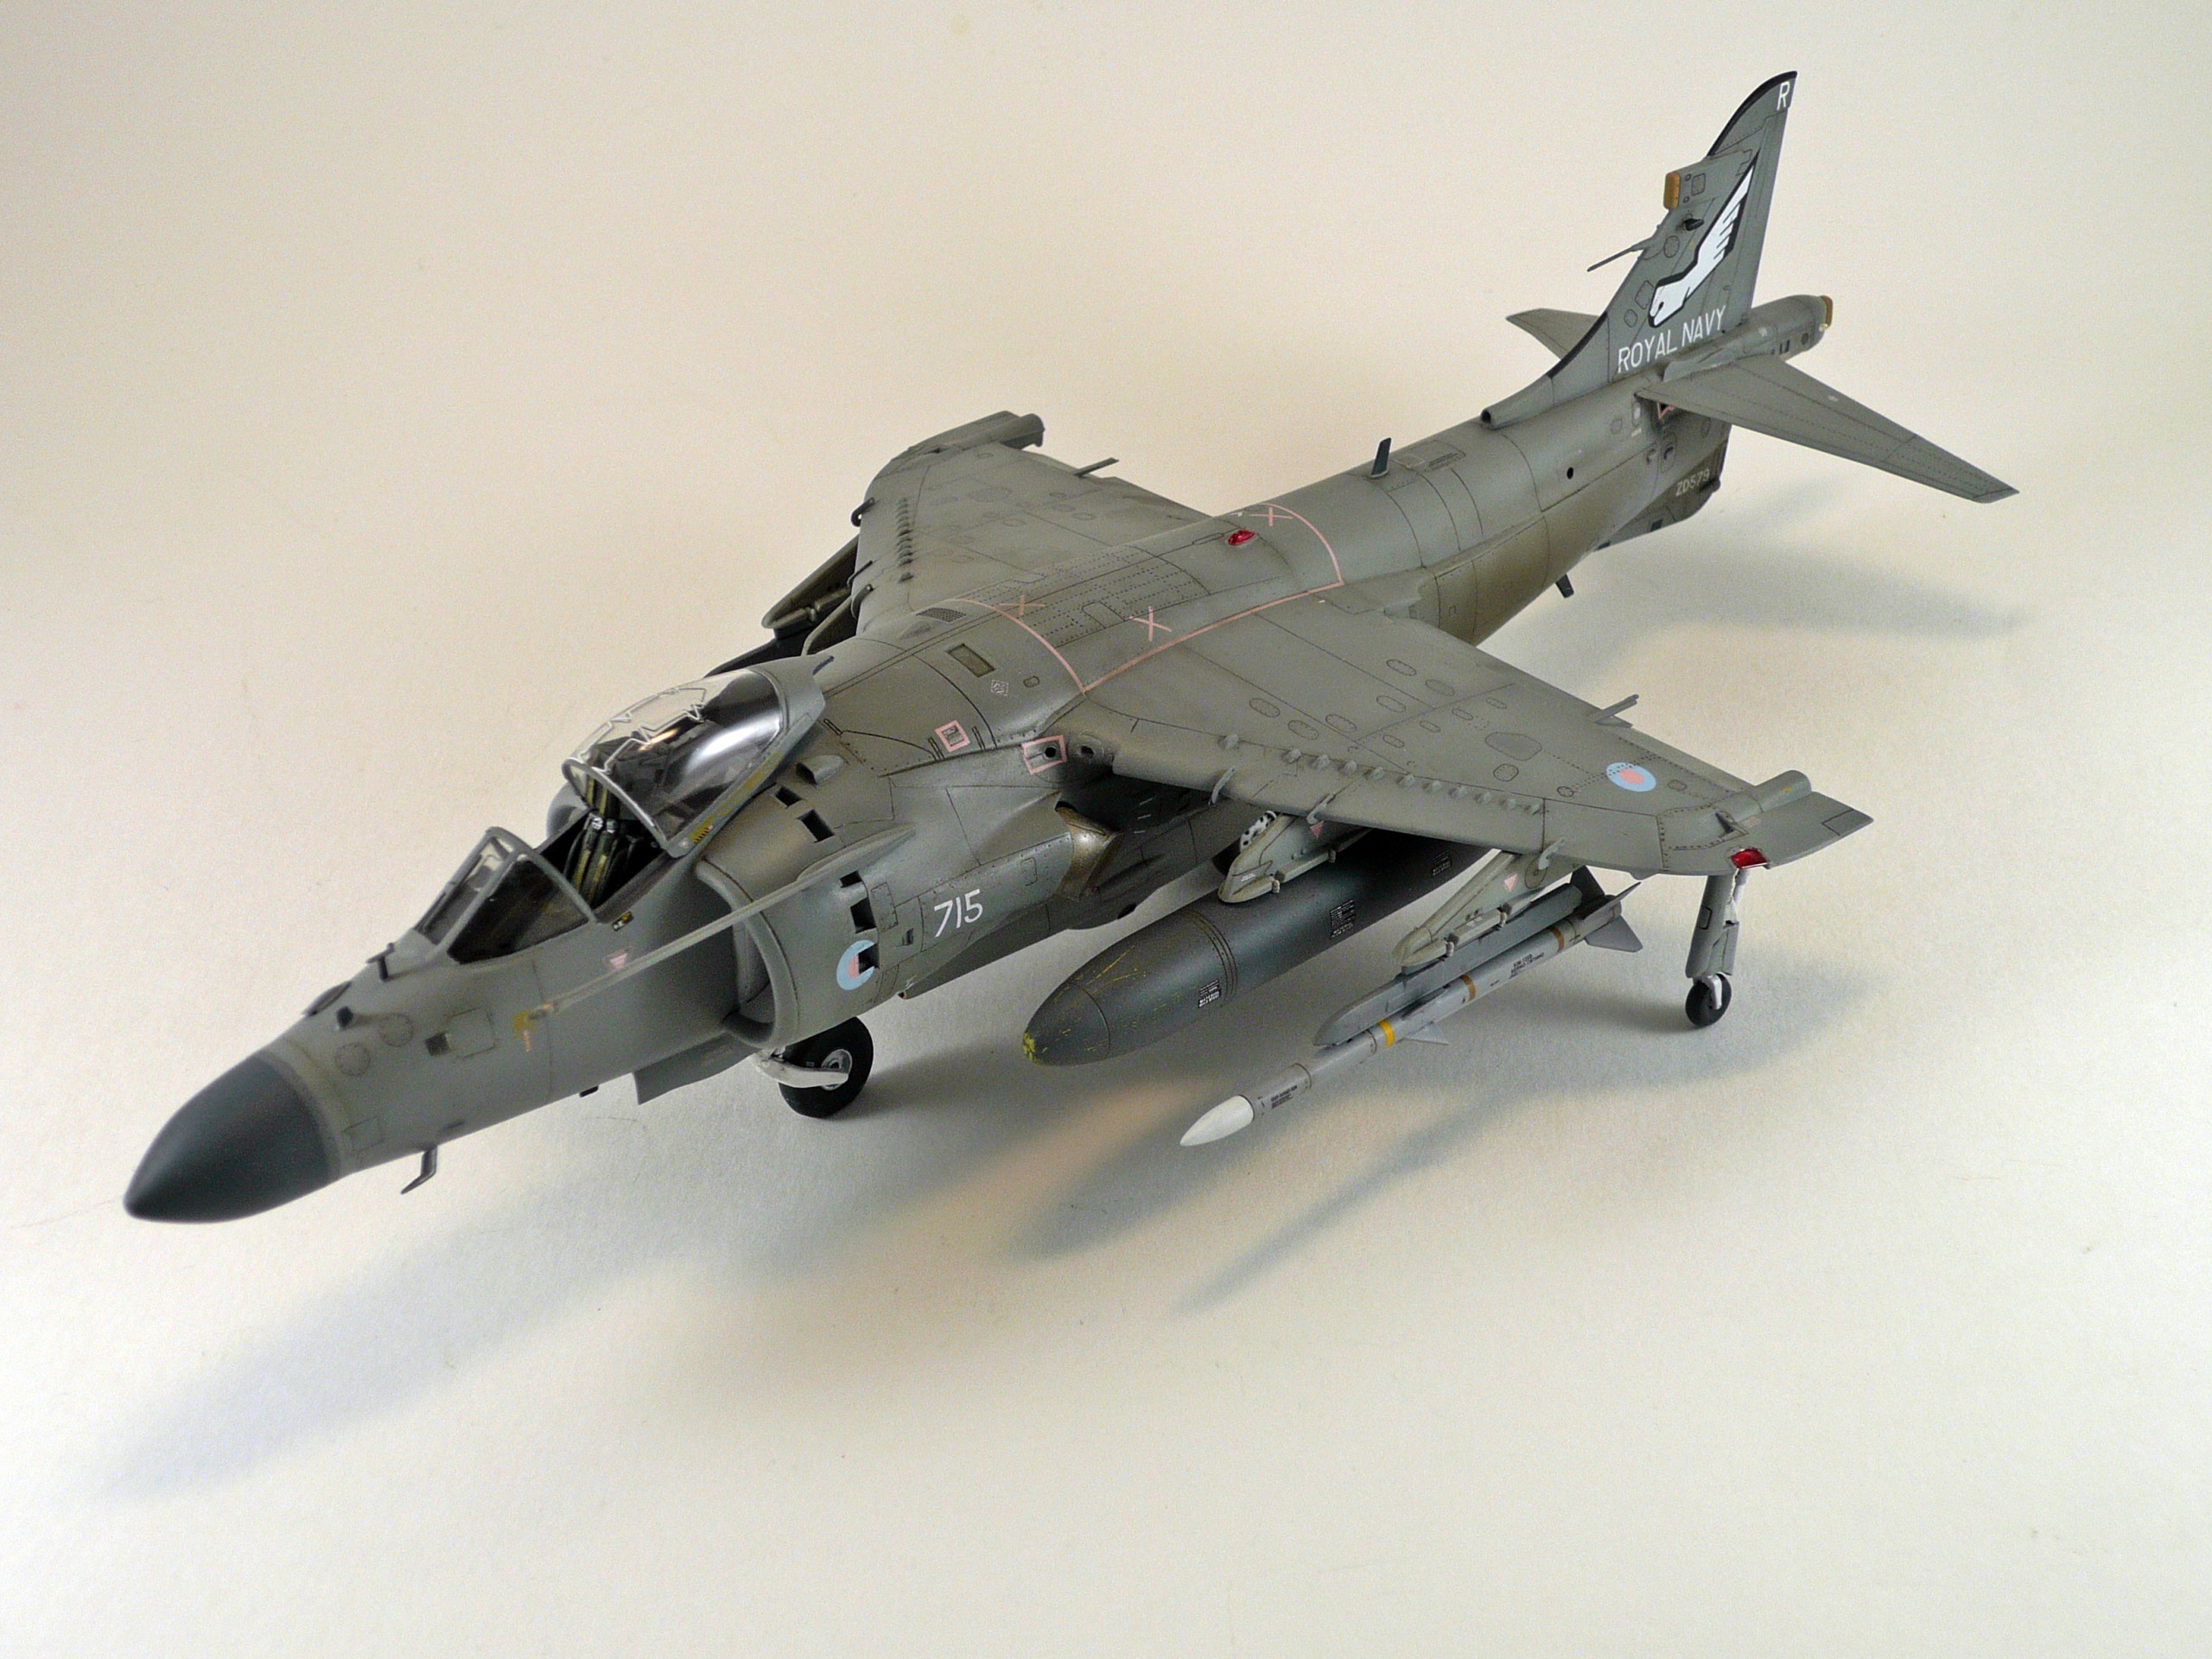
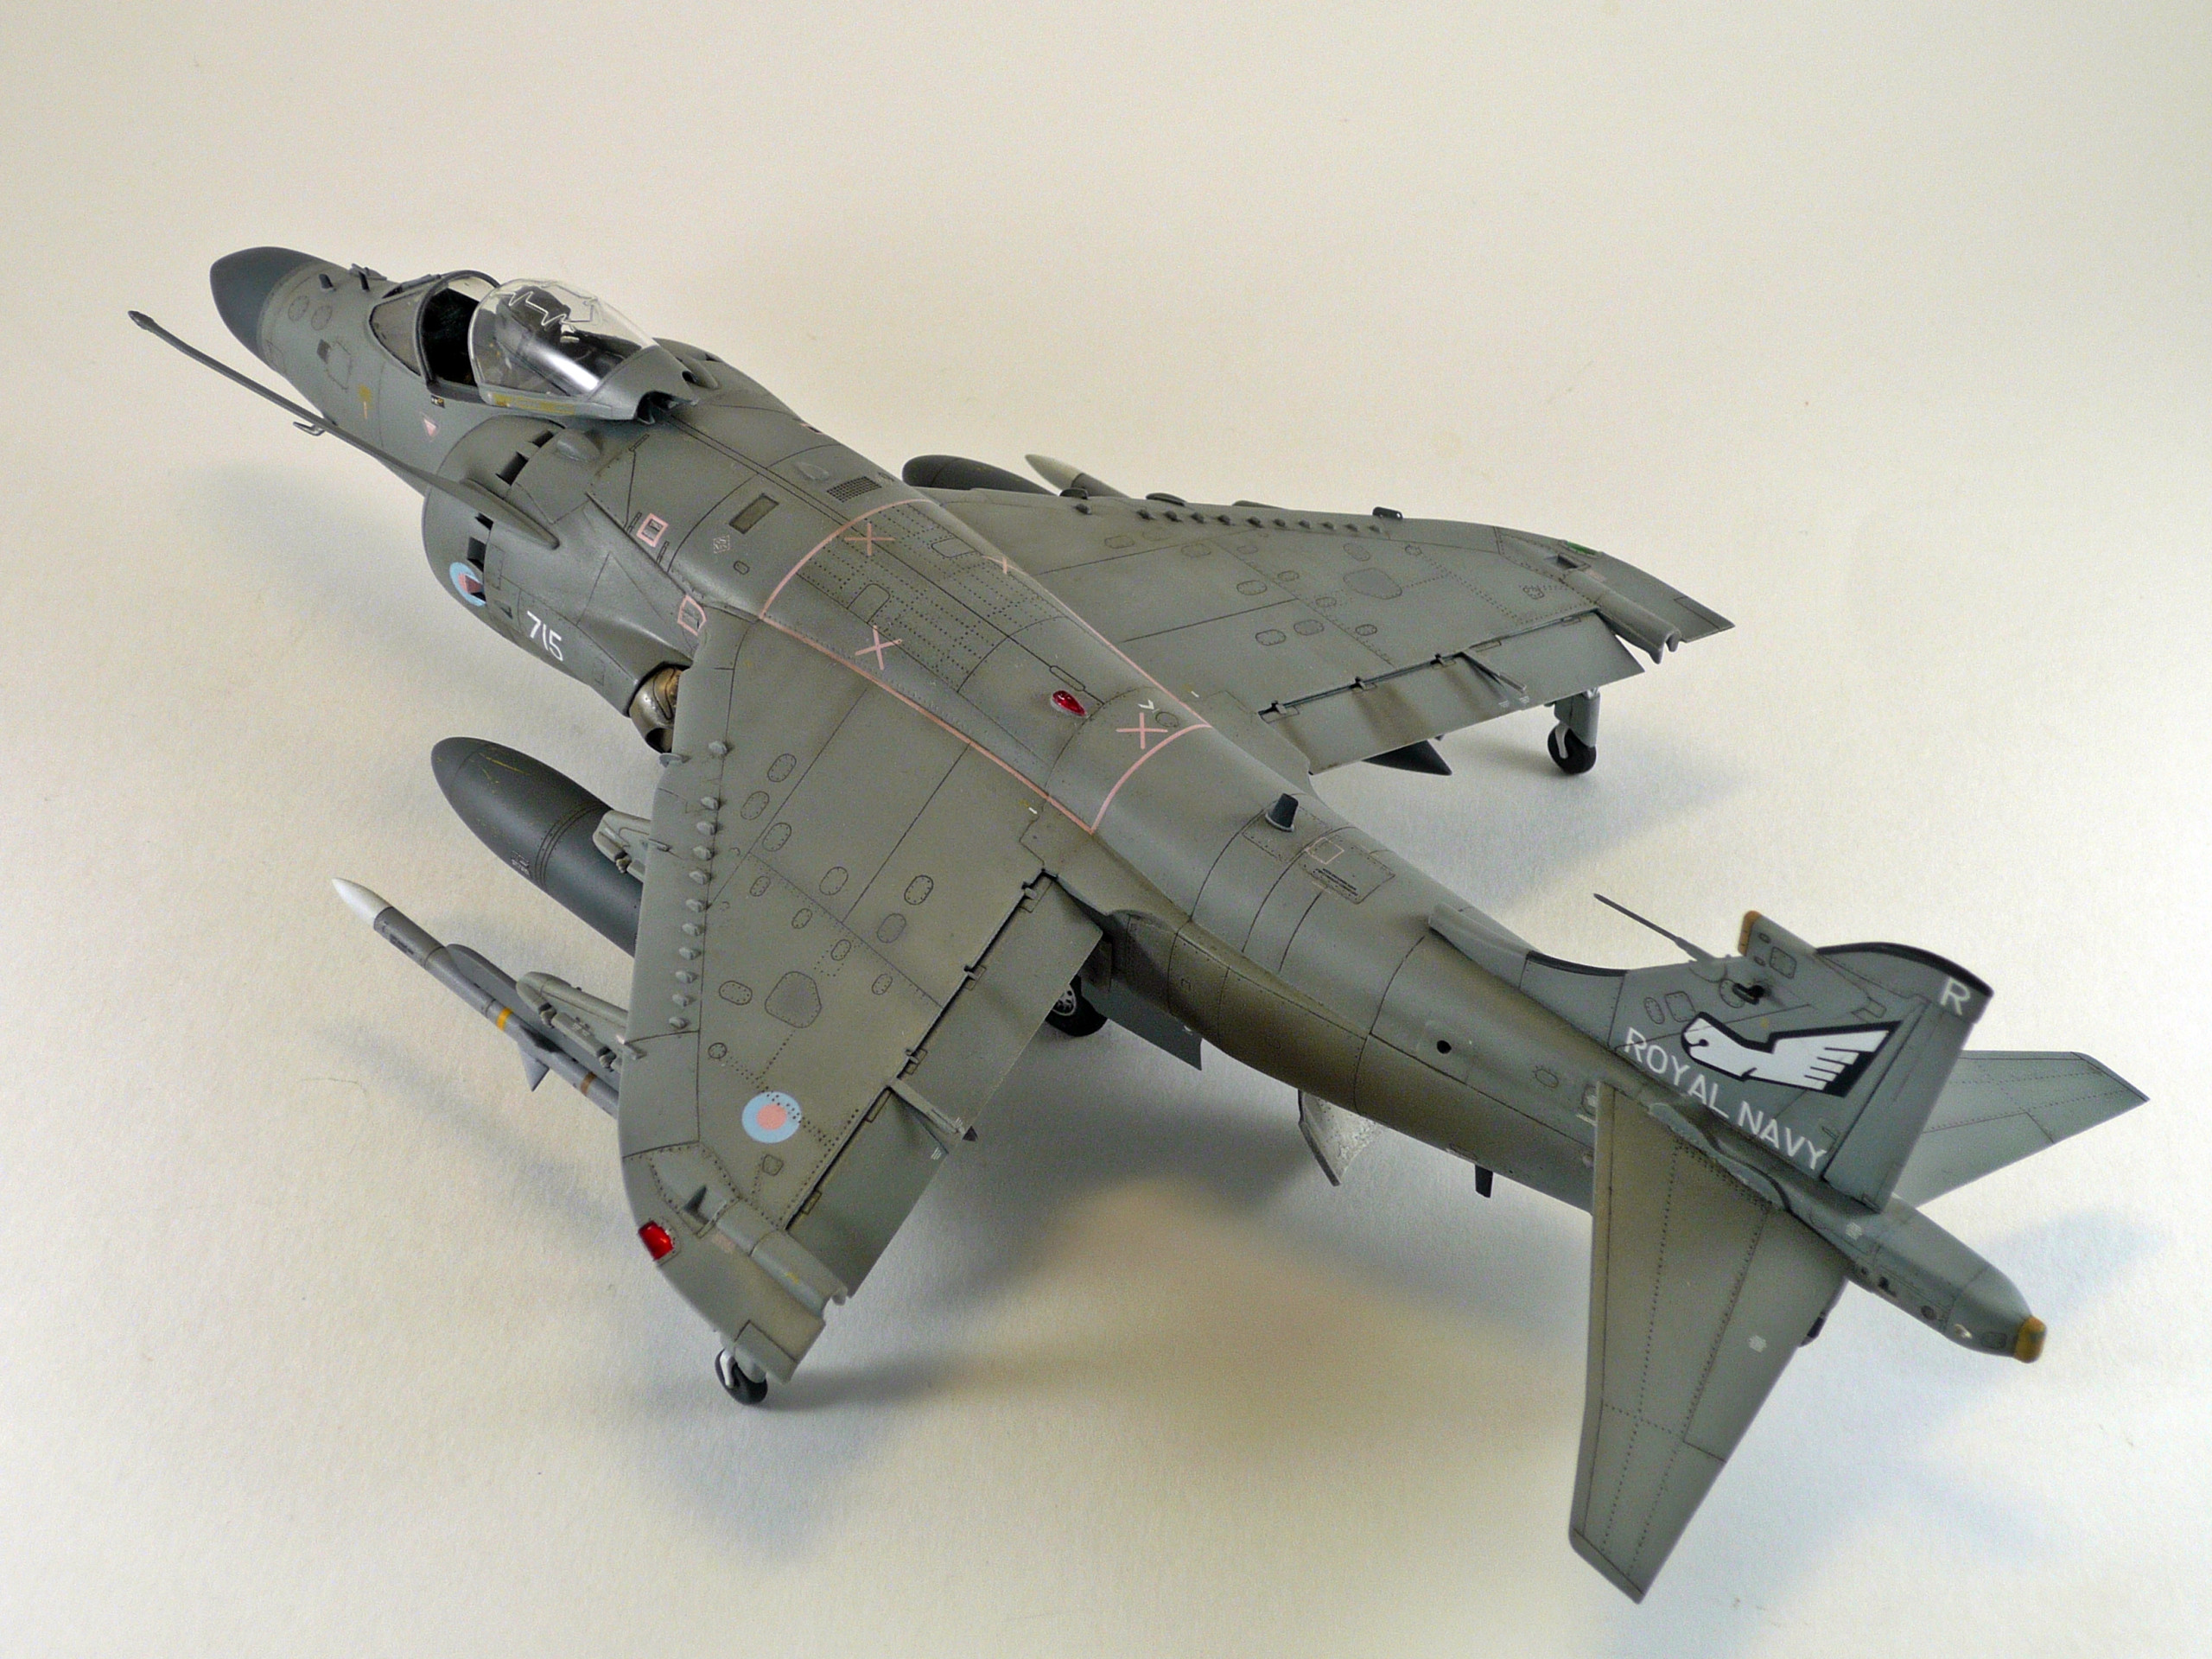
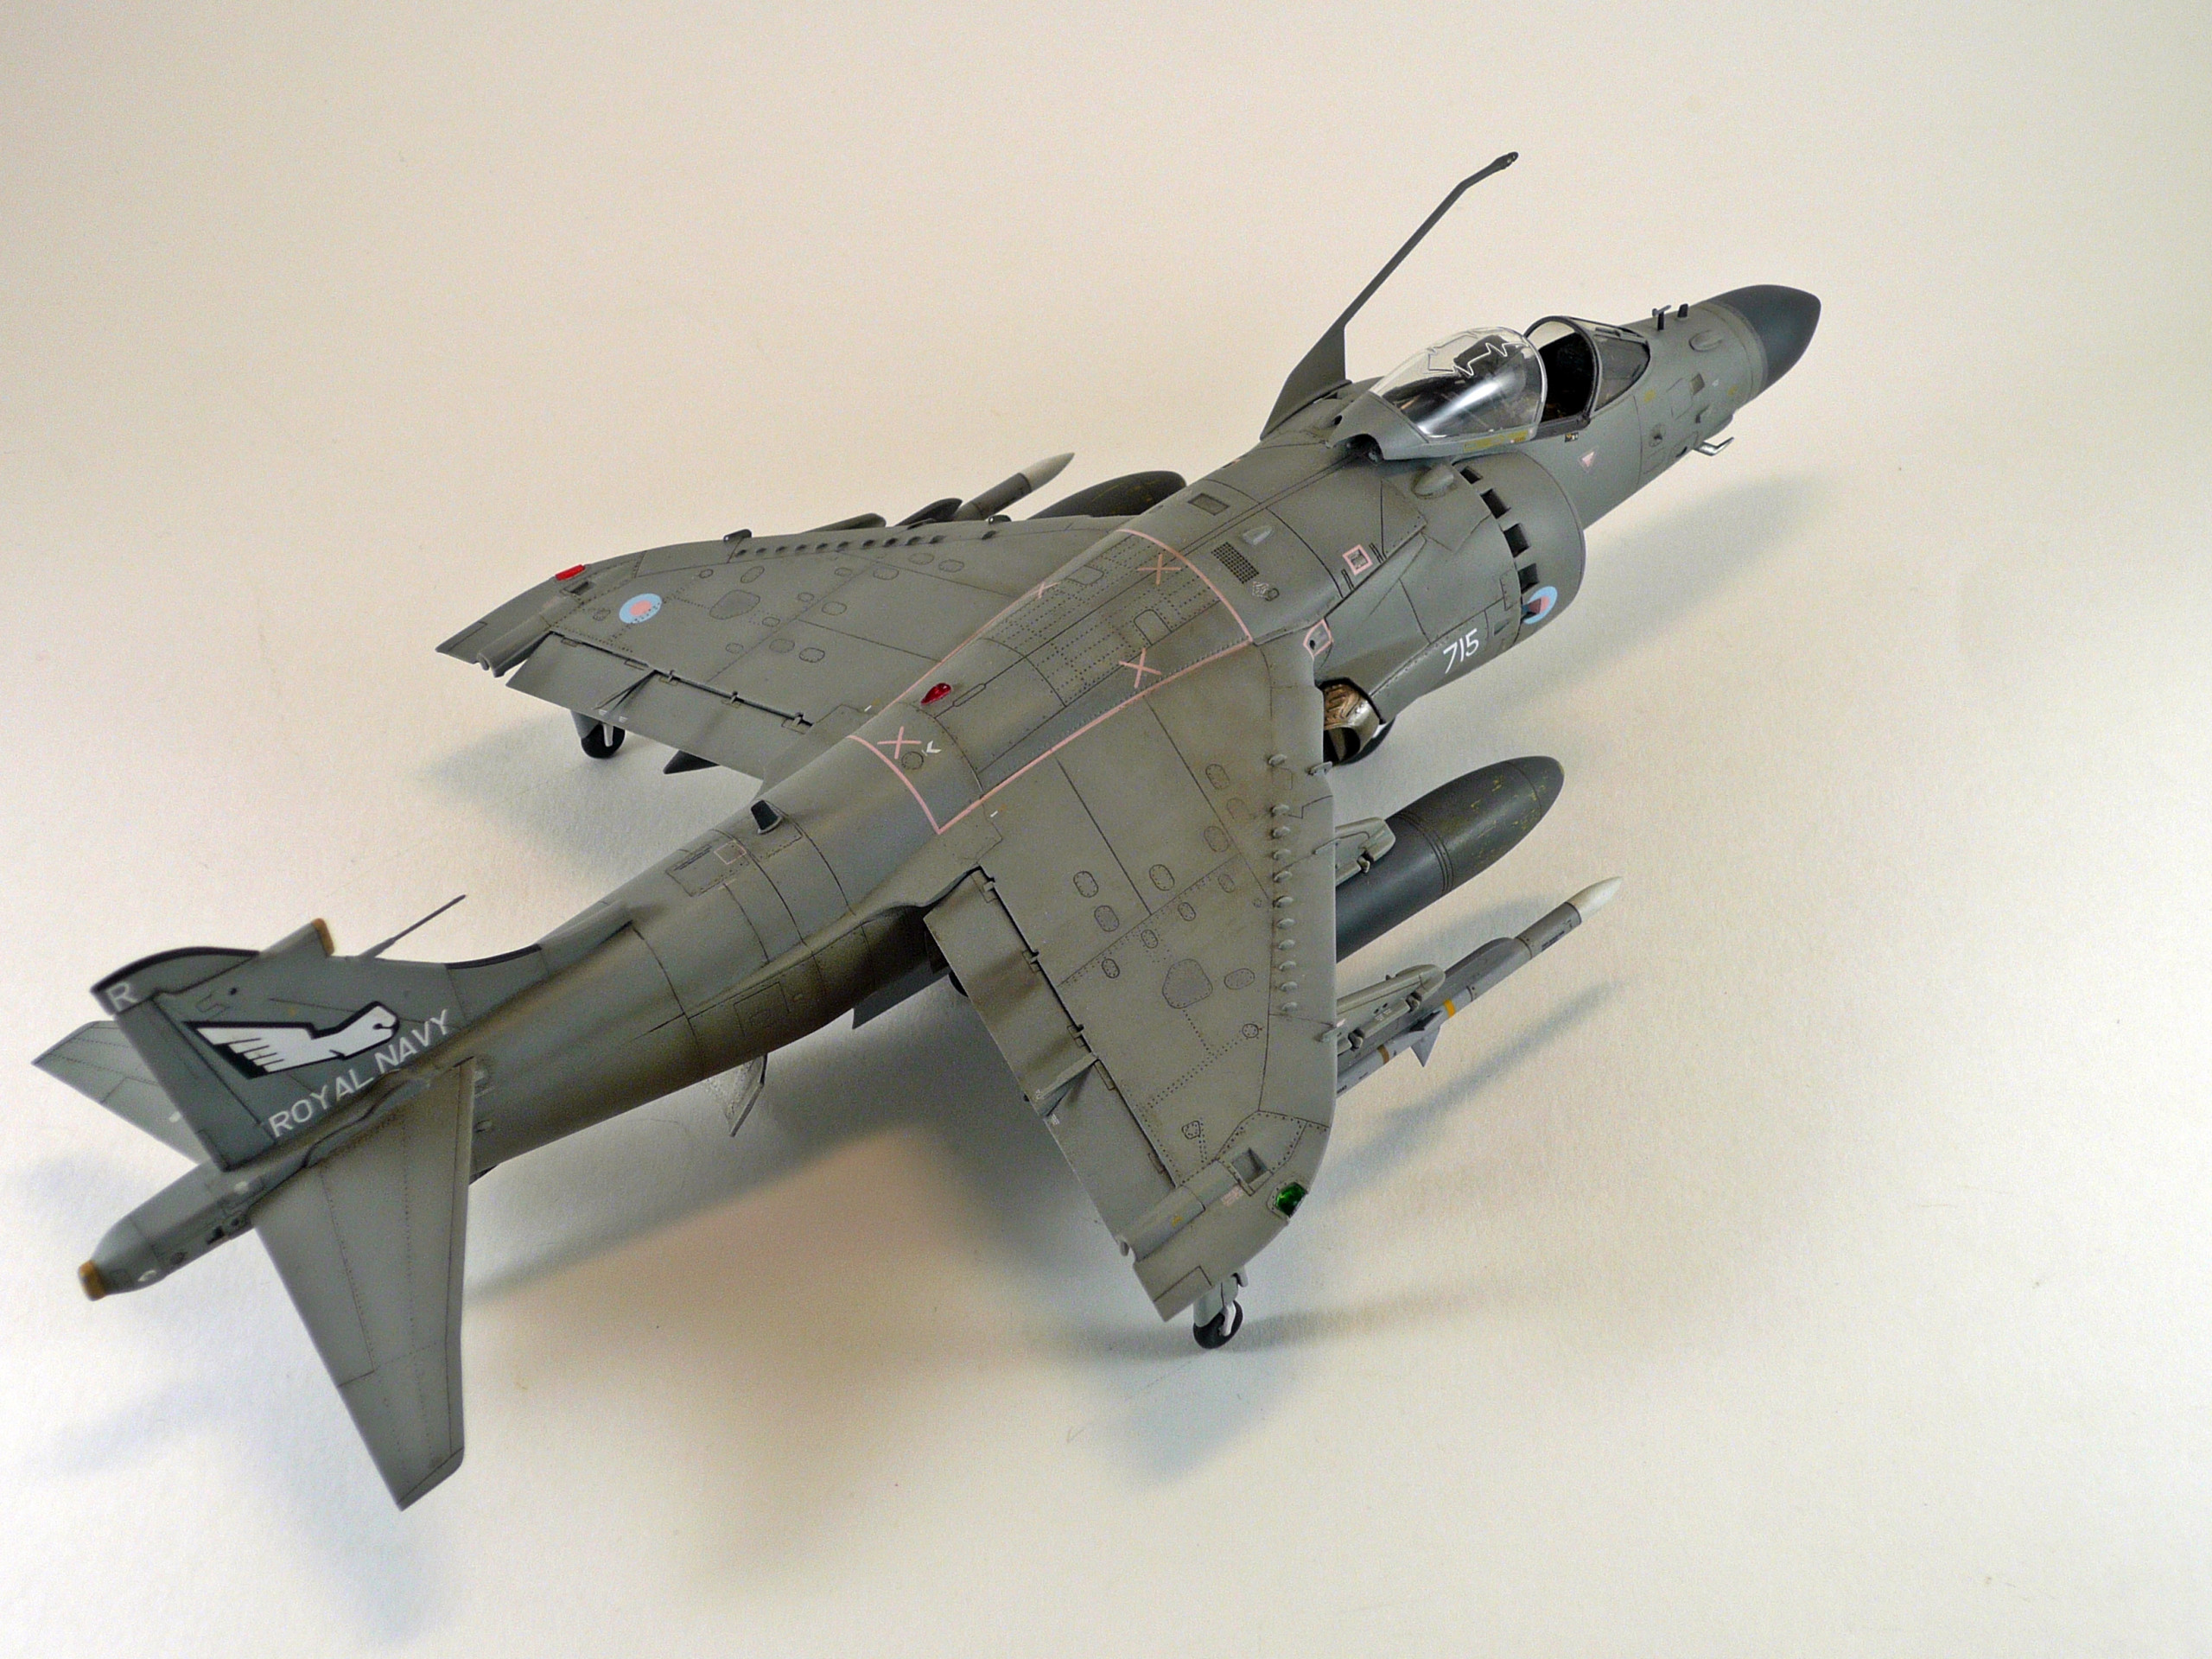
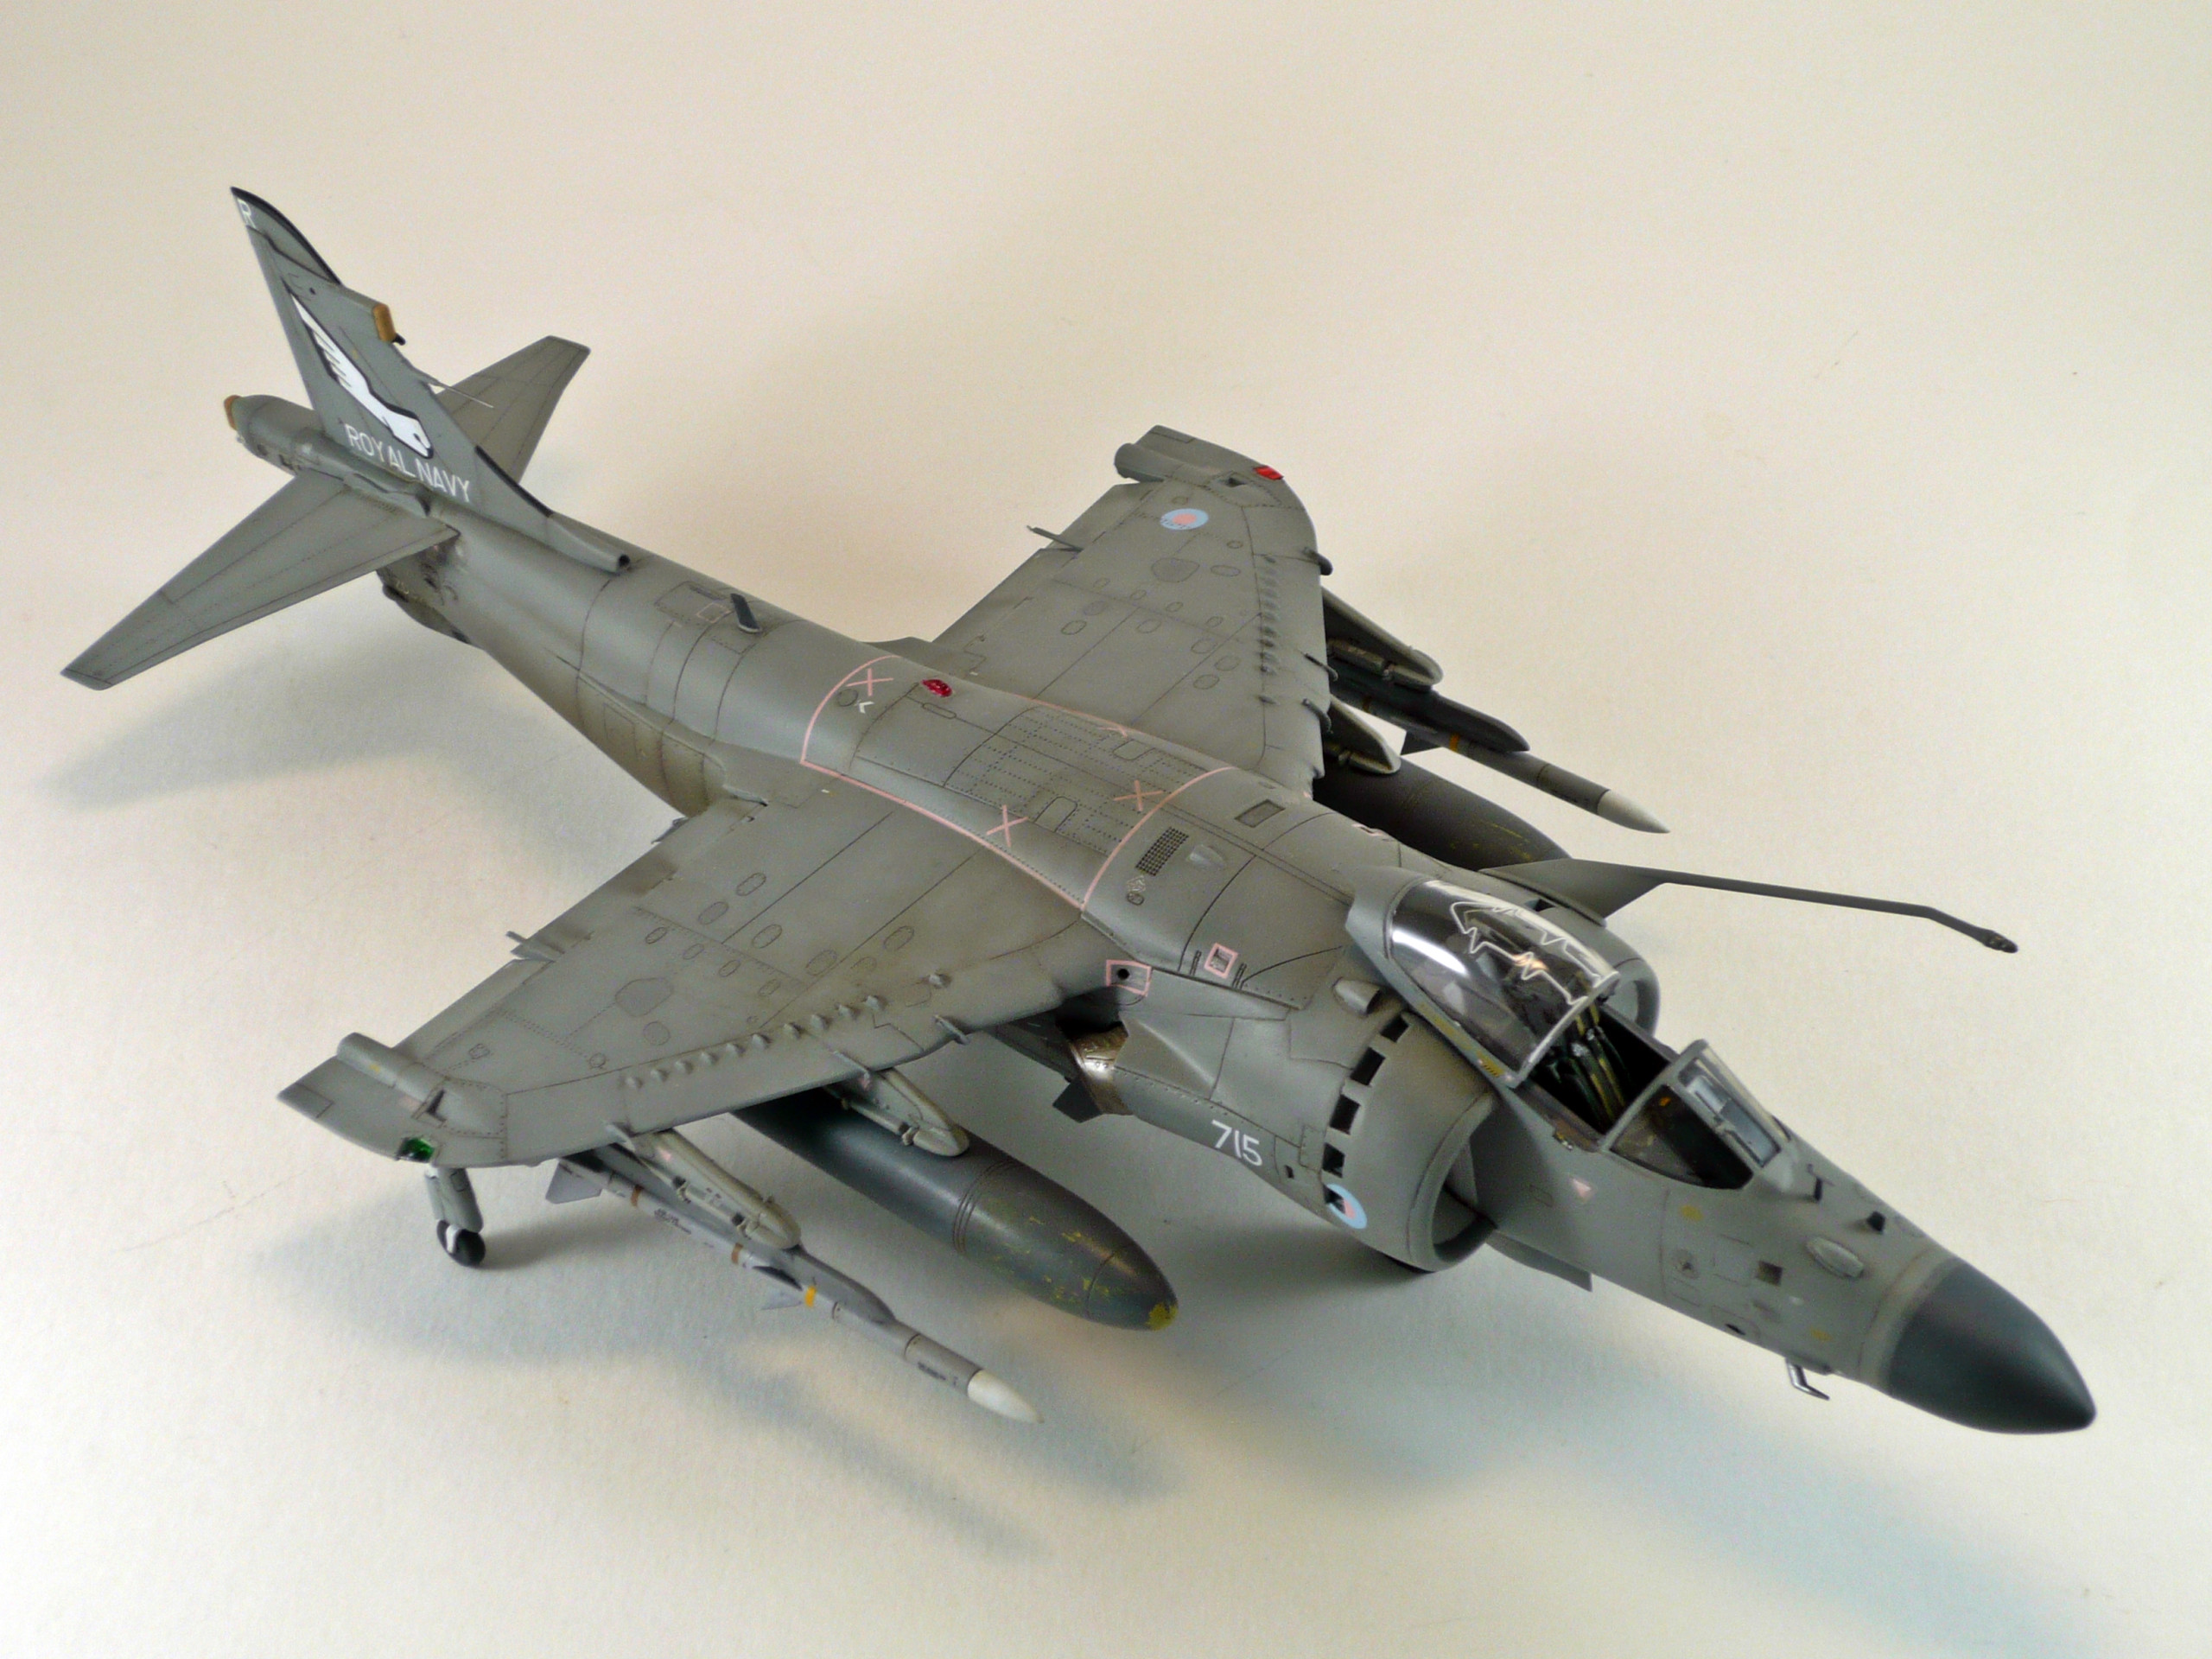
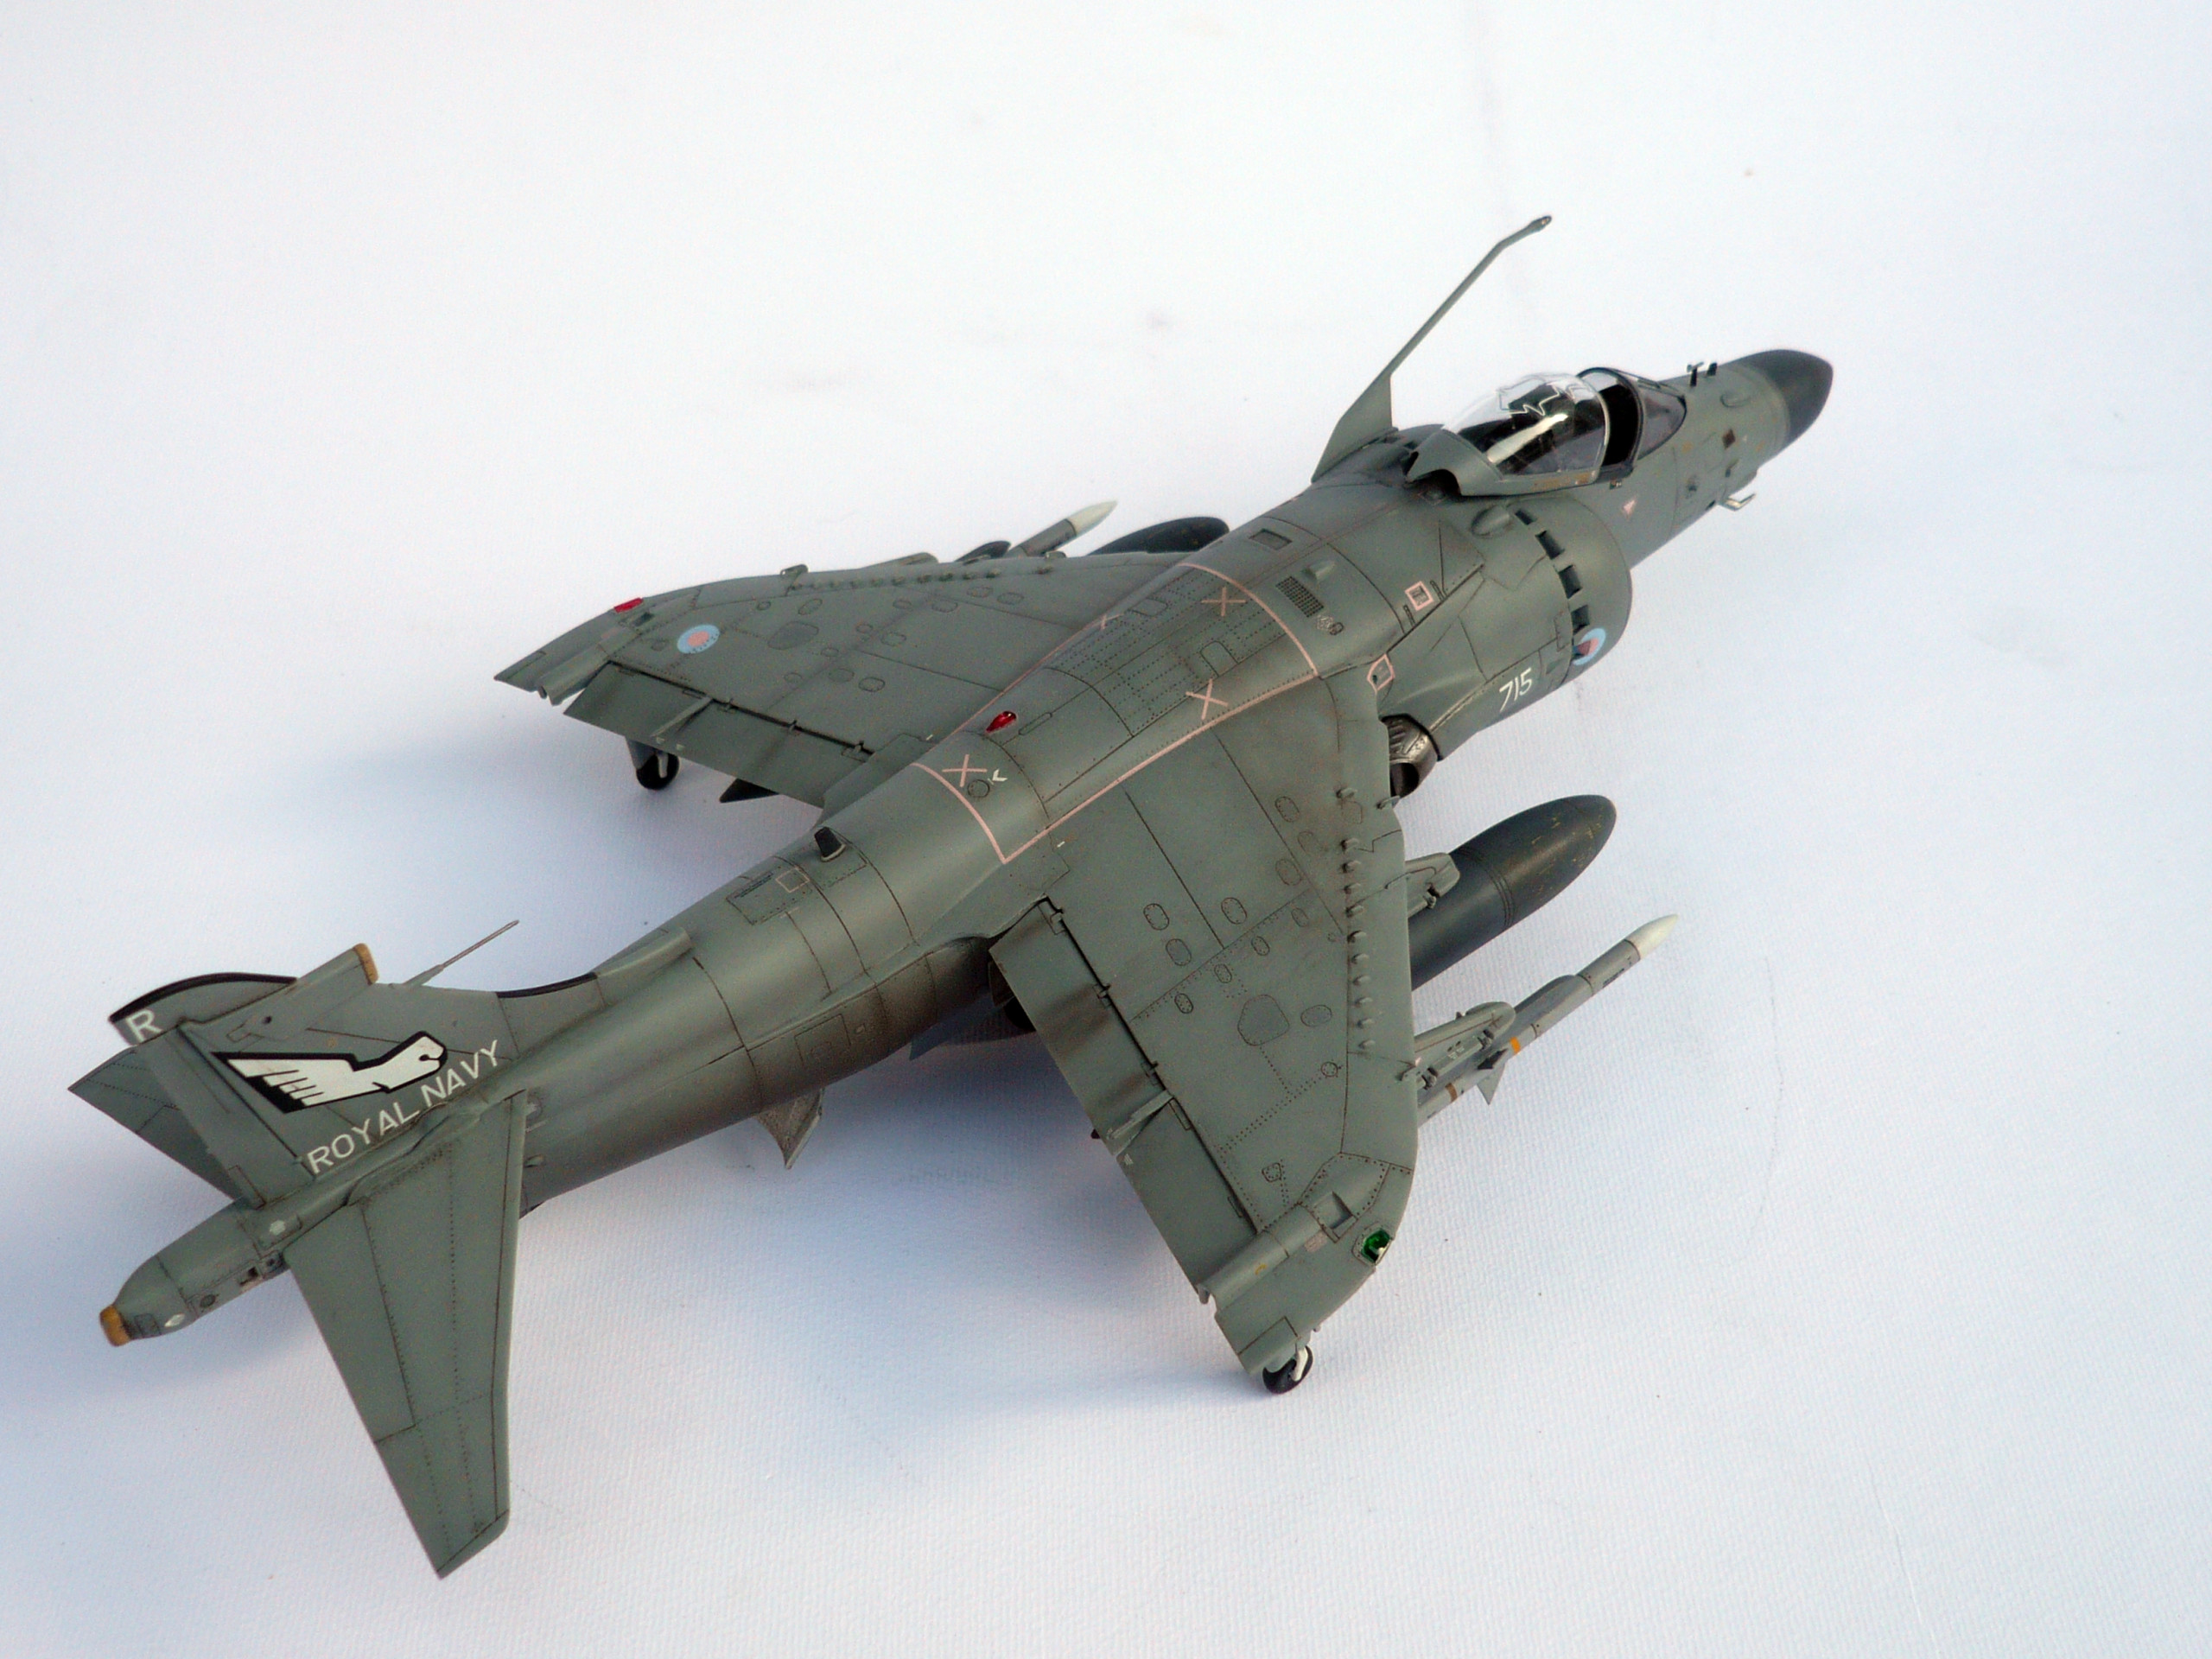
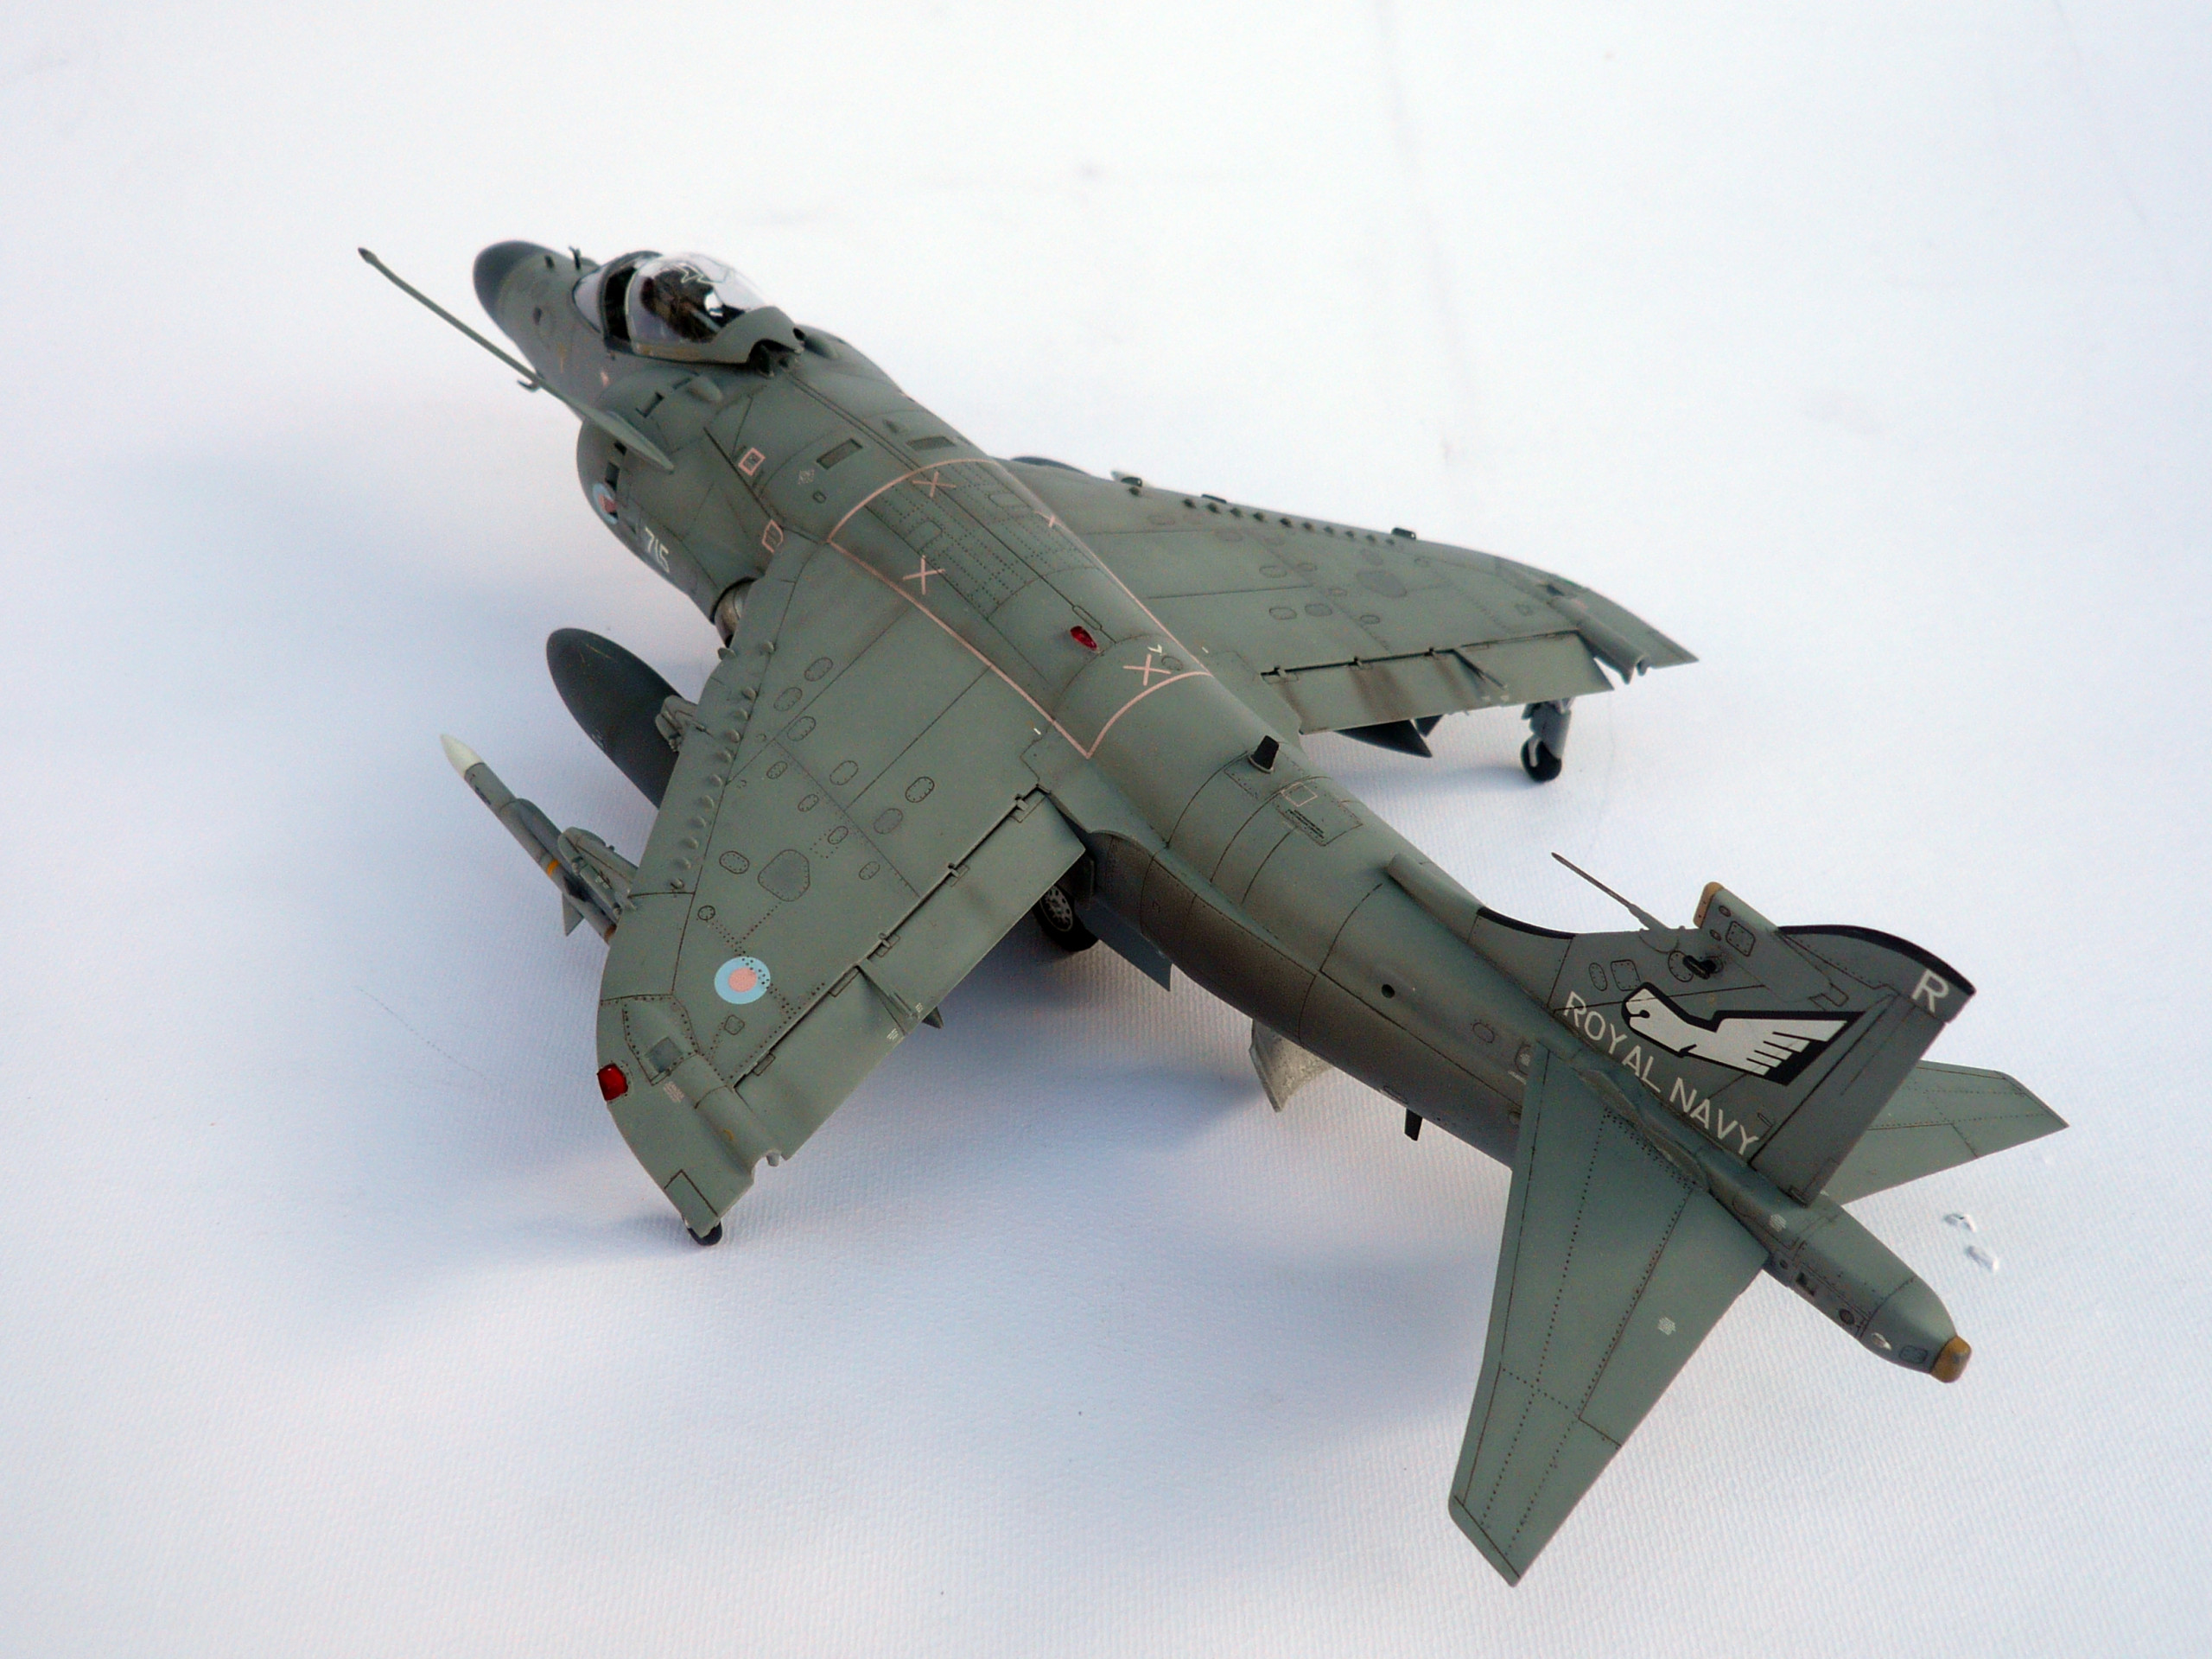
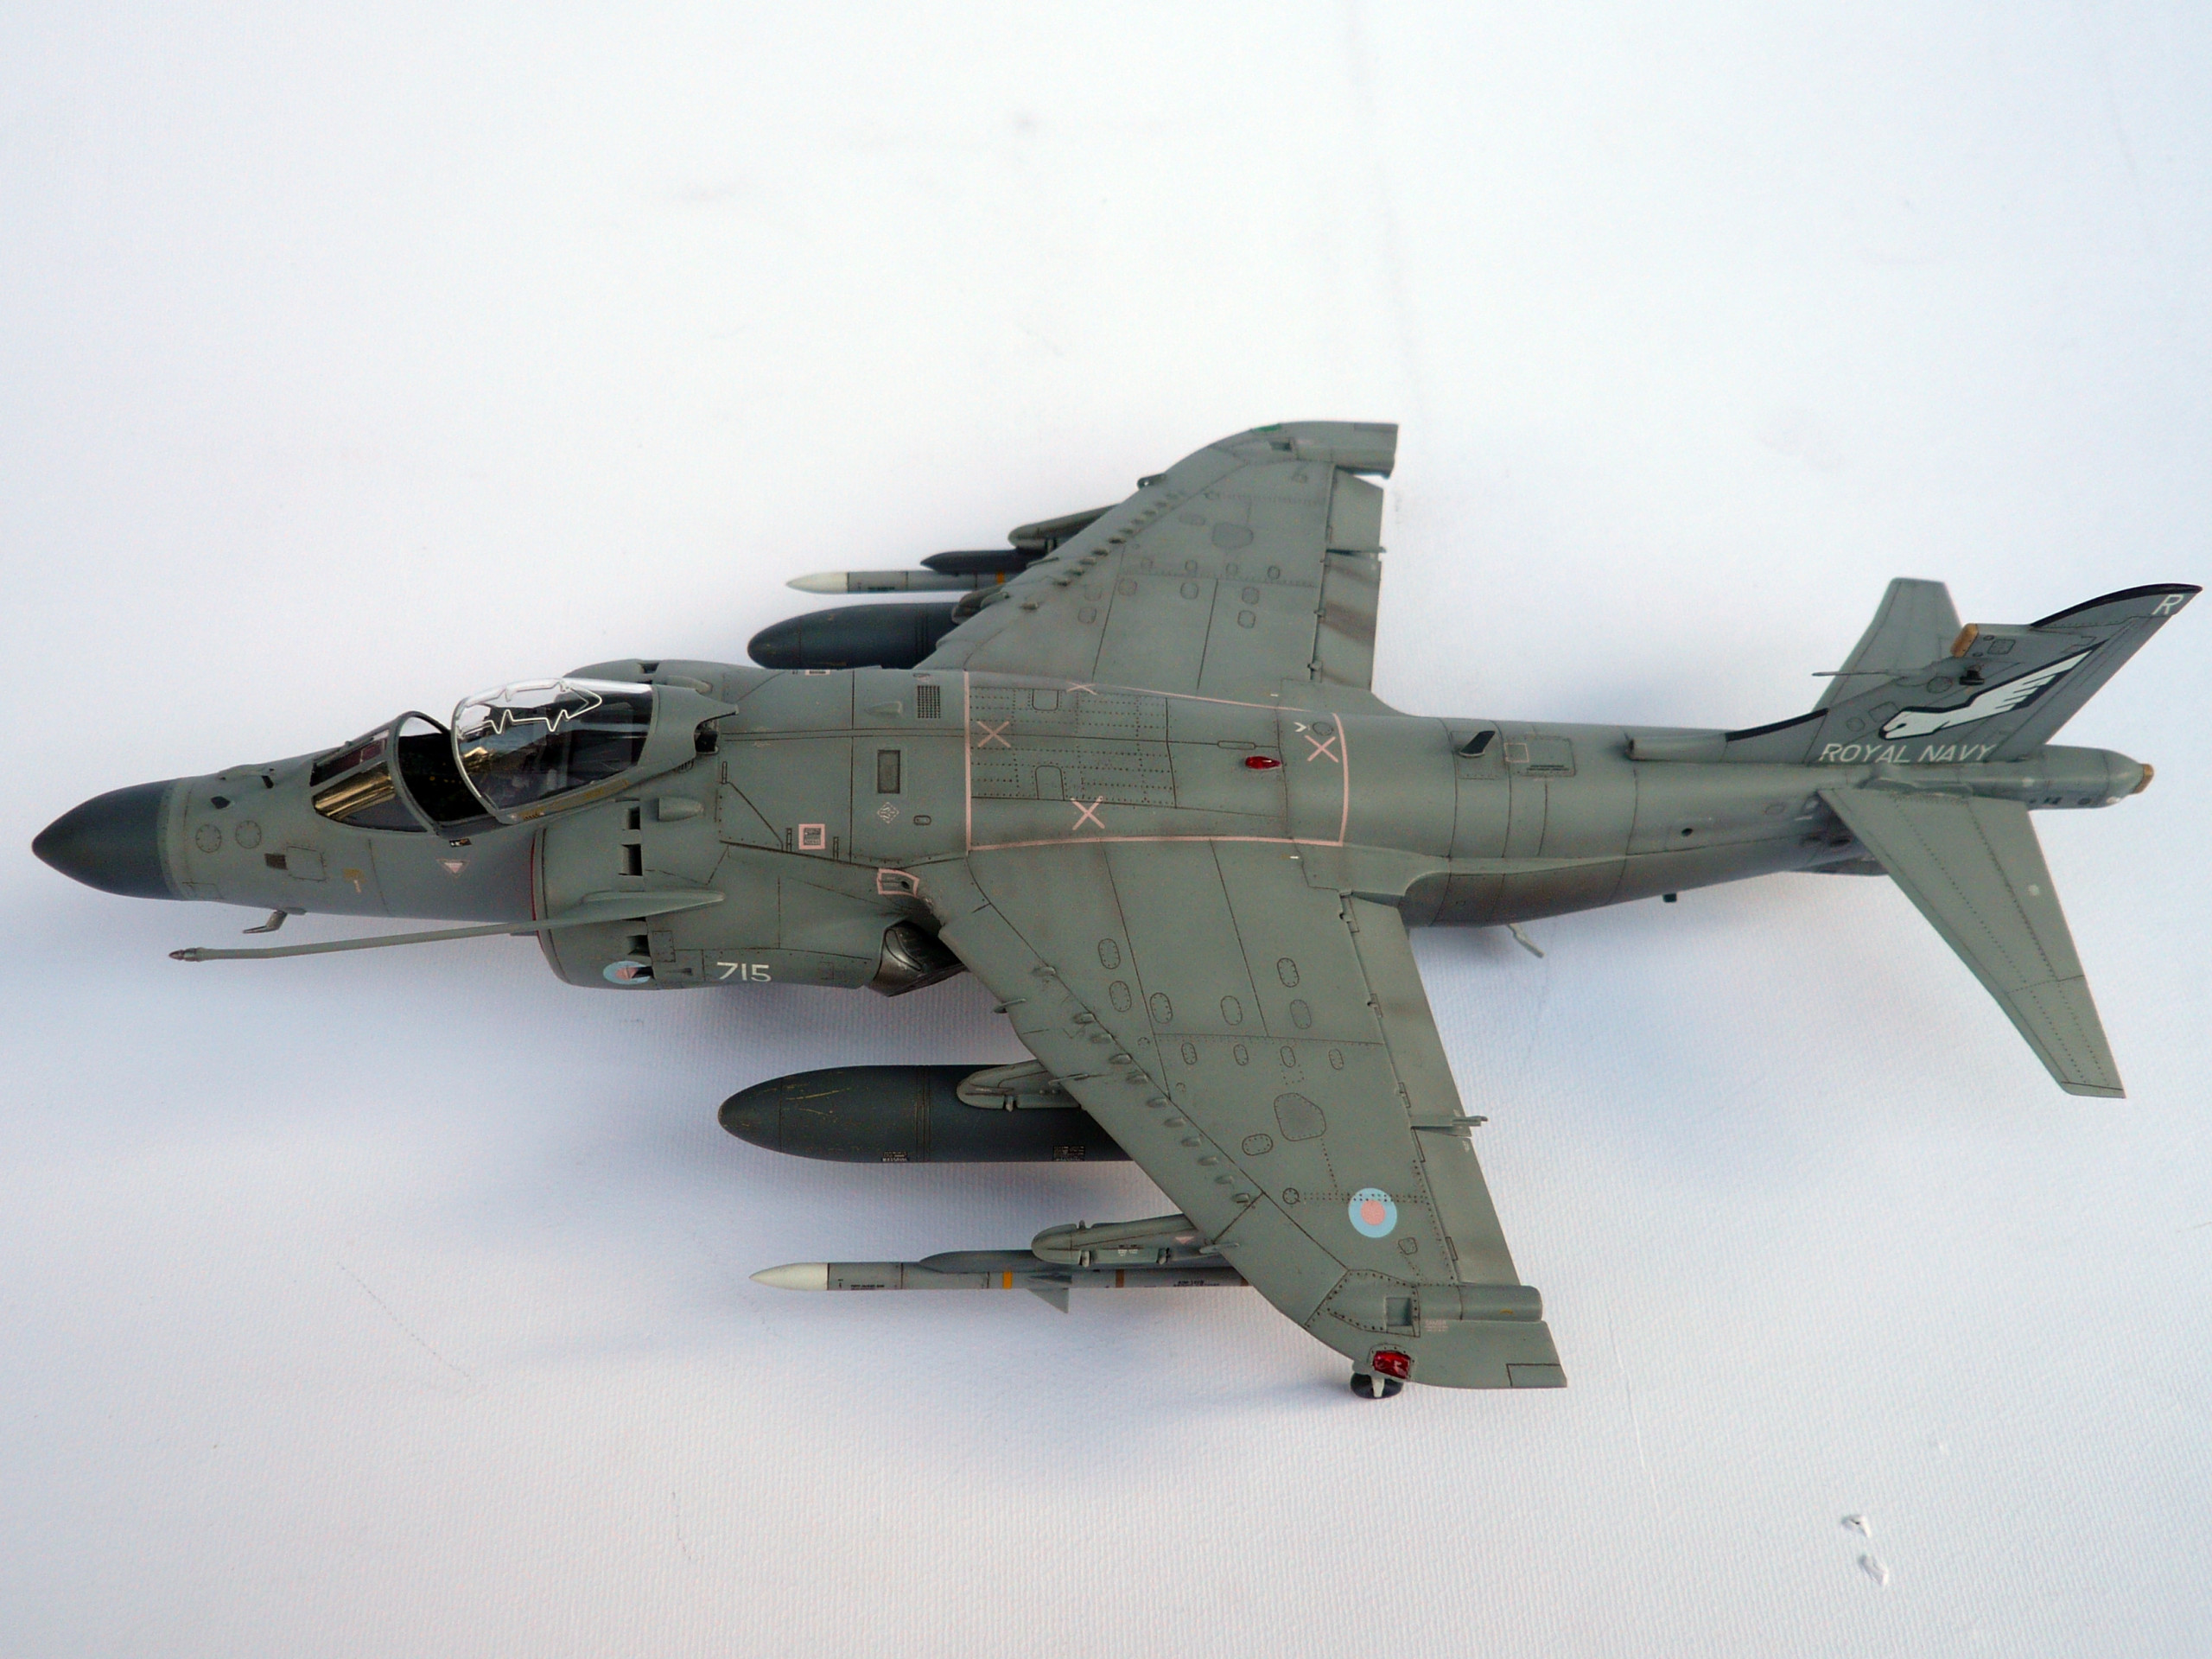
The painting procedure started using the UK aircraft air set from Ammo range. For the nose cone I used a mix of Medium gunship gray (Mig 204) and white (Mig 050) in a ratio 90/10. Some color tone corrections made by adding some drops of Mig 046 matt black. For the rest of the fuselage I used a mix of Mig 205 and Mig 050 in a ratio 95/5 and some small touch ups with Mig 207. The various shades and highlights came from using the basic color with some drops of matt black and matt white (pic.30,31,32,33)
After the paint job finished I gave the whole model 3 coats of clear gloss varnish from Ammo range (pic.37,38)
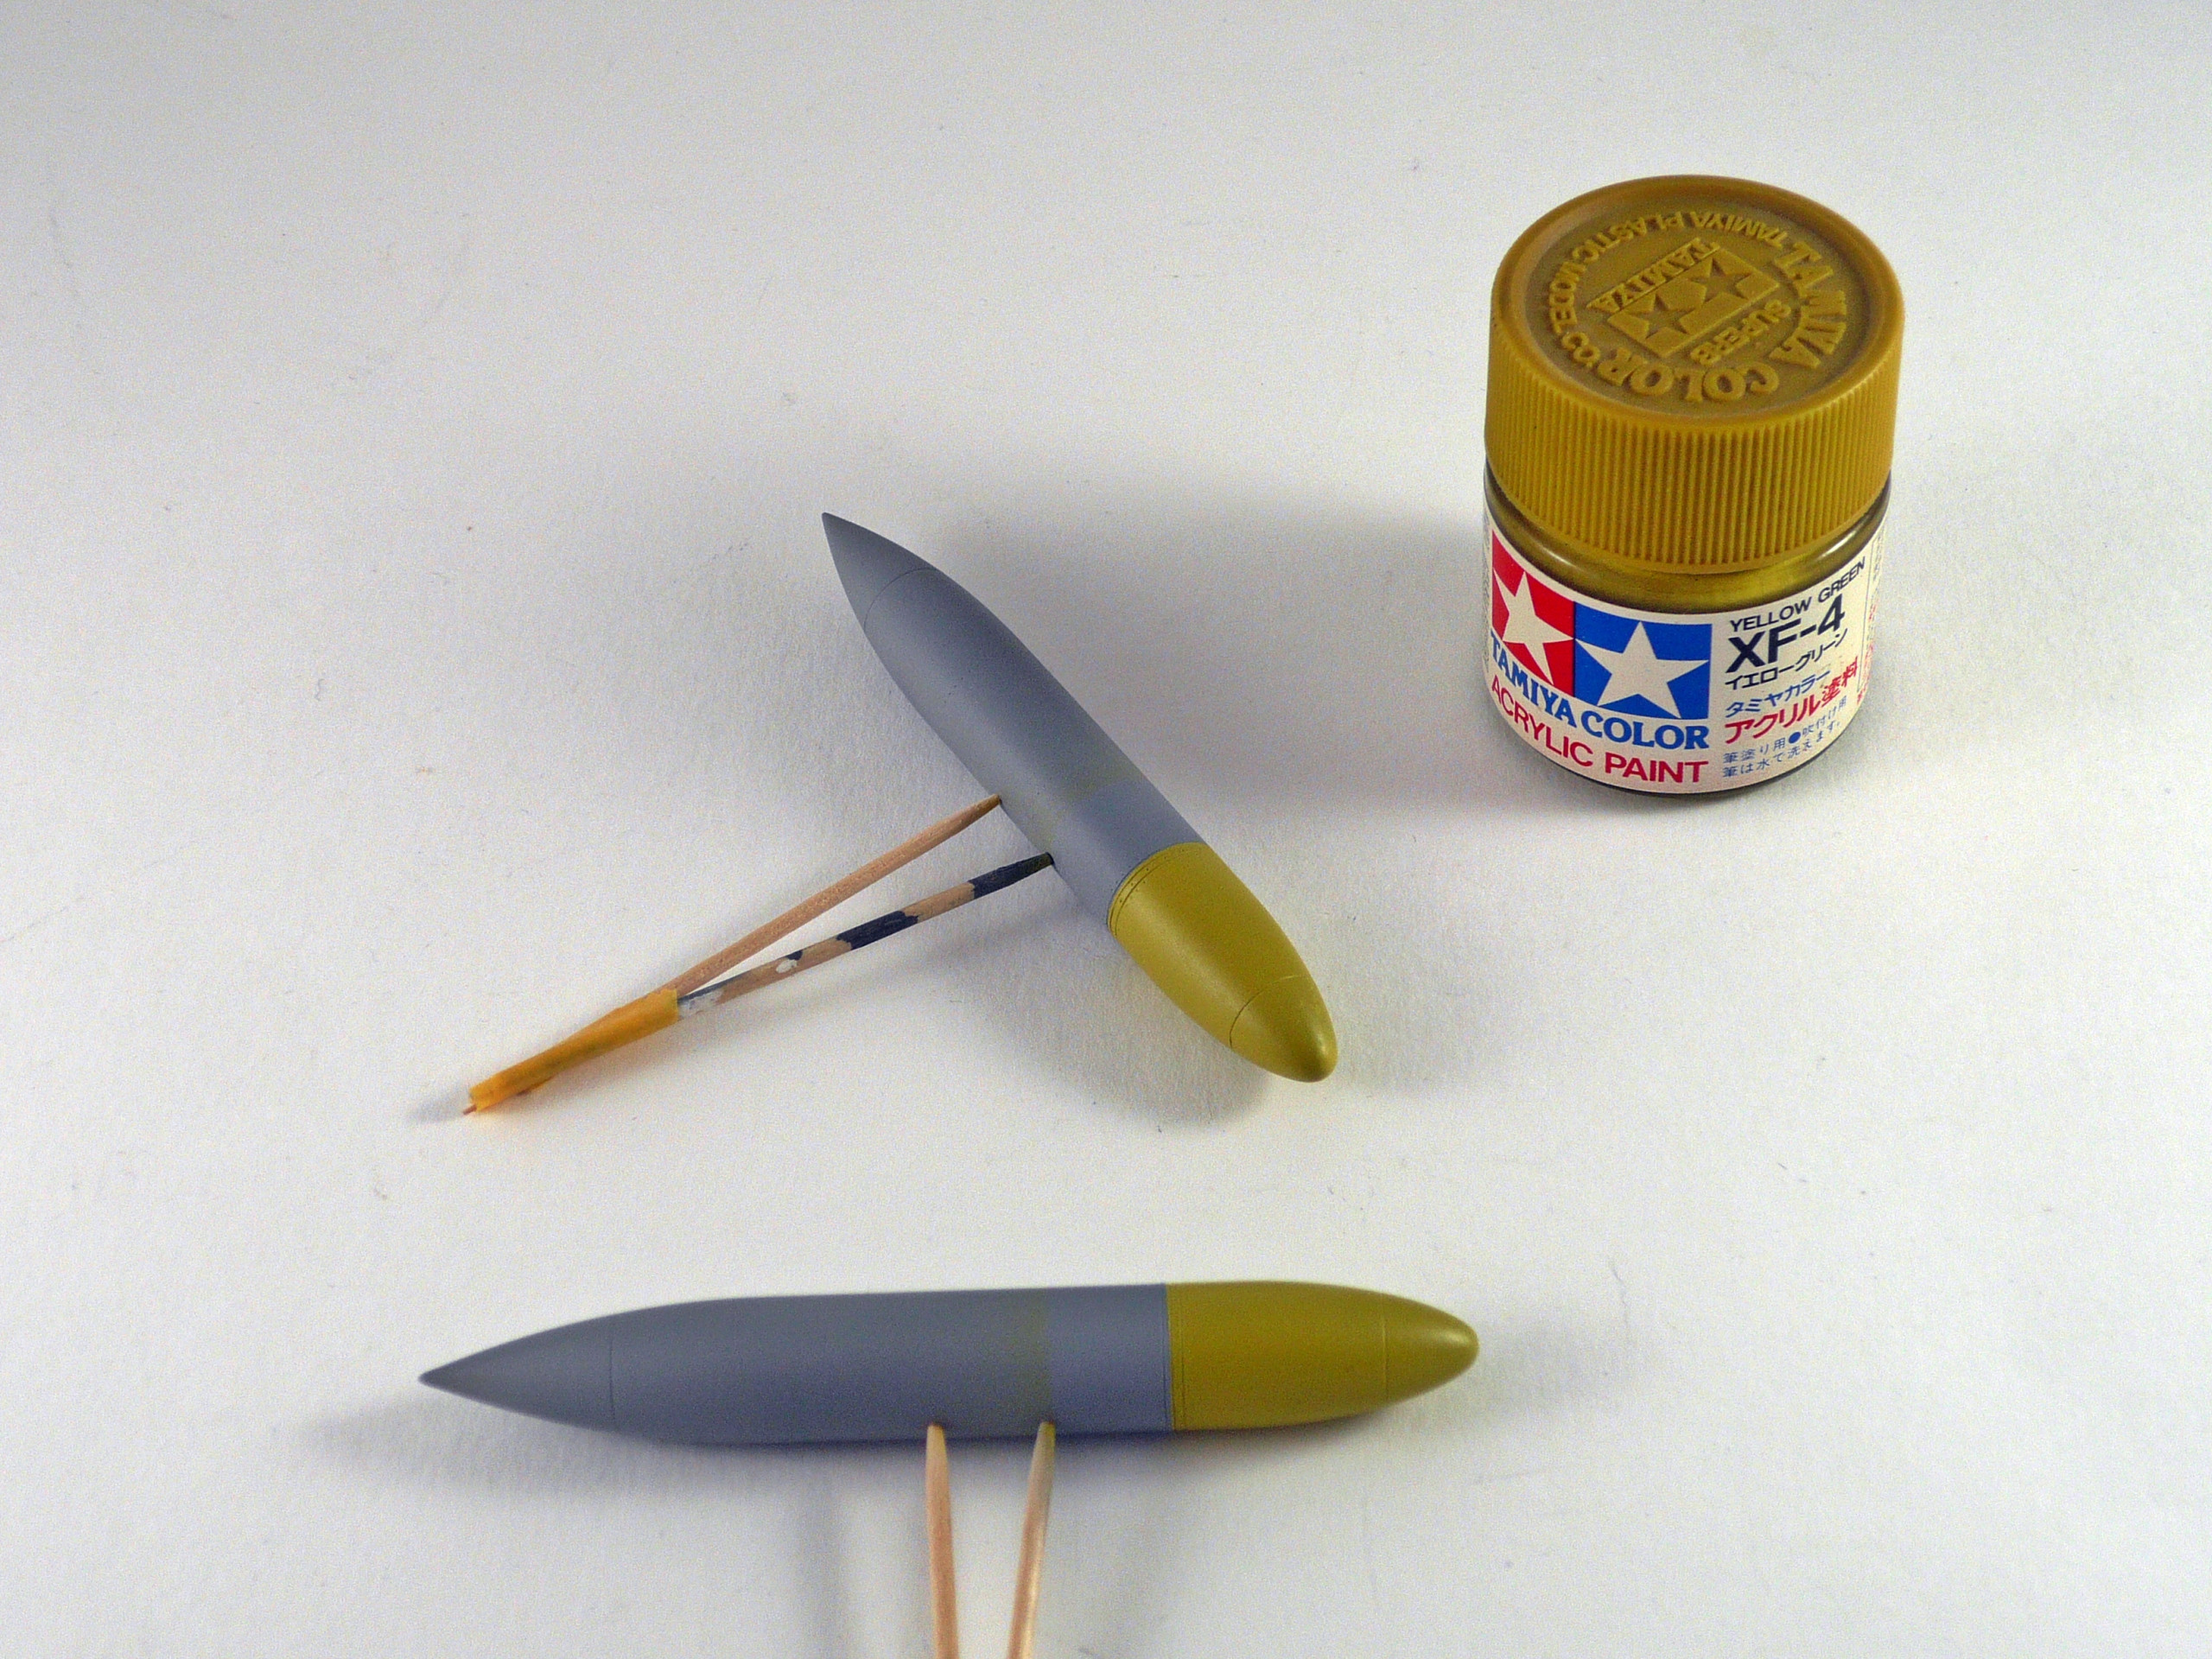
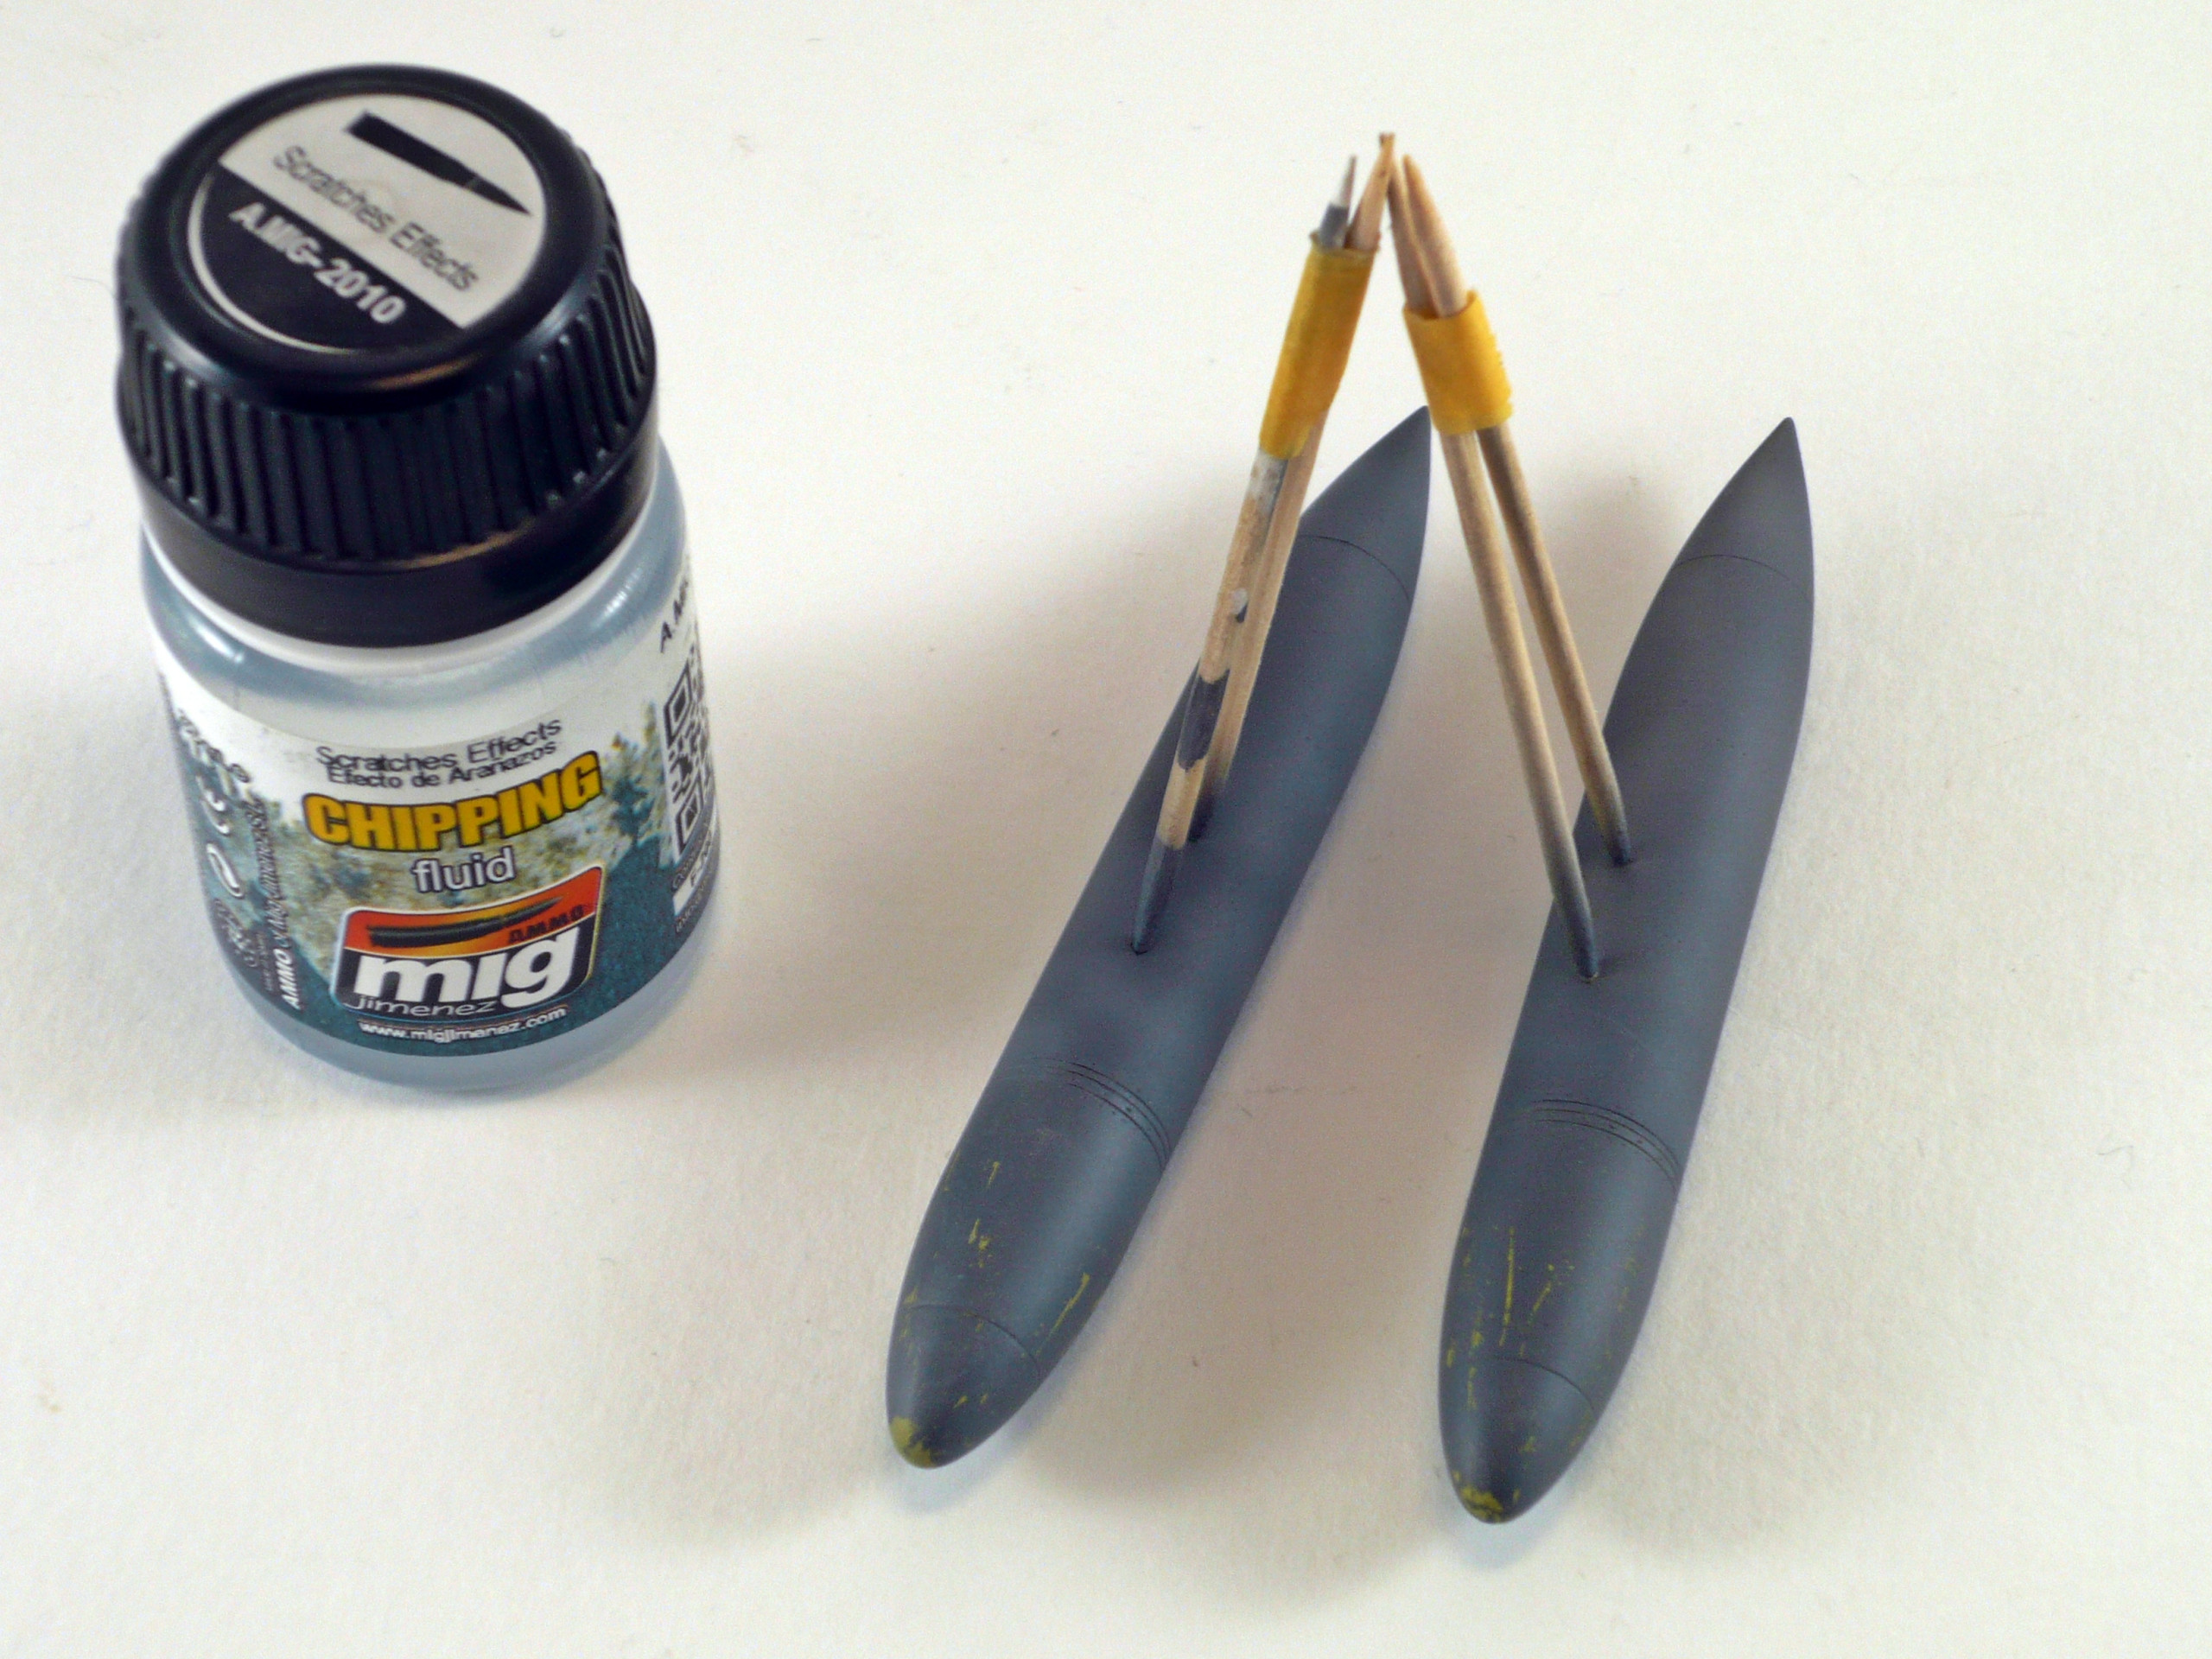
Fuel tanks painted with the same mix of colors used in the radome and the front section painted with Tamiya’s XF-4. The chipping effect done using Ammo’s Chipping fluid for scratches effect (pic.34,35,36)
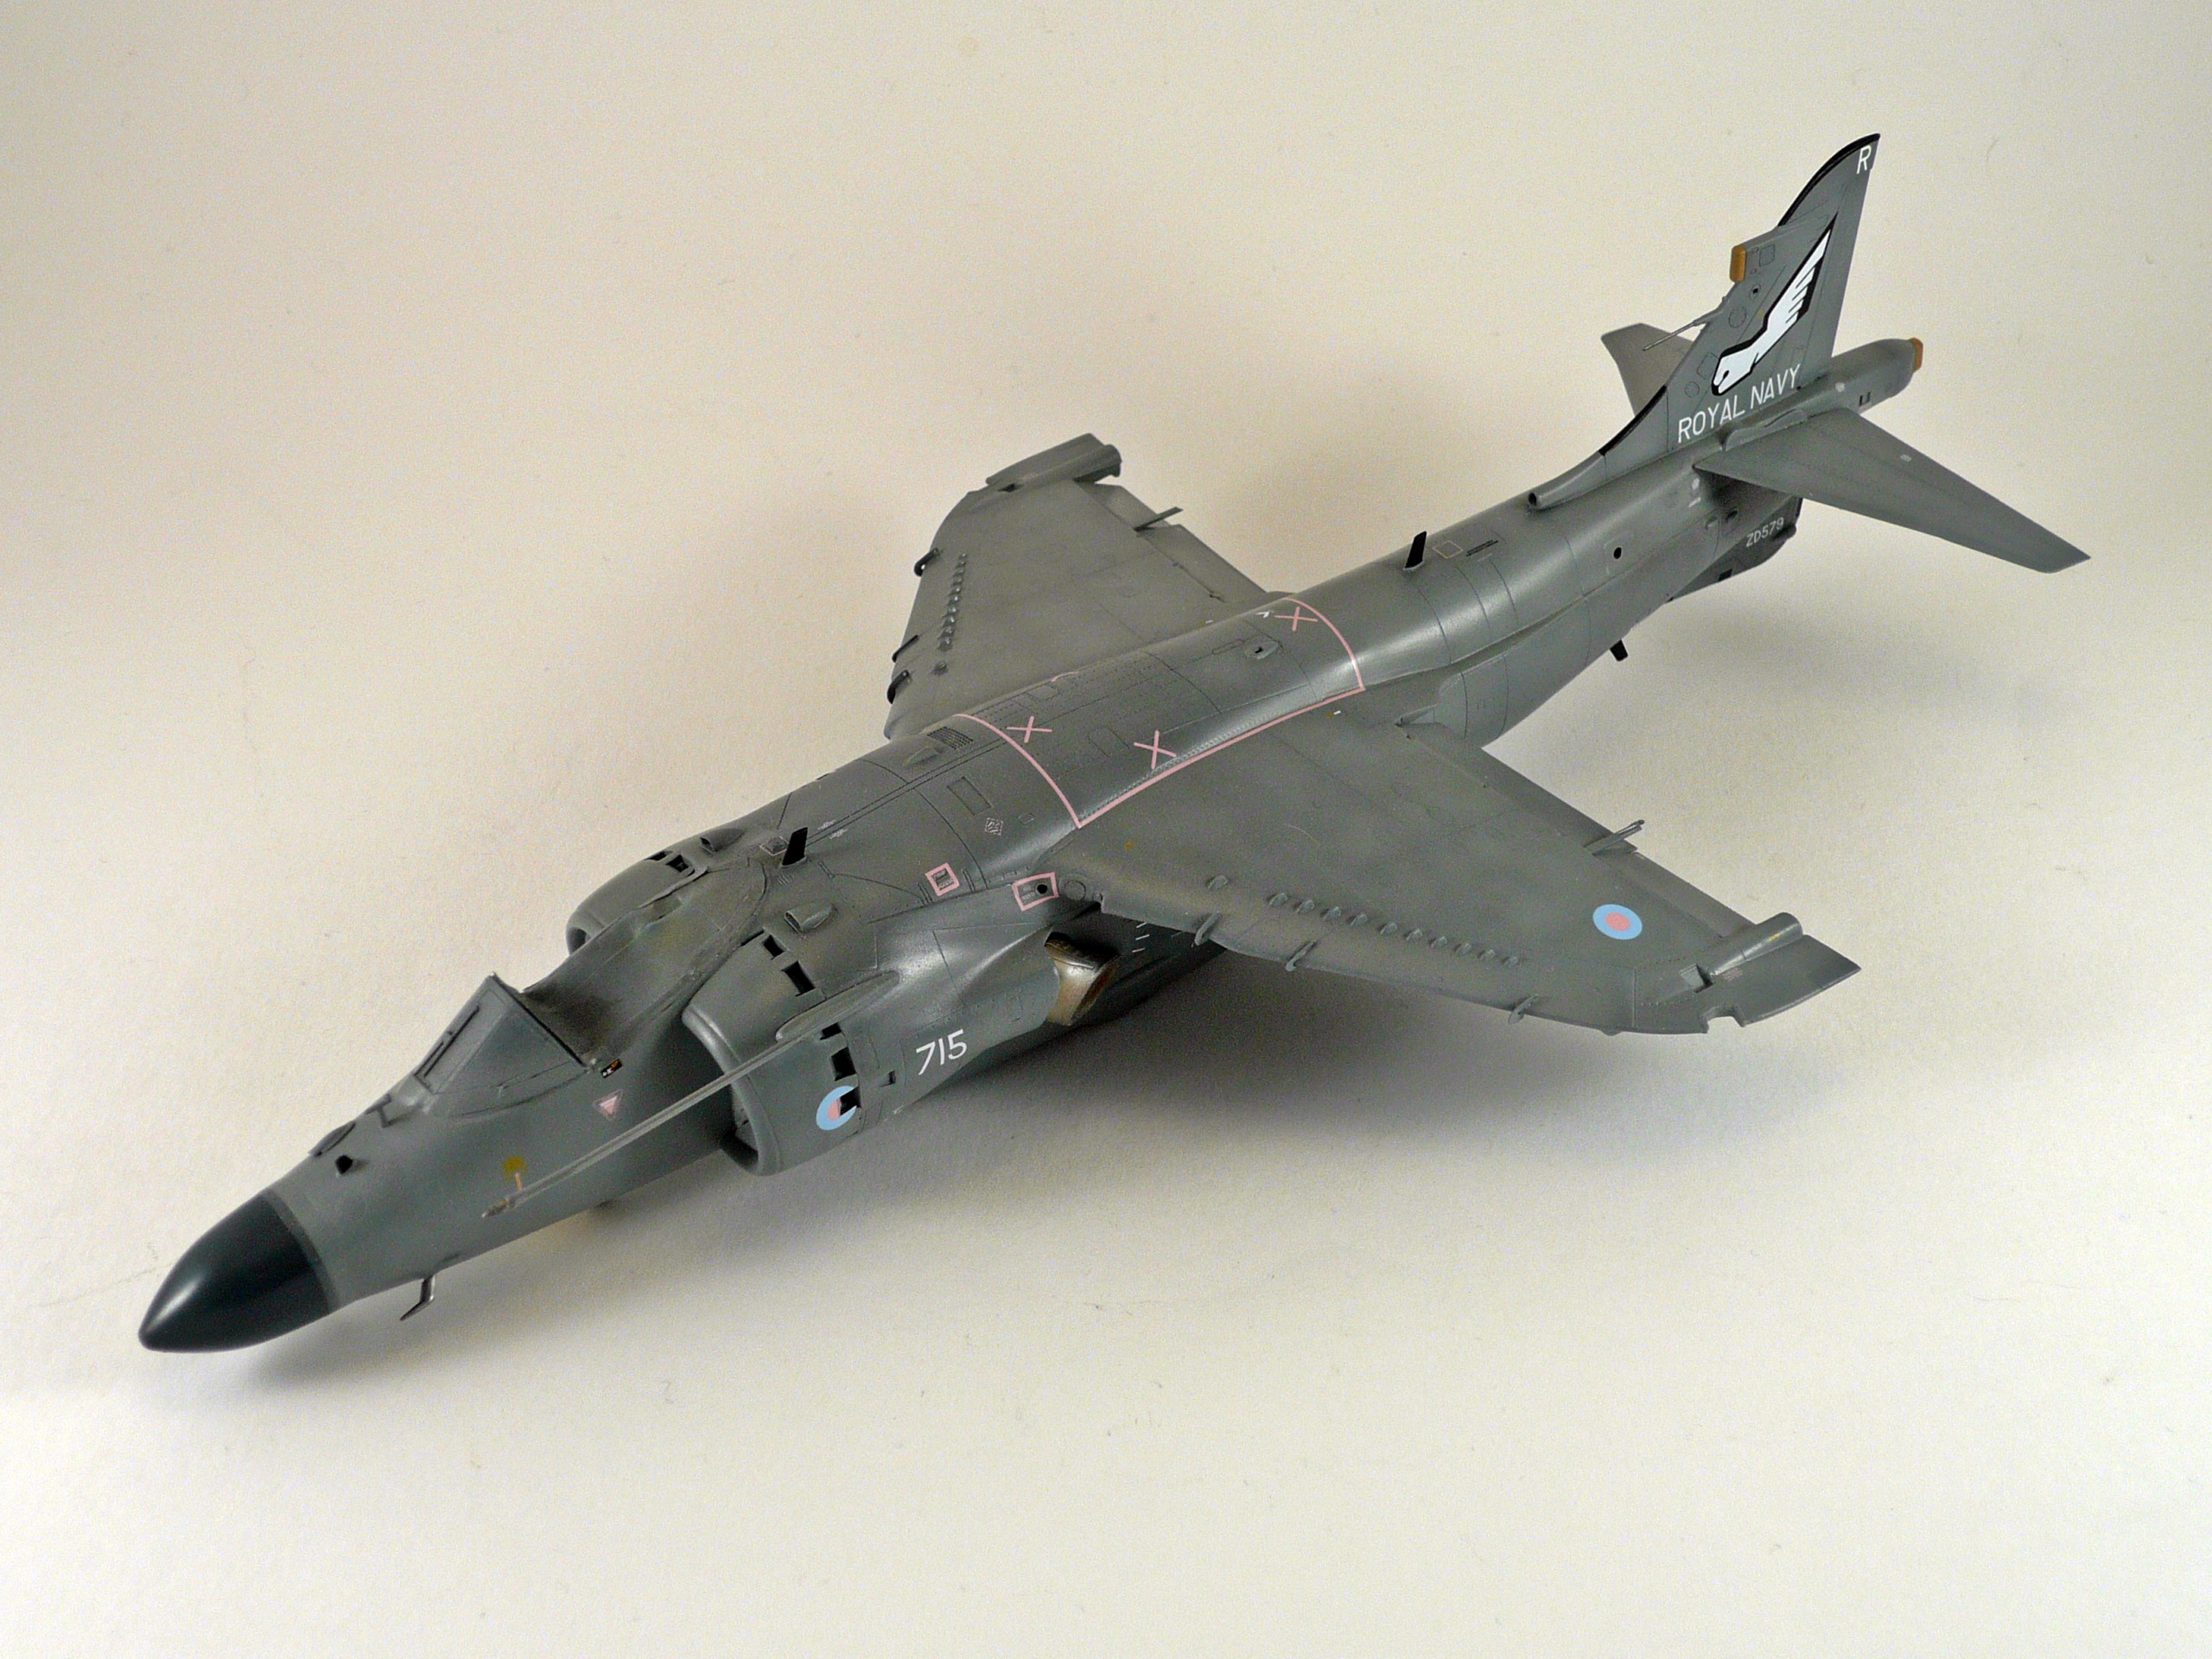
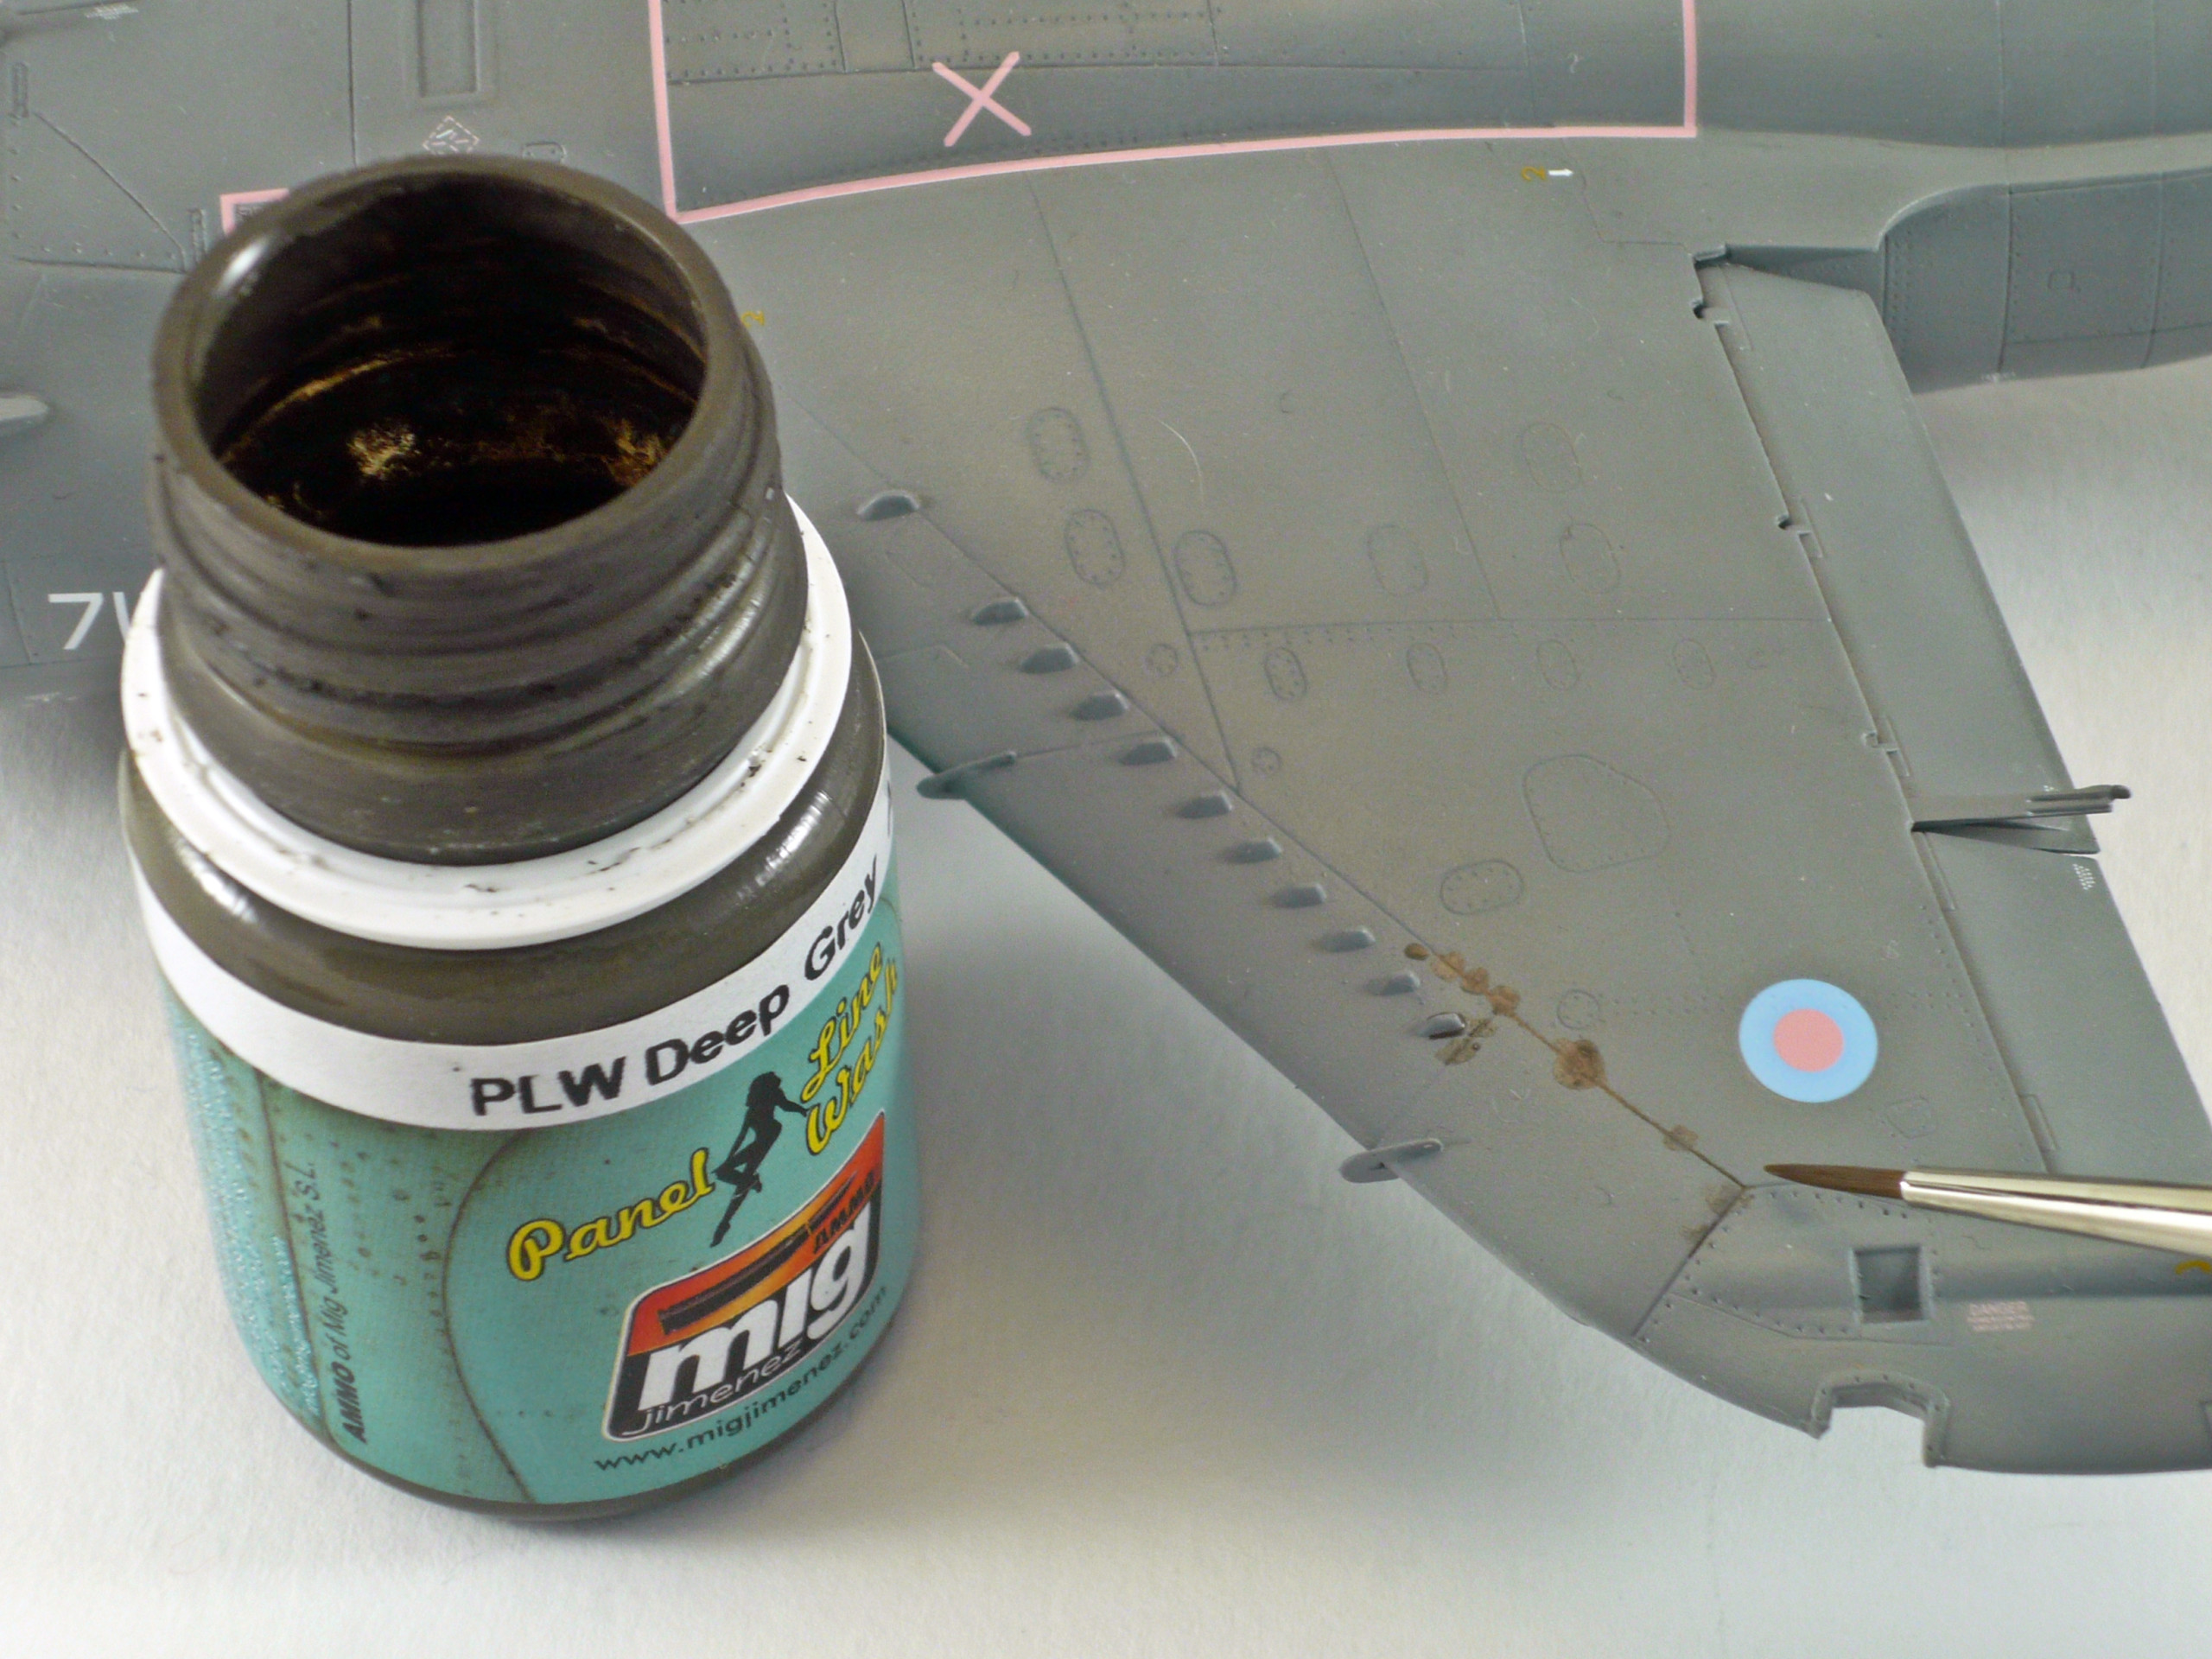
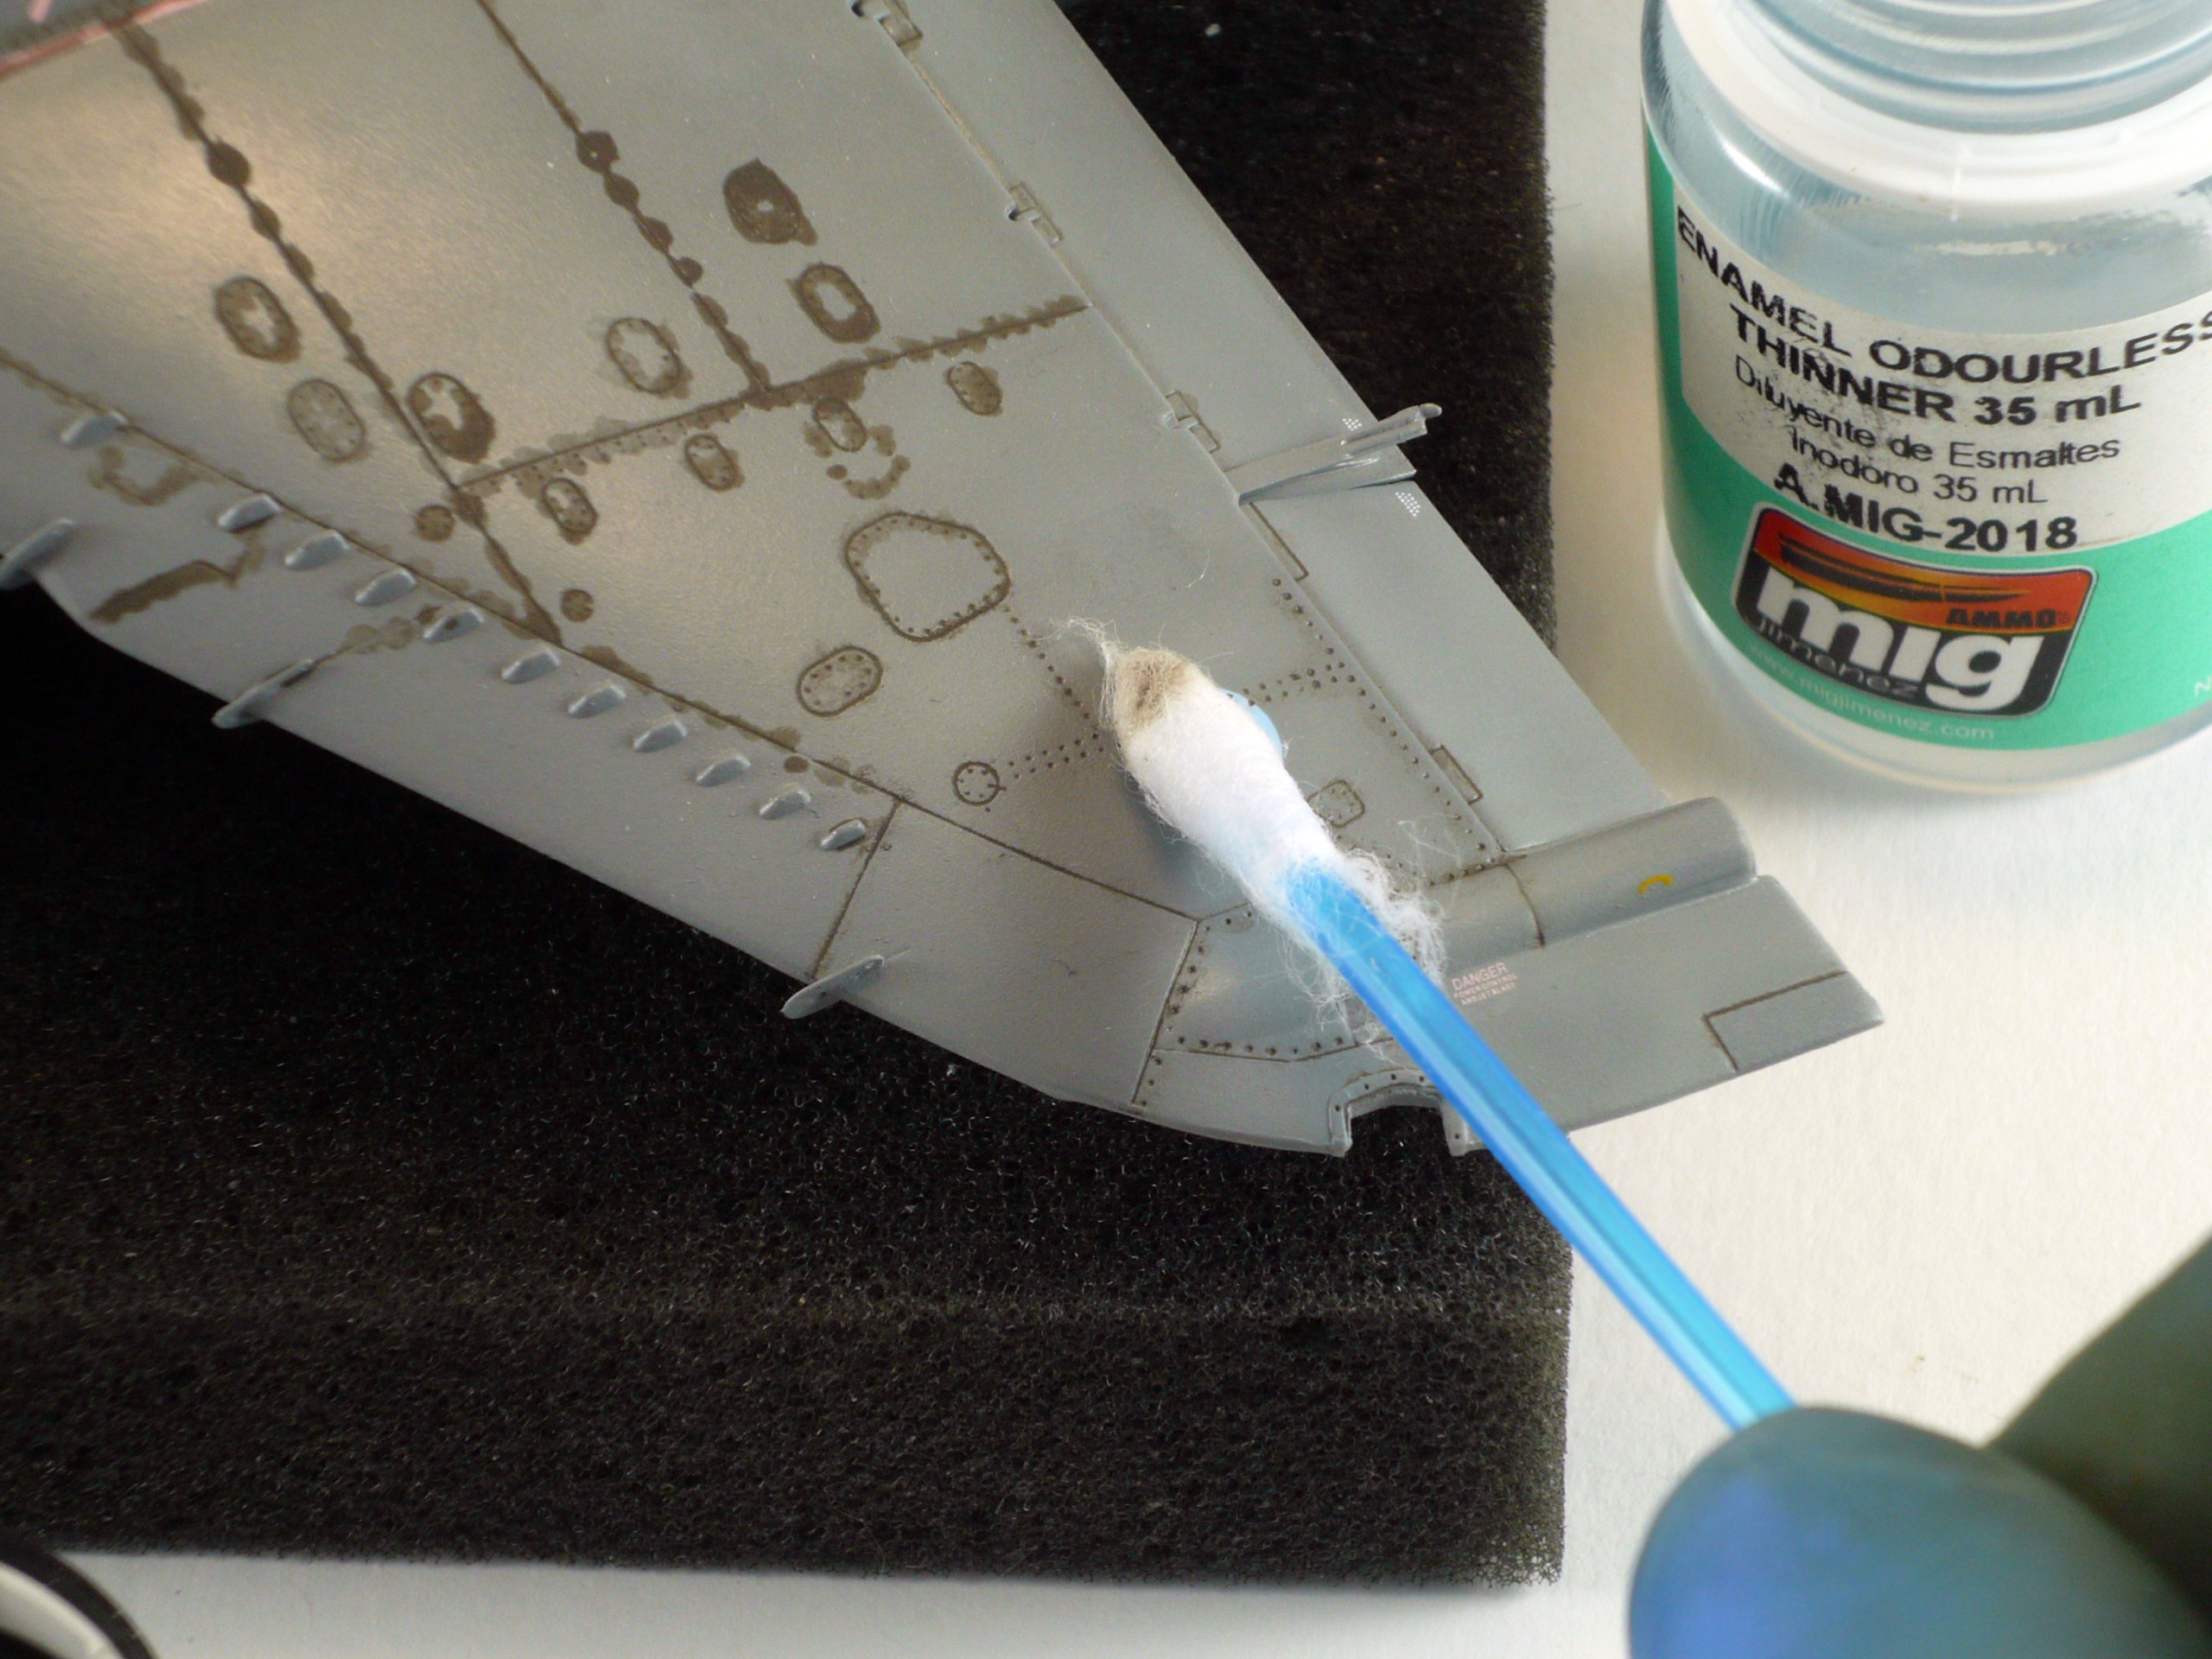
After placing decals to the whole model, weathering stage started using PLW Deep Gray (1602). Give it 2 hours to dry and then remove the excess with a cotton bud and some thinners help (pic.39,40,41,42)
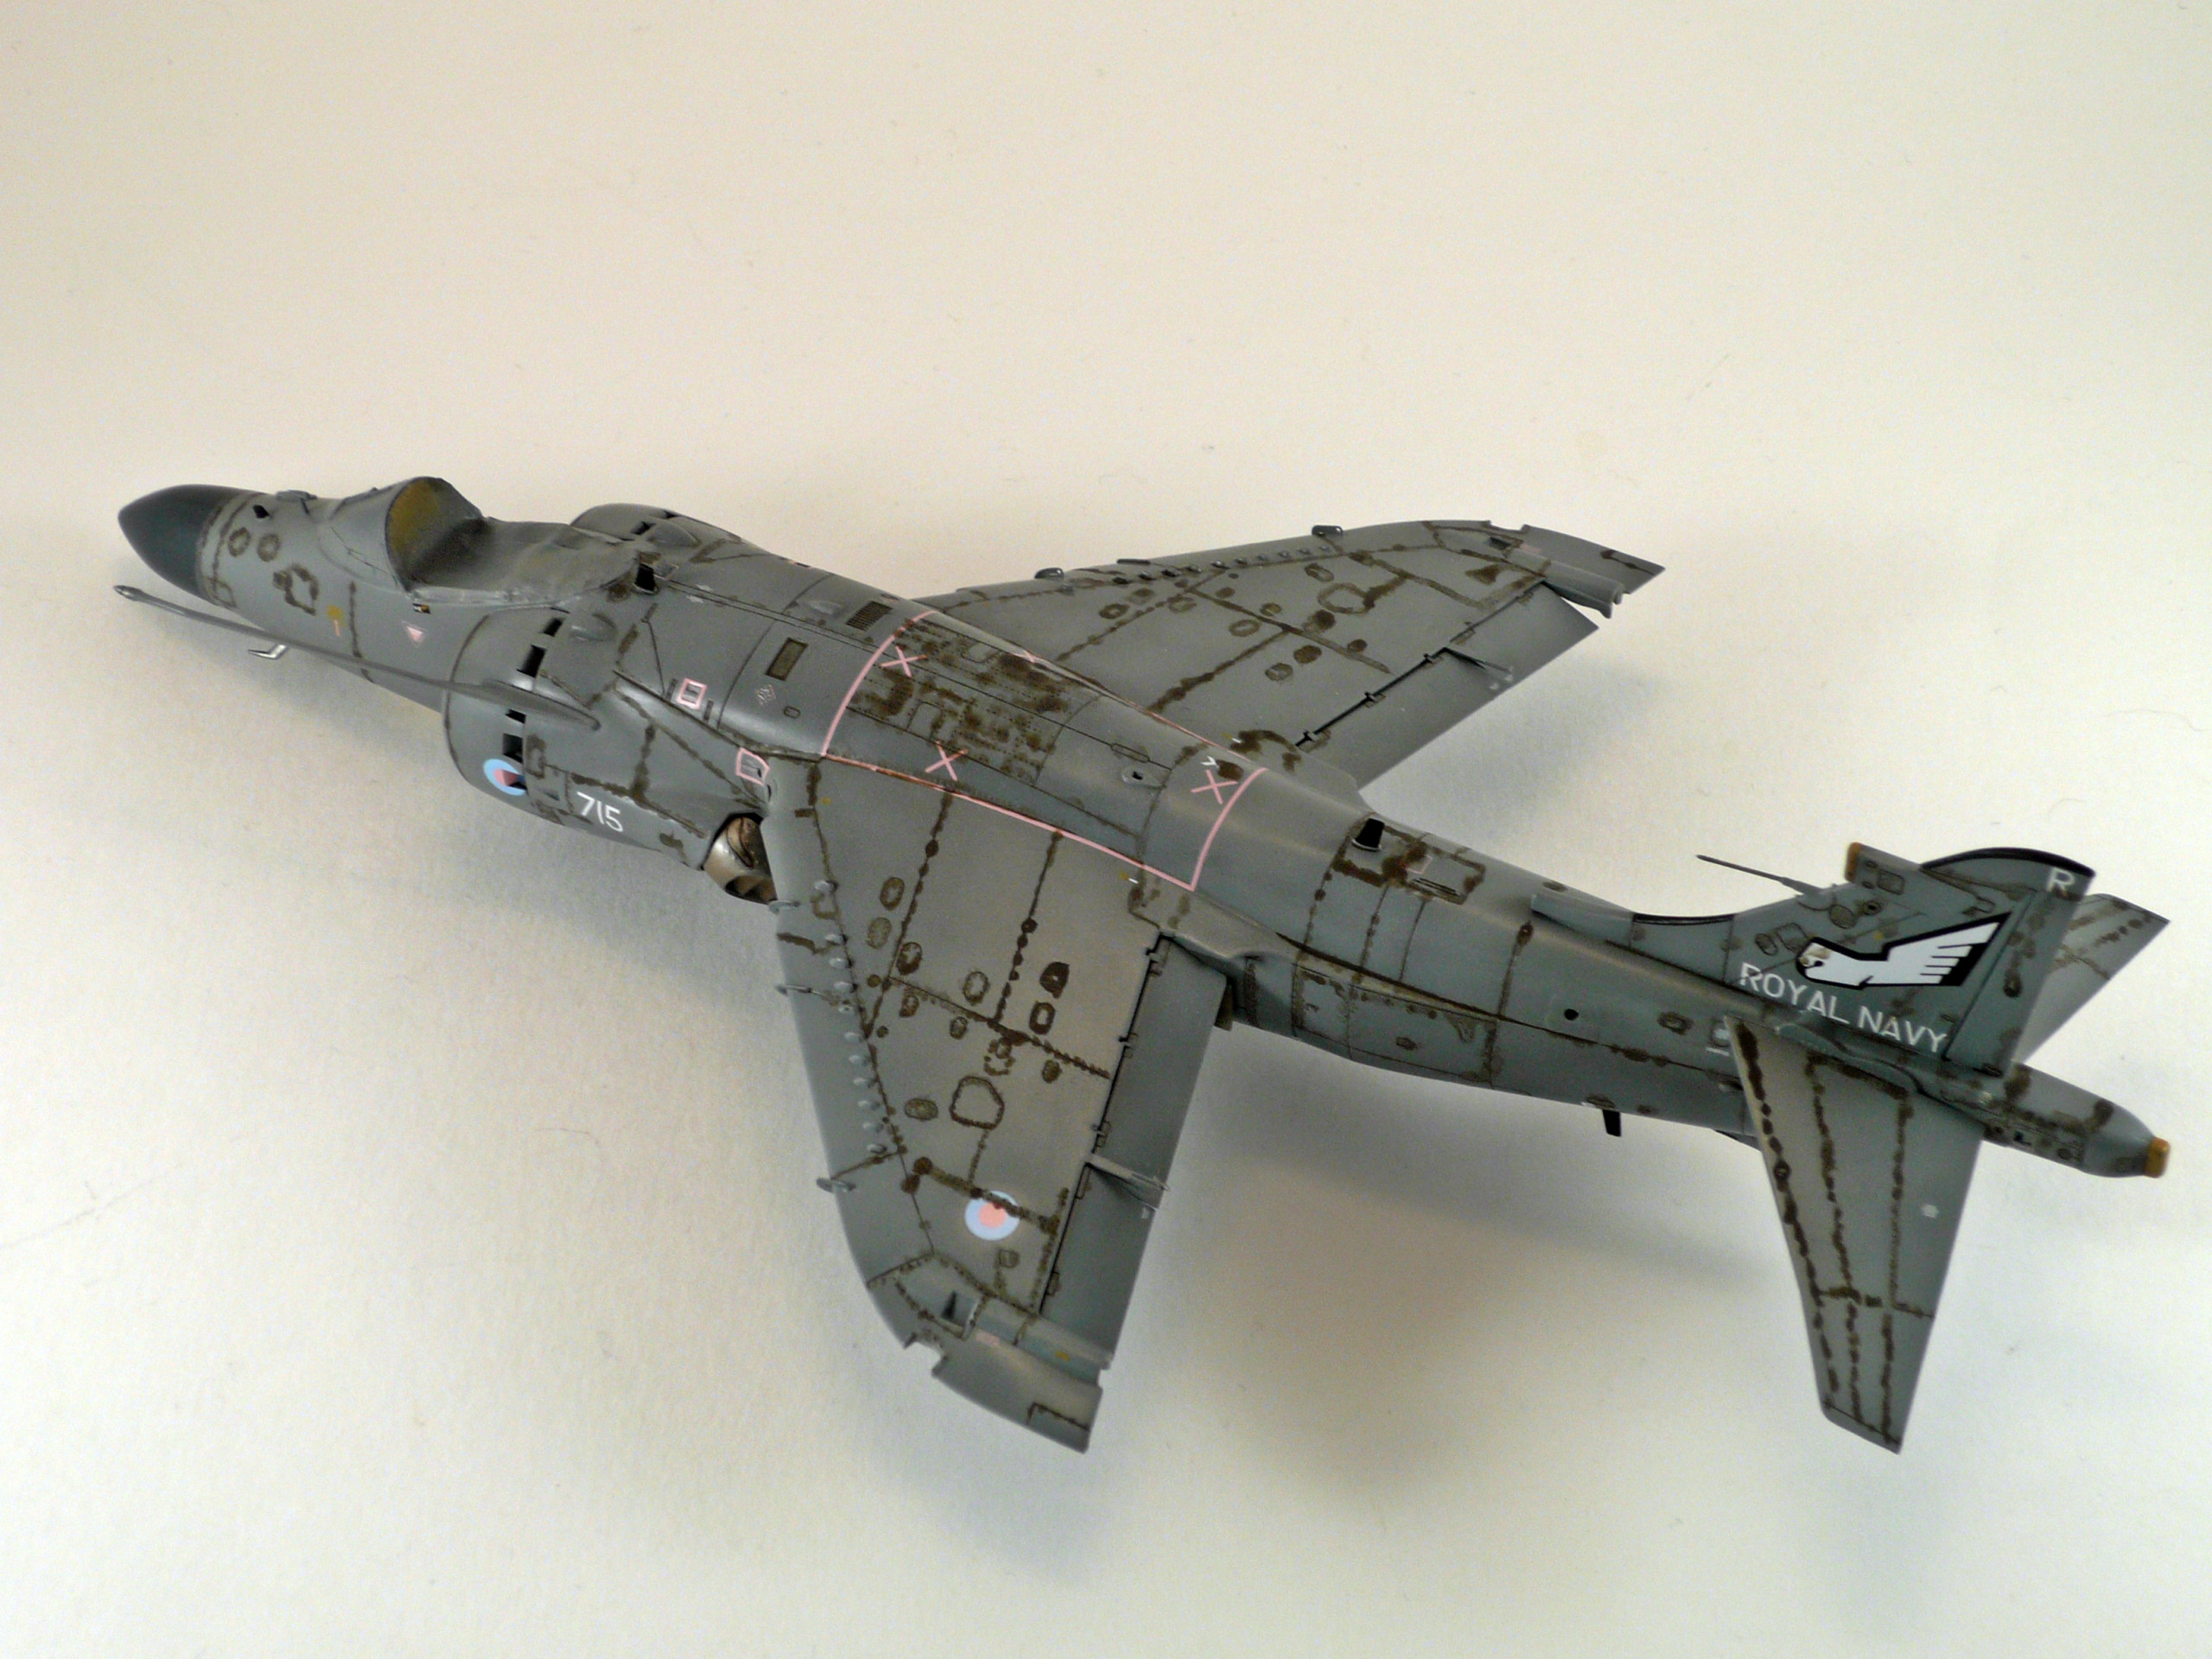
This time streaks and engine grime (darken area on the fuselage sides and engines/plates) made by airbrush and I used for that a very diluted mix of Gunze matt black and a brownish color (H-310) in a ratio 20/80.
With the same mix a made that strange weathered look Harrier’s have on the top of the fuselage and wing roots.
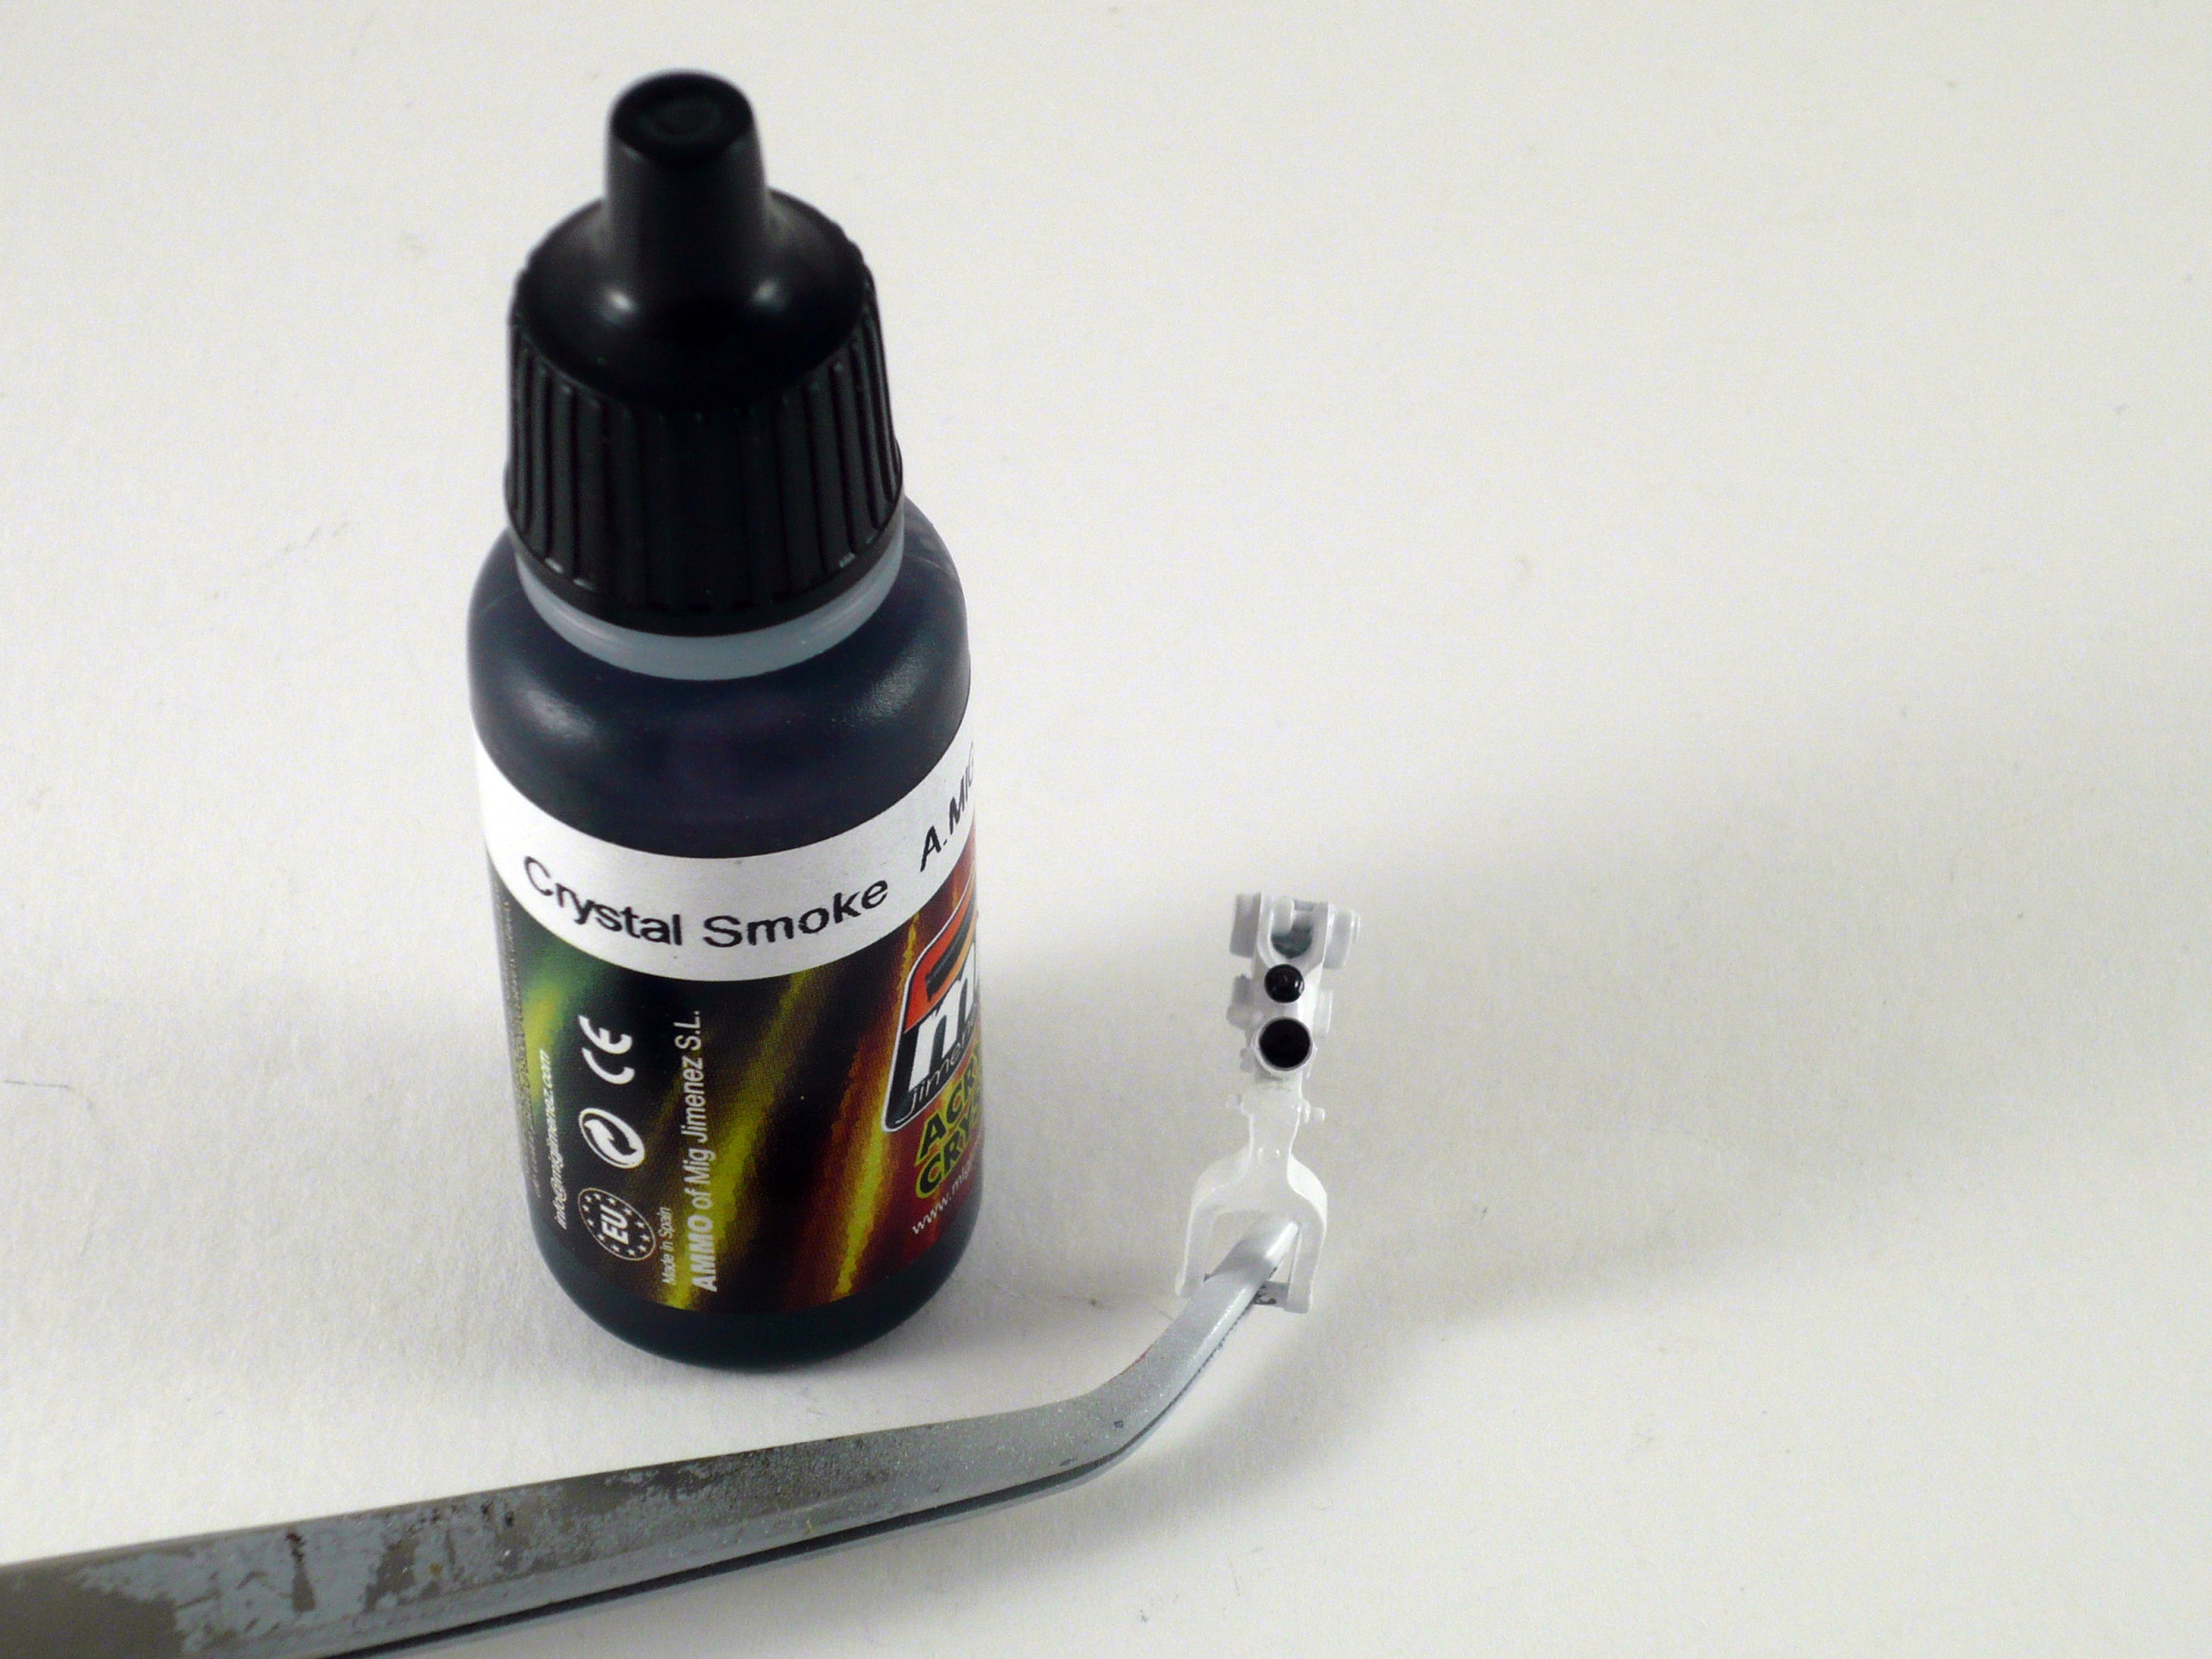
For the front wheel lights I used Ammo’s crystal smoke color to give the effect of the dark glass (pic.43)
Finally I sprayed the model with matt varnish from Ammo. Give it at least 4-6 hours to dry before touching it.
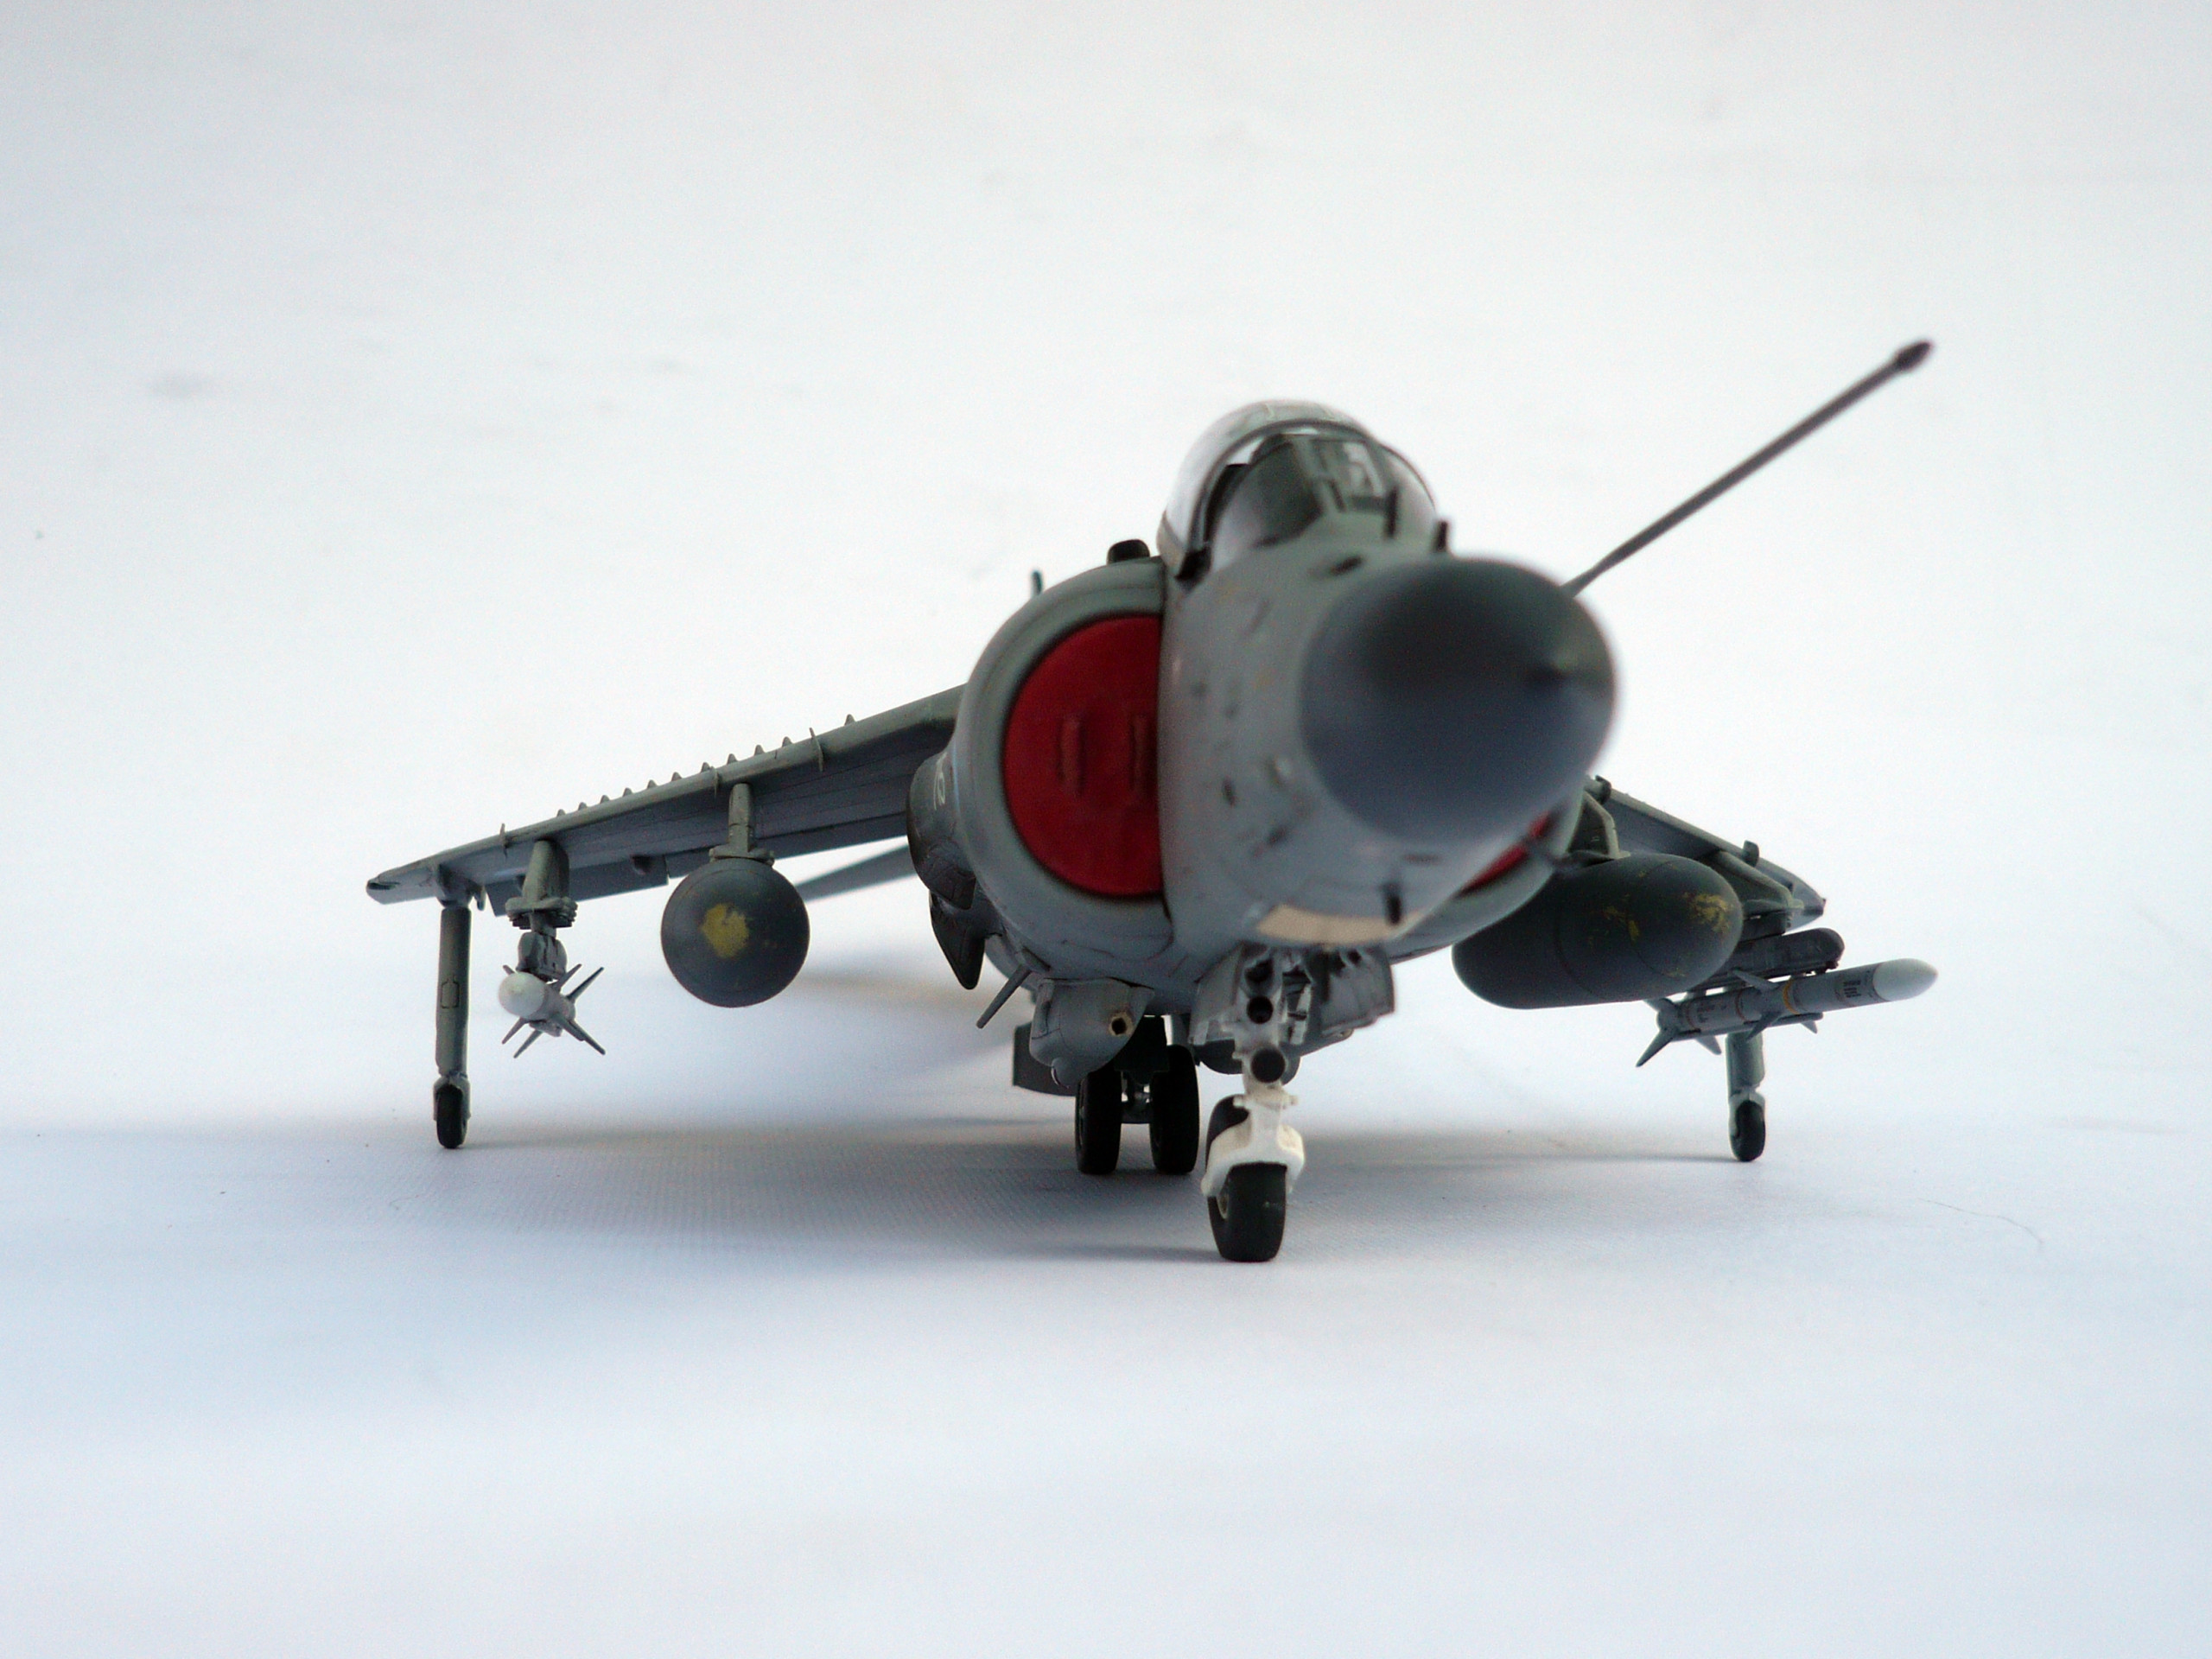
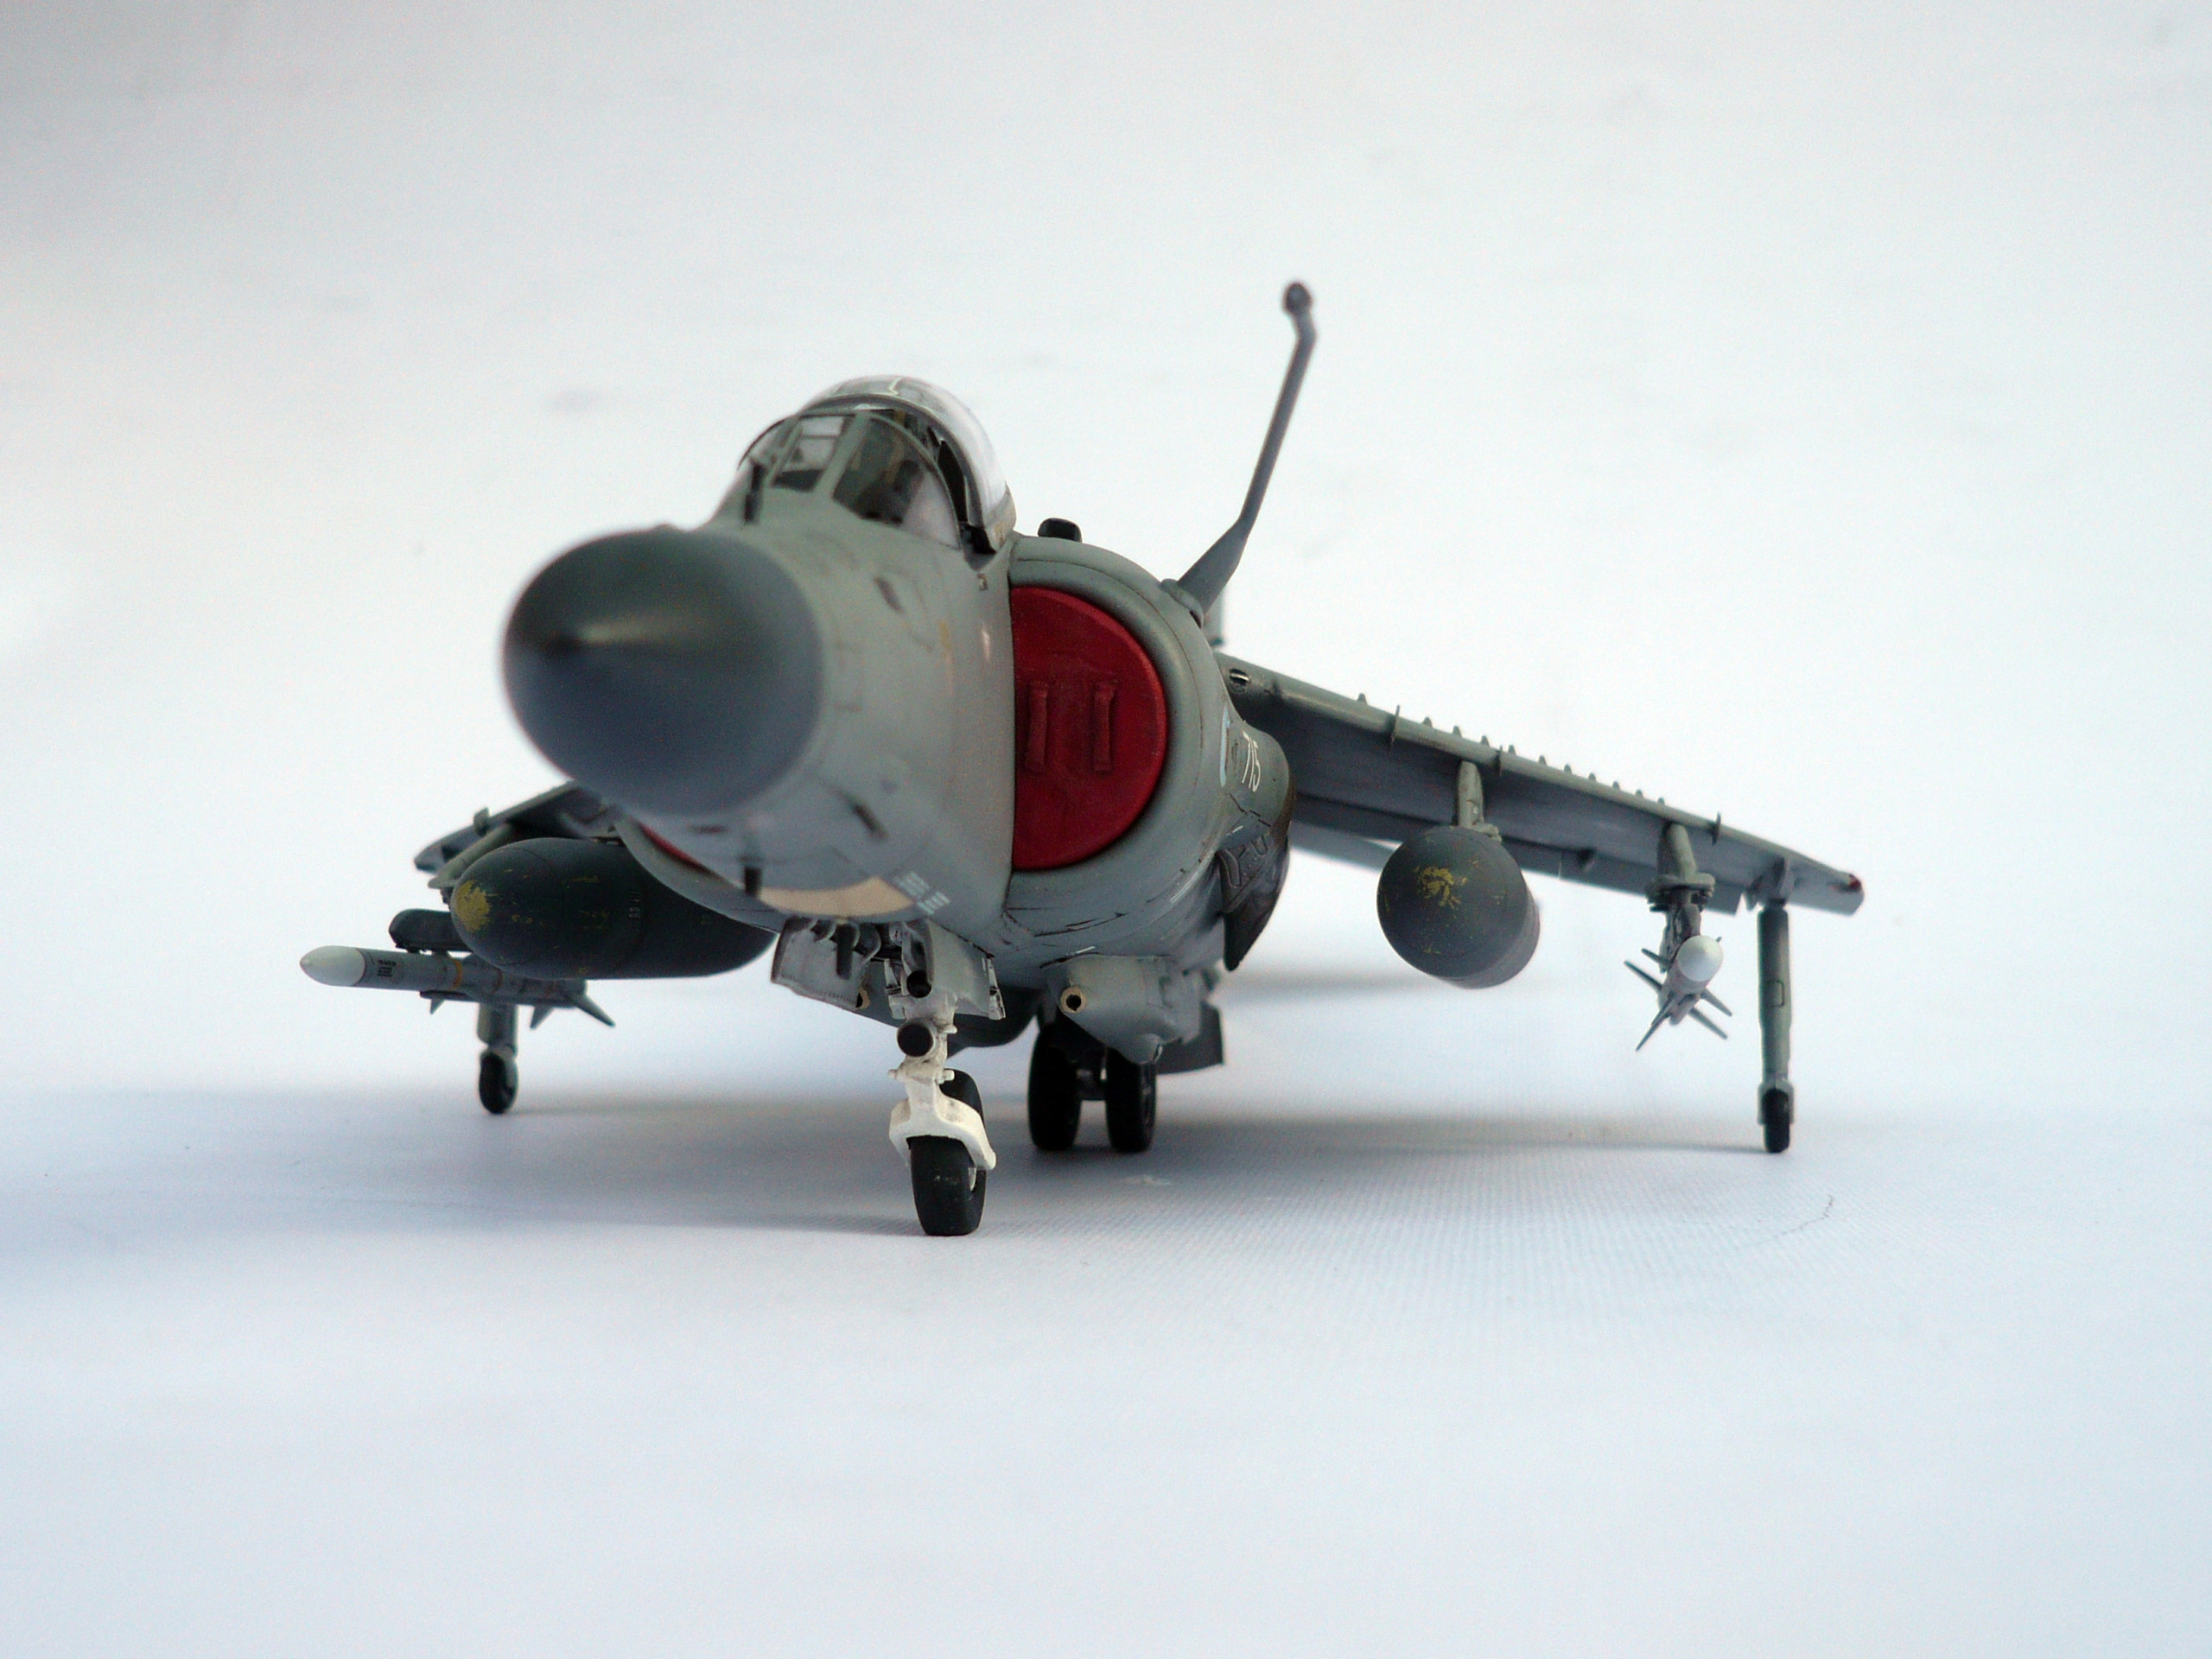
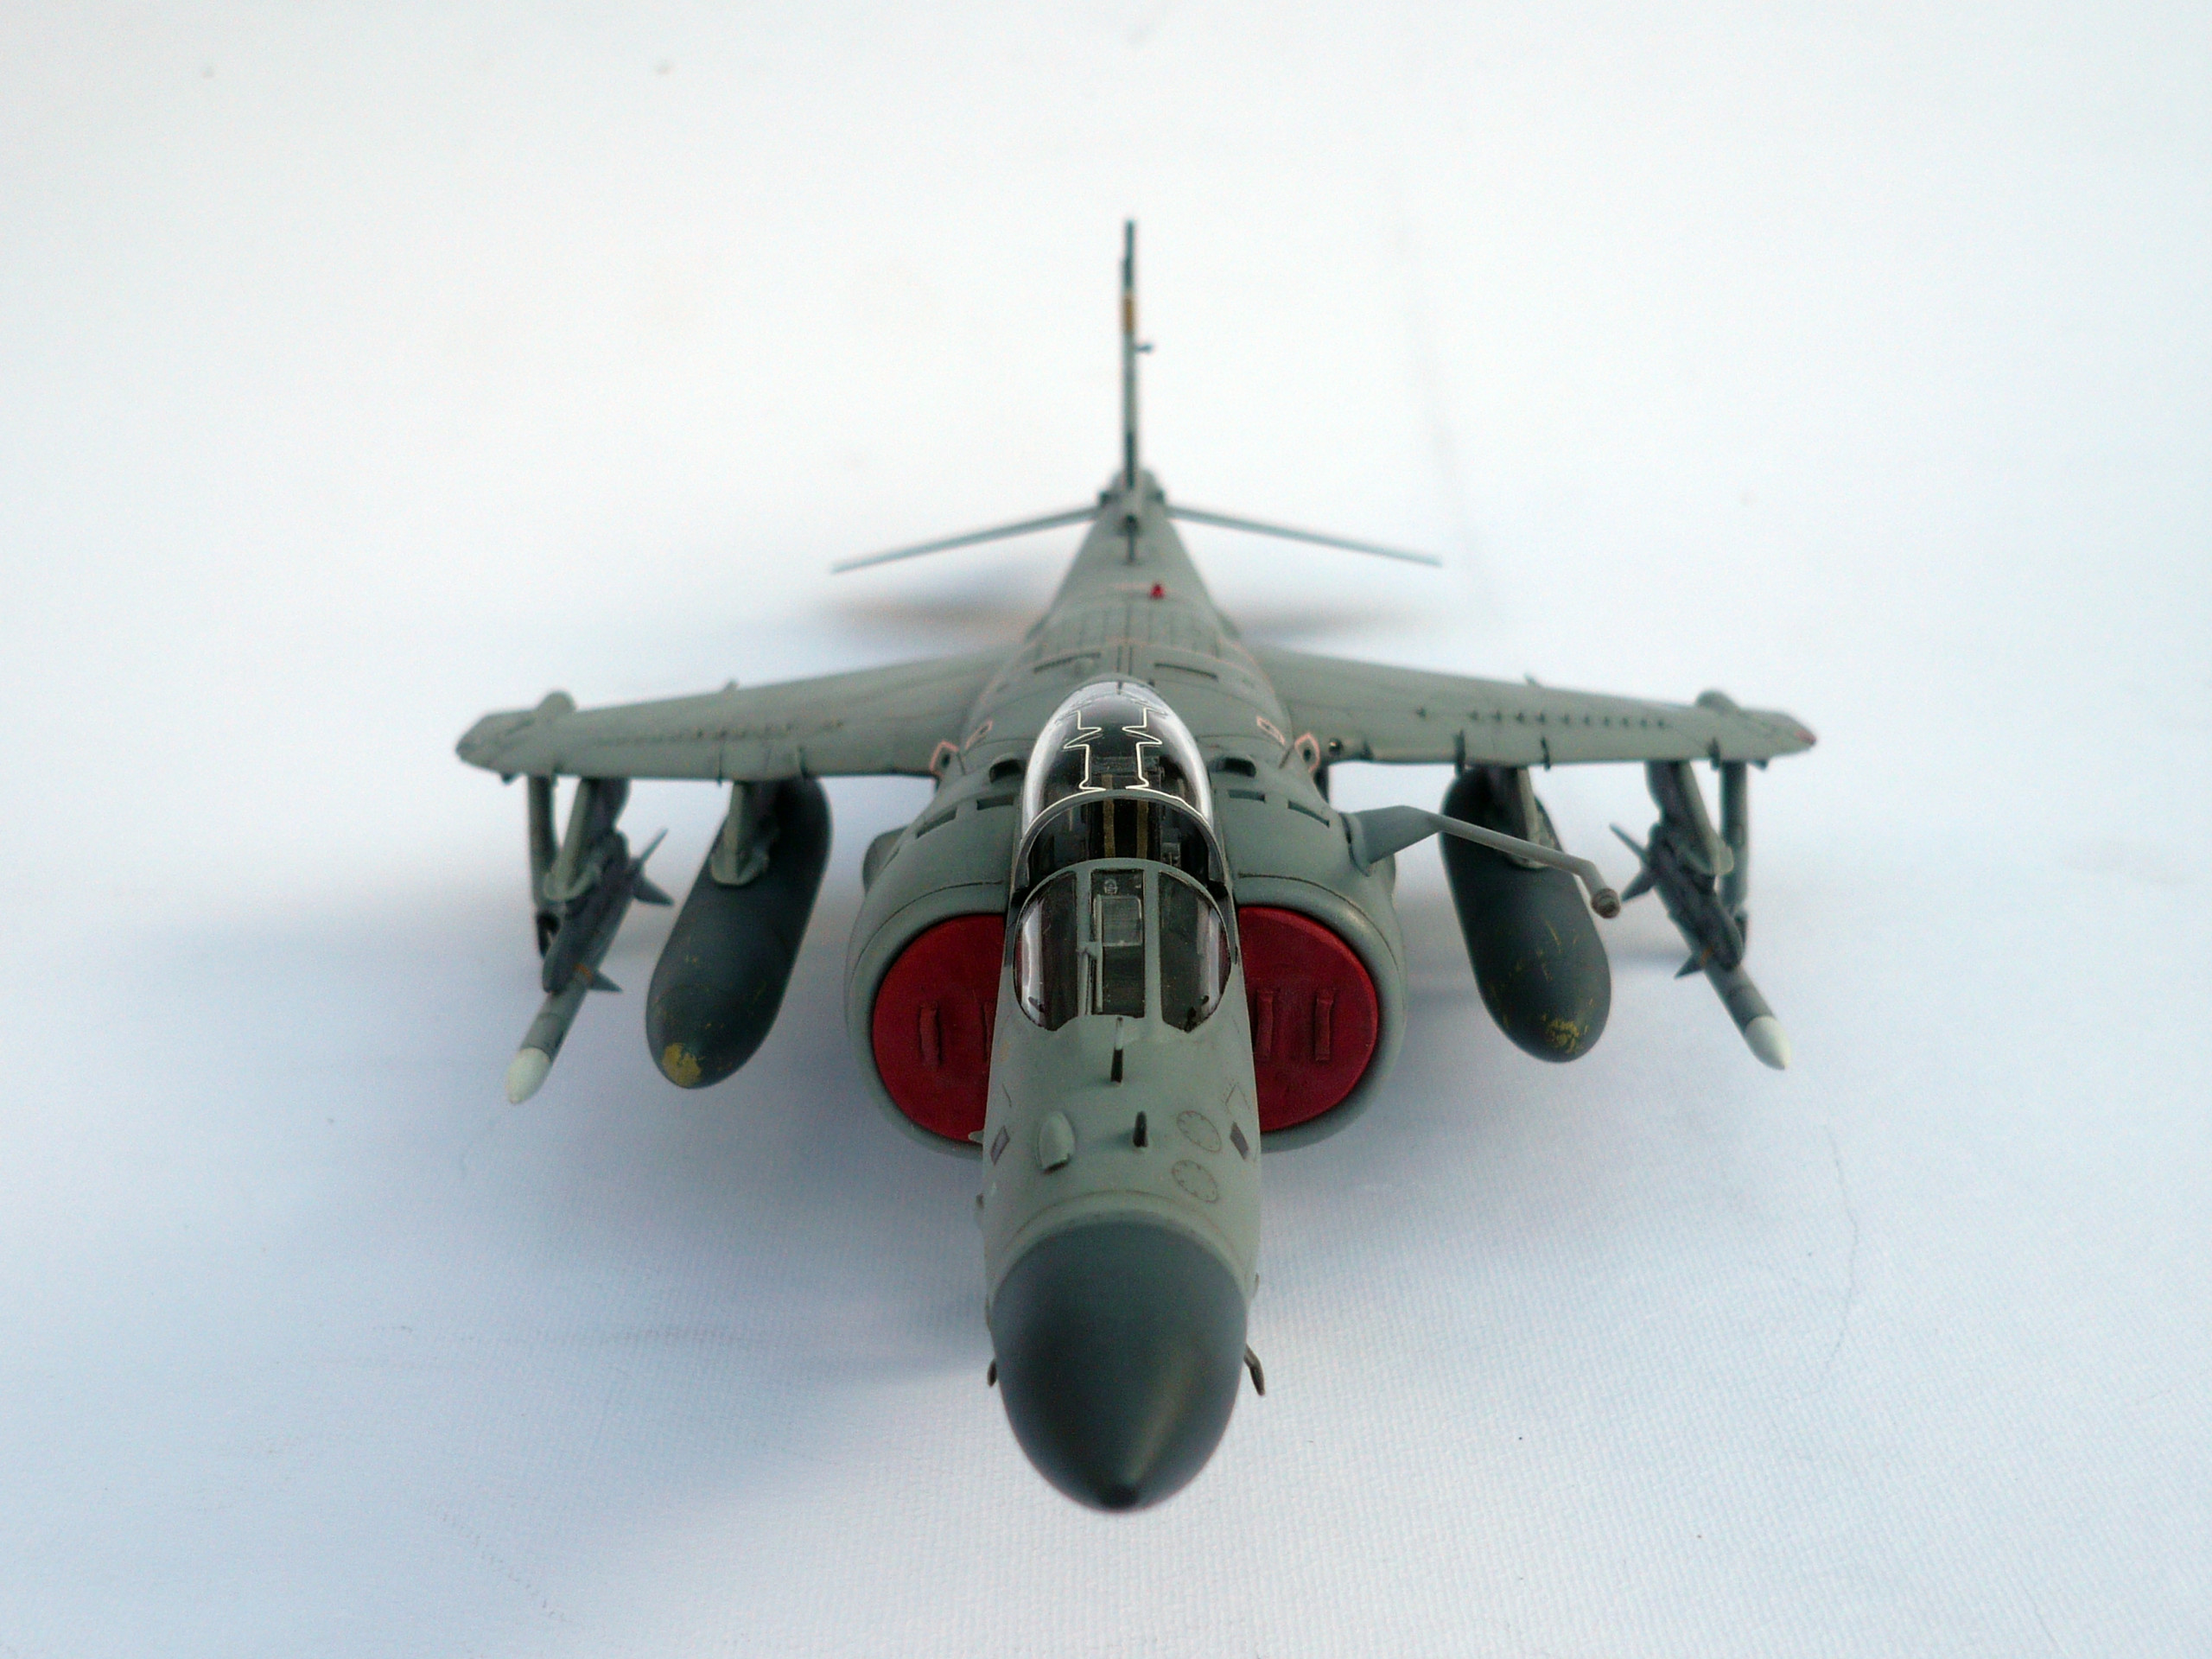
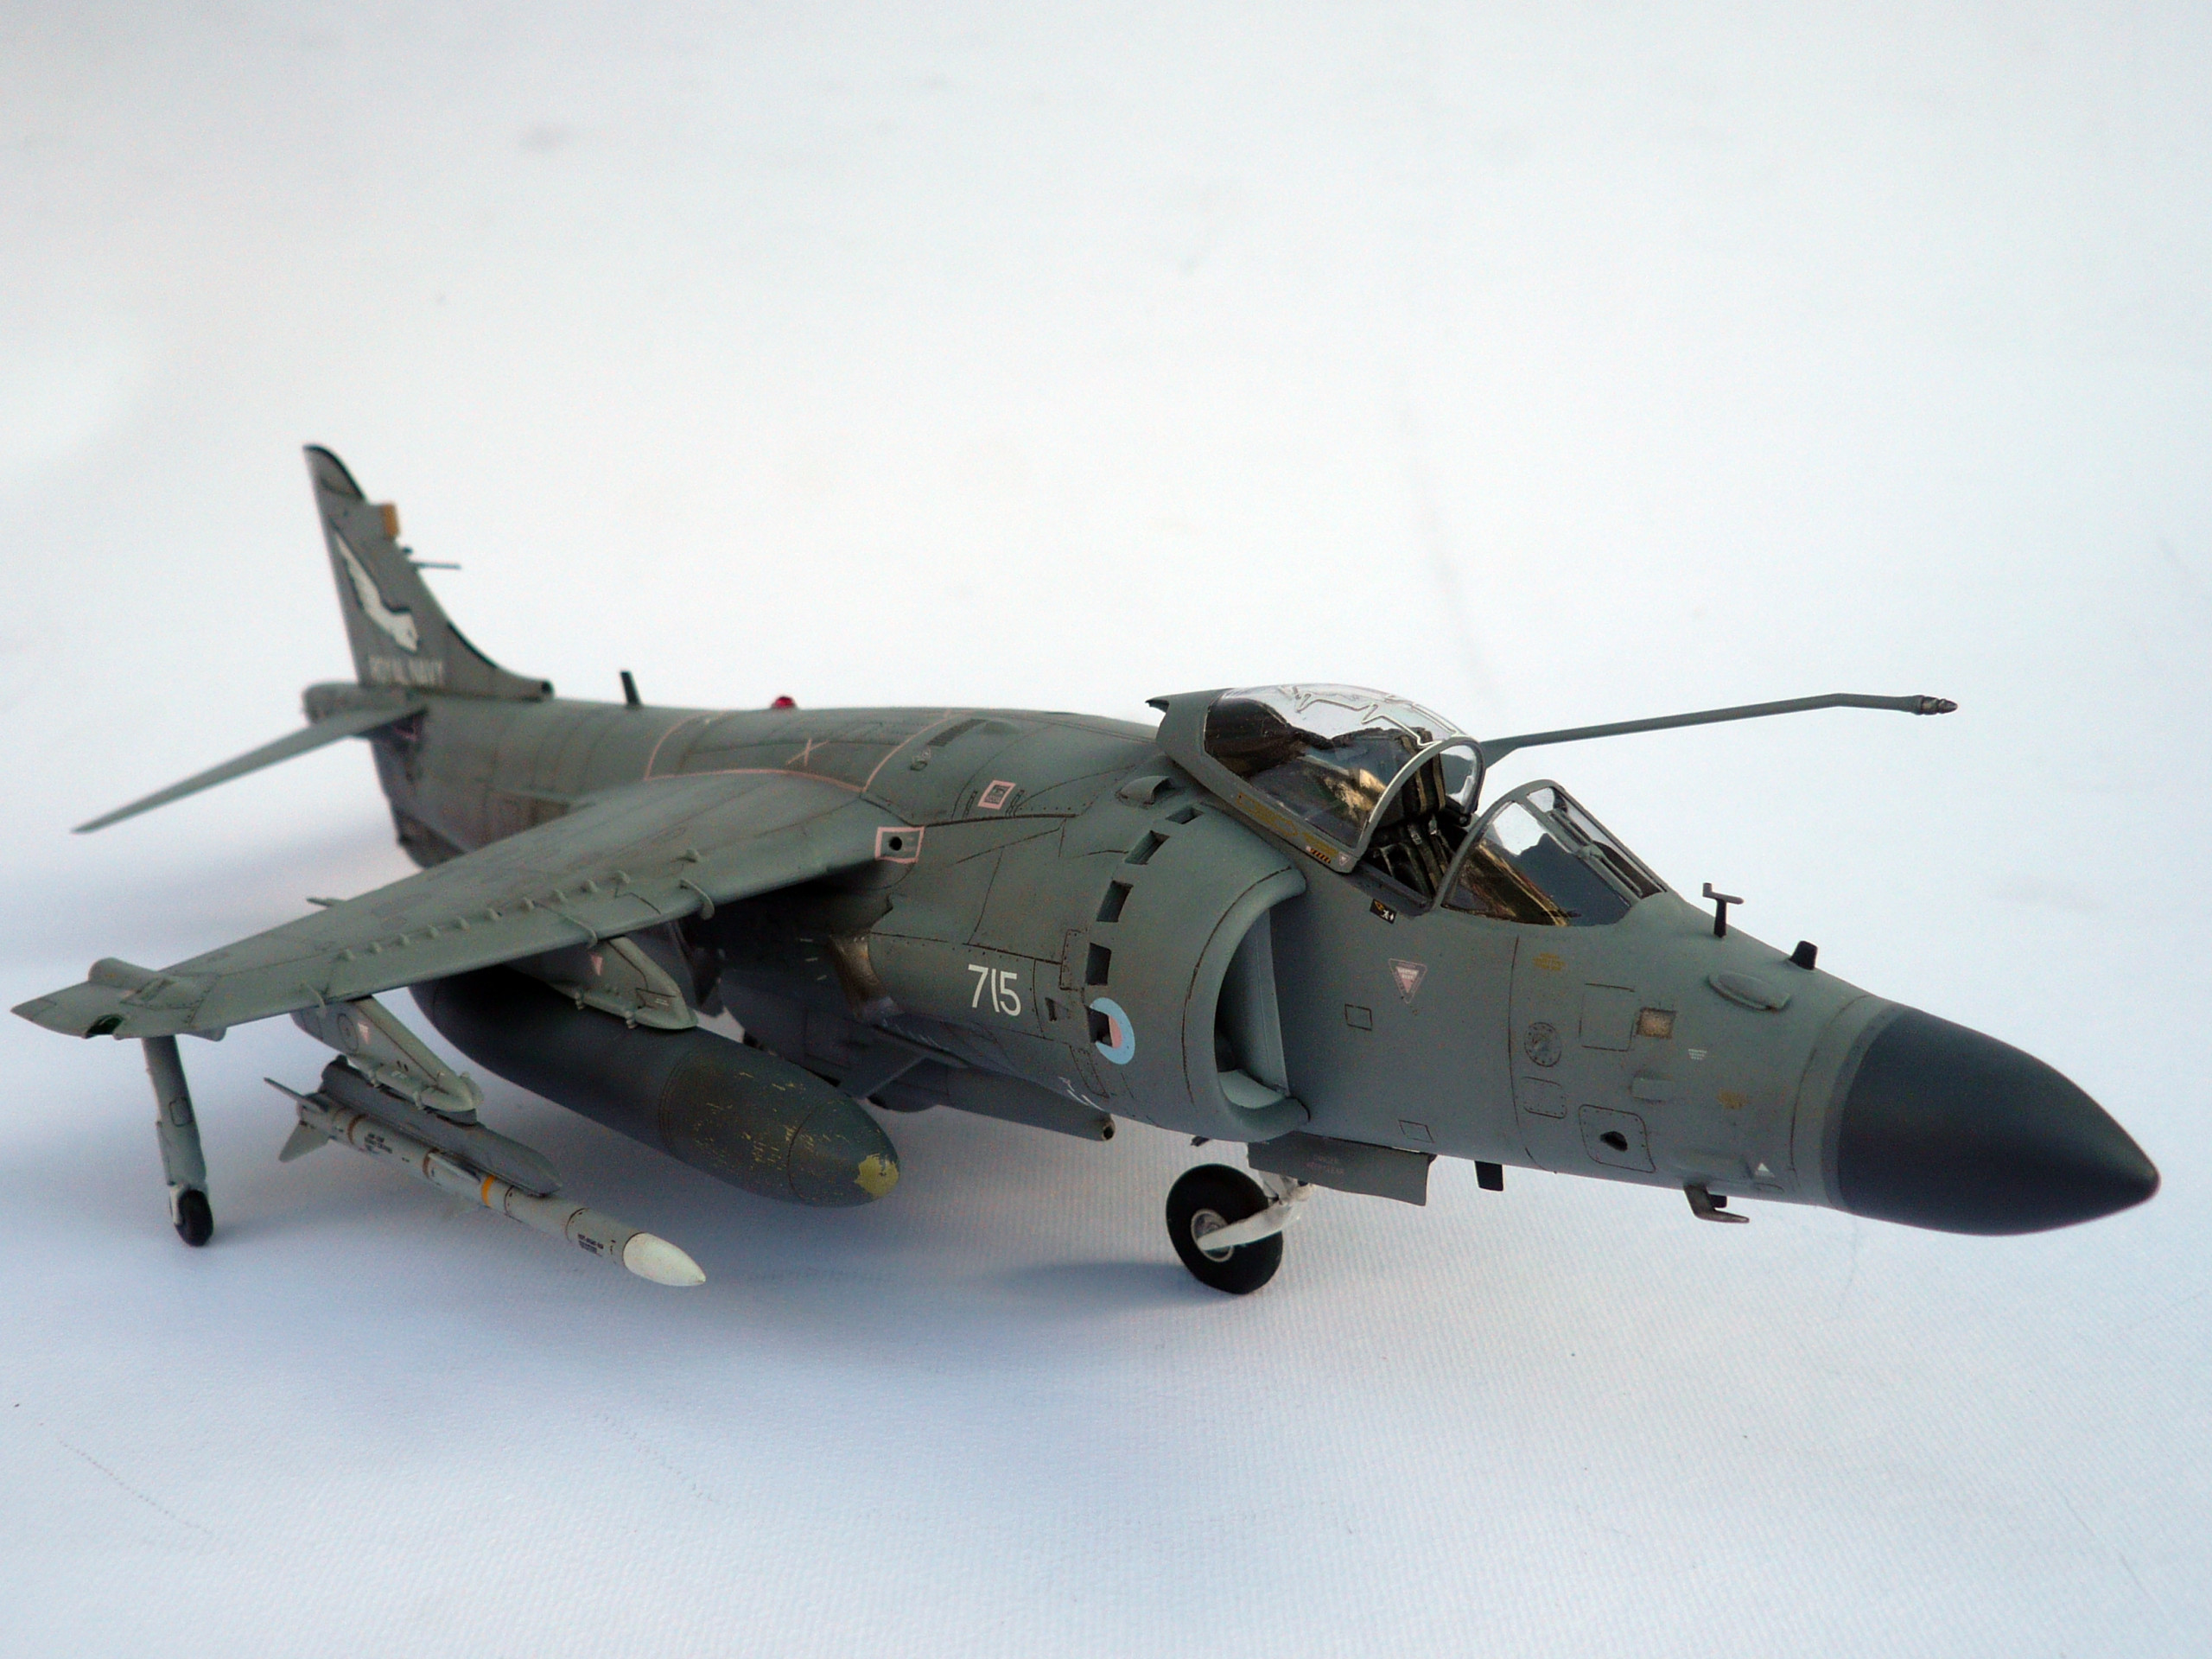
Final Reveal pics following….