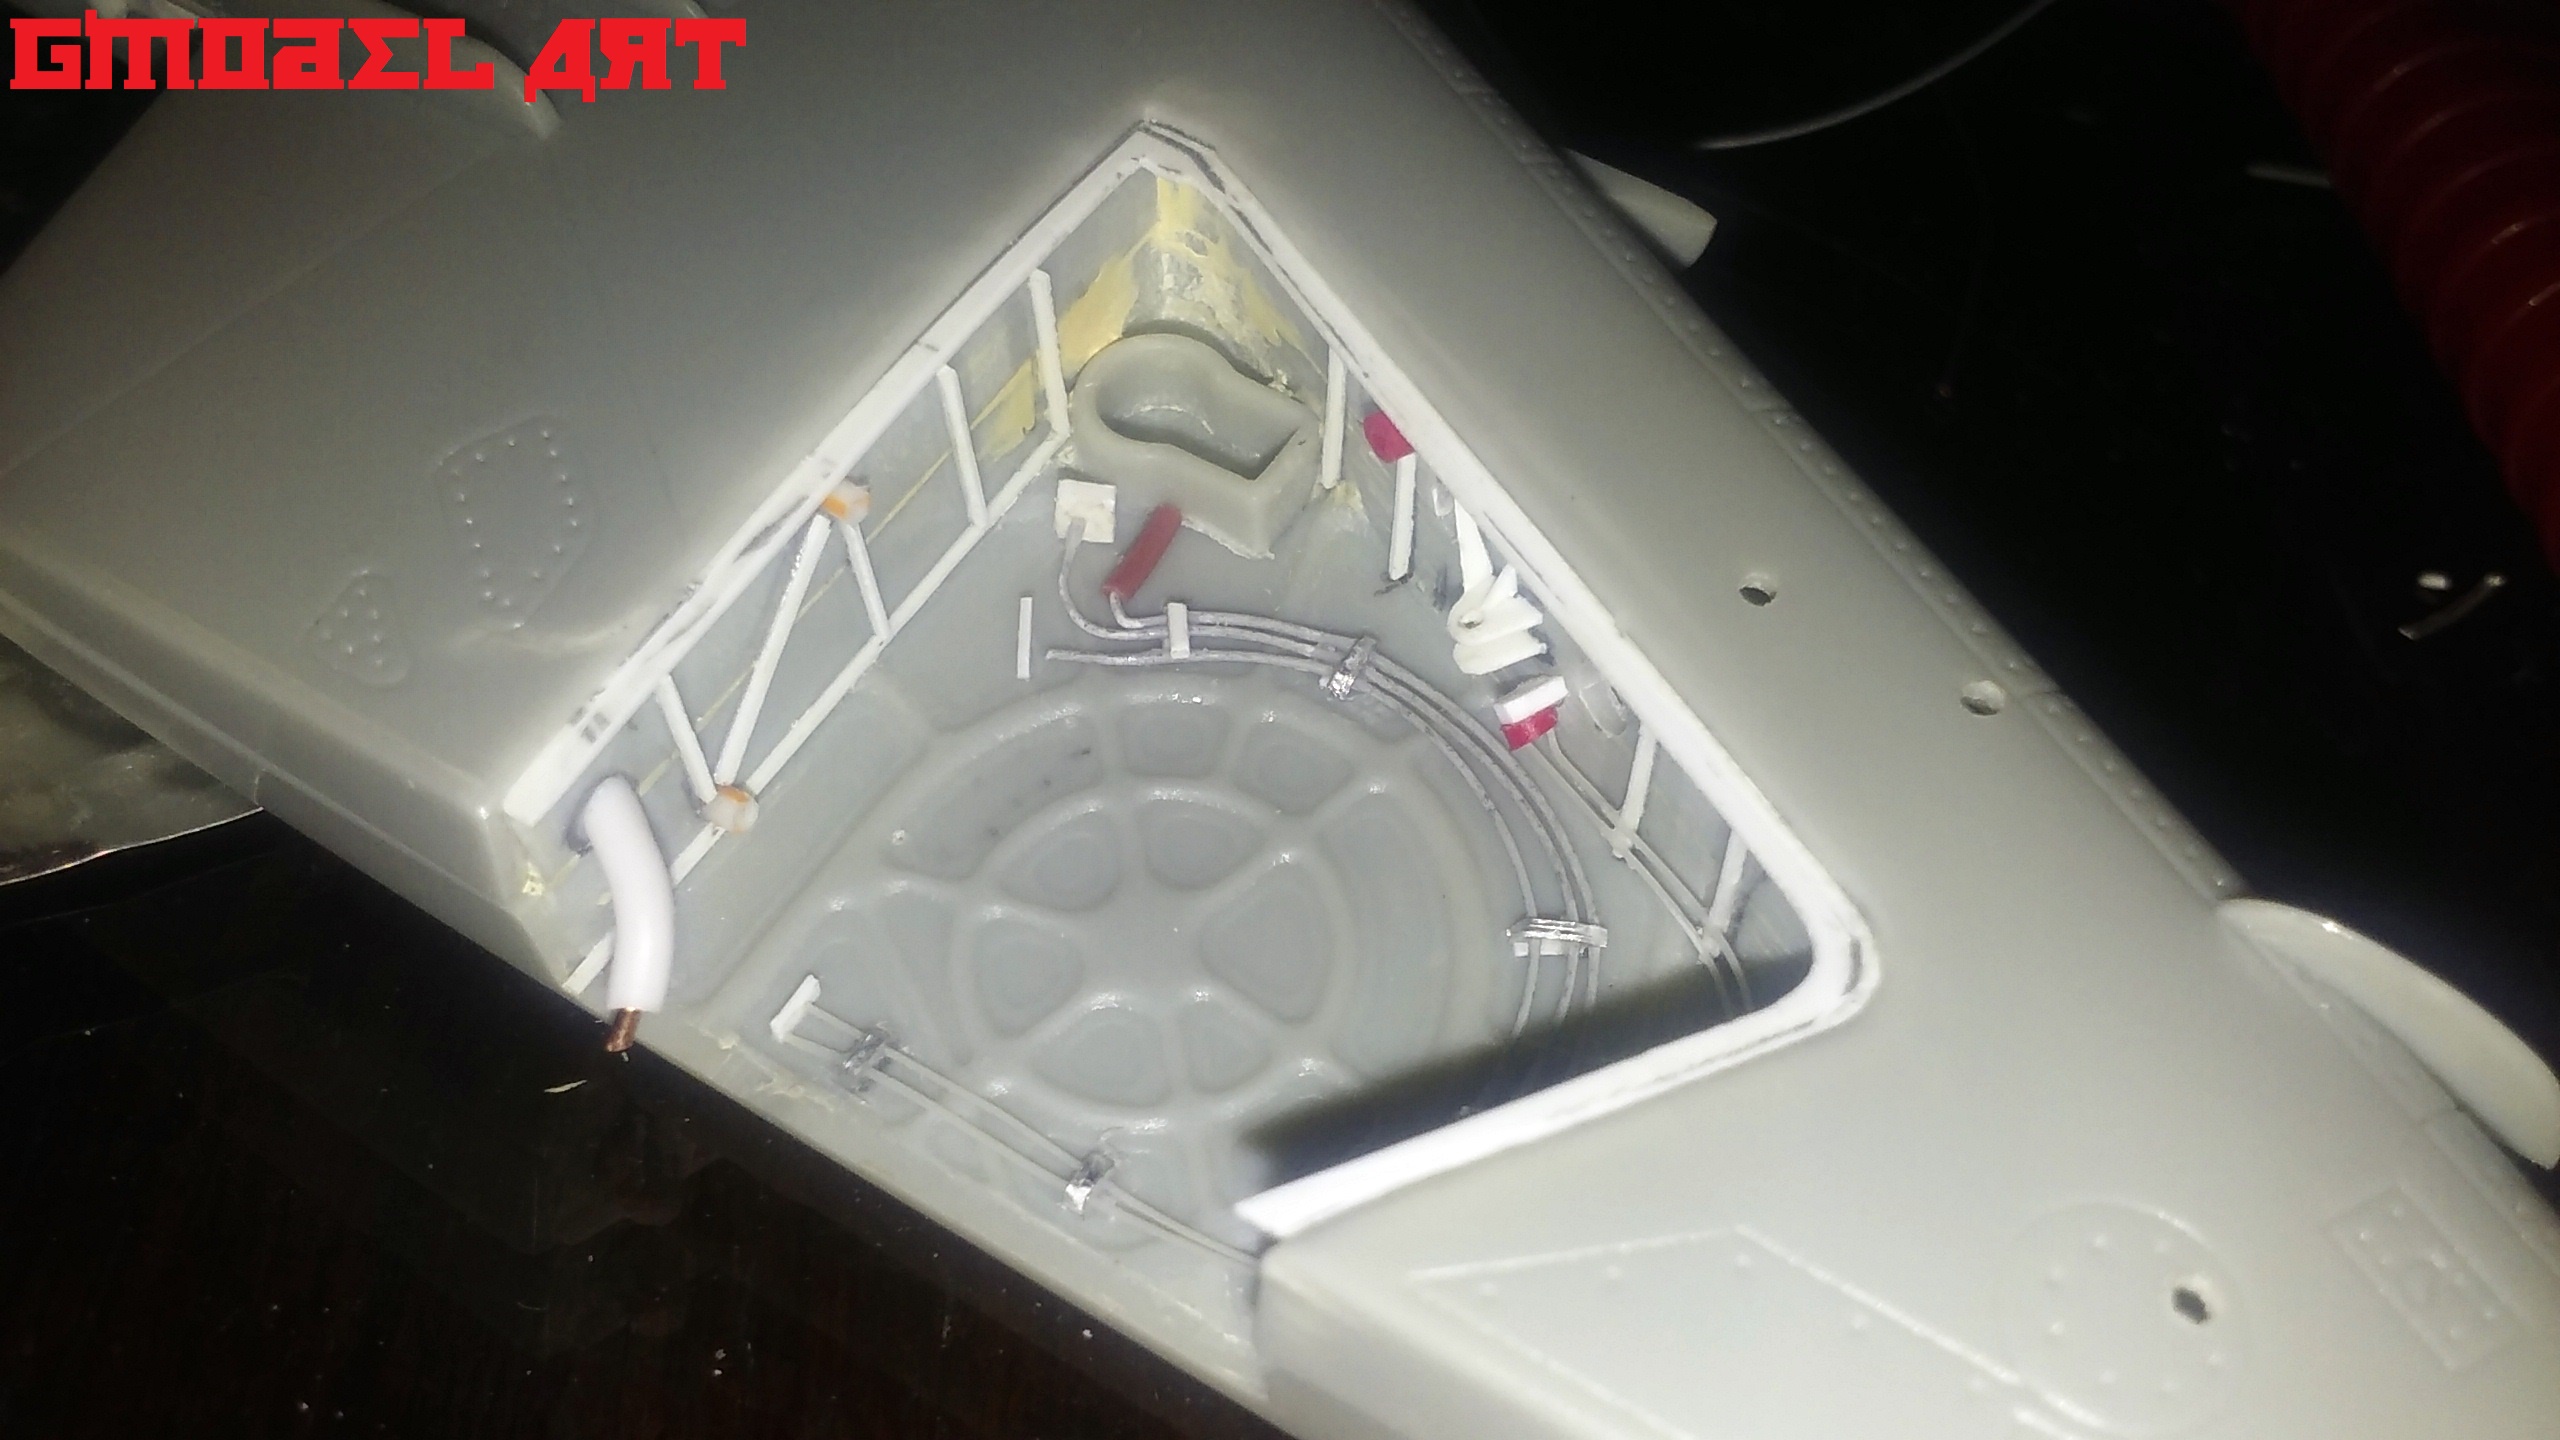
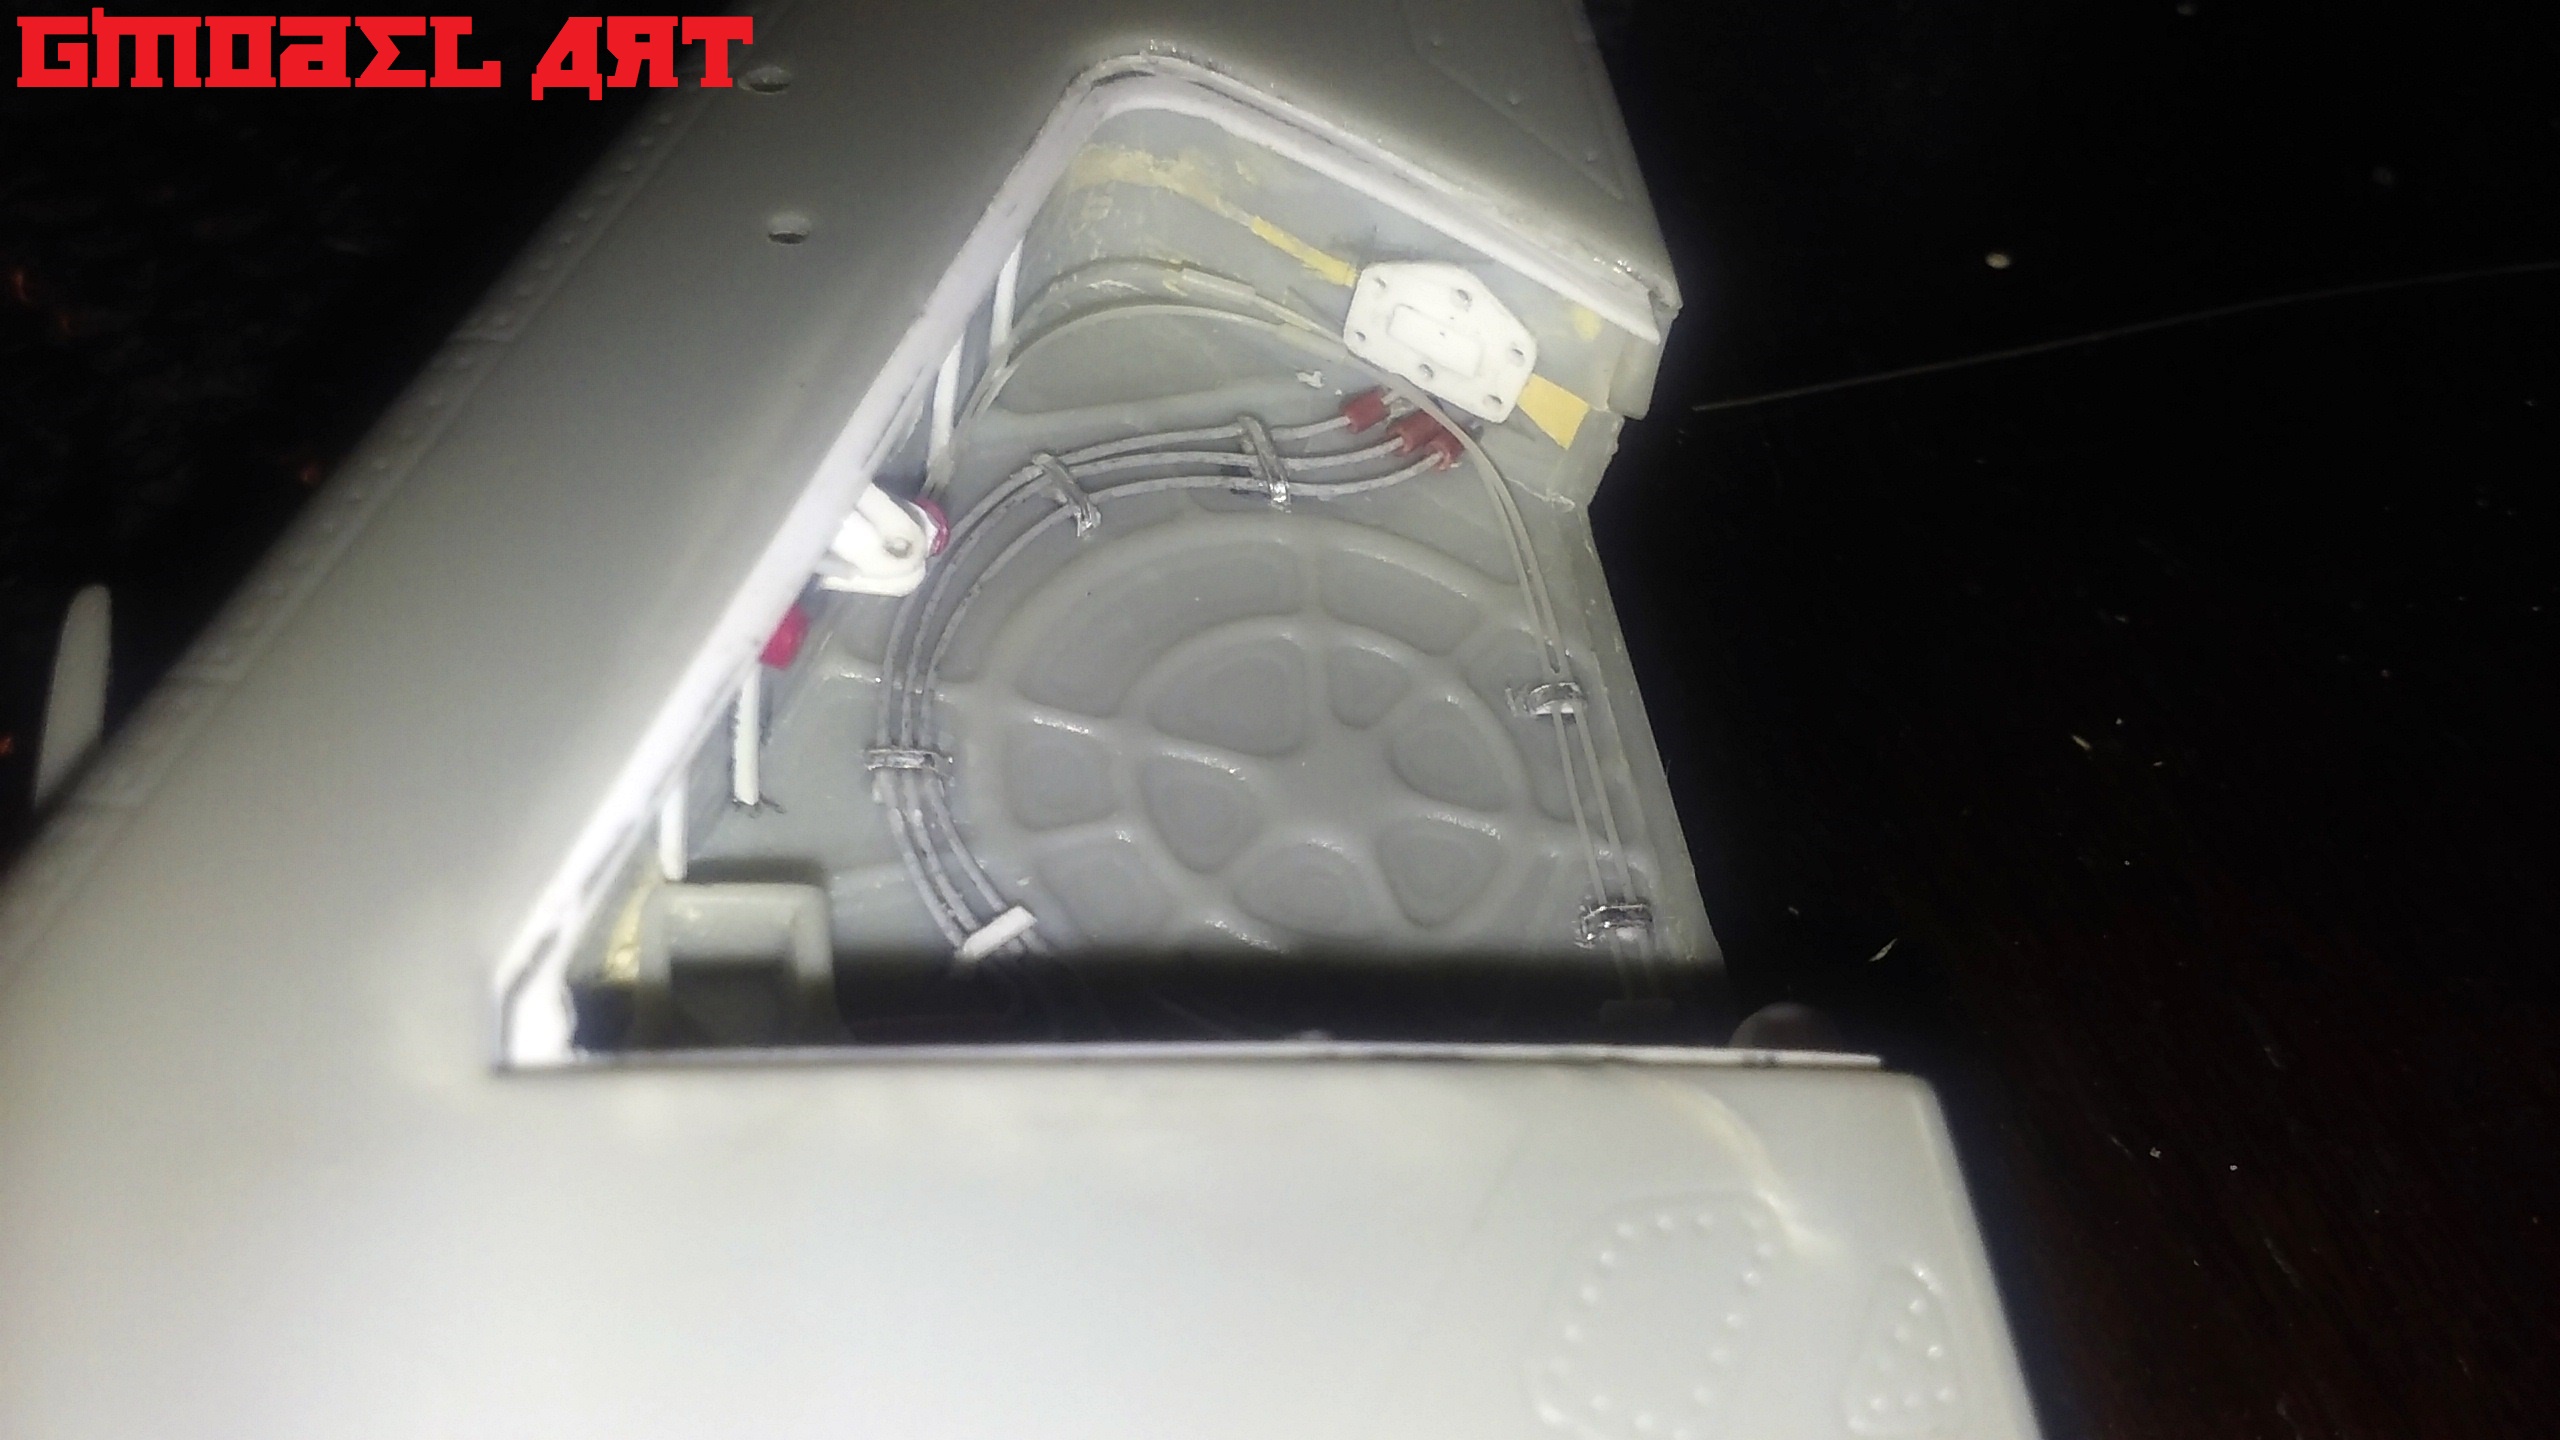
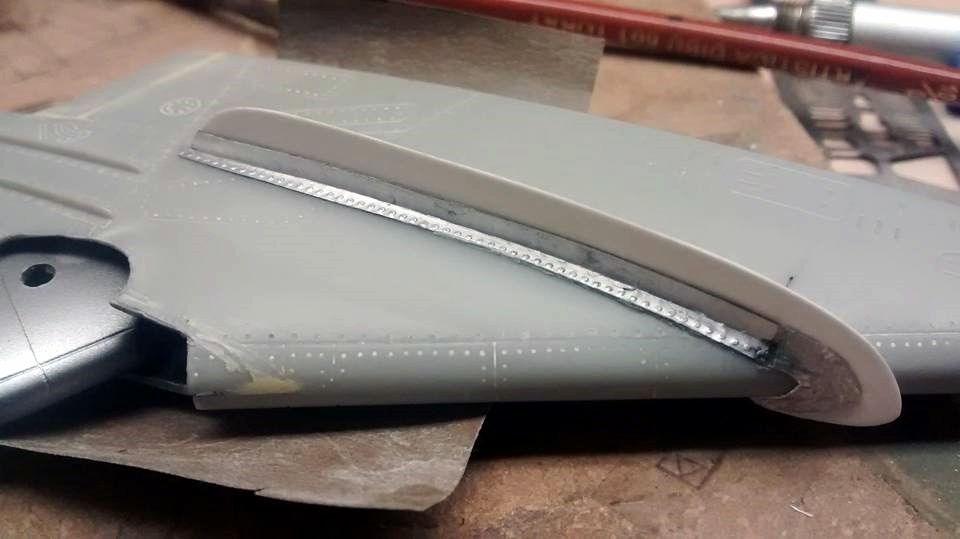
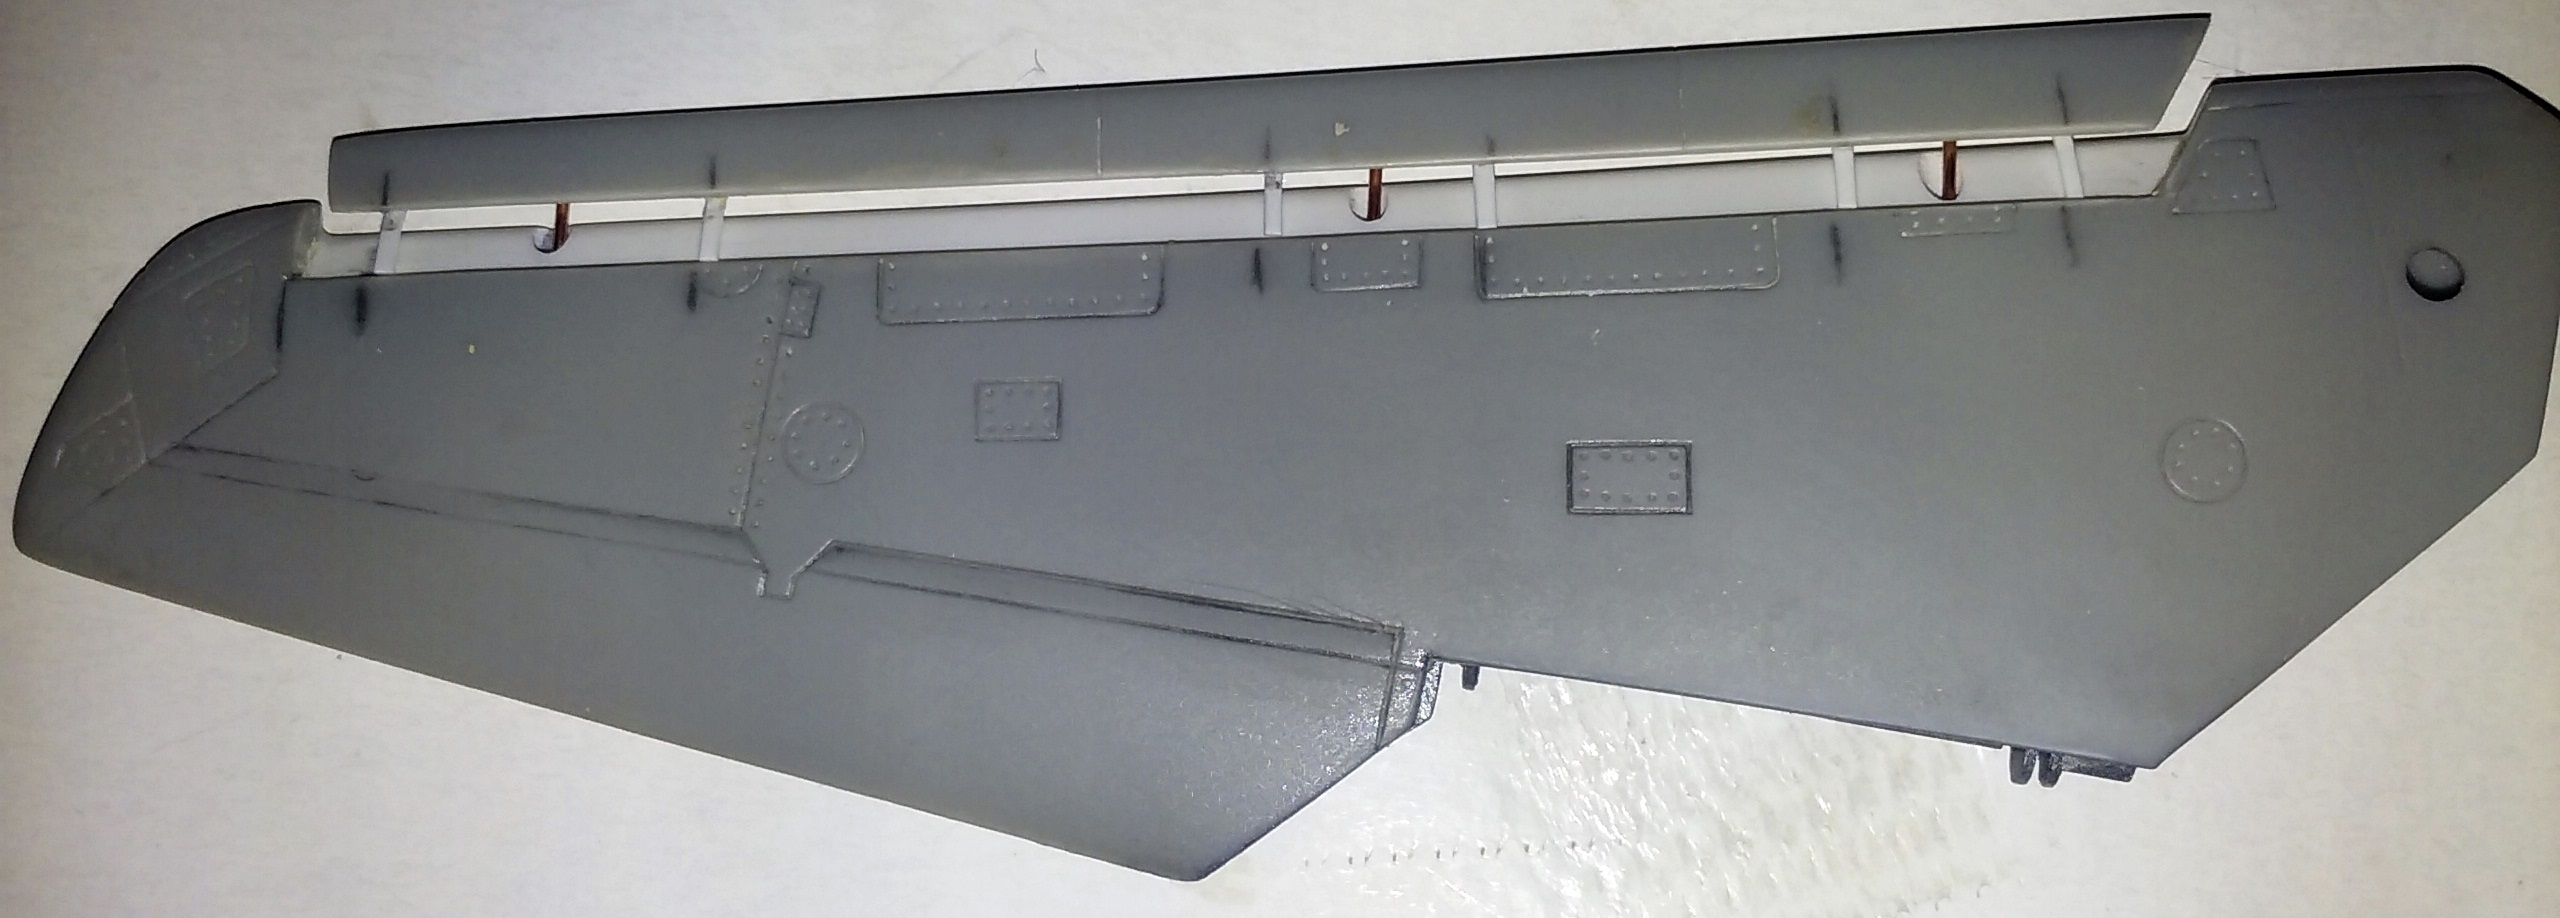
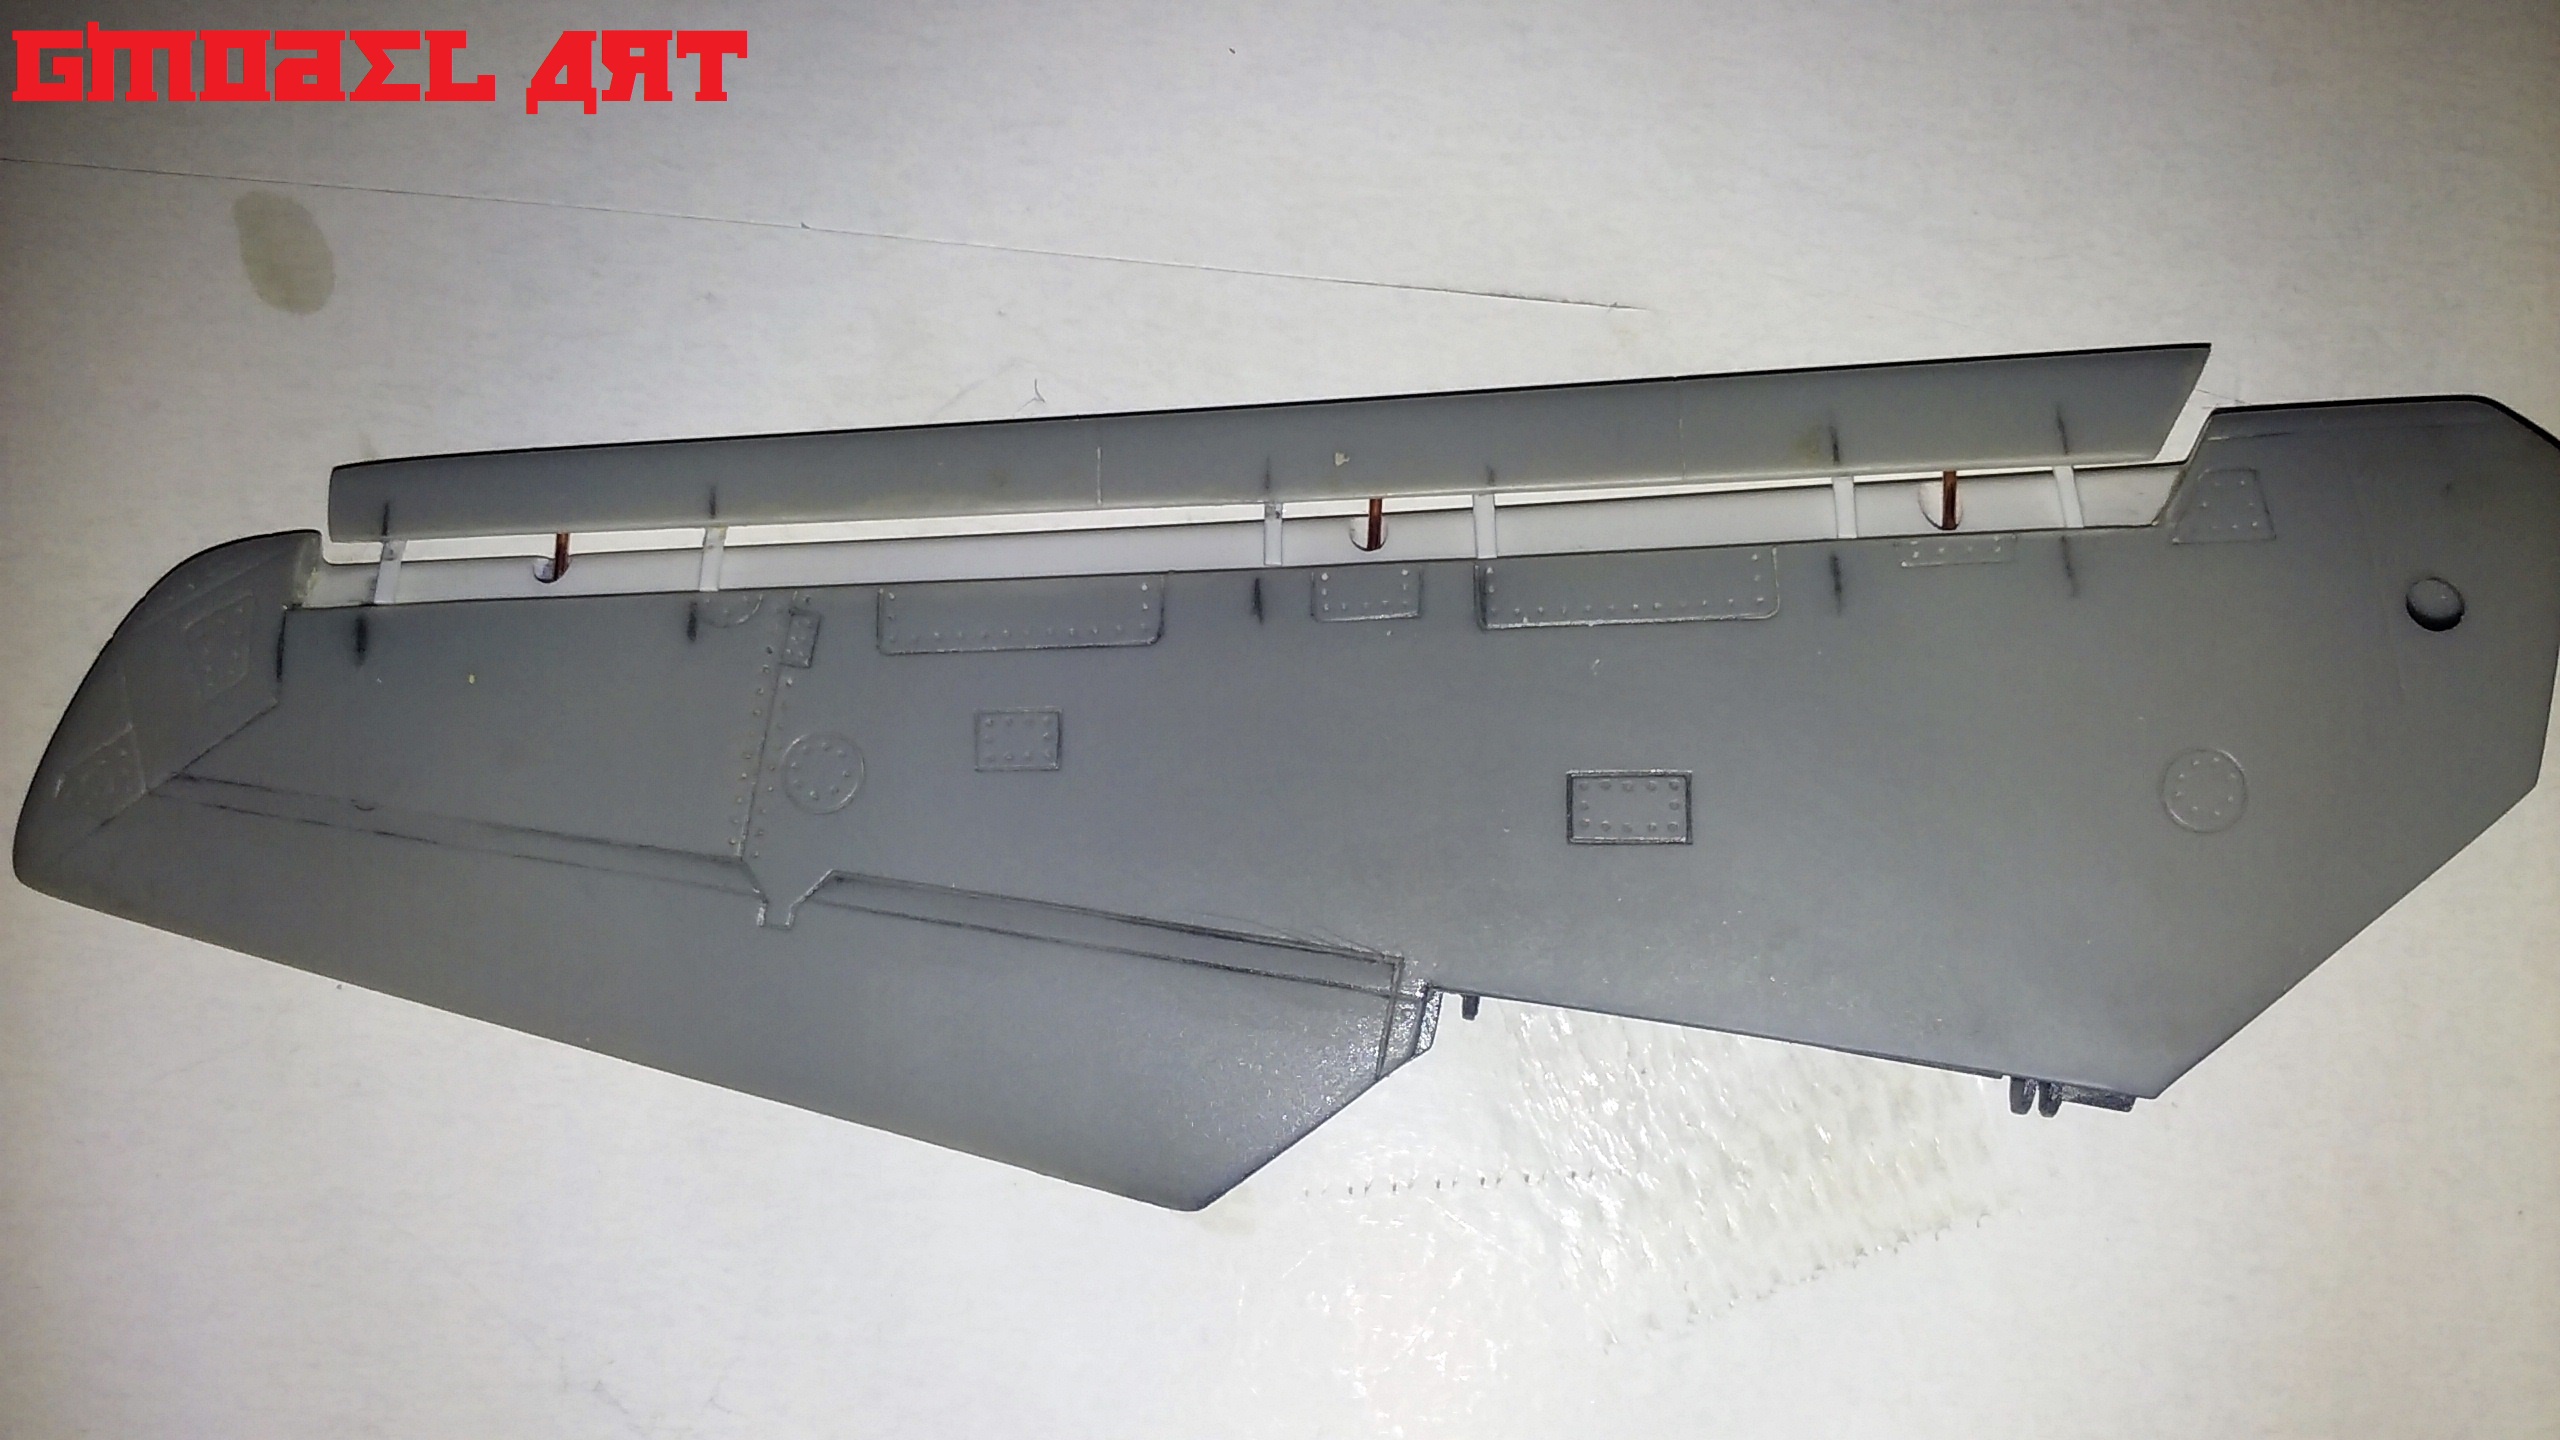
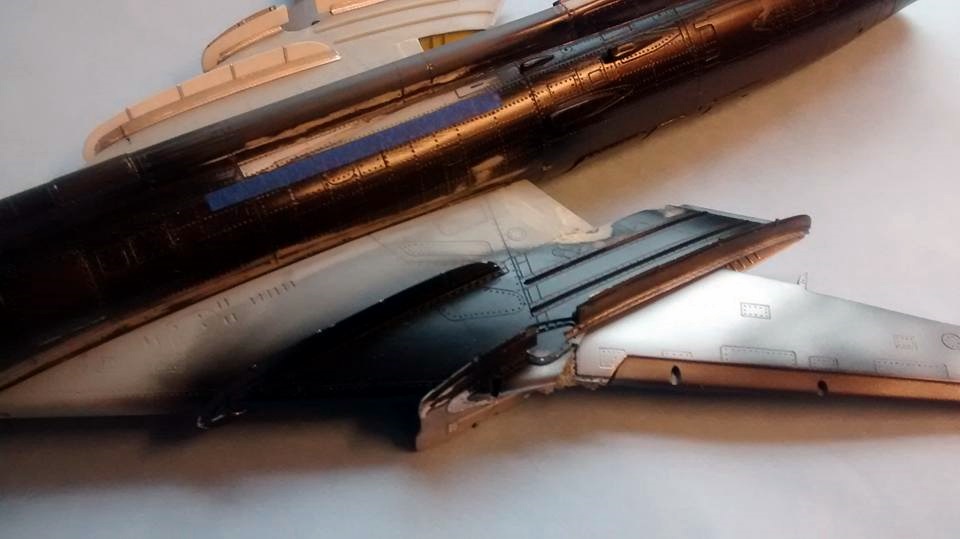
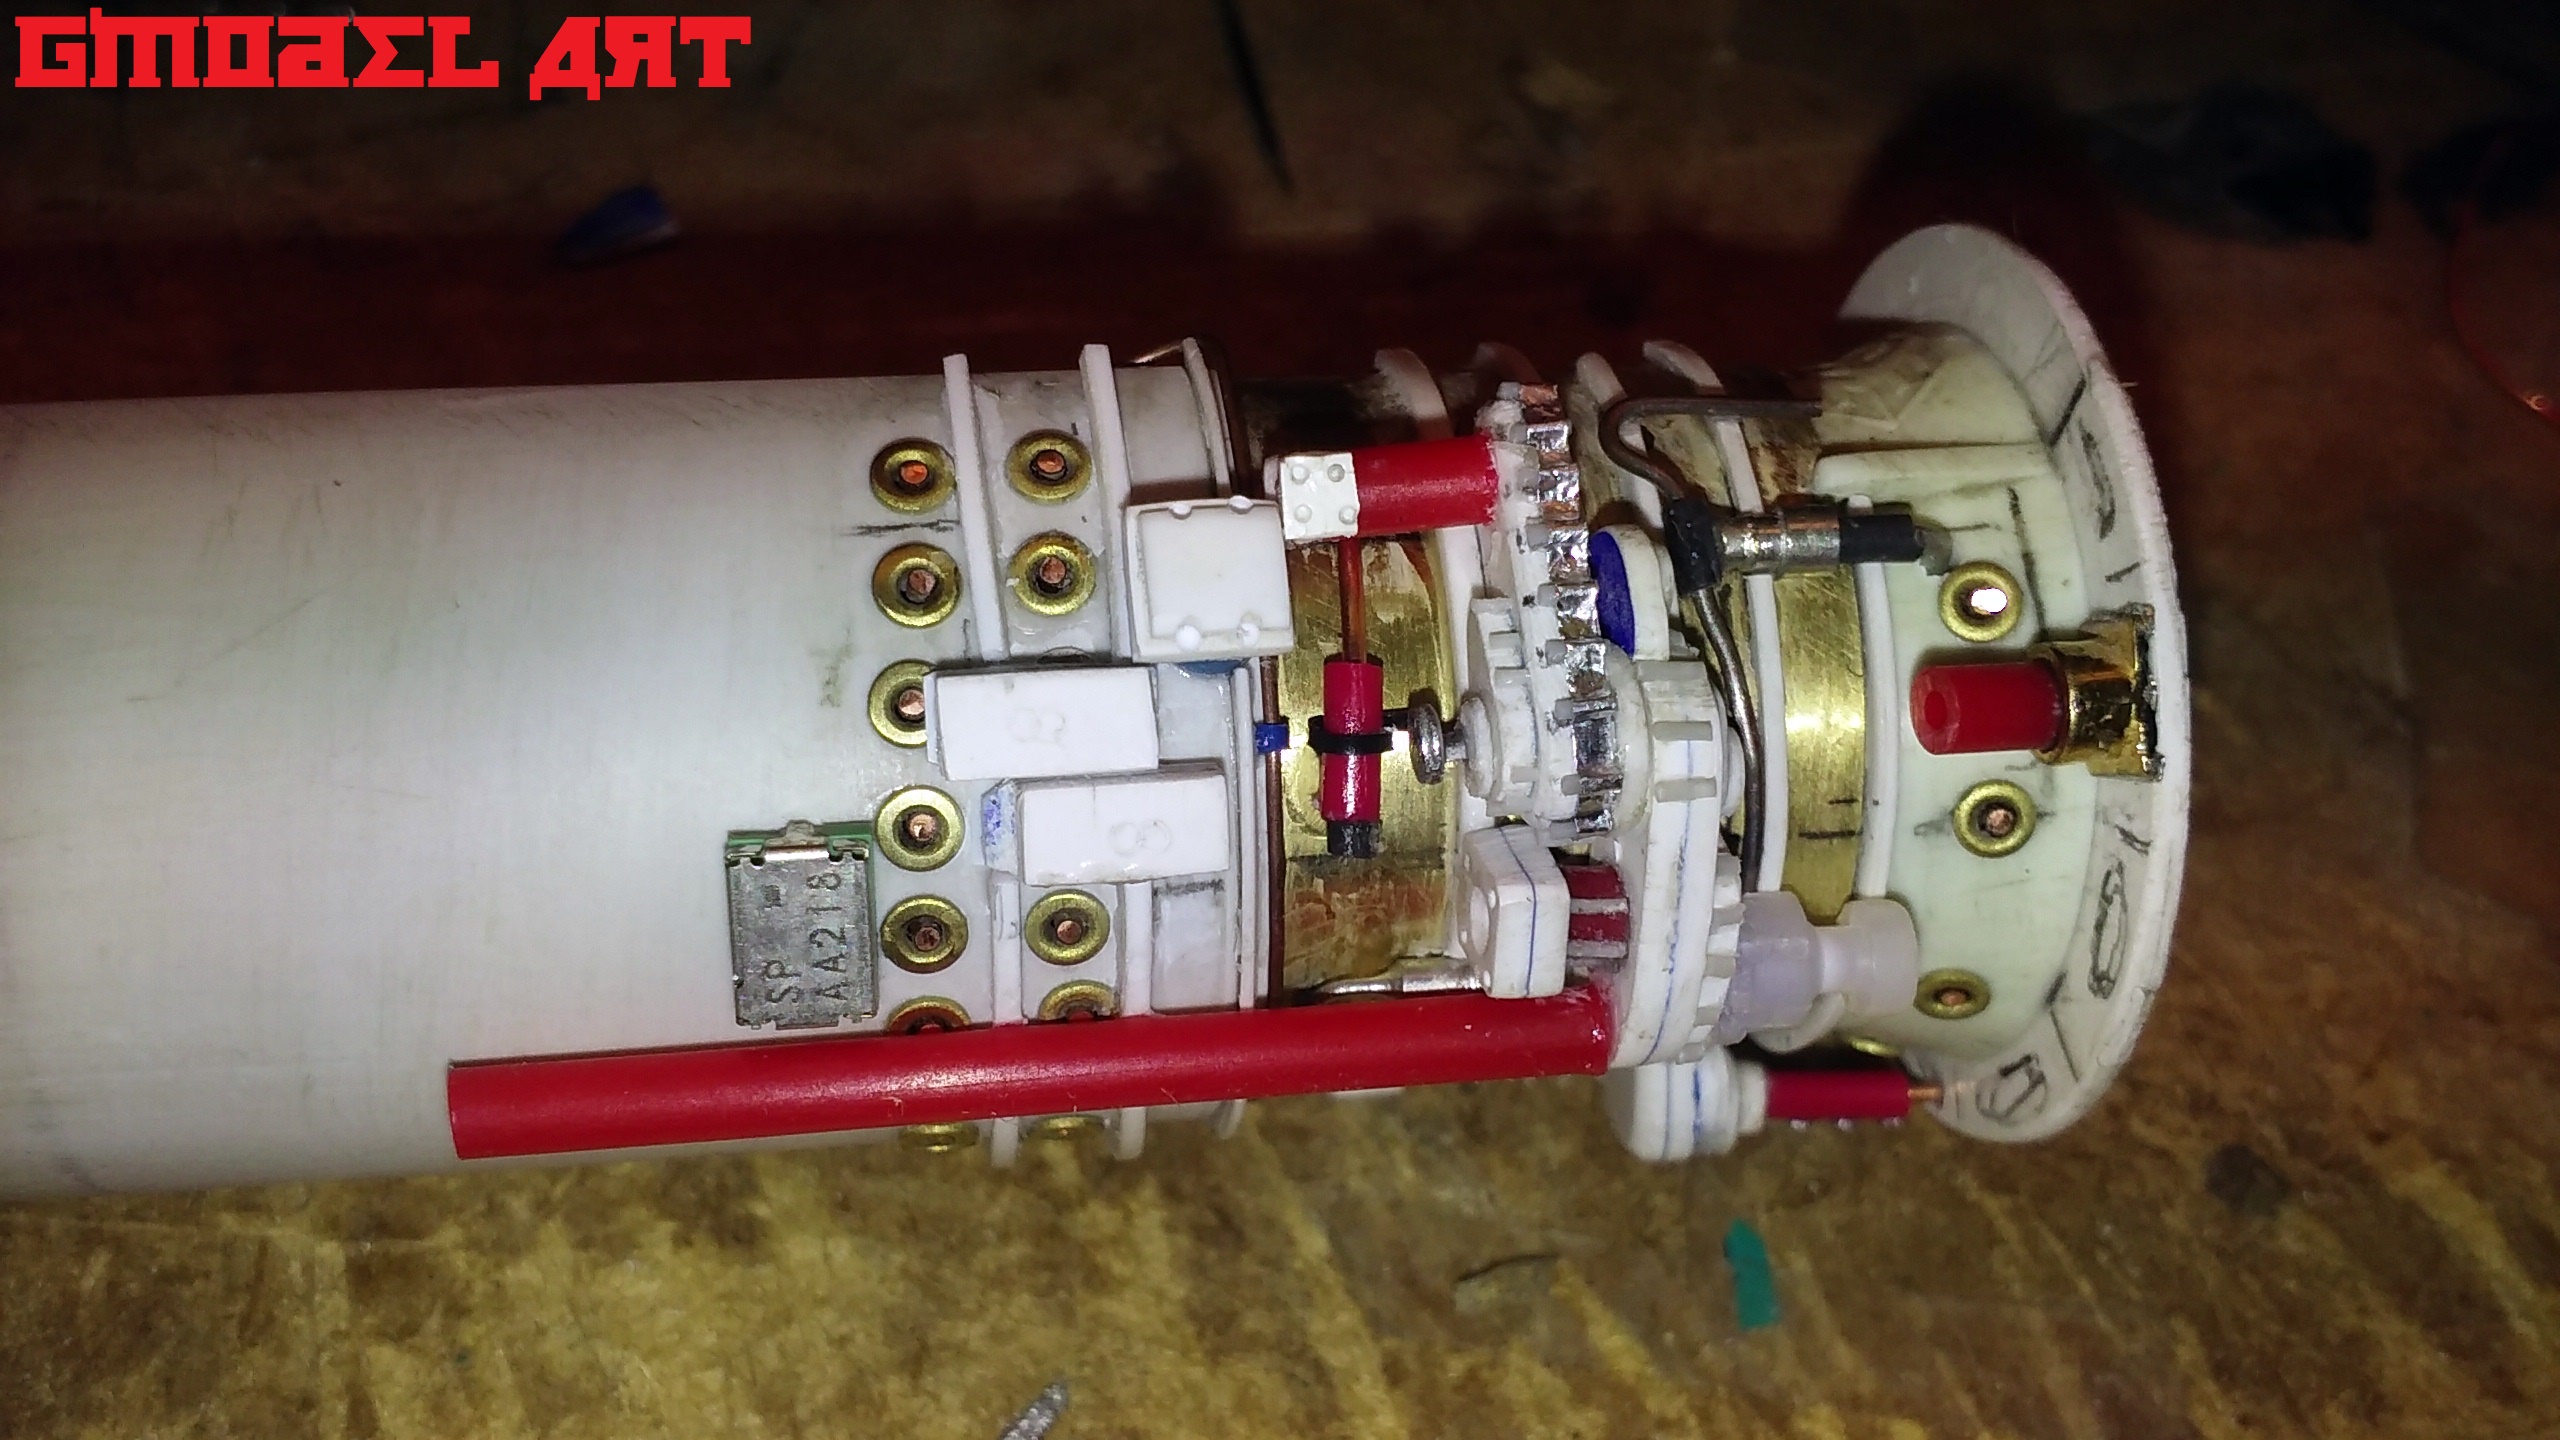
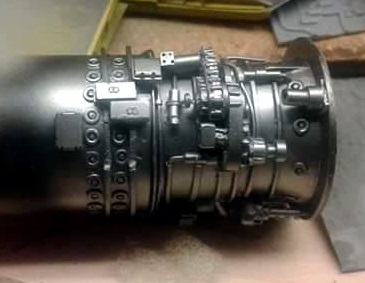
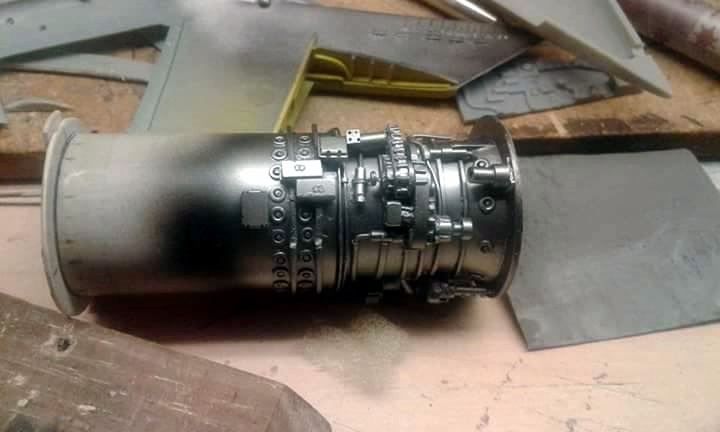
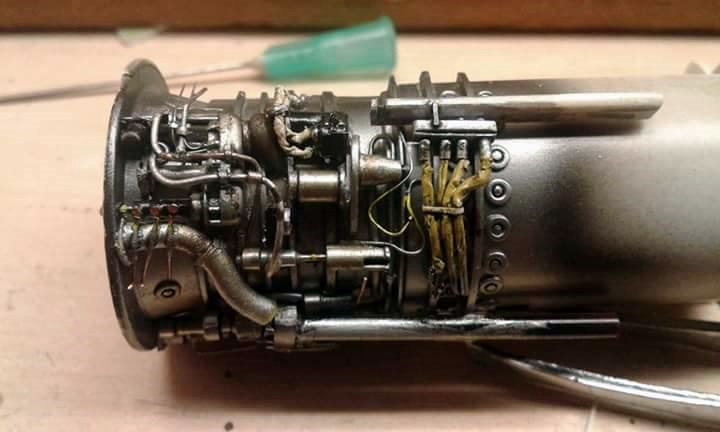
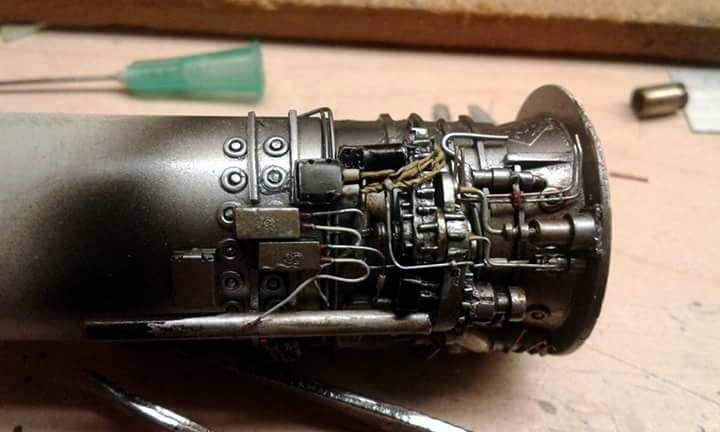
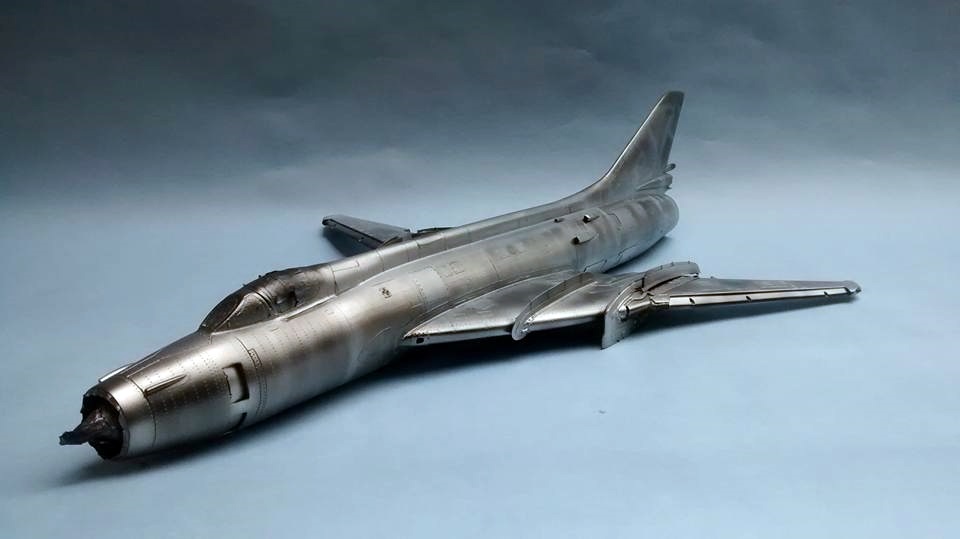
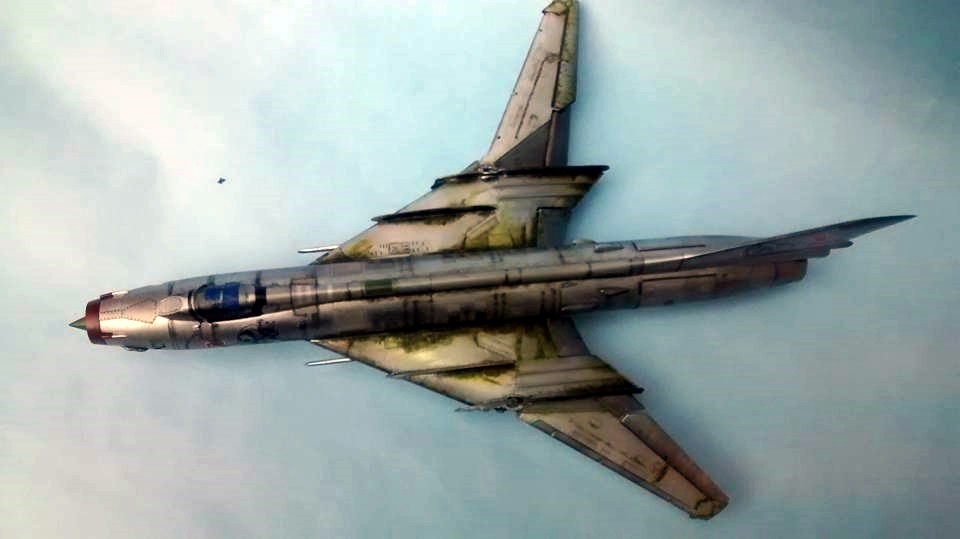
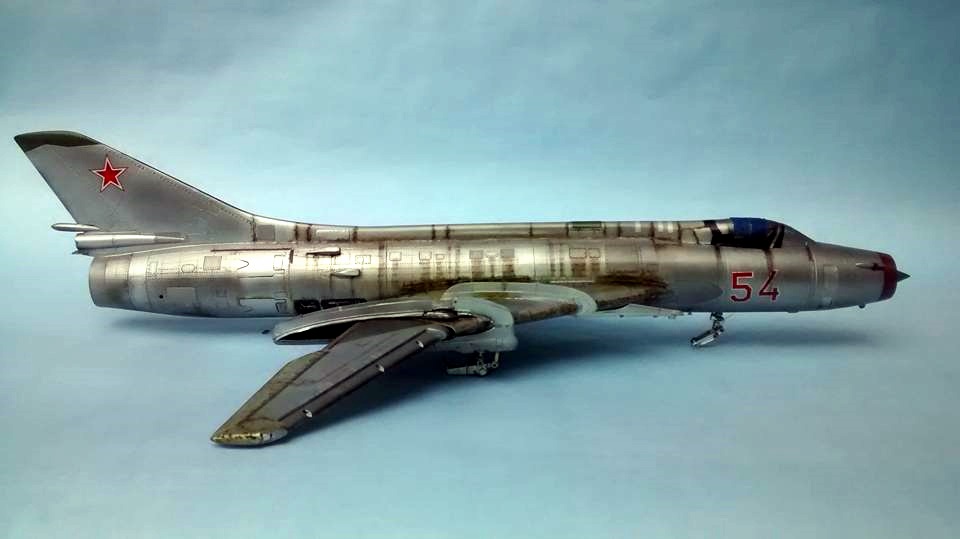
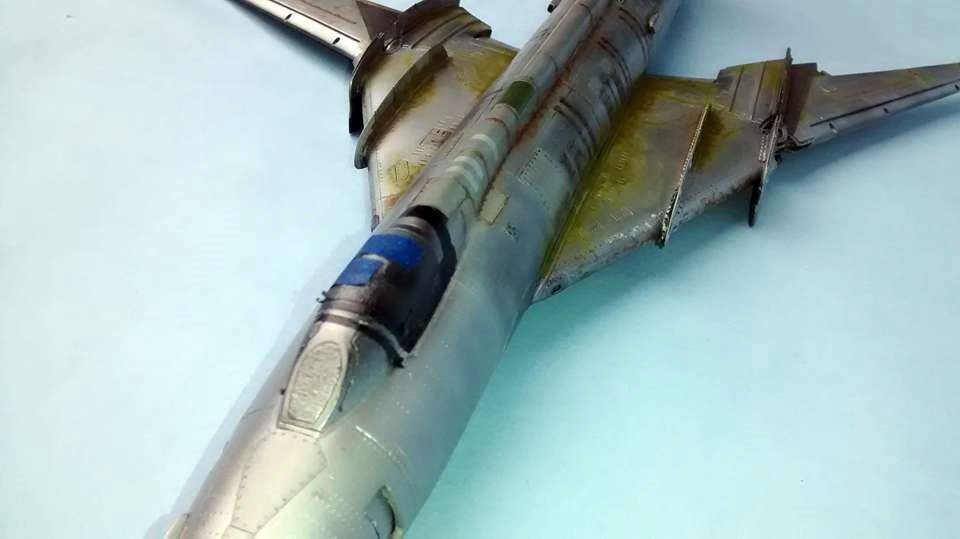
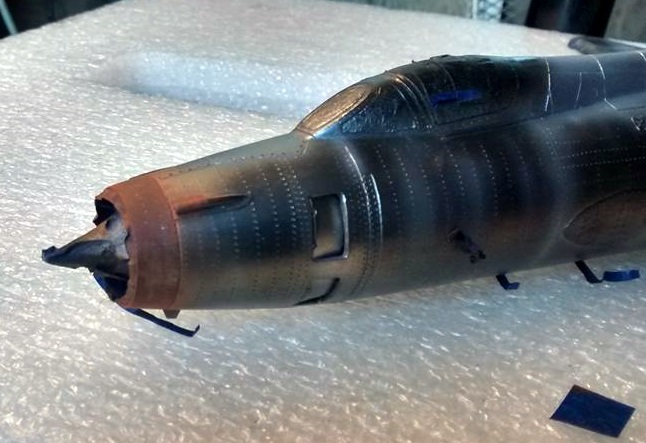
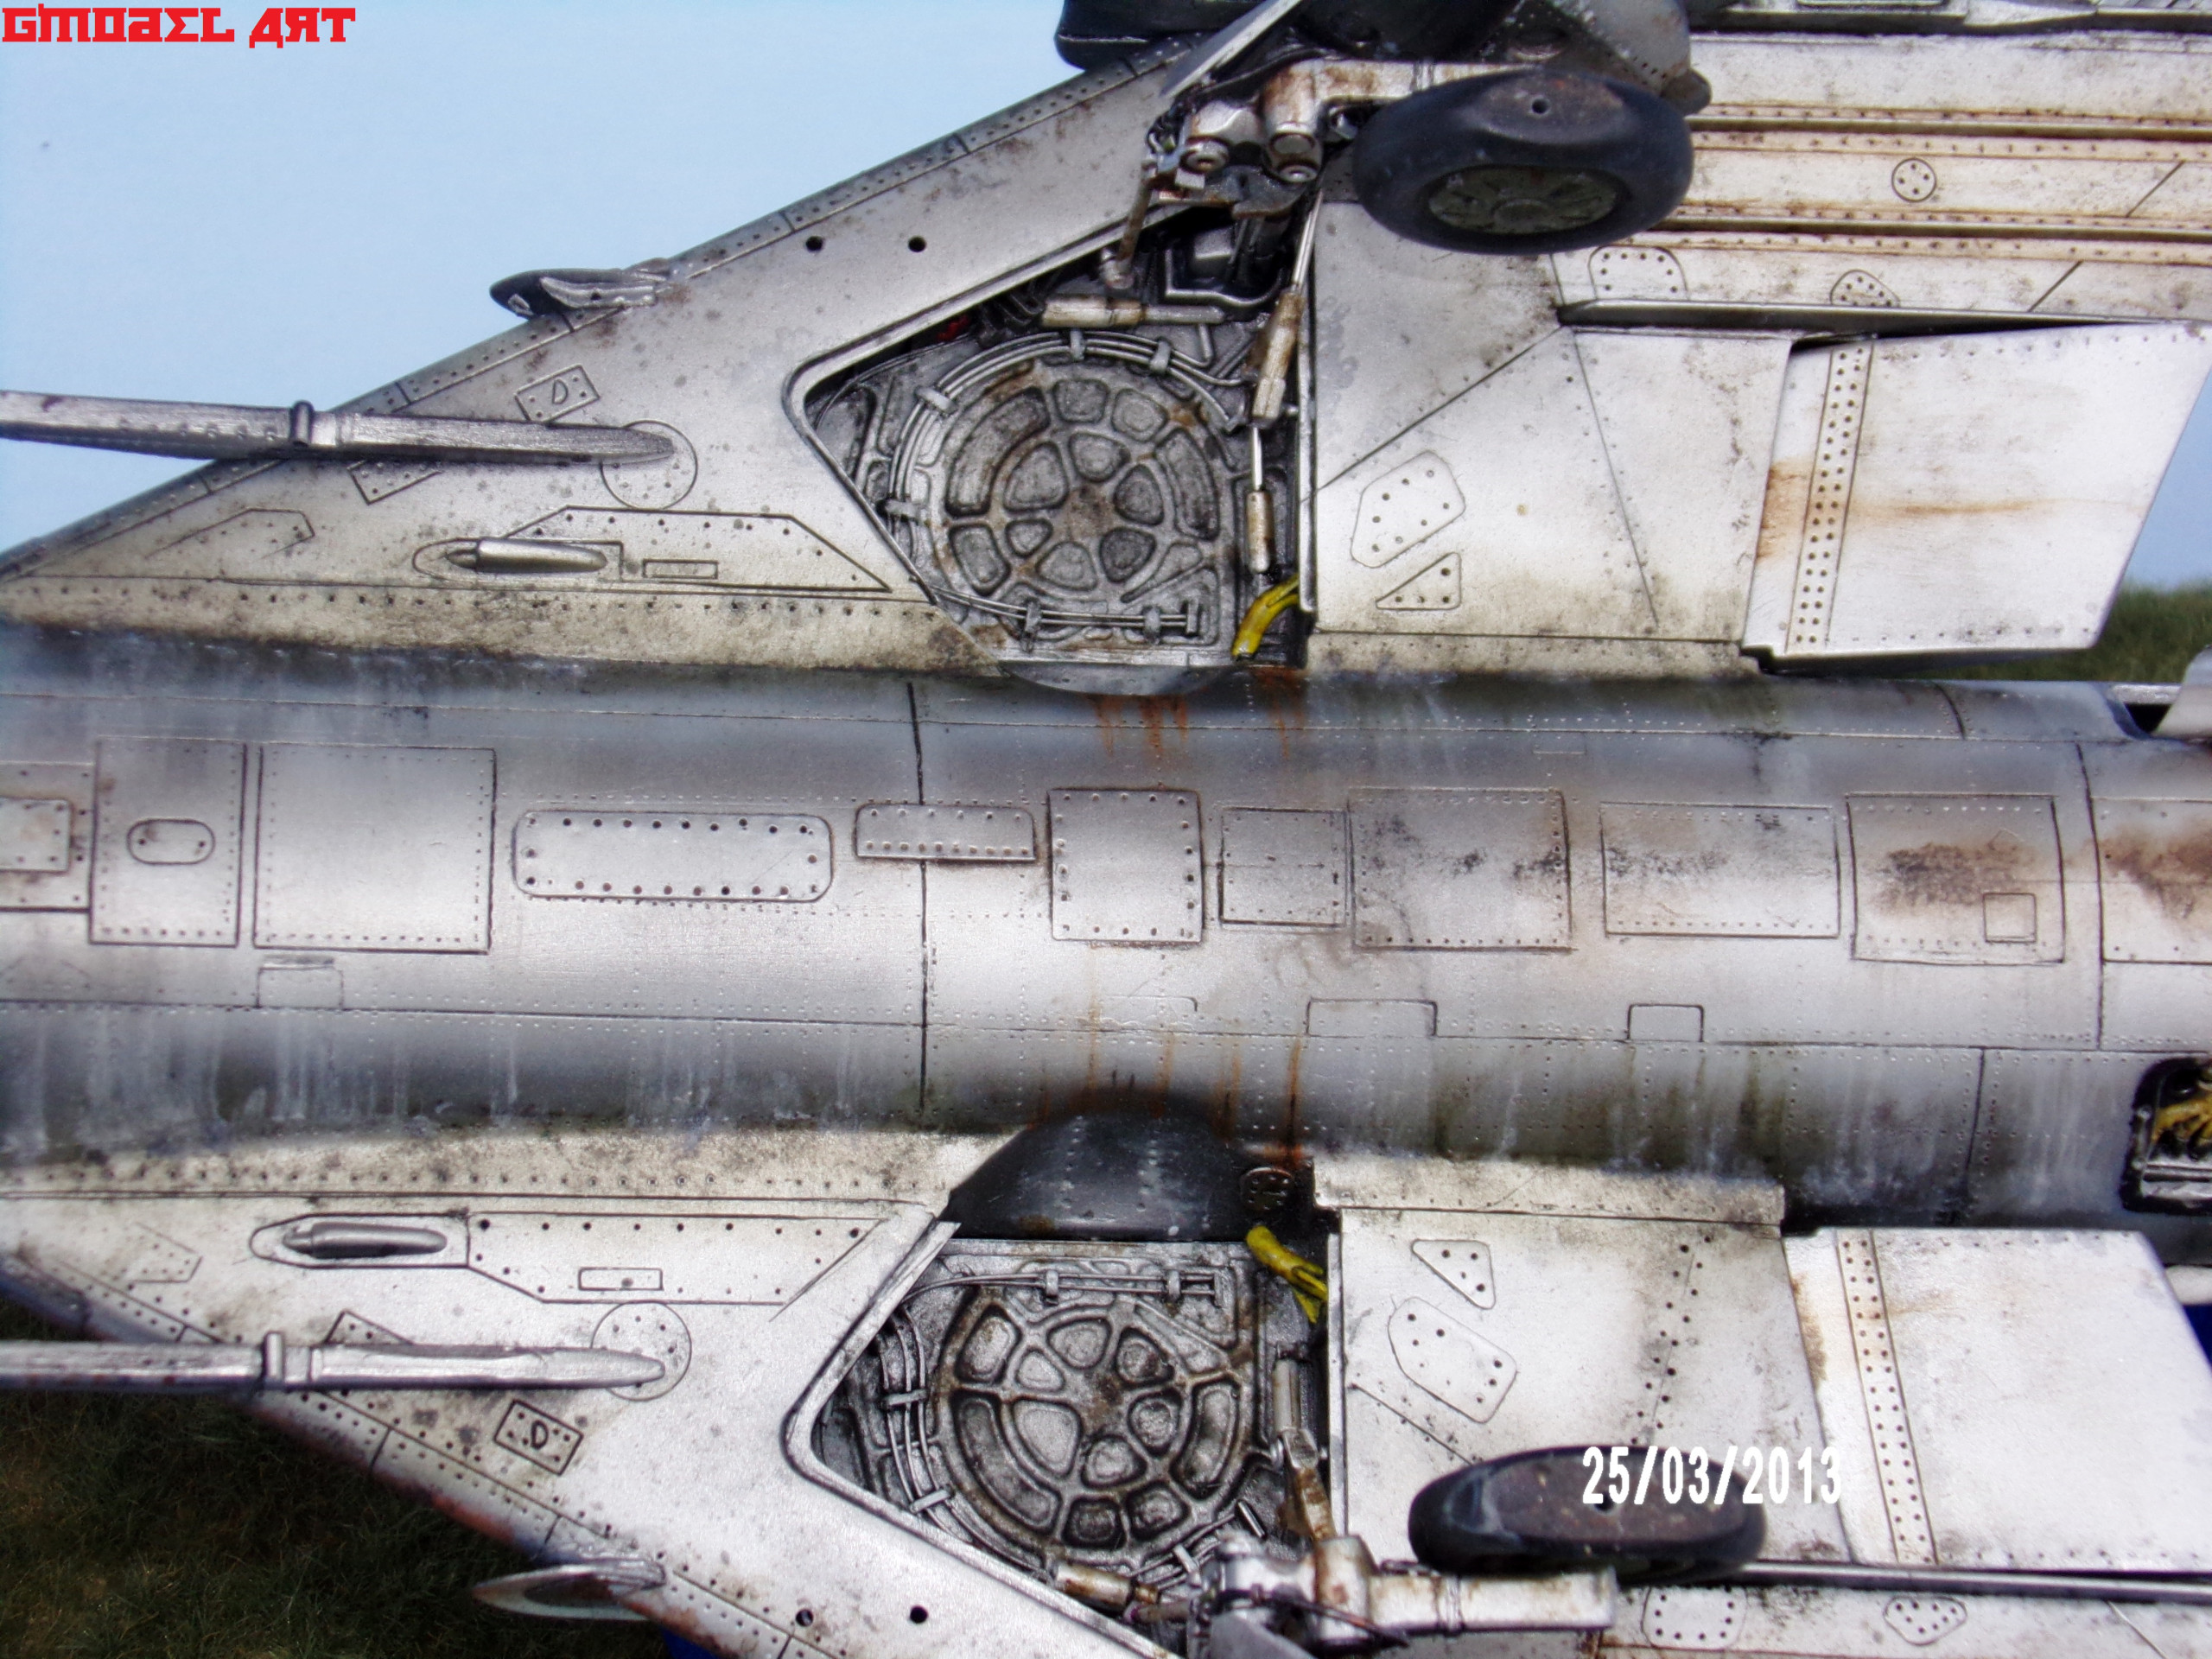
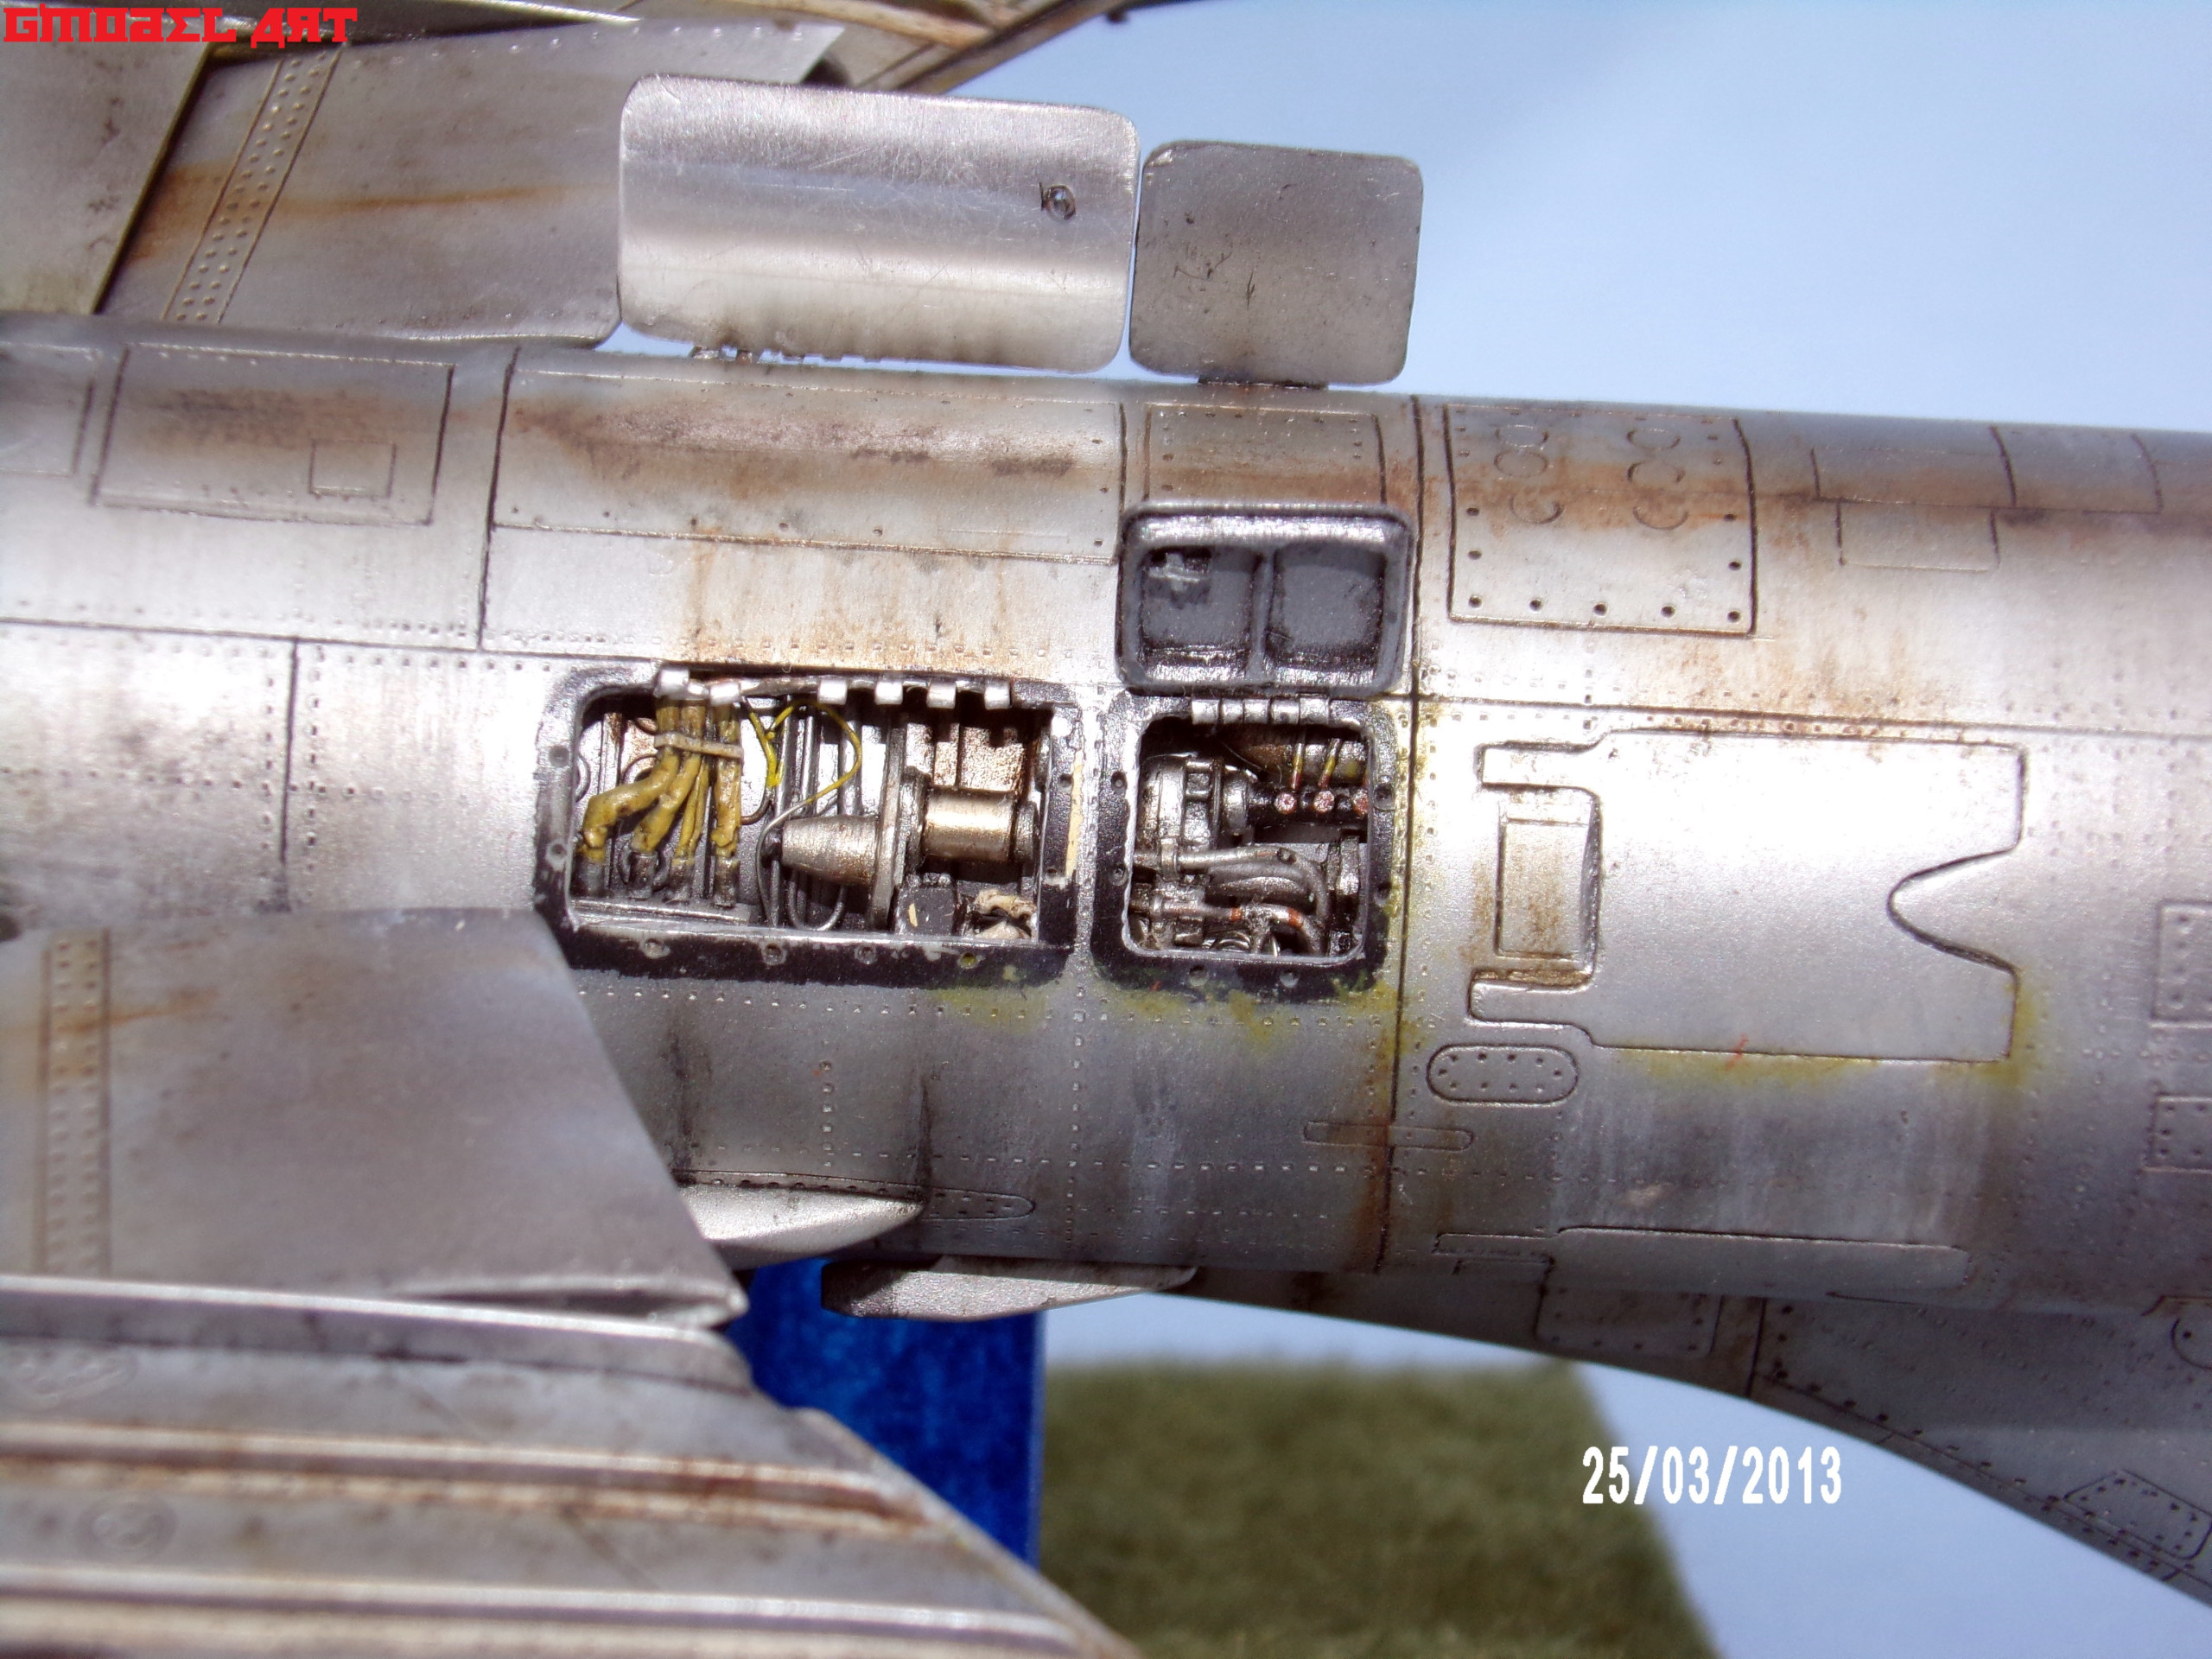
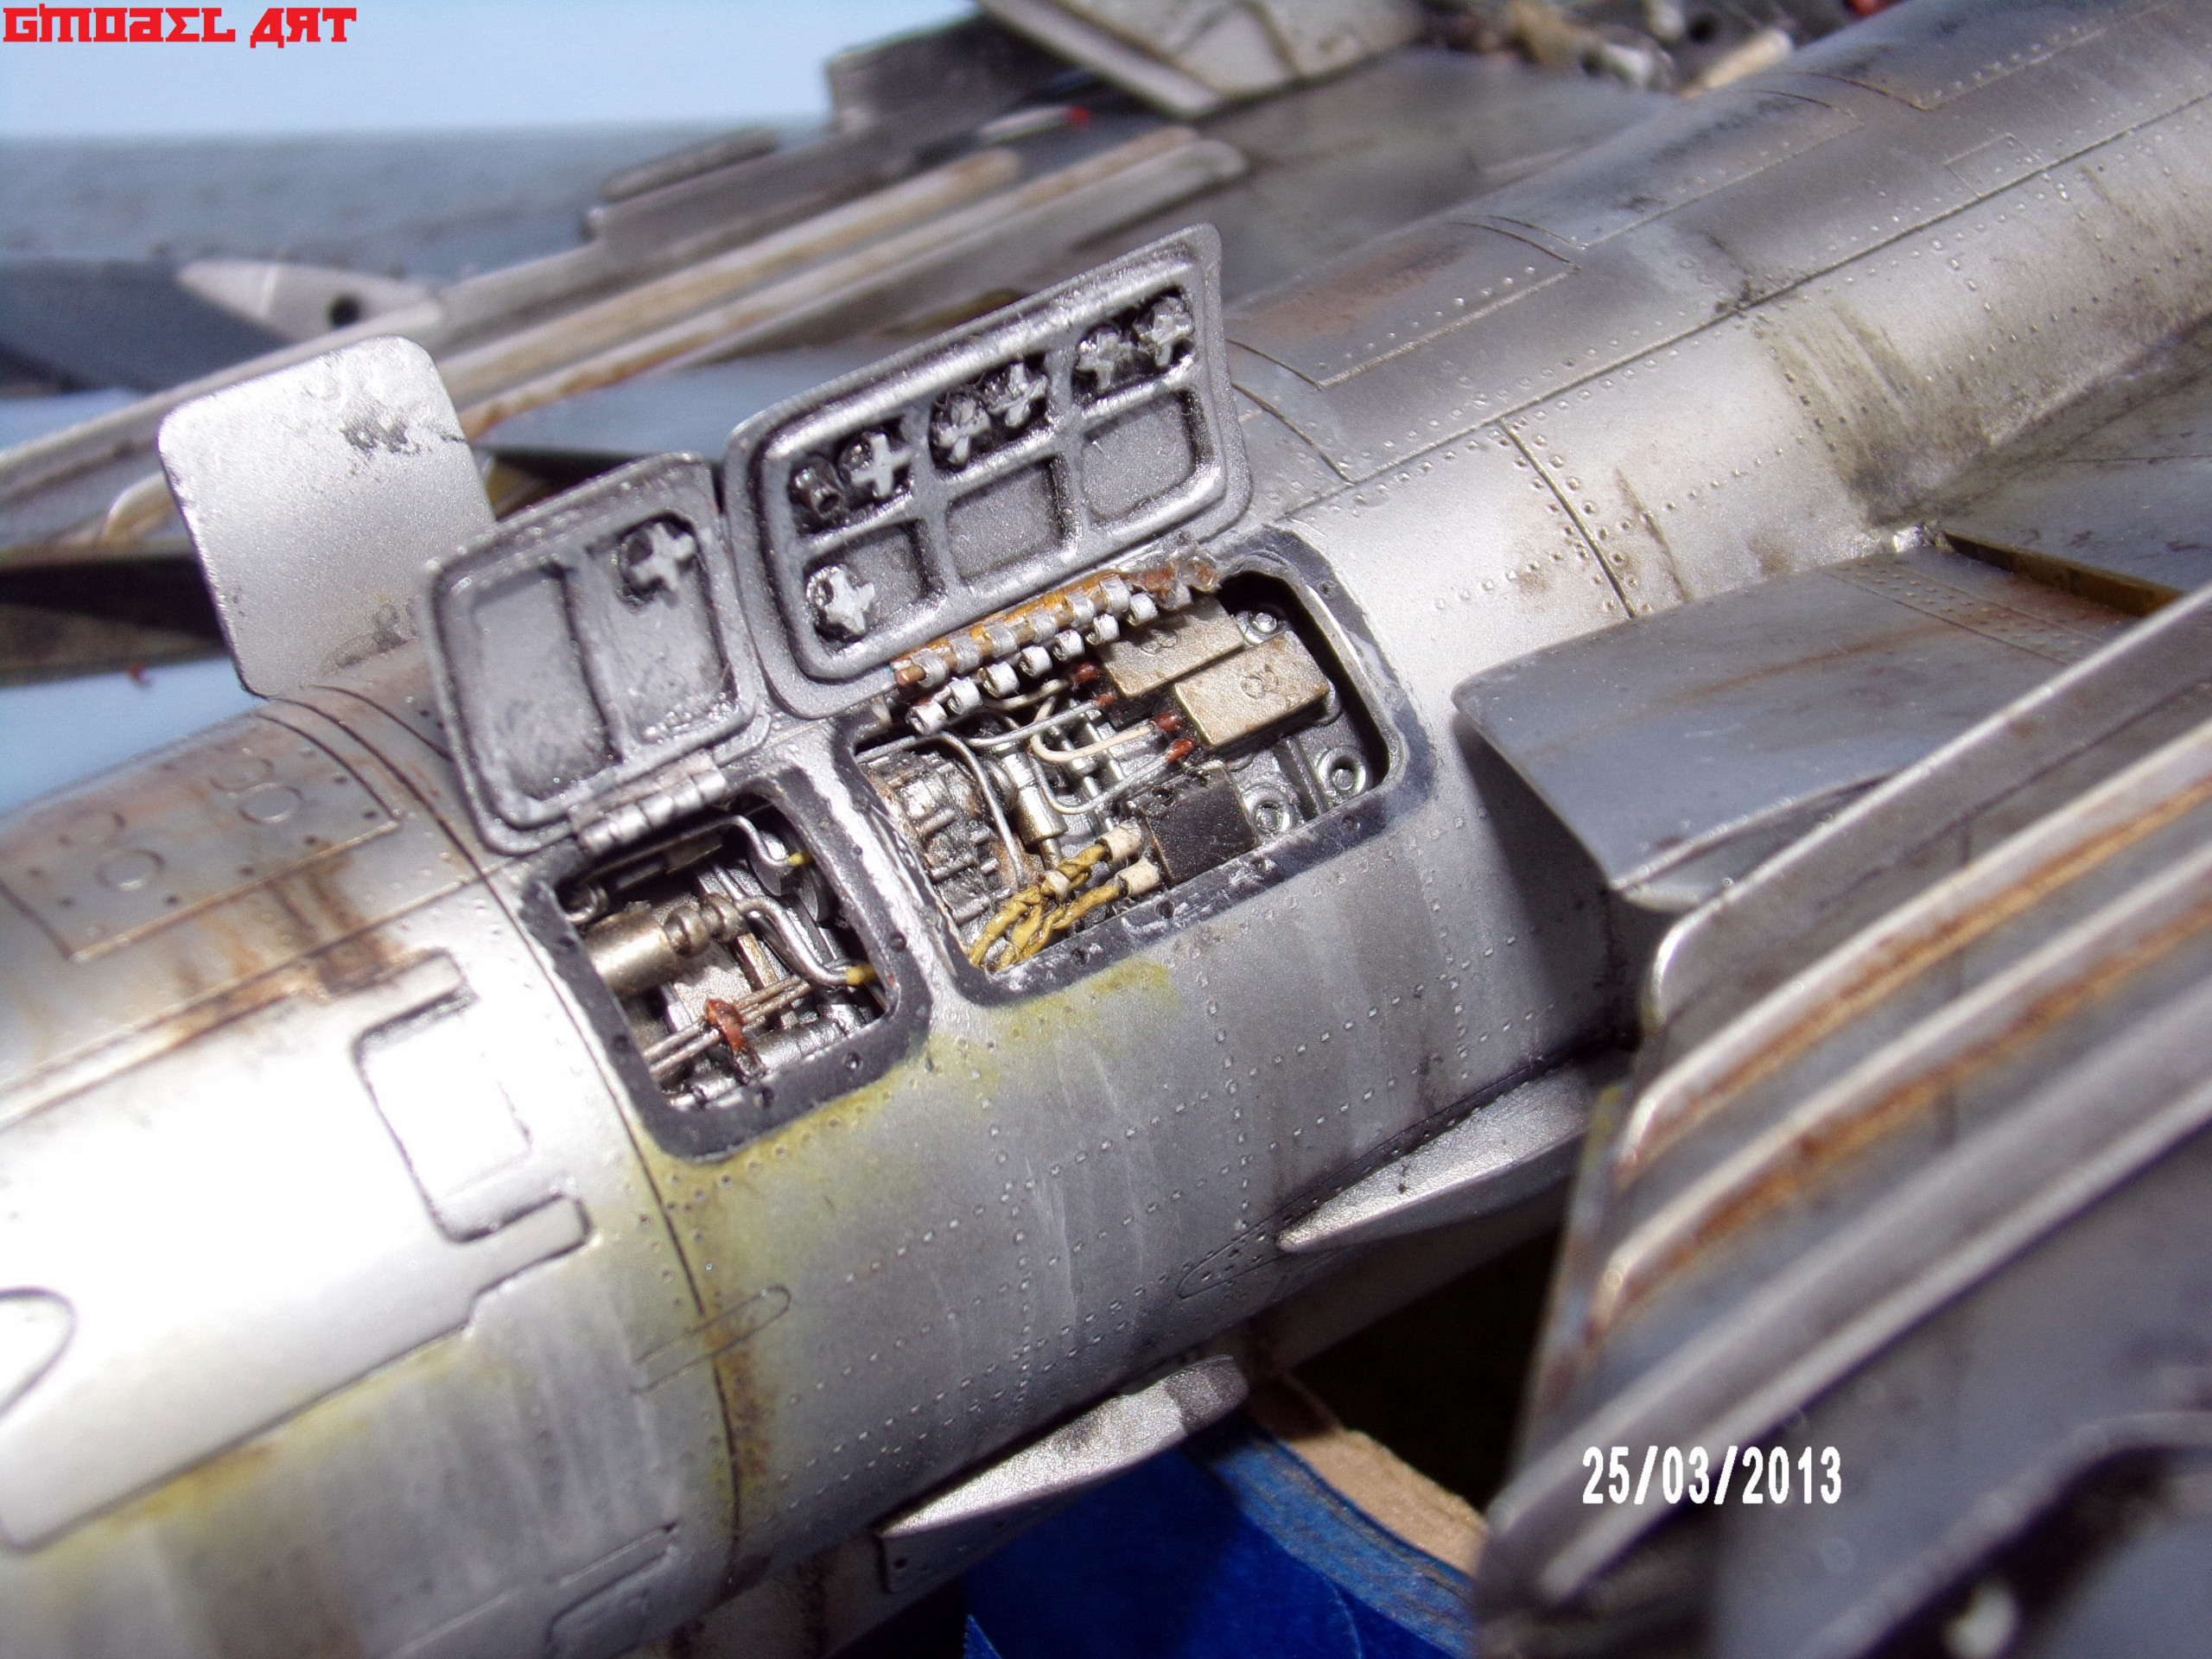
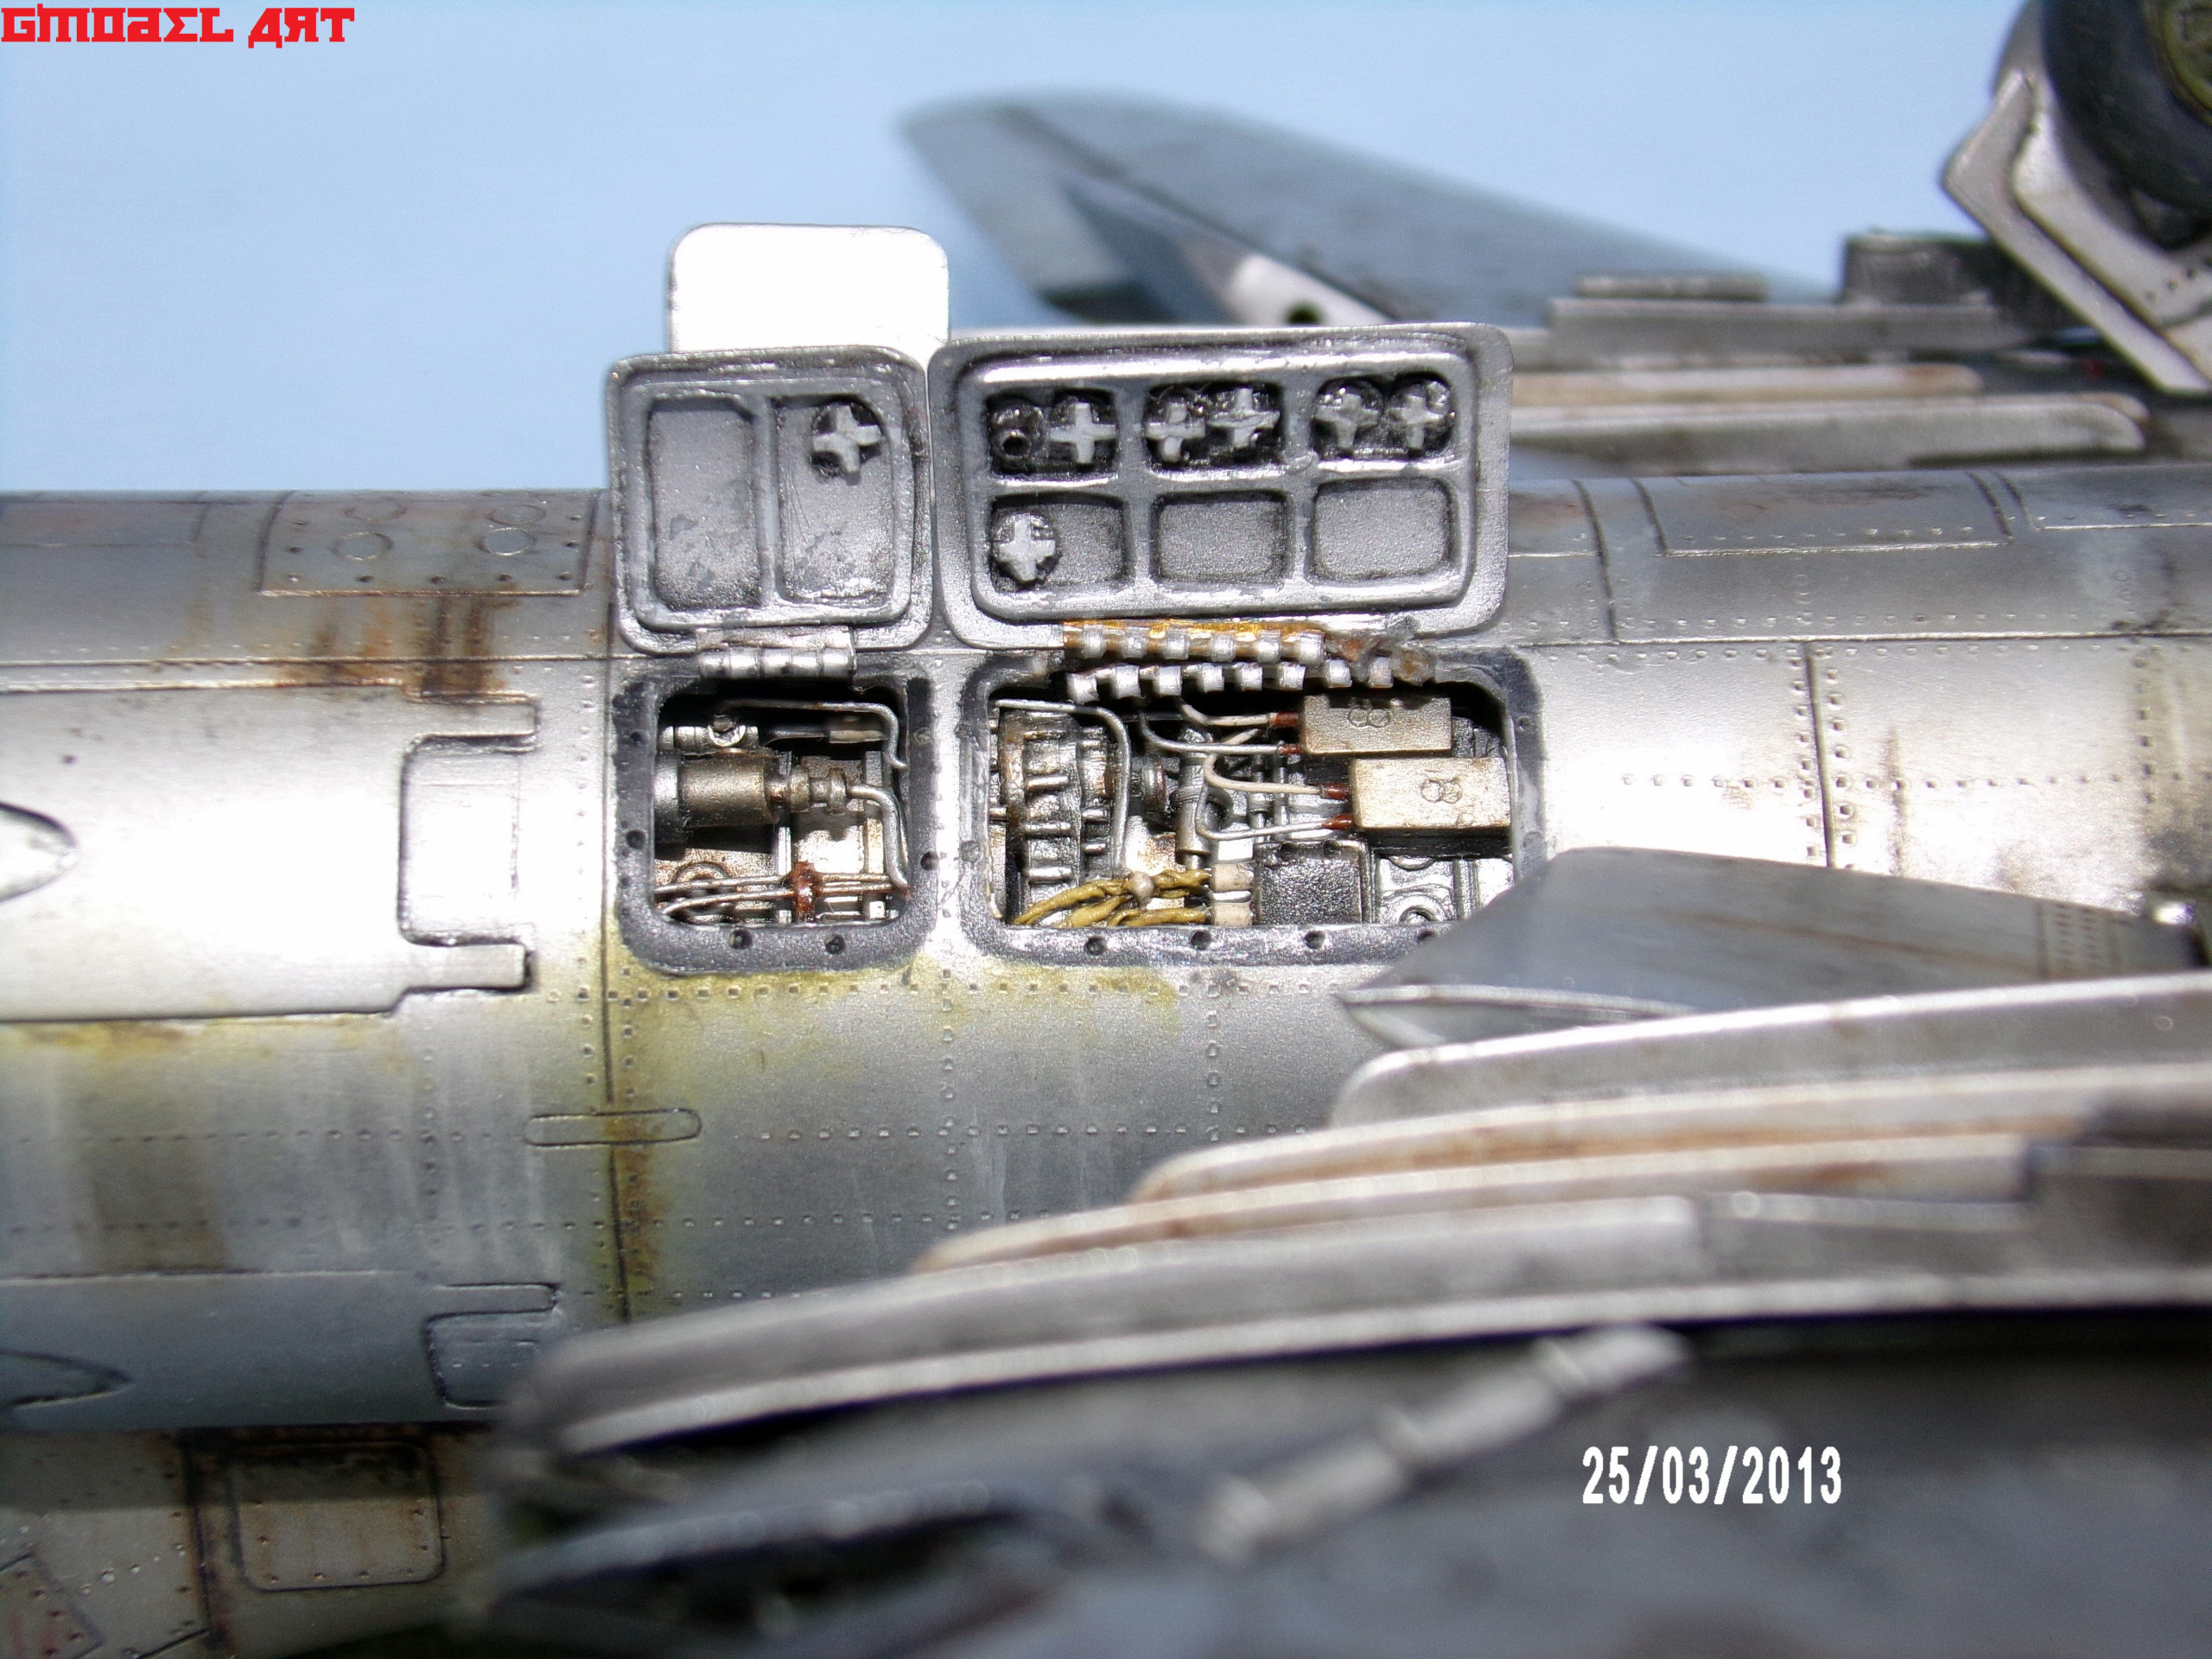
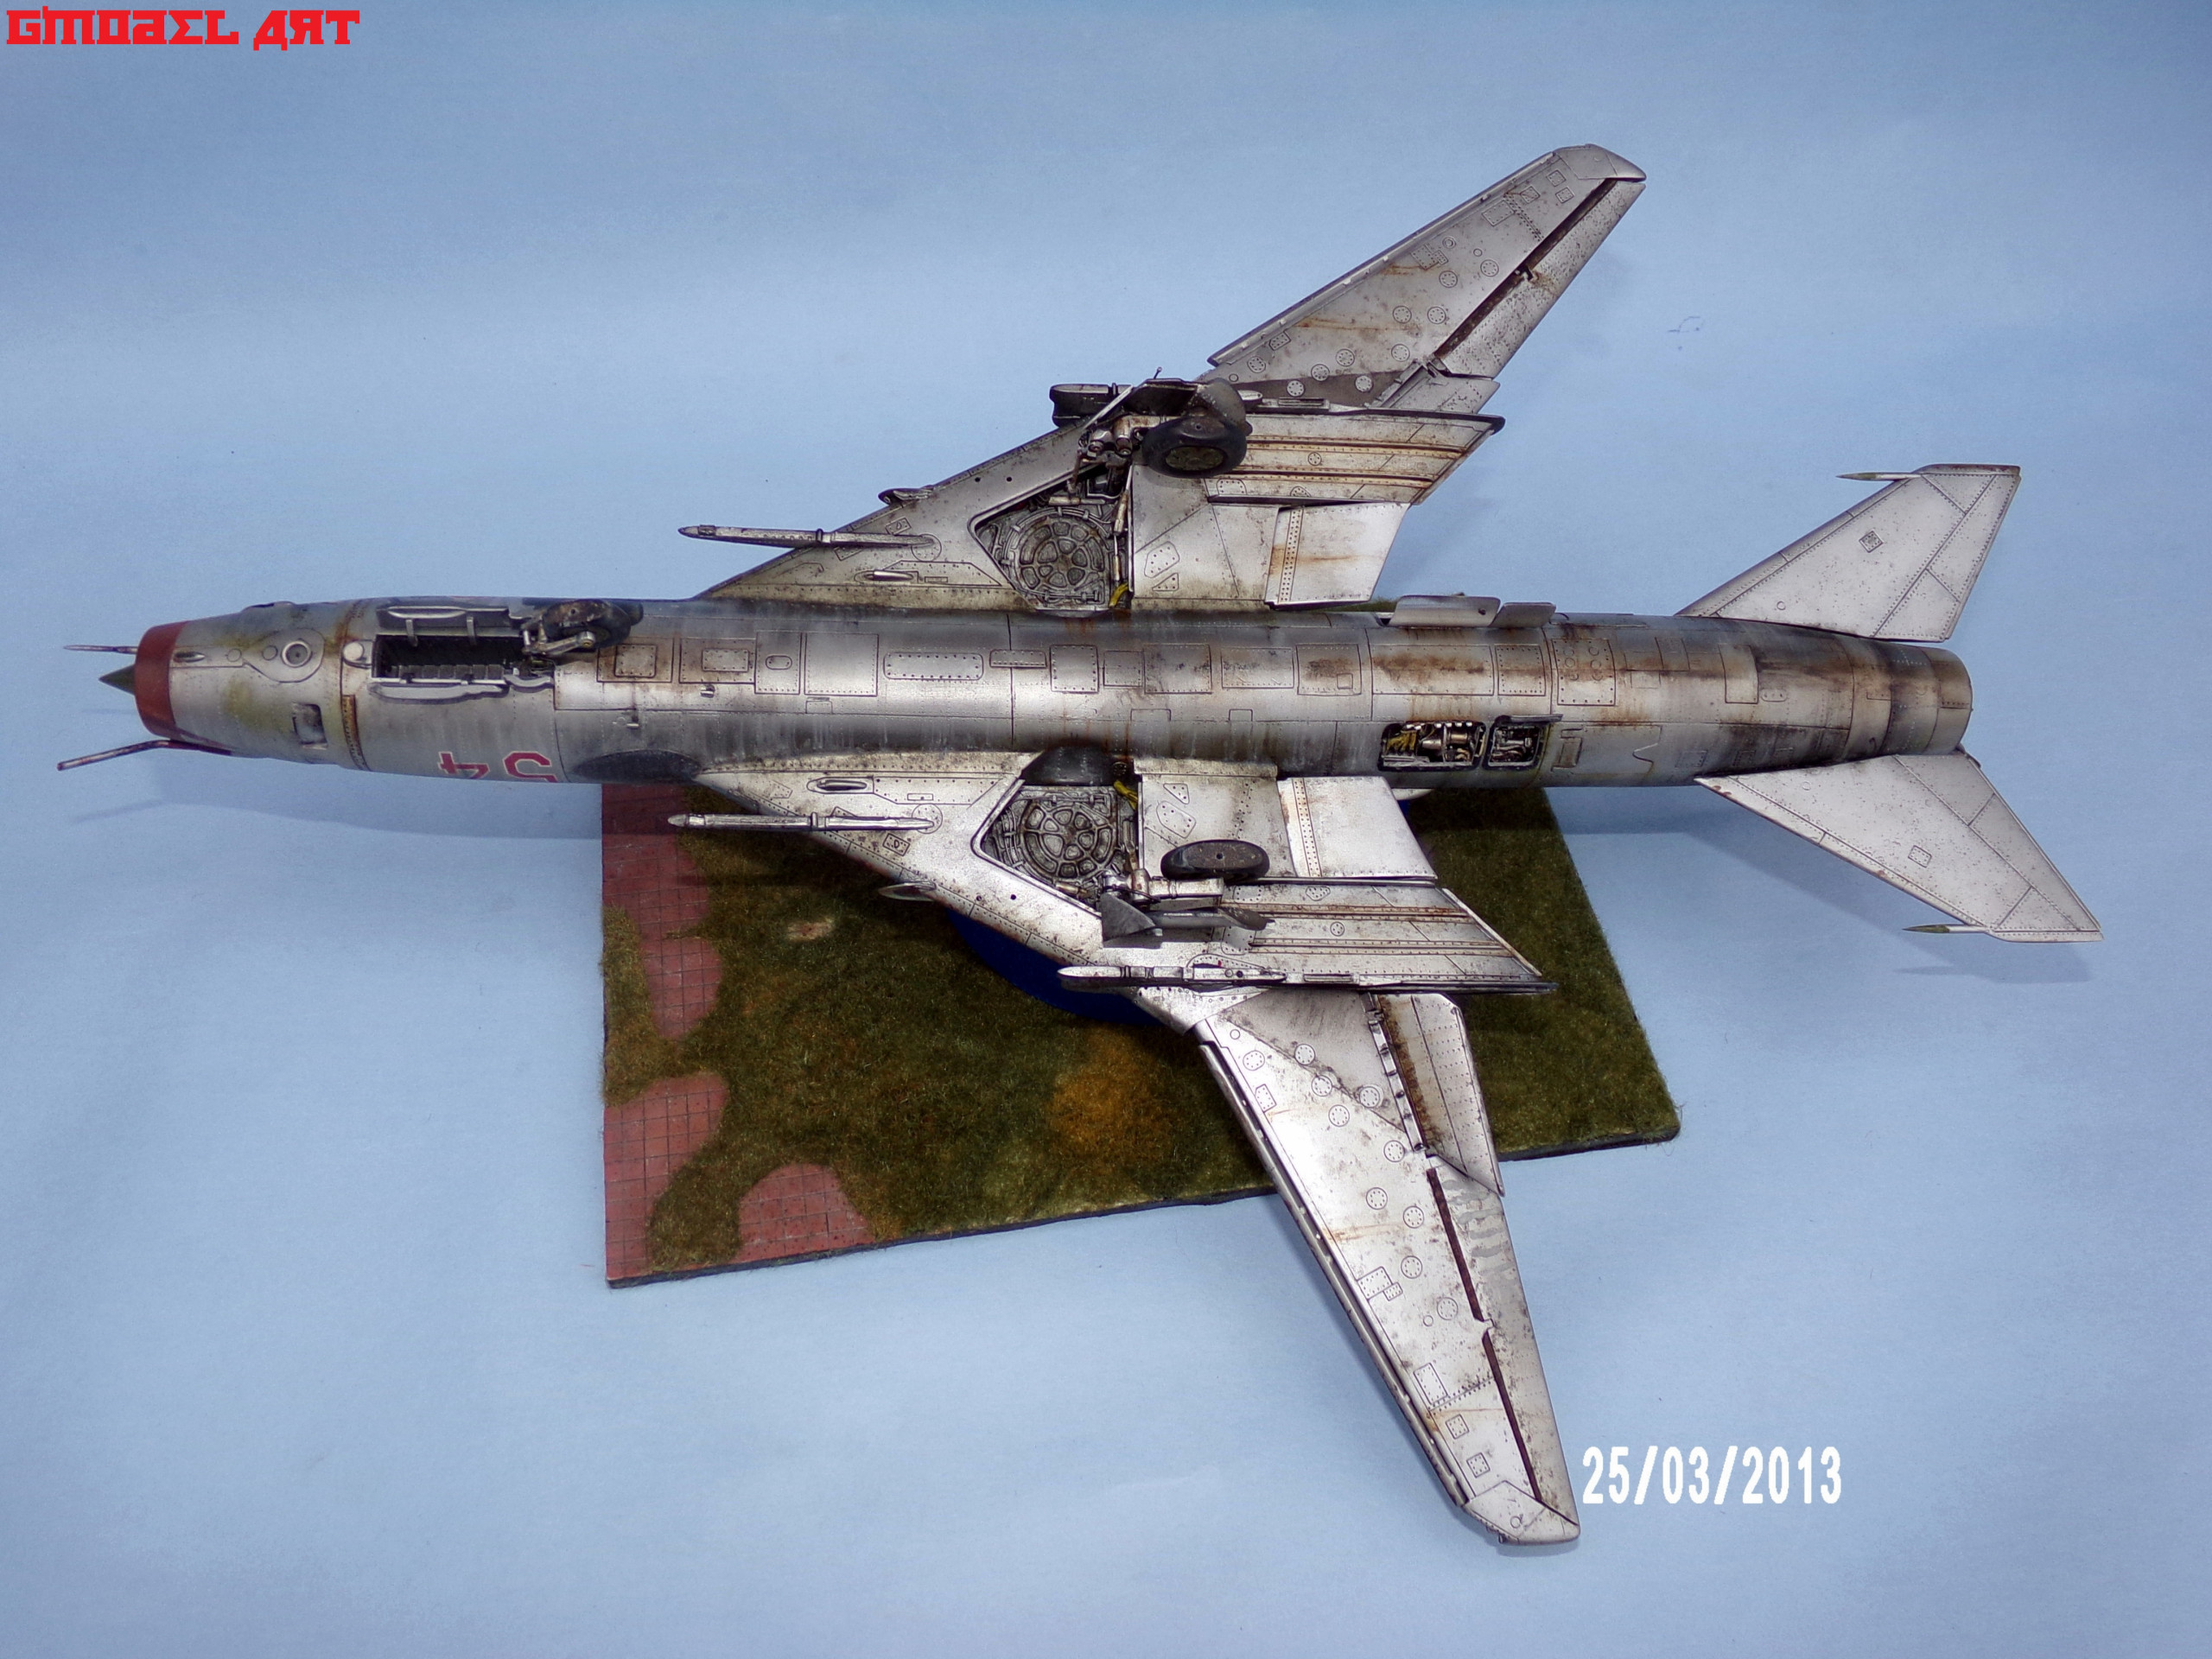
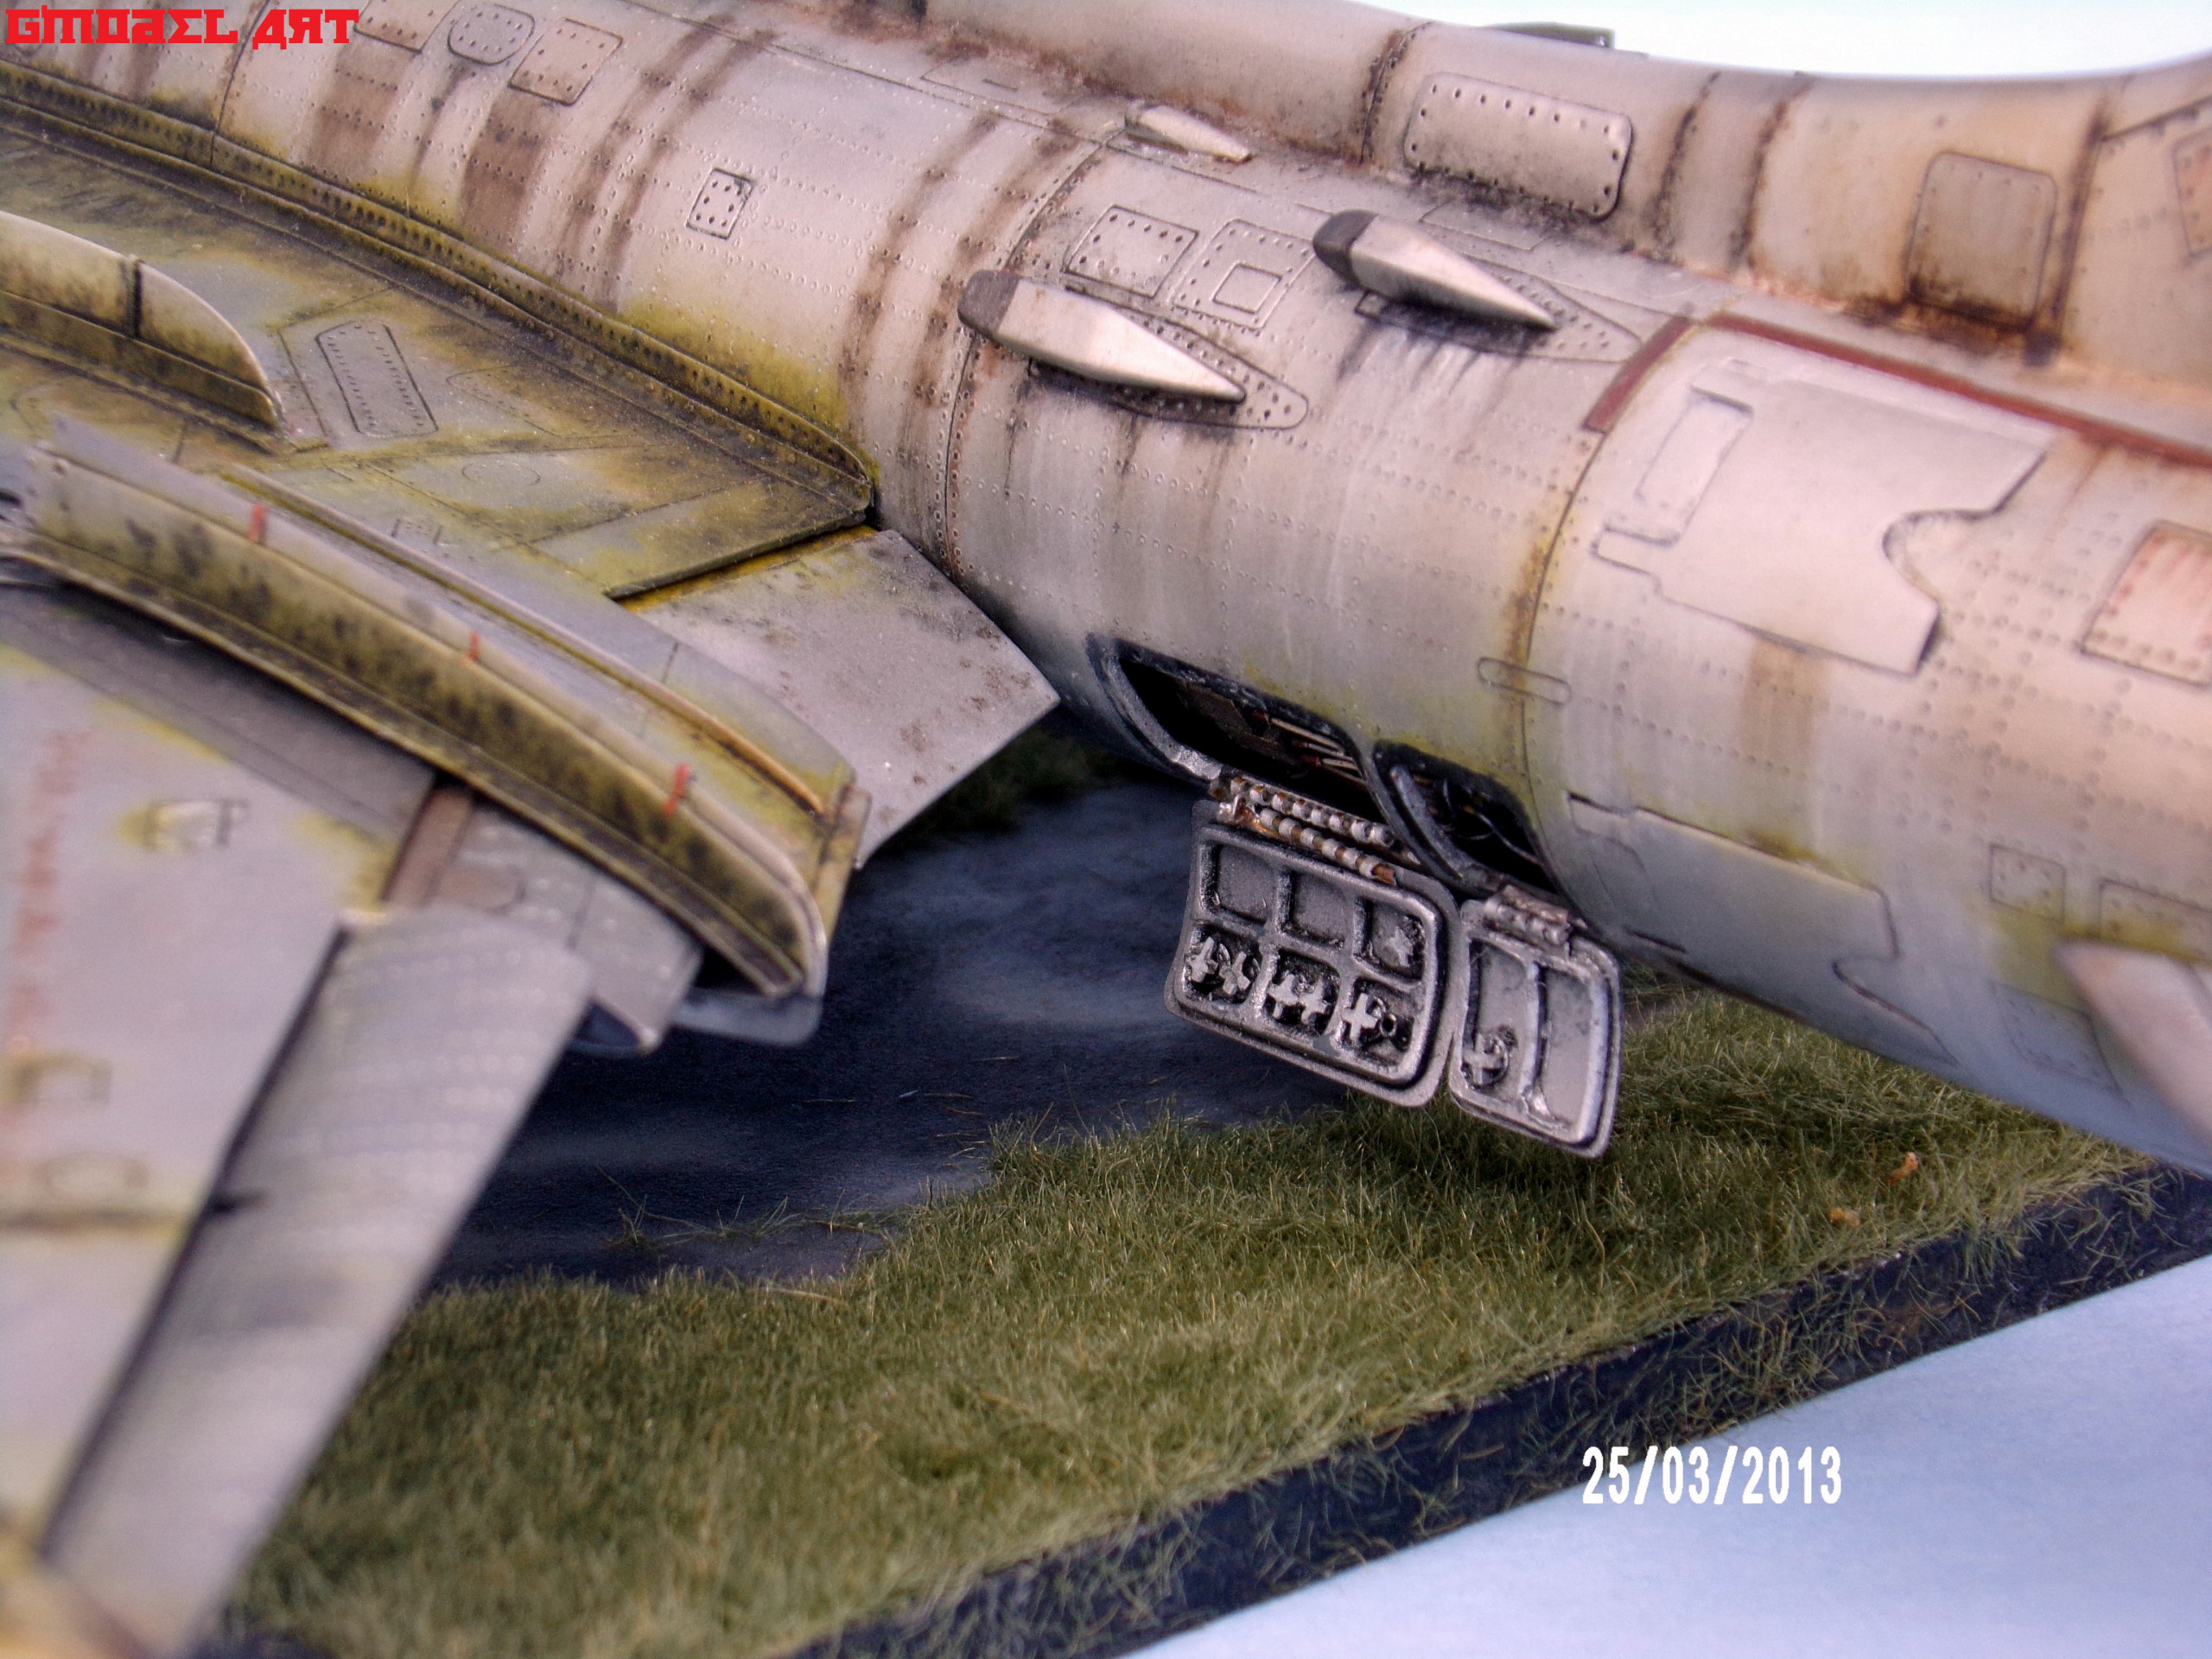
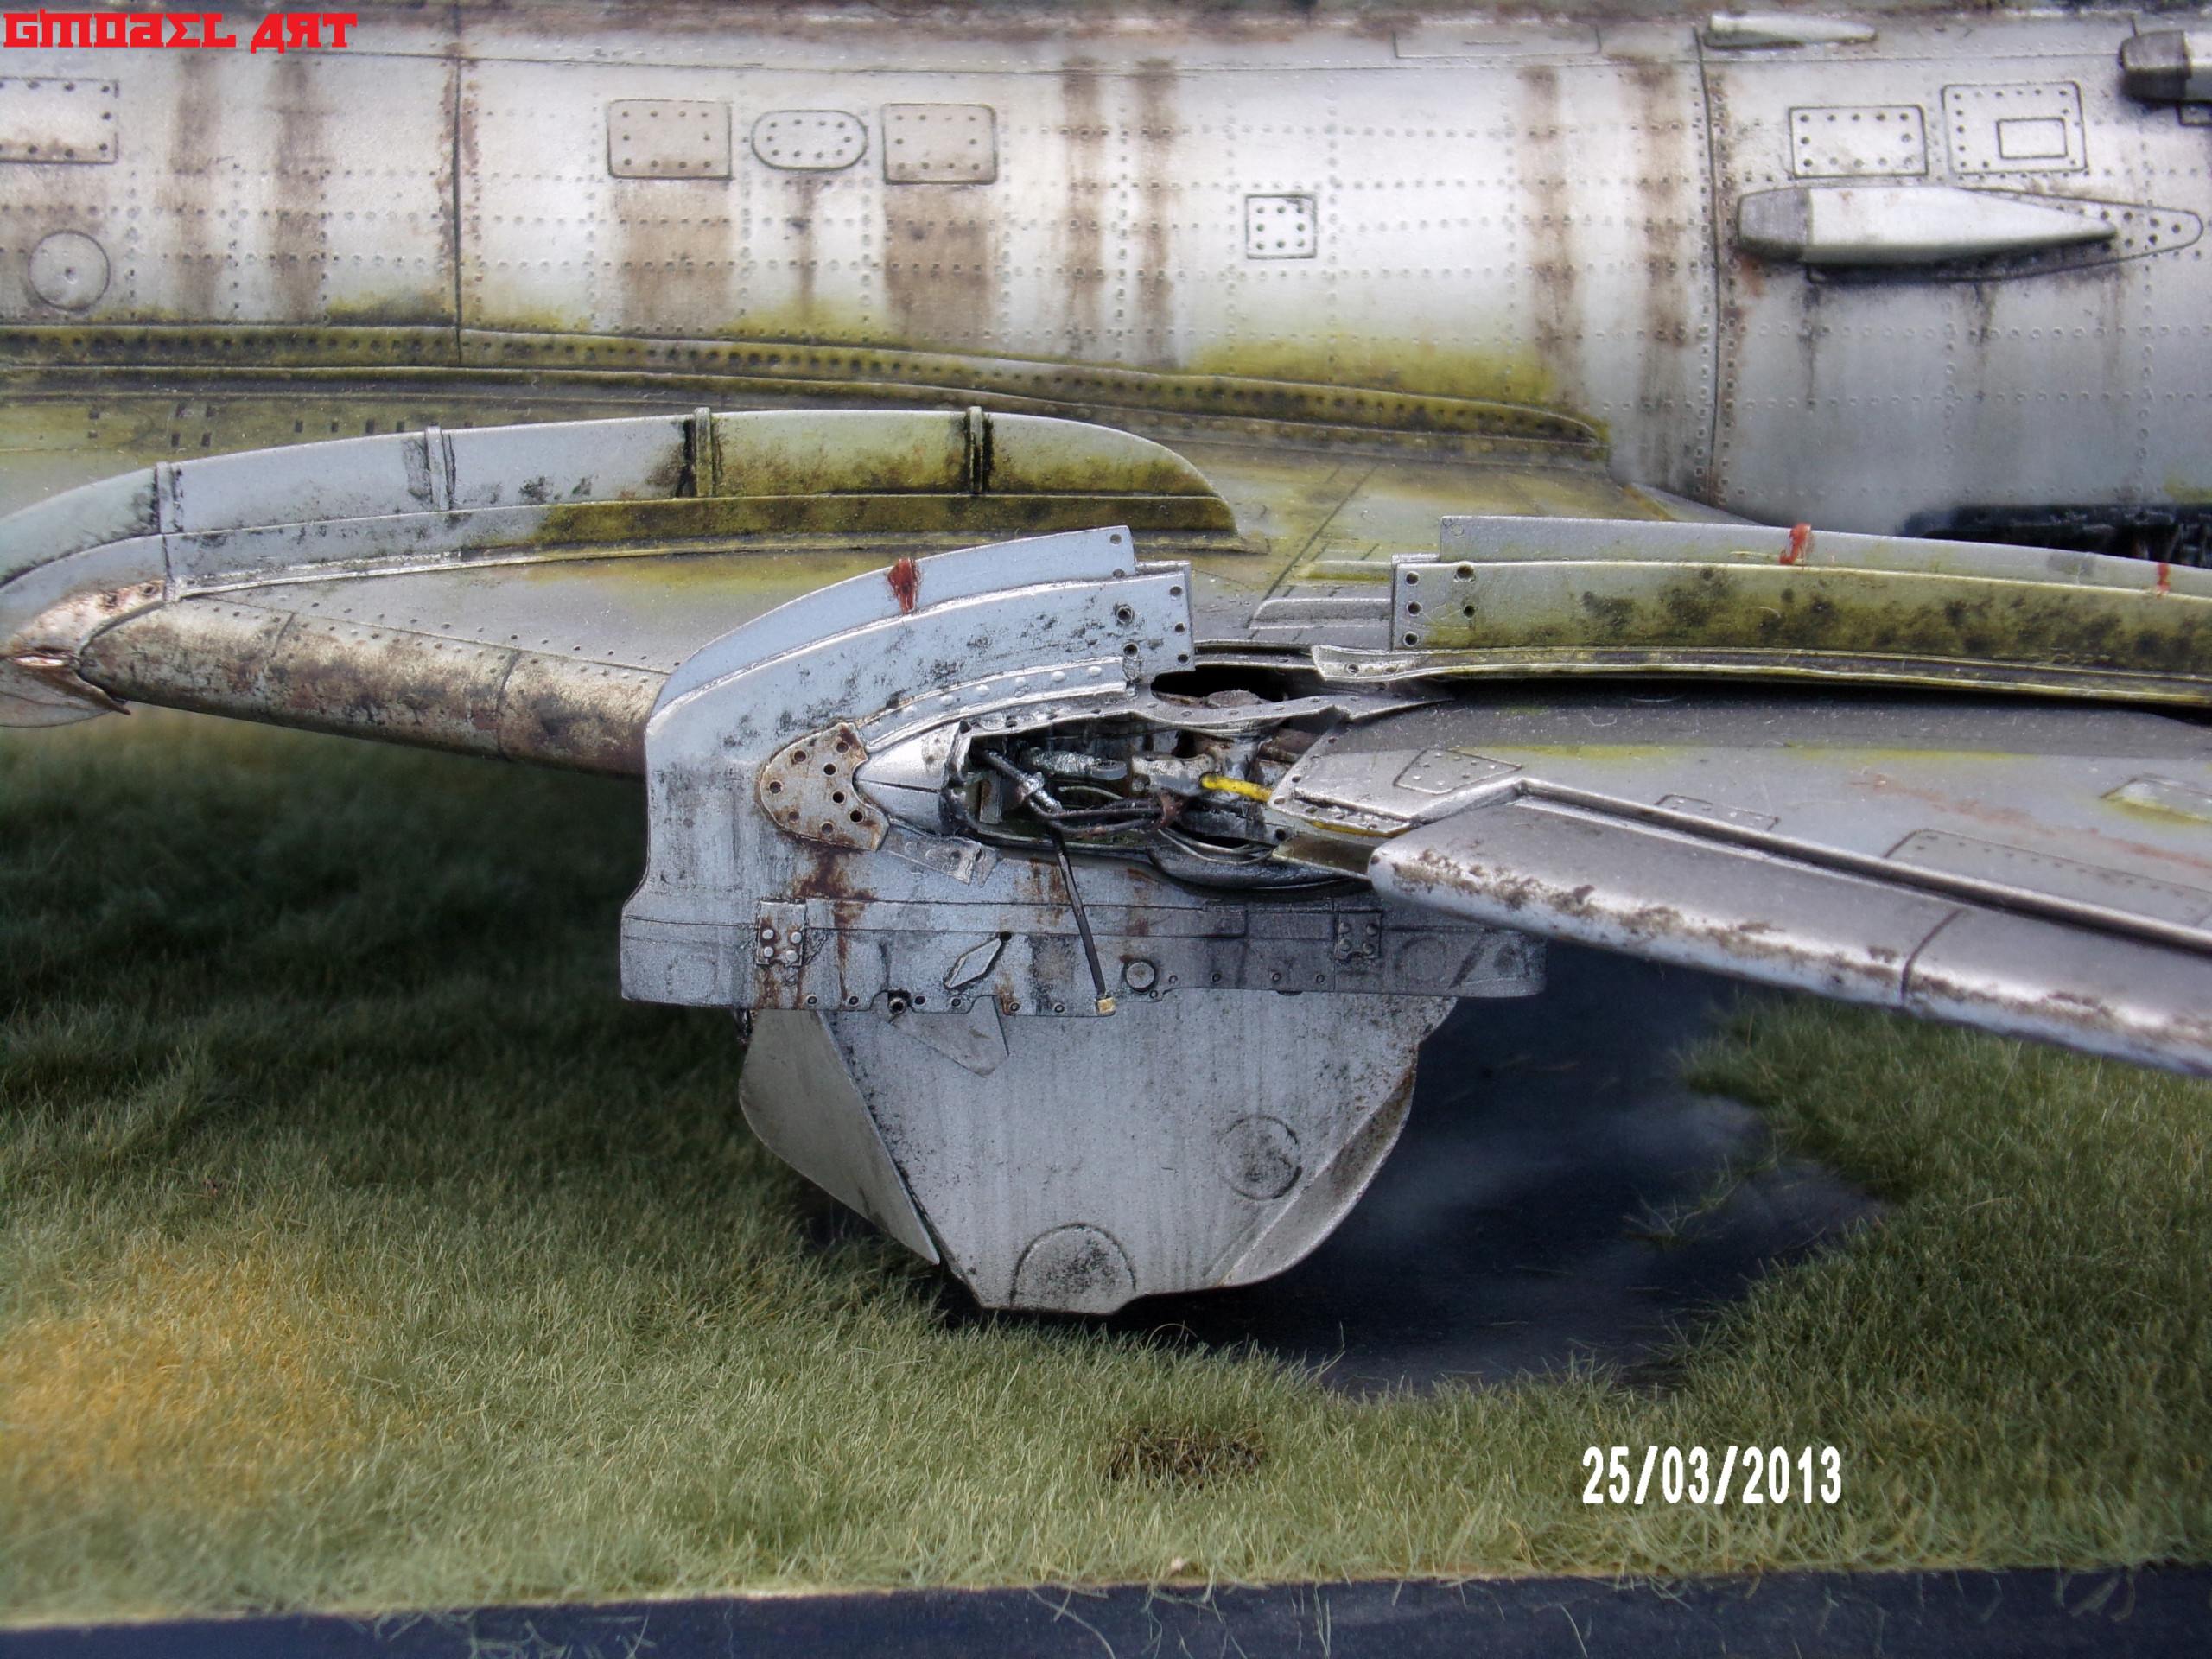
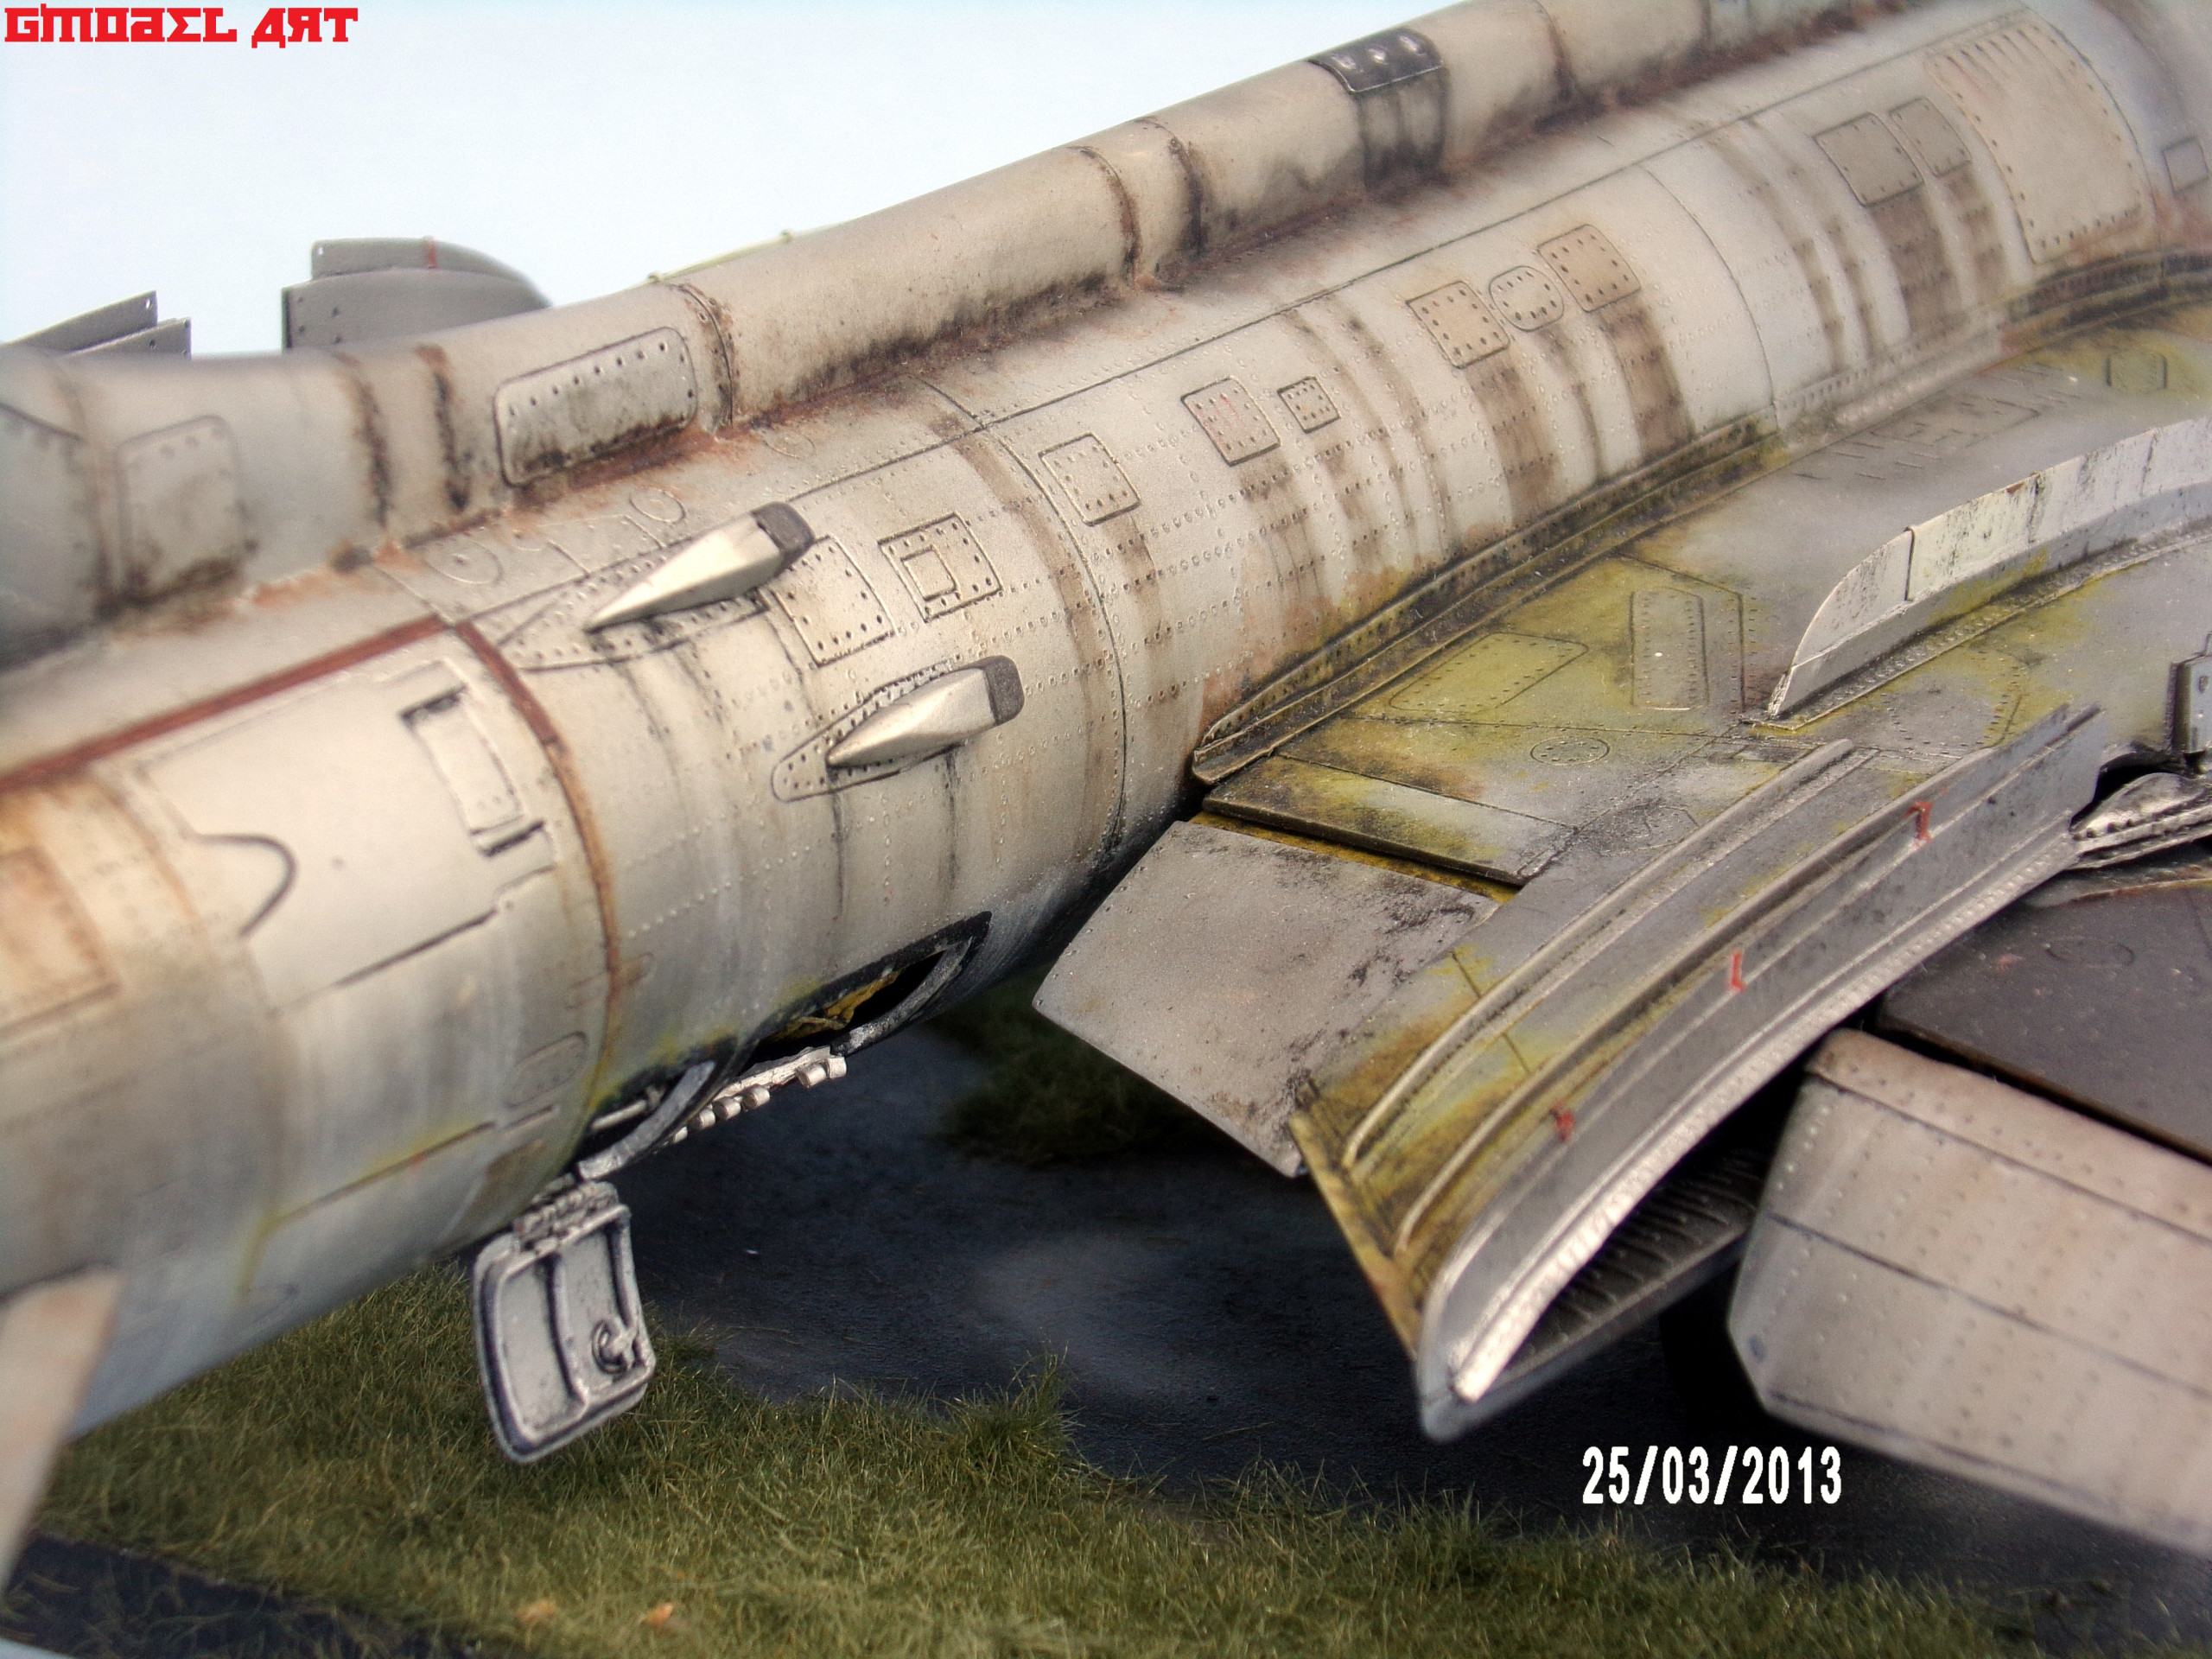
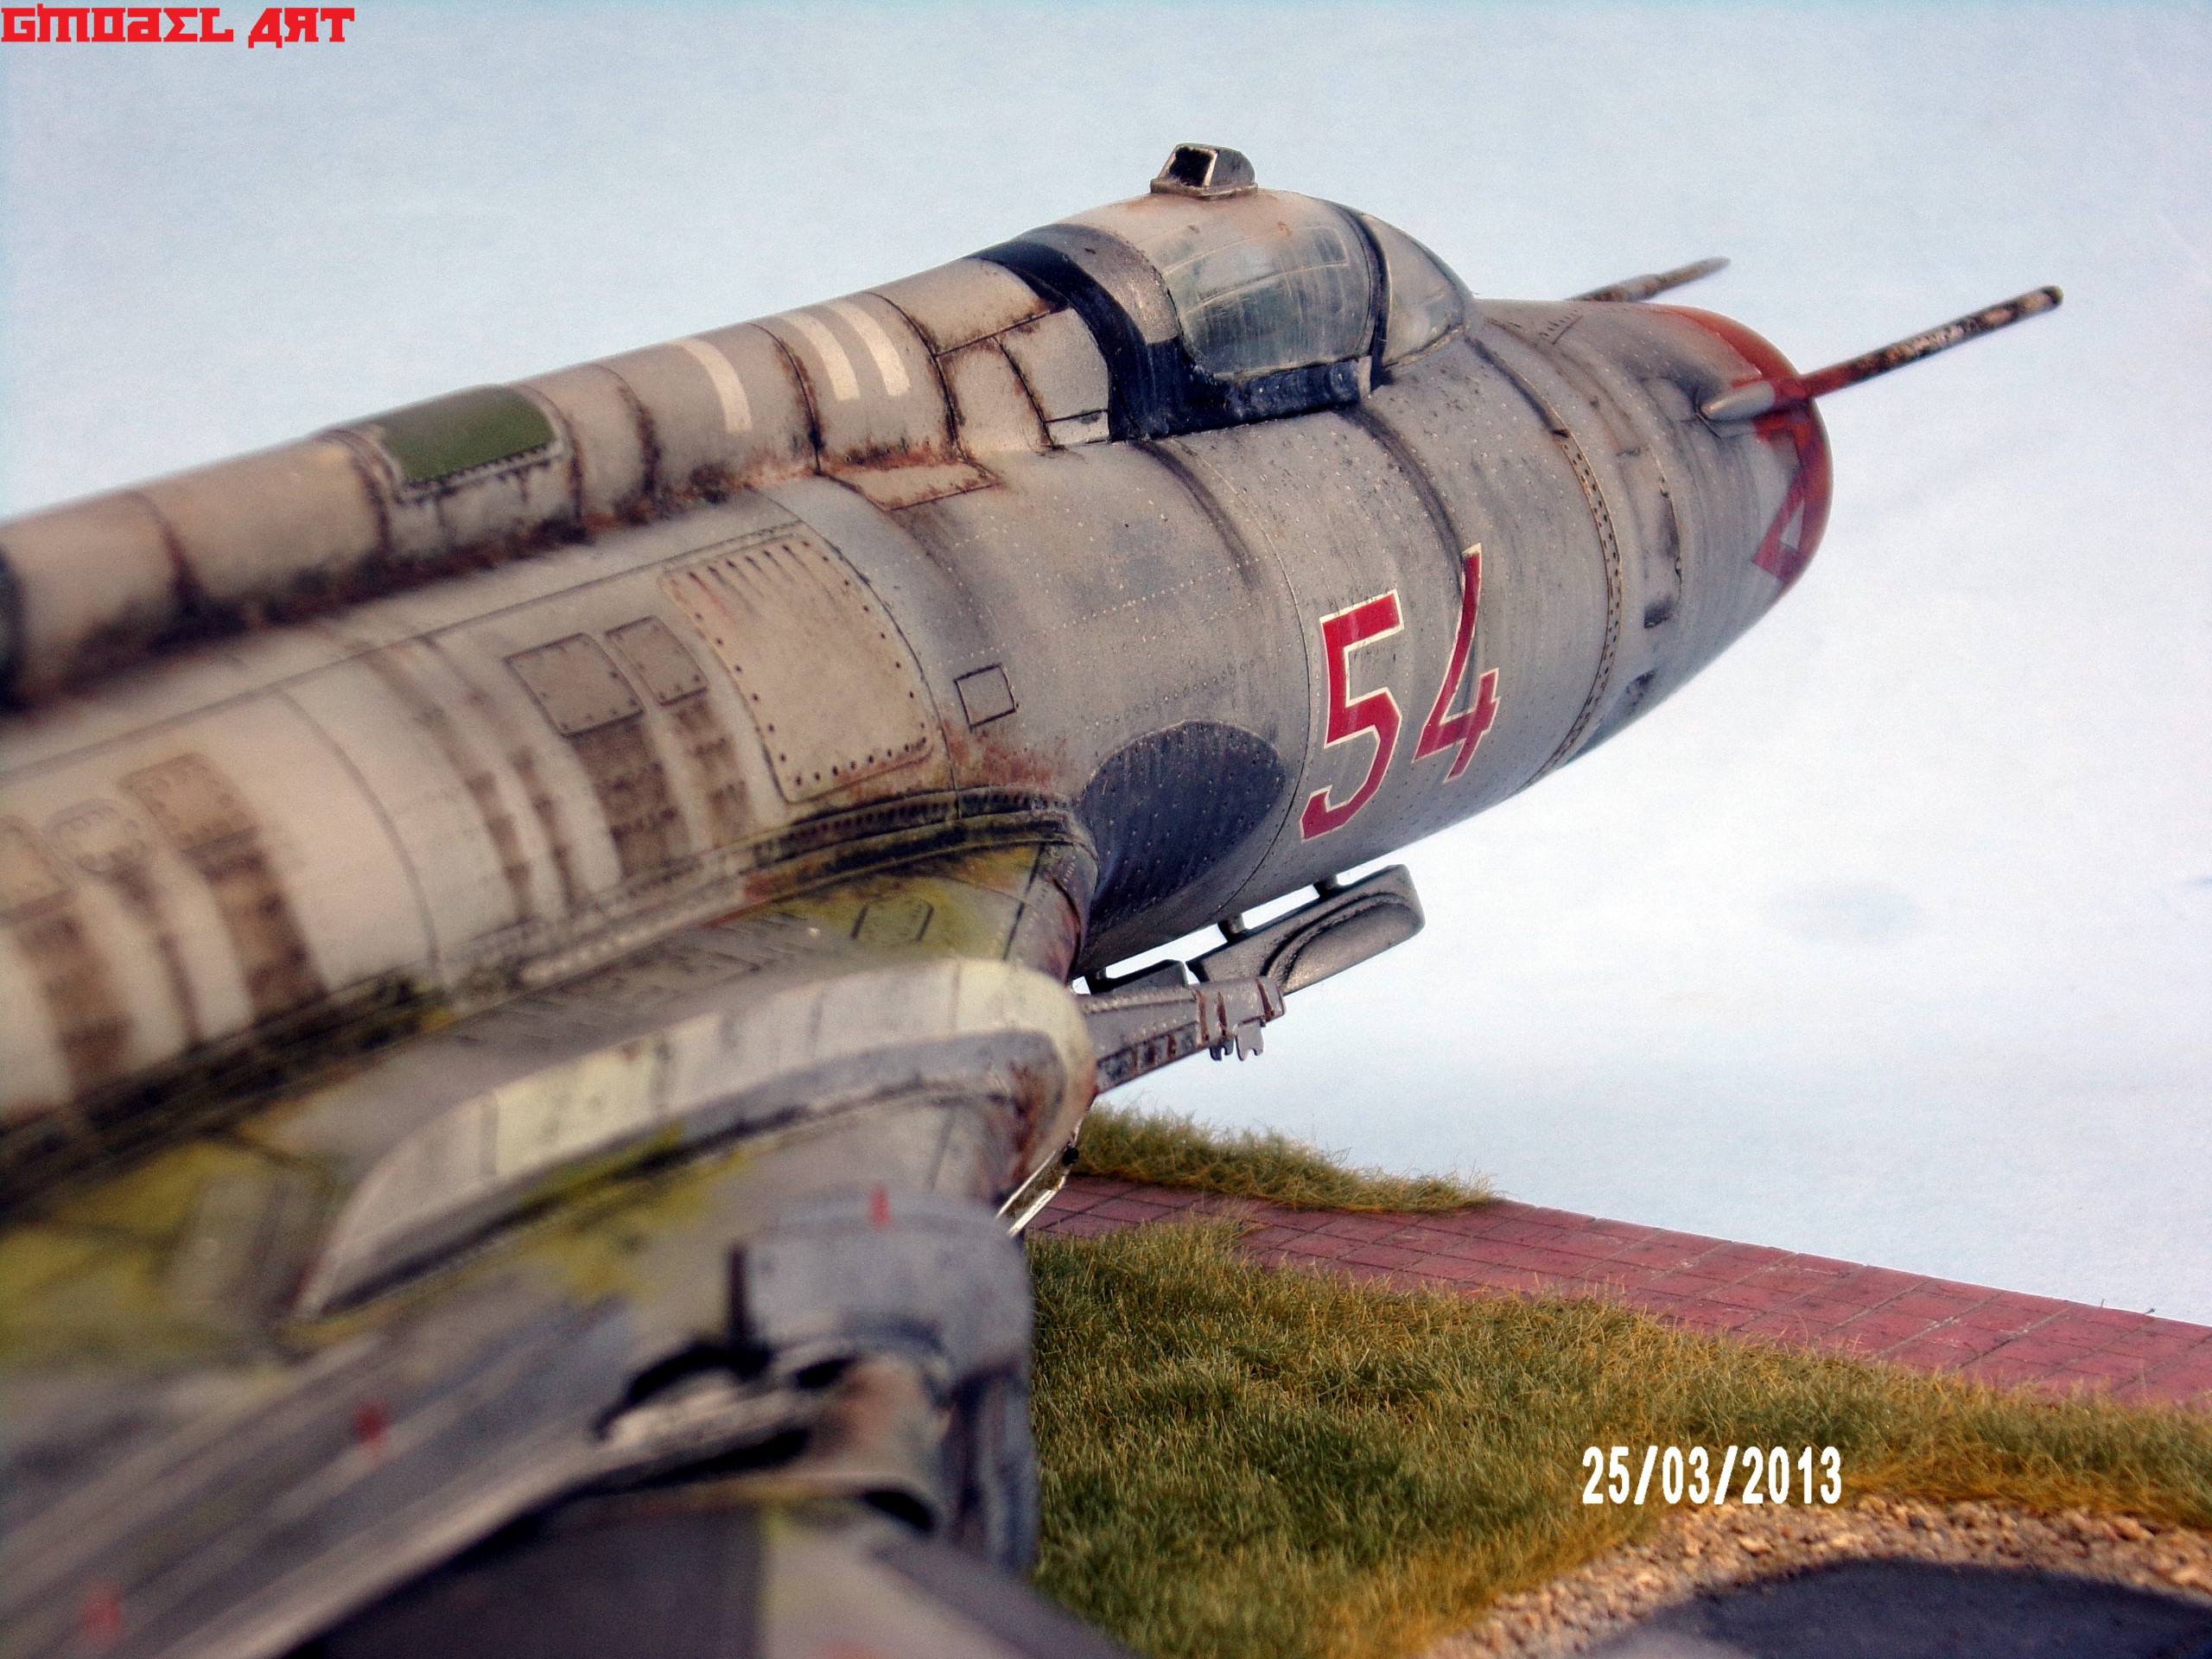
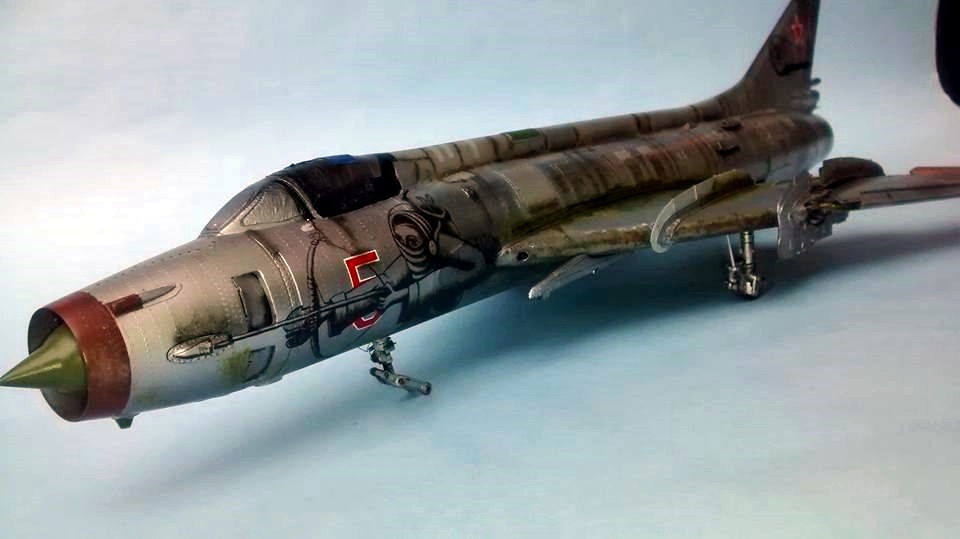
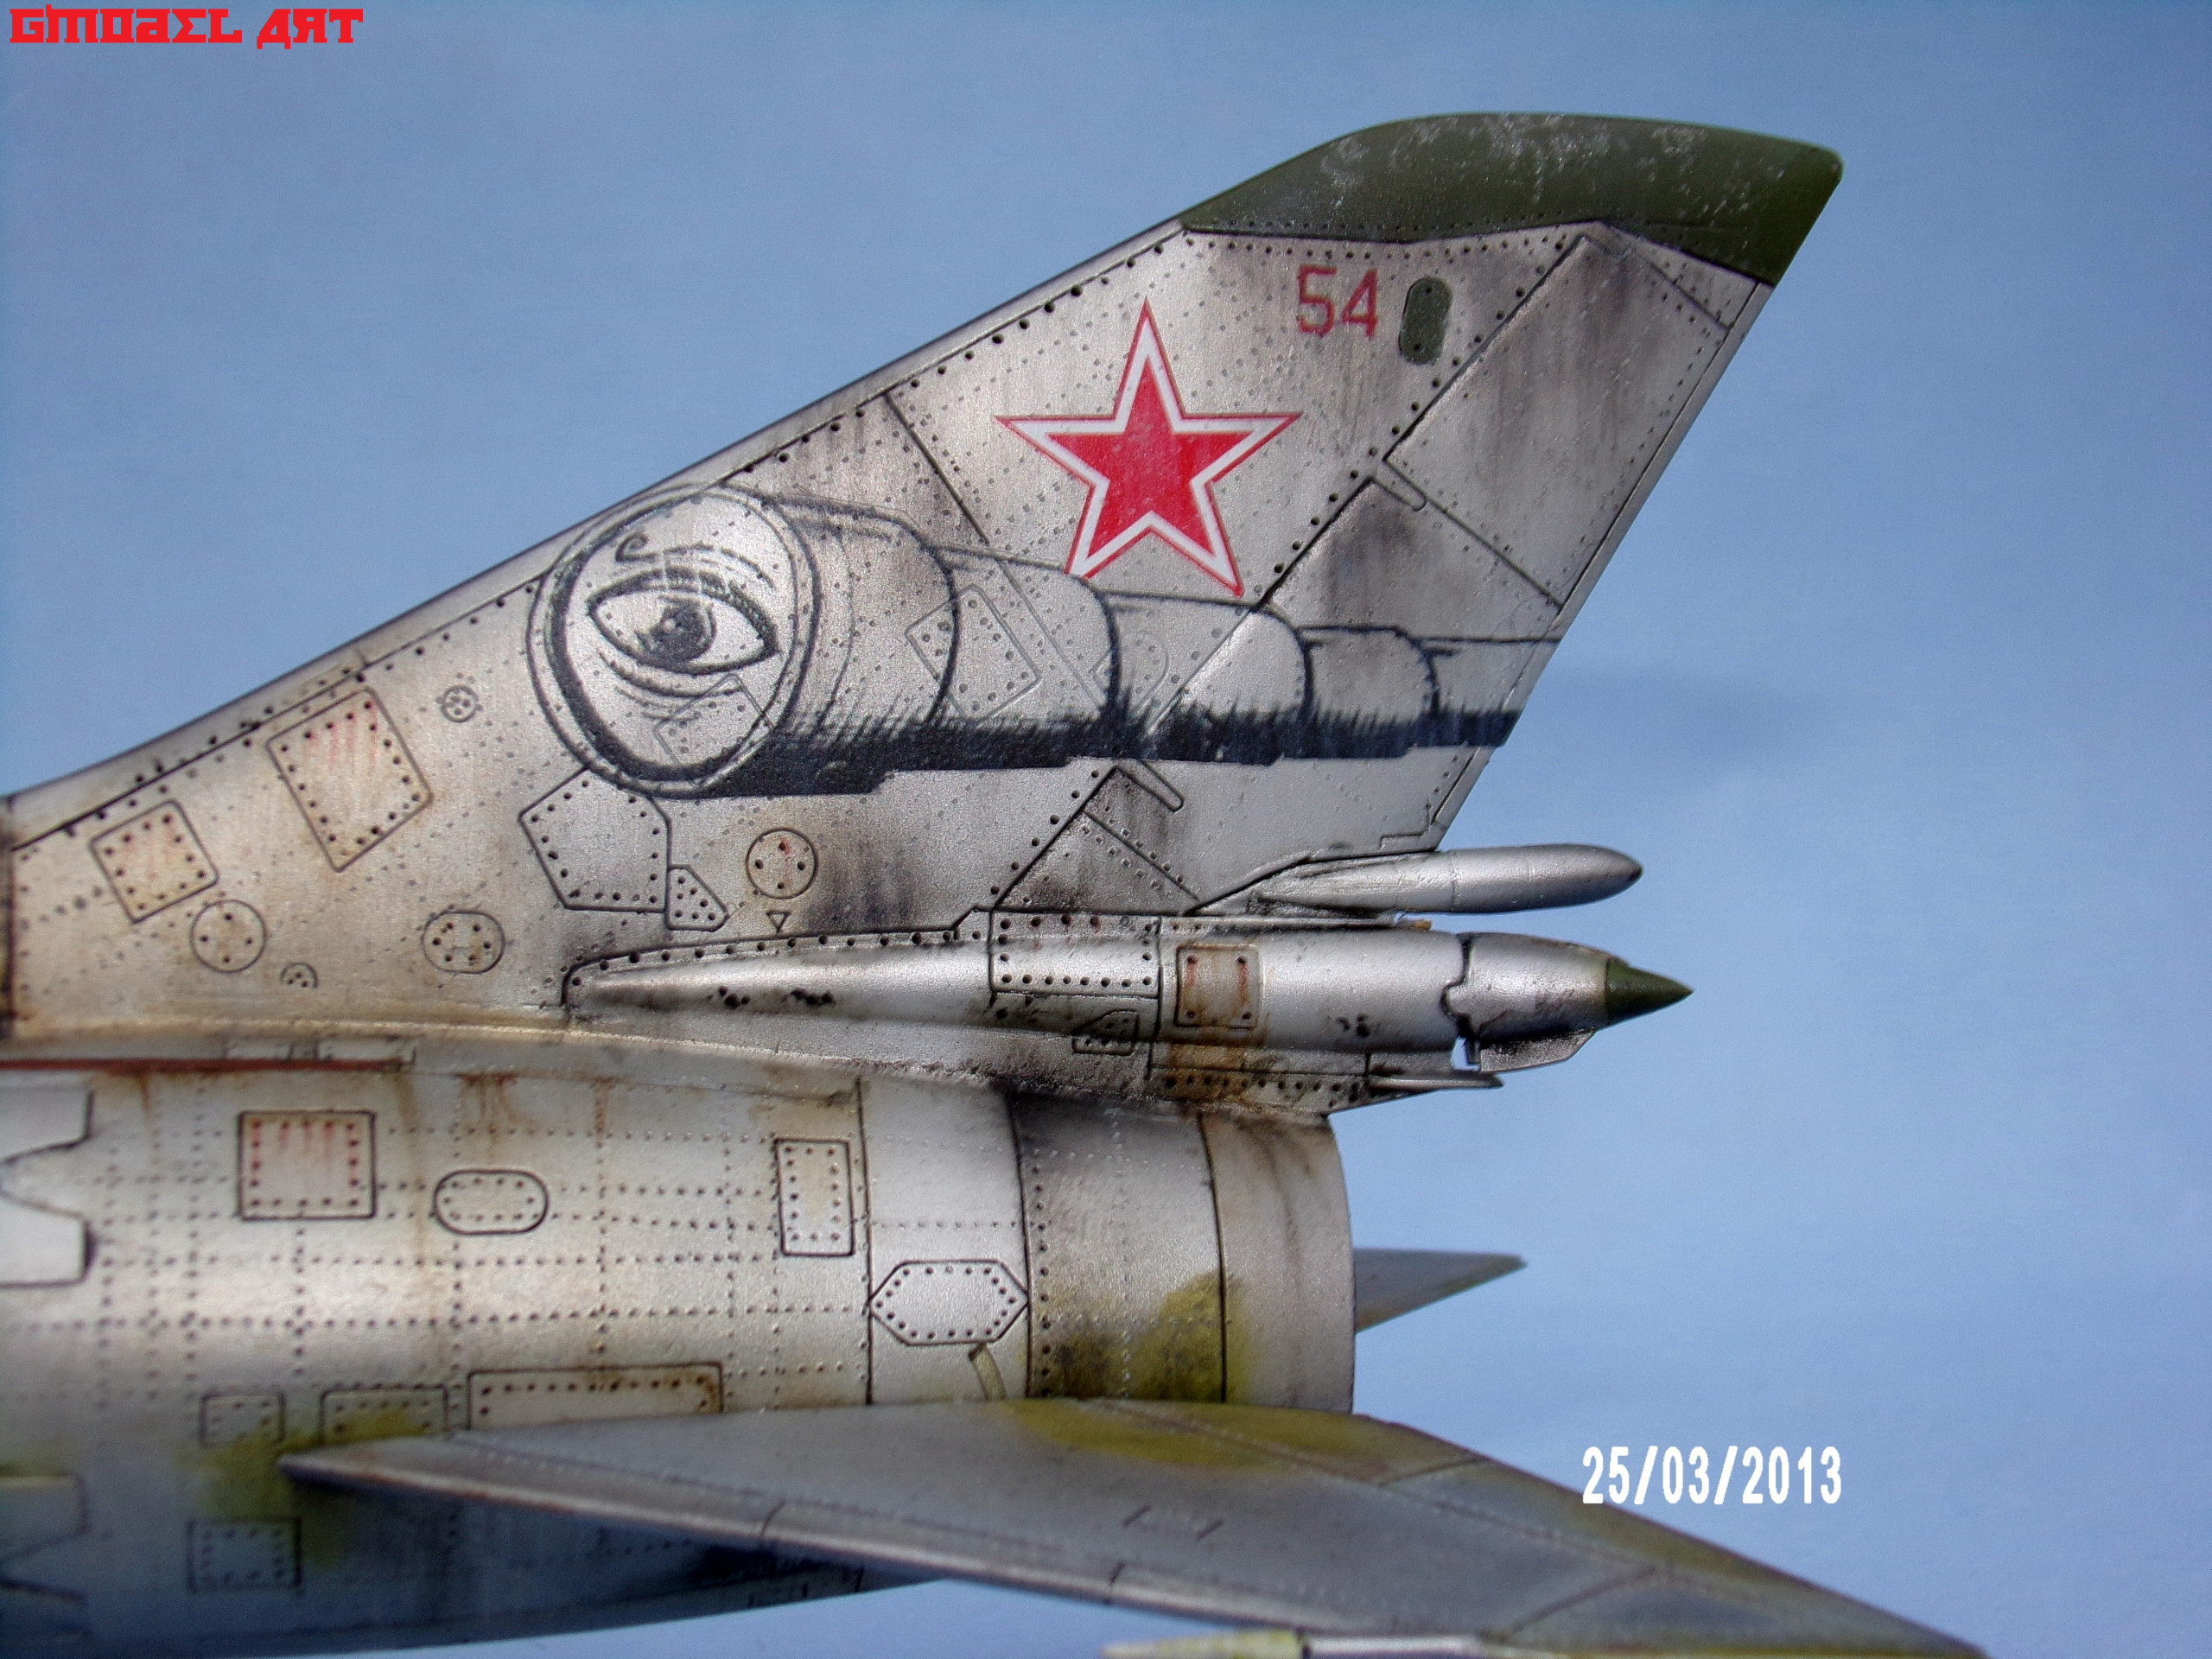
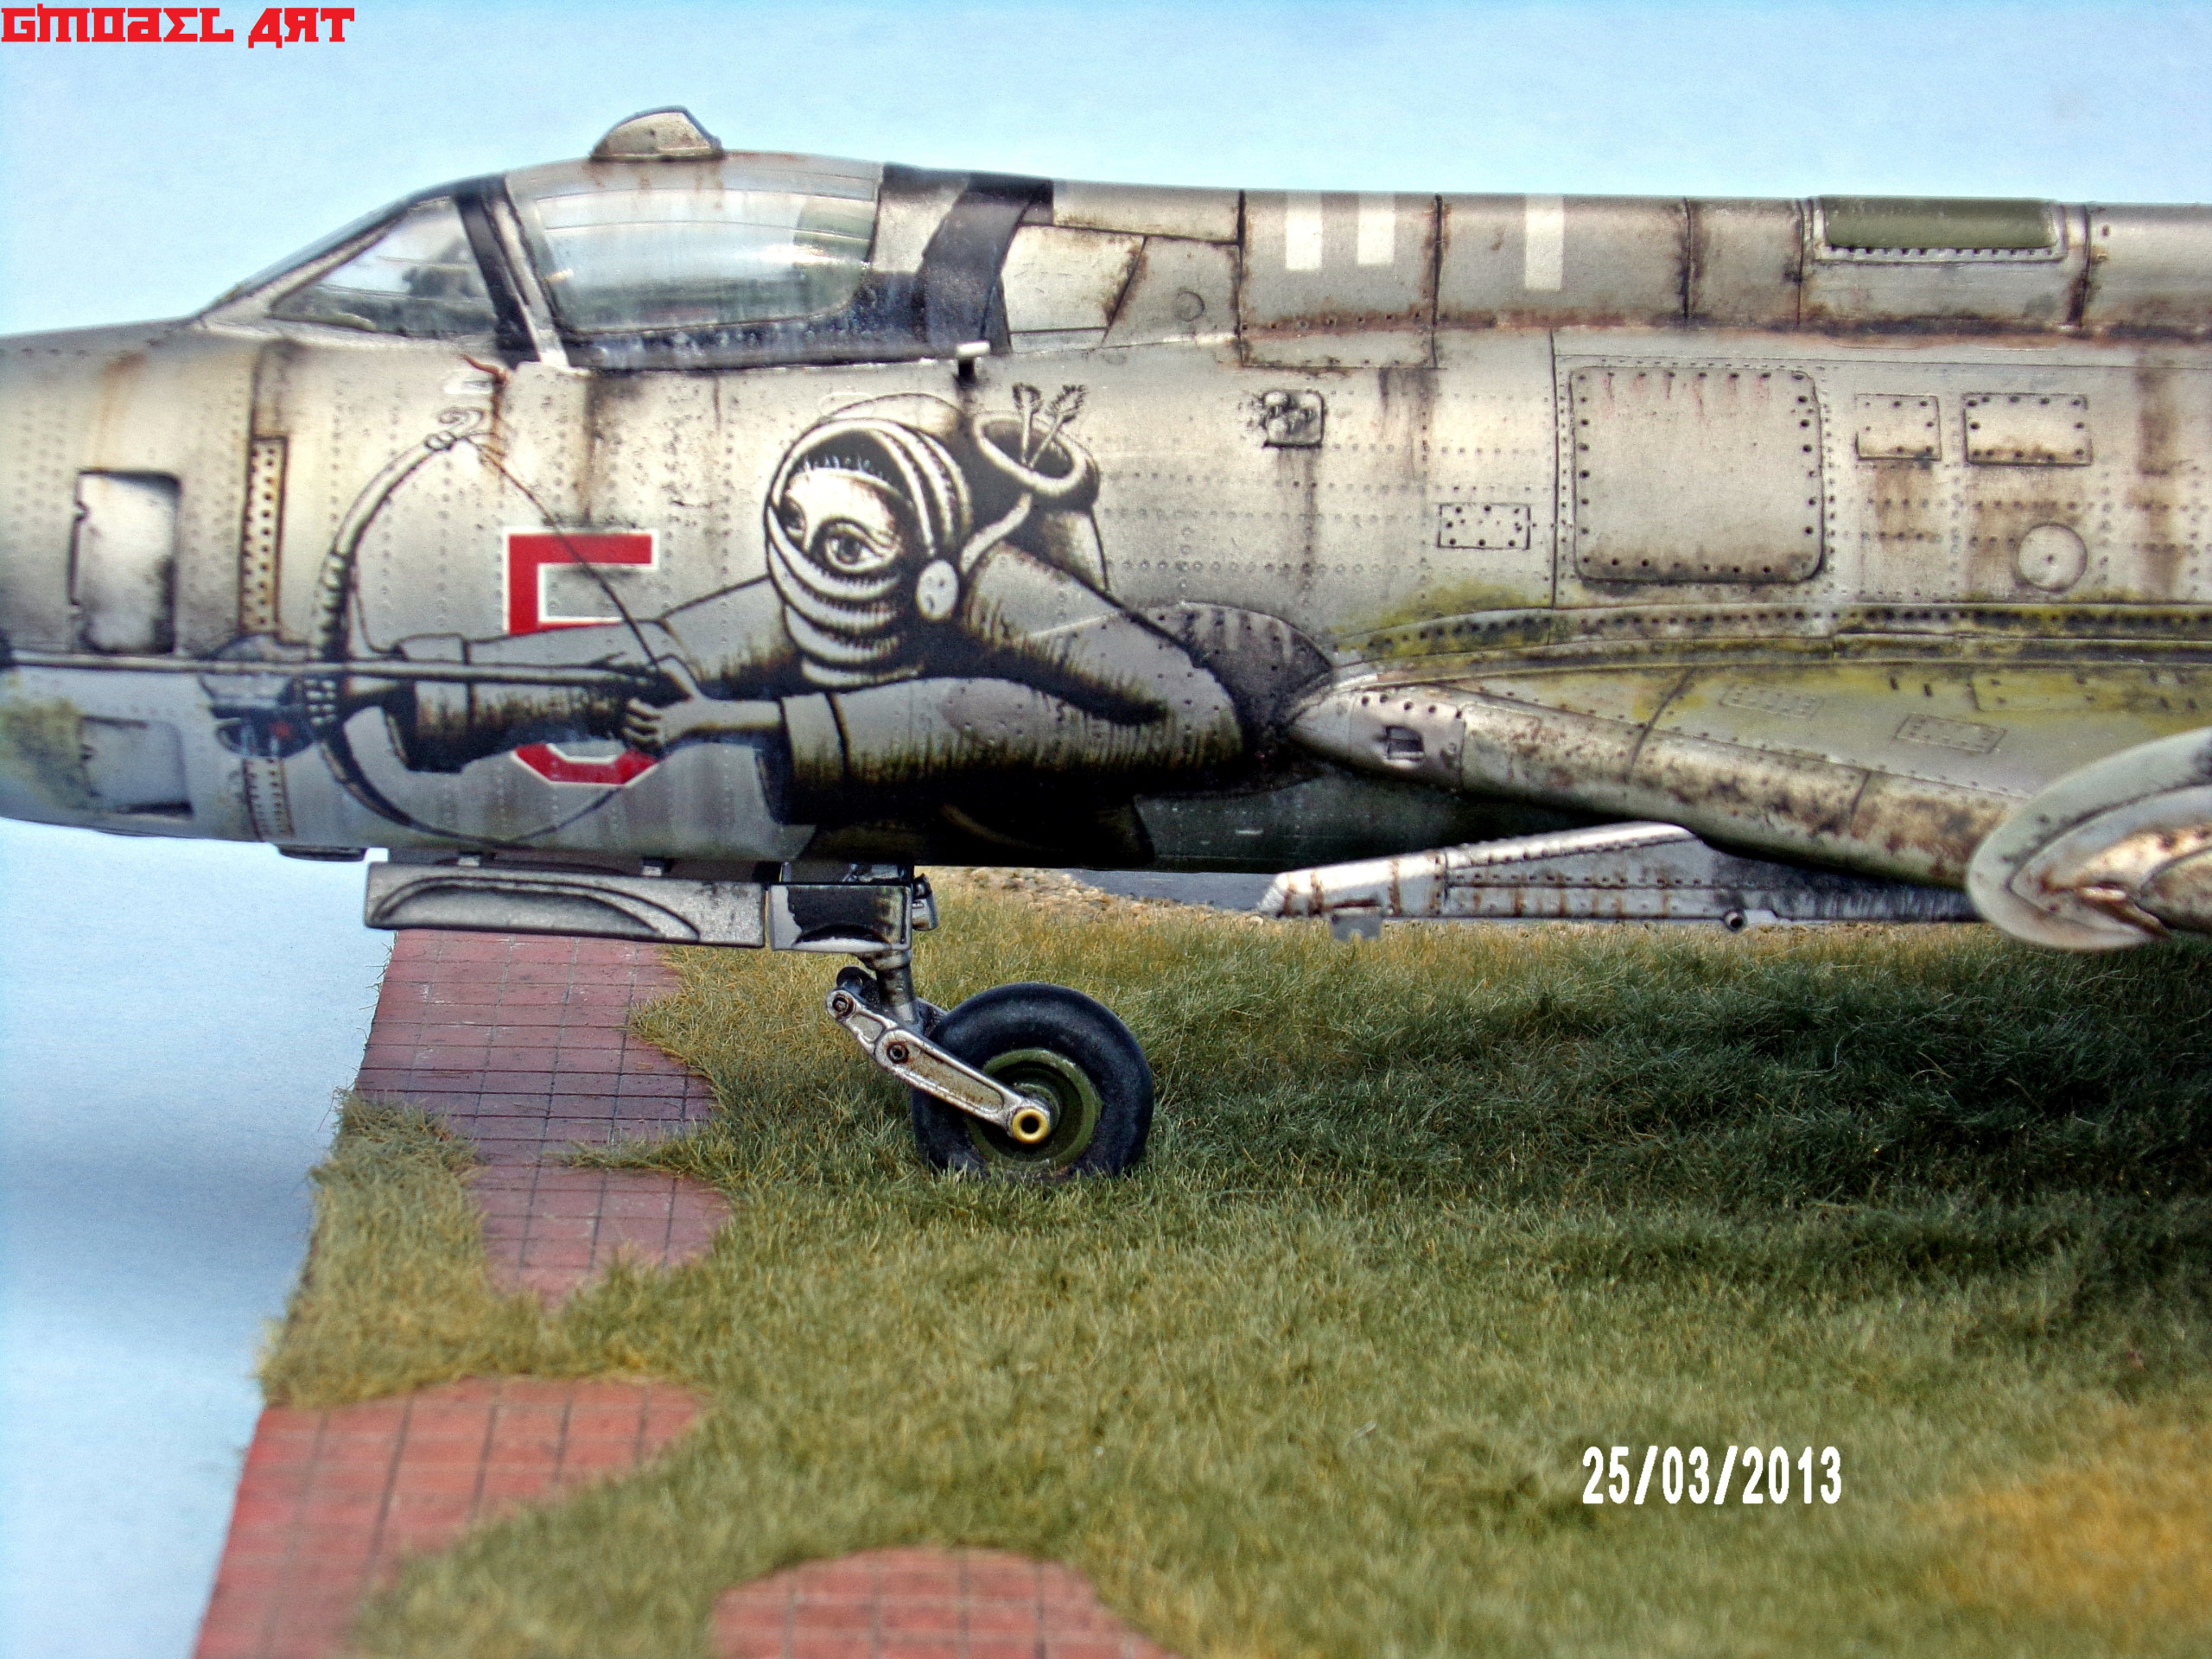
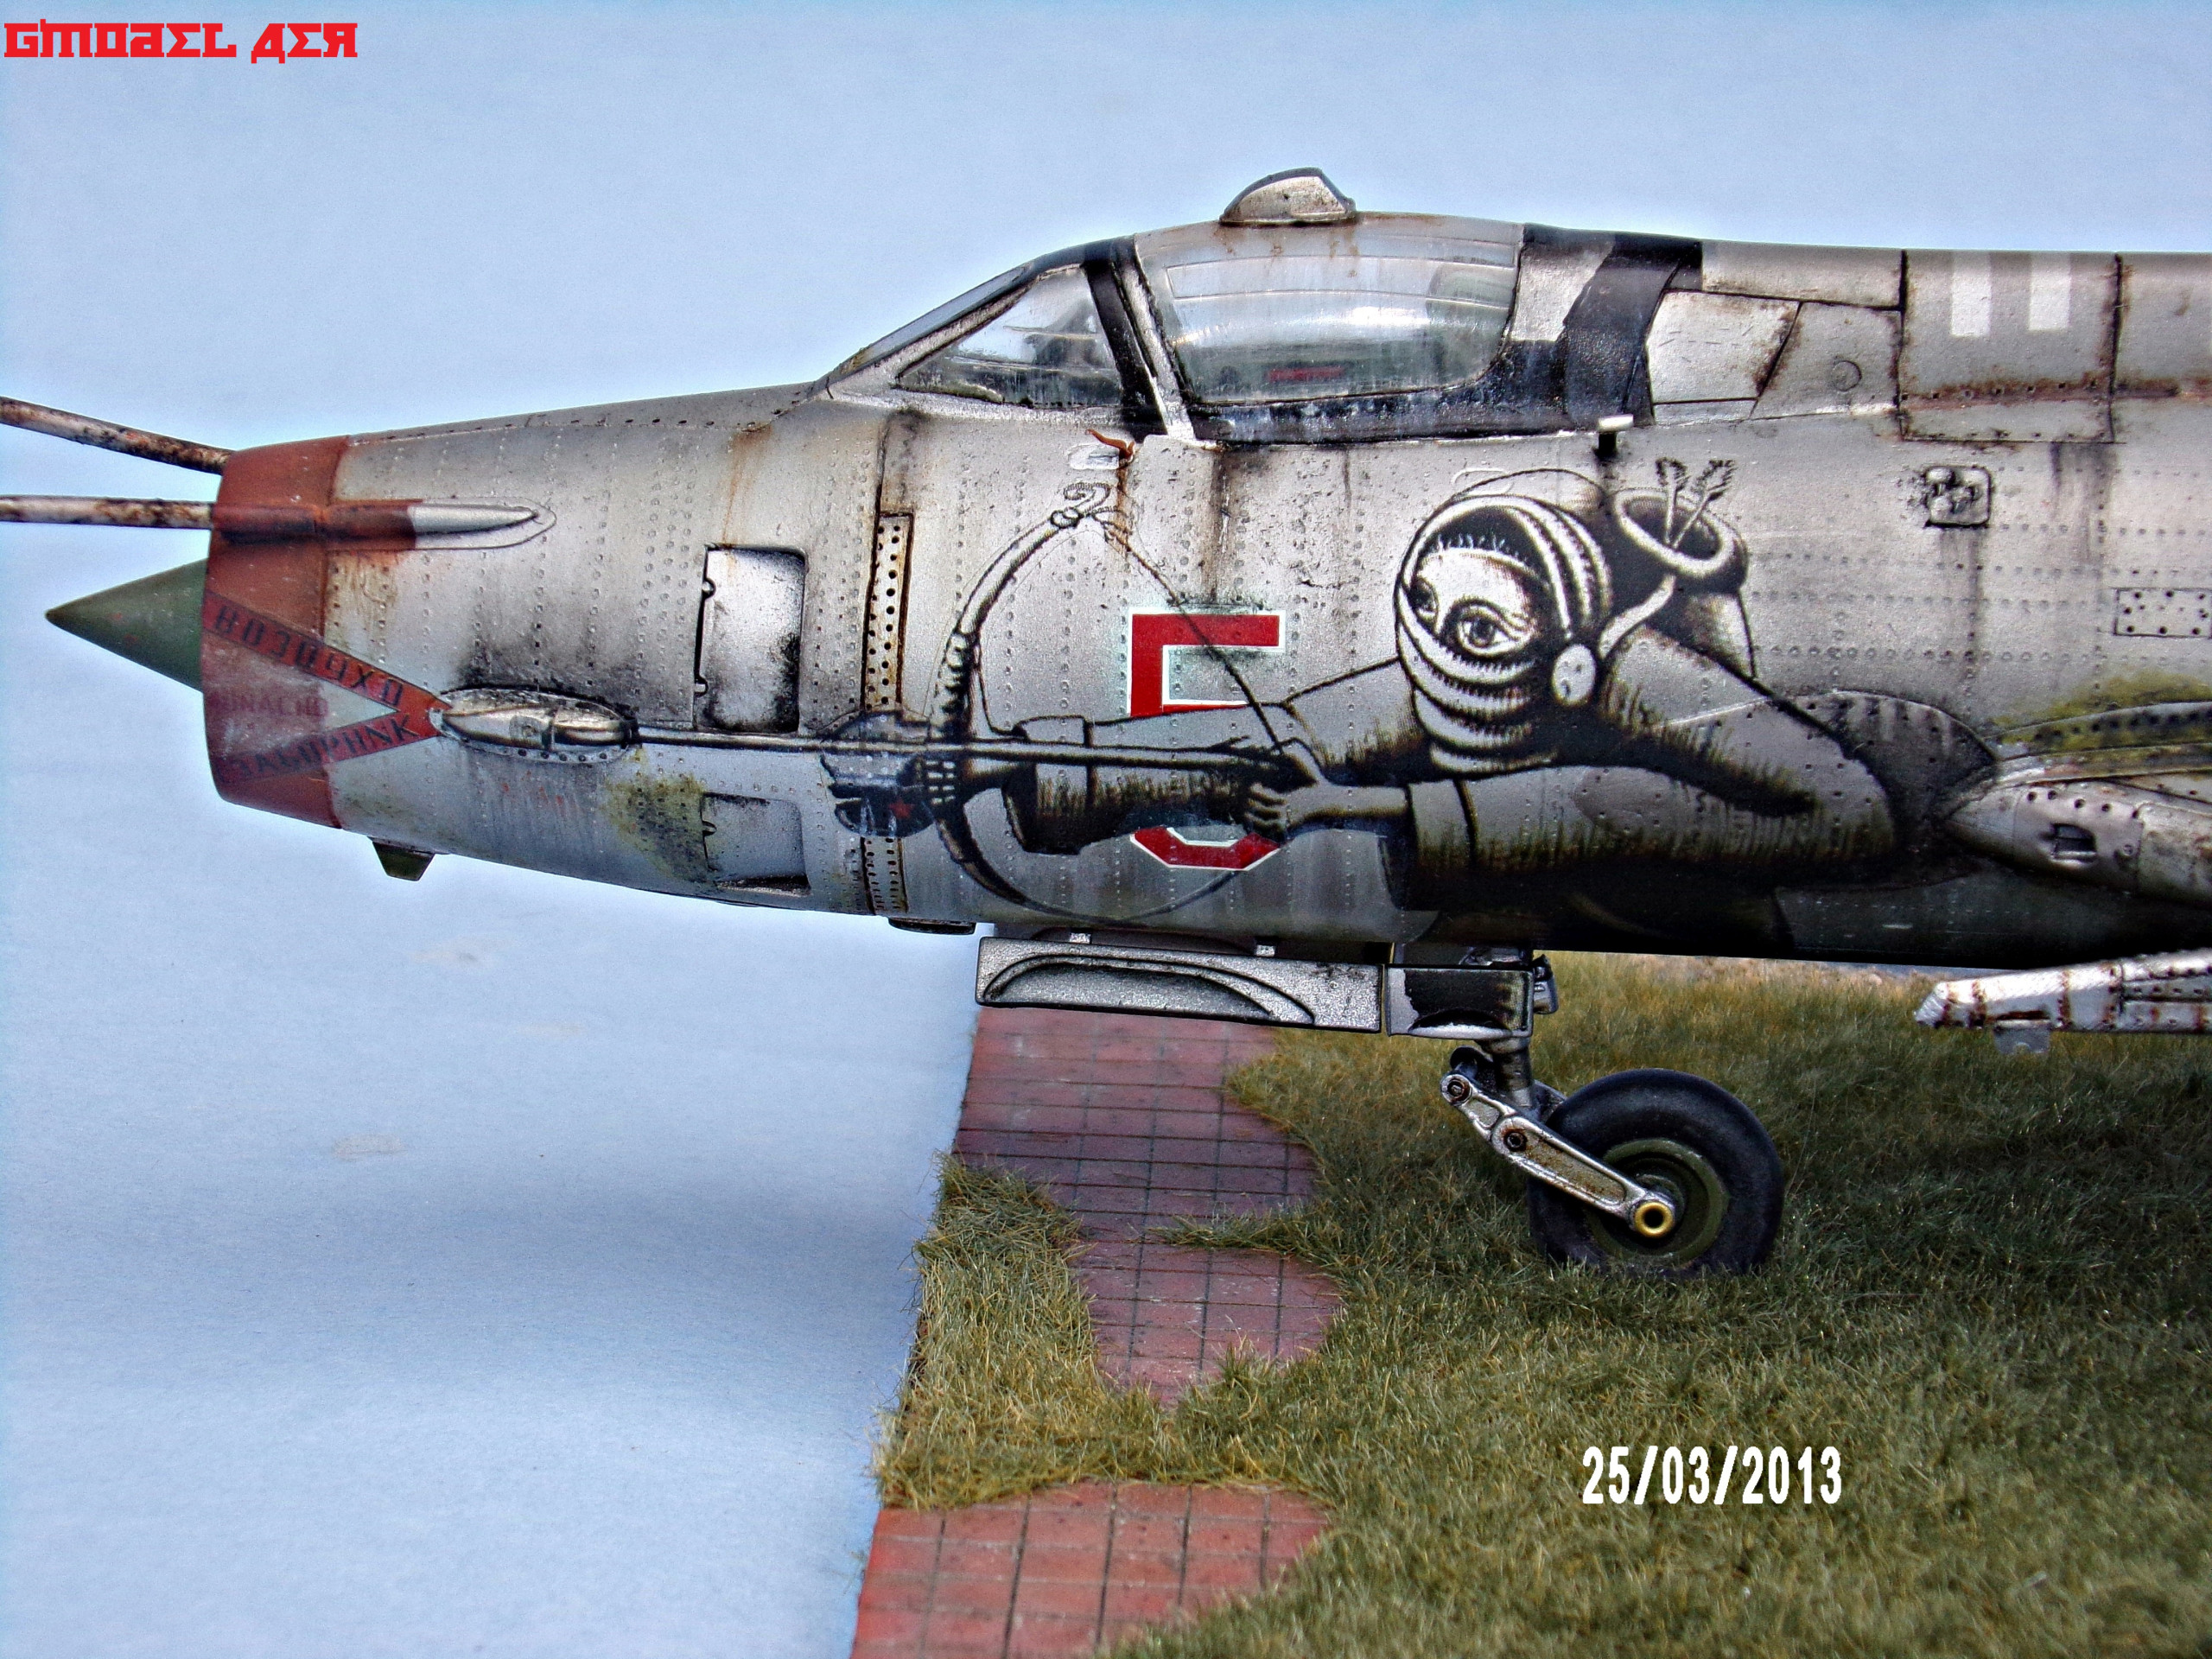
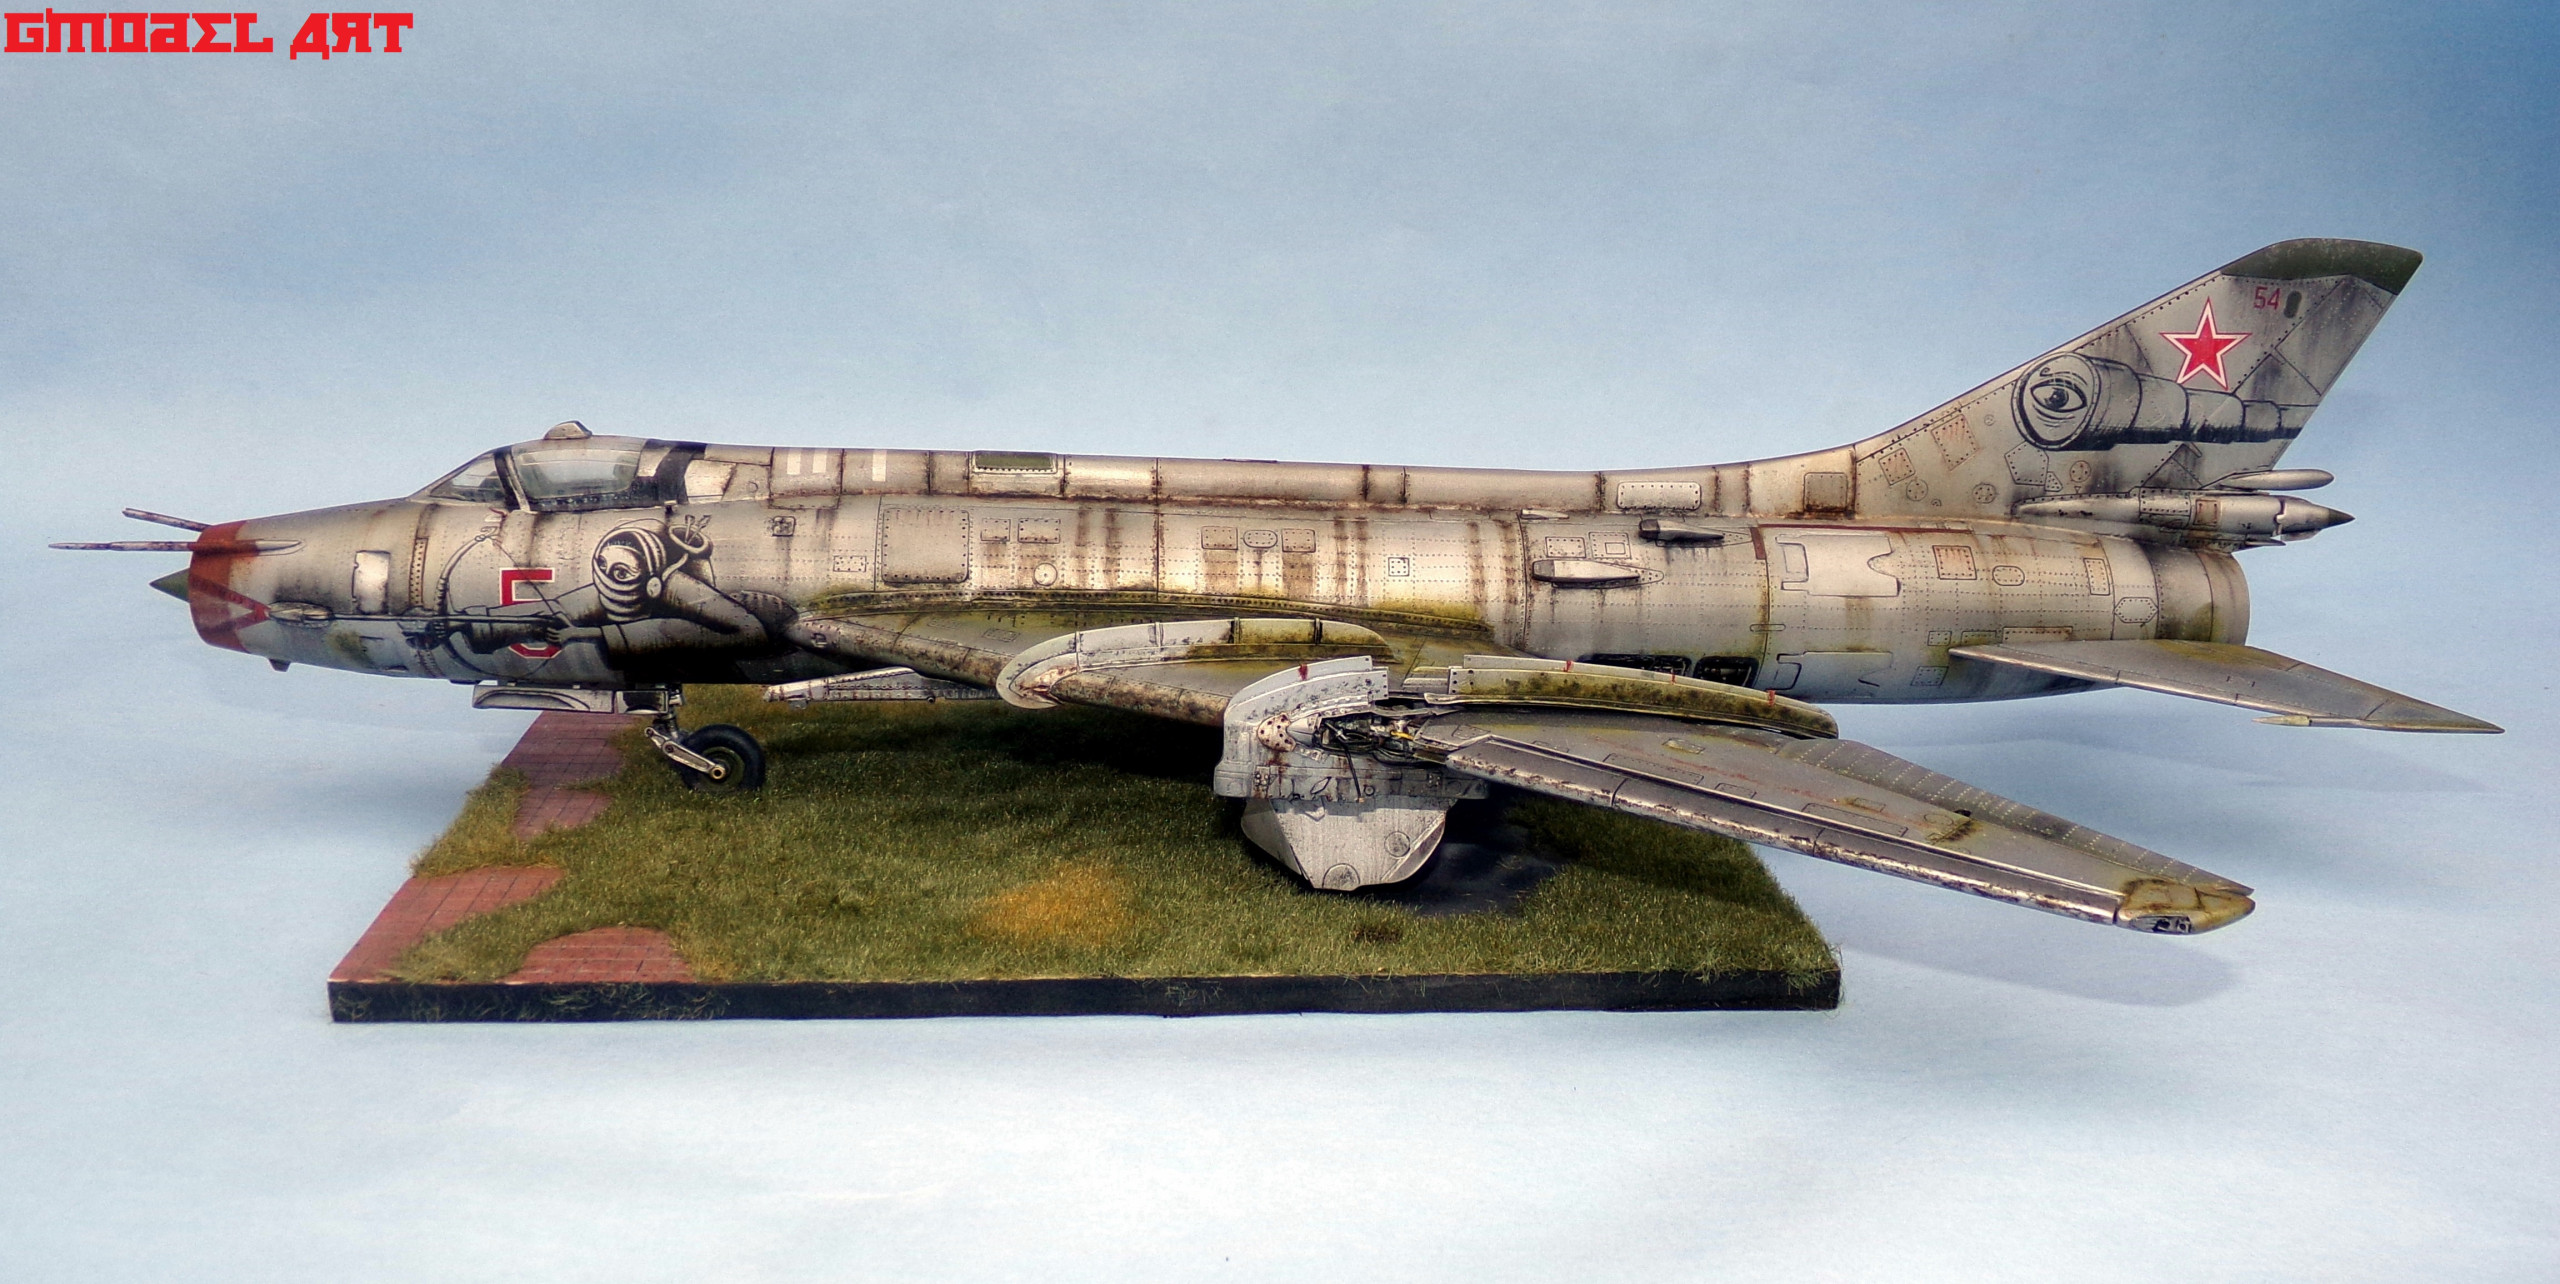
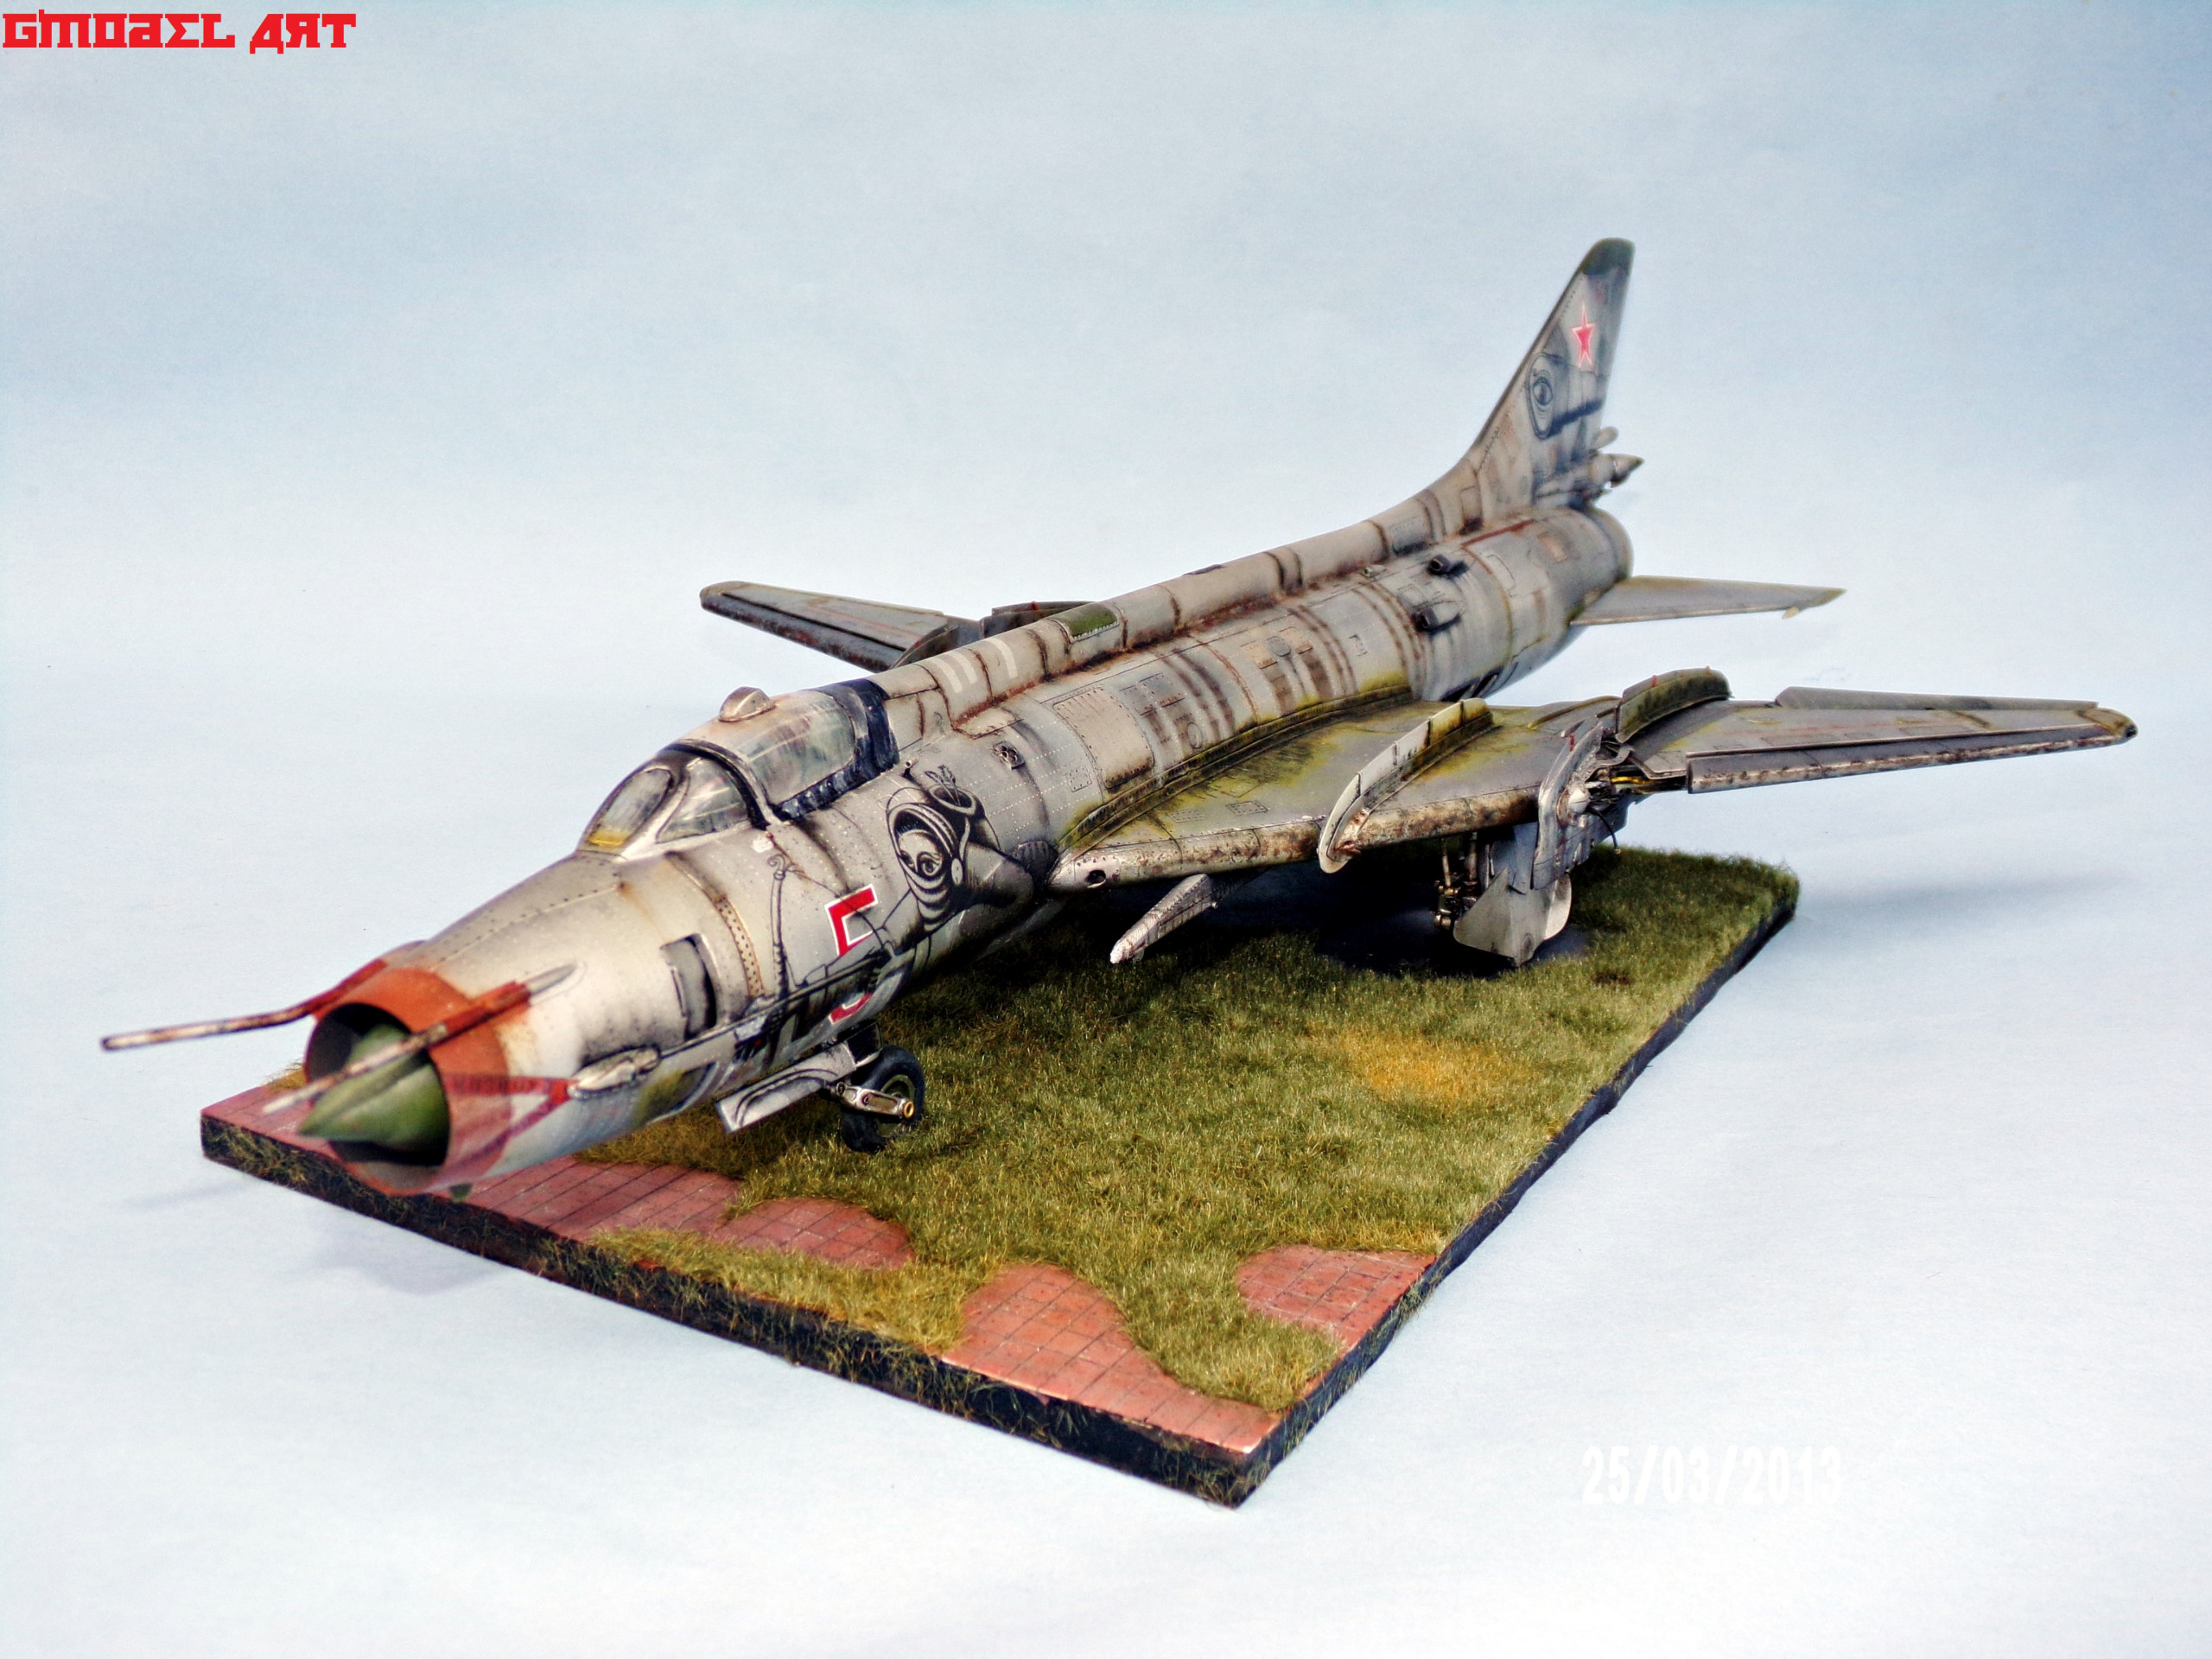
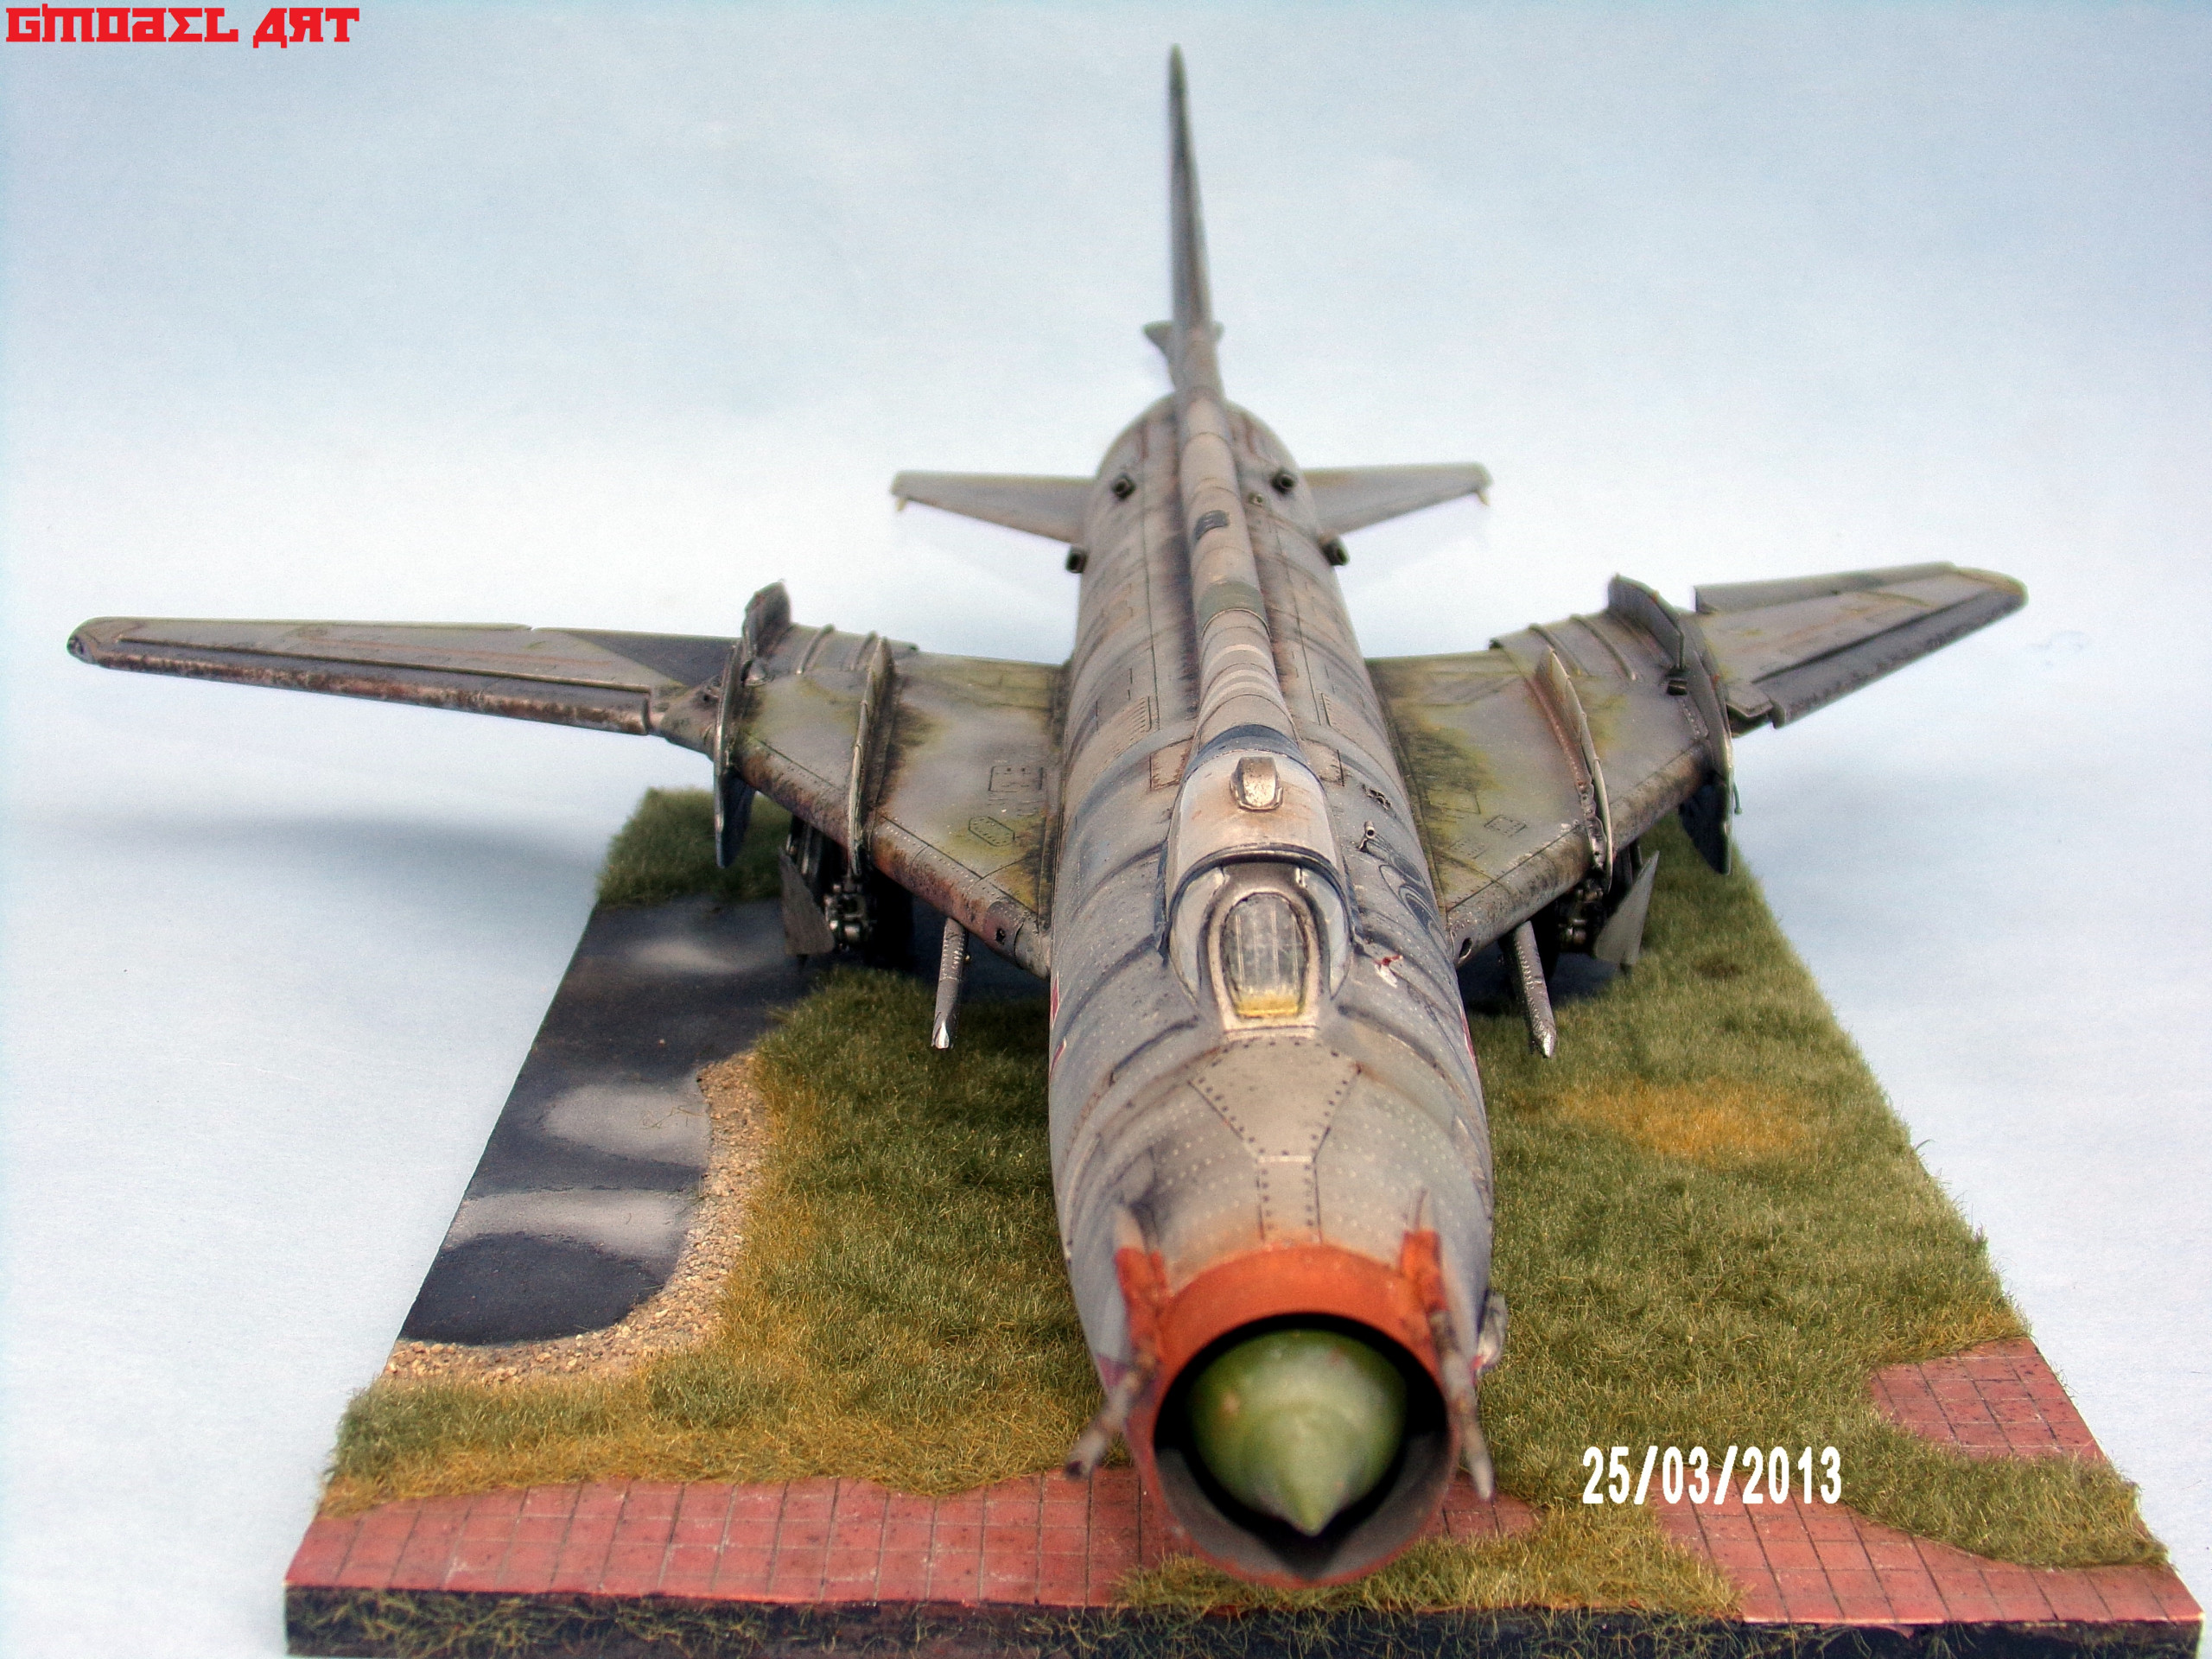
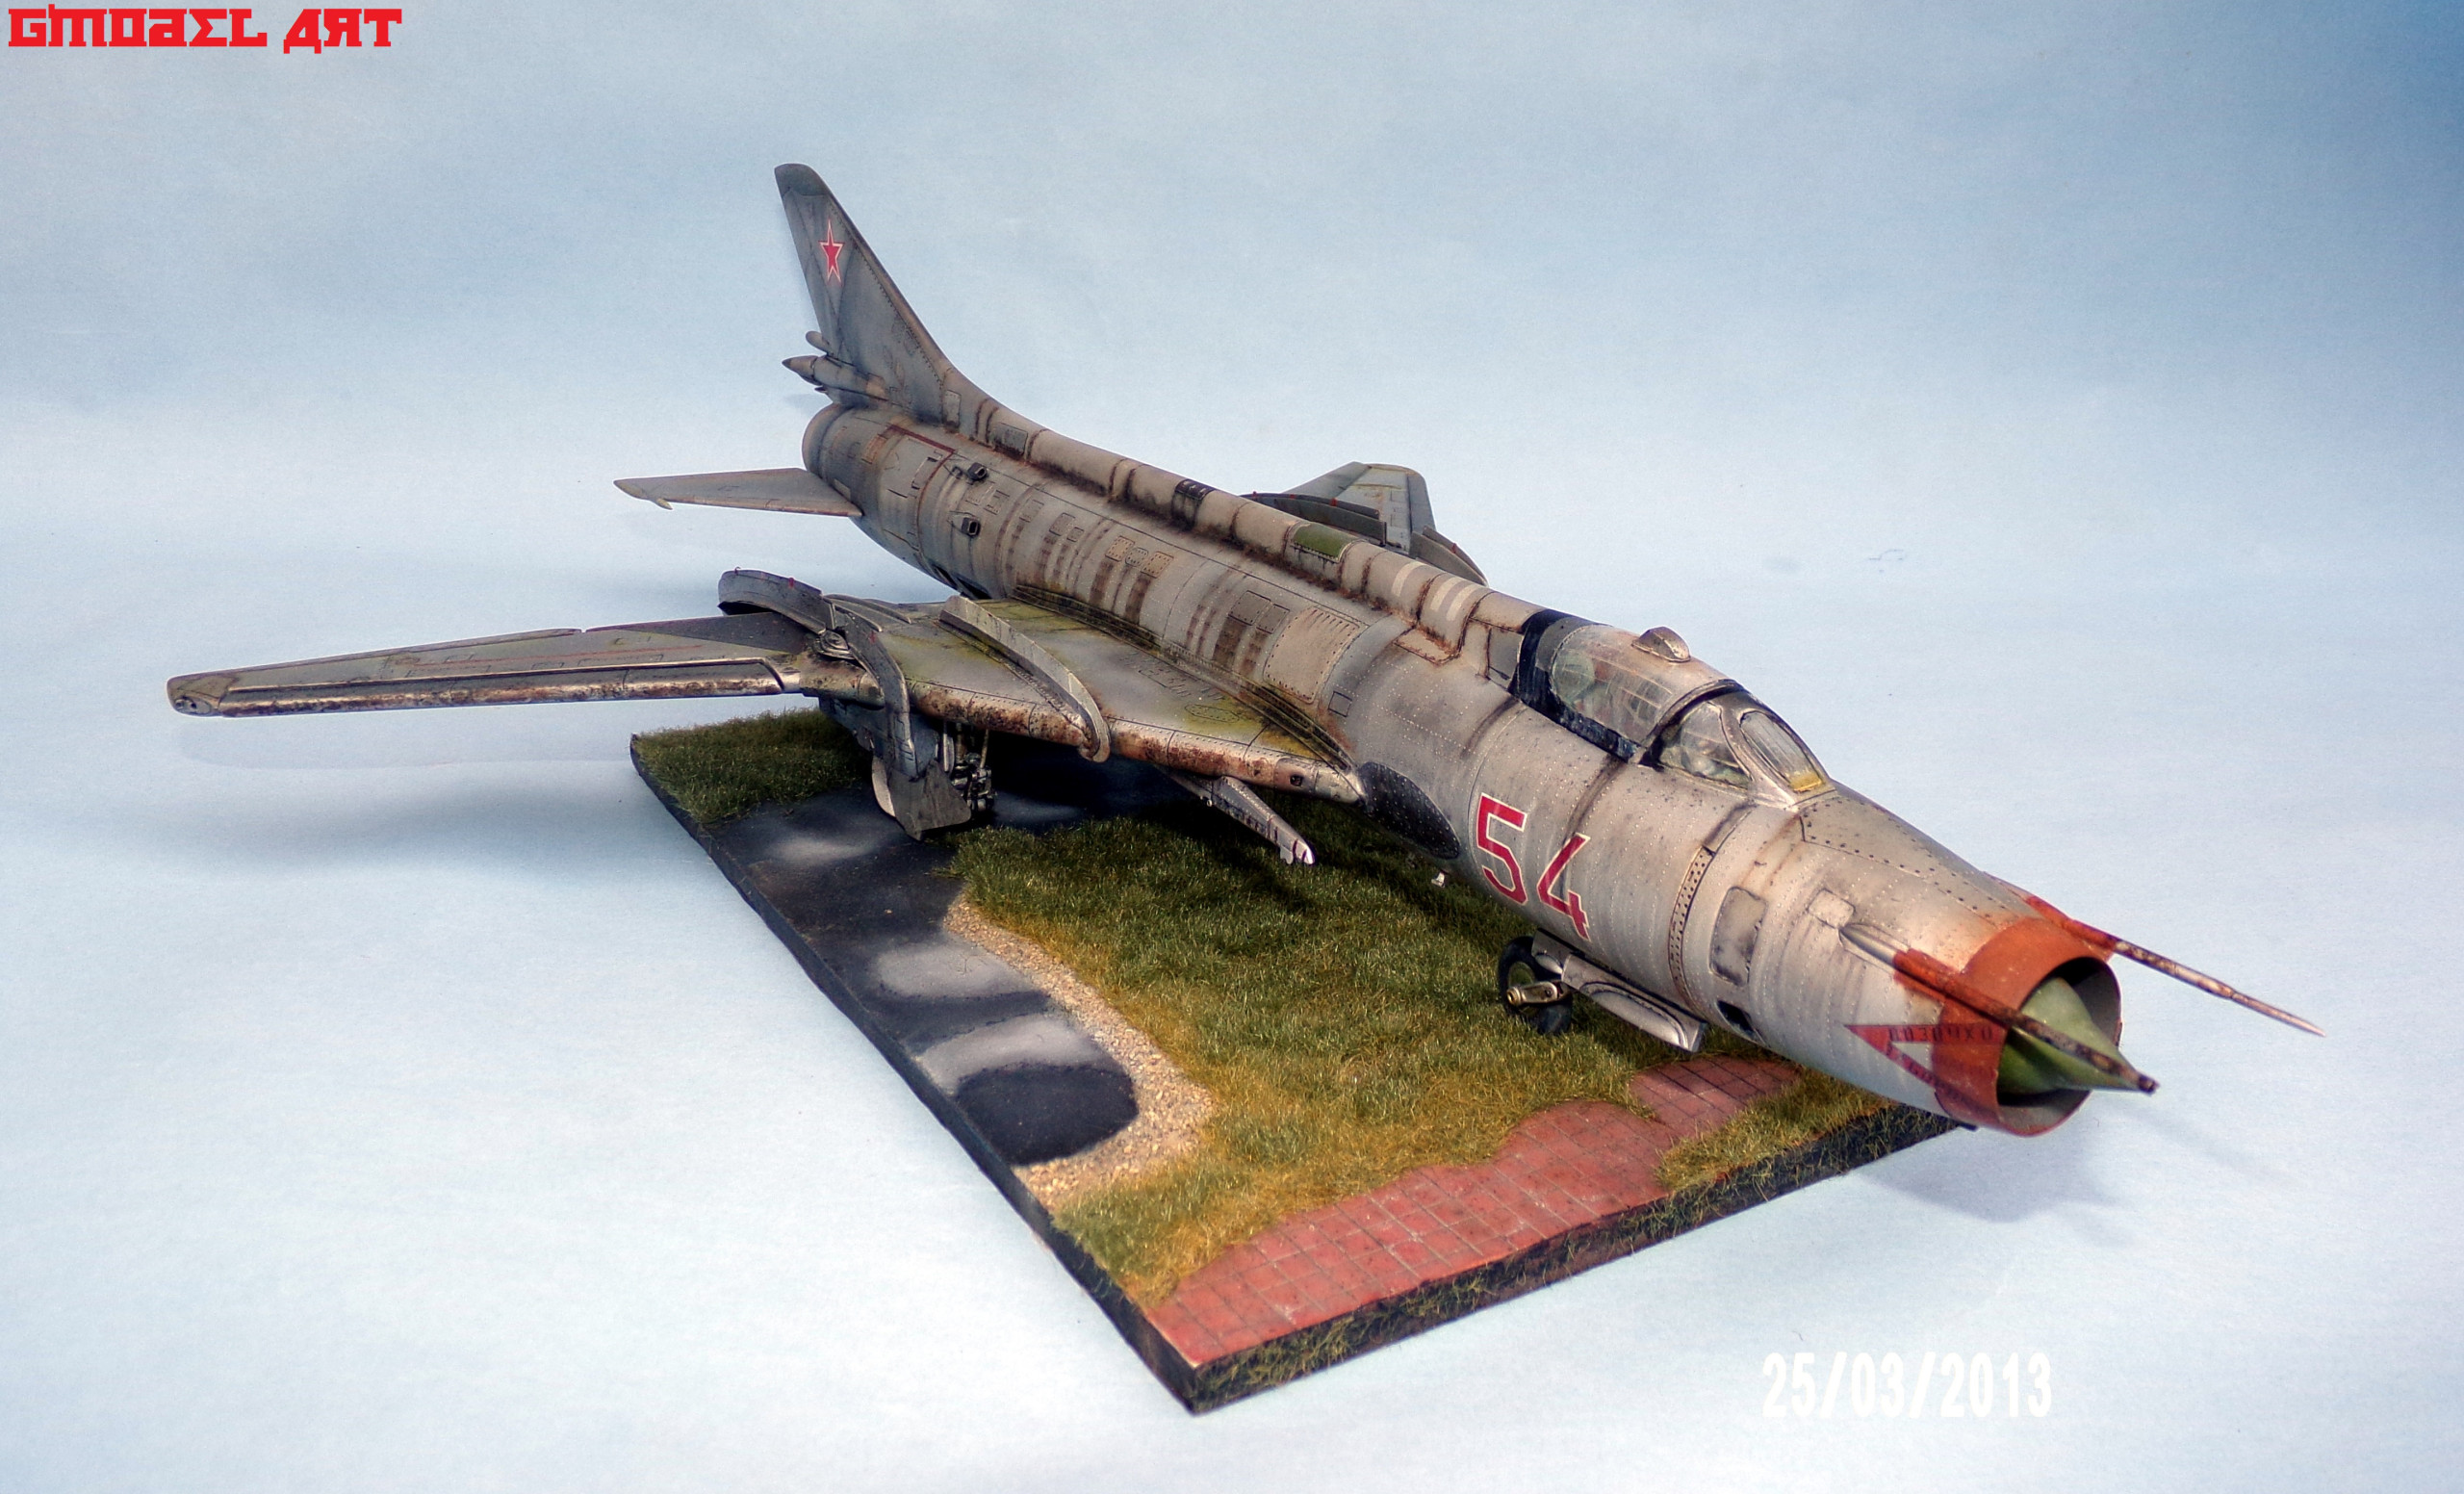
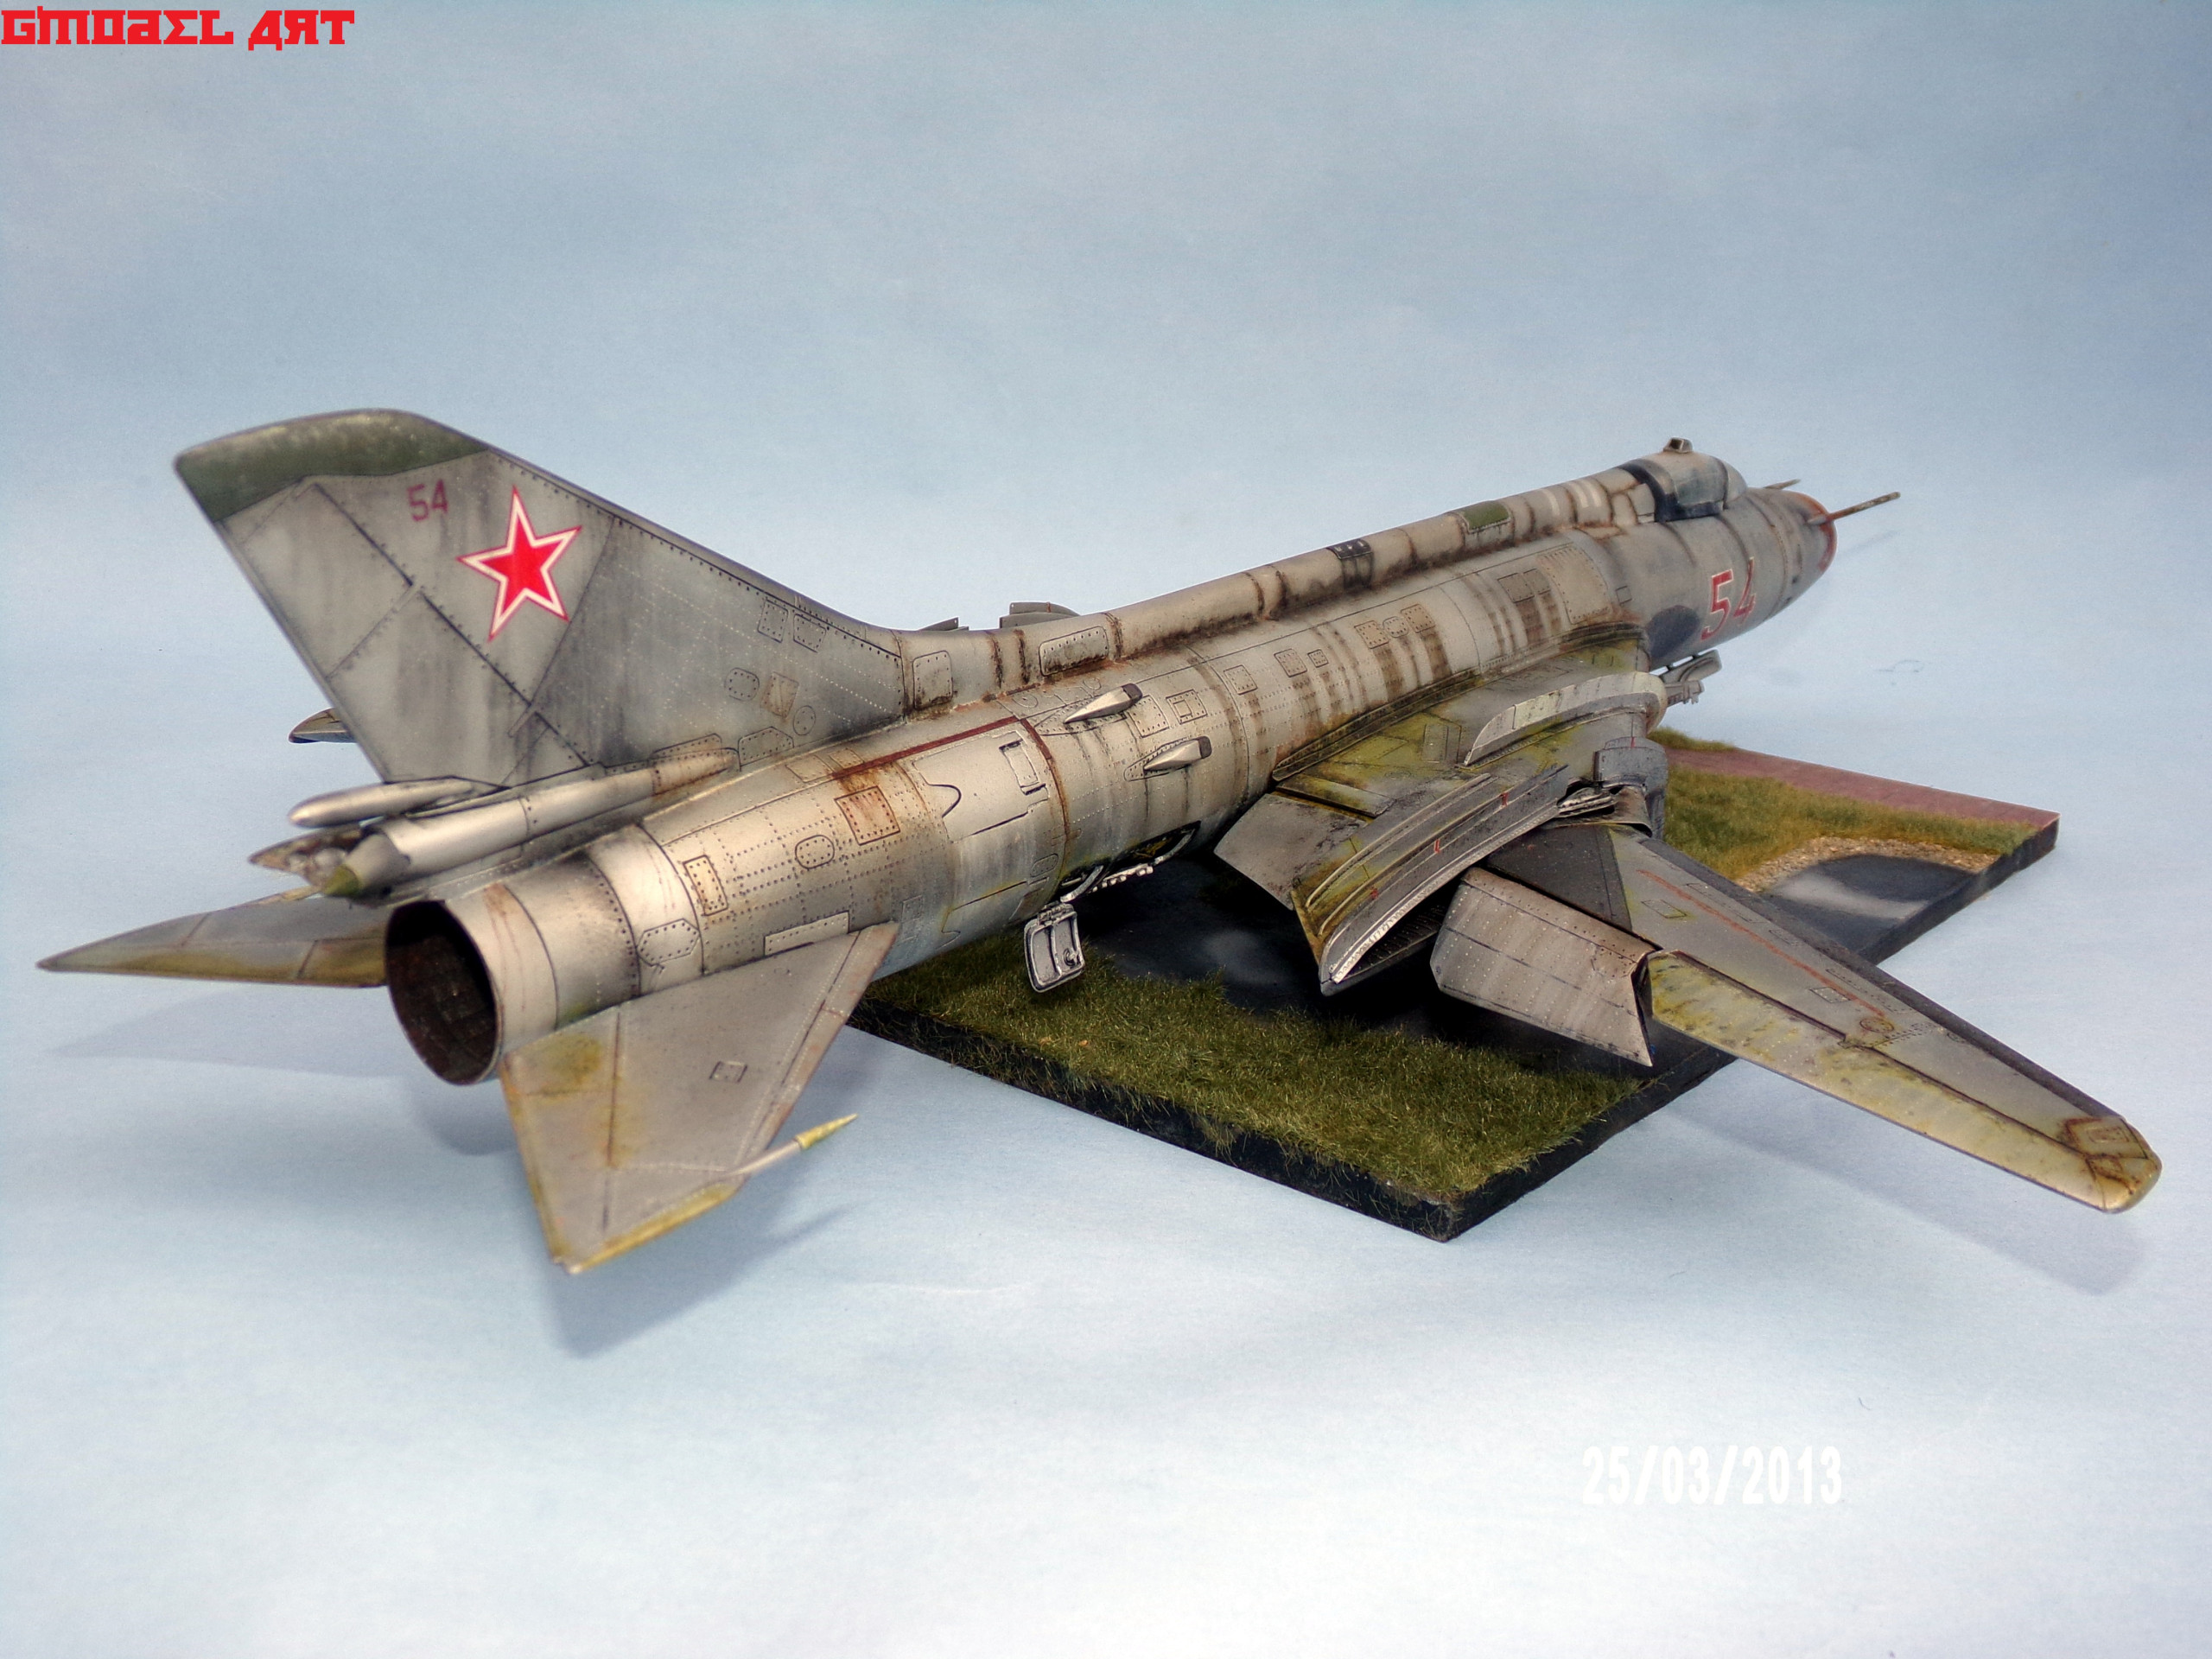
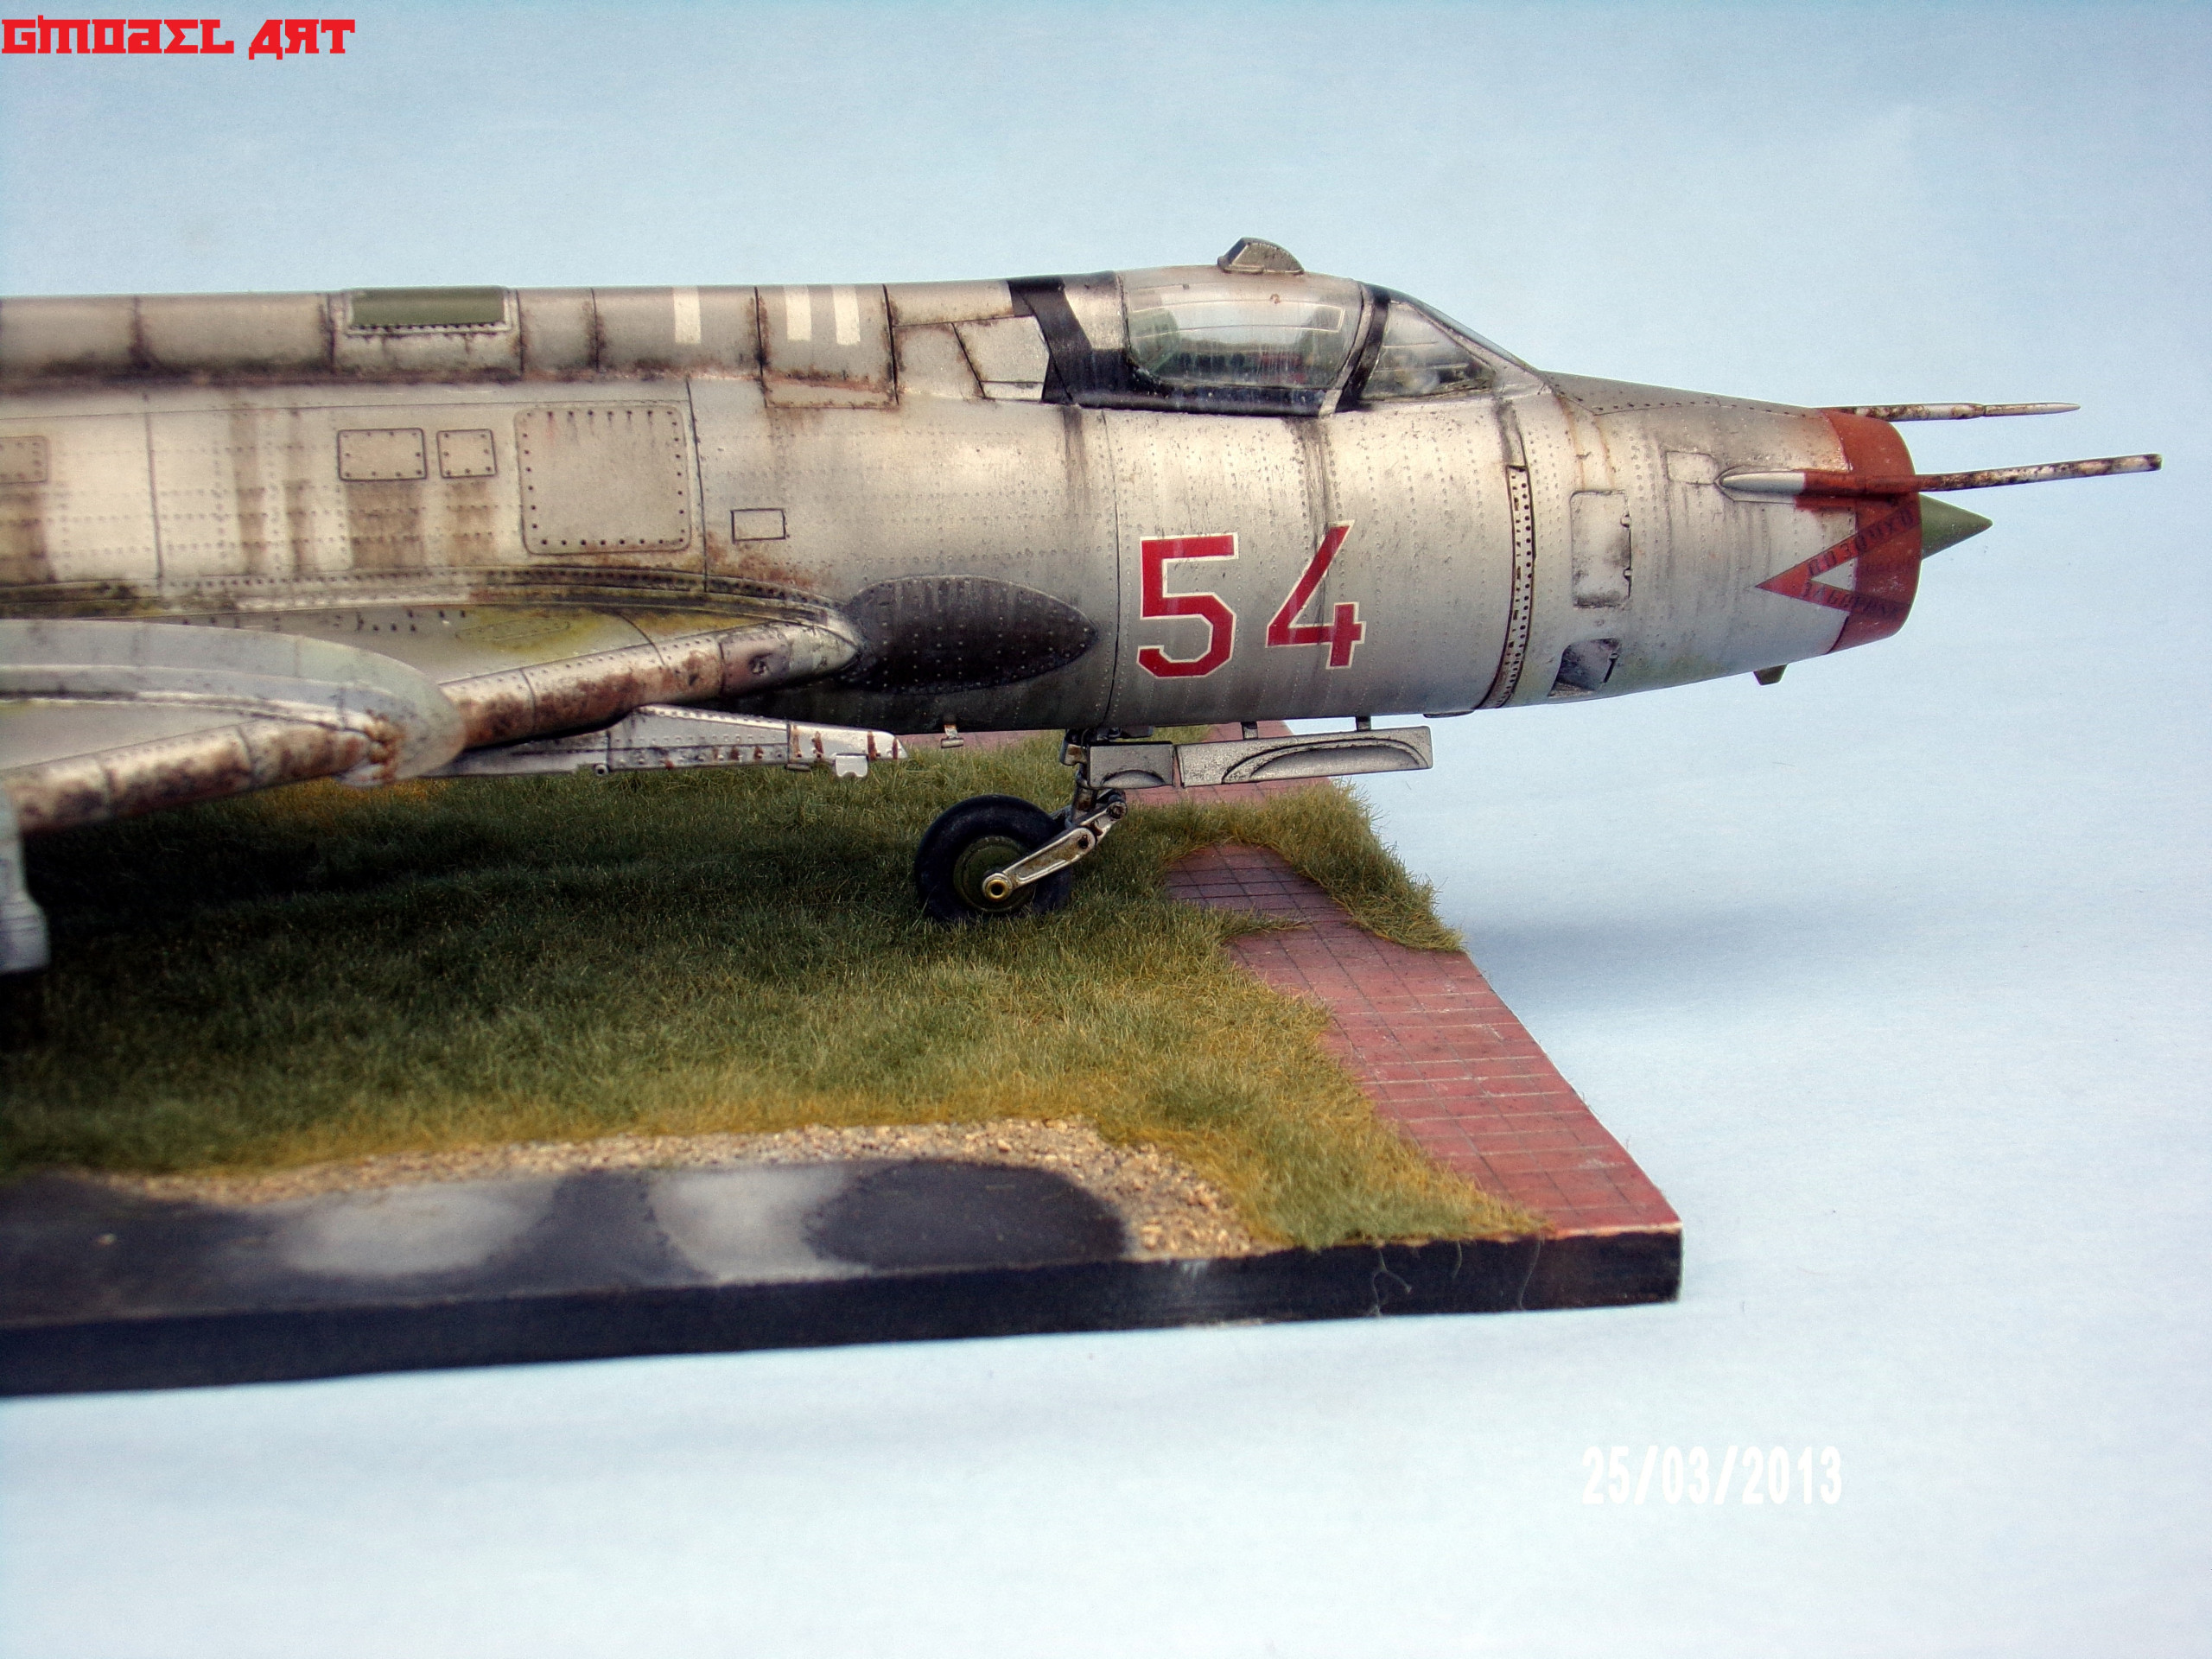
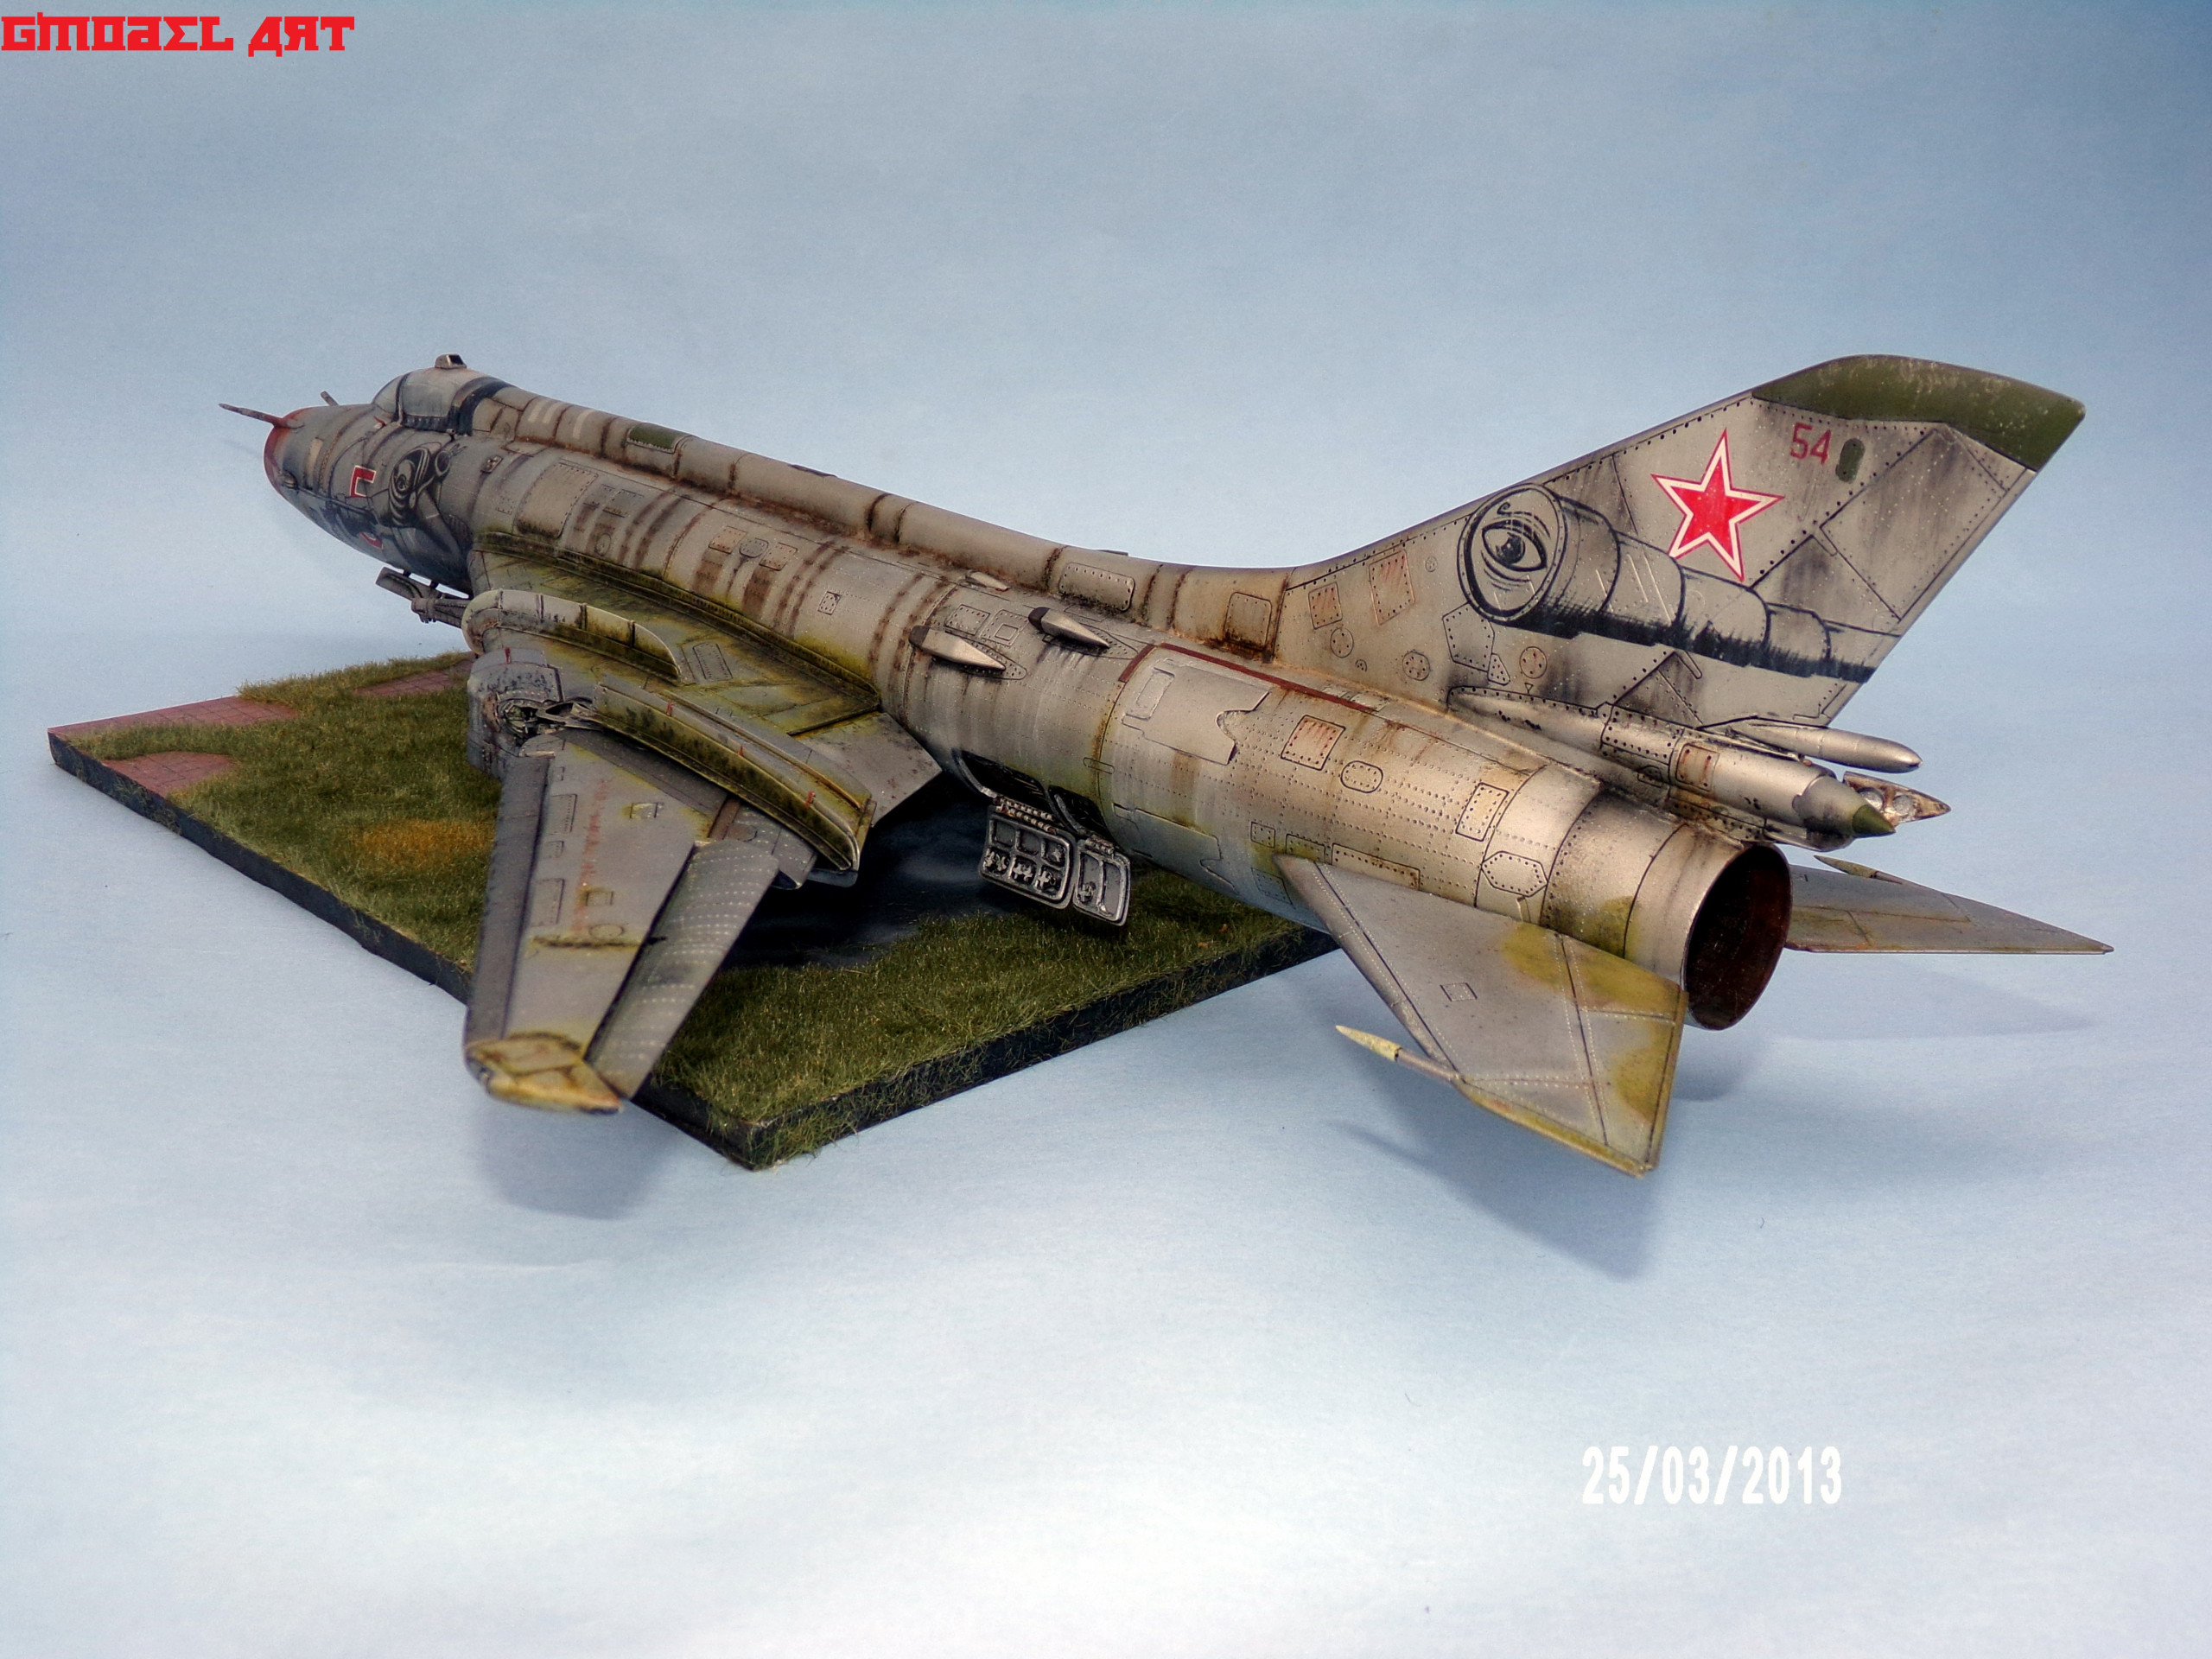
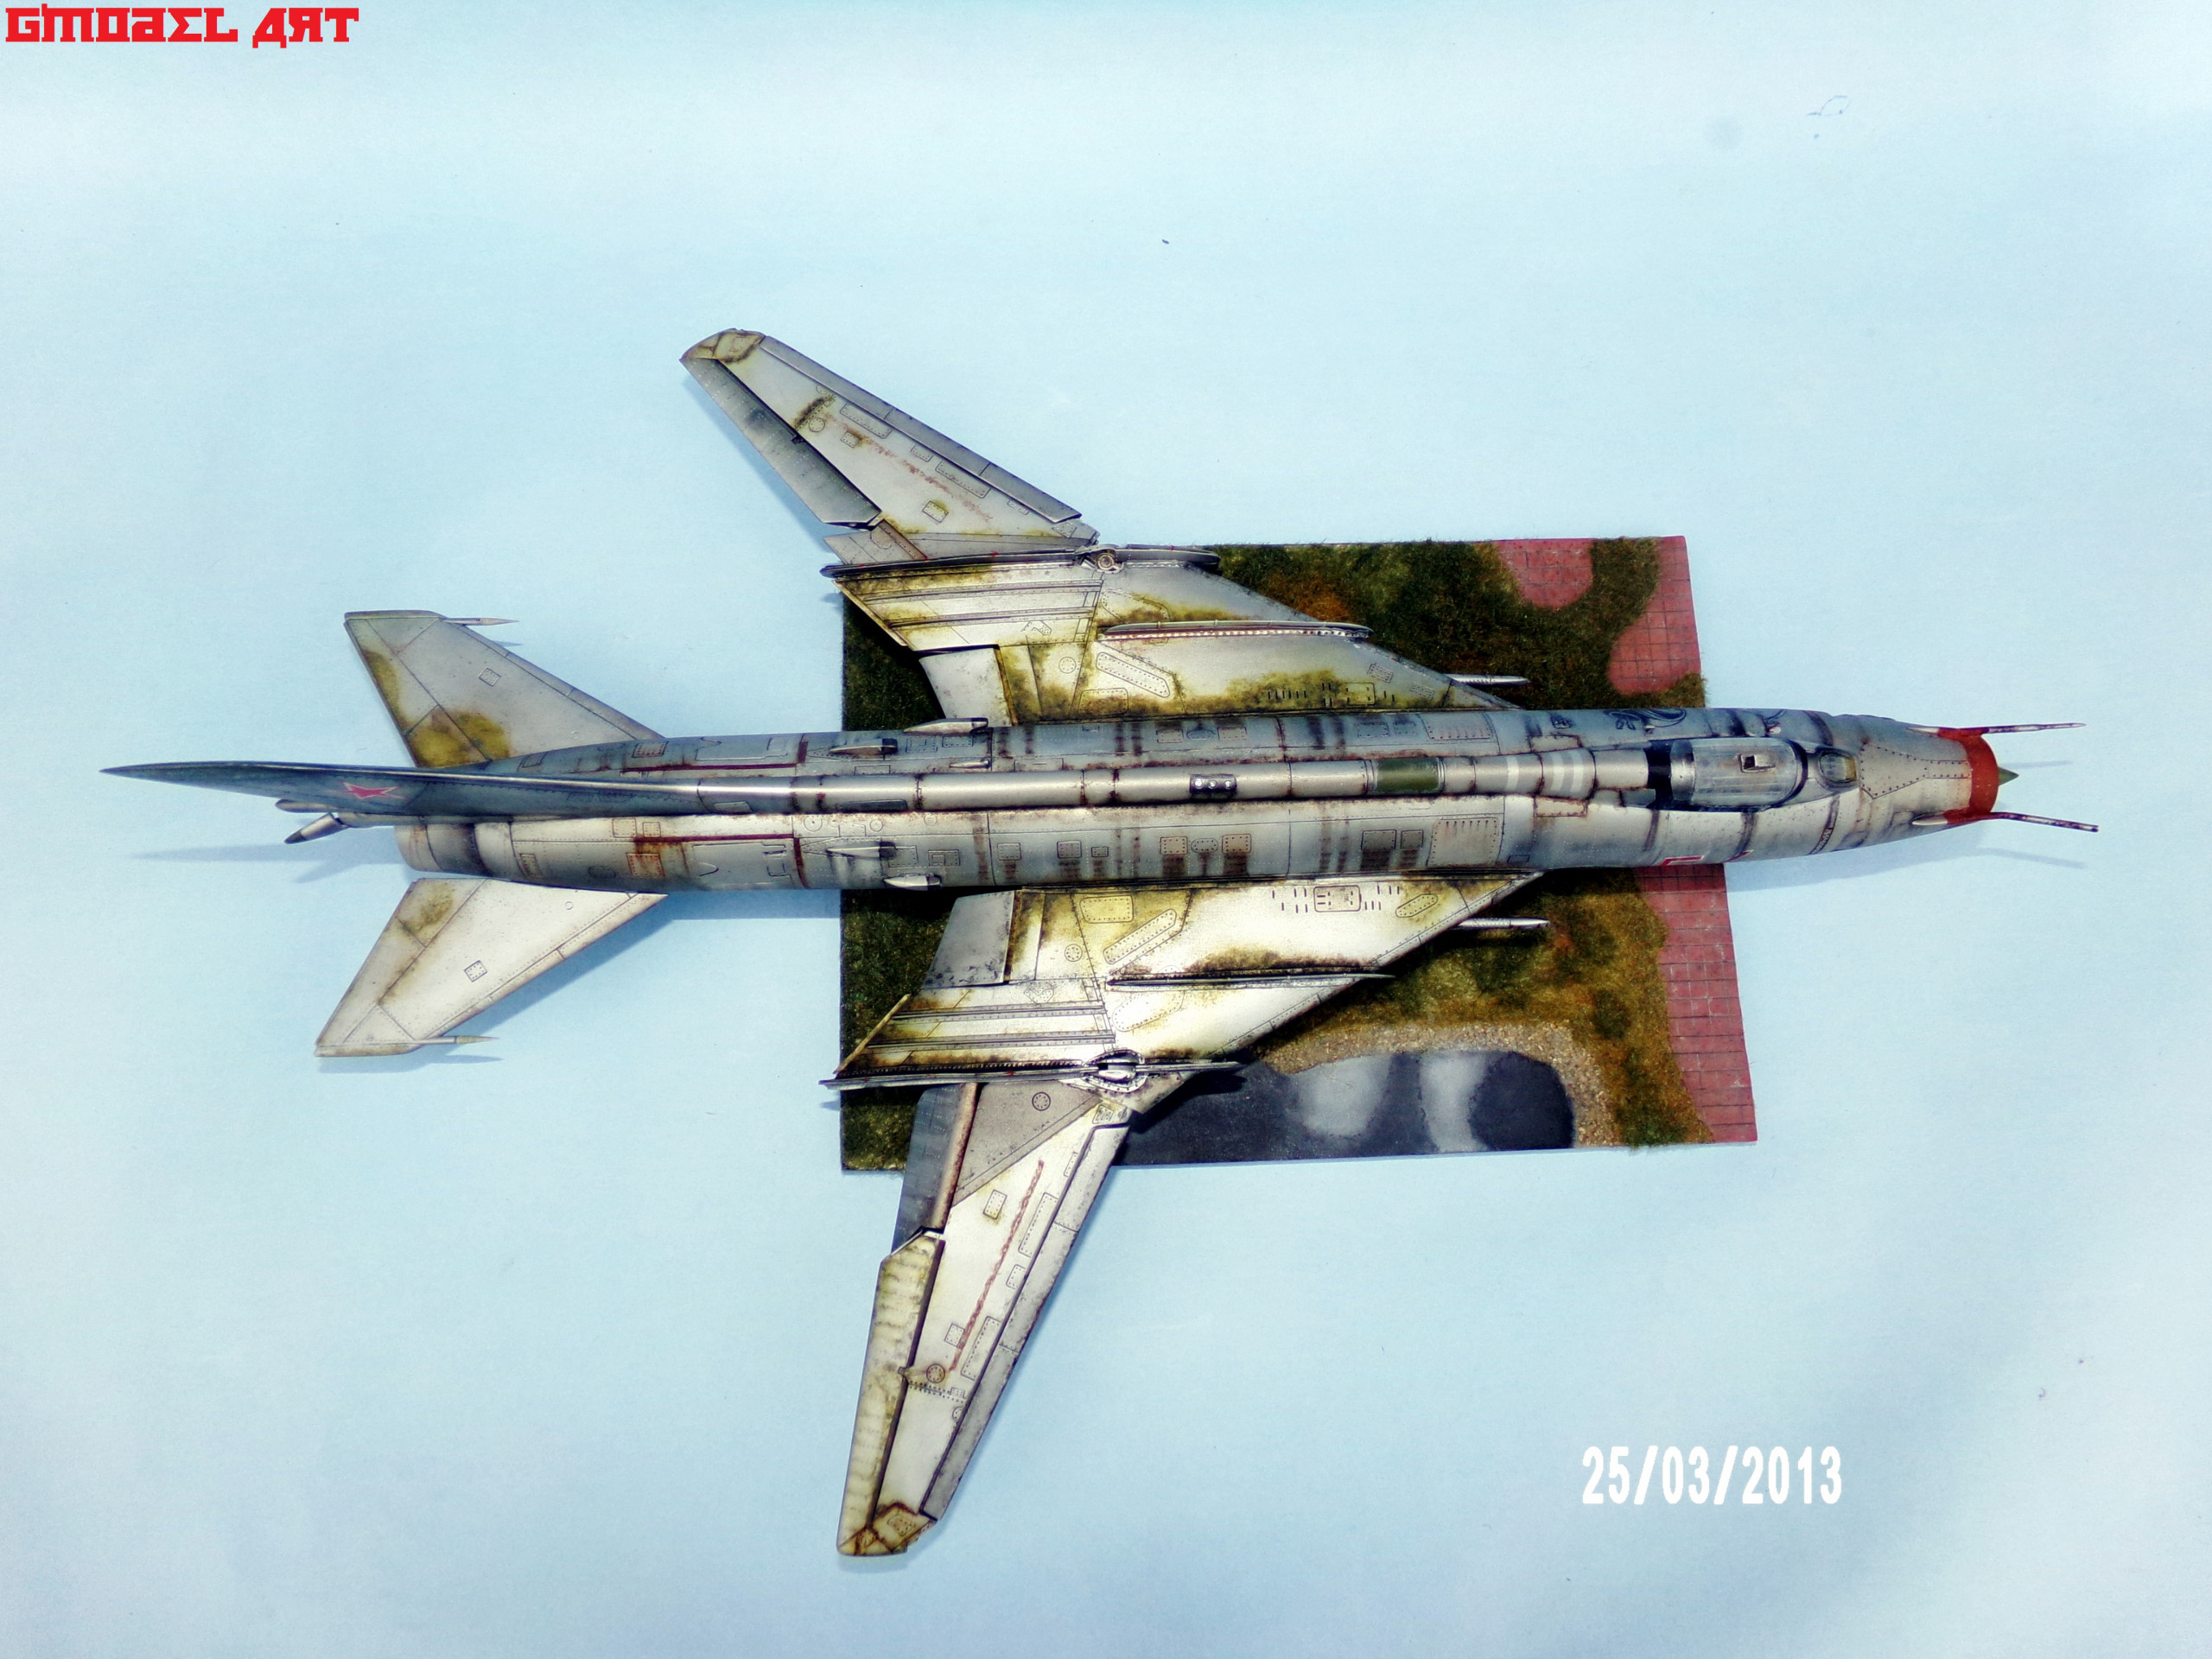
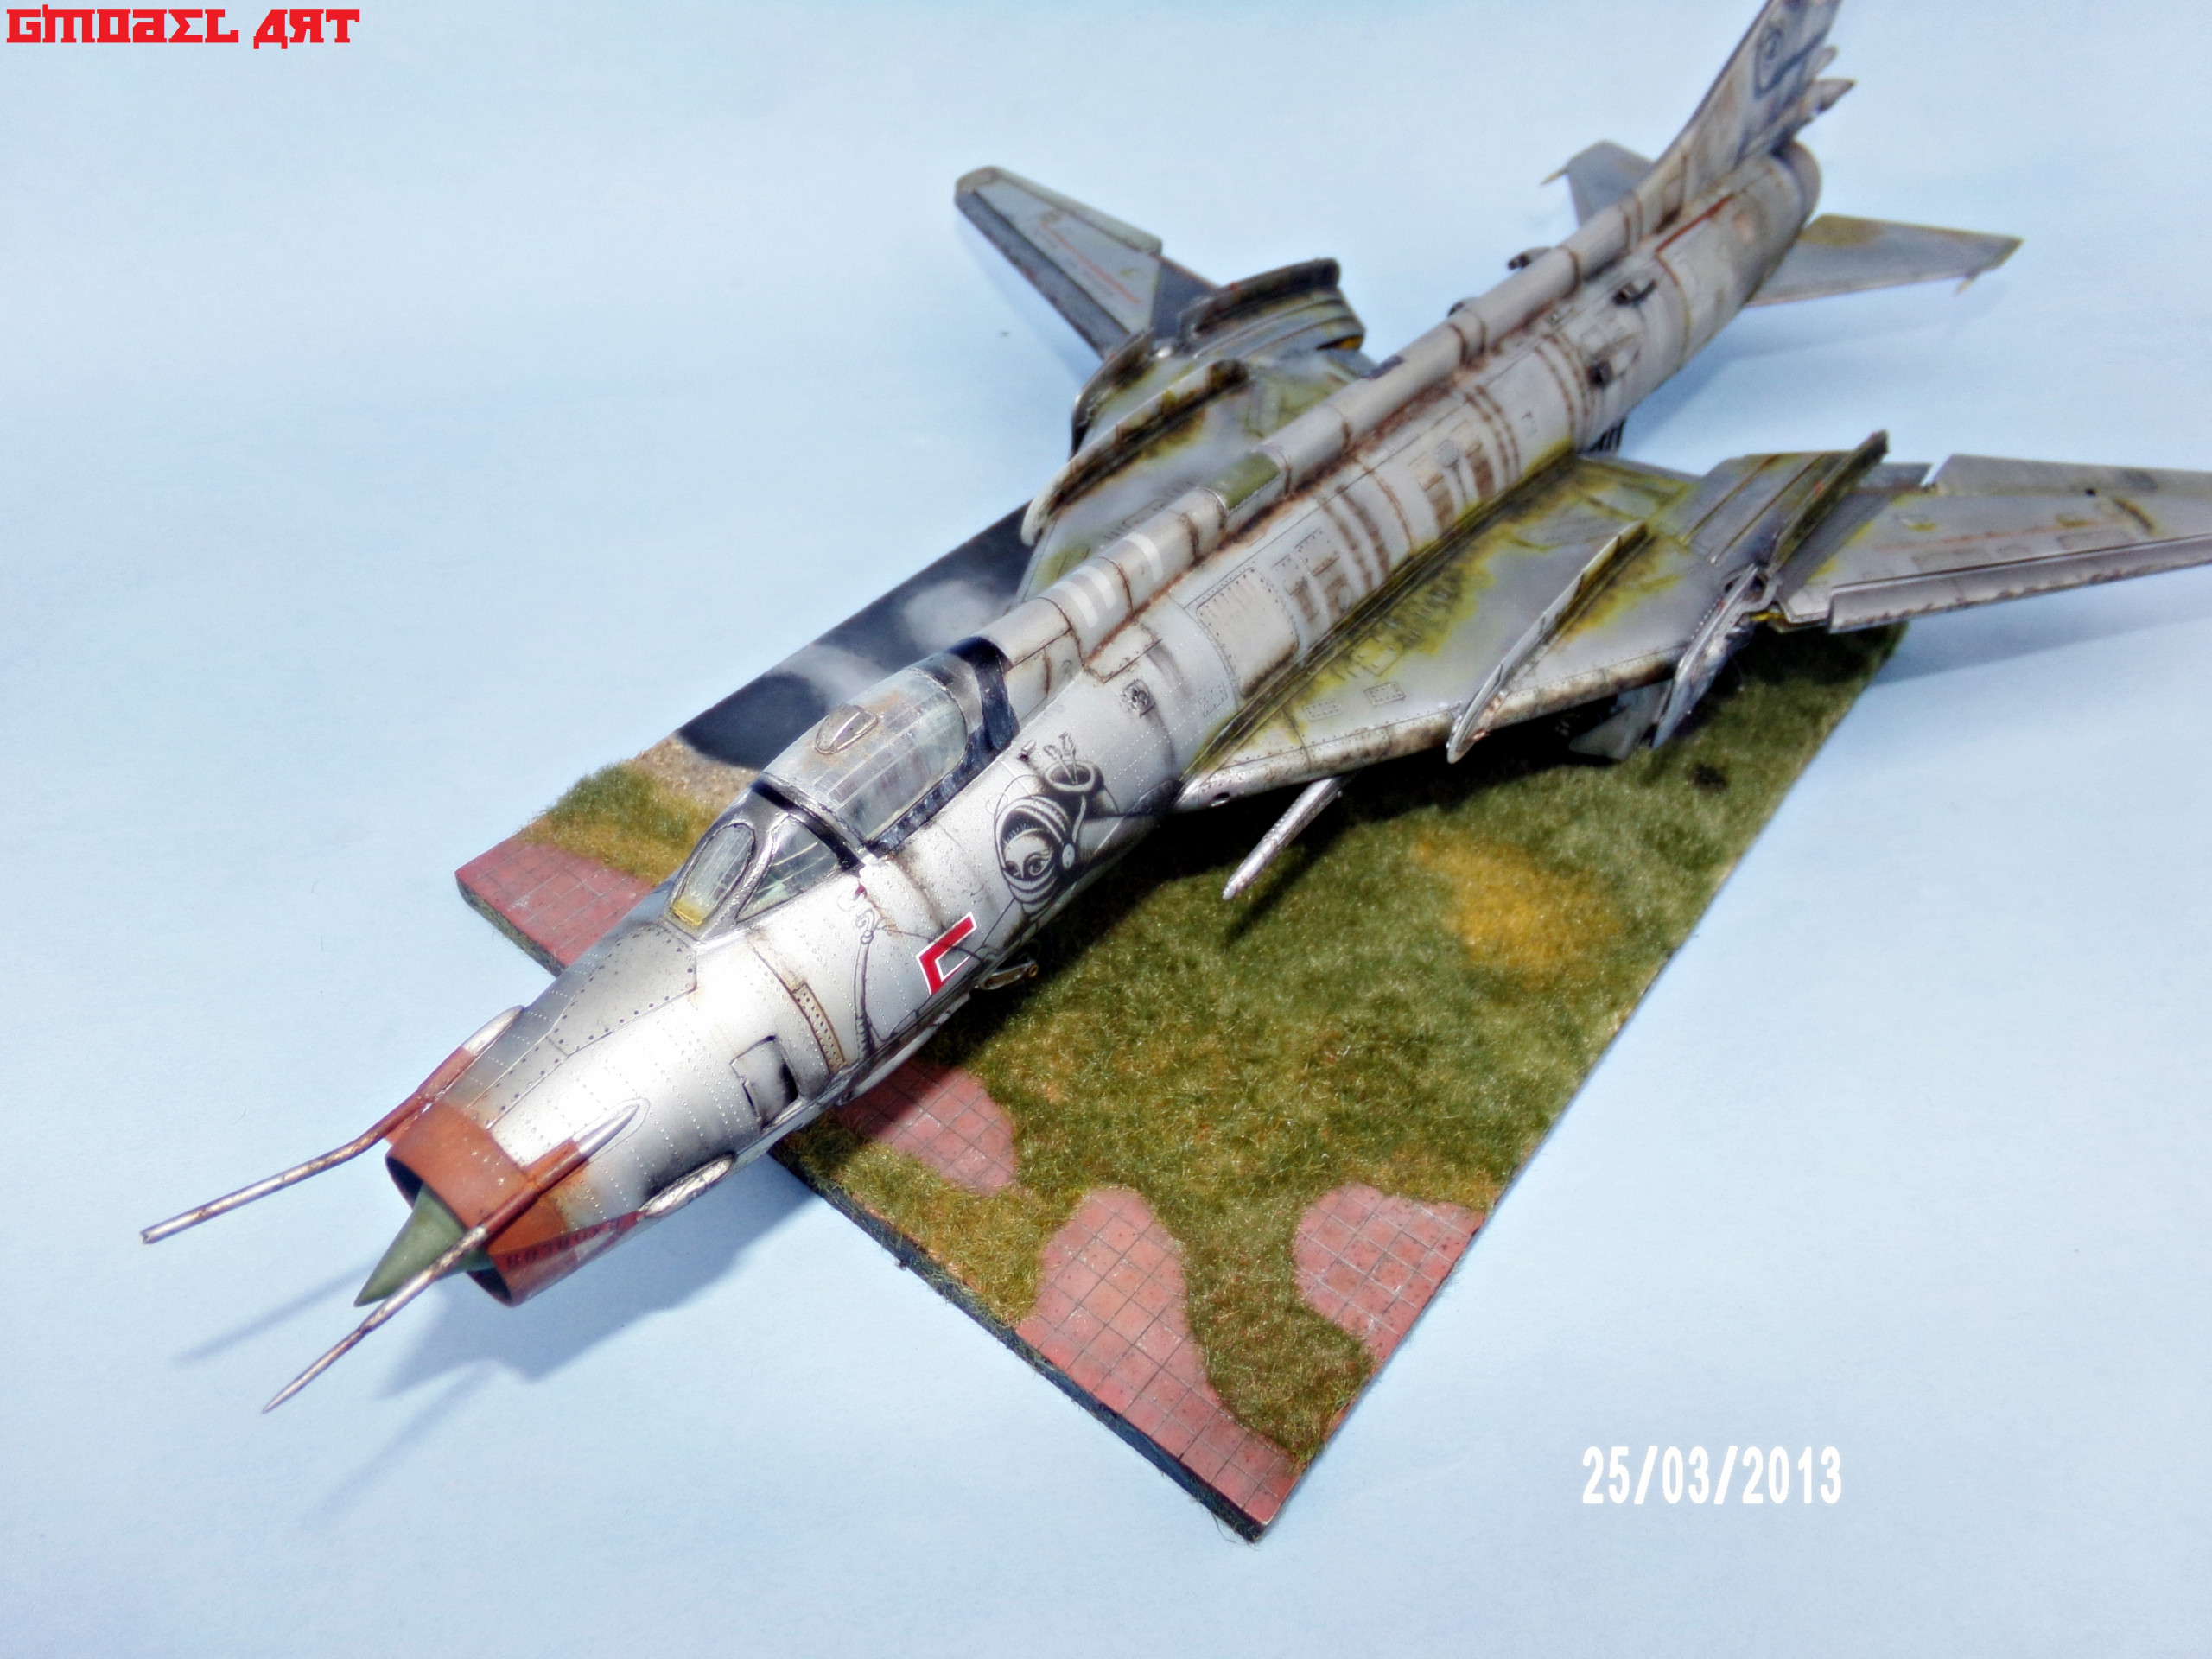
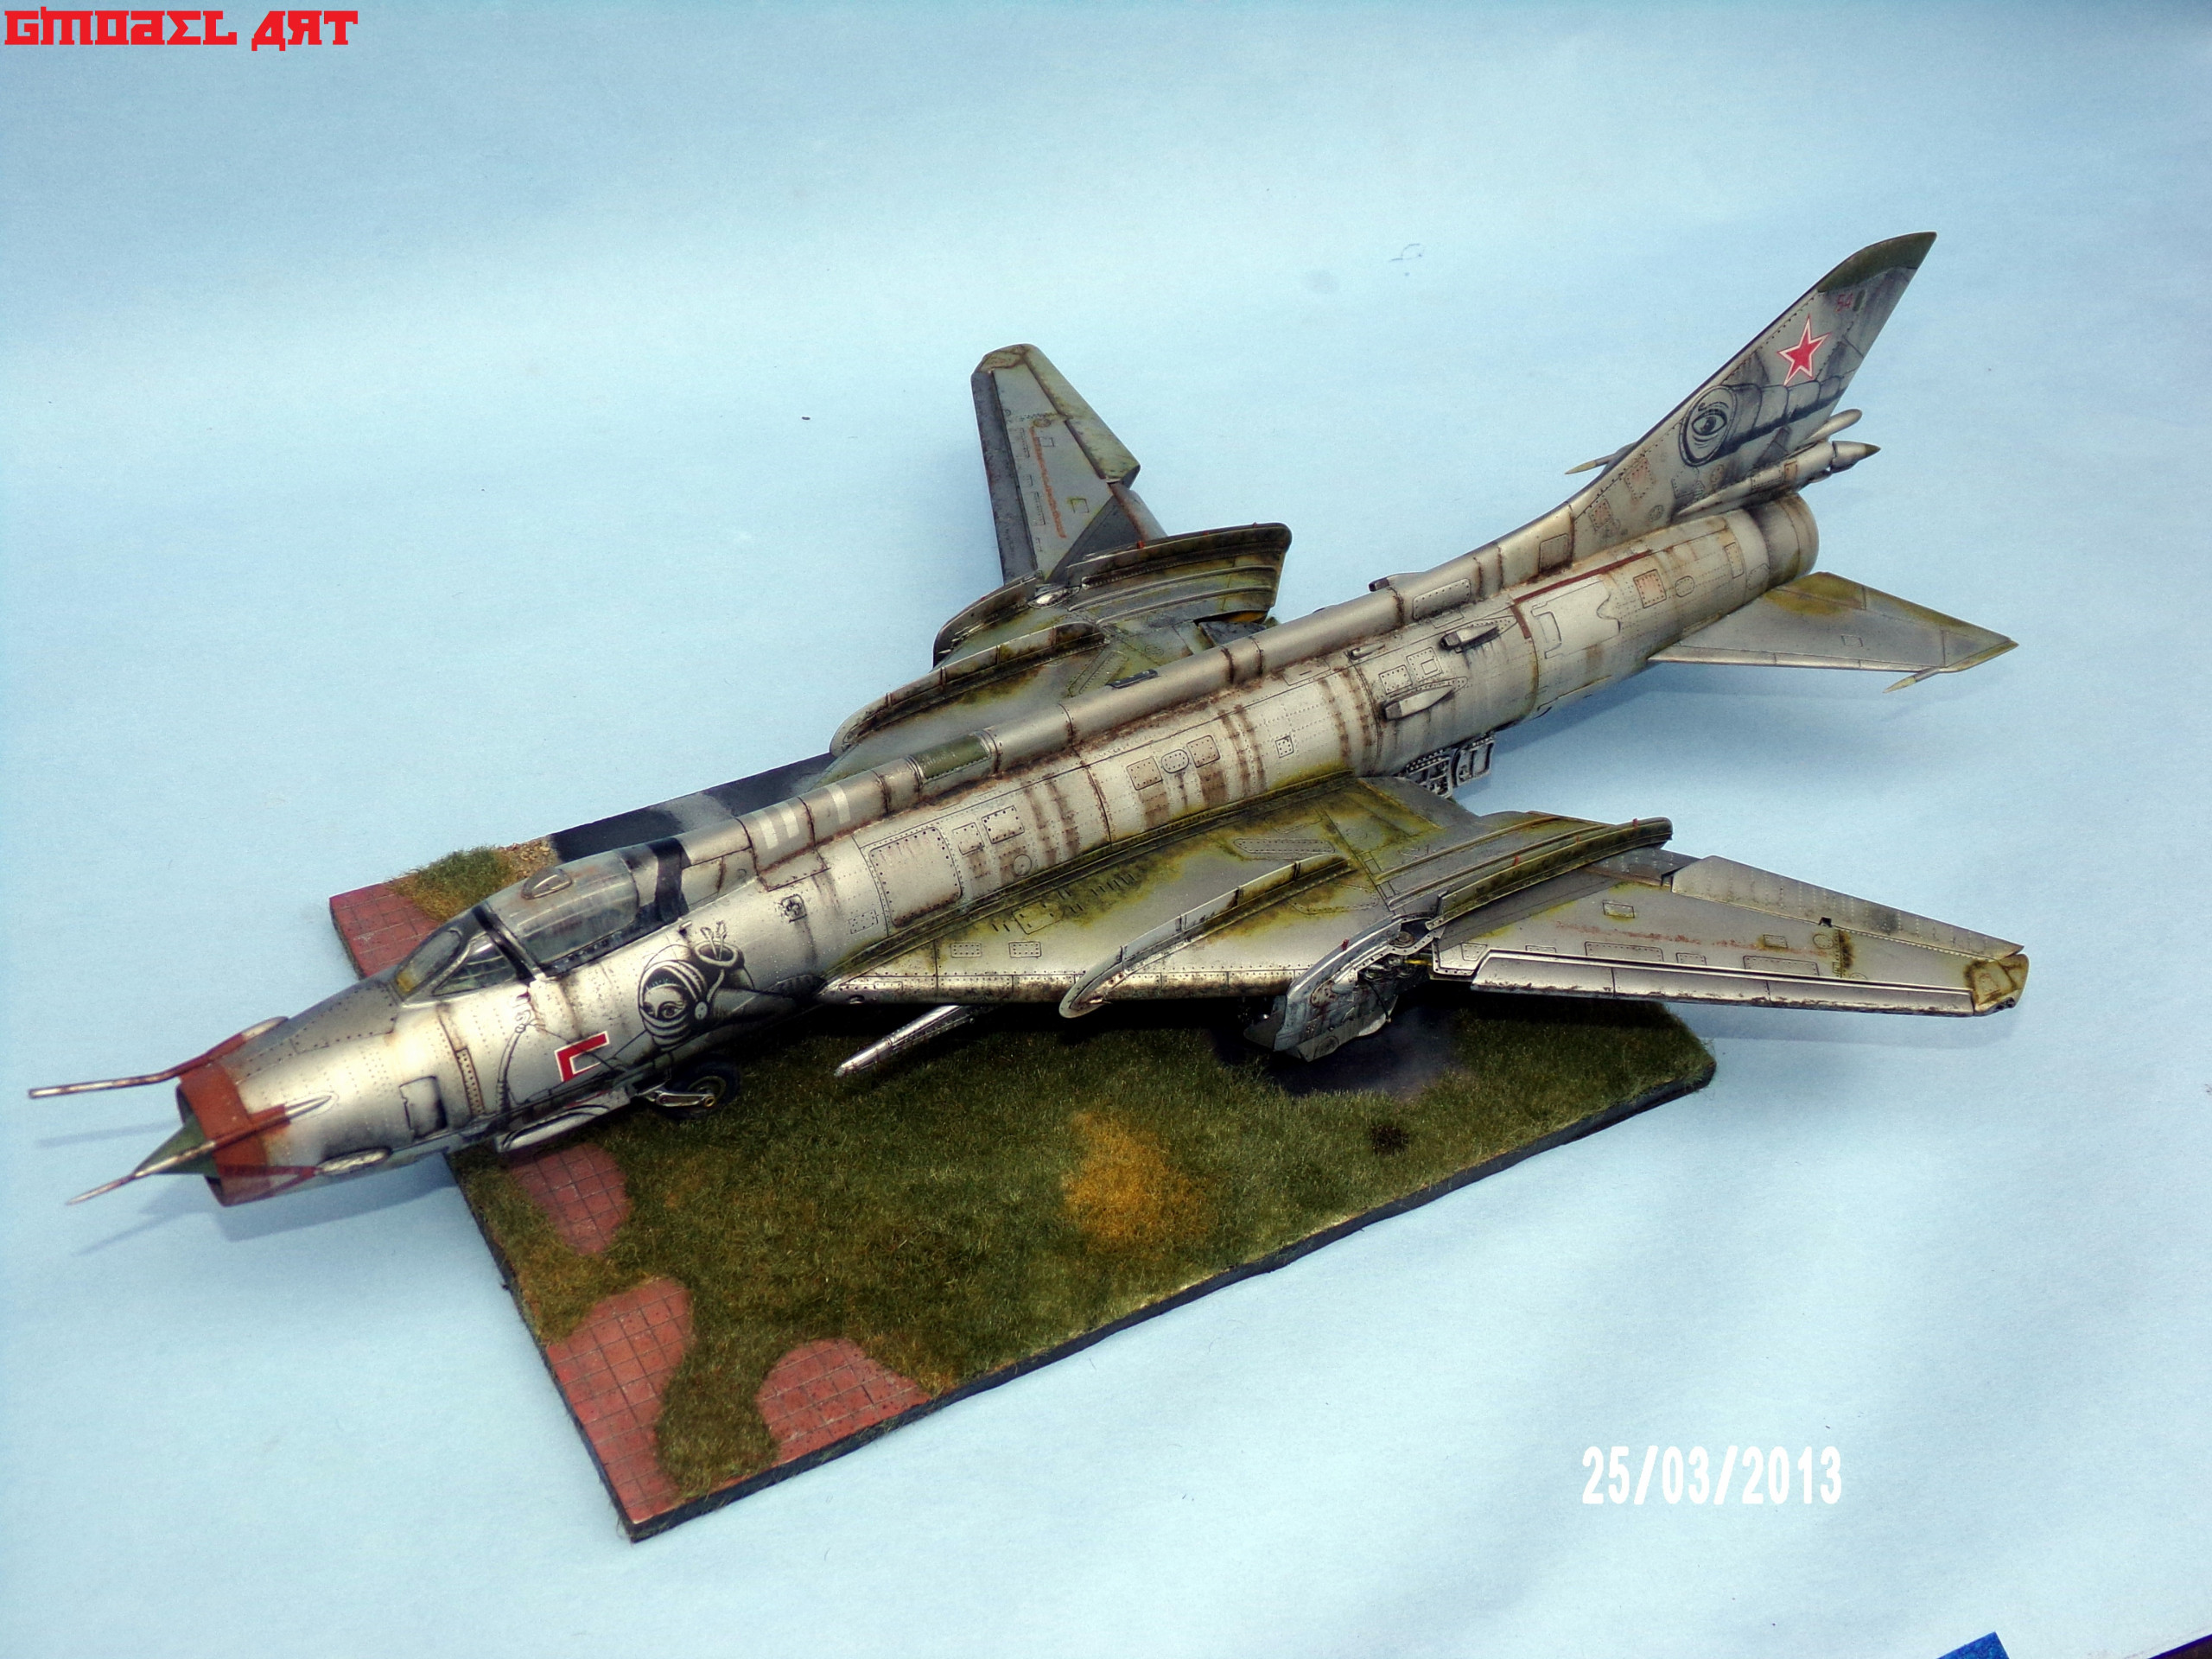
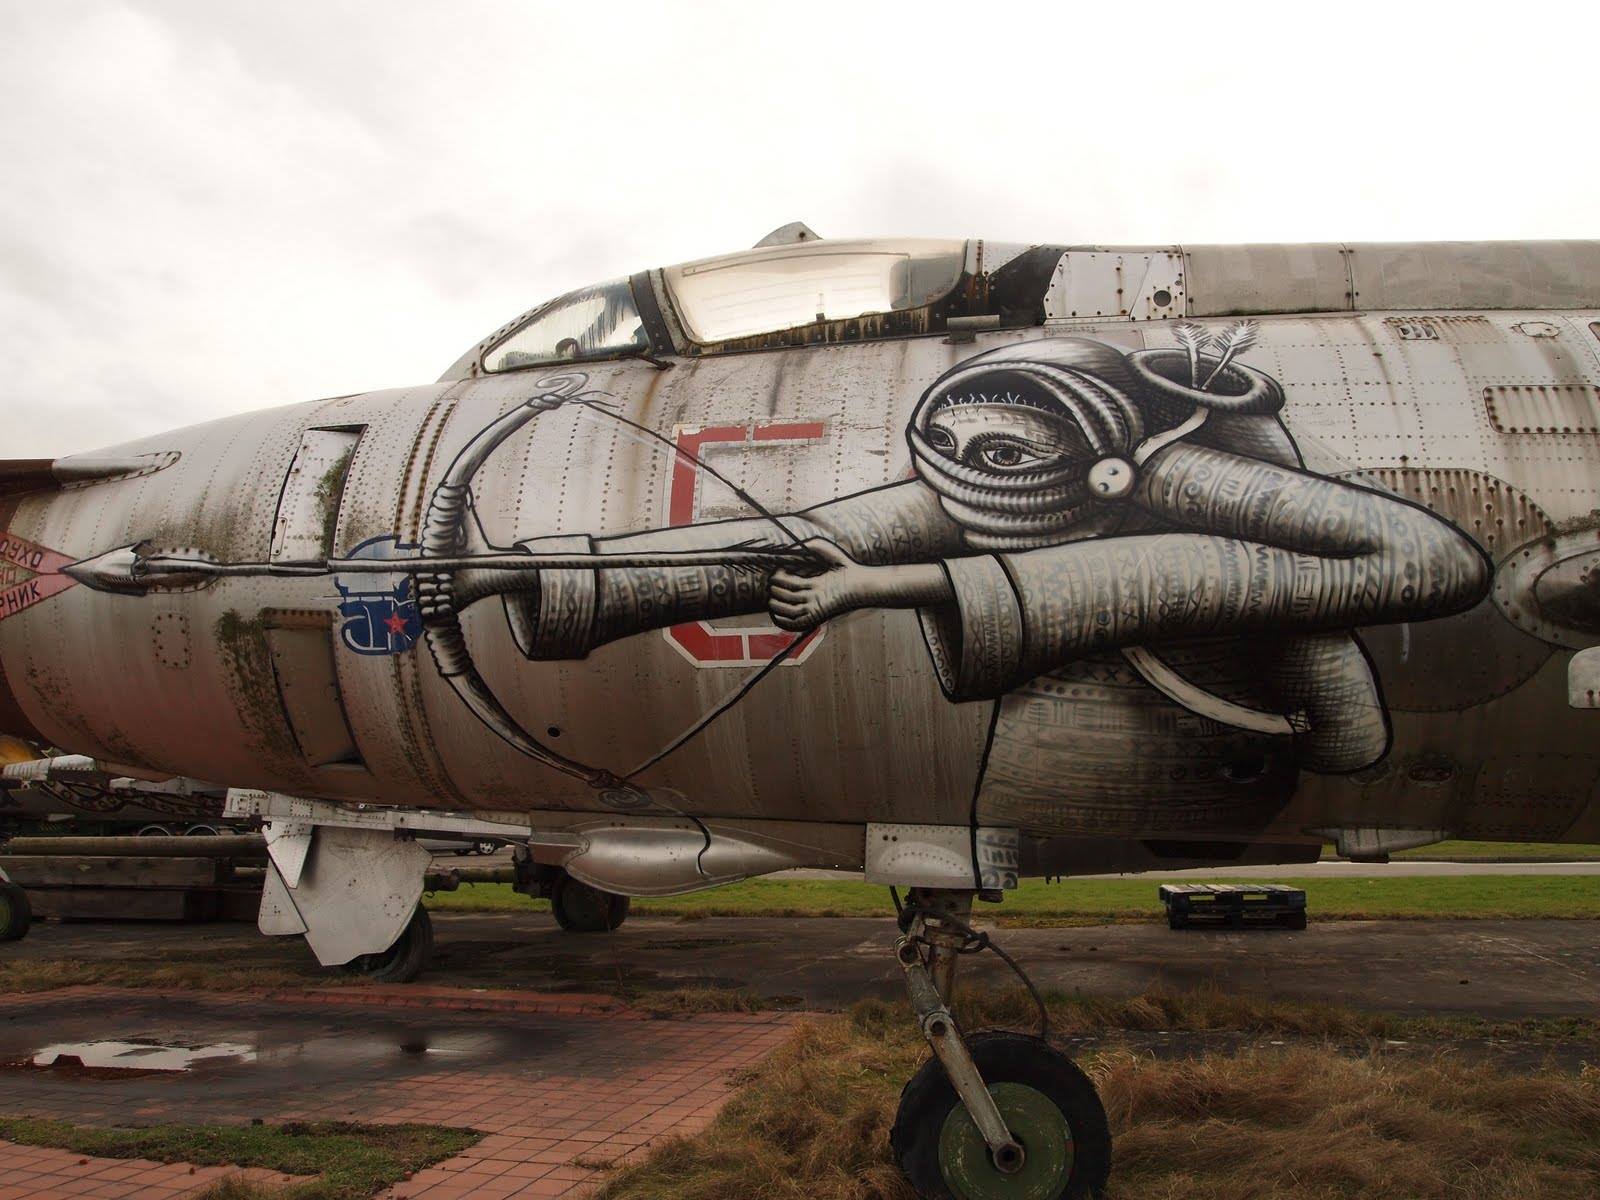
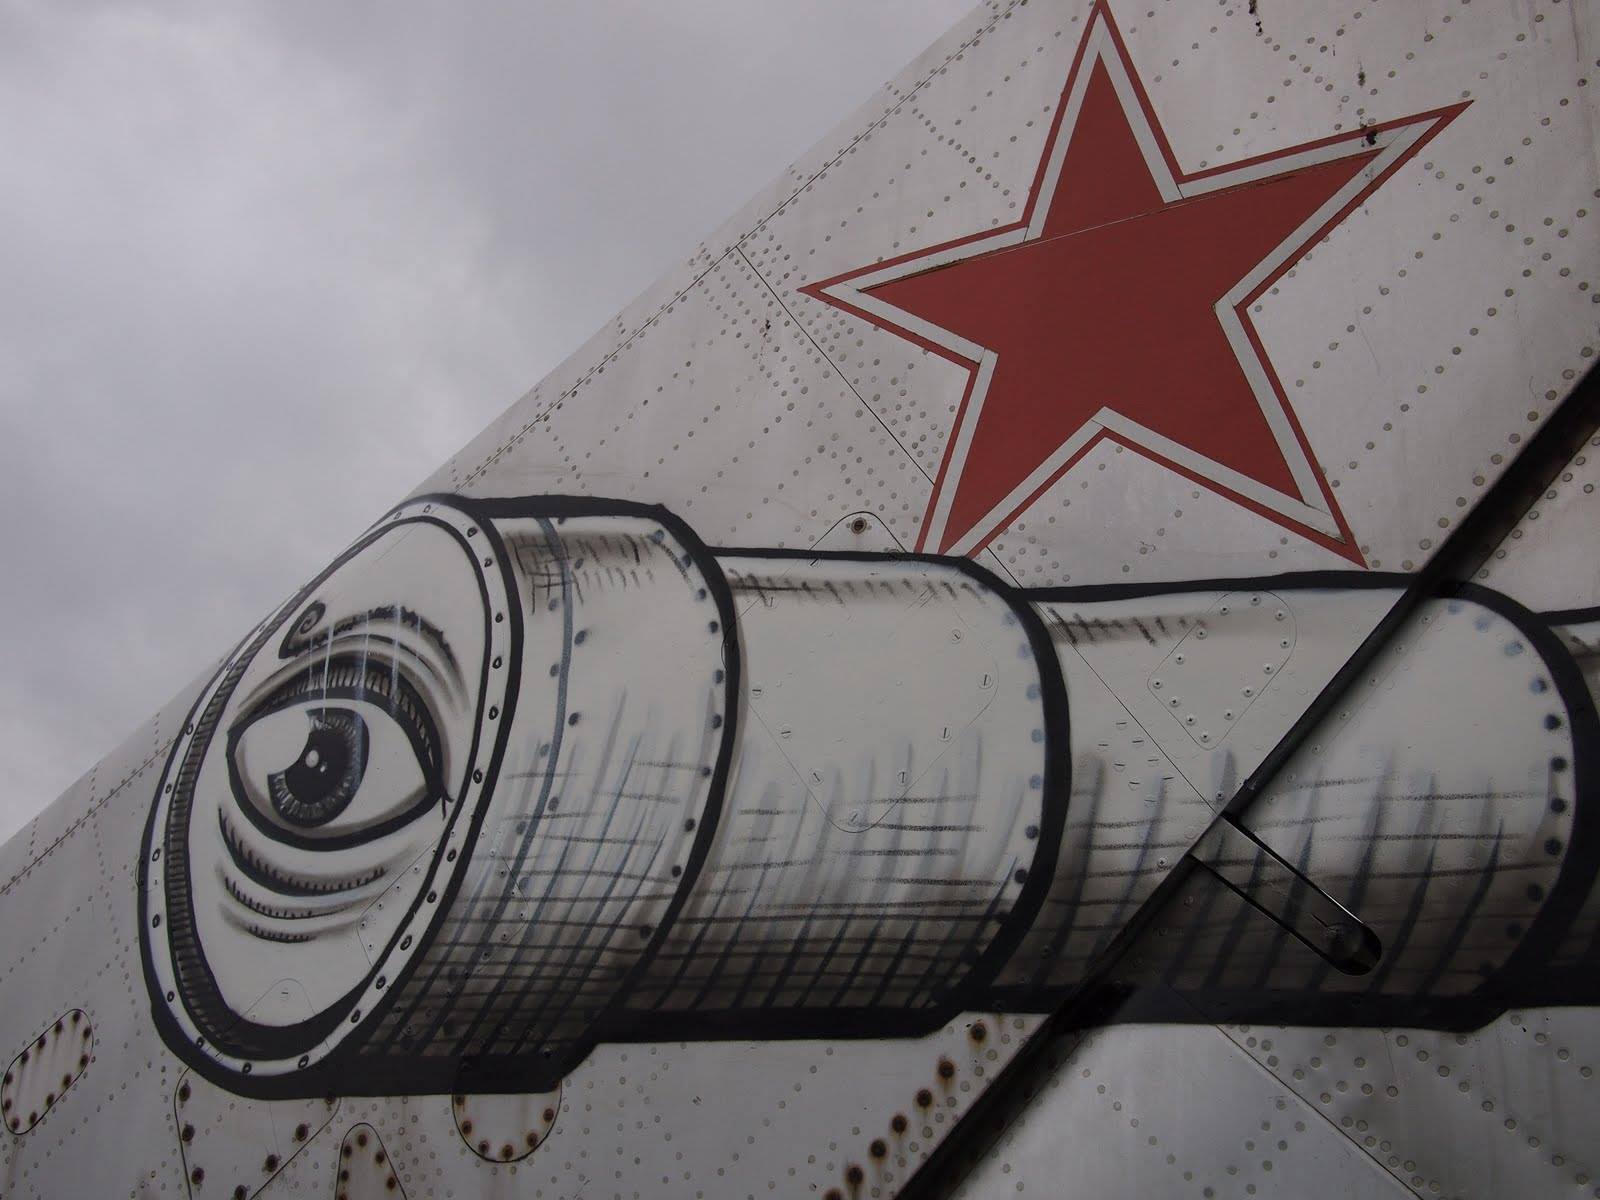
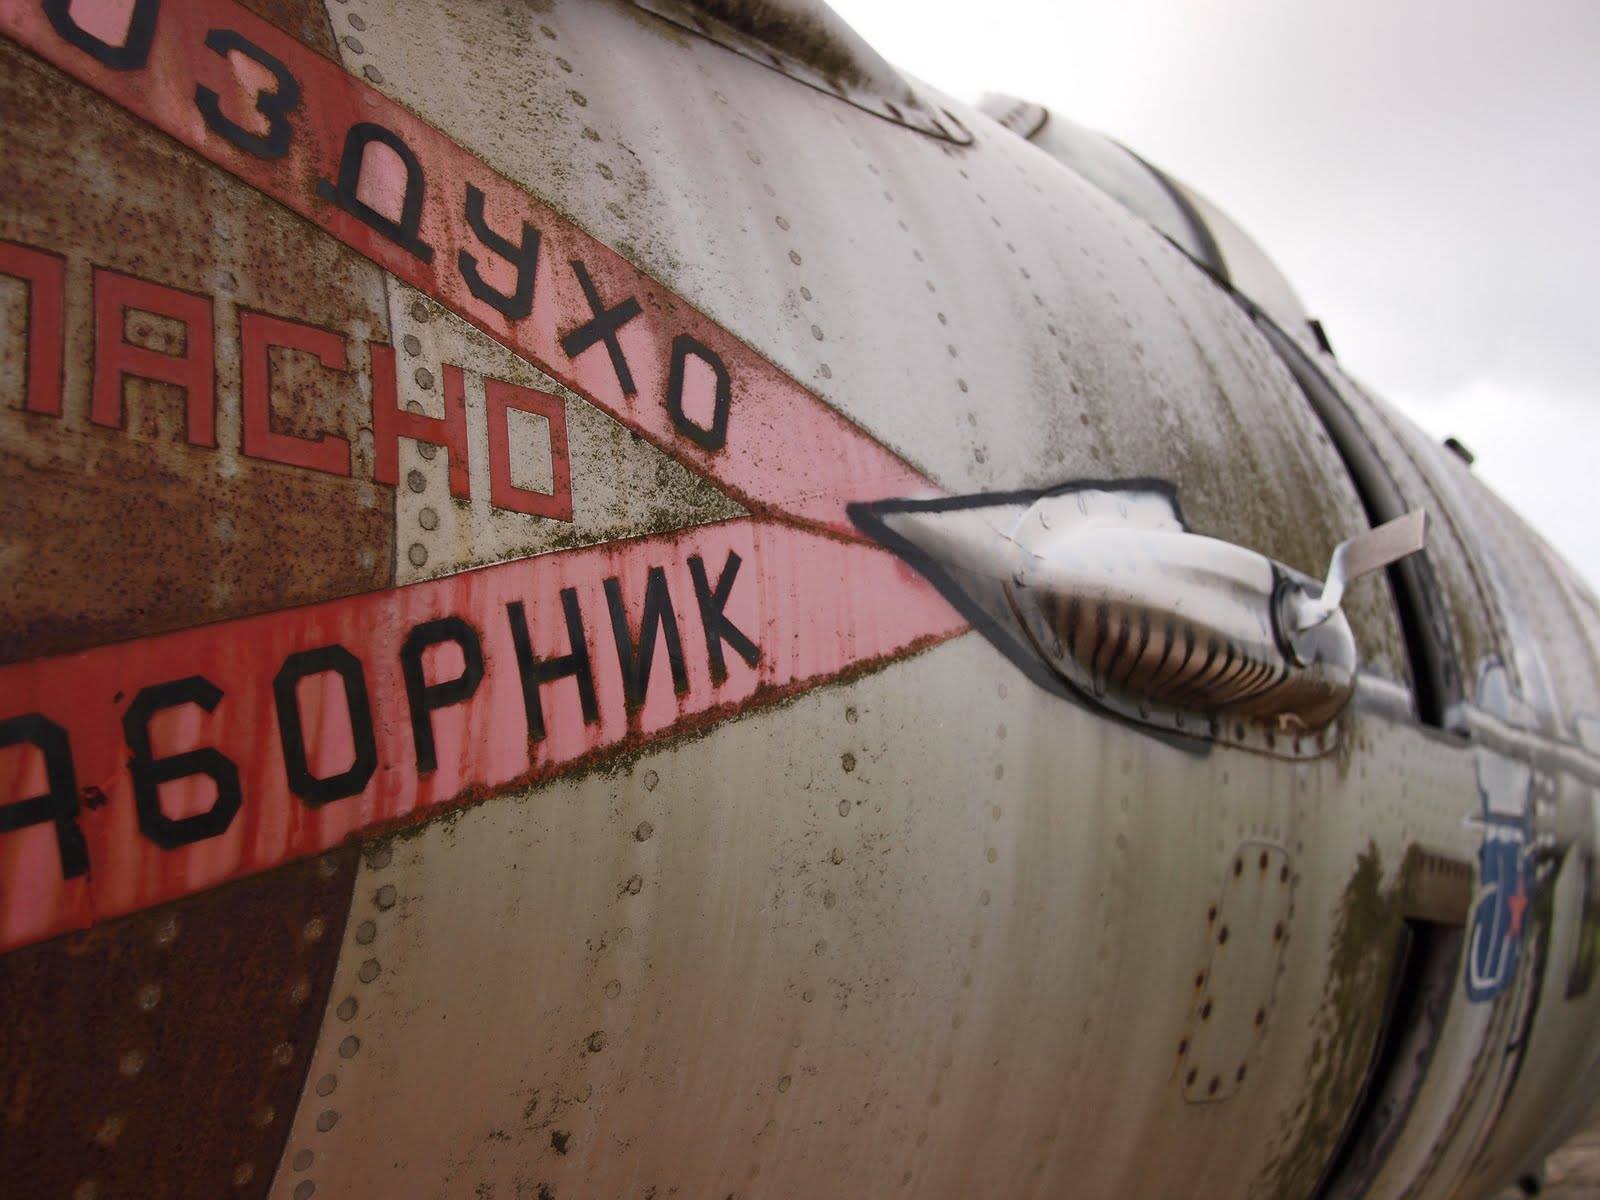
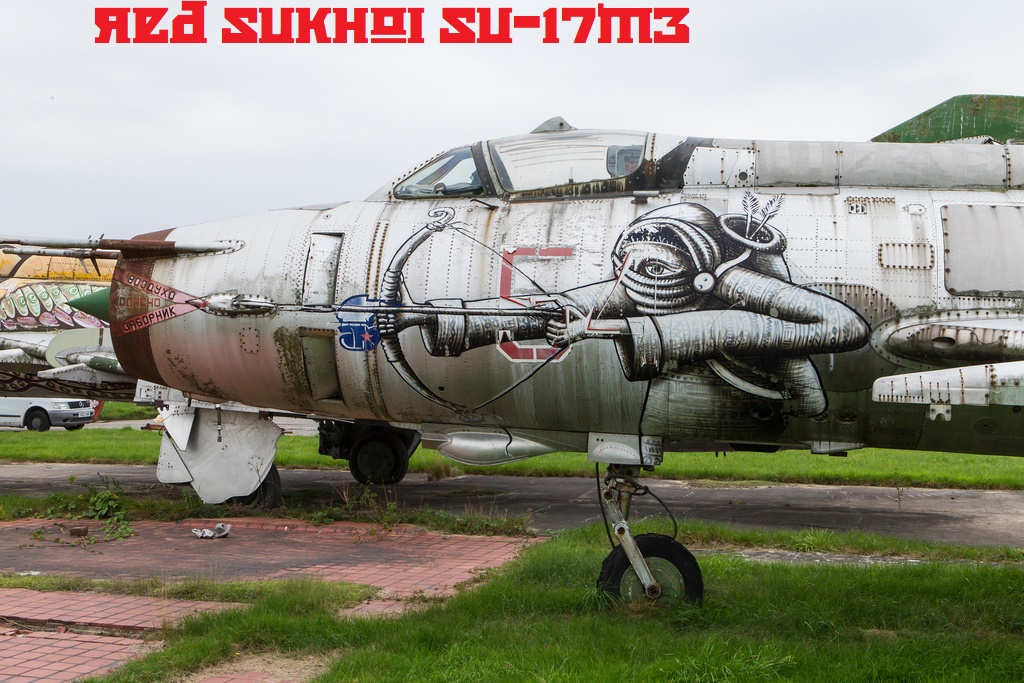
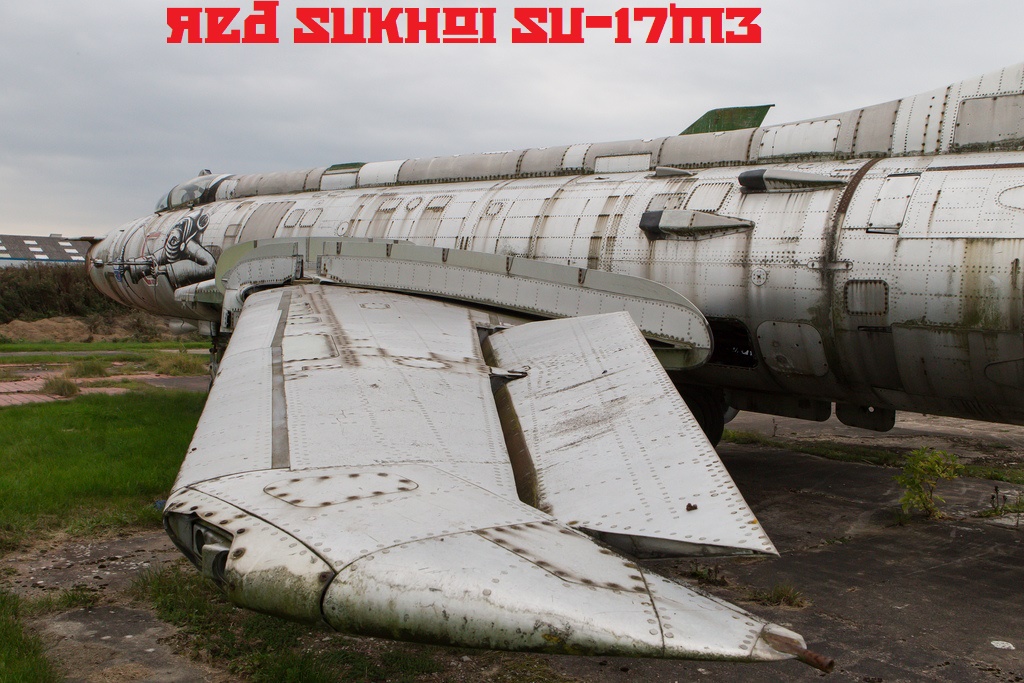
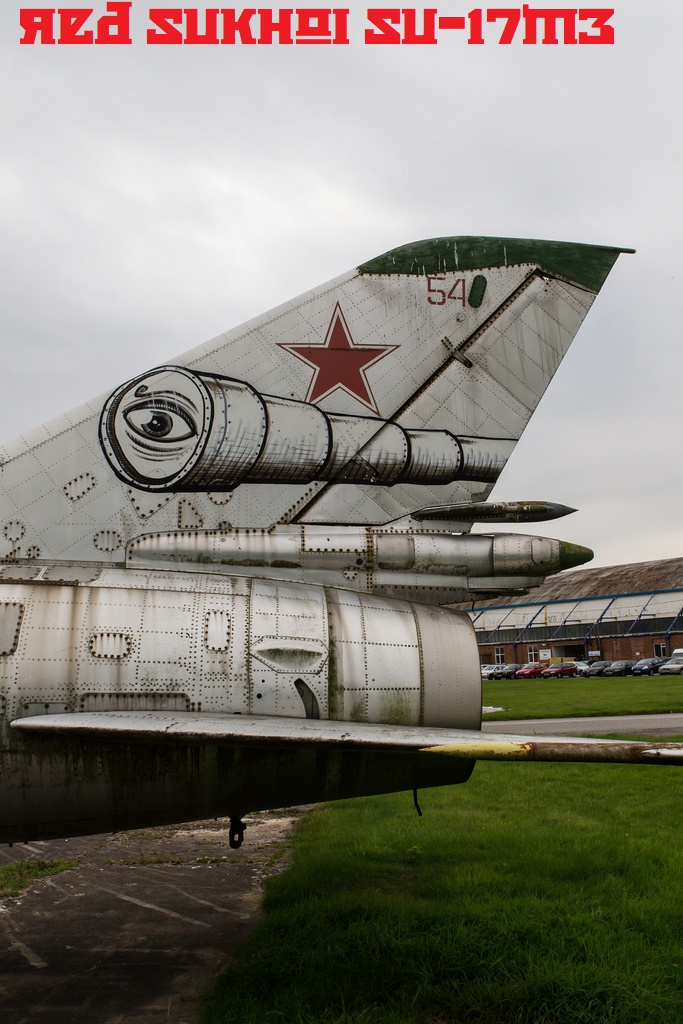
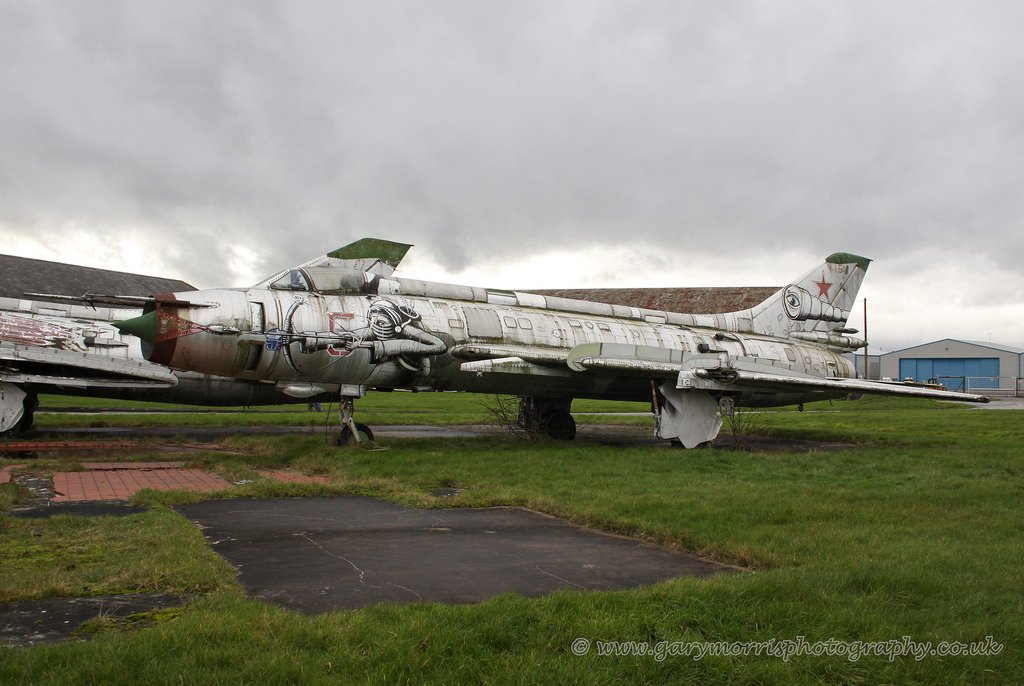
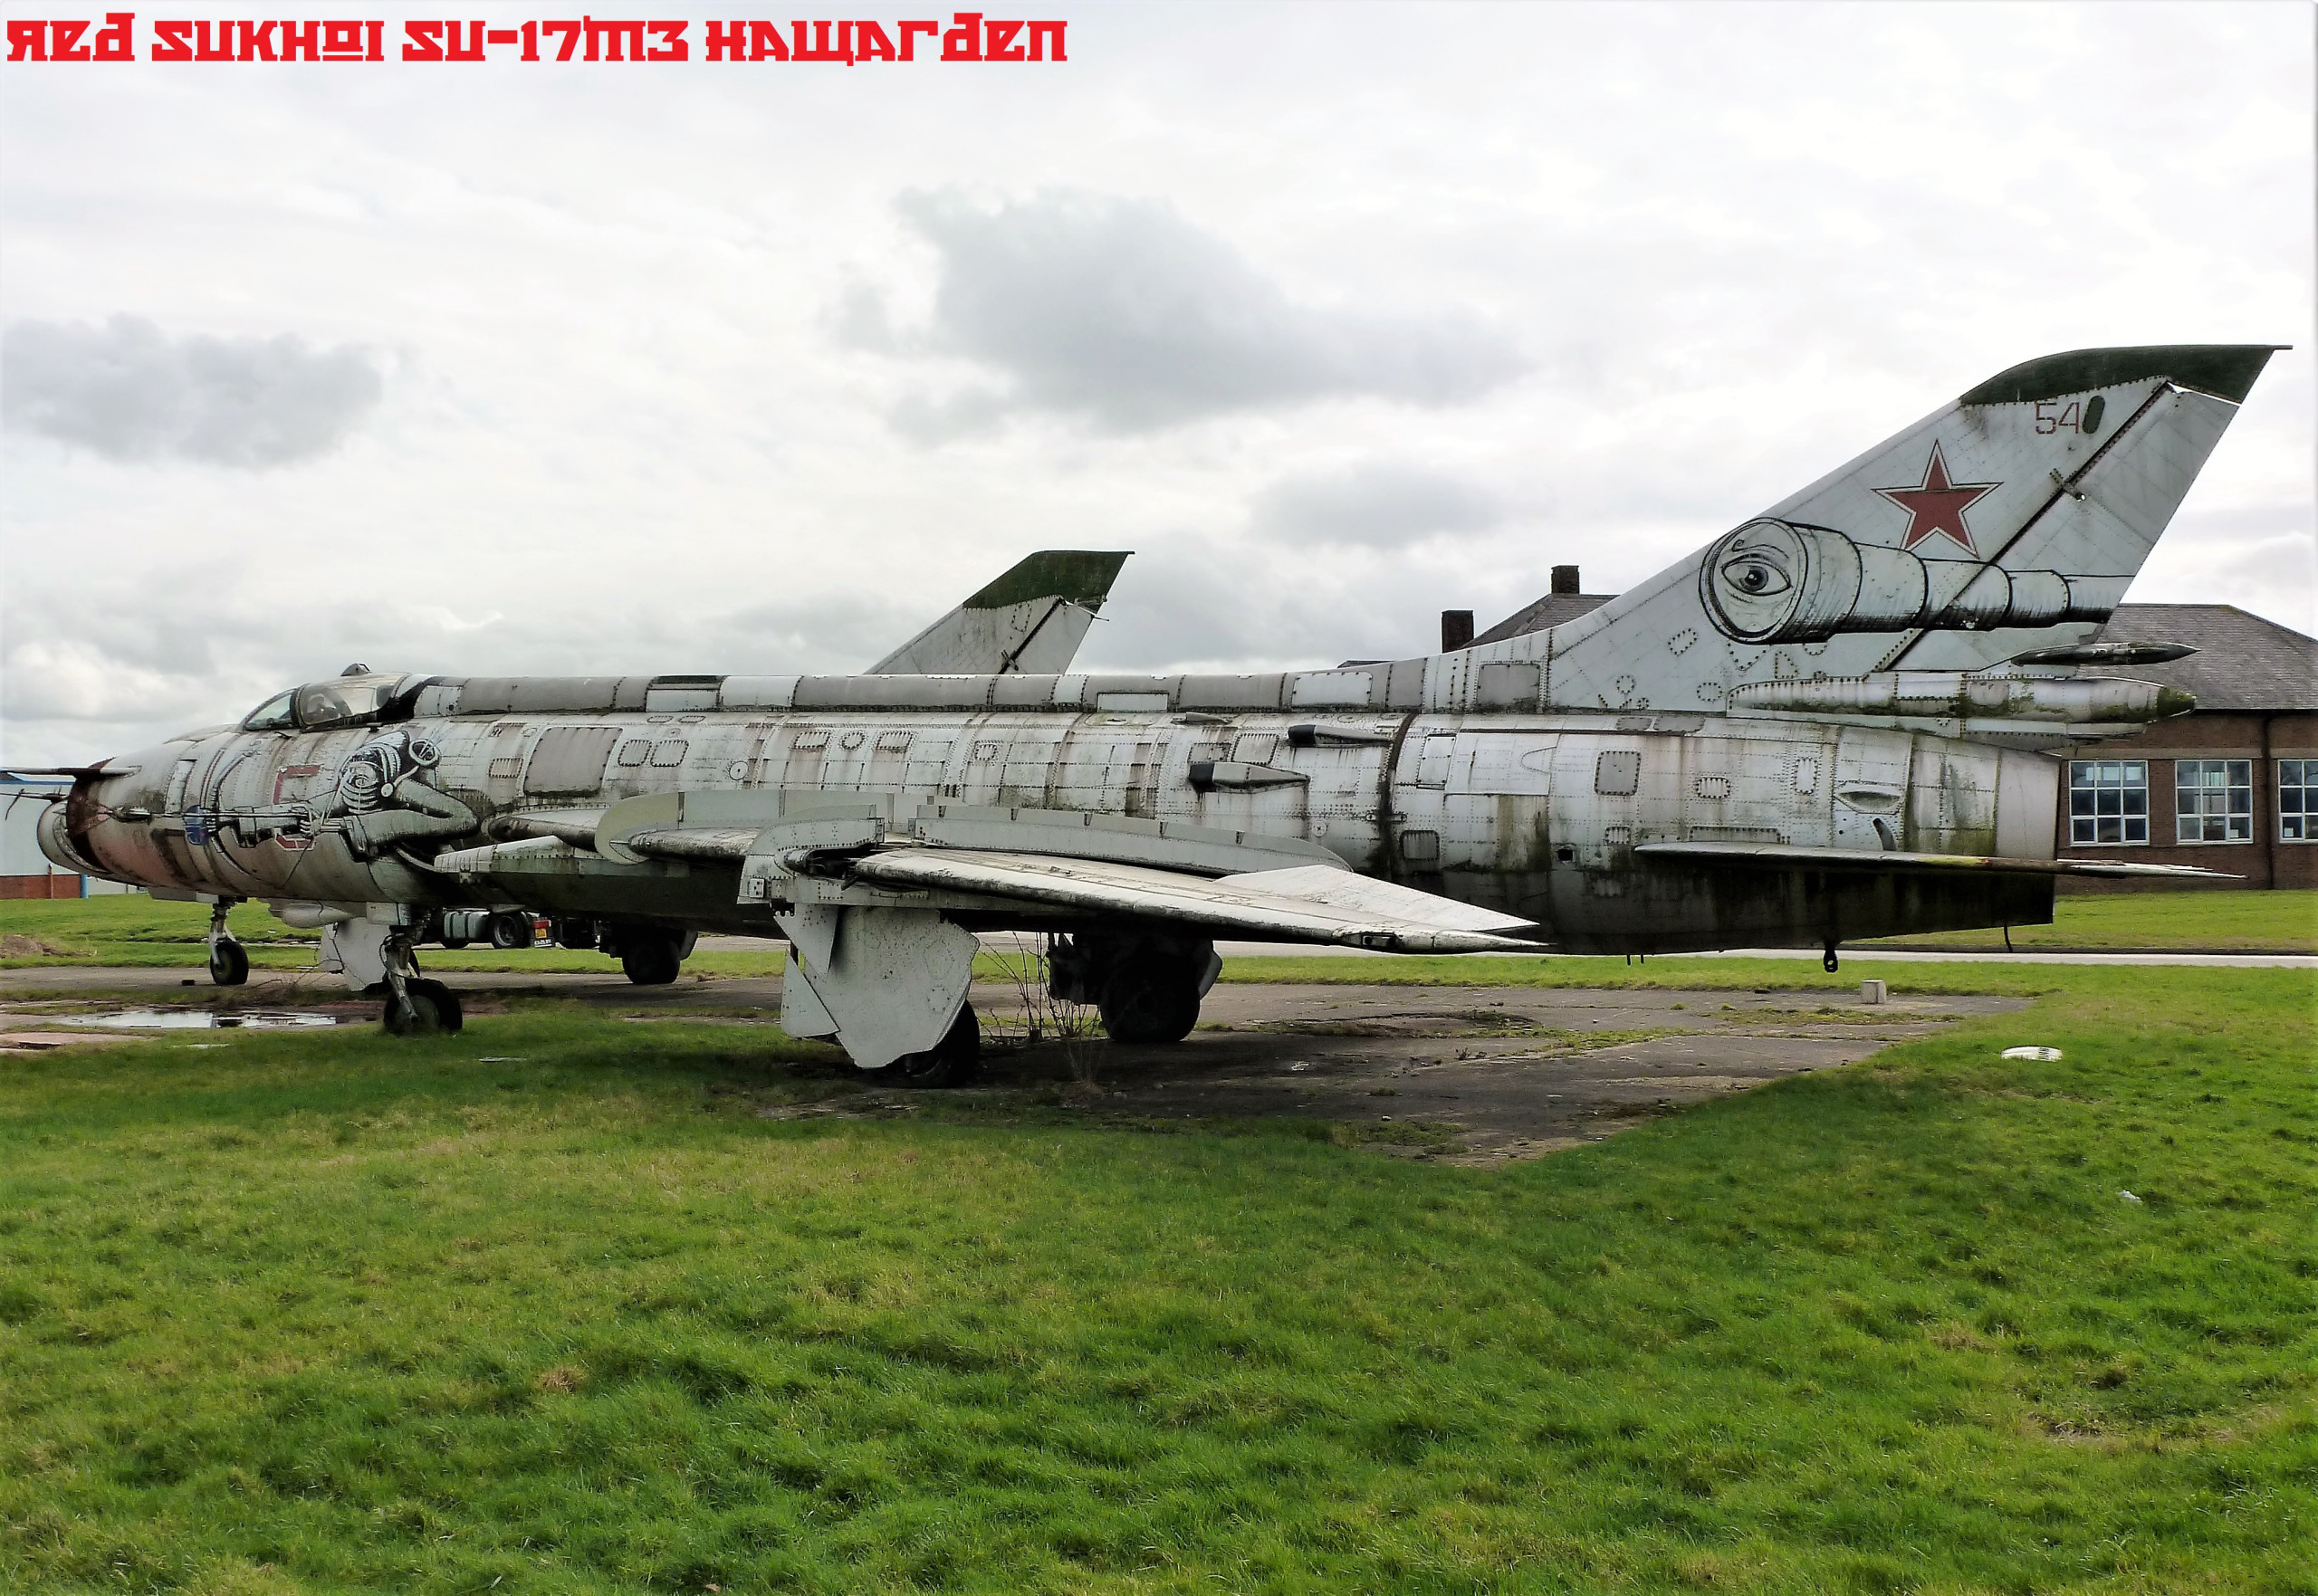
This project began when the only information available on the Internet was gathered. It is based on an existing device in a square in the UK (more information is missing) which has another SU-17 M3 as a companion. I found it interesting since it was coming out. of the clean aluminum of these devices and I am also passionate about Soviet devices. Details: First of all I am going to clarify the differences in the names, the Soviet project began when it was about using shorter runways, (in conjunction with the V-STOL projects) with a two-seat SU-7 to which the wings were added. variable geometry and was called SU-7 IG, with the constant improvements the SU-17M was produced (for export SU-20), with the changes in engine and electronics the SU-17 M3 and M4 were produced, (for export su -22 M3 and M4) This should be clarified since the kits that come on the market in 1/48 are the M3 and M4 versions. Duration: The duration of this project without counting days of leisure was approximately 4 months. Construction: As there is no kit of the SU-17 M in 1/48 scale (only SU-17 M3 and M4), a kit of the SU-7 of the OEZ brand (front fuselage) and another of the SU-17 M3 were used. /M4 from KP MODELS; (rear fuselage, wings and deribas). The kit was configured by making several reforms; The nose air intakes were opened, the nerve was created from the cabin to the drift, cutting the cockpit glass to match, the drift was cut; The engine inspection covers were opened. Rivet lines were engraved throughout the model, the position of the flaps, ailerons and slats were changed Scratch; The section of the engine that is visible through the open inspection doors was completely completed; The exhaust too, the rear axle wells, cables and nerves were added to the walls, all with the corresponding documentation. The wing boundary layer separation plates were configured. Painting: AMMO alclad lacquer and acrylics were used, as well as weathering products and other effects from the same brand of acrylics, the scuffs and drips were configured by layers sealed with glossy acrylic varnish, AMMO pigments were also used in the trunk (rusted metal) and exhaust areas. The graffiti is made on virgin decal paper, the others are from the same kit. Engine section was made entirely in scratch. 1. Primer with black and alclad base 2. Painting the different elements with acrylics and oil effects 3. Presentation on the fuselage Work was done on train wells in wings, trains and covers were improved. The wing boundary layer separation plates were changed for ones that were more realistic to scale. 1. Made with high-impact plastic and aluminum sheets. As for the paint, we started with a synthetic black base for the aclad lacquer and added gray tones in areas where more dust accumulates (so that the tone of the alclad changes, becoming more opaque). Then they began to play with the accumulations of water with brown and moss green tones using filters, always looking at photos of the real plane, the darker tones of the metal were achieved in some areas with very diluted medium gray and in others with smoke. The runners were made with black oil paint blended downwards in the direction of the rainwater fall and were reviewed with a black watercolor pencil to further define them. The rust-colored horn veneer was made with a small layer of dark oxide acrylic to give the effect and then AMMO pigments were used. All drips and wear effects were produced with ammo products for this purpose, several techniques were used: brush stains, sponge stains, rain effects, drained dirt, blurring, etc. The result is in sight, hoping you like it.