article
Building the Hellenic Air Force F-4E Phantom II of 337 Squadron in 1995
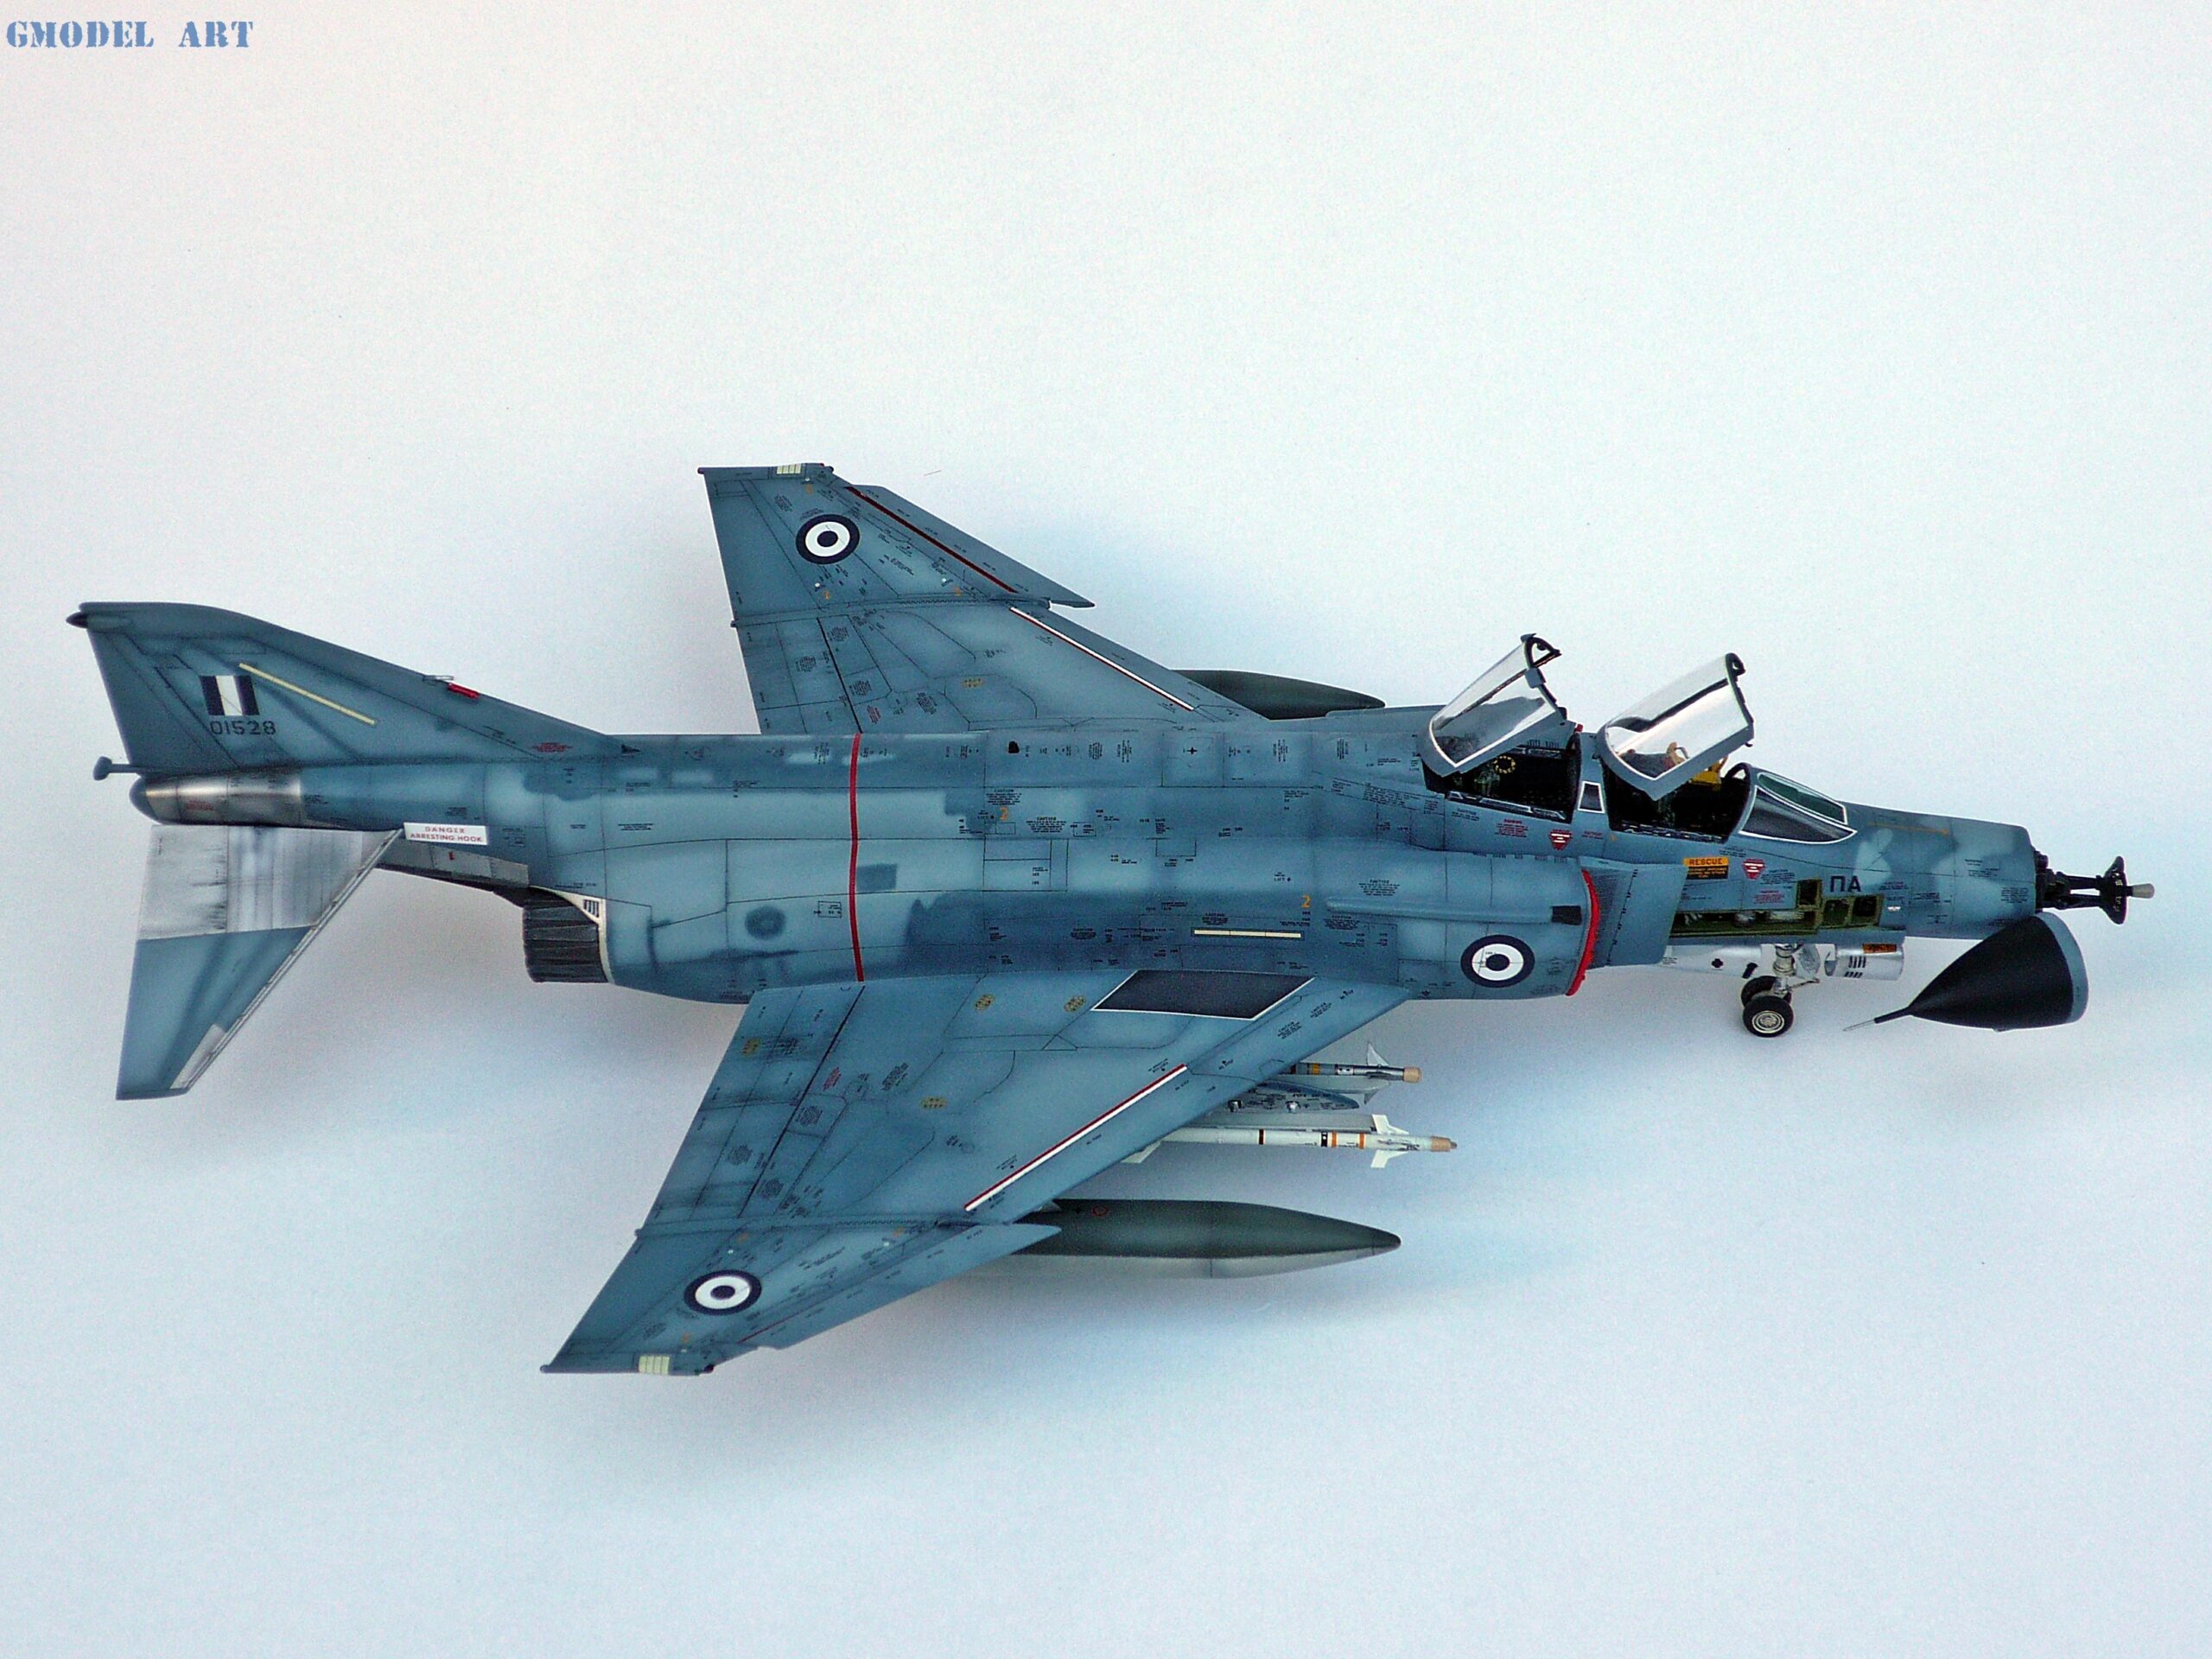
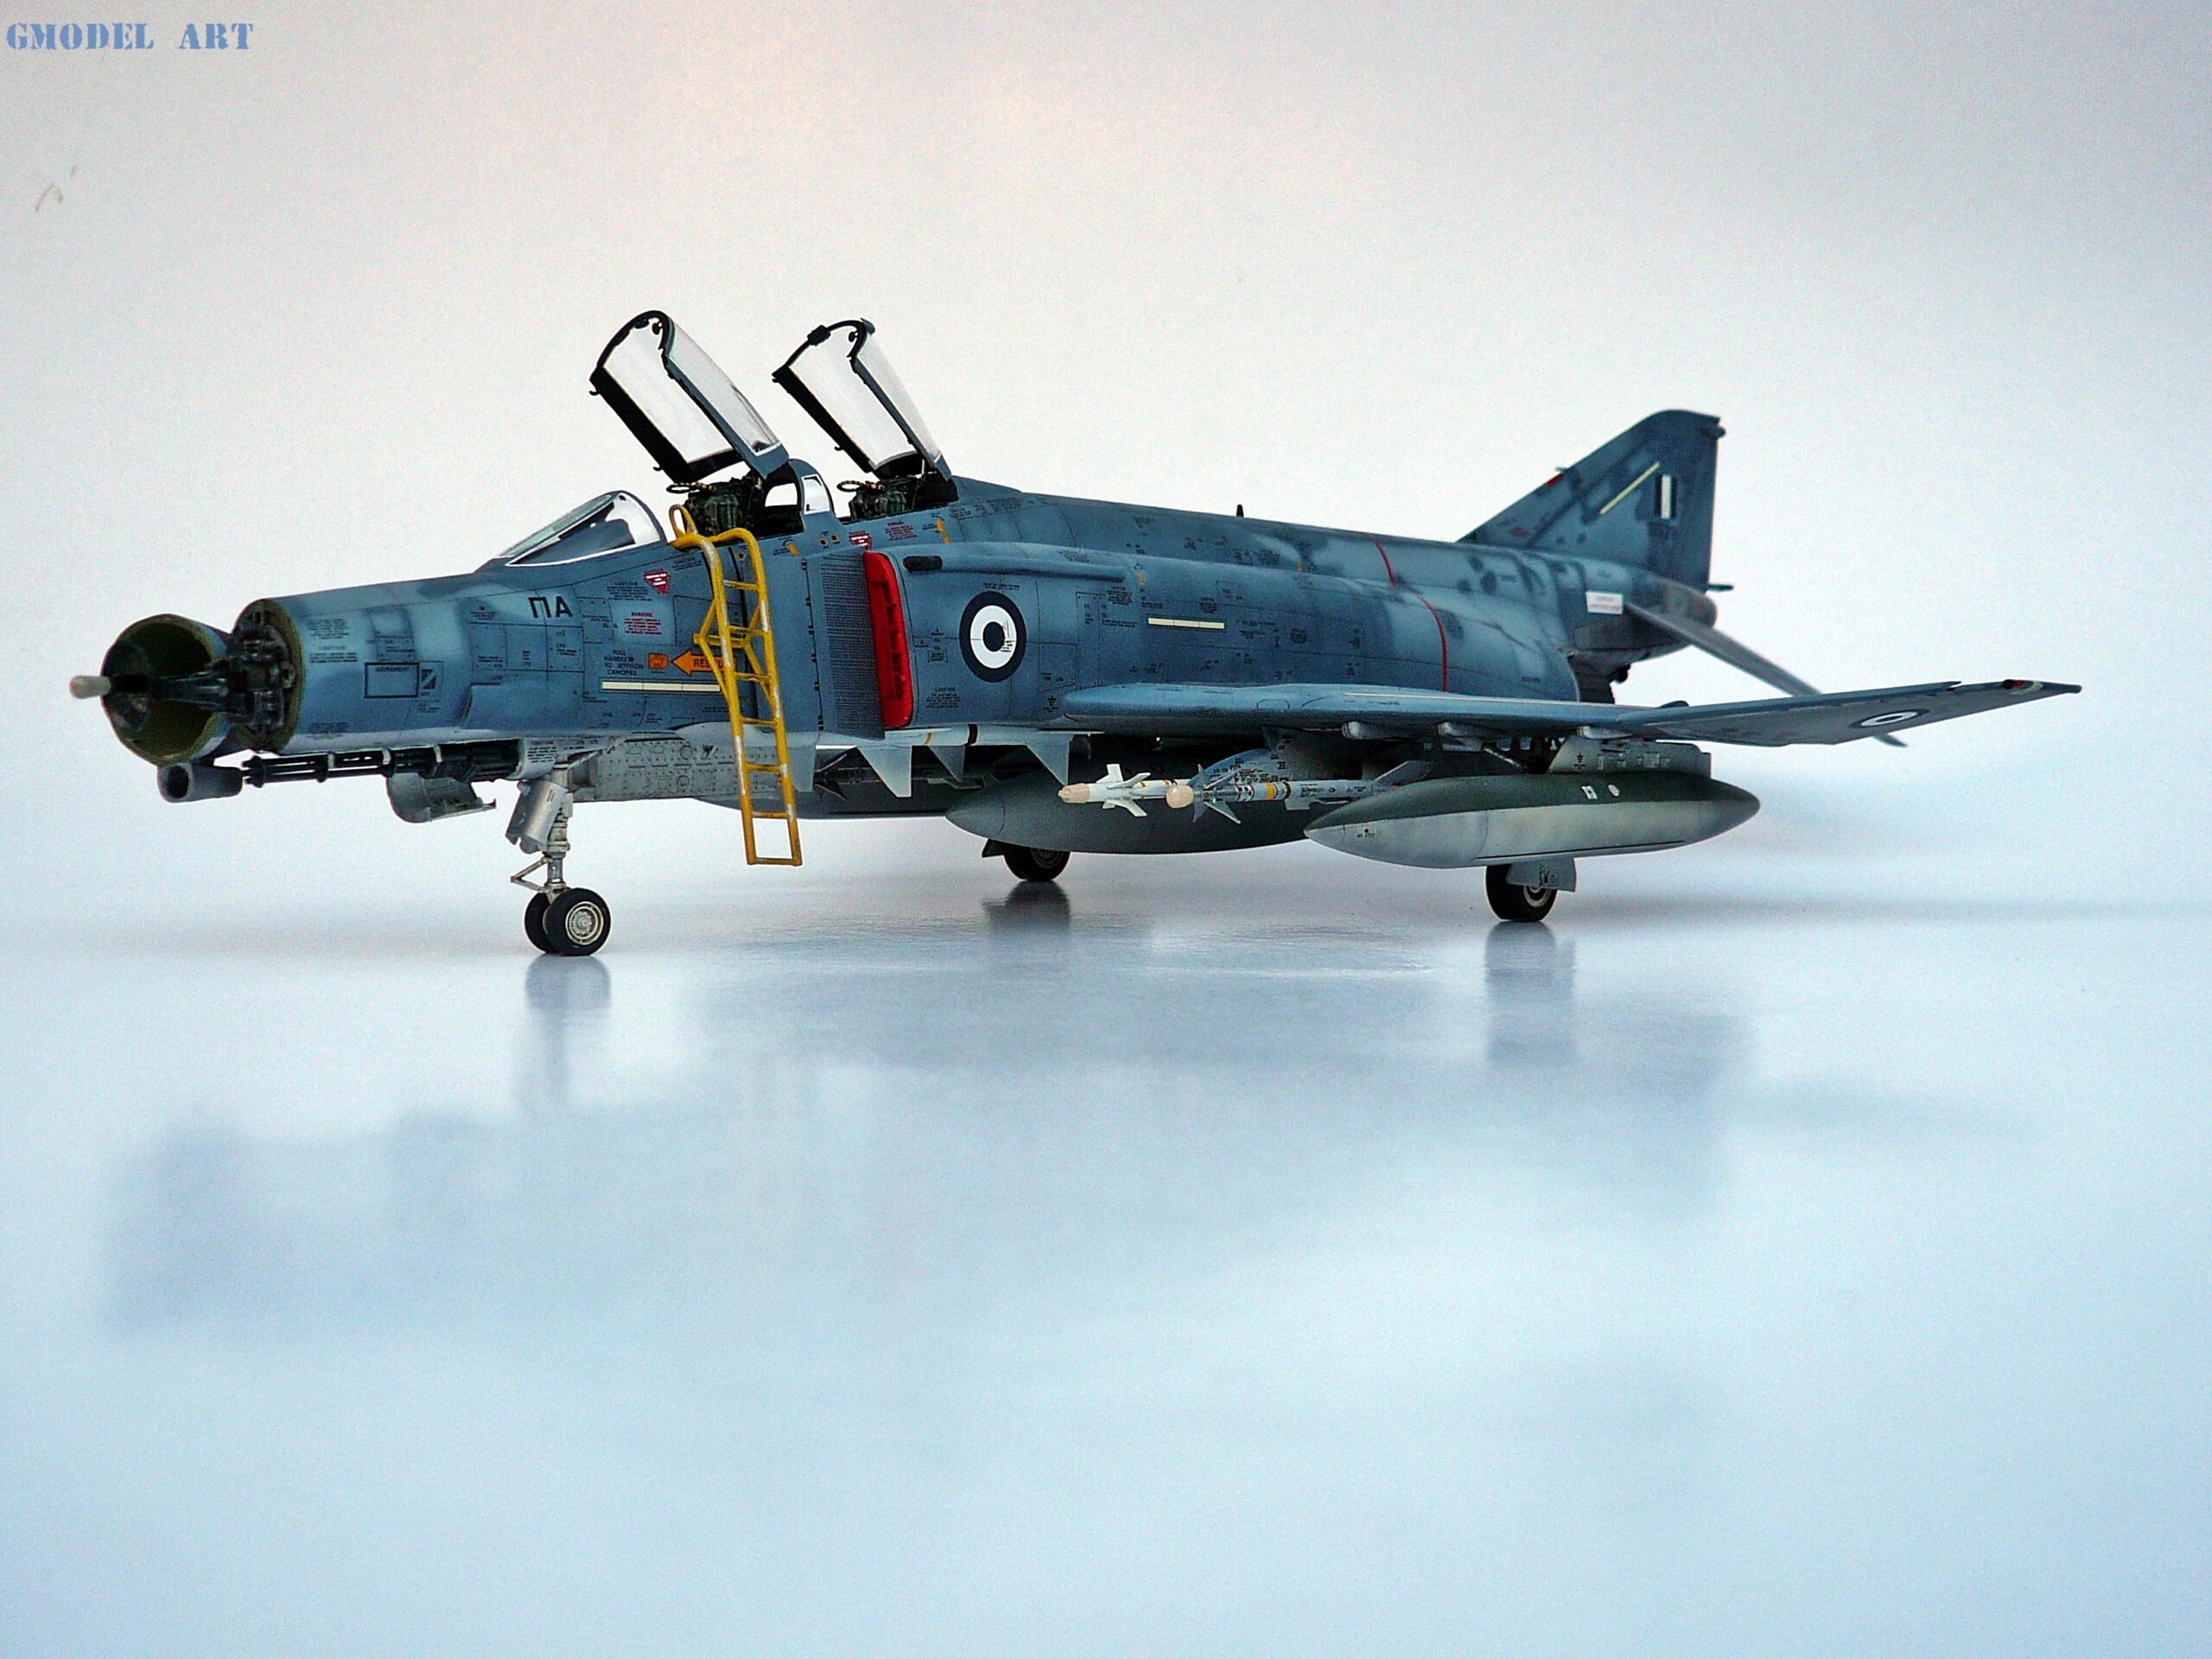
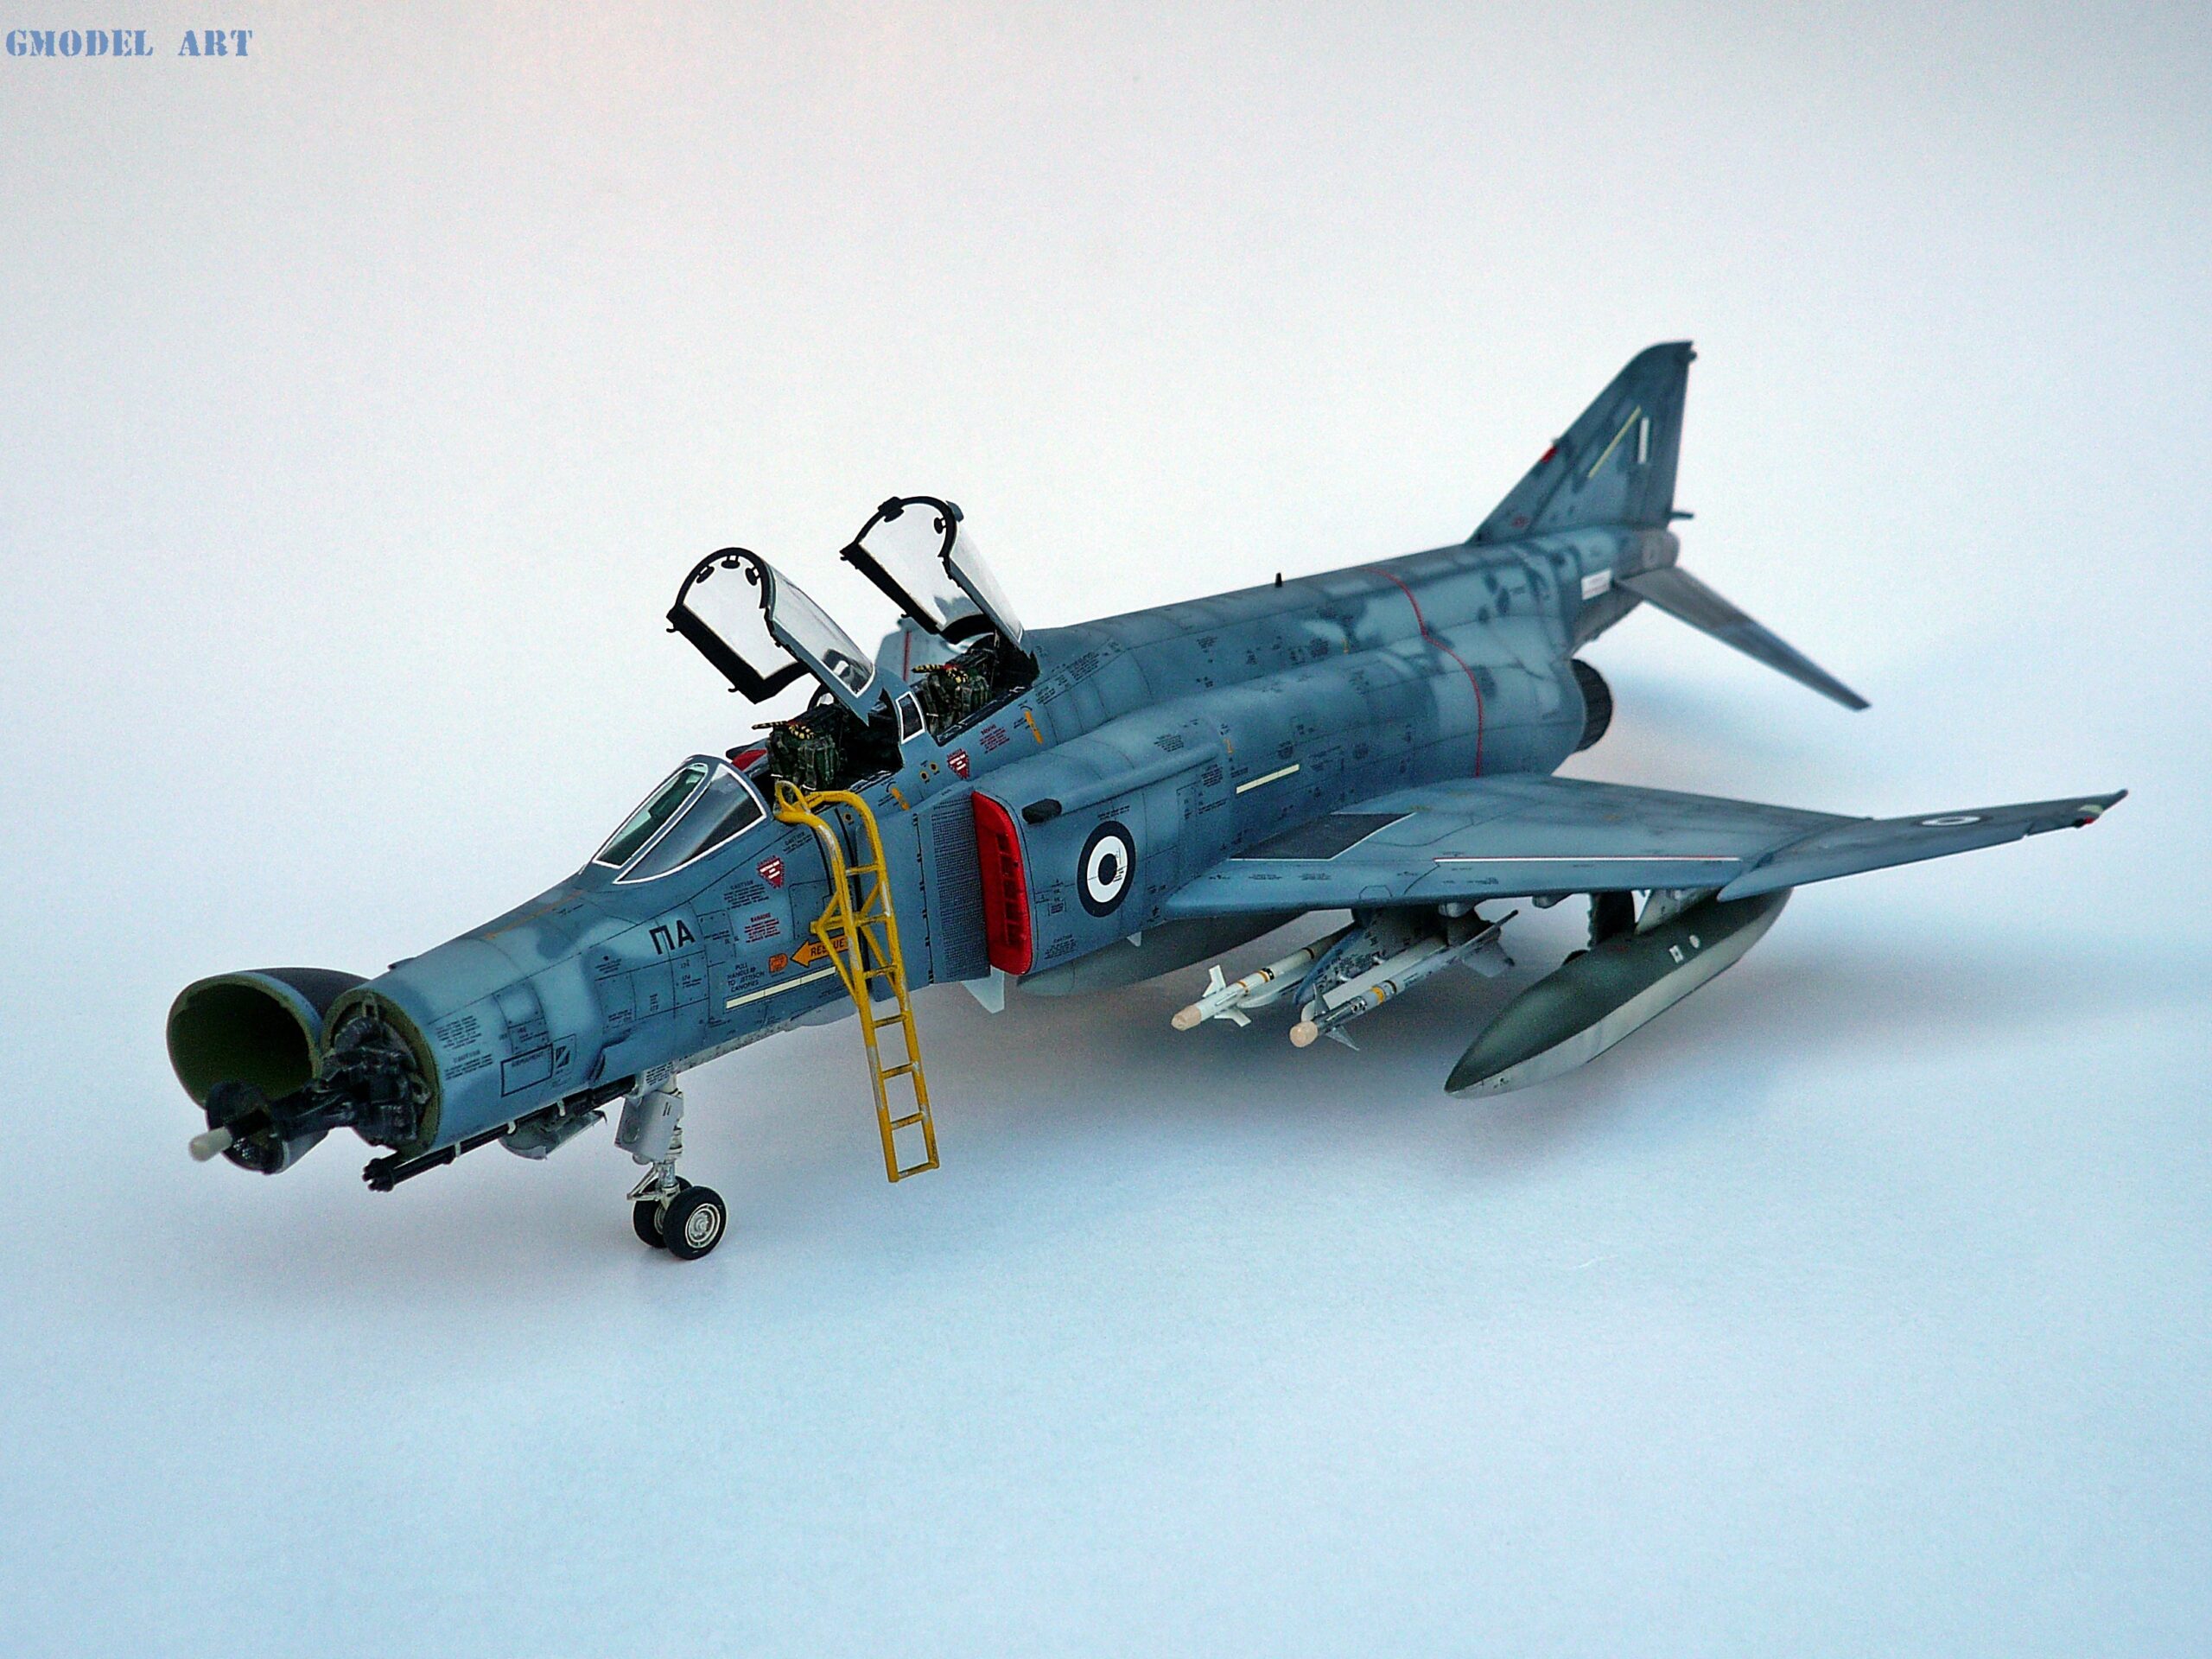
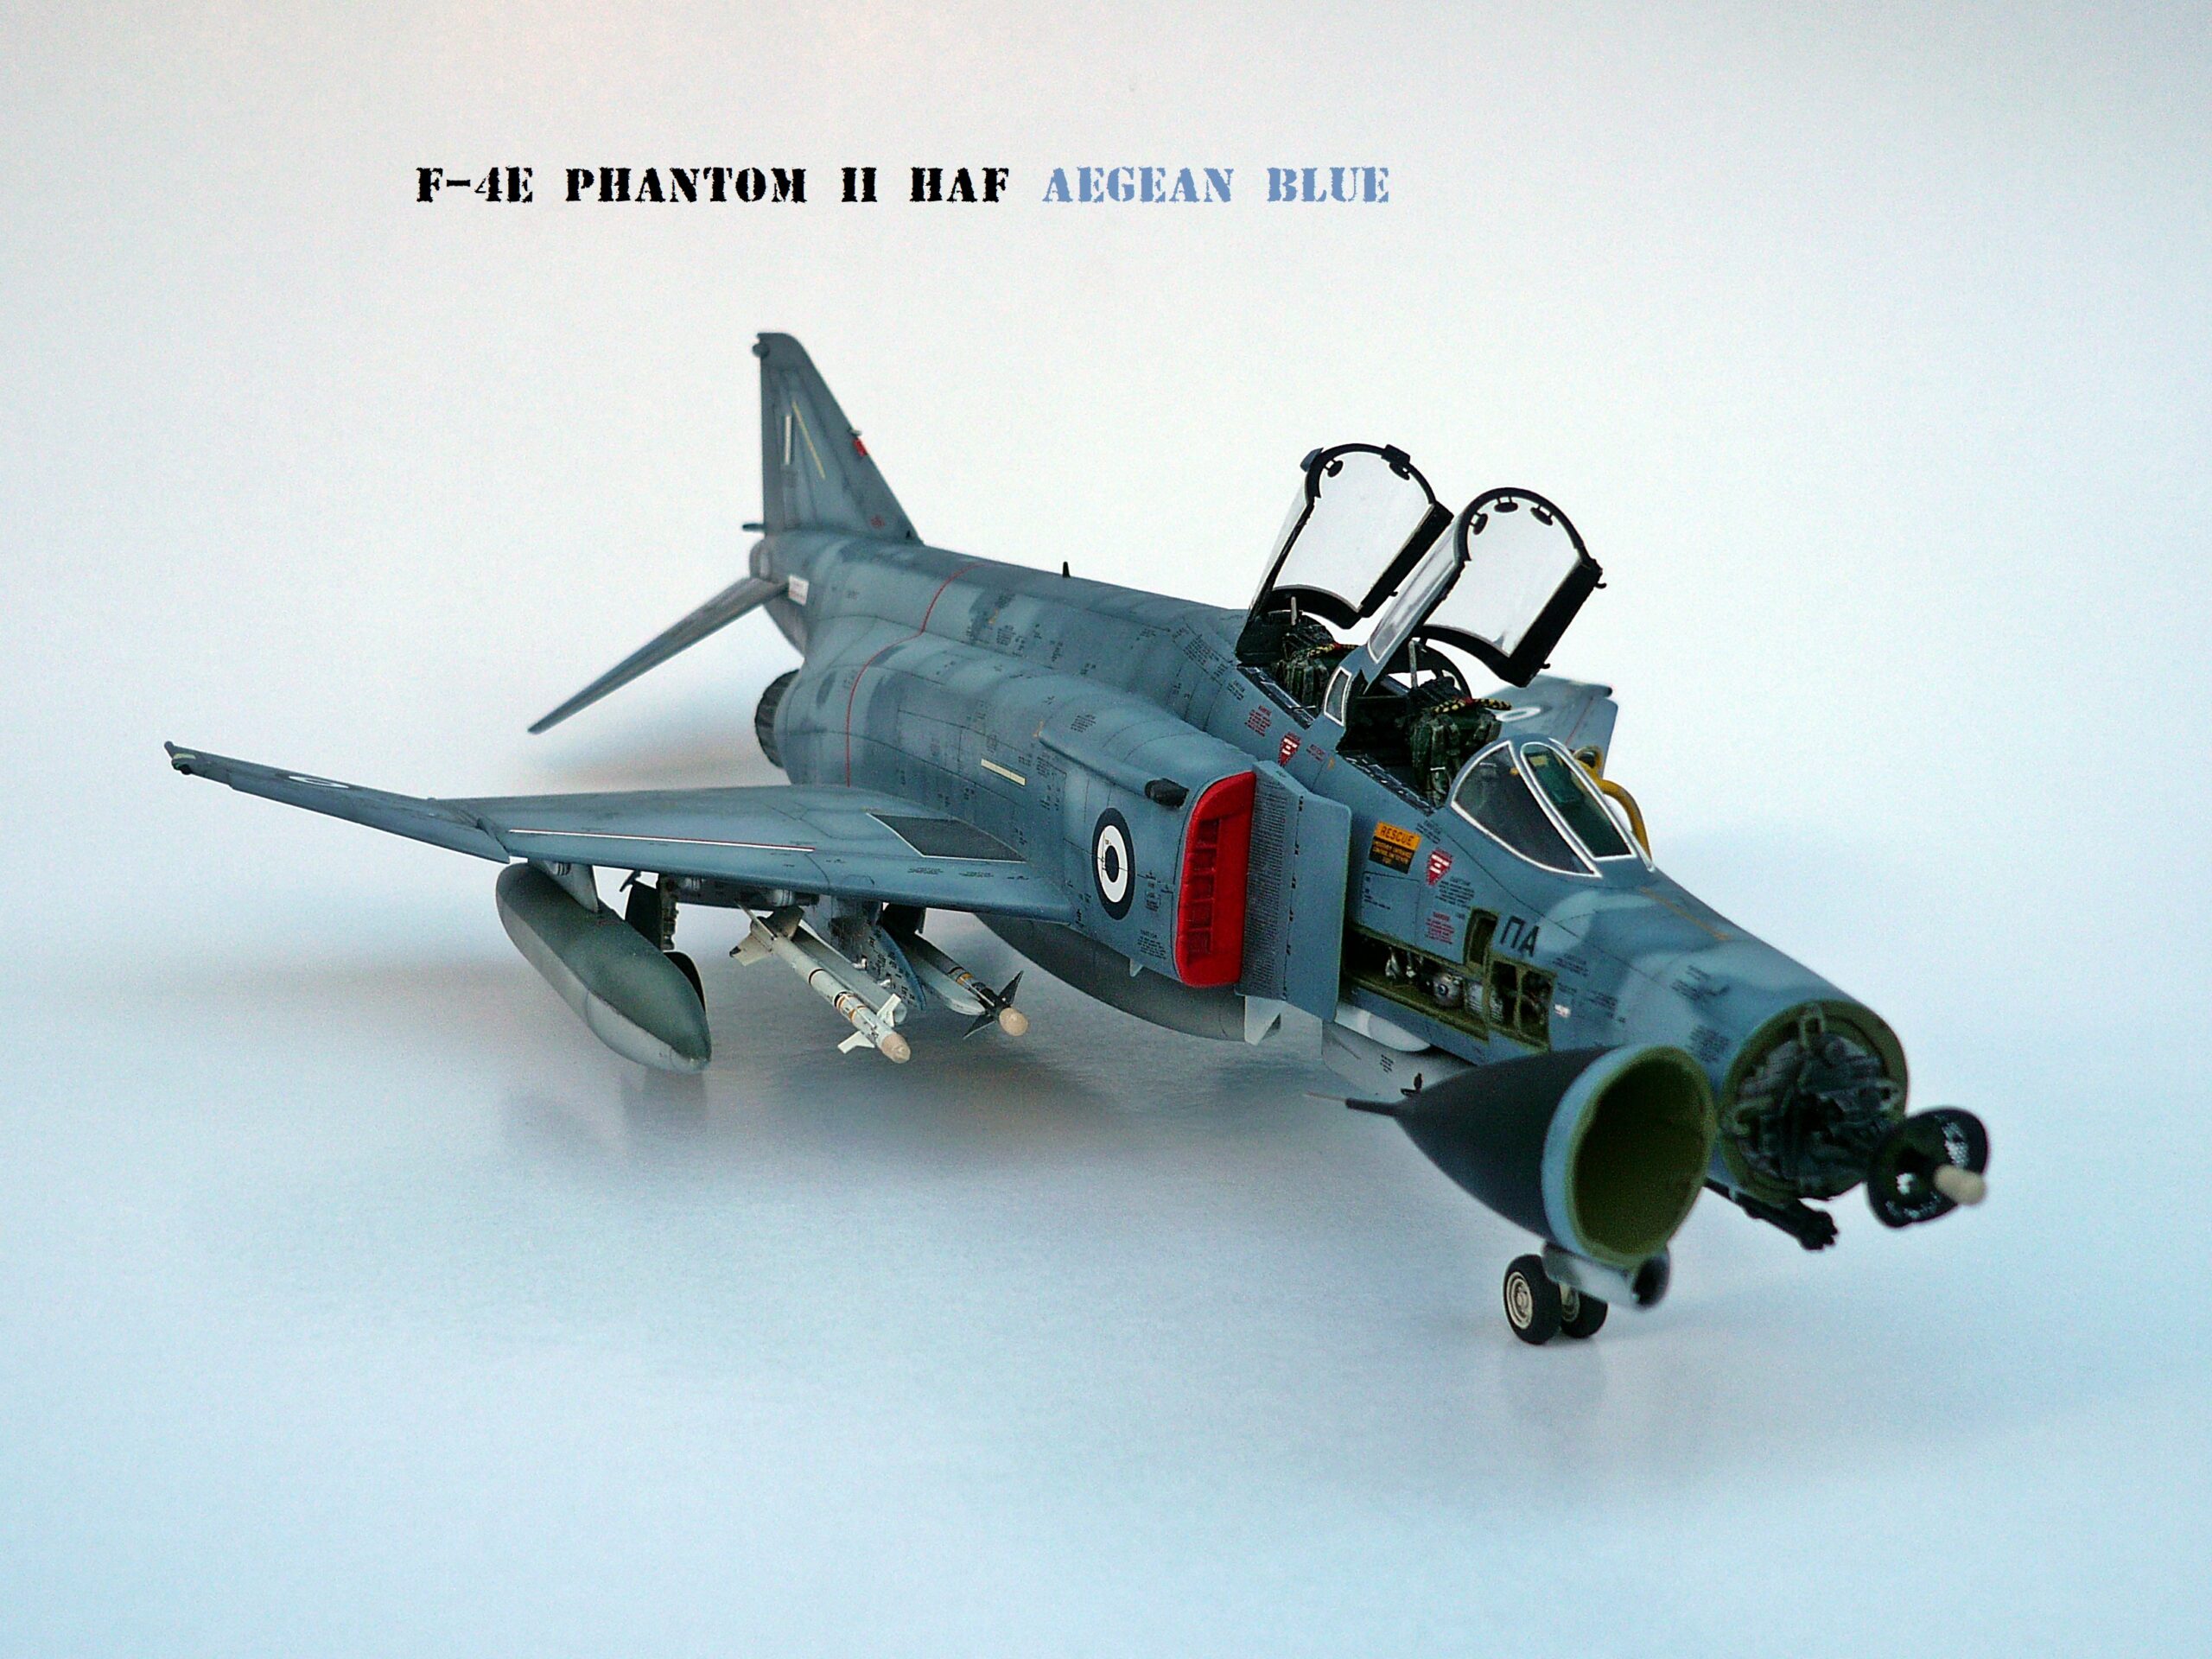
The McDonnell Douglas F-4E Phantom II is one of the most recognisable combat aircraft to have served with the Hellenic Air Force (HAF). Its powerful twin-engine configuration, distinctive airframe and long operational career make it an especially rewarding subject for scale modellers.
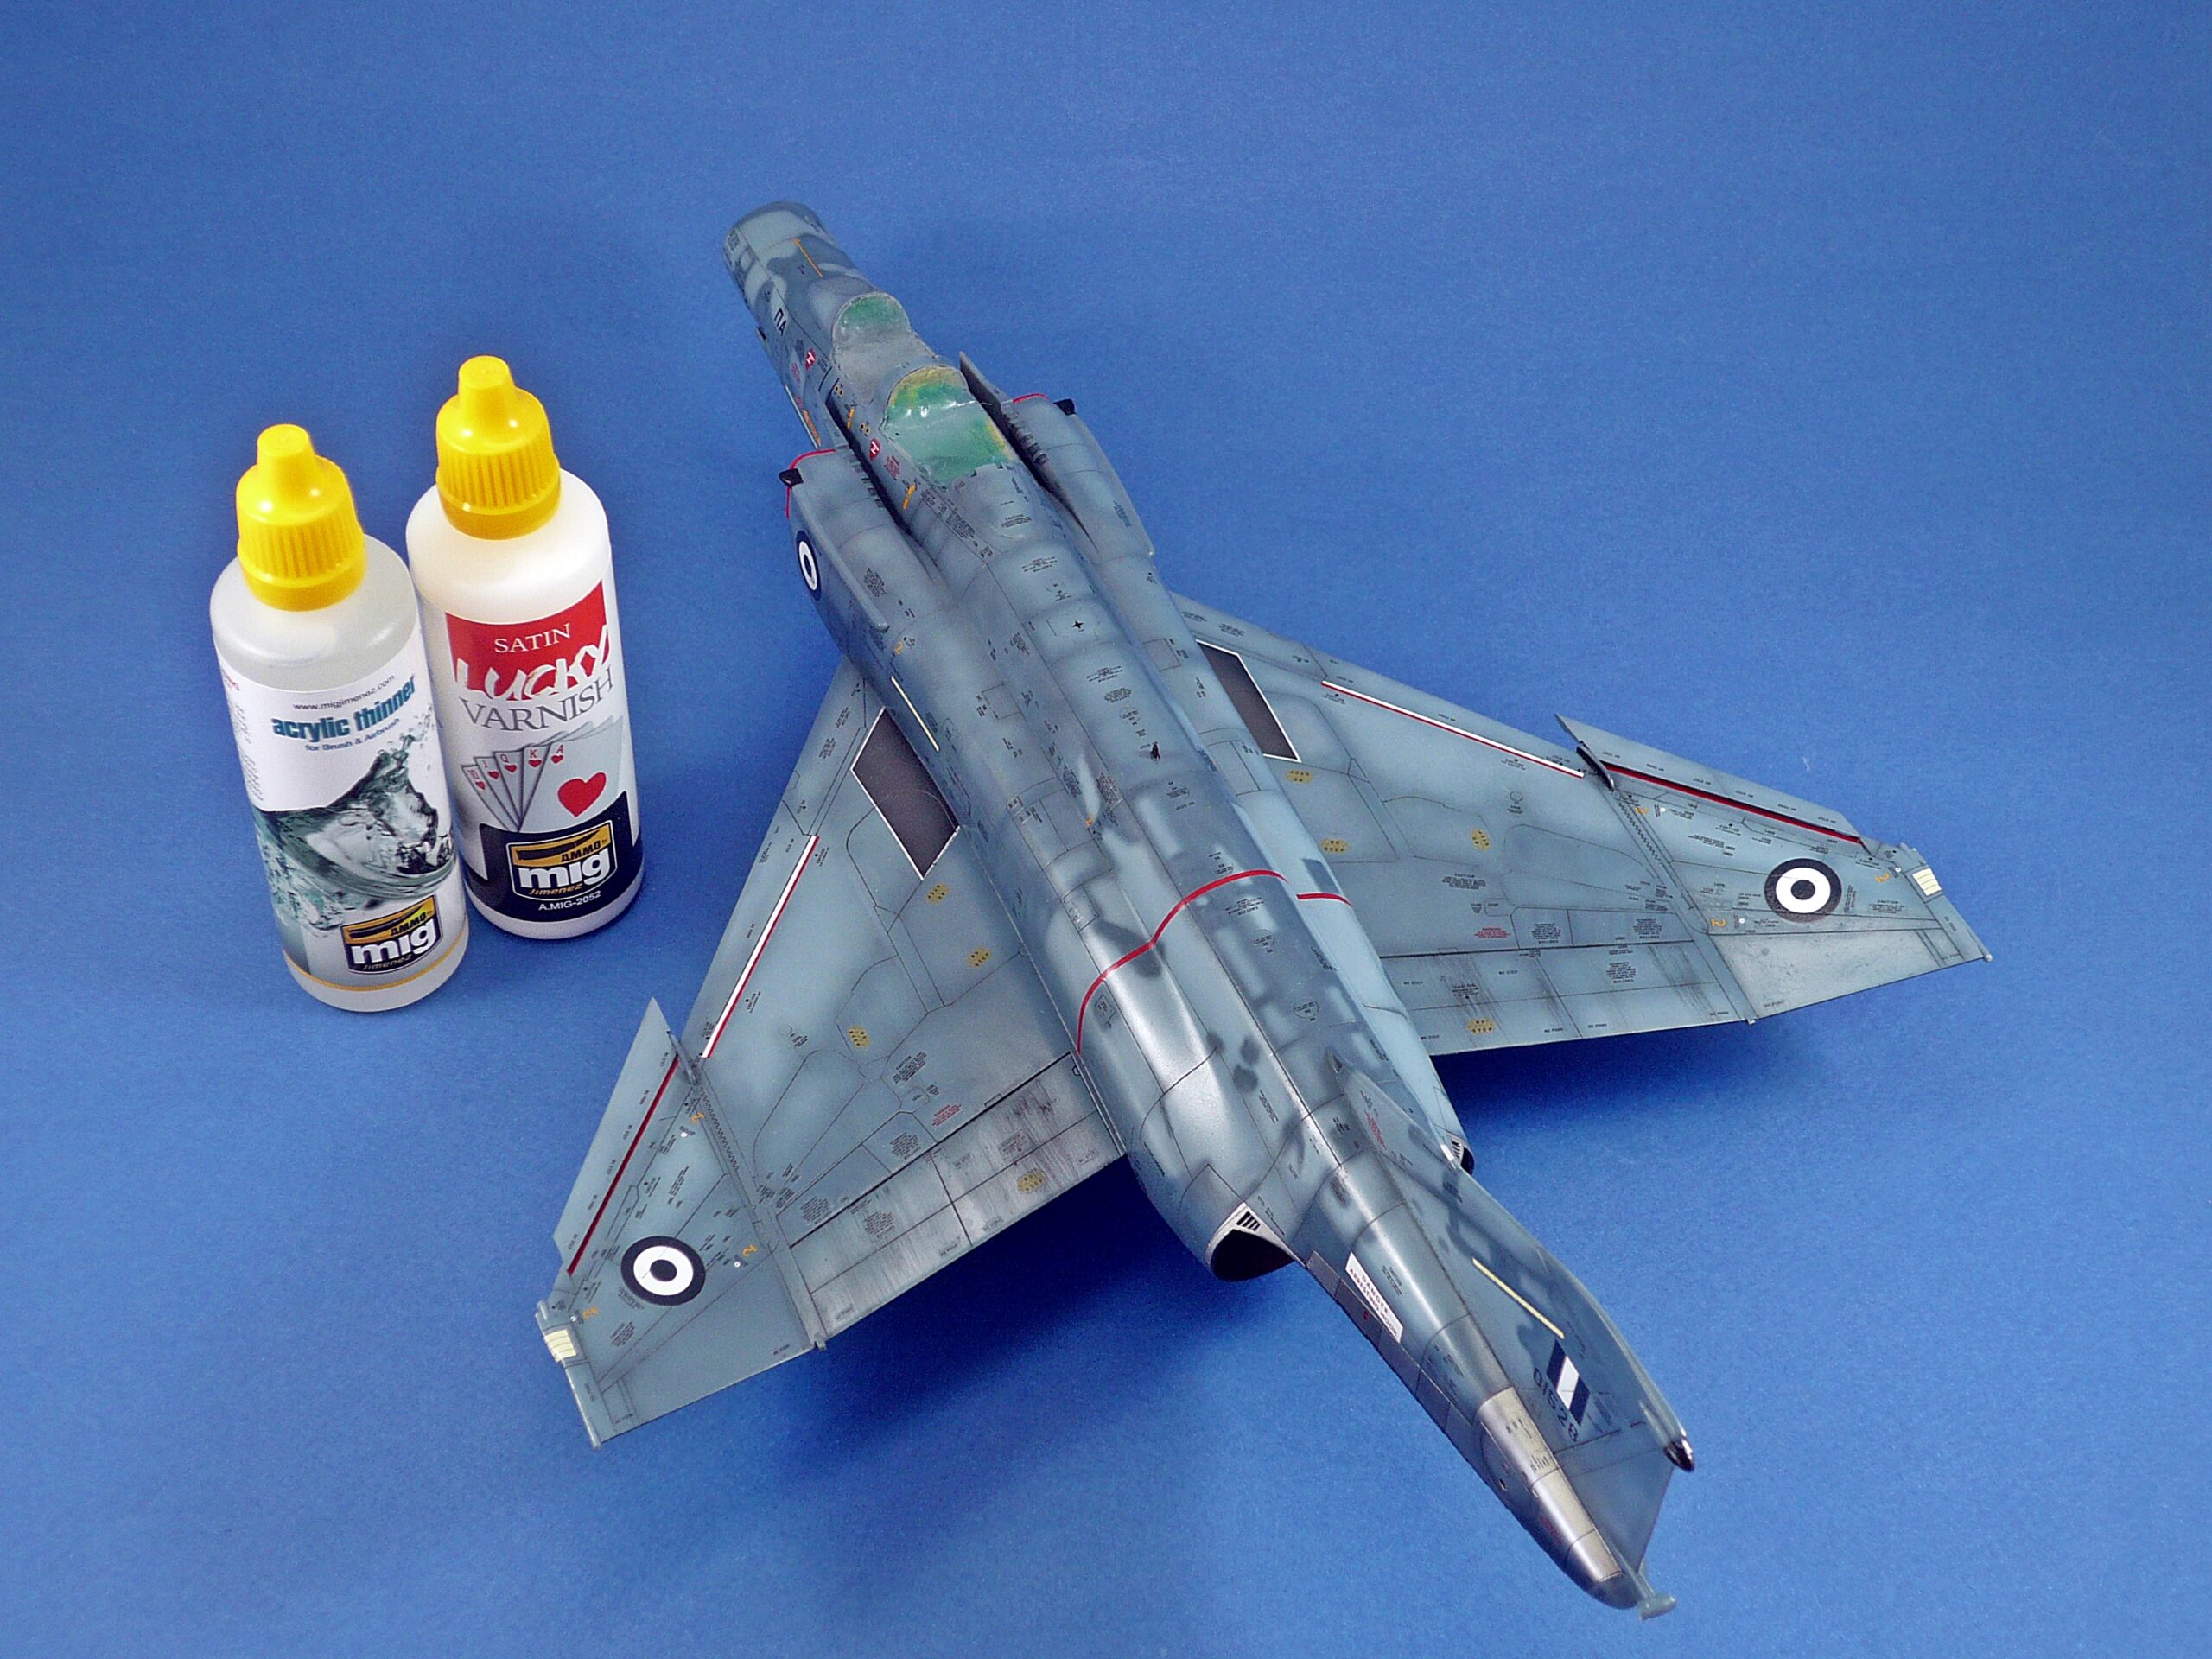
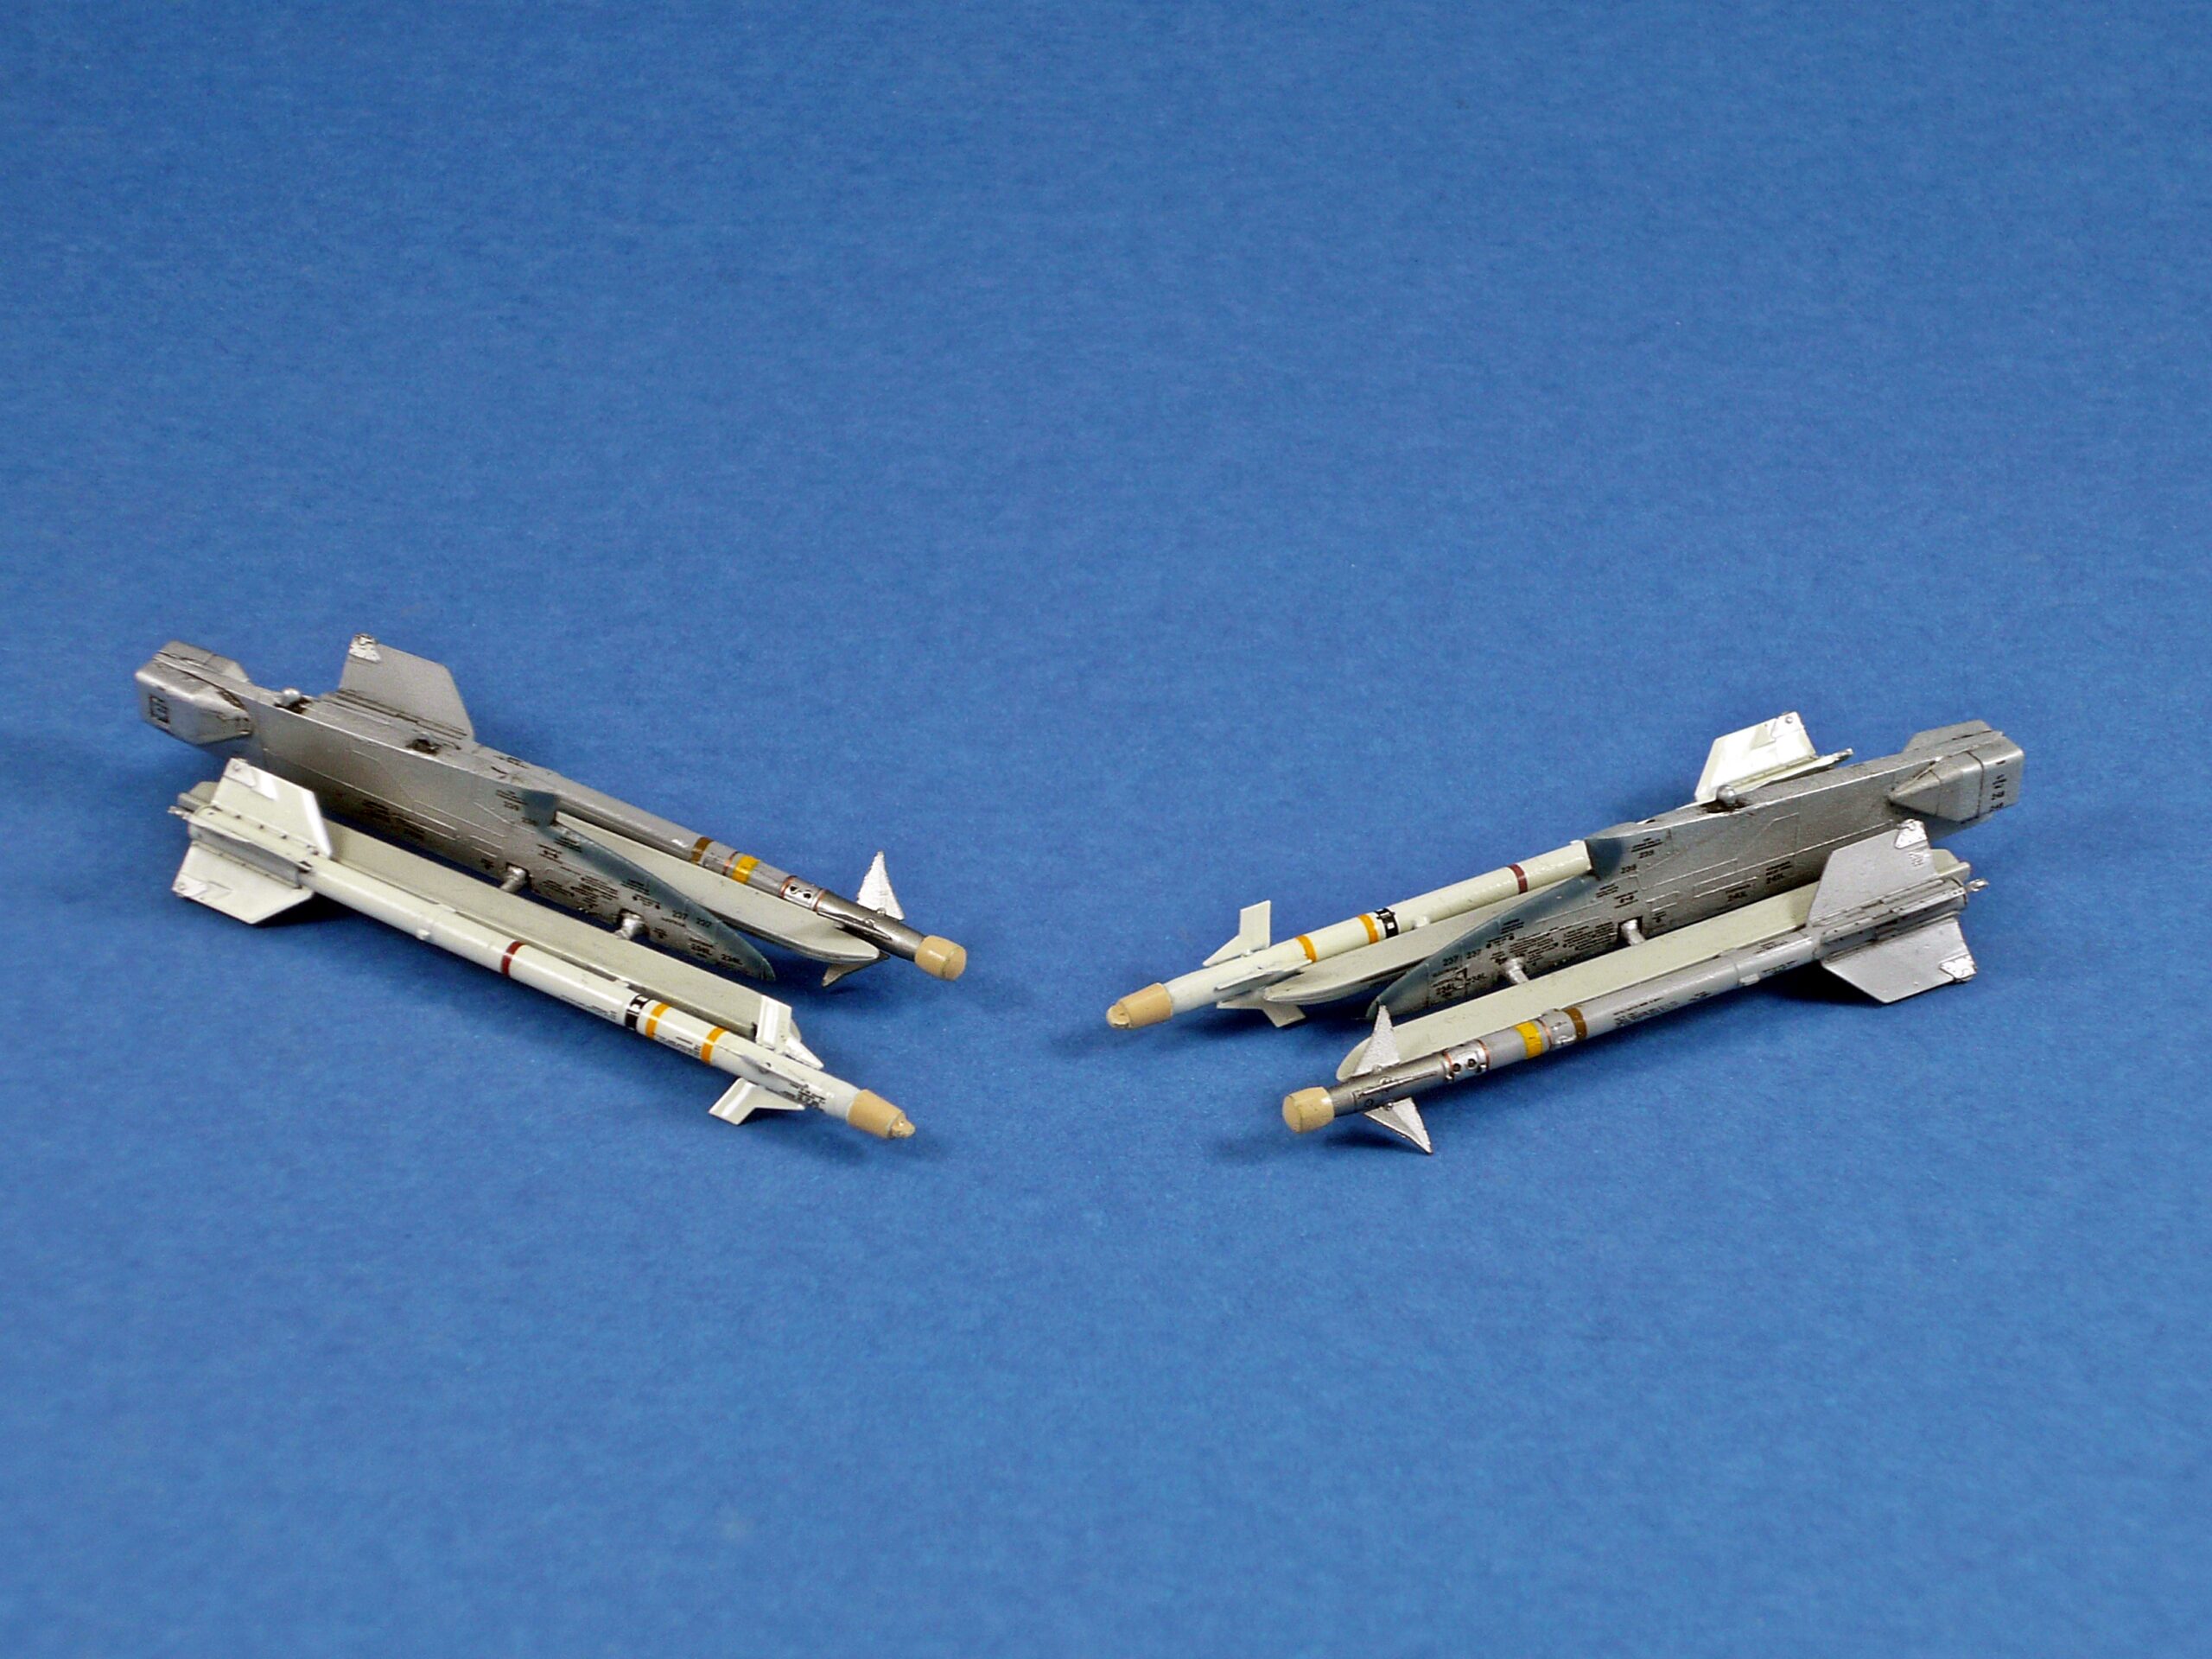
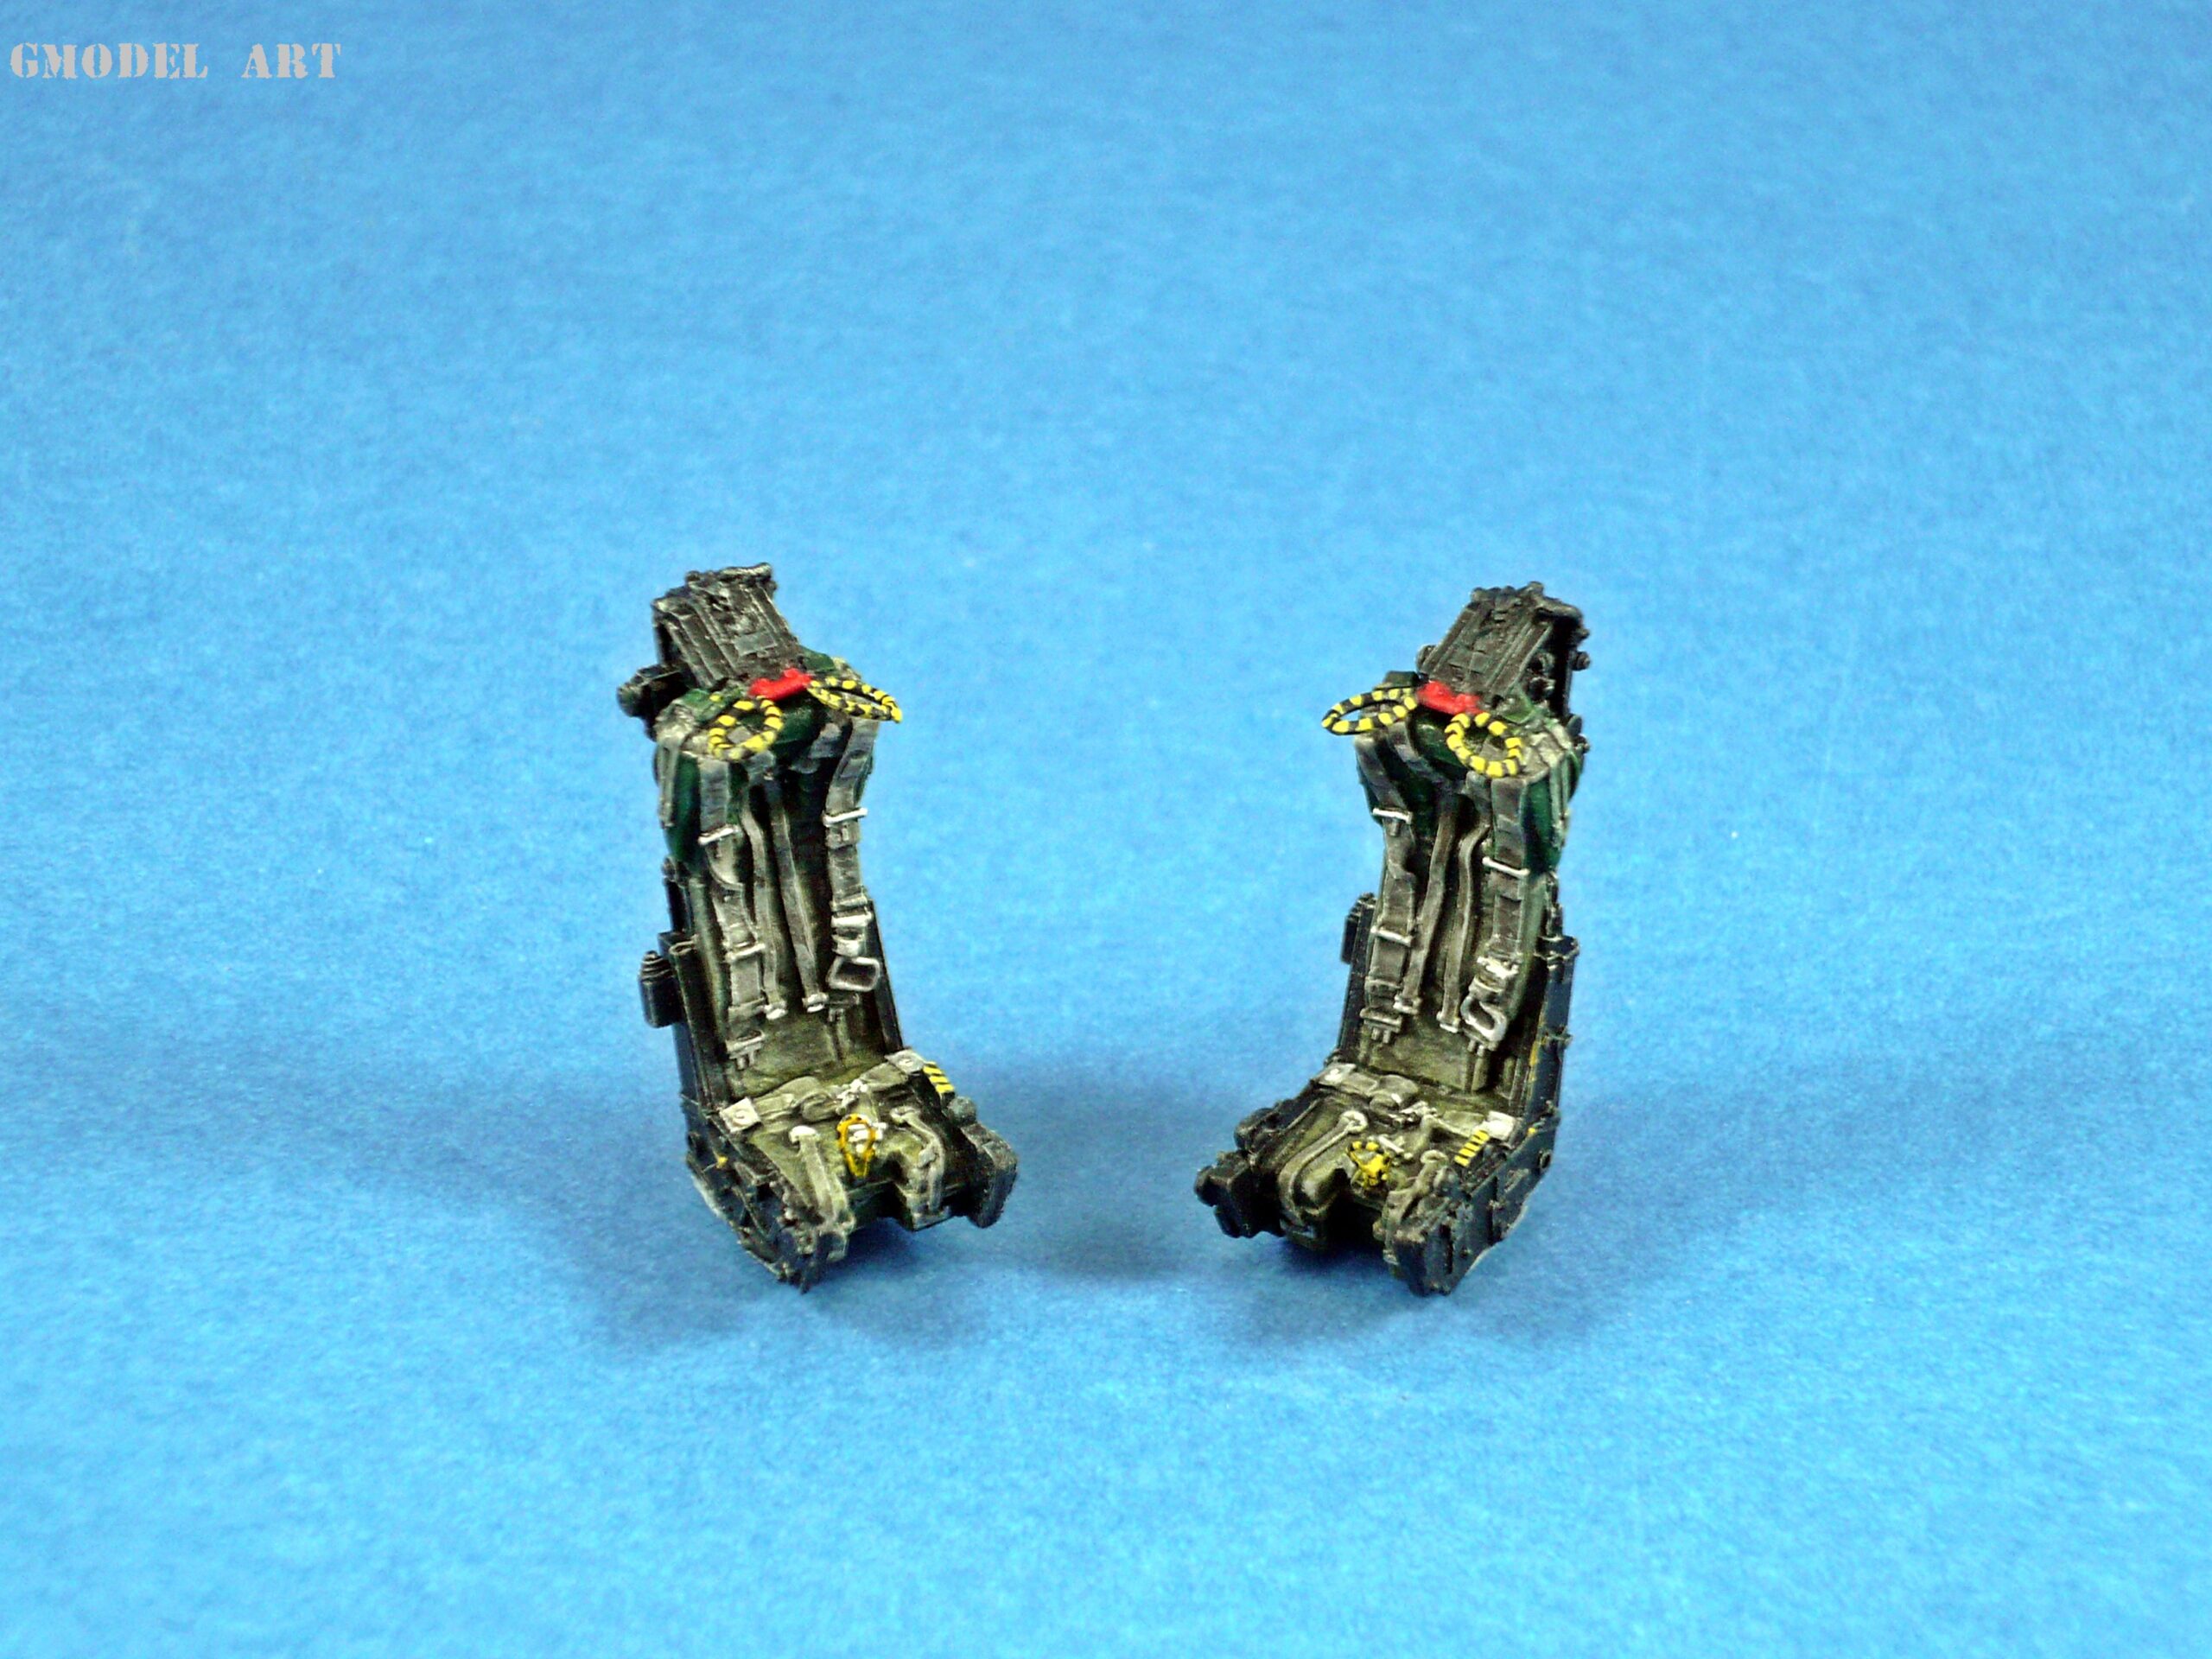
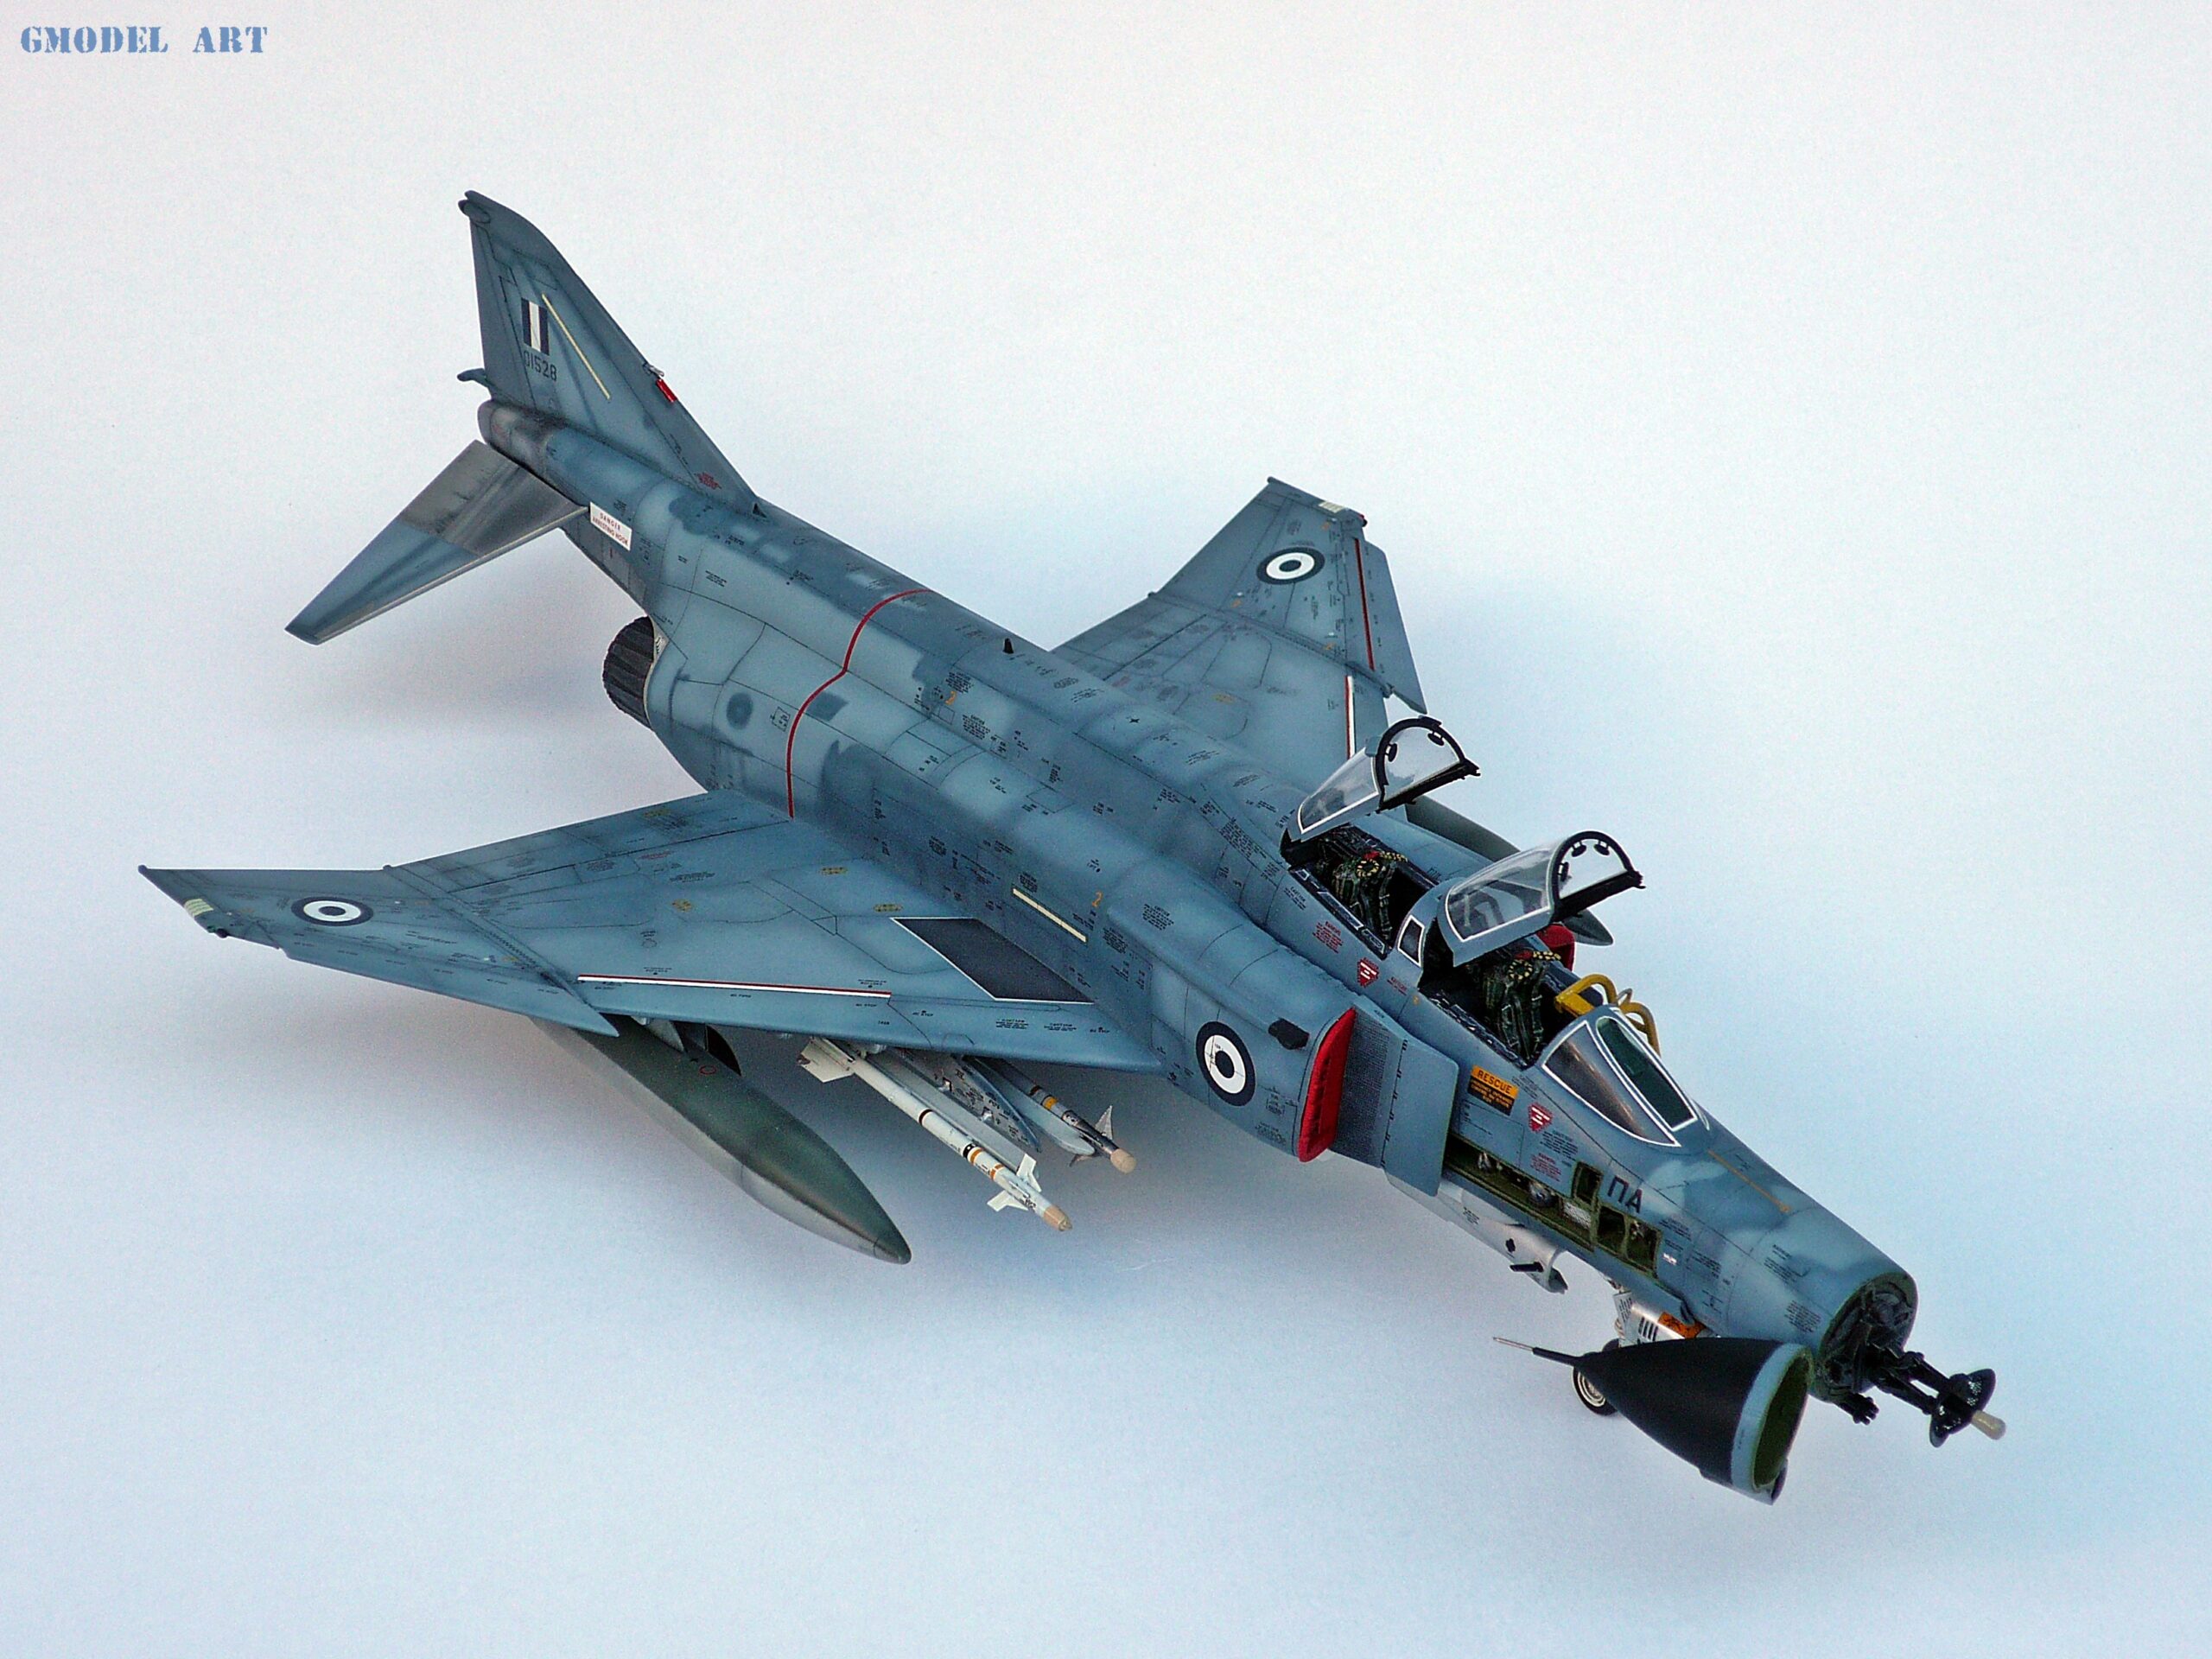
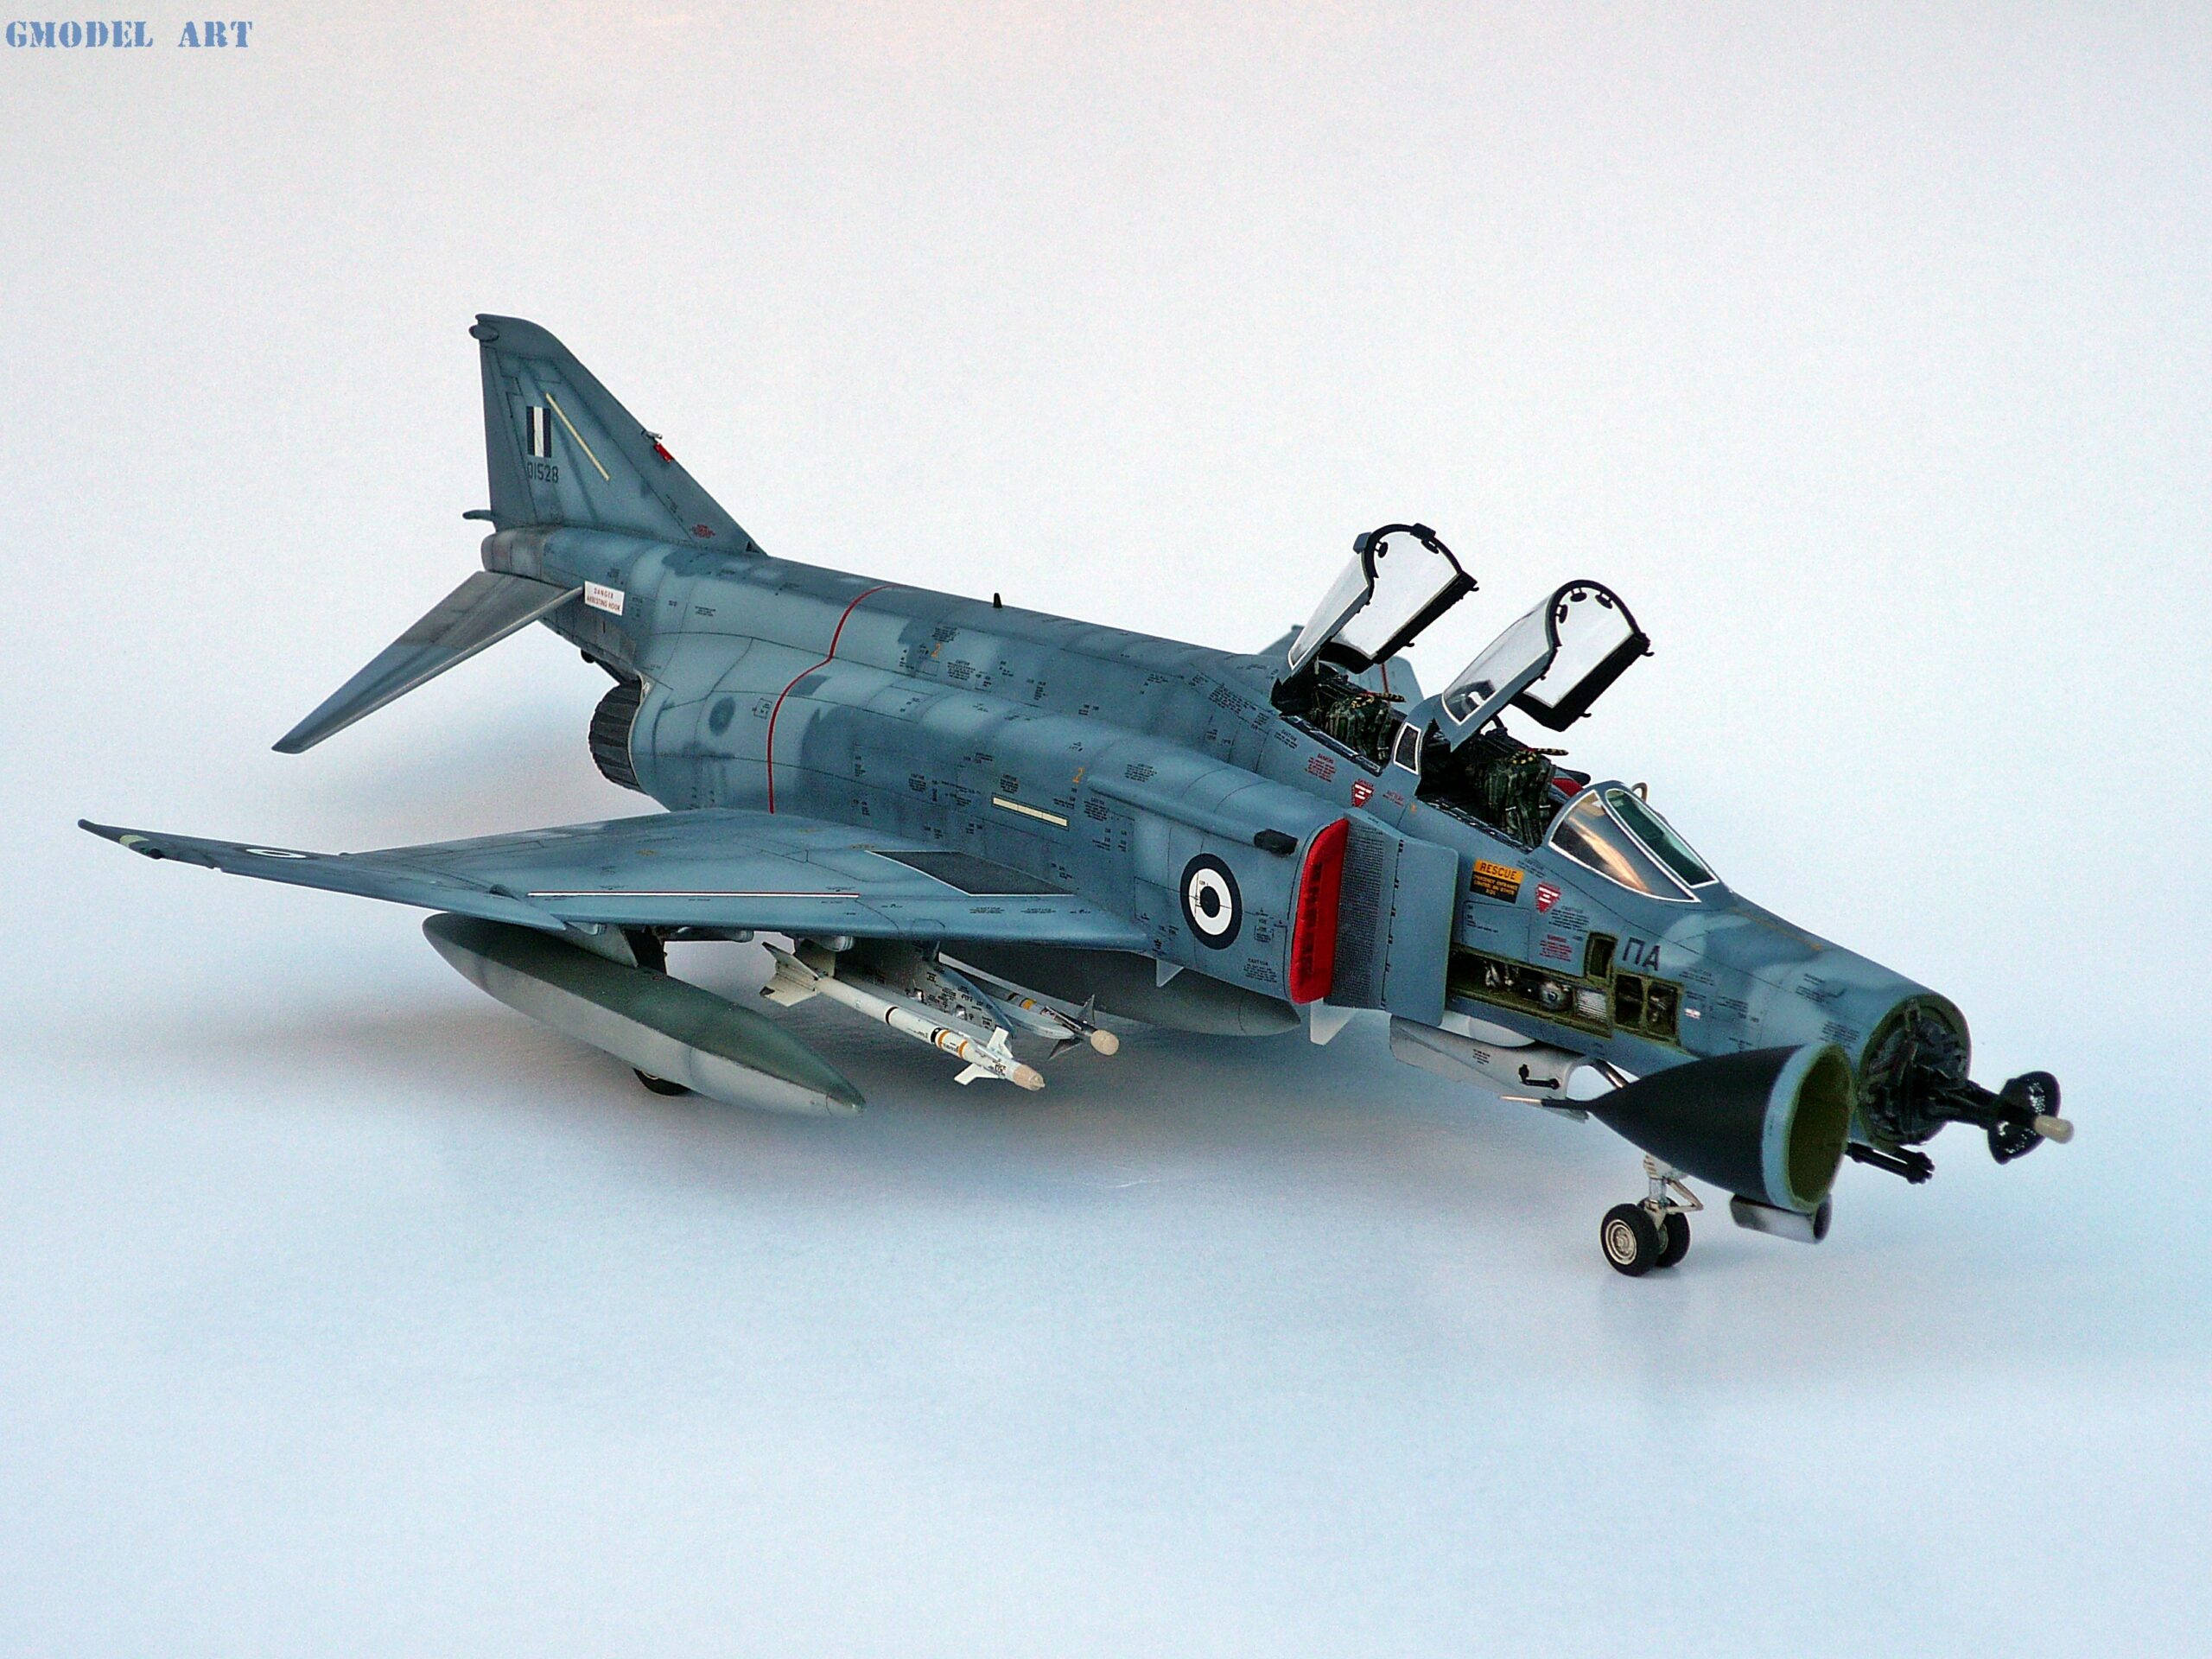
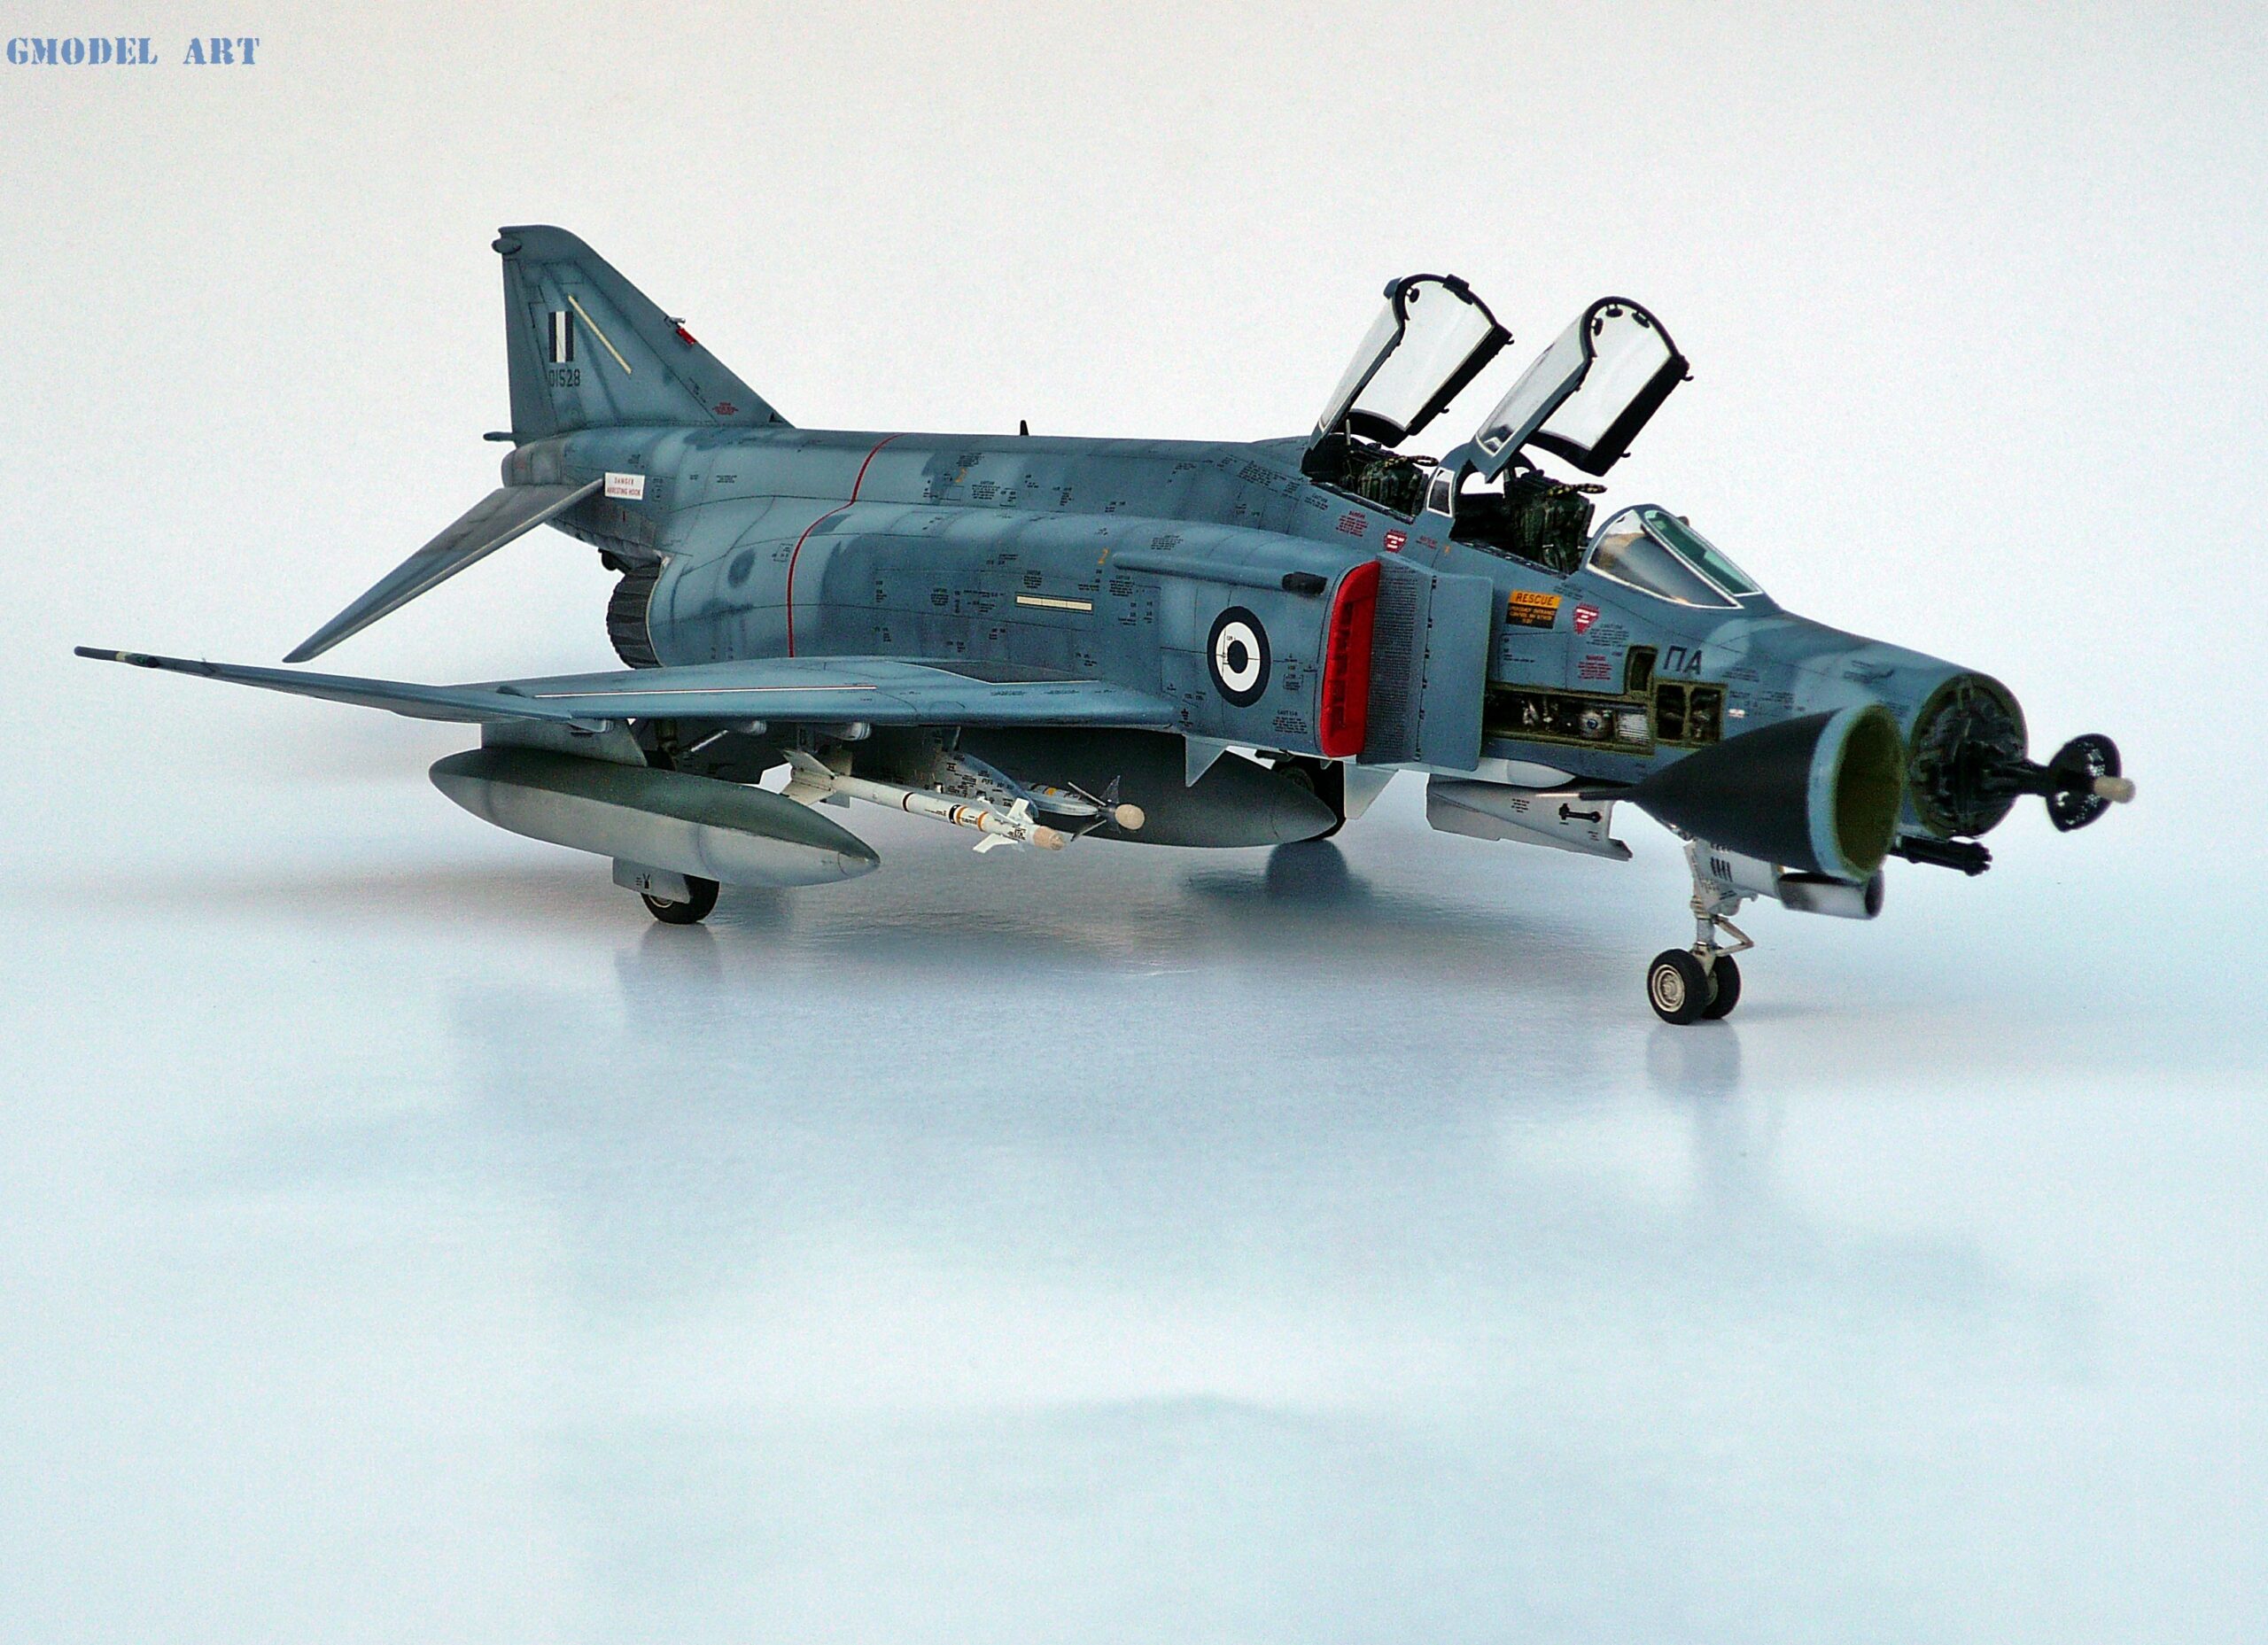
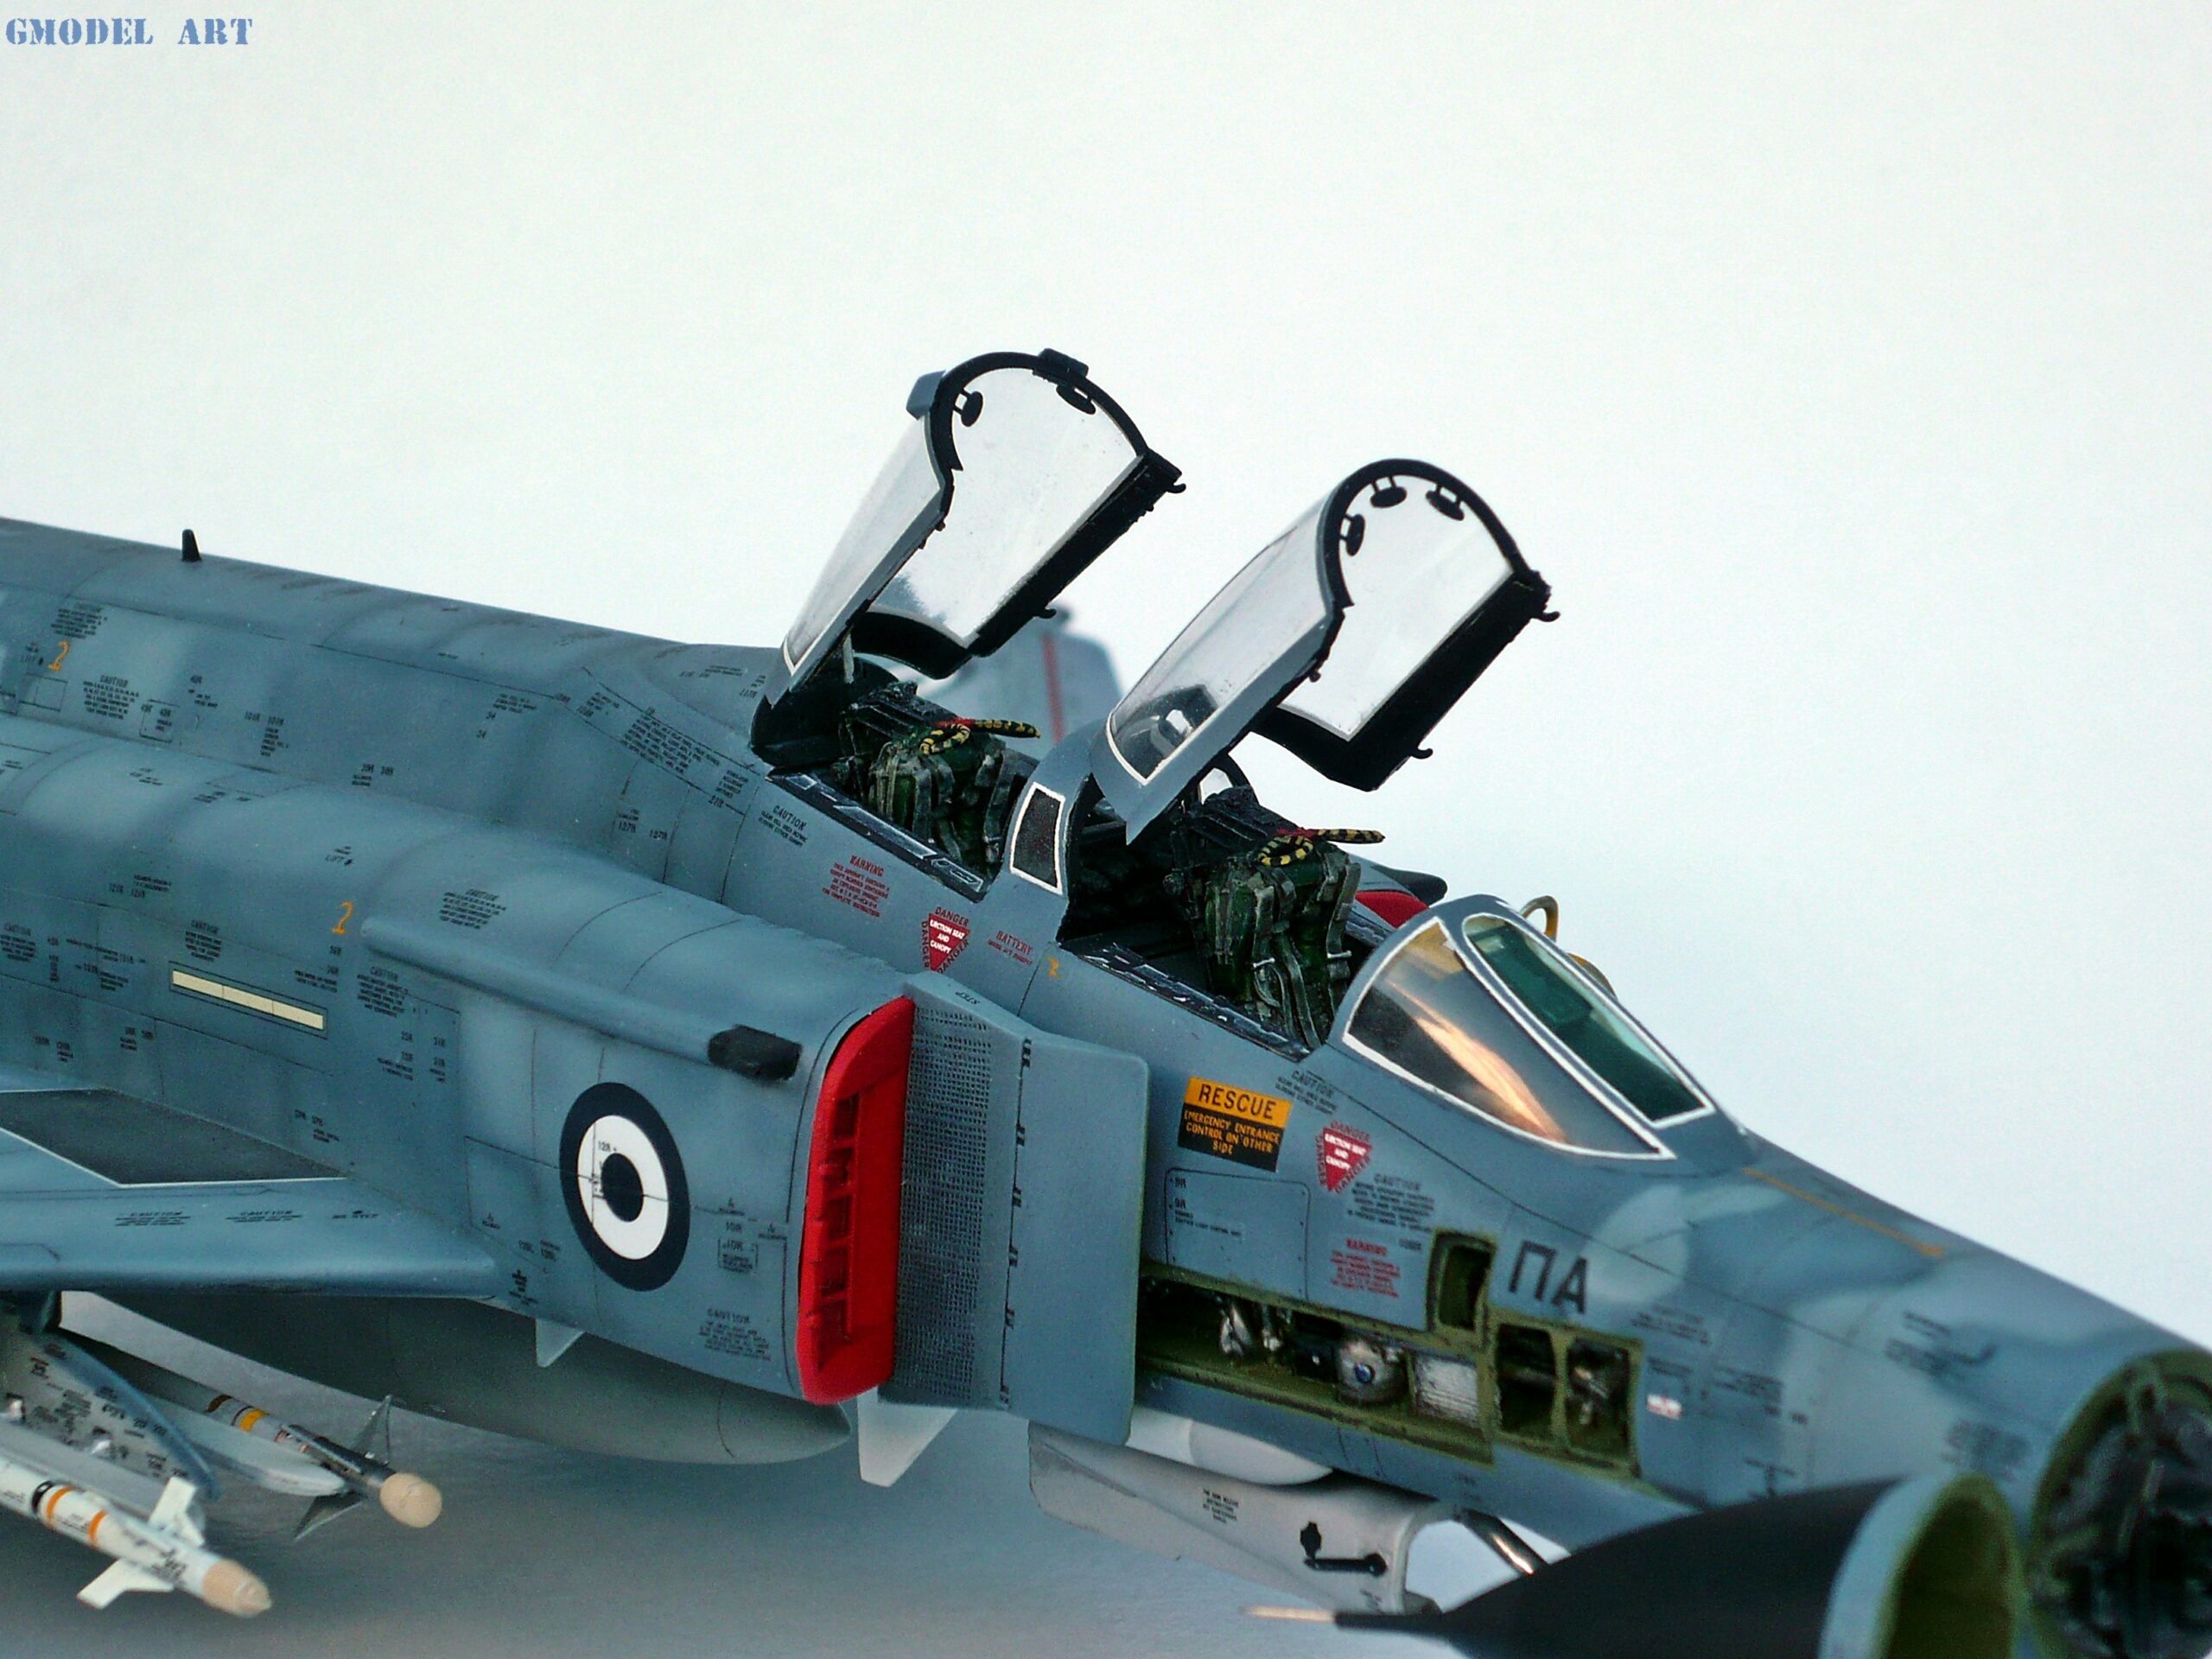
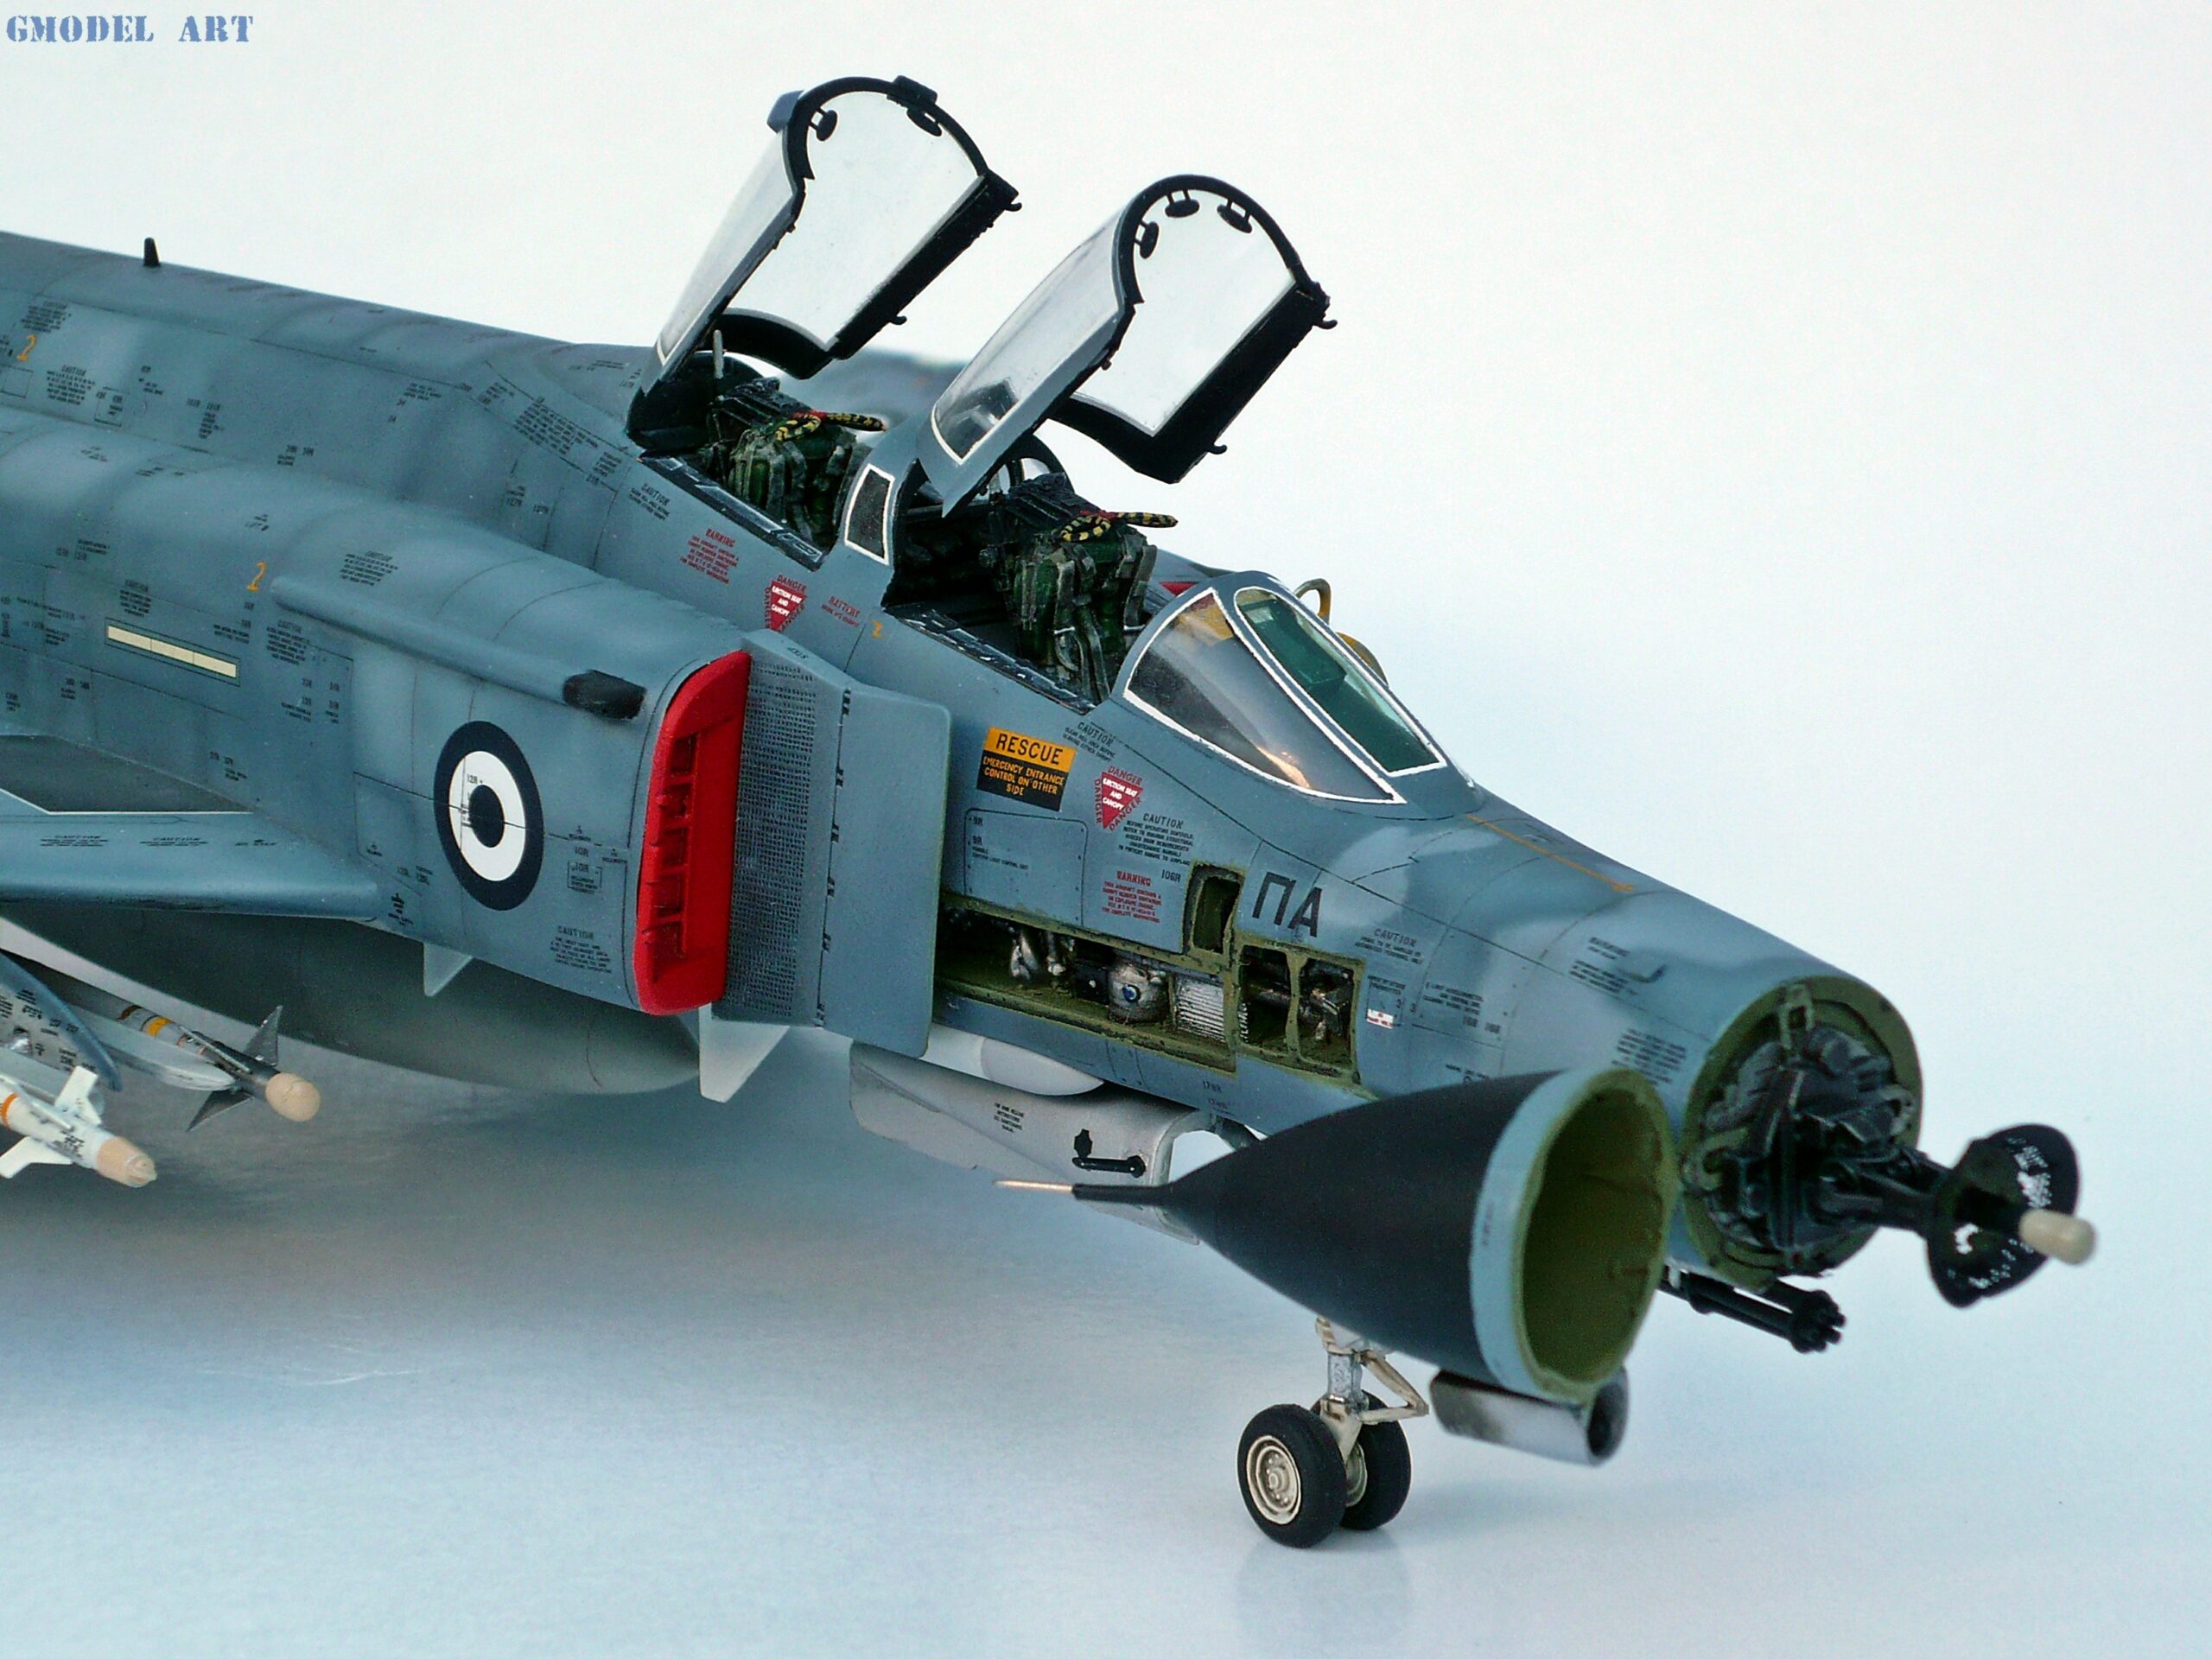
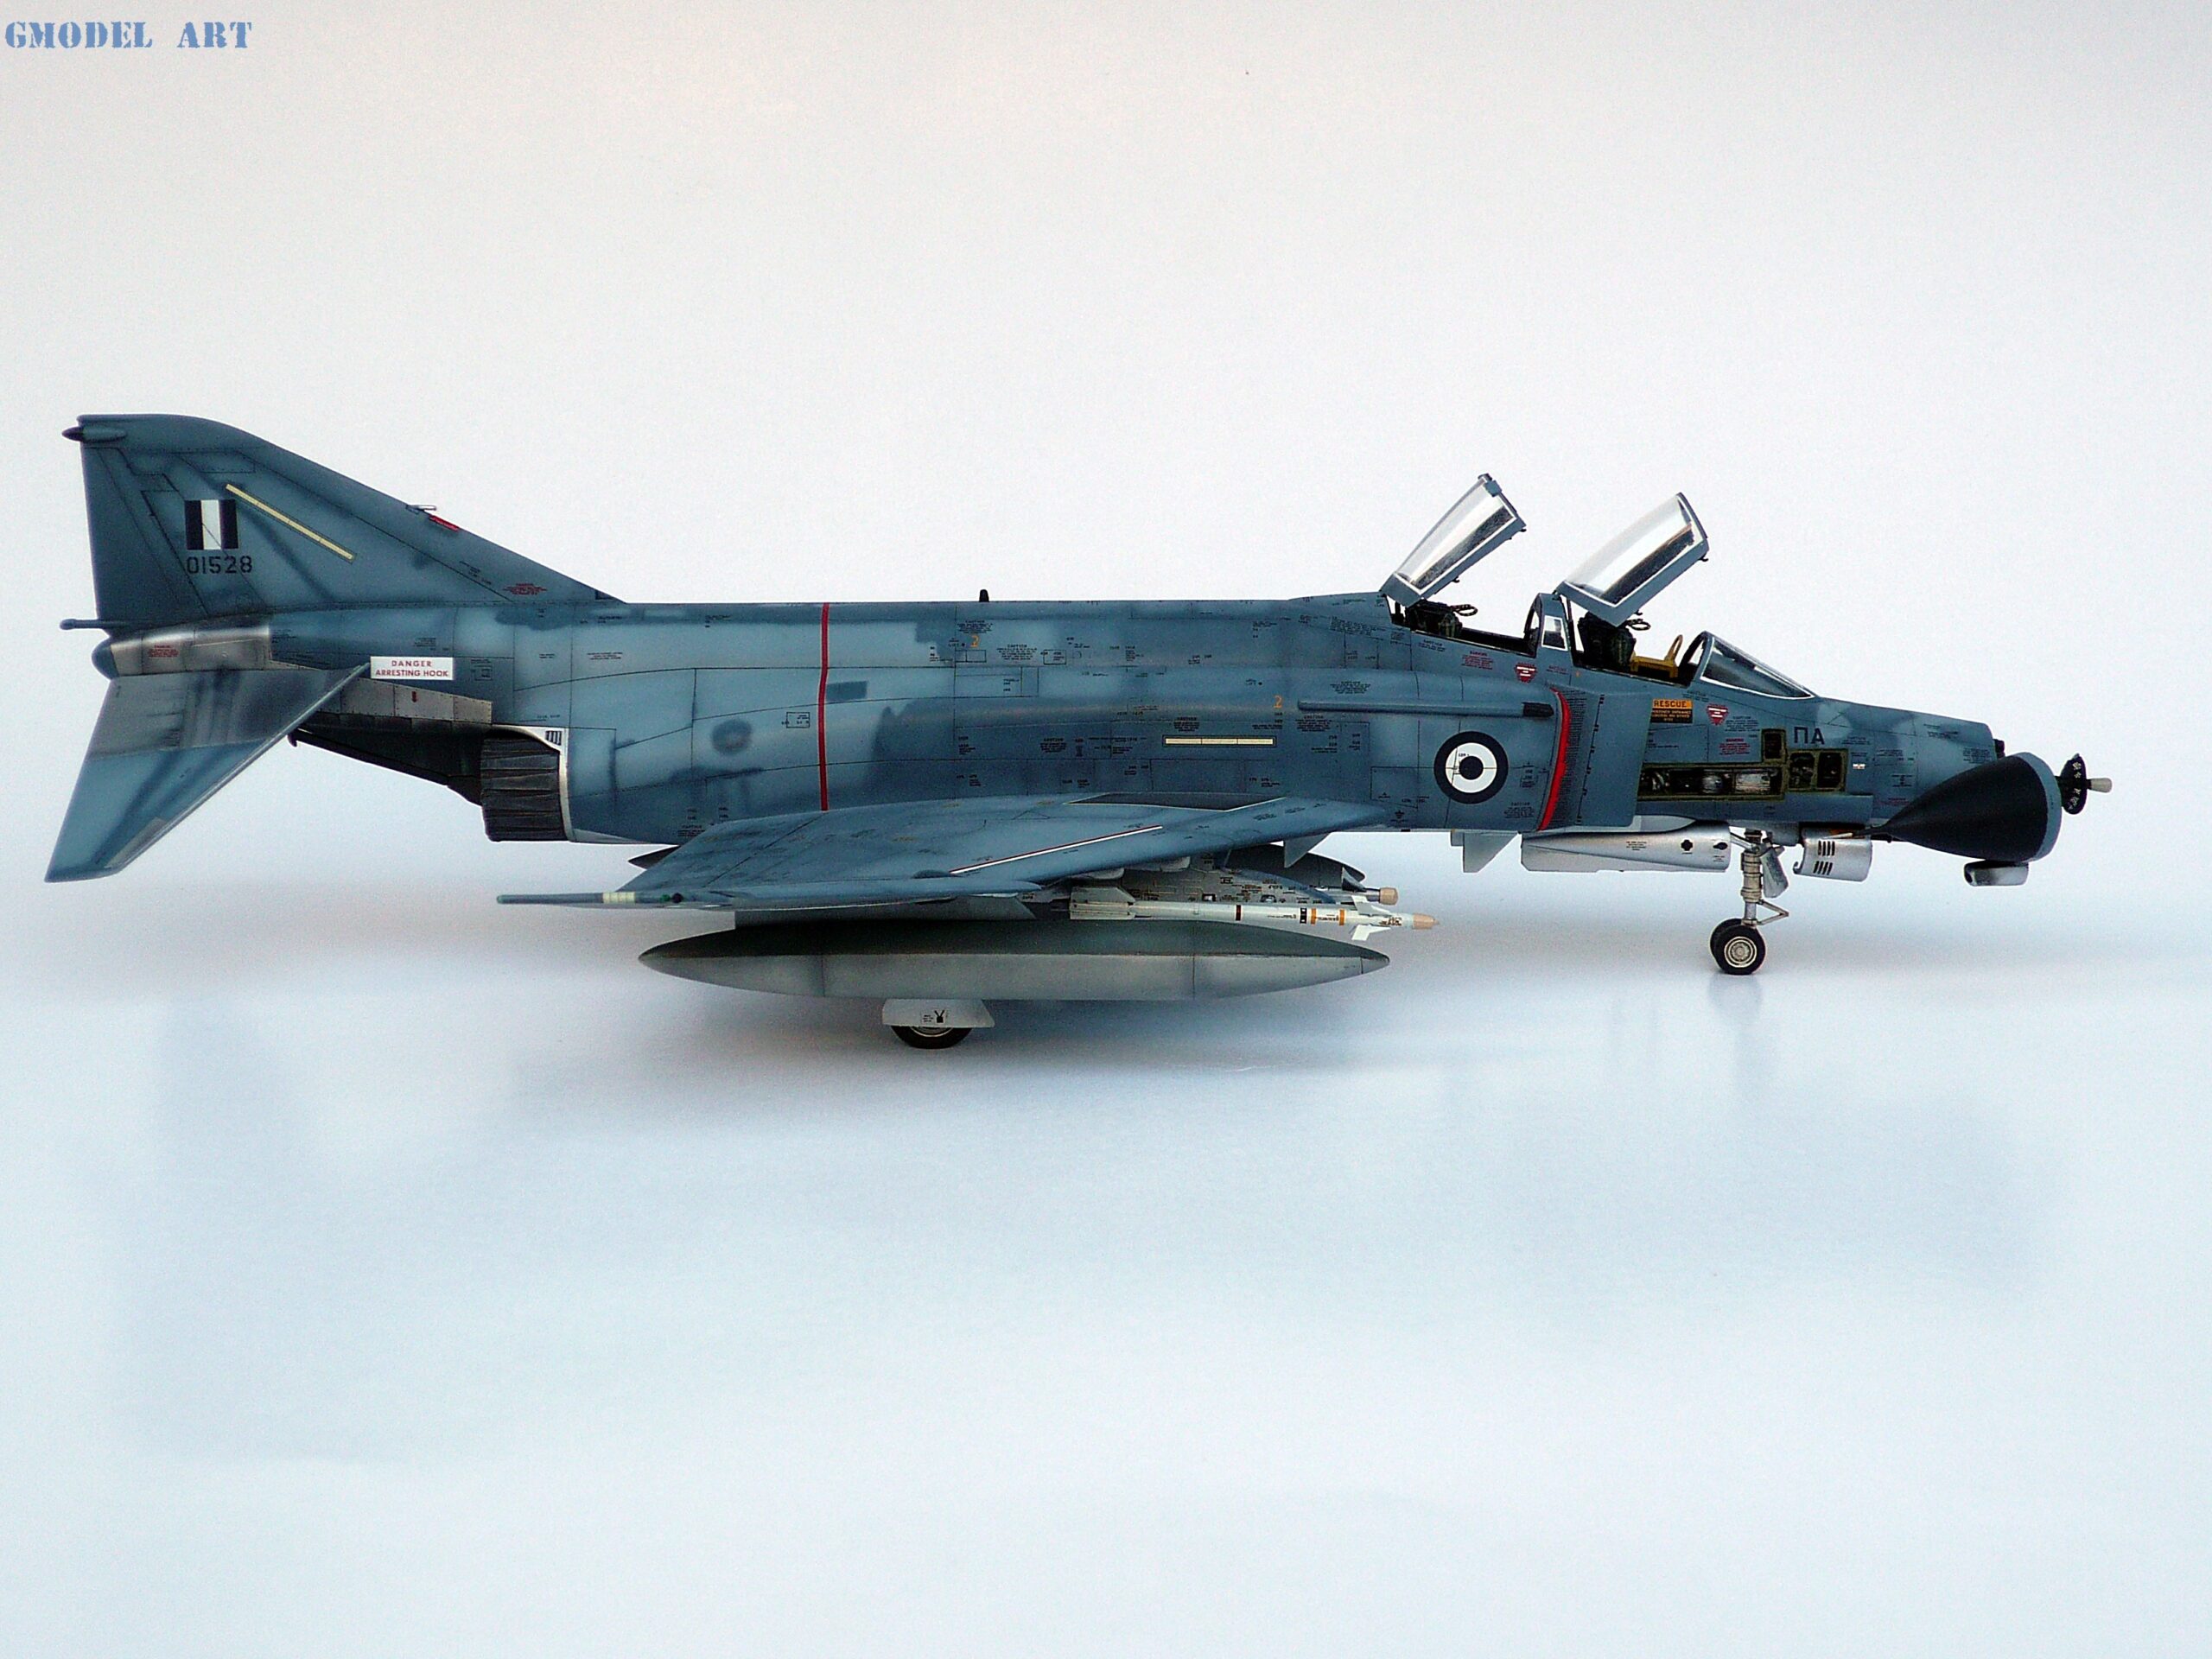
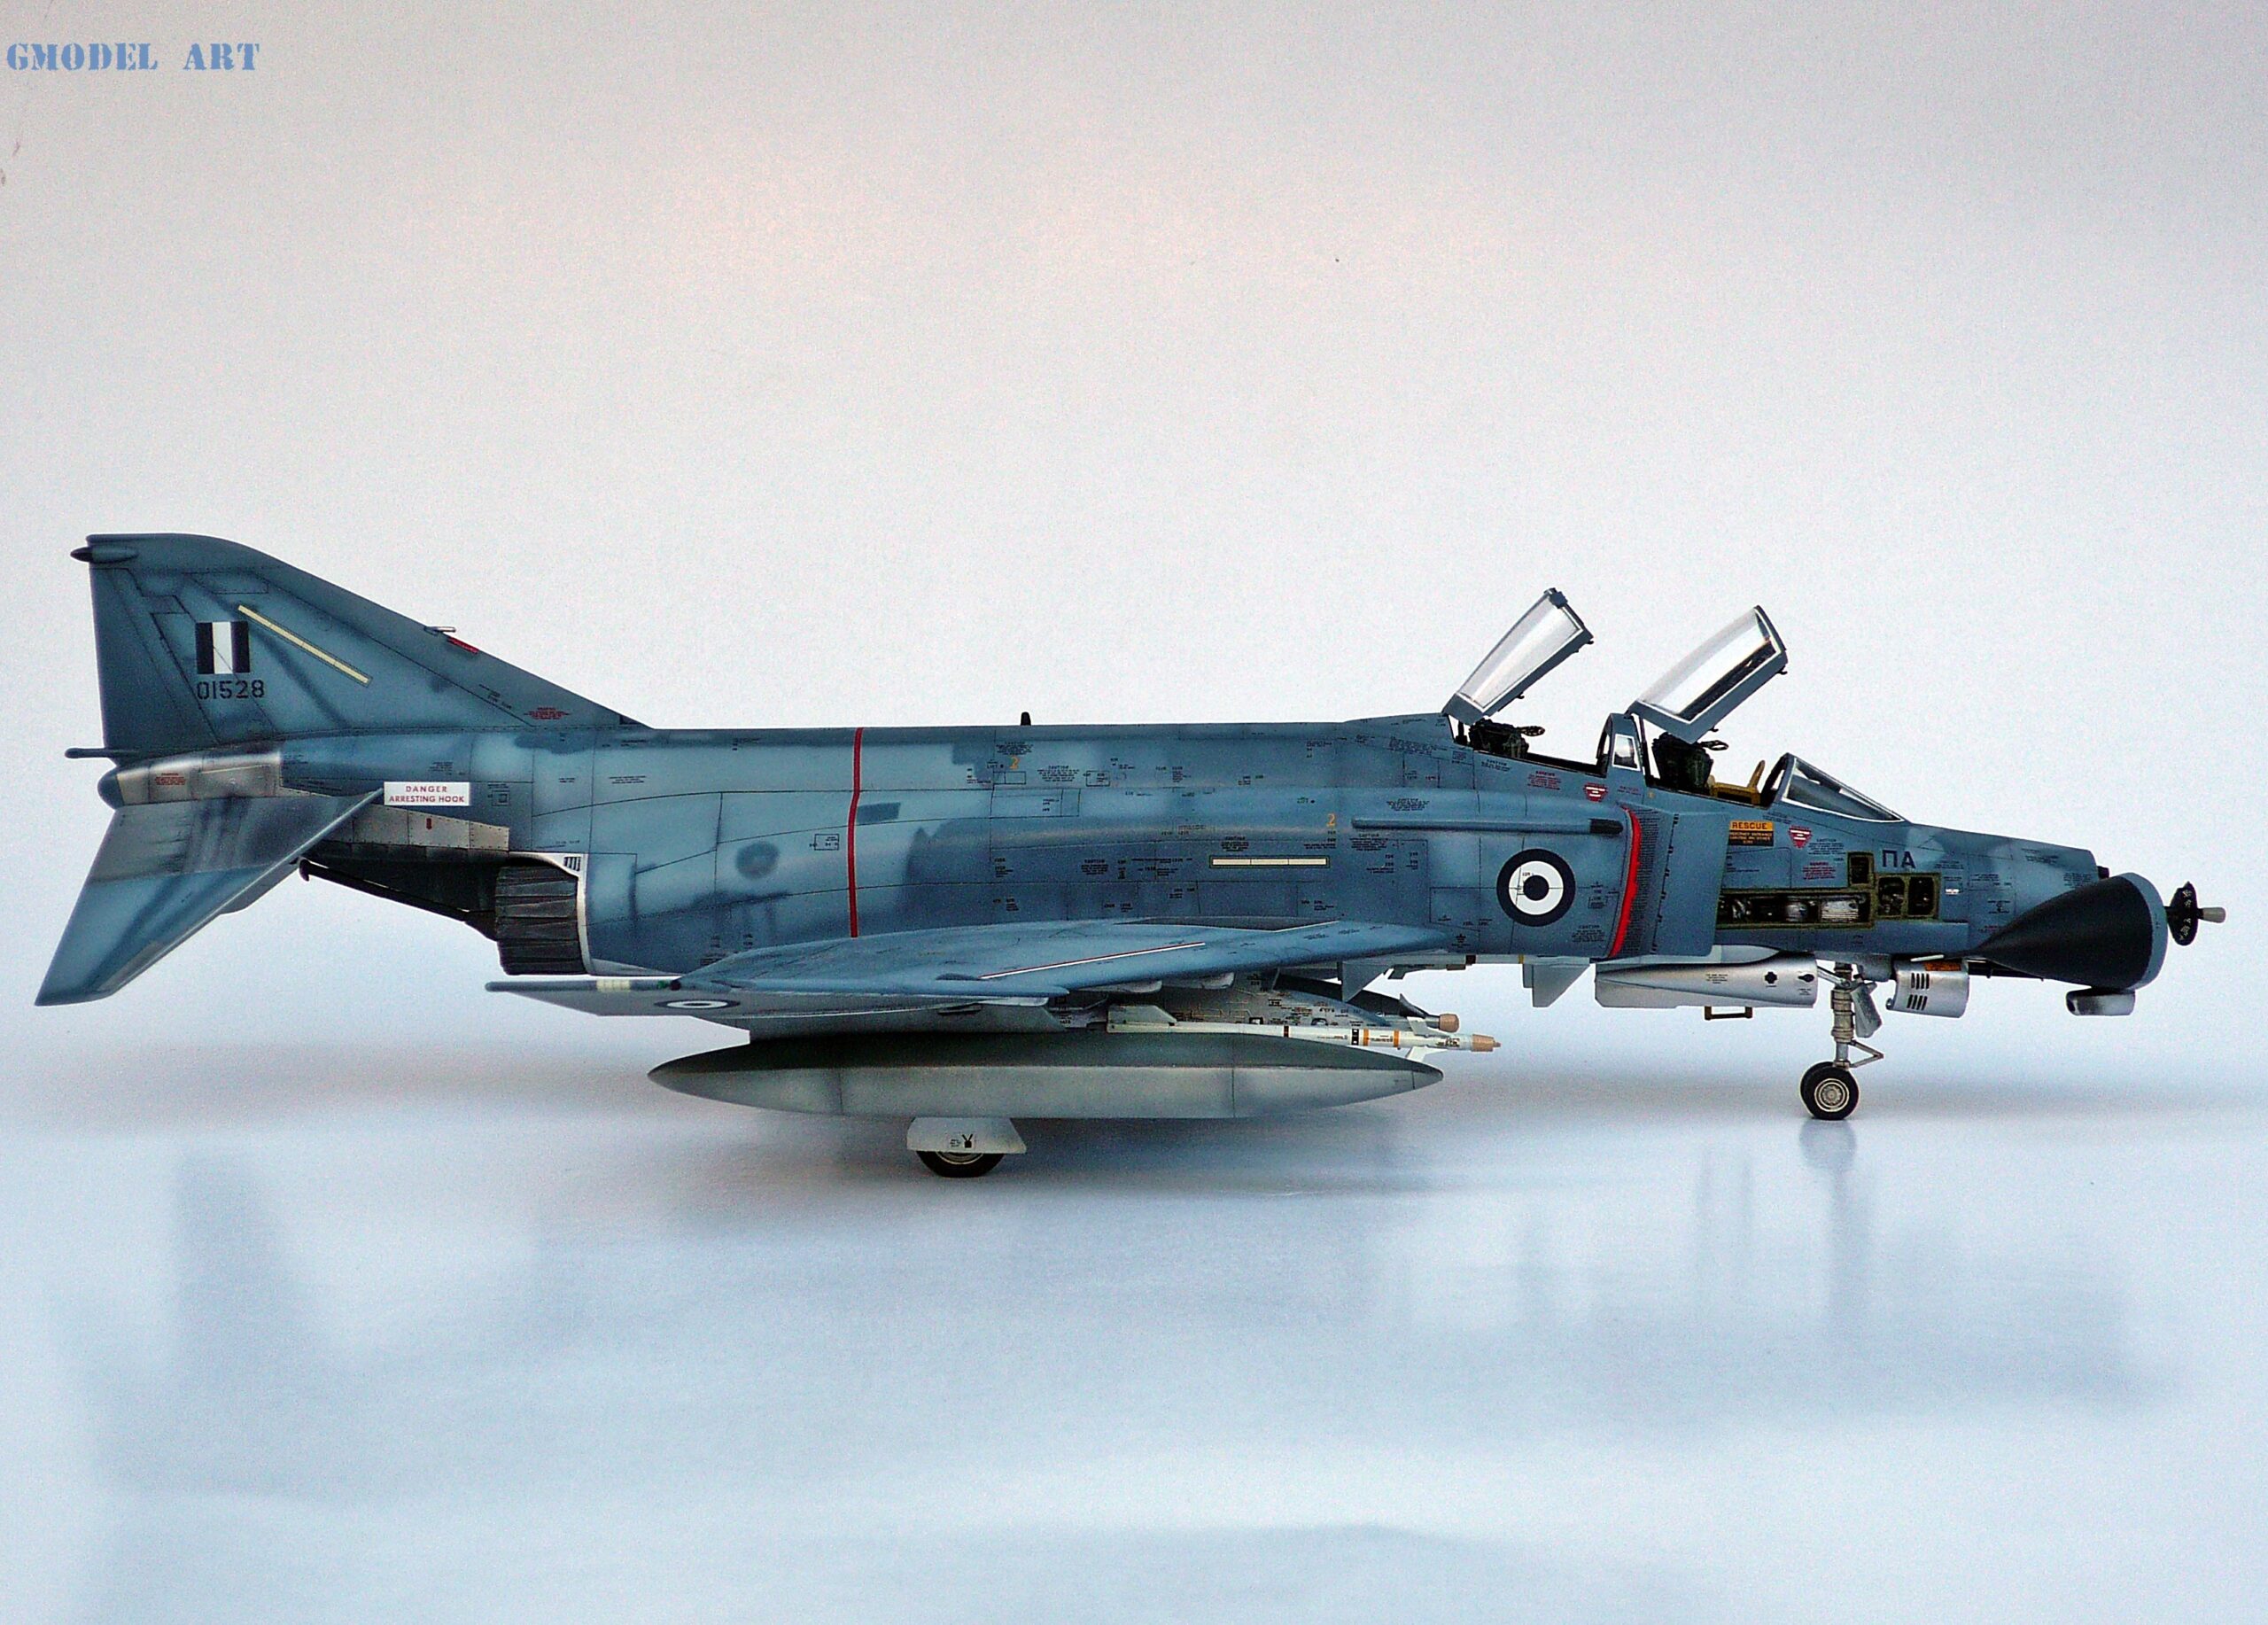
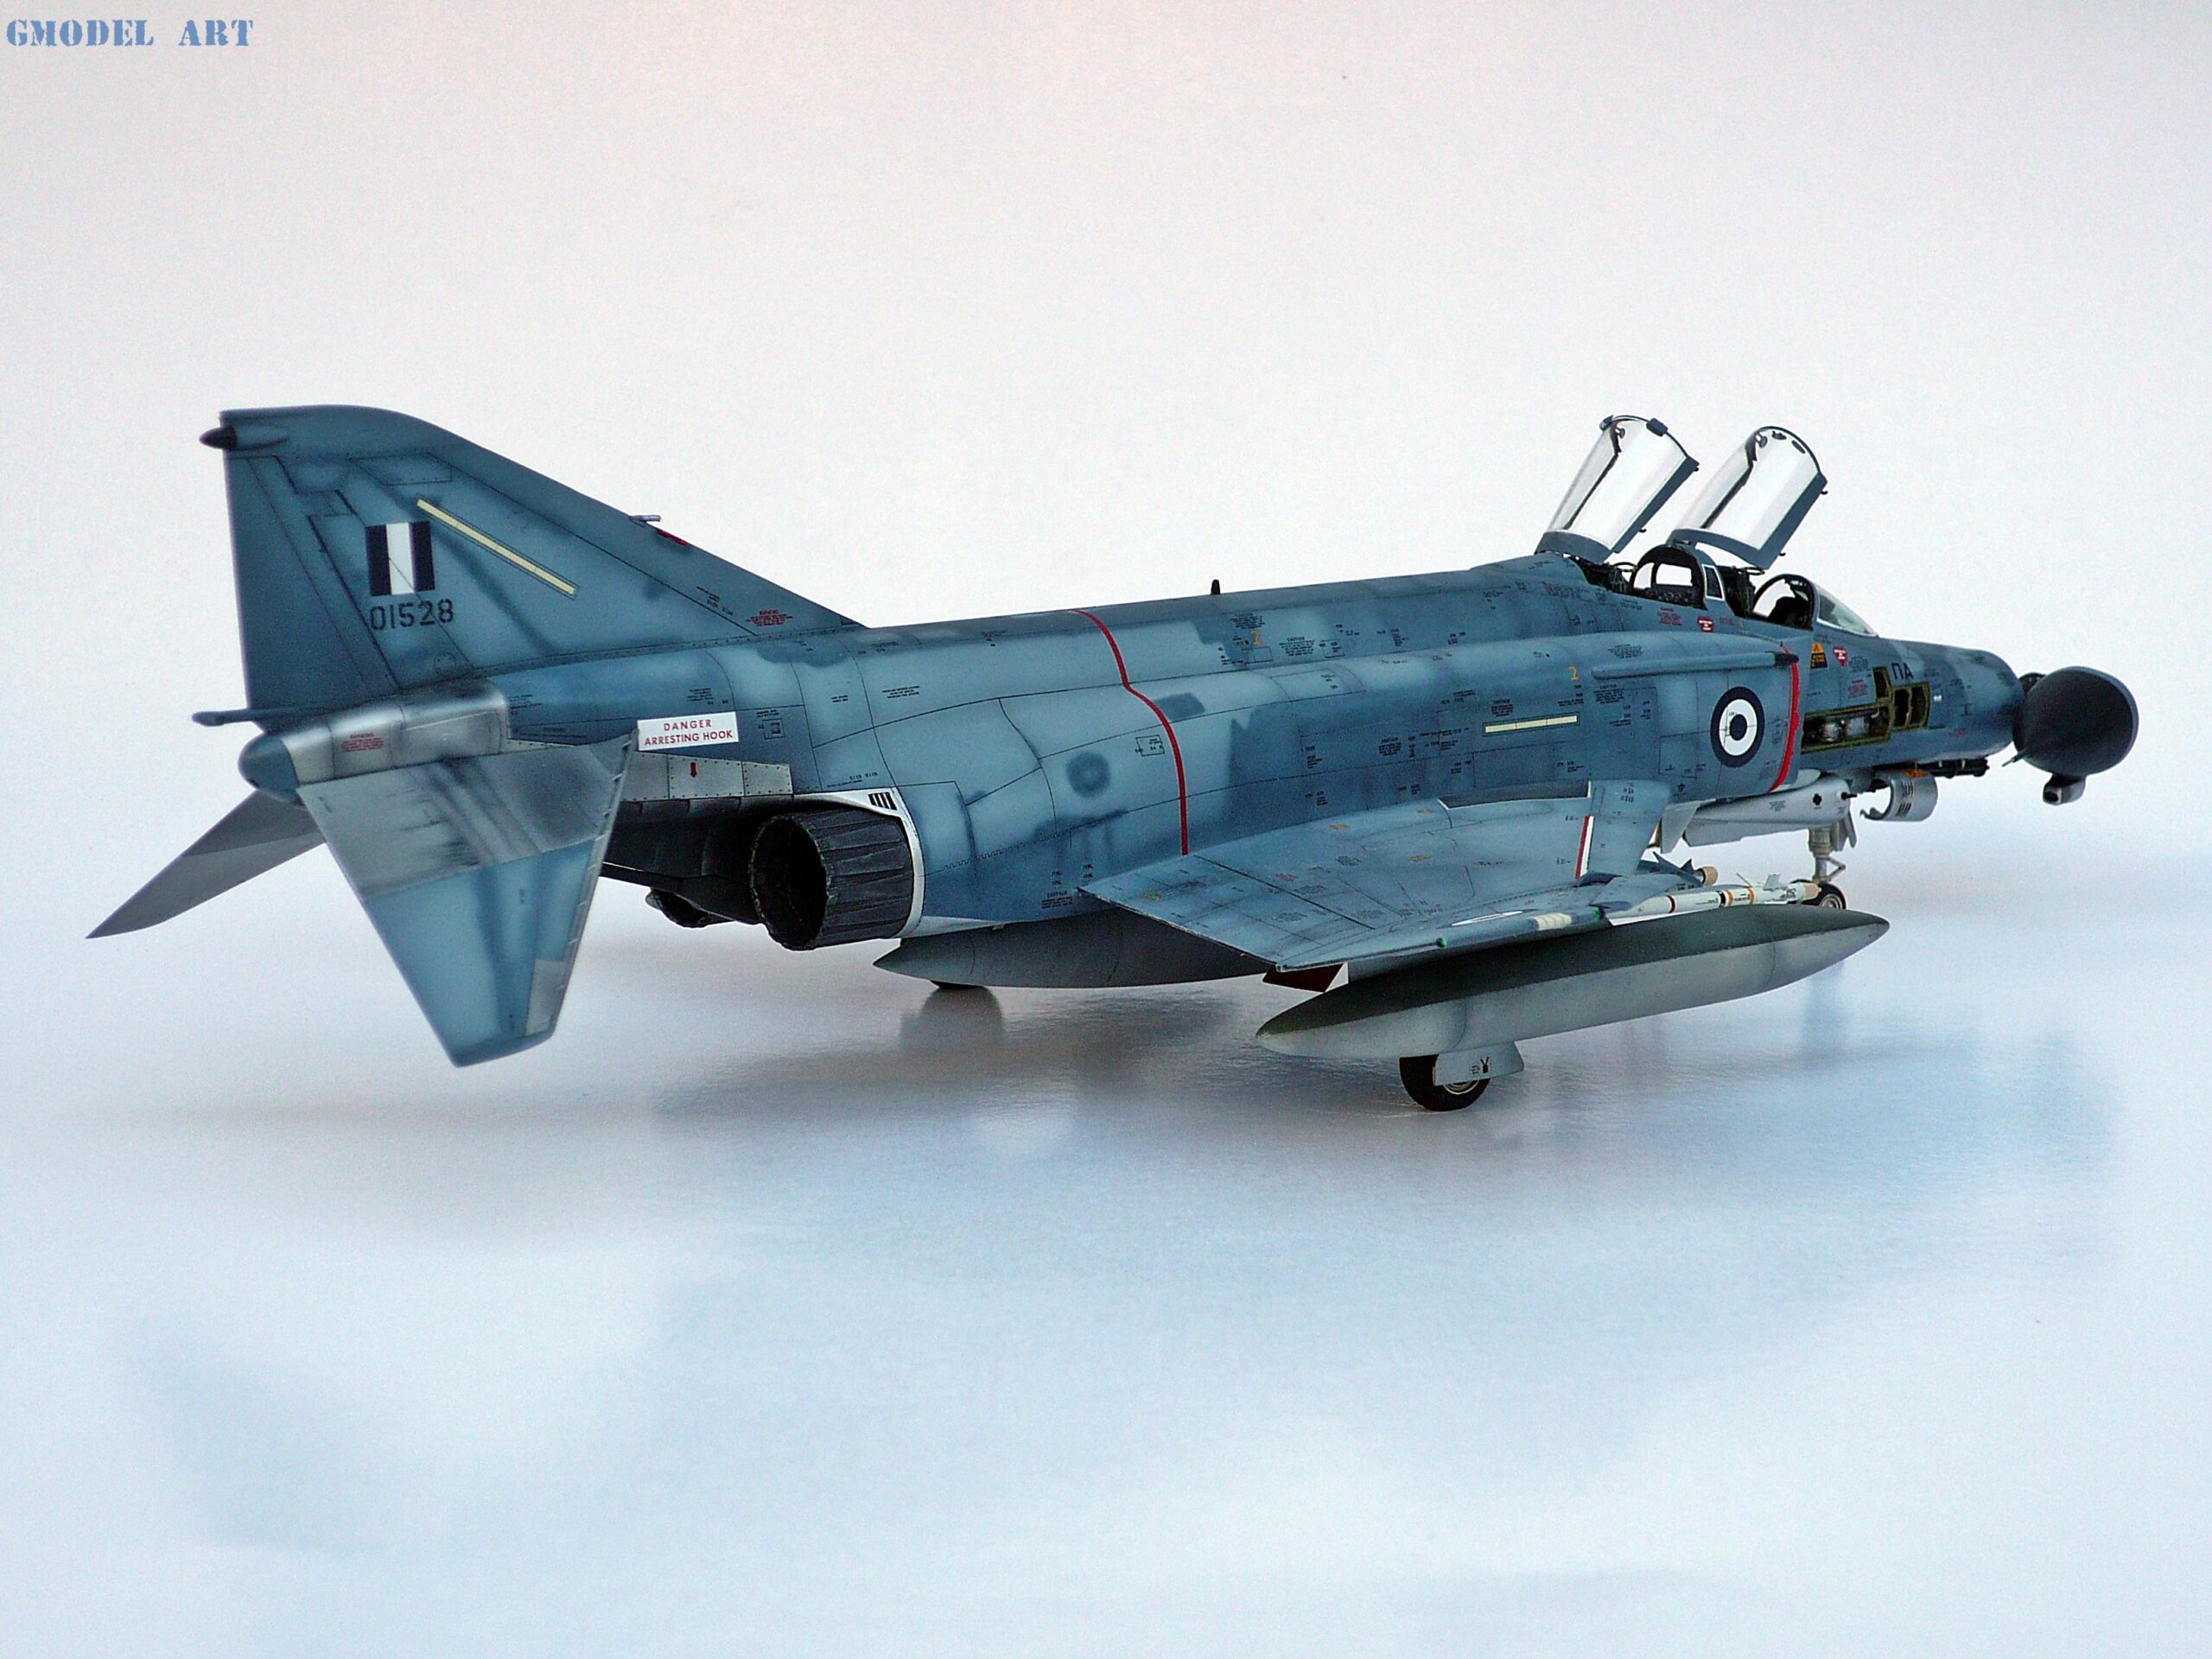
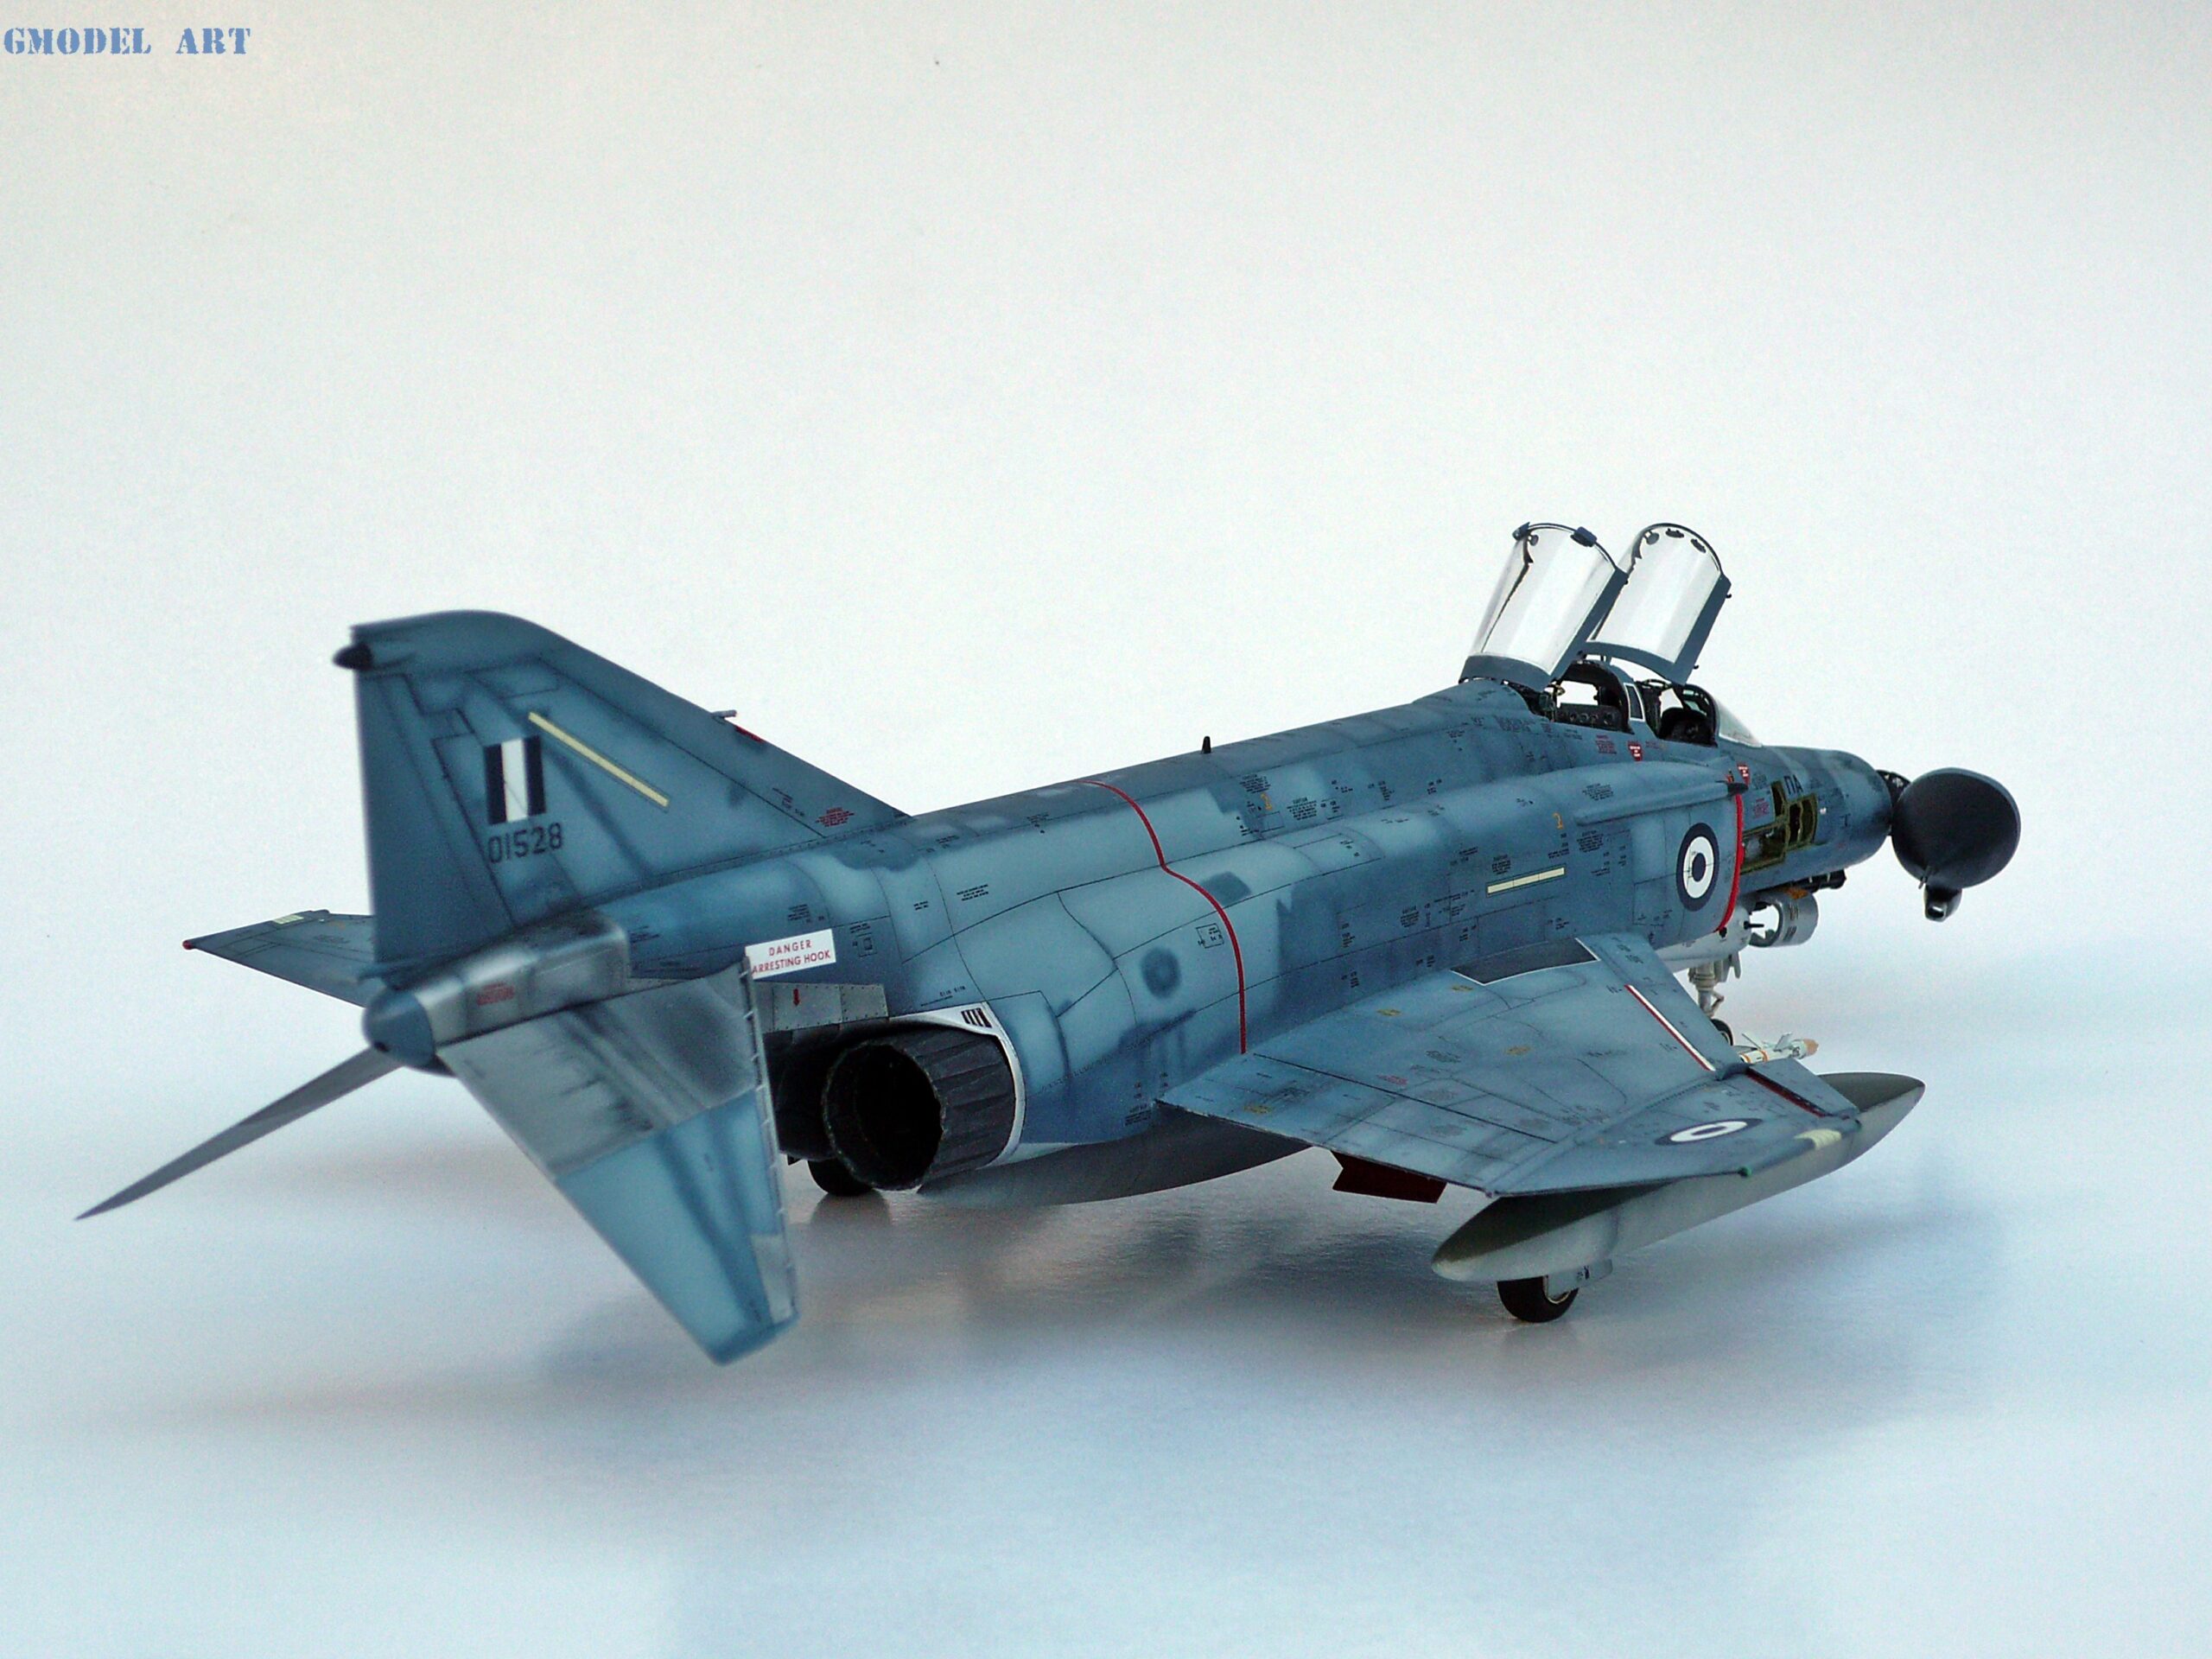
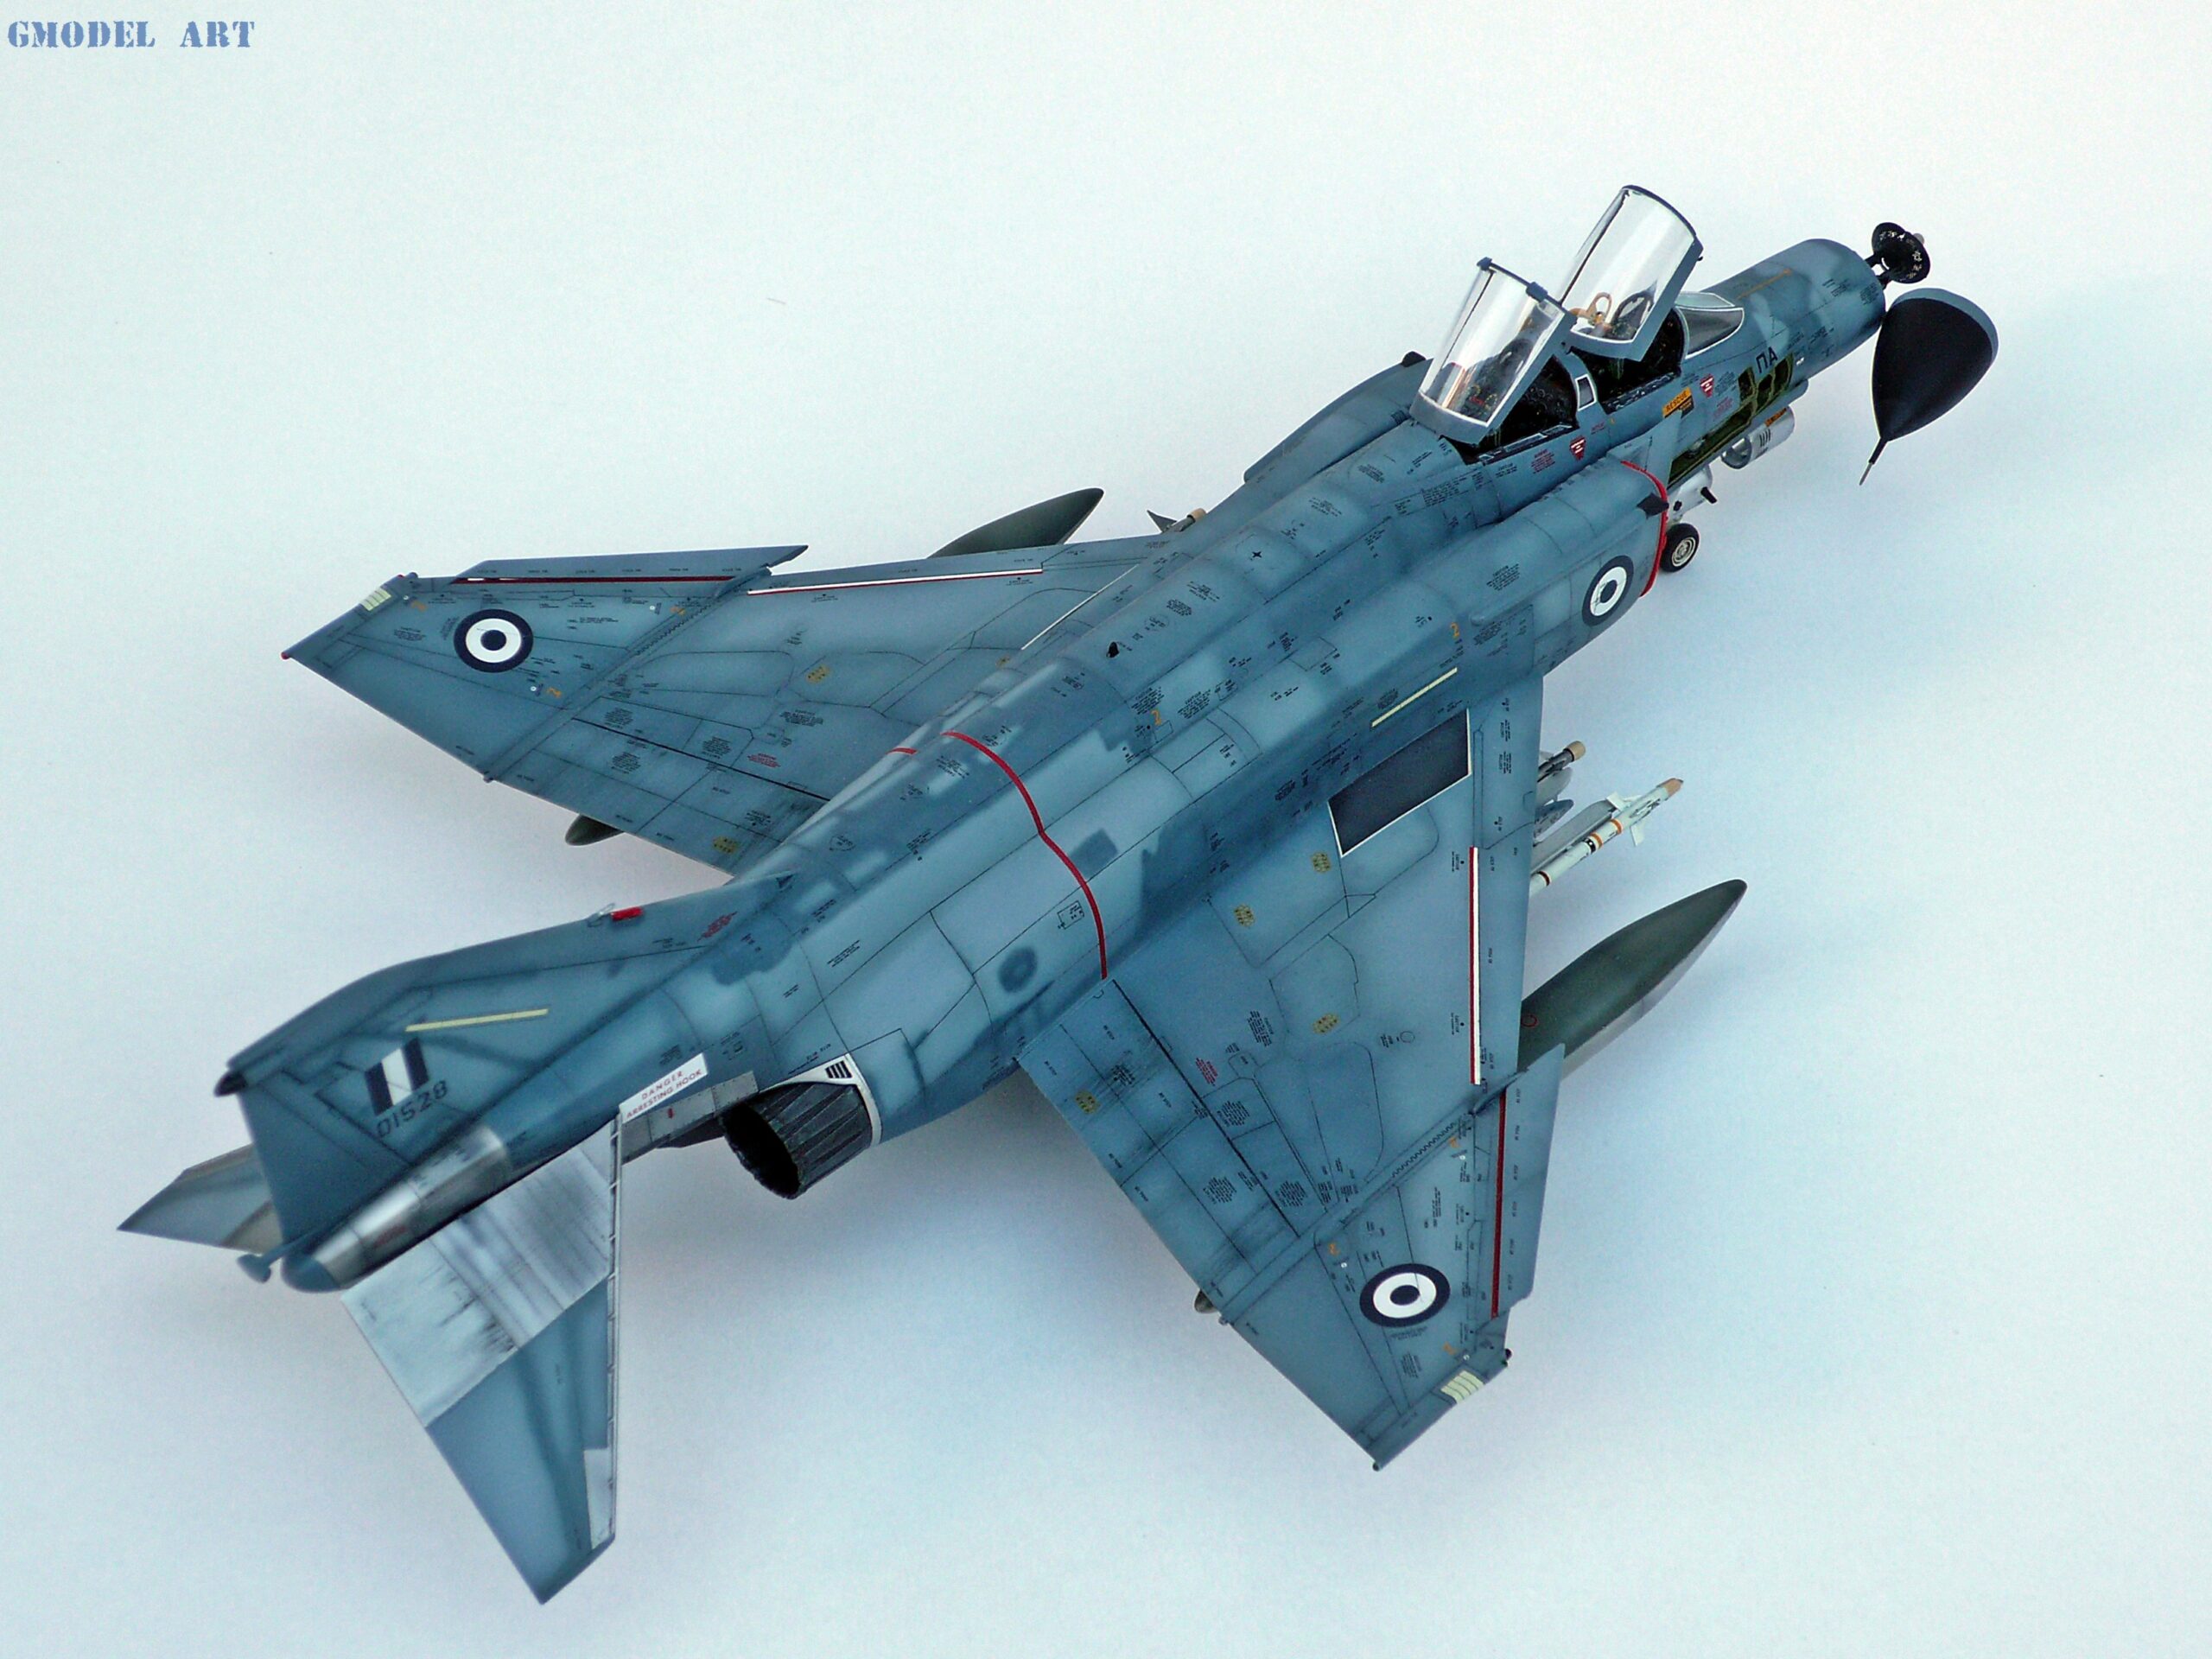
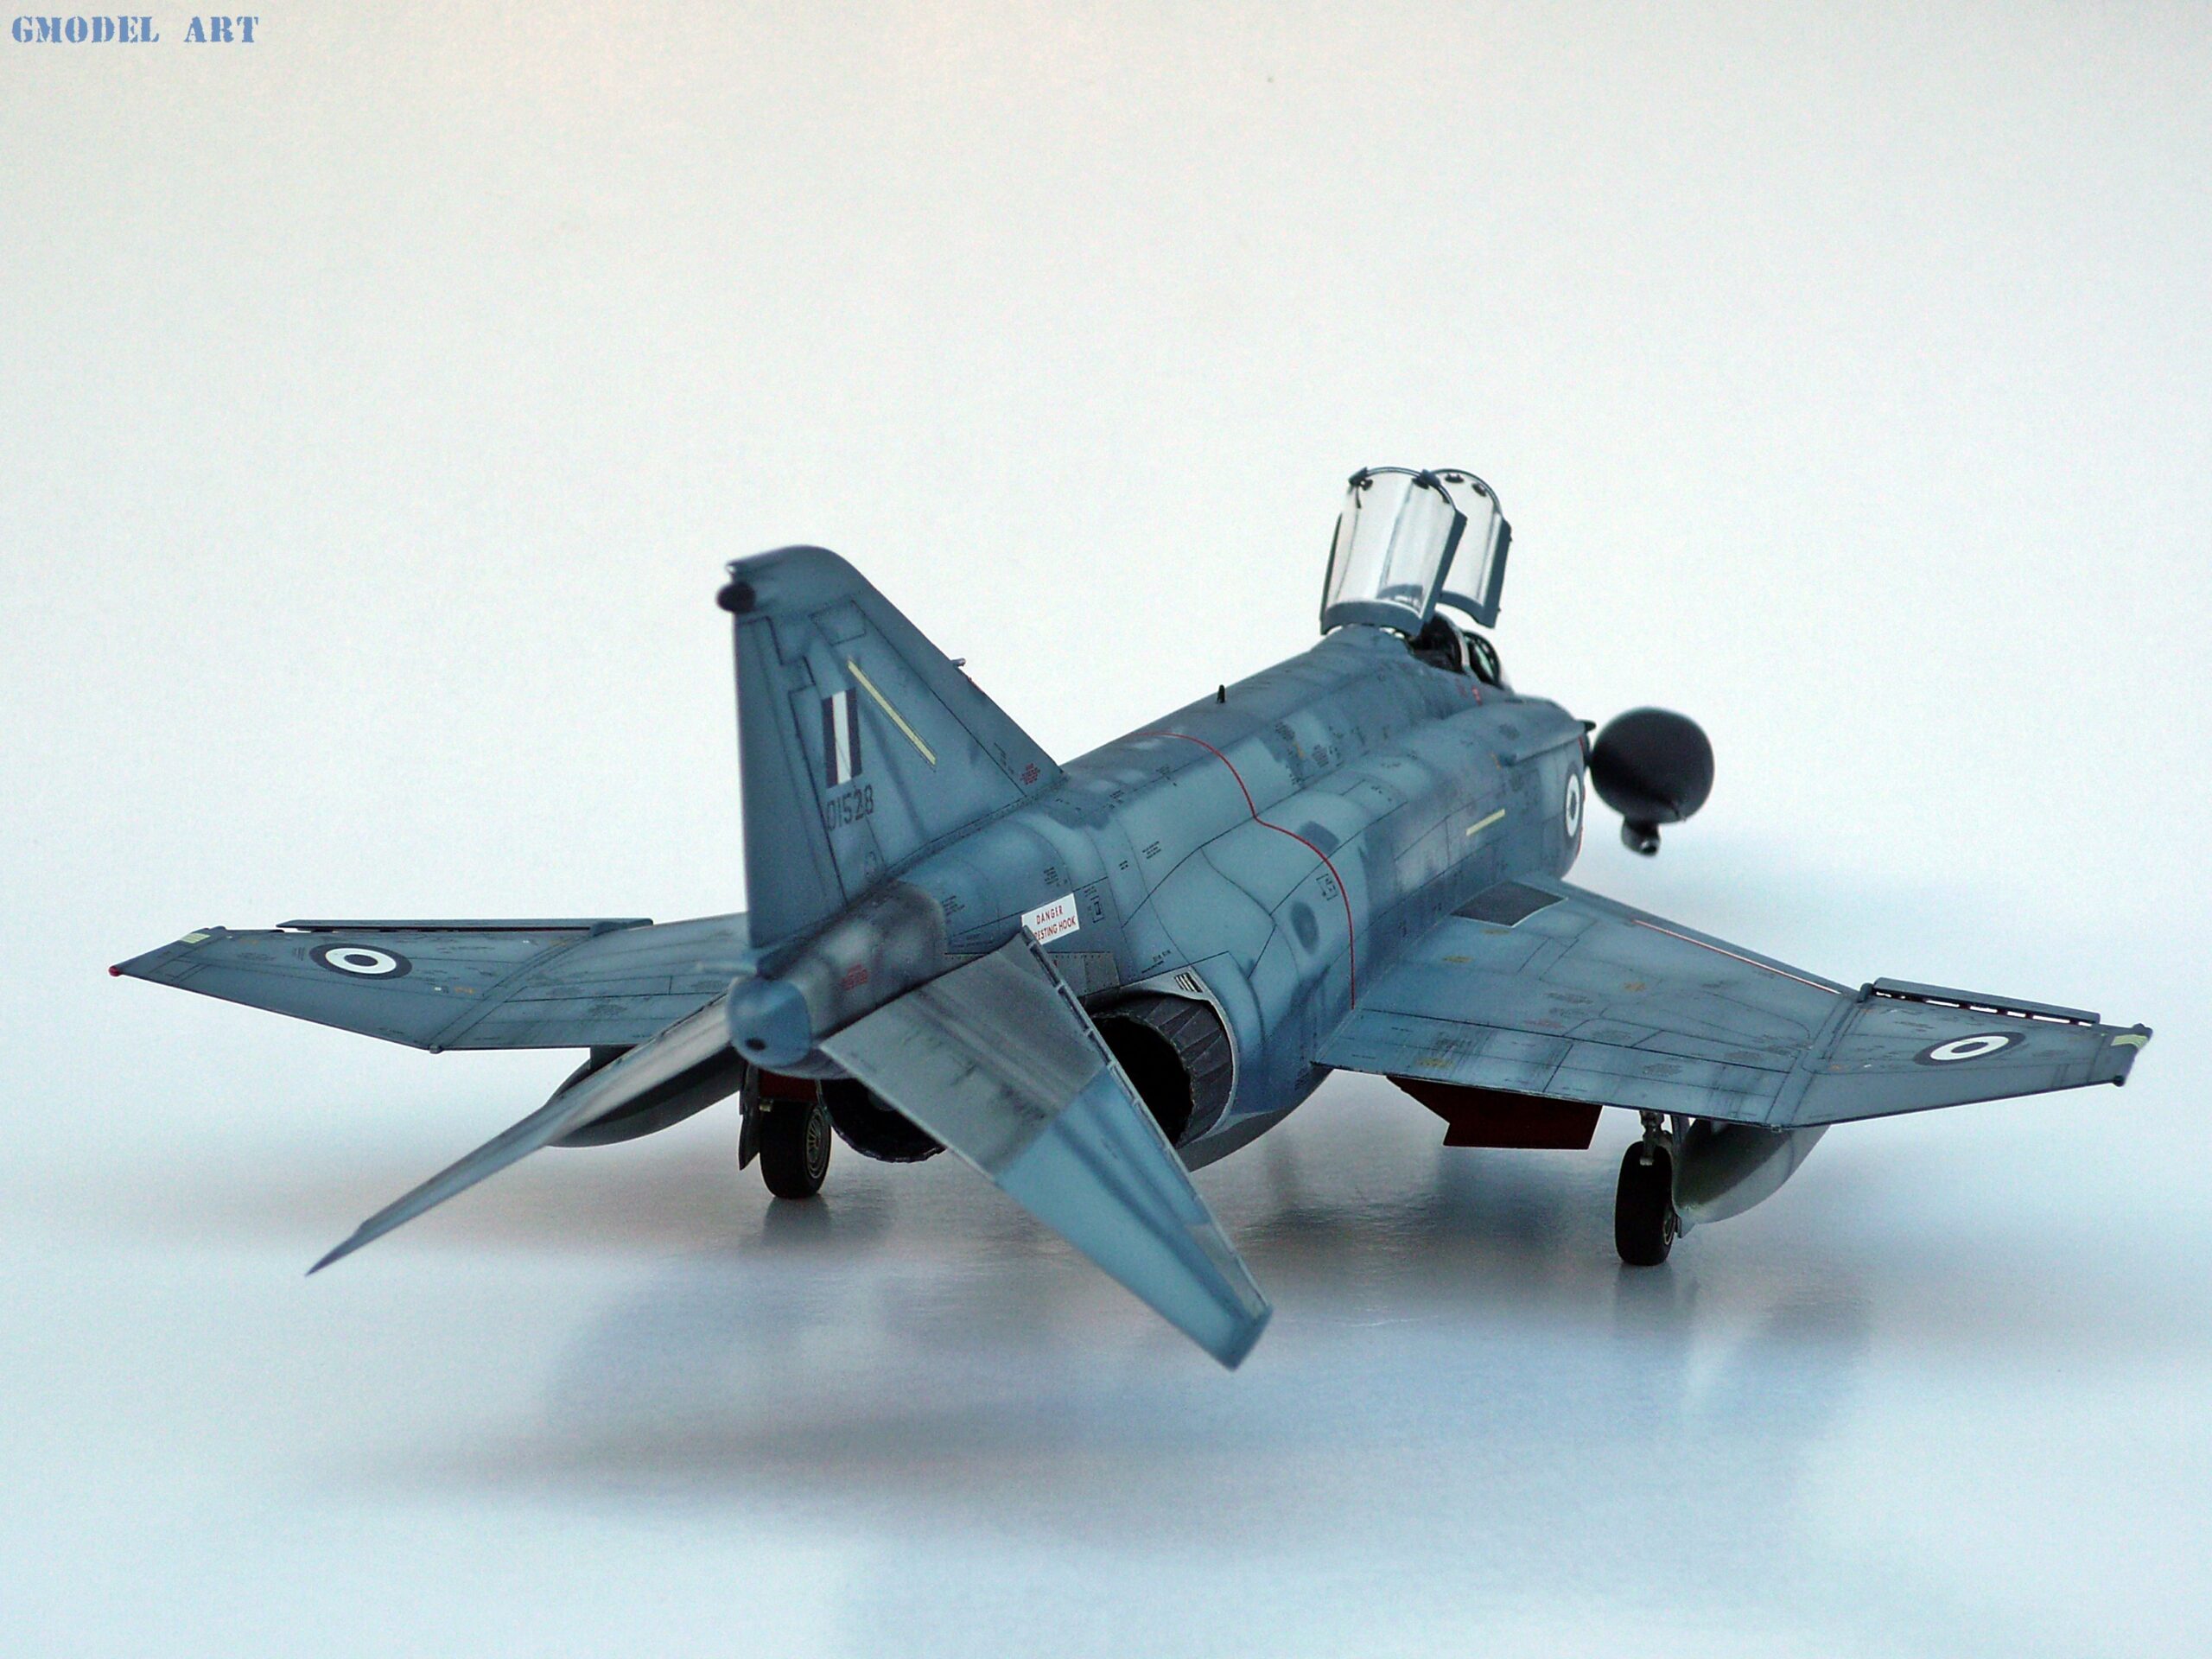
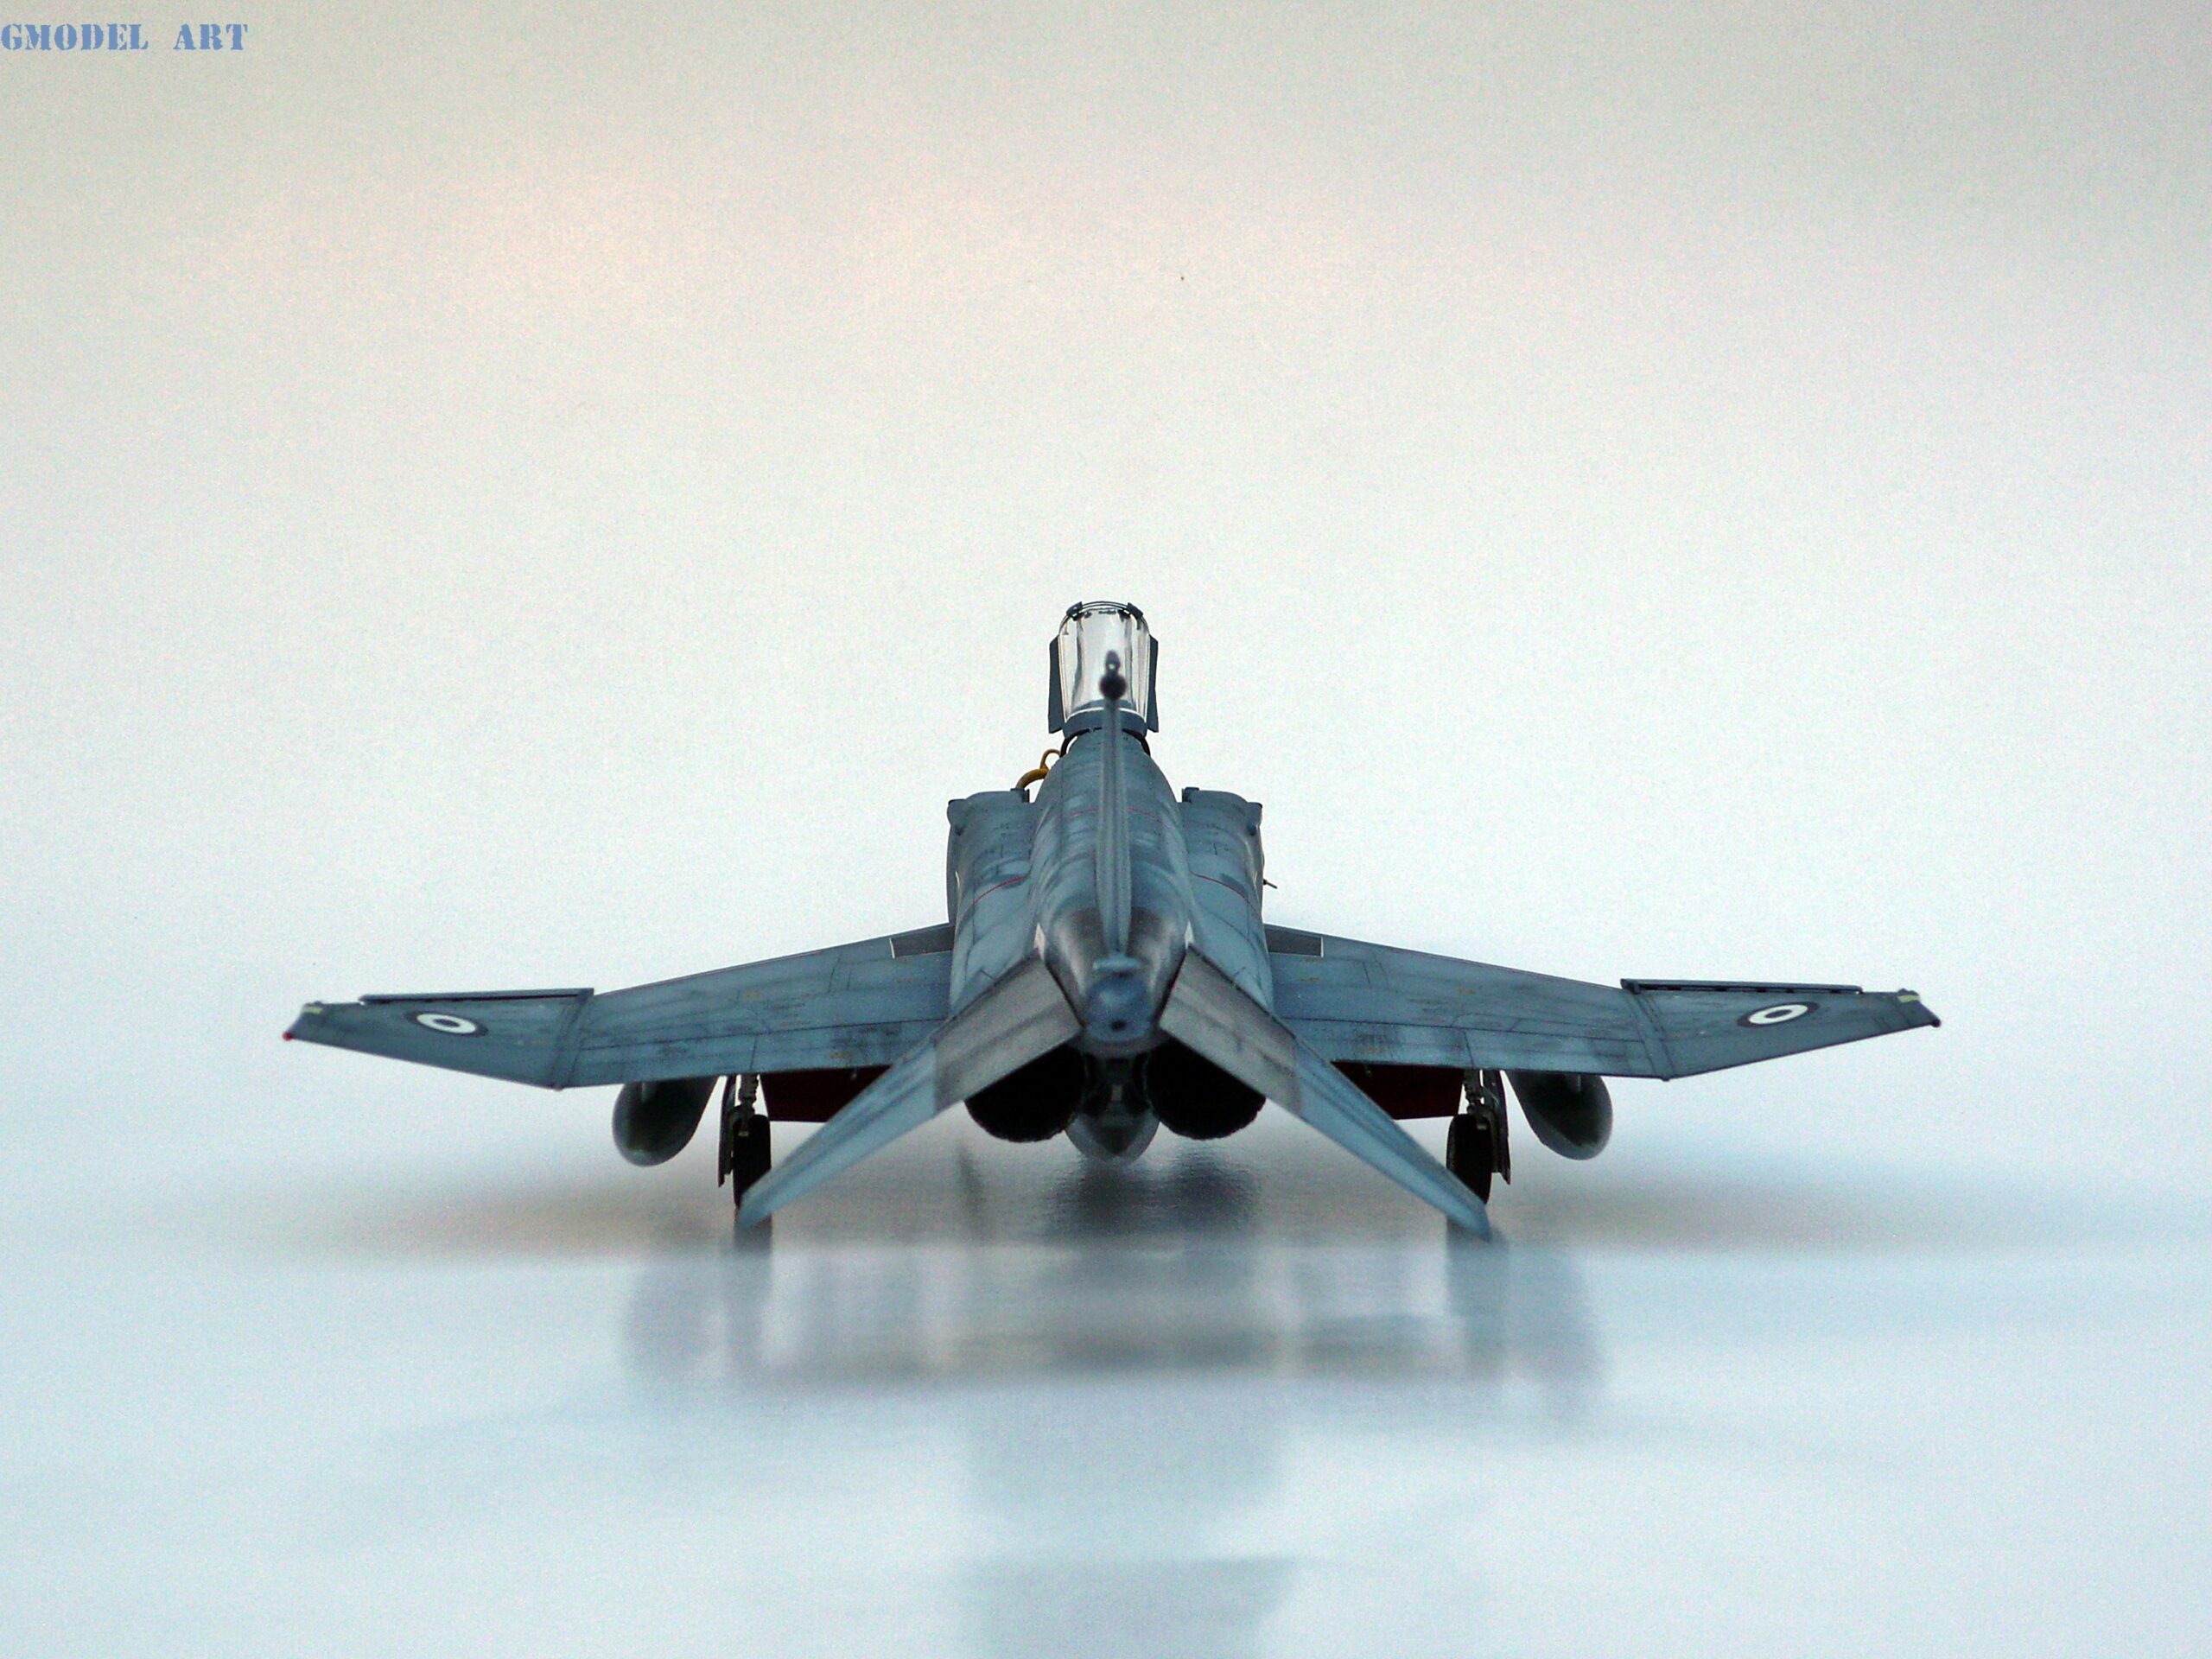
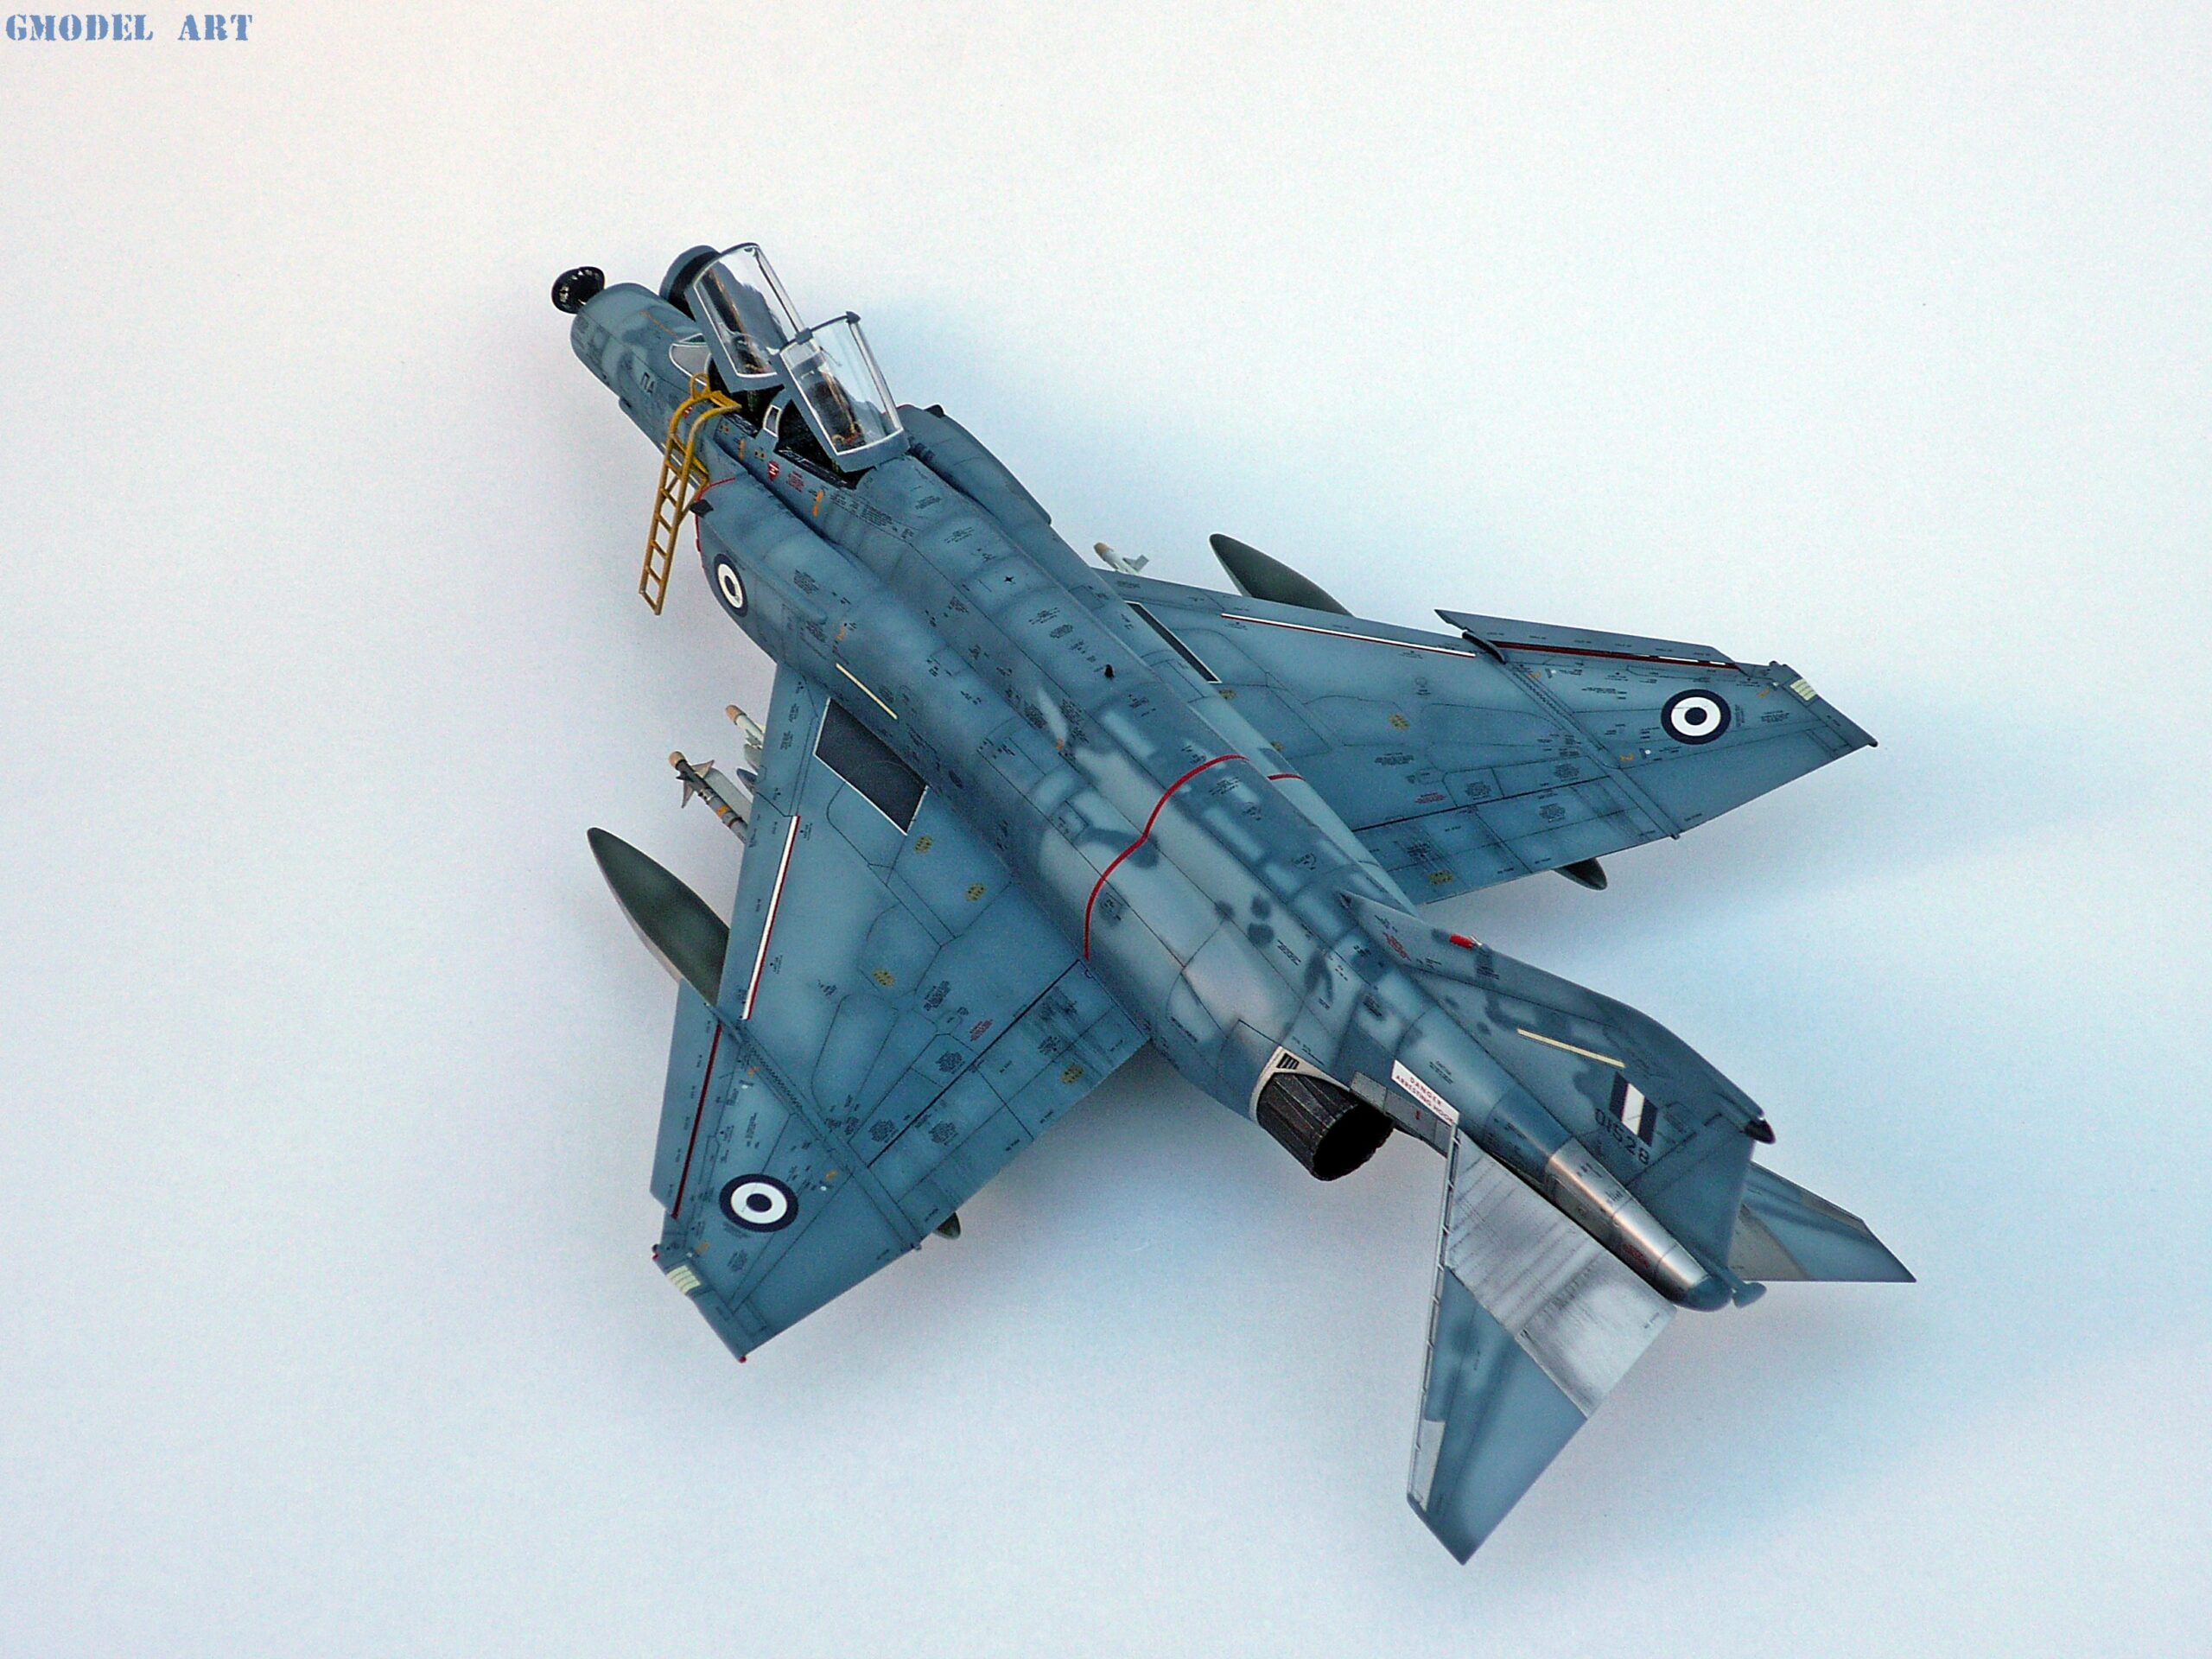
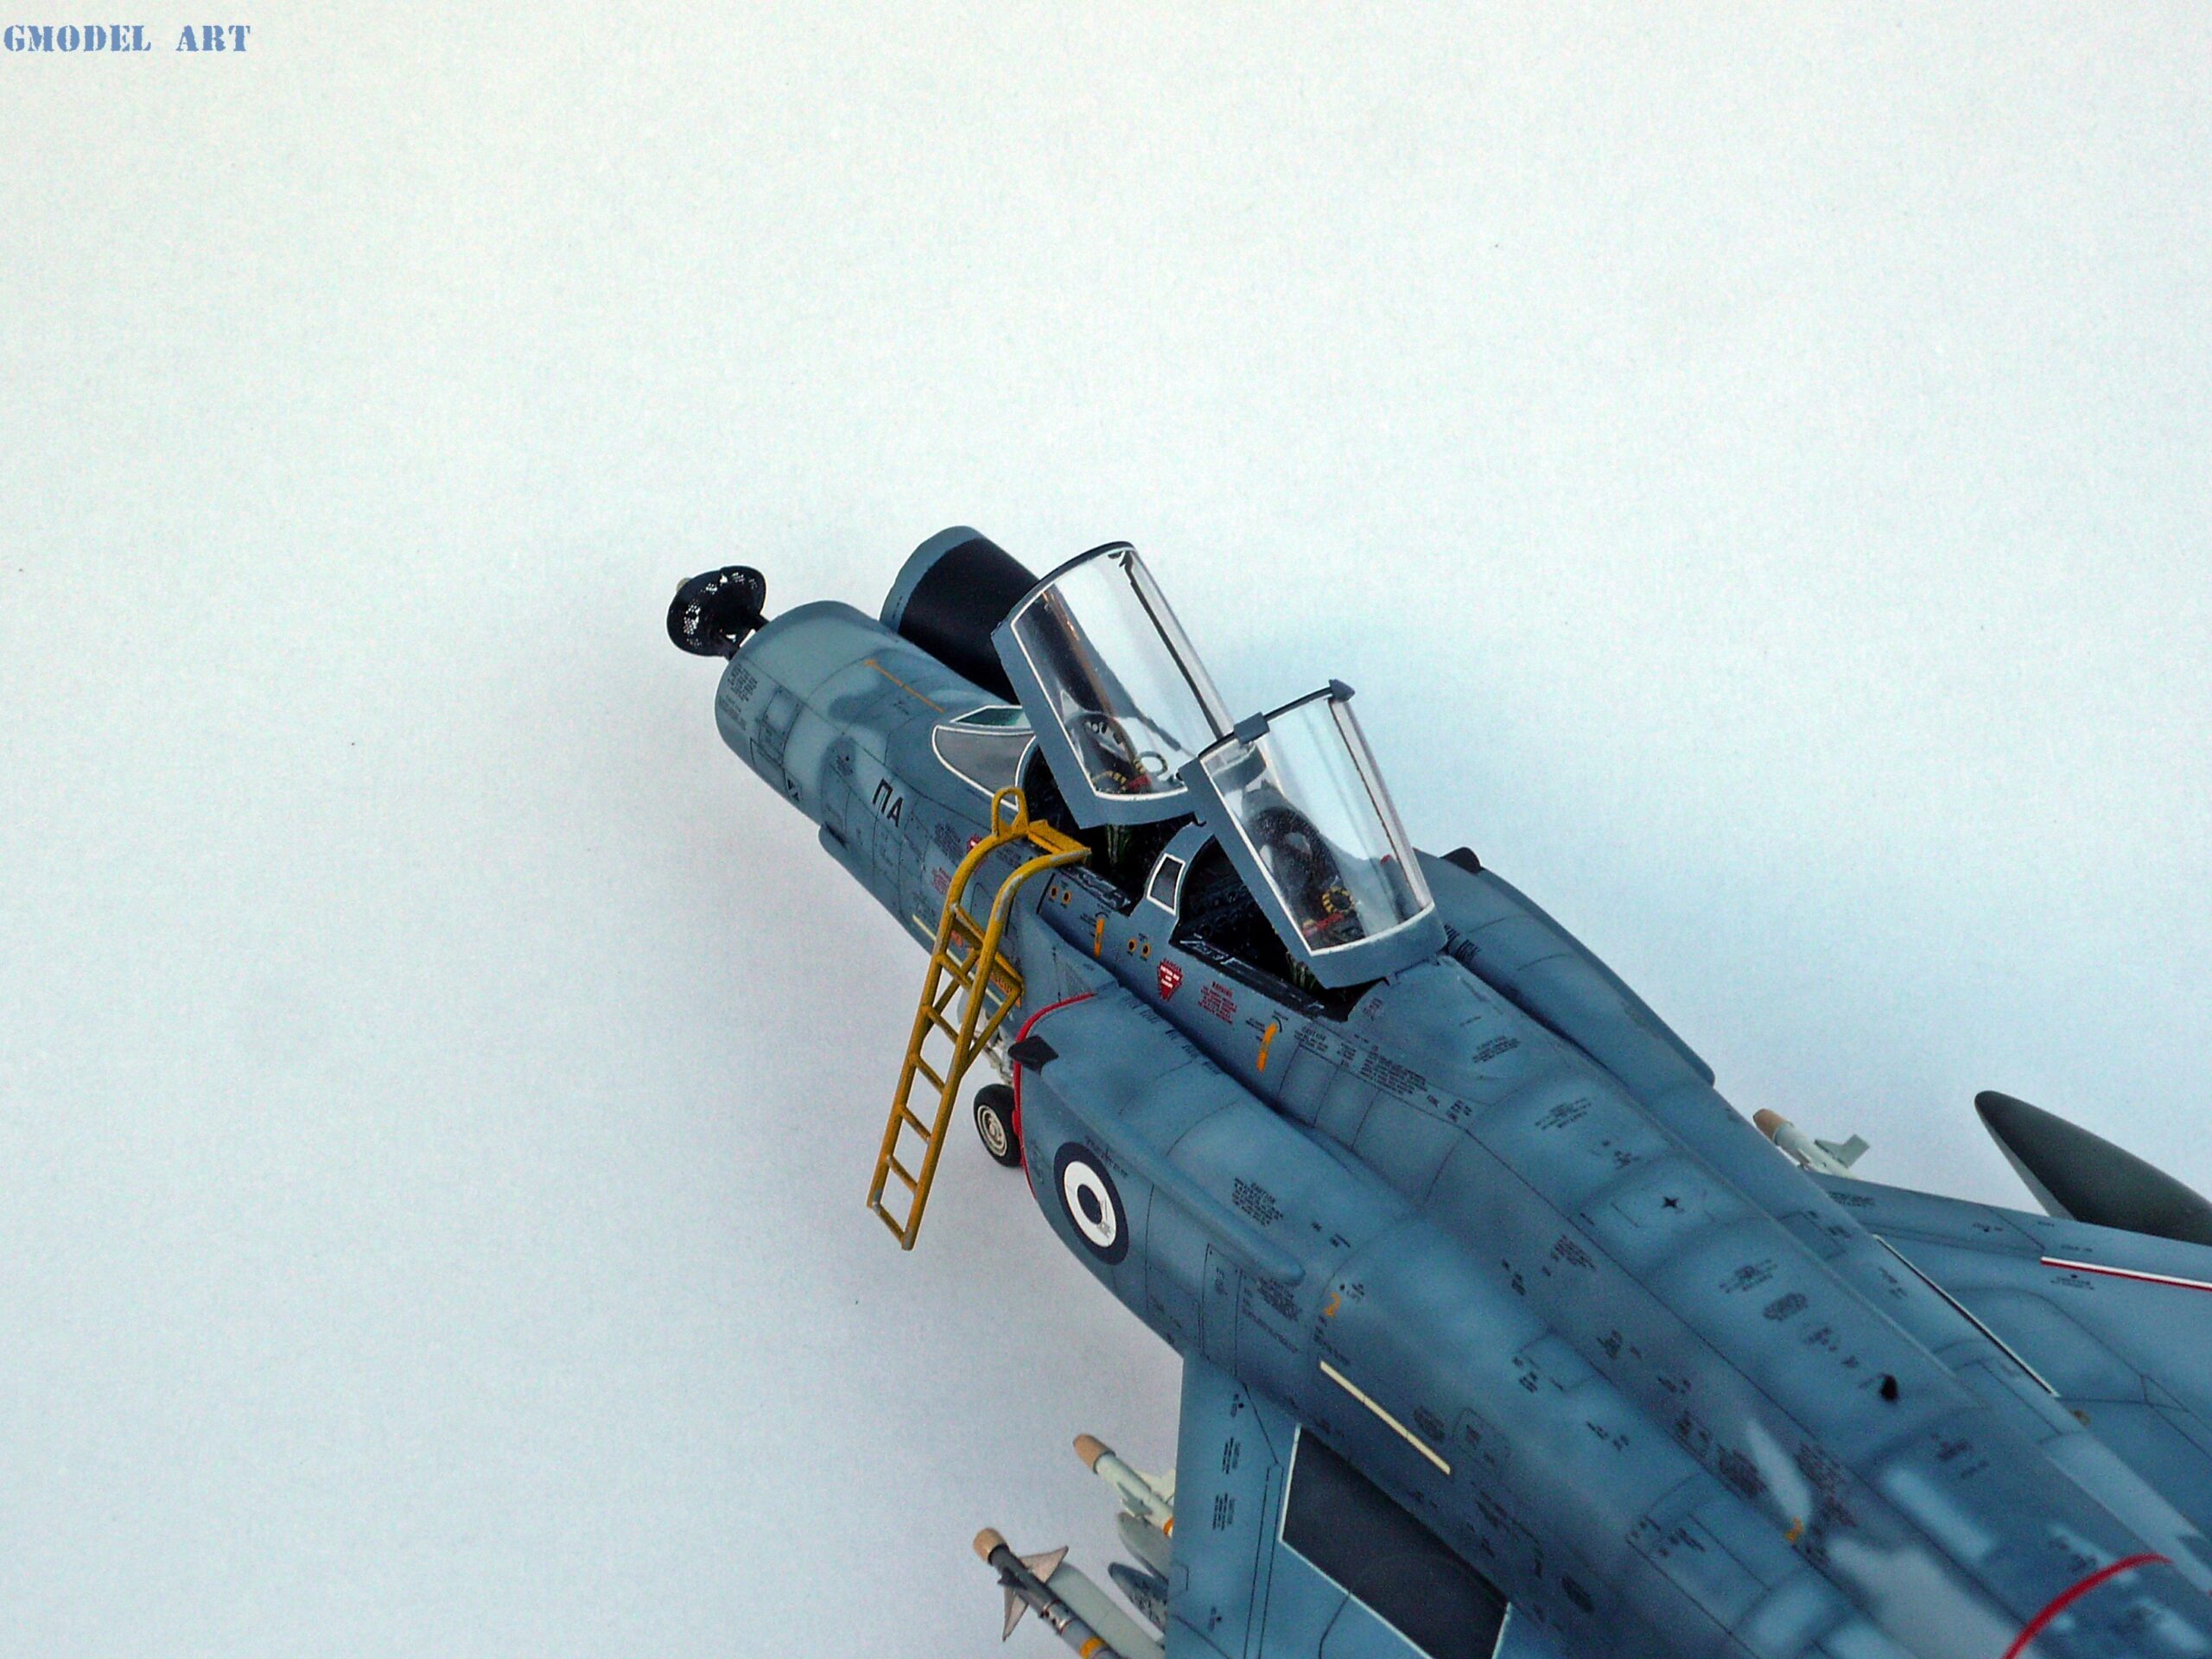
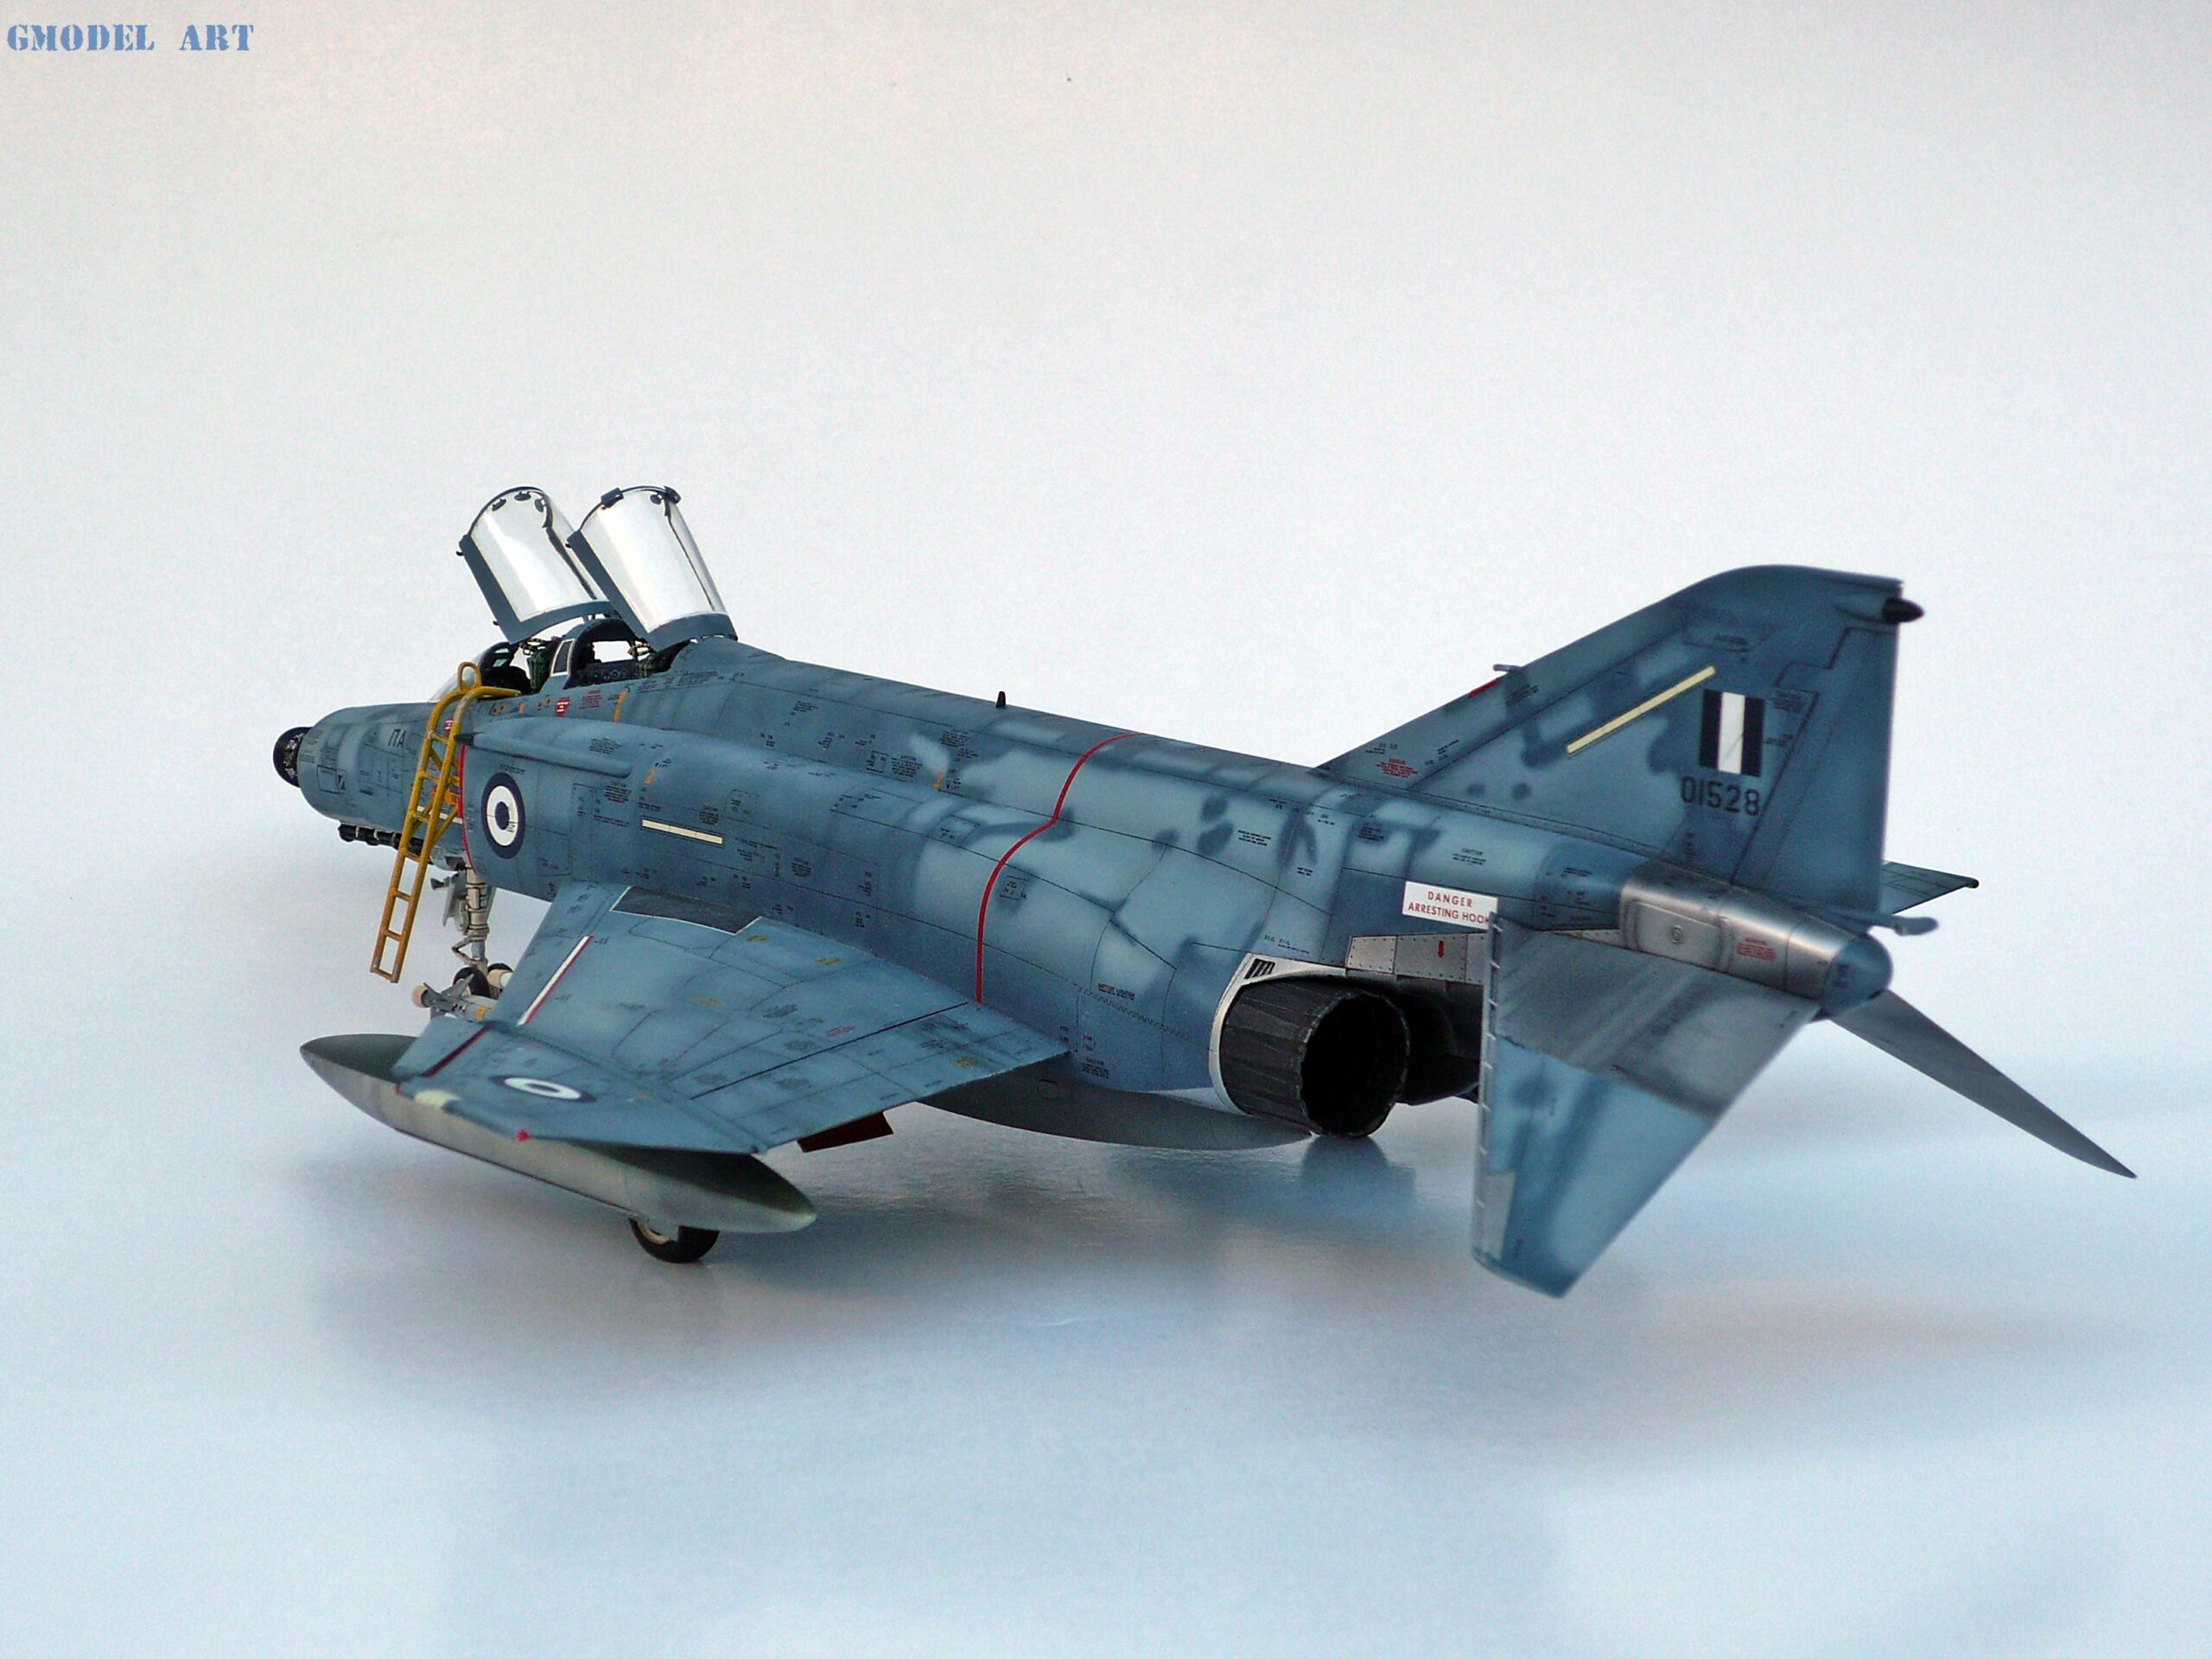
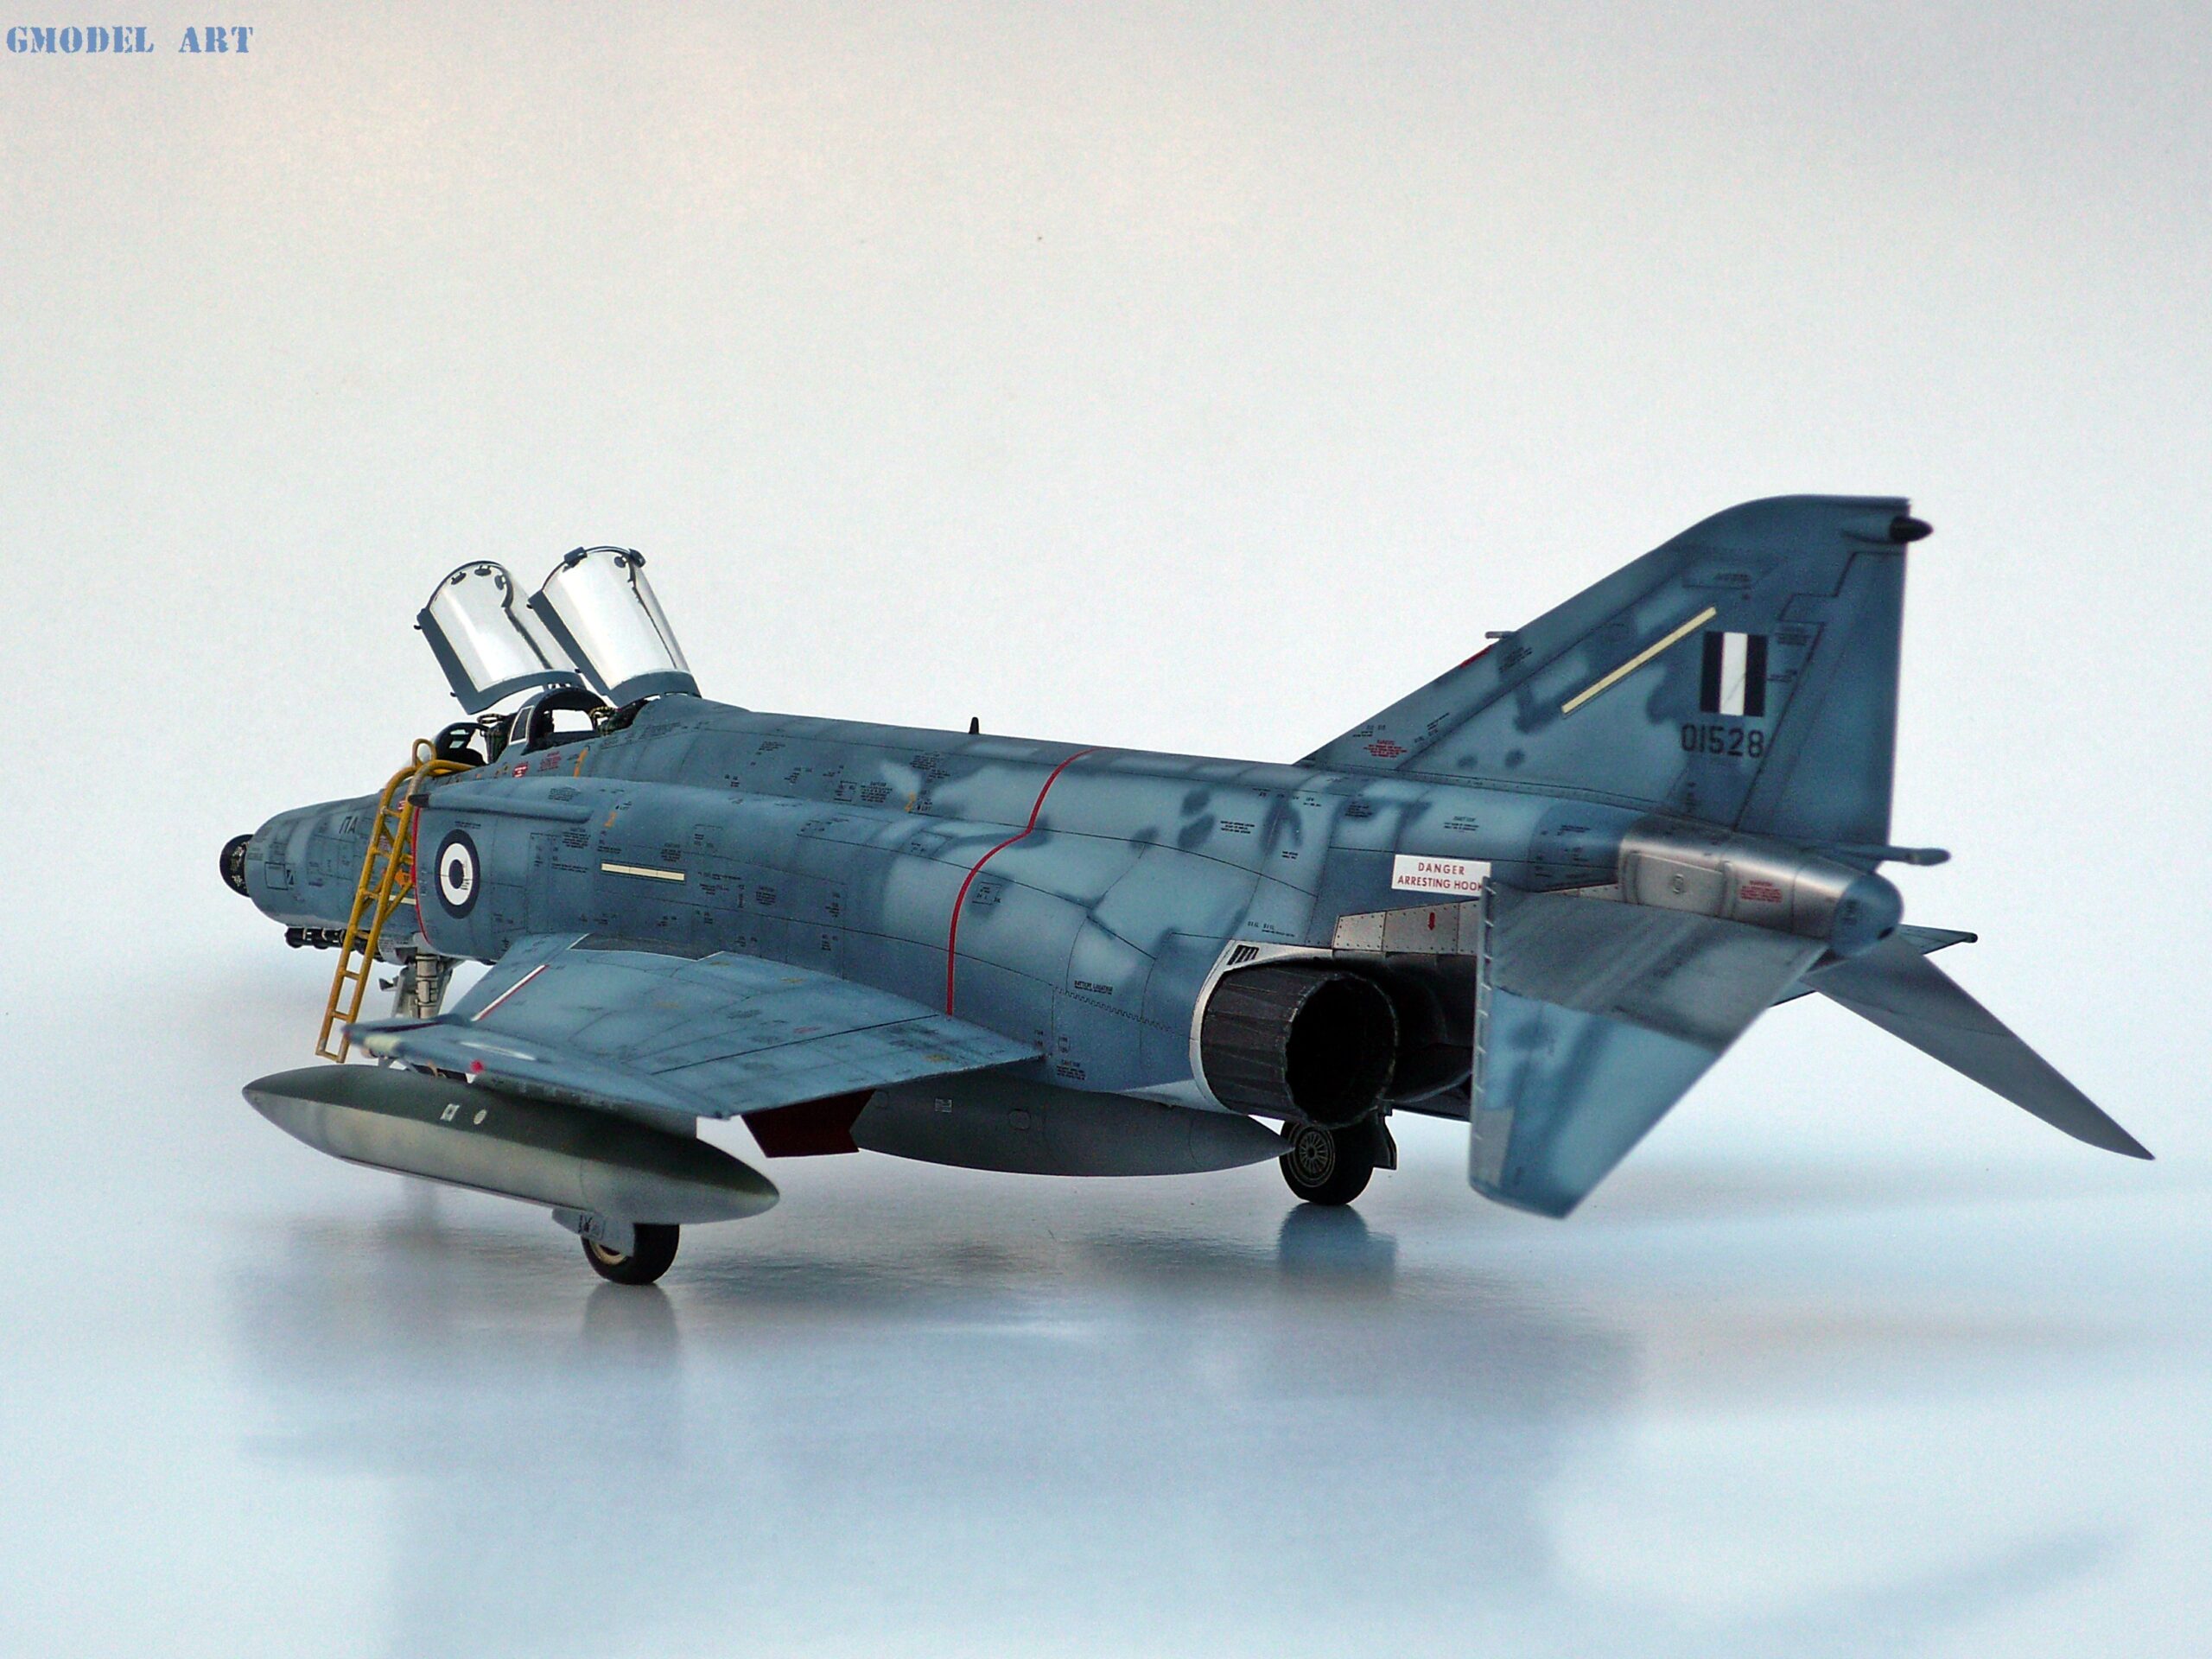
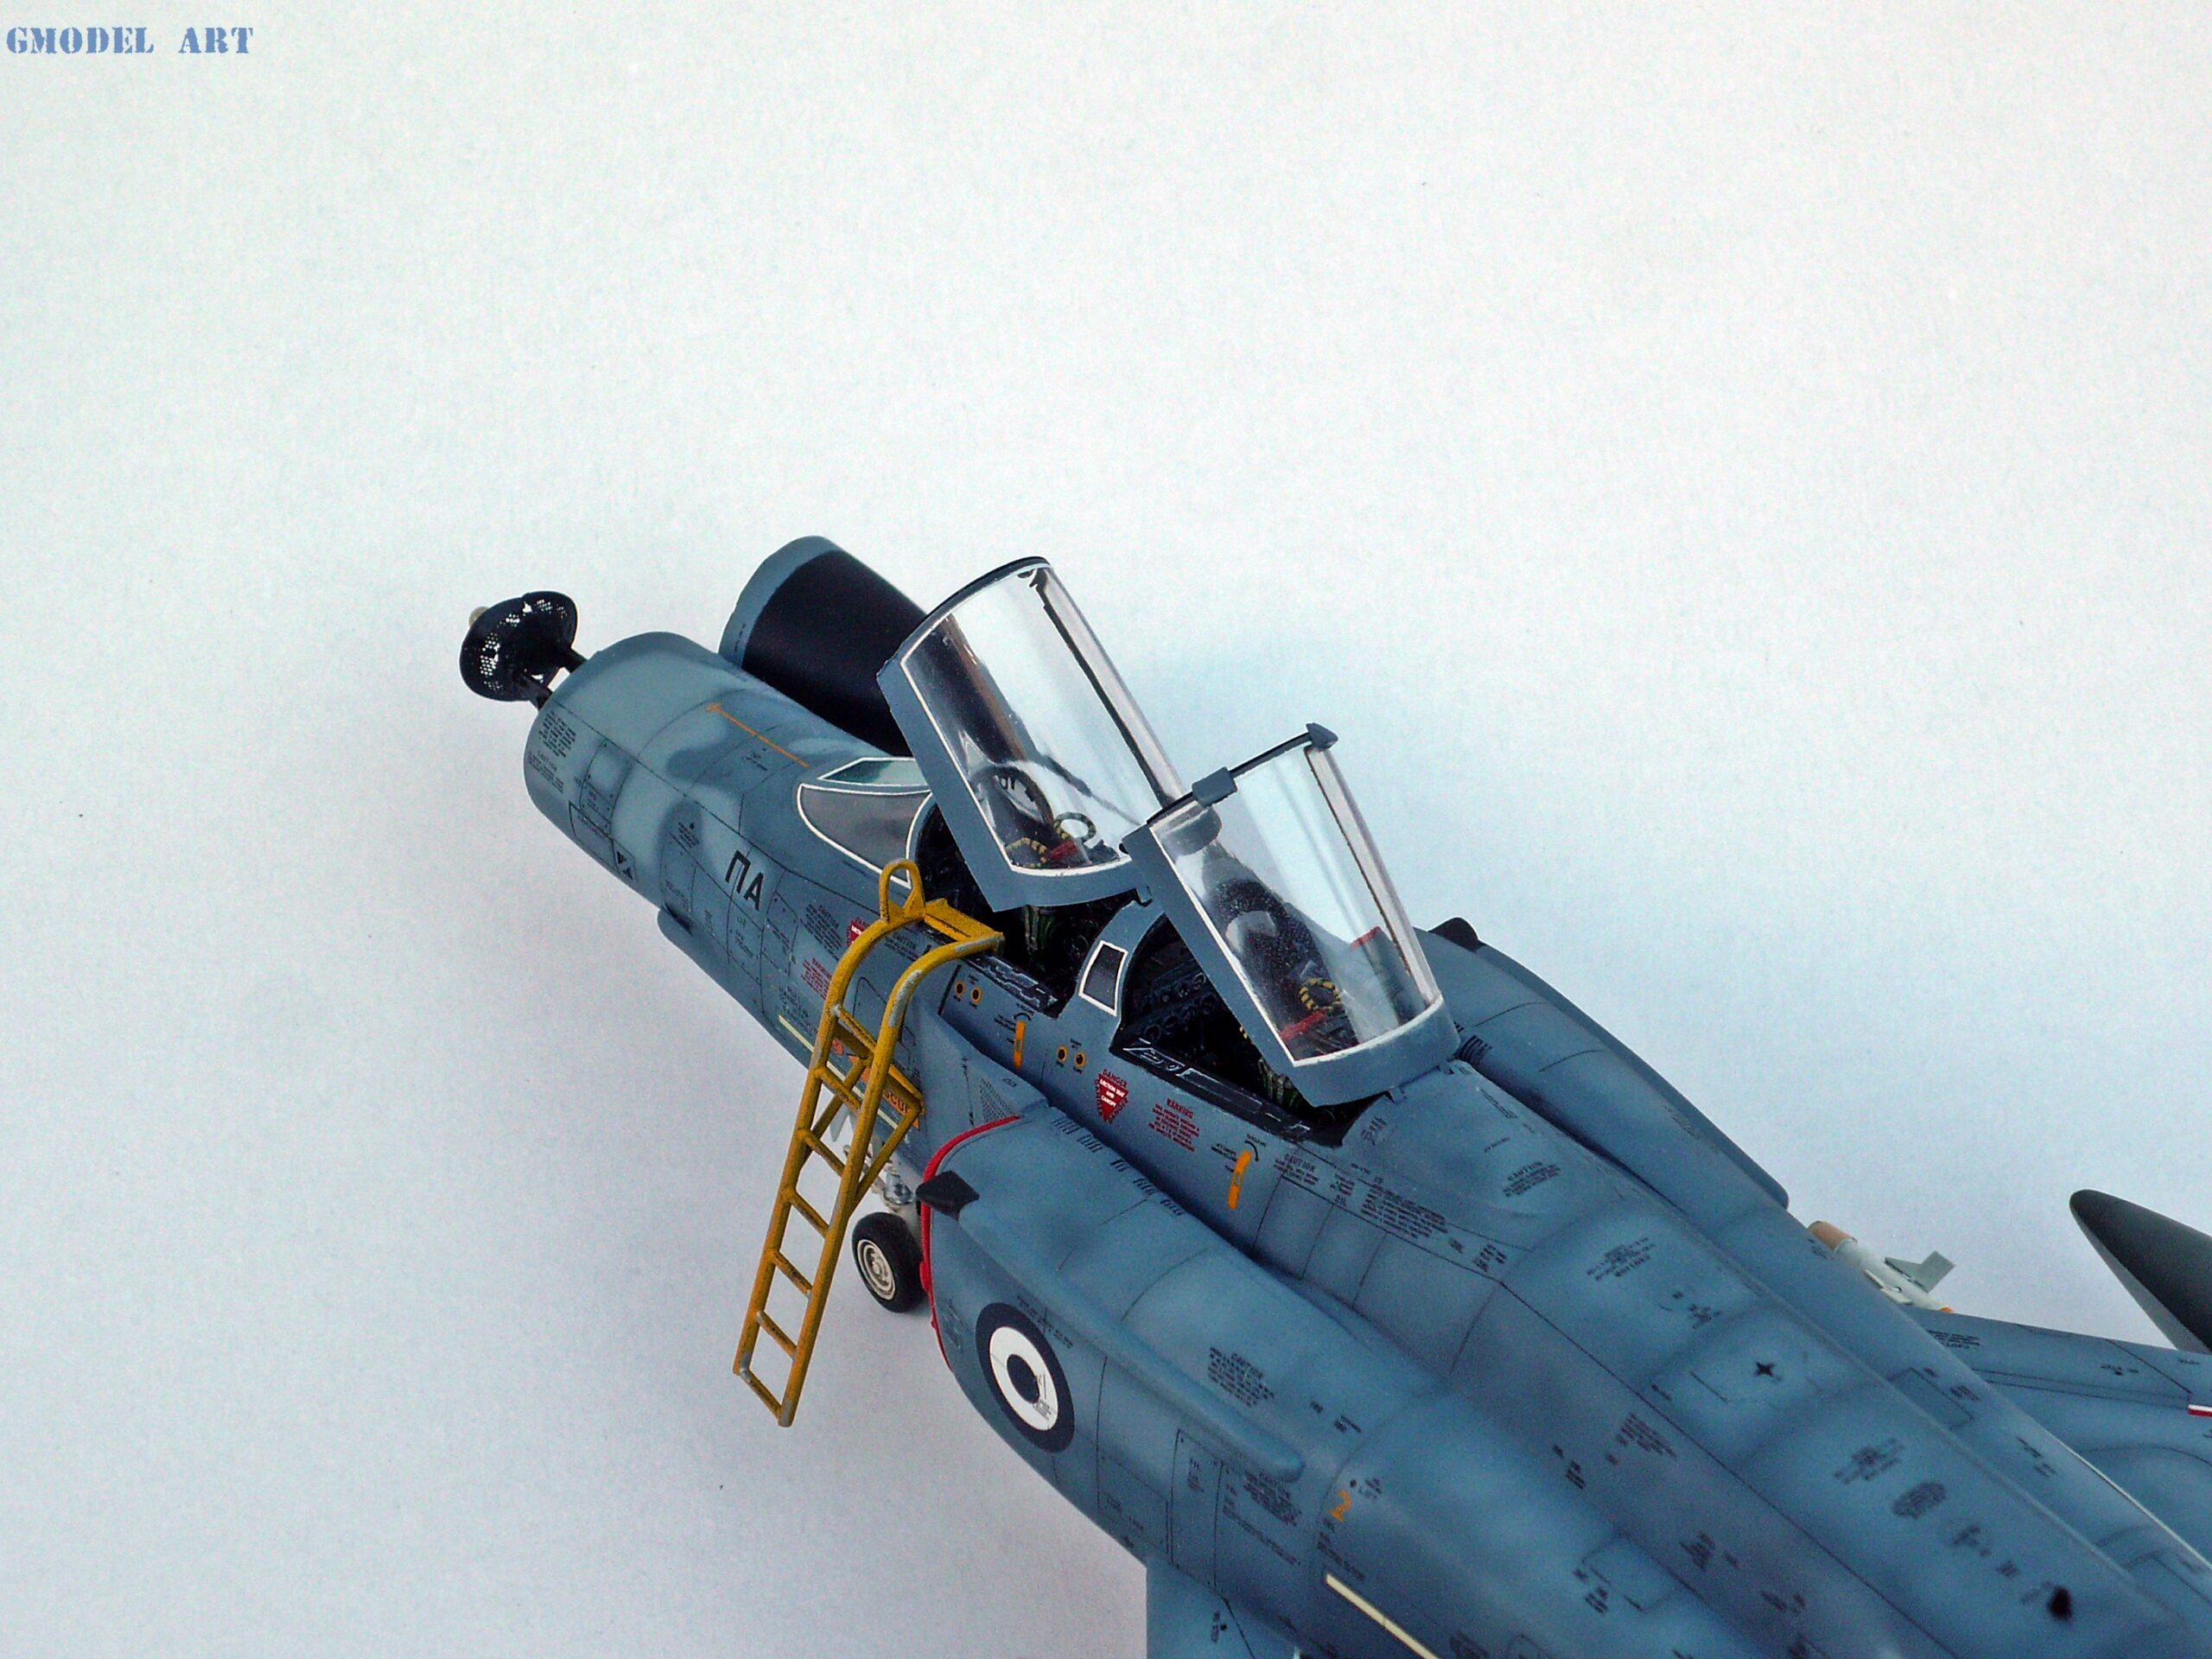
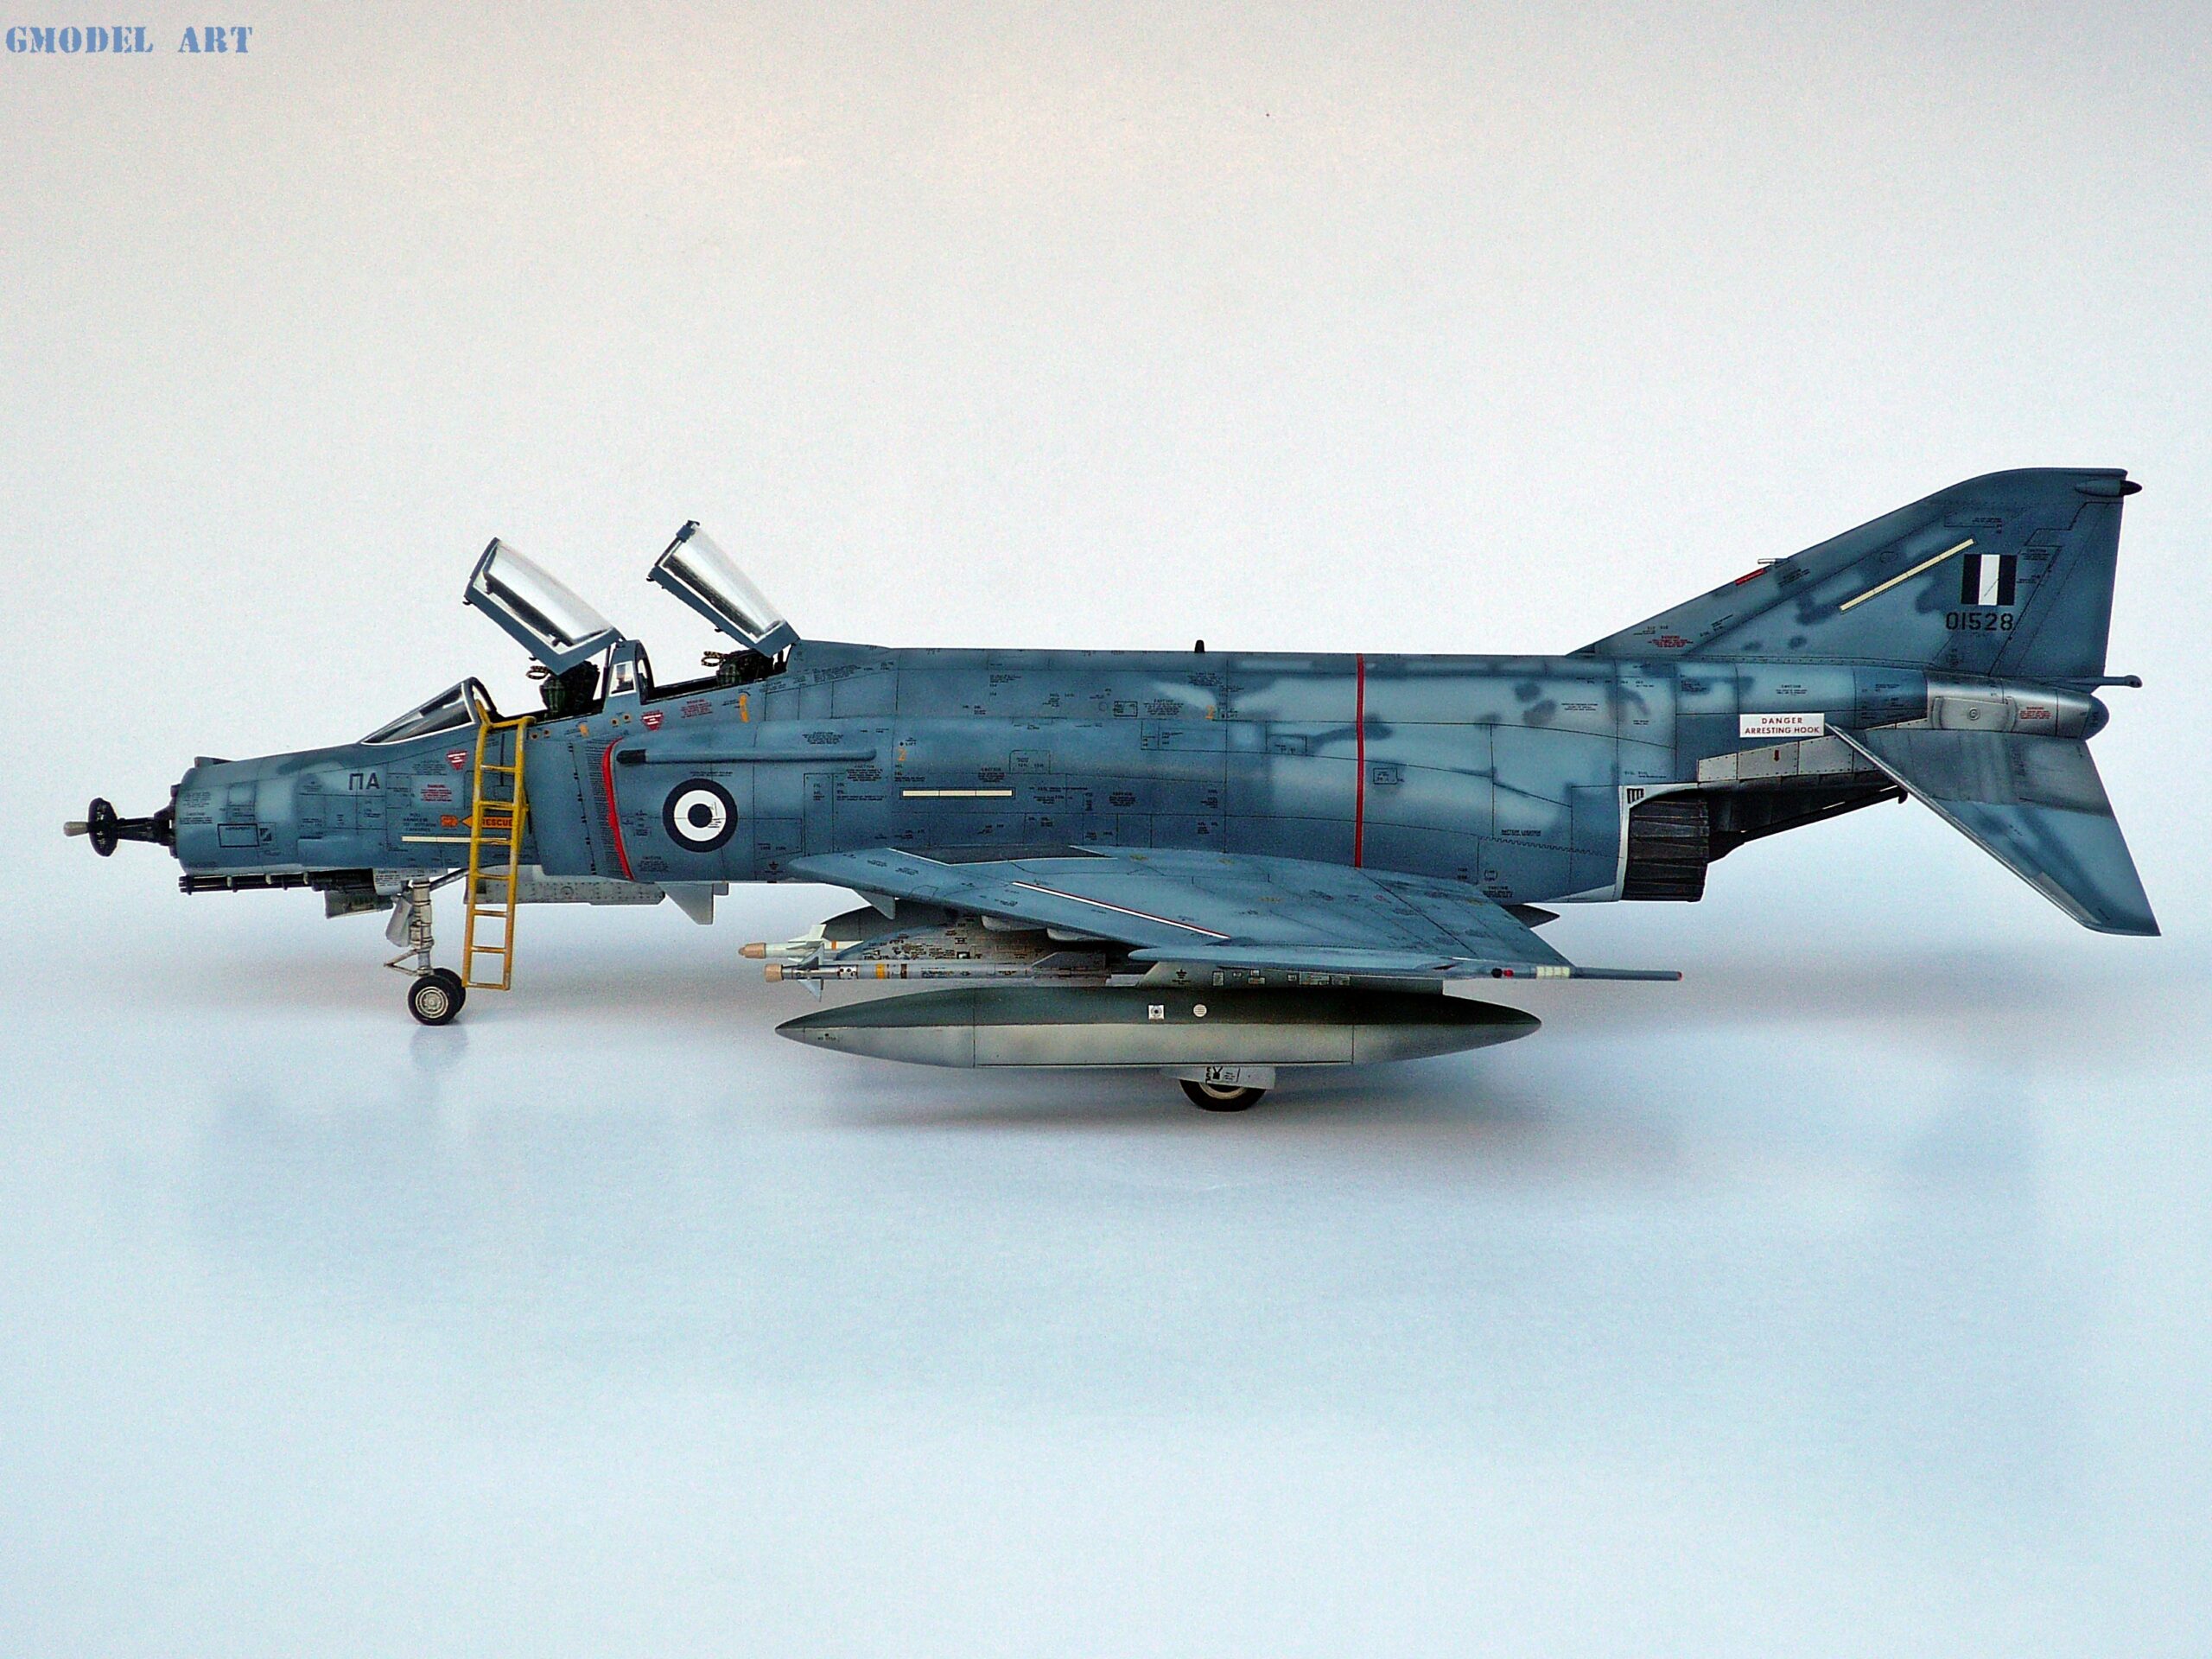
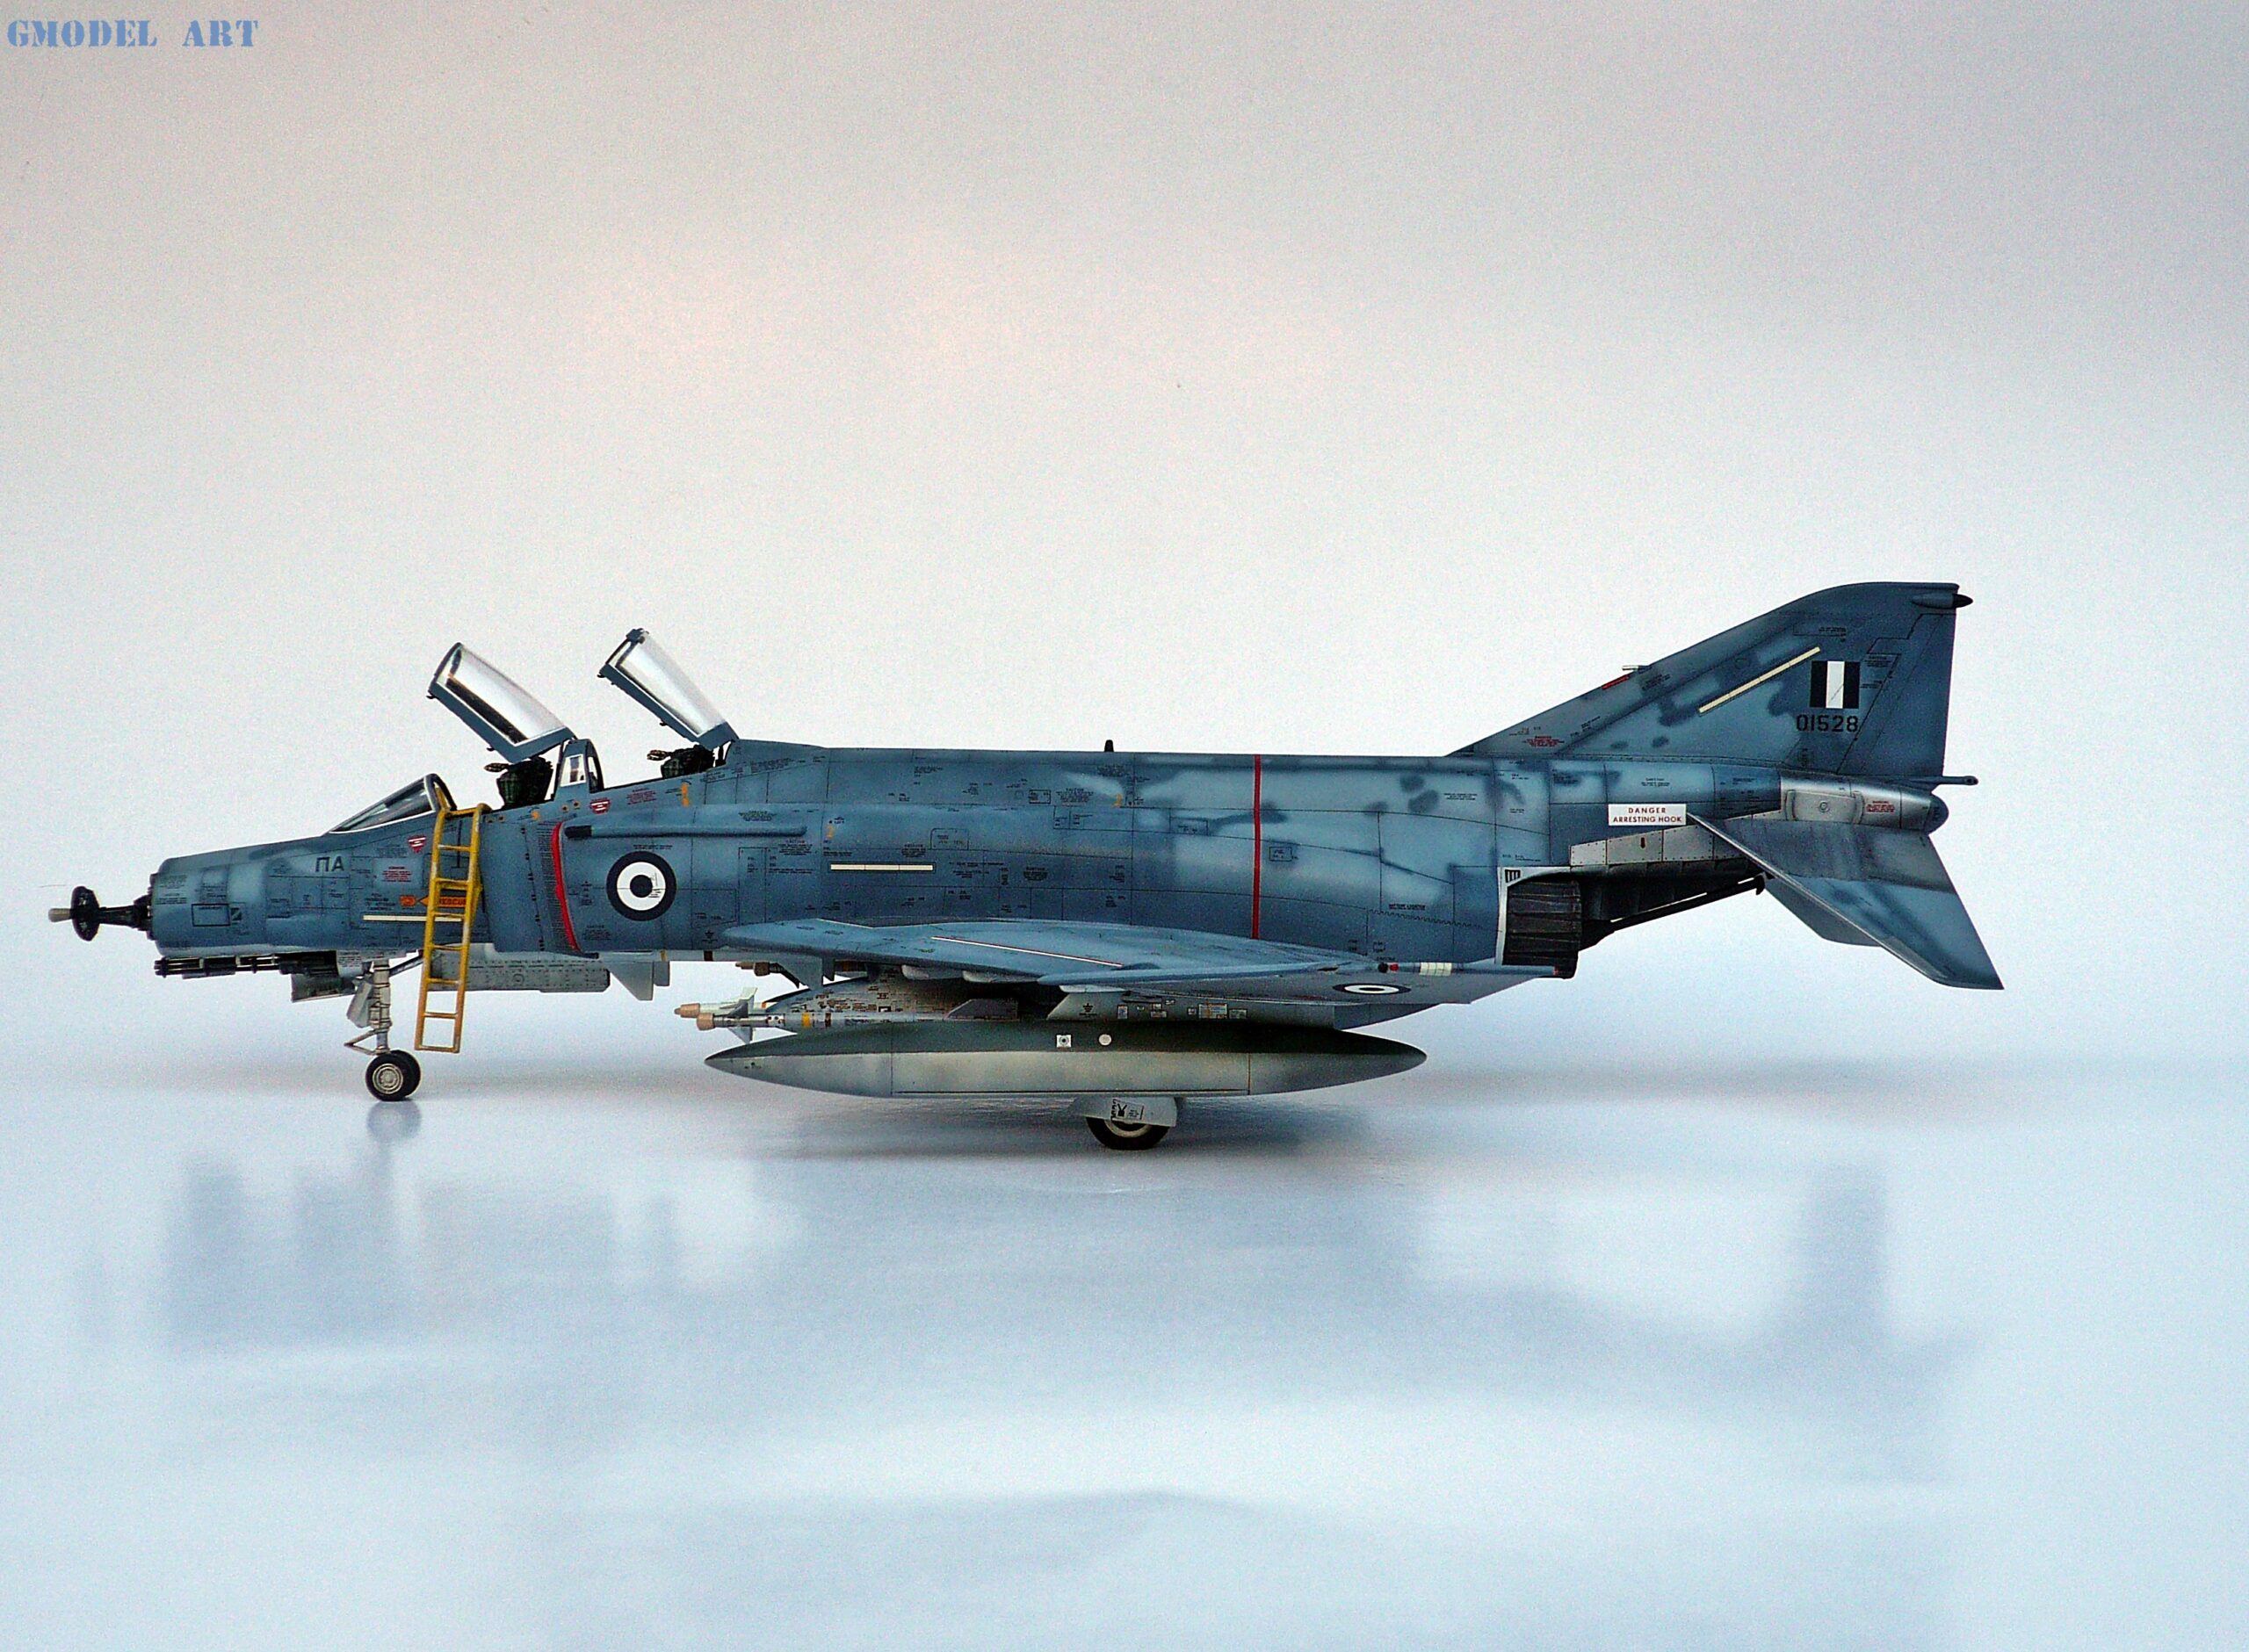
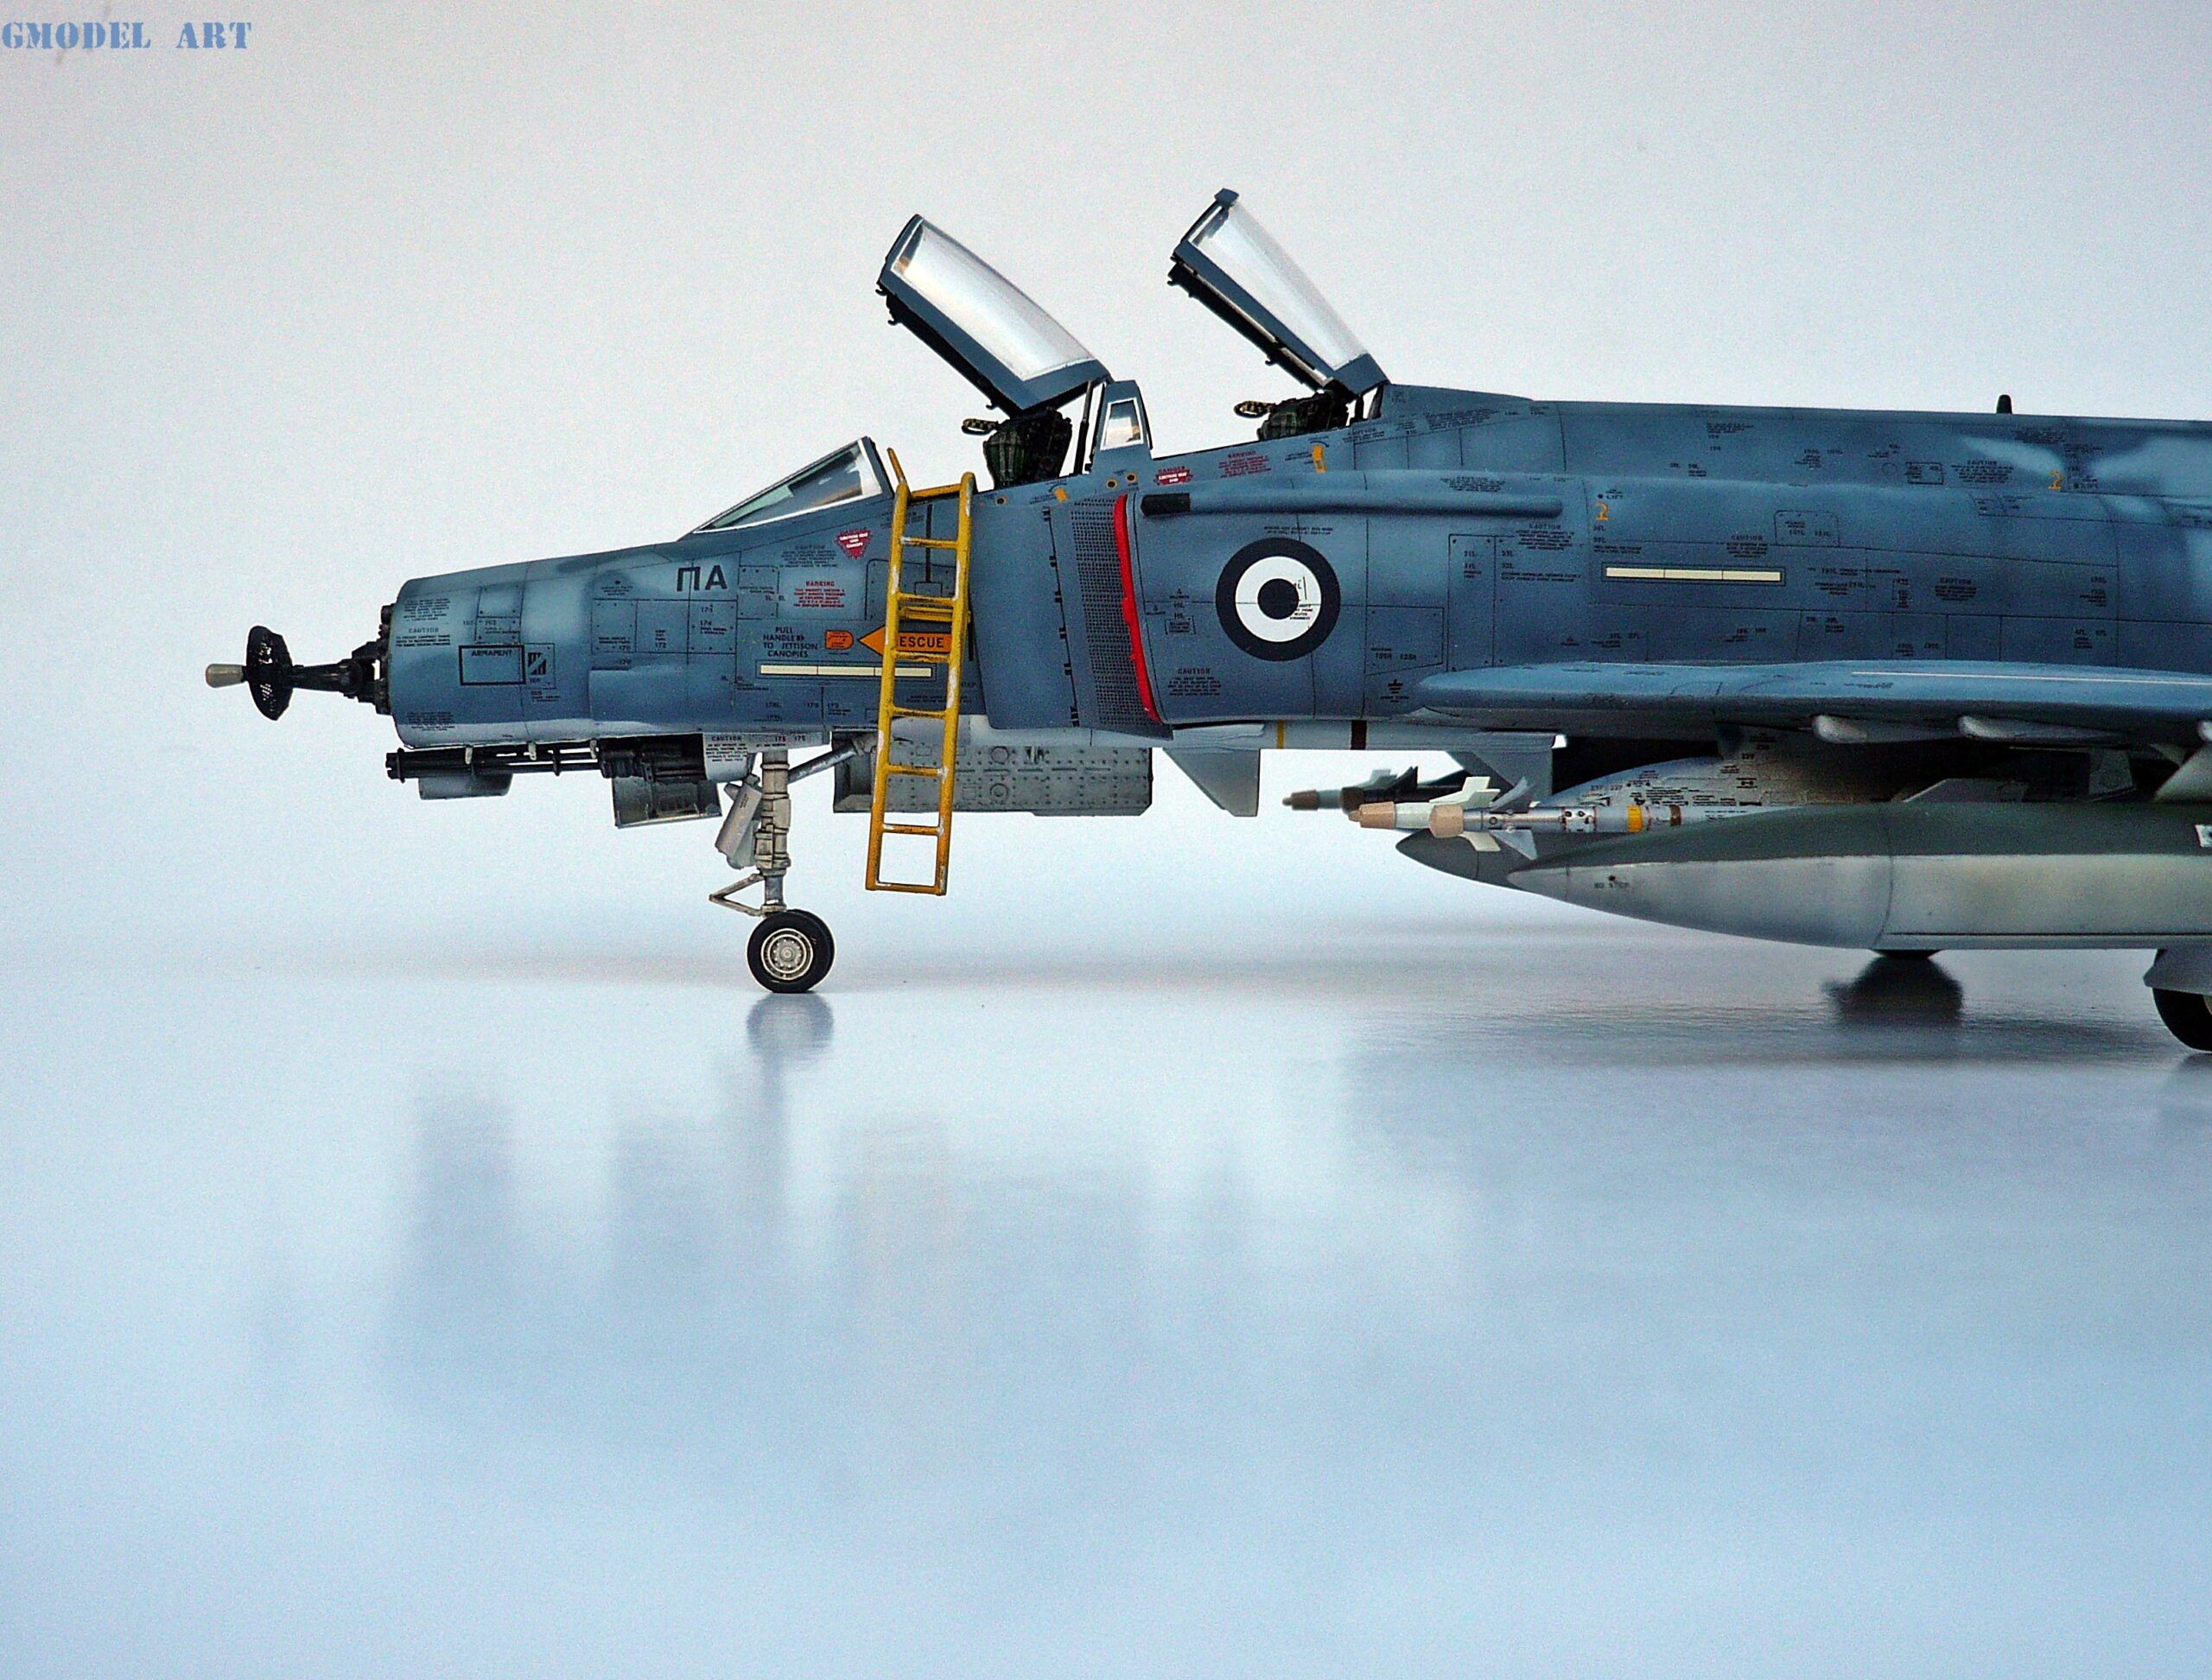
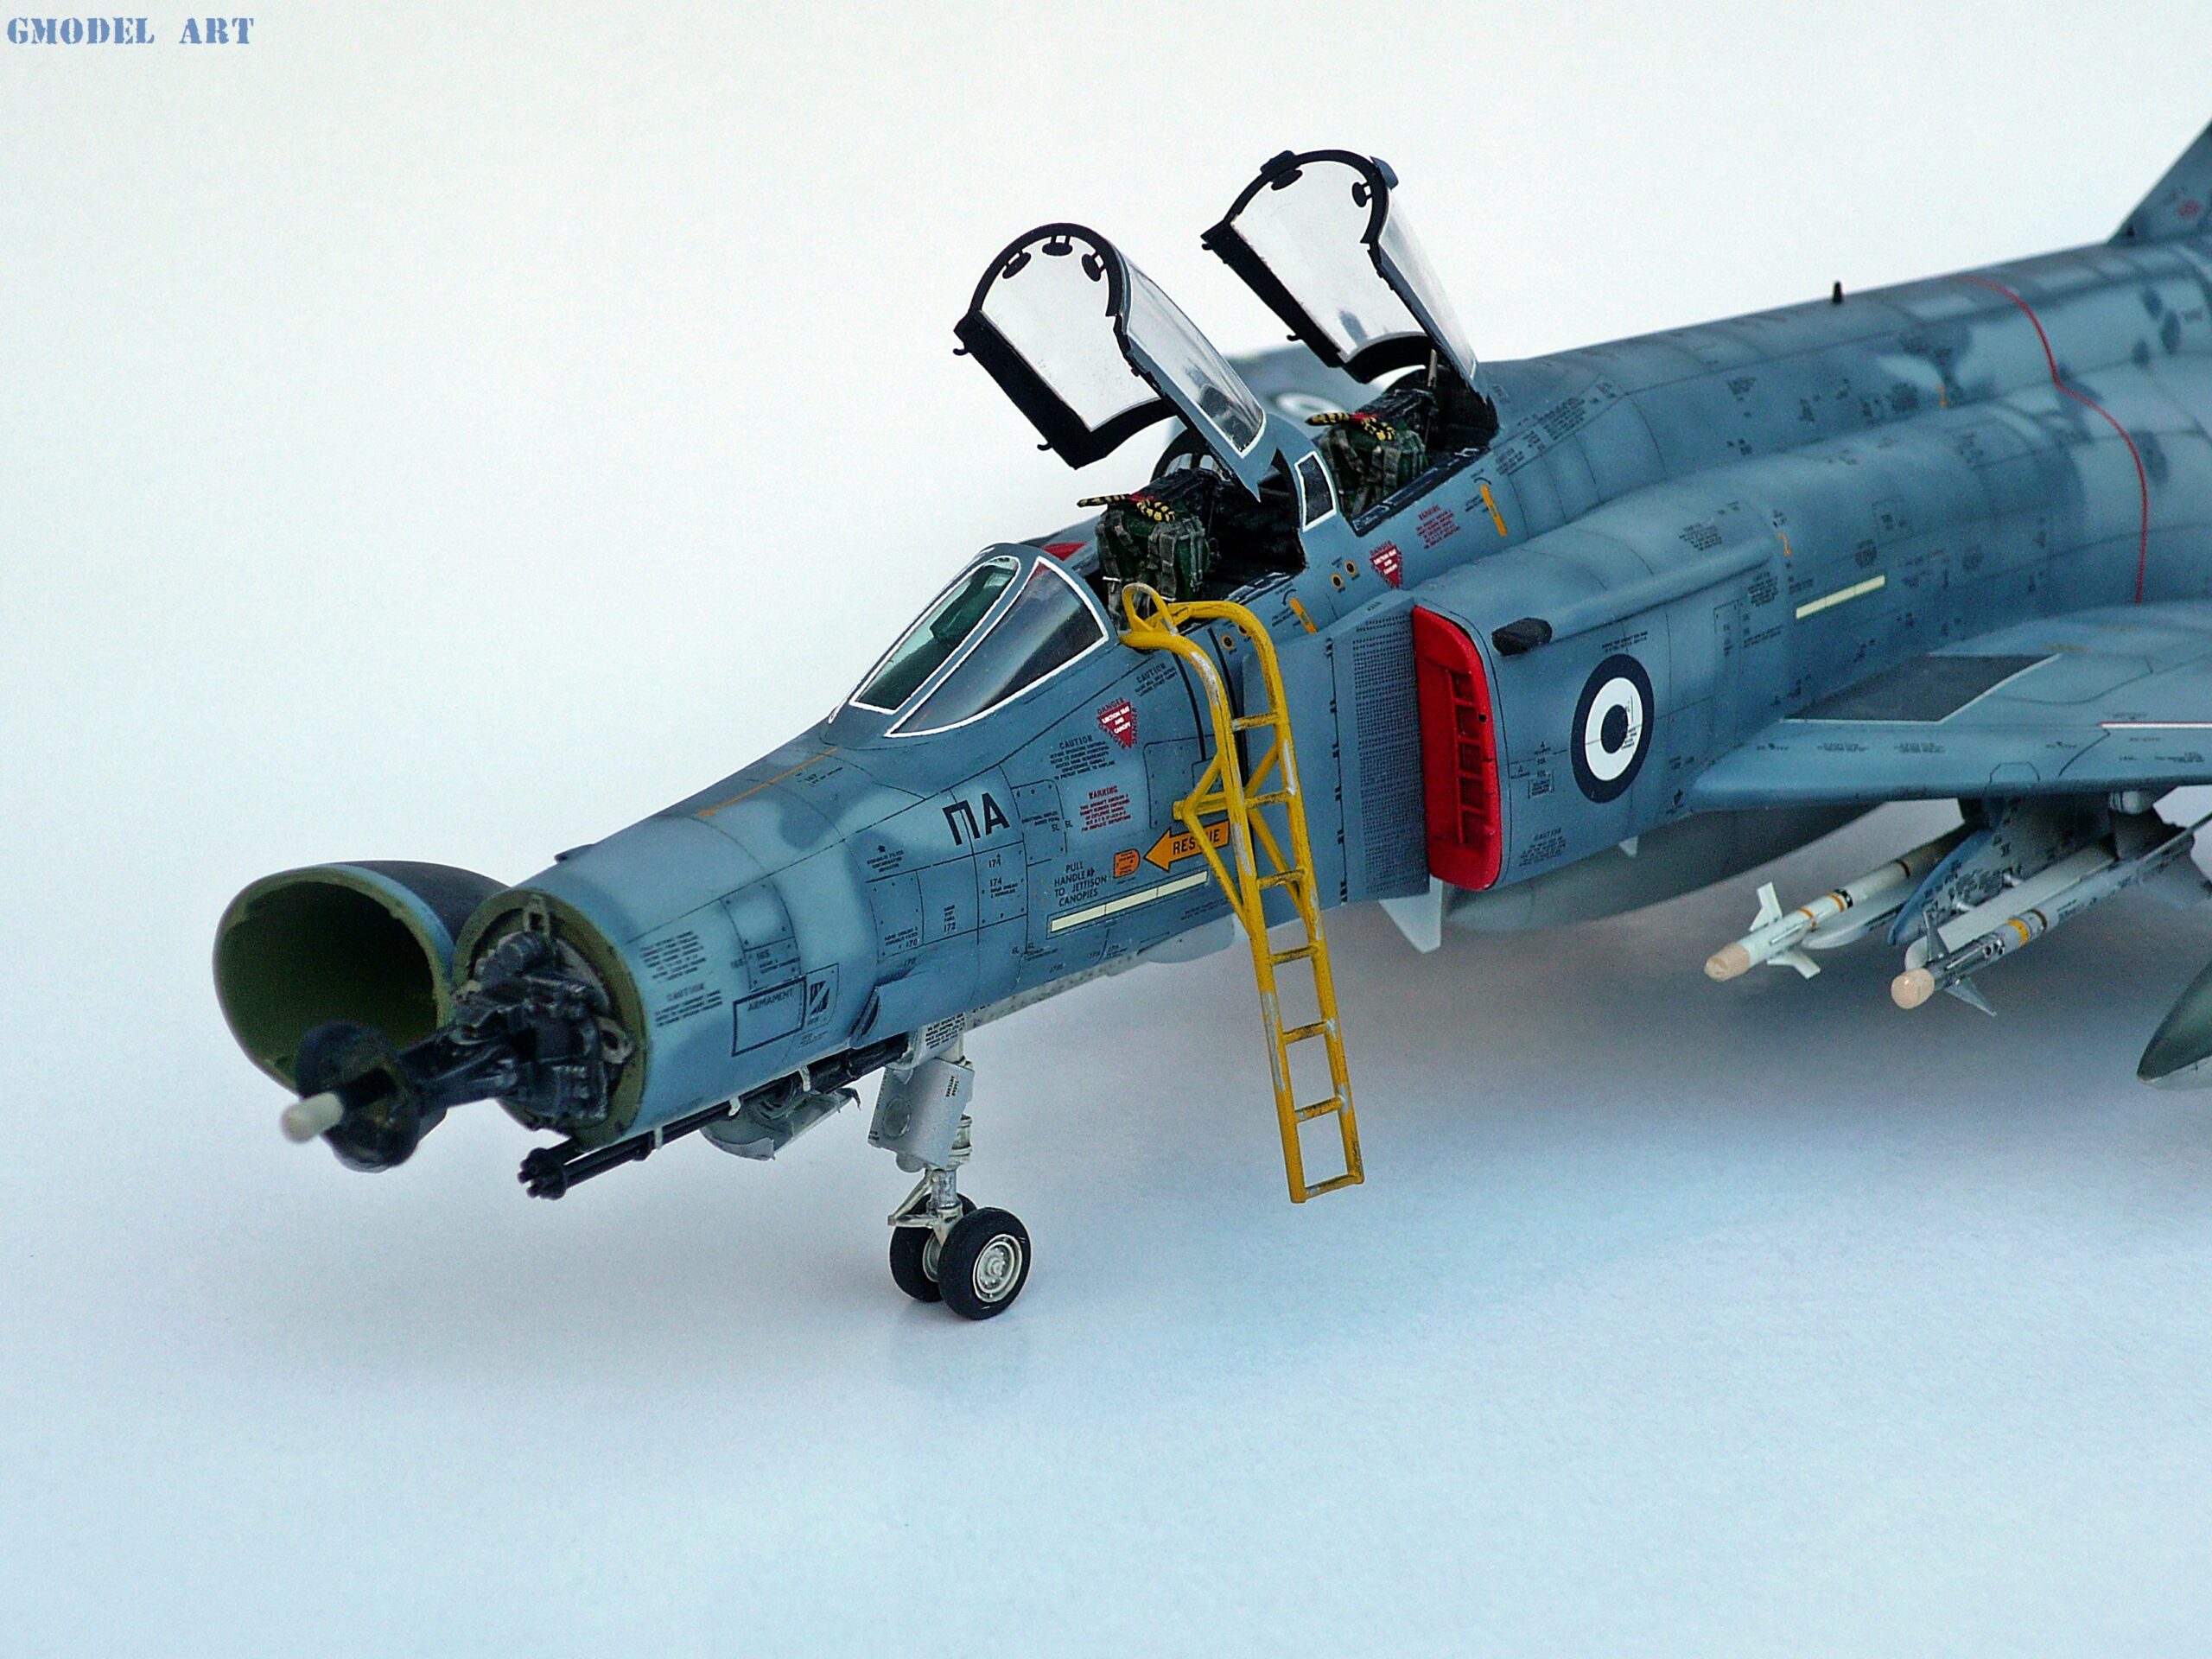
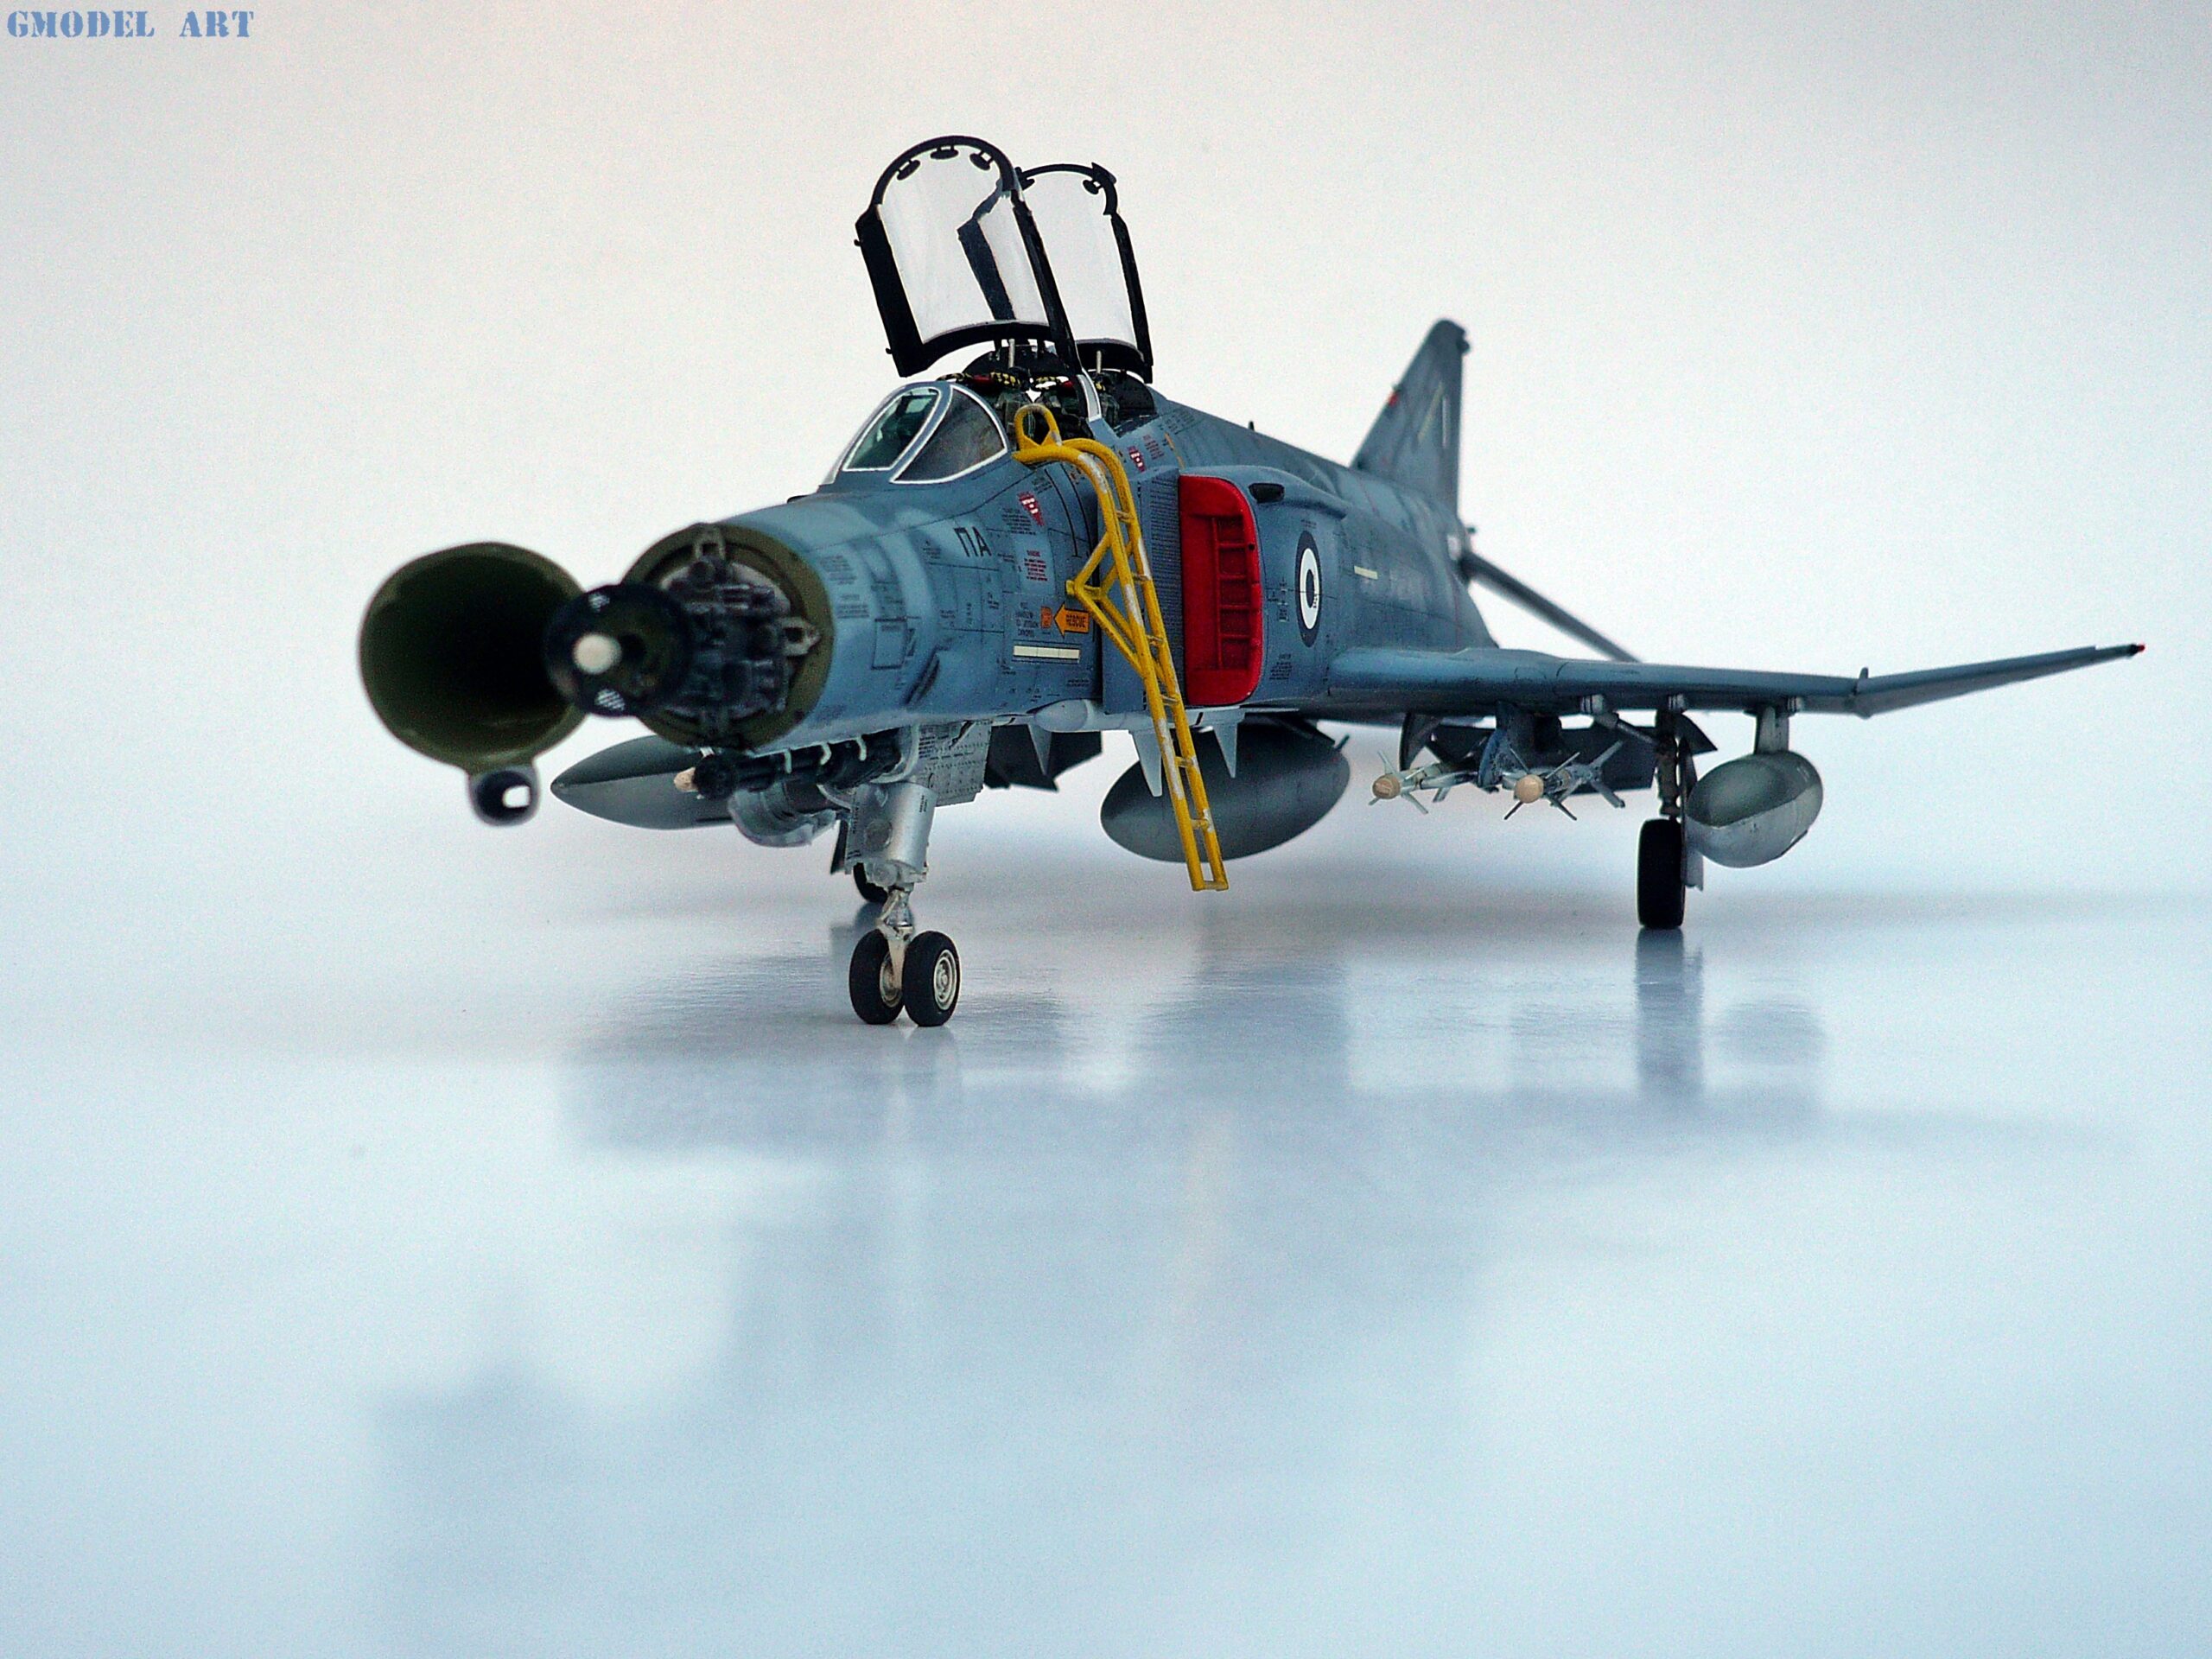
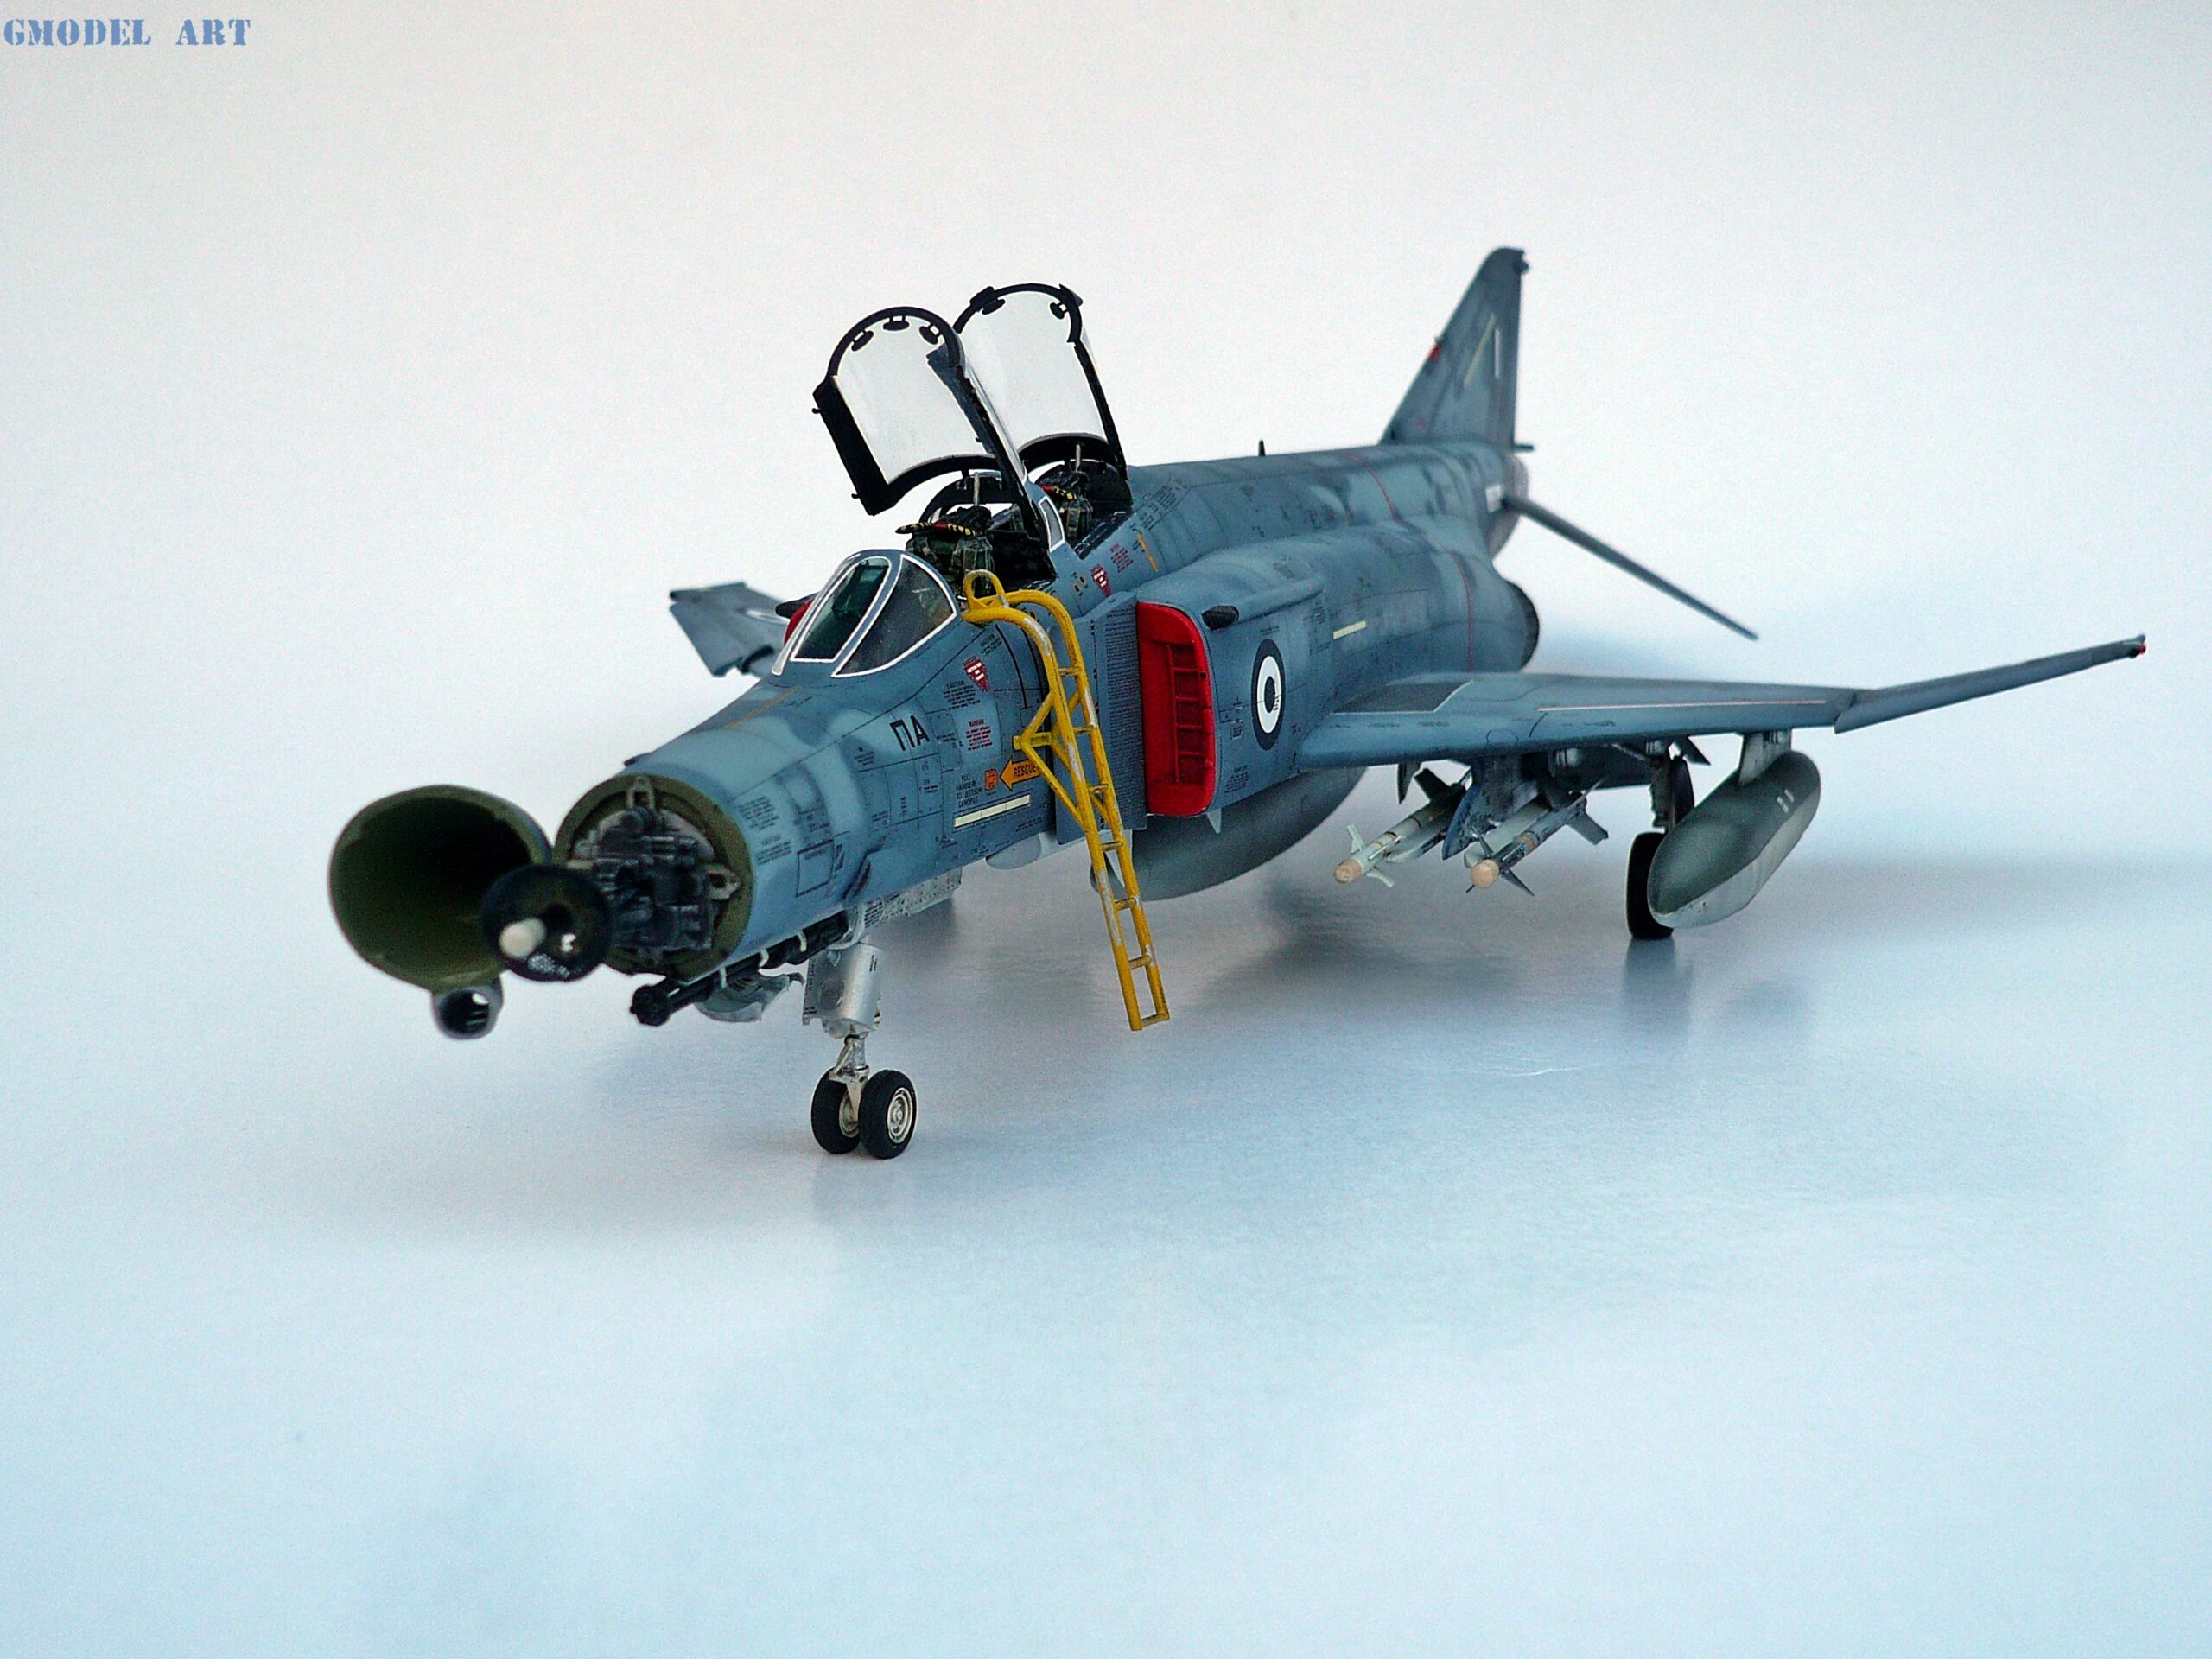
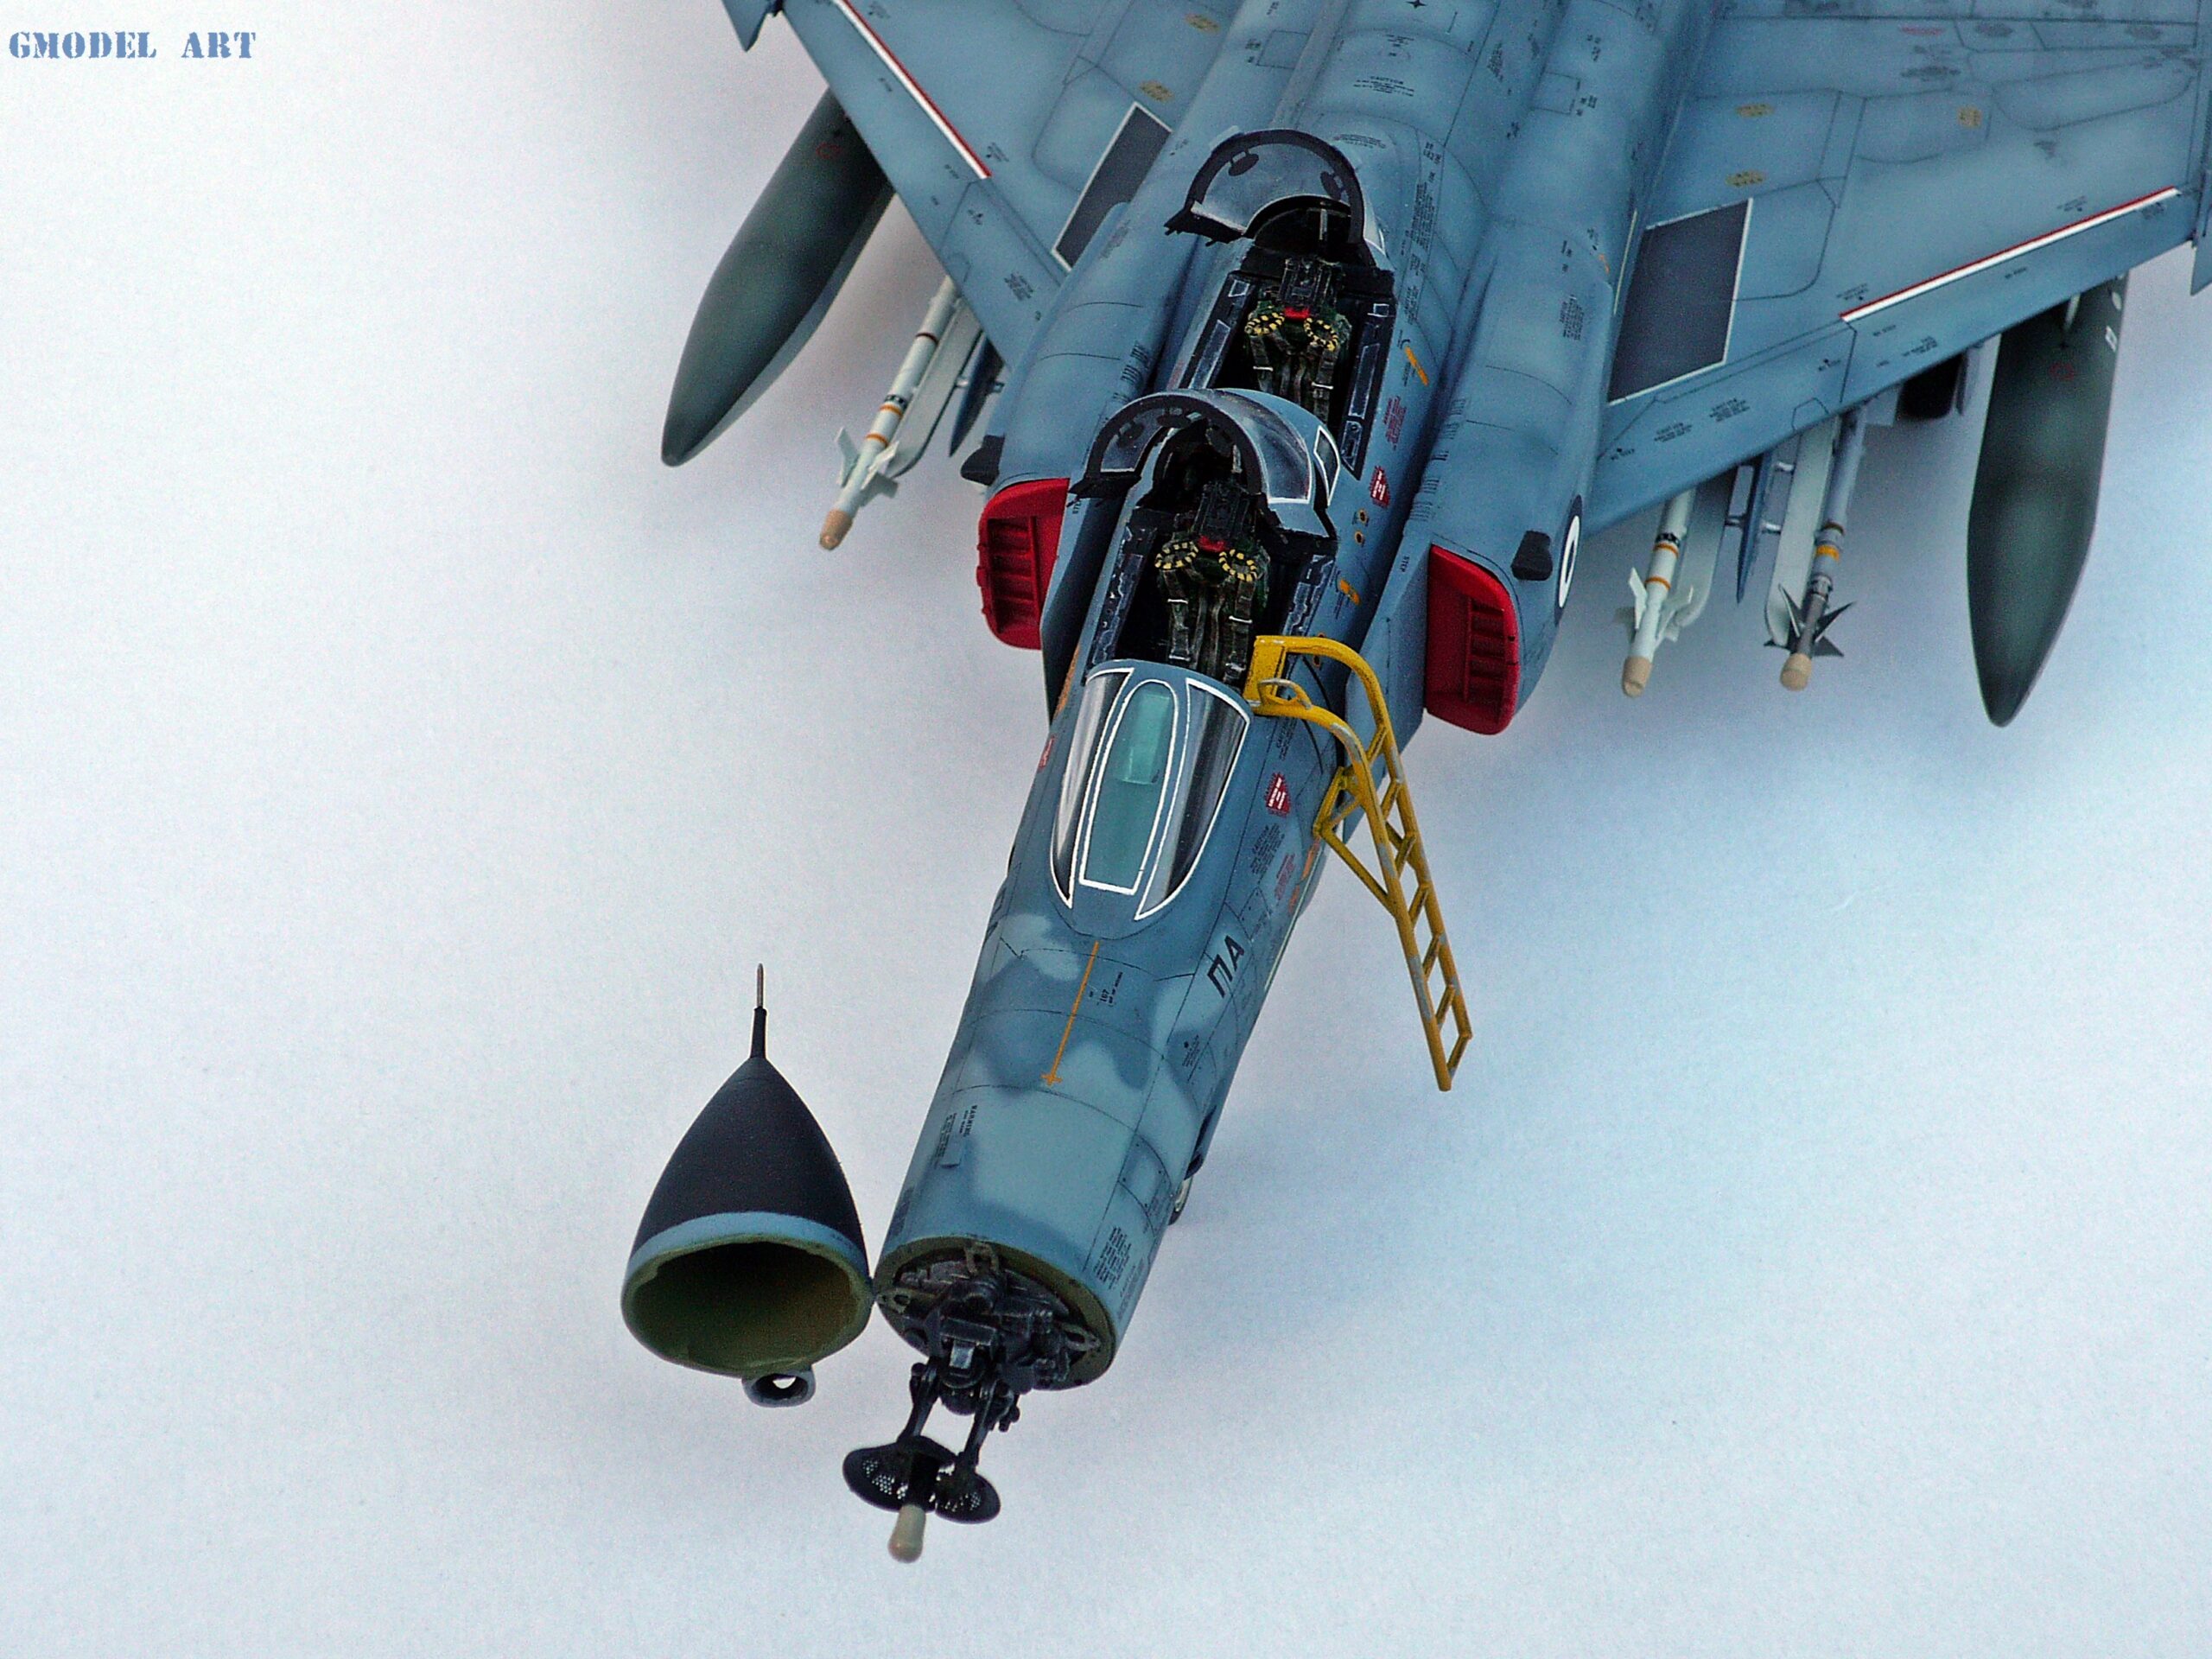
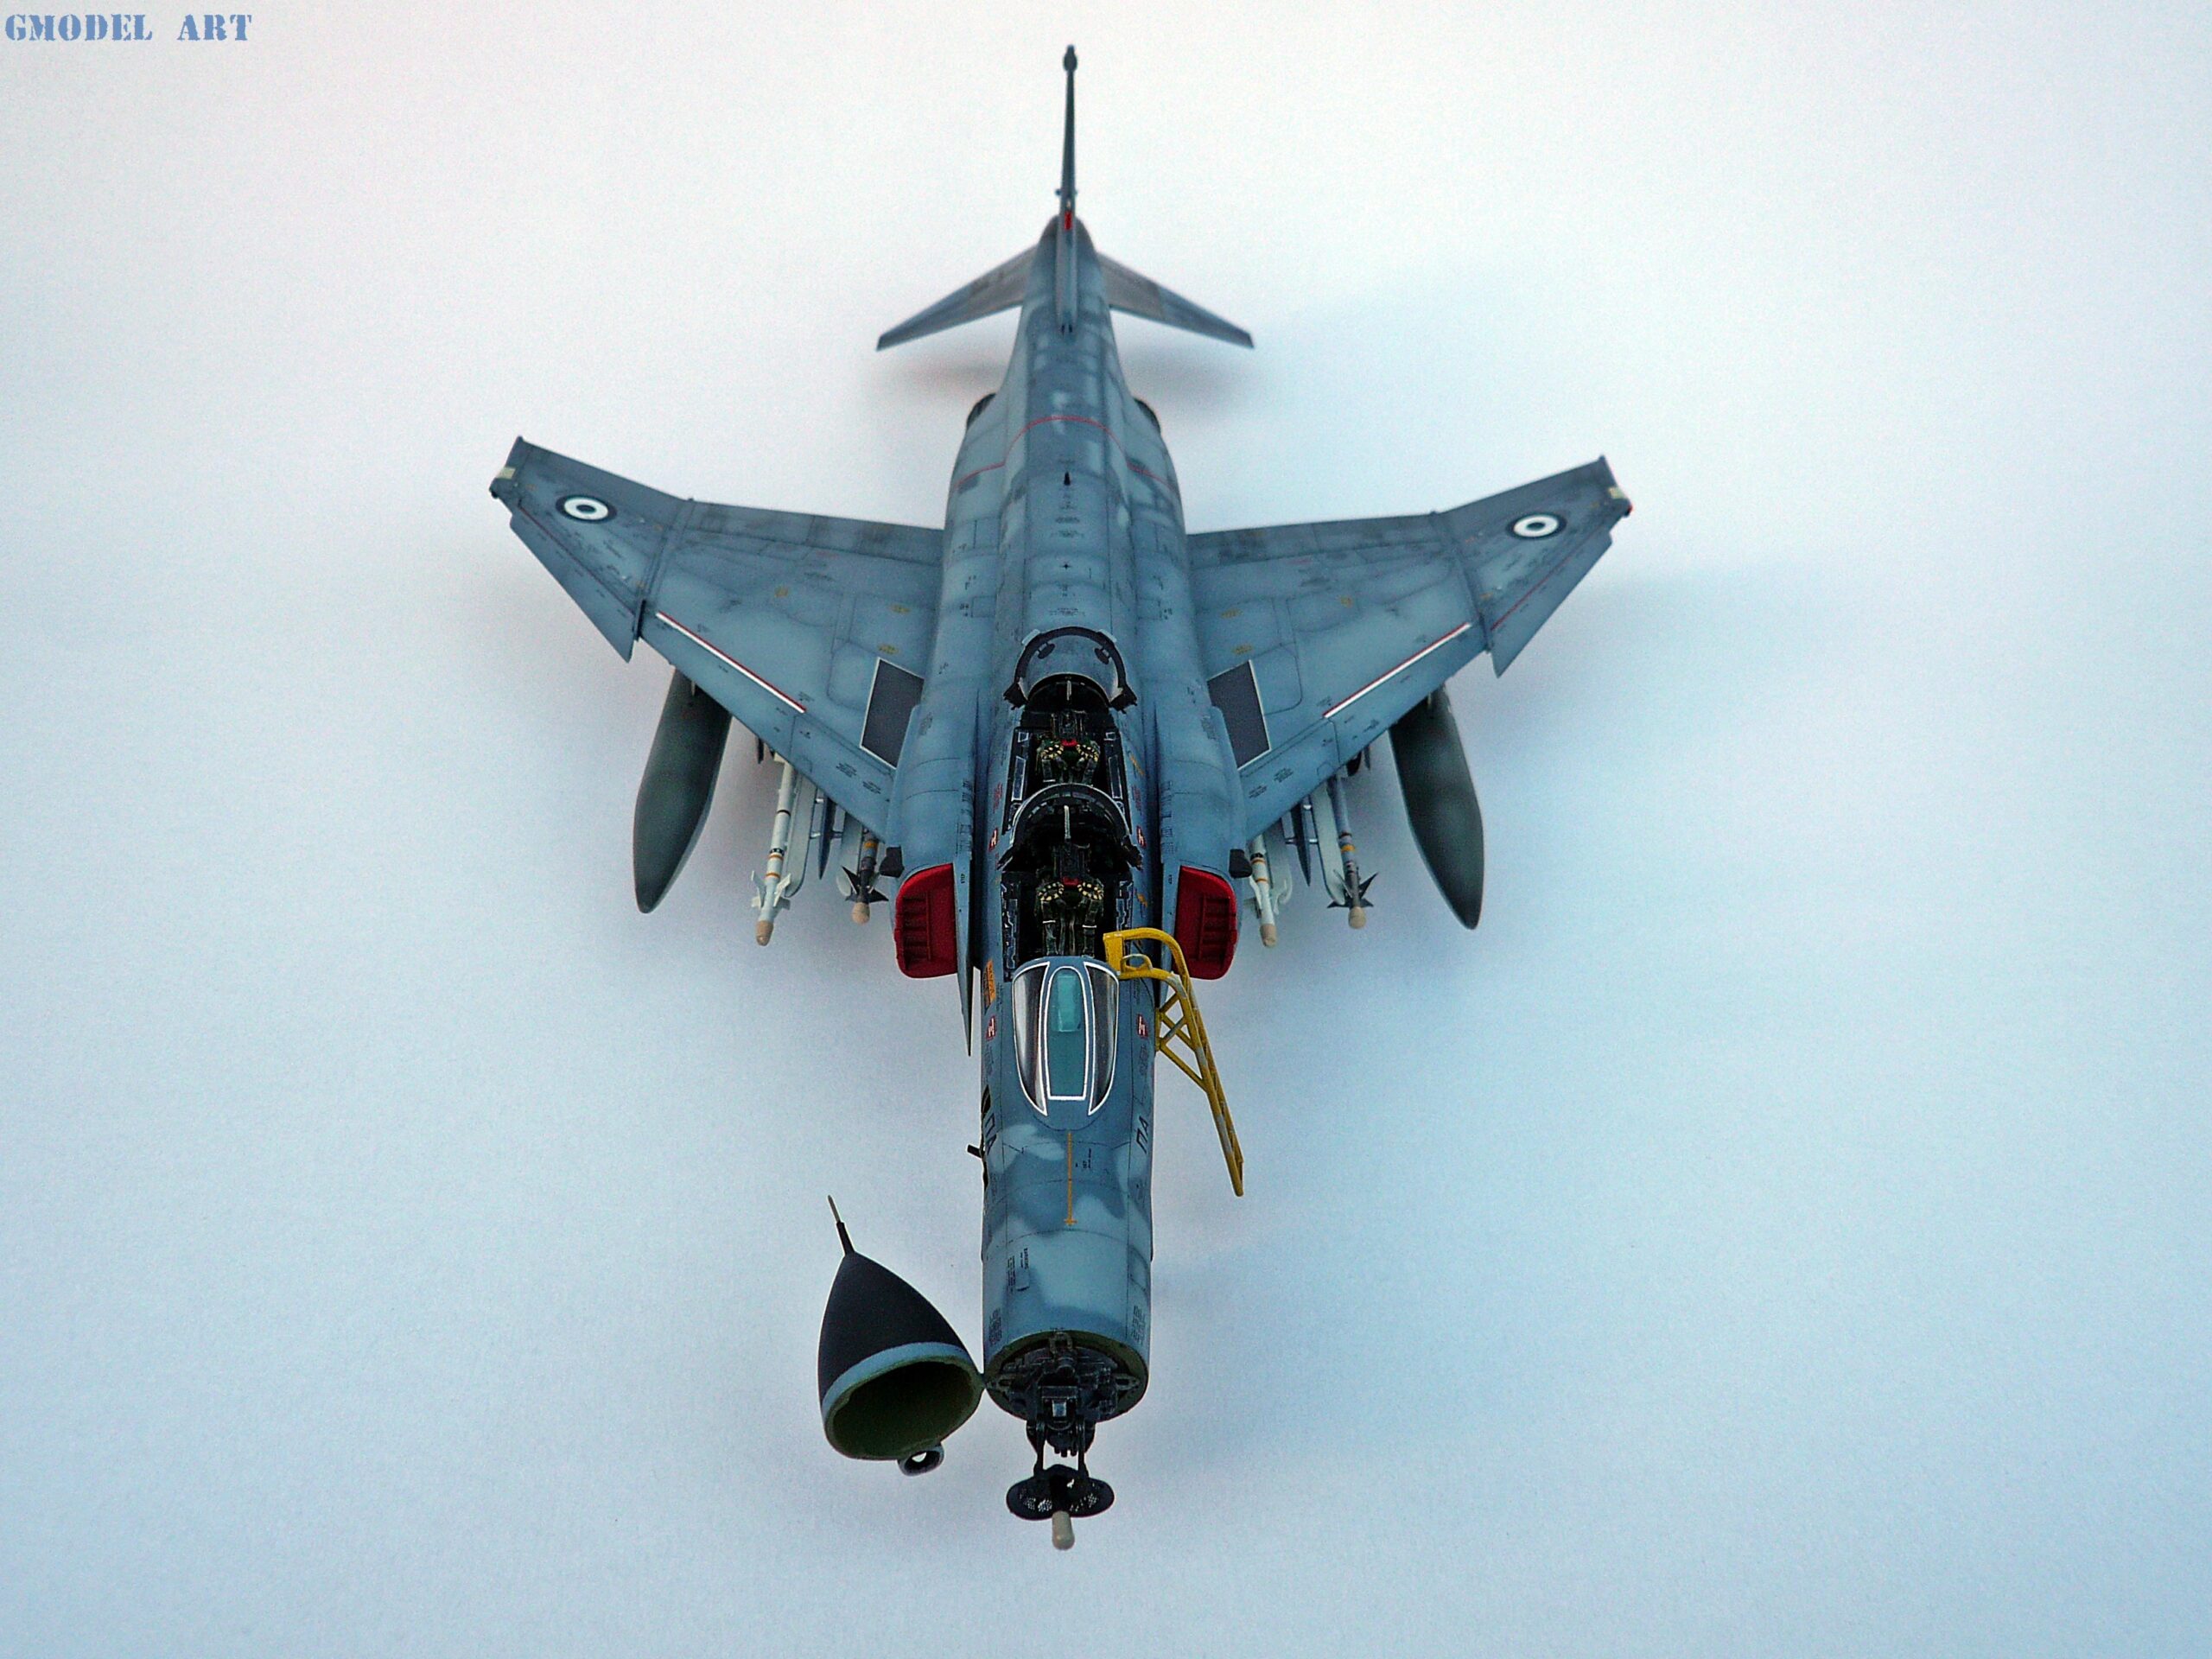
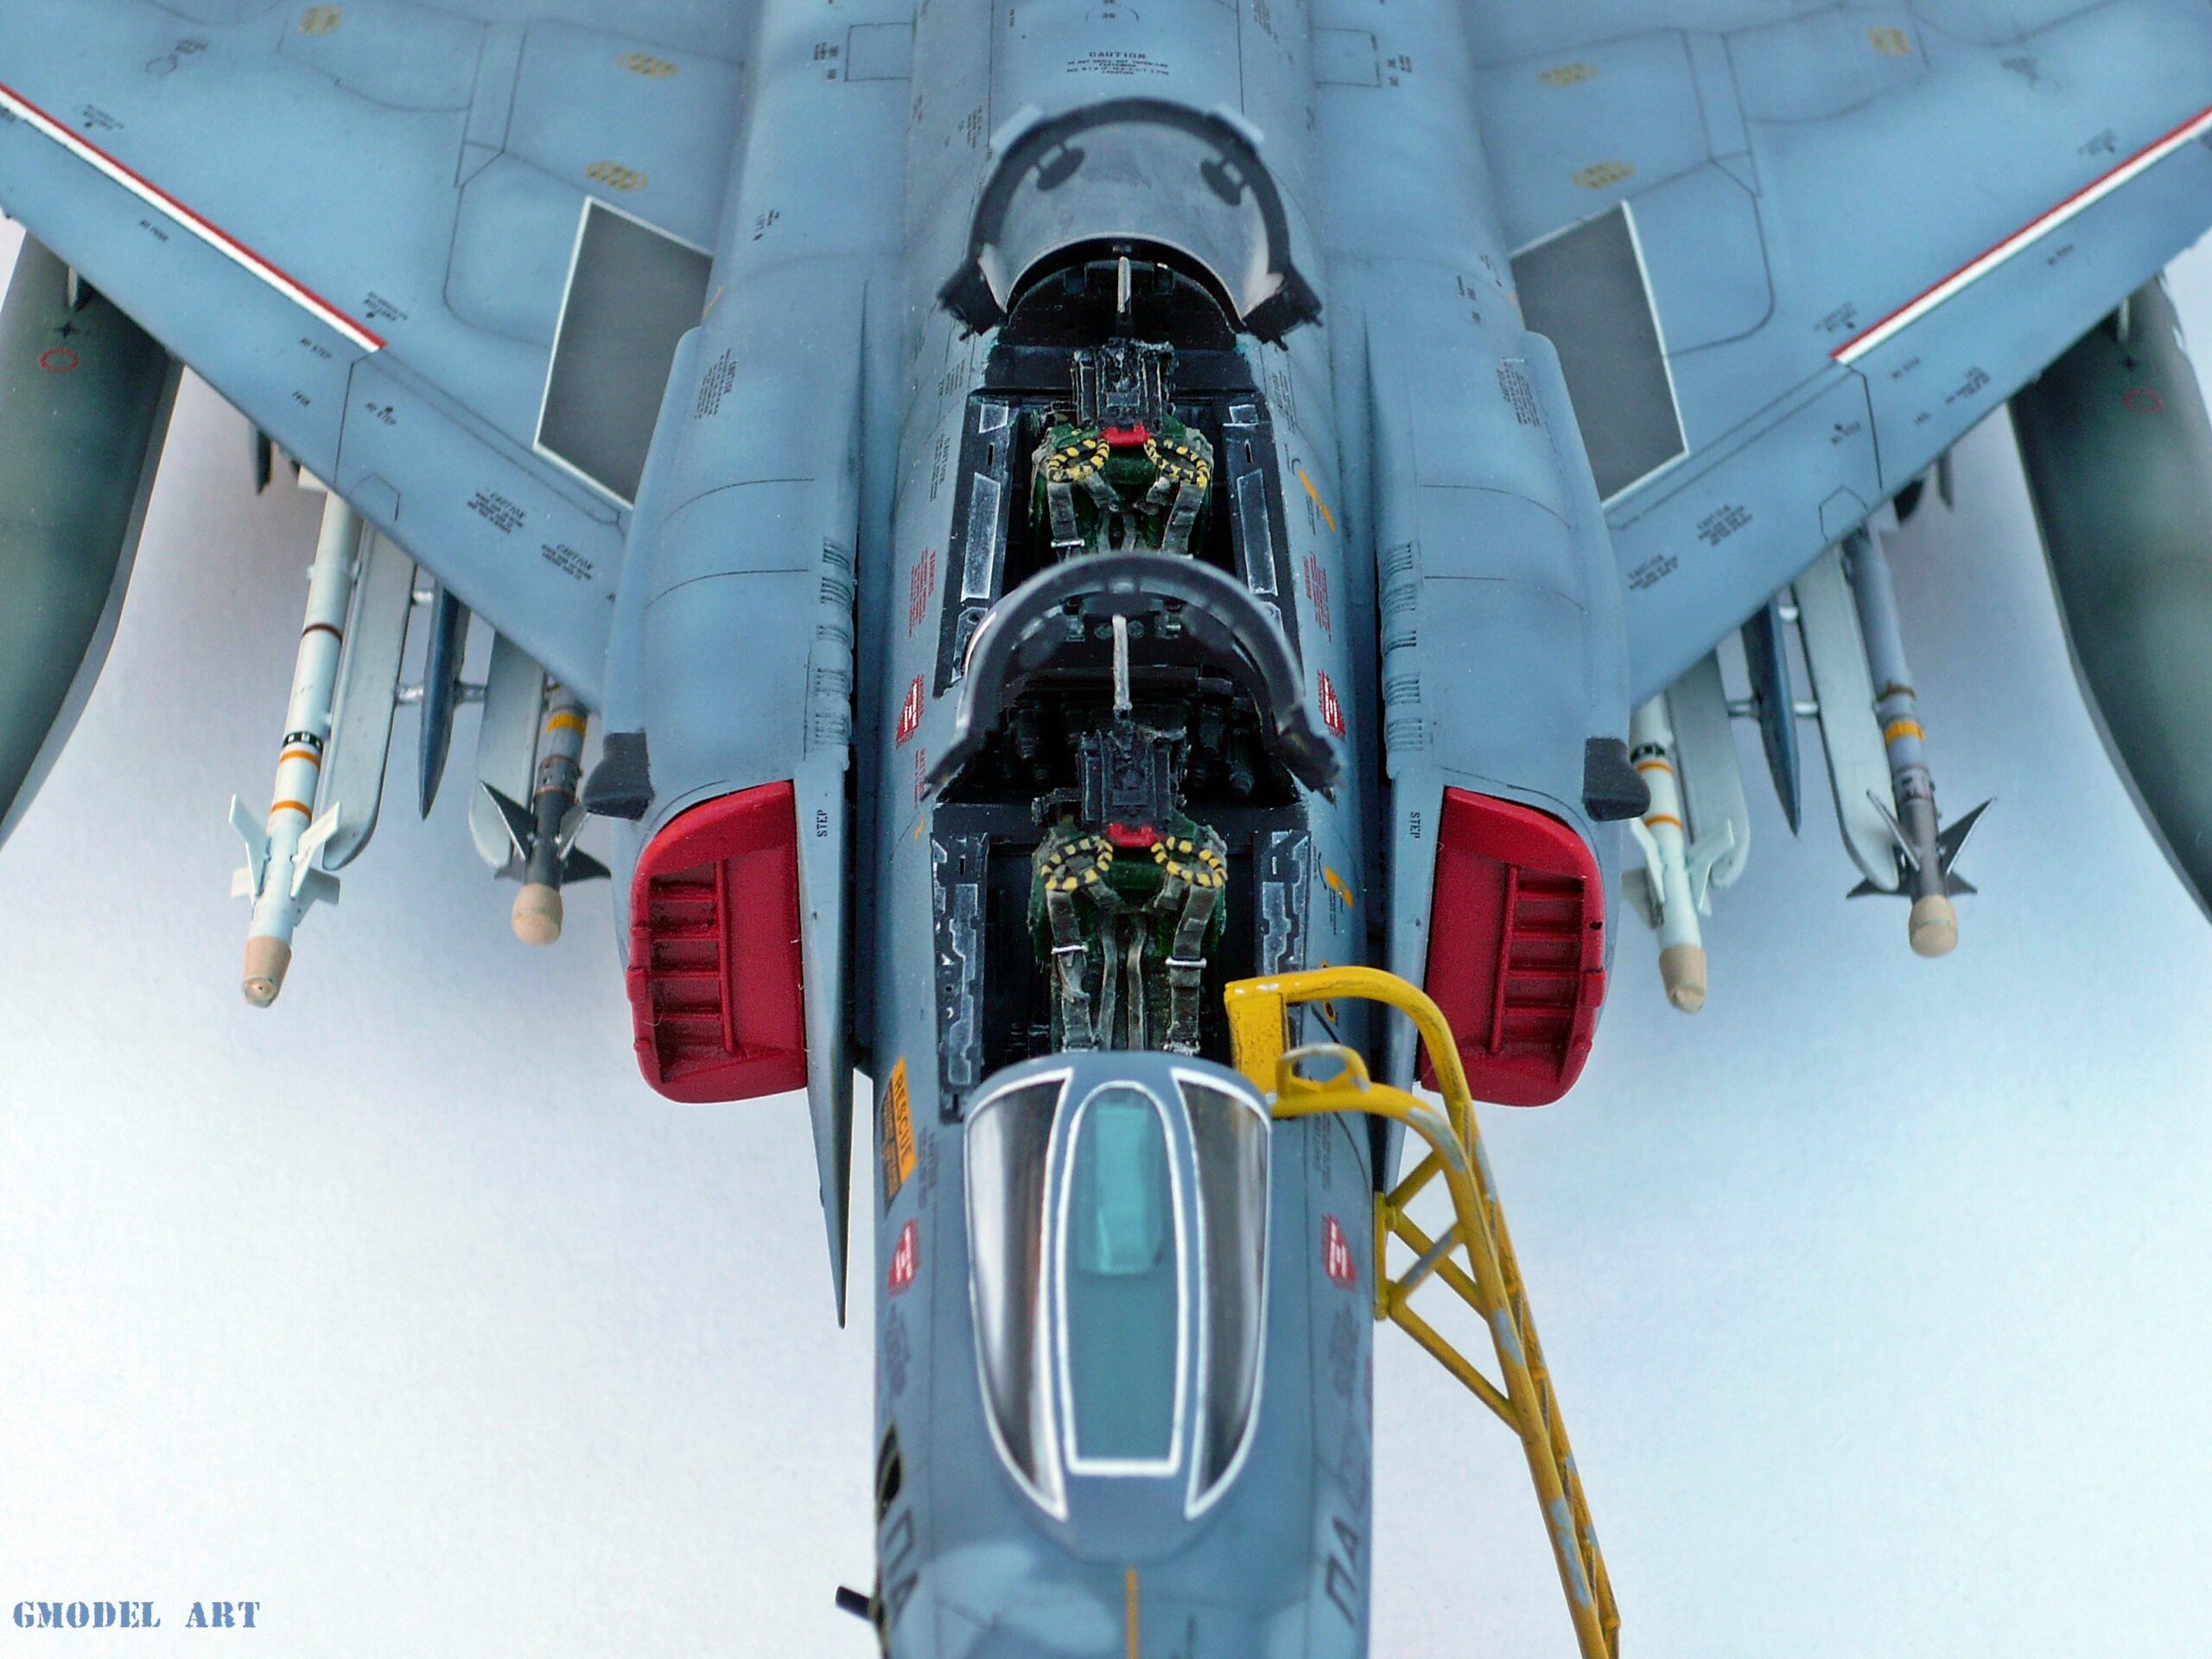
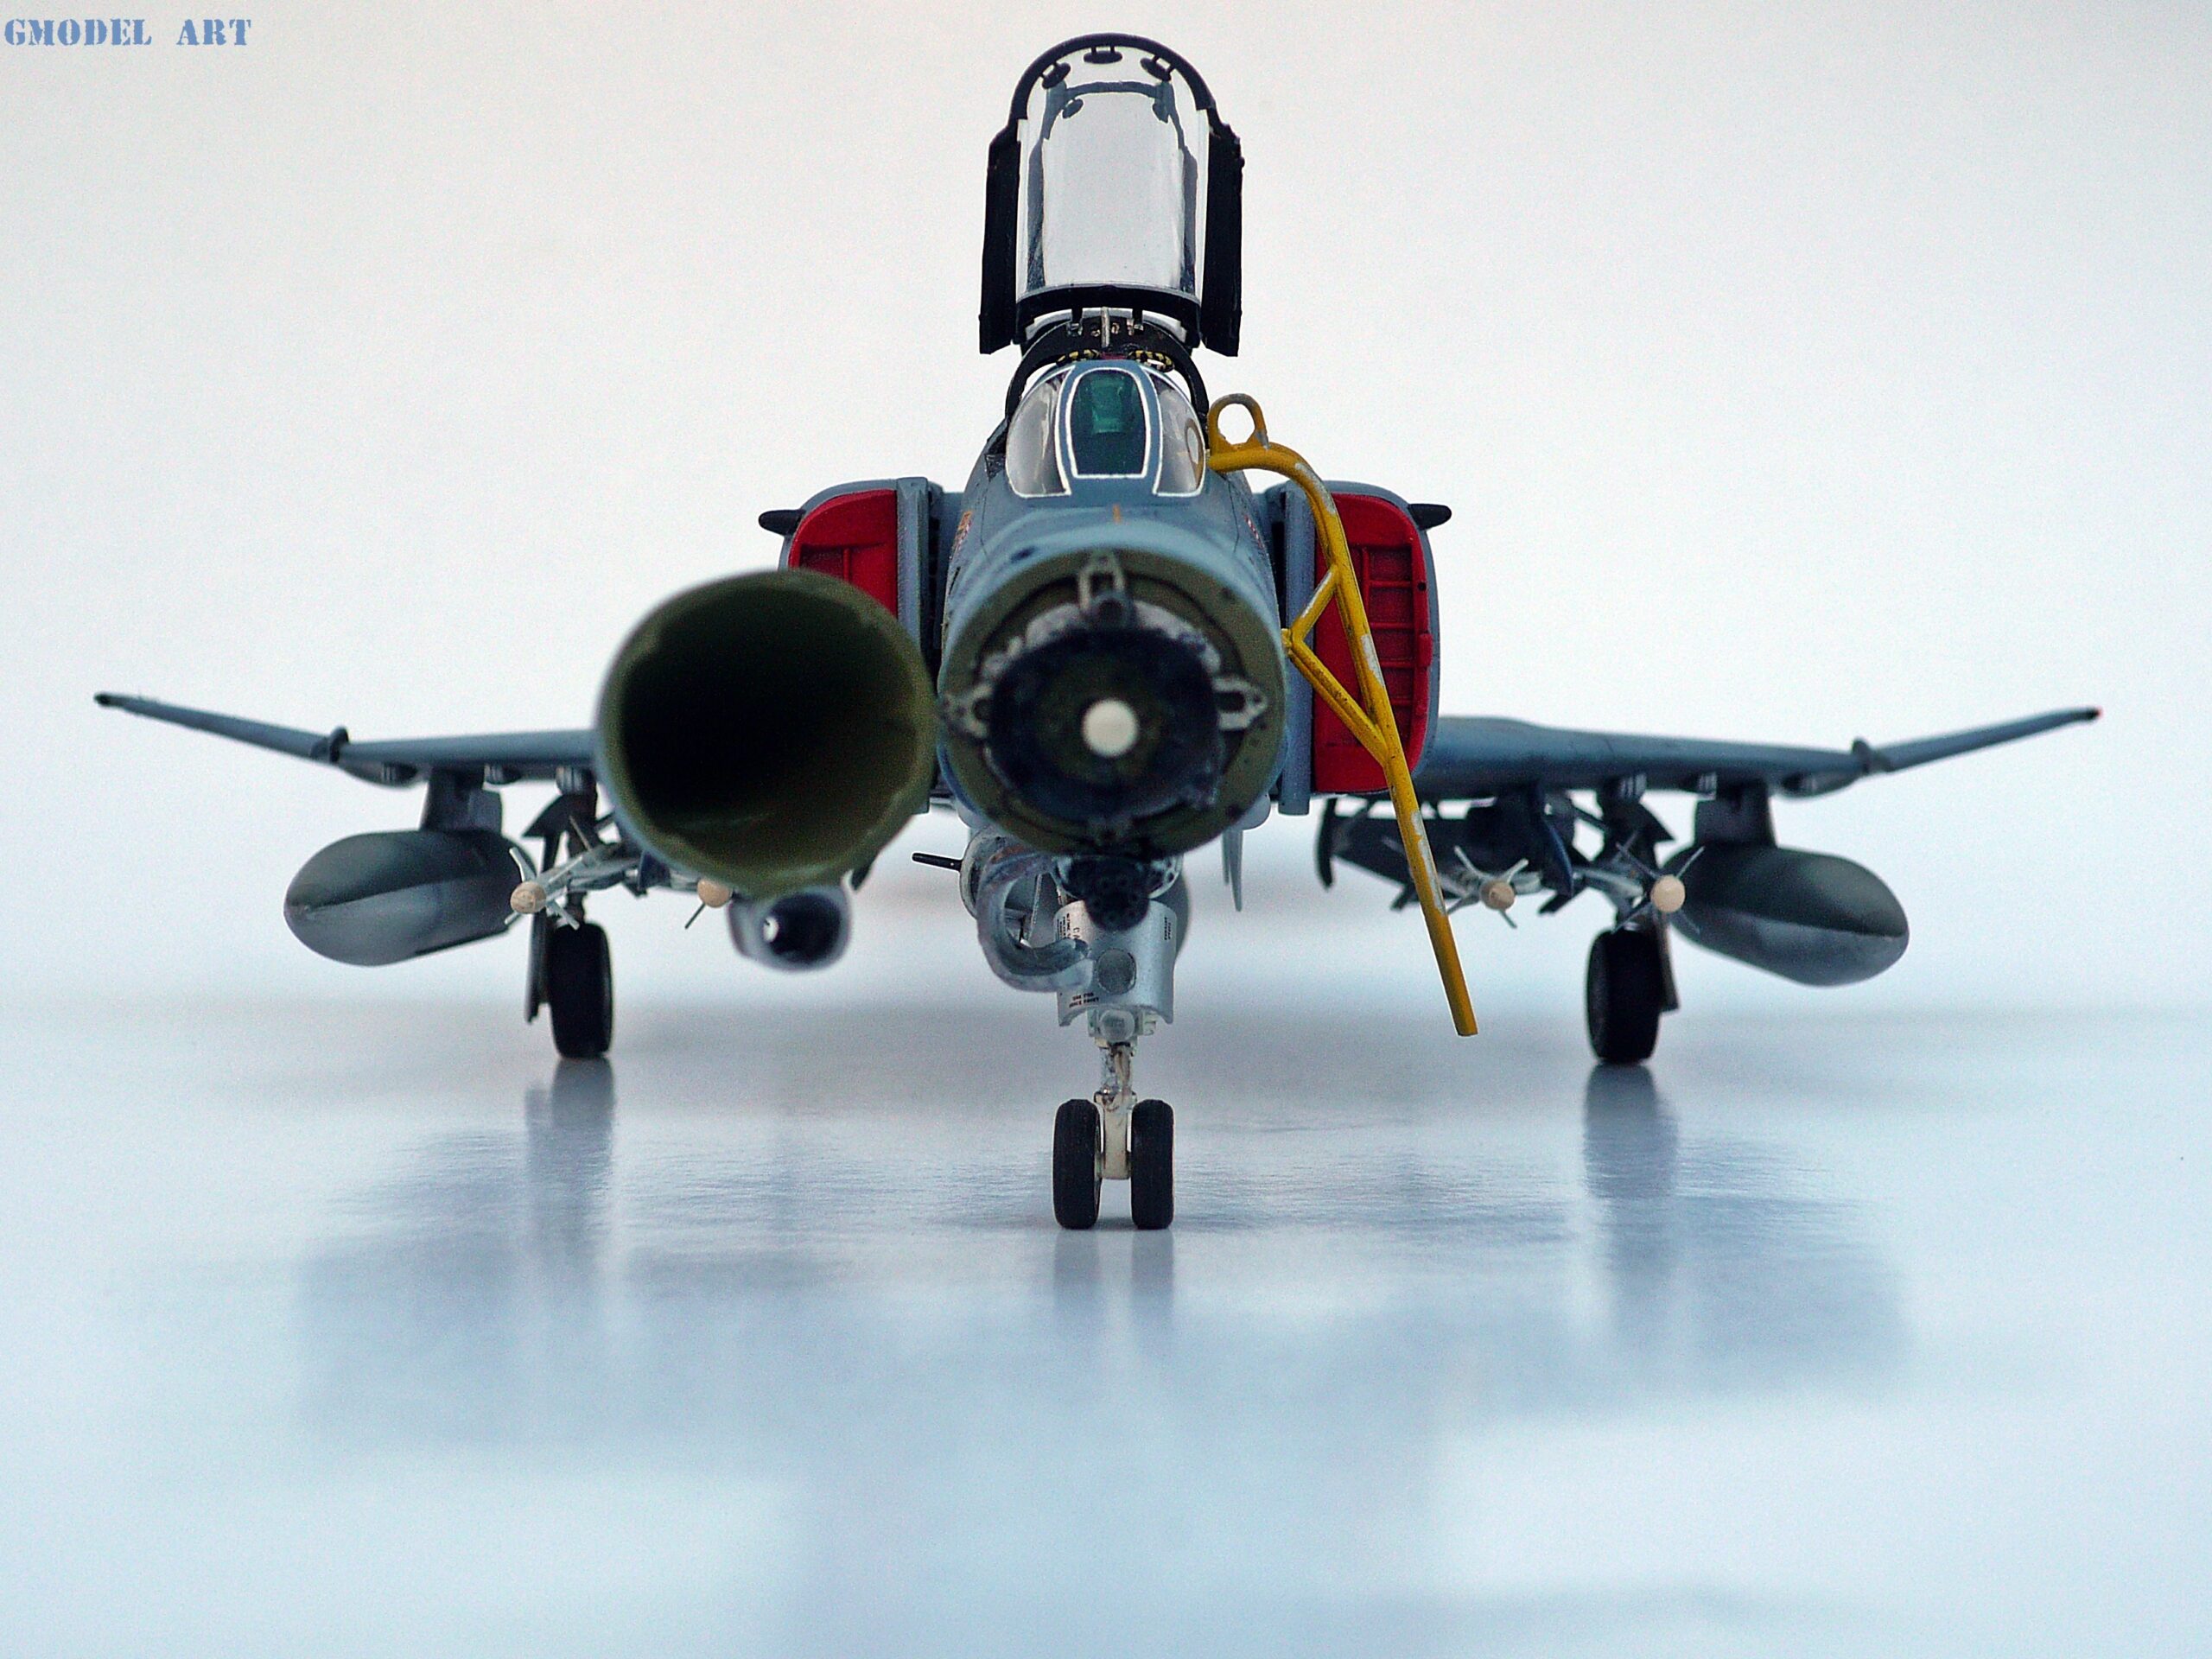
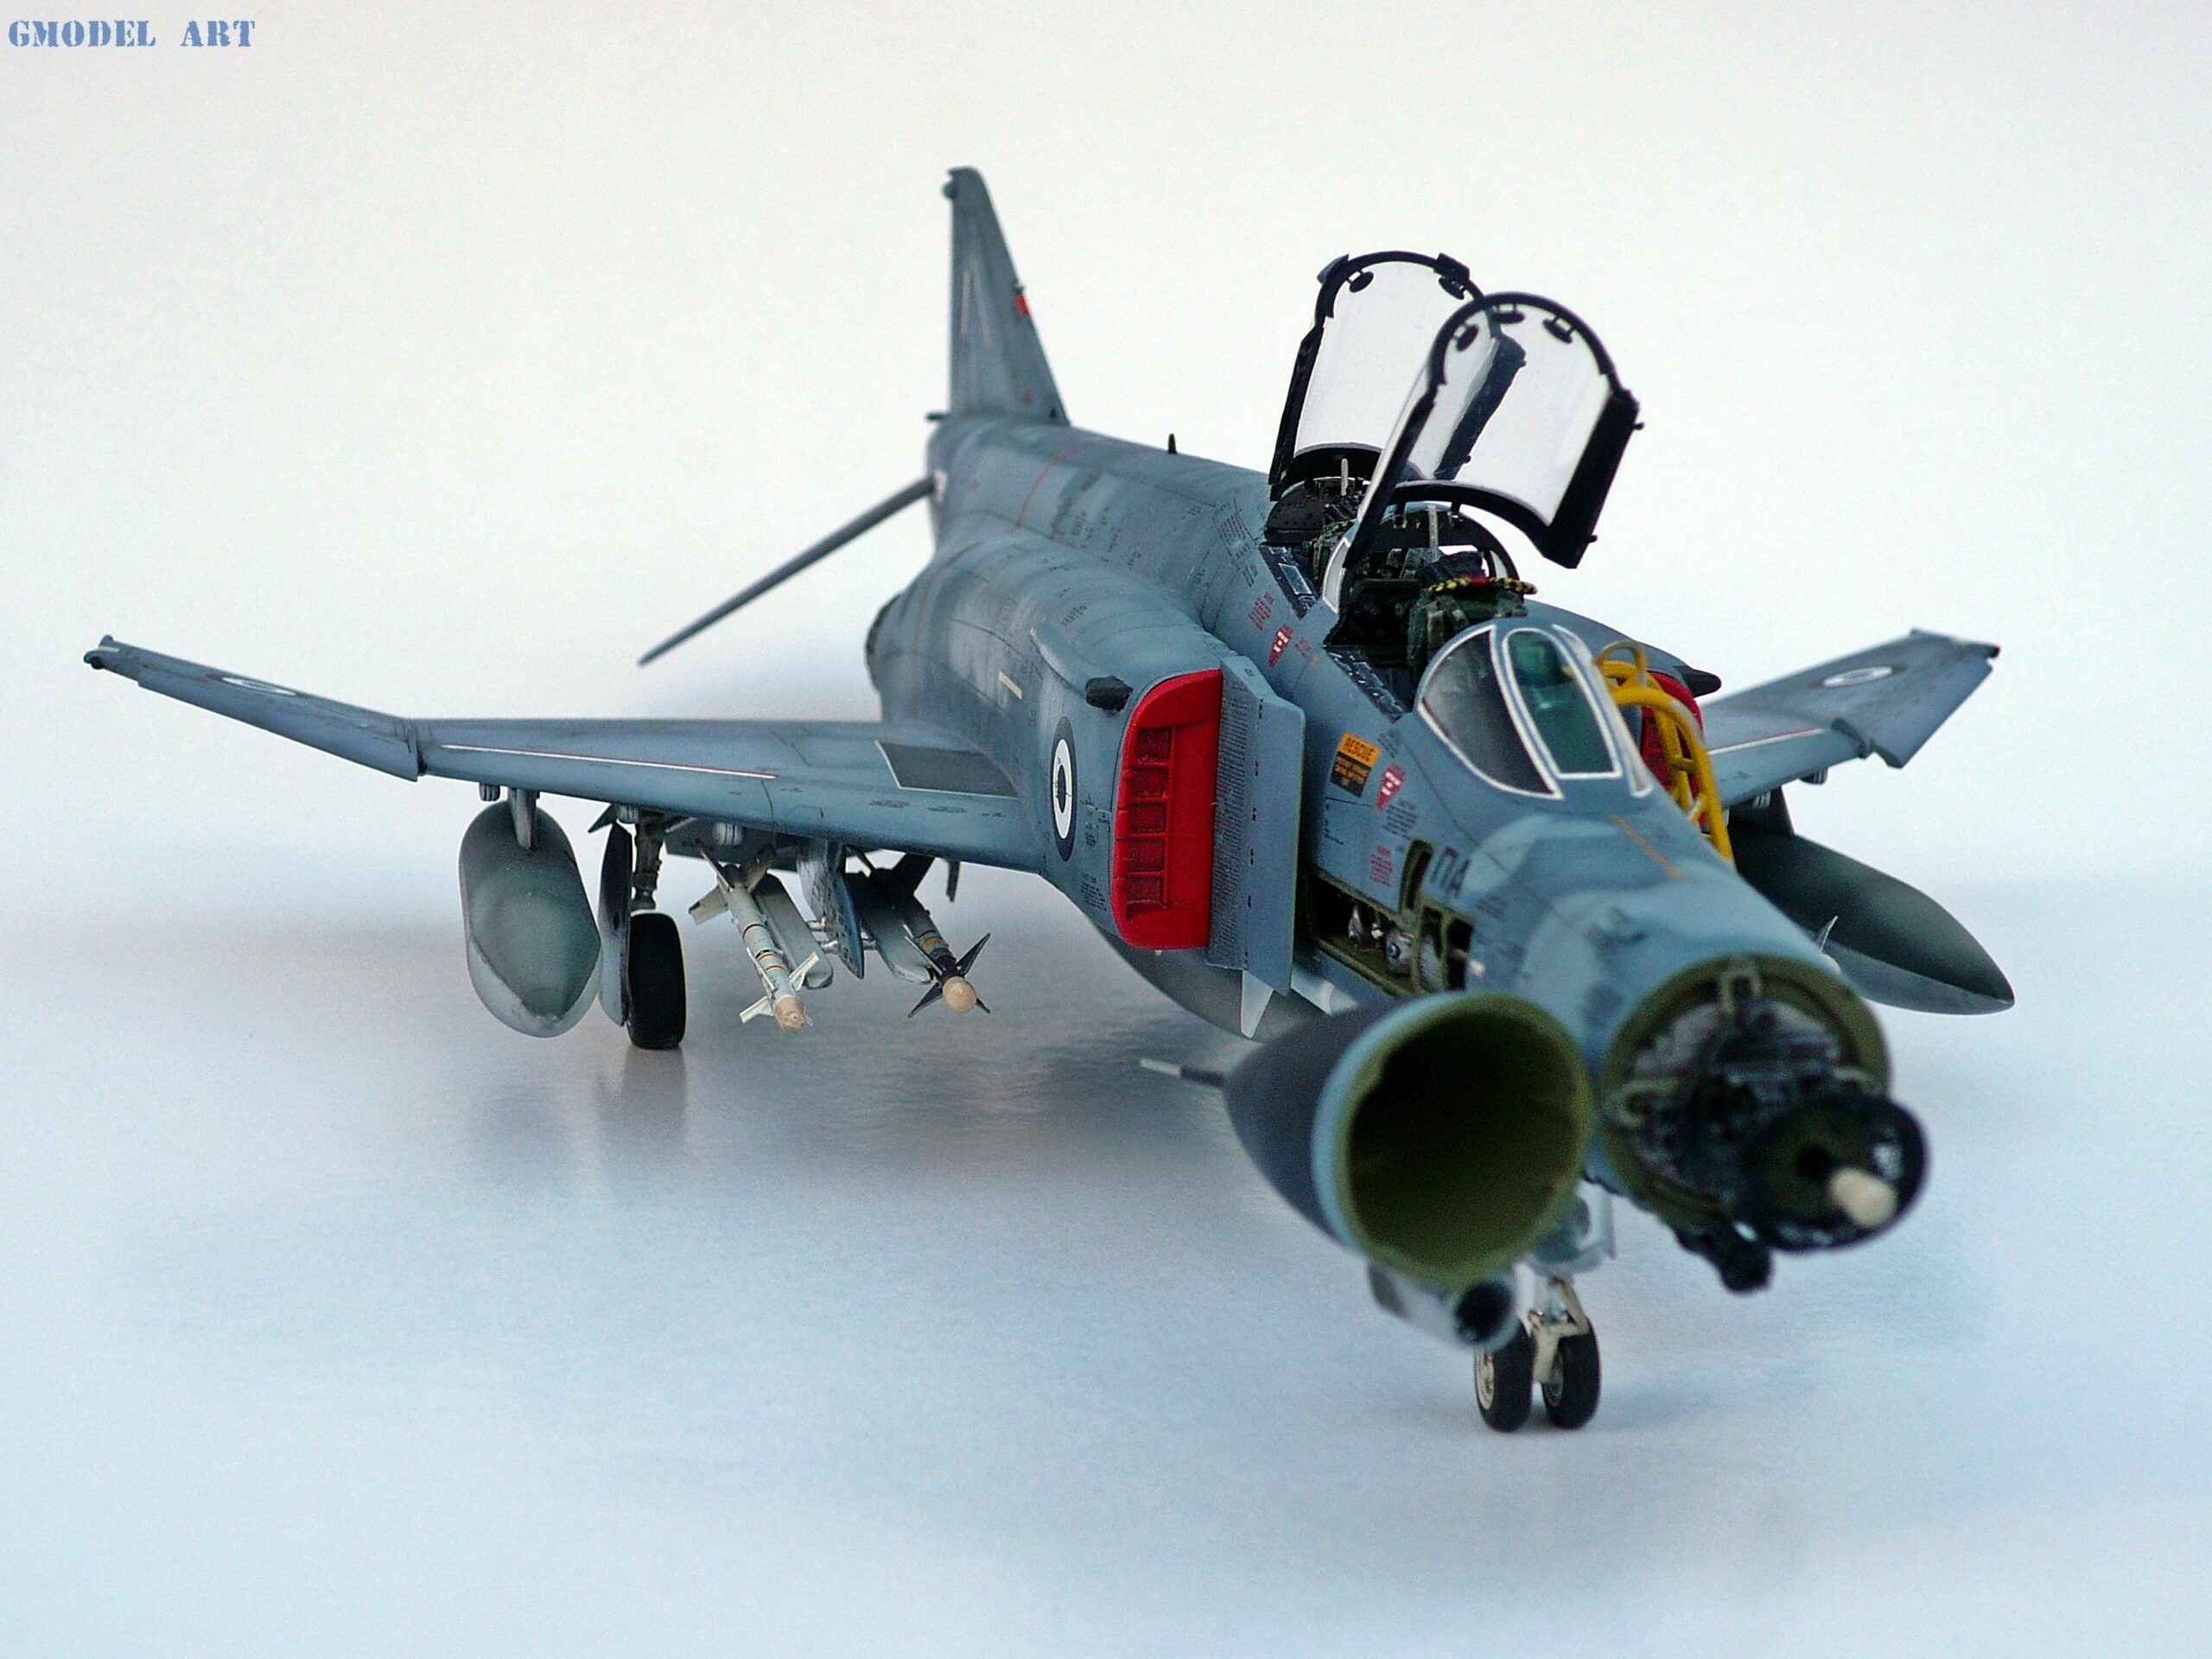
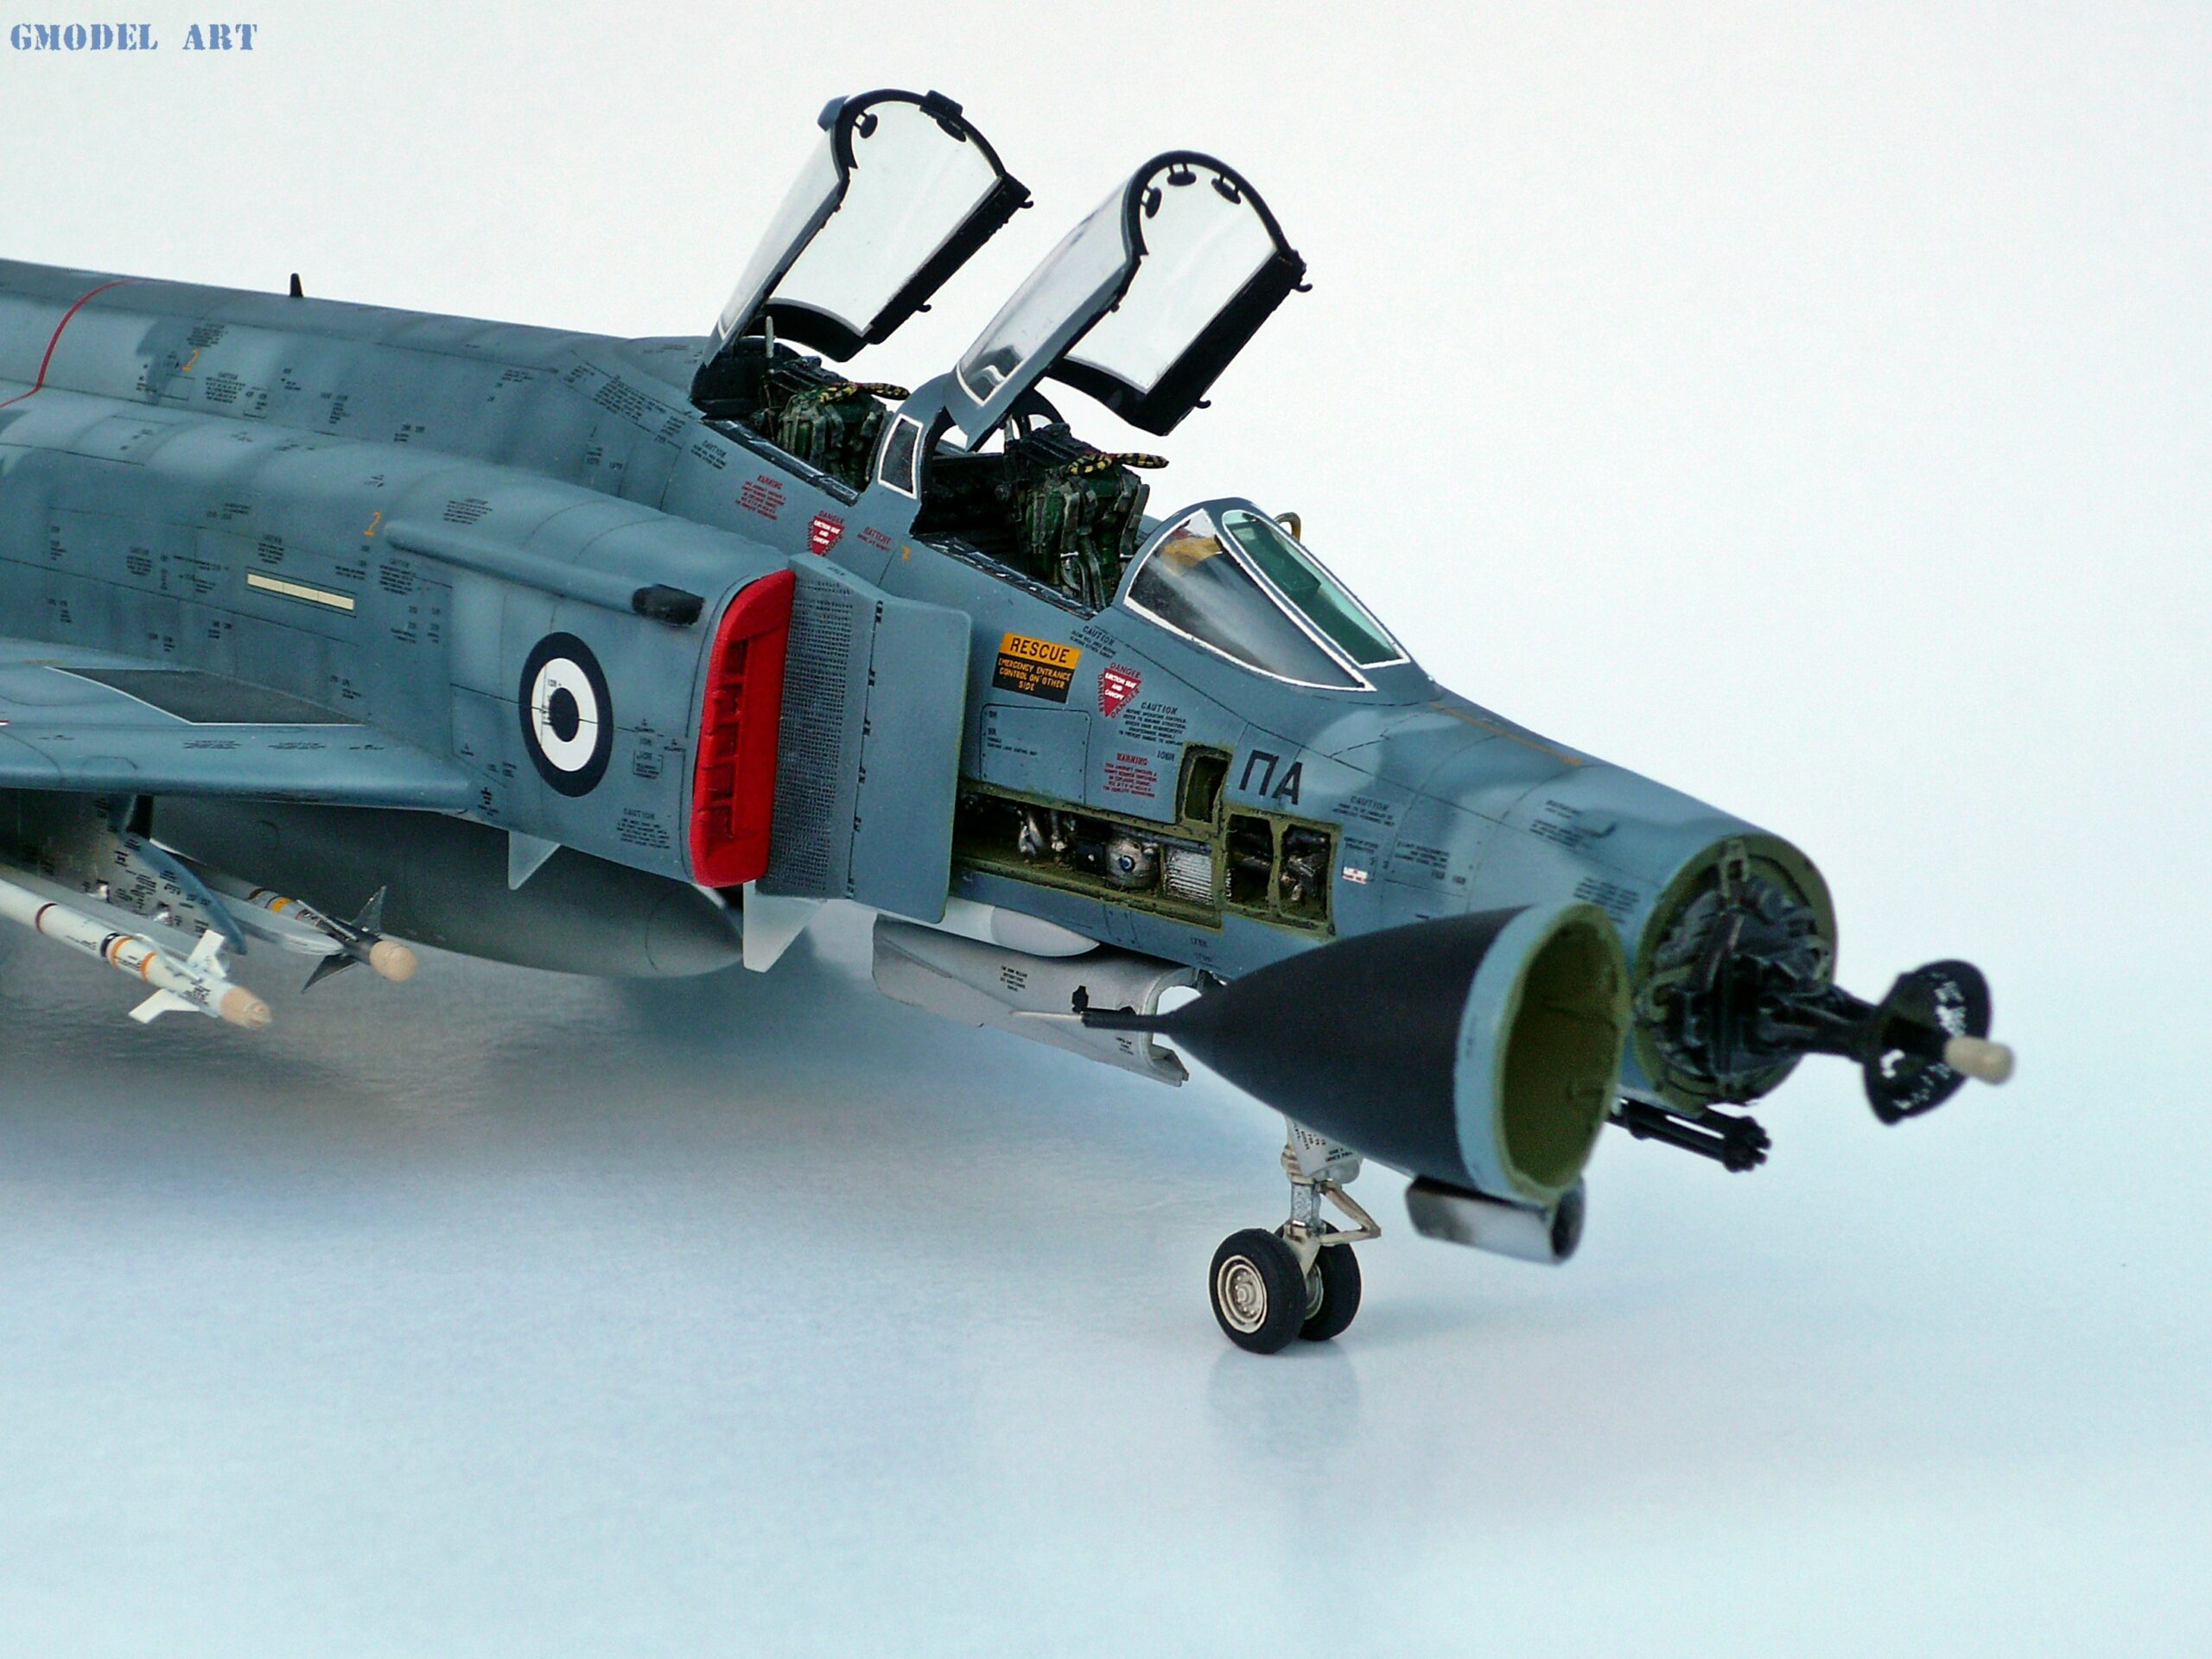
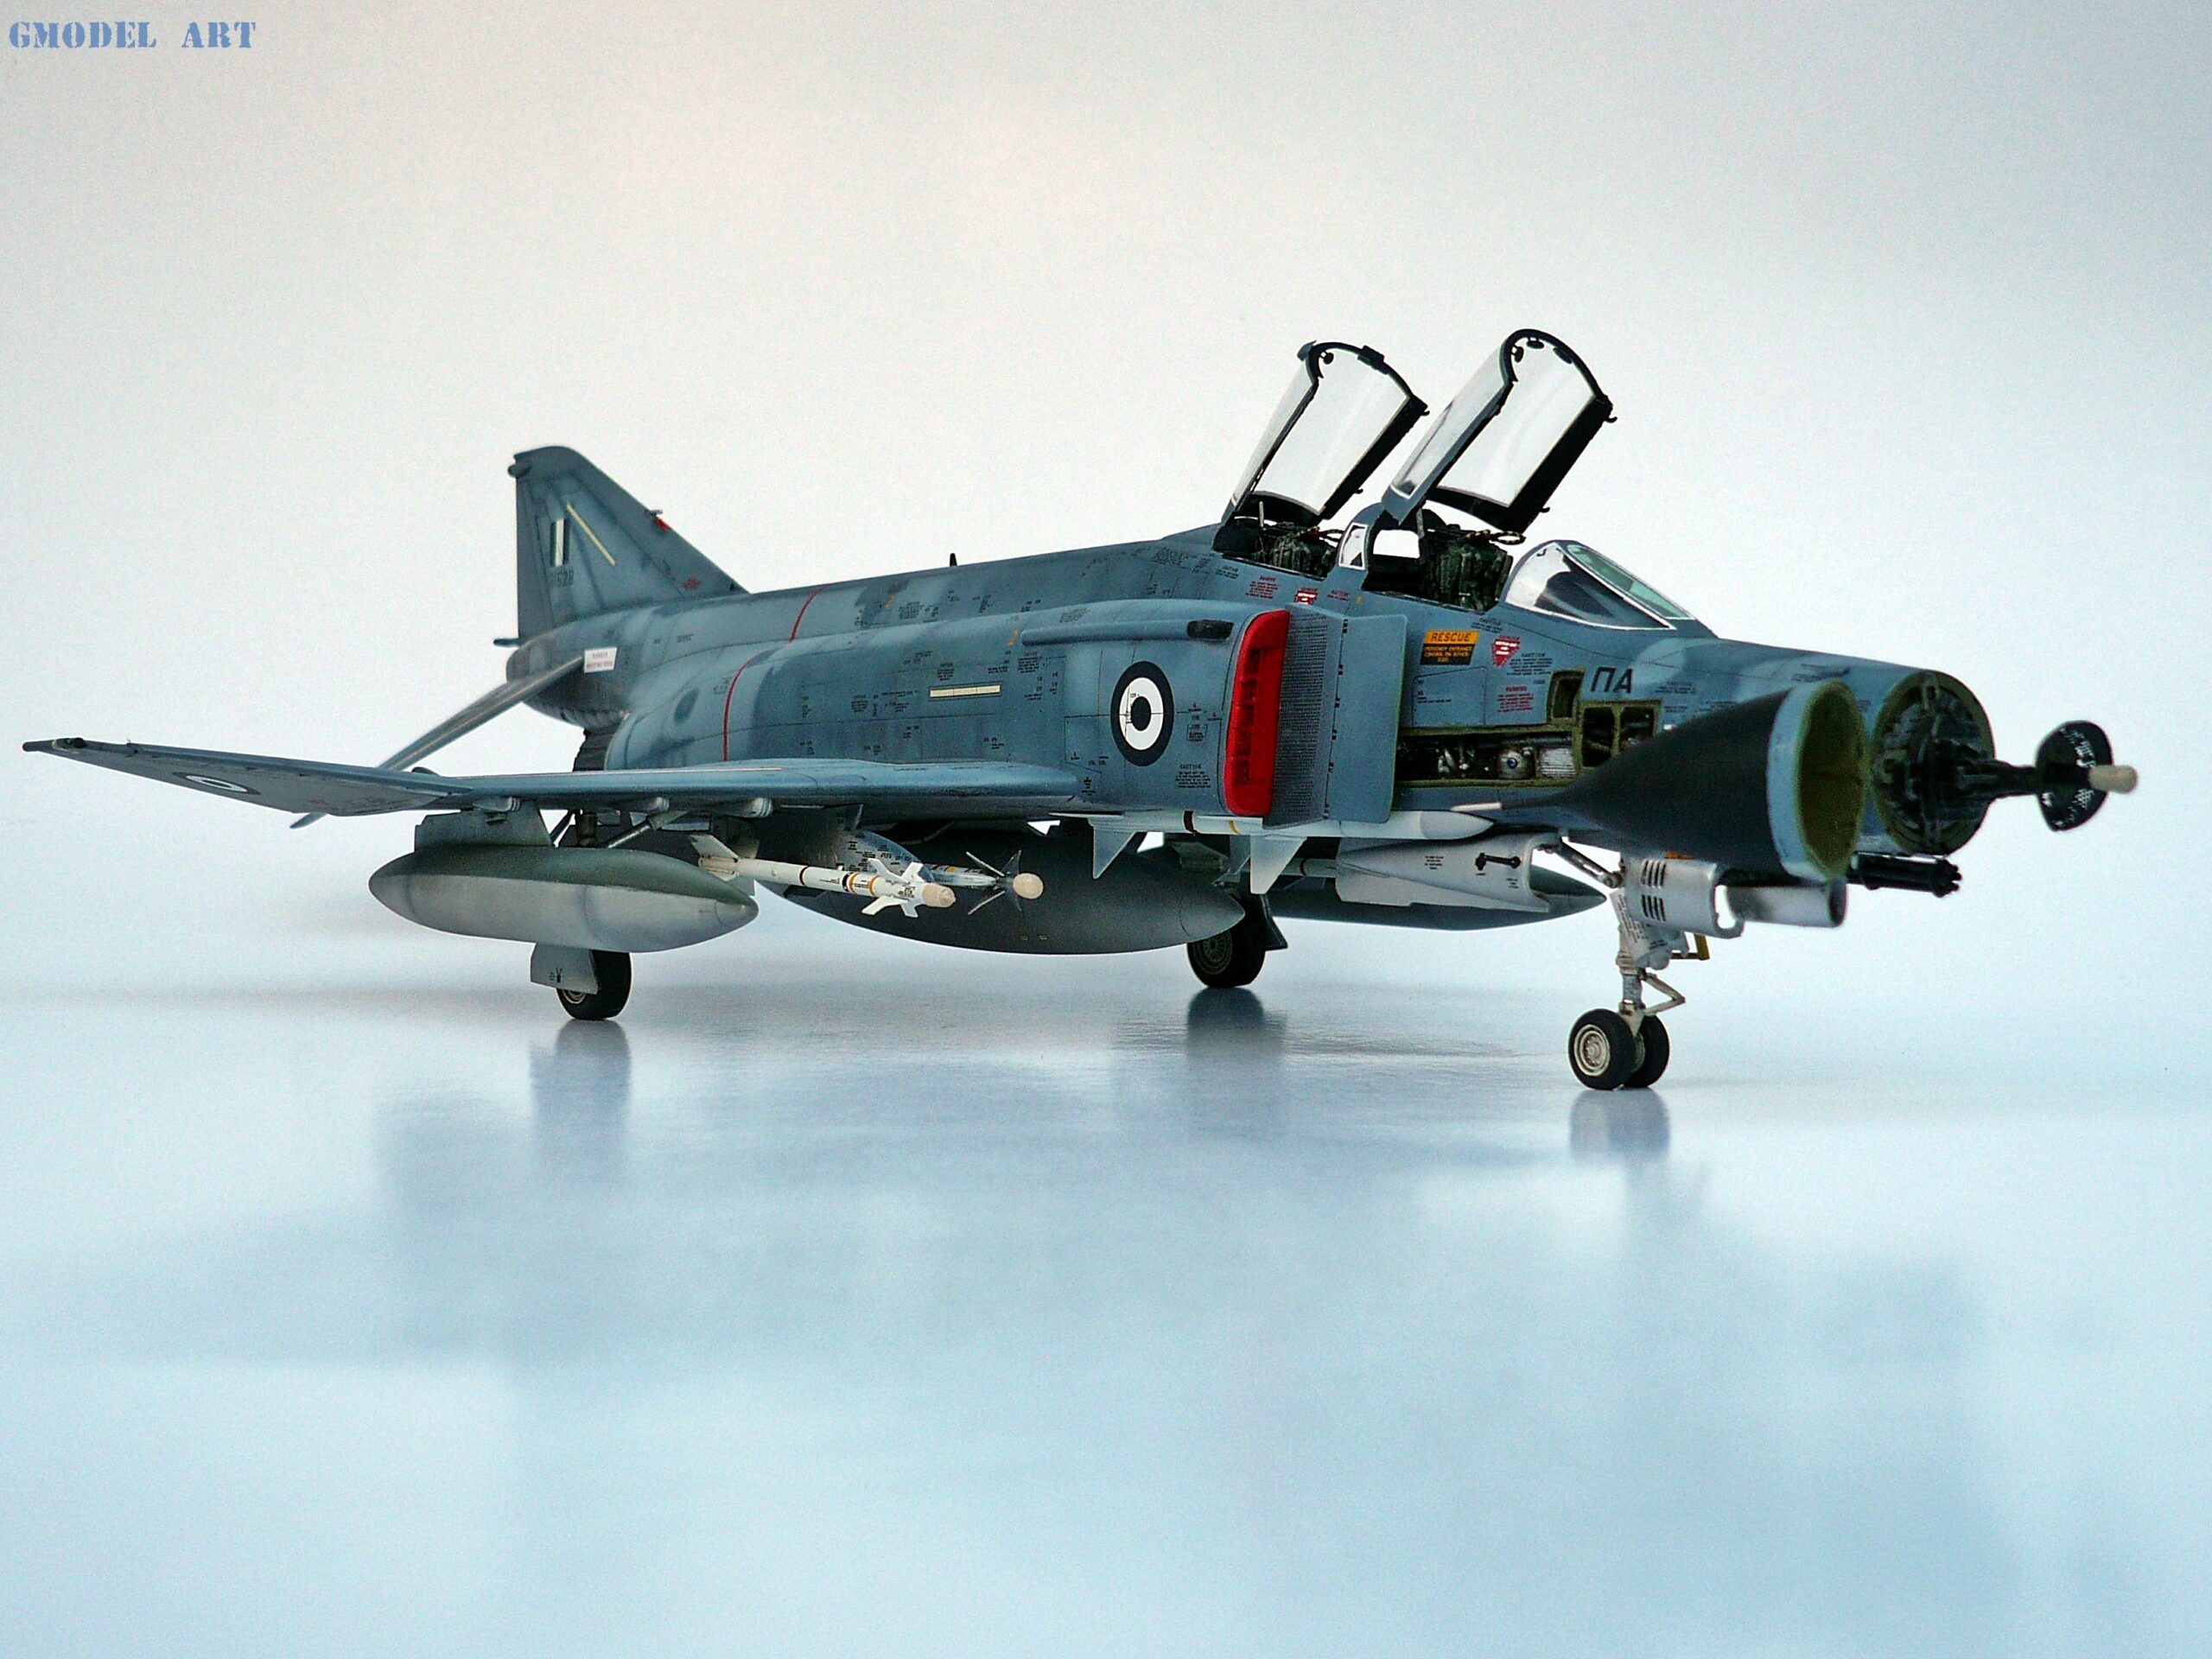
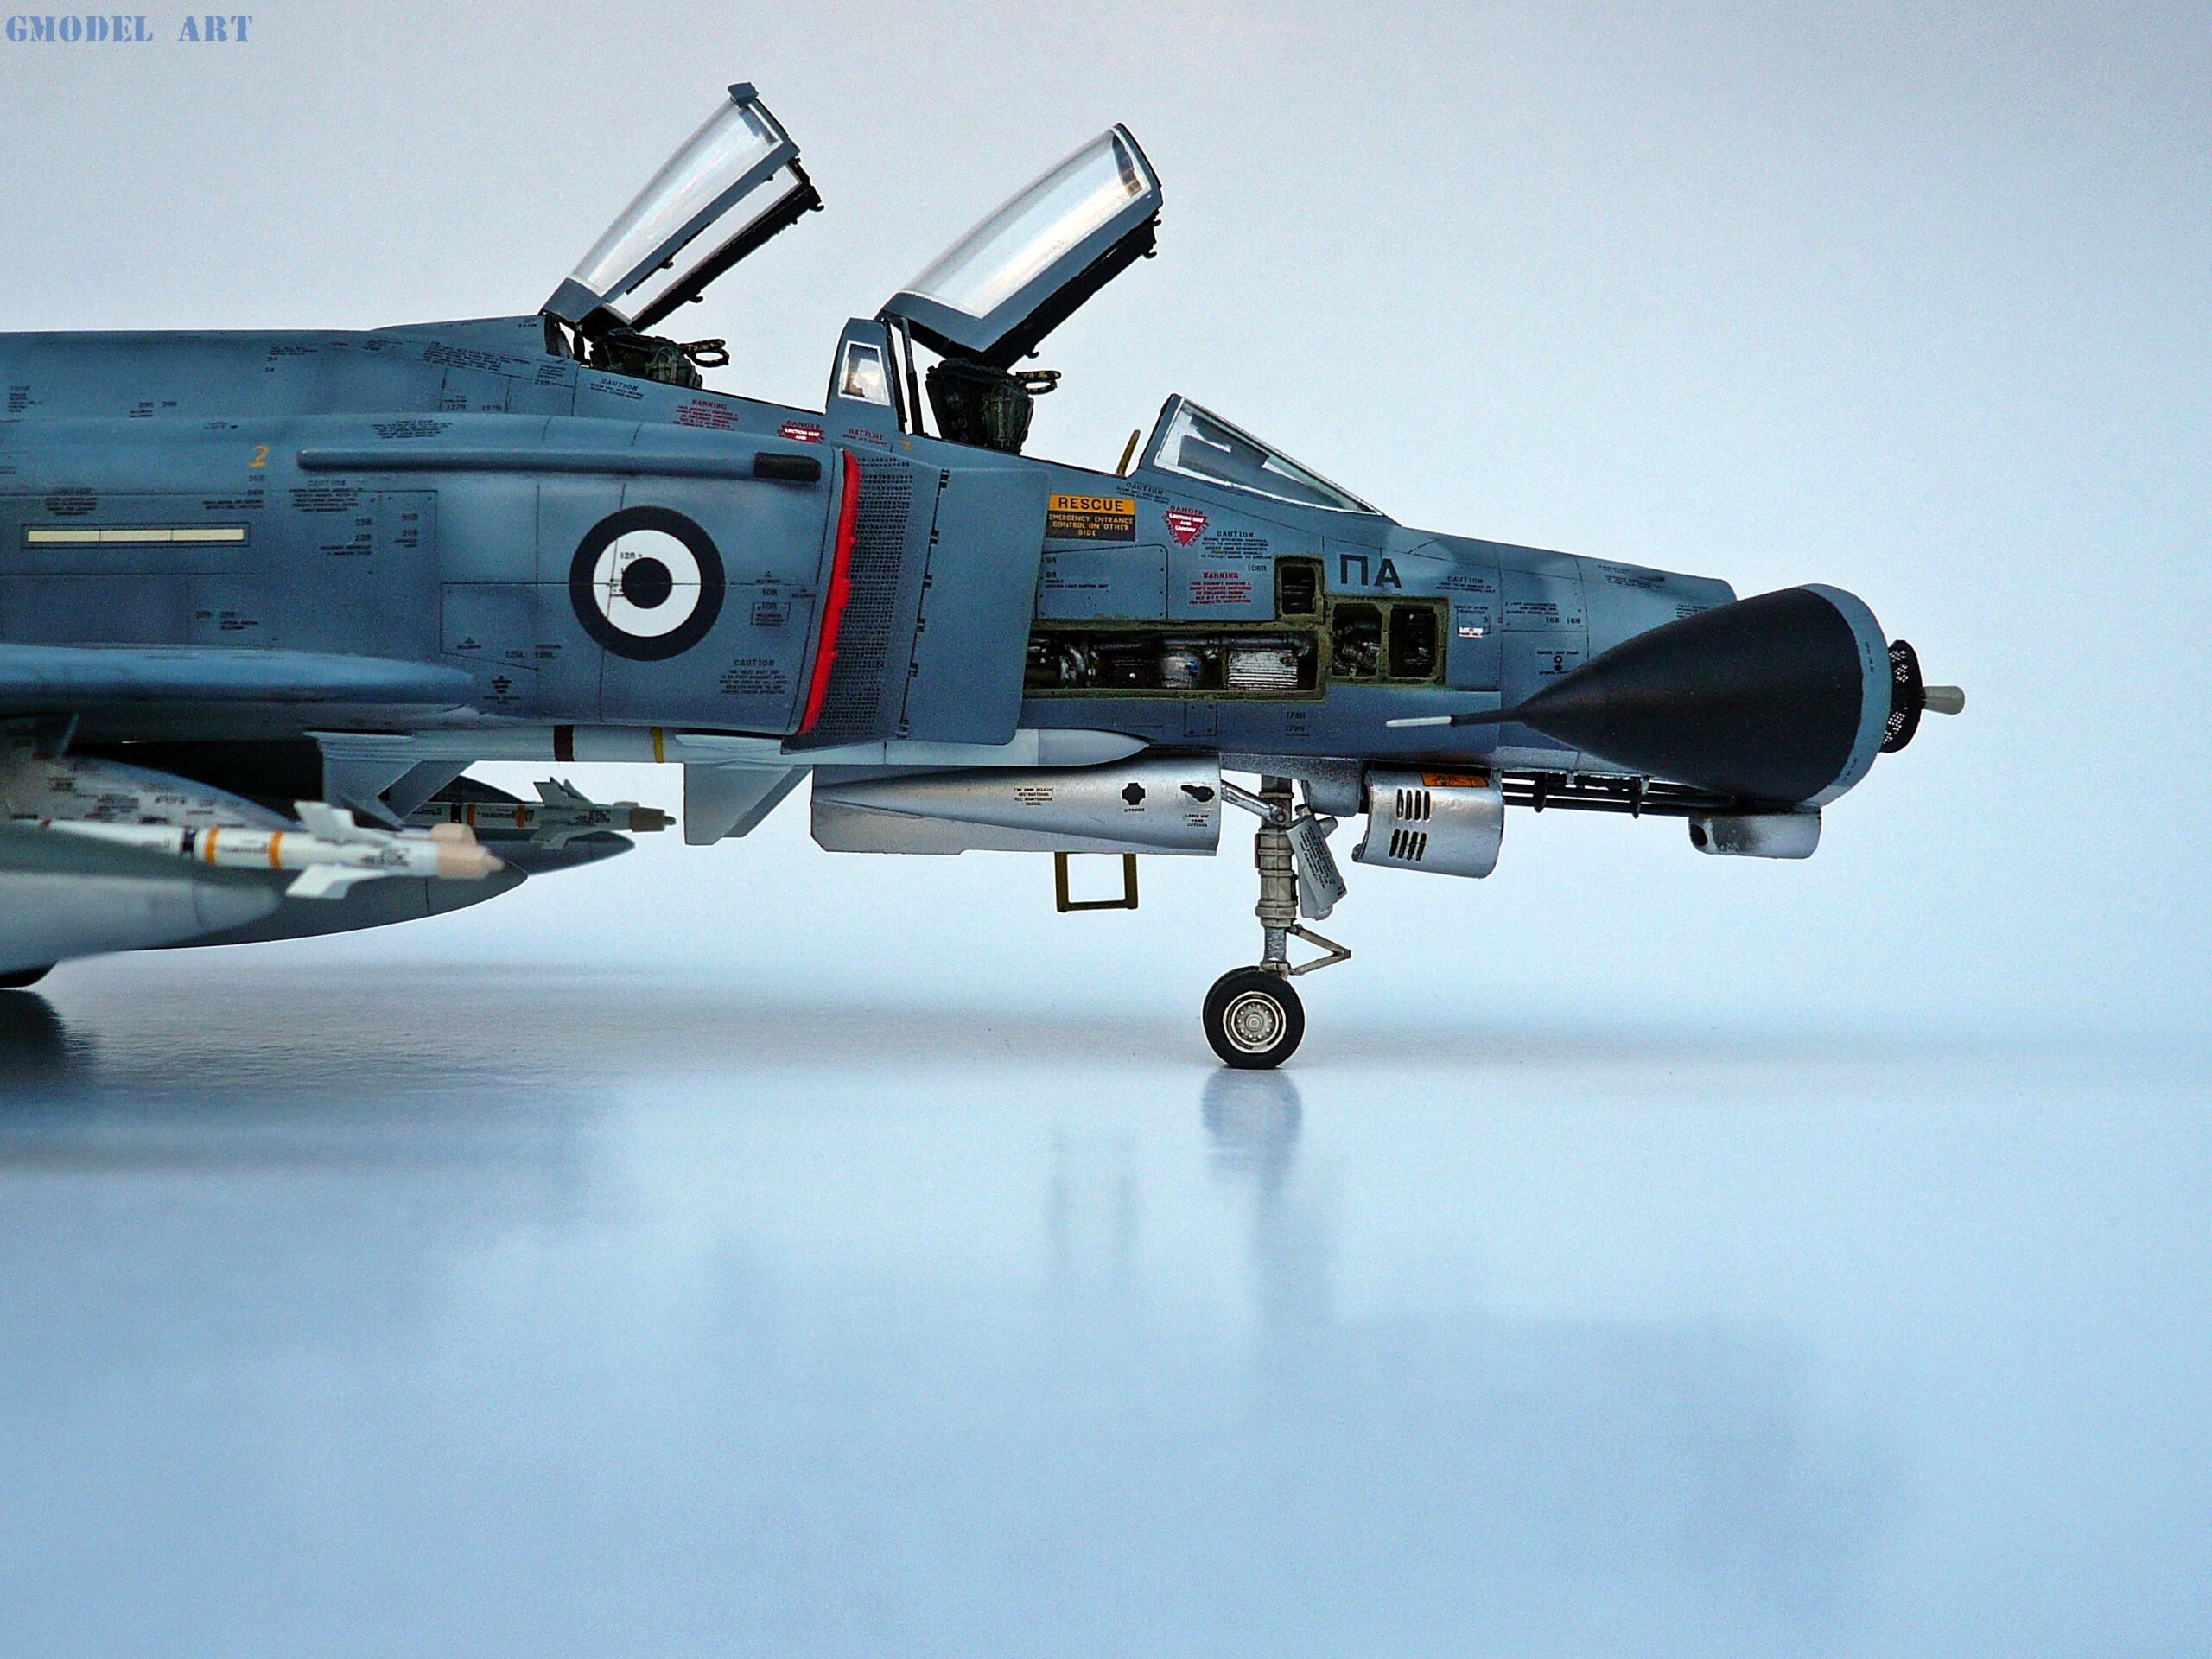
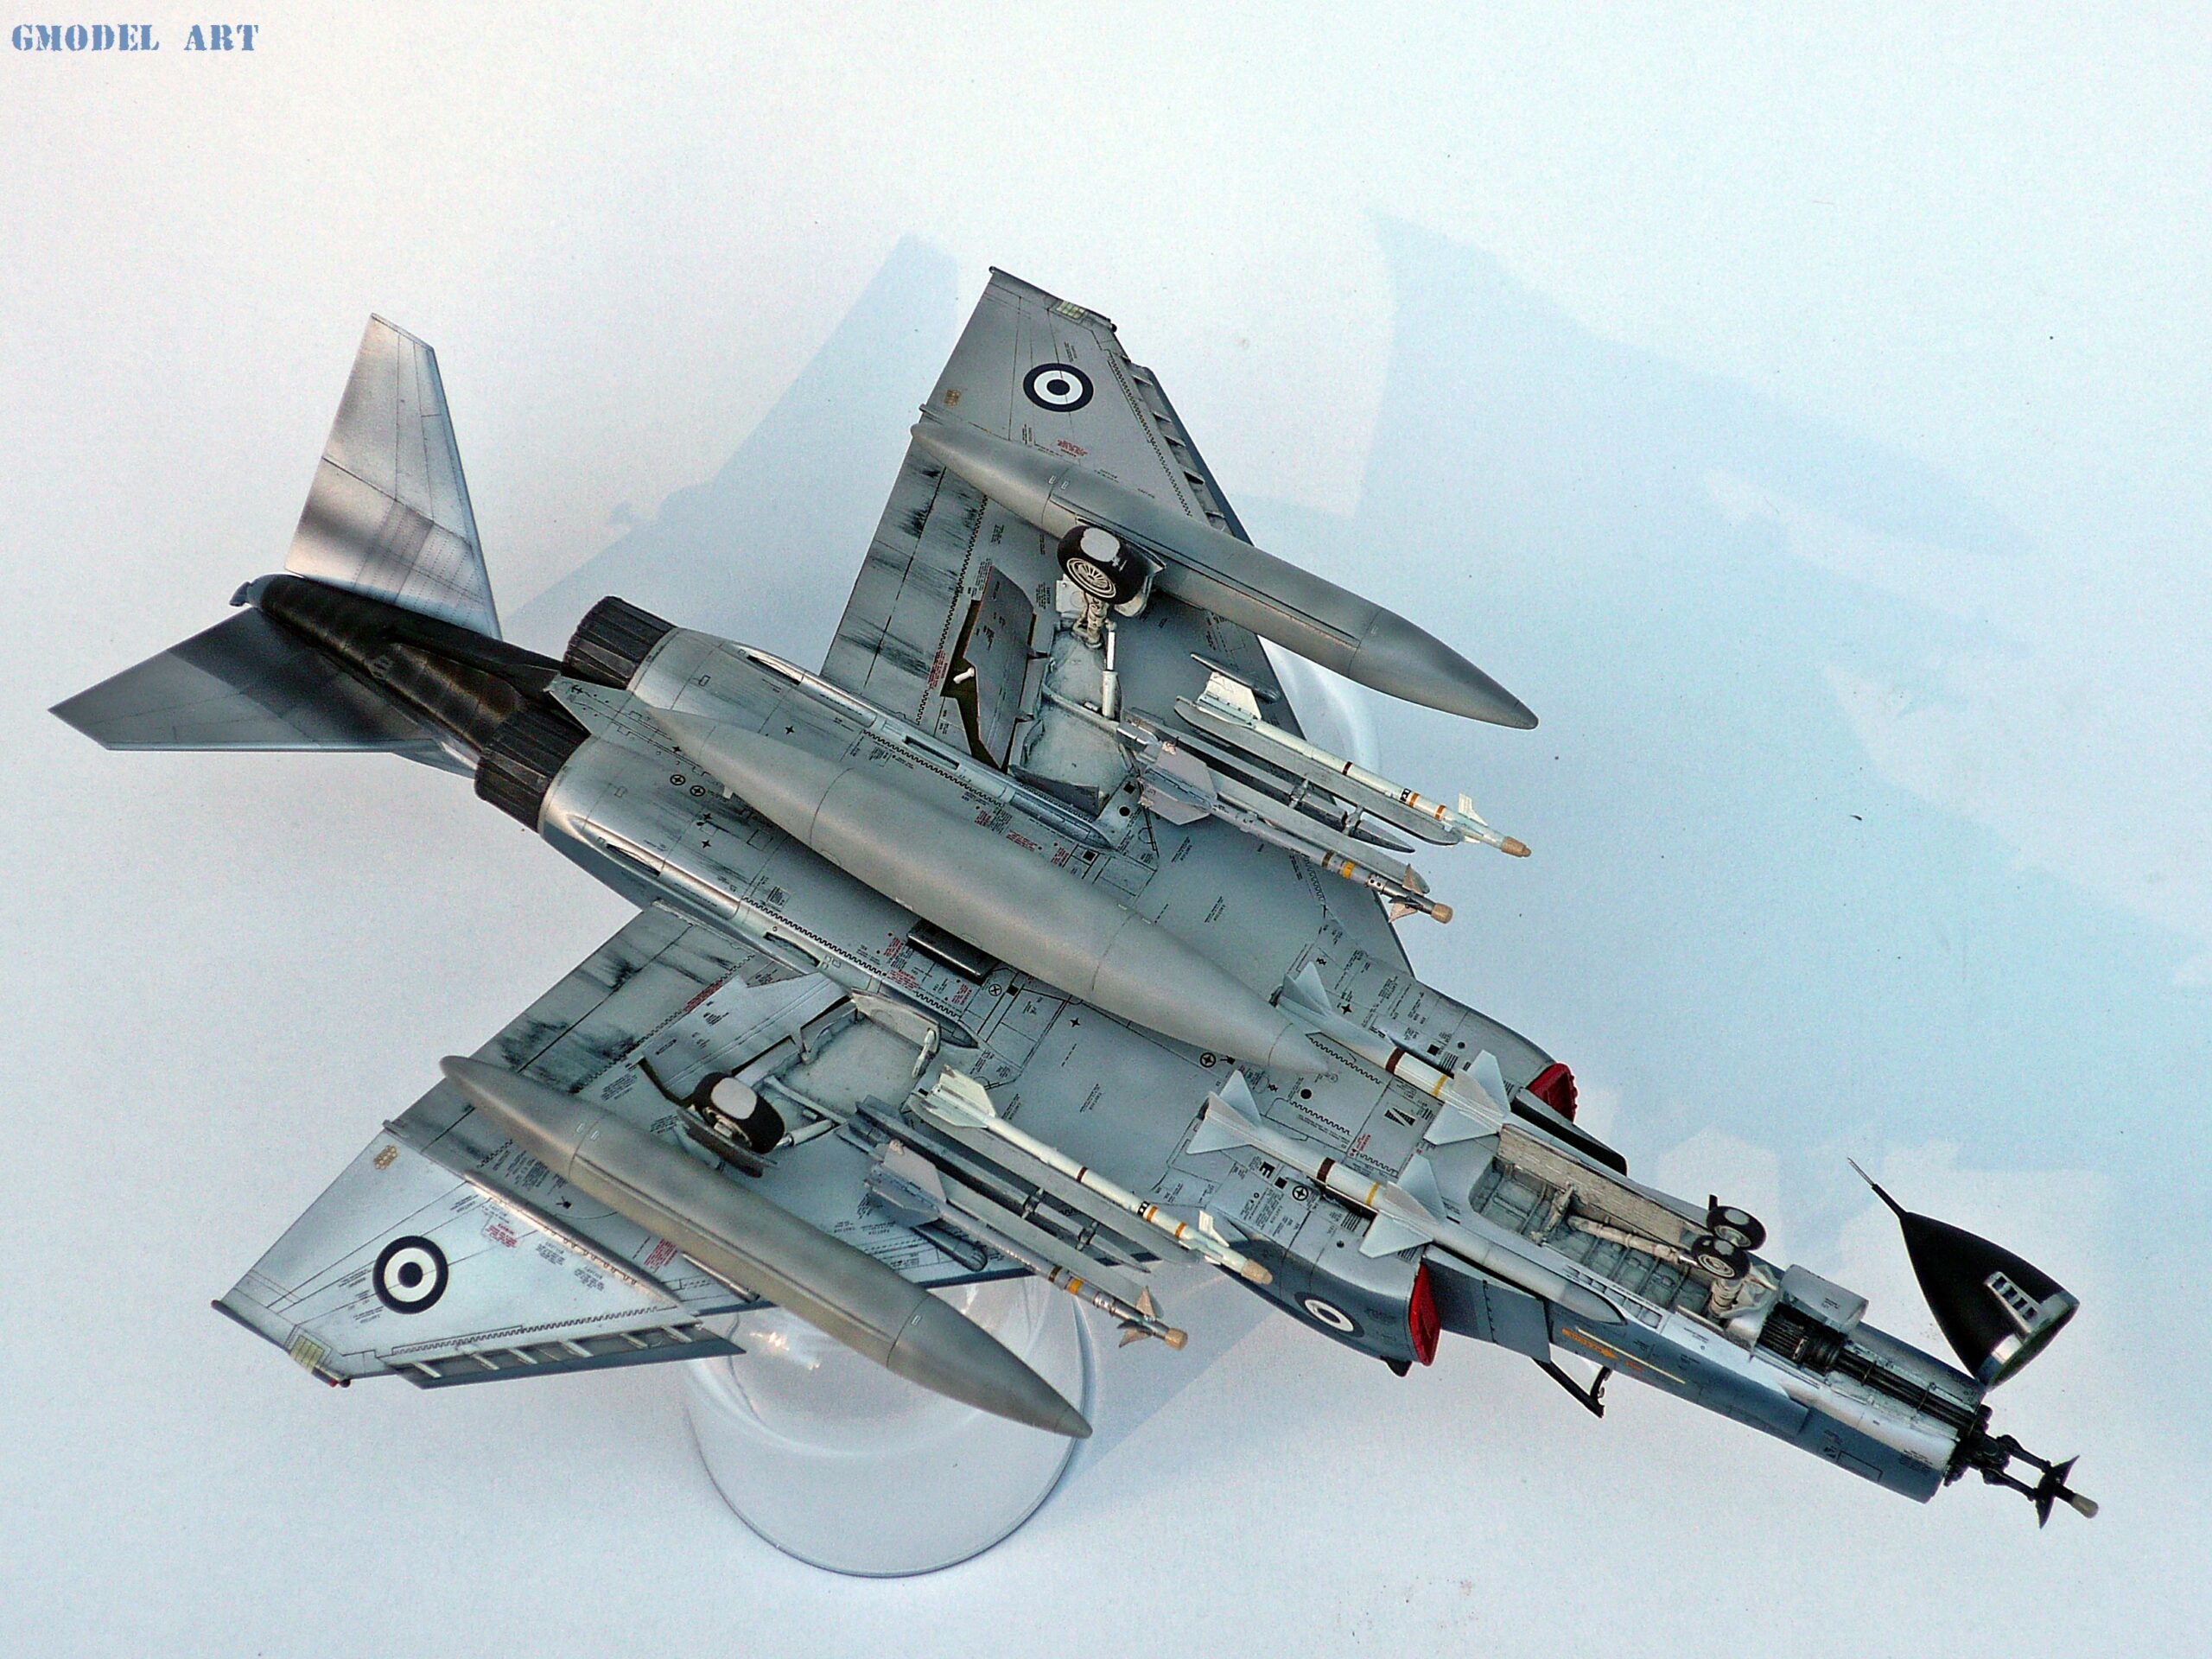
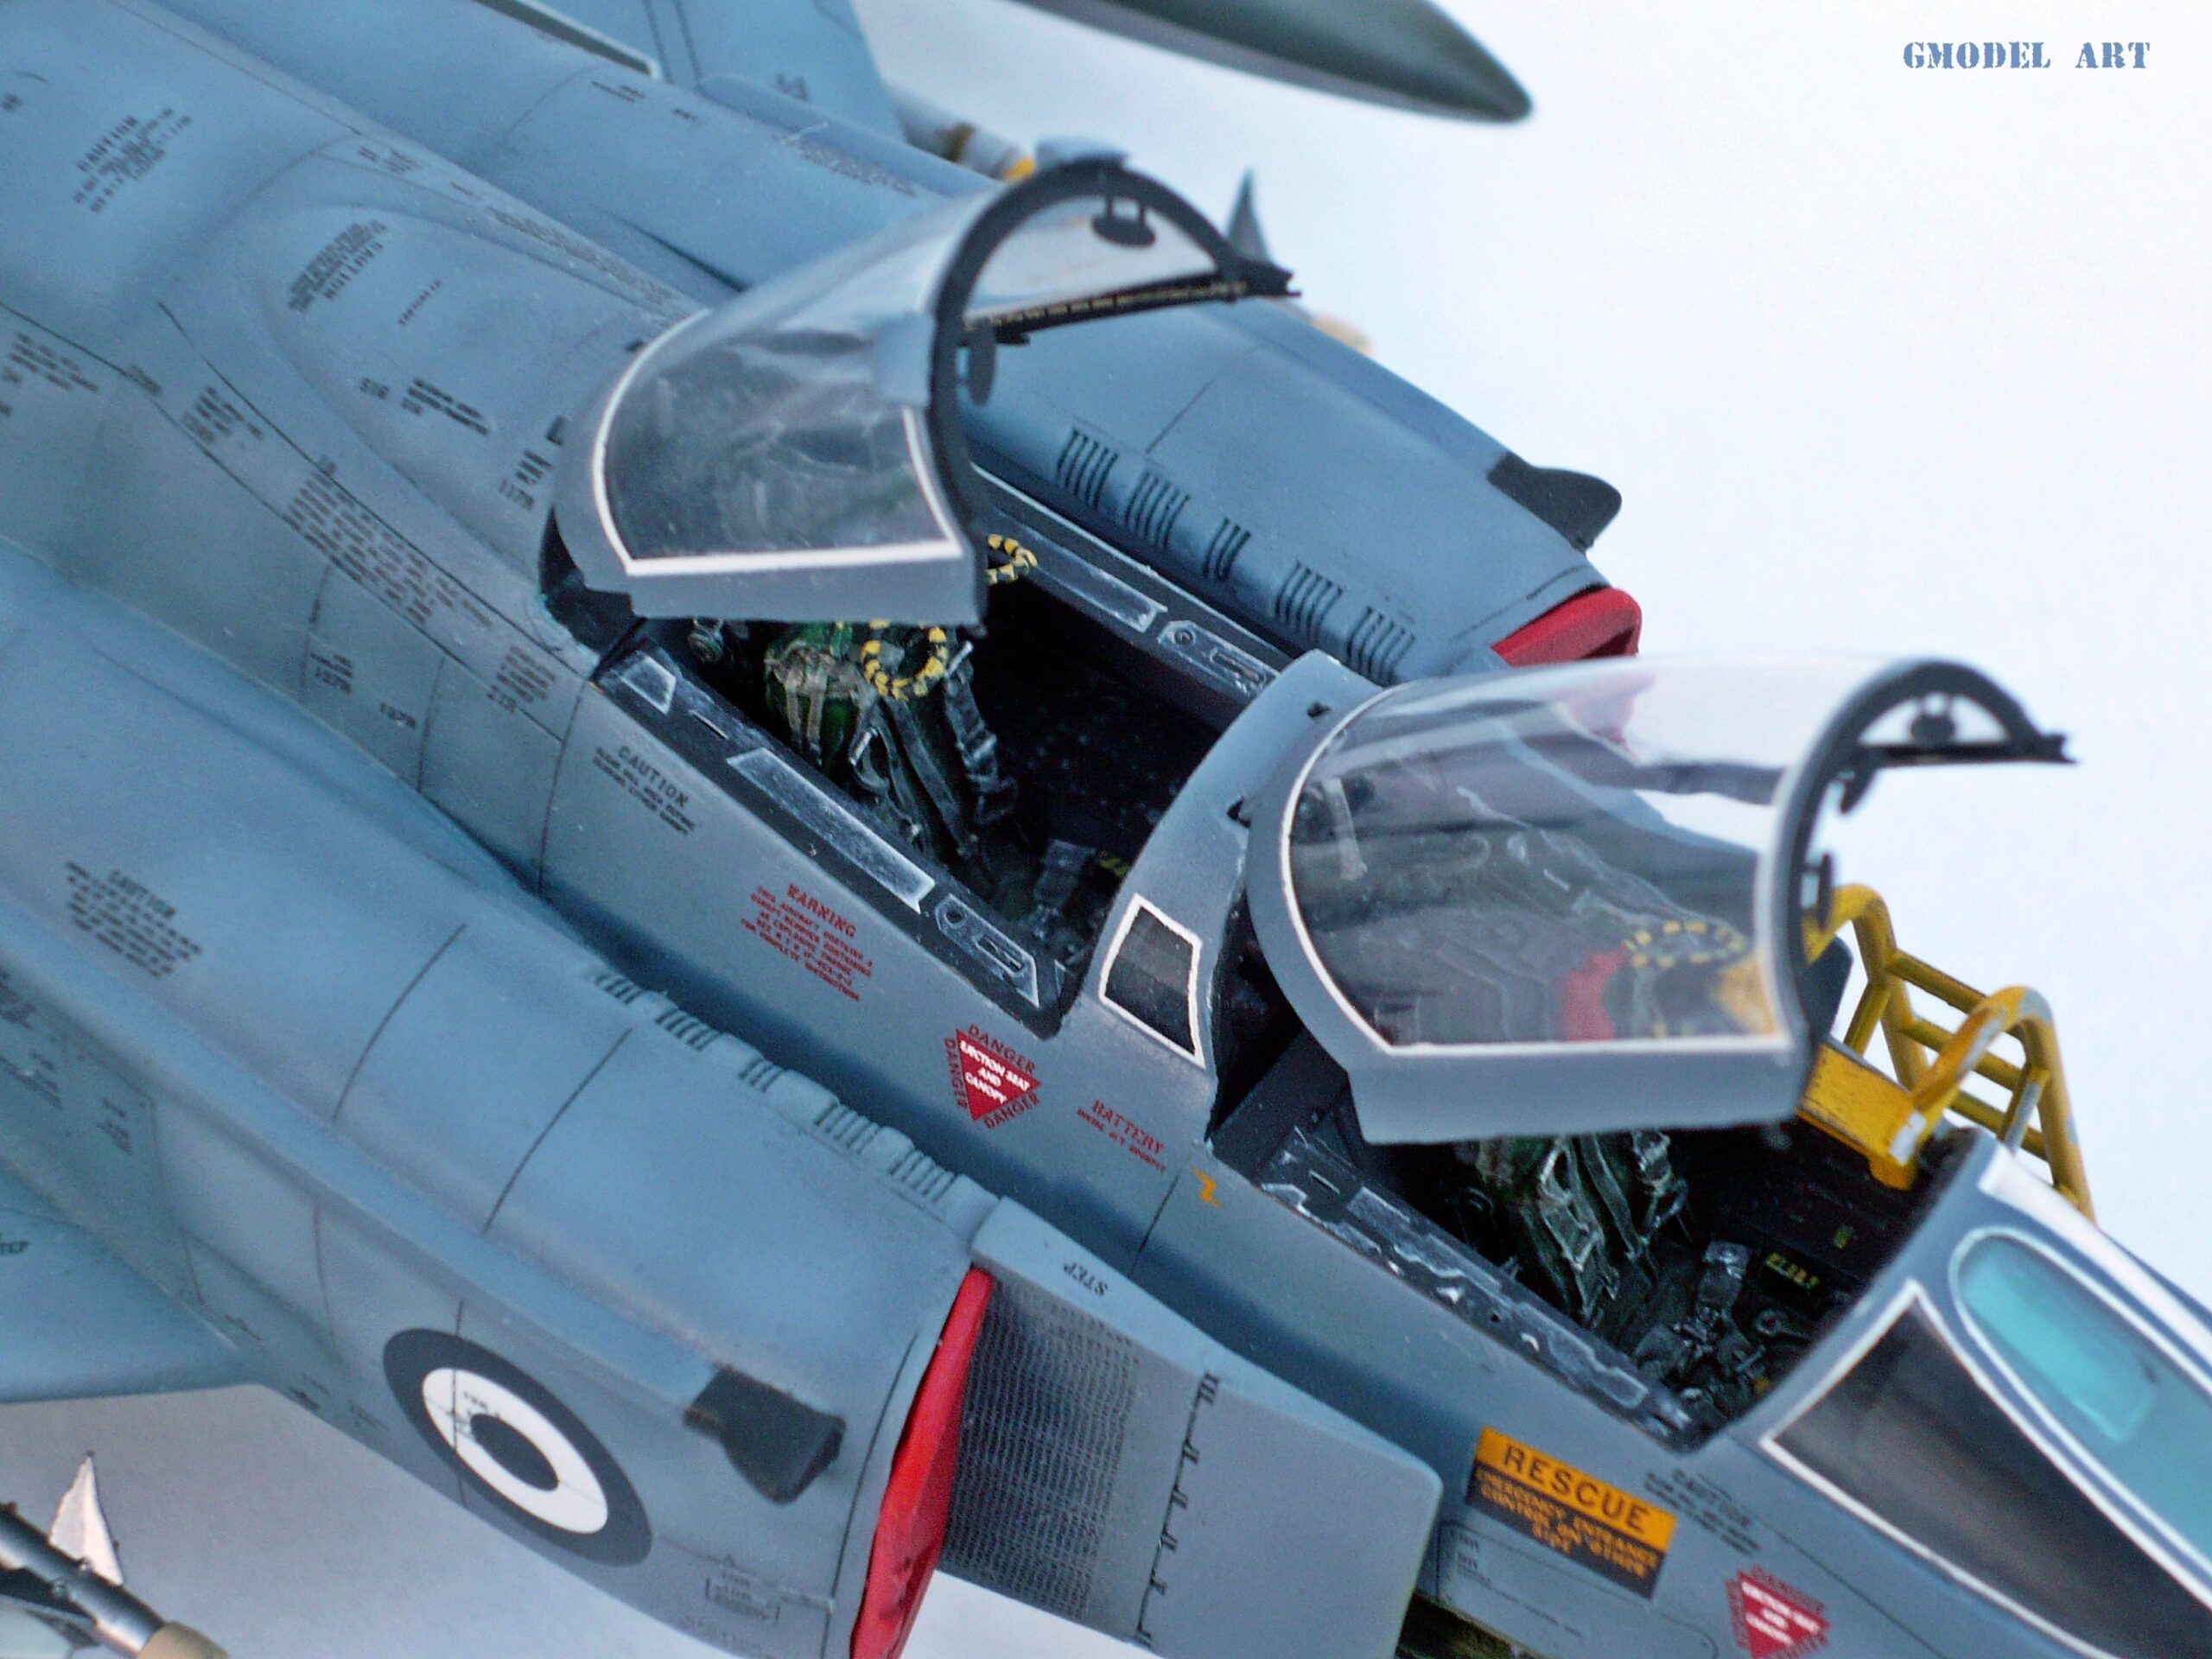
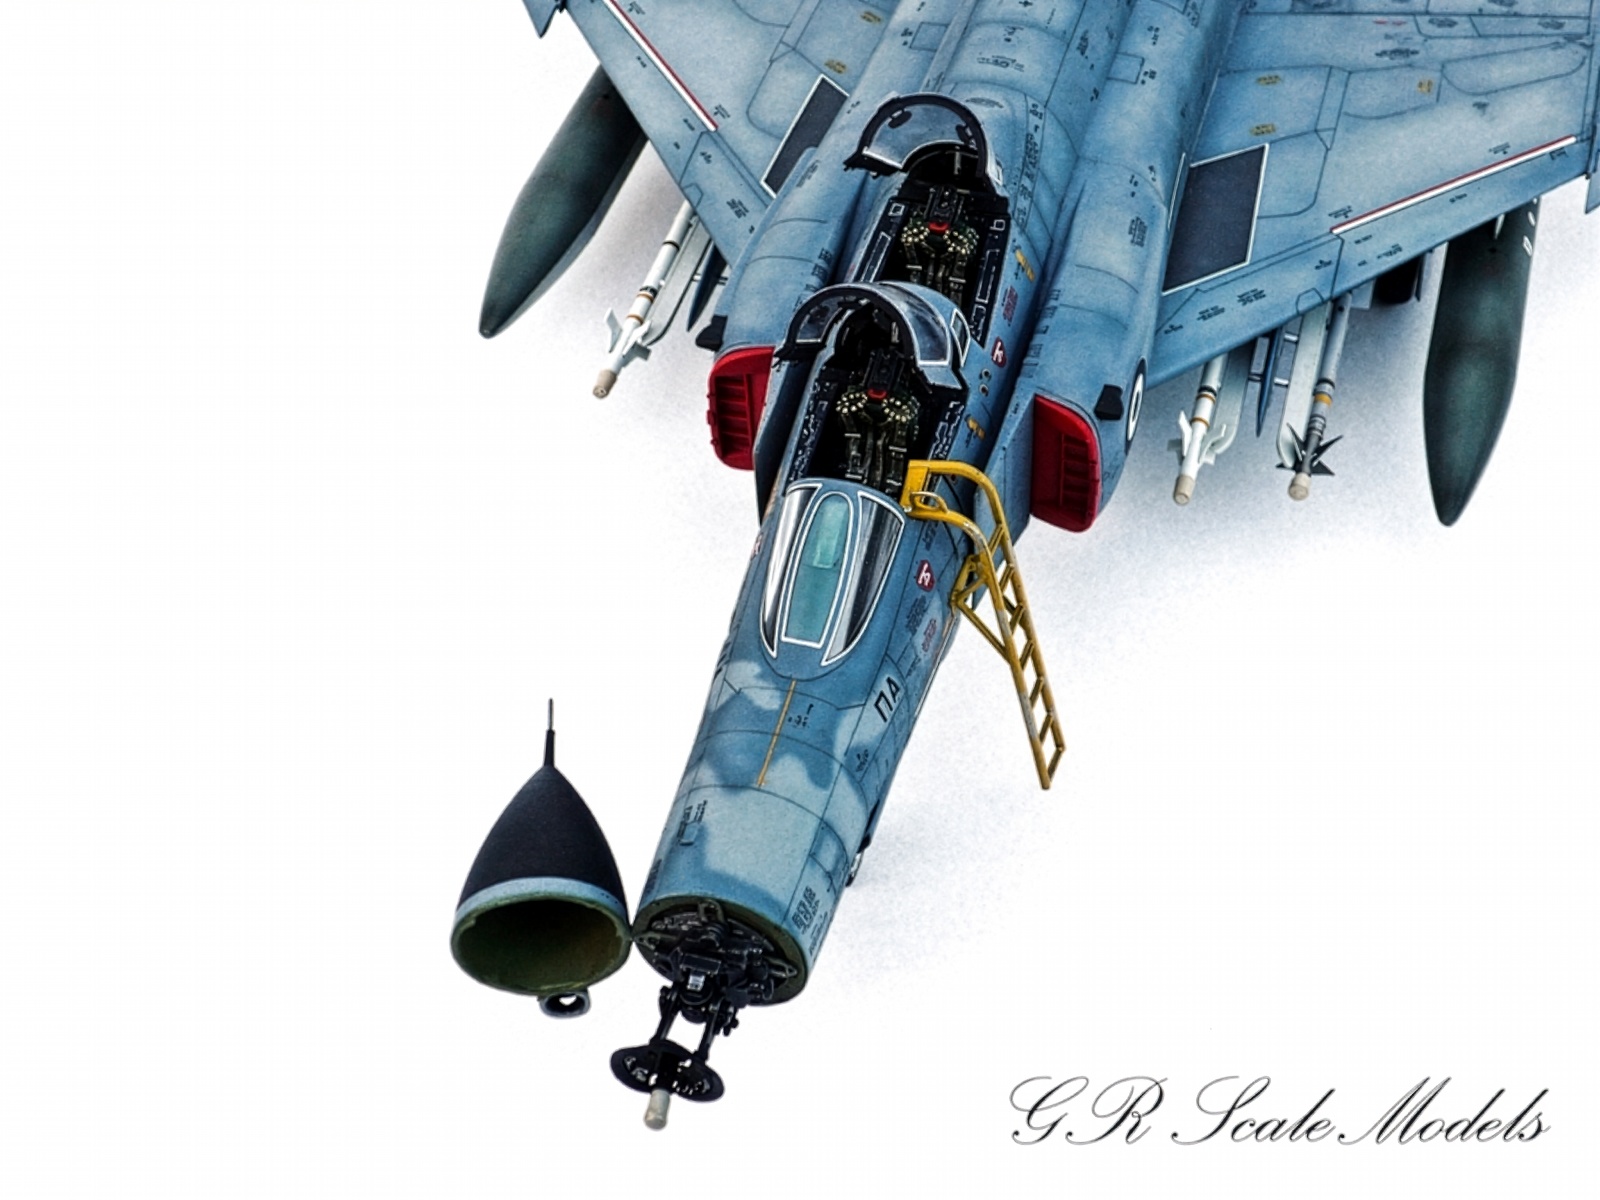
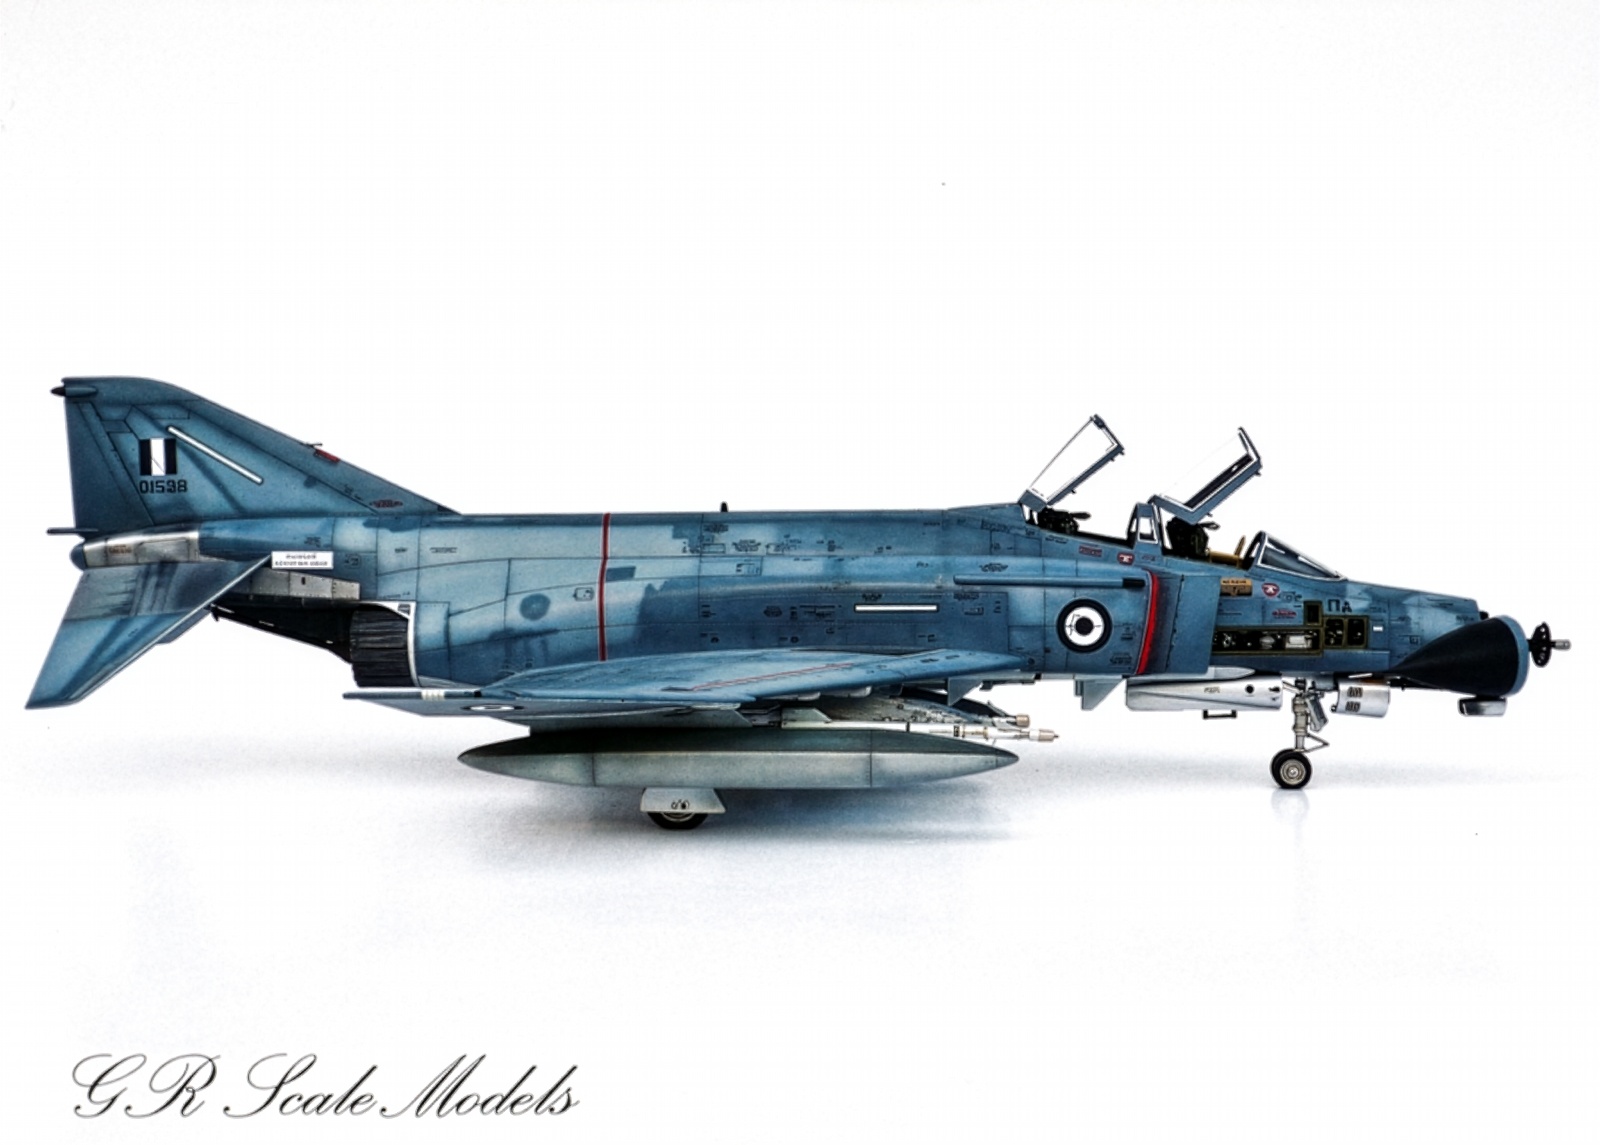
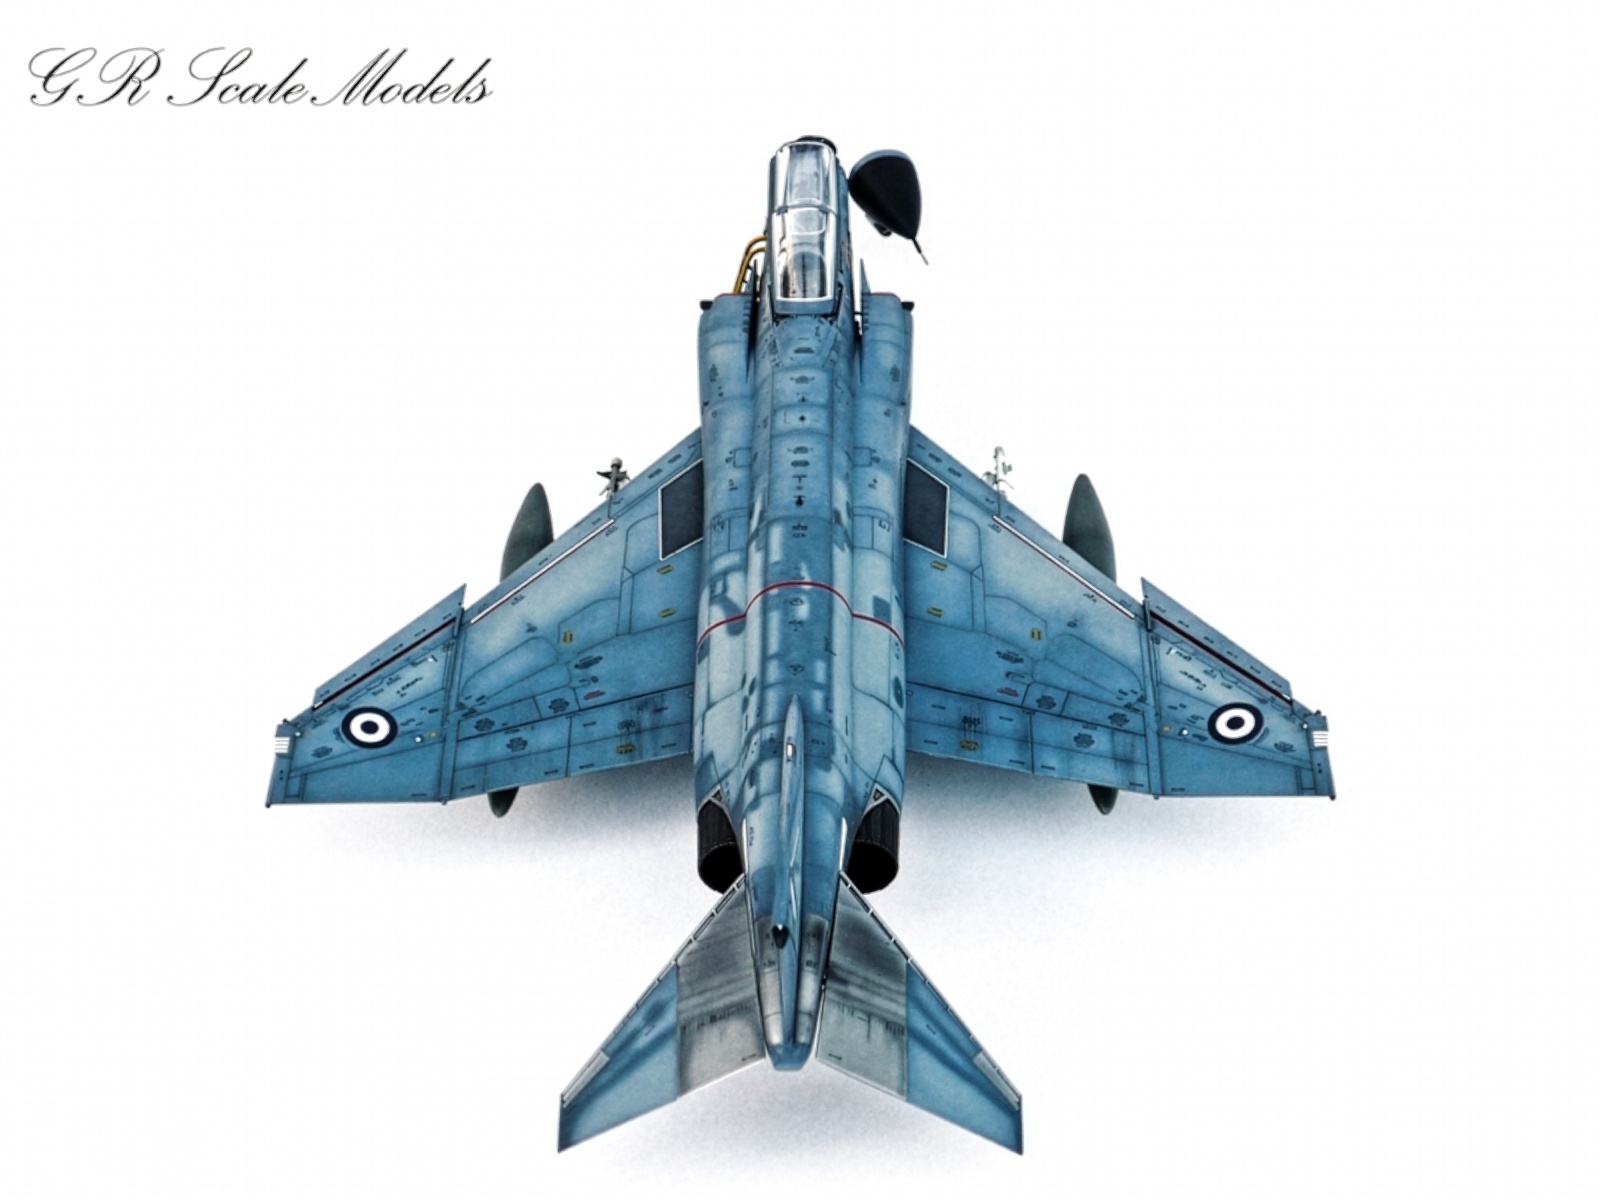
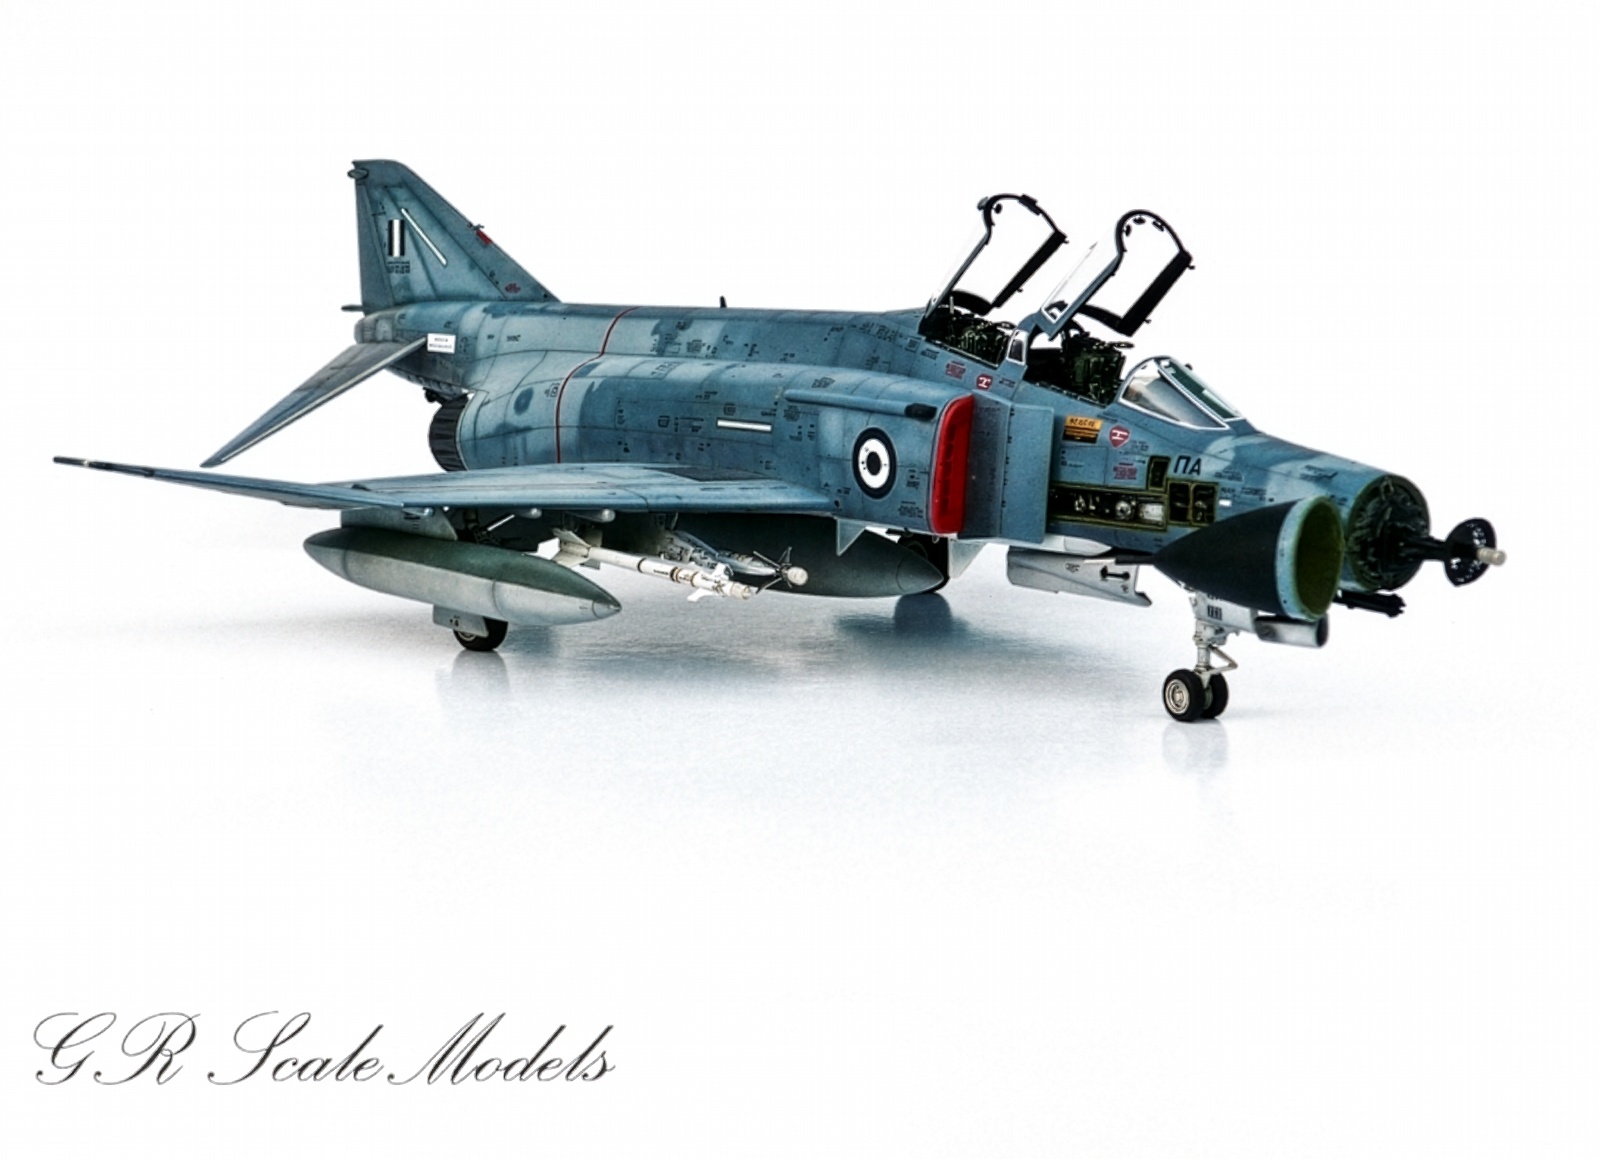
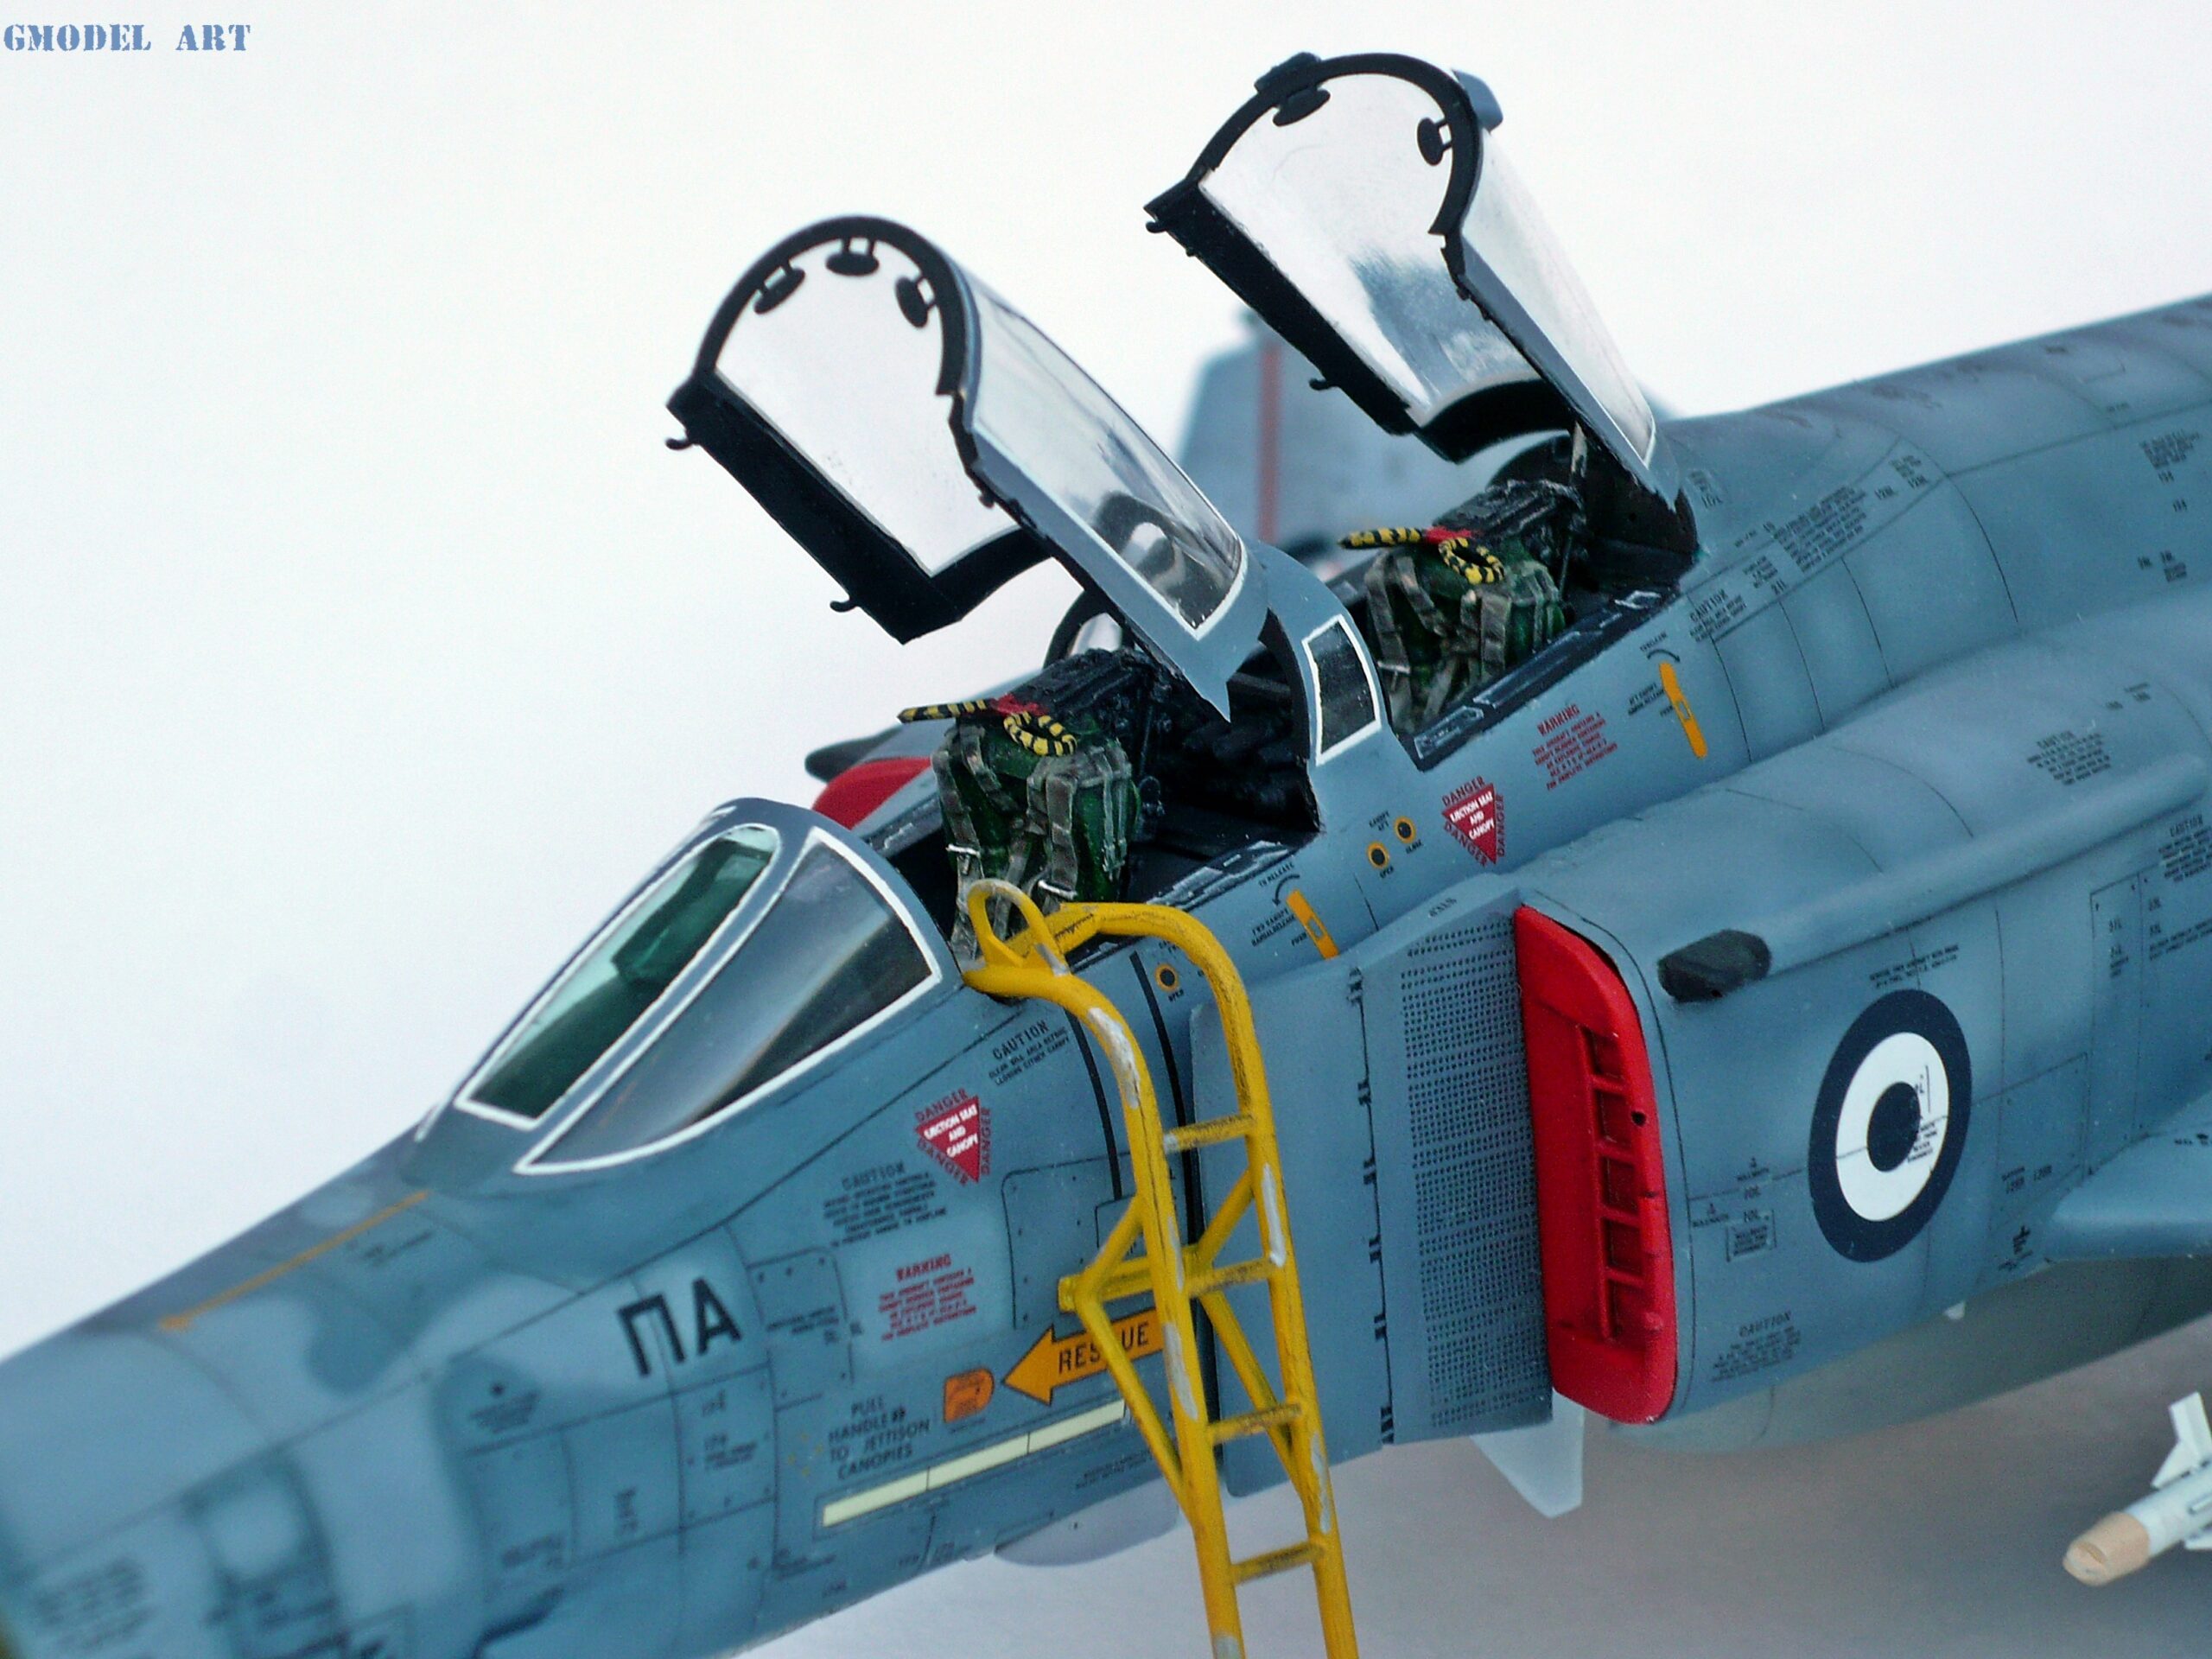
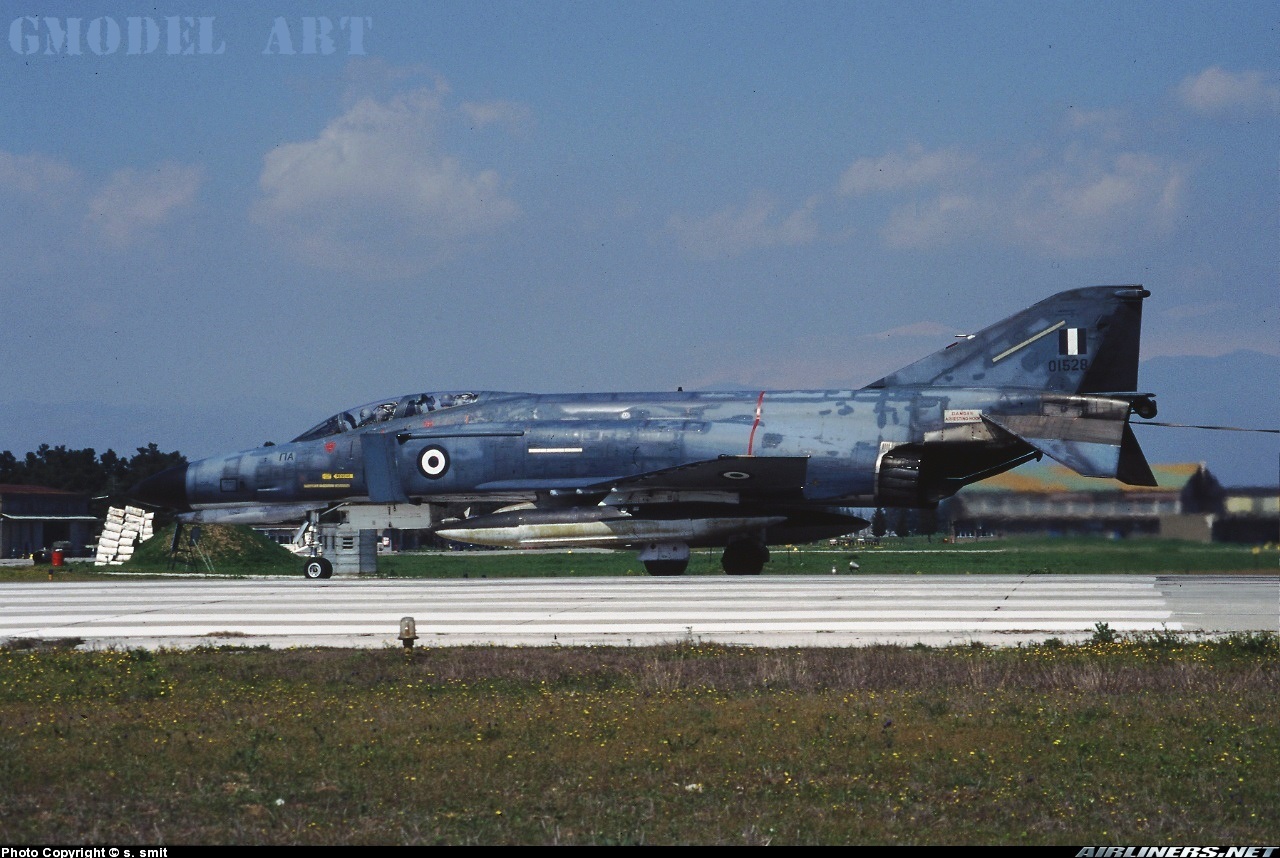
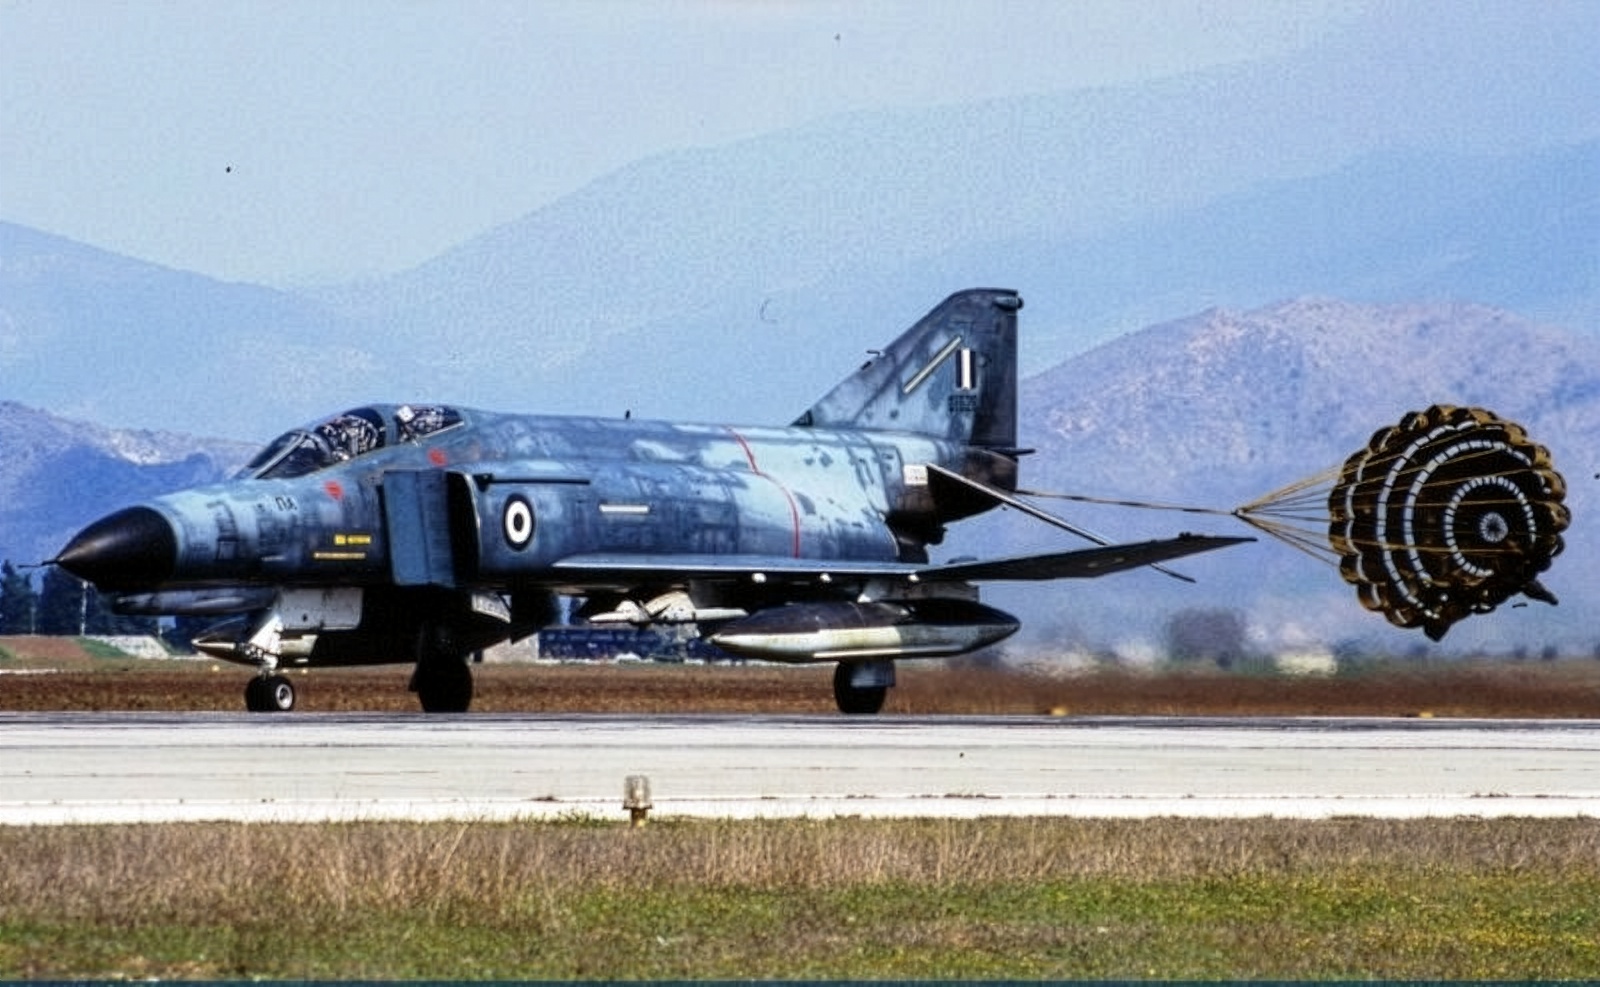
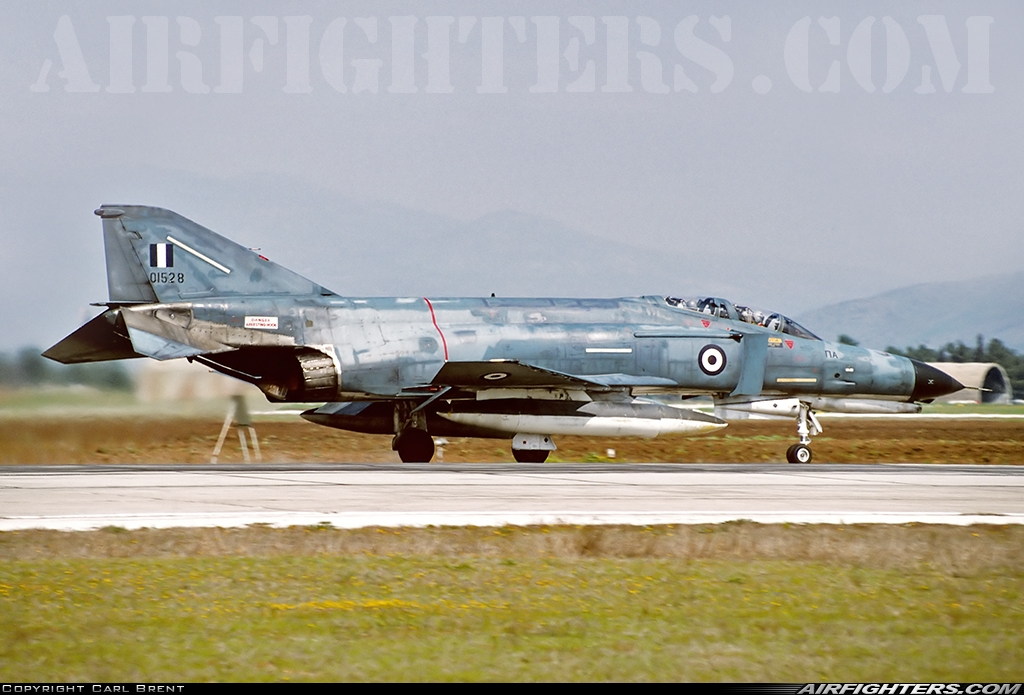
This project represents a Hellenic Air Force F-4E Phantom II serving with 337 Squadron in 1995, finished in the distinctive blue Aegean camouflage scheme. The build combines a Hasegawa 1:48 F-4E Phantom II kit with a Verlinden resin detail set and Aires exhausts, with particular attention paid to surface preparation, colour variation, metallic finishes and convincing operational weathering.
Rather than relying on a uniform coat of paint, the approach uses carefully controlled shading, subtle tonal differences and several layers of finishing products to reproduce the visual complexity of a well-used military aircraft.
Model kit and aftermarket accessories
The main components selected for the project were:
Component | Product |
|---|---|
Aircraft kit | Hasegawa F-4E Phantom II, 1:48 scale |
Resin detailing | Verlinden resin set |
Exhaust assemblies | Aires exhausts |
National markings and stencils | Icarus Decals, sheets 48003 and 48004 |
Primer | AMMO by Mig Jimenez One Shot |
Camouflage paint | AMMO ANA 608 Intermediate Blue, FS 35164 as specified in the original build |
Metallic finishes | Alclad II range |
Weathering | AMMO by Mig Jimenez panel line washes and Oilbrusher |
The aftermarket components enhance the level of detail, while the painting process brings the model to life. The key to the project is the combination of a smooth surface, restrained colour modulation and careful separation between painted surfaces and natural-metal finishes.
Surface preparation and priming
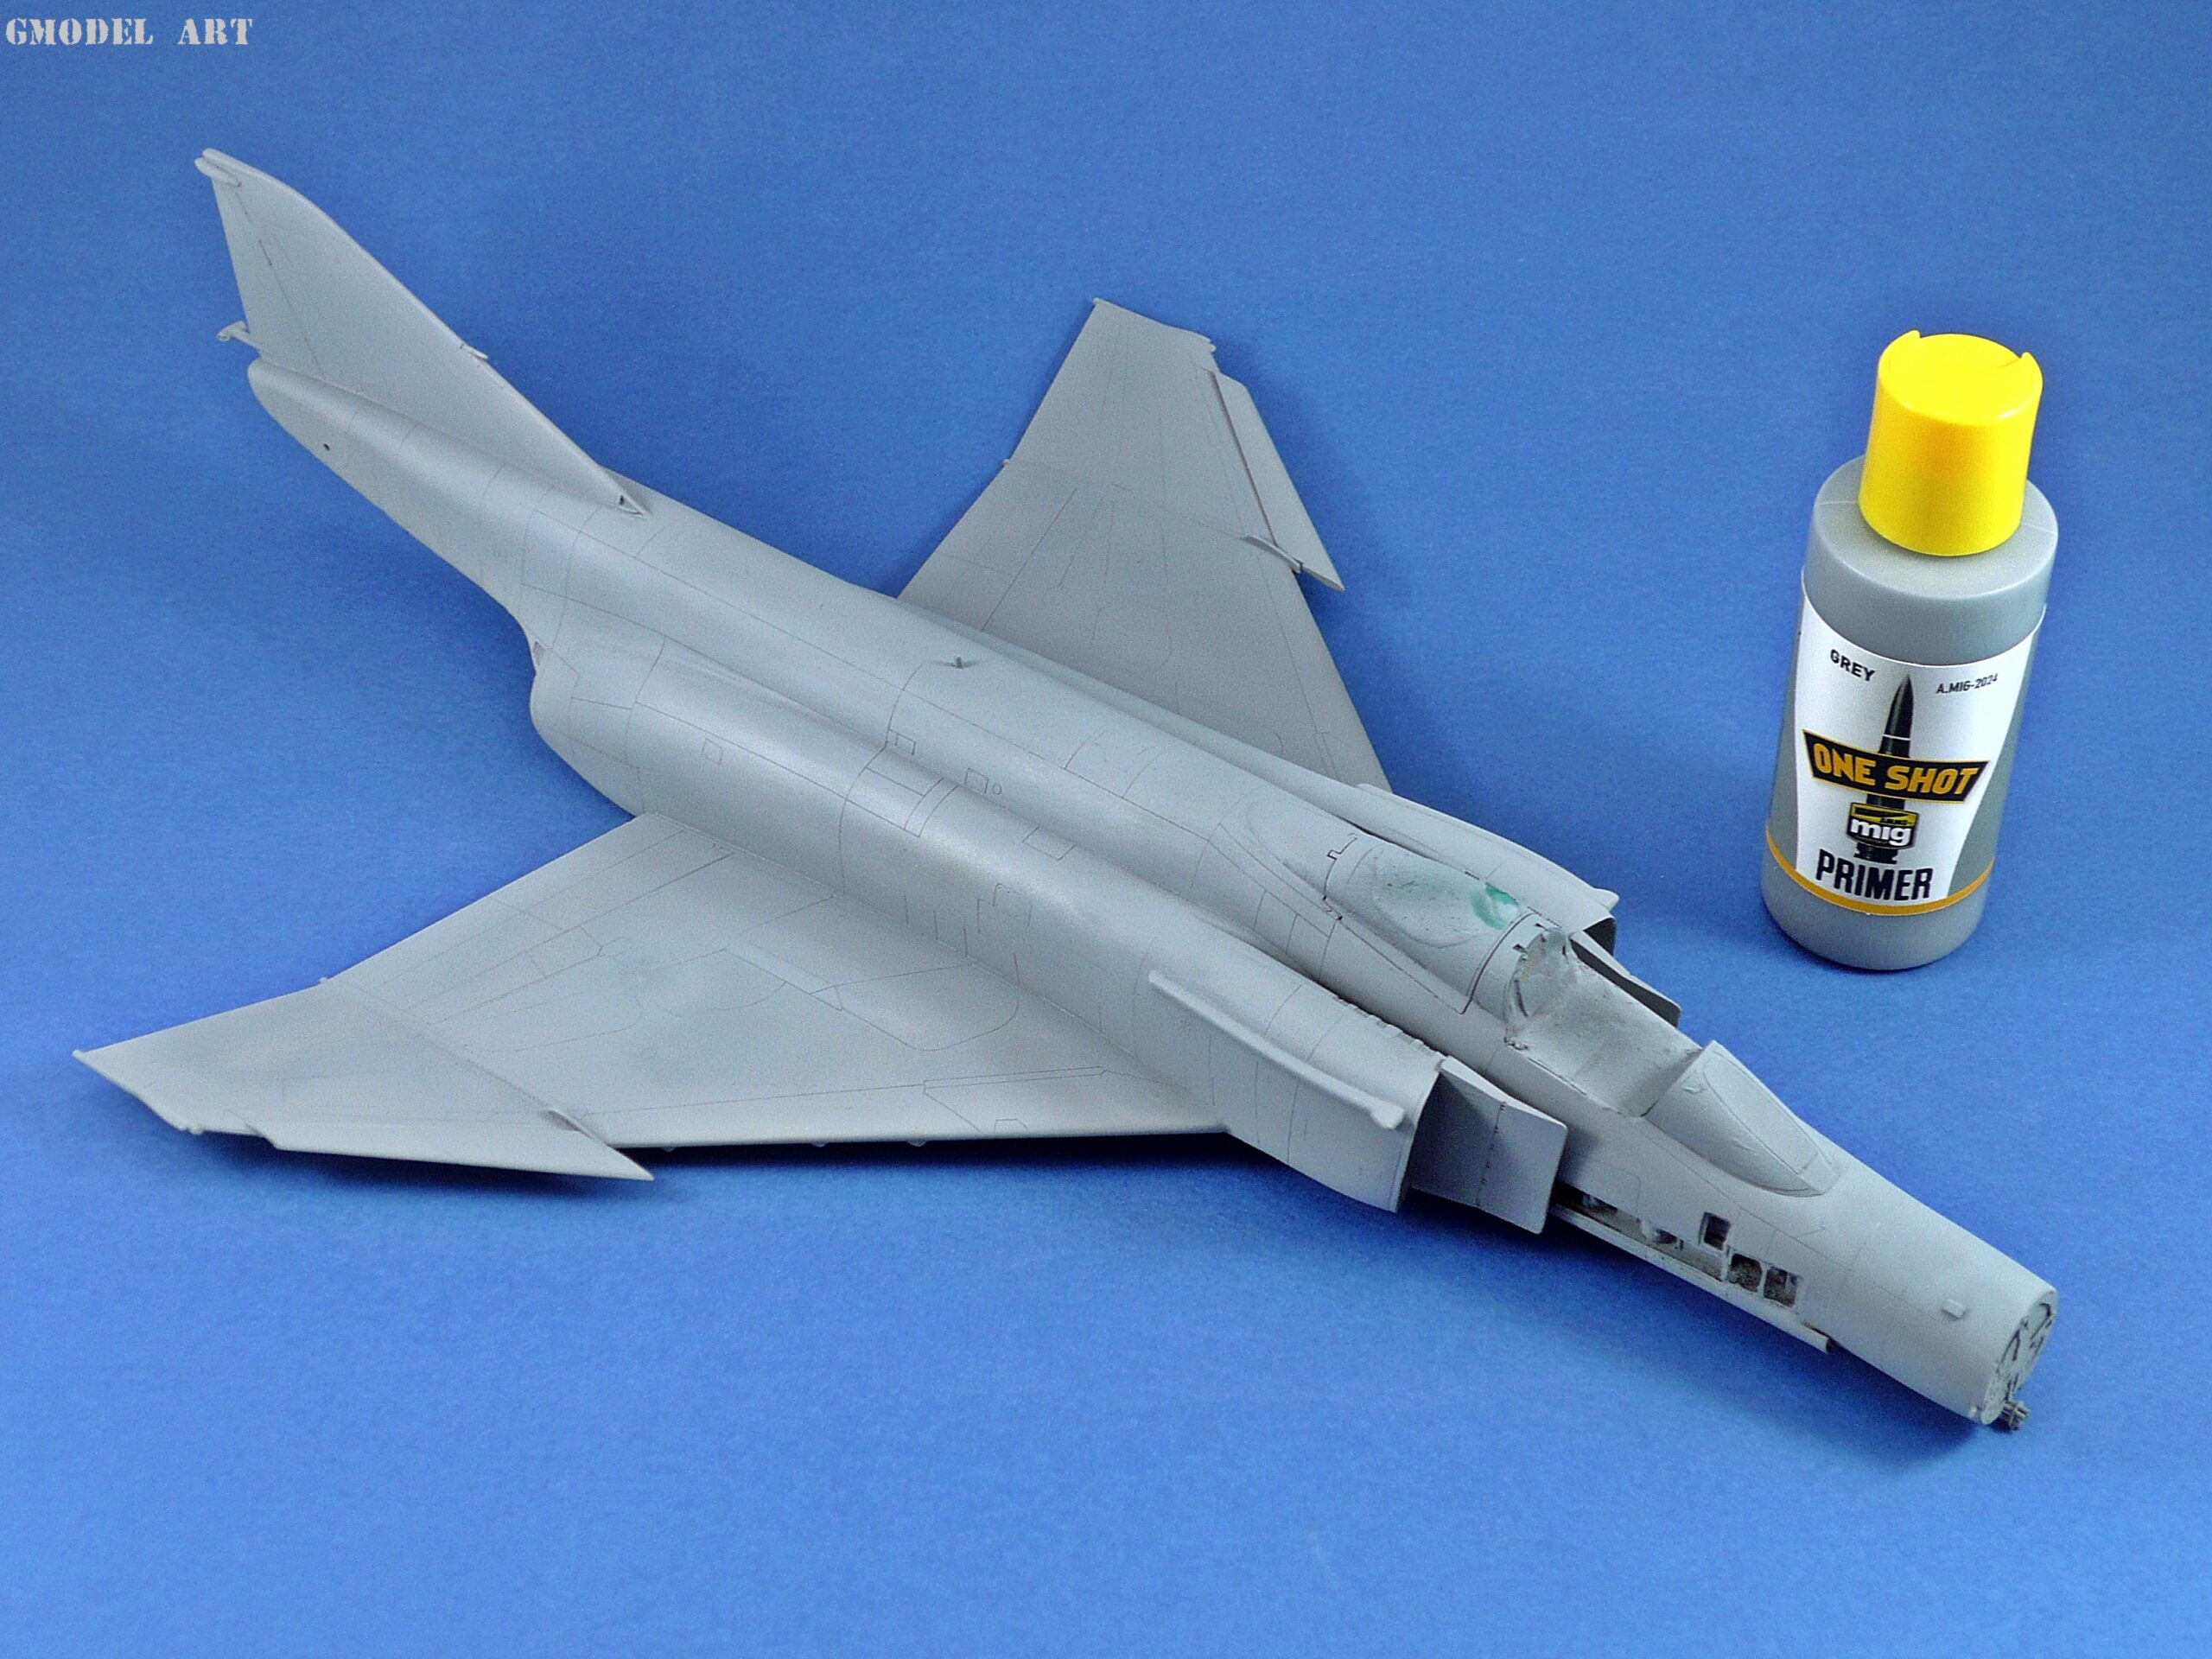
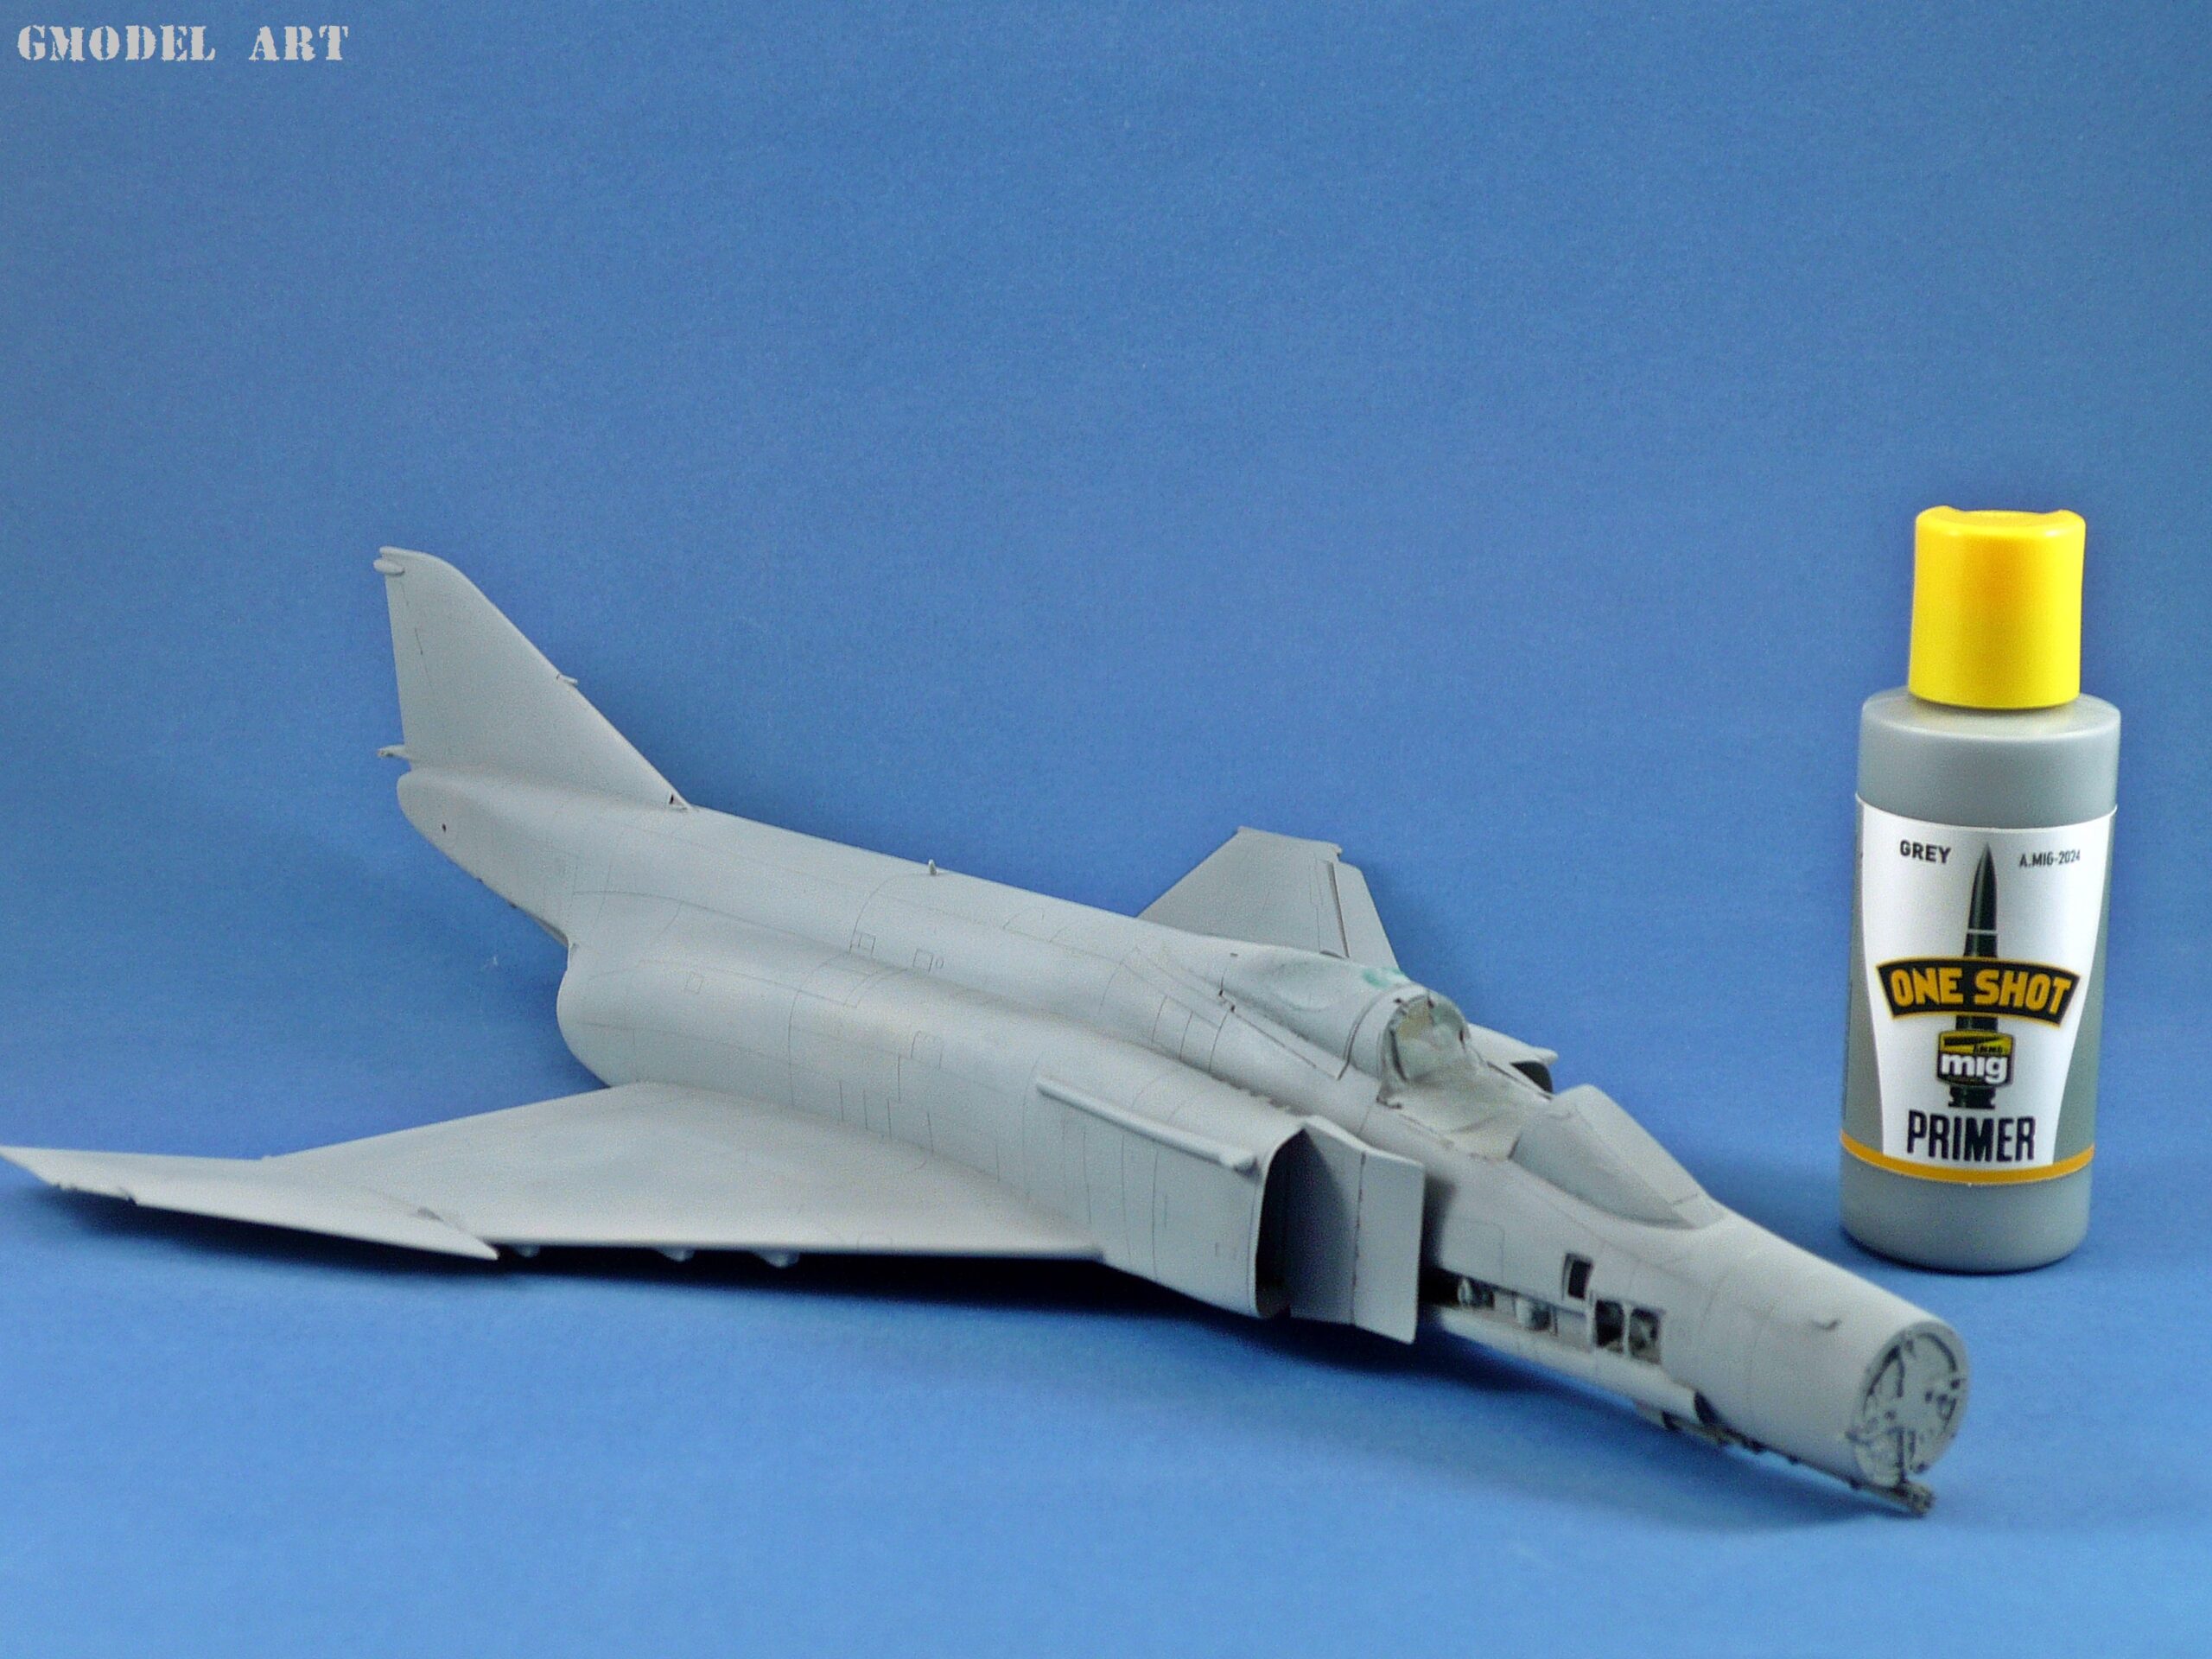
Before painting, the completed assembly was washed with soapy water to remove fingerprints, grease and dust. This is a simple but important step: contaminants can interfere with paint adhesion and cause problems during subsequent finishing stages.
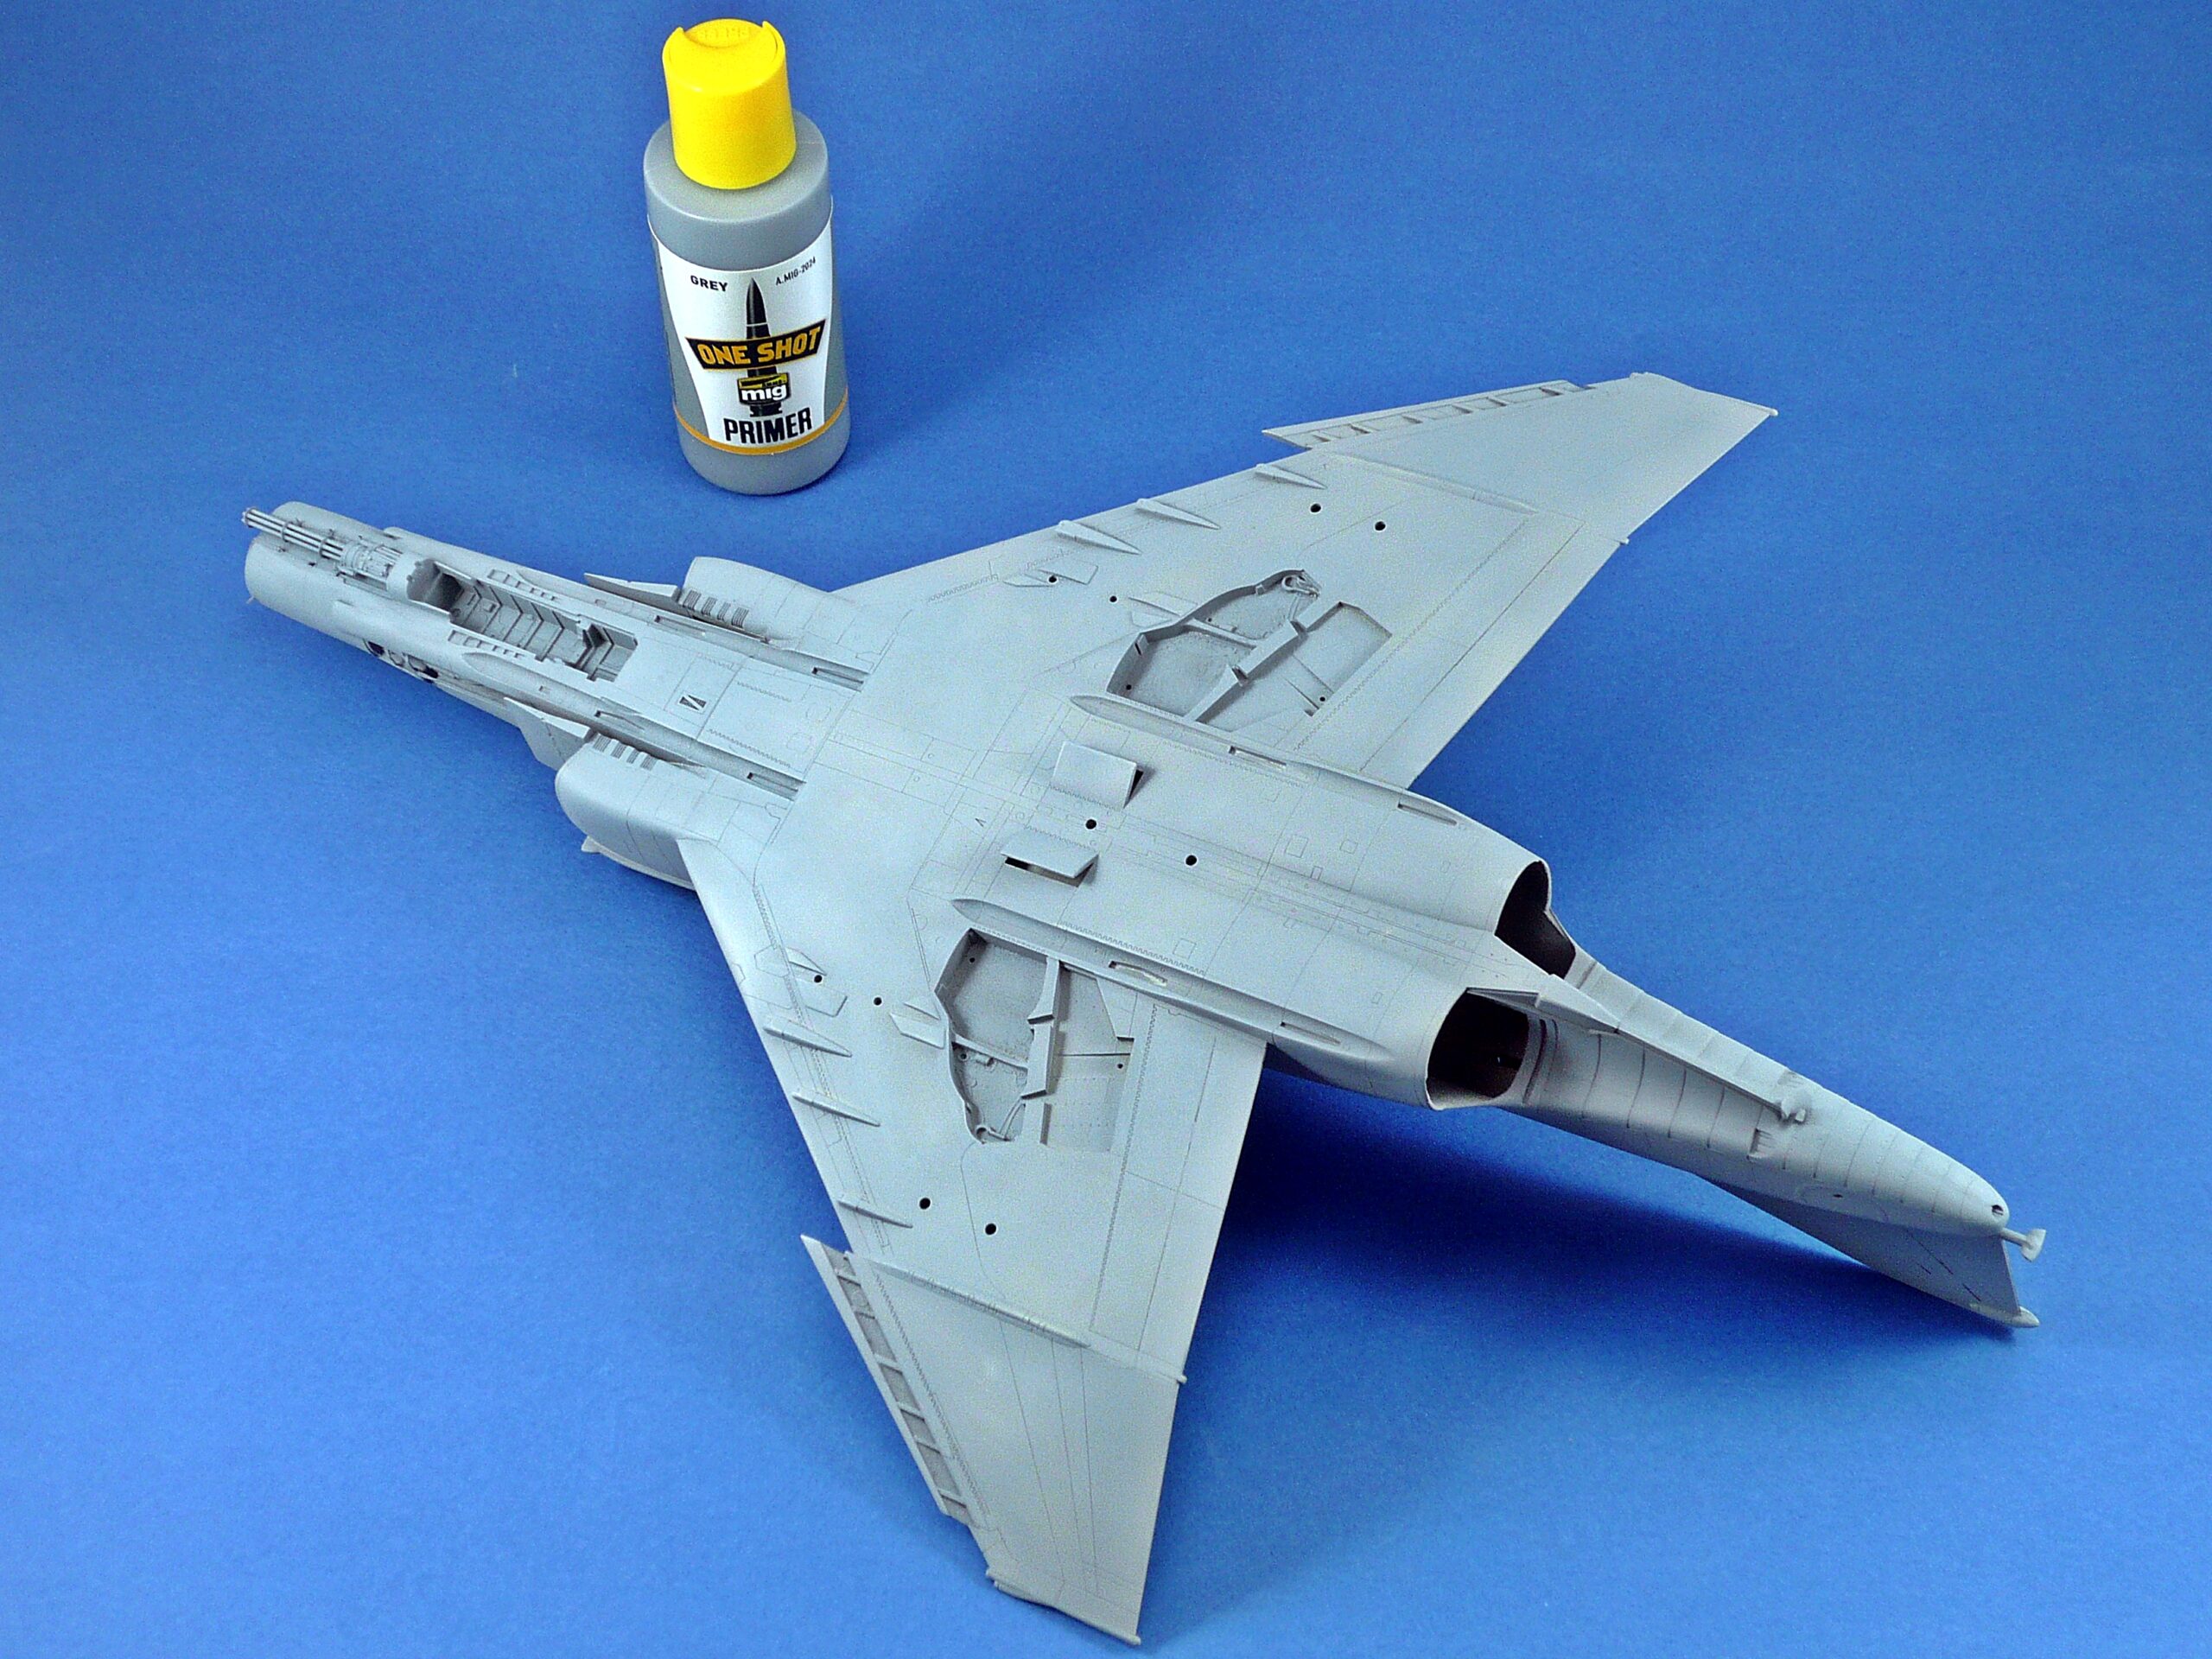
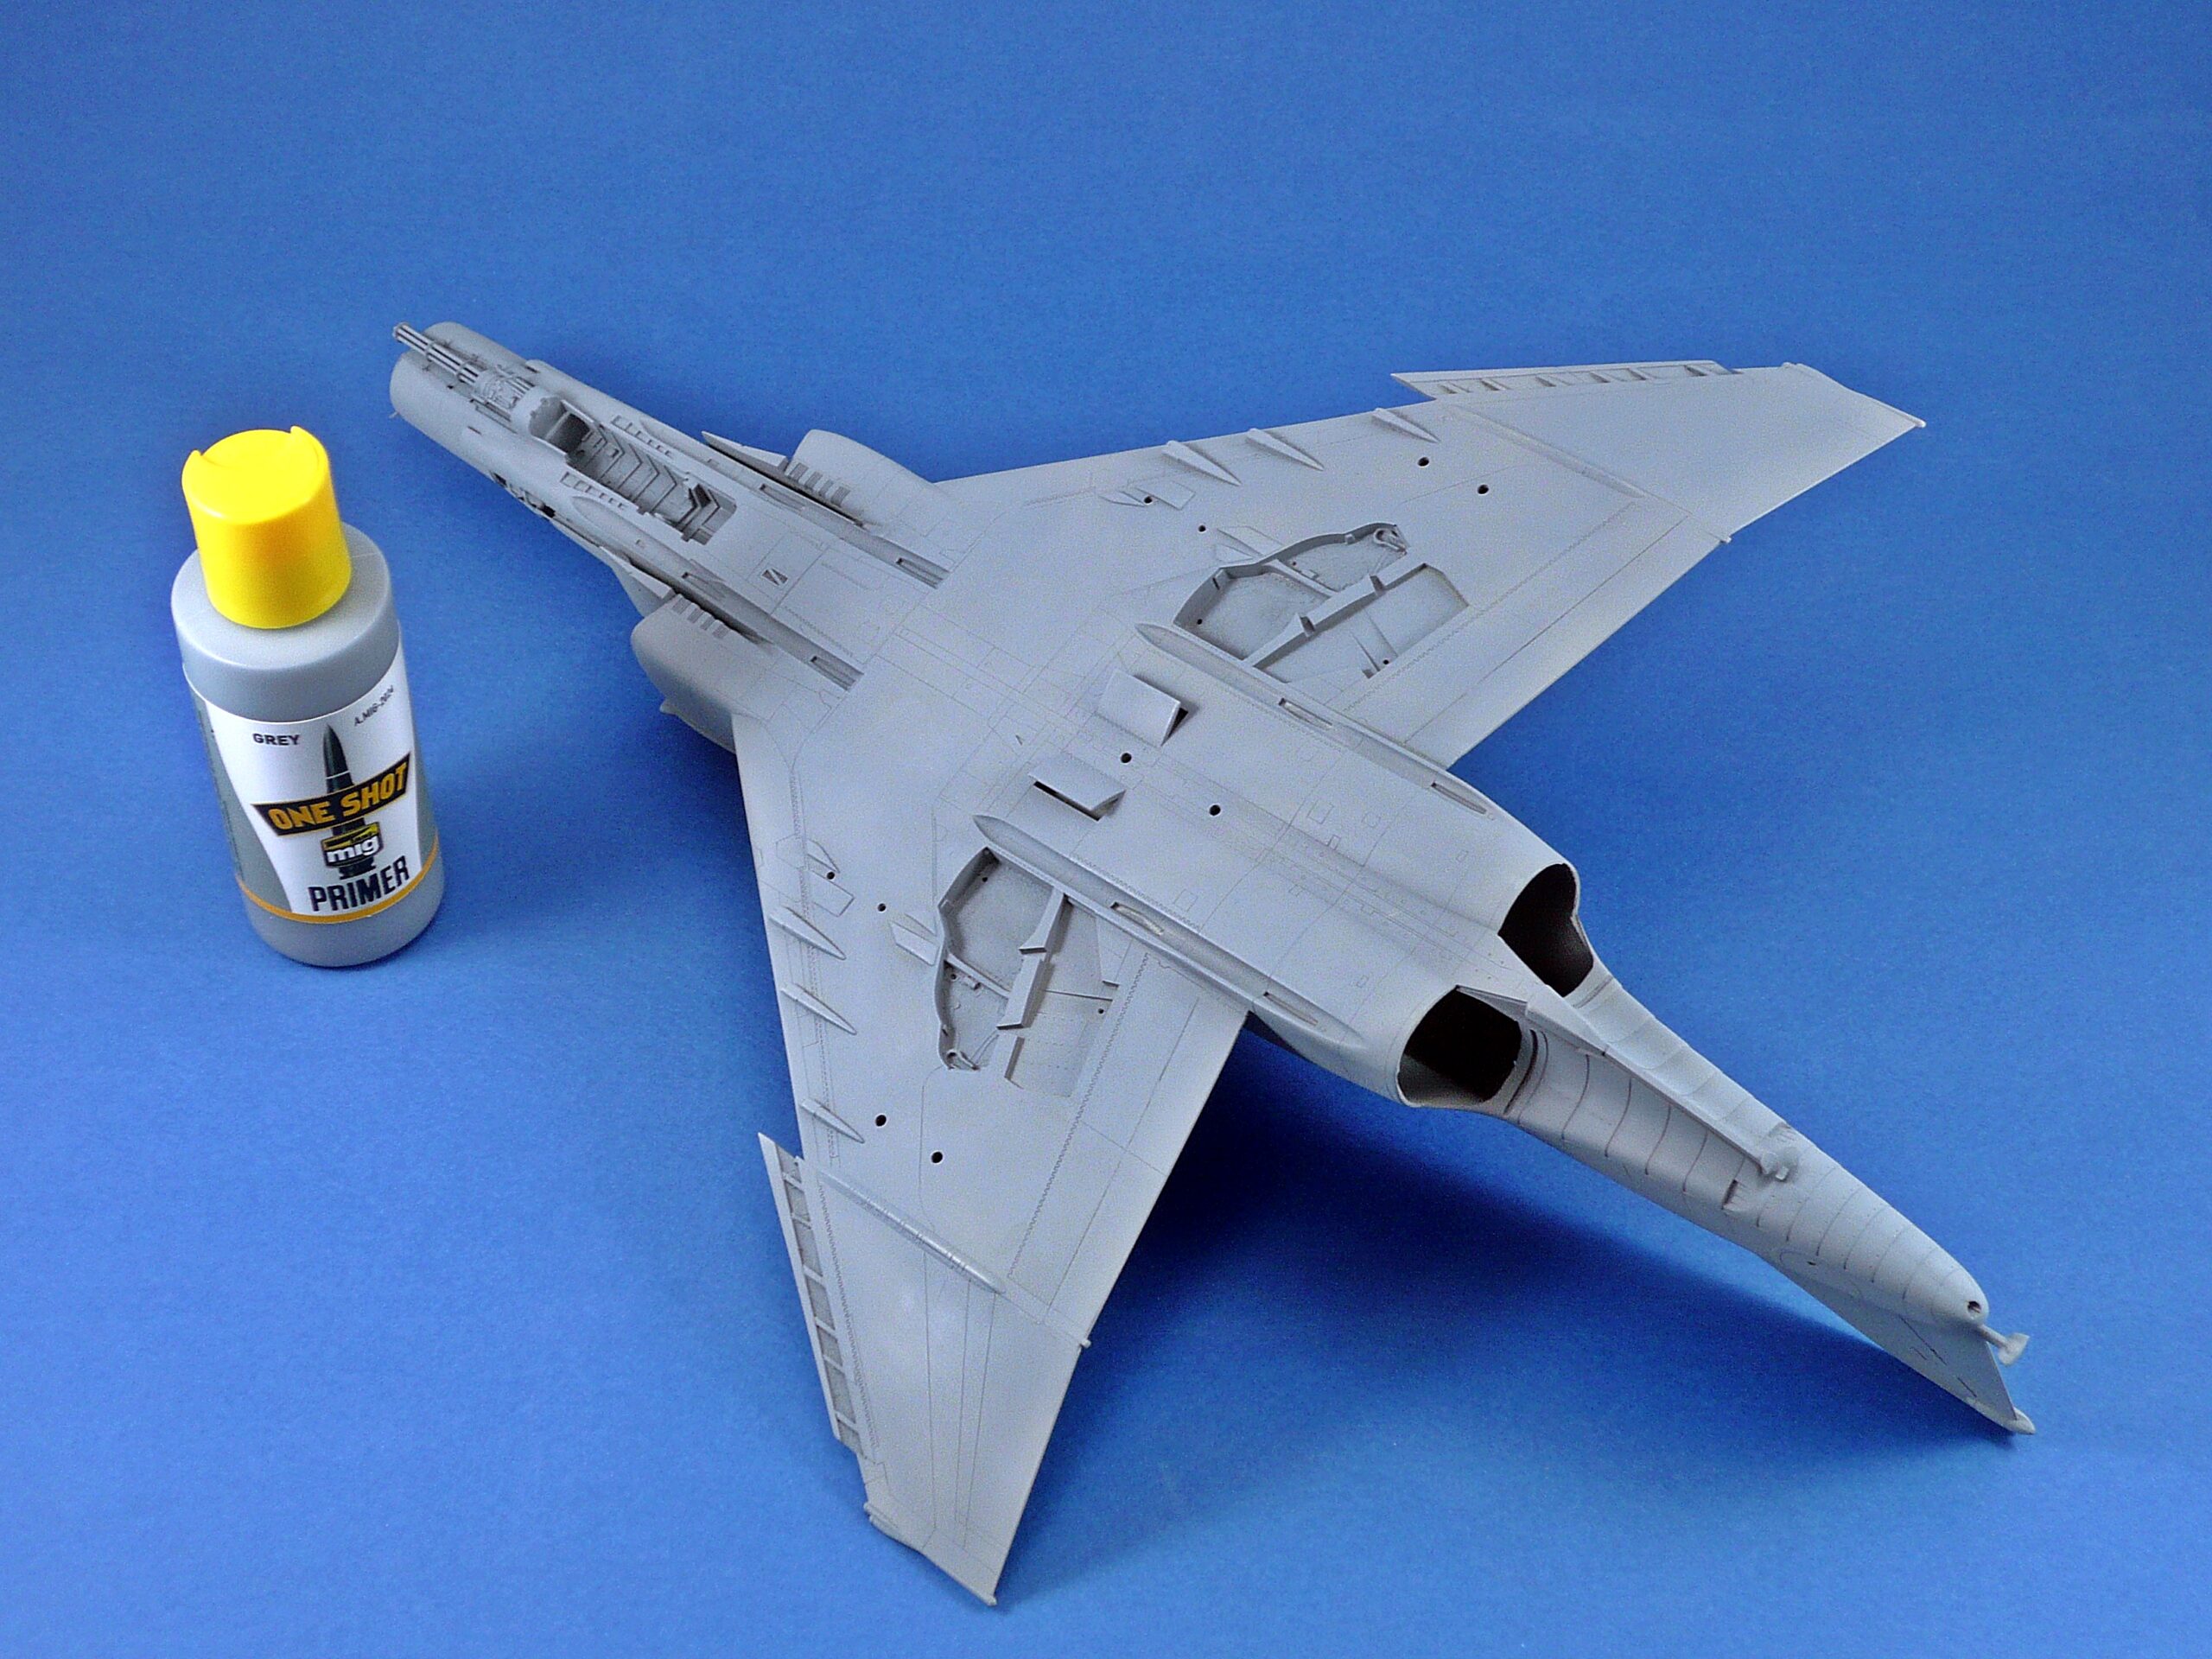
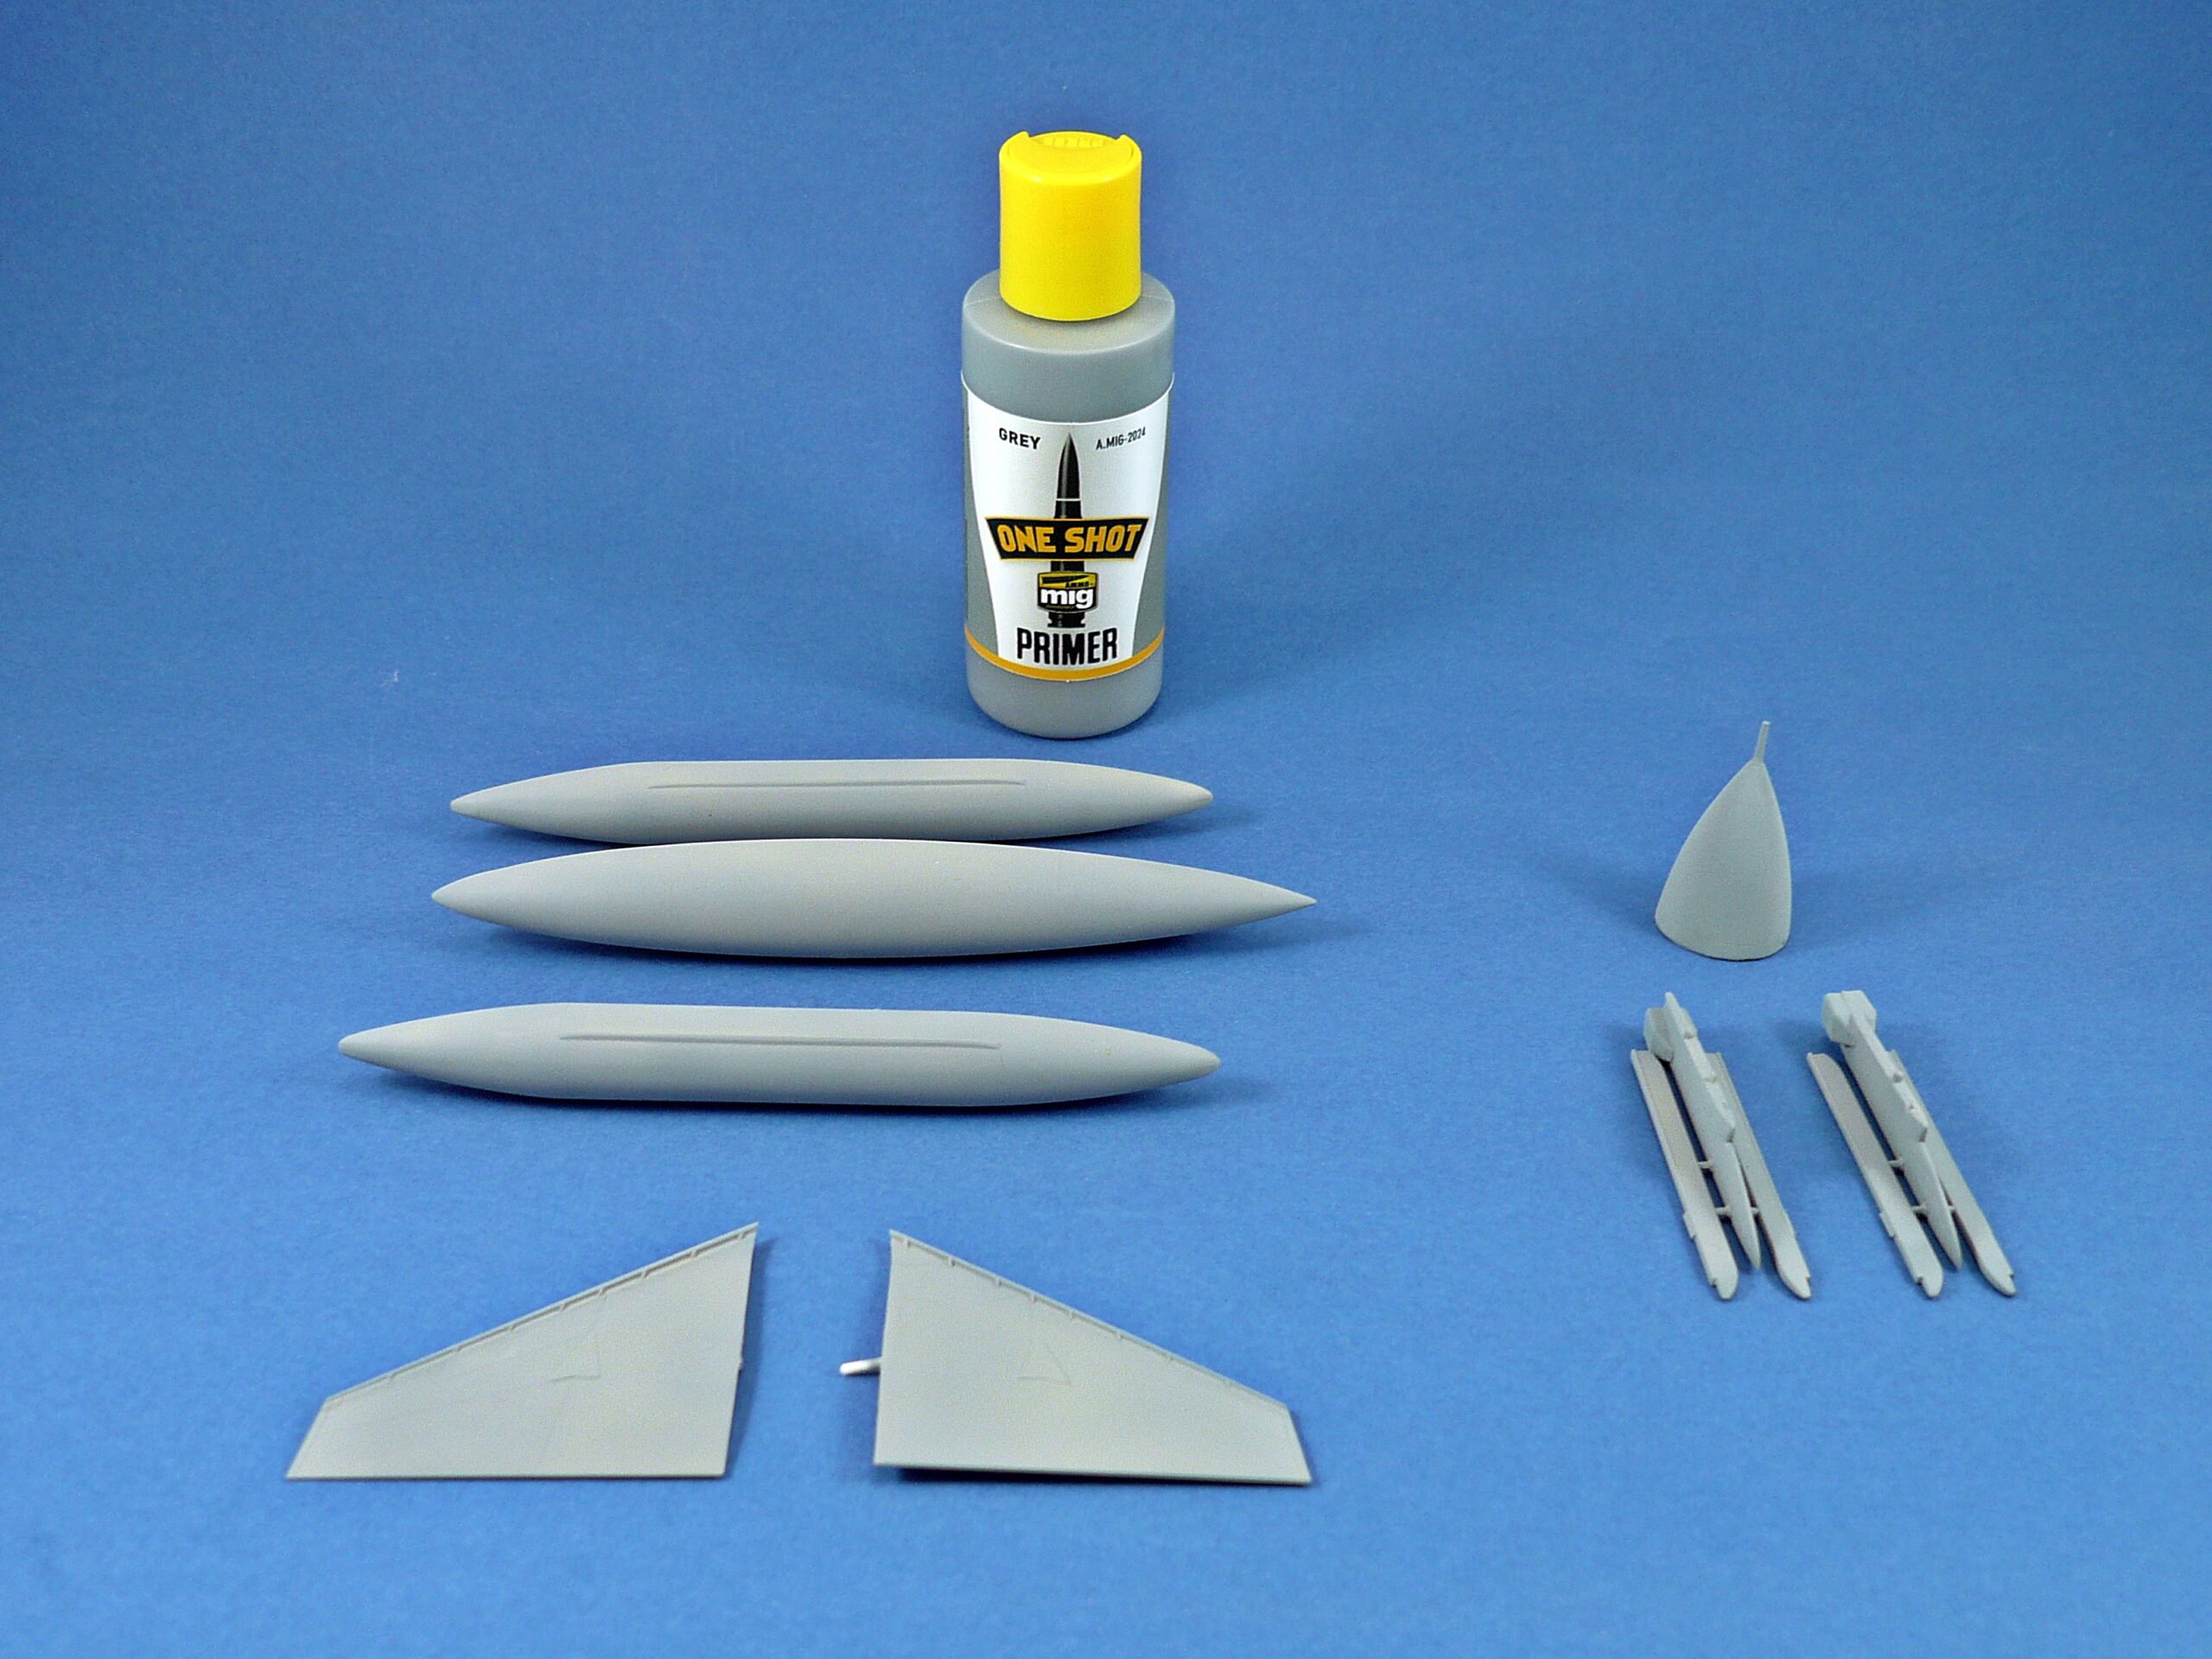
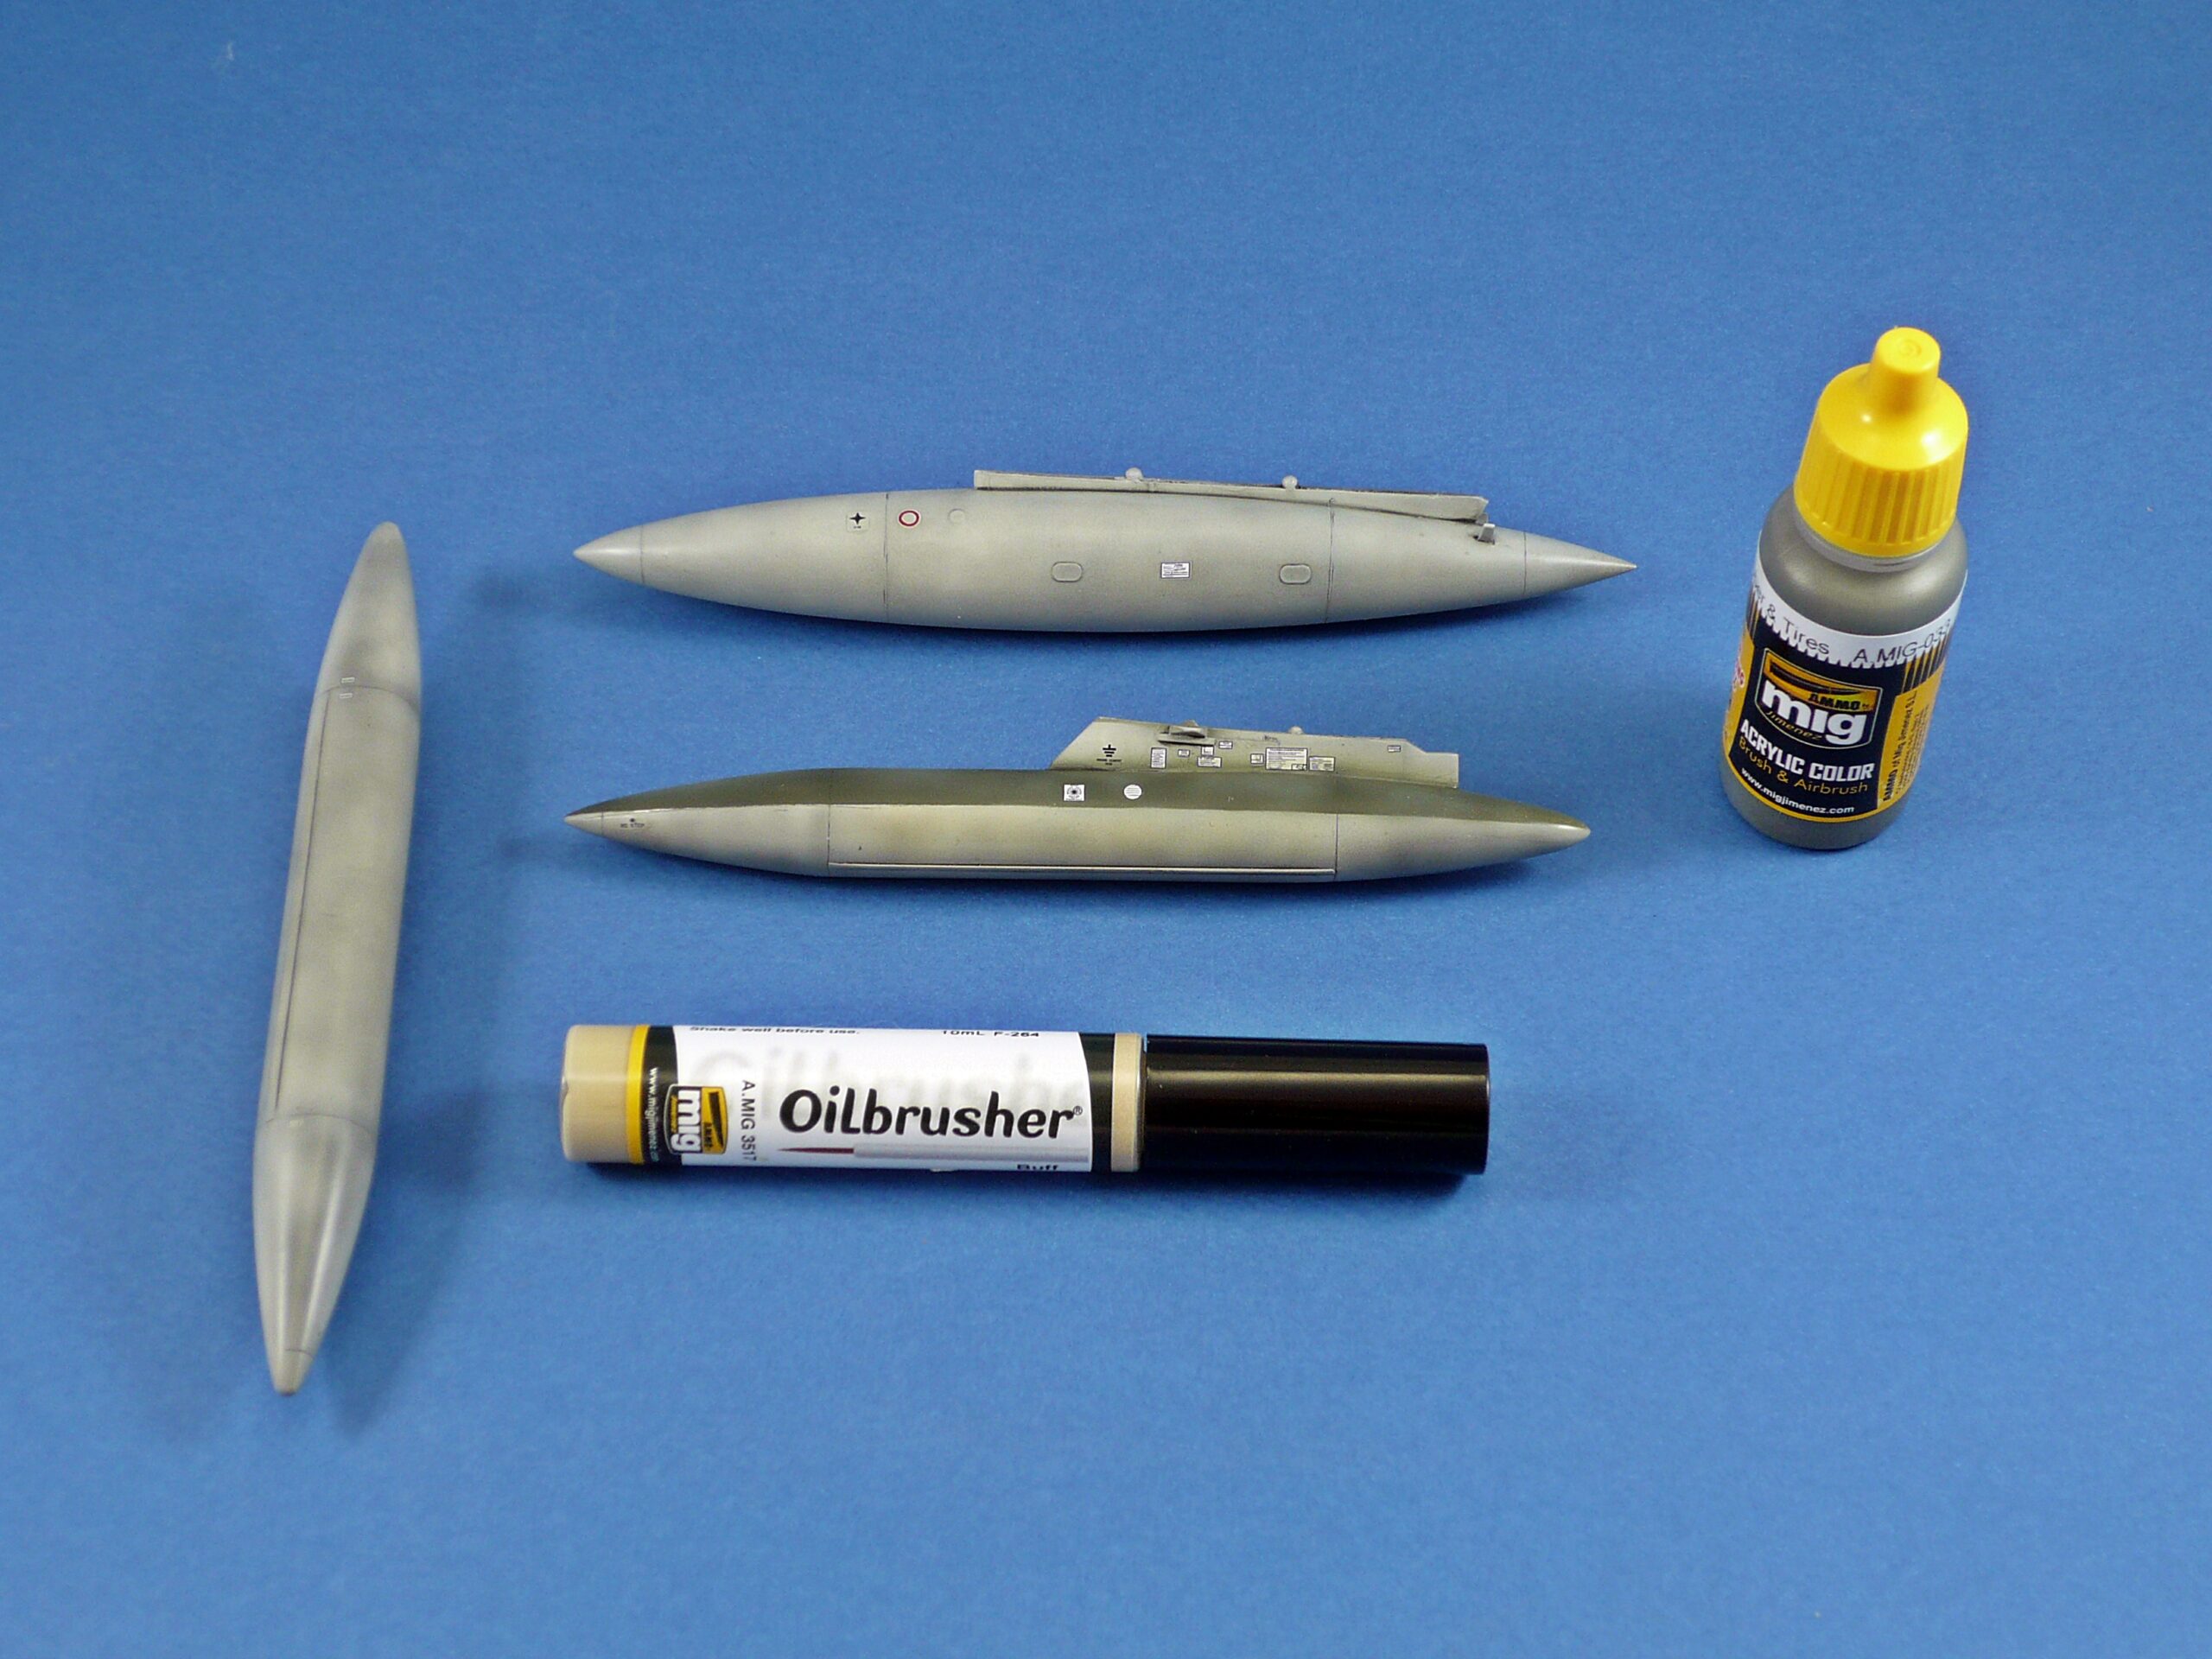
The first primer coat was AMMO by Mig Jimenez One Shot Primer, applied to the aircraft, external fuel tanks and other main components. Primer provides a consistent surface for the following coats and helps reveal imperfections that may have been overlooked during assembly.
Any visible flaws should be corrected before proceeding. Once the surface is satisfactory, the model is ready for the metallic and camouflage finishes.
Preparing the metallic undersurfaces
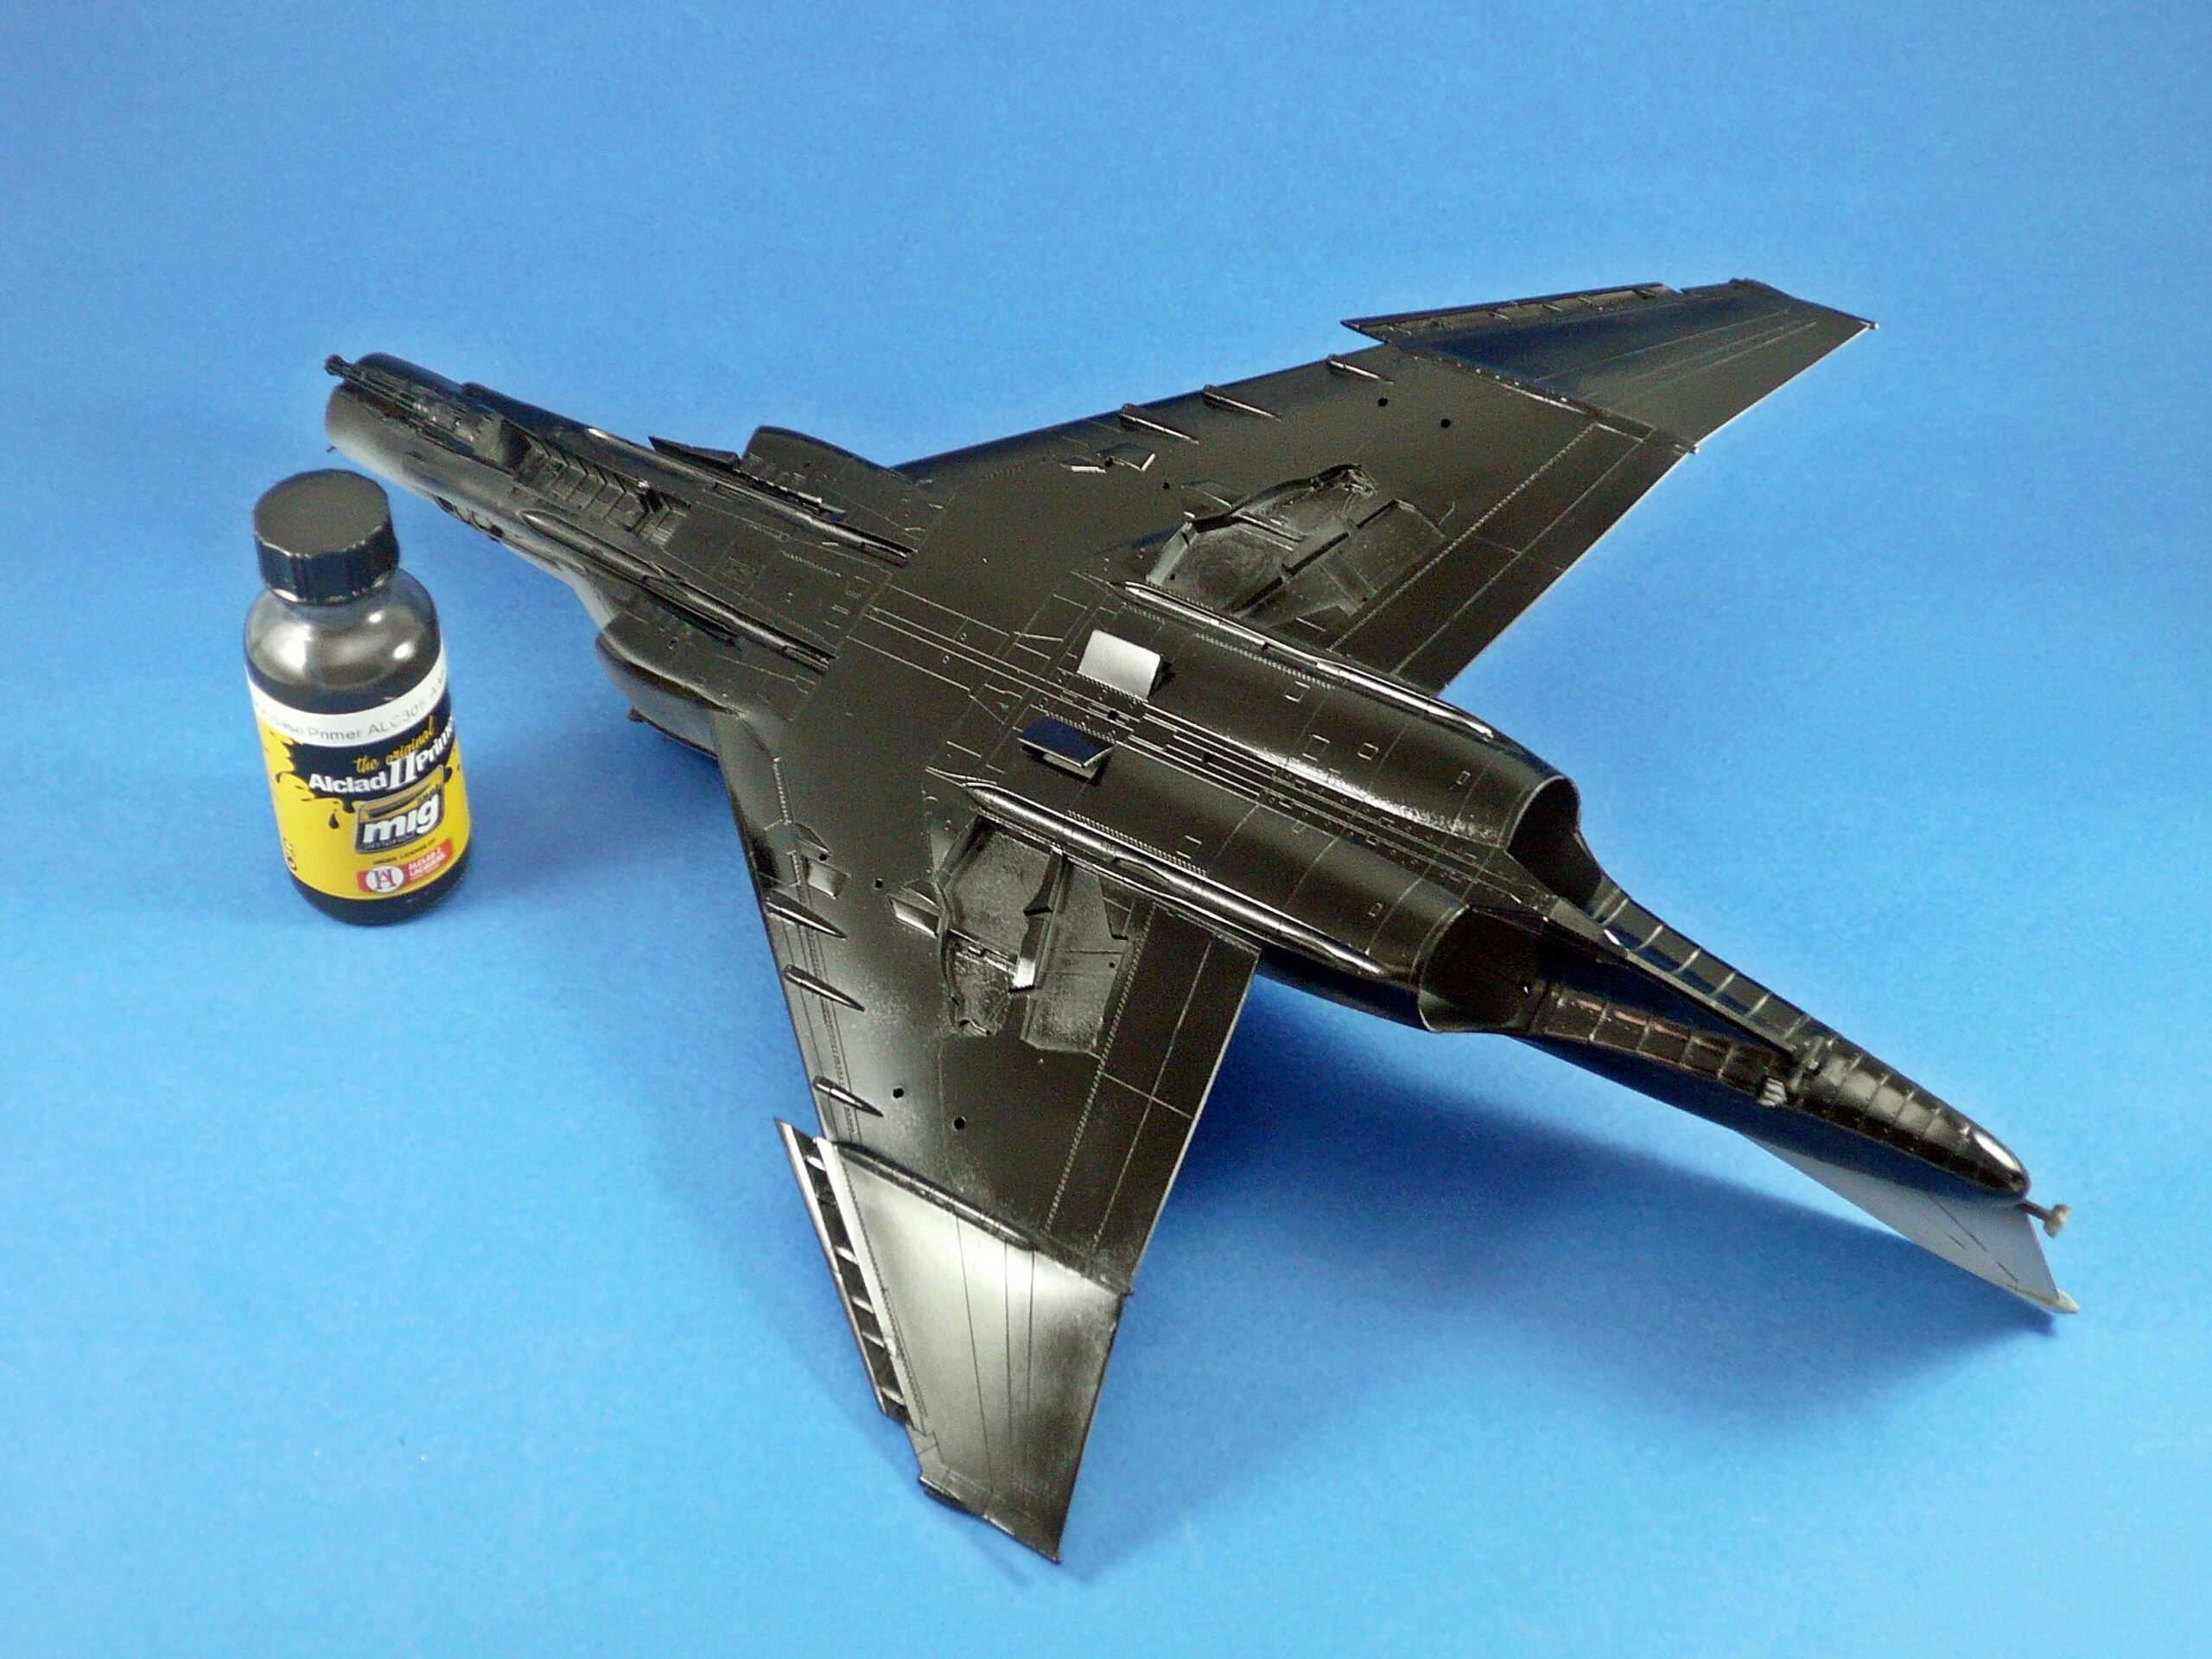
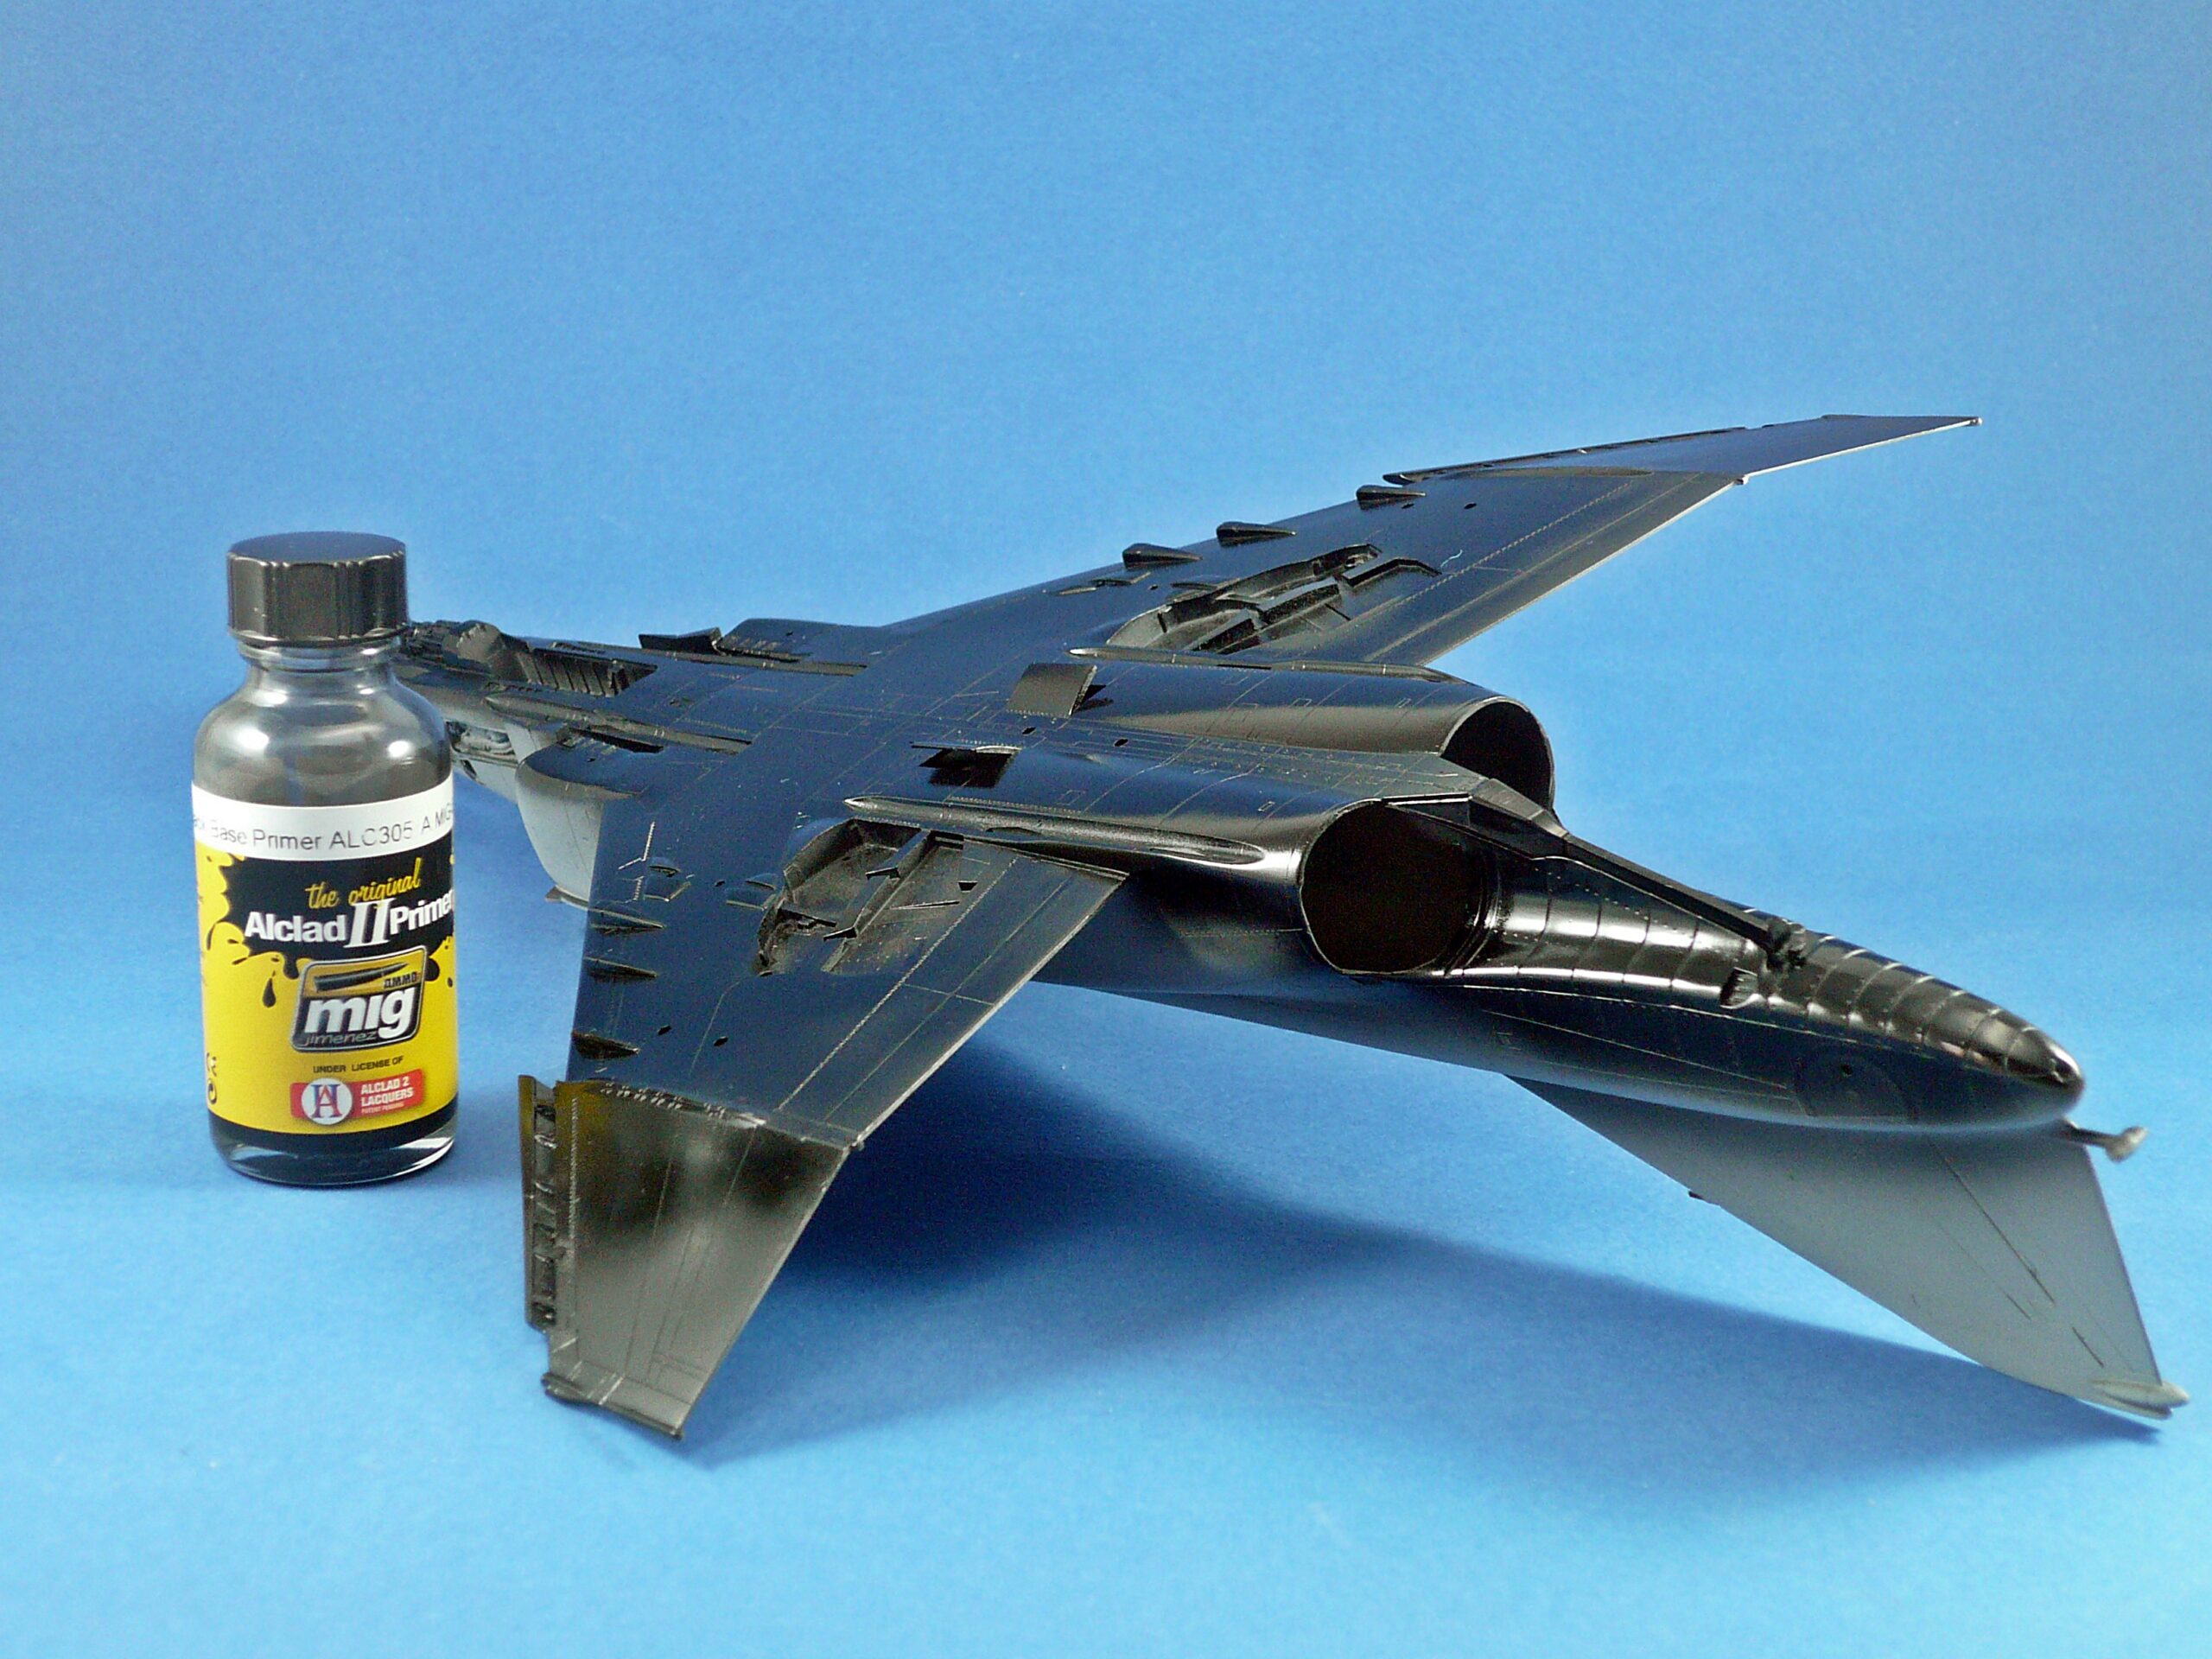
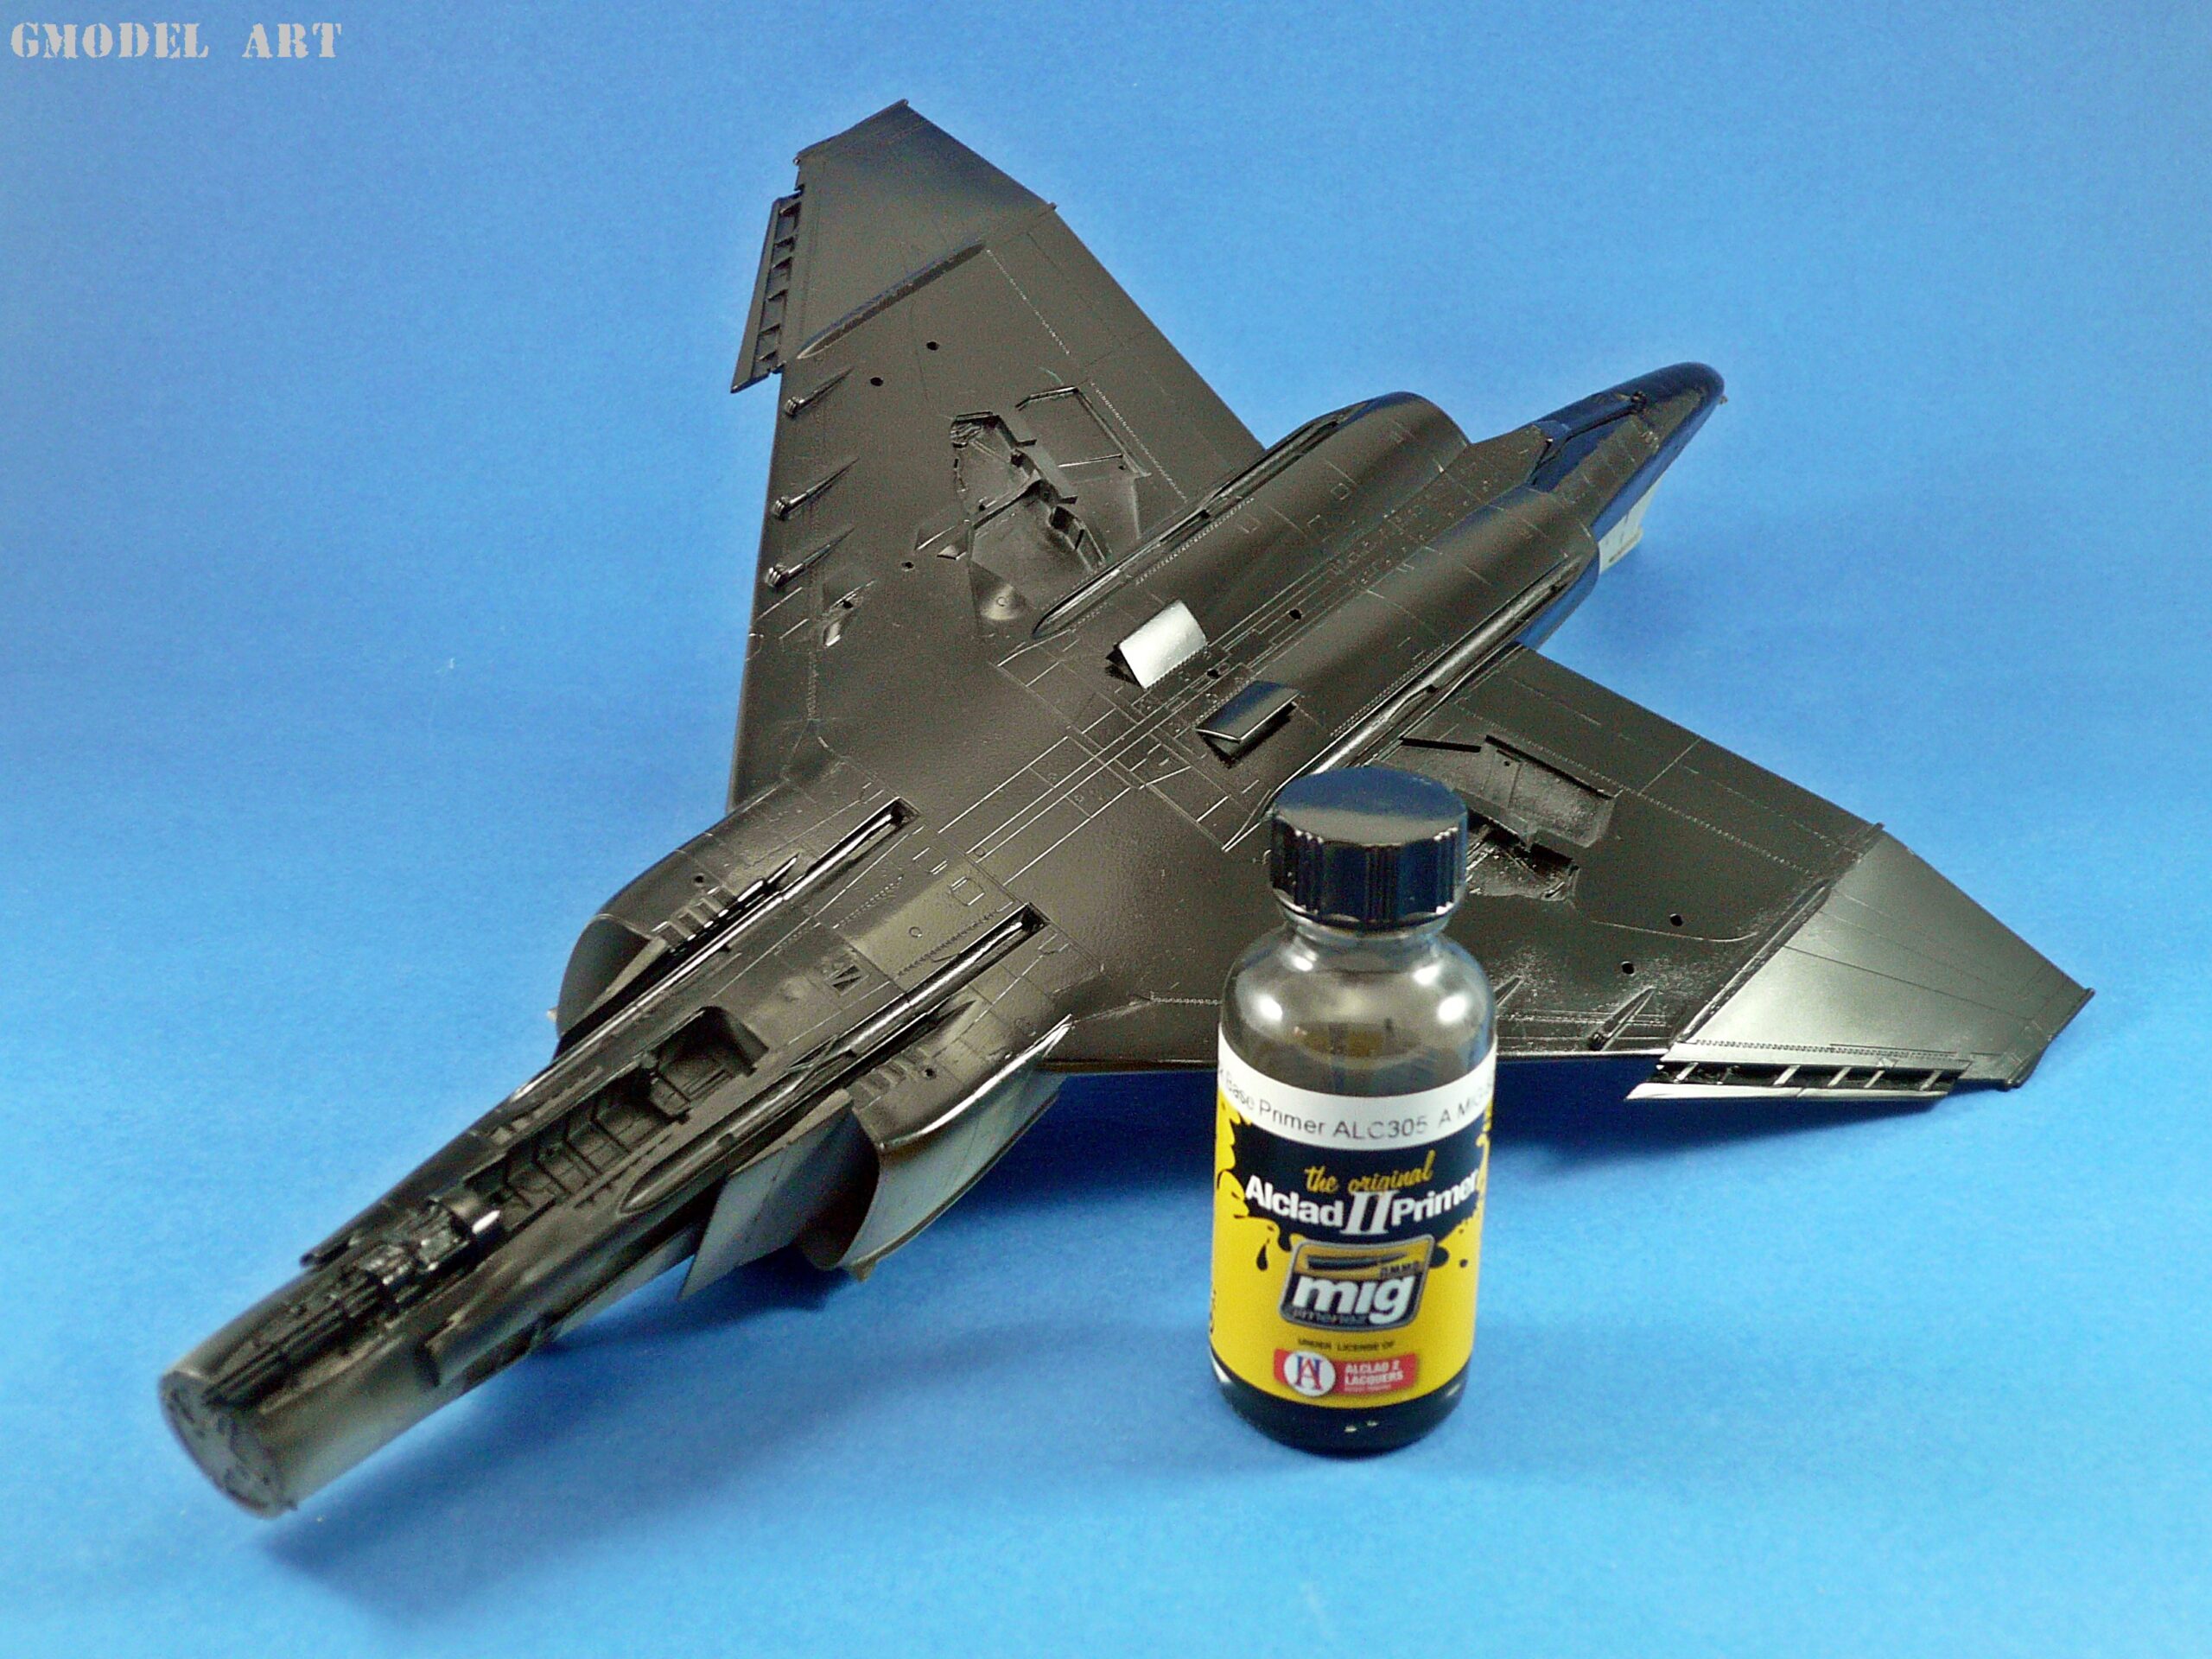
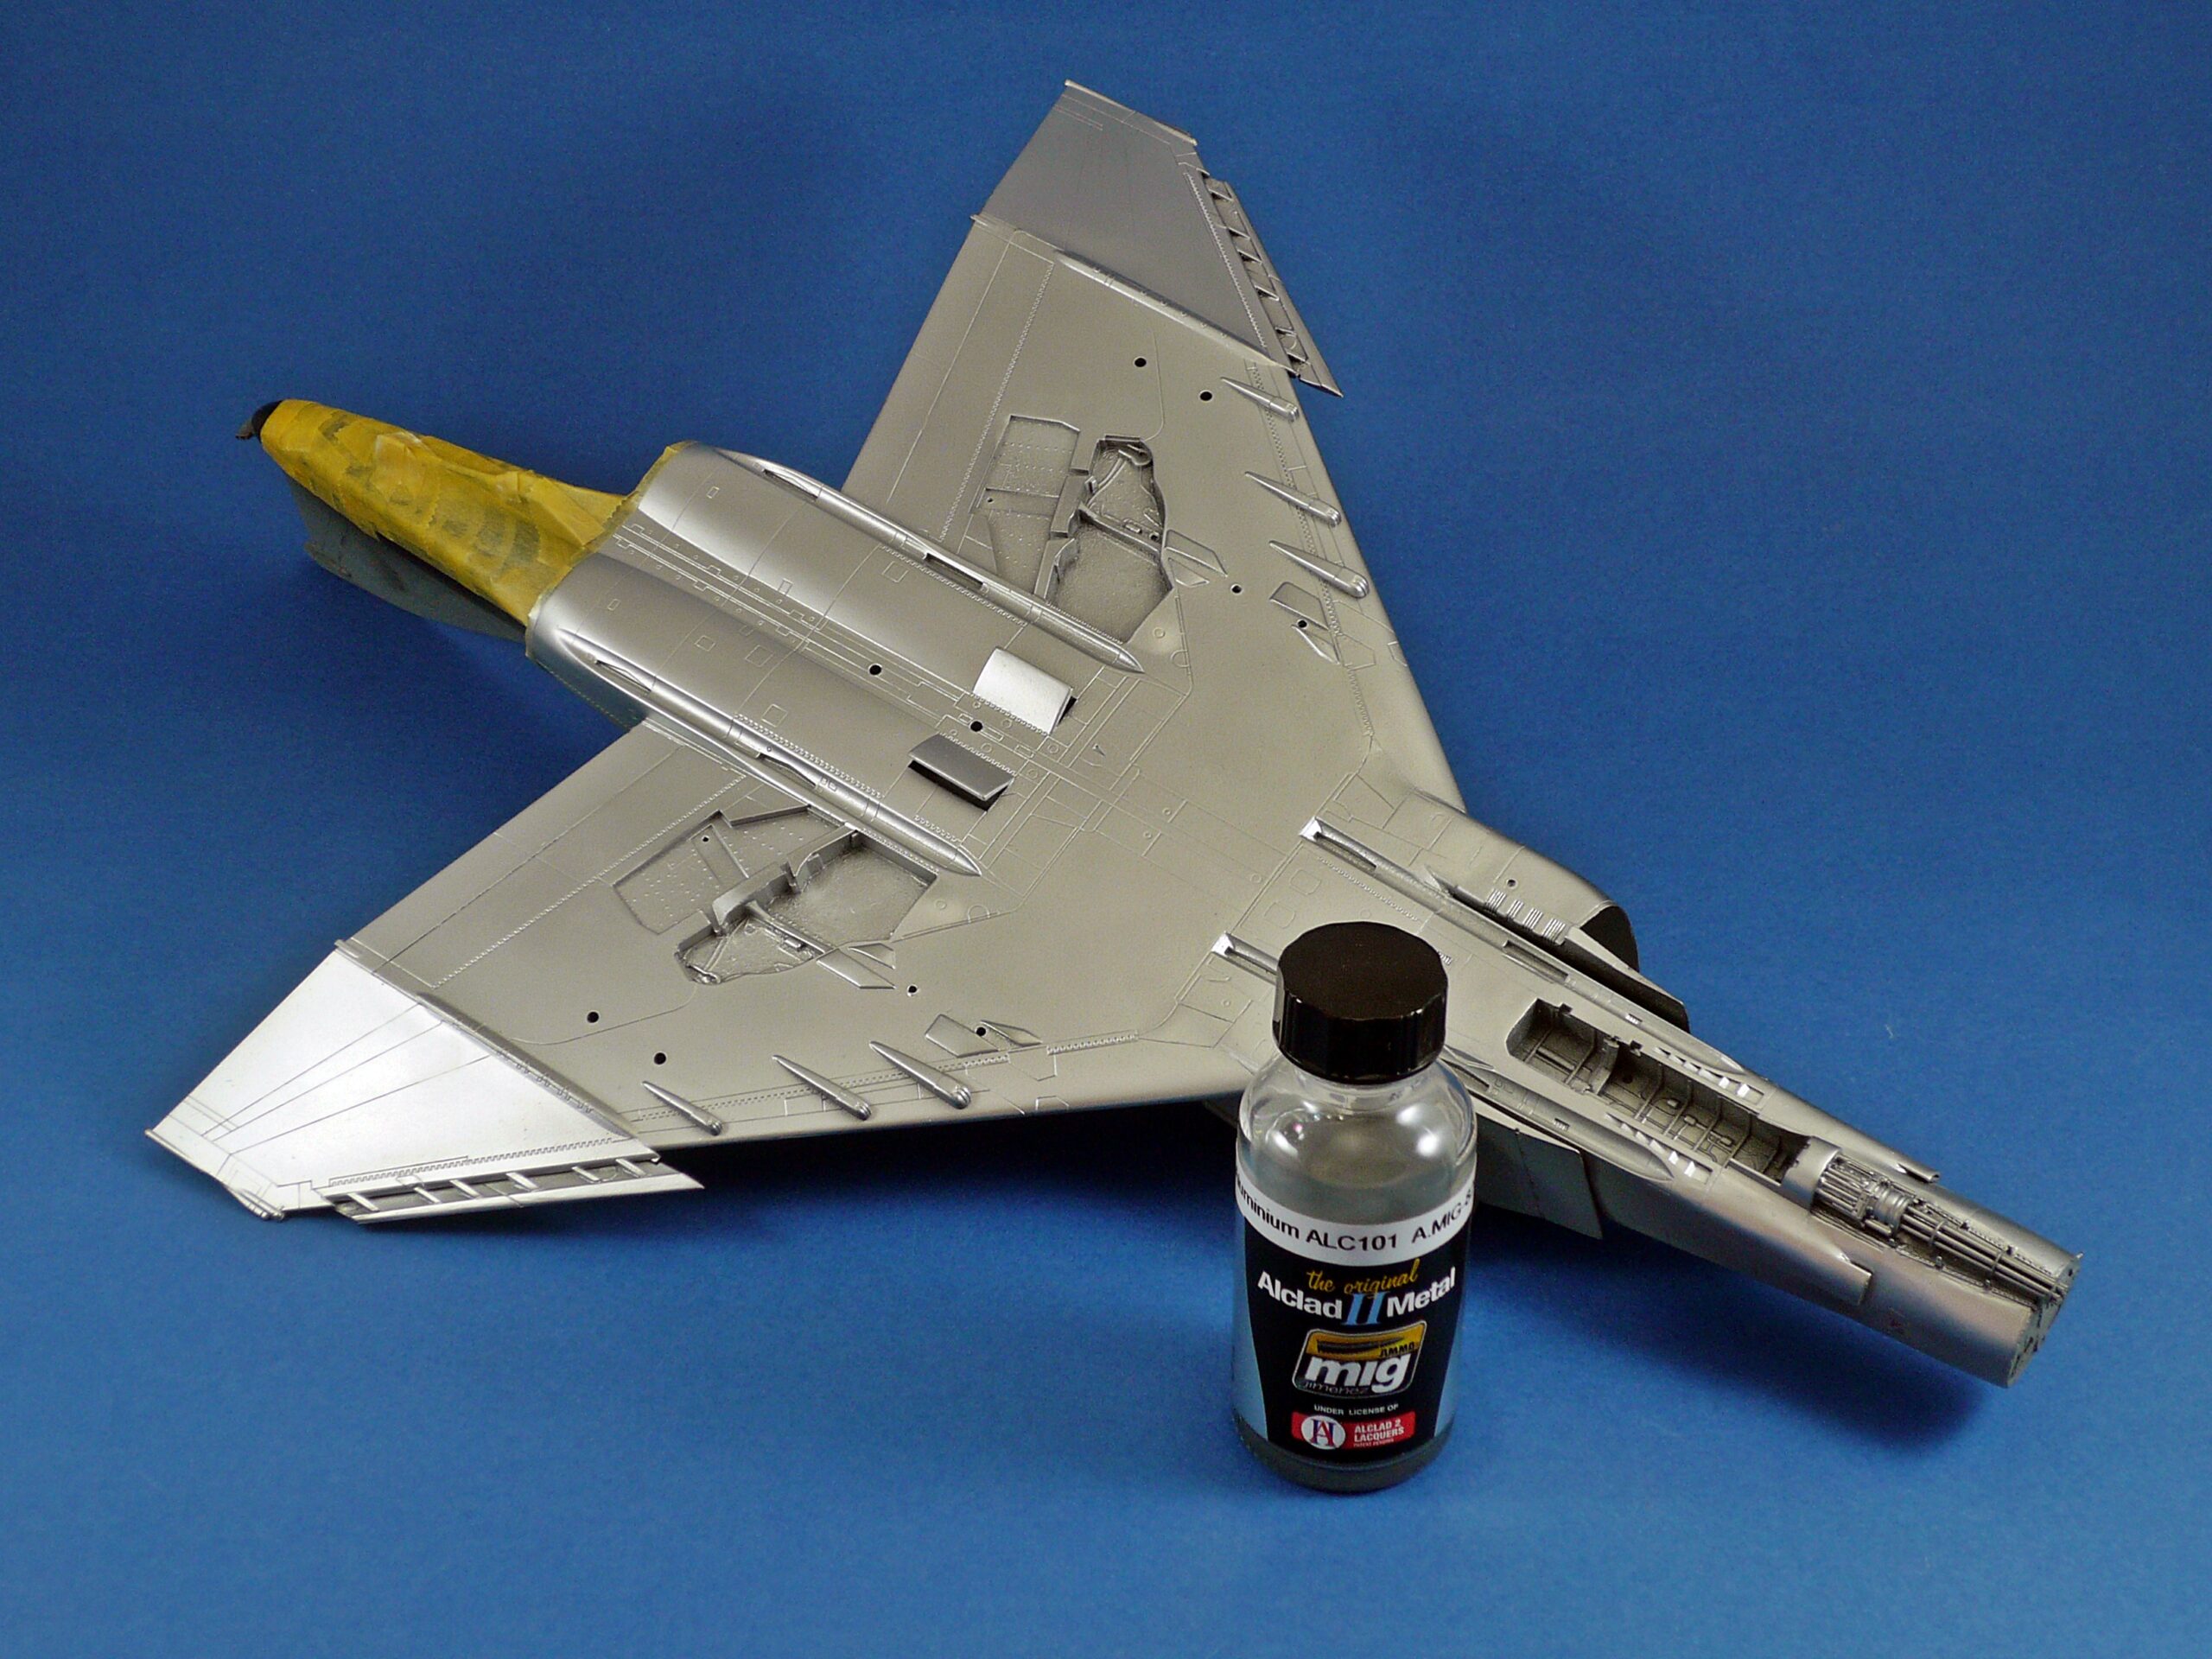
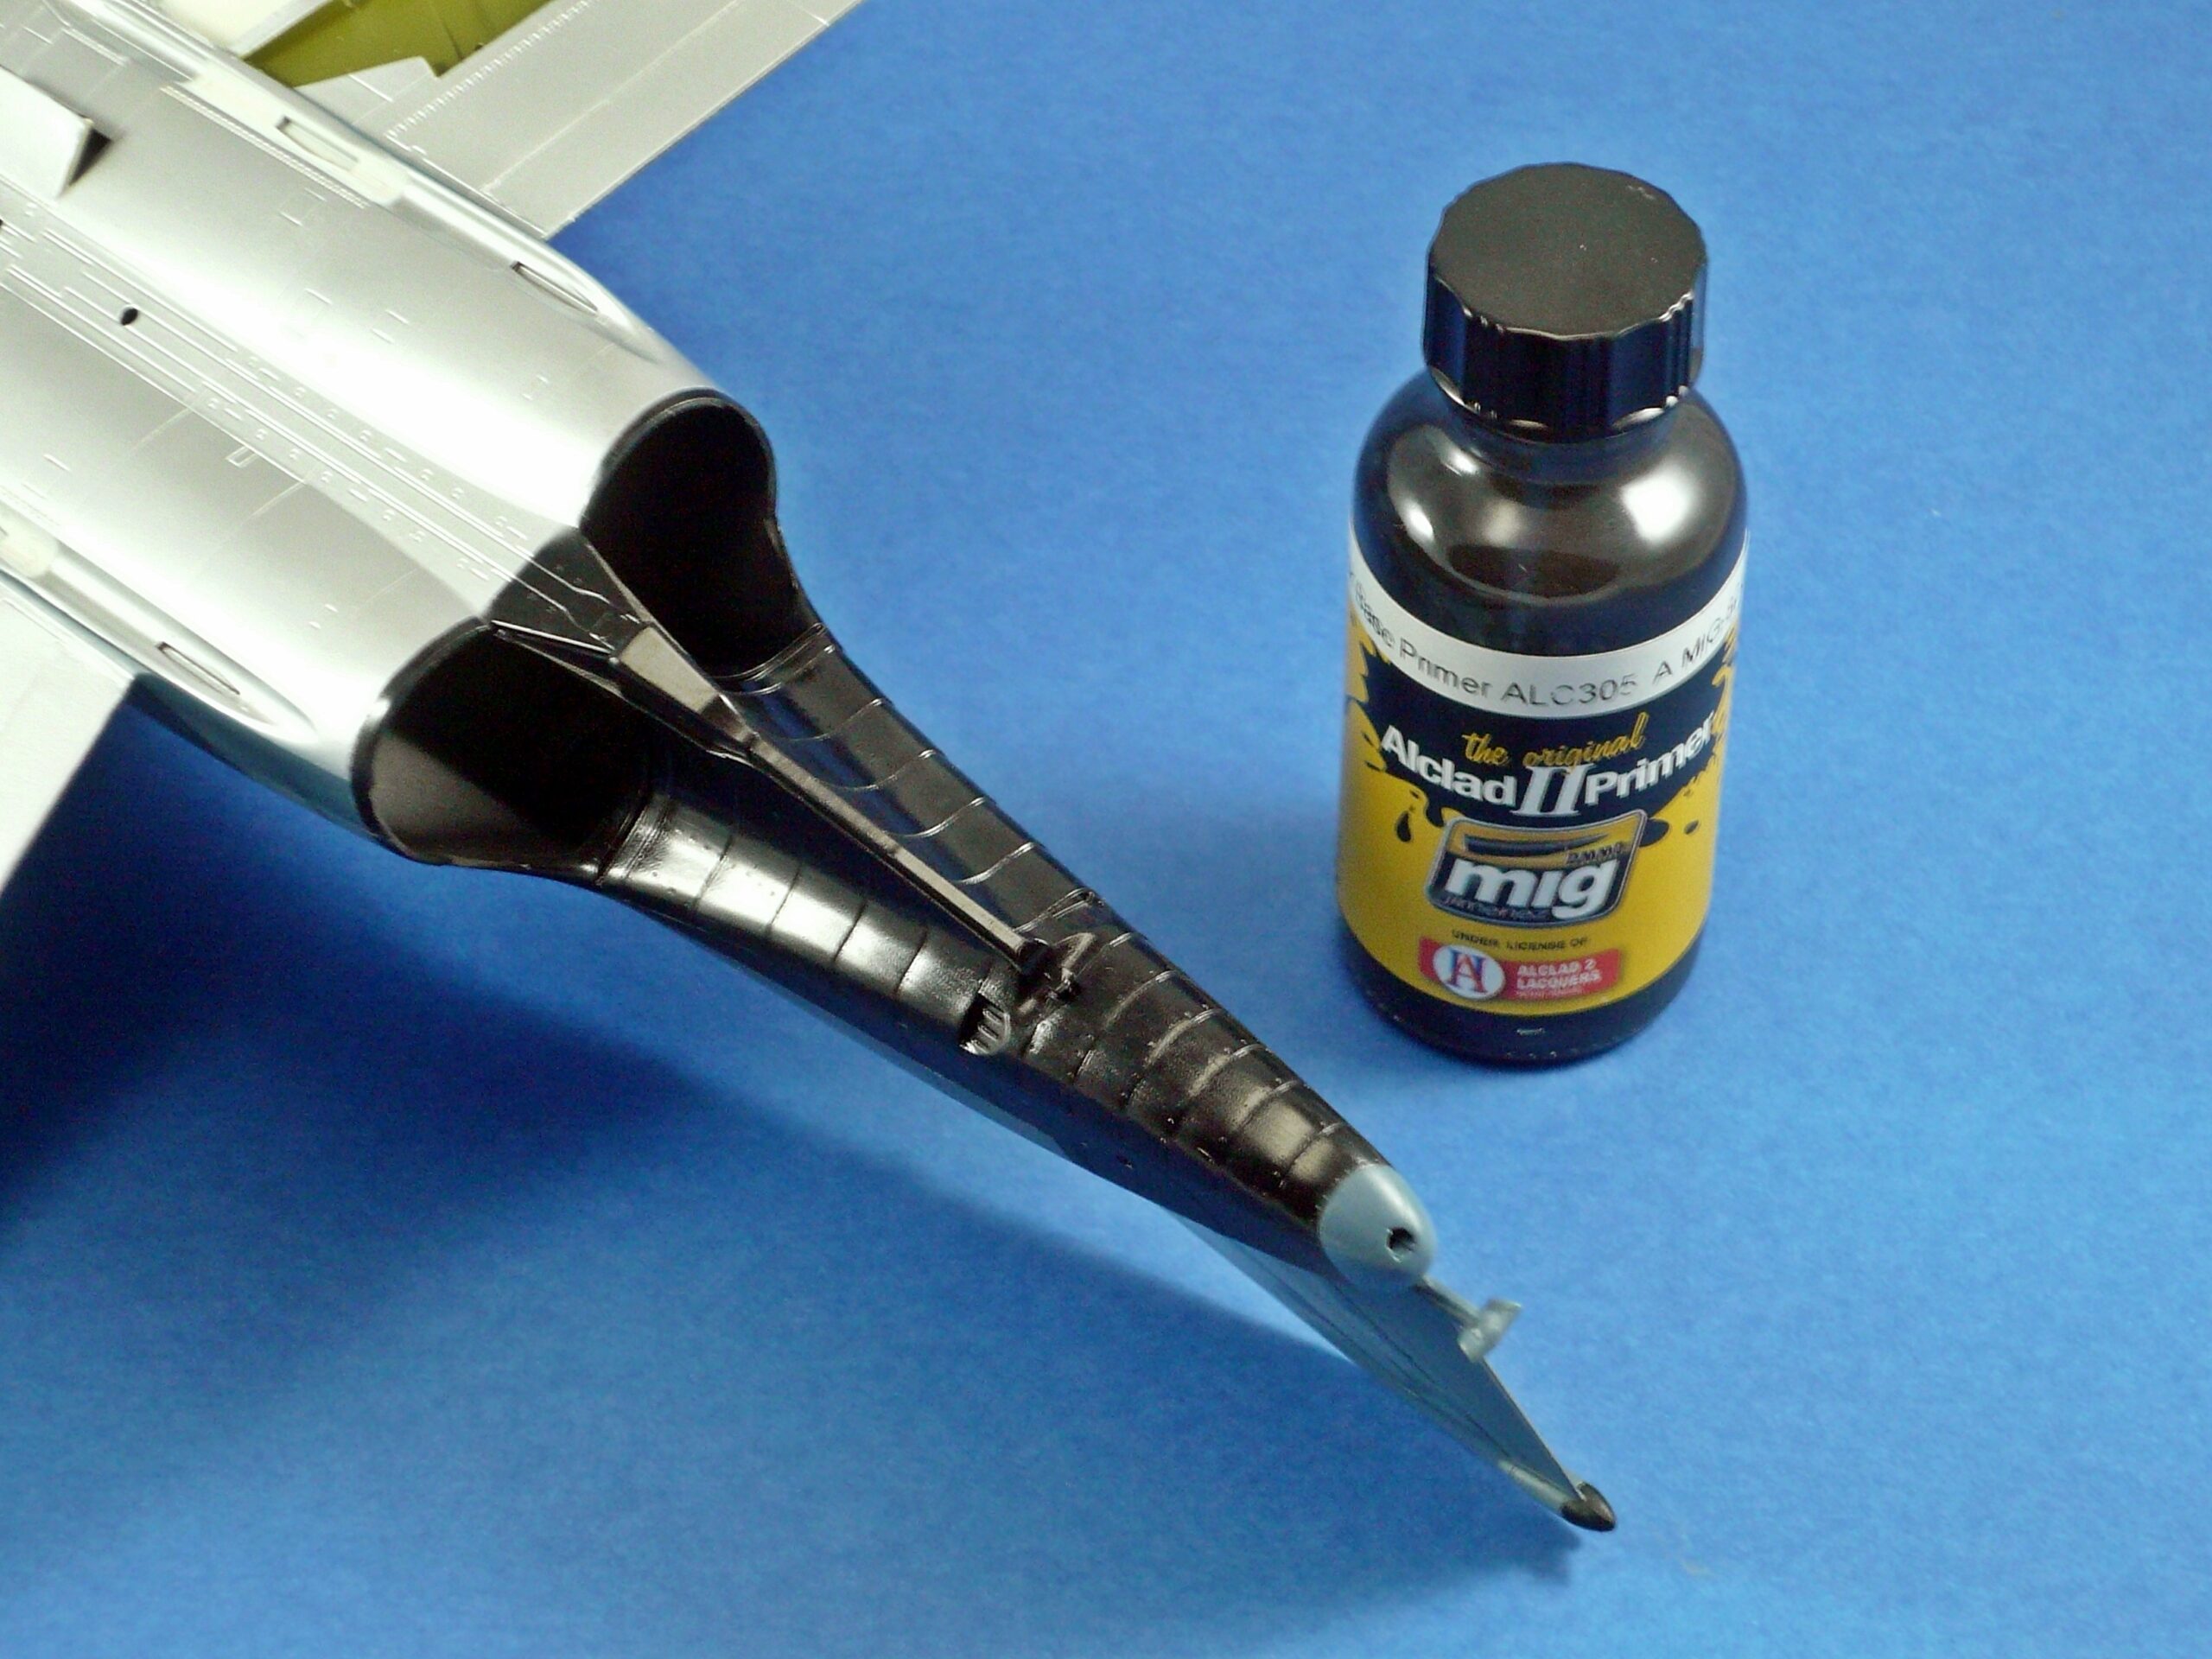
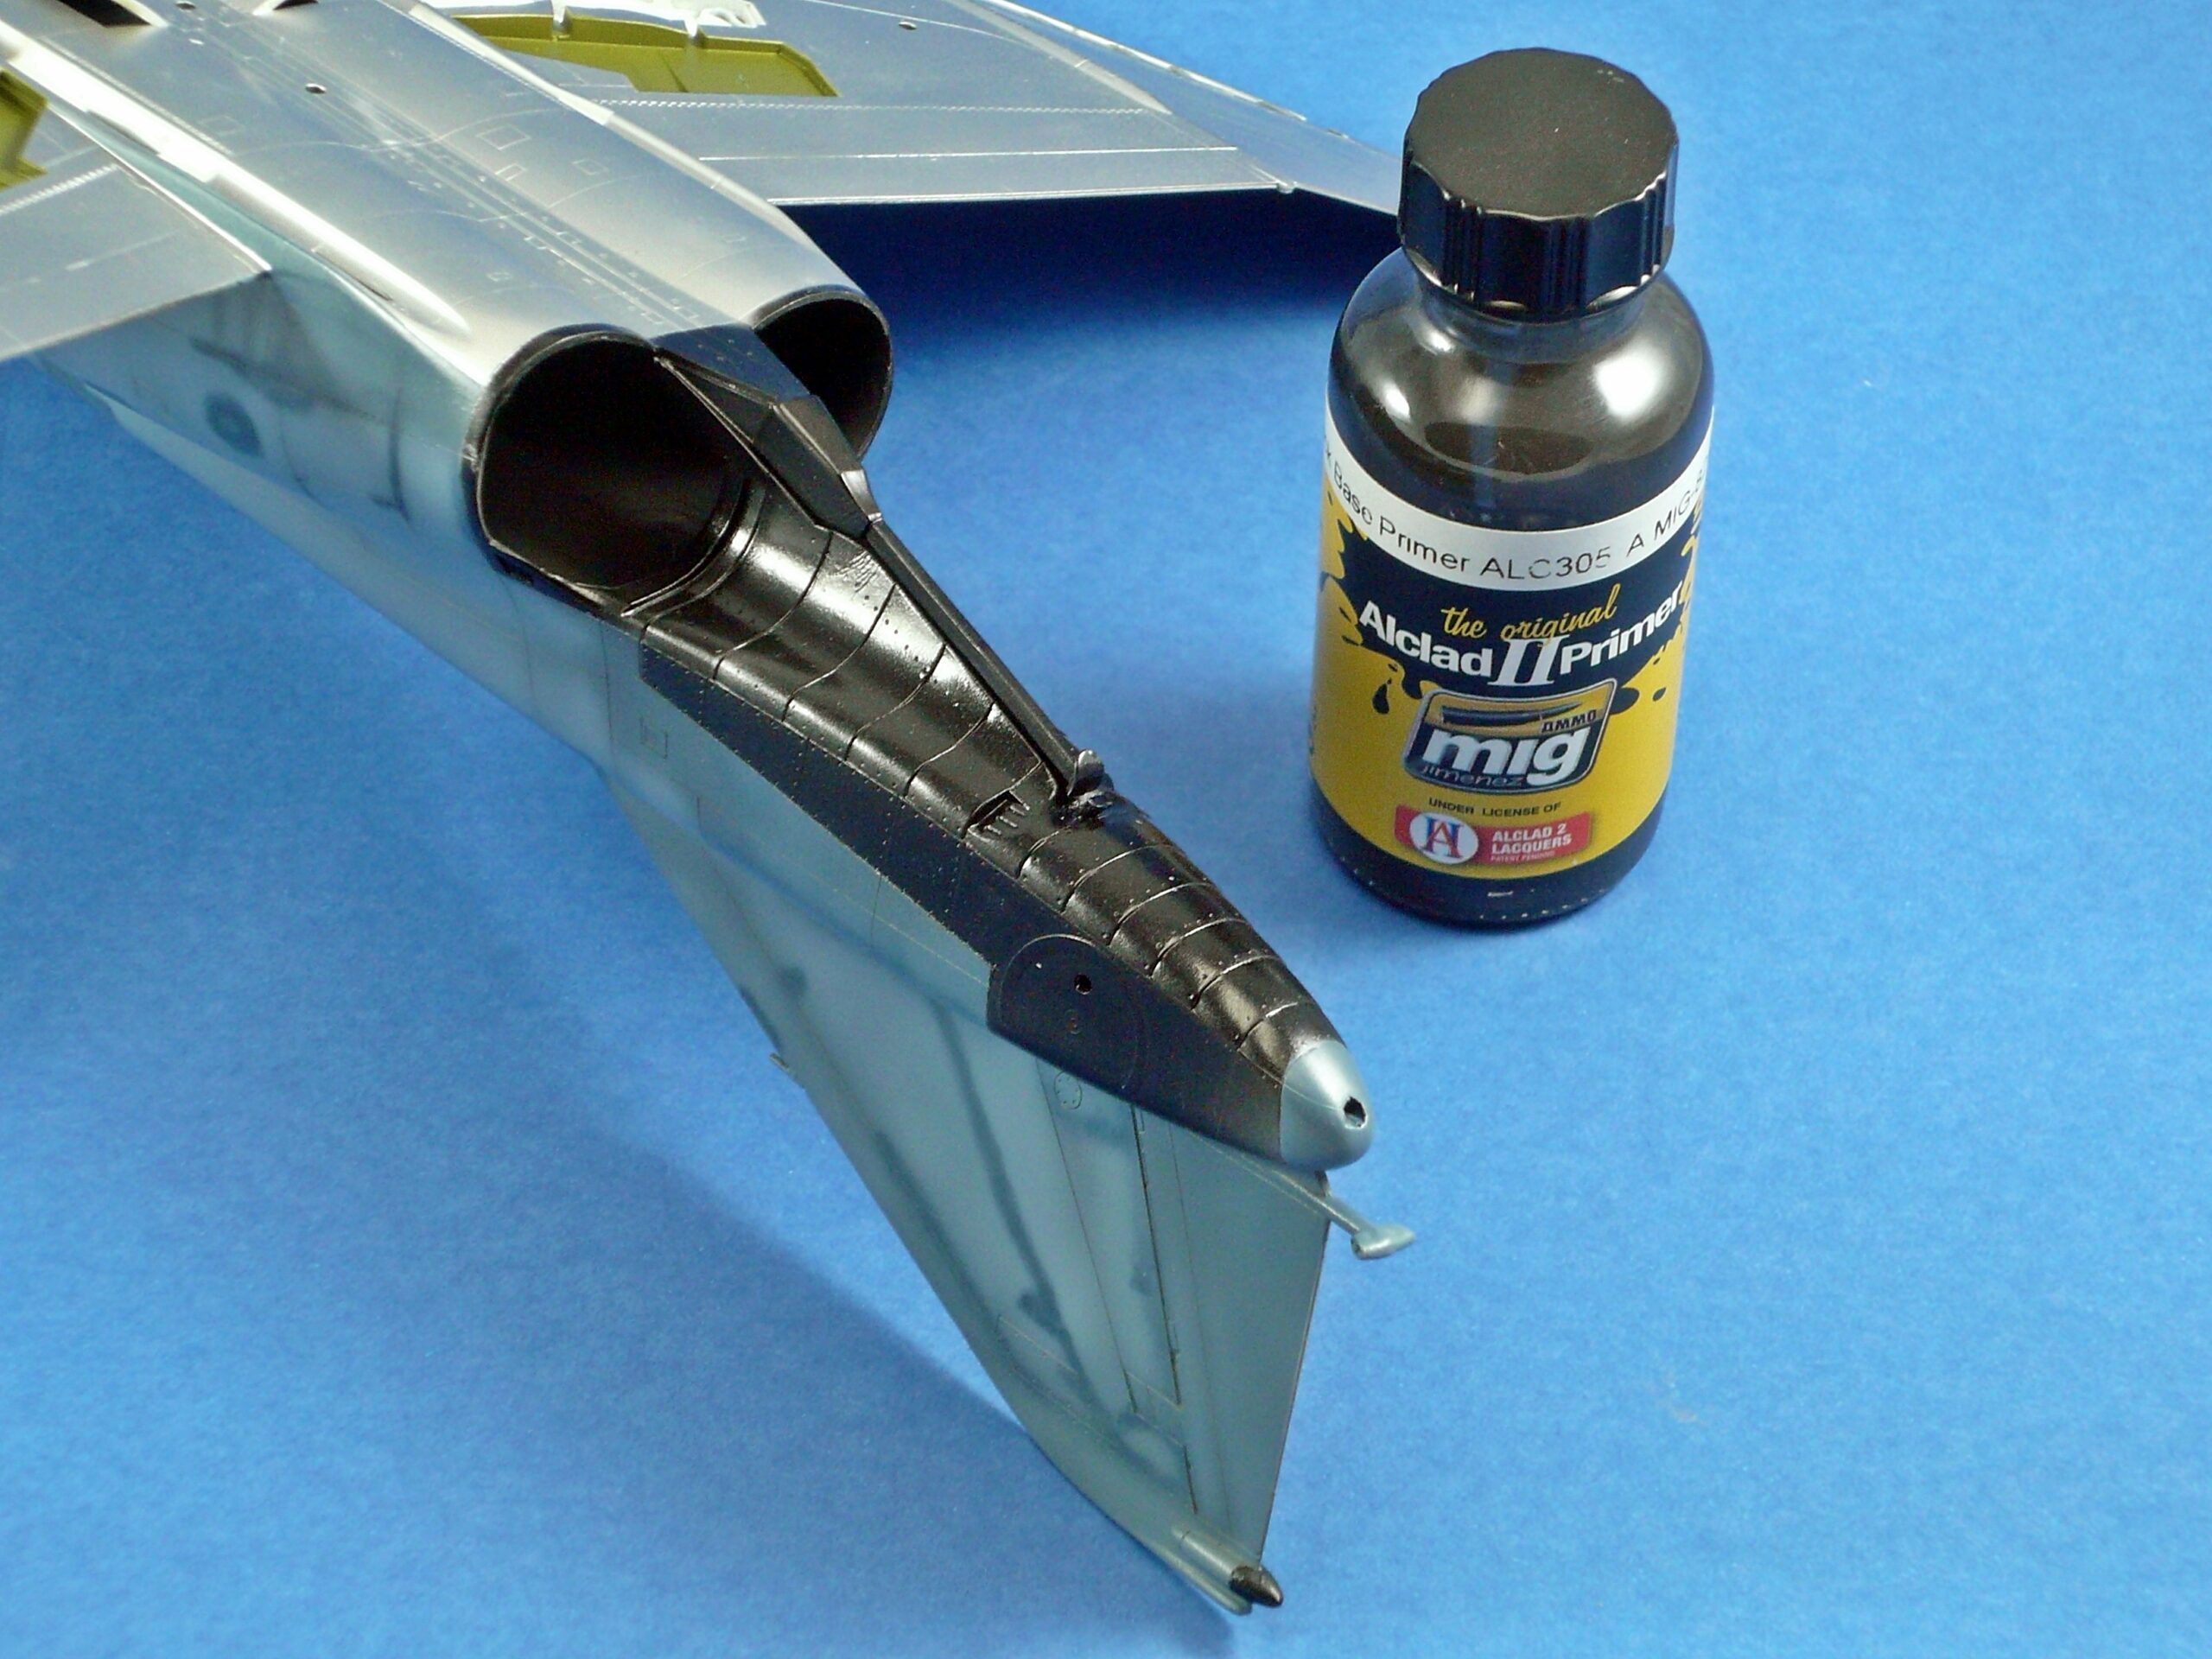
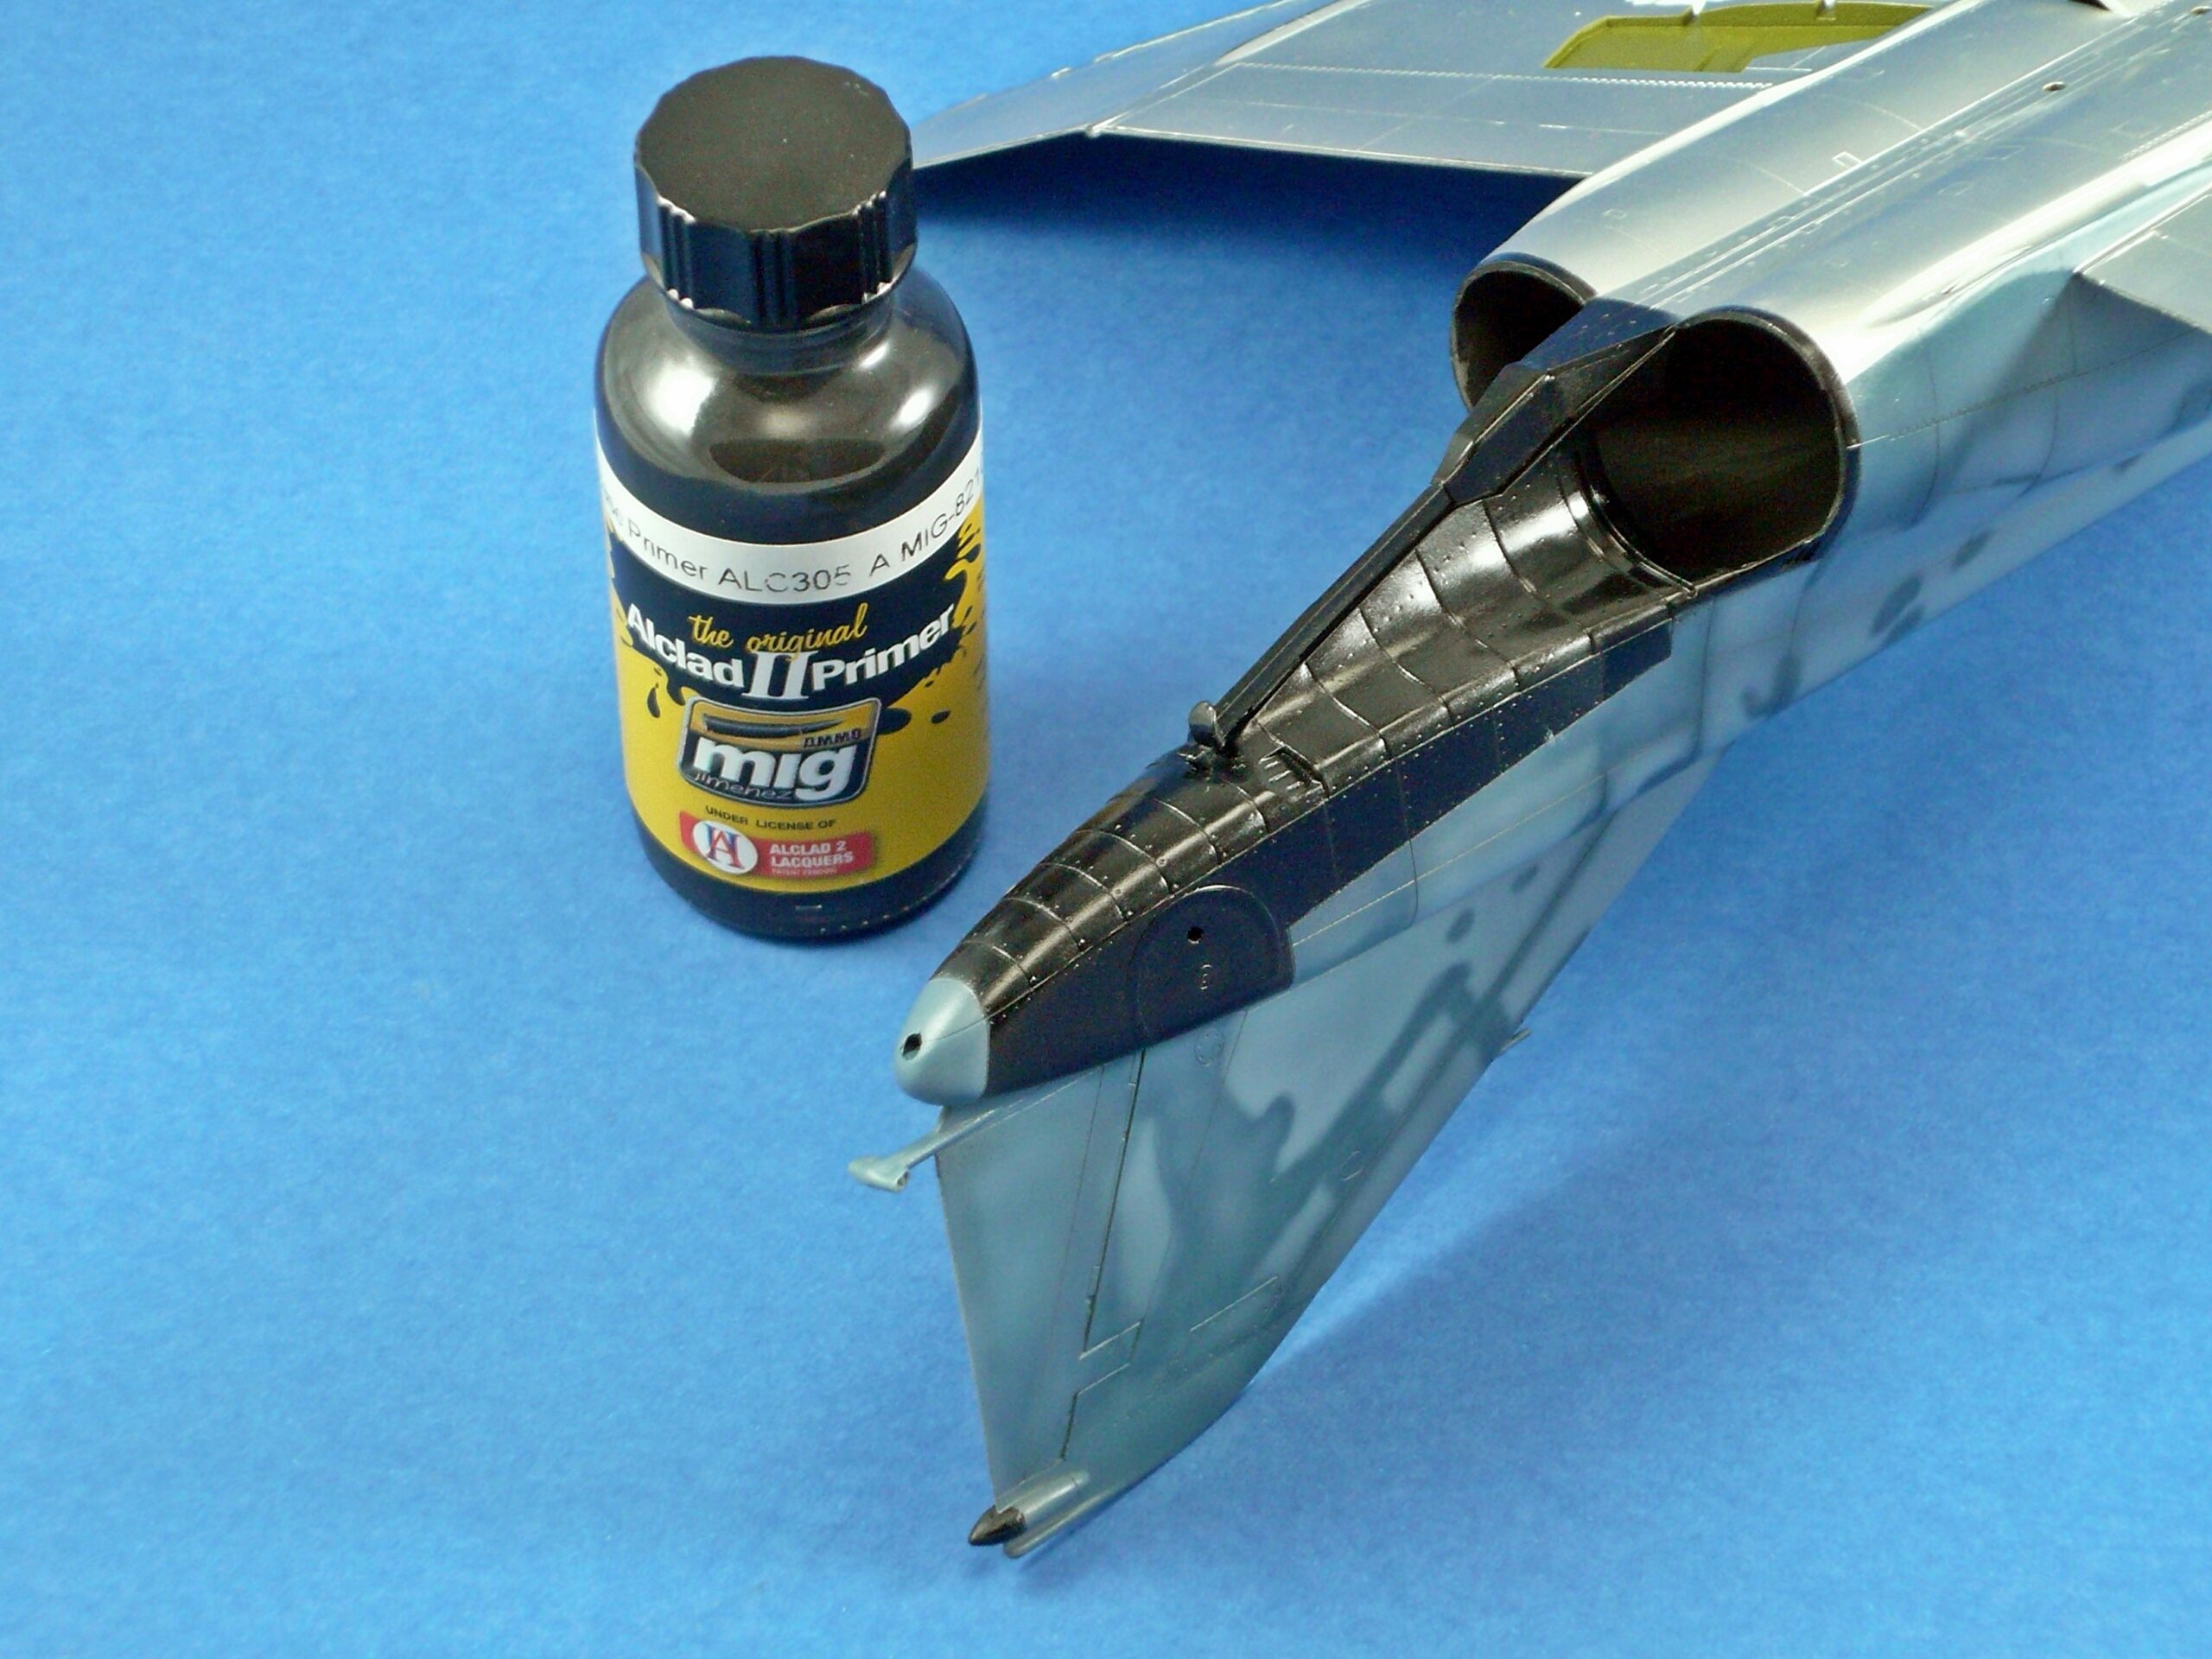
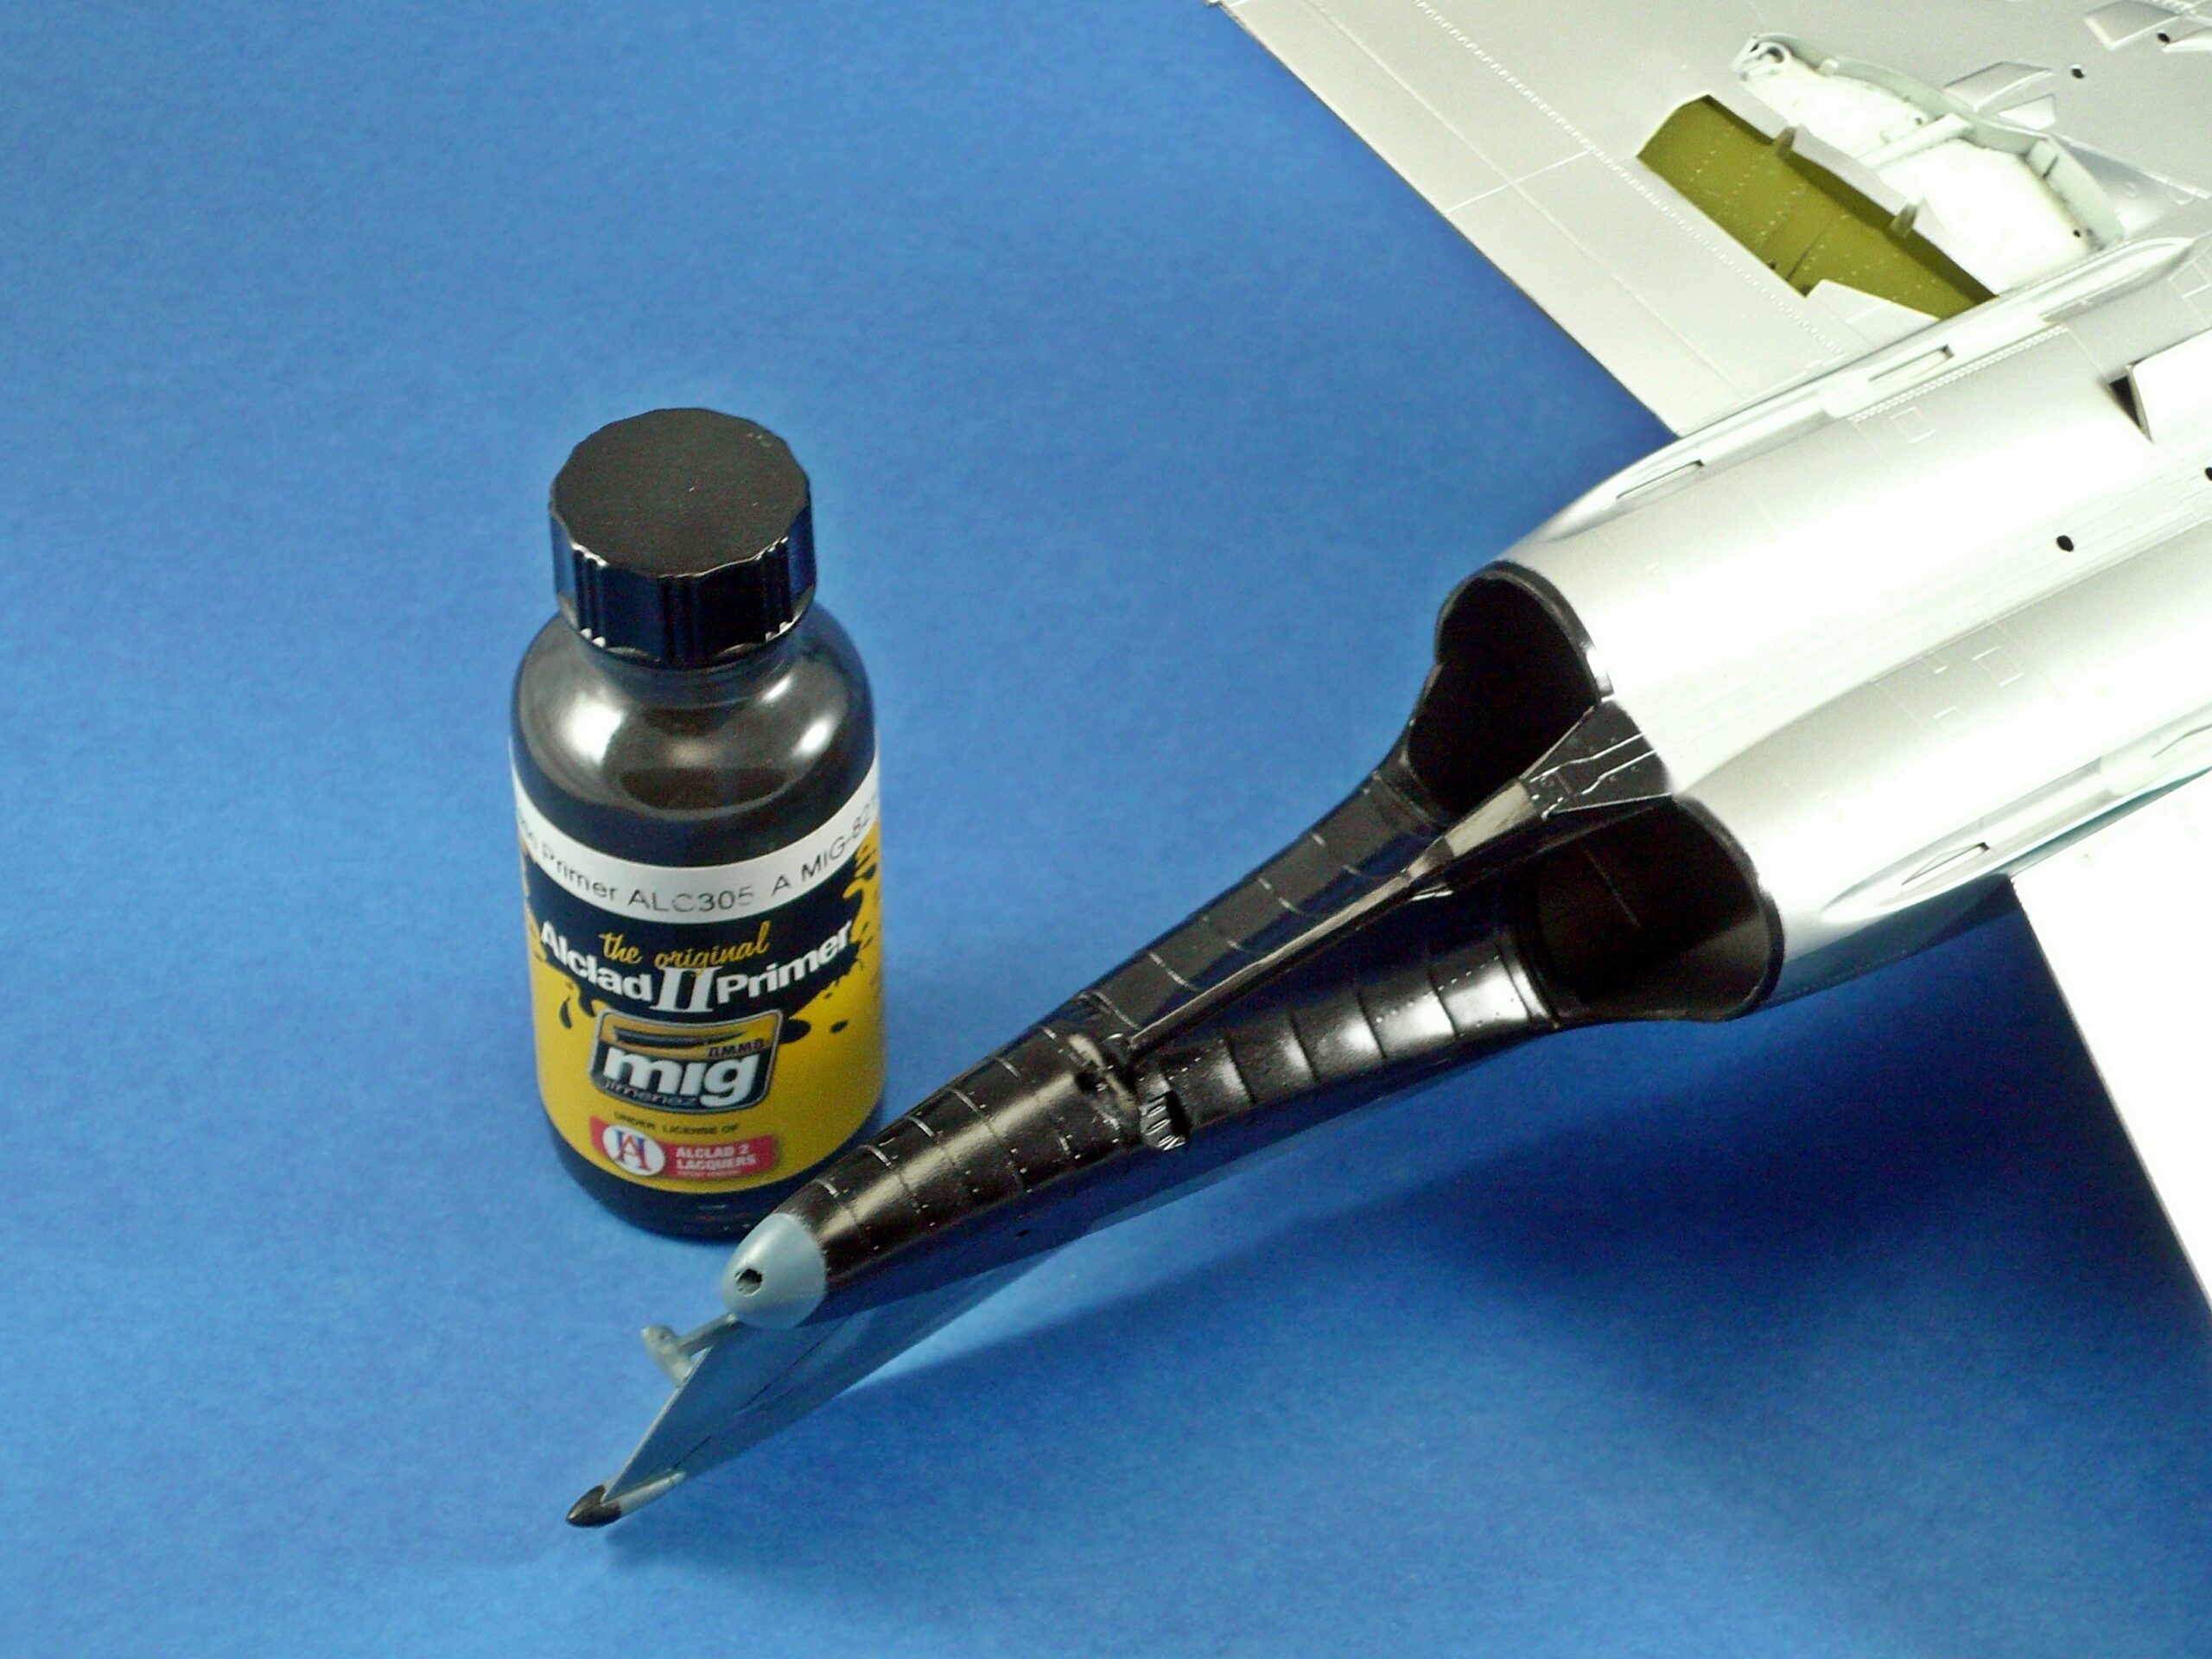
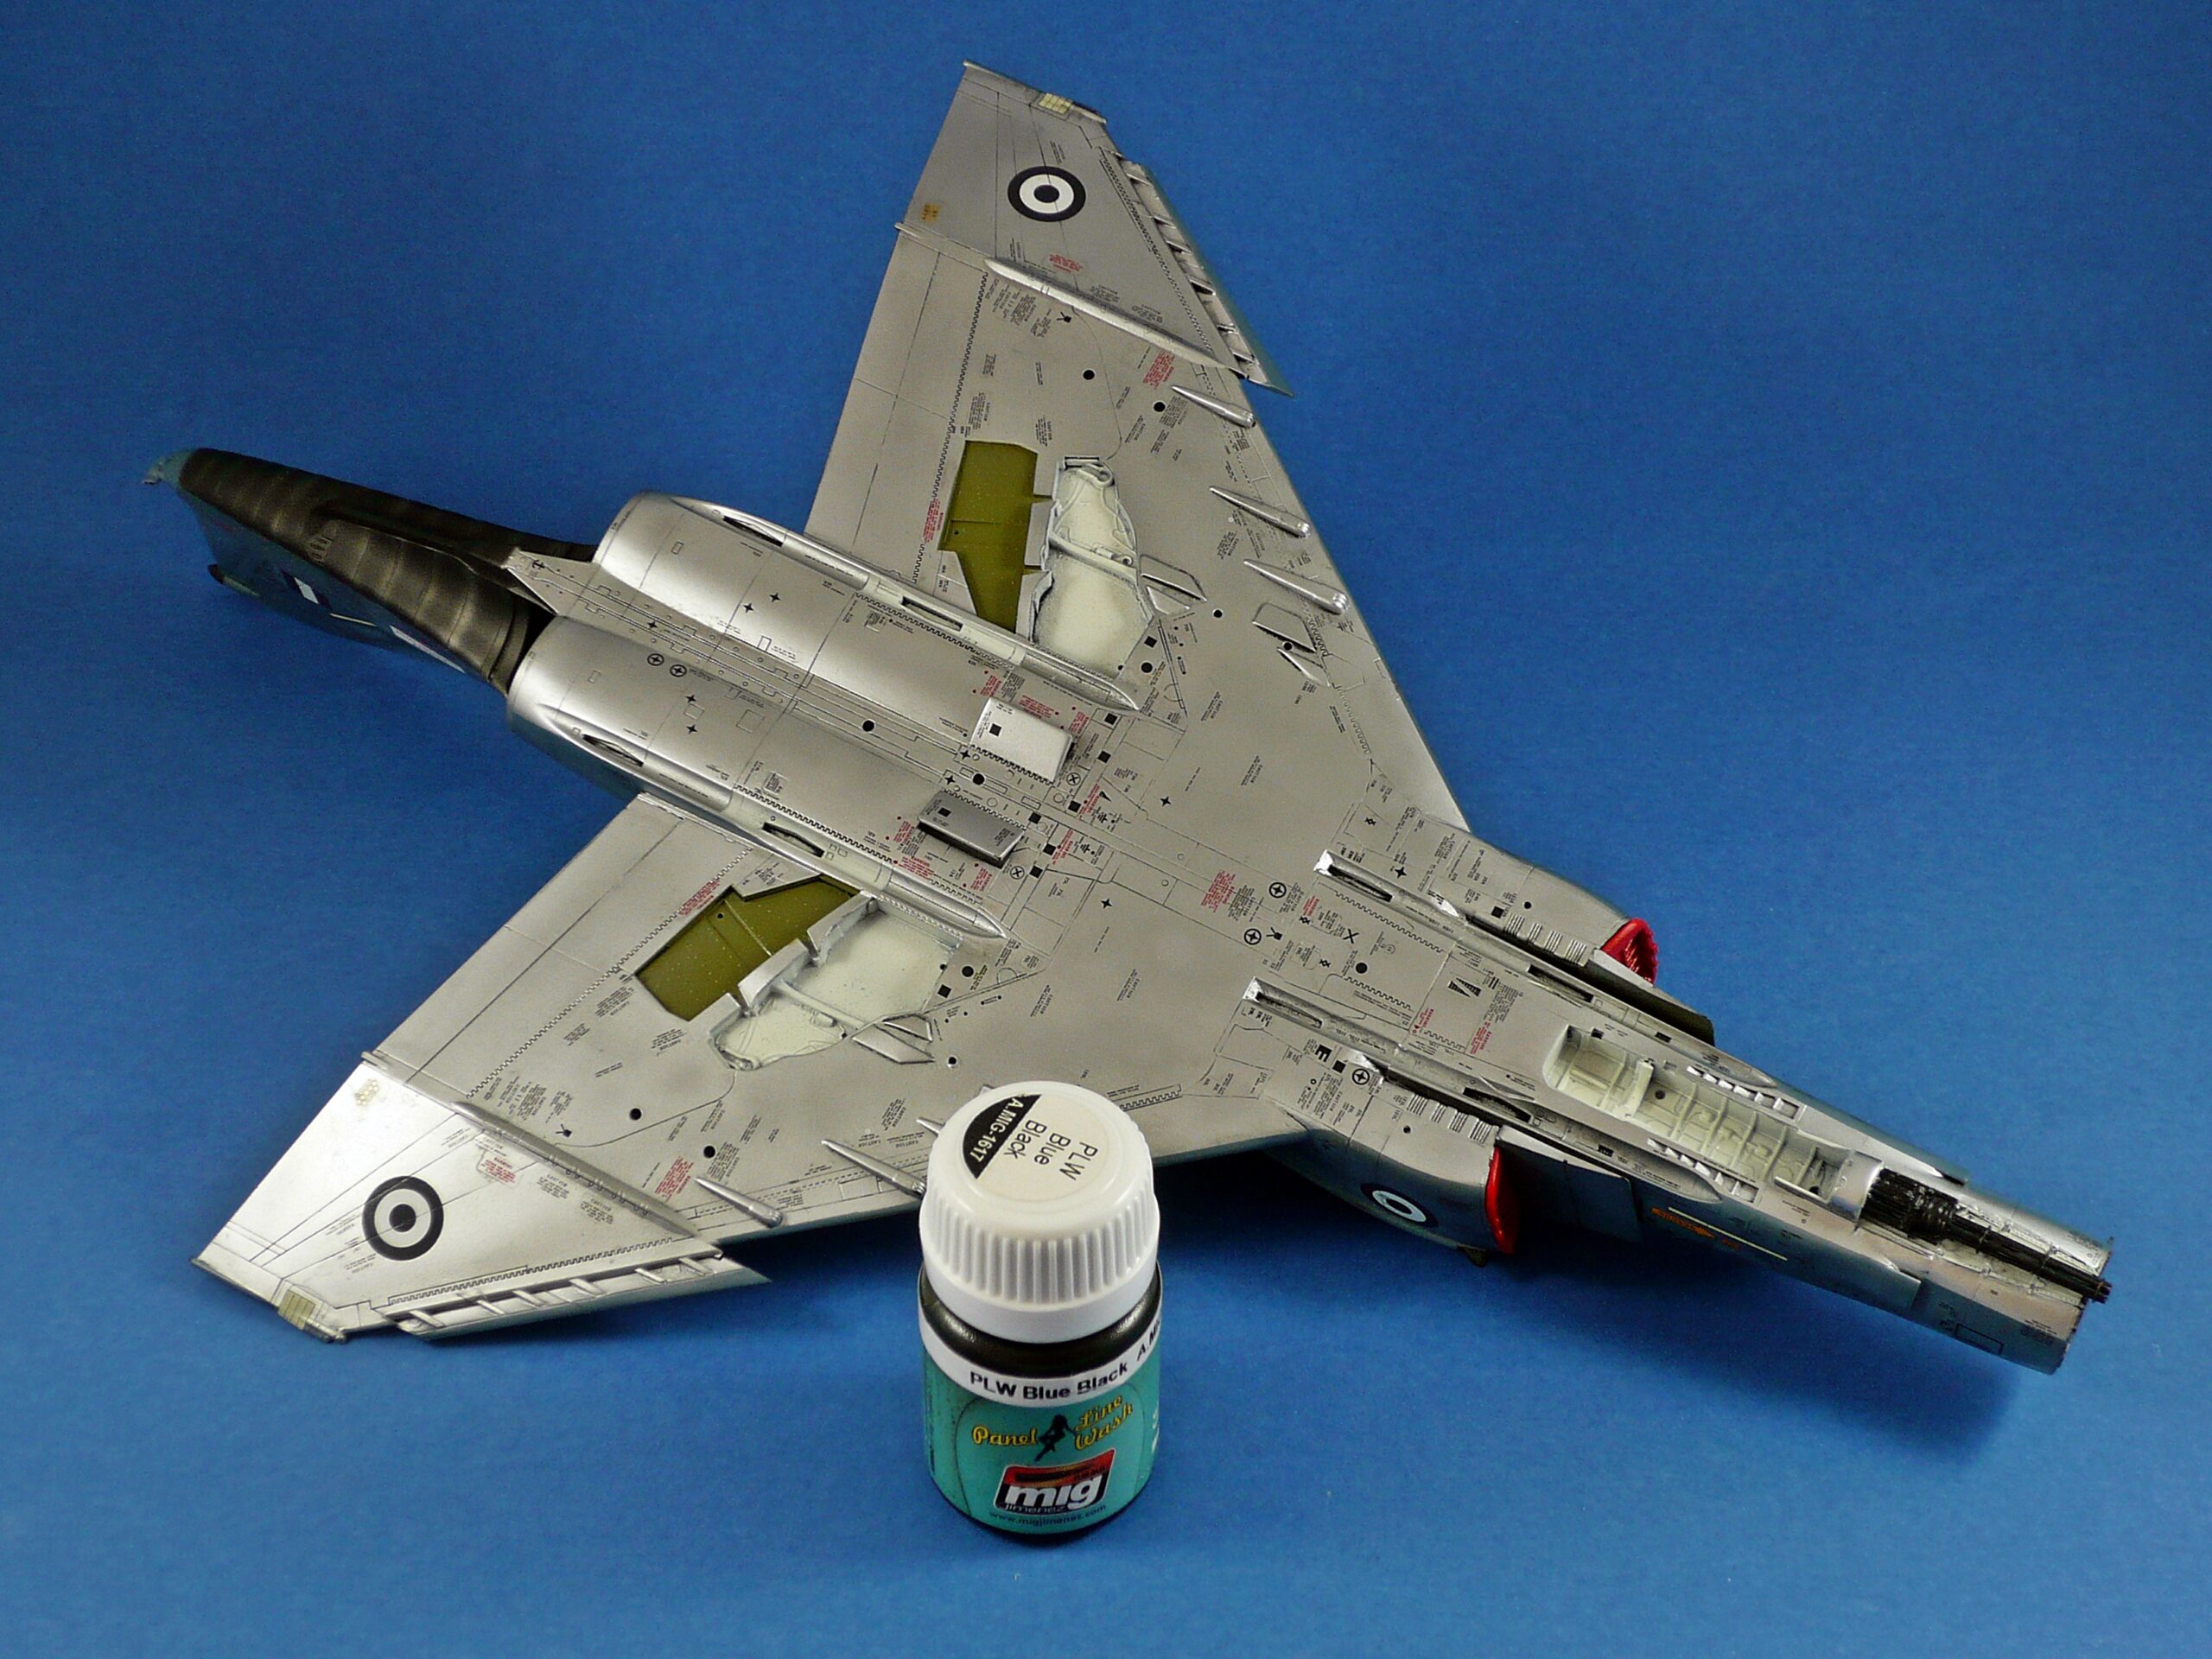
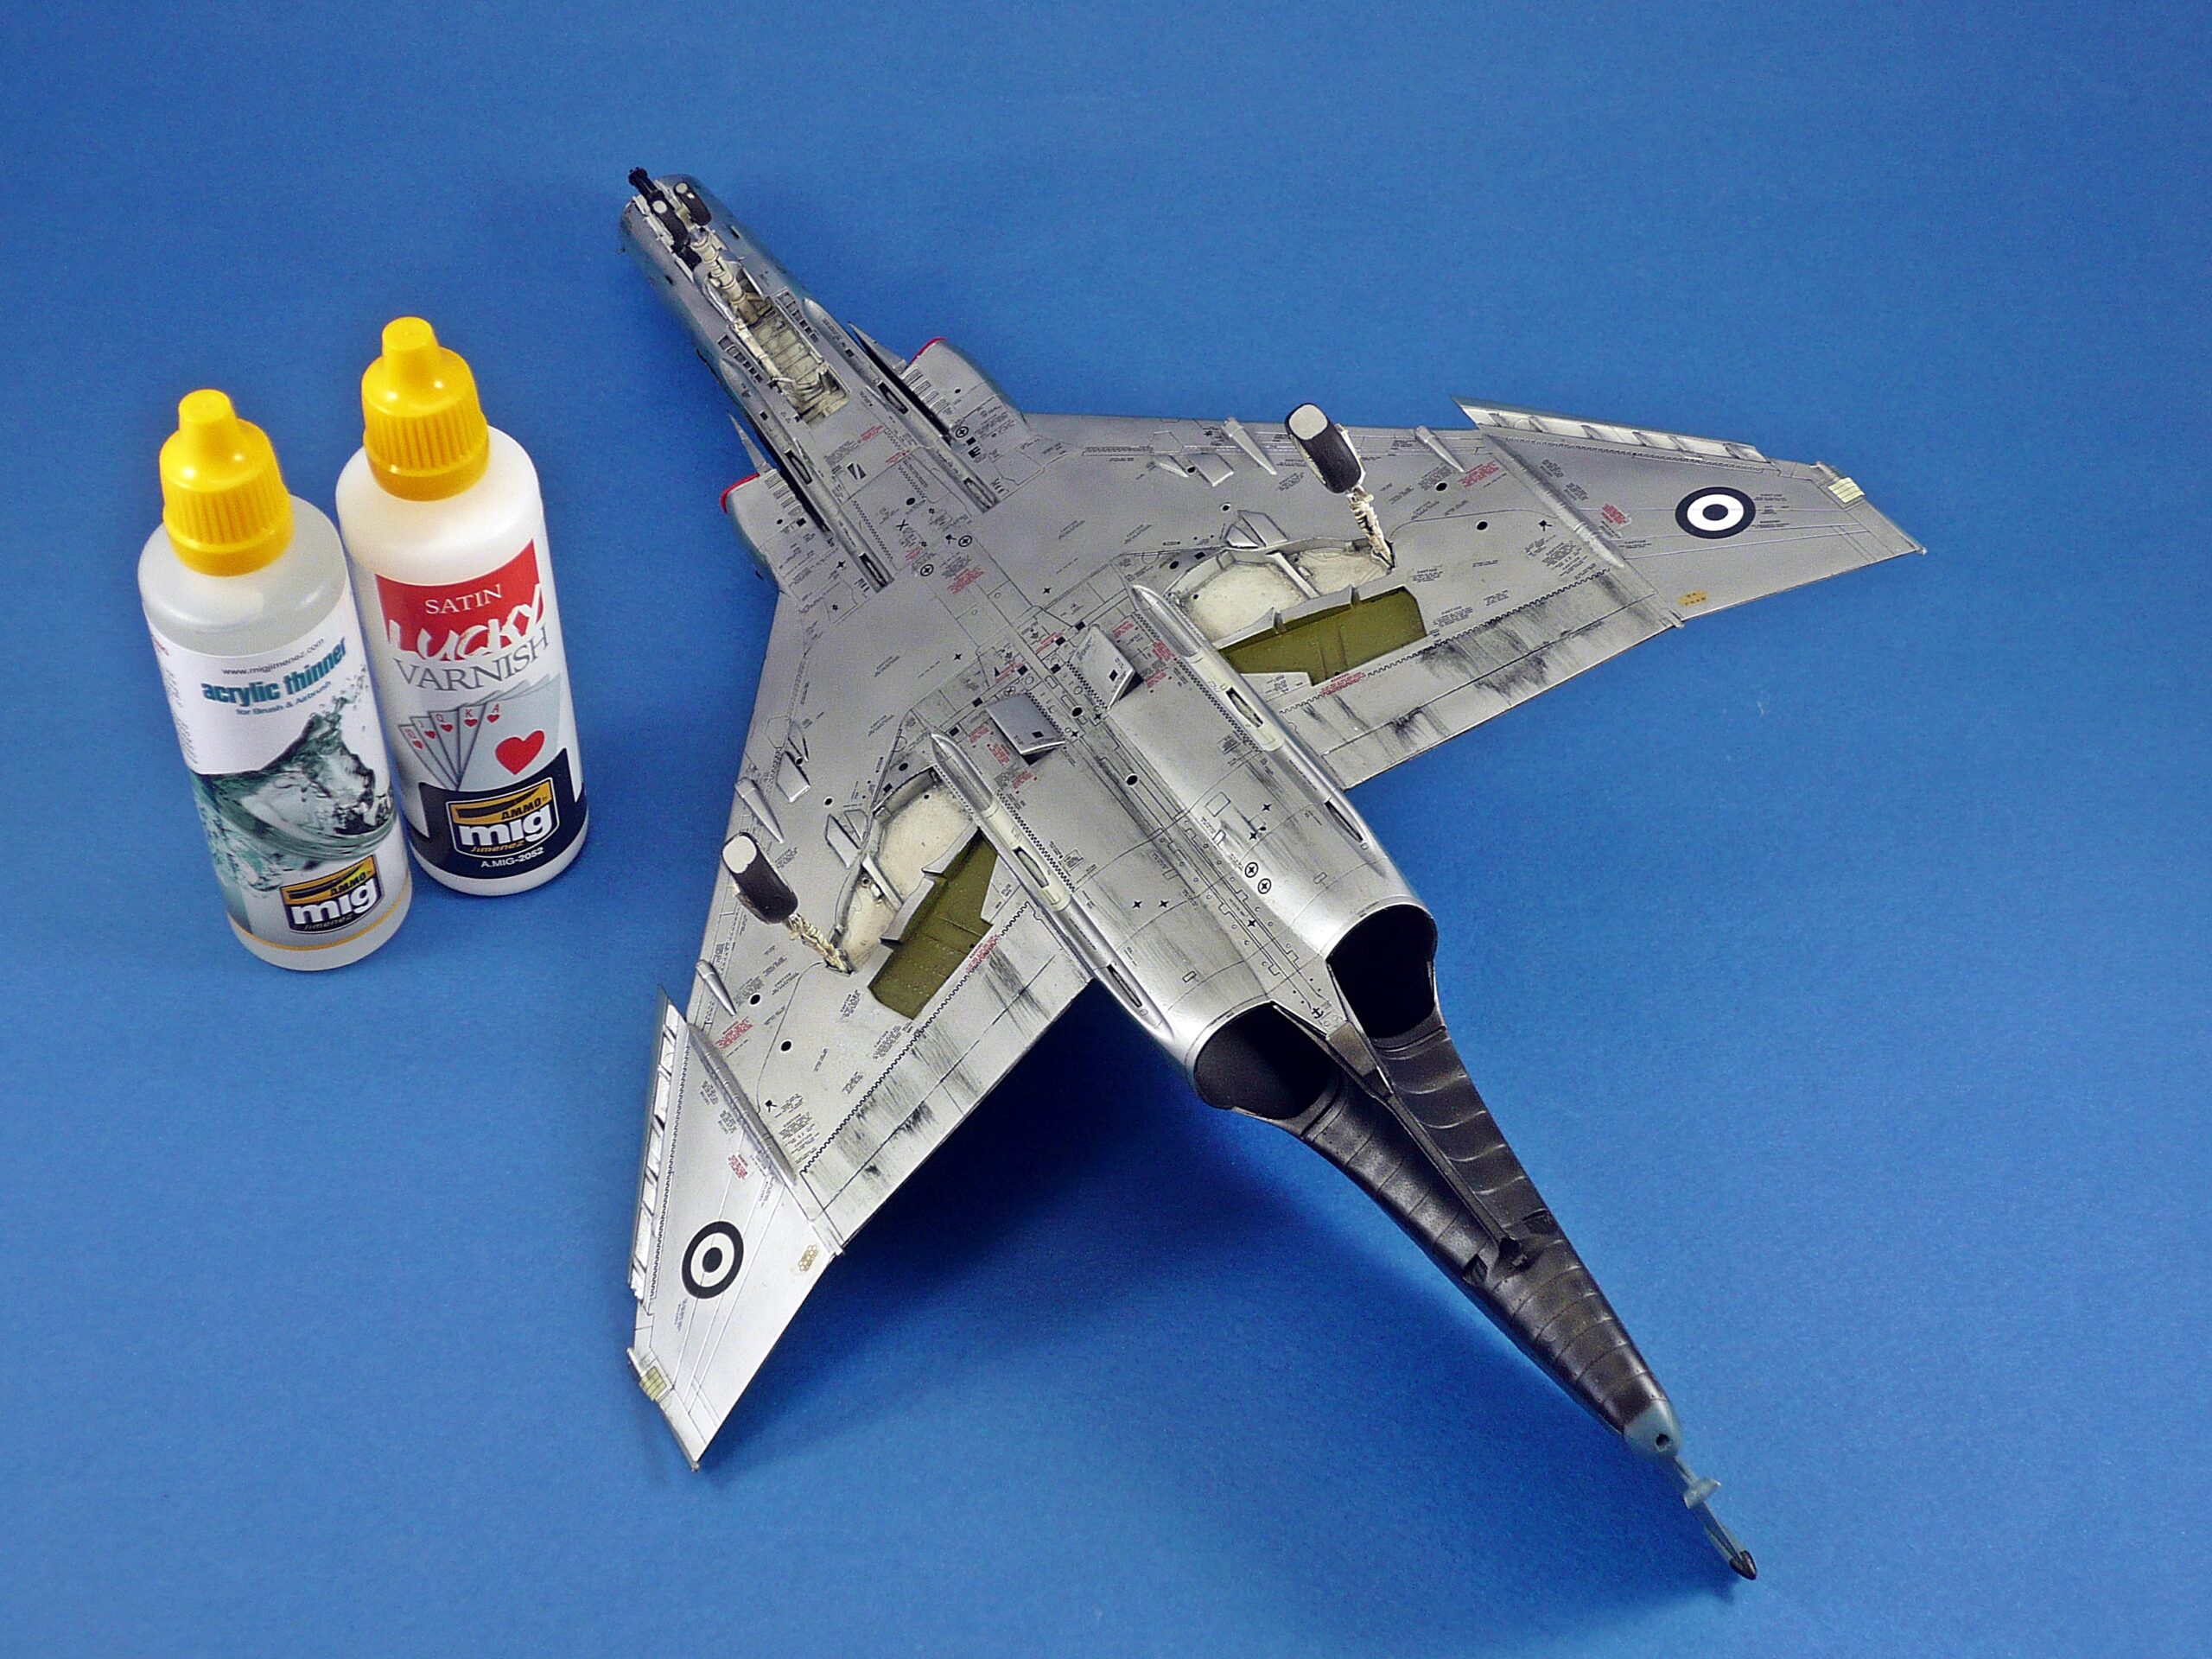
The lower surfaces were prepared for their aluminium finish using Alclad Gloss Black Primer (ALC 305). A glossy black base helps metallic paints produce a smooth, reflective appearance, making surface preparation particularly important.
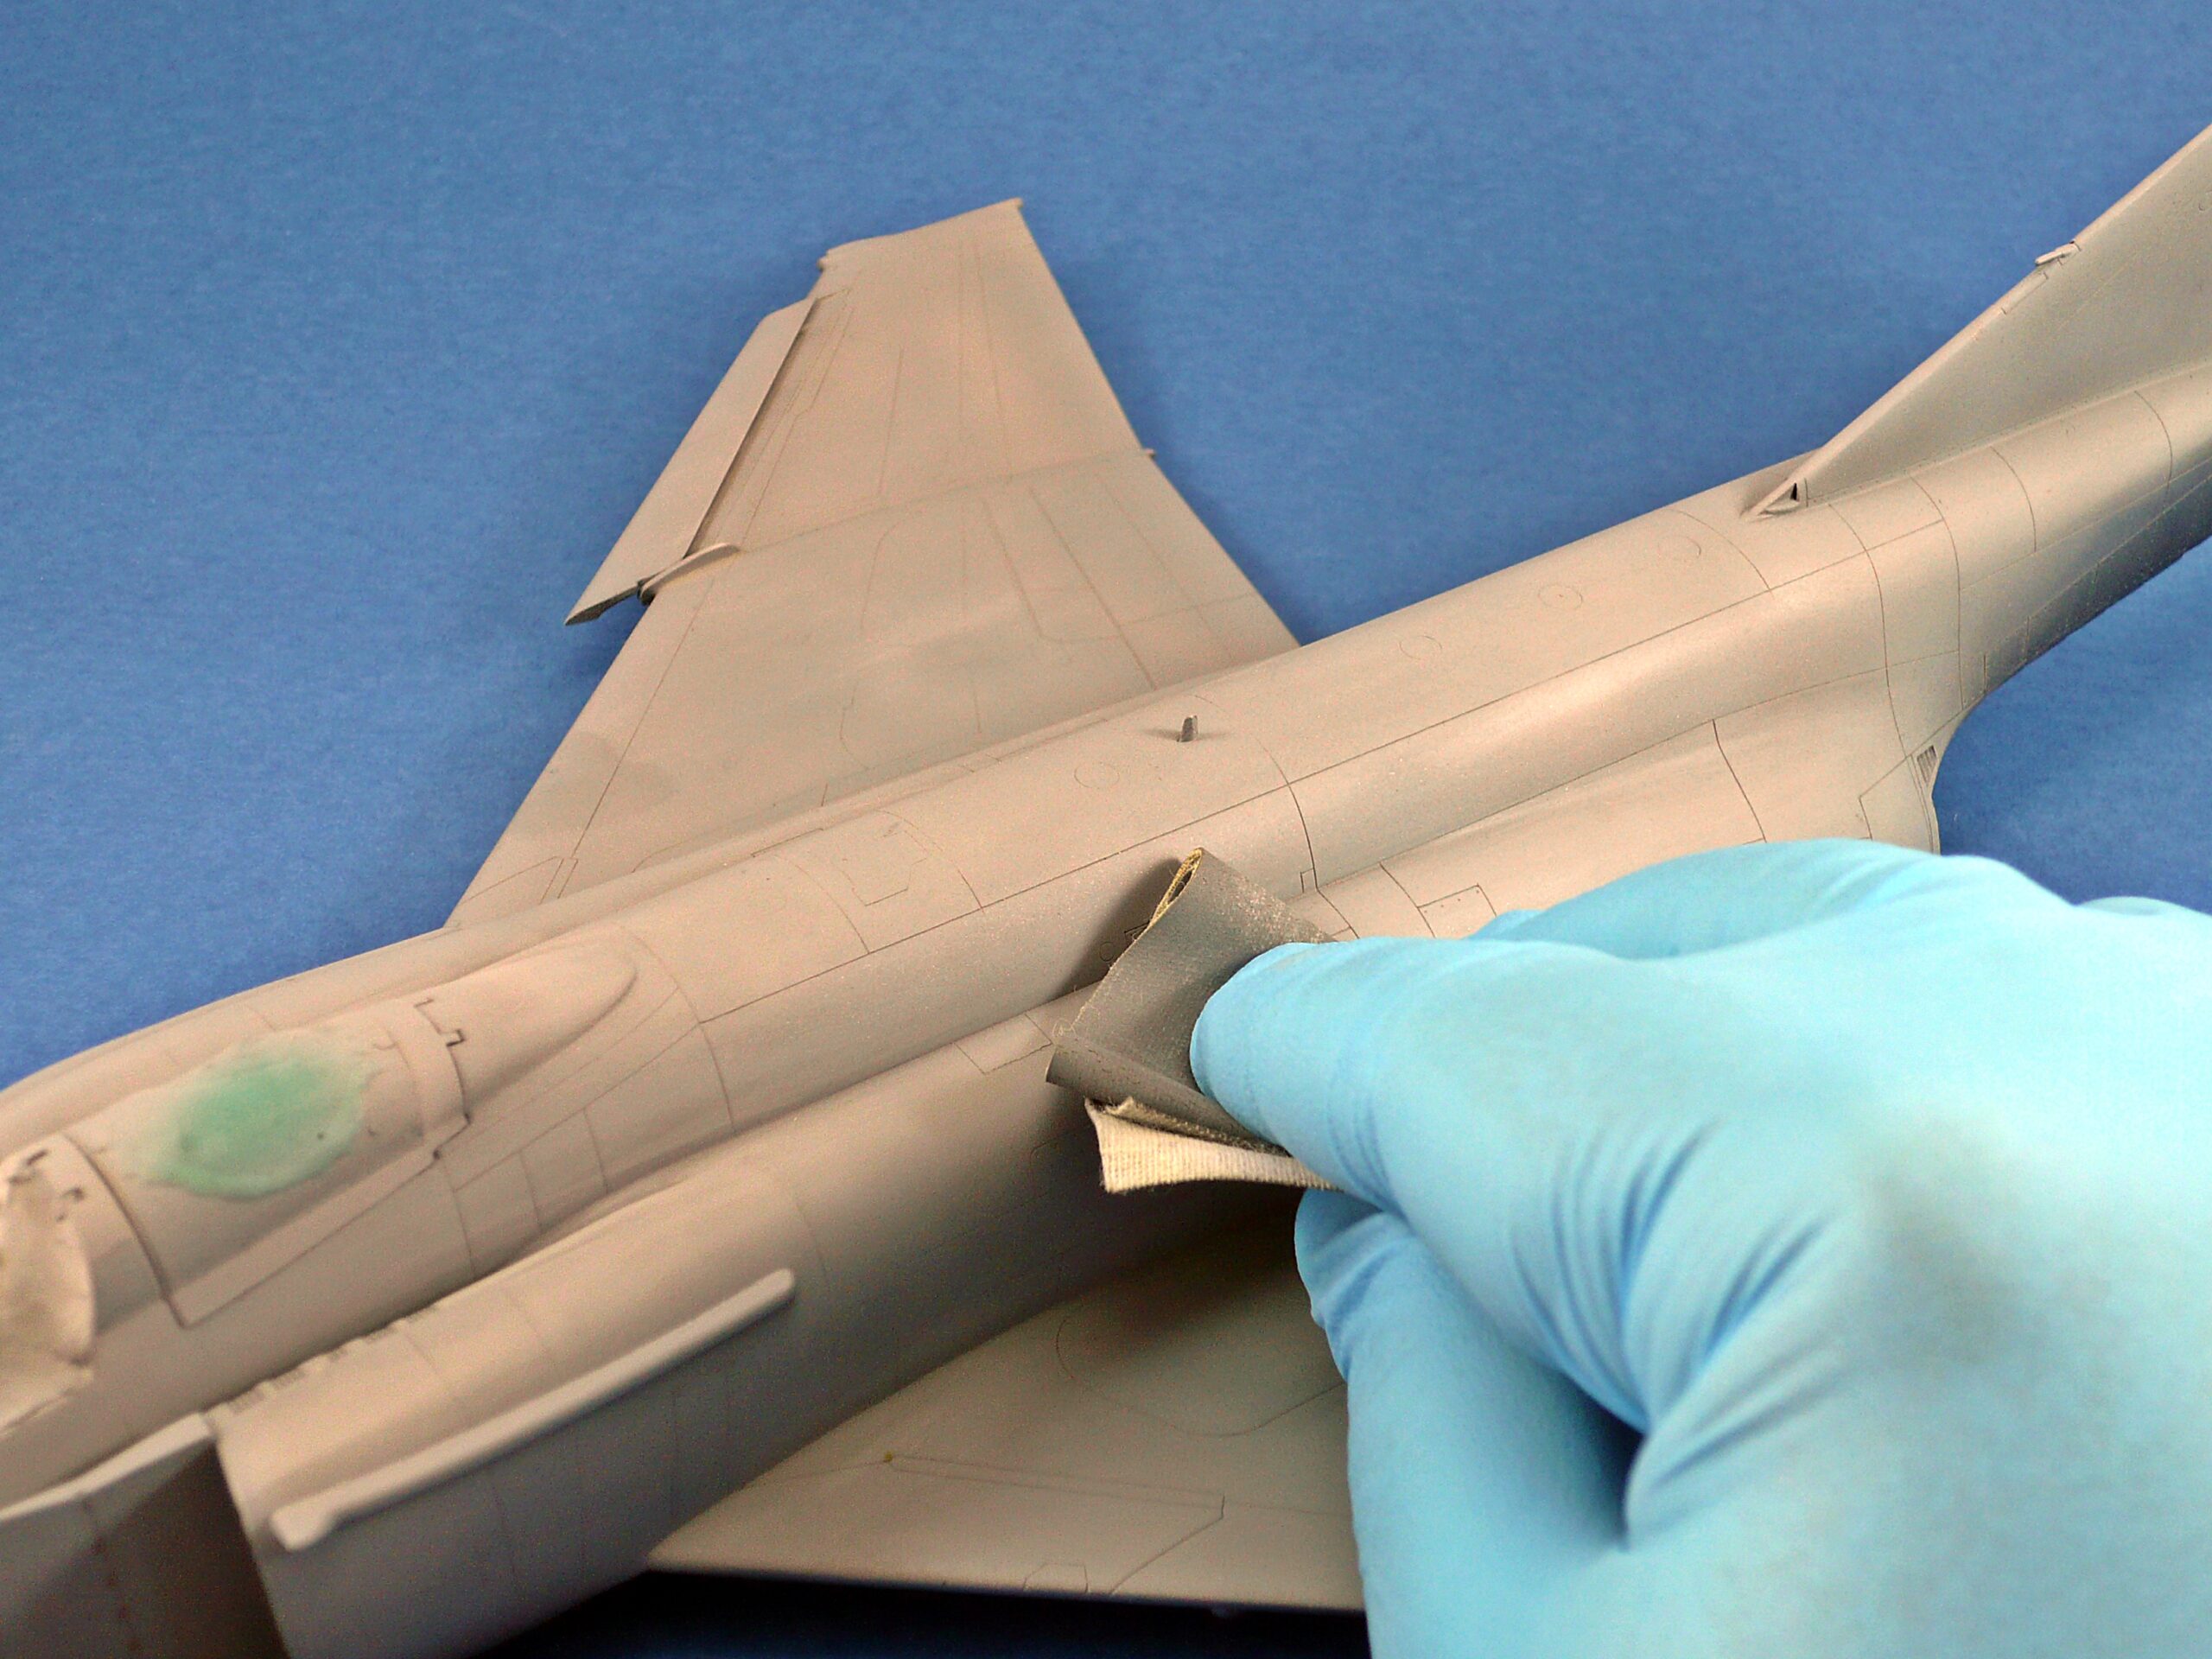
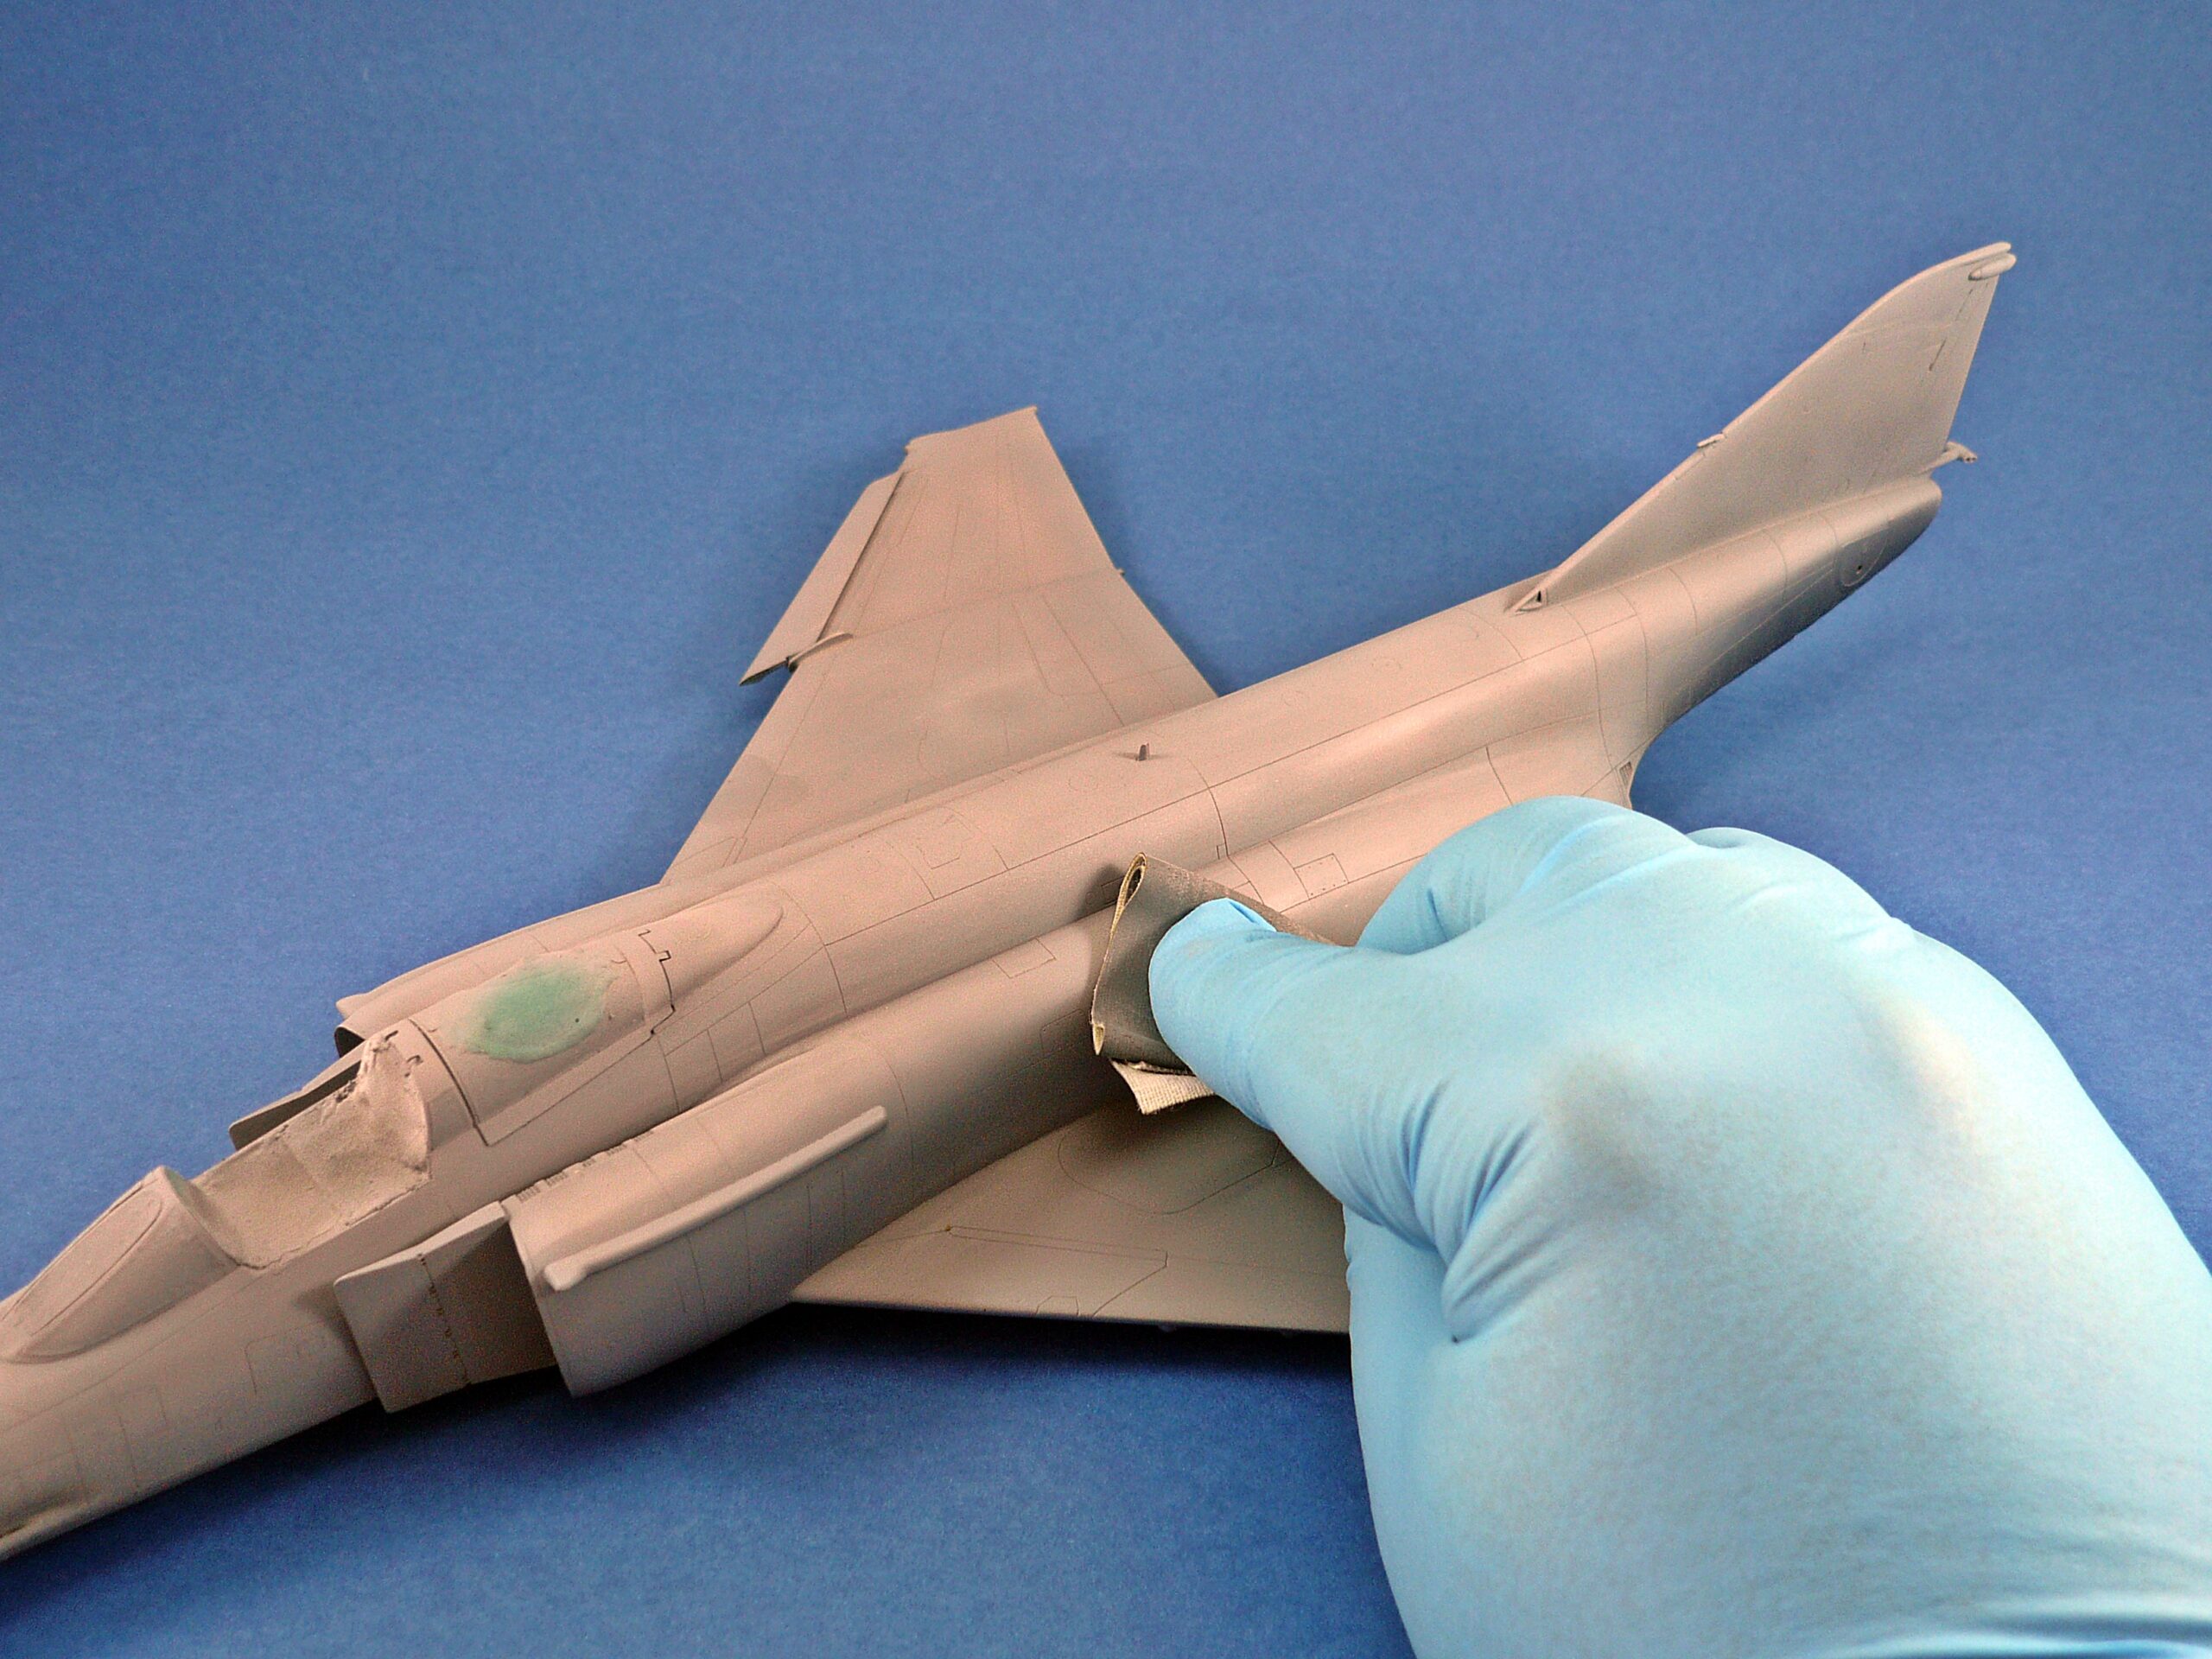
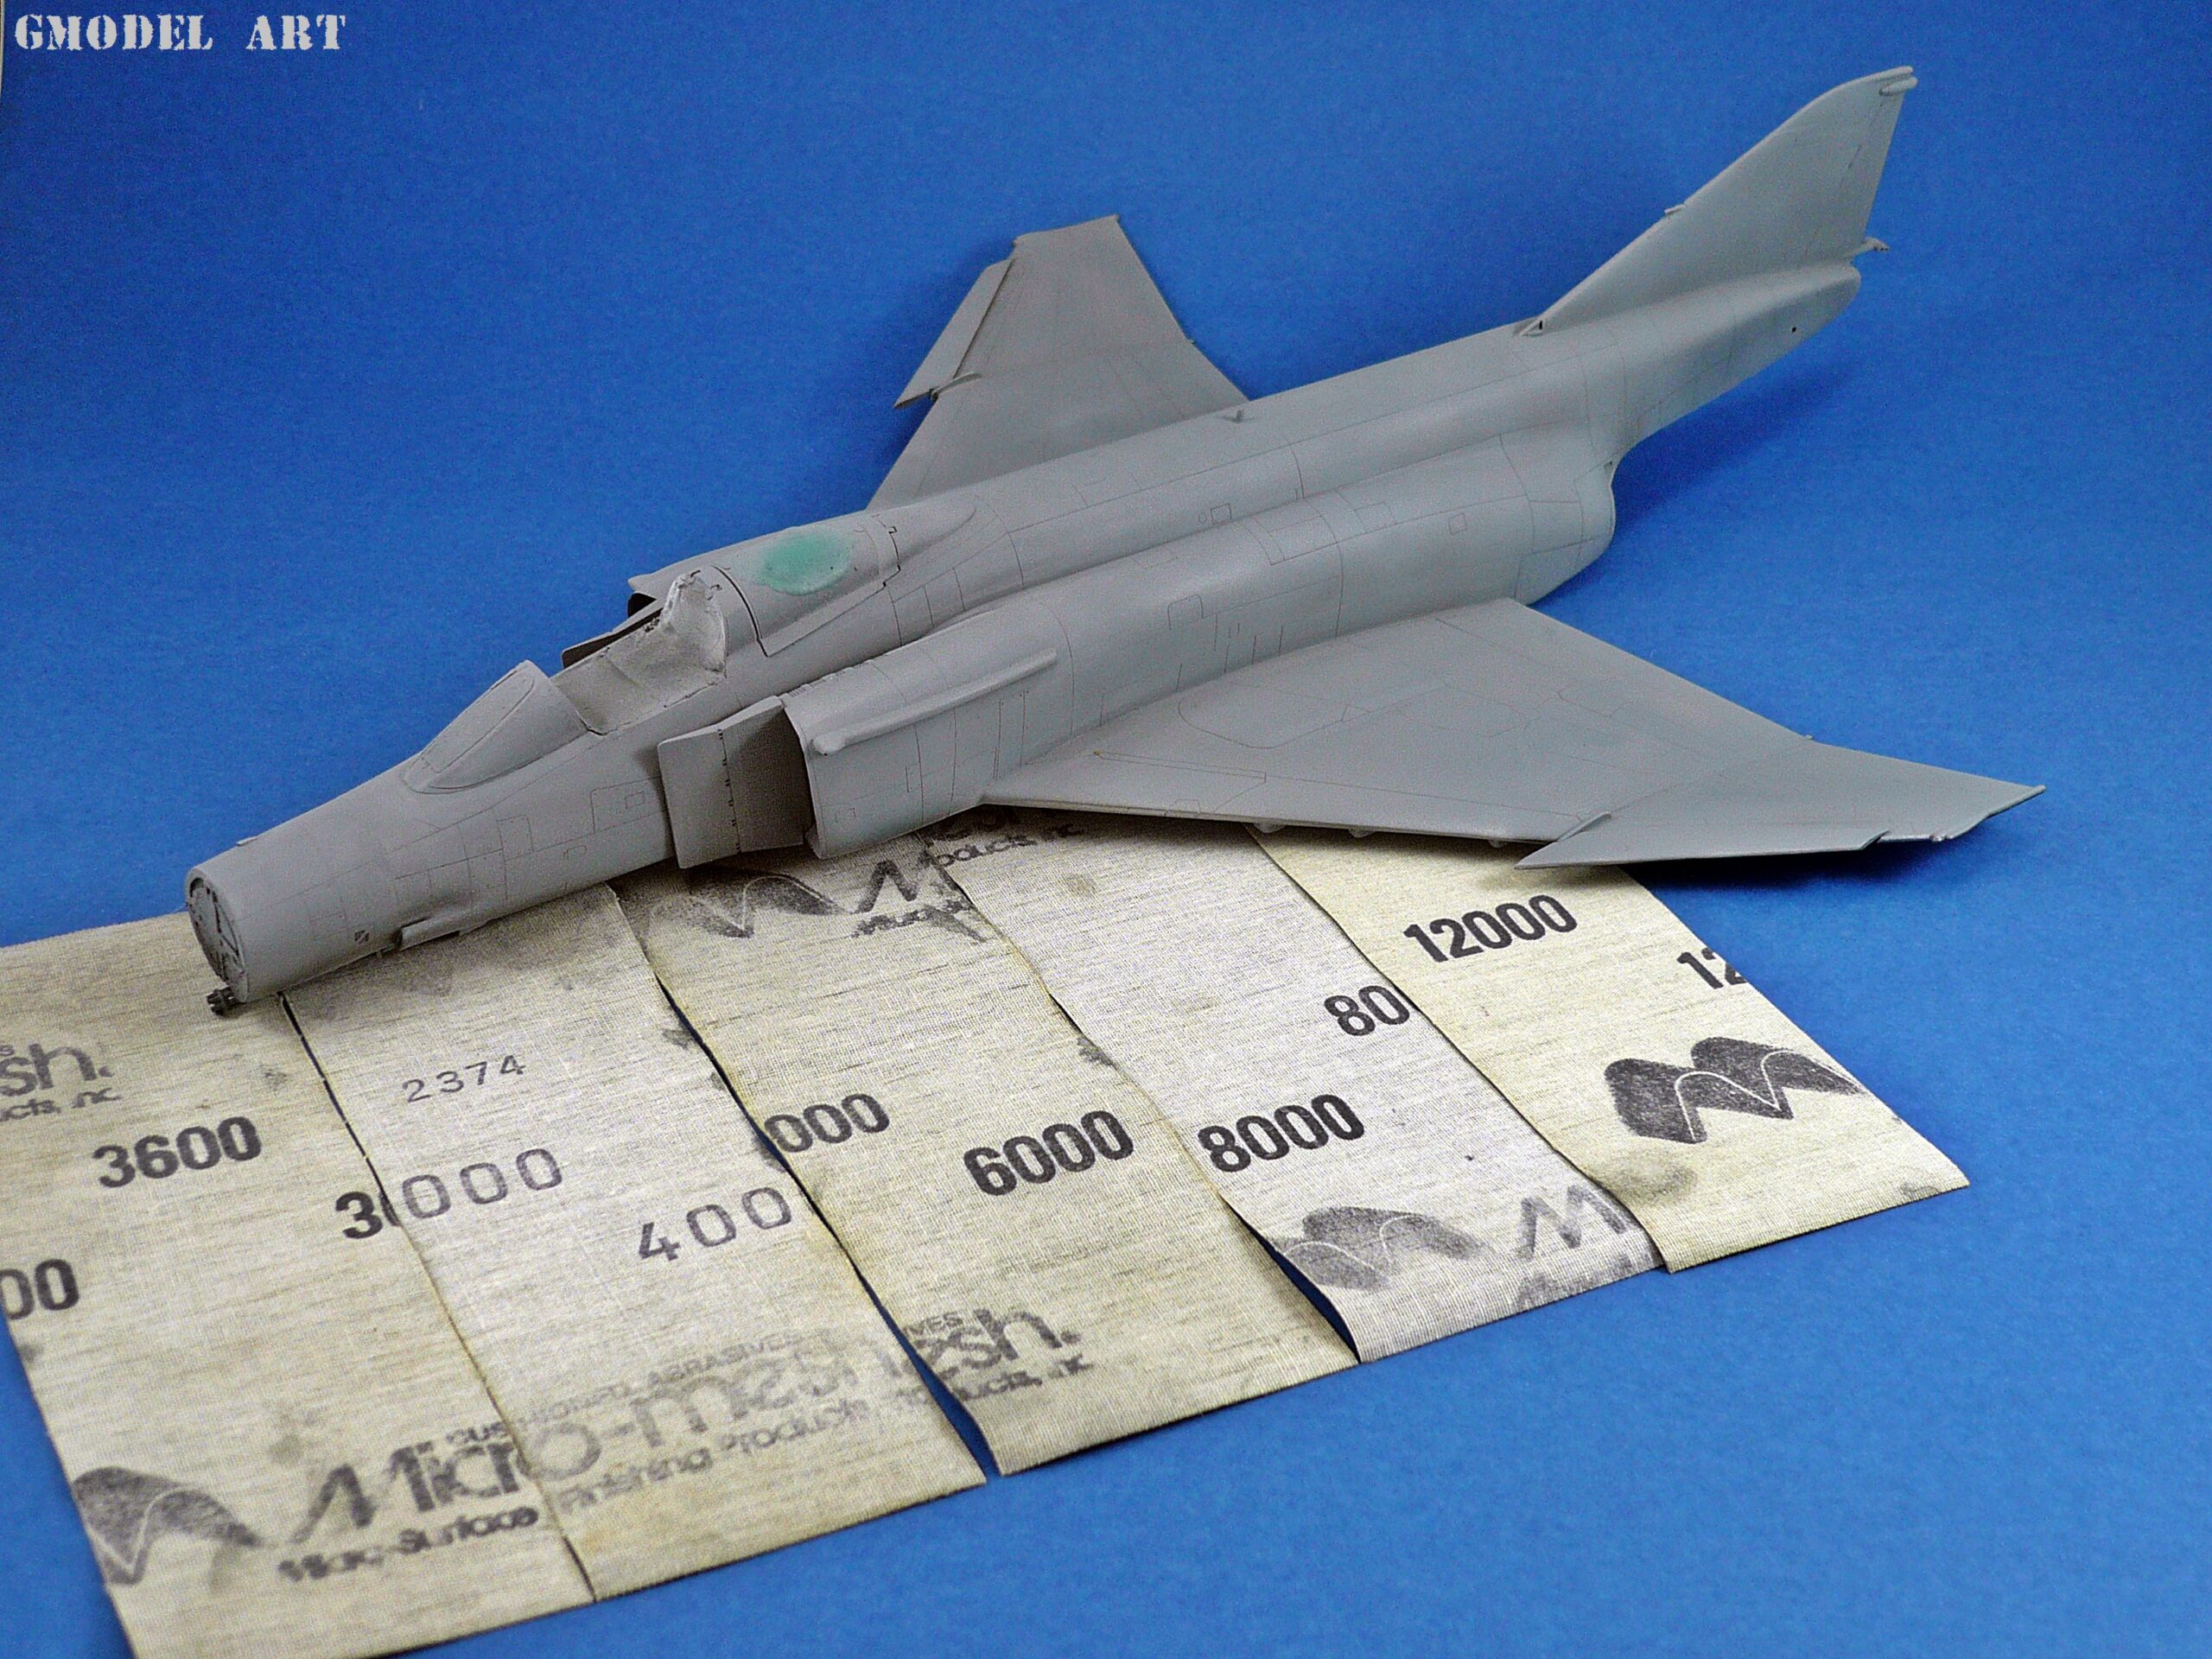
The upper surfaces were then refined progressively with Micromesh abrasives, moving from 3600 to 12000 grit. The aim was to reduce surface roughness and create an even foundation for the camouflage paint.
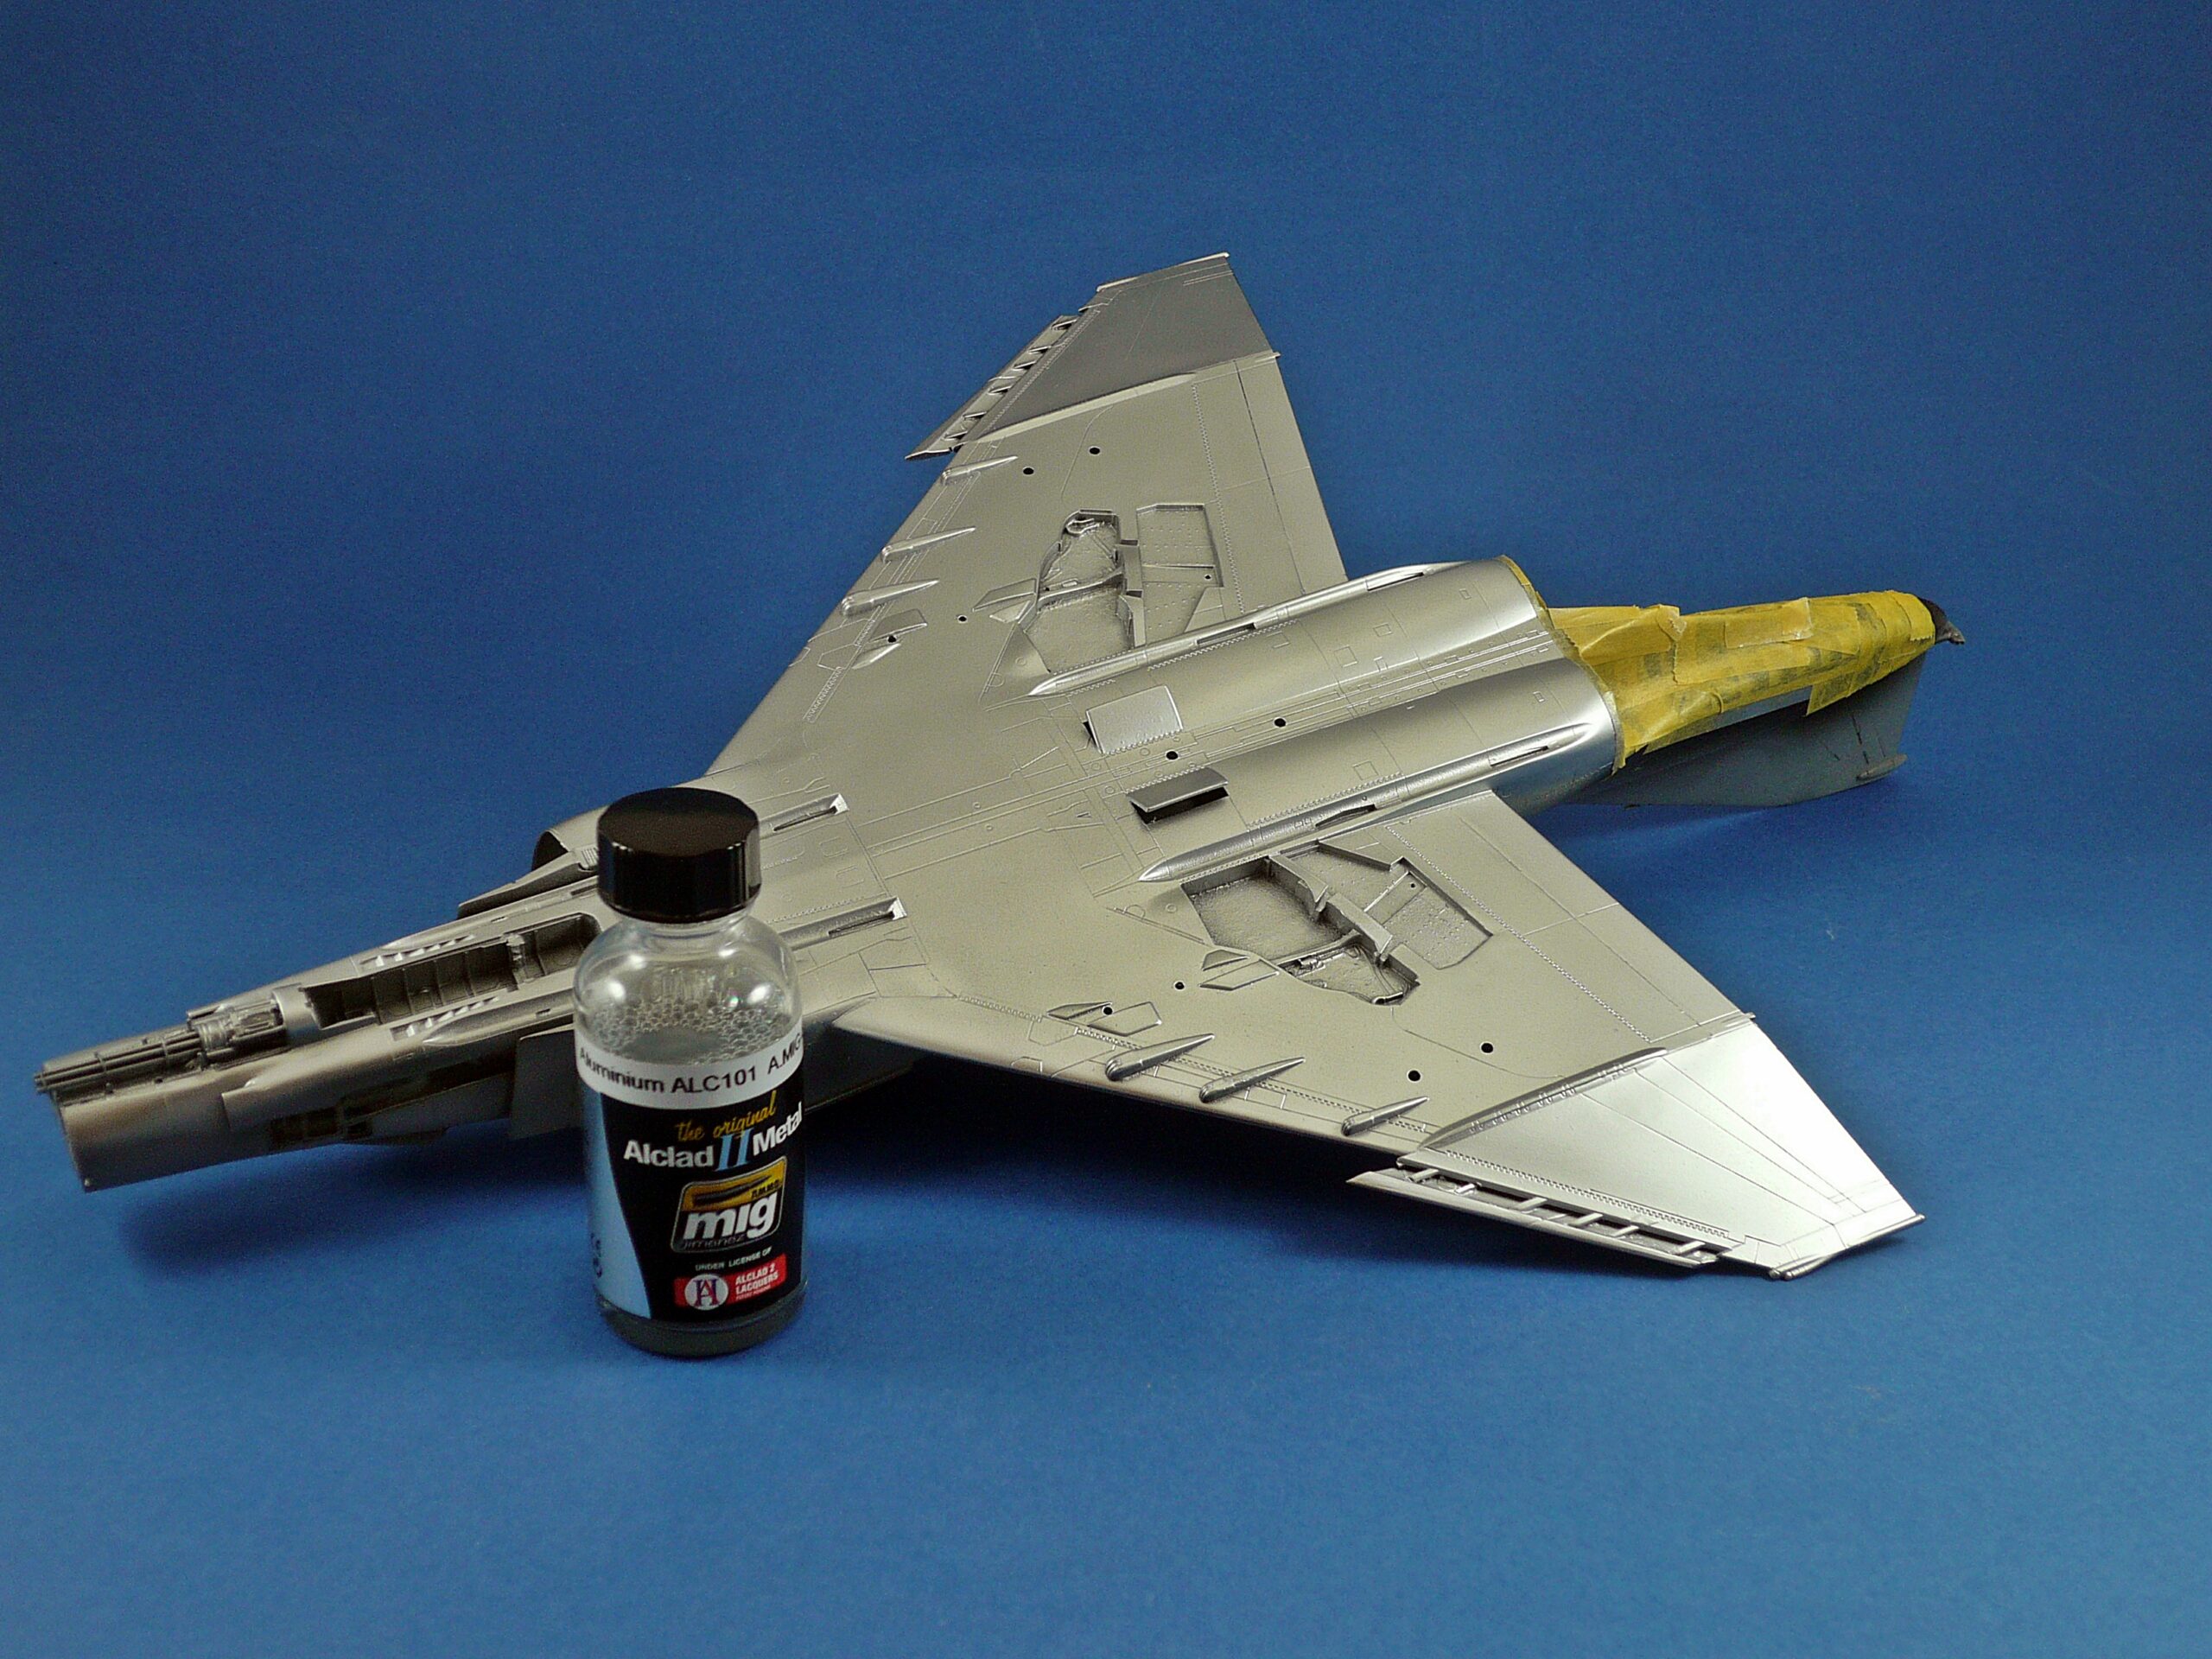
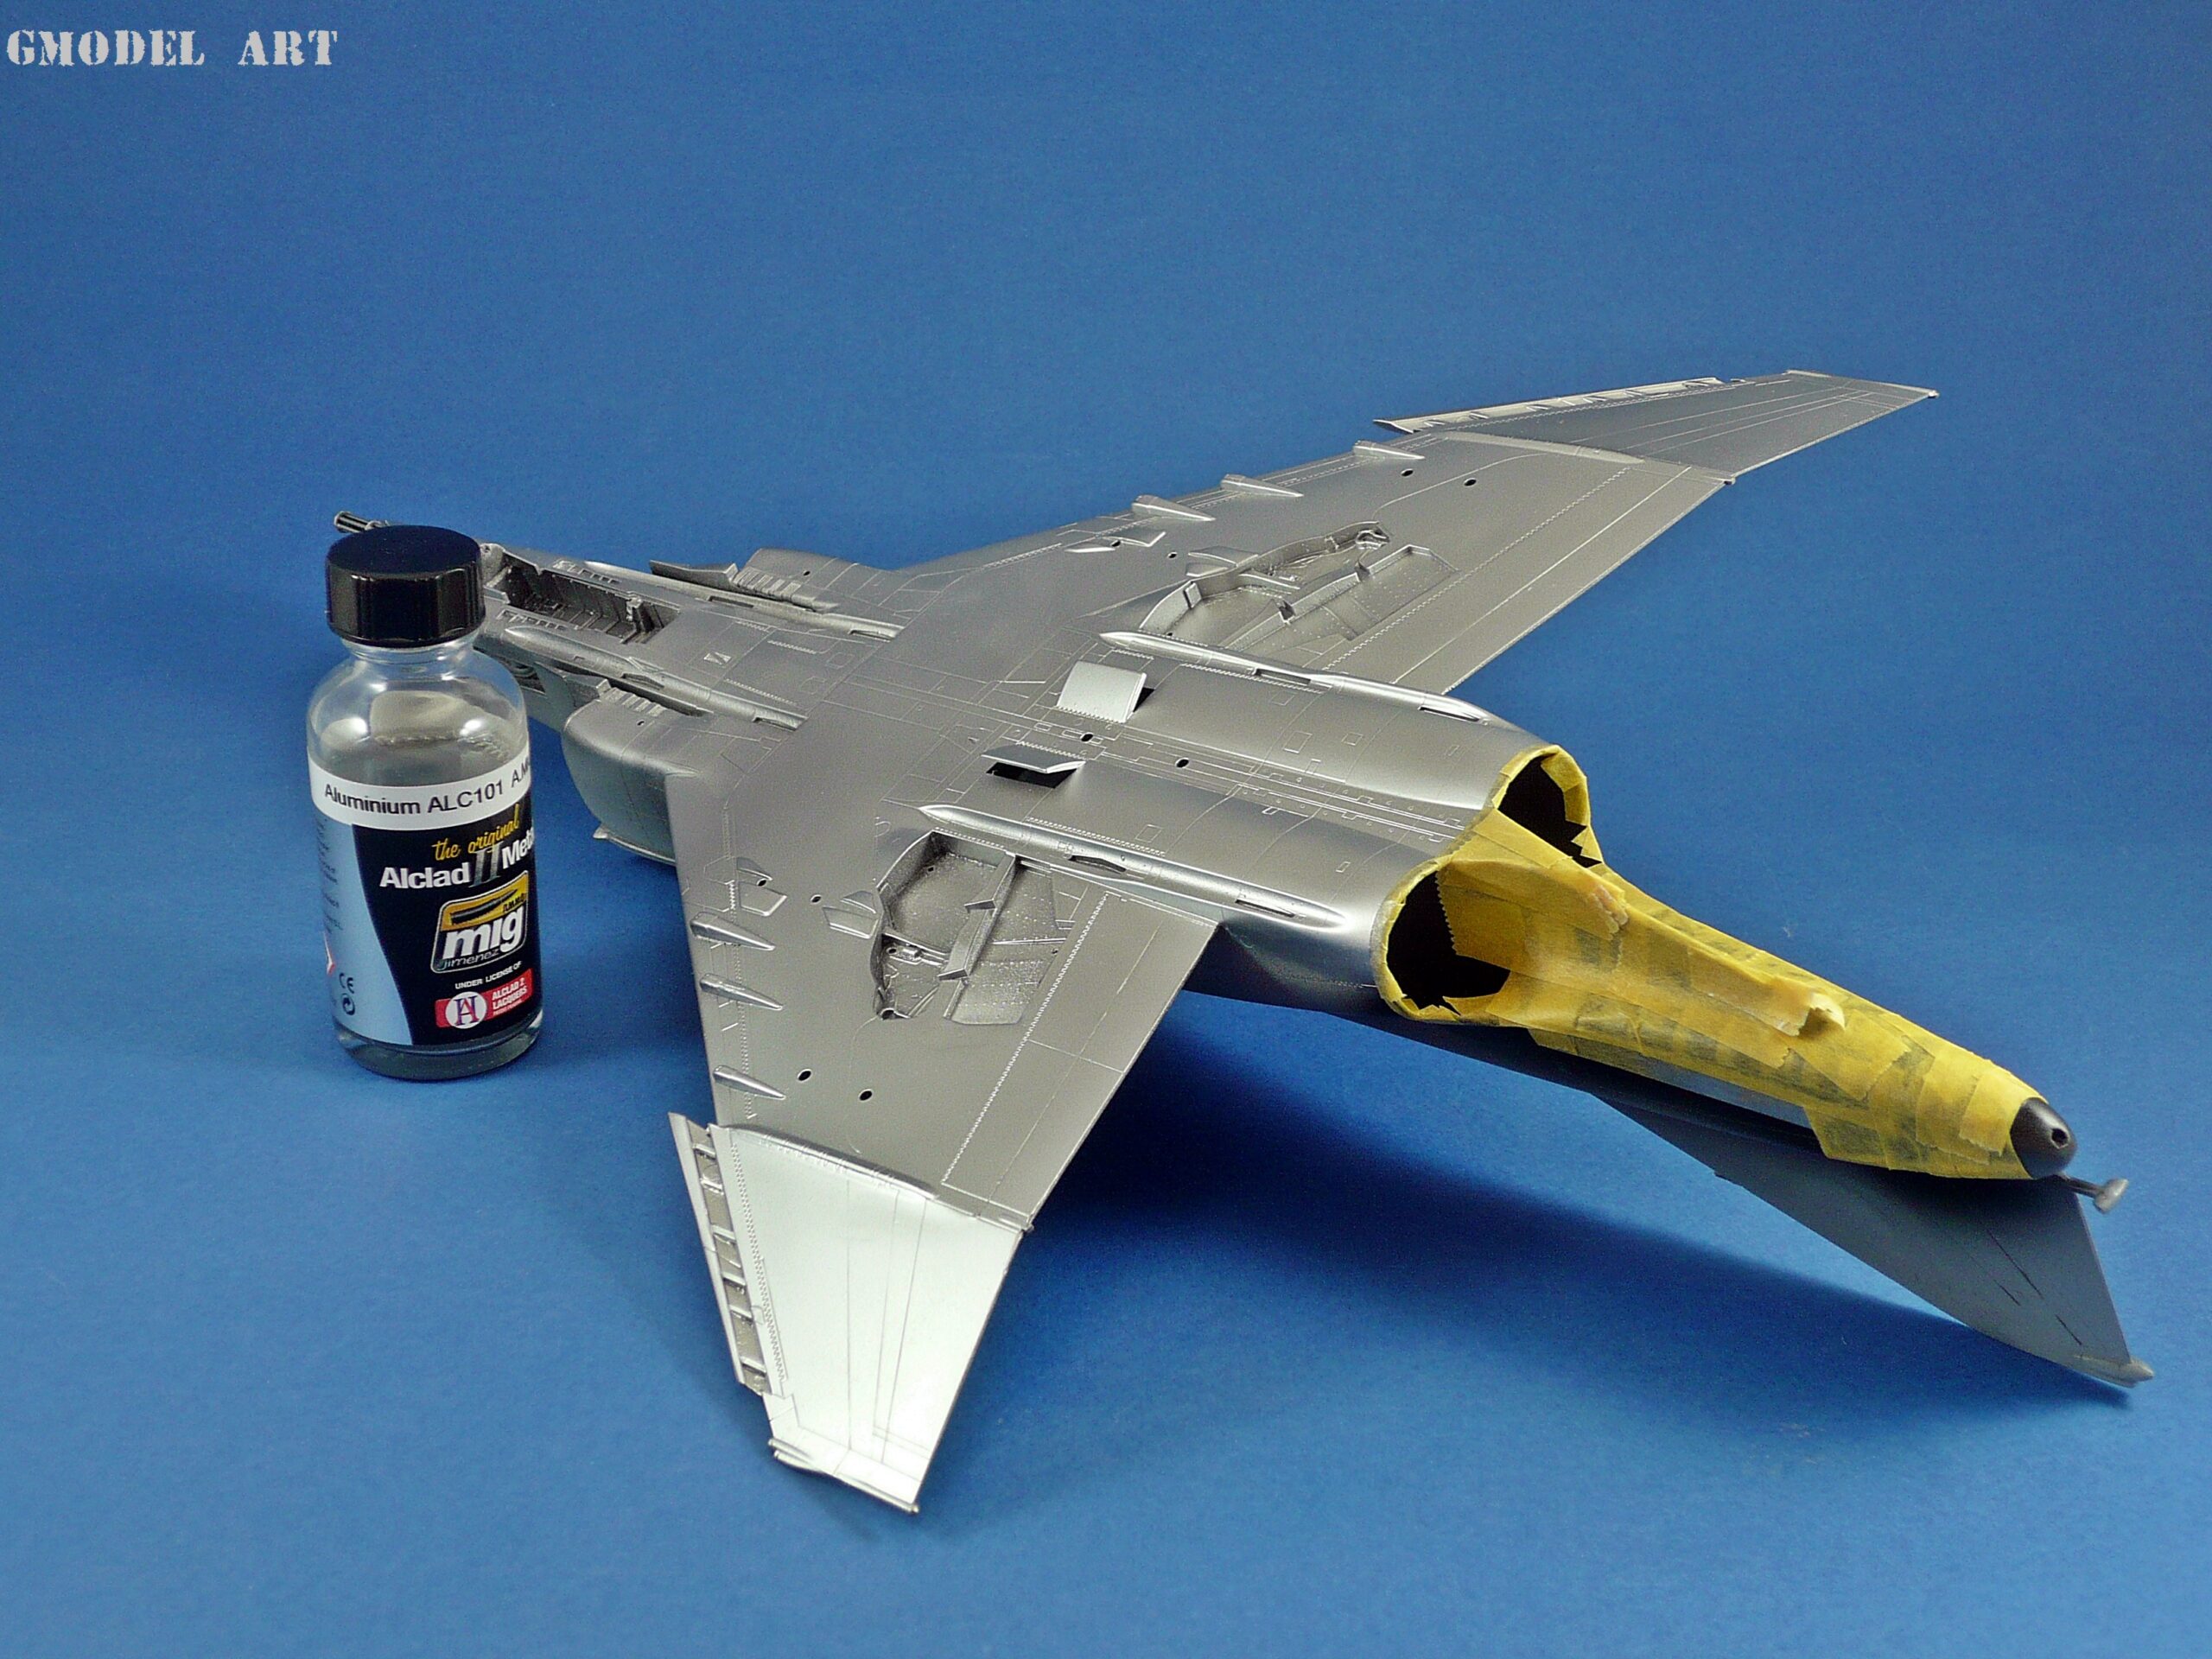
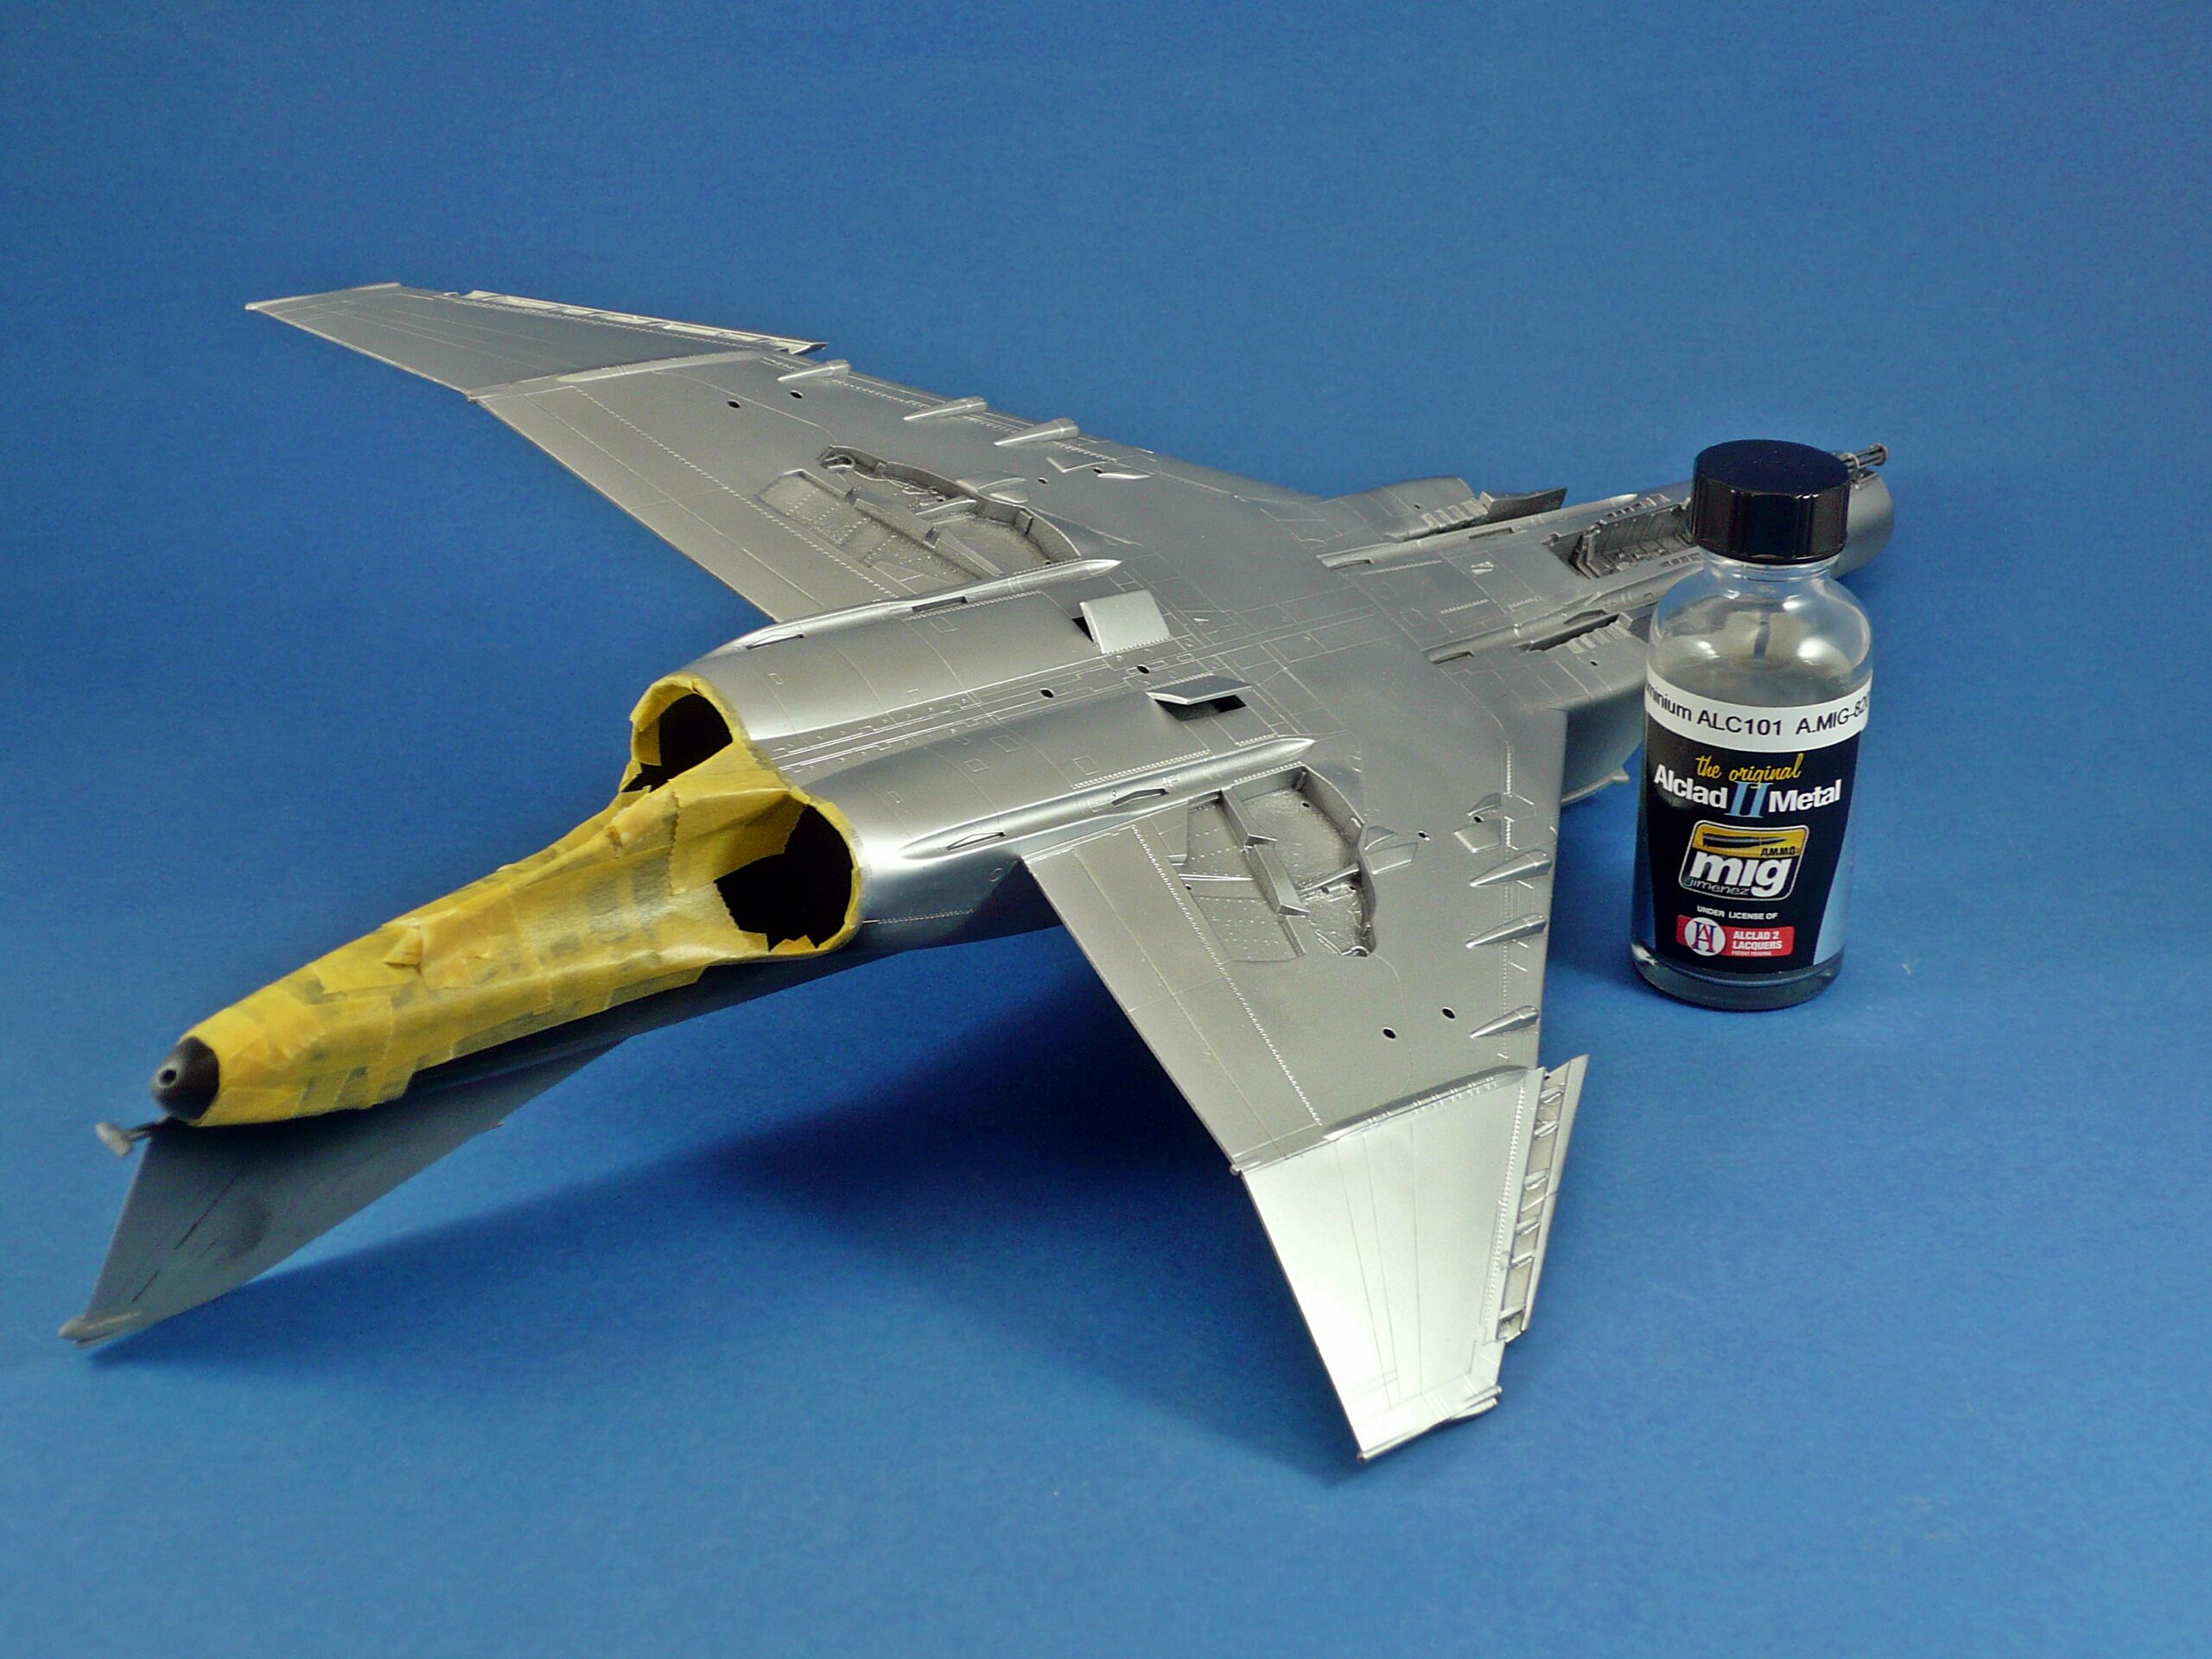
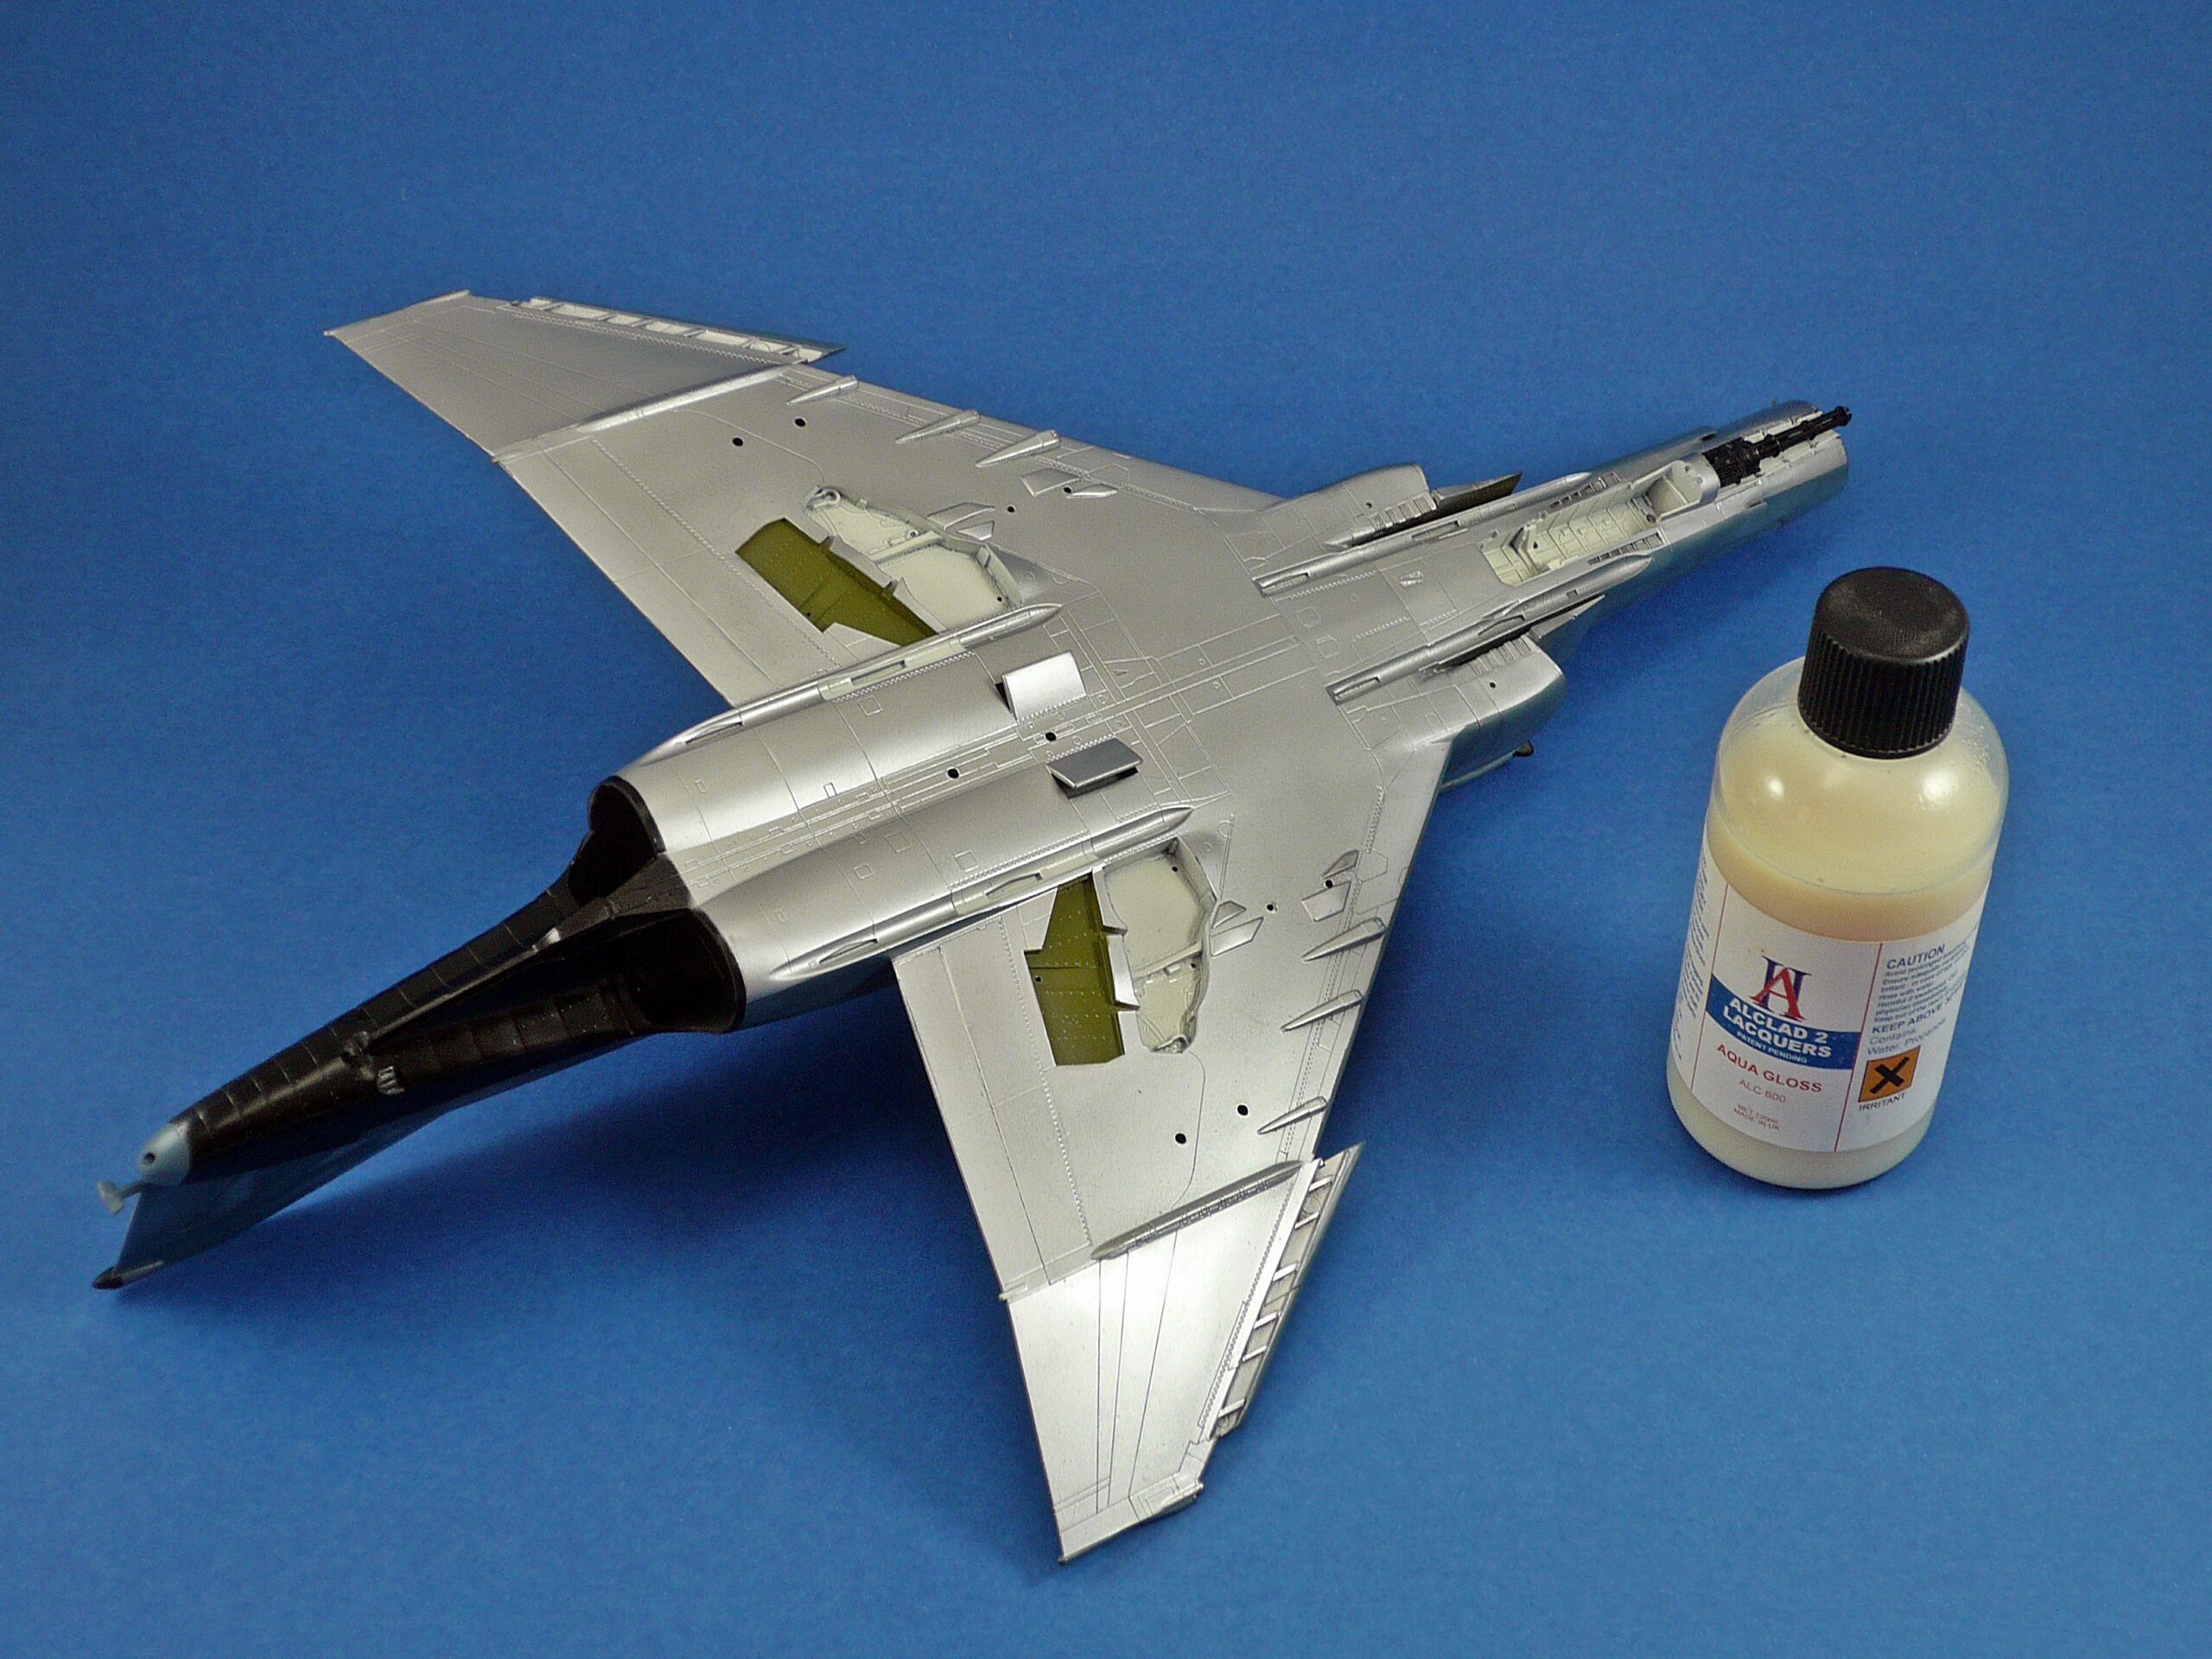
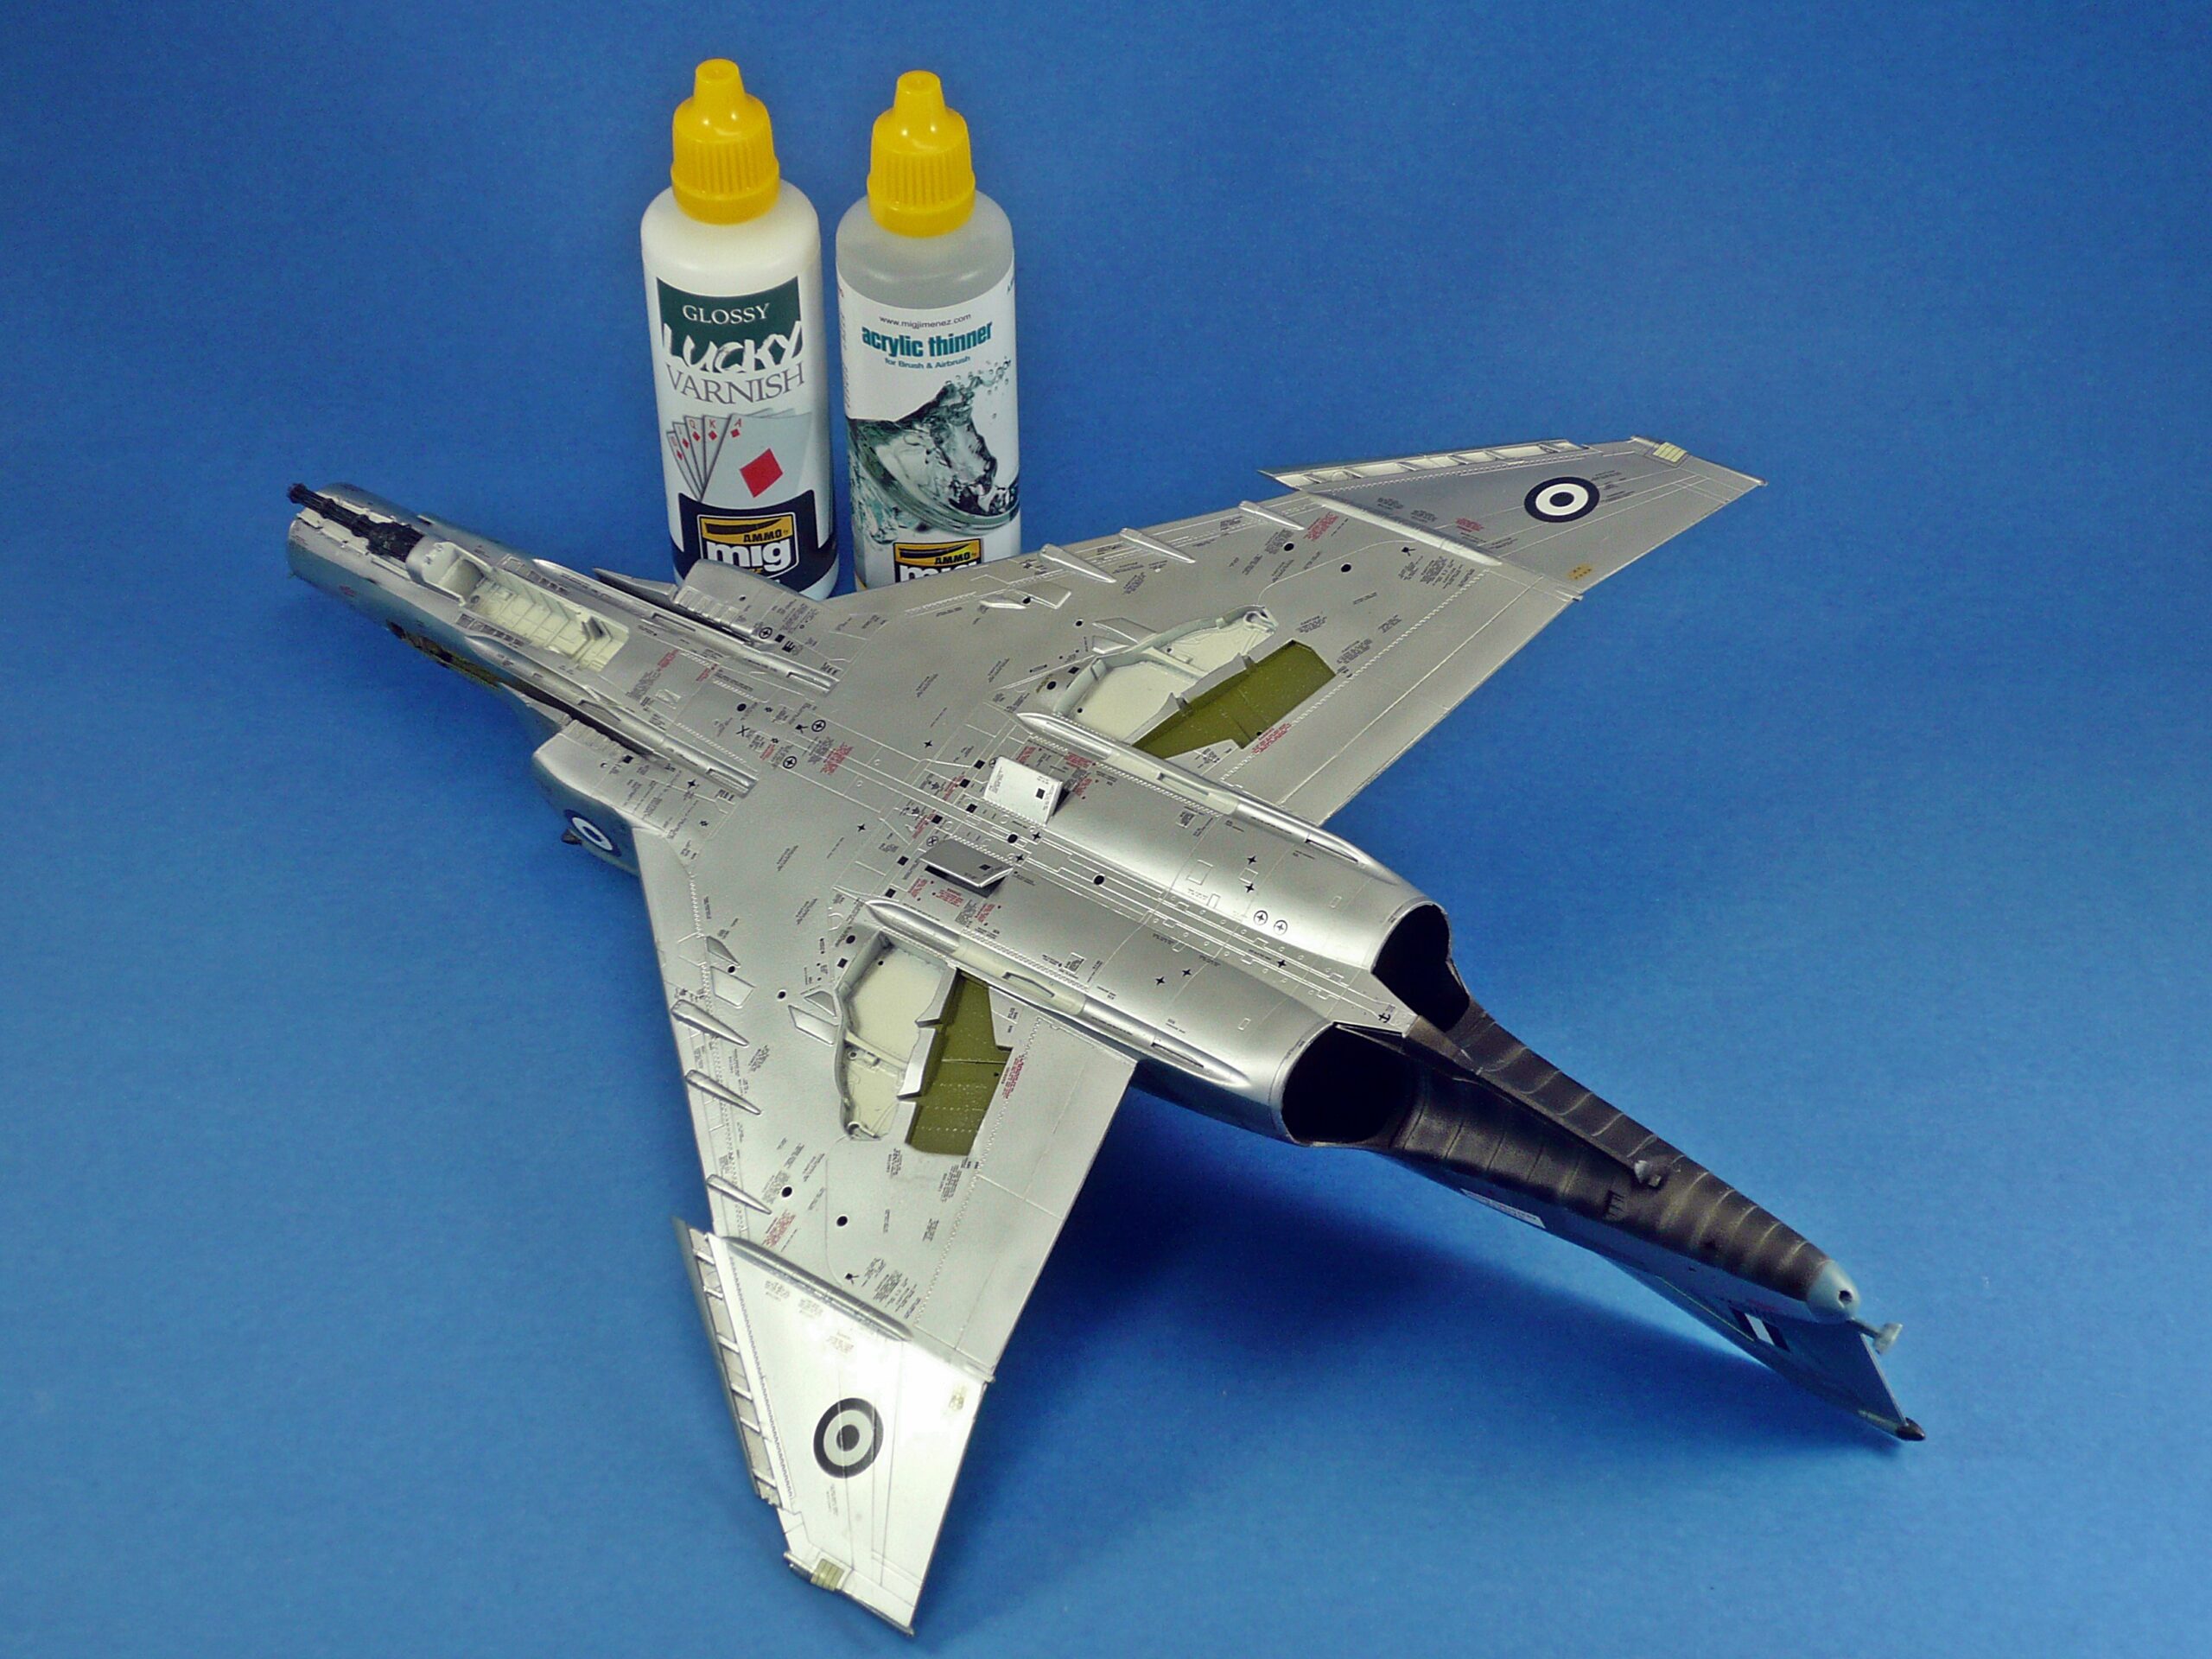
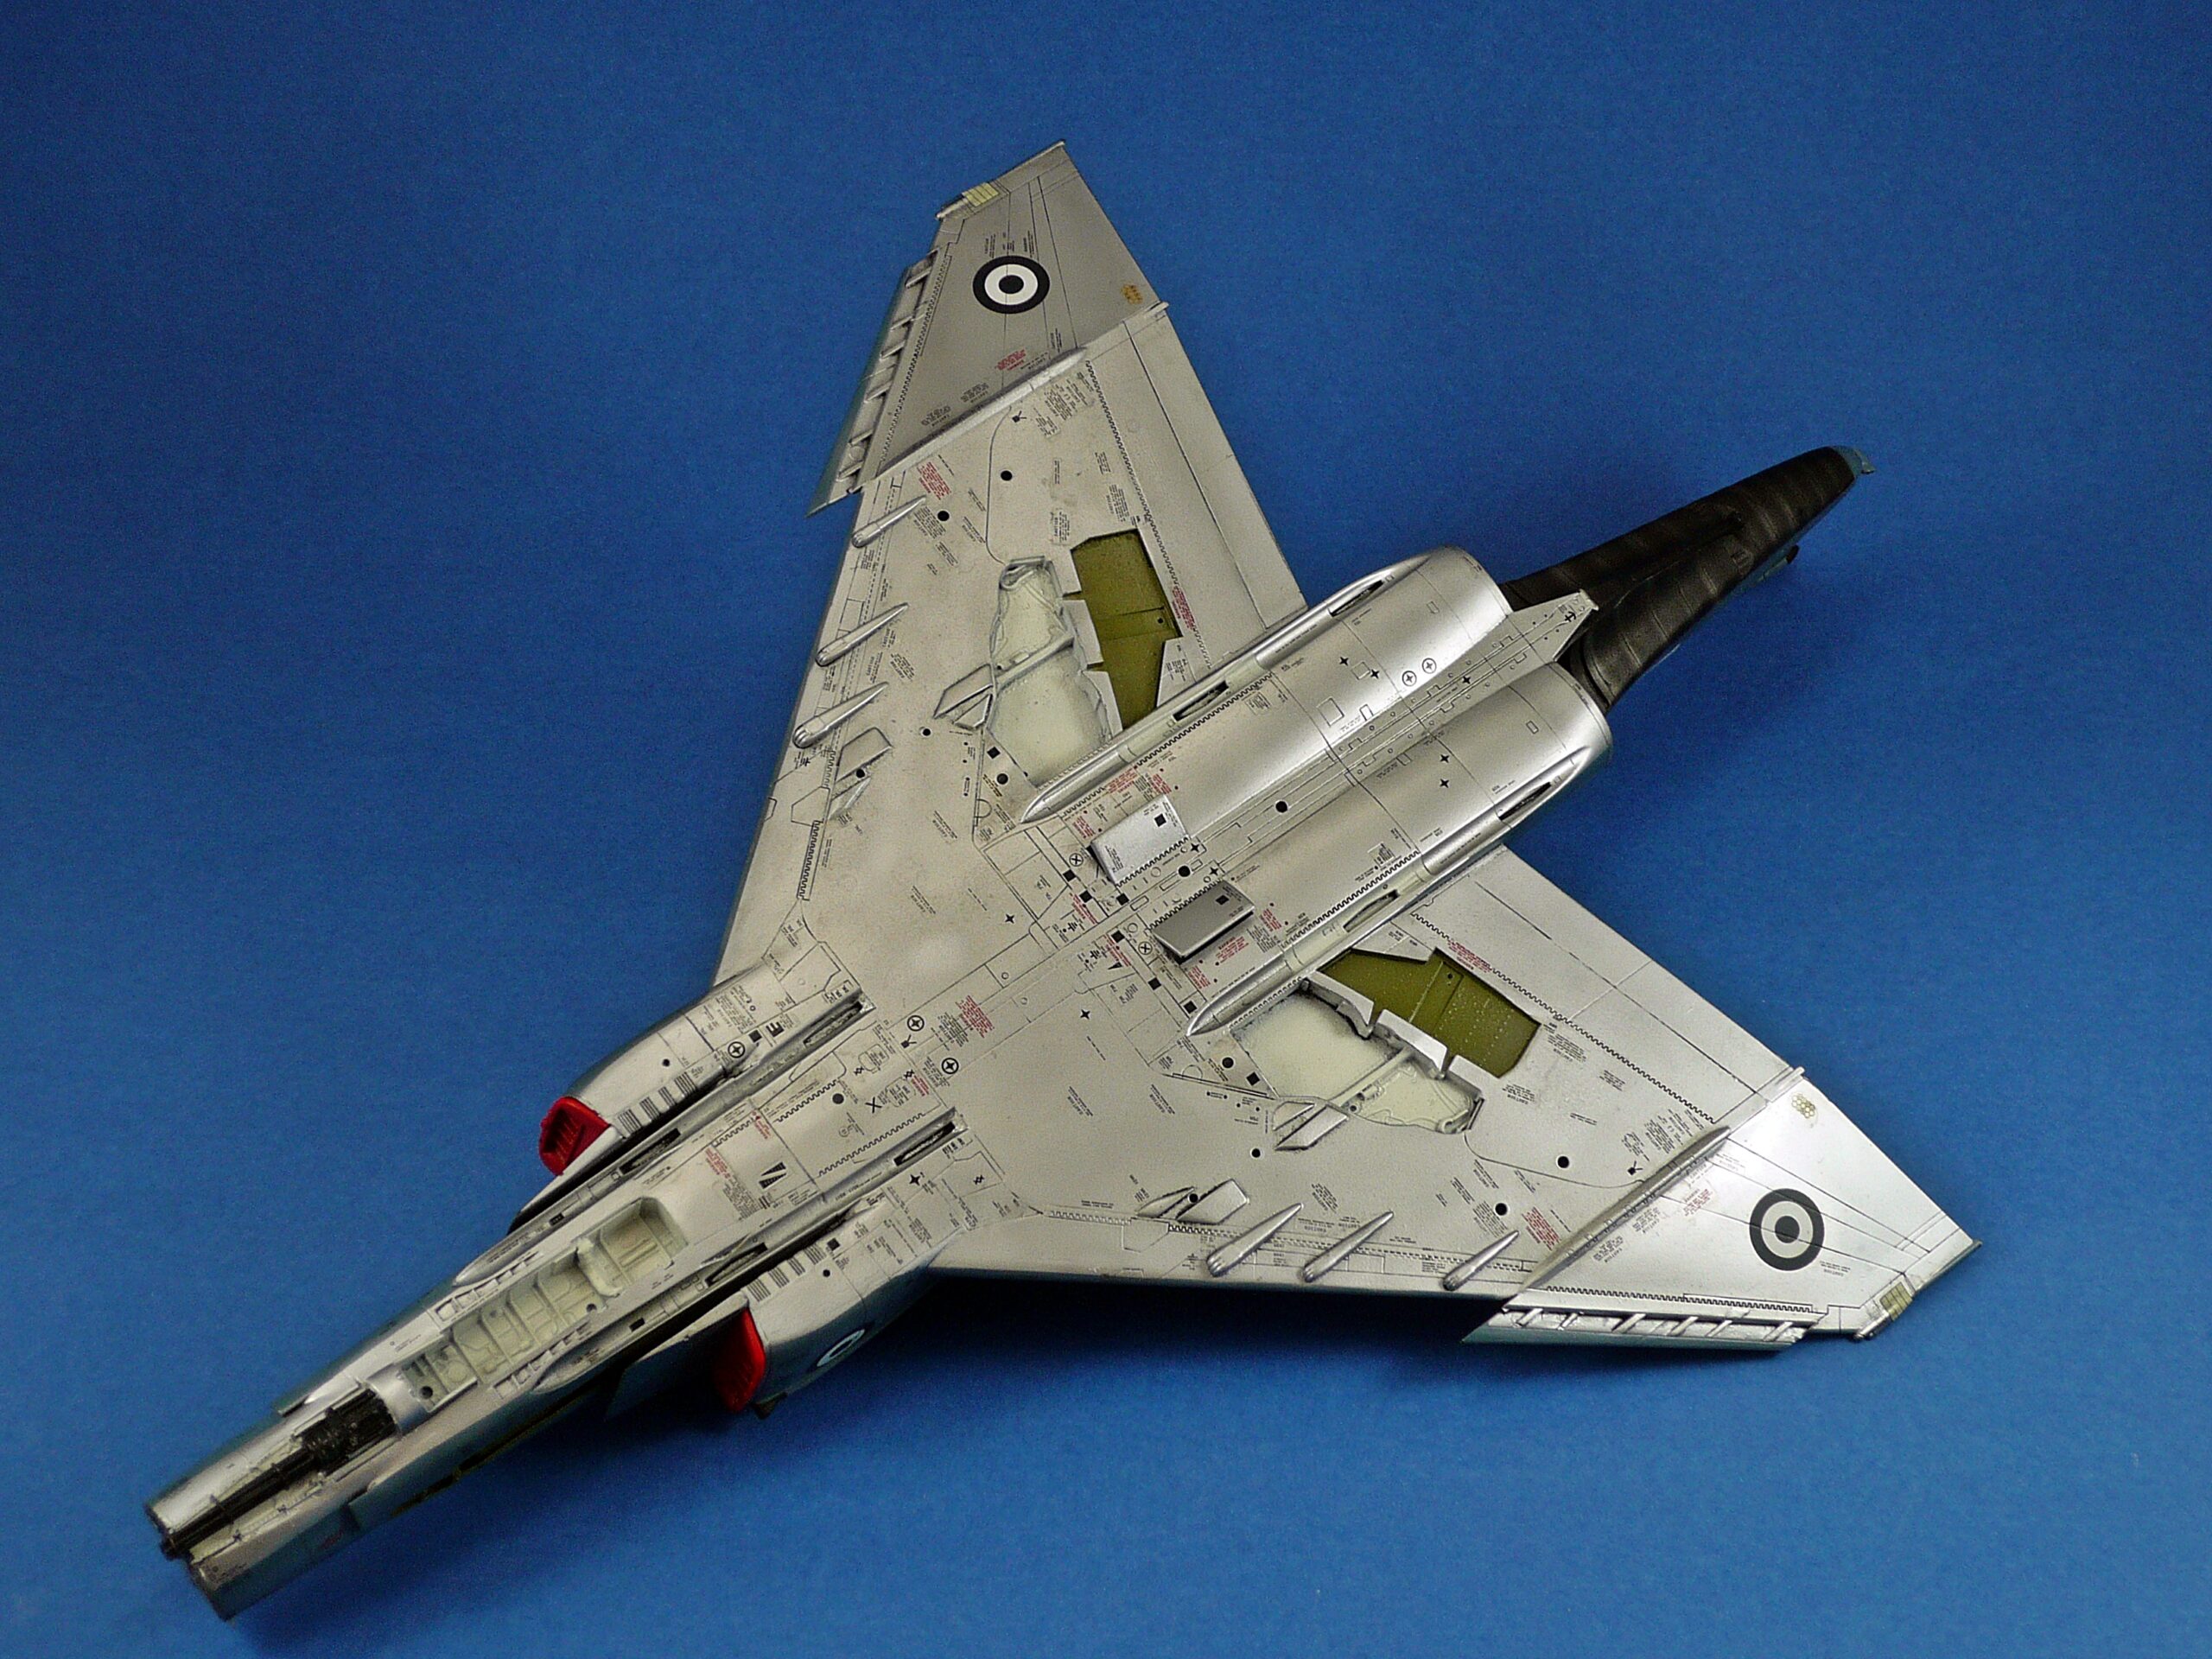
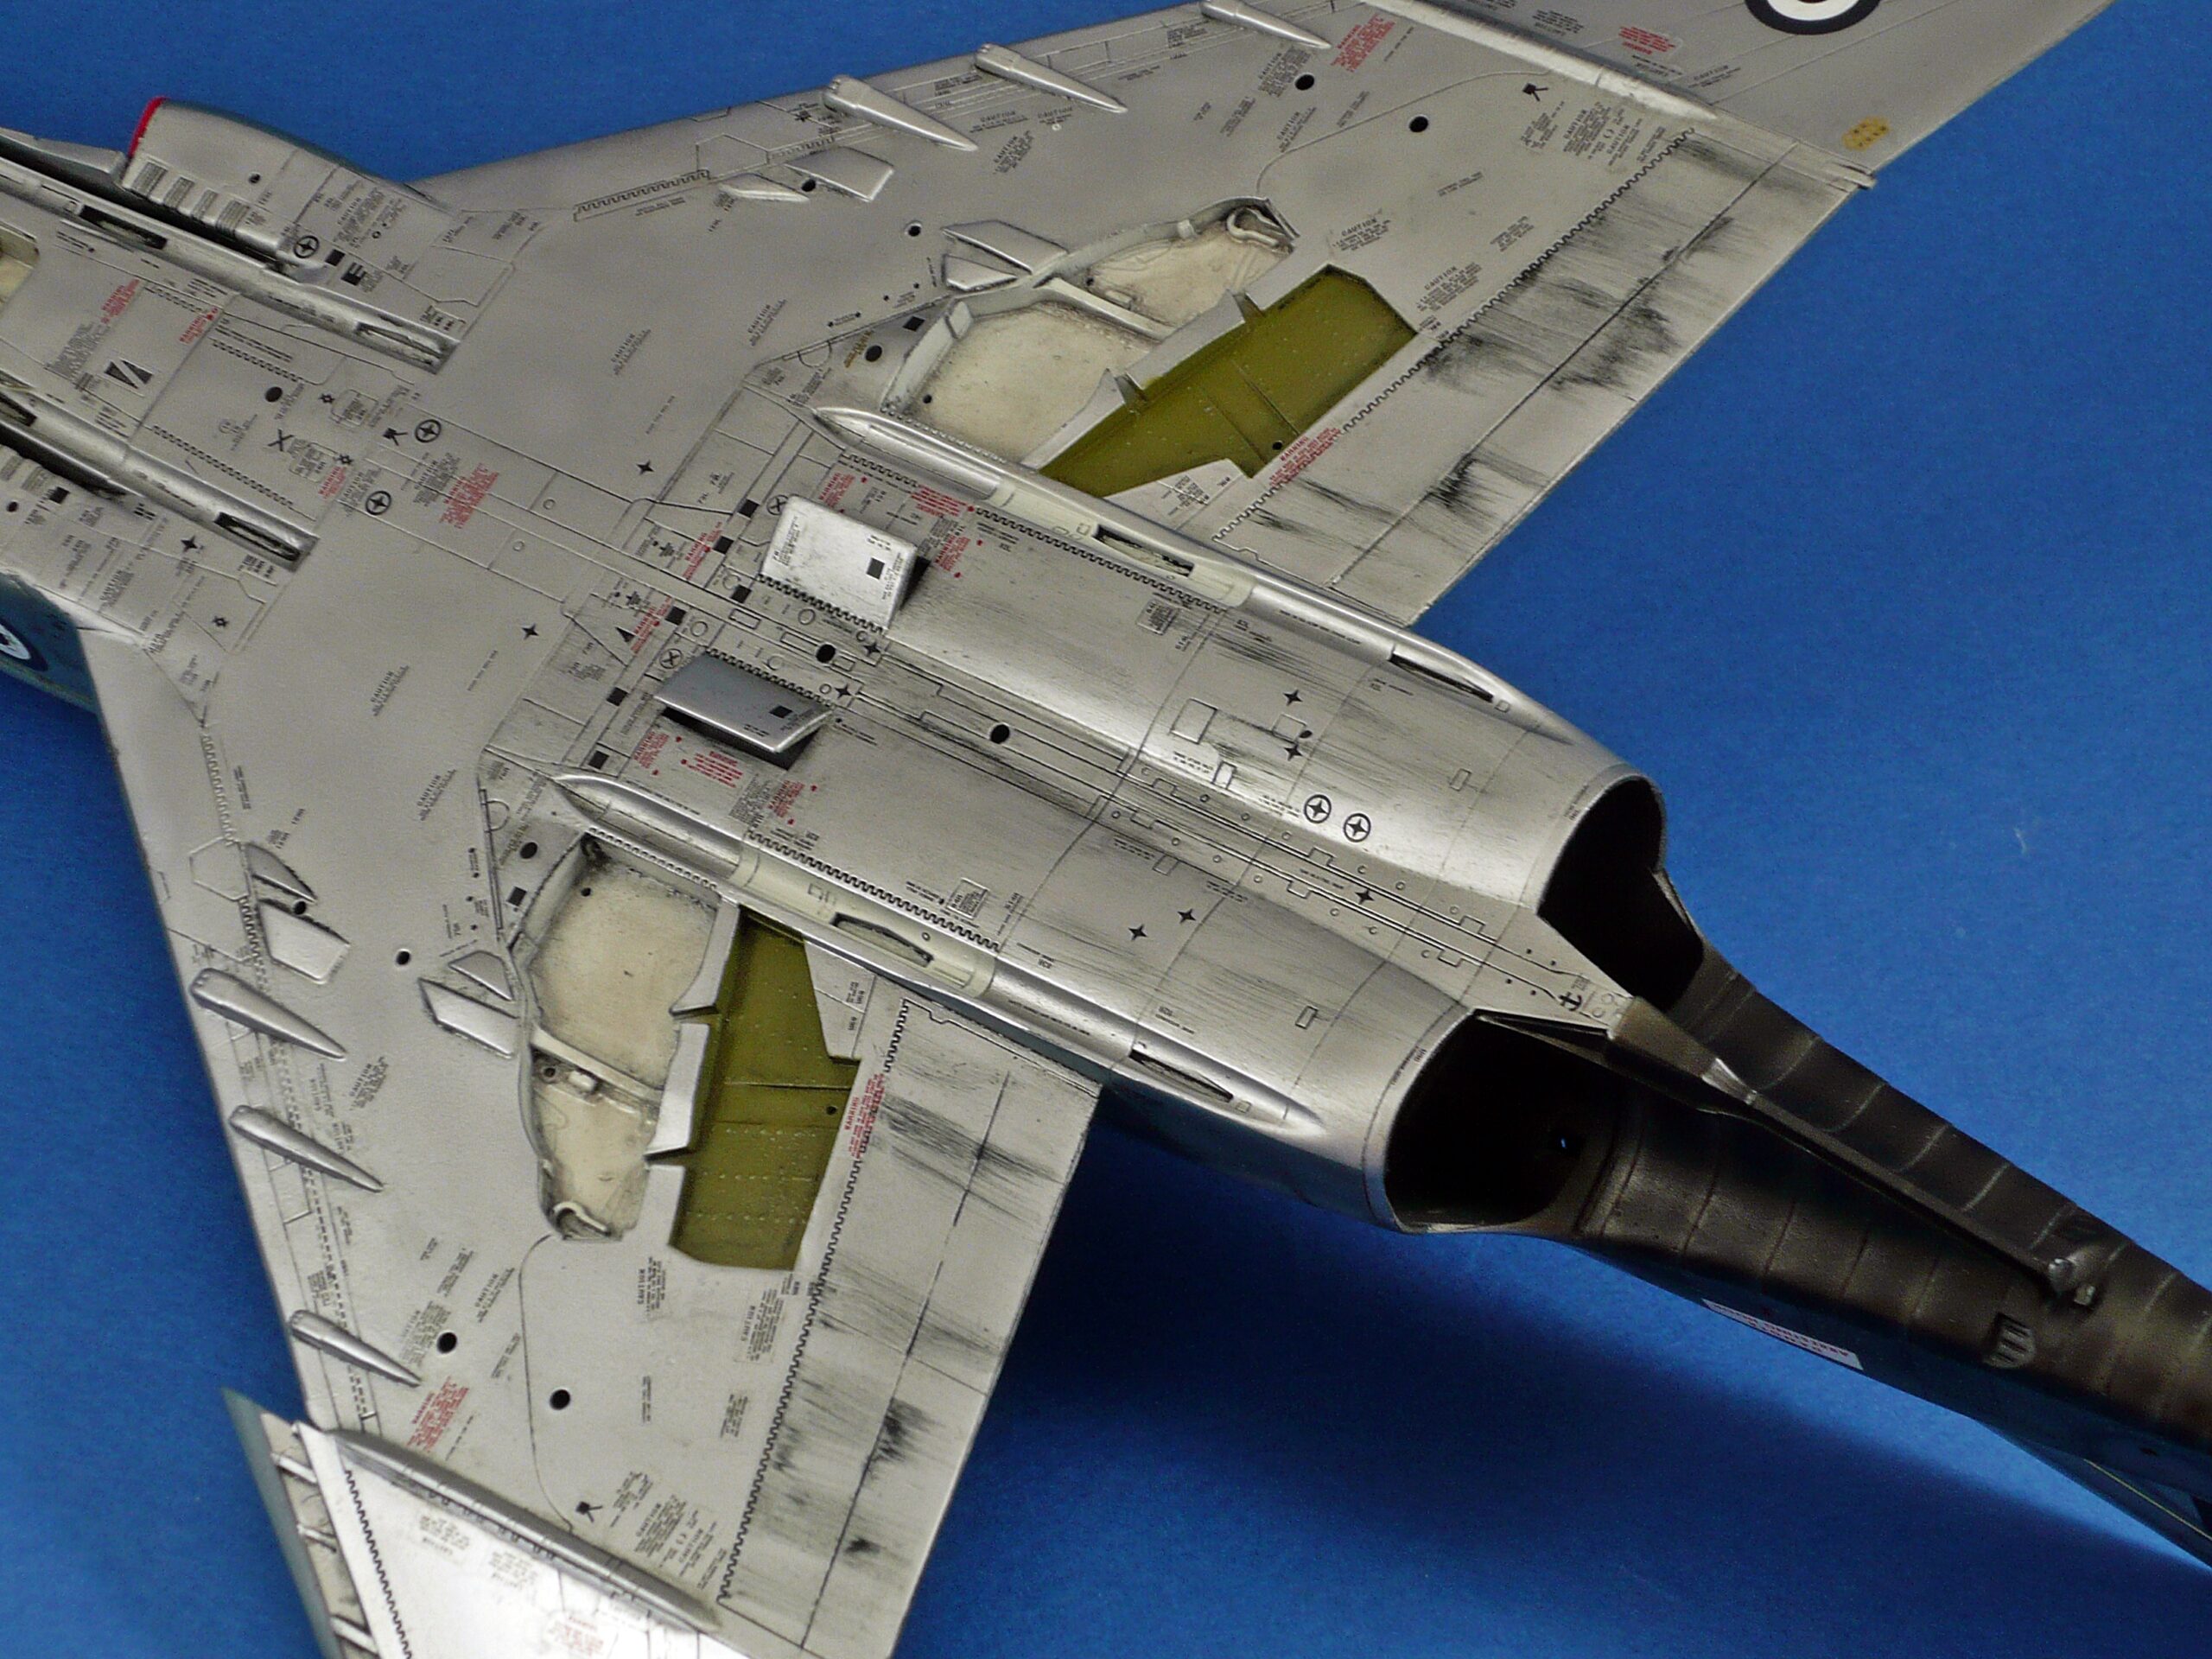
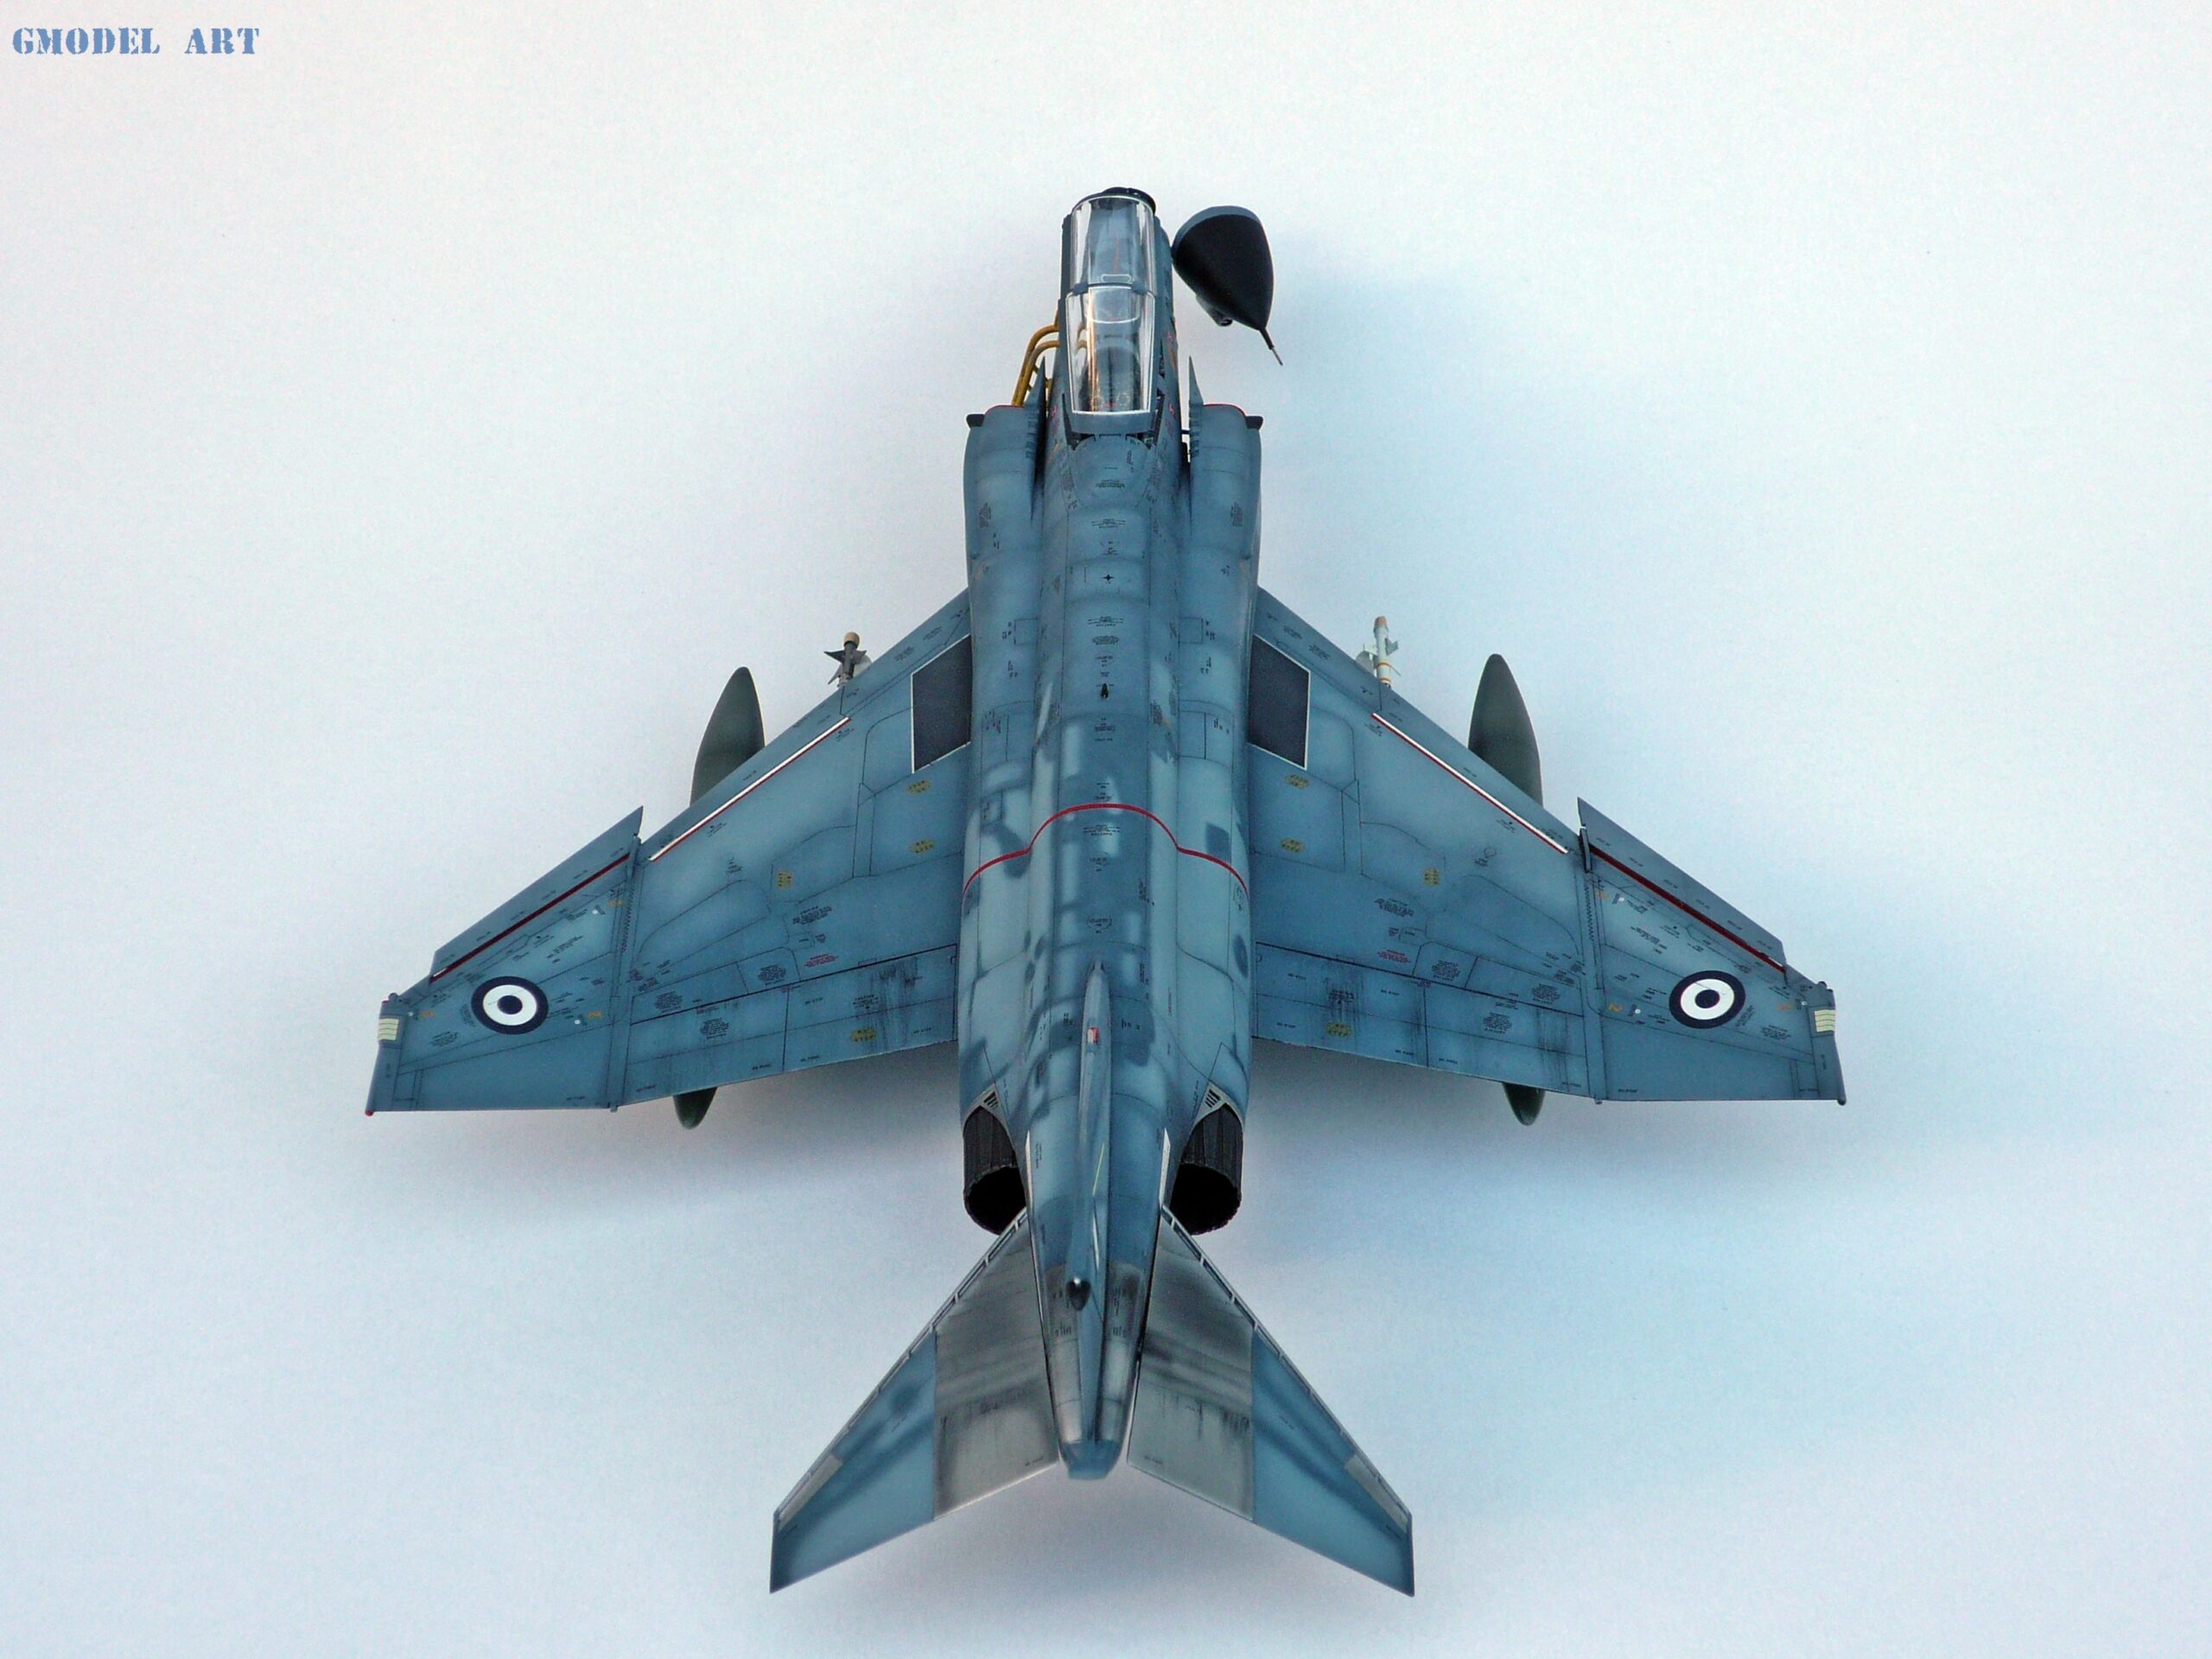
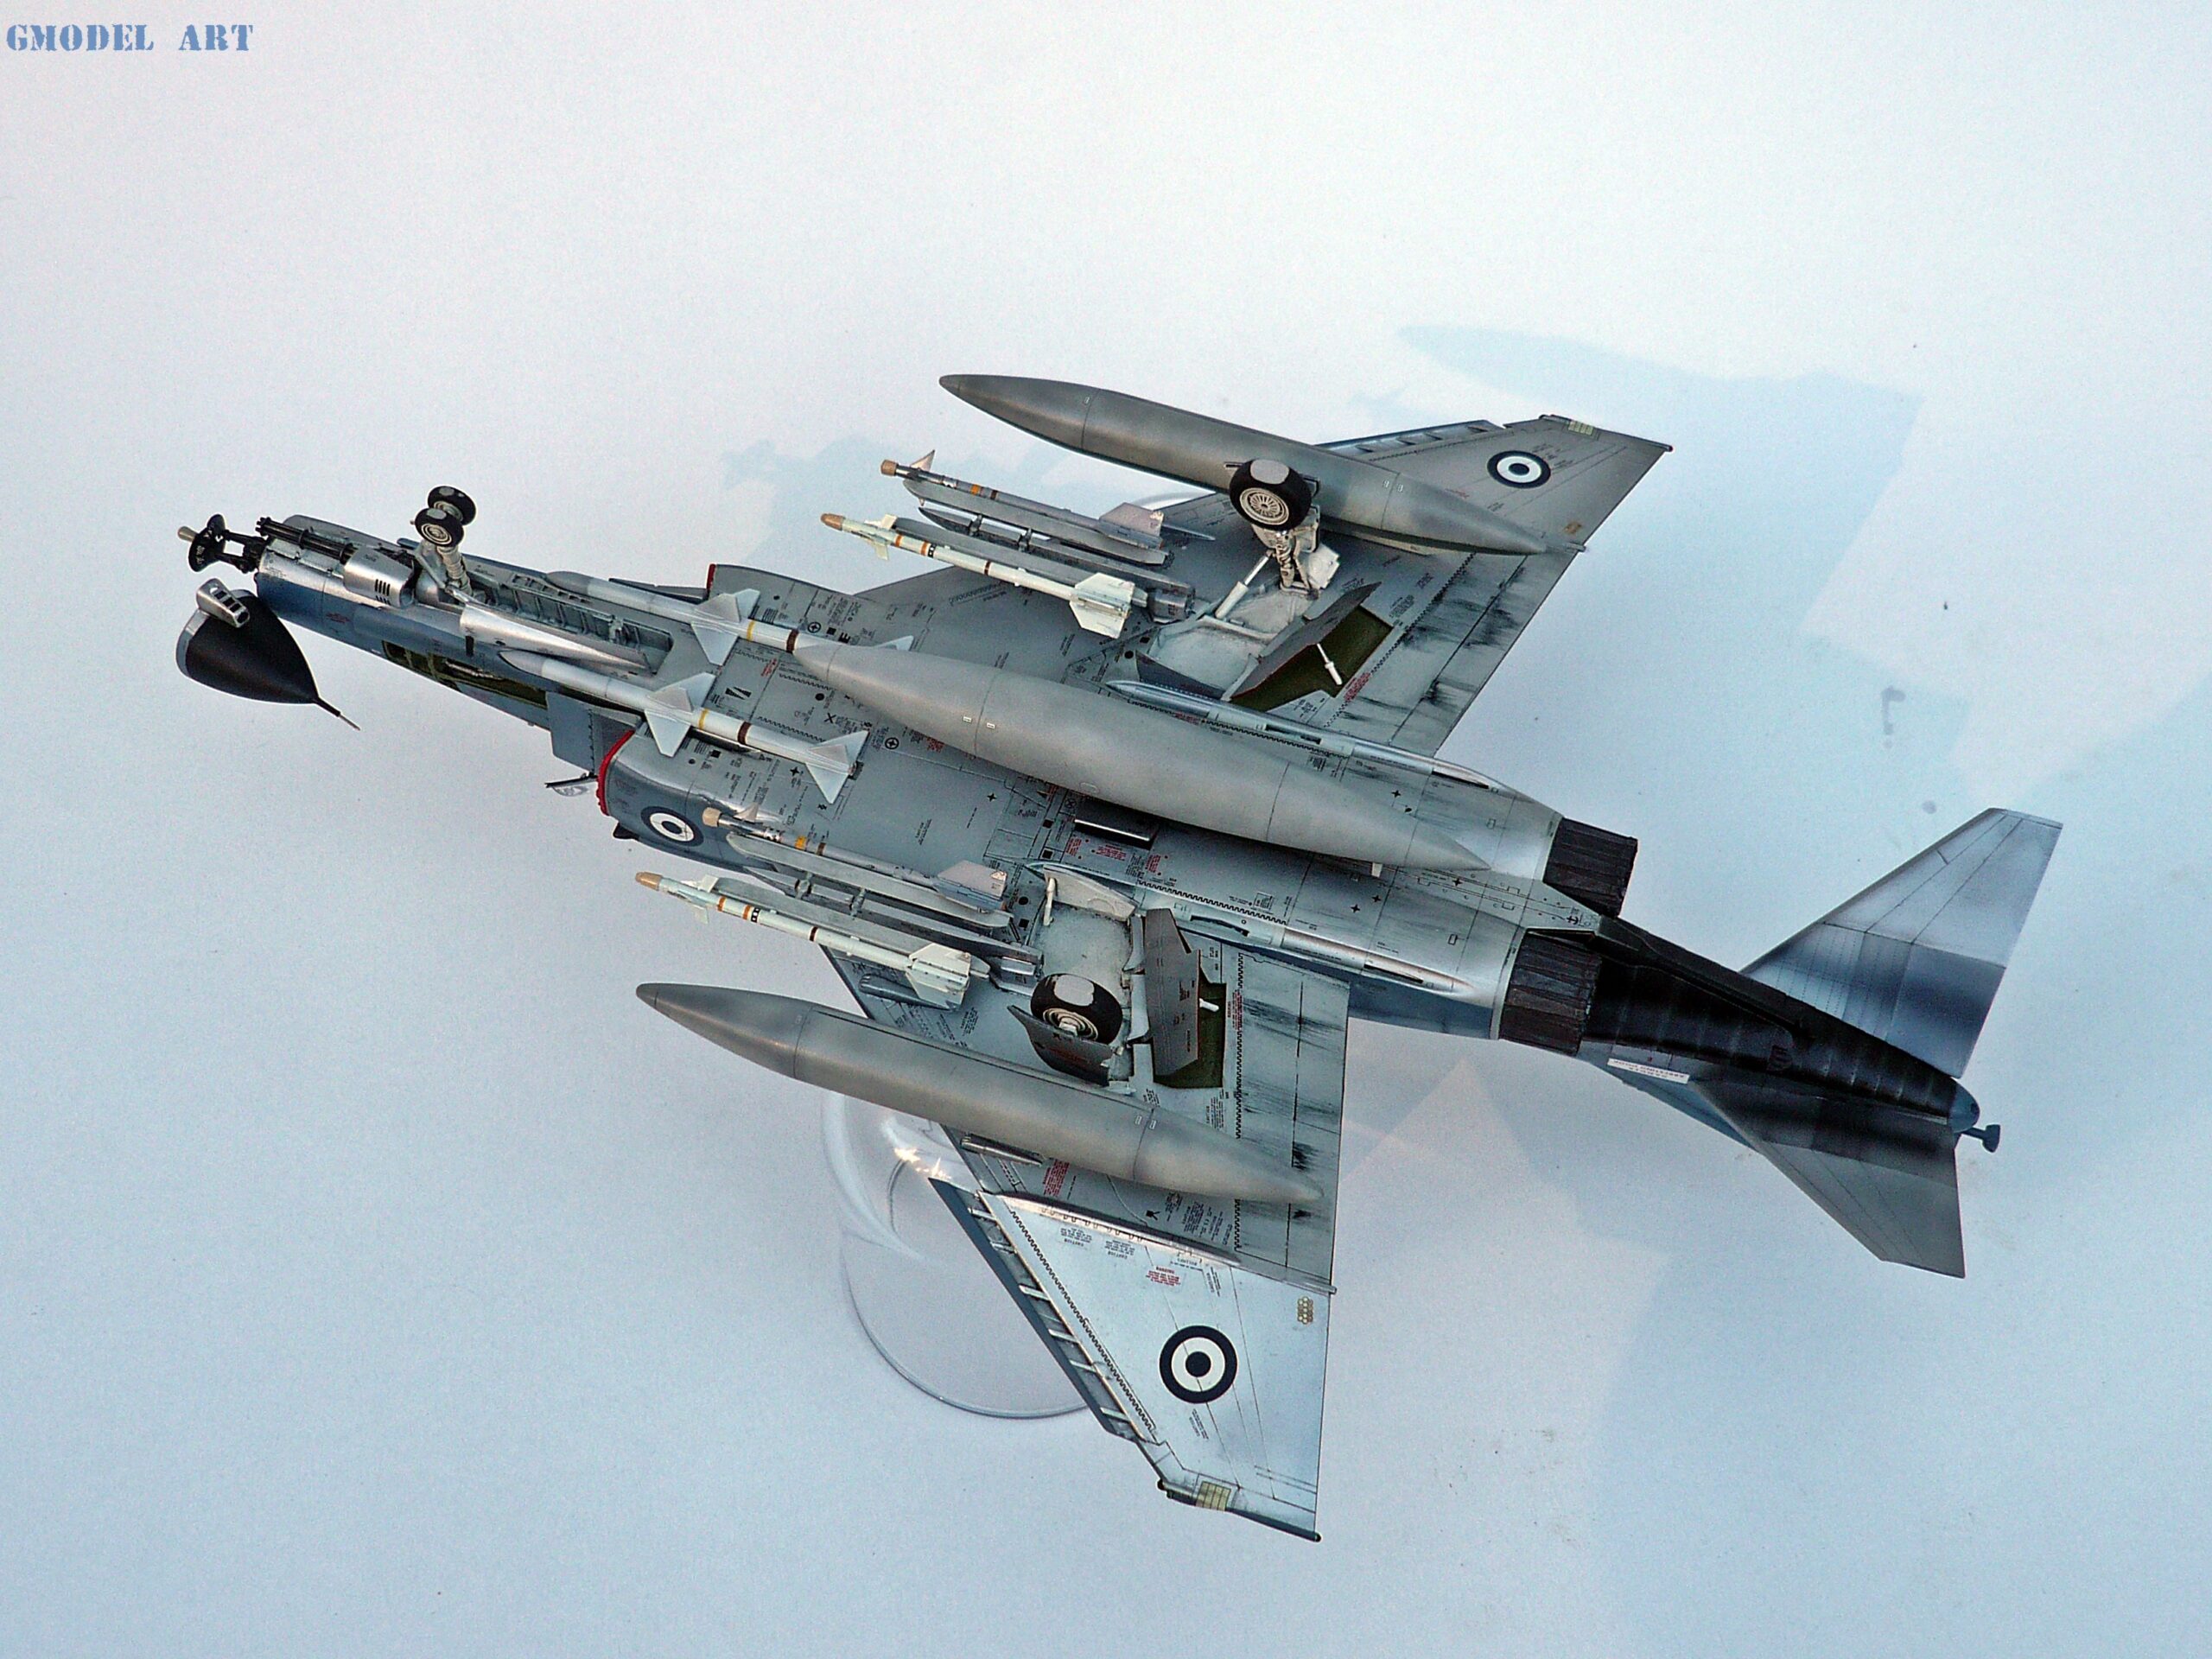
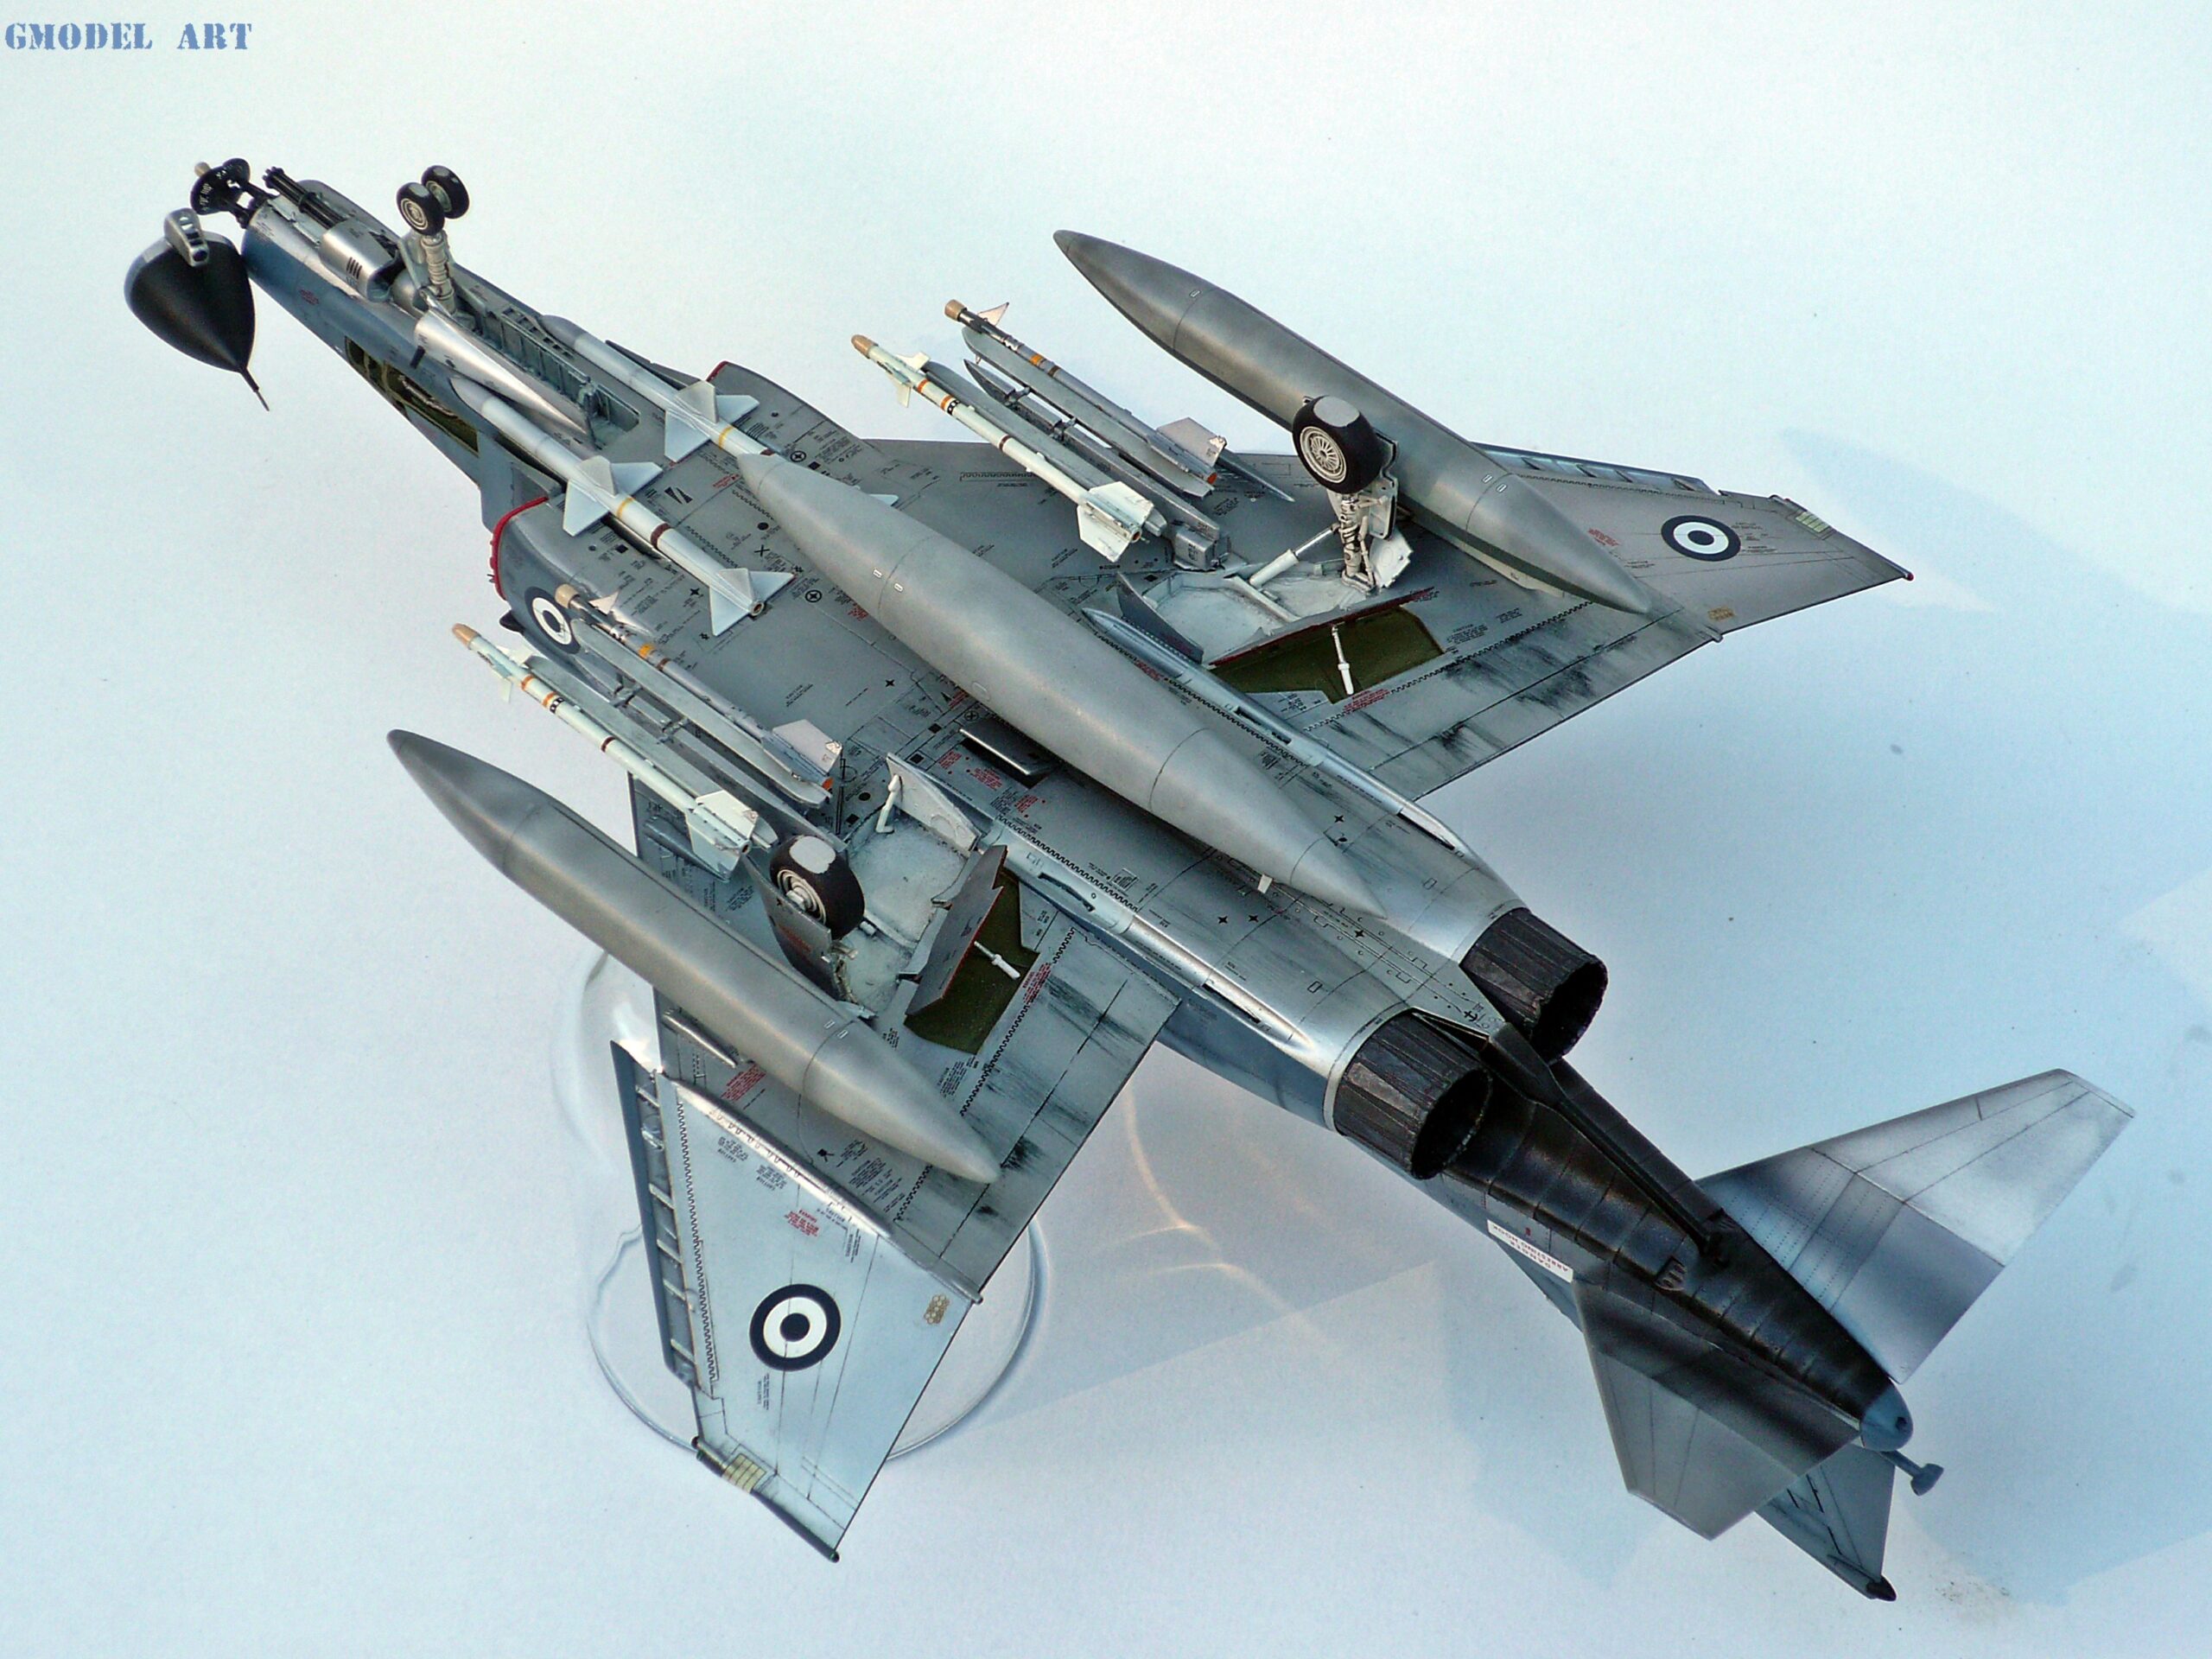
The undersurfaces were subsequently painted in several light coats of Alclad Aluminium (ALC 101). Applying the paint gradually helps preserve the smooth finish and reduces the risk of obscuring fine surface details.
After the metallic areas had dried, they were carefully masked with modelling tape to protect them during the camouflage process.
Black preshading and the Aegean Blue camouflage
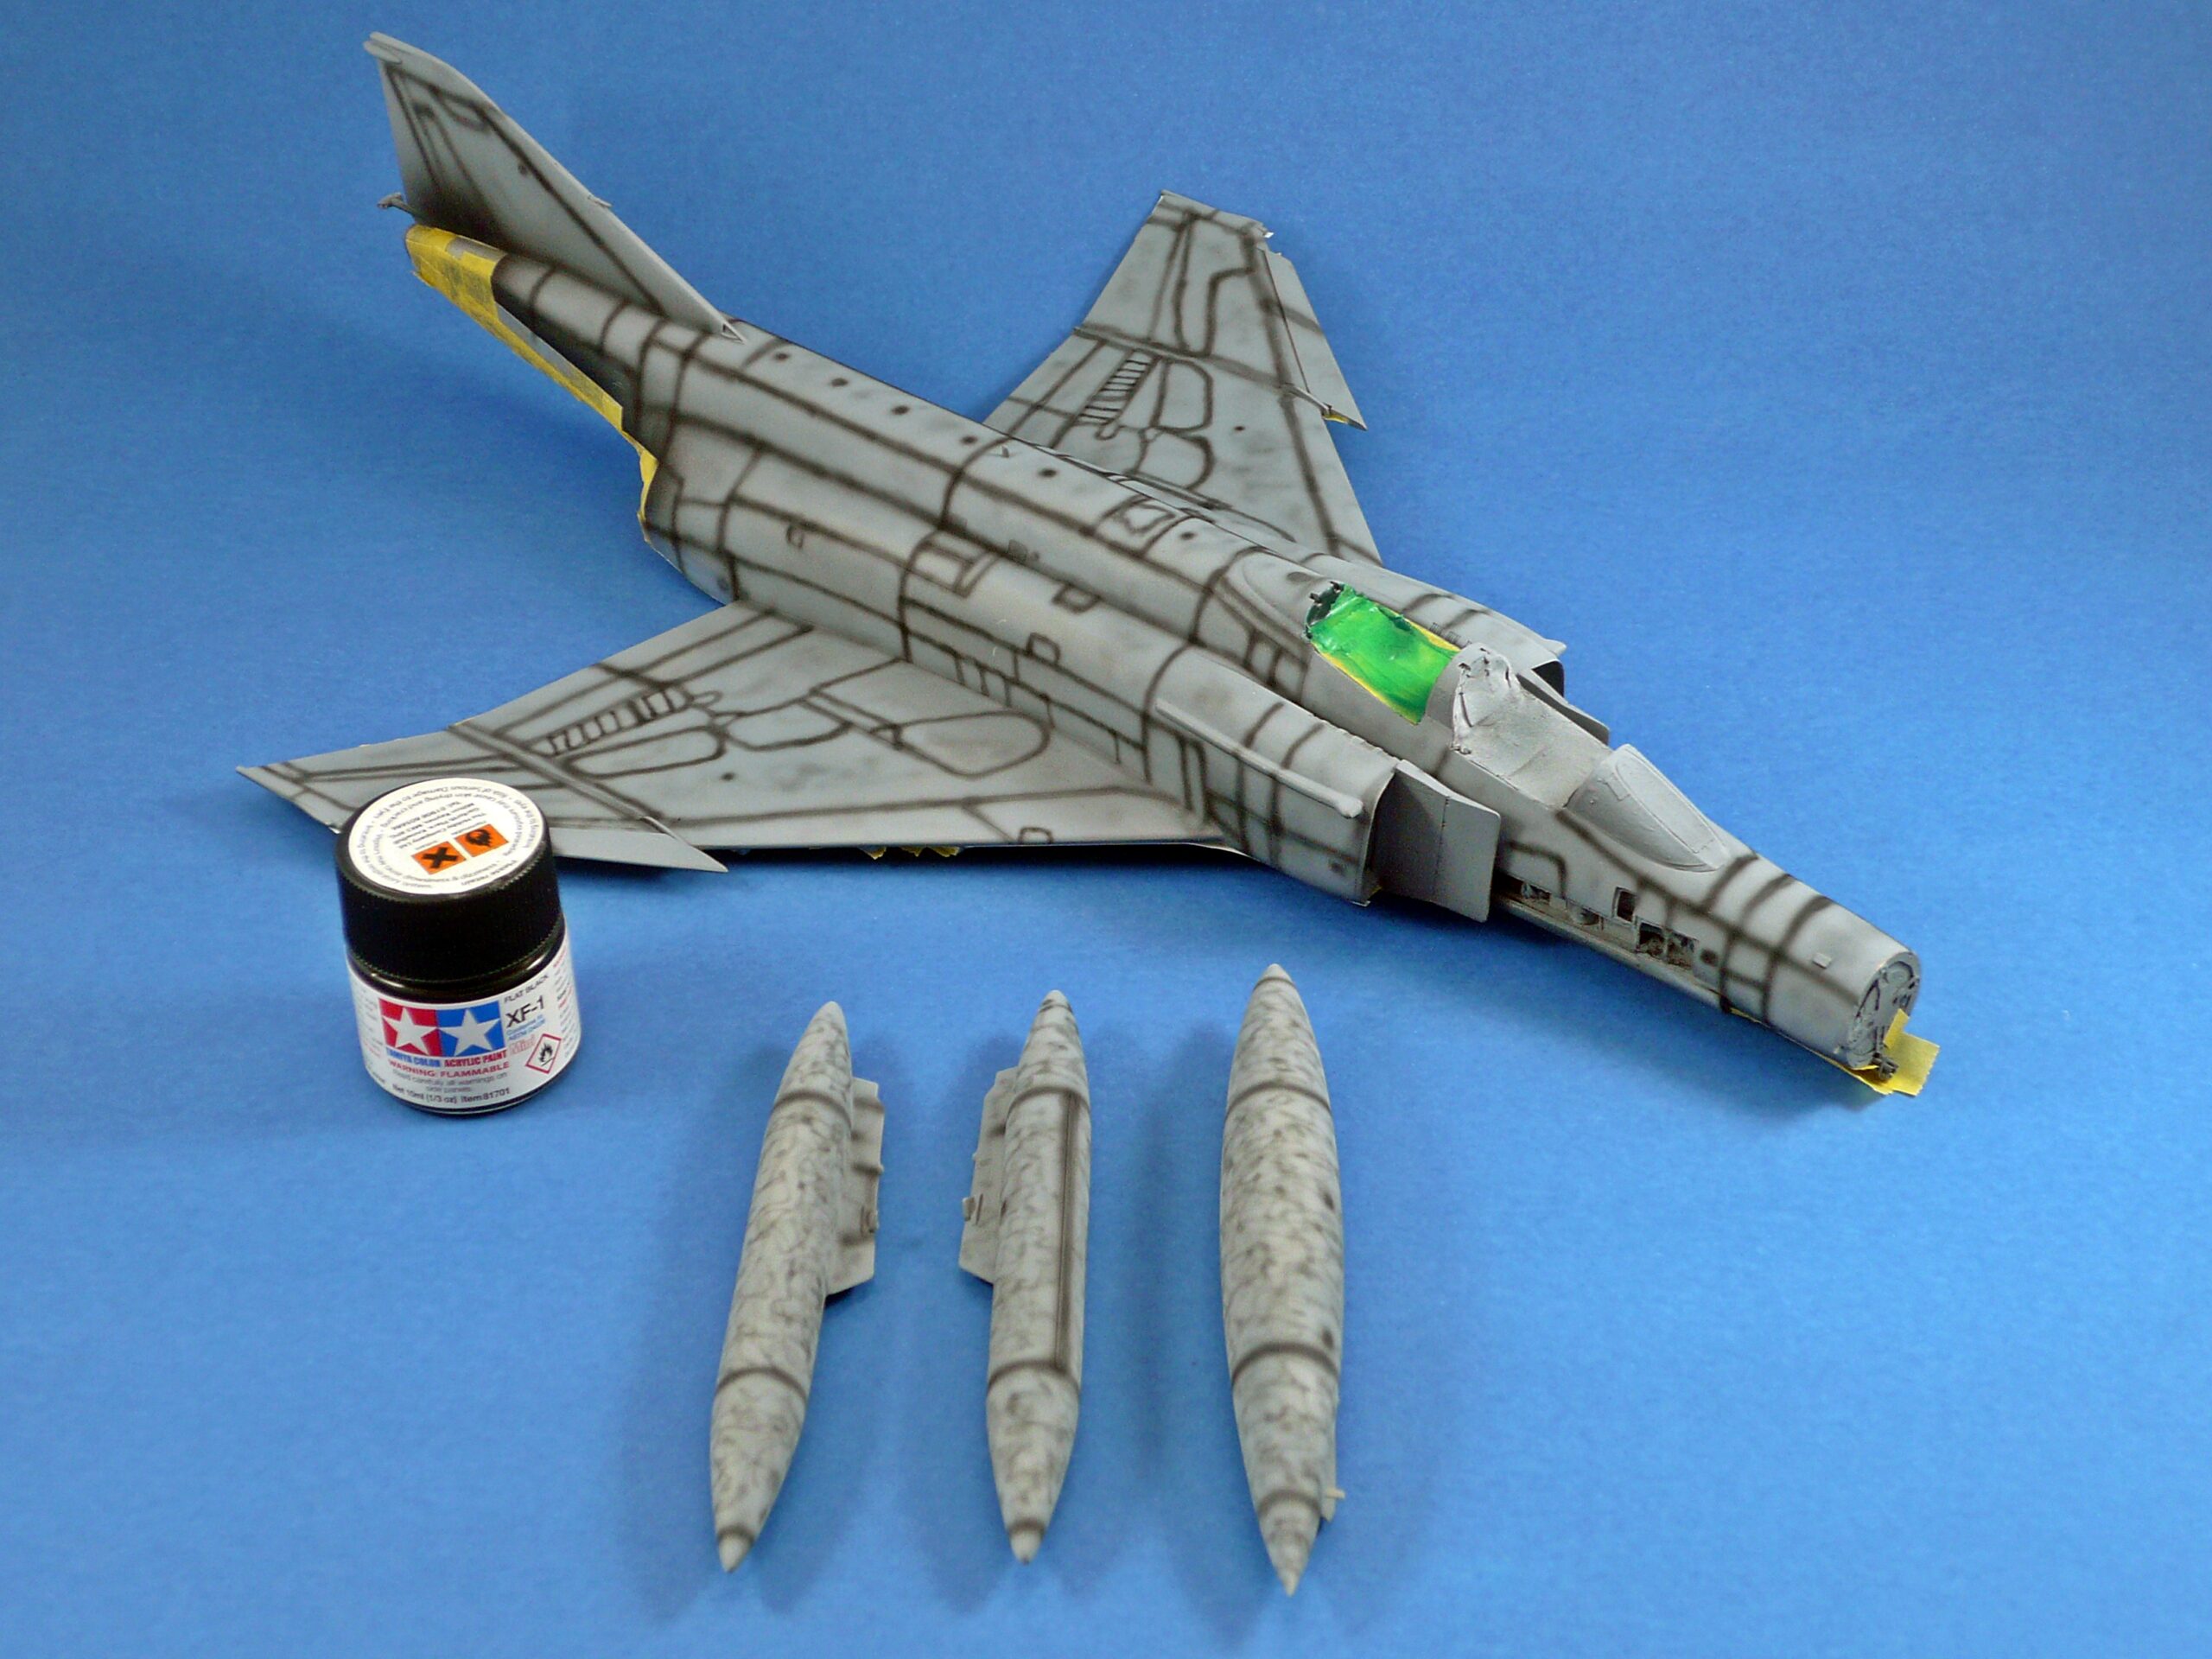
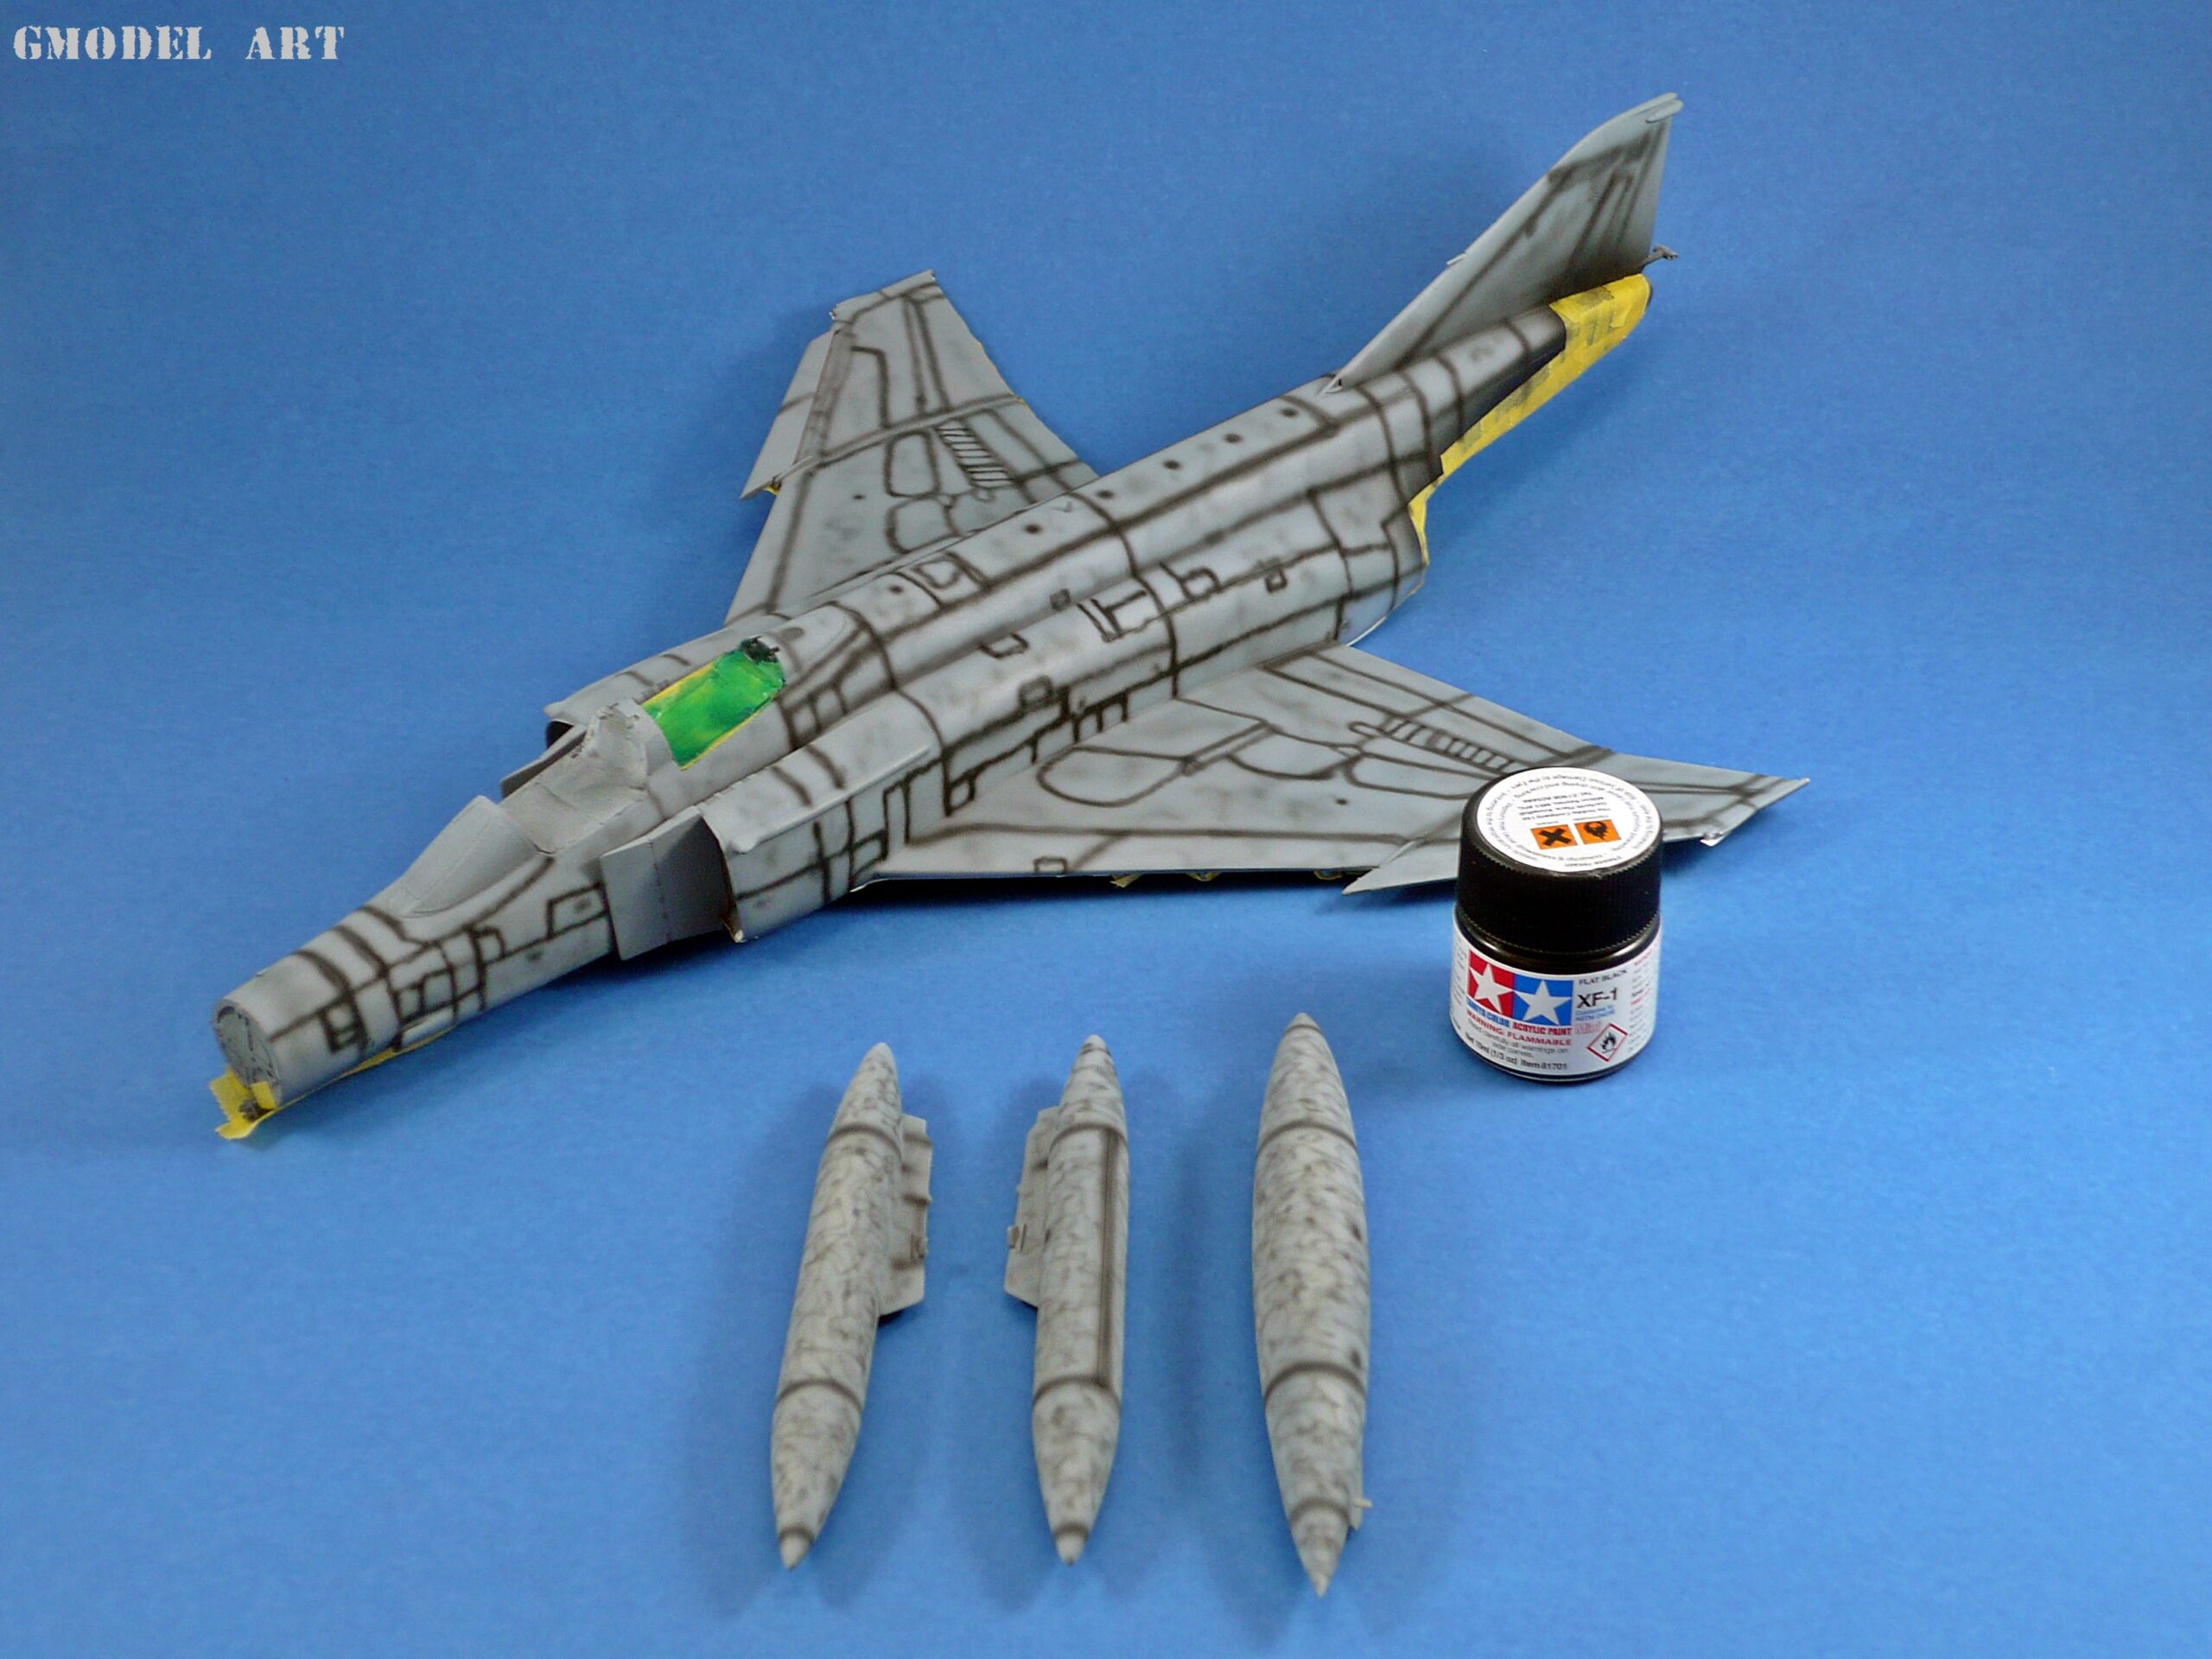
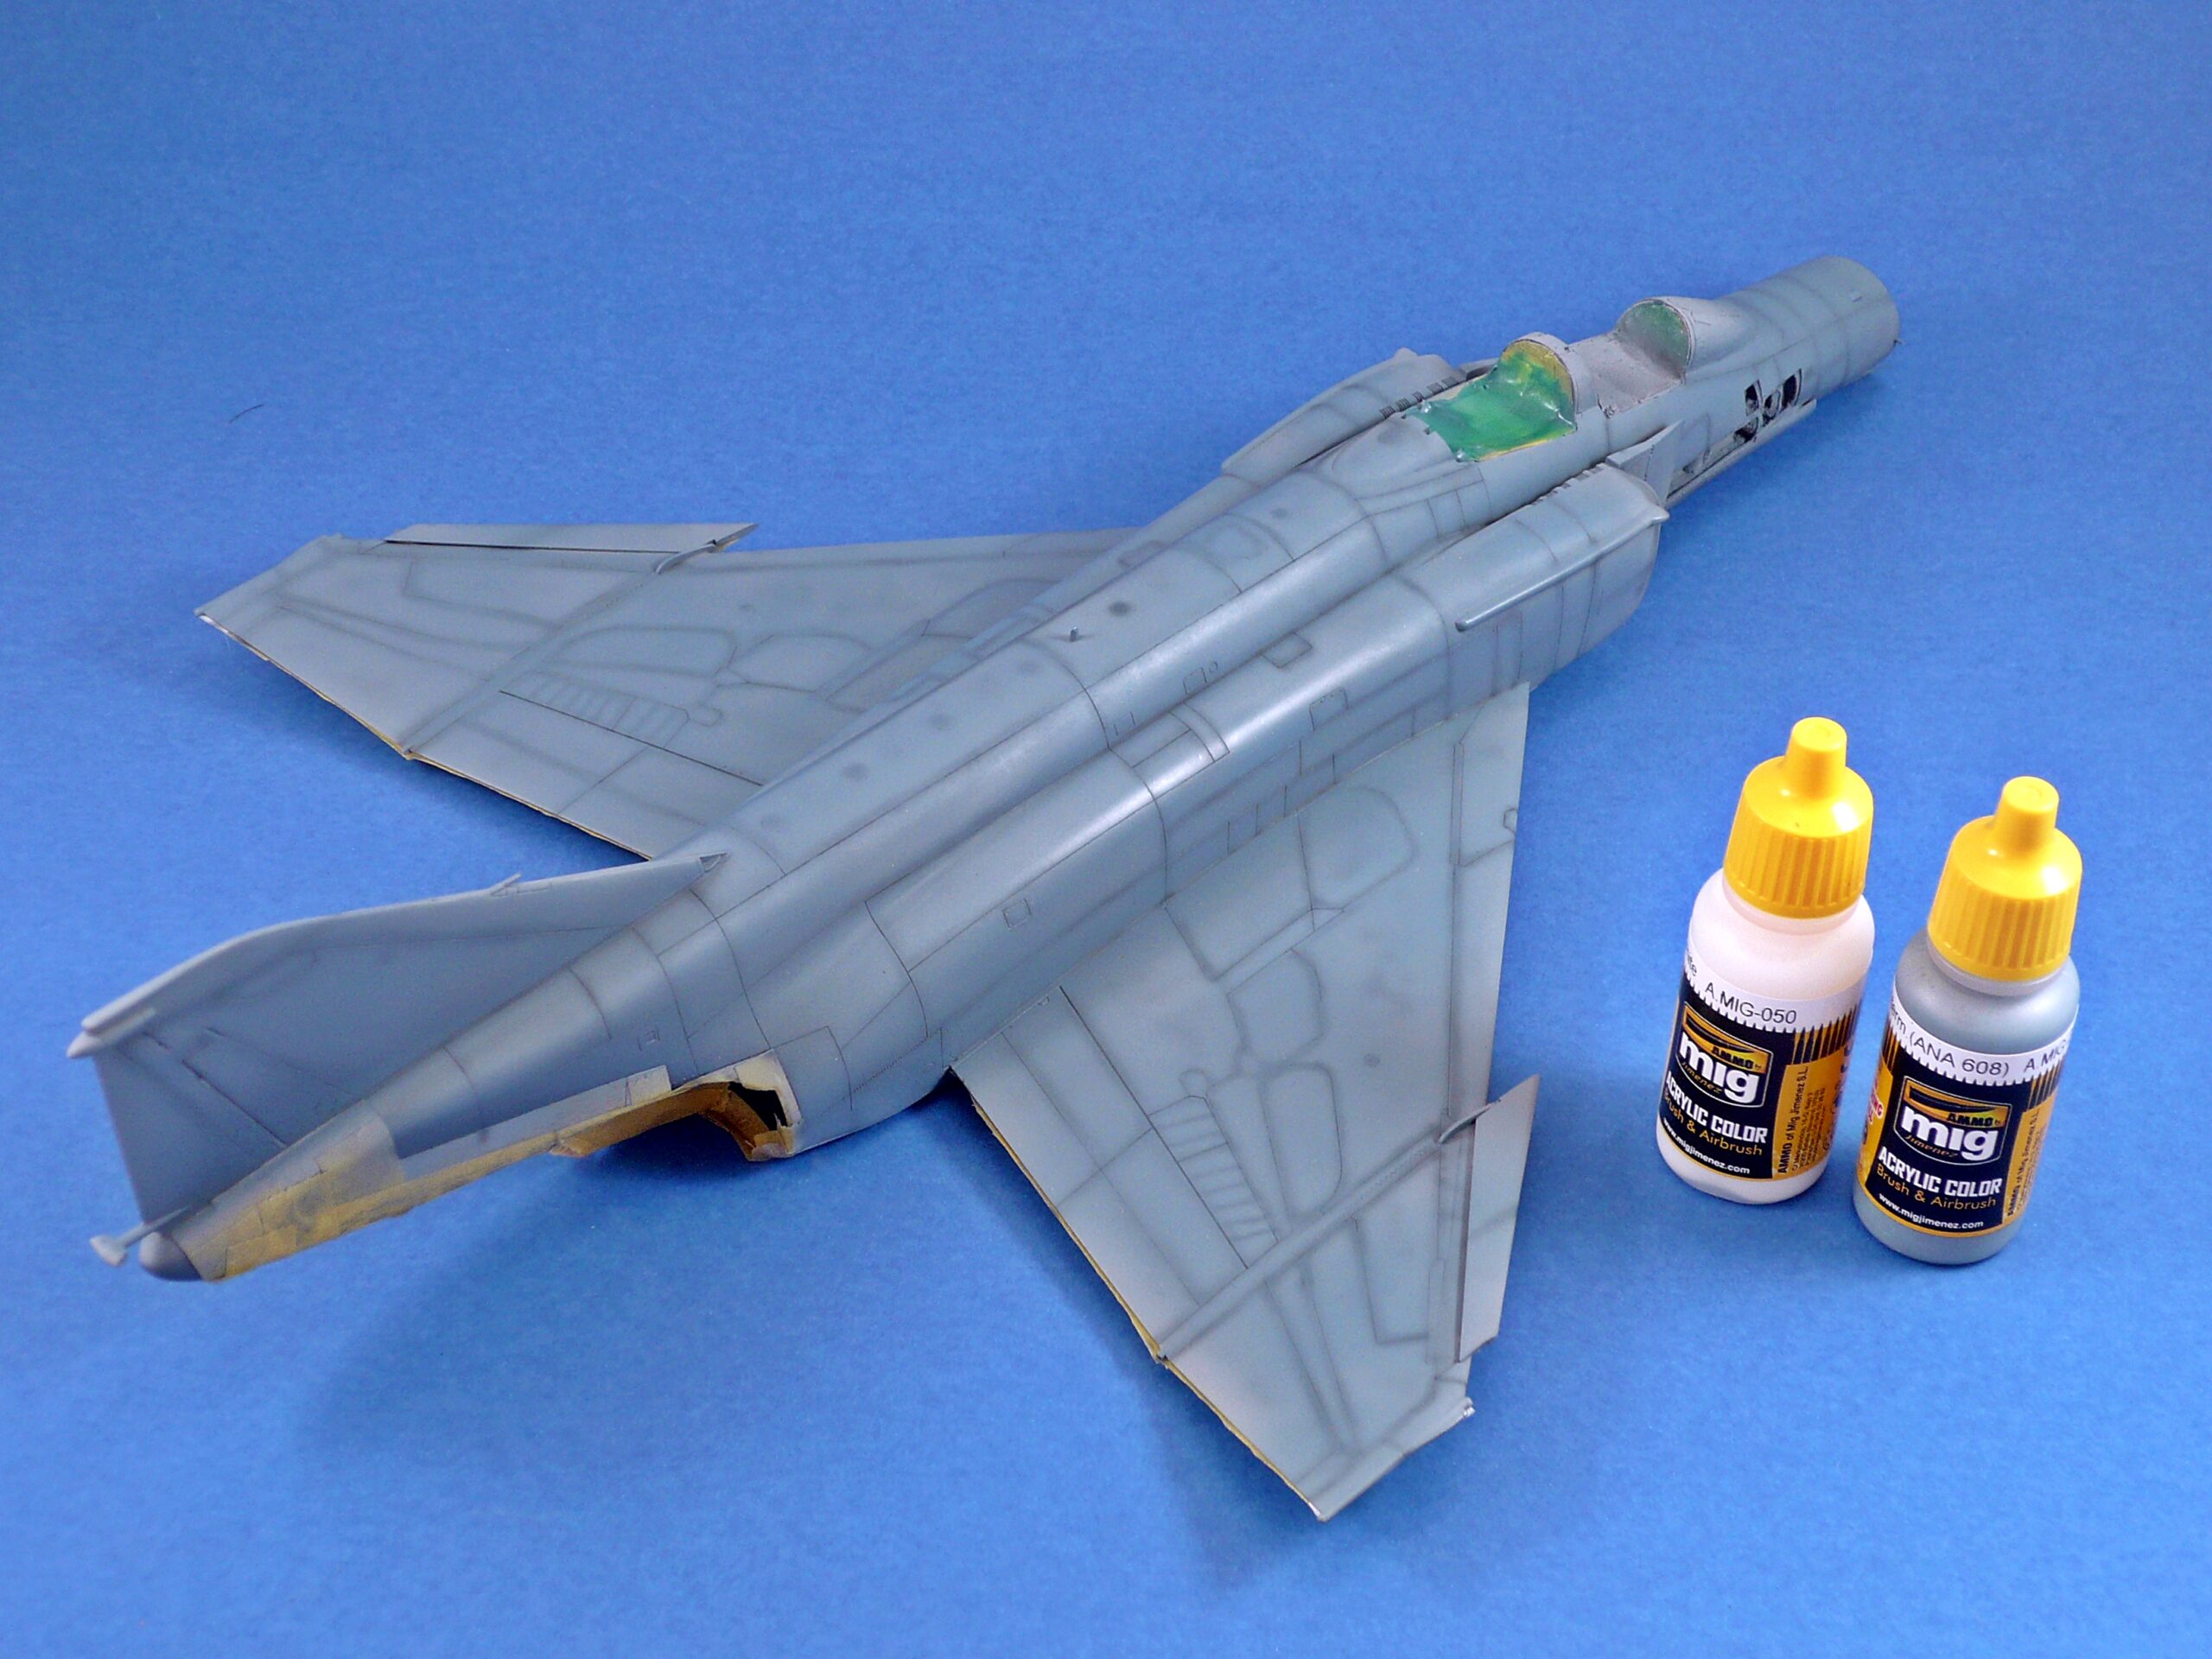
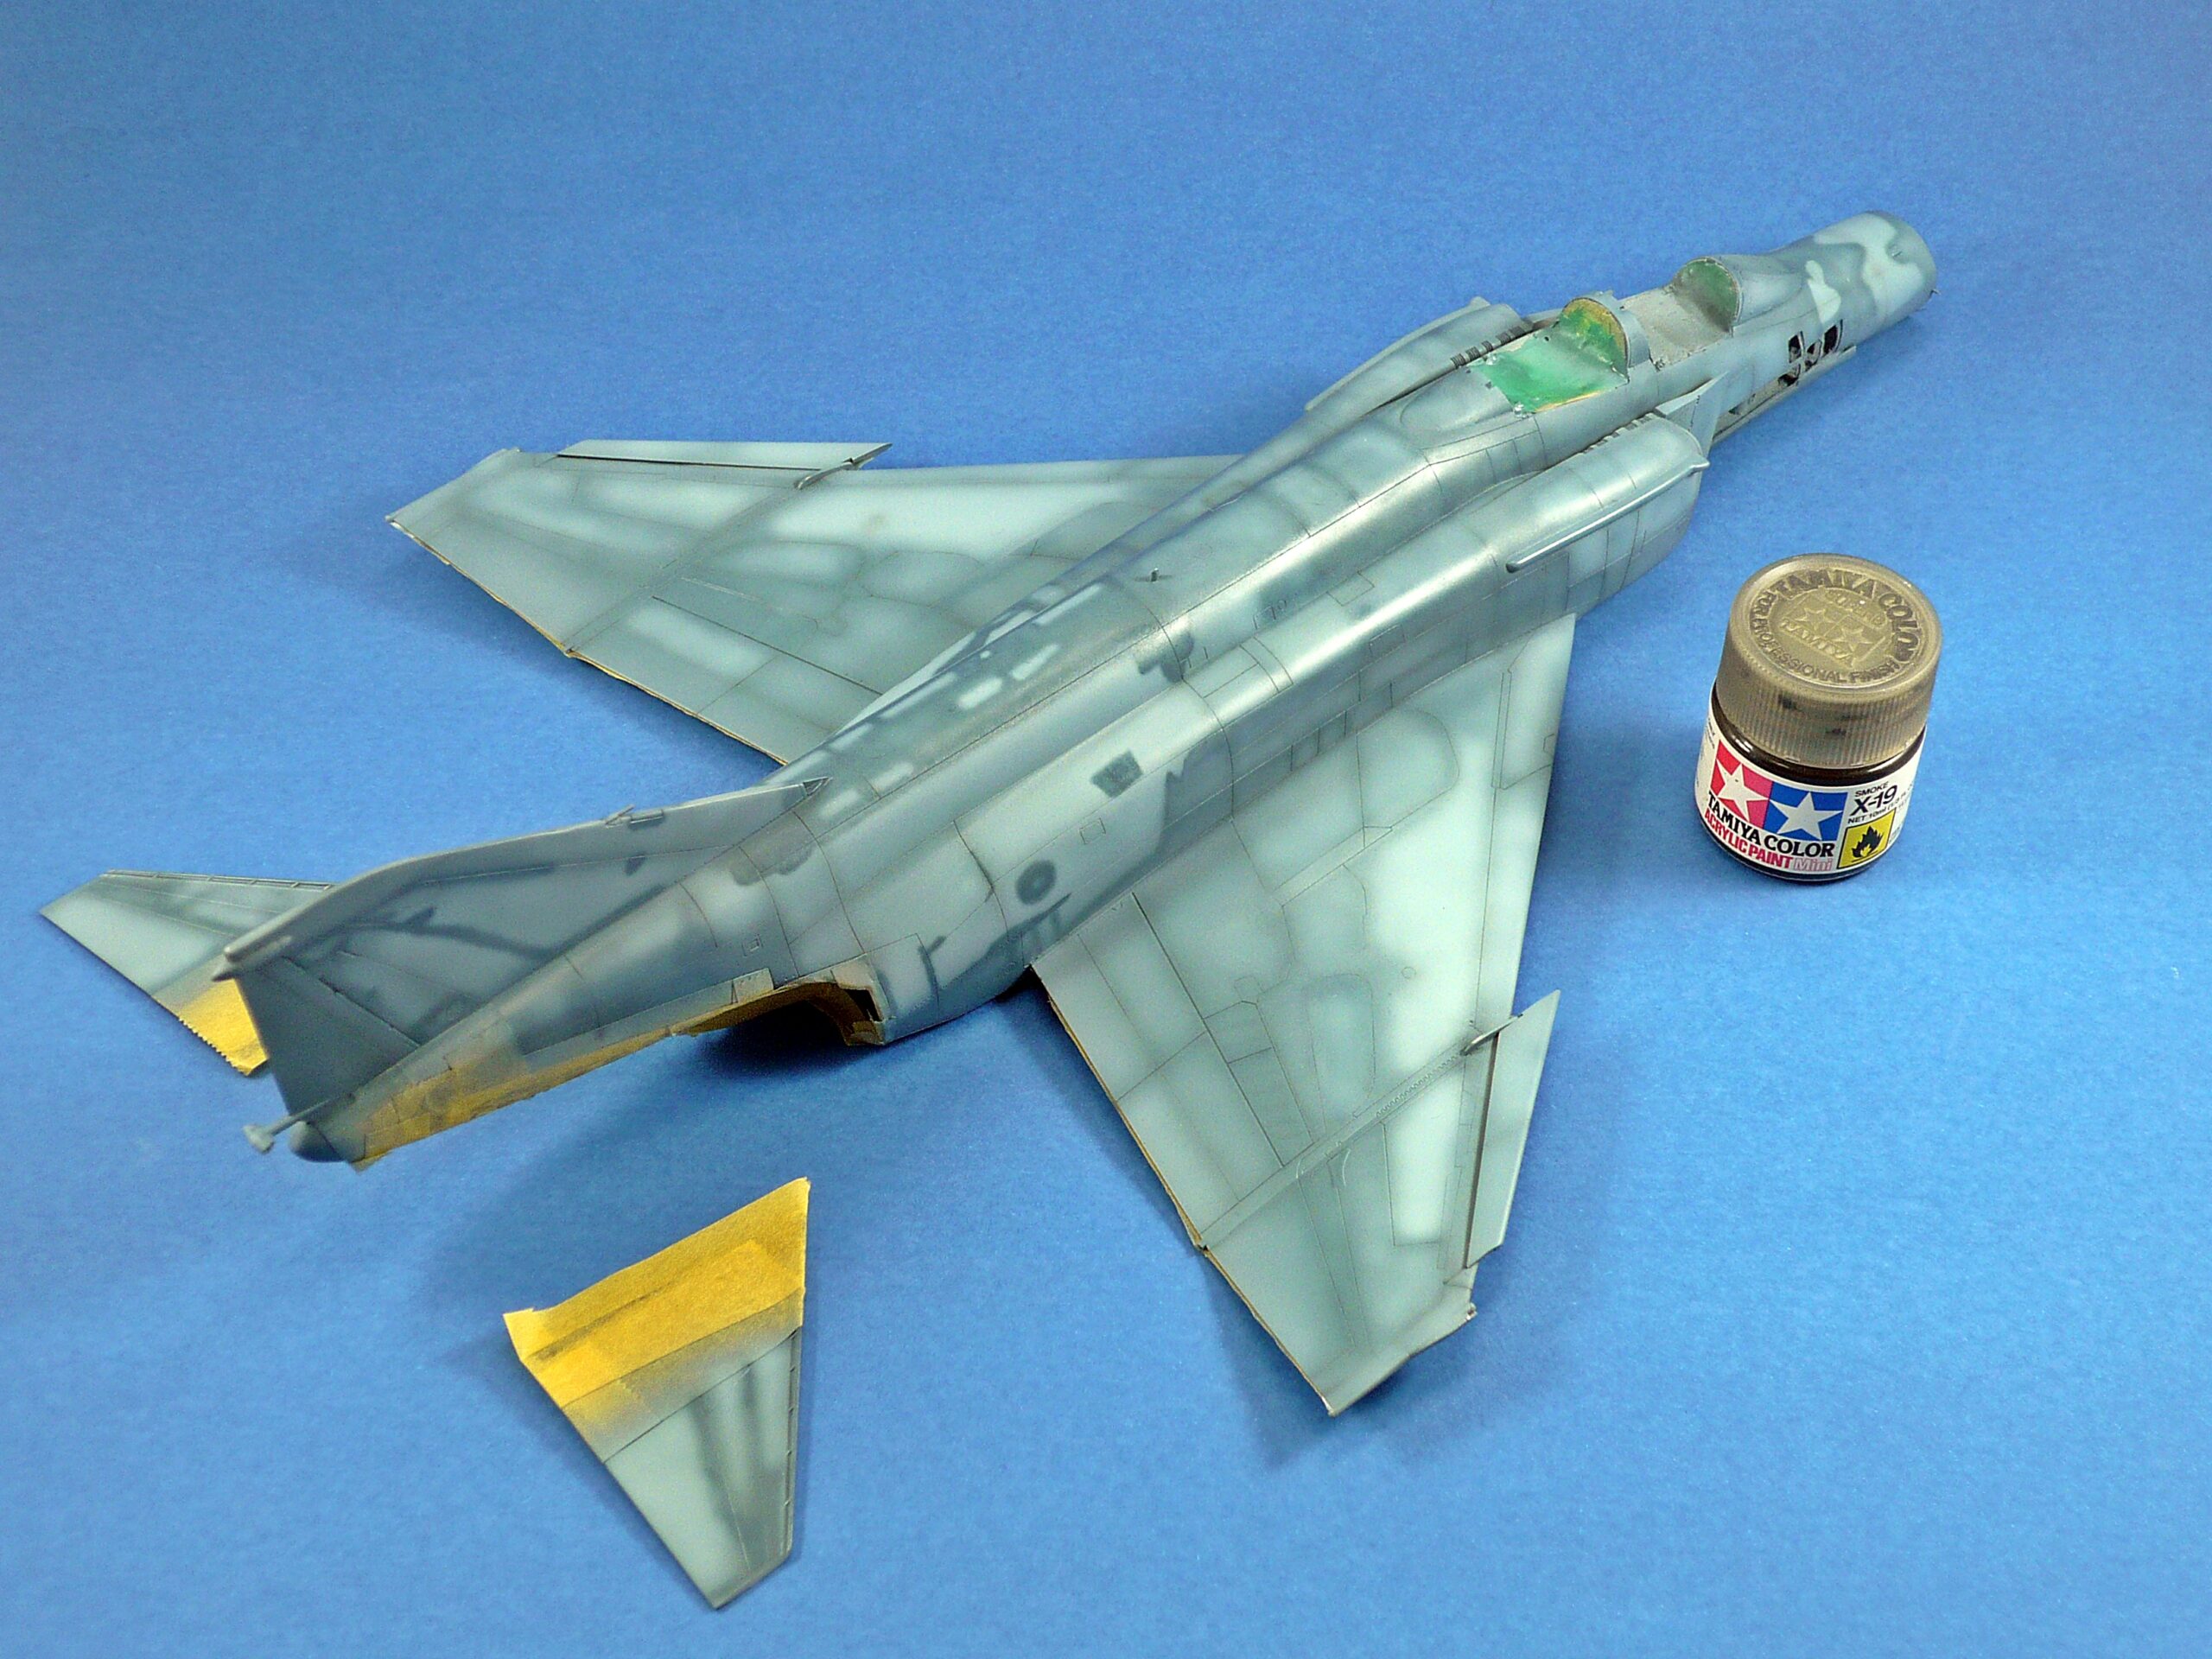
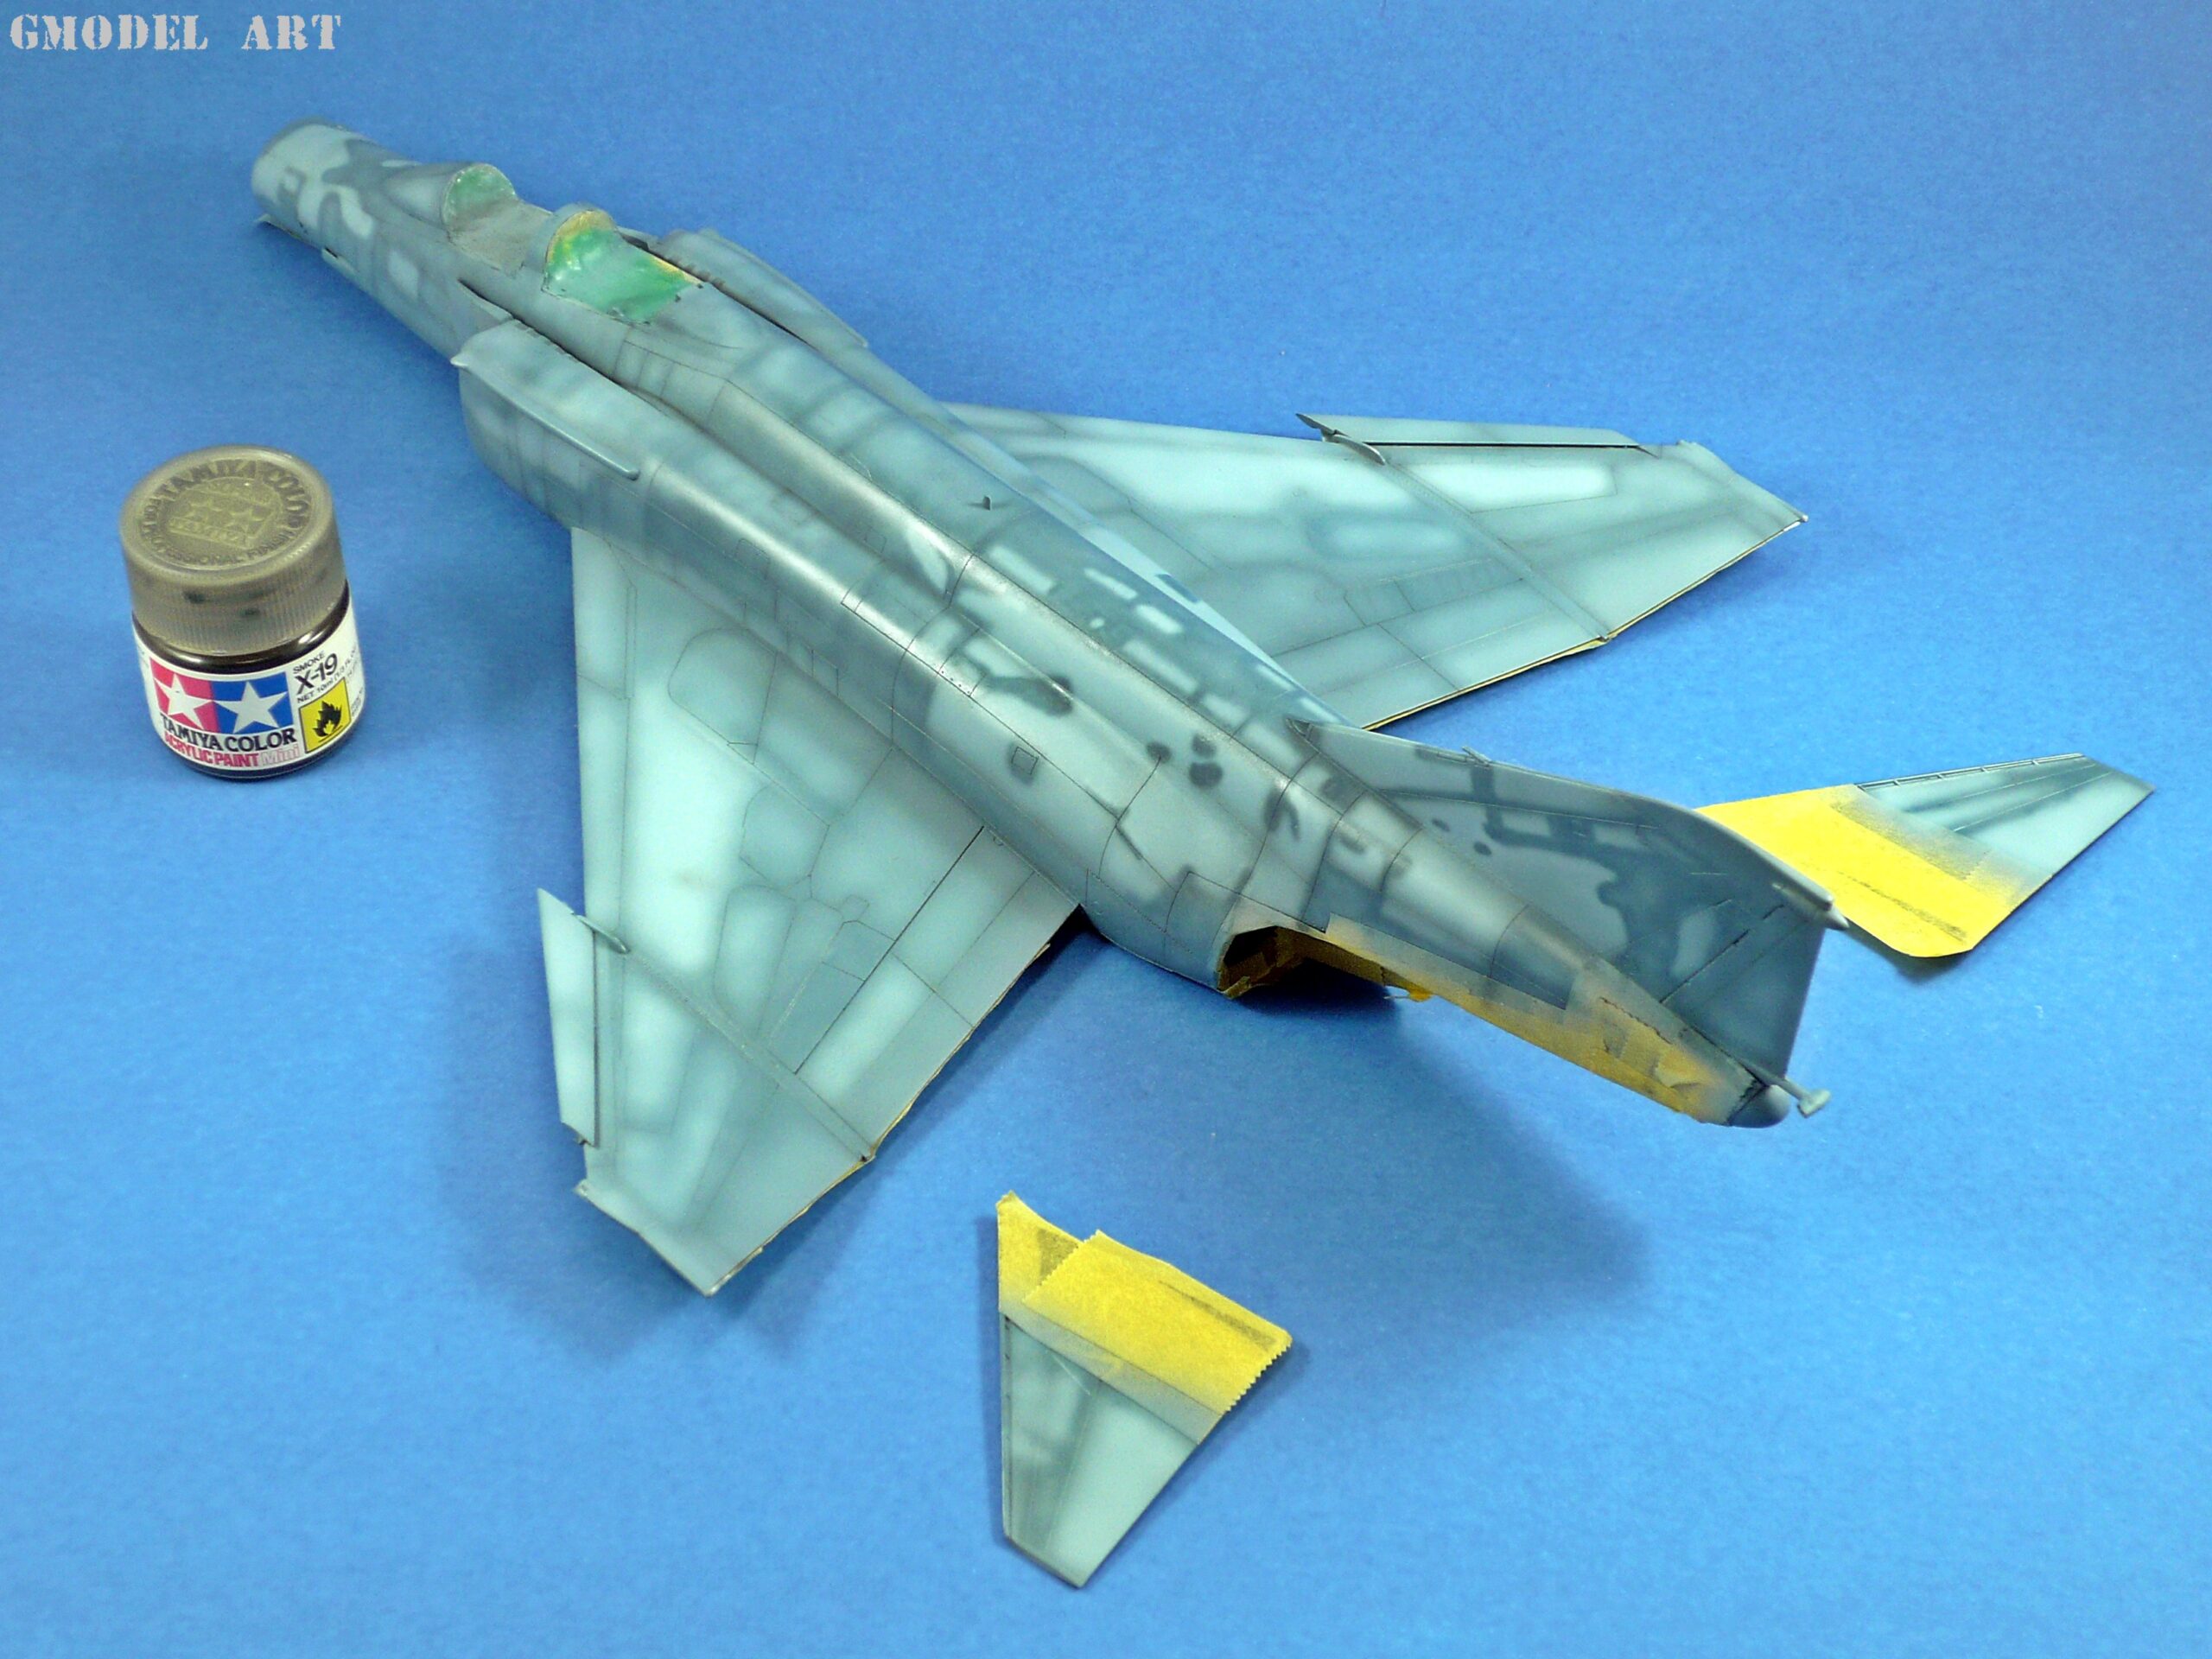
With the lower surfaces protected, black preshading was applied to selected areas of the upper fuselage, wings and external fuel tanks using Tamiya Flat Black.
The purpose of preshading is to establish subtle tonal variation beneath the main colour. When used carefully, it helps break up large painted surfaces and gives the finished aircraft greater visual depth.
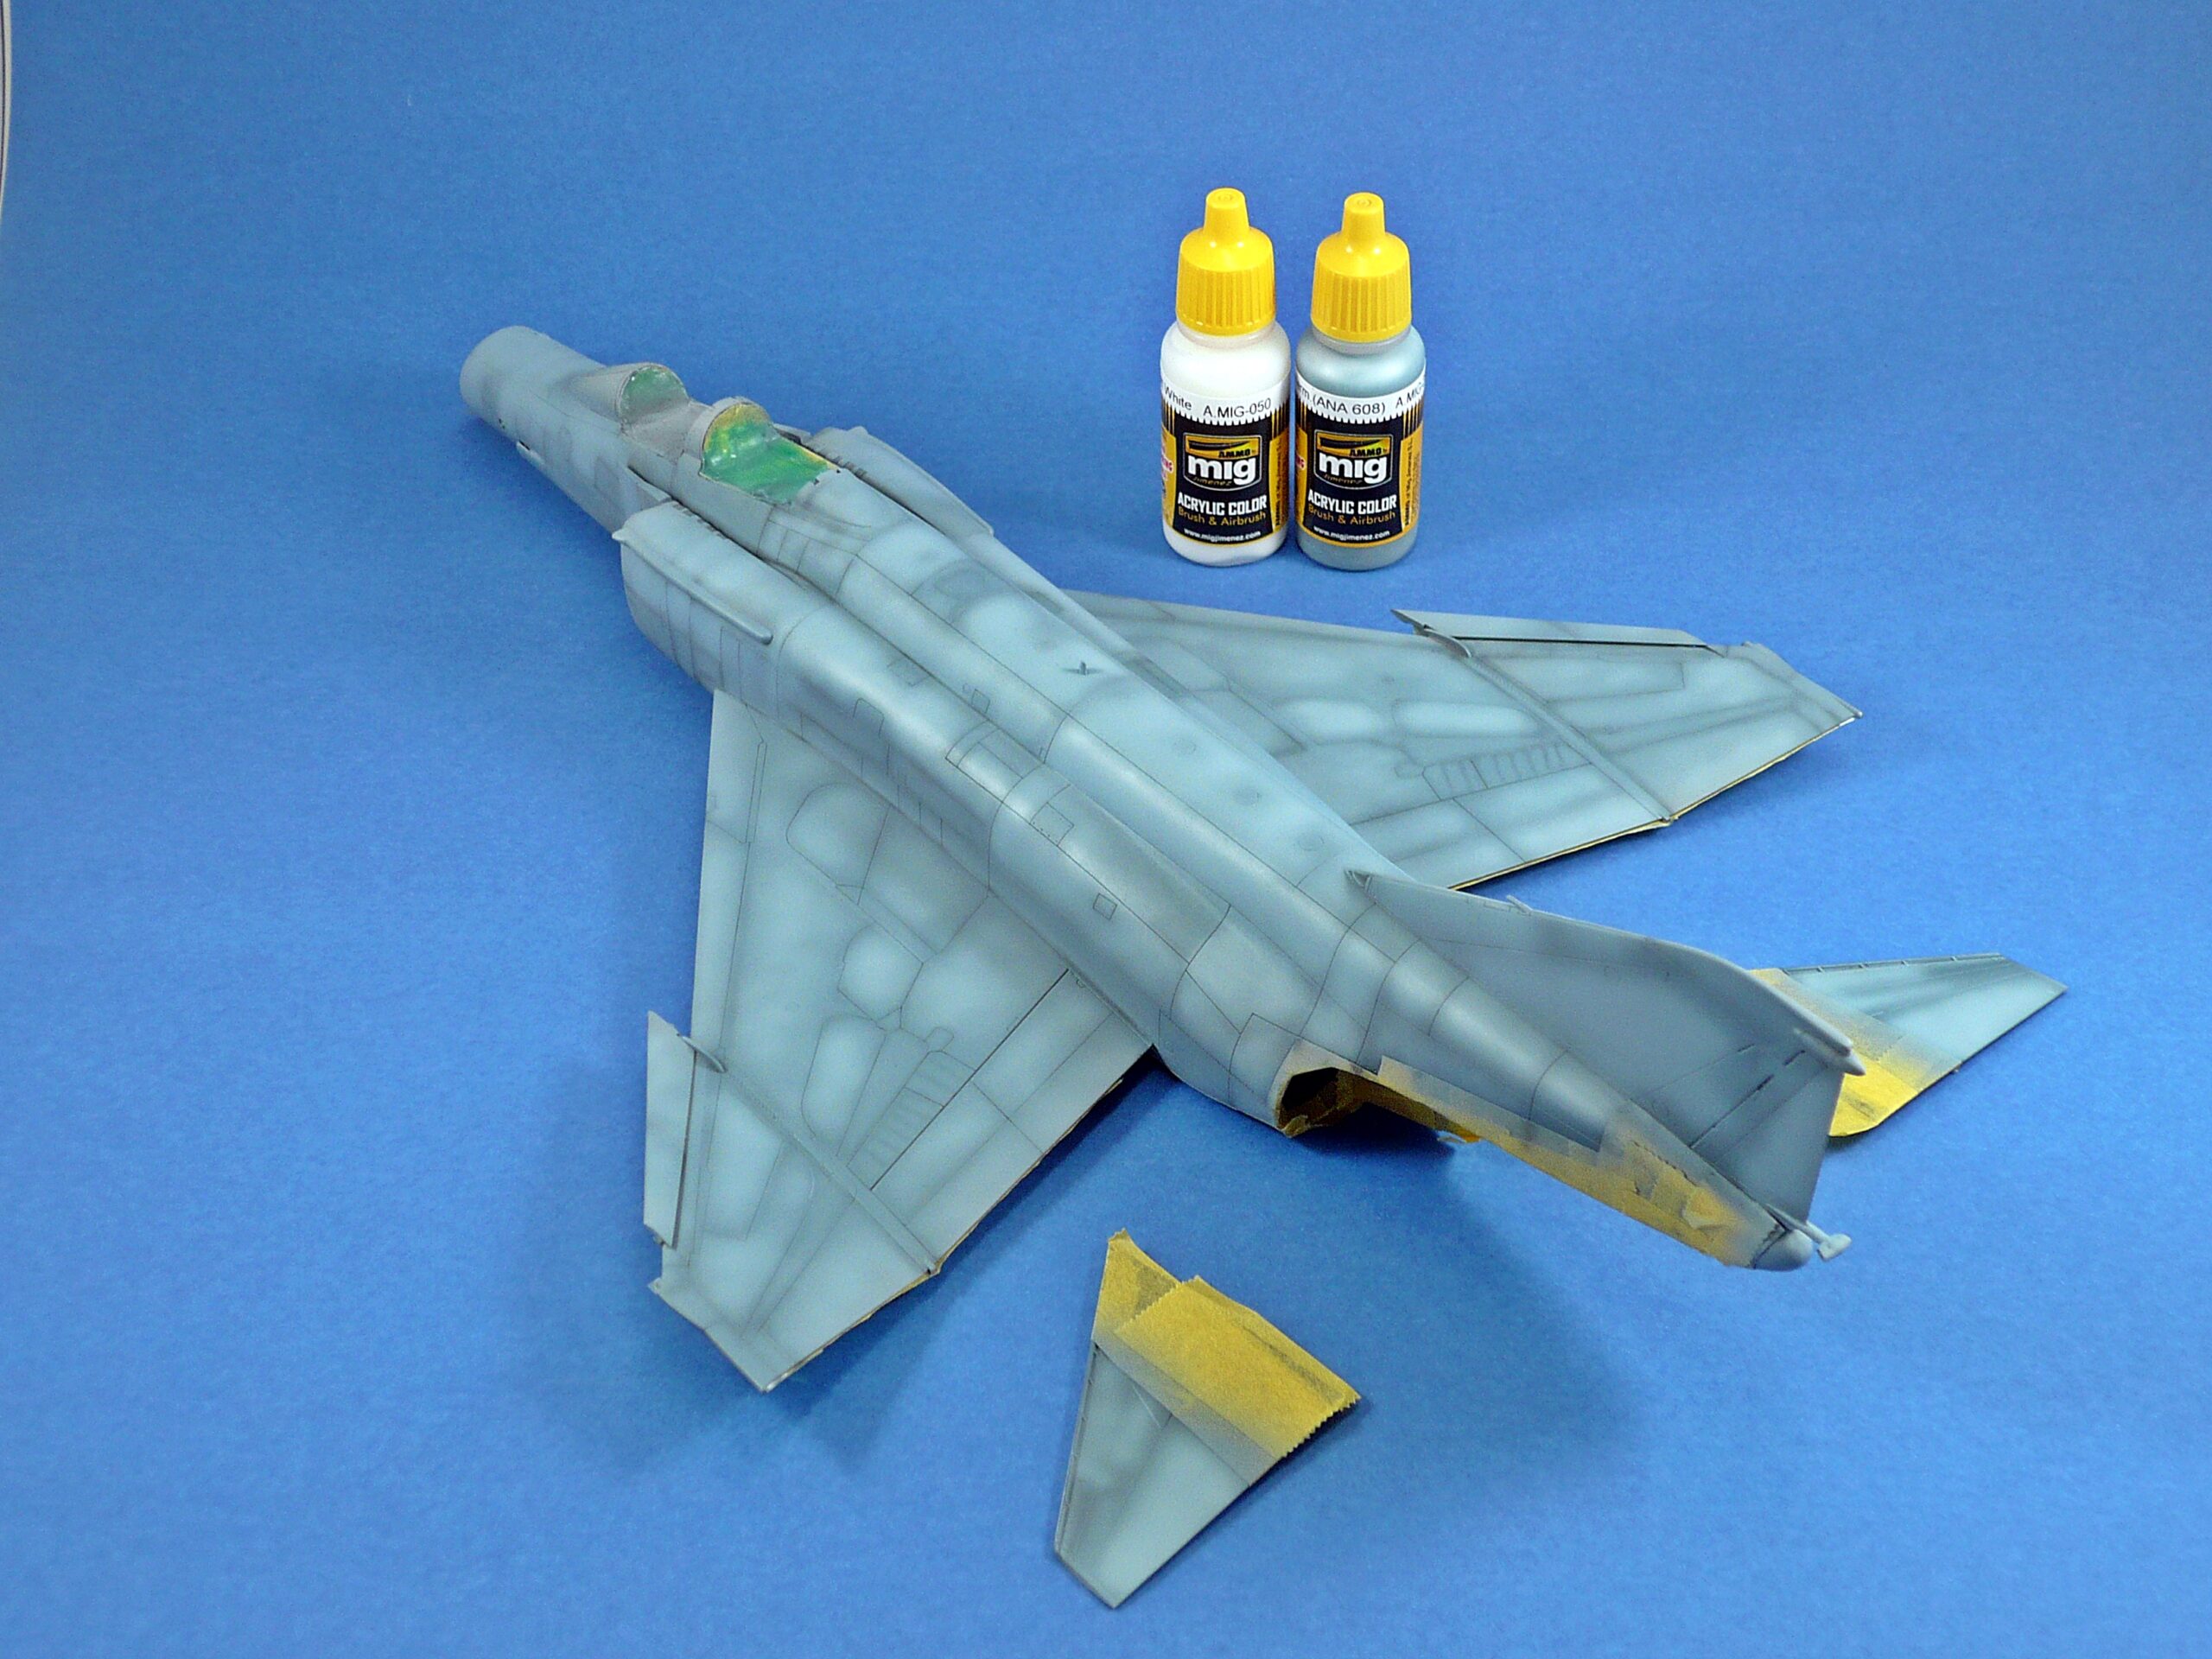
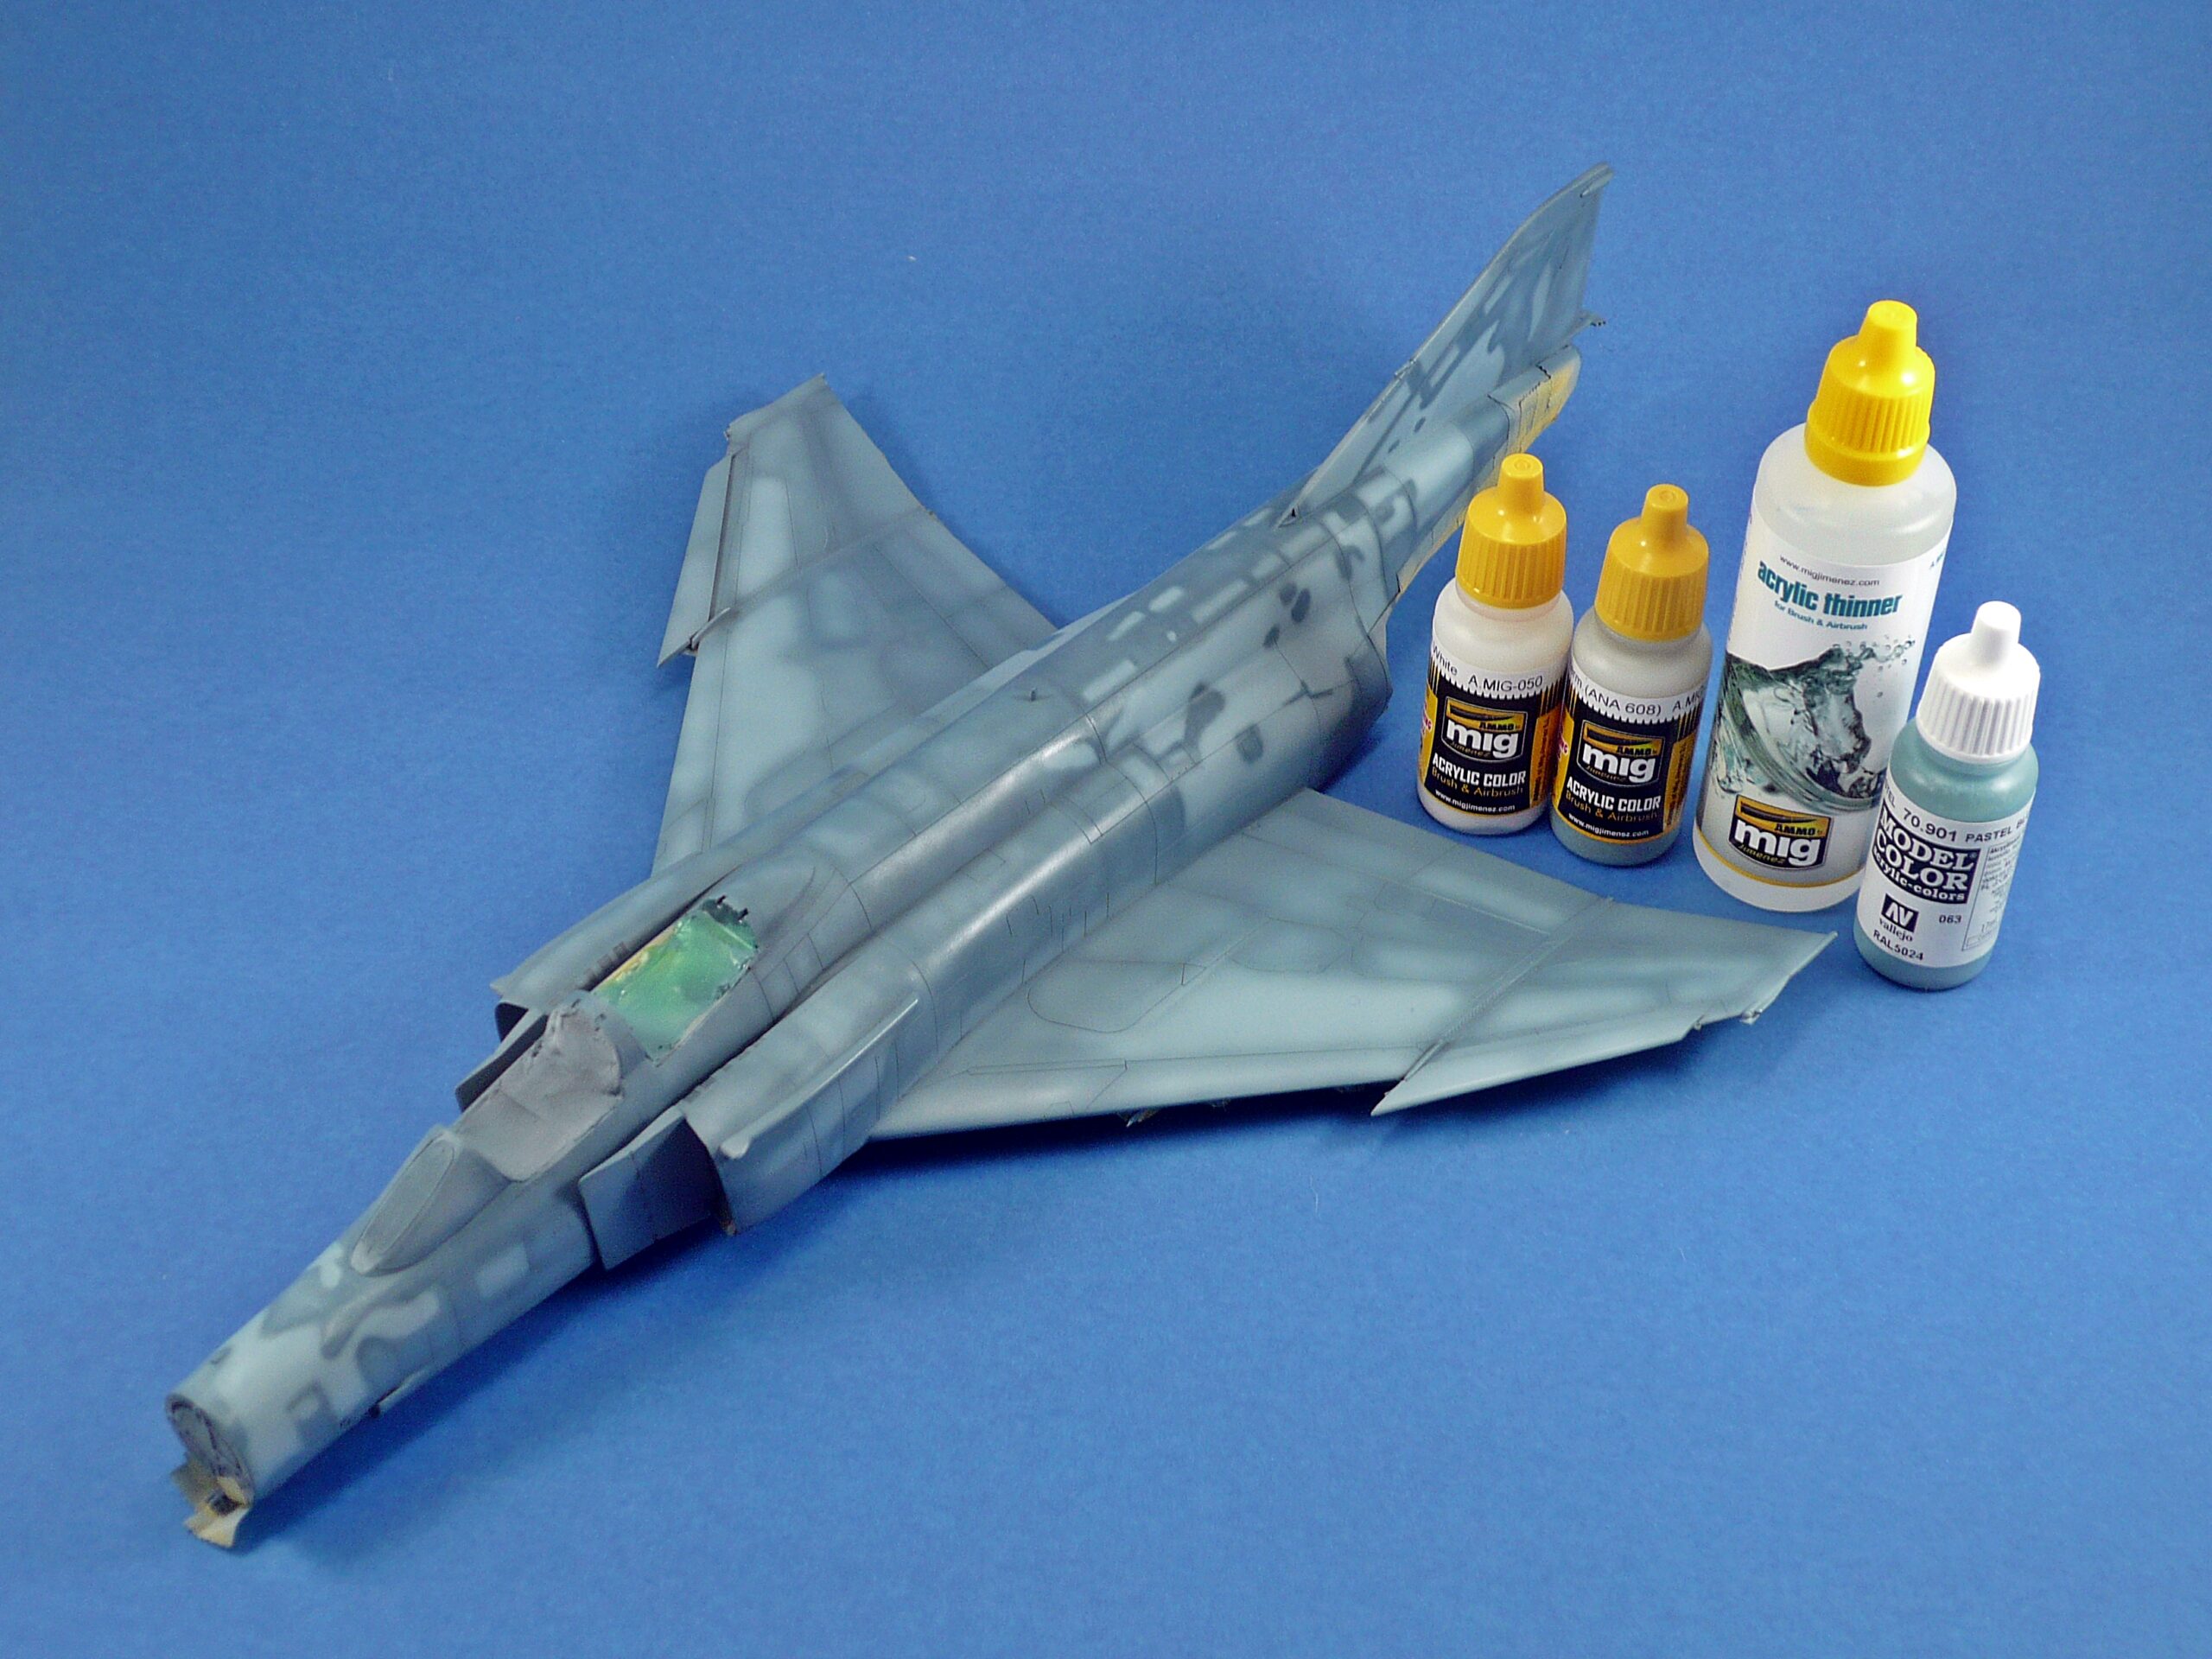
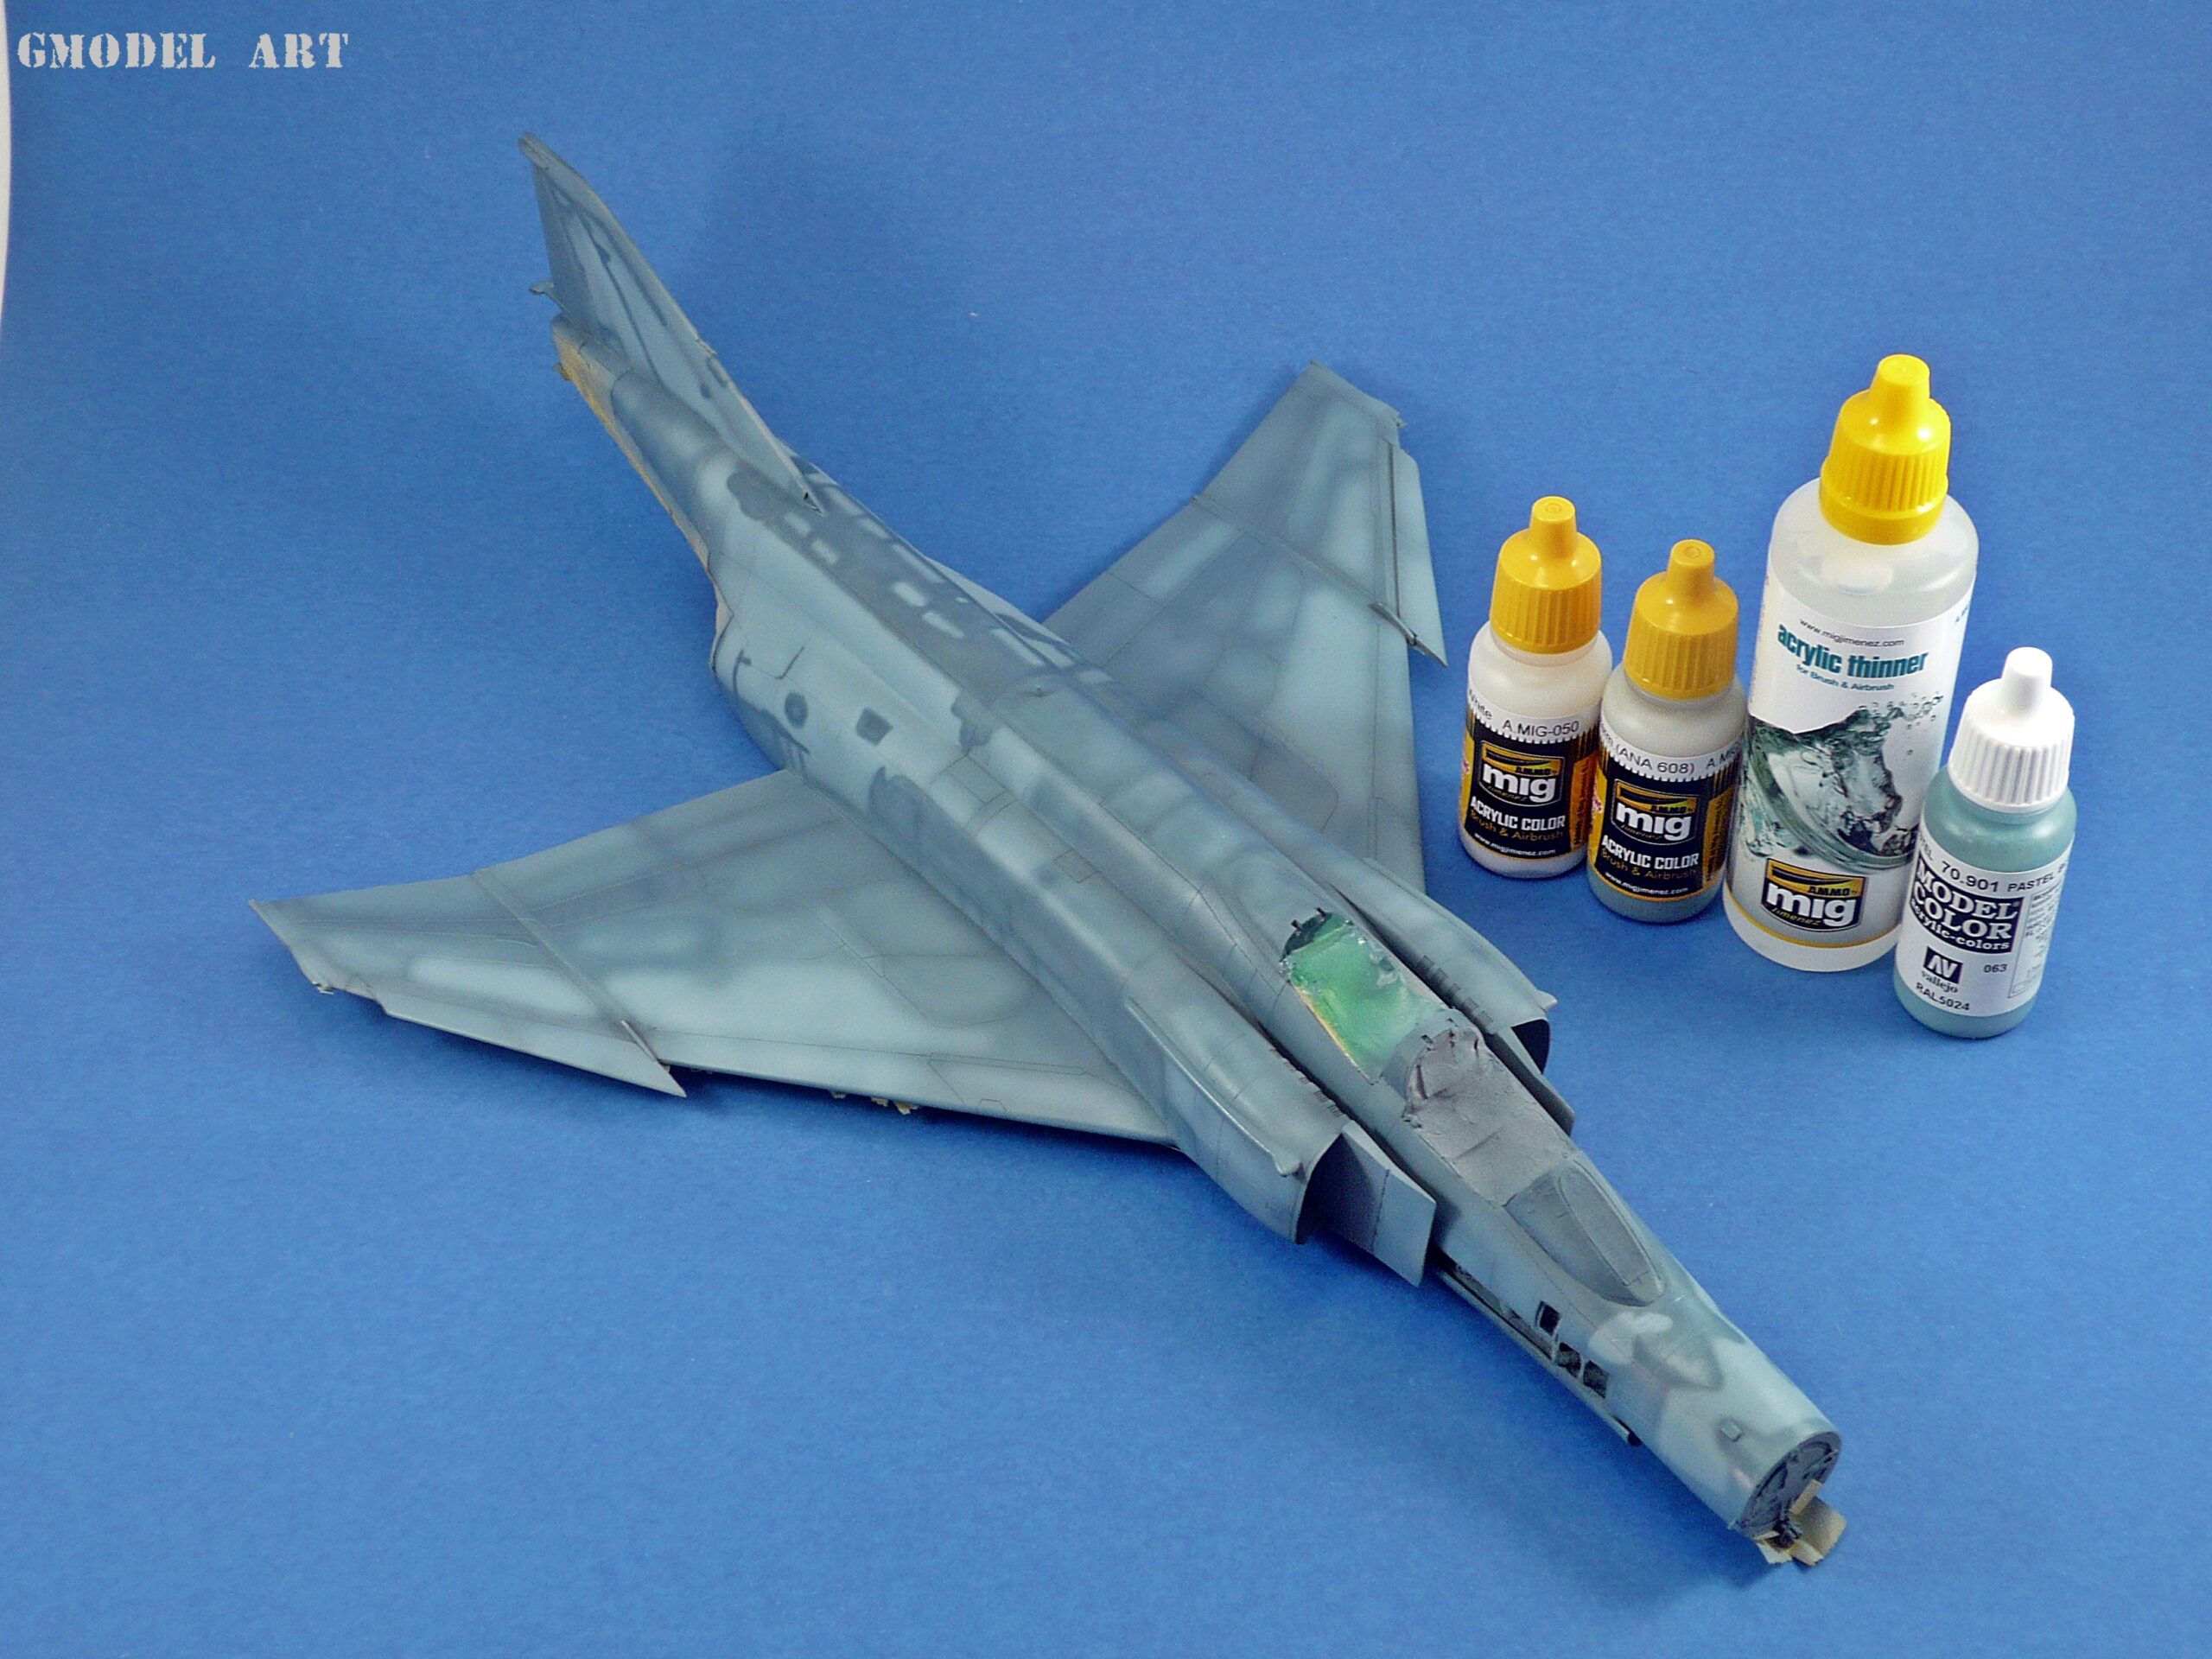
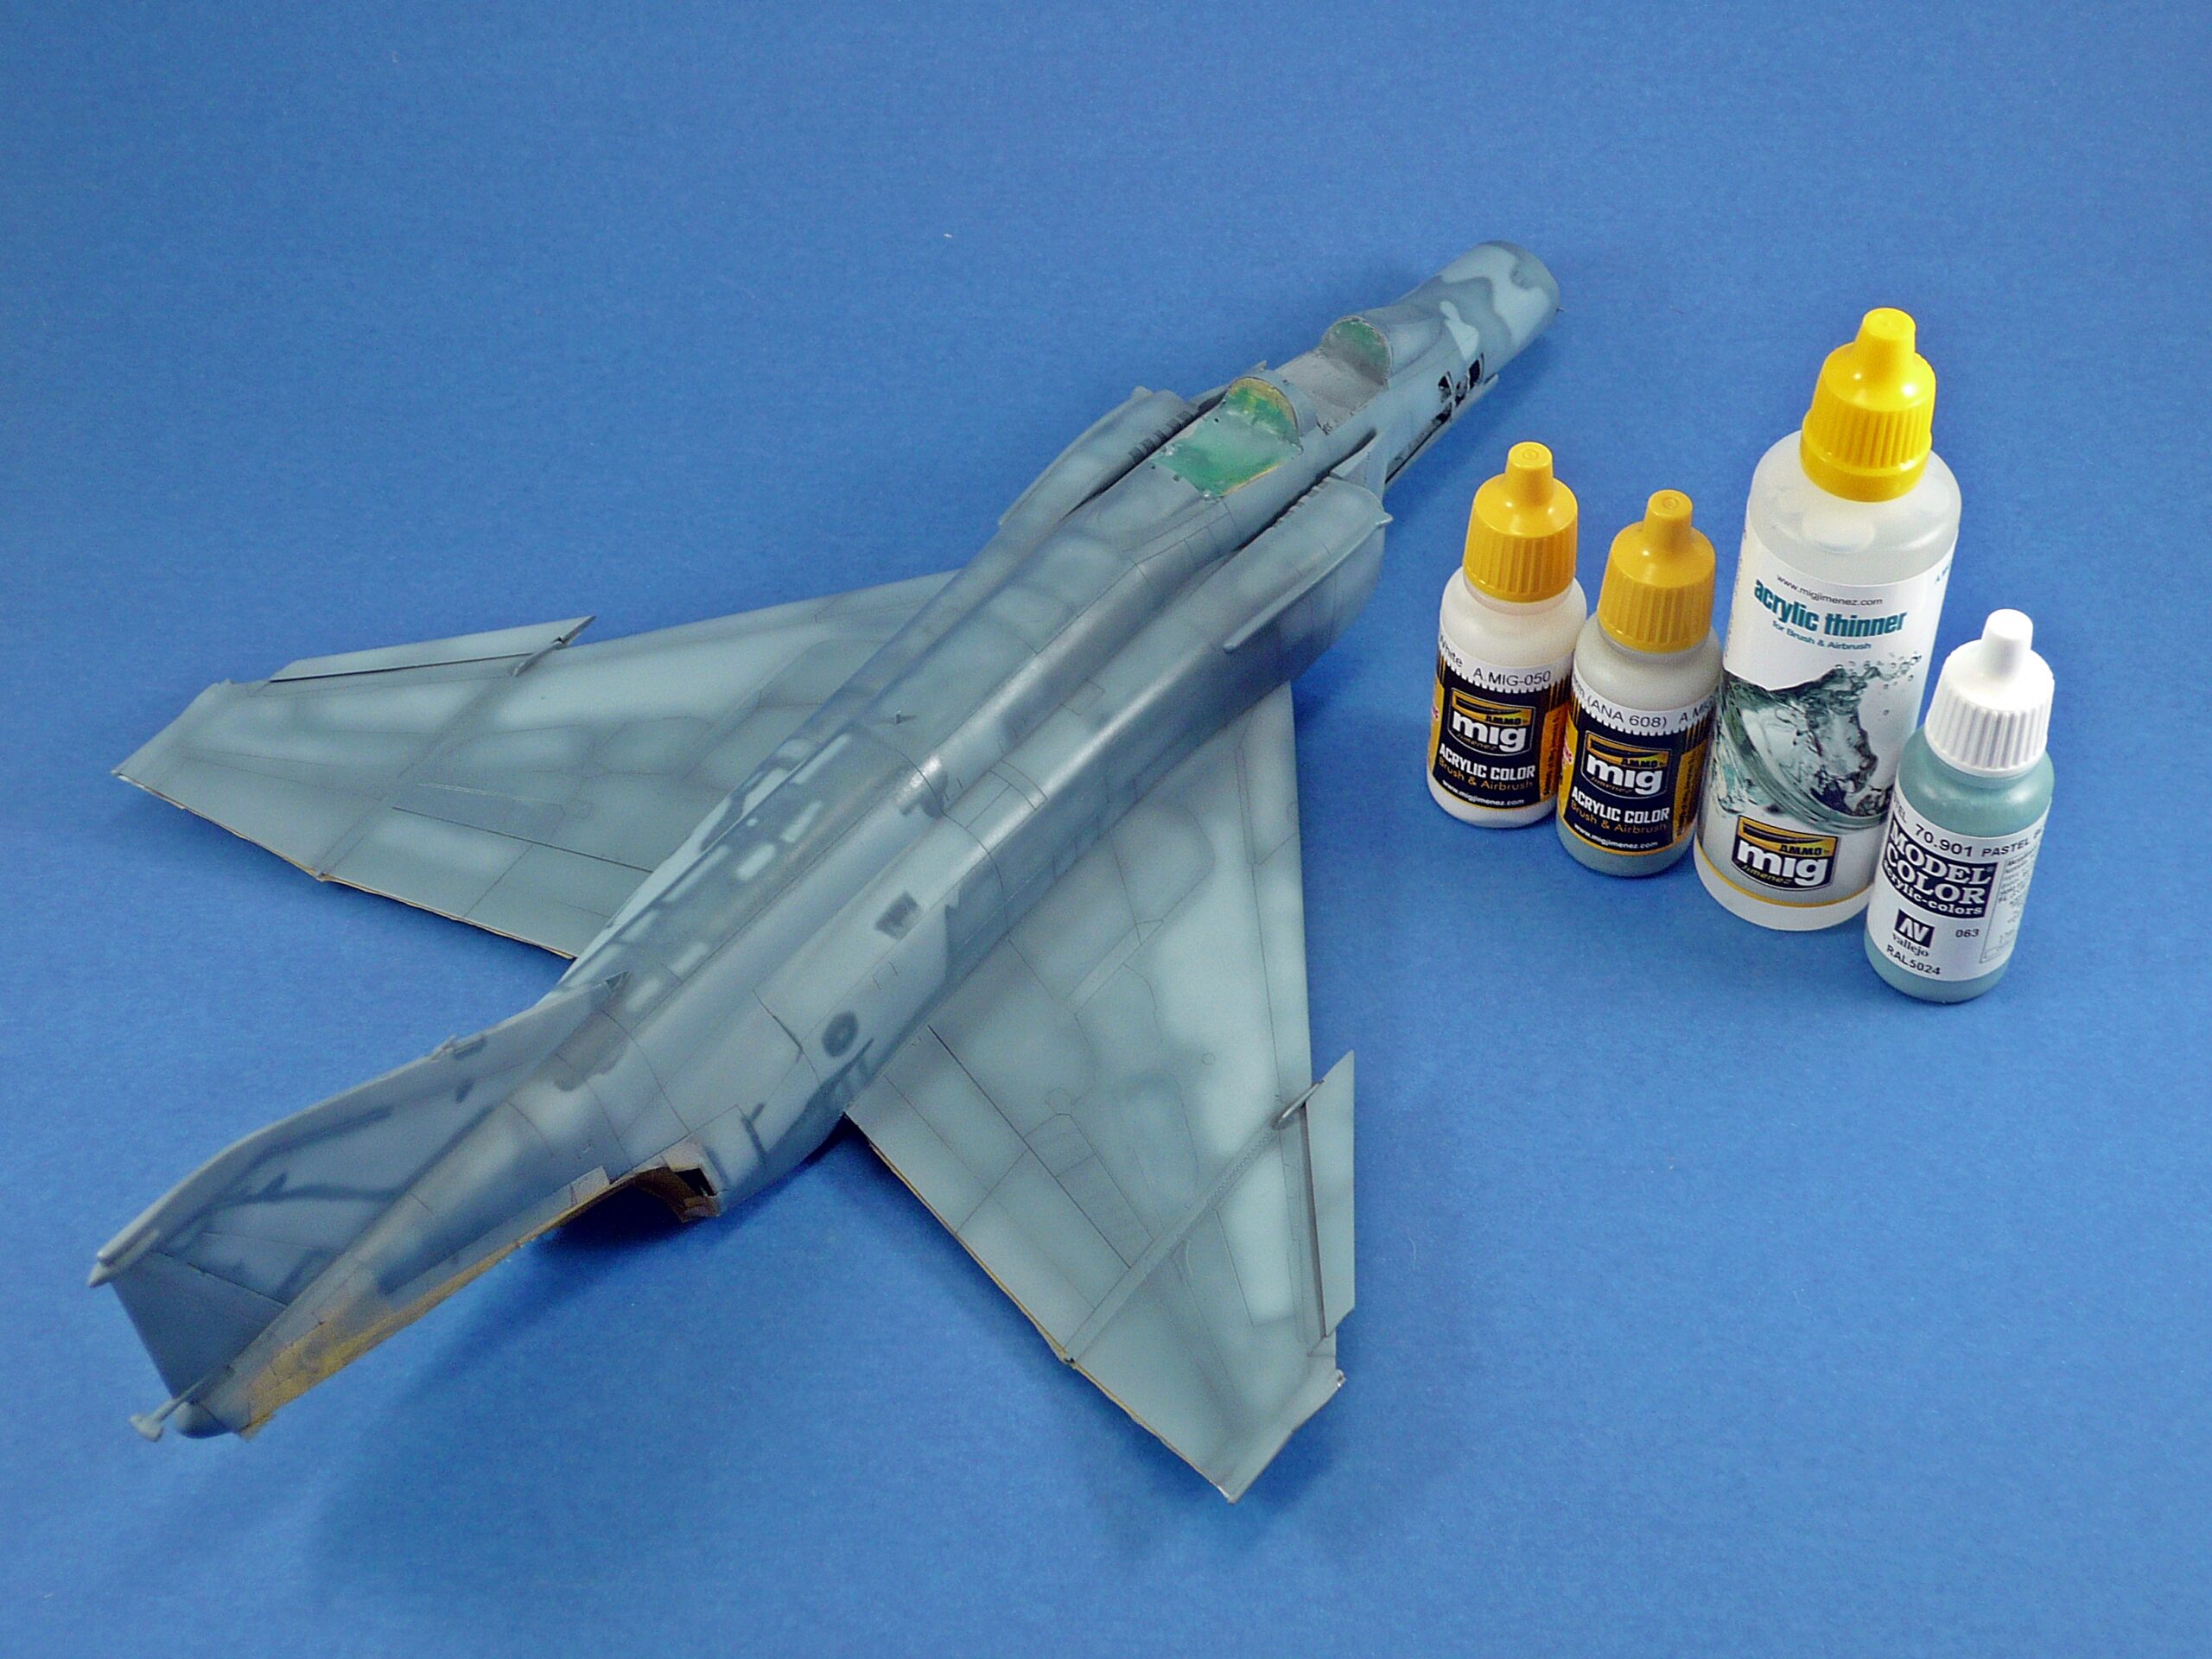
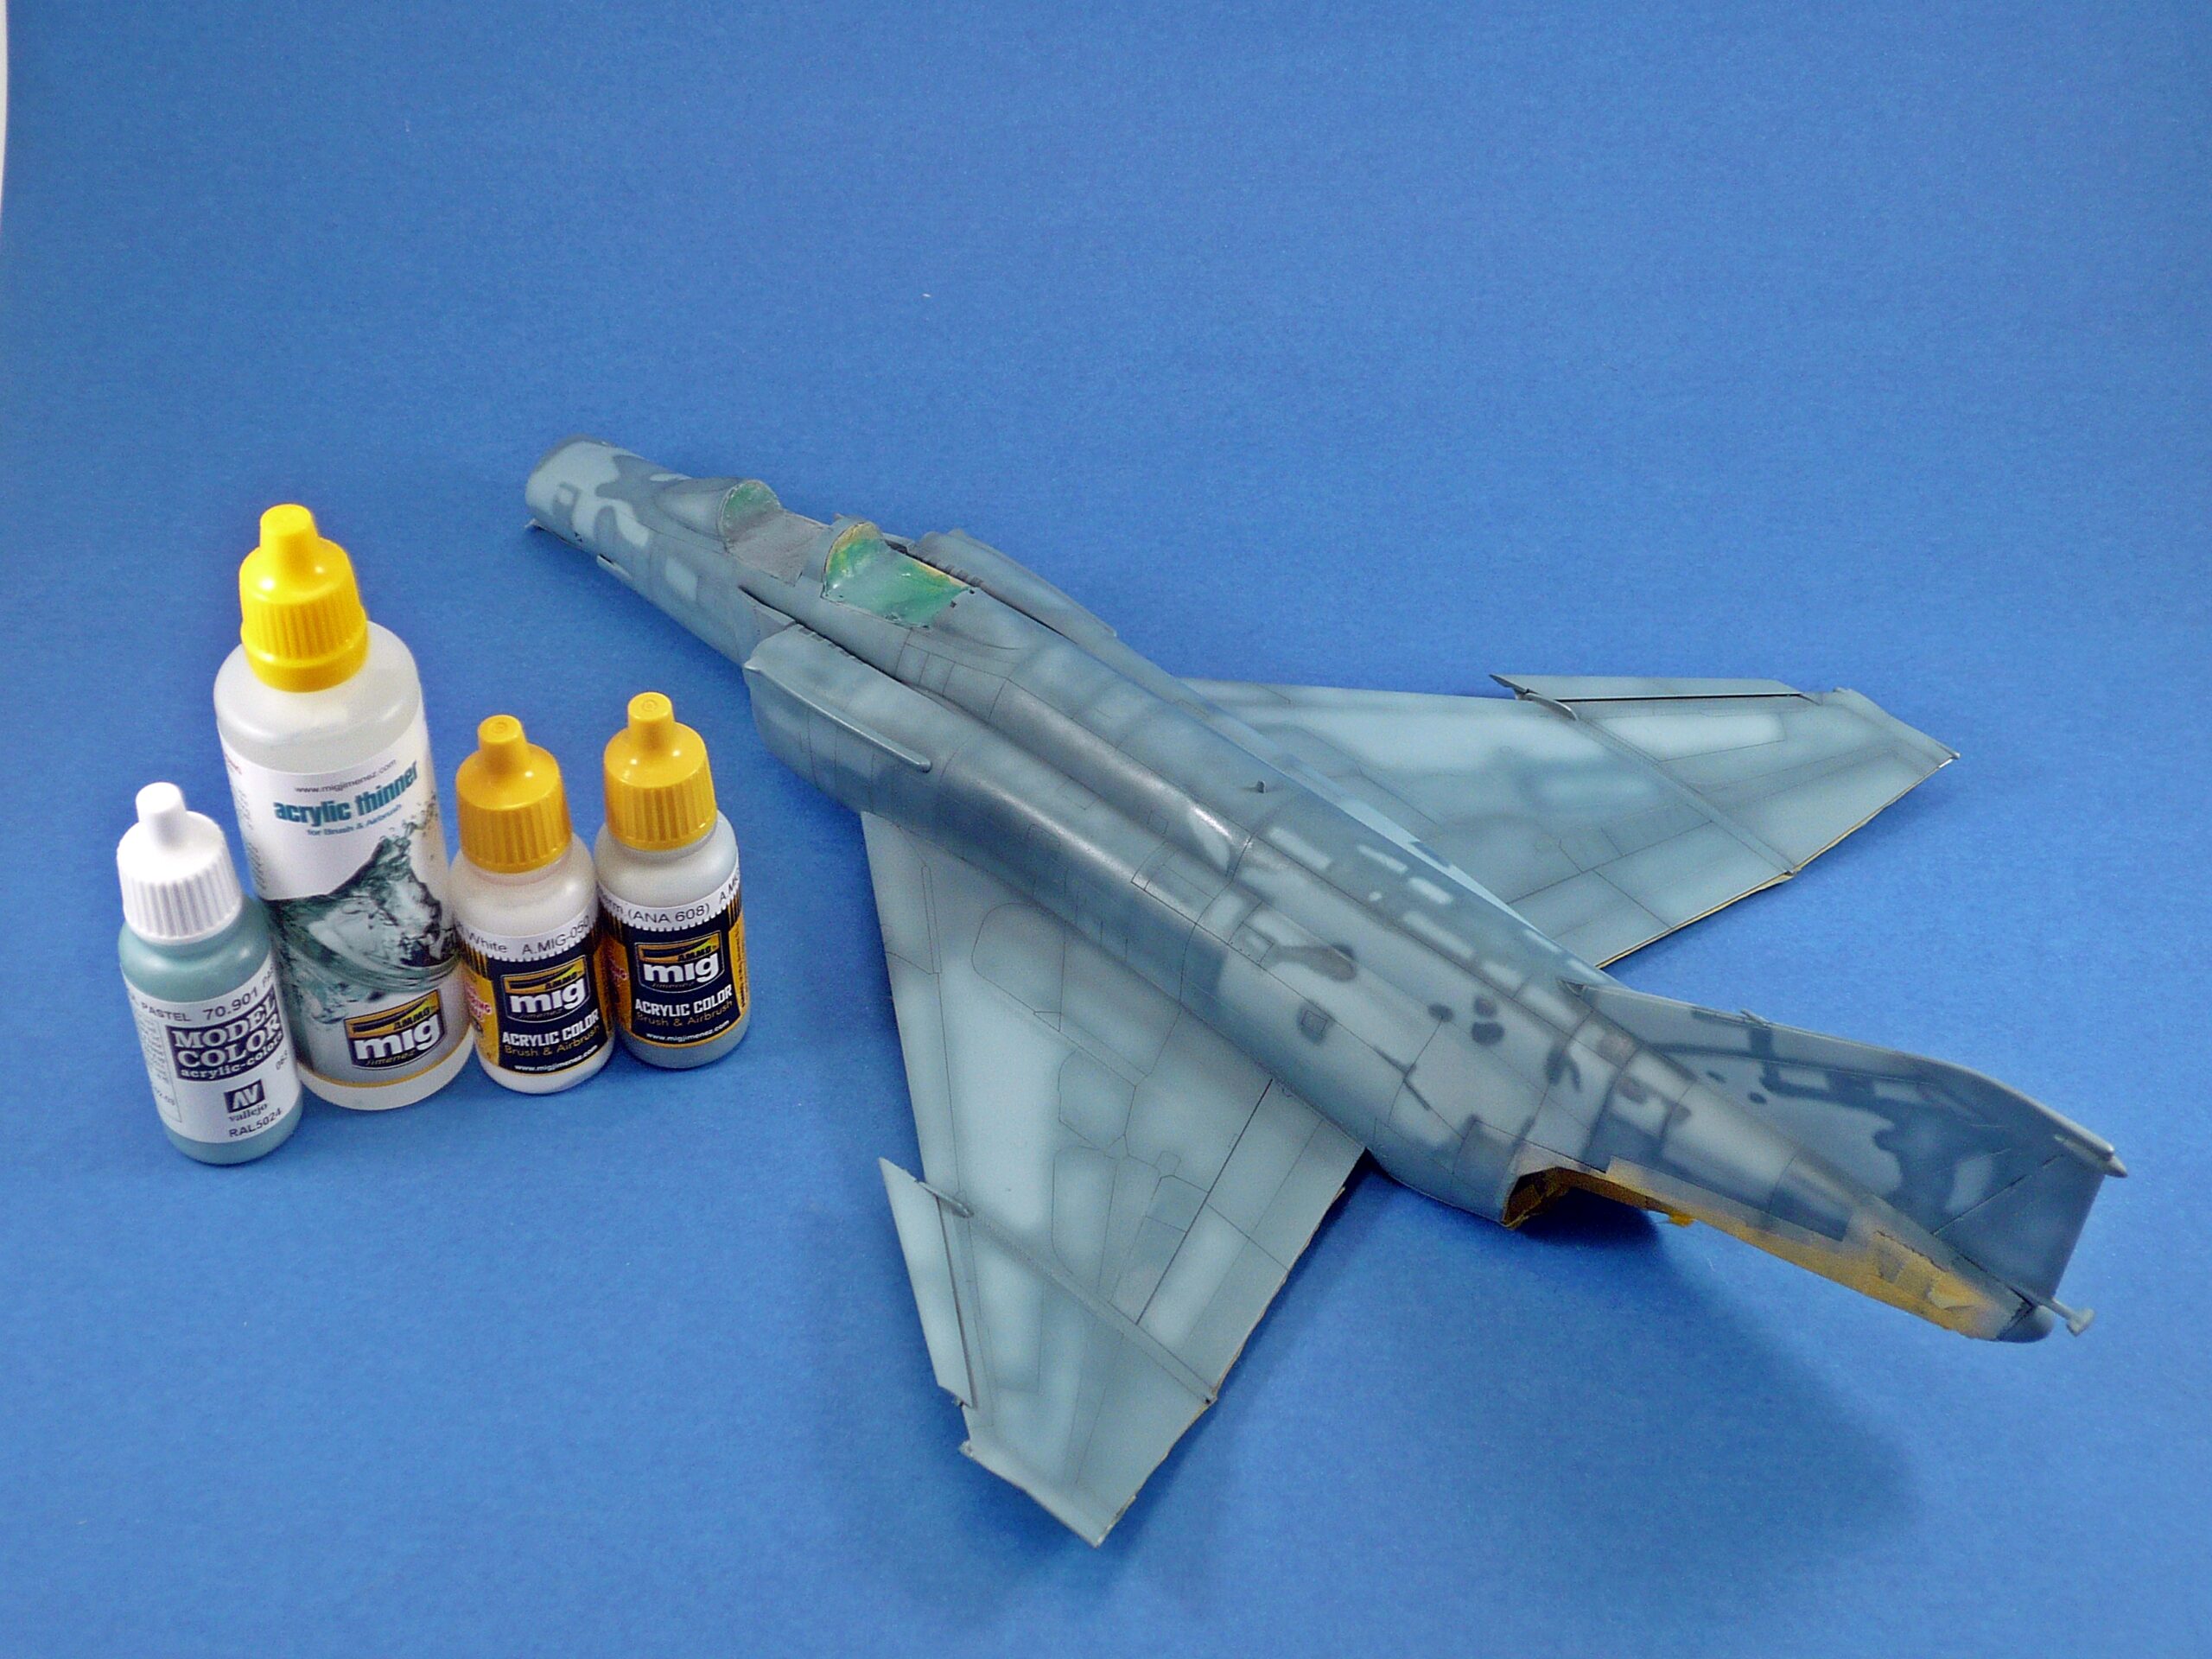
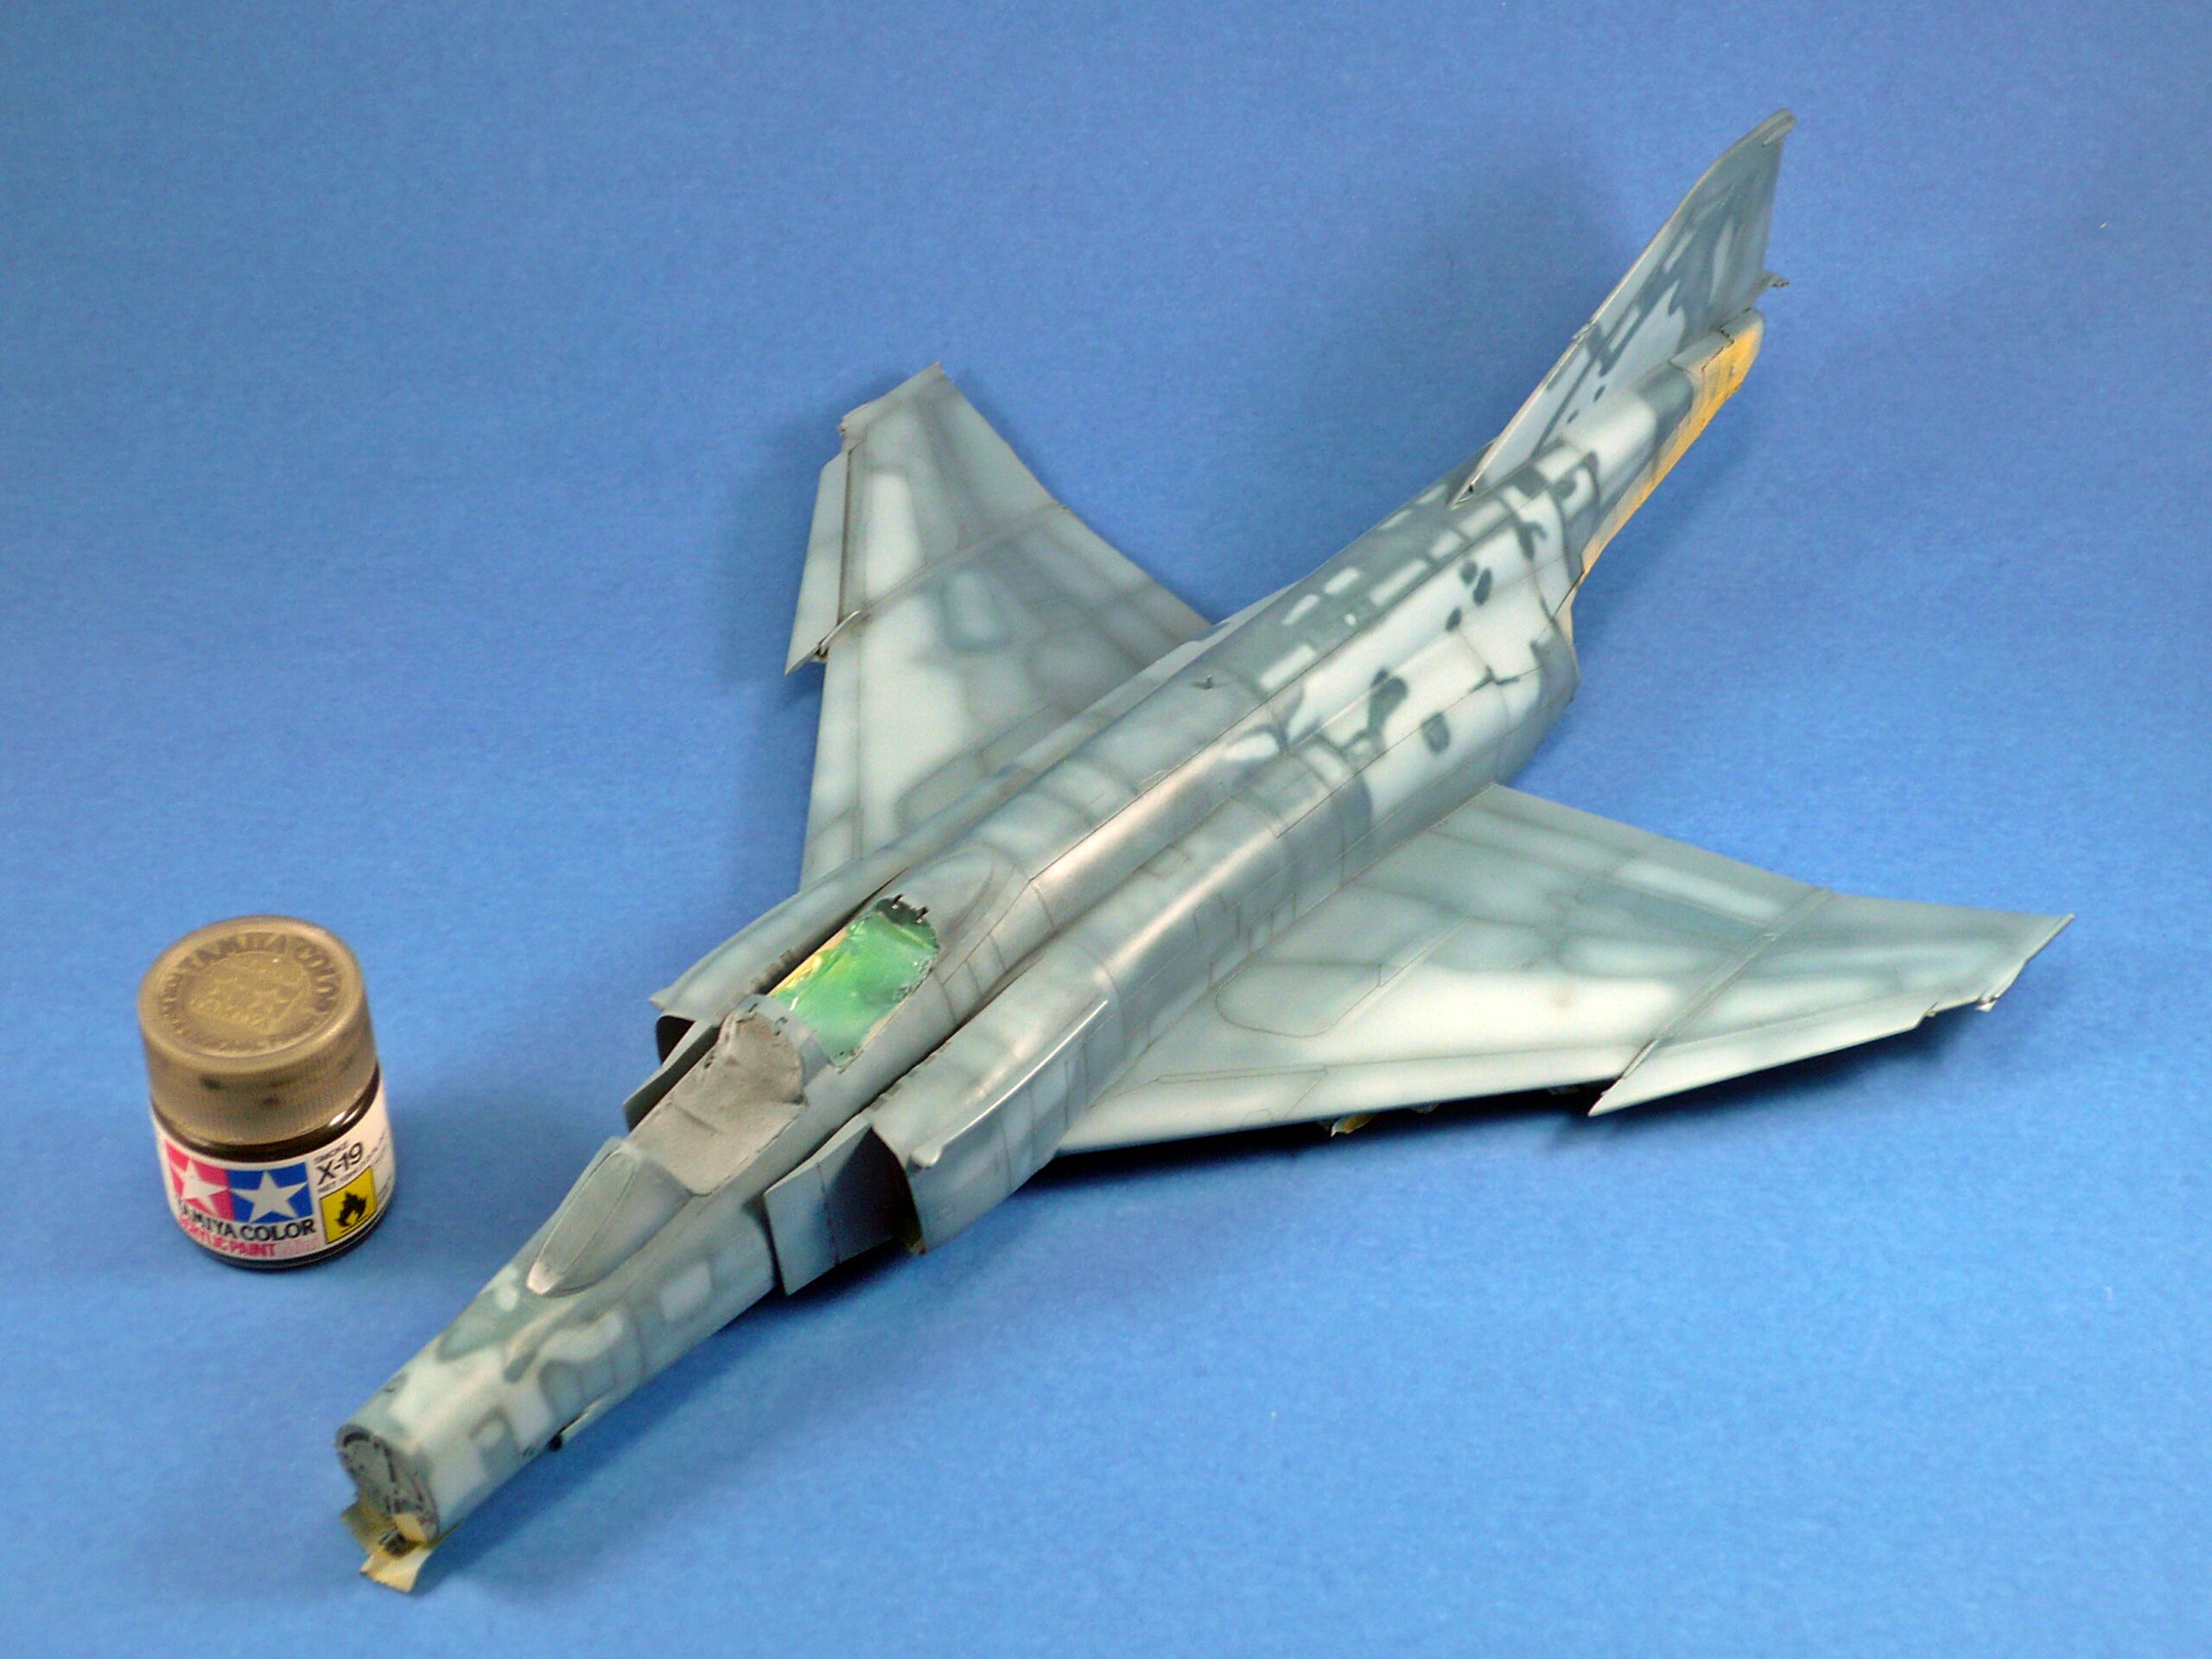
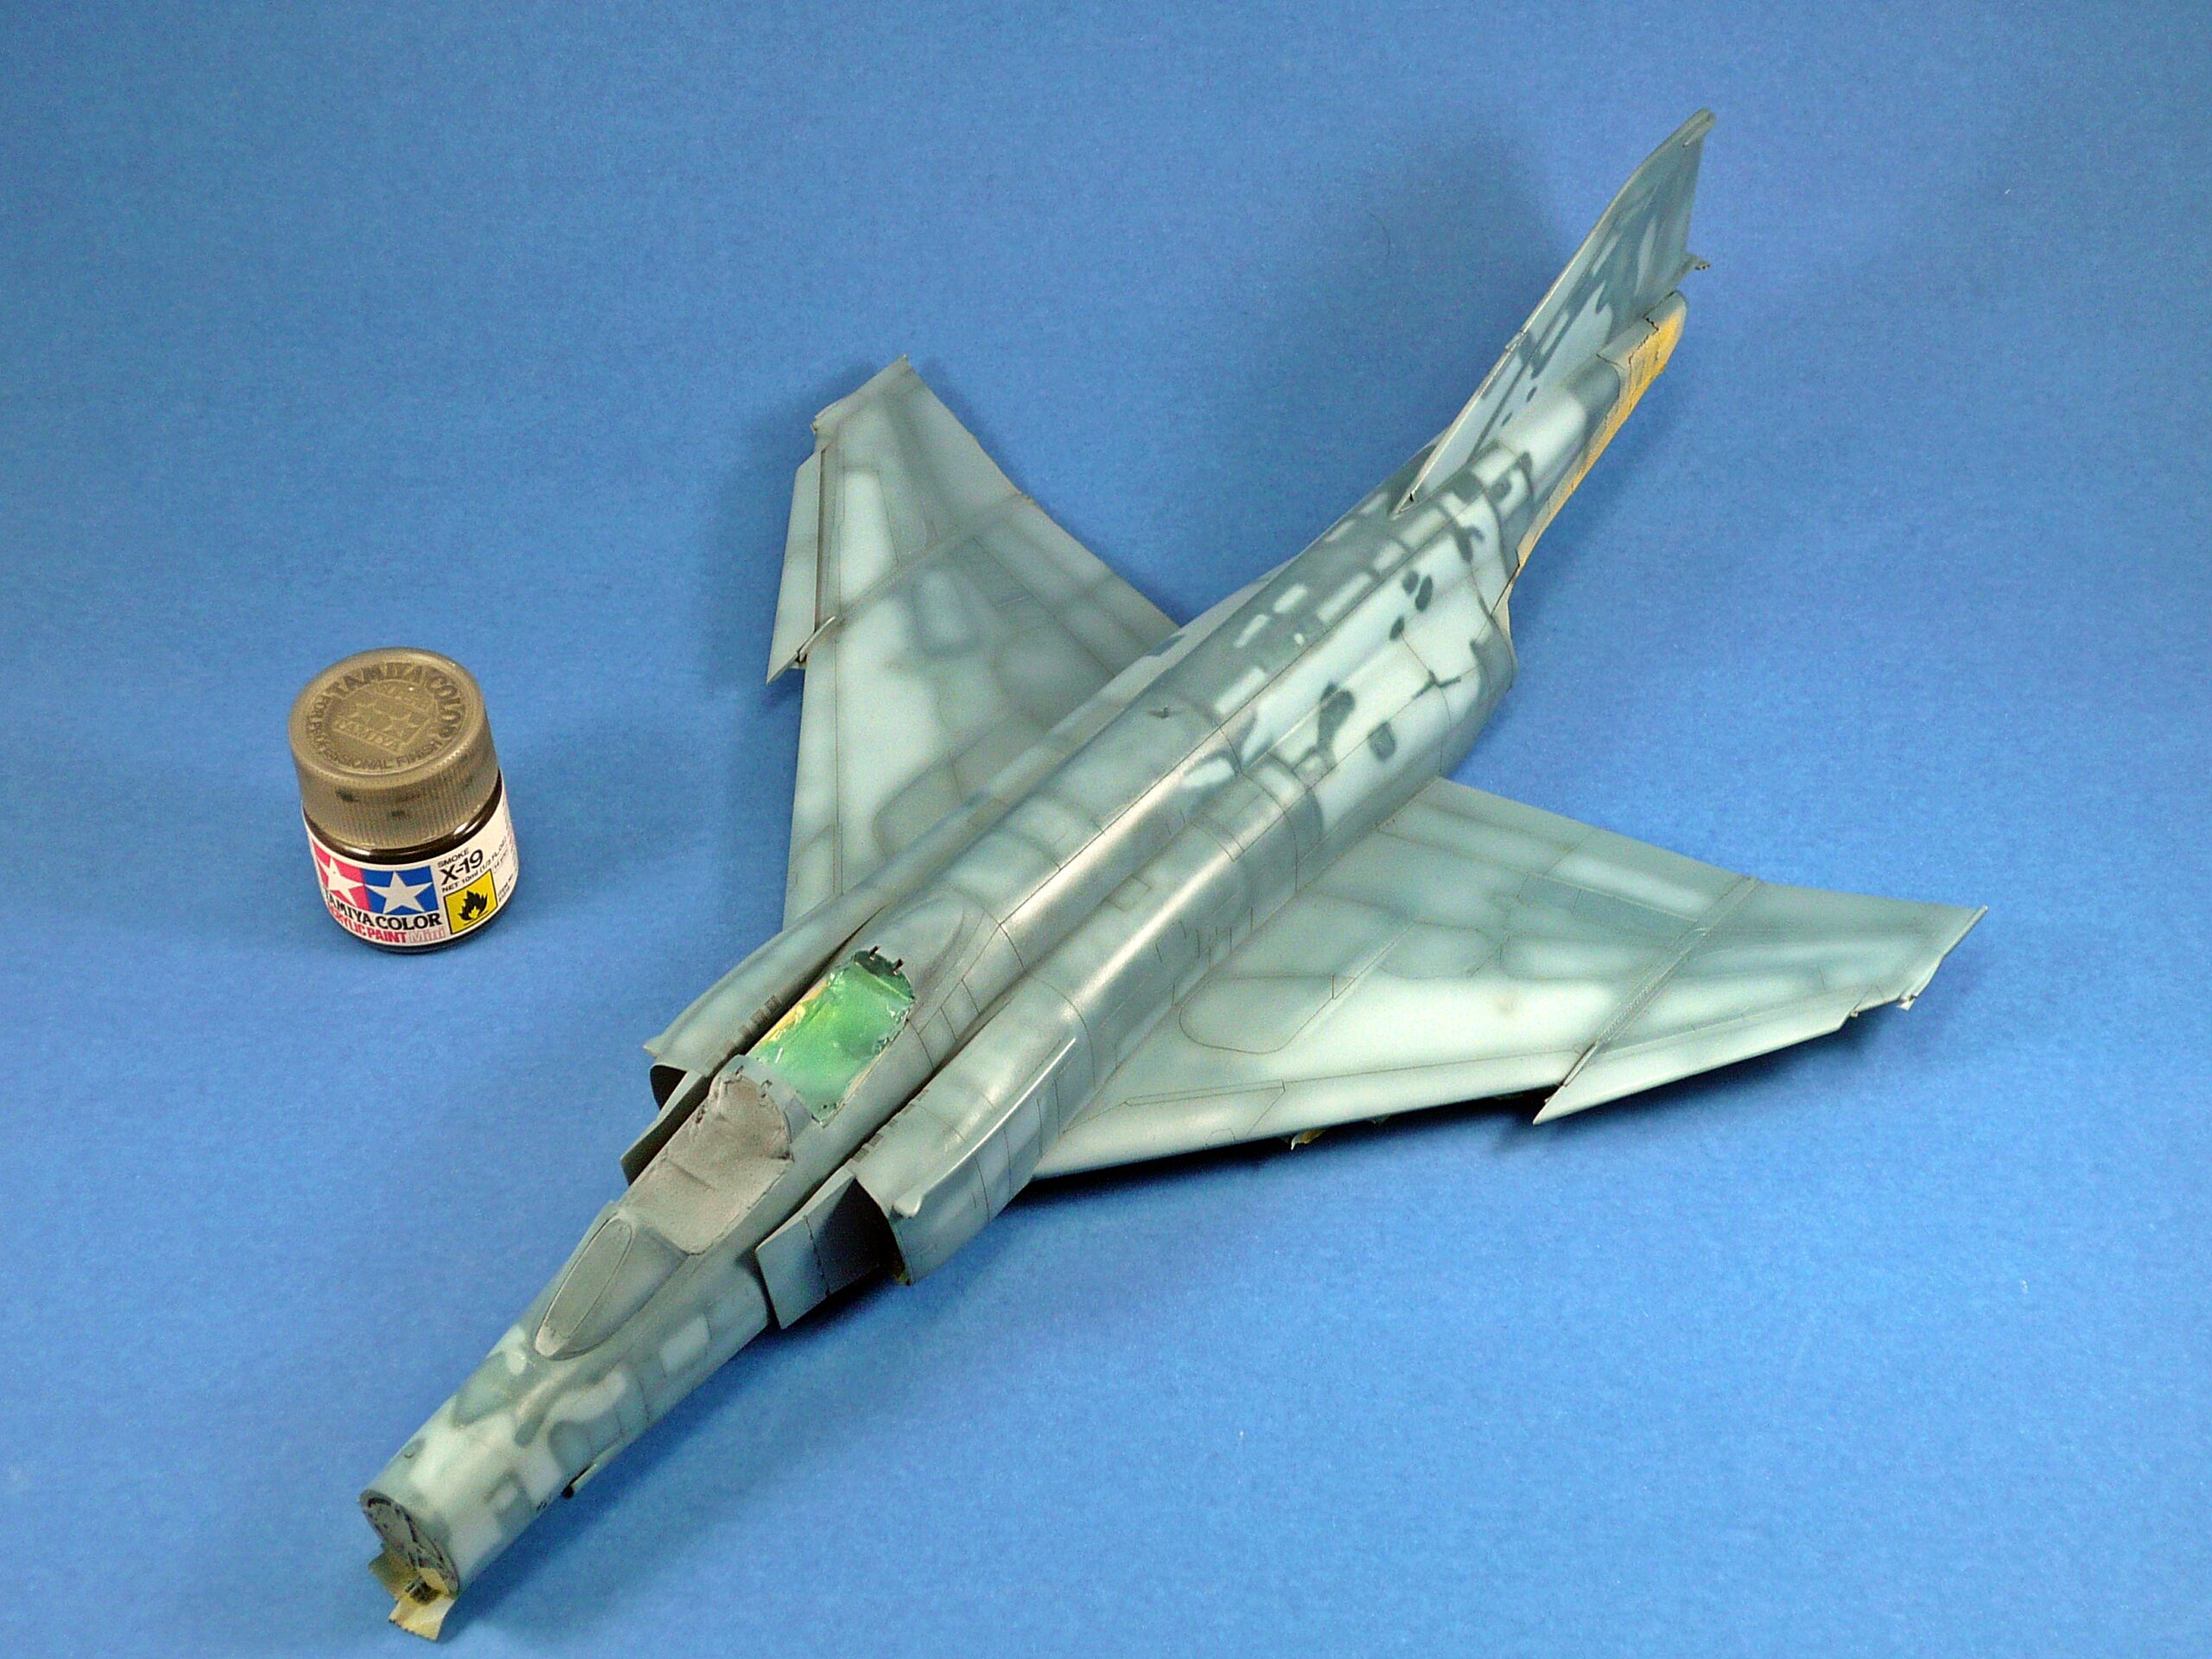
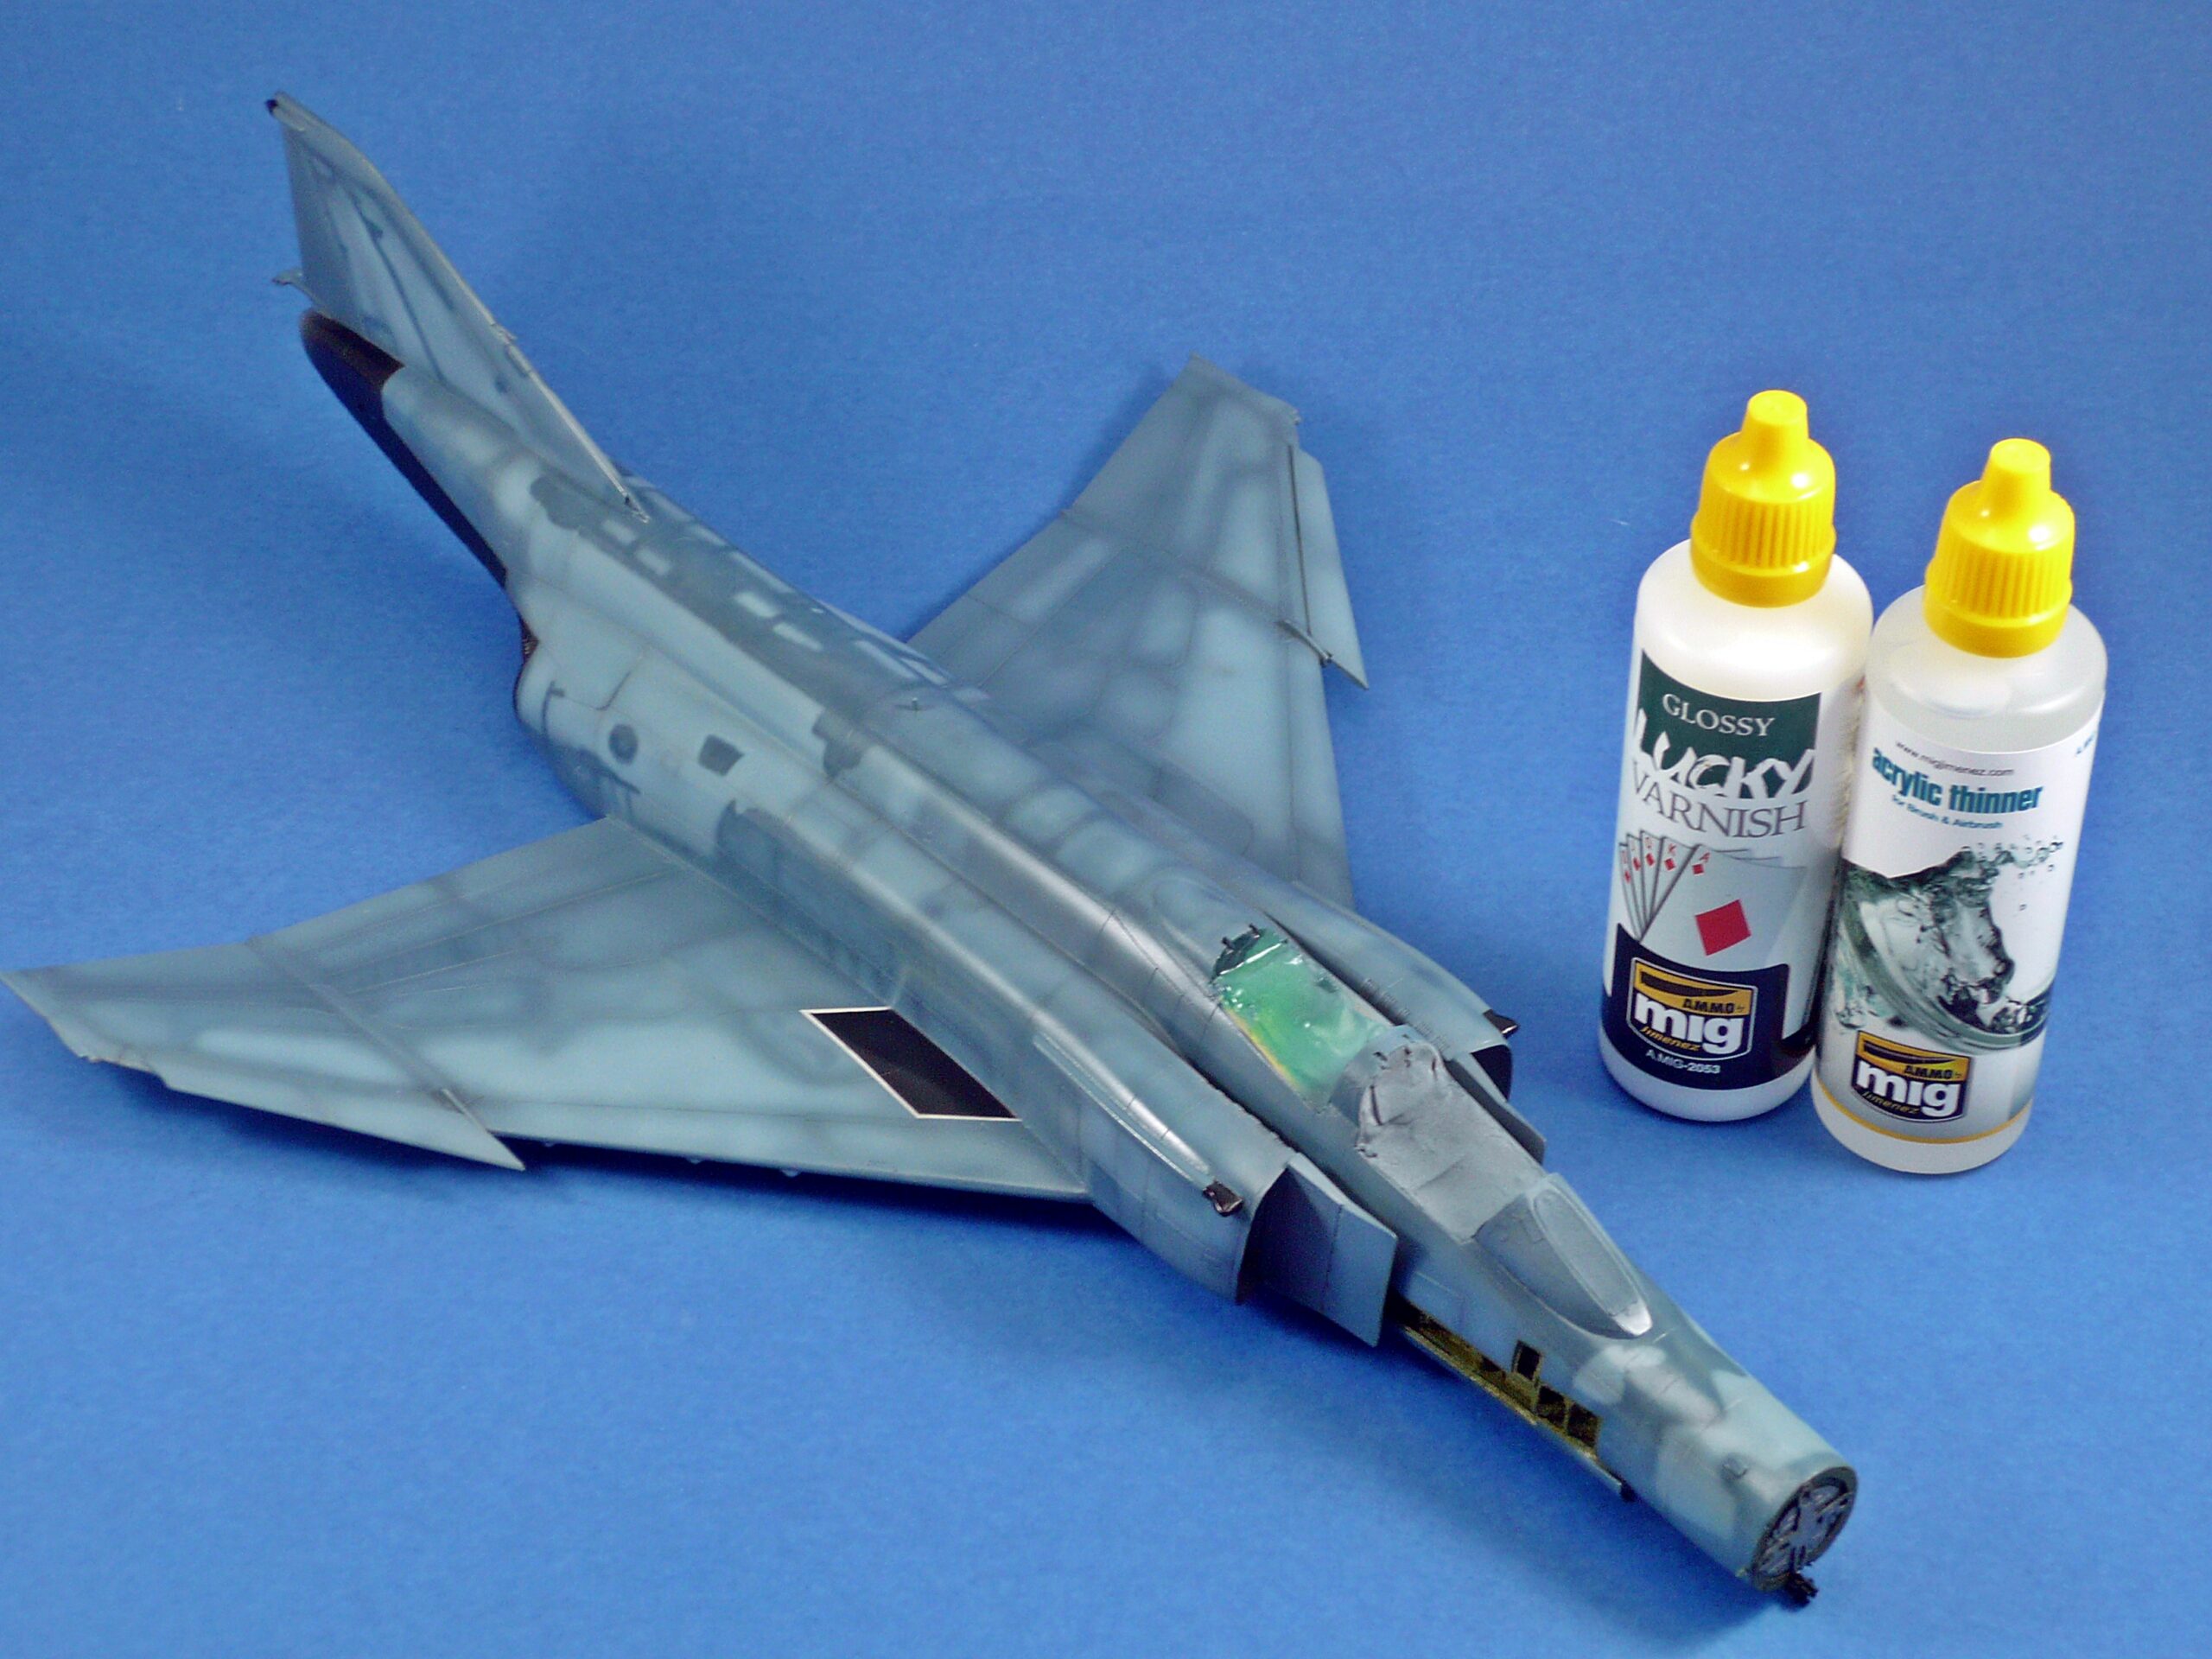
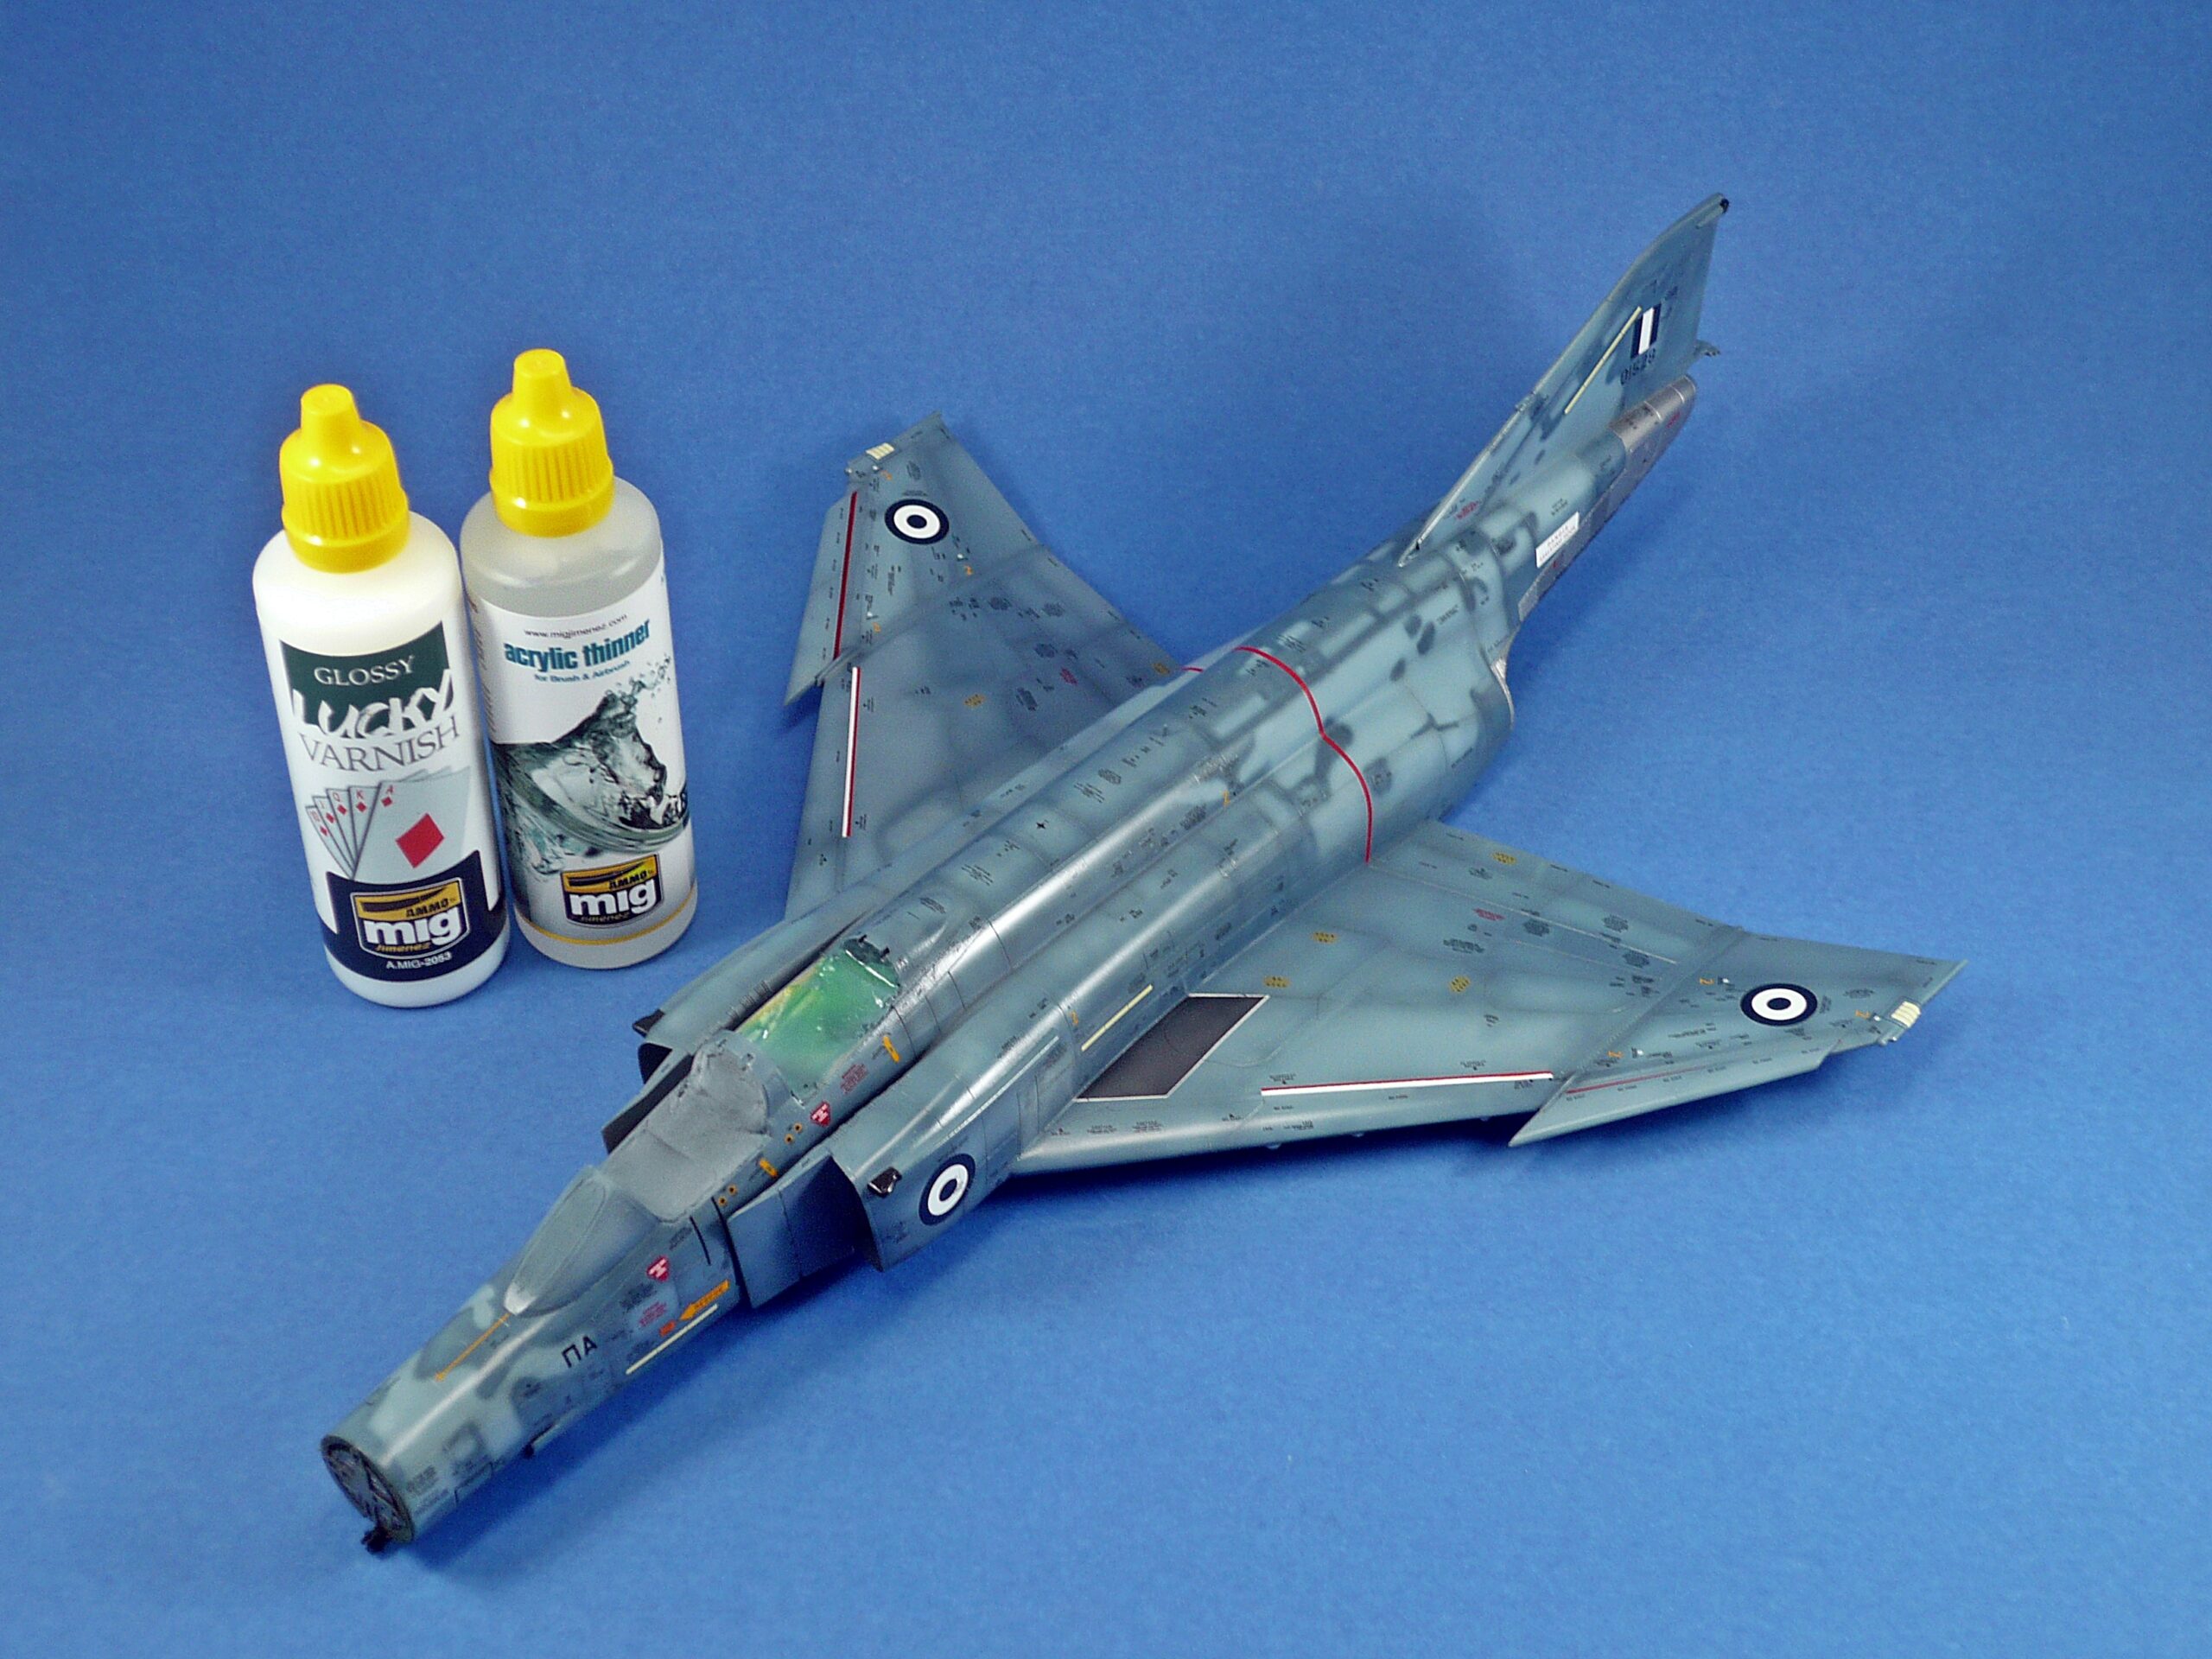
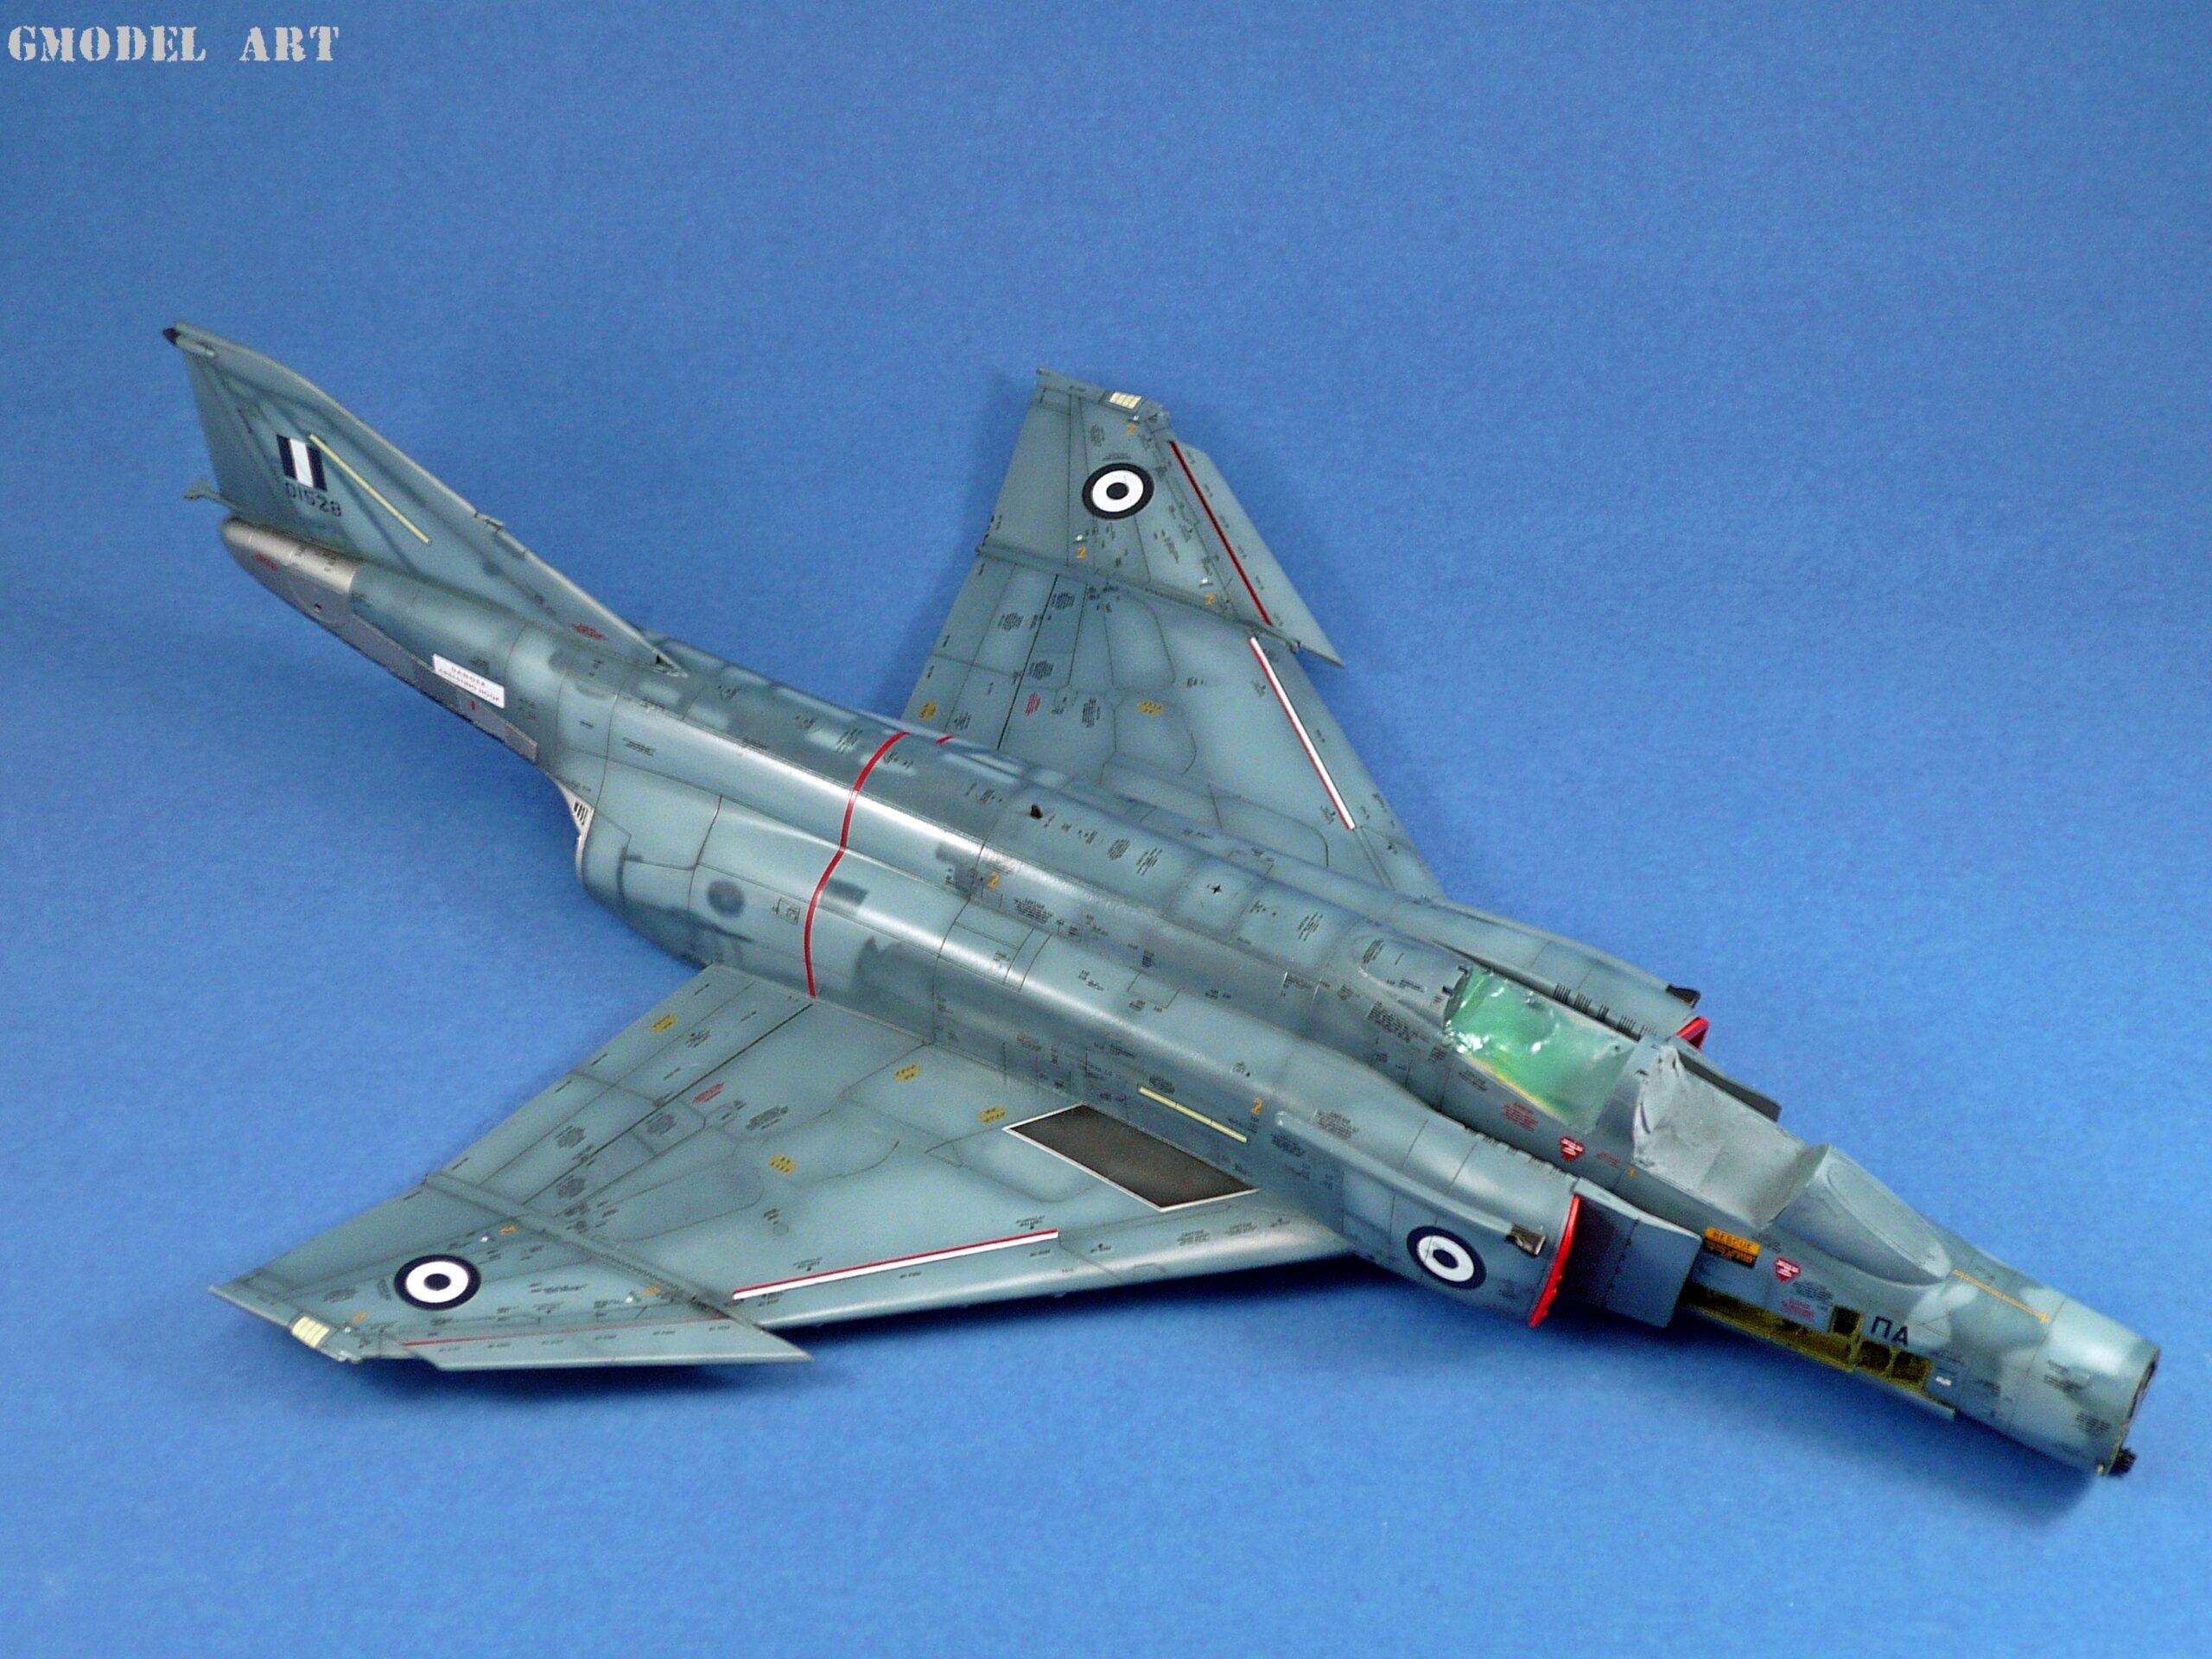
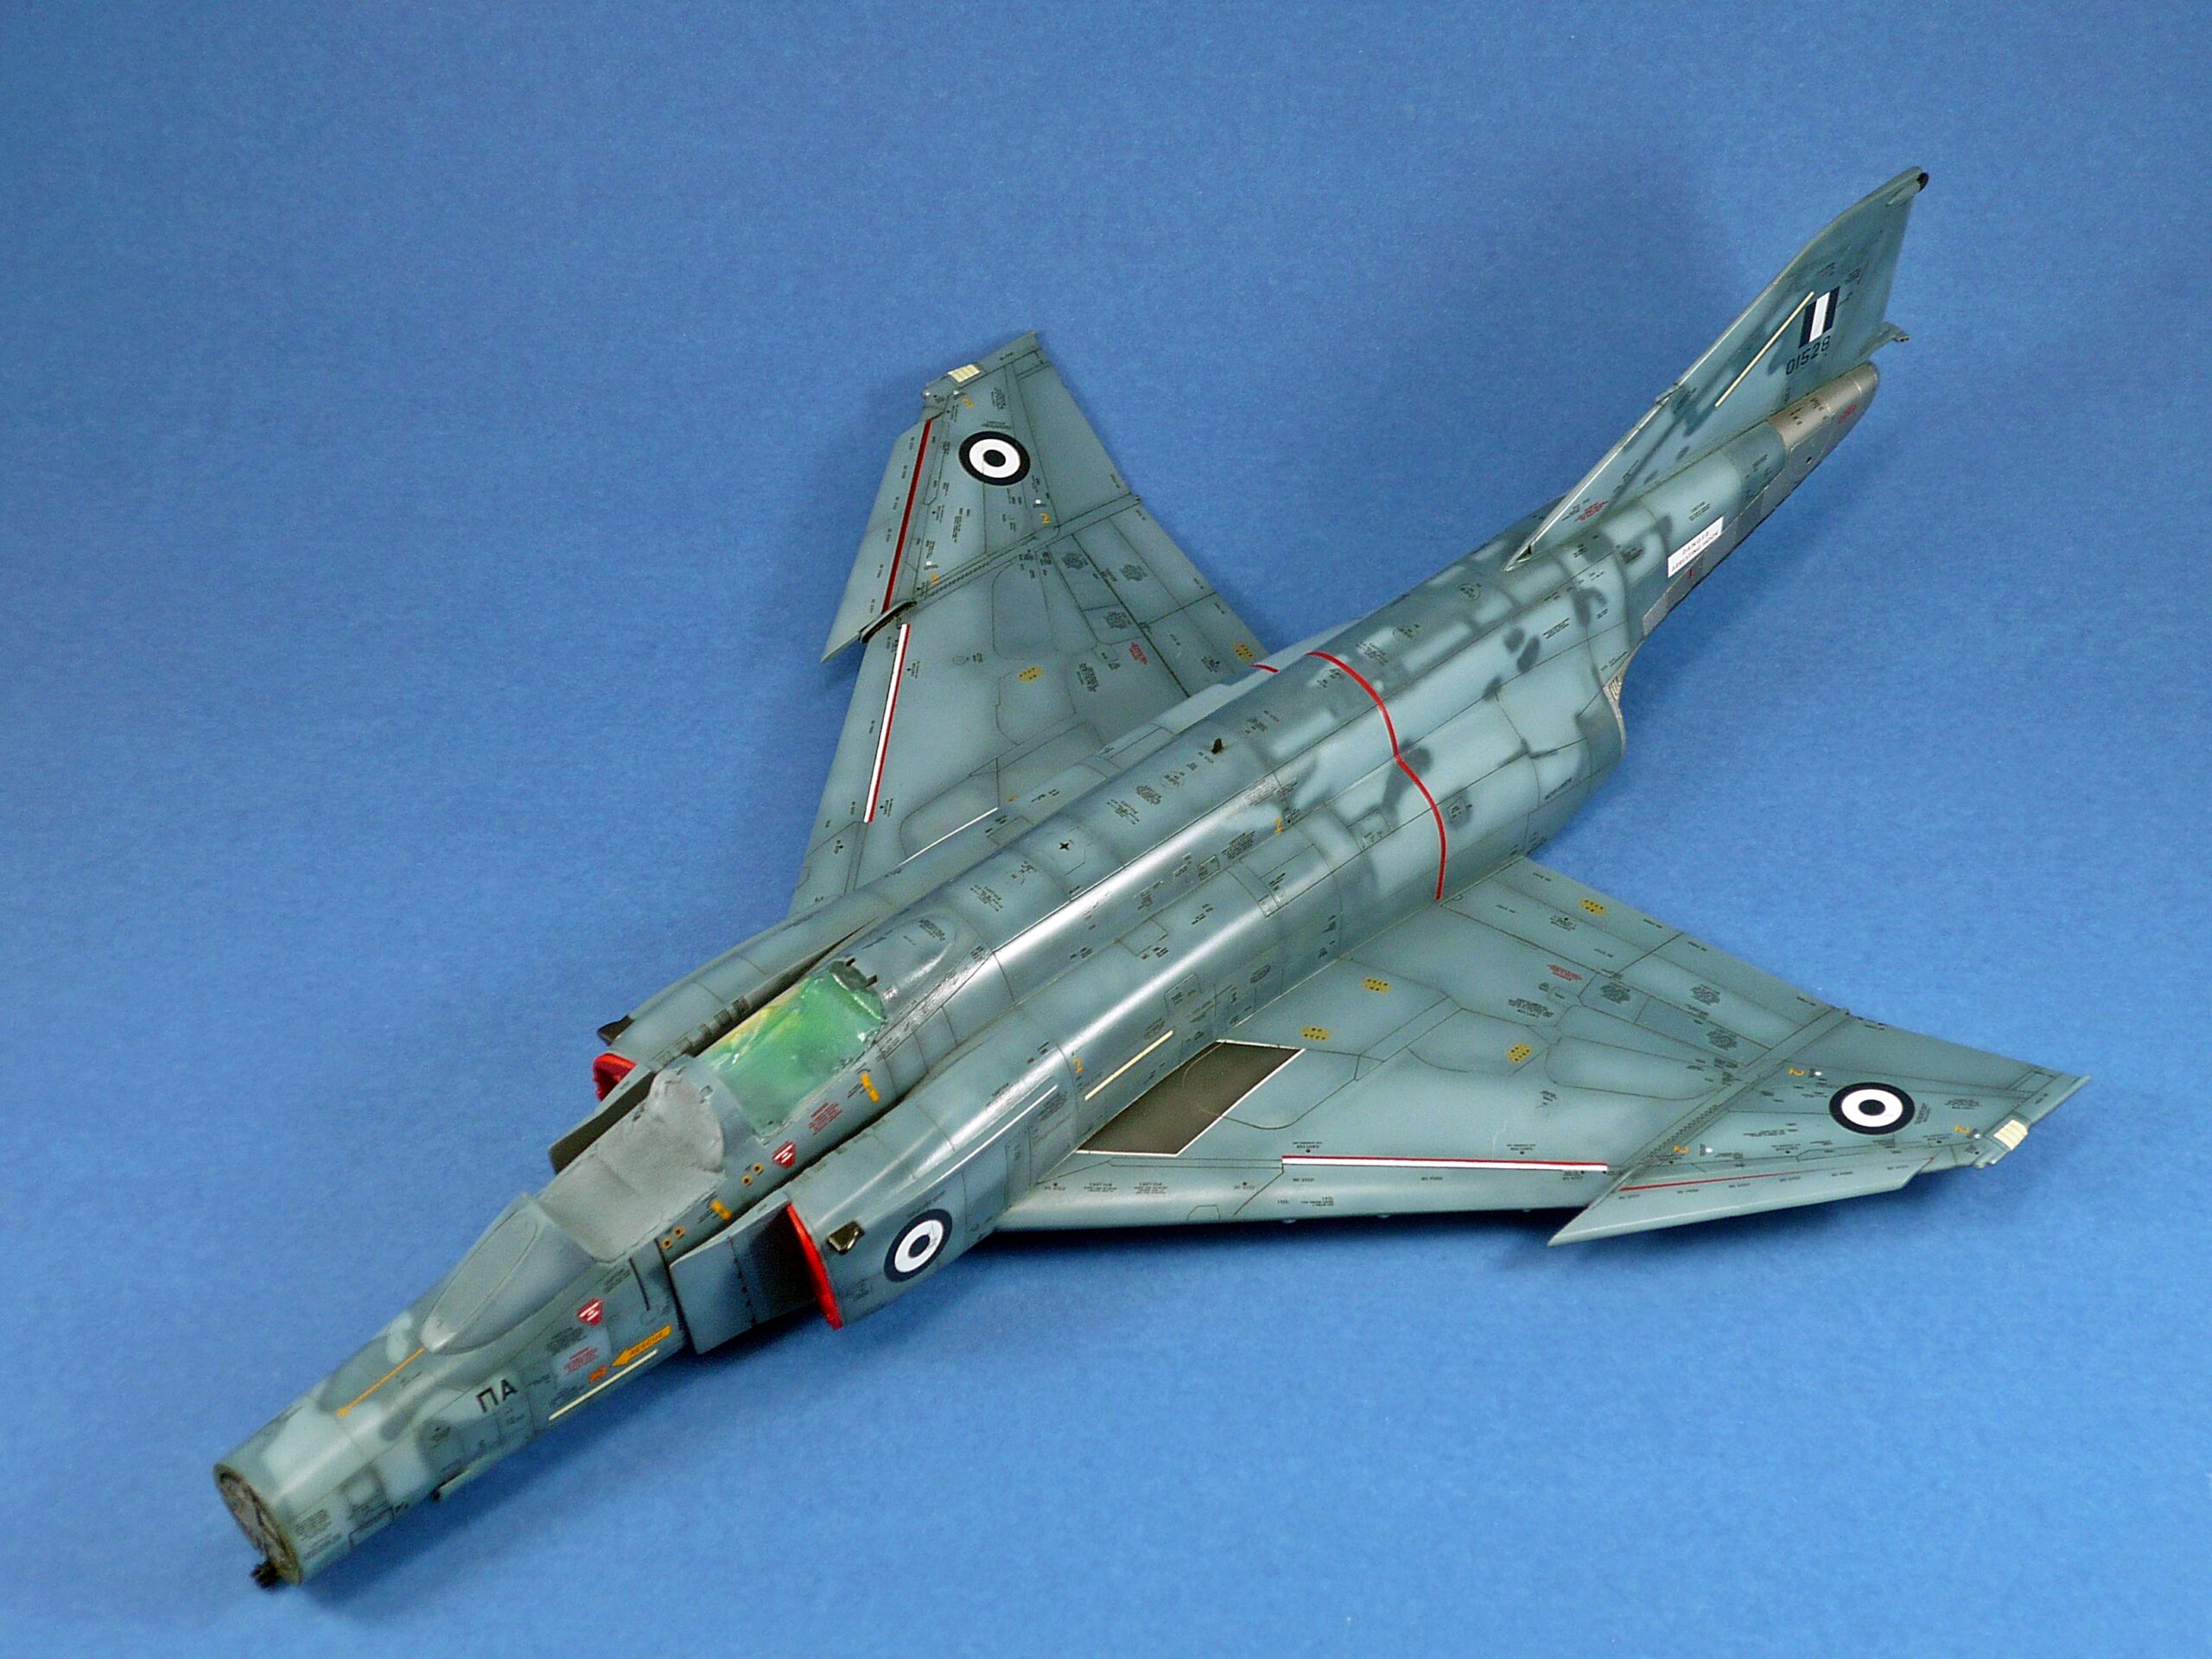
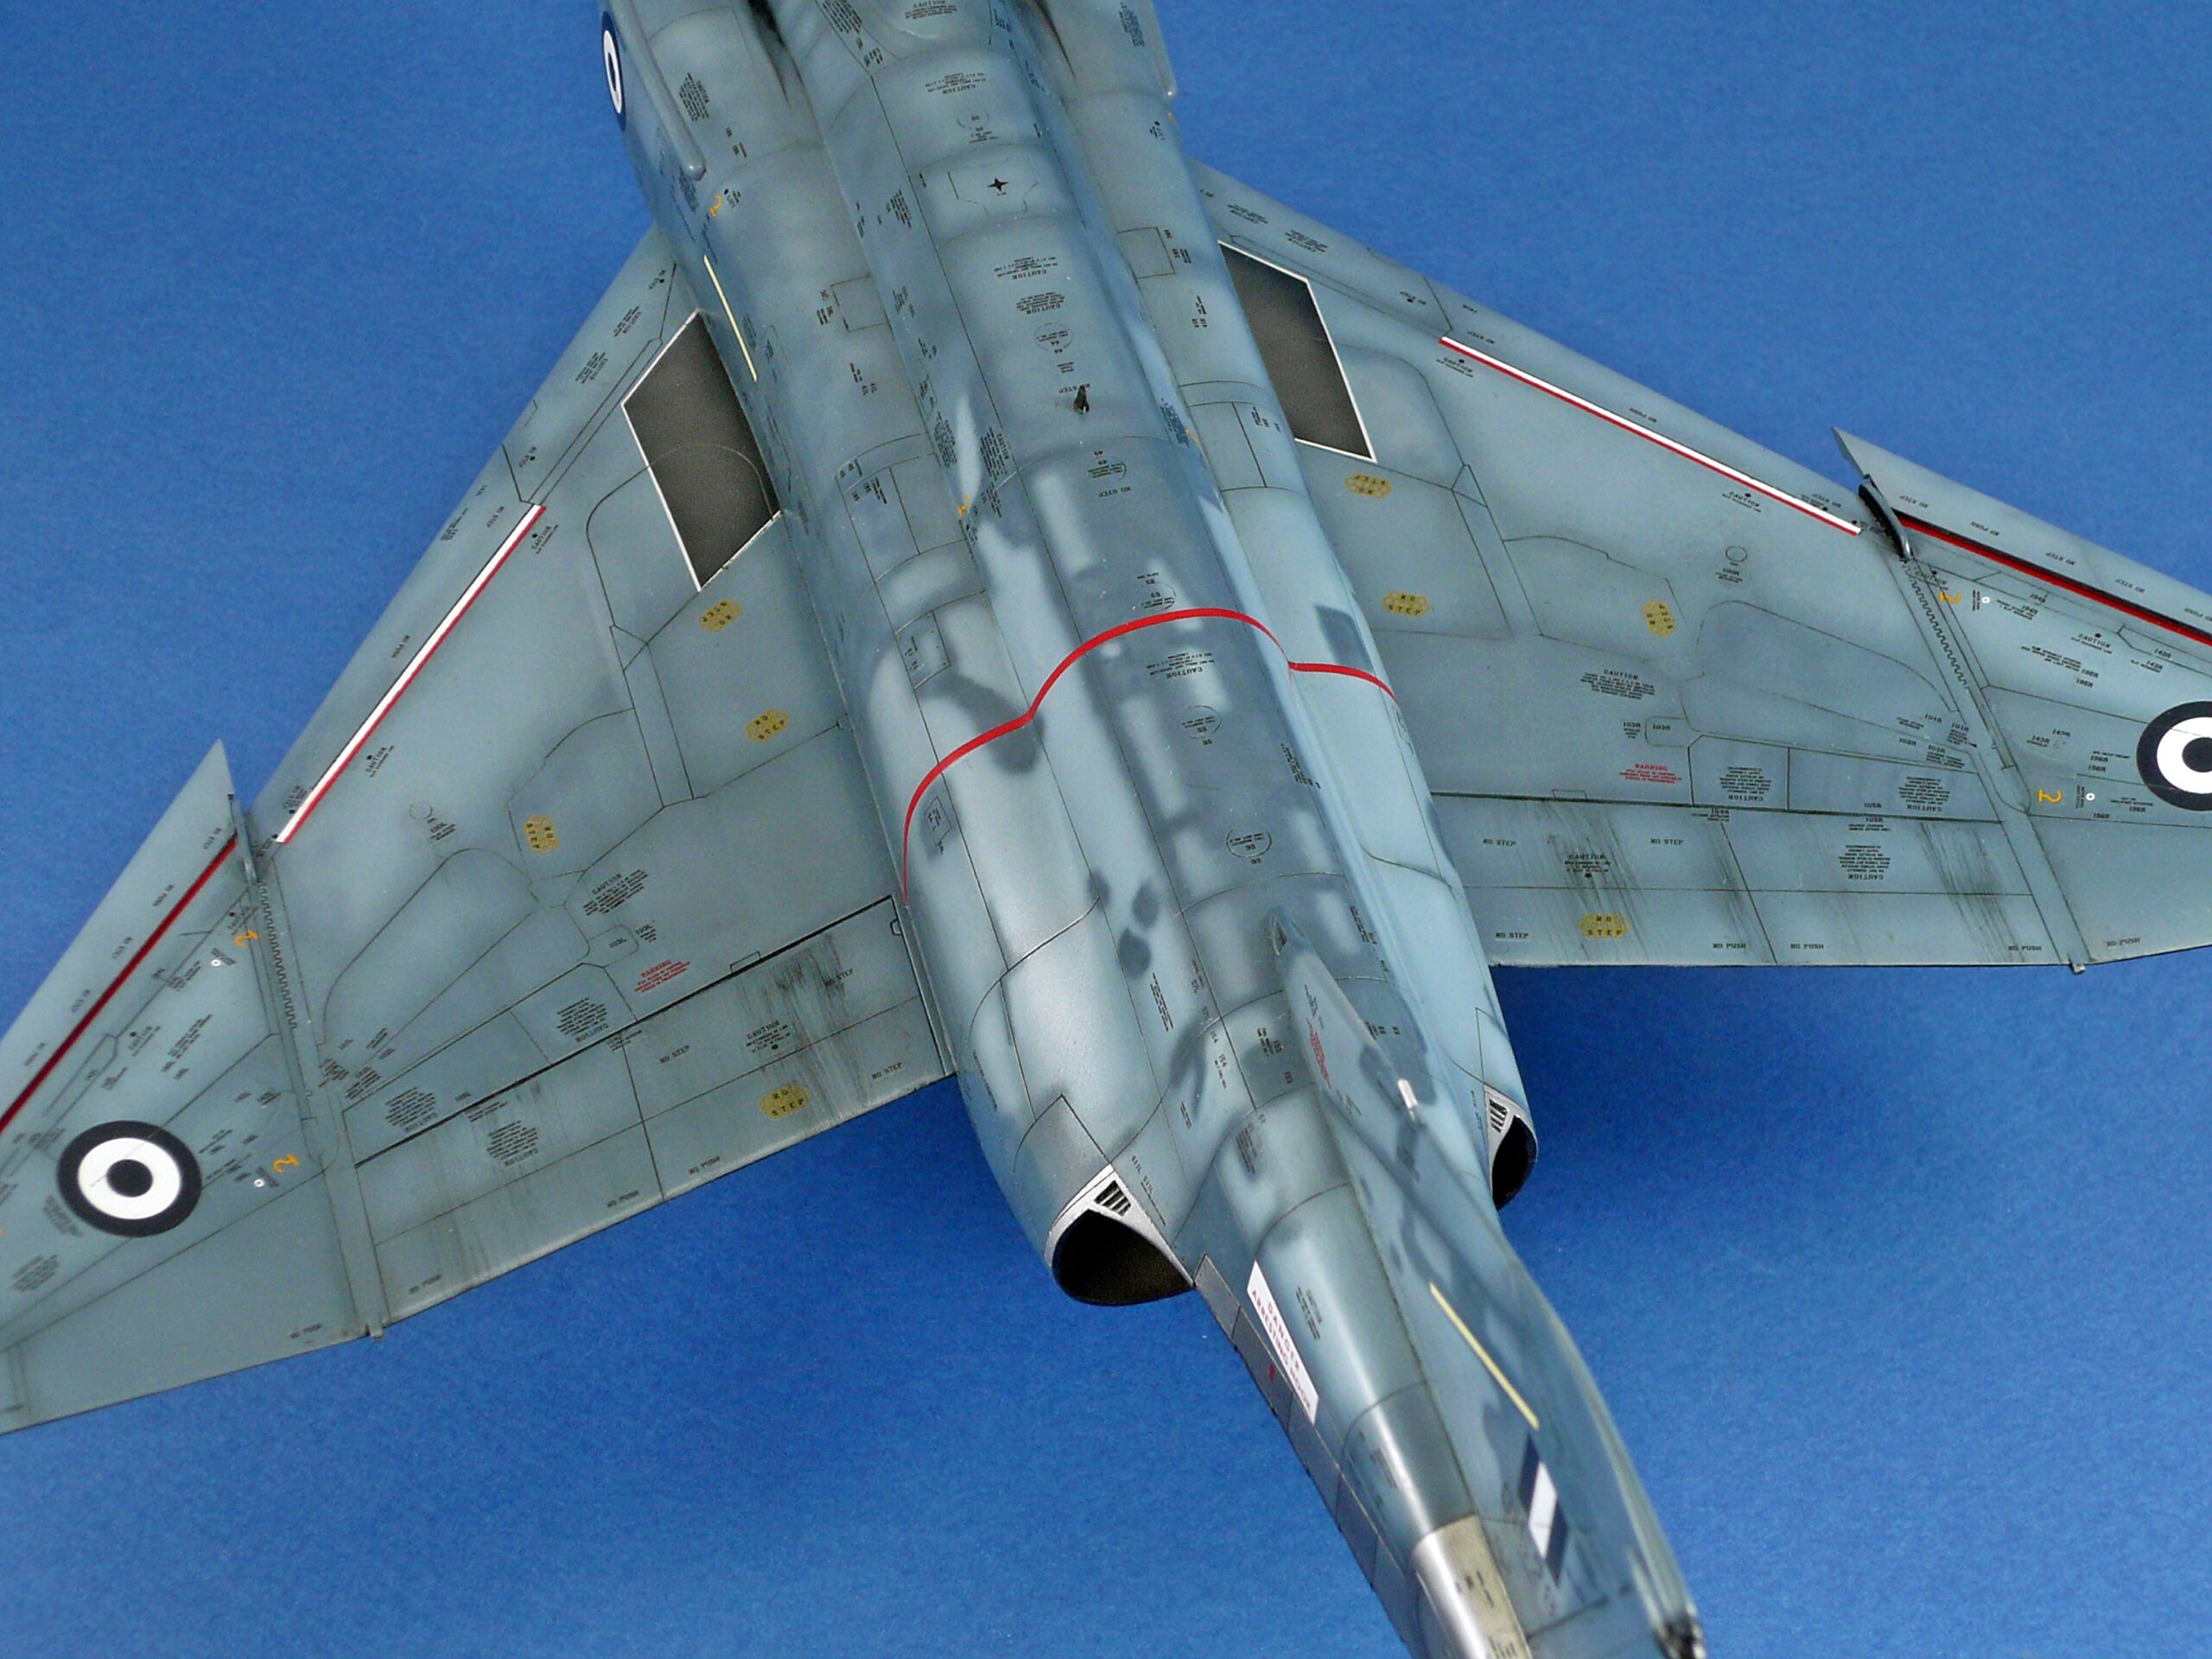
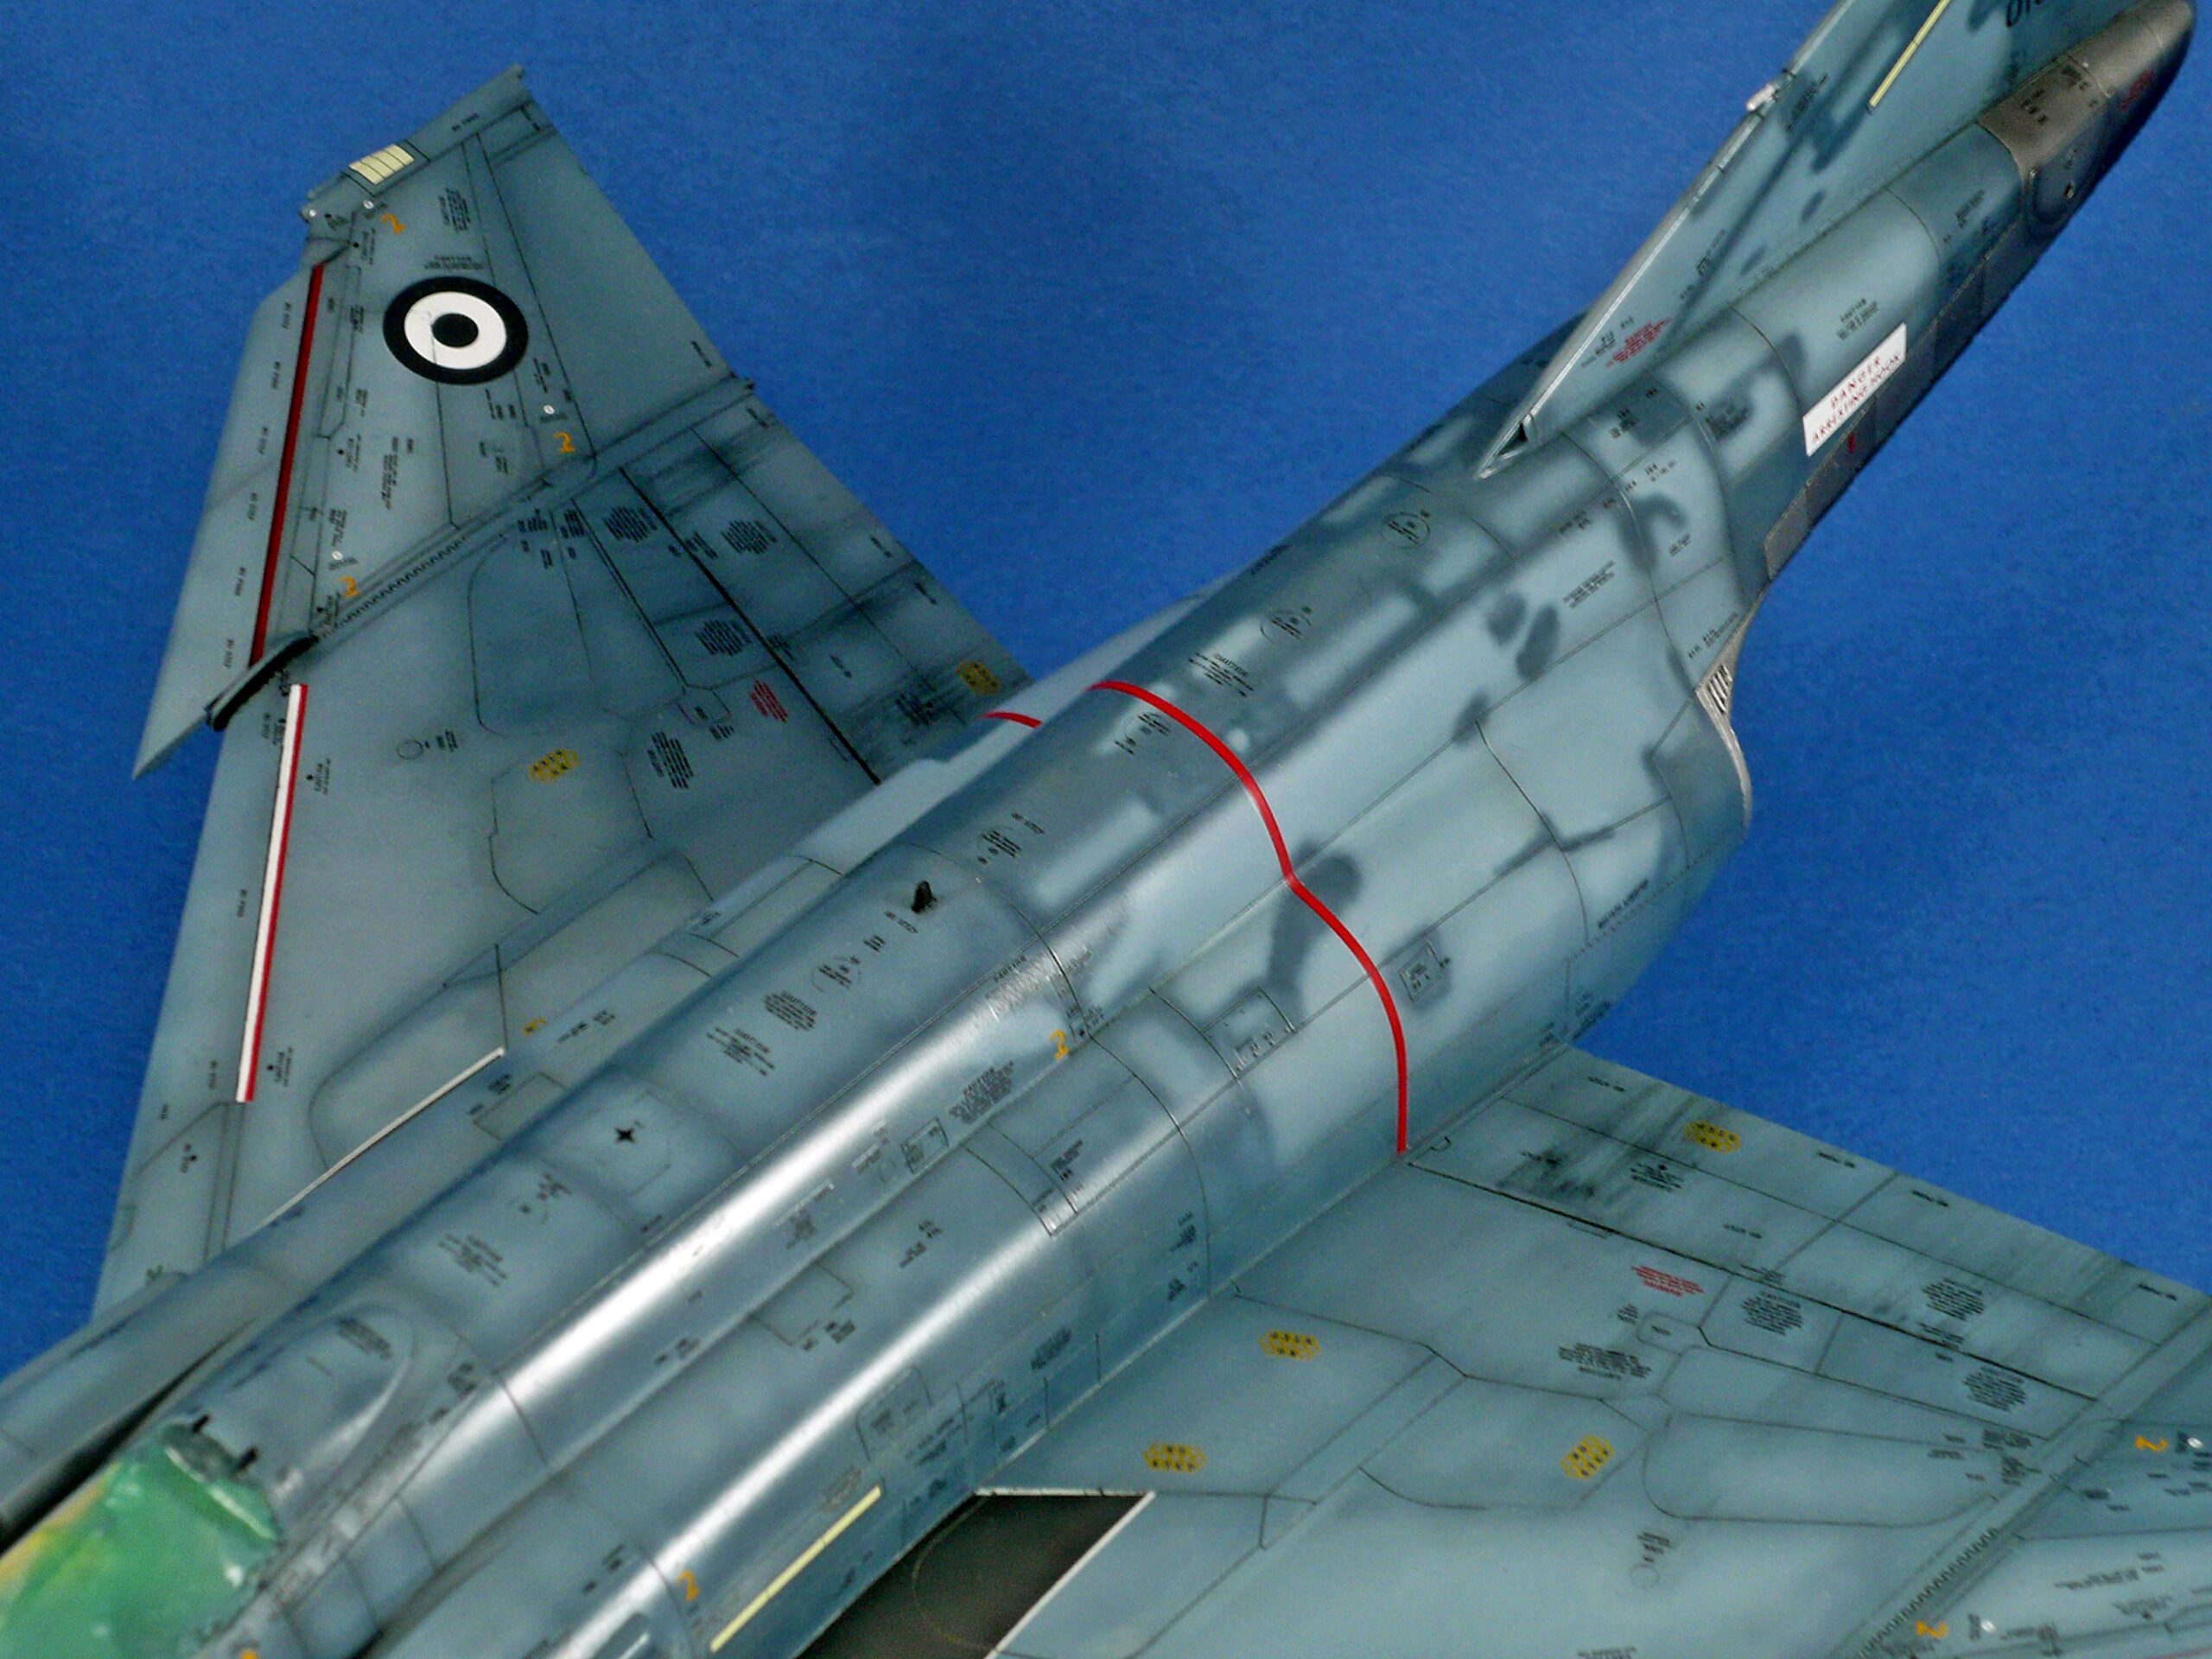
The principal camouflage colour was AMMO ANA 608 Intermediate Blue, identified in the original build as FS 35164. It was applied in controlled coats to establish the basic Aegean Blue appearance.
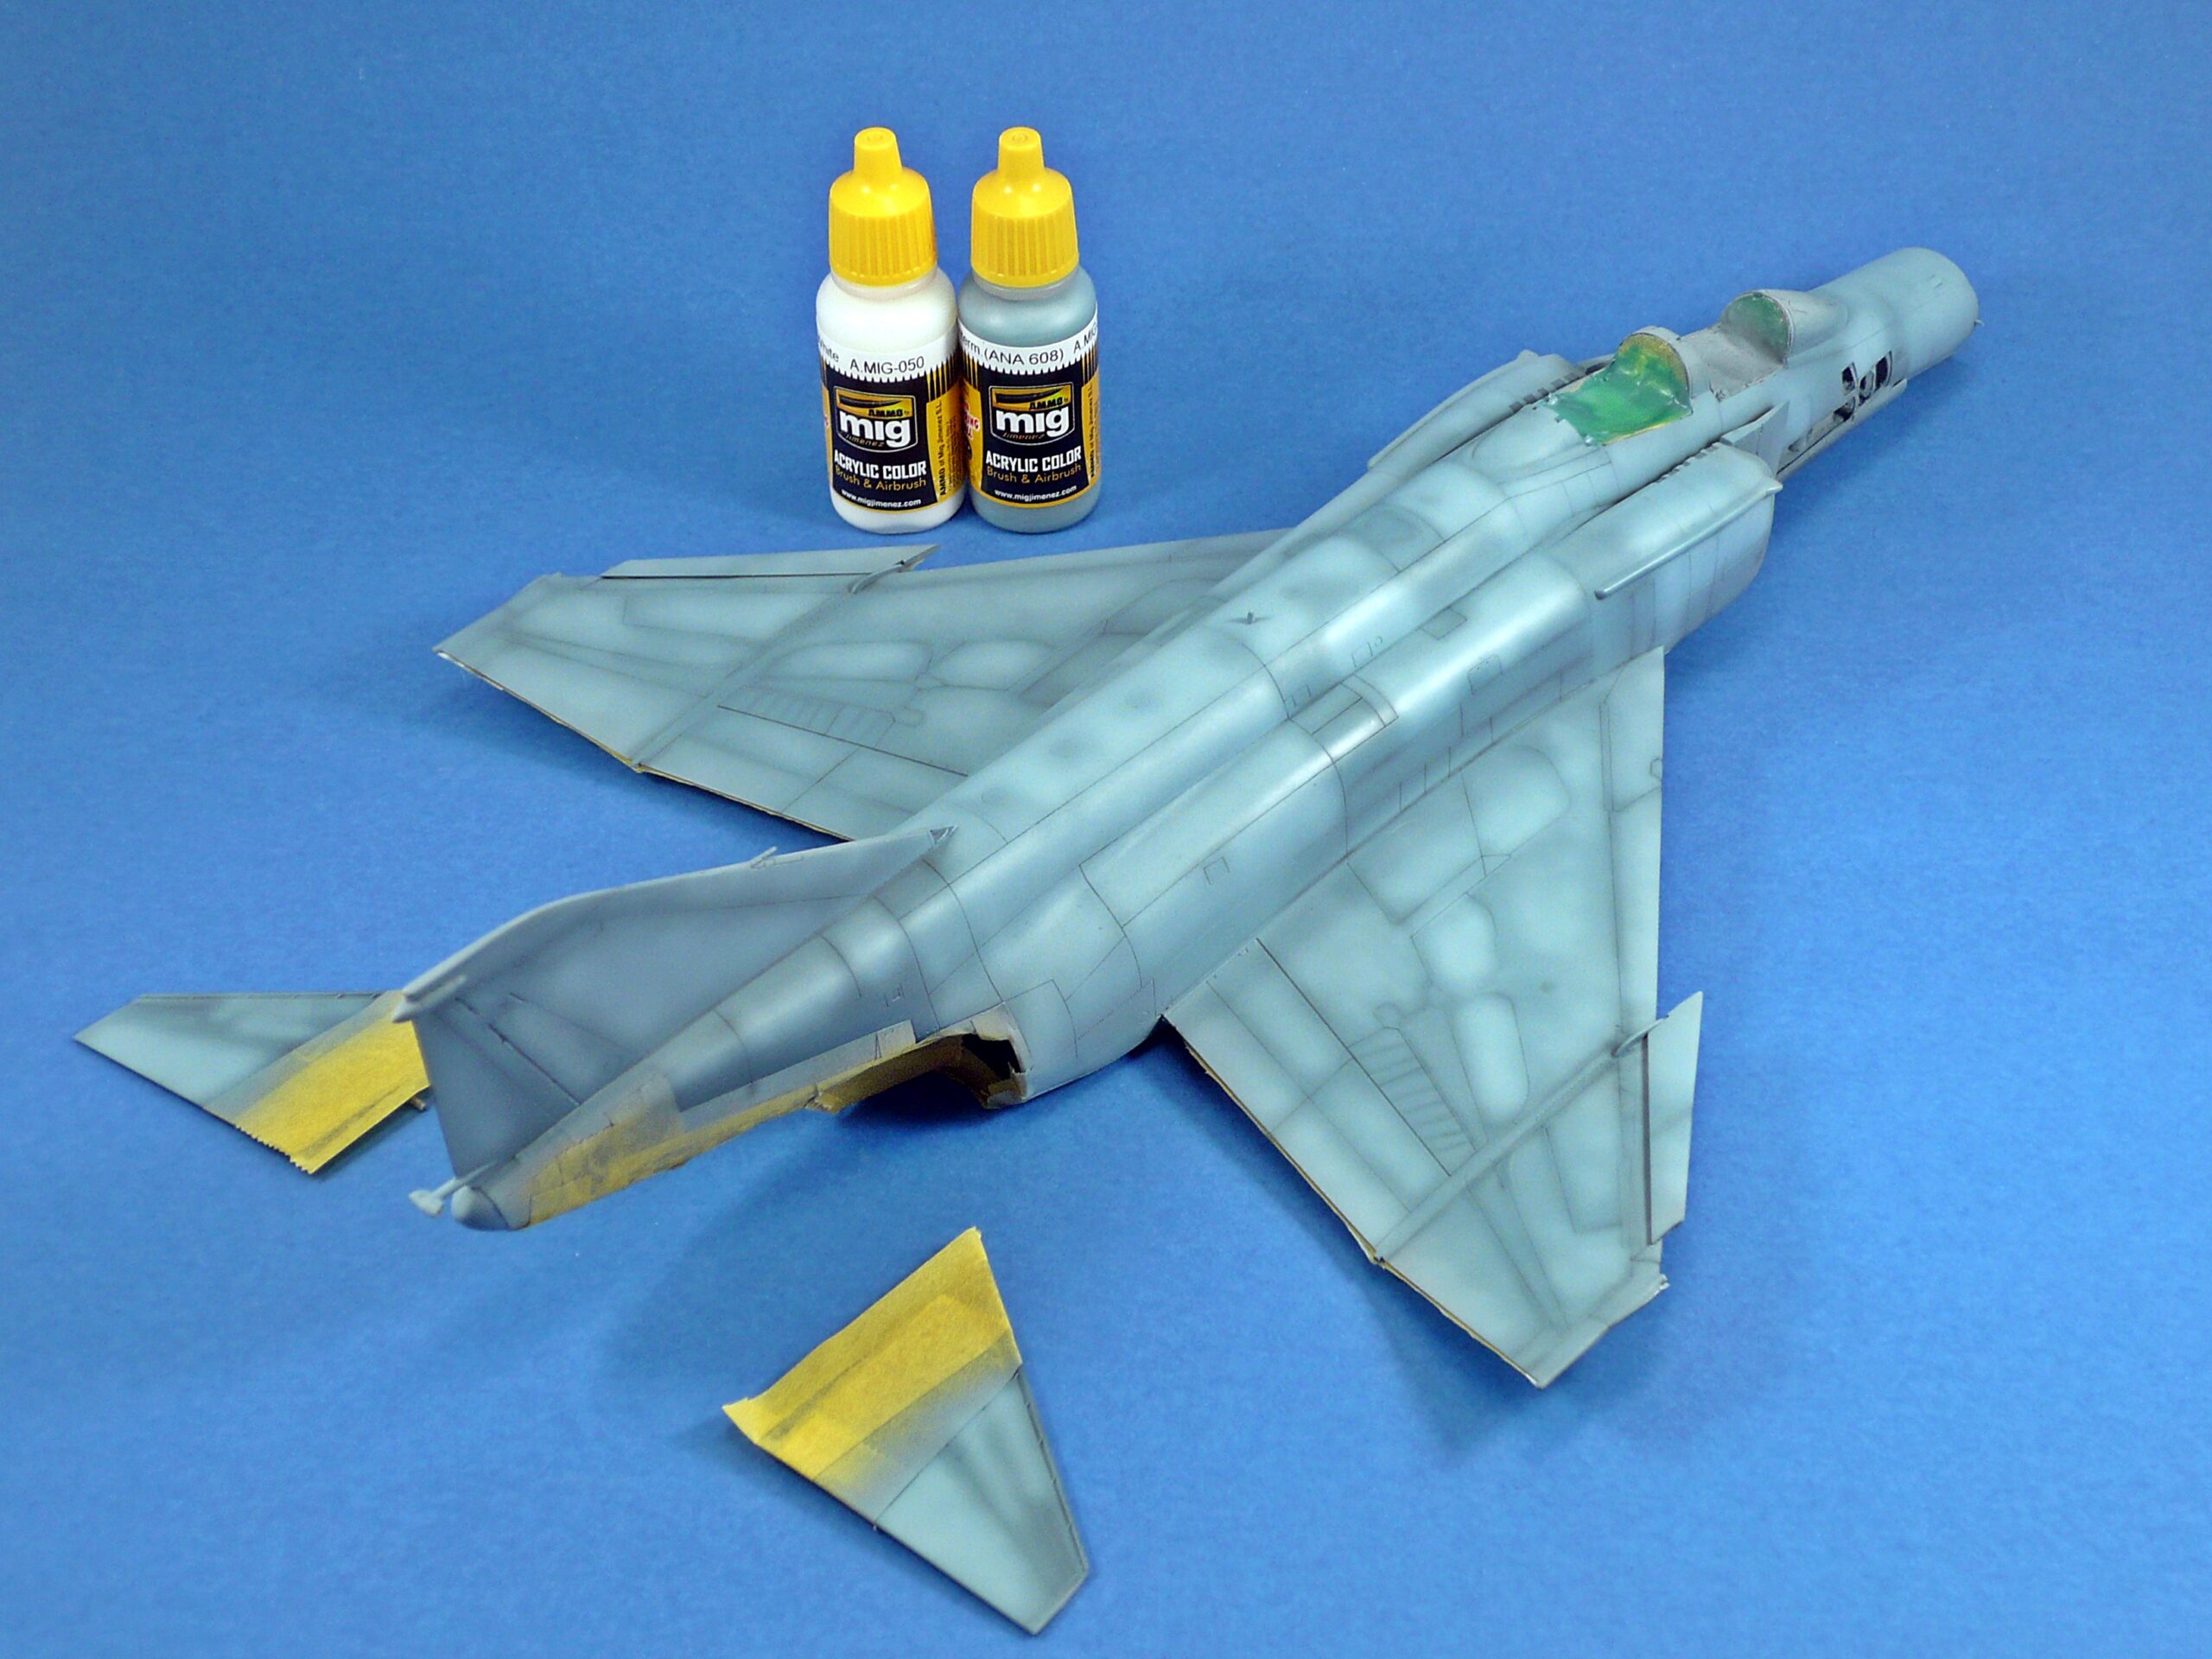
Once the base colour was in place, selected areas were lightened with mixtures of the same blue and AMMO Flat White (AMMO 050). The lightened paint was applied selectively rather than uniformly, producing variation across individual panels and larger sections of the airframe.
Reference photographs of the real aircraft indicated noticeably faded areas. To reproduce this appearance, the base colour was further adjusted with additional Flat White and a small quantity of Vallejo Pastel Blue (70.901).
The mixture was applied sparingly, allowing the underlying colour to remain visible. This approach helped create the faded appearance sought for the model without making the camouflage look artificially patchy.
The result was a more nuanced blue finish, with differences in tone that helped reproduce the character of the reference aircraft.
Enhancing panel definition and surface depth
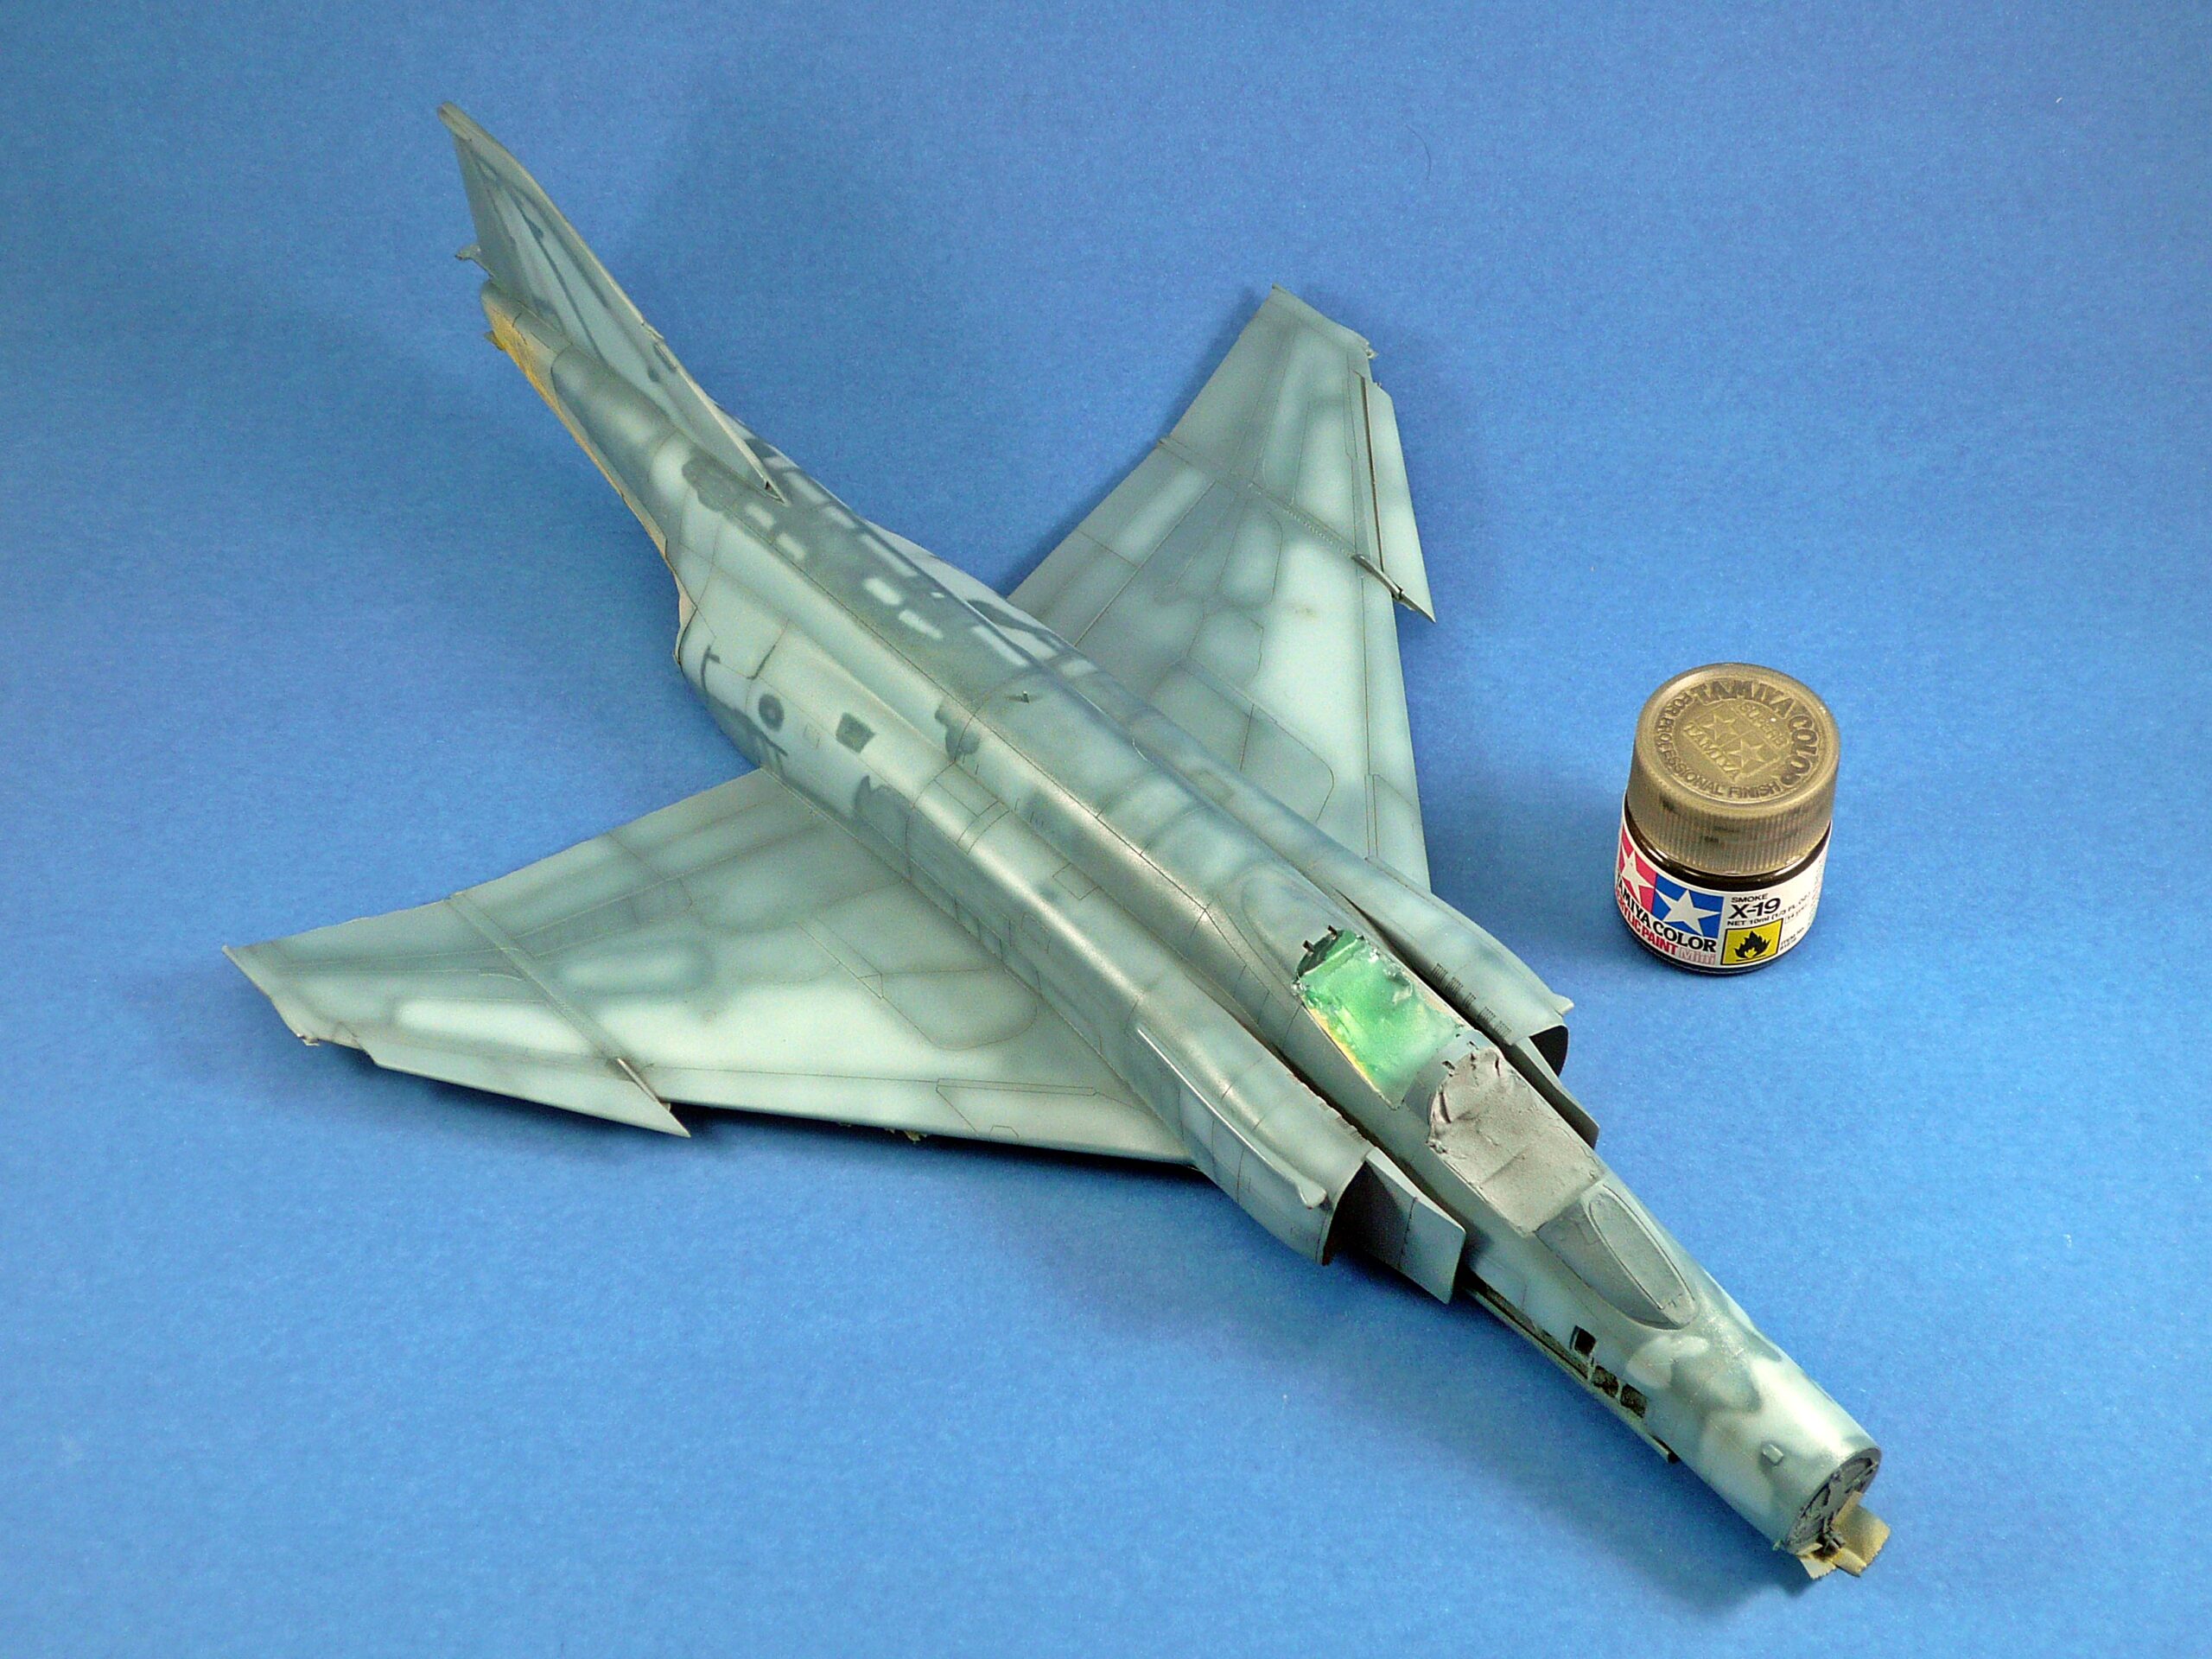
After the camouflage had been established, Tamiya X-19 Smoke was used to accentuate selected panel lines and individual panels.
This transparent effect added depth to the surface and helped distinguish areas that might otherwise appear flat under a single camouflage colour. The application was selective, with the aim of complementing the previous preshading and colour modulation rather than overpowering them.
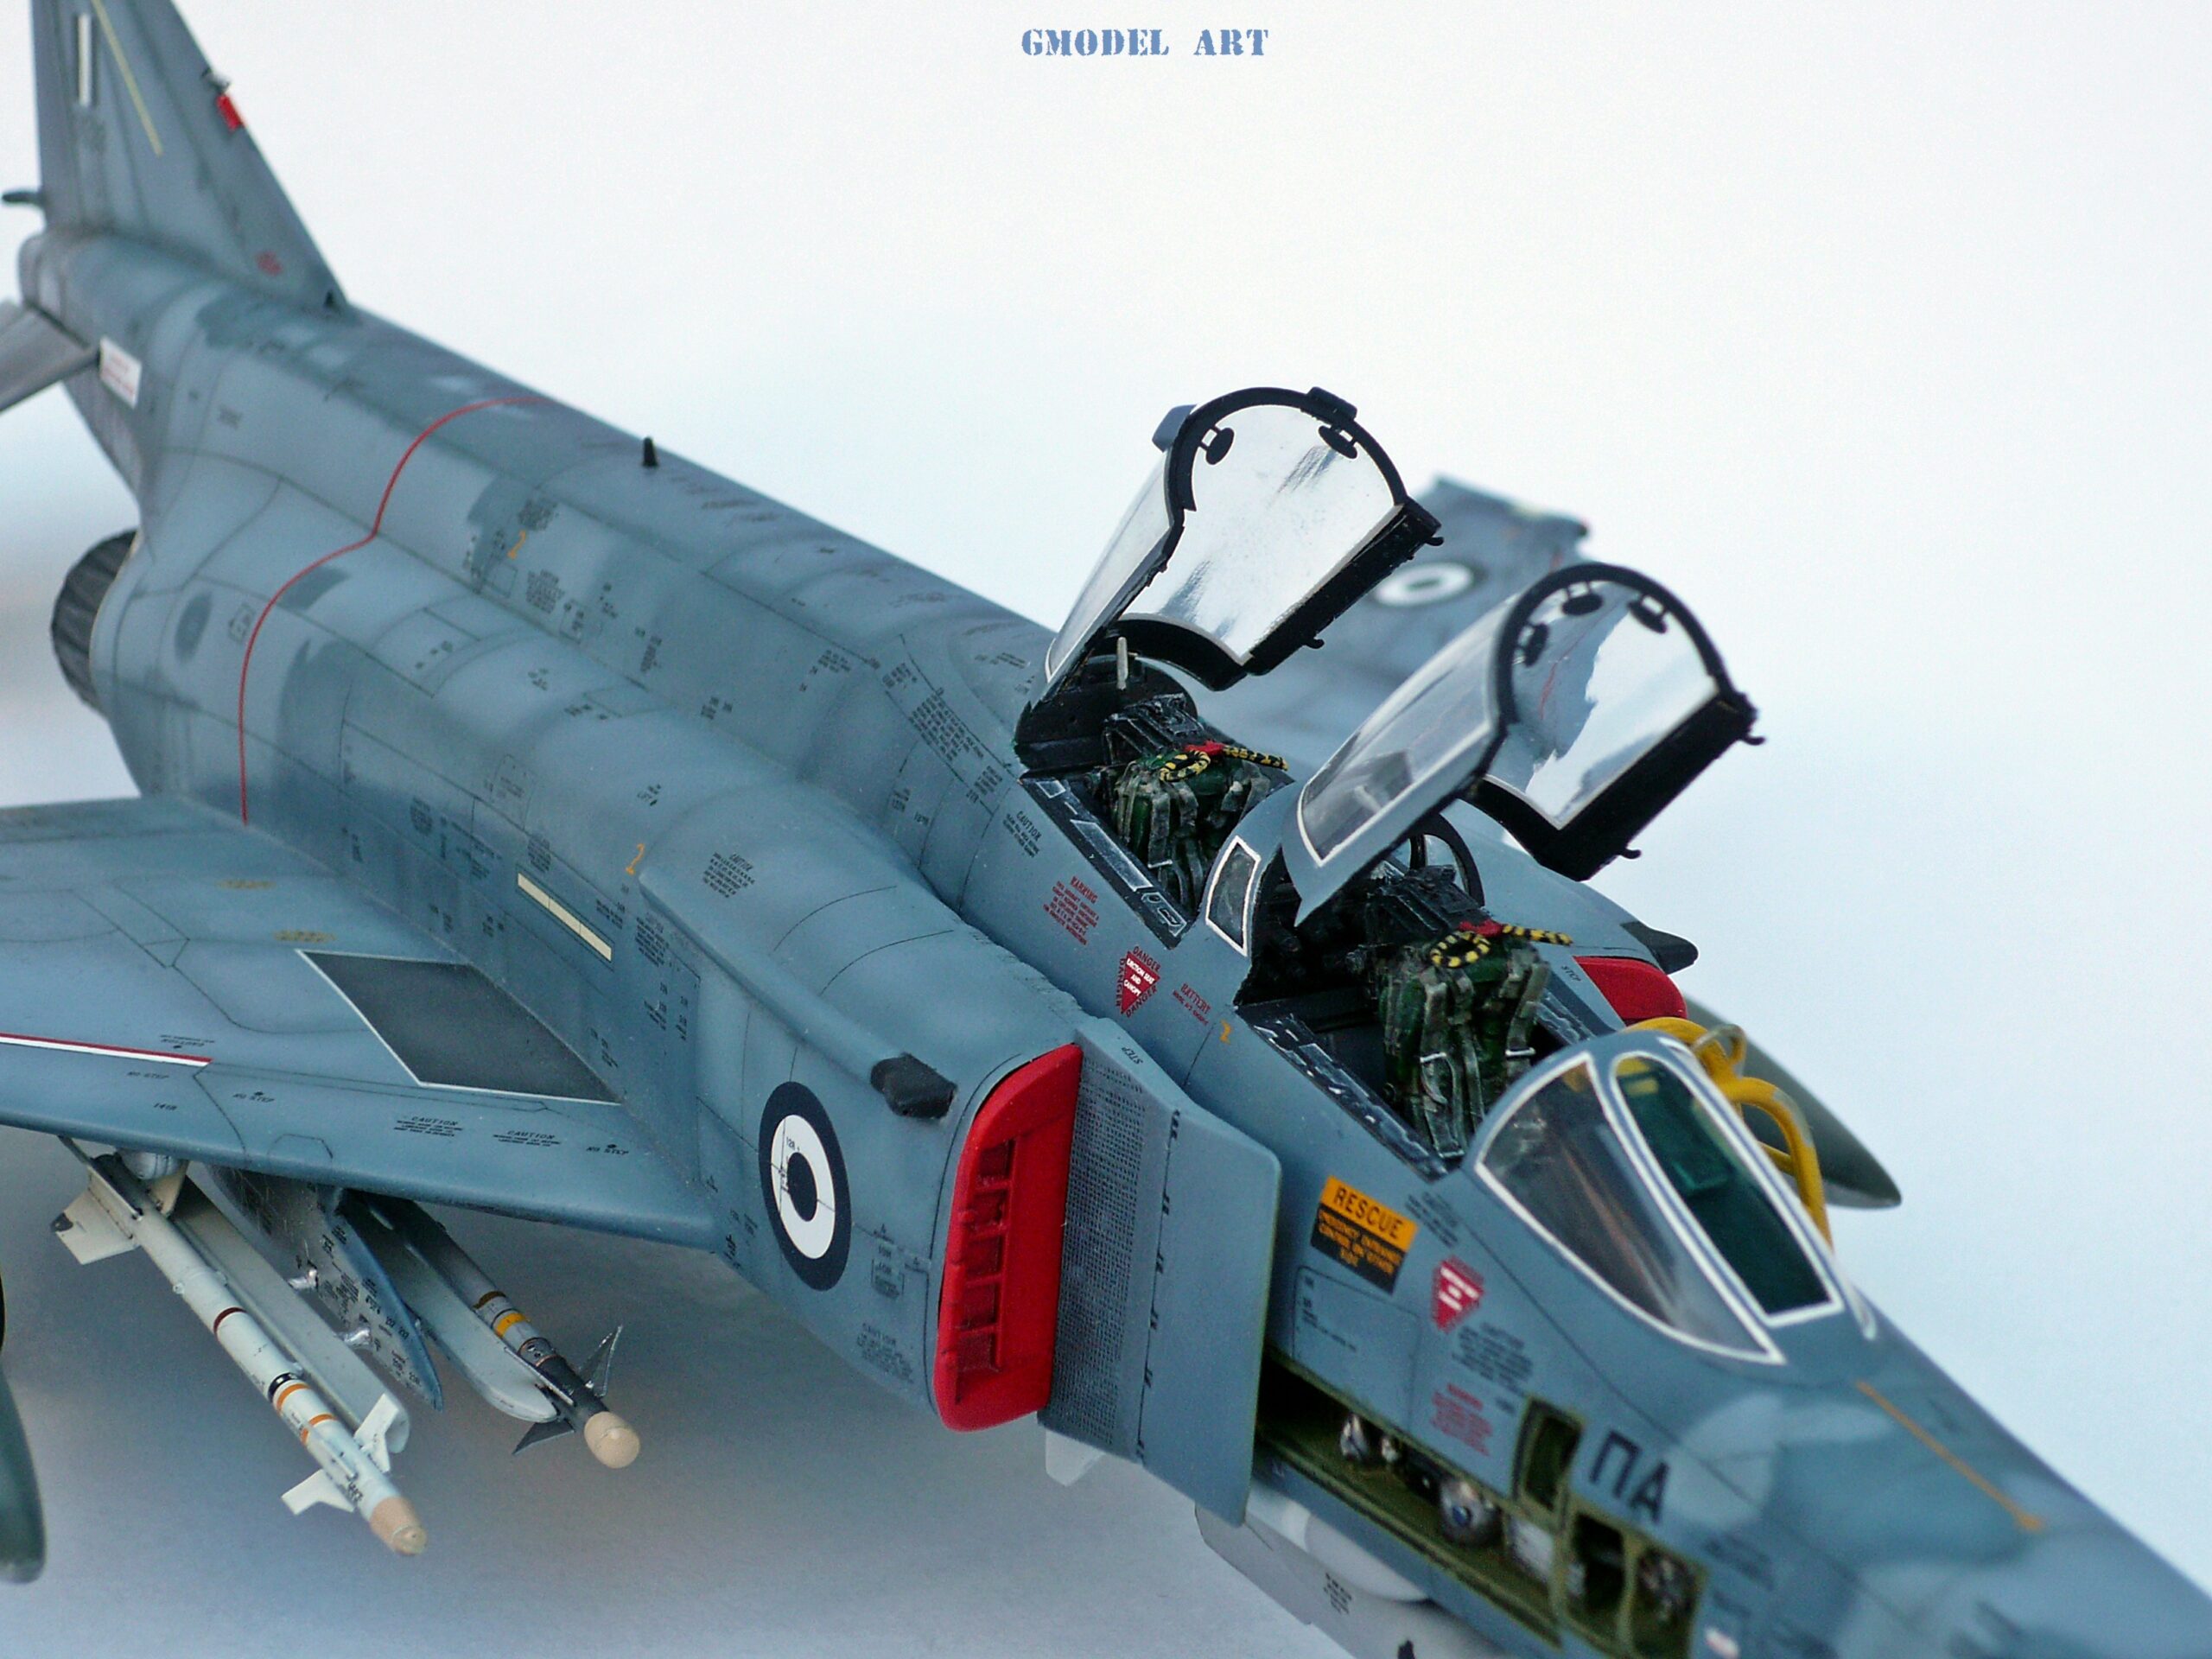
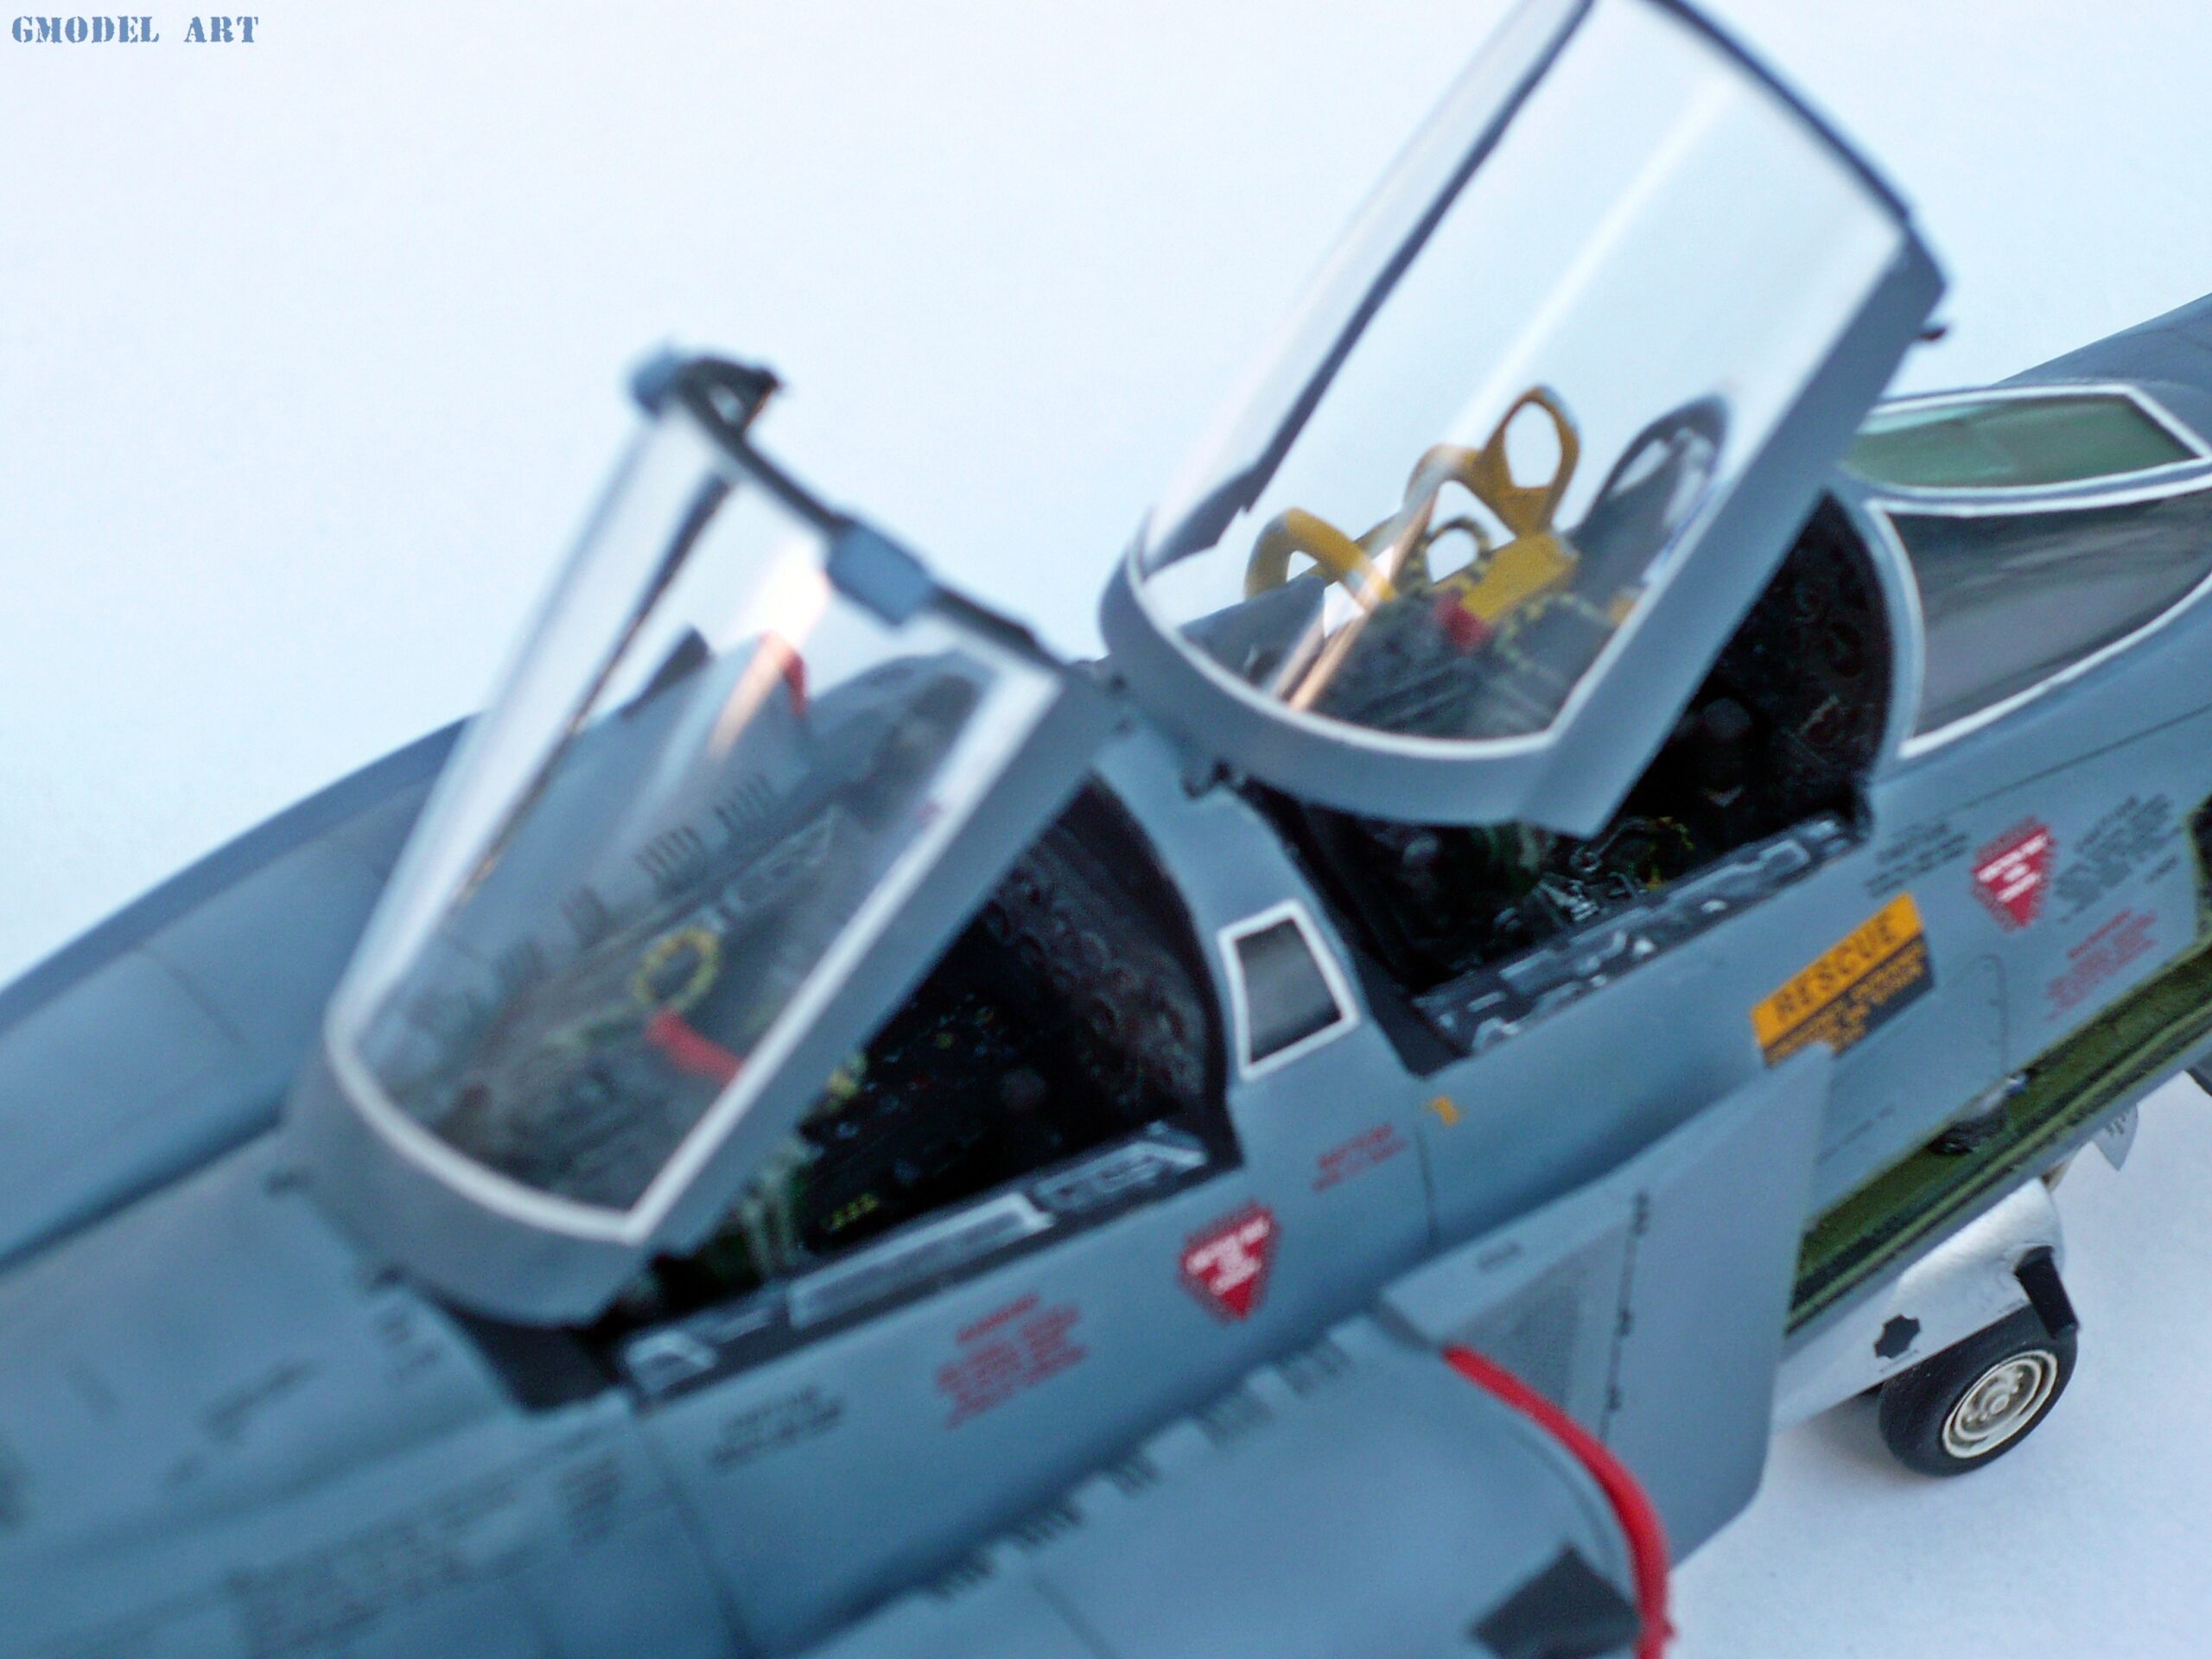
Special attention was also given to the black parallel areas with white outer borders around the fuselage and wing-root region, as well as the inner and outer slat areas. These markings were painted by hand because the Hasegawa kit did not provide decals for them in the build described.
This step required careful masking and painting to achieve clean edges and consistent proportions.
Sealing the paintwork
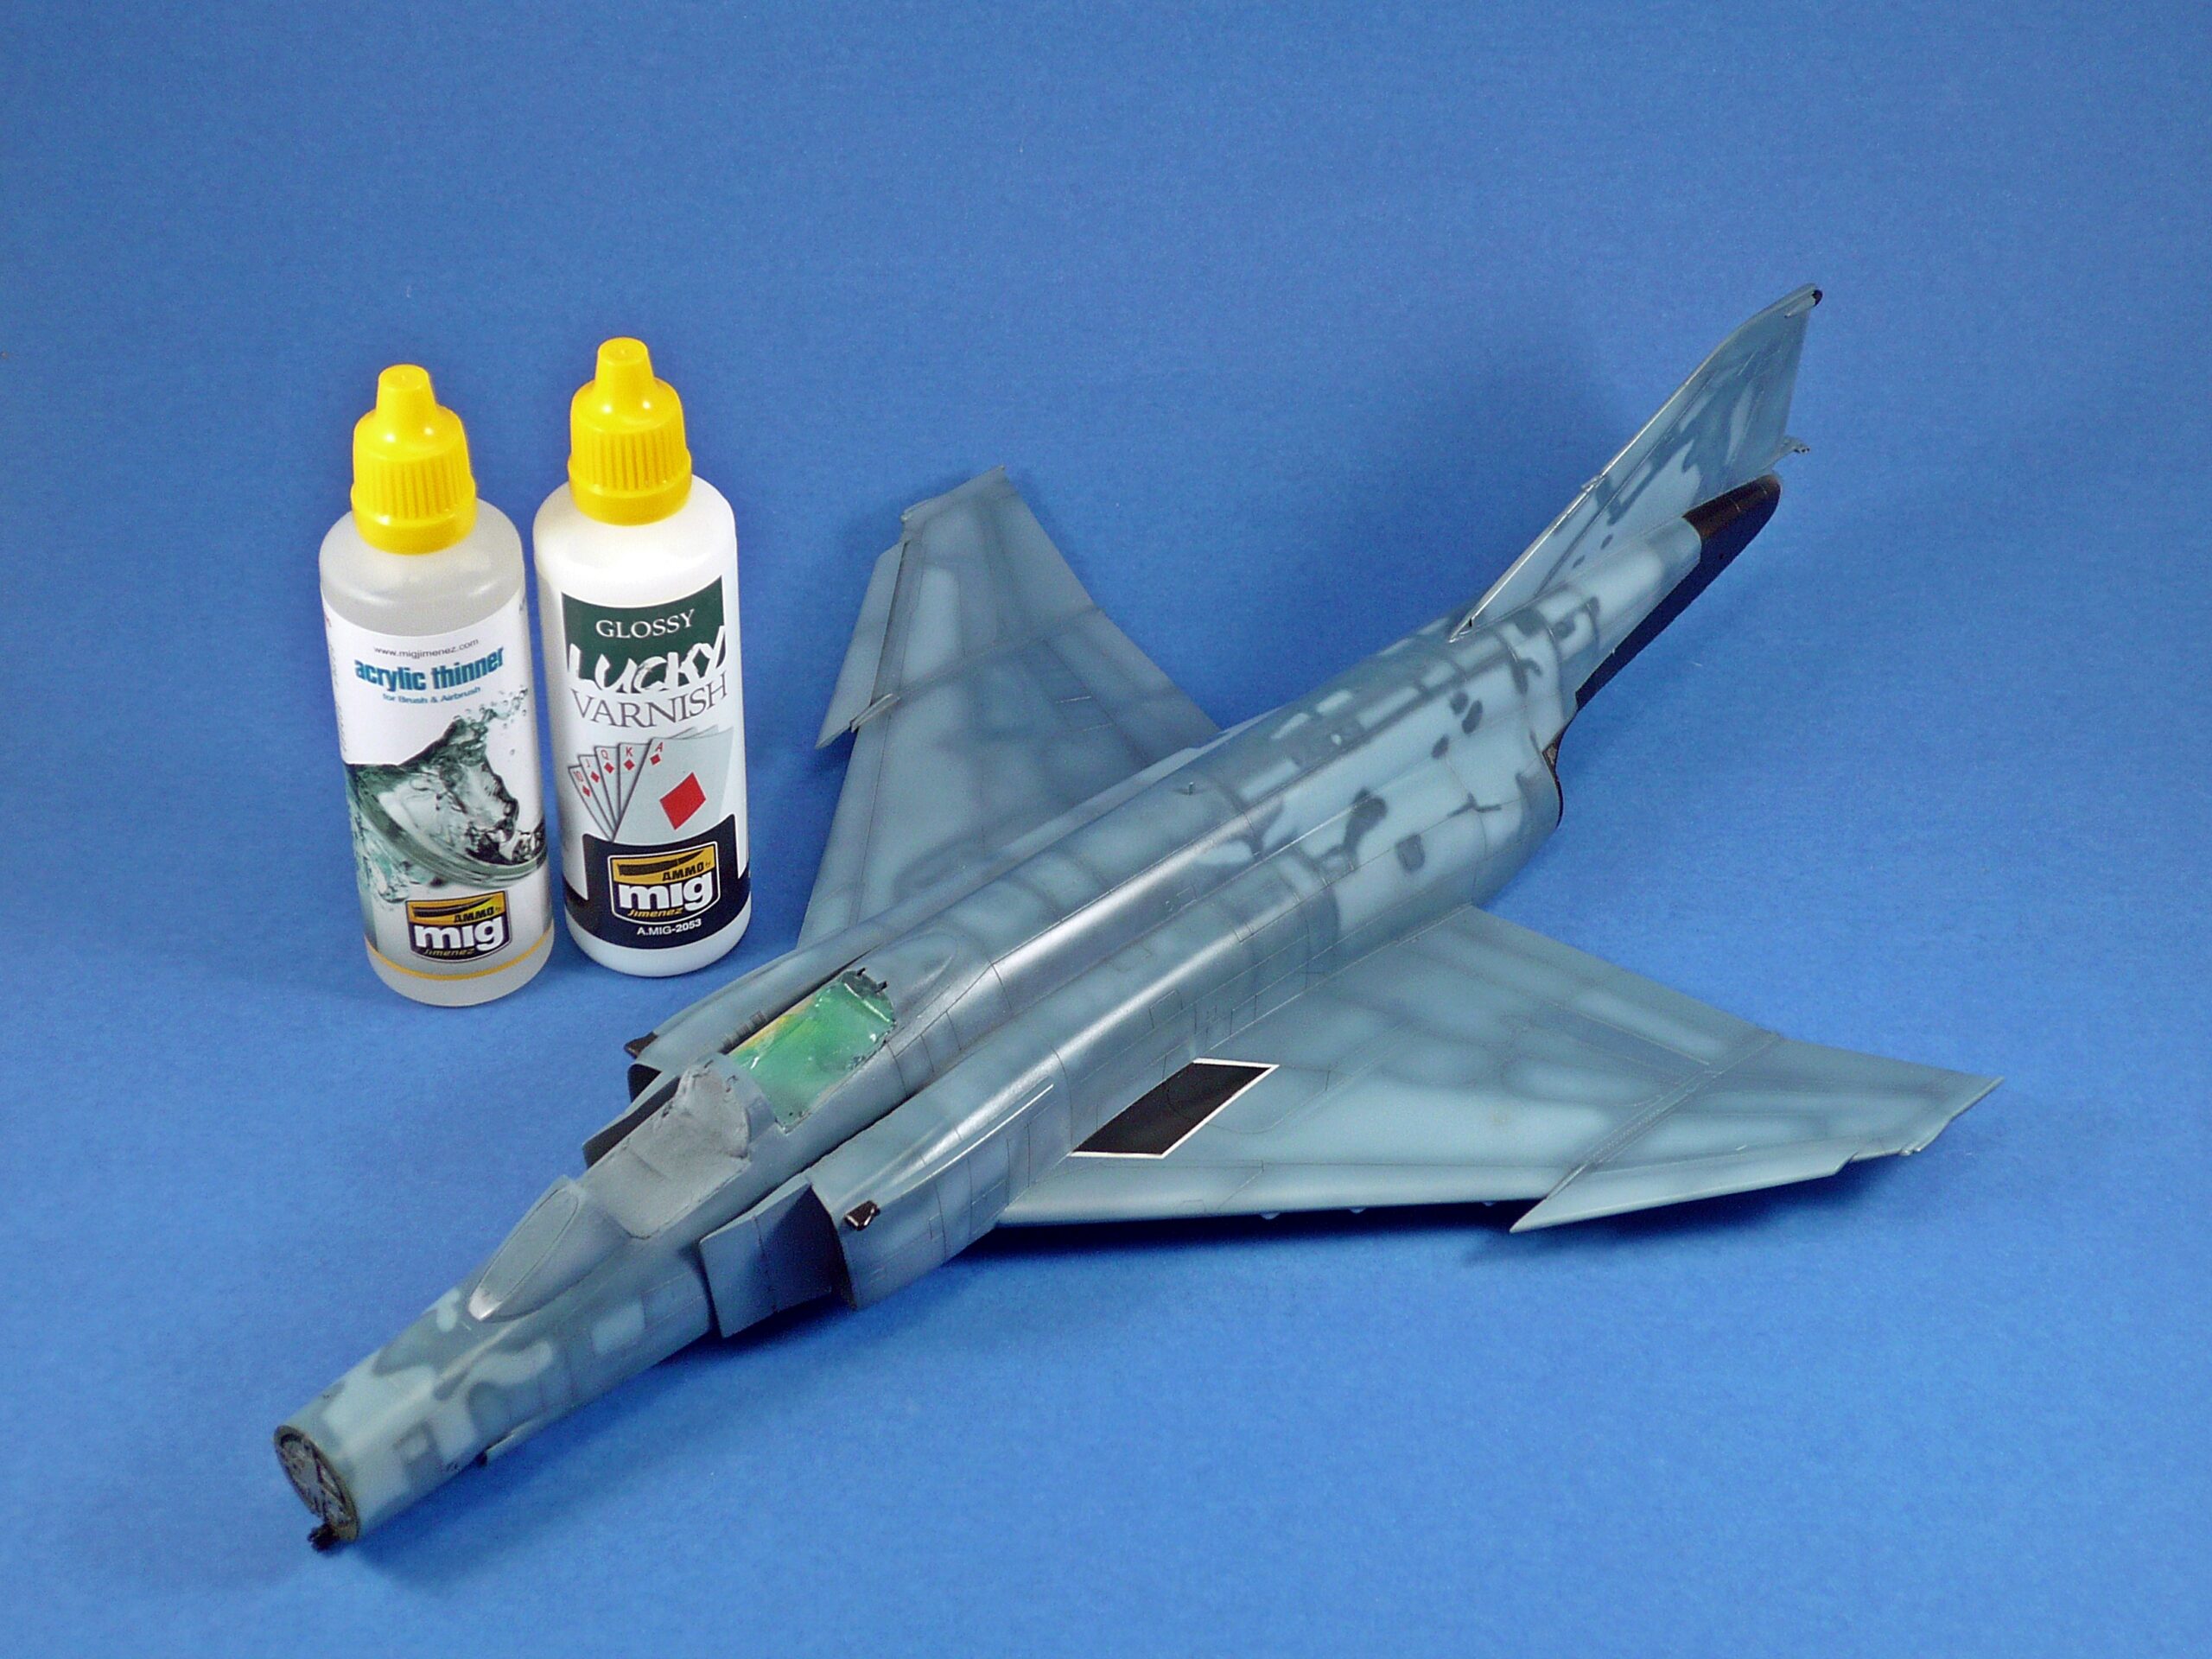
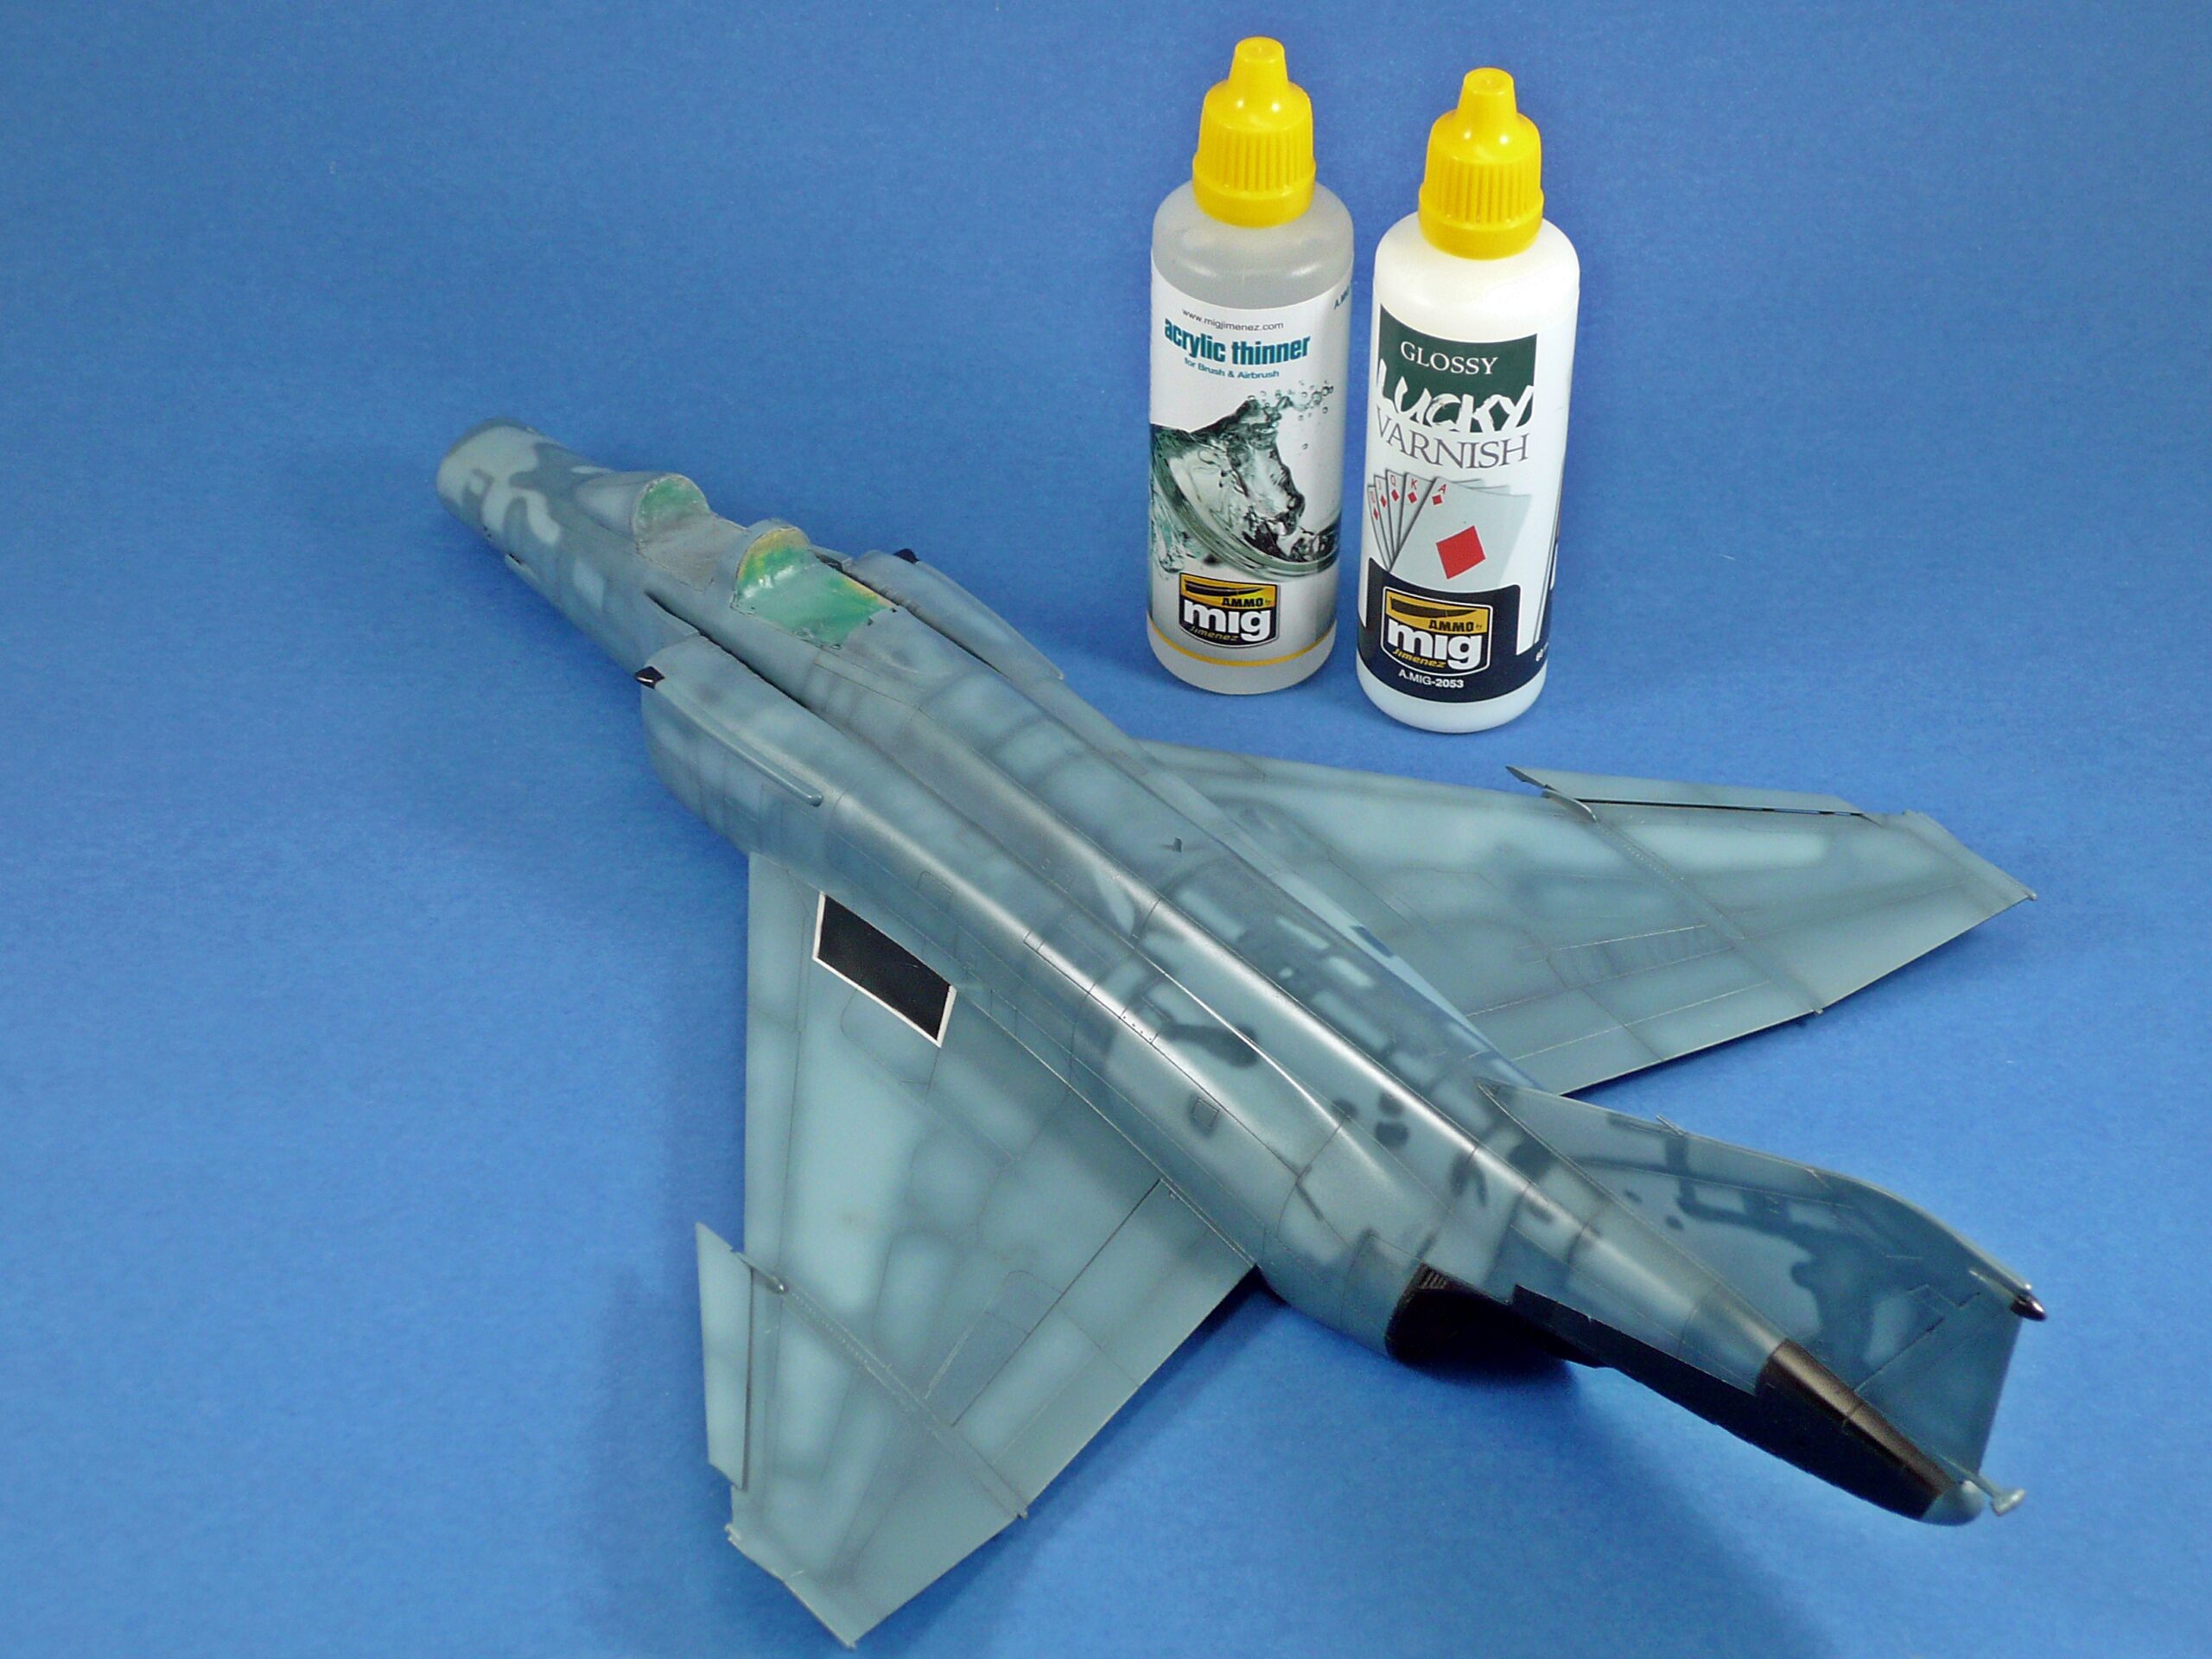
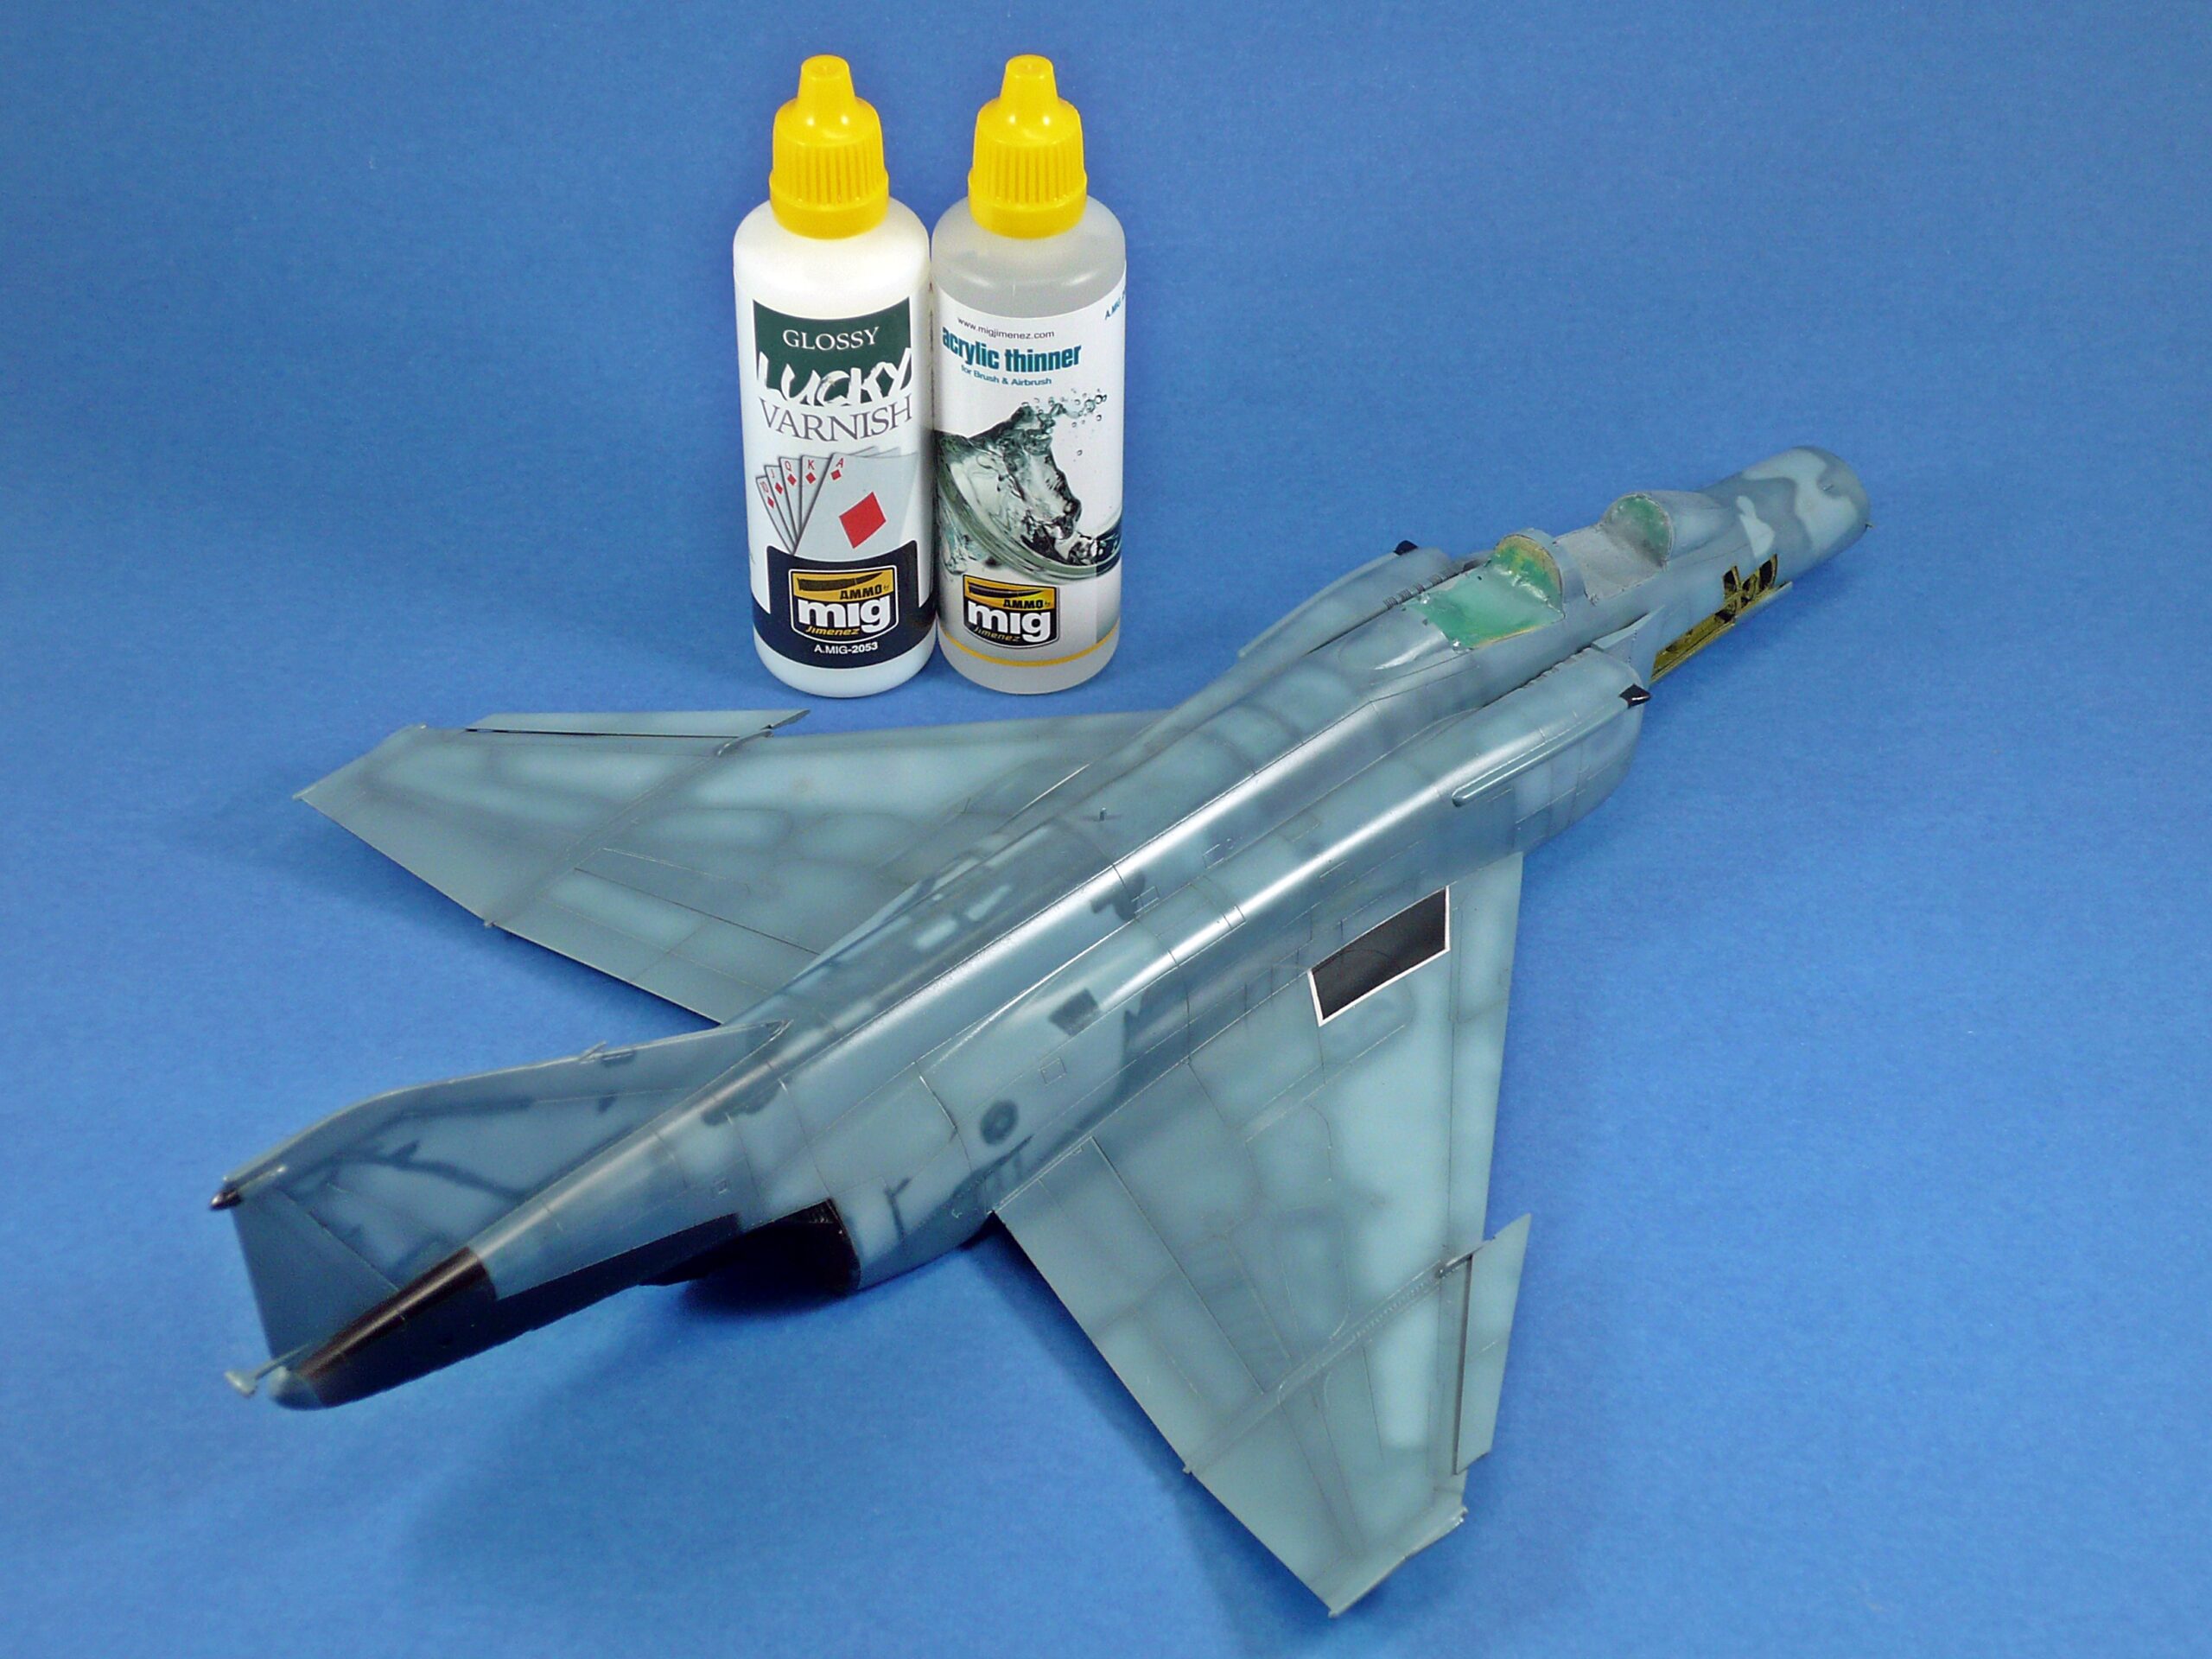
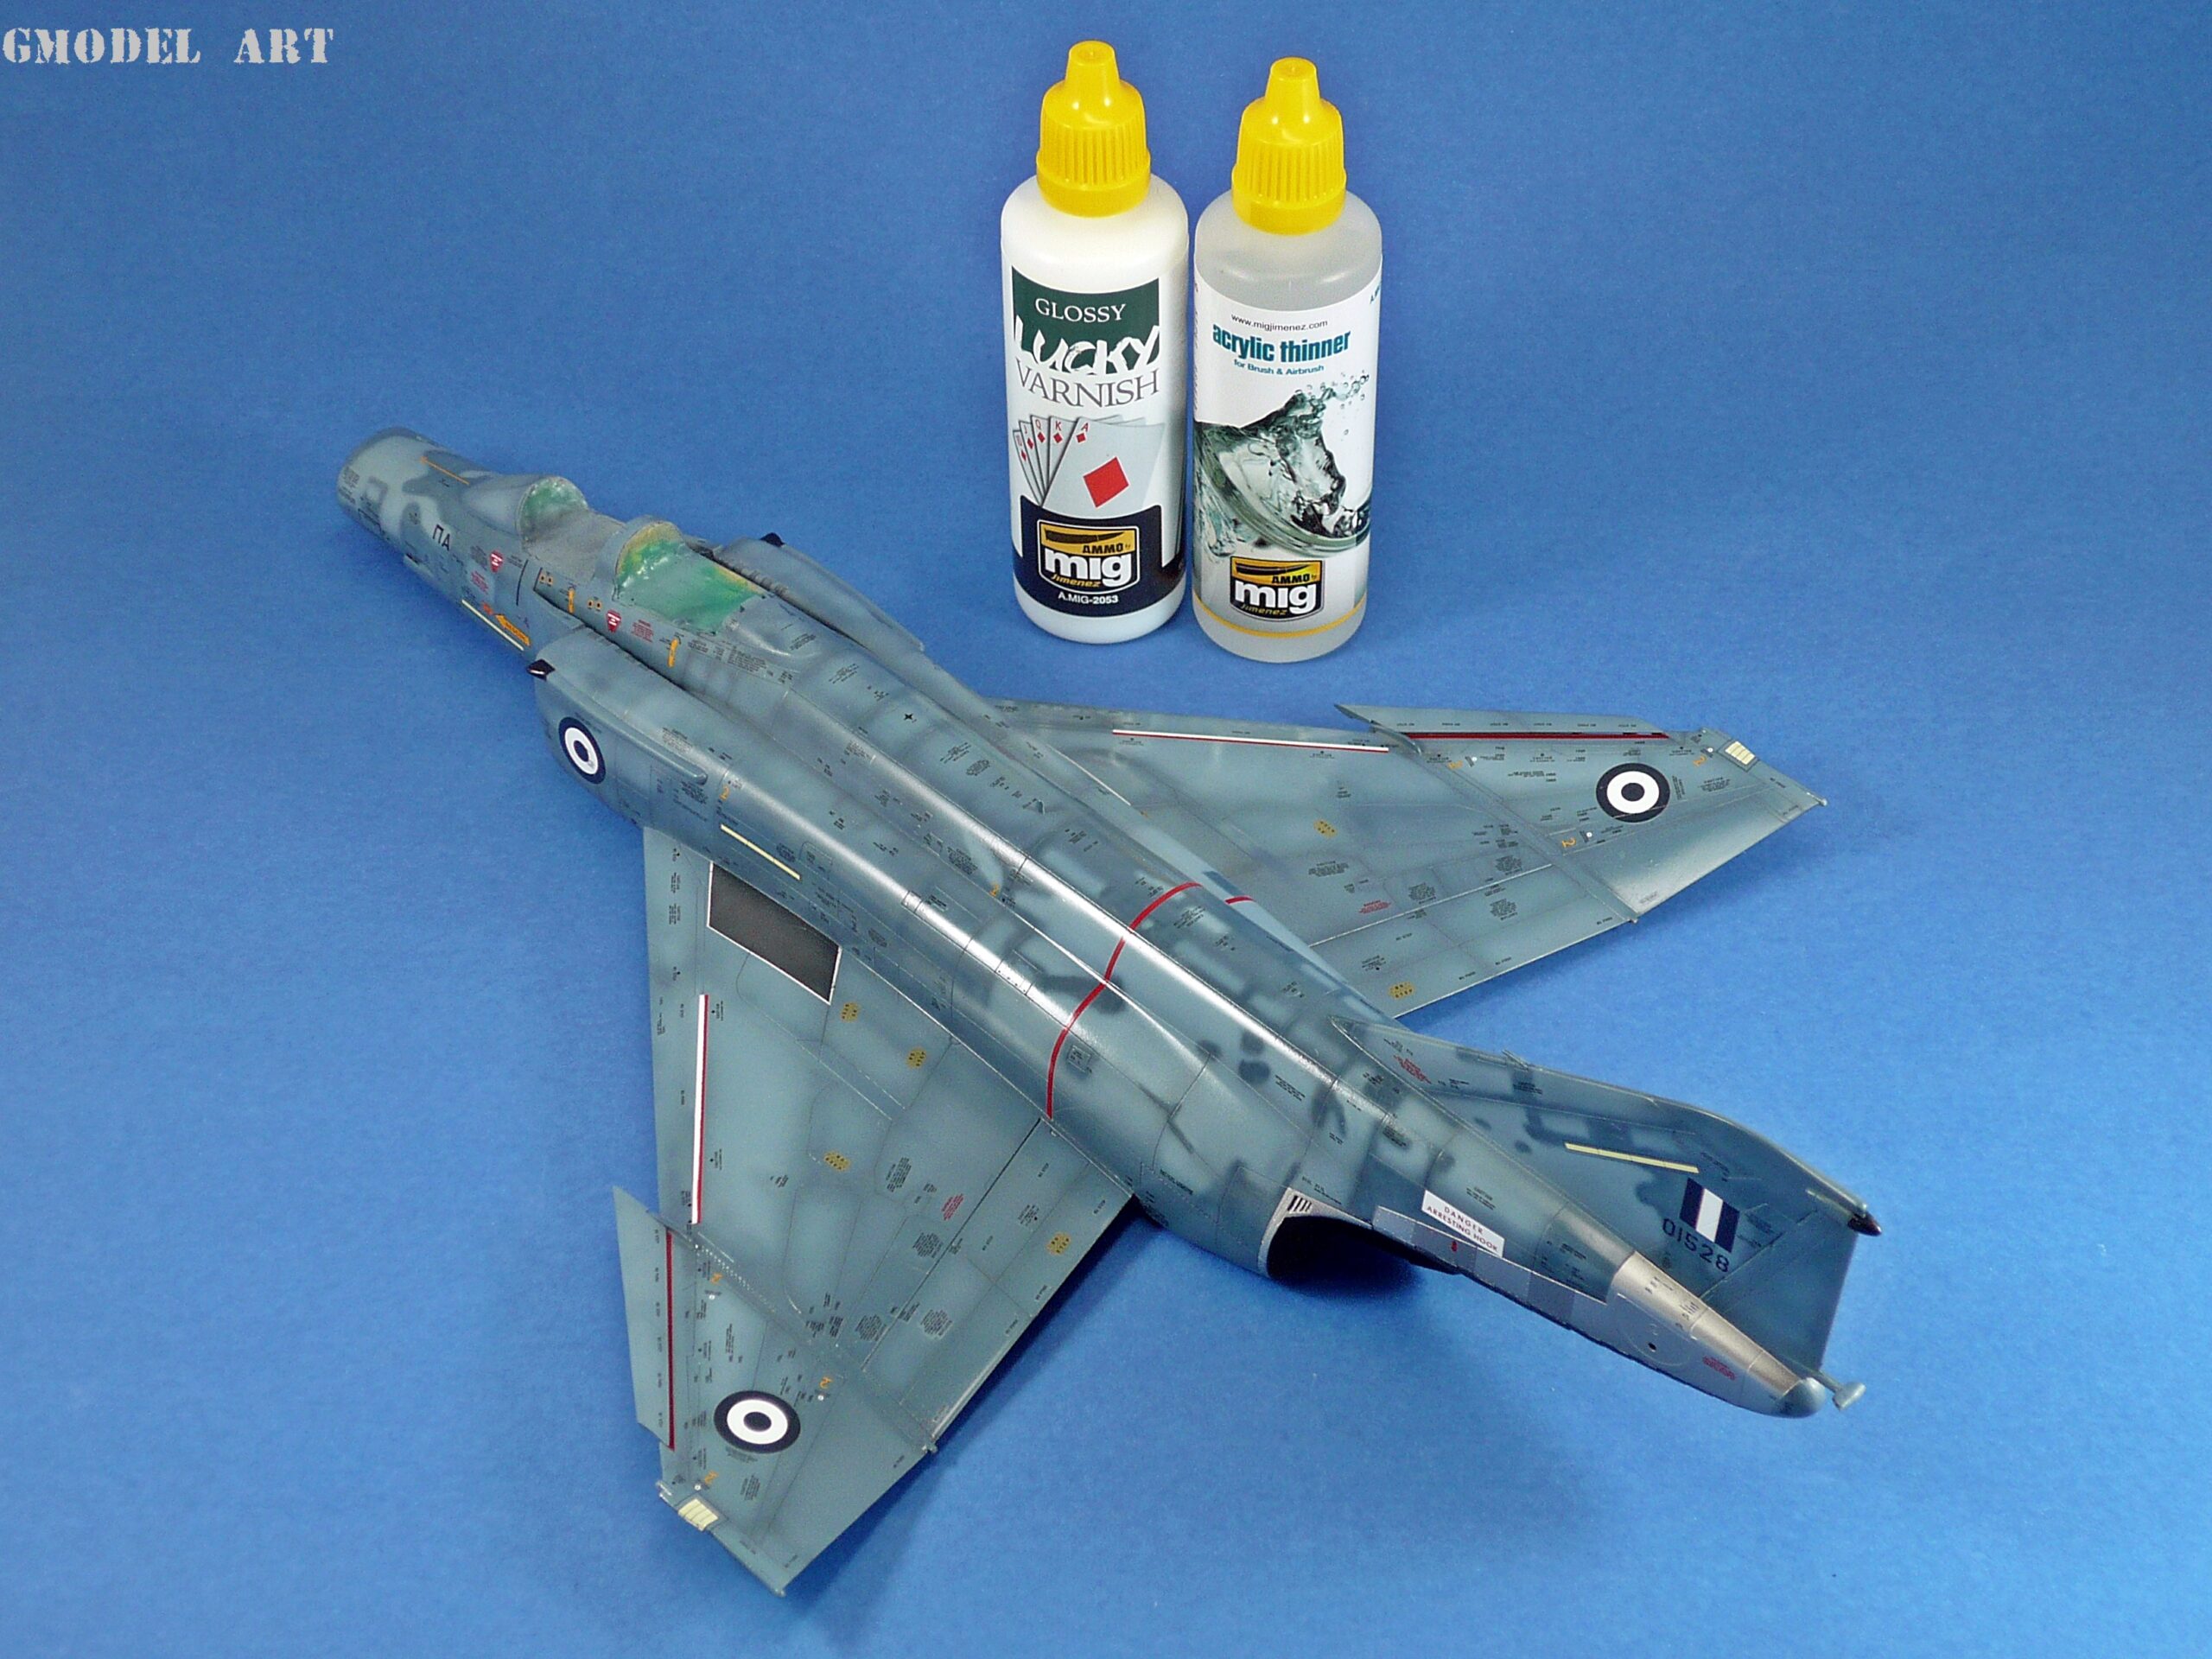
Once the camouflage and painted markings were complete, the model was coated with AMMO by Mig Jimenez Lucky Gloss Varnish.
The varnish protected the finish and prepared the surface for the subsequent detailing and weathering stages. A smooth clear coat also provides a suitable foundation for decal application and panel line washes.
The exhaust areas were then prepared separately for their metallic finishes. Alclad Gloss Black Primer (ALC 305) was applied to the relevant surfaces to create a suitable base for the different metallic tones.
The lower surfaces were also sealed with Alclad Aqua Gloss (ALC 600), as specified in the original build.
Wheel wells, airbrakes and exhaust detailing
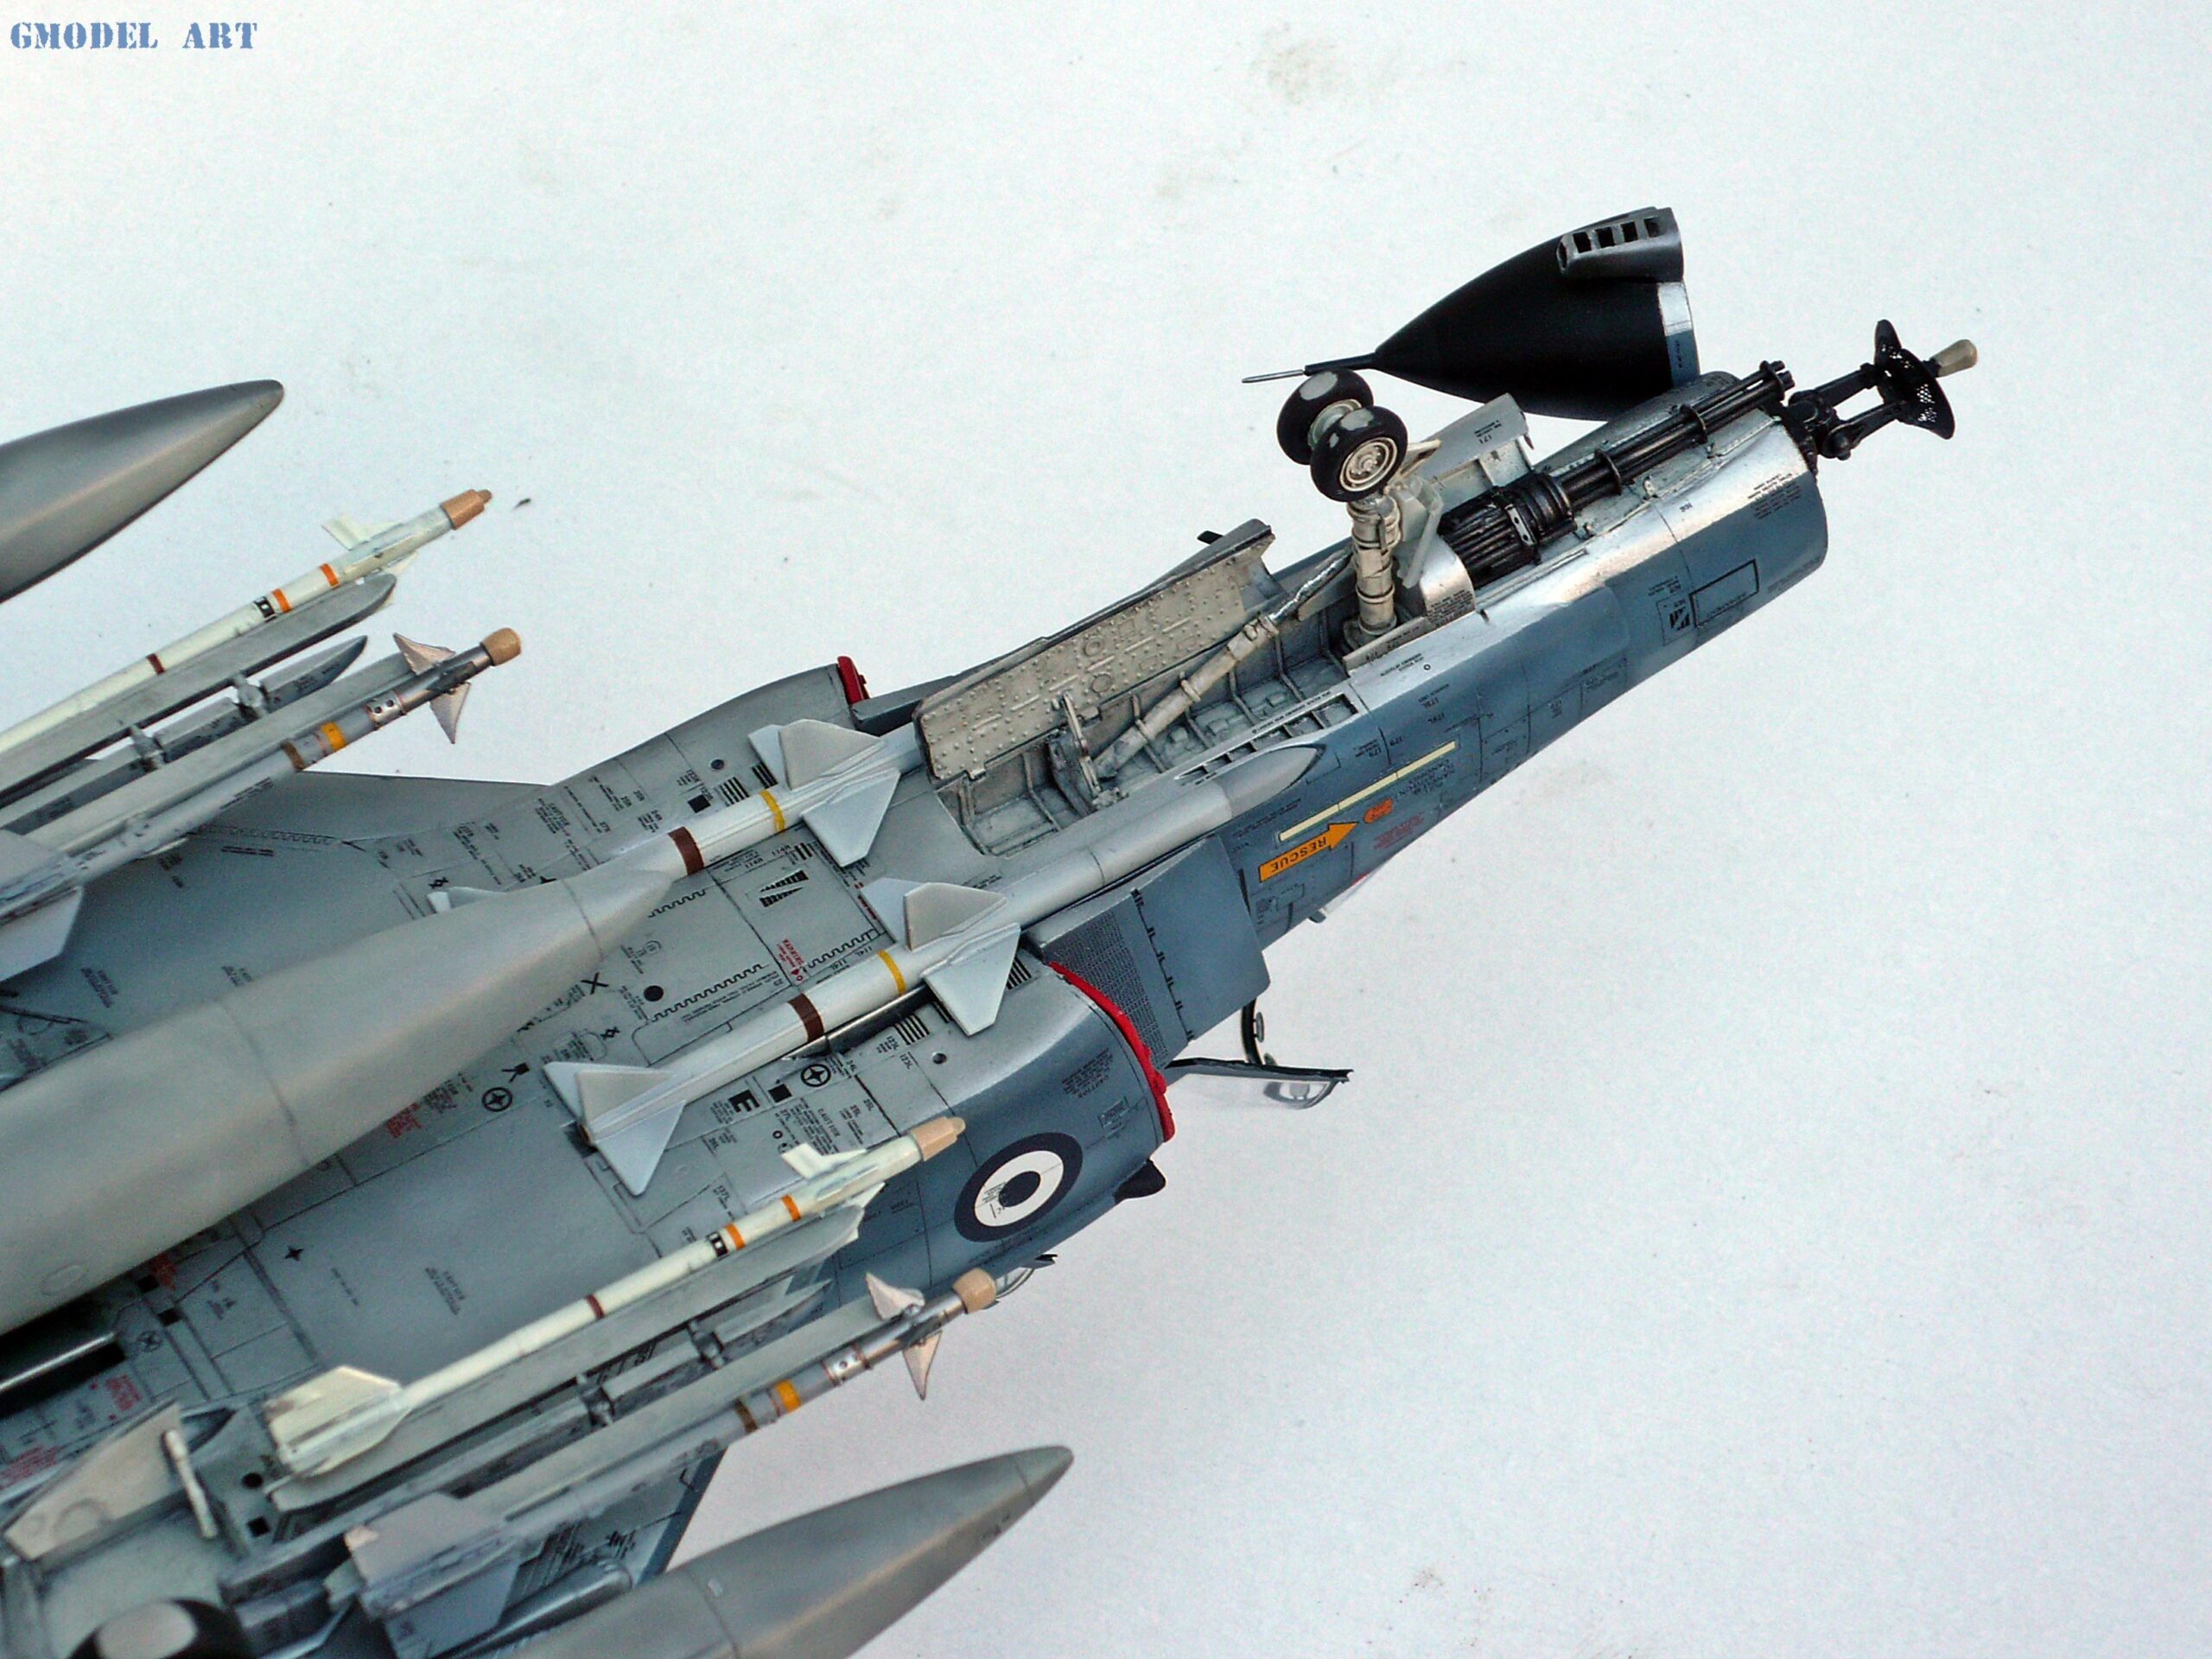
The wheel wells and airbrake interiors were painted off-white and interior green, respectively, following the reference photographs used for the project.
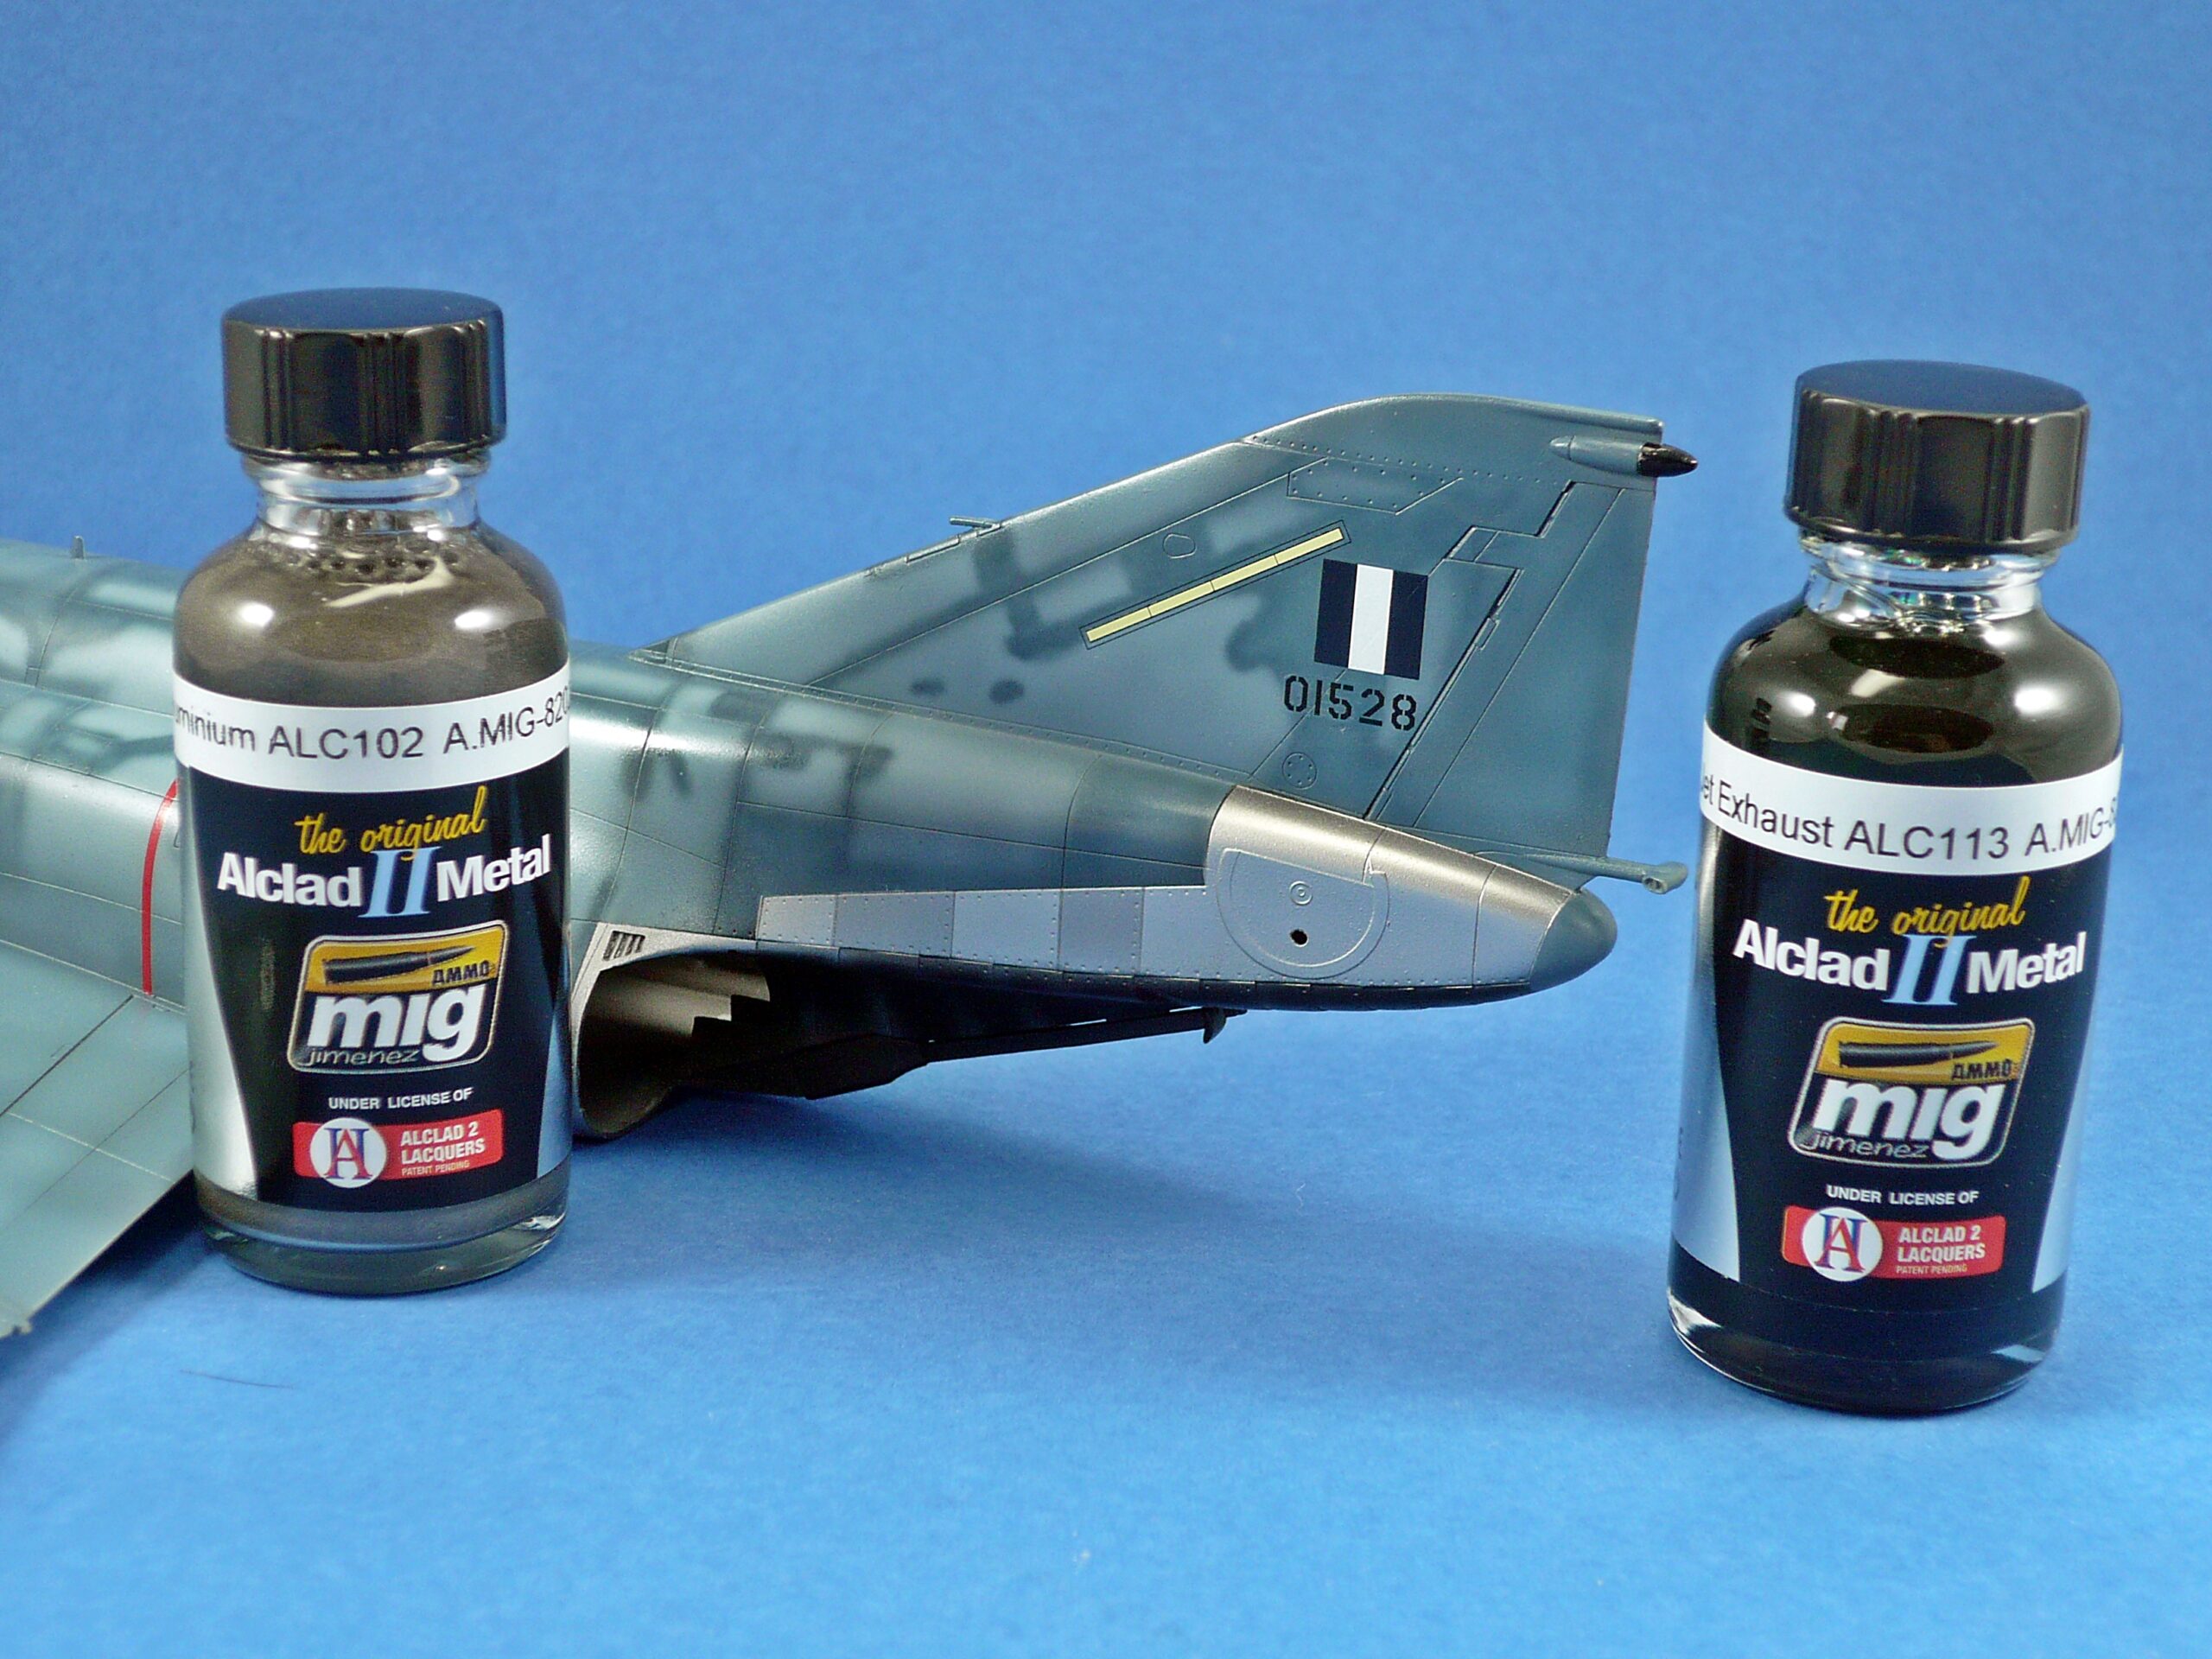
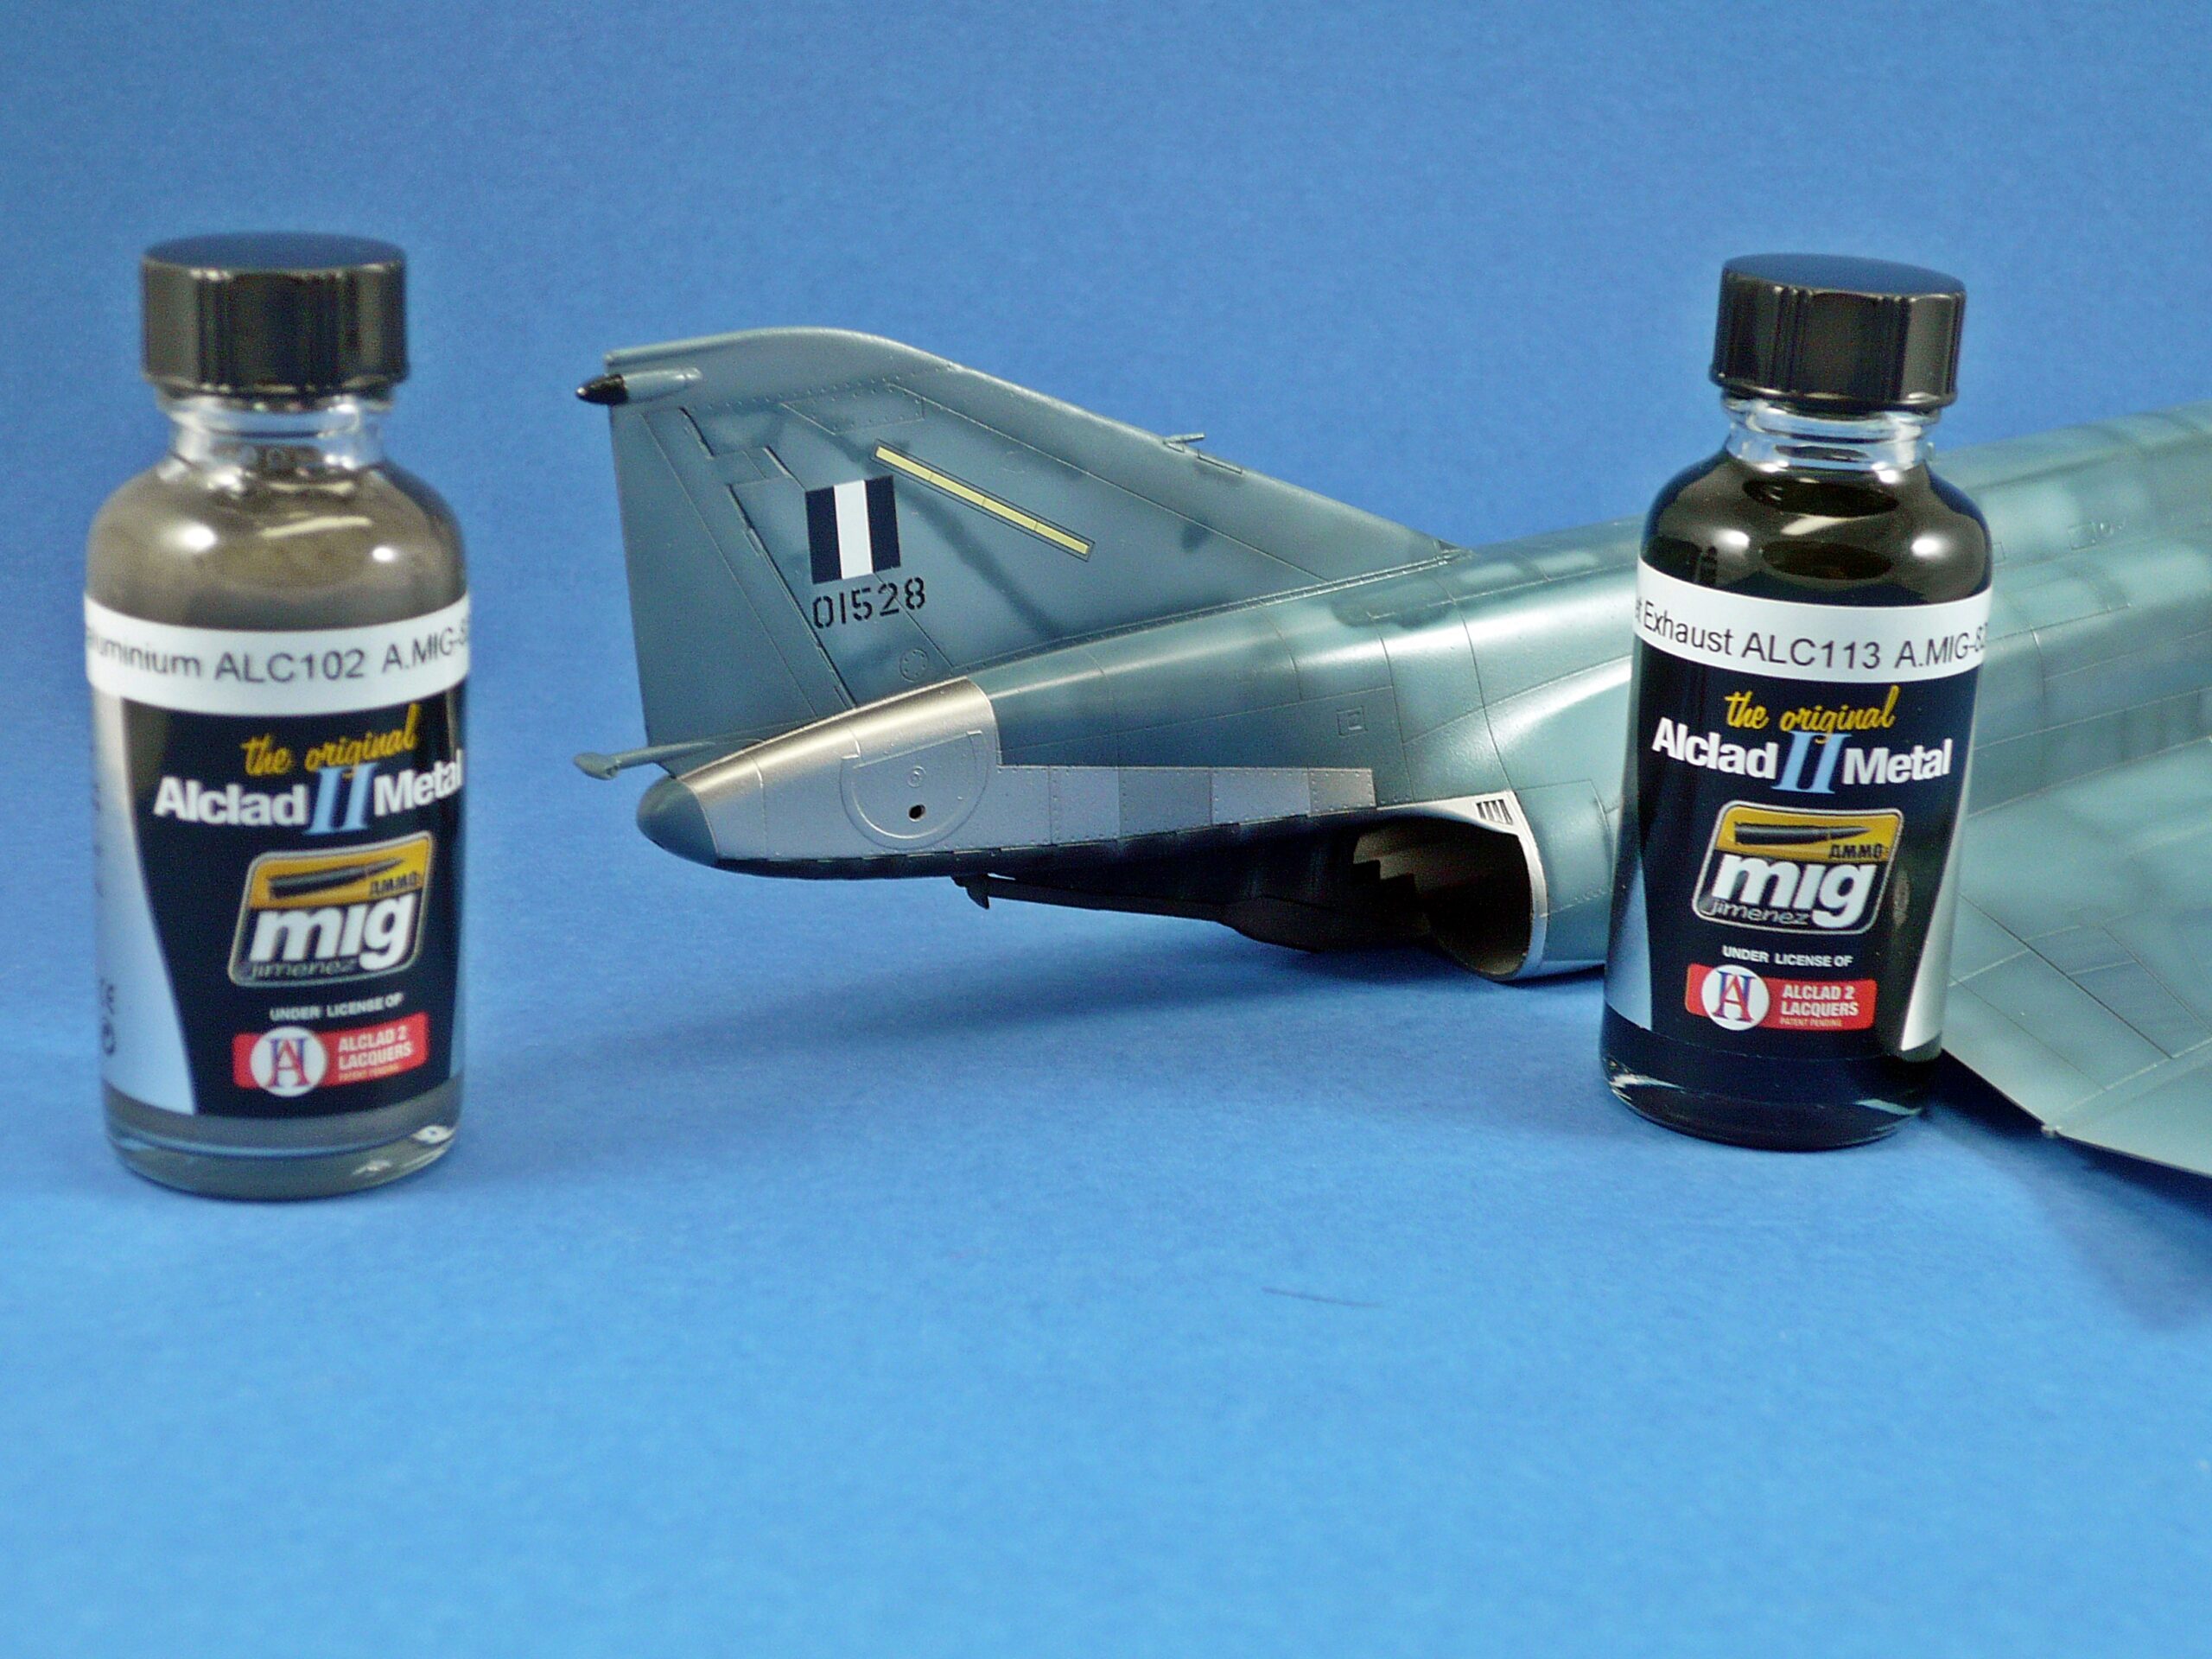
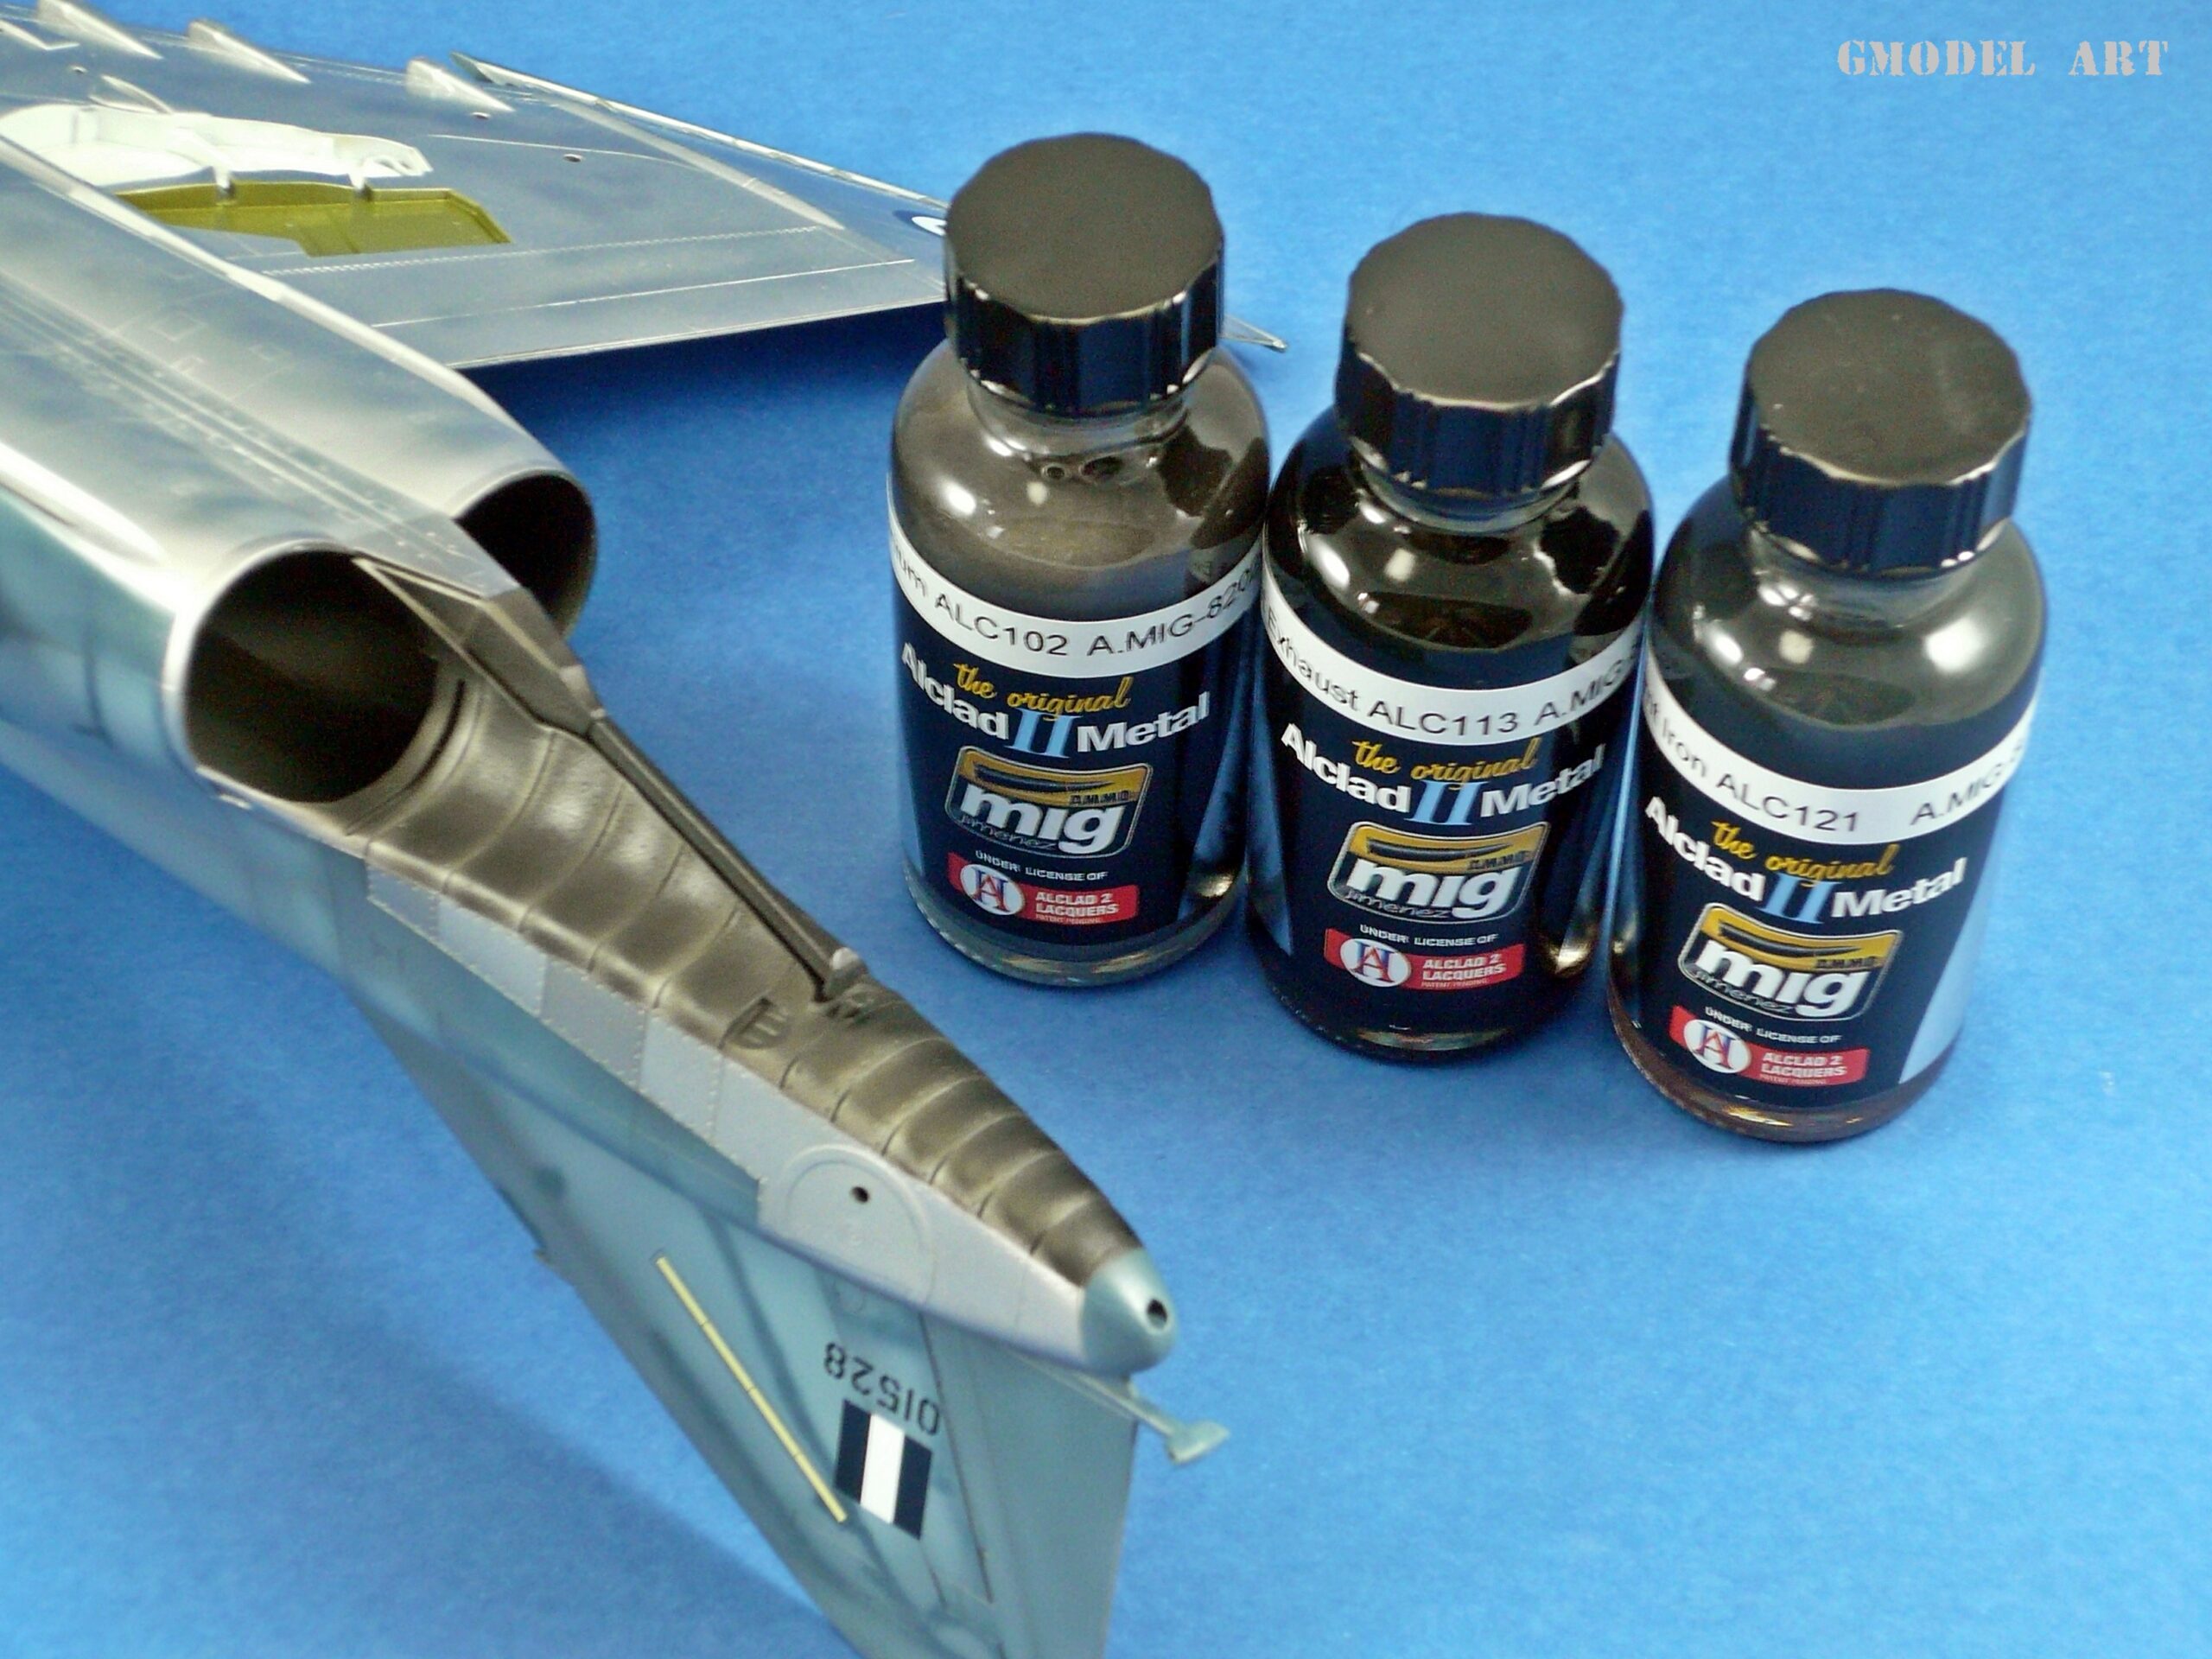
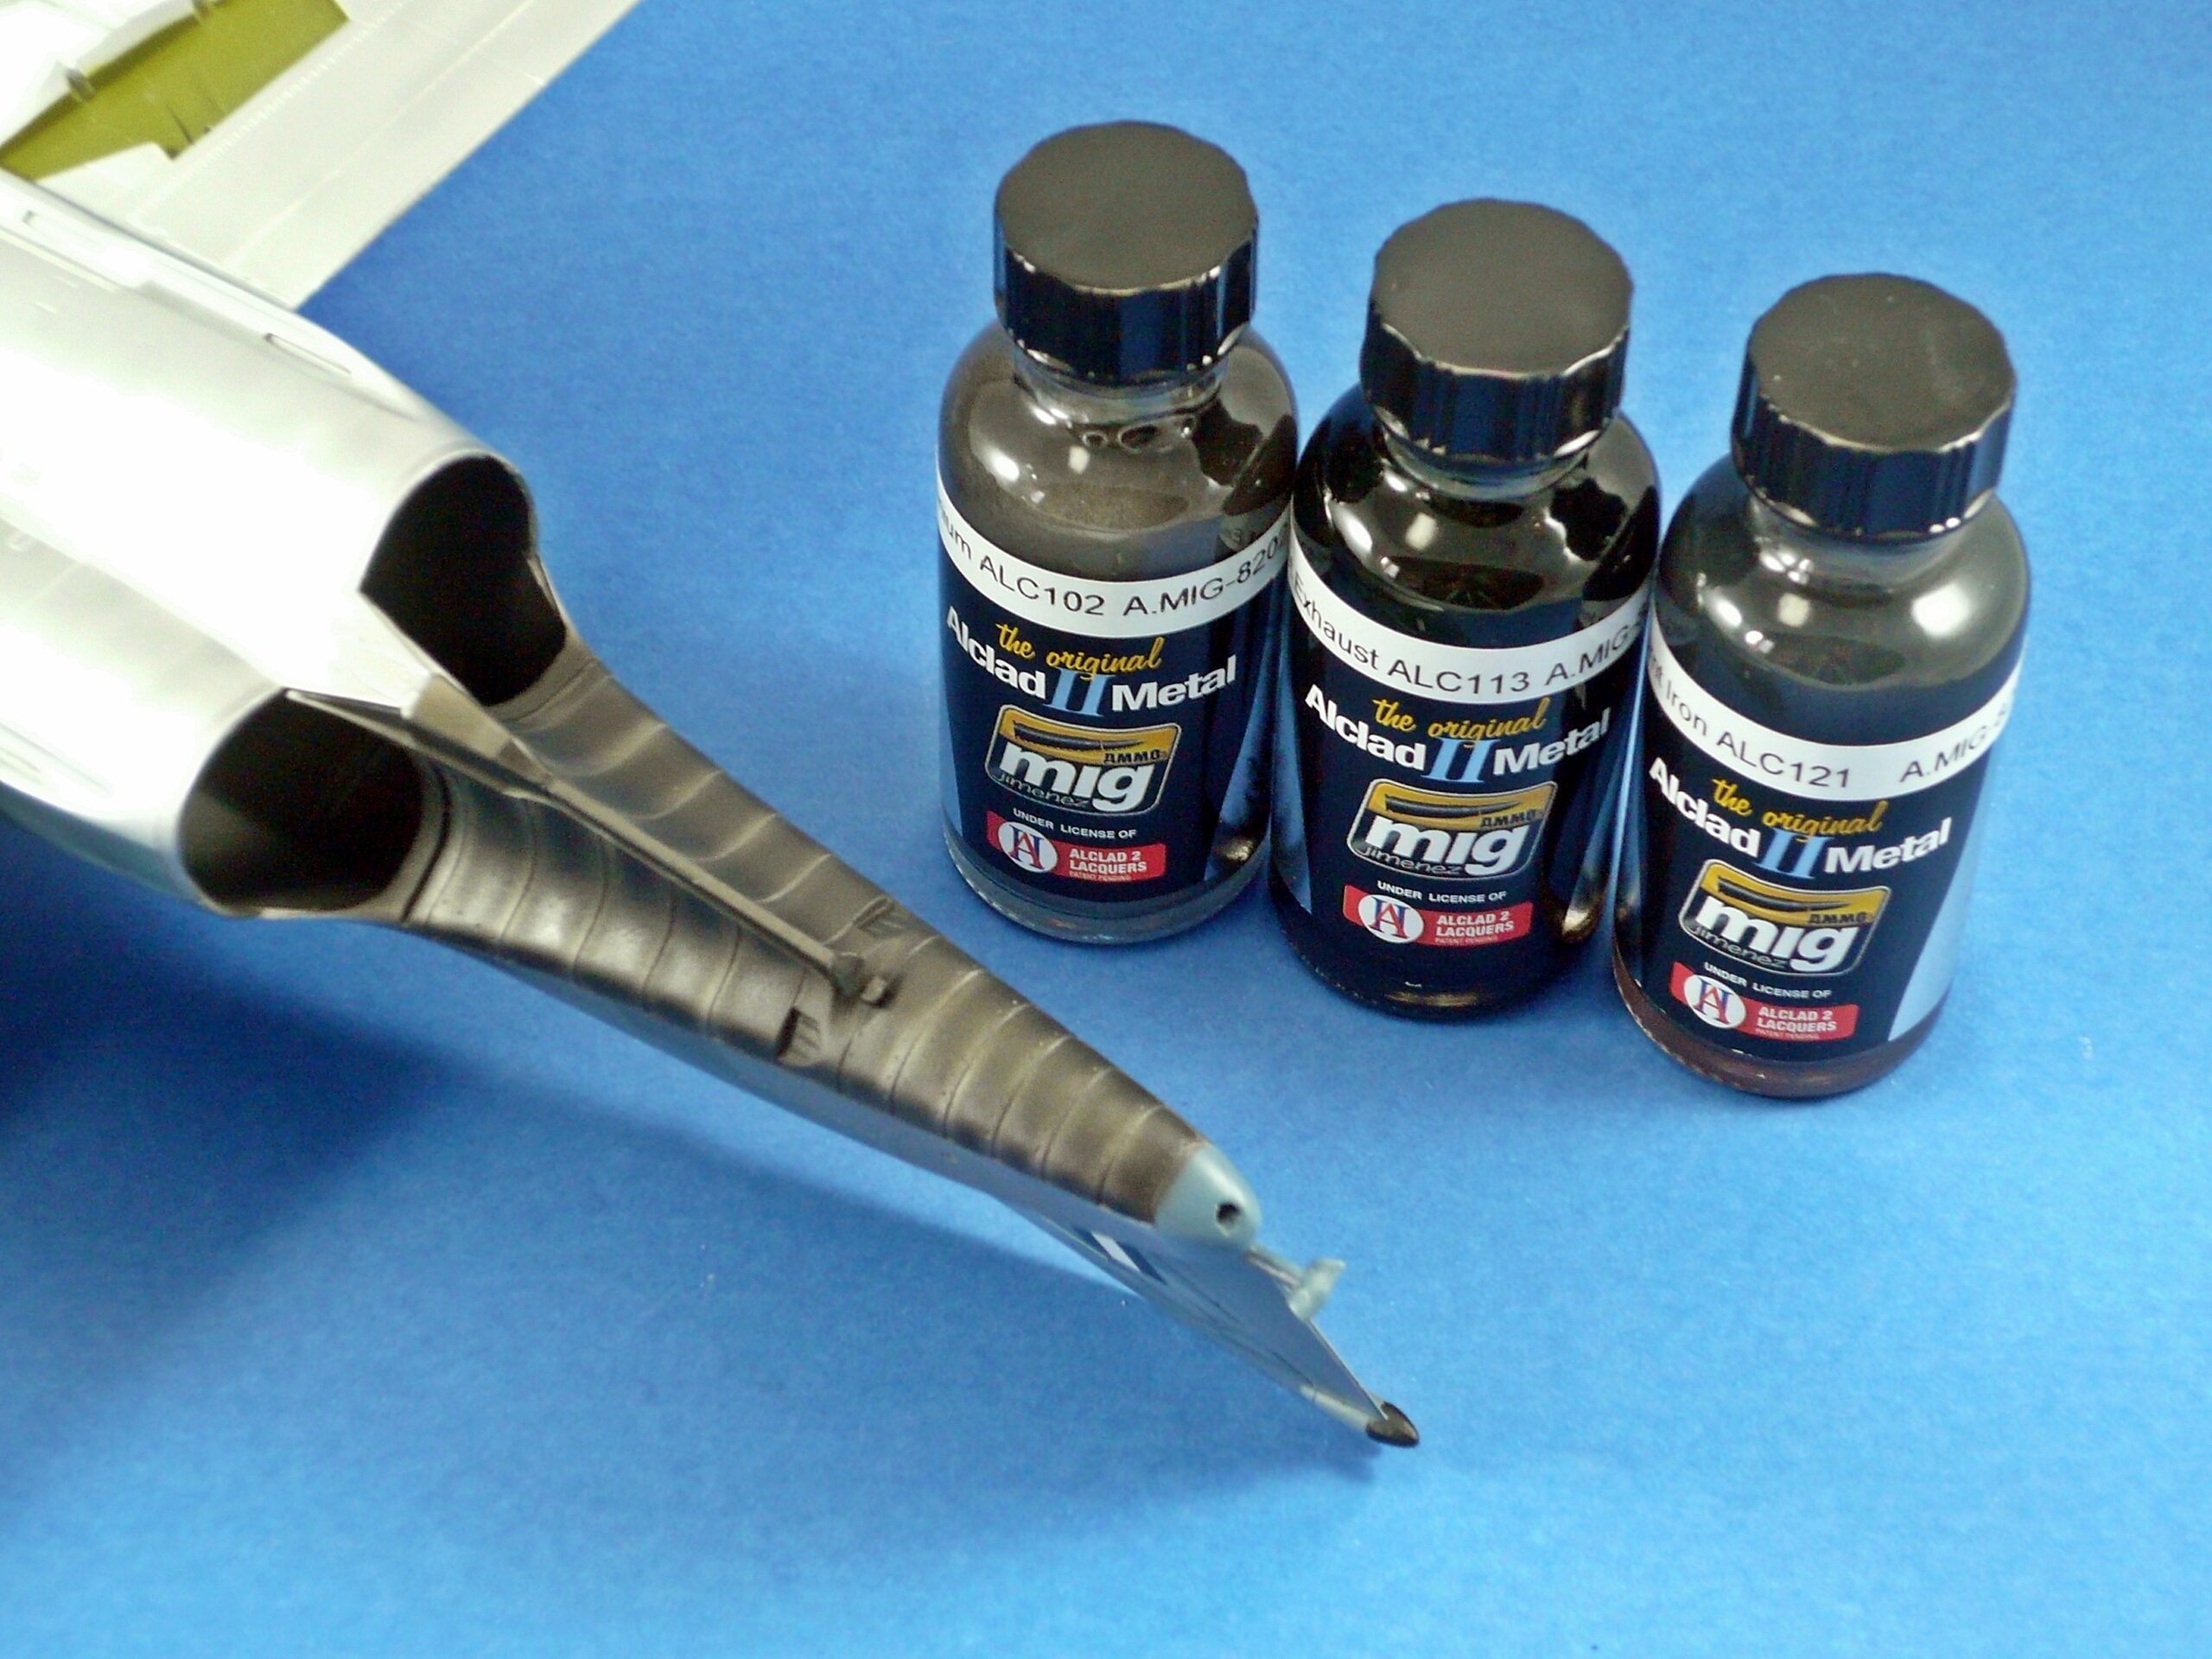
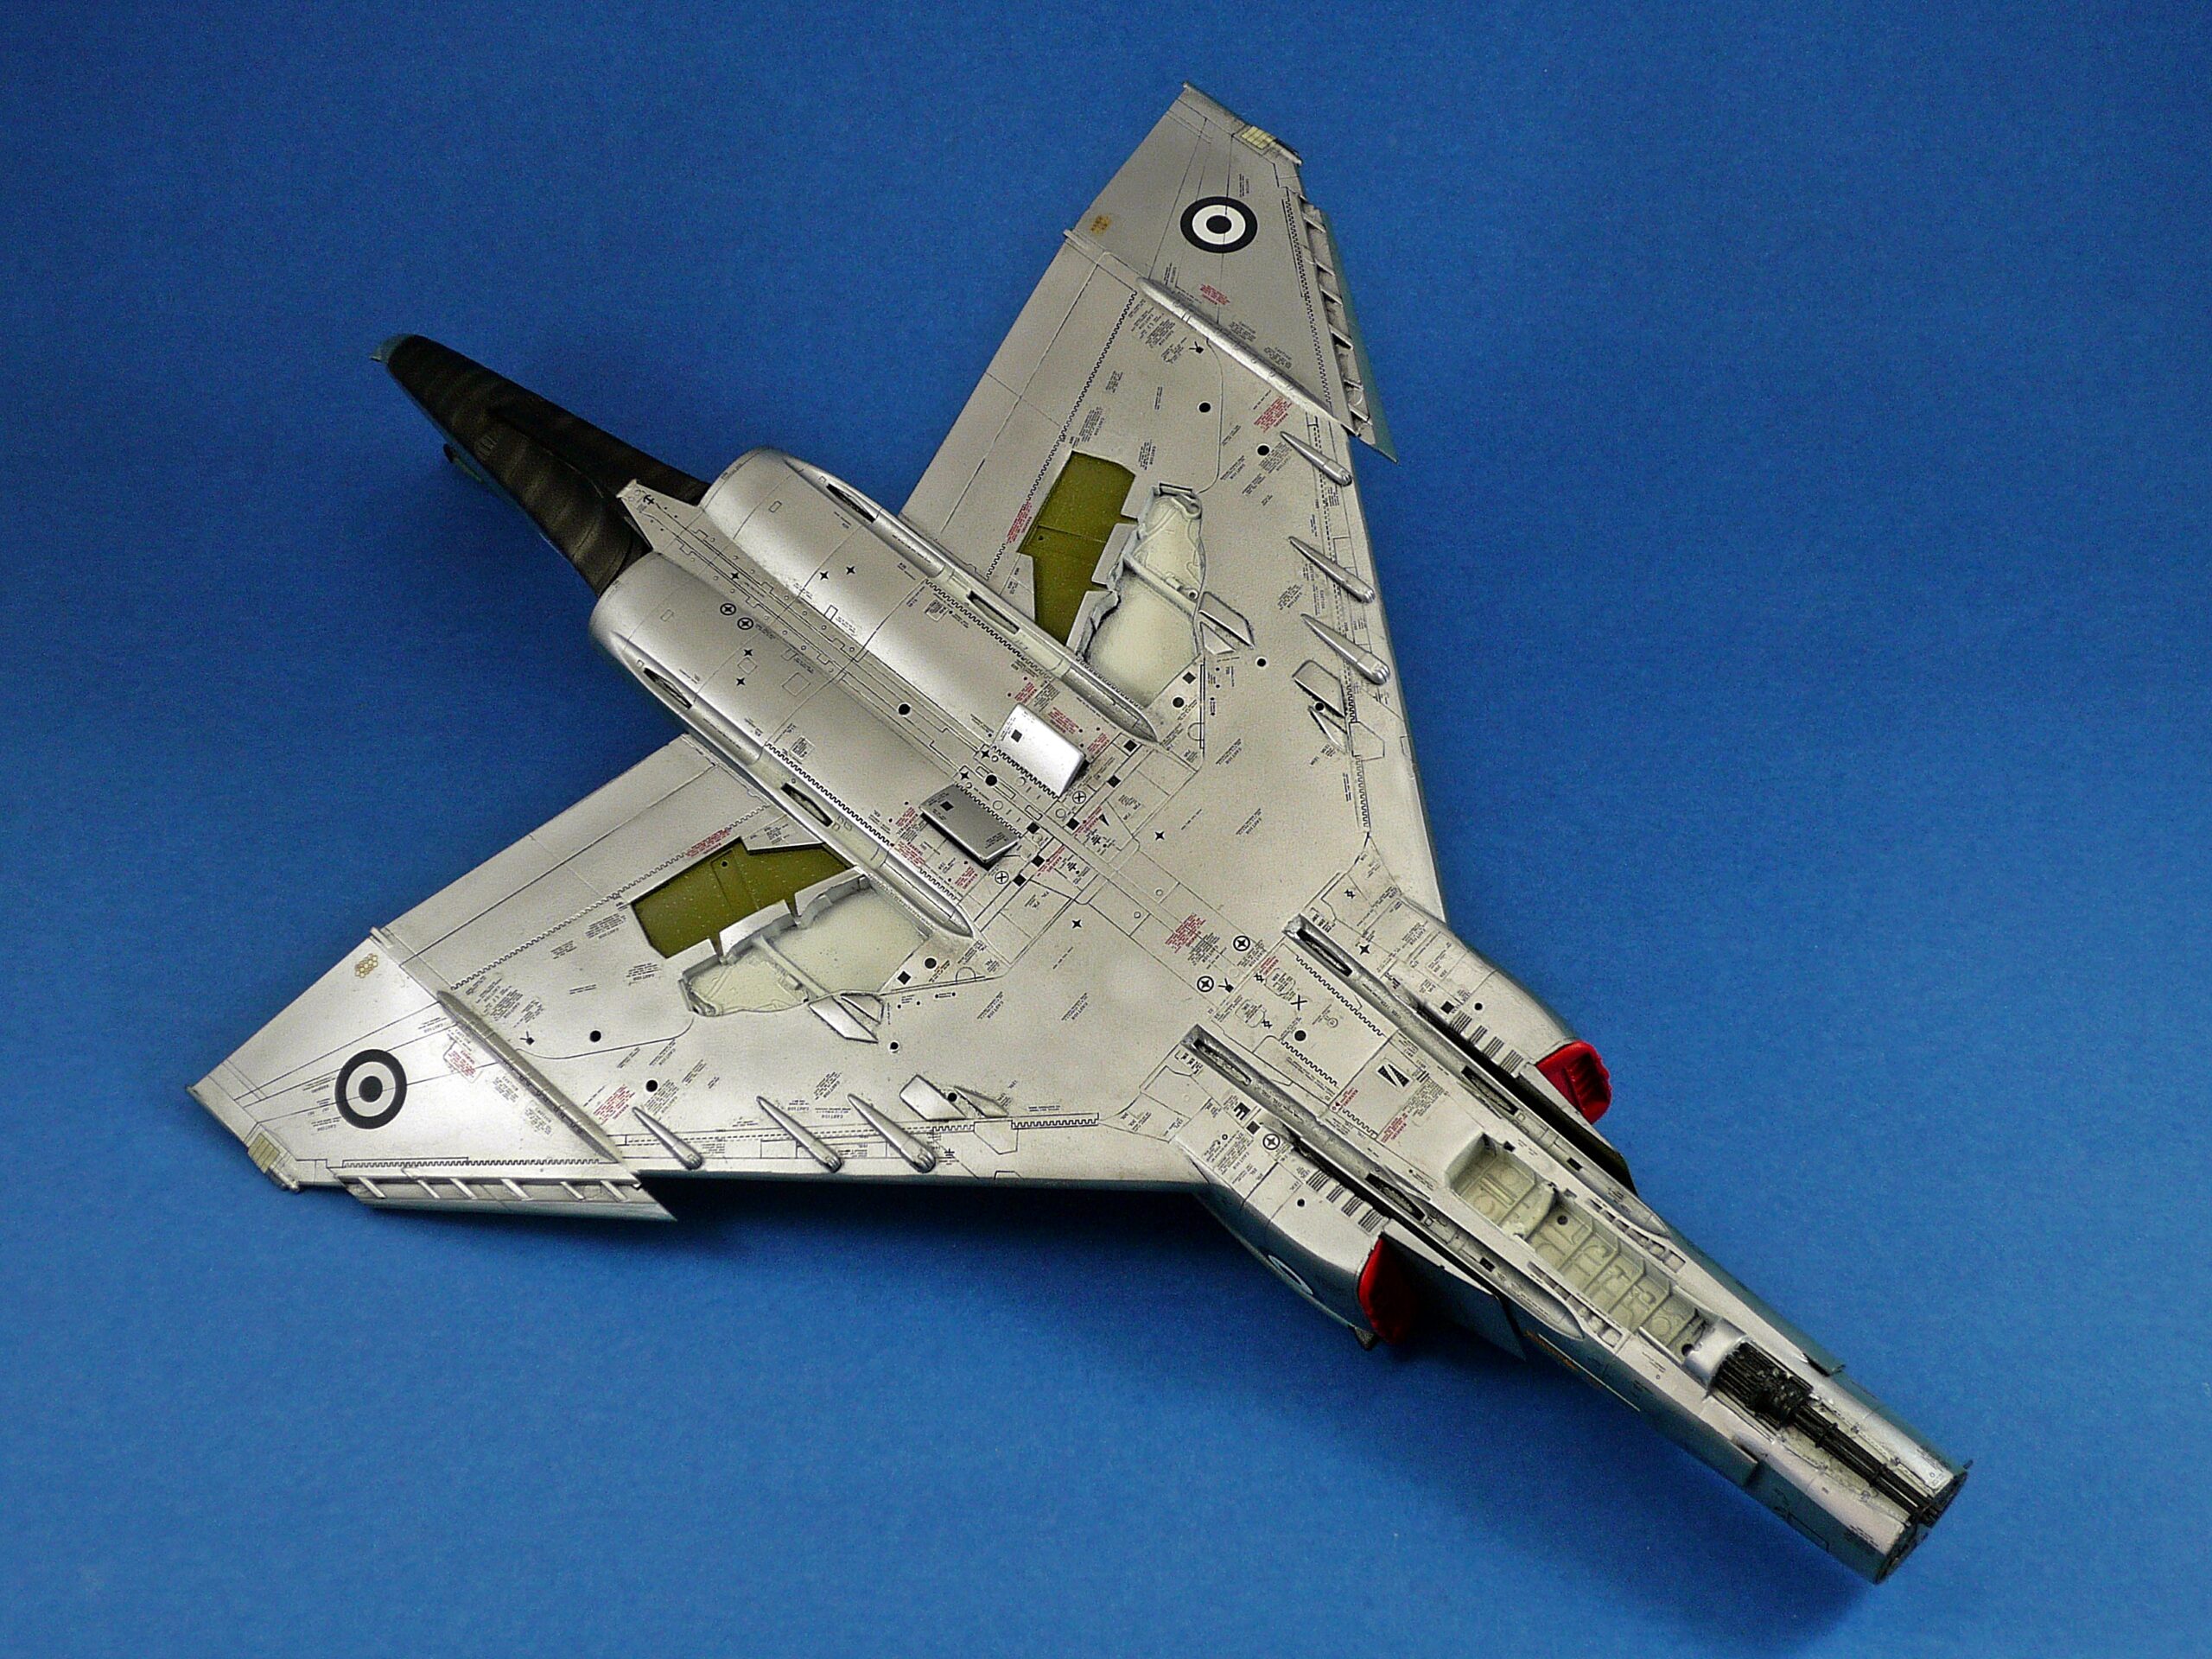
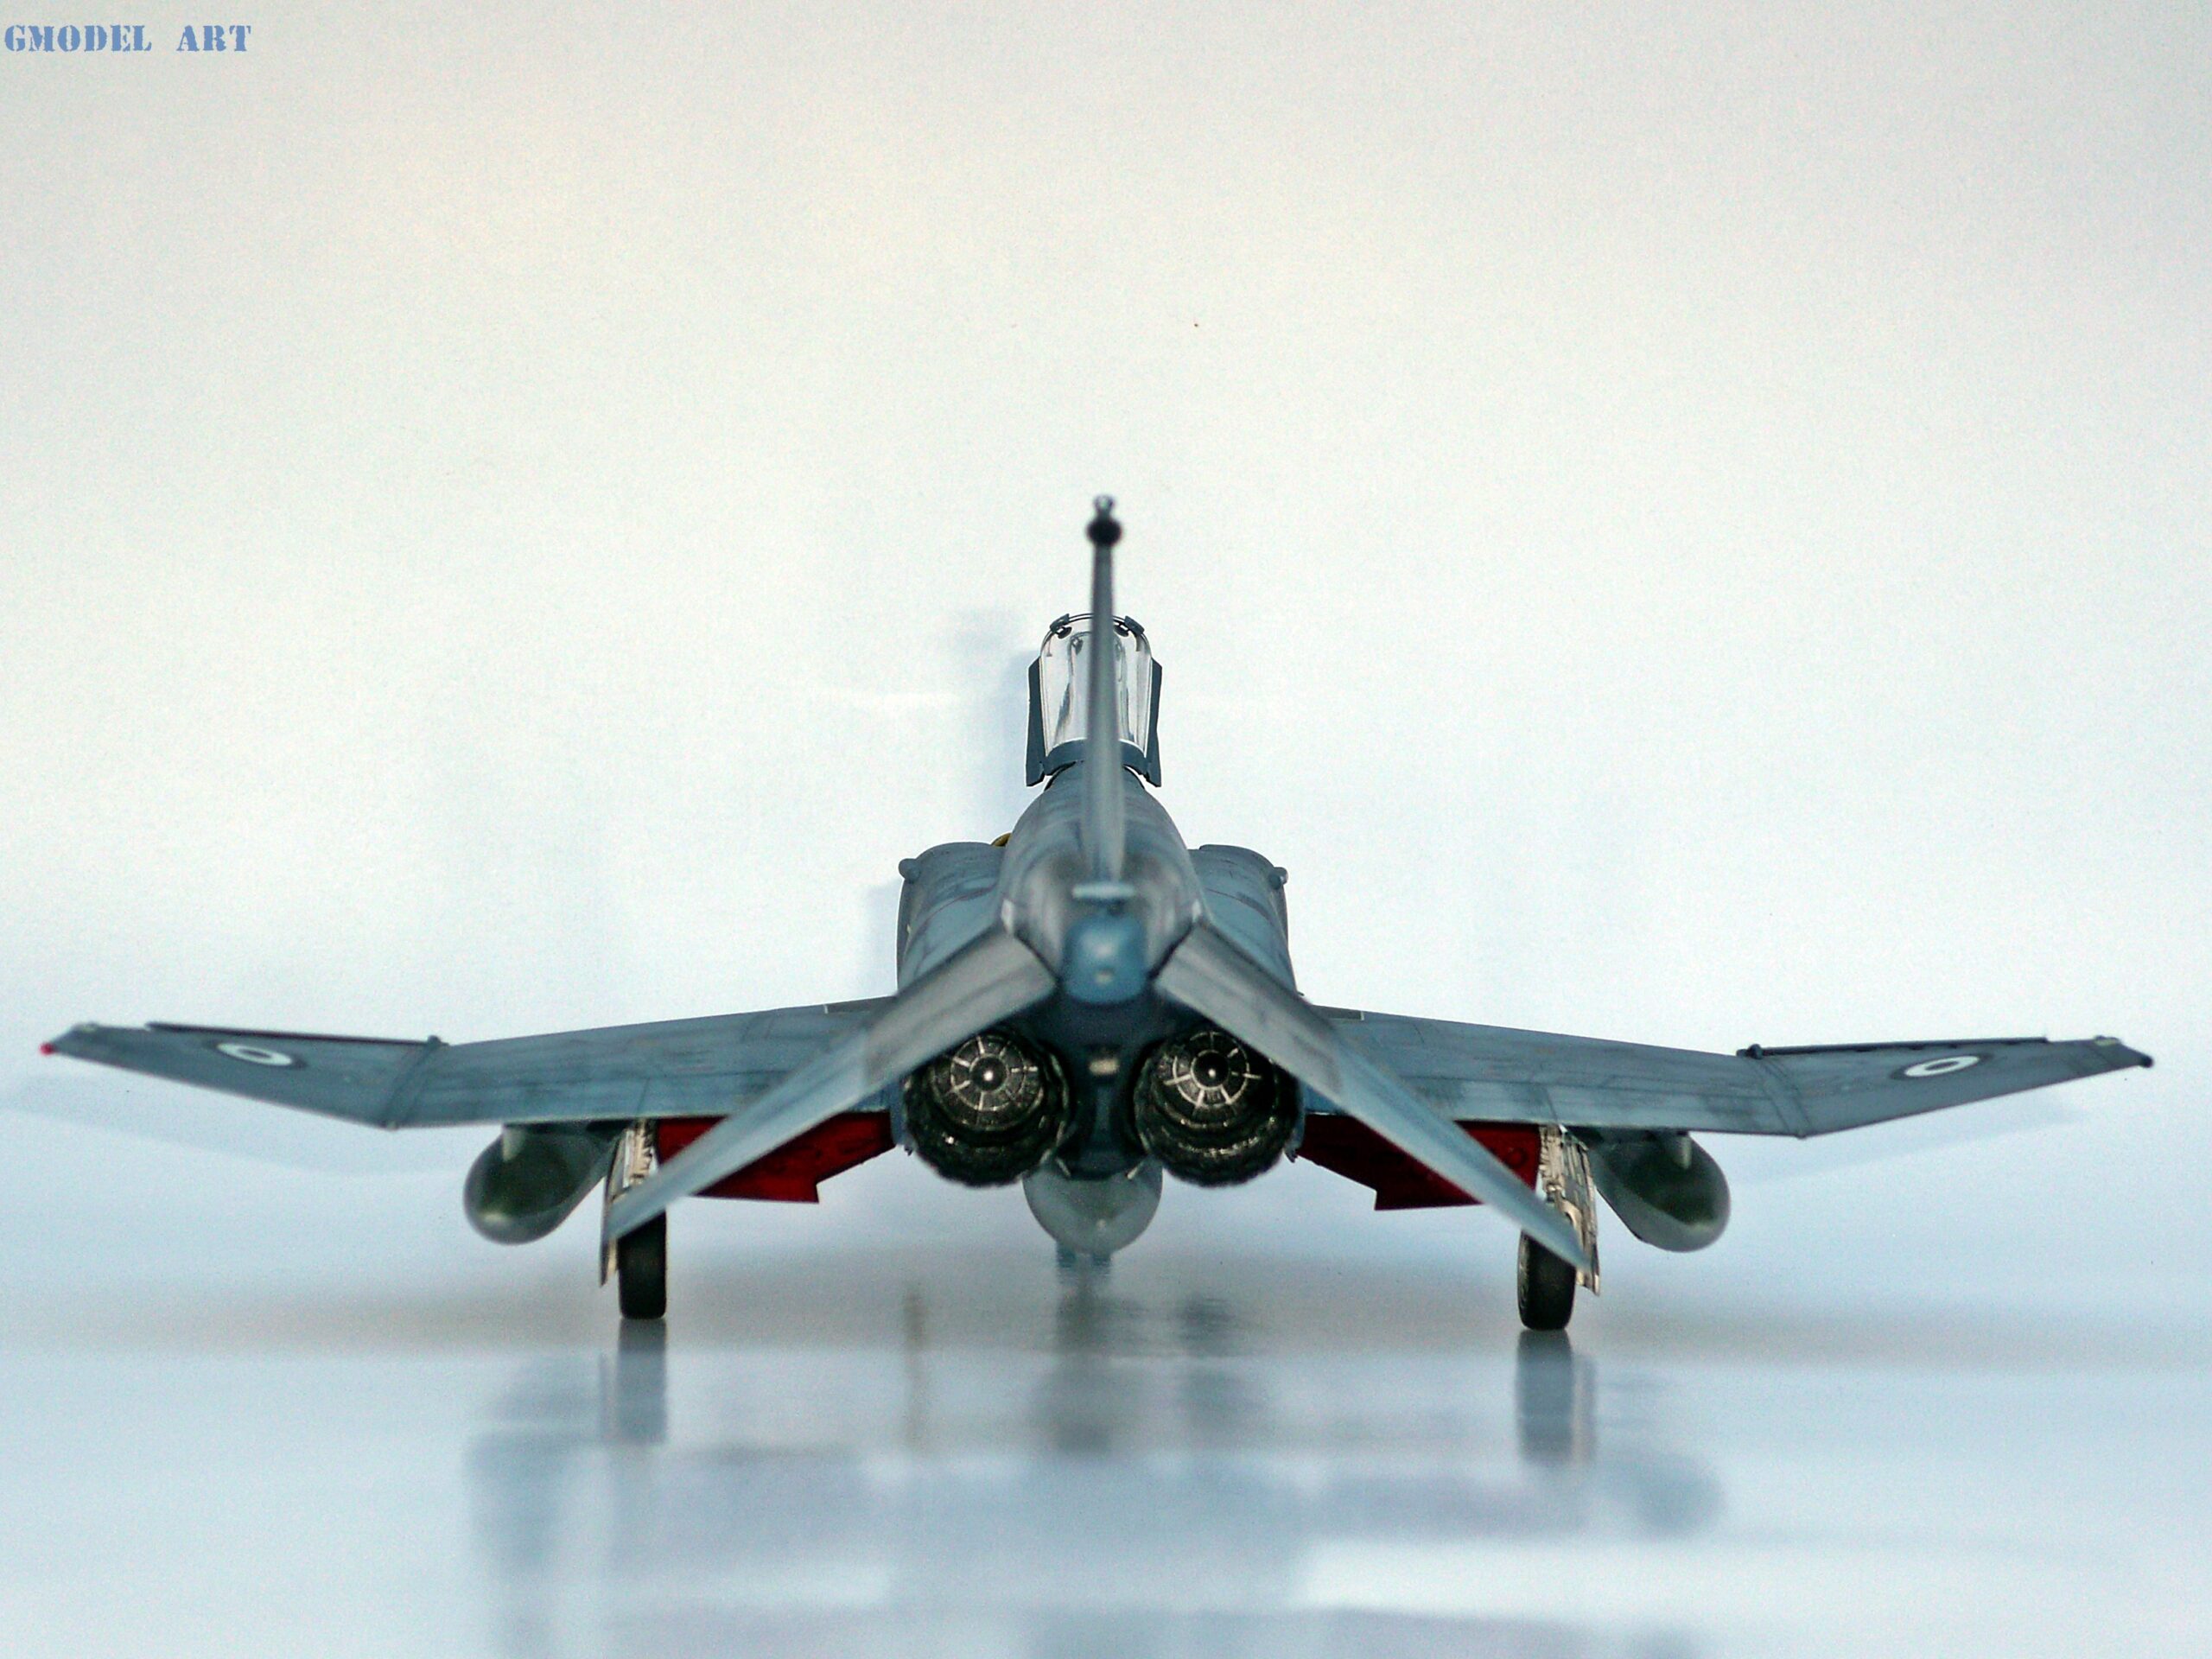
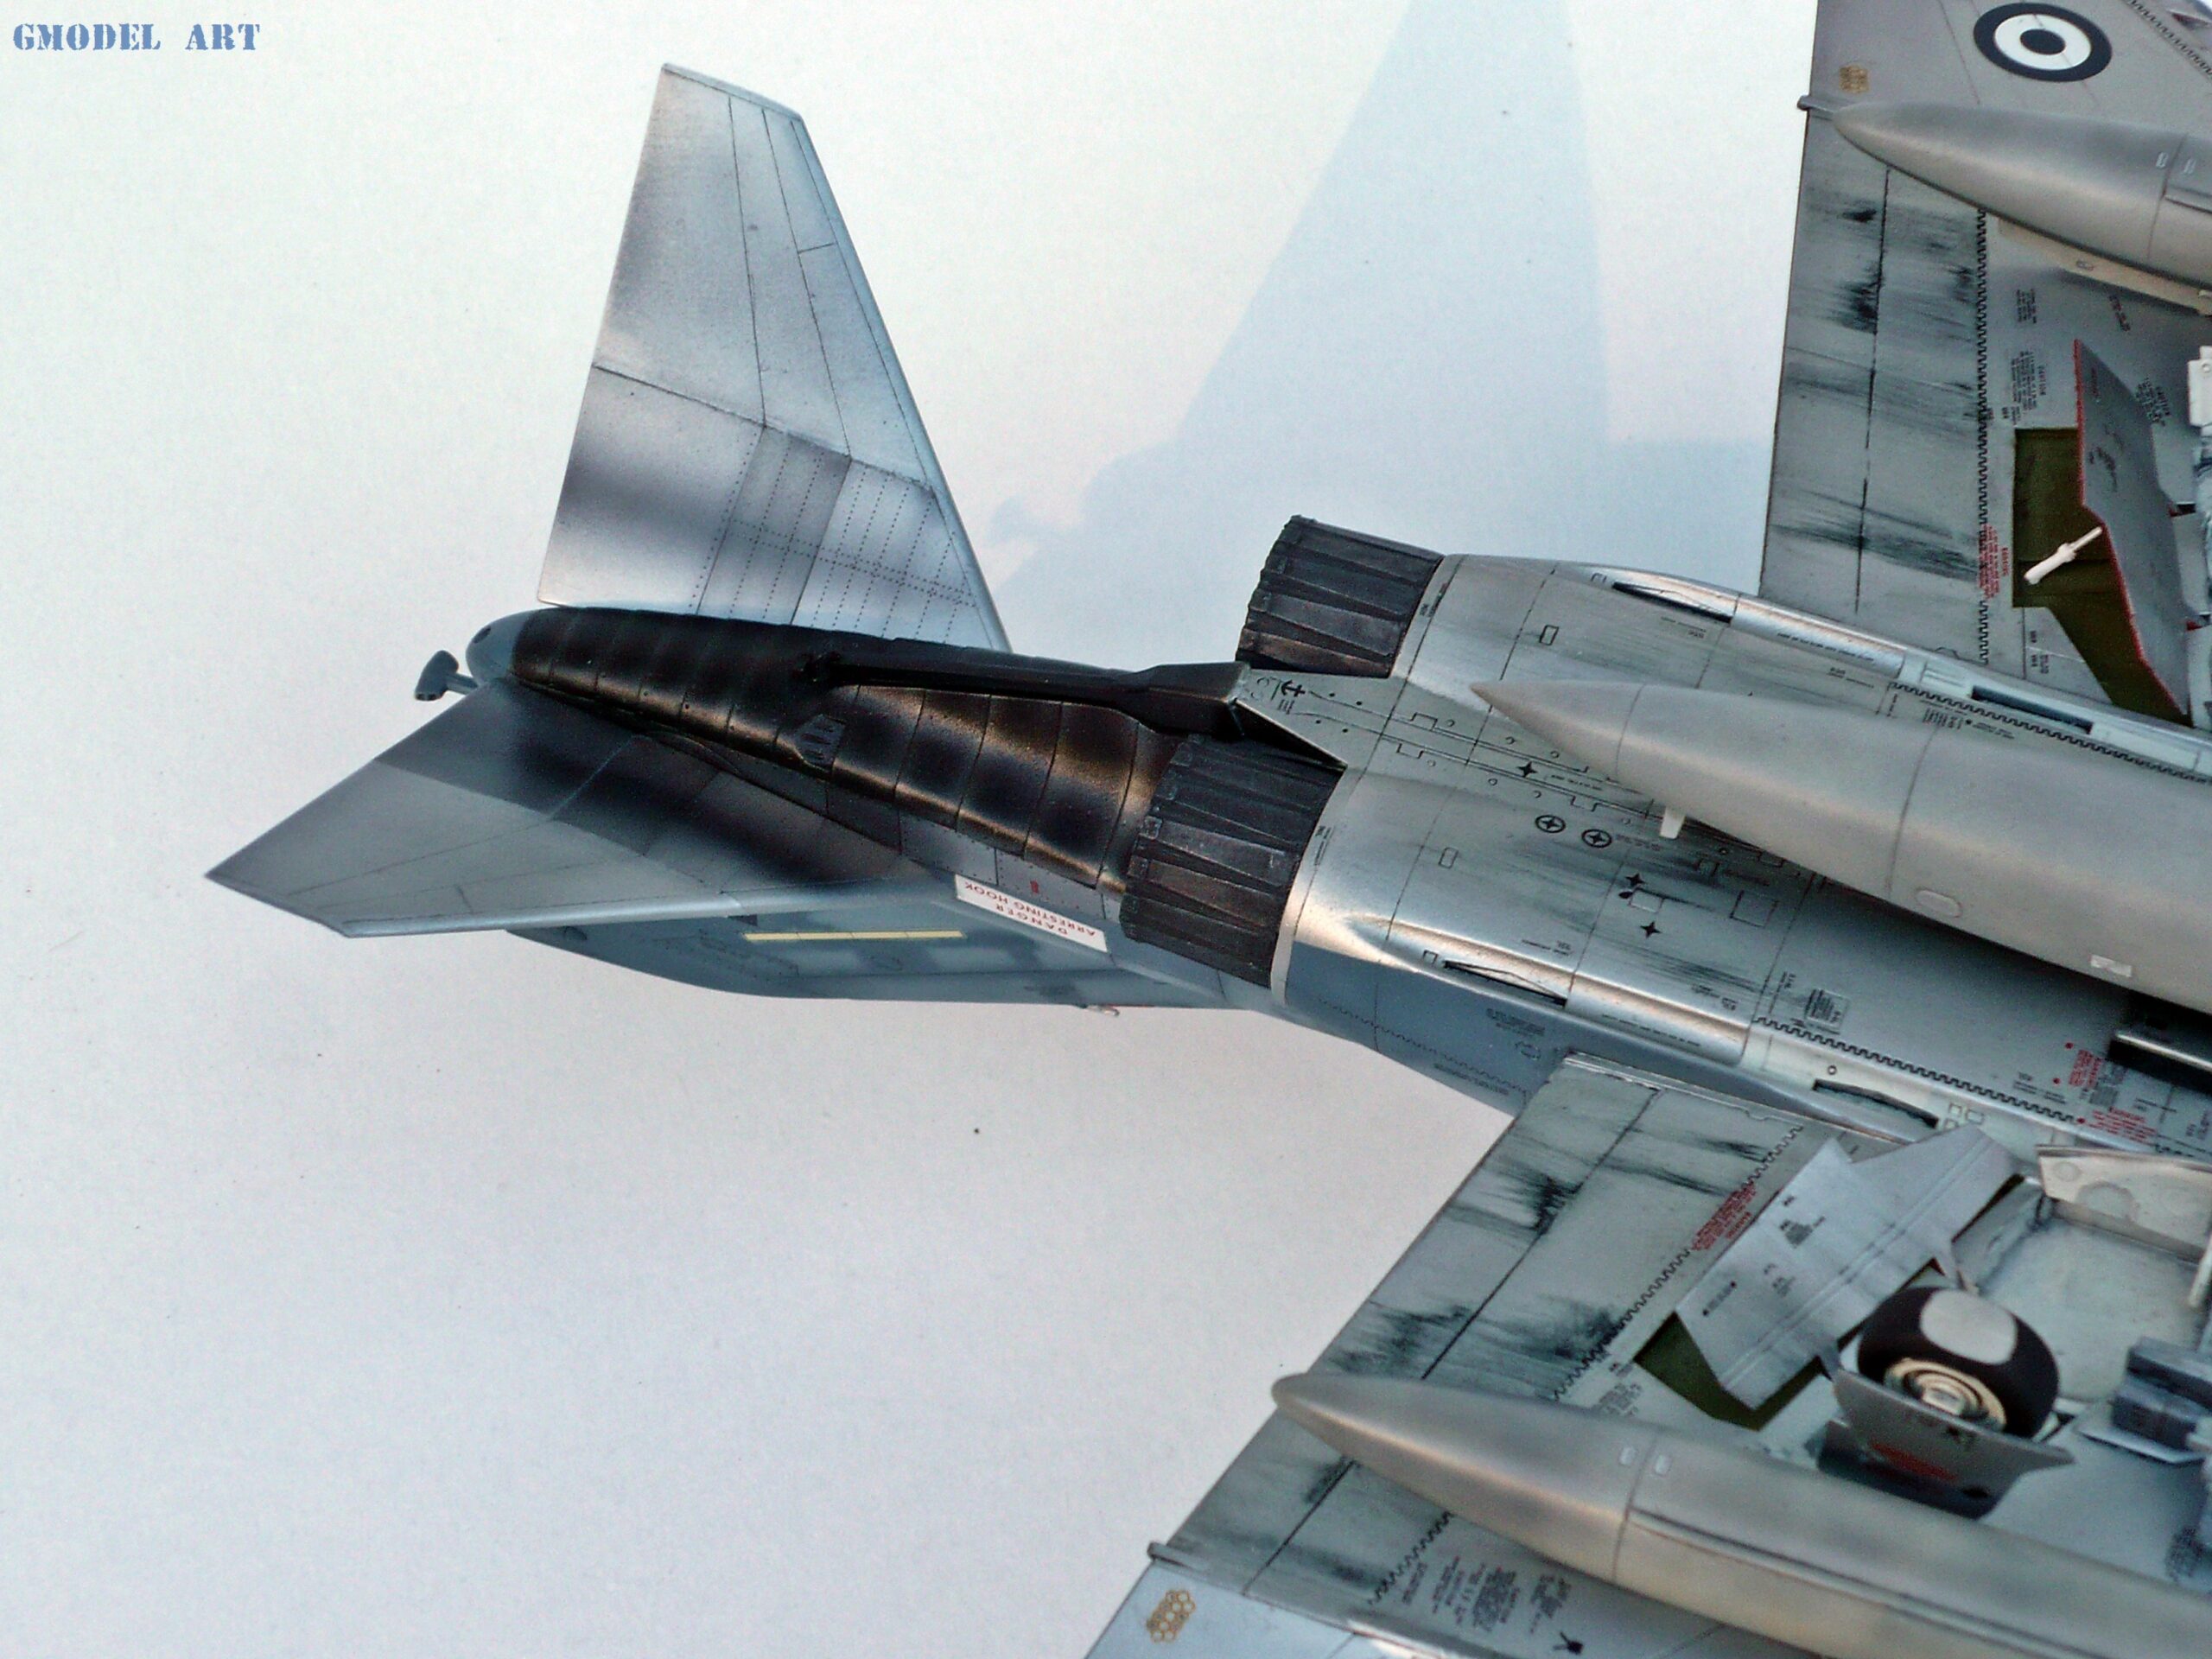
The upper exhaust areas received Alclad Duraluminium (ALC 102). For a darker panel within the same area, a small amount of Alclad Jet Exhaust (ALC 113) was mixed into the Duraluminium, producing a more varied metallic appearance.
The lower exhaust areas were finished with a combination of Alclad Duraluminium (ALC 102), Jet Exhaust (ALC 113) and Burnt Iron (ALC 121). Selected areas were further emphasised with pigments to introduce additional tonal variation.
Using several metallic shades instead of a single colour is particularly effective around jet exhausts. Heat exposure, surface materials and accumulated operational staining can produce a range of tones, so controlled variation creates a more convincing scale effect.
For this model, the goal was to keep the metallic finishes distinct from the blue camouflage while maintaining a natural transition between the different surface treatments.
Decals and national markings
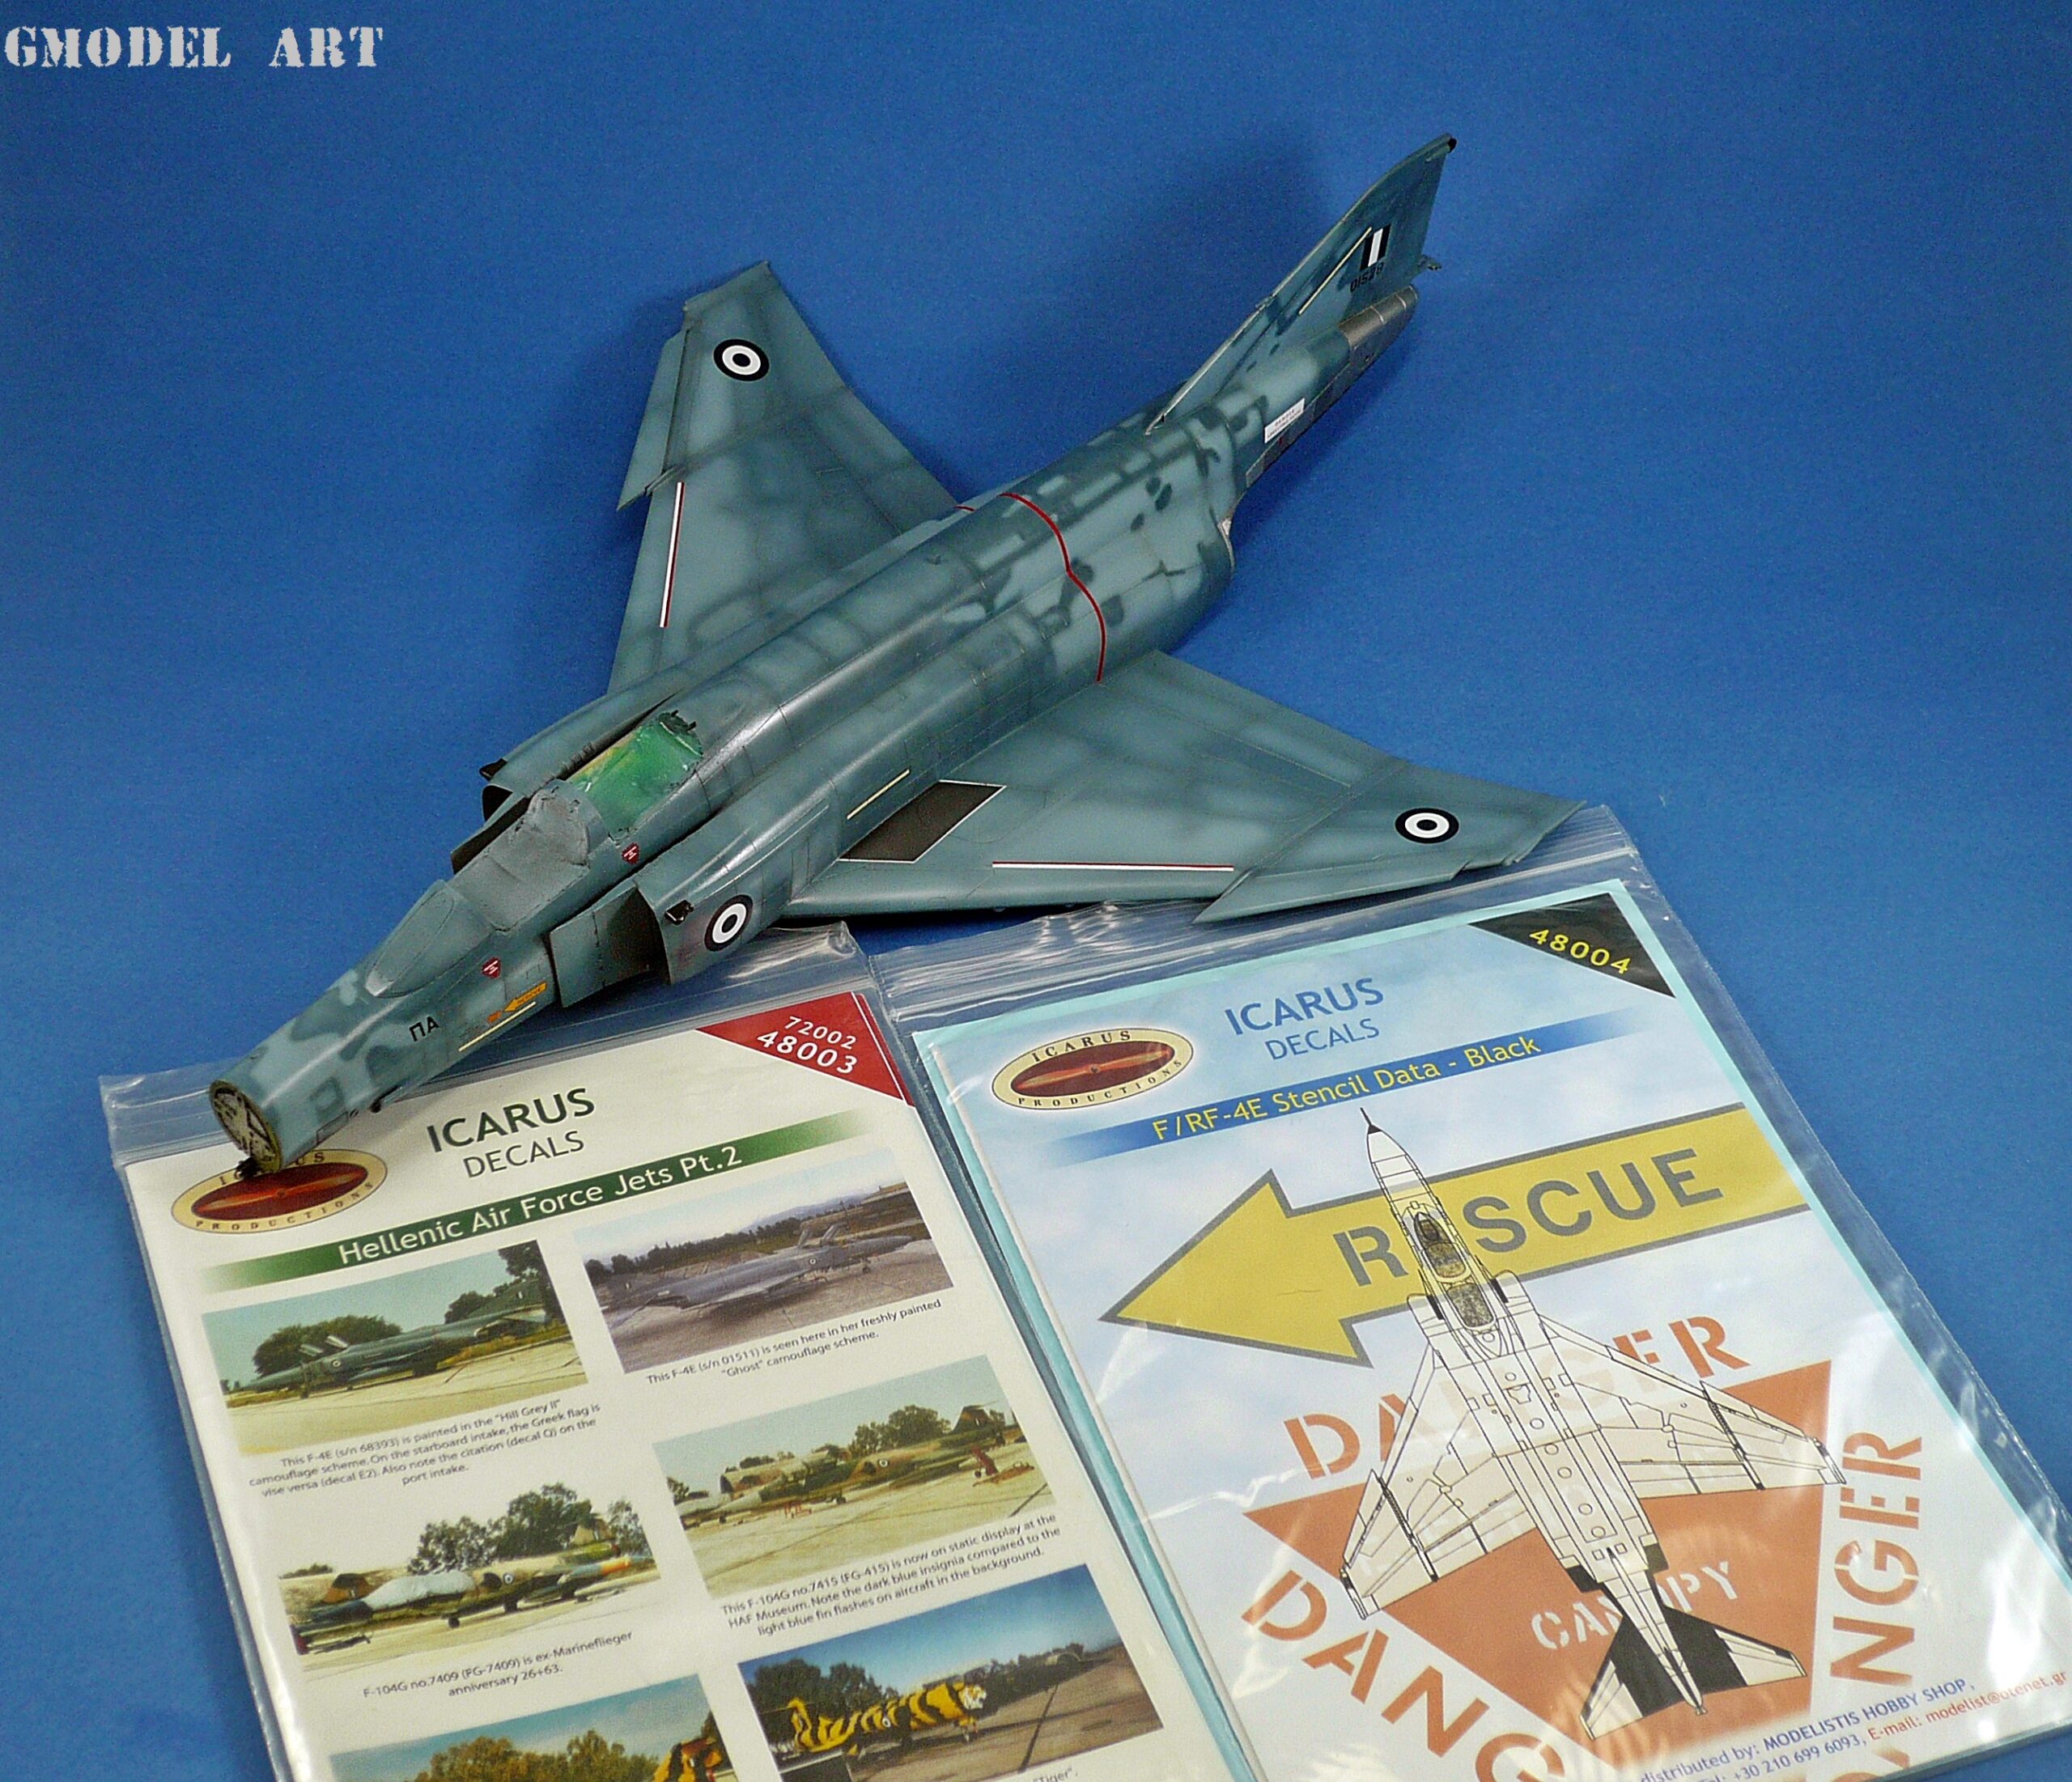
The decal stage used Icarus Decals sheets 48003 and 48004 for the stencils.
Applying the stencils was a time-consuming part of the project, but they contributed significantly to the finished appearance. Small markings help establish the scale of the aircraft and add detail that would otherwise be missing from the model.
Once the decals had been positioned and allowed to settle, another coat of AMMO Lucky Gloss Varnish was applied to protect them before weathering.
The clear coat was applied over the upper painted surfaces while avoiding the natural-metal areas as much as possible. Maintaining this separation helped preserve the intended metallic appearance.
Weathering the upper and lower surfaces
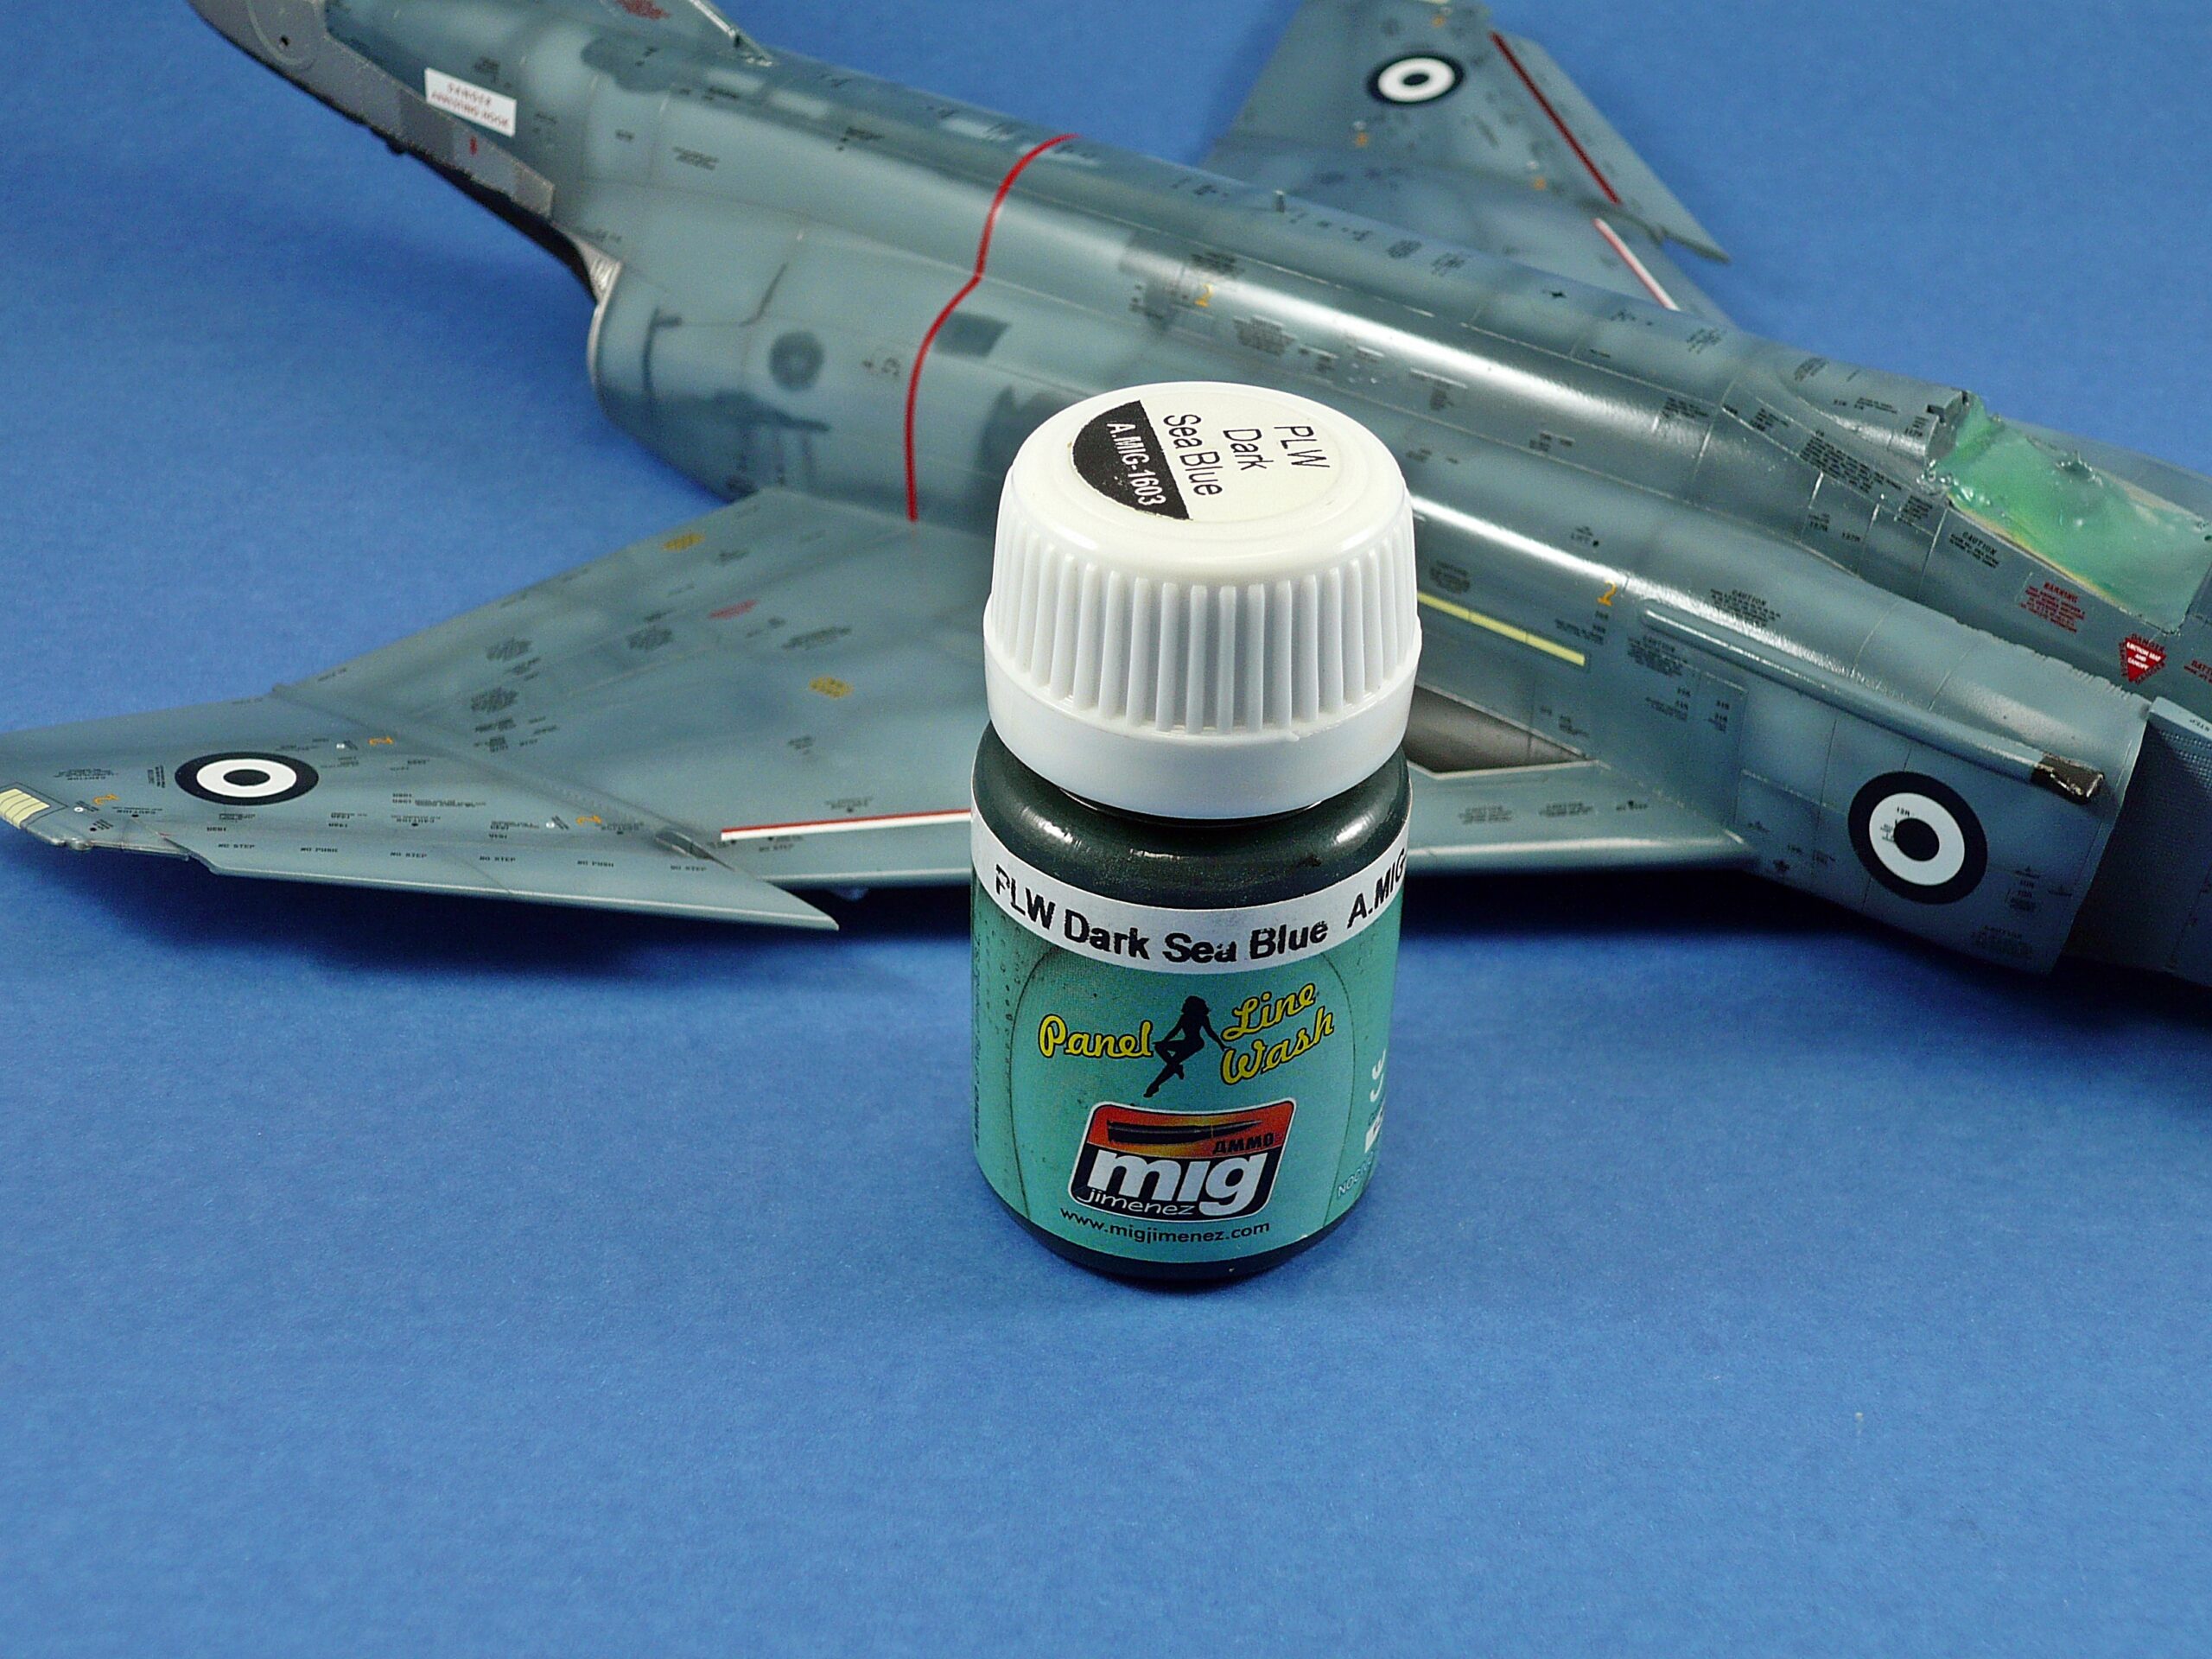
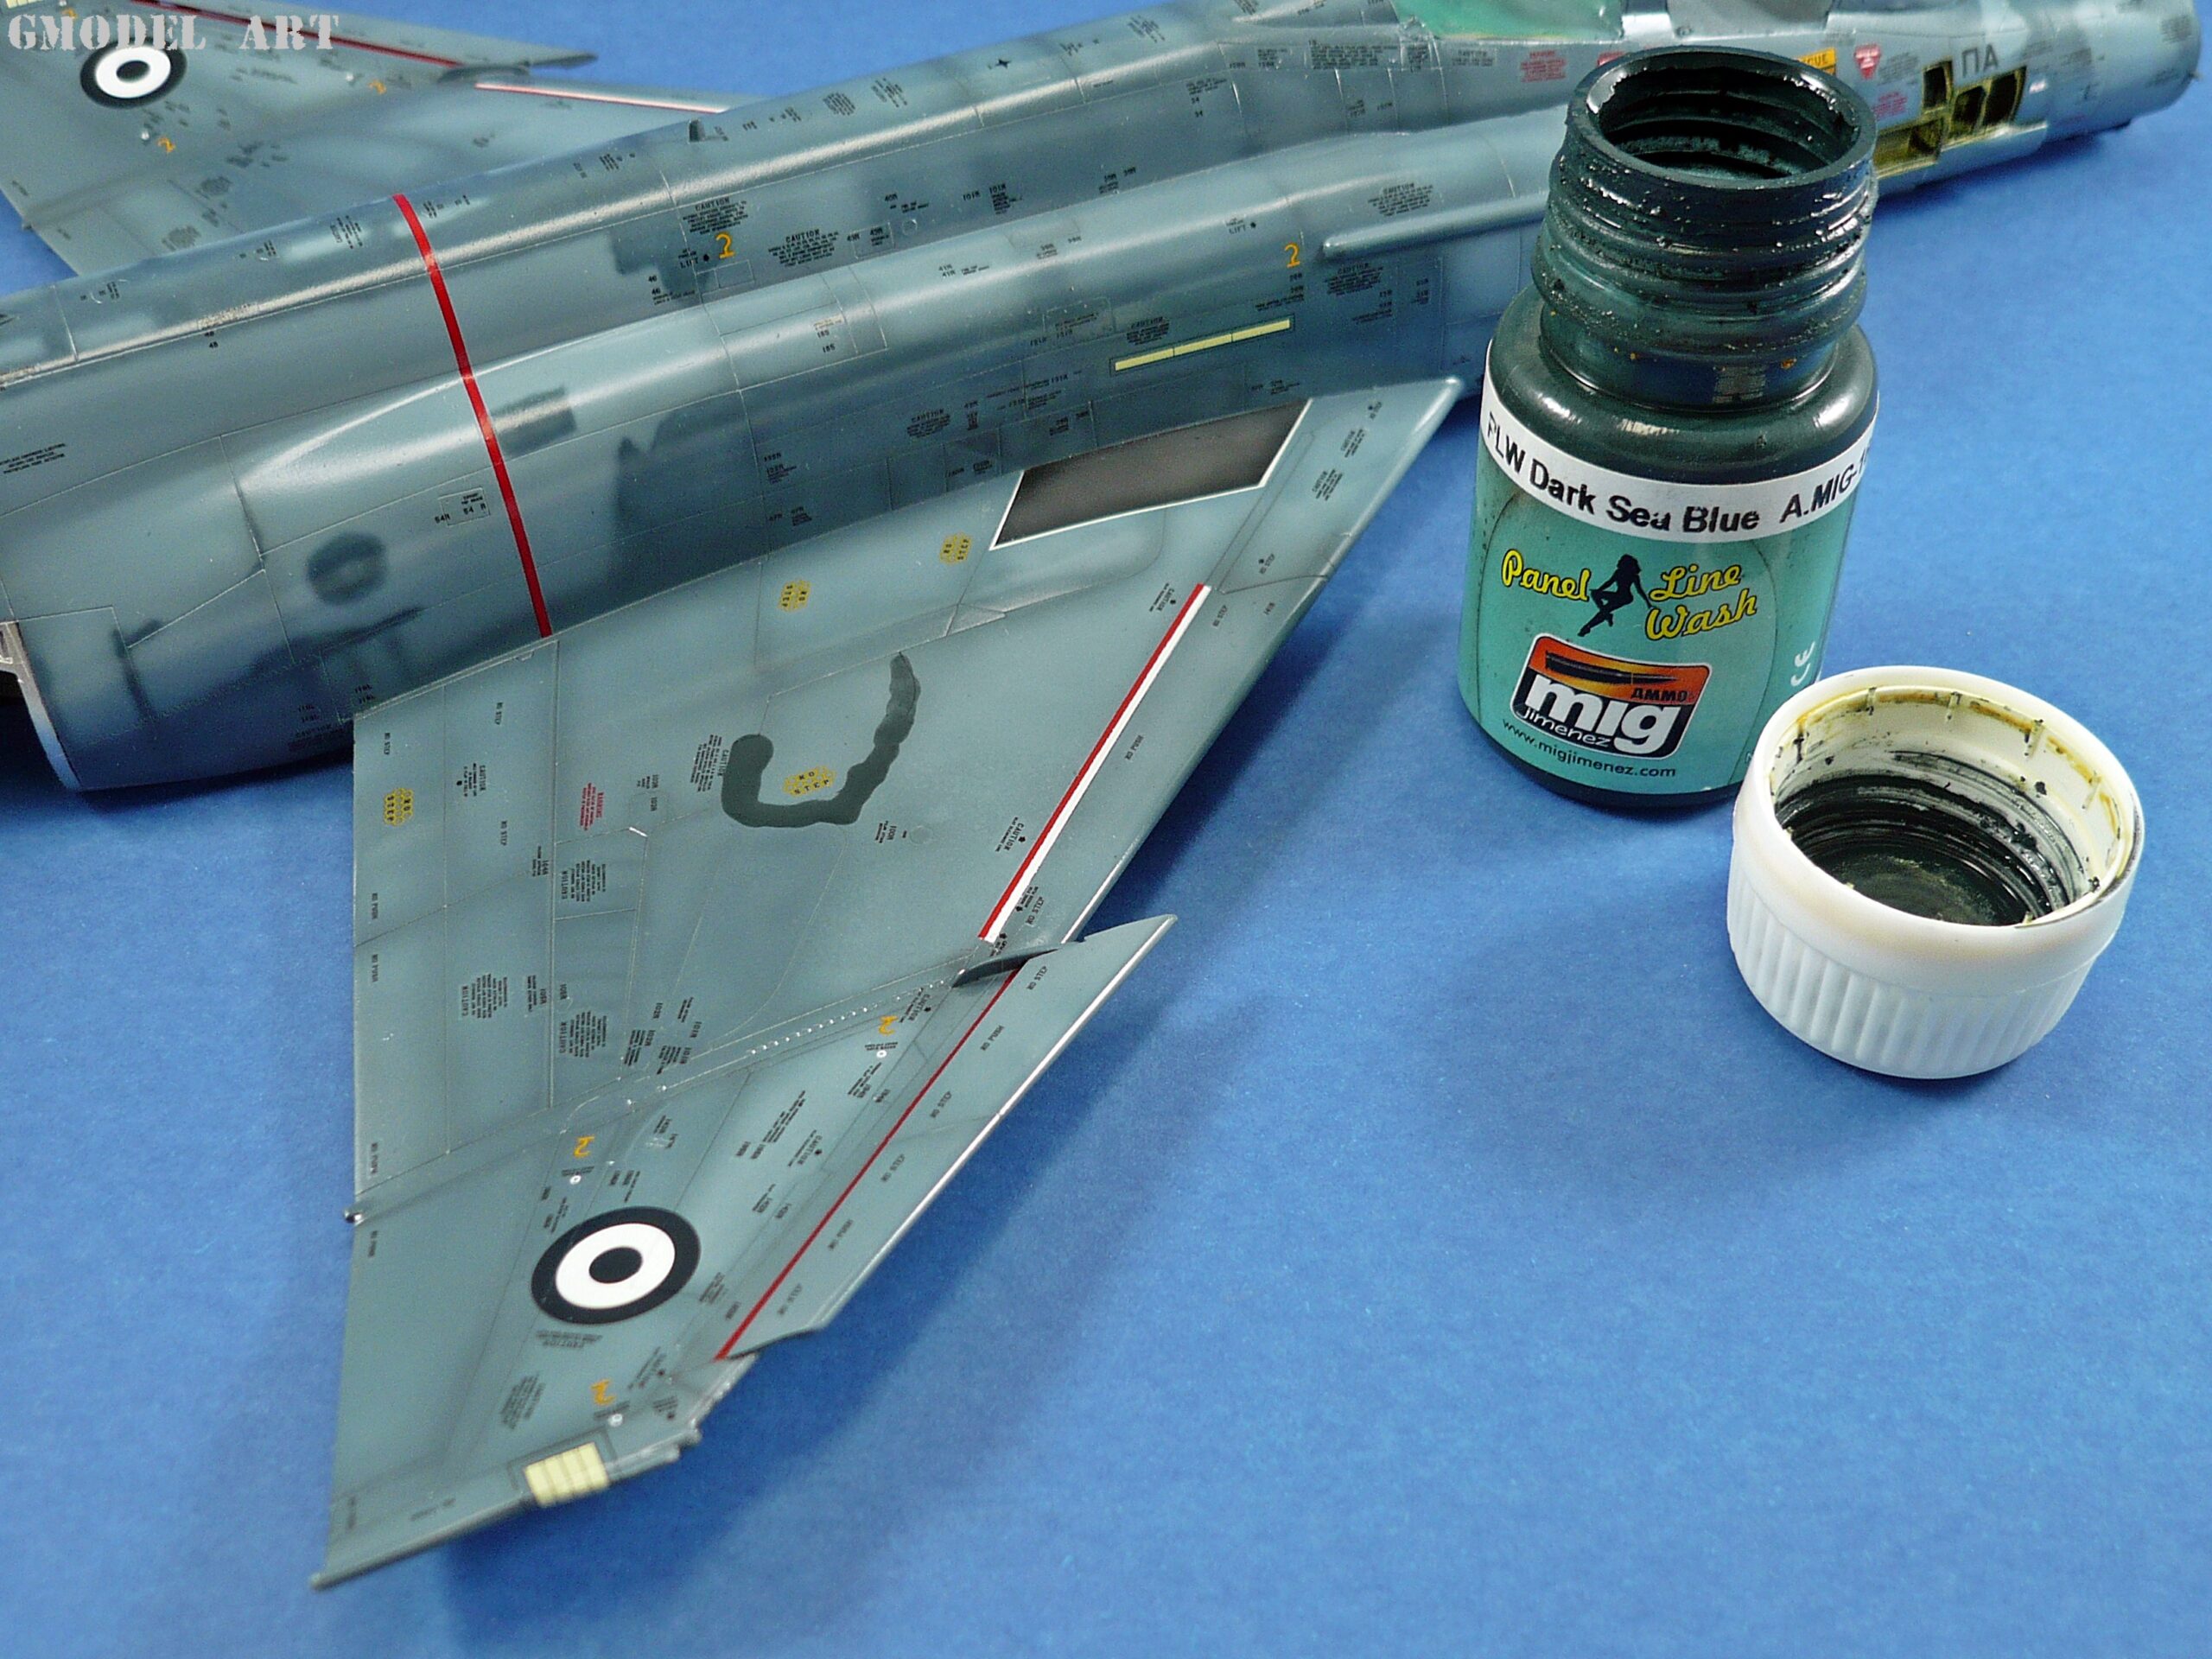
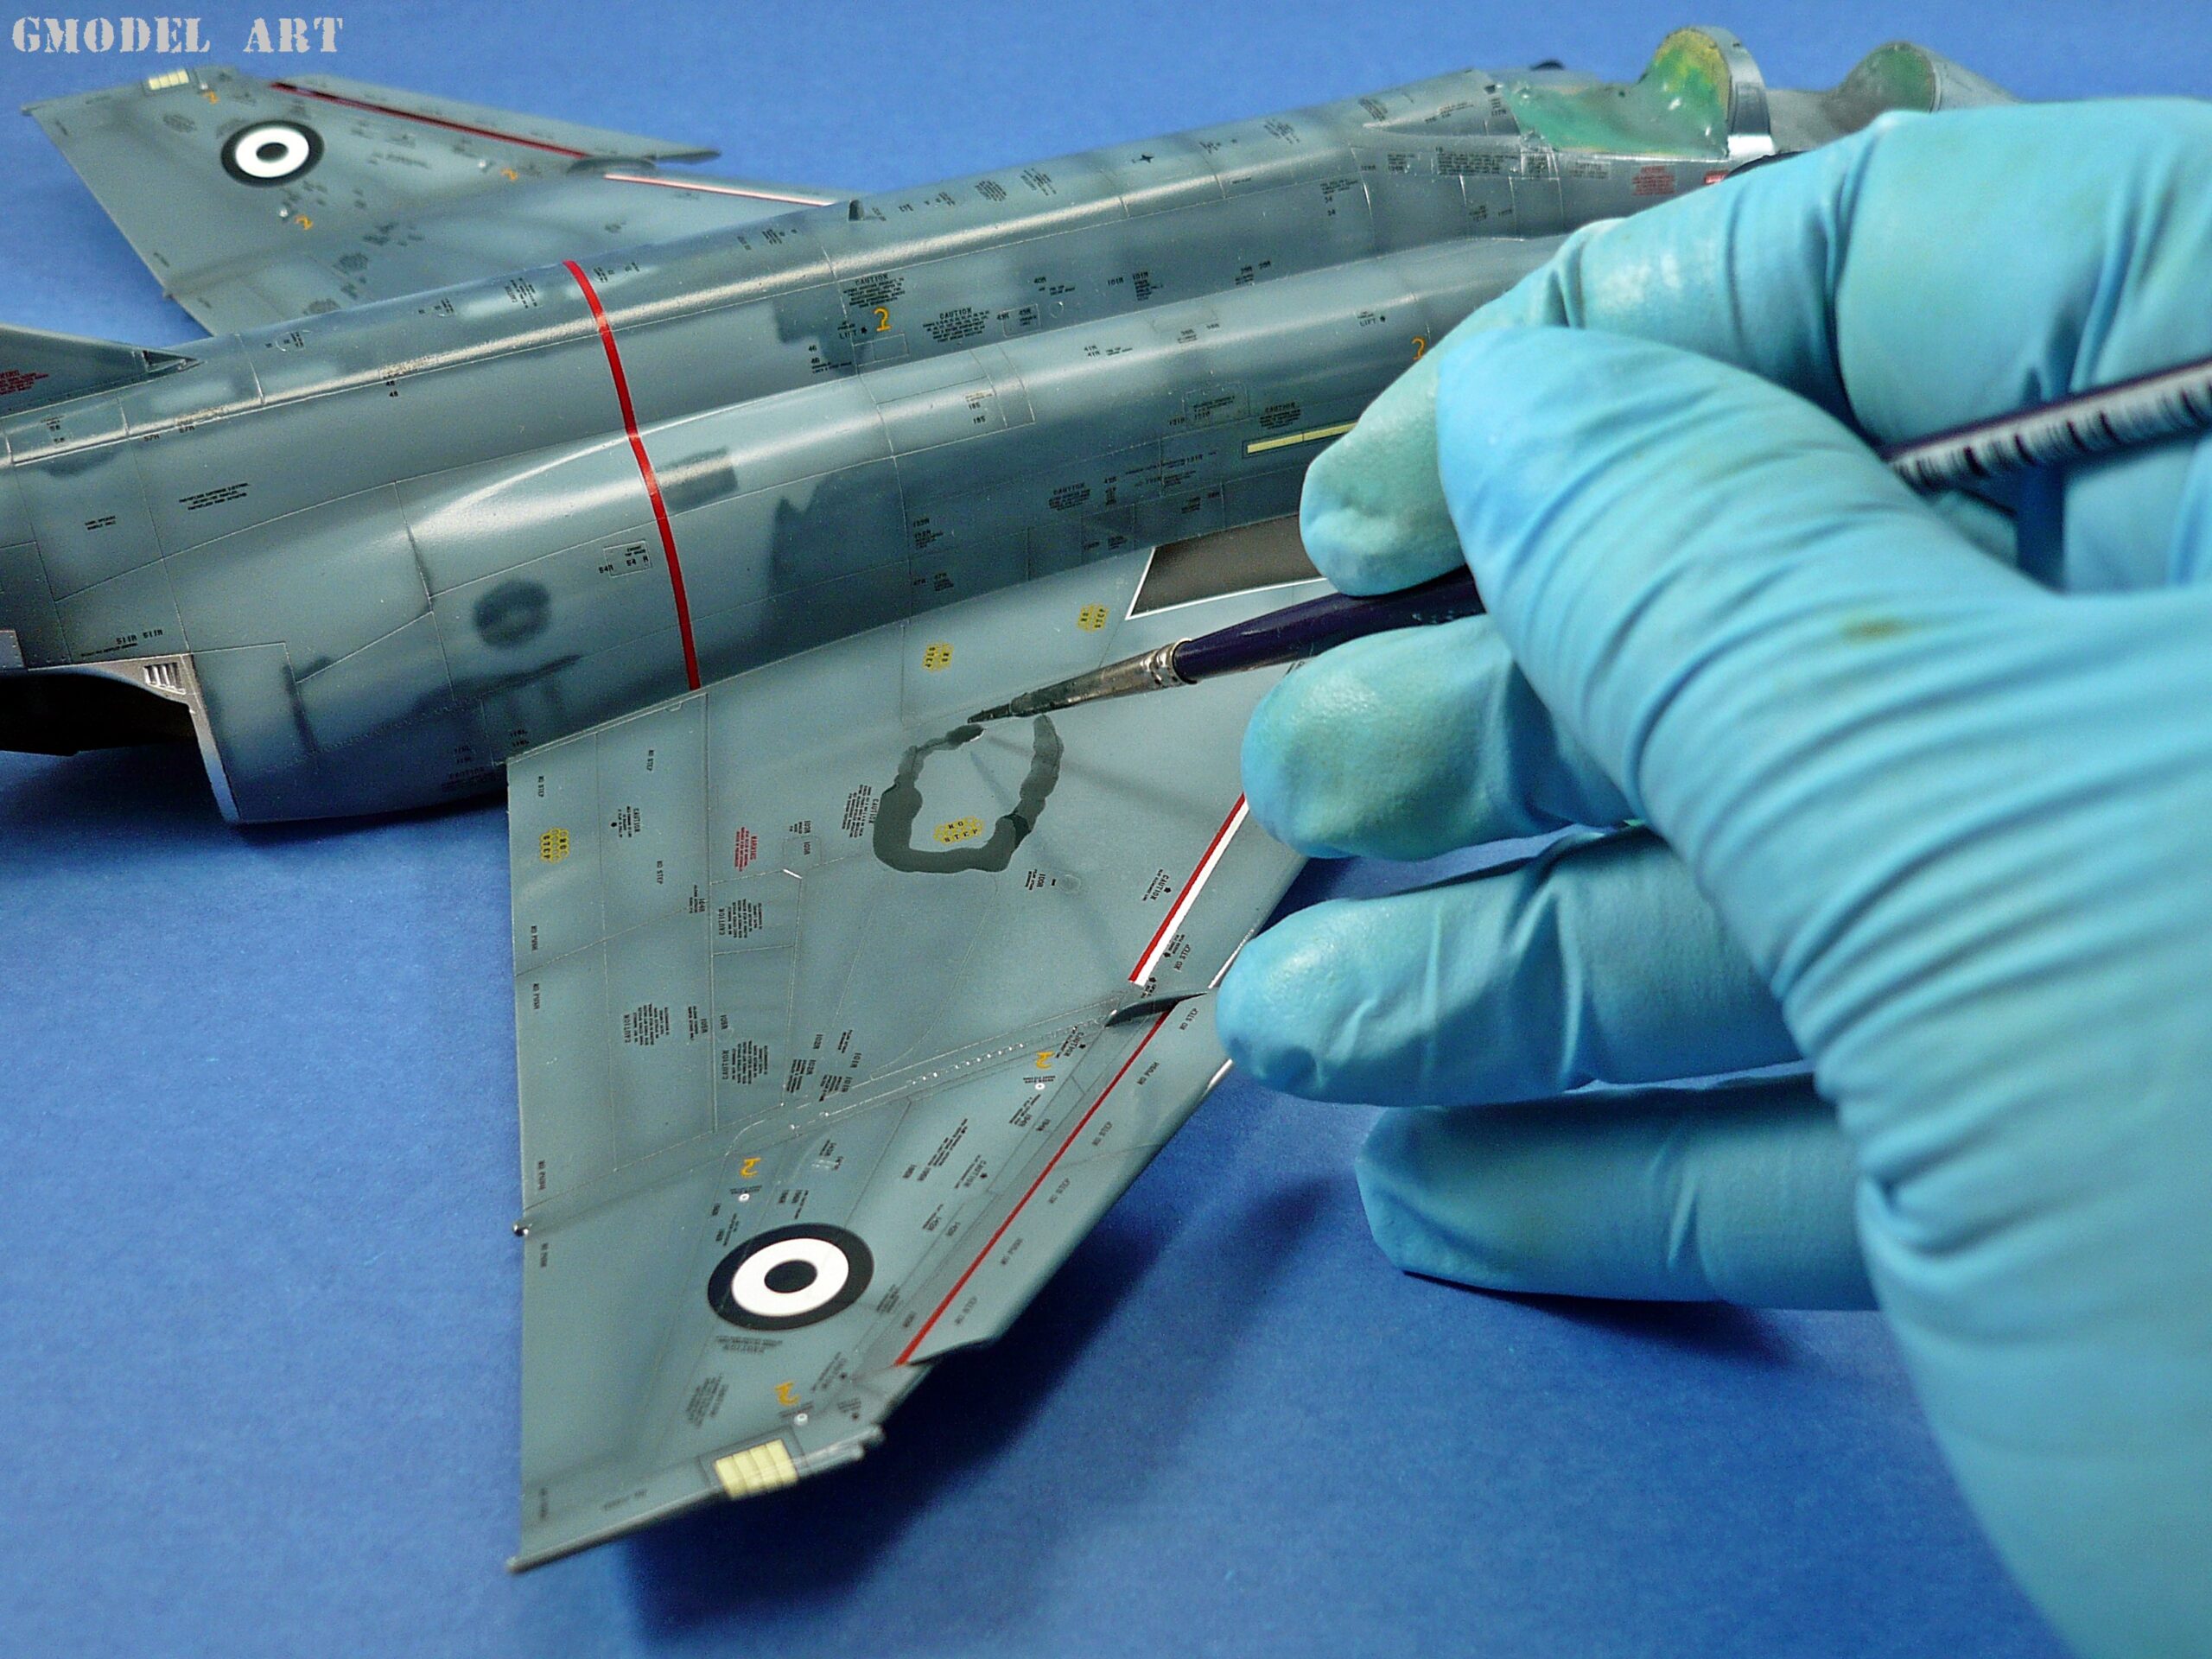
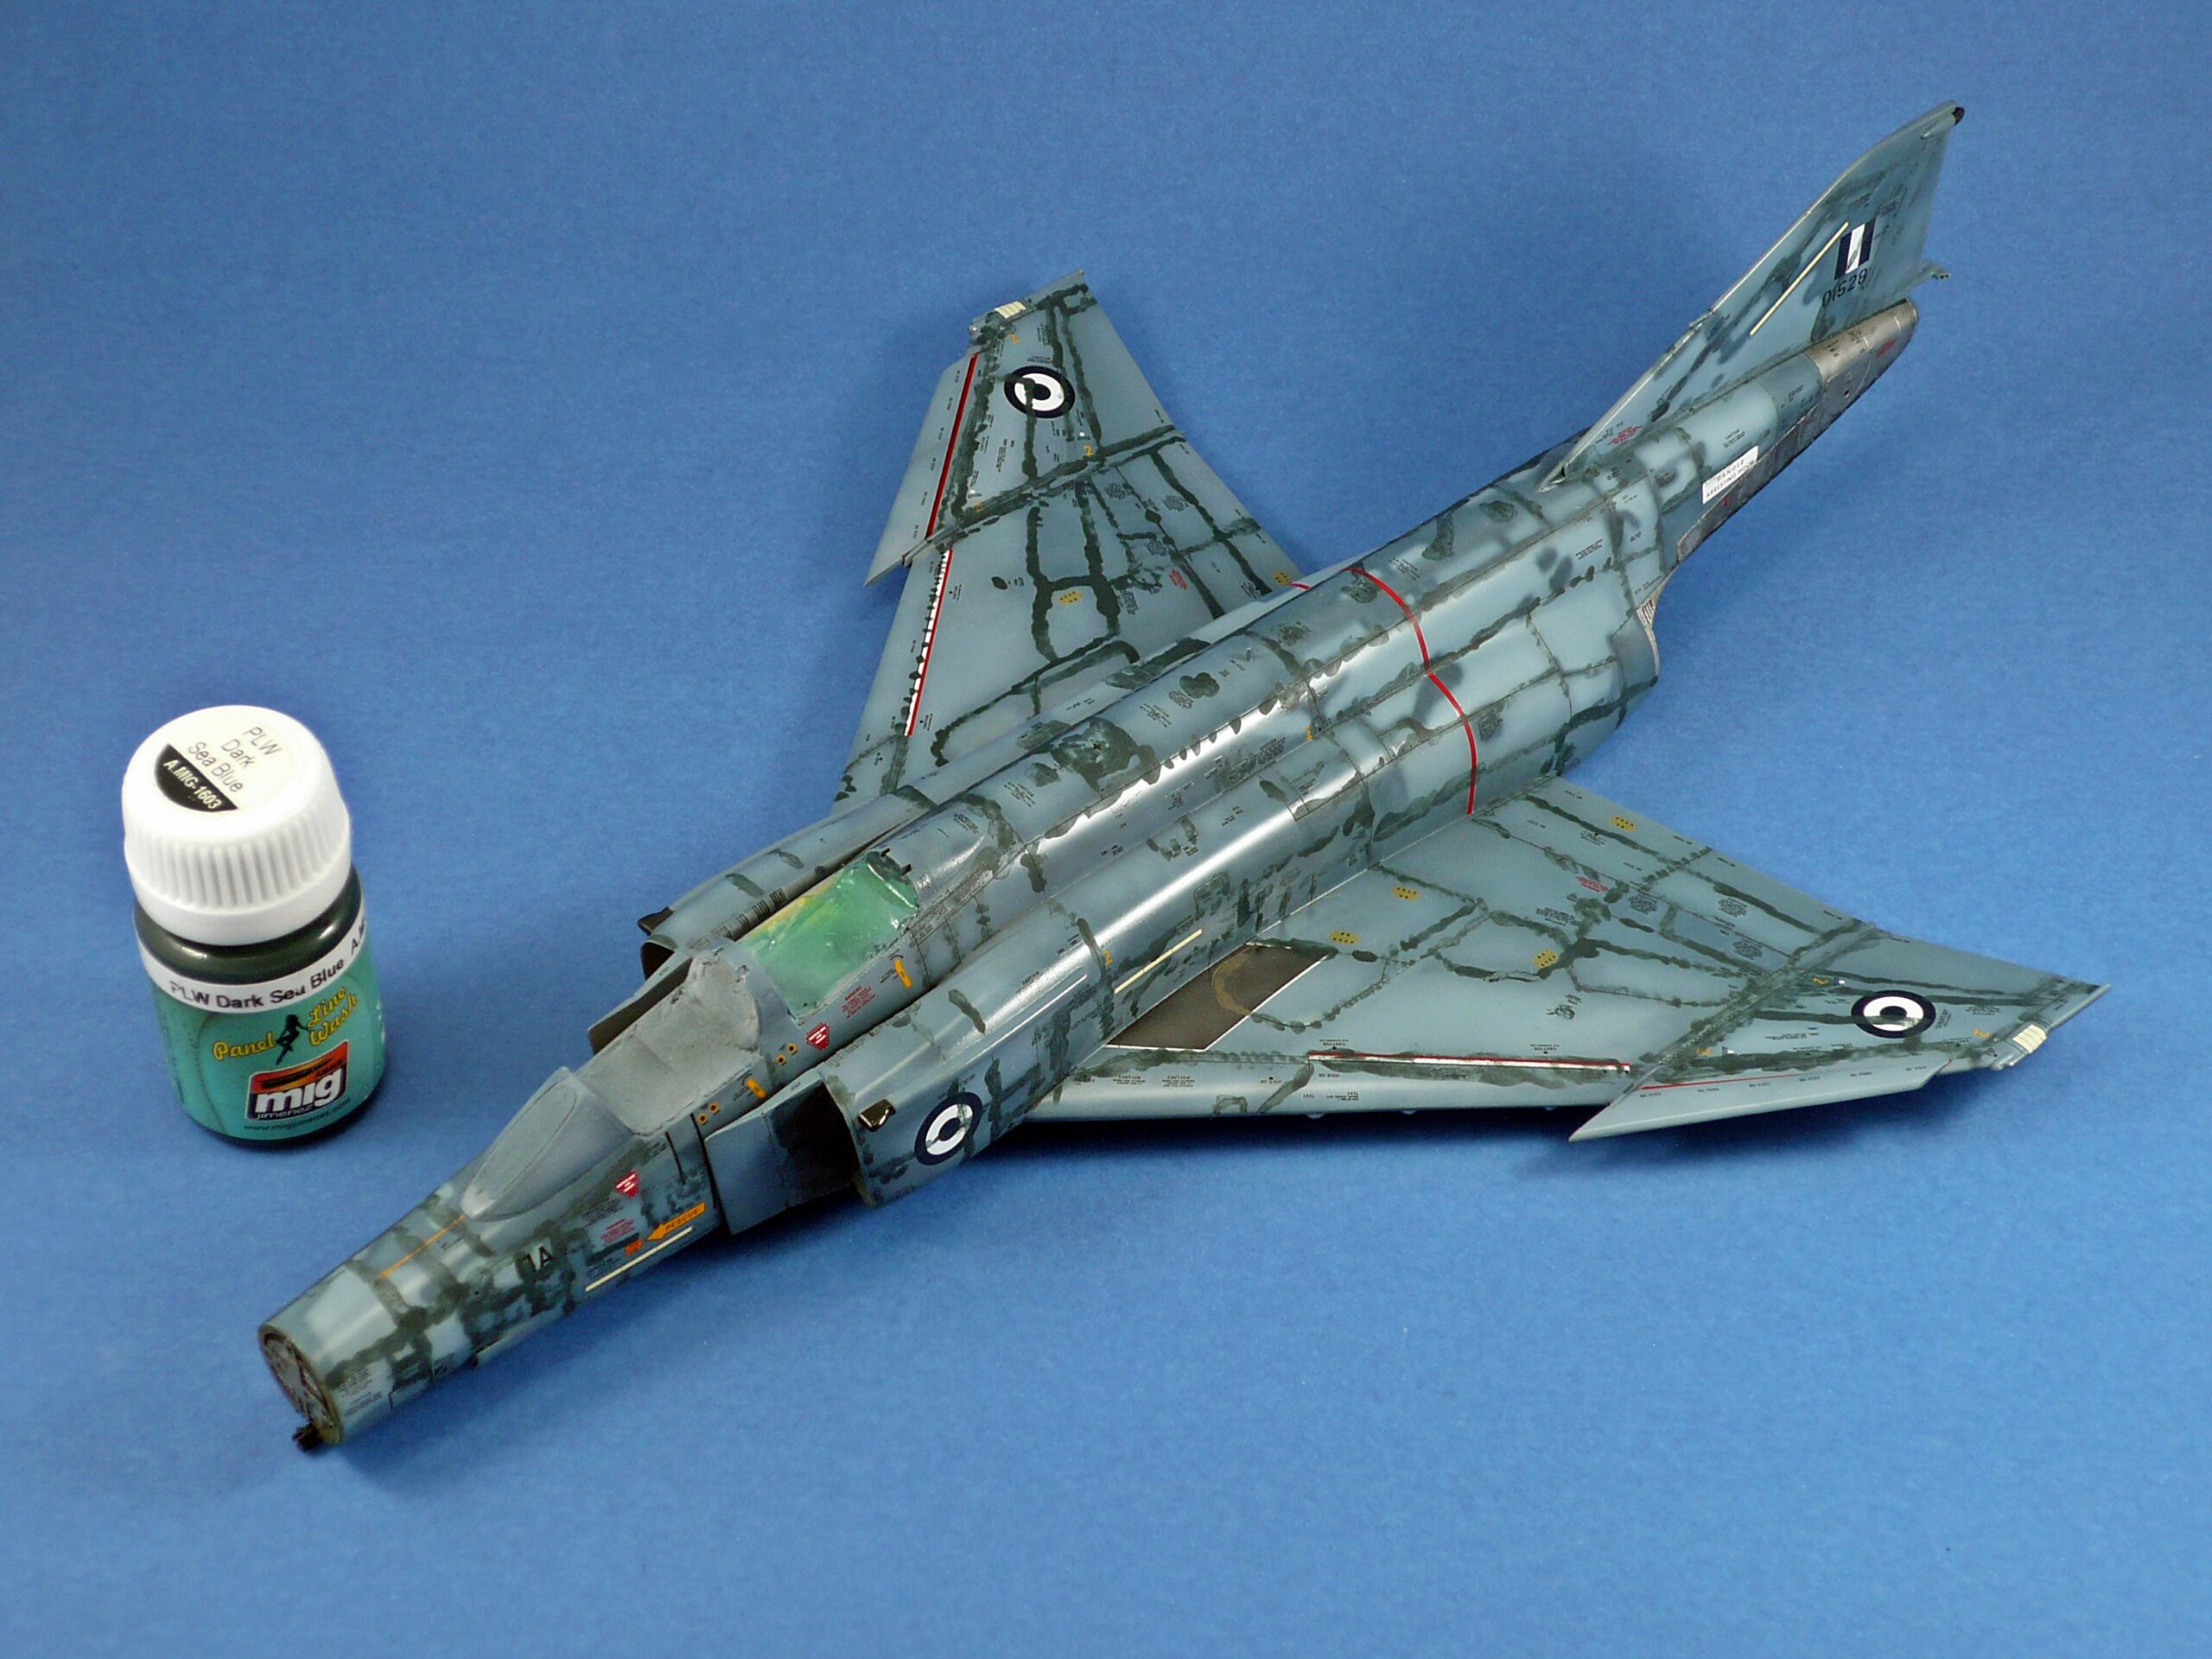
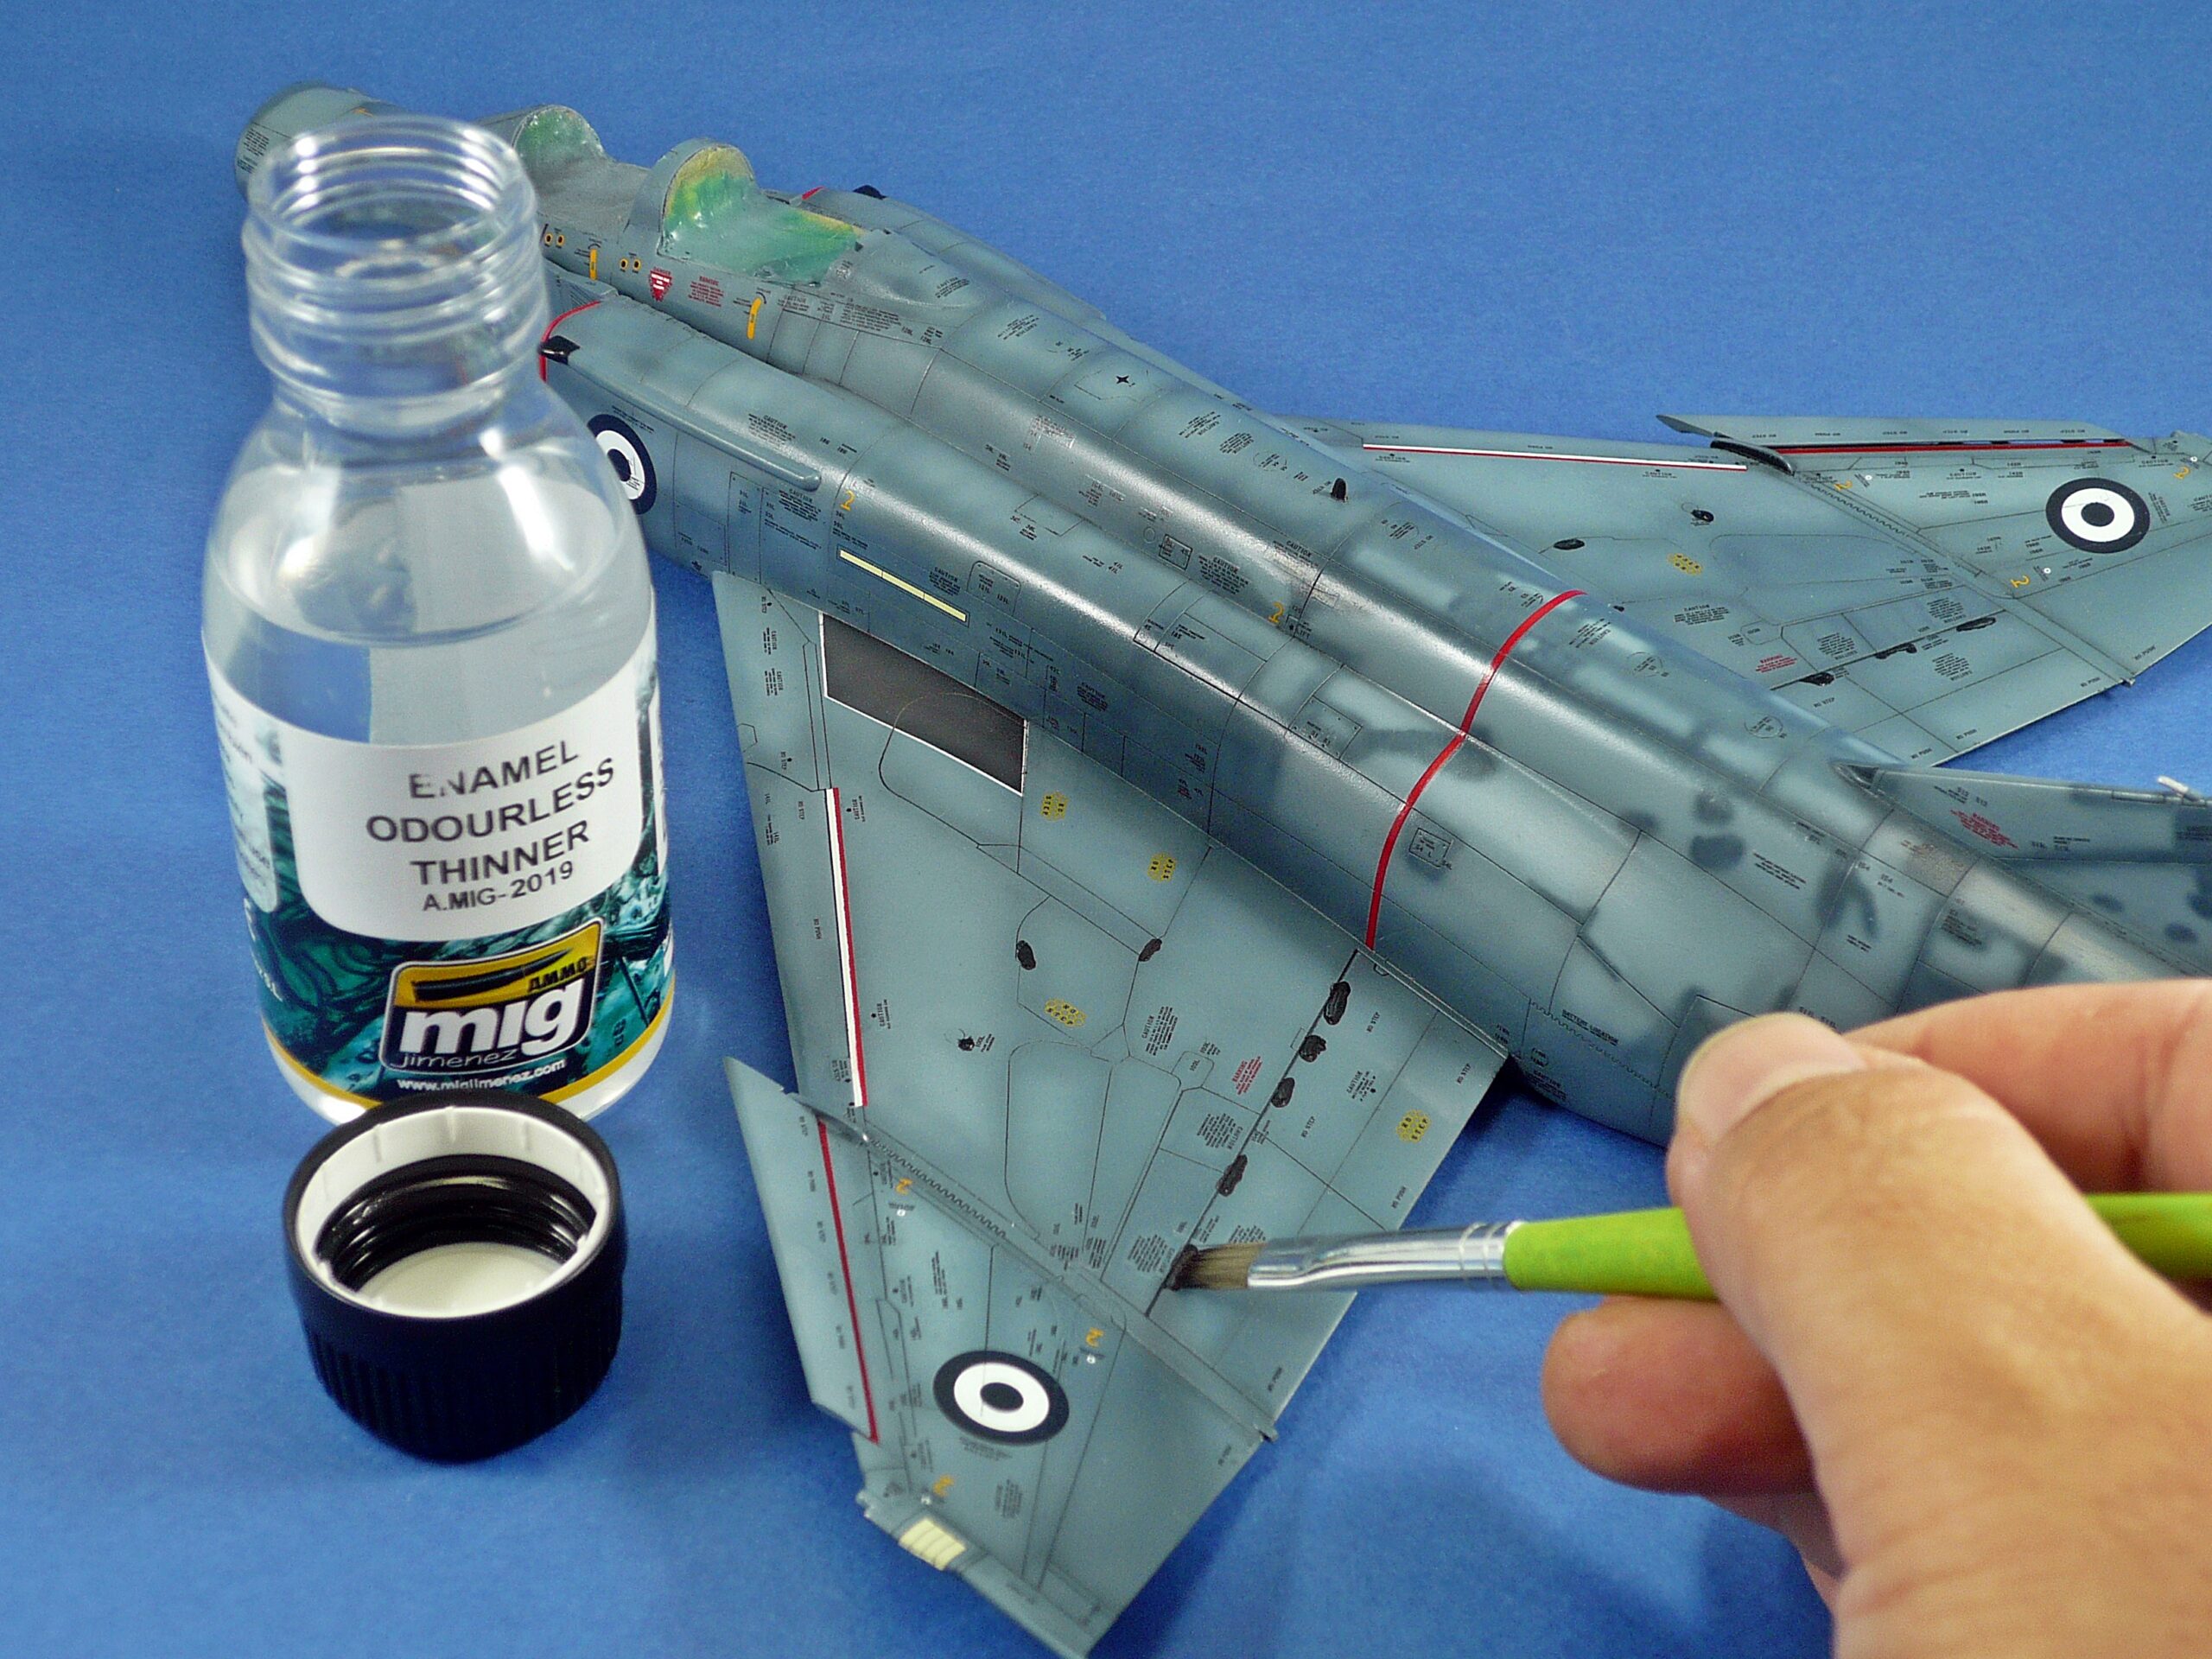
For the upper surfaces, the panel lines were treated with AMMO Panel Line Wash PLW 1603 Dark Sea Blue. The wash was applied with a fine-tipped brush, allowing it to flow into the recessed details.
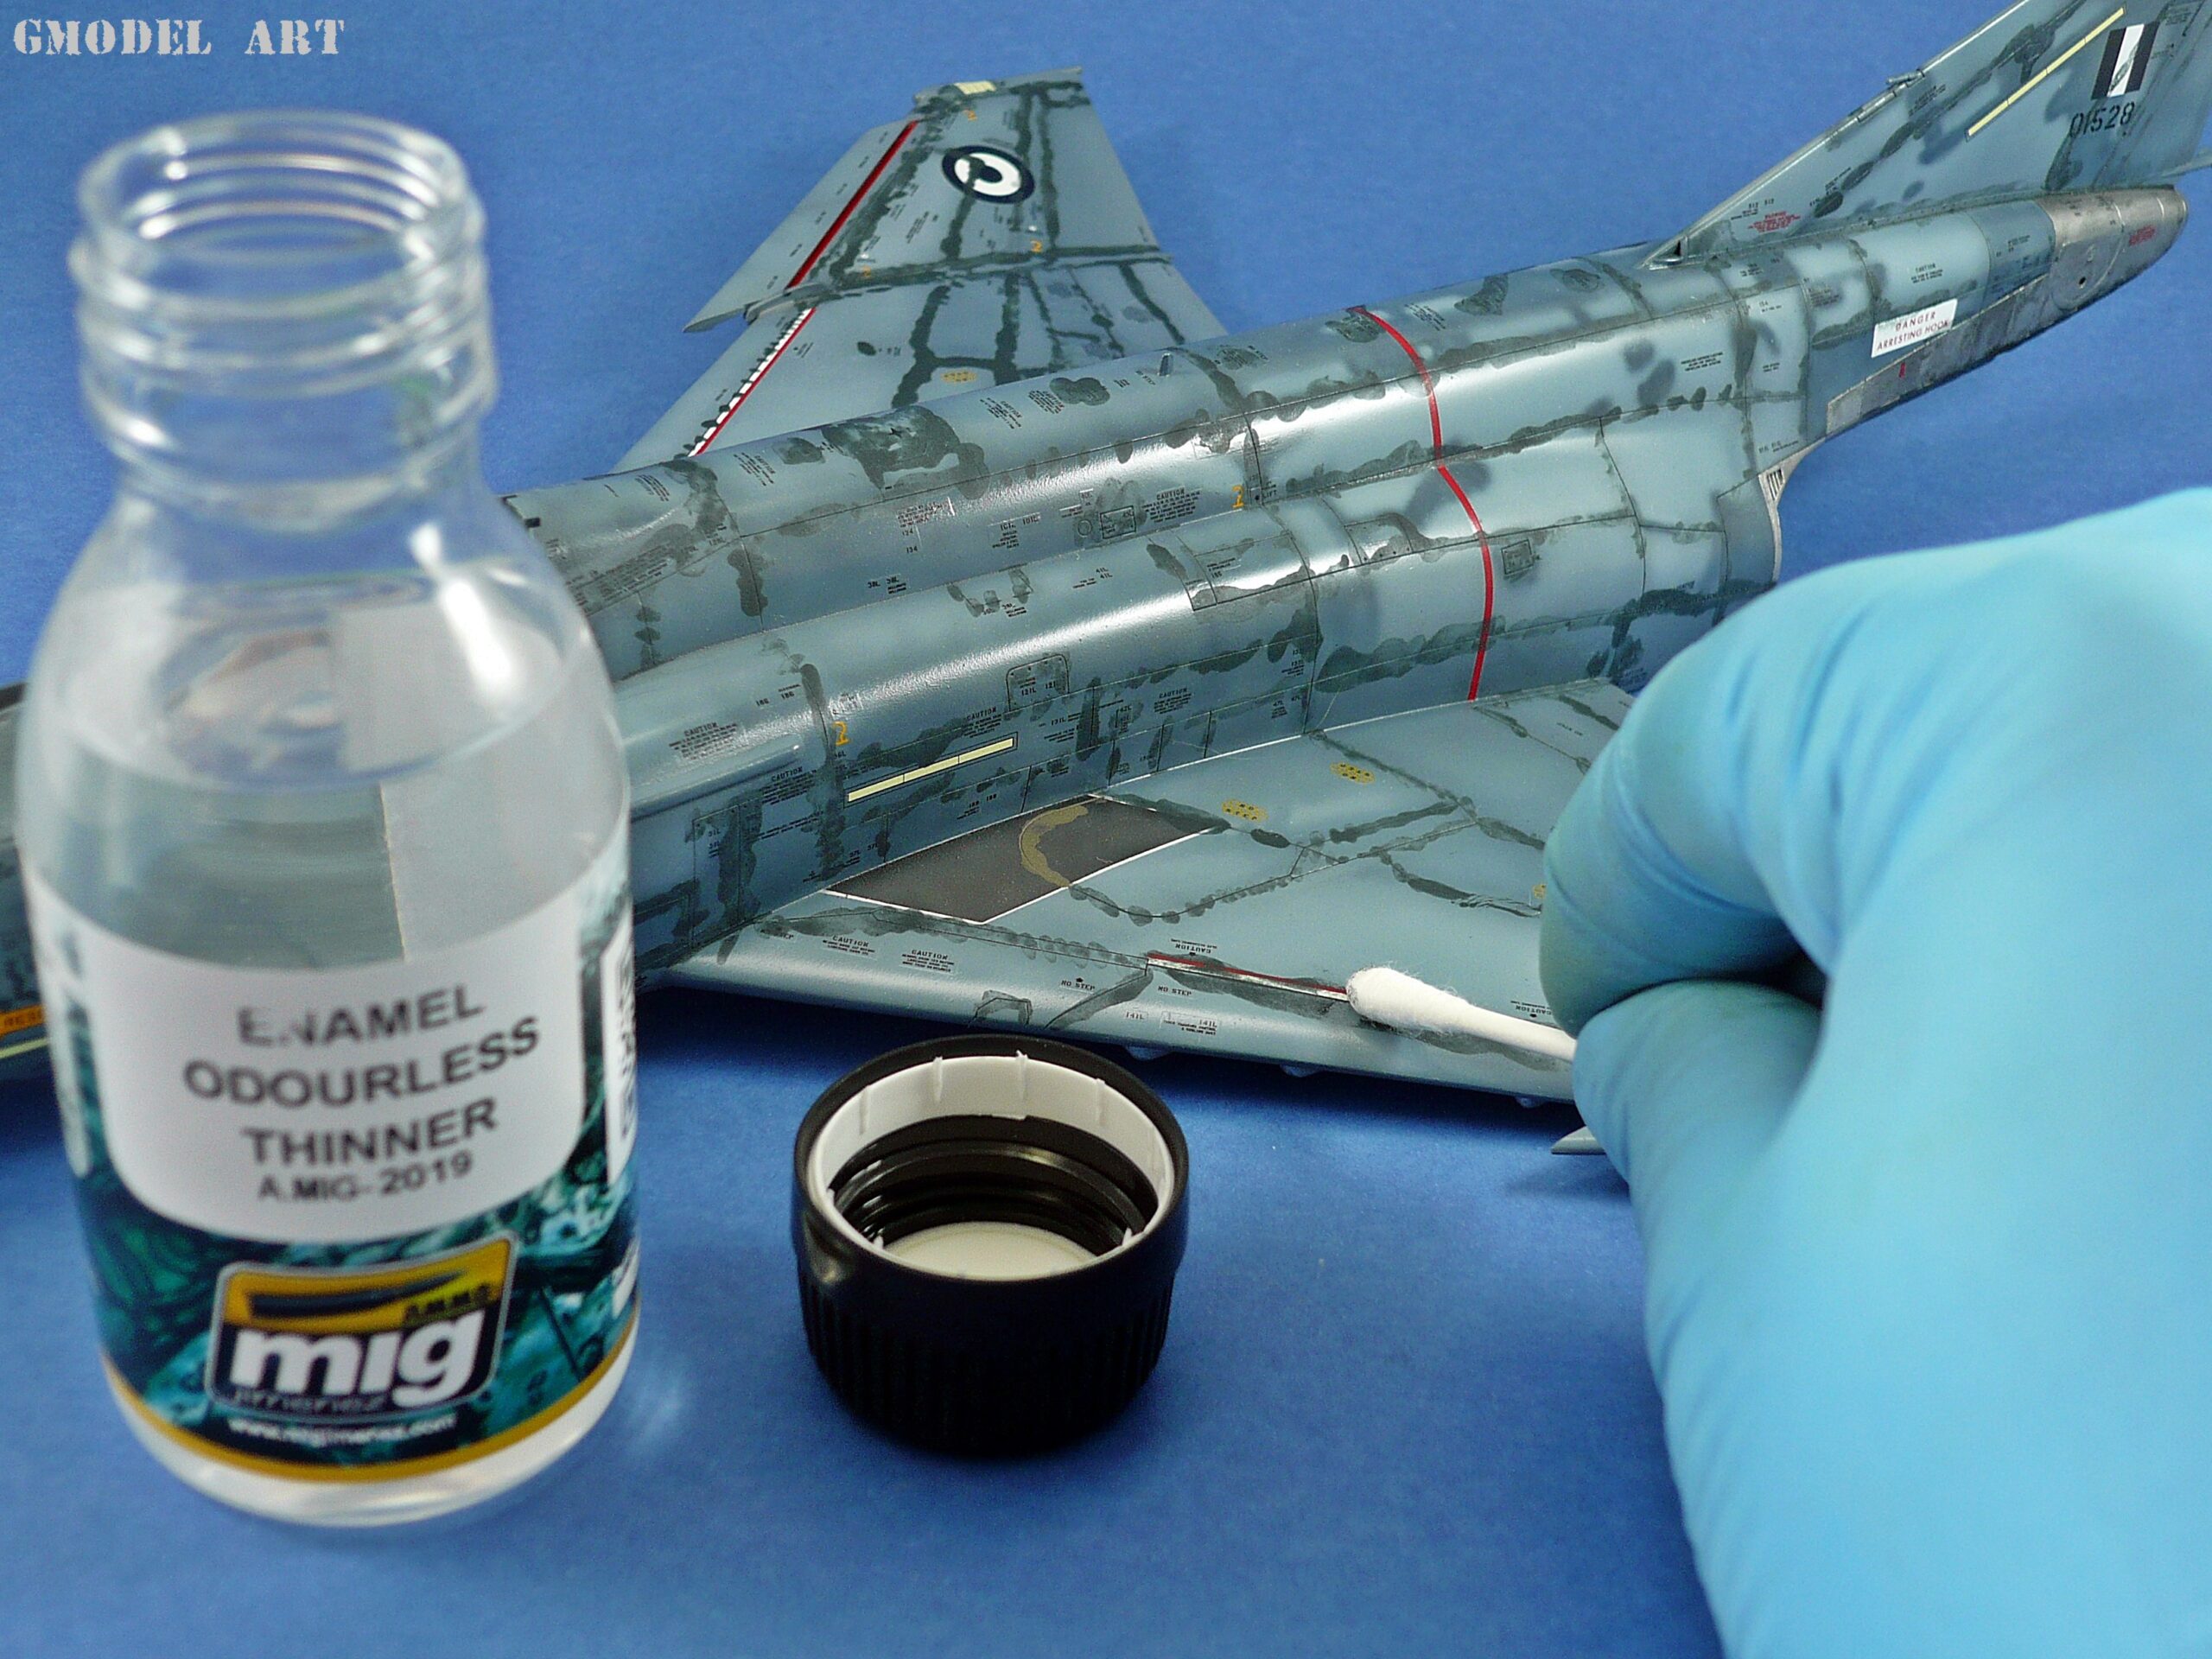
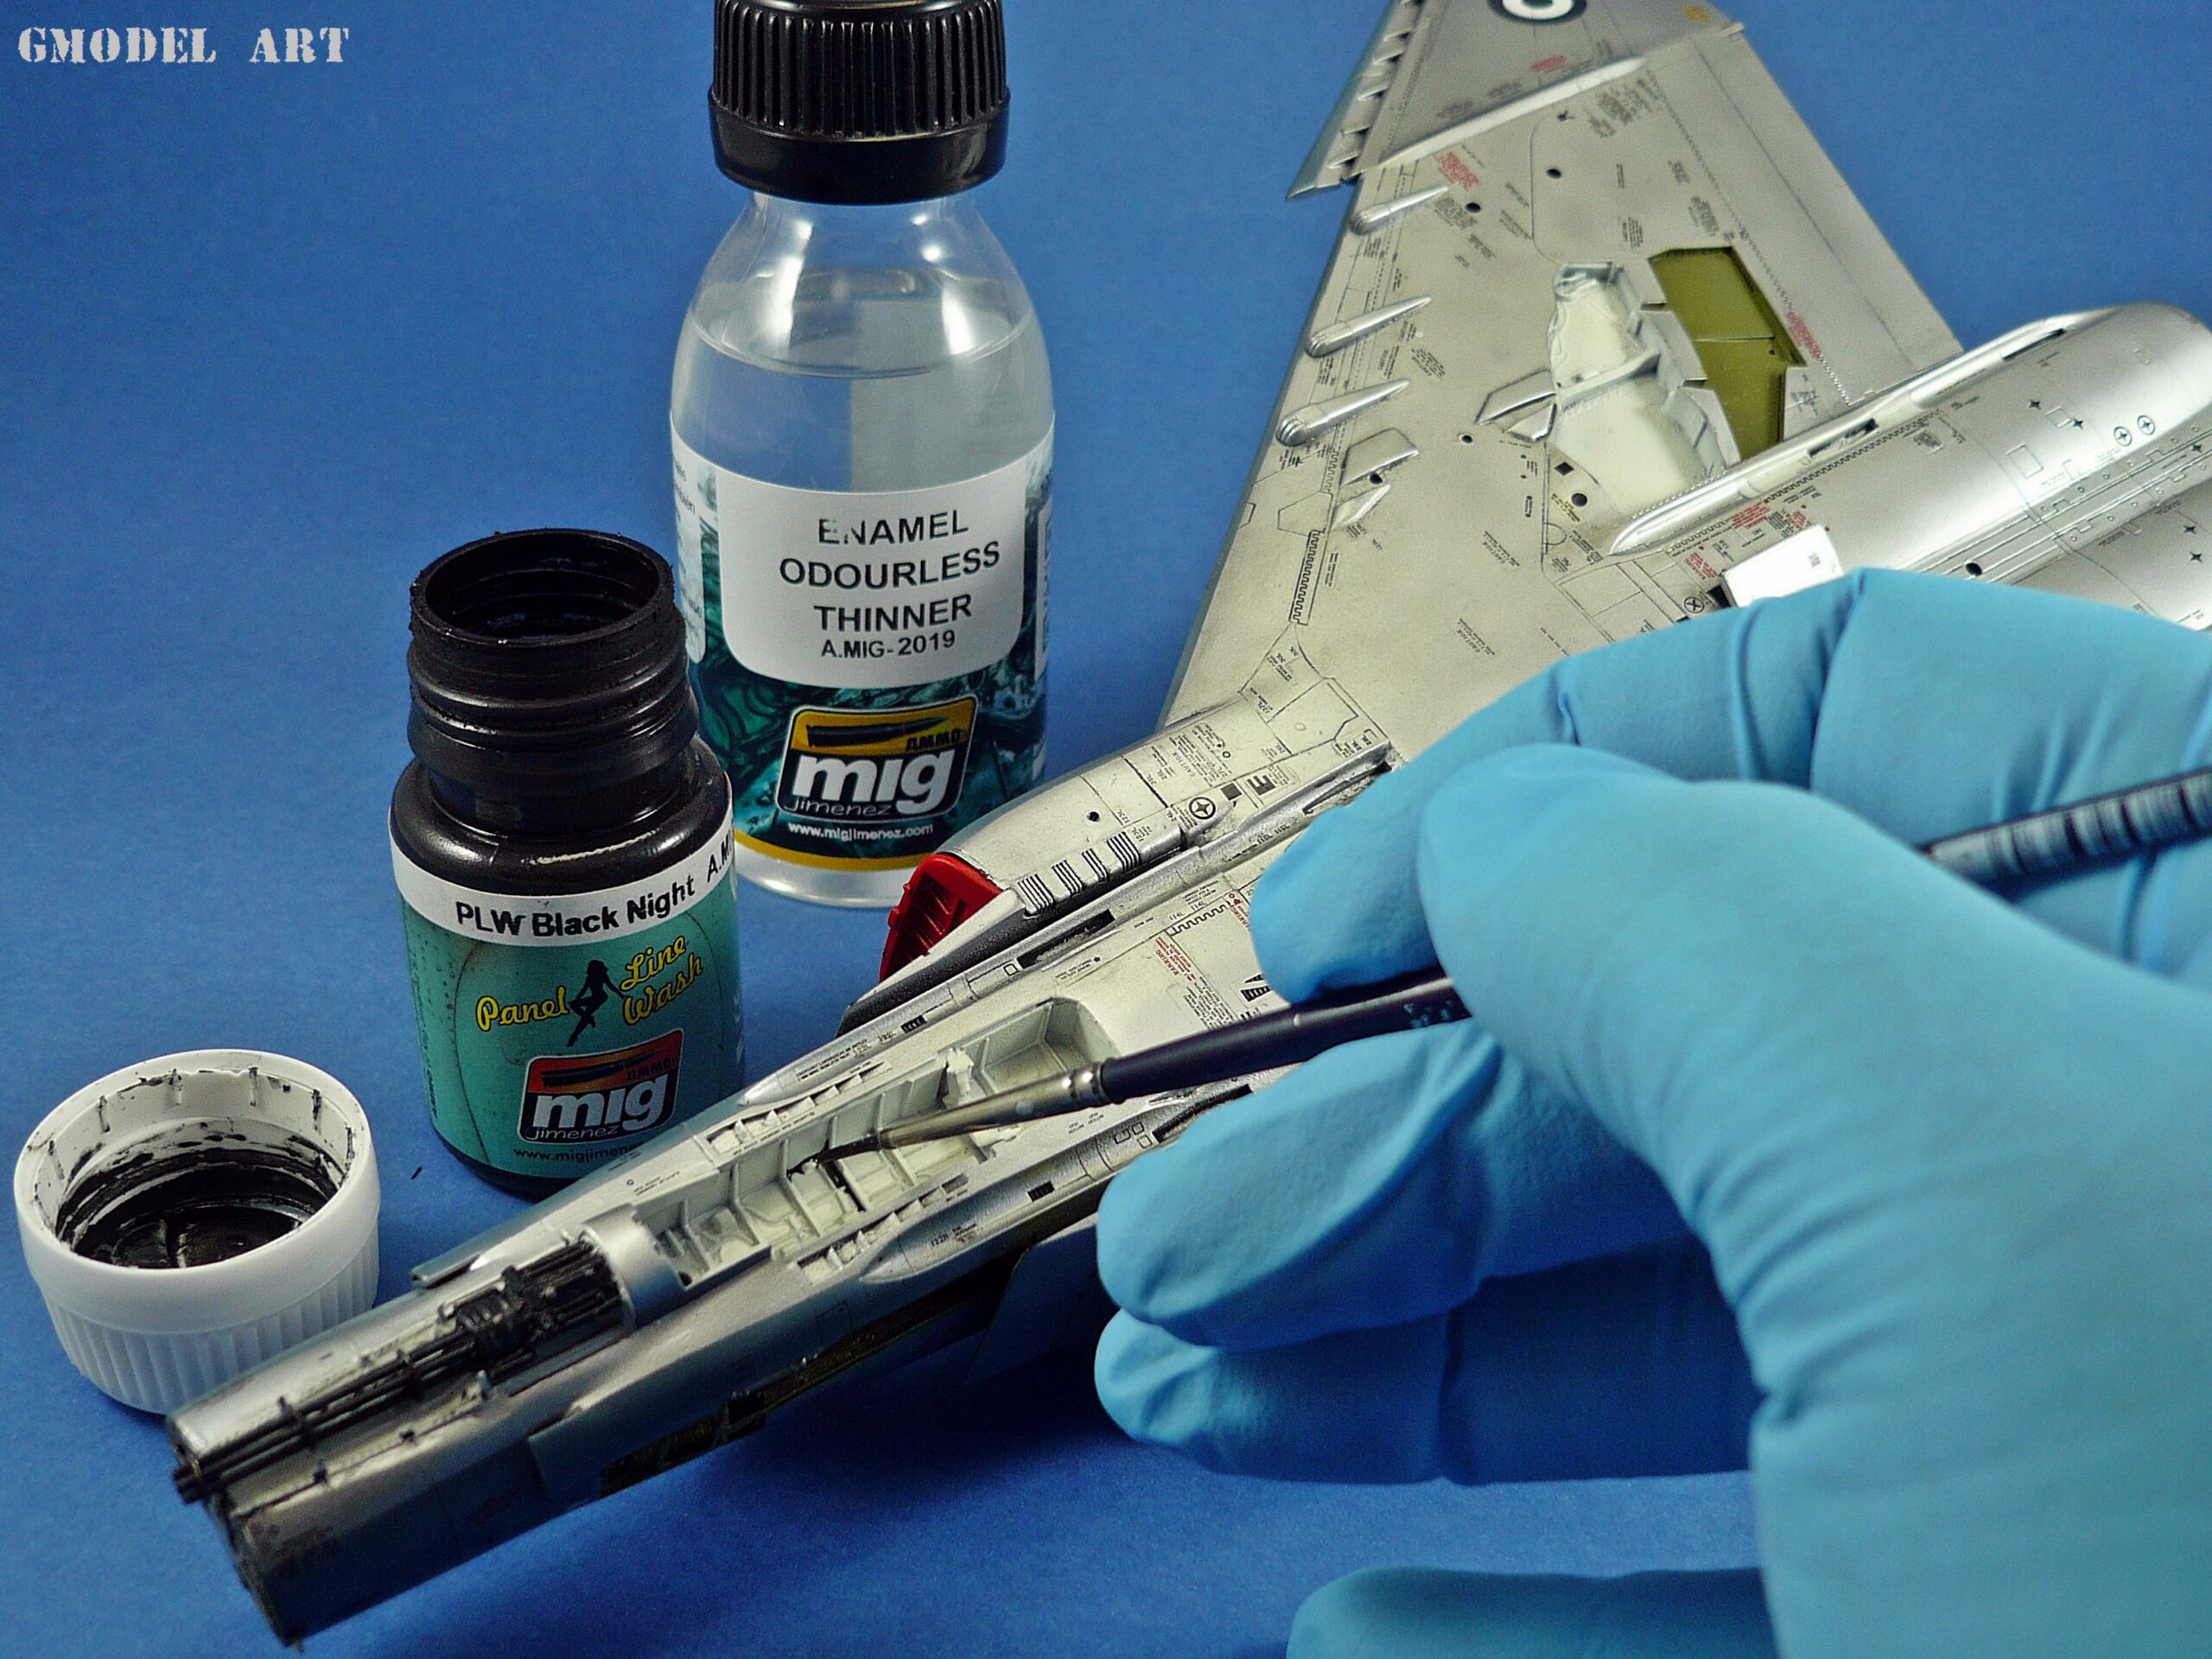
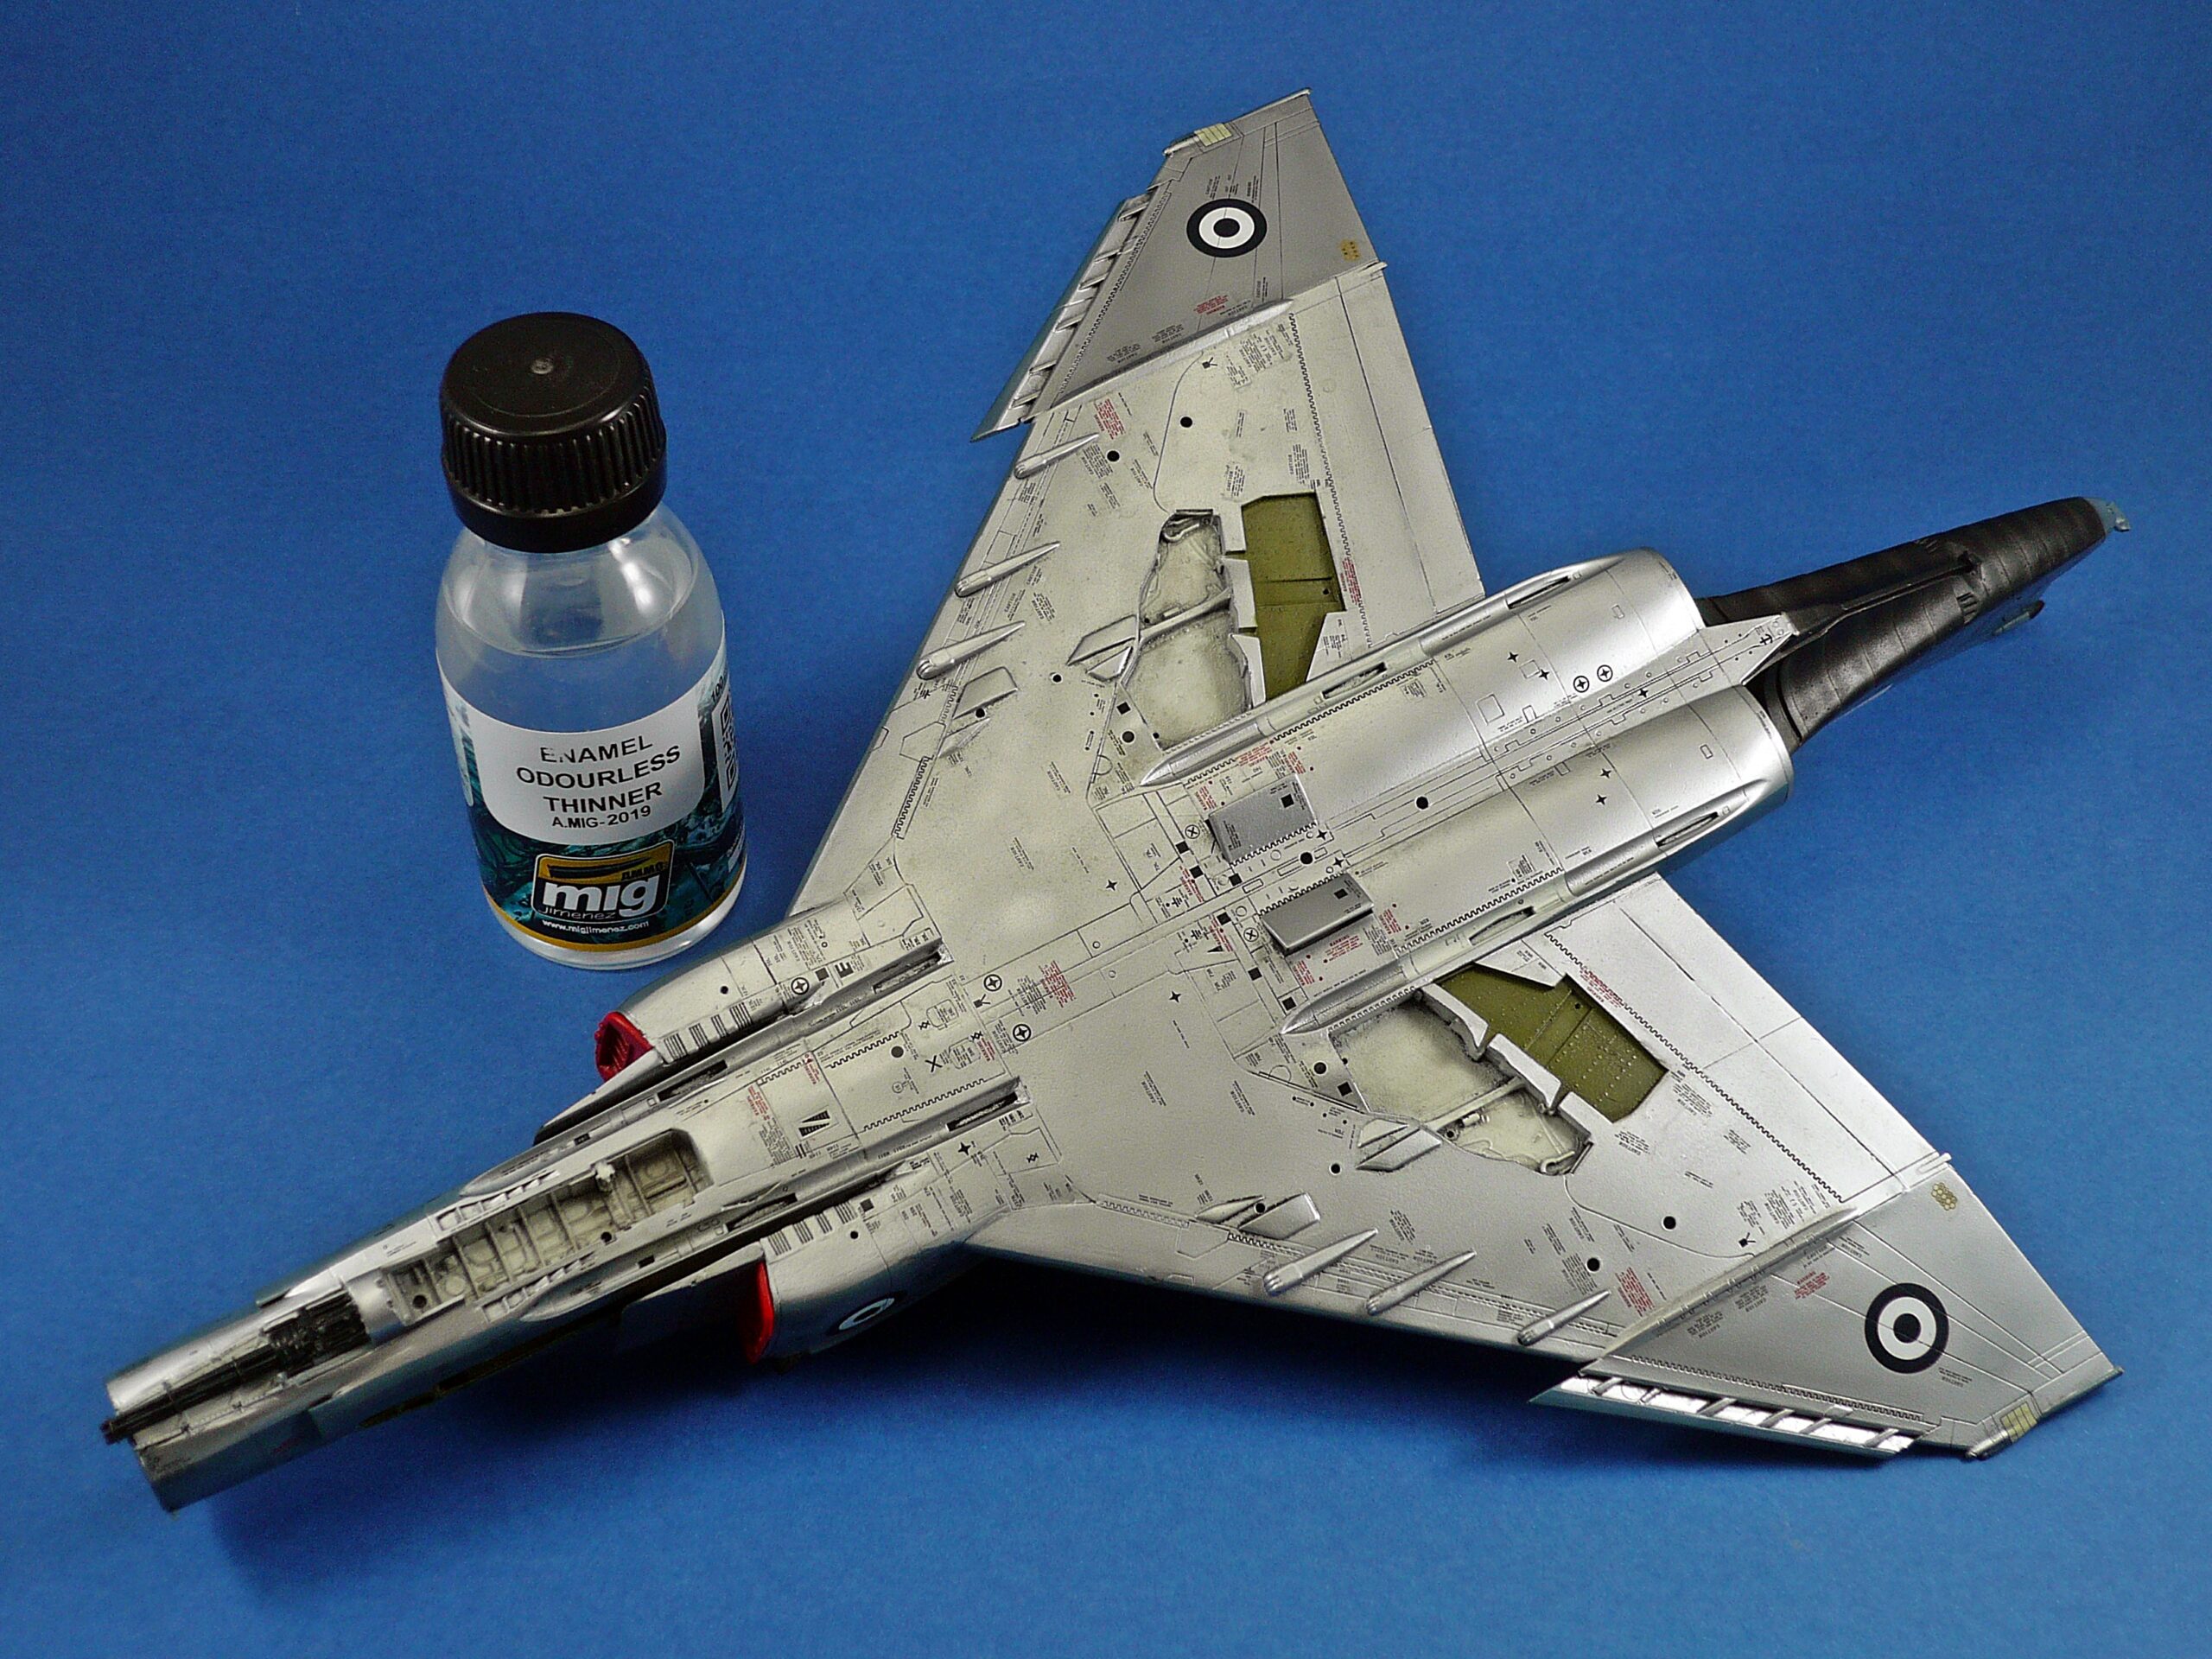
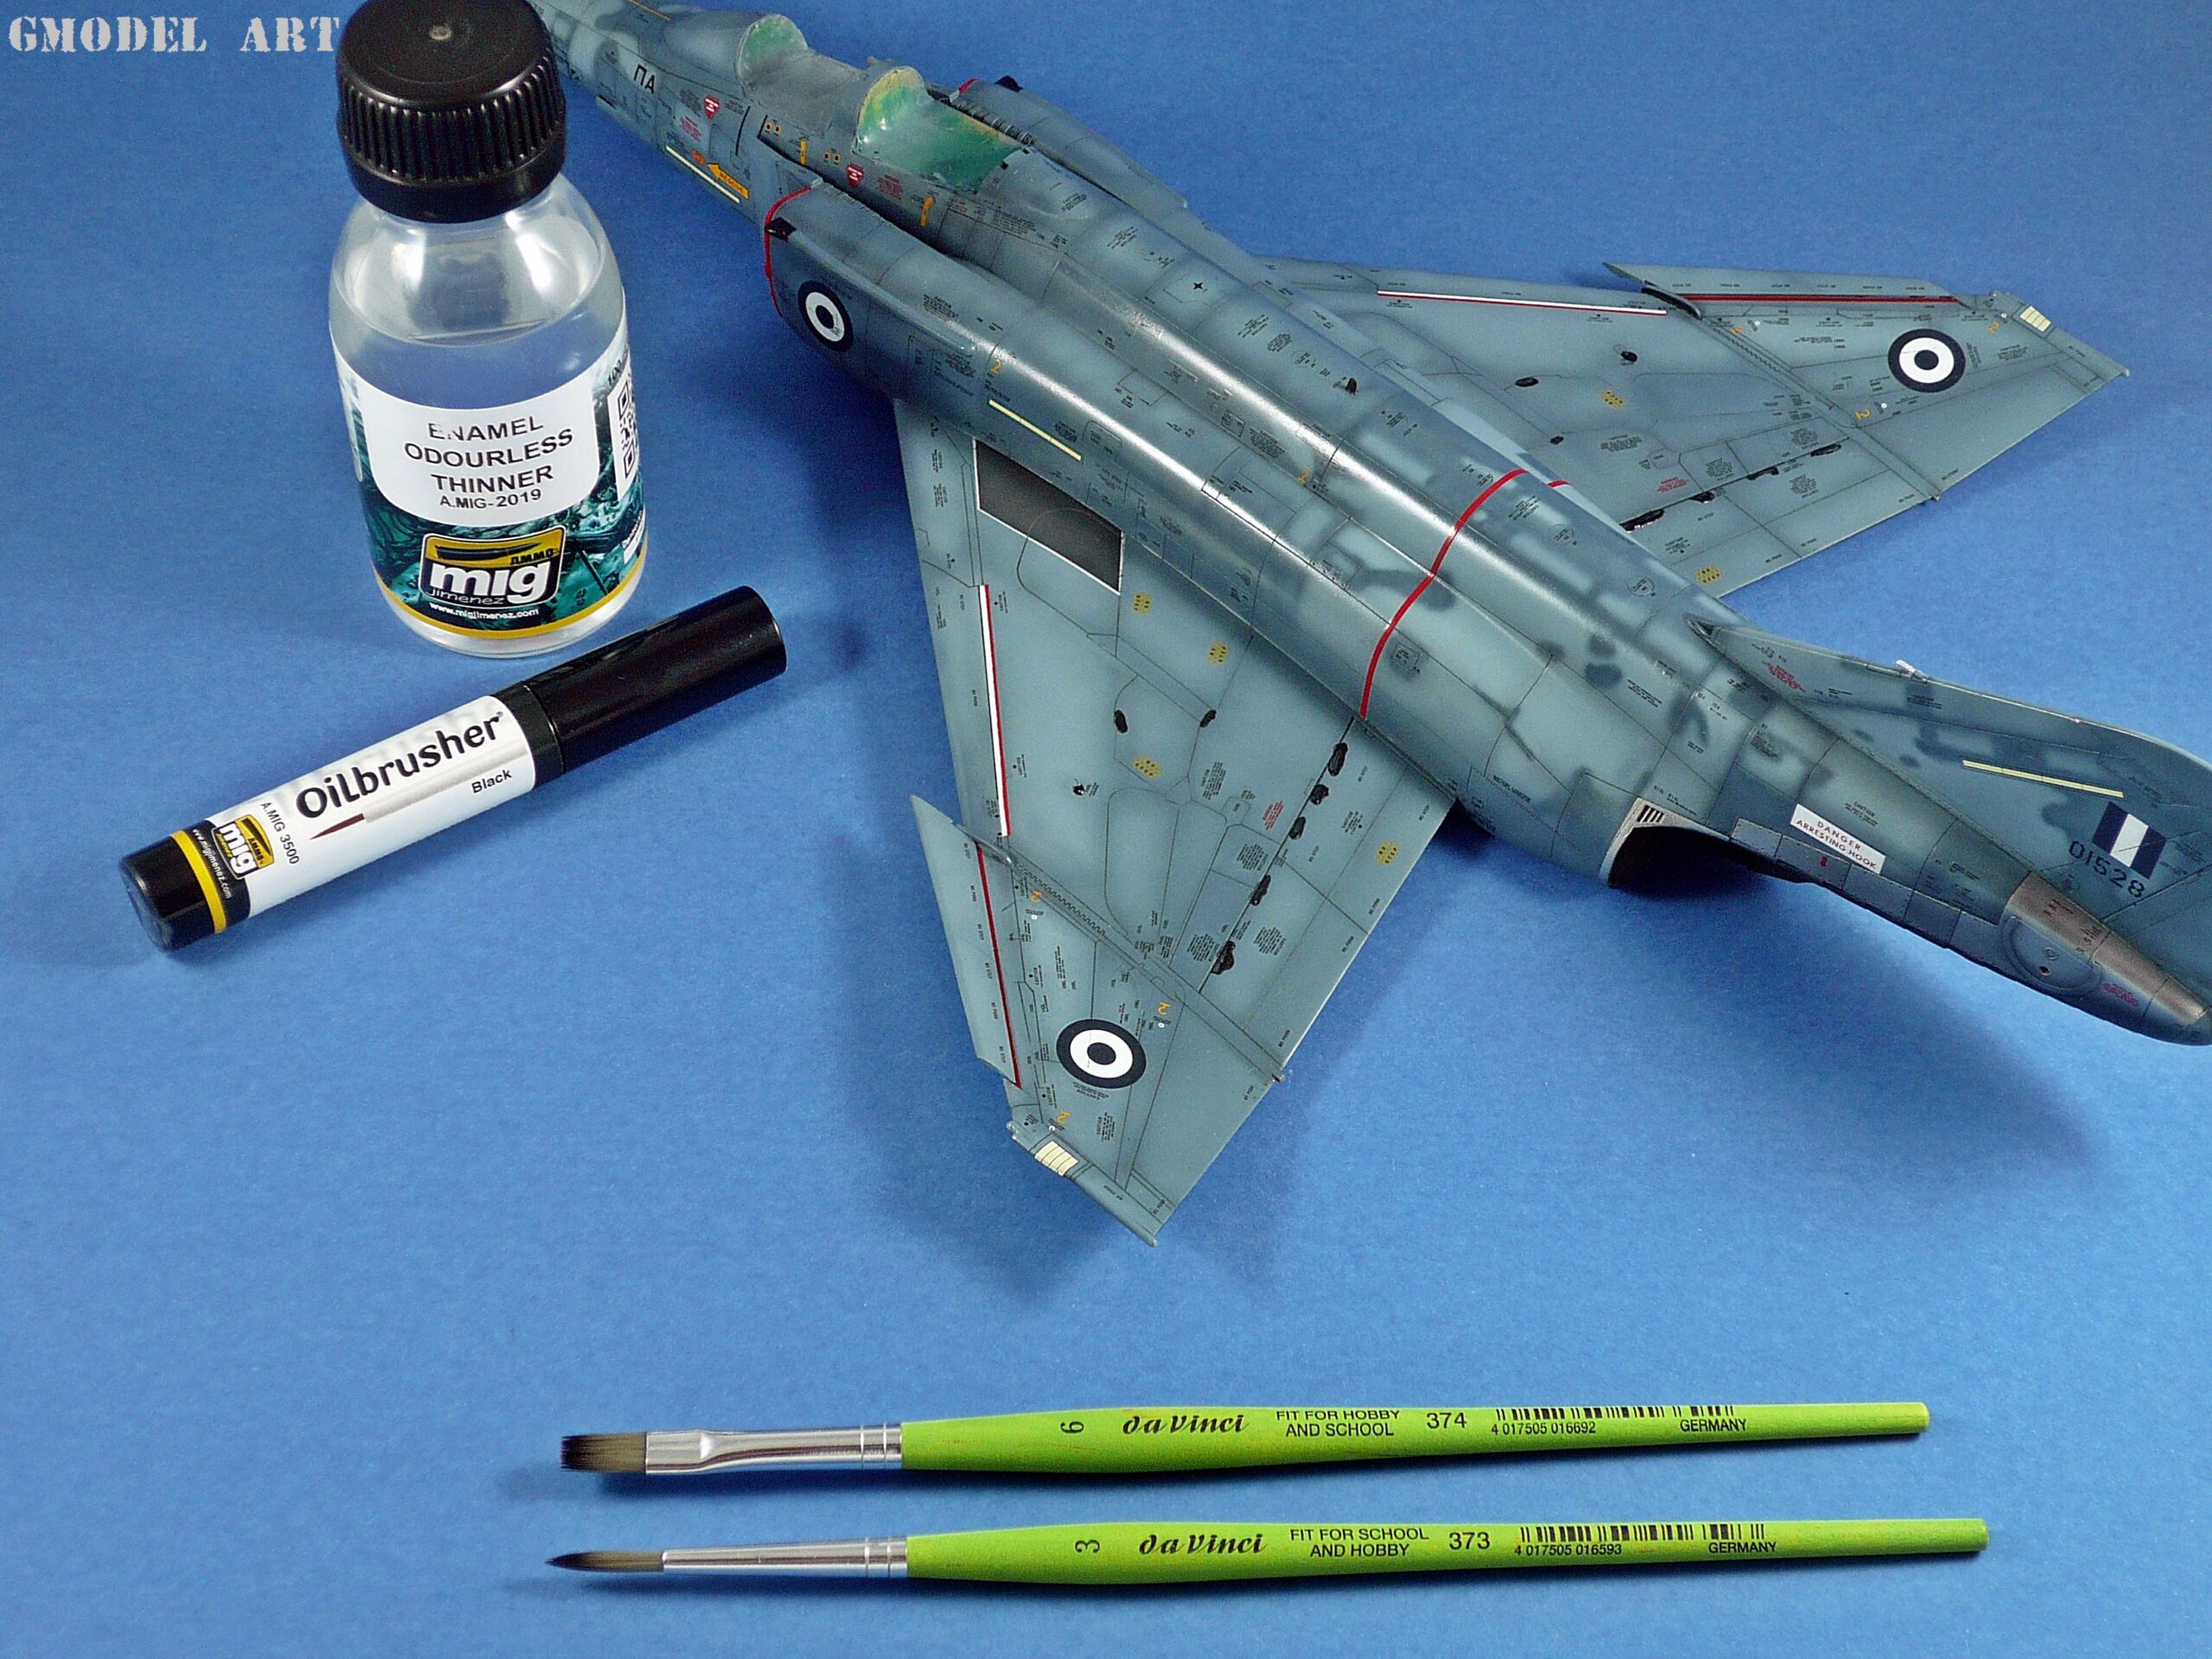
Excess wash was removed using a cotton bud lightly moistened with AMMO Odourless Enamel Thinner (A.MIG-2019). The cotton bud was first dipped into the thinner and then wiped against a kitchen towel to remove most of the liquid before it touched the model.
This controlled technique helps prevent the thinner from spreading excessively across the finish and allows the modeller to retain the wash within the intended areas.
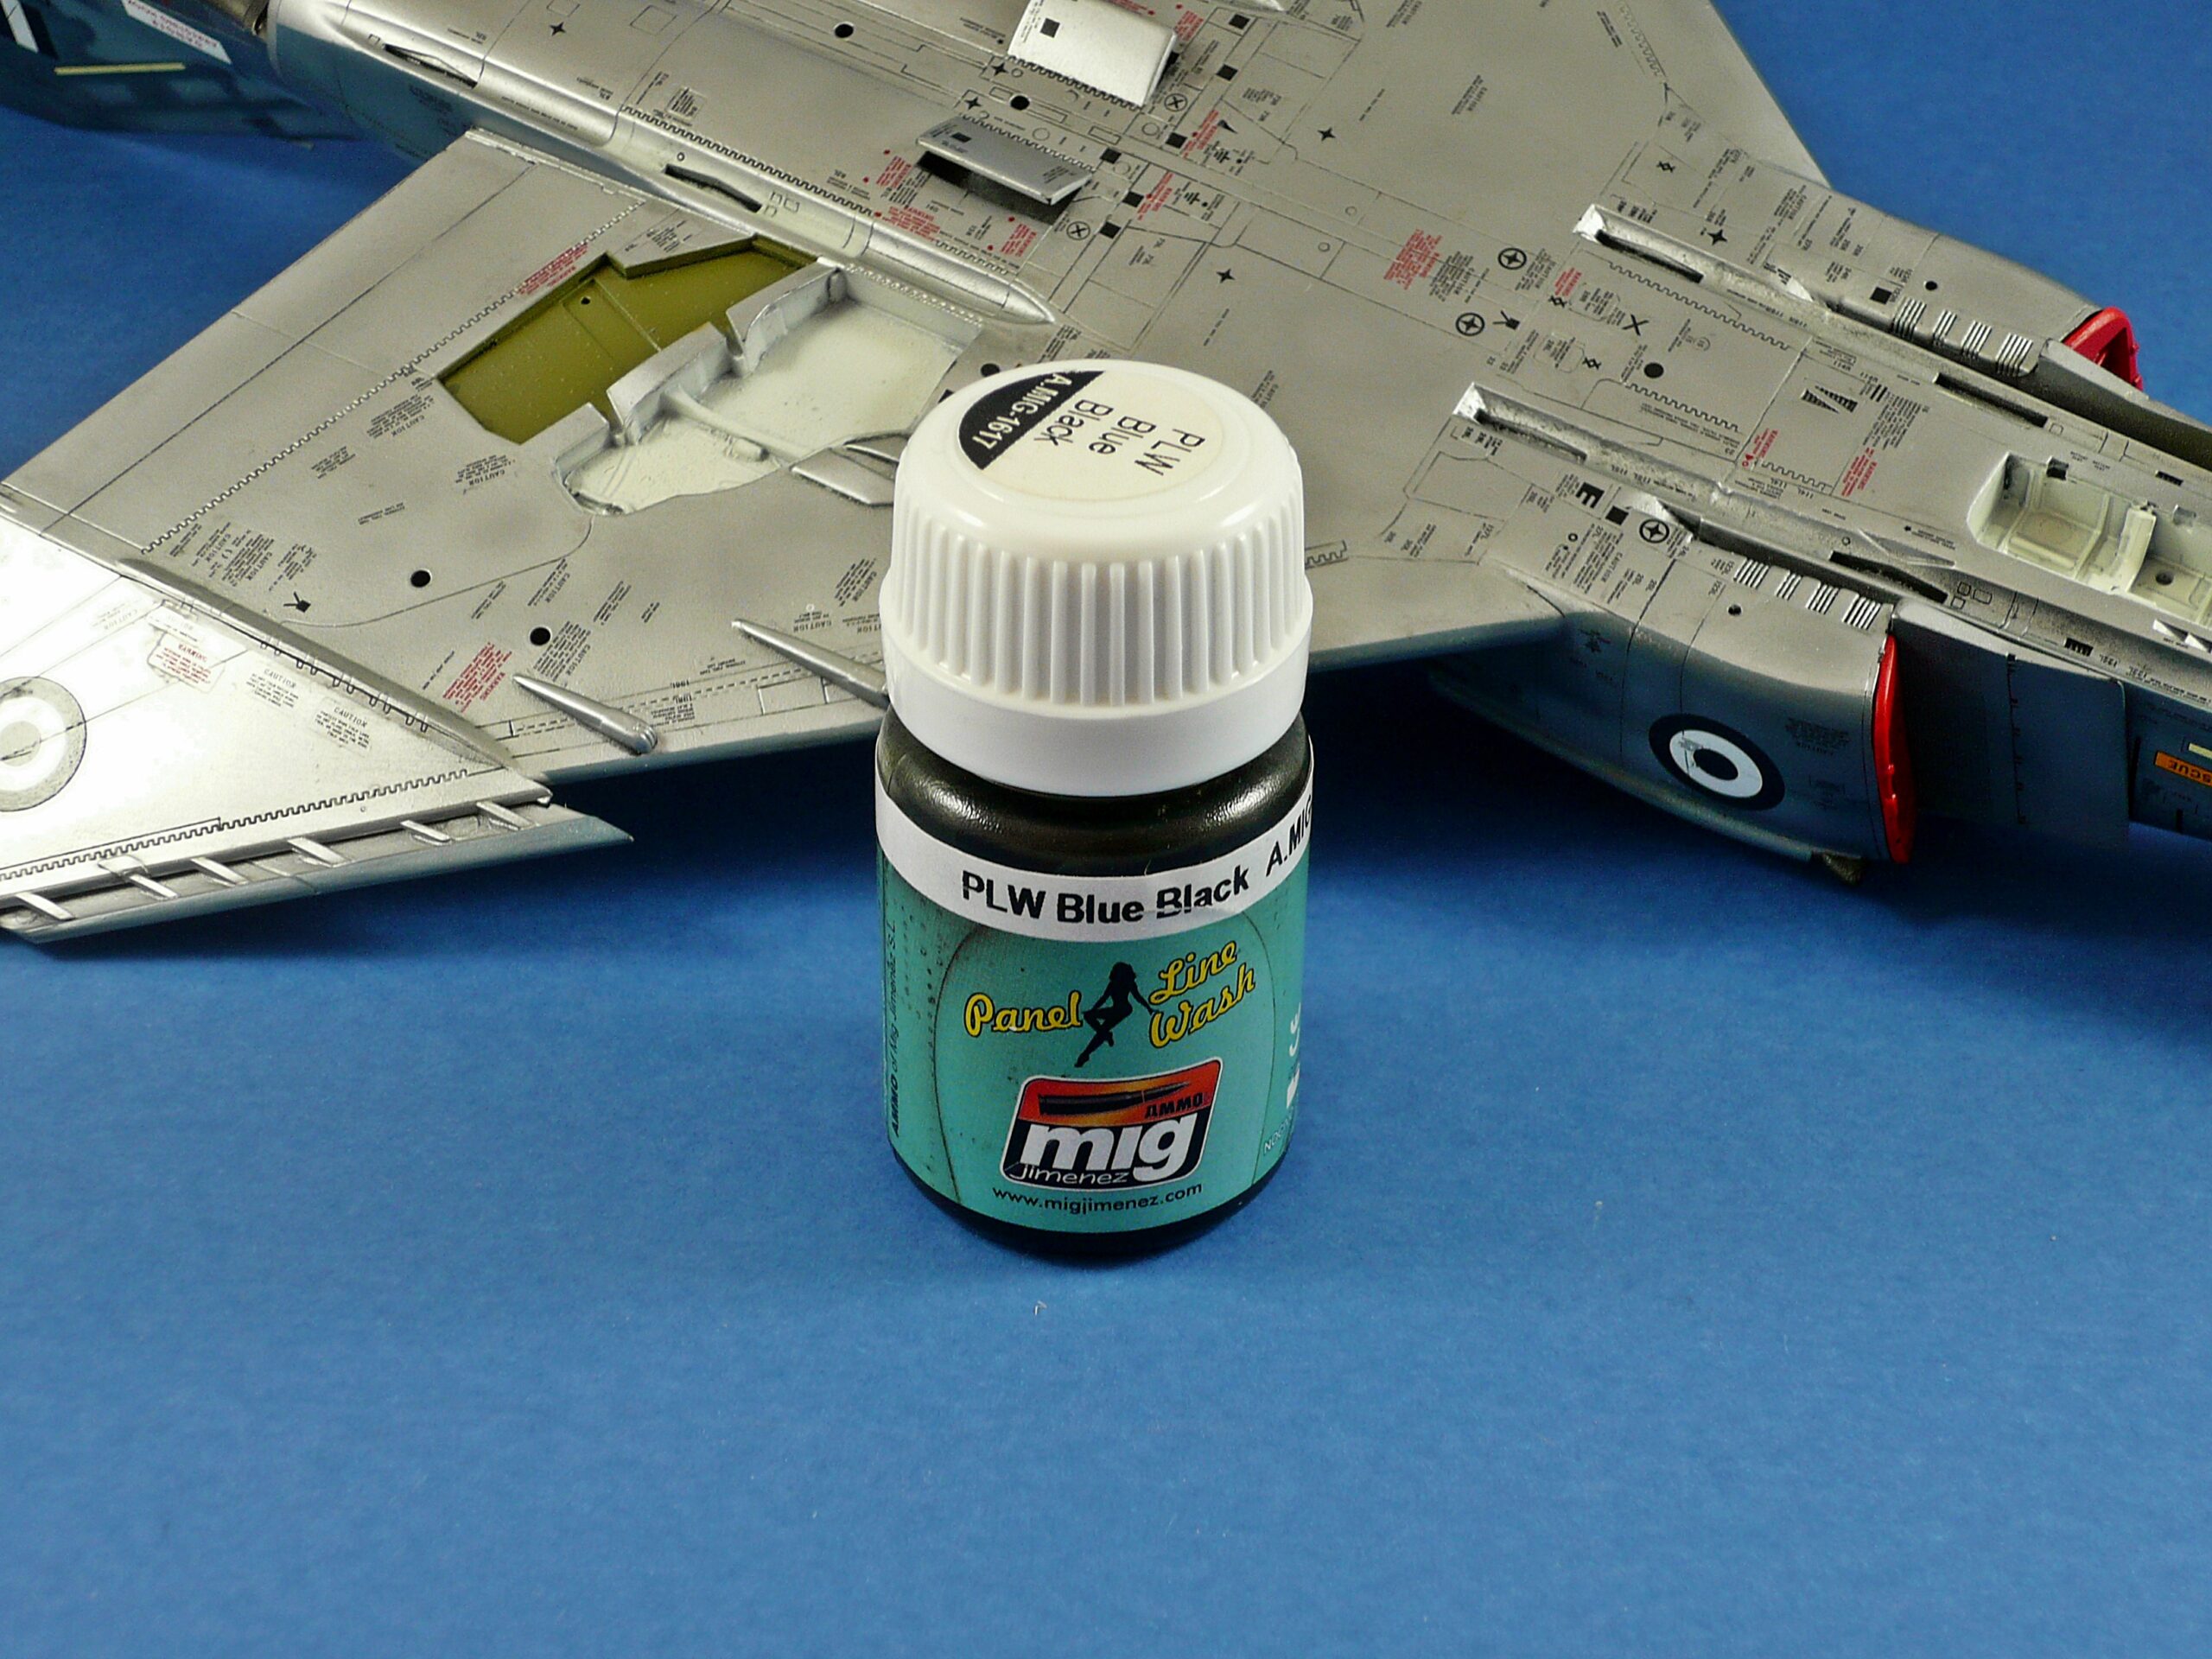
For the lower surfaces, AMMO PLW 1617 Blue Black was selected. Using a different wash for the underside created a suitable contrast with the upper camouflage and metallic finish.
After the excess wash had been removed from both the upper and lower surfaces, the panel lines became more defined without overwhelming the surrounding paintwork.
The effectiveness of this stage depends on restraint. The wash should reinforce the aircraft’s surface detail rather than make every panel line appear equally dark.
Exhaust staining and operational grime
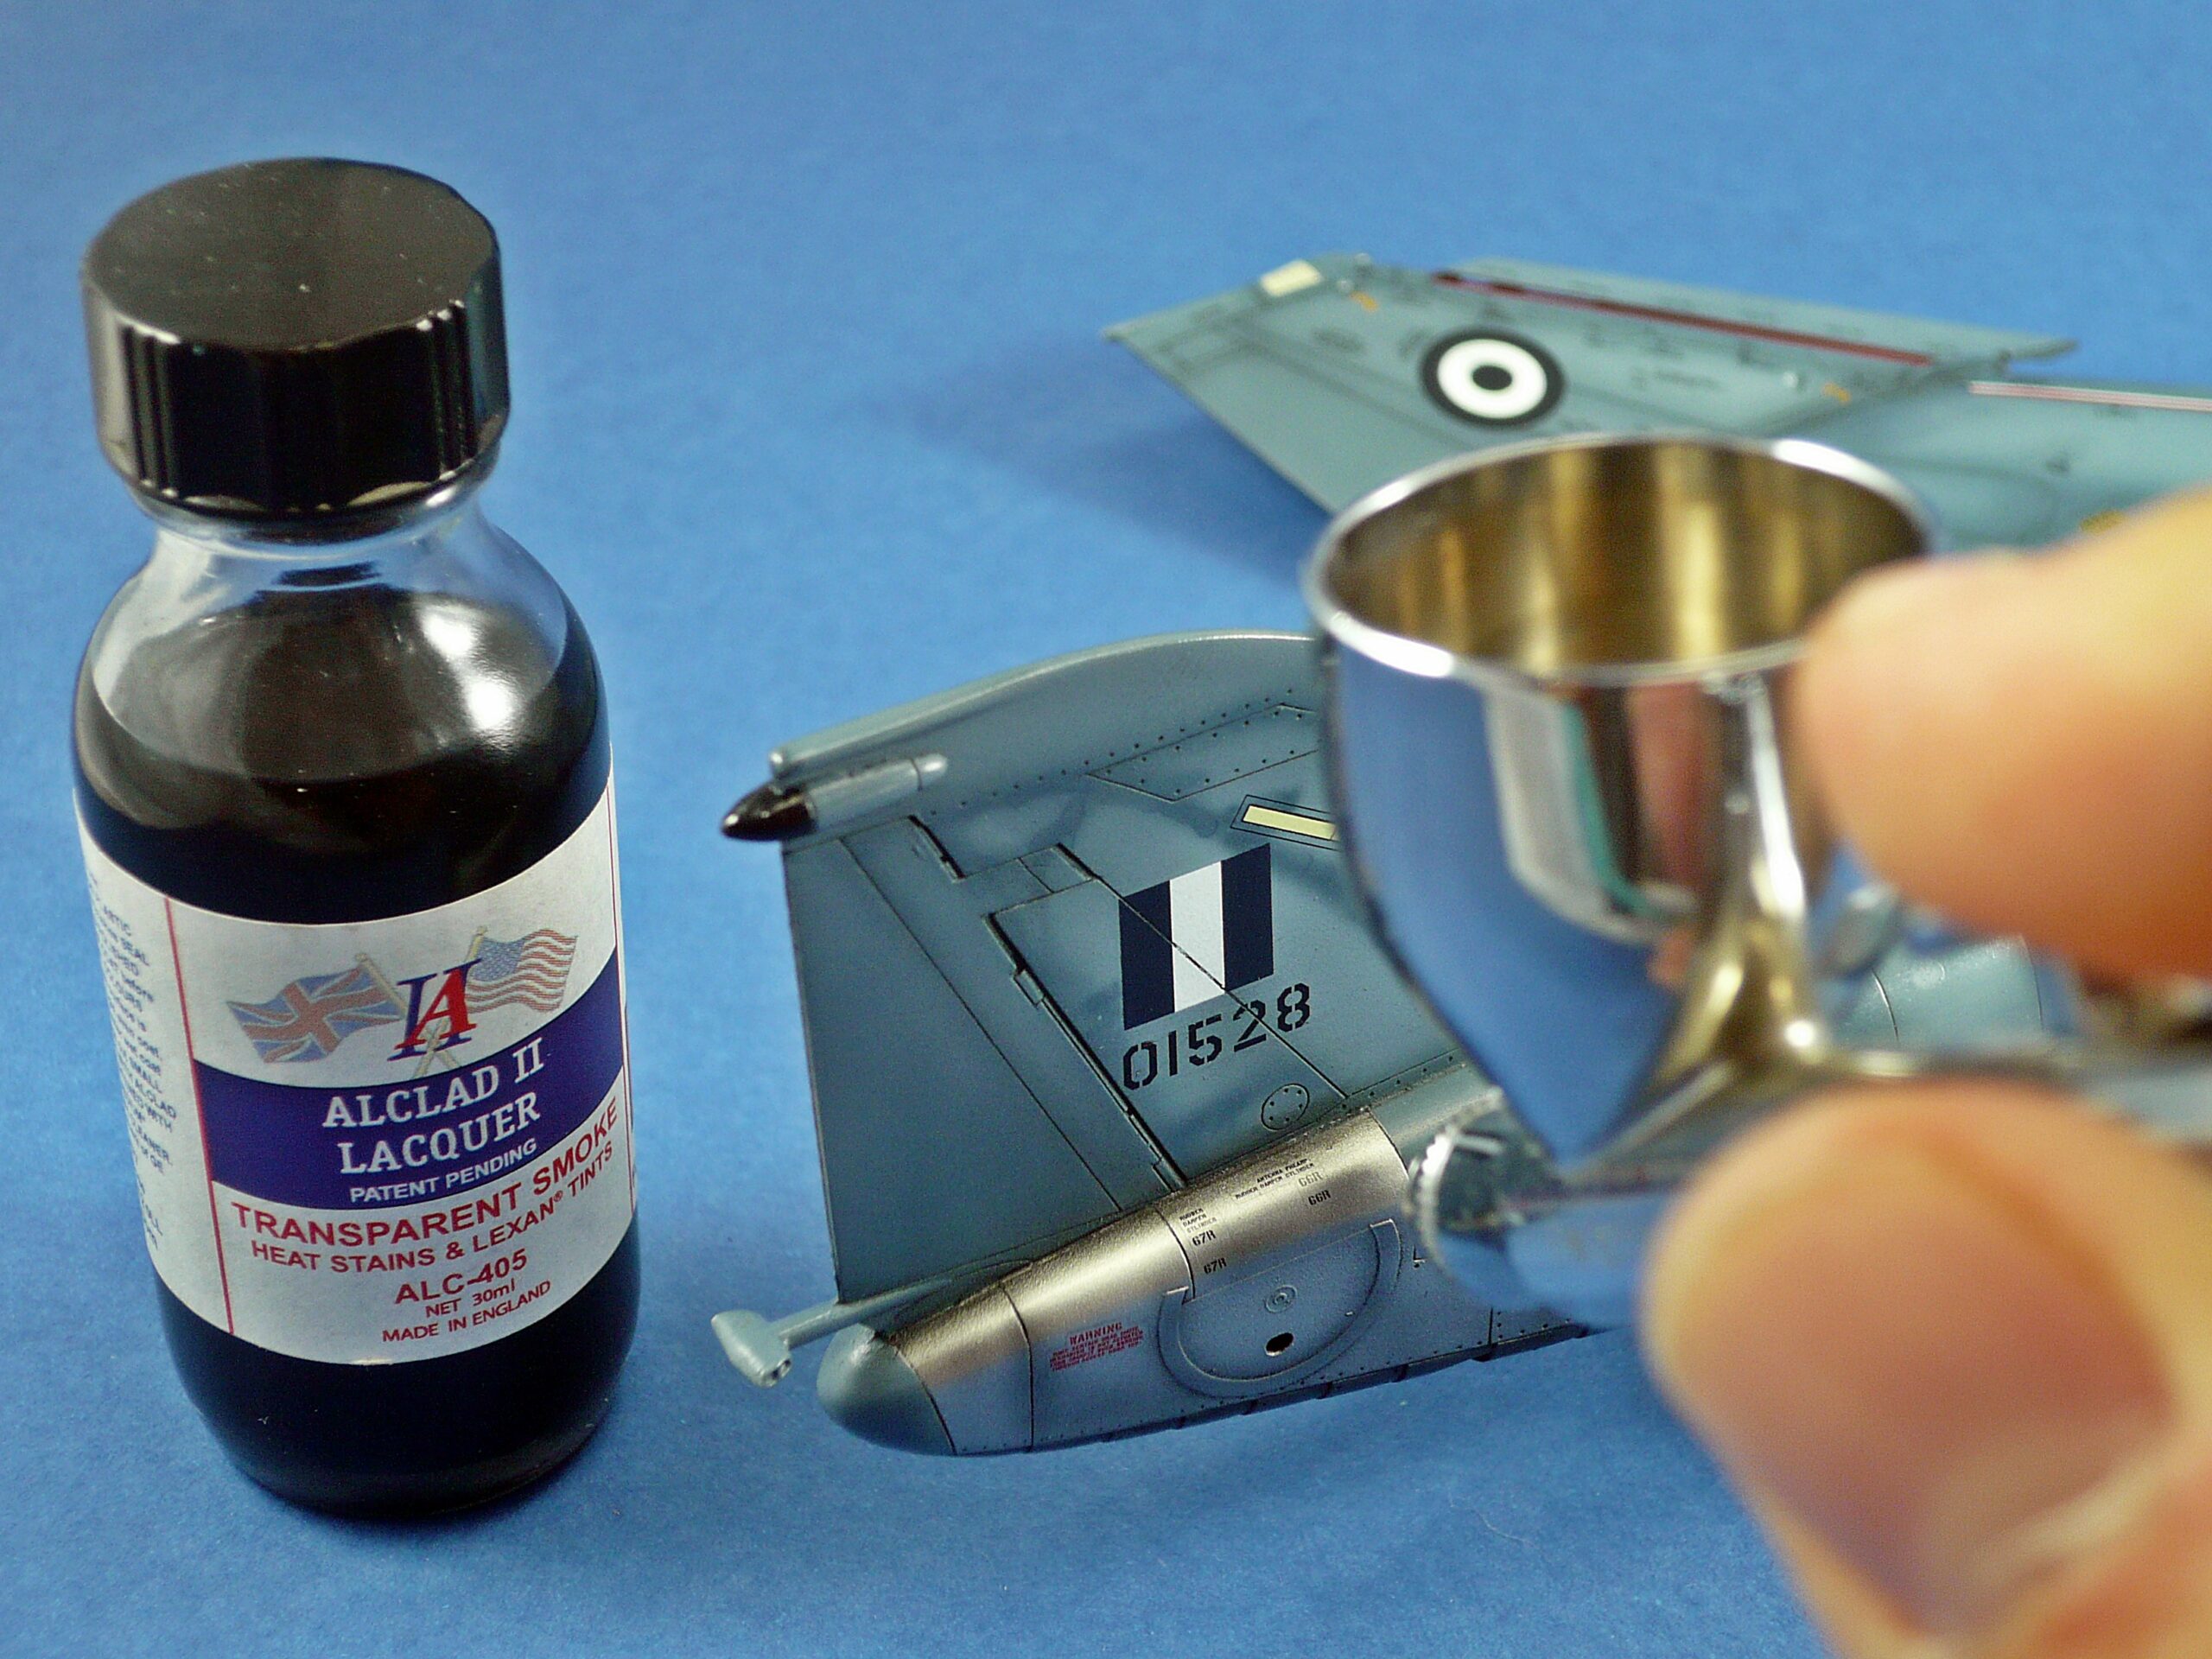
Reference photographs also showed heat staining and dirty areas around the upper natural-metal exhaust surfaces.
To reproduce these effects, Alclad Transparent Smoke (ALC 405) was applied selectively. Its transparent character allowed the underlying metallic finish to remain visible while introducing darker areas associated with exhaust staining.
The wheel wells were weathered using AMMO PLW Black Night 1611. As with the other washes, excess material was removed with odourless enamel thinner to avoid leaving an unnecessarily heavy finish.
These areas benefit from a different treatment than the main camouflage surfaces. Recessed wheel wells naturally lend themselves to darker washes, while exhaust areas require more nuanced tonal transitions to retain the appearance of metal exposed to heat.
Final weathering with Oilbrusher
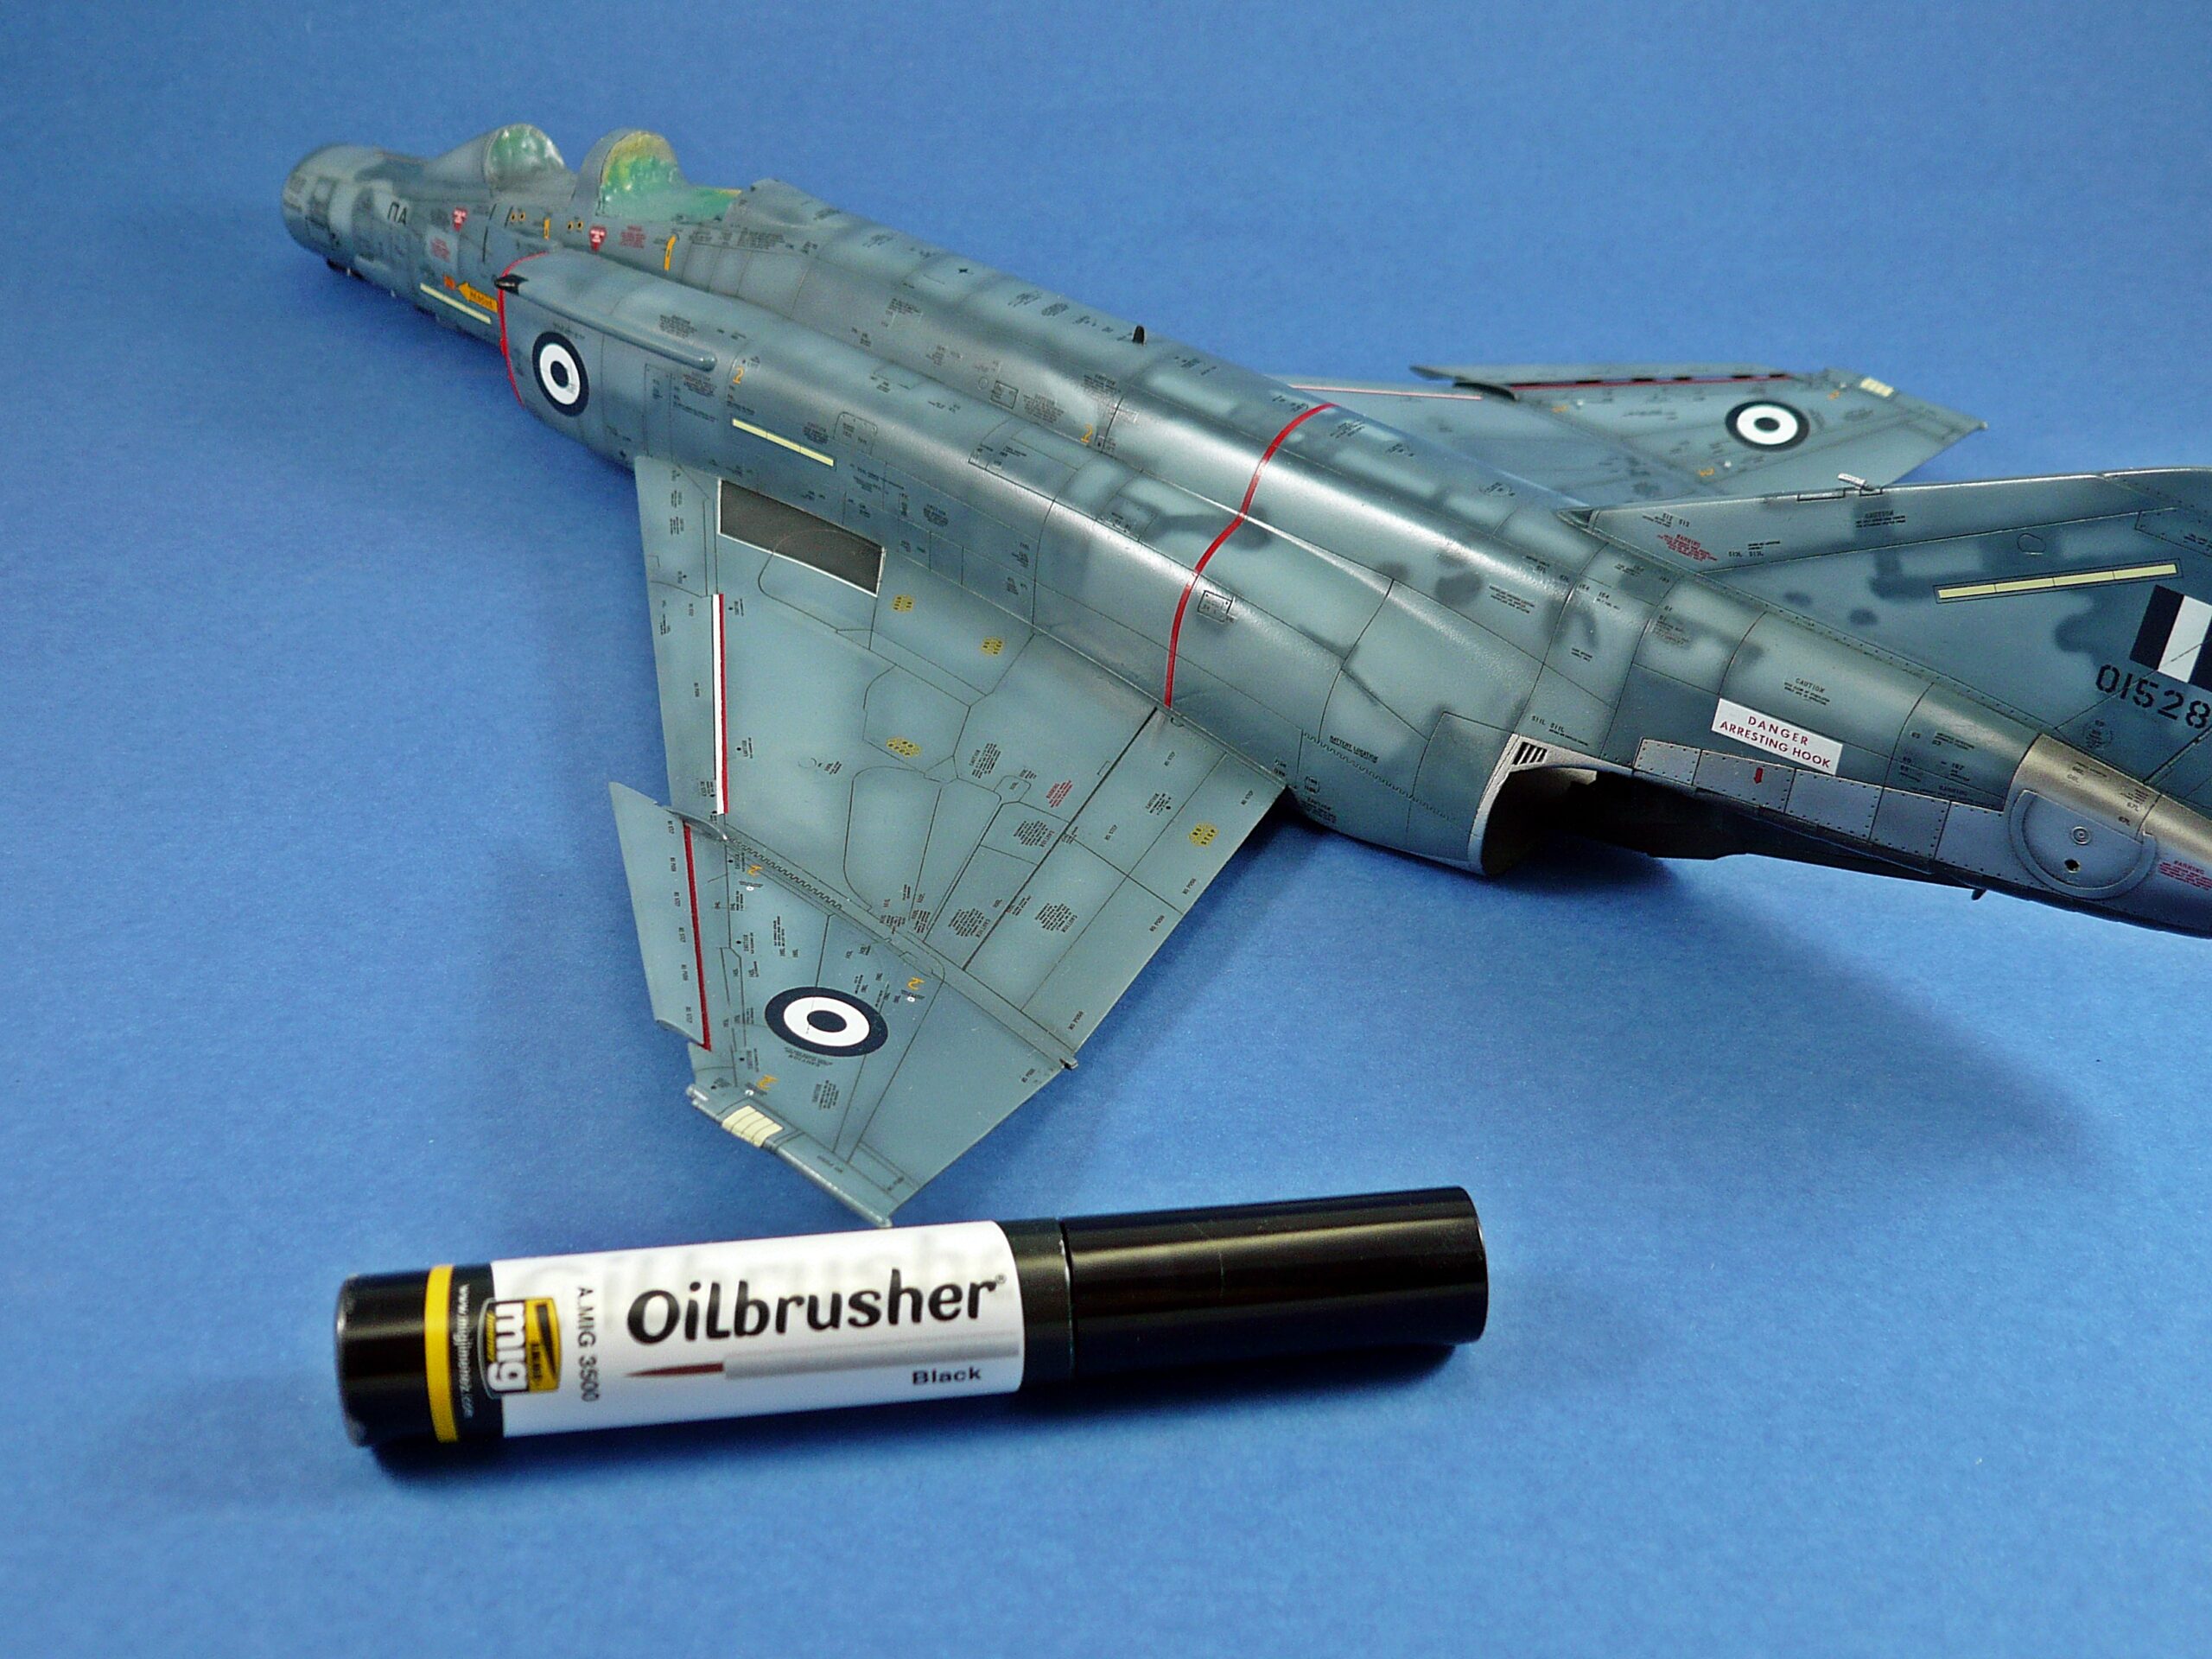
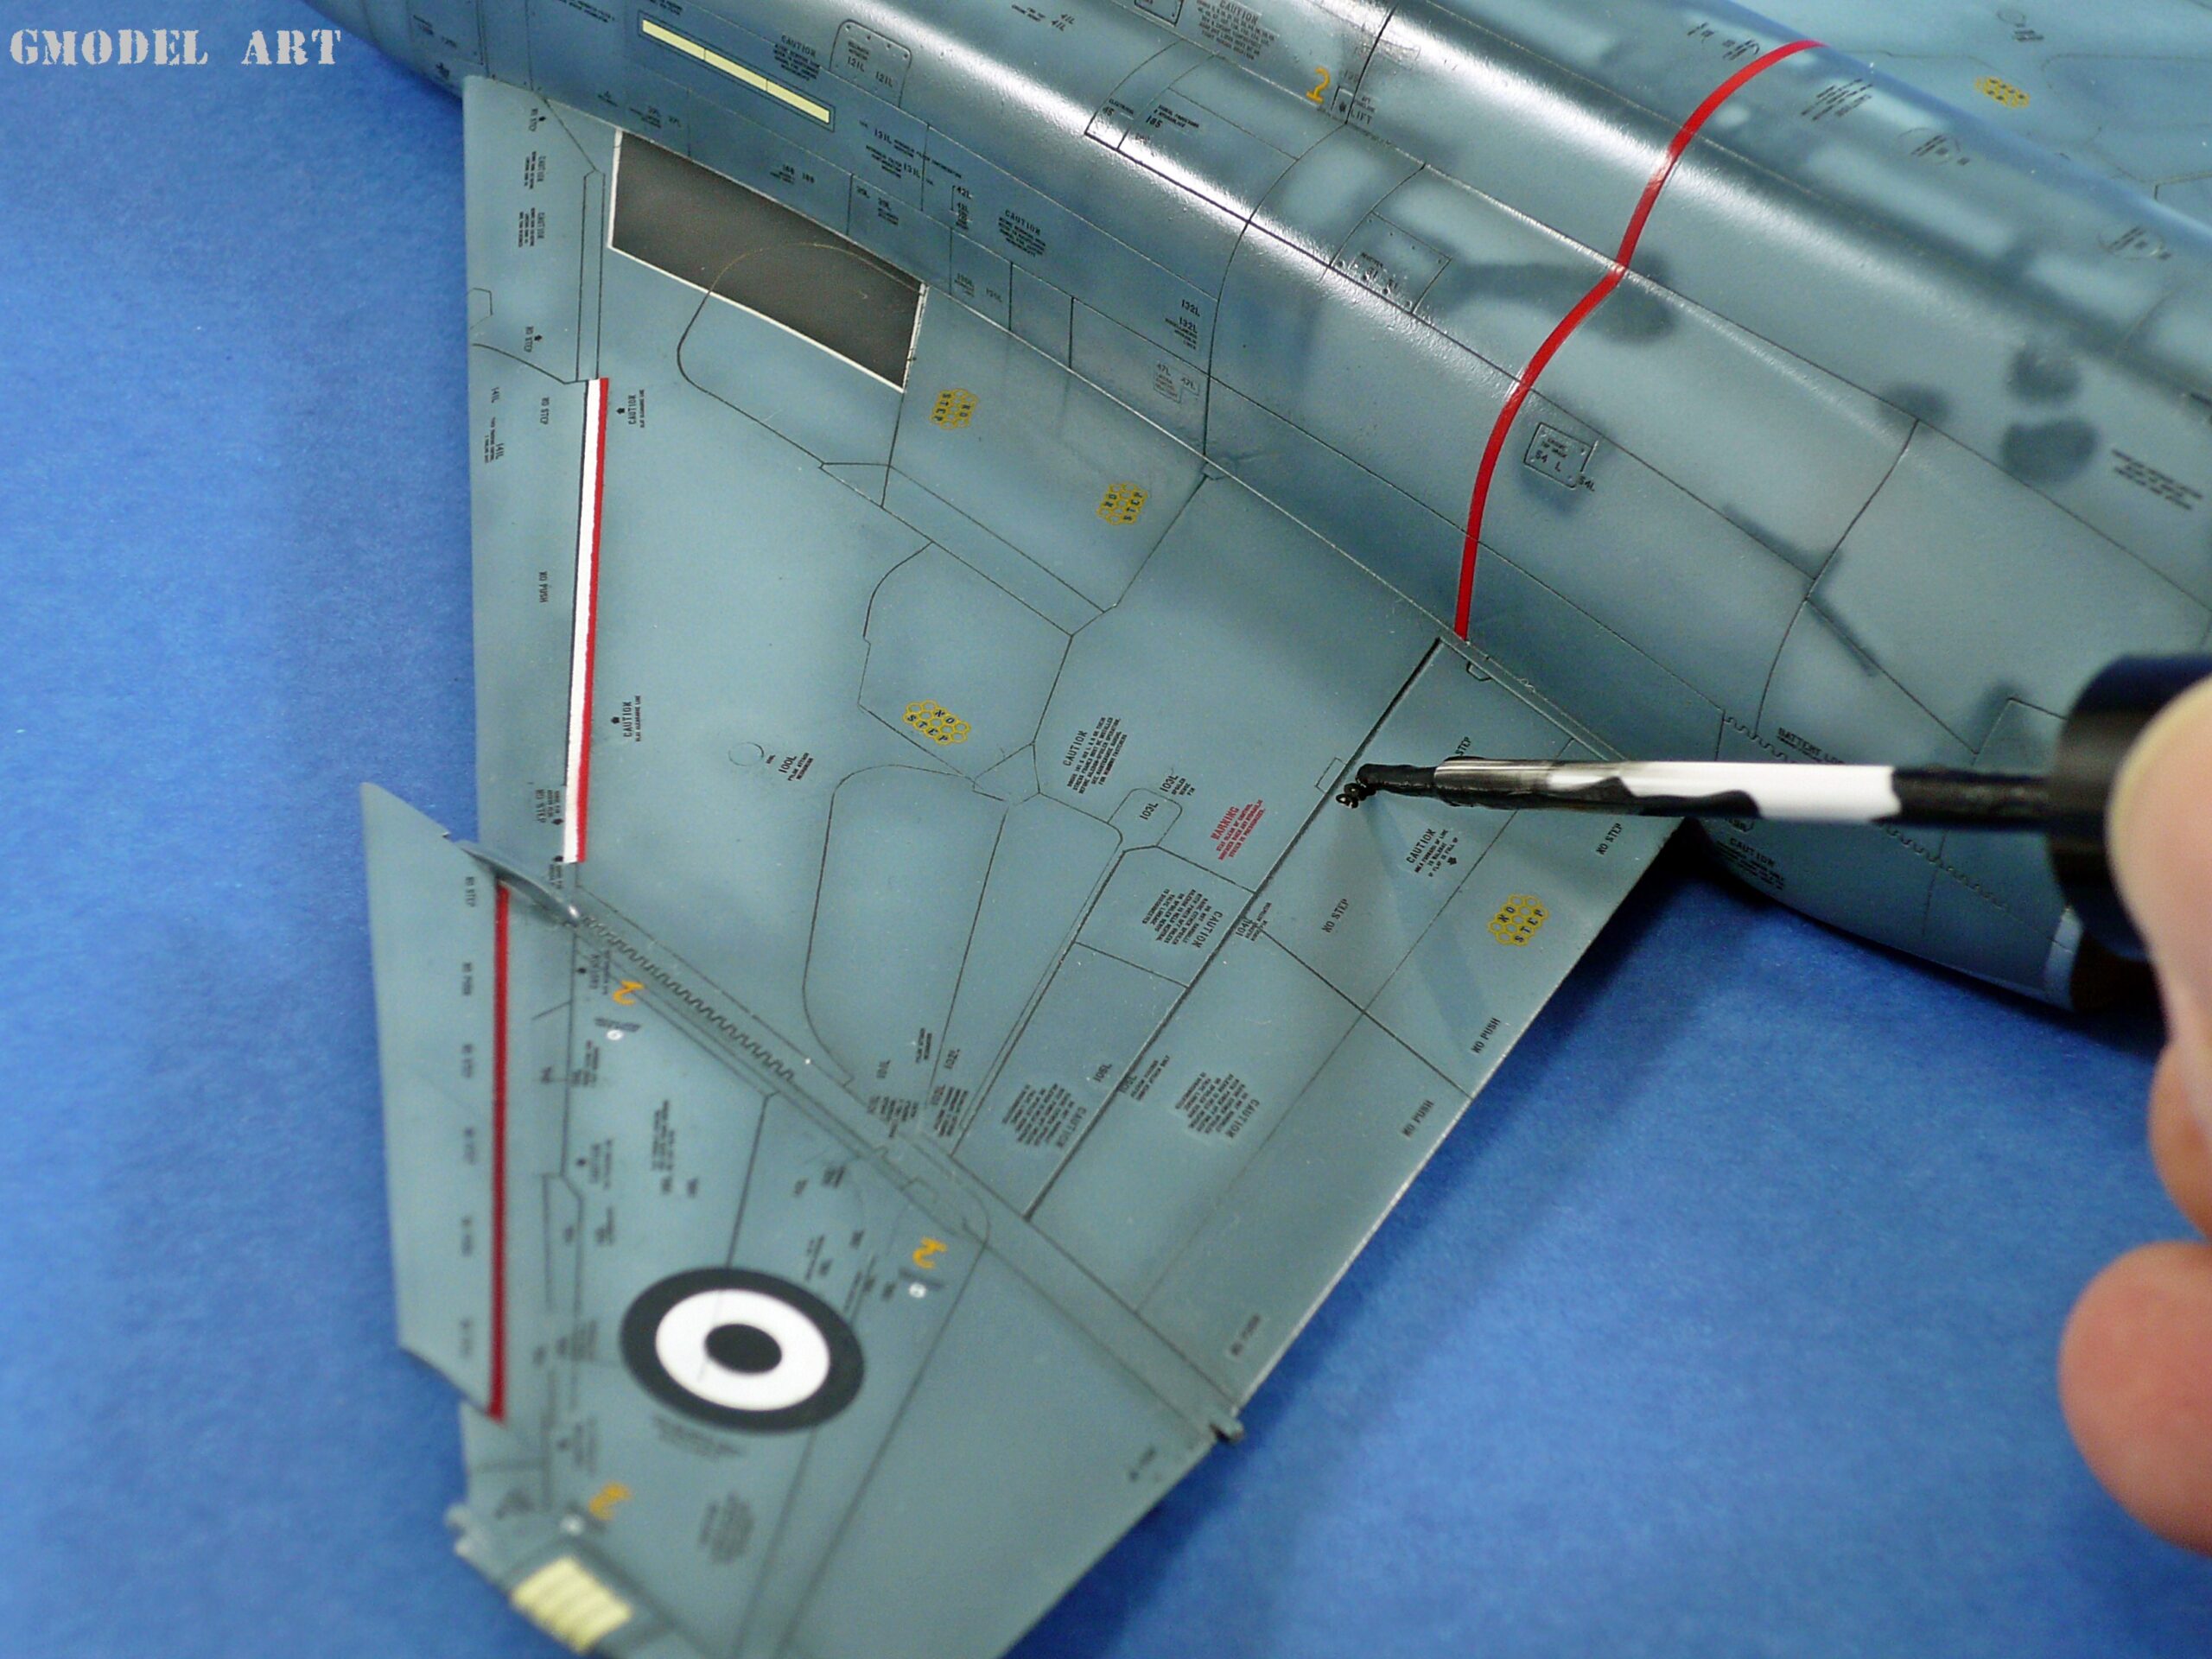
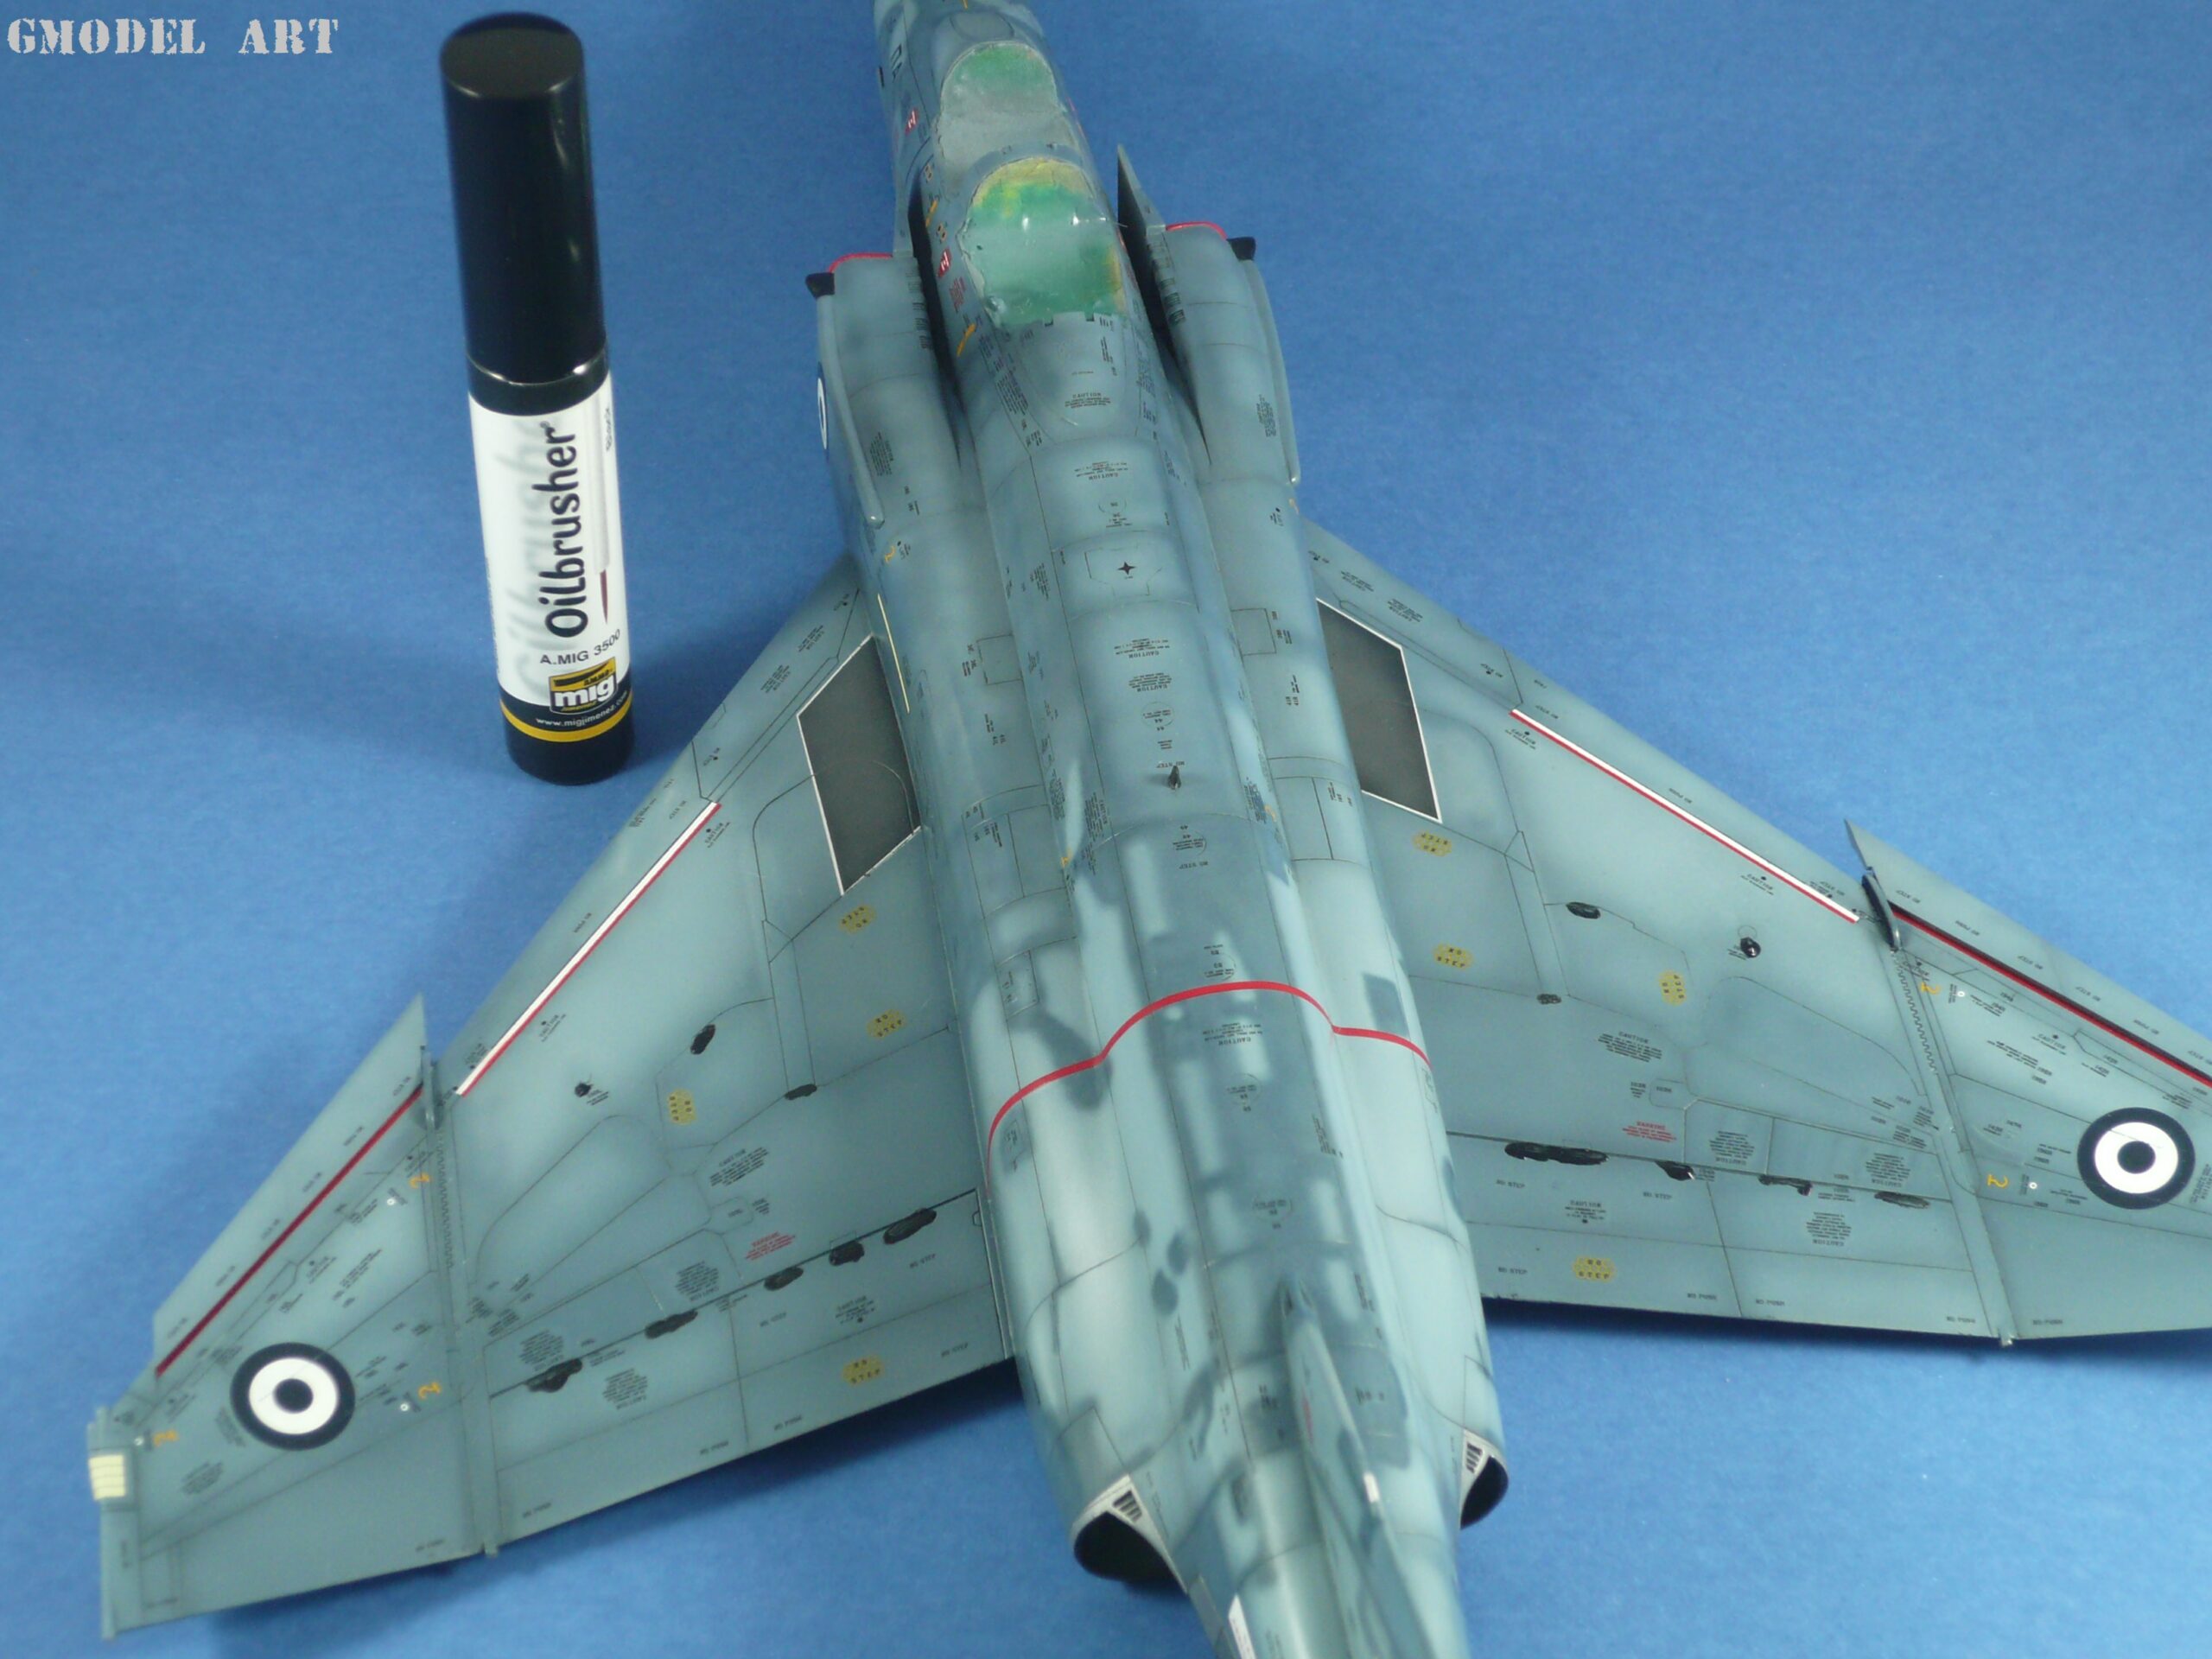
The final weathering stage described in the original build used the black AMMO Oilbrusher to represent oil leaks and stains around the flaps, main wing areas and stabilators.
Small dots of the product were applied to the selected areas and left for approximately ten minutes before the next step.
The original source text ends at this point, so the subsequent blending method and final finishing steps cannot be confirmed from the supplied description.
A detailed Hellenic Phantom in 1:48 scale
This Hellenic Air Force F-4E Phantom II of 337 Squadron, representing 1995, demonstrates how a convincing aircraft finish can be built through a sequence of carefully controlled techniques.
The combination of Hasegawa, Verlinden and Aires components provides the basis for the model, while the layered Aegean Blue camouflage, aluminium undersurfaces, multi-tone exhausts, Icarus stencils and selective weathering create its distinctive appearance.
The most important lesson from this project is the value of preparation and restraint. Smooth surfaces, thin paint layers, carefully selected colour variations and controlled weathering can make a substantial difference to the final result.
For aircraft modellers interested in Greek military aviation, this build also offers a practical reference for combining camouflage and metallic finishes on a modern-era Hellenic Air Force Phantom II.
F-4E Phantom II SRA 68-0424 HAF – Hasegawa 1/48 Scale Model